Posted on Leave a comment

Baked Haddock Recipe: Easy Oven Haddock with Buttery Ritz or Panko Topping

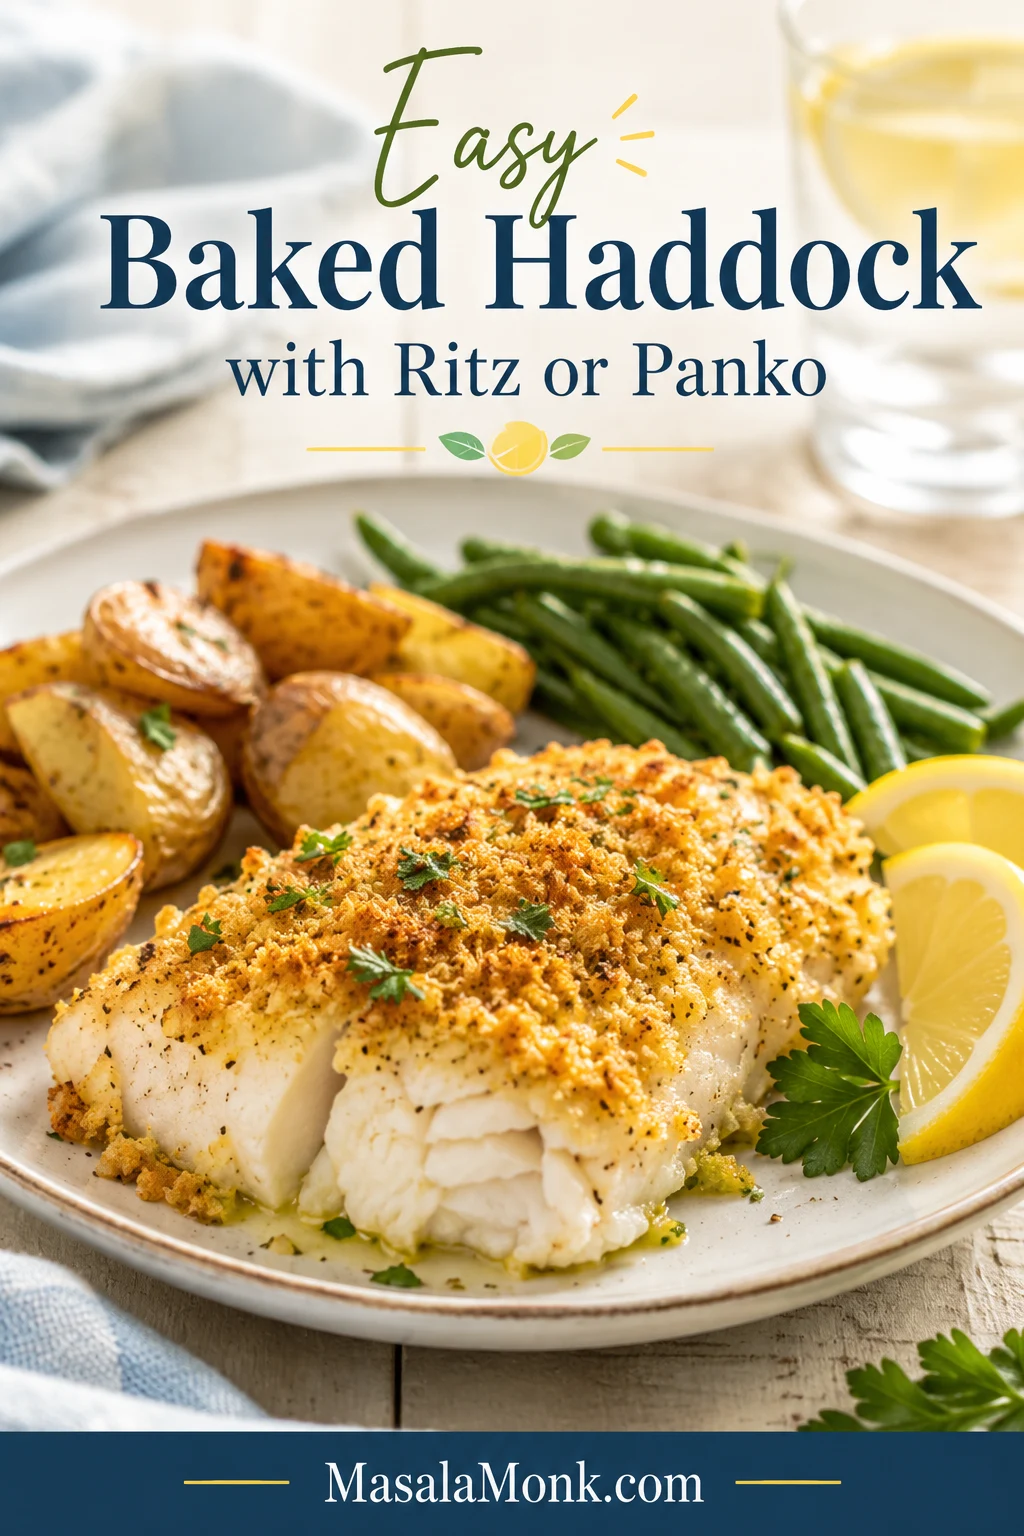
Baked haddock fillet with golden crumb topping served with lemon wedges, roasted potatoes, green beans, and tartar sauce.

This baked haddock recipe gives you tender, flaky white fish with a golden buttery topping in about 25 minutes. It is simple oven fish, but with the small details that keep haddock from turning dry, watery, bland, or hidden under soggy crumbs.

Haddock cooks quickly, which can feel a little unforgiving at first. The rhythm is simple: dry the fish, season it directly, add a buttery topping, and stop baking when the fish is done. After that, it becomes one of the easiest weeknight seafood dinners.

Quick Answer: Bake Time, Temperature, and Doneness

Bake haddock fillets at 400°F / 200°C for 12 to 16 minutes, depending on thickness. The fish is done when it turns opaque, flakes easily with a fork, and reaches 145°F / 63°C in the thickest part.

  • 400°F / 200°C is the easiest everyday temperature for quick, flaky baked haddock.
  • 350°F / 175°C is gentler for thick haddock loins, a heavier Ritz cracker topping, or a more traditional New England-style bake.
  • Bake uncovered when using panko, breadcrumbs, or Ritz crackers.
  • The fish comes first. The crumbs come second. Pull the haddock when it is done; the broiler can finish a pale surface in a minute.

A pale topping can be fixed. Overcooked fish cannot. That one idea makes this recipe much easier.

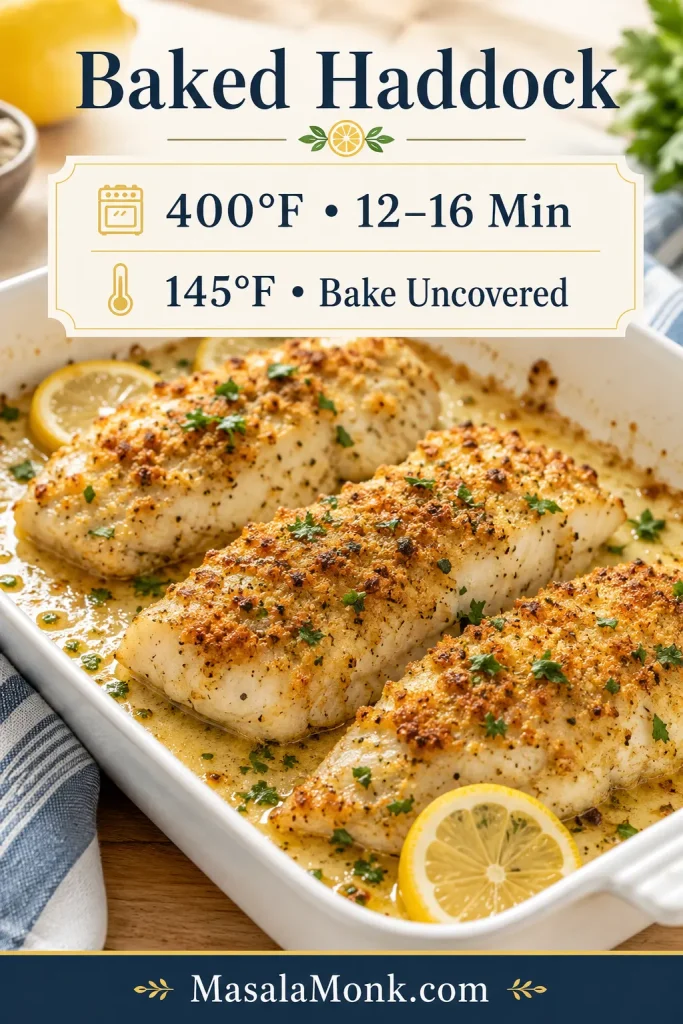
Recipe guide card showing baked haddock timing of 400°F for 12 to 16 minutes and doneness at 145°F.
For most haddock fillets, 400°F gives a fast oven bake; then 145°F confirms the center is cooked without drying out.

Easy Baked Haddock Recipe

Easy Baked Haddock with Buttery Ritz or Panko Topping

Mild haddock fillets baked with lemon, butter, herbs, and your choice of panko, breadcrumbs, or crushed Ritz crackers. The fish turns soft and flaky while the surface becomes golden and savory.

Prep Time10 minutes
Cook Time12 to 16 minutes
Total TimeAbout 25 minutes
Servings4
Yield4 baked haddock fillets
Oven Temperature400°F / 200°C
Doneness145°F / 63°C, opaque, and flaky

Ingredients

  • 4 skinless boneless haddock fillets, about 6 oz / 170 g each, or about 1 1/2 lb / 680 g total
  • 1 tablespoon olive oil or melted butter, for the baking dish and fish
  • Fine salt, to taste: about 3/4 teaspoon for plain crumbs, or 1/4 to 1/2 teaspoon for Ritz crackers, salted butter, or Parmesan
  • 1/4 teaspoon black pepper
  • 1 tablespoon lemon juice / 15 ml, plus lemon wedges for serving
  • 1 teaspoon lemon zest, optional but excellent in the topping
  • 1/2 teaspoon garlic powder
  • 1/2 teaspoon paprika
  • 2 tablespoons chopped parsley, plus more for serving

For a Breadcrumb or Panko Topping

  • 3/4 to 1 cup panko or breadcrumbs
  • 4 tablespoons melted butter / 56 g
  • 1/4 cup grated Parmesan / about 22 g, optional

For a Ritz Cracker Topping

  • 1 sleeve Ritz crackers, about 34 crackers / roughly 90 to 100 g, crushed
  • 3 to 4 tablespoons melted butter / 42 to 56 g
  • 1/4 to 1/2 teaspoon fine salt total, added only after tasting the cracker mixture

Instructions

  1. Preheat the oven. Heat the oven to 400°F / 200°C. Lightly grease a 9×13-inch / 23×33 cm baking dish.
  2. Dry the haddock. Pat the fillets very dry with paper towels. Dry fish before the oven means better texture after the oven.
  3. Season the fish. Arrange the fillets in one layer. Brush lightly with olive oil or melted butter, then season with salt, pepper, lemon juice, garlic powder, and paprika.
  4. Make the topping. Mix panko, breadcrumbs, or crushed Ritz crackers with melted butter, lemon zest, parsley, and Parmesan if using. The mixture should look like damp sand, not wet paste.
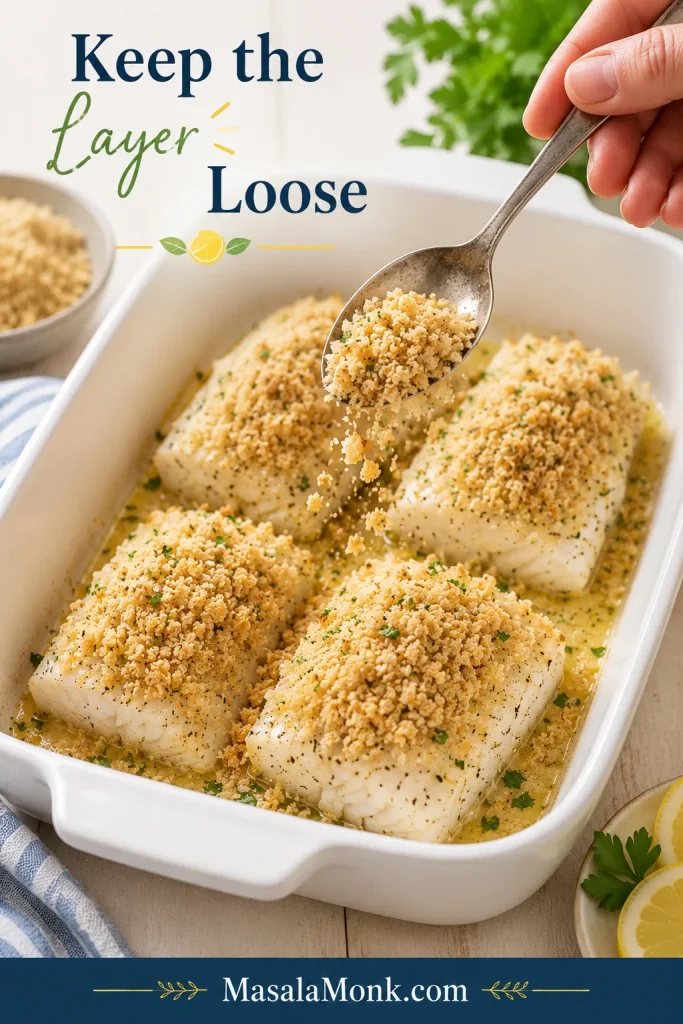
  5. Top the fillets. Spoon the mixture over the fish and press gently so it sticks. Keep the layer loose rather than packed down.
  6. Bake uncovered. Bake for 12 to 16 minutes, depending on thickness, until the fish is opaque and flakes easily.
  7. Check doneness. For the most reliable result, check the thickest part with an instant-read thermometer. Haddock is done at 145°F / 63°C.
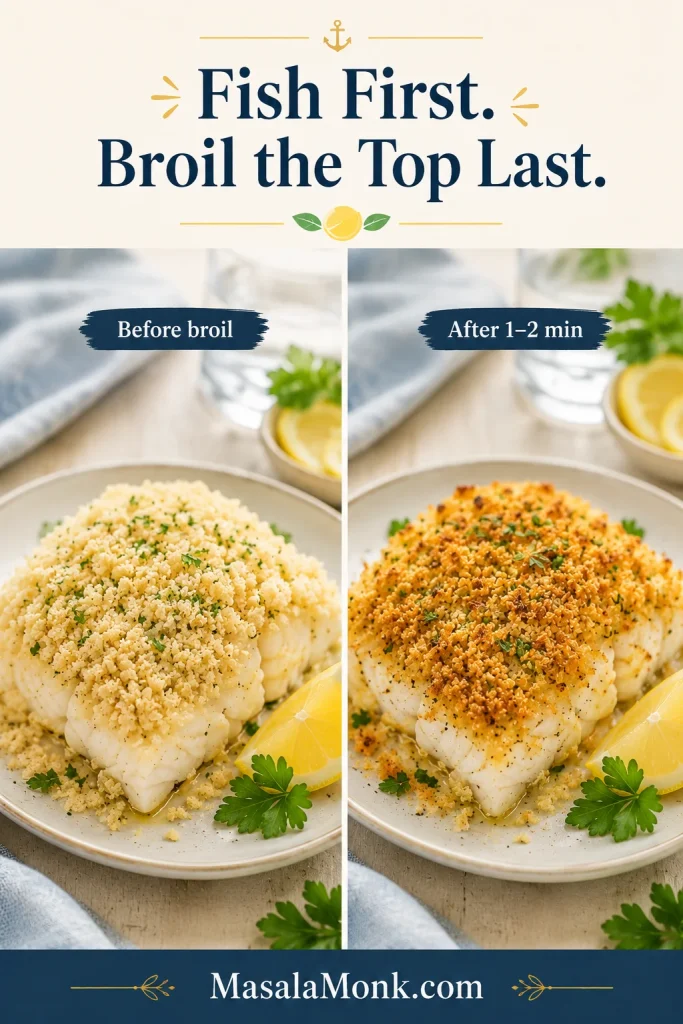
  8. Brown only if needed. If the fish is done but the topping is pale, broil, or use the oven grill, for 1 to 2 minutes. Watch closely.
  9. Rest and serve. Let the fish rest for 2 minutes, then serve with lemon wedges and more parsley.

When it is right, the fish should lift in soft flakes, the center should look opaque and moist, and the buttery layer should be golden without feeling greasy.

Recipe Notes

  • For thicker haddock loins or a heavier Ritz layer, bake at 350°F / 175°C for 18 to 25 minutes instead.
  • Thin fillets may be done in less than 12 minutes, so start checking early.
  • If using a fan or convection oven, begin checking 2 to 3 minutes early.
  • Mixed-size fillets need mixed timing: lift out thinner pieces first and let thicker ones finish.
  • Serve soon after baking. The fish stays moist, but the golden layer is best while warm and fresh.
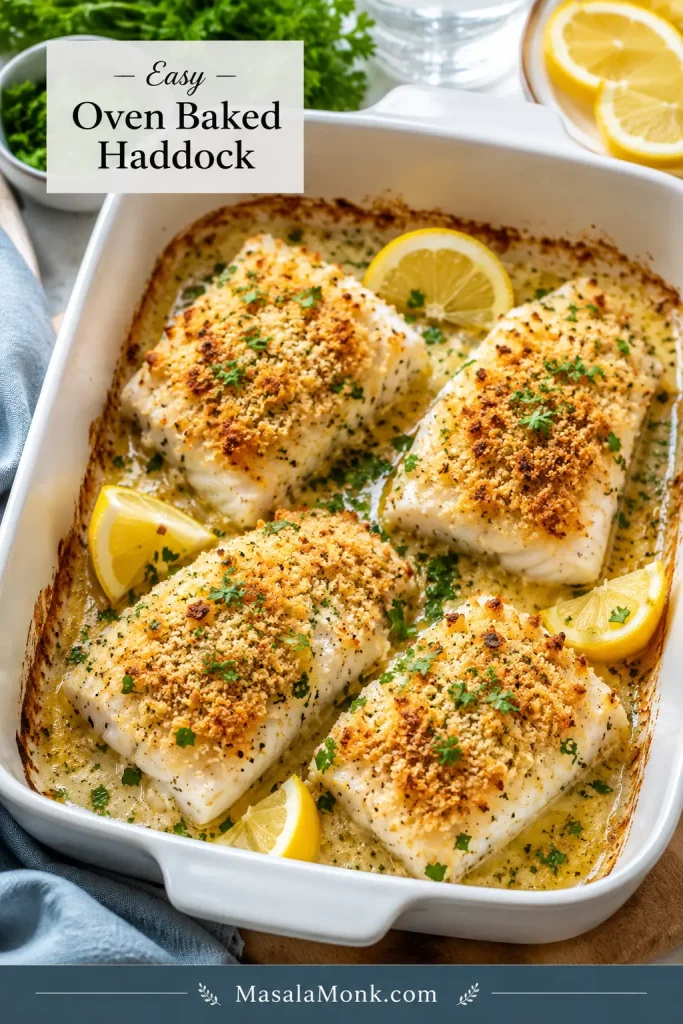
Four baked haddock fillets in a white baking dish with golden topping, parsley, and lemon wedges.
Baking the fillets uncovered helps the topping toast while the haddock underneath stays tender, moist, and easy to lift from the dish.

Choose Your Baked Haddock Version

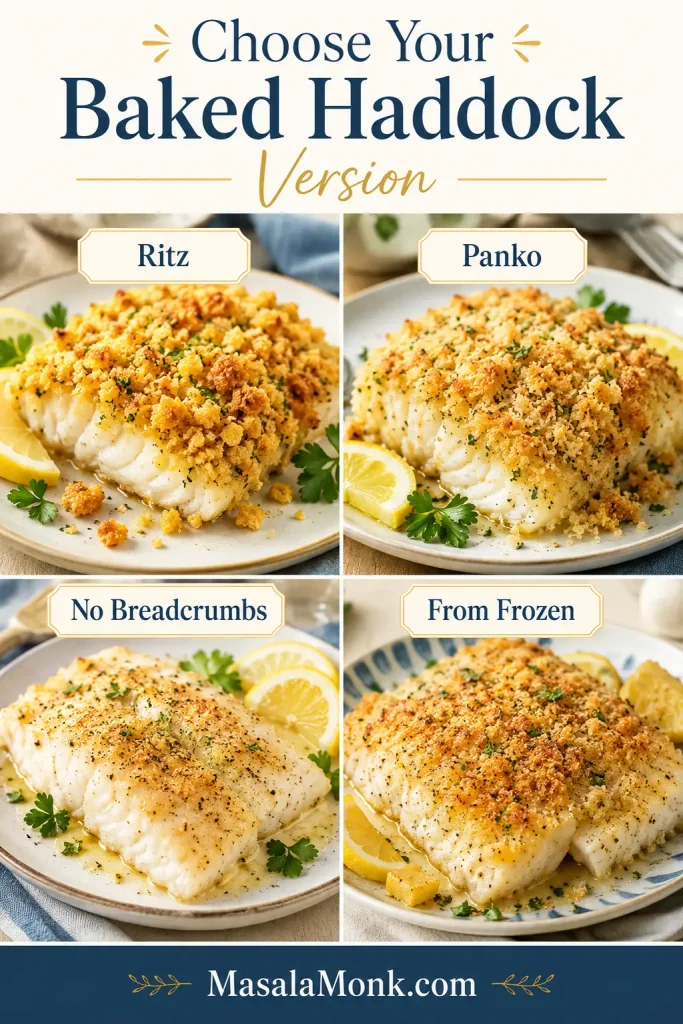
Start with the dinner you want, then choose the topping. Ritz gives you buttery New England comfort, panko gives you crunch, breadcrumbs keep it classic, and lemon butter keeps the plate lighter.

Four-panel guide showing baked haddock versions with Ritz, panko, no breadcrumbs, and a from-frozen method.
Once you know the style you want, this guide helps you choose between Ritz, panko, no breadcrumbs, or a from-frozen method.

Best Topping by Dinner Style

What You WantUseBest TemperatureWhy It Works
New England baked haddockCrushed Ritz crackers350°F or 400°FButtery, cozy, and classic with lemon and parsley.
Crispy baked haddock without fryingPanko and Parmesan400°FLight crunch without a pot of oil.
Soft classic baked fishPlain breadcrumbs375°F or 400°FGentler texture and familiar flavor.
Baked haddock without breadcrumbsLemon, butter or olive oil, herbs400°FClean, bright, and lighter.
Thick center-cut haddockHaddock loins350°F or longer 400°F timingThicker fish needs gentler timing.
Baked haddock from frozenEmergency frozen method400°FBake briefly first, blot moisture, then season.

Use this topping comparison to choose the texture you want before you bake: buttery Ritz, crisp panko, or softer breadcrumbs.

Comparison board showing Ritz crackers, panko, and breadcrumbs as three topping options for baked haddock.
Choose Ritz for buttery New England baked haddock, panko for a crisp finish, or breadcrumbs for a softer classic crust.

For a first try, choose Ritz if you want the coziest fish dinner and panko if you want the crispest finish. Both make mild haddock feel more complete than plain baked fish.

Craving fried fish instead of baked fish? This fish batter recipe is the better path.

More Baked Haddock Tips

Why This Baked Haddock Works

Haddock needs three things: a dry surface, seasoning on the fish itself, and the confidence to stop baking before the fillets turn firm. The buttery layer adds flavor and comfort, but the fish is still the main event.

If baked fish has disappointed you before, it was probably not because you did anything dramatic wrong. Delicate white fish simply rewards early checking. Once you learn that, this recipe feels relaxed instead of risky.

The buttered surface protects the fish, the lemon keeps the flavor bright, and the broiler gives you a backup plan when the fish is done before the surface looks perfect.

Ingredients You’ll Need

The ingredient list is short, so balance matters. Haddock is mild; it needs direct seasoning and enough butter in the topping to brown without turning greasy.

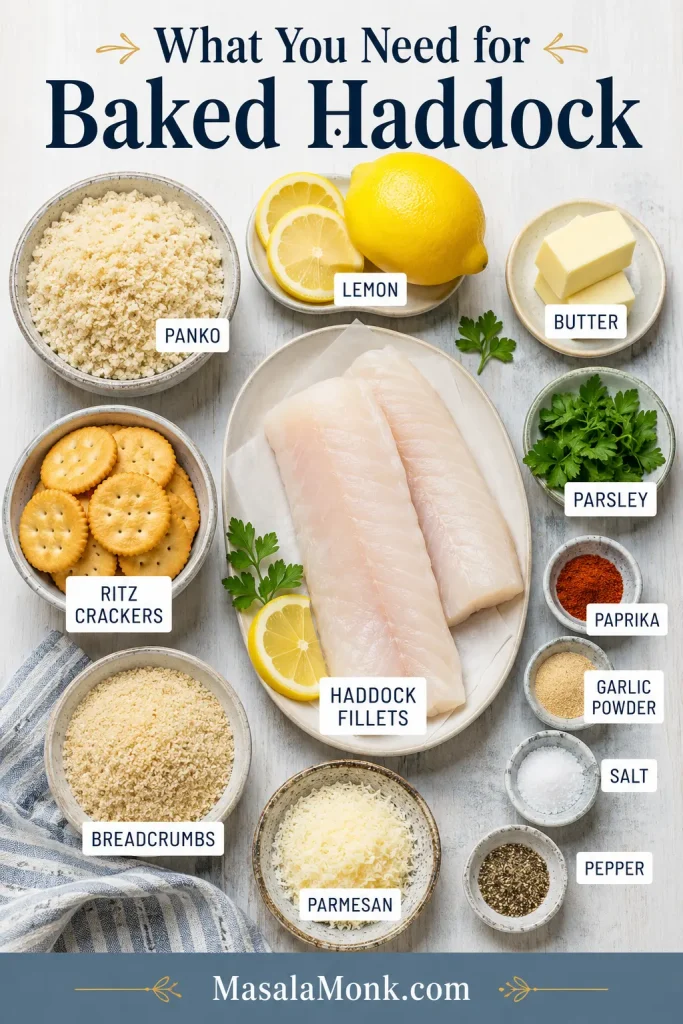
Ingredients for baked haddock arranged overhead, including haddock fillets, lemon, butter, parsley, Ritz crackers, panko, breadcrumbs, Parmesan, and spices.
Before choosing your topping, gather the essentials: mild haddock, lemon, butter, herbs, and either Ritz crackers, panko, or breadcrumbs.

Haddock Fillets

Skinless boneless haddock fillets are easiest. Four fillets, about 6 oz / 170 g each, fit well in a 9×13-inch baking dish. Thinner pieces cook quickly; thick haddock loins need more time. Skin-on haddock can still be baked skin-side down.

Butter or Olive Oil

Butter gives the most classic flavor and helps the surface turn golden and savory. Olive oil works when you want a lighter plate, especially with plenty of lemon and herbs.

Panko, Breadcrumbs, or Ritz Crackers

Panko gives the lightest crunch. Fine breadcrumbs make a softer classic crust. Ritz crackers bring buttery New England comfort and need a lighter hand with salt.

Crush Ritz crackers into coarse pieces, not powder. You want little buttery bits that toast on top of the fish.

Lemon, Garlic, Paprika, and Herbs

Lemon brightens the fish, garlic powder seasons evenly, paprika adds color, and parsley keeps the plate fresh. For a seafood-seasoning flavor, replace the paprika with a small pinch of seafood seasoning and reduce the salt.

Parmesan

Parmesan is optional, but it works beautifully with panko. It adds savory depth and helps the panko crust taste more finished.

Step-by-Step Tips for Better Baked Haddock

The recipe card gives you the fast version. These cues help with thin fillets, thick loins, frozen fish, and heavier toppings.

1. Start with dry fillets

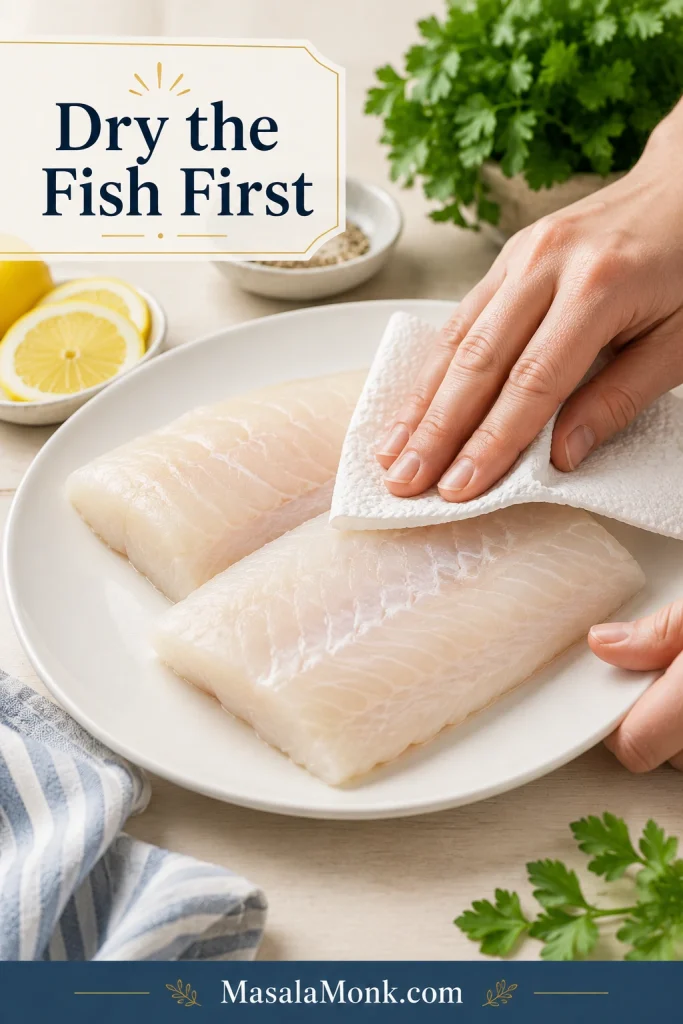
Pat both sides of the fish with paper towels. This one step helps seasoning stick and keeps the dish from turning watery.

Raw haddock fillets being patted dry with paper towels on a light surface before baking.
First, pat the haddock dry; otherwise, extra surface moisture can make the fish steam and soften the topping.

2. Season the fish, not just the topping

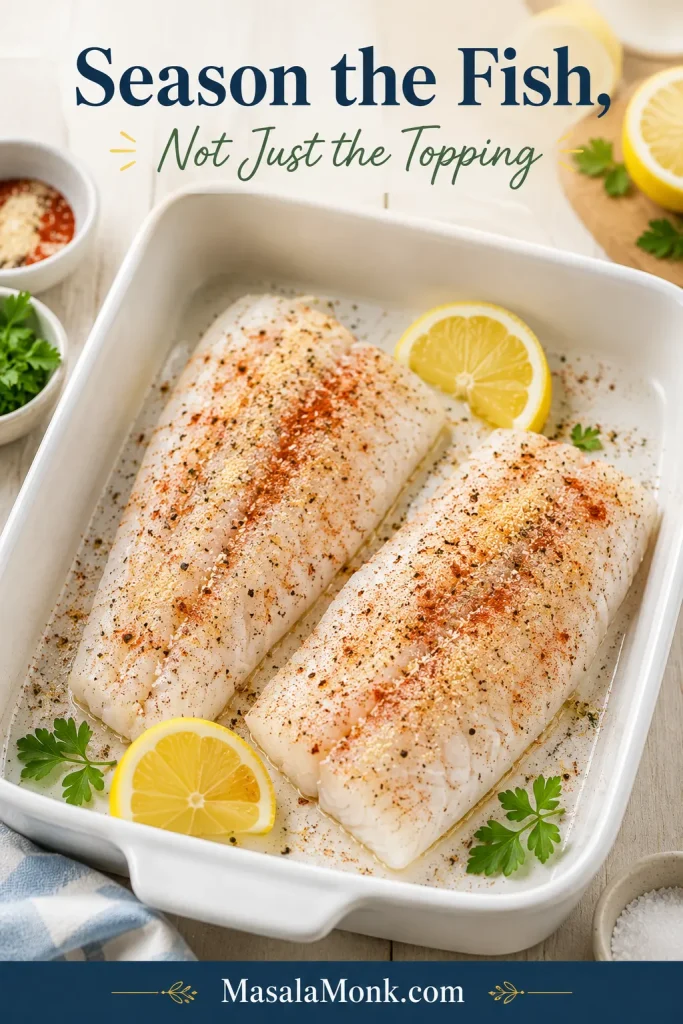
Add salt, pepper, lemon juice, garlic powder, and paprika before the topping goes on. The golden layer should support the fish, not carry all the flavor by itself.

Haddock fillets in a white baking dish being seasoned with lemon, paprika, garlic powder, salt, and pepper before topping.
Next, season the haddock itself with lemon, salt, pepper, garlic, and paprika so the fish tastes good beneath the topping.

3. Keep the topping loose

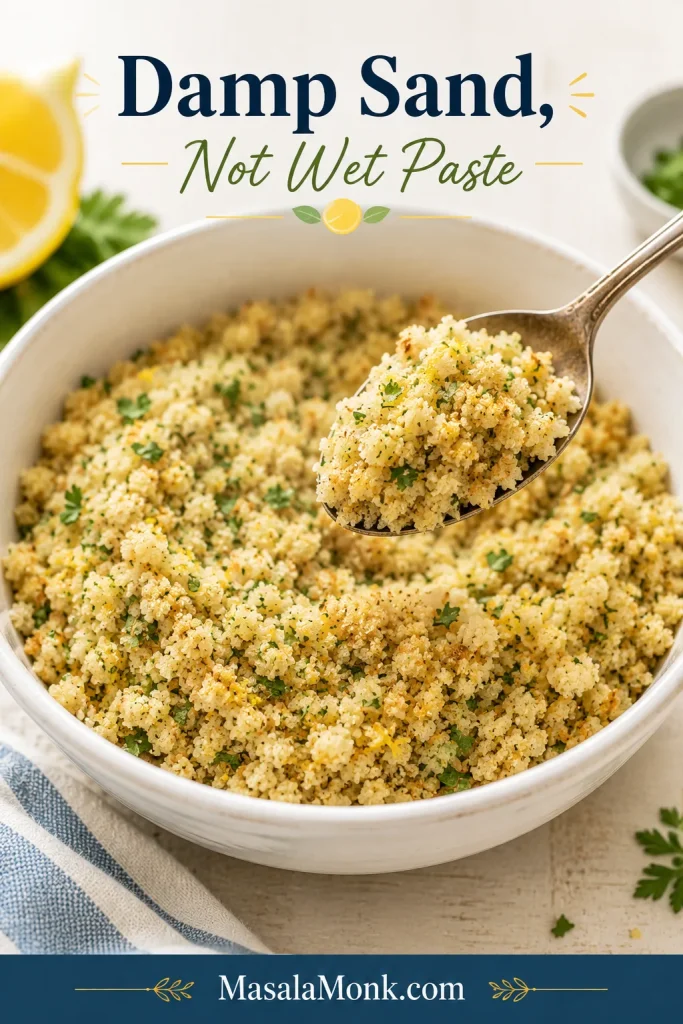
Mix the panko, breadcrumbs, or crushed crackers with melted butter until the texture looks like damp sand. Spoon it over the fish, press gently, and stop there. A loose layer browns better than a packed one.

Bowl of buttered panko breadcrumb topping with herbs and lemon zest, lifted with a spoon to show a damp sand texture.
The topping should feel like damp sand because that texture browns better than dry crumbs or a greasy butter paste.

After mixing the crumbs, keep the layer loose on top of the fillets so the heat can move through the fish.

Loose breadcrumb topping being spooned over seasoned haddock fillets in a white ceramic baking dish.
Spoon the topping on lightly instead of pressing it down, because a loose layer leaves room for heat to cook the fish evenly.

4. Bake uncovered

An uncovered dish gives the surface a chance to toast. Covering traps steam, which is useful for some foods but not for buttery topping on delicate fish.

5. Let the fish win

Pull the haddock when it flakes, even if the top is not quite as golden as you hoped. A minute under the broiler can fix the color.

Before and after comparison of baked haddock topping before broiling and after becoming golden brown.
If the haddock is done but the surface looks pale, broil the topping briefly instead of extending the bake time.

Once the topping choice is clear, the only real timing question is temperature.

350°F vs 400°F: Which Is Better?

Both temperatures can work. Choose based on thickness and topping.

Oven TemperatureBest ForTypical Timing
350°F / 175°CThicker fillets, haddock loins, heavier Ritz layer, gentler New England-style bake18 to 25 minutes
375°F / 190°CA middle path when the topping browns quickly but the fish is thick14 to 20 minutes
400°F / 200°CMost everyday baked haddock fillets12 to 16 minutes
425°F / 220°CVery thin fillets or quick browning at the end8 to 12 minutes

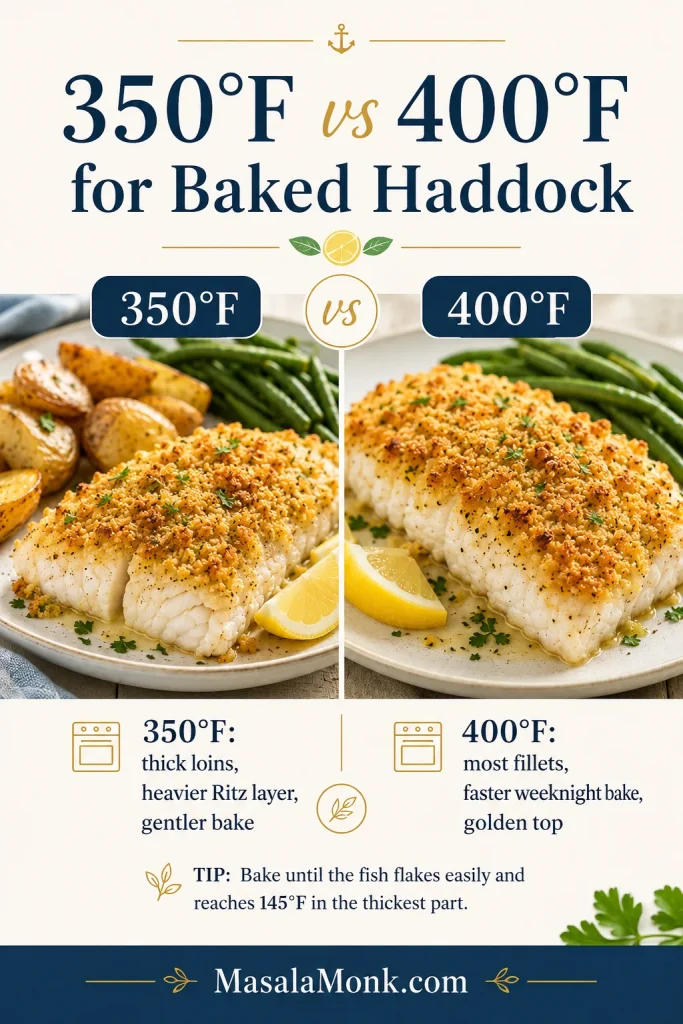
For most weeknight dinners, 400°F / 200°C is the easiest default. For a thicker loin or a heavy Ritz layer, 350°F / 175°C gives the fish more time to cook gently.

Infographic comparing 350°F and 400°F oven temperatures for baked haddock with notes for thick loins and most fillets.
Use 400°F for most weeknight haddock fillets; however, thicker loins or a heavier Ritz layer often bake better at 350°F.

How Long to Bake Haddock by Thickness

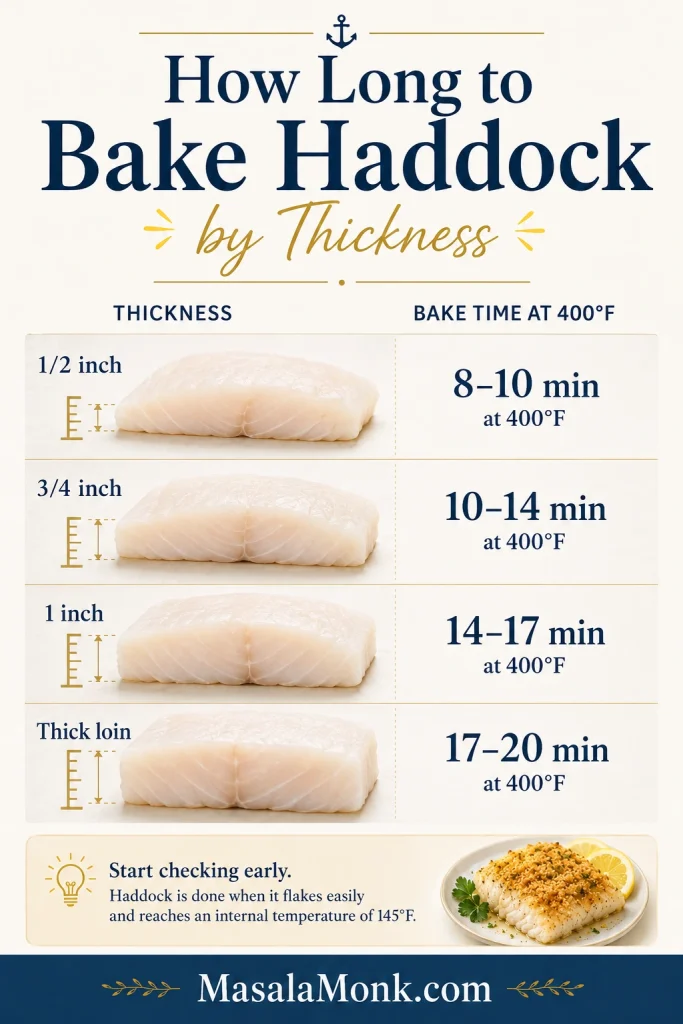
Thickness matters more than weight. A thin 6 oz fillet can cook faster than a smaller but thicker haddock loin.

Fillets vs Loins

Haddock fillets are usually thinner and cook quickly, while haddock loins are thicker center-cut pieces that need more time and often do better with gentler heat.

If your dish has mixed sizes, remove the thinner fillets as soon as they are done and let the thicker pieces finish. This simple move prevents dry edges and underdone centers.

Haddock ThicknessAt 400°F / 200°CAt 350°F / 175°C
Thin fillet, about 1/2 inch8 to 10 minutes12 to 15 minutes
Medium fillet, about 3/4 inch10 to 14 minutes15 to 18 minutes
Thick fillet, about 1 inch14 to 17 minutes18 to 22 minutes
Very thick haddock loin17 to 20 minutes22 to 25 minutes

Start checking at the early end of the range. Haddock rewards early checking more than extra oven time.

Bake time chart for haddock by thickness, showing 1/2 inch, 3/4 inch, 1 inch, and thick loin timing at 400°F.
Because thickness changes bake time more than weight, thin fillets need early checking while thick haddock loins need extra minutes.

How to Know When Haddock Is Done

Haddock is done when the center is opaque, moist-looking, and flakes with gentle pressure. The most reliable check is an instant-read thermometer in the thickest part.

  • Temperature: 145°F / 63°C in the thickest part
  • Fork test: soft flakes separate without force
  • Visual cue: opaque center, not translucent or glossy

The first time, a thermometer is helpful. After that, you will start recognizing the soft flakes and opaque center by sight.

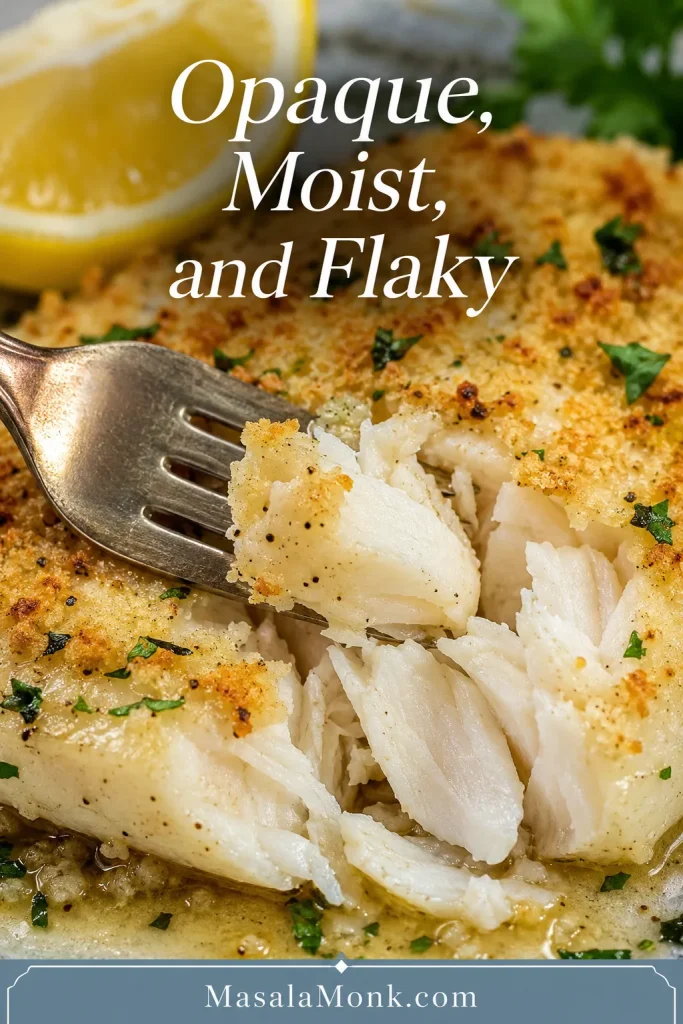
Close-up of baked haddock flaking apart with a fork, showing a moist opaque center and golden topping.
When the center turns opaque and separates into soft flakes, pull the haddock from the oven before the delicate fish overcooks.
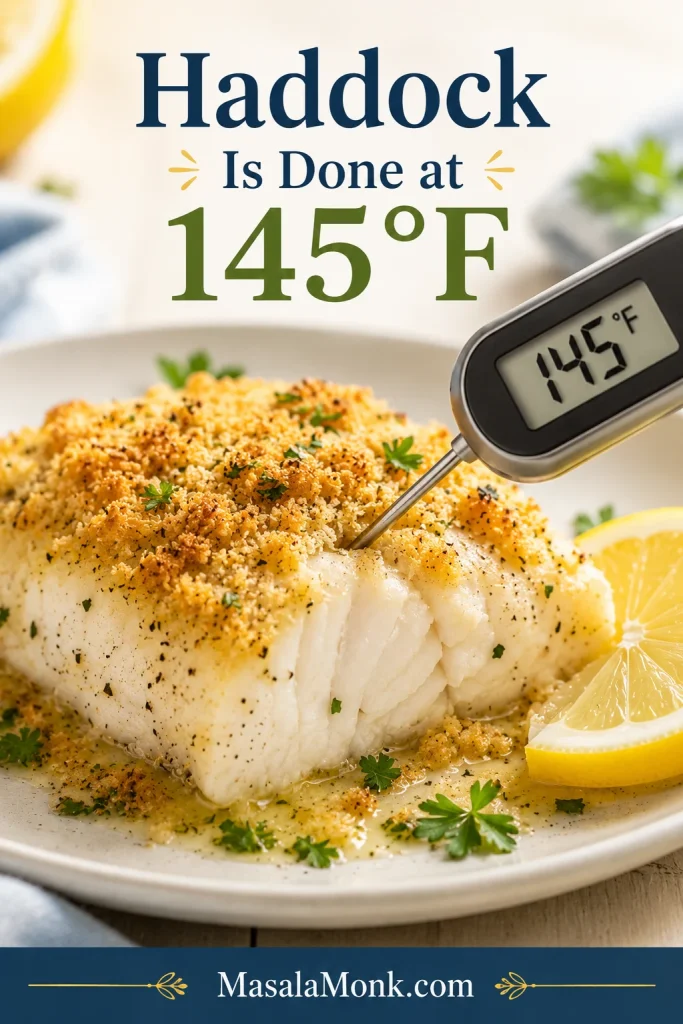
Instant-read thermometer inserted into baked haddock, showing doneness at 145°F with lemon and parsley nearby.
A thermometer gives the clearest first-time answer: haddock is done when the thickest part reaches 145°F.

The safe minimum internal temperature for fish is 145°F / 63°C. Once haddock looks firm, dry, or heavily shrunken, it has probably gone too far.

Fresh vs Frozen Haddock

Fresh haddock is easiest, but frozen haddock works well when it is thawed and dried properly. Crumb-topped fish needs a dry surface more than extra liquid in the dish.

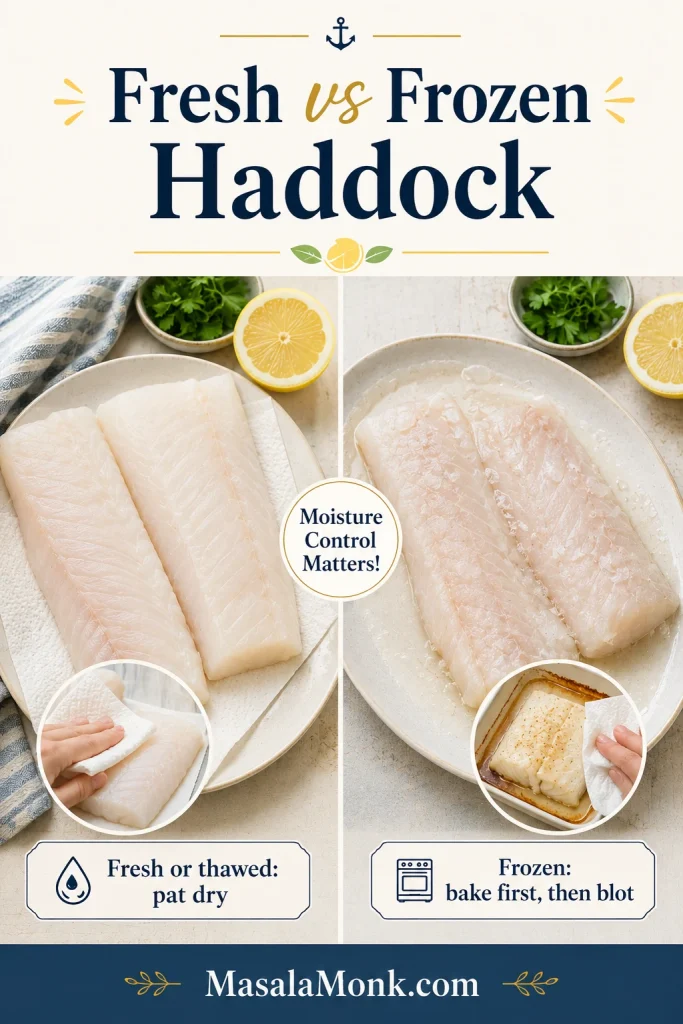
Side-by-side comparison of fresh or thawed haddock patted dry and frozen haddock needing moisture control before baking.
Fresh or thawed haddock needs a dry surface; for frozen haddock, a short first bake and a quick blot help control moisture.

Best Method: Thaw First

Thaw frozen haddock overnight in the refrigerator. For a faster method, keep the fish sealed and thaw it in cold water, changing the water every 30 minutes. The USDA describes refrigerator thawing, cold-water thawing, and microwave thawing as safe defrosting methods. Fish thawed by cold water or microwave should be cooked right away.

After thawing, unwrap the fillets and pat them dry before seasoning. That is the difference between a golden top and a wet crust.

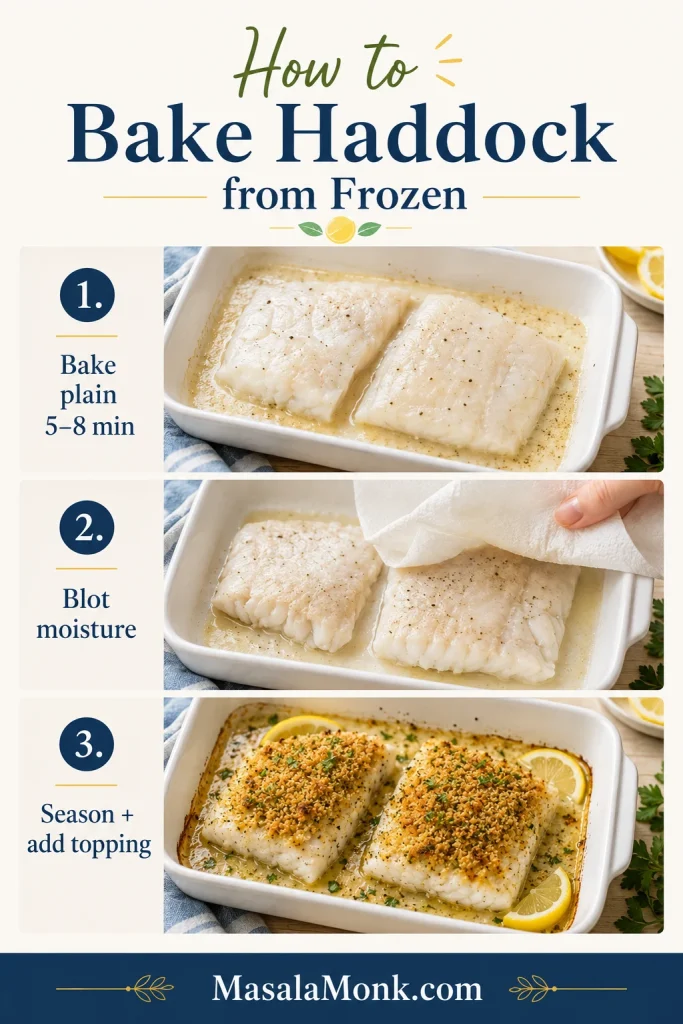
Emergency Method: Baking Haddock from Frozen

Thawed fish gives the best texture, but frozen fillets can still become dinner. Keep the topping off at first.

  1. Heat the oven to 400°F / 200°C.
  2. Place frozen fillets in a lightly greased baking dish.
  3. Bake plain for 5 to 8 minutes, just until surface ice melts and moisture starts to release.
  4. Blot or drain the dish carefully.
  5. Season the fish, add the topping, and continue baking until the center reaches 145°F / 63°C.

This will get dinner on the table, but thawed fish gives you a drier surface and a better topping.

Three-step guide showing how to bake haddock from frozen by baking plain, blotting moisture, then seasoning and adding topping.
When baking haddock from frozen, bake it plain first, blot the released moisture, and only then add seasoning and topping.

Flavor Variations

Choose one flavor direction and keep it simple. Haddock is mild, so it does not need a crowded topping.

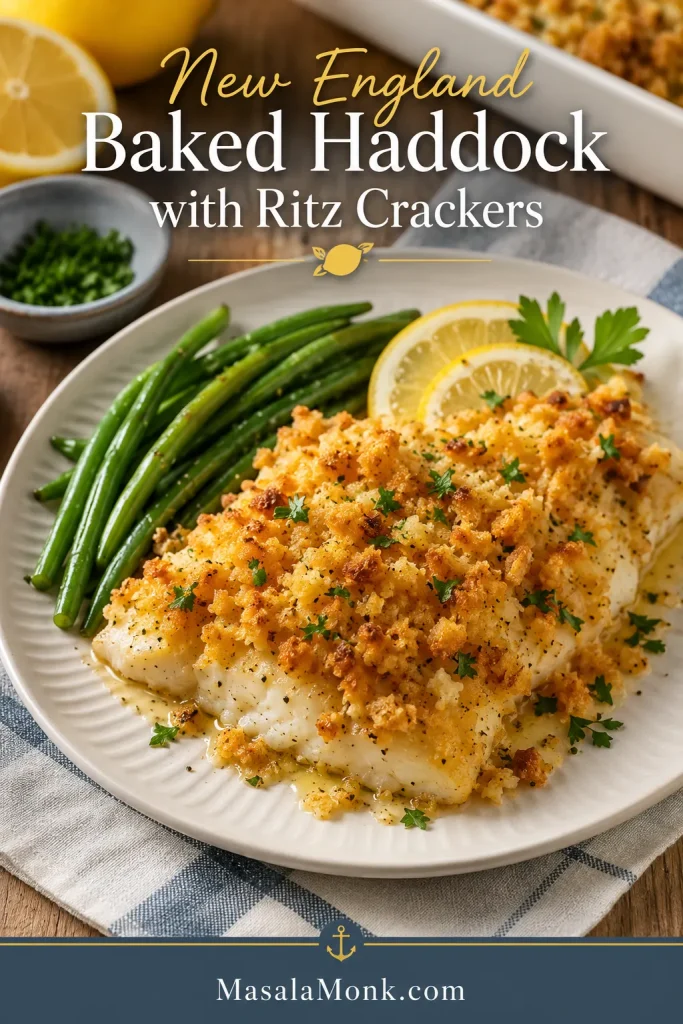
New England Baked Haddock with Ritz Crackers

This is the buttery comfort version: crushed Ritz crackers, melted butter, lemon, and parsley over mild white fish. Bake at 350°F for a gentler old-school feel, or 400°F when you want dinner faster. Keep the salt light and let the crackers do their job.

New England baked haddock with buttery Ritz cracker topping served on a plate with lemon and parsley.
Crushed Ritz crackers give this New England baked haddock its buttery comfort, while lemon and parsley keep each bite balanced.

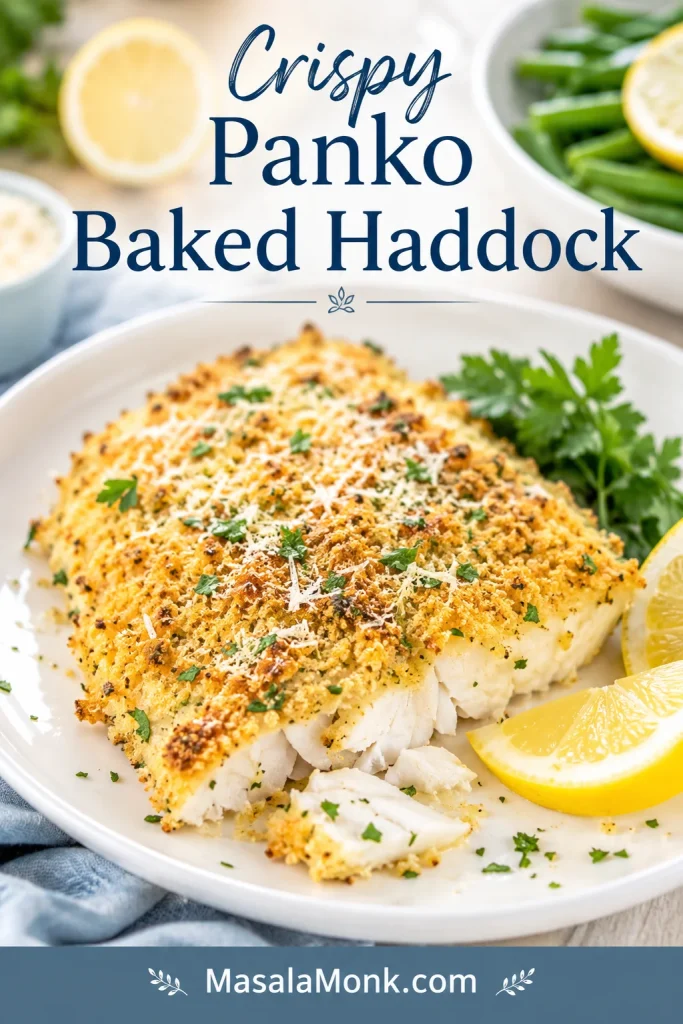
Panko Parmesan Baked Haddock

Panko and Parmesan give you the crunch of fried fish without pulling out a pot of oil. This version is best at 400°F so the panko crust can toast while the fish stays tender.

Panko Parmesan baked haddock with a crisp golden crust, lemon wedge, and parsley garnish on a plate.
Panko and Parmesan add crispness without frying, so this baked haddock version works well when you want crunch with less mess.

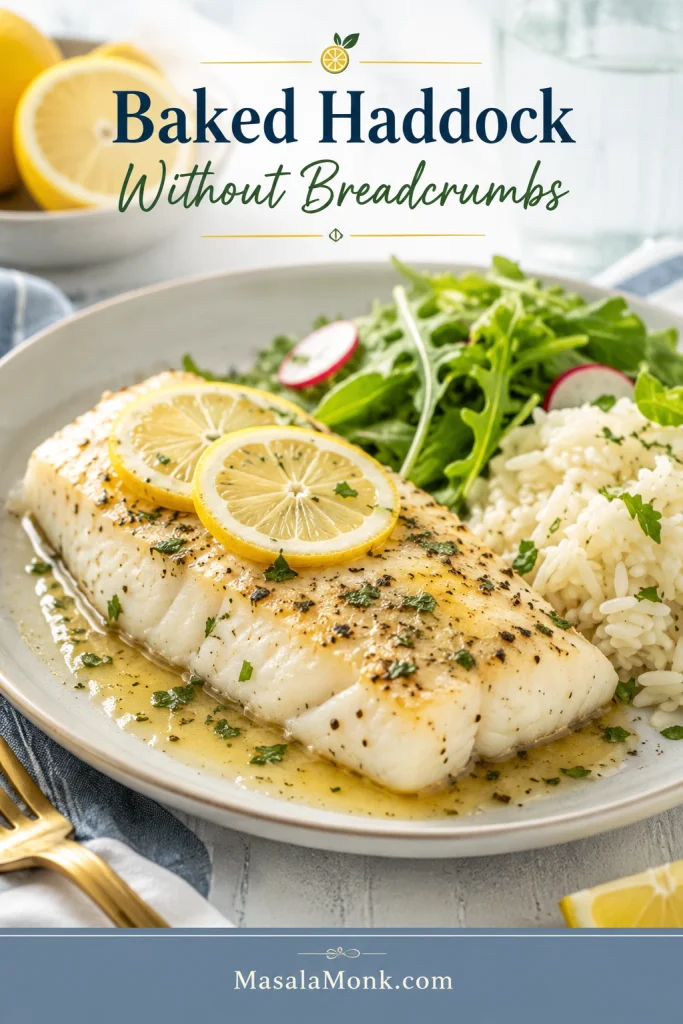
Lemon Butter Haddock

Skip the crumbs and let lemon butter lead. This is the lightest path, especially when the fish is fresh and you want a clean, bright dinner.

Lemon butter baked haddock without breadcrumbs served with herbs, lemon, and a light side.
For a lighter baked haddock variation, skip the crumbs and let lemon butter, herbs, and gentle oven heat carry the flavor.

Garlic Butter Haddock

Add garlic powder or a little finely grated garlic to the melted butter, then finish with parsley and lemon. Fresh garlic can burn under the broiler, so use a light hand.

Warm Paprika or Chili Crumb Haddock

Add a small pinch of smoked paprika, mild chili powder, or Kashmiri chili powder to the buttered crumbs. Keep the warmth gentle; haddock tastes best when the spice supports the fish instead of taking over.

Healthy Baked Haddock

Use olive oil instead of some of the butter, keep the topping thin, and add lemon, herbs, and quick-cooking vegetables around the fish. The plate stays lighter, but the golden finish still makes it feel like dinner.

Cod or Another White Fish

This method also works with cod, pollock, hake, or another mild white fish. Cod is often thicker and meatier than haddock, so use the thickness chart instead of only the clock.

For a crisp battered dinner instead, save this fish and chips recipe for another night.

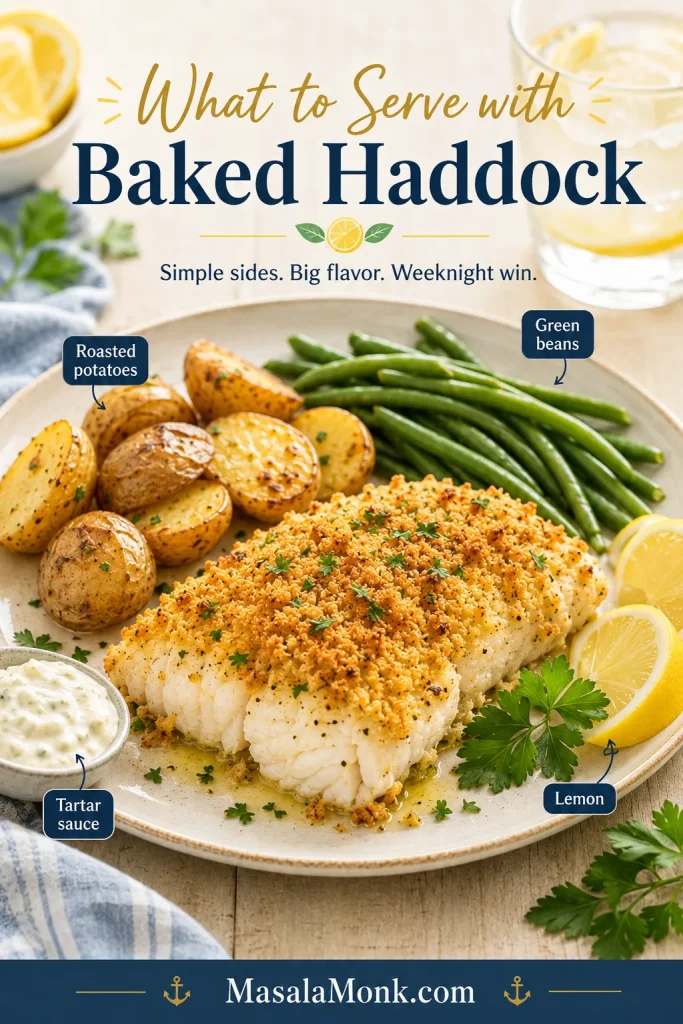
What to Serve with Baked Haddock

For the easiest comfort plate, serve the haddock with roasted potatoes, green beans, lemon wedges, and a spoonful of tartar sauce. It feels classic, but still light enough for a weeknight.

Baked haddock served with roasted potatoes, green beans, lemon wedges, parsley, and tartar sauce on a dinner plate.
To make baked haddock feel like a full dinner, pair the flaky fish with roasted potatoes, green beans, lemon, and tartar sauce.

Cozy Sides

Fresh Sides

  • Green beans
  • Peas
  • Cucumber salad or simple green salad
  • Coleslaw
  • Roasted carrots

Sauces and Extras

  • Lemon wedges
  • Tartar sauce
  • Lemon butter sauce
  • Herb yogurt sauce
  • Crusty bread

Keep the sides simple so the fish still feels like the center of the plate. For something brighter than tartar sauce, spoon a little mango salsa over the lemon-butter version, especially with rice or salad.

Troubleshooting

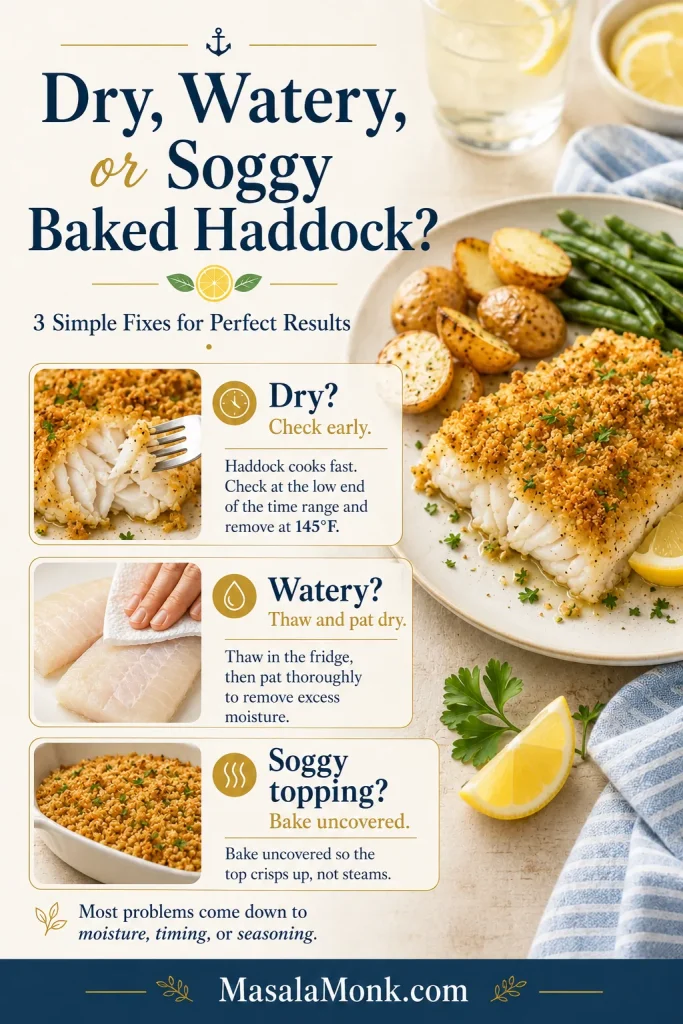
Most baked haddock problems come down to moisture, timing, or seasoning. The fix is usually simple.

Three things to remember: Start with dry fillets, bake uncovered when using a topping, and pull the fish when it is done. The surface can always be browned for one more minute.

Troubleshooting guide for baked haddock with fixes for dry fish, watery fish, and soggy topping.
If baked haddock turns dry, watery, or soggy, adjust the timing, dry the fillets better, and bake uncovered next time.
ProblemLikely CauseHow to Fix It
Haddock is dryIt baked too long or the fillets were thin.Check early and pull the fish when it reaches 145°F / 63°C.
Fish is wateryThe fish was frozen, not fully thawed, or crowded in the dish.Thaw fully, pat dry, and leave space between fillets.
Topping is soggyToo much moisture or a covered dish.Bake uncovered and avoid adding extra liquid under the topping.
Topping is paleThe fish cooked before the surface browned.Broil for 1 to 2 minutes after the fish is done.
Fish tastes blandOnly the topping was seasoned.Season the fish directly before adding the top layer.
Fish fell apartIt was overcooked or lifted too roughly.Rest for 2 minutes and use a thin fish spatula.
Topping is greasyToo much butter, especially with crackers.Use less butter with Ritz and keep the layer loose.
Fish smells too strongThe fish may not be fresh or was stored too long after thawing.Use fresh-smelling fish and cook soon after thawing.

Make Ahead, Storage, and Reheating

Can You Make It Ahead?

Assemble this recipe right before baking. You can thaw the fish ahead and mix the dry topping ahead, but add butter, seasoning, and the final layer close to oven time.

How to Store Leftovers

Store leftovers in an airtight container in the refrigerator for up to 2 days. Keep extra lemon wedges separate and add fresh lemon after reheating.

Flaked leftovers are useful, not wasted. Fold them into potato and herbs for simple fish cakes, or tuck them into fish tacos with slaw, lime, and a creamy sauce.

Three-panel guide showing leftover baked haddock as flaked fish, golden fish cakes, and fish tacos with slaw and lime.
Leftover baked haddock still has options: flake it into bowls, shape it into fish cakes, or tuck it into tacos with slaw and lime.

How to Reheat It

Reheat gently in a low oven or air fryer until warmed through. The microwave works in a pinch, but it softens the topping and can make fish smell stronger.

Can You Freeze Cooked Haddock?

Cooked crumb-topped haddock does not freeze beautifully. The fish can turn watery and the topping usually softens. For best texture, freeze raw haddock, thaw it safely, and bake it fresh.

FAQ

What temperature is best for baked haddock?

For most fillets, 400°F / 200°C is the easiest everyday temperature. It cooks the fish quickly while giving the topping time to turn golden. For thicker loins or a heavier Ritz cracker topping, 350°F / 175°C gives a gentler bake.

How long does haddock take in the oven?

Most medium fillets take 12 to 16 minutes at 400°F / 200°C. Thin pieces may be ready in 8 to 10 minutes, while thick loins may need 17 to 20 minutes or more.

Should baked haddock be covered or uncovered?

Bake it uncovered when using a crumb topping. Covering traps steam, which helps some dishes but makes buttery crumbs soft instead of golden.

Can I bake frozen haddock?

Yes, but thawing first gives a drier surface and a better topping. For a frozen emergency, bake the plain fish briefly, blot the released moisture, season, add the topping, and continue baking until done.

Can I use cod instead of haddock?

Yes — cod works well here, but it is often thicker and meatier than haddock. Use the thickness chart and doneness cues instead of relying only on the clock.

Is haddock done at 145°F?

Yes. For safety, fish should reach 145°F / 63°C in the thickest part. It should also look opaque and flake easily with a fork.

Why did my baked haddock turn watery?

Watery haddock usually means the fish carried too much moisture into the oven. Fully thaw frozen fillets, pat them dry, and leave space in the dish so the fish bakes instead of steaming.

Can I make baked haddock without breadcrumbs?

Yes. Use melted butter or olive oil, lemon juice, lemon zest, parsley, salt, and pepper. Bake just until the fish is opaque and flaky. It will be lighter and softer, more lemon-butter fish than crisp-topped fish.

What is the best topping for baked haddock?

Ritz crackers give the buttery New England-style finish. Panko gives the crispest bite. Plain breadcrumbs give a softer, classic baked-fish texture.

Can I use smoked haddock for this recipe?

You can, but reduce the salt because smoked haddock is already salty and stronger in flavor. Smoked haddock is also excellent in chowder, Cullen skink, fish pie, and kedgeree.

A Few Last Tips Before You Bake

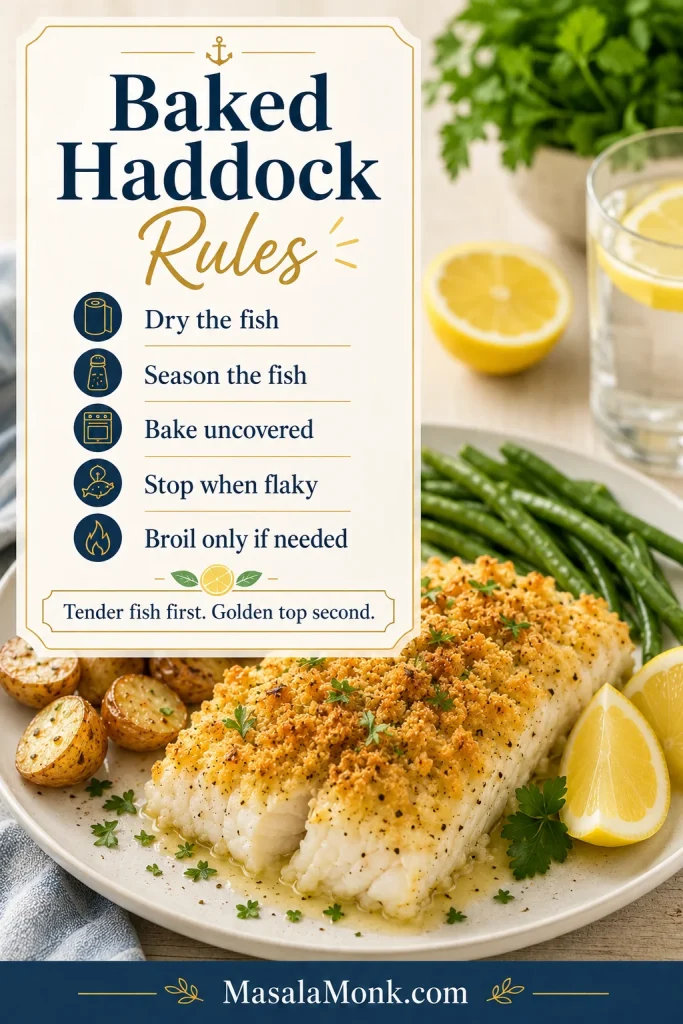
Baked haddock should feel simple, not stressful. Dry the fish, season the fish, bake it uncovered, and stop when the center is flaky and moist. The surface can always get one more minute under the broiler; the fish cannot be uncooked.

Baked haddock rules card listing dry the fish, season the fish, bake uncovered, stop when flaky, and broil only if needed.
Finally, remember the core baked haddock rules: dry the fish, season it directly, bake uncovered, stop when flaky, and broil only if needed.

Whether you choose buttery Ritz crackers, crisp panko, plain breadcrumbs, or lemon butter, the goal is the same. You want tender haddock with enough golden flavor on top to make it feel like a proper dinner.

If you make this baked haddock, leave a comment and tell us which version you chose: Ritz, panko, breadcrumbs, or lemon butter. Also mention whether you used thin fillets, thick loins, or frozen haddock. Your notes help other readers choose their own path.

Posted on Leave a comment

Ranch Roasted Potatoes Recipe

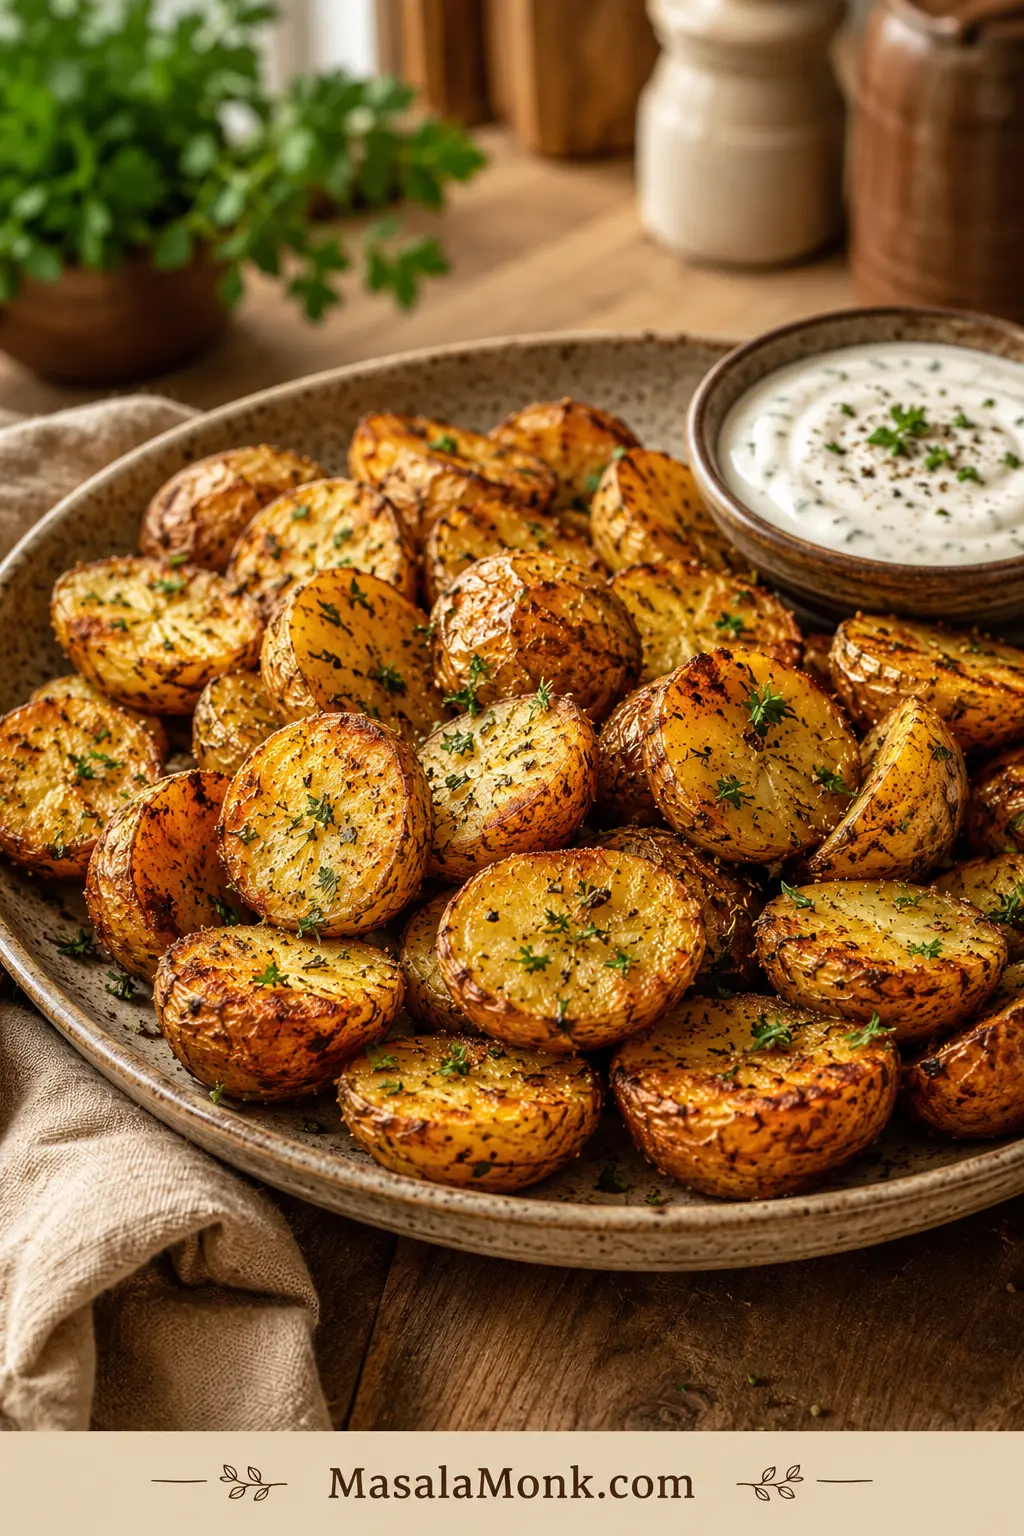
Crispy ranch roasted potatoes on a rustic platter with browned cut sides, chopped herbs, black pepper, and a small bowl of ranch dip.

Ranch roasted potatoes are the easy sheet-pan side you make when dinner needs something crispy, salty, herby, and almost no fuss. Cut the potatoes, toss them with oil and dry ranch seasoning, spread them out, and let a hot oven do the work.

The key is using dry ranch seasoning, not bottled ranch dressing, before roasting. Dry mix gives you crisp edges and bold flavor; bottled ranch is better as a dip or drizzle after the potatoes are browned.

Remember the simple rhythm: dry potatoes, oil first, ranch second, plenty of space. That is what turns a basic ranch packet into golden potatoes people start stealing from the tray before dinner is even served.

Quick Answer: How to Make Ranch Roasted Potatoes

For crispy ranch roasted potatoes, cut 2 lb / 900 g potatoes into 1-inch / 2.5 cm pieces. Toss with 3 tablespoons / 45 ml oil, then add 1 standard 1 oz / 28 g packet dry ranch seasoning, or about 3 tablespoons dry ranch seasoning from a jar. Spread on a large rimmed sheet pan and roast at 425°F / 218°C for 30 to 35 minutes, flipping once halfway through.

For darker, faster browning, roast at 450°F / 232°C and start checking around 25 minutes. The potatoes are done when the flat sides are golden, the edges look roasted, and a fork slides through the centers easily.

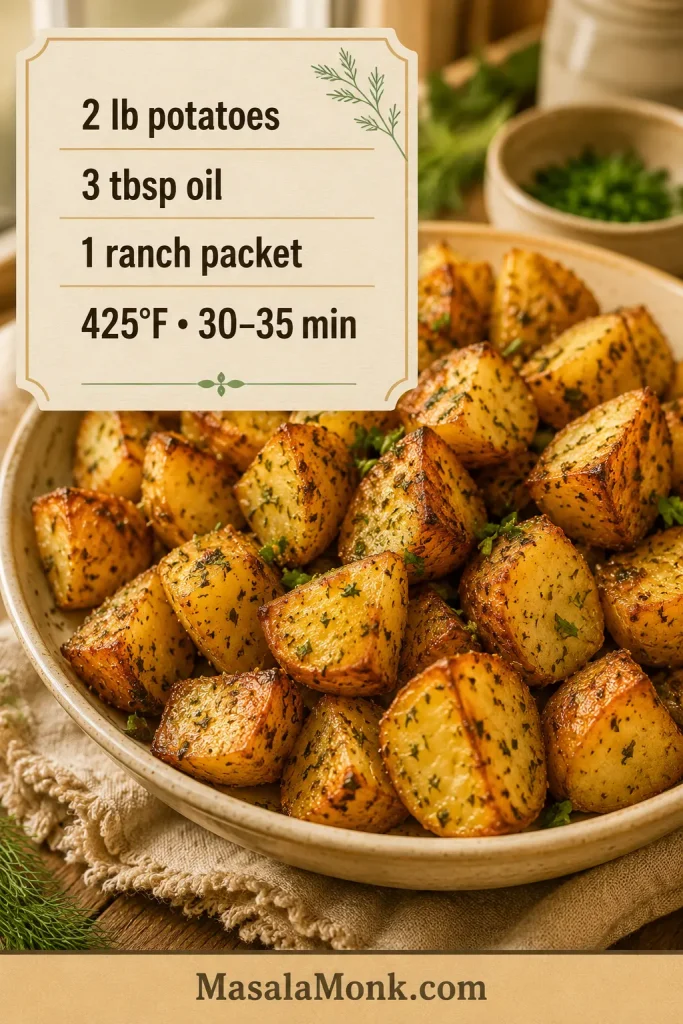
The simple ranch potato ratio

This visual keeps the ranch potato ratio easy to check before you move into the full recipe card.

Recipe ratio card for ranch roasted potatoes showing 2 lb potatoes, 3 tbsp oil, 1 ranch packet, and 425°F for 30 to 35 minutes.
Start with the base ratio: 2 lb potatoes, 3 tablespoons oil, 1 ranch packet, and 425°F for a reliable sheet-pan batch.

Ranch Roasted Potatoes Recipe Card

Crispy Ranch Roasted Potatoes

Description: Crispy ranch roasted potatoes made with dry ranch seasoning, oil, and a hot sheet pan. The edges turn golden and salty-herby while the centers stay soft and creamy.

What to look for: The potatoes should be browned on the flat sides, tender when pierced with a fork, and seasoned all the way around — not dusty in one bite and plain in the next.

Prep Time10 minutes
Cook Time30 to 35 minutes
Total Time40 to 45 minutes
Servings4 to 6
MethodOven roasted
Best PanLarge rimmed sheet pan

Ingredients

  • 2 lb / 900 g potatoes, such as baby red potatoes, baby Yukon gold potatoes, Yukon gold potatoes, russets, or creamer potatoes
  • 3 tablespoons / 45 ml olive oil or neutral oil
  • 1 standard 1 oz / 28 g packet dry ranch seasoning, or about 3 tablespoons dry ranch seasoning from a jar
  • ½ teaspoon black pepper
  • ½ teaspoon garlic powder, optional
  • ¼ cup / 20 to 25 g finely grated parmesan, optional
  • 1 to 2 tablespoons chopped parsley, chives, or dill, optional, for finishing

Instructions

  1. Heat the oven to 425°F / 218°C. For faster, darker browning, use 450°F / 232°C and start checking the potatoes earlier.
  2. Wash the potatoes and dry them well. Cut them into 1-inch / 2.5 cm pieces. Halve very small baby potatoes and quarter larger ones.
  3. Add the potatoes to a large bowl. Pour in the oil and toss until every piece looks lightly glossy.
  4. Add the dry ranch seasoning, black pepper, and garlic powder if using. Toss again until the seasoning is evenly distributed.
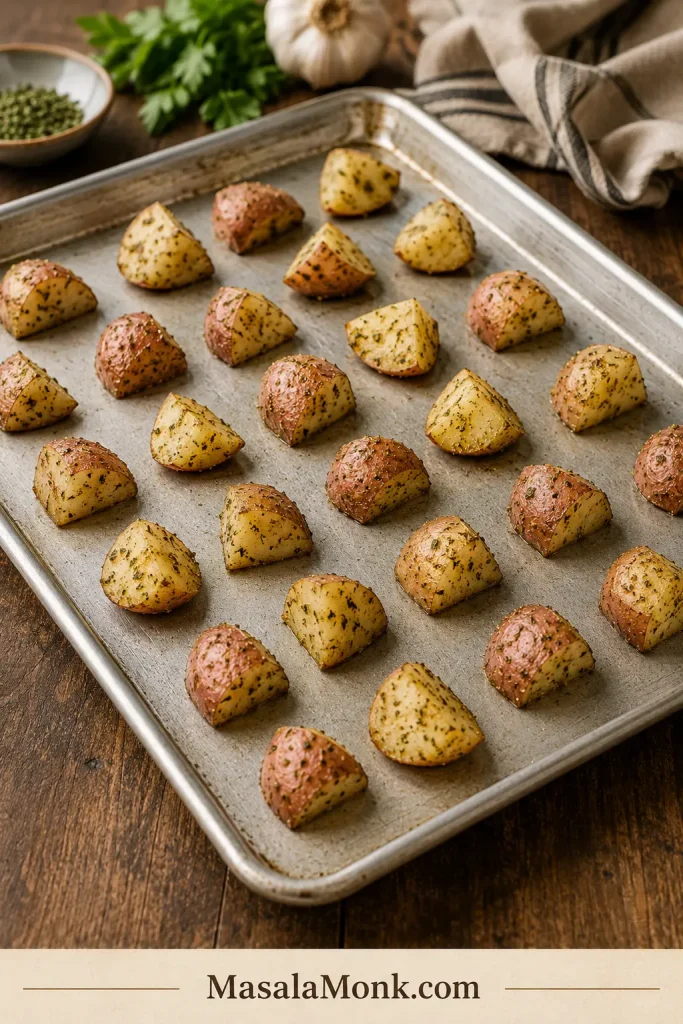
  5. Spread the potatoes on a large rimmed sheet pan in one layer. Place as many cut sides down as possible for better browning.
  6. Roast for 30 to 35 minutes, flipping once around the 18 to 20 minute mark, until the potatoes are browned outside and tender inside.
  7. Finish with parmesan, herbs, cooked bacon, shredded cheese, or a small drizzle of ranch dressing after roasting. Serve hot.
Recipe note: Use up to 4 tablespoons jarred ranch seasoning only if your mix is mild or salt-free. If your ranch mix tastes salty on its own, start with less and add more after roasting if needed.

Tested Notes for Best Results

  • Best potatoes: baby red and baby Yukon gold potatoes are the easiest because they hold their shape and brown well.
  • Russets work: they give fluffy centers and rougher edges, but toss them gently because they break more easily.
  • Seasoning order: dry the potatoes, coat them with oil, then add the ranch seasoning.
  • Pan choice: a bare metal sheet pan browns better; parchment makes cleanup easier.
  • Texture tip: spread the potatoes in one layer and place some cut sides down.
  • Browning rule: pan space matters more than the exact ranch seasoning brand.

Choose your version: Want the easiest tray? Use the recipe card. Want the crispiest tray? Use the parboil option. Want the fastest small batch? Use the air fryer method.

Once that basic rhythm is clear, the rest is just choosing the right potato, the right heat, and the right finish. Here is how to make the tray crisp, not soggy.

Why This Works

Ranch potatoes are simple, but they are not random. The crisp version depends on three things: dry seasoning, steady heat, and enough space on the pan. Dry ranch seasoning gives concentrated flavor without adding the moisture that comes from bottled dressing. Oil helps that seasoning cling and gives the cut sides enough surface fat to brown.

One-inch pieces are small enough to cook through before the seasoning gets too dark, but large enough to stay creamy inside. A large sheet pan lets them roast instead of steam. When a few cut sides sit directly against the pan, they pick up the golden crust that makes roasted potatoes feel like more than boiled potatoes with seasoning.

The best pieces should have a toasted flat side, a soft middle, and that salty ranch flavor baked into the surface. Those are usually the bites people pick at first.

Ingredients and Ranch Seasoning Amount

What you need before roasting

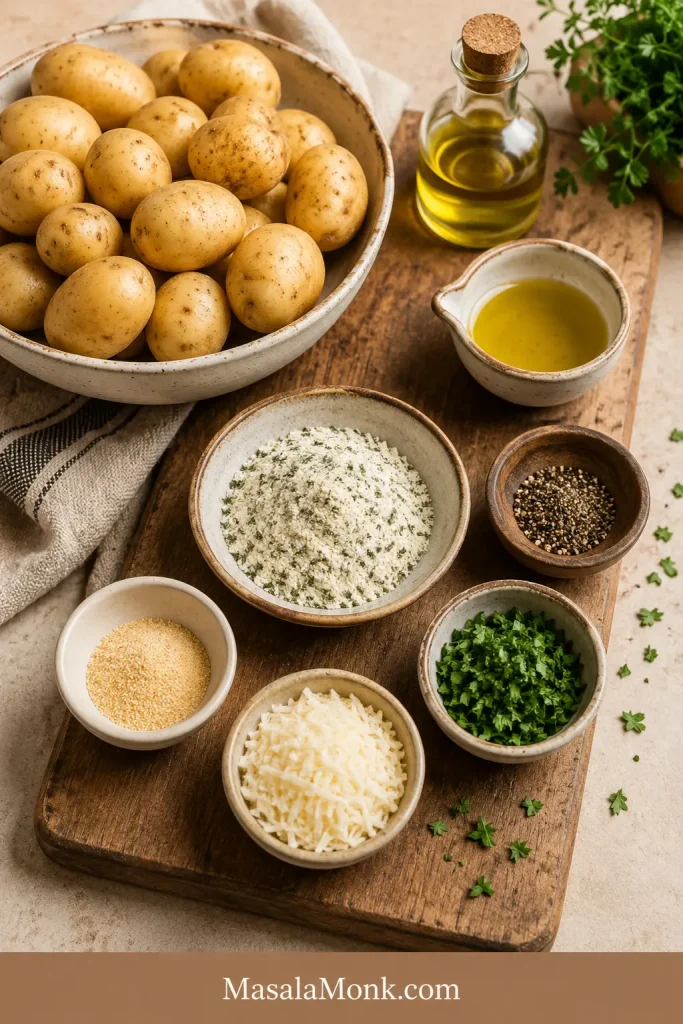
Keep the base simple, then use optional add-ins only when you want a sharper, cheesier, or fresher finish.

Ingredients for ranch roasted potatoes on a wooden board, including potatoes, dry ranch seasoning, oil, black pepper, garlic powder, parmesan, and chopped herbs.
Potatoes, oil, and dry ranch seasoning build the base flavor; then pepper, garlic powder, parmesan, and herbs can add a sharper, fresher finish.

Potatoes

Most potatoes will work here, but they do not all give you the same bite. Baby red potatoes stay creamy and neat. Yukon gold potatoes taste buttery and tender. Russets give you fluffier centers and rougher browned edges, but they can break if you toss them too hard.

If you are unsure, choose baby red potatoes or baby Yukon gold potatoes. They are the least fussy and look good even when cut quickly. If you often choose between Yukon golds and russets, the same creamy-versus-fluffy split matters in mashed potatoes too.

Oil

No fancy oil needed. Olive oil, avocado oil, canola oil, vegetable oil, or another neutral roasting oil will work. For 2 pounds of potatoes, 3 tablespoons should make the pieces lightly glossy, not greasy.

Dry Ranch Seasoning

Dry ranch seasoning is the main flavor. It usually brings herbs, garlic, onion, salt, and tangy dairy-style flavor in one packet. A standard ranch packet is usually about 1 oz / 28 g, which is a good amount for 2 lb / 900 g potatoes.

If your seasoning comes from a jar, start with about 3 tablespoons. Go up to 4 tablespoons only if the mix is mild or salt-free. If you also use ranch packets for snacks, the same dry-mix logic shows up in these ranch oyster crackers: fat helps the seasoning cling, while too much moisture softens the crunch.

Ranch Seasoning Ratio

Use this ratio when you are making a smaller tray, doubling for a crowd, or trying to avoid a too-salty batch.

PotatoesOilDry Ranch SeasoningBest Pan Setup
1 lb / 450 g1½ tbsp / 22 ml½ packet or about 1½ tbspSmall to medium sheet pan
2 lb / 900 g3 tbsp / 45 ml1 packet / 28 g or about 3 tbsp1 large sheet pan
4 lb / 1.8 kg6 tbsp / 90 ml1½ to 2 packets, depending on saltiness2 large sheet pans

If you are adding bacon, cheese, parmesan, or a ranch drizzle, start on the lighter side with the seasoning. Those toppings bring salt too.

Using a Hidden Valley-style packet? You do not need a separate method. Use the same base recipe: 2 lb / 900 g potatoes, 3 tablespoons / 45 ml oil, and 1 standard 1 oz / 28 g dry ranch packet. Roast at 425°F / 218°C for control or 450°F / 232°C for deeper browning. If the packet tastes salty or you are adding bacon or cheese, use a little less and finish with more only if needed.

Pepper, Garlic Powder, Parmesan, and Herbs

Black pepper gives the potatoes a sharper finish. Garlic powder is optional because ranch seasoning already contains garlic, but a small amount makes the flavor fuller. Parmesan, chives, parsley, or dill are best as finishing touches. They make the tray taste fresher without changing the base recipe.

Dry Ranch Seasoning vs Bottled Ranch Dressing

This is the ranch-potato choice that changes texture most. Dry ranch seasoning and bottled ranch dressing do not behave the same way in the oven.

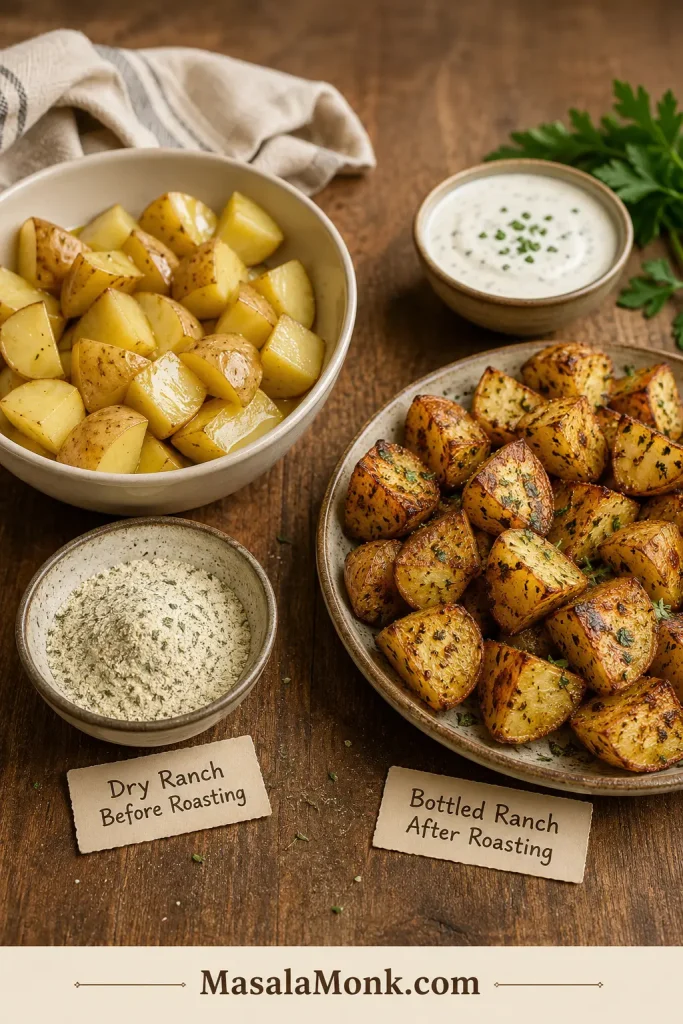
Dry mix before roasting, bottled ranch after

Keep the powdered mix in the oven step and the creamy dressing at the table.

Dry ranch seasoning beside oiled potato chunks with finished roasted potatoes and a bowl of ranch dressing for dipping.
Use dry ranch mix before roasting for crisp edges; then save bottled ranch for dipping or drizzling once the potatoes are browned.
Ranch ProductBest UseWhat Happens
Dry ranch seasoning packetCrispy roasted potatoesStrong flavor, less moisture, better browning
Dry ranch dressing mix from a jarCrispy roasted potatoesWorks like a packet when measured carefully
Homemade ranch seasoningMore control over salt and ingredientsGood flavor, but you may need to adjust salt
Bottled ranch dressingDipping, drizzling, or creamy potato bakesAdds moisture and softens the roasted finish
Bottled ranch before roastingSofter, saucier baked potatoesLess browning, more casserole-style texture

Bottled ranch makes more sense in a softer, saucier potato bake. In this sheet-pan version, let the dry mix bake into the edges, then bring in bottled ranch later as a dip or drizzle.

Ready to cook? Jump back to the recipe card. Want crispier results? See the crispy potato tips.

Best Potatoes to Use

Choose based on what you already have and the kind of bite you want.

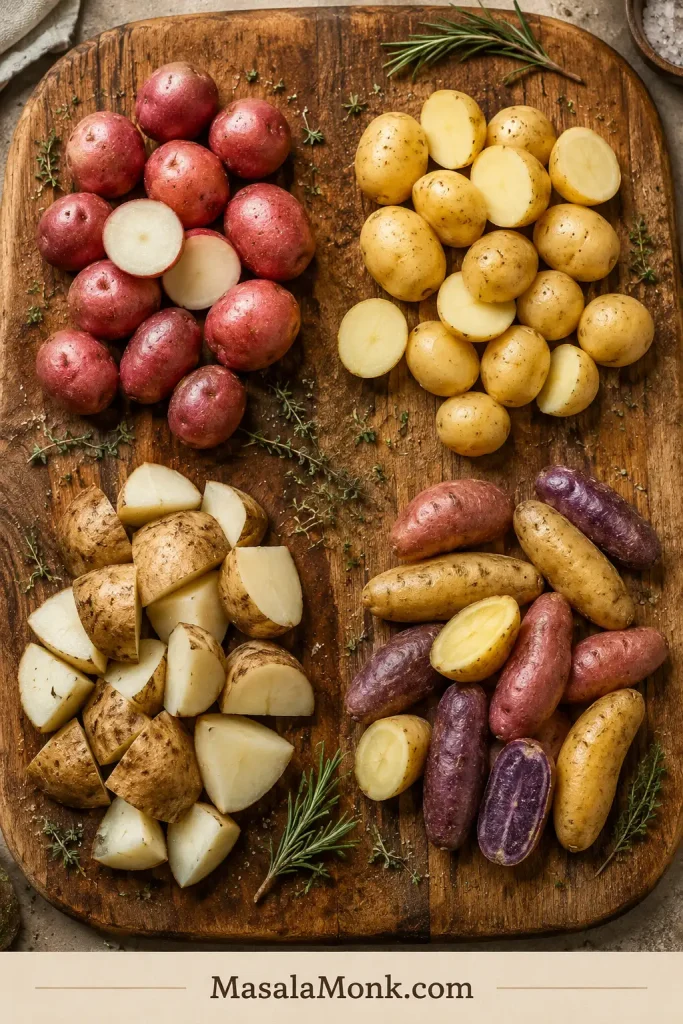
Best potatoes for ranch roasting

Red and Yukon-style potatoes are the most forgiving, while russets give a fluffier bite when handled gently.

Red potatoes, yellow baby potatoes, russet chunks, and fingerling potatoes arranged in separate groups on a wooden board.
Baby red and baby Yukon gold potatoes are the easiest choices because they roast evenly and hold their shape; meanwhile, russets give fluffier centers but break more easily.
PotatoBest ForResultPeel or Not?
Baby red potatoesBest no-peel optionClassic ranch potato texture, creamy centers, thin skinsNo need to peel
Baby Yukon gold potatoesBest overallButtery, tender, reliable browningNo need to peel
Yukon gold potatoesBest creamy biteSoft centers and good flavorPeeling optional
Russet potatoesBest fluffy centerFluffy inside, browned edges, more fragilePeeling optional
Fingerling potatoesBest presentationPretty side dish, good roasted flavorNo need to peel

Red potatoes are especially easy here because the skins are thin and the pieces hold together well. Scrub, dry, cut, season, and roast. No peeling needed.

425°F vs 450°F

For the easiest tray, 425°F / 218°C is the safest default. The potatoes have time to soften before the ranch seasoning gets too dark. Use 450°F / 232°C when you want deeper color and are willing to check the pan a little earlier.

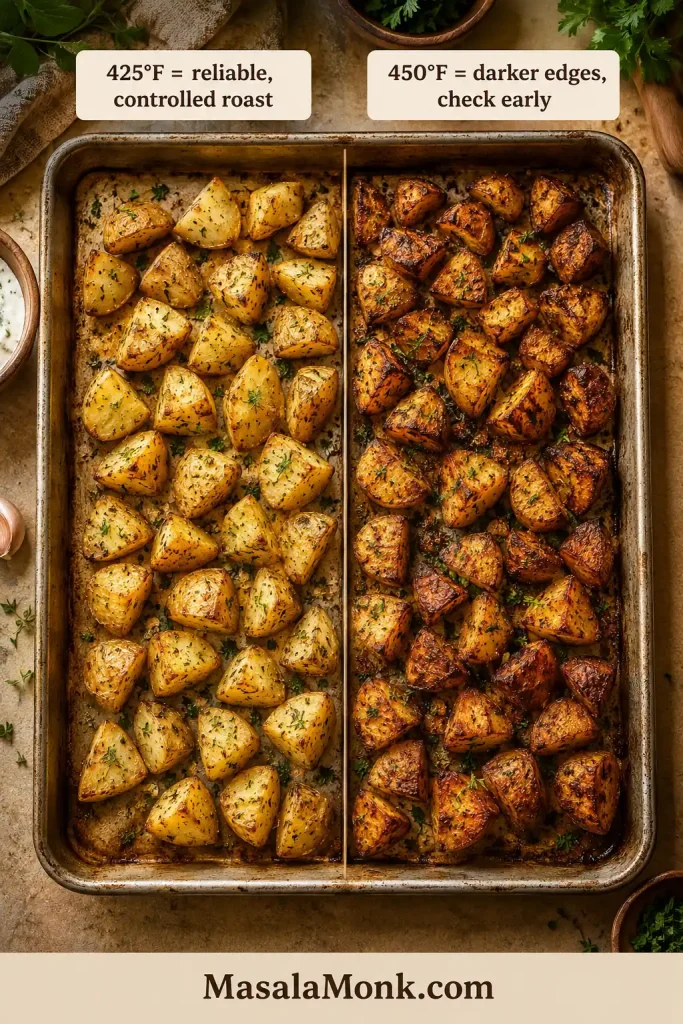
Choose the oven temperature

The hotter tray browns faster, but the lower temperature gives you more control if your oven runs strong.

Oven temperature comparison showing ranch roasted potatoes at 425°F with lighter golden edges and 450°F with darker browned edges.
The 425°F tray gives you more control, while 450°F creates deeper color if you are willing to check early.
Oven TemperatureBest ForWatch Out For
425°F / 218°CBest default and most reliable roastSlightly slower browning, but better control
450°F / 232°CDarker edges and faster browningRanch seasoning can darken faster, so check early
400°F / 200°CCheesy or saucier baked potato versionsLess crisp for plain roasted potatoes

When your oven runs hot, stay with 425°F the first time. Once you know your oven is steady and you like darker edges, 450°F gives a more roasted finish.

How to Roast Them in the Oven

1. Heat the oven

Heat the oven to 425°F / 218°C. For a faster, darker tray, use 450°F / 232°C, but check earlier so the seasoning does not over-darken.

2. Cut and dry the potatoes

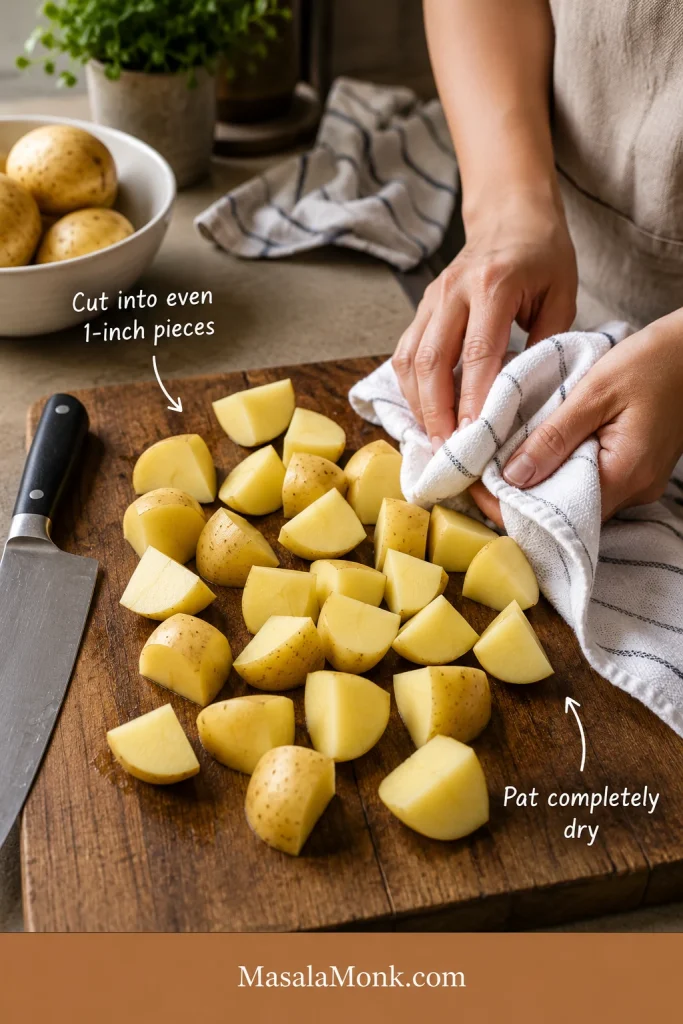
Cut the potatoes into 1-inch / 2.5 cm pieces. Small baby potatoes can be halved, larger baby potatoes can be quartered, and bigger potatoes should be cut into even chunks. Pat the pieces dry before seasoning so the oil and ranch mix cling properly.

Visual cue: cut and dry before seasoning

Cut size and surface moisture decide whether this step browns or steams.

Hands drying cut potato pieces with a towel on a wooden cutting board beside a chef’s knife and whole potatoes.
Even 1-inch pieces give the oven a fair shot; drying the surface helps the seasoning roast cleanly instead of steaming.

3. Toss with oil, then ranch seasoning

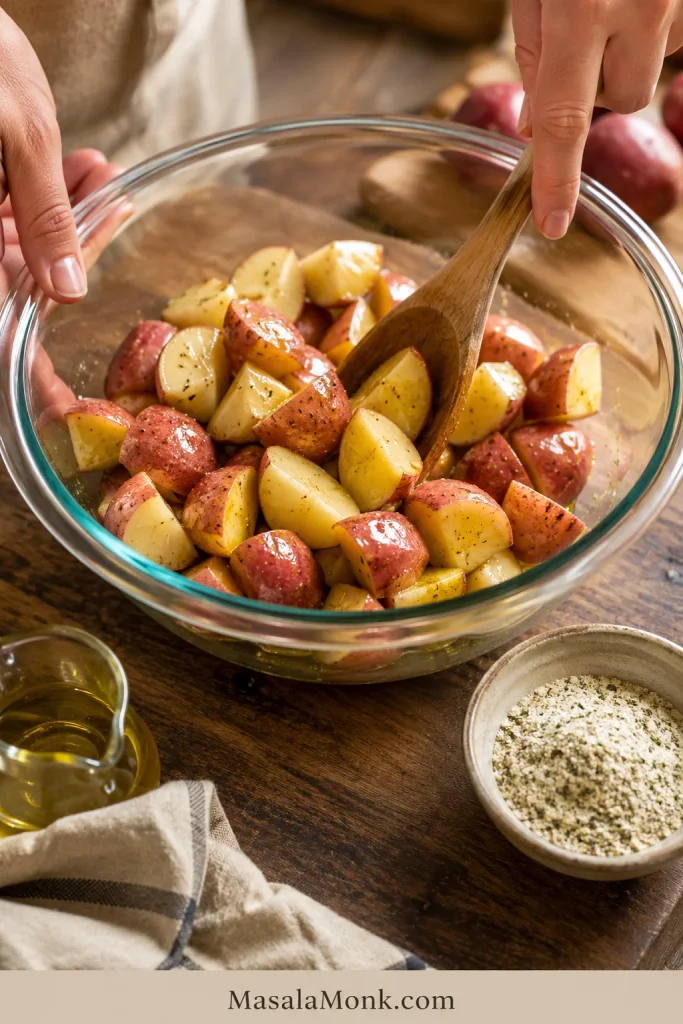
Add the potatoes to a large bowl and coat them with oil first. Then add the dry ranch seasoning, black pepper, and garlic powder if using. This keeps the dry mix from clumping in dusty patches. The pieces should look lightly glossy, not oily or wet.

Visual cue: oil first, ranch second

Do this in two tosses: oil first, ranch second.

Potato chunks being tossed with oil in a glass mixing bowl, with a small bowl of dry ranch seasoning nearby.
A light oil coating gives the dry ranch mix something to grab, so the flavor lands evenly instead of clumping.

Visual cue: even ranch coating

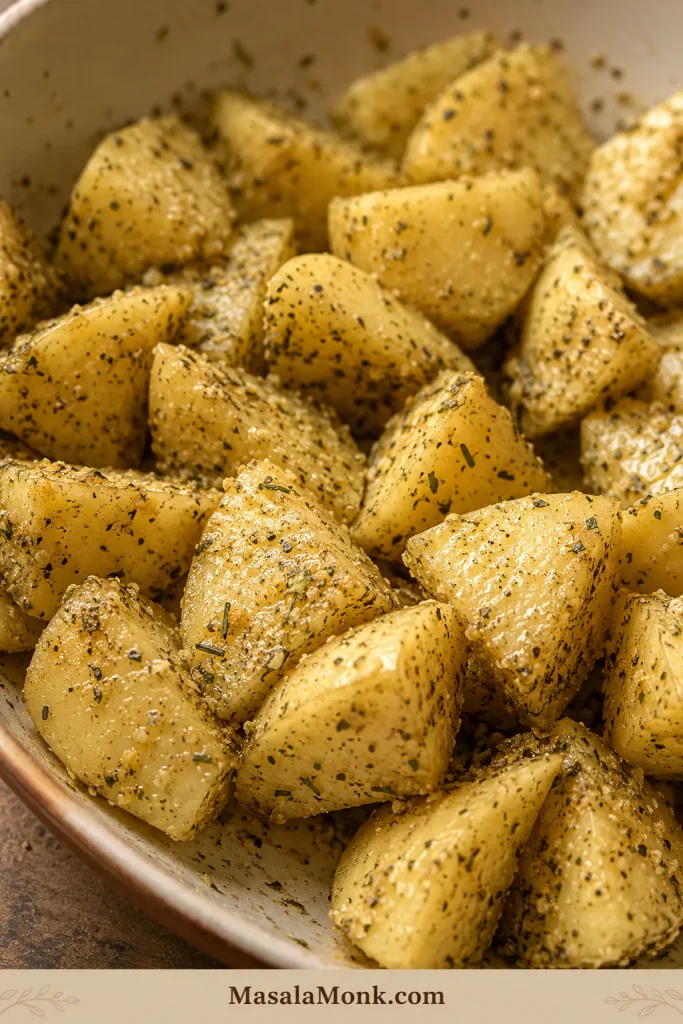
Before roasting, every piece should look lightly speckled, not buried in mix.

Close-up of raw potato chunks evenly coated with dry ranch seasoning, herbs, pepper, and oil in a mixing bowl.
A thin, even ranch coating means every bite seasons the same; if you see dusty spots, toss a little longer.

4. Spread on a sheet pan

Spread the potatoes in one layer on a large rimmed sheet pan. Leave a little space between the pieces and turn some cut sides down against the pan. Those flat sides usually become the best bites.

Visual cue: give the potatoes room to brown

A little space around the pieces helps hot air move across the pan and gives cut sides better contact.

Ranch seasoned potato pieces spread apart on a rimmed metal sheet pan with several cut sides facing down.
Space is what turns seasoned potatoes into roasted potatoes; the cut sides need room and pan contact to brown.

5. Roast, flip, and finish

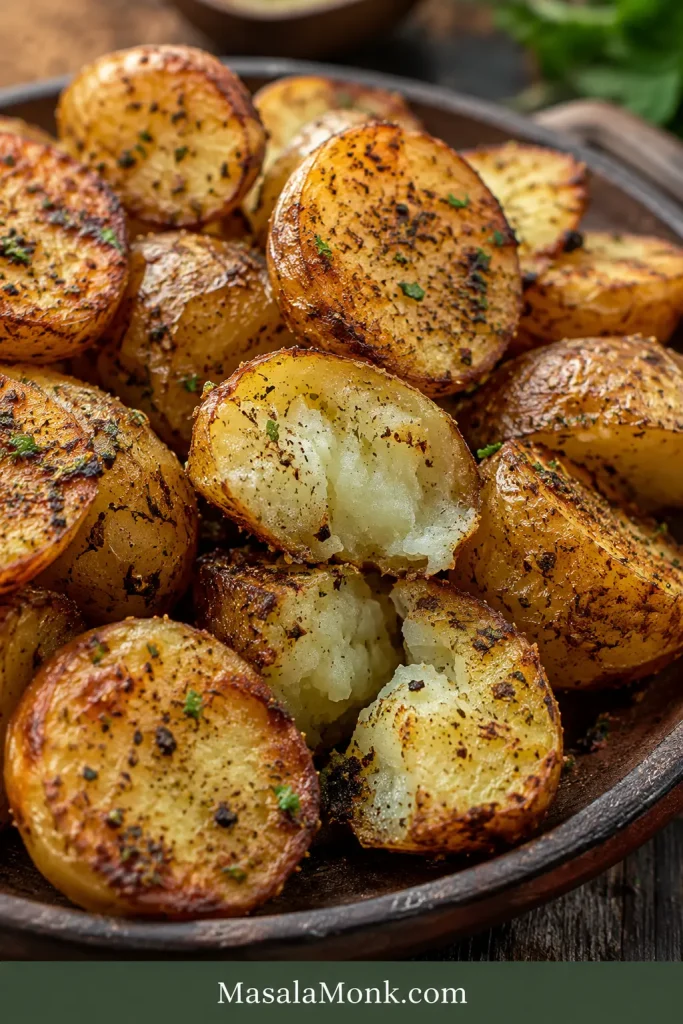
Roast for 30 to 35 minutes, flipping once around the 18 to 20 minute mark. The potatoes are ready when the flat sides are golden, the edges look roasted, and a fork slides easily into the centers. Finish with herbs, parmesan, bacon, cheese, or a small ranch drizzle after roasting.

Visual cue: what done potatoes should look like

The timer helps, but color, crisp edges, and a tender center are the better doneness signs.

Close-up of roasted ranch potatoes with browned flat sides, crisp edges, herb flecks, and a broken piece showing a soft center.
Look for browned flat sides, crisp edges, and tender centers; these visual cues are more reliable than the timer alone.

Want to push the texture further? Read the crisping rules or try the extra-crispy parboil method.

Tips for Crispy Potatoes

If you remember only a few things, make them these crisping rules.

  • Dry the potatoes. Wet potatoes steam before they brown.
  • Oil before ranch. The oil helps the dry mix cling evenly.
  • Use a sheet pan, not a deep dish. A deep casserole dish traps moisture.
  • Give every piece breathing room. Use two pans if needed.
  • Put cut sides down. The flat side browns better against the pan.

A zip-top bag works if you like the classic packet-recipe shake method. Parchment makes cleanup easier, but direct contact with the pan gives stronger browning. Add cheese near the end so it melts without burning.

The goal is not just “done.” The best pieces have golden flat sides, soft centers, and ranch flavor baked onto the edges. Space is what turns ranch potatoes from seasoned and soft into browned and snacky.

Biggest mistake to avoid: do not crowd the pan. If the potatoes touch too much, they steam before they brown. Use two pans for a double batch.

For Extra Crispy Potatoes

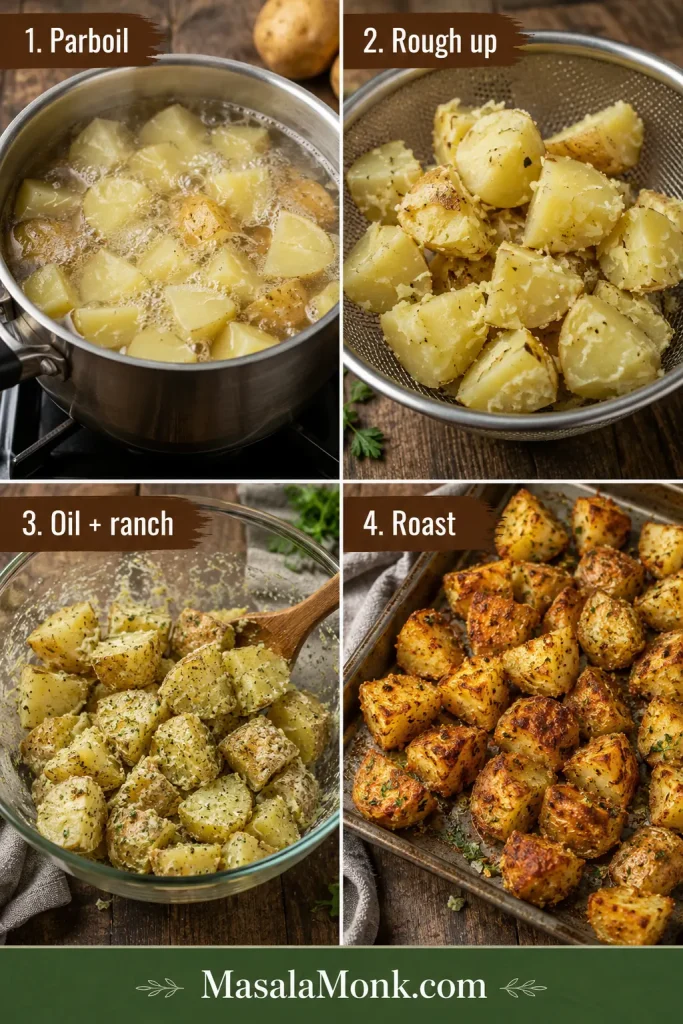
The main recipe keeps things simple. For a more pub-style crispy bite, add a quick parboil before roasting. It roughs up the potato edges so they brown more aggressively in the oven.

Parboil for extra crisp edges

This optional method creates rougher potato surfaces, which means more places for the oil and ranch seasoning to brown.

Four-step guide showing potatoes being parboiled, roughened after draining, tossed with oil and ranch seasoning, and roasted until crispy.
For extra crispy ranch potatoes, parboil briefly, rough up the edges, coat with oil and ranch seasoning, and then roast until deeply browned.
  1. Cut the potatoes into 1-inch / 2.5 cm pieces.
  2. Boil in lightly salted water for 6 to 8 minutes, just until the edges begin to soften. If your ranch mix is already very salty, use unsalted water.
  3. Drain very well.
  4. Shake the potatoes gently in the pot for a few seconds to rough up the edges.
  5. Let them steam-dry for 2 to 3 minutes.
  6. Toss with oil first, then dry ranch seasoning.
  7. Roast on a hot sheet pan at 425°F / 218°C or 450°F / 232°C until deeply browned and tender.

This method takes a few extra minutes, but it gives you more craggy edges for the seasoning to cling to. If you like crisp-edge potato sides, you may also like these homemade French fries, which go deeper into potato choice, soaking, drying, oven fries, air fryer fries, and loaded variations.

Keeping it simple instead? Go back to the main recipe. Making a smaller batch? Use the air fryer method.

Homemade Ranch Seasoning Option

No packet? You can still make ranch-style potatoes with a quick homemade mix. It will not taste exactly like a packet, but it gives you a fresher, less salty coating.

IngredientAmount
Dried parsley1 tablespoon
Dried dill1 teaspoon
Dried chives, optional1 teaspoon
Garlic powder1 teaspoon
Onion powder1 teaspoon
Black pepper½ teaspoon
Fine salt½ to ¾ teaspoon, to taste
Buttermilk powder, optional1 tablespoon

Without buttermilk powder, use the whole homemade mix for 2 lb / 900 g potatoes. With buttermilk powder, start with about 3 tablespoons, then add the rest after roasting only if the potatoes need more ranch flavor.

Air Fryer Method

Air fryer ranch potatoes are great for a faster, smaller batch, but the basket still needs space. A crowded air fryer basket will cook the potatoes, but it will not crisp them well.

Air fryer spacing matters too

The same anti-crowding rule applies in the basket, especially when you want browned edges instead of soft potatoes.

Ranch seasoned potato chunks with browned edges arranged in a single layer inside an air fryer basket.
Air fryer ranch potatoes still need breathing room, so arrange them in a single layer or cook in batches for better browning.

Keep the seasoning amount the same, but reduce the oil. For 2 lb / 900 g potatoes, 1½ to 2 tablespoons oil is usually enough because the air fryer circulates heat closely around the pieces.

Potato SizeAir Fryer TimeTemperature
Small baby potato halves12 to 15 minutes400°F / 200°C
1-inch / 2.5 cm chunks15 to 20 minutes400°F / 200°C
Larger chunks20 to 22 minutes400°F / 200°C
  1. Cut the potatoes into even pieces.
  2. Toss with oil and dry ranch seasoning.
  3. Air fry at 400°F / 200°C.
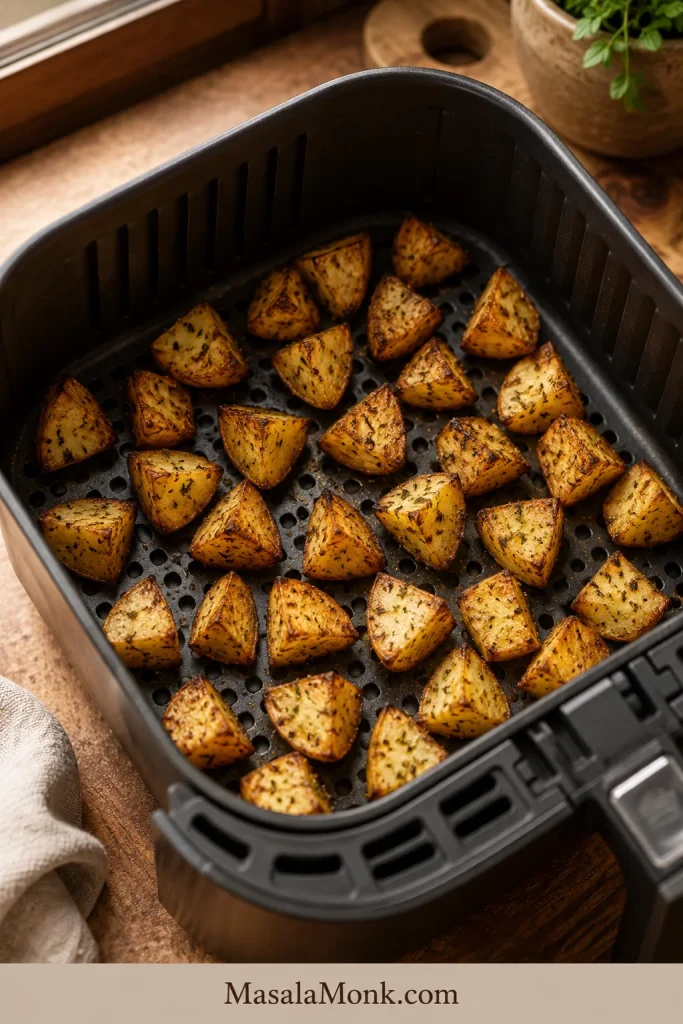
  4. Shake the basket halfway through, or every 5 to 7 minutes for more even browning.
  5. Cook in batches if your air fryer basket is small.

Start checking early if your pieces are small or your air fryer runs hot. Air fryers vary more than ovens, so use the timing as a guide and look for browned edges with tender centers. If you use the air fryer for potato sides often, this air fryer hash browns guide is also useful for timing, shaking, thin layers, and fixing soft potato batches.
Once the potatoes are browned, choose a variation or fix common ranch potato problems.

Easy Variations

Think of the base recipe as the reliable weeknight tray. The variations are for nights when you want the potatoes to feel more like a snack, a party side, or something loaded enough to steal attention from the main dish.

Four ways to finish the tray

These ideas keep the base method the same while changing the final flavor and serving style.

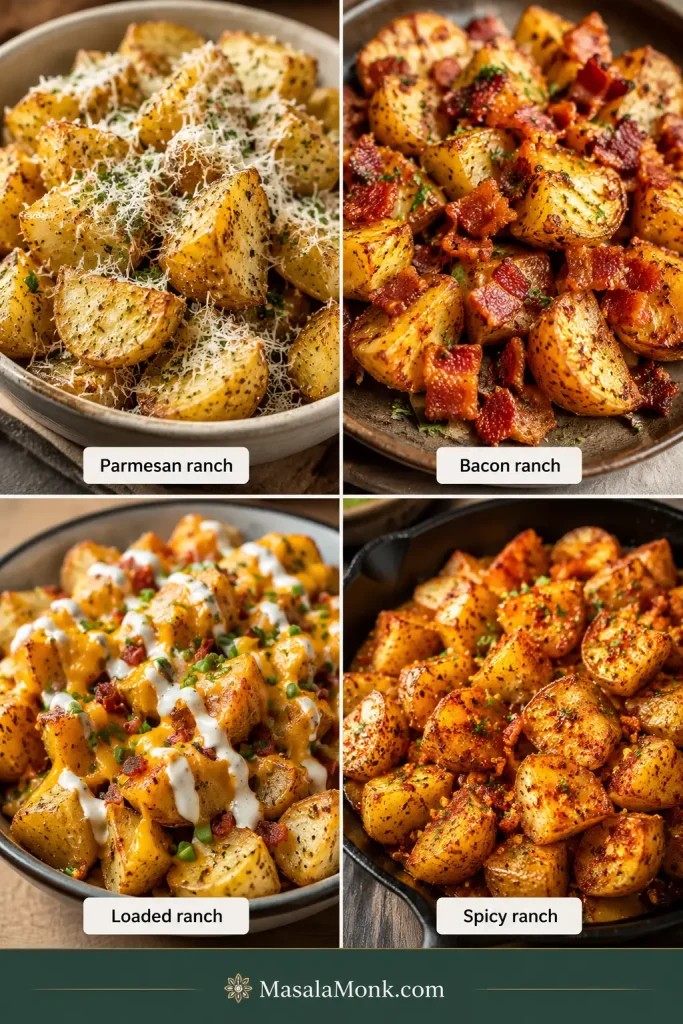
Four ranch potato variations showing parmesan ranch potatoes, bacon ranch potatoes, loaded ranch potatoes with cheese and drizzle, and spicy ranch potatoes.
Once the base tray is roasted, you can make parmesan ranch, bacon ranch, loaded ranch, or spicy ranch potatoes without changing the main method.

More ranch potato variation ideas

VariationHow to Make It
Parmesan ranch potatoesAdd ¼ cup / 20 to 25 g finely grated parmesan during the last 8 to 10 minutes of roasting, or sprinkle it over the potatoes right after they come out of the oven.
Garlic ranch potatoesAdd ½ teaspoon garlic powder with the ranch seasoning. If using fresh garlic, add it during the last 10 minutes so it does not burn.
Bacon ranch potatoesRoast the potatoes as usual, then toss with cooked crumbled bacon before serving. Use a little less ranch seasoning if the bacon is salty.
Cheesy ranch potatoesRoast until almost done, sprinkle with shredded cheddar, Monterey Jack, mozzarella, or a cheese blend, then return to the oven for 3 to 5 minutes.
Loaded ranch potatoesFinish with melted cheese, bacon, chives, and a small drizzle of ranch dressing or sour cream.
Spicy ranch potatoesAdd smoked paprika, cayenne, chili flakes, or a little hot sauce after roasting. Start small because ranch seasoning is already bold.
Ranch potatoes with onionsAdd thick onion wedges to the pan with the potatoes so they soften and brown without burning before the potatoes are done.

Creamy ranch potato bake note: A cheesy ranch potato bake made with bottled ranch dressing is softer and more casserole-like than these sheet-pan potatoes. Here, the cheesy version simply means roasted potatoes finished with melted cheese. If you are in the mood for a full potato casserole instead of a crisp side, this tater tot casserole is a better fit for a creamy, cheesy casserole-style dinner.

Serving these tonight? See what goes with ranch potatoes. Making them ahead? Check storage and reheating tips.

What to Serve with Ranch Potatoes

Serve ranch potatoes with burgers, steak, pork chops, BBQ mains, baked chicken tenders, or this baked chicken breast when you want a simple oven dinner. They also work with eggs for brunch or as a game-day potato tray with cheese, bacon, and chives.

For dipping, use ranch dressing, sour cream, spicy mayo, a yogurt-herb sauce, or this easy garlic aioli. If the potatoes taste salty from the ranch seasoning, choose a cooler dip instead of another salty one.

To balance the plate, add something crisp or fresh, like a chickpea salad or simple green salad. The loaded version can turn them from a side dish into the thing people hover around.

Make-Ahead, Storage, and Reheating

  • Cut ahead: Cut potatoes can sit covered in cold water in the refrigerator for up to a day. Drain and dry them very well before roasting.
  • Season ahead: Season right before roasting. Salt in the ranch mix can pull moisture from the potatoes if they sit too long.
  • Double batch: For 4 lb / 1.8 kg potatoes, double the oil and use two large sheet pans. Start with about 1½ packets if adding bacon, cheese, or parmesan.
  • Rotate pans: If using two pans, rotate them halfway through roasting if your oven has hot spots.
  • Refrigerate: Store leftovers in an airtight container for 3 to 4 days.
  • Reheat: Use the oven, air fryer, or a lightly oiled skillet for the best texture. The microwave is fine for speed, but the potatoes will soften.
  • Freeze: You can freeze them, but the texture is not ideal. Roasted potatoes often turn softer and slightly grainy after freezing and thawing.

For broader leftover timing and cold-storage guidance, the FoodSafety.gov cold food storage chart is a helpful reference.

If the potatoes seem dry after chilling, toss them with a tiny drizzle of oil before reheating. The oven or air fryer is what brings the edges back.

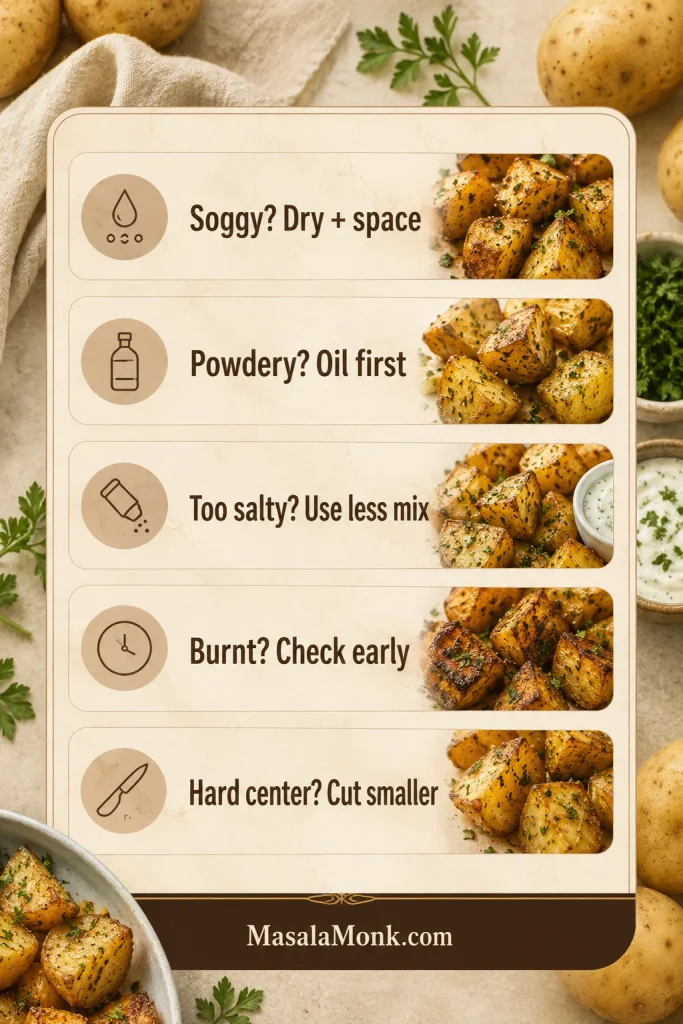
Troubleshooting

If your first batch is softer than you wanted, it is usually not a recipe failure. Ranch potatoes go soggy for predictable reasons, and most of them are easy to fix next time.

Quick fixes for common ranch potato problems

The same few causes show up again and again, which makes the fixes easy to remember.

Troubleshooting guide for ranch potatoes with tips for soggy, powdery, salty, burnt, and hard-centered potatoes beside small roasted potato photos.
When a tray goes wrong, check moisture, crowding, seasoning amount, oven heat, and potato size first.
ProblemLikely CauseHow to Fix It
Soggy potatoesWet potatoes, crowded pan, deep dish, low heat, or bottled ranch before roastingDry well, use a sheet pan, spread in one layer, and use dry ranch seasoning
Burnt seasoningOven too hot too long, pieces too small, seasoning clumped, or not enough oilOil first, cut 1-inch pieces, toss evenly, and check early at 450°F / 232°C
Too saltySalty ranch packet plus bacon, cheese, or parmesanUse less ranch seasoning next time; serve with sour cream, yogurt dip, herbs, or lemon
Potatoes taste powderyToo much dry ranch mix or seasoning added unevenlyToss with oil first, use less mix next time, and finish with herbs or a small ranch drizzle
Browned outside, hard insidePotato pieces too large or oven too hot for their sizeCut smaller next time; lower the oven slightly and continue roasting
Sticking to the panNot enough oil or potatoes moved before crust formedUse enough oil, let the cut sides brown, then flip with a thin spatula
Uneven flavorSeasoning added before oil or not tossed well enoughToss with oil first, then add ranch seasoning and toss again

Problem solved? Return to the recipe card or back to top.
FAQ

Is ranch seasoning the same as ranch dressing mix?

In many recipes, yes. Dry ranch seasoning and dry ranch dressing mix usually mean the powdered mix used to make ranch dressing or season foods.

How much ranch seasoning do I use for 2 pounds of potatoes?

For 2 pounds of potatoes, use 1 standard 1 oz / 28 g packet, or about 3 tablespoons dry ranch seasoning from a jar. Go up to 4 tablespoons only if the mix is mild or salt-free.

Should I use dry ranch mix or bottled ranch dressing?

Dry ranch mix is best before roasting. Bottled ranch works better after roasting as a dip or drizzle, or in softer cheesy potato bakes.

What temperature is best?

425°F / 218°C is the best default. Use 450°F / 232°C when you want darker edges and are comfortable checking the pan earlier.

How long do ranch potatoes take in the oven?

Most 1-inch potato pieces take 30 to 35 minutes at 425°F / 218°C. They are done when the flat sides are golden and a fork slides through the centers easily.

Do red potatoes need to be peeled?

No. Red potato skins are thin and help the pieces hold together. Scrub, dry, cut, and roast.

Will russet potatoes work?

Yes. Russets give you fluffy centers and browned edges, but they are more fragile than red or Yukon gold potatoes, so toss them gently.

How do I make ranch potatoes crispier?

Dry the potatoes well, oil before seasoning, spread them in one layer, and place cut sides down. For extra crispiness, parboil for 6 to 8 minutes, rough up the edges, then roast.

Air fryer version: what changes?

Keep the seasoning amount the same, but reduce the oil to about 1½ to 2 tablespoons for 2 lb / 900 g potatoes. Air fry 1-inch pieces at 400°F / 200°C for 15 to 20 minutes, shaking halfway through.

Can I add cheese and bacon?

Yes. Add cooked bacon after roasting, and add shredded cheese during the last few minutes so it melts without burning. Use less ranch seasoning if your bacon or cheese is salty.

A Good Pan of Ranch Potatoes

Good ranch potatoes should taste bold and comforting without turning heavy. The outside should be seasoned and browned, the inside should be soft, and the ranch flavor should feel baked onto the potatoes instead of sitting on top as a wet dressing.

Once you learn the dry-potatoes, oil-first, ranch-second rhythm, this becomes the tray you can make without looking at the recipe.

Back to top ↑