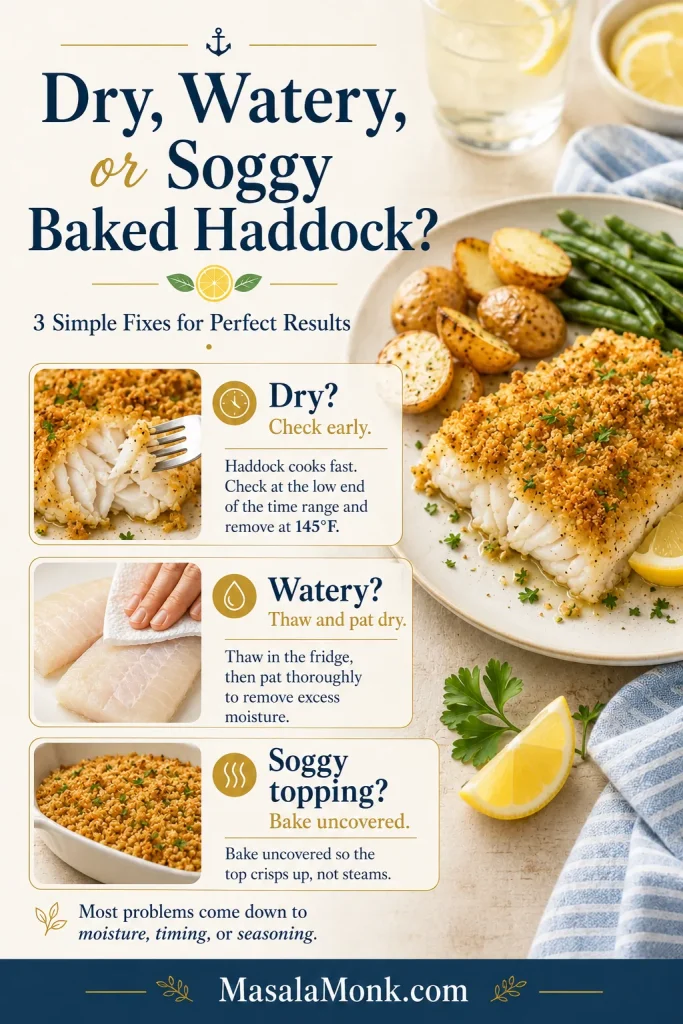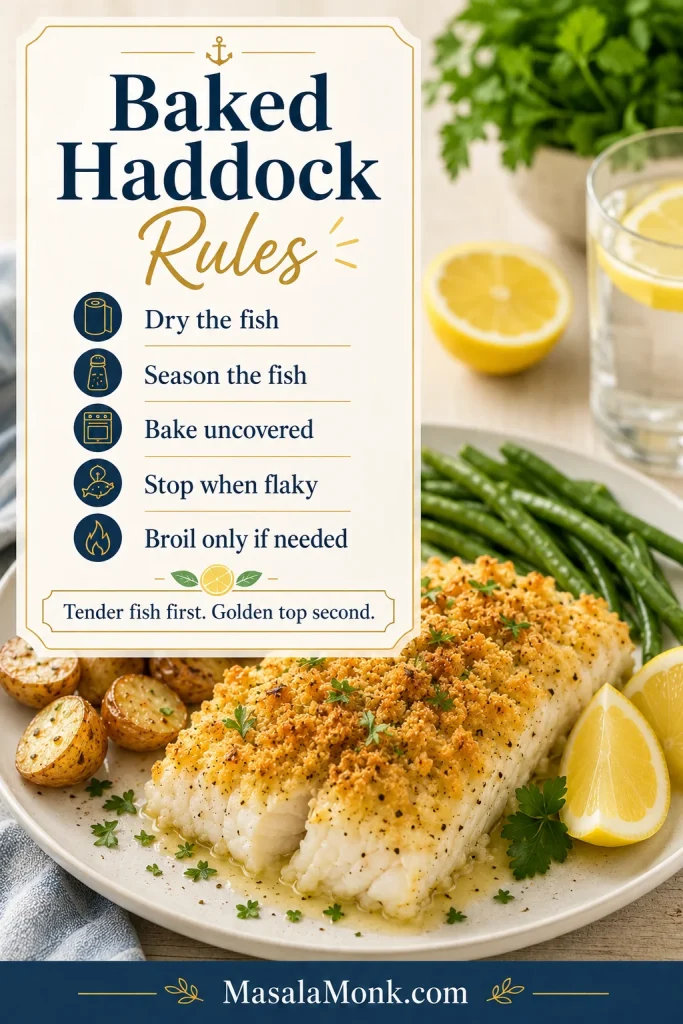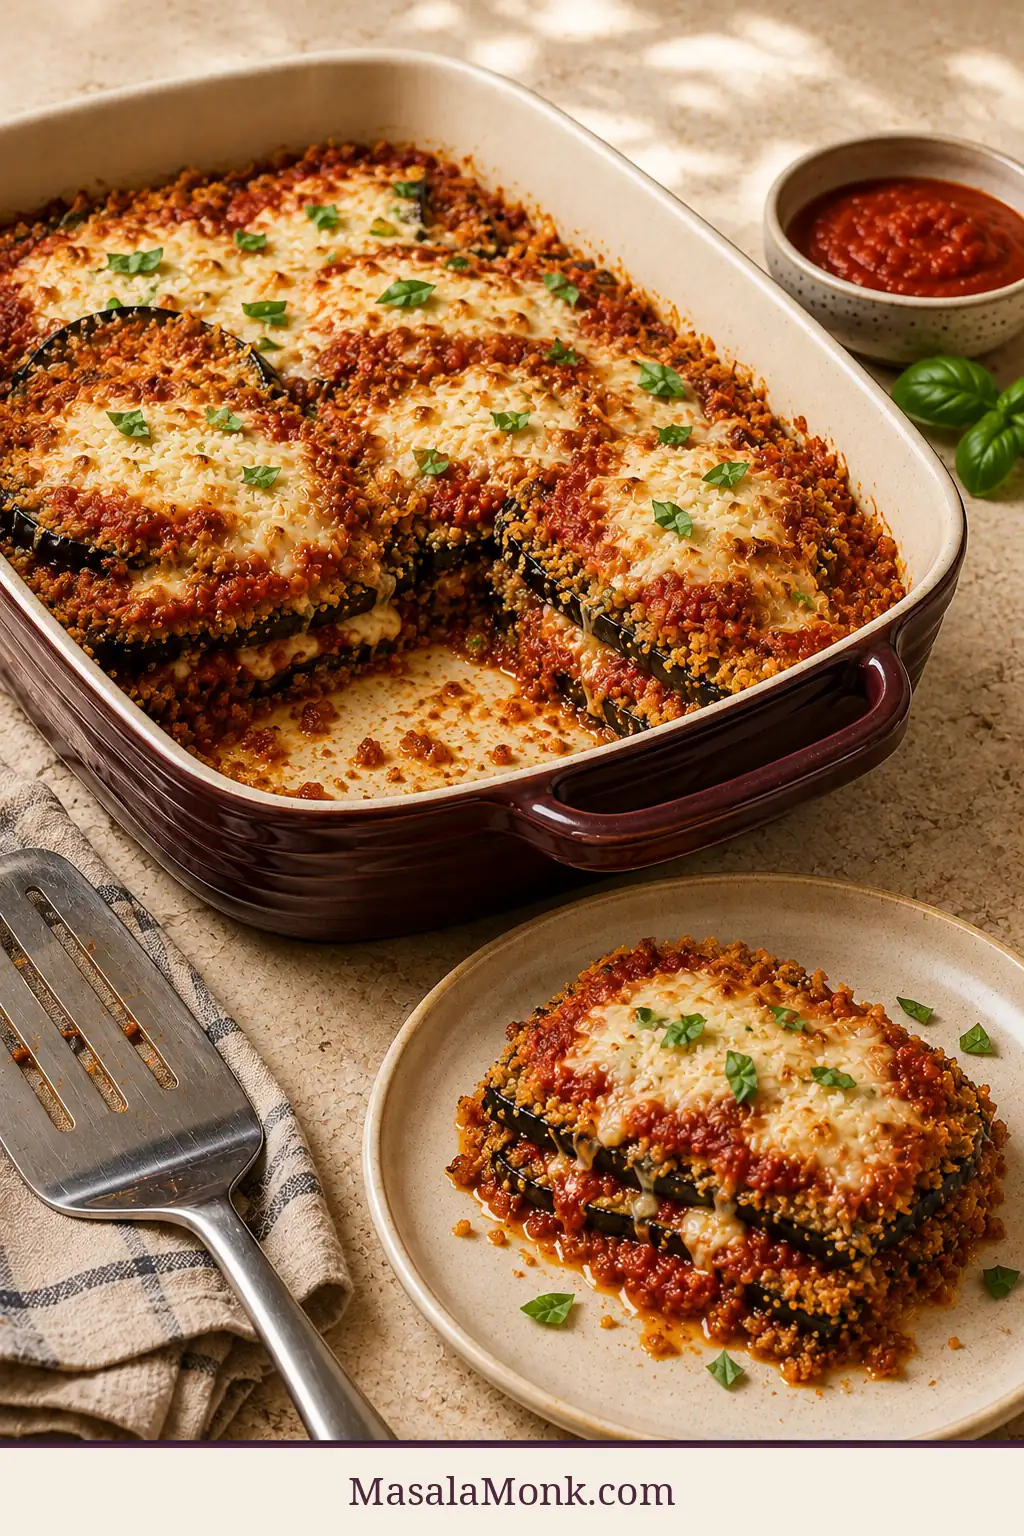
The first slice tells the truth. In a good baked Eggplant Parmesan, the spatula lifts a settled portion, mozzarella pulls between tender layers and a few Parmesan-panko edges still offer a light crunch. The disappointing version can look just as golden—until loose sauce gathers underneath and the breaded shell disappears into it.
This version keeps the familiar comfort of tomato, basil and melted cheese while baking the eggplant instead of frying it in batches. Even rounds are lightly salted, breaded and cooked until the centres turn silky and both sides are deeply golden. Only then are they layered with thick marinara and low-moisture mozzarella.
This is a weekend-worthy dinner for when you want each slice wrapped in its own browned Parmesan-panko crust without standing over a frying pan. That individual crust is what the extra handling buys you—not merely breadcrumbs scattered between the layers. It is not a 30-minute shortcut, but the work comes in manageable bursts and most of the elapsed time belongs to salting, baking and resting.
The MasalaMonk rule is simple: let the first bake finish the eggplant; let the final bake bring the casserole together.
Start here
The Method in One Minute
Cut the eggplant evenly, dry the surfaces well and bake the breaded slices with room around them until the crust is golden and the centres are fully tender. That first bake does the real cooking.
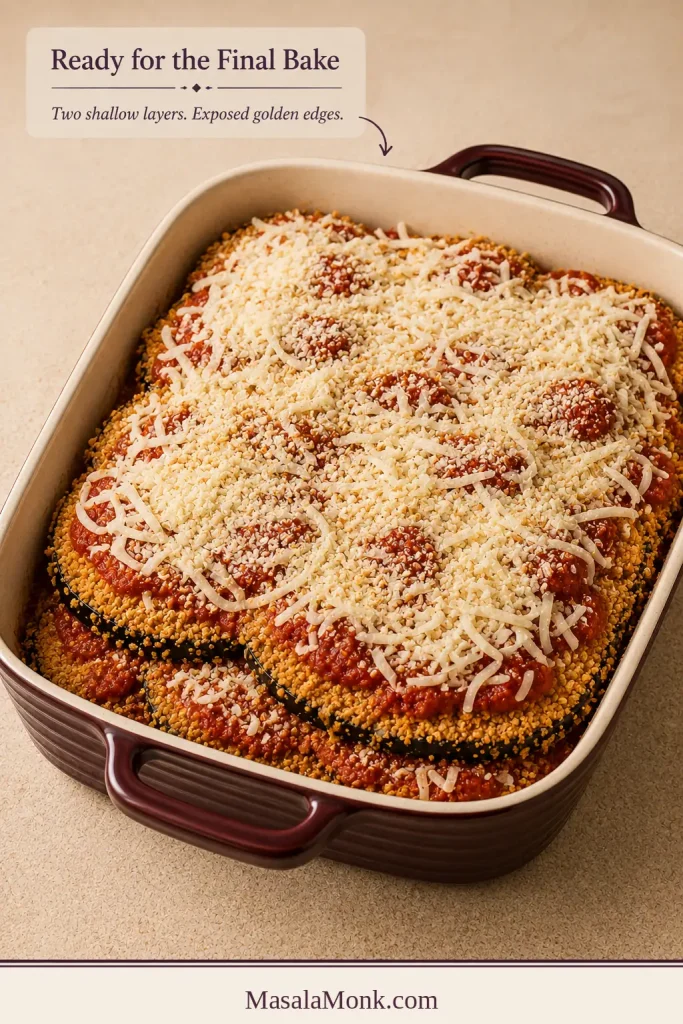
For assembly, use marinara thick enough to cling, low-moisture whole-milk mozzarella and only two shallow layers. Sauced breading naturally softens; the goal is a crust that stays distinct beneath the marinara, with crisp edges left exposed. Bake uncovered until the sauce bubbles around the edges, then give the pan 15 minutes to settle before lifting a serving.
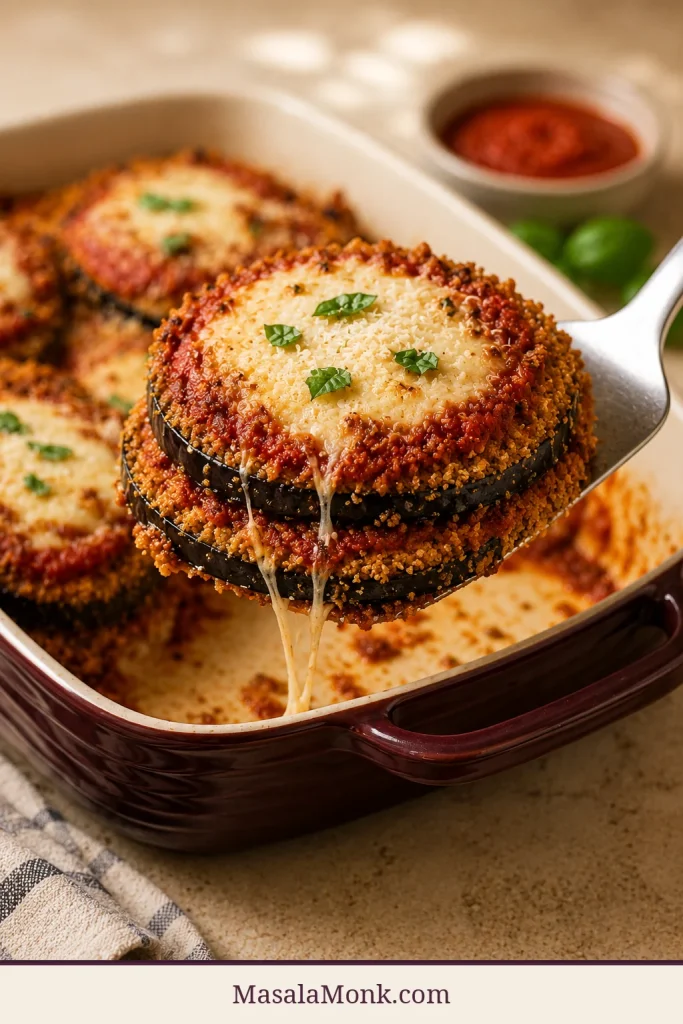
How this method was built
This research-led recipe compares common baked, fried and sheet-pan approaches. It then works backward from the failures home cooks report most often: firm centres, slipping breading, pale crumbs, loose sauce and wet cheese. The method separates surface dryness from interior doneness, calibrates the sauce and cheese quantities to protect the layered texture, and pairs timing windows with visible, tactile and aroma cues because eggplants, pans and ovens vary.
Choose the Texture You Want
Those same breaded slices can become a saucy layered casserole or stay in one crisp sheet-pan layer. The recipe below follows the classic layered route.
On a phone, each finish appears as a stacked card.
| Finish | How to build it | What reaches the table |
|---|---|---|
| Classic layered | Two shallow layers with measured sauce and cheese; leave a few breaded edges exposed | A cohesive, saucy casserole with tender centres and crisp-edged contrast |
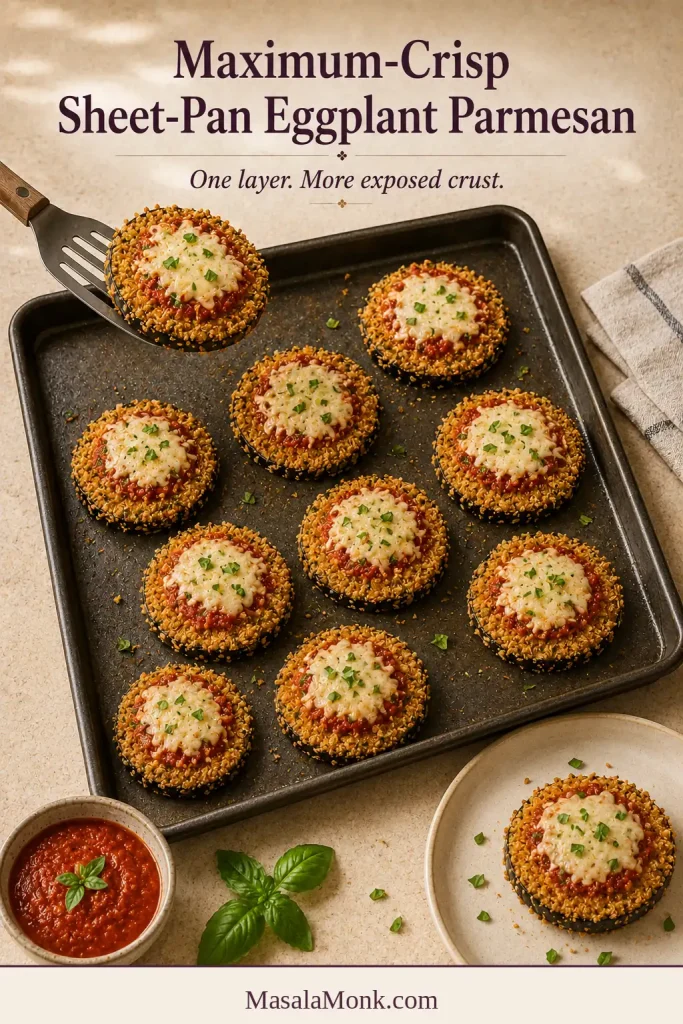
| Maximum crisp | Keep the rounds in one layer, top each lightly and serve extra warm marinara alongside | More browned crust, lighter topping and easy individual portions |
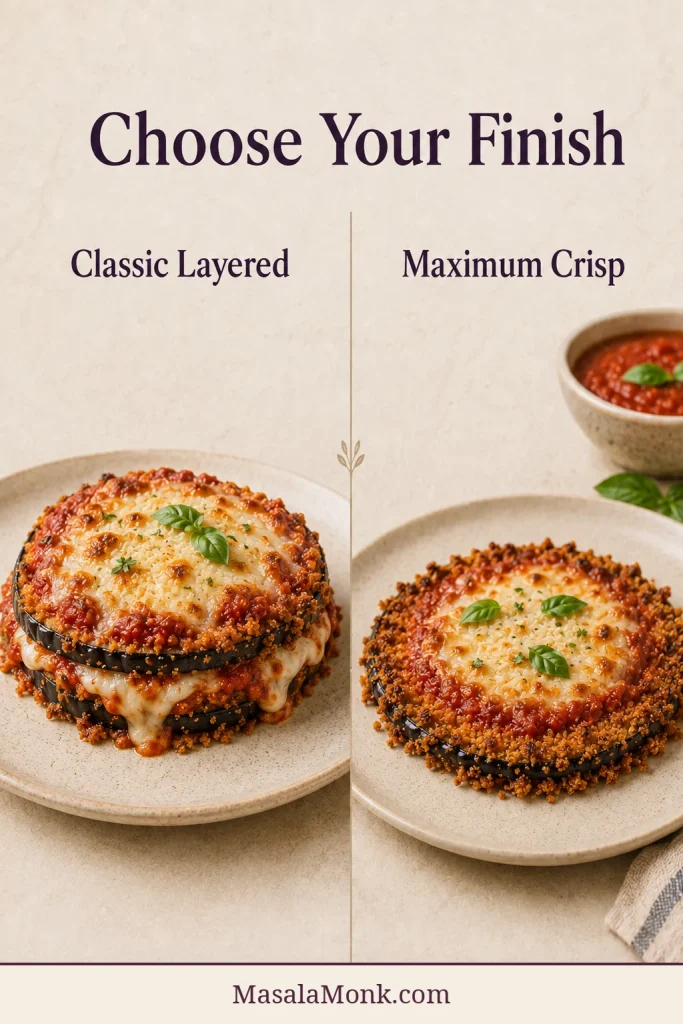
Prefer the sheet-pan finish? The exact sauce and cheese amounts are in Variations.
Make it now
Crispy-Edged Baked Eggplant Parmesan Recipe
Slice the eggplant evenly, salt it lightly and coat it in flour, egg and Parmesan-seasoned panko. Bake until the centres are tender and the crumbs are deeply golden, then layer with thick marinara, whole-milk mozzarella, Parmesan and basil for a tomato-rich casserole that slices cleanly after resting.
The timing windows overlap: prep and cleanup happen during salting and baking, so they are not meant to be added together. Timing assumes 28–36 slices fit across two half-sheet pans. Smaller pans or unusually numerous slices may require a second batch; add 26–34 minutes.
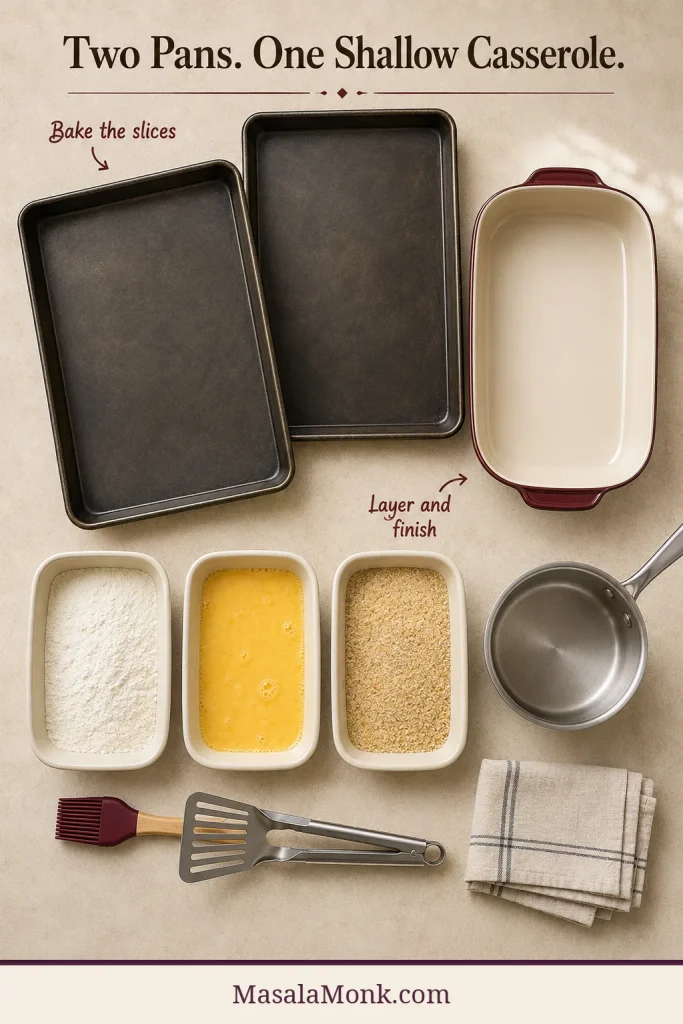
Equipment
- Two rimmed half-sheet pans, approximately 18 × 13 inches / 46 × 33 cm
- One shallow 9 × 13-inch / 23 × 33 cm baking dish; choose metal or broiler-safe ceramic if you plan to brown the top beneath the broiler
- Three wide, shallow bowls or dishes for breading
- Sharp chef’s knife or guarded mandoline
- Large thin spatula or turner
- Wire cooling racks, useful but optional
- Pastry brush or oil mister
Ingredients
For the breaded eggplant
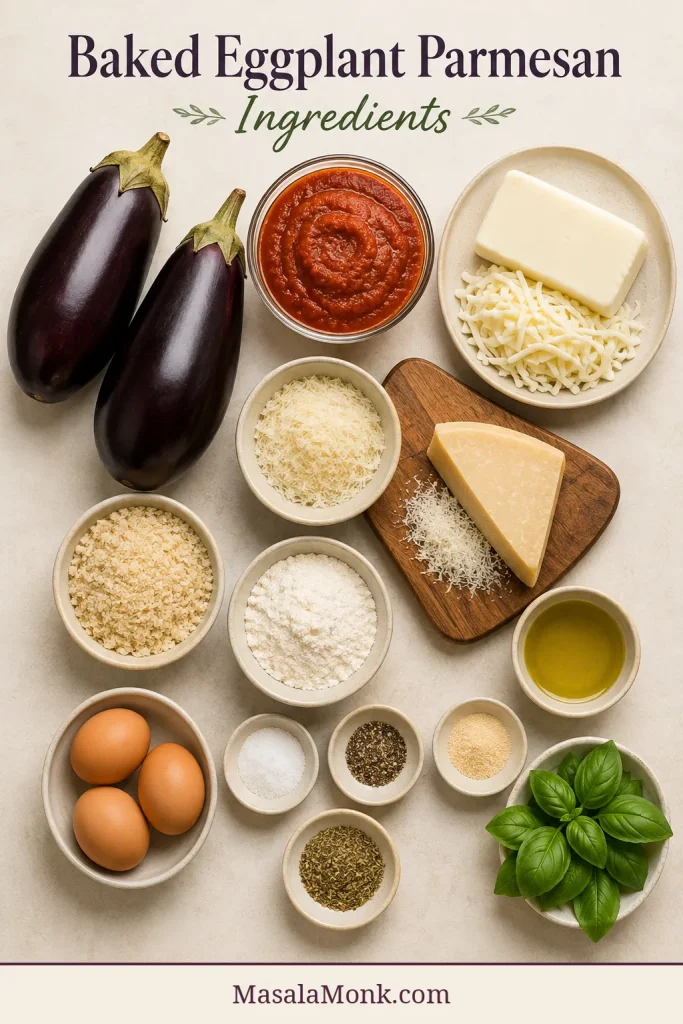
- 2 medium globe or Italian eggplants, about 2–2¼ pounds / 900 g–1 kg before trimming
- 6 g fine sea salt, about 1 teaspoon; measure kosher salt by weight because crystal size differs by brand
- ¾ cup all-purpose flour, about 90 g
- 3 large eggs, plus 1 additional egg only if needed for unusually broad rounds
- 1 tablespoon water, 15 ml, plus 1 teaspoon / 5 ml for the optional extra egg
- 2 cups panko breadcrumbs, about 120 g
- 1 cup finely grated Parmesan, about 90 g
- 1 teaspoon garlic powder
- 1 teaspoon dried Italian seasoning
- ½ teaspoon ground black pepper
- 6 tablespoons olive oil, 90 ml, divided, plus a little more only if a second batch is needed
For assembling
- 1 jar thick marinara sauce, 24 ounces / 680 g, about 2¾ cups / 660 ml, divided
- 10 ounces low-moisture whole-milk mozzarella, about 285 g, freshly shredded
- ½ cup finely grated Parmesan, about 45 g
- ½ cup loosely packed basil leaves, about 15 g, torn or thinly sliced
- Ground black pepper, to finish
Use the waiting time
While the eggplant salts, shred the mozzarella and measure the breading. While the first side bakes, clear the breading station, tear the basil, set out the casserole dish and check whether the marinara needs reducing. Much of the elapsed time is waiting for salt or oven heat to do its work, not two hours of nonstop prep.
Instructions
Slice, salt and prepare the pans
- Slice evenly. Trim the ends, then cut the eggplants into ⅜-inch / 1 cm rounds. Expect 28–36 usable slices, depending on their shape. Keep the thickness as consistent as possible.
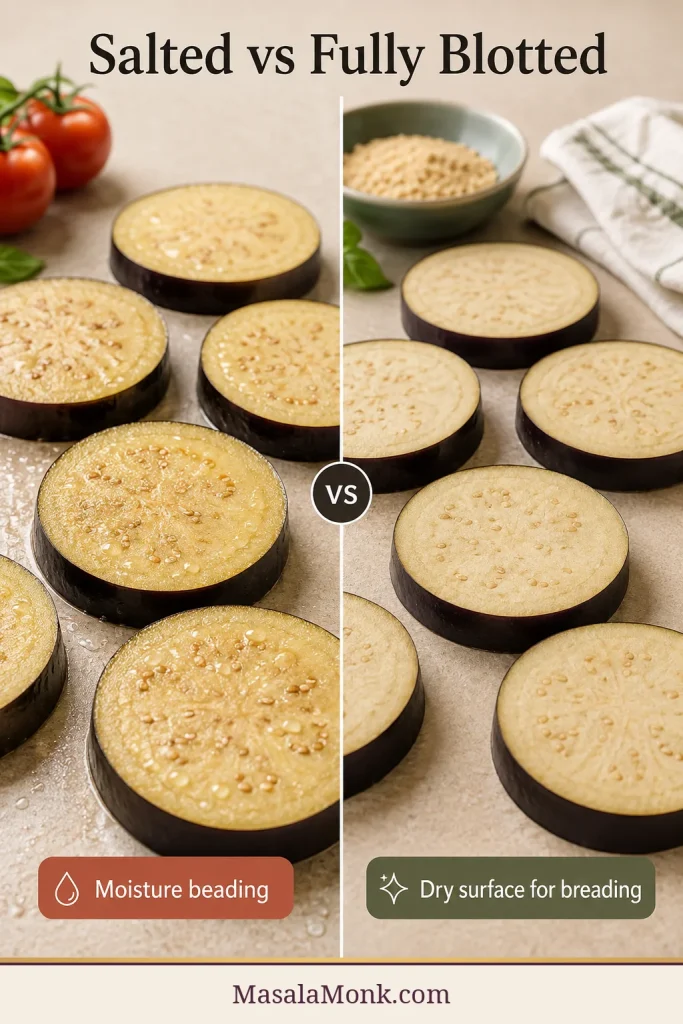
- Salt and dry. Arrange the rounds in a single layer. Sprinkle the measured salt lightly and evenly over both sides; do not build a visible salt crust. Leave for 30 minutes, then blot firmly with clean kitchen towels or paper towels until the surfaces feel dry. Do not rinse; remove visible moisture and any undissolved salt.
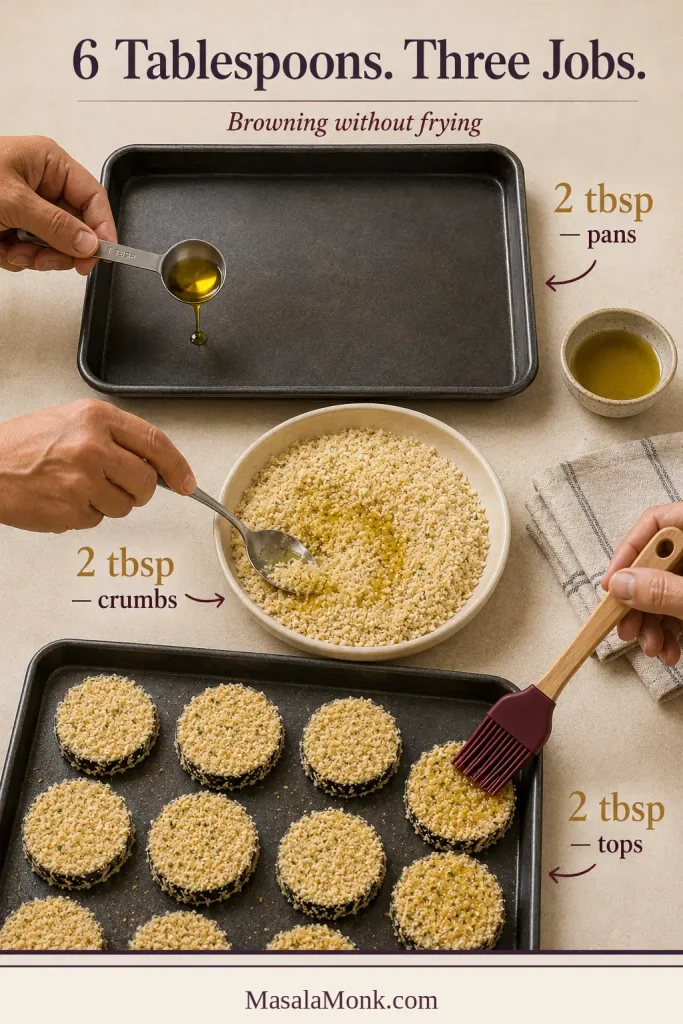
- Heat the oven. Position racks in the upper and lower thirds. Preheat to 425°F / 220°C conventional or 400°F / 200°C fan. Brush the two metal pans with 2 tablespoons / 30 ml olive oil in total. Plan on 14–18 rounds per pan.When smaller pans or unusually numerous slices leave overflow, keep those rounds unbreaded until the first batch is nearly done. Reuse the pans and add only a thin extra film of oil if they look dry.
Bread and oil the slices
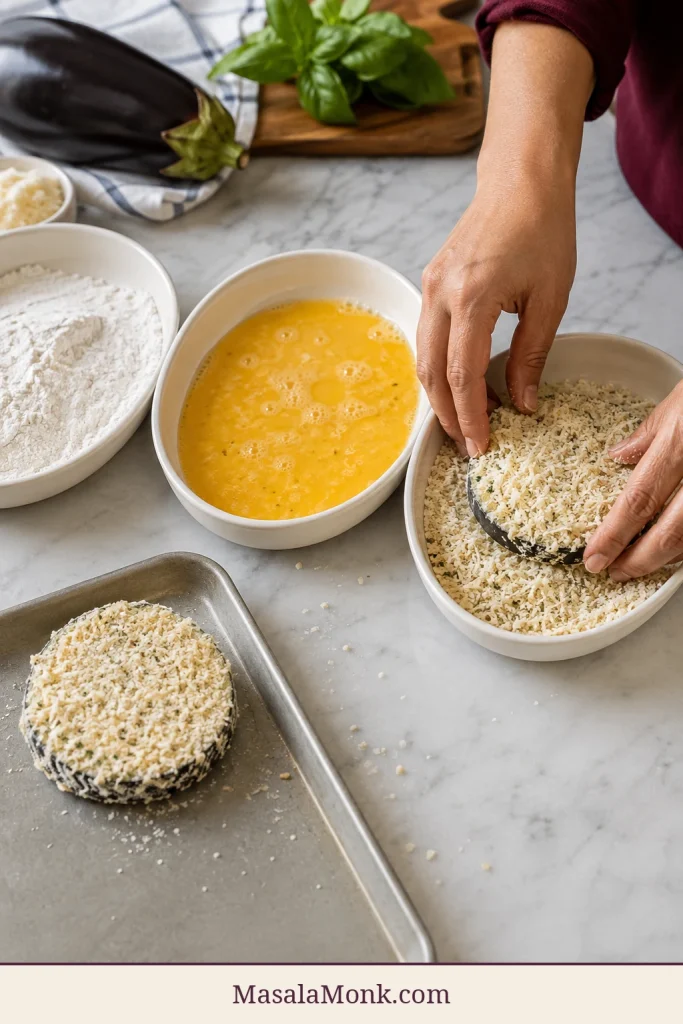
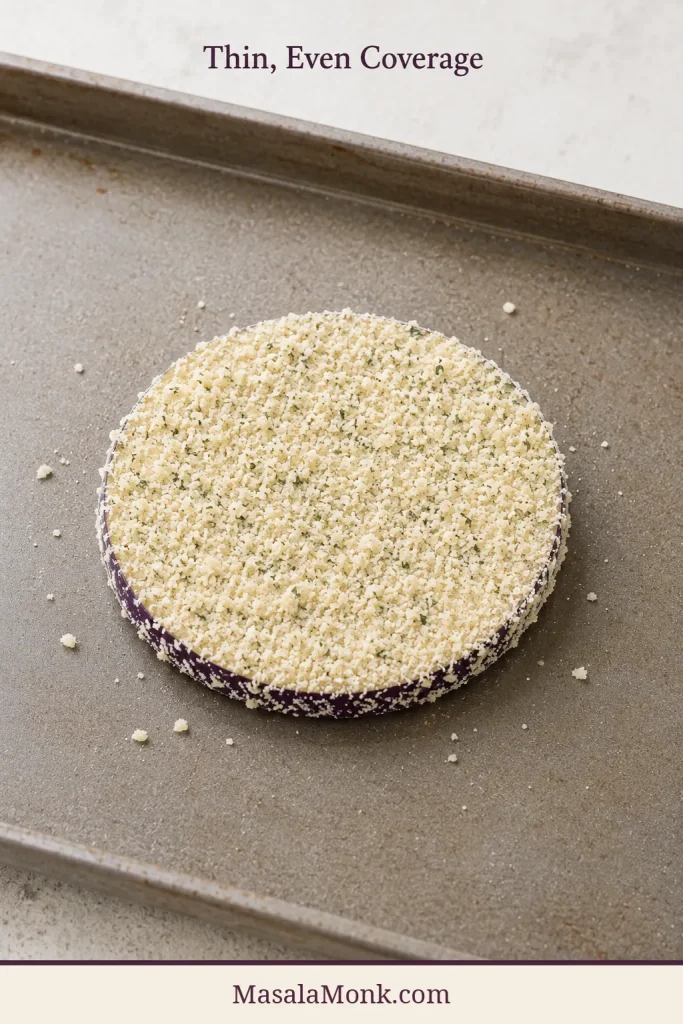
- Prepare three breading dishes. Put the flour in the first. Beat the eggs with 1 tablespoon / 15 ml water in the second. Combine panko, 1 cup / 90 g Parmesan, garlic powder, Italian seasoning and black pepper, then rub 2 tablespoons / 30 ml olive oil evenly through it.Keep half the crumb mixture aside and replenish the working dish as needed. This keeps the later slices away from damp, heavy clumps.
- Bread each slice. Coat lightly in flour and shake off the excess. Dip in egg and let the extra drip away. Press into the panko mixture on both sides.Transfer to the prepared pans with a little space around each round.If especially broad rounds use the egg wash early, beat the optional egg with 1 teaspoon / 5 ml water instead of stretching a thin, patchy coating over the final slices.
- Oil the tops. Brush or mist the remaining 2 tablespoons / 30 ml olive oil evenly over the breaded surfaces. Cover dry-looking crumb patches without creating pools.
Bake the breaded eggplant
- Bake the first side. Bake for 14–16 minutes. Wait until the crust has set before lifting a slice; forcing an under-browned coating from the metal can pull it away. Flip the slices, rotate both pans front to back and exchange their rack positions.
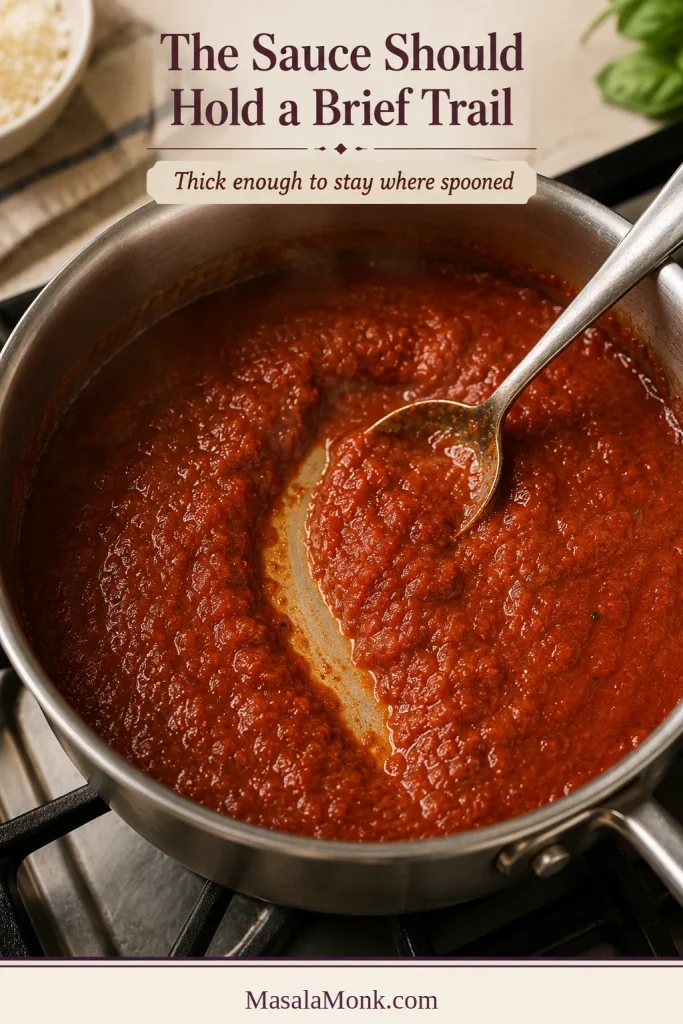
- Warm, taste and check the marinara. While the second side bakes, warm the sauce. If it looks loose, simmer uncovered until a spoon drawn across the pan leaves a trail for a moment before the sauce flows back. Taste it warm: it should be tomato-forward and balanced rather than markedly sweet or salty, since Parmesan and mozzarella will add more salt in the casserole.
- Finish the eggplant. Bake the second side for 12–18 minutes. Check from 26 minutes total. Both sides should be deeply golden, a thin knife should enter the centre with little resistance and a lifted round should bend slightly without falling apart. Give any firm or pale slices longer before assembly.
Assemble, melt and rest
- Lower the oven and prepare the dish. Reduce to 400°F / 200°C conventional or 375°F / 190°C fan, then spread ½ cup / 120 ml sauce across the base of the baking dish.
- Build the first layer. Add half the eggplant in one slightly overlapping layer. Spoon over ¾ cup / 180 ml sauce in patches, leaving a few golden edges visible. Add half the mozzarella, ¼ cup / about 22 g Parmesan and half the basil. The leaves will soften and perfume the warm sauce. Reserve the remaining basil for serving.
- Complete the casserole. Add the remaining eggplant. Spoon over ¾ cup / 180 ml sauce without completely flooding every slice. Add the remaining mozzarella and Parmesan. Reserve the remaining ¾ cup / about 180 ml sauce for the table; jar yields vary slightly.
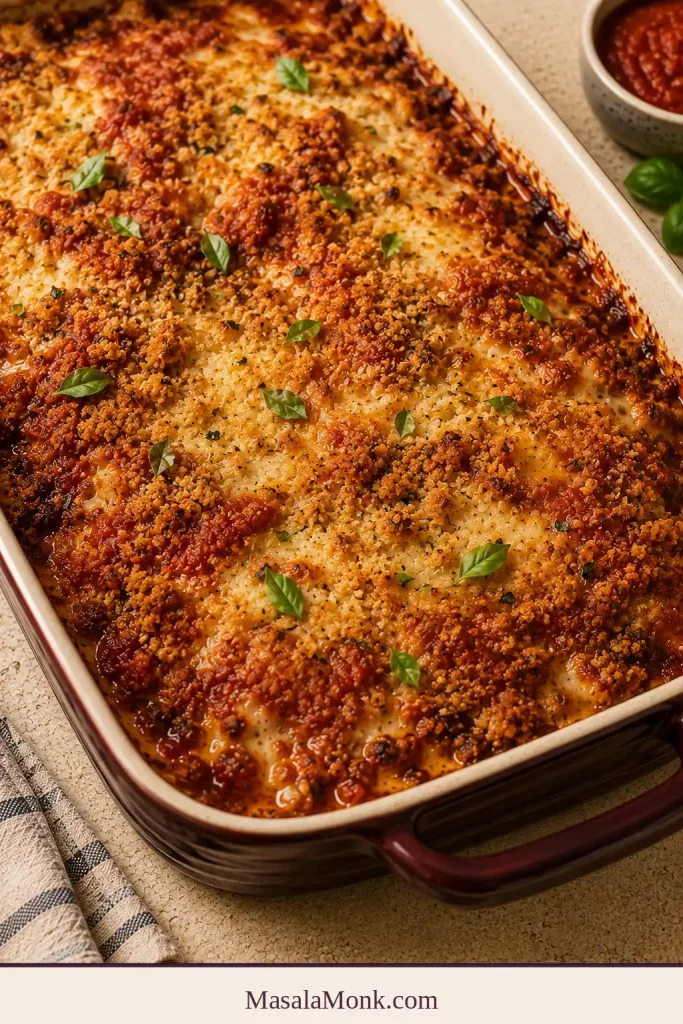
- Bake uncovered. Bake for 18–22 minutes. Begin checking at 18 minutes. The sauce should bubble at the edges and the mozzarella should be fully melted.
- Brown the top if needed. Broil for 1–3 minutes only when the cheese needs more colour, watching continuously. Use cookware rated for direct broiler heat; ordinary glass dishes should not go beneath the broiler.
- Rest and serve. Rest for at least 15 minutes—the melted cheese makes the wait difficult, but a clean serving is worth it. Finish with the reserved basil and black pepper, and serve the reserved sauce warm at the table.
Prefer more crunch? Keep the slices on their sheet pans and use the maximum-crisp finish instead of stacking them.
Explore the Eggplant Parmesan Guide
Cook With Confidence
Choose, Serve and Plan
Why Eggplant Parmesan Gets Watery or Soggy
A watery Eggplant Parmesan is usually a chain of problems, not one bad step. The eggplant may still be undercooked, the sauce or cheese may carry too much liquid, or steam may be trapped by crowding, deep layers, covering or cutting too soon. Salting helps dry the surface, but it cannot replace a complete first bake or careful assembly.
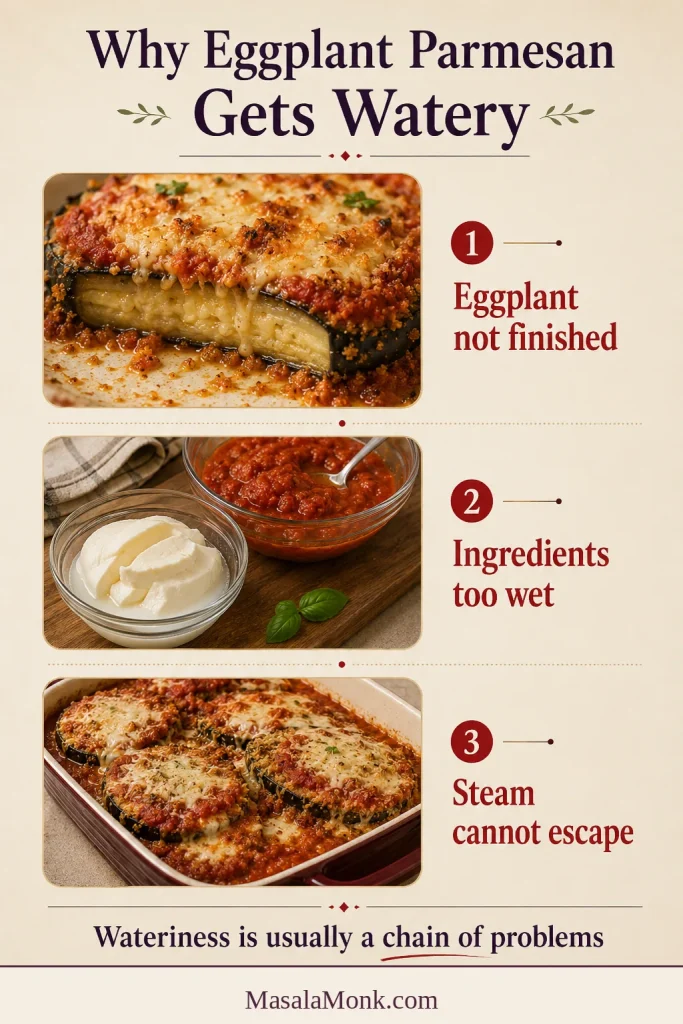
On a phone, swipe sideways to see the cause and fix together.
| What goes wrong | Why it matters | What helps |
|---|---|---|
| Uneven slices | Thin rounds overcook while thick rounds stay firm and wet | Cut every slice to about ⅜ inch / 1 cm |
| Wet surface after salting | Flour turns pasty and the crust slips | Blot both sides firmly before breading |
| Crowded pans | Released moisture becomes trapped steam | Use two large metal sheet pans |
| Incomplete first bake | The sauced casserole has to finish cooking the vegetable | Bake until the centre is tender before assembly |
| Pale, dry crumbs | The coating absorbs sauce before it forms a browned shell | Distribute a measured amount of oil evenly |
| Thin marinara | Loose water runs between the layers | Reduce sauce until it briefly holds a spoon trail |
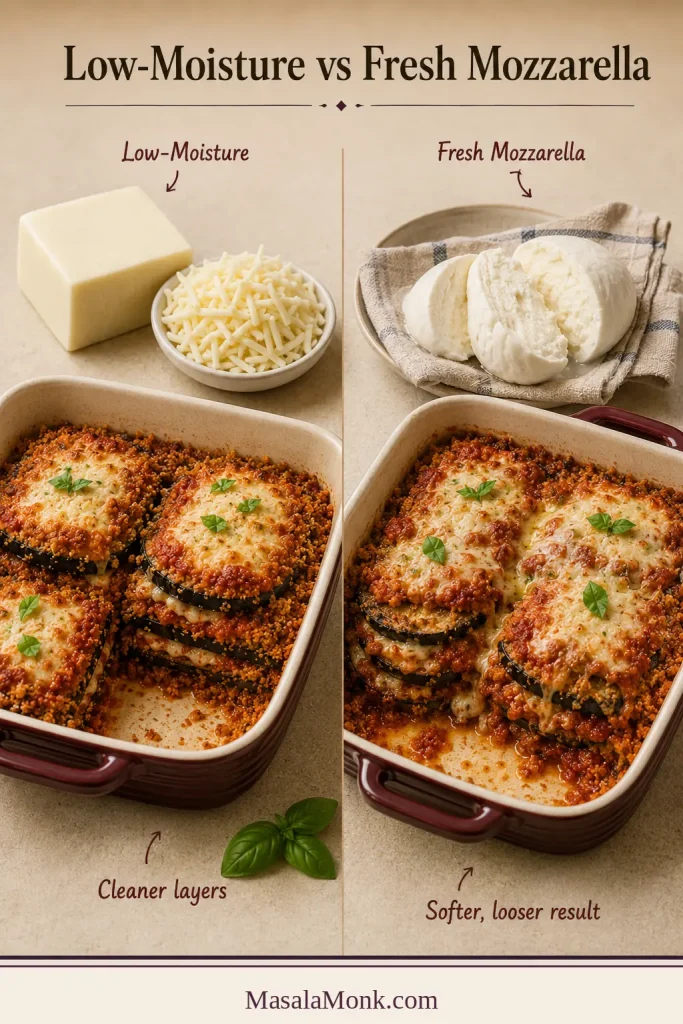
| Fresh mozzarella liquid | Whey loosens the sauce and softens the coating | Use low-moisture whole-milk mozzarella |
| Excess sauce | Every crumb becomes saturated | Measure each layer and reserve sauce for serving |
| Deep or covered casserole | Steam cannot escape | Build two shallow layers and bake uncovered |
| Cutting immediately | Hot sauce and cheese run before the layers settle | Rest for at least 15 minutes |
Prepare the Eggplant
Peel only when the skin asks for it
Most medium eggplants can keep their skin; it helps the rounds survive breading, turning and layering. Peel fully or in alternating strips when the eggplant is oversized, the skin feels thick or you prefer especially soft layers.
Rounds are easiest; planks make tidier layers
Rounds are easier to bread, flip and portion, and their uneven edges leave more crust visible. Lengthwise planks create neater, lasagna-like layers. Either shape works as long as every piece lies flat on the sheet pan.
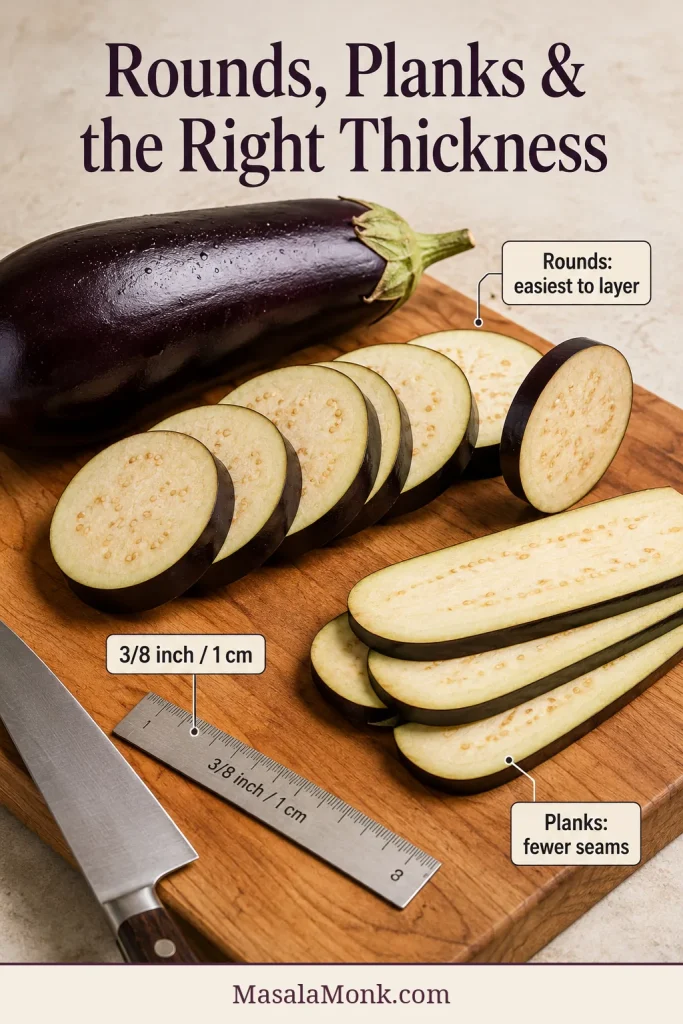
Keep the slices close to ⅜ inch / 1 cm
Consistency matters more than perfect geometry. Thin ¼-inch / 6 mm rounds cook quickly but can disappear into the casserole; thick ½-inch / 13 mm rounds need longer to soften. At ⅜ inch / 1 cm, the eggplant stays substantial and still becomes silky. Use a sharp knife or a guarded mandoline that can safely hold that setting.
Salt and blot for a drier breading surface
Modern eggplants are often mild, so the useful benefit here is practical rather than bitterness control. A measured 30-minute rest draws beads of liquid to the surface, lightly seasons the flesh and gives you a chance to remove that liquid before flour is applied.
Blot firmly and brush away visible salt; rinsing only creates another drying job. Very fresh eggplants may not need salting for bitterness, but this breaded casserole is calibrated around the full salt-and-blot step because it seasons the flesh and creates the driest, most dependable surface for flour. Keep it especially when the eggplants are older, softer, unusually large or quick to bead with liquid.
Ingredients and What They Do
Eggplant
Choose medium globe or Italian eggplants with smooth, glossy skin, green caps and firm flesh that gives only slightly when pressed. Medium eggplants are generally easier to slice and cook evenly; very large ones are more likely to have developed seeds, thicker skin and a spongier centre.
Weight is more dependable than “two large eggplants.” About 2–2¼ pounds / 900 g–1 kg usually produces 28–36 rounds for two layers in a 9 × 13-inch dish. Eggplant shape varies, so keep any overflow for a second sheet-pan batch instead of packing the pans or casserole into a deep, steamy stack.
Flour, egg and panko
A thin dusting of flour absorbs the last surface moisture and gives the egg something dry to hold. A visible flour shell can turn into a pasty band beneath the crust.
Let extra egg drip away before moving the slice into the panko, then press the crumbs on gently. Panko gives the coating irregular, crisp edges; ordinary fine breadcrumbs also work, though the crust will be smoother, denser and less craggy. That dry-to-wet-to-crumb sequence keeps the coating attached in MasalaMonk’s homemade mozzarella sticks.
Parmesan and olive oil
Finely grated Parmesan distributes more evenly than large shreds, brings nutty savouriness and helps the panko brown.
Parmesan, marinara and mozzarella already bring salt, so the coating needs restraint. MasalaMonk’s Parmesan versus Parmigiano Reggiano guide can help when choosing between milder domestic Parmesan, sharper aged cheese and other hard grating options.
Baked crumbs need some fat. Oil is divided between the pan, panko and tops so the underside and exposed surface can colour. A loose drizzle leaves some crumbs dry and others greasy, so measured oil gives a more even crust.
Choose marinara for flavour and body
Choose a marinara you enjoy by the spoonful, with enough acidity to balance the cheese and enough body to stay where it is spooned. A brief uncovered simmer not only removes excess water; it makes the tomato, garlic and herb flavours fuller so a measured amount still tastes generous. Drag a spoon across the saucepan: the track should remain visible briefly before the sauce flows back.
If liquid fills the trail immediately, keep simmering. MasalaMonk’s homemade marinara sauce makes 3–4 cups, leaving enough to thicken for the casserole and warm for the table.
Why low-moisture mozzarella fits this version
Low-moisture whole-milk mozzarella gives a soft, full melt with less free liquid than fresh mozzarella. Part-skim cheese works but can set more firmly. Fresh mozzarella tastes delicate and milky, though its whey produces a softer casserole.
To replace the low-moisture mozzarella, use one 7–8-ounce / 200–225 g ball of fresh mozzarella. Slice or tear it, then drain it over towels for at least 30 minutes. Put about one-third between the layers and scatter the rest over the top. Keep the same final-bake checking window, but expect softer layers and a little more surface liquid. Pre-shredded low-moisture mozzarella also works, although anti-caking powders can make the melt slightly less fluid than cheese shredded from a block.
Vegetarian note: traditional Parmesan may be made with animal rennet. Strict vegetarians should choose a Parmesan-style hard cheese and mozzarella labelled as using microbial or vegetarian rennet.
Fresh basil brings a clean, peppery lift to the tomato and melted cheese. Tear some into the layers and save the brightest leaves for the rested casserole.
Five Cues That Matter More Than the Timer
Timers tell you when to look. These five cues show what readiness looks, feels and smells like when your oven or the eggplants behave differently.
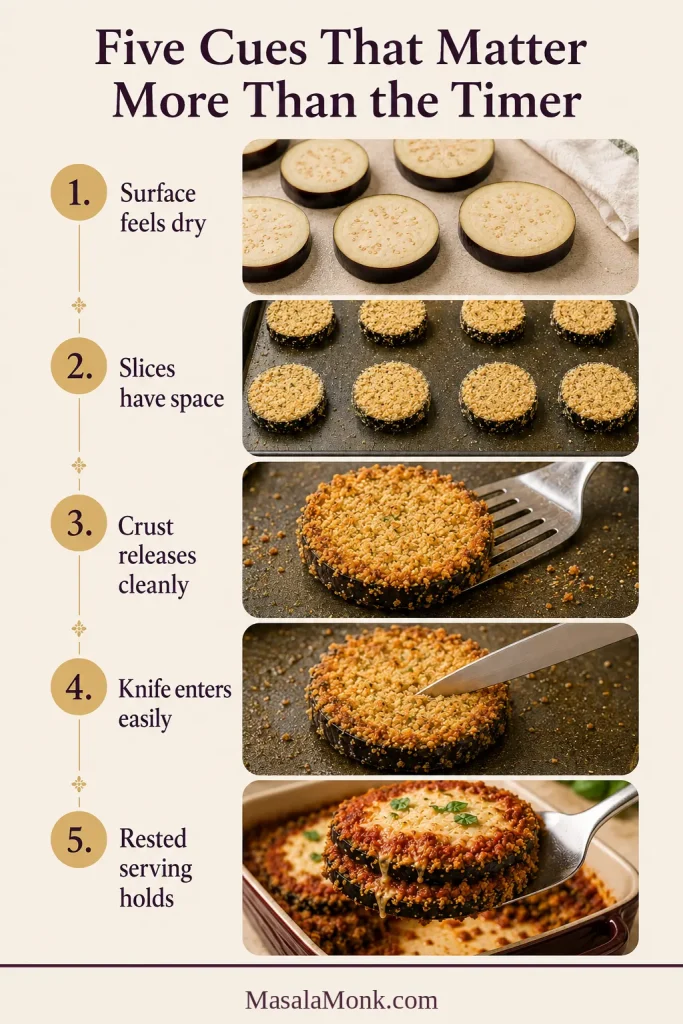
1. Turn a damp cut surface into one that can hold a crust
After salting, press the rounds with clean towels until they no longer feel wet. This is not a ceremonial pat: flour clings to a dry surface instead of turning into glue.
Dust lightly with flour, let excess egg drip away and press on a modest layer of panko. By the final broad rounds, the egg wash may be running low and the working crumbs much clumpier than at the start. Replenishing both is easier than forcing a thin, patchy coating onto the last slices.
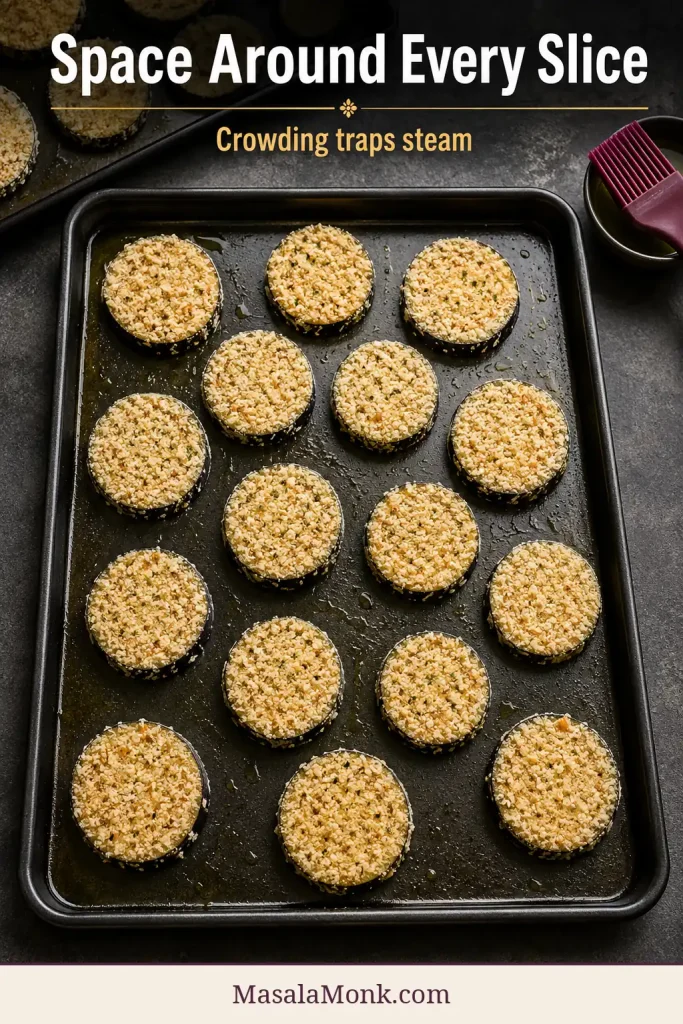
2. Give the crumbs room, oil and contact with metal
Room around each slice lets steam escape and gives the underside contact with hot metal. There is no prize for squeezing the last rounds onto a crowded pan. Dark pans colour faster; parchment may need extra time, and silicone mats can slow underside browning.
3. Watch pale, rigid slices become golden and tender
A crust that is ready to turn usually releases with little persuasion. If it clings, give it another minute rather than tearing it away.
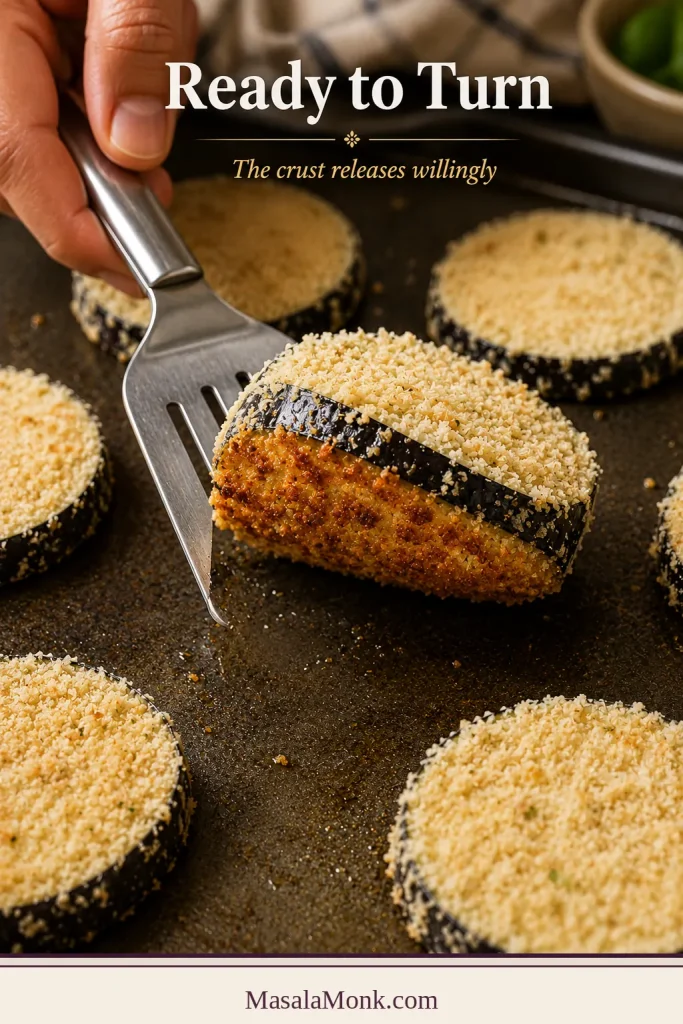
Colour alone is not enough. A thin knife should pass through a thicker centre with little resistance, and the slice should bend slightly while staying intact. If the crumbs brown first, lower the oven by about 25°F / 15°C and keep going until the eggplant is tender.
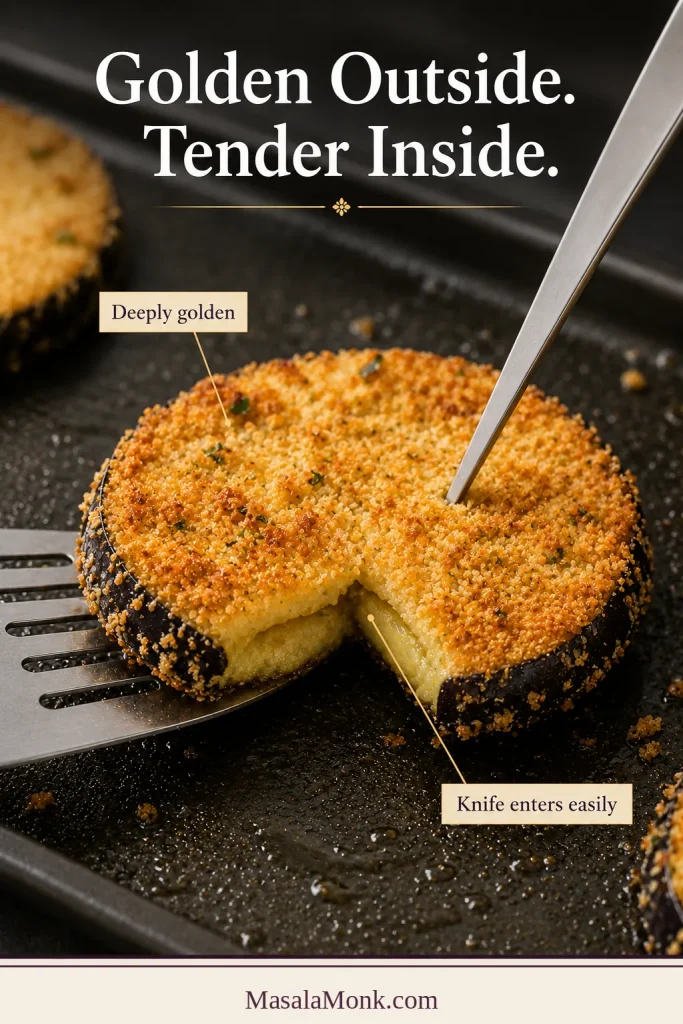
When the crust releases cleanly and the Parmesan smells toasted, the slices stop feeling like prepared ingredients and start feeling ready to eat.
4. Layer without hiding all the browning
Warm loose marinara until a spoon drawn across the saucepan leaves a brief trail. The measured sauce may look restrained as you assemble the dish. That restraint is deliberate: warm sauce at the table keeps the portions generous without soaking every breaded surface in the pan.
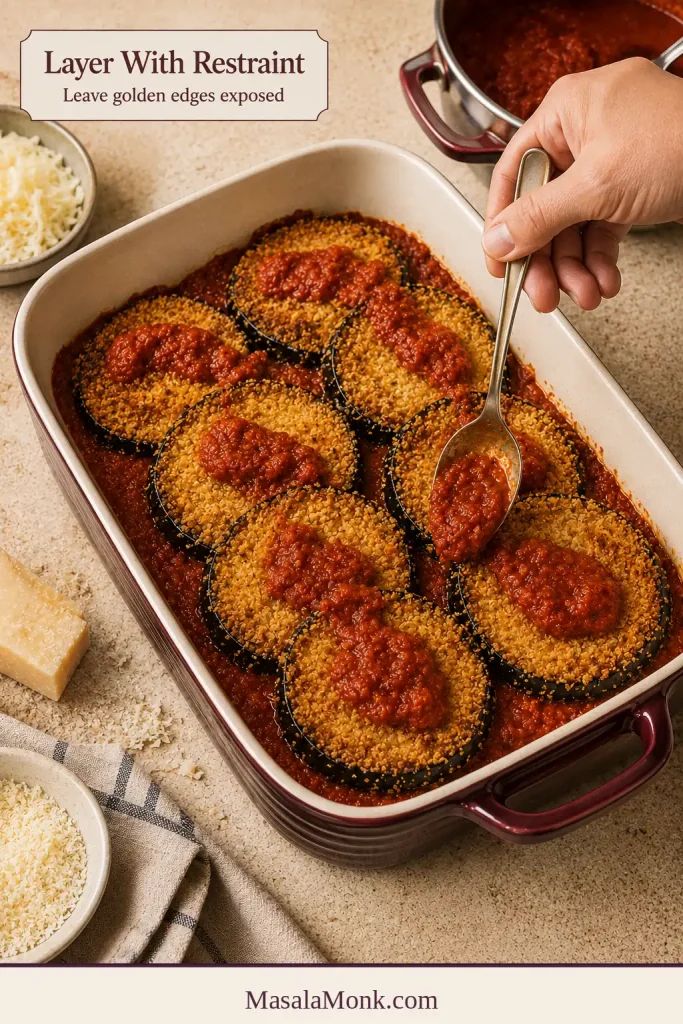
A little breading left uncovered is intentional. Once the mozzarella melts and the sauce bubbles, those exposed crumbs provide the contrast.
5. Let the hot casserole settle before cutting
This is the moment to wait. As the casserole rests, the sauce gains body and the cheese stays with the layers, allowing a wide spatula to lift a complete serving.
Eggplant Parmesan Bake Time and Oven Temperature
Breaded eggplant needs 26–34 minutes at 425°F / 220°C conventional or 400°F / 200°C fan. The assembled casserole then needs 18–22 minutes at 400°F / 200°C conventional or 375°F / 190°C fan. The hotter first stage browns the coating and cooks the centres; the shorter second stage bubbles the sauce and melts the cheese.
On a phone, swipe sideways for both oven settings and doneness cues.
| Stage | Conventional oven | Fan oven | Begin checking | Ready when |
|---|---|---|---|---|
| Breaded eggplant | 425°F / 220°C | 400°F / 200°C | 26 minutes total | Both sides are golden and the centre is fully tender |
| Assembled casserole | 400°F / 200°C | 375°F / 190°C | 18 minutes | Sauce bubbles at the edges and mozzarella is melted |
| Optional broil | High | High | After 1 minute | Cheese is browned without burnt panko |
| Rest | Room temperature | Room temperature | 15 minutes | A lifted portion holds together |
Pan colour, oven calibration and the eggplants themselves can shift the last few minutes. Use the times as checking windows, then let deep browning, easy knife entry and bubbling sauce decide.
Troubleshooting
| Problem | Likely cause | Most useful fix |
|---|---|---|
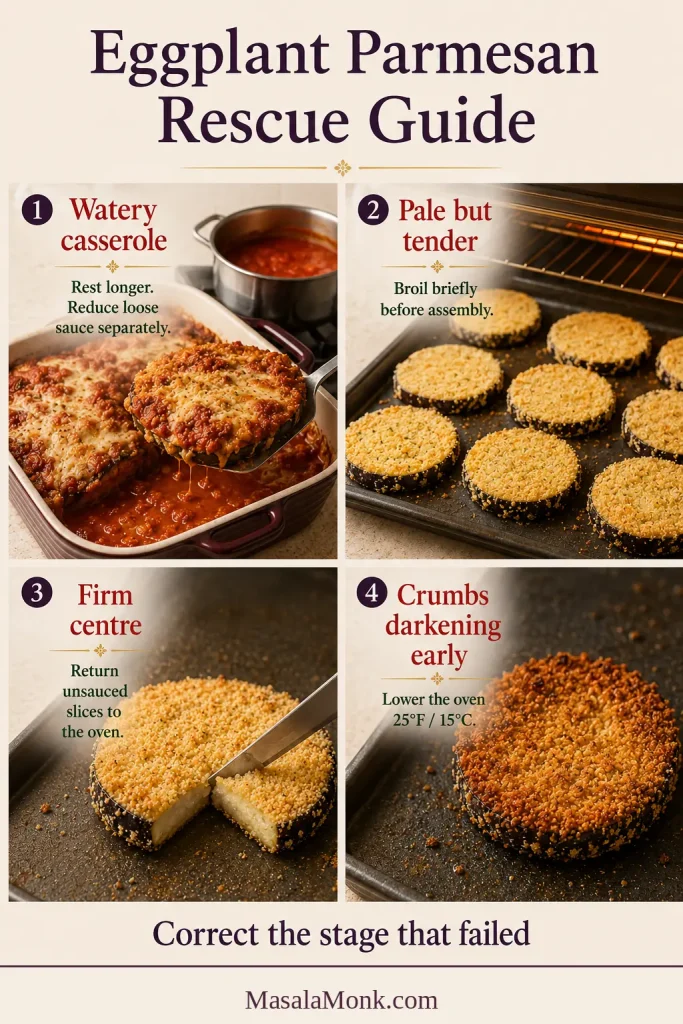
| The dish is watery | Thin sauce, wet cheese, undercooked eggplant or cutting too soon | Reduce the sauce, use low-moisture mozzarella, bake the slices until tender and rest the casserole 15 minutes |
| The coating became completely soft | Too much sauce, deep layers or a covered final bake | Use measured sauce, build two layers and bake uncovered |
| The breading falls off | Wet eggplant, skipped flour or excess egg | Dry thoroughly, flour lightly and let egg drip before panko |
| The coating is pale | Too little oil, crowding or weak contact with hot metal | Distribute oil evenly, use two pans and continue until browned |
| Crumbs burn before the centre softens | Slices are thick or the oven runs hot | Lower the temperature about 25°F / 15°C and continue until tender |
| The eggplant feels firm or spongy | It entered the casserole before the first bake was complete | Return unsauced slices to the oven; do not rely on the final bake |
| The finished dish is salty | Surface salt, salty marinara and Parmesan accumulated | Use salt by weight, blot thoroughly and avoid extra seasoning before tasting |
| The cheese releases liquid | Fresh mozzarella was not drained | Use low-moisture cheese or drain fresh mozzarella for at least 30 minutes |
| The layers slide apart | Excess sauce or insufficient resting | Reserve more sauce for serving and rest longer before cutting |
| The skin is tough | The eggplant was oversized or mature | Choose medium eggplant or peel it in alternating strips |
Can a watery finished casserole be rescued?
Let it rest longer first; some apparent liquid thickens as the dish cools. When a large amount remains, lift portions with a slotted spatula and simmer any loose sauce separately before spooning it back over the plate.
Do not keep baking the whole casserole indefinitely. The sauce may reduce, but the eggplant and cheese can become dry before the centre stops looking loose.
What if the eggplant is tender but the coating is pale?
Shift the pan to a higher rack or broil briefly before assembly, watching continuously. Once sauce has been added, pale crumbs are much harder to correct.
Variations
Start with the breaded recipe above, then use the option that matches the texture or dietary change you need. Each variation lists only what changes.
Maximum-crisp sheet-pan Eggplant Parmesan
Keep the browned rounds in one layer. For the full batch, use up to 1½ cups / 360 ml marinara and 8 ounces / 225 g mozzarella—about 2–2½ teaspoons sauce and roughly 1 tablespoon shredded cheese per round. Return to a 400°F / 200°C oven for 5–7 minutes, then broil briefly only if needed.
Serve the remaining sauce warm alongside. Because the rounds are never stacked, more of the Parmesan-panko crust reaches the plate browned and distinct.
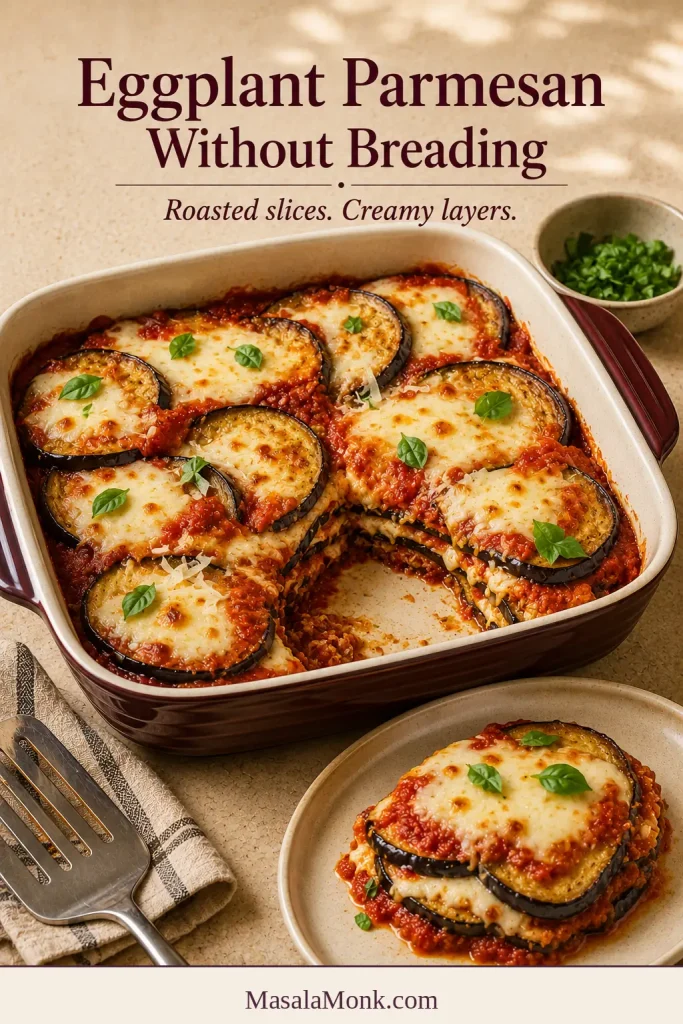
Eggplant Parmesan without breading
Skip the flour, eggs and slice coating. Brush the rounds with 4 tablespoons / 60 ml olive oil in total. Roast at 425°F / 220°C conventional or 400°F / 200°C fan, turning once, until browned and fully tender. Assemble with 2 cups / 480 ml thick marinara, 8 ounces / 225 g mozzarella and ⅓ cup / 30 g Parmesan.
For crunch on top, combine ½ cup / 30 g panko with ¼ cup / 22 g Parmesan and 1 tablespoon / 15 ml olive oil. Scatter it over the final cheese layer. The result has creamy roasted eggplant and a crisp top rather than a crust around every slice. For a completely breadcrumb-free casserole, simply omit this topping.
Gluten-free Eggplant Parmesan
Gluten-free panko is the direct substitution and gives the closest result to the main recipe. Replace the flour with a gluten-free all-purpose blend and keep the same flour–egg–crumb order.
For allergy-led cooking, check the panko, flour blend, seasoning, marinara and cheeses for relevant allergen and cross-contact statements.
Egg-free Eggplant Parmesan
For an egg-free coating, skip the separate flour and egg dishes. Whisk ¾ cup / 180 ml dairy or unsweetened soy milk with ½ cup / 60 g all-purpose flour and 1 tablespoon / 8 g cornstarch. The mixture should be smooth and thin enough to drip slowly from a spoon. Add milk 1 tablespoon at a time if it becomes too thick.
Dip each dry eggplant round in the batter, let the excess drip, then press on the panko mixture. The coating is more fragile than an egg-bound crust, so turn it with a thin spatula only after the first side has set and browned.
Eggplant Parmesan with ricotta
Ricotta makes a creamier, more lasagna-like casserole. If that is the texture you enjoy, MasalaMonk’s baked ziti guide explores the same ricotta-and-mozzarella comfort-food lane in pasta form.
Mix 15 ounces / 425 g well-drained whole-milk ricotta with 1 large egg, ¼ cup / 22 g from the Parmesan reserved for assembly and black pepper. Spread it in a thin, even layer over the first layer of sauced eggplant.
Reduce the mozzarella to 6 ounces / 170 g and use the remaining ¼ cup / 22 g Parmesan on top. Keep only 2 cups / 480 ml sauce inside the casserole and rest it for about 20 minutes so the creamy layers cut more cleanly.
Small-batch Eggplant Parmesan
For two to four servings, use one medium eggplant weighing 1–1¼ pounds / 450–570 g and halve the remaining ingredients. For the breading station, beat 2 large eggs with 2 teaspoons / 10 ml water; expect a little to remain. An 8 × 8-inch / 20 × 20 cm dish usually holds two shallow layers.
The slice-baking temperatures stay the same. Begin checking the smaller assembled dish at about 15 minutes; its shallower centre usually heats sooner than a full 9 × 13-inch pan.
What to Serve With It
Eggplant Parmesan is rich enough to arrive at the centre of the table as the main event. Set down the rested pan and pass the warm reserved marinara. The centre pieces stay silky and saucy; the corners bring browned cheese and exposed crumbs. Something green, sharp or bread-like keeps bright tomato, milky mozzarella and nutty Parmesan from feeling heavy.
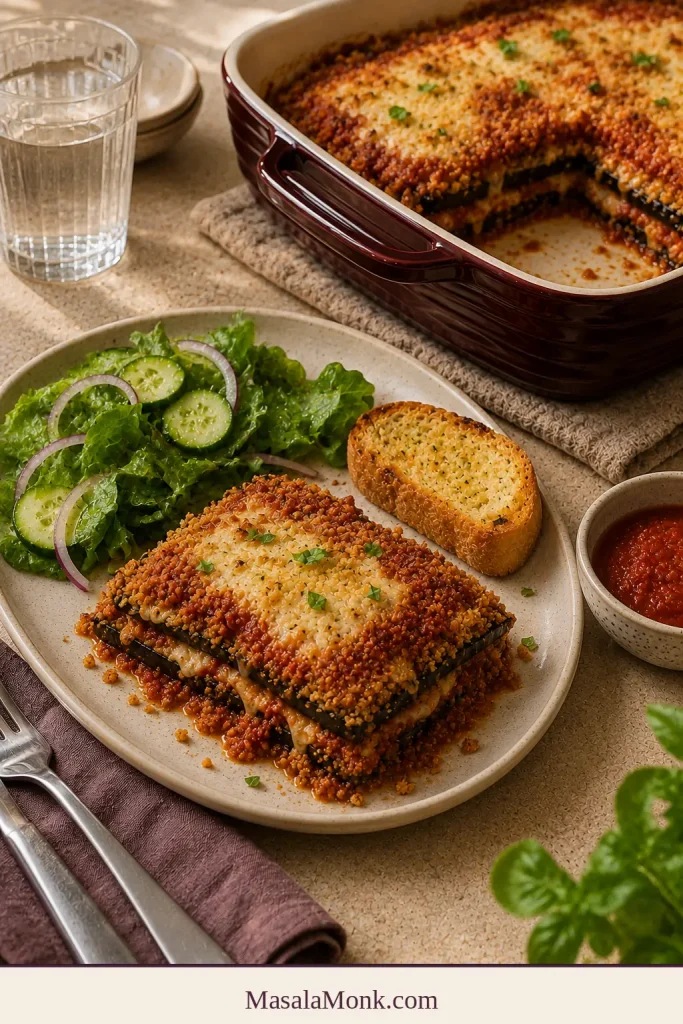
- Classic dinner: spaghetti, linguine or another simply dressed pasta for catching the extra sauce
- Fresh contrast: a crisp cucumber salad, lemony greens or roasted broccoli
- Comfort-food table: a homemade garlic bread loaf, crisp-edged focaccia or another crusty loaf for the last spoonful of marinara
- Lighter plate: sautéed greens, salad or roasted vegetables instead of pasta
- Tomorrow’s lunch: a reheated slice tucked into a toasted roll with a little extra sauce and basil
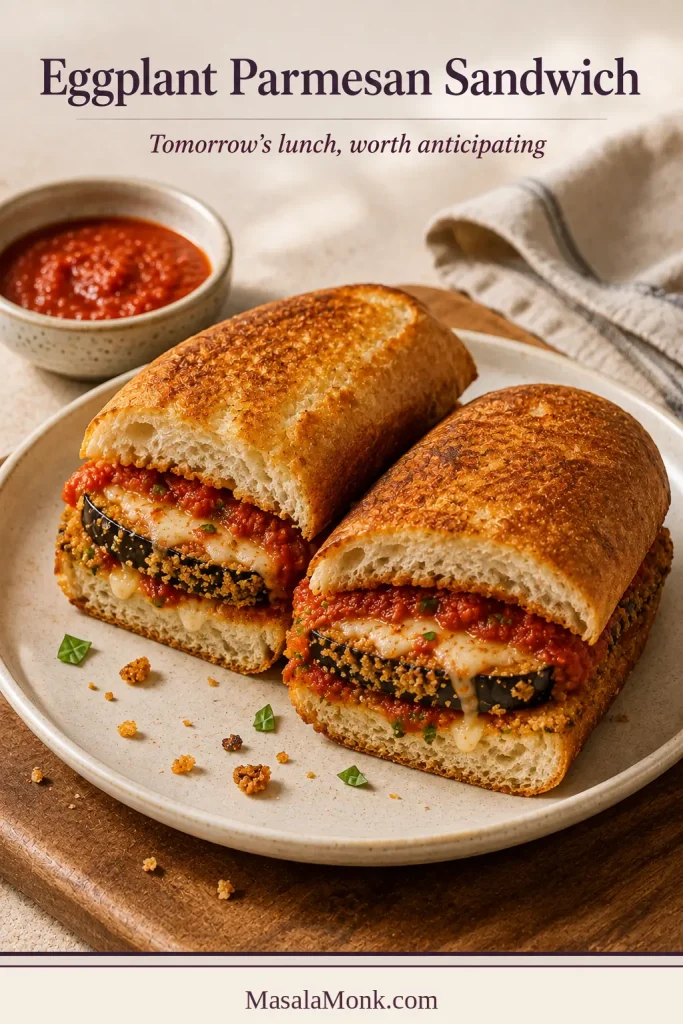
When the casserole is already generously sauced, keep pasta simple. The plate needs contrast more than another heavy tomato-and-cheese component.
Make Ahead: Choose by Texture
Convenience and crispness move in opposite directions. Decide which matters more for this meal, then stop at the point that fits your plans.
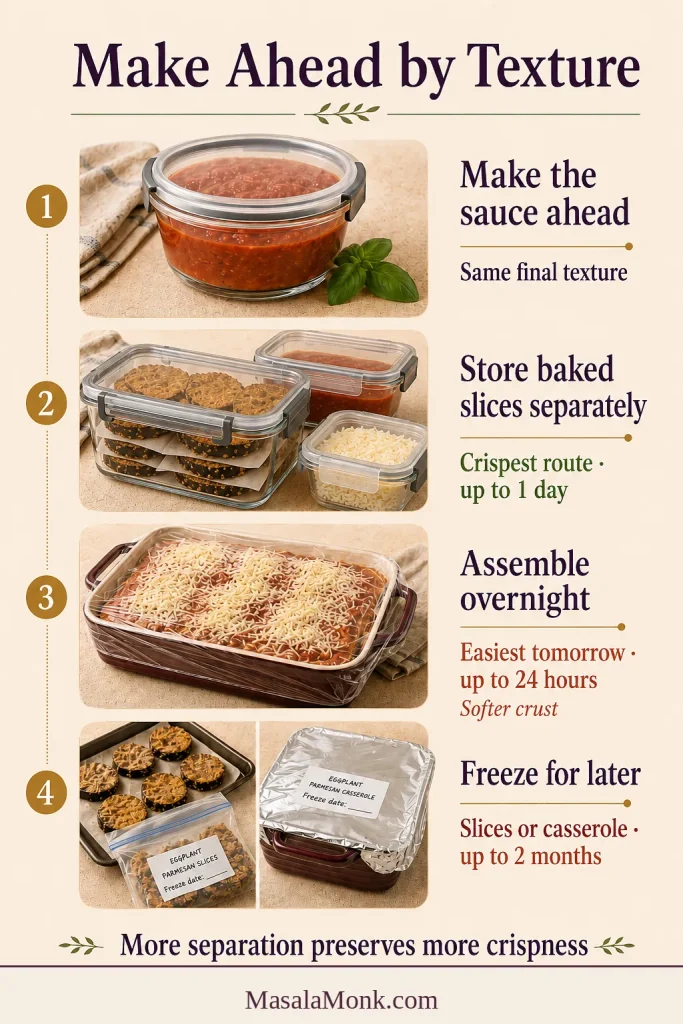
On a phone, each make-ahead option appears as a stacked card.
| Prepare it this far | Best for | What to expect |
|---|---|---|
| Make the marinara ahead | Spreading the work across two days | The finished texture stays the same |
| Bake slices and refrigerate separately for up to 1 day | Guests or a planned dinner when crust still matters | The crispest make-ahead route |
| Assemble overnight | Dinner that only needs baking | A softer, more integrated casserole |
| Freeze baked slices separately for up to 2 months | Crisper portions after reheating | More assembly later, but stronger browned edges |
| Freeze the assembled casserole | The easiest freezer meal | Softer layers after baking |
Store the components separately for the crispest result
Bake the breaded slices and cool them completely on wire racks, or on clean sheet pans with the slices turned once so condensation does not collect beneath them. Refrigerate for up to 1 day in shallow containers with parchment between layers. Store the sauce and shredded cheese separately.
Before assembly, return refrigerated slices to a 425°F / 220°C conventional or 400°F / 200°C fan oven for 6–10 minutes, beginning to check at 6 minutes. Refresh only until the coating feels dry and hot; then layer and complete the short final bake.
Can the casserole be assembled a day ahead?
Yes, but the breading will absorb moisture while it rests. Cover and refrigerate for up to 24 hours. The next day, bake uncovered at 375°F / 190°C conventional or 350°F / 175°C fan for 25–35 minutes, checking from 25 minutes. The centre should reach 165°F / 74°C. Follow the cookware manufacturer’s guidance before moving a chilled glass or ceramic dish into a hot oven.
This is the easiest day-ahead option, though the breading will be softer. Keep the components separate when browned crust matters most.
Storage, Freezing and Reheating
The portion methods below assume one piece equal to roughly one-sixth to one-eighth of the pan. Thick pieces, cold cookware and a colder starting temperature may add time, so check from the early end and heat the centre to 165°F / 74°C.
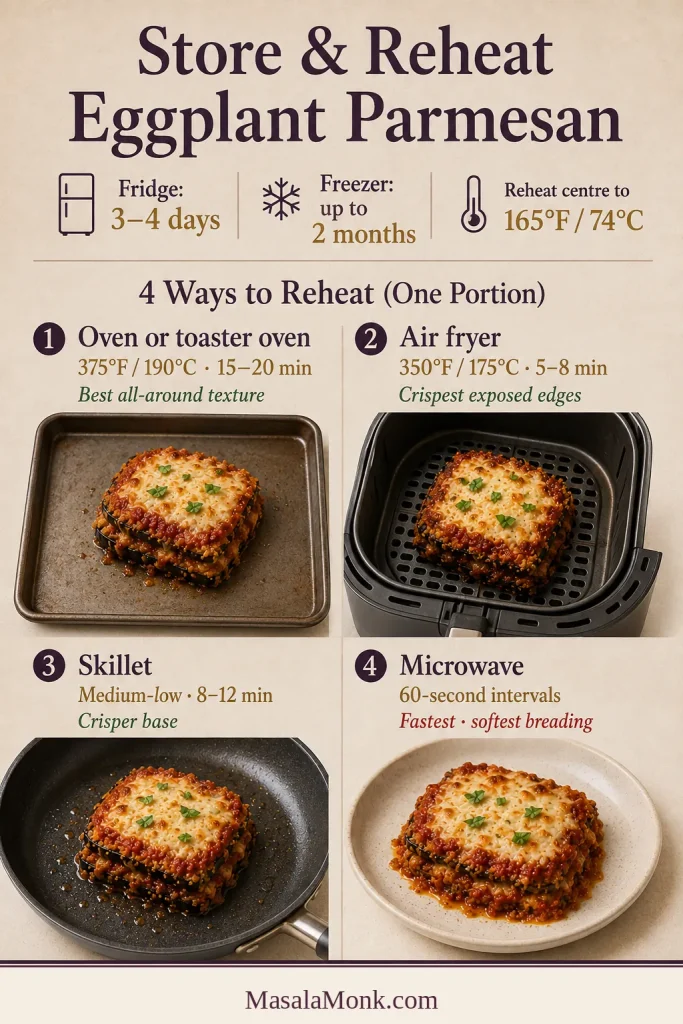
Refrigerating leftovers
Divide leftovers into shallow containers and refrigerate within 2 hours of cooking—within 1 hour when the room or outdoor temperature is above 90°F / 32°C. Use refrigerated leftovers within three to four days, in line with USDA leftover-safety guidance.
The coating softens in storage, but dry heat can recover some texture around the exposed edges.
Freezing breaded eggplant slices separately
Cool the baked slices completely, freeze them in one layer until firm, then transfer to a freezer-safe container with parchment between layers. Freeze for up to two months for best quality. Reheat from frozen at 425°F / 220°C conventional or 400°F / 200°C fan for 12–18 minutes. Turn once and check from 12 minutes, then assemble when the slices are hot and the coating feels dry.
Freezing the assembled casserole
To freeze a complete dinner rather than separate components, wrap the unbaked casserole securely and freeze for up to two months for best quality. Thaw completely in the refrigerator, usually 24–48 hours, then bake uncovered at 375°F / 190°C conventional or 350°F / 175°C fan for about 35–45 minutes. Begin checking at 35 minutes and heat the centre to 165°F / 74°C.
Use a freezer-safe metal or suitable ceramic dish. Do not transfer an ice-cold glass dish directly to a hot oven because sudden temperature change can break it.
Reheating a fully cooked casserole
For a fully cooked casserole that has thawed in the refrigerator, cover loosely and reheat at 350°F / 175°C conventional or 325°F / 165°C fan for 25–35 minutes. Uncover for the final 10 minutes and heat the centre to 165°F / 74°C. Follow the cookware manufacturer’s temperature-change guidance, especially for glass or ceramic dishes.
How to reheat Eggplant Parmesan while bringing back some browned edges
- Oven or toaster oven: Reheat a refrigerated portion uncovered at 375°F / 190°C for about 15–20 minutes, beginning to check at 15 minutes. Tent loosely only near the end if the cheese darkens too quickly.
- Air fryer: Reheat one portion at 350°F / 175°C for about 5–8 minutes, checking at 5 minutes so the exposed coating refreshes before the cheese burns.
- Skillet: Warm over medium-low heat for about 8–12 minutes with the lid slightly ajar. The base can crisp, but trapped steam softens the top.
- Microwave: Heat in 60-second intervals, covered and vented, until hot. It is the fastest route but produces the softest breading.
Whichever method you use, reheat leftovers to 165°F / 74°C in the centre. Warm additional sauce separately and add it afterward; sauce poured over the portion first slows any return of crispness.
Baked Eggplant Parmesan vs. Italian Parmigiana
This is a breadcrumb-coated, oven-baked Italian-American Eggplant Parmesan. Each round is browned before it meets tomato sauce, mozzarella, Parmesan and basil, creating a crisp-edged coating without frying every batch in oil.
Traditional Italian parmigiana di melanzane, or melanzane alla parmigiana, is generally unbreaded and often fried before layering. Its softer, integrated texture is different from the deliberate panko crust here. Family and regional versions vary; La Cucina Italiana’s overview gives useful context. In the UK, both styles may be called aubergine Parmesan or aubergine parmigiana.
Frequently Asked Questions
Do you have to salt eggplant?
Salting is recommended for this breaded version because it seasons the flesh and gives the flour a drier, more dependable surface. Very fresh eggplants may not need it for bitterness, but the recipe is calibrated around the full 30-minute salt-and-blot step. Blot the rested slices rather than rinsing them.
Should you peel eggplant for Parmesan?
Usually not. Keep the skin on medium, tender eggplants; peel fully or in alternating strips when the skin feels thick or you want especially soft layers.
Why does Eggplant Parmesan turn watery?
Common causes include eggplant that was still firm inside, loose marinara, too much sauce, undrained fresh mozzarella, deep layers or cutting while the sauce and cheese are still loose. Salting helps the surface but cannot correct all of those factors.
Can you use fresh mozzarella?
Yes. Use one 7–8-ounce / 200–225 g ball, slice or tear it, then drain it over towels for at least 30 minutes. Put about one-third between the layers and the rest on top; expect a softer casserole than the low-moisture version.
Can Eggplant Parmesan be assembled the day before?
Yes. Cover and refrigerate it for up to 24 hours, then bake uncovered from cold at 375°F / 190°C conventional or 350°F / 175°C fan for 25–35 minutes, until the centre reaches 165°F / 74°C. The breading will be softer than when the components are stored separately.
The First Slice Is Worth the Wait
After all the salting, breading and turning, the reward arrives in the first lifted portion. The sauce stays with the layers, the eggplant cuts easily with the side of a fork, mozzarella stretches through the centre and browned crust still shows around the edges.
Cook first. Layer second. Once the eggplant reaches the sauce already golden and tender, the final bake becomes the easy part. The layered casserole gives saucy, family-style comfort; the sheet-pan finish protects every crunchy edge.
What usually gives you trouble with Eggplant Parmesan—wateriness, breading or timing?