
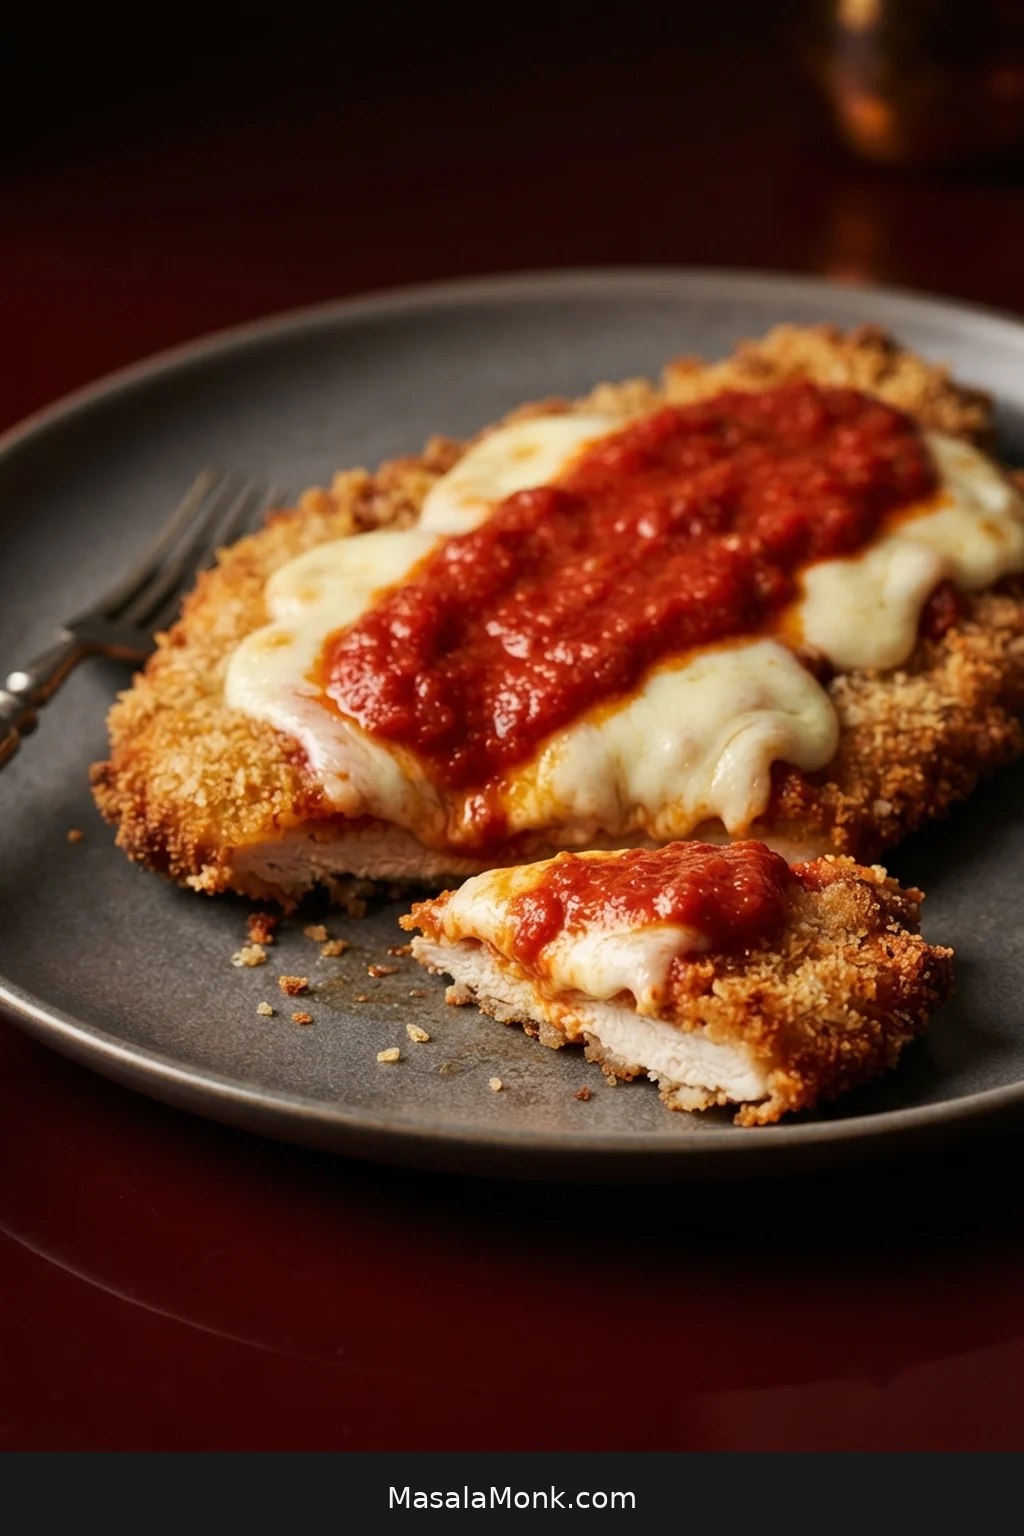
Cut into good Chicken Parmesan and you should hit a crisp golden edge before the juicy chicken, melted mozzarella, and hot marinara underneath. The breading beneath the sauce will soften a little—that is part of the pleasure—but the whole cutlet should not arrive as one uniformly soft layer.
That contrast is surprisingly easy to lose. A cutlet can leave the skillet beautifully crisp, then steam on a plate, sit under too much sauce, or spend another long stretch in the oven. Start with chicken that is too thick and the opposite happens: the breading darkens while the center is still catching up.
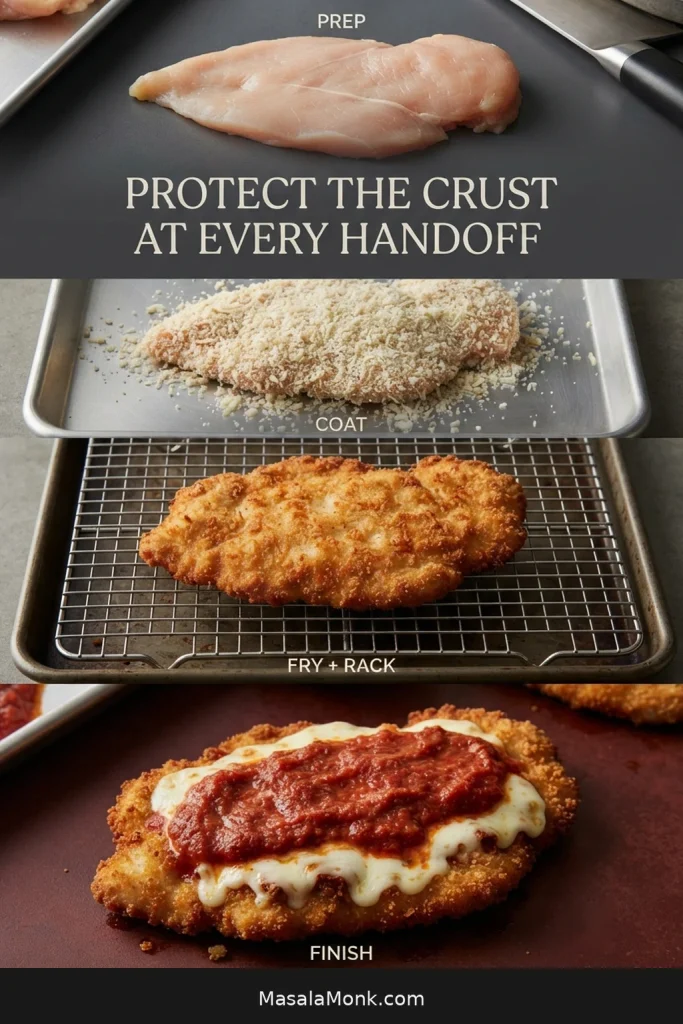
The order matters more than any trick ingredient. Most failures happen at the handoffs—breading to oil, skillet to rack, cheese to sauce—so this method pays particular attention to those moments. Build a crisp, fully cooked cutlet first; the mozzarella and marinara are a quick finish, not a second long cooking phase.
Protect the Crust From Pan to Plate
- Cutlet: thin and even, about ⅓ inch / 8 mm.
- Coating: light dredges, crumbs pressed on, then a 10-minute rest.
- Fry: keep the oil around 350–365°F / 175–185°C and rack the cooked chicken immediately.
- Finish: melt the cheese quickly, then spoon on the marinara.
Crispy Chicken Parmesan Recipe
Thin Parmesan-breaded chicken cutlets, shallow-fried until golden and cooked through, topped with low-moisture mozzarella, then finished with hot marinara after the cheese melts.
Prep: about 20 minutes Breading rest: 10 minutes, mostly overlapping Cook & finish: about 15–25 minutes Total: about 40–50 minutes Yield: 4 servings
Use the breading rest to heat the oil, warm the marinara, and prepare the cheese. Cook time changes mainly with how many cutlets fit comfortably in your skillet at once.
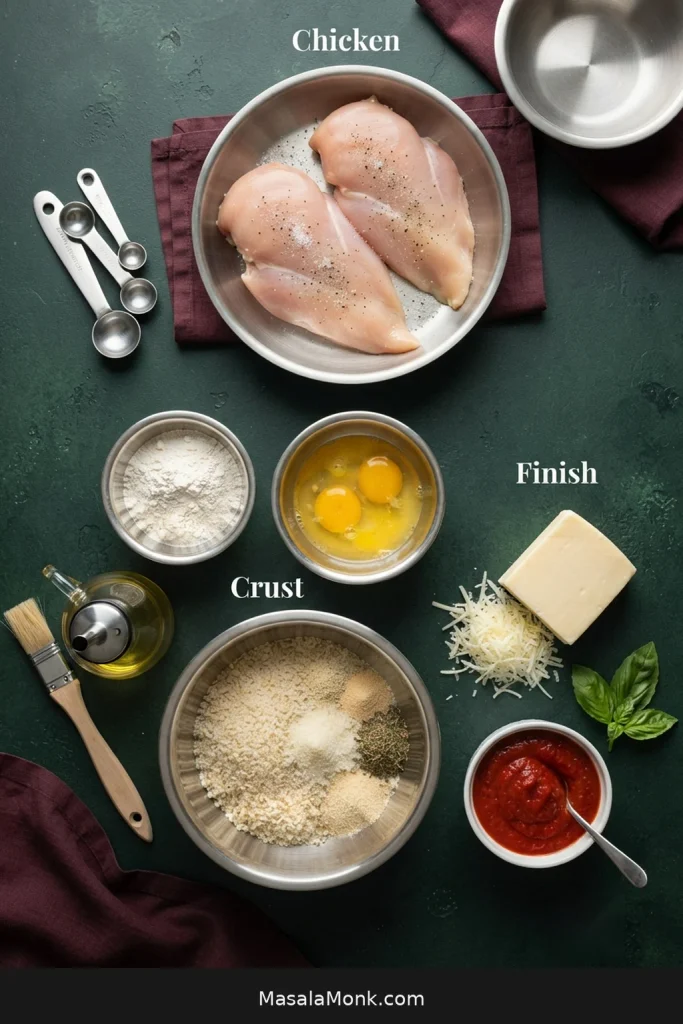
Equipment
- Heavy 12-inch / 30-cm skillet
- Sharp chef’s knife
- Meat mallet or rolling pin
- 3 shallow dishes
- Large plate or tray for raw breaded chicken
- Wire rack set over a rimmed sheet pan for cooked chicken
- Clean broiler-safe sheet pan or tray if your rack is not broiler-safe
- Thin spatula or fish turner suitable for your skillet
- Instant-read thermometer
Ingredients
Chicken
- 1½ lb / 680 g boneless, skinless chicken breasts, usually 2 large breasts
- 1 teaspoon / about 6 g fine sea salt
- ½ teaspoon freshly ground black pepper
Parmesan Breadcrumb Coating
- ½ cup / 60 g all-purpose flour
- 2 large eggs
- 1 tablespoon / 15 ml water
- 1 cup / about 60 g panko breadcrumbs
- ½ cup / about 55 g fine dry breadcrumbs, plain or Italian-style
- ½ cup / about 45 g finely grated Parmesan
- 1 teaspoon garlic powder
- ½ teaspoon dried Italian seasoning, optional if your breadcrumbs are not already strongly seasoned
For Frying & Finishing
- Neutral high-heat oil such as canola, vegetable, or avocado oil, enough for a shallow layer about ⅛ inch / 3 mm deep; usually around ¾–1 cup / 180–240 ml depending on the skillet
- 6 oz / 170 g whole-milk low-moisture mozzarella, preferably freshly shredded
- ¼ cup / about 22 g finely grated Parmesan
- 1½ cups / 360 ml thick marinara, warmed and divided; use about ½–¾ cup / 120–180 ml on the chicken and keep the rest for serving
- Fresh basil or flat-leaf parsley, optional
Before You Start
- Chicken breasts are the easiest default. Large breasts split neatly into broad cutlets. Store-bought raw chicken cutlets save time; just even out any thick spots. If they are already close to ⅓ inch / 8 mm, pat them dry, season with the salt and pepper, and start at Step 2.
- Slice before pounding. Halve thick breasts horizontally first, then flatten only the thicker areas. The pieces do not have to look like factory copies.
- Low-moisture mozzarella is the easiest cheese to manage. Freshly shredded cheese melts more smoothly; pre-shredded saves time and still gets dinner done.
- Jarred marinara is a smart weeknight choice. Use one you already enjoy, as long as it is thick enough to stay where you spoon it.
- Keep raw and cooked surfaces separate. Rest breaded raw chicken on the plate or tray; reserve the rack for chicken coming out of the skillet.
Instructions
1. Slice and even out the chicken
Place each breast flat on a cutting board. With a sharp knife held parallel to the board, slice horizontally through the center to make 4 thinner cutlets.
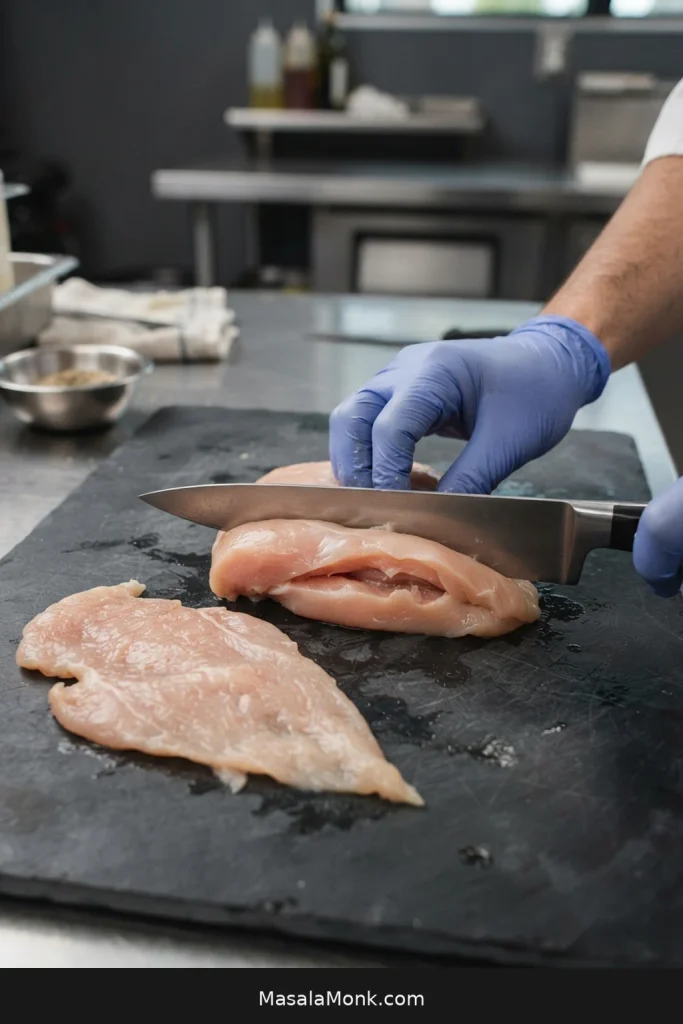
Put the cutlets between sheets of parchment or inside a sturdy reusable bag. Gently pound the thicker areas until the pieces are evenly thin, close to ⅓ inch / 8 mm through the center. You are removing bulky spots, not trying to make every cutlet identical.
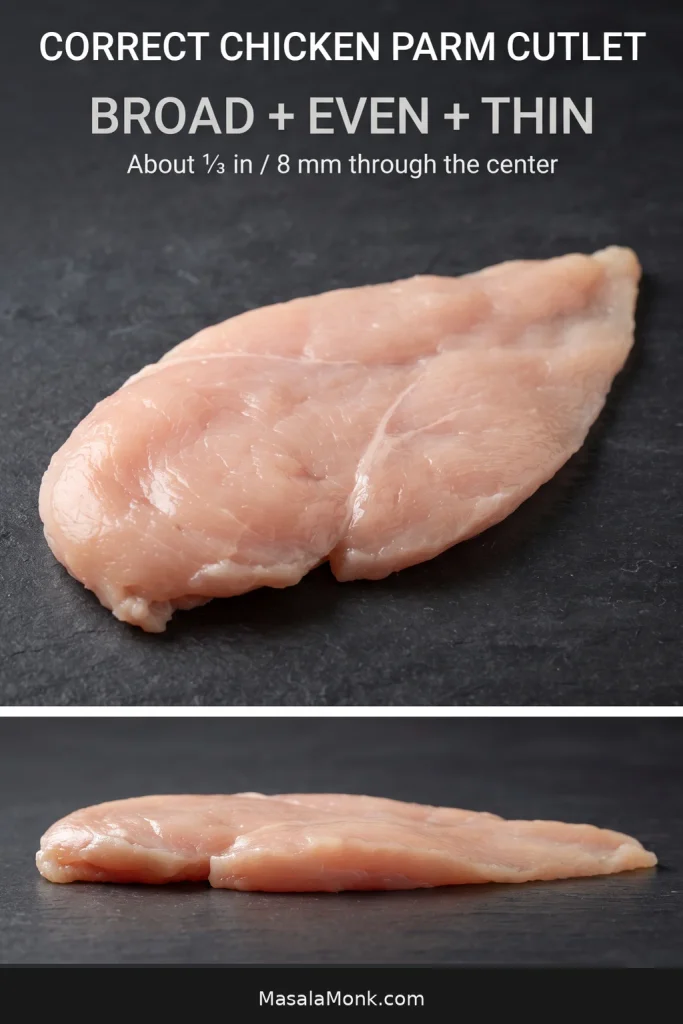
Pat the chicken dry, then season both sides with salt and black pepper. Small beads of moisture may collect while you prepare the breading; blot them gently before dredging.
2. Build the breading station
Put the flour in the first shallow dish. Beat the eggs with 1 tablespoon / 15 ml water in the second dish until smooth.
In the third dish, mix the panko, fine breadcrumbs, ½ cup / 45 g Parmesan, and garlic powder. If you are using Italian-style breadcrumbs, taste the dry mixture before adding the optional Italian seasoning; some brands are already strongly seasoned.
Crush especially large panko flakes lightly between your fingers as you mix.
3. Bread the cutlets
Coat one cutlet lightly in flour and shake off anything loose. Dip it into the egg, then hold it above the dish for a moment so the excess can drip away.
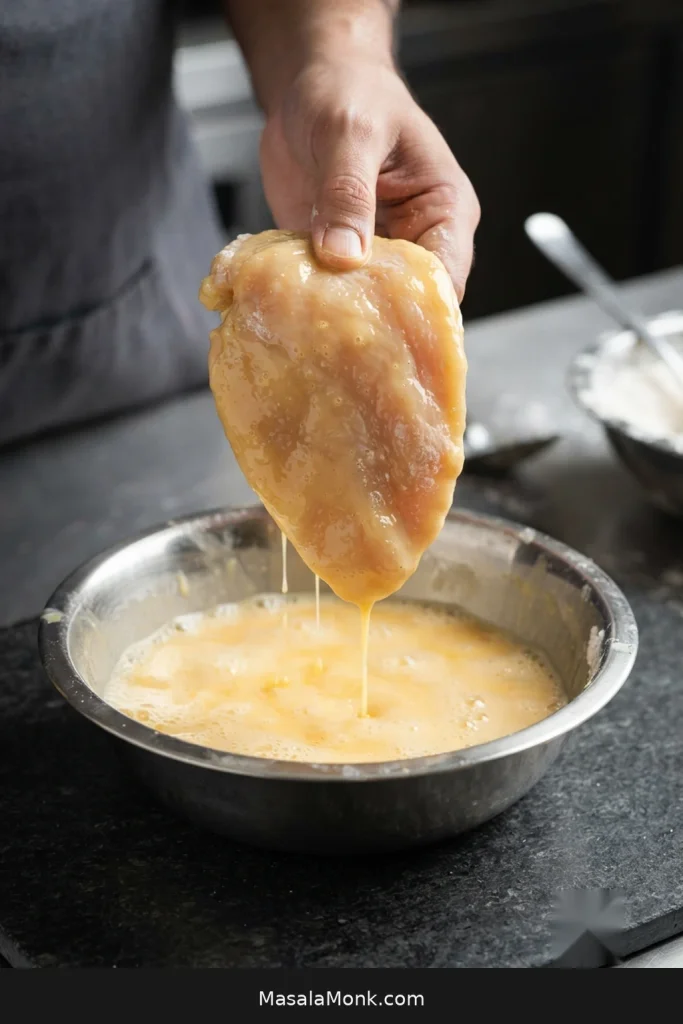
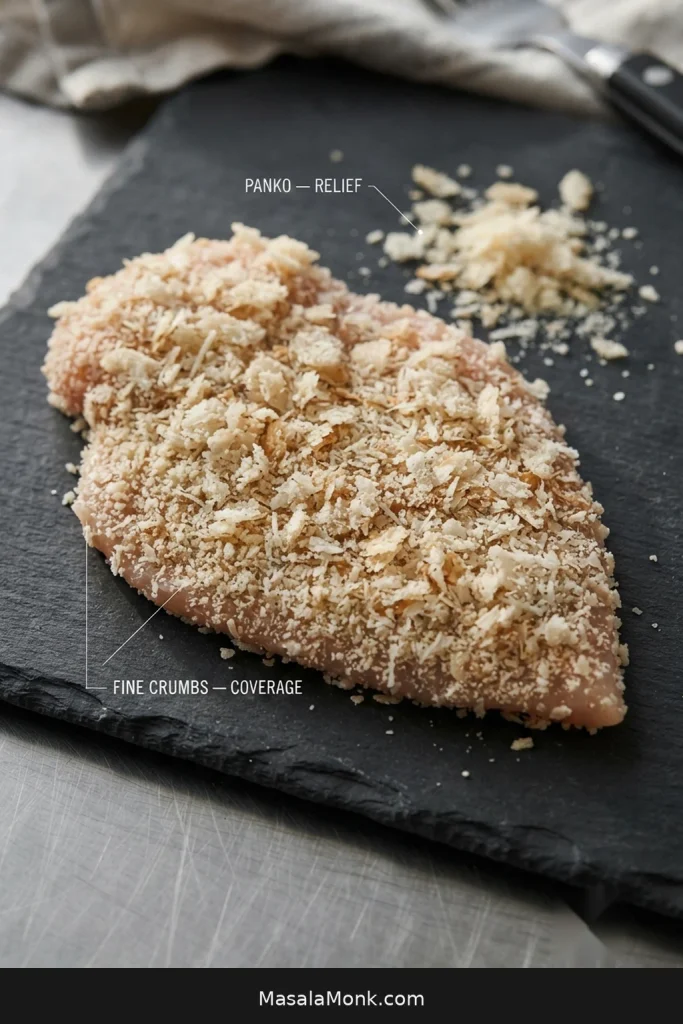
Press the chicken firmly into the breadcrumb mixture on both sides and around the edges. A good coating looks craggy but complete, with no wet bald patches or thick armor of crumbs. If it still looks glossy with egg, let more drip away before pressing on the breading.
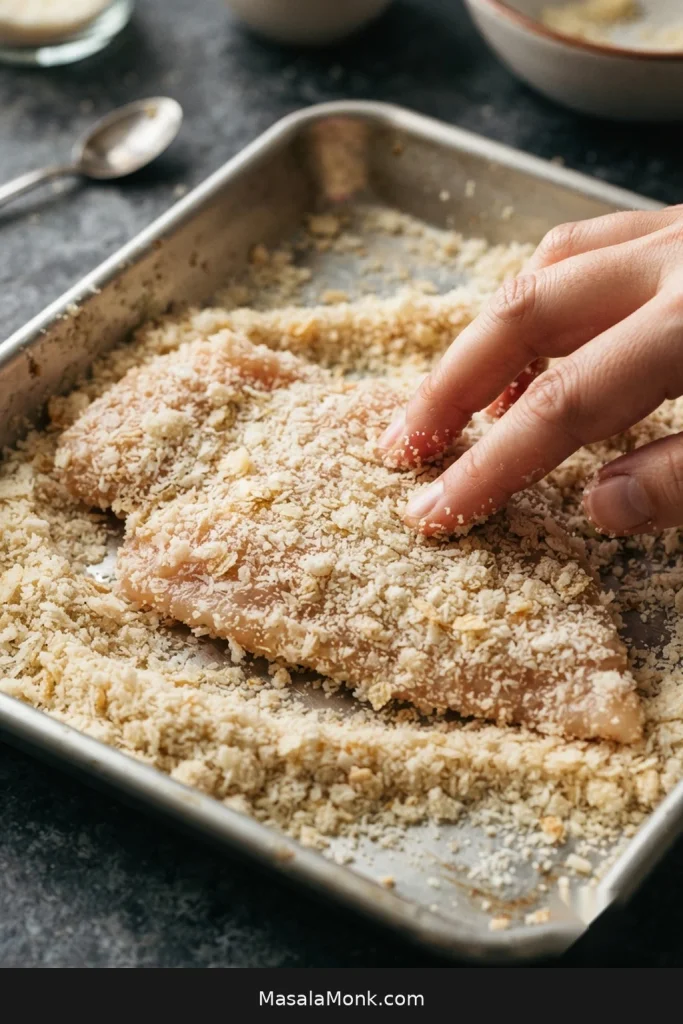
Set the breaded raw cutlet on the clean plate or tray—not on the rack reserved for cooked chicken. Repeat with the remaining pieces, then let them rest for about 10 minutes. That short rest gives the coating time to settle onto the chicken before frying.
Meanwhile, warm the marinara, prepare the finishing cheese, and heat the oil. Position an oven rack about 6 inches / 15 cm from the broiler so the finishing setup is ready later. Discard any flour, egg, or breadcrumb mixture that has touched raw chicken.
4. Heat the oil
Keep the frying oil around 350–365°F / 175–185°C while the chicken cooks. Add enough oil for a shallow layer about ⅛ inch / 3 mm deep, then heat it to about 365°F / 185°C before the first cutlet goes in.
Skillets vary in shape, so use the oil depth—not a fixed volume—as your guide.
As a rough check without a thermometer, drop in a pinch of breadcrumbs. They should sizzle immediately and steadily without turning dark within a few seconds.
5. Fry without crowding the skillet
Add 1 or 2 cutlets at a time—only as many as fit with clear space around them. Fry the first side for about 2–3 minutes, until the coating is deeply golden and feels set.
Read the First Side Before You Flip
Try not to keep lifting the chicken to check underneath. A crust that is ready to turn usually releases more easily. If the cutlet still grips the pan, it generally needs another 20–30 seconds. Give it that time; pulling harder can take the crust with it.
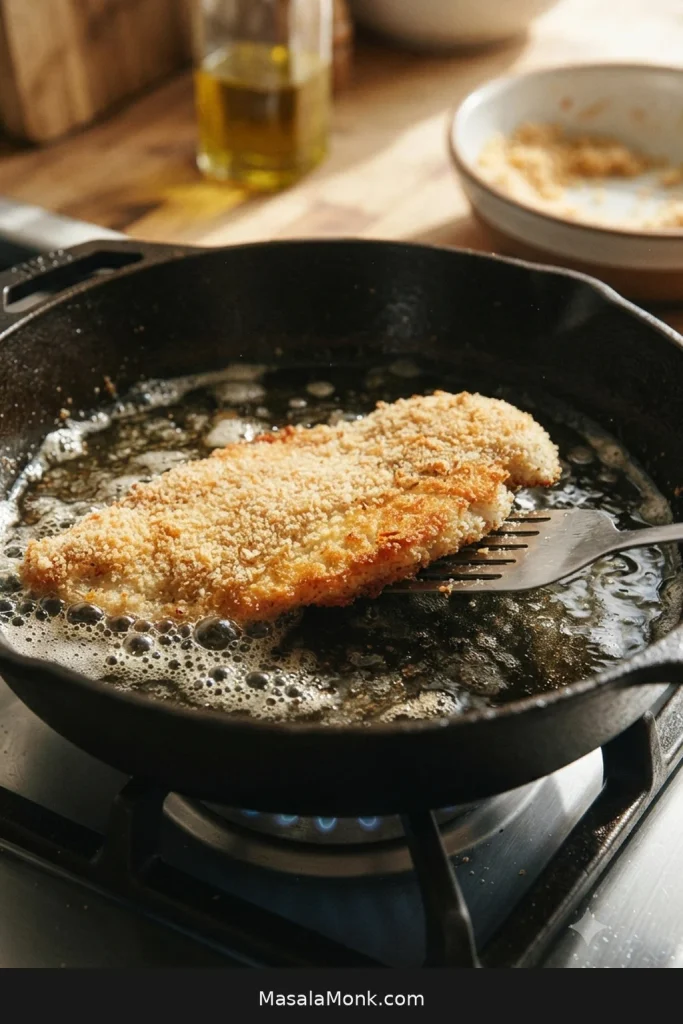
Flip once and cook the second side for about 1½–2½ minutes, adjusting the heat if the coating is darkening too quickly.
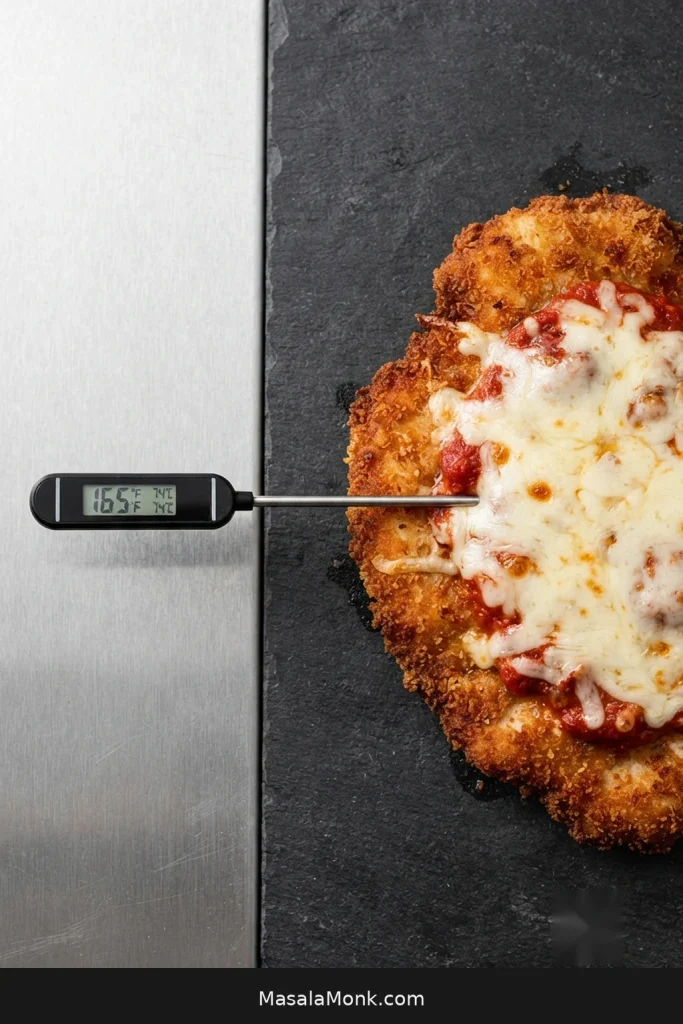
Cook the chicken to 165°F / 74°C in the thickest part. On a thin cutlet, slide the thermometer horizontally in from the side so the tip reaches the center without passing straight through.
Rack the Chicken and Reset the Oil
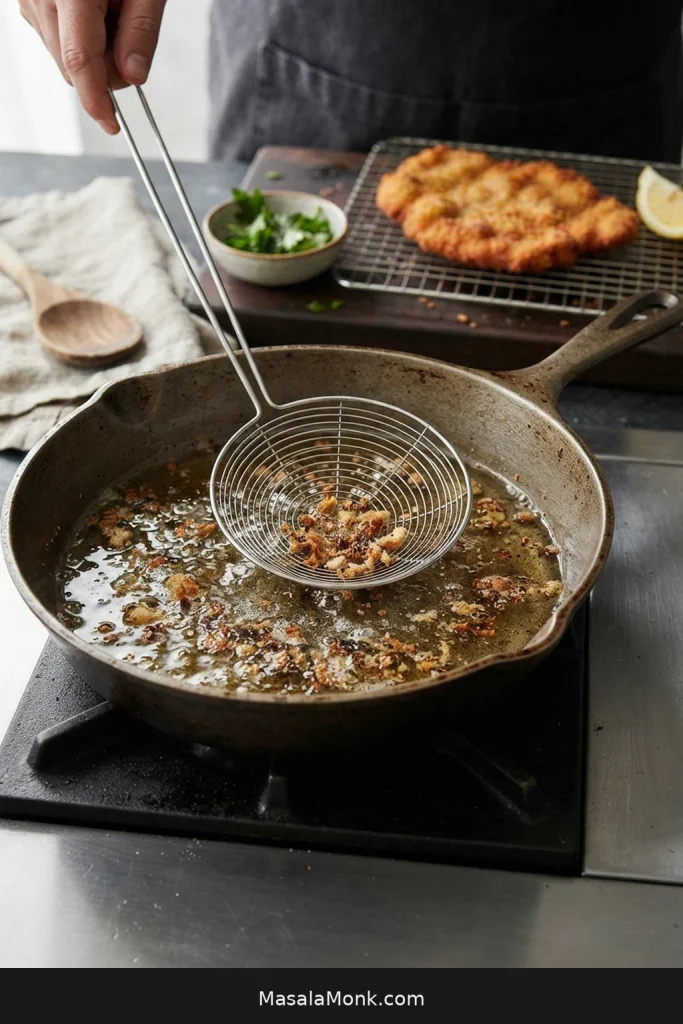
Transfer each cooked cutlet directly to the clean wire rack in one uncovered layer. Repeat with the remaining chicken, letting the oil recover between batches and skimming out obviously dark crumbs as needed.
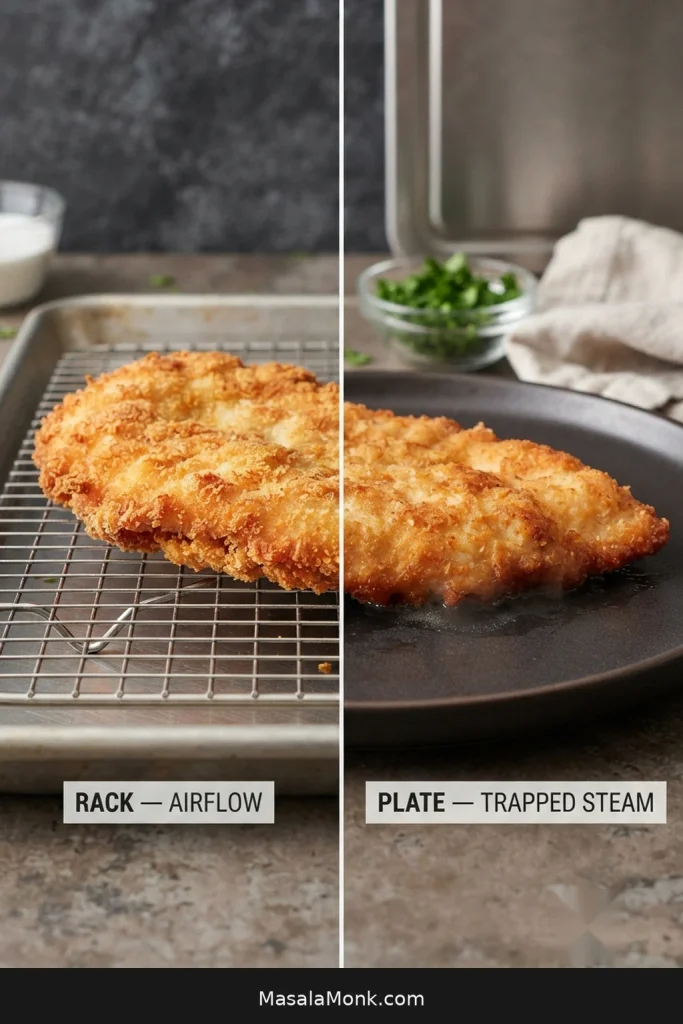
Use the first batch to read the pan. A first cutlet that comes out darker than you wanted has not ruined dinner—lower the heat before the next one goes in. Pale, oily breading means the oil needs time to recover. Scoop out loose dark crumbs while you wait.
6. Heat the broiler and melt the cheese quickly
As the final batch fries, turn on the broiler so it is fully hot when the chicken reaches the rack. Keep the warm marinara and finishing cheese close by; this handoff should move quickly.
If your wire rack and sheet pan are broiler-safe, leave the cooked cutlets on the rack. Otherwise, move them to a clean broiler-safe tray. Divide the mozzarella over the centers, leaving a border of golden breading visible. Sprinkle with the remaining Parmesan.
Broil for about 1–2 minutes, watching continuously. The cheese is ready when the individual shreds have relaxed into one bubbling layer. Follow the cheese rather than the clock; this is a melt, not another cooking stage for the chicken.
7. Add the marinara and serve
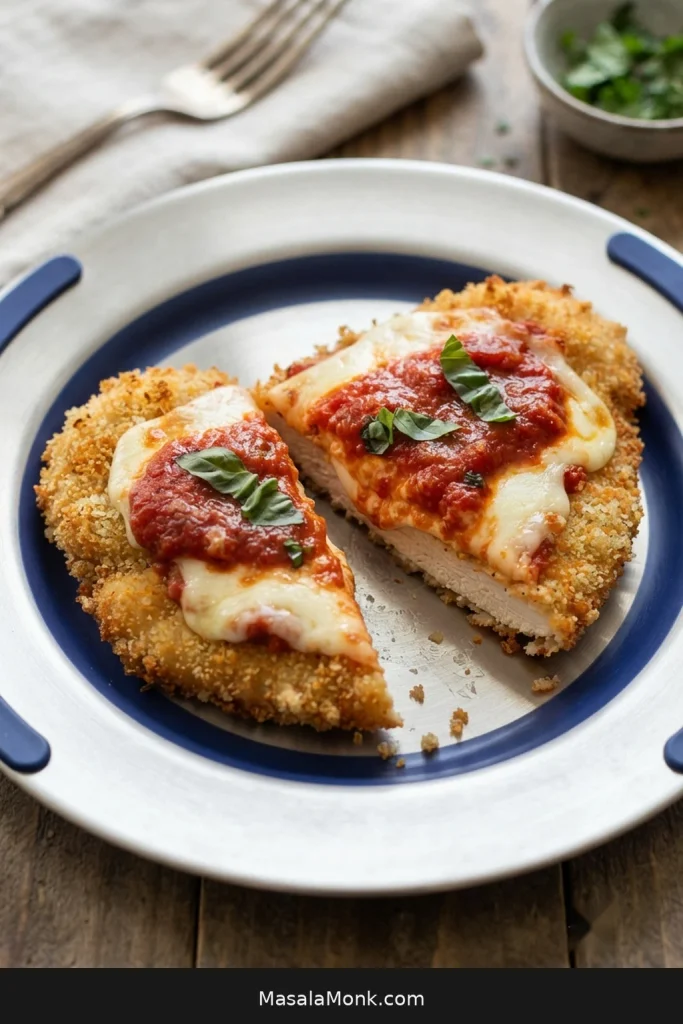
Spoon about 2–3 tablespoons / 30–45 ml of hot marinara mostly over the melted cheese on each cutlet. You should still see a clean band of golden crust around the bubbling cheese and red sauce.
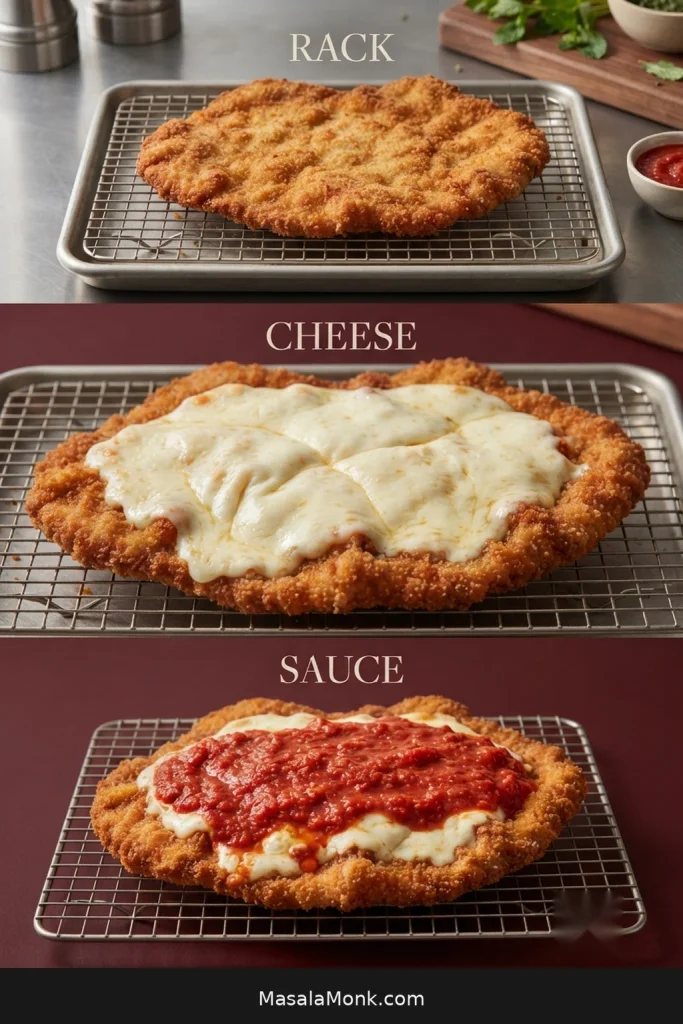
Finish with basil or parsley if you like and serve straight away. Put the remaining marinara on the table or use it for pasta so anyone who wants more sauce can add it without soaking every cutlet in advance.
Recipe Notes
- Thickness controls the timing. Very thin cutlets finish faster; thick spots give the crumbs more time to darken.
- If the marinara is watery, reduce it first. A sauce thick enough for Chicken Parm stays mostly where the spoon puts it instead of leaving a red moat around the cutlet.
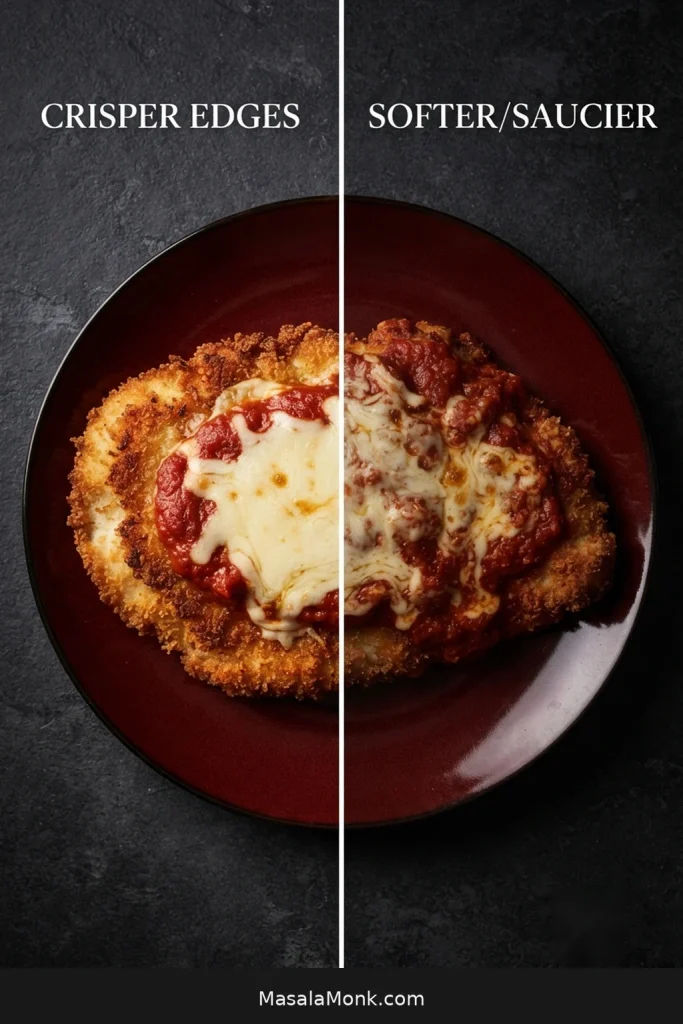
- Prefer a softer, saucier version? Add more marinara before the cheese. The crust will soften faster, but that may be exactly the texture you want.
What the Finished Chicken Parmesan Should Look Like
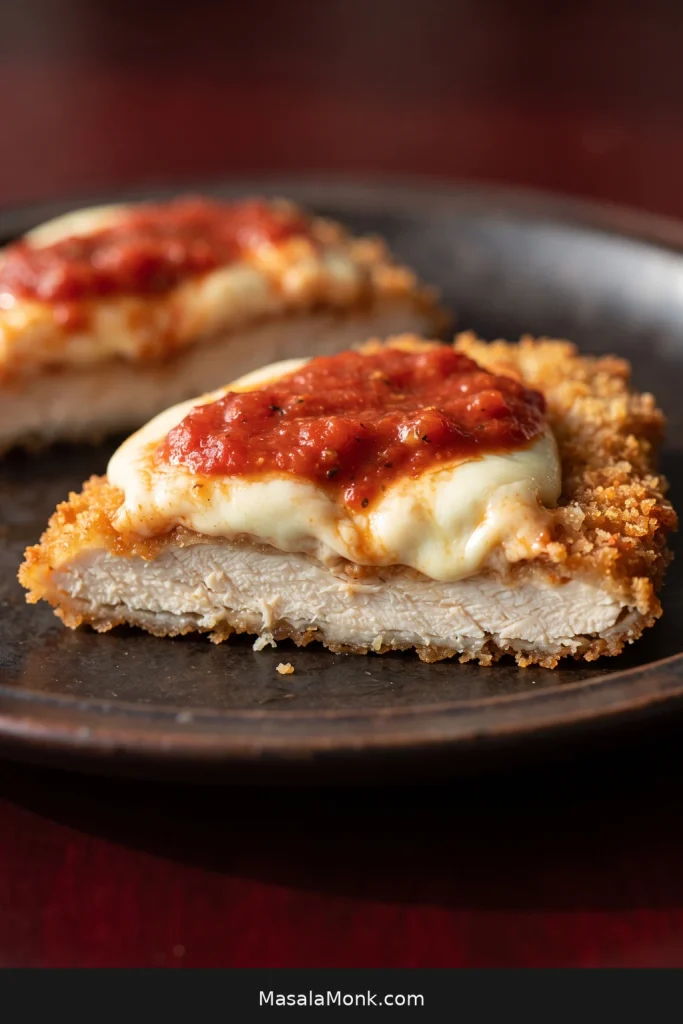
About this recipe: This is a research-led synthesis of established Chicken Parmesan methods and recurring home-cook problems with breading, frying, cheese, sauce, and reheating; it was not developed in a MasalaMonk test kitchen.
The Details That Make Chicken Parmesan Work
The crust depends on a few things working together: the coating has to stay attached, the oil has to stay hot enough, and moisture has to stay controlled once the chicken leaves the skillet. Below, we unpack the places where those pieces most often go wrong—and what to change when they do.
Build the Crust
Finish It
Fix, Save & Serve
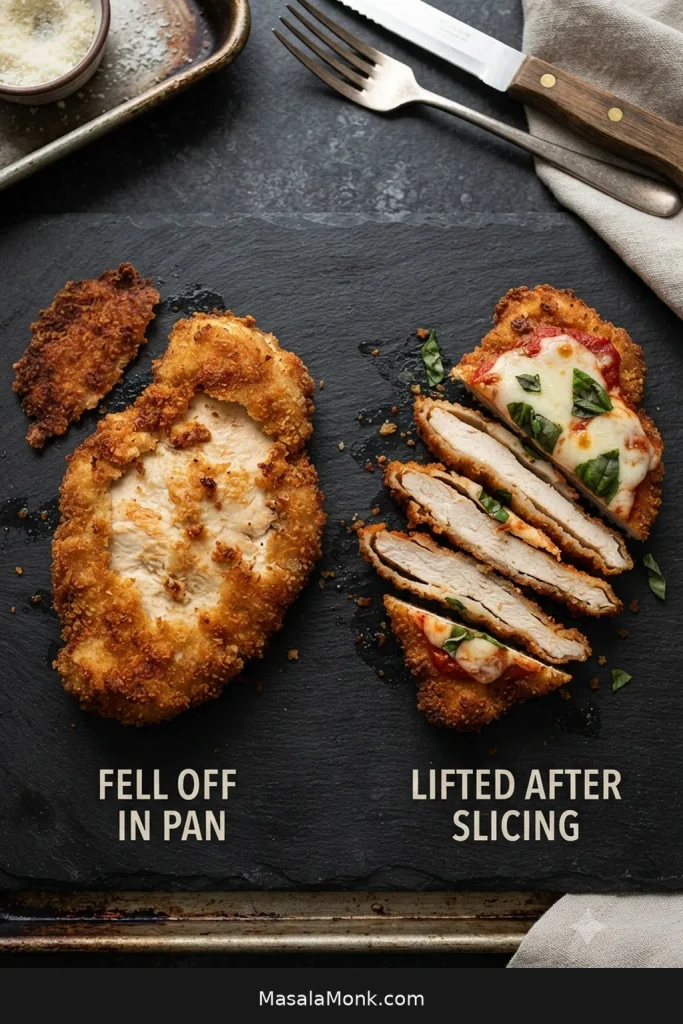
Why Chicken Parmesan Breading Falls Off
There are two common versions of this problem, and they do not fail in quite the same way.
The coating comes off in the pan
Bare patches during frying or flipping often start with moisture on the chicken. Flour grabs much more cleanly onto a dry surface than one that is slick with moisture.
A heavy flour layer can turn pasty; too much egg leaves a slippery layer beneath the crumbs. Shake off the flour, let the egg drip, and press the crumb mixture onto what remains.
Then give the first side time to become a crust. A cutlet that still feels stuck usually needs a few more seconds. If a small patch does come loose, keep cooking—one imperfect spot does not ruin the cutlet.
The crust pulls away when you slice the chicken
Breading that stays intact in the pan but lifts away like a shell when sliced usually points to trapped moisture or an overly thick coating.
Thin chicken shortens that steamy cooking window. Light dredges leave less wet material beneath the crumbs, and the short rest gives the layers time to settle together before they hit the pan.
Cover the chicken completely, but do not build a thick shell.
Panko, Breadcrumbs & Parmesan
Fine crumbs fill the gaps; panko creates rougher, airier edges. Together they give the chicken full coverage without making the crust feel dense.
Only have one kind? All-panko gives a rougher, more open crust; all-fine breadcrumbs make a tighter, more uniform one.
Why Parmesan belongs in the breading
Finely grated Parmesan seasons the coating itself and adds nutty, savory flavor wherever the crumbs brown. It also colors quickly, so the breading still needs plenty of crumb for structure and a little more forgiveness in the skillet.
If you are choosing between supermarket Parmesan, Parmigiano Reggiano, and similar hard cheeses, our guide to Parmesan cheese and its varieties explains the differences in more detail.
What the Frying Oil Is Doing
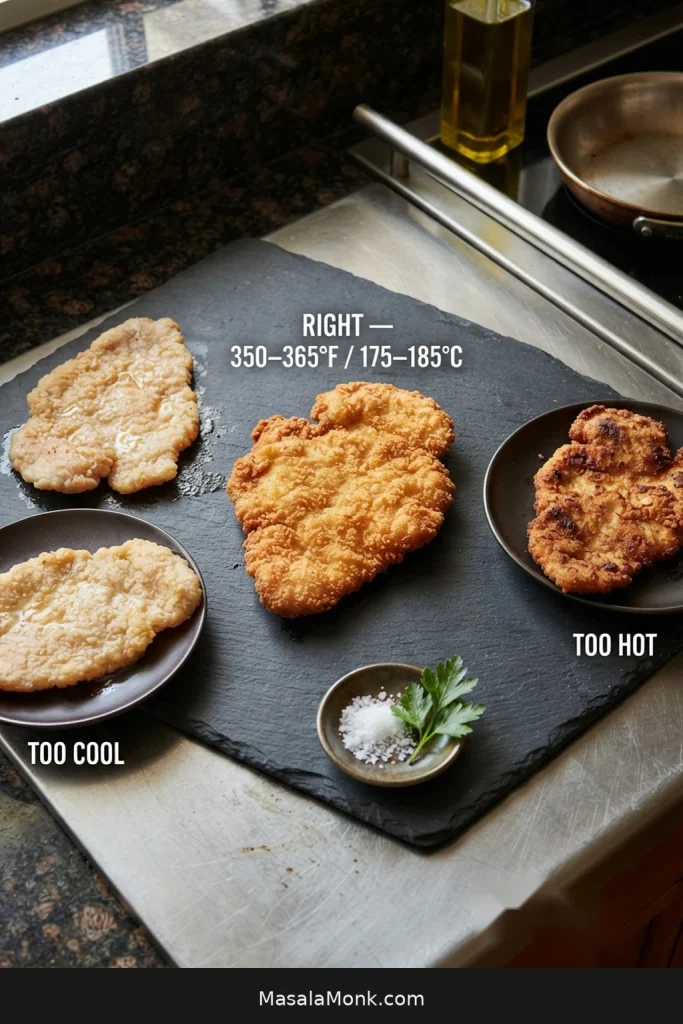
Keep the oil around 350–365°F / 175–185°C while frying.
Cool oil leaves the crumbs shiny and heavy. At the right temperature, the finished crust looks dry and deeply golden, without an oily sheen. Crowding the skillet can drag the temperature down quickly because each cold cutlet absorbs heat from the oil.
Oil that runs too hot sends the coating toward dark brown while the center is still cooking. A first cutlet several shades darker than you wanted is useful information: turn the burner down before batch two.
Later batches have another complication. Loose breadcrumb and Parmesan fragments keep frying after the chicken comes out, gradually changing the oil. Skim the obviously dark pieces and let the temperature recover before adding more chicken.
When Is Chicken Parmesan Done?
A deeply golden crust tells you the breading is ready; it does not tell you whether the center of the chicken is done. Check the thickest cutlet in the batch instead of assuming pieces that look alike will finish at exactly the same moment.
The thickest part should reach 165°F / 74°C, the USDA safe minimum temperature for poultry. On a thin cutlet, slide the thermometer horizontally in from the side so the tip reaches the center without passing straight through.
One piece may be ready while another needs another 30–60 seconds. Move the finished cutlet to the rack and leave the slower one in the skillet. The chicken is already safely cooked before the broiler; that final burst of heat should be just long enough to melt the cheese.
Sauce Last, Not Sauce-Free
Once the chicken is golden and cooked, the next few minutes decide how much of that crust survives. For the crispest Chicken Parmesan, melt the cheese first and spoon thick marinara mainly over the center just before serving.
Some Chicken Parmesan is assembled in a sauced baking dish and baked until everything melds together. That produces a softer style, and plenty of people prefer it.
Use a Thick Marinara
Thin marinara runs straight under the chicken and leaves a red moat around it. A thicker sauce stays mostly where the spoon puts it.
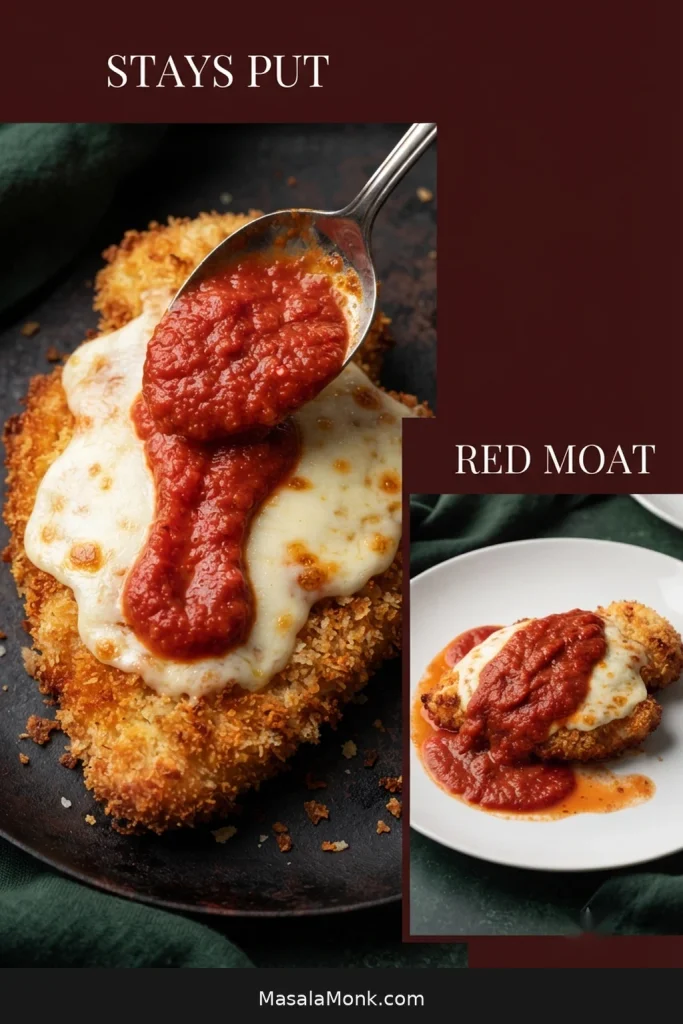
Jarred sauce keeps the weeknight version easy. For homemade, our Marinara Sauce Recipe gives you a bright tomato base; let it reduce enough to fall from the spoon in a thick ribbon for Chicken Parm.
Keep extra sauce hot at the table or use it on pasta. Anyone who wants a saucier plate can add more without every cutlet being soaked in advance.
More sauce gives you a softer, more unified Chicken Parm; keeping it mostly toward the center preserves more of the fried edge.
Low-Moisture Mozzarella Is the Easiest Choice
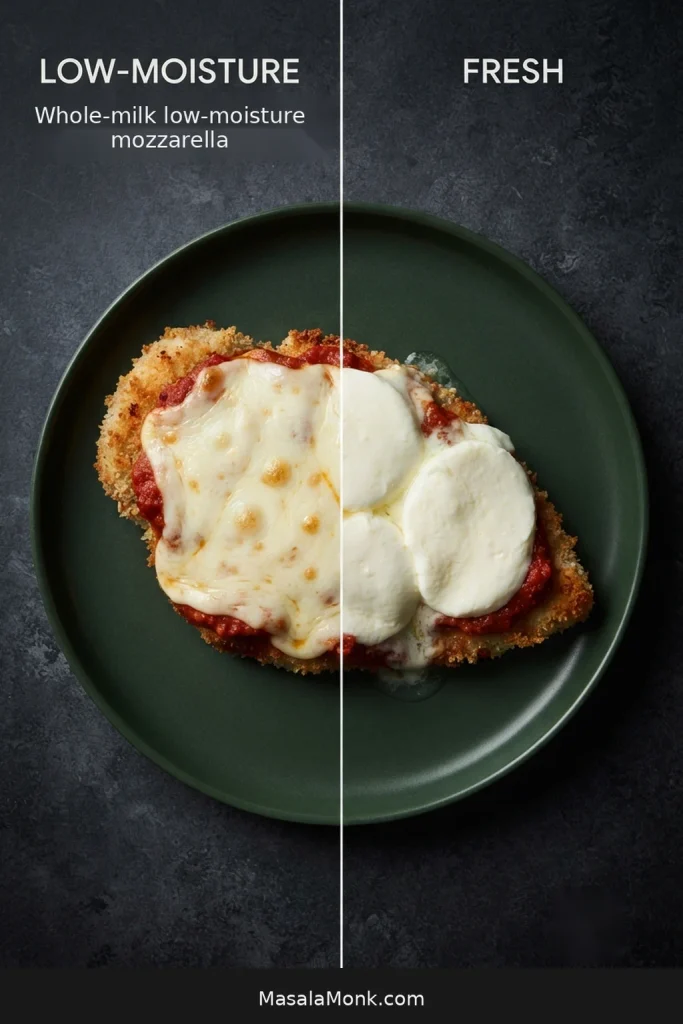
Whole-milk low-moisture mozzarella is the easiest default: it melts readily and brings less free water to the crust than fresh mozzarella. Freshly shredded cheese generally melts more smoothly; pre-shredded saves time.
Fresh mozzarella is a workable alternative if you drain and blot it thoroughly, but expect a softer, wetter finish. Provolone can replace part of the mozzarella when you want a sharper flavor.
Crispy Baked Chicken Parmesan
Want Chicken Parm without standing over a skillet? The baked version works best when the panko gets browned before it ever touches the chicken; otherwise the meat can finish before the crust develops enough color.
Jumped straight here? Use these quantities for the baked version:
Chicken
- 1½ lb / 680 g boneless, skinless chicken breasts or thin chicken cutlets
- 1 teaspoon / about 6 g fine sea salt
- ½ teaspoon black pepper
Breading
- ½ cup / 60 g all-purpose flour
- 2 large eggs + 1 tablespoon / 15 ml water
- 1 cup / about 60 g panko breadcrumbs
- ½ cup / about 55 g fine dry breadcrumbs
- ½ cup / about 45 g finely grated Parmesan
- 1 teaspoon garlic powder
- ½ teaspoon dried Italian seasoning, optional
- 2 tablespoons / 30 ml olive oil
Finish
- 6 oz / 170 g low-moisture mozzarella
- ¼ cup / about 22 g finely grated Parmesan
- 1½ cups / 360 ml thick marinara, warmed
- Fresh basil or parsley, optional
1. Brown the panko first
Heat the oven to 425°F / 218°C. Toss the panko with 2 tablespoons / 30 ml olive oil on a rimmed sheet pan and spread it into an even layer. Bake for about 8–10 minutes, stirring halfway, until the panko is golden.
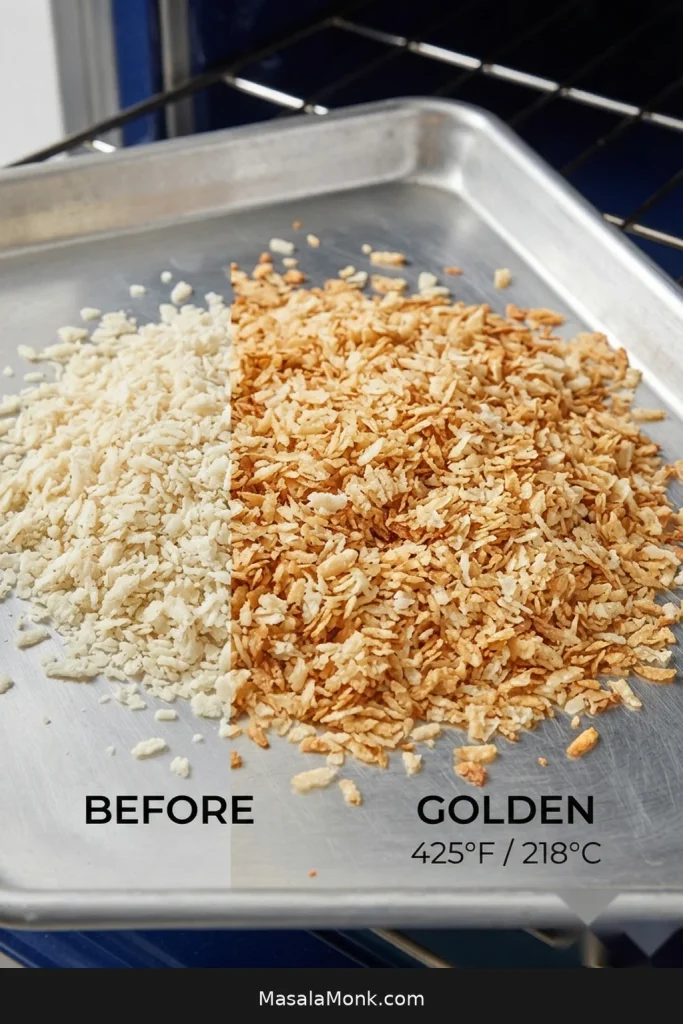
Let it cool briefly, then combine it with the fine breadcrumbs, ½ cup / 45 g Parmesan, garlic powder, and Italian seasoning. Raise the oven temperature to 450°F / 232°C while you bread the chicken.
2. Prepare and bread the chicken
Slice thick chicken breasts horizontally into 4 cutlets, then gently even out bulky spots to about ⅓ inch / 8 mm. Pat the chicken dry and season with the salt and black pepper. If you started with thin store-bought cutlets, simply even out any noticeably thick spots before drying and seasoning.
Coat each cutlet lightly in flour, dip in the beaten egg mixture and let the excess drip away, then press firmly into the browned panko mixture. Rest the breaded chicken for 10 minutes.
3. Bake at 450°F Until 165°F, About 10–14 Minutes
Set an oven-safe wire rack over a clean rimmed sheet pan and grease the rack lightly. Arrange the cutlets with space between them.
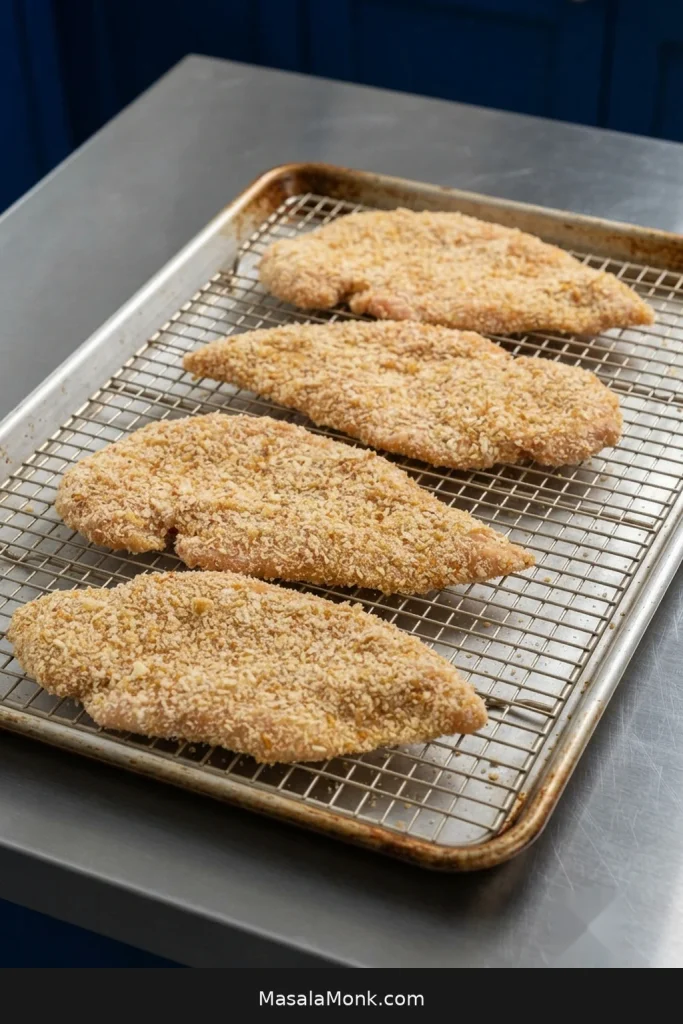
Begin checking around 10 minutes. Thin cutlets will commonly need roughly 10–14 minutes. The timer gets you close; pull the chicken when the thickest part reaches 165°F / 74°C.
4. Melt the cheese and add the sauce
Switch the oven to broil. The chicken should sit roughly 6 inches / 15 cm below the broiler element; if your baking position is lower, carefully move the sheet pan to a higher oven rack. If the wire rack and sheet pan are broiler-safe, leave the chicken in place. Otherwise, move the cutlets to a clean broiler-safe tray.
Add the mozzarella and finishing Parmesan, then broil only until the cheese melts into a bubbling layer. Spoon hot marinara over the center and serve.
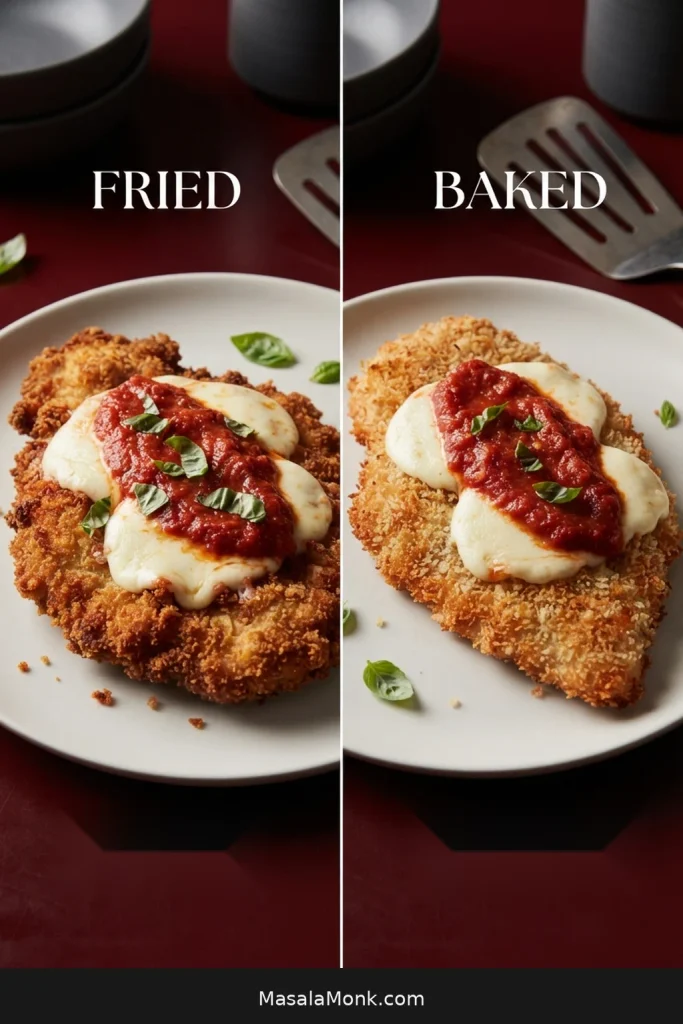
Fried vs Baked Chicken Parmesan
| Method | Fried | Baked |
|---|---|---|
| Crust | Deepest, most even crunch | Lighter, still crisp when the panko is pre-browned |
| Oil | Shallow layer in skillet | 2 tbsp / 30 ml on the panko |
| Hands-on cooking | Cook in batches | Mostly oven time |
| Best for | Classic fried texture | Less stovetop frying and cleanup |
For an air-fryer route, our Air Fryer Fried Chicken Breast covers thin breaded cutlets, spacing, oil mist, flipping, and doneness in detail. Once the chicken is crisp, use the cheese-and-marinara finish from this recipe.
Chicken Parmesan Troubleshooting
If one of those handoffs went wrong, match what you saw to the part of the process that caused it. Most problems need one adjustment, not a complete restart.
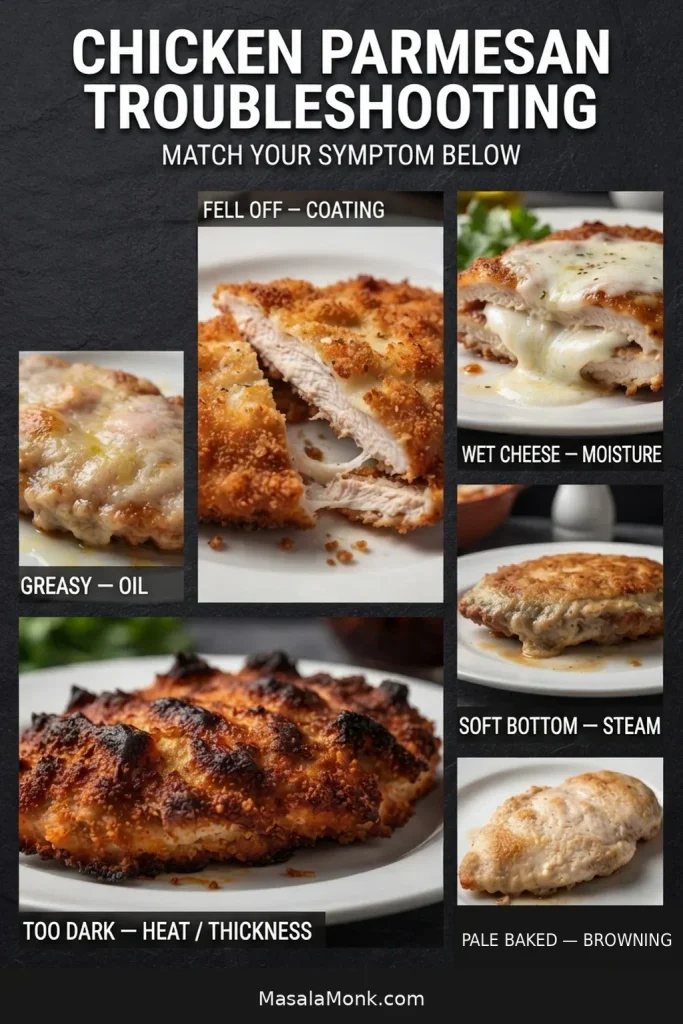
Crust, Oil & Doneness Problems
| What You Saw | Likely Cause | What to Change |
|---|---|---|
| Breading fell off in the pan | Wet chicken, heavy flour/egg layers, no setting time, or turning too early | Pat dry, shake off excess flour, drain the egg, press crumbs on, rest 10 minutes, and let the first side set |
| Crust separated like a shell when sliced | Trapped moisture or an overly thick coating | Keep the dredges light, use thin even cutlets, and avoid unnecessarily long cooking |
| Coating looked greasy | Oil was too cool or the skillet was crowded | Let the oil recover and fry only as many cutlets as fit with clear space around them |
| Crumbs were dark before chicken was done | Chicken was too thick or the oil was too hot | Even out bulky spots and reduce the heat before the next batch |
| Chicken was dry | Cutlets were very thin, fried too long, or spent too long under the broiler | Use the thermometer, keep the broiler finish brief, and stop as soon as the cheese melts |
Moisture, Cheese & Baked Problems
| What You Saw | Likely Cause | What to Change |
|---|---|---|
| Bottom turned soft before sauce | Hot chicken sat on a plate, was stacked, or was covered | Move cooked cutlets straight to a wire rack in one uncovered layer |
| Chicken went soggy after assembly | Too much sauce contact or too much waiting time | Use thick marinara near serving time and keep some fried edge exposed |
| Later batches had black specks or bitterness | Loose breadcrumb and Parmesan debris burned in the oil | Skim out dark crumbs and let the oil recover between batches |
| Mozzarella released water | High-moisture cheese | Use low-moisture mozzarella or drain and dry fresh mozzarella thoroughly |
| Cheese slid off in one sheet | A slick sauce layer sat beneath heavily melted cheese | Melt the cheese directly on the cutlet and spoon marinara over it afterward |
| Baked coating stayed pale or soft | Panko was not pre-browned, oven heat was too low, or steam collected underneath | Brown the panko first, bake hot, space the chicken, and use a rack |
Make Ahead Without Making It Soggy
If dinner has to happen in stages, Chicken Parm handles that well as long as the sauce and cheese stay out of the way until the final finish.
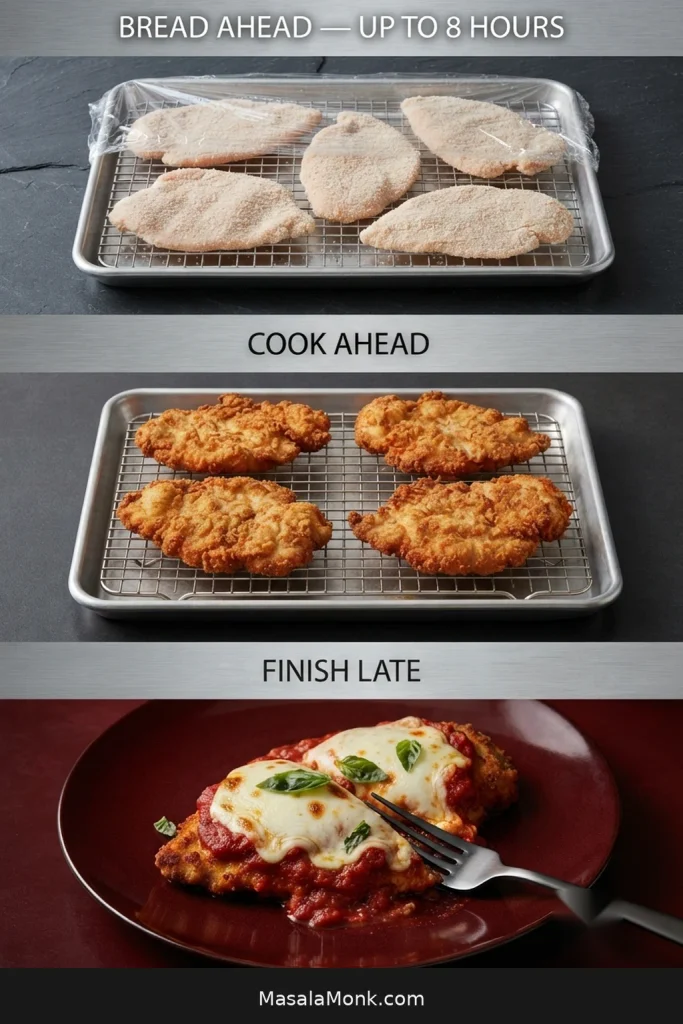
Bread ahead: Bread the cutlets up to about 8 hours ahead, cover and refrigerate them in one layer, then fry close to serving time.
Cook ahead: Cook the chicken fully, leave it unsauced, and refrigerate it promptly. Reheat with dry heat, add the cheese, broil briefly, and finish with hot marinara.
Do not partially cook poultry, chill it, and plan to finish cooking it later.
Shortcut Chicken Parm With Frozen Breaded Chicken
If the package says the breaded chicken is fully cooked, cook it according to the package directions until hot and crisp, then add mozzarella and Parmesan, melt the cheese, and spoon on hot marinara. Some frozen breaded chicken products are raw or only partly cooked despite looking browned, so follow the label carefully.
Store, Freeze & Reheat
Fridge: refrigerate leftovers promptly and use them within 3–4 days.
Freeze: cool the cooked cutlets and freeze them without sauce. Wrap well, separate layers with parchment if needed, and use within about 4 months for best quality. Add the cheese and marinara after reheating.
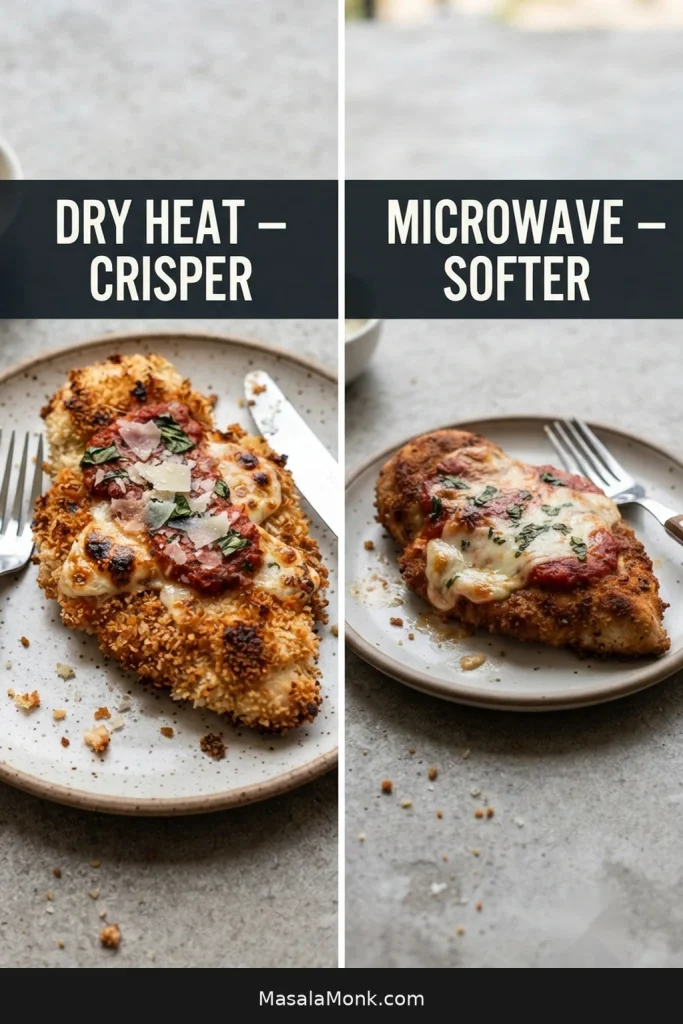
Reheat: an oven, toaster oven, or air fryer gives the coating the best chance of crisping again. Heat cooked leftovers to 165°F / 74°C in the center. The microwave is faster, but expect a softer crust.
What to Serve with Chicken Parmesan
For the classic plate, serve Chicken Parmesan with spaghetti, linguine, or another simple pasta and put the extra marinara on the pasta instead of beneath the chicken. A fresher counterpoint comes from Green Beans Almondine, with lemon and toasted-almond crunch against the rich cutlet.
Homemade garlic bread takes the meal firmly into red-sauce comfort-food territory. If what you really want is Chicken Parm in a roll, the Chicken Parmesan Sandwich handles the bread, sauce placement, and broiler timing as its own recipe.
Chicken Parmesan FAQs
Is Chicken Parmesan the same as chicken parmigiana?
In everyday American usage, Chicken Parmesan, chicken parm, and chicken parmigiana generally refer to the same Italian-American dish: breaded chicken cutlets with tomato sauce and cheese. Recipes differ in how heavily the chicken is sauced, which cheeses are used, and whether the cutlets are fried or baked.
Can I make Chicken Parmesan gluten-free?
Yes. Replace the all-purpose flour with a dependable gluten-free all-purpose blend and use gluten-free panko or breadcrumbs. Keep the same light dredges, pressed coating, and short rest before cooking.
The Final Forkful
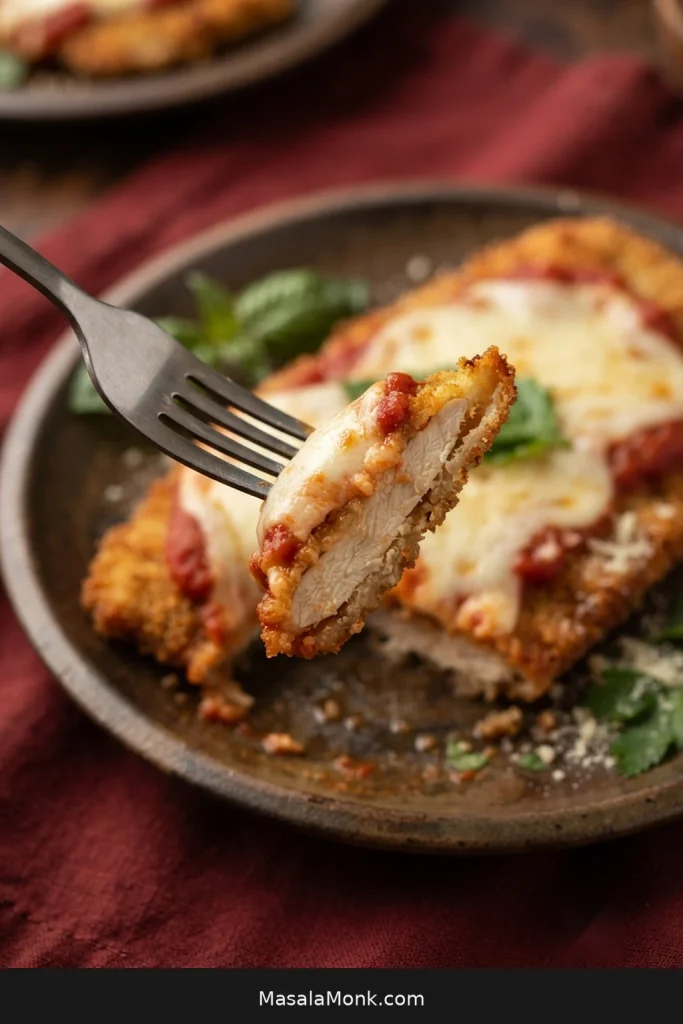
Serve it while the mozzarella is still bubbling and the marinara is hot. The best forkful catches juicy chicken, tomato, and melted cheese with one golden edge still exposed.








