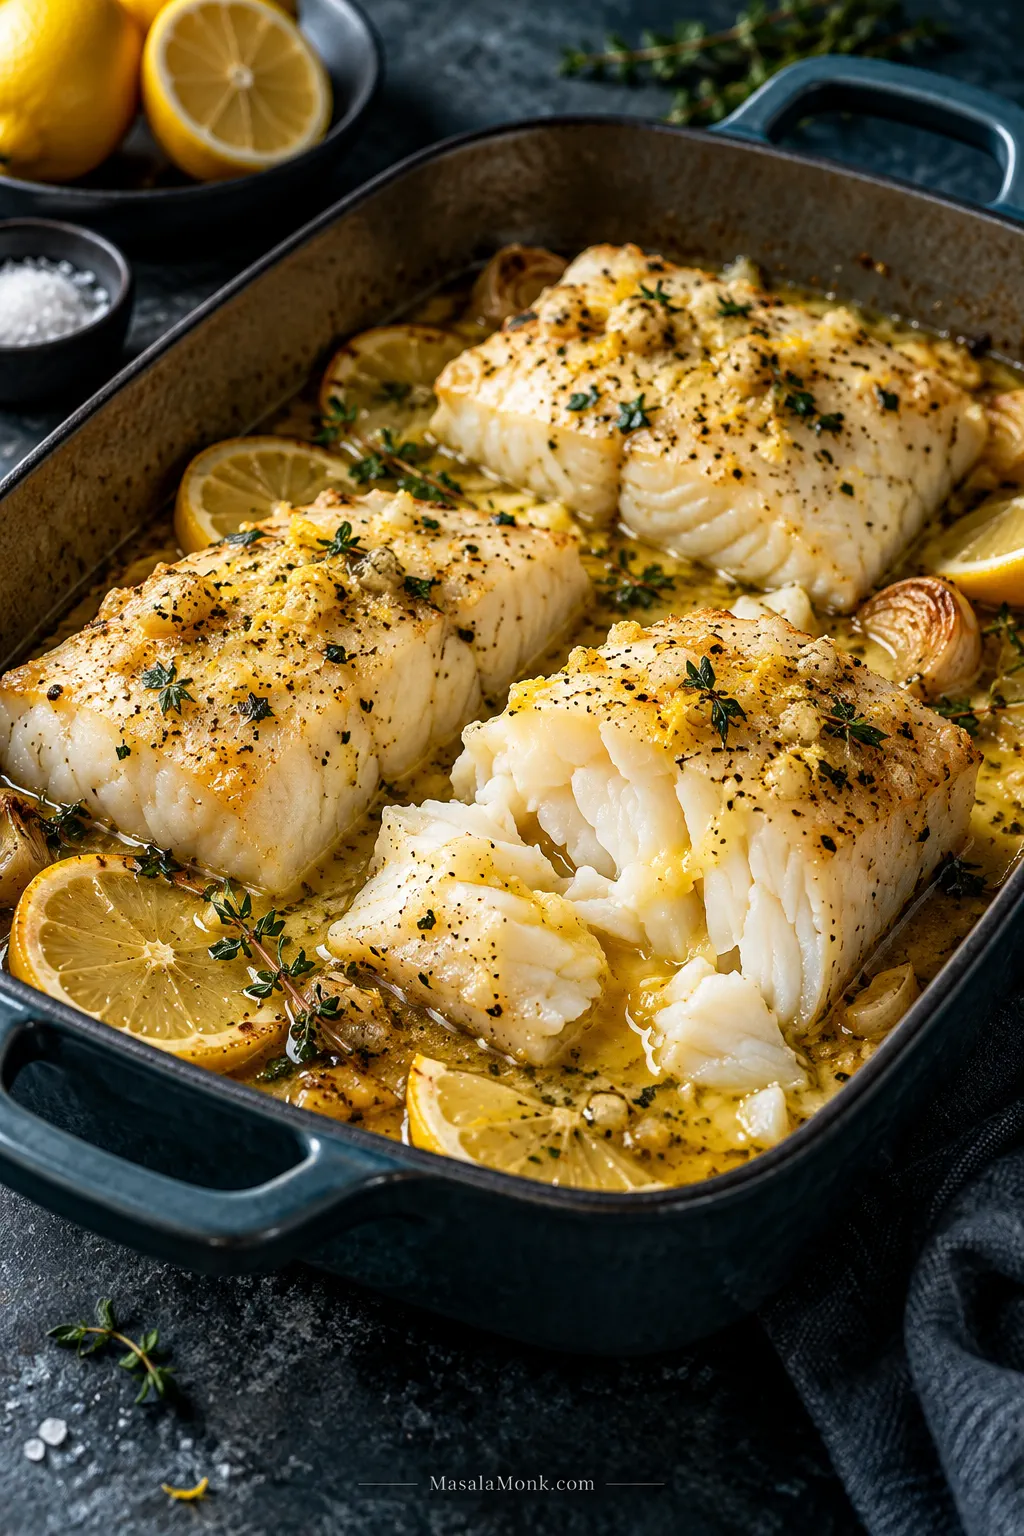
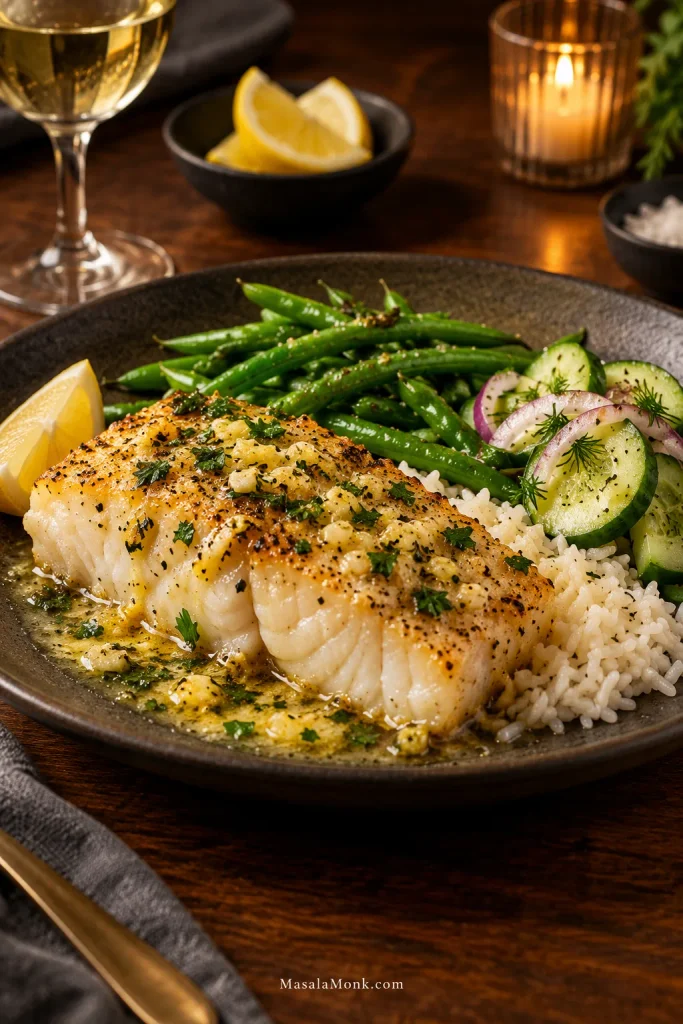
Tender white flakes, warm lemon garlic butter and a squeeze of fresh lemon just before you eat. That’s what this baked cod recipe is about. A handful of familiar ingredients, one baking dish and plenty of buttery pan juices to spoon over the fish.
The only tricky part is the cod itself. It doesn’t always come in neat, matching pieces, and two portions of the same weight can cook quite differently when one is broad and thin and the other is a thick loin. This recipe gives you the lemon-garlic butter; the useful bit is knowing how to read the piece of fish you actually bought.
Cod is mild and lean, with large, tender flakes when it’s cooked well. Pat it dry, season it directly and bake it uncovered at 400°F / 205°C. There’s no breading, flipping or skillet sear to manage. The timer tells you when to start paying attention; the thickest part tells you when dinner is ready.
Choose four portions that are reasonably similar in thickness and a shallow baking dish that holds them comfortably in one layer.
Serves 4
Prep About 10 minutes
Cook About 10–20 minutes for most portions
Total About 20–30 minutes
Oven 400°F / 205°C
Typical Thickness About ¾–1¼ in / 2–3 cm
Doneness 145°F / 63°C
Equipment: shallow 9×13-inch / 23×33-cm baking dish or similarly sized pan, small bowl, paper towels and an instant-read thermometer.
Ingredients
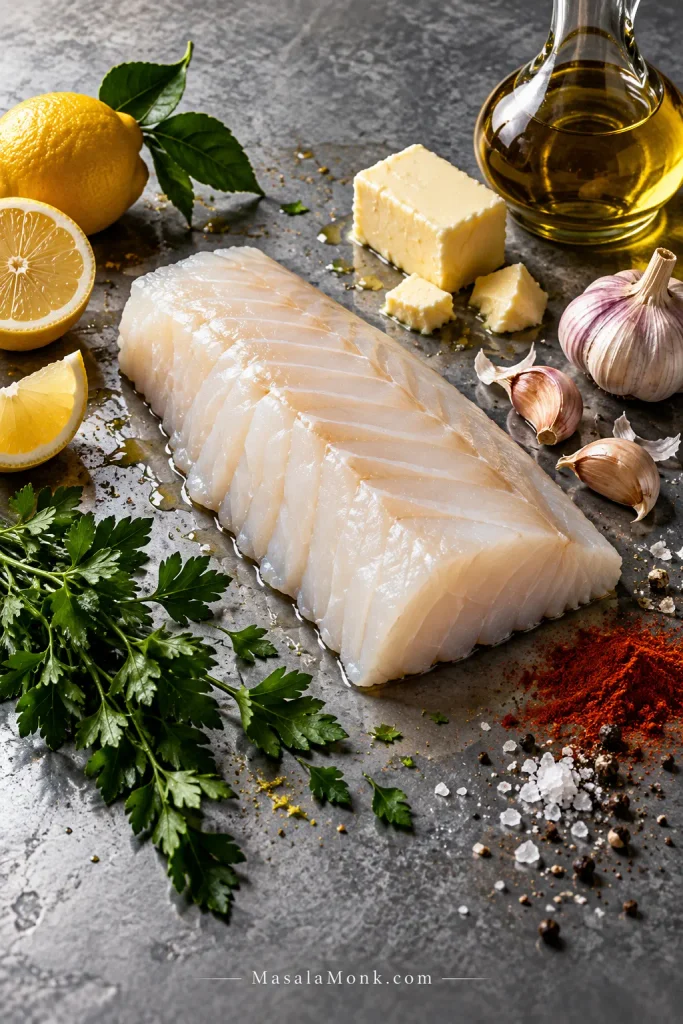
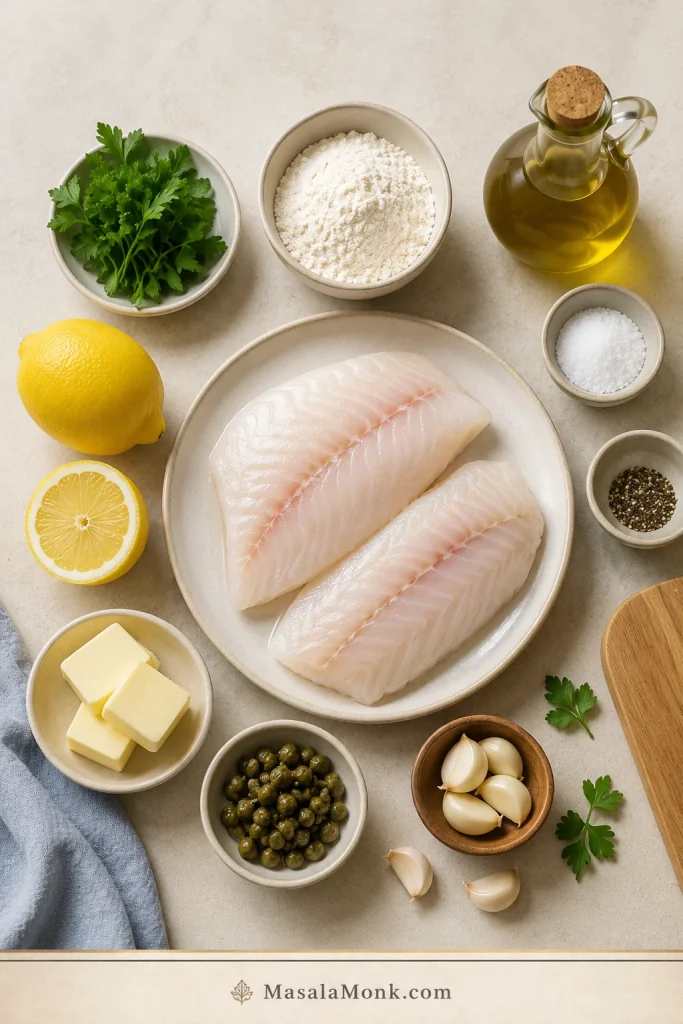
1½ lb / 680 g skinless cod fillets or loins, divided into 4 portions of about 6 oz / 170 g each
3 tbsp / 42 g unsalted butter, melted
1 tbsp / 15 ml olive oil
3 medium garlic cloves, finely minced or grated
1½ tbsp / 22 ml fresh lemon juice, divided, plus lemon wedges for serving
1 tsp finely grated lemon zest
¾ tsp fine sea salt
½ tsp sweet paprika
¼ tsp freshly ground black pepper
2 tbsp chopped fresh parsley
Each ingredient has a different job here: zest brings aroma, juice brings acidity, butter carries the garlic, and paprika adds gentle warmth without overwhelming the mild cod.
Check the package before adding salt. Some frozen cod may contain added salt or brine. If yours does, start with less.
How to Make It
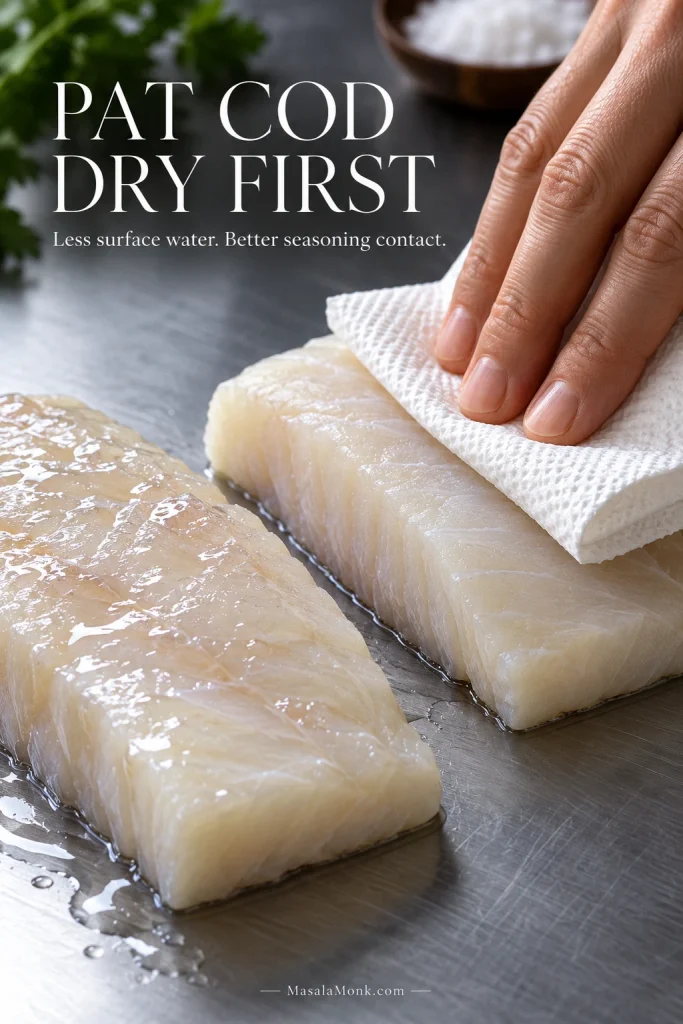
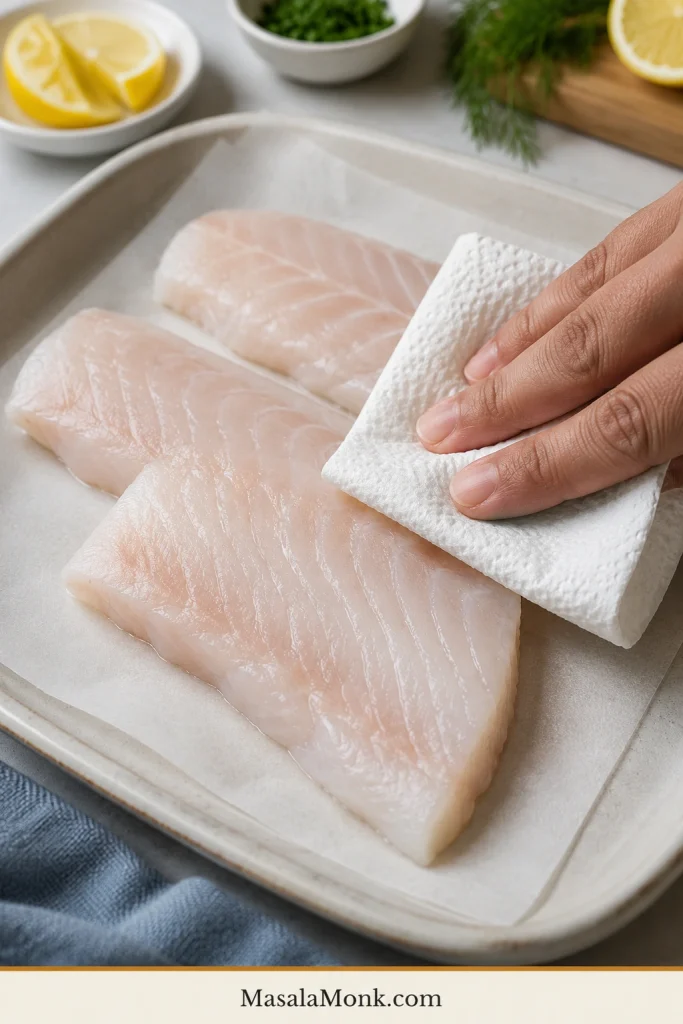
Preheat and dry. Heat the oven to 400°F / 205°C and lightly grease the baking dish. Remove any obvious pin bones, then pat the cod thoroughly dry on every side.
First, dry until the surface loses its wet shine. That gives the seasoning direct contact with the cod and reduces the amount of stray water entering the baking dish.
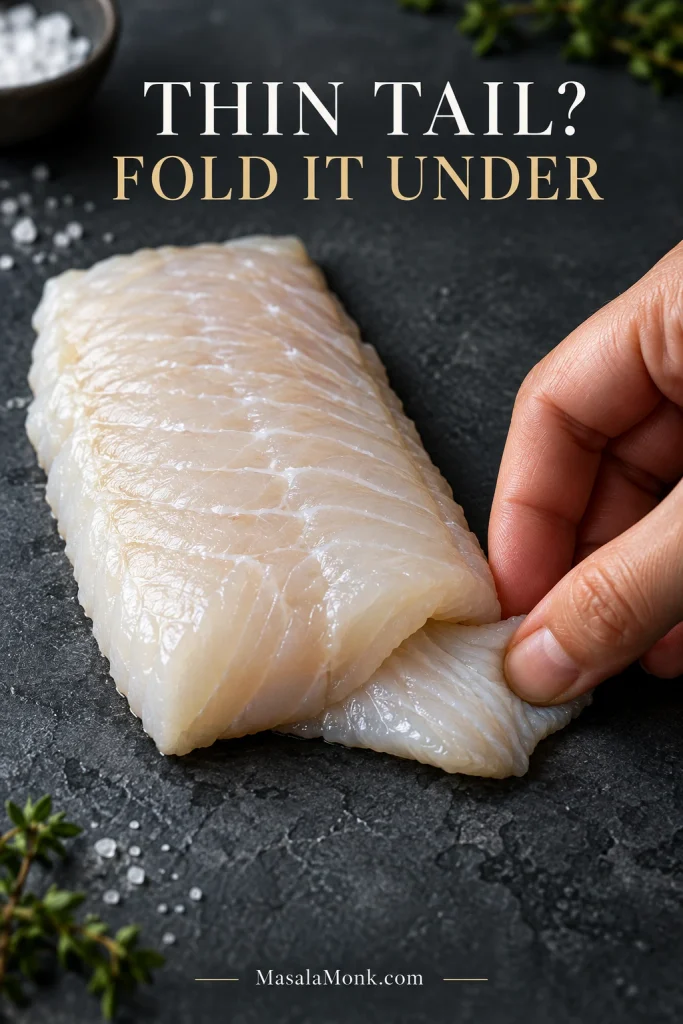
Arrange and season. Set the portions in a single layer with a little room between them. Fold a very thin tail underneath itself so it doesn’t dry out before the thicker part is done. Season the fish directly with salt, paprika and black pepper.
If only the last inch or two becomes dramatically thinner, tuck just that section underneath. The goal is a more even profile, not a doubled-up lump of fish.
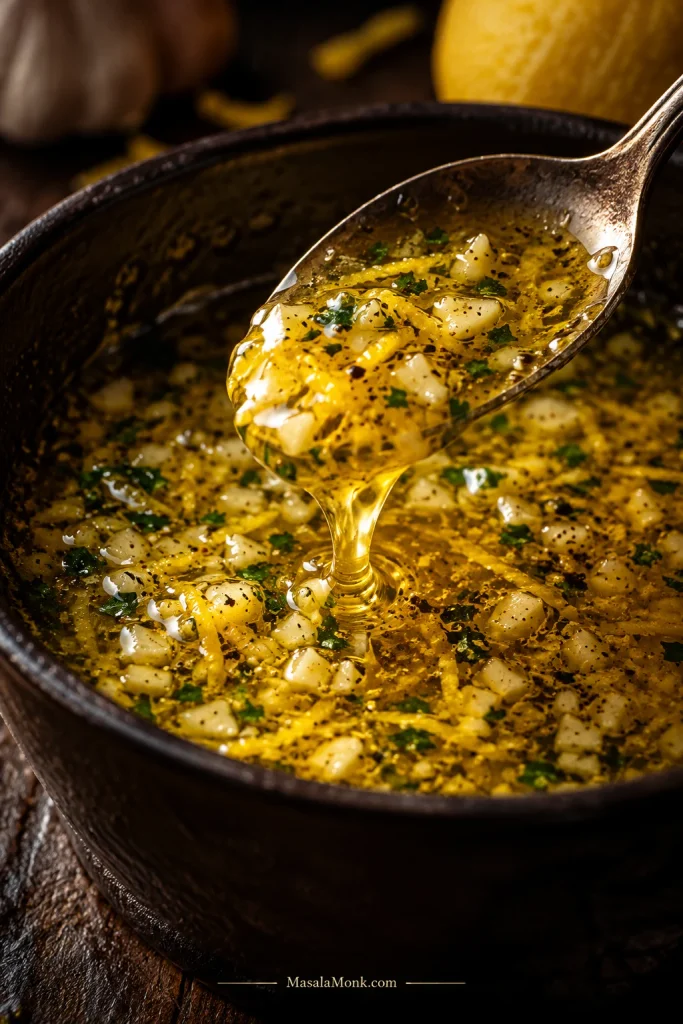
Mix the butter. Stir together the melted butter, olive oil, garlic, lemon zest and 1 tbsp / 15 ml of the lemon juice.
For even flavor, disperse the garlic and lemon zest through the melted butter before spooning it over the fish; otherwise the aromatics tend to collect unevenly between portions.
Spoon it over. Coat each piece with the lemon-garlic butter, letting a little run into the dish. Leave the pan uncovered.
Bake, Check and Finish
Bake and check. Begin checking according to the thickness guide below. Uneven pieces may be ready at different times.
Finish. Take each portion out when the center reaches 145°F / 63°C. Add the remaining ½ tbsp / 7 ml lemon juice and scatter with parsley.
No flipping needed. Cod becomes delicate as it cooks. Leave it alone in the oven, then slide a broad spatula underneath each piece when you’re ready to serve.
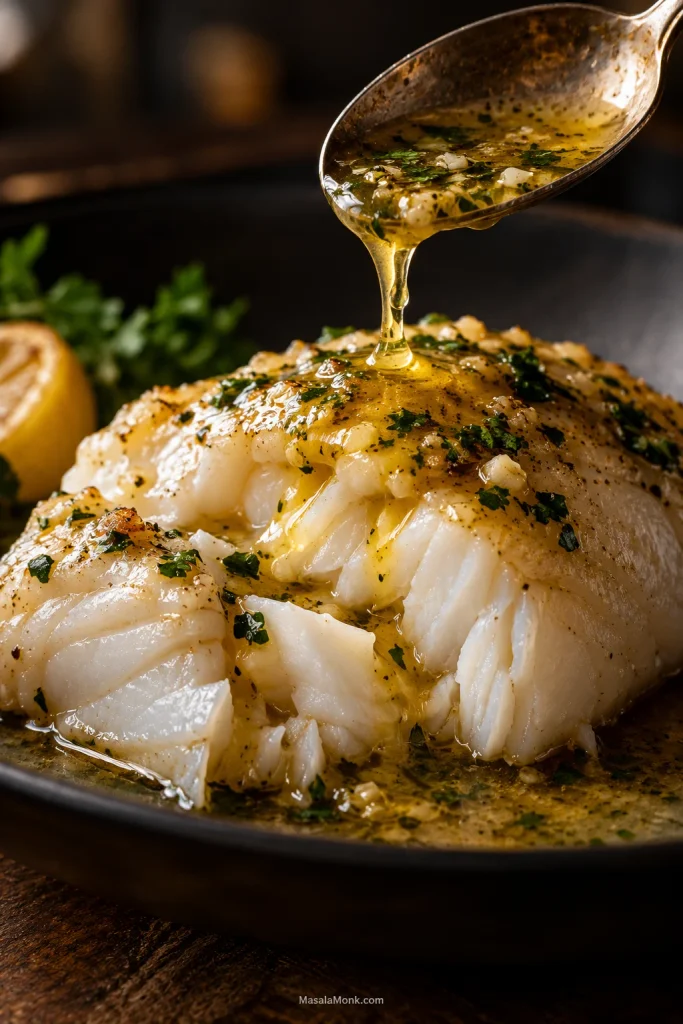
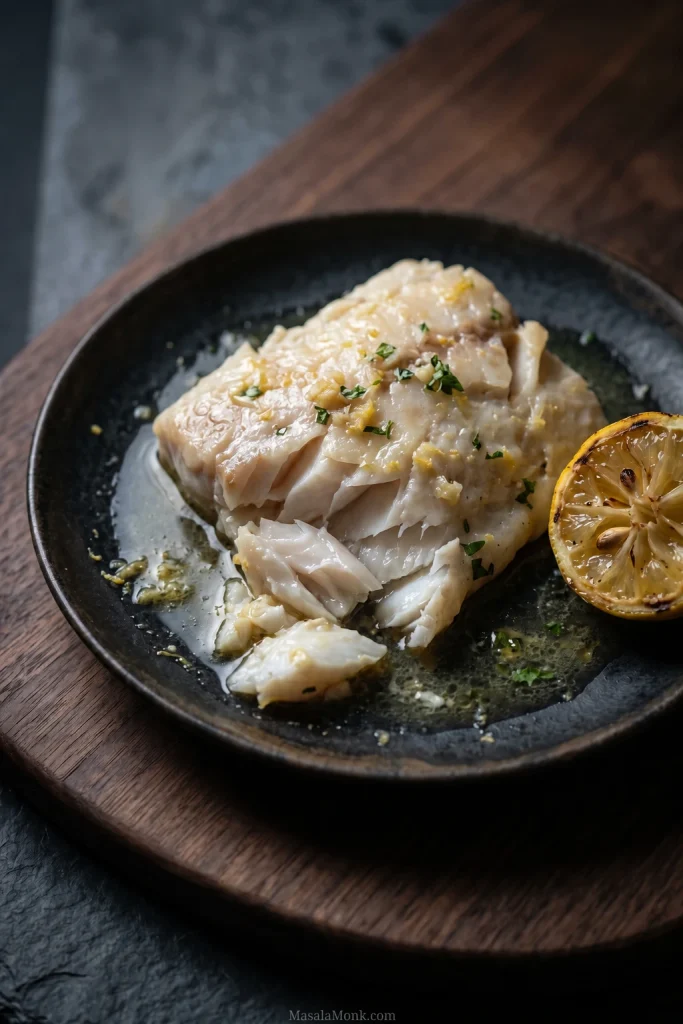
Don’t leave the butter behind. Spoon those warm, garlicky juices over the flakes before the plates reach the table.
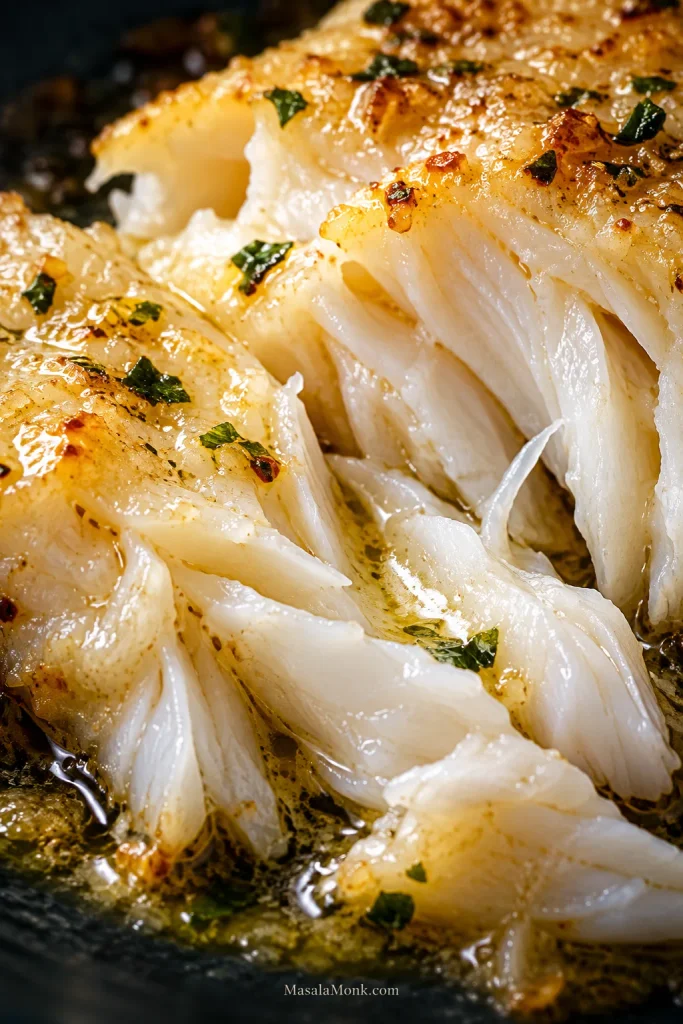
Warm pan butter slips into the opened flakes instead of sitting only on the surface.
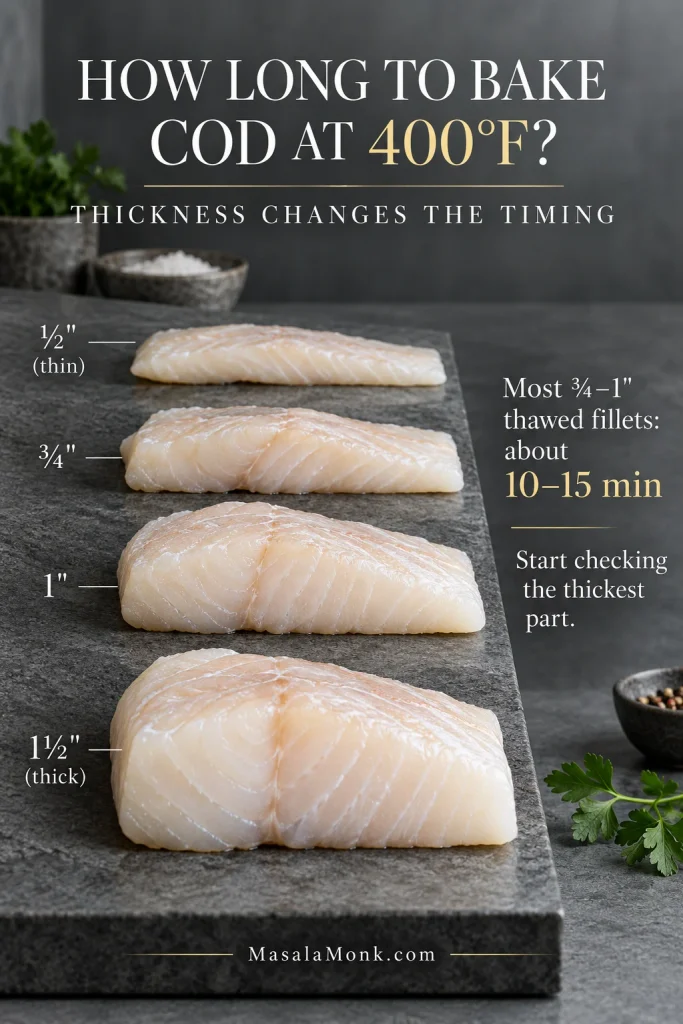
At 400°F / 205°C, most fully thawed cod fillets around ¾–1 inch thick take approximately 10–15 minutes. A thin tail may finish sooner; a substantial loin can need 15–20 minutes or more.
Thickness
Typical piece
Start checking
Approximate bake time
½ in / 1.3 cm
Thin fillet or tail
About 7 min
About 7–10 min
¾ in / 2 cm
Regular fillet
About 9 min
About 9–13 min
1 in / 2.5 cm
Thick fillet
About 11 min
About 11–15 min
1¼–1½ in / 3–4 cm
Thick loin
About 14 min
About 15–20+ min
You don’t need to predict the exact finishing minute. Start checking at the first number in the table. If you’re not sure how your piece compares, see how fillet and loin shape change the timing.
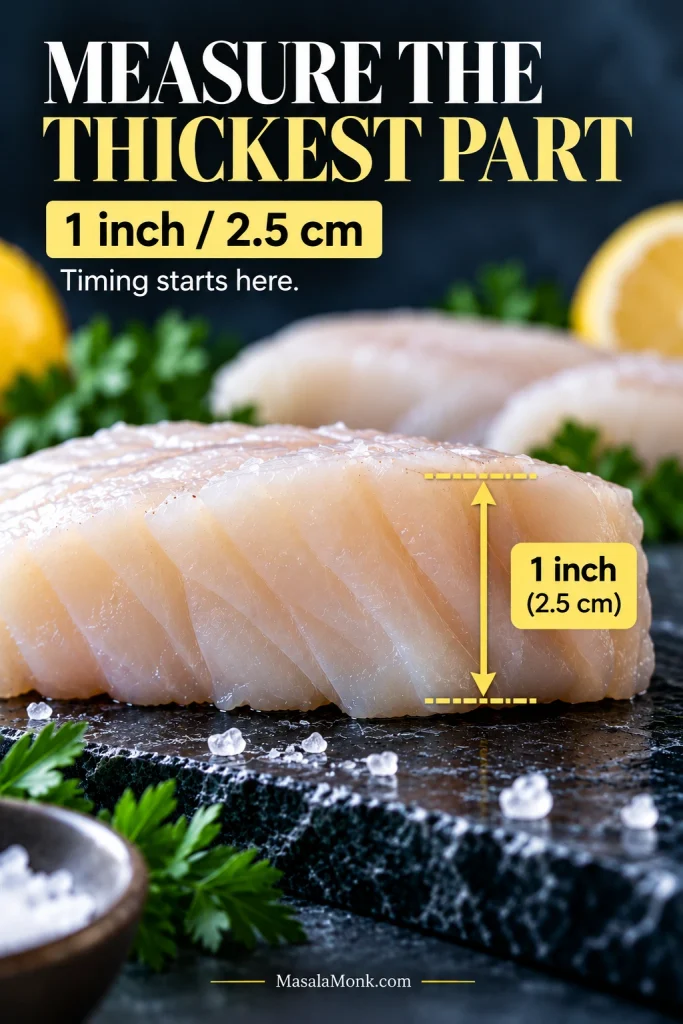
At 400°F, the height of the fish is more useful than its weight for deciding when to start checking. Use the thickest part of the fillet as your guide.
Measure the fish at its thickest point before you compare it with the timing guide.
Take the thickness vertically through the deepest section of flesh; width, length and the sloping top surface do not tell you how far heat must travel to reach the center.
Cod Fillet vs Loin: Look at the Shape
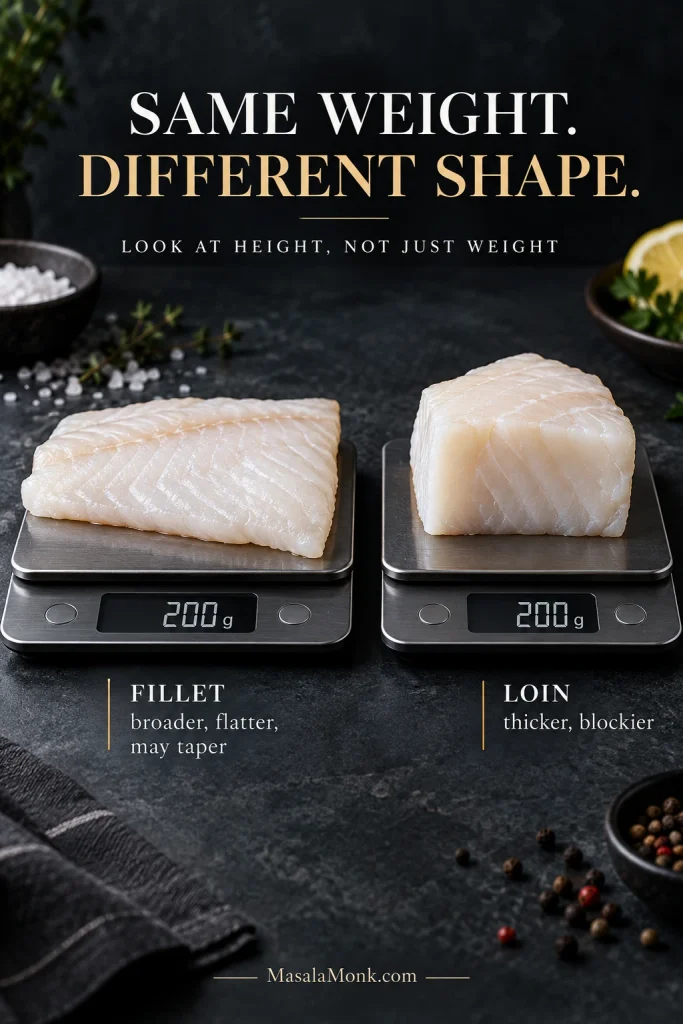
These equal-weight pieces illustrate why cod loin and cod fillet timing can diverge: the blockier loin concentrates the same mass into a deeper center.
That’s why shape matters as much as the label. A loin is usually the thick, blockier center cut. A fillet may be broad and flat or taper sharply toward the tail. At the fish counter, look at height as much as weight. If you’re cooking several pieces together, choosing similar thicknesses makes the timing much easier.
What About 375°F or 425°F?
The timing above assumes 400°F / 205°C, the temperature this version is built around. At 375°F / 190°C the fish cooks more slowly; at 425°F / 220°C, begin checking earlier.
How to Tell When Cod Is Done
Whatever shape you’re cooking, the center settles the question. For food safety, cook fin fish to 145°F / 63°C in the center, following the USDA safe temperature guidance.
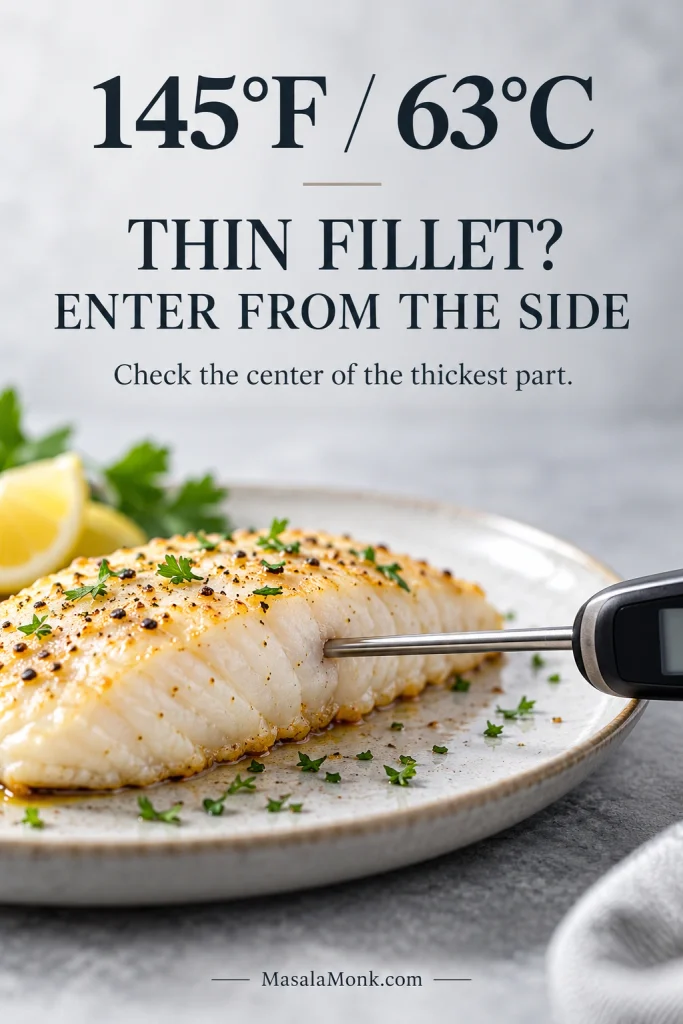
Keep the thermometer tip inside the center of the thickest flesh and clear of the hot baking dish; touching the pan can give a misleadingly high reading.
For a thin fillet, insert the thermometer from the side. That makes it easier to place the tip in the middle instead of passing straight through.
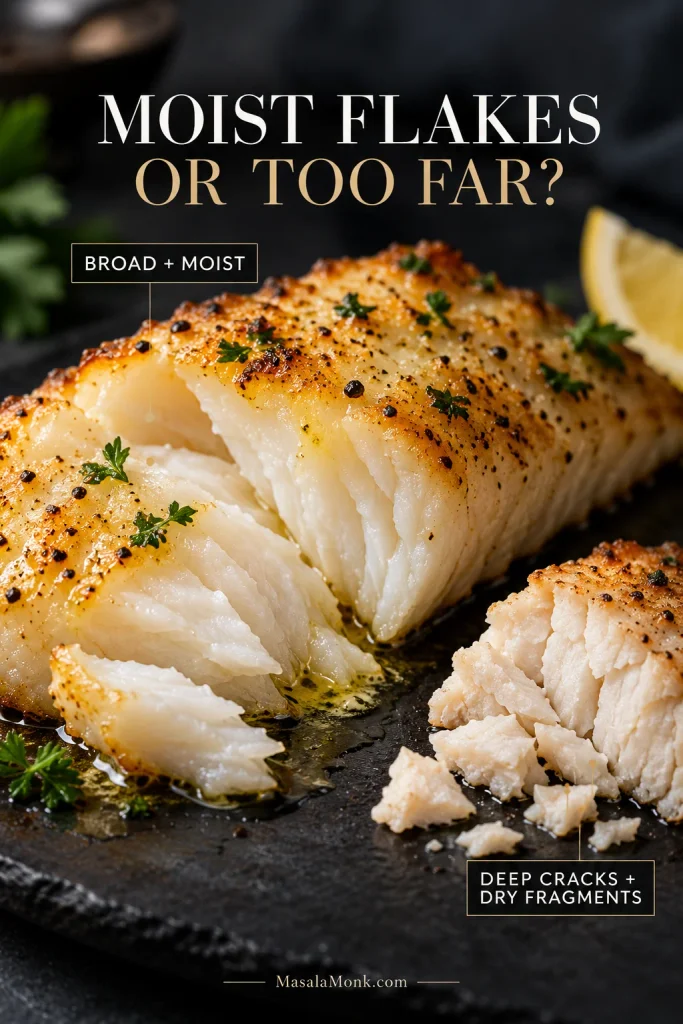
When it’s ready, the flesh should look opaque and open into broad, moist flakes with gentle pressure from a fork. Deep cracks, a chalky surface or lots of small dry fragments mean it has gone too far.
By contrast, doneness should be judged from the center, not the driest edge. Thin areas can look overcooked even while the thickest part still needs another moment.
As those flakes separate, spoon a little of the hot garlic butter into the openings. It slips between the layers while the fish is still warm instead of simply sitting on top.
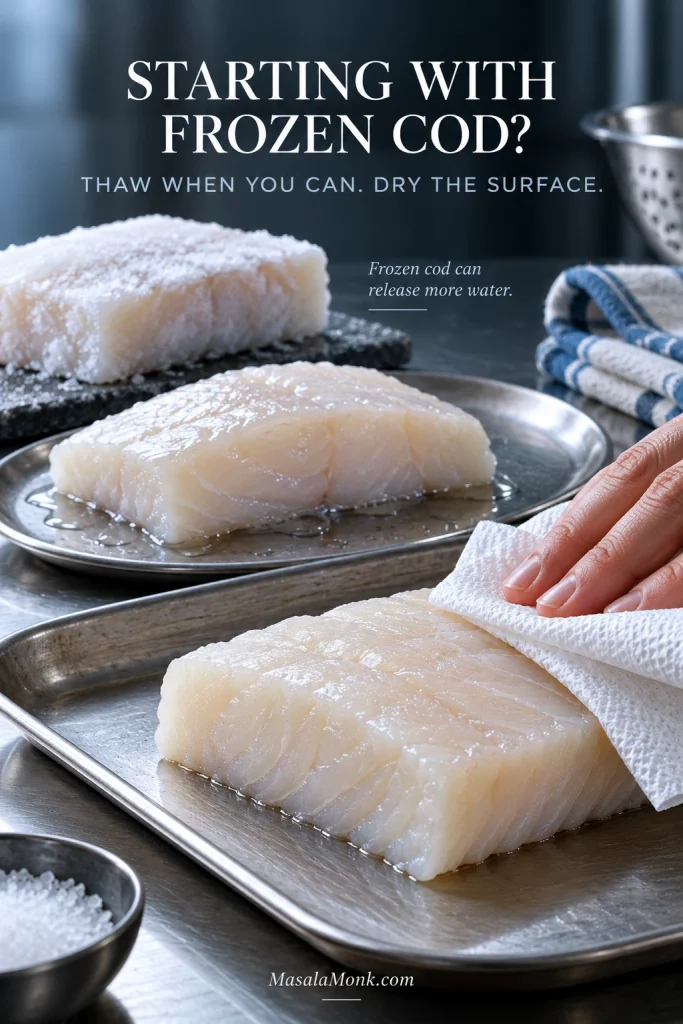
Frozen cod works here too. The complication is water. A puddle in the baking dish doesn’t automatically mean you overcooked the fish; sometimes that water arrived with the cod.
Thaw first when you can. It makes the timing easier to judge and lets you dry the surface properly before the butter goes on. If thawing is not practical tonight, jump to the straight-from-frozen guidance.
When thawing frozen cod, moisture often collects underneath the fillet and between natural folds. Check those hidden areas before seasoning, not just the exposed top surface.
Thawing Cod Safely
The FDA’s seafood-handling guidance recommends thawing frozen seafood in the refrigerator. When you need it faster, use cold water and a leakproof bag according to the product’s handling directions, then cook the fish promptly. Counter thawing isn’t a safe shortcut.
Vacuum-packed cod needs a label check. Follow the package directions carefully. Some reduced-oxygen packaged fish must be removed from the original packaging before thawing.
Can You Bake Cod Straight From Frozen?
Yes, but frozen cod needs its own timing. Remove loose surface ice, season the fish and follow the package’s cooking directions where provided. The center will take longer to heat and the fish may release more water, so check it with a thermometer rather than adding an arbitrary number of minutes.
Should You Cover Cod When Baking?
Not for this recipe. Leave the dish uncovered so some released moisture can escape. A sealed foil or parchment packet traps steam and gives you softer, steam-cooked fish—a different style of cod with different timing.
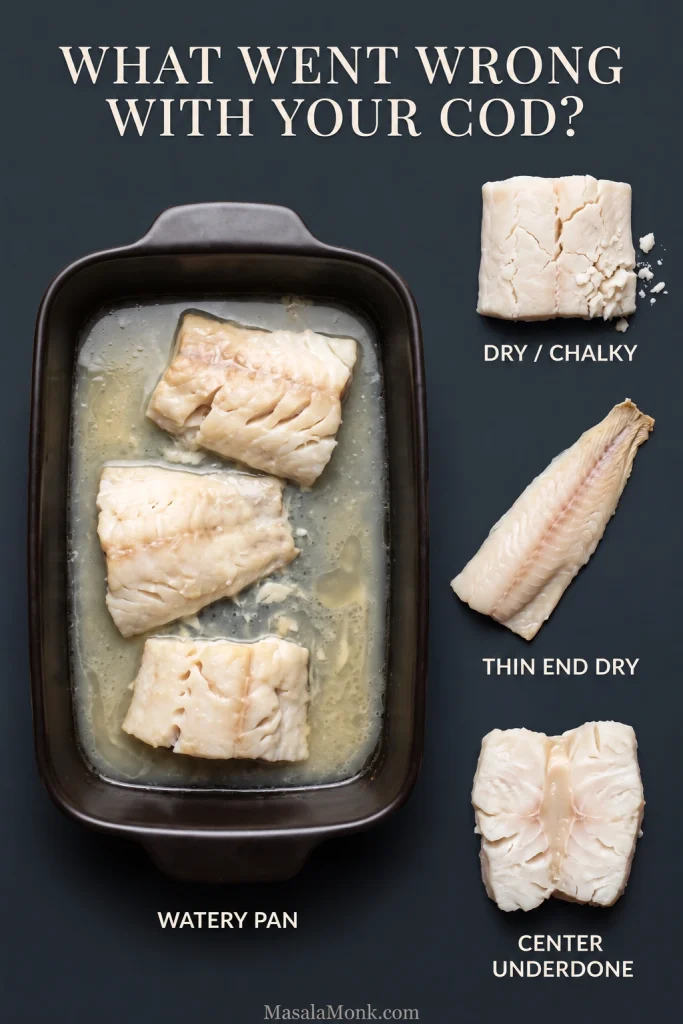
If the Cod Didn’t Come Out Right
Don’t change five things at once. Find the symptom that looks most like yours and start there.
One clue can prevent the wrong fix: a watery pan does not necessarily mean undercooked cod, and dry fish can still sit in excess liquid if it released a lot of moisture.
What happened?
Likely reason
What to do
Dry or rubbery
It cooked too long for its thickness.
You can’t put moisture back into overcooked cod. Add fresh lemon and begin checking earlier next time.
Watery pan
The cod was wet, crowded or released a lot of water.
Dry it thoroughly, give the portions some room and bake uncovered.
Mushy or mealy
Excess moisture or damage from freezing and thawing.
Check how it was thawed. If the same product repeatedly disappoints, try another source.
Bland
The fish wasn’t seasoned directly.
Season the cod itself before the lemon-garlic mixture goes on.
Thin end dry
The tail finished before the thicker part.
Fold it underneath before baking, or remove smaller pieces as soon as they’re done.
Outside cooked, center translucent
A substantial or partly frozen center needs longer.
Return it to the oven briefly, then check the center again.
Cooking took much longer
A thick loin, cold center or oven variation.
Keep cooking in short intervals and judge the center, not the clock.
Fish broke apart
Cooked cod is delicate and was handled too much.
Lift it from underneath with a broad spatula. Already have loose flakes? Turn them into fish tacos.
Hot rice may be the easiest answer. Start it first; the cod cooks quickly, and the rice gives all that lemon-garlic butter somewhere to go. If you want the timing sorted before the fish goes into the oven, use our guide to cooking rice.
For a balanced cod dinner, pair one element that absorbs the lemon butter with another that adds crunch, acidity or coolness; that keeps the plate from becoming uniformly soft and rich.
For something green, green beans almondine add toasted-almond crunch beside the soft fish. A crisp cucumber salad goes the other way: cool and sharp against the warm cod.
Potatoes work beautifully too. Our Greek lemon potatoes need a much longer head start, so get them well underway before the cod goes into the oven.
Small Changes That Work
Want it brighter? Swap the parsley for fresh dill and lean on the lemon wedges at the table. Want something warmer and smokier? Use smoked paprika instead of sweet. Two garlic cloves make the flavor gentler; four bring the garlic forward.
The zest and juice do different jobs. Lemon zest brings citrus aroma without adding much liquid; the final squeeze gives the hot fish its sharper citrus edge.
For a dairy-free version, replace the 3 tbsp butter with 3 tbsp additional olive oil. That version won’t have quite the same richness, but the garlic, paprika, zest and finishing lemon still carry plenty of flavor.
The same seasoning also works with other mild white fish; just reset the timing for the fish you choose. For a crisp, browned topping rather than lemon-garlic butter, our baked haddock recipe is built around that style.
Storing and Using Leftover Cod
Refrigerate leftover cod promptly in a shallow, covered container and use it within 3–4 days. When reheating, bring leftovers to 165°F / 74°C, following USDA food-safety guidance.
Because cod is lean, stop once the leftovers are safely heated through; prolonged reheating dries the flakes quickly.
If the fish is already in pieces, don’t try to reconstruct the fillet. Fold the flakes into fish cakes and let that become tomorrow’s dinner.
For tonight, serve the cod while the butter is still warm and loose in the dish. Spoon it over the fish, squeeze fresh lemon across the top and let the tender flakes do the rest.
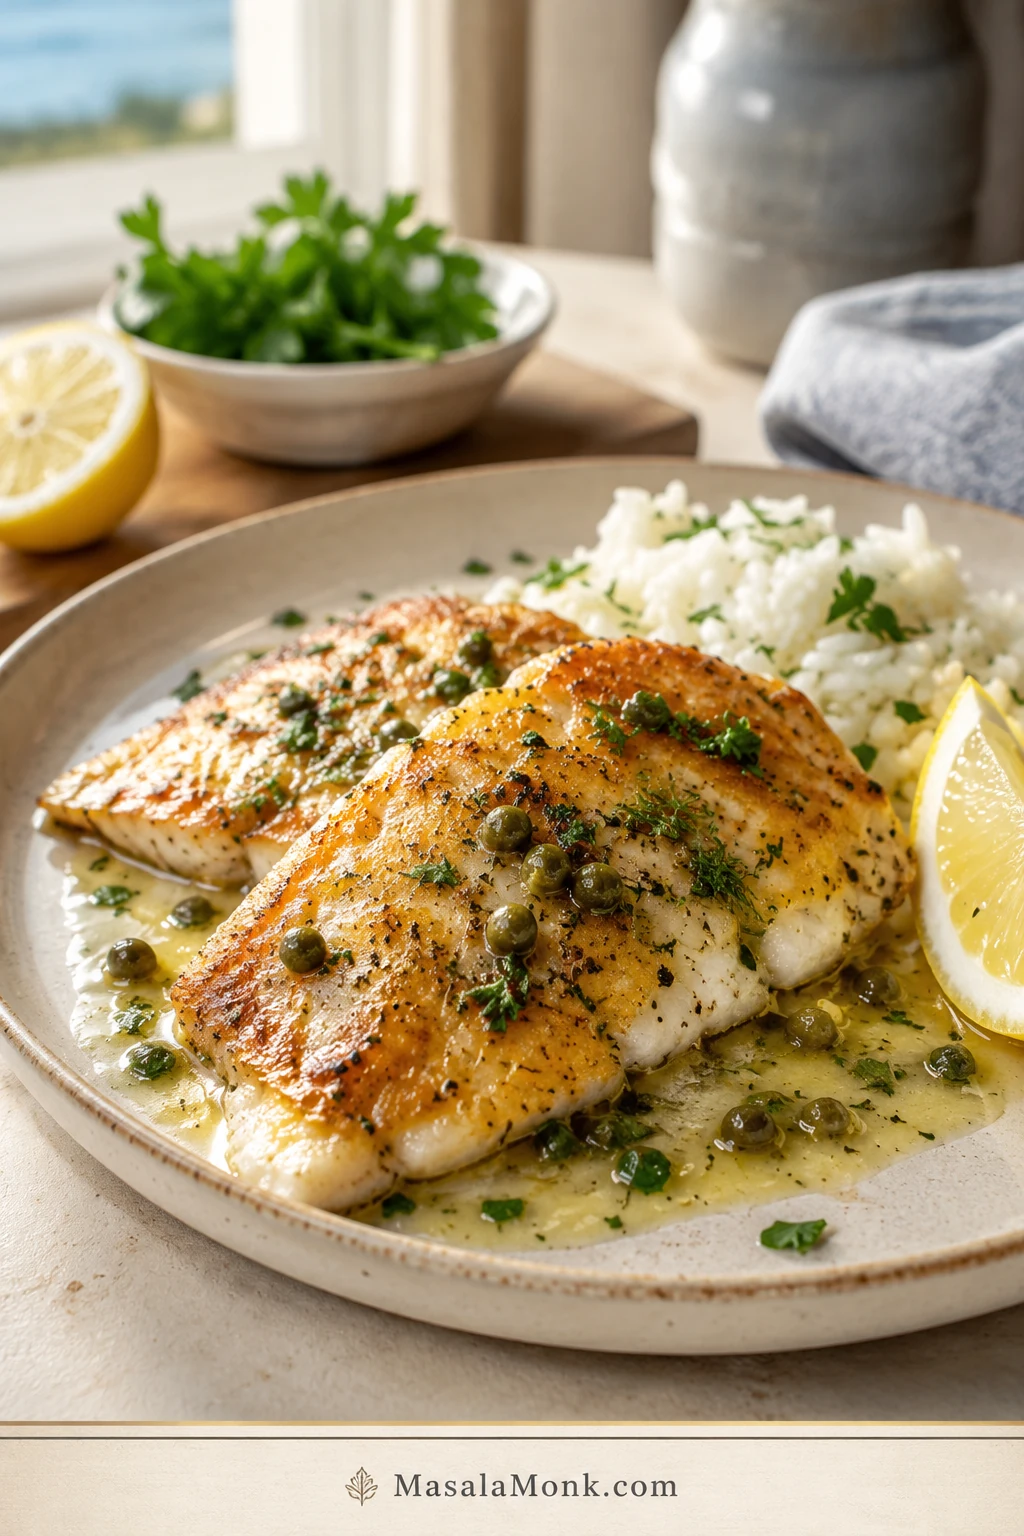
Rockfish rewards a simple approach: a dry fillet, a hot pan, a little butter, and a squeeze of lemon. In less than 20 minutes, this rockfish recipe gives you tender white fish with pale golden edges and a bright garlic lemon butter sauce you can spoon over rice, potatoes, salad, or warm tortillas.
This is the rockfish recipe to use when you want a safe first cook: lightly floured fillets, a quick skillet sear, and a lemony pan sauce that gives the fish flavor without covering it up. The best bite is soft, clean, buttery, and lifted with just enough lemon.
If you bought rockfish and now feel a little unsure what to do with it, start here. The fish is delicate, but it is not difficult. Once you know what to look for, the timing is simple.
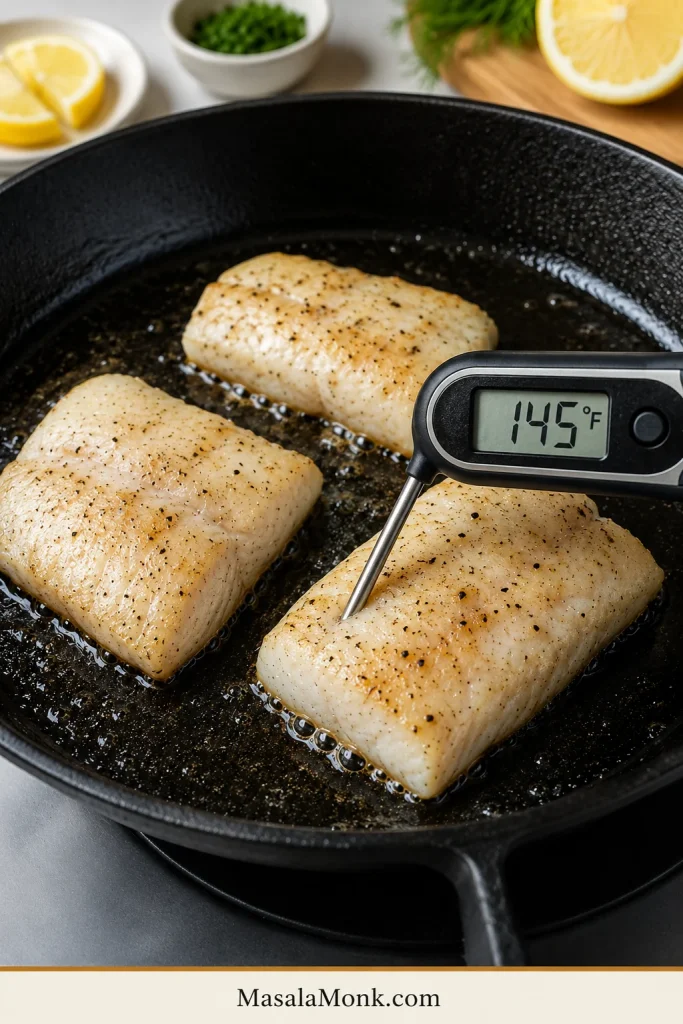
Blot the rockfish fillets very well, season them with salt, pepper, and garlic powder, lightly dredge them in flour, then pan-sear them in a hot skillet with oil and a little butter. Medium fillets usually take 3–4 minutes on the first side and 2–3 minutes on the second side.
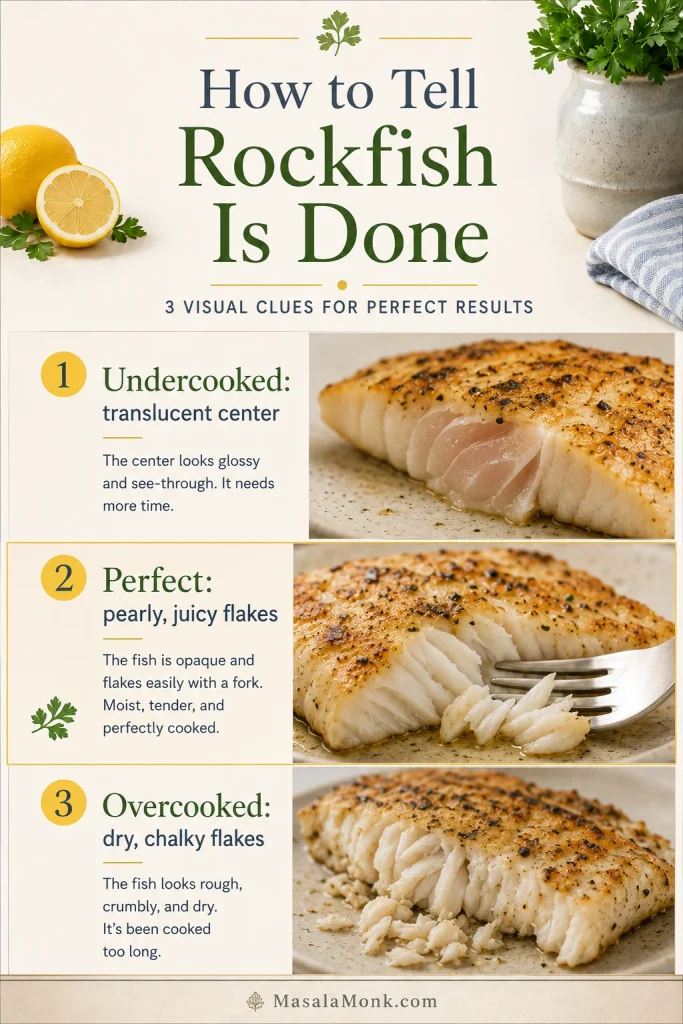
The fish is ready when the thickest part turns pearly and opaque, gives gently under a fork, and reaches 145°F / 63°C. Do not chase a dark crust. A light golden surface and a juicy center are better than a deeply browned fillet that turns dry.
Do not chase a hard crust: rockfish is lean and delicate. Pale gold outside and tender inside is the goal, not a deep steak-like sear.
Cooking rule: Dry well, sear briefly, and stop while the flakes stay moist.
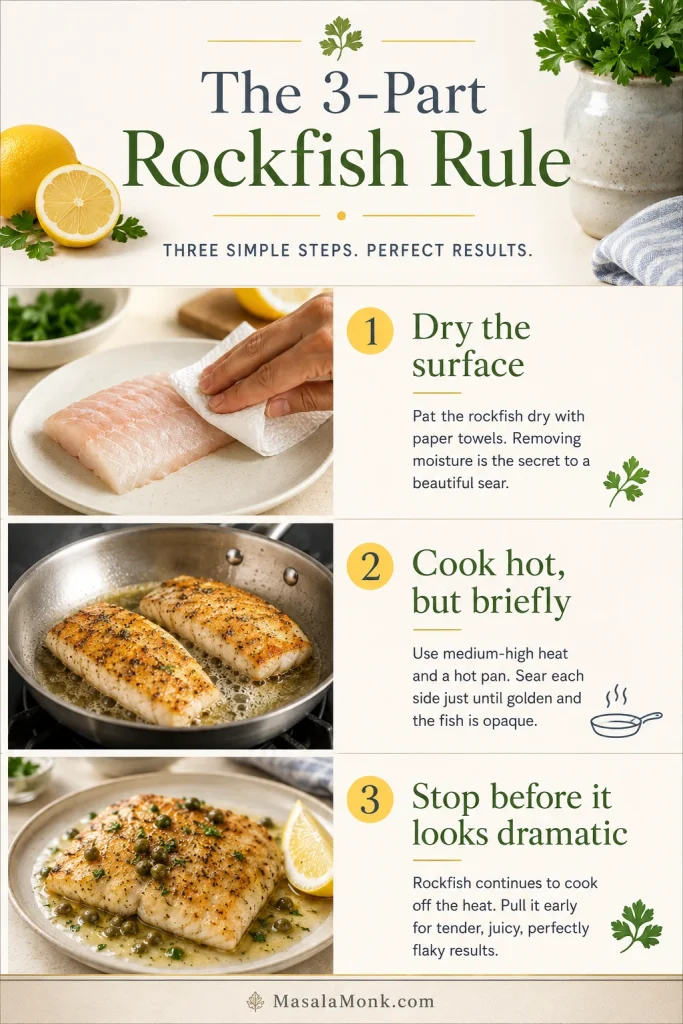
Before cooking, remember the three-part rockfish rule: dry the fish well, sear it briefly, and stop before the flakes turn dry.
For your first time, keep the fish simple and let the timing teach you. Rockfish is not the fish to force into a hard crust. You are protecting a gentle white fish and pulling it from the heat while it is still tender.
Dry the surface. Moisture makes the fish steam and stick.
Cook hot, but briefly. The first side needs enough heat to set a light crust.
Stop before it looks dramatic. Pale gold outside and juicy inside is the win.
Use skinless fillets, a thin flour coating, and lemon butter for your first batch. Once you learn the feel of the fish in the skillet, the baked, air fryer, grilled, and taco versions become simple adjustments.
Make It Now: Pan-Seared Rockfish with Lemon Butter
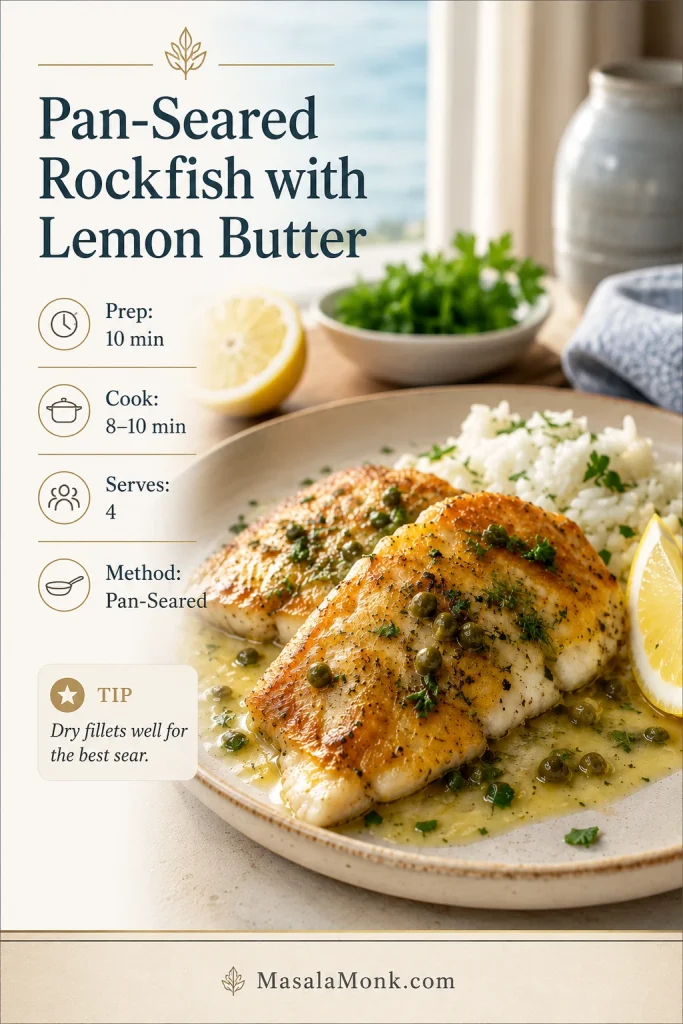
Recipe shortcut: Use this card for quick timing, ingredients, and the lemon butter finish.
Save this pan-seared rockfish recipe card when you need a quick lemon butter fish dinner with clear timing and simple ingredients.
Easy Pan-Seared Rockfish with Lemon Butter
This is the skillet version to make when you want tender white fish with golden edges and a lemony butter sauce that comes together in the same pan. Keep the coating thin, the heat steady, and the cook time short.
Servings
4
Prep Time
10 minutes
Cook Time
8–10 minutes
Total Time
18–20 minutes
Method
Pan-seared
Best For
Rockfish fillets, quick seafood dinner, lemon butter fish
Equipment
Large nonstick, stainless steel, or cast iron skillet
Paper towels
Fish spatula or thin spatula
Instant-read thermometer
Ingredients
4 rockfish fillets, 5–6 oz / 140–170 g each
¾ tsp fine salt, divided
½ tsp black pepper
½ tsp garlic powder
¼ cup all-purpose flour, about 30 g, optional but helpful for a light crust
2 tbsp olive oil or neutral oil, 30 ml
3 tbsp unsalted butter, about 42 g, divided
3 garlic cloves, minced
1½ tbsp fresh lemon juice, about 22 ml
1–2 tbsp capers, drained, optional
2 tbsp chopped parsley or dill
Lemon wedges, for serving
Optional: ¼ cup white wine or chicken broth, 60 ml, for a looser sauce
Instructions
Work in three short stages: prep the fish, sear the fillets, then make the sauce.
Prep the Fish
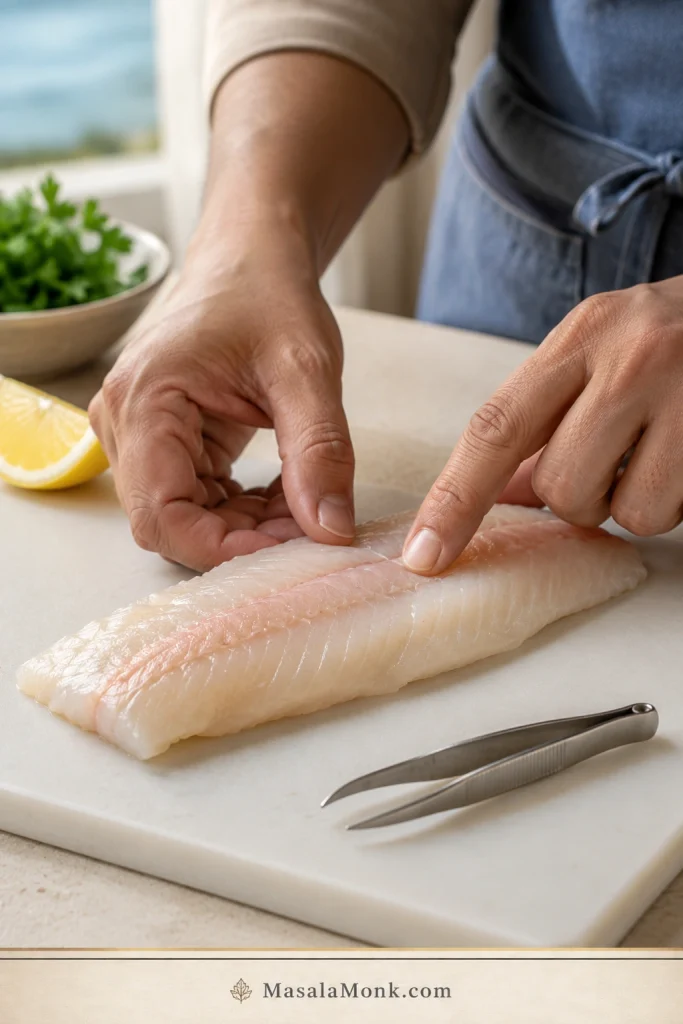
Check the fish. Run your fingers gently over the fillets and remove any pin bones with clean tweezers if needed.
Dry the fillets. Blot the rockfish thoroughly with paper towels so the surface sears instead of steams.
Season both sides. Sprinkle the fillets with salt, black pepper, and garlic powder.
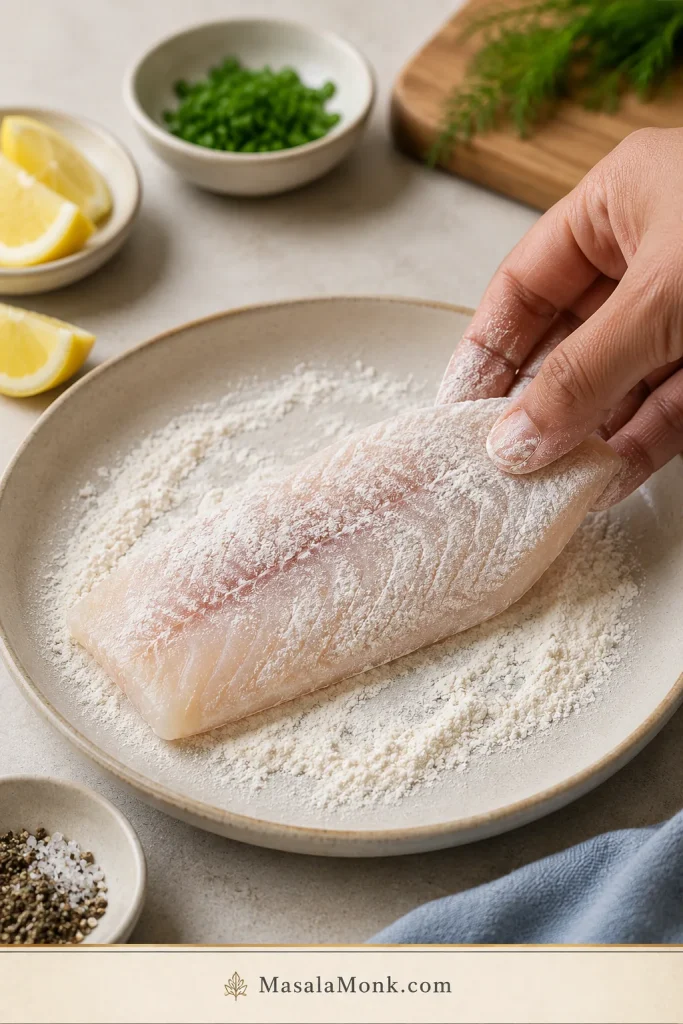
Lightly flour. Spread the flour on a shallow plate. Dredge each fillet lightly, then shake off the excess. The coating should be thin, not heavy.
Sear the Fillets
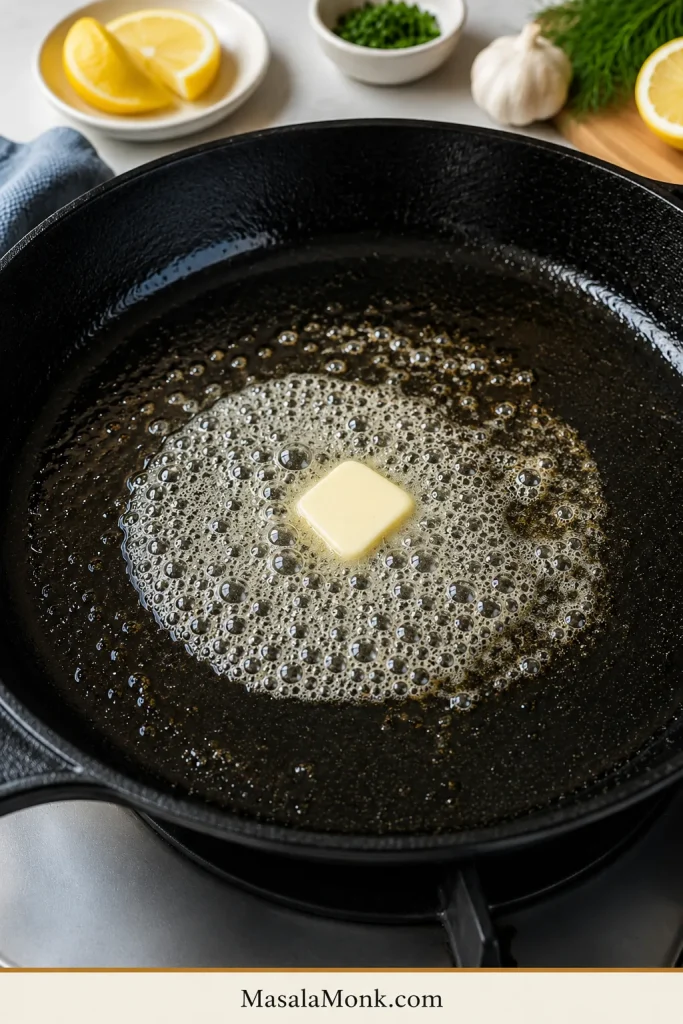
Heat the oil. Set a large skillet over medium-high heat. Add the oil and let it heat until it shimmers. Add 1 tbsp butter, let it foam lightly, then add the fish right away.
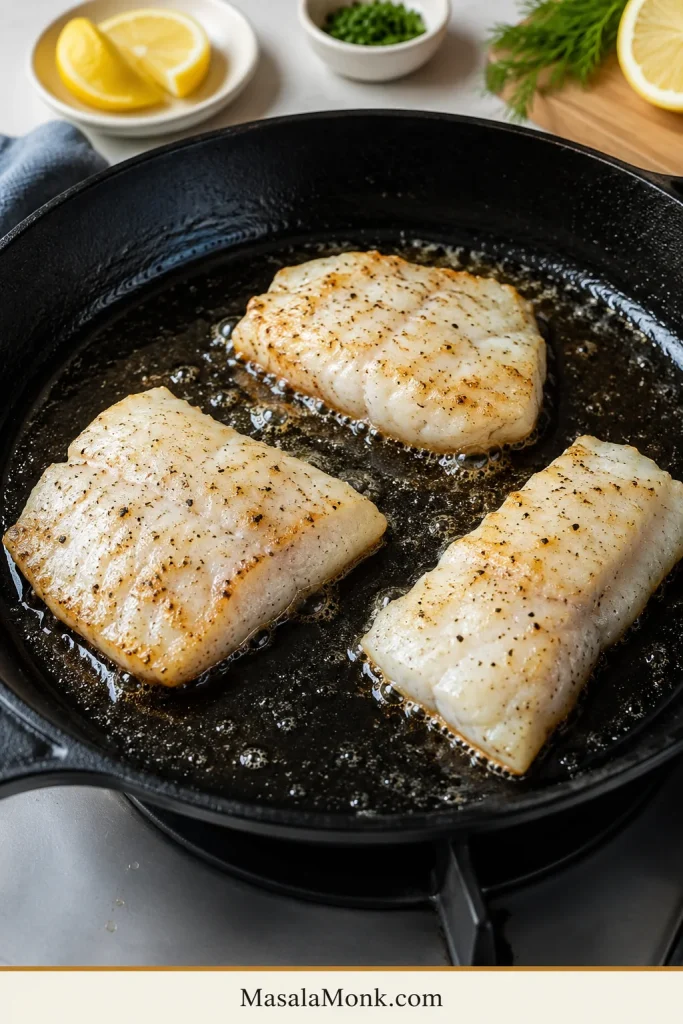
Sear the first side. Place the fillets in the pan presentation-side down. Do not crowd the skillet; cook in batches if needed. Cook for 3–4 minutes without moving the fish too early.
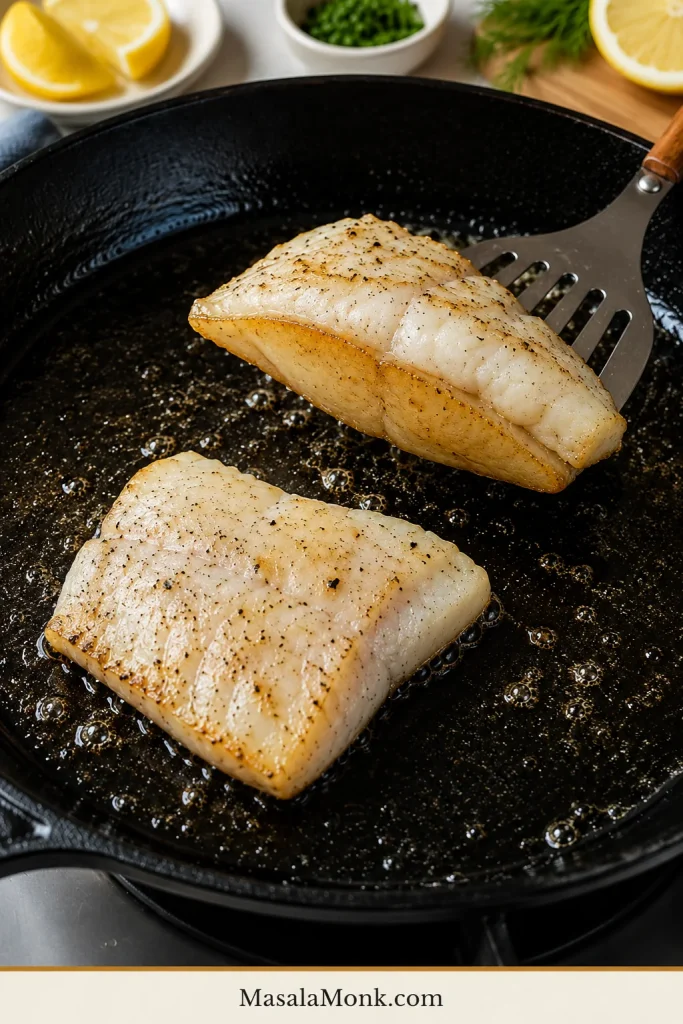
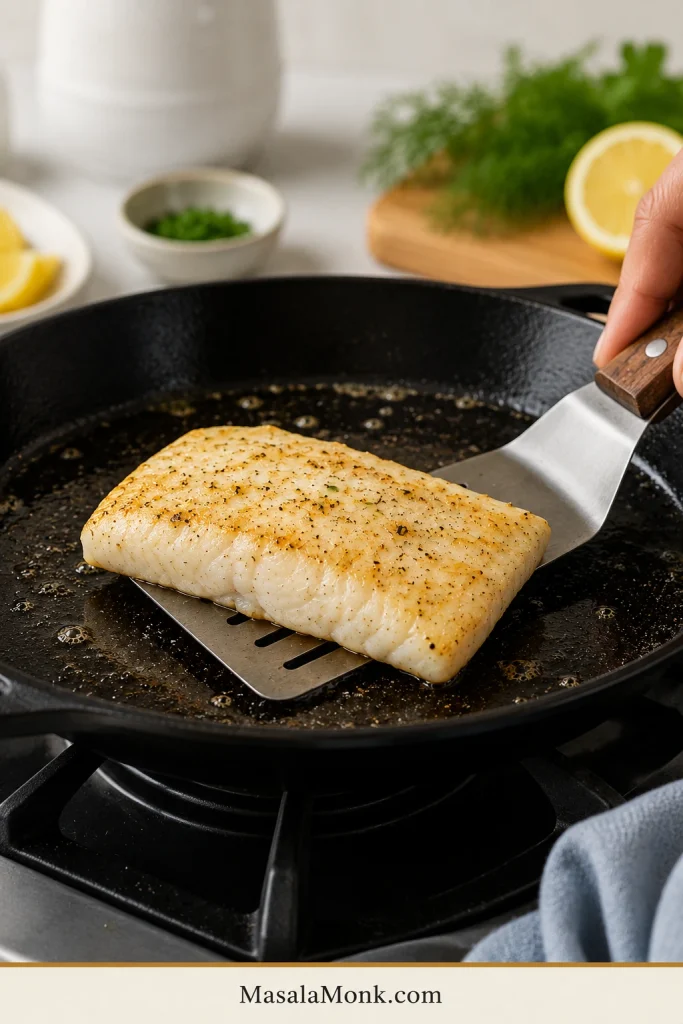
Flip gently. Slide a fish spatula under each fillet and turn carefully. Cook the second side for 2–3 minutes, depending on thickness. Lower the heat to medium if the coating or butter is browning too quickly.
Check doneness. The thickest part should look pearly and opaque, not translucent. For the safest check, use a thermometer and look for 145°F / 63°C.
Remove the fish. Transfer the cooked rockfish to a plate. Thin pieces keep cooking slightly from carryover heat, so do not leave them in the hot pan while making the sauce.
Make the Sauce and Serve
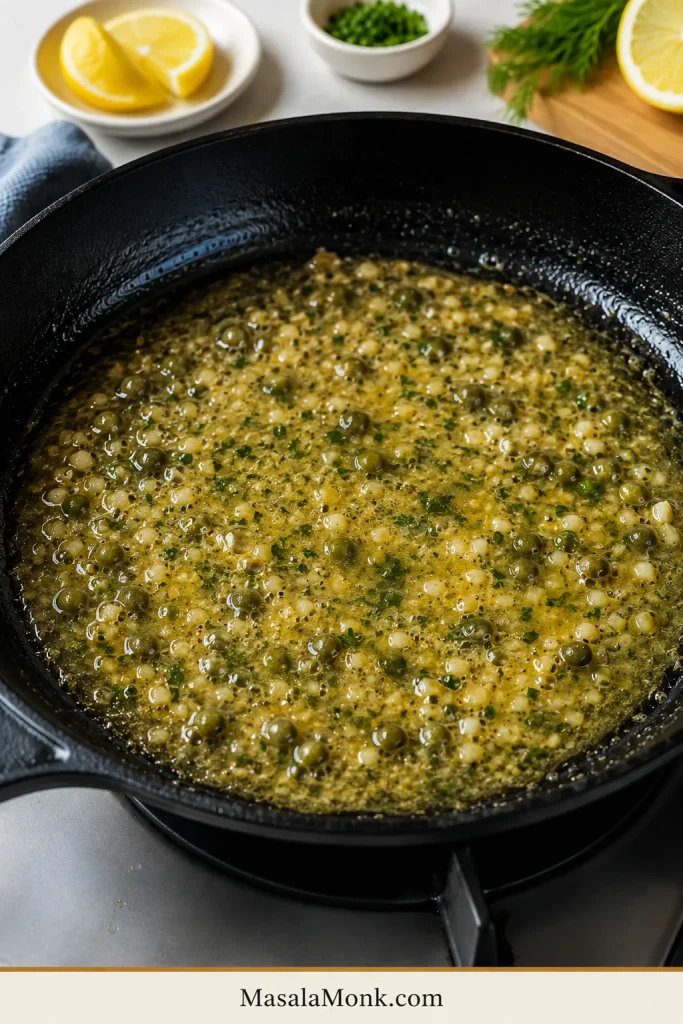
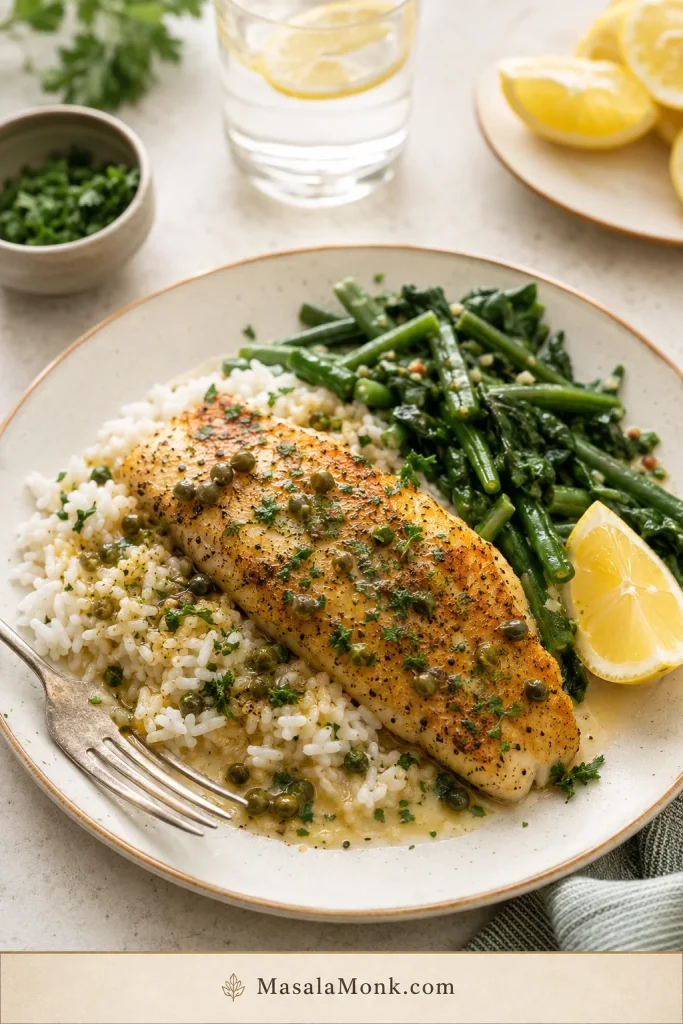
Make the sauce. Reduce the heat to medium-low. Add the remaining 2 tbsp butter to the skillet. Stir in the garlic for 20–30 seconds, just until fragrant. Add lemon juice, capers, and optional wine or broth. Scrape up the browned bits; the sauce should taste bright, buttery, and lightly salty.
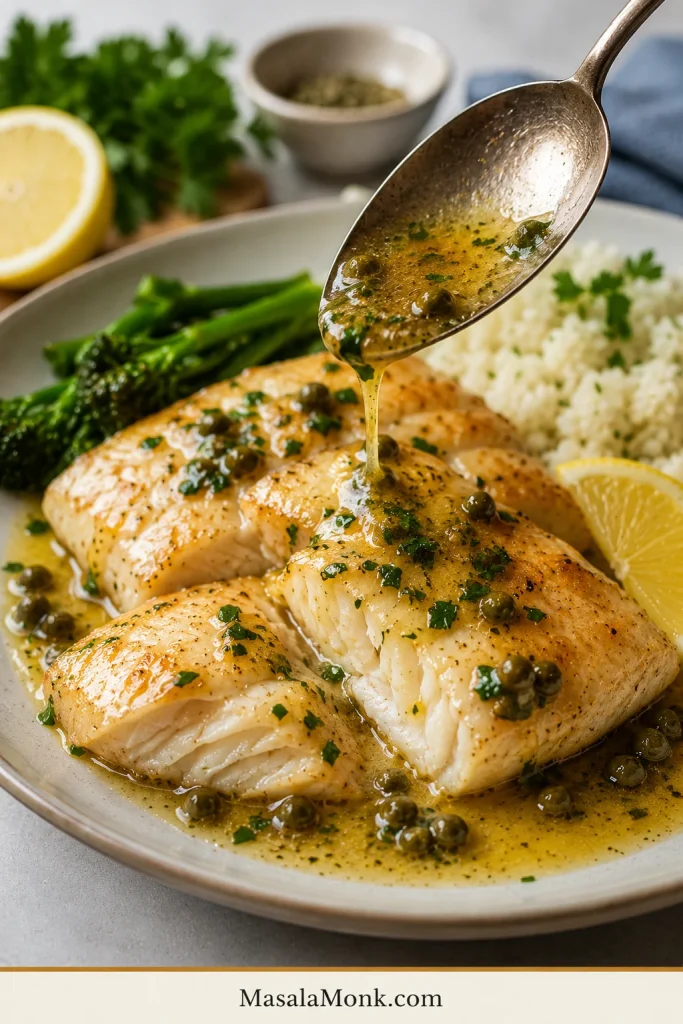
Finish and serve. Spoon the lemon butter sauce over the rockfish while it is warm, letting it catch in the flakes and run into the rice, potatoes, or vegetables underneath. Sprinkle with parsley or dill and serve with lemon wedges.
Recipe Notes
For very thin fillets, start checking after 2 minutes per side.
For thicker pieces, reduce the heat slightly after flipping so the outside does not brown before the center cooks.
Flour is optional. Skip it for a lighter fish, or use gluten-free flour if needed.
Capers add a salty, briny finish. Leave them out for a simple garlic lemon butter sauce.
Frozen rockfish works well if thawed overnight in the fridge and blotted thoroughly before cooking.
Choose Your Rockfish Method
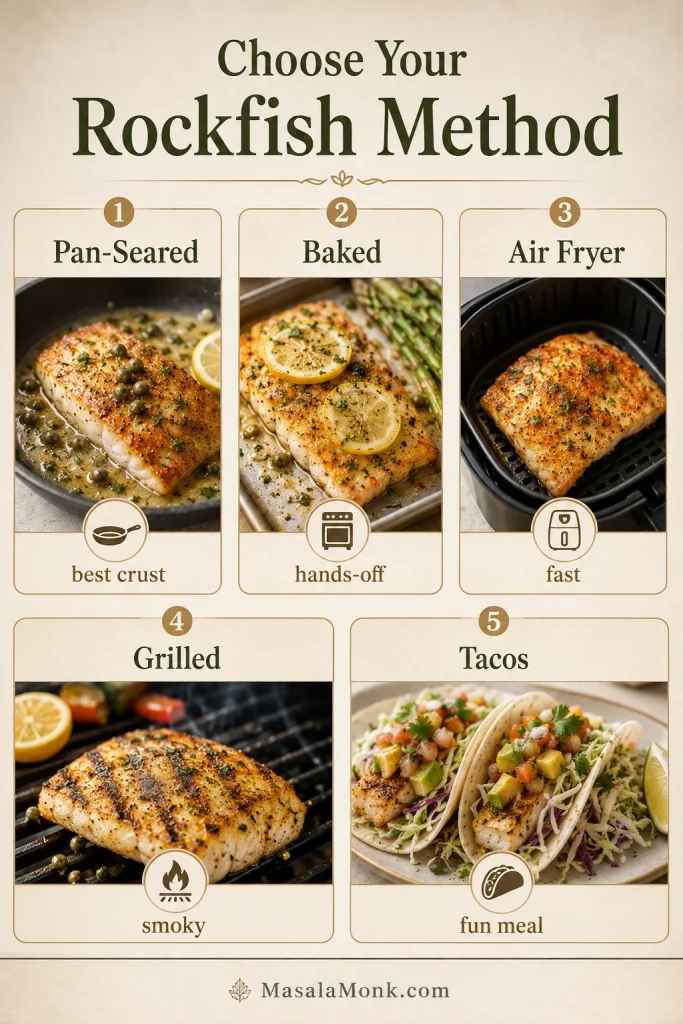
Once the skillet version makes sense, choose the method that fits your dinner. Thin, delicate pieces do well in the skillet or air fryer. Larger or uneven fillets are often easier in the oven. Skin-on pieces are the friendliest choice for the grill.
Method
Use When
Result
Best Tip
Pan-seared
You want the best crust and sauce
Golden edges, tender center, lemony pan sauce
Use oil first, then a little butter
Baked
You want a hands-off dinner or several fillets at once
Soft, simple, easy to serve with sides
Add butter or olive oil so the fish stays juicy
Air fryer
You want fast, lightly browned fish without heating the oven
Quick, clean, good for thinner pieces
Keep the fillets in a single layer
Grilled
You have skin-on or sturdy fillets
Lightly smoky, fresh, great with lemon
Use foil or a grill basket for fragile pieces
Tacos
You want a casual meal with slaw and sauce
Flaky fish, lime, crunch, and creamy toppings
Blackened seasoning works especially well
Once the method is clear, it helps to know what kind of rockfish you have, what it tastes like, and how the fillet’s thickness affects the cook.
Method chooser: Pick skillet, oven, air fryer, grill, or tacos based on dinner style.
Once the basic skillet method makes sense, choose your path: pan-seared for crust, baked for ease, air fryer for speed, grilled for smoke, or tacos for texture.
What Is Rockfish?
Rockfish is a mild, lean white fish with a tender texture. In U.S. markets, the name is often used for Pacific rockfish, though regional labels can vary.
For this recipe, the exact label matters less than the fillet itself. Thin pieces cook quickly, larger portions need a few extra minutes, and the visual cues matter more than the species name on the package.
What Does Rockfish Taste Like?
The flavor is mild, clean, and slightly sweet. The texture is lean and tender, so it pairs easily with lemon, butter, garlic, herbs, Old Bay, Cajun seasoning, capers, salsa, or creamy taco sauce.
If you like cod, snapper, haddock, tilapia, halibut, or sea bass, this fish will feel familiar. For another gentle white-fish dinner, this baked haddock recipe follows the same easy idea: mild fish, simple seasoning, and a tender finish.
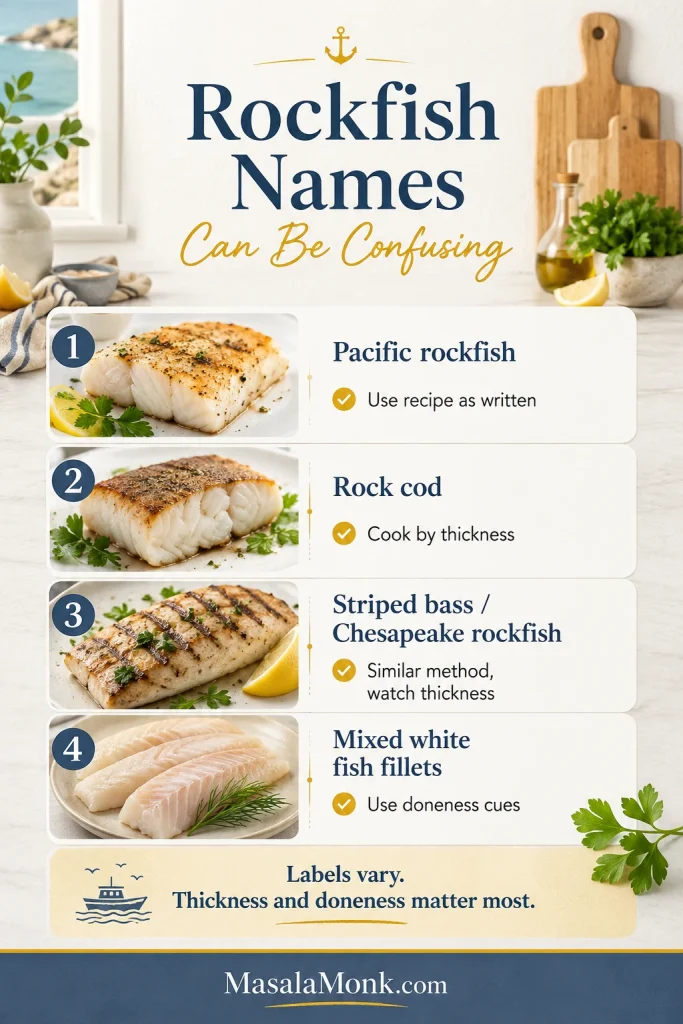
Rockfish Names Can Be Confusing
The word “rockfish” can mean different things depending on where you shop. Do not let the label slow you down; use the fish’s thickness, freshness, and texture as your main cooking guides.
Label You May See
What It Usually Means
How to Use This Recipe
Pacific rockfish
A mild white fish from the Pacific coast
Use the recipe as written
Rock cod
Often another market name for Pacific rockfish
Use thickness as your timing guide
Striped bass / Chesapeake rockfish
A different fish sometimes called rockfish regionally
The method still works for similar fillet thickness
Mixed white fish fillets
May include similar mild fish
Cook by thickness and doneness cues
Fish counter tip: If the label is confusing, cook by thickness and doneness cues.
Rockfish may be sold under different names, but once it is in your kitchen, thickness and doneness cues matter more than the label.
How to Choose Rockfish
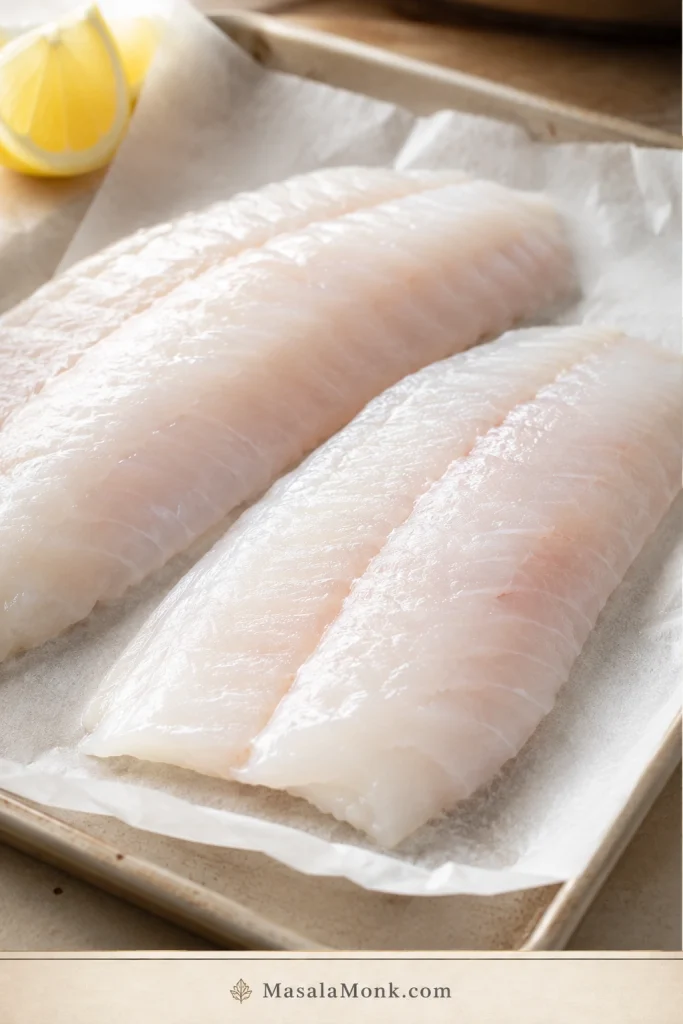
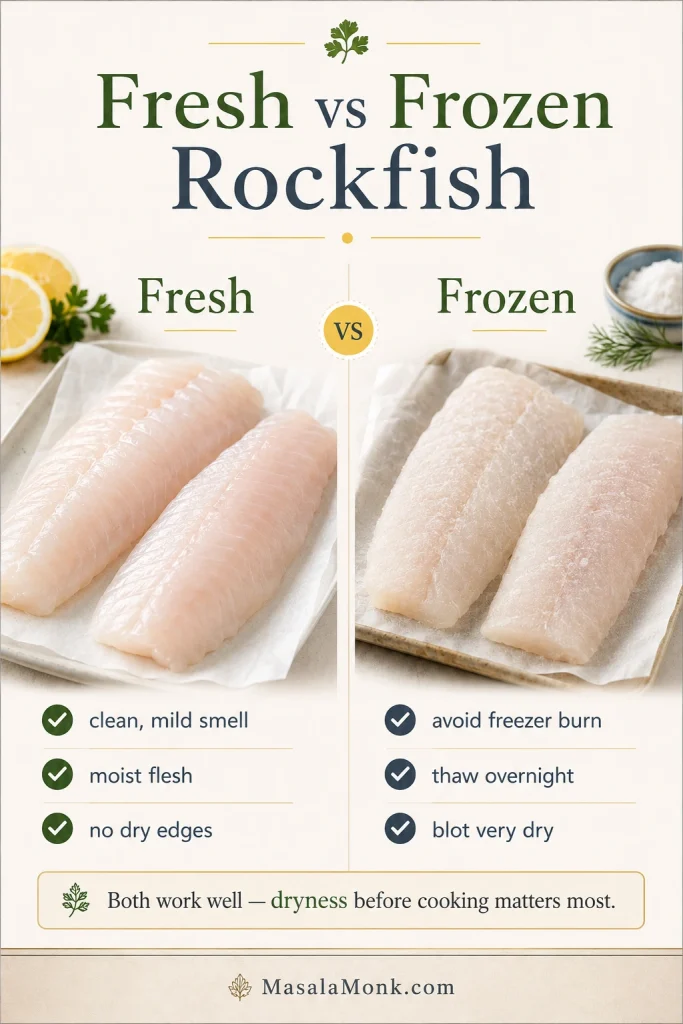
Good fish should smell clean and mild, not sour, sharp, or strongly fishy. The flesh should look moist and fresh, not dried out around the edges. If the fillets are frozen, choose pieces without heavy ice crystals or freezer-burned patches.
Buying cue: Choose moist, clean-looking fillets with no dry edges or strong odor.
Good fish makes everything easier; therefore, choose fillets that look moist and clean, with no dry edges or strong fishy smell.
Buying tip: rockfish names and species vary by region, so buy from a fish counter or brand you trust. If the label is unclear, ask whether it is Pacific rockfish, striped bass, or another mild white fish, then cook by thickness.
For frozen fillets, thaw overnight in the refrigerator. Before cooking, press away as much surface moisture as you can. That one small step makes the difference between a pale steamed surface and a clean skillet sear.
Frozen-fish cue: Blot thawed fillets well so the surface can brown.
Fresh and frozen rockfish can both cook well; however, thawed fillets need extra drying so they brown instead of steam.
Rockfish Fillets: Skin-On, Skinless, Fresh, or Frozen
Most home cooks will use fillets, and thickness matters more than almost anything else. A thin piece may be done before it gets deeply golden, while a larger portion may need gentler heat after the first sear.
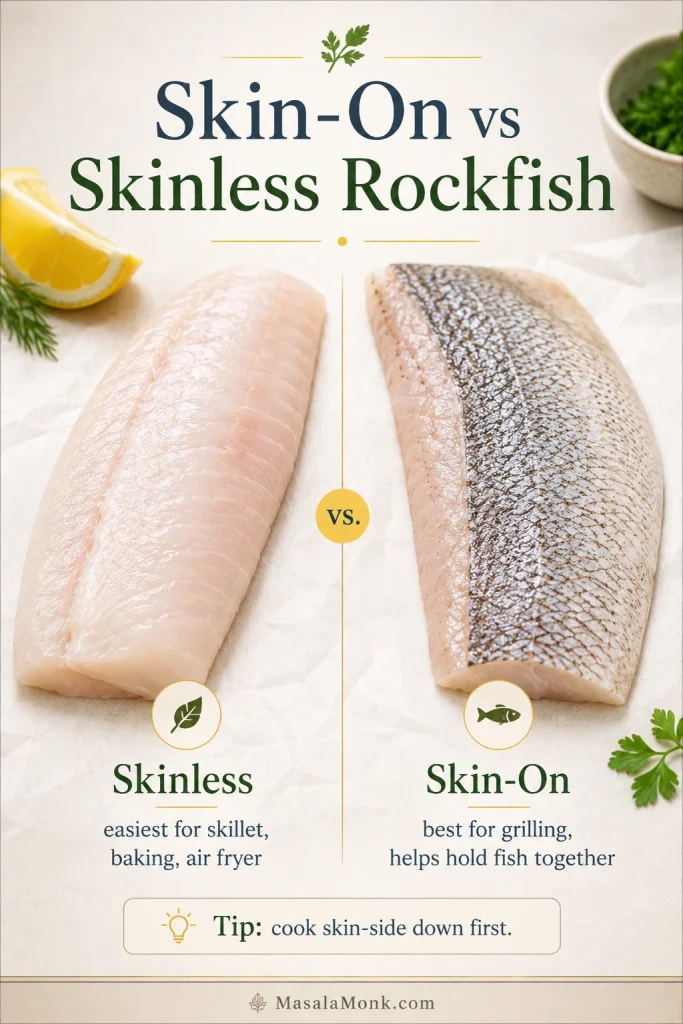
Fillet choice: Skinless is easiest for the skillet; skin-on helps on the grill.
Use skinless fillets for the easiest skillet version, while skin-on rockfish is useful when grilling because it helps the fish hold together.
Fillet Type
Best Use
What to Know
Skinless fillets
Pan-searing, baking, air frying
Easiest for this recipe, but delicate when thin
Skin-on fillets
Grilling or crisp-skin skillet cooking
Cook skin-side down first; the skin helps hold the fish together
Fresh fillets
Any method
Should smell clean and mild, not sour or strongly fishy
Thawed frozen fillets
Pan-searing, baking, air frying
Thaw overnight in the fridge and press away surface moisture before cooking
Very thin fillets
Quick skillet or air fryer
Watch closely; they may only need 2 minutes per side
Thick fillets
Skillet-to-gentle heat, baking, grilling
Sear first, then reduce heat so the center cooks without burning the outside
If a fillet is uneven, tuck the thin tail end slightly under itself or place that end toward the cooler edge of the pan. This helps the delicate part avoid overcooking before the thicker section is done.
For skin-on fillets, cook skin-side down first for most of the time. Press gently for the first few seconds so the skin makes contact with the pan, then let it cook undisturbed before turning.
It is fast enough for a weeknight. The fish cooks in minutes once the pan is hot.
The sauce keeps the flavor bright. You get richness from butter, lift from lemon, and just enough garlic in the background.
A light coating makes flipping easier. The thin flour layer helps the surface set without turning the fish heavy.
The timing cues are flexible. Thin and thick fillets are both covered, so you are not locked into one exact size.
Leftovers can become another meal. Flake them into tacos, salads, rice bowls, or sandwiches.
Rockfish Recipe Ingredients and Why They Matter
Once you know the kind of fillets you have, the ingredient list stays simple. Each item is there to help the fish brown gently, stay tender, or taste brighter at the end.
Ingredient cue: Keep the setup simple and save the flour for a thin release layer.
The best rockfish recipe starts with a short ingredient list: fresh fillets, lemon, butter, garlic, capers, herbs, and just enough flour to help the sear.
Rockfish Fillets
Use fresh or thawed frozen fillets. Skinless pieces are easiest in the skillet, while skin-on pieces are helpful for grilling or crisp-skin cooking. Check for pin bones before seasoning.
Salt, Pepper, and Garlic Powder
This gentle white fish does not need heavy seasoning. Salt brings out the flavor, black pepper adds warmth, and garlic powder gives an even savory base without burning quickly.
Flour
A barely-there coating helps the surface brown and makes flipping less stressful. Shake off the excess so the coating stays light instead of gummy.
Oil and Butter
Oil gives you safer heat for the sear. Butter brings richness to the skillet sauce, but most of it goes in after the fish comes out so it stays glossy instead of scorched.
Lemon, Capers, and Herbs
Fresh lemon wakes up the sauce and keeps the fish from tasting heavy. Capers make the finish salty-bright and a little restaurant-style. Parsley keeps things clean, while dill leans more classic seafood.
How to Cook Rockfish Fillets Without Drying Them Out
The recipe card gives you the direct steps. This section is the coaching layer: the small choices that keep delicate fillets from sticking, breaking, or drying out.
Before the Fish Hits the Pan
Start by running your fingers gently over the fillets and removing any pin bones with clean tweezers. Then press the surface dry with paper towels, especially if the fish was frozen and thawed. Moisture blocks browning and makes sticking more likely.
Prep cue: Check for pin bones before seasoning.
Before seasoning, check for pin bones with your fingers; this quick step makes the finished rockfish easier and safer to eat.
Searing cue: Dry fillets stick less and brown better.
Dry the fillets before they hit the pan, because surface moisture is the main reason delicate fish sticks, steams, and refuses to brown.
Season the fish right before cooking. If salted fillets sit too long, they can release moisture and make the surface harder to brown. If you are using flour, keep it barely there: a light dusting that helps the surface set, not a thick breaded shell.
Coating cue: Use only a thin dusting so the fish stays delicate.
A thin flour coating helps rockfish release cleanly from the skillet; however, the fish should still show through the coating.
While the Fish Cooks
Let the oil shimmer before adding a small amount of butter. The butter should foam lightly, not smoke. Leave space around each piece so the pan does not trap steam, and give the first side time to form a pale golden crust before you try to lift it.
Pan cue: Heat oil first, then add butter just before the fish.
Heat oil first, then add butter just before the fish; that way, the pan is hot enough to sear without burning the butter.
Skillet cue: Leave space so the fillets sear instead of steam.
Leave space between the fillets as they cook, since a crowded skillet traps steam and prevents the pale golden sear you want.
Flip cue: Wait for the first side to set before turning.
Wait until the first side releases easily before flipping; otherwise, delicate rockfish can tear before the crust has set.
Use a fish spatula or the thinnest spatula you own. Slide it fully under the fillet and turn gently. If the coating or butter starts browning too fast, lower the heat slightly and let the center finish more gently.
Tool cue: Support the full fillet with a thin fish spatula.
A thin fish spatula supports the full fillet, so the rockfish turns cleanly instead of breaking into pieces.
After the Fish Comes Out
Remove the cooked rockfish before making the sauce. Thin pieces keep cooking from carryover heat, and the garlic, lemon, butter, and capers come together quickly. The garlic should smell good after 20–30 seconds, not browned or bitter.
Sauce cue: Make the lemon butter after the fish comes out.
Make the lemon butter sauce after removing the fish, so the garlic, capers, and butter stay bright while the fillets avoid extra heat.
If one fillet breaks, do not treat it like a failure. Spoon the sauce over it, serve it over rice, or turn it into tacos. It will still taste good.
Serving cue: Spoon sauce at the end so it catches in the flakes.
Spoon the sauce over the fish at the end; then the lemon butter settles into the flakes and flavors the rice or vegetables underneath.
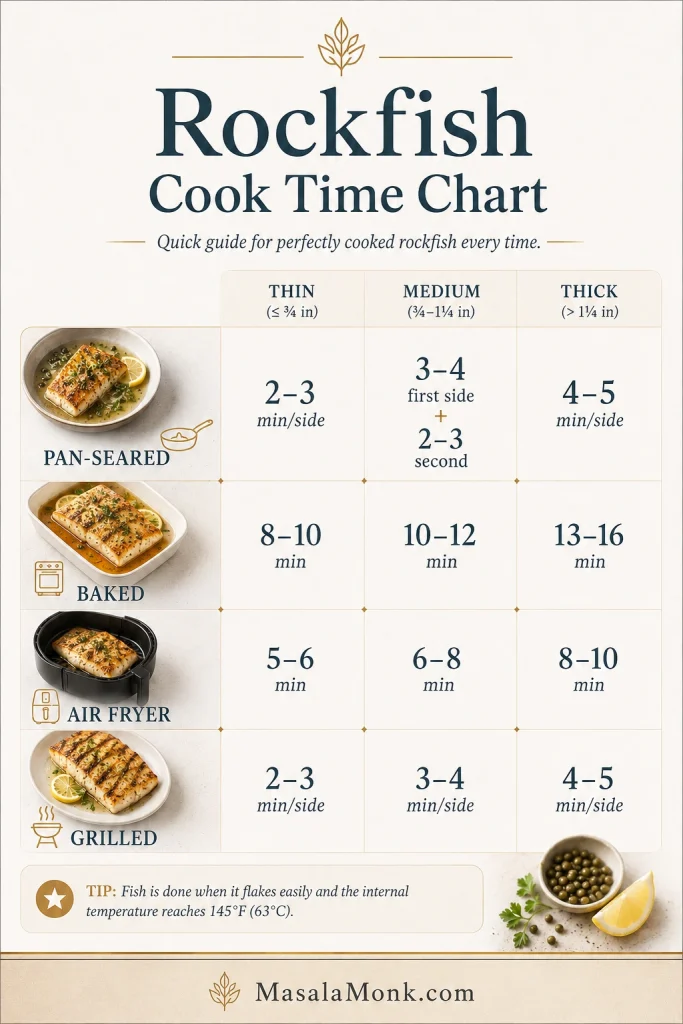
Cooking time depends mostly on thickness. The timer gets you close, but the fish itself tells you when to stop. Thin fillets may be ready in minutes; thicker pieces need more patience and slightly gentler heat.
Timing cue: Start with the chart, then adjust by thickness.
Use the rockfish cook time chart as a guide, then adjust for thickness because thin and thick fillets finish at different speeds.
Best cue: the fish should look juicy at the thickest point and open into tender flakes when pressed gently. If it looks tight, dry, or chalky, it has gone too far.
How to Tell When Rockfish Is Done
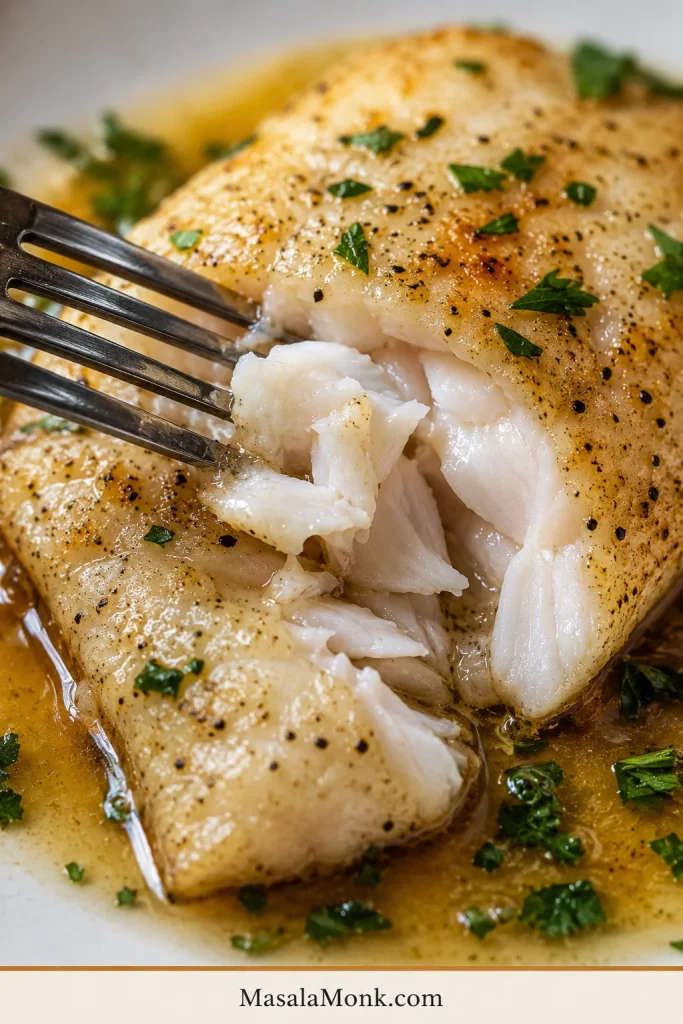
The flesh should change from translucent to pearly and opaque. The thickest part should still look juicy, and the flakes should open softly when pressed with a fork.
Doneness cue: Look for pearly, moist flakes instead of dark crust.
Look for pearly, moist flakes rather than a dark crust; rockfish is done when it opens gently with a fork.
With a thermometer, check the thickest part of the fillet and look for 145°F / 63°C. For thin pieces, start checking before the full time is up because carryover heat can finish them quickly after they leave the pan.
Safety cue: Check the thickest part for the clearest doneness read.
For the safest doneness check, test the thickest part of the fillet and look for 145°F / 63°C before serving.
Do not wait for both sides to become dark or heavily crisp. Light gold outside, tender inside, and no raw translucence in the center is the sweet spot.
Texture cue: Compare undercooked, perfect, and overcooked fish.
Perfect rockfish sits between translucent and chalky: opaque, pearly, moist, and flaky without falling apart.
Baked, Air Fryer, Grilled, and Taco Rockfish Options
The skillet teaches you the feel of rockfish. After that, the other methods are easy to choose: bake when you want hands-off cooking, air fry when you want speed, grill when you have sturdier pieces, and use tacos when dinner wants slaw, lime, and sauce.
Baked Rockfish Fillets
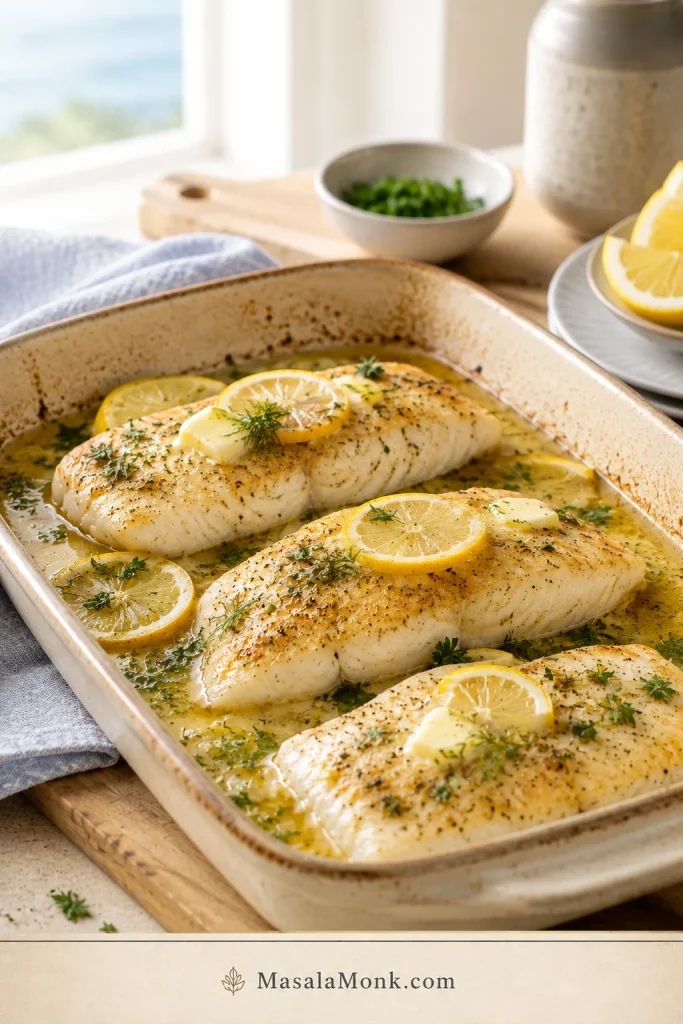
When you want a hands-off dinner, baking is the easiest move. It works especially well when you are cooking several fillets at once.
Heat the oven to 400°F / 204°C.
Place the seasoned fillets in a lightly oiled baking dish.
Add lemon slices, a small pat of butter, or a drizzle of olive oil.
Bake medium fillets for 10–12 minutes.
For larger pieces, check around 13 minutes and continue until the center turns opaque and tender.
For a breadcrumb, parmesan, or panko topping, use 425°F / 218°C and watch closely. The topping should turn golden while the fish stays soft underneath.
Oven cue: Bake when you want several fillets with less hands-on work.
Baked rockfish is the hands-off option for cooking several fillets at once, while lemon, butter, and herbs keep the dish bright.
Air Fryer Rockfish Fillets
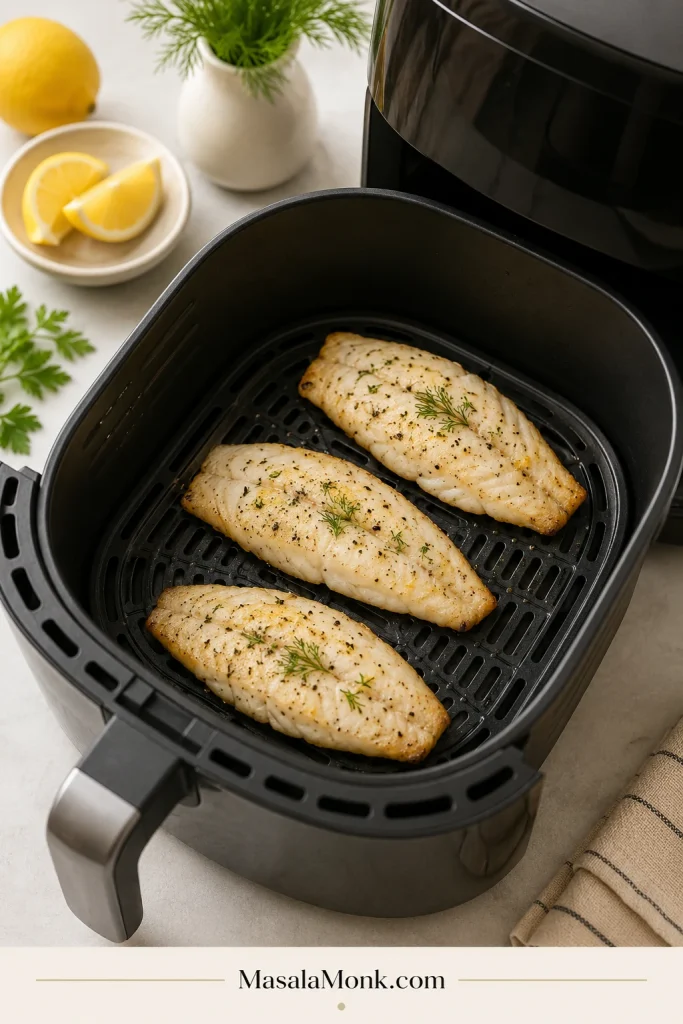
Use the air fryer when you want a quick, lightly browned fillet and do not feel like heating the oven. Keep the pieces in a single layer so the hot air can move around them.
Preheat the air fryer to 400°F / 204°C.
Blot the fillets well and season them.
Brush lightly with oil, melted butter, or a thin mayo-lemon mixture.
Air fry medium fillets for 6–8 minutes.
Check for tender flakes and a center temperature of 145°F / 63°C.
For breaded pieces meant for tacos, use smaller chunks and air fry around 350°F / 177°C for 5–6 minutes, or until the coating is golden and the fish is cooked through.
Air fryer cue: Keep pieces spaced in one layer.
For air fryer rockfish, keep the fillets in one spaced-out layer so the edges brown lightly instead of steaming.
Grilled Rockfish Fillets
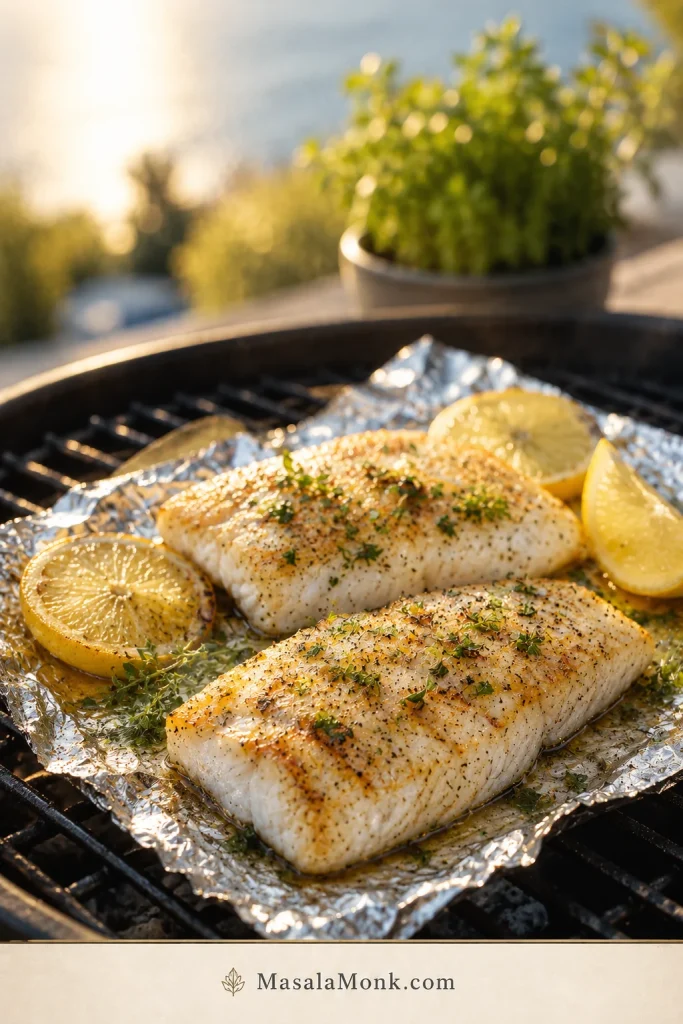
On the grill, delicate fillets need a little protection. Skin-on pieces are easier to grill directly than skinless ones. For thin or fragile fillets, use foil, a grill basket, or a cast iron skillet on the grill.
Heat the grill to medium-high, about 400–450°F / 204–232°C.
Clean and oil the grates well if grilling directly.
Blot the fish dry and brush lightly with oil.
Grill thin fillets for 2–3 minutes per side.
Grill medium fillets for 3–4 minutes per side.
Use a fish spatula and flip gently.
If you are worried about sticking or breakage, foil is your friend. You will lose some direct-grill char, but the fish will be much easier to manage.
Grill cue: Use foil or a grill basket for delicate fillets.
When grilling rockfish, use foil or a grill basket to protect the delicate fillets while still adding gentle smoky flavor.
Rockfish for Tacos
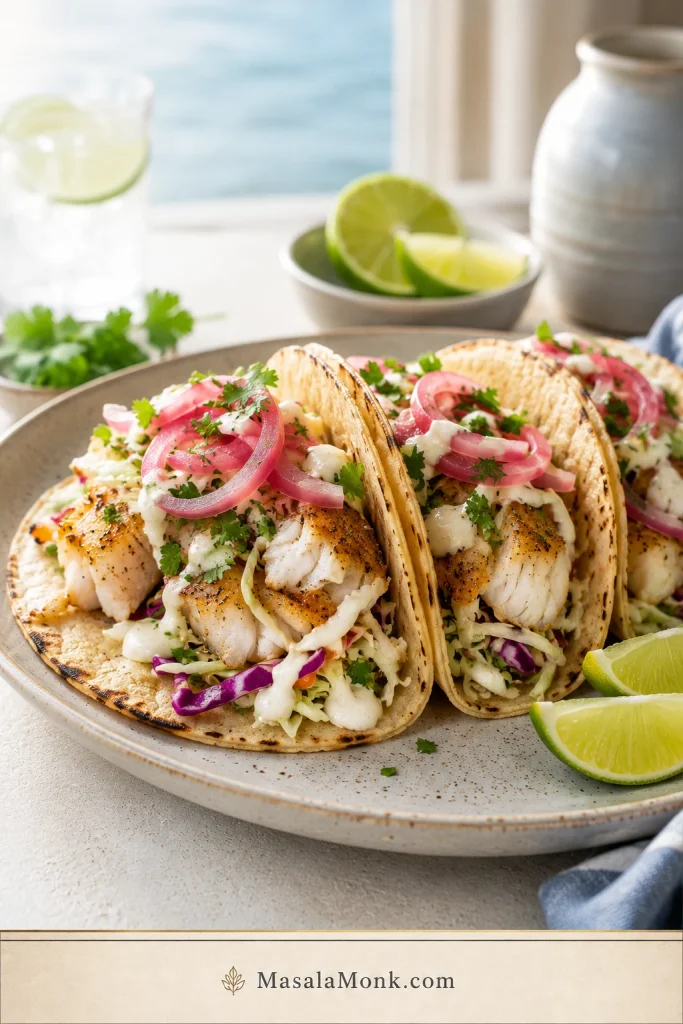
For tacos, rockfish is a quiet little win: mild enough for slaw and sauce, sturdy enough to flake into warm tortillas. Use pan-seared, blackened, grilled, or air-fried fish, then add cabbage slaw, lime, crema, chipotle mayo, salsa, avocado, cilantro, or pickled onions.
You can cook the fillets whole and flake them into tacos, or cut the fish into larger chunks before cooking. For a full taco-style dinner with slaw, sauce, toppings, and method choices, use this fish tacos recipe as the next step.
Blackened seasoning is especially good here because the smoky spices balance the mild fish and creamy slaw. For a brighter topping, spoon on fresh mango salsa with lime, cilantro, and a little chile.
Taco cue: Add slaw, lime, crema, and crunch for contrast.
Rockfish tacos work because mild white fish needs contrast: crunchy slaw, lime, crema, cilantro, and pickled onions add freshness.
Whole rockfish note: this recipe is written for fillets. Whole rockfish needs a different timing approach because size, stuffing, bones, and oven temperature all change the cook time.
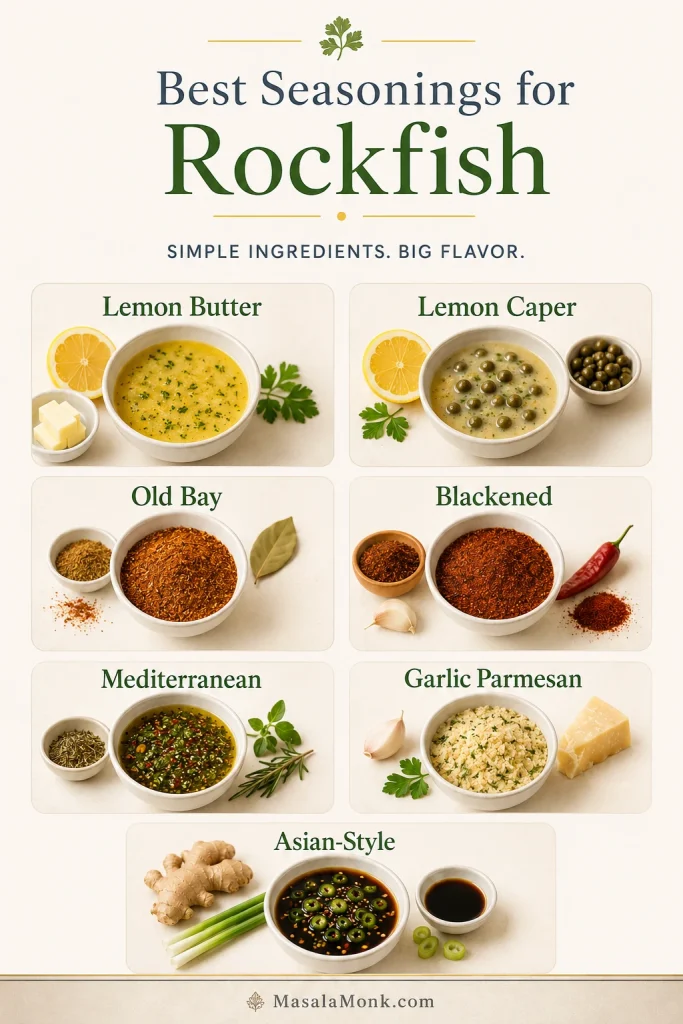
Because the flavor is gentle, you can take the seasoning in several directions. For the first cook, choose lemon butter. If the fish is headed for tacos, blackened seasoning brings the best contrast. When you want crunch, move toward panko.
Flavor Style
Best For
What to Use
Lemon butter
Best first cook
Butter, lemon, garlic, parsley
Lemon caper
Restaurant-style skillet fish
Butter, lemon, capers, dill or parsley
Old Bay
Baked or crispy rockfish
Old Bay, lemon, butter, parsley
Blackened
Best taco pick
Paprika, cayenne, garlic powder, thyme, oregano
Mediterranean
Baked fillets
Olive oil, tomato, oregano, capers, lemon
Garlic parmesan
Baked crusted fish
Parmesan, breadcrumbs, garlic, lemon
Asian-style
Pan-cooked or steamed fish
Soy sauce, ginger, scallions, sesame oil
The skillet sauce should taste like butter first, lemon second, and garlic in the background. For a bolder seafood plate, a small spoonful of garlic butter Cajun seafood boil sauce can also work well with simply cooked rockfish.
For crispy, panko, or fried-style fish, a cold spoonful of homemade tartar sauce is often a better match than lemon butter.
Flavor cue: Choose lemon butter, capers, Old Bay, blackened spice, or aromatics.
Because rockfish is mild, it handles many flavor directions, from lemon butter and capers to Old Bay, garlic parmesan, and Asian-style aromatics.
What to Serve with Rockfish
Because the fish is light, the best sides depend on the kind of dinner you want. Keep the plate fresh and simple, or turn it into a cozier meal with potatoes and extra sauce.
For a Light Dinner
Serve the fish with steamed rice, green beans, roasted asparagus, extra lemon, or a cool cucumber salad. This keeps the meal fresh and lets the pan sauce shine.
Serving cue: Use rice to catch lemon butter, capers, herbs, and pan juices.
Rice is a smart side for pan-seared rockfish because it absorbs the lemon butter sauce, capers, herbs, and pan juices.
For a Comfort-Food Plate
Pair the fillets with roasted potatoes, garlic bread, or creamy mashed potatoes. Spoon a little sauce around the edges so the potatoes catch the lemony butter.
For Tacos or Sandwiches
Use warm tortillas, soft rolls, lime, salsa, and crisp coleslaw. The cool crunch is especially good with blackened or panko-crusted fish.
Easy Rockfish Variations
Garlic Lemon Butter Rockfish
For the cleanest version, skip the capers. Add an extra garlic clove and a little lemon zest for a brighter garlic butter flavor.
Lemon Caper Rockfish
For a restaurant-style finish, add 1–2 tbsp drained capers to the butter sauce. The salty, briny flavor works well with parsley or dill.
Old Bay Baked Rockfish
When you want an easy oven version, season the fillets with Old Bay, lemon juice, and a little melted butter. Bake at 400°F / 204°C until the thickest part turns tender.
Blackened Rockfish
For something smoky and bolder, coat the fillets with paprika, garlic powder, onion powder, cayenne, thyme, oregano, salt, and pepper. Sear in a hot skillet and serve with lime, slaw, or tacos.
Panko Crusted Rockfish
For a crispier dinner, brush the fillets with a little mayo or beaten egg, then press on a mixture of panko, parmesan, garlic powder, and lemon zest. Bake at 425°F / 218°C until the topping is golden and the center is tender.
If you want a true fried-fish crust instead of a baked panko topping, use this crispy fish batter recipe as the better path.
Mediterranean Rockfish
For a lighter baked plate, add olive oil, cherry tomatoes, oregano, lemon, capers, and a few olives. The juices from the tomatoes make a simple sauce around the fish.
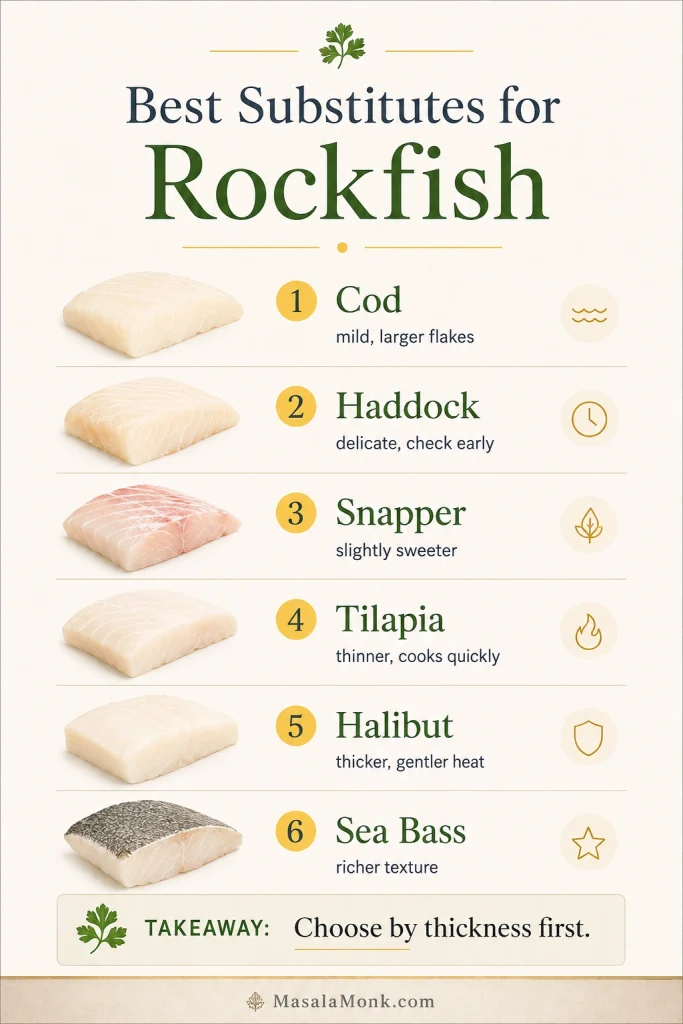
Best Substitutes for Rockfish
If you cannot find rockfish, choose another mild white fish with a similar thickness. Timing changes more with thickness than with the fish name.
Substitute
Best Method
Notes
Cod
Bake or pan-sear
Mild flavor, larger flakes, can be thicker
Haddock
Bake or pan-sear
Delicate and lean; check early
Snapper
Pan-sear or grill
Slightly sweeter, good with lemon and herbs
Tilapia
Pan-sear or air fry
Usually thinner, cooks quickly
Halibut
Pan-sear or bake
Thicker and meatier; use gentler heat after searing
Sea bass
Pan-sear or grill
Richer texture, excellent with lemon butter
Substitute cue: Choose another mild white fish by thickness first.
If rockfish is unavailable, choose another mild white fish by thickness first; then reduce or extend the cooking time as needed.
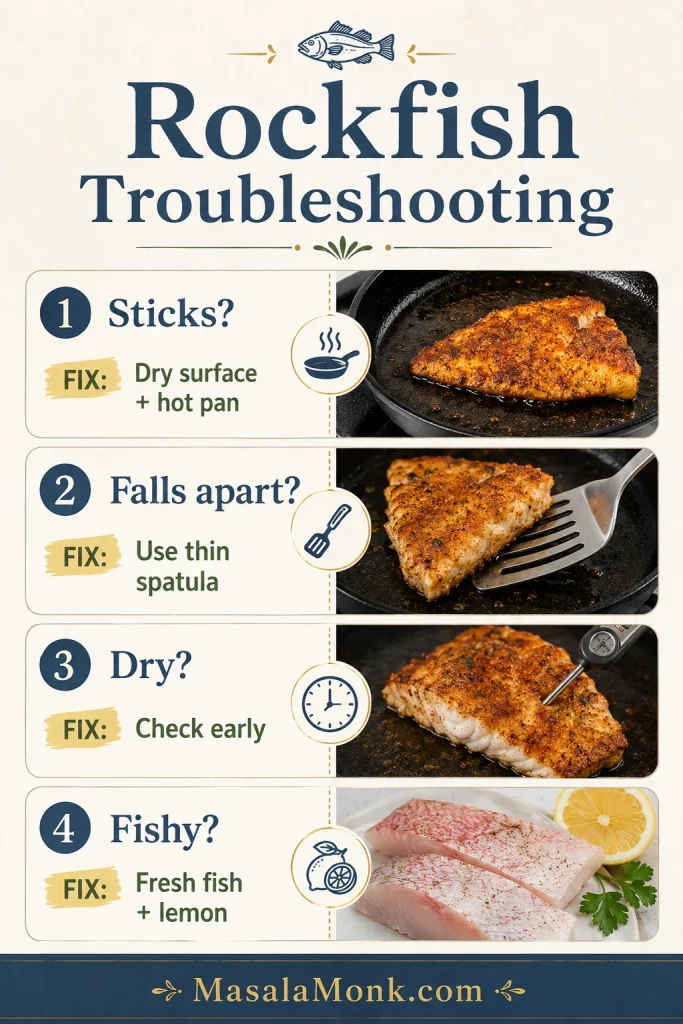
Troubleshooting Rockfish
Fix-it cue: For sticking, breaking, dryness, or fishy flavor, return to basics.
If the fish sticks, breaks, dries out, or tastes fishy, return to the basics: dry surface, hot pan, gentle flipping, early checking, and lemon.
Why Did My Rockfish Stick to the Pan?
If the fish sticks, it usually means the surface was still wet, the pan was not hot enough, there was not enough oil, or the fish was nudged before the crust had time to form. Dry the surface well, preheat the skillet, coat the bottom with enough fat, and give the first side time to release.
Why Did My Rockfish Fall Apart?
Delicate fillets can break if they are flipped too soon, handled with a thick spatula, or cooked past the point of tender flakes. A light flour coating and a thin fish spatula both help. If a piece still breaks, spoon the sauce over it and serve it anyway; it will still taste good.
Why Is My Rockfish Dry?
If the fish turns dry, it probably stayed on the heat a little too long. Rockfish is lean, so it does not give you much extra time once the center is cooked. Start checking early, lower the heat after the first sear, and remove the fillets as soon as the thickest part turns opaque and juicy.
How Do I Make Rockfish Less Fishy?
Start with fish that smells clean and fresh, not sour or strongly fishy. Thaw frozen fillets slowly in the fridge, blot them well, and cook them with lemon, garlic, herbs, and butter. Avoid overcooking, which can make the flavor stronger.
What If My Fillets Are Very Thin?
Very thin pieces cook fast. Use medium heat instead of very high heat, check after 2 minutes per side, and remove them as soon as they give gently under a fork. They are also easier to break, so flip carefully.
What If My Fillets Are Thick?
Thicker fillets need a little more time, but high heat the whole way can overbrown the outside before the center cooks. Sear the first side, flip, then lower the heat slightly so the middle can finish gently.
What If the Butter Starts Burning?
Lower the heat and add a small splash of oil if needed. Butter browns quickly, especially in a hot skillet with flour. That is why the recipe heats the oil first and adds only a little butter before the fish goes in.
Cooked rockfish is best eaten right away, when the flakes are moist and the lemon butter is fresh. If you do have leftovers, keep them gentle and use them in meals where the fish can be flaked instead of served as a whole fillet again.
Refrigerate: Store cooked rockfish in an airtight container for up to 2 days.
Reheat gently: Warm it in a covered skillet over low heat with a splash of water, broth, or lemon butter.
Avoid harsh reheating: Long microwaving can make the fish dry and rubbery.
Use leftovers smartly: Flake leftover fish into tacos, salad, pasta, a seafood sandwich, or a rice bowl built like this salmon bowl.
Freezing cooked rockfish is possible, but the texture can suffer. If you do freeze it, wrap it tightly and use it later in dishes where the fish will be flaked rather than served as whole fillets.
Rockfish Recipe FAQs
What is the best way to cook rockfish?
Pan-searing is one of the best ways to cook rockfish fillets because it is quick and gives the fish a lightly golden outside. Baking is better for hands-off cooking, and grilling works well with foil, a grill basket, or skin-on fillets.
How long does rockfish take to cook?
Most fillets take 6–10 minutes in a skillet or 10–16 minutes in the oven, depending on thickness. Start checking early; it is easier to give rockfish another minute than to undo overcooking.
What temperature should rockfish be cooked to?
Rockfish should reach 145°F / 63°C in the thickest part. Without a thermometer, look for flesh that is opaque and feels tender at the thickest point.
Does rockfish taste fishy?
The flavor is usually mild, clean, and slightly sweet. It should not taste strongly fishy if it is fresh, properly thawed, and not overcooked.
Should I remove the skin from rockfish?
Skinless fillets are easiest for this skillet version. Skin-on pieces also work, especially for grilling, because the skin helps hold the fish together. Cook them skin-side down first.
Can I cook frozen rockfish?
Yes, but thaw it first for the skillet. Frozen rockfish releases surface moisture as it thaws, and that moisture keeps it from browning. If the fish is still very cold or slightly icy, baking or air frying is more forgiving.
What seasoning is good on rockfish?
Lemon, garlic, butter, black pepper, Old Bay, paprika, Cajun seasoning, dill, parsley, capers, and thyme all work well. For the first cook, keep it simple with salt, pepper, garlic powder, lemon, and butter.
Is rockfish good for tacos?
Yes. Rockfish is mild enough for slaw and sauce but sturdy enough to flake into tortillas. Pair it with cabbage slaw, lime, crema, chipotle mayo, salsa, avocado, or blackened seasoning.
What fish can I substitute for rockfish?
Cod, haddock, snapper, tilapia, halibut, sea bass, or other mild white fish can work as substitutes. Choose fillets with similar thickness so the timing stays close.
Why is my rockfish mushy?
Mushy fish can come from poor thawing, excess moisture, or overhandling. Thaw frozen fillets in the fridge, dry the surface well, and avoid moving them around too much once they are in the pan.
The Simple Secret to Good Rockfish
Rockfish does not need a heavy hand. Dry it well, cook it briefly, and pull it while the center is still juicy. Once you get that rhythm, the same fillets can become lemon butter dinner, baked fish, tacos, or a quick air fryer meal without stress.
Start with the skillet version because it teaches you the feel of the fish. After that, you can bake it, air fry it, grill it, or tuck it into tortillas with slaw and lime. The lemon butter does the rest, catching in the flakes and making even a simple plate of rice or potatoes feel complete.
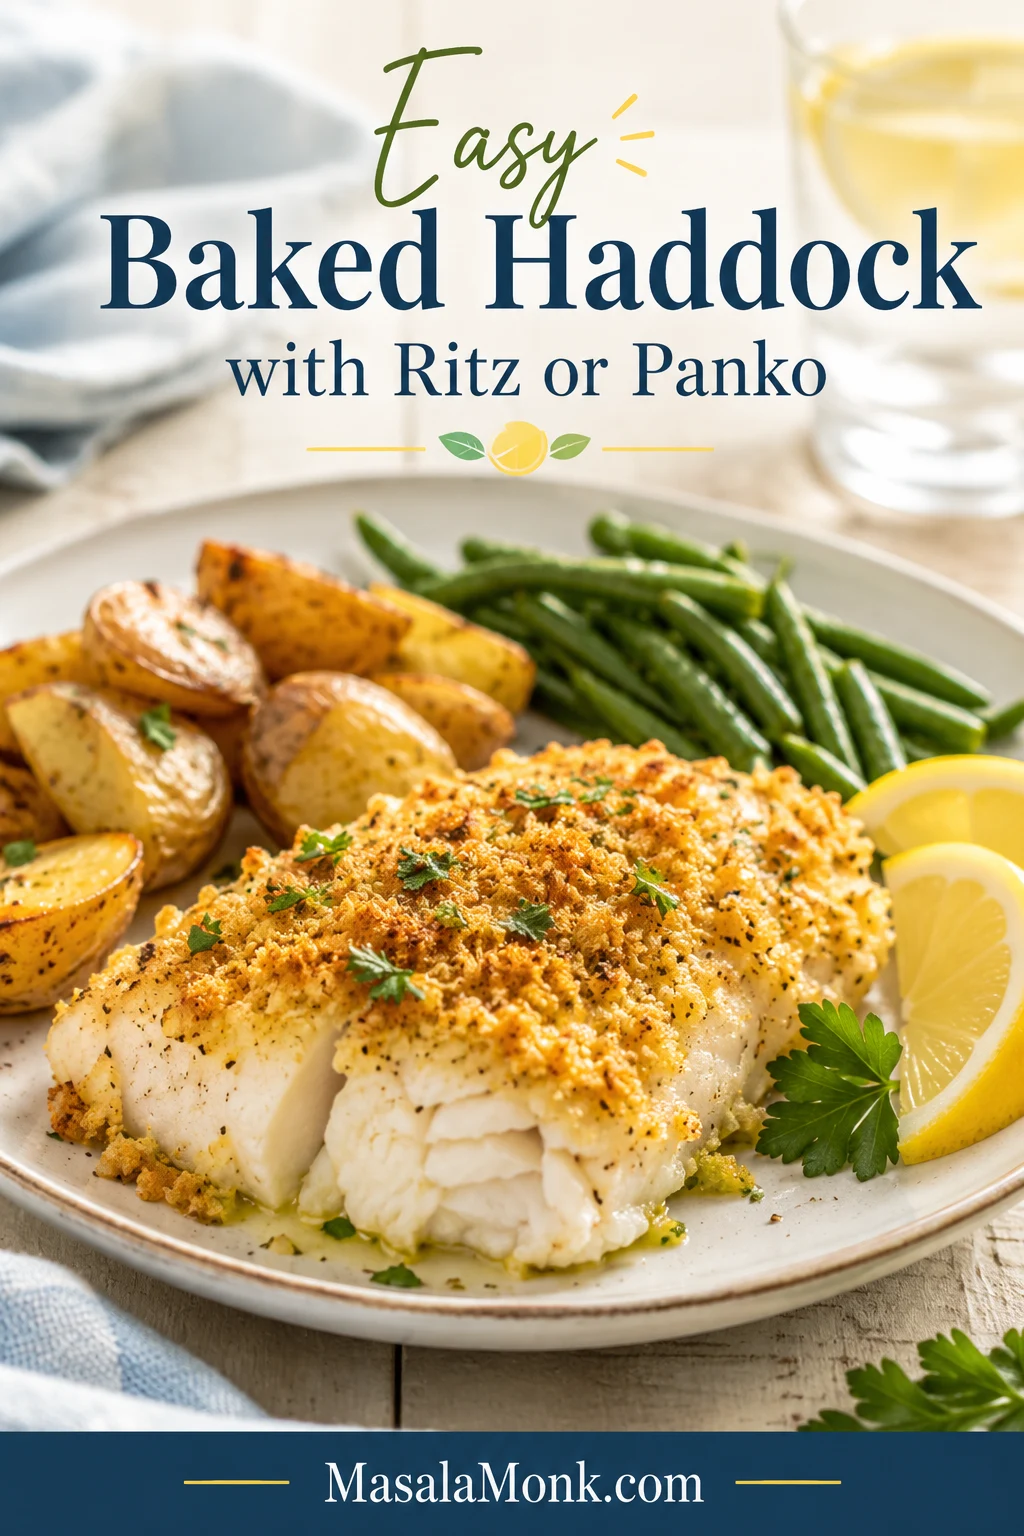
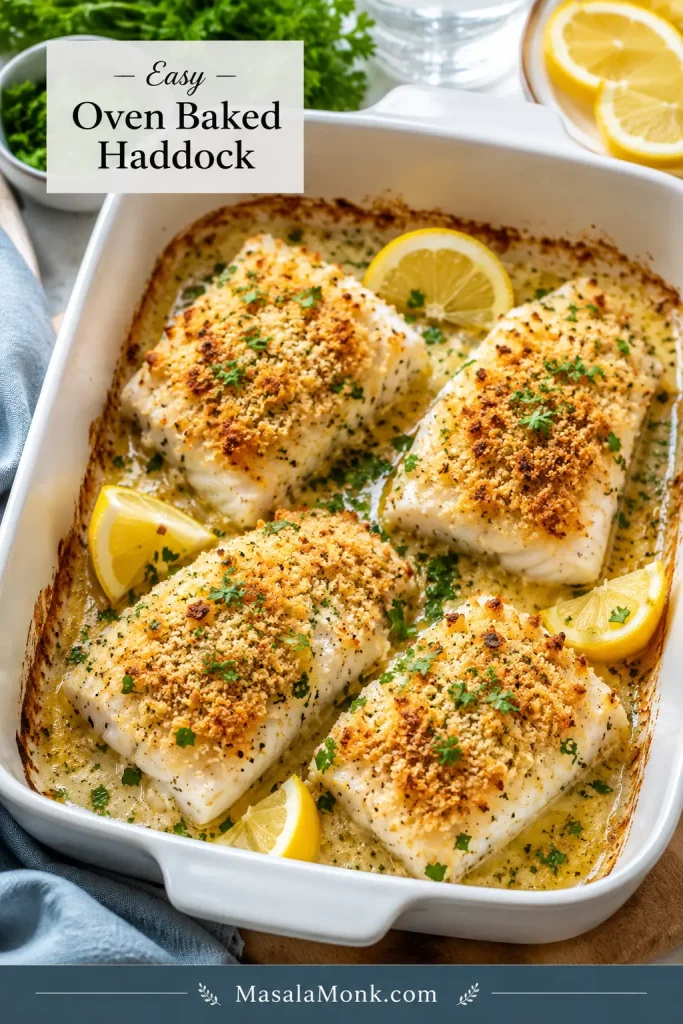
This baked haddock recipe gives you tender, flaky white fish with a golden buttery topping in about 25 minutes. It is simple oven fish, but with the small details that keep haddock from turning dry, watery, bland, or hidden under soggy crumbs.
Haddock cooks quickly, which can feel a little unforgiving at first. The rhythm is simple: dry the fish, season it directly, add a buttery topping, and stop baking when the fish is done. After that, it becomes one of the easiest weeknight seafood dinners.
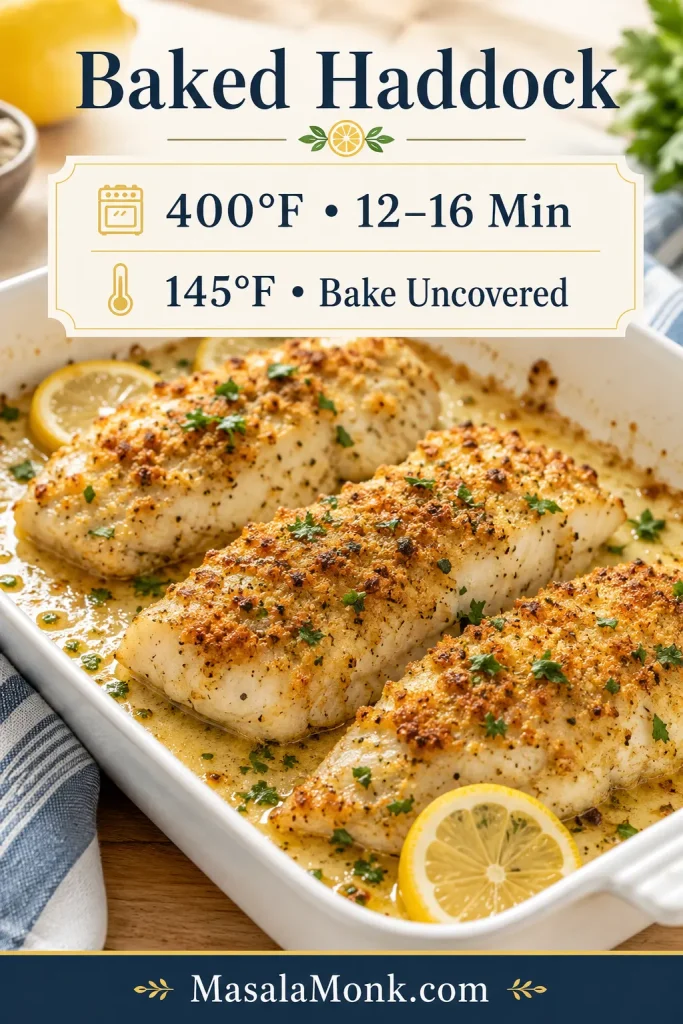
Quick Answer: Bake Time, Temperature, and Doneness
Bake haddock fillets at 400°F / 200°C for 12 to 16 minutes, depending on thickness. The fish is done when it turns opaque, flakes easily with a fork, and reaches 145°F / 63°C in the thickest part.
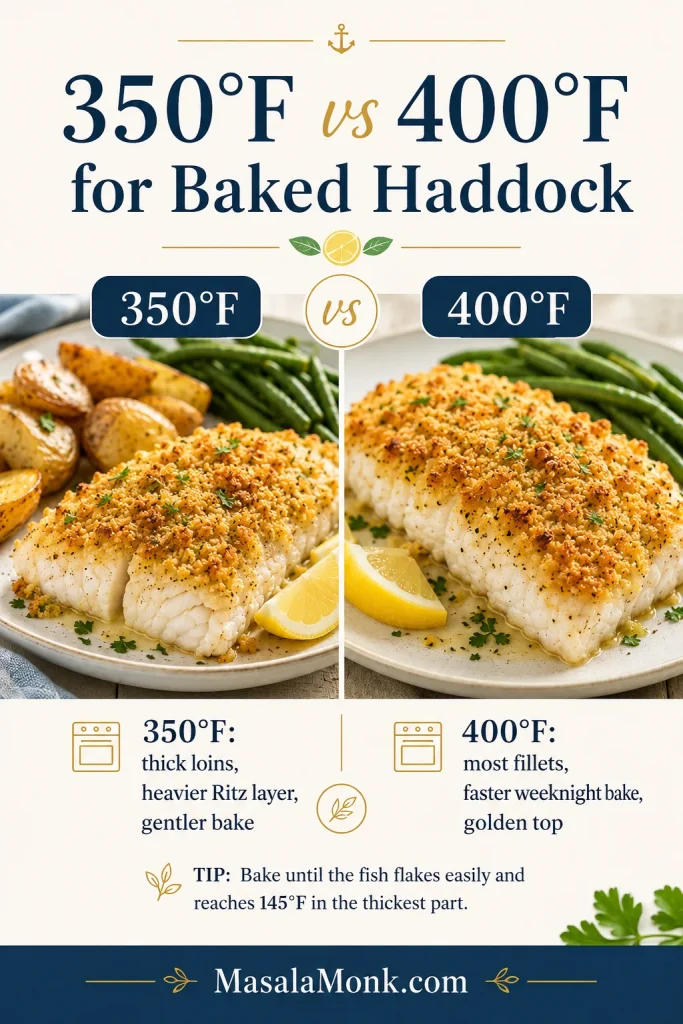
400°F / 200°C is the easiest everyday temperature for quick, flaky baked haddock.
350°F / 175°C is gentler for thick haddock loins, a heavier Ritz cracker topping, or a more traditional New England-style bake.
Bake uncovered when using panko, breadcrumbs, or Ritz crackers.
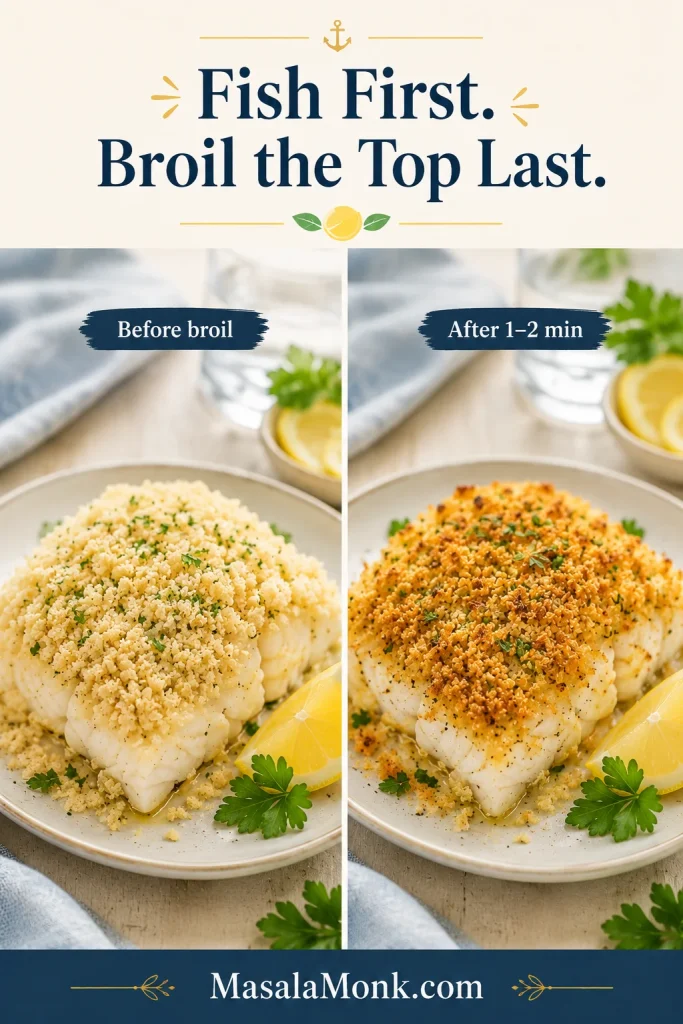
The fish comes first. The crumbs come second. Pull the haddock when it is done; the broiler can finish a pale surface in a minute.
A pale topping can be fixed. Overcooked fish cannot. That one idea makes this recipe much easier.
For most haddock fillets, 400°F gives a fast oven bake; then 145°F confirms the center is cooked without drying out.
Easy Baked Haddock Recipe
Easy Baked Haddock with Buttery Ritz or Panko Topping
Mild haddock fillets baked with lemon, butter, herbs, and your choice of panko, breadcrumbs, or crushed Ritz crackers. The fish turns soft and flaky while the surface becomes golden and savory.
Prep Time
10 minutes
Cook Time
12 to 16 minutes
Total Time
About 25 minutes
Servings
4
Yield
4 baked haddock fillets
Oven Temperature
400°F / 200°C
Doneness
145°F / 63°C, opaque, and flaky
Ingredients
4 skinless boneless haddock fillets, about 6 oz / 170 g each, or about 1 1/2 lb / 680 g total
1 tablespoon olive oil or melted butter, for the baking dish and fish
Fine salt, to taste: about 3/4 teaspoon for plain crumbs, or 1/4 to 1/2 teaspoon for Ritz crackers, salted butter, or Parmesan
1/4 teaspoon black pepper
1 tablespoon lemon juice / 15 ml, plus lemon wedges for serving
1 teaspoon lemon zest, optional but excellent in the topping
1/2 teaspoon garlic powder
1/2 teaspoon paprika
2 tablespoons chopped parsley, plus more for serving
For a Breadcrumb or Panko Topping
3/4 to 1 cup panko or breadcrumbs
4 tablespoons melted butter / 56 g
1/4 cup grated Parmesan / about 22 g, optional
For a Ritz Cracker Topping
1 sleeve Ritz crackers, about 34 crackers / roughly 90 to 100 g, crushed
3 to 4 tablespoons melted butter / 42 to 56 g
1/4 to 1/2 teaspoon fine salt total, added only after tasting the cracker mixture
Instructions
Preheat the oven. Heat the oven to 400°F / 200°C. Lightly grease a 9×13-inch / 23×33 cm baking dish.
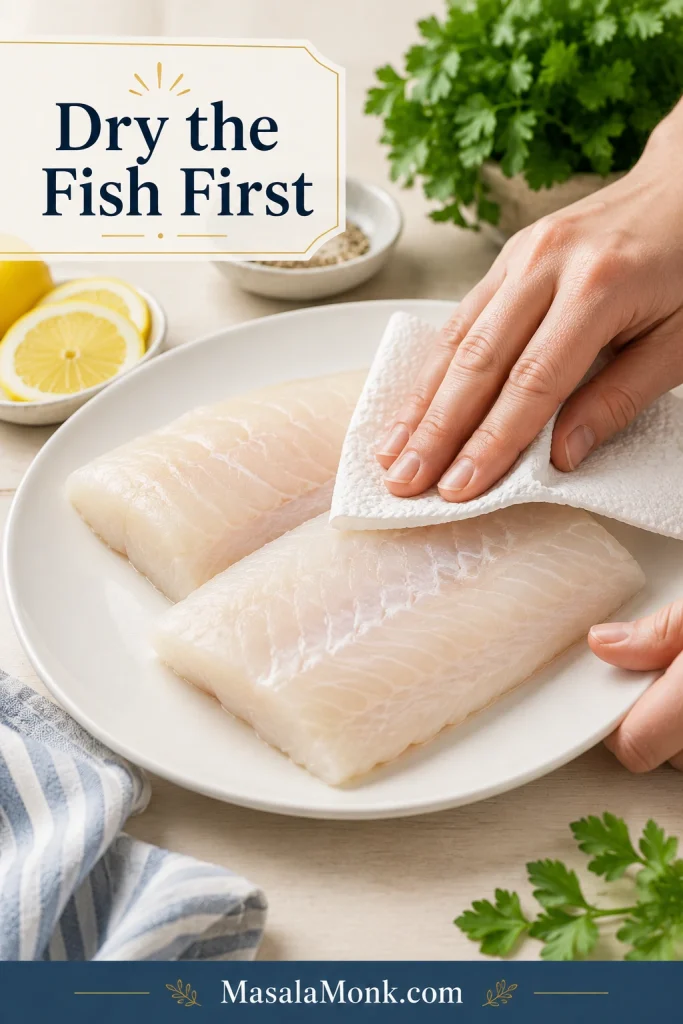
Dry the haddock. Pat the fillets very dry with paper towels. Dry fish before the oven means better texture after the oven.
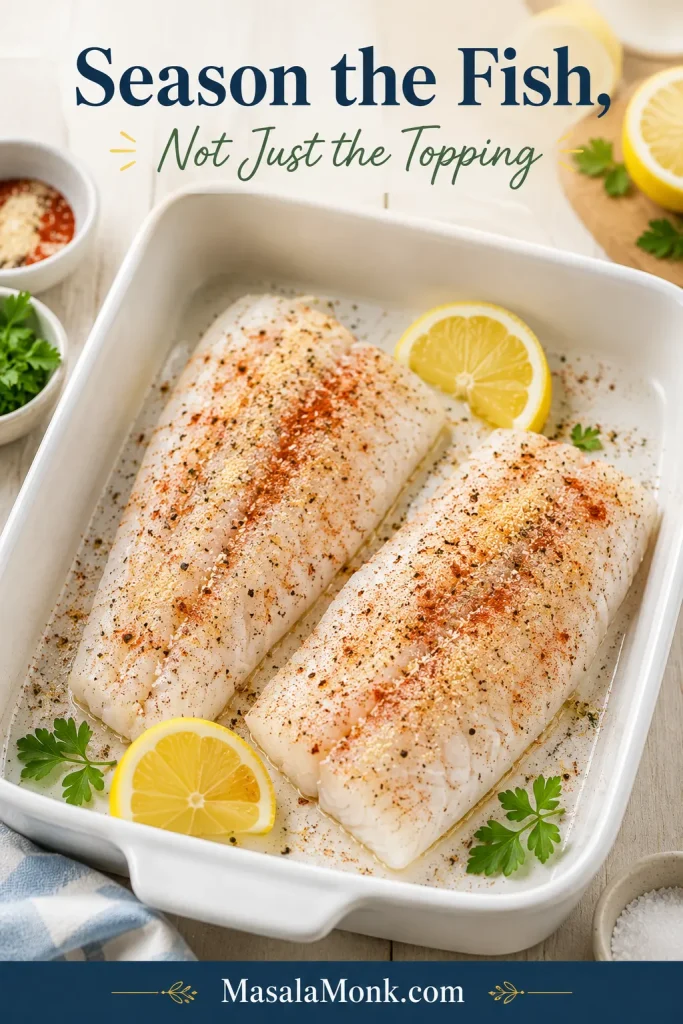
Season the fish. Arrange the fillets in one layer. Brush lightly with olive oil or melted butter, then season with salt, pepper, lemon juice, garlic powder, and paprika.
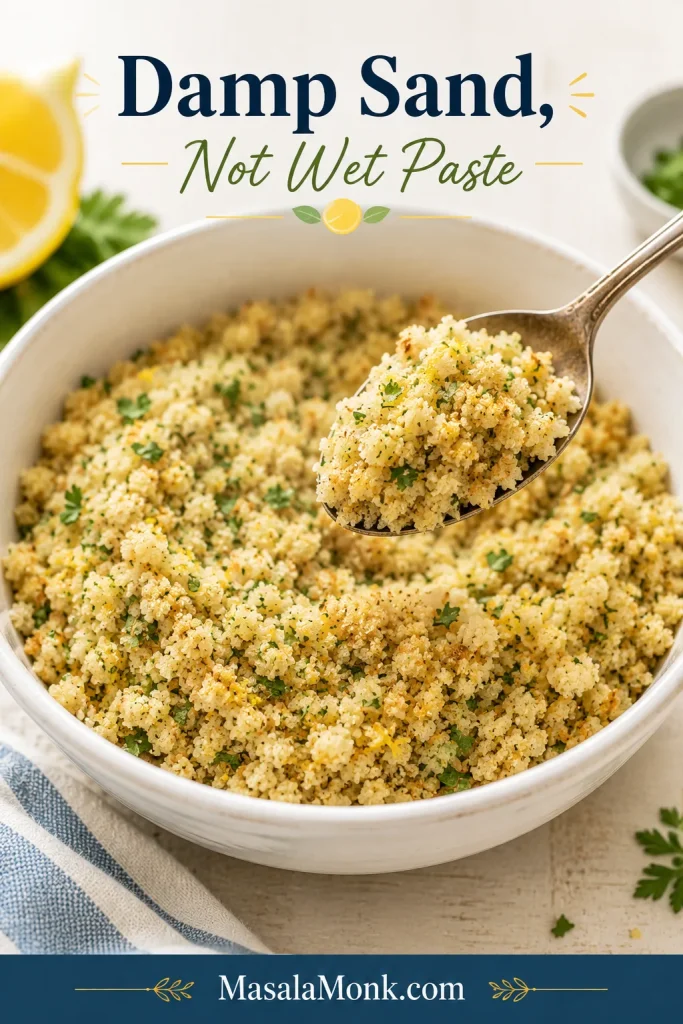
Make the topping. Mix panko, breadcrumbs, or crushed Ritz crackers with melted butter, lemon zest, parsley, and Parmesan if using. The mixture should look like damp sand, not wet paste.
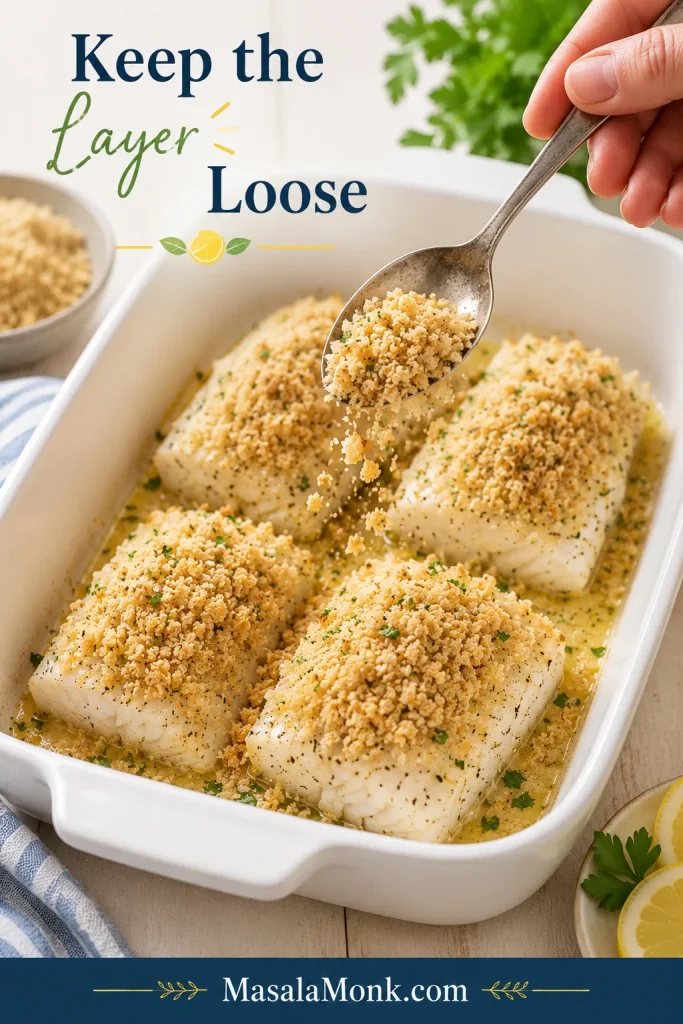
Top the fillets. Spoon the mixture over the fish and press gently so it sticks. Keep the layer loose rather than packed down.
Bake uncovered. Bake for 12 to 16 minutes, depending on thickness, until the fish is opaque and flakes easily.
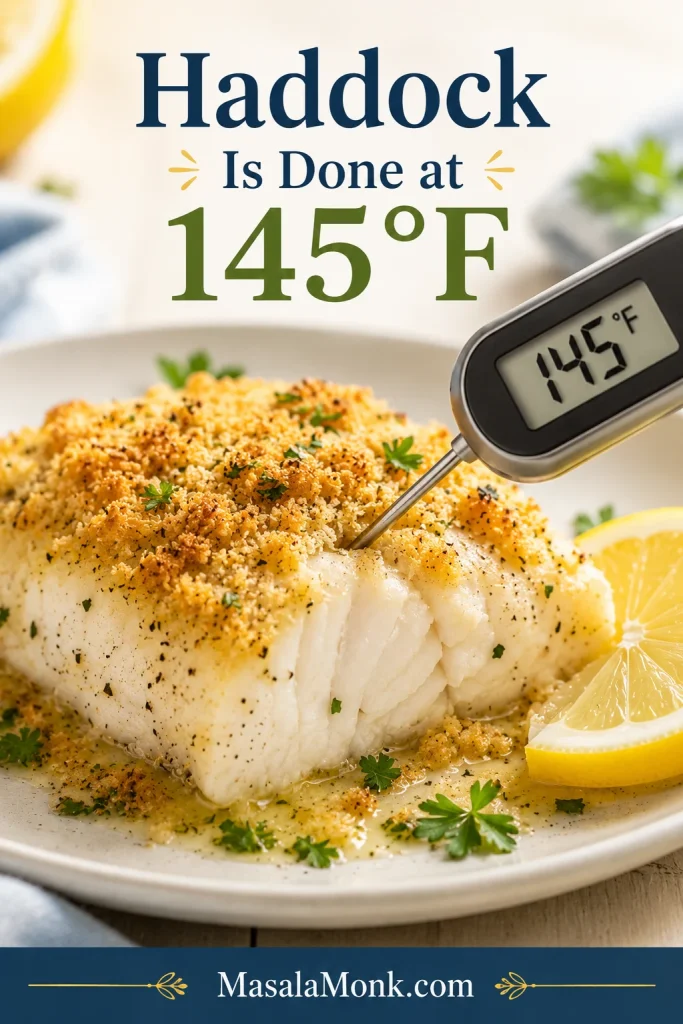
Check doneness. For the most reliable result, check the thickest part with an instant-read thermometer. Haddock is done at 145°F / 63°C.
Brown only if needed. If the fish is done but the topping is pale, broil, or use the oven grill, for 1 to 2 minutes. Watch closely.
Rest and serve. Let the fish rest for 2 minutes, then serve with lemon wedges and more parsley.
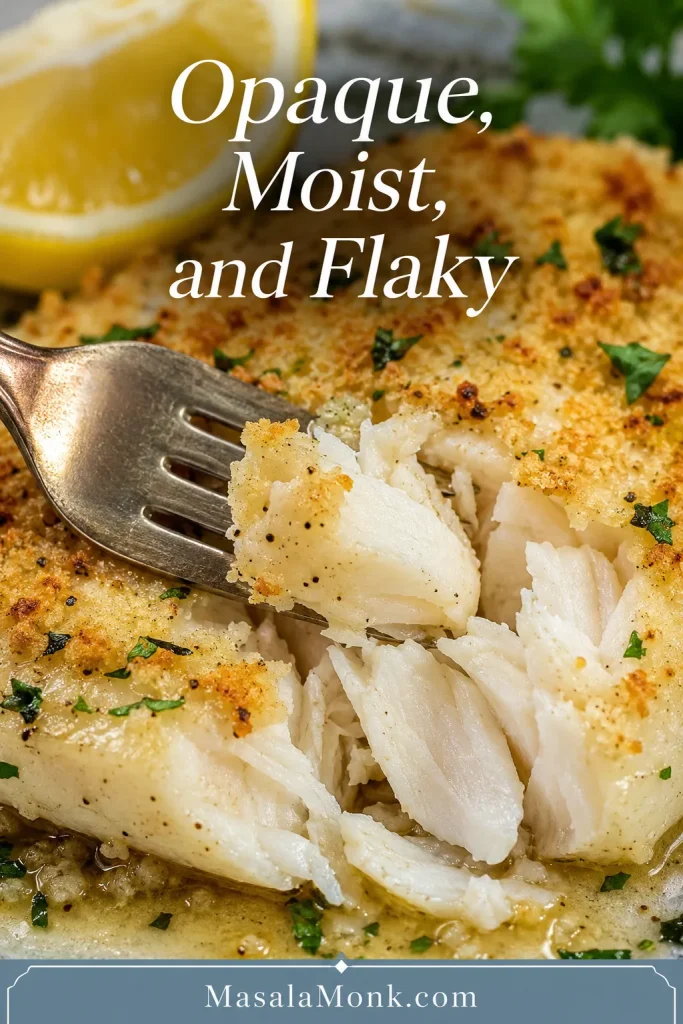
When it is right, the fish should lift in soft flakes, the center should look opaque and moist, and the buttery layer should be golden without feeling greasy.
Recipe Notes
For thicker haddock loins or a heavier Ritz layer, bake at 350°F / 175°C for 18 to 25 minutes instead.
Thin fillets may be done in less than 12 minutes, so start checking early.
If using a fan or convection oven, begin checking 2 to 3 minutes early.
Mixed-size fillets need mixed timing: lift out thinner pieces first and let thicker ones finish.
Serve soon after baking. The fish stays moist, but the golden layer is best while warm and fresh.
Baking the fillets uncovered helps the topping toast while the haddock underneath stays tender, moist, and easy to lift from the dish.
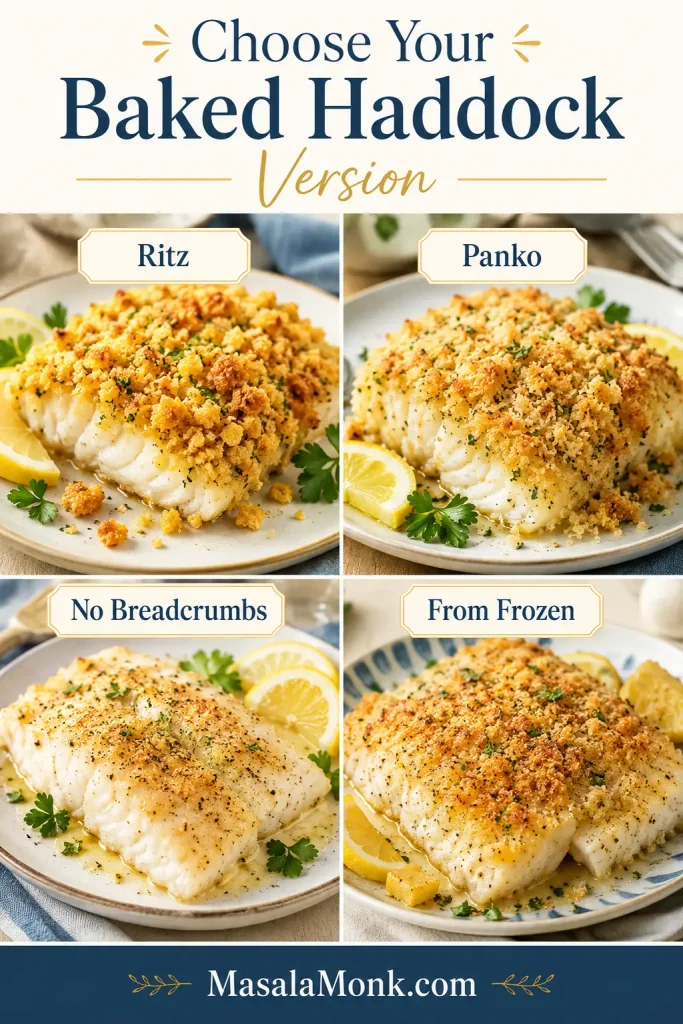
Start with the dinner you want, then choose the topping. Ritz gives you buttery New England comfort, panko gives you crunch, breadcrumbs keep it classic, and lemon butter keeps the plate lighter.
Once you know the style you want, this guide helps you choose between Ritz, panko, no breadcrumbs, or a from-frozen method.
Best Topping by Dinner Style
What You Want
Use
Best Temperature
Why It Works
New England baked haddock
Crushed Ritz crackers
350°F or 400°F
Buttery, cozy, and classic with lemon and parsley.
Crispy baked haddock without frying
Panko and Parmesan
400°F
Light crunch without a pot of oil.
Soft classic baked fish
Plain breadcrumbs
375°F or 400°F
Gentler texture and familiar flavor.
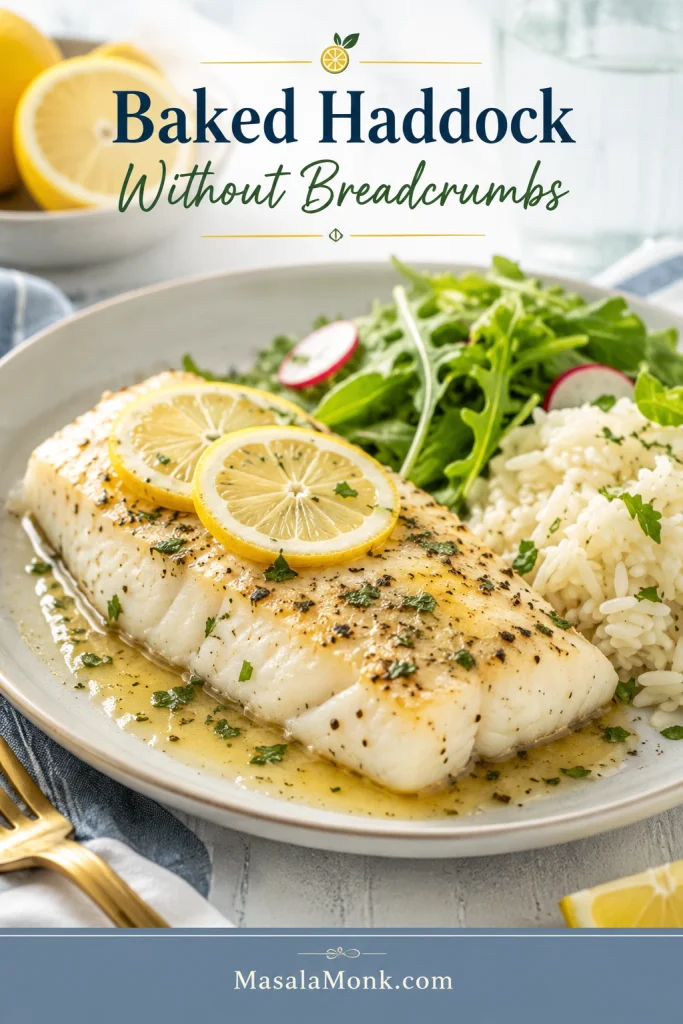
Baked haddock without breadcrumbs
Lemon, butter or olive oil, herbs
400°F
Clean, bright, and lighter.
Thick center-cut haddock
Haddock loins
350°F or longer 400°F timing
Thicker fish needs gentler timing.
Baked haddock from frozen
Emergency frozen method
400°F
Bake briefly first, blot moisture, then season.
Use this topping comparison to choose the texture you want before you bake: buttery Ritz, crisp panko, or softer breadcrumbs.
Choose Ritz for buttery New England baked haddock, panko for a crisp finish, or breadcrumbs for a softer classic crust.
For a first try, choose Ritz if you want the coziest fish dinner and panko if you want the crispest finish. Both make mild haddock feel more complete than plain baked fish.
Craving fried fish instead of baked fish? This fish batter recipe is the better path.
Haddock needs three things: a dry surface, seasoning on the fish itself, and the confidence to stop baking before the fillets turn firm. The buttery layer adds flavor and comfort, but the fish is still the main event.
If baked fish has disappointed you before, it was probably not because you did anything dramatic wrong. Delicate white fish simply rewards early checking. Once you learn that, this recipe feels relaxed instead of risky.
The buttered surface protects the fish, the lemon keeps the flavor bright, and the broiler gives you a backup plan when the fish is done before the surface looks perfect.
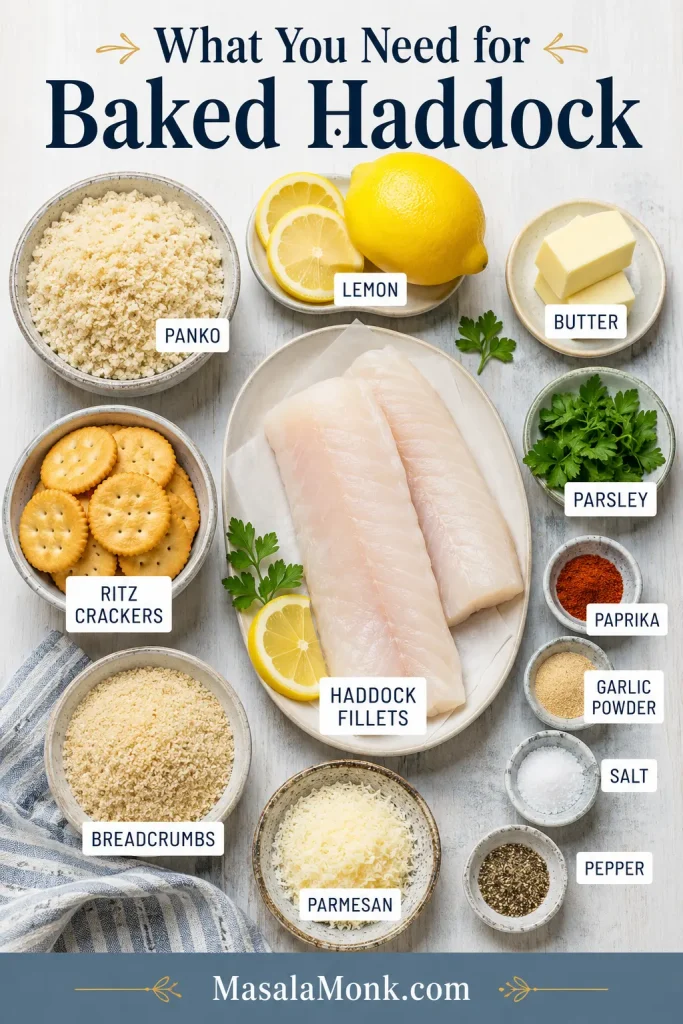
Ingredients You’ll Need
The ingredient list is short, so balance matters. Haddock is mild; it needs direct seasoning and enough butter in the topping to brown without turning greasy.
Before choosing your topping, gather the essentials: mild haddock, lemon, butter, herbs, and either Ritz crackers, panko, or breadcrumbs.
Haddock Fillets
Skinless boneless haddock fillets are easiest. Four fillets, about 6 oz / 170 g each, fit well in a 9×13-inch baking dish. Thinner pieces cook quickly; thick haddock loins need more time. Skin-on haddock can still be baked skin-side down.
Butter or Olive Oil
Butter gives the most classic flavor and helps the surface turn golden and savory. Olive oil works when you want a lighter plate, especially with plenty of lemon and herbs.
Panko, Breadcrumbs, or Ritz Crackers
Panko gives the lightest crunch. Fine breadcrumbs make a softer classic crust. Ritz crackers bring buttery New England comfort and need a lighter hand with salt.
Crush Ritz crackers into coarse pieces, not powder. You want little buttery bits that toast on top of the fish.
Lemon, Garlic, Paprika, and Herbs
Lemon brightens the fish, garlic powder seasons evenly, paprika adds color, and parsley keeps the plate fresh. For a seafood-seasoning flavor, replace the paprika with a small pinch of seafood seasoning and reduce the salt.
Parmesan
Parmesan is optional, but it works beautifully with panko. It adds savory depth and helps the panko crust taste more finished.
Step-by-Step Tips for Better Baked Haddock
The recipe card gives you the fast version. These cues help with thin fillets, thick loins, frozen fish, and heavier toppings.
1. Start with dry fillets
Pat both sides of the fish with paper towels. This one step helps seasoning stick and keeps the dish from turning watery.
First, pat the haddock dry; otherwise, extra surface moisture can make the fish steam and soften the topping.
2. Season the fish, not just the topping
Add salt, pepper, lemon juice, garlic powder, and paprika before the topping goes on. The golden layer should support the fish, not carry all the flavor by itself.
Next, season the haddock itself with lemon, salt, pepper, garlic, and paprika so the fish tastes good beneath the topping.
3. Keep the topping loose
Mix the panko, breadcrumbs, or crushed crackers with melted butter until the texture looks like damp sand. Spoon it over the fish, press gently, and stop there. A loose layer browns better than a packed one.
The topping should feel like damp sand because that texture browns better than dry crumbs or a greasy butter paste.
After mixing the crumbs, keep the layer loose on top of the fillets so the heat can move through the fish.
Spoon the topping on lightly instead of pressing it down, because a loose layer leaves room for heat to cook the fish evenly.
4. Bake uncovered
An uncovered dish gives the surface a chance to toast. Covering traps steam, which is useful for some foods but not for buttery topping on delicate fish.
5. Let the fish win
Pull the haddock when it flakes, even if the top is not quite as golden as you hoped. A minute under the broiler can fix the color.
If the haddock is done but the surface looks pale, broil the topping briefly instead of extending the bake time.
Once the topping choice is clear, the only real timing question is temperature.
A middle path when the topping browns quickly but the fish is thick
14 to 20 minutes
400°F / 200°C
Most everyday baked haddock fillets
12 to 16 minutes
425°F / 220°C
Very thin fillets or quick browning at the end
8 to 12 minutes
For most weeknight dinners, 400°F / 200°C is the easiest default. For a thicker loin or a heavy Ritz layer, 350°F / 175°C gives the fish more time to cook gently.
Use 400°F for most weeknight haddock fillets; however, thicker loins or a heavier Ritz layer often bake better at 350°F.
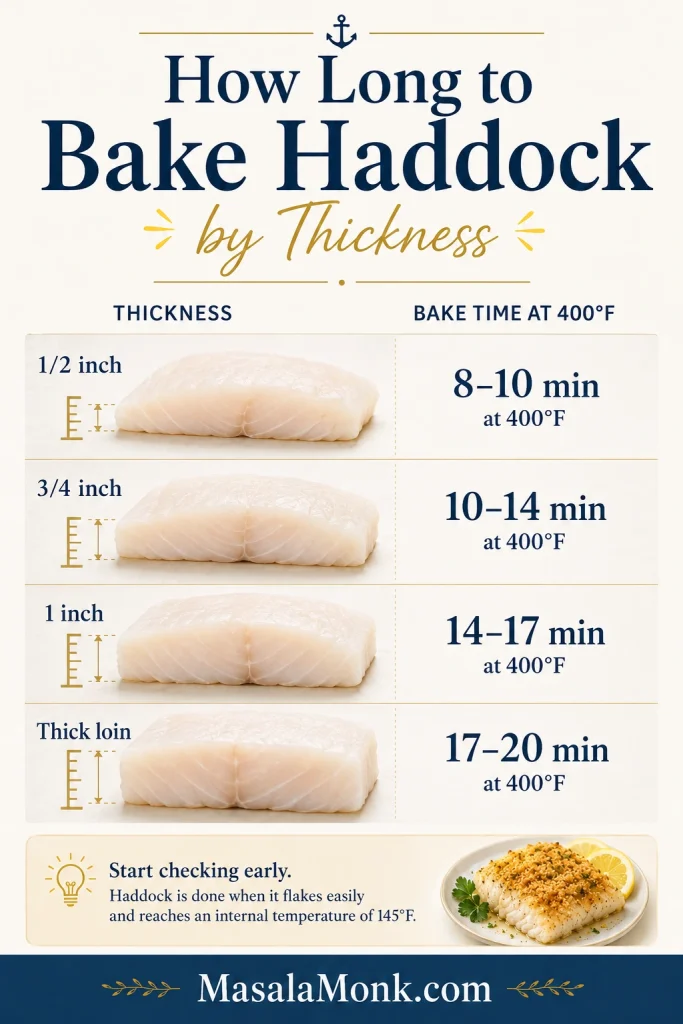
How Long to Bake Haddock by Thickness
Thickness matters more than weight. A thin 6 oz fillet can cook faster than a smaller but thicker haddock loin.
Fillets vs Loins
Haddock fillets are usually thinner and cook quickly, while haddock loins are thicker center-cut pieces that need more time and often do better with gentler heat.
If your dish has mixed sizes, remove the thinner fillets as soon as they are done and let the thicker pieces finish. This simple move prevents dry edges and underdone centers.
Haddock Thickness
At 400°F / 200°C
At 350°F / 175°C
Thin fillet, about 1/2 inch
8 to 10 minutes
12 to 15 minutes
Medium fillet, about 3/4 inch
10 to 14 minutes
15 to 18 minutes
Thick fillet, about 1 inch
14 to 17 minutes
18 to 22 minutes
Very thick haddock loin
17 to 20 minutes
22 to 25 minutes
Start checking at the early end of the range. Haddock rewards early checking more than extra oven time.
Because thickness changes bake time more than weight, thin fillets need early checking while thick haddock loins need extra minutes.
How to Know When Haddock Is Done
Haddock is done when the center is opaque, moist-looking, and flakes with gentle pressure. The most reliable check is an instant-read thermometer in the thickest part.
Temperature: 145°F / 63°C in the thickest part
Fork test: soft flakes separate without force
Visual cue: opaque center, not translucent or glossy
The first time, a thermometer is helpful. After that, you will start recognizing the soft flakes and opaque center by sight.
When the center turns opaque and separates into soft flakes, pull the haddock from the oven before the delicate fish overcooks.
A thermometer gives the clearest first-time answer: haddock is done when the thickest part reaches 145°F.
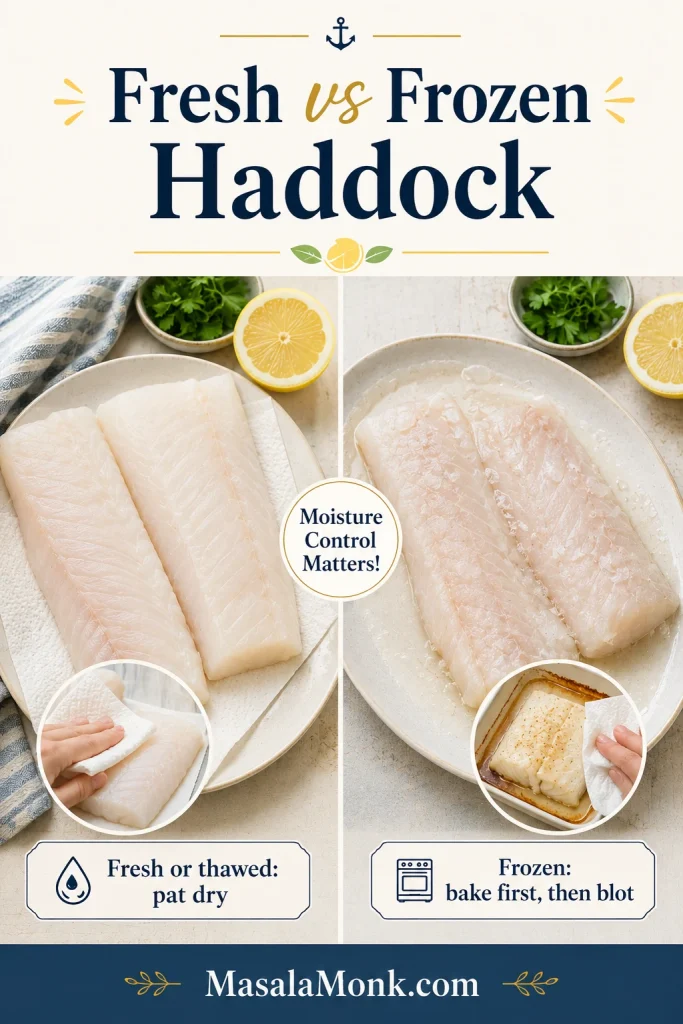
Fresh haddock is easiest, but frozen haddock works well when it is thawed and dried properly. Crumb-topped fish needs a dry surface more than extra liquid in the dish.
Fresh or thawed haddock needs a dry surface; for frozen haddock, a short first bake and a quick blot help control moisture.
Best Method: Thaw First
Thaw frozen haddock overnight in the refrigerator. For a faster method, keep the fish sealed and thaw it in cold water, changing the water every 30 minutes. The USDA describes refrigerator thawing, cold-water thawing, and microwave thawing as safe defrosting methods. Fish thawed by cold water or microwave should be cooked right away.
After thawing, unwrap the fillets and pat them dry before seasoning. That is the difference between a golden top and a wet crust.
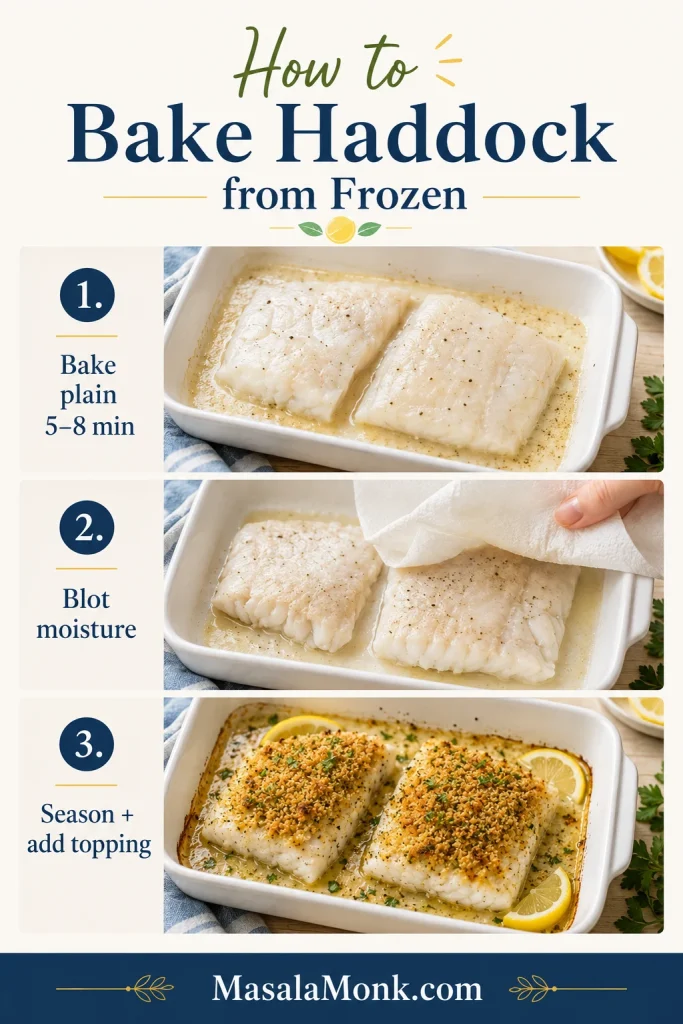
Emergency Method: Baking Haddock from Frozen
Thawed fish gives the best texture, but frozen fillets can still become dinner. Keep the topping off at first.
Heat the oven to 400°F / 200°C.
Place frozen fillets in a lightly greased baking dish.
Bake plain for 5 to 8 minutes, just until surface ice melts and moisture starts to release.
Blot or drain the dish carefully.
Season the fish, add the topping, and continue baking until the center reaches 145°F / 63°C.
This will get dinner on the table, but thawed fish gives you a drier surface and a better topping.
When baking haddock from frozen, bake it plain first, blot the released moisture, and only then add seasoning and topping.
Choose one flavor direction and keep it simple. Haddock is mild, so it does not need a crowded topping.
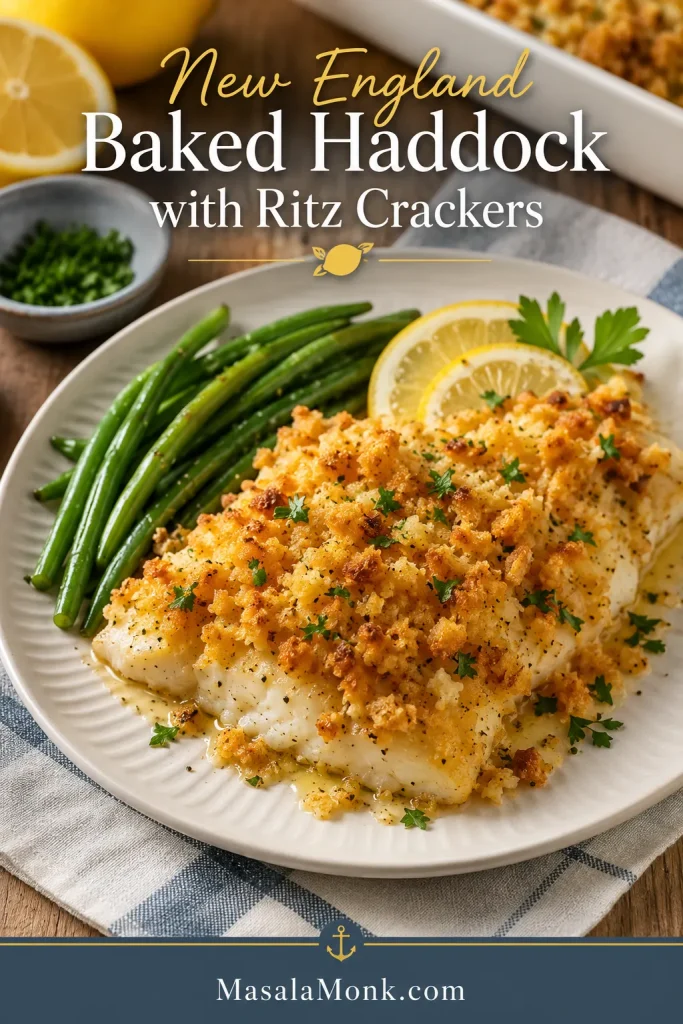
New England Baked Haddock with Ritz Crackers
This is the buttery comfort version: crushed Ritz crackers, melted butter, lemon, and parsley over mild white fish. Bake at 350°F for a gentler old-school feel, or 400°F when you want dinner faster. Keep the salt light and let the crackers do their job.
Crushed Ritz crackers give this New England baked haddock its buttery comfort, while lemon and parsley keep each bite balanced.
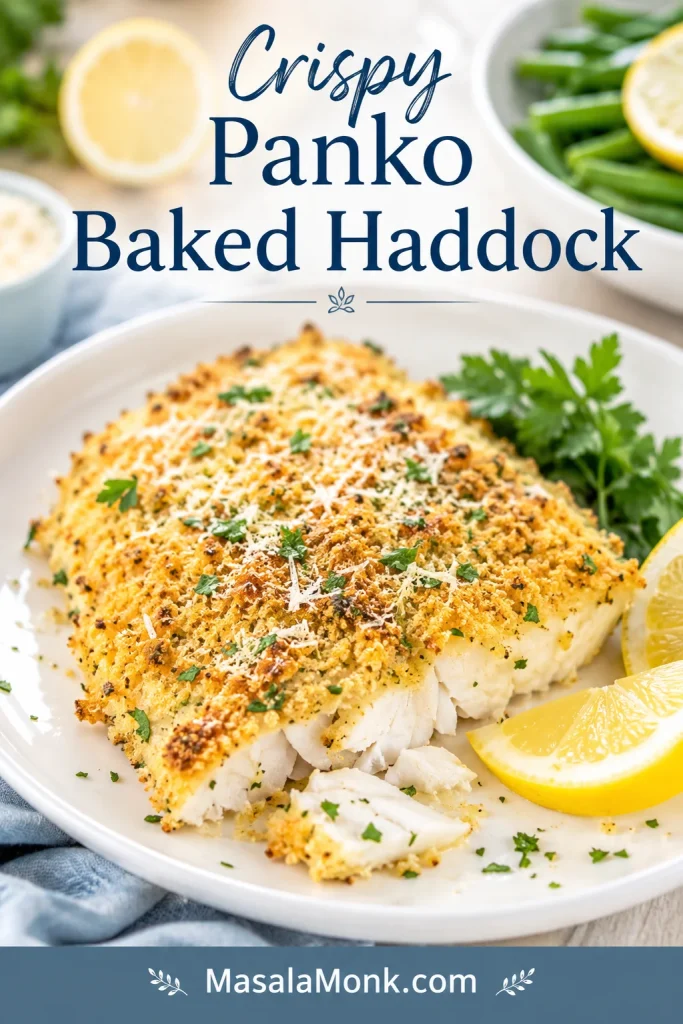
Panko Parmesan Baked Haddock
Panko and Parmesan give you the crunch of fried fish without pulling out a pot of oil. This version is best at 400°F so the panko crust can toast while the fish stays tender.
Panko and Parmesan add crispness without frying, so this baked haddock version works well when you want crunch with less mess.
Lemon Butter Haddock
Skip the crumbs and let lemon butter lead. This is the lightest path, especially when the fish is fresh and you want a clean, bright dinner.
For a lighter baked haddock variation, skip the crumbs and let lemon butter, herbs, and gentle oven heat carry the flavor.
Garlic Butter Haddock
Add garlic powder or a little finely grated garlic to the melted butter, then finish with parsley and lemon. Fresh garlic can burn under the broiler, so use a light hand.
Warm Paprika or Chili Crumb Haddock
Add a small pinch of smoked paprika, mild chili powder, or Kashmiri chili powder to the buttered crumbs. Keep the warmth gentle; haddock tastes best when the spice supports the fish instead of taking over.
Healthy Baked Haddock
Use olive oil instead of some of the butter, keep the topping thin, and add lemon, herbs, and quick-cooking vegetables around the fish. The plate stays lighter, but the golden finish still makes it feel like dinner.
Cod or Another White Fish
This method also works with cod, pollock, hake, or another mild white fish. Cod is often thicker and meatier than haddock, so use the thickness chart instead of only the clock.
For a crisp battered dinner instead, save this fish and chips recipe for another night.
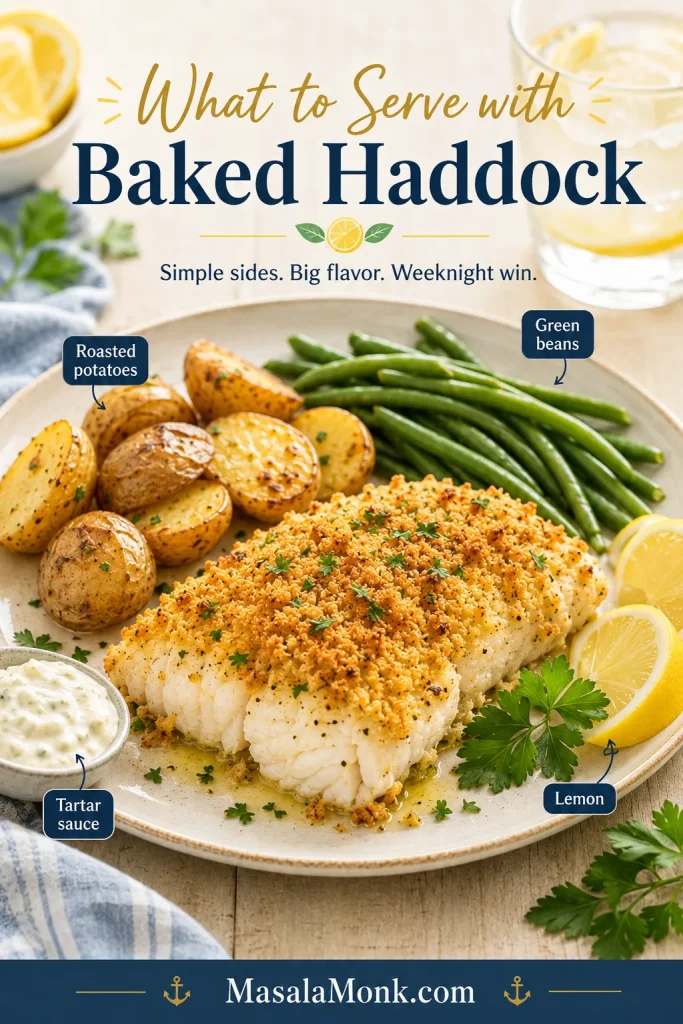
What to Serve with Baked Haddock
For the easiest comfort plate, serve the haddock with roasted potatoes, green beans, lemon wedges, and a spoonful of tartar sauce. It feels classic, but still light enough for a weeknight.
To make baked haddock feel like a full dinner, pair the flaky fish with roasted potatoes, green beans, lemon, and tartar sauce.
Keep the sides simple so the fish still feels like the center of the plate. For something brighter than tartar sauce, spoon a little mango salsa over the lemon-butter version, especially with rice or salad.
Troubleshooting
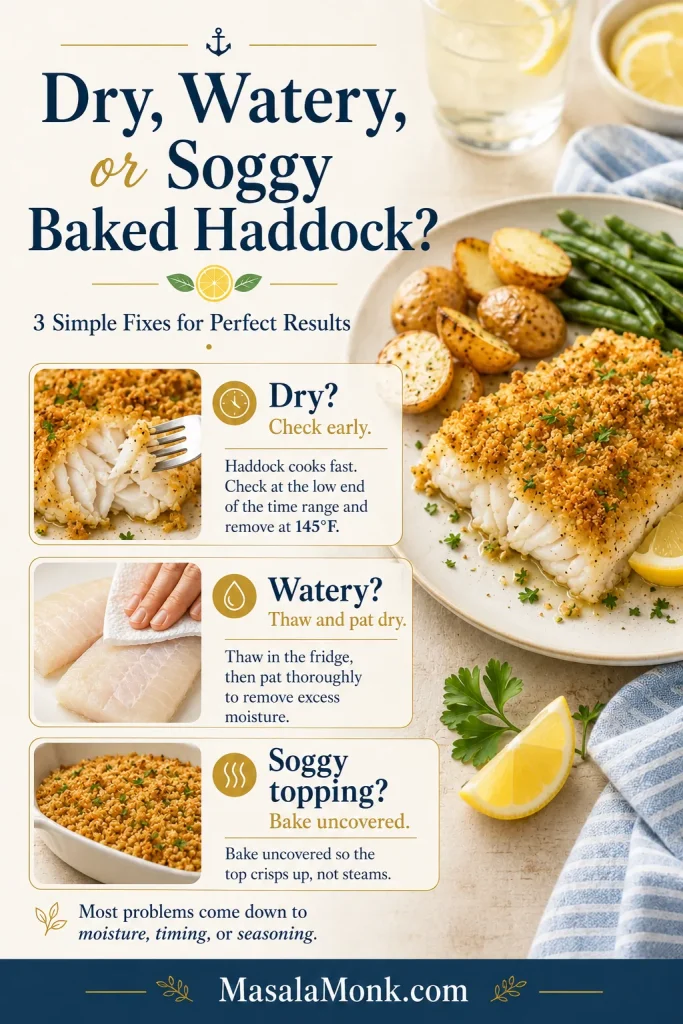
Most baked haddock problems come down to moisture, timing, or seasoning. The fix is usually simple.
Three things to remember: Start with dry fillets, bake uncovered when using a topping, and pull the fish when it is done. The surface can always be browned for one more minute.
If baked haddock turns dry, watery, or soggy, adjust the timing, dry the fillets better, and bake uncovered next time.
Problem
Likely Cause
How to Fix It
Haddock is dry
It baked too long or the fillets were thin.
Check early and pull the fish when it reaches 145°F / 63°C.
Fish is watery
The fish was frozen, not fully thawed, or crowded in the dish.
Thaw fully, pat dry, and leave space between fillets.
Topping is soggy
Too much moisture or a covered dish.
Bake uncovered and avoid adding extra liquid under the topping.
Topping is pale
The fish cooked before the surface browned.
Broil for 1 to 2 minutes after the fish is done.
Fish tastes bland
Only the topping was seasoned.
Season the fish directly before adding the top layer.
Fish fell apart
It was overcooked or lifted too roughly.
Rest for 2 minutes and use a thin fish spatula.
Topping is greasy
Too much butter, especially with crackers.
Use less butter with Ritz and keep the layer loose.
Fish smells too strong
The fish may not be fresh or was stored too long after thawing.
Use fresh-smelling fish and cook soon after thawing.
Assemble this recipe right before baking. You can thaw the fish ahead and mix the dry topping ahead, but add butter, seasoning, and the final layer close to oven time.
How to Store Leftovers
Store leftovers in an airtight container in the refrigerator for up to 2 days. Keep extra lemon wedges separate and add fresh lemon after reheating.
Flaked leftovers are useful, not wasted. Fold them into potato and herbs for simple fish cakes, or tuck them into fish tacos with slaw, lime, and a creamy sauce.
Leftover baked haddock still has options: flake it into bowls, shape it into fish cakes, or tuck it into tacos with slaw and lime.
How to Reheat It
Reheat gently in a low oven or air fryer until warmed through. The microwave works in a pinch, but it softens the topping and can make fish smell stronger.
Can You Freeze Cooked Haddock?
Cooked crumb-topped haddock does not freeze beautifully. The fish can turn watery and the topping usually softens. For best texture, freeze raw haddock, thaw it safely, and bake it fresh.
FAQ
What temperature is best for baked haddock?
For most fillets, 400°F / 200°C is the easiest everyday temperature. It cooks the fish quickly while giving the topping time to turn golden. For thicker loins or a heavier Ritz cracker topping, 350°F / 175°C gives a gentler bake.
How long does haddock take in the oven?
Most medium fillets take 12 to 16 minutes at 400°F / 200°C. Thin pieces may be ready in 8 to 10 minutes, while thick loins may need 17 to 20 minutes or more.
Should baked haddock be covered or uncovered?
Bake it uncovered when using a crumb topping. Covering traps steam, which helps some dishes but makes buttery crumbs soft instead of golden.
Can I bake frozen haddock?
Yes, but thawing first gives a drier surface and a better topping. For a frozen emergency, bake the plain fish briefly, blot the released moisture, season, add the topping, and continue baking until done.
Can I use cod instead of haddock?
Yes — cod works well here, but it is often thicker and meatier than haddock. Use the thickness chart and doneness cues instead of relying only on the clock.
Is haddock done at 145°F?
Yes. For safety, fish should reach 145°F / 63°C in the thickest part. It should also look opaque and flake easily with a fork.
Why did my baked haddock turn watery?
Watery haddock usually means the fish carried too much moisture into the oven. Fully thaw frozen fillets, pat them dry, and leave space in the dish so the fish bakes instead of steaming.
Can I make baked haddock without breadcrumbs?
Yes. Use melted butter or olive oil, lemon juice, lemon zest, parsley, salt, and pepper. Bake just until the fish is opaque and flaky. It will be lighter and softer, more lemon-butter fish than crisp-topped fish.
What is the best topping for baked haddock?
Ritz crackers give the buttery New England-style finish. Panko gives the crispest bite. Plain breadcrumbs give a softer, classic baked-fish texture.
Can I use smoked haddock for this recipe?
You can, but reduce the salt because smoked haddock is already salty and stronger in flavor. Smoked haddock is also excellent in chowder, Cullen skink, fish pie, and kedgeree.
A Few Last Tips Before You Bake
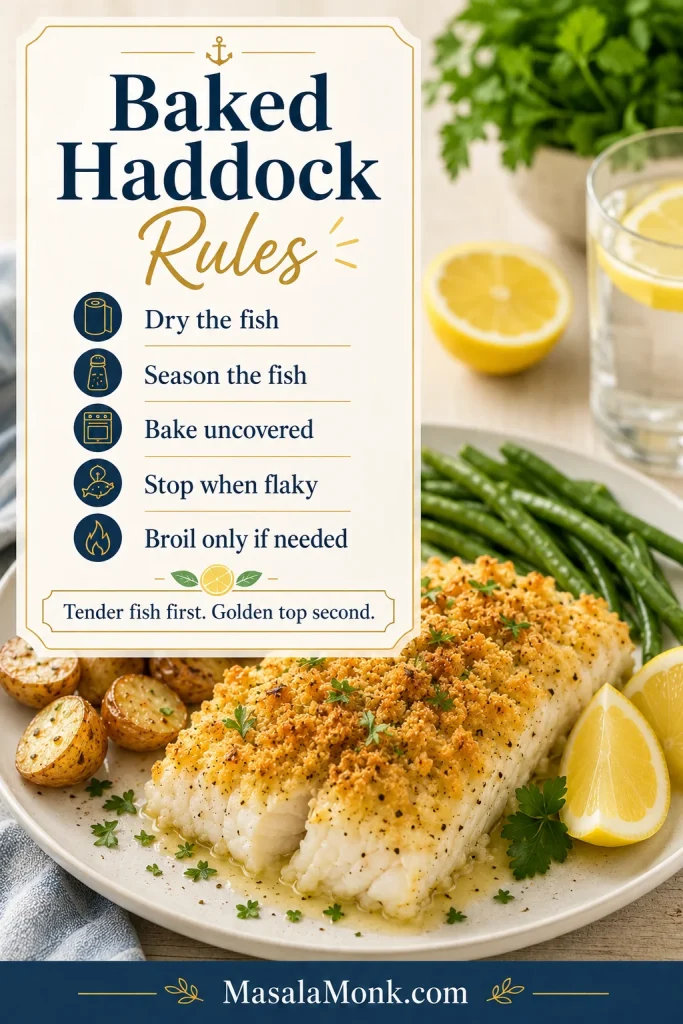
Baked haddock should feel simple, not stressful. Dry the fish, season the fish, bake it uncovered, and stop when the center is flaky and moist. The surface can always get one more minute under the broiler; the fish cannot be uncooked.
Finally, remember the core baked haddock rules: dry the fish, season it directly, bake uncovered, stop when flaky, and broil only if needed.
Whether you choose buttery Ritz crackers, crisp panko, plain breadcrumbs, or lemon butter, the goal is the same. You want tender haddock with enough golden flavor on top to make it feel like a proper dinner.
If you make this baked haddock, leave a comment and tell us which version you chose: Ritz, panko, breadcrumbs, or lemon butter. Also mention whether you used thin fillets, thick loins, or frozen haddock. Your notes help other readers choose their own path.