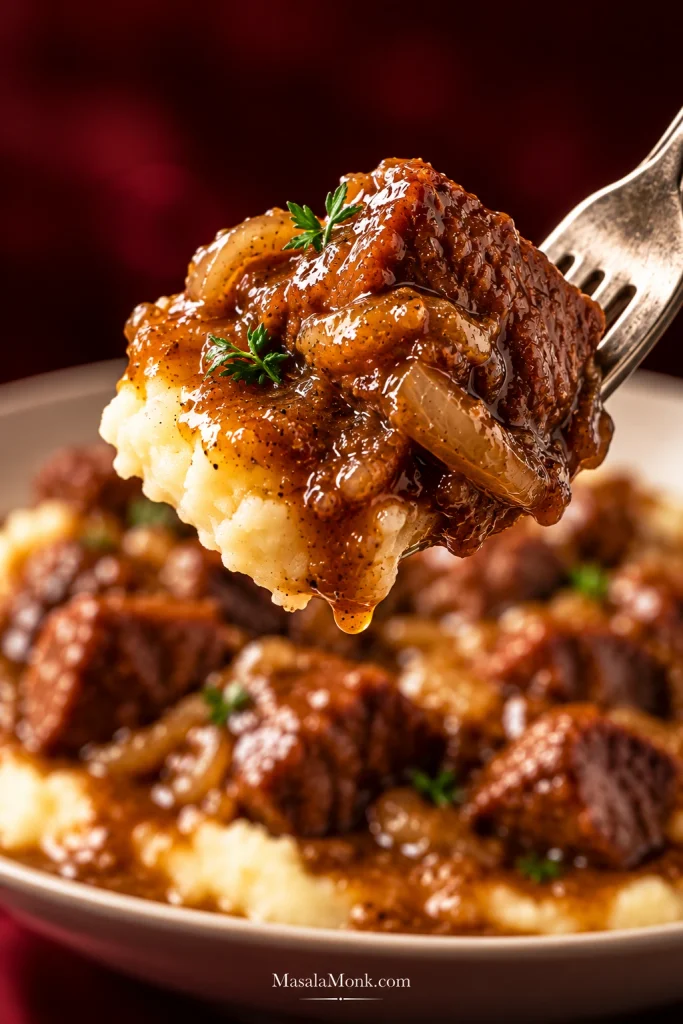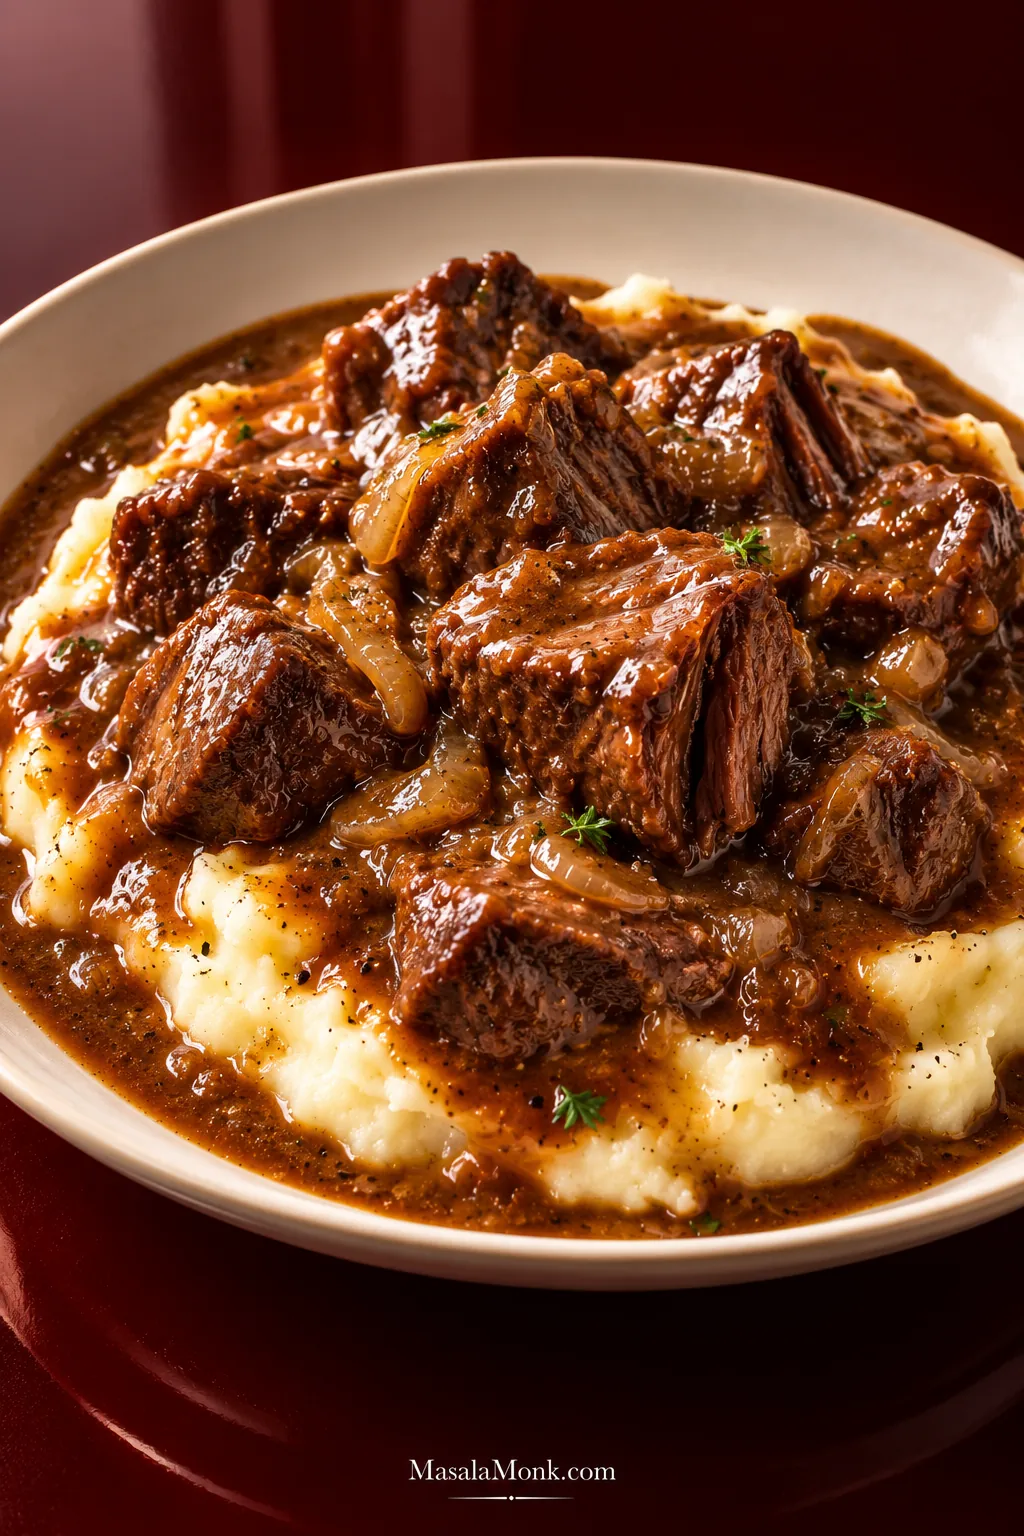
A good pot of beef tips should give you beef that yields easily under a fork, glossy gravy that clings to it, and enough sauce to settle into the mashed potatoes underneath. Chuck can get you there, but it needs time—and the gravy comes together at the end.
This slow cooker beef tips and gravy recipe is built around one simple rule: get the beef tender; the gravy can wait. Once the meat yields easily to a fork, taste the liquid in the pot and decide whether it needs thickening, a short reduction or simply a final seasoning adjustment.
The gravy starts with low-sodium beef broth, onion, garlic, Worcestershire and a little tomato paste. Sear the beef for deeper browned flavor, or skip the skillet when you want dinner with less fuss. Most of the cooking happens while you’re doing something else. When you come back to the pot, the work left is simple: check the beef, taste the cooking liquid and give the gravy whatever it needs.
Get the Beef Tender; the Gravy Can Wait
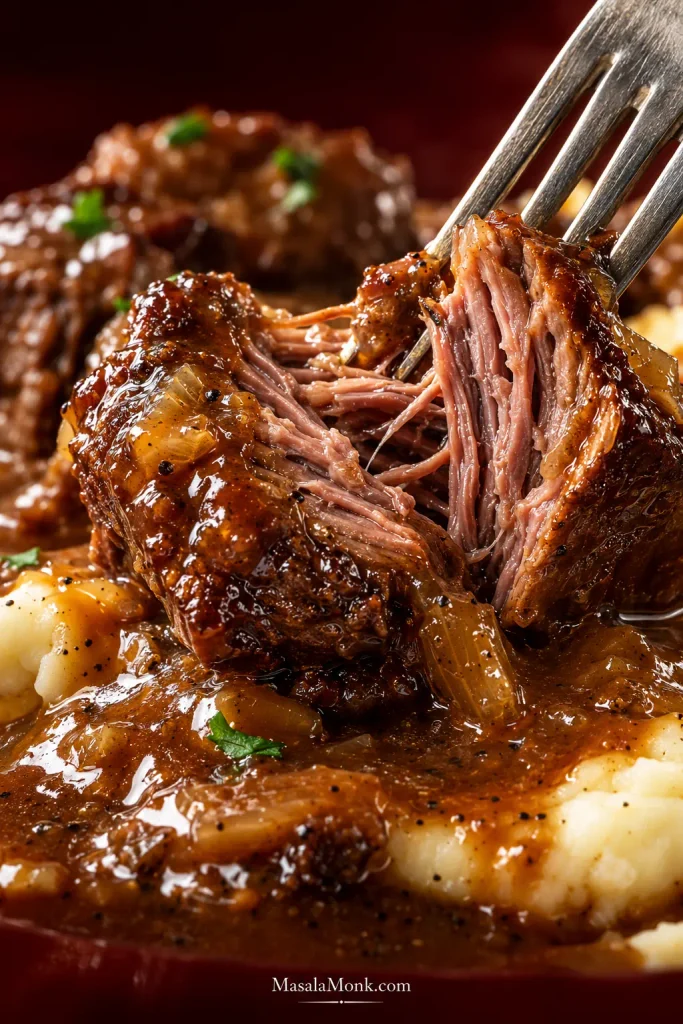
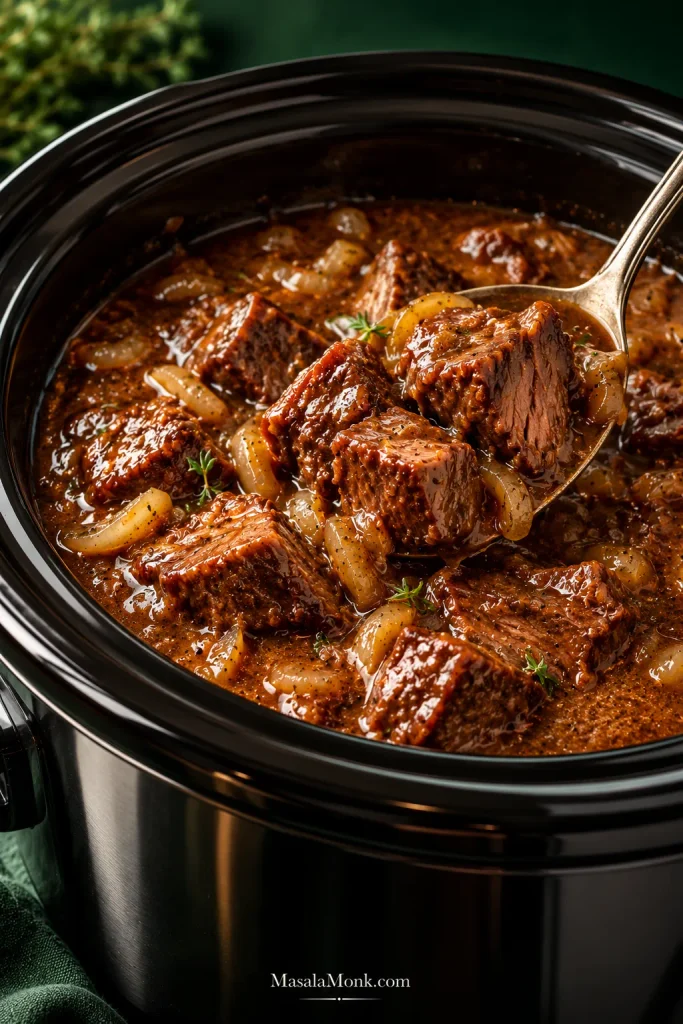
Cook the chuck until a fork slips easily into one of the larger pieces. Once the beef is tender, taste the cooking liquid: reduce it if the flavor is weak, or thicken it if the flavor is already rich but the consistency is loose.
Slow Cooker Beef Tips and Gravy Recipe
Chunks of chuck roast cook low and slow with onion, garlic, Worcestershire and beef broth until fork-tender but still holding together, then the cooking liquid becomes a glossy brown gravy. Searing is optional, and you do not need condensed soup or a gravy packet.
*Total time covers the standard slow-cooker route and gravy finish. Optional searing adds about 12–15 minutes; a saucepan reduction for diluted gravy adds about 5–10 minutes.
Equipment
- A 4- to 6-quart slow cooker. Cooker shape, capacity and fullness can affect timing, so use the tenderness cue rather than treating the clock as exact.
- Chef’s knife and cutting board
- 12-inch / 30 cm heavy skillet, optional if searing
- Small bowl or cup for the cornstarch slurry
- Whisk or fork
Ingredients
For the Beef
- 2½ lb / 40 oz / 1.13 kg beef chuck roast, cut into roughly 1½-inch / 4 cm cubes
- 6 g fine sea salt (about 1 teaspoon, depending on crystal size), plus more after tasting the finished gravy
- 1 teaspoon freshly ground black pepper
- 1 tablespoon / 15 ml neutral high-heat oil, optional for searing
For the Slow Cooker and Gravy
- 1 medium-large yellow onion / about 7 oz / 200 g, diced
- 4 garlic cloves / about 12 g, finely minced
- 1 tablespoon tomato paste / about 16 g
- 2 cups / 16 fl oz / 473 ml low-sodium beef broth or stock
- 1 tablespoon / 15 ml Worcestershire sauce
- 1 teaspoon dried thyme
- 1 bay leaf
To Finish the Gravy
- 2 tablespoons cornstarch / about 16–18 g
- 2 tablespoons / 30 ml cold water
- Up to 1 additional tablespoon cornstarch / about 8–9 g + 1 tablespoon / 15 ml cold water, only if needed
- 1 tablespoon / 14 g unsalted butter, optional
- Freshly ground black pepper and chopped parsley, optional for finishing
Method
Start the Beef and Gravy Base
- Cut and season the beef. Pat the chuck dry and cut it into roughly 1½-inch / 4 cm pieces, trimming only large seams of hard exterior fat. Toss evenly with the measured salt and black pepper.
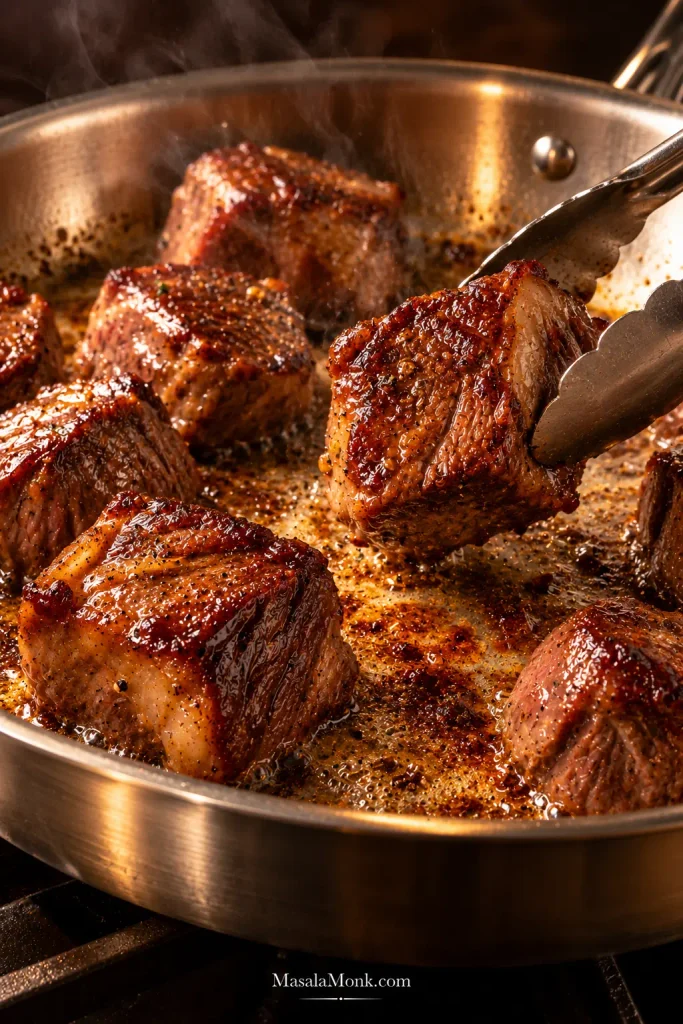
- Choose seared or dump-and-go. For deeper browned flavor, heat the oil in a large skillet over medium-high to high heat and brown the beef in 2–3 uncrowded batches. Good color on a few broad surfaces is enough; transfer the beef to the slow cooker. For the fastest version, skip the skillet and put the seasoned raw beef directly into the cooker.
- Build the gravy base.
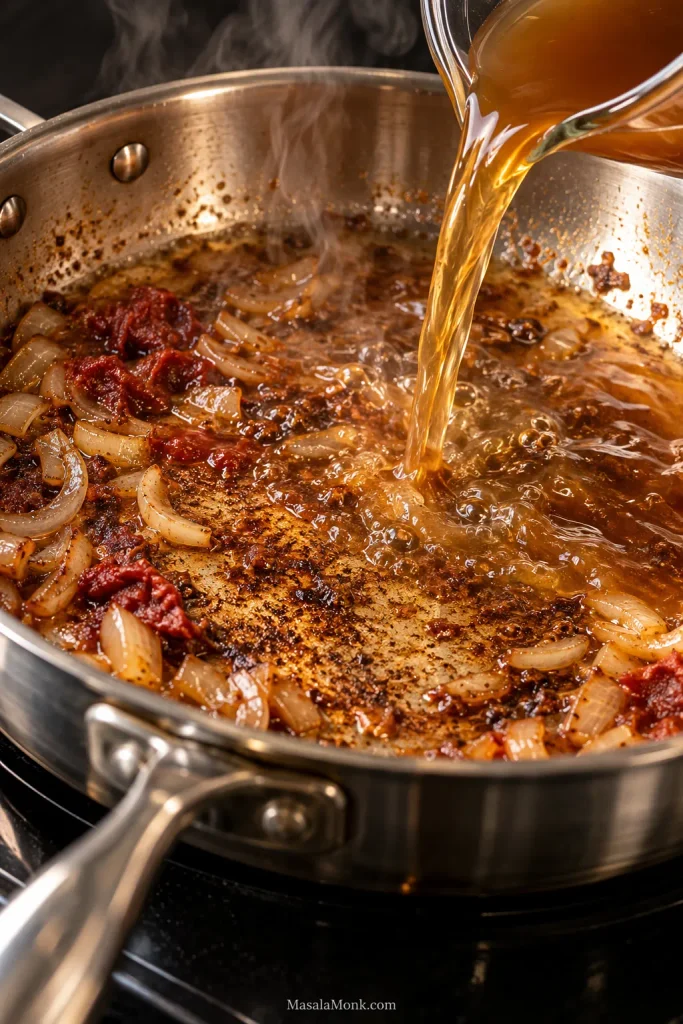
If you seared the beef: Lower the skillet heat to medium, cook the onion for 2–3 minutes, then stir in the garlic and tomato paste for 30–60 seconds. The small amount of tomato paste deepens the savory base without making the gravy taste tomatoey. Add a splash of the measured broth and scrape up the browned bits. Transfer everything to the slow cooker, then add the remaining broth, Worcestershire, thyme and bay leaf.
For dump-and-go: Whisk the tomato paste and Worcestershire into about ½ cup / 120 ml of the measured broth, pour it over the beef with the onion and garlic, then add the remaining broth, thyme and bay leaf.
Cook Until Tender, Then Finish the Gravy
- Cook until the beef yields to a fork. Cover and cook on LOW for about 6–8 hours or HIGH for about 4–5 hours. Keep the lid closed through the early part of cooking. On LOW, start checking around 6 hours. Test one of the larger cubes. A fork should slip in with little resistance, and the beef should still hold together when lifted. If it still feels springy or chewy, cover and cook another 30–45 minutes before checking again.
- Taste the cooking liquid. Remove the bay leaf. If it tastes rich but runs thin, move on to the slurry. When the flavor is diluted, transfer the tender beef to a covered bowl and simmer the liquid uncovered in a saucepan for about 5–10 minutes. Taste again before reaching for the cornstarch.
- Thicken gradually. Mix 2 tablespoons / about 16–18 g cornstarch with 2 tablespoons / 30 ml cold water until smooth. Stir the slurry into the hot liquid, cover and cook on HIGH for about 15–20 minutes. If you reduced the liquid in a saucepan, whisk in the slurry a little at a time and simmer briefly before returning the beef. Pause before adding the optional second slurry. If the liquid tasted diluted, reduce it first as described in Step 5 rather than trying to fix weak flavor with more starch. Stop slightly short of the thickness you want on the plate; the gravy will tighten a little as it cools.
- Season and serve. Taste the gravy before adding any more salt. Stir in the optional butter, add black pepper and parsley if using, then serve the beef over mashed potatoes, egg noodles or rice.
What Good Browning Looks Like
Deglaze the Fond Into the Gravy Base
What the Finished Slow-Cooker Beef Should Look Like
The Beef Tips & Gravy Guide
Get the Beef Tender
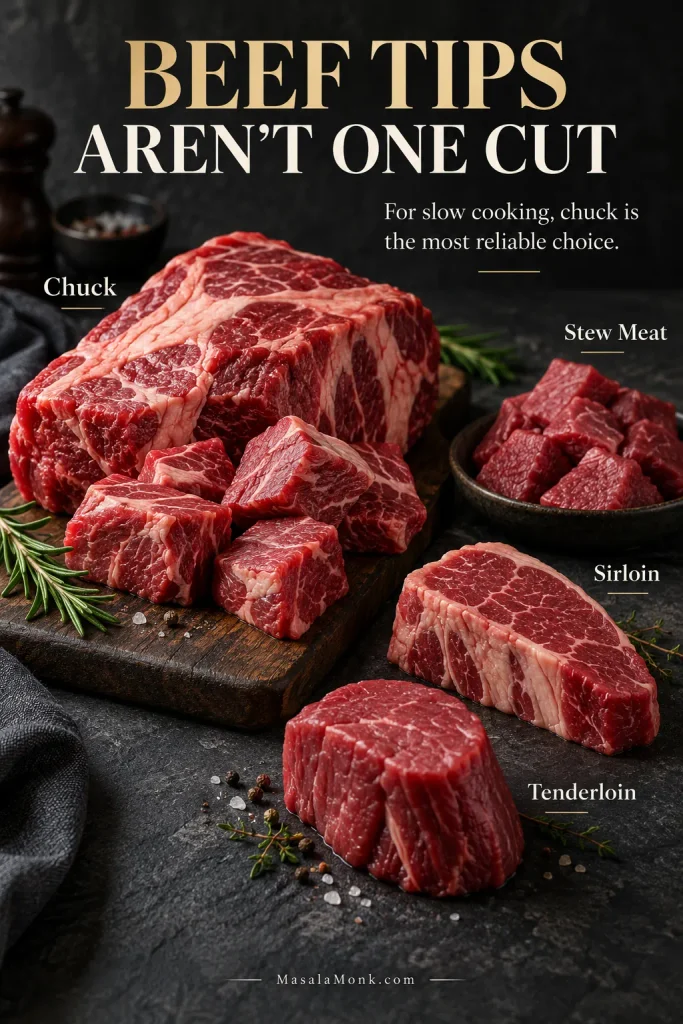
“Beef Tips” Is a Label, Not One Reliable Cut
Beef tips are not one specific cut. A package with that label can contain sirloin, chuck, round or other trimmings, which helps explain why one batch turns tender on schedule while another stays stubborn.
For this slow-cooker method, buying chuck roast and cutting it yourself is the most reliable route. You know what cut you have, you control the cube size, and chuck has the marbling and connective tissue that suit a long, moist cook.
| At the meat counter | What happens in this recipe |
|---|---|
| Chuck roast | Most reliable for this method. Rich, well-marbled and forgiving during a long cook. |
| Pre-cut stew meat | Convenient, but the package may contain mixed muscles or uneven sizes, so pieces can become tender at slightly different times. |
| Sirloin | Leaner and naturally more tender. It works, but start checking as soon as it becomes easy to pierce instead of automatically giving it the full chuck timing. |
| Tenderloin tips | Naturally tender and expensive. A long slow cook makes little sense for a cut you’re paying a premium to keep tender. |
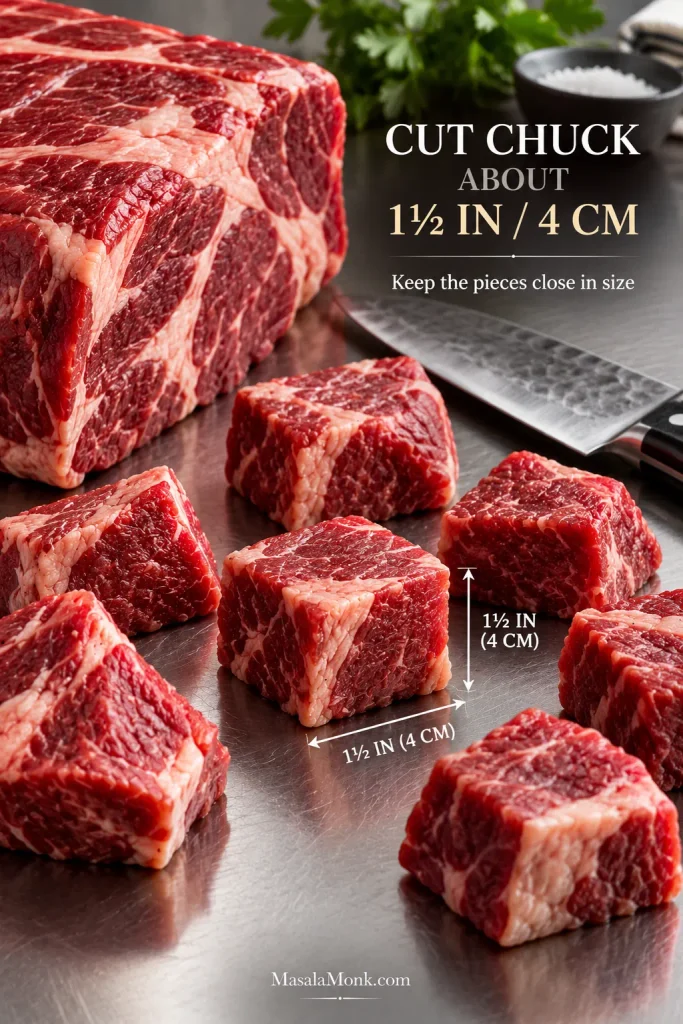
Keep the Beef Pieces Close in Size
Aim for roughly 1½-inch / 4 cm cubes. Tiny scraps can turn dry and ragged before the larger pieces are ready, while oversized chunks may still resist the fork when everything around them is tender. What matters most is getting the pieces reasonably close in size.
The Beef Stroganoff recipe takes the opposite approach: thin sirloin gets a brief sear because it starts tender, while chuck benefits from hours rather than minutes.
How to Know When Chuck Is Tender
For chuck, use LOW for about 6–8 hours or HIGH for about 4–5 hours. Start checking at the early end of the range because slow cookers, cube sizes and cuts vary.
Check one of the larger cubes first. Push in a fork and twist gently. It should slip in with little resistance while the beef still holds together when lifted.
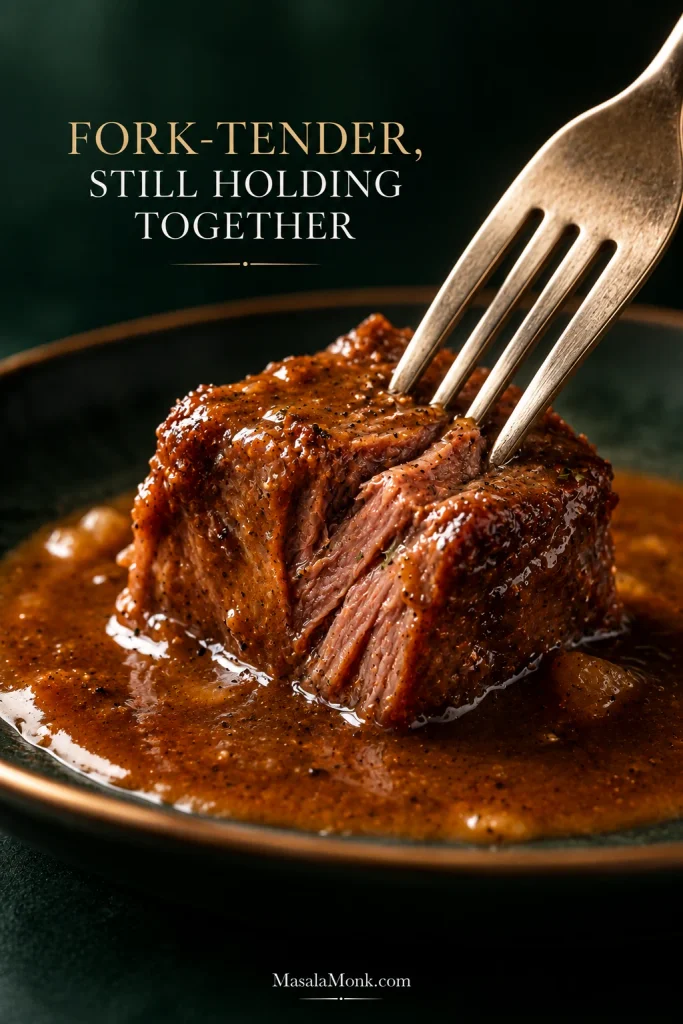
If the chuck is still chewy, don’t write it off yet. Give it another 30–45 minutes and check again. Beef can be cooked through before chuck has softened into the texture you’re waiting for.
Lean beef behaves differently. Once sirloin is tender, extra hours can make it dry and stringy. Chuck gives you more room, although eventually even those cubes begin losing their shape. That’s why the fork matters more than a universal finish time.
Keep the Lid Closed Until the Check Matters
The early hours don’t need supervision. Keep the lid shut and let the cooker hold its heat. Once you’re near the tenderness window, a fork test tells you far more than another glance through the glass.
The Beef Does Not Need to Swim
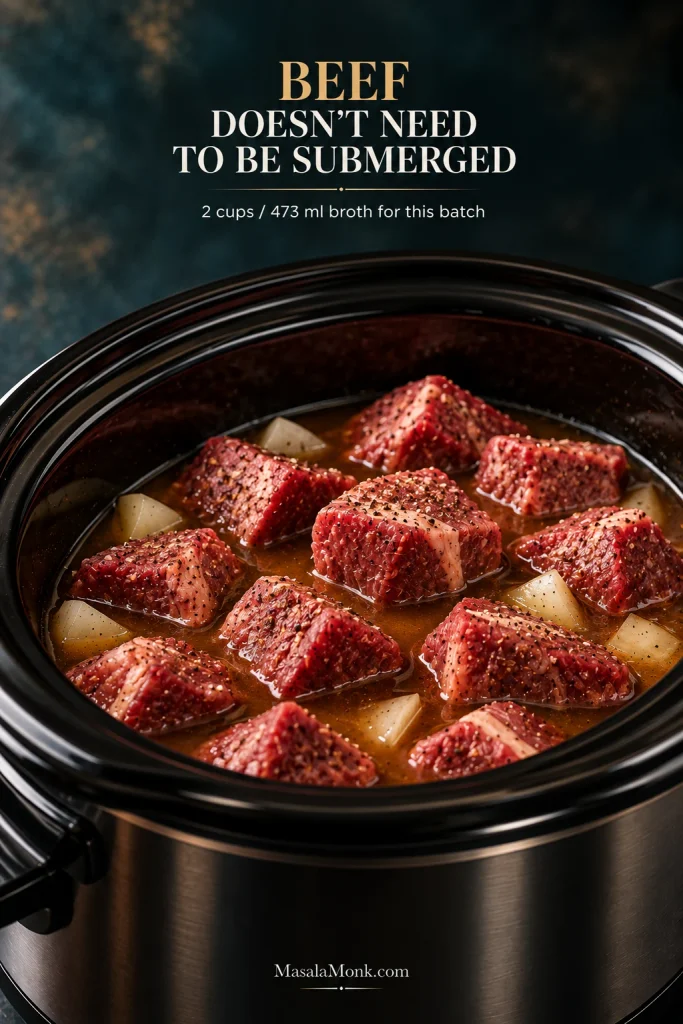
The beef does not need to be submerged. For this batch, 2 cups / 473 ml low-sodium beef broth is enough. Some cubes will sit above it. That’s fine.
With the lid closed, relatively little moisture escapes. The chuck releases juices as it cooks, and the onion adds more. Pour in extra broth now and you’ll mostly have more liquid to concentrate later.
A Slow Cooker Beef Stew deliberately needs more surrounding liquid because the broth is part of the finished bowl with the beef, potatoes and vegetables. Here, you need enough for the beef and the eventual gravy, not a potful of soup.
Why Low-Sodium Broth Matters
Broth is only one source of salt. Worcestershire contributes more, while gravy mix, onion soup mix, bouillon or condensed soup can add a great deal if you use a shortcut version. Starting with low-sodium broth and modest measured salt keeps the final adjustment in your hands.
Thin Gravy and Weak Gravy Are Not the Same Problem
Taste the liquid before you thicken it. If it already tastes rich and beefy but looks thin, use the cornstarch slurry. When the flavor tastes weak or diluted, reduce the liquid first and thicken it only if it still needs more body.

Good Flavor, Loose Texture: Thicken
Whisk 2 tablespoons / about 16–18 g cornstarch with 2 tablespoons / 30 ml cold water, stir the smooth slurry into the hot gravy base and give it about 15–20 minutes on HIGH. Pause before adding anything else. Cornstarch needs heat and a little time to show its full effect.
For a looser gravy over rice or noodles, that first slurry may be all you need. With mashed potatoes, add part or all of the optional second slurry only after you see where the first one lands.
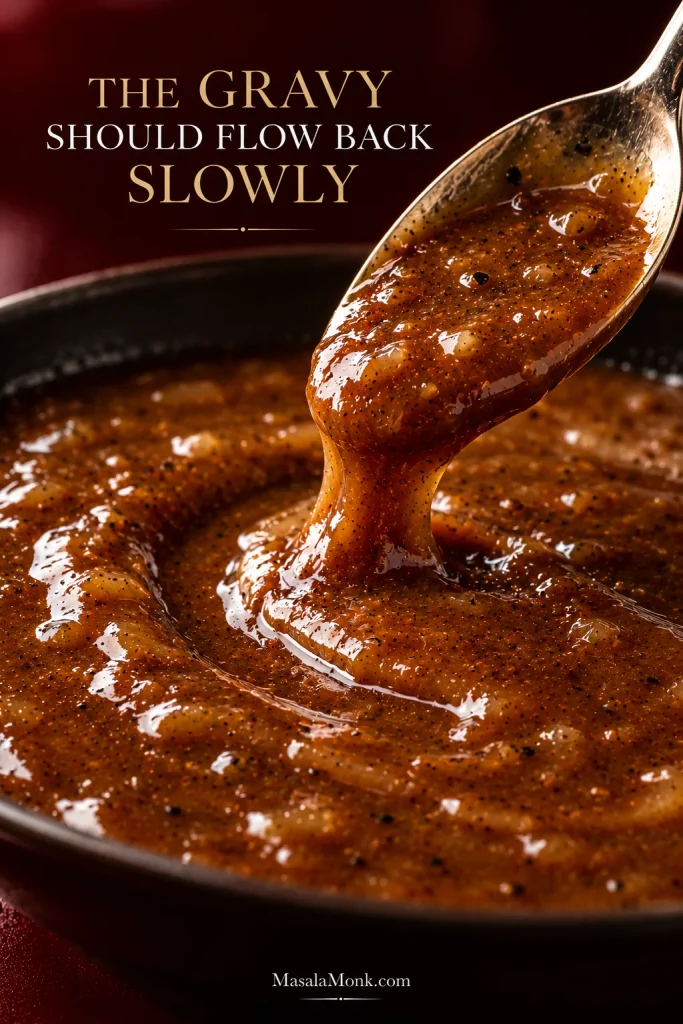
Drag a spoon through the gravy. It should flow back slowly rather than flooding together at once. Stop slightly short of the thickness you want on the plate; the gravy will tighten a little as it cools.
Diluted Flavor: Reduce First
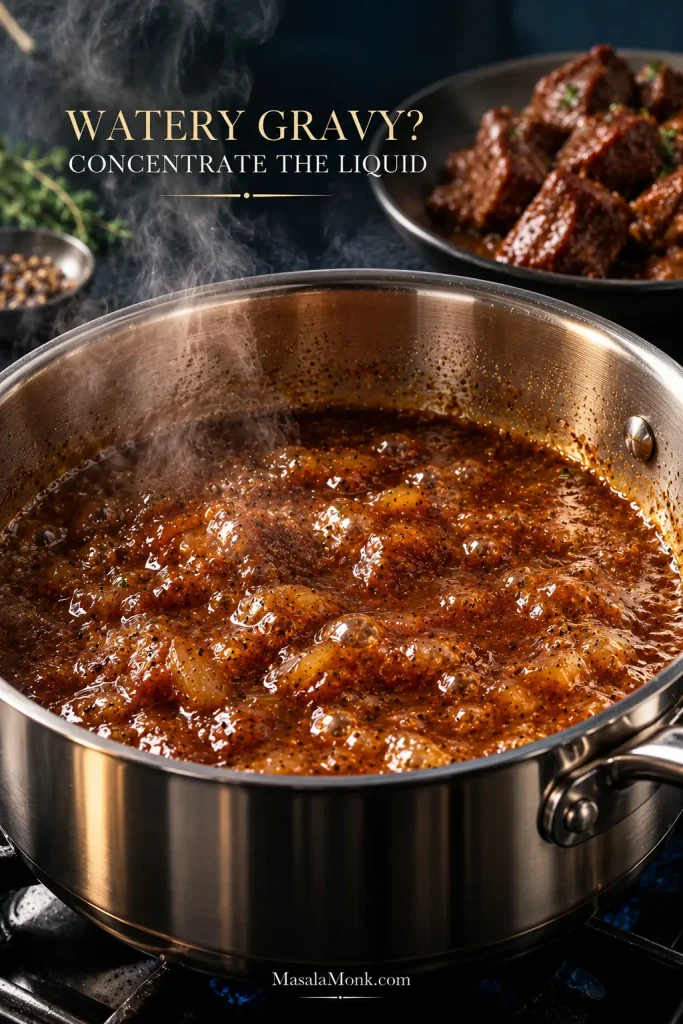
More starch can make weak liquid thicker, but it cannot make weak liquid taste more concentrated. Move the tender beef to a covered bowl, skim obvious excess fat if necessary, pour the liquid into a saucepan and simmer it uncovered for about 5–10 minutes. When it tastes like gravy rather than diluted broth, decide whether it still needs slurry.
Troubleshooting Beef Tips and Gravy
If you lift the lid and the beef is still chewy or the gravy looks nothing like you expected, don’t change everything at once. Check the beef first. Once it’s tender, taste what’s in the pot and fix one problem at a time. If the meat itself is the problem, revisit the fork-tender test before changing the gravy.
Quick Fixes by Symptom
| What you see or taste | What’s probably happening | What to do |
|---|---|---|
| Beef is chewy and resistant | The chuck needs more time | Cover and cook another 30–45 minutes, then check again |
| Beef is dry or stringy | Lean meat or too much time after tenderness | Serve with plenty of gravy; next time check sirloin earlier or use chuck |
| Gravy tastes rich but looks thin | The flavor is already concentrated; it just needs body | Add the measured slurry and wait before adding more |
| Gravy tastes watery as well as thin | The cooking liquid needs concentration | Remove the beef and reduce the liquid first |
| Gravy is too thick | Too much starch, too much reduction, or the gravy thickened further as it cooled | Stir in warm low-sodium broth 1–2 tbsp / 15–30 ml at a time |
| Gravy is too salty | Sodium from broth, packets or seasoning stacked up | Dilute with unsalted or low-sodium liquid and serve over an unsalted starch |
| Flavor is bland even though the texture is good | The sauce needs seasoning | Check salt first, then black pepper or a small splash of Worcestershire |
| It tastes salty enough but still feels heavy | The rich sauce may need a little acidity | Stir in ½ tsp / 2.5 ml red-wine vinegar, taste, and stop unless it genuinely needs more |
| Greasy layer on top | Chuck rendered more fat | Skim it now, or chill the finished dish and lift off the firm fat later |
| Mushrooms made the pot watery | They released additional moisture | Let them finish cooking, then check the gravy before deciding whether it needs reduction or slurry |
Using Gravy Mix, Onion Soup Mix or Cream of Mushroom Soup
Beef tips made with a gravy packet, onion soup mix or cream of mushroom soup can work here too; they simply change how much salt, broth and starch you need later.
Packet weights and sodium vary by brand, so leave out the starting salt and taste the finished sauce before adding more.
| Shortcut | Starting adjustment | What to watch |
|---|---|---|
| Brown gravy mix | Use about 0.87–1 oz / 25–28 g and omit the starting salt | It adds seasoning and starch, so wait before deciding whether you need the usual slurry |
| Onion soup mix | Use about 1 oz / 28 g, whisk it into the broth and omit the starting salt | It brings concentrated onion flavor and sodium but little thickening |
| Au jus mix | Use roughly one standard packet as a seasoning addition and omit or sharply reduce the starting salt | Do not add the packet’s separate preparation water unless you deliberately want more total liquid; the finished gravy may still need slurry |
| Cream of mushroom soup | Use one 10.5-oz / 298-g can, reduce broth to about 1½ cups / 355 ml and omit the starting salt | Whisk it into the broth first; it adds body, dairy and mushroom flavor, so judge extra thickener only after cooking |
Adding Fresh Mushrooms
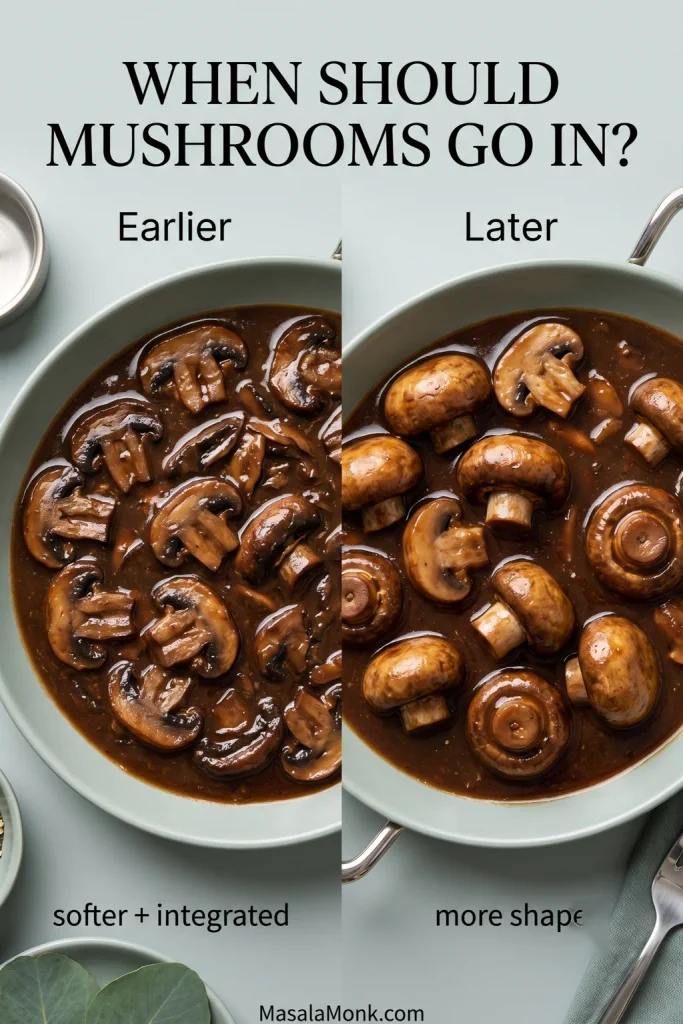
Use about 8 oz / 225 g sliced cremini or white mushrooms. For very soft mushrooms that melt into the gravy, add them at the beginning; for slices that keep more shape, add them during roughly the last 60–90 minutes on LOW, depending on slice thickness. They’ll release some water, so judge the gravy only after they’re cooked.
Doubling the Beef Doesn’t Mean Doubling the Broth
The base recipe uses 2 cups / 473 ml broth for 2½ lb / 1.13 kg beef. For a larger batch, increase the beef and aromatics roughly in proportion, but don’t automatically multiply the broth by the same factor. More meat releases more liquid while the covered cooker holds on to most of it.
Don’t automatically scale the cornstarch either. Wait until the larger batch is cooked, taste the liquid and see how much gravy you actually have before sizing the slurry.
Use a cooker large enough that the ingredients fit comfortably and the lid closes normally. Crock-Pot’s slow-cooker guidance recommends keeping the cooker about one-half to two-thirds full for best results. Follow the guidance for your own appliance.
What to Serve With Beef Tips and Gravy
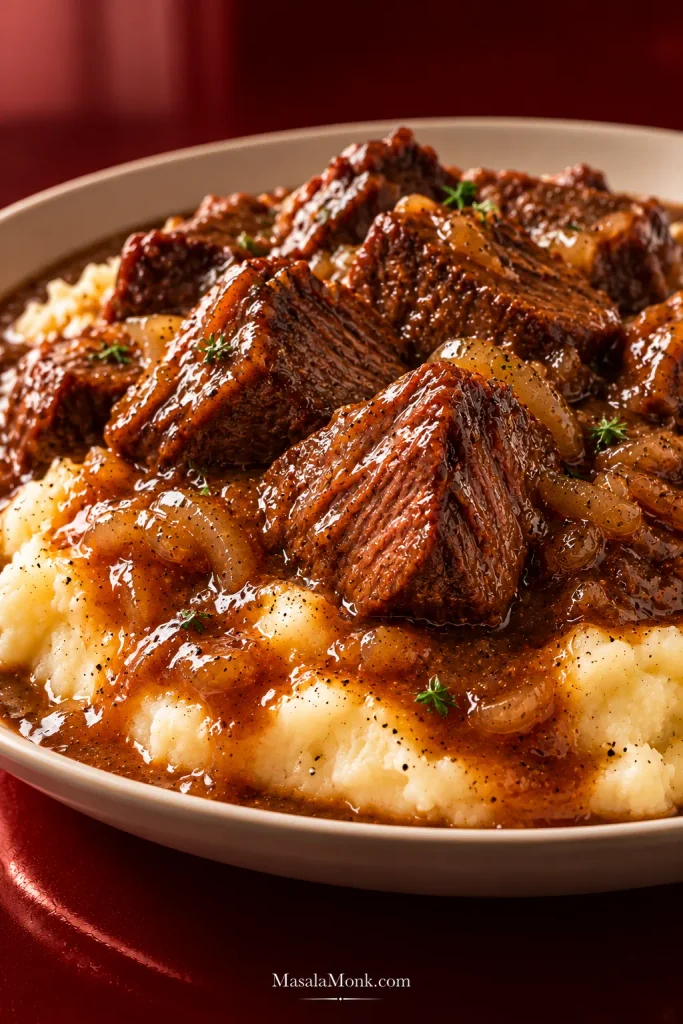
Mashed potatoes are the natural first choice because they catch the brown gravy in every little valley. The creamy mashed potatoes work especially well here; keep the gravy toward the thicker end of the range so it settles into the potatoes instead of disappearing across the plate.
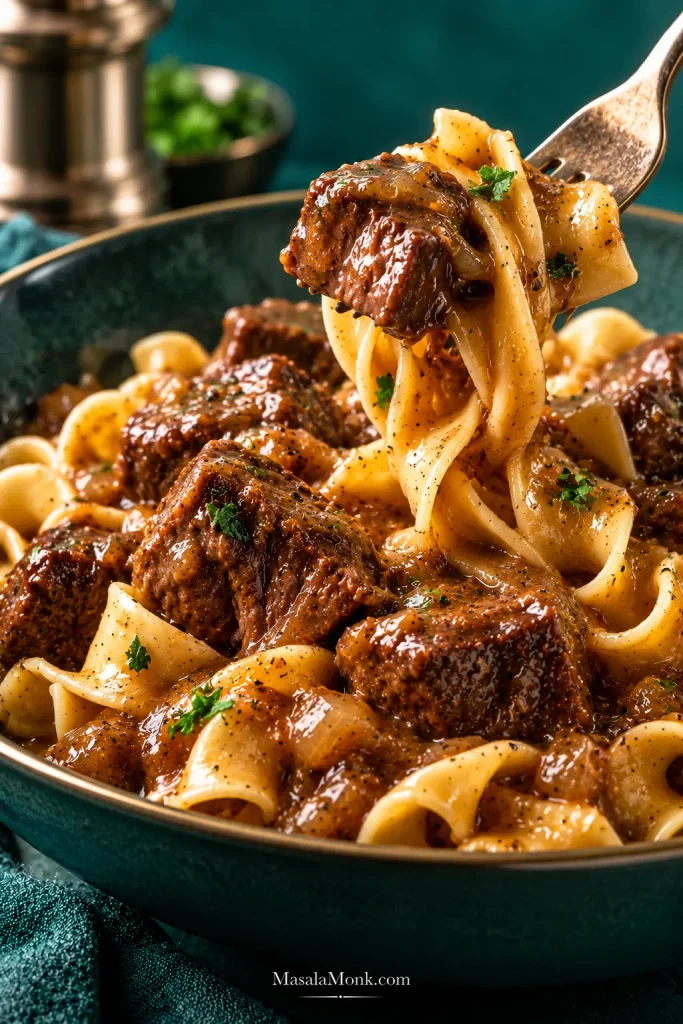
Egg noodles make the plate a little looser and especially comforting. Cook them separately, then spoon the beef and gravy over the top so the noodles stay pleasantly chewy instead of soft and swollen from hours in the pot.
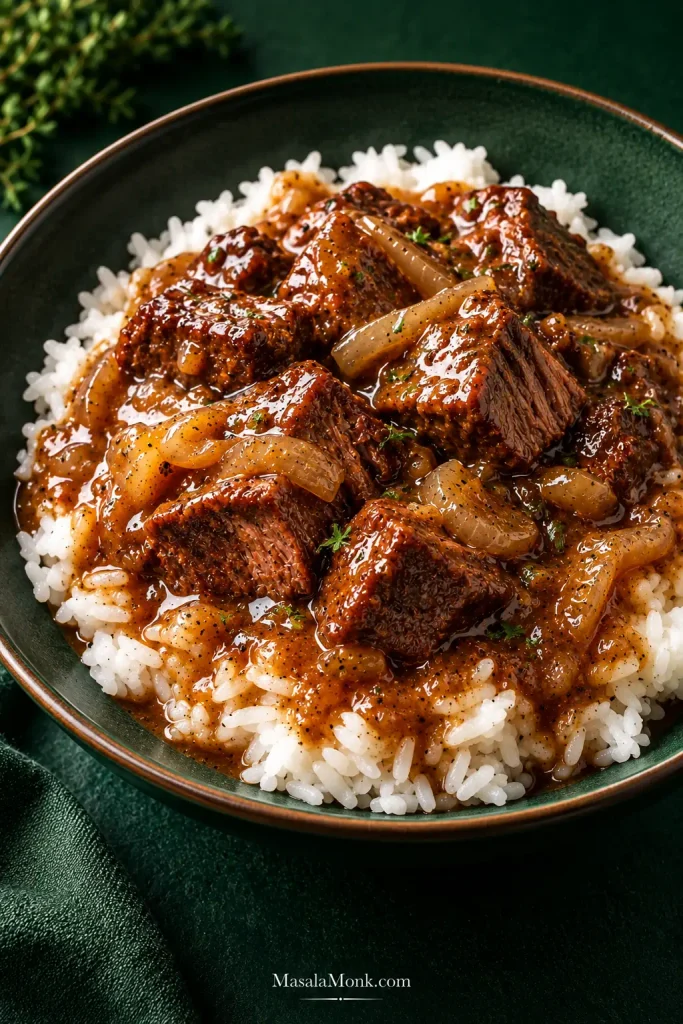
Rice works particularly well with a slightly looser gravy. Add something green—steamed beans, broccoli or a crisp salad—when you want a fresh contrast to the rich beef and sauce.
Make Ahead, Store and Reheat
This dinner also reheats well. The gravy thickens in the refrigerator, and rendered beef fat firms on the surface where it can be lifted away before reheating.
Prep the Night Before
Cut the raw beef and onion and measure the other ingredients ahead. Refrigerate the raw beef and prepared vegetables separately in covered containers until cooking time. For the seared version, brown the beef immediately before loading and starting the slow cooker; do not partially cook it the night before.
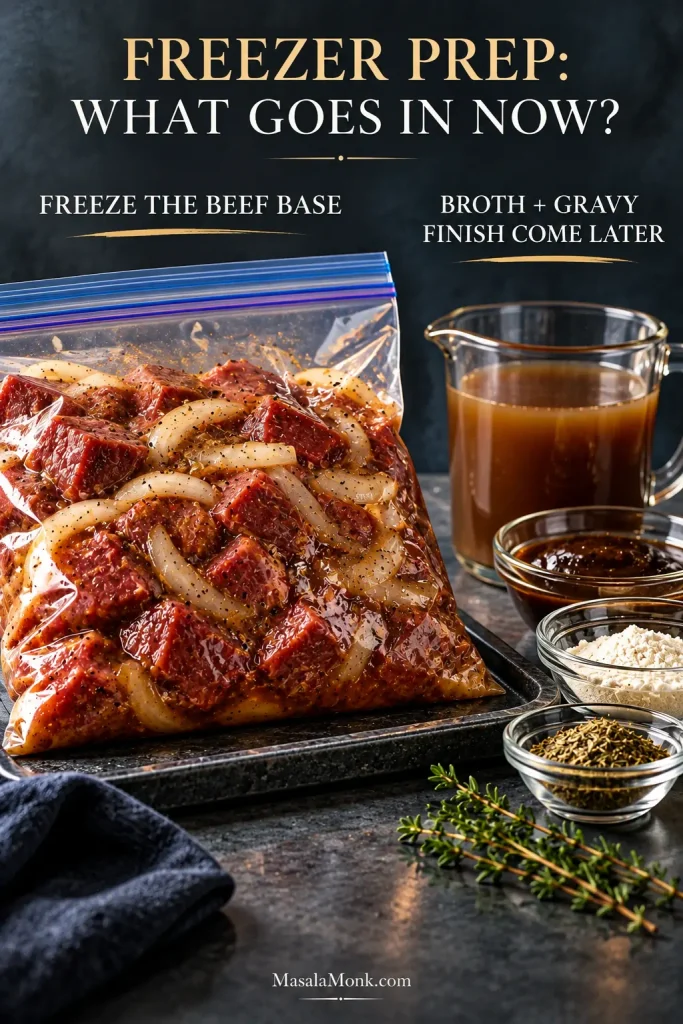
Freezer Prep
To make a freezer meal, combine the raw cubed beef, onion, garlic, tomato paste, Worcestershire, dried thyme and bay leaf in a freezer-safe bag or container. Leave out the broth to save freezer space and keep the cooking-day liquid measurement flexible; the cornstarch and butter belong at the finishing stage.
Thaw the beef mixture completely in the refrigerator, transfer it to the slow cooker, then add the measured broth before cooking. USDA FSIS slow-cooker guidance says to thaw meat before putting it into a slow cooker rather than starting with frozen raw pieces.
Freezing Cooked Beef Tips
Divide the cooked beef and gravy into shallow freezer-safe containers and chill or freeze promptly rather than leaving the full slow-cooker crock to cool as one large mass. Thaw overnight in the refrigerator and reheat gently. Once hot, stir well. Loosen overly thick gravy with a little broth; if it still looks thinner than you want after reheating, use a small fresh slurry.
Leftovers and Reheating
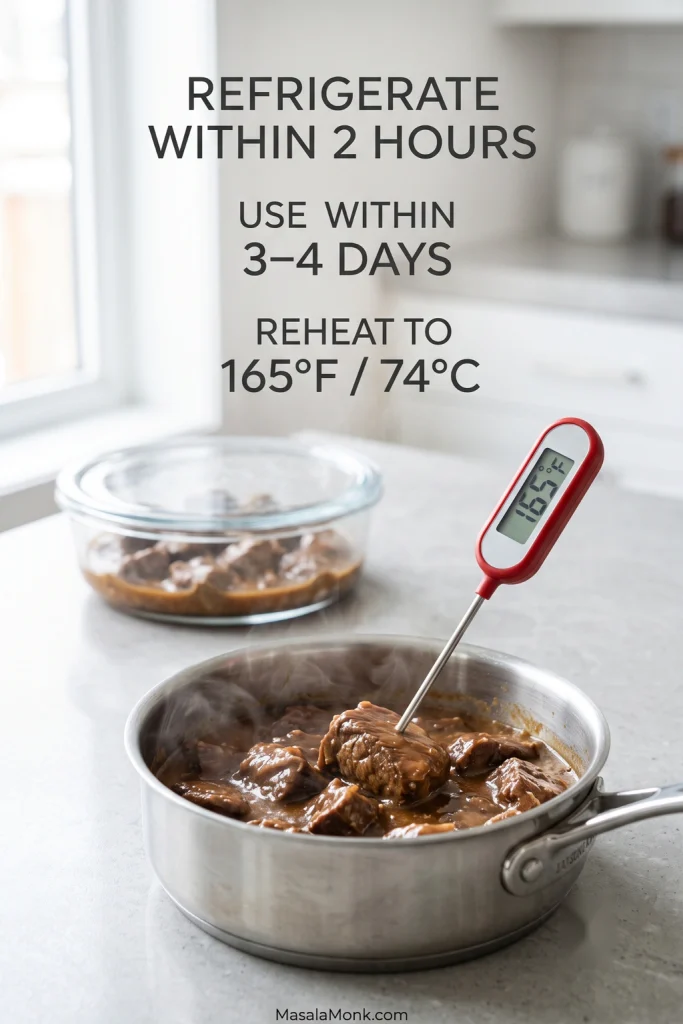
Move leftovers to shallow covered containers and refrigerate them within 2 hours of cooking. Use refrigerated leftovers within 3–4 days. Reheat on the stovetop or in the microwave until the food reaches 165°F / 74°C, adding a splash of low-sodium broth if the chilled gravy has become thicker than you want. Avoid using the slow cooker itself as a gradual reheating appliance for cold leftovers.
When the chuck gives easily under a fork, spoon it over hot mashed potatoes and let the glossy brown gravy settle into the edges. This is the moment all that hands-off cooking was heading toward: tender beef, soft potatoes and enough gravy to catch a little of everything in every forkful.