Posted on — Leave a comment

Beef Tips and Gravy Recipe: Tender, Rich & Easy

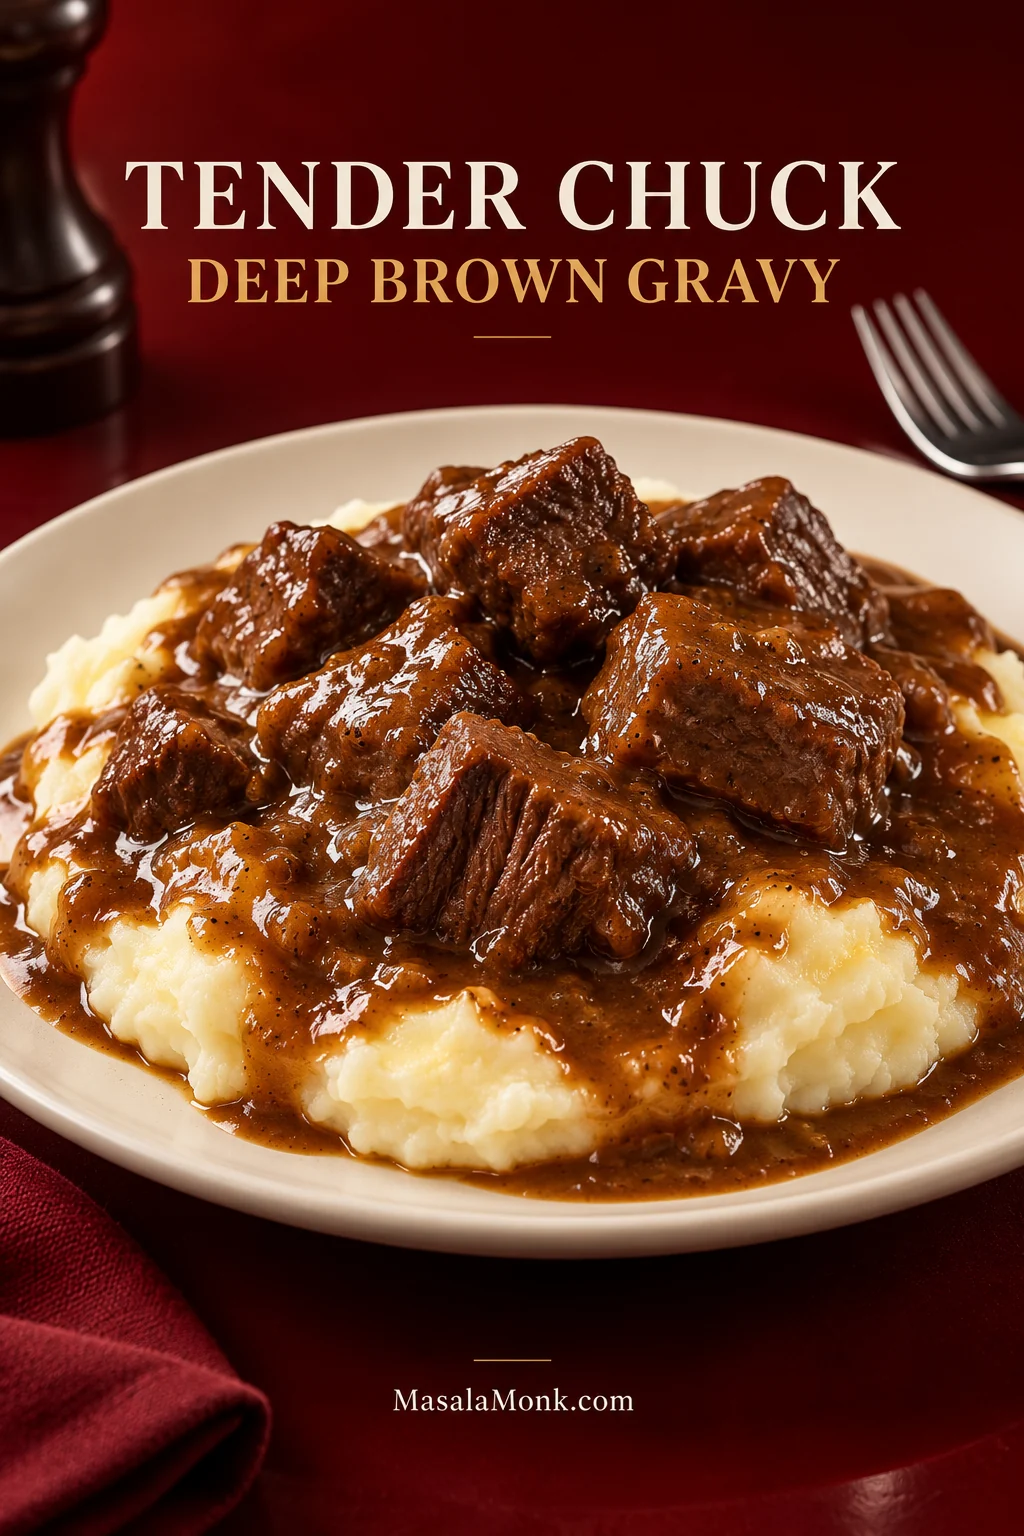
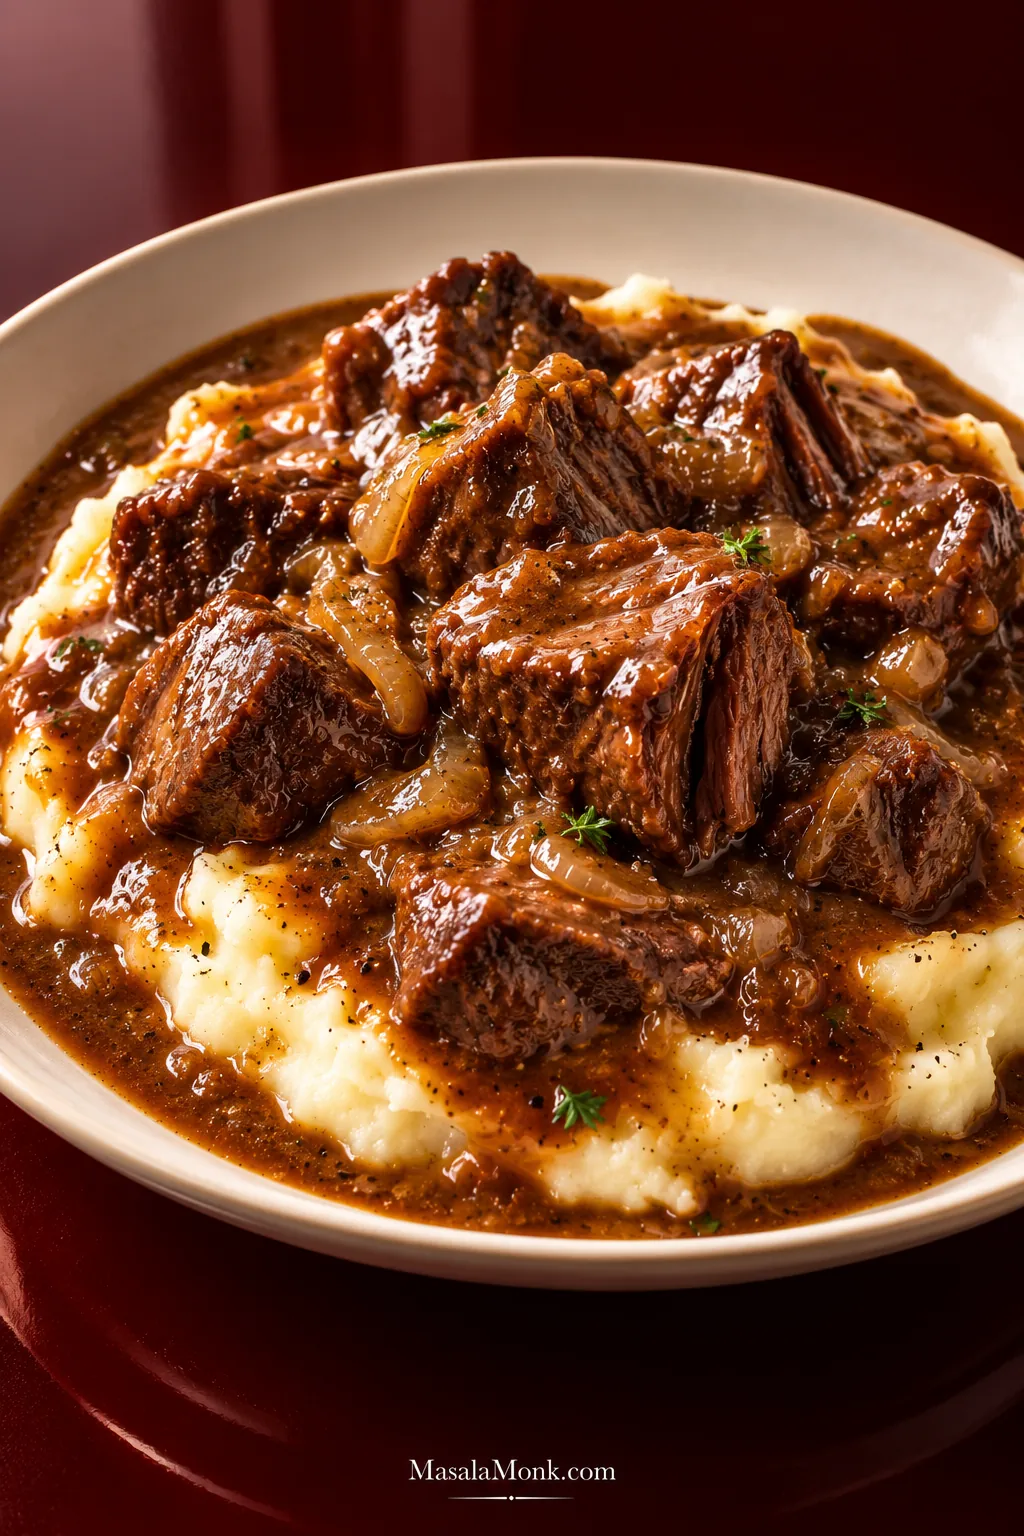
Tender braised beef tips covered with deep brown gravy and served over ridged mashed potatoes on a light plate.

This stovetop beef tips and gravy recipe turns boneless chuck into tender, distinct pieces with plenty of deep brown gravy for mashed potatoes, rice or egg noodles. The sauce comes from the same pot: browned beef, onion, garlic, broth and a butter-flour paste, with no canned soup or gravy packet needed.

The parts worth watching are simple but important. Give the beef room to brown, keep the braise gentle and stop once the chuck is tender rather than cooking by the clock. By then, evaporation and gelatin will already have given the liquid some body, so you can thicken the gravy only as much as it actually needs.

How to cook beef tips: Brown the chuck in uncrowded batches, then braise gently until fork-tender—usually about 1¾ to 2¼ hours. Remove the beef while you finish the gravy, then return it just long enough to warm through.

Beef Tips and Gravy Recipe

Boneless chuck is browned in a Dutch oven, braised until fork-tender, then returned to a deep brown gravy.

Prep Time
20 minutes

Cook Time
About 2½–3 hours

Total Time
About 3–3½ hours

Yield
6 servings

Active cooking: about 40–45 minutes. Most of the remaining time is the covered braise.

Equipment

  • 5- to 6-quart heavy Dutch oven or other heavy lidded pot
  • Tongs
  • Whisk

Ingredients

  • 2 lb (900 g) boneless chuck roast, trimmed of large hard pieces of exterior fat and cut into 1¼- to 1½-inch (3- to 4-cm) pieces
  • 1¼ teaspoons (about 7 g) fine sea salt, plus more to taste
  • 1 teaspoon freshly ground black pepper, plus more to taste
  • 2 tablespoons (30 ml) neutral high-heat oil, divided as needed
  • 1 large yellow onion (about 7 oz / 200 g), diced
  • 1 tablespoon (16 g) tomato paste
  • 4 garlic cloves (about 12 g), finely chopped or minced
  • 1 teaspoon dried thyme
  • Up to 3 cups (710 ml) low-sodium beef broth, divided
  • 1 tablespoon (15 ml) Worcestershire sauce
  • 1 bay leaf
  • 2 tablespoons (28 g) unsalted butter, softened
  • 3 tablespoons (about 24 g) all-purpose flour
  • Up to 1 teaspoon (5 ml) apple cider vinegar or fresh lemon juice, optional, added ¼ teaspoon at a time if needed

Instructions

Prep and brown the beef

  1. Prepare the beef. Cut the chuck into 1¼- to 1½-inch (3- to 4-cm) pieces. Pat thoroughly dry, then season with the salt and black pepper.
  2. Brown in batches. Heat 1 tablespoon oil over medium-high heat. Add one uncrowded layer of beef and leave it alone until the underside is dark chestnut-brown in spots. Turn and brown another side or two, then transfer to a bowl. Repeat with the remaining beef, adding oil if the pot looks dry. The browned bits on the bottom—called fond—should stay deep brown. If they start turning black, deglaze with a splash of the measured broth and save that liquid with the beef.
  3. Build the base. Reduce the heat to medium. Add the onion and cook for 5 to 7 minutes, stirring often, until softened and beginning to color. Stir in the tomato paste and cook for 1 minute. Add the garlic and thyme and cook for another 30 seconds.

Start and finish the braise

  1. Deglaze and start the braise. Pour in ½ cup (120 ml) broth and scrape the bottom thoroughly. Return the beef and its juices to the pot. Add the Worcestershire sauce, bay leaf and enough of the remaining broth for the liquid to come halfway to two-thirds up the beef. Keep any leftover broth nearby. Bring just to a gentle simmer.
  2. Braise gently. Cover and lower the heat to maintain a very gentle simmer. When you lift the lid to check, you should see only occasional small bubbles, not a hard boil. Start checking at 1½ hours; most batches take 1¾ to 2¼ hours. If the beef feels firm, continue in 15- to 20-minute intervals. Add some of the reserved broth whenever the liquid drops well below halfway up the beef. Stop when a fork slides in easily and the pieces remain whole.
  3. Reduce the liquid. Transfer the beef to a clean bowl and discard the bay leaf. Skim off an obvious layer of surface fat. If the liquid looks thin, simmer uncovered for 5 to 10 minutes. Taste after reducing before adding more salt.

Finish the gravy and serve

  1. Make the gravy. Mash the softened butter and flour together until smooth. Whisk small pieces of the paste into the simmering liquid, letting each addition disappear before adding another. Stop when the gravy coats a spoon and flows easily; you may not need all of the paste. Simmer for another 4 to 5 minutes so the flour cooks through.
  2. Return the beef. Add the beef and its juices back to the pot and warm gently for 2 to 3 minutes. Taste before adjusting anything. If the gravy needs salt or more savory depth, add a little salt or a small splash of Worcestershire. When the salt level is right but the flavor seems flat or heavy, try black pepper or ¼ teaspoon cider vinegar or lemon juice. Taste again before adding more.
  3. Rest and serve. Take the pot off the heat and leave it for 5 to 10 minutes. The gravy will tighten slightly as it settles. Spoon generously over mashed potatoes, rice or egg noodles.

Recipe Note

Timing here is for chuck. Stew meat can soften unevenly, while top sirloin needs the shorter method below.

This is a research-developed recipe based on established beef-braising techniques and published cooking guidance. MasalaMonk has not independently kitchen-tested it.

What should the finished pot look like? The beef should still be distinct, with enough flowing gravy around the pieces to spoon generously over whatever you serve underneath.
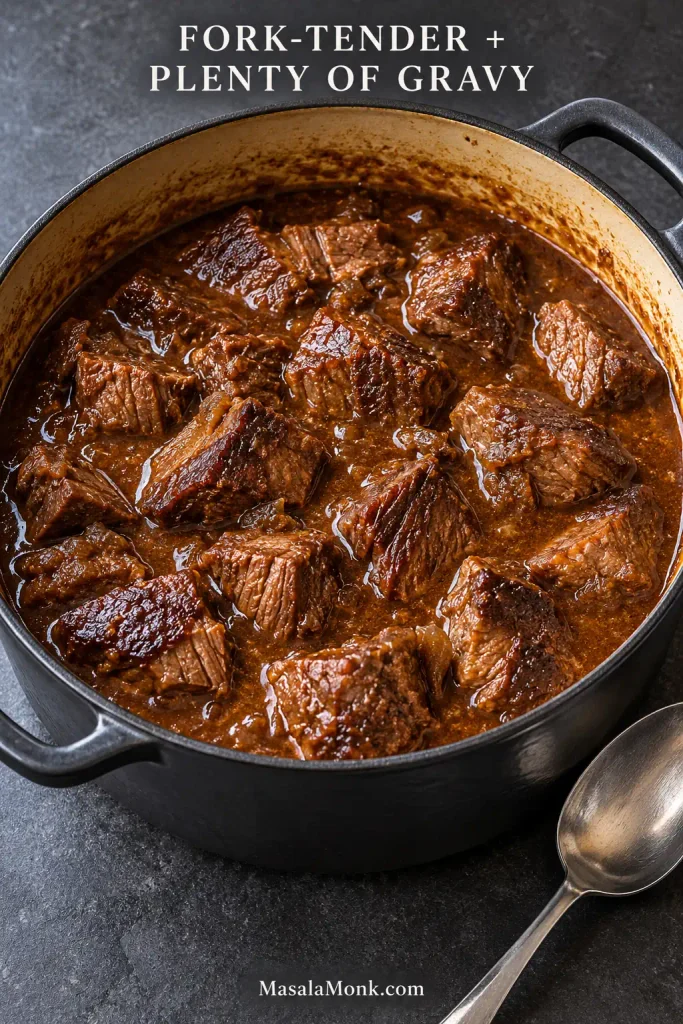
Large intact pieces of braised beef tips surrounded by brown gravy in a heavy Dutch oven.
Leave the finished pot a little saucier than seems necessary. Mashed potatoes, rice and noodles all take up gravy quickly once the beef reaches the plate.

What Are Beef Tips? Chuck, Stew Meat or Top Sirloin?

“Beef tips” describes the pieces and dish more than one universally defined retail cut. Depending on the butcher, store or recipe, the beef may come from chuck, top sirloin or mixed stew meat.
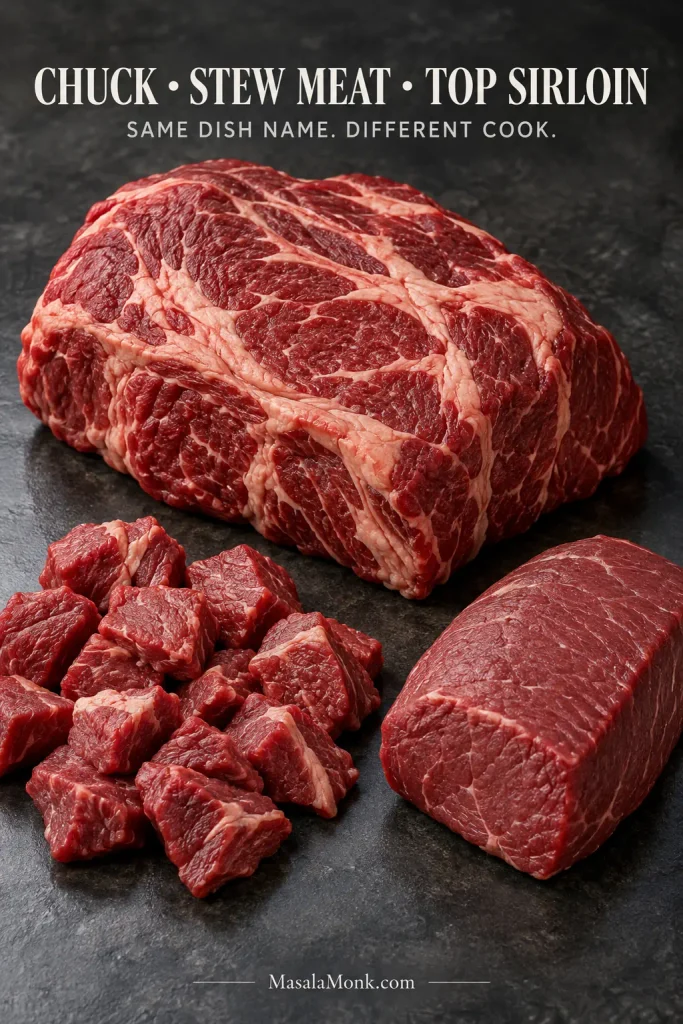
Raw boneless chuck roast, irregular stew meat pieces and a leaner top sirloin cut arranged together for comparison.
The cuts give visual clues before cooking begins: chuck has more marbling and connective seams, stew meat tends to be irregular, while top sirloin looks leaner and more uniform.

For this recipe, boneless chuck roast is the most reliable choice. It has enough marbling and connective tissue for a long braise, and buying a whole roast lets you cut the pieces yourself. Aim for roughly 1¼- to 1½-inch (3- to 4-cm) pieces so they stay substantial as they cook.
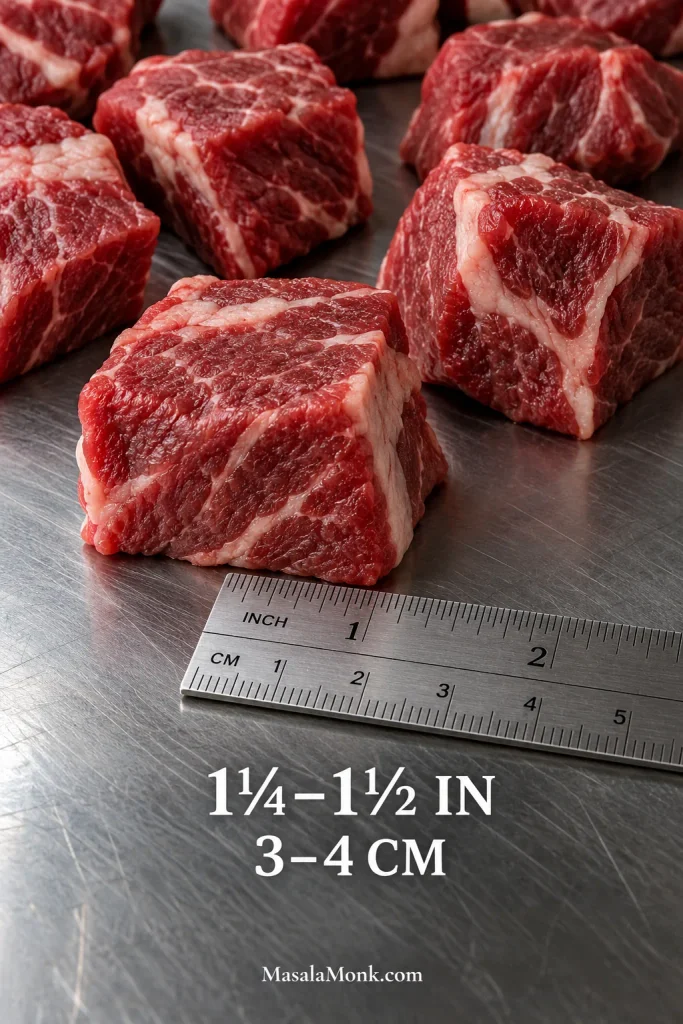
Raw chuck beef pieces beside a metal ruler showing pieces about 1¼ to 1½ inches, or 3 to 4 centimeters, across.
Pieces around 1¼–1½ inches (3–4 cm) keep enough mass to stay substantial through braising. Smaller chunks have more exposed surface and can move from tender to dry sooner.

If stew meat is what you already have, use it. Just expect some pieces to soften sooner than others because one package can contain more than one cut.

If you bought top sirloin, don’t give it the two-hour chuck treatment. Top sirloin starts tender. Sear it quickly, let the gravy develop, then put the beef back in only long enough to finish cooking. For exact quantities and timing, go straight to the faster top sirloin method.

Brown the Beef Without Steaming It—or Burning the Fond

Don’t crowd the pot. Dry beef with a little room around each piece browns much more readily than beef packed into a wet pan.
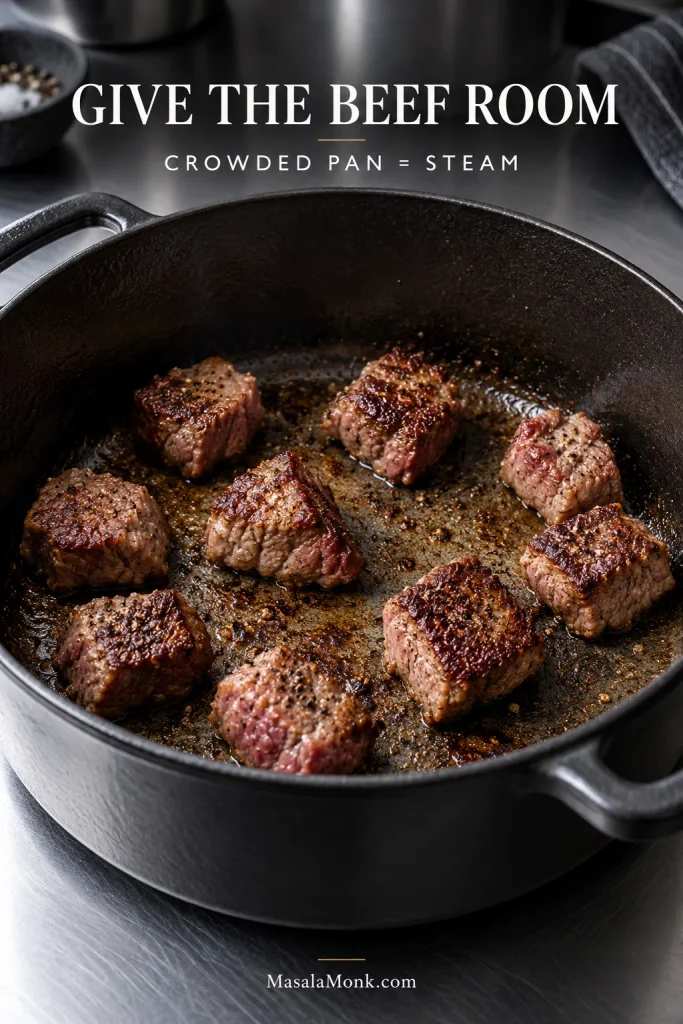
Chuck beef pieces spaced apart in a hot pan with visible cooking surface between them as the contact sides brown.
Watch the pan rather than the clock: if liquid starts collecting around the beef, the batch is steaming instead of searing. More exposed pan surface usually brings the browning back.

Look for a dark chestnut-brown crust in spots. Simply changing from red to gray-brown is not enough. Two or three well-browned sides are plenty.

Deep brown fond builds the gravy; black fond tastes burnt. If the bottom starts heading toward black, deglaze with a splash of broth before continuing.
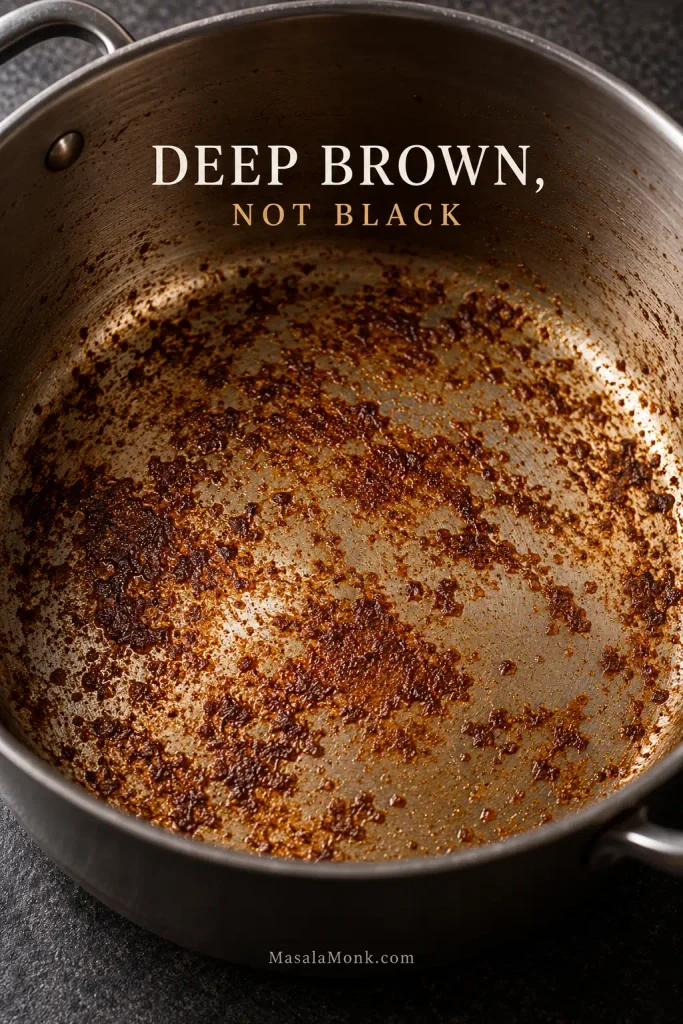
Deep brown beef fond adhered to the bottom of a metal cooking pot, with visible metal between the browned deposits.
Good beef fond is patchy, dry-looking and chestnut to mahogany, with some metal still visible between deposits. Once the surface turns uniformly black, bitterness becomes the bigger risk.

Read the Braise, Not Just the Clock

With the broth in, patience matters more than extra heat. Keep the liquid roughly halfway to two-thirds up the beef, then hold the braise at a gentle simmer rather than racing along at a boil.
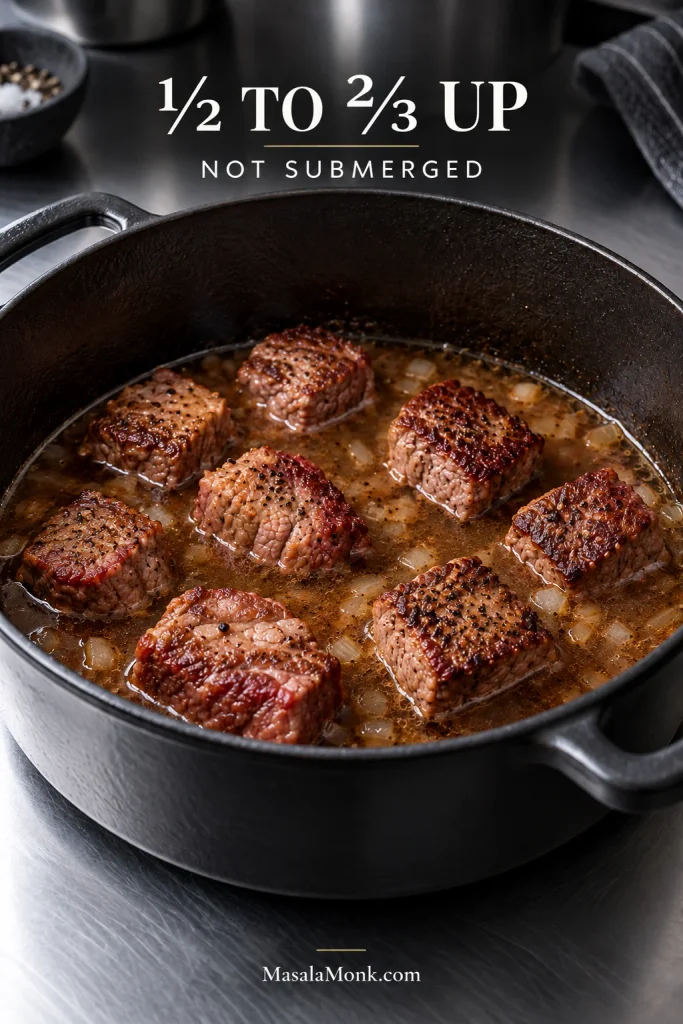
Browned beef pieces in a Dutch oven with thin brown braising liquid reaching about halfway to two-thirds up the meat.
Use the pot as the final measuring tool. Because Dutch ovens vary in width, the useful amount of broth is the amount that reaches roughly halfway to two-thirds up the beef.

Tough at this stage doesn’t mean you’ve ruined it. Chuck can feel stubborn before its connective tissue has softened, so firm resistance usually means it needs more time at the same gentle simmer. If you are unsure what the pot needs next, use the troubleshooting table.

When the beef yields easily and the pieces hold together, you’re there. Small pieces of chuck can turn stringy or dry if they cook long after softening. Once it’s tender, stop.
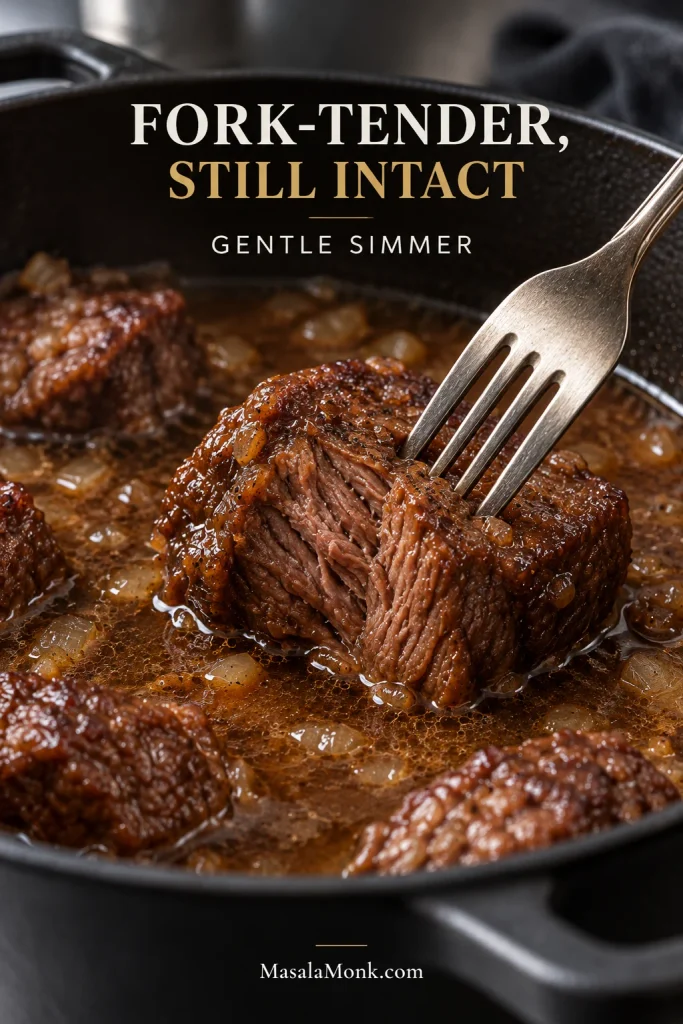
Fork entering a fully cooked braised chuck piece with moist brown fibers while the surrounding braising liquid gently simmers.
A fork entering easily is only half the test; the beef should also lift in one piece. If it breaks into dry strings, the chuck has moved past the tender-but-intact stage.

Finish the Gravy

Don’t decide the final thickness while the chuck is braising. By the time the beef is tender, evaporation and gelatin from the meat may already have given the cooking liquid much more body.
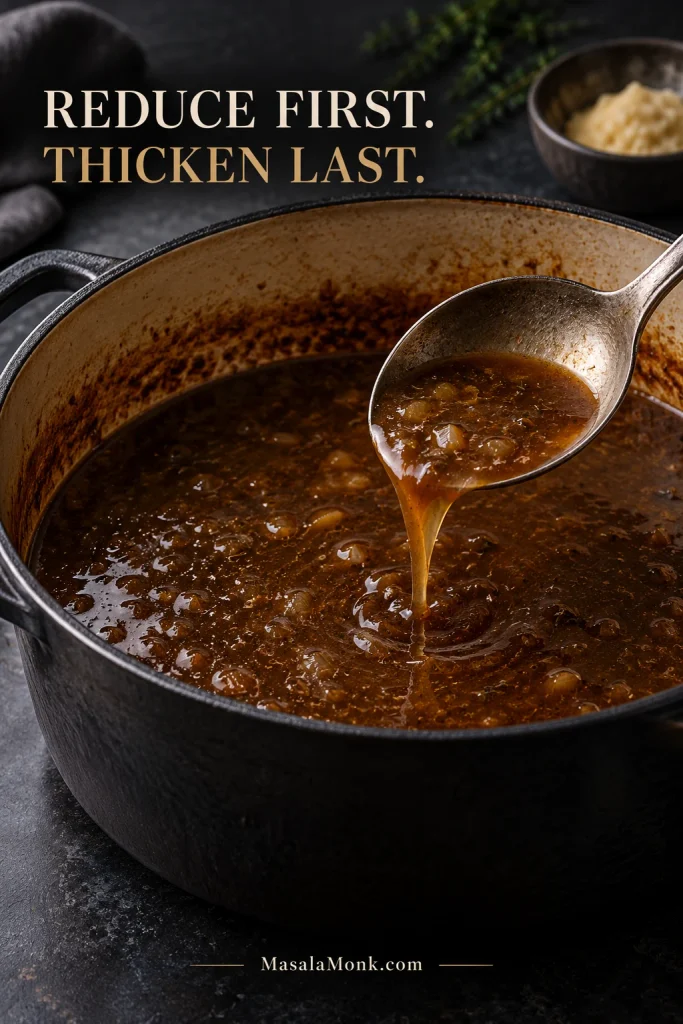
Reduced brown braising liquid in a pot after the beef has been removed, still visibly looser than finished gravy.
Reduction concentrates seasoning along with texture, so taste the cooking liquid again after it reduces and before adding more salt or the butter-flour paste.

Remove the beef first, skim any obvious surface fat and reduce the liquid only if it looks loose. Add the butter-flour paste gradually until the gravy has the body you want. There is no prize for using every bit of thickener.

The gravy should taste beefy, not floury. It should coat the meat but run from the spoon. If you can taste raw flour, simmer it another minute or two. For a texture that still seems off, jump to the gravy fixes.
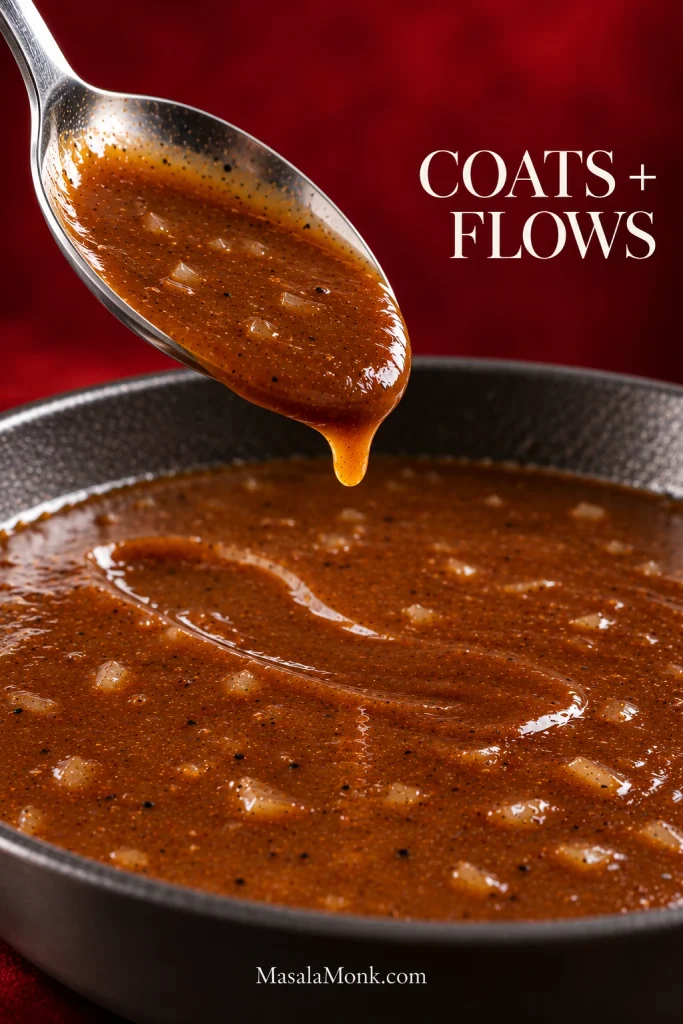
Brown beef gravy coating a stainless spoon above a shallow pan, with a soft trail visible across the gravy surface.
Tilt the spoon and watch what happens next: properly finished beef gravy leaves a light coating, then moves back into the pan instead of holding a stiff ridge.

If you like gravy built from browned pan flavor, try our smothered pork chops with onion gravy next.

Fix the Pot: Tough Beef, Thin Gravy & Other Problems

Most problems here are recoverable. Tough chuck usually needs more time; thin or greasy gravy is easier to correct once the beef is out of the pot.

Thin brown gravy spread across one pan beside gravy with distinct droplets of separated fat floating on the surface.
Thin gravy looks uniformly loose, while greasy gravy shows separate fat droplets or a surface slick. That distinction matters because thickness and excess fat are not the same problem.

Quick fixes by symptom

Problem What to do
Beef will not brown Pat it dry and leave more room between pieces. If liquid pools in the pot, use smaller batches.
Fond is getting too dark Deglaze before it burns. Save that browned liquid with the beef and continue on a cleaner surface.
Chuck is still tough Keep the simmer gentle and check again in 15 to 20 minutes. Chuck often just needs more time.
Beef is dry or stringy You can’t make overcooked beef juicy again, but plenty of gravy will make it better to eat. Next time, stop while the pieces are tender and still hold their shape.
Gravy is watery Remove the beef first, then simmer the gravy uncovered. Add more thickener only after excess liquid has had time to reduce.
Gravy is too thick Whisk in low-sodium broth 1 to 2 tablespoons (15 to 30 ml) at a time until it loosens.
Gravy looks greasy Skim excess fat from the surface. More flour will make the gravy thicker without removing the extra fat.
Gravy tastes flat Taste for salt first. If it is underseasoned, add a little salt or Worcestershire. When the salt level is right, try black pepper or ¼ teaspoon cider vinegar or lemon juice instead.
Gravy is too salty Dilute gradually with unsalted broth or water. If that makes the gravy too loose, simmer only briefly; a long reduction will concentrate the salt again.

Mushrooms, Red Wine and a Faster Top Sirloin Version

Mushrooms

Use 8 oz (225 g) sliced cremini or white mushrooms. Brown them after the beef until their released moisture has mostly evaporated and the slices begin to take on color.

Set them aside while the chuck braises, then add them back with the beef at the end so they keep some of their browned flavor and texture.
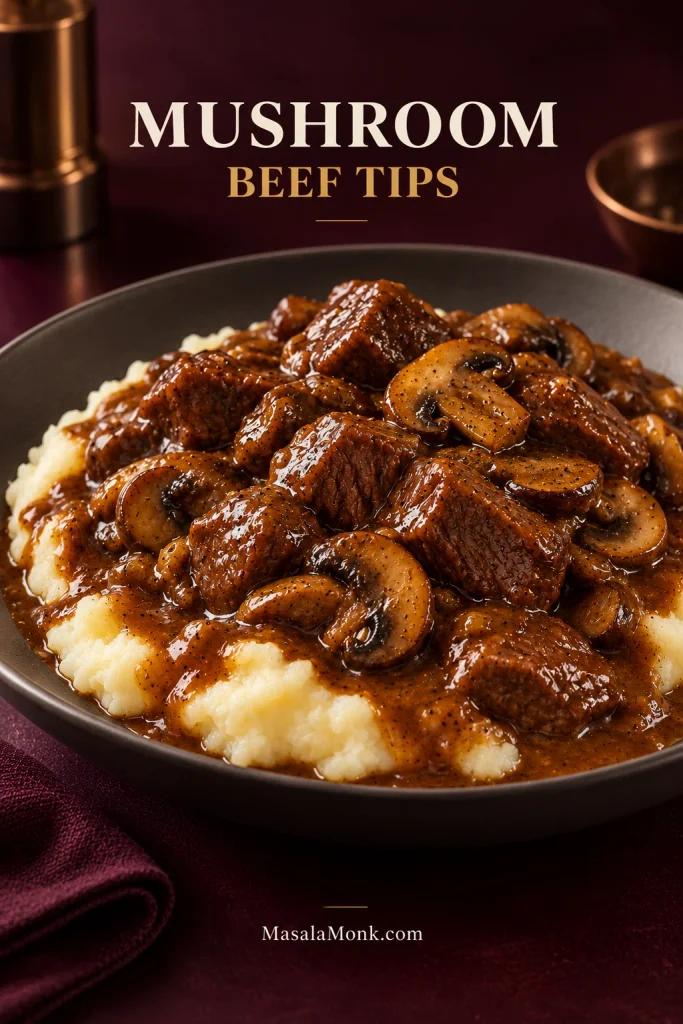
Braised beef tips in brown gravy with browned sliced mushrooms served over creamy mashed potatoes.
Mushrooms need room just like the beef does. If the pan is crowded, they steam and stay pale instead of developing the browned edges that make this variation worth adding.

Red wine

Add ½ cup (120 ml) dry red wine after the tomato paste, garlic and thyme. Scrape up the fond and let the wine reduce by half, then add only enough beef broth for the braising liquid to come halfway to two-thirds up the beef.
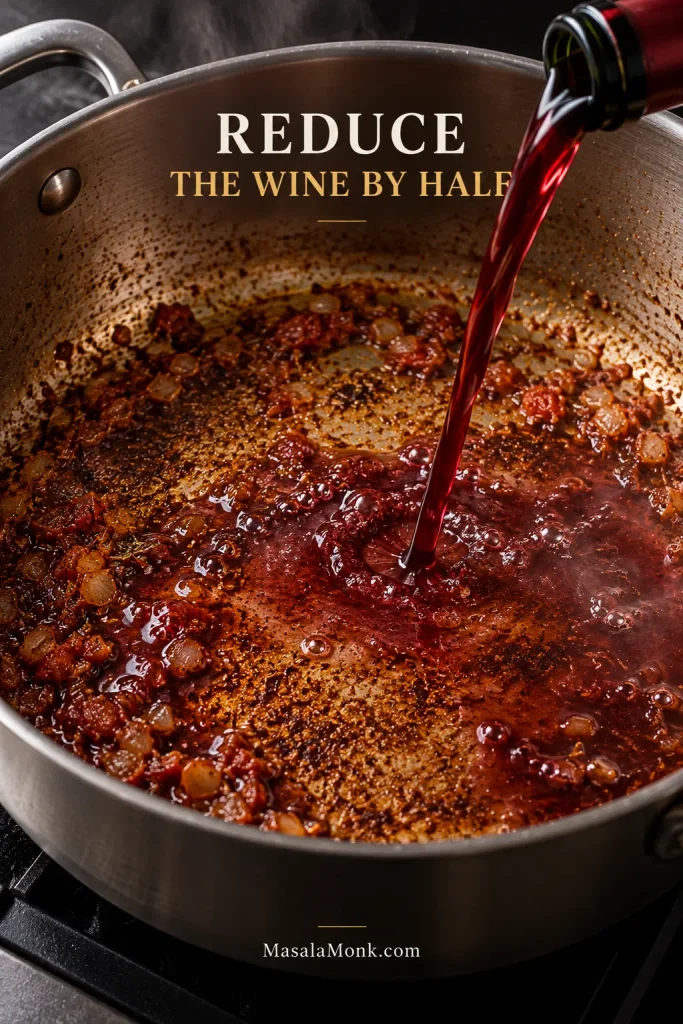
Red wine being poured into a hot metal pan with browned fond, cooked onion and tomato paste during deglazing.
As the red wine hits the pan, watch the browned fond begin to release and expose cleaner metal underneath. That visible change is the best sign the deglaze is doing its job.

Top sirloin instead of chuck

Top sirloin makes this a much quicker, slightly smaller batch. Use 1½ lb (680 g), cut into 1-inch (2.5-cm) pieces, and season with 1 teaspoon fine sea salt and ¾ teaspoon black pepper. Sear in batches for 30 to 60 seconds on each broad side, then remove before the centers are fully cooked.

Cook the onion, tomato paste, garlic and thyme as above. Add 2 cups (475 ml) low-sodium broth with the Worcestershire and simmer for about 10 minutes. Mash together 1 tablespoon (14 g) softened butter and 1½ tablespoons (about 12 g) flour, then whisk it in gradually. Return the top sirloin and its juices and start checking after 2 to 3 minutes. Once the thickest pieces reach at least 145°F (63°C), take the pot off the heat and let the dish stand for 3 minutes before serving.
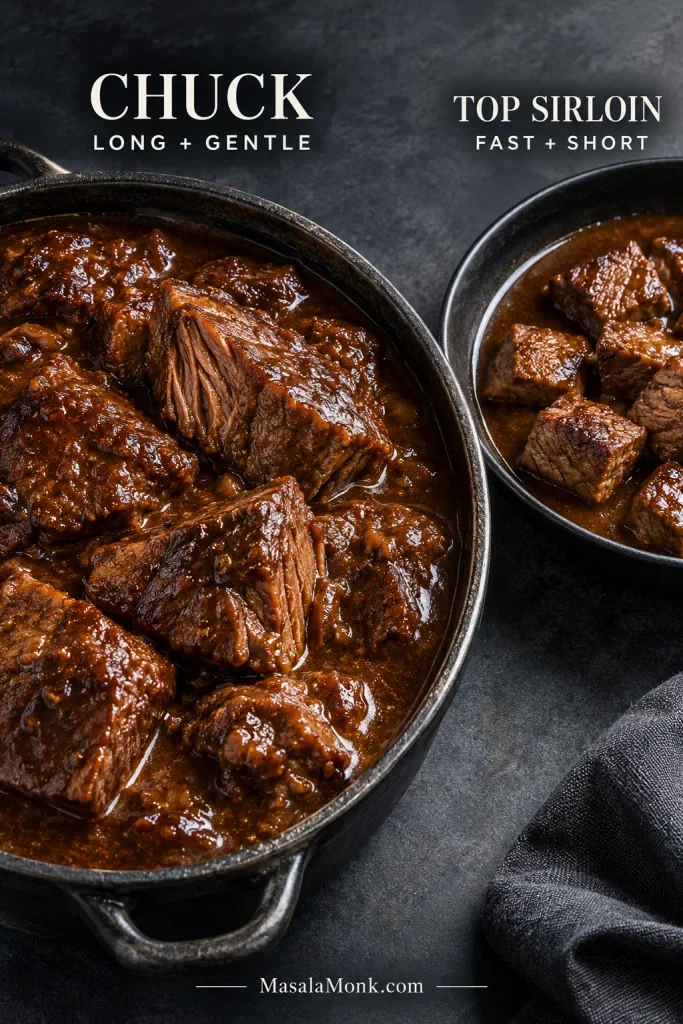
Large braised chuck pieces in brown gravy beside smaller, leaner top sirloin pieces in a separate pan for comparison.
Even after cooking, the cuts should look different: chuck stays more fibrous and irregular, while top sirloin remains neater and leaner. That difference is why their cooking times cannot simply be swapped.

For another quick-cooking top sirloin dinner, our Beef Stroganoff recipe keeps the beef’s time in the sauce short.

Prefer the Crock-Pot? Our Slow Cooker Beef Tips and Gravy Recipe uses liquid levels and timing designed for the slow cooker.

Mashed Potatoes, Rice or Egg Noodles?

Creamy mashed potatoes are especially good here because the gravy can run into the ridges instead of sitting on top like paste. This is the kind of dinner where making enough gravy really matters.
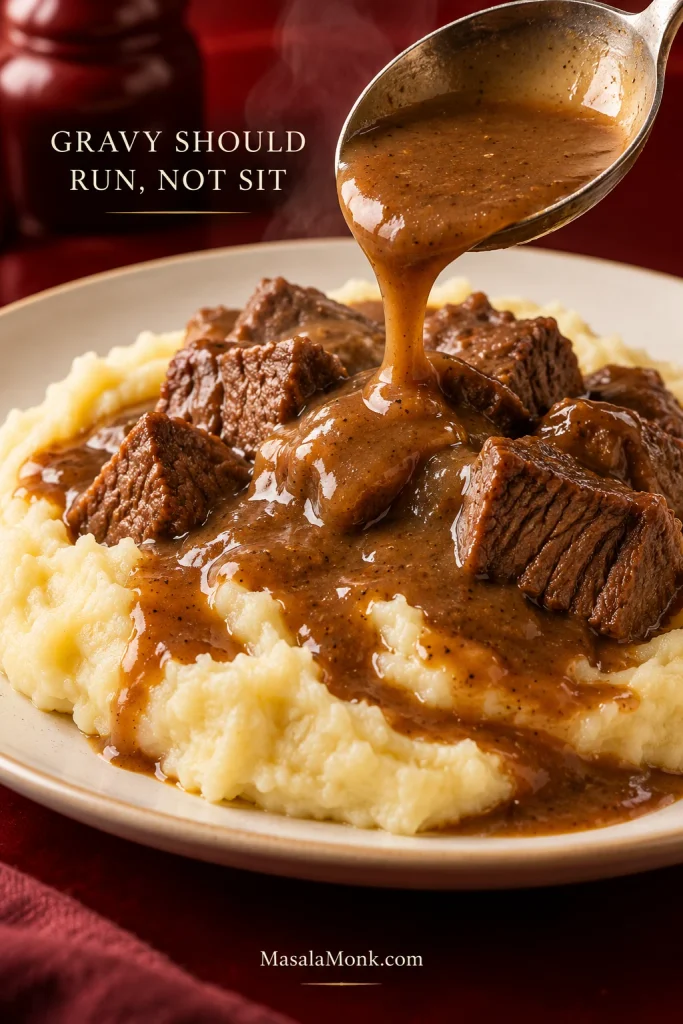
Brown gravy being spooned over intact beef tips and creamy ridged mashed potatoes on a light plate.
A shallow pool of gravy around the beef is useful here, not messy. It keeps each bite saucy without burying the texture of the potatoes or the browned beef.

For rice, keep the gravy on the looser side so it can run through the grains. If you’re making it alongside dinner, our guide to how to cook perfect rice covers the stovetop method and common rice varieties.

Egg noodles work best with gravy that is a touch more clingy.

Choosing among all three? Keep the beef the same and make only small adjustments to the final gravy so it suits what is underneath.
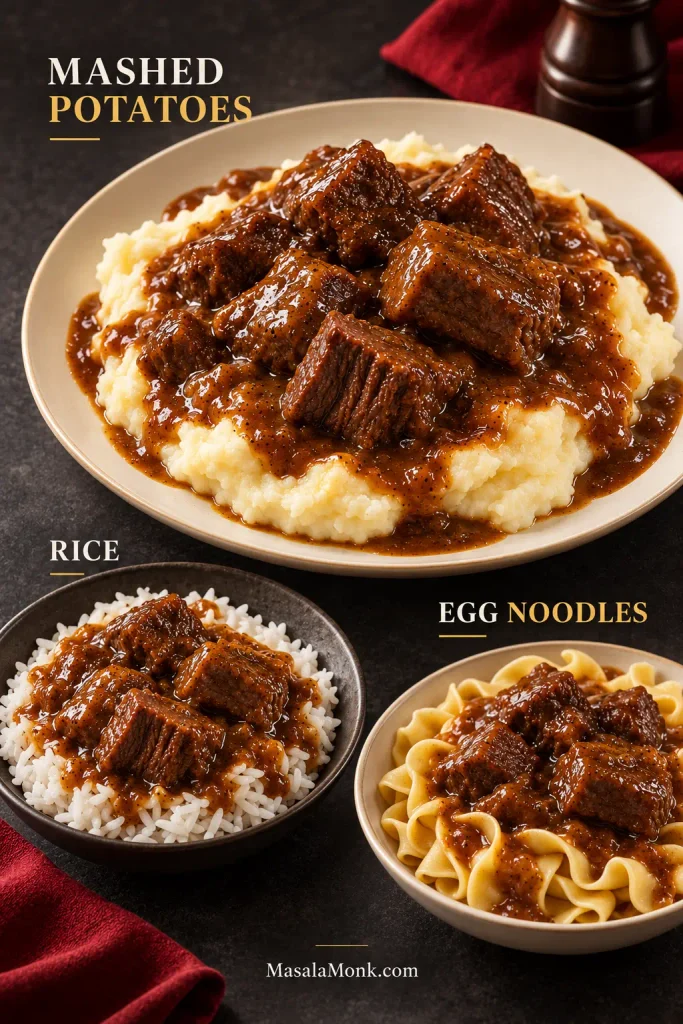
Beef tips and brown gravy served three ways over mashed potatoes, white rice and broad egg noodles.
Look at what happens after the gravy hits the base: it should remain visible around rice, cling lightly to egg noodles and settle into the ridges of mashed potatoes rather than disappearing completely.

Green beans almondine bring toasted almonds and a little lemon, which is especially welcome beside the rich beef and gravy.

Make Ahead, Store and Reheat

The finished beef tips and gravy can be made 1 to 2 days ahead and reheated together gently. To prep ingredients ahead, cut the chuck and chop the onion the day before, then refrigerate them separately.

Cool leftovers promptly and refrigerate them in covered containers. USDA recommends using refrigerated leftovers within 3 to 4 days and reheating leftovers to 165°F (74°C). Count that window from the day the beef was originally cooked, including when the dish was made ahead.

After chilling, the gravy may look very thick or almost set. That is normal. Gelatin from the chuck and the flour both firm as they cool.
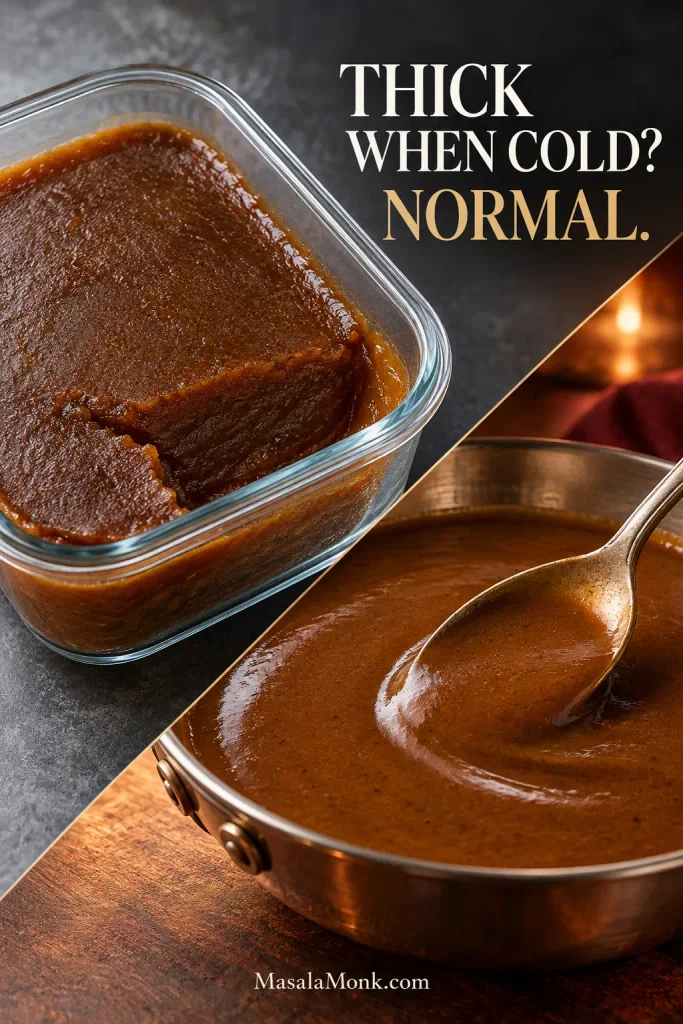
Firm chilled beef gravy in a glass container beside the same brown gravy reheated until smooth in a metal pan.
Judge leftover beef gravy only after it is warm. Chilled gravy can look almost solid, so reheating first prevents you from adding broth to a sauce that would have loosened on its own.

Reheat gently on the stovetop, stirring often, until the gravy has warmed enough to loosen. If it still seems too thick, add low-sodium broth or water 1 tablespoon at a time. Continue until the beef reaches 165°F (74°C) throughout and the gravy comes briefly to a boil, then take the pot off the heat so the already-tender beef does not keep cooking.

Freeze the cooled beef and gravy in an airtight freezer-safe container for 2 to 3 months for best quality. Thaw in the refrigerator, reheat slowly and add a little broth if the gravy needs loosening.
Posted on — Leave a comment

Slow Cooker Beef Tips and Gravy Recipe: Tender, Rich & Easy Crock Pot Dinner

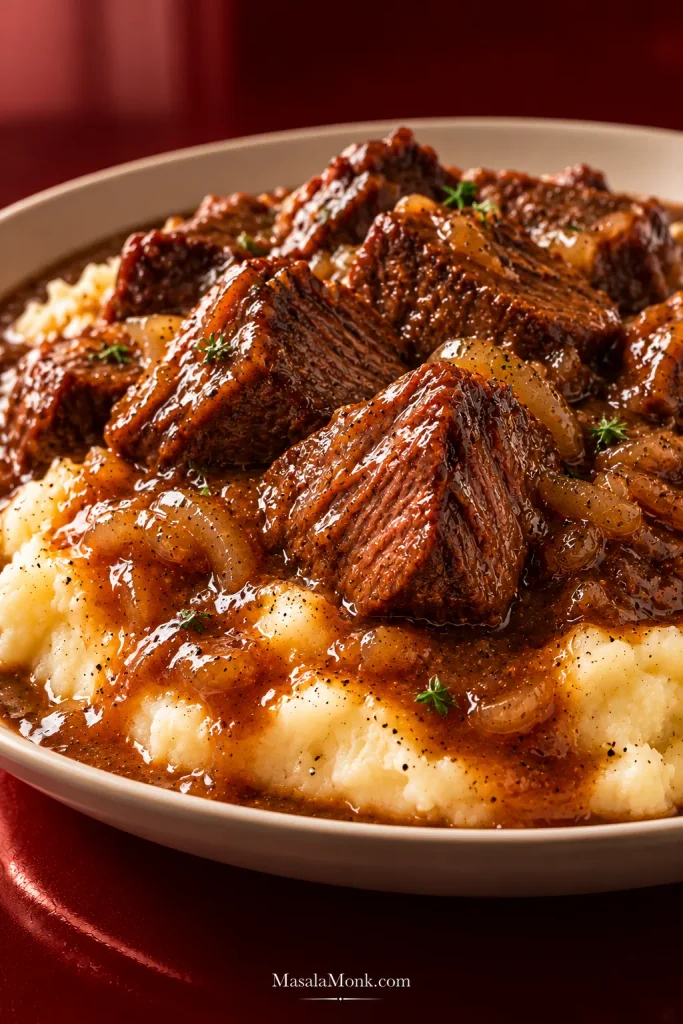
Beef tips coated in glossy brown onion gravy over creamy mashed potatoes on a deep oxblood-red background.

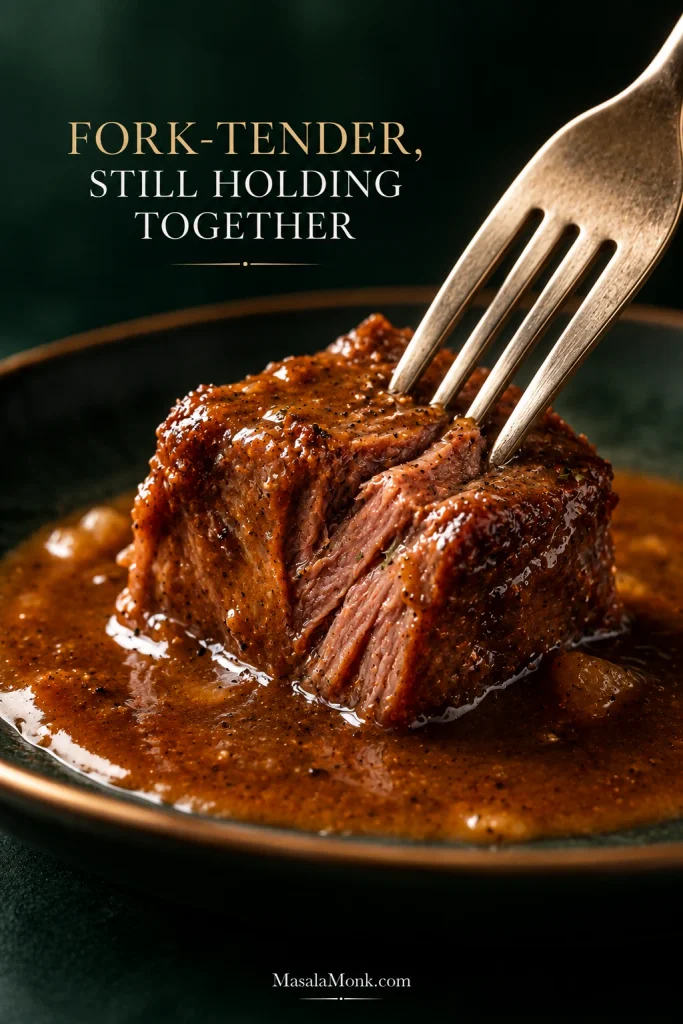
A good pot of beef tips should give you beef that yields easily under a fork, glossy gravy that clings to it, and enough sauce to settle into the mashed potatoes underneath. Chuck can get you there, but it needs time—and the gravy comes together at the end.

This slow cooker beef tips and gravy recipe is built around one simple rule: get the beef tender; the gravy can wait. Once the meat yields easily to a fork, taste the liquid in the pot and decide whether it needs thickening, a short reduction or simply a final seasoning adjustment.

The gravy starts with low-sodium beef broth, onion, garlic, Worcestershire and a little tomato paste. Sear the beef for deeper browned flavor, or skip the skillet when you want dinner with less fuss. Most of the cooking happens while you’re doing something else. When you come back to the pot, the work left is simple: check the beef, taste the cooking liquid and give the gravy whatever it needs.

Get the Beef Tender; the Gravy Can Wait

Cook the chuck until a fork slips easily into one of the larger pieces. Once the beef is tender, taste the cooking liquid: reduce it if the flavor is weak, or thicken it if the flavor is already rich but the consistency is loose.

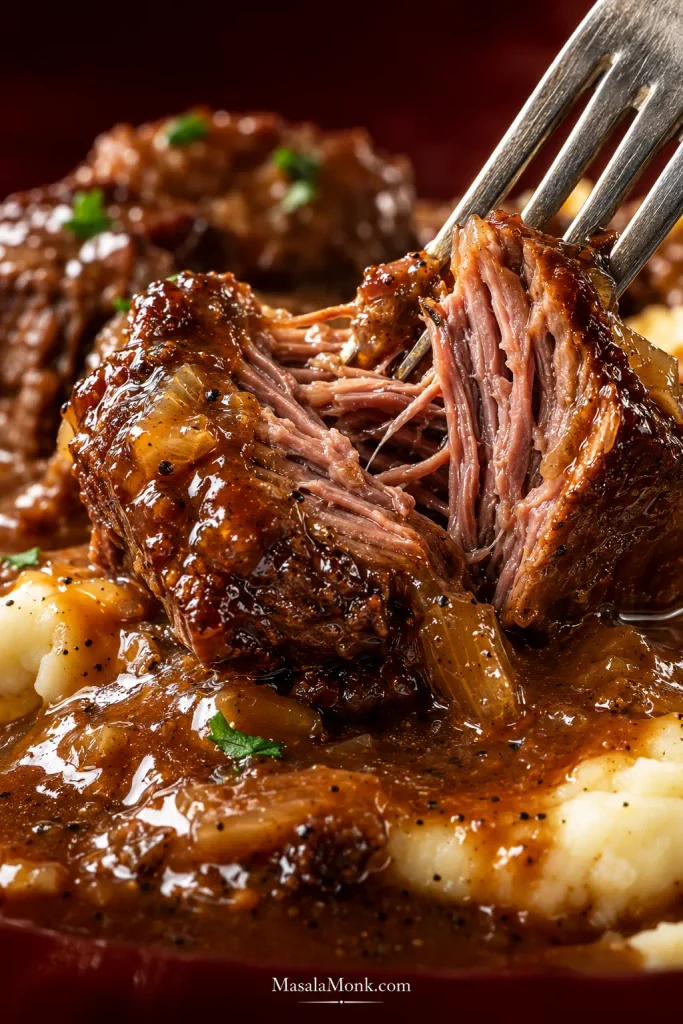
Close-up of a fork opening a gravy-coated piece of braised beef and exposing moist brown fibers inside.
The cut surface tells you more than a glossy exterior: tender chuck shows moist, relaxed fibers rather than a dense center or long dry strands. Even so, the meat should still read as one piece instead of pulled beef.

Slow Cooker Beef Tips and Gravy Recipe

Chunks of chuck roast cook low and slow with onion, garlic, Worcestershire and beef broth until fork-tender but still holding together, then the cooking liquid becomes a glossy brown gravy. Searing is optional, and you do not need condensed soup or a gravy packet.

Prep
15 minutes

Cook
LOW: 6–8 hours
HIGH: 4–5 hours

Gravy finish
15–20 minutes

Total*
LOW: about 6½–8½ hours
HIGH: about 4½–5½ hours

Yield
6 generous servings

*Total time covers the standard slow-cooker route and gravy finish. Optional searing adds about 12–15 minutes; a saucepan reduction for diluted gravy adds about 5–10 minutes.

Equipment

  • A 4- to 6-quart slow cooker. Cooker shape, capacity and fullness can affect timing, so use the tenderness cue rather than treating the clock as exact.
  • Chef’s knife and cutting board
  • 12-inch / 30 cm heavy skillet, optional if searing
  • Small bowl or cup for the cornstarch slurry
  • Whisk or fork

Ingredients

For the Beef

  • 2½ lb / 40 oz / 1.13 kg beef chuck roast, cut into roughly 1½-inch / 4 cm cubes
  • 6 g fine sea salt (about 1 teaspoon, depending on crystal size), plus more after tasting the finished gravy
  • 1 teaspoon freshly ground black pepper
  • 1 tablespoon / 15 ml neutral high-heat oil, optional for searing

For the Slow Cooker and Gravy

  • 1 medium-large yellow onion / about 7 oz / 200 g, diced
  • 4 garlic cloves / about 12 g, finely minced
  • 1 tablespoon tomato paste / about 16 g
  • 2 cups / 16 fl oz / 473 ml low-sodium beef broth or stock
  • 1 tablespoon / 15 ml Worcestershire sauce
  • 1 teaspoon dried thyme
  • 1 bay leaf

To Finish the Gravy

  • 2 tablespoons cornstarch / about 16–18 g
  • 2 tablespoons / 30 ml cold water
  • Up to 1 additional tablespoon cornstarch / about 8–9 g + 1 tablespoon / 15 ml cold water, only if needed
  • 1 tablespoon / 14 g unsalted butter, optional
  • Freshly ground black pepper and chopped parsley, optional for finishing

Method

Start the Beef and Gravy Base

  1. Cut and season the beef. Pat the chuck dry and cut it into roughly 1½-inch / 4 cm pieces, trimming only large seams of hard exterior fat. Toss evenly with the measured salt and black pepper.
  2. Choose seared or dump-and-go. For deeper browned flavor, heat the oil in a large skillet over medium-high to high heat and brown the beef in 2–3 uncrowded batches. Good color on a few broad surfaces is enough; transfer the beef to the slow cooker. For the fastest version, skip the skillet and put the seasoned raw beef directly into the cooker.
  3. Build the gravy base.

    If you seared the beef: Lower the skillet heat to medium, cook the onion for 2–3 minutes, then stir in the garlic and tomato paste for 30–60 seconds. The small amount of tomato paste deepens the savory base without making the gravy taste tomatoey. Add a splash of the measured broth and scrape up the browned bits. Transfer everything to the slow cooker, then add the remaining broth, Worcestershire, thyme and bay leaf.

    For dump-and-go: Whisk the tomato paste and Worcestershire into about ½ cup / 120 ml of the measured broth, pour it over the beef with the onion and garlic, then add the remaining broth, thyme and bay leaf.

Cook Until Tender, Then Finish the Gravy

  1. Cook until the beef yields to a fork. Cover and cook on LOW for about 6–8 hours or HIGH for about 4–5 hours. Keep the lid closed through the early part of cooking. On LOW, start checking around 6 hours. Test one of the larger cubes. A fork should slip in with little resistance, and the beef should still hold together when lifted. If it still feels springy or chewy, cover and cook another 30–45 minutes before checking again.
  2. Taste the cooking liquid. Remove the bay leaf. If it tastes rich but runs thin, move on to the slurry. When the flavor is diluted, transfer the tender beef to a covered bowl and simmer the liquid uncovered in a saucepan for about 5–10 minutes. Taste again before reaching for the cornstarch.
  3. Thicken gradually. Mix 2 tablespoons / about 16–18 g cornstarch with 2 tablespoons / 30 ml cold water until smooth. Stir the slurry into the hot liquid, cover and cook on HIGH for about 15–20 minutes. If you reduced the liquid in a saucepan, whisk in the slurry a little at a time and simmer briefly before returning the beef. Pause before adding the optional second slurry. If the liquid tasted diluted, reduce it first as described in Step 5 rather than trying to fix weak flavor with more starch. Stop slightly short of the thickness you want on the plate; the gravy will tighten a little as it cools.
  4. Season and serve. Taste the gravy before adding any more salt. Stir in the optional butter, add black pepper and parsley if using, then serve the beef over mashed potatoes, egg noodles or rice.

What Good Browning Looks Like

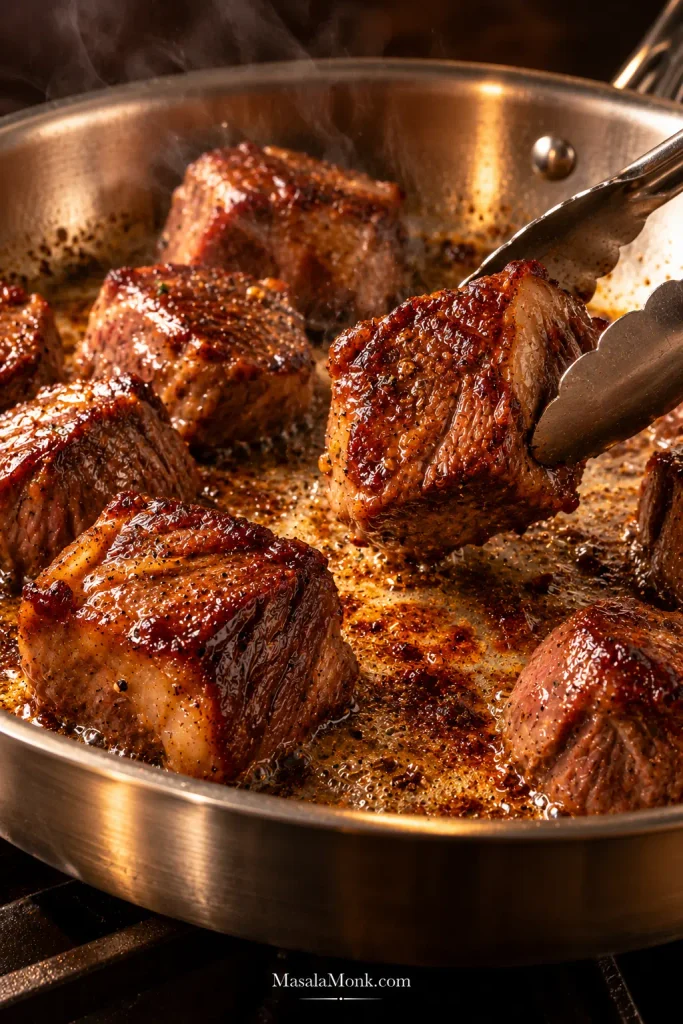
Beef cubes browning in a stainless-steel skillet while tongs turn one piece, with dark browned fond visible on the pan.
Dry beef browns; wet beef steams. Once the pan starts collecting liquid instead of leaving dark fond behind, the batch is probably too crowded, so give the cubes more space rather than simply turning up the heat.

Deglaze the Fond Into the Gravy Base

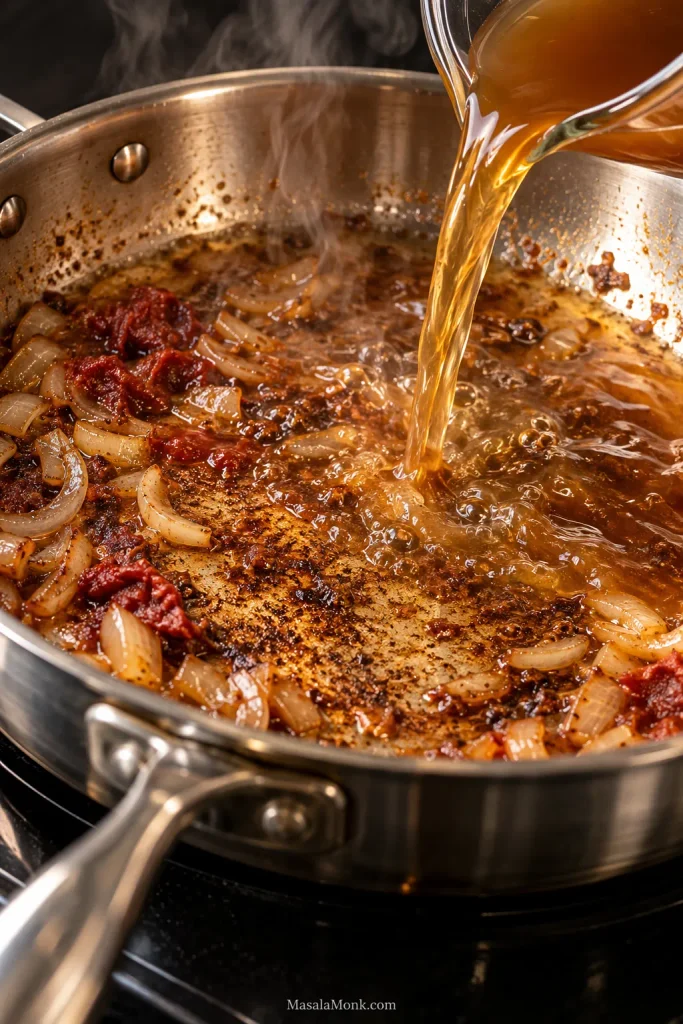
Broth pouring into a hot stainless-steel skillet with browned fond, onions and tomato paste as steam rises.
Deglaze until the browned residue loosens and the pan shows cleaner metal beneath it. Because the liquid comes from the broth already measured for the recipe, you capture the fond without quietly increasing the slow cooker’s total liquid.

What the Finished Slow-Cooker Beef Should Look Like

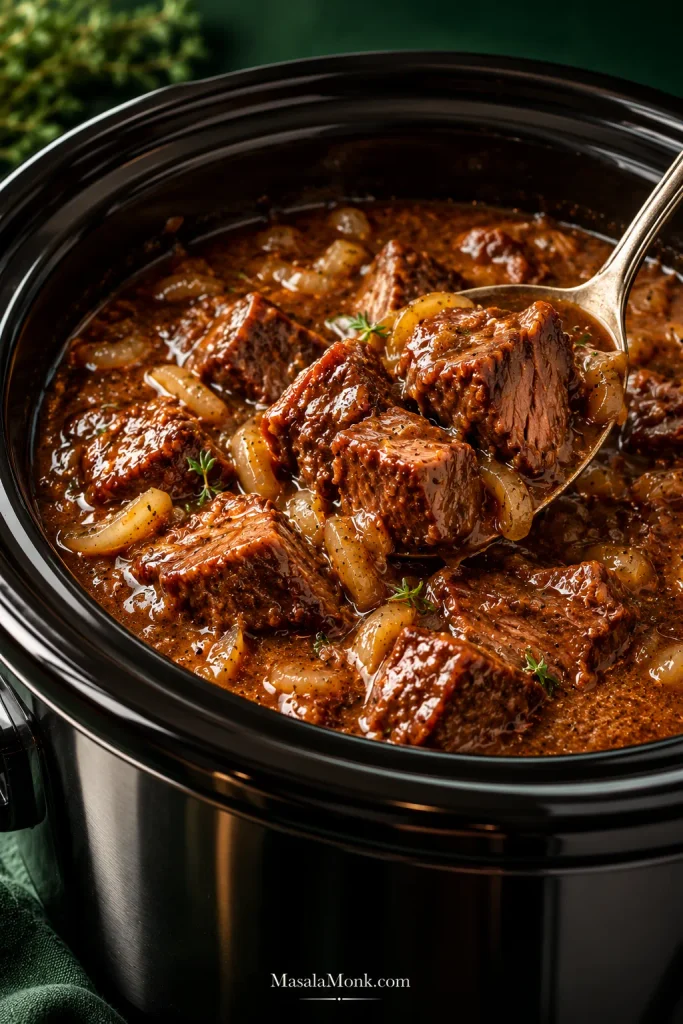
Finished beef tips and onion cooking liquid in a black slow cooker, with several cooked beef cubes lifted on a serving spoon.
The liquid in the slow cooker can look considerably looser than the gravy on the plate. Judge tenderness first; the sauce gets its final adjustment only after the beef is ready.

“Beef Tips” Is a Label, Not One Reliable Cut

Beef tips are not one specific cut. A package with that label can contain sirloin, chuck, round or other trimmings, which helps explain why one batch turns tender on schedule while another stays stubborn.

For this slow-cooker method, buying chuck roast and cutting it yourself is the most reliable route. You know what cut you have, you control the cube size, and chuck has the marbling and connective tissue that suit a long, moist cook.

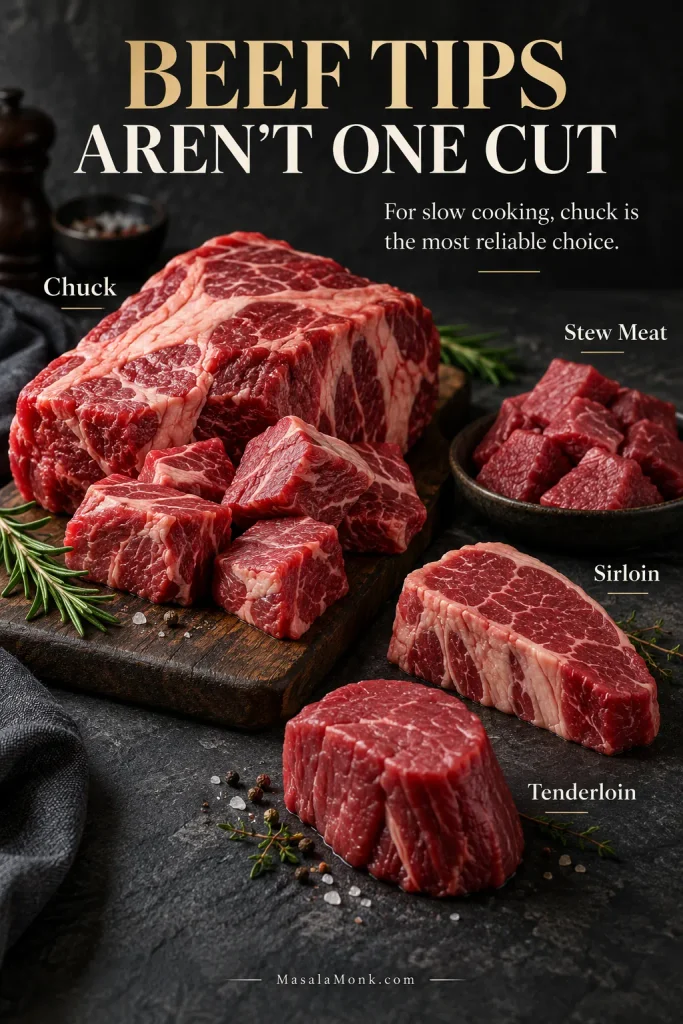
Raw beef cuts labeled chuck, stew meat, sirloin and tenderloin, with chuck shown most prominently.
At the meat counter, visible marbling is a useful clue for this long slow-cooker method. Packages marked “beef tips” may contain very different muscles, so buying chuck yourself gives you more control over both fat distribution and piece size.
At the meat counterWhat happens in this recipe
Chuck roastMost reliable for this method. Rich, well-marbled and forgiving during a long cook.
Pre-cut stew meatConvenient, but the package may contain mixed muscles or uneven sizes, so pieces can become tender at slightly different times.
SirloinLeaner and naturally more tender. It works, but start checking as soon as it becomes easy to pierce instead of automatically giving it the full chuck timing.
Tenderloin tipsNaturally tender and expensive. A long slow cook makes little sense for a cut you’re paying a premium to keep tender.

Keep the Beef Pieces Close in Size

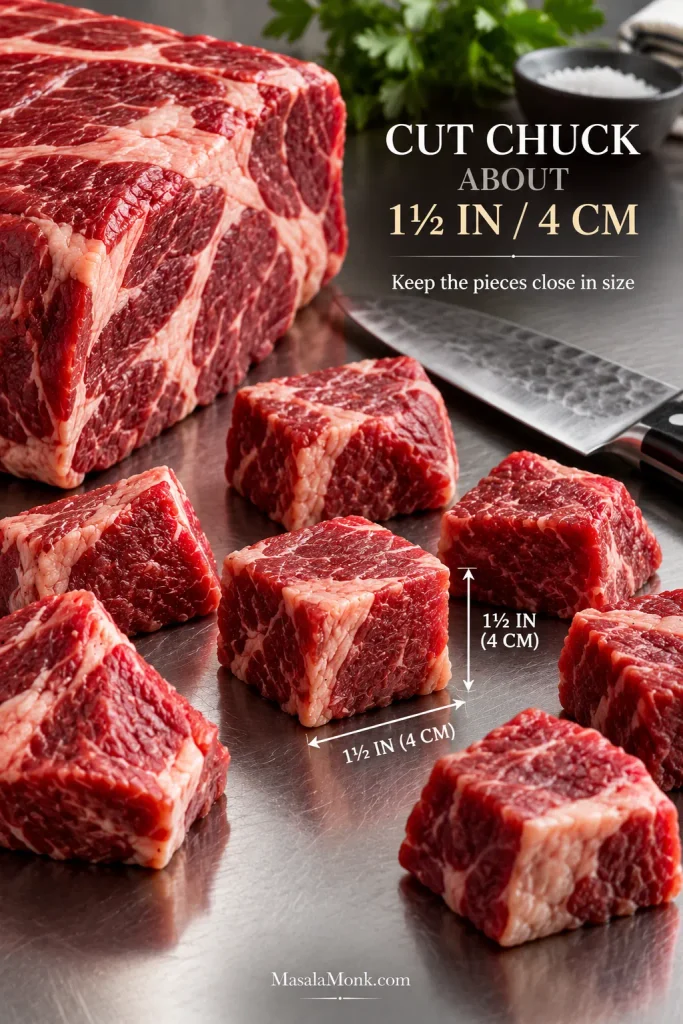
Aim for roughly 1½-inch / 4 cm cubes. Tiny scraps can turn dry and ragged before the larger pieces are ready, while oversized chunks may still resist the fork when everything around them is tender. What matters most is getting the pieces reasonably close in size.

Raw chuck roast cut into roughly 1½-inch or 4 cm cubes on a stainless work surface beside a chef’s knife.
Leave the chuck’s internal marbling in place while trimming only obvious hard exterior fat. Keeping the pieces reasonably even at 1½-inch / 4 cm gives that fat and connective tissue enough time to soften without turning the smaller pieces ragged.

The Beef Stroganoff recipe takes the opposite approach: thin sirloin gets a brief sear because it starts tender, while chuck benefits from hours rather than minutes.

How to Know When Chuck Is Tender

For chuck, use LOW for about 6–8 hours or HIGH for about 4–5 hours. Start checking at the early end of the range because slow cookers, cube sizes and cuts vary.

Check one of the larger cubes first. Push in a fork and twist gently. It should slip in with little resistance while the beef still holds together when lifted.

Fork inserted into an intact cube of cooked beef coated in gravy, with tender interior fibers visible while the cube keeps its shape.
“Cooked through” and “braise-tender” are not the same finish line. Chuck can be fully cooked yet still feel springy, so the fork matters more than elapsed time when you decide whether these beef tips are ready.

If the chuck is still chewy, don’t write it off yet. Give it another 30–45 minutes and check again. Beef can be cooked through before chuck has softened into the texture you’re waiting for.

Lean beef behaves differently. Once sirloin is tender, extra hours can make it dry and stringy. Chuck gives you more room, although eventually even those cubes begin losing their shape. That’s why the fork matters more than a universal finish time.

Keep the Lid Closed Until the Check Matters

The early hours don’t need supervision. Keep the lid shut and let the cooker hold its heat. Once you’re near the tenderness window, a fork test tells you far more than another glance through the glass.

The Beef Does Not Need to Swim

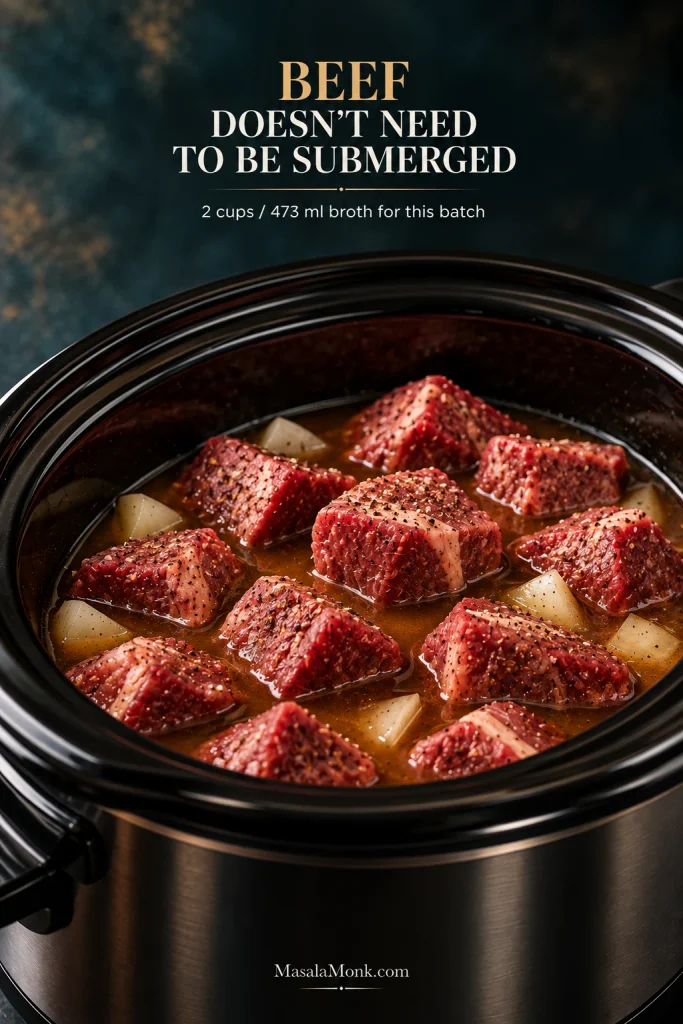
The beef does not need to be submerged. For this batch, 2 cups / 473 ml low-sodium beef broth is enough. Some cubes will sit above it. That’s fine.

With the lid closed, relatively little moisture escapes. The chuck releases juices as it cooks, and the onion adds more. Pour in extra broth now and you’ll mostly have more liquid to concentrate later.

Raw seasoned chuck cubes and onions in a black slow cooker, with several beef pieces sitting above the visible broth level.
Notice the starting liquid line rather than expecting the beef to swim. As the chuck and onion release moisture, the level rises naturally. Covering every cube with broth at the beginning can leave you with more liquid than the gravy needs later.

A Slow Cooker Beef Stew deliberately needs more surrounding liquid because the broth is part of the finished bowl with the beef, potatoes and vegetables. Here, you need enough for the beef and the eventual gravy, not a potful of soup.

Why Low-Sodium Broth Matters

Broth is only one source of salt. Worcestershire contributes more, while gravy mix, onion soup mix, bouillon or condensed soup can add a great deal if you use a shortcut version. Starting with low-sodium broth and modest measured salt keeps the final adjustment in your hands.

Thin Gravy and Weak Gravy Are Not the Same Problem

Taste the liquid before you thicken it. If it already tastes rich and beefy but looks thin, use the cornstarch slurry. When the flavor tastes weak or diluted, reduce the liquid first and thicken it only if it still needs more body.

Spoon lifting loose brown beef gravy, with on-image text contrasting “Rich + beefy?” with “Watery + diluted?”
Color and shine cannot tell you whether a thin gravy needs starch or concentration. Taste is the deciding clue, and hot gravy will gain a little additional body between the cooker and the plate.

Good Flavor, Loose Texture: Thicken

Whisk 2 tablespoons / about 16–18 g cornstarch with 2 tablespoons / 30 ml cold water, stir the smooth slurry into the hot gravy base and give it about 15–20 minutes on HIGH. Pause before adding anything else. Cornstarch needs heat and a little time to show its full effect.

For a looser gravy over rice or noodles, that first slurry may be all you need. With mashed potatoes, add part or all of the optional second slurry only after you see where the first one lands.

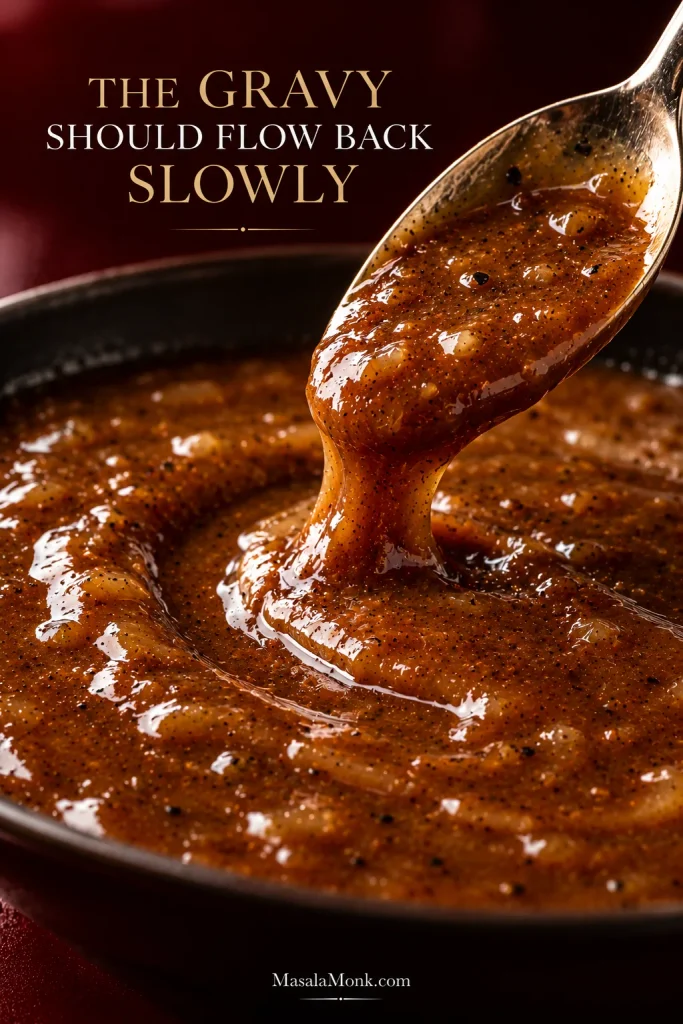
Drag a spoon through the gravy. It should flow back slowly rather than flooding together at once. Stop slightly short of the thickness you want on the plate; the gravy will tighten a little as it cools.

Silver spoon dragged through glossy brown gravy, leaving a channel that is beginning to flow slowly back together.
Wait until the slurry has had time to heat before using this test. Then drag the spoon through once: if the channel begins closing gradually, the gravy has body without behaving like a paste.

Diluted Flavor: Reduce First

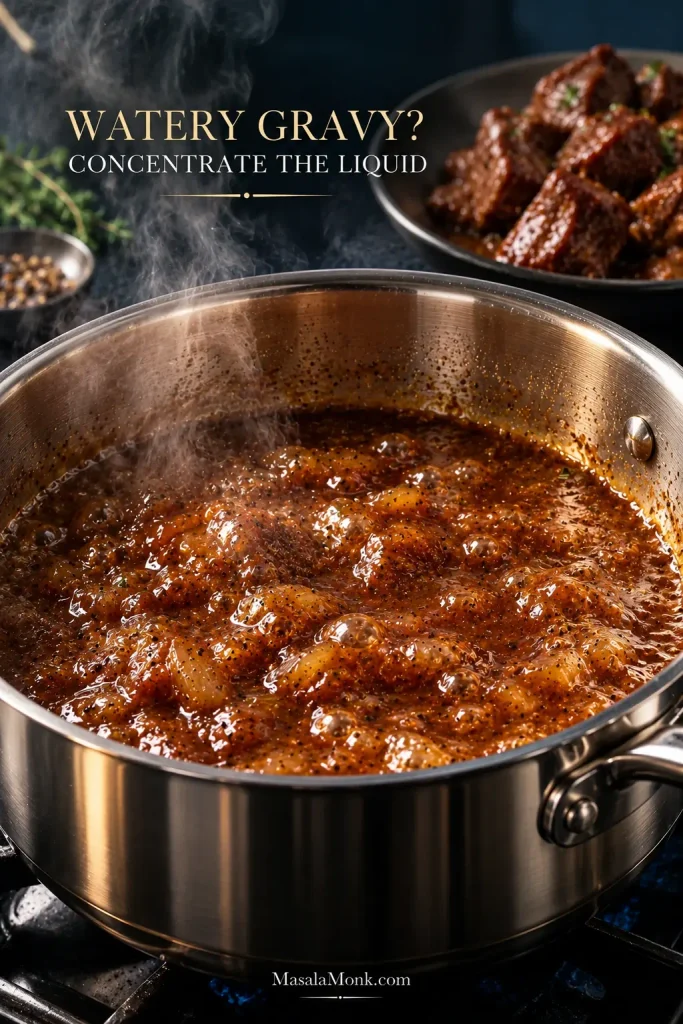
More starch can make weak liquid thicker, but it cannot make weak liquid taste more concentrated. Move the tender beef to a covered bowl, skim obvious excess fat if necessary, pour the liquid into a saucepan and simmer it uncovered for about 5–10 minutes. When it tastes like gravy rather than diluted broth, decide whether it still needs slurry.

Brown beef cooking liquid simmering uncovered in a stainless saucepan while cooked beef tips rest separately in the background.
A wide saucepan exposes more liquid to the air, so weak cooking liquid concentrates more efficiently. Keep the simmer active rather than violent; otherwise, splashing and scorching become bigger problems than the extra minute or two you might save.

Troubleshooting Beef Tips and Gravy

If you lift the lid and the beef is still chewy or the gravy looks nothing like you expected, don’t change everything at once. Check the beef first. Once it’s tender, taste what’s in the pot and fix one problem at a time. If the meat itself is the problem, revisit the fork-tender test before changing the gravy.

Quick Fixes by Symptom

What you see or tasteWhat’s probably happeningWhat to do
Beef is chewy and resistantThe chuck needs more timeCover and cook another 30–45 minutes, then check again
Beef is dry or stringyLean meat or too much time after tendernessServe with plenty of gravy; next time check sirloin earlier or use chuck
Gravy tastes rich but looks thinThe flavor is already concentrated; it just needs bodyAdd the measured slurry and wait before adding more
Gravy tastes watery as well as thinThe cooking liquid needs concentrationRemove the beef and reduce the liquid first
Gravy is too thickToo much starch, too much reduction, or the gravy thickened further as it cooledStir in warm low-sodium broth 1–2 tbsp / 15–30 ml at a time
Gravy is too saltySodium from broth, packets or seasoning stacked upDilute with unsalted or low-sodium liquid and serve over an unsalted starch
Flavor is bland even though the texture is goodThe sauce needs seasoningCheck salt first, then black pepper or a small splash of Worcestershire
It tastes salty enough but still feels heavyThe rich sauce may need a little acidityStir in ½ tsp / 2.5 ml red-wine vinegar, taste, and stop unless it genuinely needs more
Greasy layer on topChuck rendered more fatSkim it now, or chill the finished dish and lift off the firm fat later
Mushrooms made the pot wateryThey released additional moistureLet them finish cooking, then check the gravy before deciding whether it needs reduction or slurry

Using Gravy Mix, Onion Soup Mix or Cream of Mushroom Soup

Beef tips made with a gravy packet, onion soup mix or cream of mushroom soup can work here too; they simply change how much salt, broth and starch you need later.

Packet weights and sodium vary by brand, so leave out the starting salt and taste the finished sauce before adding more.

ShortcutStarting adjustmentWhat to watch
Brown gravy mixUse about 0.87–1 oz / 25–28 g and omit the starting saltIt adds seasoning and starch, so wait before deciding whether you need the usual slurry
Onion soup mixUse about 1 oz / 28 g, whisk it into the broth and omit the starting saltIt brings concentrated onion flavor and sodium but little thickening
Au jus mixUse roughly one standard packet as a seasoning addition and omit or sharply reduce the starting saltDo not add the packet’s separate preparation water unless you deliberately want more total liquid; the finished gravy may still need slurry
Cream of mushroom soupUse one 10.5-oz / 298-g can, reduce broth to about 1½ cups / 355 ml and omit the starting saltWhisk it into the broth first; it adds body, dairy and mushroom flavor, so judge extra thickener only after cooking

Adding Fresh Mushrooms

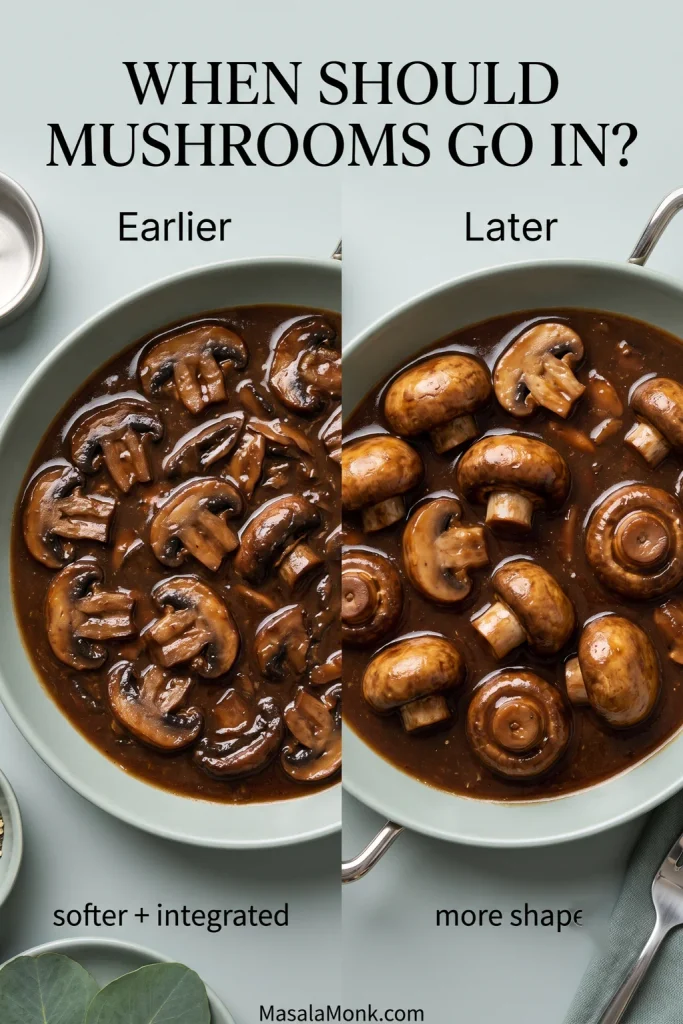
Use about 8 oz / 225 g sliced cremini or white mushrooms. For very soft mushrooms that melt into the gravy, add them at the beginning; for slices that keep more shape, add them during roughly the last 60–90 minutes on LOW, depending on slice thickness. They’ll release some water, so judge the gravy only after they’re cooked.

Two cooked cremini mushroom preparations in brown gravy: softer darker mushrooms labeled “Earlier” and plumper defined mushrooms labeled “Later.”
Slice thickness matters alongside timing. Thicker cremini slices naturally keep more definition, while thinner slices soften faster. Compare the mushrooms only after both versions are fully cooked in the gravy.

Doubling the Beef Doesn’t Mean Doubling the Broth

The base recipe uses 2 cups / 473 ml broth for 2½ lb / 1.13 kg beef. For a larger batch, increase the beef and aromatics roughly in proportion, but don’t automatically multiply the broth by the same factor. More meat releases more liquid while the covered cooker holds on to most of it.

Don’t automatically scale the cornstarch either. Wait until the larger batch is cooked, taste the liquid and see how much gravy you actually have before sizing the slurry.

Use a cooker large enough that the ingredients fit comfortably and the lid closes normally. Crock-Pot’s slow-cooker guidance recommends keeping the cooker about one-half to two-thirds full for best results. Follow the guidance for your own appliance.

What to Serve With Beef Tips and Gravy

Mashed potatoes are the natural first choice because they catch the brown gravy in every little valley. The creamy mashed potatoes work especially well here; keep the gravy toward the thicker end of the range so it settles into the potatoes instead of disappearing across the plate.

Close-up of beef tips and glossy onion gravy settling into ridged creamy mashed potatoes.
A shallow well in the mashed potatoes gives the beef and gravy somewhere to settle instead of sending the sauce straight across the plate. That keeps more gravy close to the beef in each serving.

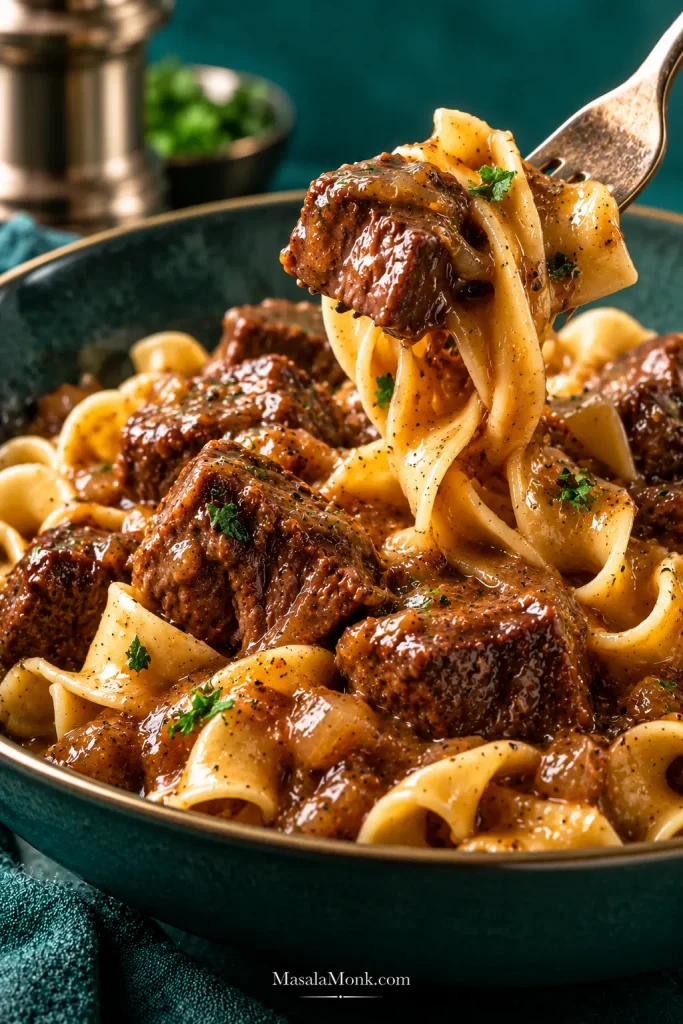
Egg noodles make the plate a little looser and especially comforting. Cook them separately, then spoon the beef and gravy over the top so the noodles stay pleasantly chewy instead of soft and swollen from hours in the pot.

Fork lifting broad egg noodles coated in brown beef gravy, with braised beef tips in a teal bowl below.
Drain egg noodles well before adding the beef and gravy. Residual cooking water can loosen the sauce at the exact moment you want it coating the broad ribbons.

Rice works particularly well with a slightly looser gravy. Add something green—steamed beans, broccoli or a crisp salad—when you want a fresh contrast to the rich beef and sauce.

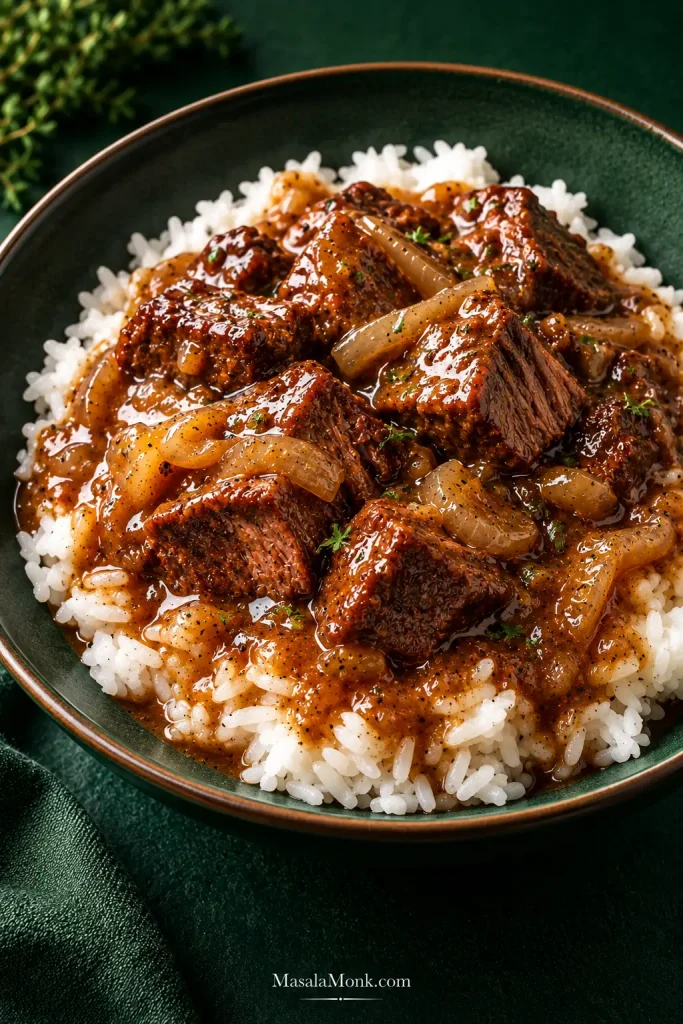
Beef tips and onion gravy served over white rice in a dark green bowl, with sauce soaking between the grains.
Rice continues absorbing gravy after serving, so this is the one starch where a slightly looser sauce has room to tighten naturally. Spoon some gravy around the rice as well as over the beef for more even flavor.

Make Ahead, Store and Reheat

This dinner also reheats well. The gravy thickens in the refrigerator, and rendered beef fat firms on the surface where it can be lifted away before reheating.

Prep the Night Before

Cut the raw beef and onion and measure the other ingredients ahead. Refrigerate the raw beef and prepared vegetables separately in covered containers until cooking time. For the seared version, brown the beef immediately before loading and starting the slow cooker; do not partially cook it the night before.

Freezer Prep

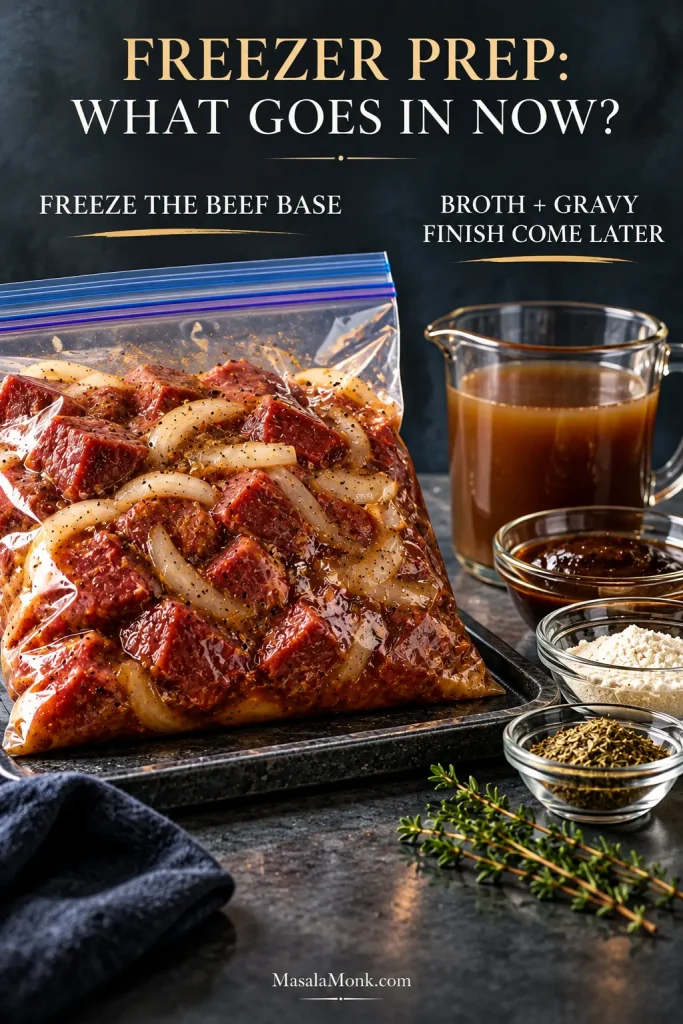
To make a freezer meal, combine the raw cubed beef, onion, garlic, tomato paste, Worcestershire, dried thyme and bay leaf in a freezer-safe bag or container. Leave out the broth to save freezer space and keep the cooking-day liquid measurement flexible; the cornstarch and butter belong at the finishing stage.

Thaw the beef mixture completely in the refrigerator, transfer it to the slow cooker, then add the measured broth before cooking. USDA FSIS slow-cooker guidance says to thaw meat before putting it into a slow cooker rather than starting with frozen raw pieces.

Raw beef and aromatics packed for freezer preparation, with broth and gravy-finishing ingredients arranged separately.
Press the beef mixture into a relatively flat layer before freezing. A thinner package stacks more neatly and thaws more evenly in the refrigerator while the broth and gravy finish remain separate for cooking day.

Freezing Cooked Beef Tips

Divide the cooked beef and gravy into shallow freezer-safe containers and chill or freeze promptly rather than leaving the full slow-cooker crock to cool as one large mass. Thaw overnight in the refrigerator and reheat gently. Once hot, stir well. Loosen overly thick gravy with a little broth; if it still looks thinner than you want after reheating, use a small fresh slurry.

Leftovers and Reheating

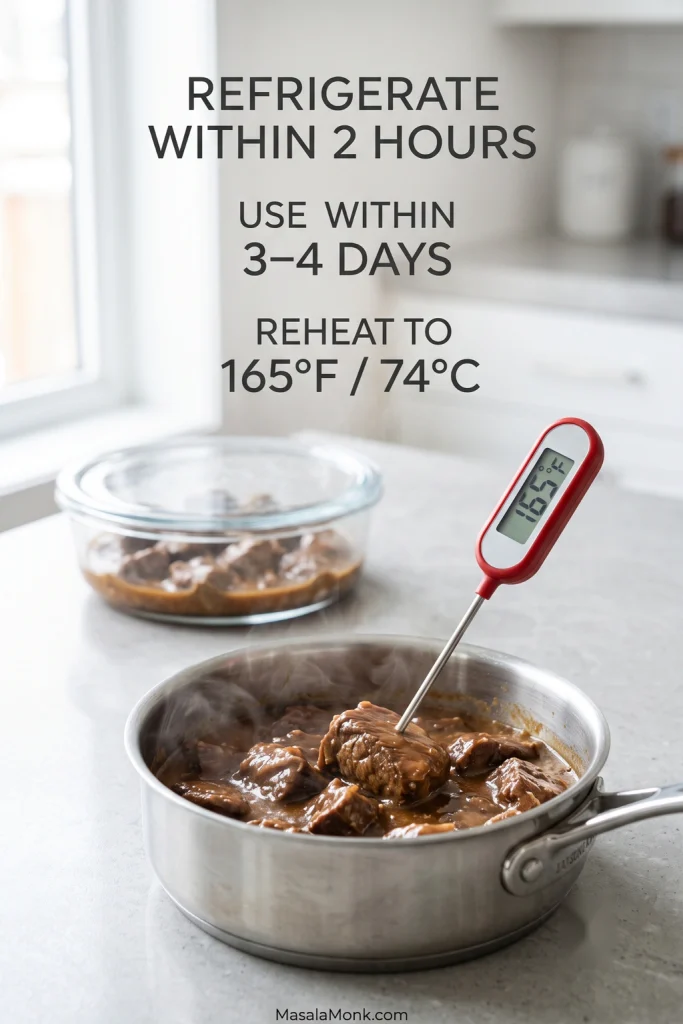
Move leftovers to shallow covered containers and refrigerate them within 2 hours of cooking. Use refrigerated leftovers within 3–4 days. Reheat on the stovetop or in the microwave until the food reaches 165°F / 74°C, adding a splash of low-sodium broth if the chilled gravy has become thicker than you want. Avoid using the slow cooker itself as a gradual reheating appliance for cold leftovers.

Beef tips and gravy reheating in a stainless saucepan with a food thermometer, with a shallow leftovers container in the background.
Cold gravy often looks thicker than it will once reheated, so warm and stir it before adding extra broth. Then check the temperature in the center of the food, where a cool pocket is easier to miss than around the hot edges.

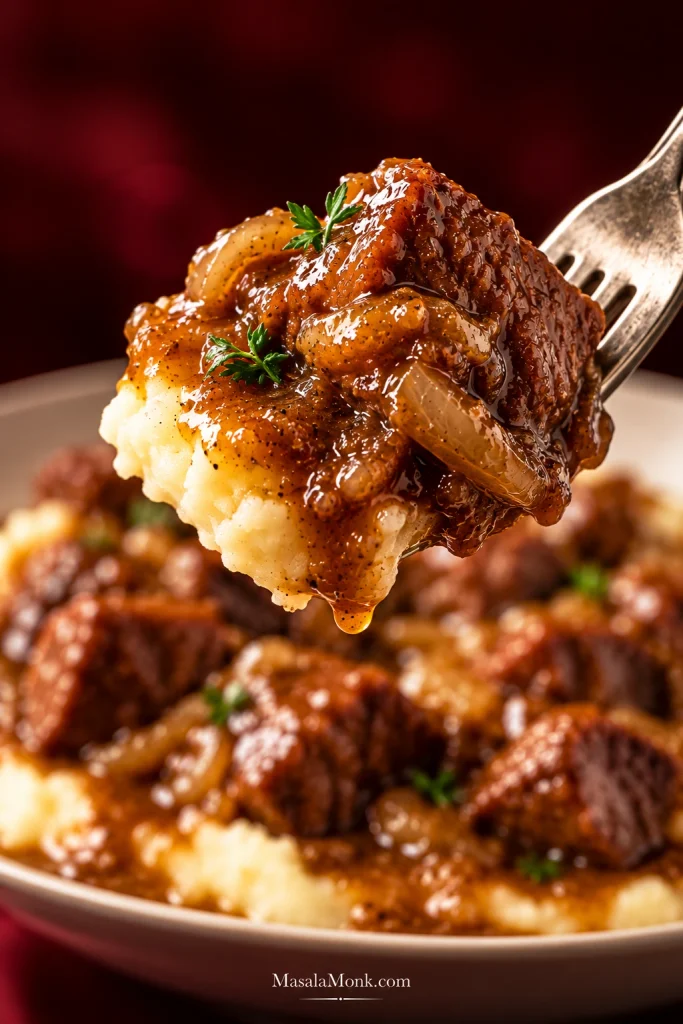
When the chuck gives easily under a fork, spoon it over hot mashed potatoes and let the glossy brown gravy settle into the edges. This is the moment all that hands-off cooking was heading toward: tender beef, soft potatoes and enough gravy to catch a little of everything in every forkful.

Fork holding a bite of braised beef, mashed potato, onion and glossy brown gravy against a deep red background.
A balanced gravy stays with the beef and mashed potato on the fork but still releases easily when you take the bite. If it behaves like a sticky glaze, the sauce has moved beyond the texture this dinner needs.