Posted on Leave a comment

Tilapia Tacos Recipe with Crisp Slaw and Creamy Lime Sauce

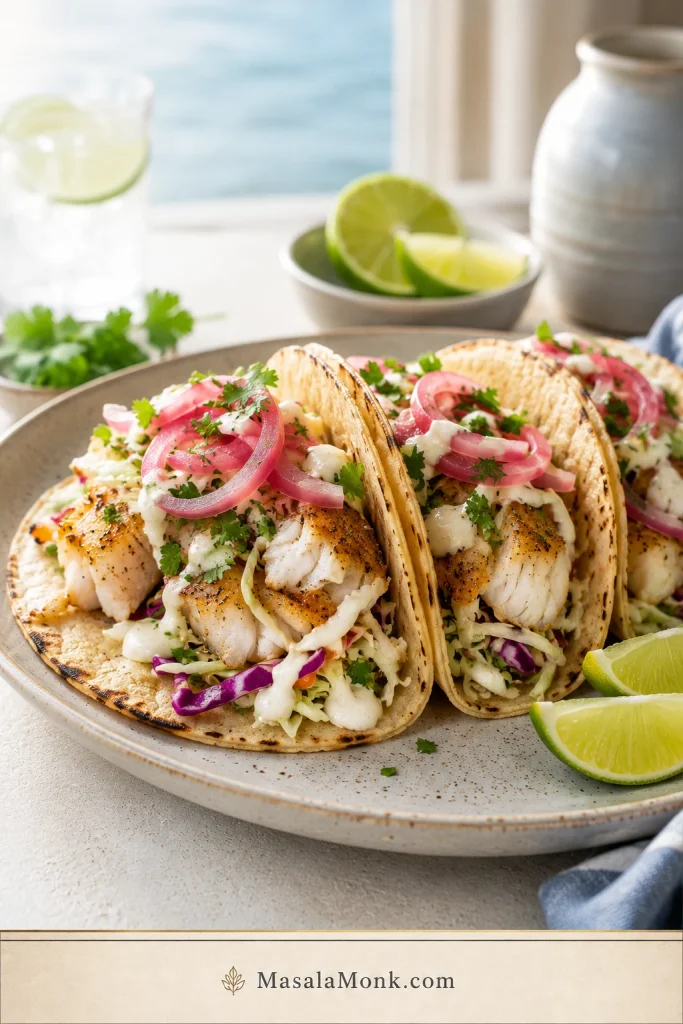
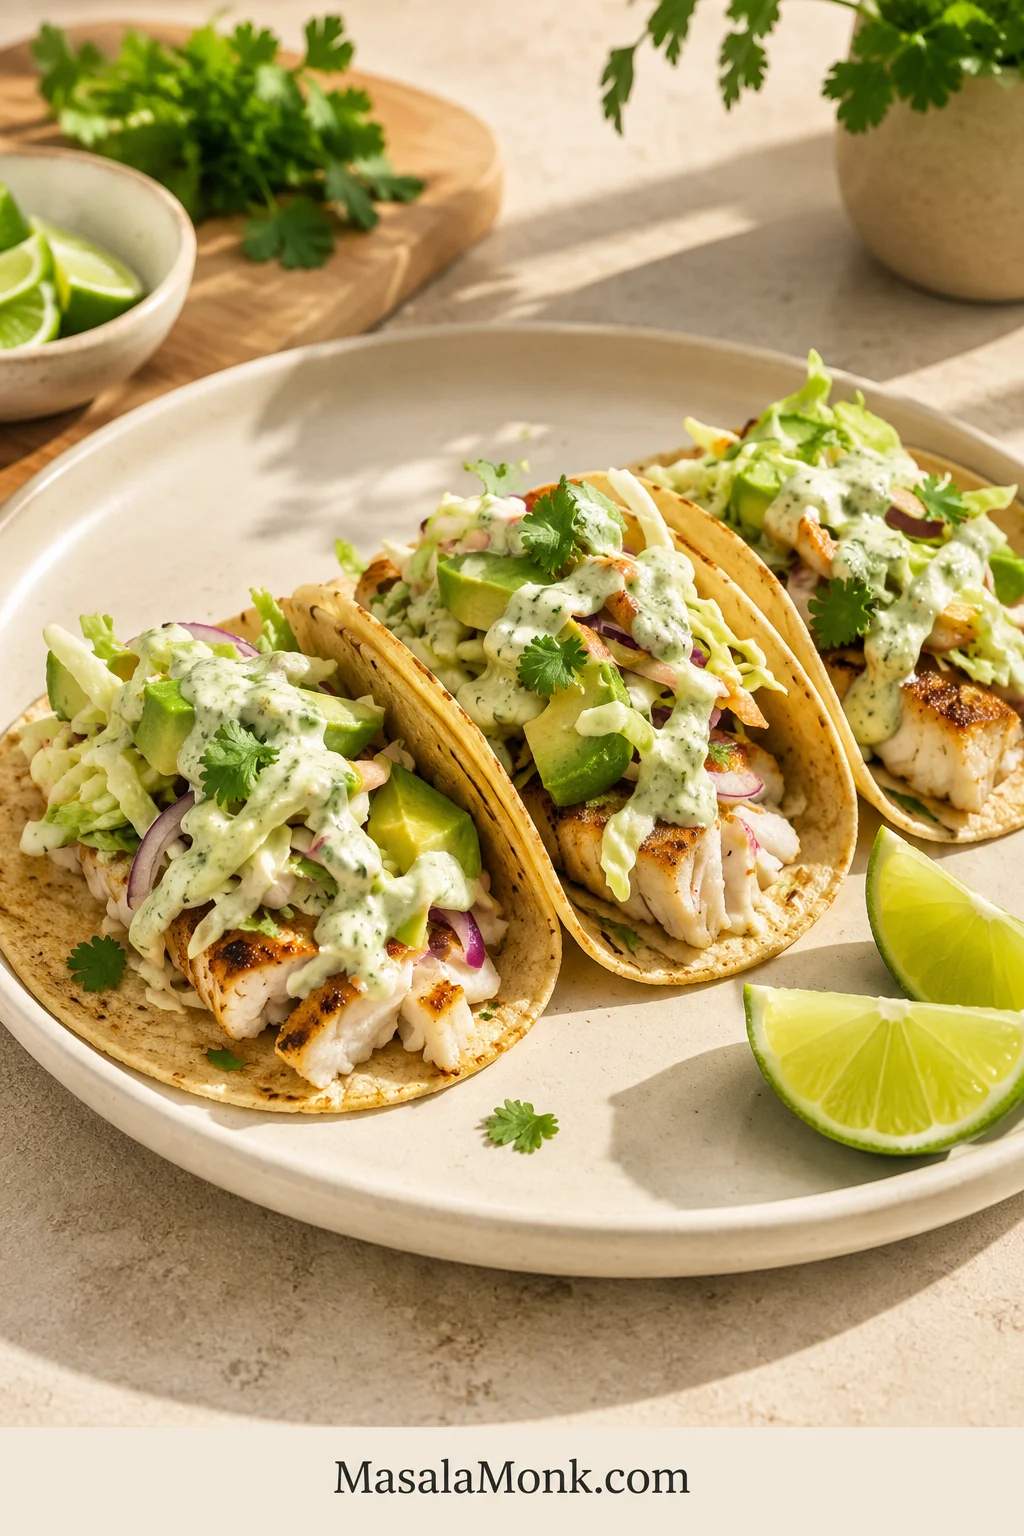
Three corn-tortilla tacos filled with browned tilapia, green and purple cabbage slaw, avocado, pale cilantro-lime sauce and fresh cilantro, with lime wedges beside the plate.

These tilapia fish tacos are for the nights when you want dinner to feel bright and generous without turning the kitchen into a project. Smoky skillet tilapia meets cold lime-dressed cabbage, cool cilantro-jalapeño sauce, avocado, and warm tortillas in every bite.

Tilapia is mild, affordable, and quick-cooking, so it rewards a hot pan and an early check. Dress the cabbage lightly, warm the tortillas before the fish is ready, and each taco stays flaky, crisp, and fresh rather than watery or soggy.

The timing does the work: make the cool sauce and crisp slaw first, warm the tortillas next, and cook the fish last so it reaches the table hot while the cabbage still snaps.

Three rules for better tilapia tacos:

  • Dry before seasoning. Surface moisture is the difference between browned fish and pale, steamed fish.
  • Check by thickness. Thin fillets may finish in 4–5 minutes; remove each piece when it reaches 145°F / 63°C and separates easily.
  • Cook the fish last. Once the tilapia hits the pan, the sauce, slaw, and tortillas should already be waiting.

Tilapia Tacos Recipe

The skillet recipe below is the one to make first: fast enough for a weeknight, but carefully balanced so the mild fish doesn’t disappear beneath the toppings.

Tilapia Tacos with Crisp Slaw and Creamy Lime Sauce

Smoky, tender tilapia with crisp lime slaw, creamy cilantro-jalapeño sauce, avocado, and warm tortillas.

Prep Time20 minutes
Cook Time6–8 minutes for one batch; 12–15 minutes for two
Total TimeAbout 26–35 minutes
Yield8 tacos / 4 servings

Equipment

  • 12-inch / 30 cm nonstick or well-seasoned skillet
  • Thin, wide fish spatula or flexible turner
  • Instant-read thermometer
  • Medium mixing bowl and small bowl
  • Small blender or food processor, optional
  • Tongs and a clean kitchen towel for the tortillas

Limes, Cilantro, and Jalapeños

  • 3–4 medium limes, divided among the slaw, sauce, and wedges for serving
  • 1 small bunch cilantro (fresh coriander), divided
  • 2 small jalapeños, divided, optional

For the Tilapia

  • 1¼ lb / 20 oz / 567 g skinless, boneless tilapia fillets
  • 1 tbsp / 15 ml neutral high-heat oil, plus a little more if the fish needs two batches
  • 2 tsp chili powder
  • 1 tsp smoked paprika
  • 1 tsp ground cumin
  • ¾ tsp garlic powder
  • ½ tsp onion powder
  • ½ tsp dried oregano
  • ¾ tsp / about 4 g fine sea salt
  • ¼ tsp ground black pepper
  • ⅛–¼ tsp cayenne pepper, optional
  • 1–2 of the limes, cut into wedges for finishing

For the Cabbage Slaw

  • 9 oz / 250 g finely shredded green cabbage, red cabbage, or a mixture
  • ¼ cup / about 10 g chopped cilantro from the bunch above
  • 2 tbsp / 30 ml fresh lime juice
  • 1 tbsp / 15 ml olive oil
  • ¼ tsp / about 1.5 g fine sea salt
  • 1 small jalapeño, finely sliced or minced, optional

For the Creamy Lime Sauce

  • ½ cup / 120 g plain Greek yogurt or sour cream
  • ¼ cup / about 60 g mayonnaise
  • 2 tbsp / 30 ml fresh lime juice, plus more to taste
  • ½ packed cup / about 15 g cilantro from the bunch above
  • 1 small garlic clove
  • ½–1 jalapeño, seeded for less heat, or 1 tsp minced chipotle in adobo
  • ¼ tsp / about 1.5 g fine sea salt, plus more to taste
  • 1–2 tbsp / 15–30 ml cold water, only as needed

Sauce yield: about 1 cup / 240 ml—enough for a thin layer underneath and a light drizzle over all eight tacos, with a little extra for the table.

For Assembly

  • 8 sturdy corn or flour tortillas, about 5–6 inches / 13–15 cm, or 16 very thin corn tortillas if using two per taco
  • 1 ripe avocado, sliced or diced
  • Fresh cilantro
  • Lime wedges
  • Crumbled cotija or feta, optional
  • Fresh mango salsa, optional

Instructions

Prepare the Cool Components and Fish
  1. Make the sauce. Blend the yogurt or sour cream, mayonnaise, lime juice, cilantro, garlic, jalapeño or chipotle, and salt. Without a blender, finely mince the cilantro, garlic, and jalapeño first, then whisk everything together. Taste before adding water: the sauce should be bright, lightly salty, and a little more assertive than you want it to taste in the finished taco. Add cold water one tablespoon at a time until it falls from a spoon in a thick ribbon, then refrigerate.
  2. Make the slaw. Toss the cabbage, cilantro, lime juice, olive oil, salt, and optional jalapeño. Let it stand for 10–15 minutes, then taste one strand. It should be crisp, lightly salty, and clearly lime-bright—not sharply sour or wet. If liquid gathers in the bowl, lift the slaw out with tongs when assembling.
  3. Taste the cool components together. Try a strand of slaw with a little sauce. They should taste slightly brighter and bolder than necessary because the warm fish and tortilla will soften both.
  4. Dry the fish. Pat the tilapia thoroughly dry on both sides, especially if it was previously frozen.
  5. Season. Mix the chili powder, smoked paprika, cumin, garlic powder, onion powder, oregano, salt, black pepper, and optional cayenne. Rub the fish lightly with oil, then press the seasoning evenly over both sides.
  6. Warm the tortillas. Heat them in a dry skillet for about 15–30 seconds per side, then stack them inside a clean kitchen towel.
Cook, Rest, and Assemble
  1. Cook the first side. Heat the 12-inch skillet over medium-high heat. Add a thin film of oil. When it shimmers, add as many fillets as fit in one layer with visible space between them. Cook mostly undisturbed for about 2–4 minutes, depending on thickness.
  2. Turn and finish. Carefully turn the fish with a fish spatula and cook for about 1½–3 minutes more. Remove each fillet when the thickest point reaches 145°F / 63°C and the flesh is opaque and easy to separate.
  3. Cook a second batch if needed. Add a little more oil and let the pan recover its heat before adding the remaining fish. Keep the first batch on a warm plate, loosely covered rather than sealed tightly.
  4. Rest and flake. Let the fish rest for 2–3 minutes, then break it into large taco-size flakes.
  5. Assemble. Spread a little sauce over each warm tortilla. Add fish, drained slaw, avocado, another light drizzle of sauce, cilantro, and lime. Serve immediately.

Best result: serve as soon as the fish is ready. Don’t leave finished tilapia in the hot pan while the rest of dinner catches up.

A finished tilapia taco should still show broad fish flakes beneath the toppings. Use the close-up below as a balance check: the slaw and sauce should support the fish, not cover it.
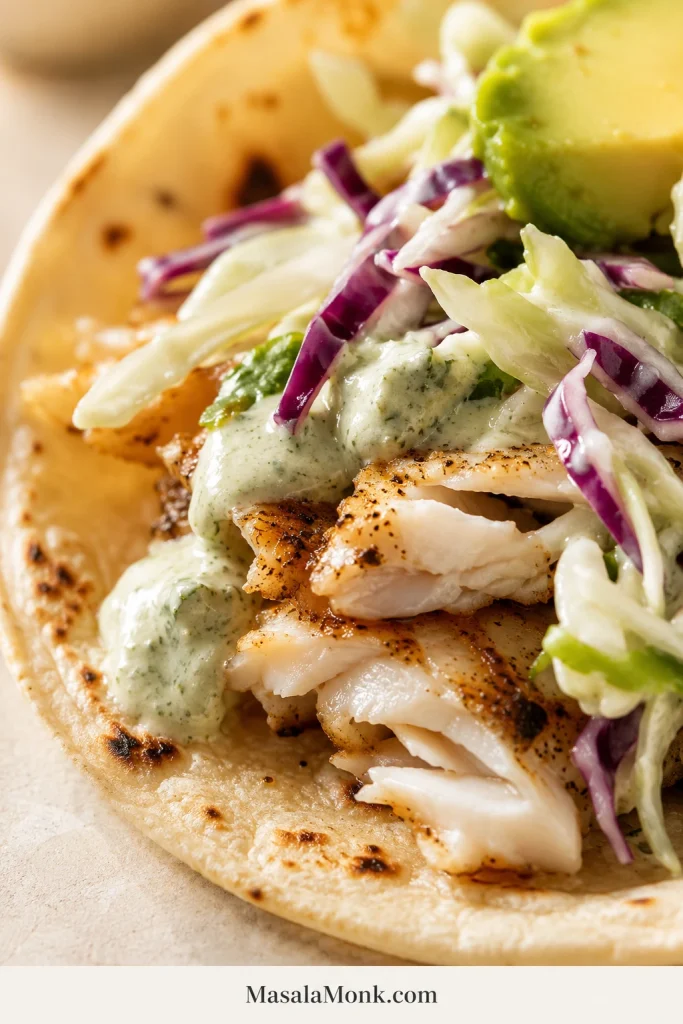
Close view of a corn tortilla holding large browned tilapia flakes, purple and green cabbage slaw, avocado and pale cilantro-lime sauce.
Keep the tilapia in broad flakes so it stays visible beneath the slaw and sits securely inside the tortilla.

Need a technique check? Skillet method·Cook time by thickness·Sauce and slaw·Assembly order

Choose the Method That Fits Tonight

The skillet gives the best balance of browning and control. Use the oven for a larger table, or the air fryer when you are cooking only a few fillets.

Choose This WhenMethodWhat You’ll Get
Making the recipe for the first timeSmoky skilletBrowned edges and moist flakes
Wanting a darker crust and more heatBlackened skilletDeeper spice and a darker surface
Feeding a larger tableOvenSoft, evenly cooked fish
Cooking only two or three filletsAir fryerLightly browned, drier edges
Wanting crunch without deep fryingPanko-coatedCrisp outside, flaky inside
Cooking outdoorsGrillLight char and smoke

Whichever cooking method you choose, the same quality checkpoints protect the result. The guide below follows the fish from a dry fillet to a balanced taco.
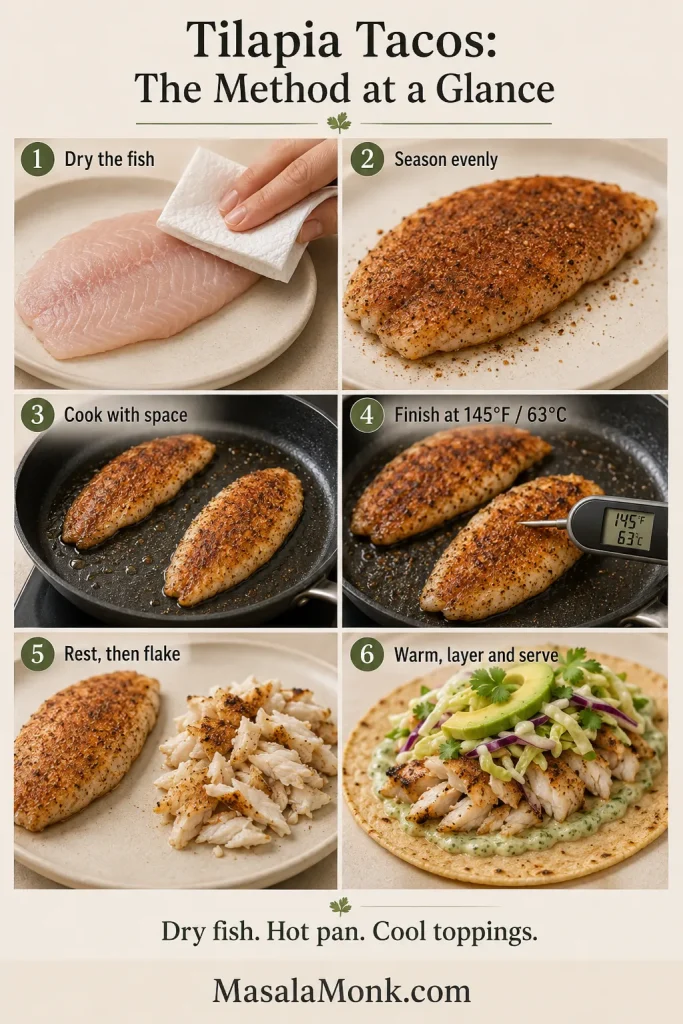
Six-step guide showing tilapia being dried, seasoned, cooked with space, checked with a thermometer, rested and flaked, then assembled in a warm tortilla.
These six checkpoints work across every method: dry, season, space, check, rest, and assemble without burying the fish.

Fish, Seasoning, and Tortillas

Tilapia cooks quickly. Thickness, surface moisture, and pan space decide whether it browns or steams. Choose evenly sized fillets, dry them well, and give them room in the pan.
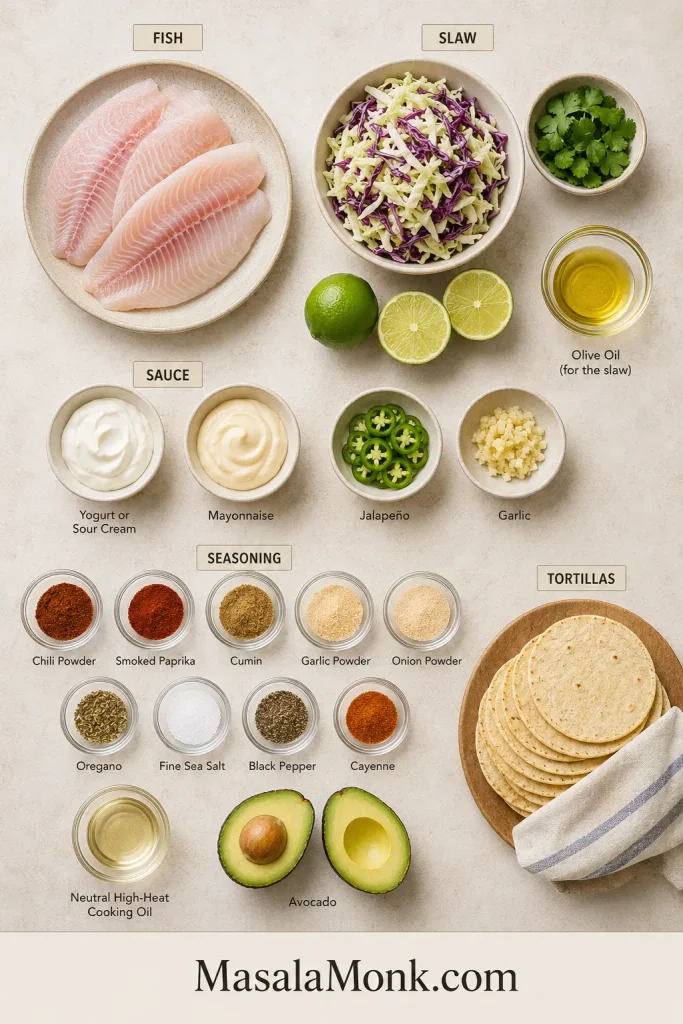
Overhead arrangement of raw tilapia, corn tortillas, cabbage, cilantro, limes, avocado, jalapeño, garlic, yogurt, mayonnaise, two cooking oils and small bowls of spices.
The two oils have different jobs: neutral oil handles the skillet heat, while olive oil dresses the cabbage slaw.

Choosing the Fillets

Choose skinless, boneless fillets with an even pale color and no strong fishy smell. Similar thickness matters more than identical length. When one fillet is much thinner than the others, plan to remove it first instead of forcing the entire batch to finish together.

Fresh and frozen tilapia both work. Previously frozen fish may release more water, so drying isn’t a decorative step. Press both sides with paper towels, replace the damp towel, and check the surface once more immediately before seasoning.

No tilapia? Use the same weight of cod, haddock, or another mild white fish. Choose fillets of similar thickness and follow the doneness cues rather than copying the exact skillet time.

Tilapia is one of the quickest and most affordable fish choices for tacos. To compare it with cod, mahi mahi, salmon, halibut, snapper, and Baja-style fish, use the complete fish tacos guide.

Tilapia Taco Seasoning

Tilapia doesn’t need to be hidden, but it does need enough seasoning to remain noticeable beside cabbage, sauce, avocado, and tortillas. Chili powder provides the main taco flavor, smoked paprika adds color and a gentle smoky edge, cumin adds warmth, and garlic, onion, and oregano fill out the middle.

Because chili powders vary, taste a tiny pinch before deciding how much cayenne to add. Some are mild seasoning blends, while others are made from hotter ground chilies.

This recipe uses ¾ teaspoon / about 4 g fine sea salt for the fish. If you use coarse kosher salt, weigh 4 g or adjust for the brand. Taste before adding cotija or another salty topping.
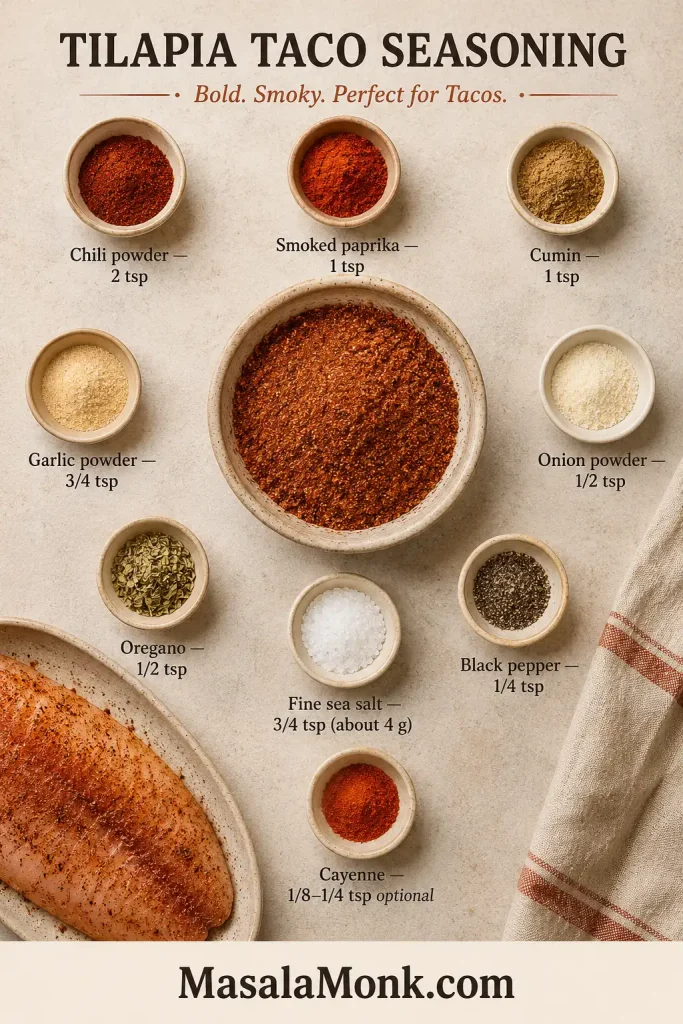
Nine labeled bowls containing measured chili powder, smoked paprika, cumin, garlic powder, onion powder, oregano, sea salt, black pepper and optional cayenne.
Mix the seasoning before applying it so salt, cayenne, and smoked paprika reach every fillet evenly.

Don’t use lime as a long marinade. If you want to marinate the fish with lime, keep it to 10–15 minutes. Longer contact can soften the surface of thin fillets. Keep most of the lime in the slaw, sauce, and final squeeze.

Corn or Flour Tortillas?

Corn tortillas bring toasted flavor and keep the tacos lighter. They are also the natural gluten-free choice when the package is certified for your needs. Warm them properly and double very thin tortillas if they split easily.

Flour tortillas are softer, more flexible, and a little richer. Use small taco-size tortillas rather than large wraps so the fish, slaw, and sauce stay balanced.

Cook the Fish Without Rushing It

Once the sauce, slaw, and tortillas are ready, the fish needs only a few focused minutes. Dry fish browns; wet fish steams. Pat both sides until slightly tacky, then oil and season just before cooking.
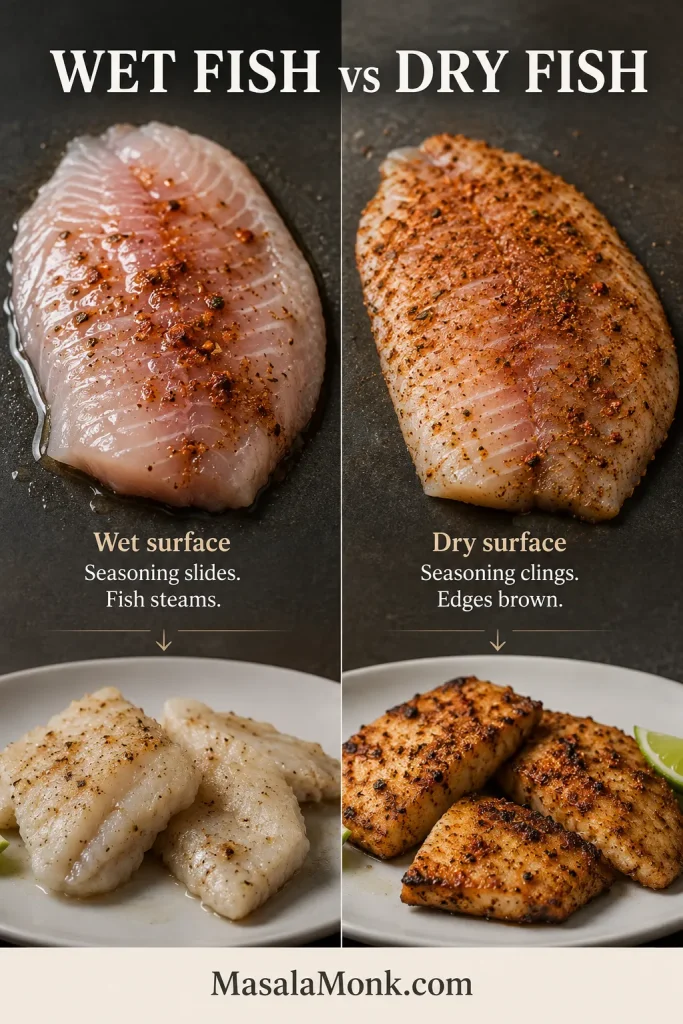
Comparison of a glossy wet tilapia fillet and a matte dried fillet, followed by pale steamed fish on one side and browned cooked fish on the other.
Dry tilapia looks matte and slightly tacky, which helps the seasoning cling. A glossy surface signals moisture that will steam in the skillet.

Give the fillets room. Add only as many as fit with visible space between them. Turn once, and remove thinner pieces as soon as they are done. That is good judgment, not a failed batch.
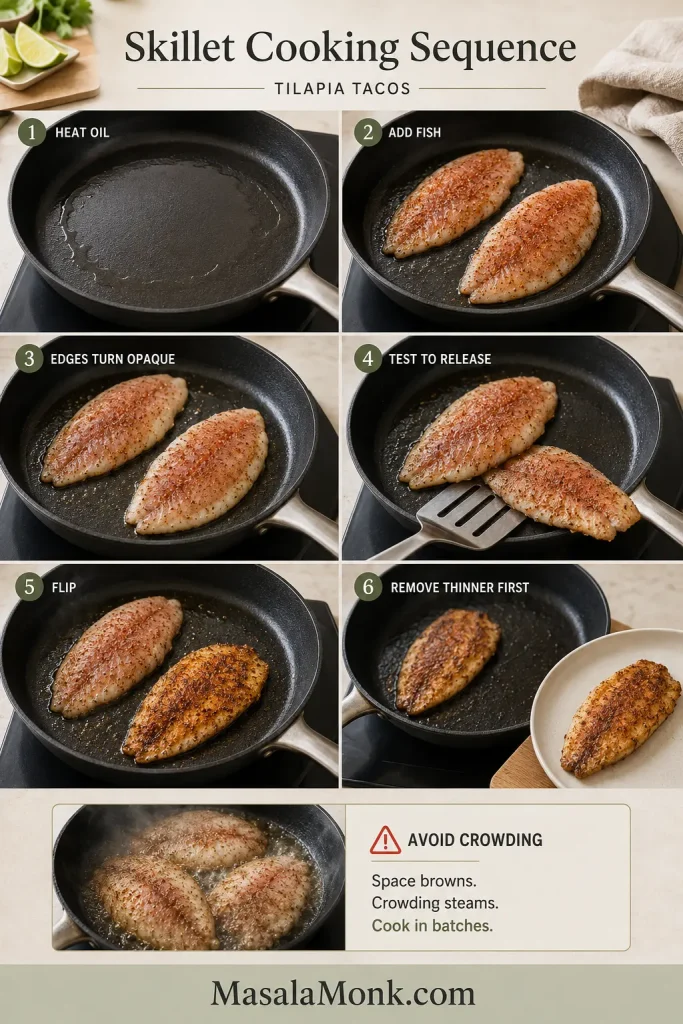
Step-by-step skillet sequence showing oil heating, spaced tilapia fillets cooking, opaque edges forming, release being tested, one fillet flipped and a thinner fillet removed first.
Watch the opaque line climb before testing the first side. If the spatula meets resistance, wait rather than forcing the turn.

A broken fillet is not a loss—it was going to be flaked for tacos anyway. Cook whole pieces when possible, rest them briefly, and break them into large flakes at the end.
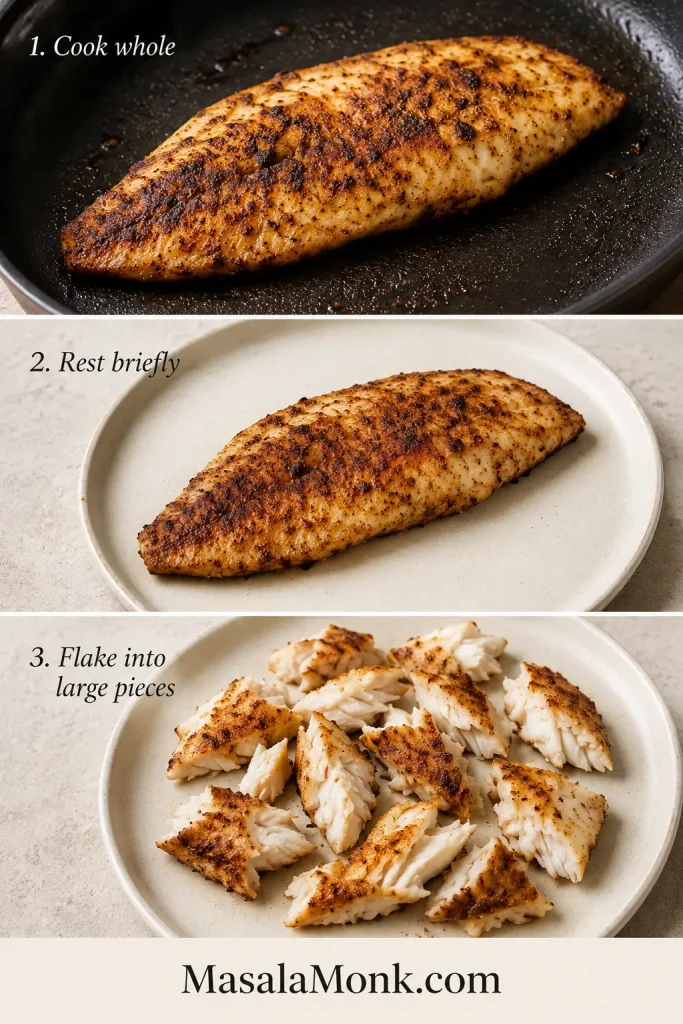
Three stages showing a whole tilapia fillet cooking, resting on a plate and separated into several large moist flakes.
Rest briefly, then separate the tilapia into broad taco-size flakes—not crumbs and not unwieldy chunks.

How Long to Cook Tilapia for Tacos

The thickest point of the fillet matters more than the total weight of the package. Use time as a reminder to begin checking, not as permission to ignore the fish until the timer rings.
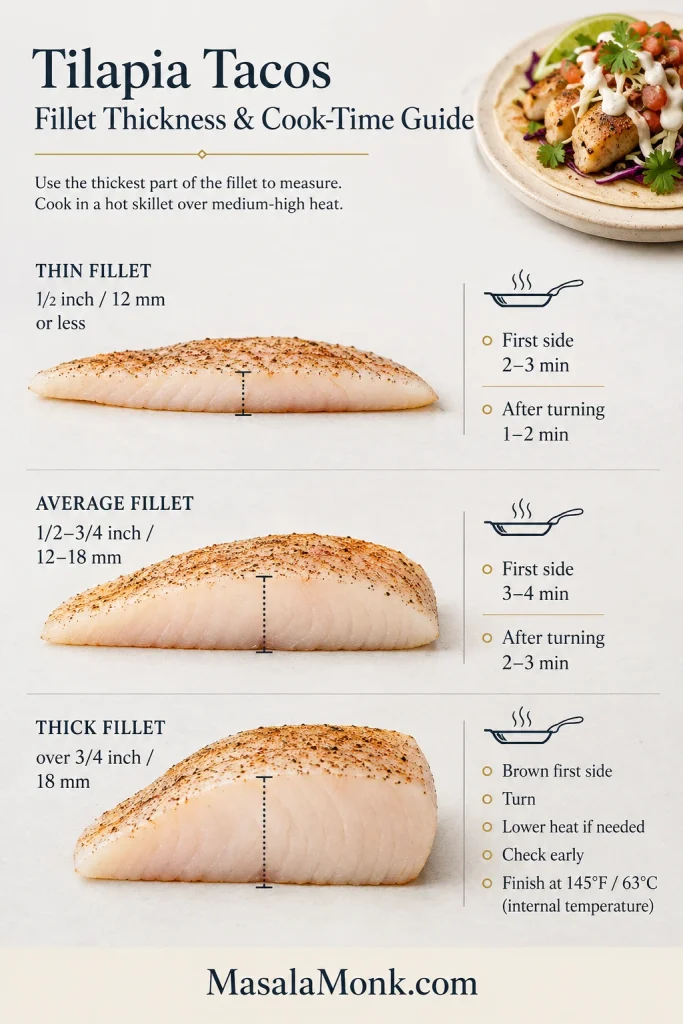
Guide comparing thin, average and thick tilapia fillets with thickness measurements, separate first-side and finishing times, and a 145°F or 63°C target.
Measure the thickest part of each fillet. Similar-looking pieces can still finish several minutes apart.
Fillet ThicknessFirst SideSecond SideWhat to Watch
Up to ½ inch / 12 mmAbout 2–3 minutesAbout 1–2 minutesTail ends may finish before the center
½–¾ inch / 12–18 mmAbout 3–4 minutesAbout 2–3 minutesStandard skillet range for many fillets
More than ¾ inch / 18 mmBrown first, then lower heat slightlyCook to temperatureUse the thermometer rather than color alone

Treat these as checking windows, not guarantees. A thick, cold fillet in a crowded pan cooks differently from a thin fillet in a wide, fully heated skillet.

How to Tell When Tilapia Is Done

Check the thickest point. The flesh should have lost its translucent look and separate under gentle pressure. FoodSafety.gov lists 145°F / 63°C for fish such as tilapia, or cooking until the flesh is no longer translucent and separates easily with a fork. See the safe minimum temperature chart.

Pale is not the same as undercooked. A thin fillet can be completely done while the surface is still lightly colored. Once the center is ready, take it out—even if the crust is paler than expected.

The visual difference: moist tilapia separates into pearly flakes. Overcooked tilapia turns chalky, tight, and dry around the edges.
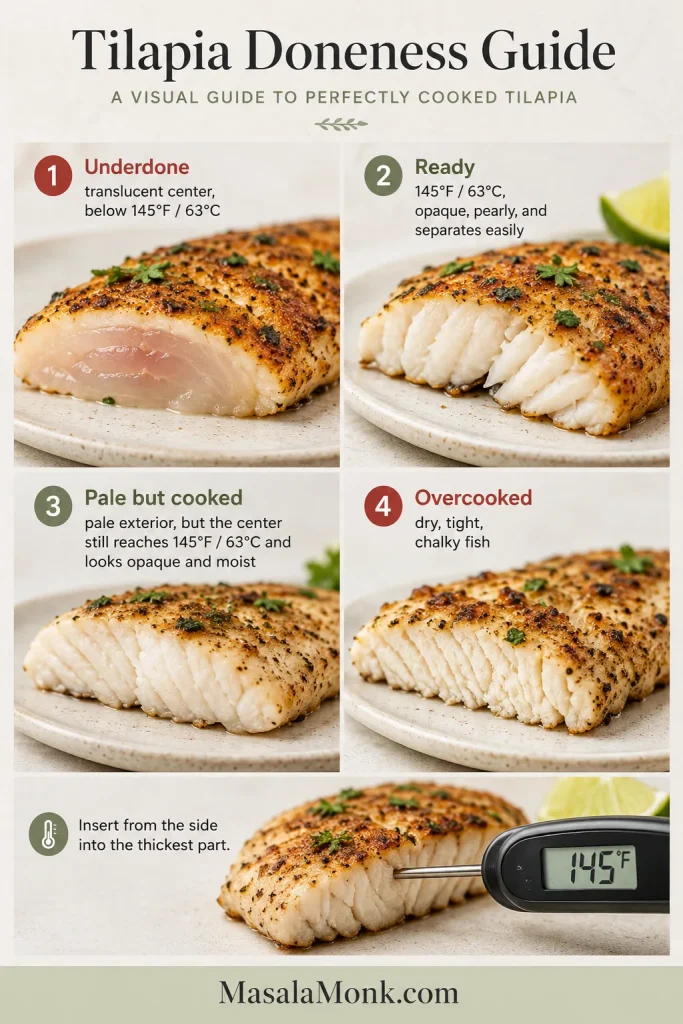
Four tilapia cross-sections showing translucent underdone fish, moist properly cooked fish, pale but cooked fish and dry overcooked fish, plus side-entry thermometer placement.
A properly cooked center looks pearly and moist, not chalky. Use 145°F / 63°C and easy separation as the final checks.

Crisp Slaw and Creamy Lime Sauce

The slaw should stay cold, crisp, and lime-bright; the sauce should be creamy enough to cling without soaking the tortilla. Make both before the fish goes into the pan, then follow the assembly order when the tilapia is ready.
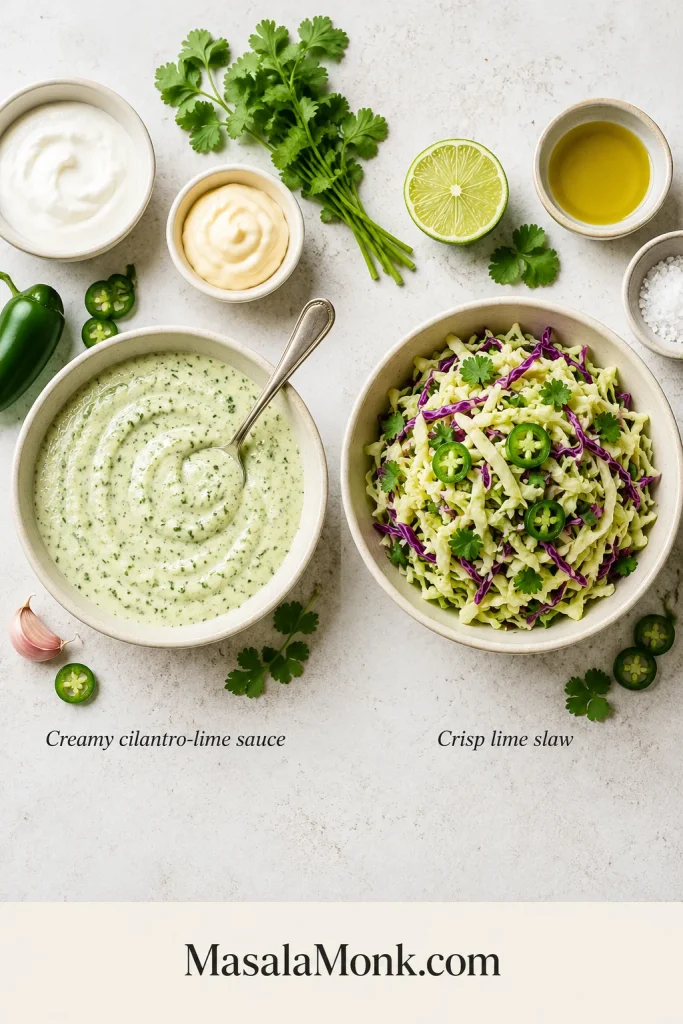
Separate bowls of pale cilantro-lime sauce and green-and-purple cabbage slaw surrounded by yogurt, mayonnaise, cilantro, lime, jalapeño, garlic, oil and salt.
Keep the sauce and slaw separate until serving so cabbage moisture cannot thin the sauce or soak the tortillas.

Cabbage Slaw

Finely shredded cabbage is easier to bite through than thick ribbons. For eight tacos, 250 g gives a generous amount without burying the fish. Dress it lightly for 10–15 minutes; it should look glossy, not wet.

Taste one strand. It should still snap, carry a light saltiness, and taste clearly of lime. If liquid gathers at the bottom, lift the slaw out with tongs so the excess dressing stays in the bowl. Prefer something creamier? This crisp homemade coleslaw keeps the dressing light enough for the cabbage to stay crunchy.

Creamy Lime Sauce

Greek yogurt makes the sauce lighter and tangier; sour cream makes it rounder and richer. Mayonnaise gives either base enough body to cling. Store-bought works well, or make homemade mayonnaise when you want full control over the flavor.

The recipe makes about 1 cup / 240 ml, enough for a thin layer below the fish and a light drizzle on top. Before thinning, the sauce should taste bright and slightly assertive; the fish, cabbage, and avocado will soften it in the finished taco.

Before assembling, compare both textures below: the sauce should fall in a thick ribbon, while the slaw should remain glossy, loose, and crisp.
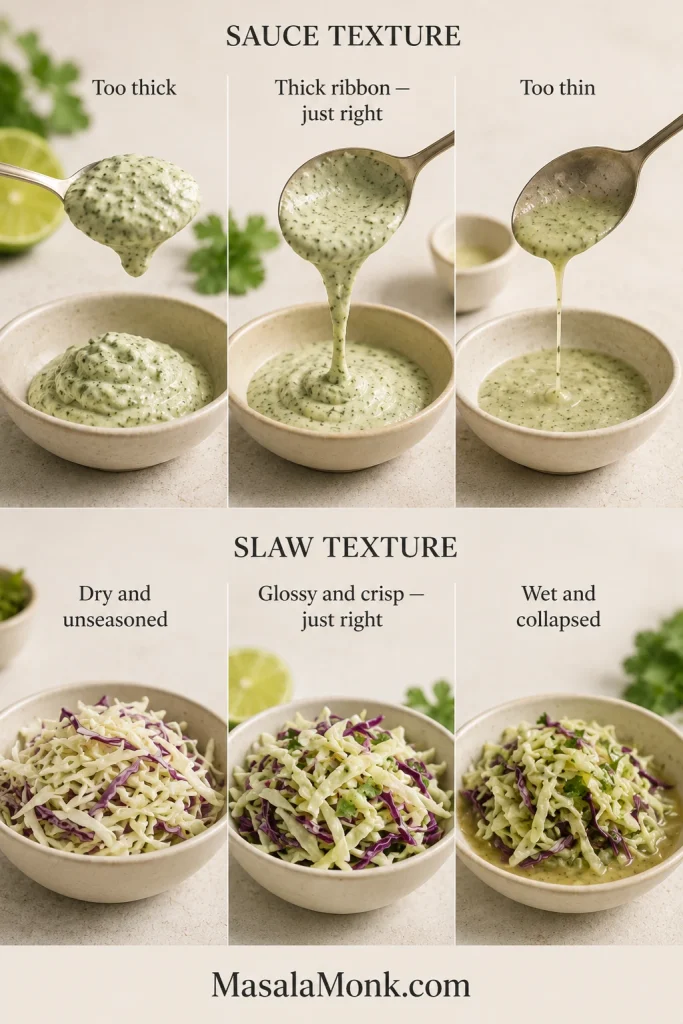
Six-panel comparison of sauce that is stiff, correctly ribboning or runny, and cabbage slaw that is dry, glossy and crisp or wet with pooled dressing.
The sauce should fall in a thick ribbon; the slaw should stay glossy, crisp, and loose enough to lift with tongs.

Easy Sauce Variations

  • Chipotle-lime: replace the jalapeño with 1–2 teaspoons minced chipotle in adobo.
  • Lighter: use ¾ cup / 180 g Greek yogurt and 2 tablespoons / 30 g mayonnaise.
  • No cilantro: use lime zest and finely sliced green onion instead.
  • Sweet heat: keep the sauce mild and add a little mango habanero sauce at the table.

The Best Assembly Order

Divide the fish generously among eight small tortillas so every taco feels substantial but still folds easily.

  1. Warm tortilla
  2. Thin layer of creamy sauce
  3. Large flakes of tilapia
  4. Drained cabbage slaw
  5. Avocado, salsa, or cheese
  6. Final light drizzle of sauce
  7. Fresh lime and cilantro

The first layer of sauce keeps the taco from tasting dry. Next, the fish creates a barrier between the tortilla and the wetter slaw. Watery salsa, extra lime, and heavy drizzles should go on last.
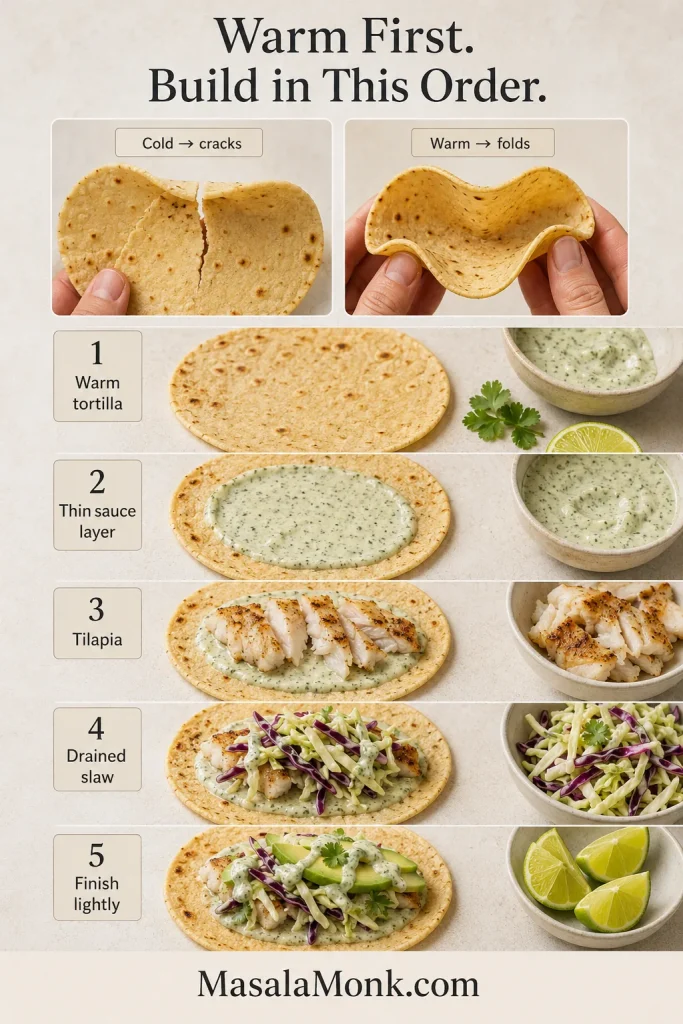
Guide comparing a cracked cold tortilla with a flexible warm tortilla, followed by assembly with sauce, tilapia, drained slaw, avocado and a light final drizzle.
Start with a thin sauce layer, then add fish, drained slaw, avocado, and only a light final drizzle.

Make a cook’s taco first. Taste one before building the remaining seven. Add lime if it feels flat, salt if the flavors disappear, more slaw for crunch, or another small drizzle of sauce if the fish needs moisture.
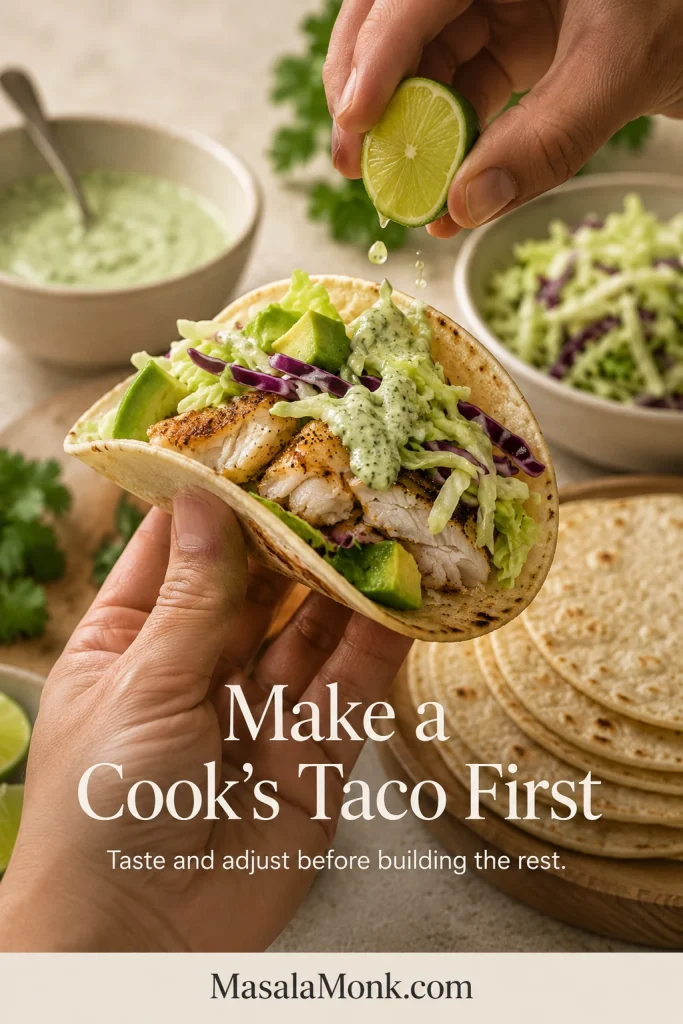
Hands holding a tilapia taco while squeezing lime over browned fish, cabbage slaw, avocado and pale sauce, with prepared taco components behind it.
Taste one assembled taco before serving. The combined bite reveals whether the table needs more lime, heat, or crunch.

Nothing needs to be plated perfectly. Put the bowls in the middle, keep the tortillas warm, and let the table finish the meal while the fish is hot.

Fresh mango salsa adds sweetness and acidity without weighing down the fish, and its chunky texture is easier on the tortillas than a watery salsa.

Other Ways to Cook Tilapia for Tacos

The skillet remains the best starting point. Go blackened for more heat, use the oven for one full tray, turn to the air fryer for a small batch, choose panko for crunch, or grill the fish for light smoke.

Blackened Tilapia Tacos

For a darker, hotter crust, increase the smoked paprika to 1½ teaspoons, use the full ¼ teaspoon cayenne, and choose a heavy skillet.

Cook over controlled medium-high heat for about 3–4 minutes on the first side and 2–3 minutes after turning. Blackened doesn’t mean burnt. The spices should smell smoky and warm, never bitter. Cool yogurt-lime sauce, cabbage, avocado, and fresh lime keep the stronger crust balanced.
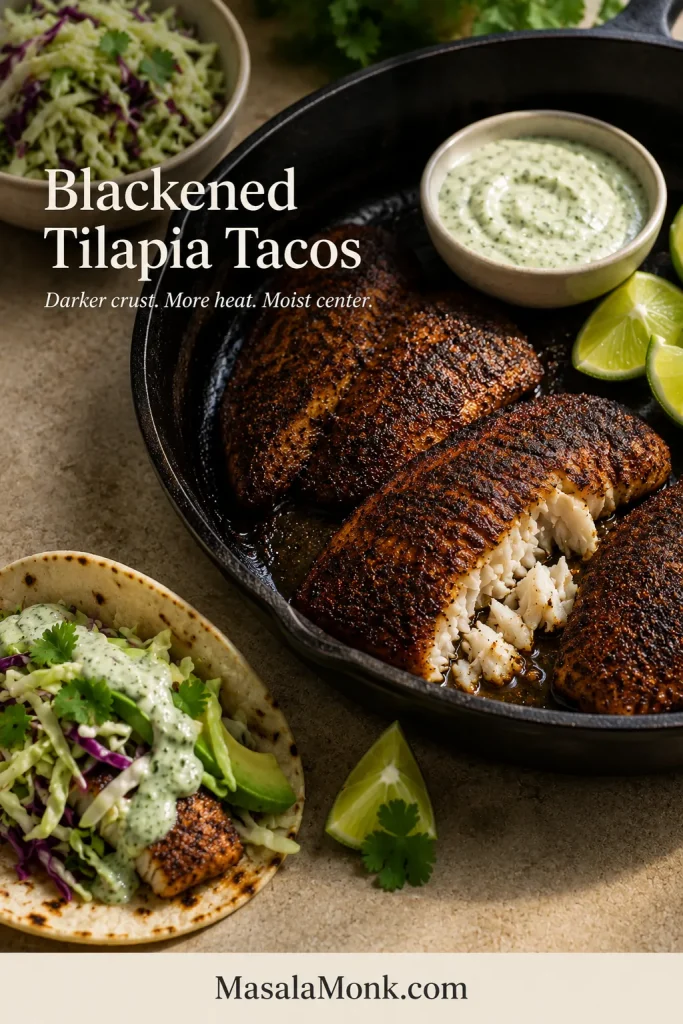
Darkly seasoned tilapia fillets in a cast-iron skillet, with one opened piece showing moist white flakes and sauce, lime, slaw and a taco nearby.
Blackened tilapia should show reddish-brown spice detail, not a uniformly burnt surface; the interior should remain pale and moist.

Baked Tilapia Tacos

Heat the oven to 400°F / 200°C and arrange the seasoned fillets in one layer on a lined rimmed sheet pan. Thin fillets may finish in 9–10 minutes, average pieces in 10–12, and thick fillets in 12–15. Remove each fillet as soon as the center is opaque and separates easily.

Baked fish is softer and paler than skillet tilapia, but it should still separate into moist, broad flakes. Choose the oven when several people are waiting and you would rather slide in one full tray than manage two skillet batches.
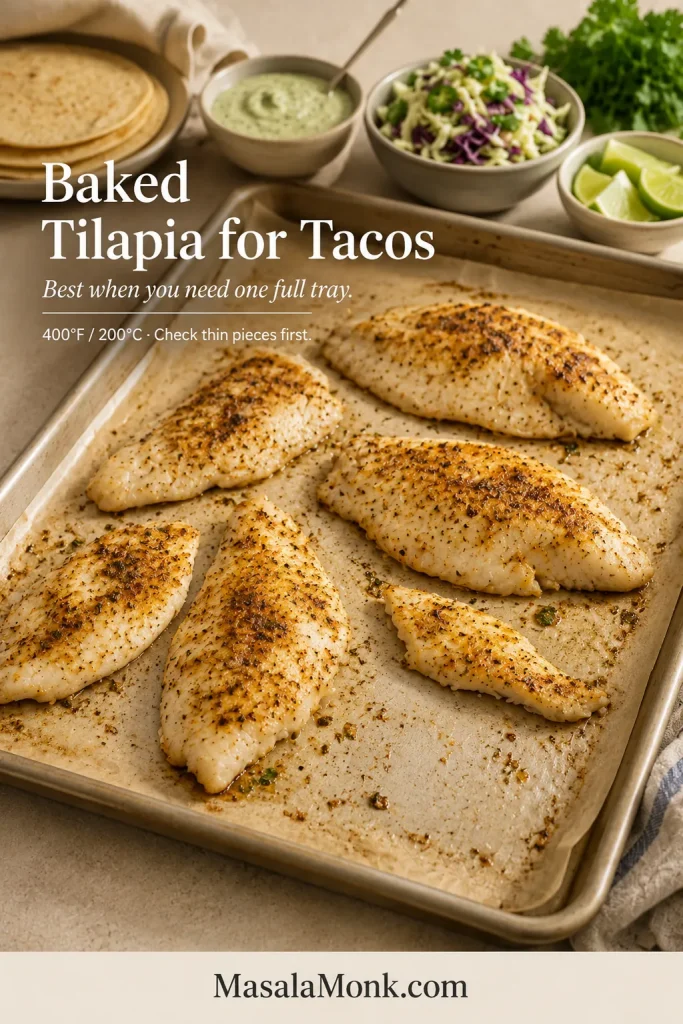
Several seasoned tilapia fillets of different sizes spaced on parchment, with an open area on the tray and tortillas, slaw, sauce and lime in the background.
Remove thin baked fillets early rather than waiting for a perfectly symmetrical tray to finish together.

Air Fryer Tilapia Tacos

Preheat to 400°F / 200°C when your model benefits from it, then lightly oil the basket and fish. Cook in one layer for about 7–10 minutes, checking the thinnest pieces at 6 minutes and taking them out first if needed.

The air fryer suits two or three fillets, not the full eight-taco batch; the first fish may cool before the second round finishes. Expect lightly browned, drier edges rather than the deeper crust of a skillet.
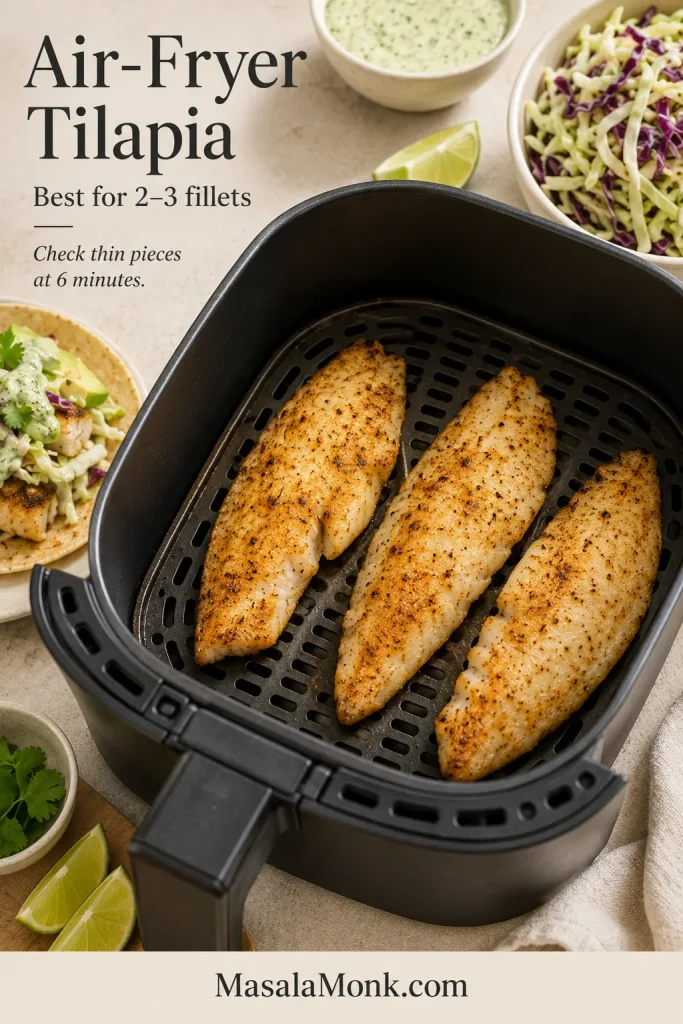
Open air-fryer basket containing three separated golden tilapia fillets, with cabbage slaw, pale sauce, lime wedges and a prepared taco nearby.
Leave open space around each fillet; circulating air cannot brown covered surfaces.

Crispy Tilapia Tacos

Cut 567 g tilapia into 1–1½-inch / 2.5–4 cm strips. Set out ½ cup / 60 g flour, 1 beaten egg with 1 tablespoon water, and 1¼ cups / 75 g panko tossed with 1 tablespoon oil. Combine 1 teaspoon chili powder, ½ teaspoon smoked paprika, ½ teaspoon cumin, ½ teaspoon garlic powder, ½ teaspoon fine sea salt, and ¼ teaspoon black pepper; mix half into the flour and half into the panko.

Coat each strip in flour, egg, and panko. Air fry at 400°F / 200°C for 7–9 minutes, or bake for 10–14 minutes, until the thickest strip reaches 145°F / 63°C. The coating should crack lightly and then give way to soft fish, not a thick shell of crumbs. Cook in batches when necessary, and discard coating ingredients that touched raw fish.
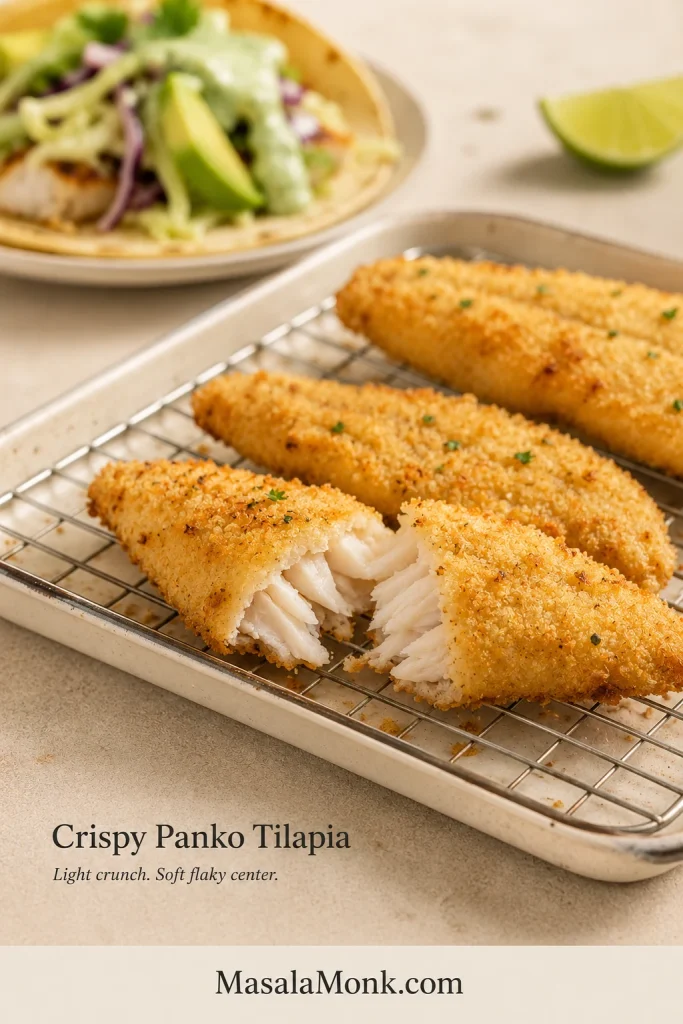
Thin golden panko-coated tilapia pieces on a wire rack, including one broken piece showing a delicate crust and moist white flakes inside.
The panko should hug the fish in a thin crust. A thick shell overwhelms delicate tilapia.

For a true fried Baja-style version, use the crispy fish batter recipe.

Grilled Tilapia Tacos

Heat a clean, oiled grill to about 400°F / 200°C. A perforated fish basket or grill-safe foil helps with thin fillets. Grill for 3–4 minutes on the first side and 2–3 minutes after turning. Pull the fish as soon as the center flakes; thin grilled tilapia dries quickly.

Finish with fresh lime and serve with avocado, roasted salsa verde, charred corn, or mango salsa. Avoid a long citrus marinade, which can soften the delicate surface.
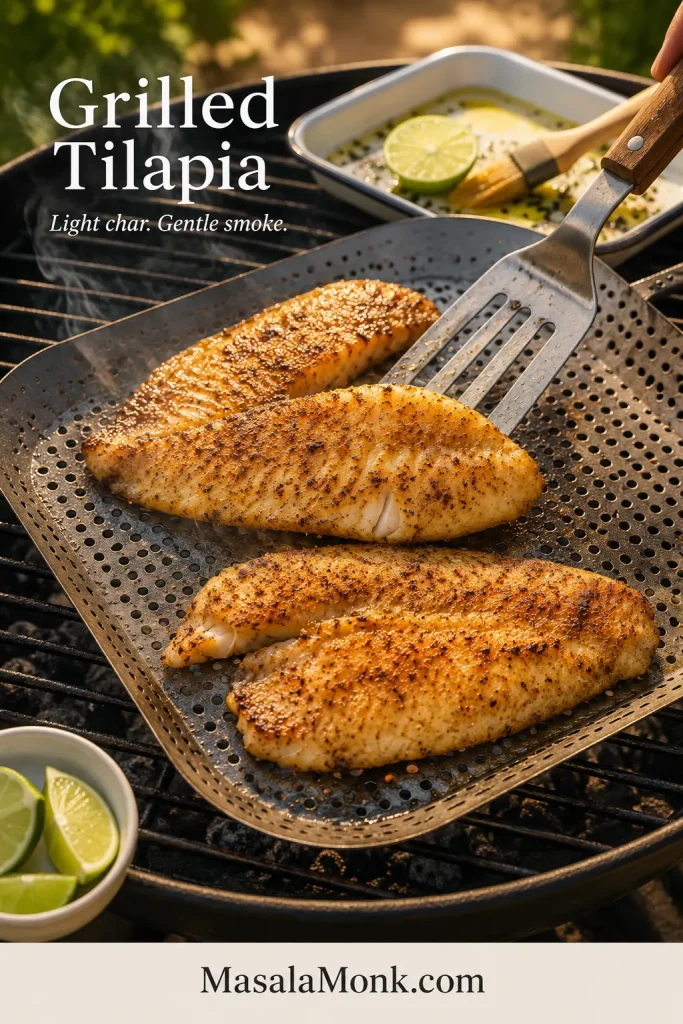
Seasoned tilapia fillets cooking inside a perforated grill basket outdoors, with one fillet being lifted by a spatula and lime wedges nearby.
A grill basket supports thin fillets. Light, patchy browning is enough; deep grill stripes can mean the fish cooked too long.

Continue with: Frozen tilapia·Lighter tacos·Topping ideas·Serving ideas·Back to top

How to Cook Frozen Tilapia for Tacos

Thawed and thoroughly dried tilapia gives the best browning. Leave it in the refrigerator overnight, or thaw it in a sealed bag under cold water, changing the water regularly. FoodSafety.gov explains safe seafood handling.
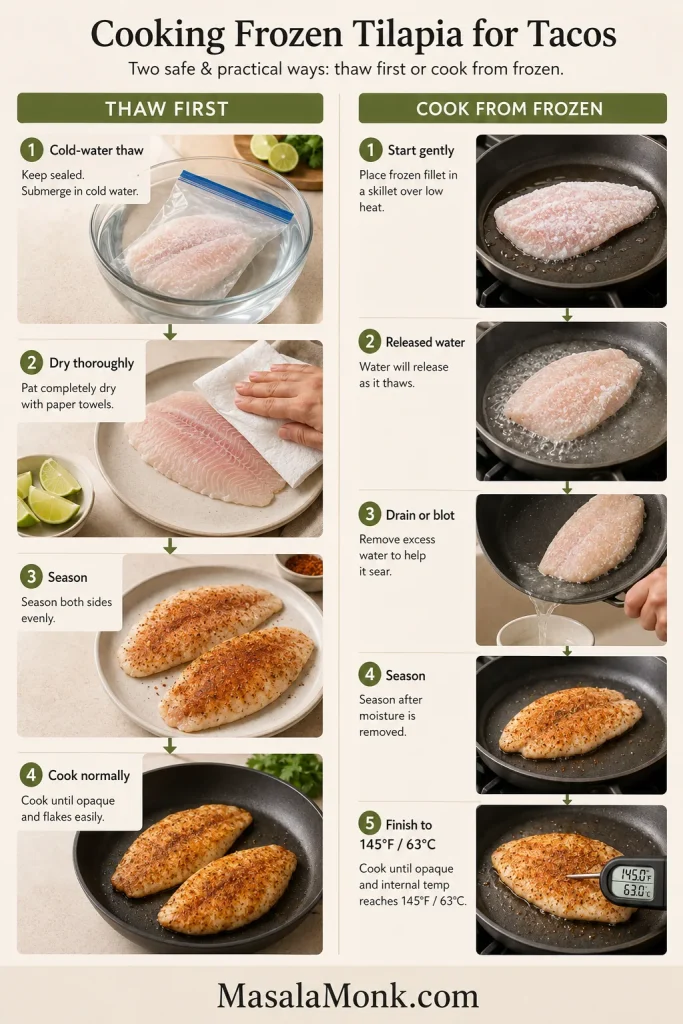
Two-path guide showing sealed cold-water thawing, drying and seasoning on one side, and gentle cooking from frozen, moisture removal, seasoning and temperature checking on the other.
When cooking from frozen, remove the released water before seasoning. That reset allows the surface to brown instead of steam.

Air fryer: cook frozen fillets at 400°F / 200°C for 5 minutes. Transfer them to a clean plate, pour away released liquid, and pat the surface dry. Oil and season, then cook for another 7–10 minutes.

Oven: bake frozen fillets at 400°F / 200°C for 5–7 minutes. Drain the sheet pan carefully, dry the exposed surface, then oil, season, and bake for another 12–18 minutes.

With either method, finish at 145°F / 63°C and check that the thickest part is opaque and easy to separate.

Direct-from-frozen skillet cooking is the weakest choice for browned tacos because the released water steams the fish and carries away seasoning. The baked tilapia guide goes deeper into thickness and frozen-fish troubleshooting.

Healthy Tilapia Tacos: Practical Lighter Swaps

A lighter taco should still feel generous. Keep the fish, cabbage, cilantro, and lime plentiful; lighten the sauce instead of shrinking the whole meal. Use small corn tortillas, make the sauce mostly with Greek yogurt, and treat avocado or cheese as accents. Exact nutrition varies with the tortillas, dairy base, and toppings you choose.
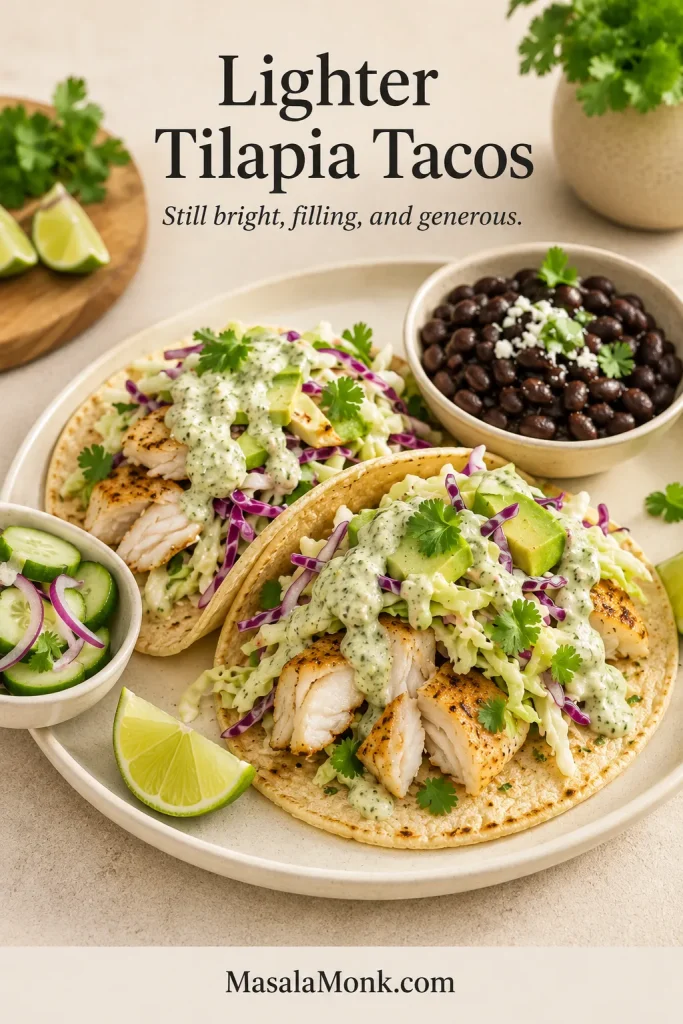
Two tilapia tacos with cabbage slaw, avocado, cilantro and pale sauce, served with black beans, cucumber salad and lime wedges.
Keep the full fish portion. Fresh vegetables and yogurt-forward sauce lighten the taco without making dinner feel skimpy.
  • Keep the full fish portion and use the skillet or oven instead of a crumb coating.
  • Choose small corn tortillas.
  • Use ¾ cup Greek yogurt with only 2 tablespoons mayonnaise for the sauce.
  • Keep cabbage, radish, cilantro, lime, and fresh salsa generous.
  • Use avocado and cheese as accents rather than removing every creamy element.
  • Add black beans or extra slaw when you want a fuller plate.

Gluten-Free and Dairy-Free Options

Making the tacos gluten-free is simple: use certified corn tortillas and check packaged chili powder, chipotle, and sauces when cross-contact matters. The skillet fish and cabbage slaw are naturally gluten-free as written.

To make the tacos dairy-free, use unsweetened dairy-free yogurt or mashed avocado in the sauce and omit cotija or feta. Regular mayonnaise is usually dairy-free; an egg-free vegan mayonnaise covers both needs. Add water slowly because dairy-free yogurt can be thinner than Greek yogurt or sour cream.

Toppings That Work

One creamy element, one crunchy element, and one fresh or acidic finish are usually enough. Too many wet or rich toppings hide the fish and soften the tortilla.
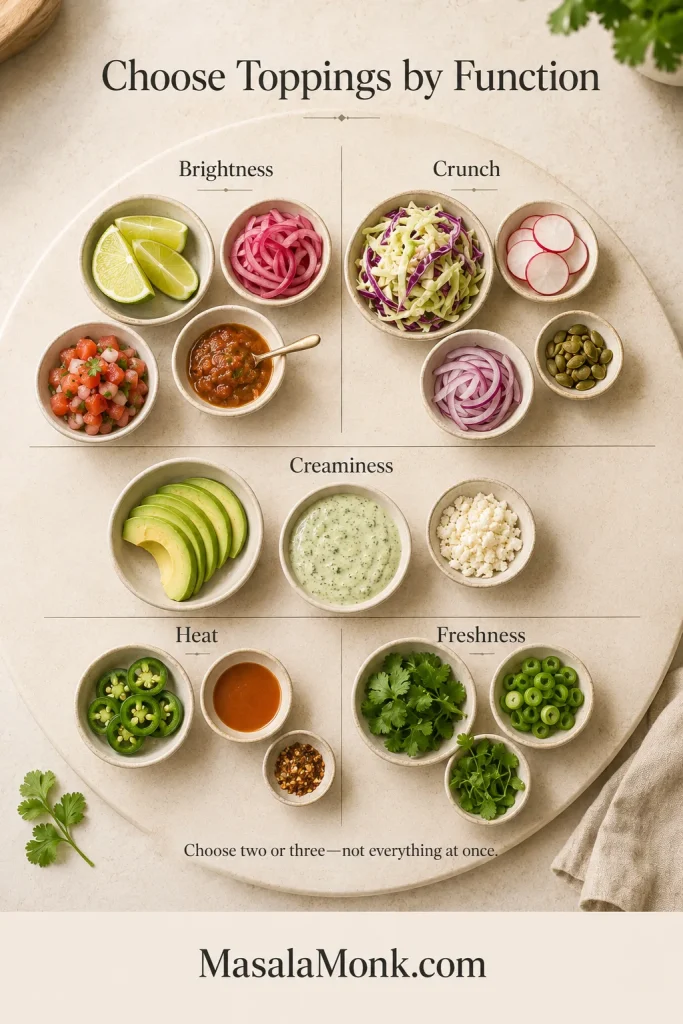
Overhead topping board divided into brightness, crunch, creaminess, heat and freshness, with lime, onion, salsa, cabbage, radish, avocado, sauce, cheese, jalapeño and herbs.
Choose toppings by function: one creamy element, one crunch, and one fresh or acidic finish.
  • Fresh and acidic: lime, cilantro, pico de gallo, pickled onion, or radish.
  • Creamy: avocado, lime sauce, fresh guacamole, cotija, or feta.
  • Sweet heat: mango salsa, pineapple salsa, mango habanero, or chipotle crema.
  • Extra crunch: cabbage, radish, pickled vegetables, or toasted pepitas.

What to Serve with Tilapia Tacos

Keep the sides simple so the tacos remain the center of the meal. Good choices include fluffy rice finished with cilantro and lime, black or pinto beans, grilled corn, a light green salad, or crisp cucumber salad. Fresh mango salsa can work as both a topping and a side.
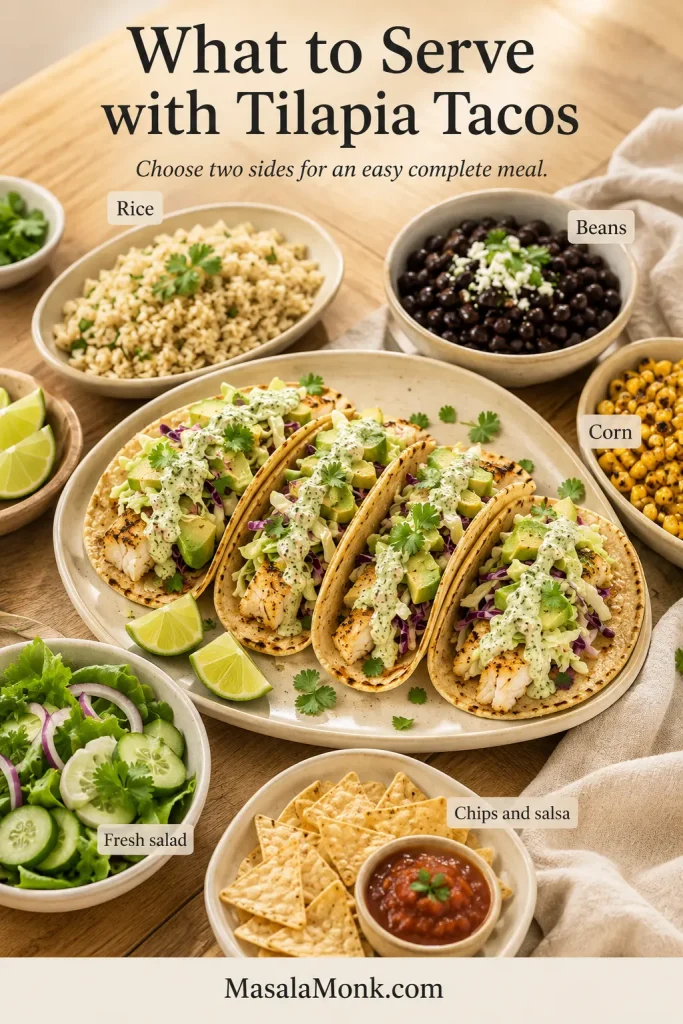
Family-style spread of four tilapia tacos with seasoned rice, black beans, charred corn, cucumber salad, tortilla chips, salsa and lime wedges.
This spread shows the full range of serving ideas. For an ordinary dinner, choose one substantial side—rice or beans—and one fresh side such as cucumber salad or grilled corn.

Common Problems and Fixes

Most problems begin with moisture, heat, or timing. Fix the cause first instead of trying to hide dry or watery fish under more sauce.
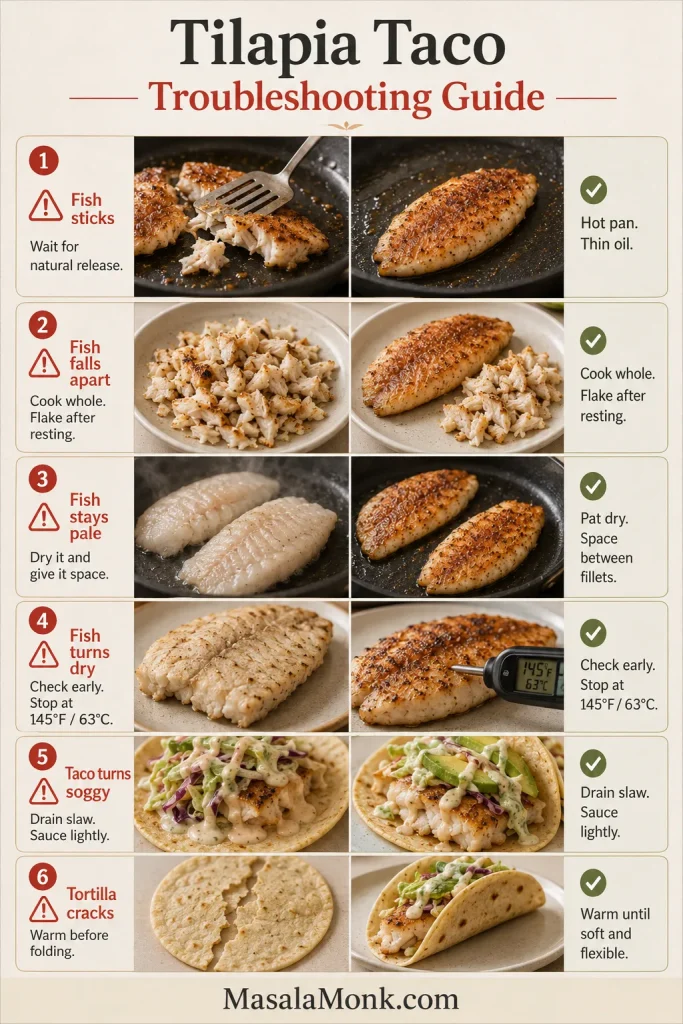
Six-part guide comparing sticking, broken, pale and dry tilapia, plus soggy tacos and cracked tortillas, with corrected examples beside each problem.
Pale fish and soggy tacos point to moisture; torn fillets and cracked tortillas usually signal rushed handling.
ProblemLikely CauseWhat to Do
Fish is watery and paleWet fillets, cool pan, or overcrowdingDry more thoroughly, reheat the pan, and cook in batches
Tilapia is dryThin fillets cooked for a thick-fillet timeBegin checking early and remove pieces separately
Fish breaks while turningMoved too early or turned repeatedlyUse a wide fish spatula and turn only once
Seasoning tastes burntPan too hot, coating too thick, or insufficient oilReduce heat slightly and use a thin, even spice layer
Tacos taste blandFish, slaw, or sauce under-seasonedTaste the fish, slaw, and sauce separately; add salt or lime where it is actually missing
Tortillas become soggyWet slaw, too much sauce, or early assemblyDrain toppings, use controlled sauce, and assemble at the table

Fix the underlying step: Skillet technique·Timing by thickness·Doneness cues·Recipe card

Storage, Make-Ahead, and Reheating

Store the fish, slaw, sauce, and tortillas separately. Following the USDA leftovers guidance, refrigerate cooked tilapia in a shallow, covered container within 2 hours—or within 1 hour when the temperature is above 90°F / 32°C. An assembled taco doesn’t reheat well because the tortilla absorbs moisture from the sauce and slaw.

  • Cooked tilapia: use within 3–4 days, or freeze it sooner if you will not eat it in that window.
  • Sauce: refrigerate for up to 3 days and stir before using.
  • Cabbage: shred a day ahead, but dress it closer to serving for the best crunch.
  • Seasoning: mix several days ahead and store dry.
  • Tortillas: warm immediately before serving.

How to Reheat the Fish

Warm the fish gently in a lightly oiled skillet over medium-low heat, or air fry at 350°F / 175°C for 2–4 minutes, checking after 2 minutes. Reheat the thickest piece to 165°F / 74°C, then stop; extra time makes thin tilapia dry and rubbery.

The microwave works when speed matters. Arrange the fish evenly, cover it loosely with a microwave-safe lid, and heat at 50–70% power in 20–30 second intervals until the thickest piece reaches 165°F / 74°C.

Leftover fish also works well in a taco bowl with warm rice, slaw, sauce, avocado, and lime.
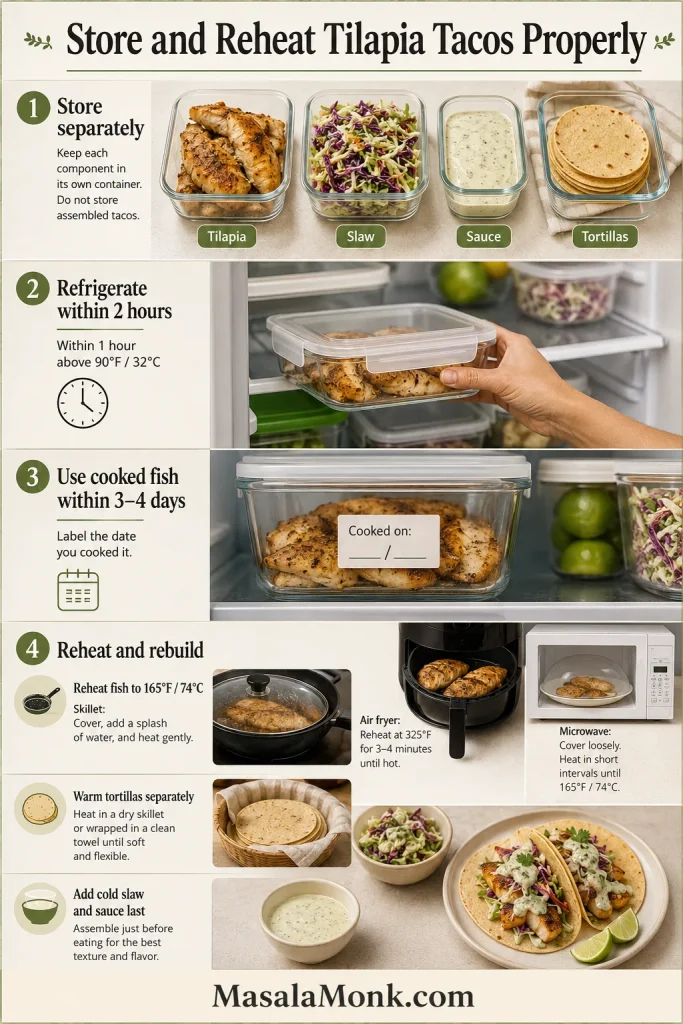
Storage guide showing tilapia, slaw, sauce and tortillas in separate containers, a dated fish container in a refrigerator, three reheating methods and freshly rebuilt tacos.
Store fish, slaw, sauce, and tortillas separately. Reheat only the fish, then rebuild the tacos just before serving.

Frequently Asked Questions

How Many Tacos Should I Plan per Person?

Plan on two small tacos per person, using about 5 oz / 140 g raw fish. Increase that for larger tortillas, bigger appetites, or a meal with very few sides.

What Can I Make Ahead?

Make the sauce up to 3 days ahead, shred the cabbage a day ahead, and mix the seasoning in advance. Dress the slaw and cook the fish close to serving. For leftovers, use the storage and reheating guide.

Hot Fish, Cold Slaw, Warm Tortillas

Bring everything to the table separately and build the first taco while the fish is still hot. That first bite—warm tortilla, smoky tilapia, cool sauce, sharp lime, and crisp cabbage—is the whole point.

Once the cook’s taco tastes balanced, pass the bowls around and let everyone build their own while the tortillas are warm.

What did your cook’s taco need—more lime, more heat, or more crunch?

Quick return: Recipe card·Method chooser·Troubleshooting·Back to top
Posted on Leave a comment

Rockfish Recipe: Easy Pan-Seared Rockfish with Lemon Butter

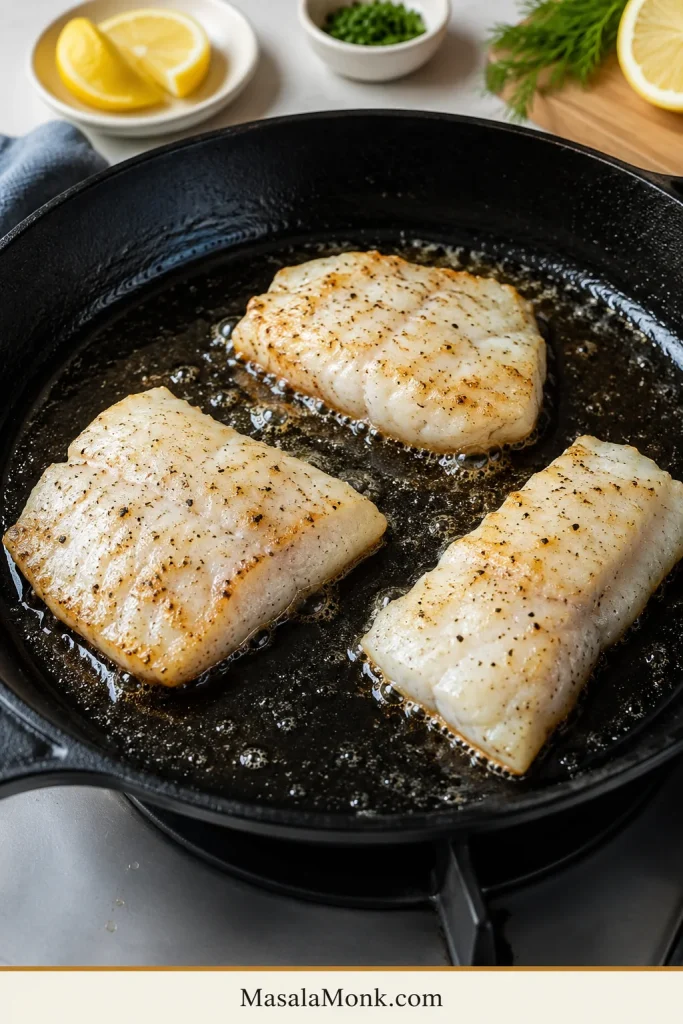
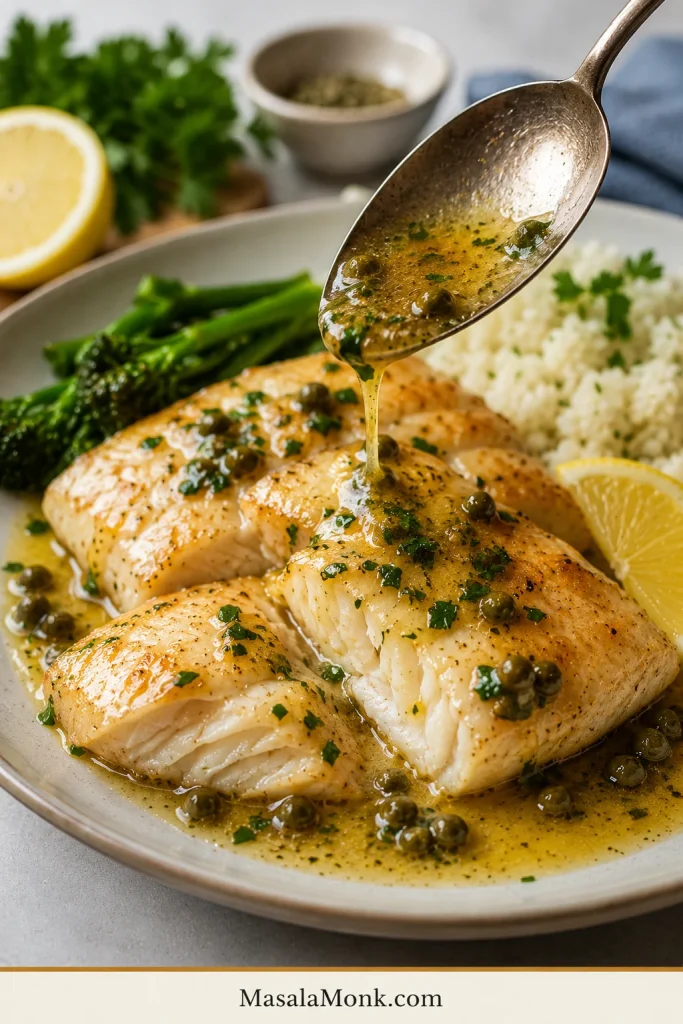
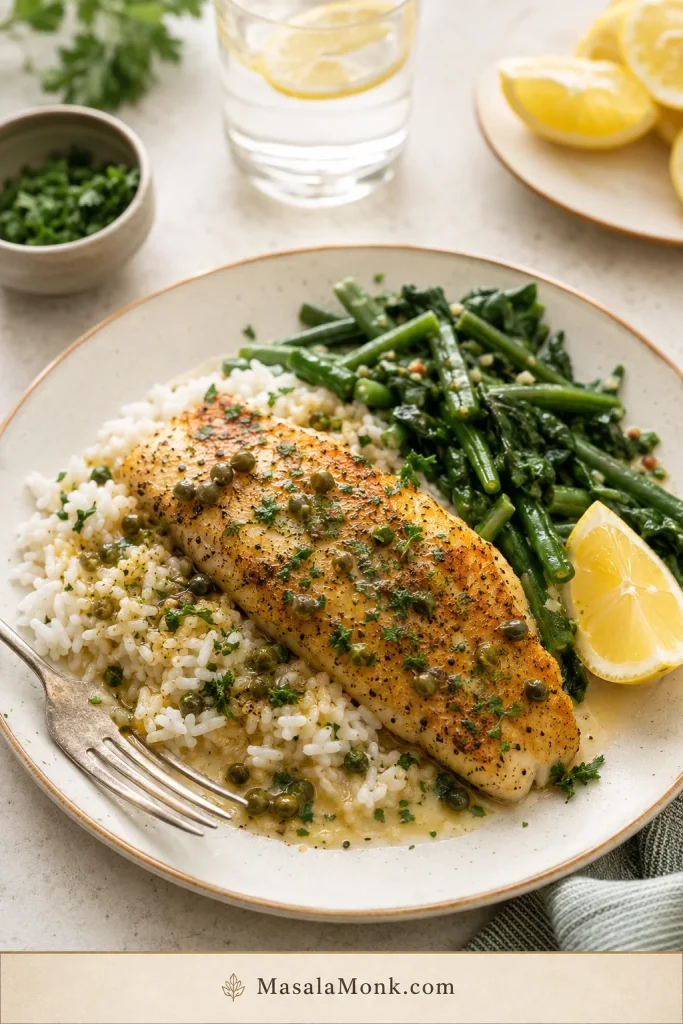
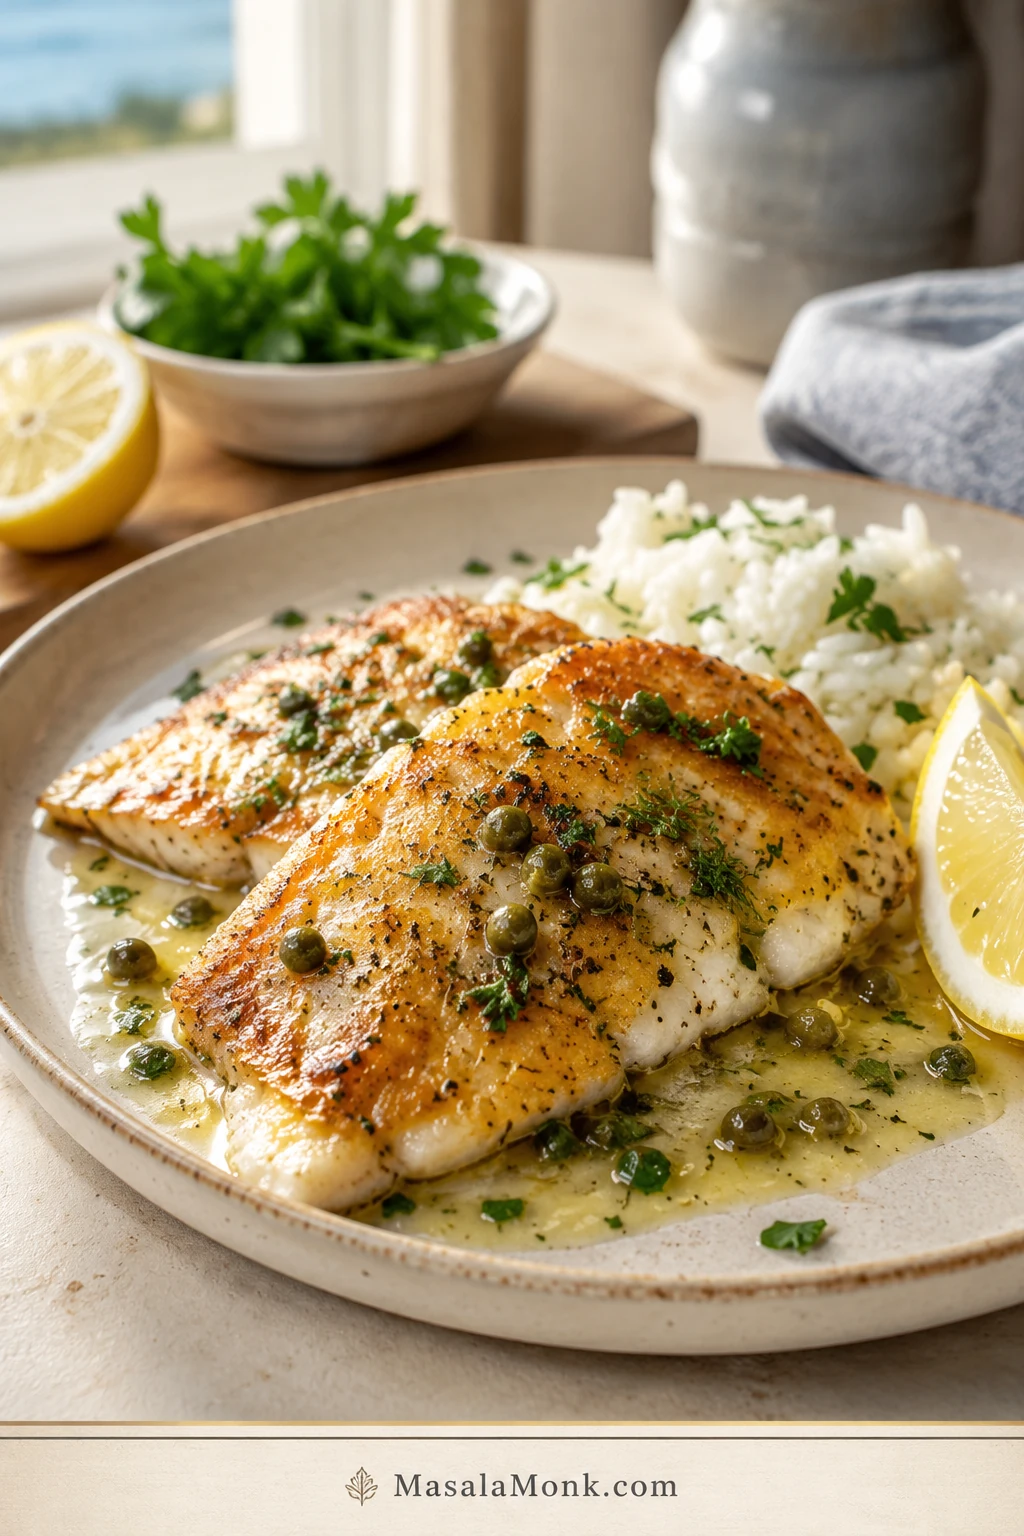
Pan-seared rockfish fillets with lemon butter sauce, capers, herbs, rice, and lemon wedges on a ceramic plate.

Rockfish rewards a simple approach: a dry fillet, a hot pan, a little butter, and a squeeze of lemon. In less than 20 minutes, this rockfish recipe gives you tender white fish with pale golden edges and a bright garlic lemon butter sauce you can spoon over rice, potatoes, salad, or warm tortillas.

This is the rockfish recipe to use when you want a safe first cook: lightly floured fillets, a quick skillet sear, and a lemony pan sauce that gives the fish flavor without covering it up. The best bite is soft, clean, buttery, and lifted with just enough lemon.

If you bought rockfish and now feel a little unsure what to do with it, start here. The fish is delicate, but it is not difficult. Once you know what to look for, the timing is simple.

Jump to Recipe3-Part RuleCook Time ChartFillet TipsOther MethodsFix Problems

Quick Answer: How to Cook Rockfish

Blot the rockfish fillets very well, season them with salt, pepper, and garlic powder, lightly dredge them in flour, then pan-sear them in a hot skillet with oil and a little butter. Medium fillets usually take 3–4 minutes on the first side and 2–3 minutes on the second side.

The fish is ready when the thickest part turns pearly and opaque, gives gently under a fork, and reaches 145°F / 63°C. Do not chase a dark crust. A light golden surface and a juicy center are better than a deeply browned fillet that turns dry.

Do not chase a hard crust: rockfish is lean and delicate. Pale gold outside and tender inside is the goal, not a deep steak-like sear.

Want the direct method? Jump to the recipe card. Need timing help first? See the cook time chart.

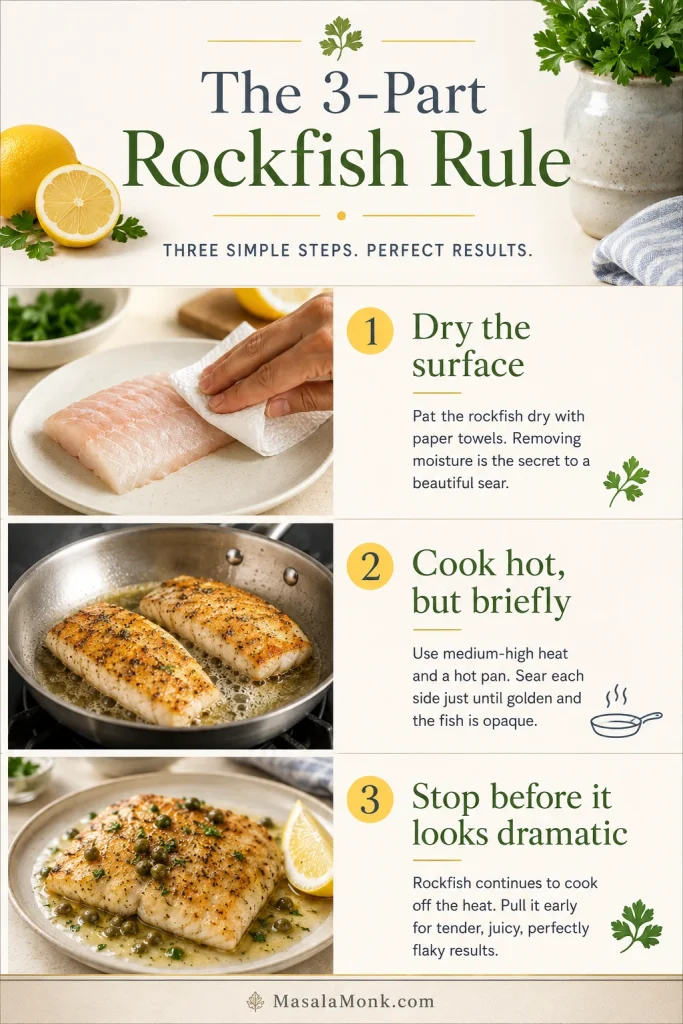
The 3-Part Rockfish Rule

Cooking rule: Dry well, sear briefly, and stop while the flakes stay moist.

Infographic showing three rockfish cooking rules: dry the surface, sear briefly, and stop before the fish dries out.
Before cooking, remember the three-part rockfish rule: dry the fish well, sear it briefly, and stop before the flakes turn dry.

For your first time, keep the fish simple and let the timing teach you. Rockfish is not the fish to force into a hard crust. You are protecting a gentle white fish and pulling it from the heat while it is still tender.

  1. Dry the surface. Moisture makes the fish steam and stick.
  2. Cook hot, but briefly. The first side needs enough heat to set a light crust.
  3. Stop before it looks dramatic. Pale gold outside and juicy inside is the win.

Use skinless fillets, a thin flour coating, and lemon butter for your first batch. Once you learn the feel of the fish in the skillet, the baked, air fryer, grilled, and taco versions become simple adjustments.

Ready to cook? Go to the pan-seared rockfish recipe, or compare all cooking methods.

Make It Now: Pan-Seared Rockfish with Lemon Butter

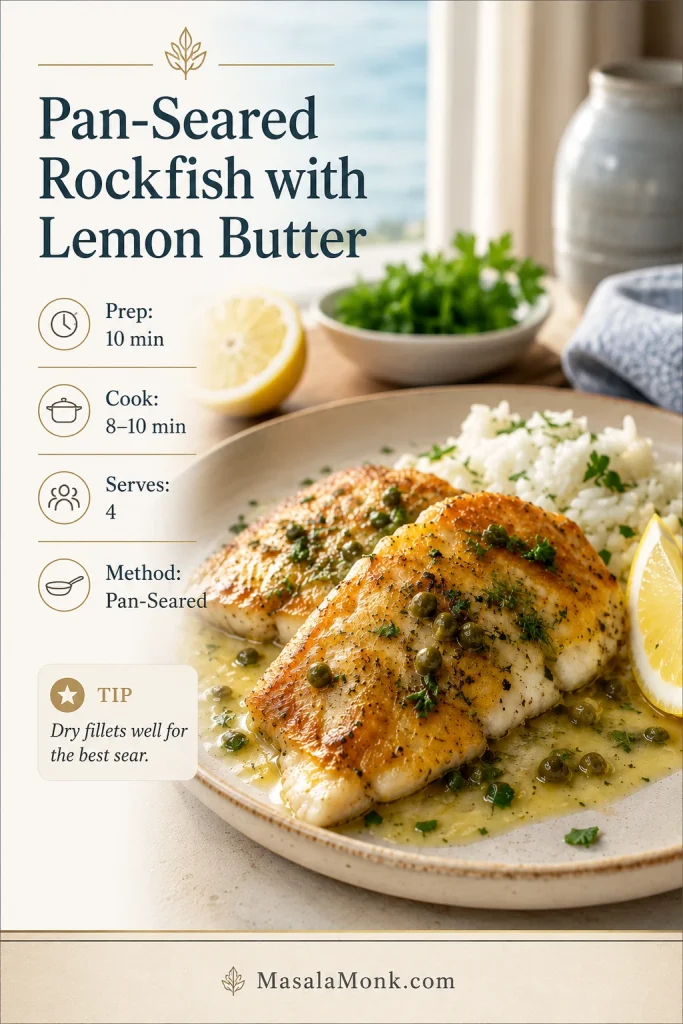
Recipe shortcut: Use this card for quick timing, ingredients, and the lemon butter finish.

Recipe card for pan-seared rockfish with lemon butter showing cook time, servings, method, and a finished plated dish.
Save this pan-seared rockfish recipe card when you need a quick lemon butter fish dinner with clear timing and simple ingredients.

Easy Pan-Seared Rockfish with Lemon Butter

This is the skillet version to make when you want tender white fish with golden edges and a lemony butter sauce that comes together in the same pan. Keep the coating thin, the heat steady, and the cook time short.

Servings4
Prep Time10 minutes
Cook Time8–10 minutes
Total Time18–20 minutes
MethodPan-seared
Best ForRockfish fillets, quick seafood dinner, lemon butter fish

Equipment

  • Large nonstick, stainless steel, or cast iron skillet
  • Paper towels
  • Fish spatula or thin spatula
  • Instant-read thermometer

Ingredients

  • 4 rockfish fillets, 5–6 oz / 140–170 g each
  • ¾ tsp fine salt, divided
  • ½ tsp black pepper
  • ½ tsp garlic powder
  • ¼ cup all-purpose flour, about 30 g, optional but helpful for a light crust
  • 2 tbsp olive oil or neutral oil, 30 ml
  • 3 tbsp unsalted butter, about 42 g, divided
  • 3 garlic cloves, minced
  • 1½ tbsp fresh lemon juice, about 22 ml
  • 1–2 tbsp capers, drained, optional
  • 2 tbsp chopped parsley or dill
  • Lemon wedges, for serving
  • Optional: ¼ cup white wine or chicken broth, 60 ml, for a looser sauce

Instructions

Work in three short stages: prep the fish, sear the fillets, then make the sauce.

Prep the Fish
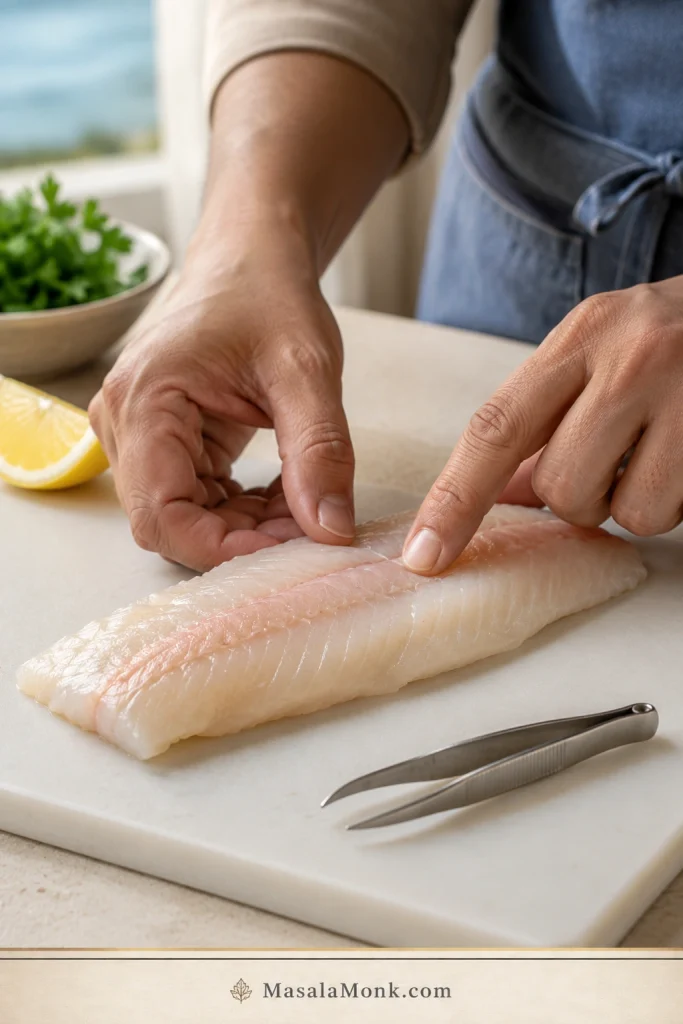
  1. Check the fish. Run your fingers gently over the fillets and remove any pin bones with clean tweezers if needed.
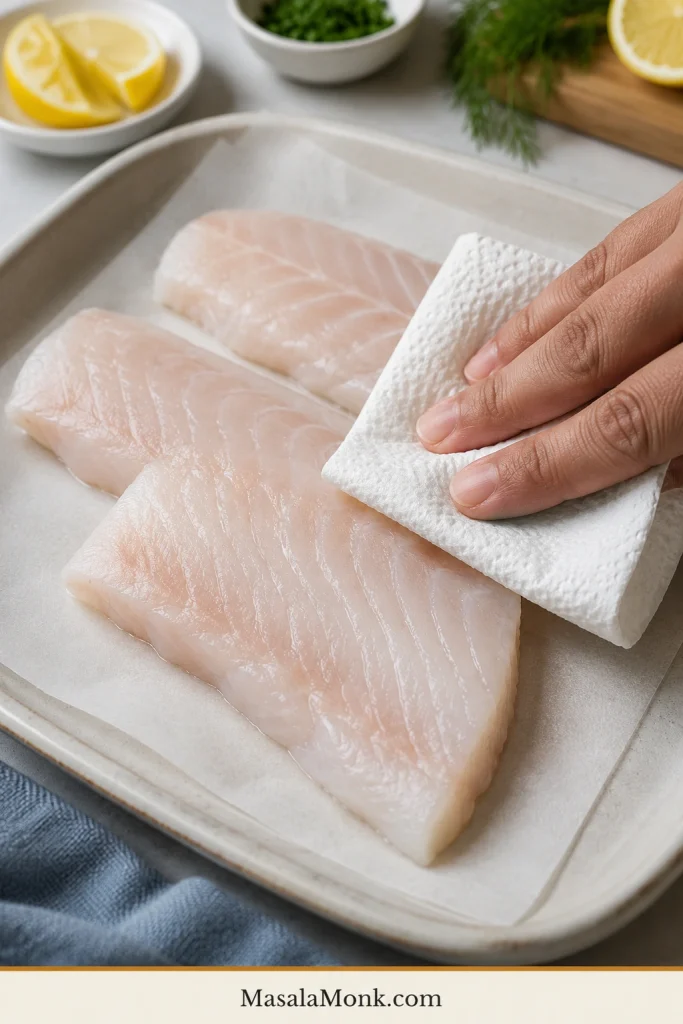
  2. Dry the fillets. Blot the rockfish thoroughly with paper towels so the surface sears instead of steams.
  3. Season both sides. Sprinkle the fillets with salt, black pepper, and garlic powder.
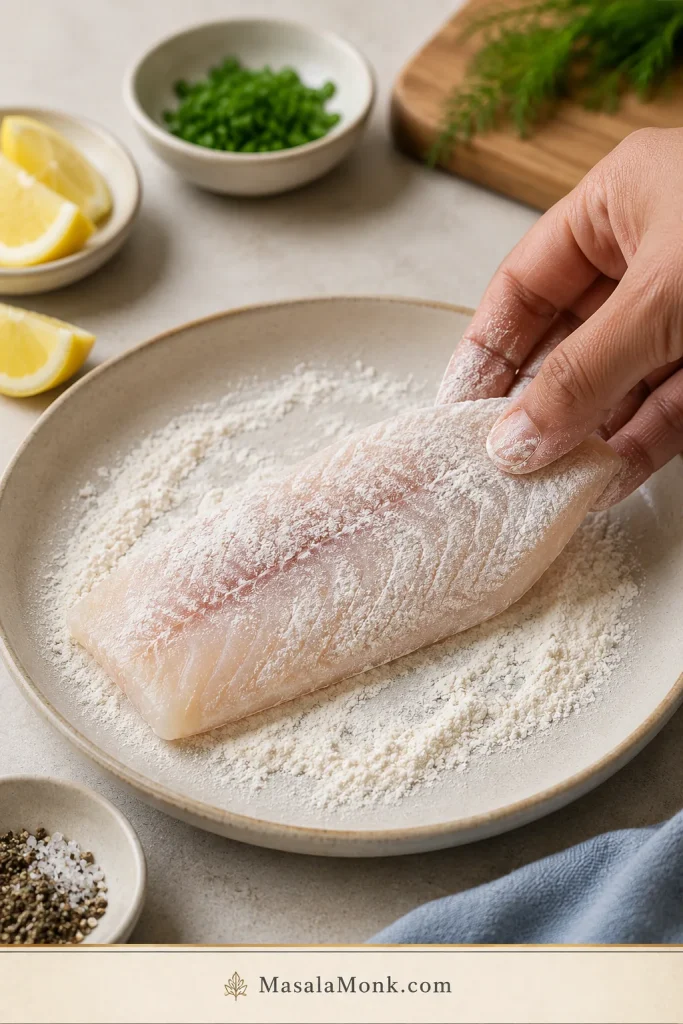
  4. Lightly flour. Spread the flour on a shallow plate. Dredge each fillet lightly, then shake off the excess. The coating should be thin, not heavy.
Sear the Fillets
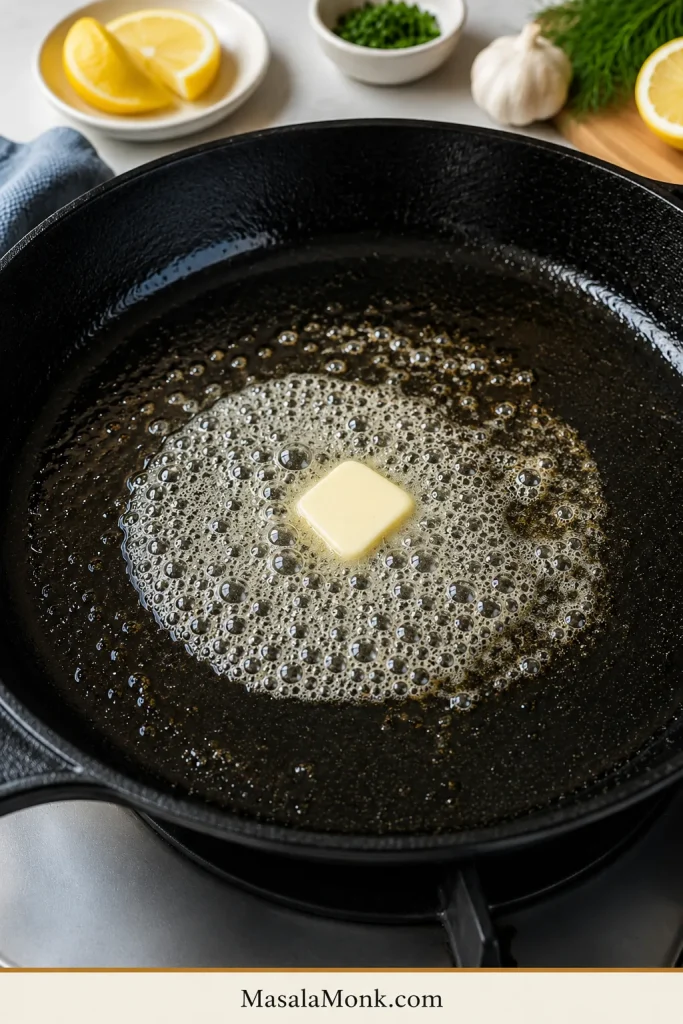
  1. Heat the oil. Set a large skillet over medium-high heat. Add the oil and let it heat until it shimmers. Add 1 tbsp butter, let it foam lightly, then add the fish right away.
  2. Sear the first side. Place the fillets in the pan presentation-side down. Do not crowd the skillet; cook in batches if needed. Cook for 3–4 minutes without moving the fish too early.
  3. Flip gently. Slide a fish spatula under each fillet and turn carefully. Cook the second side for 2–3 minutes, depending on thickness. Lower the heat to medium if the coating or butter is browning too quickly.
  4. Check doneness. The thickest part should look pearly and opaque, not translucent. For the safest check, use a thermometer and look for 145°F / 63°C.
  5. Remove the fish. Transfer the cooked rockfish to a plate. Thin pieces keep cooking slightly from carryover heat, so do not leave them in the hot pan while making the sauce.
Make the Sauce and Serve
  1. Make the sauce. Reduce the heat to medium-low. Add the remaining 2 tbsp butter to the skillet. Stir in the garlic for 20–30 seconds, just until fragrant. Add lemon juice, capers, and optional wine or broth. Scrape up the browned bits; the sauce should taste bright, buttery, and lightly salty.
  2. Finish and serve. Spoon the lemon butter sauce over the rockfish while it is warm, letting it catch in the flakes and run into the rice, potatoes, or vegetables underneath. Sprinkle with parsley or dill and serve with lemon wedges.

Recipe Notes

  • For very thin fillets, start checking after 2 minutes per side.
  • For thicker pieces, reduce the heat slightly after flipping so the outside does not brown before the center cooks.
  • Flour is optional. Skip it for a lighter fish, or use gluten-free flour if needed.
  • Capers add a salty, briny finish. Leave them out for a simple garlic lemon butter sauce.
  • Frozen rockfish works well if thawed overnight in the fridge and blotted thoroughly before cooking.

Choose Your Rockfish Method

Once the skillet version makes sense, choose the method that fits your dinner. Thin, delicate pieces do well in the skillet or air fryer. Larger or uneven fillets are often easier in the oven. Skin-on pieces are the friendliest choice for the grill.

MethodUse WhenResultBest Tip
Pan-searedYou want the best crust and sauceGolden edges, tender center, lemony pan sauceUse oil first, then a little butter
BakedYou want a hands-off dinner or several fillets at onceSoft, simple, easy to serve with sidesAdd butter or olive oil so the fish stays juicy
Air fryerYou want fast, lightly browned fish without heating the ovenQuick, clean, good for thinner piecesKeep the fillets in a single layer
GrilledYou have skin-on or sturdy filletsLightly smoky, fresh, great with lemonUse foil or a grill basket for fragile pieces
TacosYou want a casual meal with slaw and sauceFlaky fish, lime, crunch, and creamy toppingsBlackened seasoning works especially well

Once the method is clear, it helps to know what kind of rockfish you have, what it tastes like, and how the fillet’s thickness affects the cook.

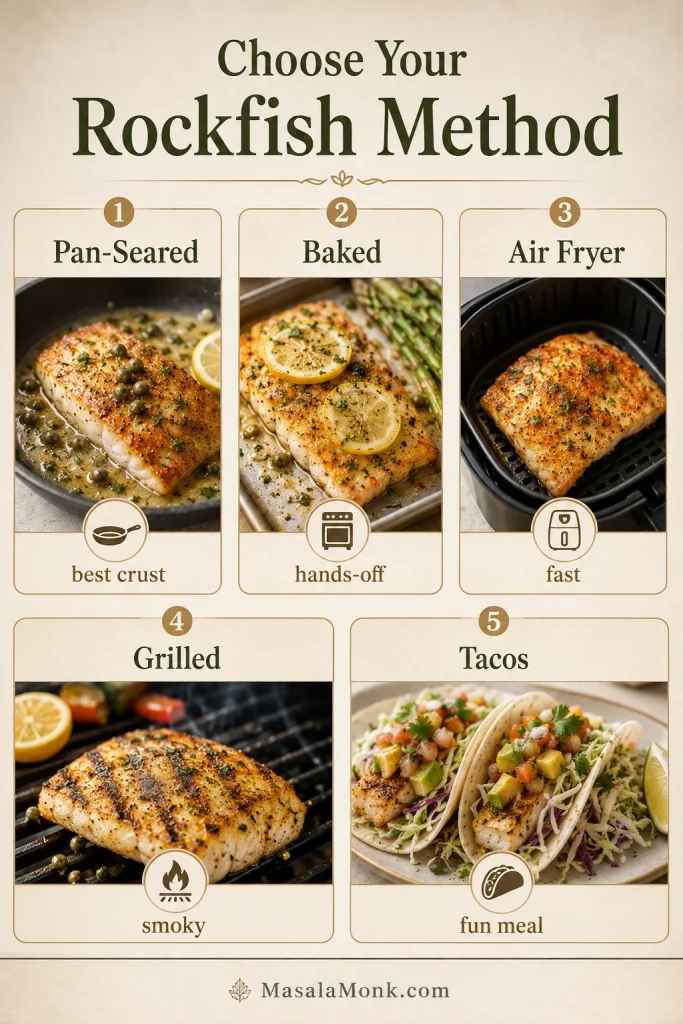
Method chooser: Pick skillet, oven, air fryer, grill, or tacos based on dinner style.

Guide comparing pan-seared, baked, air fryer, grilled, and taco methods for cooking rockfish.
Once the basic skillet method makes sense, choose your path: pan-seared for crust, baked for ease, air fryer for speed, grilled for smoke, or tacos for texture.

What Is Rockfish?

Rockfish is a mild, lean white fish with a tender texture. In U.S. markets, the name is often used for Pacific rockfish, though regional labels can vary.

For this recipe, the exact label matters less than the fillet itself. Thin pieces cook quickly, larger portions need a few extra minutes, and the visual cues matter more than the species name on the package.

What Does Rockfish Taste Like?

The flavor is mild, clean, and slightly sweet. The texture is lean and tender, so it pairs easily with lemon, butter, garlic, herbs, Old Bay, Cajun seasoning, capers, salsa, or creamy taco sauce.

If you like cod, snapper, haddock, tilapia, halibut, or sea bass, this fish will feel familiar. For another gentle white-fish dinner, this baked haddock recipe follows the same easy idea: mild fish, simple seasoning, and a tender finish.

Rockfish Names Can Be Confusing

The word “rockfish” can mean different things depending on where you shop. Do not let the label slow you down; use the fish’s thickness, freshness, and texture as your main cooking guides.

Label You May SeeWhat It Usually MeansHow to Use This Recipe
Pacific rockfishA mild white fish from the Pacific coastUse the recipe as written
Rock codOften another market name for Pacific rockfishUse thickness as your timing guide
Striped bass / Chesapeake rockfishA different fish sometimes called rockfish regionallyThe method still works for similar fillet thickness
Mixed white fish filletsMay include similar mild fishCook by thickness and doneness cues

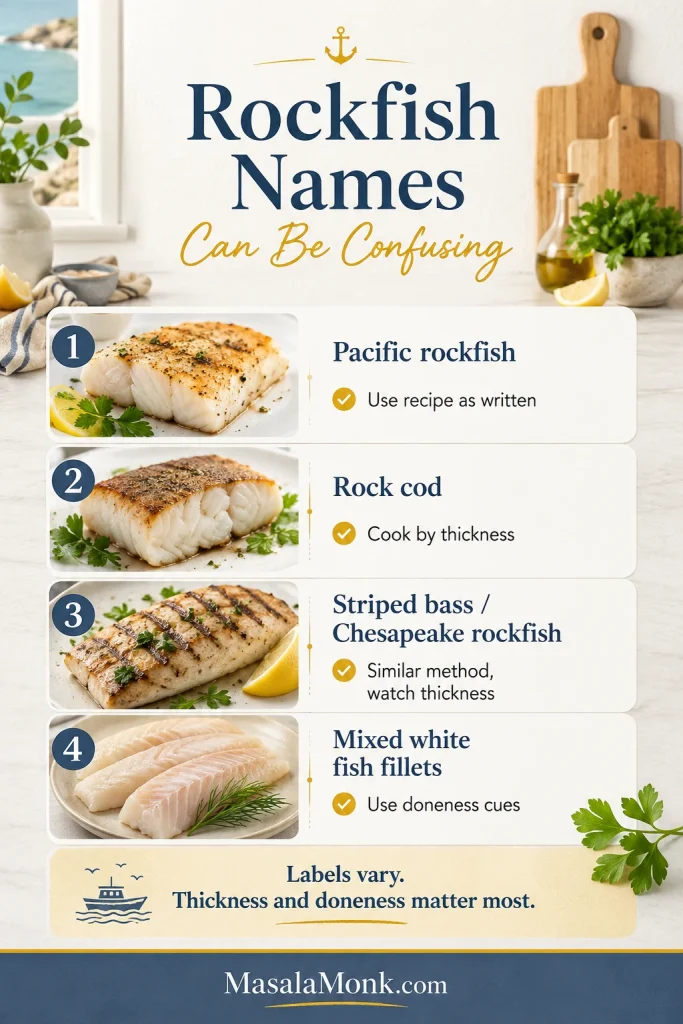
Fish counter tip: If the label is confusing, cook by thickness and doneness cues.

Guide showing common rockfish names including Pacific rockfish, rock cod, striped bass, Chesapeake rockfish, and white fish fillets.
Rockfish may be sold under different names, but once it is in your kitchen, thickness and doneness cues matter more than the label.

How to Choose Rockfish

Good fish should smell clean and mild, not sour, sharp, or strongly fishy. The flesh should look moist and fresh, not dried out around the edges. If the fillets are frozen, choose pieces without heavy ice crystals or freezer-burned patches.

Buying cue: Choose moist, clean-looking fillets with no dry edges or strong odor.

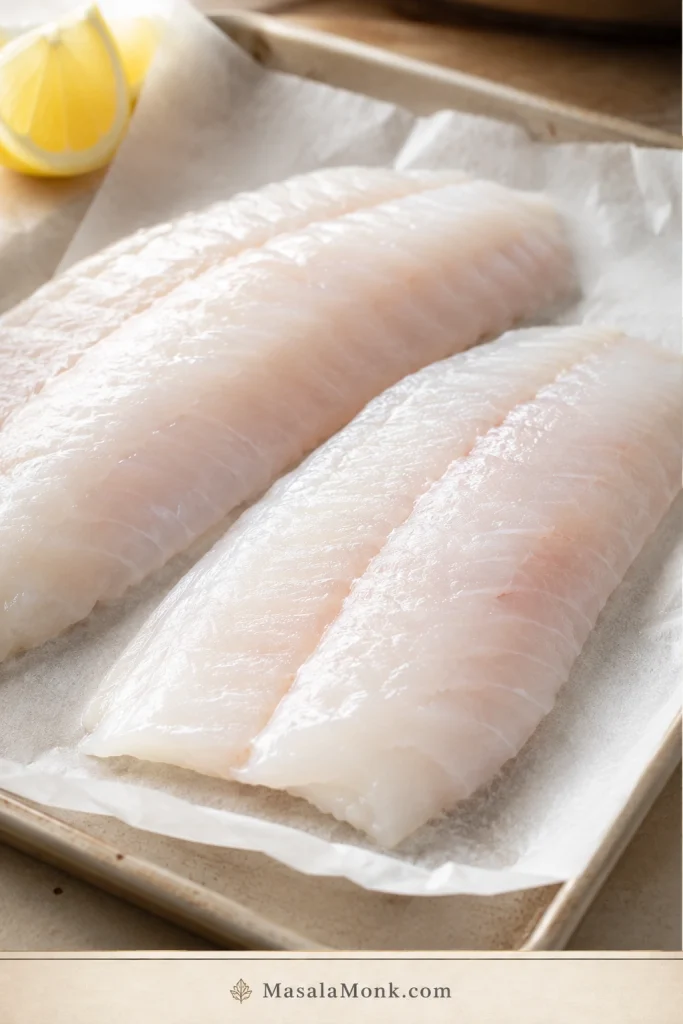
Fresh raw rockfish fillets with moist white flesh arranged on parchment paper.
Good fish makes everything easier; therefore, choose fillets that look moist and clean, with no dry edges or strong fishy smell.

Buying tip: rockfish names and species vary by region, so buy from a fish counter or brand you trust. If the label is unclear, ask whether it is Pacific rockfish, striped bass, or another mild white fish, then cook by thickness.

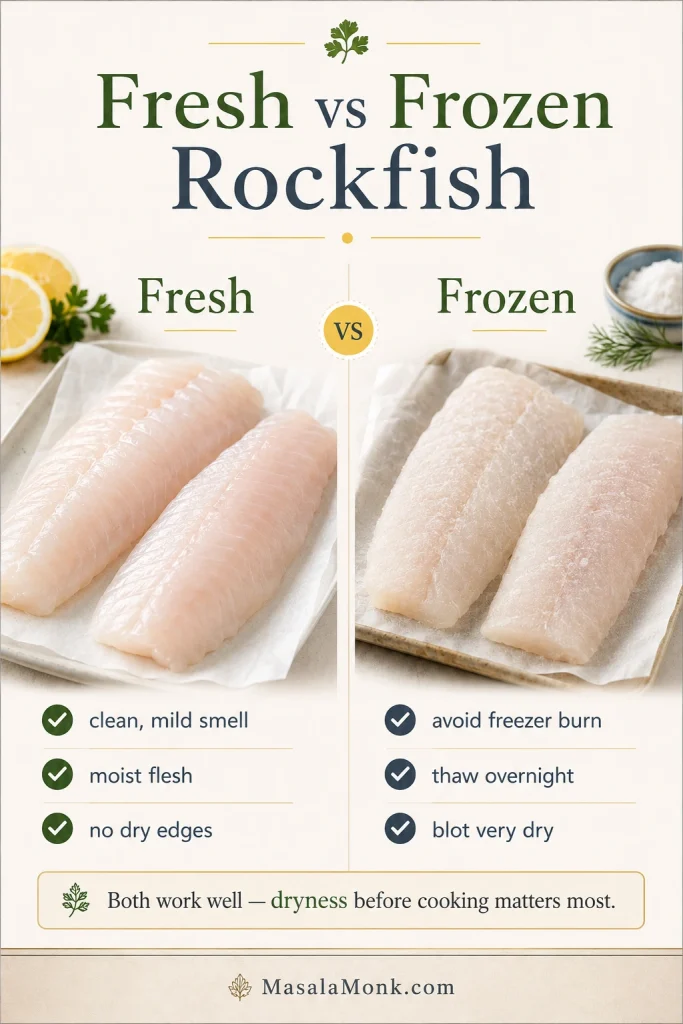
For frozen fillets, thaw overnight in the refrigerator. Before cooking, press away as much surface moisture as you can. That one small step makes the difference between a pale steamed surface and a clean skillet sear.

Frozen-fish cue: Blot thawed fillets well so the surface can brown.

Fresh versus frozen rockfish guide comparing fresh fillets, frozen fillets, thawing, freezer burn, and drying before cooking.
Fresh and frozen rockfish can both cook well; however, thawed fillets need extra drying so they brown instead of steam.

Rockfish Fillets: Skin-On, Skinless, Fresh, or Frozen

Most home cooks will use fillets, and thickness matters more than almost anything else. A thin piece may be done before it gets deeply golden, while a larger portion may need gentler heat after the first sear.

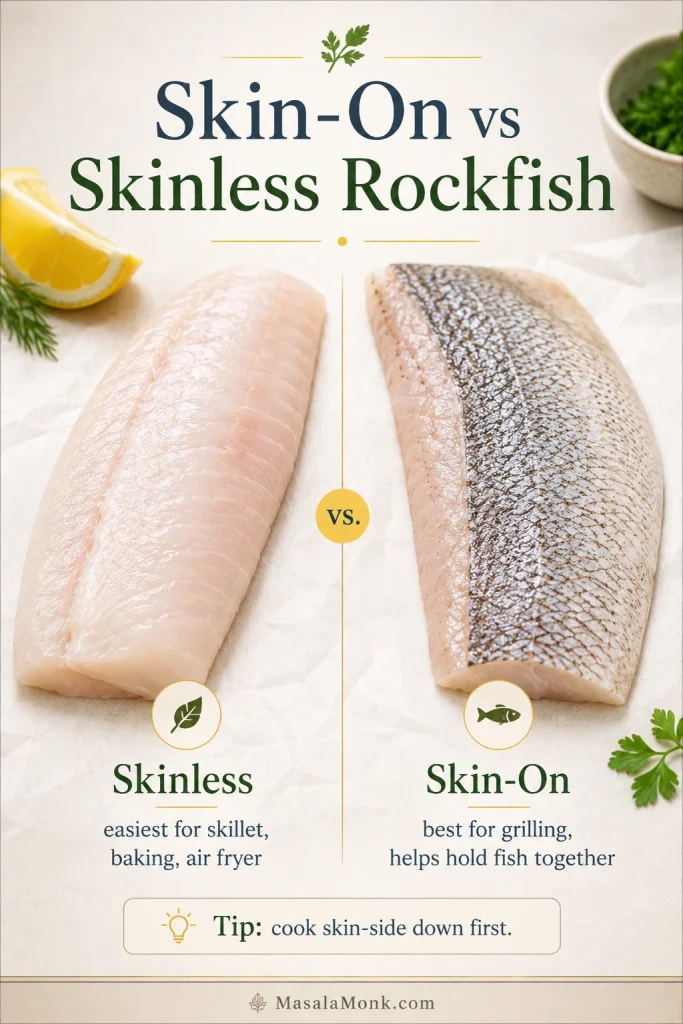
Fillet choice: Skinless is easiest for the skillet; skin-on helps on the grill.

Comparison guide showing raw skinless and skin-on rockfish fillets with cooking notes.
Use skinless fillets for the easiest skillet version, while skin-on rockfish is useful when grilling because it helps the fish hold together.
Fillet TypeBest UseWhat to Know
Skinless filletsPan-searing, baking, air fryingEasiest for this recipe, but delicate when thin
Skin-on filletsGrilling or crisp-skin skillet cookingCook skin-side down first; the skin helps hold the fish together
Fresh filletsAny methodShould smell clean and mild, not sour or strongly fishy
Thawed frozen filletsPan-searing, baking, air fryingThaw overnight in the fridge and press away surface moisture before cooking
Very thin filletsQuick skillet or air fryerWatch closely; they may only need 2 minutes per side
Thick filletsSkillet-to-gentle heat, baking, grillingSear first, then reduce heat so the center cooks without burning the outside

If a fillet is uneven, tuck the thin tail end slightly under itself or place that end toward the cooler edge of the pan. This helps the delicate part avoid overcooking before the thicker section is done.

For skin-on fillets, cook skin-side down first for most of the time. Press gently for the first few seconds so the skin makes contact with the pan, then let it cook undisturbed before turning.

Once your fillets are sorted, check the ingredients or read the cooking walkthrough.

Why This Rockfish Recipe Works

  • It is fast enough for a weeknight. The fish cooks in minutes once the pan is hot.
  • The sauce keeps the flavor bright. You get richness from butter, lift from lemon, and just enough garlic in the background.
  • A light coating makes flipping easier. The thin flour layer helps the surface set without turning the fish heavy.
  • The timing cues are flexible. Thin and thick fillets are both covered, so you are not locked into one exact size.
  • Leftovers can become another meal. Flake them into tacos, salads, rice bowls, or sandwiches.

Rockfish Recipe Ingredients and Why They Matter

Once you know the kind of fillets you have, the ingredient list stays simple. Each item is there to help the fish brown gently, stay tender, or taste brighter at the end.

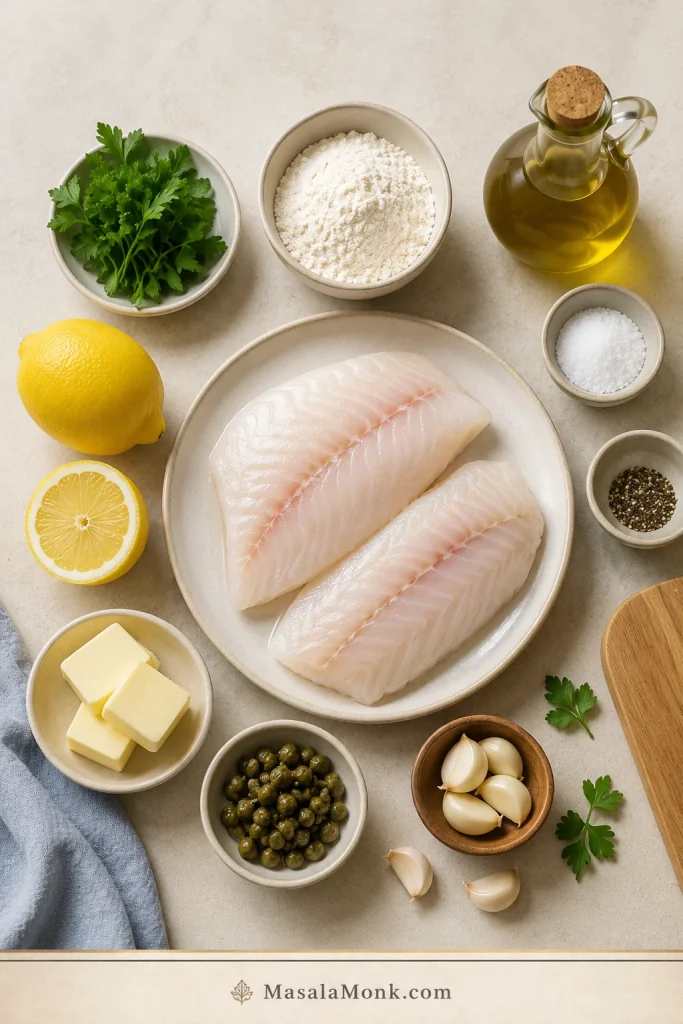
Ingredient cue: Keep the setup simple and save the flour for a thin release layer.

Ingredient board with raw rockfish fillets, lemon, butter, garlic, capers, herbs, flour, oil, salt, and pepper.
The best rockfish recipe starts with a short ingredient list: fresh fillets, lemon, butter, garlic, capers, herbs, and just enough flour to help the sear.

Rockfish Fillets

Use fresh or thawed frozen fillets. Skinless pieces are easiest in the skillet, while skin-on pieces are helpful for grilling or crisp-skin cooking. Check for pin bones before seasoning.

Salt, Pepper, and Garlic Powder

This gentle white fish does not need heavy seasoning. Salt brings out the flavor, black pepper adds warmth, and garlic powder gives an even savory base without burning quickly.

Flour

A barely-there coating helps the surface brown and makes flipping less stressful. Shake off the excess so the coating stays light instead of gummy.

Oil and Butter

Oil gives you safer heat for the sear. Butter brings richness to the skillet sauce, but most of it goes in after the fish comes out so it stays glossy instead of scorched.

Lemon, Capers, and Herbs

Fresh lemon wakes up the sauce and keeps the fish from tasting heavy. Capers make the finish salty-bright and a little restaurant-style. Parsley keeps things clean, while dill leans more classic seafood.

Got everything ready? Use the recipe card, or read the step-by-step technique notes before you start.

How to Cook Rockfish Fillets Without Drying Them Out

The recipe card gives you the direct steps. This section is the coaching layer: the small choices that keep delicate fillets from sticking, breaking, or drying out.

Before the Fish Hits the Pan

Start by running your fingers gently over the fillets and removing any pin bones with clean tweezers. Then press the surface dry with paper towels, especially if the fish was frozen and thawed. Moisture blocks browning and makes sticking more likely.

Prep cue: Check for pin bones before seasoning.

Hands checking a raw rockfish fillet for pin bones with tweezers on a clean prep surface.
Before seasoning, check for pin bones with your fingers; this quick step makes the finished rockfish easier and safer to eat.

Searing cue: Dry fillets stick less and brown better.

Raw rockfish fillets being patted dry with paper towels before pan-searing.
Dry the fillets before they hit the pan, because surface moisture is the main reason delicate fish sticks, steams, and refuses to brown.

Season the fish right before cooking. If salted fillets sit too long, they can release moisture and make the surface harder to brown. If you are using flour, keep it barely there: a light dusting that helps the surface set, not a thick breaded shell.

Coating cue: Use only a thin dusting so the fish stays delicate.

Raw rockfish fillet with a light flour coating on a shallow plate.
A thin flour coating helps rockfish release cleanly from the skillet; however, the fish should still show through the coating.

While the Fish Cooks

Let the oil shimmer before adding a small amount of butter. The butter should foam lightly, not smoke. Leave space around each piece so the pan does not trap steam, and give the first side time to form a pale golden crust before you try to lift it.

Pan cue: Heat oil first, then add butter just before the fish.

Oil and butter melting in a skillet before adding rockfish fillets.
Heat oil first, then add butter just before the fish; that way, the pan is hot enough to sear without burning the butter.

Skillet cue: Leave space so the fillets sear instead of steam.

Three rockfish fillets searing in a skillet with visible space between each piece.
Leave space between the fillets as they cook, since a crowded skillet traps steam and prevents the pale golden sear you want.

Flip cue: Wait for the first side to set before turning.

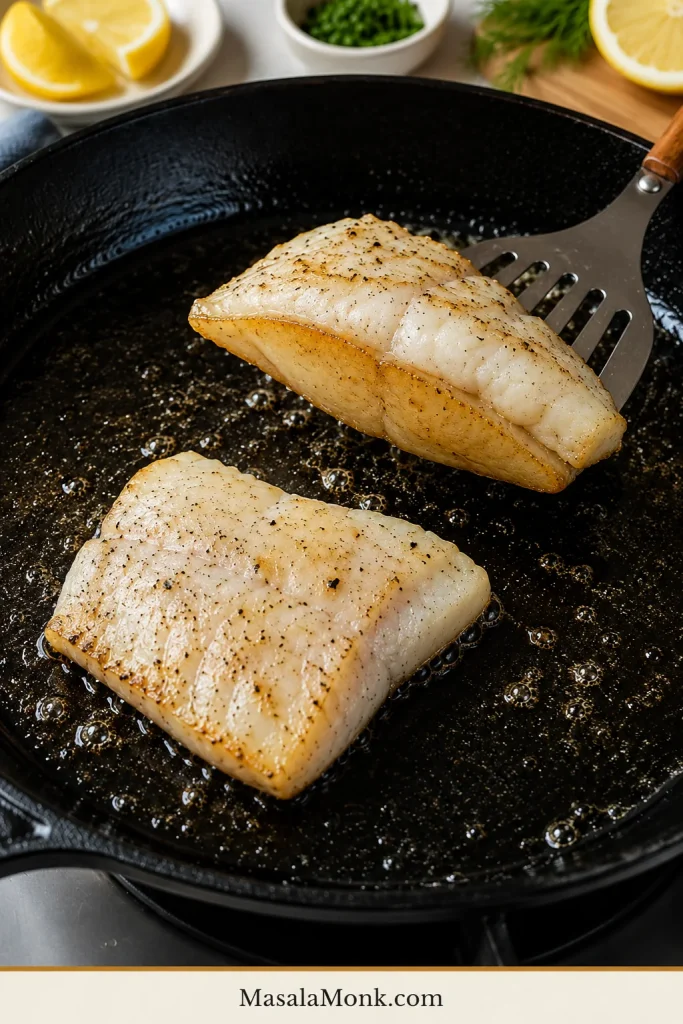
Rockfish fillet partly lifted with a fish spatula to show a pale golden seared underside.
Wait until the first side releases easily before flipping; otherwise, delicate rockfish can tear before the crust has set.

Use a fish spatula or the thinnest spatula you own. Slide it fully under the fillet and turn gently. If the coating or butter starts browning too fast, lower the heat slightly and let the center finish more gently.

Tool cue: Support the full fillet with a thin fish spatula.

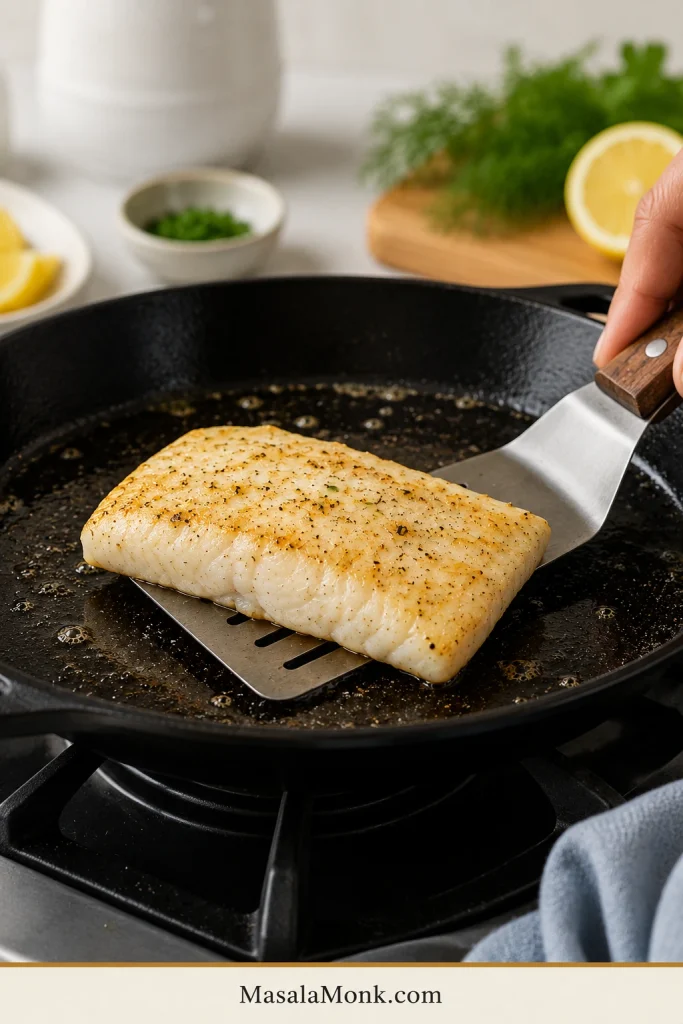
Thin fish spatula supporting a delicate rockfish fillet during a gentle flip in a skillet.
A thin fish spatula supports the full fillet, so the rockfish turns cleanly instead of breaking into pieces.

After the Fish Comes Out

Remove the cooked rockfish before making the sauce. Thin pieces keep cooking from carryover heat, and the garlic, lemon, butter, and capers come together quickly. The garlic should smell good after 20–30 seconds, not browned or bitter.

Sauce cue: Make the lemon butter after the fish comes out.

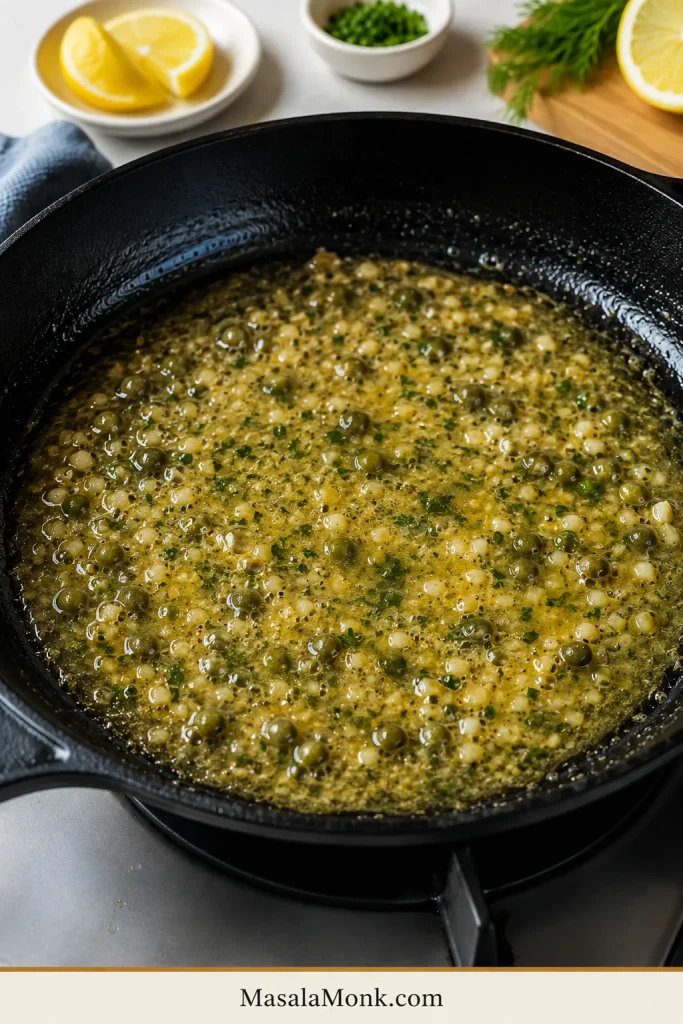
Lemon butter sauce with garlic, capers, and herbs bubbling gently in a skillet.
Make the lemon butter sauce after removing the fish, so the garlic, capers, and butter stay bright while the fillets avoid extra heat.

If one fillet breaks, do not treat it like a failure. Spoon the sauce over it, serve it over rice, or turn it into tacos. It will still taste good.

Serving cue: Spoon sauce at the end so it catches in the flakes.

Lemon butter sauce being spooned over pan-seared rockfish with capers, herbs, rice, and lemon.
Spoon the sauce over the fish at the end; then the lemon butter settles into the flakes and flavors the rice or vegetables underneath.

Next, check rockfish cook times, doneness cues, or common fixes.

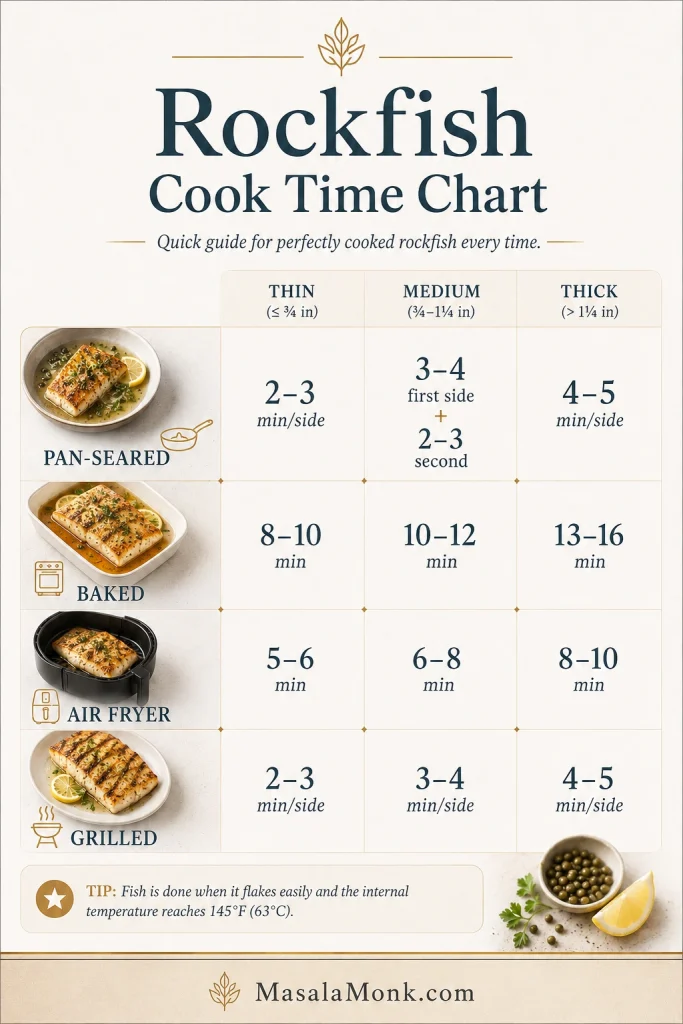
How Long to Cook Rockfish Fillets

Cooking time depends mostly on thickness. The timer gets you close, but the fish itself tells you when to stop. Thin fillets may be ready in minutes; thicker pieces need more patience and slightly gentler heat.

MethodTemperature / HeatThin FilletsMedium FilletsThick FilletsBest Cue
Pan-searedMedium-high, then medium2–3 min per side3–4 min first side, 2–3 min second side4–5 min per sideGolden outside, pearly center
Baked fillets400°F / 204°C8–10 min10–12 min13–16 minFork opens soft flakes
Baked with topping425°F / 218°C10–12 min15–18 min18–22 minTopping golden, center juicy
Air fryer fillets400°F / 204°C5–6 min6–8 min8–10 minLightly browned, tender inside
Grilled fillets400–450°F / 204–232°C2–3 min per side3–4 min per side4–5 min per sideReleases from grate, gives gently

These times are guides, not strict rules. The safest doneness target for fish is 145°F / 63°C in the thickest part. FoodSafety.gov lists 145°F as the safe minimum internal temperature for fish, so an instant-read thermometer is the easiest way to avoid guessing.

Timing cue: Start with the chart, then adjust by thickness.

Rockfish cook time chart comparing pan-seared, baked, air fryer, and grilled fillets by thickness.
Use the rockfish cook time chart as a guide, then adjust for thickness because thin and thick fillets finish at different speeds.

Best cue: the fish should look juicy at the thickest point and open into tender flakes when pressed gently. If it looks tight, dry, or chalky, it has gone too far.

How to Tell When Rockfish Is Done

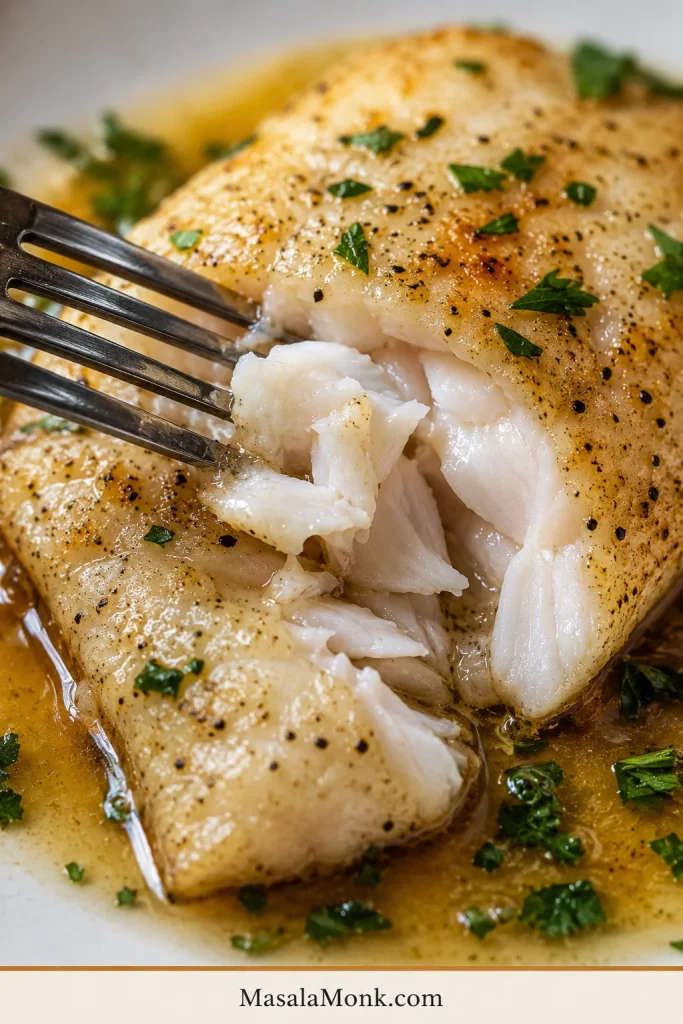
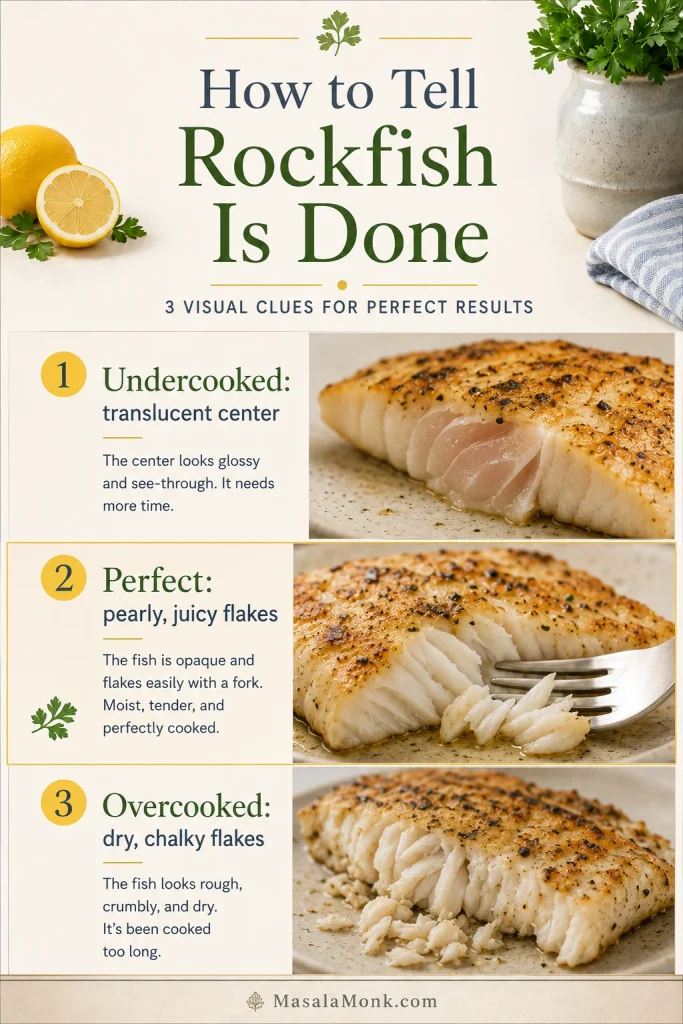
The flesh should change from translucent to pearly and opaque. The thickest part should still look juicy, and the flakes should open softly when pressed with a fork.

Doneness cue: Look for pearly, moist flakes instead of dark crust.

Cooked rockfish opened with a fork to show moist white flakes.
Look for pearly, moist flakes rather than a dark crust; rockfish is done when it opens gently with a fork.

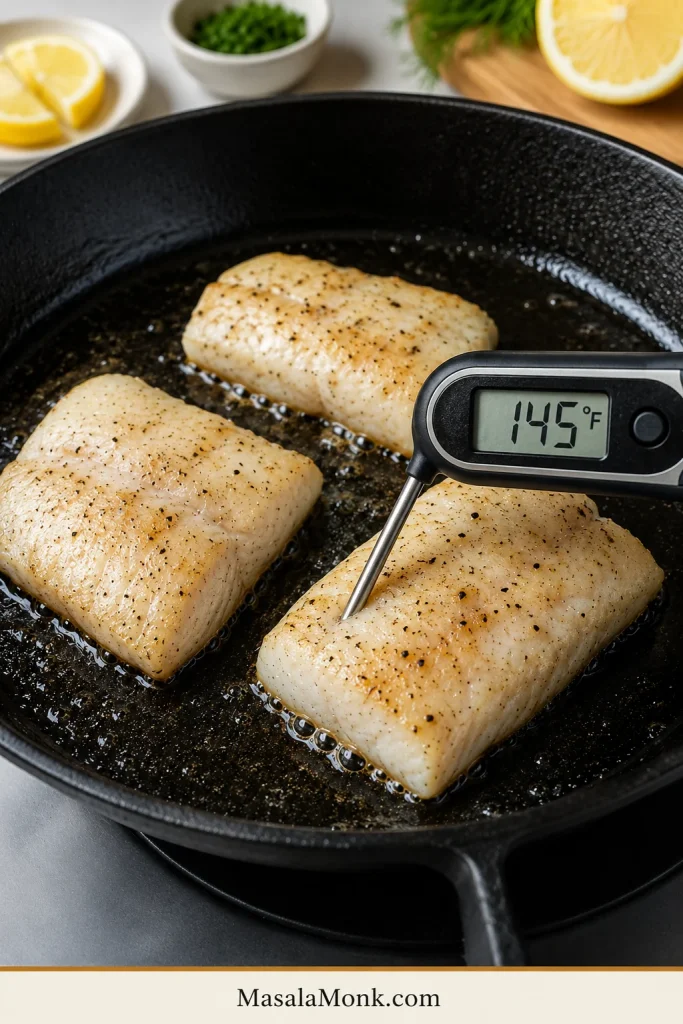
With a thermometer, check the thickest part of the fillet and look for 145°F / 63°C. For thin pieces, start checking before the full time is up because carryover heat can finish them quickly after they leave the pan.

Safety cue: Check the thickest part for the clearest doneness read.

Instant-read thermometer inserted into cooked rockfish showing 145°F.
For the safest doneness check, test the thickest part of the fillet and look for 145°F / 63°C before serving.

Do not wait for both sides to become dark or heavily crisp. Light gold outside, tender inside, and no raw translucence in the center is the sweet spot.

Texture cue: Compare undercooked, perfect, and overcooked fish.

Rockfish doneness guide showing undercooked, perfectly cooked, and overcooked fish textures.
Perfect rockfish sits between translucent and chalky: opaque, pearly, moist, and flaky without falling apart.

Baked, Air Fryer, Grilled, and Taco Rockfish Options

The skillet teaches you the feel of rockfish. After that, the other methods are easy to choose: bake when you want hands-off cooking, air fry when you want speed, grill when you have sturdier pieces, and use tacos when dinner wants slaw, lime, and sauce.

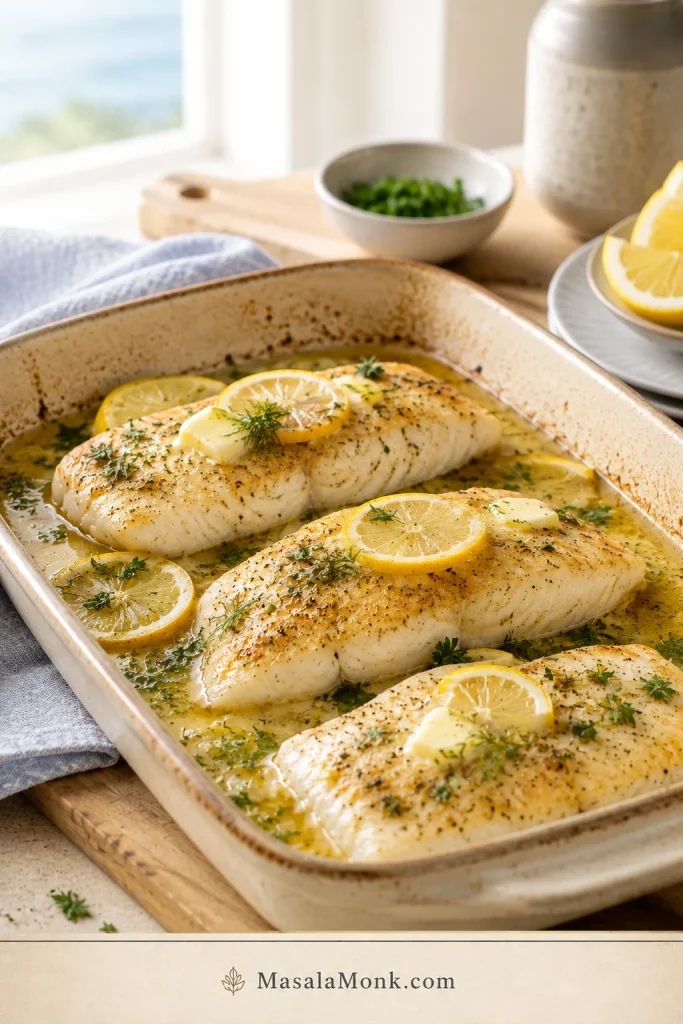
Baked Rockfish Fillets

When you want a hands-off dinner, baking is the easiest move. It works especially well when you are cooking several fillets at once.

  1. Heat the oven to 400°F / 204°C.
  2. Place the seasoned fillets in a lightly oiled baking dish.
  3. Add lemon slices, a small pat of butter, or a drizzle of olive oil.
  4. Bake medium fillets for 10–12 minutes.
  5. For larger pieces, check around 13 minutes and continue until the center turns opaque and tender.

For a breadcrumb, parmesan, or panko topping, use 425°F / 218°C and watch closely. The topping should turn golden while the fish stays soft underneath.

Oven cue: Bake when you want several fillets with less hands-on work.

Baked rockfish fillets in a ceramic dish with lemon slices, butter, herbs, and lemony sauce.
Baked rockfish is the hands-off option for cooking several fillets at once, while lemon, butter, and herbs keep the dish bright.

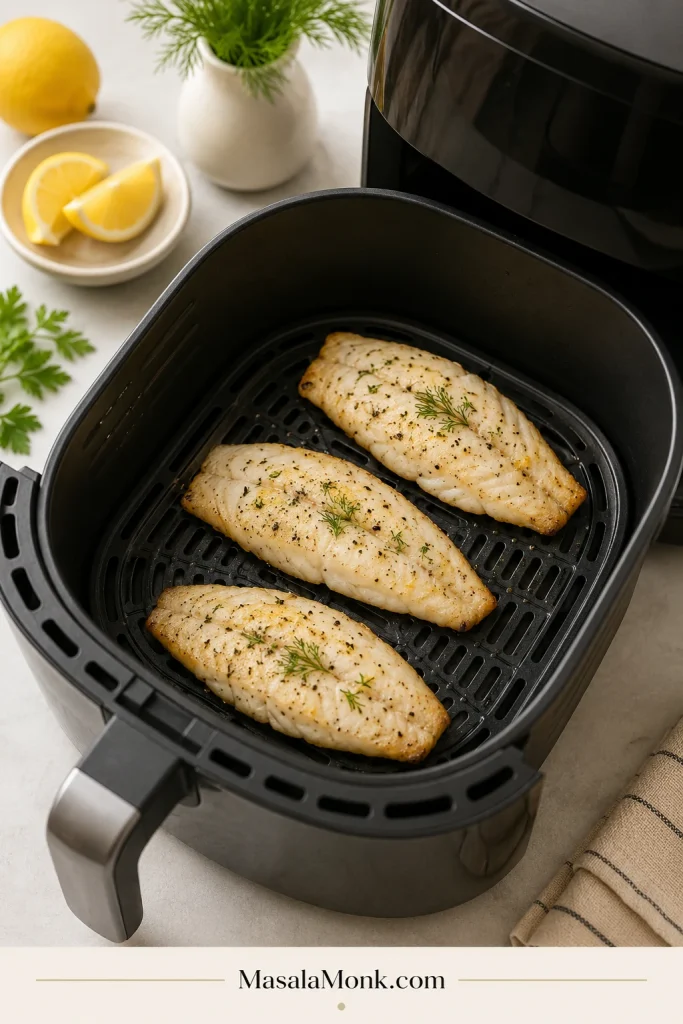
Air Fryer Rockfish Fillets

Use the air fryer when you want a quick, lightly browned fillet and do not feel like heating the oven. Keep the pieces in a single layer so the hot air can move around them.

  1. Preheat the air fryer to 400°F / 204°C.
  2. Blot the fillets well and season them.
  3. Brush lightly with oil, melted butter, or a thin mayo-lemon mixture.
  4. Air fry medium fillets for 6–8 minutes.
  5. Check for tender flakes and a center temperature of 145°F / 63°C.

For breaded pieces meant for tacos, use smaller chunks and air fry around 350°F / 177°C for 5–6 minutes, or until the coating is golden and the fish is cooked through.

Air fryer cue: Keep pieces spaced in one layer.

Three lightly browned rockfish fillets arranged in a single layer inside an air fryer basket.
For air fryer rockfish, keep the fillets in one spaced-out layer so the edges brown lightly instead of steaming.

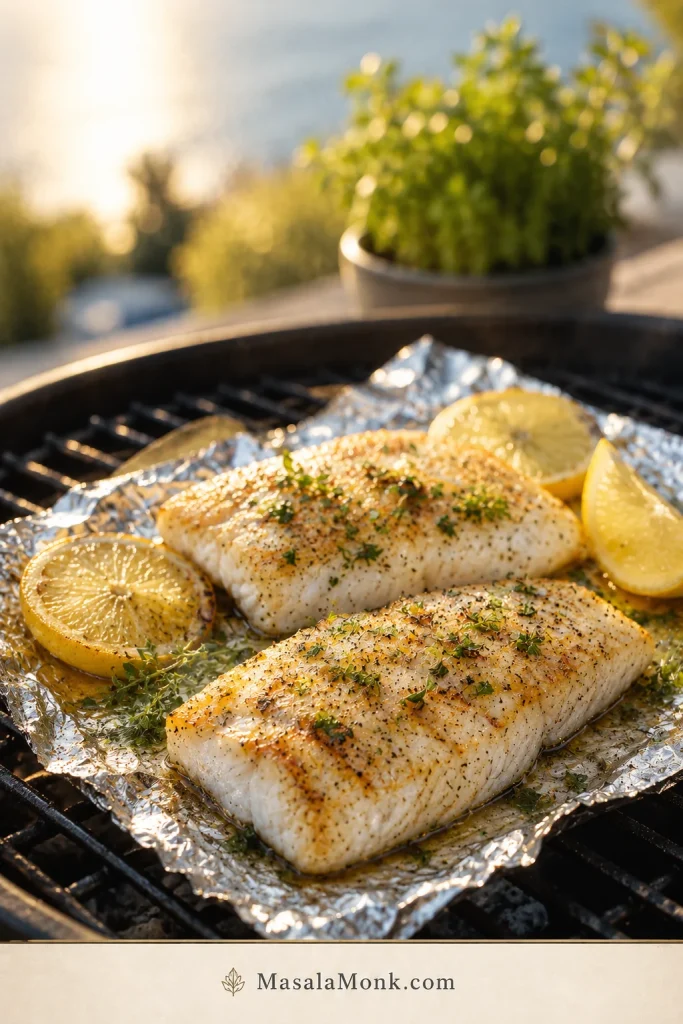
Grilled Rockfish Fillets

On the grill, delicate fillets need a little protection. Skin-on pieces are easier to grill directly than skinless ones. For thin or fragile fillets, use foil, a grill basket, or a cast iron skillet on the grill.

  • Heat the grill to medium-high, about 400–450°F / 204–232°C.
  • Clean and oil the grates well if grilling directly.
  • Blot the fish dry and brush lightly with oil.
  • Grill thin fillets for 2–3 minutes per side.
  • Grill medium fillets for 3–4 minutes per side.
  • Use a fish spatula and flip gently.

If you are worried about sticking or breakage, foil is your friend. You will lose some direct-grill char, but the fish will be much easier to manage.

Grill cue: Use foil or a grill basket for delicate fillets.

Grilled rockfish fillets with lemon and herbs cooking on foil over a grill.
When grilling rockfish, use foil or a grill basket to protect the delicate fillets while still adding gentle smoky flavor.

Rockfish for Tacos

For tacos, rockfish is a quiet little win: mild enough for slaw and sauce, sturdy enough to flake into warm tortillas. Use pan-seared, blackened, grilled, or air-fried fish, then add cabbage slaw, lime, crema, chipotle mayo, salsa, avocado, cilantro, or pickled onions.

You can cook the fillets whole and flake them into tacos, or cut the fish into larger chunks before cooking. For a full taco-style dinner with slaw, sauce, toppings, and method choices, use this fish tacos recipe as the next step.

Blackened seasoning is especially good here because the smoky spices balance the mild fish and creamy slaw. For a brighter topping, spoon on fresh mango salsa with lime, cilantro, and a little chile.

Taco cue: Add slaw, lime, crema, and crunch for contrast.

Rockfish tacos with flaked white fish, cabbage slaw, crema, cilantro, pickled onions, and lime wedges.
Rockfish tacos work because mild white fish needs contrast: crunchy slaw, lime, crema, cilantro, and pickled onions add freshness.

Whole rockfish note: this recipe is written for fillets. Whole rockfish needs a different timing approach because size, stuffing, bones, and oven temperature all change the cook time.

If you want to explore more traditional rockfish preparations later, NOAA Fisheries has a broader rockfish recipe collection with grilled, taco, pan-roasted, and battered ideas.

Prefer the skillet version? Return to the main recipe. Looking for flavor ideas? See seasonings and sauces.

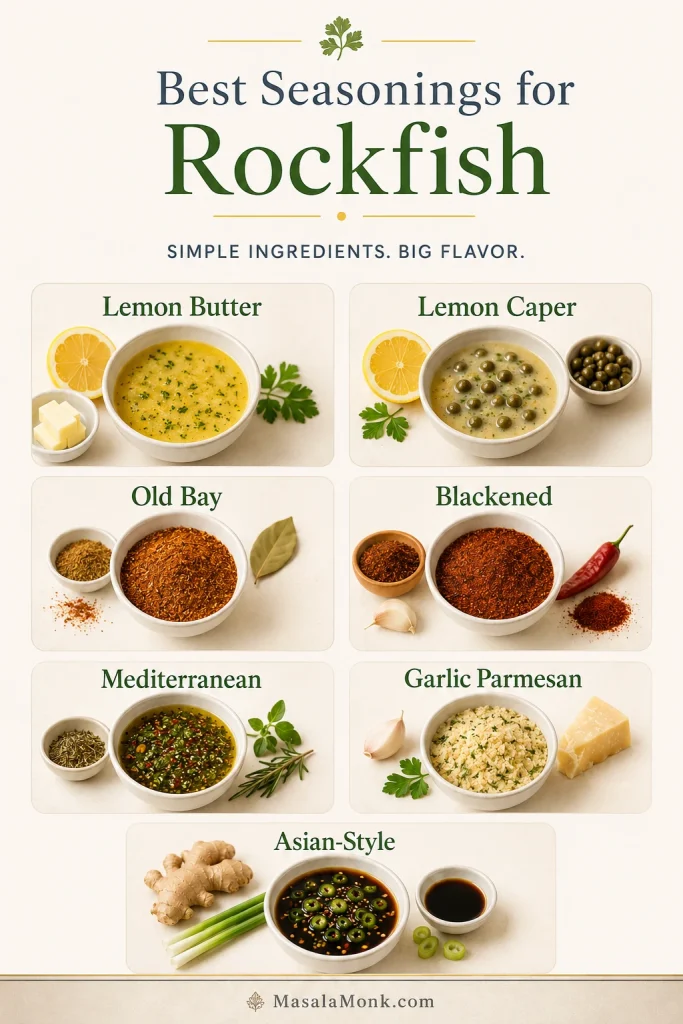
Best Seasonings and Sauces for Rockfish

Because the flavor is gentle, you can take the seasoning in several directions. For the first cook, choose lemon butter. If the fish is headed for tacos, blackened seasoning brings the best contrast. When you want crunch, move toward panko.

Flavor StyleBest ForWhat to Use
Lemon butterBest first cookButter, lemon, garlic, parsley
Lemon caperRestaurant-style skillet fishButter, lemon, capers, dill or parsley
Old BayBaked or crispy rockfishOld Bay, lemon, butter, parsley
BlackenedBest taco pickPaprika, cayenne, garlic powder, thyme, oregano
MediterraneanBaked filletsOlive oil, tomato, oregano, capers, lemon
Garlic parmesanBaked crusted fishParmesan, breadcrumbs, garlic, lemon
Asian-stylePan-cooked or steamed fishSoy sauce, ginger, scallions, sesame oil

The skillet sauce should taste like butter first, lemon second, and garlic in the background. For a bolder seafood plate, a small spoonful of garlic butter Cajun seafood boil sauce can also work well with simply cooked rockfish.

For crispy, panko, or fried-style fish, a cold spoonful of homemade tartar sauce is often a better match than lemon butter.

Flavor cue: Choose lemon butter, capers, Old Bay, blackened spice, or aromatics.

Rockfish seasoning guide with lemon butter, lemon caper, Old Bay, blackened, Mediterranean, garlic parmesan, and Asian-style options.
Because rockfish is mild, it handles many flavor directions, from lemon butter and capers to Old Bay, garlic parmesan, and Asian-style aromatics.

What to Serve with Rockfish

Because the fish is light, the best sides depend on the kind of dinner you want. Keep the plate fresh and simple, or turn it into a cozier meal with potatoes and extra sauce.

For a Light Dinner

Serve the fish with steamed rice, green beans, roasted asparagus, extra lemon, or a cool cucumber salad. This keeps the meal fresh and lets the pan sauce shine.

Serving cue: Use rice to catch lemon butter, capers, herbs, and pan juices.

Pan-seared rockfish served with rice, green vegetables, capers, herbs, lemon, and lemon butter sauce.
Rice is a smart side for pan-seared rockfish because it absorbs the lemon butter sauce, capers, herbs, and pan juices.

For a Comfort-Food Plate

Pair the fillets with roasted potatoes, garlic bread, or creamy mashed potatoes. Spoon a little sauce around the edges so the potatoes catch the lemony butter.

For Tacos or Sandwiches

Use warm tortillas, soft rolls, lime, salsa, and crisp coleslaw. The cool crunch is especially good with blackened or panko-crusted fish.

Easy Rockfish Variations

Garlic Lemon Butter Rockfish

For the cleanest version, skip the capers. Add an extra garlic clove and a little lemon zest for a brighter garlic butter flavor.

Lemon Caper Rockfish

For a restaurant-style finish, add 1–2 tbsp drained capers to the butter sauce. The salty, briny flavor works well with parsley or dill.

Old Bay Baked Rockfish

When you want an easy oven version, season the fillets with Old Bay, lemon juice, and a little melted butter. Bake at 400°F / 204°C until the thickest part turns tender.

Blackened Rockfish

For something smoky and bolder, coat the fillets with paprika, garlic powder, onion powder, cayenne, thyme, oregano, salt, and pepper. Sear in a hot skillet and serve with lime, slaw, or tacos.

Panko Crusted Rockfish

For a crispier dinner, brush the fillets with a little mayo or beaten egg, then press on a mixture of panko, parmesan, garlic powder, and lemon zest. Bake at 425°F / 218°C until the topping is golden and the center is tender.

If you want a true fried-fish crust instead of a baked panko topping, use this crispy fish batter recipe as the better path.

Mediterranean Rockfish

For a lighter baked plate, add olive oil, cherry tomatoes, oregano, lemon, capers, and a few olives. The juices from the tomatoes make a simple sauce around the fish.

Best Substitutes for Rockfish

If you cannot find rockfish, choose another mild white fish with a similar thickness. Timing changes more with thickness than with the fish name.

SubstituteBest MethodNotes
CodBake or pan-searMild flavor, larger flakes, can be thicker
HaddockBake or pan-searDelicate and lean; check early
SnapperPan-sear or grillSlightly sweeter, good with lemon and herbs
TilapiaPan-sear or air fryUsually thinner, cooks quickly
HalibutPan-sear or bakeThicker and meatier; use gentler heat after searing
Sea bassPan-sear or grillRicher texture, excellent with lemon butter

Substitute cue: Choose another mild white fish by thickness first.

Chart listing cod, haddock, snapper, tilapia, halibut, and sea bass as rockfish substitutes.
If rockfish is unavailable, choose another mild white fish by thickness first; then reduce or extend the cooking time as needed.

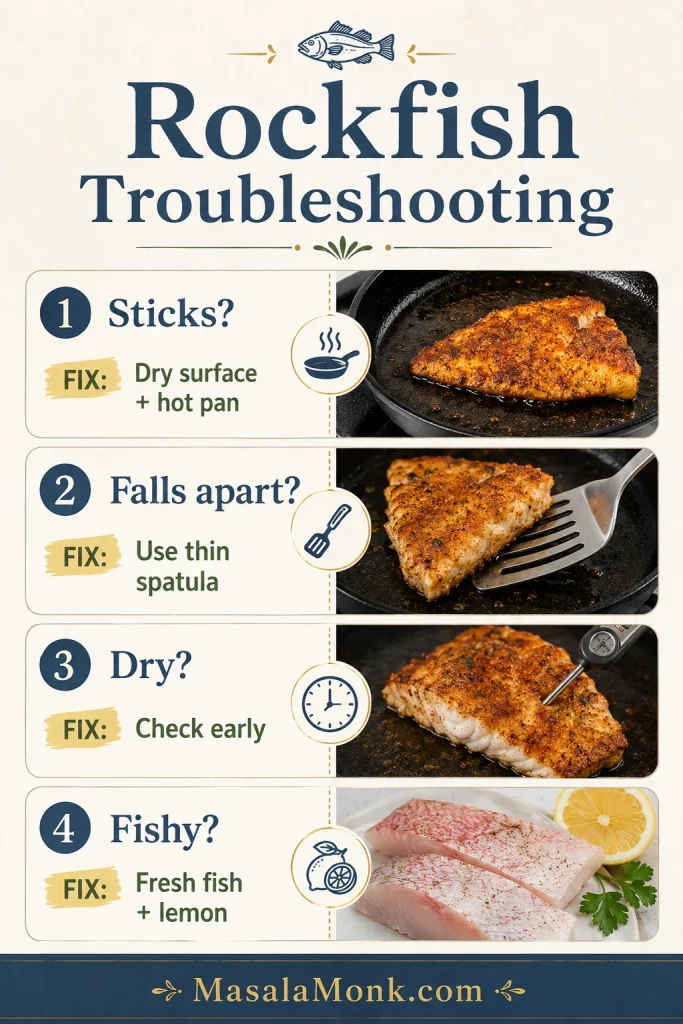
Troubleshooting Rockfish

Fix-it cue: For sticking, breaking, dryness, or fishy flavor, return to basics.

Rockfish troubleshooting guide with fixes for sticking, falling apart, dryness, and fishy flavor.
If the fish sticks, breaks, dries out, or tastes fishy, return to the basics: dry surface, hot pan, gentle flipping, early checking, and lemon.

Why Did My Rockfish Stick to the Pan?

If the fish sticks, it usually means the surface was still wet, the pan was not hot enough, there was not enough oil, or the fish was nudged before the crust had time to form. Dry the surface well, preheat the skillet, coat the bottom with enough fat, and give the first side time to release.

Why Did My Rockfish Fall Apart?

Delicate fillets can break if they are flipped too soon, handled with a thick spatula, or cooked past the point of tender flakes. A light flour coating and a thin fish spatula both help. If a piece still breaks, spoon the sauce over it and serve it anyway; it will still taste good.

Why Is My Rockfish Dry?

If the fish turns dry, it probably stayed on the heat a little too long. Rockfish is lean, so it does not give you much extra time once the center is cooked. Start checking early, lower the heat after the first sear, and remove the fillets as soon as the thickest part turns opaque and juicy.

How Do I Make Rockfish Less Fishy?

Start with fish that smells clean and fresh, not sour or strongly fishy. Thaw frozen fillets slowly in the fridge, blot them well, and cook them with lemon, garlic, herbs, and butter. Avoid overcooking, which can make the flavor stronger.

What If My Fillets Are Very Thin?

Very thin pieces cook fast. Use medium heat instead of very high heat, check after 2 minutes per side, and remove them as soon as they give gently under a fork. They are also easier to break, so flip carefully.

What If My Fillets Are Thick?

Thicker fillets need a little more time, but high heat the whole way can overbrown the outside before the center cooks. Sear the first side, flip, then lower the heat slightly so the middle can finish gently.

What If the Butter Starts Burning?

Lower the heat and add a small splash of oil if needed. Butter browns quickly, especially in a hot skillet with flour. That is why the recipe heats the oil first and adds only a little butter before the fish goes in.

Problem solved? Go back to the recipe card, or recheck cook times before your next batch.

Storage and Reheating

Cooked rockfish is best eaten right away, when the flakes are moist and the lemon butter is fresh. If you do have leftovers, keep them gentle and use them in meals where the fish can be flaked instead of served as a whole fillet again.

  • Refrigerate: Store cooked rockfish in an airtight container for up to 2 days.
  • Reheat gently: Warm it in a covered skillet over low heat with a splash of water, broth, or lemon butter.
  • Avoid harsh reheating: Long microwaving can make the fish dry and rubbery.
  • Use leftovers smartly: Flake leftover fish into tacos, salad, pasta, a seafood sandwich, or a rice bowl built like this salmon bowl.

Freezing cooked rockfish is possible, but the texture can suffer. If you do freeze it, wrap it tightly and use it later in dishes where the fish will be flaked rather than served as whole fillets.

Rockfish Recipe FAQs

What is the best way to cook rockfish?

Pan-searing is one of the best ways to cook rockfish fillets because it is quick and gives the fish a lightly golden outside. Baking is better for hands-off cooking, and grilling works well with foil, a grill basket, or skin-on fillets.

How long does rockfish take to cook?

Most fillets take 6–10 minutes in a skillet or 10–16 minutes in the oven, depending on thickness. Start checking early; it is easier to give rockfish another minute than to undo overcooking.

What temperature should rockfish be cooked to?

Rockfish should reach 145°F / 63°C in the thickest part. Without a thermometer, look for flesh that is opaque and feels tender at the thickest point.

Does rockfish taste fishy?

The flavor is usually mild, clean, and slightly sweet. It should not taste strongly fishy if it is fresh, properly thawed, and not overcooked.

Should I remove the skin from rockfish?

Skinless fillets are easiest for this skillet version. Skin-on pieces also work, especially for grilling, because the skin helps hold the fish together. Cook them skin-side down first.

Can I cook frozen rockfish?

Yes, but thaw it first for the skillet. Frozen rockfish releases surface moisture as it thaws, and that moisture keeps it from browning. If the fish is still very cold or slightly icy, baking or air frying is more forgiving.

What seasoning is good on rockfish?

Lemon, garlic, butter, black pepper, Old Bay, paprika, Cajun seasoning, dill, parsley, capers, and thyme all work well. For the first cook, keep it simple with salt, pepper, garlic powder, lemon, and butter.

Is rockfish good for tacos?

Yes. Rockfish is mild enough for slaw and sauce but sturdy enough to flake into tortillas. Pair it with cabbage slaw, lime, crema, chipotle mayo, salsa, avocado, or blackened seasoning.

What fish can I substitute for rockfish?

Cod, haddock, snapper, tilapia, halibut, sea bass, or other mild white fish can work as substitutes. Choose fillets with similar thickness so the timing stays close.

Why is my rockfish mushy?

Mushy fish can come from poor thawing, excess moisture, or overhandling. Thaw frozen fillets in the fridge, dry the surface well, and avoid moving them around too much once they are in the pan.

The Simple Secret to Good Rockfish

Rockfish does not need a heavy hand. Dry it well, cook it briefly, and pull it while the center is still juicy. Once you get that rhythm, the same fillets can become lemon butter dinner, baked fish, tacos, or a quick air fryer meal without stress.

Start with the skillet version because it teaches you the feel of the fish. After that, you can bake it, air fry it, grill it, or tuck it into tortillas with slaw and lime. The lemon butter does the rest, catching in the flakes and making even a simple plate of rice or potatoes feel complete.

Posted on Leave a comment

Tartar Sauce Recipe: Easy Homemade Sauce for Fish and Chips

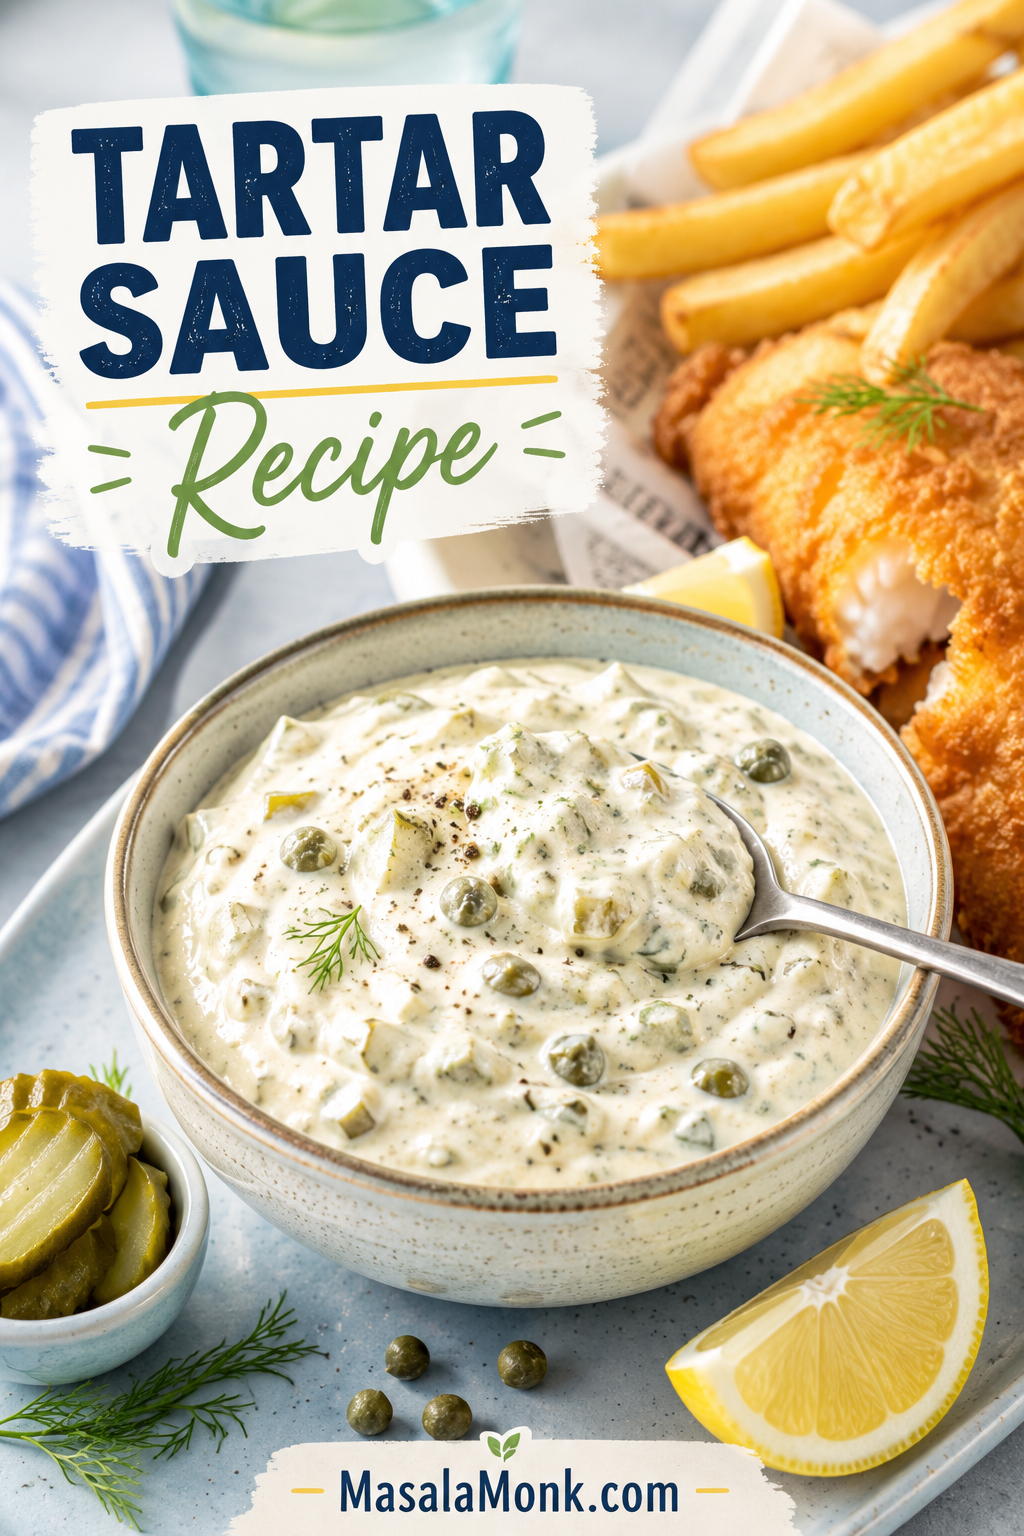
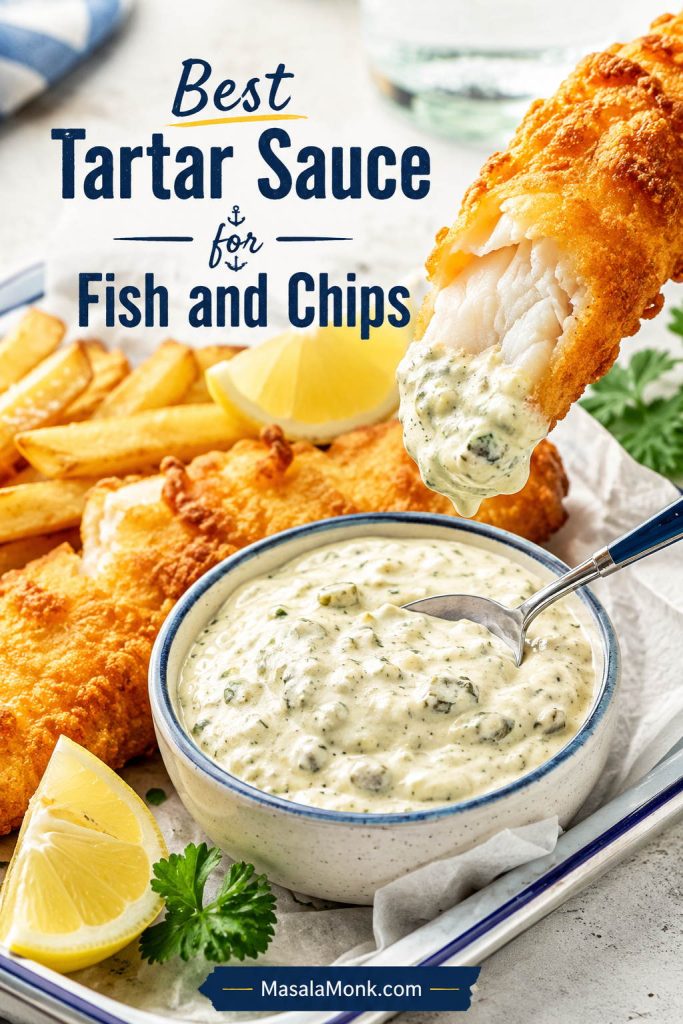
Bowl of thick homemade tartar sauce with pickle and herb flecks served beside crispy fish, chips, lemon, and fresh herbs

The best tartar sauce recipe makes hot fried fish taste better, not heavier. It should be creamy enough to cling, loose enough to spoon, and full of tiny pickle-and-caper bites so every forkful gets a little crunch, lemon, salt, and freshness.

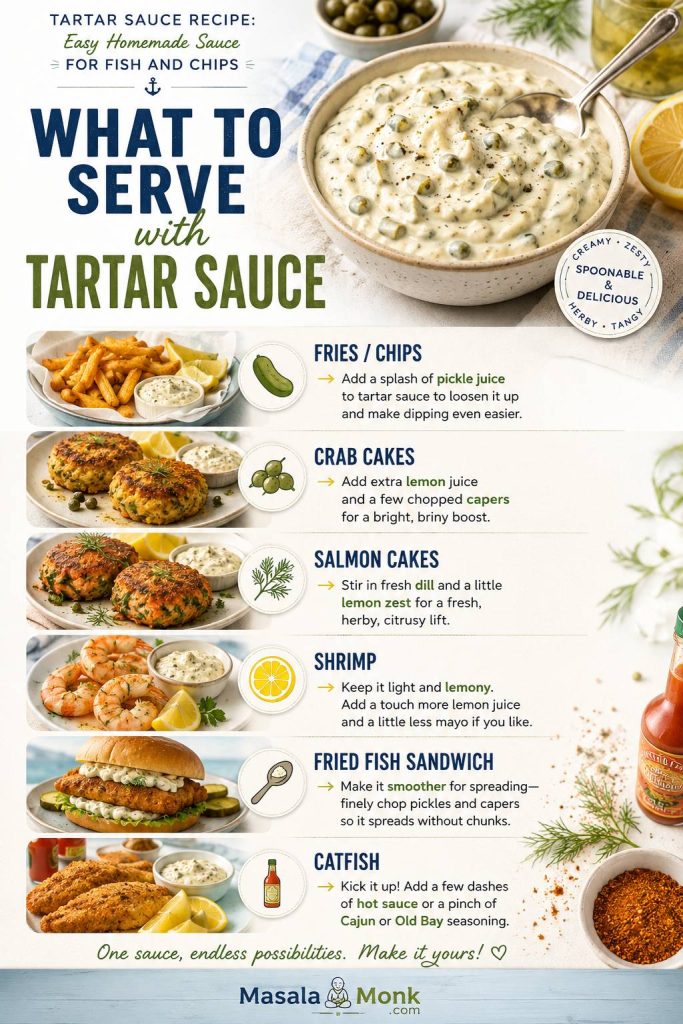
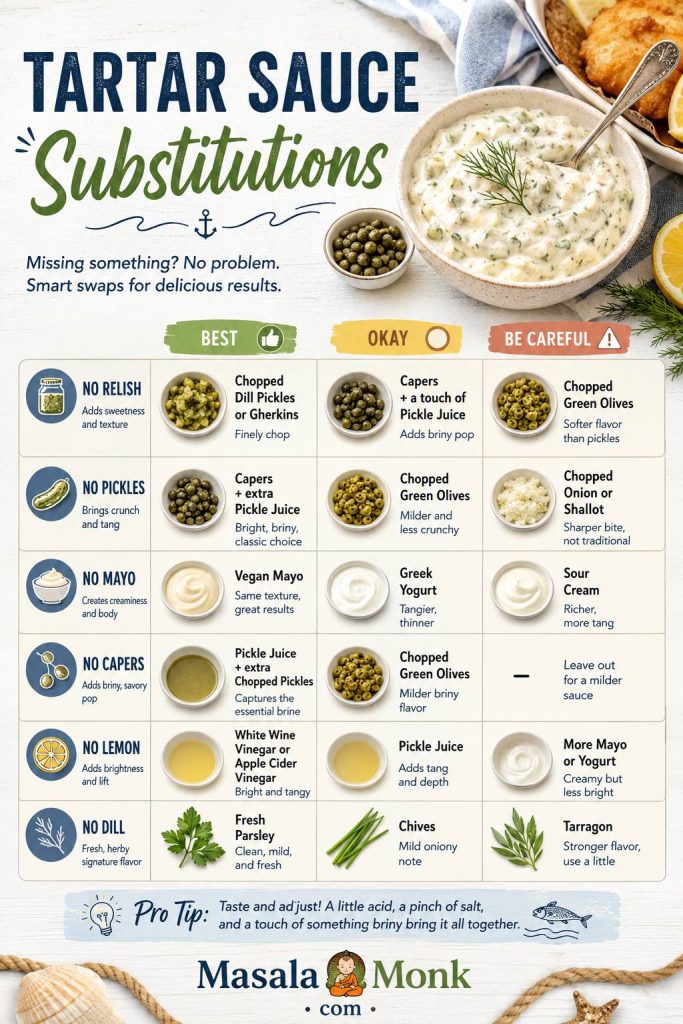
This no-cook homemade tartar sauce is built for fish and chips, fish sticks, crab cakes, salmon cakes, shrimp, fries, and fried fish sandwiches. Start with the classic dill pickle version when you want the best match for fish and chips, use the quick relish version when dinner is moving fast, and use the substitution notes when the fridge is missing relish, pickles, capers, lemon, or mayo.

Quick Answer: How to Make Tartar Sauce

To make tartar sauce, stir mayonnaise with finely chopped dill pickles or relish, lemon juice, capers, Dijon mustard, herbs, and black pepper. Chill it for 15 to 30 minutes if you have time. For fish and chips, start with dill pickles, gherkins, or cornichons; for fish sticks or soft fish sandwiches, sweet relish gives a milder diner-style sauce.

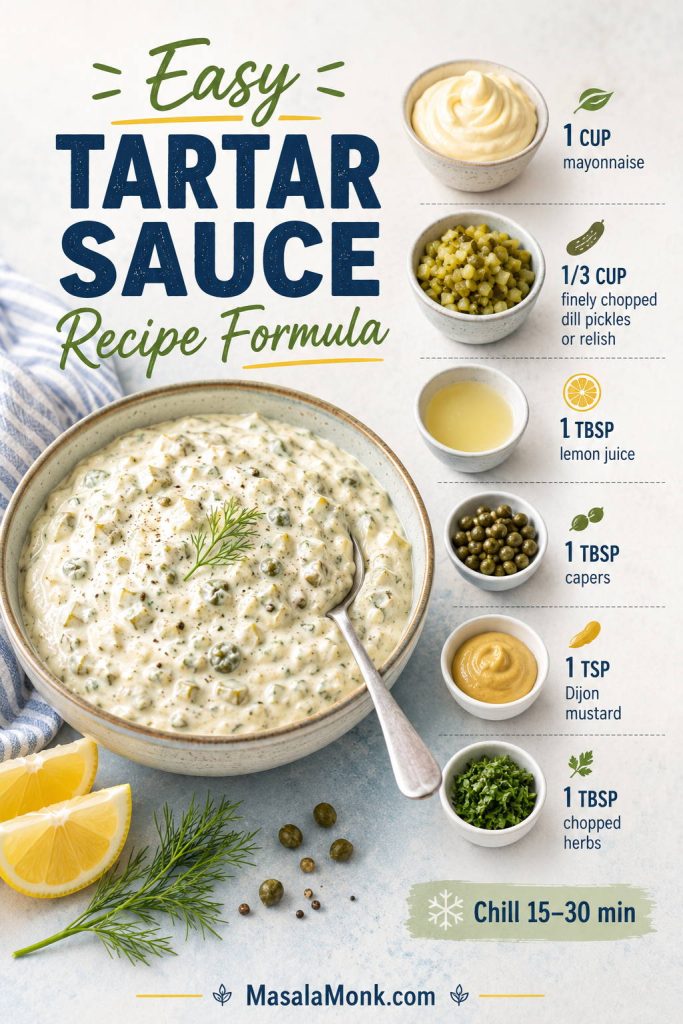
Best default ratio: For every 1 cup of mayo, use about ⅓ cup finely chopped dill pickles or relish, 1 tablespoon lemon juice, 1 tablespoon capers, 1 teaspoon Dijon, and 1 tablespoon chopped herbs. Make it before you start frying, and the sauce will be cold, rested, and ready when the fish hits the plate.

Formula board showing mayonnaise, chopped dill pickles or relish, lemon juice, capers, Dijon mustard, herbs, chill time, and finished tartar sauce
Use this formula as the starting point, then taste after chilling; the pickles, capers, lemon, and herbs settle as they rest.

Not sure which version fits your meal? Use the style guide below before you start mixing.

Homemade Tartar Sauce at a Glance

Prep time10 minutes
Cook time0 minutes
Rest time15–30 minutes recommended; 1 hour if using raw onion or shallot
YieldAbout 1¼ cups / 300 ml
Serving size2 tablespoons / 30 ml
Servings8–10
Best withFish and chips, fried fish, fish sticks, seafood cakes, shrimp, fries, and fish sandwiches
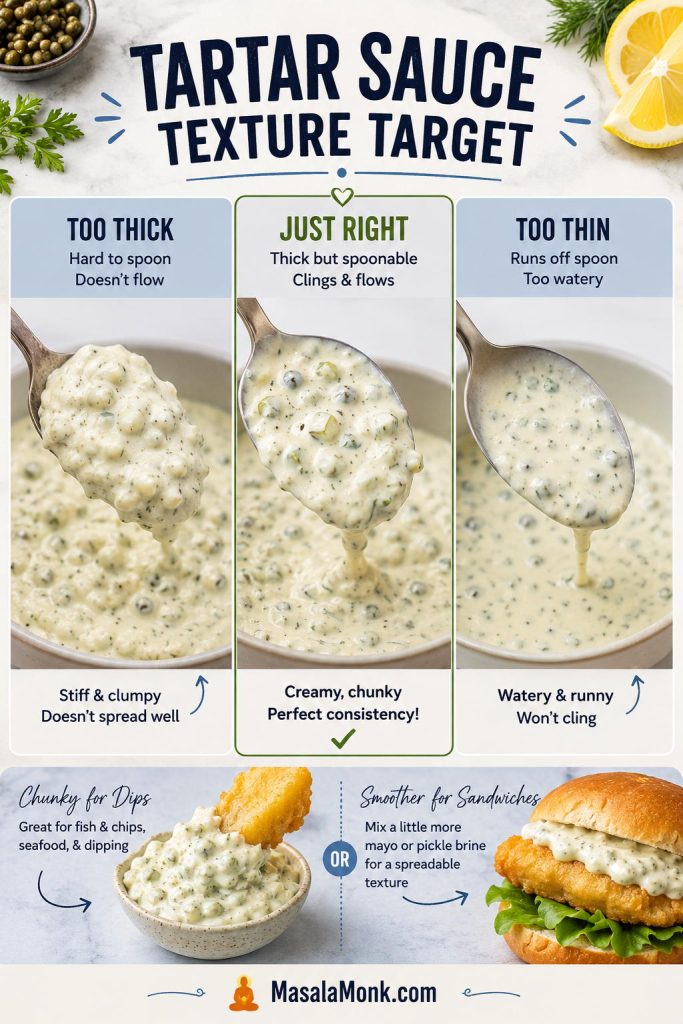
Main textureThick, spoonable, lightly chunky, and easy to dip
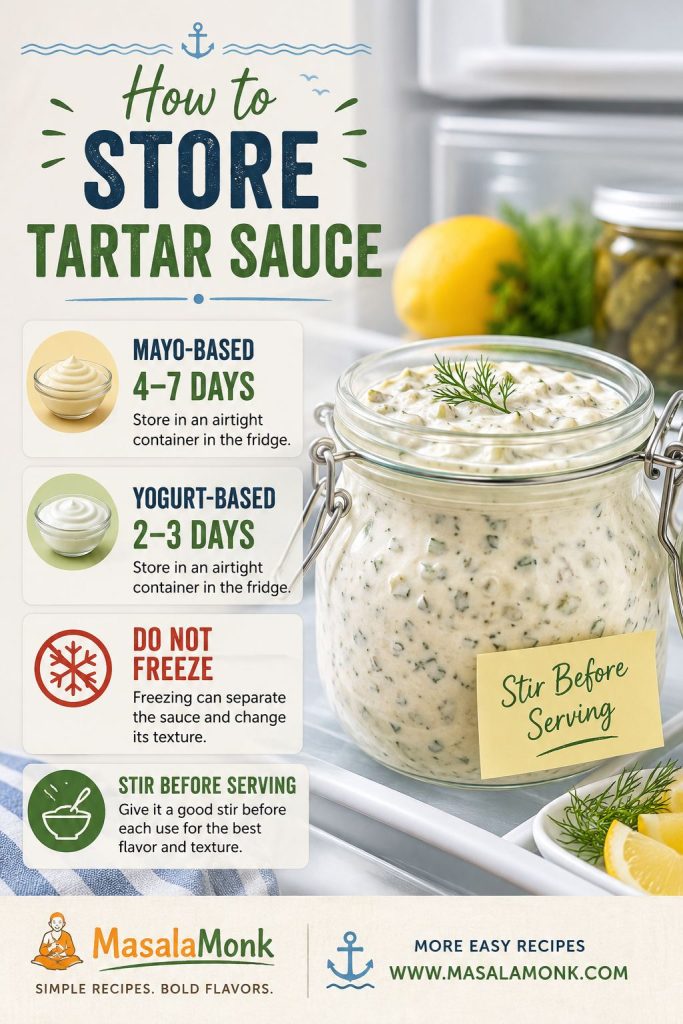
StorageMayo-based sauce: best quality within 4–7 days; Greek yogurt sauce: 2–3 days
FreezingNot recommended

Start with this bowl when dinner is moving fast; the notes below are there for texture choices, missing ingredients, lighter bases, and different seafood plates.

Homemade Tartar Sauce Recipe for Fish and Chips

This no-cook sauce is thick enough to sit on hot fish without sliding off, but still loose enough to spoon. The key is fine chopping: the pickles and capers should show up in every bite without turning the sauce into a bowl of relish.

Make the bowl before the fish goes in the oil, and the sauce will taste more settled by the time dinner is ready.

Prep10 minutes
Cook0 minutes
Rest15–30 minutes
Yield1¼ cups / 300 ml

Ingredients

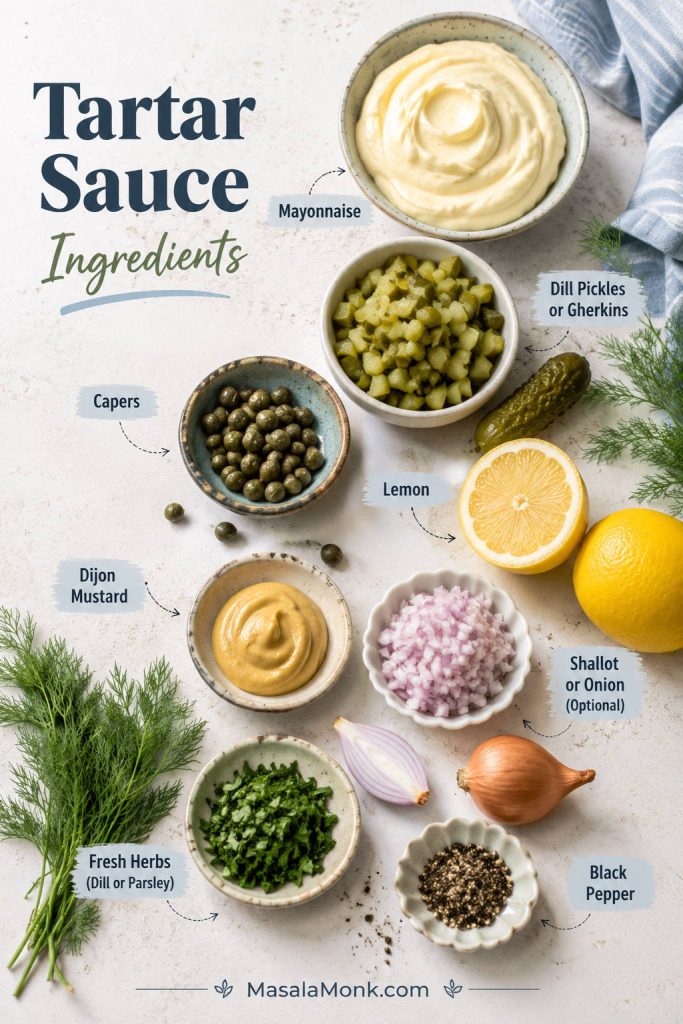
  • 1 cup mayonnaise, about 225 g / 240 ml / 8 fl oz
  • ⅓ cup finely chopped dill pickles, gherkins, or cornichons, about 55–65 g
  • 1 tablespoon capers, drained and chopped, about 9–10 g
  • 1 tablespoon fresh lemon juice, 15 ml
  • 1–2 teaspoons pickle juice, optional, for extra tang or to loosen the sauce
  • 1 teaspoon Dijon mustard, 5 ml
  • 1 tablespoon chopped fresh dill or parsley, about 2–4 g
  • 1 tablespoon finely minced shallot or onion, optional
  • ½ teaspoon Worcestershire sauce, optional
  • ¼ teaspoon black pepper
  • Salt, only if needed

Method

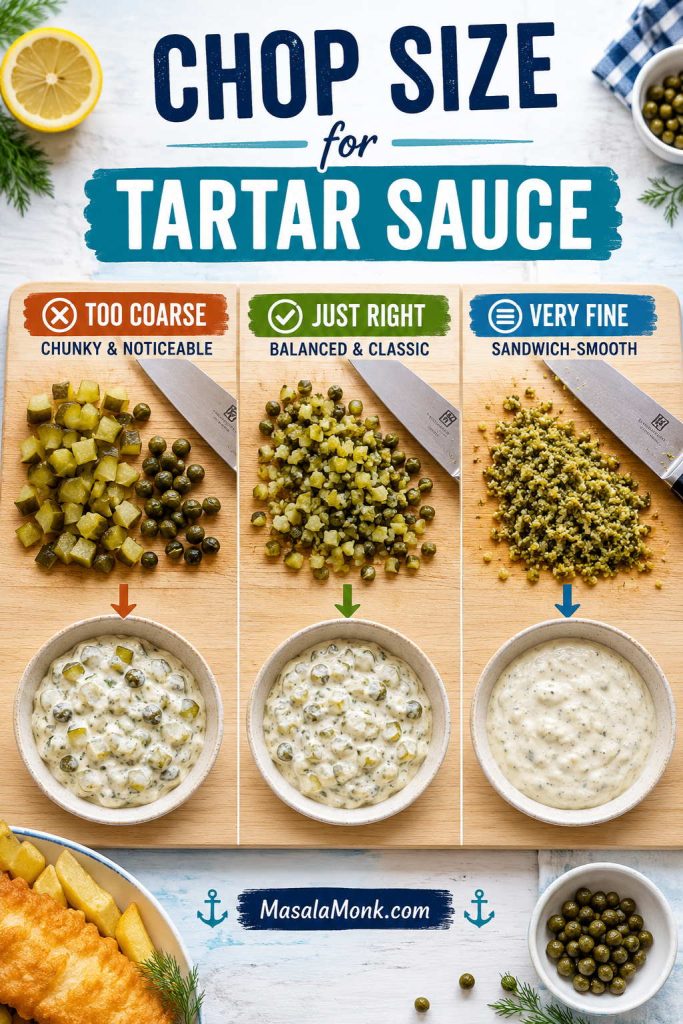
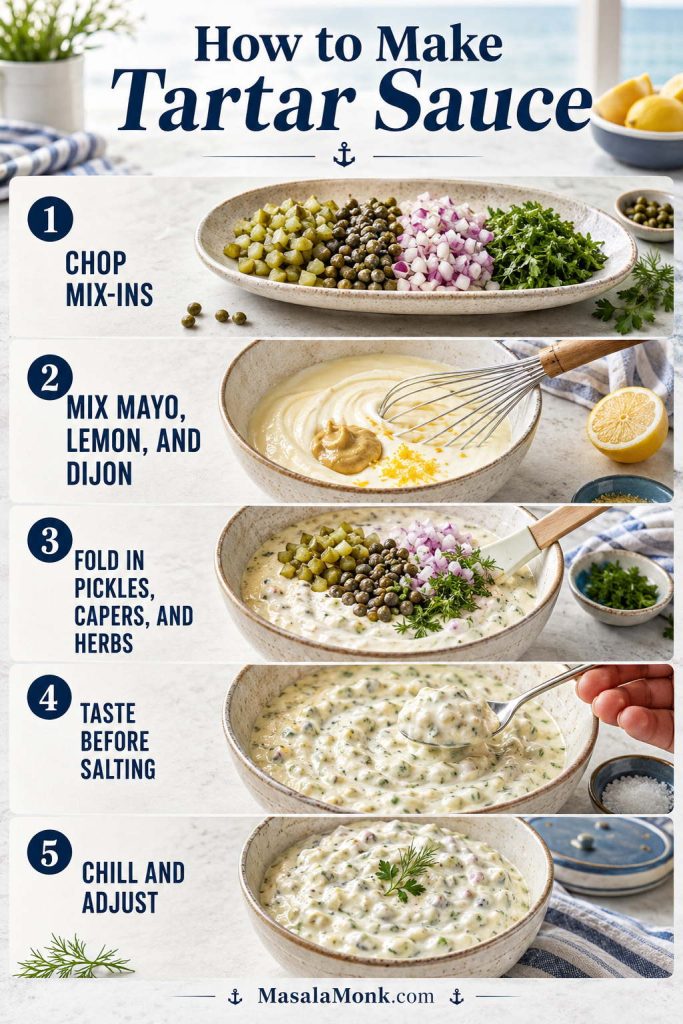
  1. Chop the mix-ins finely. Finely chop the pickles, capers, herbs, and optional shallot or onion. Smaller pieces give the sauce better texture and more even flavor. If one bite tastes like plain mayo and the next tastes like a pickle jar, the pieces are too big.
  2. Mix the base. Add the mayonnaise, lemon juice, Dijon mustard, and black pepper to a bowl. Stir until smooth.
  3. Fold in the flavor. Add the chopped pickles, capers, herbs, optional pickle juice, and optional onion or shallot. Stir until evenly combined.
  4. Taste before salting. Pickles and capers are salty, so add salt only after tasting.
  5. Rest if possible. Cover and refrigerate for 15–30 minutes. The sauce works immediately, but resting lets the chopped ingredients season the mayo.
  6. Adjust and serve cold. Stir once more before serving. Add lemon for lift, pickle juice for tang, mayo for softness, or capers for a saltier seafood edge.

Finished taste cue: The sauce should taste creamy first, then pickle-crunchy and lemony, with a light finish. If it feels heavy, add lemon or pickle juice. If it bites too hard, soften it with another spoonful of mayo.

Recipe Notes

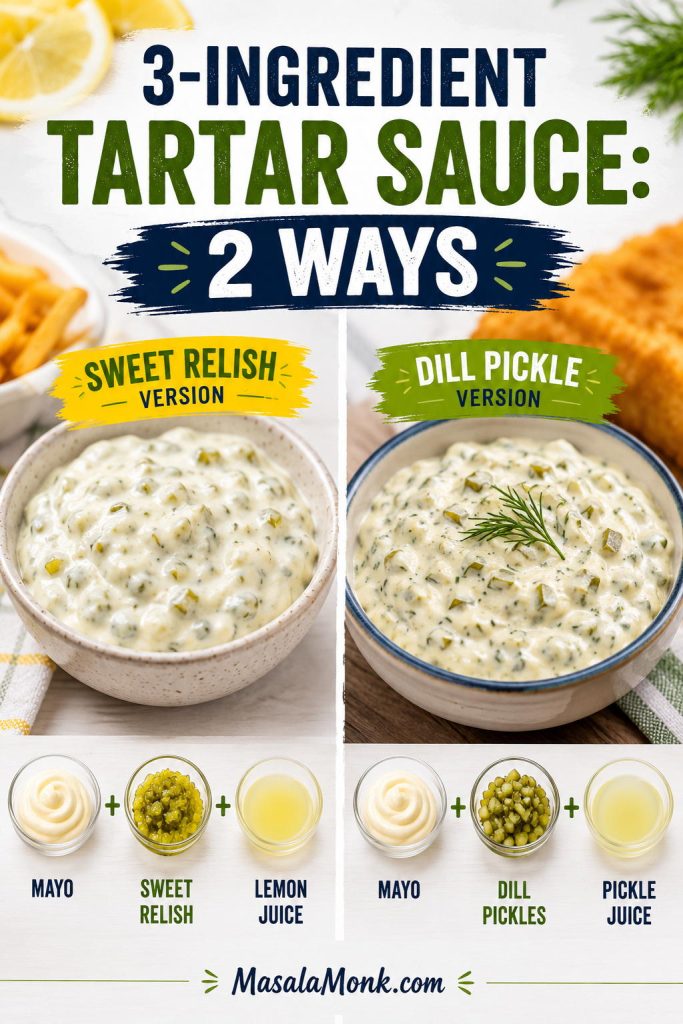
  • Want it sweeter? Swap the chopped dill pickles for sweet pickle relish.
  • Serving fried fish? Use dill pickles, capers, lemon, and herbs.
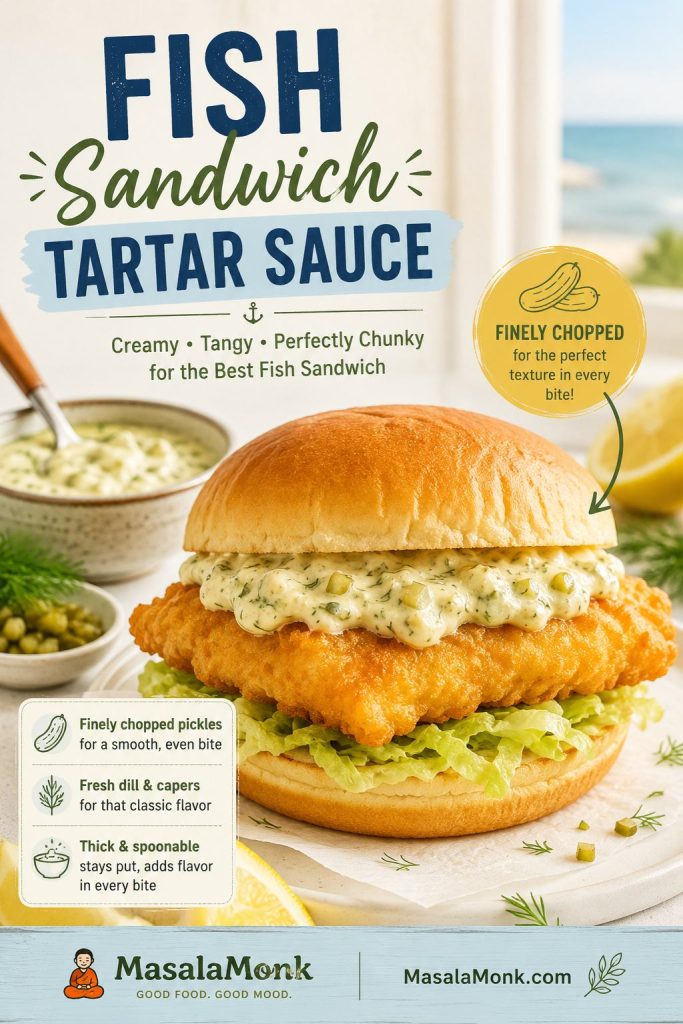
  • Prefer a smoother sandwich sauce? Mince the pickles and capers very finely or pulse once or twice.
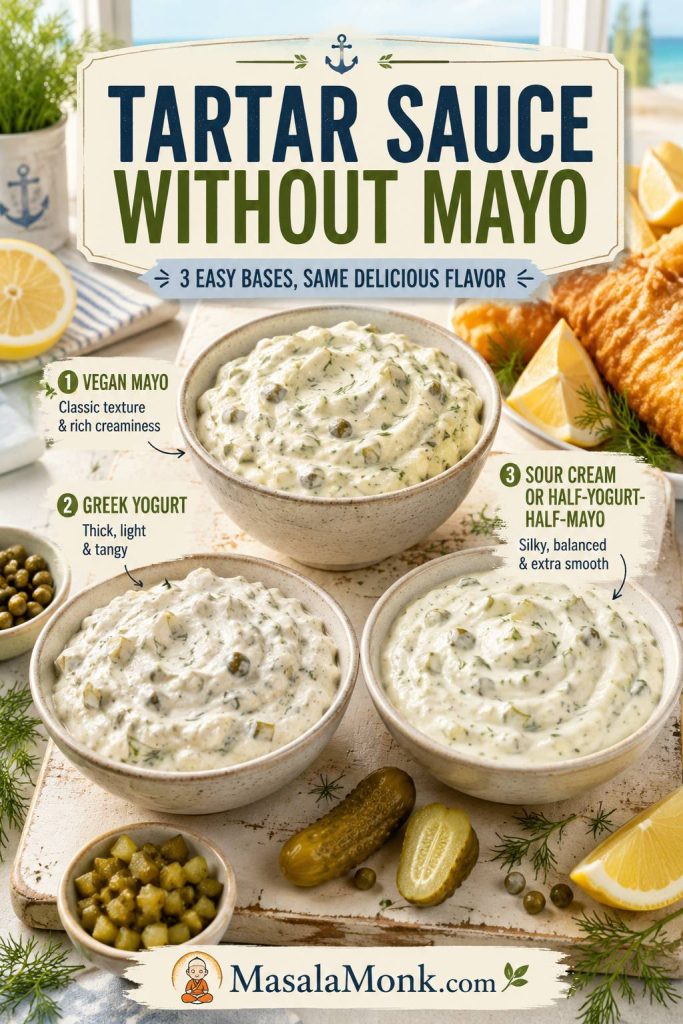
  • Making it vegan? Choose vegan mayo and skip Worcestershire sauce unless you are using a vegan one.
  • Want it lighter? Replace half or all of the mayo with plain Greek yogurt.
  • Keeping it keto? Choose full-fat mayo, dill pickles, capers, lemon, herbs, and no sweet relish or sugar.
  • Yield note: Yield varies slightly depending on how finely the pickles are chopped and whether you add pickle juice.

For more swaps and missing-ingredient fixes, see the substitution guide.

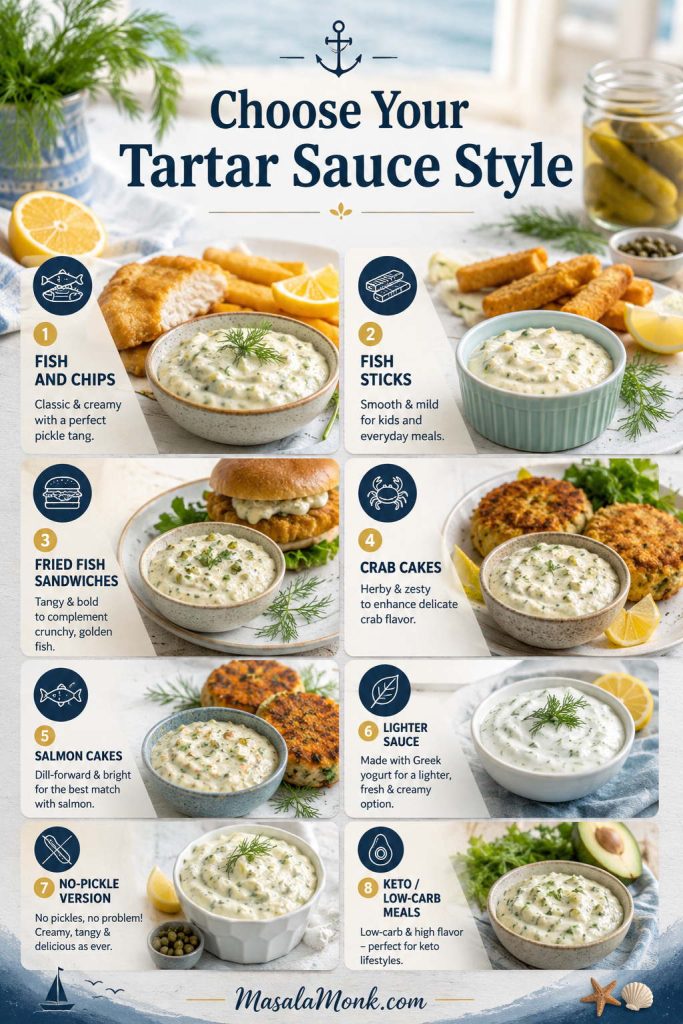
Choose Your Tartar Sauce Style

Use this table when you already know what is on the plate. It keeps the sauce matched to the meal without overthinking the bowl.

You are servingUse this style
Fish and chipsDill pickles or gherkins, capers, lemon, and herbs
Fish sticksSweet relish, mayo, and lemon juice
Fried fish sandwichFinely minced relish or pickles, a little onion, and a smoother texture
Crab cakesLemon, capers, dill, and a little extra pepper or cayenne
Salmon cakesExtra dill, lemon zest, and a thicker mayo base
No picklesCapers, shallot, lemon juice, and Dijon
Lighter sauceHalf mayo and half Greek yogurt
Keto or low-carb mealFull-fat mayo, dill pickles, capers, lemon, and no sweet relish
Guide showing tartar sauce styles for fish and chips, fish sticks, fried fish sandwiches, crab cakes, salmon cakes, lighter sauce, no-pickle sauce, and low-carb meals
The best bowl depends on the meal: sharper for crisp seafood, smoother for sandwiches, and lighter when the plate needs a fresher finish.

Why This Tartar Sauce Recipe Works

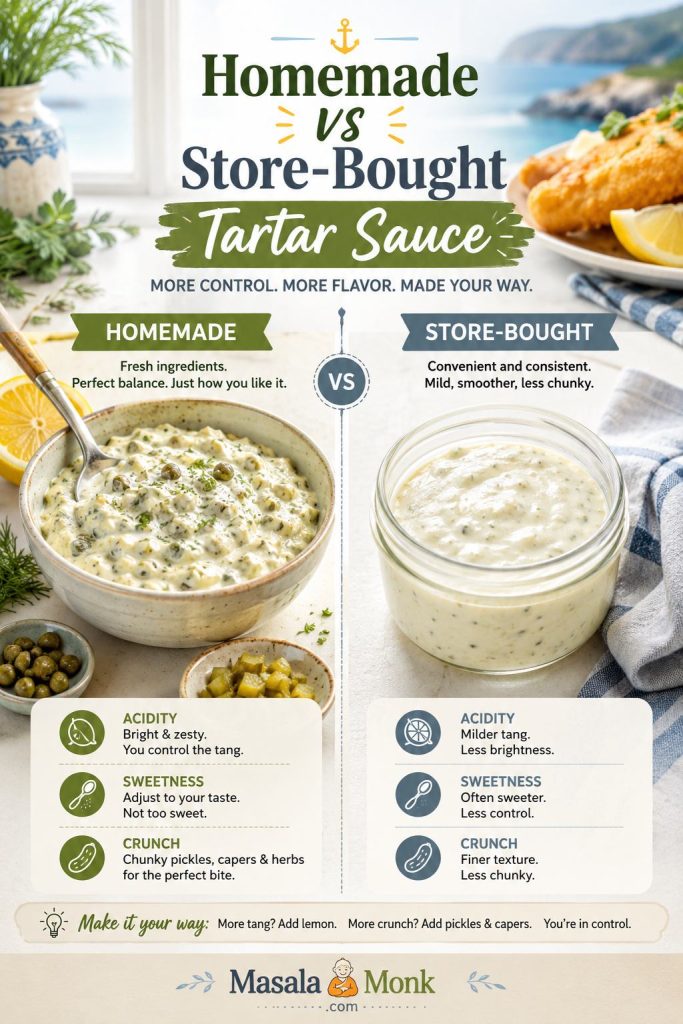
This sauce works because it balances fat, acid, salt, crunch, and rest time. Mayo gives the sauce body, while lemon and pickle juice cut through the mayo’s richness. Pickles bring texture, capers add small salty pops, and a short chill lets the chopped ingredients season the mayo instead of sitting in it separately.

That is why finely chopping matters. Large pickle pieces make some bites taste plain and others taste too sharp. Smaller pieces spread flavor through the bowl, so each spoonful lands the same way.

What Is Tartar Sauce Made Of?

Tartar sauce, also called tartare sauce in the UK and some other regions, is a creamy sauce usually made with mayonnaise, pickles or relish, lemon juice, herbs, and salty ingredients such as capers. It is most often served with fried fish, fish and chips, fish sticks, crab cakes, shrimp, and seafood sandwiches.

The creamy base can be as simple as store-bought mayo, but if you want to build the sauce from scratch, MasalaMonk’s mayo recipe walks through classic, eggless, vegan, garlic, spicy, and herb mayo options.

Tartar sauce ingredients on a light surface, including mayonnaise, dill pickles, capers, lemon, Dijon mustard, herbs, black pepper, and shallot
This small ingredient list works because every part has a job: mayo gives body, pickles add crunch, capers bring salt, and lemon keeps the sauce awake.
IngredientWhat it doesCan you skip or swap it?
MayonnaiseCreates the thick, creamy base.Swap in vegan mayo, Greek yogurt, sour cream, or a half-mayo, half-yogurt mix.
Dill pickles, gherkins, or cornichonsAdd crunch, acidity, and pickle flavor.Sweet relish works for a sweeter sauce; capers help if you have no pickles.
CapersAdd small salty pops that suit seafood.Optional, but worth using. Replace with extra pickles or pickle juice.
Lemon juiceLifts the mayo and cuts through fried food.Pickle juice, white vinegar, or apple cider vinegar can stand in.
Dijon mustardAdds gentle sharpness and depth.Yellow mustard, a little vinegar, or no mustard at all will still work.
Dill, parsley, chives, or tarragonAdd freshness and color.Dried dill works in a pinch; otherwise, leave herbs out.
Shallot or onionAdds savory bite.Optional. Onion powder gives a milder pantry-style flavor.
Worcestershire sauceAdds a deeper savory note.Optional. Skip for vegetarian or vegan tartar sauce unless using a vegetarian or vegan Worcestershire.

The Only Equipment Detail That Matters: Chop Size

No blender is needed. A bowl, spoon, knife, cutting board, and storage jar are enough. The important part is chop size: pickles and capers should be small enough to spread through the mayo, but not so tiny that the sauce loses texture.

Comparison of coarse, fine, and very fine chopped pickles and capers with tartar sauce texture samples
Chop size is the quiet difference between homemade tartar sauce that tastes balanced and a bowl where one bite is plain while the next is all pickle.

Use a small food processor only when you want a smoother sandwich-style sauce. For dipping fish and chips, a knife gives better control.

After chopping, check the finished texture target so the sauce clings without turning stiff or runny.

How to Make Tartar Sauce Step by Step

1. Chop the Pickles and Capers Finely

The sauce should not feel like chopped pickles held together with mayo. Chop the pickles, capers, herbs, and optional onion finely so every spoonful tastes balanced. If the pieces are too large, some bites taste salty and others taste plain.

2. Mix the Mayo, Lemon, and Mustard First

Add the mayonnaise to a small bowl, then stir in the lemon juice, Dijon mustard, and black pepper. This loosens the mayo slightly and helps the sharper ingredients spread evenly before the chunky ingredients go in.

3. Fold in the Pickles, Capers, and Herbs

Add the chopped pickles, capers, herbs, and optional onion or shallot. Stir until everything is evenly coated. The sauce should look creamy and speckled, with small bits of pickle, caper, and herbs in every spoonful.

4. Taste Before Adding Salt

Pickles, relish, capers, mustard, and Worcestershire sauce can all bring salt. Taste before adding more. If the bowl feels dull, it may need lemon juice, pickle juice, capers, or mustard before it needs salt.

5. Chill, Then Adjust

You can serve it immediately, but 15–30 minutes in the fridge improves the flavor. Stir once more before serving. Add lemon for lift, pickle juice for tang, mayo for softness, or capers for a saltier seafood edge.

Here is the full stir-and-chill sequence at a glance.

Step-by-step tartar sauce process showing chopped mix-ins, mayonnaise base, pickles, capers, herbs, tasting, chilling, and finished sauce
Even though tartar sauce is no-cook, sequence still matters: chop small, season the base, fold gently, taste late, and chill before serving.

Texture Target: Chunky Dip or Smooth Sandwich Sauce

The sauce should be thick enough to sit on a piece of fish without sliding off, but loose enough to spoon easily. For dip texture, keep the pickles and capers finely chopped but visible. For sandwich texture, mince everything smaller or pulse once or twice.

Texture guide showing tartar sauce that is too thick, just right, too thin, chunky for dipping, and smoother for sandwiches
Aim for a sauce that holds on a spoon without feeling stiff. Keep dip versions chunkier and sandwich versions finer.

If the sauce looks stiff, loosen it with pickle juice, lemon juice, or a teaspoon of water. If it looks runny, add a spoonful of mayo and chill it for 15–30 minutes. A good bowl should cling, not puddle.

If the sauce has already gone too thick, thin, sweet, or salty, use the troubleshooting guide before making bigger changes.

3-Ingredient Tartar Sauce

When you need the fastest bowl, you only need mayonnaise, pickles or relish, and lemon juice or pickle juice. This quick pantry sauce is not as layered as the full recipe, but it is exactly right for fish sticks, quick fried fish, frozen seafood, sandwiches, and busy weeknight dinners.

In a hurry, use relish and the sauce is closer to 5 minutes. For the best fish-and-chips texture, finely chopping pickles, capers, and herbs is worth the extra few minutes.

Sweet Relish 3-Ingredient Tartar Sauce

  • 1 cup mayonnaise
  • ⅓ to ½ cup sweet pickle relish
  • 1 teaspoon lemon juice

Dill Pickle 3-Ingredient Tartar Sauce

  • 1 cup mayonnaise
  • ⅓ cup finely chopped dill pickles
  • 1–2 tablespoons pickle juice or lemon juice

Stir, taste, and chill if possible. More pickle juice makes the bowl tangier; another spoonful of mayo softens it.

Two three-ingredient tartar sauces made with mayonnaise, sweet relish or dill pickles, and lemon juice or pickle juice
Three ingredients can still make a useful quick tartar sauce: relish gives a softer finish, while dill pickles give a sharper one.

If one of those ingredients is missing, the substitution section below will help you rebuild the bowl.

Sweet Relish vs Dill Pickles: Which Is Better?

Team dill pickle for fish and chips, team sweet relish for fish sticks — both have a place, but they are not the same sauce. Dill pickles, gherkins, and cornichons give you a more direct pickle bite. Sweet relish gives you a softer, sweeter, more diner-style sauce.

Beside crisp battered fish, dill pickles or gherkins are the better default. If you want both directions in one bowl, use half dill pickle and half sweet relish.

Side-by-side comparison of sweet relish tartar sauce and dill pickle tartar sauce with serving cues for sandwiches and fish and chips
Sweet relish and dill pickles both belong in tartar sauce, but they solve different cravings: soft and familiar versus crisp and pickle-bright.

For the full fried-fish version, jump to the fish-and-chips sauce section.

Best Tartar Sauce for Fish and Chips

The best tartar sauce for fish and chips should be thick, cold, pickle-forward, and lemony enough to wake up the batter. Make it first, then let it chill while the fish cooks and the chips finish.

Crispy battered fish being dipped into thick homemade tartar sauce with chips and lemon nearby
Mix the tartar sauce before frying, because a short chill makes the sauce taste settled by the time the fish is hot and crisp.

If you are making the full meal, pair this sauce with MasalaMonk’s fish and chips recipe. While the sauce rests, you can prep the batter from MasalaMonk’s fish batter recipe so the cold sauce and hot coating are ready at the same time.

The goal is not fancy. It is that second bite where the fish still feels crisp and the sauce makes it easier to keep going.

What to Serve with Tartar Sauce

Once the basic sauce is made, adjust the texture or seasoning for the food beside it instead of repeating the whole recipe.

Serve withSmall adjustment
Fries or chipsLoosen slightly with pickle juice so it dips easily.
Crab cakesAdd extra lemon, capers, and a pinch of cayenne.
Salmon cakesAdd more dill and a little lemon zest.
ShrimpKeep it lighter with parsley, lemon, and less onion.
Fried fish sandwichMince everything smaller so the sauce spreads cleanly.
CatfishAdd hot sauce, Cajun seasoning, or Old Bay-style seafood seasoning.
Serving guide showing tartar sauce with fries, crab cakes, salmon cakes, shrimp, a fried fish sandwich, and catfish
After the base is ready, adjust by the plate: loosen it for fries, add lemon for seafood cakes, or mince it finer for a sandwich spread.

That same cold, lemony contrast works beside MasalaMonk’s fish cakes, especially against crisp potato and flaky white fish. It is just as useful with salmon croquettes, where the capers and dill echo the flavors already working in the patties.

For a fry-night plate, MasalaMonk’s battered fries give the sauce exactly what it wants: something hot, crisp, and salty to cut through.

Homemade vs Store-Bought Tartar Sauce

Store-bought tartar sauce is convenient, but homemade gives you control over the three things bottled sauces often get wrong: sweetness, acidity, and crunch. Some jars taste sugary. Others taste flat, heavy, or short on pickle texture.

Homemade tartar sauce with visible chopped pickles and herbs compared with smoother store-bought tartar sauce in an unbranded jar
Bottled sauce is convenient, but homemade tartar sauce lets you decide how sweet, sharp, chunky, or herb-forward the final bowl should be.

Homemade wins when you want a livelier lemon-and-pickle finish and better chop texture. Bottled wins when convenience matters more. That is the whole comparison.

Tartar Sauce Substitutions: No Relish, No Pickles, No Mayo, No Capers, No Lemon

This is the kind of sauce that forgives a half-empty fridge. If you have mayo and something pickled, you are already close. Use the table below to choose the best swap without pushing the sauce too thin, too sweet, or too sour.

MissingBestOkayBe careful with
RelishFinely chopped dill pickles, gherkins, or cornichonsCapers plus a little pickle juiceAdding sugar too early
PicklesCapers, shallot, lemon juice, herbs, and DijonSweet relish if you want a softer saucePlain mayo with no briny ingredient
MayoVegan mayoGreek yogurt, sour cream, or half yogurt and half mayoThin milk-based bases
CapersExtra chopped pickles or cornichonsPickle juiceAdding salt before tasting
LemonPickle juiceWhite vinegar or apple cider vinegarToo much vinegar at once
DillParsley, chives, or tarragonA pinch of dried dillToo much dried herb
Substitution guide for tartar sauce showing swaps for missing relish, pickles, mayonnaise, capers, lemon, and dill
Missing relish, lemon, capers, or mayo does not have to stop dinner; instead, choose swaps that keep the sauce creamy, seasoned, and balanced.

Tartar Sauce Without Relish

You do not need relish. Finely chopped dill pickles, gherkins, or cornichons often give better texture for fish and chips. If you still want sweetness, add a tiny pinch of sugar at the end.

Tartar Sauce Without Pickles

No pickles or relish is not ideal, but the sauce is saveable. Capers bring salt, lemon brings lift, Dijon adds sharpness, and a little minced shallot gives the base something savory to hold onto.

Tartar Sauce Without Mayo

For a no-mayo bowl, choose vegan mayo, Greek yogurt, or sour cream. Vegan mayo gives the closest classic texture. Greek yogurt makes it lighter and tangier, while sour cream makes it softer and richer.

Tartar Sauce Without Capers

Add extra chopped pickles for crunch, a spoonful of relish for sweetness, or a splash of pickle juice if the bowl tastes flat. Taste before adding salt because pickles may already bring enough.

Tartar Sauce Without Lemon Juice

Pickle juice is the easiest lemon swap because it brings tang and seasoning at the same time. Vinegar also works, but add it slowly so the sauce does not turn harsh.

Vegan, Dairy-Free, Low-Calorie, Keto, and Low-Carb Tartar Sauce

Once you know the balance, you can change the base without losing the sauce. The base can be mayo, vegan mayo, Greek yogurt, or sour cream; the rest of the bowl still needs pickle, acid, salt, and texture.

If you are choosing the base carefully, MasalaMonk’s eggless mayonnaise recipe explains the difference between egg-free mayo and fully vegan mayo.

NeedBest adjustment
Vegan or egg-freeChoose vegan mayo, then keep the same pickle, lemon, caper, herb, and Dijon balance.
Dairy-freeMayo-based tartar sauce is usually dairy-free, but not egg-free. Check labels, especially for flavored mayo or Worcestershire sauce.
Low-calorie or no-mayoChoose Greek yogurt, or use half yogurt and half mayo for a lighter sauce that still tastes creamy.
Keto, low-carb, or sugar-freeChoose full-fat mayo and dill pickles. Avoid sweet relish, added sugar, and sweetened sauces.
Low-sodiumUse fewer capers and pickles, then lean on lemon juice, herbs, black pepper, and a small amount of mustard.
Three tartar sauce bowls made with vegan mayonnaise, Greek yogurt, and sour cream as mayonnaise alternatives
A no-mayo tartar sauce still needs body, so vegan mayo gives the closest classic texture while Greek yogurt brings a lighter tang.

Fish Sandwich / Filet-O-Fish-Style Tartar Sauce

A fish sandwich-style sauce is smoother, sweeter, and more oniony. It makes more sense on a soft fish sandwich than beside a plate of crisp battered fish. Finely minced pickles or relish work better here than chunky pickle pieces, and a short chill helps the onion flavor settle into the mayo.

Fried fish sandwich with smooth tartar sauce spread, a crisp fish fillet, pickle flecks, herbs, and a soft bun
For a fried fish sandwich, finer chopping helps tartar sauce spread evenly instead of slipping out in large pickle-heavy bites.

This is a flavor direction, not an exact restaurant copy. Use dill relish or very finely minced pickles, add 1–2 teaspoons minced onion, add a tiny pinch of sugar if needed, and chill for at least 1 hour.

Flavor Variations

Think of the base sauce as the calm version. Lemon makes it livelier, Dijon makes it rounder, cayenne makes it warmer, and herbs make it fresher.

VariationHow to adjust 1 cup mayoBest with
Lemon-dillAdd ½ teaspoon lemon zest, 1 extra teaspoon lemon juice, and another tablespoon chopped dill.Salmon cakes, shrimp, lighter fish
Caper-forwardIncrease capers to 2 tablespoons and use cornichons or gherkins.Crab cakes, fried seafood, richer fish
SpicyAdd ½ teaspoon hot sauce or 1 teaspoon minced jalapeño, then taste after resting.Catfish, fried fish sandwiches, shrimp
Old Bay or CajunAdd ¼ teaspoon seasoning, then taste before adding salt.Seafood platters, shrimp, catfish
UK-style tartareUse gherkins or cornichons, capers, parsley, chives, and optional tarragon.Fried cod, haddock, thick chips
Five tartar sauce flavor variations labeled lemon-dill, caper-forward, spicy, Cajun-style, and UK-style tartare
Once the base sauce tastes balanced, keep flavor changes small: extra dill, more capers, gentle heat, seafood seasoning, or fresh herbs.

For a homemade heat option, MasalaMonk’s pepper sauce guide can help you choose a vinegar-forward hot sauce style.

Troubleshooting Homemade Tartar Sauce

Fix the bowl slowly. A teaspoon of lemon juice, pickle juice, mayo, or capers can change everything, so stir, taste, and adjust again before adding more.

ProblemFix nowPrevent next time
Too thickStir in lemon juice, pickle juice, or 1 teaspoon water at a time.Do not drain the pickles completely dry if you want a looser dip.
Too thinAdd more mayo and chill for 30 minutes.Add pickle juice slowly and drain watery relish before mixing.
Too sweetAdd lemon juice, chopped dill pickles, capers, Dijon, or herbs.Start with ⅓ cup relish, or use half dill pickle and half relish.
Too sourSoften with more mayo or a tiny pinch of sugar.Add vinegar or lemon in teaspoons, not tablespoons.
Too saltyAdd more mayo, Greek yogurt, or sour cream.Taste before salting because capers and pickles already season the sauce.
Too blandAdd capers, pickle juice, Dijon, lemon juice, pepper, or Worcestershire sauce.Use at least one pickled or salty ingredient, not mayo alone.
Too chunkyPulse briefly or chop the mix-ins finer.Use smaller dice for sandwich sauce and slightly larger dice for dip.
Watery after storageStir well and add a spoonful of mayo if needed.Drain relish better and avoid over-loosening before chilling.
Troubleshooting guide for tartar sauce that is too thick, too thin, too sweet, too salty, too chunky, or watery after storage
Fix tartar sauce in teaspoons, not big swings; a little pickle juice, mayo, lemon, or finer chopping can bring the whole bowl back into balance.

How to Store Tartar Sauce

Store the sauce in an airtight container in the refrigerator. A clean glass jar works well because it keeps the sauce covered and easy to stir before serving.

  • Mayo-based tartar sauce: best quality within 4–7 days when kept cold in a clean, airtight container.
  • Greek yogurt or no-mayo tartar sauce: best within 2–3 days because the texture loosens faster.
  • Homemade mayo, fresh onion, or yogurt sauces: use the shorter storage window.
  • Make-ahead: make it up to 1 day ahead for better flavor.
  • Long meals: return the sauce to the fridge when possible instead of leaving it out for hours.
  • Freezing: not recommended because mayo and yogurt-based sauces can split, turn watery, or lose their creamy texture.
Glass jar of homemade tartar sauce in the refrigerator with storage notes for mayo-based sauce, yogurt sauce, and freezing
Keep tartar sauce cold, stir it before serving, and avoid freezing so the creamy texture stays spoonable for the next fish-and-chips night.

If the sauce turns watery after chilling, use the troubleshooting guide before serving.

For mayo- or yogurt-based sauces, follow the general two-hour rule for perishable foods: do not leave them out through a long meal before returning them to the fridge.

If the sauce smells off, tastes sour in an unpleasant way, or has been left out too long, discard it.

Frequently Asked Questions

Is tartar sauce the same as tartare sauce?

Yes. In most recipe contexts, tartar sauce and tartare sauce mean the same creamy pickle-based sauce for fish and seafood. “Tartare sauce” is more common in the UK and some other regions.

What is the best pickle for tartar sauce?

Dill pickles, gherkins, and cornichons are best for a fish-and-chips sauce. Sweet pickle relish is better for a sweeter diner-style or fast-food-style sauce.

Does tartar sauce need capers?

No. It can be made without capers, but they add small salty pops that work especially well with seafood. If you skip them, add extra chopped pickle, relish, or pickle juice.

How long should tartar sauce chill before serving?

It can be served immediately, but 15–30 minutes in the fridge improves the flavor. If you added raw onion or shallot, 1 hour is better because the bite softens as it rests.

Can tartar sauce be made ahead?

Yes. Make it a few hours ahead or up to 1 day ahead, then stir and taste before serving. Add a little lemon juice or pickle juice if it needs freshening up.

Is tartar sauce dairy-free?

Many mayo-based tartar sauces are dairy-free, but check the mayonnaise and optional sauces you use. Greek yogurt, sour cream, buttermilk, and crème fraîche sauces are not dairy-free. For a dairy-free and egg-free bowl, use vegan mayo.

What makes homemade tartar sauce taste better than bottled?

Fresh lemon juice, chopped pickles, herbs, and adjustable sweetness make it taste fresher than most bottled sauces. You can push it sharper, sweeter, smoother, or lighter depending on the meal.

What is the best tartar sauce for fish and chips?

Use the dill-pickle version in the recipe card: mayo, dill pickles or gherkins, capers, lemon, herbs, Dijon, and black pepper. Keep it chilled until serving.

Can tartar sauce be frozen?

Freezing is not recommended. Mayo and yogurt-based sauces can split after thawing, leaving the sauce watery, grainy, or oily.

What is the difference between tartar sauce and remoulade?

Tartar sauce is usually a simpler mayo, pickle, lemon, caper, and herb sauce for fish and seafood. Remoulade is more seasoned and can include mustard, garlic, paprika, hot sauce, horseradish, spices, or seafood seasoning.

Final Sauce Notes

A good tartar sauce should not steal the plate. It should sit beside the fish, cling when you dip, and make the next hot bite easier to enjoy — which is exactly why a small bowl made before frying can change the whole meal.

Back to top
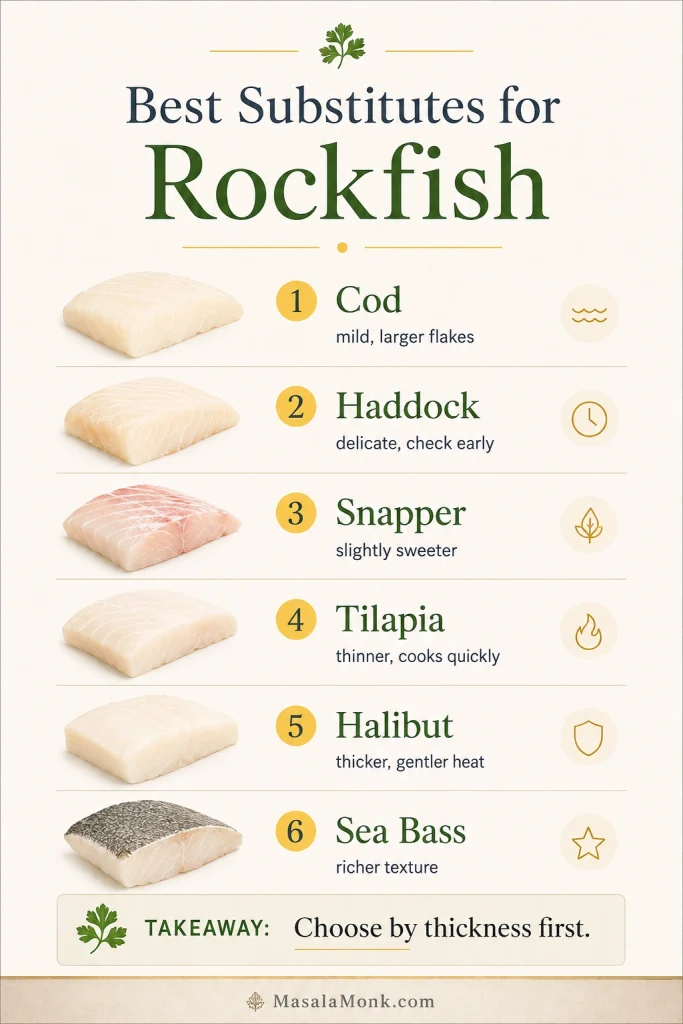
Posted on Leave a comment

Food and Gout Management

woman having a dental check up
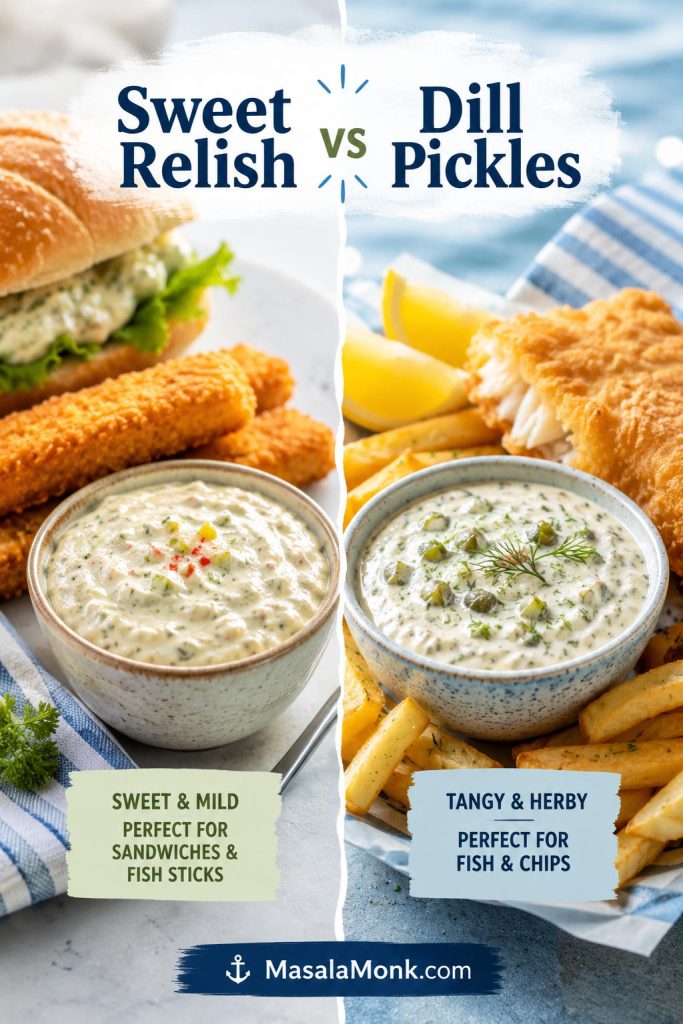
Gout is a form of inflammatory arthritis caused by the buildup of uric acid crystals in the joints. Managing gout effectively involves a combination of medication, lifestyle adjustments, and making wise food choices. In this comprehensive guide, we will delve into various food items and their impact on gout, helping you create a gout-friendly diet that promotes better management and reduces the risk of painful flare-ups.

Understanding Gout and Dietary Considerations

  1. What is Gout? Gout is a type of arthritis characterized by sudden and severe attacks of joint pain, usually affecting the big toe. It results from the accumulation of uric acid in the bloodstream, leading to the formation of sharp crystals in the joints.
  2. The Role of Diet in Gout Management Diet plays a crucial role in managing gout, as certain foods can either trigger or alleviate gout symptoms. The primary dietary concern is purine-rich foods, as they contribute to elevated uric acid levels in the body.

Gout-Friendly Foods:

  1. Onions and Gout: Onions are low in purines and possess anti-inflammatory properties. They can be a safe and flavorful addition to your gout-friendly meals. Onions are also rich in quercetin, a natural compound known for its potential to reduce inflammation and inhibit xanthine oxidase, an enzyme involved in uric acid production.
  2. Rice and Gout: Rice is considered a low-purine food, making it a suitable carbohydrate source for gout sufferers. Brown rice, in particular, provides added nutritional benefits with its fiber content. Whole grains like brown rice are beneficial for gout management as they help regulate blood sugar levels and may reduce the risk of insulin resistance, a contributing factor to gout.
  3. Legumes and Gout: Legumes, such as lentils, beans, and chickpeas, are plant-based sources of protein. While they contain some purines, they can be enjoyed in moderation as part of a balanced diet. The fiber content in legumes helps promote satiety and supports healthy digestion, both of which are essential for overall health and weight management.
  4. Peas and Gout: Peas fall under the legume category and, like other legumes, have a moderate purine content. Including peas in your meals in controlled portions may not pose a significant risk for gout. Additionally, peas are rich in vitamins and minerals, including vitamin C, which may help reduce inflammation and boost the immune system.
  5. Milk and Gout: Dairy products, including milk, are generally safe for gout sufferers. Low-fat or skim milk is recommended to limit saturated fat intake, which can help manage gout symptoms. Moreover, milk is a good source of calcium, which is vital for maintaining strong bones and reducing the risk of osteoporosis, a condition that individuals with gout may be prone to.
  6. Nuts and Gout: Nuts are a healthy snack option but vary in their purine content. Opt for low-purine nuts like almonds and walnuts and consume them in moderation. Nuts are rich in healthy fats, such as monounsaturated and polyunsaturated fats, which have been associated with reduced inflammation and improved heart health.
  7. Fish and Gout: Fatty fish rich in omega-3 fatty acids, such as salmon, mackerel, and sardines, have anti-inflammatory properties and can be beneficial for gout management. Omega-3 fatty acids have been shown to reduce inflammation and may help alleviate gout symptoms. However, it’s essential to consume fish in moderation and be mindful of the overall purine intake from various food sources.

Foods to Limit or Avoid:

  1. Pork and Gout: Pork is considered a high-purine meat and may trigger gout attacks in some individuals. Reducing or eliminating pork from your diet is advisable. Instead, opt for leaner protein sources like poultry, fish, and tofu.
  2. Shrimp and Gout: Shrimp, like other shellfish, is relatively high in purines. While occasional consumption may be acceptable for some, it is best to limit intake. If you enjoy seafood, choose low-purine options like fish or scallops.
  3. Alcohol and Gout: Alcohol, especially beer, can elevate uric acid levels and increase the risk of gout flare-ups. Reducing alcohol consumption is crucial for managing gout effectively. Instead, hydrate with plenty of water and herbal teas to help flush out uric acid from the body.

Tips for Gout-Friendly Eating:

  1. Stay Hydrated: Drink plenty of water throughout the day to help flush out uric acid from your system.
  2. Maintain a Healthy Weight: Obesity is associated with an increased risk of gout. Achieving and maintaining a healthy weight can reduce the frequency and severity of gout attacks.
  3. Practice Portion Control: Even low-purine foods can become problematic if consumed in large quantities. Moderation is key.
  4. Opt for Whole Grains: Whole grains like brown rice, quinoa, and barley offer added nutrients and fiber compared to refined grains.
  5. Consult a Healthcare Professional: If you have gout or suspect you might seek advice from a healthcare professional or a registered dietitian to create a personalized gout management plan.

FAQs About Gout and Food

  1. Is rice suitable for gout management?
    • Yes, rice is considered a low-purine food and can be included in a gout-friendly diet. Opt for whole grains like brown rice for added nutritional benefits.
  2. Can I eat nuts if I have gout?
    • Yes, you can enjoy nuts like almonds and walnuts in moderation as they are low-purine and rich in healthy fats.
  3. Should I avoid pork if I have gout?
    • It is advisable to limit or avoid pork as it is considered a high-purine meat, which may trigger gout attacks.
  4. Are onions beneficial for gout sufferers?
    • Yes, onions are low in purines and have anti-inflammatory properties, making them a safe addition to gout-friendly meals.
  5. Can I consume dairy products like milk if I have gout?
    • Yes, dairy products like milk are generally safe for gout management. Opt for low-fat or skim milk for better results.
  6. Is fish recommended for gout sufferers?
    • Fatty fish rich in omega-3 fatty acids, such as salmon, can be beneficial for gout management due to their anti-inflammatory properties.
  7. Are shrimp and other shellfish safe for individuals with gout?
    • Shrimp and shellfish are relatively high in purines. It’s best to limit their consumption and opt for low-purine seafood alternatives.
  8. Can alcohol worsen gout symptoms?
    • Yes, alcohol, especially beer, can elevate uric acid levels and increase the risk of gout flare-ups. It’s better to reduce alcohol consumption.
  9. What other lifestyle changes can help manage gout?
    • Staying hydrated, maintaining a healthy weight, and practicing portion control are essential lifestyle factors for gout management.
  10. Should I consult a healthcare professional for gout management?
    • Yes, it’s recommended to seek advice from a healthcare professional or a registered dietitian for a personalized gout management plan.

Gout management is individualized, and different foods may affect people differently. Always consult with a healthcare professional to tailor a diet that suits your specific needs and health condition. By being proactive and informed, you can successfully manage gout and improve your quality of life.

By making informed food choices and adopting a gout-friendly lifestyle, you can take control of your gout and improve your overall well-being. Remember that individual responses to foods may vary, so it’s essential to pay attention to your body and make adjustments as needed. Empower yourself with knowledge and take proactive steps to manage gout effectively.

Blog Tags: Gout, Gout Management, Gout Diet, Gout-Friendly Foods, Uric Acid, Purine, Arthritis, Joint Health, Inflammatory Arthritis, Nutrition, Lifestyle, Healthy Eating, Omega-3 Fatty Acids, Weight Management, Onions, Rice, Legumes, Peas, Milk, Nuts, Fish, Pork, Shrimp, Alcohol, Gout-Friendly Tips.