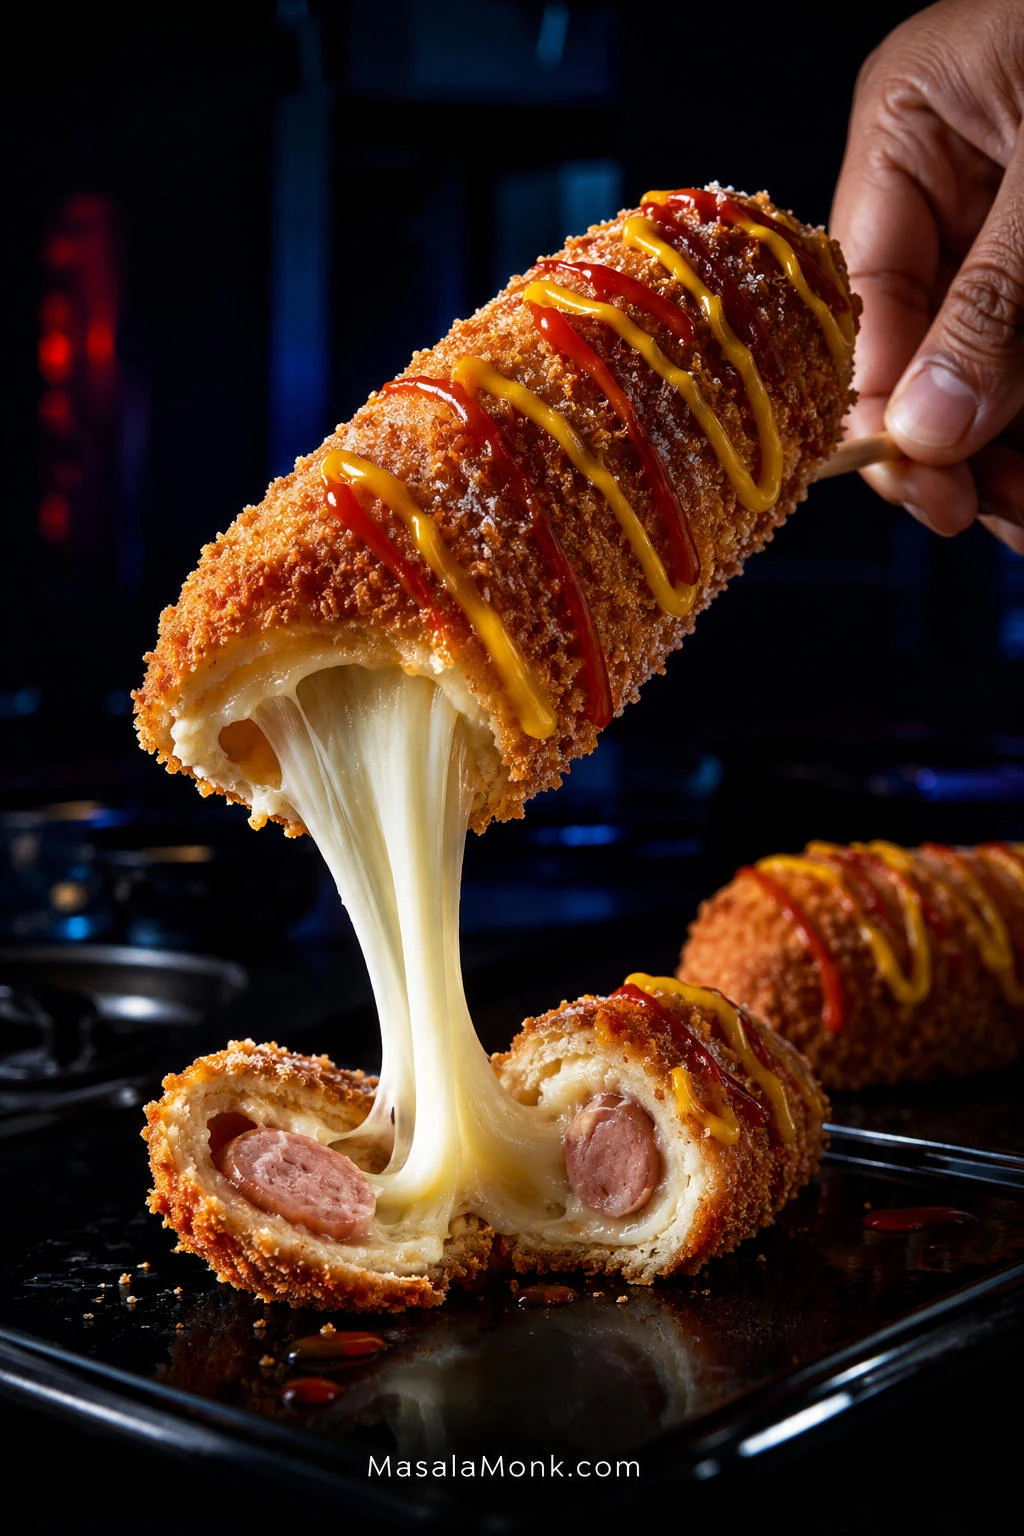
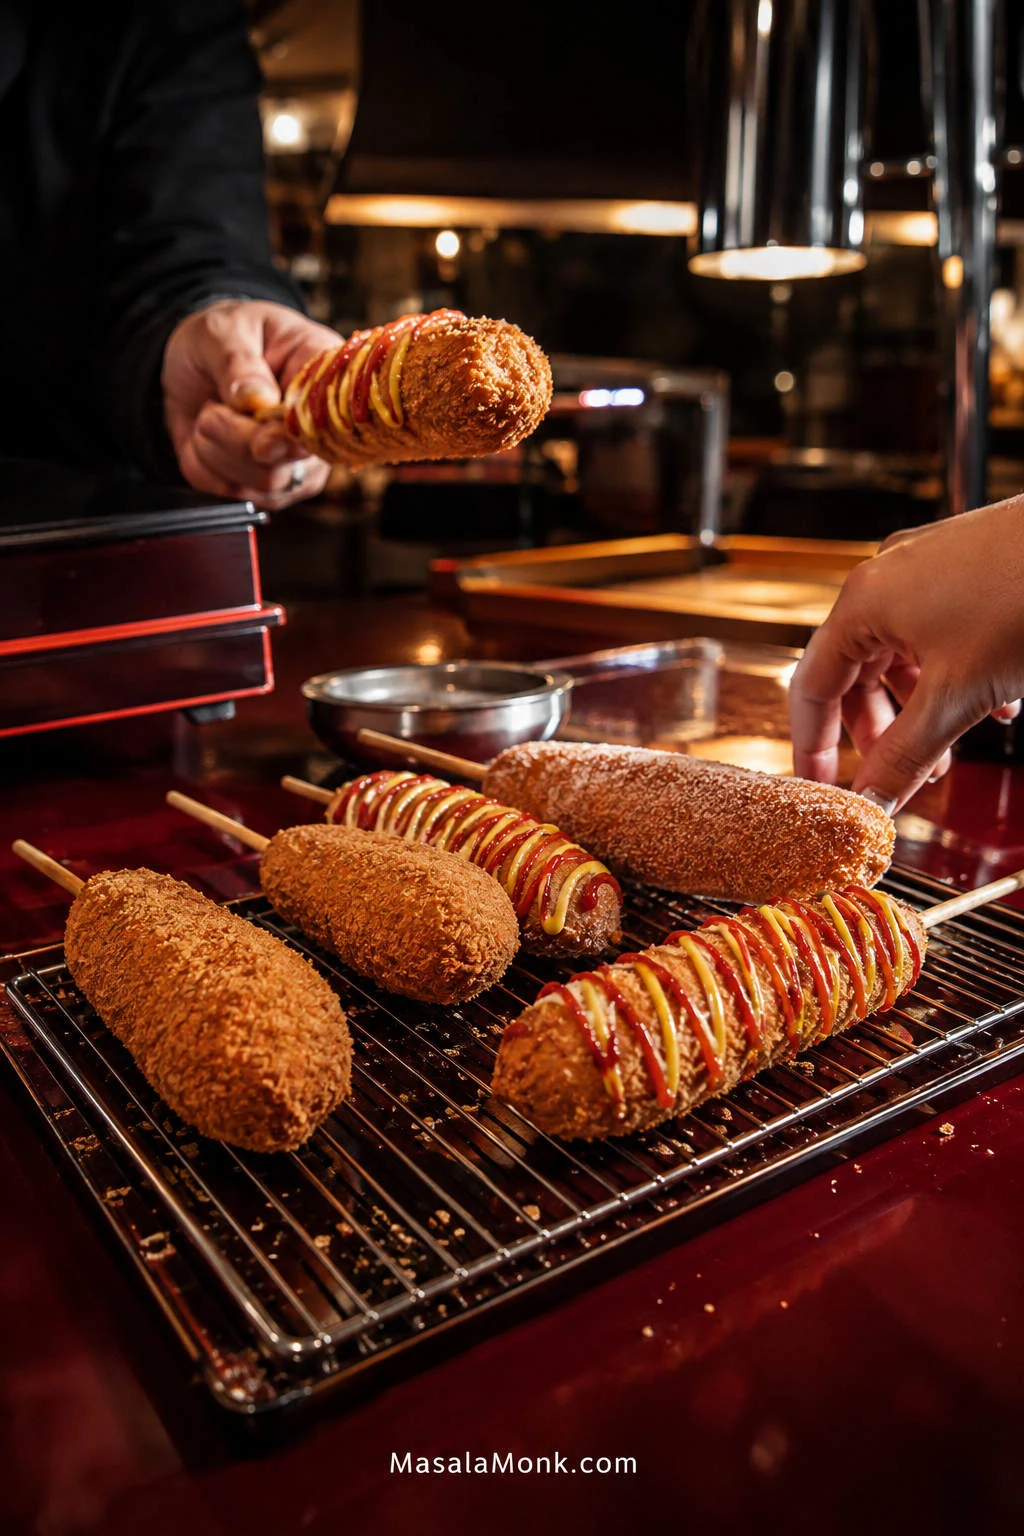
A good Korean corn dog recipe is really about that first bite: crisp, craggy panko; a soft, slightly chewy layer underneath; then hot mozzarella stretching away from the skewer while ketchup and mustard cut through the richness.
Korean corn dogs look wonderfully simple when someone else is making them. At home, trouble tends to start somewhere less glamorous: condensation beads on the cheese, sticky dough slides down the skewer, the coating gets much thicker than expected, or the mozzarella finds a way into the frying oil.
Most of those problems are easier to fix before the next skewer goes in. Dry damp cheese, adjust dough that has gone too loose, and give cooled oil another minute instead of carrying the same problem through the whole batch. This recipe uses a lightly sweet yeasted dough, low-moisture mozzarella, fully cooked hot dogs and panko to get you there.
3–5 minutes per corn dog; about 20–30 minutes for the batch
Total elapsed
About 1 hour 30 minutes to 1 hour 45 minutes
Oil
350°F / 175°C
Some skewer prep happens while the dough rises, so the prep and rise times overlap.
Three Things Before You Start
Keep the filling cold and dry. Condensation makes sticky dough much harder to keep in place.
Keep the dough layer thin. It needs to cling and stretch now because it will puff in the oil.
Coat and fry one at a time at first. Once the panko is on, get that skewer into the oil.
Get those three things right and the rough panko shell crackles over soft, chewy dough. More importantly, there is still plenty of sausage or cheese inside—not a giant piece of fried bread with the filling lost somewhere in the middle.
Pick Your Filling
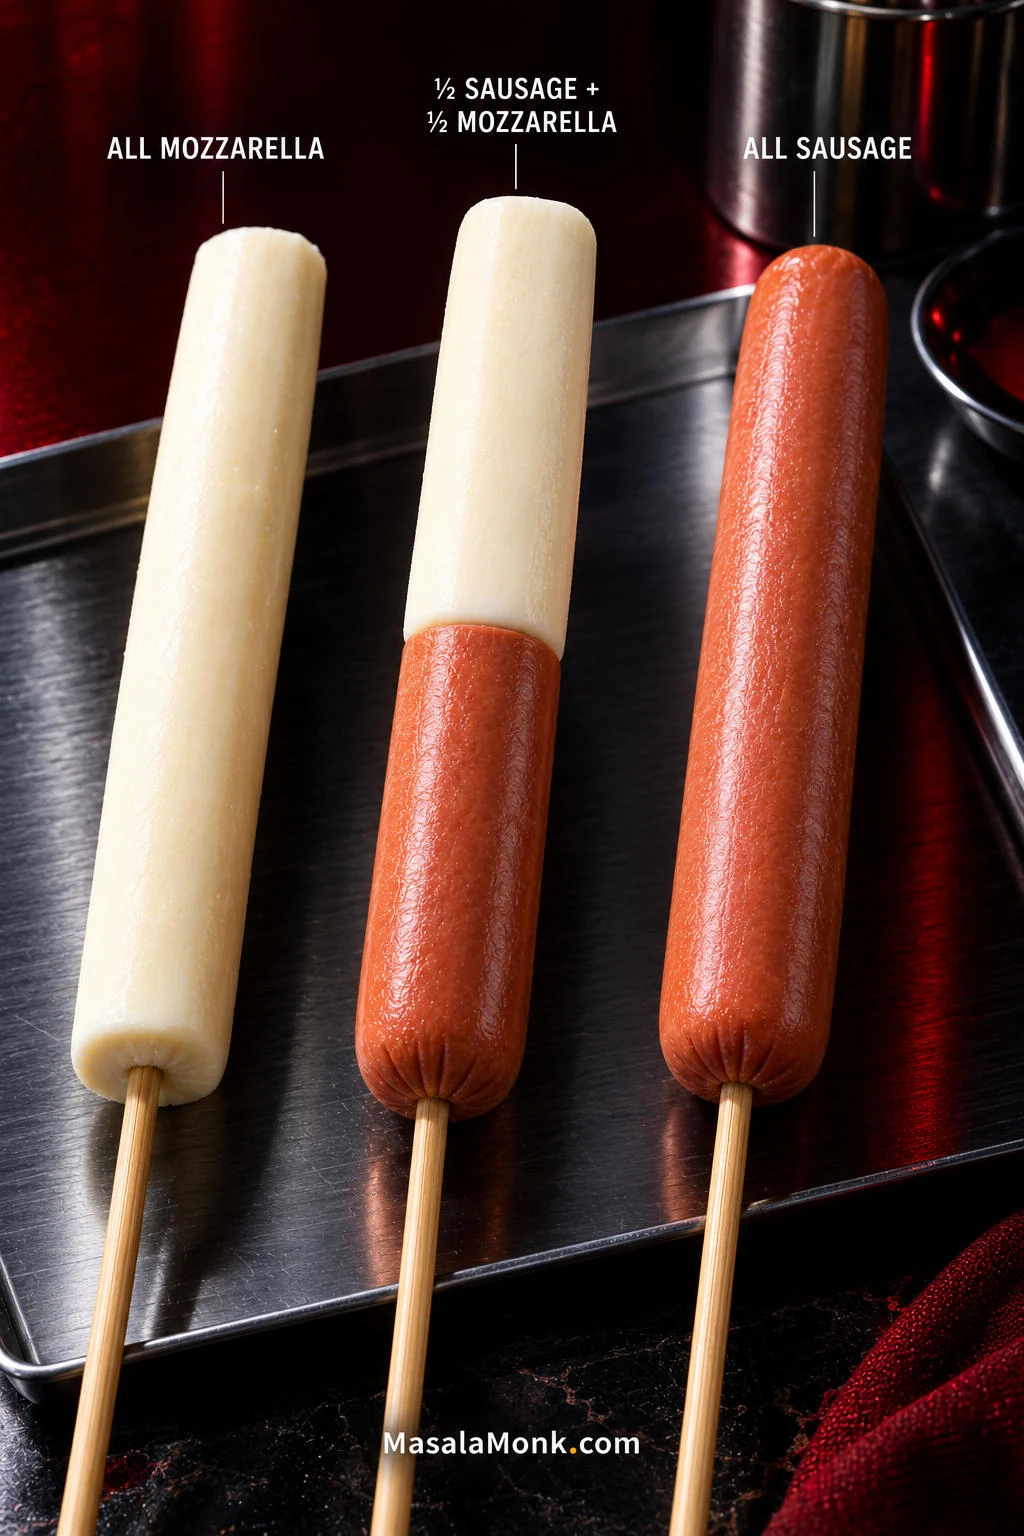
For a first batch, put half a hot dog and one mozzarella baton on each skewer, end to end. You get the signature cheese pull without making the entire filling as leak-prone as an all-cheese corn dog. For 6 corn dogs, that means 3 fully cooked hot dogs, halved, plus 170–180 g / 6–6½ oz mozzarella.
Arrange the hot dog and mozzarella end to end on the skewer, keeping both centered so the filling stays balanced while you wrap it in sticky dough. A centered skewer is also easier to rotate evenly during coating.
All mozzarella: use 330–360 g / 12–13 oz. Cut 6 longer batons about the same overall length and thickness as the standard sausage-and-cheese filling.
All sausage: use 6 fully cooked hot dogs. This is the easiest filling to fry and the least likely to leak.
Mozzarella + cheddar: keep mozzarella as the main cheese and add a smaller amount of firm cheddar when stronger cheese flavor matters more than the longest possible pull.
220 g (7¾ oz / 1¾ cups + 1 tablespoon) all-purpose flour, plus a little more only if needed
225 ml (scant 1 cup) warm water, 100–110°F / 38–43°C
25 g (2 tablespoons) granulated sugar
5 g instant yeast
4 g fine salt
Filling
3 fully cooked hot dogs, cut in half crosswise
170–180 g (6–6½ oz) firm low-moisture mozzarella, cut into 6 sturdy batons 2–2½ inches / 5–6 cm long
Look for a firm block labeled low-moisture mozzarella; in some shops it is sold as pizza mozzarella. Whole-milk mozzarella gives especially good flavor and stretch, but low moisture matters more than the exact label. Fresh mozzarella packed in water or brine is much harder to keep inside the crust.
Mozzarella string cheese is a handy fallback, though its thinner shape gives you a smaller cheese center.
Coating and Frying
30 g (¼ cup) all-purpose flour, for dusting
120–140 g panko, enough for a generous shallow tray
Neutral frying oil such as canola, vegetable or rice-bran oil, enough for 3 inches / 7–8 cm depth
Granulated sugar, optional
Ketchup and yellow mustard, for serving
Panko’s larger flakes give the shell its rough, brittle crunch. Regular breadcrumbs can substitute, but the crust will be finer and less craggy.
Useful equipment: a kitchen scale, deep-fry thermometer, heavy deep pot, 6 sturdy wooden chopsticks or thick bamboo skewers, a shallow dish for the dough and a wire rack. Before adding oil, check that the coated part of a full skewer can lie comfortably inside the pot.
1. Mix a Sticky, Stretchy Dough
Stir together the flour, sugar, instant yeast and salt. Add the warm water and mix firmly until no dry flour remains.
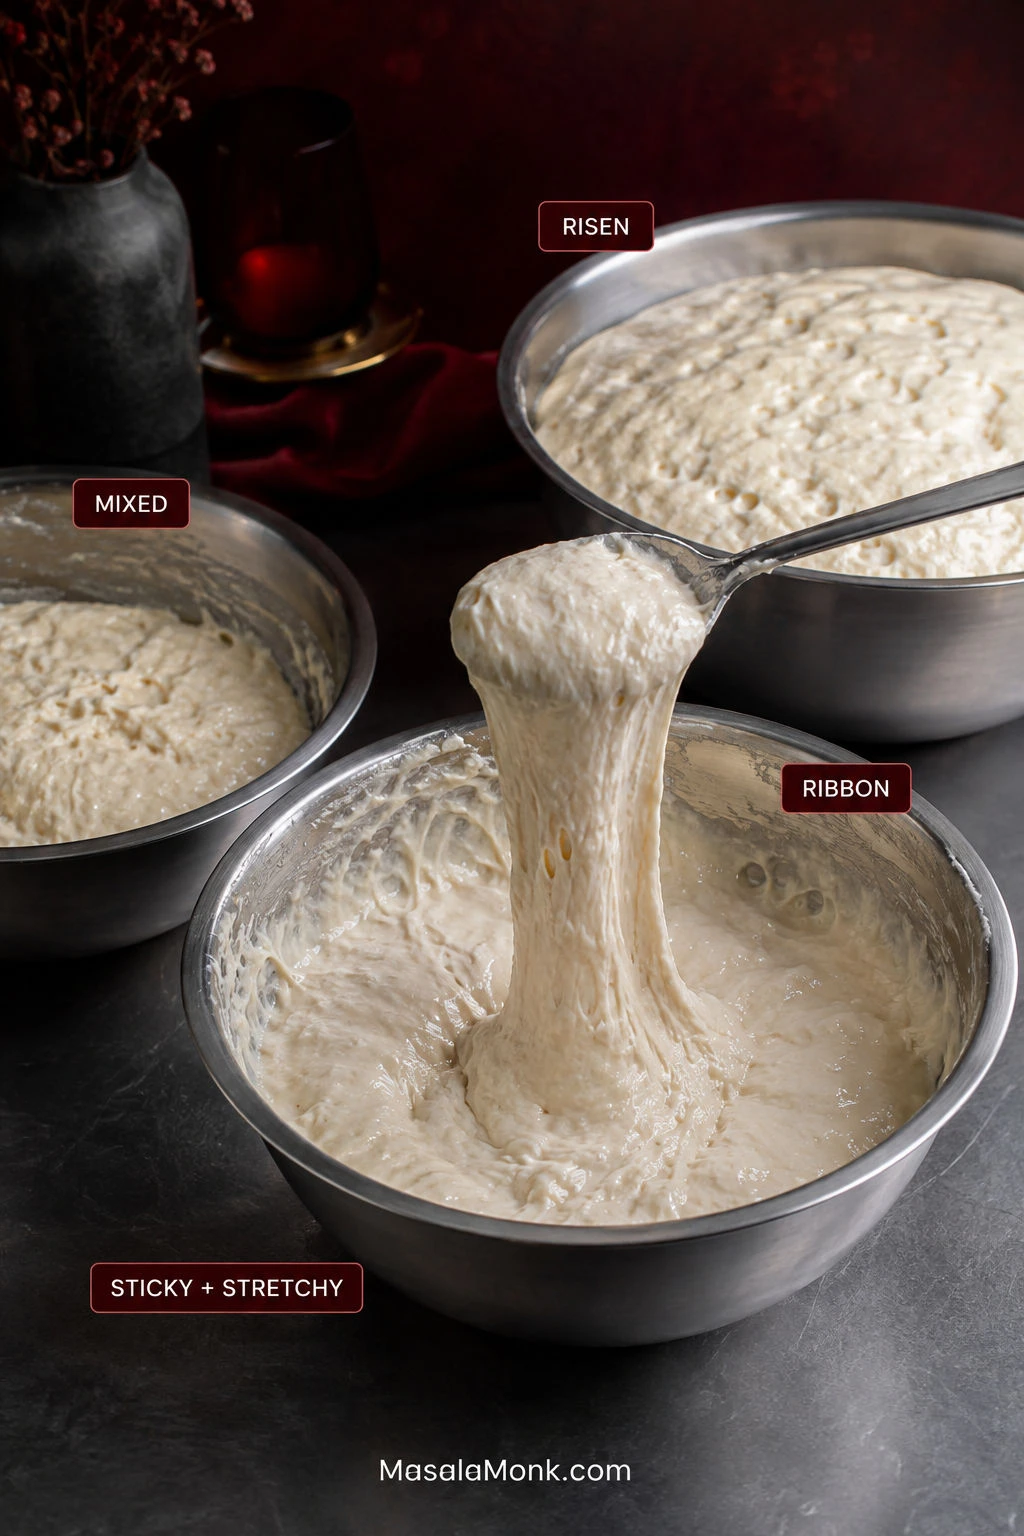
Instant yeast does not need to sit in the water waiting to foam. What you want now is very wet bread dough: sticky, stretchy and slightly unruly.
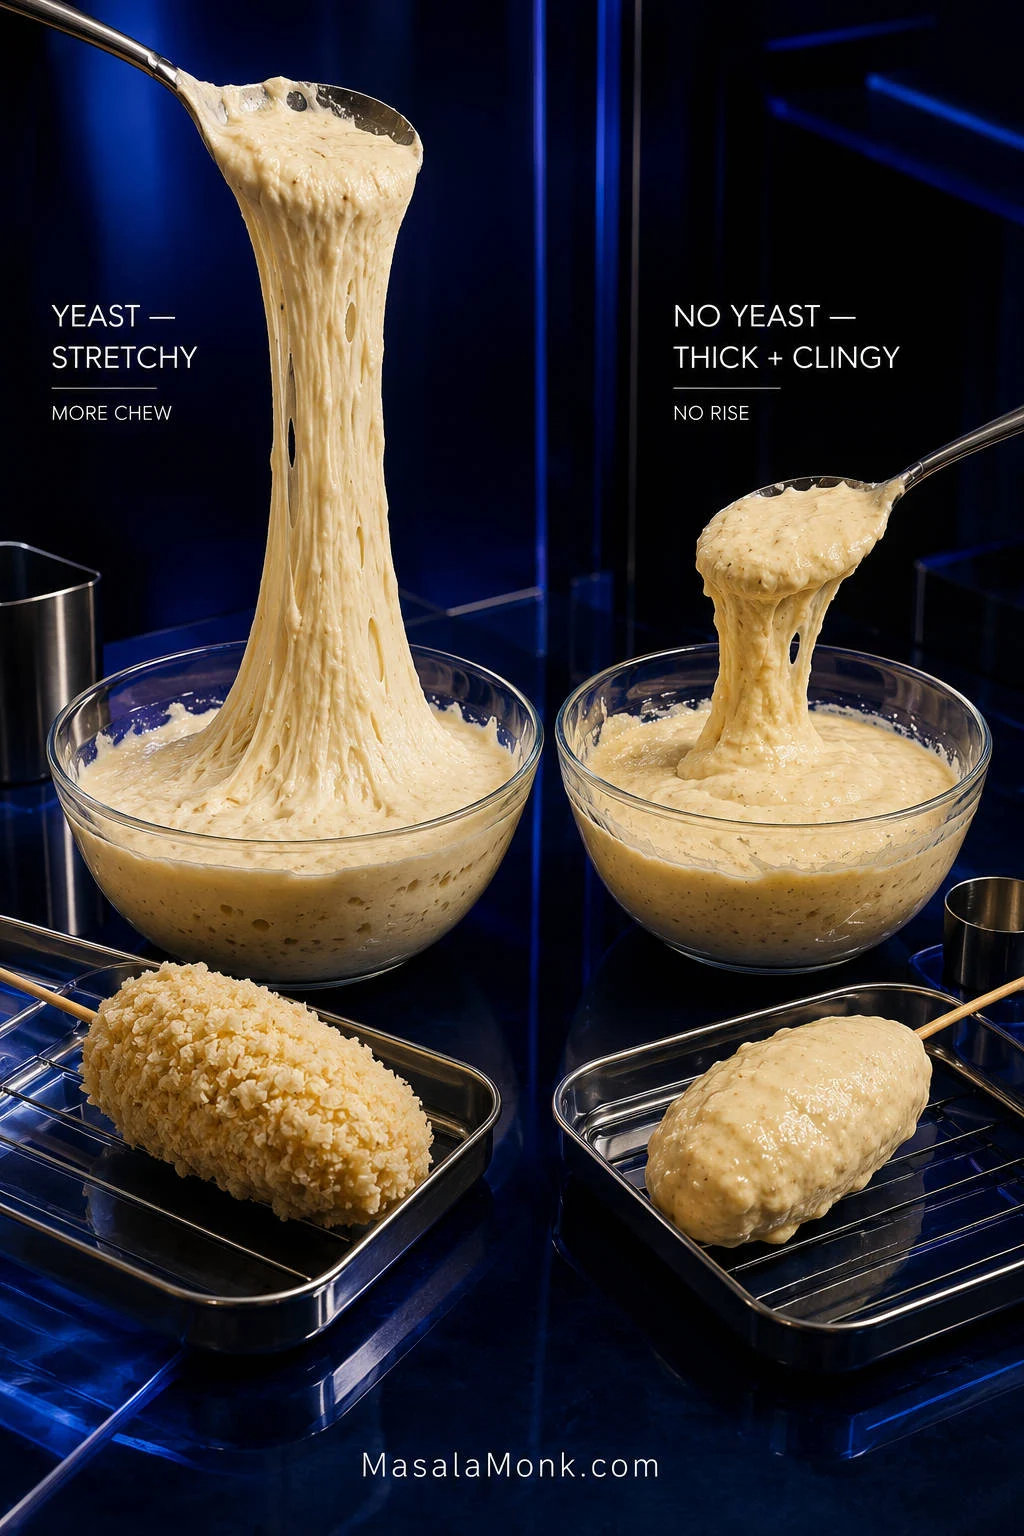
Lift some with a spoon. It should pull into a sticky ribbon and cling to itself.
Flowing instead of stretching? Add flour 1 tablespoon / 8 g at a time.
Tearing instead of stretching? Add water 1 teaspoon / 5 ml at a time.
Humidity changes how this dough feels. Let the cling and stretch guide you; it does not have to look identical from one kitchen to the next.
2. Let It Rise Until Puffy
Cover the bowl and leave it for 45–60 minutes, until the dough has doubled and looks visibly bubbly and aerated.
Watch the dough more closely than the clock. A cool room can take longer. Active dry yeast can replace instant yeast in the same weight; give it whatever extra time it needs to reach the same puffy stage.
The dough starts very sticky, stretches into a ribbon, then becomes visibly bubbly and aerated after rising. Use the ribbon stage as your consistency checkpoint before proofing: it should stretch rather than simply pour.
3. Build and Chill the Skewers
While the dough rises, thread half a hot dog onto each skewer, followed by one mozzarella baton so the cheese sits toward the eating end.
Keep the sausage and mozzarella fairly similar in thickness. A skinny strip of cheese melts much faster than a substantial baton.
If firm mozzarella cracks when you push in the wooden skewer, make a narrow pilot hole with a thin metal skewer first. Thin, smooth barbecue skewers can also spin inside the sausage while you try to coat it; a wooden chopstick or broader bamboo skewer gives you much better control.
Keep the assembled skewers refrigerated until the dough is ready. In a hot kitchen, or with all-cheese corn dogs, a 10-minute freezer chill immediately before coating can help. The cheese needs to be very cold, not frozen solid.
4. Heat the Oil and Set Up the Coating Line
Pour 3 inches / 7–8 cm of oil into a heavy pot, leaving plenty of empty space above it. Heat to 350°F / 175°C.
Keep water away from the pot and never leave heating oil unattended. If deep frying is unfamiliar, the USDA deep-fat frying safety guidance is worth reading before you start.
Set everything up in this order: cold skewers → flour → dough → panko → oil → wire rack.
5. Dry, Flour and Wrap One Skewer
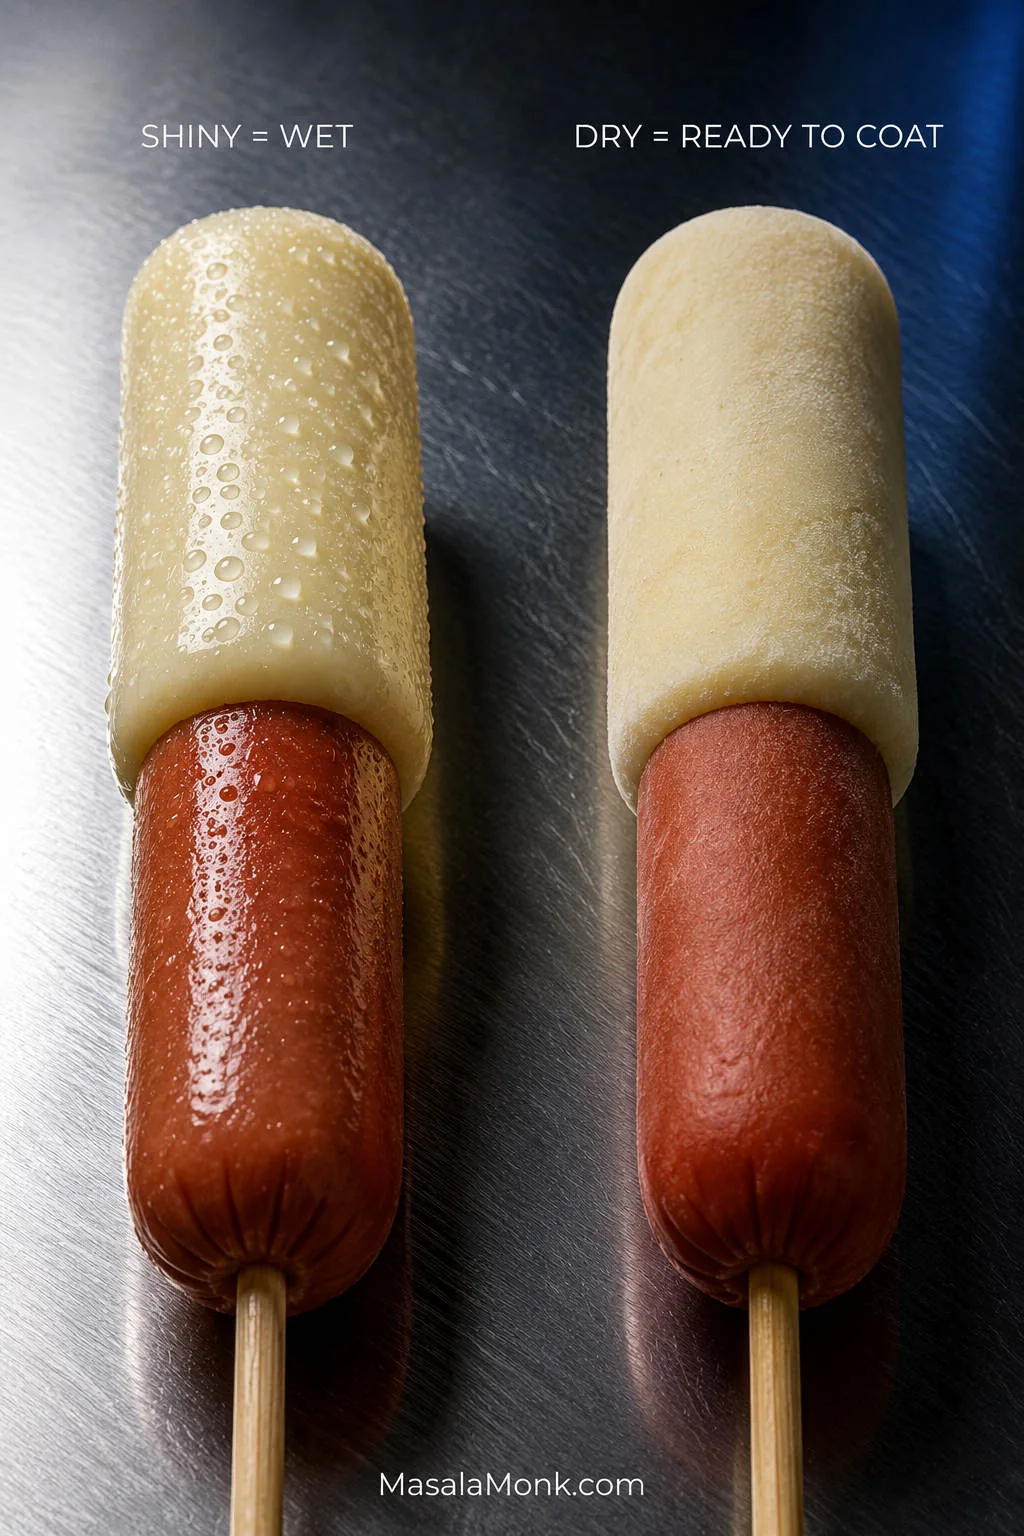
Take one cold skewer from the refrigerator and look at it before it touches the dough. A shiny surface means condensation.
Blot the cheese and sausage dry, dust with just enough flour to remove the shine, then tap off anything loose.
Before changing an entire bowl of Korean corn dog batter, test one properly dried skewer. If that one coats cleanly, moisture—not the dough—was the problem. It is a useful way to avoid “fixing” a batter that was already working.
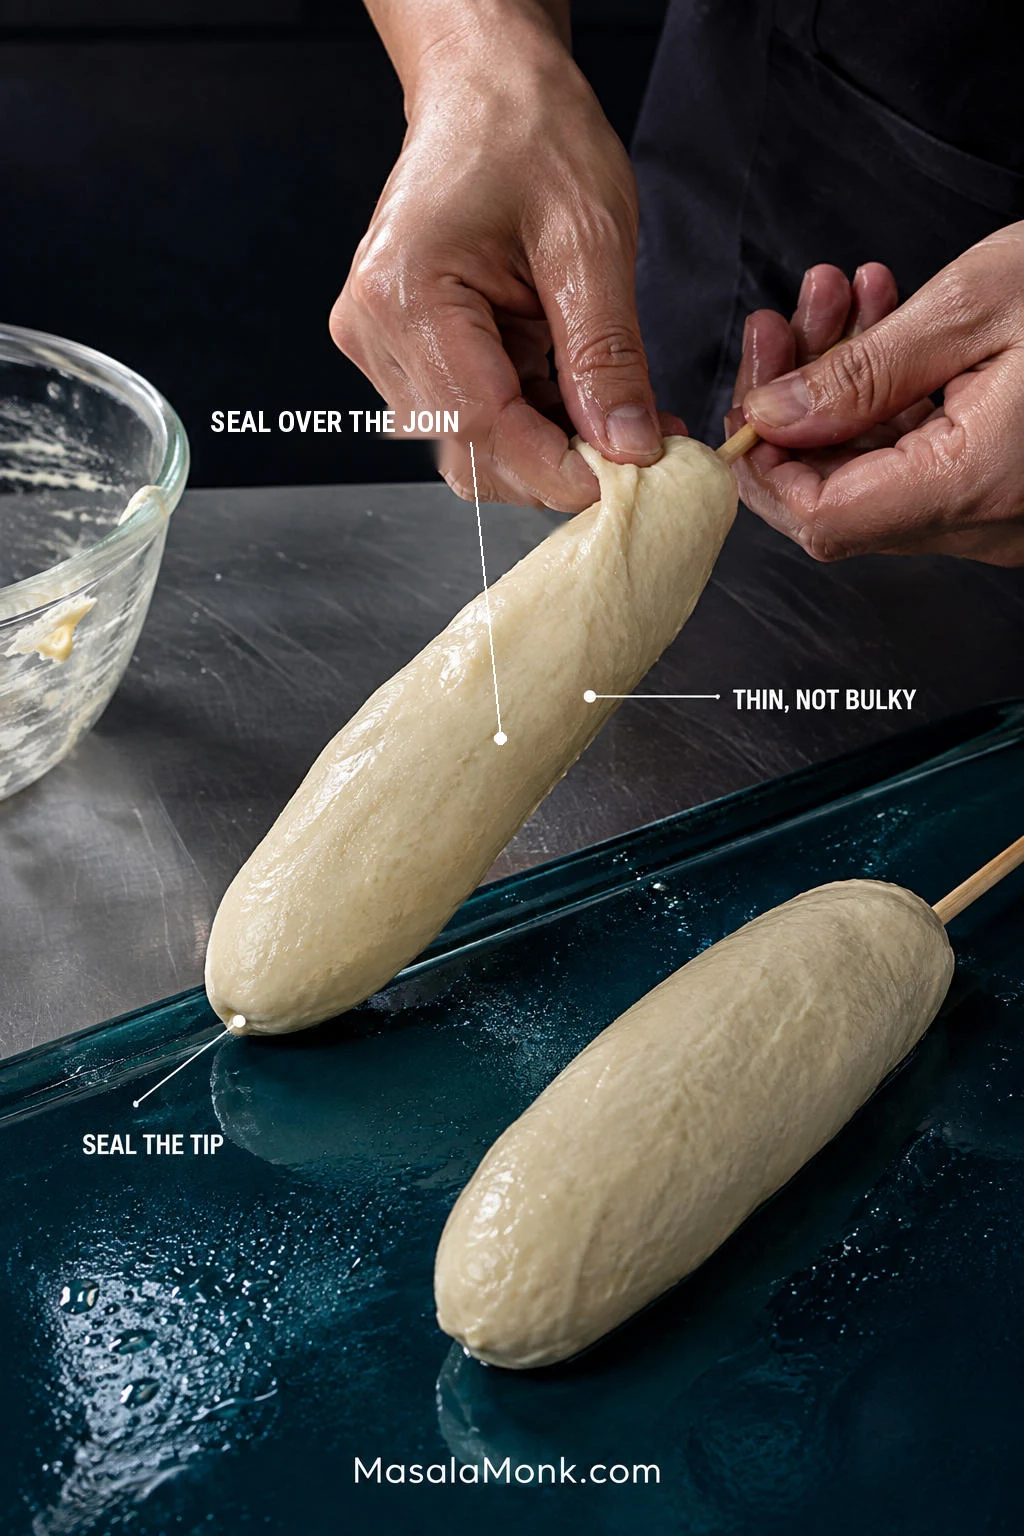
Now comes the messy bit. Lay the skewer in the dough and rotate it while pulling and stretching the dough around the filling. Your fingers may get sticky and the first wrap may look uneven. Keep turning, patch thin spots and smooth them with slightly damp fingertips.
Think thin shell—roughly ⅛ inch / 3 mm as a visual guide, not a thick blanket of dough. Seal the cheese tip and the join between cheese and sausage particularly well.
Use the silhouette as a final check before adding panko. The coated skewer should still resemble the filling underneath rather than developing thick shoulders around the mozzarella tip or sausage-cheese join; smooth excess away while every part of the cheese remains enclosed.
If the corn dog already looks enormous, take some dough off.
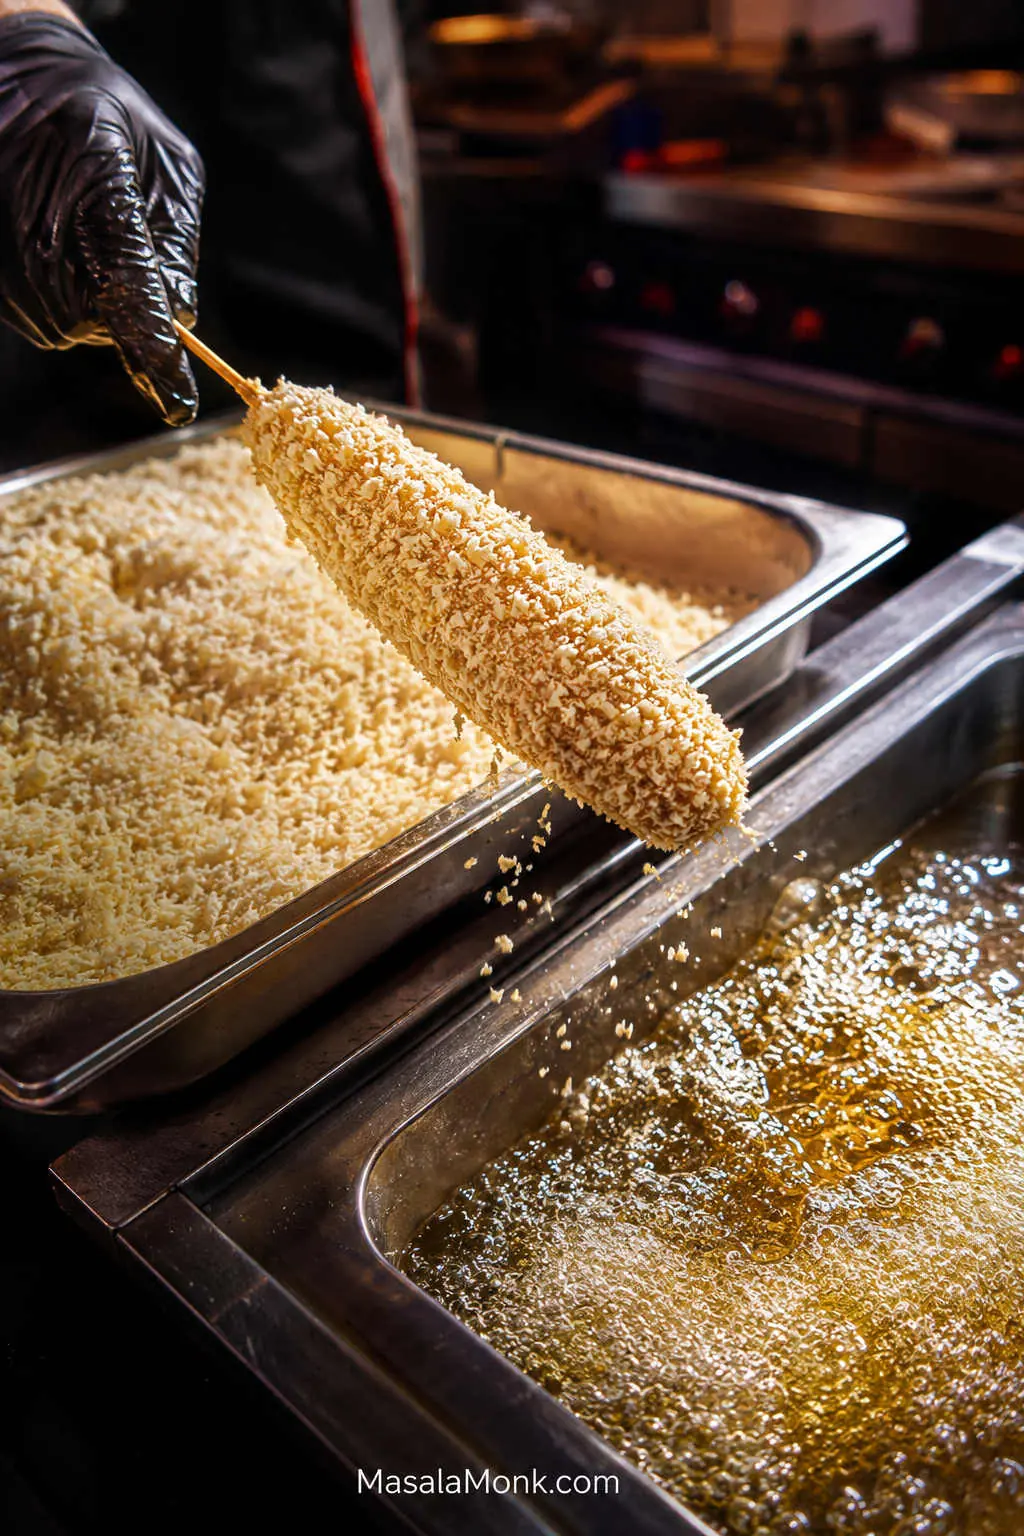
6. Press On the Panko
Set the dough-covered skewer in the panko and press the crumbs over the entire surface. Look for complete coverage, especially around the cheese tip—no shiny patches of sticky dough peeking through.
Once the panko is on, fry it straight away.
Coat one → panko one → fry one.
Panko coverage doubles as a last leak check. Pay particular attention to any shiny dough near the mozzarella tip or join: if a bare patch is easy to see now, it is also one of the first places worth inspecting if cheese escapes during frying.
7. Fry the First One and Calibrate the Batch
Lower the first corn dog gently into the oil away from you. Fry at 350°F / 175°C for 3–5 minutes, turning as needed.
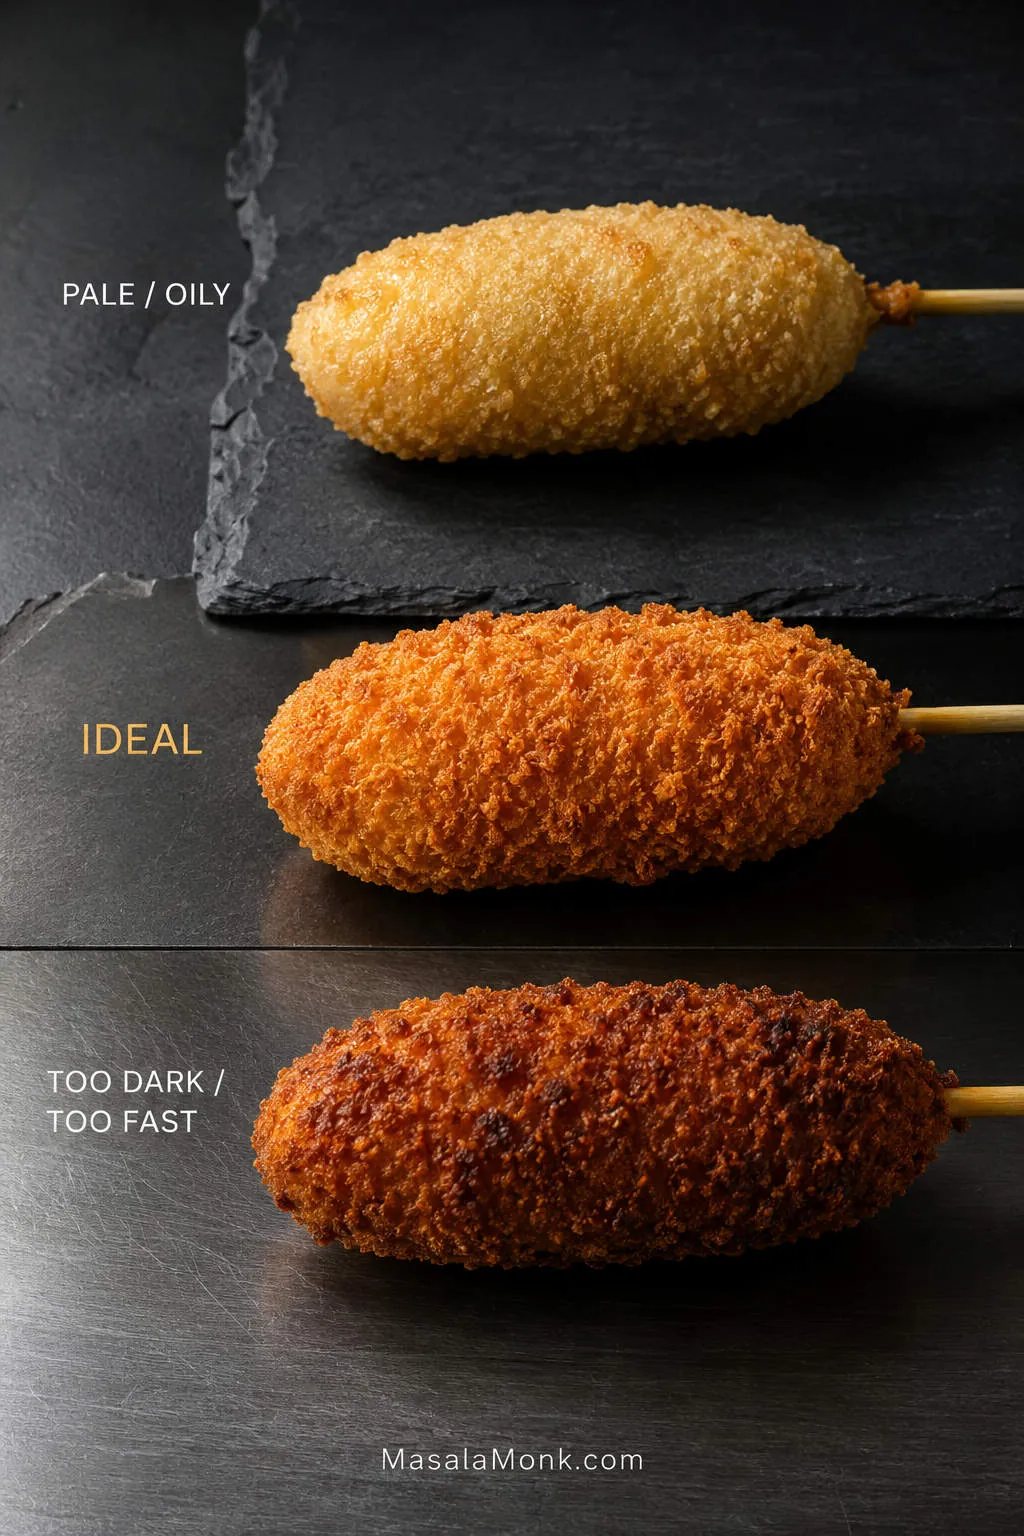
Look for steady bubbles around the shell. Violent, racing bubbles mean things are moving too fast. Weak bubbling and a pale coating tell you the oil has cooled.
The clock gives you a window. Browning tells you what the oil is actually doing.
Dark brown in only 2 minutes: check both the oil temperature and whether the dough layer is too thick.
Pale and increasingly oily: let the oil recover before continuing.
Deep golden in 3–5 minutes: that’s what you’re looking for.
Good frying is about the speed of browning as well as the final color. If one side darkens while another stays pale, think turning and oil contact; if the entire Korean corn dog races toward brown, check the heat before coating the next one.
Let the First One Teach You Something
The first corn dog is allowed to be wonky.
Fry it anyway.
While it cools, keep an eye on the thermometer and adjust the burner as needed to hold the oil around 350°F / 175°C. Do not leave the hot oil unattended while you inspect the first corn dog.
If it browned at a normal pace, stayed intact and still looks reasonably thin around the filling, there is no need to cut it just for the sake of checking. Keep going.
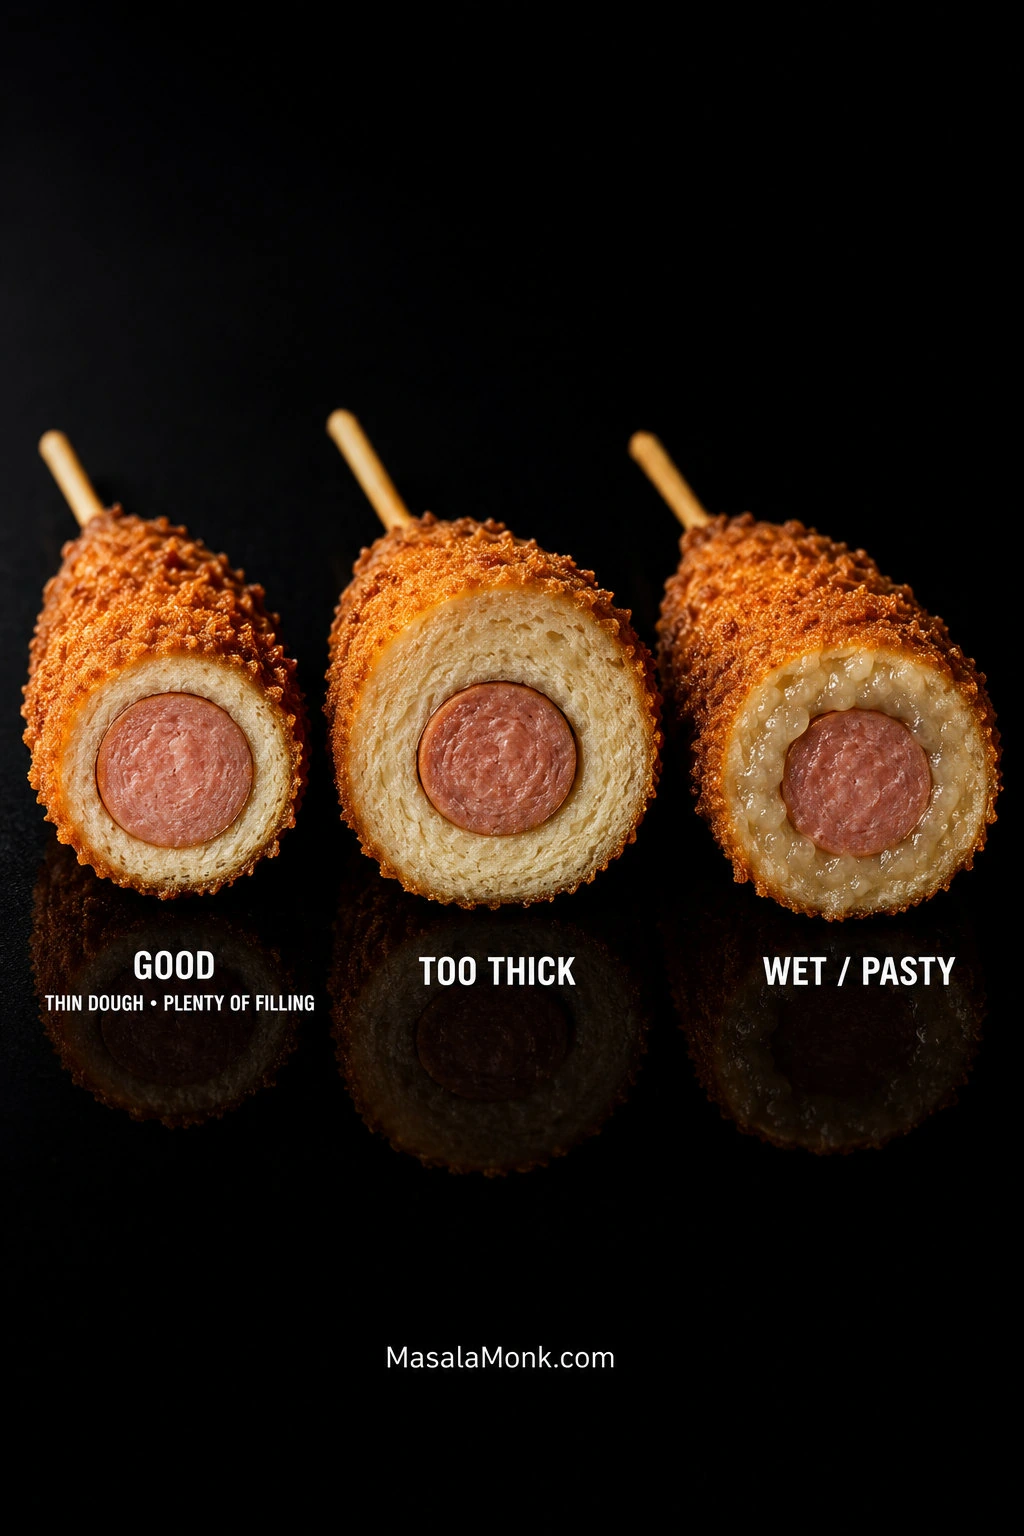
If it browned strangely, leaked, or looks thicker than you expected, let it cool enough to handle and cut it open. Under the panko, you’re looking for soft, bread-like dough rather than a wet or pasty layer. The filling should still look substantial, surrounded by a relatively thin band of dough.
A cheese leak shows you where the next skewer needs a better seal. Heavy bread around the filling means less dough next time. Fast browning means checking both the oil temperature and the thickness of the coating before the next one goes in.
If the first Korean corn dog needs investigating, cut through the middle third rather than judging it at the sealed tip. The center gives you a fairer look at how much cooked dough actually surrounds the filling—and therefore a better guide for the remaining batch.
Once the first one is right, you can fry two at a time if the pot is roomy and you can get both coated and into the oil promptly. Otherwise, keep working one at a time. Skim dark panko and dough fragments from the oil between batches.
8. Finish With Sugar and Sauce
Let each corn dog drain briefly on a wire rack, then dust or lightly roll the hot shell in granulated sugar if you want the sweet-savory shop-style finish.
A little sugar lands first, then the salty sausage and molten cheese take over; sharp yellow mustard keeps the whole thing from feeling too rich. Ketchup and mustard are hard to beat, but the sugar can stay off entirely if savory is more your thing.
Add the toppings while the shell is hot, then let the center cool just enough to bite safely. Molten mozzarella can stay much hotter than the crust around it.
Serving Six at Once
The best corn dog is the one that just left the fryer. If people are already hovering near the stove, hand them out as they come. That’s when the panko is crispest, the little crust shards break away at the first bite and the cheese still pulls.
If they need to wait, keep them uncovered on a wire rack in a 200°F / 95°C oven for 5–10 minutes. Stacking or covering them traps steam and softens the crust.
Hold first, sauce last. Korean corn dogs waiting briefly on a rack keep their panko crisper when they remain unsauced; add ketchup, mustard or creamy toppings only as each one is about to be eaten rather than dressing the entire batch in advance.
The word batter is a little misleading here. This yeasted coating behaves more like very wet bread dough: it stretches around the skewer instead of pouring over it.
That is why the method focuses on cling and stretch rather than a perfectly smooth consistency. The corrections in Step 1 are simply there to bring the dough back to that behavior.
Some Korean hotdog recipes include rice flour or glutinous rice flour alongside wheat flour; plenty do not. This all-purpose-flour dough gives you a soft, chewy layer without requiring either one.
Can You Make Korean Corn Dogs Without Yeast?
Yes. You lose some of the yeasted chew, but you also lose the hour-long wait.
Use this batter in place of the yeast dough. Keep the same cold skewers, light flour dusting, panko coating and frying setup.
For 6 corn dogs, mix:
160 g (1⅓ cups) all-purpose flour
18 g (1½ tablespoons) sugar
8 g (2 teaspoons) baking powder
3 g fine salt
1 large cold egg
100–120 ml cold milk, starting with 100 ml
Whisk the dry ingredients, then add the egg and 100 ml milk. Add more milk only until the batter is thick enough to cling to a cold, lightly floured skewer instead of running off it.
If it softens while you work in a warm kitchen, chill it briefly. There is no proofing step. Fry at 350°F / 175°C until the coating is browned and set, with a bread-like interior rather than a wet or pasty layer.
Don’t force the quick batter to imitate the yeast dough. No-yeast Korean corn dogs begin with a thicker, colder coating, while the yeasted version relies more on stretch; what matters is that each formula stays evenly attached to a cold skewer in its own way.
Mozzarella gives you the longest pull. Keep it as the main cheese when stretch matters most.
For stronger cheese flavor, add a smaller piece of firm cheddar alongside it. The center tastes richer, but the pull becomes a little shorter.
What Makes a Korean Corn Dog Different?
Korean hotdogs differ most clearly from American corn dogs in their coating, fillings and finish.
Korean corn dog
American corn dog
Coating
Wheat- or rice-based, often with panko
Usually cornmeal-based batter
Filling
Sausage, mozzarella or both; other fillings exist
Usually a hot dog
Crunch
Panko, potato and other coatings
Usually comes from the fried batter itself
Finish
Often sugar plus savory sauces
Usually savory condiments
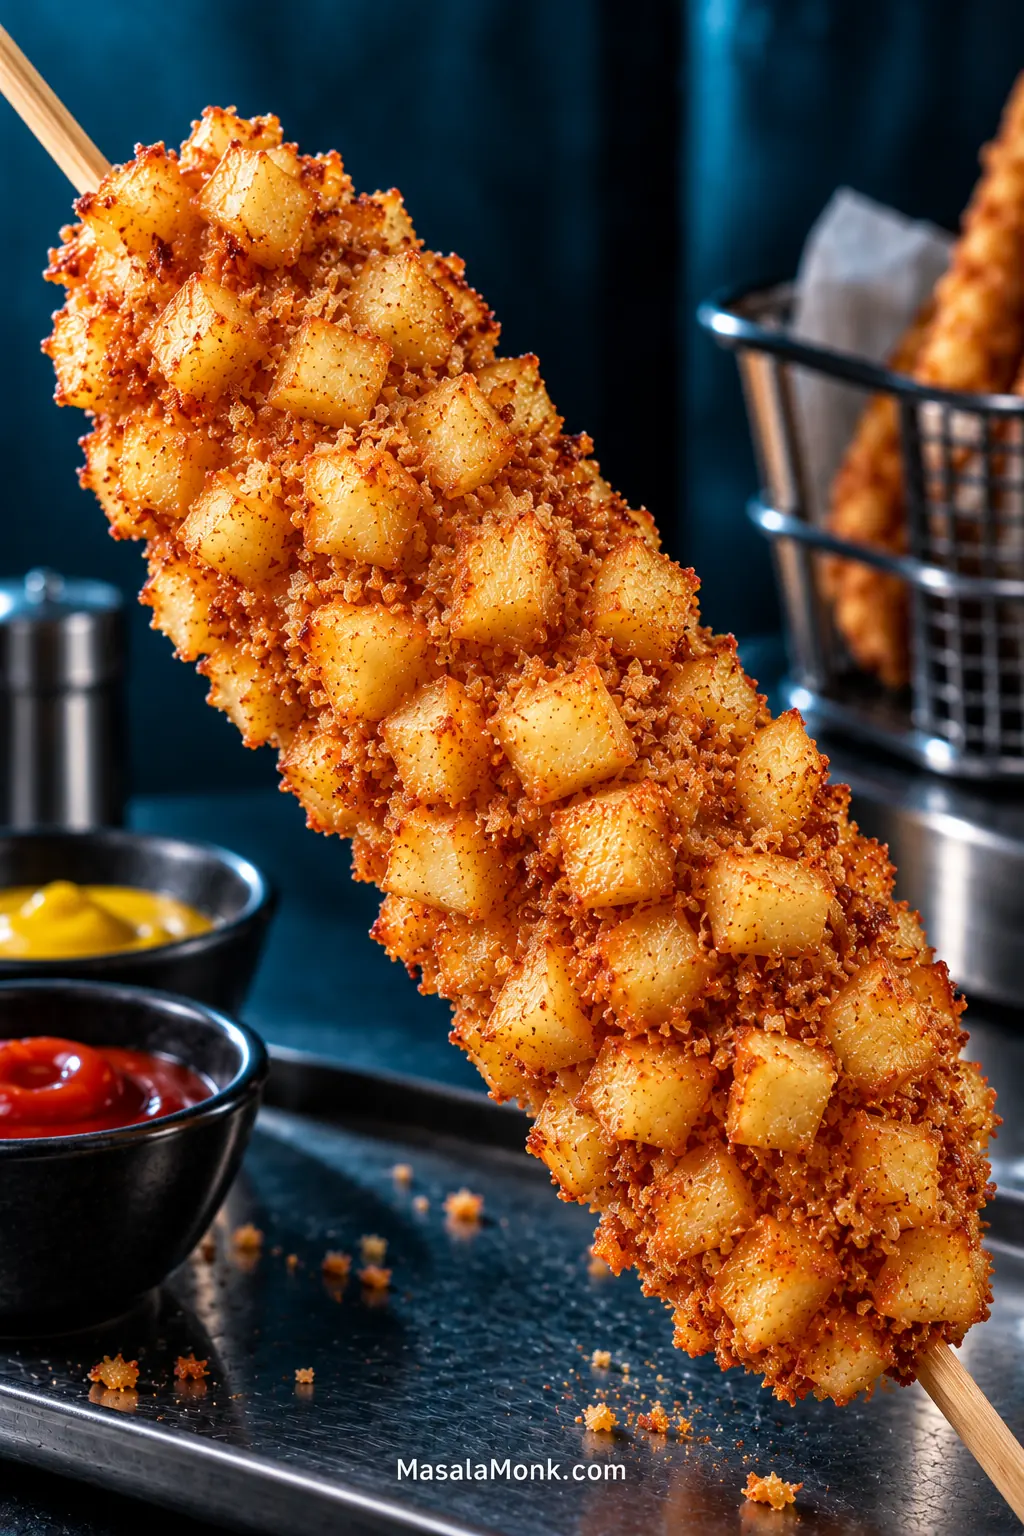
In Korea, these battered snacks on sticks are commonly called hotdogs (핫도그). Gamja (감자) means potato, so gamja-hotdog refers to the potato-coated style. Maangchi’s gamja-hotdog recipe is a useful Korean reference for both the terminology and the potato variation.
Korean Potato Corn Dogs (Gamja Hotdogs)
Gamja changes more than the appearance of the corn dog. Once fresh potato becomes part of the coating, the vegetable needs time to soften before the outside goes too far—which is why a Korean potato corn dog benefits from gentler frying than the plain panko version.
Prep the Potato
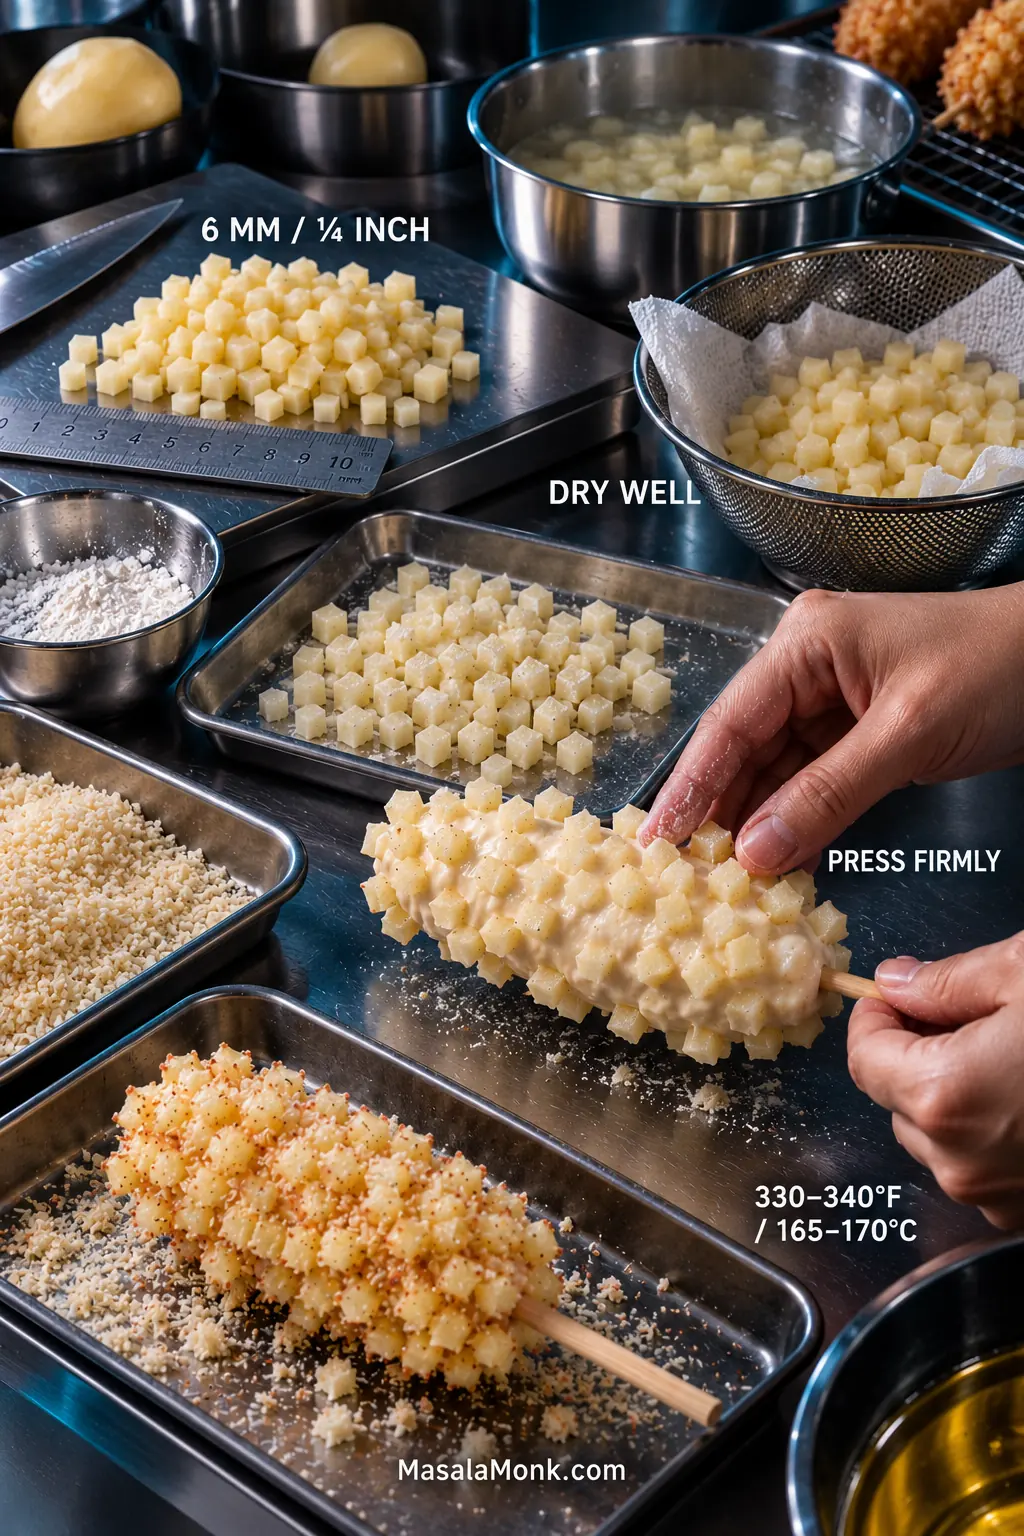
To make 3 of the 6 corn dogs potato-coated, use 250 g / 9 oz peeled potato and 1–2 tablespoons flour or cornstarch, plus panko. Double the potato if you want all six coated this way.
Cut the potato into ¼-inch / 6-mm cubes. Big chunks are harder to attach, slower to soften and awkward to bite once fried.
Rinse the cubes, blanch for 2–3 minutes, then drain and dry them very well. The edges are just beginning to soften, but the cubes still hold their shape. Toss with a light dusting of flour or cornstarch.
After blanching, spread the potato cubes out instead of leaving them in a steaming pile. Trapped moisture can wet their surfaces again; letting that steam escape gives the small cubes a drier exterior before they are pressed onto the dough.
Coat and Fry
Wrap the skewer with dough, press the potato cubes firmly into the surface, then fill exposed sticky gaps with panko.
Once the little cubes cover the whole skewer, a couple of playful Korean nicknames Maangchi records—roughly “ugly hotdog” and “goblin’s club hotdog”—suddenly make sense.
A few cubes may fall into the oil. Skim them out and press the next coating more firmly.
For fresh potato, lower the oil to 330–340°F / 165–170°C and begin checking near 5 minutes. Many take 5–7 minutes.
The best bite has crisp potato corners and panko ridges outside, then tender potato, soft dough and hot filling underneath. With cheese-heavy corn dogs, take them out as soon as the potato and dough are done; extra frying rarely does molten mozzarella any favors.
Frozen French Fry Shortcut
Chop frozen French fries into small pieces and press them into the dough straight from frozen. Because the fries are already partially cooked, skip the blanch and use the regular 350°F / 175°C frying temperature. Cook until the dough is set and the outside is crisp.
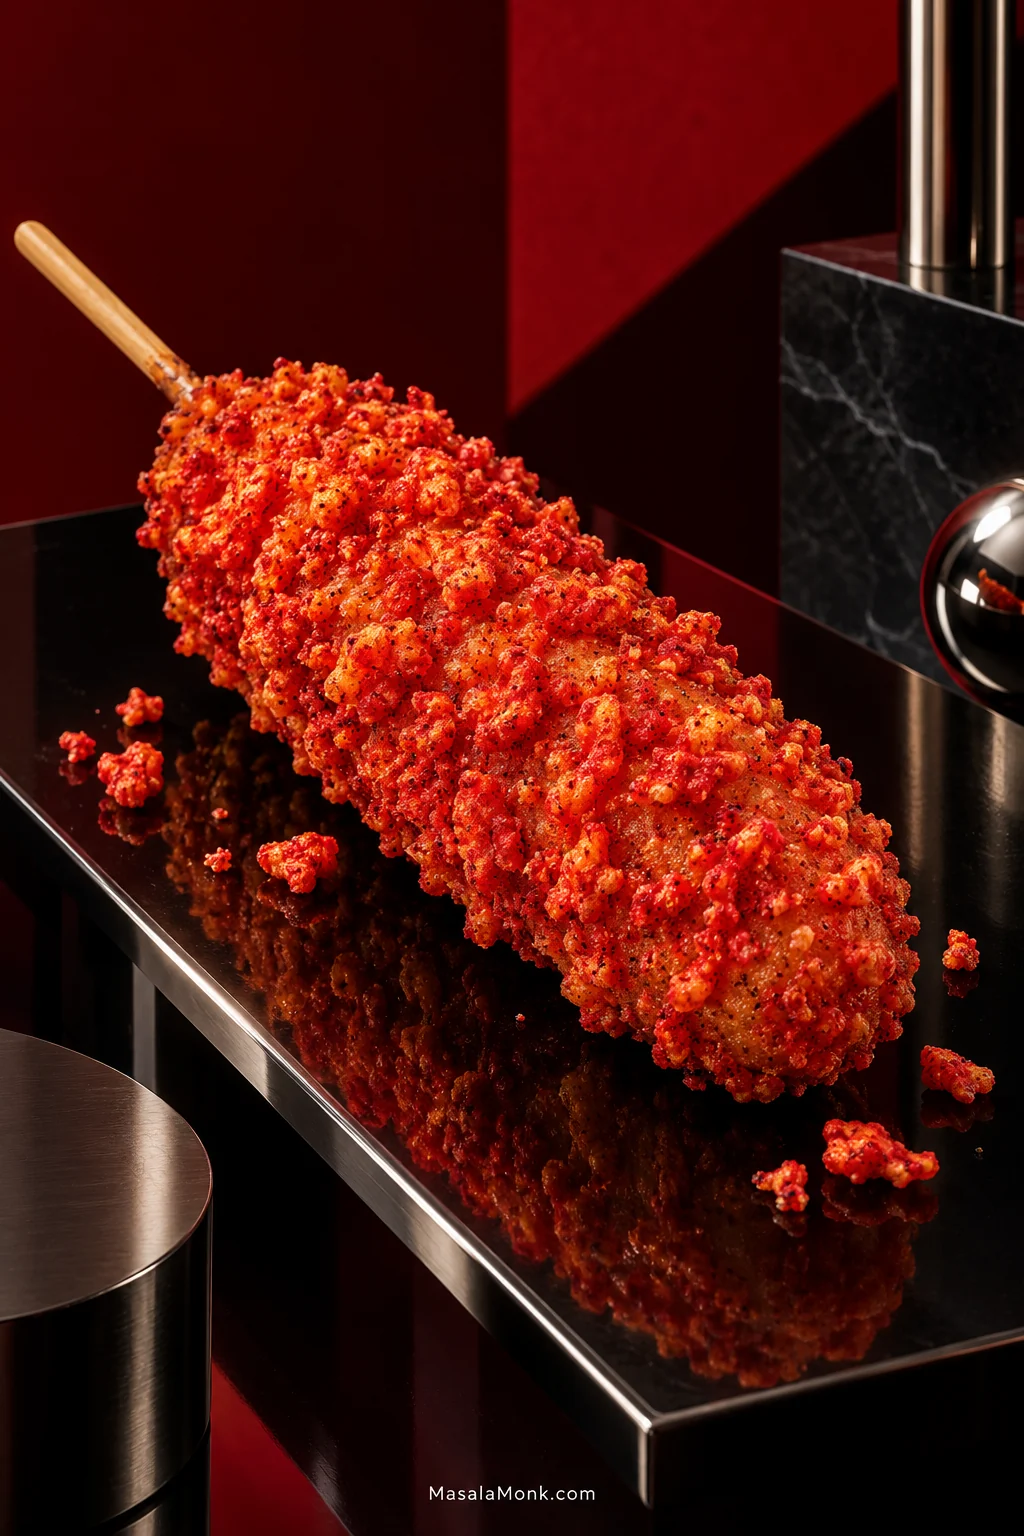
For a modern shop-style variation, Flamin’ Hot Cheetos make the coating loud on purpose: bright red, salty and spicy.
Keep enough panko in the mixture to build a complete shell, then add finely crushed Cheetos until the color and seasoning are where you want them. For the brightest red finish, you can fry in panko first, then press fine Cheeto crumbs onto the hot finished crust while there is still enough surface oil for them to cling.
If the red crumbs go into the fryer, watch the crust itself instead of waiting for ordinary golden-brown color; the seasoning makes color a poor doneness guide.
In a Flamin’ Hot Cheetos Korean corn dog, let the two crumbs do different jobs: panko helps build a complete shell, while the crushed snack brings the intense red color, salt and chile flavor. That balance works better than asking Cheetos alone to provide all the structure.
Ramen and Crispy Rice Coatings
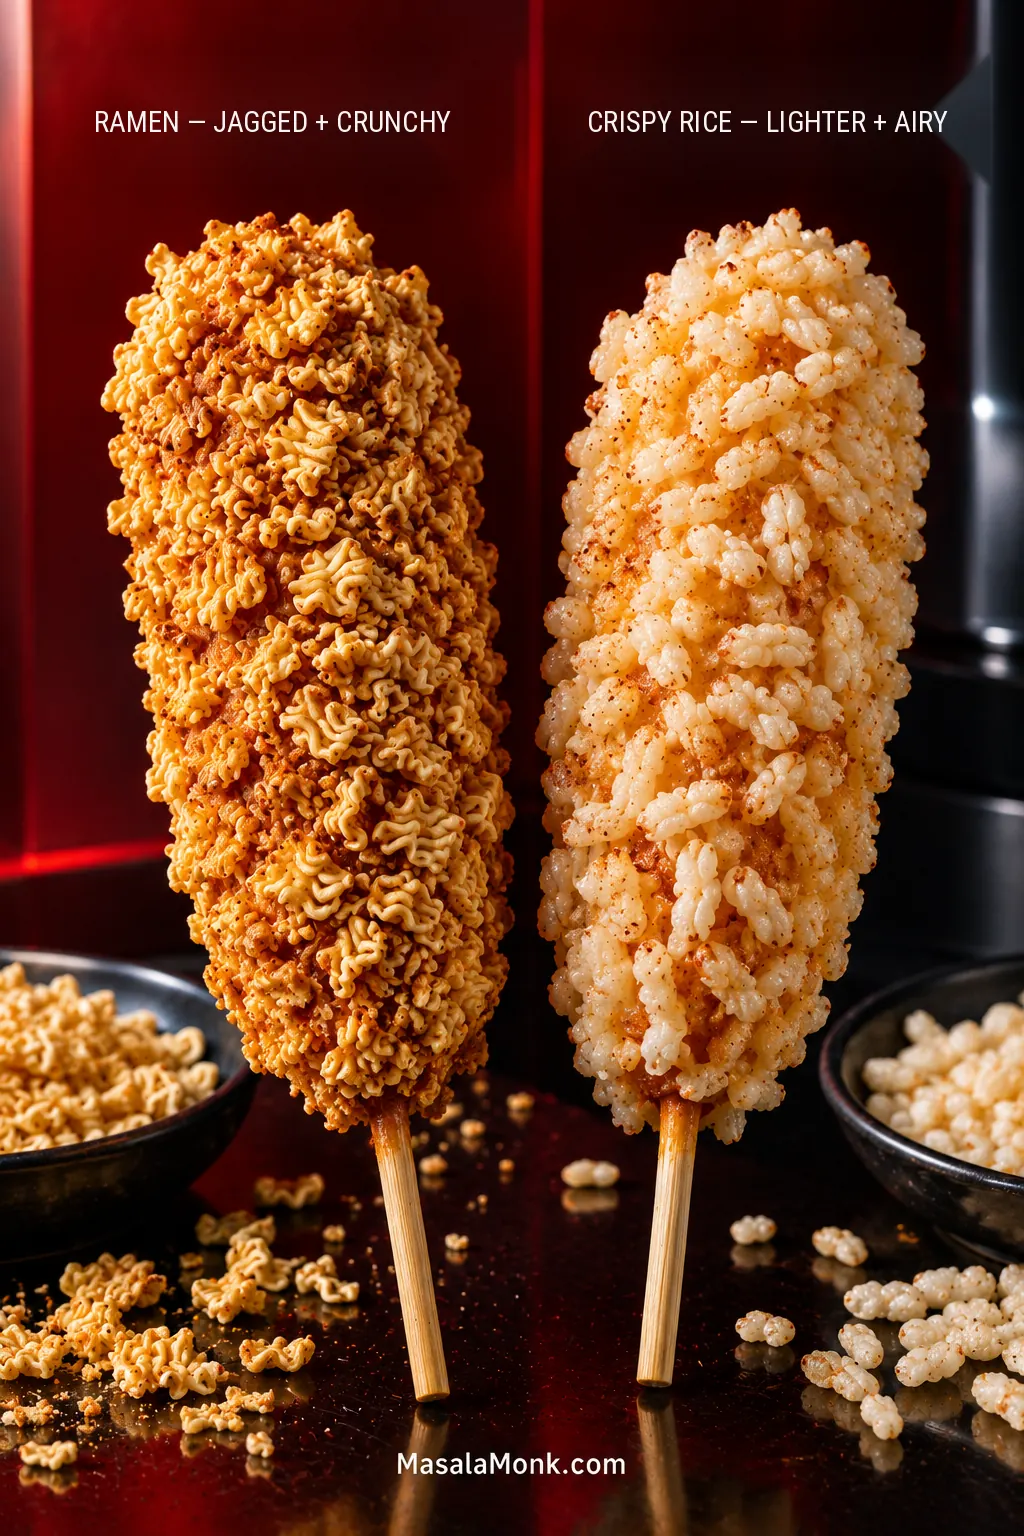
Crushed uncooked ramen gives the outside a jagged, extra-crunchy shell. Break it fairly small so the pieces can press into the sticky dough. Crispy or puffed rice makes a lighter coating; press it on firmly and use some panko to cover any bare sticky patches.
Choose by how much you want the coating to dominate the bite. Crushed ramen gives a Korean corn dog a more aggressive, jagged crunch, whereas crispy rice is lighter and lets the dough and filling stay more prominent underneath.
More Sauces and Toppings
For something creamy, try spicy mayo or gochujang mayo. Sweet chili sauce gives you a sweeter, tangier option without hiding the fried crust.
Our homemade mayonnaise guide includes spicy mayo and gochujang-mayo options if you want to make those yourself.
Start with the moment the problem appeared. That often tells you more than the problem itself.
Problem
What to Check or Do
Dough slides off
Touch the filling first. If it is shiny or damp, blot it dry and dust lightly with flour. Only then adjust the dough if it still will not cling.
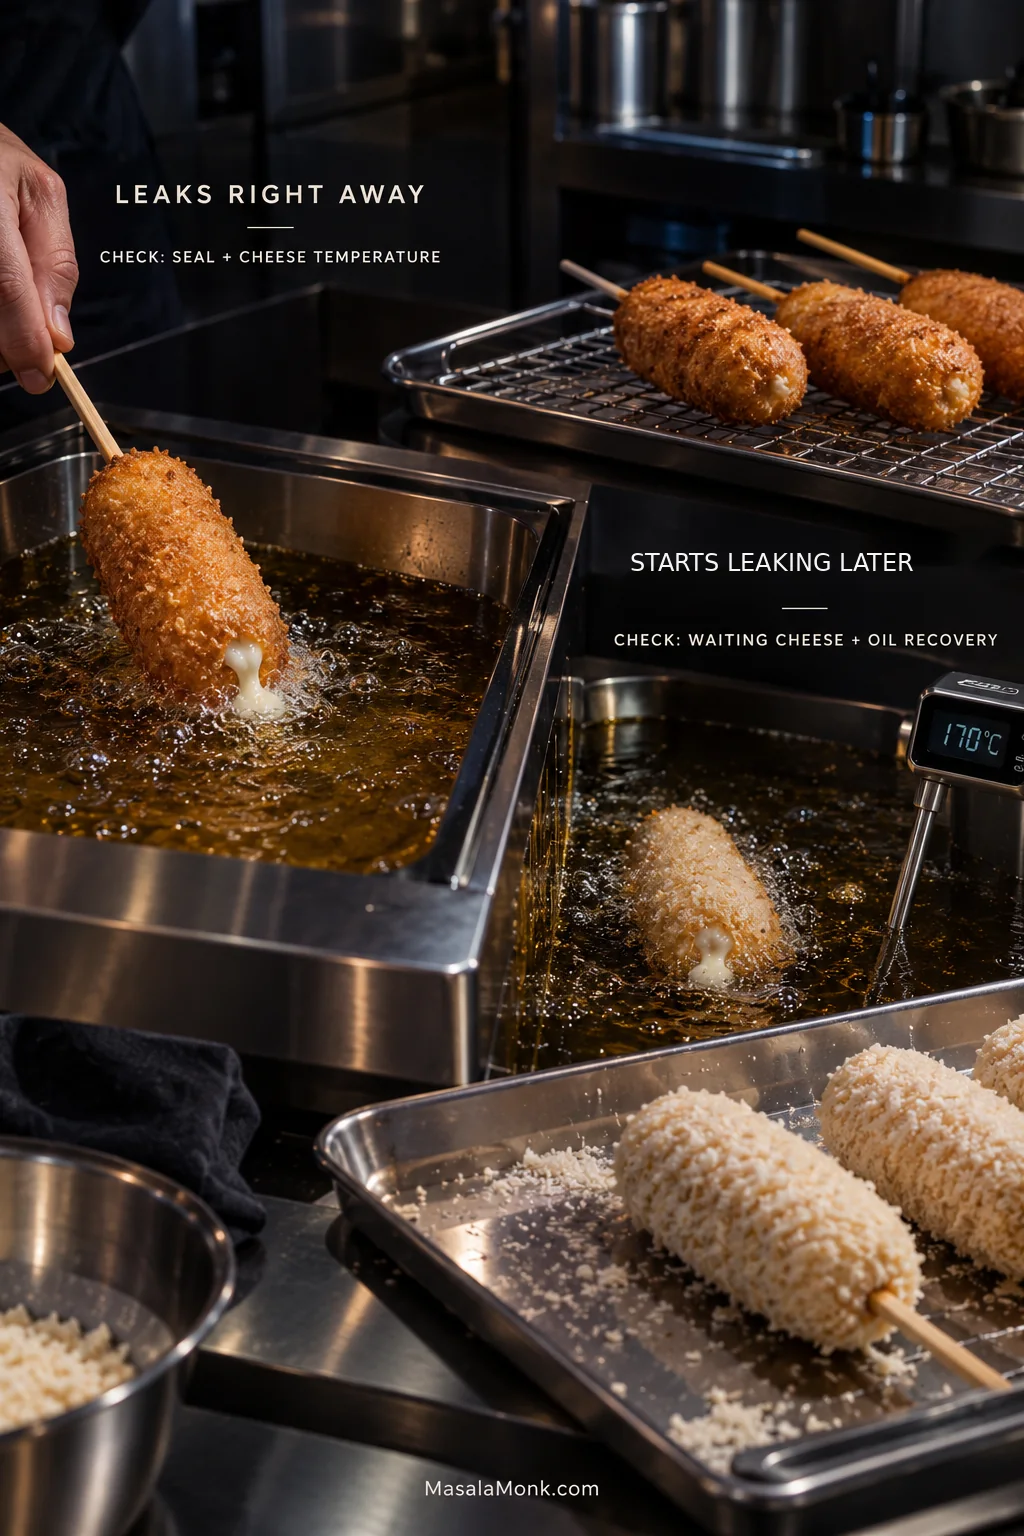
Cheese leaks immediately
Chill the filling well and look for an exposed patch around the cheese tip or join.
Later corn dogs start leaking
Keep waiting skewers cold and let the oil return to frying temperature.
Corn dog becomes mostly bread
Use less raw dough on the next skewer.
Dark outside, gummy inside
Very fast browning points to excessive heat; normal browning with a pasty center points more toward too much dough.
Pale and greasy
Let the oil recover before continuing.
Potato falls off
Dry the cubes thoroughly, dust lightly and press them firmly into the dough.
Potato stays hard
Cut smaller cubes and give them the brief blanch before coating.
Skewer spins inside the sausage
Switch to a wooden chopstick or broader bamboo skewer.
Black flecks appear on later batches
Skim burnt crumbs from the oil between batches.
Weak cheese pull
Use a substantial mozzarella baton and serve while the center is still hot.
Why Did the Cheese Start Leaking Later?
An immediate leak and one halfway through the batch tell different stories. Cheese escaping almost at once points toward warmth or a hole in the coating. If the first few work and later corn dogs begin leaking, something changed while you were frying: the waiting cheese may have warmed, or the oil may need another minute to recover.
One leak is a skewer clue; several later leaks are a batch clue. An isolated failure sends you back to that corn dog’s seal and filling, whereas repeated problems after earlier successes suggest something in the working conditions has changed.
You can assemble the sausage-and-cheese skewers earlier the same day, cover them and keep them refrigerated. Make the dough on frying day too; this dough is built for a short same-day rise rather than an overnight rest. Keep dough, panko and filling separate until close to frying time.
Can You Air Fry Homemade Korean Corn Dogs?
For this raw sticky yeast dough, deep frying works better. Hot oil sets the soft exterior quickly; in an air fryer, the coating has more time to sag before it firms.
The air fryer becomes much more useful after the corn dogs are already cooked. It crisps refrigerated leftovers well and is also a good fit for commercially frozen corn dogs designed for reheating.
Leftovers
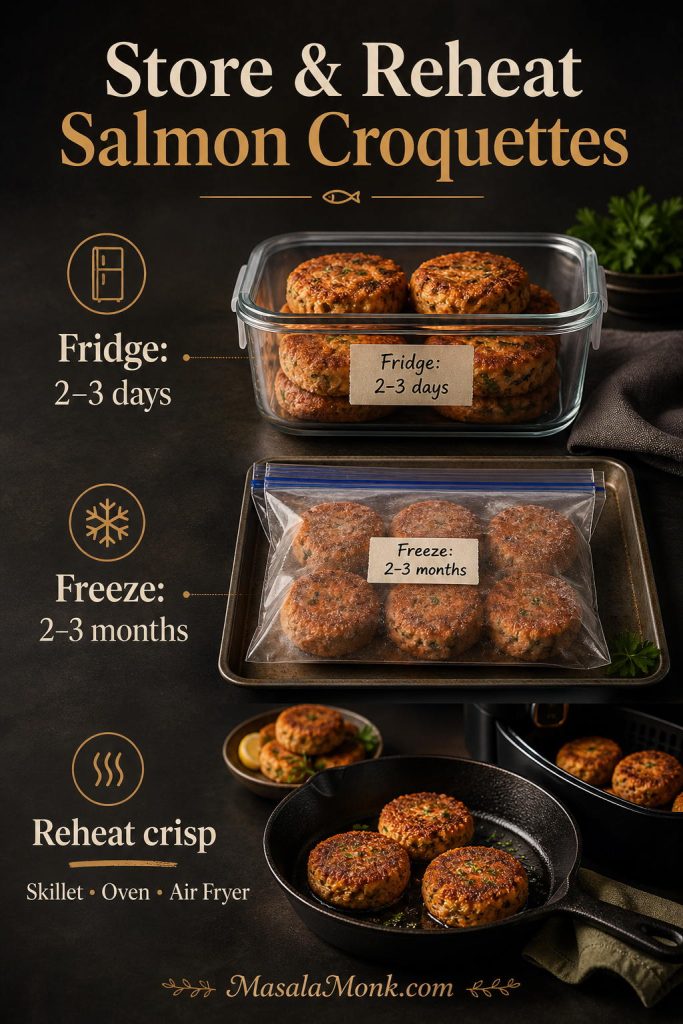
Refrigerate cooked corn dogs within 2 hours. They are at their best within 2–3 days. For longer storage, freeze them after cooling and use them within 1–2 months for best quality.
Reheating
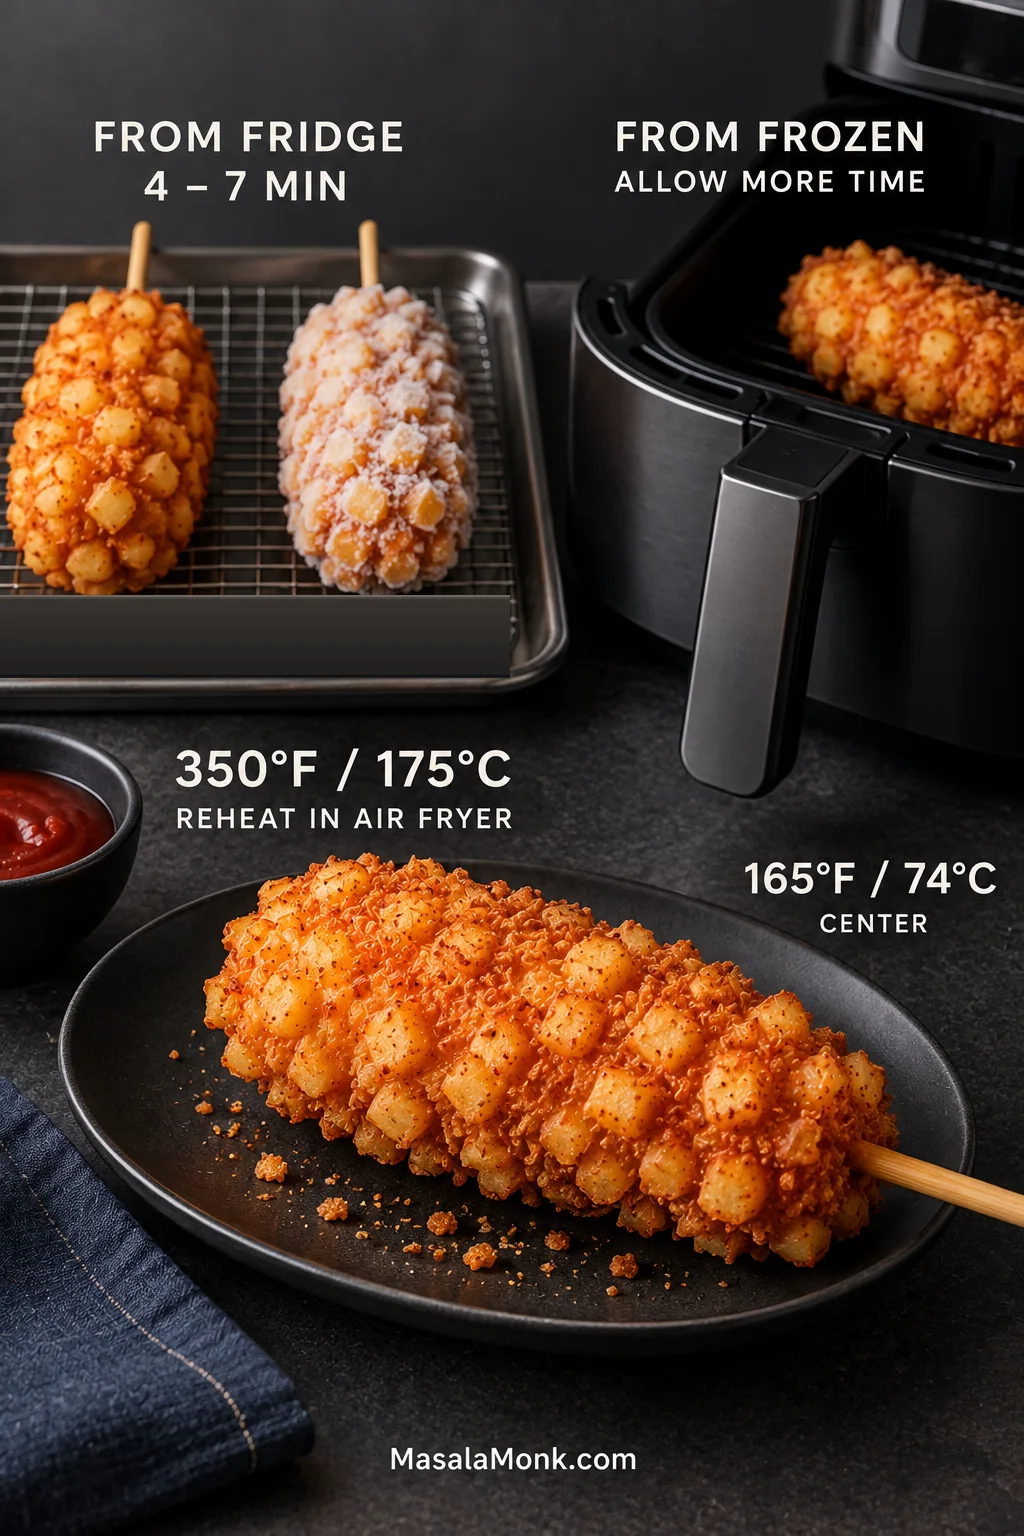
When reheating a refrigerated corn dog, air fry at 350°F / 175°C for 4–7 minutes, continuing until the shell is crisp again and the center reaches 165°F / 74°C. An oven works too; a microwave warms the center quickly but softens the panko.
Frozen leftovers can go into the air fryer from frozen at the same starting temperature. Give them more time until the outside is crisp and the center reaches 165°F / 74°C. For broader storage and reheating guidance, see the USDA leftovers and food-safety guidance.
A crisp-looking shell is not proof that the center is hot. When you reheat Korean corn dogs in the air fryer, treat exterior crunch and internal temperature as two separate checks—the panko can recover before a cold sausage-and-cheese center has fully reheated.
Once the coating rhythm clicks, the rest of the batch moves surprisingly quickly. The panko is at its crispest and the cheese at its most satisfying when you eat the corn dogs soon after frying—just give the molten center a moment before the first bite.
What did your first one do when it hit the oil? Tell us what happened.
This fish batter recipe gives you crisp, golden fried fish with a light coating that actually sticks. The main version is made without beer, using flour, cornstarch, baking powder, and ice-cold sparkling water, with a beer batter option included if you want a more classic fish-and-chips-style crust.
The goal is simple: flaky fish inside, a thin crunchy shell outside, and no soggy, greasy, or sliding batter. Below, you will find the exact batter ratio, cups and metric measurements, the right oil temperature, the best fish to use, and quick fixes for common problems like batter falling off, turning bready, or going soft after frying.
Quick Answer: What Makes This Fish Batter Recipe Crispy?
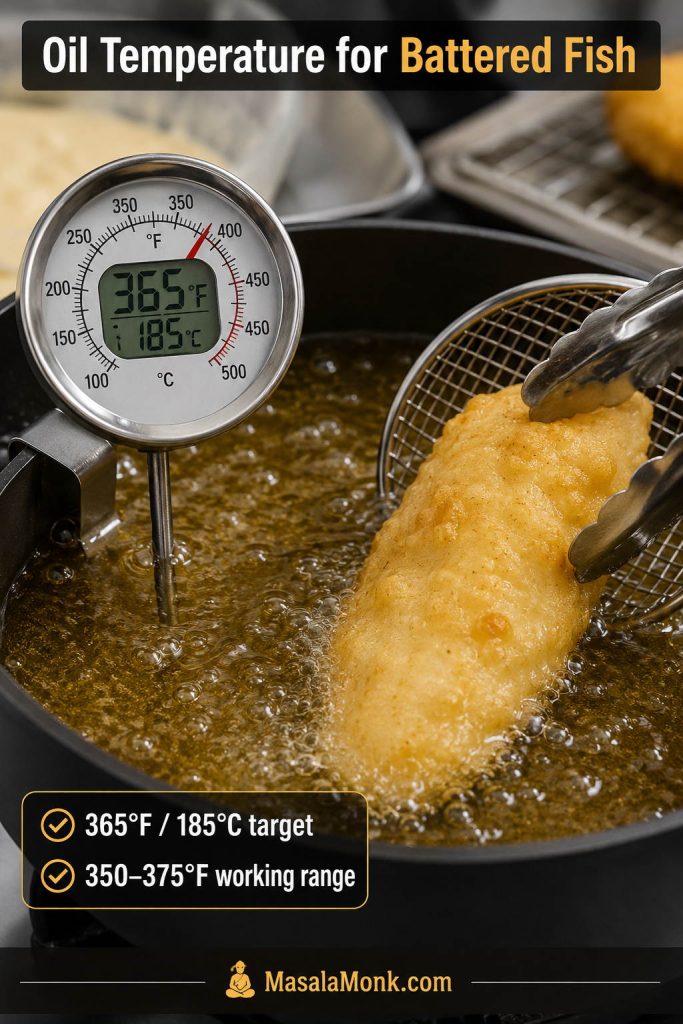
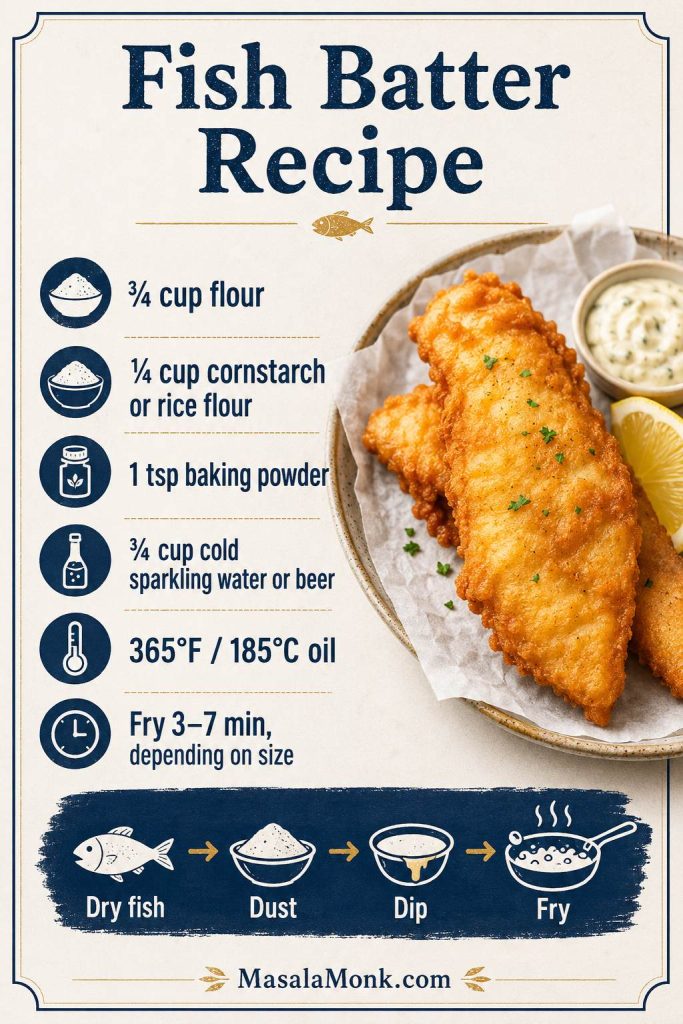
The crispiest coating comes from a mix of flour and cornstarch or rice flour, a little baking powder for lift, very cold sparkling water or beer, and hot oil. Pat the fish dry, dust it lightly with flour or cornstarch, dip it in cold batter, then fry at about 365°F / 185°C, keeping the oil between 350–375°F / 175–190°C.
The batter should look like heavy cream or loose pancake batter. It should cling to the fish, drip slowly, and leave a thin coating instead of running off instantly or piling up in thick, bready clumps.
Best first version: Use ice-cold sparkling water or club soda for a crisp no-beer coating. Use cold lager or pale ale when you want a more classic beer-battered fish-and-chips style.
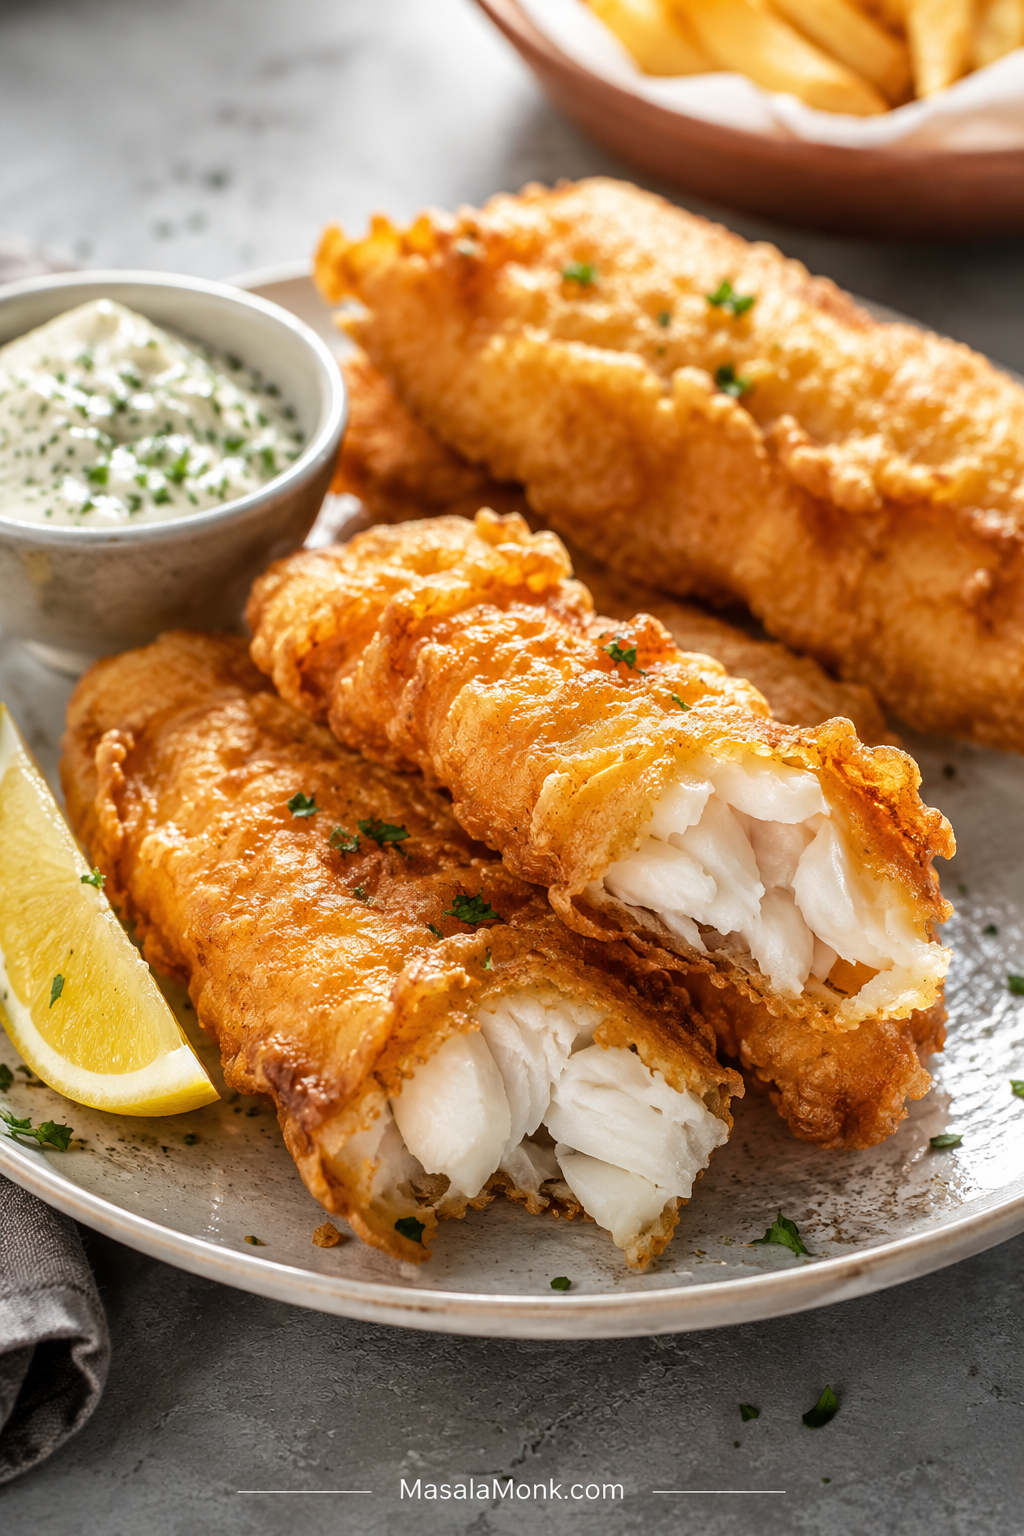
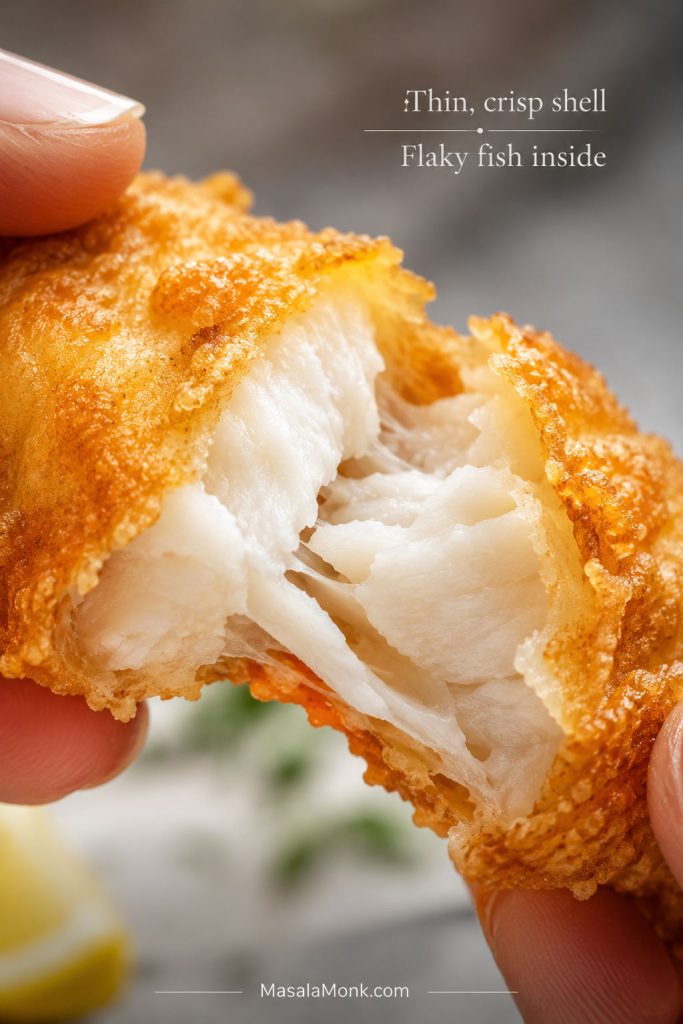
A close look at the crust tells you a lot — the best crispy fish batter forms a thin shell that cracks cleanly around tender flakes.
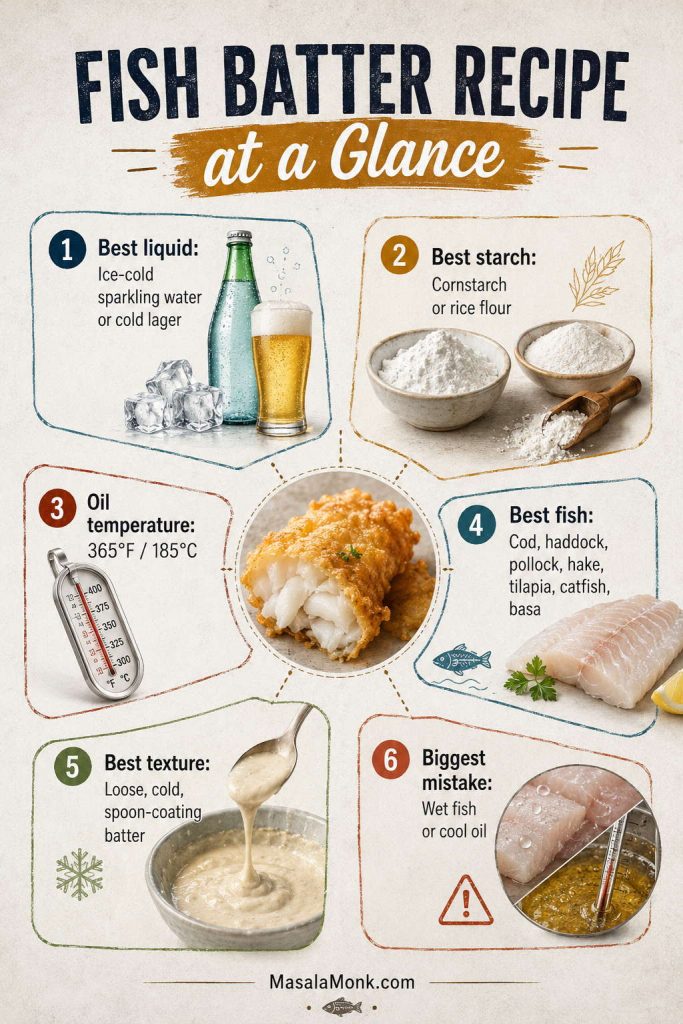
Before getting into the full method, here are the numbers and choices that matter most for this fish batter recipe: the liquid, starch, oil temperature, batter texture, and the mistake most likely to make the coating fail.
Best liquid
Ice-cold sparkling water, club soda, or cold lager
Best starch
Cornstarch for easy crispness; rice flour for a longer-lasting crunch
Best oil temperature
365°F / 185°C target, with a working range of 350–375°F / 175–190°C
Best fish
Cod, haddock, pollock, hake, tilapia, catfish, basa, or other firm white fish
Best texture
Loose, cold, lightly bubbly, and thick enough to coat the back of a spoon
Biggest mistake
Battering wet fish or frying in oil that is not hot enough
Before you start, line up the real success cues: the right starch, dry fish, spoon-coating batter, and oil hot enough to set the crust fast.
Why This Fish Batter Recipe Works
The reason this fish batter recipe works is simple: it balances structure with lift. Flour gives the mixture enough body to hold around the fish, while cornstarch or rice flour keeps the finished crust from feeling heavy. Baking powder and ice-cold bubbles help the coating puff and set quickly when it hits hot oil.
The other key is technique. Dry fish, a light dusting of flour or starch, hot oil, and a wire rack after frying all help the coating stay attached and crisp. Skip any one of those, and even a good batter can turn soggy, greasy, or patchy.
Fish Batter Ingredients You Need
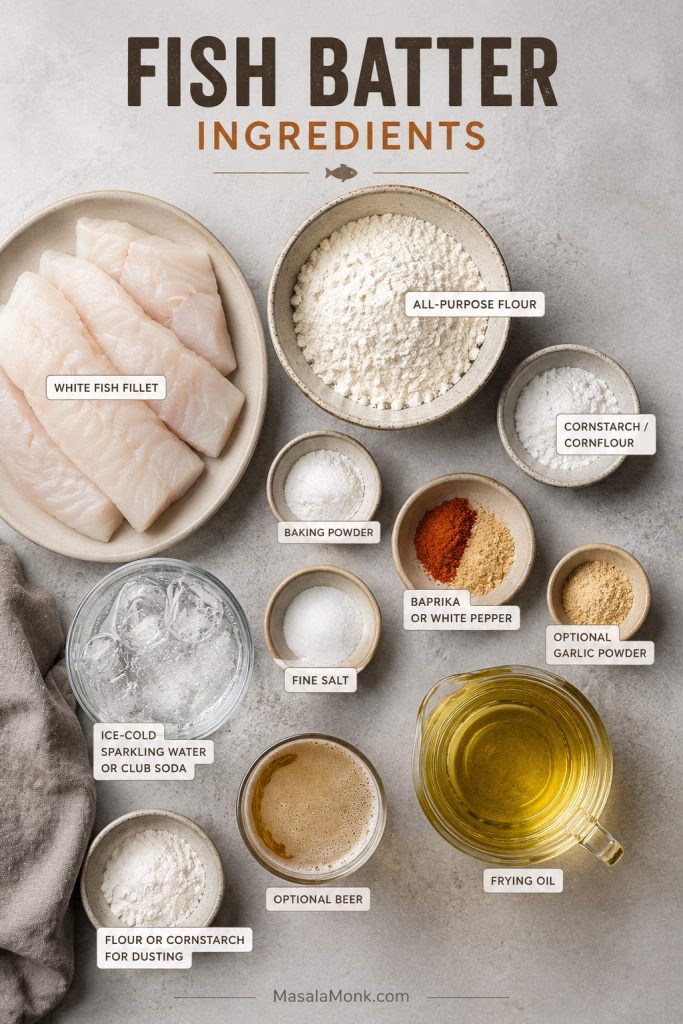
The ingredient list for this fish batter recipe is short, but each part has a job. Use the table below to see what each ingredient does and where you can adjust the batter without ruining the texture.
Ingredient
Amount
Why it matters
White fish fillets
1¼ lb / 550–600g
Firm white fish works best because it holds together and flakes cleanly after frying.
All-purpose flour
¾ cup / about 90g
Builds the base of the batter and helps the coating brown.
Cornstarch / cornflour
¼ cup / about 30g
Use cornstarch, also called cornflour in many countries. Do not use coarse cornmeal here.
Baking powder
1 teaspoon / about 4g
Adds lift so the crust fries up airy instead of dense.
Fine salt
¾ teaspoon / about 4g
Seasons the batter from the inside.
Paprika or white pepper
½ teaspoon
Adds gentle flavor and color without overpowering the fish.
Garlic powder, optional
¼–½ teaspoon
Adds a little savory depth, especially for fish tacos or casual fried fish plates.
Ice-cold sparkling water or club soda
¾ cup / 180ml, plus more if needed
Creates a light no-beer batter. Add a little more only if the mixture feels too thick.
Extra flour, cornstarch, or rice flour for dusting
¼ cup total / about 30g
Gives the wet coating something dry to grip so it does not slide off the fish.
Neutral oil
Enough for 2–3 inches depth
Canola, vegetable, sunflower, peanut, rice bran, or another neutral high-heat oil works well.
Each ingredient has a specific job here: flour builds structure, starch adds crunch, baking powder gives lift, and cold bubbles keep the coating light.
Once the basic ingredients are clear, the main choice is which starch to use for the crispest finish.
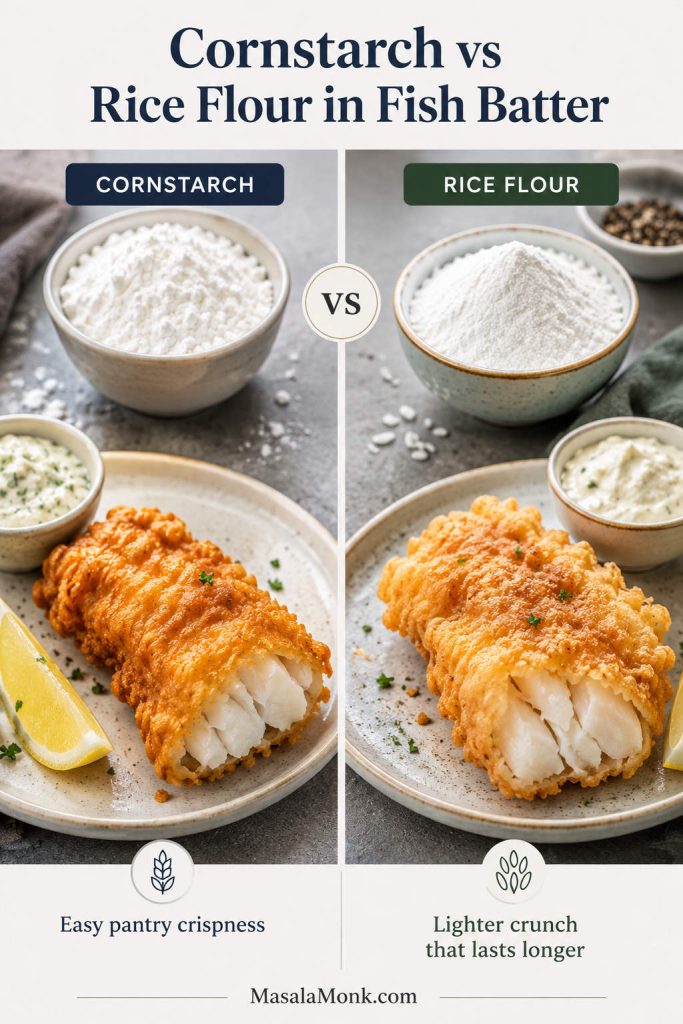
Cornstarch vs Rice Flour in Fish Batter
Cornstarch is the easiest pantry choice for a light, crisp coating. Rice flour is the upgrade when you want a more delicate crunch that stays crisp a little longer after frying. You can use either one in the same amount.
Cornstarch gives an easy crisp coating for everyday fried fish, while rice flour is useful when you want a lighter, more delicate crunch.
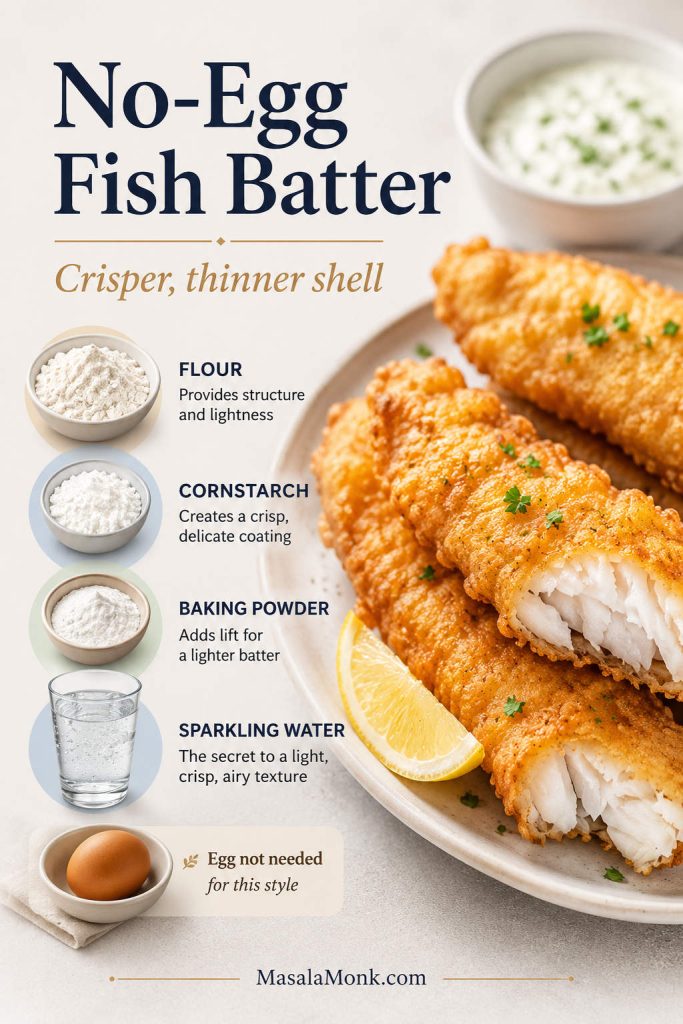
Do You Need Egg in Fish Batter?
No. For this style of no-egg fish batter recipe, skipping the egg gives you a thinner, crisper shell. Egg makes the coating richer and puffier, but it can also make the crust more cakey or chewy. Add egg only if you prefer a thicker, softer coating.
Instead of using egg, this batter relies on starch, baking powder, and cold sparkling water for a thinner, crisper shell.
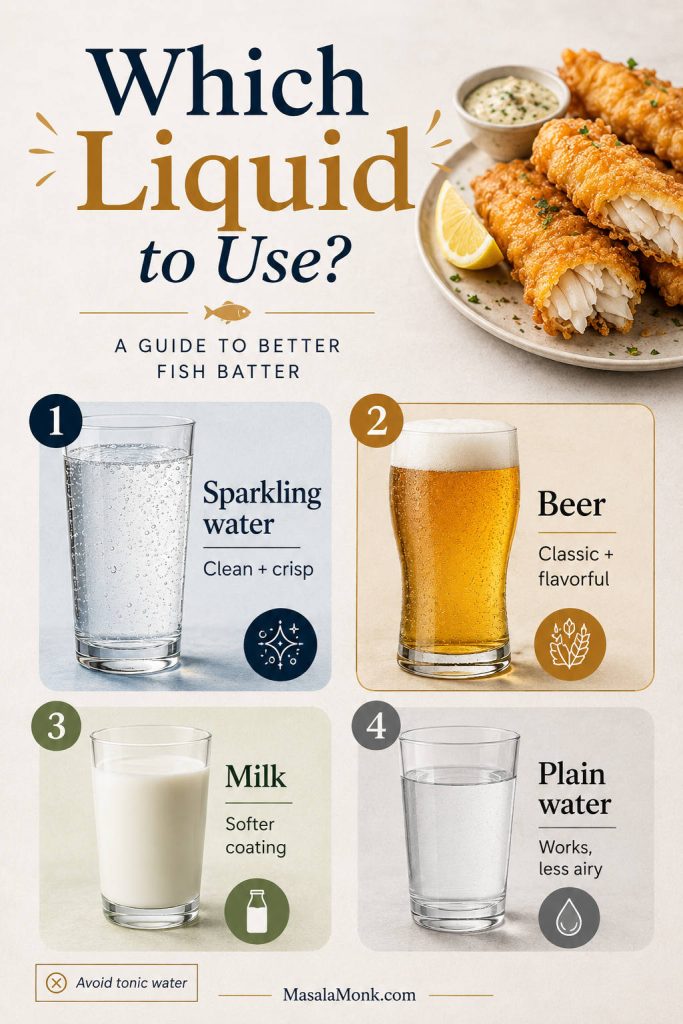
Milk, Water, Sparkling Water, or Beer?
The liquid changes the personality of the batter. Milk makes a softer, slightly richer coating, but it is not the best choice when you want the lightest crunch. Plain cold water works, but the crust is usually less airy. Sparkling water, club soda, seltzer, or cold beer gives the batter bubbles, which helps the coating fry up lighter.
For the cleanest no-beer version, use sparkling water or club soda. For a pub-style flavor, use cold lager or pale ale.
Avoid tonic water unless you specifically want bitterness and sweetness in the coating. For a neutral crispy fish batter, sparkling water, club soda, or seltzer is a better choice.
Choose the liquid based on the result you want: sparkling water for clean crispness, beer for classic fish-and-chips flavor, and milk only for a softer coating.
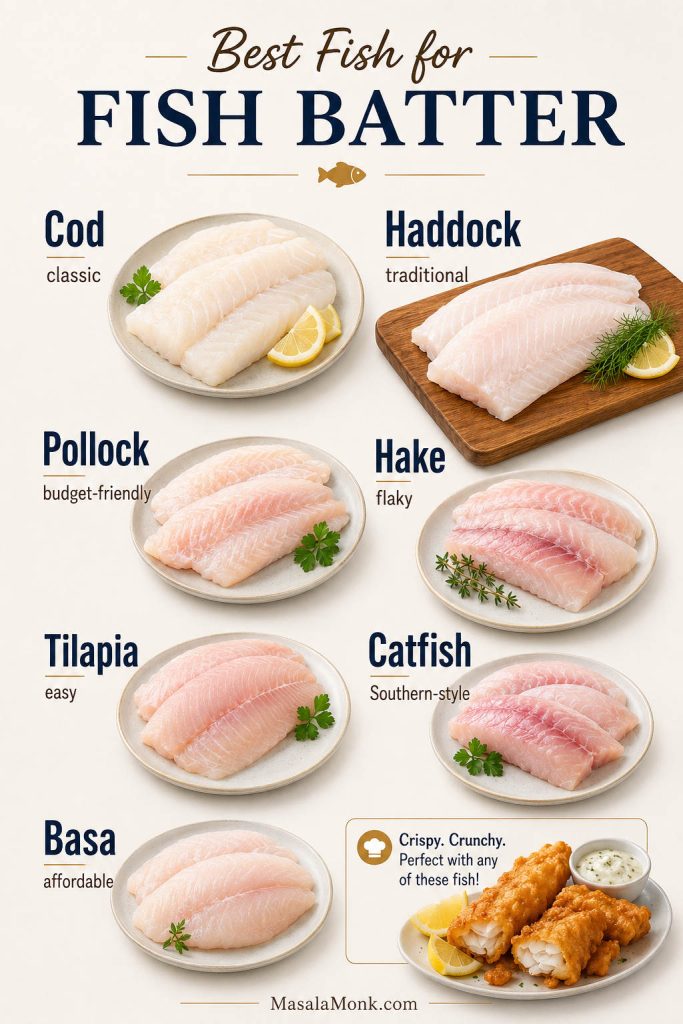
The best fish for this fish batter recipe is firm, mild, and not too wet. White fish fillets are the safest place to start because they cook quickly, flake nicely, and let the golden crust stay the main event.
Fish
Why it works
Cod
Classic choice for battered fish and fish and chips; firm, mild, and flaky.
Haddock
Traditional, flavorful, and excellent with a crisp golden coating.
Pollock
Budget-friendly, mild, and easy to fry in strips.
Hake
Soft and flaky, especially good for fish-and-chips-style dinners.
Tilapia
Accessible, thin, and quick-cooking; dry it very well before battering.
Catfish
Great for a Southern-style fried fish direction.
Basa
Mild and affordable; works well if it is patted very dry first.
Halibut
Firm and premium, but watch the cook time so it does not dry out.
Shrimp or calamari
The same batter works, but the frying time will be shorter than fish fillets.
Firm white fish works best because it can handle dipping, frying, and turning without falling apart in the batter.
If you are planning to use the fried fish in tortillas instead of serving it with chips, this same coating works beautifully as a crisp base for fish tacos.
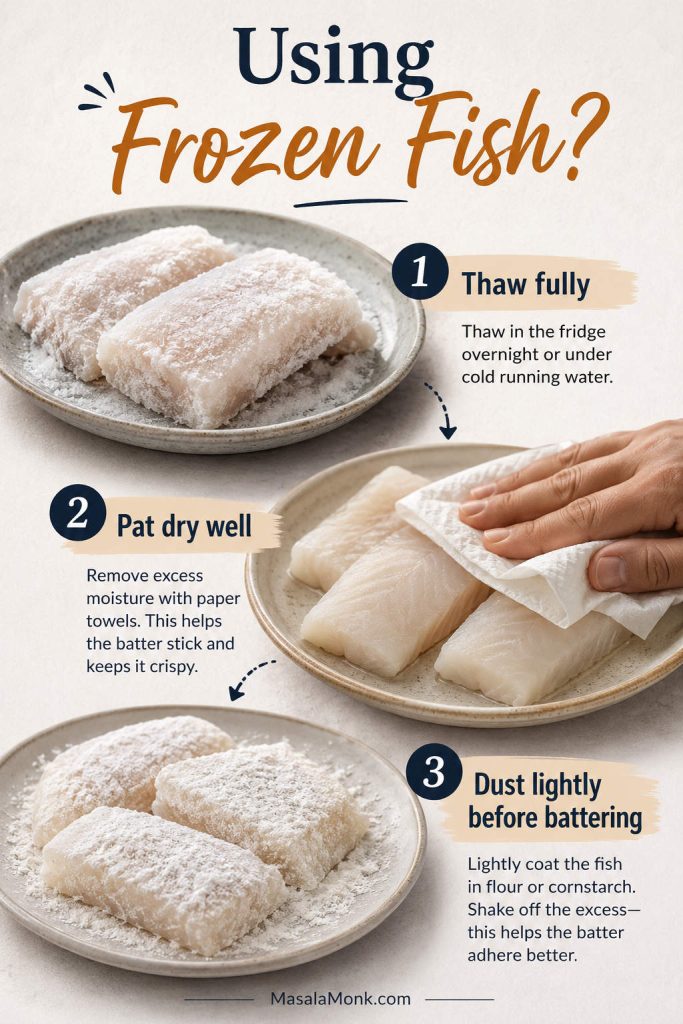
Can You Use Frozen Fish?
Yes, frozen fish can work well, but it needs extra attention before it goes anywhere near the batter.
Thaw it completely first and dry it very well. Frozen fish often releases extra moisture, and that moisture can make the batter slide off or turn soft in the oil. For best results, thaw the fish in the refrigerator, pat it dry with paper towels, let it sit uncovered for a few minutes if it still feels wet, then dust it lightly before dipping. Do not batter fish while it is still icy or partially frozen.
Frozen fish needs one extra step before battering: thaw it fully, remove surface moisture, then dust it lightly so the coating can grip.
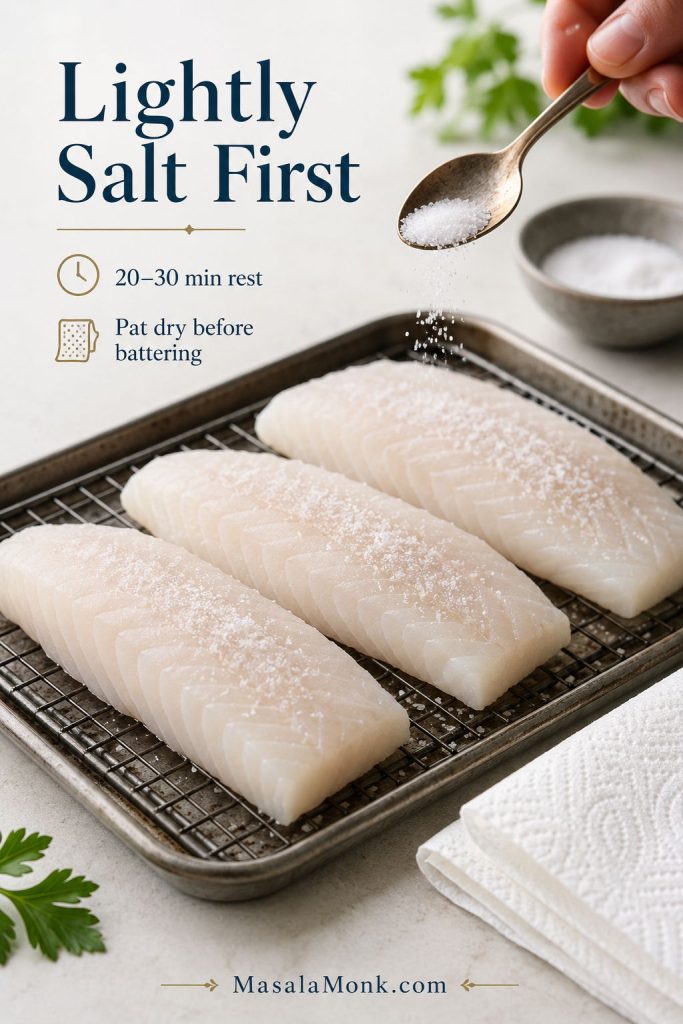
Optional Pro Step: Lightly Salt the Fish First
If you have extra time, lightly salt the fish before battering. Use about ¼ teaspoon fine salt per 1 lb / 450g fish, then let the pieces rest uncovered in the refrigerator. Even 20–30 minutes helps draw a little moisture from the surface. If you are planning ahead, you can salt thicker fillets a few hours earlier, then pat them dry before dusting and dipping.
This step is not required for a quick dinner, but it gives you firmer, better-seasoned fish and helps reduce the watery layer that can make batter slide off.
A short salted rest seasons the fish from the surface inward and helps draw away moisture before dusting and dipping.
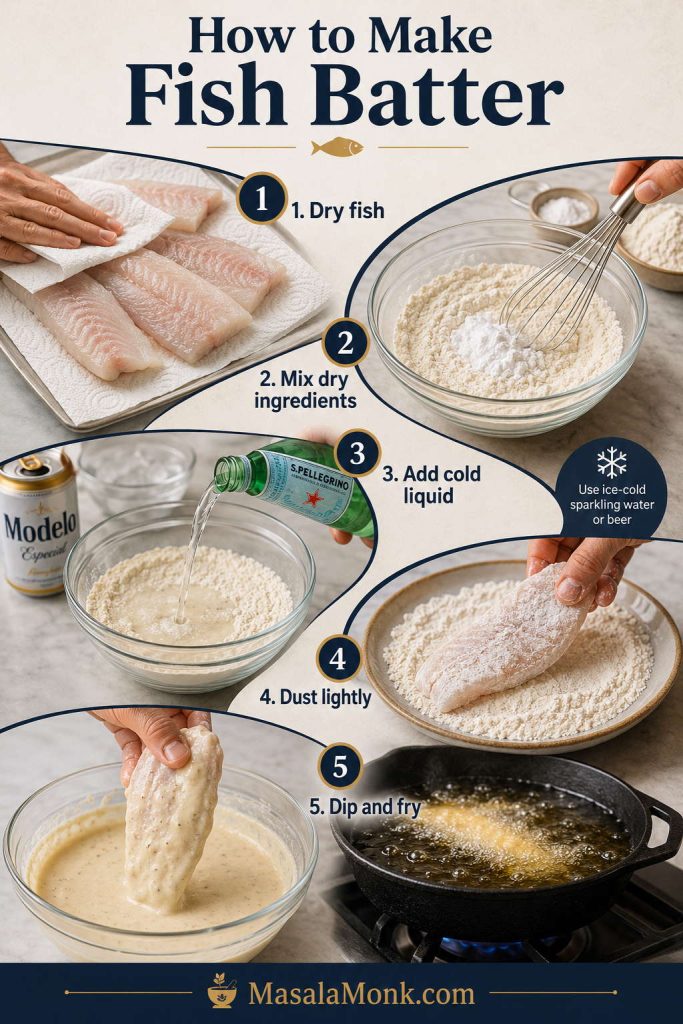
When you are ready to fry, make this fish batter recipe right before the fish goes into the oil. Once the sparkling water or beer is added, the bubbles start fading, so a freshly mixed, cold batter gives you the lightest crust.
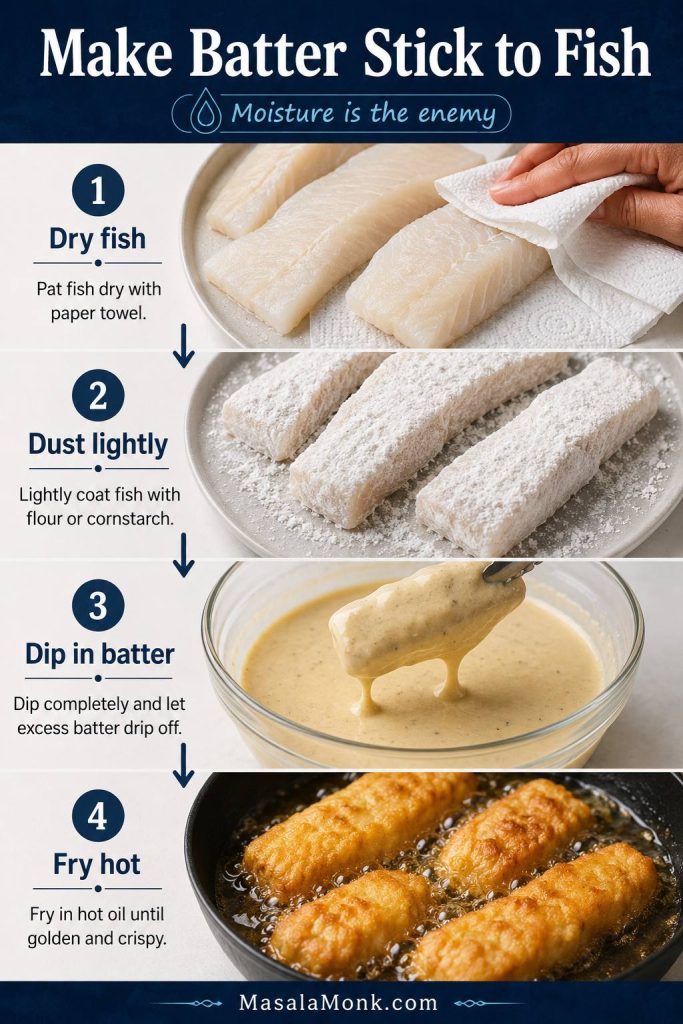
Dry the fish well. Pat the fillets with paper towels until the surface no longer feels wet. Moisture is one of the main reasons batter slips off.
Cut even pieces. Slice the fish into strips about 1 inch wide, or into batons around 3 x 1¼ inches / 7–8 x 3cm.
Mix the dry ingredients. Whisk the flour, cornstarch, baking powder, salt, and seasoning in a bowl.
Add cold liquid. Pour in ice-cold sparkling water or club soda and whisk only until combined. Small lumps are fine.
Dust the fish. Lightly coat each piece with flour, cornstarch, or rice flour, then shake off the excess.
Dip and coat. Lower the fish into the batter, turn to coat, and let the extra drip off for a second.
Fry right away. Slide the fish gently into hot oil and let the crust set before moving it.
Once the fish is dry and the oil is heating, mix the wet batter last so the bubbles are still active when the fish goes in.
Texture cue: The batter should be thinner than pancake batter but thicker than milk. It should coat the back of a spoon and drip slowly.
Should You Rest Fish Batter?
For this quick sparkling-water batter, use it soon after mixing. The bubbles are part of what makes the coating light, and they fade as the batter sits.
Some traditional fish-and-chips recipes rest the batter for 30 minutes or longer, especially when using beer and a thicker flour-cornflour mixture. That can work, but for the lightest no-beer version here, mix the wet batter only when the fish is dry, the oil is heating, and your rack is ready.
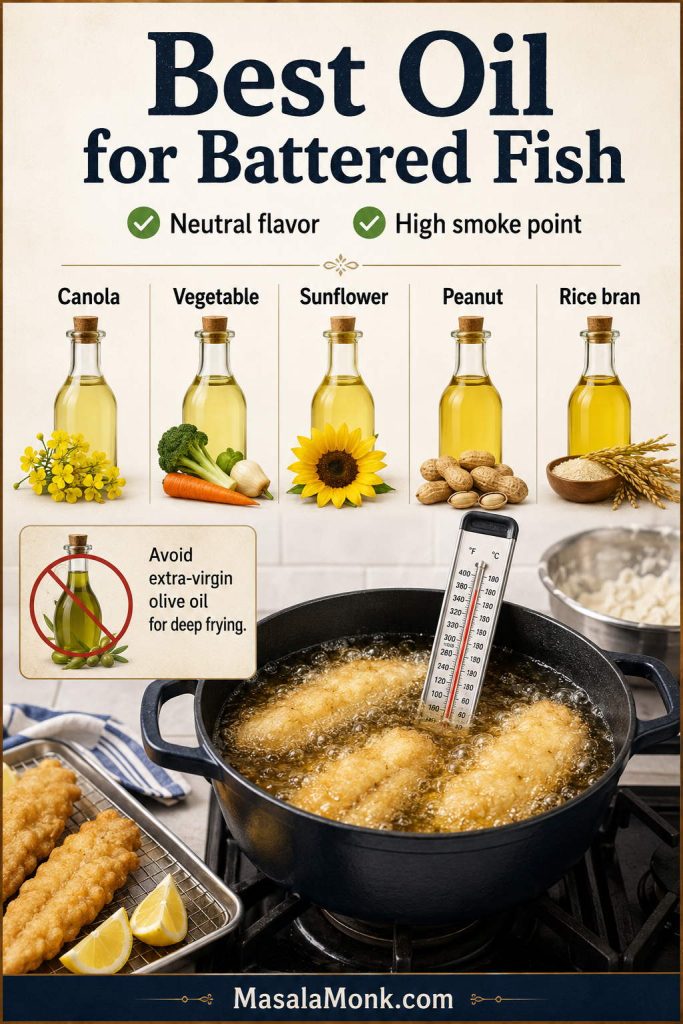
Use a neutral, high-heat oil such as canola, vegetable, sunflower, peanut, or rice bran oil. These oils let the fish and crisp coating stay the focus instead of adding a strong flavor.
Choose an oil with a high smoke point and a neutral flavor so the batter can brown cleanly without tasting heavy, burnt, or oily.
Avoid extra-virgin olive oil for deep frying this batter because its flavor is stronger and it is not the easiest choice for holding a steady frying temperature. Whatever oil you use, give it enough time to return to the right temperature between batches.
If the oil smells strongly fishy, looks dark, or has a lot of burnt batter bits floating in it, strain it carefully after cooling or discard it. Old, dirty oil can make fresh fish taste heavy and bitter.
A neutral high-heat oil lets the fish batter brown cleanly, while strong or overheated oil can make the crust taste heavy.
How to Fry Battered Fish So It Stays Crispy
Heat the oil to 365°F / 185°C, then keep it between 350–375°F / 175–190°C as the fish fries. Oil that runs too cool makes the coating greasy; oil that runs too hot browns the outside before the fish cooks through.
Aim for 365°F / 185°C before the first piece goes in, then let the oil recover between batches for a crisp, non-greasy coating.
A few small habits make a big difference once the fish hits the oil.
Use a Dutch oven, deep heavy pot, or deep fryer.
Add enough oil for a 2–3 inch depth, without filling the pot more than halfway.
Use a thermometer instead of guessing by sight.
Fry in small batches so the oil temperature stays steady.
Give the crust a moment to set before turning or moving the fish.
Drain on a wire rack set over a baking sheet, not directly on a flat plate.
Salt lightly while the fish is hot.
Leave the fried fish uncovered so steam does not soften the crust.
For unevenly cut pieces, fry one test piece first. That first piece shows whether the oil is hot enough, whether the batter texture is right, and how long the rest of the batch needs.
How Long to Fry Battered Fish
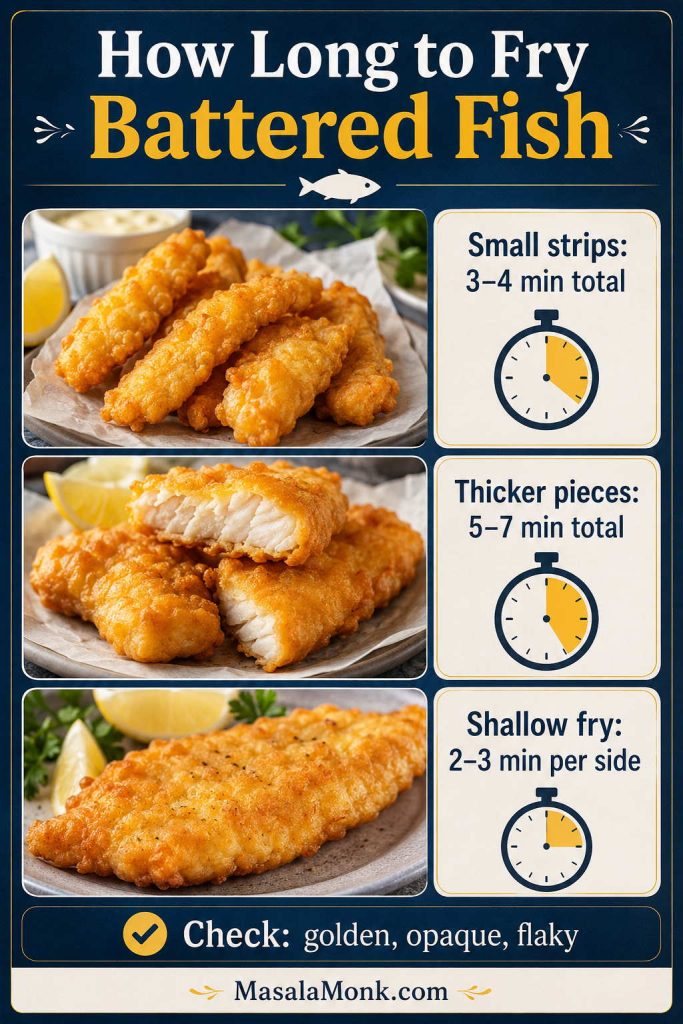
Most small battered fish strips take about 3–4 minutes total in deep oil. Thicker fillets or larger fish pieces may take 5–7 minutes total, depending on thickness. For shallow frying, plan on roughly 2–3 minutes per side.
Use color and doneness together. The crust should be golden and crisp, and the fish inside should look opaque and flake easily when checked with a fork.
Fry time changes with thickness: small strips cook quickly, thicker pieces need longer, and shallow-fried fish needs careful turning.
How to Keep Battered Fish Warm Between Batches
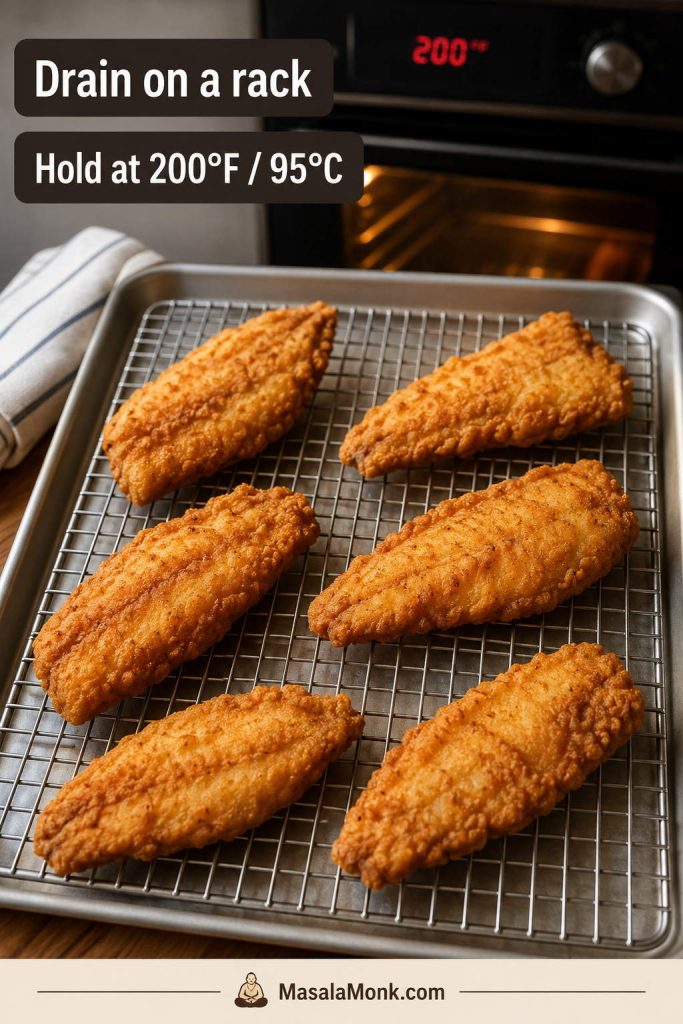
When frying in batches, place the cooked fish on a wire rack set over a baking sheet and keep it in a 200°F / 95°C oven while the next batch cooks. Keep the pieces in a single layer and avoid covering them tightly, or steam will soften the crust.
After frying, a wire rack keeps the underside from steaming, which helps the battered fish stay crisp while the next batch cooks.
Deep frying also needs basic safety. Use a deep pot, do not fill it more than halfway with oil, lower the fish gently, keep children and pets away from the stove, and never leave hot oil unattended. If oil ever smokes heavily, turn off the heat and let it cool; never add water to hot oil.
Shallow Fry vs Deep Fry for Battered Fish
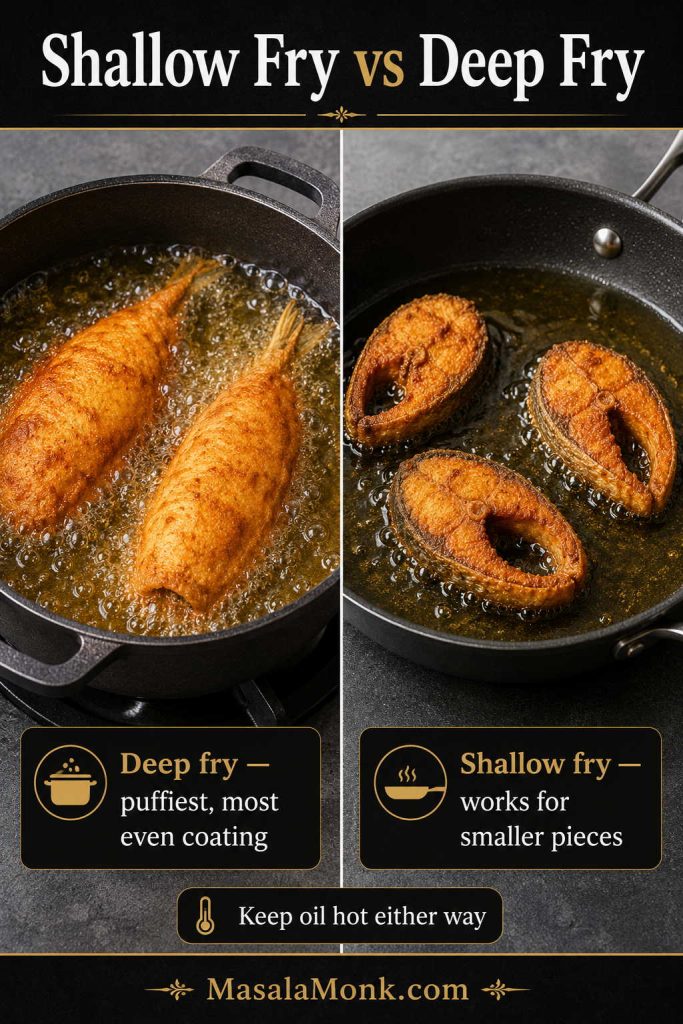
For the most even coating, deep frying is the easier route because the fish is surrounded by hot oil. It is the simplest way to get a fully puffed, crisp shell on all sides.
Shallow frying can still work, especially with smaller pieces. Use enough oil to come at least halfway up the fish, let the first side set before turning, and flip gently so the coating does not tear. The crust may be a little flatter than deep-fried batter, but it can still be crisp and golden if the oil stays hot.
Best home compromise: Use a deep heavy skillet with 1–1½ inches of oil for smaller fish pieces. It uses less oil than deep frying but gives the batter more room to puff than a very shallow pan-fry.
Deep frying gives the most even puffed coating, but shallow frying can still work well when the pieces are smaller and the oil stays hot.
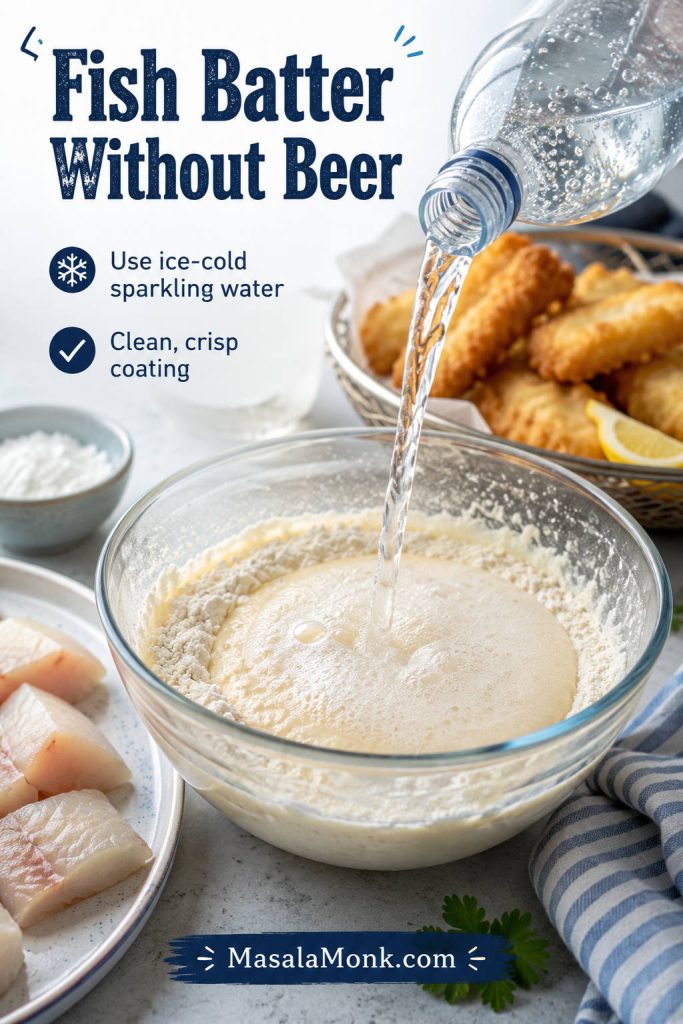
Fish Batter Without Beer
For a no-beer fish batter recipe, sparkling water is the easiest swap. Use ice-cold sparkling water, club soda, or seltzer so the batter still fries up light and delicate without beer flavor. Plain cold water works in a pinch, but the crust will usually be a little less airy.
This is the easiest version to start with because it works for fried fish, fish tacos, seafood, and fish-and-chips-style dinners. It also keeps the flavor clean, so the fish, seasoning, sauce, and sides can do more of the work.
No-beer shortcut: Start with ¾ cup / 180ml ice-cold club soda. Add 1 tablespoon more at a time only if the batter is too thick.
For fish batter without beer, club soda or sparkling water keeps the coating light while letting the fish stay clean and mild.
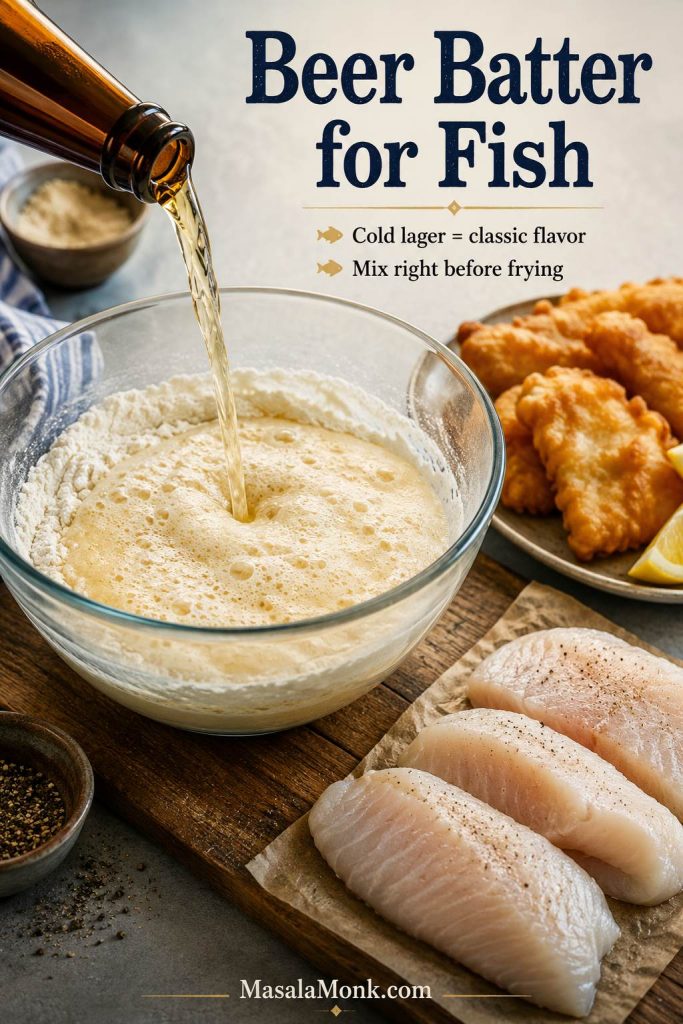
Beer Batter for Fish
To make a beer-battered version, replace the sparkling water with ¾ cup / 180ml very cold lager or pale ale. Keep the beer cold, whisk only until the batter comes together, and fry right away while the mixture is still lively.
Lager is the safest first choice because it gives a clean, crisp finish without taking over the fish. Pale ale adds a little more flavor. Very dark beers can make the coating taste heavier or more bitter, so save them for times when you specifically want that deeper flavor.
Beer batter works because cold lager or pale ale brings both bubbles and flavor; mix it right before frying so the coating stays light.
Extra-Crisp Beer Batter Upgrade
For a more delicate, extra-crisp beer batter, use rice flour instead of cornstarch and replace 2 tablespoons / 30ml of the beer with vodka. This is not an alcohol-free option; it is simply an advanced crispness upgrade. The vodka helps the coating fry up lighter because it evaporates quickly and limits gluten development. Keep this as an upgrade, not the basic version, because the sparkling-water batter above is easier and more flexible for everyday cooking.
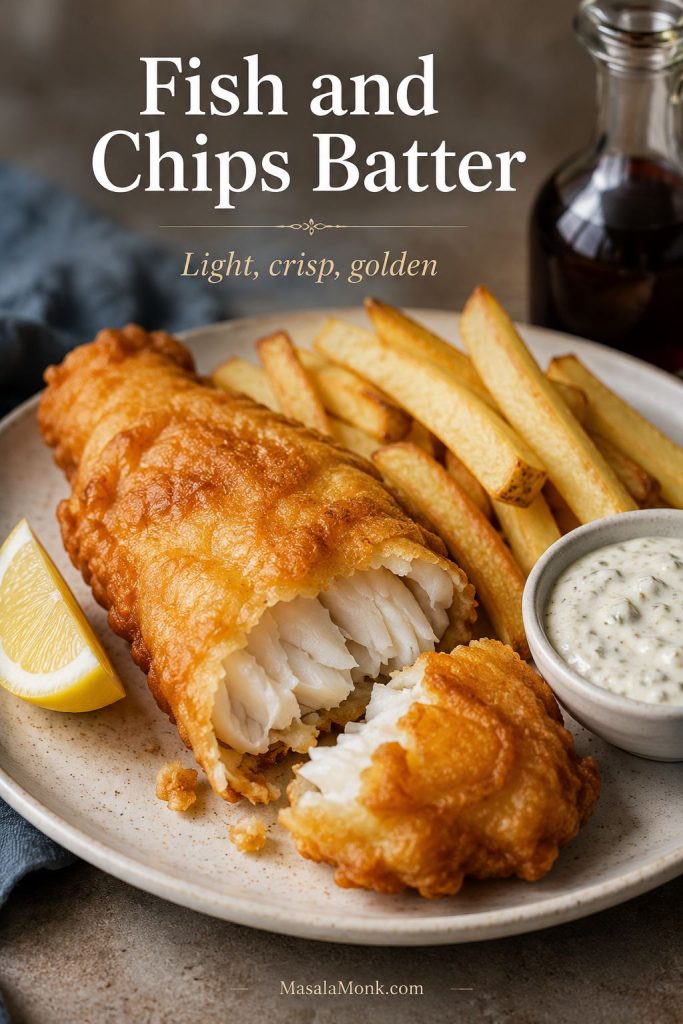
Fish and Chips Batter
For fish and chips, the coating should be light, bubbly, and crisp enough to hold up beside hot chips and tartar sauce. Cod, haddock, and hake are especially good choices because they give you thick flakes inside a golden shell.
A fish-and-chips-style batter often uses flour, cornflour or cornstarch, baking powder, and either cold beer, sparkling water, or a mix of both. The recipe on this page works well for that style, especially if you use lager instead of sparkling water and keep the batter very cold.
If you are making the full plate with chips, tartar sauce, timing, and serving ideas, see our fish and chips recipe. For a bolder plate with chutney dips, masala seasoning, and Indian-style serving ideas, you can also try these fish and chips with Indian twists.
Fish and chips batter should be sturdy enough to hold its crunch beside fries and sauce, but still thin enough to let the fish flake cleanly.
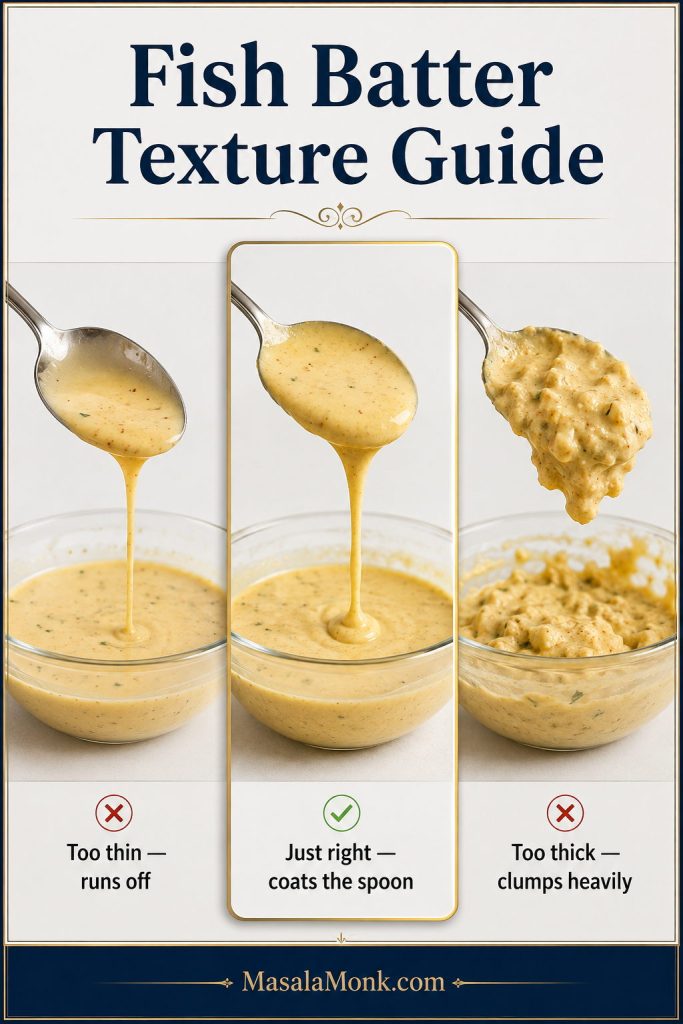
Fish Batter Texture Guide
Texture matters as much as the ingredient list. If the mixture is too thin, it slides off. If it is too thick, it fries into a heavy, bready layer. Aim for a loose, cold batter that coats the fish lightly and drips slowly.
Batter texture
What it looks like
How to fix it
Too thin
Runs off the fish immediately.
Add 1 tablespoon flour or cornstarch at a time.
Just right
Coats like heavy cream and drips slowly.
Use it immediately while cold and bubbly.
Too thick
Clings in heavy blobs or makes a bready crust.
Add 1 tablespoon ice-cold sparkling water or beer at a time.
Lumpy
Small lumps, but no dry pockets of flour.
Usually fine. Do not overmix just to make it perfectly smooth.
Flat or warm
No bubbles, no lift, heavy coating.
Chill briefly or remake with fresh cold fizzy liquid.
Batter texture matters as much as the recipe ratio: too thin slides off, too thick turns bready, and just right coats the spoon in a slow ribbon.
How to Make Batter Stick to Fish
When batter falls off, the recipe usually is not the real problem. Most of the time, the fish was too wet, the surface was not dusted first, the coating was too watery, or the oil was not hot enough when the fish went in.
Before dipping, dry the fish well and give it a light dusting of flour, cornstarch, or rice flour. That dry layer acts like a bridge between the fish and the wet batter, helping the crust set quickly instead of sliding away in the oil.
Pat the fish very dry before seasoning.
Dust with flour, cornstarch, or rice flour before dipping.
Shake off extra dusting flour so the coating is not pasty.
Make sure the batter is not watery.
Keep the oil in the 350–375°F / 175–190°C range.
Lower the fish into the oil gently and away from you.
Do not poke, flip, or drag the fish before the crust sets.
When batter falls off fish, moisture is usually the problem; drying and dusting create the grip the wet batter needs.
What to Serve with Battered Fish
For the best crunch, serve the fish within a few minutes of frying. Battered fish can be held briefly in a low oven, but it is always crispiest right after it leaves the oil.
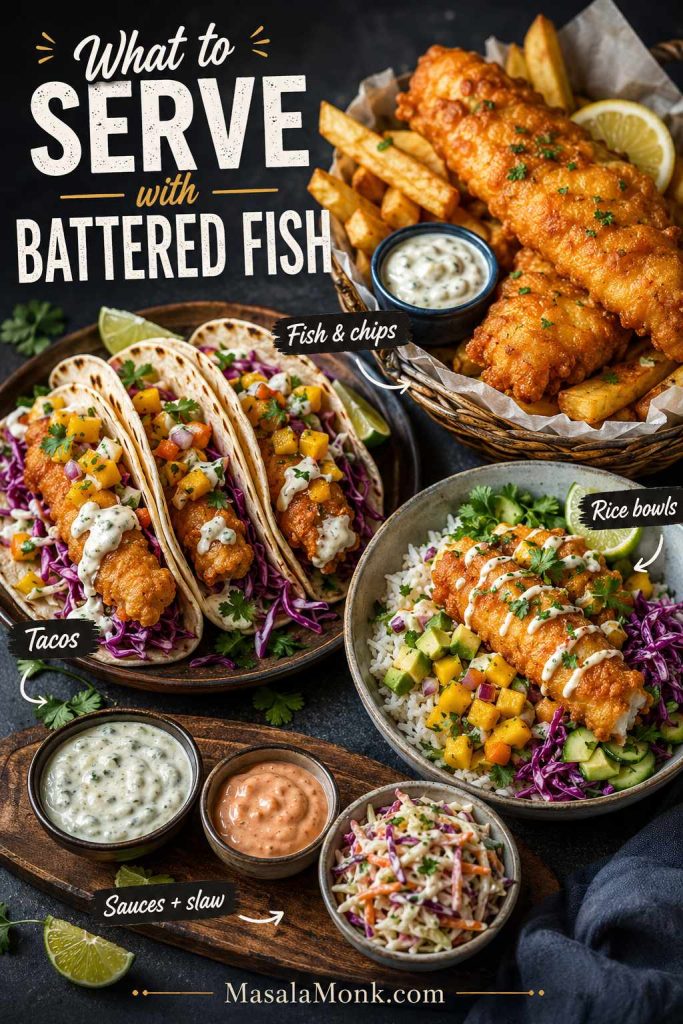
Serve battered fish hot, while the crust is still crisp. For a classic plate, pair it with chips, tartar sauce, lemon wedges, and a simple slaw. For tacos, tuck the pieces into warm tortillas with cabbage, lime, a creamy sauce, and something bright like mango salsa.
You can also serve the fried pieces with rice bowls, salad bowls, wraps, or a quick dipping sauce. The coating is mild enough to work with lemon, hot sauce, garlic mayo, tartar sauce, chutney, or a spicy yogurt dip.
If you like malt vinegar, add it lightly right before eating instead of soaking the fish. A quick drizzle, or even a small spray bottle, gives you the classic sharp finish without softening the crust too quickly.
Once the fish is fried, it can go several ways: classic fish and chips, fish tacos, rice bowls, or a sauce-and-slaw plate.
How to Fix Fish Batter Problems
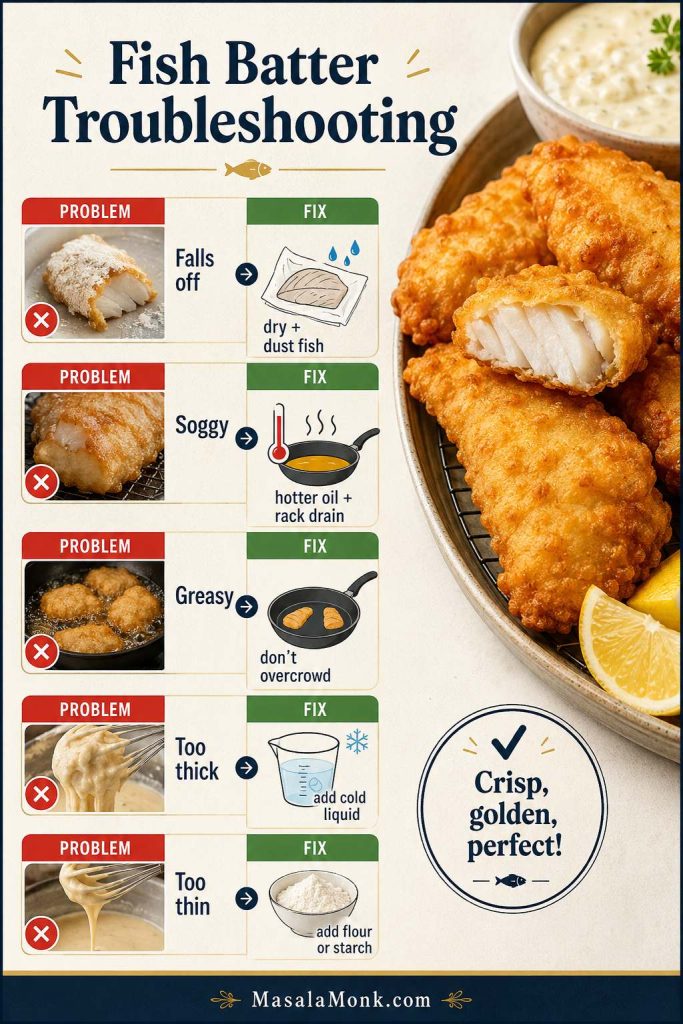
A good batter is easy to adjust once you know what went wrong. Use this table before you throw out a batch or keep adding flour and liquid without a plan.
Problem
Likely cause
Best fix
Batter falls off fish
Fish was wet, not dusted, or oil was too cool.
Dry fish well, dust before battering, and fry in hotter oil.
Batter is soggy
Oil too cool, overcrowding, or steam trapped after frying.
Fry smaller batches and drain on a wire rack.
Batter is greasy
Oil temperature dropped too low.
Let the oil return to at least 350°F / 175°C between batches.
Batter is too thick
Too much dry mix or batter sat too long.
Whisk in 1 tablespoon cold sparkling water or beer at a time.
Batter is too thin
Too much liquid.
Add 1 tablespoon flour or cornstarch at a time.
Batter browns before fish cooks
Oil is too hot or fish pieces are too thick.
Lower oil temperature slightly and cut fish into thinner pieces.
Batter tastes floury
Batter is too thick or underfried.
Thin the batter slightly and fry until deeply golden.
Batter gets soft after frying
Steam is trapped under the crust.
Use a wire rack and avoid covering the fish while hot.
Most fish batter problems have a clear fix: adjust moisture, batter thickness, oil heat, batch size, or draining method before changing the whole recipe.
If you want another crisp fish dinner that is pan-fried instead of battered, try these salmon croquettes; they use a shaped patty method rather than a wet coating.
Equipment You Need
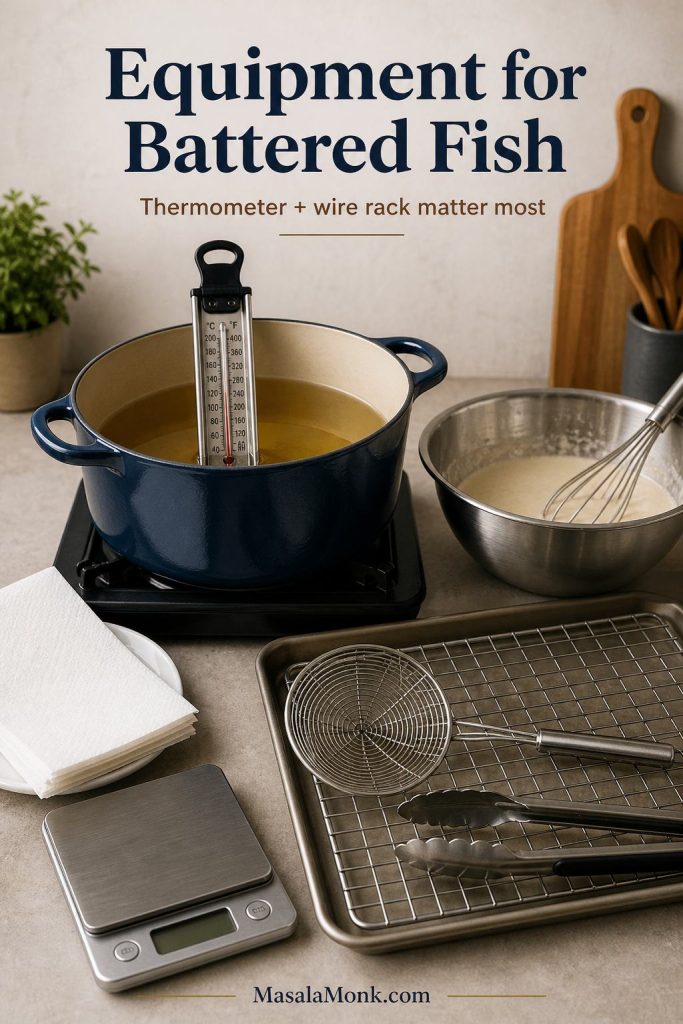
You do not need restaurant equipment, but a thermometer and a wire rack make a huge difference. The thermometer keeps the oil in the right range, and the rack keeps the crust from steaming underneath after frying.
Deep heavy pot, Dutch oven, or deep fryer
Deep-fry thermometer or instant-read thermometer
Wire rack set over a baking sheet
Tongs or spider strainer
Mixing bowls
Whisk
Paper towels for drying fish and catching oil under the rack
Kitchen scale, optional but useful for consistent batter
The most useful tools are simple ones: a thermometer for steady oil and a wire rack so the crust does not steam underneath.
Make-Ahead, Storage, and Reheating
Can You Make the Batter Ahead?
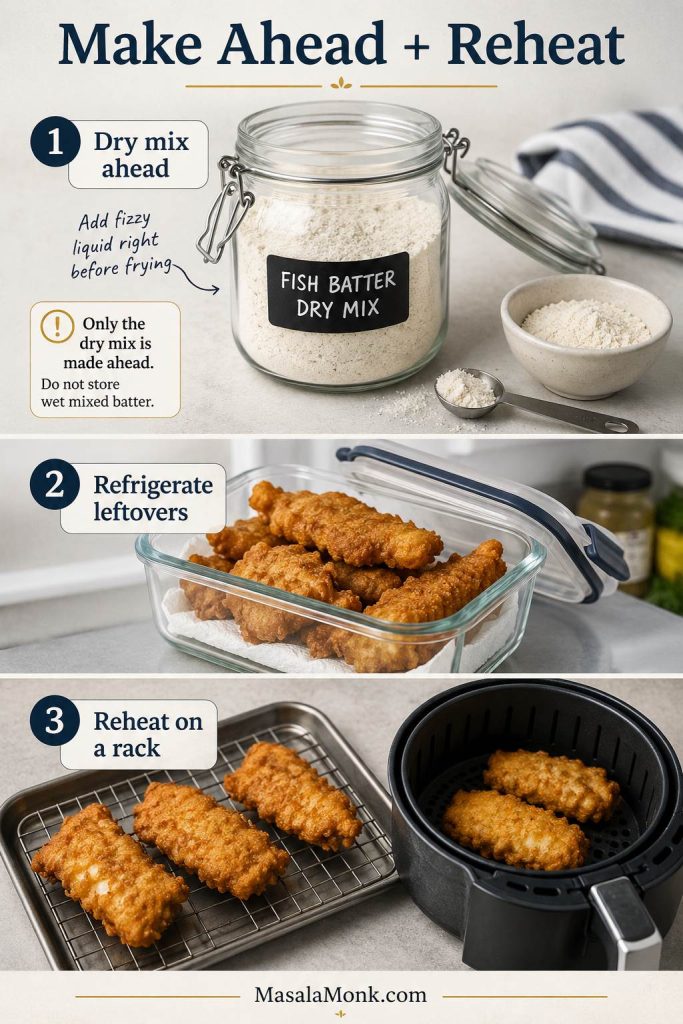
You can mix the dry ingredients ahead, but wait to add the sparkling water or beer until just before frying. Once the liquid goes in, the bubbles start fading and the batter loses some of its lift.
How to Store Leftover Fried Fish
Let leftover fried fish cool, then store it in an airtight container in the refrigerator for up to 2 days. The crust will soften as it sits, but it can crisp up again with the right reheating method.
How to Reheat Battered Fish
Reheat battered fish on a rack in a hot oven or in an air fryer until the coating is crisp again. Avoid the microwave if you care about crunch, because it steams the coating and makes it soft.
Make the dry mix ahead, but keep the wet batter fresh; later, reheat leftover battered fish on a rack so the crust can crisp again.
Once the fish is dry, the batter is cold, and the oil is hot, the actual cooking moves quickly. Keep your rack ready before the first piece goes into the pot, then use the recipe card below for the exact amounts and steps.
Keep this fish batter recipe ratio handy: flour, starch, baking powder, cold liquid, hot oil, and the dry-dust-dip-fry method.
Fish Batter Recipe for Crispy Fried Fish
This fish batter recipe works with sparkling water for a clean no-beer version, or cold lager for a more classic beer-battered coating. Either way, keep the liquid cold and fry the fish as soon as the batter is mixed.
Prep Time15 minutes
Cook Time10–15 minutes
Total Time25–30 minutes
Servings4
Ingredients
1¼ lb / 550–600g white fish fillets, such as cod, haddock, pollock, hake, tilapia, catfish, or basa
¾ cup / about 90g all-purpose flour
¼ cup / about 30g cornstarch, also called cornflour in many countries, or rice flour
1 teaspoon baking powder
¾ teaspoon fine salt
½ teaspoon paprika or white pepper
¼–½ teaspoon garlic powder, optional
¾ cup / 180ml ice-cold sparkling water or club soda, plus 1–2 tablespoons more only if the batter is too thick
¼ cup extra flour, cornstarch, or rice flour for dusting
Neutral oil for frying, enough for 2–3 inches depth
Beer Batter Option
Replace the sparkling water with ¾ cup / 180ml very cold lager or pale ale. For an extra-crisp beer batter, use rice flour instead of cornstarch and replace 2 tablespoons / 30ml of the beer with vodka. This upgrade is not alcohol-free.
Method
Pat the fish very dry, then cut it into even strips or batons.
Add 2–3 inches of oil to a deep heavy pot and heat to 365°F / 185°C.
Whisk flour, cornstarch, baking powder, salt, paprika or pepper, and optional garlic powder in a bowl.
Add the ice-cold sparkling water or beer and whisk only until combined. Small lumps are fine.
Dust each piece of fish lightly with flour, cornstarch, or rice flour. Shake off the excess.
Dip the fish into the batter, let extra batter drip briefly, then lower gently into the hot oil.
Fry in small batches for 3–4 minutes total for smaller strips or 5–7 minutes total for thicker pieces, turning as needed, until golden and crisp.
Drain on a wire rack set over a baking sheet. Salt lightly while hot and serve immediately.
Notes
Keep the batter cold and use it right after mixing.
Do not overcrowd the pot or the oil temperature will drop.
Fry one test piece first if your fish pieces vary in thickness.
If the batter is too thick, add cold sparkling water 1 tablespoon at a time.
If the batter is too thin, add flour or cornstarch 1 tablespoon at a time.
Fish is done when opaque, flaky, and 145°F / 63°C in the thickest part.
To hold batches, keep fried fish on a rack in a 200°F / 95°C oven for a short time.
Leftover fried fish is best reheated on a rack in a hot oven or air fryer until crisp again. Avoid microwaving if you want to keep the coating crunchy.
Once you understand the texture, temperature, and dusting step, this fish batter recipe becomes easy to adjust. The answers below cover the most common swaps and problems people run into while frying fish at home.
Fish Batter Recipe FAQs
Can I make this fish batter recipe without beer?
Absolutely. Use ice-cold sparkling water, club soda, or seltzer instead of beer. The bubbles help the coating fry up light and crisp without adding alcohol or beer flavor.
Is beer or sparkling water better for fish batter?
Beer gives the batter more flavor and a classic fish-and-chips feel. Sparkling water gives you a cleaner no-beer coating that still fries up light and crisp. Both work well as long as the liquid is very cold.
What makes fish batter crispy?
A crisp coating needs starch, lift, cold liquid, and hot oil. Flour gives structure, cornstarch or rice flour adds crunch, baking powder helps the batter puff, and cold sparkling water or beer keeps the mixture light.
Should fish batter have egg?
For the crispest version, skip the egg. Egg can make the coating richer and puffier, but it can also make the crust more cakey or chewy. This no-egg fish batter recipe gives you a thinner, crisper shell.
Why does my batter fall off fish?
Batter usually falls off when the fish is wet, the fish was not dusted first, the batter is too thin, or the oil is too cool. Pat the fish dry, dust it lightly with flour or starch, and fry in properly hot oil.
Why is my fish batter soggy?
Soggy batter usually comes from oil that is too cool, overcrowding the pot, or trapping steam after frying. Fry in small batches, let the oil recover between batches, and drain the fish on a wire rack instead of stacking it.
What temperature should oil be for battered fish?
Aim for 365°F / 185°C, and keep the oil between 350–375°F / 175–190°C while frying. Oil below that range can make the coating greasy, while oil that is too hot can brown the outside before the fish cooks through.
How long do you fry battered fish?
Small battered fish strips usually take about 3–4 minutes total in deep oil. Thicker fillets may take 5–7 minutes total. For shallow frying, plan on roughly 2–3 minutes per side, then check that the fish is opaque and flakes easily.
Can I shallow fry battered fish?
Shallow frying works best with smaller pieces. Use enough oil to come at least halfway up the fish, let the first side set before turning, and flip gently so the coating does not tear.
Can I use this batter for shrimp or other seafood?
This batter also works for shrimp, calamari, and some other seafood. The frying time will be shorter than fish fillets, so remove the pieces as soon as the coating is golden and the seafood is cooked.
Can I make this fish batter recipe ahead?
Mix the dry ingredients ahead, but do not add sparkling water or beer until right before frying. Once the liquid goes in, the bubbles start fading and the batter loses some of its lift.
Can I use self-rising flour?
Self-rising flour can work, but reduce or skip the baking powder because self-rising flour already contains leavening. Plain all-purpose flour gives you more control over the final texture.
Can I use milk instead of sparkling water?
Milk gives a heavier, softer coating. For a lighter crunch, sparkling water, club soda, seltzer, or cold beer is a better choice.
Can I make this fish batter gluten-free?
The main recipe is not gluten-free because it uses all-purpose flour. For a gluten-free version, use a good gluten-free all-purpose flour blend, certified gluten-free rice flour, and sparkling water or gluten-free beer. The texture may vary by flour blend, so start with slightly less liquid and thin the batter until it coats the fish like heavy cream. If you are cooking for someone with celiac disease, make sure all ingredients, oil, tools, and surfaces are free from gluten cross-contact.
Can I bake or air fry wet battered fish?
Wet batter is designed for hot oil, not dry oven or air fryer heat. In an air fryer, it can drip before it sets and leave bare patches on the fish. For baking or air frying, use a breaded coating with flour, egg, and breadcrumbs or panko instead, and avoid the common airflow and overcrowding issues covered in this guide to air fryer mistakes.
This salmon croquettes recipe gives you crisp, golden patties with a tender, flaky center using canned salmon, egg, cornmeal, flour, onion, bell pepper, lemon, and simple pantry seasoning. The main version is pan-fried and Southern-style, with baked salmon croquettes, air fryer salmon croquettes, and a fresh salmon option included below.
Most importantly, this recipe is built to work on the first try, even if salmon croquettes or salmon patties have fallen apart on you before. You will learn how to drain and bind the salmon, how thick to shape the patties, when to use cornmeal versus panko or crackers, what sauce to serve with them, and how to fix common problems like patties falling apart, turning mushy, or tasting dry.
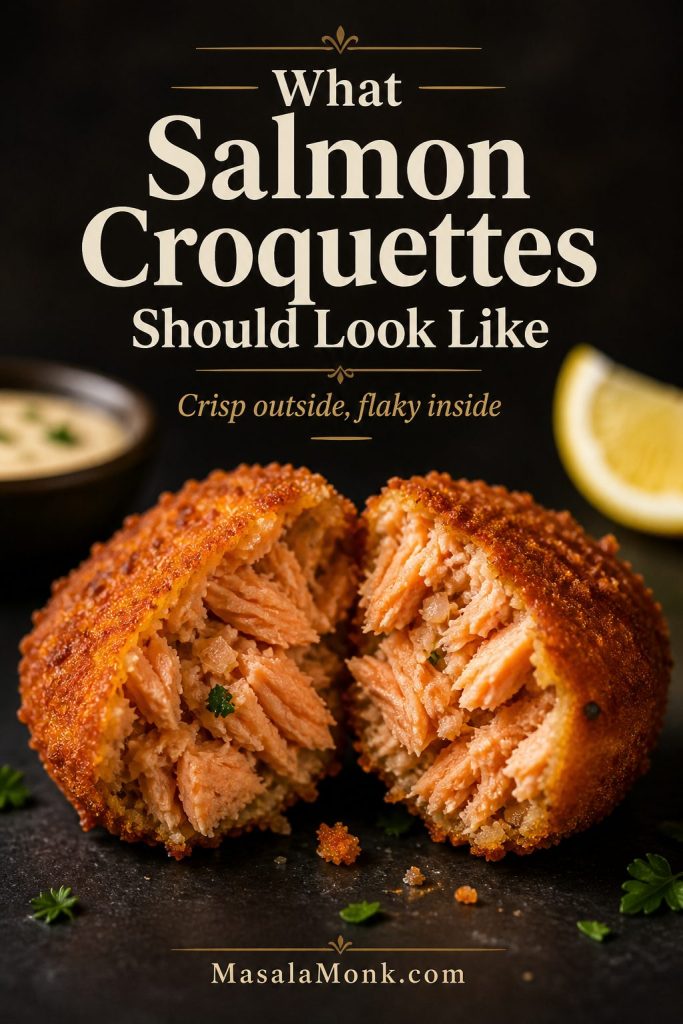
What Salmon Croquettes Should Look Like
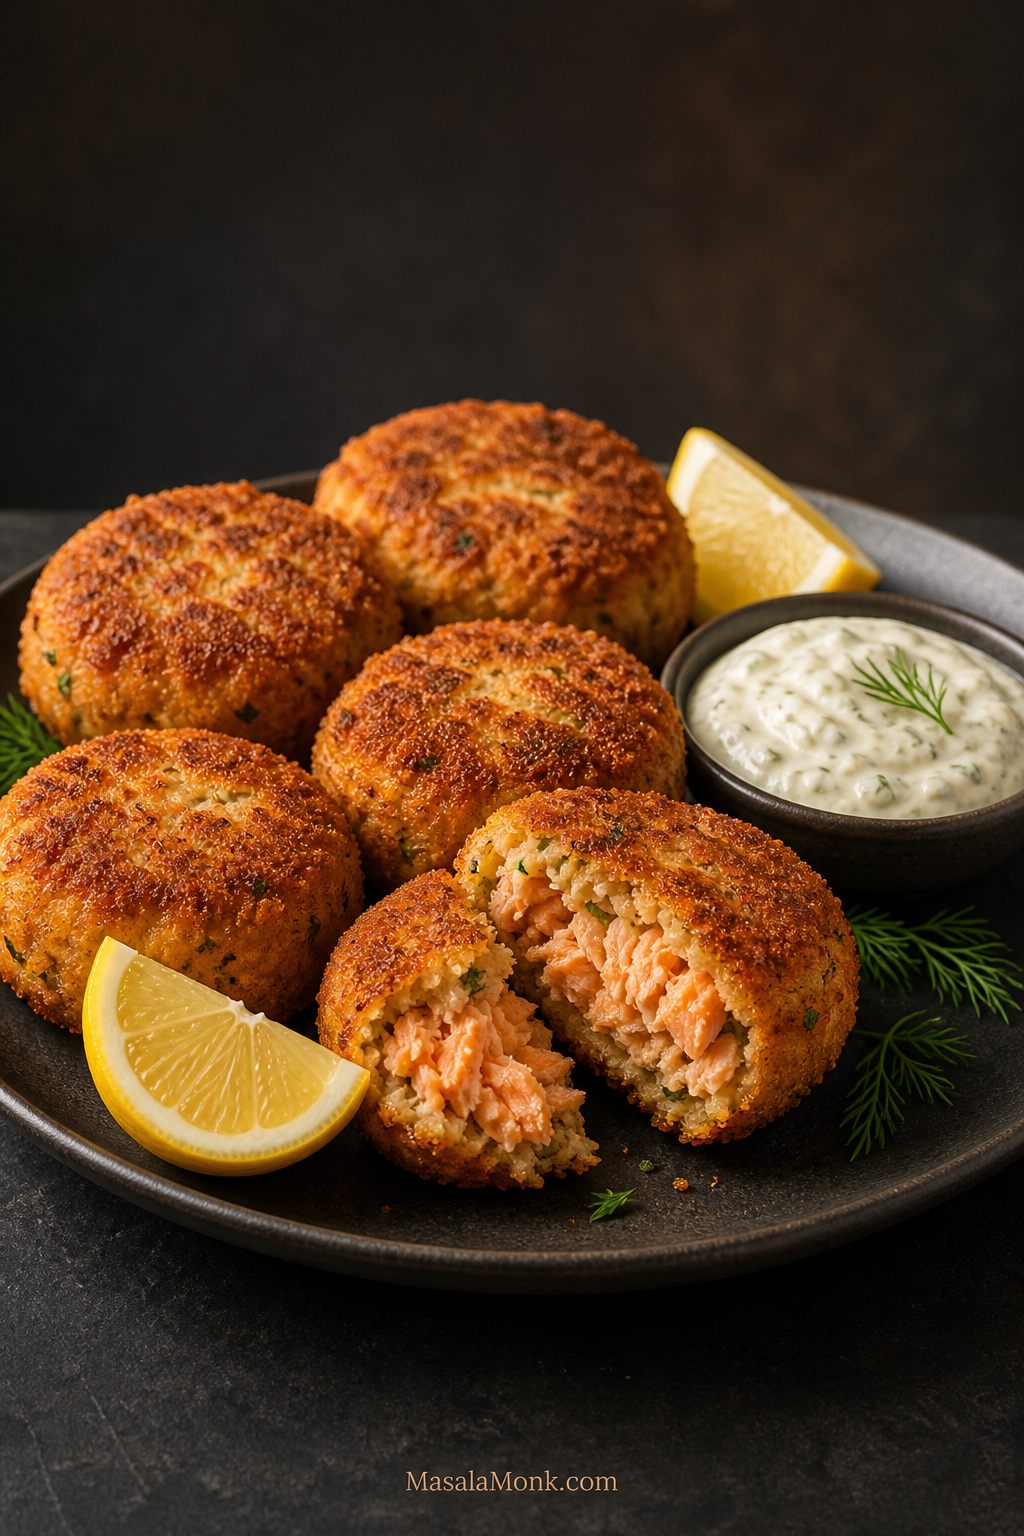
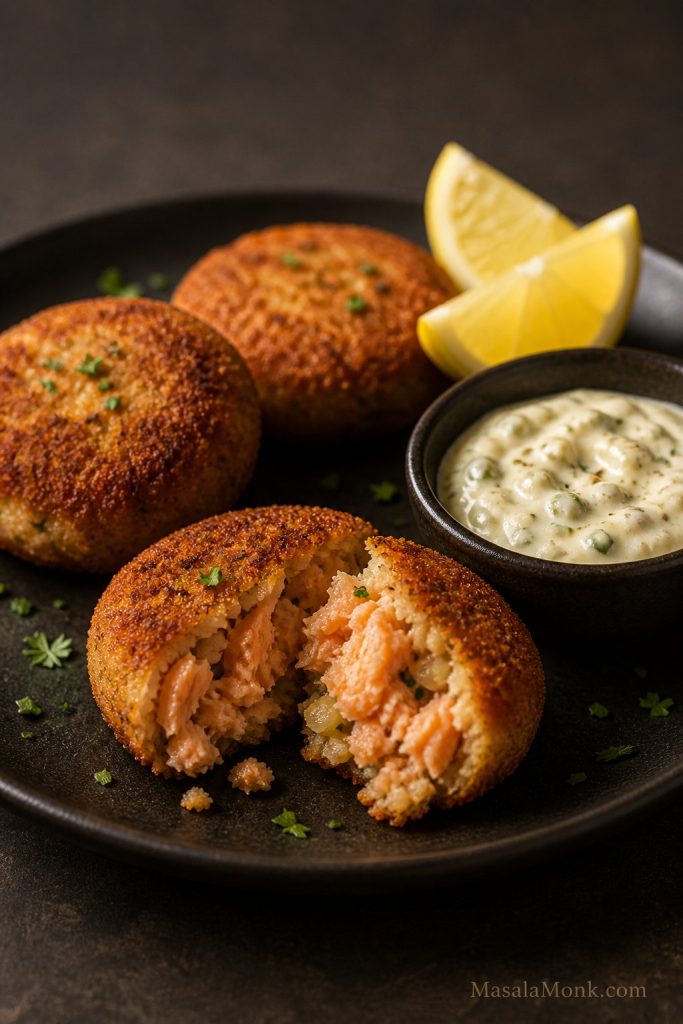
A good croquette should not be pasty inside. Instead, the crust should crack slightly while the center stays moist, flaky, and easy to break with a fork.
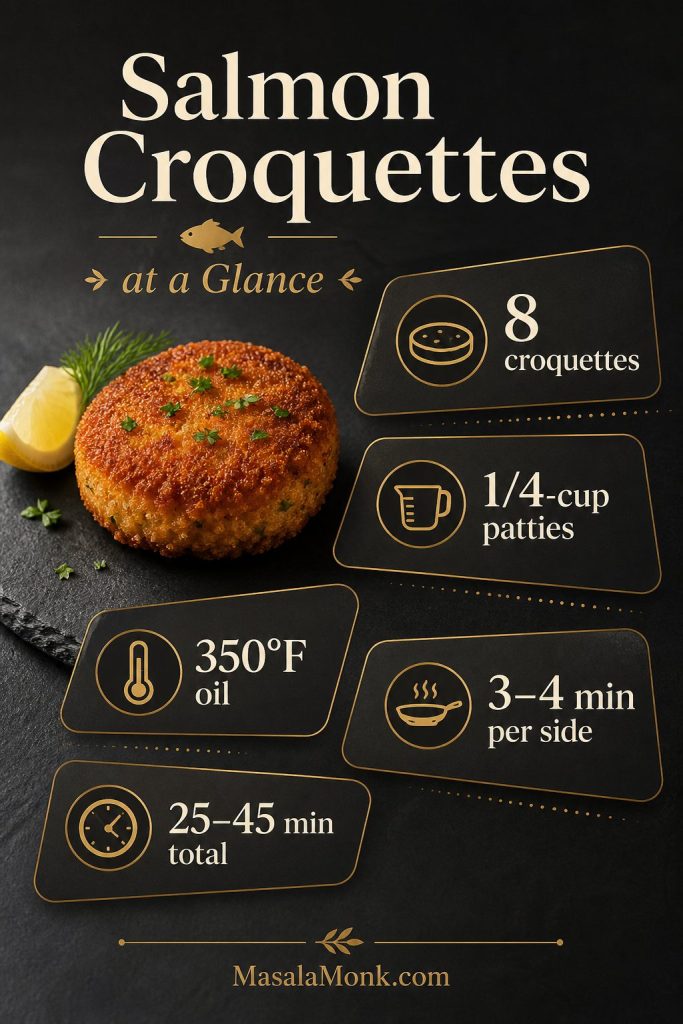
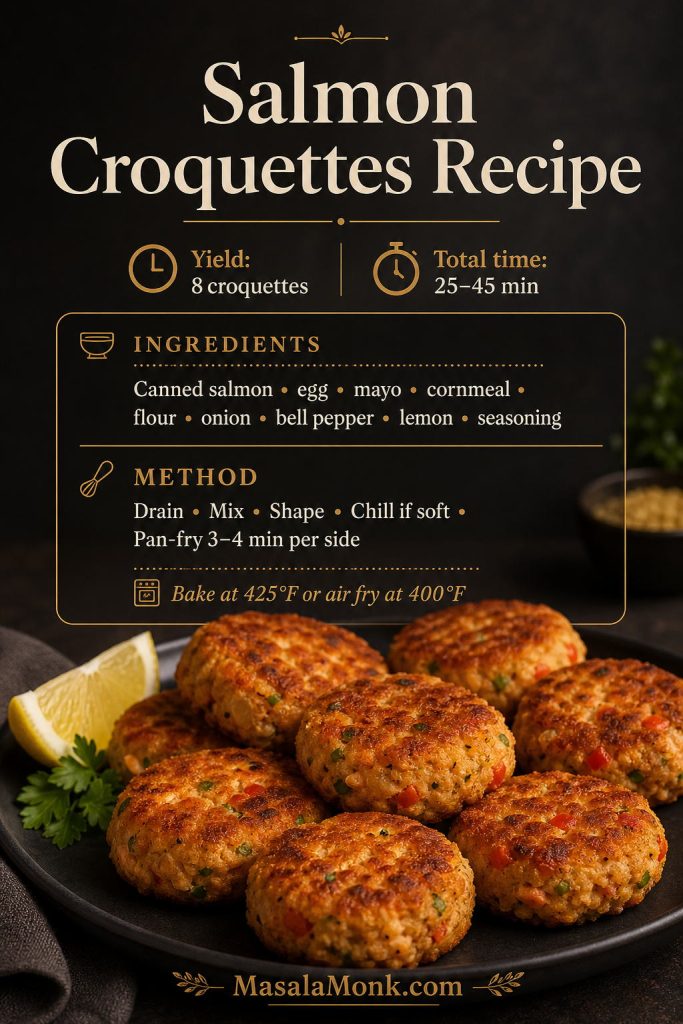
This salmon croquettes recipe starts with well-drained canned salmon, egg, mayonnaise, cornmeal, flour, onion, bell pepper, Worcestershire sauce, lemon juice, and seasonings. Shape the mixture into ¼-cup patties, then pan-fry them in hot oil for 3–4 minutes per side until crisp and golden.
Quick Visual Guide to Salmon Croquettes
The fastest way to understand this salmon croquettes recipe is to follow the sequence: drain the salmon, mix the binder, shape evenly, and fry only once the pan is hot enough.
At a Glance
Detail
Best answer
Yield
8 medium croquettes
Main salmon
Canned pink salmon for the classic version
Best binder
Egg, mayo, cornmeal, and flour
Best method
Pan-fried in a cast iron skillet or heavy skillet
Oil temperature
About 350°F / 175°C
Cook time
3–4 minutes per side
Total time
25–45 minutes, depending on whether you chill the patties
Patty size
¼ cup mixture each, about ½–⅔ inch thick
Best sauces
Tartar sauce, lemon dill mayo, remoulade, green chutney mayo, tzatziki, or mango mustard
Make-ahead tip
Chill shaped patties 10–20 minutes if the mixture feels soft
Salmon Croquettes at a Glance
These quick numbers make the salmon croquettes recipe easier to repeat successfully. Once the patties stay near ¼ cup and the oil stays around 350°F, the crust browns evenly while the center stays moist.
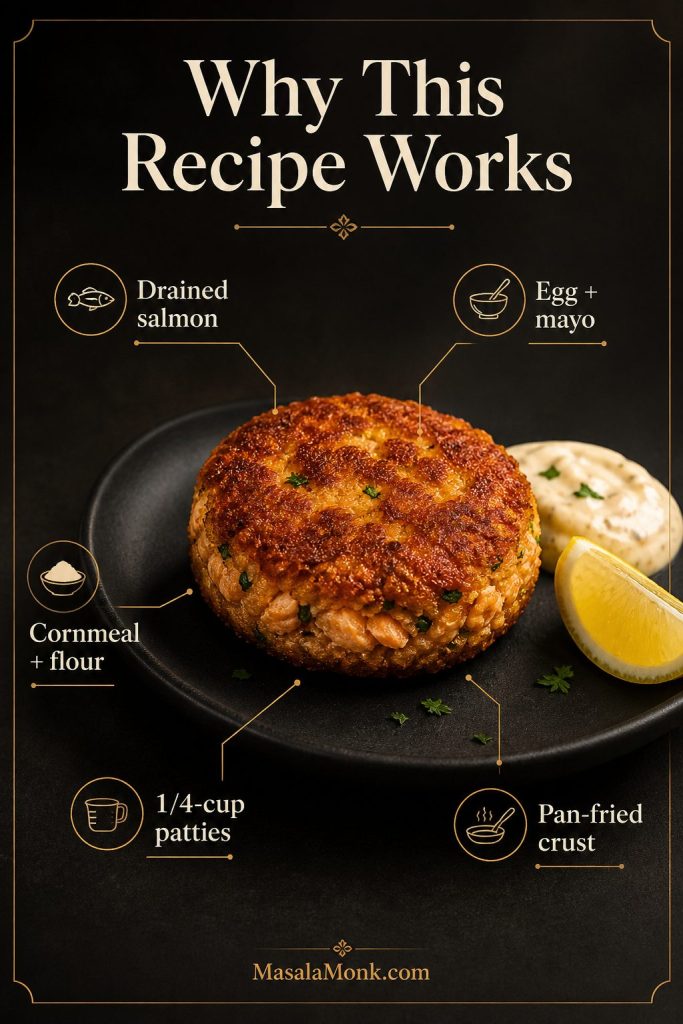
Draining the salmon first prevents mushy patties. Too much liquid is one of the biggest reasons croquettes fall apart.
Egg, mayo, cornmeal, and flour give balanced structure. The egg binds, the mayo keeps the center tender, the cornmeal adds crispness, and the flour helps the mixture hold together.
¼-cup patties cook evenly. This size gives you crisp edges without drying out the center.
Pan-frying gives the best crust. Baked and air fryer versions work, but the skillet method gives the most classic Southern-style texture.
The troubleshooting guide fixes common failures. If the mixture is wet, bland, dry, greasy, or falling apart, there is a direct fix below.
Why This Recipe Works Visually
These salmon croquettes hold together because the moisture is controlled first, and then the binder is balanced. As a result, the patties stay crisp outside while still breaking apart in tender flakes.
What Are Salmon Croquettes?
Salmon croquettes are crisp, shaped patties made from flaked salmon, egg, dry binder, aromatics, and seasoning. In many Southern-style versions, they are made with canned salmon, cornmeal or flour, onion, bell pepper, egg, and a hot skillet. They are inexpensive, fast, and deeply satisfying when the outside is crisp and the inside stays tender.
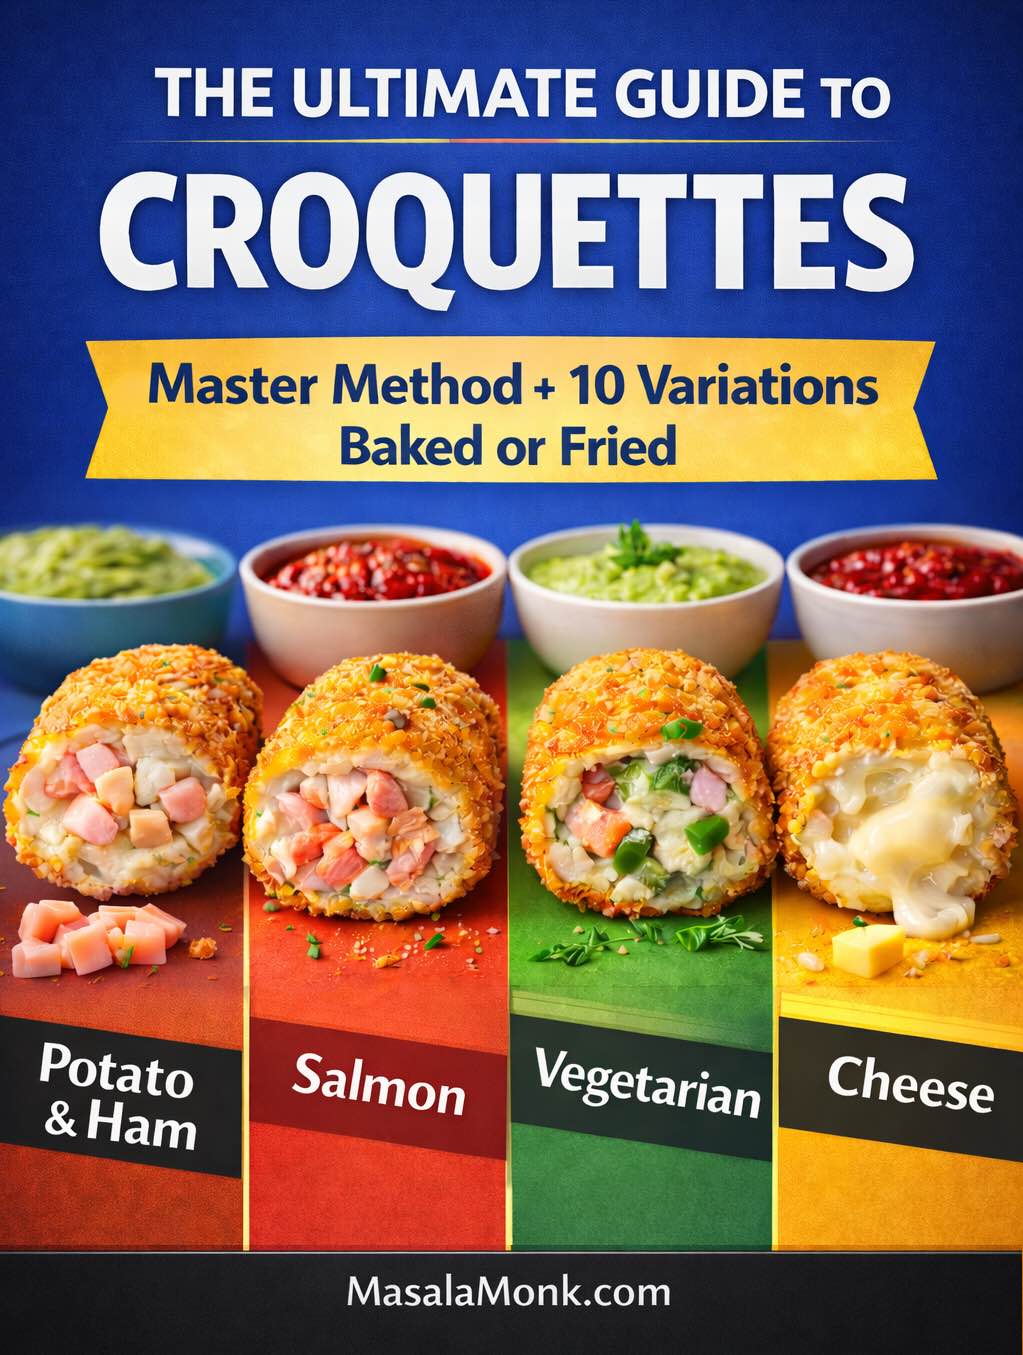
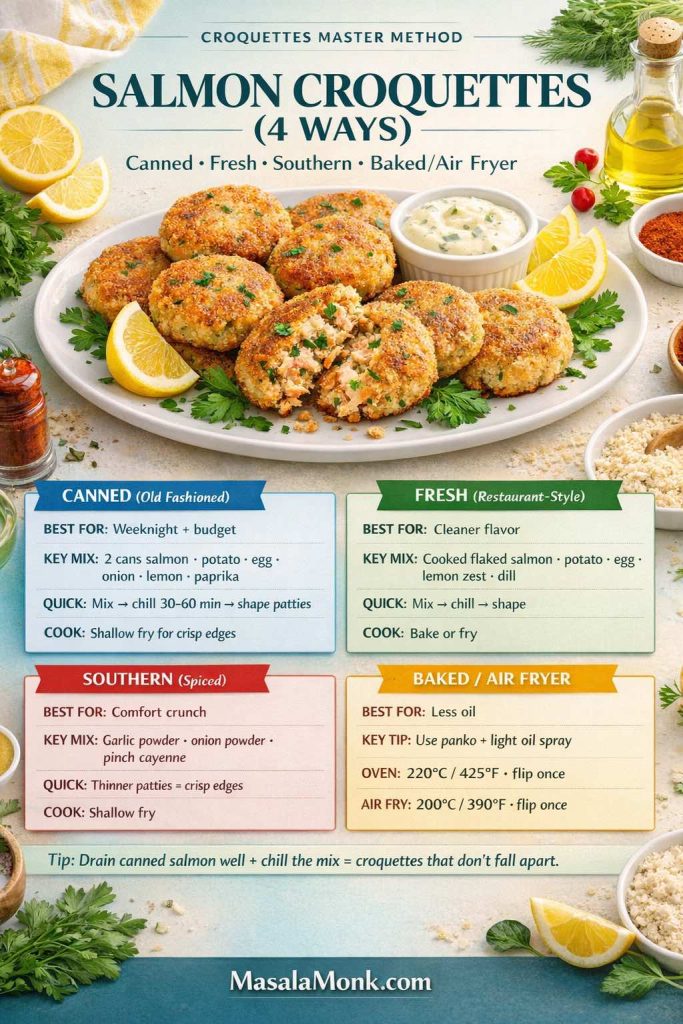
The basic logic is the same as a good croquettes master method: control moisture, bind the filling, shape it evenly, and cook until the outside sets before you flip.
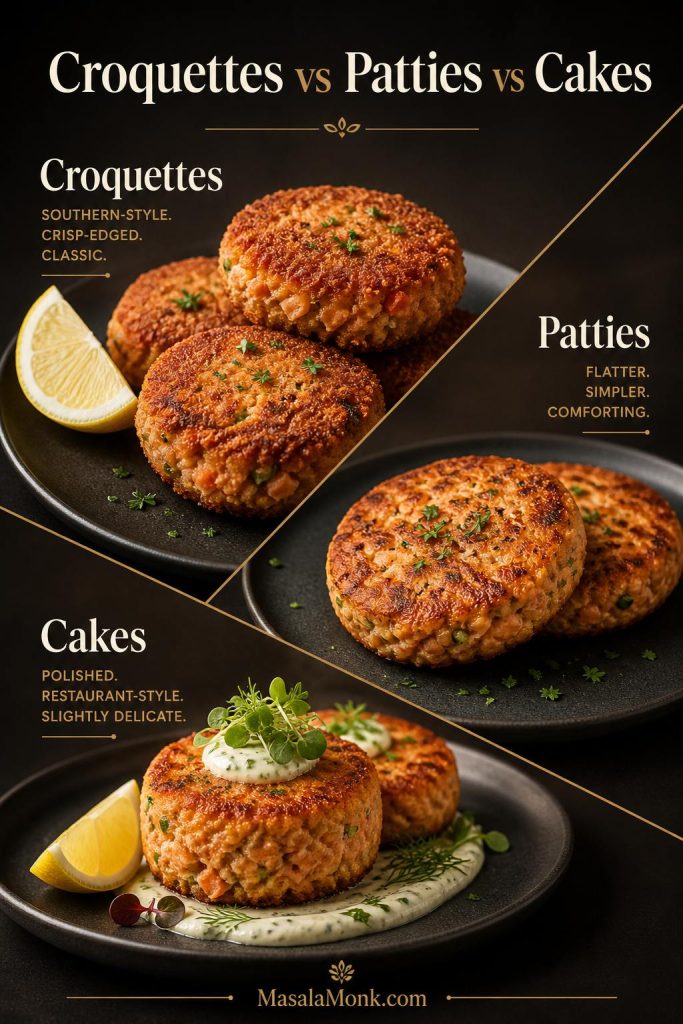
Salmon Croquettes vs Salmon Patties vs Salmon Cakes
These names overlap, and many people use them interchangeably. Still, there are a few useful differences.
Term
Usually means
How to think about it
Salmon croquettes
Often Southern-style, made with canned salmon, binder, and a crisp fried crust.
This is the main recipe here.
Salmon patties
A broader term for flatter salmon cakes or patties, usually made with canned or leftover cooked salmon.
Same family, slightly less specific.
Salmon cakes
Often a little more restaurant-style, sometimes made with fresh salmon, panko, herbs, Dijon, or mayo.
Use the fresh salmon variation below if you want this style.
The names overlap, but the texture is the real clue. Croquettes usually lean crisp-edged and Southern-style, patties are often flatter and simpler, while salmon cakes tend to feel more polished.
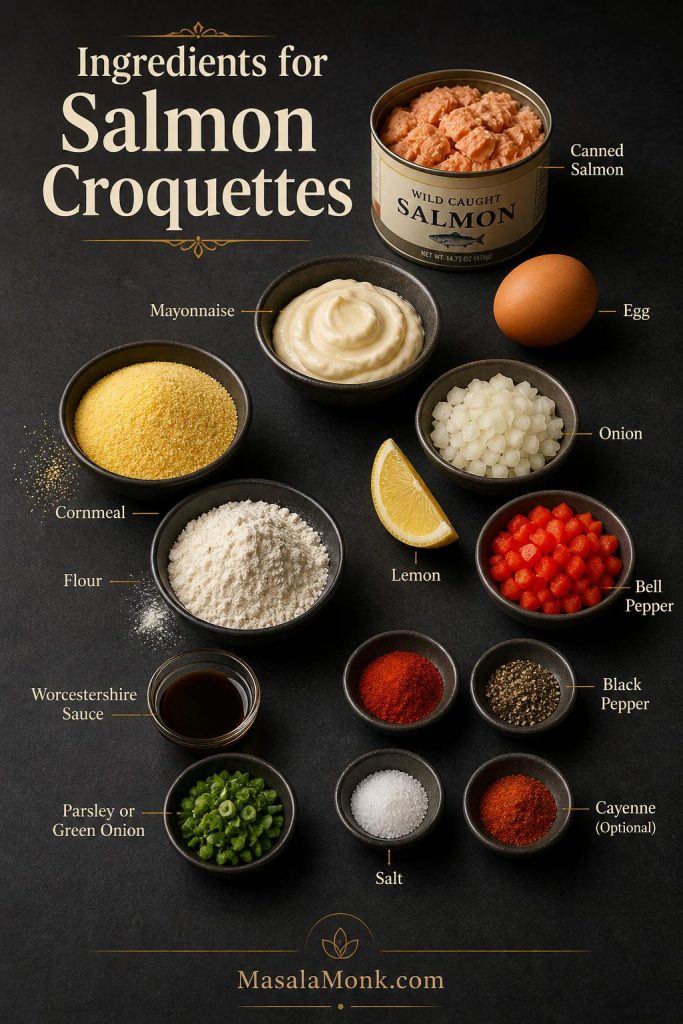
Ingredients for Salmon Croquettes
A good salmon croquettes recipe is simple, but balance still matters. Too much wet binder makes the mixture mushy; meanwhile, too much flour or cornmeal can make the patties dry. This version uses canned salmon, egg, mayo, cornmeal, and flour so the croquettes hold together while the center stays flaky.
Visual Guide to Salmon Croquettes Ingredients
The ingredient list is simple, but balance matters. Canned salmon gives the base, while egg, mayo, cornmeal, and flour help the croquettes stay moist without falling apart.
Salmon
For classic salmon croquettes, use one standard can of pink salmon, usually 14.75–15 ounces / 418–425 grams. Drain off excess liquid, but do not squeeze the salmon completely dry. It should be moist enough to flake, not watery. You can remove the larger bones and skin if you prefer, although many canned salmon recipes leave the small soft bones in because they mash easily and add calcium.
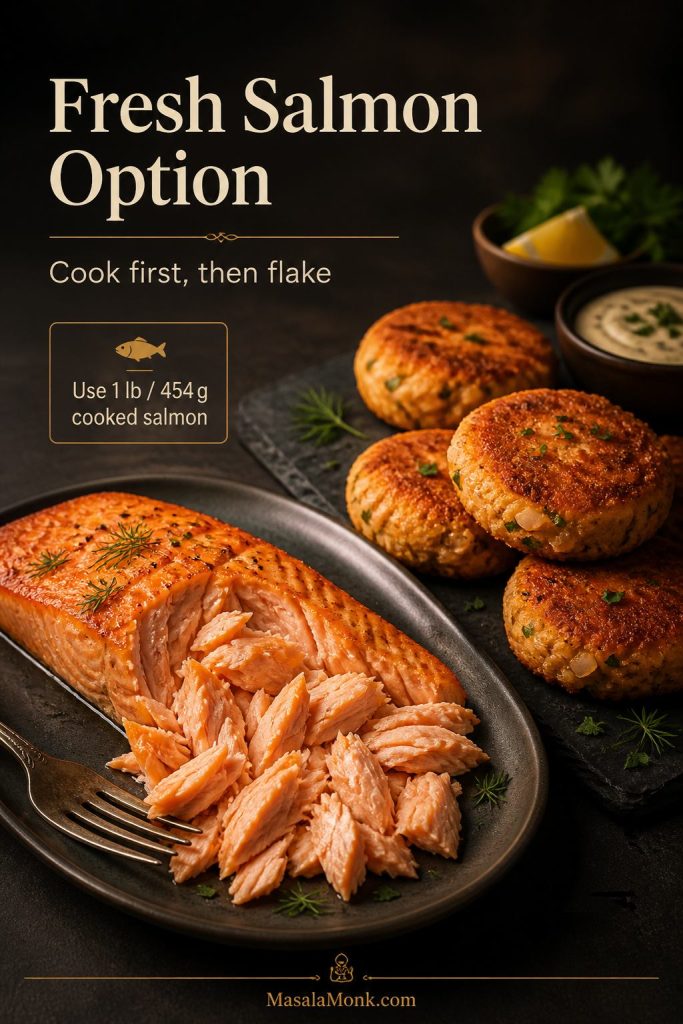
Fresh cooked salmon also works. Use about 1 pound / 454 grams raw salmon, cook it first, cool it slightly, then flake it into the mixture. Leftover cooked salmon is even easier because it is already cooked and ready to flake.
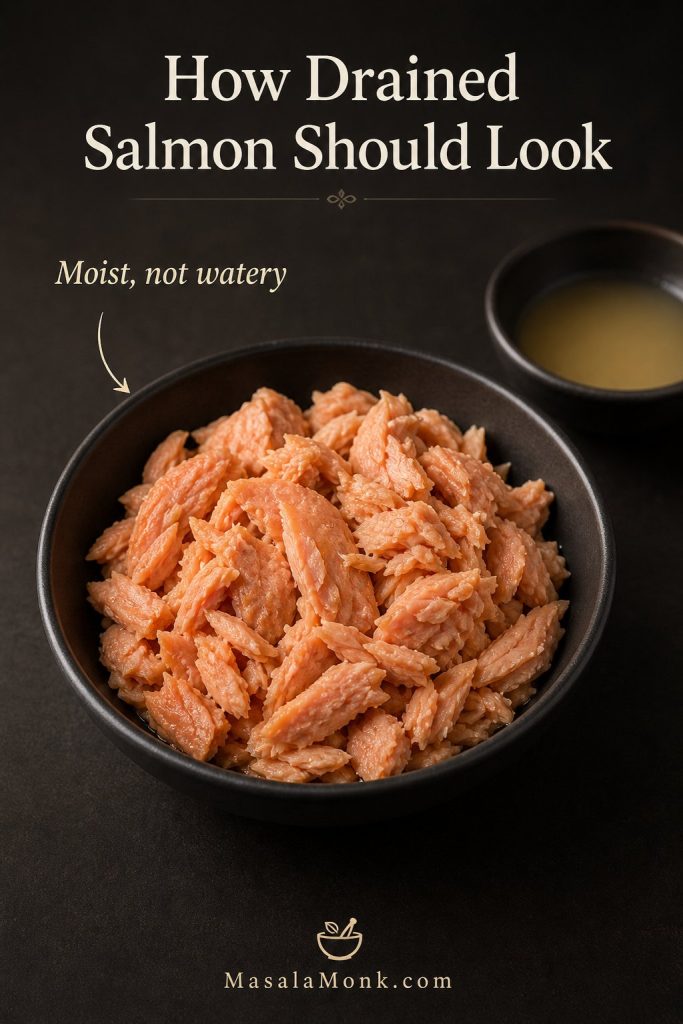
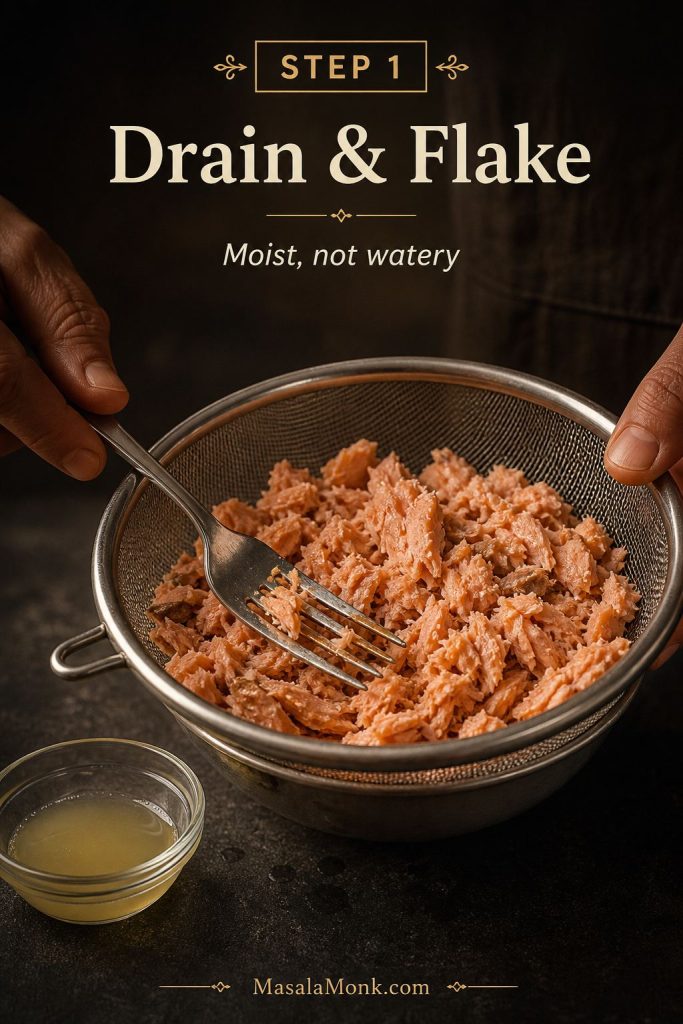
How Drained Salmon Should Look
The salmon should be moist, not watery. Draining off excess liquid prevents mushy croquettes; however, keeping a little moisture helps the center stay tender.
Egg, Mayo, Cornmeal, and Flour
The egg gives structure. Mayo adds moisture and helps keep the center from drying out. Cornmeal adds a crisp, old-fashioned Southern texture. Flour helps the mixture bind without making the croquettes too crumbly.
Mayo also gives you an easy sauce base. If you like homemade condiments, use homemade mayo to make lemon dill mayo, garlic mayo, spicy mayo, tartar sauce, or a quick remoulade-style dip for serving.
Onion, Bell Pepper, Herbs, and Seasoning
Finely diced onion and bell pepper give the croquettes sweetness and texture. Green onion or parsley adds freshness. Worcestershire sauce gives a savory backbone, lemon juice brightens the salmon, and paprika, garlic powder, black pepper, and a little cayenne or hot sauce round out the flavor.
For a seafood-style flavor, add ½ teaspoon Old Bay-style seafood seasoning, Cajun seasoning, or Creole seasoning and reduce the added salt if the blend is already salty.
Texture tip: Dice the onion and bell pepper small. Large pieces can make the patties crack or break apart when you flip them.
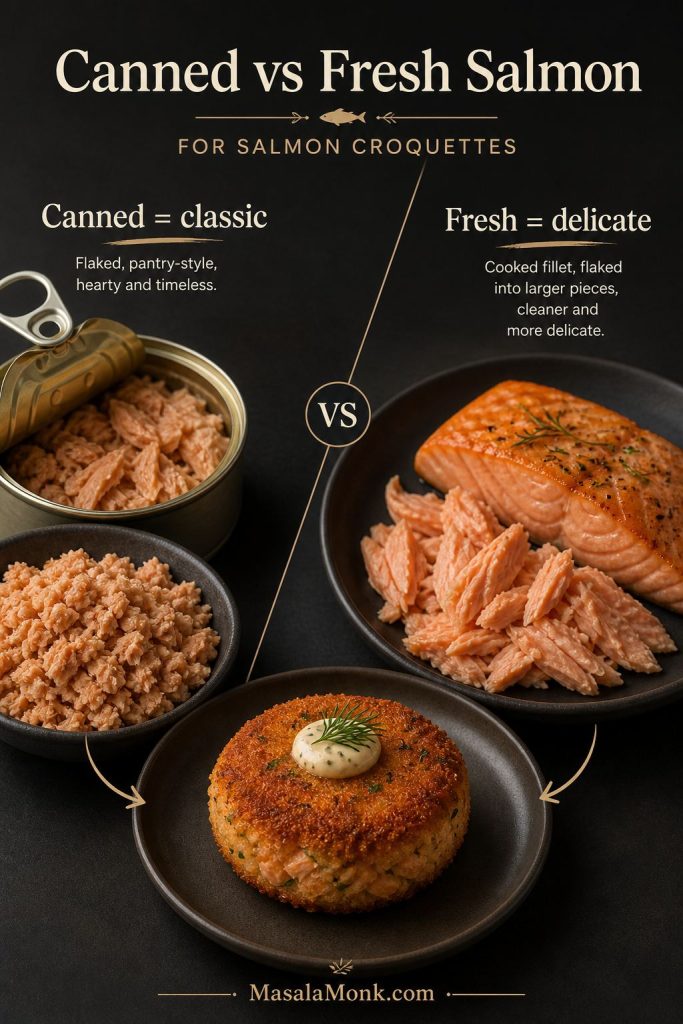
Canned Salmon vs Fresh Salmon for Croquettes
Canned salmon is the best first choice for classic salmon croquettes because it is already cooked, affordable, easy to flake, and traditional in many old-fashioned and Southern-style recipes. Fresh salmon, meanwhile, gives a cleaner flavor and a softer, more delicate texture, but it needs to be cooked before you mix the croquettes.
Canned vs Fresh Salmon at a Glance
For a classic pantry-style batch, use canned salmon; meanwhile, cooked fresh salmon gives you a cleaner, more delicate croquette when you want a softer salmon cake texture.
Canned Salmon Croquettes
For classic croquettes, canned salmon is the easiest and most traditional choice. Drain it very well, flake it gently, and use one 14.75–15 ounce / 418–425 gram can for about 8 croquettes. In this recipe, canned pink salmon gives a milder, budget-friendly patty, while canned red salmon tastes richer. Remove large pieces of skin or bone if you prefer a smoother texture.
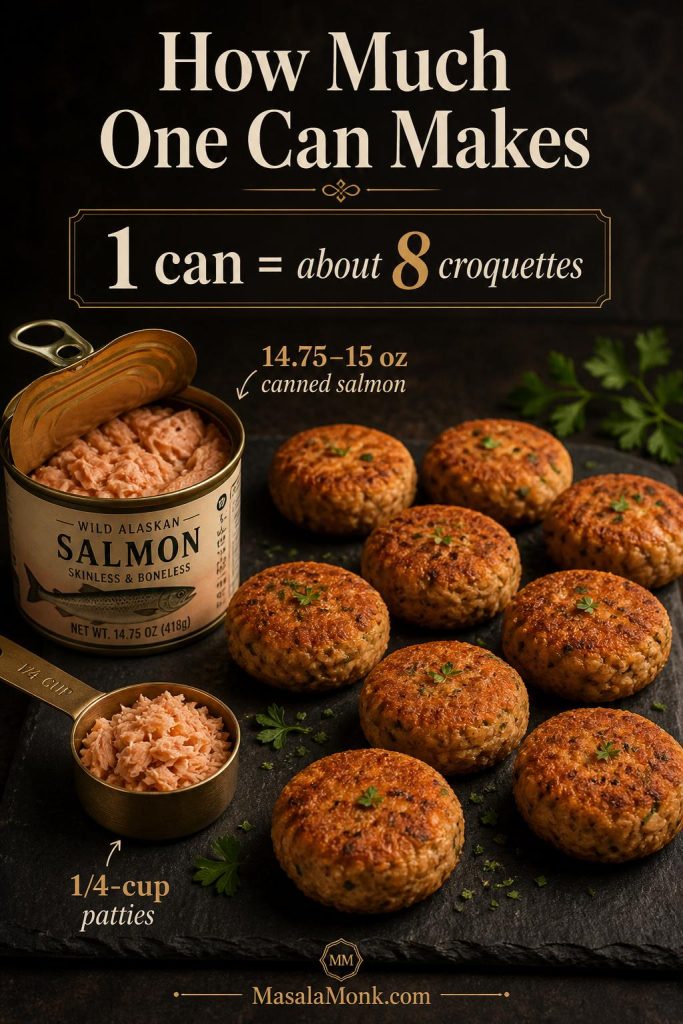
How Much One Can of Salmon Makes
One standard can of salmon makes about eight medium croquettes, so the recipe is easy to scale for dinner or meal prep. If you keep the patties the same size, they also cook more evenly in the skillet.
Drain off excess liquid, flake with a fork, and remove large bones or skin if desired. The salmon should be moist, not watery.
Canned red salmon
A richer canned salmon version
Use the same amount as pink salmon, but reduce added salt if the can tastes salty.
Fresh salmon
Fresh salmon croquettes or salmon cakes
Cook first, cool slightly, then flake into the binder.
Leftover cooked salmon
Fastest fresh-style version
Flake gently and reduce salt if the salmon was already seasoned.
If you have extra cooked salmon after dinner, use some for croquettes and turn the rest into a salmon bowl with rice, cucumber, sauce, avocado, herbs, and crunchy toppings.
How to Make Fresh Salmon Croquettes
To use fresh salmon, start with about 1 pound / 454 grams of salmon fillet. Cook it until just done, cool it slightly, then flake it into large pieces before mixing. For food safety, fresh fish should reach 145°F / 63°C, or the flesh should be opaque and separate easily with a fork, according to FoodSafety.gov.
When buying fresh salmon, the FDA’s seafood safety guidance recommends choosing fish that smells fresh and mild, not fishy, sour, or ammonia-like. Fresh fillets should look firm, not dried or discolored around the edges.
How to Use Fresh Salmon Instead
Fresh salmon can make excellent salmon croquettes, although the texture is usually cleaner and more delicate than the canned version. For that reason, cook it first, cool it slightly, and then flake it gently before mixing.
Fresh salmon adjustment: Because fresh salmon is usually less salty than canned salmon, taste the mixture before shaping and add a little extra salt, lemon, or Worcestershire if needed.
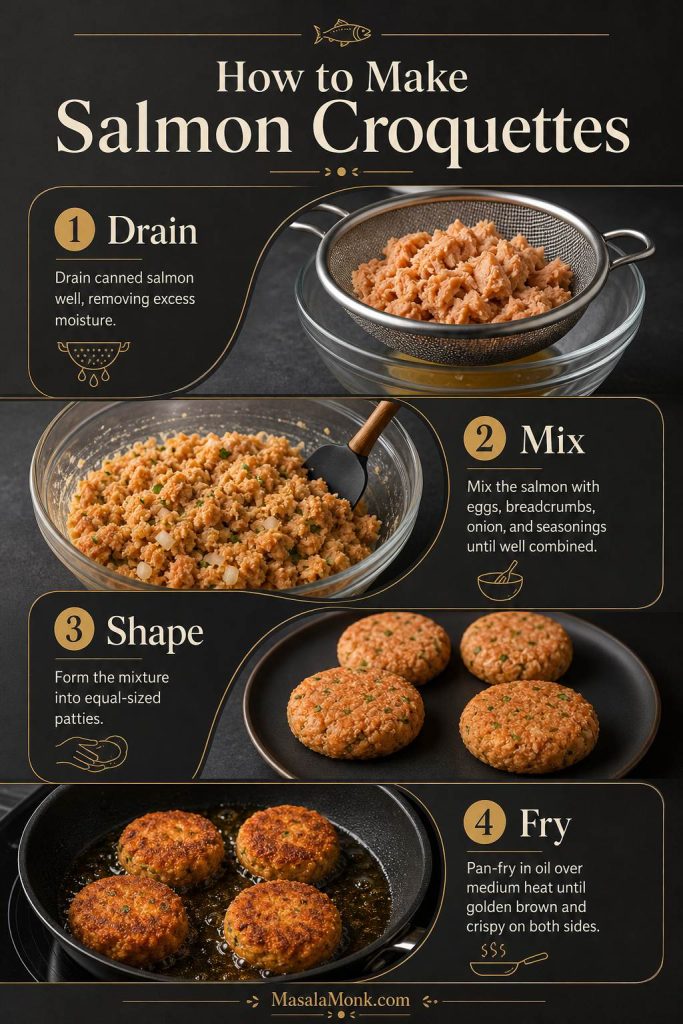
How to Make Salmon Croquettes Step by Step
This method keeps the salmon flaky and the croquettes sturdy, which is the main thing a good recipe needs to get right. Drain well, mix the wet binder first, fold gently, shape evenly, and avoid flipping until the first side has formed a crust.
Step 1: Drain and Flake the Salmon
Drain the canned salmon thoroughly. Press out extra liquid if needed, then flake it with a fork. Do not mash it into a paste. A little texture gives the croquettes a better center.
Start by draining and flaking the salmon gently. This step removes extra liquid, but it also keeps enough texture so the croquettes do not turn into a paste.
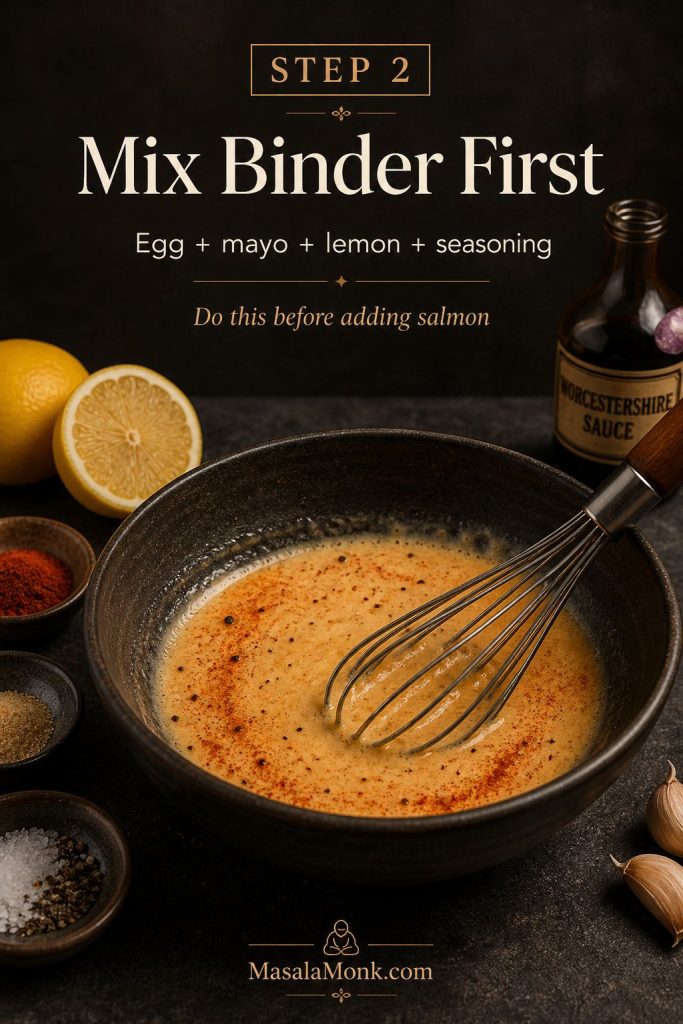
Step 2: Mix the Wet Binder First
In a large bowl, whisk the egg, mayonnaise, Worcestershire sauce, lemon juice, garlic powder, paprika, black pepper, salt, and cayenne or hot sauce if using. Mixing the wet ingredients first helps the seasoning spread evenly.
Mixing the wet binder first spreads the seasoning evenly. As a result, you can fold in the salmon gently later instead of overworking the mixture.
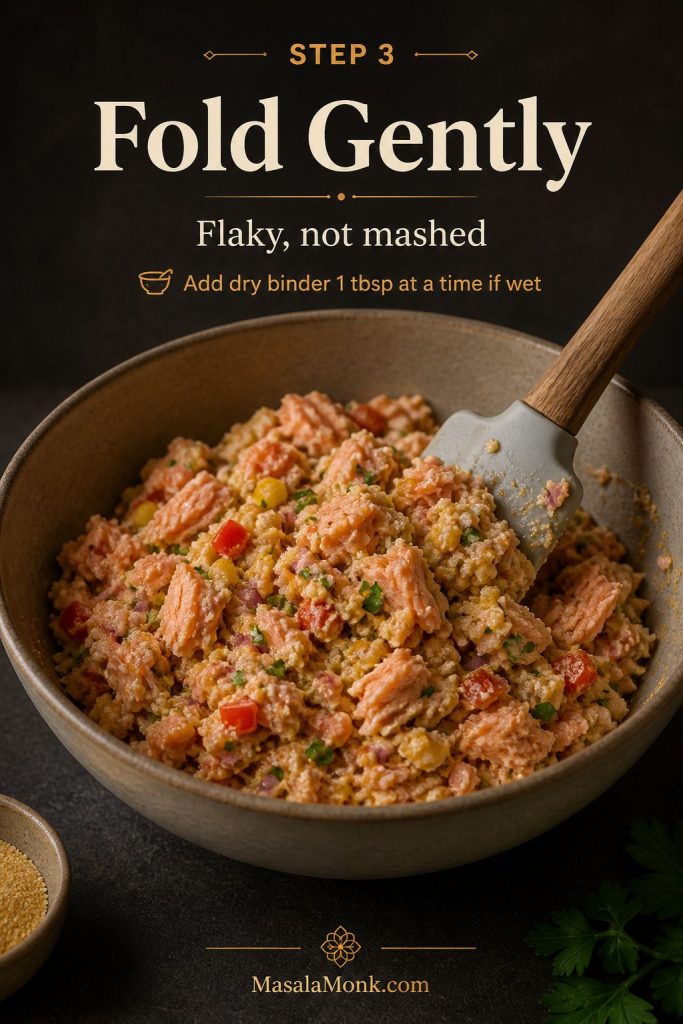
Step 3: Fold in Salmon, Vegetables, Cornmeal, and Flour
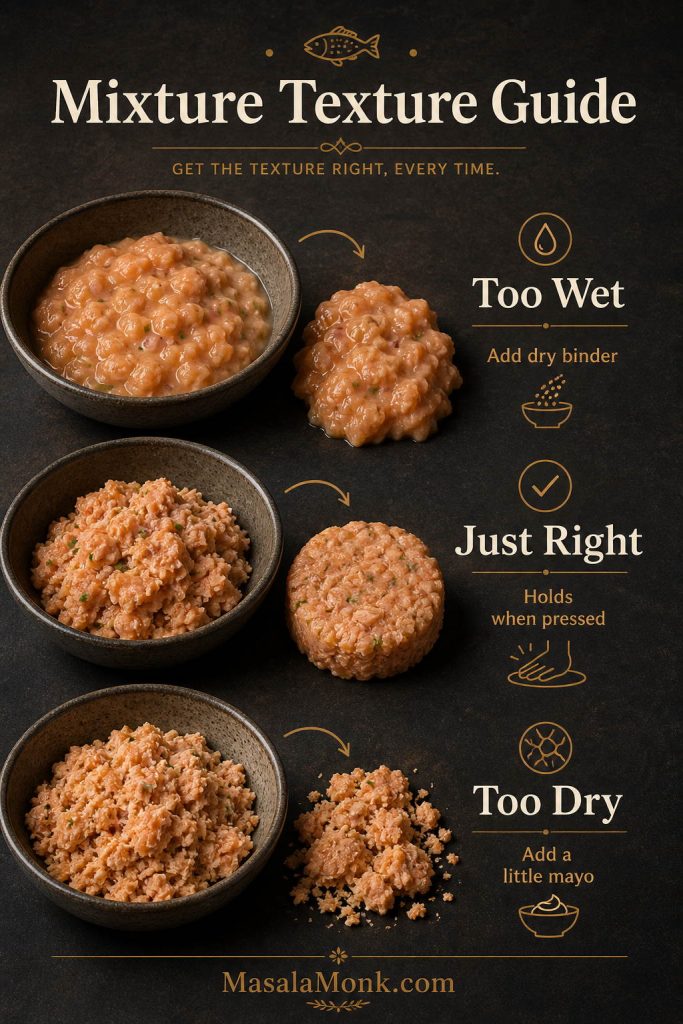
Add the flaked salmon, onion, bell pepper, green onion or parsley, cornmeal, and flour. Fold gently until the mixture holds together when pressed. If it feels very wet, add another tablespoon of cornmeal, flour, panko, or crushed crackers.
Fold the mixture just until it holds together. You should still see salmon flakes, small vegetables, and binder throughout rather than a smooth mashed filling.
Step 4: Shape Into ¼-Cup Patties
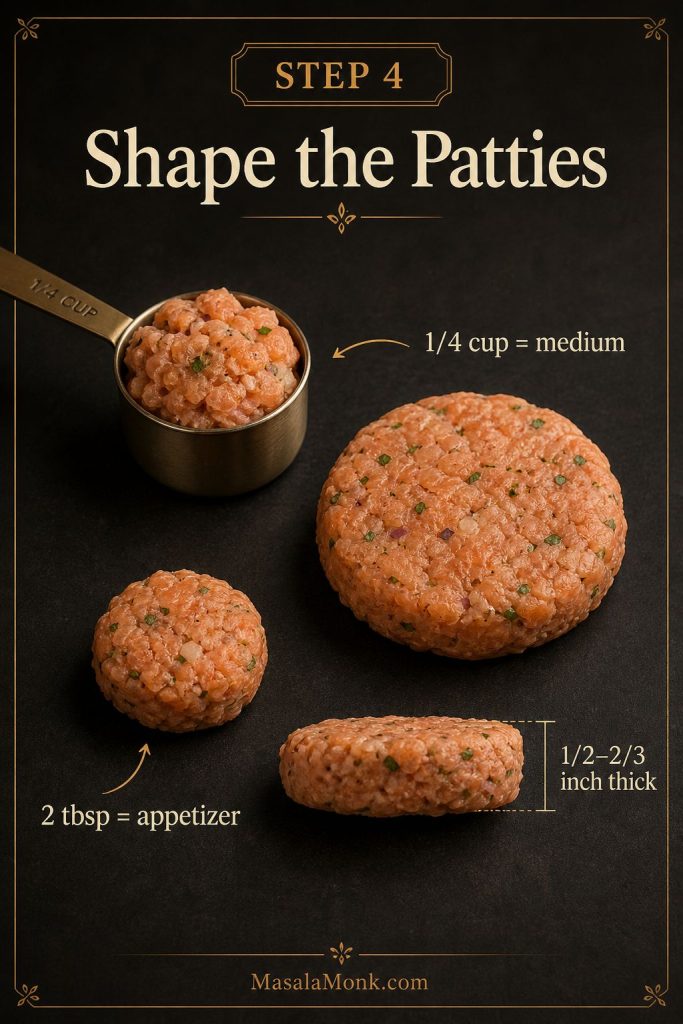
Scoop about ¼ cup of mixture for each croquette. Shape into patties about ½–⅔ inch thick. Do not pack them too tightly; press just enough so they hold together.
Appetizer size: For smaller salmon croquettes, use 2 tablespoons of mixture per patty and cook slightly less, about 2–3 minutes per side.
Even sizing helps the croquettes cook at the same speed. Use ¼ cup for dinner-size patties or 2 tablespoons for smaller appetizer croquettes.
Step 5: Chill if the Mixture Feels Soft
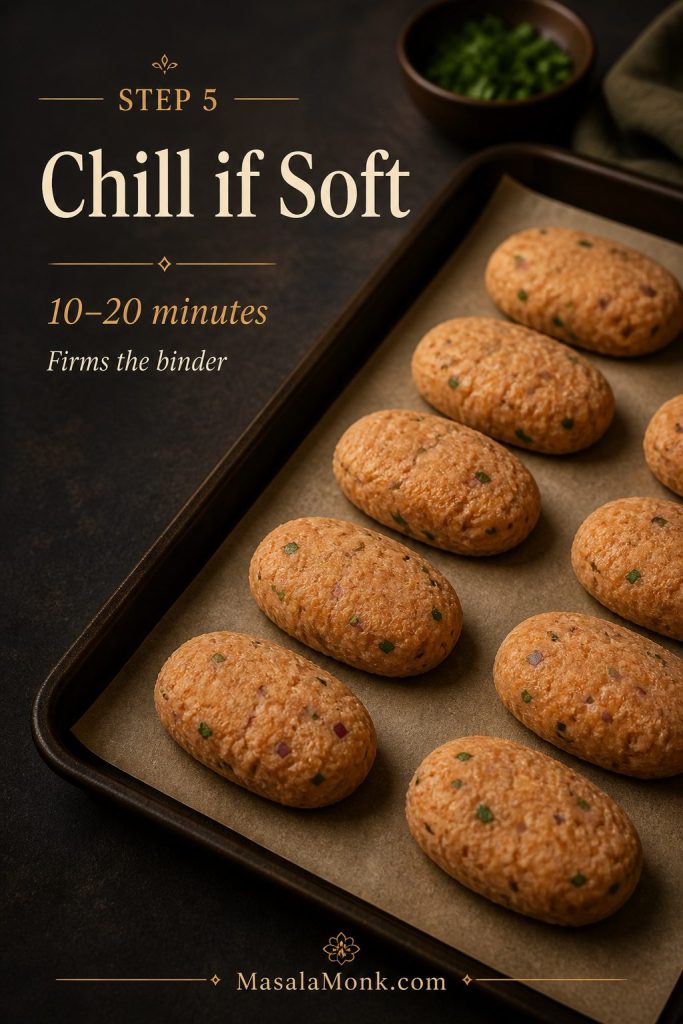
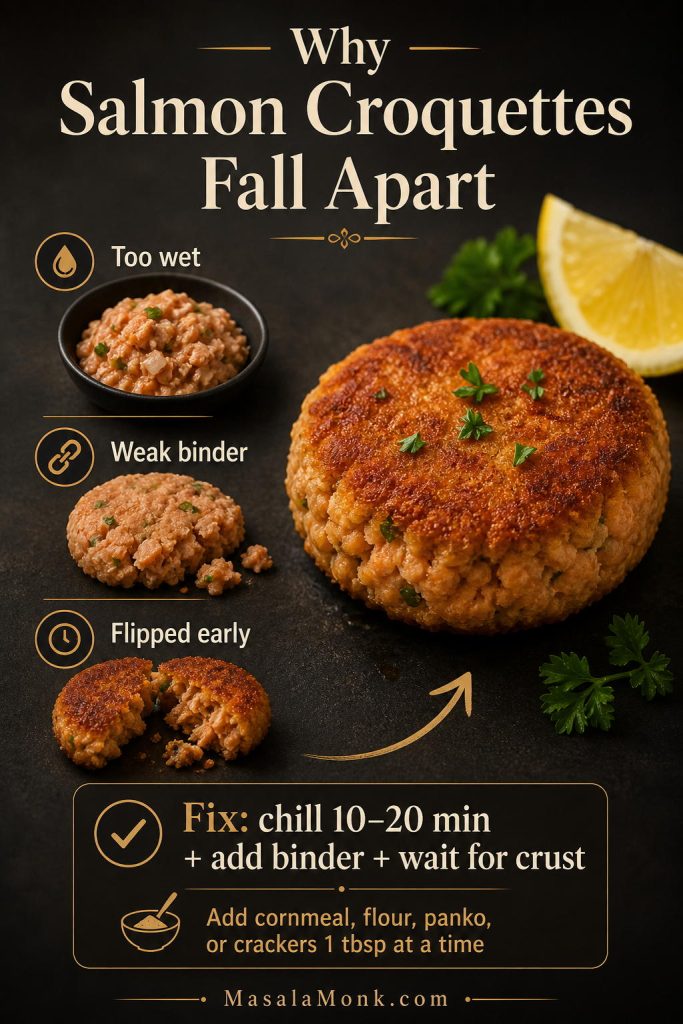
If the croquettes feel delicate, chill them for 10–20 minutes. Chilling firms the binder and makes them easier to flip. This is especially useful if your salmon was very moist or if you used fresh salmon.
If the patties feel soft, chill them before cooking. This short rest firms the binder and makes the salmon croquettes easier to move without cracking.
Step 6: Pan-Fry Until Crisp
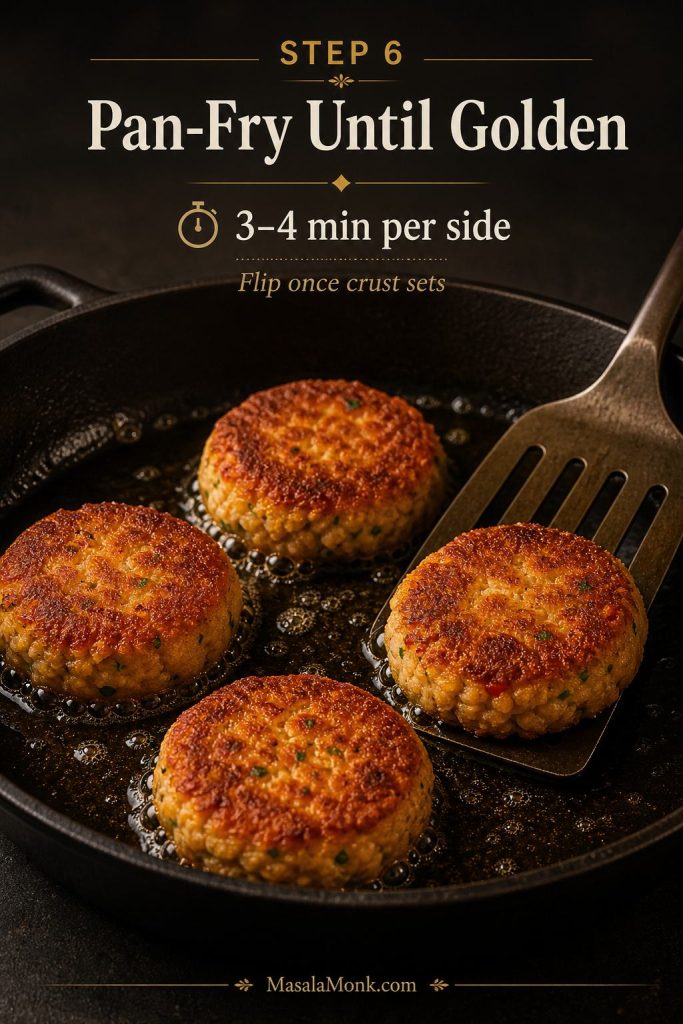
Heat neutral oil in a cast iron skillet or heavy-bottom skillet until it reaches about 350°F / 175°C, or until a small crumb sizzles steadily when dropped in. Fry the croquettes for 3–4 minutes per side, flipping once, until deeply golden and crisp. Drain on a wire rack or paper-towel-lined plate.
Pan-fry the croquettes until the first side is golden and set. Once that crust forms, the patties are much easier to flip cleanly.
Pan-Fried Salmon Croquettes
Pan-frying is the best default method because it gives salmon croquettes the crispest crust and the most classic texture. Use a 10-inch cast iron skillet or heavy-bottom skillet, and fry in batches so the oil temperature does not drop too much.
Because the salmon is already cooked when you use canned salmon, the real goal is to set the croquettes, crisp the crust, and heat the center without drying them out.
You do not need to deep-fry them. A shallow layer of oil is enough. For 8 croquettes, start with about ¼ cup / 60 ml oil and add a little more if the pan looks dry. For a more old-fashioned Southern fry, use closer to ½ cup / 120 ml.
Use a neutral frying oil such as canola, vegetable, avocado, or peanut oil. The oil should shimmer, and a small crumb should sizzle steadily when dropped in. Croquettes that brown too fast need slightly lower heat. Croquettes that absorb oil and taste greasy usually need hotter oil or fewer patties in the pan.
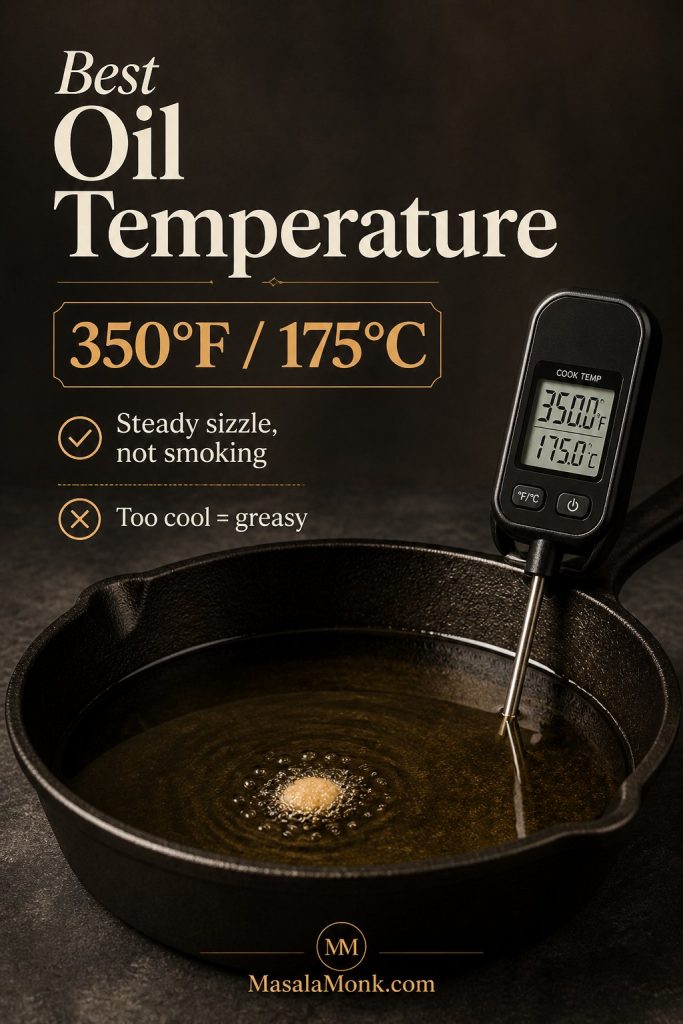
Best Oil Temperature for Salmon Croquettes
Oil temperature matters because cool oil makes croquettes greasy, while overheated oil browns the crust too fast. Aim for a steady sizzle around 350°F.
The croquettes are done when the outside is deeply golden, the center feels hot, and the patties feel set when lifted with a spatula.
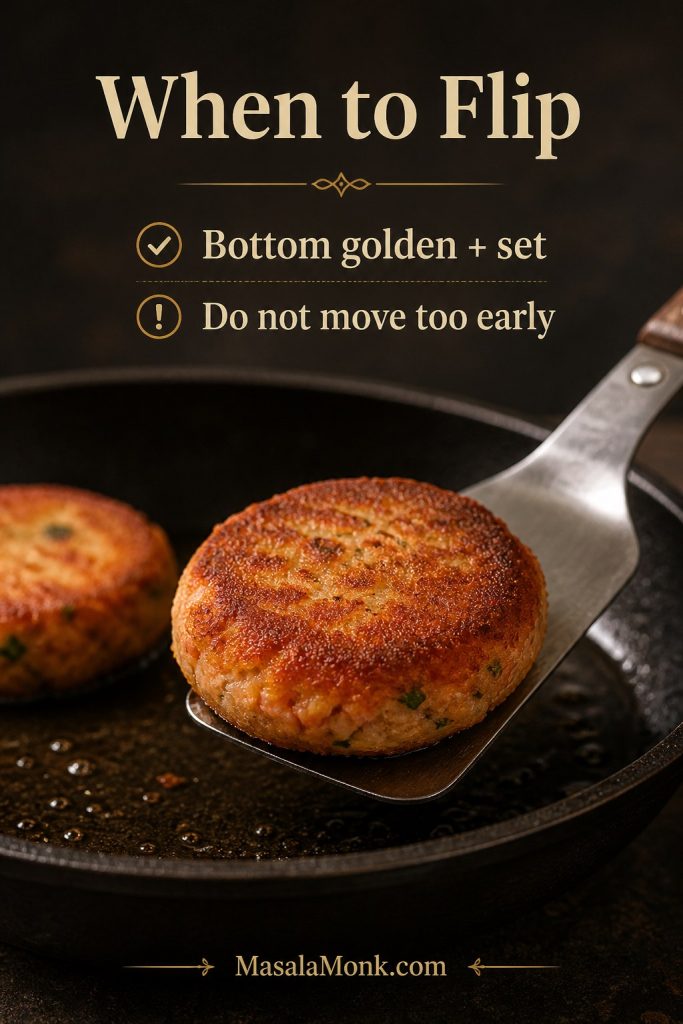
Do not flip too early. If the first side has not formed a crust, the croquette may tear. Let it cook until the edges look set and the bottom is golden.
When to Flip Salmon Croquettes
Flip only when the underside is golden and firm. Otherwise, the crust may tear before it has enough structure to hold the patty together.
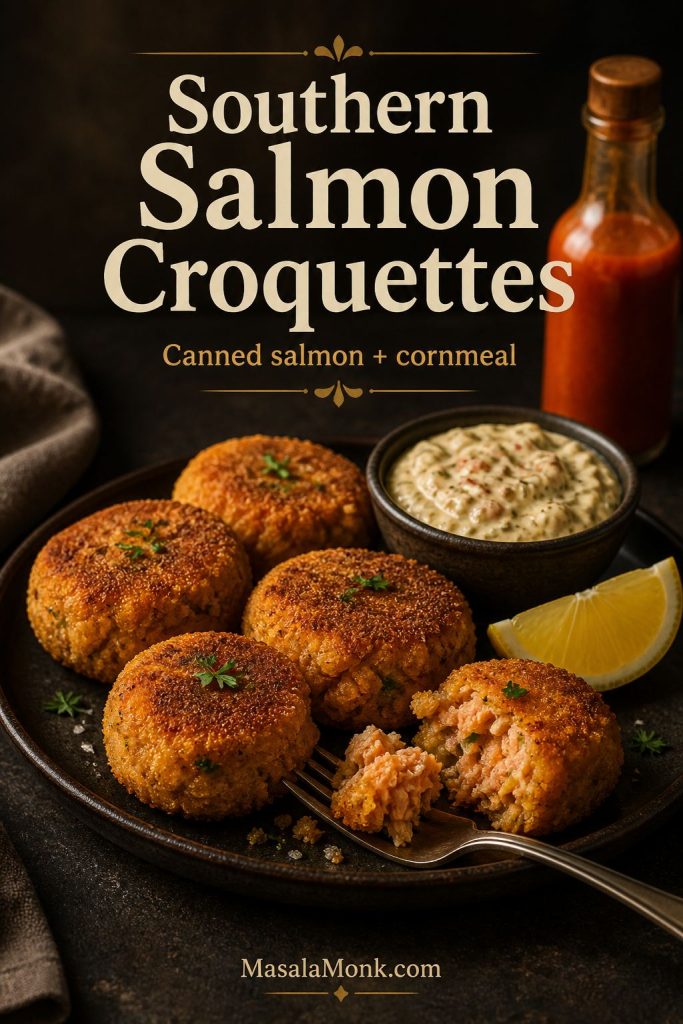
Southern Salmon Croquettes
Southern salmon croquettes usually start with canned pink salmon, onion, bell pepper, egg, cornmeal, flour, and a hot skillet. The texture is crisp-edged and old-fashioned, with a savory salmon center and a little sweetness from the vegetables.
For a stronger Southern-style version, keep the cornmeal and flour combination in the recipe card, add a pinch of cayenne or a few dashes of hot sauce, and serve the croquettes with remoulade, lemon dill mayo, green chutney mayo, or hot sauce.
Extra cornmeal on the outside creates a rougher, crunchier crust. For a softer patty, skip the extra coating and let the flour do more of the binding.
Southern Salmon Croquettes Texture Cue
Southern salmon croquettes lean into canned salmon, cornmeal, and skillet frying. That combination gives them a crisp old-fashioned crust and a tender, savory center.
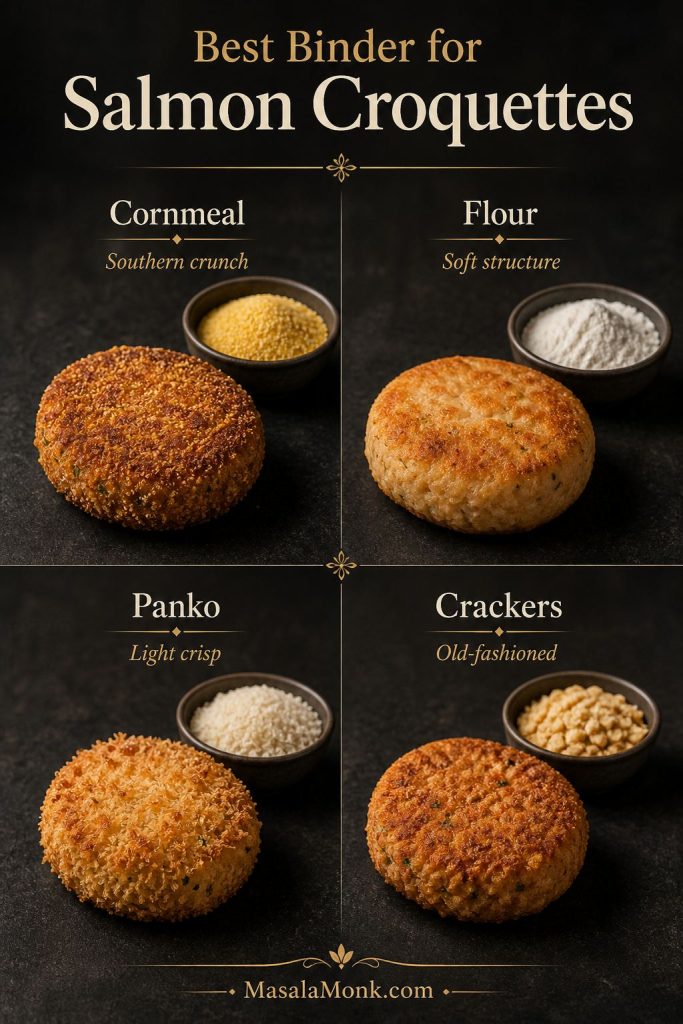
Cornmeal vs Flour vs Crackers vs Panko
The binder changes the texture of salmon croquettes more than most people realize. Cornmeal gives a classic Southern texture. Flour makes the mixture more cohesive. Panko makes the croquettes lighter and crispier. Crushed crackers give an old-fashioned pantry flavor.
Binder or coating
Best for
Texture
Cornmeal
Southern salmon croquettes
Crisp, grainy, old-fashioned crust
Flour
Softer salmon patties
Tender, cohesive, less crunchy
Panko
Modern crispy salmon cakes
Light, airy crunch
Crushed saltines
Pantry-style salmon patties
Savory, tender-crisp, nostalgic
Regular breadcrumbs
Classic salmon cakes
Even structure and mild crust
Almond flour
Low-carb or gluten-free variation
Softer and less crisp, but useful for dietary swaps
Best Binder for Salmon Croquettes
The binder changes the final bite. Cornmeal adds crunch, flour gives structure, panko makes the crust lighter, and crackers create a more old-fashioned pantry-style patty.
For the best first batch, use cornmeal plus flour. If you want a lighter, crispier version, replace some or all of the cornmeal with panko. For old-fashioned salmon patties, crushed saltines work beautifully instead of panko or breadcrumbs.
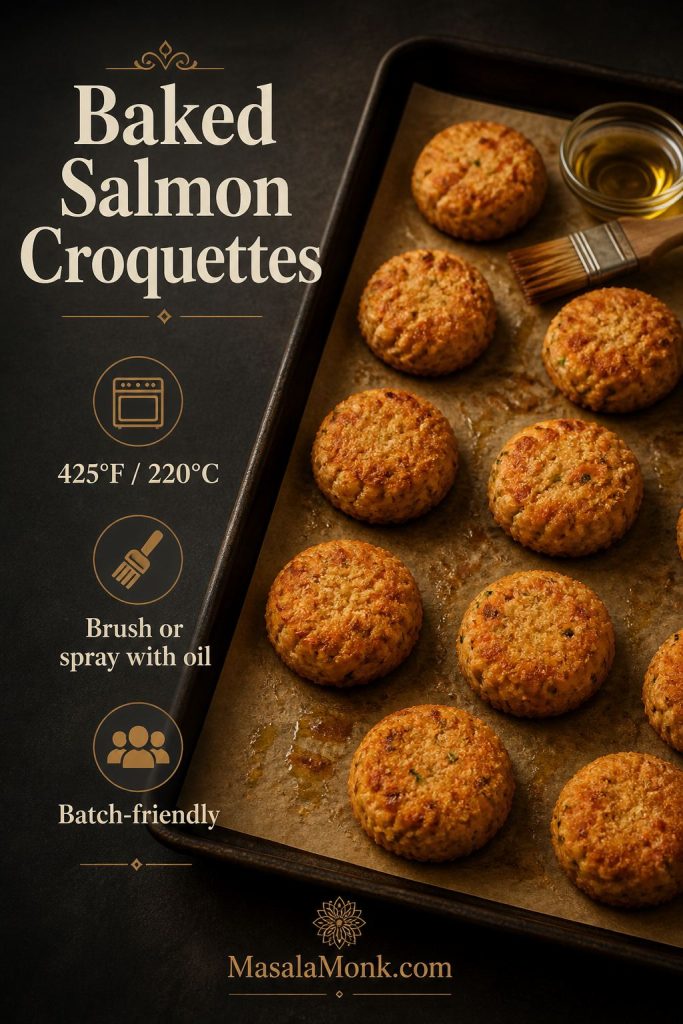
Baked salmon croquettes are useful when you want less oil or need to cook a whole batch at once. Although they will not be quite as deeply crisp as pan-fried croquettes, a hot, well-oiled sheet pan helps them brown.
To bake them, heat the oven to 425°F / 220°C. Place the shaped croquettes on a well-oiled sheet pan, brush or spray the tops lightly with oil, and bake for 15 minutes. Flip carefully, then bake for another 5–7 minutes, until golden and firm.
Baked Salmon Croquettes Texture Cue
Baked salmon croquettes are useful when you want a lighter batch or need to cook several at once. However, brushing or spraying them with oil helps the surface brown better and keeps the crust from tasting dry.
Baked texture tip: Keep baked croquettes slightly thinner, around ½ inch, so they heat through and brown before drying out.
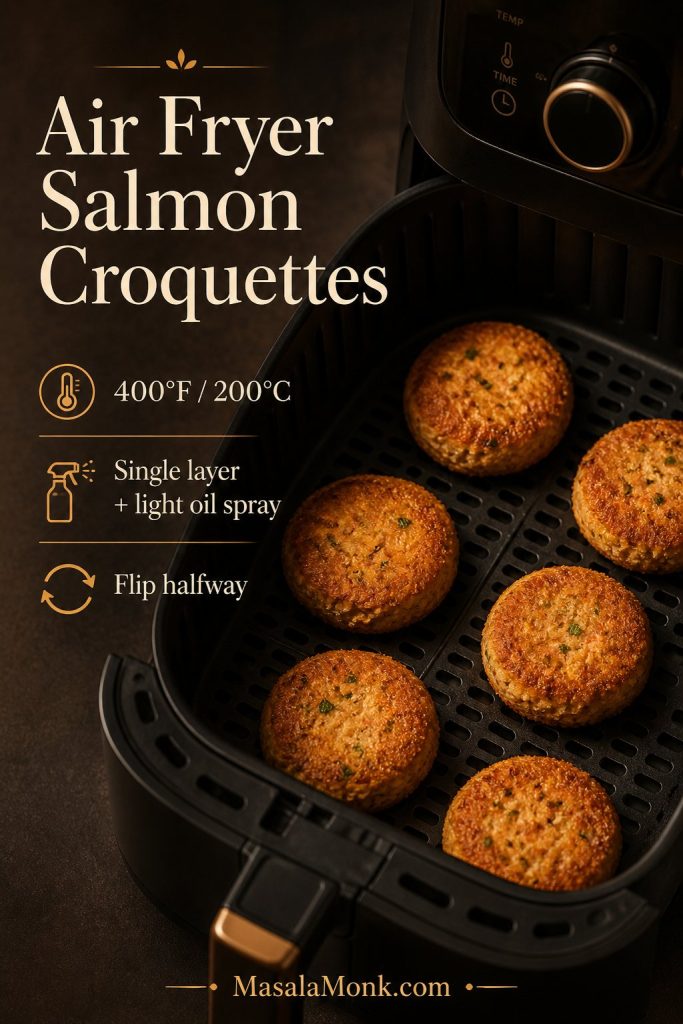
Air fryer salmon croquettes are a good middle ground between pan-fried and baked. They use less oil than skillet frying; however, they can still develop a crisp surface if you spray them lightly and avoid overcrowding the basket.
Preheat the air fryer to 400°F / 200°C. Spray the basket or use perforated parchment. Add the croquettes in a single layer, spray the tops lightly with oil, and air fry for 8–10 minutes. Flip, spray again if needed, and cook for another 3–5 minutes, depending on thickness.
Air Fryer Salmon Croquettes Texture Cue
Air fryer salmon croquettes can crisp surprisingly well, provided the patties are spaced apart and lightly oiled. Meanwhile, overcrowding the basket traps steam and makes the crust softer.
If you are building a full air fryer meal, serve the croquettes with something crisp and simple like air fryer hash browns or a cold salad on the side.
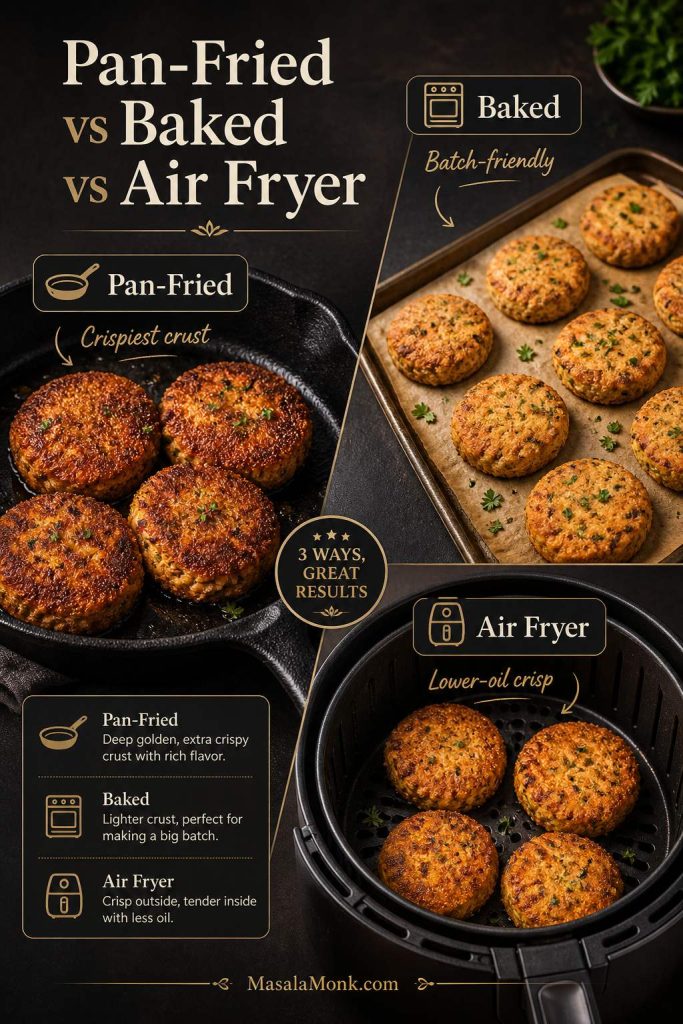
Pan-Fried vs Baked vs Air Fryer Salmon Croquettes
Each cooking method changes the result a little. Pan-fried salmon croquettes give the boldest crust, baked croquettes are easiest for a larger batch, and the air fryer offers a crisp finish with less oil.
Potato Salmon Croquettes
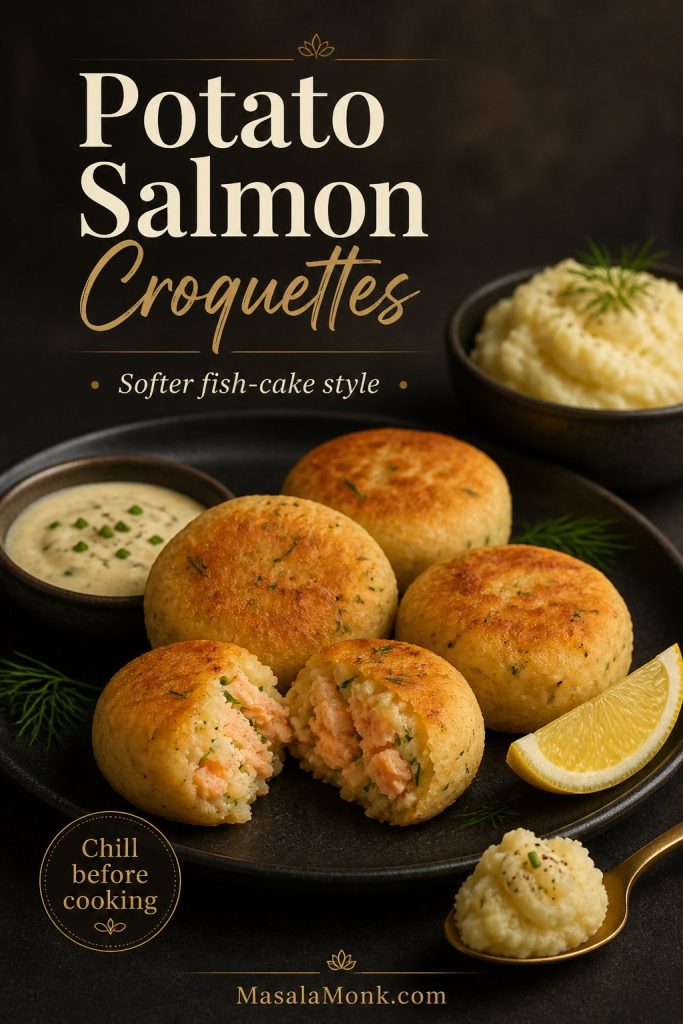
Potato salmon croquettes are softer and more like fish cakes. To make them, mix the drained salmon with about 1 cup mashed potatoes, one egg, onion, herbs, lemon, and seasoning. Reduce the cornmeal and flour because the potatoes already add body.
Chill potato salmon croquettes before cooking. They are more delicate than the canned salmon version, so a short rest in the fridge helps them hold their shape.
Potato Salmon Croquettes Texture Cue
Potato salmon croquettes are softer than the cornmeal version. Because the mixture is more delicate, chilling before cooking helps them hold their shape.
Best Sauce for Salmon Croquettes
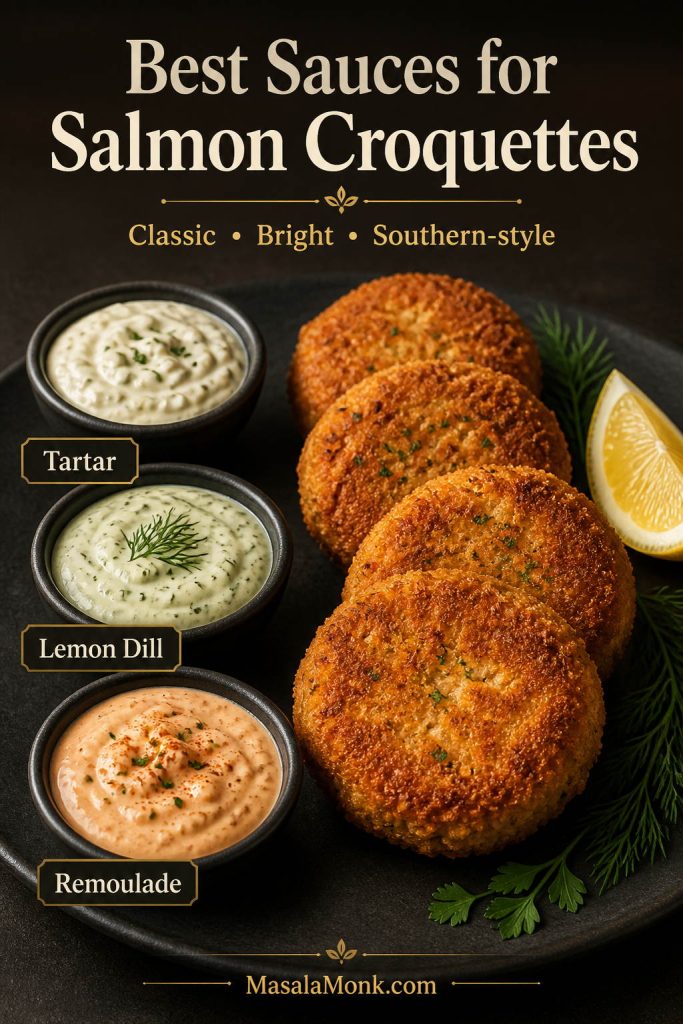
Salmon croquettes need a sauce with acid, creaminess, herbs, or heat. Tartar sauce is the familiar classic, lemon dill mayo is the easiest homemade option, remoulade gives a more Southern seafood-style finish, and brighter sauces like green chutney mayo, tzatziki, mango mustard, or mango habanero can change the whole plate.
Best Sauces for Salmon Croquettes
The best sauce depends on the mood of the plate. Tartar keeps things classic, lemon dill adds brightness, and remoulade gives the croquettes a Southern seafood-style finish.
Quick Tartar Sauce Shortcut
½ cup mayonnaise
1–2 tablespoons chopped pickles or relish
1 teaspoon lemon juice
1 teaspoon Dijon mustard, optional
Black pepper, to taste
Stir everything together and chill until serving. This is the easiest classic dip for salmon patties, salmon cakes, and crisp croquettes.
Quick Lemon Dill Sauce
½ cup mayonnaise or Greek yogurt
1 tablespoon lemon juice
1 teaspoon Dijon mustard
1 tablespoon chopped dill or parsley
1 small grated garlic clove
Salt and black pepper, to taste
Mix everything together and chill until ready to serve. If the sauce tastes flat, add more lemon. If it tastes too sharp, add a spoonful more mayo or yogurt.
Quick Remoulade-Style Sauce
½ cup mayonnaise
1 teaspoon Dijon mustard
1 tablespoon lemon juice or pickle juice
1 teaspoon hot sauce
½ teaspoon paprika
1 tablespoon chopped pickles, relish, or capers, optional
Black pepper, to taste
Mix everything together and chill for 10–15 minutes if you have time. This sauce is especially good with Southern salmon croquettes, cornmeal-crusted croquettes, and fried salmon patties.
For an Indian-style twist, stir green chutney into mayo or yogurt. The coriander, mint, chilli, ginger, cumin, and citrus make a sharp, fresh dip that cuts through the fried crust.
For baked or air fryer croquettes, a cool tzatziki sauce works beautifully. The cucumber and yogurt keep the plate lighter, especially if the croquettes are spicy or served as lunch.
For a sweet, tangy, fish-friendly sauce, try mango mustard sauce instead of plain mustard. For more heat, finish the plate with mango habanero sauce, especially with slaw, rice, or a bowl-style meal.
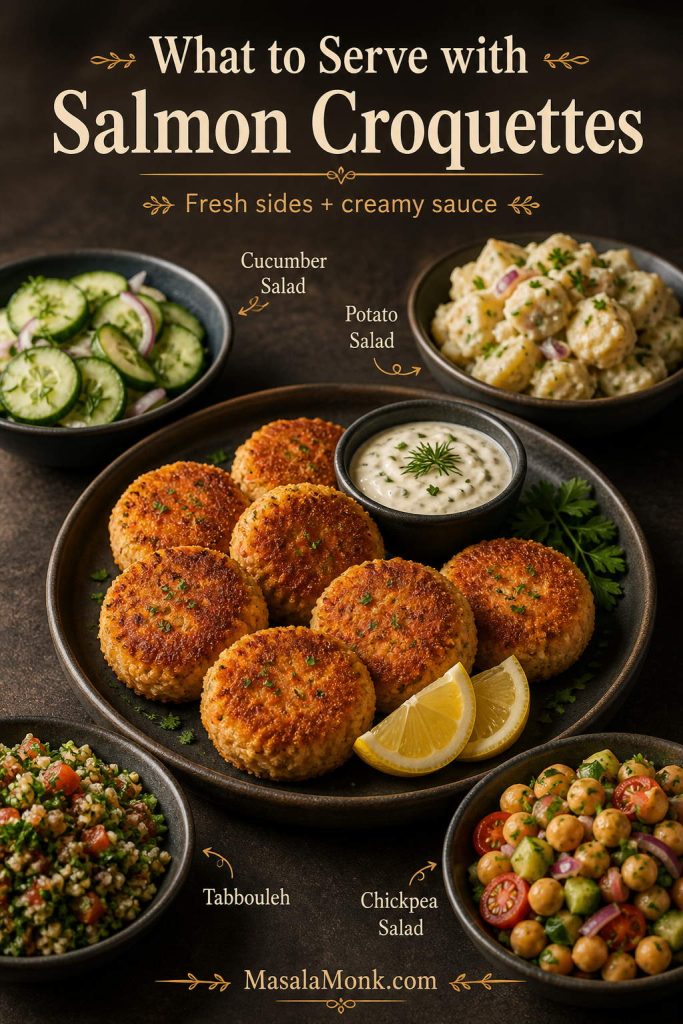
A cold, crisp cucumber salad is one of the easiest sides for salmon croquettes. The vinegar, dill, onion, and crunch balance the fried crust without making the meal heavy.
Tabbouleh is a brighter herb-heavy side because parsley, mint, lemon, tomato, and bulgur bring freshness to the plate.
For a more filling lunch, add chickpea salad on the side or tuck the croquettes into bowls with greens, cucumber, herbs, and sauce.
A classic comfort-food plate works well with potato salad, fries, roasted potatoes, green beans, coleslaw, or a simple green salad.
During warmer months, serve the croquettes with mango salsa, lime, and shredded cabbage for a fresher, taco-inspired plate.
Visual Side Dish Guide
For a balanced meal, pair crisp salmon croquettes with something fresh and something creamy. Cucumber salad, tabbouleh, chickpea salad, and potato salad all work well because they cut through the richness.
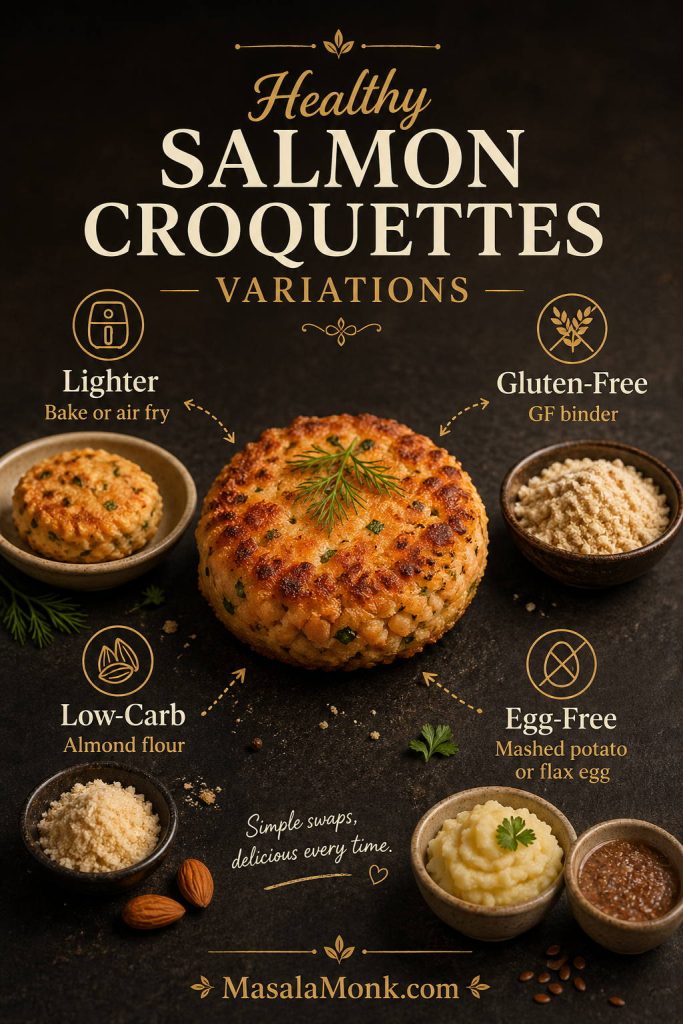
Healthy, Gluten-Free, Low-Carb, and Egg-Free Variations
For a lighter or dietary-specific version, keep the same basic method and adjust the binder, cooking method, or sauce.
Variation
How to adjust it
Lighter salmon croquettes
Bake or air fry instead of pan-frying, and serve with a yogurt-based sauce like tzatziki.
Gluten-free salmon croquettes
Use certified gluten-free cornmeal plus gluten-free flour, gluten-free crackers, gluten-free breadcrumbs, or almond flour. Expect almond flour to make a softer croquette.
Low-carb salmon croquettes
Use almond flour in place of flour and skip crackers or breadcrumbs. Expect a softer texture than the cornmeal version.
Egg-free salmon croquettes
Use 2–3 tablespoons mashed potato or a flax egg as the binder, then chill the patties well before cooking.
Dairy-free salmon croquettes
The base recipe is already dairy-free if your mayo is dairy-free.
Healthy Salmon Croquettes Variations
You can adapt this salmon croquettes recipe in several directions without starting over. For example, bake or air fry for a lighter version, use a gluten-free binder if needed, or swap the binder to fit low-carb or egg-free needs.
In these gluten-free, low-carb, or egg-free versions, treat the croquette mixture more gently and chill it before cooking. These swaps usually need a short rest because they are softer than the classic canned salmon and cornmeal version.
Why Do Salmon Croquettes Fall Apart?
Croquettes usually fall apart when the salmon mixture is too wet, the binder is too weak, the patties were not chilled, or they were flipped before the crust had time to set. Fortunately, the fix is simple: drain the salmon better, add dry binder one tablespoon at a time, chill the shaped patties, and flip only after the bottom is golden.
Salmon Croquettes Mixture Texture Guide
The mixture should hold together when pressed, but still look flaky. If it is wet, add dry binder; if it crumbles, add a little mayo.
Problem
Why it happens
Fix
Croquettes fall apart
Too wet, weak binder, or flipped too early.
Add 1–2 tablespoons dry binder, chill 10–20 minutes, and flip only after a crust forms.
Mixture is too wet
Salmon was not drained well or there is too much mayo.
Add cornmeal, flour, panko, or crushed crackers 1 tablespoon at a time.
Croquettes are dry
Too much flour or cornmeal, or they cooked too long.
Add a little mayo to the mixture next time and serve with sauce.
Croquettes are mushy
Too much wet binder or salmon mashed too finely.
Drain salmon well, leave some flakes, and reduce mayo slightly.
They stick to the pan
Oil was not hot enough or they were moved too soon.
Heat oil until shimmering and let the bottom set before flipping.
They taste greasy
Oil was too cool or the pan was crowded.
Fry hotter, cook in batches, and drain on a wire rack.
They taste bland
Not enough salt, acid, or savory seasoning.
Add lemon, Worcestershire, herbs, black pepper, cayenne, hot sauce, or a small amount of Old Bay-style seasoning.
Why Salmon Croquettes Fall Apart
Salmon croquettes usually fall apart for one of three reasons: too much moisture, weak binder, or flipping too early. Therefore, chill the patties, adjust the binder, and wait for the crust to set.
Salmon croquettes are best right after frying, but leftovers reheat well if you use a skillet, oven, or air fryer. Avoid microwaving if you want to keep the crust crisp.
Storage method
Time
Best reheating method
Fridge
2–3 days
Skillet, oven, or air fryer
Make ahead
Up to 1 day
Shape the croquettes, cover, and refrigerate. Fry straight from the fridge, adding an extra minute if needed.
Freeze uncooked
Up to 2–3 months
Freeze on a tray first, then transfer to a bag. Thaw before cooking.
Freeze cooked
Up to 2–3 months
Cool fully, freeze in a single layer, then reheat from thawed.
Skillet reheat
2–3 minutes per side
Best for restoring the crust
Air fryer reheat
375°F / 190°C for 4–7 minutes
Fast and crisp
Oven reheat
350°F / 175°C for 10–15 minutes
Best for larger batches
How to Store and Reheat Salmon Croquettes
Leftover croquettes keep best when stored properly and reheated with dry heat. Use the fridge for short storage, the freezer for longer storage, and a skillet, oven, or air fryer to bring back the crust.
Saveable Salmon Croquettes Recipe Card
This saveable salmon croquettes recipe card keeps the core method simple: drain well, bind carefully, shape evenly, and fry until the crust sets. Therefore, it works as a quick refresher when you do not want to reread the full post.
Crispy Salmon Croquettes Recipe
These salmon croquettes are crisp outside, tender inside, and made with canned salmon, egg, mayo, cornmeal, flour, onion, bell pepper, lemon, Worcestershire, and pantry seasoning. Pan-fry them for the classic version, or use the baked and air fryer notes below.
Prep Time15 minutes
Cook Time8–10 minutes
Optional Chill10–20 minutes
Total Time25–45 minutes
Yield8 croquettes
Equipment
Large mixing bowl
Fork for flaking salmon
¼-cup measuring cup or scoop
10-inch cast iron skillet or heavy-bottom skillet
Thin spatula or fish spatula
Wire rack or paper-towel-lined plate
Optional instant-read thermometer for oil
Ingredients
1 can canned pink salmon, 14.75–15 oz / 418–425 g, drained well
1 large egg
¼ cup / 60 g mayonnaise
½ cup / about 75 g fine yellow cornmeal
¼ cup / about 30 g all-purpose flour
¼ cup / about 40 g finely diced onion
¼ cup / about 35 g finely diced bell pepper
2 tablespoons chopped green onion or parsley
1 tablespoon / 15 ml Worcestershire sauce
1 tablespoon / 15 ml fresh lemon juice
½ teaspoon garlic powder
½ teaspoon paprika or smoked paprika
¼ teaspoon black pepper
¼–½ teaspoon salt, to taste
Pinch of cayenne or a few dashes hot sauce, optional
Optional: ½ teaspoon Old Bay-style seafood seasoning, Cajun seasoning, or Creole seasoning; reduce salt if using a salty blend
¼–½ cup / 60–120 ml neutral oil, such as canola, vegetable, avocado, or peanut oil, for frying
Instructions
Drain and flake the salmon. Drain the canned salmon well, but do not squeeze it completely dry. Flake it with a fork, leaving some texture.
Mix the wet binder. In a large bowl, whisk the egg, mayonnaise, Worcestershire sauce, lemon juice, garlic powder, paprika, black pepper, salt, and cayenne or hot sauce.
Add the salmon and dry binder. Fold in the salmon, onion, bell pepper, green onion or parsley, cornmeal, and flour. Mix gently until the mixture holds together when pressed.
Adjust texture if needed. If the mixture feels too wet, add cornmeal, flour, panko, or crushed crackers 1 tablespoon at a time.
Shape. Scoop about ¼ cup mixture per croquette and shape into patties about ½–⅔ inch thick. You should get about 8 croquettes.
Chill if needed. If the patties feel soft, chill them for 10–20 minutes.
Heat the oil. Add oil to a cast iron skillet or heavy-bottom skillet and heat to about 350°F / 175°C.
Fry. Cook the croquettes for 3–4 minutes per side, flipping once, until golden, crisp, hot in the center, and set enough to lift with a spatula.
Drain and serve. Transfer to a wire rack or paper-towel-lined plate. Serve hot with lemon wedges, tartar sauce, lemon dill sauce, remoulade, green chutney mayo, tzatziki, mango mustard, or hot sauce.
Baked Version
Heat oven to 425°F / 220°C. Place croquettes on a well-oiled sheet pan, brush or spray the tops with oil, and bake for 15 minutes. Flip and bake 5–7 minutes more.
Air Fryer Version
Air fry at 400°F / 200°C for 8–10 minutes. Flip, spray lightly with oil, and cook 3–5 minutes more, until crisp and heated through.
Fresh Salmon Version
Use 1 lb / 454 g cooked fresh salmon. Cool slightly, flake, and use in place of canned salmon. Taste before shaping because fresh salmon may need a little extra salt or seasoning.
Notes
For a lighter crispy version, replace some or all of the cornmeal with panko.
For old-fashioned salmon patties, use crushed saltines instead of panko or breadcrumbs.
For gluten-free salmon croquettes, use certified gluten-free cornmeal plus gluten-free flour, gluten-free crackers, gluten-free breadcrumbs, or almond flour.
For spicier croquettes, add cayenne, hot sauce, Cajun-style seasoning, or extra black pepper.
You can shape the croquettes up to 1 day ahead, cover, and refrigerate. Fry them straight from the fridge, adding an extra minute if needed.
Serve with lemon wedges and one creamy sauce, such as tartar sauce, lemon dill mayo, or remoulade.
If this salmon croquettes recipe helped you get crisp patties that actually hold together, save it for the next time you have canned salmon in the pantry. You can also come back to the binder guide, sauce ideas, and troubleshooting table whenever you want to adjust the recipe with panko, crackers, fresh salmon, or the air fryer.
Serving Salmon Croquettes
Serve salmon croquettes as soon as they come out of the pan if you want the contrast at its best. The crust stays crispest early on, while lemon and a creamy sauce brighten the rich, savory center.
FAQs About Salmon Croquettes
Are salmon croquettes the same as salmon patties?
They are very similar, and many people use the names interchangeably. Salmon croquettes are often associated with a crisp, Southern-style version made with canned salmon, cornmeal or flour, egg, onion, and skillet frying. Salmon patties is a broader term and can refer to thinner or simpler salmon cakes.
Are salmon croquettes the same as salmon cakes?
They are in the same family, but salmon cakes often sound a little more restaurant-style and may use fresh salmon, panko, herbs, Dijon, or mayo. Croquettes usually feel more old-fashioned, pantry-friendly, and crisp-edged.
Can I use canned salmon?
Yes. Canned salmon is the easiest and most traditional choice for classic salmon croquettes. Drain it well and flake it before mixing.
Do I remove the bones and skin from canned salmon?
You can remove the larger bones and skin if you prefer a smoother texture. The small soft bones are edible and mash easily, but it is fine to take them out if you do not like them.
Is this recipe better with canned salmon or fresh salmon?
For classic croquettes, canned salmon is easier because it is already cooked, budget-friendly, and easy to bind. Fresh salmon also works, but you need to cook it first, cool it slightly, and flake it before mixing the patties.
Can I use fresh salmon?
Yes. Cook fresh salmon first, cool it slightly, then flake it and use it in place of canned salmon. Fresh salmon croquettes usually taste cleaner and more delicate than canned salmon croquettes.
What keeps salmon croquettes from falling apart?
Good drainage, enough binder, even shaping, and patient frying. Use egg plus a dry binder, chill the patties if they feel soft, and do not flip until the first side has formed a crust.
Do you use cornmeal or flour for salmon croquettes?
Use both for the best classic texture. Cornmeal gives crispness and an old-fashioned Southern feel, while flour helps bind the mixture. You can also use panko, breadcrumbs, or crushed crackers.
Can I use crackers instead of breadcrumbs?
Yes. Crushed saltines are a classic pantry binder for salmon patties and croquettes. They give a savory, tender-crisp texture.
Can salmon croquettes be baked?
Yes. Bake them at 425°F / 220°C on a well-oiled sheet pan for 15 minutes, flip, then bake 5–7 minutes more. Brush or spray the tops with oil for better browning.
Can salmon croquettes be cooked in the air fryer?
Yes. Air fry at 400°F / 200°C for 8–10 minutes, flip, then cook 3–5 minutes more. Spray lightly with oil for a crisp surface.
How long do you cook salmon croquettes?
Pan-fried salmon croquettes usually take 3–4 minutes per side. Baked salmon croquettes take about 20–22 minutes total at 425°F / 220°C. Air fryer salmon croquettes usually take 11–15 minutes total at 400°F / 200°C, depending on thickness.
What sauce goes with salmon croquettes?
Tartar sauce, lemon dill mayo, remoulade, green chutney mayo, tzatziki, mango mustard, mango habanero sauce, hot sauce, or a simple garlic mayo all work well.
What sides go with salmon croquettes?
Cucumber salad, tabbouleh, chickpea salad, potato salad, coleslaw, roasted potatoes, rice, green beans, and mango salsa all pair well with salmon croquettes.
Can you freeze salmon croquettes?
Yes. Freeze shaped uncooked croquettes on a tray, then transfer to a freezer bag. You can also freeze cooked croquettes after they cool fully. For best texture, thaw before reheating or frying.
How do you reheat salmon croquettes?
Reheat them in a skillet for 2–3 minutes per side, in an air fryer at 375°F / 190°C for 4–7 minutes, or in the oven at 350°F / 175°C for 10–15 minutes. The microwave works, but it softens the crust.
Are salmon croquettes healthy?
They can be part of a balanced meal, especially if you serve them with salad, vegetables, or a yogurt-based sauce. Pan-fried croquettes use more oil, while baked or air fryer salmon croquettes are lighter.
Croquettes have a way of making an ordinary day feel a little more celebratory. The outside turns crisp and golden, the inside stays soft and savory, and suddenly a handful of simple ingredients becomes something you’d happily serve to guests. Even so, a lot of people hesitate to try a croquettes recipe because they’ve had the frustrating version: croquettes that crack in the oil, croquettes that taste bland inside, croquettes that go oily, or croquettes that collapse the moment you flip them.
Fortunately, once you learn one reliable croquettes recipe method, everything clicks. After that, you can make easy croquettes on a weeknight, bake them when you want healthy croquettes, or go all-in with Spanish croquetas that are creamy enough to feel like a tapas bar at home. You can also work through the classics—potato croquettes, ham croquettes, chicken croquettes, tuna croquettes, salmon croquettes (canned or fresh salmon croquette), cod croquettes, vegetarian croquettes, vegan croquettes—without learning a new technique every time.
This post is exactly that: a single, detailed, step-by-step guide that covers croquette fish styles, croquette veggie options, and the “perfect croquettes” approach—plus the oven baked croquettes route when you want crunch with less fuss.
And because croquettes are at their best when they’re part of a spread, you’ll also get natural pairings: cooling chutneys, fiery chutneys, and a few drink and dessert ideas to finish the meal without feeling heavy.
Croquettes Recipe: The Four Rules That Make Them Work Every Time
Before you pick a variant, it helps to understand what croquettes really are. Whether you call it a croquette, a croqueta recipe, a kroket (you’ll see “chicken kroket” and “dutch croquettes” used in different places), or even a Japanese potato croquette style, the structure is the same:
A flavorful filling
A binder that holds it together
A coating that creates crunch
A chill step that turns “hope” into “confidence”
If you keep those four rules steady, you can change almost everything else.
Croquettes falling apart? This is the “save it forever” checklist. Season the filling like it’s the final dish, cool and control moisture, build a real shell (flour → egg → crumbs), then chill so the coating firms up before you cook. Once these four rules click, you can swap in potato, salmon (canned or fresh), ham & cheese, chicken, tuna, cod, vegetarian, or vegan fillings without changing the method. Bookmark this guide, pin it for later, and use it as your quick reset before frying, baking, or air frying.
Rule 1: Season the filling like it’s the final dish. Once croquettes are breaded, the outside becomes the star. That means the inside must be seasoned enough to hold its own.
Rule 2: Control moisture, don’t fight it. Wet fillings are the number one reason croquettes fall apart. Instead of adding more egg (which can make them softer), you remove or offset moisture: cool the mixture, add just enough dry binder, and chill properly.
Rule 3: The coating is a shell, not decoration. Flour → egg → crumbs isn’t tradition for tradition’s sake. It builds a sturdy exterior so the inside can stay creamy.
Rule 4: Chilling is non-negotiable for perfect croquettes. Chilling firms fat and starches, reduces steam pressure, and makes shaping easier. It’s the difference between croquettes that survive the pan and croquettes that become snack-flavored chaos.
Keep these rules in mind, and suddenly “how do you make croquettes” becomes a calm question rather than a stressful one.
How to Make Croquettes: The Master Step-by-Step (Works for Every Variant)
This is the core croquettes recipe method you’ll use for everything in the post—potato, fish, chicken, turkey, vegetarian, vegan, Spanish croquetas, and more.
If your croquettes crack, leak, or fall apart, this is the fix: shape → flour → egg → panko → chill. That 15–30 minute chill firms the coating so you can fry for max crunch or bake/air-fry for a lighter batch—then plug in any filling from the post (potato, salmon, ham & cheese, tuna, chicken, cod, or vegan) without changing the method.
What you’ll need
3 shallow bowls (for breading)
A tray (for chilling shaped croquettes)
A rack (for draining fried croquettes or baking with airflow)
Optional but helpful: a food thermometer for meat and fish variants
Base quantities (Recipe makes 10–12 croquettes)
Think of these as the “croquettes template.” Your filling changes, the structure stays.
For the croquette mixture
2 packed cups prepared filling (pick a variant below)
1 large egg (binder) Vegan binder method is included later
2–6 tablespoons breadcrumbs or flour, only as needed (moisture control)
Salt and pepper (plus any spices/herbs your filling wants)
For the coating
½ cup flour
2 eggs, beaten with a pinch of salt
1½ cups breadcrumbs or panko (panko gives the crispest bite)
Step 1: Prepare the filling, then cool it completely
Make your filling according to the variant recipe you’re using. When it’s done, spread it out on a plate or tray and let it cool. If you rush and mix while it’s warm, you’ll need more breadcrumbs, the texture will be heavier, and shaping will feel like wrestling mashed clouds.
Warm croquette mixture is the fastest way to end up with heavy croquettes that crack or soak up oil. Spread your filling thin, cool it fully, then bind and bread—your croquettes shape cleanly, hold their coating, and cook with less drama whether you fry, bake, or air fry. Save this card for every potato, salmon, chicken, veg, or vegan batch.
Step 2: Bind the mixture
Add your egg and mix thoroughly. Then test the texture:
If it holds together when you press a small handful, you’re good.
If it feels loose or wet, add breadcrumbs 1 tablespoon at a time until it firms up.
This step is where people often over-correct. Slow down. You’re aiming for a mixture that is cohesive, not dry.
Use this quick ‘filling fixer’ before you shape anything: it shows the one adjustment that saves a batch—drain/pat dry where needed, then choose the right binder so croquettes stay intact. It’s especially handy for fish croquettes (salmon/cod) and vegan croquettes, where moisture control makes or breaks the crust.
Step 3: Chill the mixture (30–60 minutes)
This single step makes shaping easier and prevents cracking. In addition, it helps the mixture set so it survives turning.
Chilling the croquettes mixture is the quiet step that prevents most disasters. A cold mix holds its shape, needs fewer extra crumbs, and is far less likely to crack once it hits hot oil. Use the quick ready test here (press → scoop → roll), then match the chill time to your filling—potato/veg sets fast, fish benefits from a steady firm-up, and béchamel-based Spanish croquetas really shine with a longer rest. Keep this guide nearby before shaping so every batch stays tidy, crisp, and confident.
Step 4: Shape your croquettes
You can shape croquettes as:
Logs (classic croquette shape)
Thick patties (great for salmon croquettes, tuna croquettes, and easy croquettes you want to flip quickly)
Small cylinders (perfect for Spanish croquetas, which are often bite-sized)
As you shape, keep the sizes consistent so cook times match.
Not sure which croquettes shape to make? Use this quick shape guide: logs cook evenly (great for potato, chicken, veg), patties are perfect for salmon croquettes and tuna croquettes when you want a quick shallow-fry, and bite-size croquetas are the tapas-style choice for creamy béchamel centers. Keep sizes consistent so every batch cooks evenly—then bake, air fry, shallow fry, or deep fry with confidence.
Step 5: Bread the croquettes (flour → egg → crumbs)
Set up a breading station:
Flour bowl
Egg bowl
Breadcrumb bowl
Coat each croquette in flour first, shaking off excess. Then dip in egg. Finally, press into breadcrumbs so the crumbs actually stick rather than merely dust the surface.
Want croquettes that stay sealed and crisp? Use this breading station every time: flour → egg (or eggless slurry) → panko, then chill 15–20 minutes so the coating sets like a shell before you fry, bake, or air fry. The right side is perfect for vegan croquettes or when you’re out of eggs—same crunch, less stress.
Step 6: Chill again (15–20 minutes)
This second chill is optional for potato croquettes, yet extremely helpful for béchamel-based Spanish croquetas and any very soft filling. It firms the exterior and helps the coating adhere.
That “second chill” is the quiet upgrade that stops croquettes from cracking or shedding crumbs. After flour → egg/slurry → panko, refrigerate the breaded croquettes for 15–20 minutes so the coating hydrates, firms up, and grips the surface—especially for very soft fillings like béchamel-style Spanish croquetas, fish, or cheese-heavy centers. Then cook with confidence: the shell sets faster, edges stay cleaner, and frying feels far less stressful. Keep this card saved as your quick reminder whenever your coating feels fragile.
Step 7: Cook using your method of choice (fry, shallow fry, bake, or air fry)
You’ve got options. None of them are “wrong,” so choose based on your time and your mood.
Baked vs fried croquettes at a glance: fry at 175°C/350°F for 2–4 minutes for maximum crunch, or bake at 220°C/425°F for 18–22 minutes (air fryer 200°C/390°F for 10–14 minutes) for a lighter option. Use this as your quick timing guide before you jump into the master croquettes recipe and pick a variation.
Croquettes Cooking Methods (Fried, Shallow-Fried, Oven Baked, Air Fryer)
Deep-fried croquettes recipe (crispiest and fastest)
Heat oil to 175°C / 350°F
Fry in batches, 2–4 minutes, until deep golden
Drain on a rack so they stay crisp
If your croquettes ever turn greasy or crack in the oil, this is the reset: aim for 175°C / 350°F and fry in small batches so the shell sets fast and browns evenly. Use the “too cool vs too hot” cues here to troubleshoot in seconds, then drain on a rack (not paper) to keep the crust crunchy—whether you’re making potato croquettes, salmon croquettes, chicken croquettes, or Spanish croquetas.
Because the shell sets quickly, deep frying is surprisingly forgiving—provided the oil is hot enough and you don’t overcrowd the pot.
Shallow-fried croquettes (easier, still crisp)
Add about 1 cm of oil to a skillet
Medium heat
Fry 2–3 minutes per side
Shallow frying is excellent for salmon croquette patties and old fashioned tuna croquettes where you want more surface browning.
Croquettes oven baked (the best “healthy croquettes” recipe)
If you want croquettes oven baked without losing that crunch, do this:
Preheat oven to 220°C / 425°F
Place croquettes on a rack over a tray
Lightly spray or brush with oil
Bake 18–22 minutes, flipping once
Baked croquettes won’t taste “fried,” but they can be crisp and satisfying when you use panko and high heat.
Air fryer croquettes (fast, crisp, low mess recipe)
Preheat if your air fryer benefits from it
Cook at 200°C / 390°F
Spray lightly with oil
Air fry 10–14 minutes, flipping once
Air frying is fantastic for frozen croquettes you’ve made ahead, because it re-crisps without drying out the center too harshly.
Vada Pav Dry Chutney when you want a sprinkle-style punch that clings to the crust
Meanwhile, if you’re turning croquettes into cocktail snacks, the pairing is almost too natural: salty croquettes with a briny drink, or crispy croquettes with a citrusy drink. A crisp Dirty Martini fits especially well with Spanish croquetas and ham and cheese croquettes, while a bright Lemon Drop Martini works beautifully when you want freshness to cut richness. If you prefer something lighter and longer, Vodka with Lemon is an easy match.
Now that the method is clear, let’s cook through the variants properly.
Potato Croquettes (Classic, Leftover Mash Friendly, and Japanese Potato Croquette Recipe)
Potato croquettes are the easiest place to start because potatoes naturally bind. That’s why “mashed potato croquette” and “how to make potato croquettes with leftover mashed potatoes” are such popular queries—this version welcomes leftovers.
Potato croquettes are the easiest starting point because mashed potatoes bind naturally. This quick card gives you the exact ingredient ratios, the chill window (30–60 minutes), and the 3 “leftover mash” fixes (loose/stiff/chunky), plus a Japanese korokke-style twist—so you can get crisp, golden croquettes without guessing.
Easy potato croquettes recipe (makes 10–12)
Ingredients
2 cups cold mashed potatoes
1 egg
½ teaspoon salt
½ teaspoon black pepper
2 tablespoons chopped parsley or chives (optional)
½ cup grated cheese (optional, great for cheese croquettes vibes)
2–4 tablespoons breadcrumbs if needed (only if your mash is loose)
Step-by-step
Mix the mashed potatoes with salt, pepper, and herbs.
Stir in cheese if you want a richer center.
Add the egg and mix until cohesive.
If it feels too soft to shape, add breadcrumbs gradually.
Chill 30–60 minutes.
Shape into logs or patties.
Bread and cook using your preferred method.
If you like checking a classic baseline, BBC Good Food’s potato croquettes are a handy reference for the traditional approach.
Recipe for leftover mashed potato croquettes: making them sturdier
Leftover mash varies a lot. Some is buttery, some is stiff, some has milk or cream. Consequently, the fix also varies:
If your mash is loose: add 1–2 tablespoons breadcrumbs and chill longer
If your mash is stiff: add 1 tablespoon milk, mix gently, then chill
If your mash is chunky: mash a bit more so shaping is smoother
Japanese potato croquette direction (korokke vibe recipe)
If you want Japanese potato croquette style, keep the potato base, then fold in one of these:
sautéed onions and carrots
a little cooked minced meat (beef croquettes style)
a pinch of nutmeg plus a tiny splash of soy for depth
Shape into patties, bread with panko, then shallow fry or bake hot for a crisp shell.
Spanish Croquetas (Ham, Jamón, and Ham and Cheese Croquettes recipe)
Spanish croquetas are the ones people describe as “perfect croquetas” because the interior is creamy in a way potato croquettes simply aren’t. Instead of mash, you build a very thick béchamel that sets in the fridge, then you bread and fry.
This is the point where “how do you make ham croquettes” becomes a real cooking question, because béchamel croquetas reward patience. Luckily, the steps are straightforward.
Salmon croquettes are popular because they hit the sweet spot: inexpensive enough for regular meals, yet special enough for guests. They also adapt well to baking, so “baked salmon croquette recipe” and “easy salmon croquette” versions fit nicely alongside fried.
Use this as your salmon croquettes shortcut: canned for weeknight budget patties, fresh for a cleaner “restaurant” bite, southern for crisp, spiced edges, or baked/air fryer when you want less oil. The big wins are the same across all four—drain well, chill the mix, and keep patties consistent—so they hold together whether you shallow fry, bake hot, or air fry.
Tuna Croquettes (Easy, Budget-Friendly, and Sturdy)
Tuna croquettes are simple, but they demand one thing: dry tuna. If you drain it aggressively, the rest is easy.
Tuna croquettes only ask for one thing: drain the tuna hard, then chill the mix so patties stay intact. Use this card as your quick reference—basic tuna + mashed potato + egg, plus the simple “fix-it” moves (breadcrumbs, extra draining, firm crumb press) that stop croquettes from turning mushy or breaking when you fry, bake, or air-fry.
Easy tuna croquette recipe (makes 10–12)
Ingredients
2 cans tuna, drained very well
1½ cups mashed potatoes
1 egg
2 tablespoons yogurt or mayo (optional)
1 tablespoon lemon juice
¼ cup finely diced onion or celery (optional)
salt and pepper
pinch paprika
Step-by-step
Mix tuna with mashed potatoes and seasoning.
Add egg and mix until cohesive.
Chill, shape, bread, cook.
If you’re asking “how do you make tuna croquettes” without them falling apart, the answer is nearly always the same: drain more, chill more, and don’t rush the breading.
Chicken Croquettes and Turkey Croquettes (Best Use of Leftovers)
Chicken croquettes are a brilliant leftover solution because shredded chicken gives texture and protein while the binder creates creaminess. Turkey croquettes follow the same pattern, and they’re especially useful after a roast dinner.
Chicken croquettes recipe (makes 10–12)
Ingredients
2 cups cooked shredded chicken
1 to 1½ cups mashed potatoes (start with 1 cup)
1 egg
¼ cup sautéed onion (or finely minced onion)
salt and pepper
optional: thyme or mixed herbs
Chicken croquettes are the best leftover upgrade: mix shredded chicken with mashed potatoes and egg, chill so they hold shape, then choose your cook method—shallow fry for crisp edges, deep fry for fastest crunch, or bake/air fry for a lighter batch. Use this card as your quick reference when you reach the chicken/turkey croquettes section, especially if your mixture feels dry or you want that creamy center every time.
Step-by-step
Mix chicken with potatoes, onion, and seasonings.
Add egg and mix well.
If it feels loose, add breadcrumbs 1 tablespoon at a time.
Chill, shape, bread, then fry or bake.
For a restaurant-style croquetas de pollo approach, Food & Wine’s chicken croquettes is a solid external reference.
Turkey croquettes (leftover-friendly recipe)
Use the chicken method, then lean into turkey flavors:
add chopped sage
add black pepper generously
optionally tuck a tiny cranberry center inside each croquette for a sweet-savory surprise
Because turkey can be drier than chicken, the potato ratio often helps: aim for the higher end (closer to 1½ cups potato).
These turkey croquettes are the easiest way to turn leftover roast turkey into a crisp, restaurant-style snack: bind shredded turkey with mashed potatoes, chill so the mixture firms up, then coat well for a sealed shell that stays moist inside. Use the “keep it moist” fixes if your mix feels dry, and pick your cook style—shallow fry for crisp edges, deep fry for fastest crunch, or bake/air fry when you want a lighter batch with less mess. Save this card as your quick reference when you’re making turkey (or chicken) croquettes again.
Cod Croquettes Recipe and Croquette Fish Variants (Moisture Control Wins)
Cod croquettes are delicate, light, and surprisingly elegant. However, cod holds water, which is why “croquettes cod” attempts sometimes go wrong.
Cod fish croquettes (Recipe for 10–12 pieces)
Ingredients
2 cups cooked flaked cod, cooled and patted dry
1½ cups mashed potatoes
1 egg
1 tablespoon lemon juice
2 tablespoons parsley
salt and pepper
Cod croquettes are delicate because cod holds water—so the “secret” isn’t more binder, it’s drying the fish properly. Pat the cooled cod dry, mix with mashed potatoes + lemon + herbs, then chill before shaping so the patties stay firm. Use this card as your quick guide whenever you want light, lemony fish croquettes that don’t crack, leak, or turn mushy.
Vegetarian croquettes succeed or fail on one detail: dry vegetables. Sauté peas, corn, and carrots until the pan looks dry (no steam, no watery shine), then mix with mashed potatoes, season well, and chill before shaping. This card is your quick guide for crisp, sturdy veg croquettes that don’t crumble—perfect for weeknight snacks, lunchboxes, or party platters.
Step-by-step
Sauté vegetables until they’re tender and relatively dry.
Cool, then mix with potatoes and spices.
Add egg; chill.
Shape, bread, cook.
These are especially good with South Indian Coconut Chutney because the creamy chutney doubles down on comfort without overpowering the filling.
Vegan Croquettes (Croquettes Vegan, Eggless Binding and Coating)
These croquettes can be just as crisp, yet the vegan version needs a binder that sets and a coating that sticks without eggs.
Vegan croquettes don’t fail because they’re vegan—they fail because the coating doesn’t set. Use one strong binder (flax egg or chickpea flour), then bread the smart way (flour → slurry → panko) and chill the breaded croquettes 15–20 minutes so the shell holds. This card gives you the full eggless workflow plus the best cook options (air fryer, oven, or quick fry) for a crisp crust and a center that stays together.
Beef Croquettes and Lamb Croquettes (When You Want Something Heartier)
Even though potato and fish croquettes get most of the attention, beef croquettes and lamb croquette versions are excellent when you want deeper savoriness.
Craving something heartier than potato croquettes? This quick beef vs lamb croquettes guide helps you pick the vibe: beef croquettes for fast, savory comfort and lamb croquettes for a cozier, bolder batch (cumin + a pinch of cinnamon). Either way, the method stays the same—cool the filling, bind, chill, coat, then cook hot—so you get a crisp shell without the “fall apart” drama. Serve these with a sweet-tangy chutney (plum is perfect) and something bright like vodka with lemon to keep the plate feeling balanced.
Beef croquettes (quick recipe)
Use cooked minced beef, cooled
Add sautéed onions and a pinch of spice (paprika, cumin, or black pepper)
Bind with mashed potato and egg
Chill, bread, cook
Lamb croquette (cozy, bold recipe)
Use cooked minced lamb or finely chopped leftover roast lamb
Season with black pepper, cumin, and a small pinch of cinnamon
Bind with potato (or a thicker béchamel if you want a tapas vibe)
Making Croquettes That Don’t Fall Apart (Without Overcomplicating It)
It’s tempting to treat croquettes like a mysterious technique. In reality, croquettes fail for a few predictable reasons. Once you can spot them, you can fix them quickly.
Croquettes cracking, going oily, or turning soft? Save this “fix it fast” guide. It covers the 5 issues that ruin a croquettes recipe—too-wet filling, weak coating, wrong oil temp, baked croquettes not crisp, and bland centers—plus the exact quick fixes (including the key chill steps). Use it right before you cook potato croquettes, salmon croquettes (canned or fresh), ham and cheese croquetas, chicken croquettes, cod croquettes, or vegan croquettes so every batch comes out golden and sturdy.
If your croquettes are too soft to shape
Cool the mixture fully
Add 1–2 tablespoons breadcrumbs
Chill 45–60 minutes
Shape smaller pieces (large croquettes are harder to stabilize)
Croquettes crack or leak while frying
Your oil may be too hot
Your croquettes may not be chilled enough
The mixture might be too wet
The coating may be too thin (press crumbs in firmly)
And if croquettes are crisp outside but bland inside
Season more than you think. Croquettes are not a stew. The crust dilutes the perceived seasoning, so the filling needs confidence: salt, pepper, acidity (lemon in fish croquettes), and aromatics.
If croquettes oven baked are not crisp
Use panko
Bake at high heat
Oil-spray the crumbs
Place on a rack so air circulates
Leave space between croquettes
Baked croquettes can be genuinely crunchy. They just need structure and heat rather than hope.
Make-Ahead, Freezing, and “Frozen Croquettes” Without Store-Bought Anything
Even though “frozen croquettes” and “croquetas frozen” often show up as shopping intent, freezing homemade croquettes is one of the smartest ways to keep this recipe in your regular rotation. In fact, croquettes are almost designed for batch cooking.
Croquettes are made for batch cooking. Shape and bread a double batch, freeze them uncooked, then cook straight from frozen whenever you want easy croquettes—no soggy crust, no defrosting drama. Use this quick guide for frozen croquettes: air fryer 200°C/390°F (12–18 min), oven baked croquettes 220°C/425°F (24–32 min), or fry at 175°C/350°F (3–5 min). Flip once and add a light oil spray for the crispiest shell—then pair with your favorite chutney, dip, or sauce from the post.
Make-ahead (best texture)
Prepare filling
Shape croquettes
Bread them
Refrigerate up to 24 hours before cooking
This keeps the coating intact and gives you that “ready whenever” flexibility.
Freeze croquettes (uncooked, breaded)
Place breaded croquettes on a tray in a single layer
Freeze until firm
Transfer to a freezer bag or container
Cook from frozen
Air fryer: add 2–4 minutes
Oven: add 6–10 minutes
Frying: lower into oil carefully, fry slightly longer at steady temperature
Frozen homemade croquettes are also a lifesaver when you want easy croquettes for guests without spending the whole evening at the stove.
Serving Croquettes Like a Complete Meal (Not Just a Snack)
Croquettes can be appetizers, lunch, or dinner. The difference is what you serve around them.
Croquettes are rich and crispy—so the easiest way to make them feel like a complete meal is to add contrast. Use this serving guide for three go-to setups: a snack platter with a cooling chutney + spicy chutney, lemon wedges (especially for fish croquettes), and something crunchy like cucumbers, pickles, or salad; a cocktail-night spread with salty-sip pairings (Dirty Martini, Lemon Drop Martini, or Vodka with Lemon); or a simple dinner with croquettes alongside salad or sautéed greens. Keep the rule simple: bright + crunchy + tangy makes every croquettes recipe taste sharper and more satisfying.
For a snack platter
A cooling chutney + a spicy chutney
Lemon wedges for fish croquettes
Something crunchy on the side (salad, pickles, sliced cucumbers)
Croquettes were practically made for a salty sip. A briny Dirty Martini pairs especially well with ham croquettes, jamon croquettes, and ham and cheese croquettes because the flavors reinforce each other instead of competing. On the other hand, if you want the opposite effect—freshness that cuts richness—a citrusy Lemon Drop Martini is a fun counterpoint. And when you want something lighter, Vodka with Lemon keeps the whole spread breezy.
For a simple dinner
Croquettes + salad
Croquettes + sautéed greens
Fish croquettes + a quick cucumber-onion salad with lemon
Croquettes don’t need much. They just need contrast.
Putting It All Together: Choose Your Croquettes Recipe, Then Follow the Same Flow
At this point, you’ve got everything you need:
a single croquettes recipe method
detailed recipes for the most common variants
a baked option for healthy croquettes
make-ahead and freezing guidance
sauces, drinks, and dessert pairings that turn croquettes into a full experience
So the only question left is what you’re making first.
Not sure which croquettes recipe to start with? Use this “pick your first batch” guide to match your mood—potato croquettes or canned salmon croquettes for fast weeknights, Spanish croquetas (ham & cheese) to wow guests, oven baked croquettes for a lighter, low-mess option, or chicken/beef/lamb croquettes when you want hearty comfort. Whichever you choose, the success formula is the same: cool → bind → chill → shape → coat → chill → cook—then finish with contrast (coconut chutney for cool creaminess, kara chutney/thecha for heat, and a bright drink like vodka with lemon).
For a fast, no-drama batch, potato croquettes or canned salmon croquettes are the easiest place to begin. Planning to wow guests? Spanish croquetas—especially ham and cheese croquettes—feel instantly special alongside coconut chutney and a dirty martini. On busy nights when you’d rather skip splatter and cleanup, croquettes oven baked with a punchy kara chutney keep things crisp, flavorful, and wonderfully low-effort.
Whichever path you pick, the method stays the same—and that’s the real upgrade.
Croquettes are crispy, breaded bites with a soft, savory center—usually made from mashed potato, béchamel, flaked fish, or shredded meat. In other words, a croquette is less about one “fixed” ingredient and more about the method: a seasoned filling, a binder, and a crunchy coating.
2) How do you make croquettes so they don’t fall apart?
Start by cooling the filling completely, then add just enough binder to make it hold its shape. After that, chill the shaped croquettes before cooking. Finally, keep the oil at a steady temperature (or bake hot on a rack) so the shell sets quickly instead of soaking.
3) How to make a croquette with the classic flour–egg–breadcrumbs coating?
First, roll each croquette in flour and shake off the excess. Next, dip in beaten egg. Then press firmly into breadcrumbs (panko if you want extra crunch). Afterward, chill briefly so the coating adheres, and cook.
4) What’s the easiest croquettes recipe for beginners?
Potato croquettes are the simplest starting point because mashed potatoes naturally bind and shape easily. Alternatively, canned salmon croquettes are very forgiving when you combine drained salmon with mashed potatoes and a single egg.
5) Can I make croquettes oven baked instead of fried?
Yes—croquettes oven baked can be crisp when you use panko, bake at a high temperature, and lightly oil the surface. Even so, spacing matters; if croquettes touch, steam builds and the coating softens.
6) Are baked croquettes actually “healthy croquettes”?
Compared with deep-frying, baking uses less oil, so it’s often a lighter option. However, “healthy” still depends on the filling and portion size—especially for ham and cheese croquettes or béchamel-based Spanish croquetas.
7) How do I make potato croquettes with leftover mashed potatoes?
Use cold mashed potatoes, mix in an egg, then adjust with a little breadcrumb only if needed. After that, chill the mixture, shape, bread, and cook. If your mash is very buttery or loose, chilling longer makes a big difference.
8) What’s the difference between potato croquettes and mashed potato croquette patties?
Potato croquettes are often shaped as logs, while mashed potato croquette patties are flattened and typically pan-fried. Because patties have more surface area, they brown quickly and feel extra crisp around the edges.
9) What are Spanish croquetas and how are they different from regular croquettes?
Spanish croquetas usually use a thick béchamel base instead of mashed potato. As a result, the center is creamier and softer. That said, they need more chilling time so they’re firm enough to bread and fry cleanly.
10) How do you make ham croquettes the Spanish way?
Make a very thick béchamel, stir in finely chopped ham or jamón, then chill until solid. Next, shape quickly, bread thoroughly, and fry at a steady temperature until golden. In practice, patience during chilling is what separates perfect croquetas from messy ones.
11) How to make ham and cheese croquettes without the filling leaking out?
Let the béchamel cool completely, then chill overnight if possible. Also, dice ham finely and use grated cheese that melts smoothly. Finally, keep the croquettes small and the coating firm so the shell seals before the cheese gets too runny.
12) Can I make cheese croquettes without ham?
Absolutely. Swap ham for grated cheese, sautéed mushrooms, spinach, or finely chopped herbs. Even so, avoid watery fillings; otherwise, the mixture turns loose and needs more binder.
13) What’s the best salmon croquette recipe: canned salmon or fresh salmon croquette?
Canned salmon croquettes are quicker and more consistent, especially for weeknights. Meanwhile, a fresh salmon croquette tastes cleaner and more “restaurant-like,” particularly when you add lemon zest and herbs.
14) How do I make old fashioned salmon croquettes?
Use drained canned salmon, mashed potatoes (or a small amount of breadcrumbs), egg, onion, and seasoning. Then shape into patties and shallow-fry until deeply golden. Traditionally, this style is simple, crisp, and comfort-forward.
15) How to make southern salmon croquettes (southern fried salmon croquettes recipe style)?
Season more boldly—think garlic powder, onion powder, and a pinch of cayenne—then shape thinner patties for extra crunch. After that, shallow-fry until the edges brown well. As a result, you get that classic southern-style crispness without a deep fryer.
16) Can I use fresh salmon for salmon croquettes southern style?
Yes—cook and flake the salmon first, then cool it completely before mixing. Still, add mashed potatoes for stability; fresh salmon can be softer than canned once it’s flaked.
17) How do you make tuna croquettes that aren’t mushy?
Drain tuna extremely well, then bind it with mashed potatoes and egg. Additionally, chill the mixture before shaping. If needed, add a small amount of breadcrumbs, but don’t overdo it or the croquettes turn dry.
18) How do you make chicken croquettes so they stay creamy inside?
Use shredded chicken plus a creamy binder like mashed potato (or a thick béchamel-style base). Then chill before shaping so the mixture firms up. Finally, cook until the crust is deeply golden, which helps seal in moisture.
19) How do you make turkey croquettes from leftovers?
Combine shredded turkey with mashed potatoes, seasoning, and an egg. Next, chill, shape, bread, and cook. For extra flavor, add herbs like sage or a little minced onion, and keep the croquettes slightly smaller so they heat through evenly.
20) What’s the best method for cod croquettes or cod fish croquette?
Pat the cooked cod dry after it cools, then mix with mashed potatoes, egg, lemon, and herbs. Afterward, chill thoroughly. Because cod holds moisture, that drying step is the quiet key to croquettes cod that hold together.
21) Can I make croquettes vegetarian without them crumbling?
Yes—use a sturdy base like mashed potatoes and cook vegetables until most moisture evaporates. Then add egg and chill before shaping. Consequently, vegetarian croquettes stay cohesive and fry or bake neatly.
22) How do I make croquettes vegan without eggs?
Use a binder such as a flax “egg” (ground flax + water) or chickpea flour. For breading, replace the egg dip with a simple flour-and-water slurry. Then chill longer before cooking to help everything set.
23) Why are my croquettes not crispy?
Usually, the oil wasn’t hot enough, the pan was overcrowded, or the coating was too thin. For oven baked croquettes, the most common issue is low heat or skipping oil on the crumbs. In contrast, using panko and baking on a rack improves crispness dramatically.
24) Why do croquettes crack while frying?
Cracking often happens when the mixture is too wet or not chilled, or when oil is too hot and the outside sets before the inside stabilizes. Therefore, chilling and steady oil temperature solve most cracking problems.
25) Can I freeze croquettes?
Yes—freeze breaded croquettes on a tray, then transfer to a container once firm. Later, bake, air-fry, or fry from frozen with a slightly longer cook time. This is especially handy for easy croquettes on busy days.
26) How do I reheat croquettes so they stay crisp?
Reheat in an oven or air fryer rather than the microwave. That way, the exterior re-crisps while the center warms through. If you must microwave, finish in a hot pan or oven for a quick crisping boost.
27) What can I serve with croquettes?
Pair croquettes with bright, tangy sides or sauces—something that cuts richness. Also, salads, pickles, citrus wedges, and herby dips all work well. Meanwhile, for party food, croquettes fit beautifully on snack platters alongside other small bites.
28) What’s the single biggest tip for perfect croquettes?
Chill twice: chill the mixture before shaping, and chill the breaded croquettes before cooking. Ultimately, that one habit makes croquettes easier to handle, cleaner to cook, and far more consistent.
Welcome to another culinary adventure with 매일맛나 delicious day, a YouTube channel dedicated to bringing you the most mouthwatering recipes from around the world. In this episode, we’re diving into the world of Korean street food with a focus on the ever-popular Korean Rice Corn Dogs. This isn’t your average corn dog; it’s a unique fusion of flavors and textures that will leave you craving for more.
If you’re a fan of street food or just love trying out new recipes, this is a must-try! The video tutorial can be found here. But before we delve into the recipe, let’s take a moment to appreciate the creativity and culinary expertise of 매일맛나 delicious day. Their channel is a treasure trove of delectable recipes that are easy to follow and absolutely delightful to taste.
🌽 The Magic of Korean Rice Corn Dogs 🌭
Korean Rice Corn Dogs, also known as Myungrang Hot Dogs, are a popular street food in Korea. Unlike the traditional corn dogs, these are made with a blend of wheat flour and rice flour, giving them a unique texture that’s crispy on the outside and chewy on the inside. But the real magic lies in the variety of toppings and fillings that you can experiment with. From cheese and sausage to potatoes and ramen, the possibilities are endless!
📝 The Recipe: How to Make Korean Rice Corn Dogs 🍡
The recipe starts with a simple dough made from strong bread flour, rice flour, sugar, salt, yeast, an egg, and warm water. The dough is then left to ferment, which helps it rise and develop a light, airy texture.
Once the dough is ready, it’s time to prepare the fillings. The video tutorial shows how to make three different types of corn dogs: sausage, mozzarella cheese, and a combination of both. The sausages and cheese are skewered on wooden sticks, then coated in the dough.
Next comes the fun part: the toppings! One version is coated in small diced potatoes, another in crushed ramen noodles, and the third is left plain. All three versions are then rolled in bread crumbs for an extra layer of crunch.
The corn dogs are then deep-fried until golden brown and crispy. The final touch is a sprinkle of sugar and a drizzle of ketchup and mustard. The result is a deliciously crunchy, cheesy, and satisfying snack that’s perfect for any time of the day!
🍽️ Enjoying Korean Rice Corn Dogs: Tips and Suggestions 🌭
When making Korean Rice Corn Dogs at home, here are a few tips and suggestions to keep in mind:
Feel free to experiment with different fillings and toppings. You can try using different types of cheese, or even add some veggies for a healthier twist.
When frying the corn dogs, start with high heat to seal the outside, then lower the heat to ensure the inside is cooked through without burning the outside.
Serve the corn dogs while they’re still hot to enjoy the maximum crunch and melty cheese goodness!
🎉 Join the Foodie Community! 🍽️
If you try this recipe or have other delicious recipes to share, join the vibrant and engaging food lovers community on Facebook. It’s a place where you can share your culinary experiments, discover new recipes, and connect with fellow food enthusiasts.
So, are you ready to bring a taste of Korean street food into your kitchen? With this Korean Rice Corn Dogs recipe, you can enjoy a delicious and unique snack right at home. Happy cooking! 🍽️🎉
Remember to check out more amazing recipes on 매일맛나 delicious day‘s YouTube channel. Enjoy the delicious day! 🌞🍡🌭