
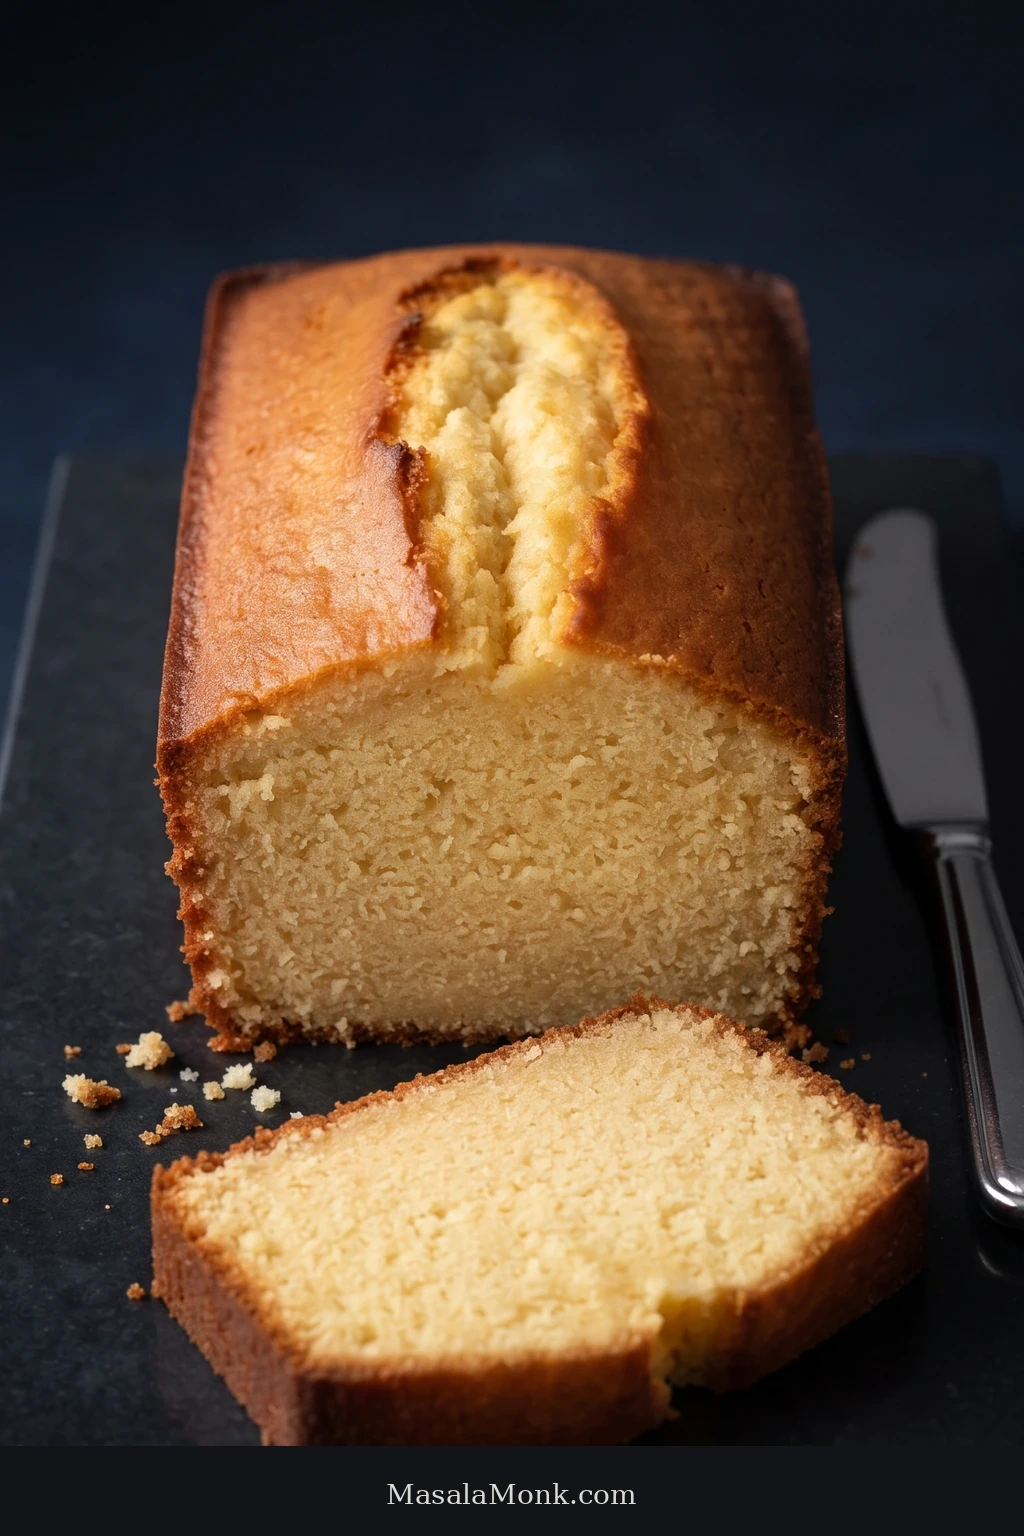
A good pound cake has some weight to it. The knife should pass cleanly through a fine crumb, with plenty of butter and vanilla underneath a golden crust that is lightly crisp when fresh. Dense is right. Gummy, greasy and dry are not.
This version keeps the simple butter-and-vanilla character of an old-fashioned pound cake. It is made from scratch, without sour cream or cream cheese doing the moisture work. The texture comes from the balance of butter, eggs, flour and sugar—and from handling them properly.
It is a wonderfully plain-looking cake once it comes out of the oven: no frosting, no elaborate finish, just a deeply browned loaf with a split along the top. When the crumb is right, that simplicity is exactly the appeal.
Three stages deserve most of your attention: the butter before creaming, the batter while the eggs go in, and the deepest part of the loaf as it bakes. Learn to read those three moments and the recipe becomes much easier to trust.
Three Checks That Decide the Loaf
Butter
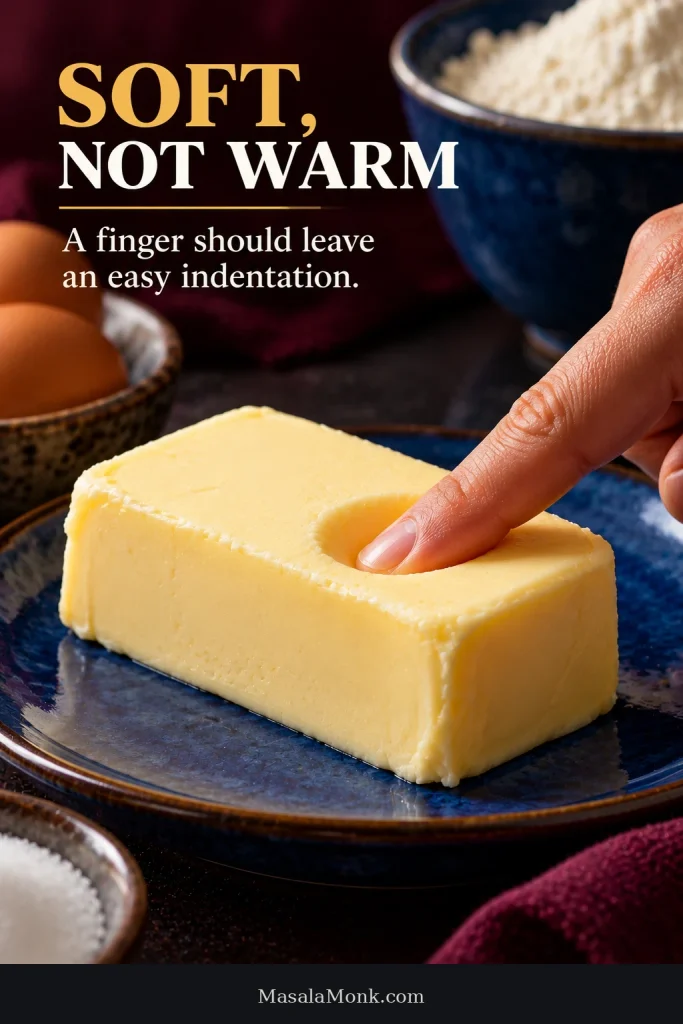
It should indent easily but still look cool, matte and able to hold its shape. Shiny or oily butter has gone too far.
Batter
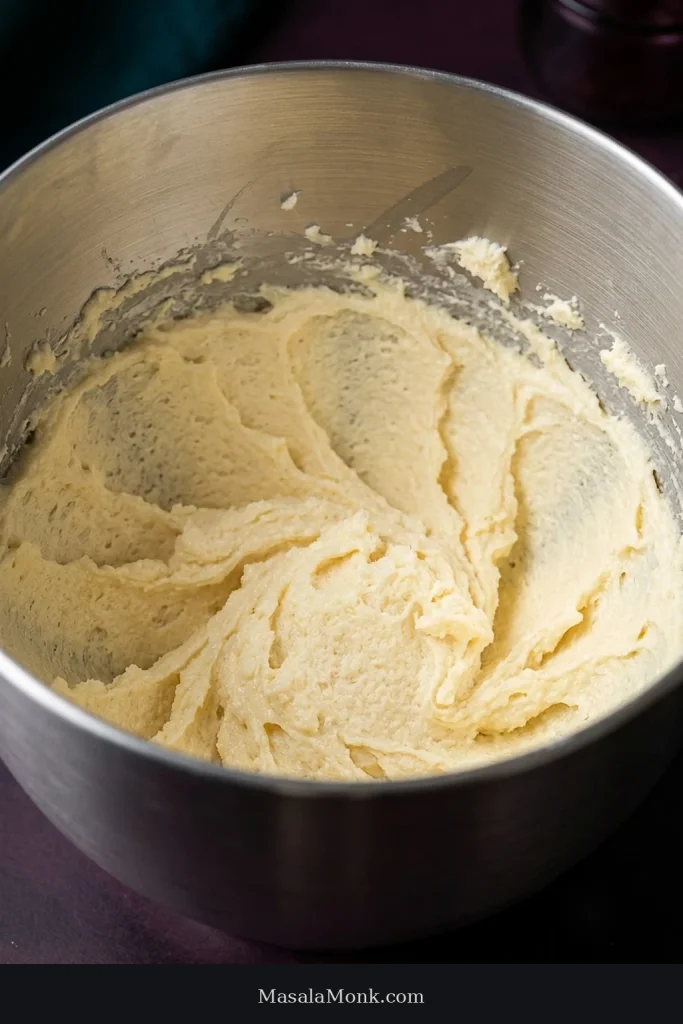
It should look aerated after creaming and stay cohesive as the eggs are added. Slight graininess is very different from visible pools of oil or liquid.
Center
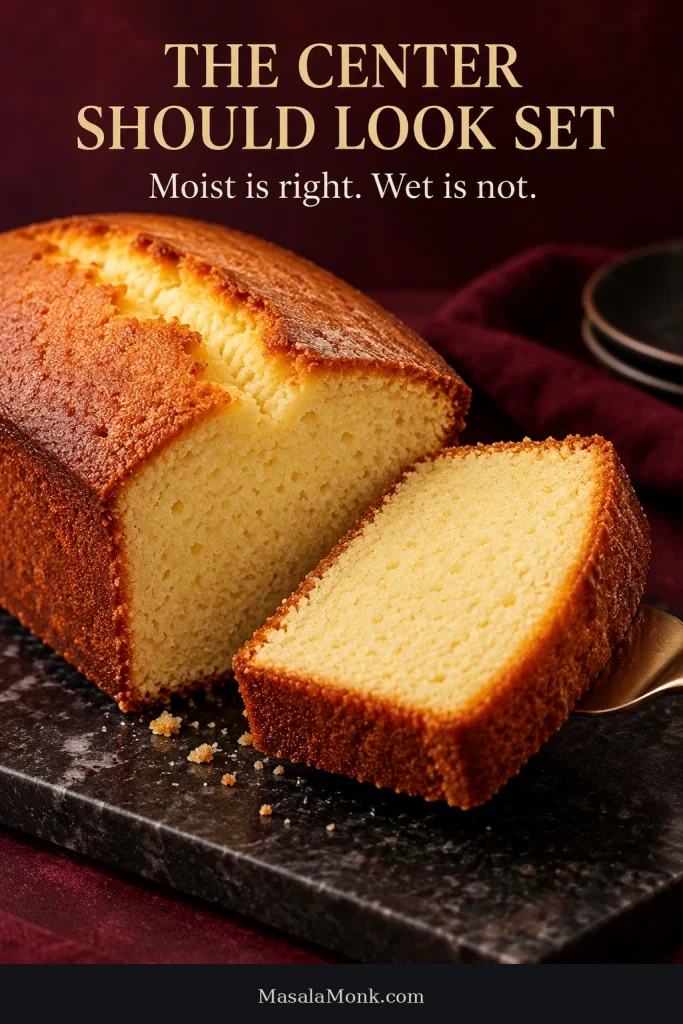
The top may be browned and cracked while the middle still needs time. Reach the deepest part with a long skewer before calling the loaf done.
Pound Cake Recipe
Prep: about 25 minutes · Bake: begin checking around 65 minutes; allow longer as needed · Yield: about 10–12 slices
Pan: 9 × 5 × about 2¾ inches / 23 × 13 × 7 cm light-colored metal loaf pan · Oven: 325°F / about 165°C conventional or about 150°C fan
Butter target: about 64–68°F / 18–20°C · Batter weight: about 1 kg / 2¼ lb
Equipment: digital kitchen scale, electric mixer, flexible spatula, parchment paper, long wooden skewer and cooling rack. A stand mixer with the paddle attachment is convenient, but an electric hand mixer is fine. An oven thermometer and instant-read thermometer are optional.
Ingredients
- 227 g / 8 oz / 1 cup unsalted butter, softened to about 64–68°F / 18–20°C
- 270 g / 9.5 oz / about 1⅓ cups granulated sugar, or 270 g caster sugar
- 4 large eggs + 1 large egg yolk, about 215–220 g without shells, not refrigerator-cold
- 10 ml / 2 teaspoons vanilla extract
- 240 g / 8.5 oz / about 2 cups all-purpose flour, preferably weighed
- 2 g / ½ teaspoon baking powder
- 3 g / ½ teaspoon fine salt
- 60 ml / 2 fl oz / ¼ cup whole milk, not refrigerator-cold
Method
Prepare the Pan and Ingredients
- Prepare the oven and pan. Put a rack in the middle of the oven and heat to 325°F / about 165°C conventional, or about 150°C fan. Lightly grease the loaf pan and line the base and long sides with parchment.
- Combine the dry ingredients. Whisk the flour, baking powder and salt together thoroughly.
- Prepare the eggs. Whisk the whole eggs, extra yolk and vanilla together just until combined. A spouted measuring cup makes it much easier to pour them into the butter gradually.
Mix the Pound Cake Batter
- Start with the butter. Beat the softened butter briefly until smooth. It should still look cool and matte.
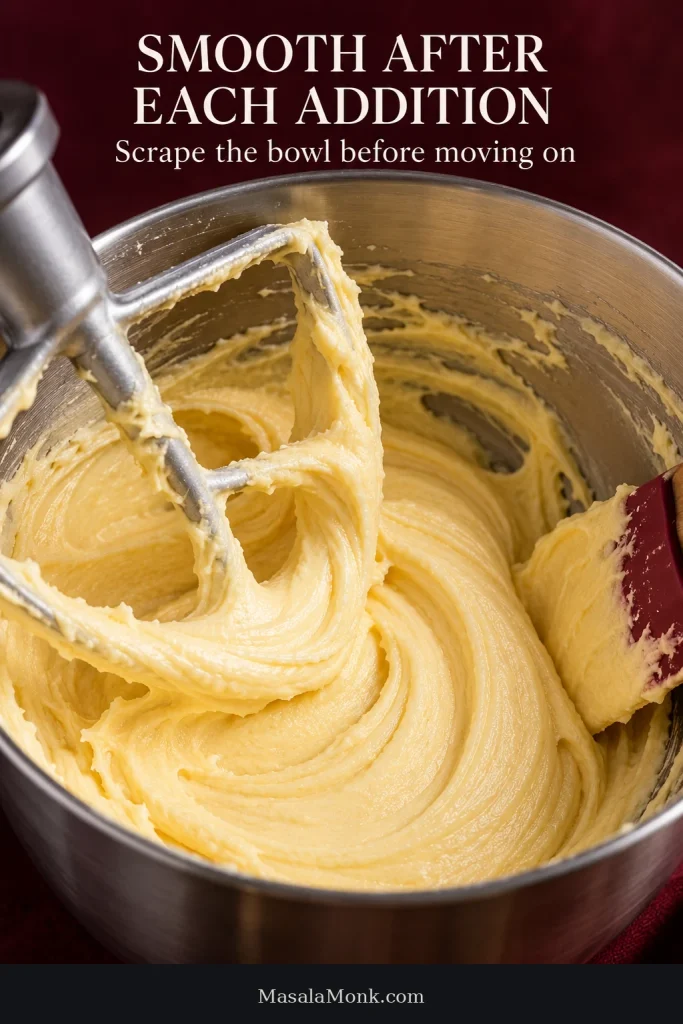
- Cream the butter and sugar. Add the sugar gradually and beat on medium speed until the mixture is paler, visibly fuller and creamy. With many stand mixers this may take around 4–6 minutes; stop based on the change in the bowl, not the timer. A hand mixer may take longer. Scrape the bowl and beaters or paddle at least once.
- Add the eggs gradually. Reduce the speed to medium-low and pour in the egg mixture in about 5–6 small additions. Let each one mostly disappear before adding the next. A slightly grainy look is not a reason to panic; pause, scrape the bowl and give the mixture time to come together. Oily patches or loose liquid are a more serious warning.
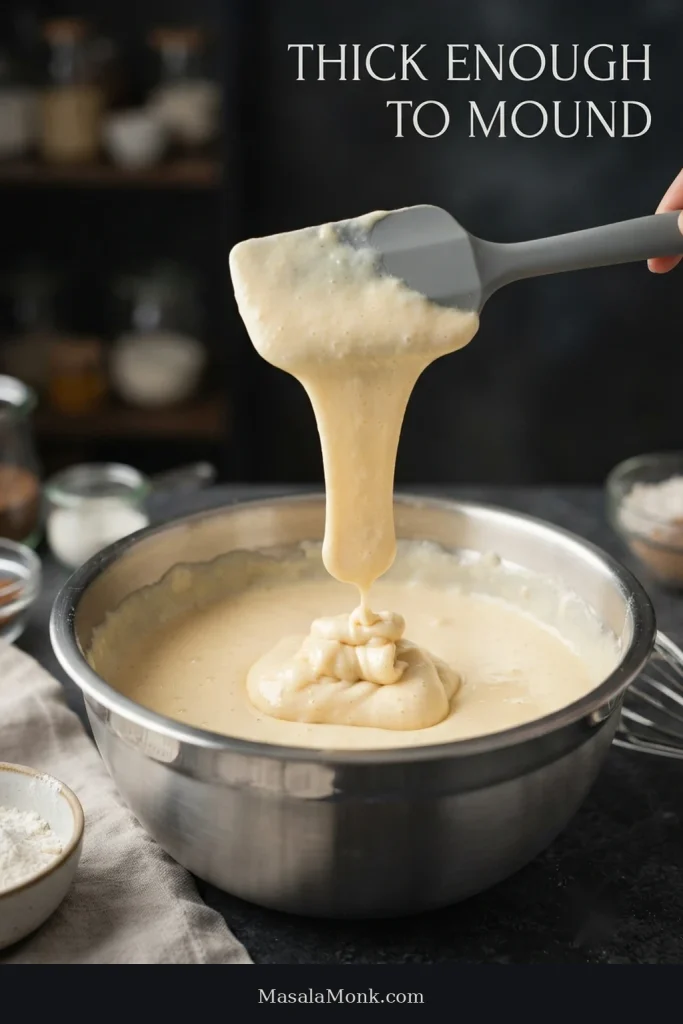
- Add the flour and milk. Reduce the mixer to low. Add roughly one-third of the flour mixture, then half the milk. Repeat, finishing with the final flour. Stop while a few dry streaks remain and fold those in gently with a spatula. The batter should be thick enough to mound; it will not pour like ordinary layer-cake batter.
Fill the Pan, Bake and Cool
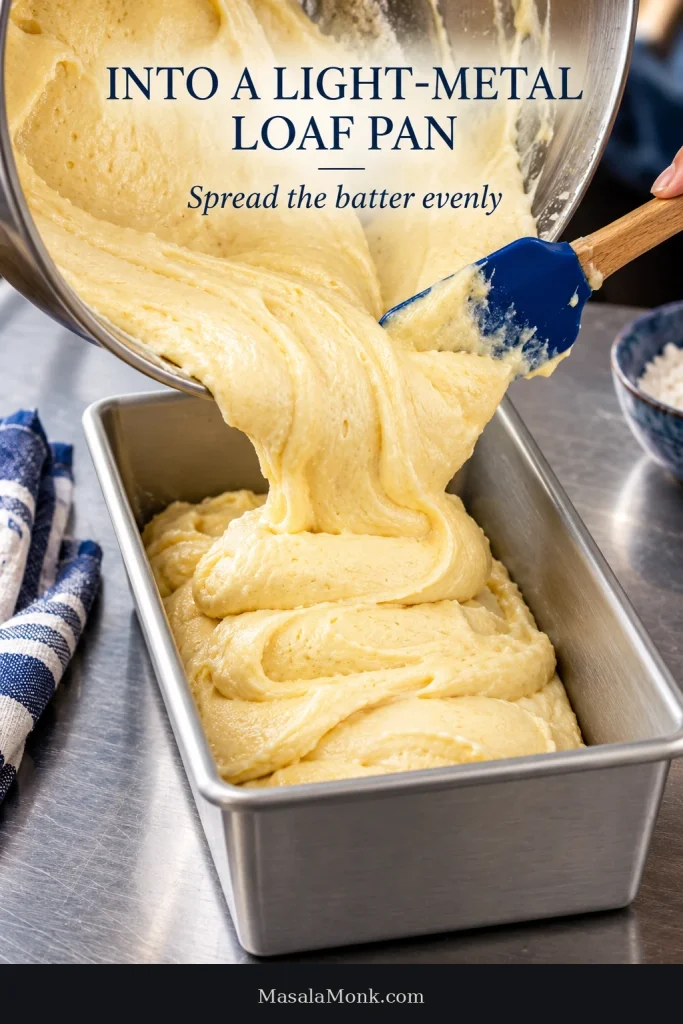
- Fill the pan. Spread the batter evenly into the prepared pan and keep it at or below roughly two-thirds of the pan’s depth. If you are using an 8½ × 4½-inch loaf pan, do not force the full batch into it; bake the excess separately.
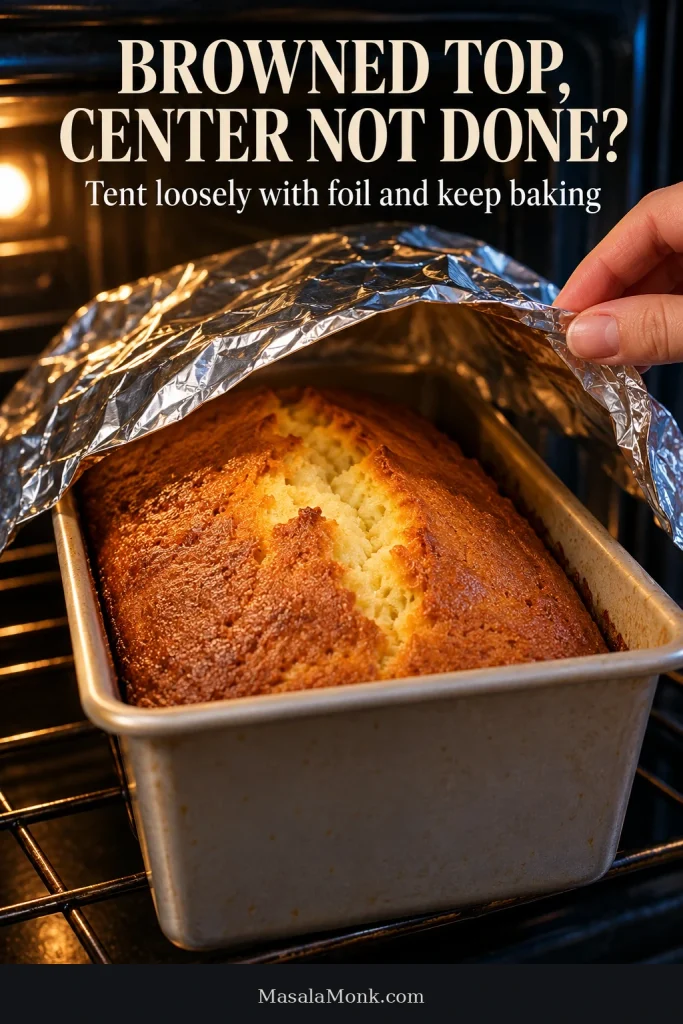
- Bake. Put the loaf on the middle rack and avoid opening the oven unnecessarily during the earlier part of the bake. Begin checking around 65 minutes. Depending on the pan and oven, it may continue well into the 70-minute range. The top may split before the cake is ready. If it already has enough color while the middle still needs time, tent it loosely with foil.
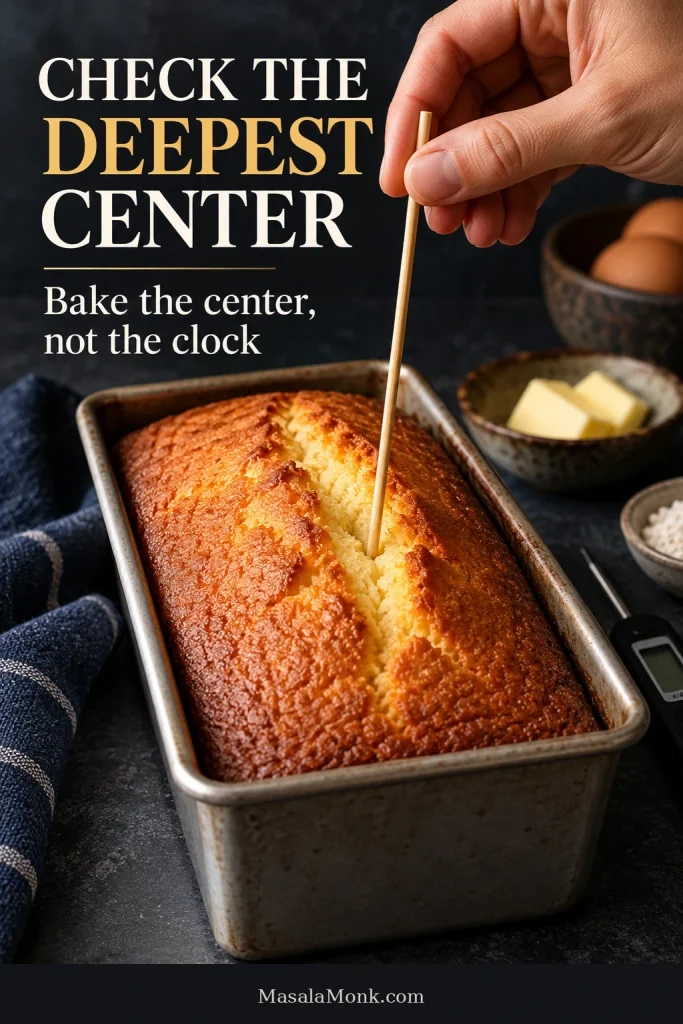
- Check the deepest part. The loaf is ready when the top is well browned, the middle looks set, a gentle press springs back and a long skewer pushed through the thickest part comes out without wet batter. A few moist crumbs are fine.
- Cool. Leave the cake in the pan for about 10–15 minutes, then move it to a wire rack. Cool it uncovered if you want to keep the fresh crust lightly crisp. Wait until the loaf has cooled before wrapping or slicing for the cleanest crumb.
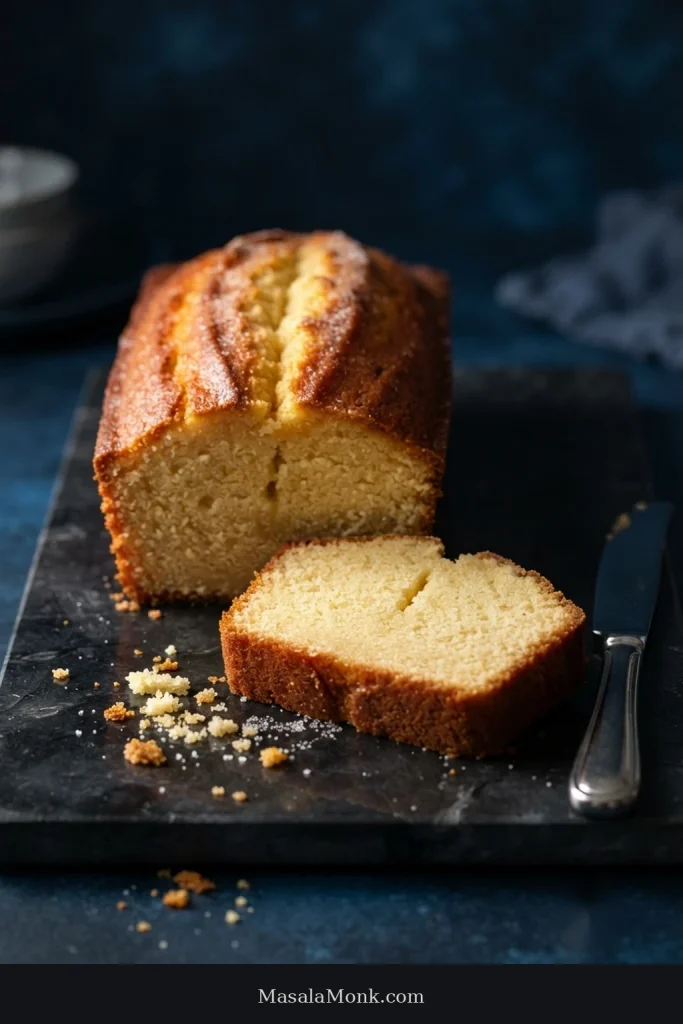
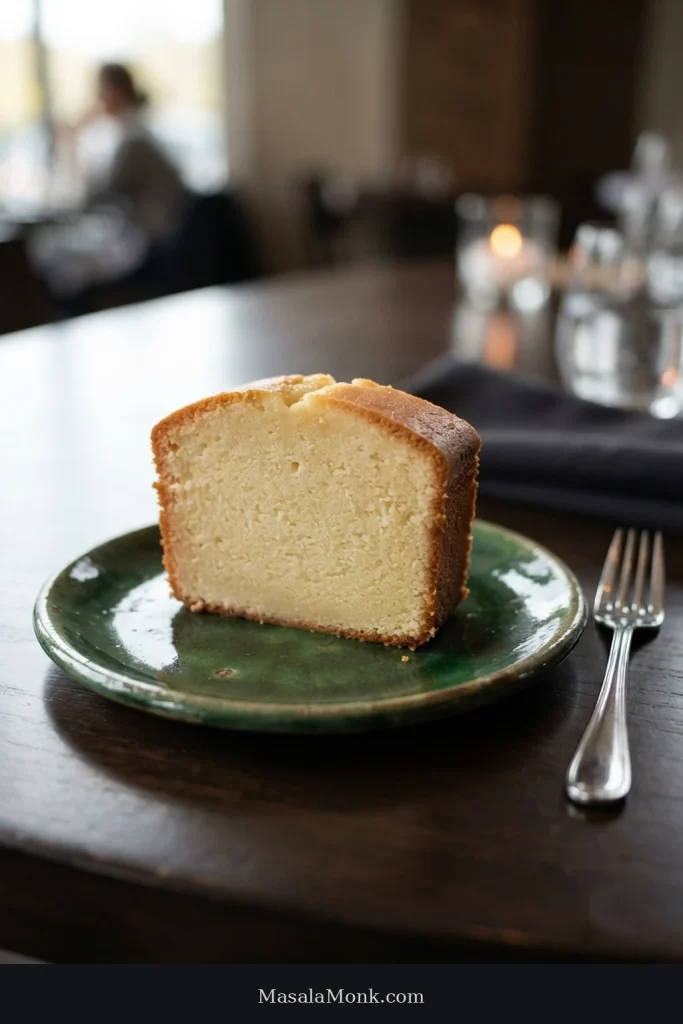
The finished loaf: buttery and substantial, with an even crumb that stays moist without feeling wet or greasy. Once cool, the lightly crisp crust gives way to a soft, close-textured middle.
Pound Cake Guide
The recipe above is enough to bake the loaf successfully. If you want to understand what the bowl is telling you—or work out why a batch came out differently than expected—the guide below goes deeper into the stages where pound cake most often goes right or wrong.
Build the Batter
What Makes This a Classic Pound Cake?
Pound cake gets its name from the original formula: one pound each of butter, sugar, eggs and flour. Those equal weights explain both the name and the traditionally rich, close-textured character of the cake.
Modern recipes change the proportions, but the family resemblance remains. There should be plenty of butter and egg, a relatively tight crumb and more heft than you would expect from an ordinary vanilla layer cake.
A proper slice can still be tender. Small, even pores and a crumb that cuts cleanly are exactly what we want; rubbery streaks, pasty patches and grease point to different problems.
Soft Butter Is Not Warm Butter
For creaming, aim for butter around 64–68°F / 18–20°C: soft enough to indent easily, but still matte and able to hold its shape.
That is why “room-temperature butter” can be misleading. In a hot kitchen, butter can technically be at room temperature and already be far too soft for reliable creaming.
Press it with a finger. The butter should take the indentation without collapsing around it. Once the surface turns glossy or greasy and the stick begins slumping under its own weight, it has lost much of the structure needed to trap air well.
If “softened butter” still feels vague, the visual cues in our buttercream frosting guide apply here too. Both jobs begin with butter that is pliable and matte.
What Properly Creamed Butter Looks Like
Properly creamed butter and sugar should look paler and visibly fuller while staying creamy, not loose or oily.
One recipe may tell you three minutes and another eight. Both can be reasonable because mixer speed, bowl shape and starting butter temperature differ. With many stand mixers this may take around 4–6 minutes, but the appearance of the mixture matters more than the clock.
Watch the bowl. Once the mixture has clearly gained volume and lost its dense, waxy appearance, there is little value in beating simply because another timer says to continue. If it turns loose and glossy, stop.
Adding the Eggs Without Splitting the Batter
Add the eggs gradually so the butter has time to take in their moisture without separating. Whisking the eggs and yolk together first makes that easier than dropping a whole egg into the bowl at once.
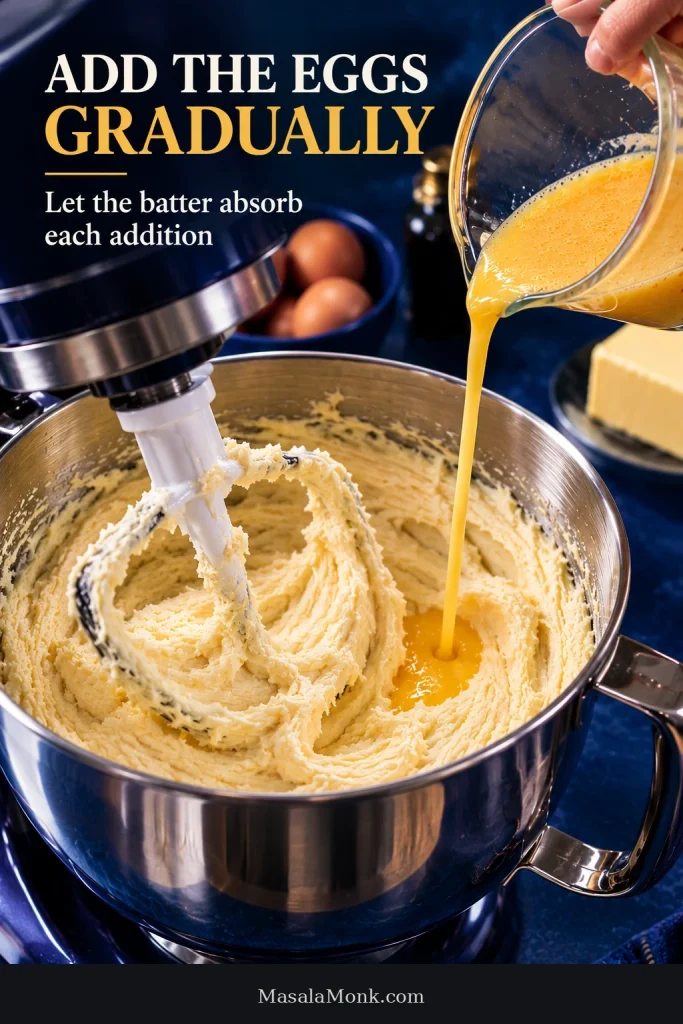
As the eggs go in, the mixture may lose some of its fluffy look. Brief graininess can happen; pause, scrape the bowl and let what is already there mix in before pouring more.
Visible oil, loose liquid or persistent separation means the butter-and-egg mixture is starting to split. Very cold eggs, overheated butter and adding too much egg at once can all contribute. If warmth is the problem, more mixer speed will not rescue it.
Already seeing a clear split? Jump to The Batter Curdled or Split for the diagnostic checks.
Once the Flour Goes In, Mix Less
Up to this point, mixing has helped build and hold air. Once flour enters the bowl, combine it efficiently and stop. Use low speed and let the spatula handle the last few streaks.
The batter should mound slightly instead of flowing freely. That thickness helps produce the close, buttery crumb we are after.
All-Purpose Flour or Cake Flour?
Cake flour generally produces a softer, more delicate crumb. All-purpose flour gives the cake a little more structure and a firmer bite.
This formula uses all-purpose flour for a more substantial texture. Weighing it is strongly recommended; an overfilled measuring cup can add enough extra flour to make the loaf noticeably drier. The goal is a slice that cuts cleanly but still feels tender when you eat it.
Does Pound Cake Need Baking Powder?
Traditional pound cake can be made without baking powder. Its rise comes largely from air incorporated during creaming, while the eggs provide structure and steam contributes in the oven.
This version uses just ½ teaspoon / about 2 g for a little extra support. Adding much more would change the rise and move the texture further from the close crumb we want.
Why Milk but No Sour Cream or Cream Cheese?
The small amount of milk keeps the batter workable and helps the crumb stay tender without taking the cake away from its butter-first character.
Sour cream, cream cheese and whipping cream can all make excellent pound cakes, but each changes the batter enough that none is a simple one-for-one swap for the milk here.
Before You Swap an Ingredient
- Salted butter: use it if needed and omit the added ½ teaspoon salt.
- Self-rising flour: it already contains leavening and usually salt, so it is not a direct substitute for the all-purpose flour here.
- A whole egg in place of the extra yolk: the additional white changes the water and protein balance.
- Large sugar reductions: they affect moisture, aeration, browning and tenderness as well as sweetness.
Ready to bake? Return to the recipe method, or jump ahead to the doneness checks if the loaf is already in the oven.
Bake the Center, Not the Clock
With pound cake, the outside can look convincingly done long before the deepest part is ready. The kitchen may already smell strongly of butter and vanilla, the crust may be richly colored, and the top may have split while the middle is still catching up.
Choose the Pan Before Trusting the Time
Use a light-colored 9 × 5-inch / 23 × 13 cm metal loaf pan and keep the batter at or below roughly two-thirds of its depth.
This formula is written for a pan about 2¾ inches / 7 cm deep. The difference between a 9 × 5-inch pan and an 8½ × 4½-inch pan looks small, but the capacity difference is not. King Arthur Baking’s guide to loaf-pan sizes notes that the larger pan can hold almost 20% more.
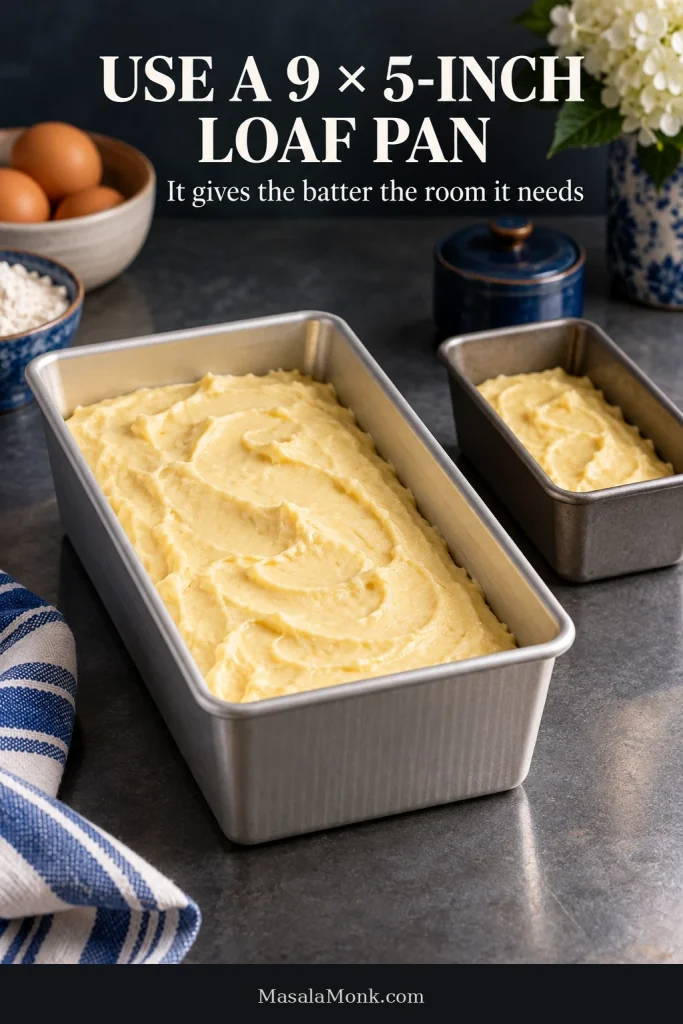
If you have the smaller pan, do not pack the entire batch into it. Keep the fill level around two-thirds and bake any excess separately. Crowding a dense batter gives the outside a long head start while heat works its way inward.
Pan material matters too. Dark nonstick metal browns more aggressively, while glass and ceramic heat differently from light metal.
Using a Bundt pan, a smaller pan or a scaled batch? Go to Pan Sizes, Smaller Cakes & Scaling before relying on the loaf timing.
What About Cold-Oven Pound Cake?
Some traditional pound-cake formulas are intentionally designed for a cold start, rising as the oven gradually heats.
This version is not. It uses a fully preheated 325°F / about 165°C conventional oven, so switching to a cold start would change the method rather than simply the first step.
Why Pound Cake Cracks on Top
A crack down the center of a loaf-style pound cake is normal. The outside sets before the middle has finished expanding, so the rising center pushes through the partially set crust.
A dramatic mushroom over the edge, overflowing batter or an unusually violent split is different and deserves a closer look at pan capacity and leavening.
How to Know the Center Is Actually Done
Pound cake is done when the deepest part is set, springs back lightly and a long skewer comes out without wet batter. K-State Research and Extension’s baked-goods doneness guidance gives about 210°F / 99°C as a supporting temperature check while also recommending visual signs of doneness.
A short toothpick can miss the very part of a deep loaf you need to test, so use a long wooden skewer and send it through the thickest section.
Other signs help confirm what the skewer is telling you:
- the crust is well browned;
- the center no longer looks wet or visibly jiggly;
- slight pulling from the sides may begin; and
- a few moist crumbs on the skewer are perfectly acceptable.
Treat temperature as supporting evidence, not a magic number. The whole picture tells you more than a single degree on the probe.
Cooling and Slicing
Leave the cake in its pan for about 10–15 minutes, then move it to a wire rack.
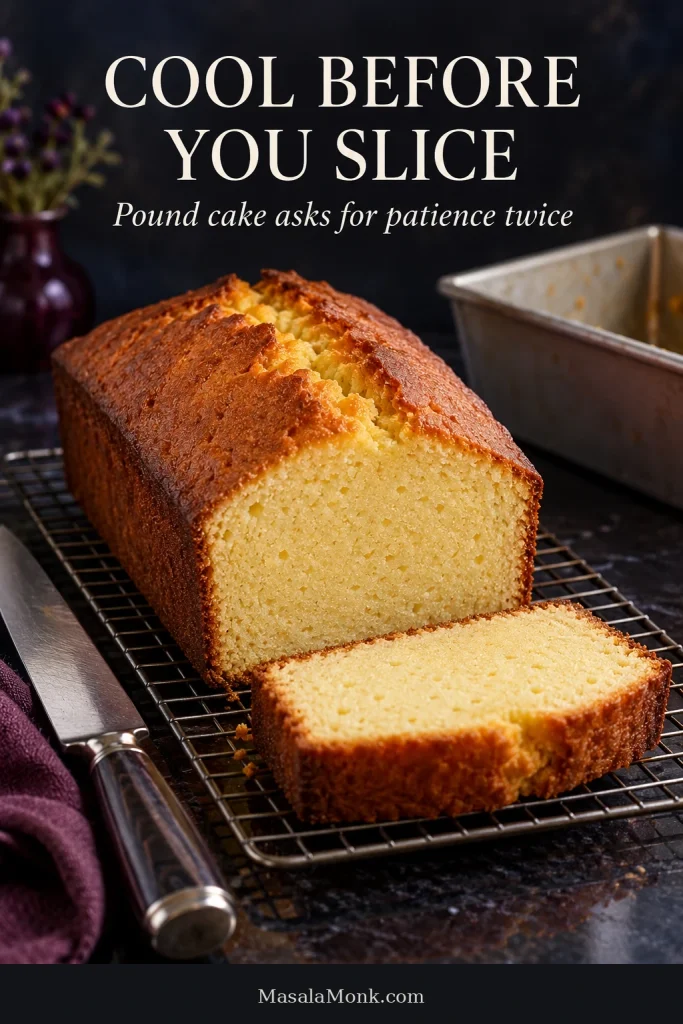
Pound cake asks for patience twice: once while the middle finishes baking and again while the loaf cools. A hot slice gives you the least settled version of the crumb.
For the crispest fresh crust, leave the loaf uncovered until it is completely cool. Wrapping a warm cake traps steam and softens the outside quickly.
Pound Cake Troubleshooting
A wet middle, a gummy stripe and an oily dark band can all look “dense” when you first cut the loaf. Their textures tell you much more than color alone.
| What you see | Check first | Then consider |
|---|---|---|
| Wet, batter-like middle | Was the deepest part fully baked? | Oven calibration, pan depth, too much batter |
| Gummy or translucent stripe | Is it compressed rather than genuinely raw? | Split batter, mixing problems |
| Dry crumb throughout | Flour quantity and baking time | Hot oven, large sugar reduction, storage |
| Tough or rubbery crumb | Mixing after the flour was added | Too much flour |
| Greasy cake | Was the butter or batter too warm? | Split batter, richer dairy swaps, underbaked center |
| Curdled batter | Egg and butter temperatures | Egg added too quickly |
| Dark outside, raw middle | Oven temperature and pan color | Pan depth, rack position, too much batter |
| Sunken middle | Was the cake fully baked? | Too much leavener, unstable batter, too much incorporated air, early oven opening |
| Overflow | Pan capacity | Self-rising flour, extra leavener, oversized batch |
| Dark dense band at bottom | Is it wet, oily or rubbery? | Incomplete baking, unstable batter, mixing or uneven heat |
Raw in the Middle or Gummy?
Raw pound cake is wet or pasty and leaves uncooked batter on a deep skewer; a gummy streak is compressed and rubbery even though the surrounding crumb may already be baked.
That distinction matters because extra oven time only fixes one of the two.
If the middle is genuinely underbaked and the crust still has room to darken, further baking can finish it. If the top is already brown, the cake is not necessarily lost—tent the surface loosely with foil and give the inside more time at the same oven temperature.
A gummy or “sad” streak tends to look compressed and sometimes slightly translucent. In that case the problem is more likely to have started in the batter than in the final few minutes of baking.
Leaving a structurally gummy loaf in the oven for another half hour often dries the surrounding cake while the compressed band remains.
Dark crust but a genuinely wet middle? Go straight to Dark Outside Before the Center Is Done for the rescue path.
Our banana cake troubleshooting guide shows the same raw-versus-gummy distinction in a wetter style of cake.
The Batter Curdled or Split
A mildly grainy batter can often continue successfully. Visible oil or loose liquid is a stronger sign that the mixture has actually split.
At the first grainy look, pause, scrape the bowl and let the egg already there mix in before pouring more. If the mixture is clearly separating, think back to the conditions in the bowl:
- Were the eggs still very cold?
- Had the butter become shiny and overly soft?
- Did the bowl warm up during prolonged beating?
- Did a large amount of egg go in at once?
Adding flour later may make the mixture look smoother, but that does not necessarily mean a badly split batter has truly come back together.
Dry, Tough or Crumbly Pound Cake
Dry pound cake usually points first toward too much flour, too much oven time or an oven running hotter than expected. A rubbery cake points more strongly toward mixing.
- Dry throughout: check flour measurement, baking time and oven temperature.
- Dry mainly around the edges: look at overbaking, a dark pan or an oven running hot.
- Tough or rubbery: think about how long the batter was mixed after the flour went in.
- Good when fresh but dry later: storage becomes the more likely culprit.
Dark Outside Before the Center Is Done
If the crust is dark but the middle is still wet, tent the loaf loosely with foil and continue baking at the same temperature. Turning up the heat only makes the outside race further ahead.
Then work out why it happened:
- Is the oven running hotter than its setting?
- Are you using a dark pan?
- Could the pan be smaller or deeper than the one specified?
- Does the batter sit unusually high in the pan?
- Is the loaf close to a strong heating element?
A dark band along the bottom also needs a texture check. Wet suggests incomplete baking. Oily points more toward fat separation. If the whole loaf is heavily browned, heat and pan material become more likely suspects.
Pan Sizes, Smaller Cakes & Scaling
Changing the pan changes more than the shape. Batter depth, surface area and the amount of batter affect how quickly heat reaches the middle and how much moisture escapes during baking.
Bundt Pans
This formula was developed for a loaf pan. In a large Bundt pan, the same amount of batter would make a shallower cake and the loaf timing would no longer apply.
A full-size 10- or 12-cup Bundt is better treated as its own formula. Simply doubling this batch changes both the amount your mixer has to handle and the way the cake bakes, so it is not a conversion we would recommend without testing.
If you still choose to bake this batch in a Bundt pan simply for the shape, grease every ridge thoroughly and judge doneness by the cake itself, not by the loaf timing above.
Scaling for Smaller Cakes
You can scale the ingredients by weight, but baking time does not shrink in the same proportion.
Use appropriately smaller pans, keep the batter depth sensible and start checking much earlier than you would for the full loaf. Smaller cakes heat through faster and have more crust relative to their centers, so they can lose moisture sooner.
Half the batter does not mean half the baking time.
Doubling the Recipe
For a double batch, divide the batter between two loaf pans.
Mixer capacity matters too. Twice as much butter takes more work to cream evenly, and the larger mixture has to absorb twice as much egg. If your mixer is close to its limit, two separately mixed batches are more predictable than one oversized batch.
If you regularly move cake batters between very different formats, our spice cake pan-size guide goes deeper into how sheet cakes, layers, Bundt pans, cupcakes and loaves behave at different depths.
Storage, Freezing & Serving
Pound cake is an excellent make-ahead cake. Bake it a day ahead, cool it completely, then wrap it well. In a cool kitchen, it keeps at room temperature for about 3 days.
Day one gives you the crisper crust. By day two, the crust is usually softer and the crumb more settled. Neither is inherently better; it depends on the texture you prefer.
Very warm or humid weather changes the storage advice. If your kitchen stays hot, wrap the cooled cake well and refrigerate it sooner, then let individual slices lose their chill before serving. A butter-rich crumb tastes softer and more aromatic closer to room temperature.
Freezing Pound Cake
For best quality, use frozen pound cake within about 2–3 months. Freeze the loaf completely cooled, either whole or cut into individual slices.
Wrap it well and place it inside a freezer-safe bag or container. Individual slices are convenient because you can thaw only what you need. Leave them wrapped as they thaw so most condensation collects on the wrapping instead of directly on the crumb.
Serve It Plain First
Try a slice plain while the fresh crust still has some crispness and the butter-and-vanilla flavor is unobscured. A good loaf should be satisfying before anything else reaches the plate.
Then Add Berries, Cream or Lemon Curd
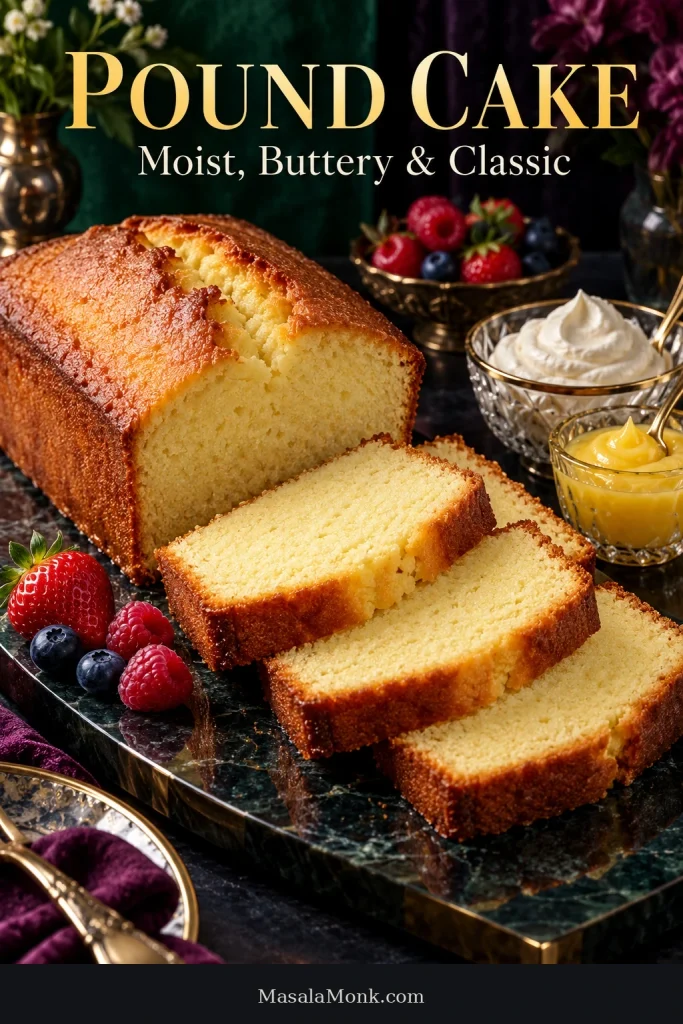
For a simple dessert, add berries and a spoonful of soft homemade whipped cream. A soft peak settles naturally beside the cake instead of sitting on it like frosting.
Spoon strawberries or other juicy fruit over individual slices at the table rather than storing them on the loaf; their syrup softens the surface quickly.
Homemade lemon curd, macerated strawberries or a light dusting of powdered sugar are enough if you want something extra. The cake should still be the thing you taste first.
If you bake this loaf, tell us which pan you used and roughly when the center finished in your oven. Those two details are especially useful for the next baker reading the comments.
Once those cues become familiar, pound cake becomes much easier to read as it bakes: soft-but-cool butter, cohesive batter and a genuinely set center lead to a loaf that slices cleanly and stays moist through the middle.








