Posted on — Leave a comment

Pound Cake Recipe: Moist, Buttery & Classic

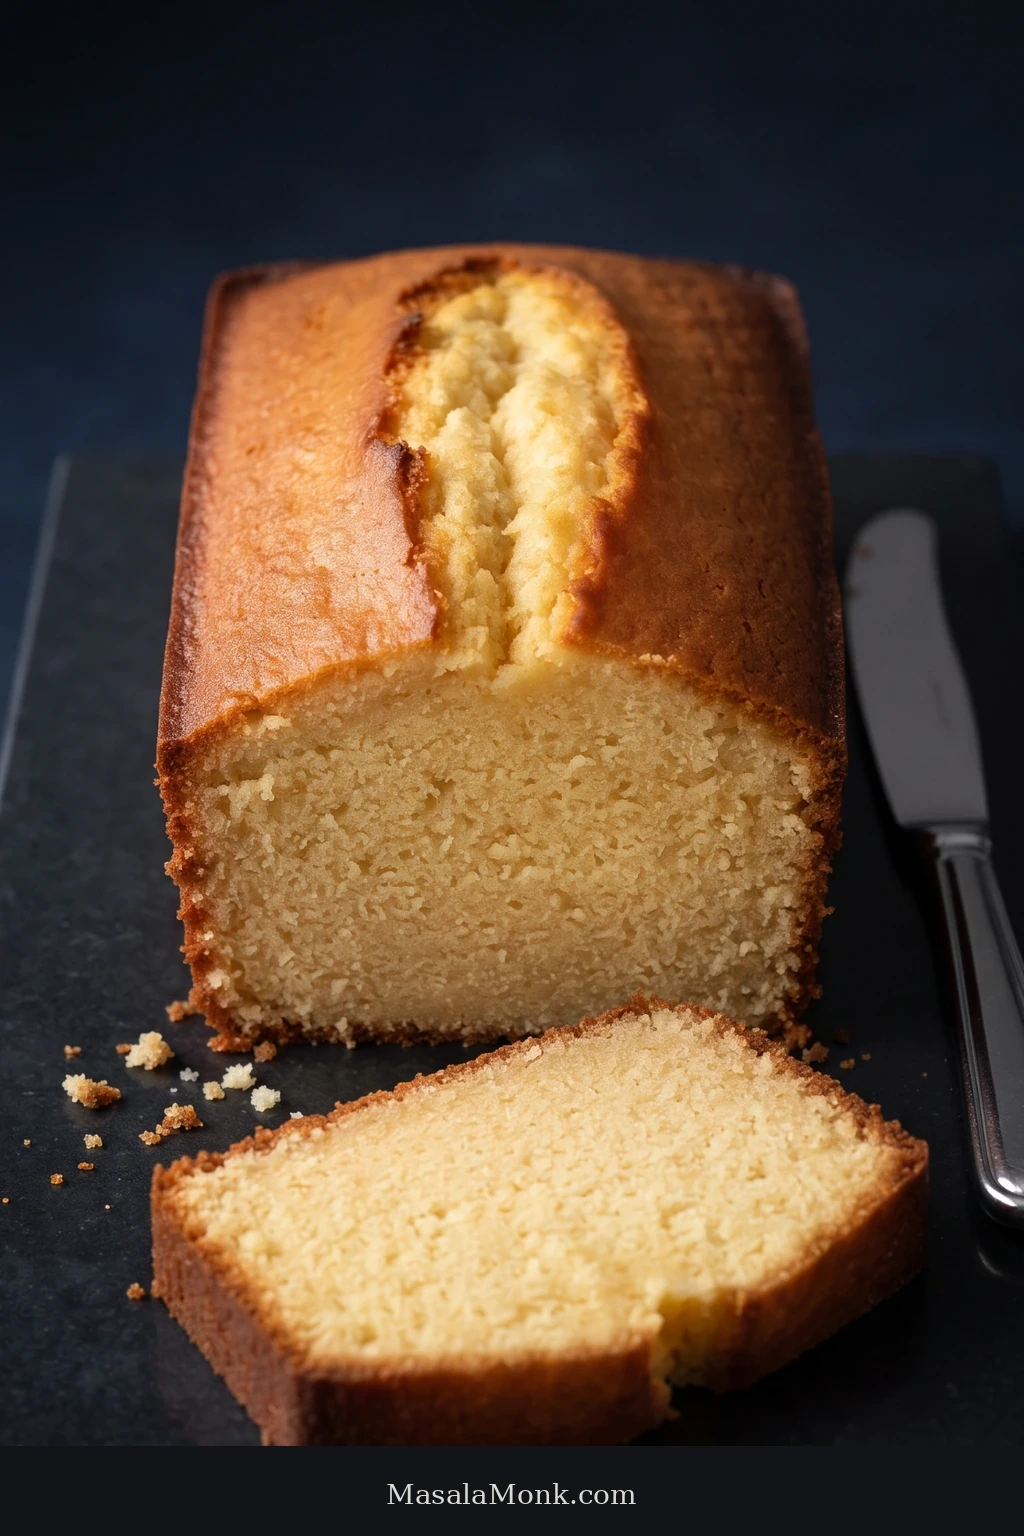
Golden loaf-style pound cake with a long center crack, cut open to reveal an even pale-yellow crumb, with one thick slice in front.

A good pound cake has some weight to it. The knife should pass cleanly through a fine crumb, with plenty of butter and vanilla underneath a golden crust that is lightly crisp when fresh. Dense is right. Gummy, greasy and dry are not.

This version keeps the simple butter-and-vanilla character of an old-fashioned pound cake. It is made from scratch, without sour cream or cream cheese doing the moisture work. The texture comes from the balance of butter, eggs, flour and sugar—and from handling them properly.

It is a wonderfully plain-looking cake once it comes out of the oven: no frosting, no elaborate finish, just a deeply browned loaf with a split along the top. When the crumb is right, that simplicity is exactly the appeal.

Three stages deserve most of your attention: the butter before creaming, the batter while the eggs go in, and the deepest part of the loaf as it bakes. Learn to read those three moments and the recipe becomes much easier to trust.

Three Checks That Decide the Loaf

Butter

It should indent easily but still look cool, matte and able to hold its shape. Shiny or oily butter has gone too far.

Batter

It should look aerated after creaming and stay cohesive as the eggs are added. Slight graininess is very different from visible pools of oil or liquid.

Center

The top may be browned and cracked while the middle still needs time. Reach the deepest part with a long skewer before calling the loaf done.

Pound Cake Recipe

Prep: about 25 minutes · Bake: begin checking around 65 minutes; allow longer as needed · Yield: about 10–12 slices

Pan: 9 × 5 × about 2¾ inches / 23 × 13 × 7 cm light-colored metal loaf pan · Oven: 325°F / about 165°C conventional or about 150°C fan

Butter target: about 64–68°F / 18–20°C · Batter weight: about 1 kg / 2¼ lb

Equipment: digital kitchen scale, electric mixer, flexible spatula, parchment paper, long wooden skewer and cooling rack. A stand mixer with the paddle attachment is convenient, but an electric hand mixer is fine. An oven thermometer and instant-read thermometer are optional.

Ingredients

  • 227 g / 8 oz / 1 cup unsalted butter, softened to about 64–68°F / 18–20°C
  • 270 g / 9.5 oz / about 1⅓ cups granulated sugar, or 270 g caster sugar
  • 4 large eggs + 1 large egg yolk, about 215–220 g without shells, not refrigerator-cold
  • 10 ml / 2 teaspoons vanilla extract
  • 240 g / 8.5 oz / about 2 cups all-purpose flour, preferably weighed
  • 2 g / ½ teaspoon baking powder
  • 3 g / ½ teaspoon fine salt
  • 60 ml / 2 fl oz / ¼ cup whole milk, not refrigerator-cold

Method

Prepare the Pan and Ingredients

  1. Prepare the oven and pan. Put a rack in the middle of the oven and heat to 325°F / about 165°C conventional, or about 150°C fan. Lightly grease the loaf pan and line the base and long sides with parchment.
  2. Combine the dry ingredients. Whisk the flour, baking powder and salt together thoroughly.
  3. Prepare the eggs. Whisk the whole eggs, extra yolk and vanilla together just until combined. A spouted measuring cup makes it much easier to pour them into the butter gradually.

Mix the Pound Cake Batter

  1. Start with the butter. Beat the softened butter briefly until smooth. It should still look cool and matte.
  2. Cream the butter and sugar. Add the sugar gradually and beat on medium speed until the mixture is paler, visibly fuller and creamy. With many stand mixers this may take around 4–6 minutes; stop based on the change in the bowl, not the timer. A hand mixer may take longer. Scrape the bowl and beaters or paddle at least once.
  3. Add the eggs gradually. Reduce the speed to medium-low and pour in the egg mixture in about 5–6 small additions. Let each one mostly disappear before adding the next. A slightly grainy look is not a reason to panic; pause, scrape the bowl and give the mixture time to come together. Oily patches or loose liquid are a more serious warning.
  4. Add the flour and milk. Reduce the mixer to low. Add roughly one-third of the flour mixture, then half the milk. Repeat, finishing with the final flour. Stop while a few dry streaks remain and fold those in gently with a spatula. The batter should be thick enough to mound; it will not pour like ordinary layer-cake batter.

Fill the Pan, Bake and Cool

  1. Fill the pan. Spread the batter evenly into the prepared pan and keep it at or below roughly two-thirds of the pan’s depth. If you are using an 8½ × 4½-inch loaf pan, do not force the full batch into it; bake the excess separately.
  2. Bake. Put the loaf on the middle rack and avoid opening the oven unnecessarily during the earlier part of the bake. Begin checking around 65 minutes. Depending on the pan and oven, it may continue well into the 70-minute range. The top may split before the cake is ready. If it already has enough color while the middle still needs time, tent it loosely with foil.
  3. Check the deepest part. The loaf is ready when the top is well browned, the middle looks set, a gentle press springs back and a long skewer pushed through the thickest part comes out without wet batter. A few moist crumbs are fine.
  4. Cool. Leave the cake in the pan for about 10–15 minutes, then move it to a wire rack. Cool it uncovered if you want to keep the fresh crust lightly crisp. Wait until the loaf has cooled before wrapping or slicing for the cleanest crumb.

The finished loaf: buttery and substantial, with an even crumb that stays moist without feeling wet or greasy. Once cool, the lightly crisp crust gives way to a soft, close-textured middle.
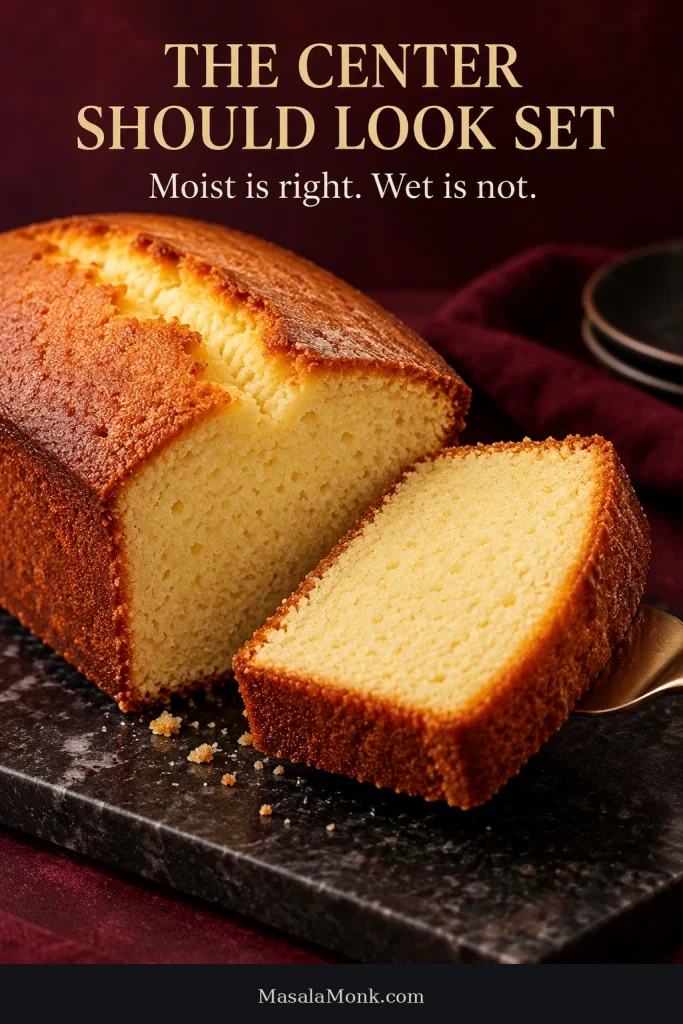
Cut pound cake loaf and thick slice showing an evenly baked, pale-yellow crumb with no wet or compressed center.
This is the target crumb: fine and even from browned edge to center, moist without looking pasty, translucent or compressed.

Pound Cake Guide

The recipe above is enough to bake the loaf successfully. If you want to understand what the bowl is telling you—or work out why a batch came out differently than expected—the guide below goes deeper into the stages where pound cake most often goes right or wrong.

Build the Batter

What Makes This a Classic Pound Cake?

Pound cake gets its name from the original formula: one pound each of butter, sugar, eggs and flour. Those equal weights explain both the name and the traditionally rich, close-textured character of the cake.

Modern recipes change the proportions, but the family resemblance remains. There should be plenty of butter and egg, a relatively tight crumb and more heft than you would expect from an ordinary vanilla layer cake.

A proper slice can still be tender. Small, even pores and a crumb that cuts cleanly are exactly what we want; rubbery streaks, pasty patches and grease point to different problems.

Soft Butter Is Not Warm Butter

For creaming, aim for butter around 64–68°F / 18–20°C: soft enough to indent easily, but still matte and able to hold its shape.

That is why “room-temperature butter” can be misleading. In a hot kitchen, butter can technically be at room temperature and already be far too soft for reliable creaming.

Press it with a finger. The butter should take the indentation without collapsing around it. Once the surface turns glossy or greasy and the stick begins slumping under its own weight, it has lost much of the structure needed to trap air well.
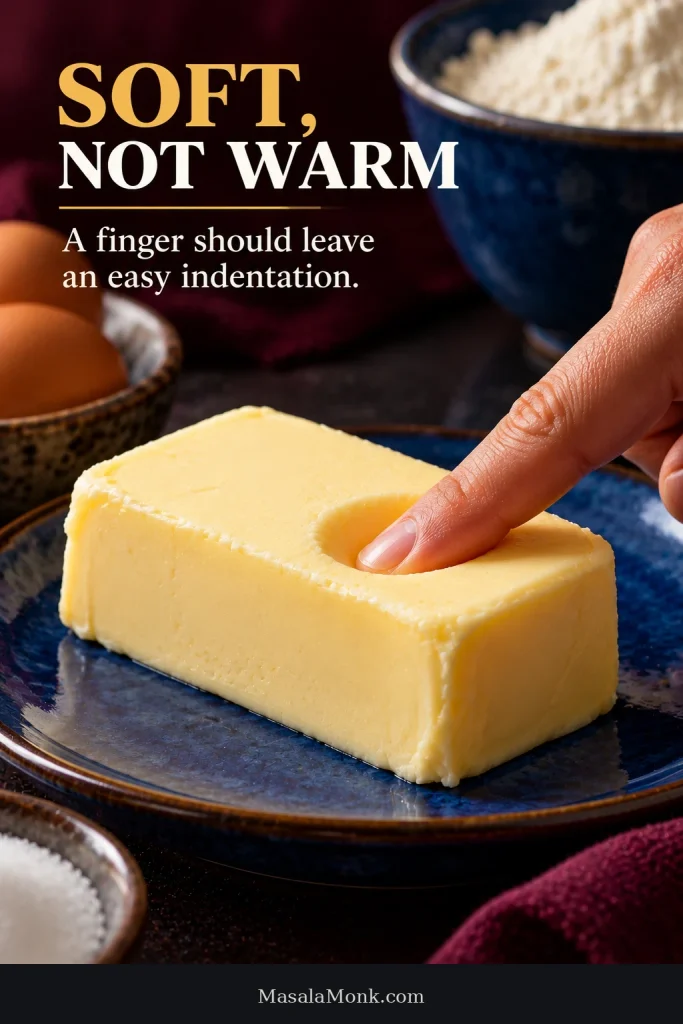
Finger pressing softened butter and leaving a clear indentation while the stick remains matte and holds its shape.
Before creaming pound cake batter, notice that the fingerprint stays defined while the butter still holds its shape. That is the useful boundary between pliable butter and butter beginning to melt.

If “softened butter” still feels vague, the visual cues in our buttercream frosting guide apply here too. Both jobs begin with butter that is pliable and matte.

What Properly Creamed Butter Looks Like

Properly creamed butter and sugar should look paler and visibly fuller while staying creamy, not loose or oily.

One recipe may tell you three minutes and another eight. Both can be reasonable because mixer speed, bowl shape and starting butter temperature differ. With many stand mixers this may take around 4–6 minutes, but the appearance of the mixture matters more than the clock.

Watch the bowl. Once the mixture has clearly gained volume and lost its dense, waxy appearance, there is little value in beating simply because another timer says to continue. If it turns loose and glossy, stop.
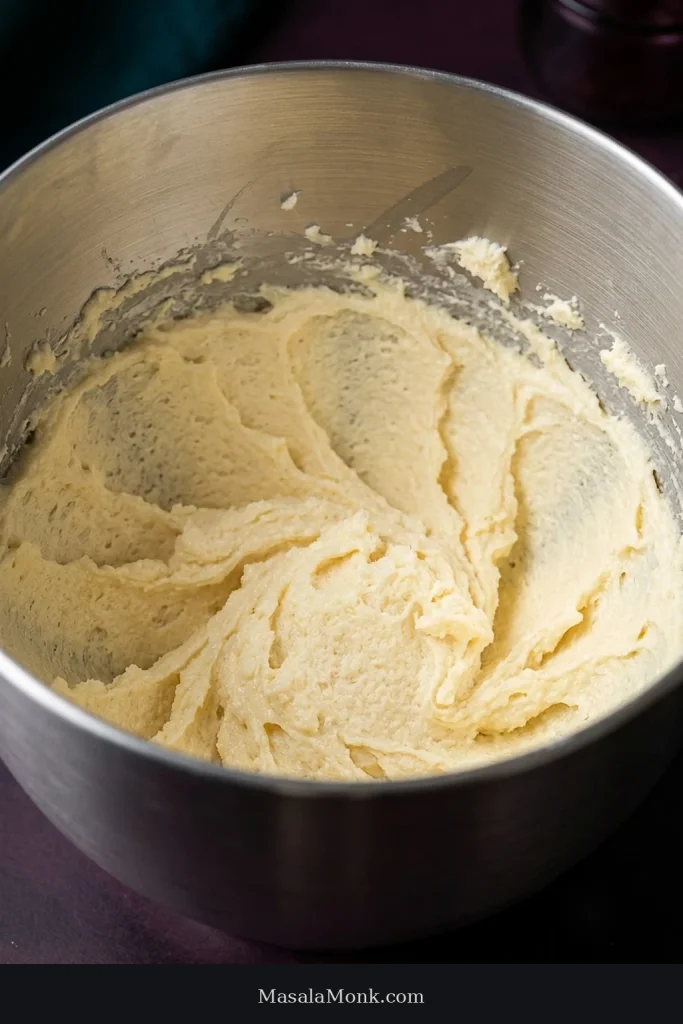
Pale, fluffy creamed butter and sugar with soft ridges in a stainless-steel mixer bowl.
Once the butter and sugar look aerated, scrape the bowl before judging the result. The whole mixture—not just the fluffy surface—should have become lighter and more uniform.

Adding the Eggs Without Splitting the Batter

Add the eggs gradually so the butter has time to take in their moisture without separating. Whisking the eggs and yolk together first makes that easier than dropping a whole egg into the bowl at once.
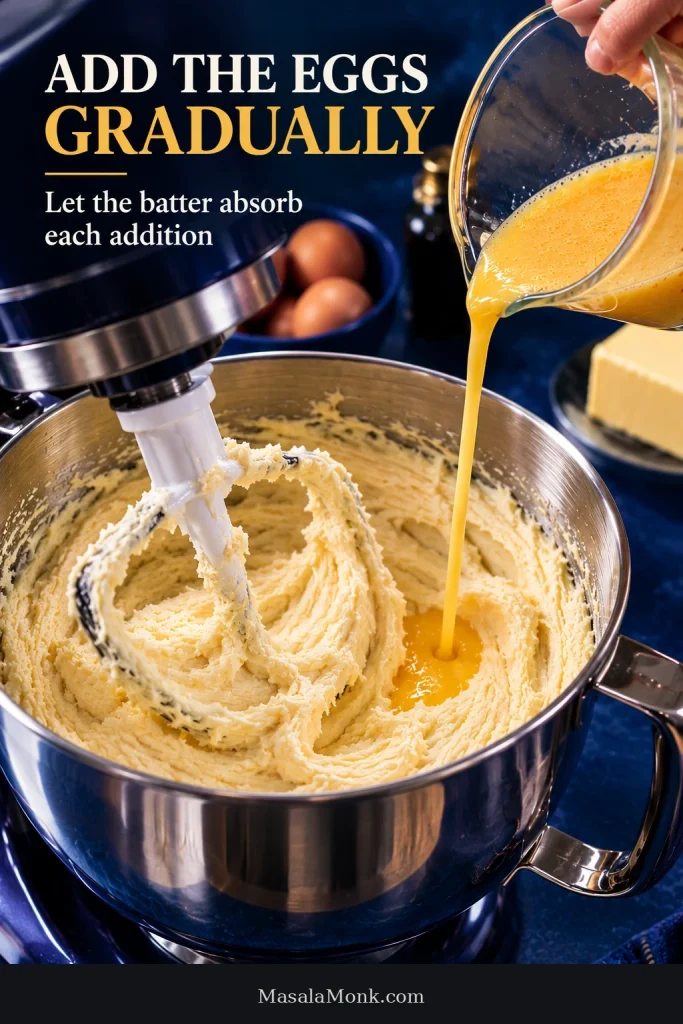
Beaten eggs being poured in a thin stream from a spouted glass measuring cup into pale pound cake batter in a stand mixer.
As the eggs go in, a whisked mixture and spouted measuring cup give you finer control than adding whole eggs at once. Small pours make it easier to keep the batter cohesive.

As the eggs go in, the mixture may lose some of its fluffy look. Brief graininess can happen; pause, scrape the bowl and let what is already there mix in before pouring more.
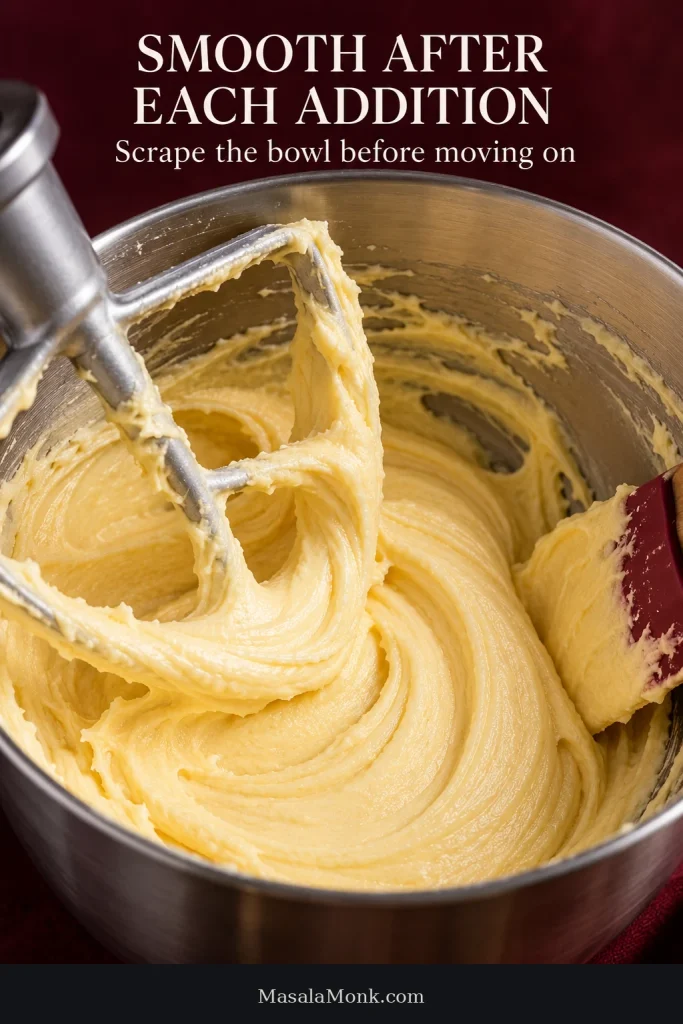
Smooth golden pound cake batter surrounding a mixer paddle, with a spatula resting against the side of the metal bowl.
After an egg addition, read the batter around the paddle: a cohesive mixture moves as one mass, while shiny fat pockets or a moat of loose liquid signal a stronger separation.

Visible oil, loose liquid or persistent separation means the butter-and-egg mixture is starting to split. Very cold eggs, overheated butter and adding too much egg at once can all contribute. If warmth is the problem, more mixer speed will not rescue it.

Already seeing a clear split? Jump to The Batter Curdled or Split for the diagnostic checks.

Once the Flour Goes In, Mix Less

Up to this point, mixing has helped build and hold air. Once flour enters the bowl, combine it efficiently and stop. Use low speed and let the spatula handle the last few streaks.

The batter should mound slightly instead of flowing freely. That thickness helps produce the close, buttery crumb we are after.
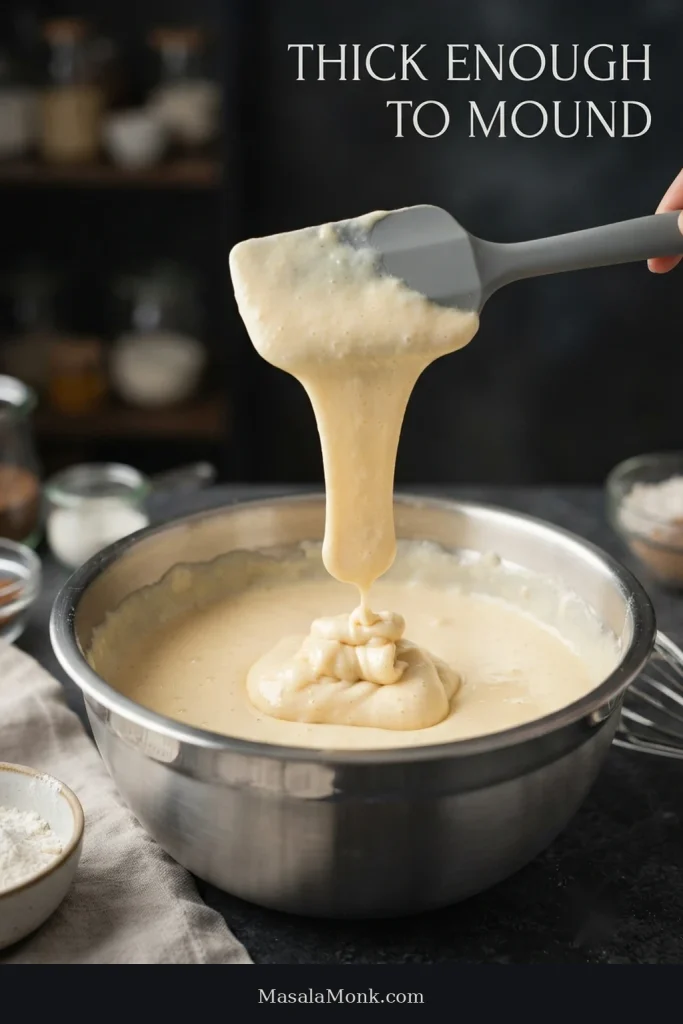
Thick pale pound cake batter falling slowly from a spatula and forming a soft mound in a mixing bowl.
Once the flour and milk are incorporated, this thick pound cake batter will not completely level itself. Smooth the surface deliberately before baking so the loaf starts evenly shaped.

All-Purpose Flour or Cake Flour?

Cake flour generally produces a softer, more delicate crumb. All-purpose flour gives the cake a little more structure and a firmer bite.

This formula uses all-purpose flour for a more substantial texture. Weighing it is strongly recommended; an overfilled measuring cup can add enough extra flour to make the loaf noticeably drier. The goal is a slice that cuts cleanly but still feels tender when you eat it.

Does Pound Cake Need Baking Powder?

Traditional pound cake can be made without baking powder. Its rise comes largely from air incorporated during creaming, while the eggs provide structure and steam contributes in the oven.

This version uses just ½ teaspoon / about 2 g for a little extra support. Adding much more would change the rise and move the texture further from the close crumb we want.

Why Milk but No Sour Cream or Cream Cheese?

The small amount of milk keeps the batter workable and helps the crumb stay tender without taking the cake away from its butter-first character.

Sour cream, cream cheese and whipping cream can all make excellent pound cakes, but each changes the batter enough that none is a simple one-for-one swap for the milk here.

Before You Swap an Ingredient

  • Salted butter: use it if needed and omit the added ½ teaspoon salt.
  • Self-rising flour: it already contains leavening and usually salt, so it is not a direct substitute for the all-purpose flour here.
  • A whole egg in place of the extra yolk: the additional white changes the water and protein balance.
  • Large sugar reductions: they affect moisture, aeration, browning and tenderness as well as sweetness.

Ready to bake? Return to the recipe method, or jump ahead to the doneness checks if the loaf is already in the oven.

Bake the Center, Not the Clock

With pound cake, the outside can look convincingly done long before the deepest part is ready. The kitchen may already smell strongly of butter and vanilla, the crust may be richly colored, and the top may have split while the middle is still catching up.

Choose the Pan Before Trusting the Time

Use a light-colored 9 × 5-inch / 23 × 13 cm metal loaf pan and keep the batter at or below roughly two-thirds of its depth.

This formula is written for a pan about 2¾ inches / 7 cm deep. The difference between a 9 × 5-inch pan and an 8½ × 4½-inch pan looks small, but the capacity difference is not. King Arthur Baking’s guide to loaf-pan sizes notes that the larger pan can hold almost 20% more.
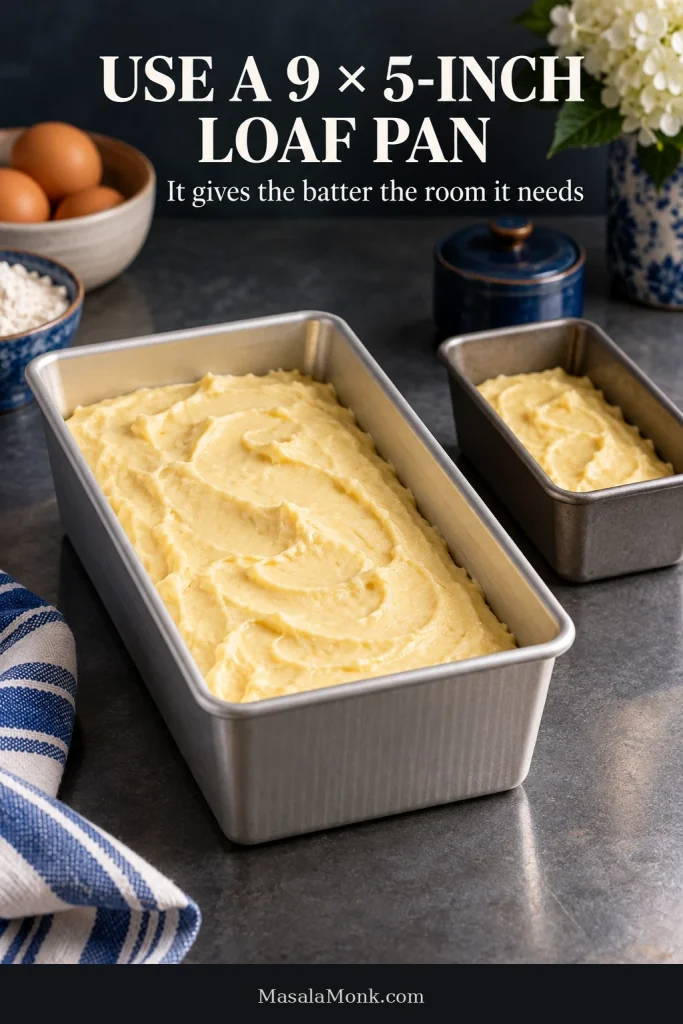
Large light-colored 9 × 5-inch loaf pan containing pound cake batter beside a visibly smaller loaf pan.
Before filling an unfamiliar loaf pan, measure its inside dimensions and depth. Two pans that look almost interchangeable can create noticeably different batter depths and baking behavior.

If you have the smaller pan, do not pack the entire batch into it. Keep the fill level around two-thirds and bake any excess separately. Crowding a dense batter gives the outside a long head start while heat works its way inward.

Pan material matters too. Dark nonstick metal browns more aggressively, while glass and ceramic heat differently from light metal.
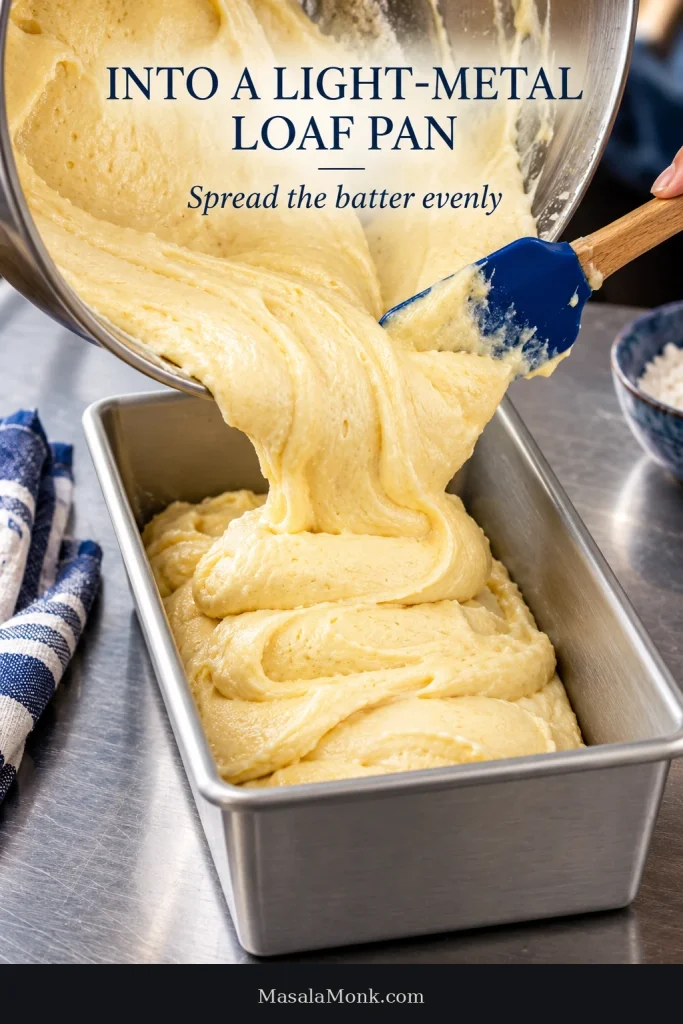
Thick pound cake batter being scraped from a mixing bowl into a parchment-lined, light-colored metal loaf pan.
Pan material and fill level work together here: light-colored metal slows aggressive edge browning, while keeping the batter at or below about two-thirds of the pan depth gives the center more time to bake through evenly.

Using a Bundt pan, a smaller pan or a scaled batch? Go to Pan Sizes, Smaller Cakes & Scaling before relying on the loaf timing.

What About Cold-Oven Pound Cake?

Some traditional pound-cake formulas are intentionally designed for a cold start, rising as the oven gradually heats.

This version is not. It uses a fully preheated 325°F / about 165°C conventional oven, so switching to a cold start would change the method rather than simply the first step.

Why Pound Cake Cracks on Top

A crack down the center of a loaf-style pound cake is normal. The outside sets before the middle has finished expanding, so the rising center pushes through the partially set crust.
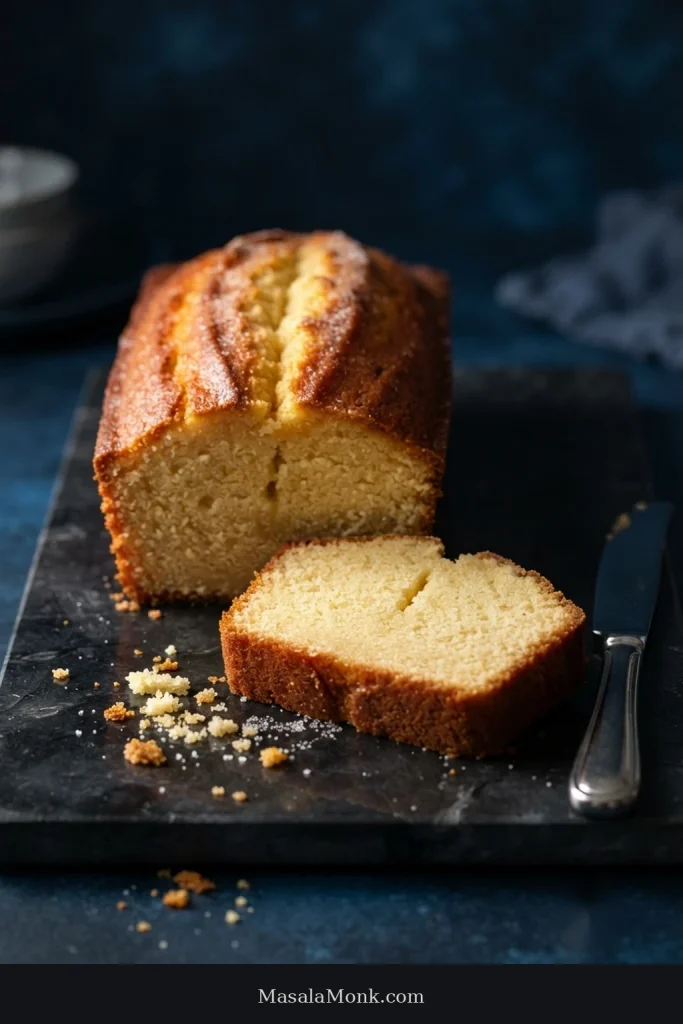
Deeply golden pound cake with a prominent natural crack running lengthwise along the top and a cut slice resting in front.
During baking, treat the center crack as an expansion seam—not a doneness test. A pound cake can split beautifully on top while its deepest center still needs more time.

A dramatic mushroom over the edge, overflowing batter or an unusually violent split is different and deserves a closer look at pan capacity and leavening.

How to Know the Center Is Actually Done

Pound cake is done when the deepest part is set, springs back lightly and a long skewer comes out without wet batter. K-State Research and Extension’s baked-goods doneness guidance gives about 210°F / 99°C as a supporting temperature check while also recommending visual signs of doneness.

A short toothpick can miss the very part of a deep loaf you need to test, so use a long wooden skewer and send it through the thickest section.
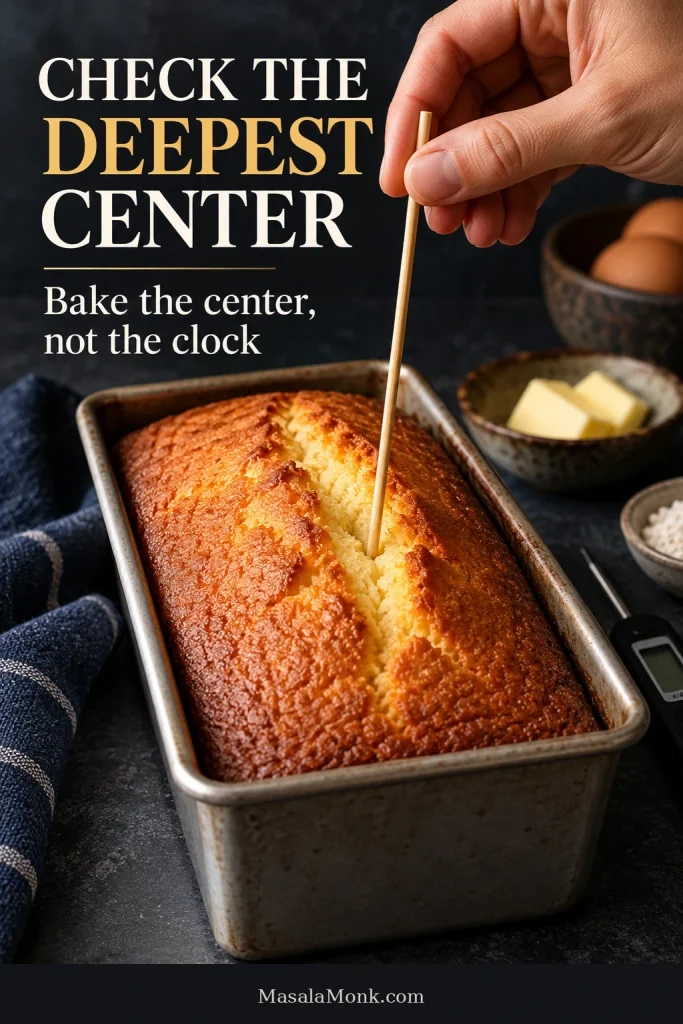
Hand inserting a long wooden skewer into the thick center of a browned pound cake still inside its loaf pan.
When checking pound cake doneness, aim the long skewer into the thick crumb beside the open crack rather than simply dropping it through the split. Test the slowest-baking center.

Other signs help confirm what the skewer is telling you:

  • the crust is well browned;
  • the center no longer looks wet or visibly jiggly;
  • slight pulling from the sides may begin; and
  • a few moist crumbs on the skewer are perfectly acceptable.

Treat temperature as supporting evidence, not a magic number. The whole picture tells you more than a single degree on the probe.

Cooling and Slicing

Leave the cake in its pan for about 10–15 minutes, then move it to a wire rack.
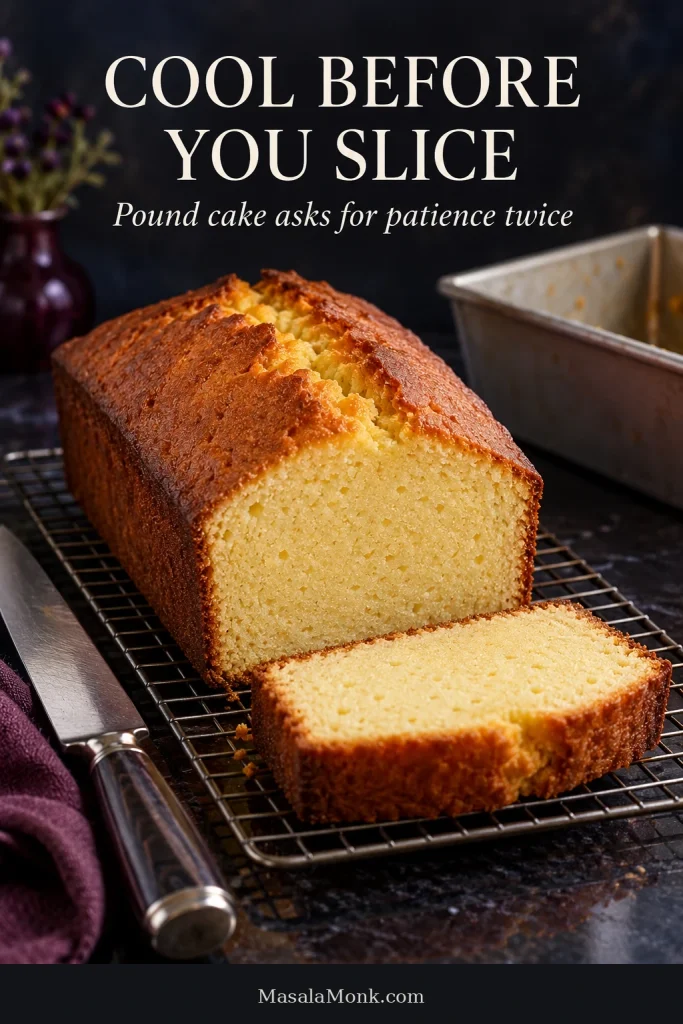
Fully cooled golden pound cake on a wire rack with a cleanly cut slice in the foreground and the empty loaf pan behind it.
Let the loaf finish cooling on the rack before slicing. Once cool, the crumb has settled enough to cut cleanly while the uncovered crust stays distinct from the moist center.

Pound cake asks for patience twice: once while the middle finishes baking and again while the loaf cools. A hot slice gives you the least settled version of the crumb.

For the crispest fresh crust, leave the loaf uncovered until it is completely cool. Wrapping a warm cake traps steam and softens the outside quickly.

Pound Cake Troubleshooting

A wet middle, a gummy stripe and an oily dark band can all look “dense” when you first cut the loaf. Their textures tell you much more than color alone.

What you seeCheck firstThen consider
Wet, batter-like middleWas the deepest part fully baked?Oven calibration, pan depth, too much batter
Gummy or translucent stripeIs it compressed rather than genuinely raw?Split batter, mixing problems
Dry crumb throughoutFlour quantity and baking timeHot oven, large sugar reduction, storage
Tough or rubbery crumbMixing after the flour was addedToo much flour
Greasy cakeWas the butter or batter too warm?Split batter, richer dairy swaps, underbaked center
Curdled batterEgg and butter temperaturesEgg added too quickly
Dark outside, raw middleOven temperature and pan colorPan depth, rack position, too much batter
Sunken middleWas the cake fully baked?Too much leavener, unstable batter, too much incorporated air, early oven opening
OverflowPan capacitySelf-rising flour, extra leavener, oversized batch
Dark dense band at bottomIs it wet, oily or rubbery?Incomplete baking, unstable batter, mixing or uneven heat

Raw in the Middle or Gummy?

Raw pound cake is wet or pasty and leaves uncooked batter on a deep skewer; a gummy streak is compressed and rubbery even though the surrounding crumb may already be baked.

That distinction matters because extra oven time only fixes one of the two.

If the middle is genuinely underbaked and the crust still has room to darken, further baking can finish it. If the top is already brown, the cake is not necessarily lost—tent the surface loosely with foil and give the inside more time at the same oven temperature.

A gummy or “sad” streak tends to look compressed and sometimes slightly translucent. In that case the problem is more likely to have started in the batter than in the final few minutes of baking.

Leaving a structurally gummy loaf in the oven for another half hour often dries the surrounding cake while the compressed band remains.

Dark crust but a genuinely wet middle? Go straight to Dark Outside Before the Center Is Done for the rescue path.

Our banana cake troubleshooting guide shows the same raw-versus-gummy distinction in a wetter style of cake.

The Batter Curdled or Split

A mildly grainy batter can often continue successfully. Visible oil or loose liquid is a stronger sign that the mixture has actually split.

At the first grainy look, pause, scrape the bowl and let the egg already there mix in before pouring more. If the mixture is clearly separating, think back to the conditions in the bowl:

  • Were the eggs still very cold?
  • Had the butter become shiny and overly soft?
  • Did the bowl warm up during prolonged beating?
  • Did a large amount of egg go in at once?

Adding flour later may make the mixture look smoother, but that does not necessarily mean a badly split batter has truly come back together.

Dry, Tough or Crumbly Pound Cake

Dry pound cake usually points first toward too much flour, too much oven time or an oven running hotter than expected. A rubbery cake points more strongly toward mixing.

  • Dry throughout: check flour measurement, baking time and oven temperature.
  • Dry mainly around the edges: look at overbaking, a dark pan or an oven running hot.
  • Tough or rubbery: think about how long the batter was mixed after the flour went in.
  • Good when fresh but dry later: storage becomes the more likely culprit.

Dark Outside Before the Center Is Done

If the crust is dark but the middle is still wet, tent the loaf loosely with foil and continue baking at the same temperature. Turning up the heat only makes the outside race further ahead.
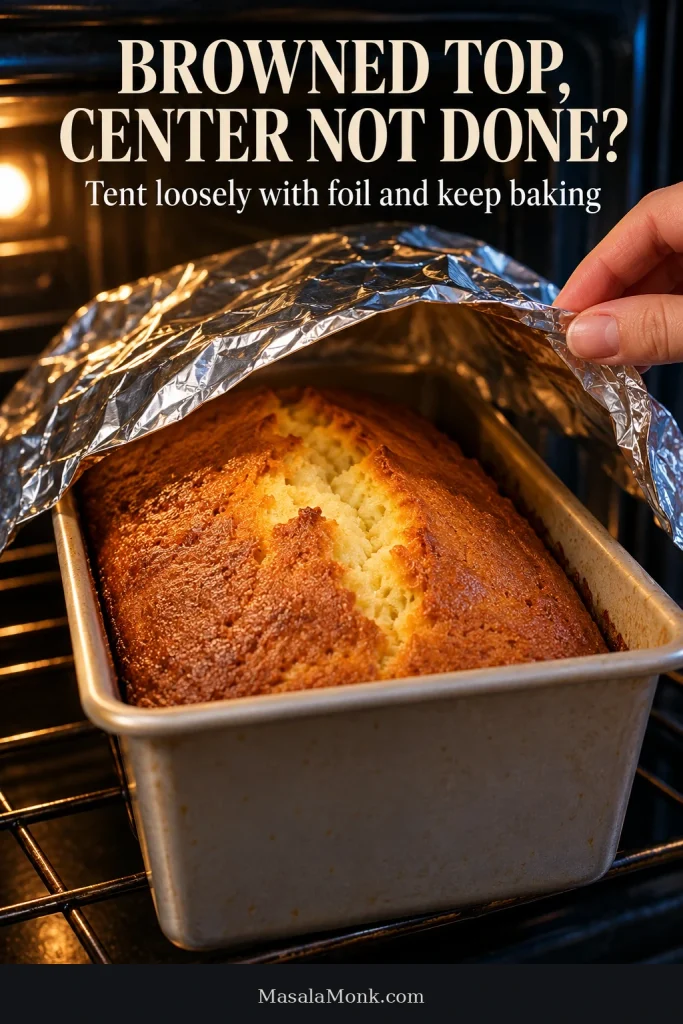
Hand positioning a loose sheet of aluminum foil above a deeply browned pound cake in its loaf pan inside the oven.
If your pound cake is browning too fast, make the foil a loose roof rather than a tight cover. Keeping it above the crust protects the surface while the center continues baking.

Then work out why it happened:

  • Is the oven running hotter than its setting?
  • Are you using a dark pan?
  • Could the pan be smaller or deeper than the one specified?
  • Does the batter sit unusually high in the pan?
  • Is the loaf close to a strong heating element?

A dark band along the bottom also needs a texture check. Wet suggests incomplete baking. Oily points more toward fat separation. If the whole loaf is heavily browned, heat and pan material become more likely suspects.

Pan Sizes, Smaller Cakes & Scaling

Changing the pan changes more than the shape. Batter depth, surface area and the amount of batter affect how quickly heat reaches the middle and how much moisture escapes during baking.

Bundt Pans

This formula was developed for a loaf pan. In a large Bundt pan, the same amount of batter would make a shallower cake and the loaf timing would no longer apply.

A full-size 10- or 12-cup Bundt is better treated as its own formula. Simply doubling this batch changes both the amount your mixer has to handle and the way the cake bakes, so it is not a conversion we would recommend without testing.

If you still choose to bake this batch in a Bundt pan simply for the shape, grease every ridge thoroughly and judge doneness by the cake itself, not by the loaf timing above.

Scaling for Smaller Cakes

You can scale the ingredients by weight, but baking time does not shrink in the same proportion.

Use appropriately smaller pans, keep the batter depth sensible and start checking much earlier than you would for the full loaf. Smaller cakes heat through faster and have more crust relative to their centers, so they can lose moisture sooner.

Half the batter does not mean half the baking time.

Doubling the Recipe

For a double batch, divide the batter between two loaf pans.

Mixer capacity matters too. Twice as much butter takes more work to cream evenly, and the larger mixture has to absorb twice as much egg. If your mixer is close to its limit, two separately mixed batches are more predictable than one oversized batch.

If you regularly move cake batters between very different formats, our spice cake pan-size guide goes deeper into how sheet cakes, layers, Bundt pans, cupcakes and loaves behave at different depths.

Storage, Freezing & Serving

Pound cake is an excellent make-ahead cake. Bake it a day ahead, cool it completely, then wrap it well. In a cool kitchen, it keeps at room temperature for about 3 days.

Day one gives you the crisper crust. By day two, the crust is usually softer and the crumb more settled. Neither is inherently better; it depends on the texture you prefer.

Very warm or humid weather changes the storage advice. If your kitchen stays hot, wrap the cooled cake well and refrigerate it sooner, then let individual slices lose their chill before serving. A butter-rich crumb tastes softer and more aromatic closer to room temperature.

Freezing Pound Cake

For best quality, use frozen pound cake within about 2–3 months. Freeze the loaf completely cooled, either whole or cut into individual slices.

Wrap it well and place it inside a freezer-safe bag or container. Individual slices are convenient because you can thaw only what you need. Leave them wrapped as they thaw so most condensation collects on the wrapping instead of directly on the crumb.

Serve It Plain First

Try a slice plain while the fresh crust still has some crispness and the butter-and-vanilla flavor is unobscured. A good loaf should be satisfying before anything else reaches the plate.
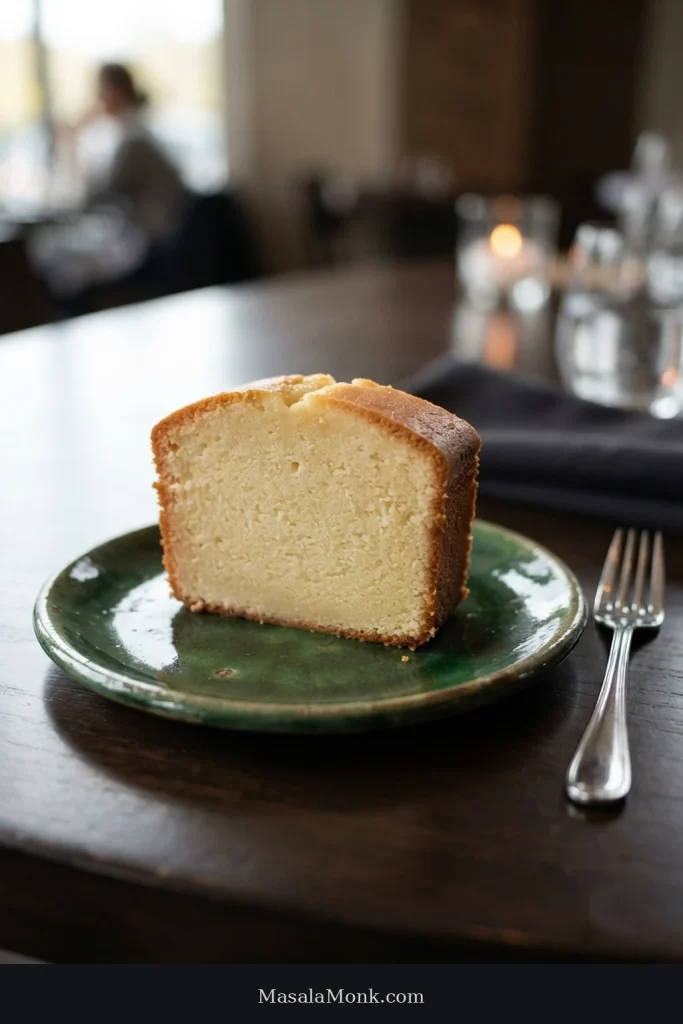
Thick plain slice of golden pound cake standing upright on a green ceramic plate beside a fork.
A plain slice is the best first check on the cake itself: fine, even crumb, browned edge and clear butter-and-vanilla flavor. If the loaf has been refrigerated, let the slice lose its chill first.

Then Add Berries, Cream or Lemon Curd

For a simple dessert, add berries and a spoonful of soft homemade whipped cream. A soft peak settles naturally beside the cake instead of sitting on it like frosting.

Spoon strawberries or other juicy fruit over individual slices at the table rather than storing them on the loaf; their syrup softens the surface quickly.

Homemade lemon curd, macerated strawberries or a light dusting of powdered sugar are enough if you want something extra. The cake should still be the thing you taste first.
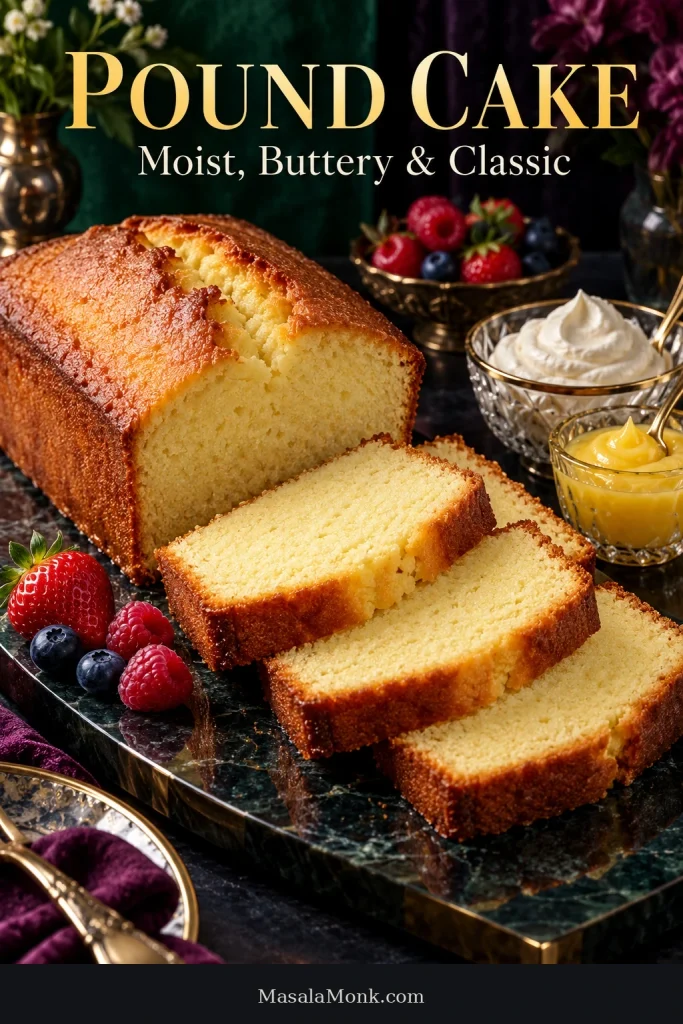
Sliced golden pound cake on a dark marble board with strawberries, blueberries and raspberries beside bowls of whipped cream and yellow lemon curd.
For serving pound cake, use contrast rather than more richness: tart berries and lemon curd brighten the buttery crumb, while soft whipped cream rounds each bite without hiding the cake.

If you bake this loaf, tell us which pan you used and roughly when the center finished in your oven. Those two details are especially useful for the next baker reading the comments.


Once those cues become familiar, pound cake becomes much easier to read as it bakes: soft-but-cool butter, cohesive batter and a genuinely set center lead to a loaf that slices cleanly and stays moist through the middle.
Posted on — Leave a comment

Lemon Curd Recipe: Silky, Tart, Easy & Perfect for Cakes, Tarts and Desserts

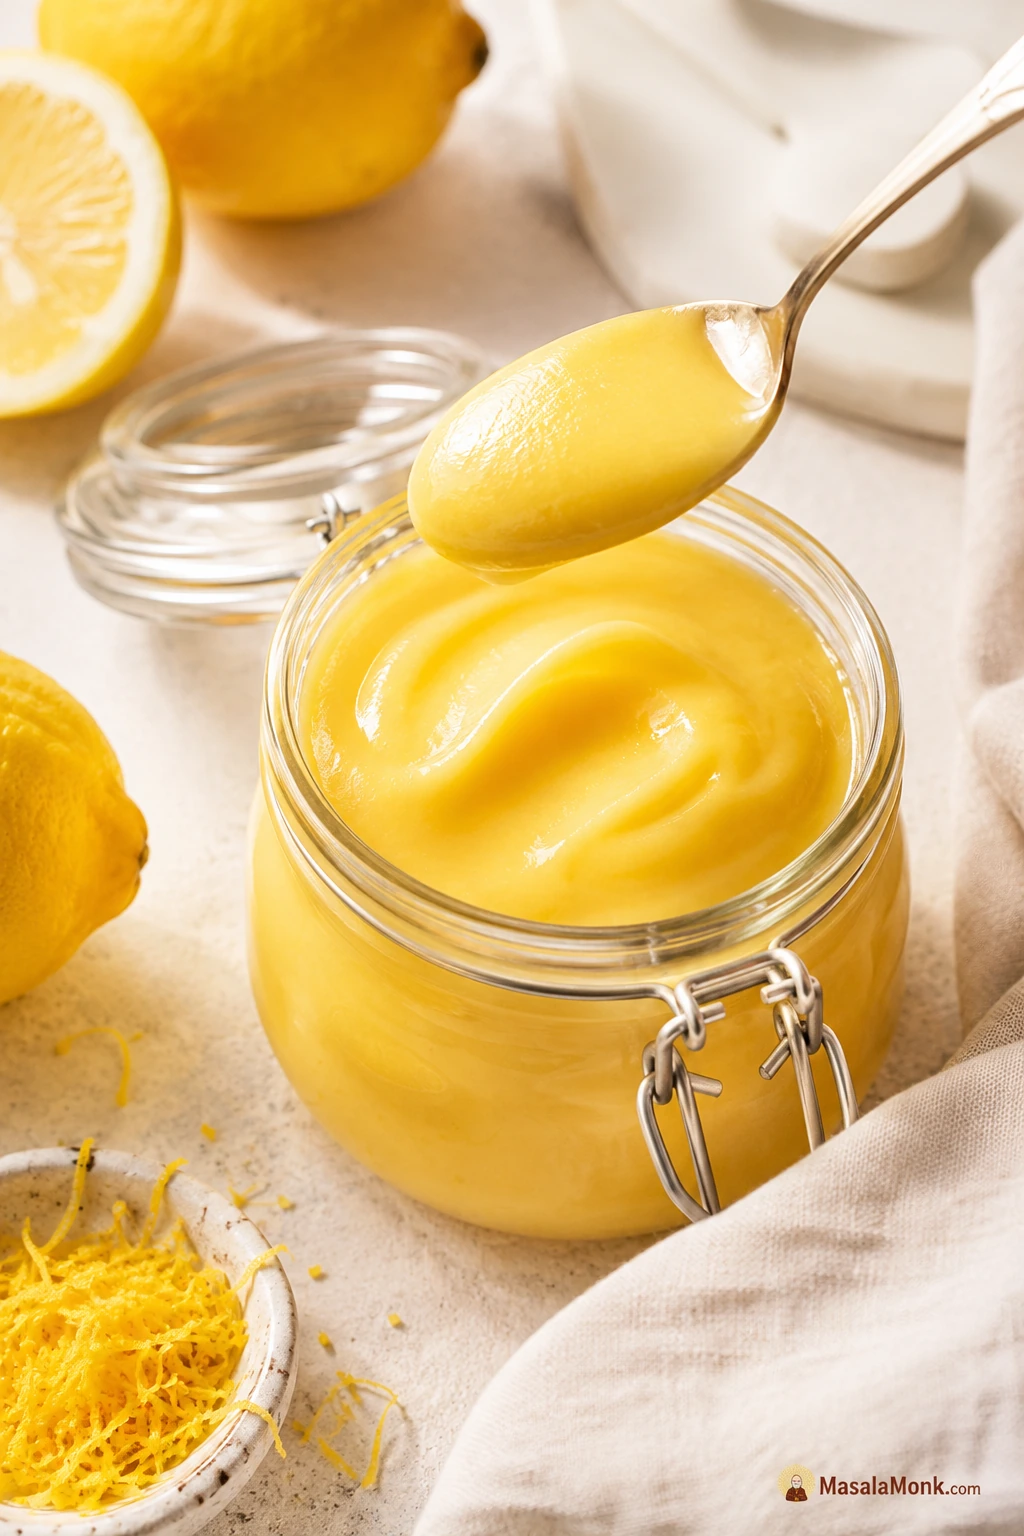
A glass jar of glossy homemade lemon curd with fresh lemons, lemon zest, and a spoonful lifted above the jar.

Lemon curd looks fancy, but the whole trick is gentle heat and knowing when to stop. When it works, it is glossy, buttery, tart-sweet, and bright enough to make cakes, tarts, toast, cheesecake, cookies, yogurt, pancakes, scones, and quick desserts feel finished.

It can feel risky because the same few ingredients can turn silky or stressful depending on heat and timing. This recipe is built around the real questions that come up at the stove: why is it runny, will the eggs scramble, is it thick enough, and can it actually work as a cake filling or tart filling?

The goal is not just to make lemon curd. It is to know whether your jar is soft enough for scones, thick enough for tarts, and stable enough for the cake, cookie, or dessert you actually want to make.

Quick Answer: How to Make Lemon Curd

Lemon curd is a smooth lemon custard-style spread made with lemon juice, lemon zest, sugar, eggs, and butter. Whisk everything together before heating, cook gently over low to medium-low heat until it coats the back of a spoon or reaches about 170°F / 77°C, then strain and chill until thick and glossy.

For tarts, mini tarts, cookies, or simple cake filling, cook a little closer to 175°F / 79–80°C without letting the mixture boil. It always looks softer while warm, so judge the final texture after it has cooled properly.

The flavor lands bright and lemony, but not harsh: tart enough to cut through cream and cake, smooth enough to spoon over scones or pancakes.

Recipe at a Glance

DetailBest answer
YieldAbout 1 1/4 cups / 20 tablespoons
Main methodStovetop, low heat, constant whisking
Best temperatureAbout 170°F / 77°C
Thicker target175°F / 79–80°C, without boiling
Active timeAbout 20 minutes
Chill time2 hours minimum
Make-ahead timingMake 1 day ahead for cakes, tarts, cookies, and neat dessert layers
Lemons neededUsually 2 to 3 medium lemons for 1/2 cup / 120 ml juice
Egg ratio1 large whole egg + 3 large egg yolks
Finished textureGlossy, spoon-coating, thick after chilling

Recipe Card

Recipe type: Dessert spread, filling, and sauce

Yield: About 1 1/4 cups / 20 tablespoons lemon curd

Prep time: 10 minutes
Cook time: 8 to 10 minutes
Chill time: 2 hours minimum
Total time: About 2 hours 20 minutes, including chilling

Best for: toast, scones, tarts, mini tarts, cake filling, cupcakes, cookies, cheesecake, yogurt, pancakes, crepes, pavlova, ice cream, and quick desserts

Ingredients

IngredientAmount
Fresh lemon juice1/2 cup / 120 ml / 4 fl oz
Finely grated lemon zest1 tablespoon, from about 2 lemons
Granulated sugar1/2 cup / 100 g for tart curd, or 2/3 cup / 135 g for sweeter curd
Large whole egg1
Large egg yolks3
Unsalted butter, cold and cubed6 tablespoons / 85 g / 3 oz
Fine salt1/8 teaspoon

Lemon note: You will usually need 2 to 3 medium lemons for 1/2 cup / 120 ml juice. Zest the lemons before juicing them.

Sugar note: Choose the lower amount if the curd will be paired with frosting, cream, meringue, or sweet cake. Go higher if you want a softer, sweeter spread for toast, scones, or pancakes.

Method

  1. Zest the lemons first, then juice them. Measure out 1/2 cup / 120 ml lemon juice.
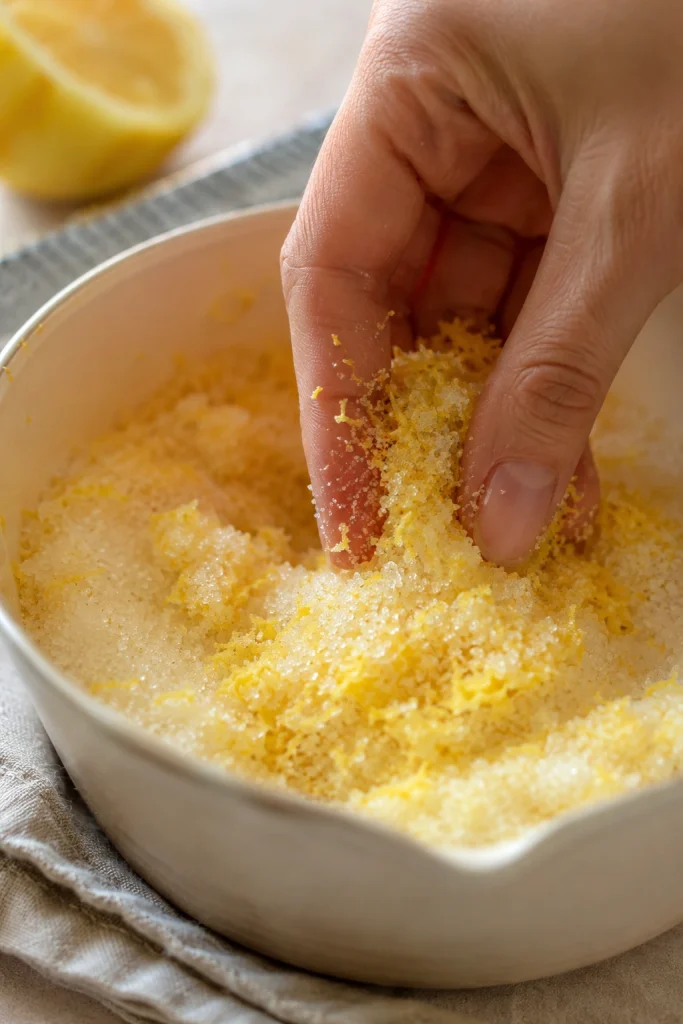
  2. Add the zest and sugar to a small heavy-bottom saucepan. Rub them together with your fingertips for about 30 seconds, until the sugar smells fragrant and lemony.
  3. Whisk in the whole egg, egg yolks, lemon juice, and salt before turning on the heat.
  4. Place the pan over low to medium-low heat. Cook while whisking constantly, scraping the base and corners of the pan.
  5. Continue for 8 to 10 minutes, until the mixture coats the back of a spoon. Aim for about 170°F / 77°C, or closer to 175°F / 79–80°C for a thicker curd. Do not boil.
  6. Remove from the heat. Whisk in the cold cubed butter, a few pieces at a time, until glossy and smooth.
  7. Strain through a fine mesh sieve into a heatproof bowl or jar.
  8. Press parchment or plastic wrap directly onto the surface. Cool slightly, then refrigerate for at least 2 hours, or until thick.

Recipe note: The pan gets the curd most of the way there, but the refrigerator finishes the texture. Judge the final thickness after chilling.

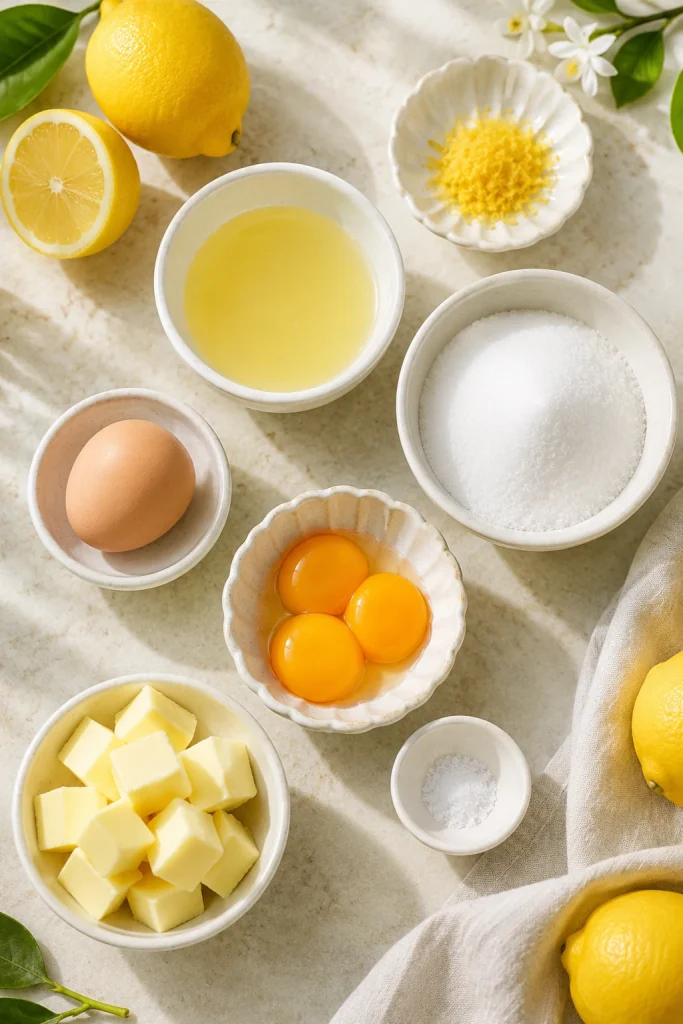
Visual cue: A balanced batch starts with fresh lemon juice, fragrant zest, rich yolks, butter, sugar, and salt.

Measured lemon curd ingredients arranged in bowls, including lemon juice, lemon zest, sugar, one whole egg, egg yolks, butter, and salt.
A short ingredient list leaves nowhere for weak flavor to hide, so fresh lemon juice, fragrant zest, rich yolks, butter, sugar, and salt all matter.

Cooking now? Check doneness cues · choose the right texture · fix common problems

After chilling, the finished curd mounds softly on a spoon, shines on top, and tastes bright first, then buttery and smooth at the end.

Most Useful Sections

Why This Works

This recipe uses one whole egg plus three yolks. The whole egg gives structure, while the extra yolks make the texture rich, smooth, and thick enough for more than just spreading on toast.

Fresh lemon juice gives sharp brightness, but zest gives the deeper citrus aroma that makes the flavor pop. Rubbing zest into sugar releases lemon oils before the mixture reaches the stove.

The 170°F / 77°C target gives the eggs enough heat to thicken the curd without pushing the mixture into boiling or scrambling. Cold butter added off the heat makes it glossy, and straining catches zest, tiny egg bits, or any uneven texture so the finished batch tastes silky.

Ingredients and Why They Matter

Fresh Lemon Juice

This is one of those recipes where fresh lemons really earn their place. Bottled lemon juice can taste flat, bitter, or harsh because there is nowhere for that flavor to hide.

Measure the juice after squeezing. Lemons vary in size and sharpness, and too much juice can make the batch loose or overly sour.

Lemon Zest

The zest is where the curd gets its real lemon perfume. Grate only the yellow outer skin and avoid the white pith underneath, which can taste bitter.

Always zest before juicing. Then rub the zest into the sugar so the fragrant oils spread through the whole batch.

Sugar

Sugar balances the acidity of the lemons and helps the eggs cook into a smooth custard-like texture. Choose the lower amount for a sharper curd and the higher amount for a sweeter dessert-style spread.

Whole Egg and Egg Yolks

Eggs thicken the mixture. The whole egg gives structure, while the yolks give richness, color, and a smoother set. Large eggs work best here; smaller eggs can make the finished batch set a little softer.

Butter

Butter turns the sharp lemon custard into something glossy, rounded, and spoonable. Add it cold and cubed after the pan comes off the heat so it melts in smoothly.

Salt

You should not notice the salt; it simply makes the lemon taste cleaner and more complete.

Whole Eggs vs Yolks in Lemon Curd

Different recipes use different egg ratios. The right choice depends on whether you want a soft spread, a rich tart filling, or an all-purpose curd that can do both.

Egg choiceTextureBest for
Whole eggs onlyLighter, softer, slightly looserToast, scones, yogurt, pancakes
Egg yolks onlyRicher, thicker, more custardyTarts, fillings, layered desserts
Whole egg + yolksBalanced, silky, stableBest all-purpose lemon curd

The whole egg plus yolk combination gives this recipe its useful texture: rich enough for desserts, but still soft enough to spread after chilling.

Helpful equipment: A fine zester, citrus juicer, heavy-bottom saucepan, whisk, silicone spatula, fine mesh sieve, and heatproof bowl or jar make the process easier. An instant-read thermometer is optional, but helpful for precise doneness.

Choose a nonreactive pan, such as stainless steel or enamel-coated cookware. Avoid uncoated aluminum or copper, which can react with acidic lemon juice and affect the flavor.

Stovetop vs Double Boiler

A double boiler is the gentlest method because the bowl is heated by steam instead of direct contact with the burner. It is helpful if you are nervous about scrambling the eggs, but it is slower.

A heavy-bottom saucepan is faster and works well when the heat stays low and the whisk keeps moving. This recipe uses the saucepan method because it is practical, quick, and reliable once you know the doneness cues.

MethodBest forWatch out for
Heavy-bottom saucepanFast, everyday lemon curdNeeds low heat and constant whisking
Double boilerBeginners, nervous cooks, gentle cookingTakes longer to thicken
MicrowaveSmall quick batchesUneven heat; higher risk of curdling if rushed

How to Make Lemon Curd

1. Zest and Juice the Lemons

Zest the lemons before cutting them. Once lemons are juiced, they become harder to hold and zest cleanly. Use a fine grater and stop as soon as you reach the white pith.

After juicing, measure out 1/2 cup / 120 ml juice. Measuring matters because extra juice can make the curd too loose or too sharp.

2. Rub the Zest Into the Sugar

Add the zest and sugar to the saucepan. Use your fingertips to rub them together until the sugar smells strongly of lemon. This takes less than a minute and makes the final flavor brighter.

Visual cue: Rub the zest into the sugar before heating so the citrus oils flavor the whole batch.

Fingers rubbing finely grated lemon zest into sugar in a bowl before making lemon curd.
Rubbing lemon zest into sugar wakes up the citrus oils and gives homemade lemon curd a fuller aroma before any heat is added.

3. Whisk Before Heating

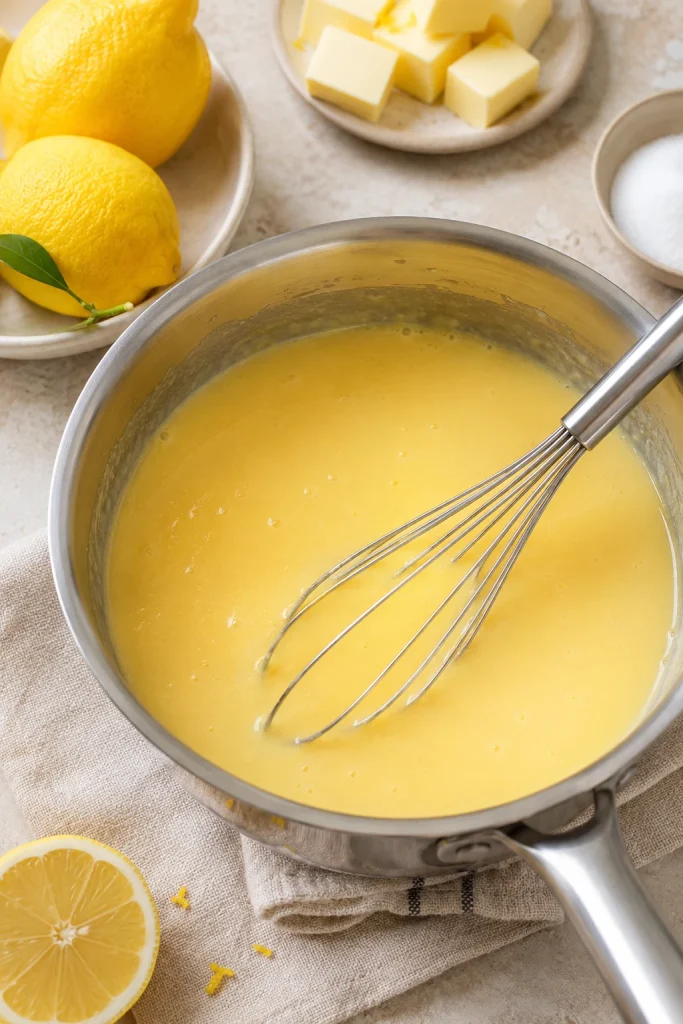
Add the whole egg, egg yolks, lemon juice, and salt. Mix until smooth before the pan goes on the stove. Starting with an even mixture helps the eggs cook evenly.

Visual cue: Whisk the mixture smooth before it goes on the stove.

Lemon curd ingredients whisked smooth in a stainless steel saucepan before cooking.
Whisk before heating so the eggs thicken evenly instead of forming streaks or small cooked bits.

4. Cook Low and Slow

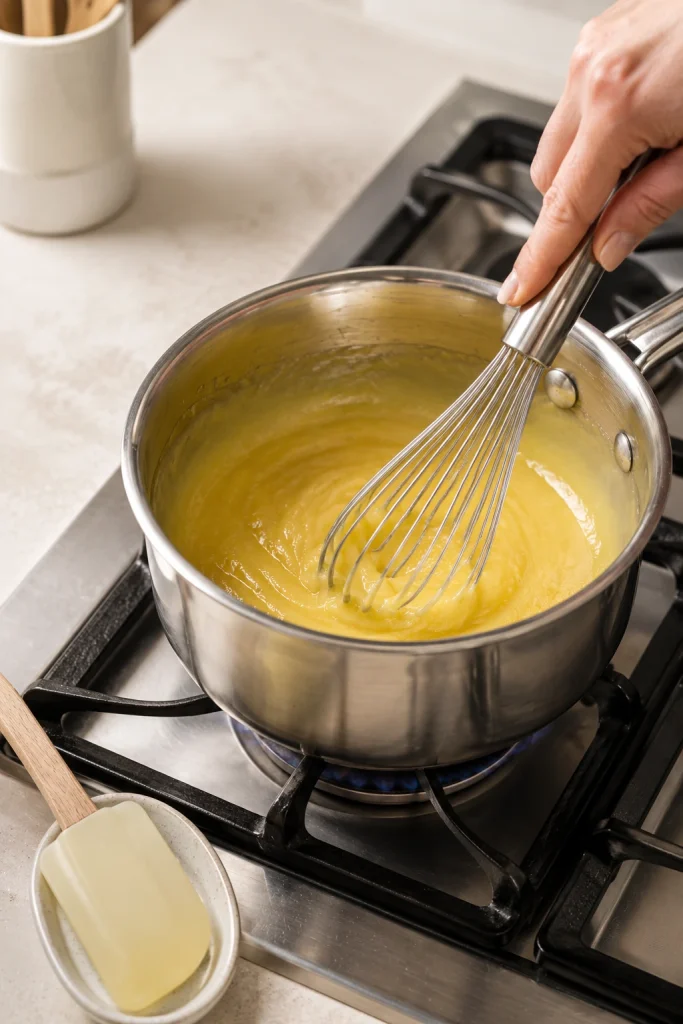
Place the pan over low to medium-low heat. Whisk constantly, making sure to reach the edges and bottom of the pan. At first, the mixture will look thin and loose.

Visual cue: The pan should look calm, not boiling; steady whisking is what thickens the curd safely.

Lemon curd being whisked in a saucepan on a stovetop over gentle heat.
Gentle heat is your safety net: slow cooking gives the eggs time to thicken the lemon curd without scrambling.

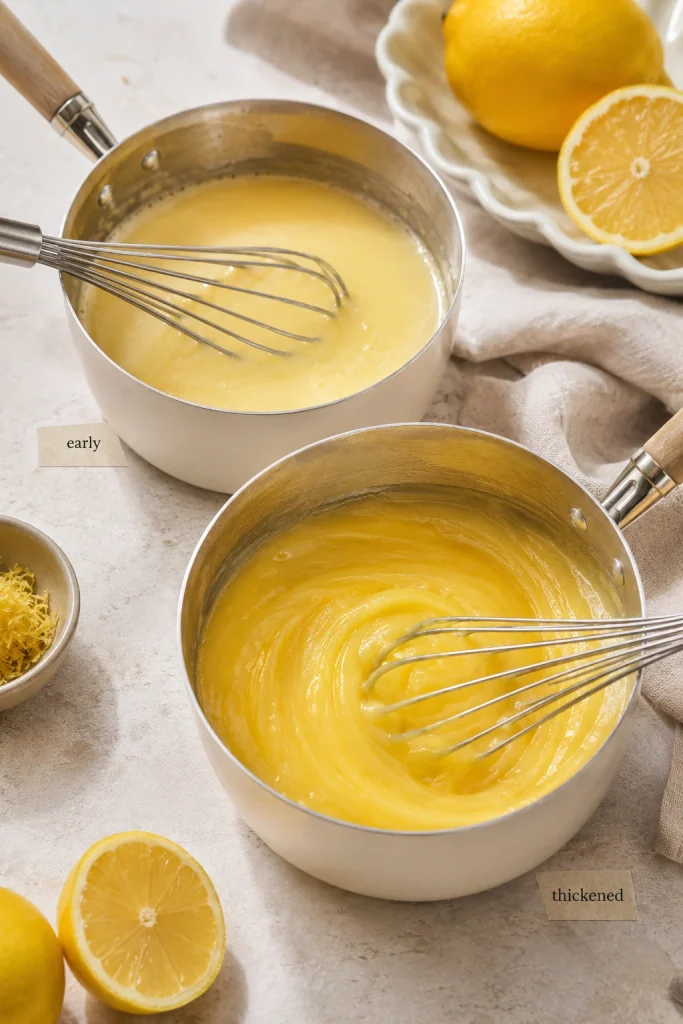
Do not worry if it feels like nothing is happening for the first few minutes. That is normal. The change usually comes near the end, when the mixture turns glossier, feels heavier on the whisk, and starts leaving soft trails.

Visual cue: Watch the curd turn from loose and thin to glossy with soft whisk trails.

Two pans of lemon curd showing an early thin mixture beside a thicker glossy curd with whisk trails.
Watch the body of the mixture, not just the clock: it moves from loose and thin to glossy, heavier, and able to leave soft whisk trails.

This is the moment to slow down, not turn up the heat. If the curd looks almost right but not quite there, give it another minute over gentle heat.

5. Stop at the Right Texture

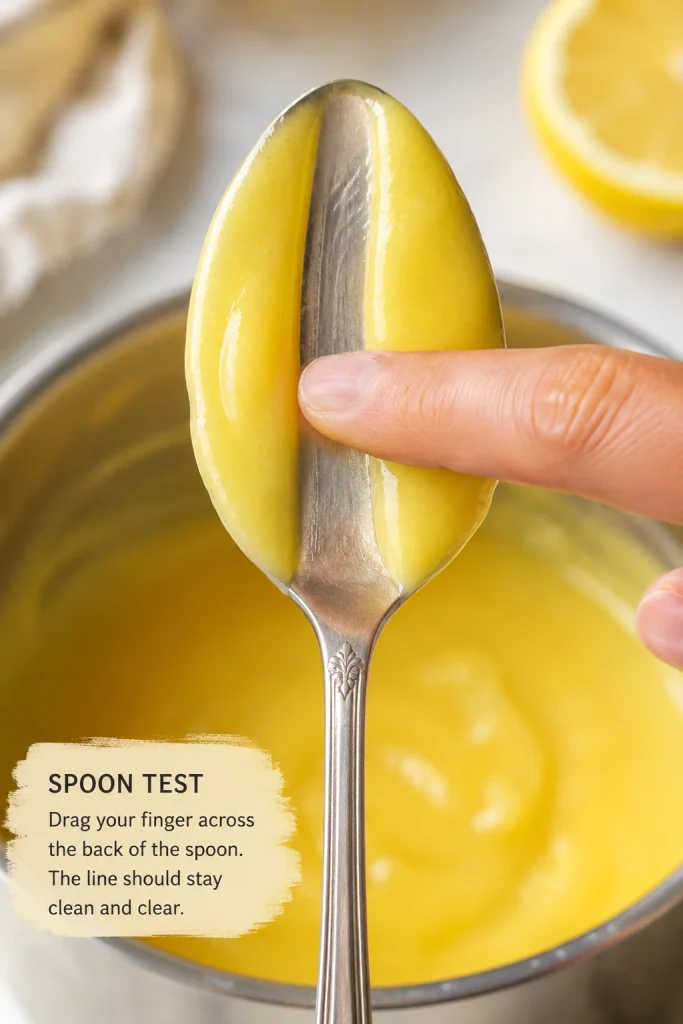
The curd is ready when it coats the back of a spoon and holds a clean line when you run a finger through it. If you are using a thermometer, aim for about 170°F / 77°C.

What the spoon test should show

A finger dragging through lemon curd on the back of a spoon, leaving a clean line that holds.
Use the spoon test when the curd is close; if the path stays open, it has enough body to finish setting as it cools.

For tart shells, mini tarts, cookies, or simple cake filling, you can cook it a little closer to 175°F / 79–80°C. Keep the heat gentle and do not let it boil.

The thermometer is a guide, not the only test. If the mixture has reached temperature but still looks watery, keep it over gentle heat a little longer until it coats the spoon.

6. Add Butter Off the Heat

Remove the pan from the heat. Whisk in the cold butter cubes a few pieces at a time. The curd turns glossy, smooth, and slightly richer as the butter melts in.

7. Strain the Lemon Curd

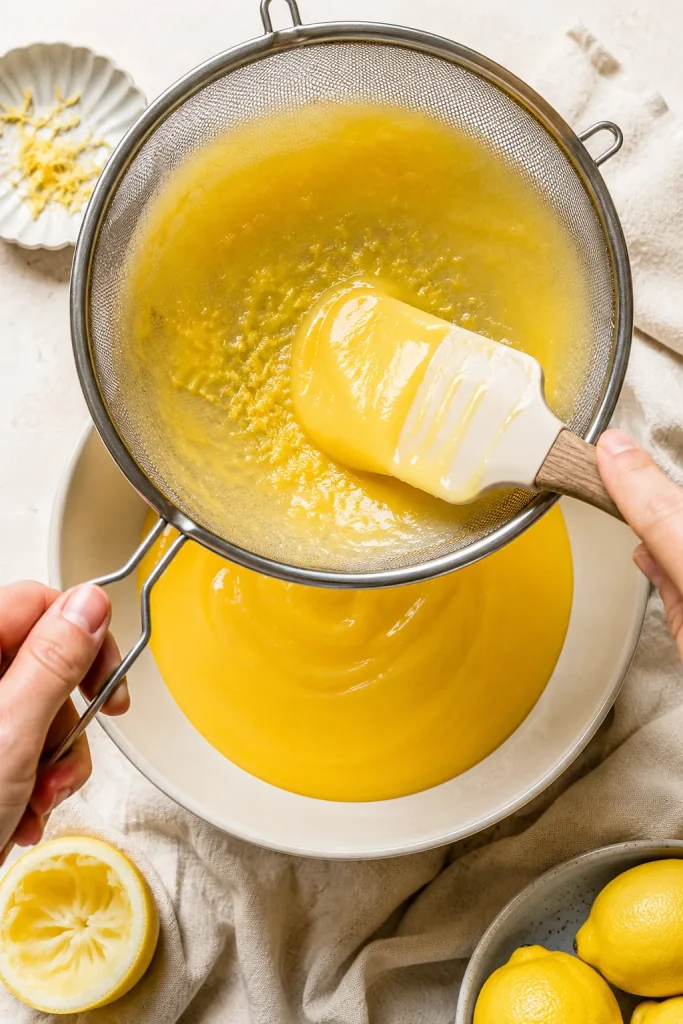
Pour the warm curd through a fine mesh sieve into a clean heatproof bowl or jar. The sieve is your safety net: it catches zest, tiny egg bits, and any uneven texture so the finished batch still tastes silky.

Texture cue: Straining while warm catches zest and tiny cooked bits before the curd goes into jars.

Warm lemon curd being pushed through a fine mesh sieve into a bowl, with small bits caught in the sieve.
The sieve is final texture insurance, catching zest and tiny cooked bits before the curd goes into cakes, tarts, or jars.

8. Cover and Chill

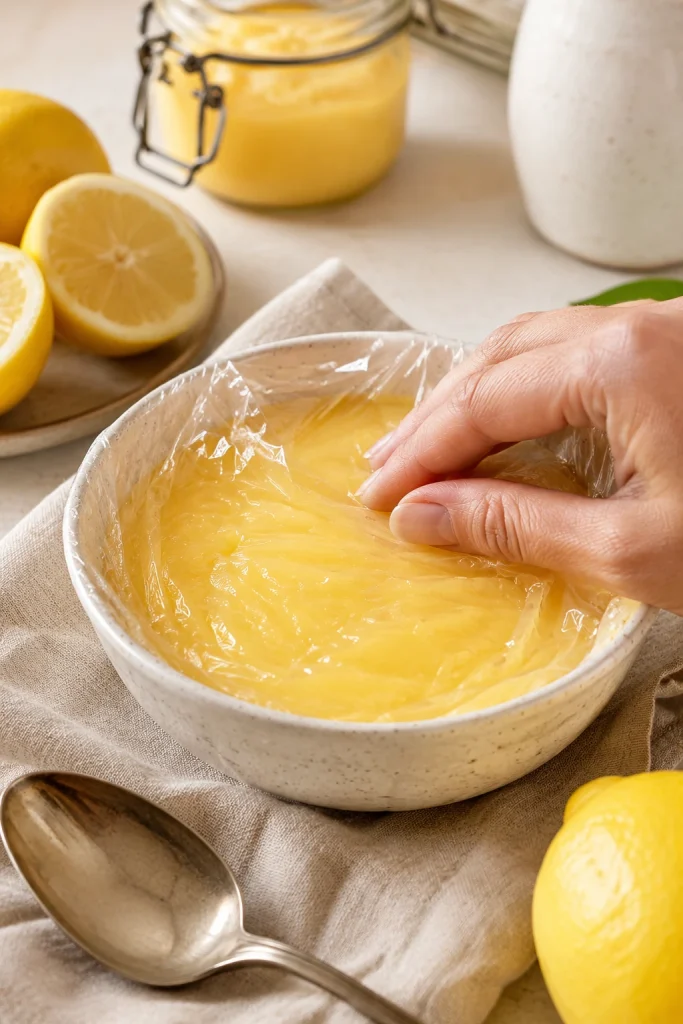
Press parchment or plastic wrap directly against the surface so a skin does not form. Chill for at least 2 hours before judging the final thickness.

Visual cue: The cover should touch the surface so a skin does not form as the curd cools.

Fresh lemon curd in a bowl covered with plastic wrap pressed directly against the surface.
Protect the surface while it cools; direct contact keeps the top smooth, especially when the curd will be used as a filling or topping.

How to Know It Is Done

Doneness is the part that makes lemon curd feel risky. Look for texture first: it should coat a spoon, fall in a thick ribbon, and move like warm loose pudding when you tilt the pan.

Doneness cueWhat to look for
Spoon testIt coats the back of a spoon and holds a clean line when you run a finger through it.
Whisk trailThe whisk briefly leaves trails before the mixture settles back in.
TextureGlossy, slightly heavier on the whisk, and no longer watery.
TemperatureAbout 170°F / 77°C for smooth curd; up to 175°F / 79–80°C for thicker curd.
After chillingIt mounds softly before slowly relaxing.

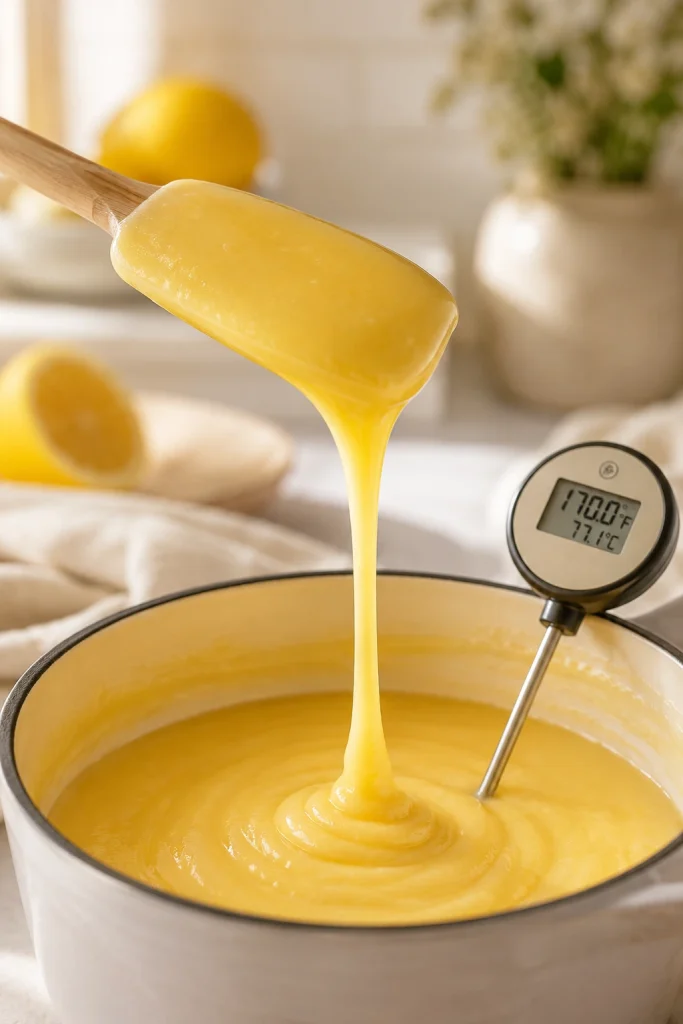
How to use temperature with texture

Thick lemon curd falling in a ribbon from a spatula while a thermometer in the curd reads about 170 degrees Fahrenheit.
Pair temperature with texture: near 170°F is helpful, but the curd should also fall in a slow, glossy ribbon.

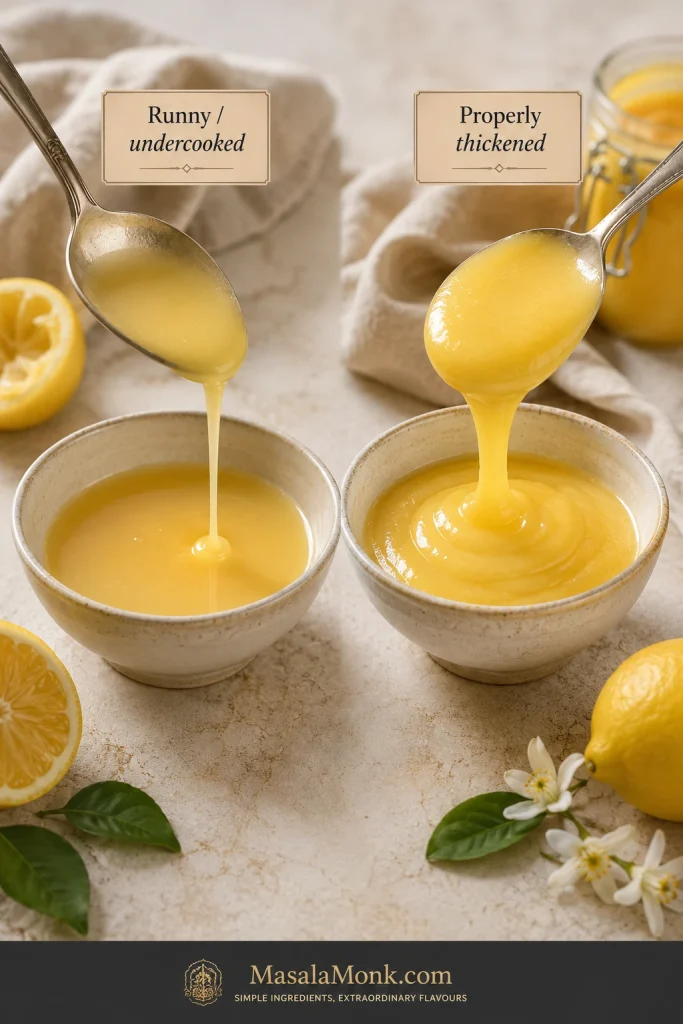
Underdone curd looks shiny but thin and slips off the spoon quickly. Overheated curd may bubble hard, smell eggy, or show tiny cooked-egg specks.

How to tell runny curd from thick curd

A comparison of runny undercooked lemon curd and properly thickened lemon curd dripping from spoons into bowls.
If lemon curd seems runny, watch how it moves: thin curd races off the spoon, while properly cooked curd drops slowly and settles into soft folds.

This is the point where many people stop too early. Give it the extra minute it needs, but keep the heat gentle.

7 Rules That Prevent Lemon Curd Failure

  • Keep the heat gentle; high heat can scramble the eggs before the mixture thickens.
  • Do not let it boil. Hard bubbling is a sign to lower the heat.
  • Measure the lemon juice so the balance stays right.
  • Trust texture as much as temperature.
  • Let the refrigerator finish the set before judging thickness.
  • Use a thin layer inside a frosting dam for cakes.
  • Treat homemade curd as a refrigerator recipe, not a shelf-stable preserve.

Not sure where the curd is going? Match thickness to use · use it in cake · fix runny or lumpy curd

Once the curd is cooked and chilled, the next question is where it is going. Cakes, tarts, cookies, and spoonable desserts all need slightly different handling.

How Thick Should Lemon Curd Be?

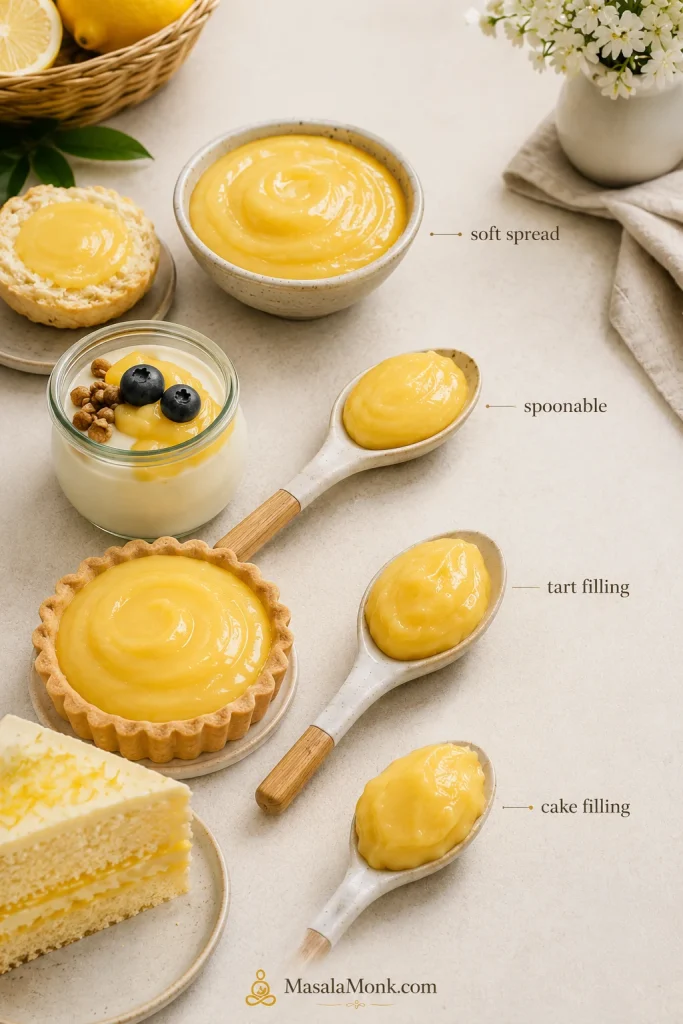
Warm lemon curd is ready when it coats a spoon and looks glossy; after chilling, it thickens into a soft mound. Before you judge the batch, decide where it is going: a soft curd is perfect for toast, scones, and yogurt, while cakes, tart shells, cookies, and clean slices need a curd that sets thicker after chilling.

Which lemon curd texture works for which use

A lemon curd texture guide showing soft spread, spoonable topping, tart filling, and cake filling textures with bowls, spoons, and dessert examples.
The right lemon curd texture depends on the job: looser for spreading, spoonable for toppings, thicker for tarts, and cold and stable for cake filling.
UseBest textureWhat to do
Toast, scones, pancakesSoft and spreadableThe standard recipe works well once chilled.
Yogurt or ice creamGlossy and spoonableStir before spooning over.
Tart shellsSmooth and sliceableCook slightly thicker and strain well.
Mini tartsThick and neatFill once the curd has set.
Cake fillingThick, cold, stableMake ahead, then use inside a frosting dam.
CupcakesSpoonable but not runnyFill only after cupcakes are completely cool.
CookiesThick and jammyA set, spoonable batch works best for thumbprints or sandwich cookies.
Cheesecake toppingSmooth and spreadableStir gently before spreading.

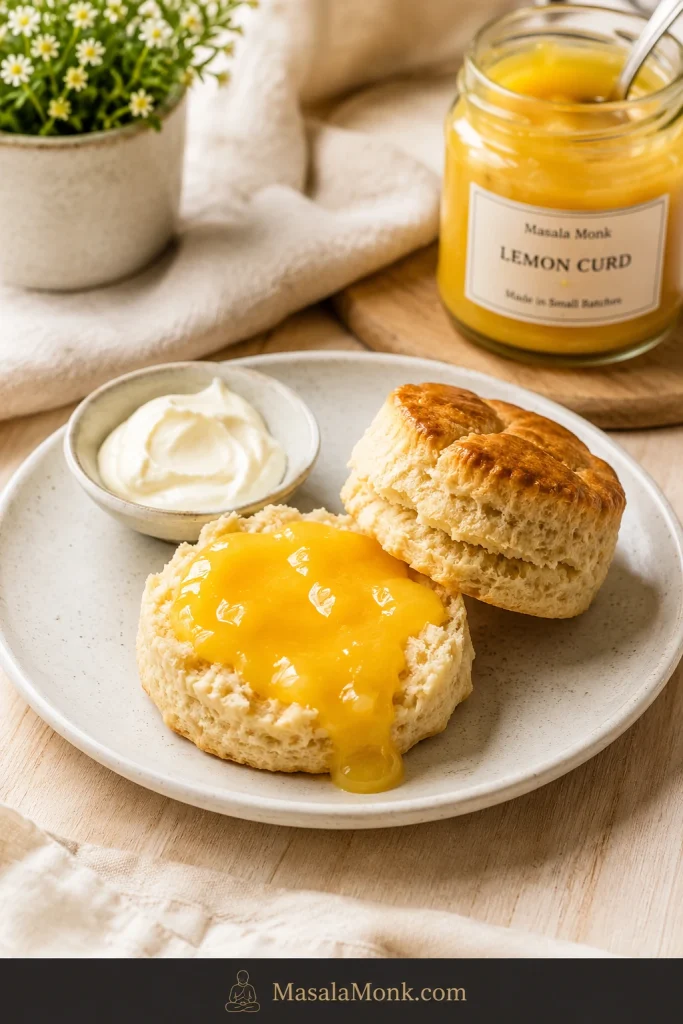
For a classic tea-table pairing, a soft spoonful belongs beside easy English scones, where the tender crumb gives the tart filling somewhere to settle without turning heavy.

Visual cue: A softer lemon curd is ideal for scones, toast, pancakes, and yogurt.

A split English scone topped with soft lemon curd, with cream and a jar of curd nearby.
On scones and toast, softness is a strength; this spreadable lemon curd gives bright flavor without needing the firmness required for tarts or cake layers.

Choose your dessert path: cake filling · tarts and mini tarts · cheesecake, cookies, and quick desserts

Lemon Curd Cake Filling

Cake is where lemon curd needs the most boundaries. Spread thinly, it is beautiful. Treated like frosting, it can slide.

Yes, lemon curd works as cake filling when it is fully chilled, spread thinly, and held inside a frosting dam.

This curd works well with vanilla cake, lemon cake, coconut cake, almond cake, sponge cake, white chocolate frosting, cream cheese frosting, or buttercream frosting. The rule is simple: keep it cold, keep the layer thin, and keep it inside the frosting border.

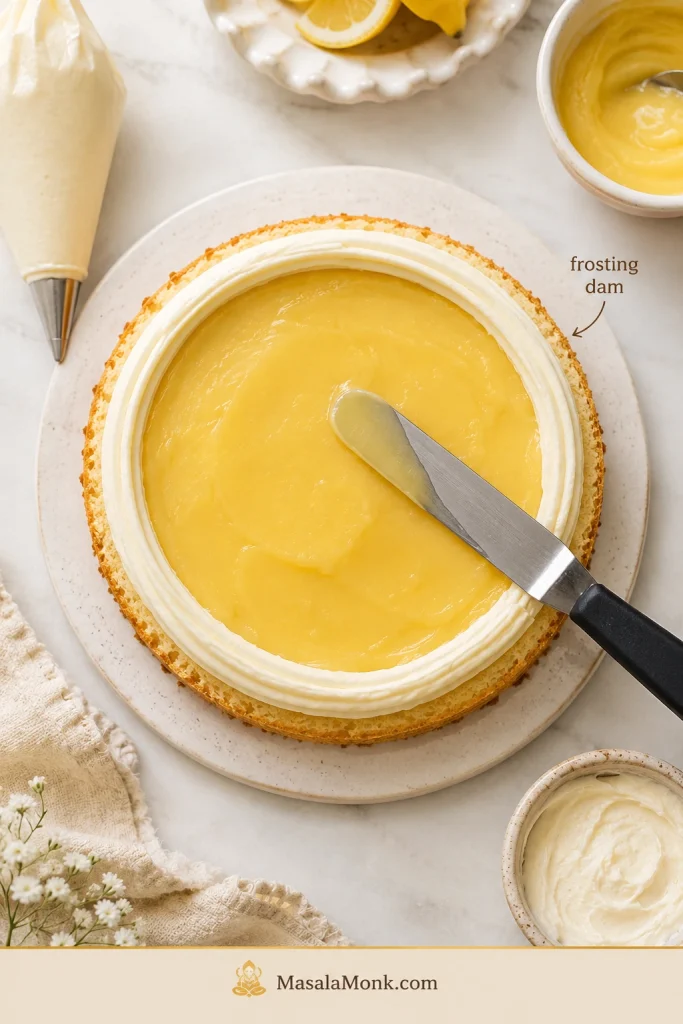
Pipe a ring of buttercream, cream cheese frosting, or whipped ganache around the edge of the cake layer. Spread the curd inside that border. This keeps the filling from squeezing out when the cake is stacked.

How to hold lemon curd inside cake layers

A cake layer filled with lemon curd inside a piped frosting dam, with an offset spatula smoothing the curd.
Inside a layer cake, remember the visual rule: frosting around the edge, curd inside the border, and only a thin layer between cake layers.

If the cake has more than two layers, soft frosting, warm weather, or a long travel time, treat lemon curd as a flavor layer, not the structural filling. When lemon needs to be the main support in a tall cake, use a dedicated lemon filling instead.

How Much to Use in Cake

Cake sizeApproximate amount per filling layerNote
6-inch cake1/4 to 1/3 cupUse a thin layer inside a frosting dam.
8-inch cake1/3 to 1/2 cupKeep the layer even and away from the edge.
9-inch cakeAbout 1/2 cupBest with a sturdy frosting border.
Cupcakes1 to 2 teaspoons eachFill only after the cupcakes are fully cool.

These amounts are guides, not strict rules. Softer cakes and softer frostings need a thinner layer.

Visual cue: In cake, a thin chilled layer gives flavor without making slices slide.

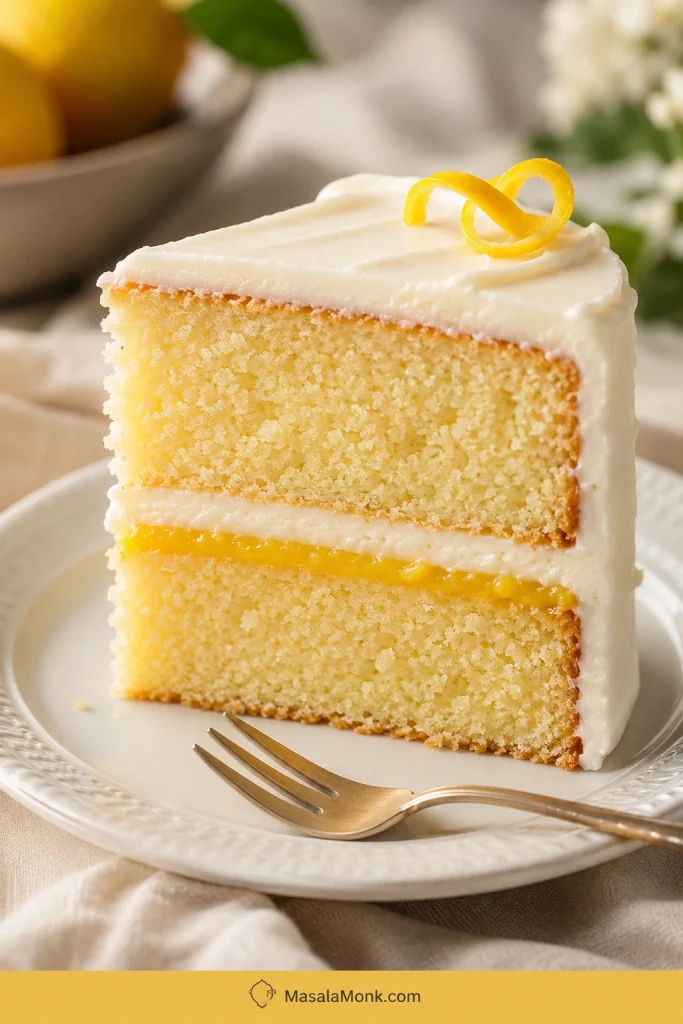
A slice of layer cake with white frosting and a thin yellow lemon curd layer between the cake layers.
A clean cake slice shows why restraint matters: a thin chilled layer adds lemon flavor while cake and frosting keep the structure.

Lemon Curd vs Lemon Filling

Lemon curd is a buttery egg-thickened lemon custard; lemon filling is usually thicker, more stable, and often starch-thickened. The difference matters most when you need structure.

If you need a pipeable filling, a tall cake filling, or a dessert that must sit out longer, choose a starch-stabilized lemon filling instead of classic curd.

NeedBetter choiceWhy
Toast, scones, yogurt, pancakesLemon curdSoft, glossy, and spreadable
Tart shellsThicker lemon curdBright flavor with a smooth, sliceable texture
CupcakesChilled curd or lemon fillingBoth can work if the texture is thick enough
Layer cakeThick curd inside a frosting damWorks when used cold and not overfilled
Tall celebration cakeStable lemon fillingBetter structure for height and clean slices
Warm-weather cakeStable lemon fillingLess likely to soften or slide
Pipeable bakery-style fillingLemon fillingUsually thicker and more controlled

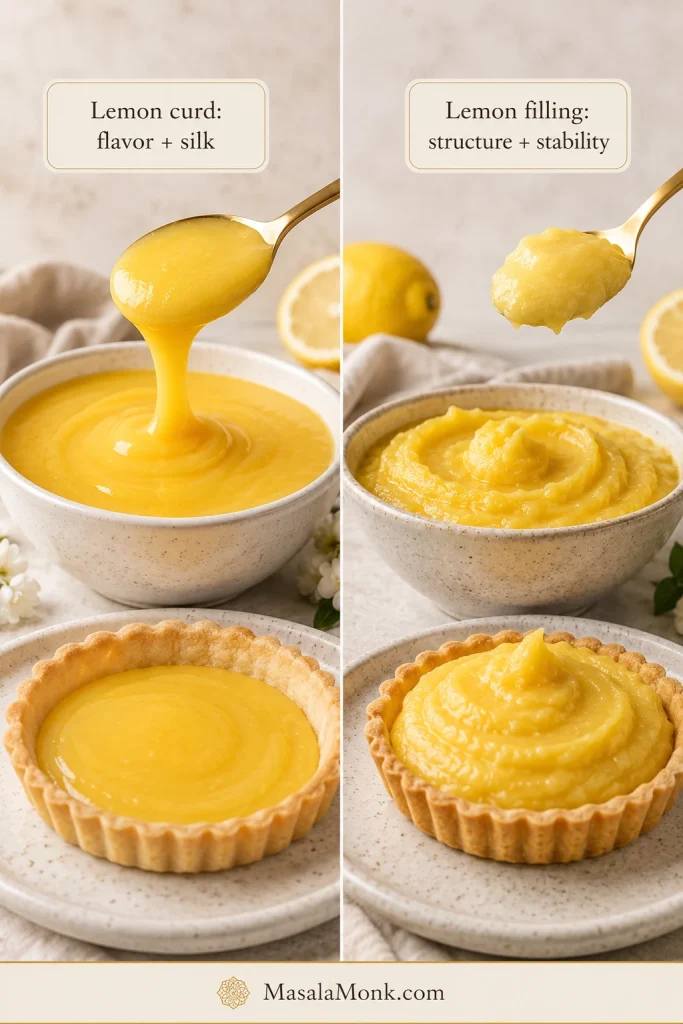
When to use curd and when to use filling

A side-by-side guide comparing smooth lemon curd with thicker lemon filling in bowls and tart shells.
Choose by function: lemon curd brings buttery brightness, while lemon filling is better when height, travel, or sharp slices matter.

Think of curd as flavor and silk; think of filling as structure. In a simple home cake, chilled curd can work beautifully inside a frosting dam. For a tall cake, wedding-style cake, or dessert that needs very sharp slices, use a dedicated lemon filling instead.

Using It in Tarts and Mini Tarts

Lemon curd is excellent in tart shells because it gives you a bright, creamy filling without making a separate pastry cream. Strain it well for the glossiest finish.

Start with fully baked and fully cooled tart shells. Fill them while the curd is cooled but still spreadable, or spoon in chilled curd and smooth the top with an offset spatula.

Mini tarts work best once the filling has set because it spoons or pipes more neatly. For a tart that slices cleanly, cook the curd slightly thicker and chill the filled tart before serving.

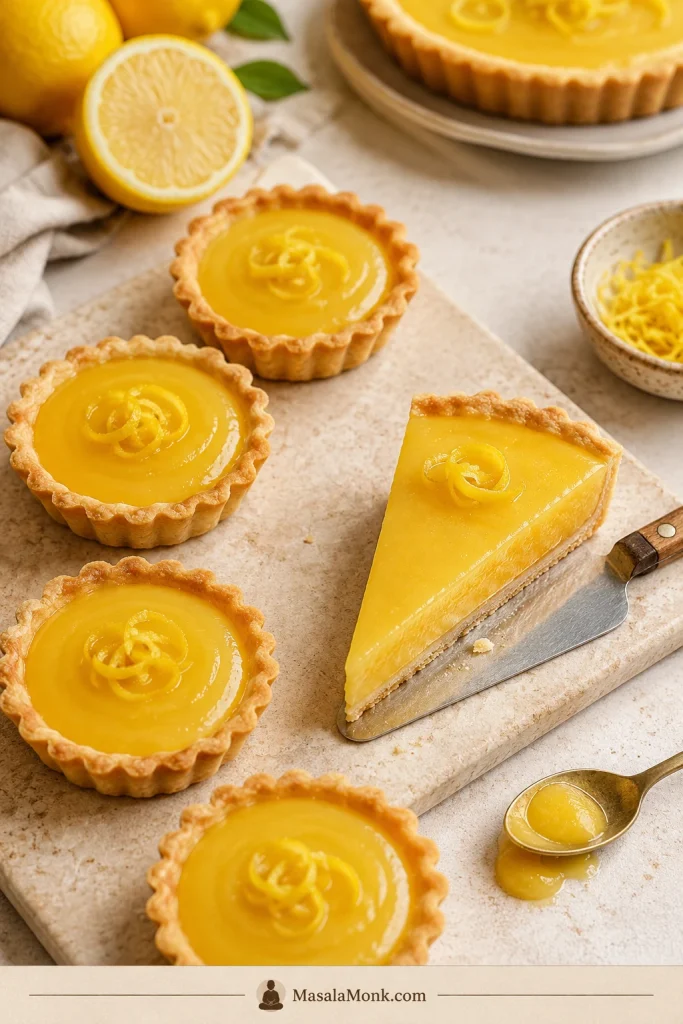
Visual cue: A slightly thicker, fully chilled curd gives cleaner tart tops and slices.

Mini lemon curd tarts and a clean slice of lemon tart with glossy yellow filling on a light stone surface.
In lemon tarts and mini tarts, the curd needs more set than a breakfast spread; that thicker chill gives neat tops and cleaner slices.

If you are comfortable with simple tart assembly, the same crisp-base thinking appears in this apple tart recipe: keep the pastry base crisp, the filling controlled, and the final texture clean.

Pie, Cheesecake, Cookies and Desserts

Once the texture is right, lemon curd can become a layer, topping, swirl, filling, or quick dessert shortcut.

Pie

Use lemon curd as a tart-sweet layer in cream pies, no-bake pies, or layered desserts. It works beautifully as a flavor layer, but a classic lemon meringue pie usually needs a dedicated pie filling because it has to slice cleanly and hold under meringue.

Cheesecake

Spread it over cheesecake as a topping, swirl it lightly into the filling, or use it as a thin layer between cheesecake and whipped cream. It works especially well with a no bake cheesecake, where the bright curd cuts through the creamy filling and keeps each bite from feeling too heavy.

Cookies

For thumbprint cookies, sandwich cookies, or shortbread cookies, use a thicker batch. Filled cookies look cleanest when the curd is added after baking unless the cookie recipe is designed to bake with a filling. For a gluten-free cookie base, almond flour cookies are a natural direction because their tender, nutty texture pairs well with sharp lemon.

Quick Desserts

Spoon it into yogurt parfaits, fold a little into homemade whipped cream, layer it with crushed cookies, drizzle it over pound cake, or serve it with pavlova and berries. A small amount adds brightness, creaminess, and that sharp lemon finish.

What to Make With Lemon Curd

Once the jar is chilled, it becomes a shortcut to brightness: breakfast, cake, cream, cookies, and simple desserts all get a sharper finish.

CategoryIdeas
BreakfastToast, scones, pancakes, waffles, yogurt, crepes
CakesLayer cake, lemon cake, vanilla cake, cupcakes, loaf cake, sponge cake
Tarts and piesMini tarts, tart shells, lemon tart, cream pie layers
CookiesThumbprint cookies, sandwich cookies, shortbread bars
No-bake dessertsParfaits, cheesecake topping, whipped cream layers, ice cream topping
Plated dessertsPavlova, pound cake, angel food cake, crepes, meringues

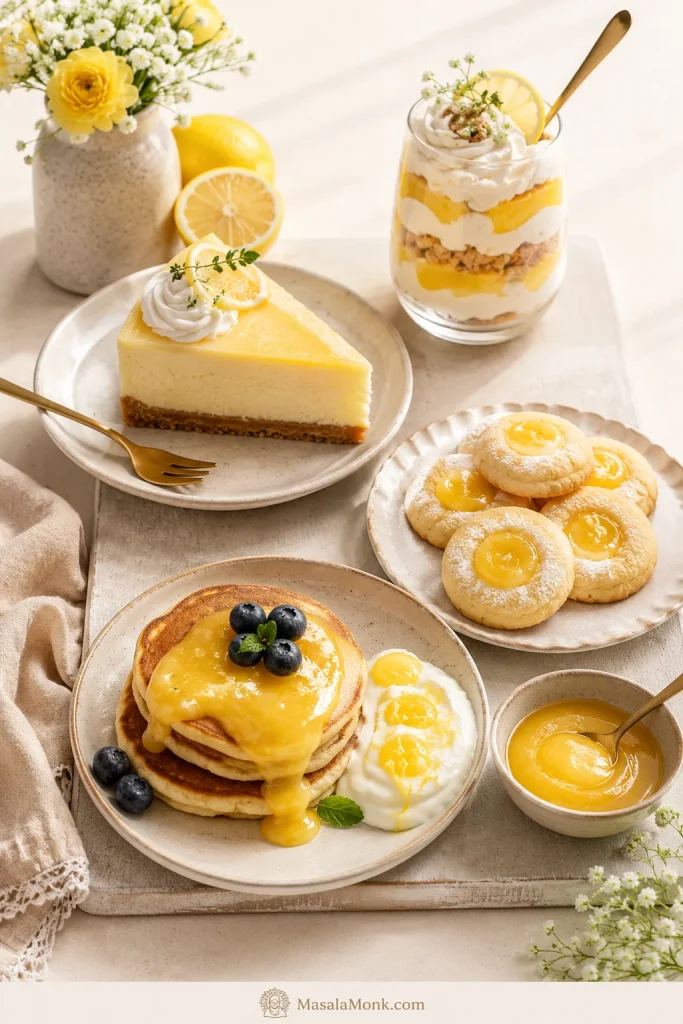
Visual cue: One chilled jar can brighten cheesecakes, cookies, parfaits, pancakes, yogurt, and whipped cream.

Lemon curd served with cheesecake, thumbprint cookies, a whipped cream parfait, pancakes, and yogurt.
Once chilled, one jar can work across desserts: sharpen cheesecake, fill cookies, layer parfaits, brighten pancakes, swirl yogurt, or lift whipped cream.

For a fruit-and-cream dessert, borrow the same assemble-at-serving idea used in classic strawberry shortcake: keep the base, fruit, cream, and curd separate until the last minute so nothing turns soggy.

With breakfast, a spoonful of chilled curd is excellent over almond flour pancakes, especially when you want something brighter than syrup.

Microwave Lemon Curd Shortcut

The stovetop method gives the best control, especially the first time you make lemon curd. The microwave can work for a quick small batch, but it asks for patience in short bursts.

Microwave timing varies by wattage, so texture matters more than exact minutes. Use the spoon test instead of trusting the clock alone.

  1. Start with a large microwave-safe glass bowl because the mixture can rise as it heats.
  2. Whisk the lemon juice, zest, sugar, eggs, and salt together until smooth.
  3. Microwave in 30-second bursts, whisking well after each burst.
  4. Once the mixture begins to thicken, switch to 10 to 15-second bursts.
  5. Stop when it coats a spoon. Do not let it boil over or scramble.
  6. Whisk in the butter, strain through a fine mesh sieve, then chill.

The microwave method is fast, but less forgiving because the heat is uneven. For the smoothest, most controlled result, use the stovetop method.

Vegan, Eggless, Dairy-Free and Gluten-Free Notes

Classic lemon curd is made with eggs and butter, so vegan and eggless versions need a different method. They are not just a simple egg swap.

  • Dairy-free: plant-based butter can work, but flavor and texture may change depending on the brand.
  • Eggless: usually needs cornstarch or another thickener to replace the eggs.
  • Vegan: usually uses lemon juice, zest, sugar, plant milk, starch, and plant butter or coconut-based fat.
  • Gluten-free: classic curd is usually naturally gluten-free, but check all ingredients and avoid cross-contact if needed.
  • Sugar-free or keto: needs separate testing because sweeteners behave differently from sugar.

If you need a vegan or egg-free version, choose a recipe designed for that method. The texture, thickening system, and cooking behavior are different from classic curd.

Troubleshooting Lemon Curd

Most lemon curd problems look worse than they are. The fix depends on whether the batch is undercooked, overheated, or simply not chilled yet.

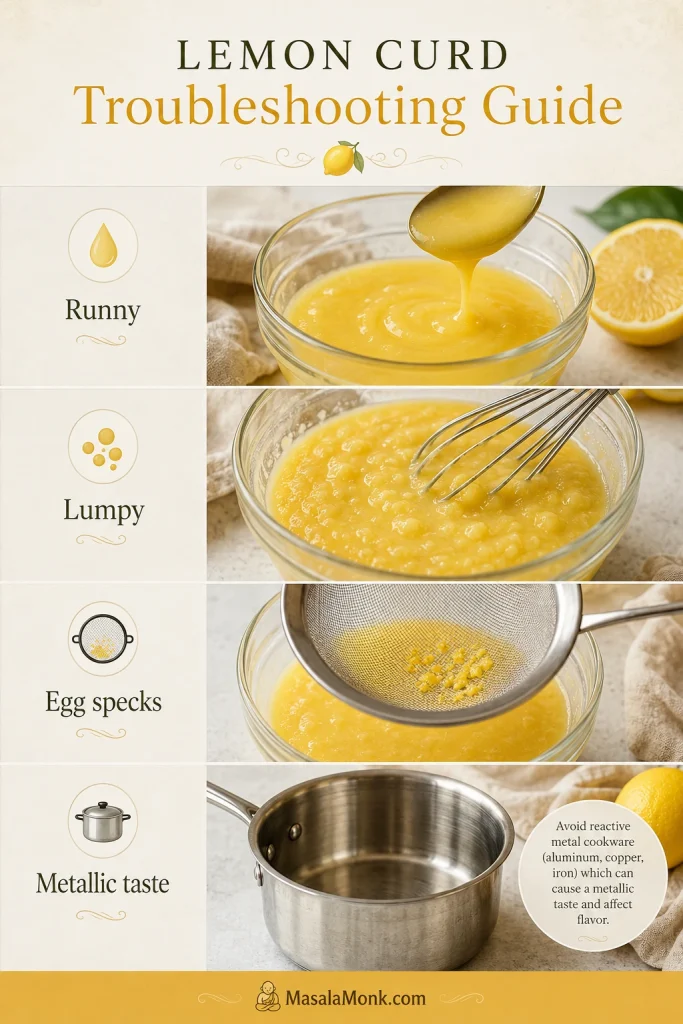
How to diagnose lemon curd problems

A lemon curd troubleshooting guide showing runny curd, lumpy curd, egg specks in a sieve, and a stainless steel pan for avoiding metallic taste.
Most lemon curd problems point back to heat, timing, chilling, or cookware, so diagnose the texture before giving up on the batch.

Fix Texture Problems First

ProblemWhy it happenedWhat to do
Runny curdIt was undercooked or has not chilled long enough.Reheat gently and cook until it coats a spoon or reaches about 170°F / 77°C. Chill fully.
Runny after chillingIt was undercooked, even if it looked slightly thick while warm.Reheat gently, cook to spoon-coating texture, then chill again.
Lumpy textureThe eggs cooked too quickly or the heat was too high.Strain immediately through a fine mesh sieve. Use lower heat next time.
Eggy tasteThe eggs overheated or cooked too aggressively.Strain well. Next time, cook lower and whisk constantly.
Grainy textureThe sugar did not dissolve evenly or the heat was uneven.Rub zest into sugar, whisk well before heating, cook gently, and strain after cooking.
Split curdThe heat was too high or the butter did not emulsify smoothly.Whisk vigorously off heat, then strain. Next time, add butter gradually off heat.

Fix Flavor, Skin, and Cookware Issues

ProblemWhy it happenedWhat to do
Too tartThe lemons were very sharp or the lower sugar amount was used.Use the sweeter sugar amount next time. Serve this batch with cream, yogurt, cake, or meringue.
Too sweetThe lemons were mild or the higher sugar amount was used.Add more zest next time for stronger lemon flavor instead of adding too much extra juice.
Skin on topIt cooled uncovered.Press parchment or plastic wrap directly onto the surface while cooling.
Metallic tasteA reactive pan or bowl may have affected the flavor.Use stainless steel, enamel-coated cookware, or heatproof glass.

Even if the batch is not perfect, do not throw it away too quickly. A slightly thin curd can often be cooked a little longer, and a slightly lumpy one can often be rescued with a sieve.

Batch rescued? Recheck doneness cues · store the finished curd · return to the recipe card

Storage and Freezing

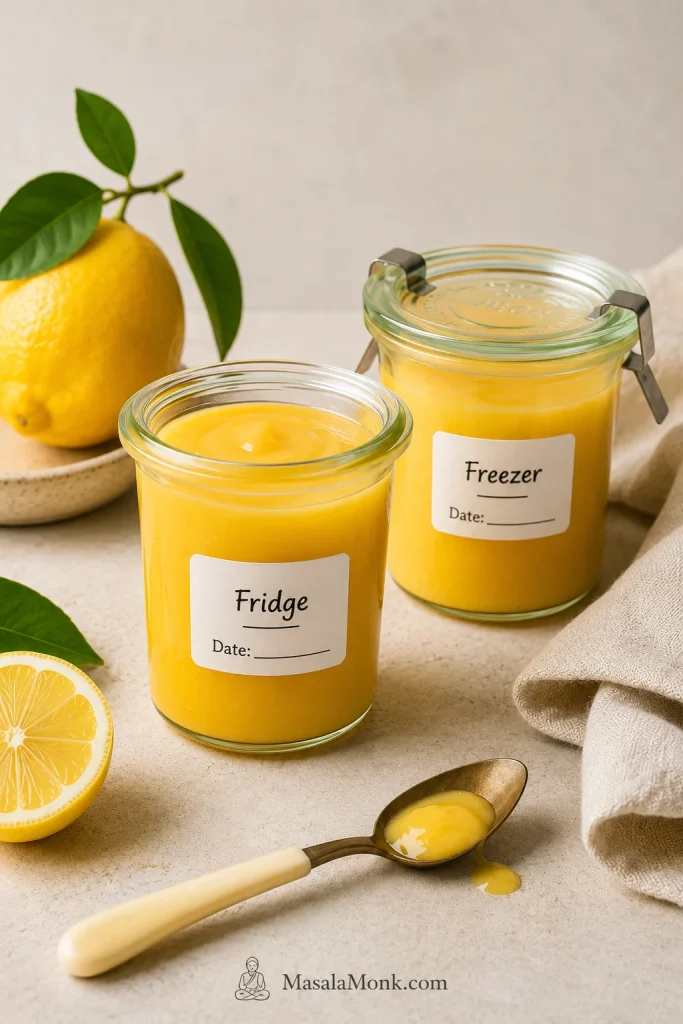
Homemade lemon curd is a refrigerator recipe, not a shelf-stable preserve. Store it in a clean airtight jar or container and keep it chilled.

Think of it like a chilled custard-style spread: clean jar, cold fridge, clean spoon.

How to store lemon curd safely

Two jars of homemade lemon curd labeled fridge and freezer, with blank date lines, a lemon, linen, and a spoon nearby.
Date the jar and keep it cold; homemade lemon curd behaves like a custard-style spread, so clean handling matters as much as flavor.

If you want tested preservation guidance, the National Center for Home Food Preservation has specific lemon curd freezing and canning guidance.

  • Refrigerator: keep for about 1 to 2 weeks, depending on freshness and handling.
  • Freezer: freeze in an airtight freezer-safe container for longer storage.
  • Thawing: thaw overnight in the refrigerator.
  • After thawing: stir gently before using.
  • Serving: always use a clean spoon so the curd stays fresh longer.

Let the curd cool slightly before sealing the jar fully, so condensation does not collect inside. For food-safety storage temperatures, use a refrigerator at 40°F / 4°C or below; FoodSafety.gov’s cold food storage chart uses that same refrigerator temperature benchmark.

Keep it chilled until serving, especially because it contains eggs and butter.

FAQ

Why did my lemon curd turn runny?

It was probably undercooked or not chilled long enough. Reheat gently until it coats a spoon, then chill again.

How do you thicken lemon curd?

Cook it gently until it coats the back of a spoon. For a thicker texture, cook closer to 175°F / 79–80°C without boiling, then chill until fully set.

What temperature should lemon curd reach?

A good target is about 170°F / 77°C. For tarts or cake filling, cook closer to 175°F / 79–80°C without letting it boil.

How many lemons do you need?

Usually 2 to 3 medium lemons for 1/2 cup / 120 ml juice. Zest them before juicing so they are easier to handle.

Do you need a double boiler?

No. A double boiler gives extra protection, but a heavy-bottom saucepan works well with low heat and constant whisking.

Whole eggs or egg yolks: which is better?

Use whole eggs for a lighter curd and yolks for a richer, thicker one. This recipe uses both for a balanced all-purpose texture.

Should lemon curd be strained?

Yes. Straining while warm is the easiest way to remove zest, tiny egg bits, and uneven texture.

How long does homemade lemon curd last?

It usually keeps for about 1 to 2 weeks in the refrigerator in a clean airtight container.

Can you freeze lemon curd?

Yes. Freeze it in an airtight freezer-safe container, thaw overnight in the refrigerator, then stir gently before using.

Is lemon curd the same as lemon filling?

Not always. Lemon curd is buttery and custard-like, while lemon filling is often thicker, more stable, or starch-thickened.

Does lemon curd work as cake filling?

Yes, if it is cold, thick, and used thinly inside a frosting dam. For tall cakes or very clean slices, use a more stable lemon filling.

Why does lemon curd taste metallic?

A metallic taste can come from reactive cookware. Use stainless steel, enamel-coated cookware, or heatproof glass.

Final Tips for Smooth Lemon Curd

  • Zest before juicing.
  • Measure the lemon juice.
  • Rub zest into sugar for stronger lemon flavor.
  • Cook gently and whisk constantly.
  • Stop when it coats a spoon and looks glossy.
  • Use temperature as a guide, not the only test.
  • Strain warm, then chill before using as filling.

Good lemon curd should taste bright, smooth, and alive with lemon. Keep the heat gentle, trust the spoon test, and let the refrigerator finish the texture. Once you know what properly thickened curd looks and feels like, it stops being fussy and becomes one of the easiest ways to make toast, cakes, pancakes, cookies, whipped cream, and simple desserts taste finished.

Make it now: jump back to the recipe card · back to top

Posted on — 2 Comments

Orange Olive Oil Cake- Ridiculously Easy and Super Moist

Orange Olive Oil Cake is one of my favourite desserts. I mean who doesn’t like citrus flavours with a bit of sweetness. It is loaded with bright citrus flavour from orange and super moist texture from olive oil. This cake is so easy to make. It can be served with a sprinkle of powdered sugar or with a simple orange glaze or just as it is. It pairs beautifully with a coffee or espresso, doesn’t require any complicated technique or tools to make it and of course taste absolutely fantastic. 

I also happen to adore this Carrot and Orange Cake and this healthy Wholewheat Jaggery Banana Tea Cake. 

Olive Oil cakes gained an overnight popularity some years back when Kylie Jenner shared it on Instagram. Since then, the whole olive oil cake thing took on a whole life of its own and EVERYONE started baking olive oil cakes. There are tons of recipes on the internet but most of them use a lot of olive oil which makes the flavour too strong and the texture of the cake a bit too greasy. I prefer this recipe as there is a good balance of fat from olive oil and freshness from oranges. 

Does Olive Oil Cake taste like Olive Oil?

Olive oil cakes do not taste like olive oil. Infact it is there just to add richness and moisture to the cake. It gives cakes a wonderfully moist texture and a light, subtle flavour that pairs perfectly with other ingredients like fresh fruit and nuts. It is also a much healthy alternative to store-bought butter as it is rich in antioxidants and packed with good fats. It is great for people avoiding dairy or people who are lactose intolerant. You’ll want to use good quality extra virgin olive for this recipe or else you might just end up with an oily cake.

Ingredients Needed

For this Orange Olive Oil cake, you will need the following ingredients (exact quantities are provided in the recipe with step-by step instructions are below):

Olive oil: Of course! I used cold pressed extra virgin olive oil for this recipe. 

Fresh Unsweetened Orange Juice and Orange Zest: Fresh juice is always better than canned ones. It tastes better and is definitely a much healthier option than store-bought ones. You can use any orange.

Flour: I used a mix of wholewheat flour and all purpose flour. You can bake it with just all purpose flour alone or with just whole wheat flour. I have tried this cake with just wholewheat flour. The taste is excellent but it is slightly denser than the one with all purpose flour. So, I chose a mid way and went with half and half. 

Vanilla extract: Go for pure vanilla extract and not the essence. It tastes much better while the latter gives a very synthetic like flavour. 

Baking Soda and Baking Powder: These are leavening agents and must be used. Do not use baking soda or powder that is older than 1 year. 

Castor Sugar: You can also bake this cake with unprocessed sugar like palm sugar or coconut sugar. But do remember that this will alter the taste a bit because palm sugar does have an earthy and a rustic taste. I prefer white castor sugar for this recipe. 

Salt: Salt balances and accentuates the sweetness of the cake

Eggs: Eggs bring in that much needed texture, lightness and fluffiness. However, if you do not want to use eggs then substitute 1 egg with flaxmeal. 1 tsp ground roasted flaxseeds in 4 tbsps water. Let it sit for 10 minutes. Use this mixture in place of egg or use 1/4th cup of Greek yogurt for 1 egg. So, if the recipe calls for 2 eggs, then you will need half a cup or Greek yogurt. 

Cornstarch: This helps reduce the protein content in the flour, making the cake more tender. In some countries it is called cornflour.

Now, let’s see the full recipe 

Recipe

Ingredients: cup measurements 250 grams

Wet Ingredients 

  1. Olive Oil: 1/4th cup
  2. Orange Juice: 125 ml
  3. Sugar: 1/3rd cup (I do not like too sweet cakes. You can use 1/2 cup sugar if prefer sweeter 
  4. Eggs 2 large
  5. Vanilla Extract: 1/2 tsp
  6. Orange Zest: 1 tbsp

Dry Ingredients

  1. Wholewheat flour: 1/2 cup
  2. All Purpose Flour: 1/2 cup
  3. Salt: 1/4th tsp
  4. Baking Soda: 1/2 tsp
  5. Baking Powder: 1/2 tsp
  6. Cornstarch: 1 tbsp

Instructions 

  • Pre-heat oven to 180 C and line a 6” round pan with a parchment paper.
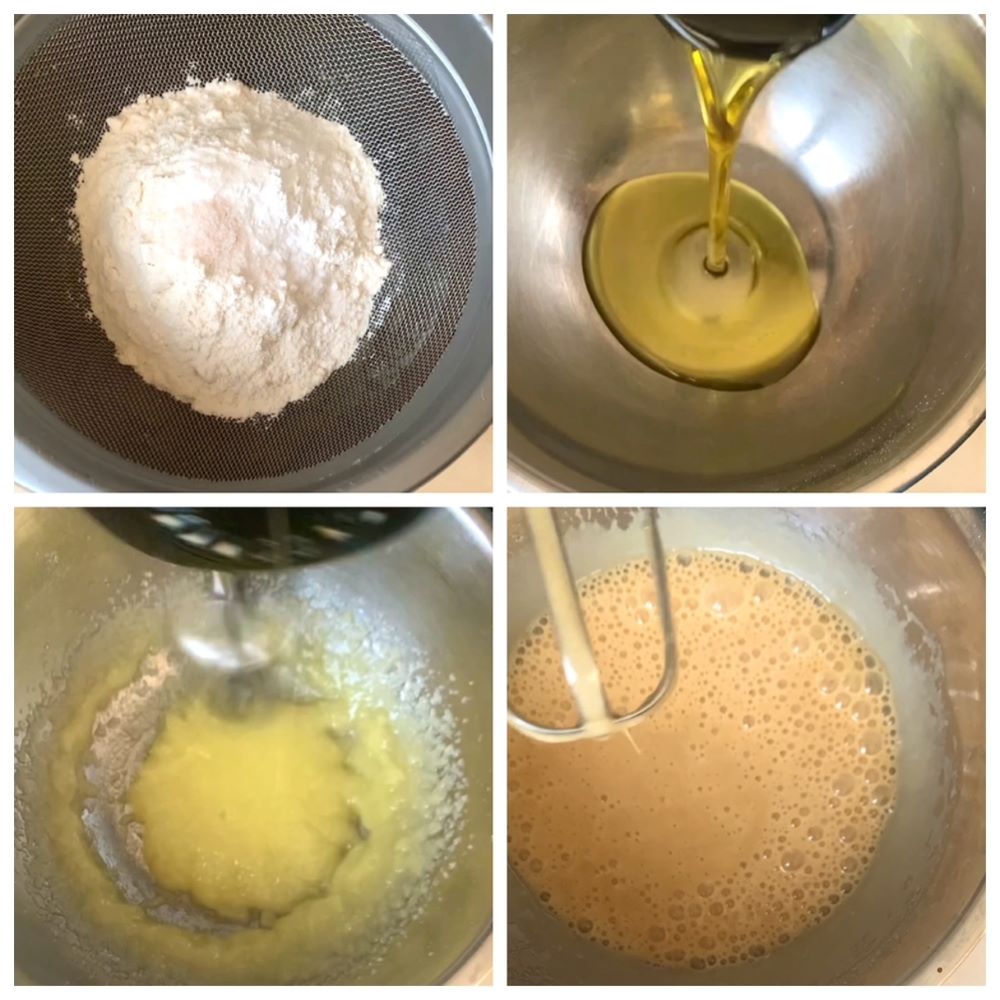
  • In a large bowl add olive oil and castor sugar. Whisk till well combined. Then add eggs one by one and whisk till it becomes foamy. 
  • Now add vanilla extract and whisk again for a minute. 
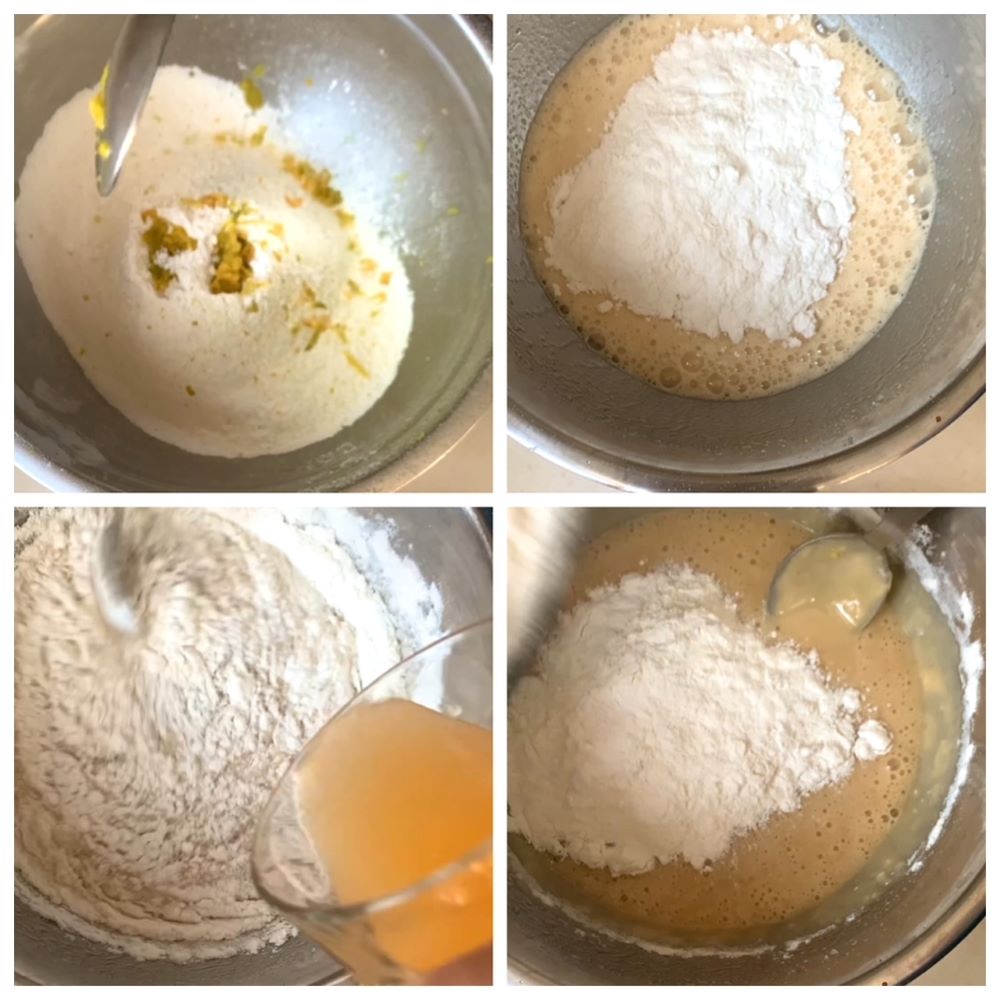
  • Sift in all the dry ingredients in a pan. Add orange zest and mix until well combined. 
  • Now add dry ingredients to wet ingredients in batches. Keep alternating between dry ingredients and orange juice. Add one batch of dry ingredients followed by little orange juice and then gently fold till combined. Keep repeating till all the dry ingredients are used up and the batter is well combined. Do not over mix the batter. 
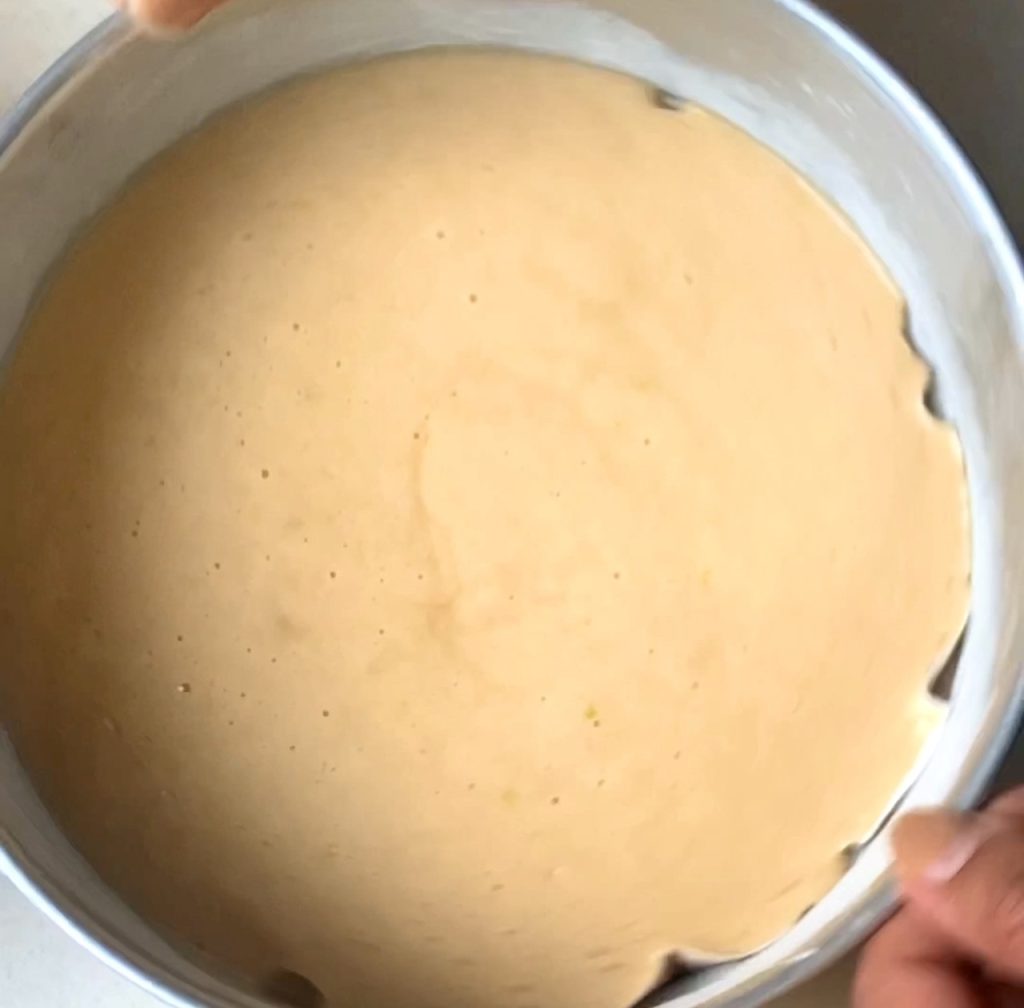
  • Pour the batter into a prepared pan. Tap on the counter 2 or 3 times to clear air pockets. 
  • Bake in the preheated oven for 40 minutes or till toothpick inserted at the centre comes out clean with moist crumbs attached. 
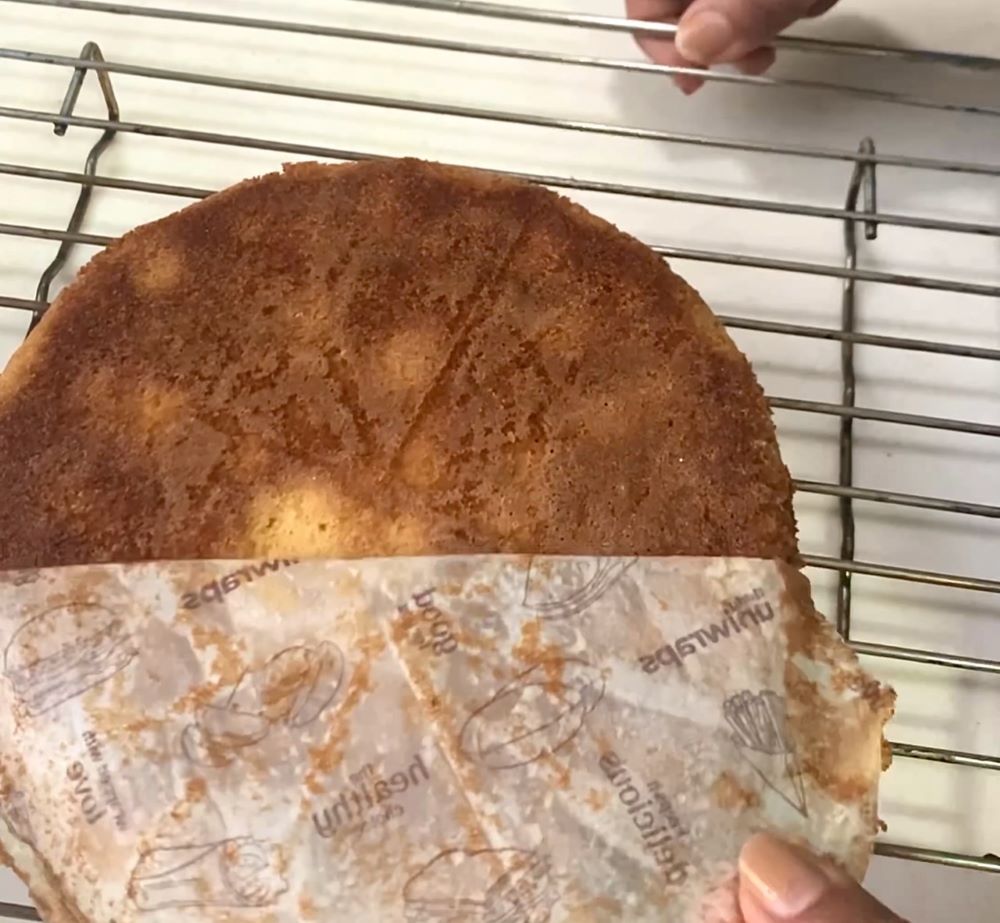
  • Allow it to cool in the pan for 10 minutes then demould by running a knife along the edges. The cake will come out smoothly. 
  • Allow it to cool completely on wire rack before dusting it with powdered sugar or glazing it. 
  • Note: This cake stays fresh at room temperature for 2 days. Wrap it with butter paper and store it in a container with a lid.

Do give this recipe a shot. You do not need another orange cake recipe after this one, I promise. If you try this recipe, do give us a shout out. Just click a picture and tag us on @masala.monk or use the hashtag #MasalaMonkRecipe and share on Instagram and Facebook. We would love to hear from you. 🙂