Posted on Leave a comment

Crab Cake Recipe: Easy Lump Crab Cakes With Little Filler

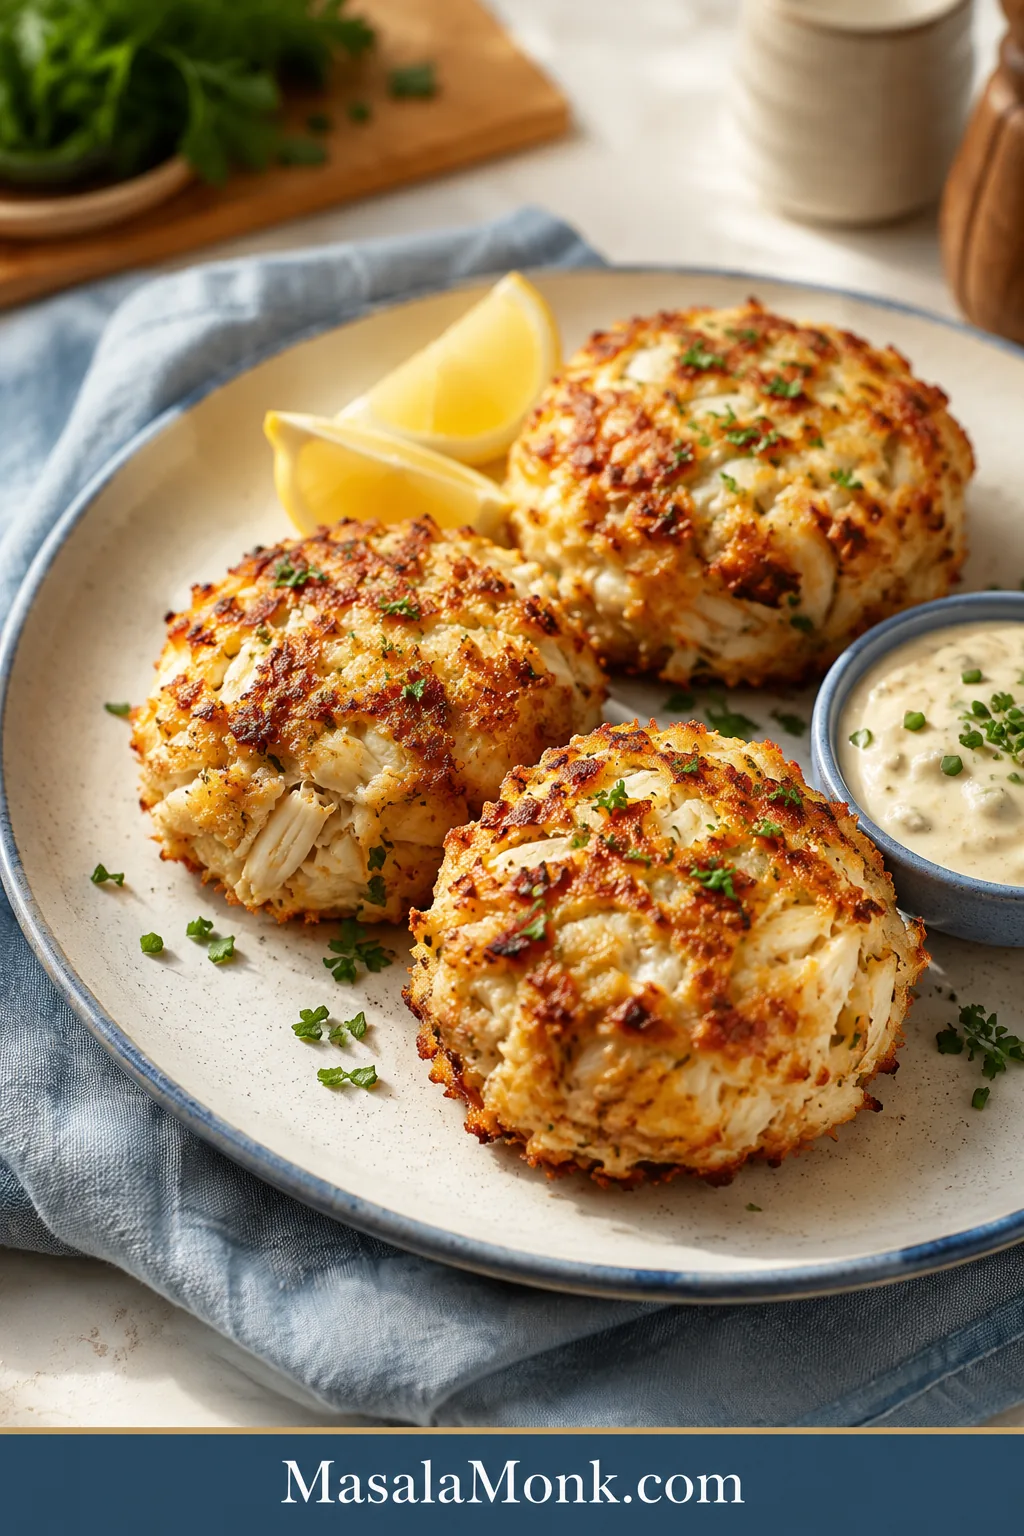
Golden lump crab cakes on a cream plate with lemon wedges, herb garnish, and creamy dipping sauce.

Crab cakes should feel generous, not stressful. When you buy good crab, the last thing you want is a bready patty, a dry center, or a cake that falls apart the second you flip it. This recipe protects what matters most: 1 lb / 454g lump crab, just enough mayo-egg binder, a small amount of panko or crushed saltines, and a proper chill so the cakes hold together without losing their sweet crab texture.

The goal is simple: big crab flavor, little filler, crisp edges, and no first-flip panic. The win is a cake that lifts cleanly from the pan, cracks lightly at the edge, and still tastes warm, tender, and unmistakably like crab in the center.

Pan-frying gives the deepest golden crust, but the same crab cake mixture can also be baked, air-fried, or seared and finished in the oven. Choose the method that fits the meal, then let the ratio, chill time, and visual cues do the work.

Quick Answer: How to Make Crab Cakes That Hold Together

For reliable crab cakes, use 1 lb / 454g lump crab meat, 1 egg, 1/4 cup / 60g mayonnaise, Dijon, Worcestershire, lemon juice, Old Bay, herbs, and a small amount of panko or crushed saltines. For every pound of crab, use 1/2 cup / 30–40g panko or 2/3 cup / 41g crushed saltines. That is enough filler to help the cakes hold together without turning them bready.

Fold gently, shape into 6 thick cakes, chill for 30–60 minutes, then pan-fry for 3–4 minutes per side until crisp and golden. To keep crab cakes from falling apart, drain the crab well, use just enough binder and crumbs, chill the shaped cakes, and wait until the first side is golden before flipping.

The method is simple on purpose: protect the crab, bind only as much as needed, chill before cooking, and let the crust form before you move the cakes. That is the difference between a crab cake that tastes like crab and one that needs too much filler just to survive the pan.
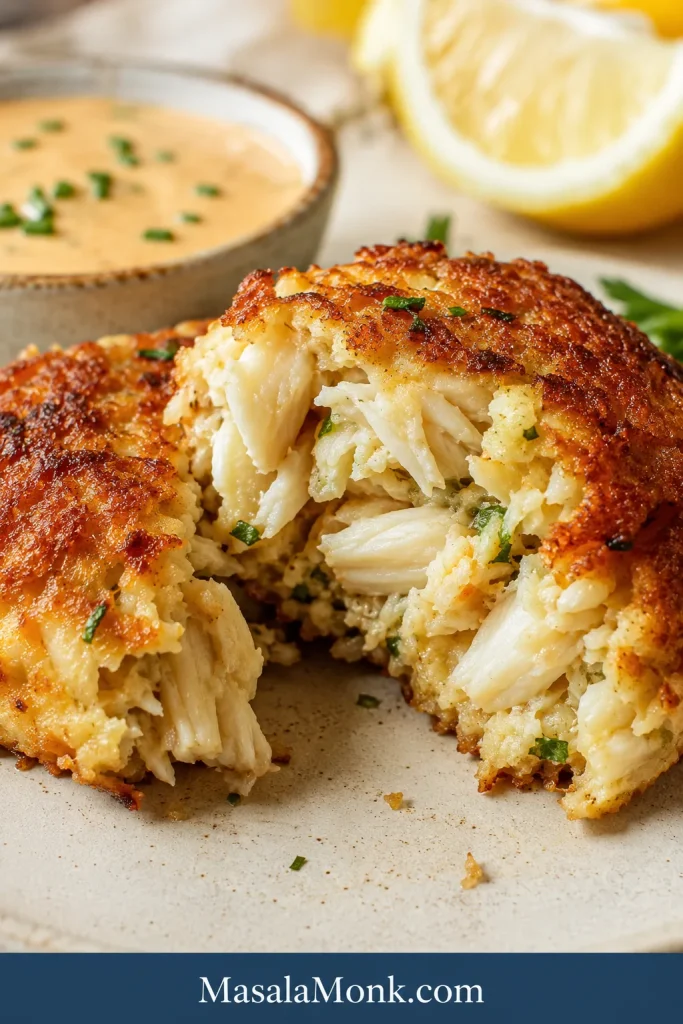
Split-open lump crab cake showing a crab-heavy interior with little filler and a crisp golden crust.
Breaking one open shows the real goal here: big crab pieces, a soft center, and just enough binder to hold the cake together.

The Few Details That Make Crab Cakes Work

If you remember only a few things, remember these: keep the crab cold and well-drained, use only enough filler to hold the cakes together, and let the first side brown before you move it.

Crab cake detailBest choiceWhy it matters
Crab meatLump crab; jumbo lump for a splurgeSweet, tender pieces without a bready bite
FillerPanko or crushed saltinesHelps the cakes stay intact without taking over
BinderEgg + mayoSets the cakes and keeps the center moist
Chill time30–60 minutesMakes the cakes easier to lift and flip
Main methodPan-friedGives the crispest golden edges
Easiest methodBakedNo flipping, less stress, better for batches
SauceTartar, remoulade, or lemon aioliAdds brightness without covering the crab

Recipe Card: Easy Crab Cakes With Lump Crab and Little Filler

These homemade crab cakes are crisp outside, tender inside, and packed with lump crab meat. They use little filler, just enough binder, Old Bay, lemon, Dijon, Worcestershire, and herbs for a recipe that still tastes like crab.

Yield6 large crab cakes
Prep time20 minutes
Chill time30–60 minutes
Cook time6–15 minutes, depending on method
Total timeAbout 1 hour to 1 hour 35 minutes
Main methodPan-fried
Other methodsBaked, air fryer, pan-seared with oven finish

Ingredients

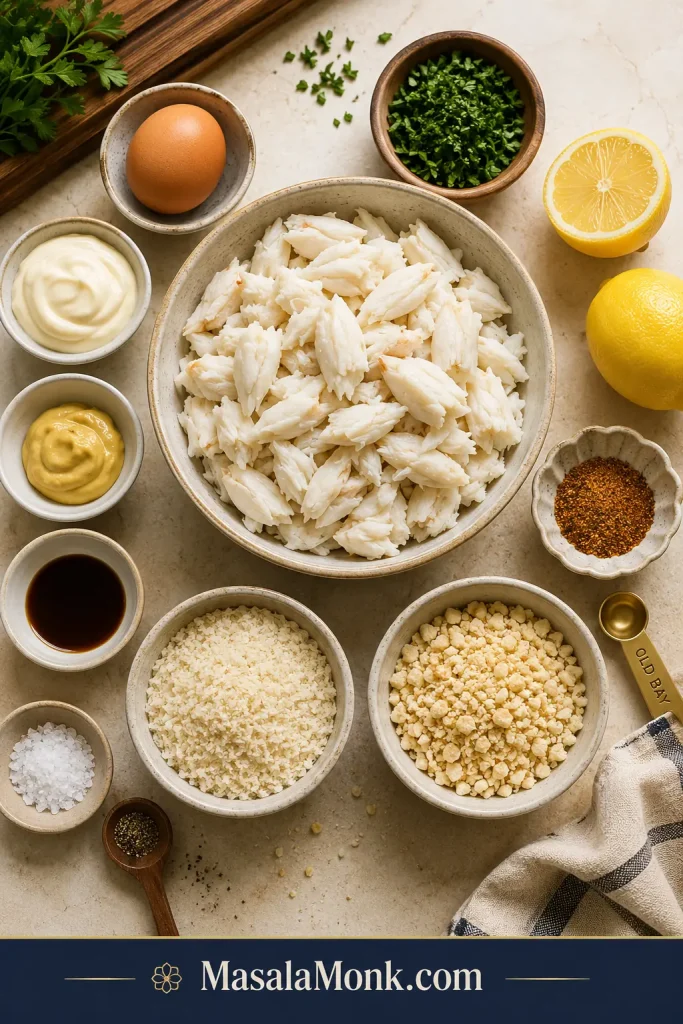
Overhead crab cake ingredient board with lump crab, egg, mayonnaise, lemon, Old Bay, panko, and saltines.
The ingredient list stays short on purpose, because the best crab cake flavor comes from crab, seasoning, and a light hand with crumbs.
  • 1 lb / 454g lump crab meat, picked over for shells
  • 1 large egg
  • 1/4 cup / 60g mayonnaise
  • 2 tsp Dijon mustard
  • 2 tsp / 10ml Worcestershire sauce
  • 1 tbsp / 15ml fresh lemon juice
  • 1 tsp Old Bay seasoning, plus more to taste
  • 1/8 tsp salt, optional
  • 1/4 tsp black pepper
  • 2 tbsp chopped parsley or chives
  • 1/2 cup / 30–40g panko breadcrumbs or 2/3 cup / 41g crushed saltines
  • Neutral oil, for pan-frying
  • Optional: 1 tbsp butter for richer browning or brushing baked crab cakes
  • Lemon wedges, for serving

Quick Remoulade-Style Crab Cake Sauce

This quick crab cake sauce is creamy, tangy, savory, and bright enough to lift the crab without covering it.

Make the sauce while the crab cakes chill, then keep it cold until the cakes are ready to serve.

  • 1/2 cup / 120g mayonnaise
  • 1 tbsp Dijon mustard
  • 1 tbsp / 15ml lemon juice
  • 1 tsp Worcestershire sauce
  • 1 tsp hot sauce
  • 1 tsp chopped capers or pickle relish
  • 1 small garlic clove, grated
  • Pinch of Old Bay or paprika
  • 1 tbsp chopped parsley or chives

Mix everything in a small bowl. The sauce should taste bright before it tastes heavy, because crab cakes are rich and sweet. Adjust with more lemon juice, hot sauce, or Old Bay, then chill until ready to serve.

Instructions

Mix and Shape the Crab Cakes

  1. Check the crab. Place the crab meat in a bowl and gently pick through it for small shell pieces. Try not to break up the larger lumps.
  2. Make the binder. In a large bowl, whisk together the egg, mayonnaise, Dijon mustard, Worcestershire sauce, lemon juice, Old Bay, salt, black pepper, and herbs.
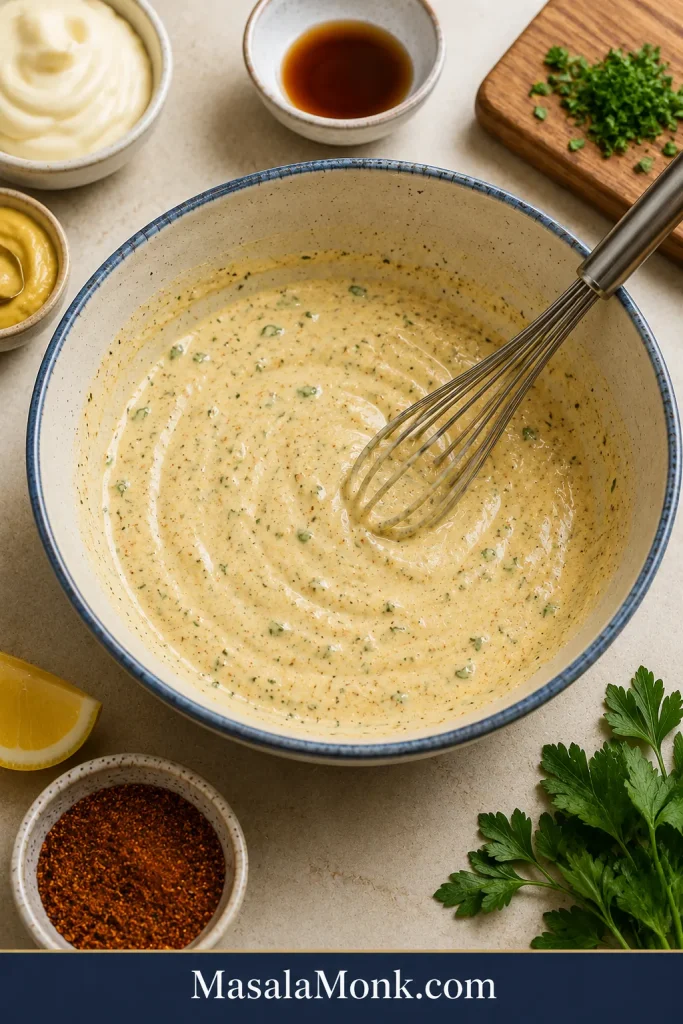
Mixing bowl with crab cake binder made from egg, mayonnaise, Dijon, Worcestershire, lemon, and seasoning.
Mixing the binder first keeps the seasoning even, so the crab stays in beautiful pieces when everything comes together.
  1. Fold in the crab and crumbs. Add the crab meat and panko or crushed saltines. Fold gently with a spatula until the mixture is evenly moistened. It should look loose but scoopable, not smooth or pasty.
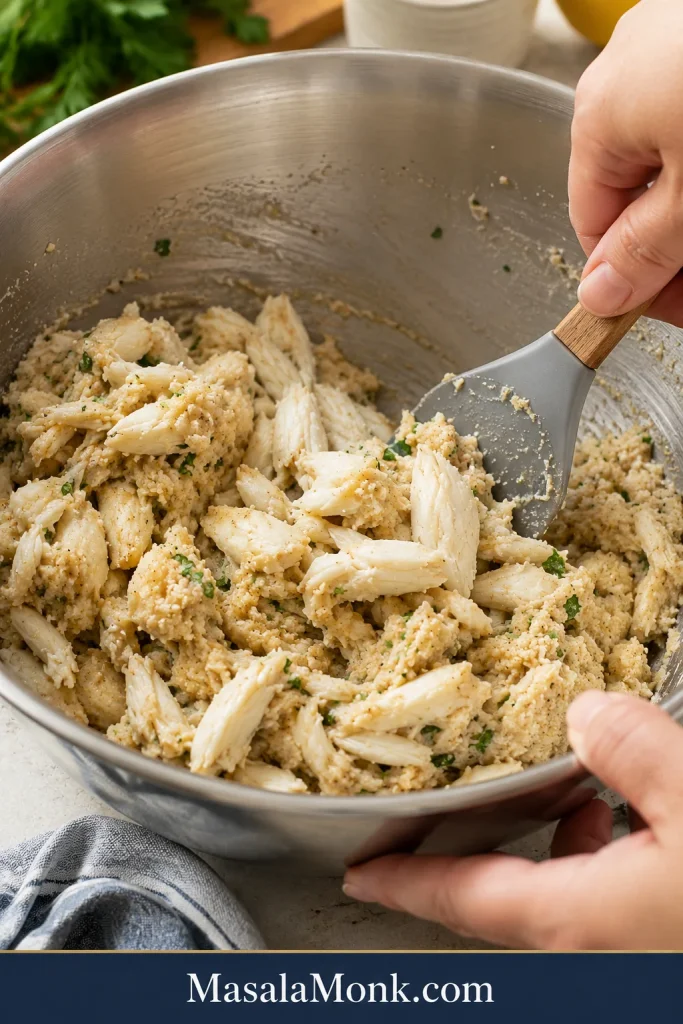
A spatula gently folding lump crab into crab cake mixture in a bowl.
Gentle folding protects the lump crab, which is why this step matters so much in a little-filler crab cake.
  1. Cook a tiny test cake if needed. If you are unsure about salt or seasoning, cook one small spoonful of the mixture first. Adjust gently before shaping the full batch.
  2. Shape the cakes. Divide the mixture into 6 large cakes, about 1/2 cup each. Shape gently but firmly. The cakes should hold their edges without feeling packed hard.
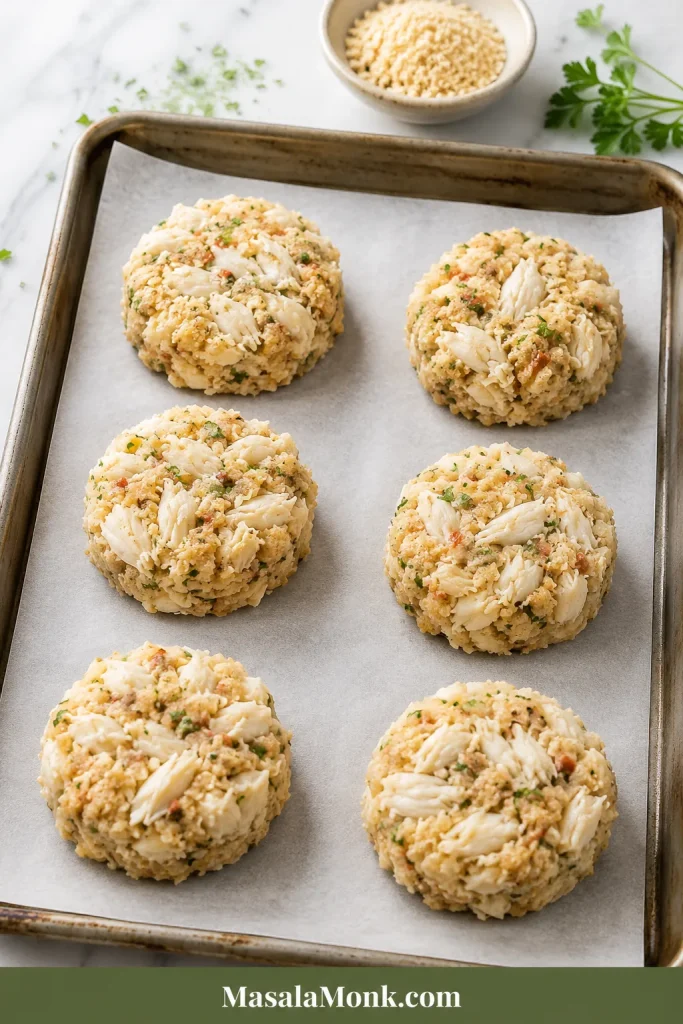
Six shaped lump crab cakes arranged on parchment before chilling.
Shaping the cakes before chilling helps them hold their shape later, especially when the batch is soft and crab-heavy.

Chill and Cook the Crab Cakes

  1. Chill. Place the crab cakes on a plate or parchment-lined tray. Refrigerate for 30–60 minutes so the binder and crumbs can settle.
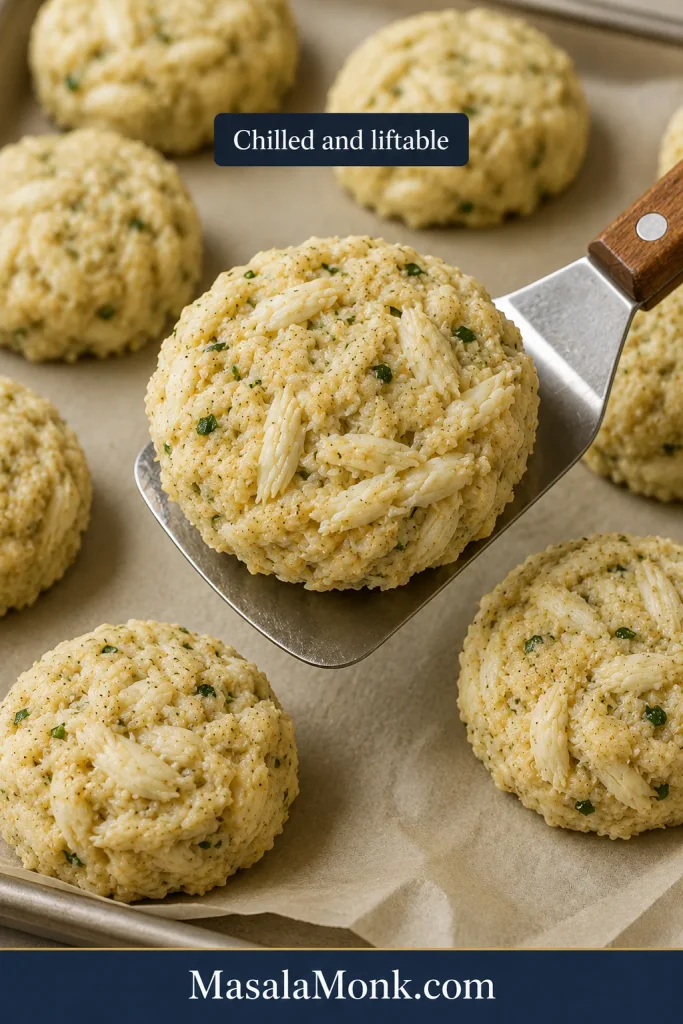
Chilled crab cakes lifting from parchment with a wide spatula before cooking.
Once the cakes are chilled, they should still feel delicate but lift cleanly enough to move without breaking apart.
  1. Pan-fry. Heat a thin layer of oil, about 1–2 tablespoons for a large skillet, over medium heat. Add the chilled cakes in a single layer without crowding. Cook for 3–4 minutes per side, until deeply golden and crisp at the edges. If a cake resists the spatula, give it another minute.
  2. Serve. Serve hot with the quick crab cake sauce, lemon wedges, and extra herbs.

Baked Crab Cake Option

  • Heat oven to 450°F / 230°C.
  • Place chilled crab cakes on a parchment-lined baking sheet.
  • Brush or dot the tops with a little melted butter.
  • Bake for 12–15 minutes, until heated through and golden on top.
  • For deeper color, broil for 1–2 minutes at the end, watching closely.

Baking is the easiest method because there is no flipping. Broil only at the end and only for color, or the tops can brown before the centers are properly heated.

Air Fryer Crab Cake Option

  • Preheat air fryer to 375°F / 190°C.
  • Spray the basket and crab cakes lightly with oil.
  • Air fry for 10–12 minutes, flipping halfway.
  • Check smaller crab cakes around the 8-minute mark so they do not dry out.

Once the recipe is in front of you, these choices help you adapt the batch without guessing or adding filler just to feel safe.

Best Choices for Your Crab Cake Batch

Use this as the fast decision guide for your crab cakes. It keeps the recipe flexible without making the mixture feel like a guessing game.
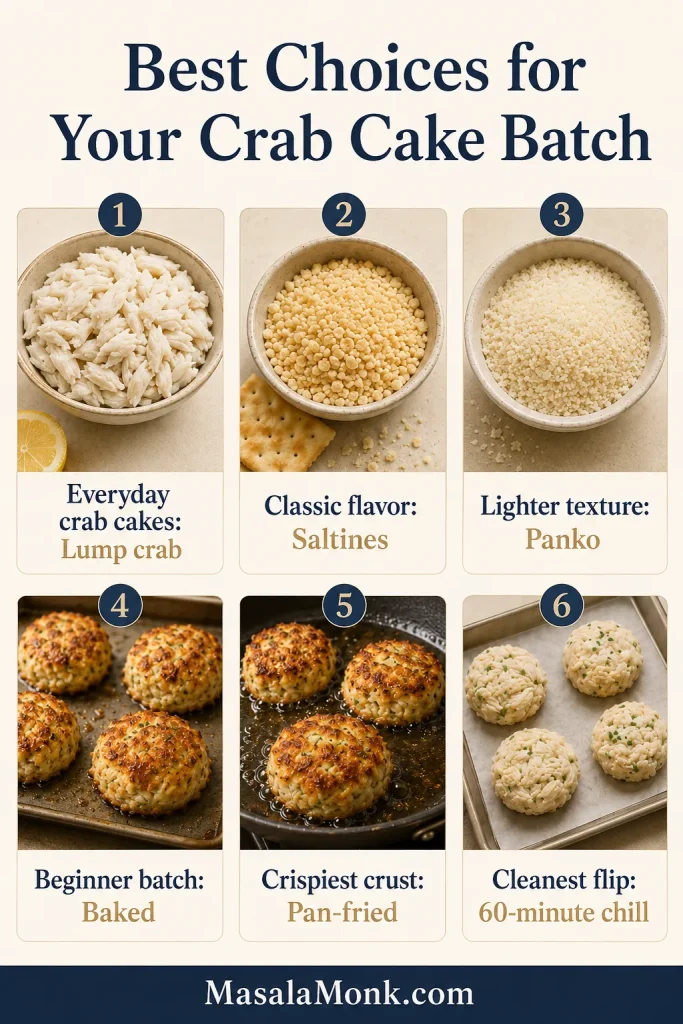
Crab cake decision guide showing best choices for crab, filler, cooking method, and chill time.
Use this guide to choose the right crab, filler, and cooking method before you shape the batch, so the result fits your plan.
Your situationGo with this
Everyday crab cakesRefrigerated lump crab
Classic flavorCrushed saltines
Lighter texturePanko
Beginner batchBake at 450°F / 230°C
Crispiest crustPan-fry over medium heat
Cleanest flipChill the full 60 minutes
Using canned crabDrain hard, reduce salt, shape smaller
Making sandwichesShape slightly flatter and sturdier

This ratio is built for little-filler crab cakes: enough egg, mayo, and crumbs to hold the shape, but not so much that the crab turns into a breadcrumb patty. The full 60-minute chill gives the cleanest flip, especially if your crab is wet or your cakes are large.

If this is your first batch, bake them or chill the full 60 minutes before pan-frying. If you want the most restaurant-style crust, pan-fry and wait for the golden edge before touching them.

Texture Target: What the Mixture Should Look and Feel Like

A loose mixture is not automatically a bad mixture. Little-filler crab cakes are supposed to feel delicate before they chill. The goal is not a stiff patty; the goal is a tender cake that uses only enough binder to stay together.
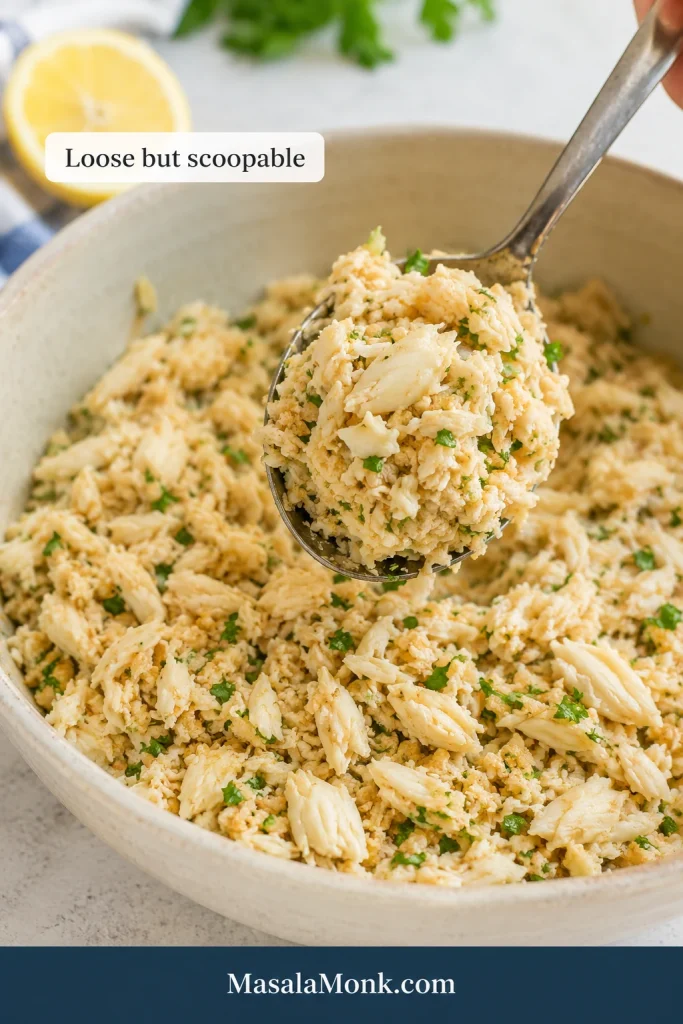
Crab cake mixture in a bowl being lifted with a spoon, showing a moist, scoopable texture with crab pieces.
A loose but scoopable mixture is exactly what you want before chilling, since crab cakes set best when they are handled gently.
  • Before chilling: moist, loose, and scoopable, with no liquid pooling at the bottom of the bowl.
  • After shaping: the cakes should hold their edges without feeling packed hard.
  • When the mixture is wet: drain better or add 1 tablespoon crumbs at a time.
  • For a dry mixture: add a small spoon of mayo or a few drops of lemon juice.
  • If the cakes stick: wait. The crust probably has not finished forming.

Use the visual guide below before adding more crumbs. Most soft crab cake mixtures need draining or chilling first, not heavy packing.
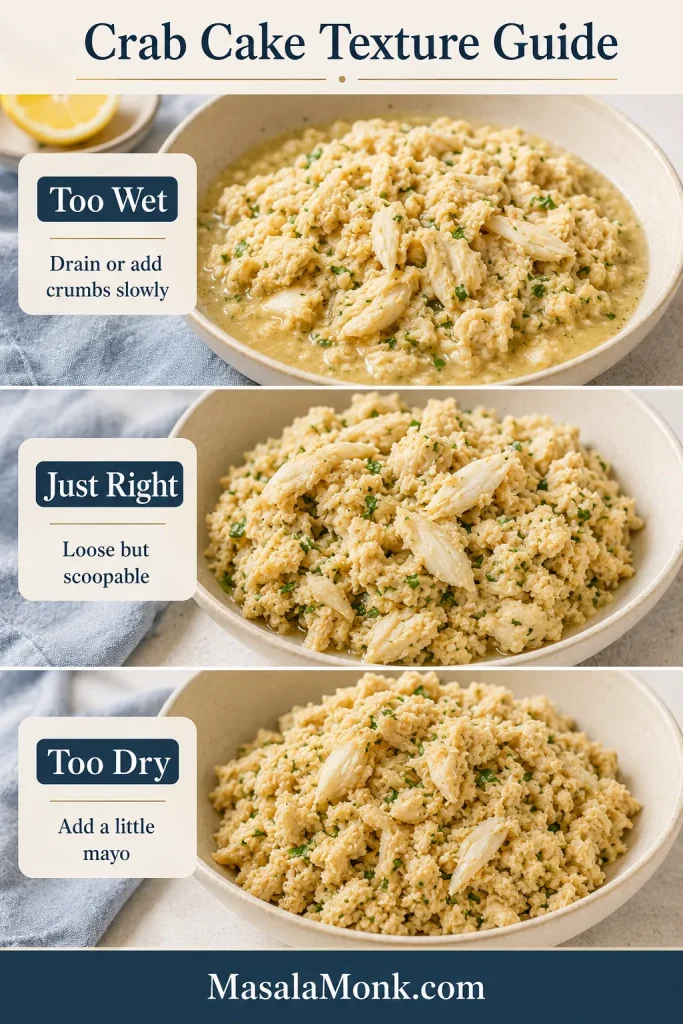
Three-panel crab cake texture guide showing too wet, just right, and too dry mixture stages.
If the mixture is too wet, drain it; if it feels dry, add a little mayo. This guide makes the fix easy to see at a glance.

Do not fix a loose crab cake mixture by smashing the cakes tighter. That makes the center dense. Chill first, then add crumbs only if the cakes still slump or fall apart.

Crab Cake Ratio Per 1 Pound of Crab

Once you know the ratio, crab cakes become much less intimidating. For every 1 lb / 454g crab meat, use one egg, about 1/4 cup mayo, a small amount of mustard and seasoning, and just enough crumbs to hold the cakes together.

For 1 lb / 454g crabUse
Egg1 large egg
Mayonnaise1/4 cup / 60g
Dijon mustard2 tsp
Worcestershire sauce2 tsp / 10ml
Lemon juice1 tbsp / 15ml
Old Bay1 tsp, plus more to taste
Panko1/2 cup / 30–40g
Crushed saltines2/3 cup / 41g
Yield6 large cakes or 8 medium cakes
Chill30–60 minutes

Use this ratio as the baseline before making small moisture adjustments for your crab meat.
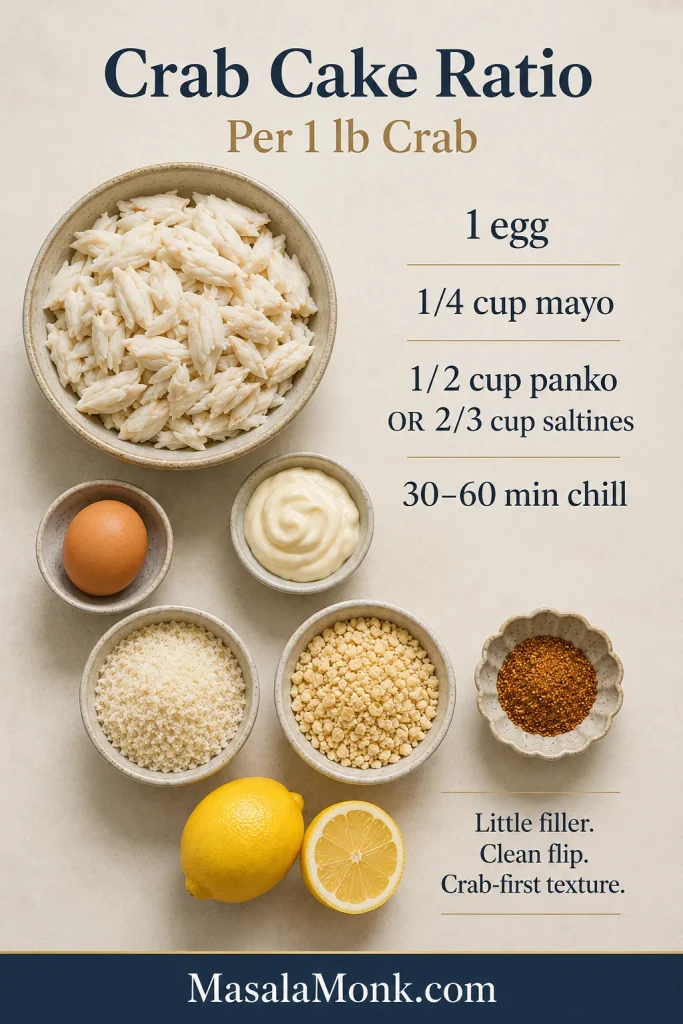
Crab cake ratio infographic showing the ingredient formula per pound of crab.
This ratio is the simple rule that keeps the cakes tender: one pound of crab, a light binder, a little filler, and a full chill.

This ratio keeps the cakes tender and crab-heavy without turning them bready. Very wet crab may need 1 extra tablespoon of crumbs and a longer chill. Dry crab may need a small spoon of mayo. Make either adjustment gently.

The Ingredients That Keep Crab First

Every ingredient has a job: protect the crab flavor, hold the cakes together, or help the edges brown.

Lump Crab Meat

Lump crab is the best everyday choice for homemade crab cakes. It has enough large pieces to feel special, but it is usually more affordable than jumbo lump. If using pasteurized refrigerated crab, drain it well and gently pat away extra moisture before mixing.
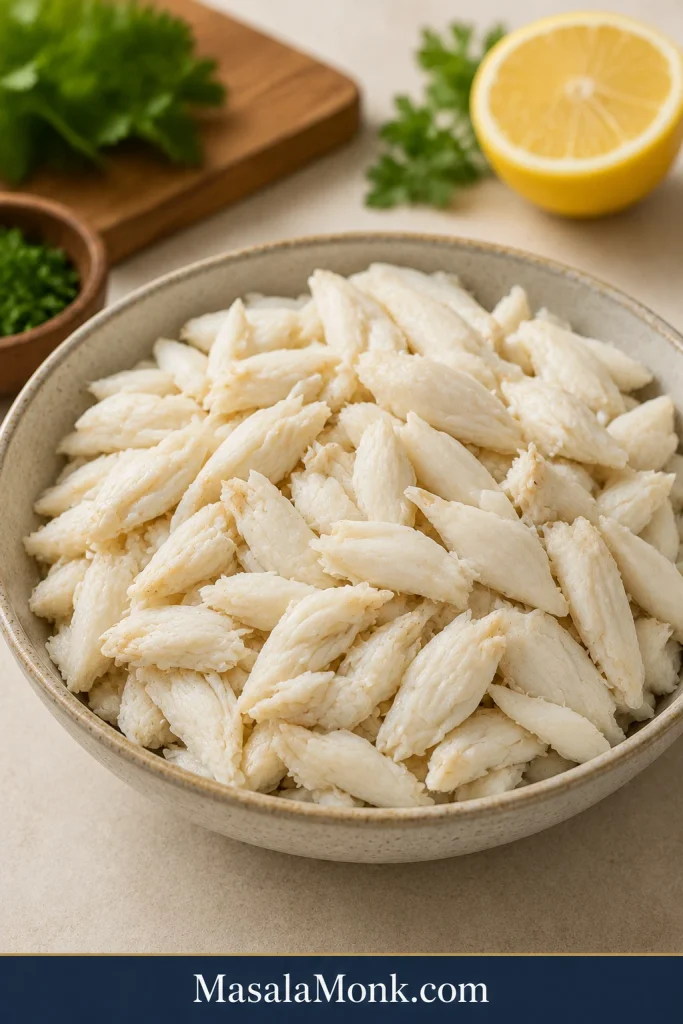
Bowl of lump crab meat on a light stone surface.
Lump crab is the best everyday choice because it gives sweet pieces, a clean bite, and the right balance of texture.

Egg and Mayonnaise

Egg helps the cakes set, while mayo keeps the center moist and helps the seasonings spread. Regular mayo gives the closest texture, while homemade mayonnaise can make the binder and sauce taste fresher.

Dijon, Worcestershire, Lemon, and Old Bay

Dijon adds sharpness, Worcestershire adds savory depth, lemon wakes up the sweetness of the crab, and Old Bay gives the cakes their familiar Maryland-style seasoning. Start gently with salt because crab meat, saltines, and seasoning blends can already be salty.

If you are nervous about seasoning, cook one tiny test cake before shaping the full batch. It is the easiest way to check salt, heat, and brightness without risking all the crab.

Panko, Saltines, or Ritz

Panko gives a light, clean texture and crisp edges. Crushed saltines taste more classic and slightly saltier. Ritz crackers make a softer, richer, buttery variation. Whatever you choose, the filler should support the crab, not become the main texture.
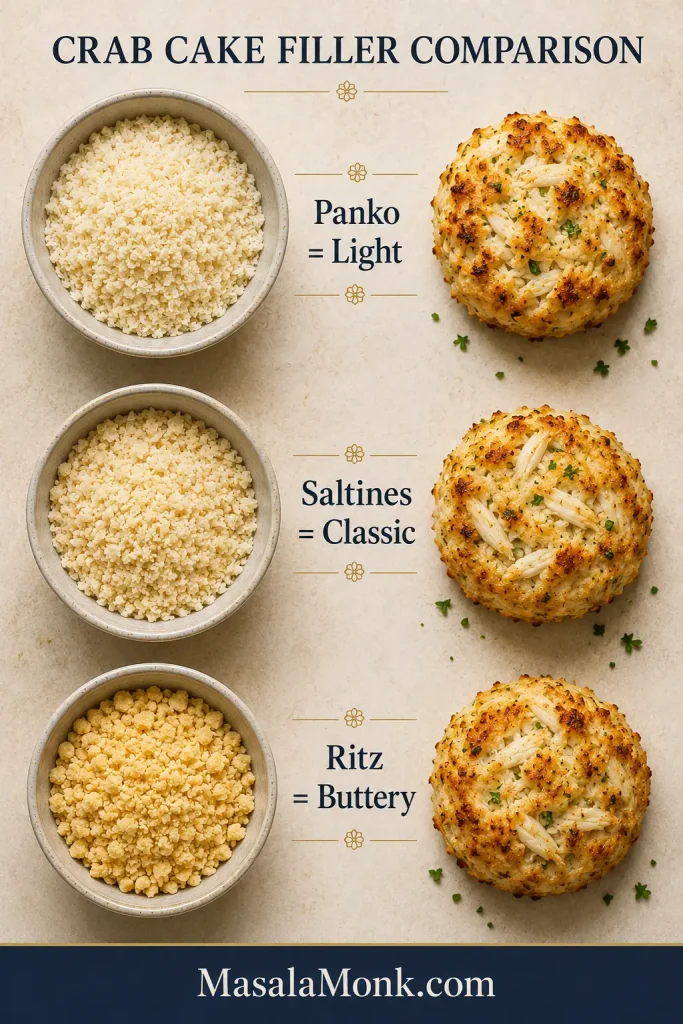
Comparison board showing panko, saltines, and Ritz crackers for crab cake filler.
The filler changes the texture more than most people expect, which is why panko, saltines, and Ritz each have a different job.

Parsley or Chives

Fresh herbs add color and lift. Parsley is classic and mild; chives are delicate and slightly oniony without taking over.

Smart Swaps Without Losing the Crab

Make small swaps, then chill before deciding the mixture needs more crumbs. Many crab cake mixtures feel soft at first and firm up after resting.

  • No panko: use crushed saltines for a classic flavor or Ritz for a richer, buttery version.
  • Out of saltines: use panko for a lighter texture or fine dry breadcrumbs in a pinch.
  • For a mayo swap: use Greek yogurt, sour cream, or eggless mayonnaise. Yogurt and sour cream will taste tangier.
  • No Old Bay: use seafood seasoning, Cajun seasoning, or paprika with celery salt. Add slowly and taste before adding extra salt.
  • Gluten-free: use gluten-free panko or crushed gluten-free crackers, and check the Worcestershire sauce and seasoning blend too.
  • No egg: use eggless mayo with 1–2 extra tablespoons crumbs, chill fully, shape smaller cakes, and flip carefully.

Which Crab Meat Should You Use?

The crab you choose changes the texture, price, and flavor of the finished cakes. For this recipe, lump crab is the best balance. Jumbo lump is beautiful for special occasions, while backfin or claw meat can work when you want something more affordable.
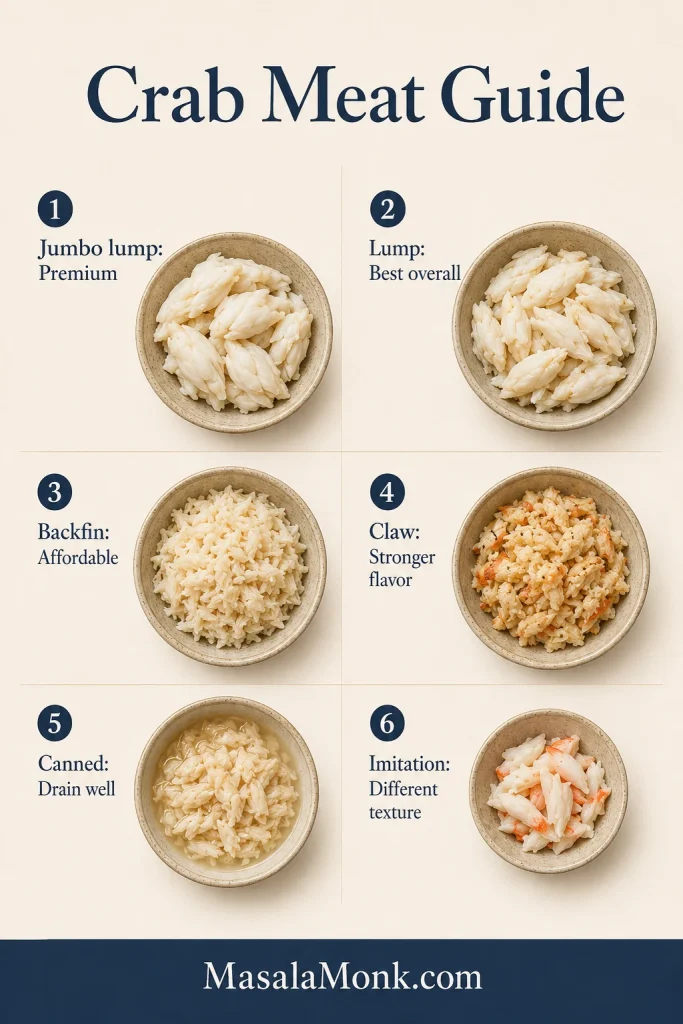
Crab meat guide showing jumbo lump, lump, backfin, claw, canned, and imitation crab.
Choosing the right crab meat is easier when you can see how each type changes texture, flavor, and moisture.
Crab meatShould you use it?Works well for
Jumbo lump crabYes, premiumSpecial occasion cakes with large visible pieces
Lump crabYes, best overallThe main recipe
Backfin crabYesAffordable crab cakes with good flavor
Claw meatYes, but strongerBudget cakes or mixing with lump crab
Canned crabYes, with adjustmentsPantry crab cakes when drained very well
Imitation crabNot ideal for this recipeBetter for a different budget crab-style patty
Dungeness crabYesSweet West Coast-style crab cakes
Blue crabYesClassic Maryland-style flavor

When buying crab specifically for this recipe, choose fresh or refrigerated pasteurized lump crab meat when possible. Avoid watery crab meat, and always drain it well before mixing. When buying fresh or refrigerated seafood, keep it cold, check that it smells clean rather than sour or ammonia-like, and refrigerate it promptly. The FDA seafood safety tips are helpful when choosing fresh or frozen seafood.

Pan-Fried, Baked, and Air Fryer Crab Cakes

Choose pan-fried for the deepest crust, baked for the least stress, and air fryer for a lighter, less-oil option. The mixture stays the same; only the cooking method changes.

MethodWorks well forTimeTexture
Pan-friedCrispiest golden edges3–4 minutes per sideCrisp outside, tender inside
BakedBeginners and batches12–15 minutes at 450°F / 230°CTender, less crust underneath
Air fryerLess oil10–12 minutes at 375°F / 190°CLightly crisp; check early
Pan + oven finishThicker cakes2–3 minutes per side, then 5–8 minutes at 400°F / 200°CCrisp crust with evenly heated center

Pan-Fried Crab Cakes

Pan-frying gives the best crust. Keep the heat at medium, use a thin layer of oil, and leave space between the cakes. Once the cakes hit the pan, the hardest part is leaving them alone.
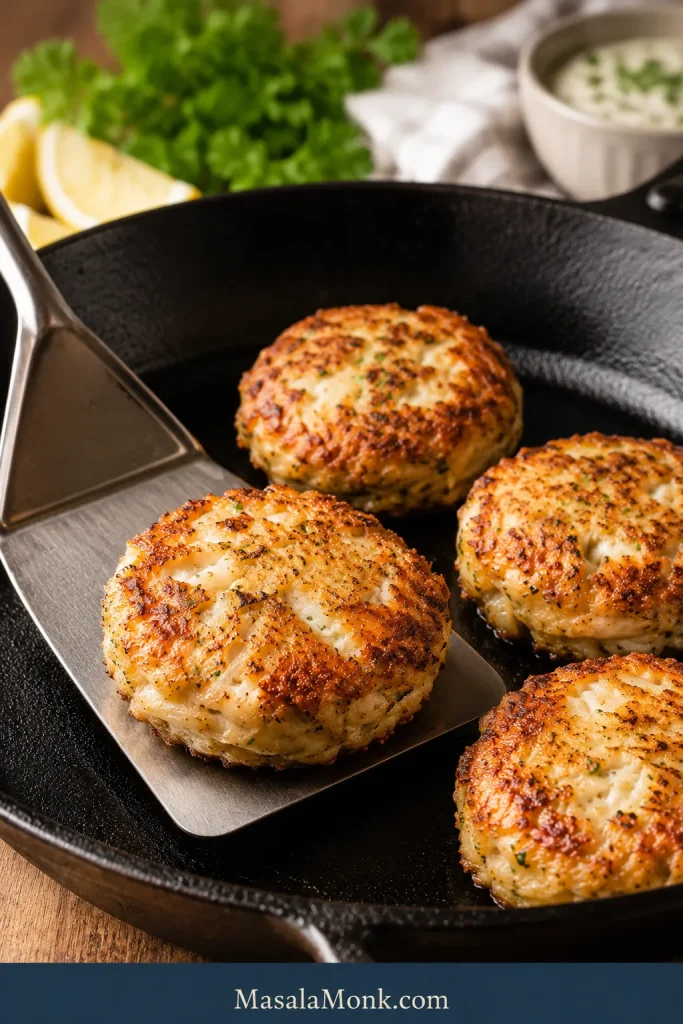
Golden pan-fried crab cakes in a skillet with crisp edges.
Pan-frying gives the richest crust, which is why the golden edges look so good when the cakes are done right.

Look for a golden ring around the bottom edge before you touch them. That little ring is your sign that the crust is forming and the cake is getting strong enough to lift. If the cake resists the spatula, that is not failure; it usually means the crust has not finished forming.
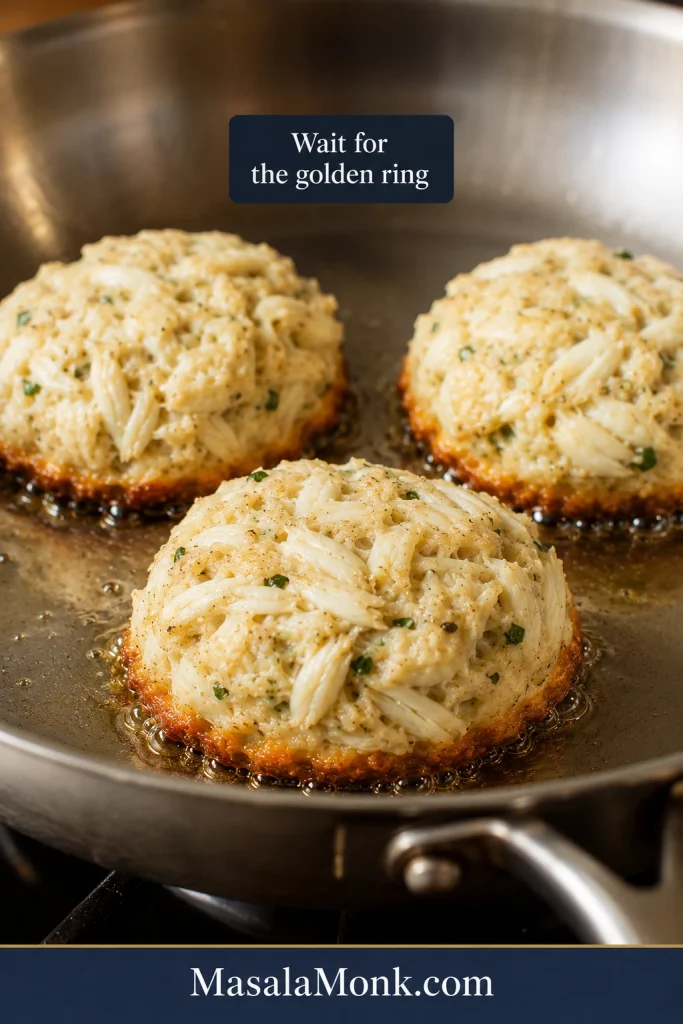
Crab cakes cooking in a skillet with a golden ring forming around the bottom edge before flipping.
That golden ring around the edge is your cue to wait a little longer, because the crust needs time before the flip.

When the first side is ready, the spatula should slide under with less resistance, and the bottom should look deeply golden instead of pale or patchy.
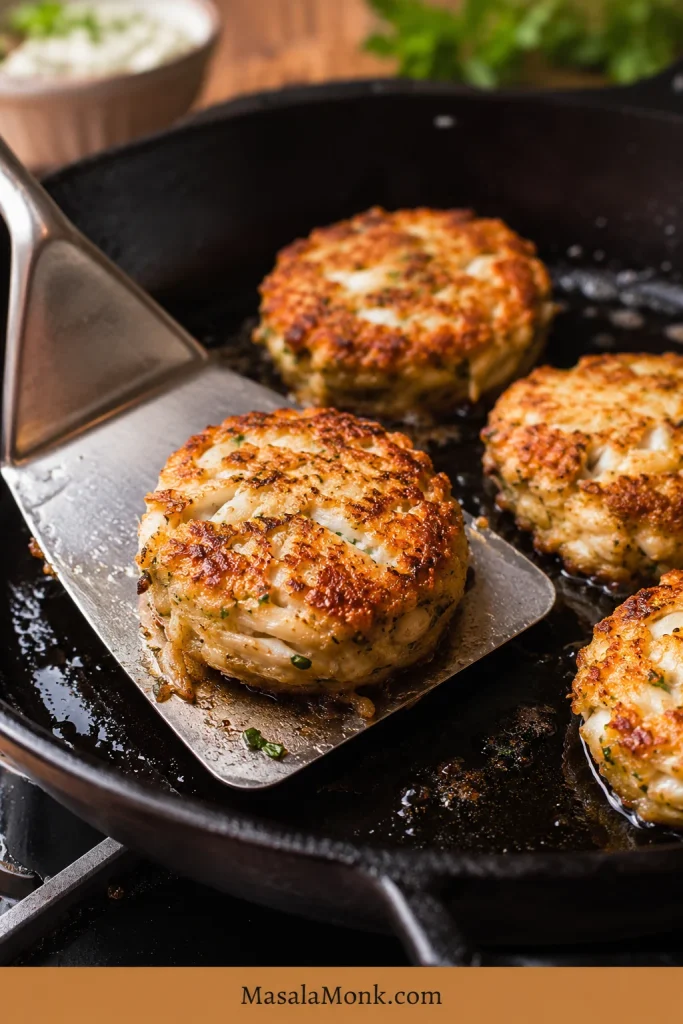
A crab cake being flipped cleanly with a wide metal spatula in a skillet.
A wide spatula gives the cleanest flip, which is one of the easiest ways to keep delicate crab cakes intact.

If cooking in batches, keep finished crab cakes on a rack in a 200°F / 95°C oven while the rest cook. Avoid stacking them, or the crust will soften.

Baked Crab Cakes

Baking is easier because there is no flipping. The cakes will be a little less crusty underneath, but they stay tender and golden on top. If you like gentle baked seafood, this baked haddock recipe uses the same idea: high enough heat for a tender finish, with lemon, butter, and a light panko or Ritz topping.
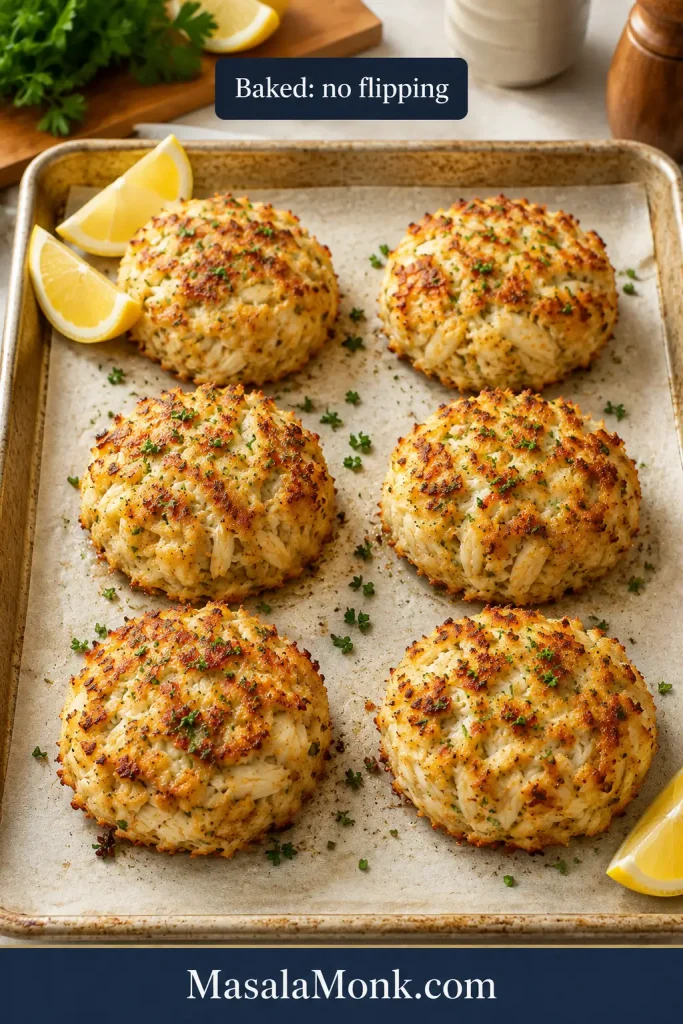
Baked crab cakes on a parchment-lined sheet pan with lightly browned tops.
Baking is the easiest option when you want less fuss, because the cakes can brown evenly without any flipping.

Air Fryer Crab Cakes

Air frying uses less oil than pan-frying, but the cakes still need a light spray and enough space for air to move around them.
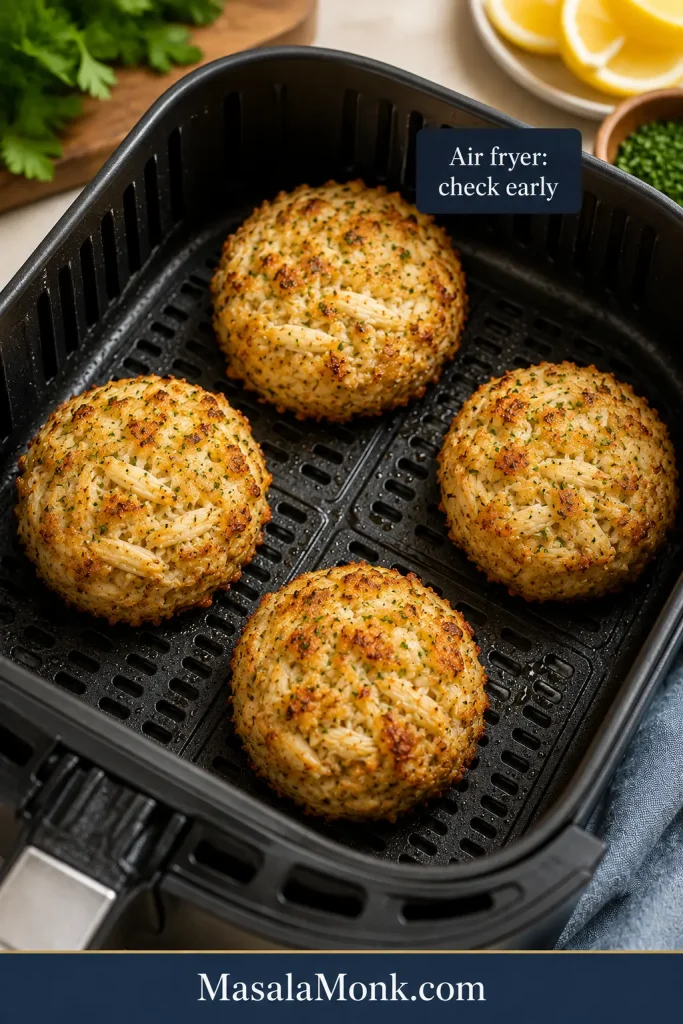
Crab cakes in an air fryer basket with lightly crisp golden edges.
Air fryer crab cakes are a useful middle ground when you want a crisp surface but still want a tender center.

Thick Crab Cakes

For extra-thick cakes, sear them first, then finish them in a 400°F / 200°C oven for 5–8 minutes. Because most lump crab meat is already cooked, the goal is to heat the cakes through and set the binder. For very thick cakes, 145°F / 63°C is a useful safety-minded check, but do not keep cooking thin cakes until they dry out. You can see the general seafood guidance on FoodSafety.gov.

How to Keep Crab Cakes From Falling Apart

Most crab cake problems are fixable and usually come from one of four places: too much moisture, too little chill time, too much or too little filler, or flipping before the crust forms.
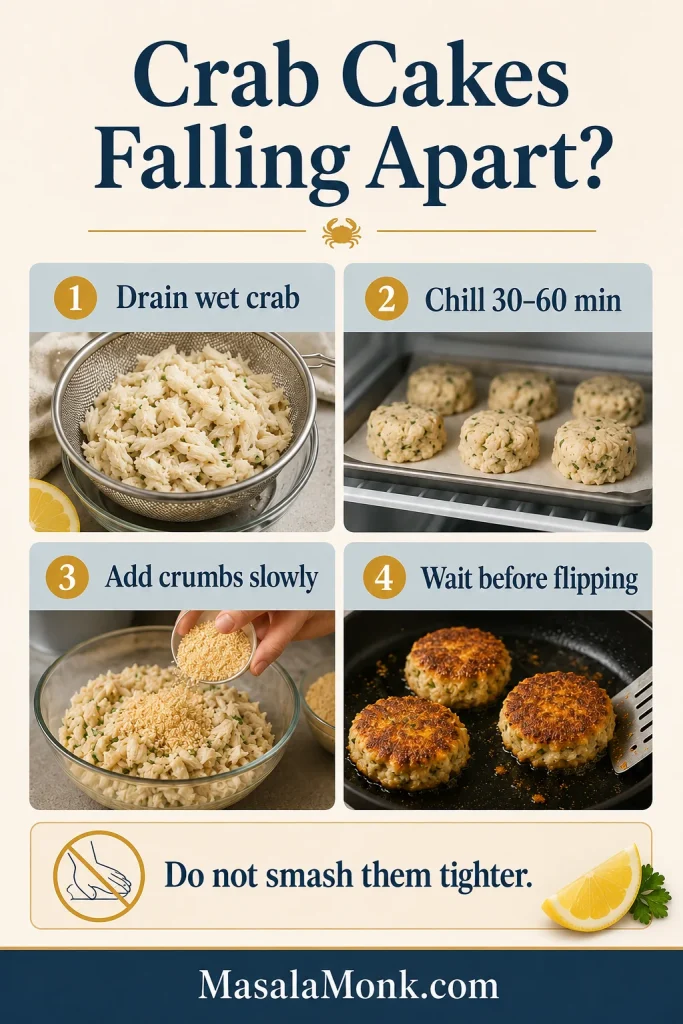
Crab cakes falling apart troubleshooting board with quick fixes for moisture, chilling, crumbs, and flipping.
Most crab cakes fall apart for the same few reasons, so this quick fix guide helps you solve the problem before the pan gets hot.
ProblemLikely causeFix
Cakes fall apartWet crab, short chill, or early flippingDrain well, chill longer, wait for the golden edge
Cakes taste breadyToo much filler or overmixingUse less crumbs next time and fold gently
Cakes feel dryToo much breadcrumb or overcookingAdd a small spoon of mayo; check air fryer cakes early
Cakes are soggyWet crab, low heat, or crowded panDrain better, use medium heat, leave space
Outside browns too fastHeat too high or cakes too thickSear, then finish in a 400°F / 200°C oven
Cakes stick to panMoved before crust formedWait another minute before lifting

If the mixture still feels loose after chilling, add 1 tablespoon panko or crushed saltines at a time. Stop as soon as the cakes hold together. Too much filler will make the crab disappear.

Canned Crab, Imitation Crab, and Maryland-Style Notes

Can You Use Canned Crab?

Yes, canned crab can work, but it needs care. Drain it very well, gently press out excess liquid, taste before adding salt, and add the lemon juice gradually instead of all at once. If the crab is very wet, add 1 extra tablespoon panko or crushed saltines, chill for the full 60 minutes, and shape slightly smaller cakes so they are easier to flip.
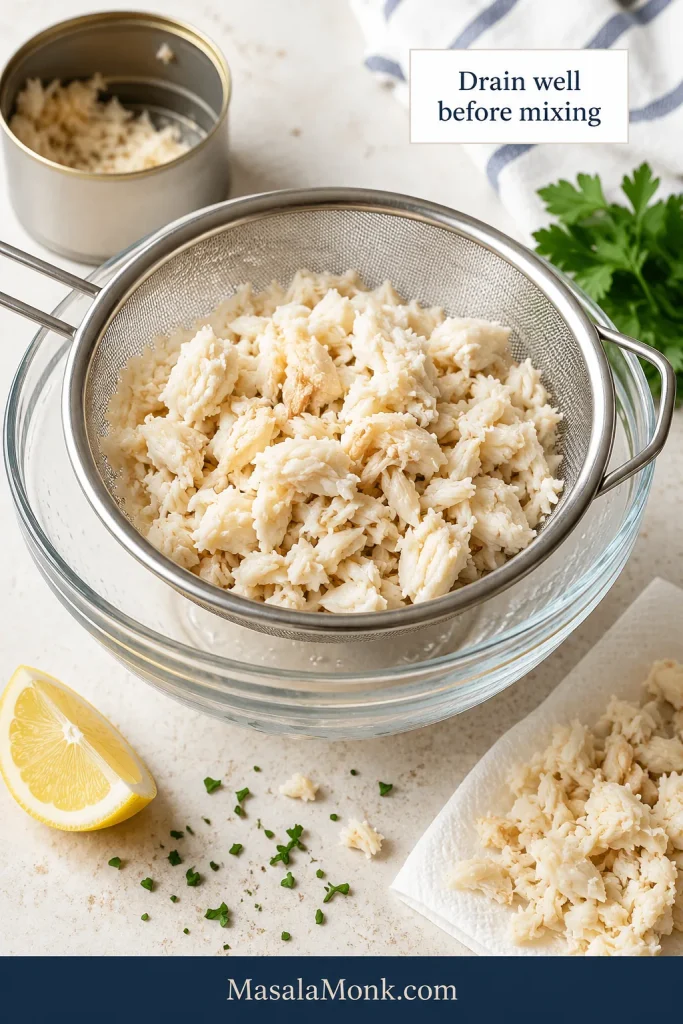
Canned crab drained in a fine-mesh sieve over a bowl before mixing.
Canned crab works better when you drain it well first, because excess moisture is what usually weakens the cakes.

The same moisture-control idea matters in salmon croquettes too: drain first, bind gently, shape evenly, and cook only once the pan is ready. For the cleanest crab flavor and best texture, though, lump crab is still the better choice when you can get it.

Can You Use Imitation Crab?

Imitation crab can be tasty in its own style, but it does not behave like lump crab. It is softer, sweeter, and more uniform, so this exact formula will not give the same flaky texture or sweet seafood flavor. If imitation crab is what you have, chop it small, reduce the mayo slightly, and make smaller cakes. The result will be more of an affordable crab-style patty than a lump crab cake.

Maryland-Style Crab Cake Notes: What This Recipe Keeps and Skips

This is a Maryland-style home version, not a claim that every Maryland cook makes crab cakes the same way. It keeps the important direction: sweet crab first, Old Bay, lemon, mustard, Worcestershire, and very little filler. It skips onions, peppers, and heavy seasoning so the crab stays clear.

Blue crab is classic, saltines are traditional in many versions, and panko is a lighter modern option when you want crisp edges without heaviness. The main rule is simple: let the crab lead. If the finished cake tastes mostly like bread, the balance has gone too far.

Crab Cake Sizes: Dinner Cakes, Mini Cakes, Crab Balls, and Sandwiches

Choose the size before you shape the mixture. Large cakes feel like dinner, medium cakes work for plates and appetizers, mini cakes are party-friendly, and slightly flatter cakes are best for sandwiches.
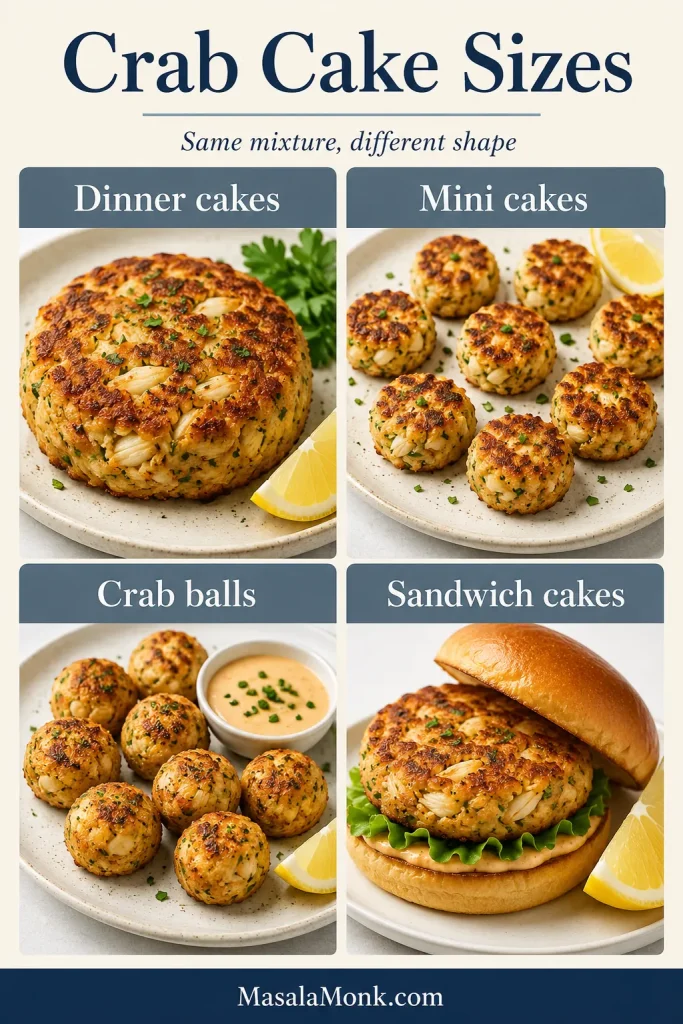
Crab cake size guide showing dinner cakes, mini cakes, crab balls, and sandwich cakes.
The same mixture can become dinner cakes, appetizer bites, crab balls, or sandwich cakes, depending on how you shape it.
SizeMixture per cakeYield from 1 lb crabWorks well for
Large crab cakesAbout 1/2 cup6 cakesDinner or main course
Medium crab cakesHeaping 1/3 cup8 cakesAppetizer or lighter meal
Mini crab cakes2 tbsp16–20 cakesParty bites
Crab balls1–2 tbsp24–36 ballsSnack boards and appetizers
Sandwich cakesAbout 1/3–1/2 cup6–8 cakesToasted buns with slaw and sauce

Smaller cakes cook faster, so check early. Mini crab cakes usually need only 2–3 minutes per side in a pan or about 8–10 minutes in a hot oven. The chill-and-shape logic also helps with other delicate patties and croquettes: control moisture, chill before cooking, and turn only when the first side is ready.

Sauces That Keep the Crab First

The best sauce for crab cakes is creamy, bright, and tangy: tartar sauce for classic flavor, remoulade for heat, and lemon or garlic aioli for a richer modern dip. The sauce should wake up the richness of the crab, not bury it.
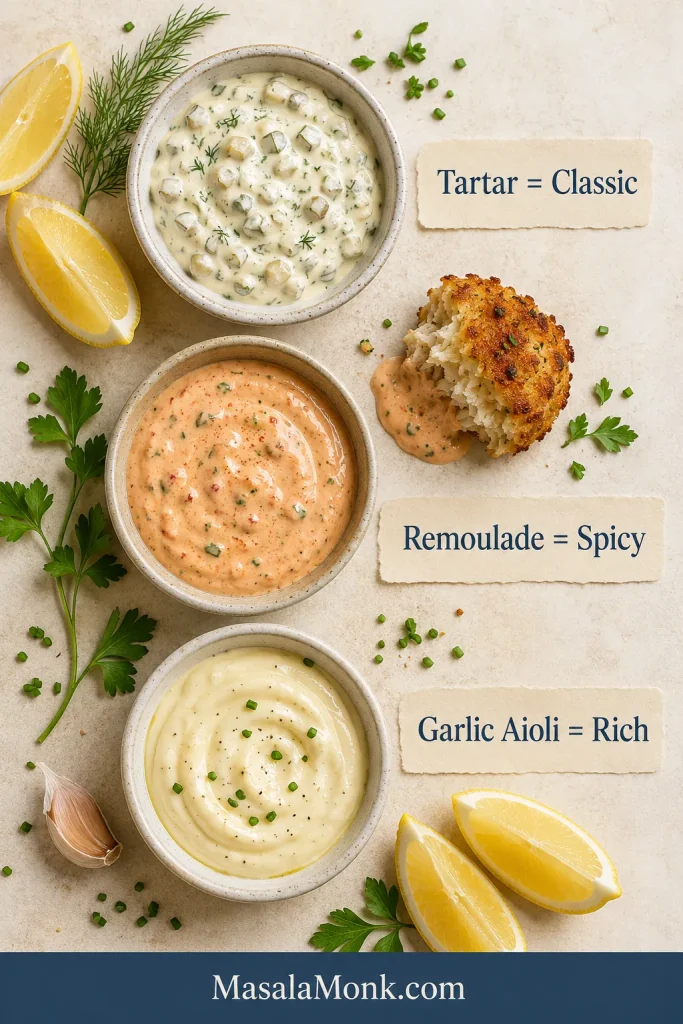
Sauce board showing tartar sauce, remoulade, and garlic aioli with lemon and herbs.
A classic tartar, a spicier remoulade, or a rich aioli can each change the plate without taking the crab out of focus.
  • Tartar sauce: classic, mild, and family-friendly.
  • Remoulade: spicier, tangier, and more restaurant-style.
  • Lemon aioli: rich, bright, and modern.
  • Garlic aioli: bold, creamy, and simple.
  • Mustard sauce: punchy and Maryland-style.

For a classic pairing, serve these crab cakes with homemade tartar sauce. Choose easy garlic aioli for a richer, garlicky dip. A small drizzle of honey mustard dressing works well with cabbage, greens, or a crab cake sandwich when you want a lighter slaw-style pairing.

Serve crab cakes while the edges are still crisp, with lemon on the side and just enough sauce to brighten each bite without hiding the crab.

What to Serve With Crab Cakes

Serve crab cakes as an appetizer, seafood dinner, sandwich filling, or brunch base. Keep the sides fresh and simple so the crab stays the star.
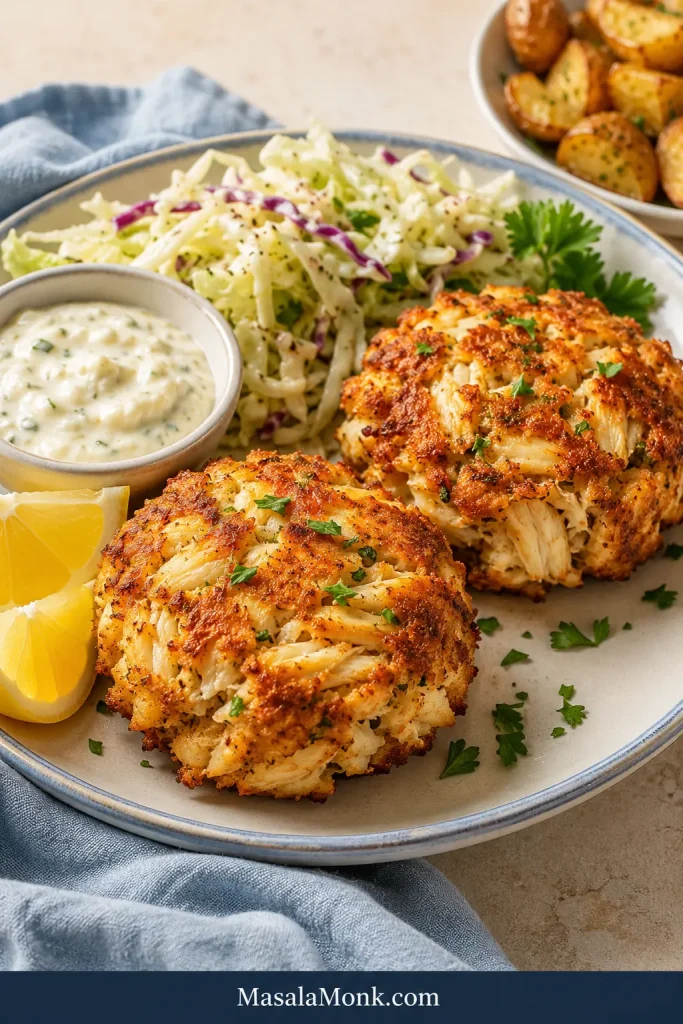
Crab cake dinner plate with two golden crab cakes, slaw, lemon wedges, sauce, and a blue linen napkin.
Serve the cakes while the crust is still crisp, then add lemon and slaw for a fresh finish that keeps each bite balanced.

For a picnic-style plate, add corn, pickles, and potato salad. For brunch, serve crab cakes with poached eggs and hollandaise sauce. For sandwiches, use toasted buns, lettuce, tomato, pickles, sauce, and a little slaw.

Make Ahead, Storage, Freezing, and Reheating

  • Make ahead: shape the crab cakes up to 24 hours ahead. Cover and refrigerate until ready to cook.
  • Refrigerate cooked crab cakes: store in an airtight container for up to 3 days. Let them cool before covering so steam does not soften the crust, but do not leave seafood sitting out for long.
  • Freeze uncooked crab cakes: freeze shaped cakes on a tray until firm, then transfer to a freezer-safe bag or container. Thaw overnight in the refrigerator before cooking.
  • Freeze cooked crab cakes: possible, but the texture is usually better when frozen before cooking.
  • Reheat: use a 350°F / 175°C oven for 8–12 minutes, an air fryer at 350°F / 175°C for 4–6 minutes, or a skillet over medium-low heat. The microwave works in a pinch but softens the crust.

FAQs

What is the best crab meat for crab cakes?

Lump crab meat is the best everyday choice because it gives tender pieces without the highest price of jumbo lump. Jumbo lump is beautiful for special occasions, while backfin or claw meat can work for more budget-friendly crab cakes.

Are crab cakes better baked or fried?

Pan-fried crab cakes have the crispest edges and deepest color. Baked crab cakes are easier for beginners and batches because there is no flipping, so they are less likely to break.

How much filler should crab cakes have?

For 1 lb / 454g crab meat, use about 1/2 cup / 30–40g panko or 2/3 cup / 41g crushed saltines. More than that can make the cakes taste bready.

What keeps crab cakes from falling apart best?

The biggest fixes are draining the crab well, chilling the shaped cakes, and waiting until the first side is golden before flipping. Add more crumbs only after chilling if the mixture still feels too loose.

Do crab cakes need egg?

Egg helps bind the crab cakes and makes them easier to cook without breaking. For an egg-free version, shape smaller cakes, add 1–2 extra tablespoons crumbs, chill for the full 60 minutes, and flip carefully.

What can replace mayonnaise in crab cakes?

Greek yogurt, sour cream, or eggless mayonnaise can replace regular mayo. Yogurt and sour cream taste tangier, while eggless mayo keeps the texture closer to the original.

Should I use panko or saltine crackers?

Use panko for a lighter, crisper texture and saltines for a more classic, slightly saltier Maryland-style crab cake. Ritz crackers are richer and more buttery.

How long should crab cakes chill before cooking?

Chill crab cakes for at least 30 minutes. A full 60 minutes is better when the mixture is soft, the crab is wet, or you are nervous about flipping.

Can crab cakes be made ahead?

Yes. Shape the crab cakes, place them on a tray, cover, and refrigerate for up to 24 hours before cooking. This makes them easier to handle and helps them stay intact.

Can you freeze crab cakes?

Yes. Freeze them uncooked after shaping for the best texture. Thaw overnight in the refrigerator before cooking.

How do I make gluten-free crab cakes?

Use gluten-free panko or crushed gluten-free crackers instead of regular panko or saltines. Check that your Worcestershire sauce and seasoning blend are gluten-free too.

The Crab Cake Promise

Crab cakes are easier when you remember the basic promise: 1 lb crab, 1 egg, 1/4 cup mayo, a small handful of crumbs, bright seasoning, and enough chill time. Start with good lump crab when you can, drain it well, fold gently, and let the first side brown before flipping.

When the edges are crisp, the center is warm and tender, and the crab still tastes sweet and clear, that is the whole win.

If you make them, leave a note with your crab type, cooking method, and whether you used panko, saltines, or Ritz. Your note can help the next person choose their version.
Posted on 5 Comments

Salmon Croquettes Recipe with Canned Salmon

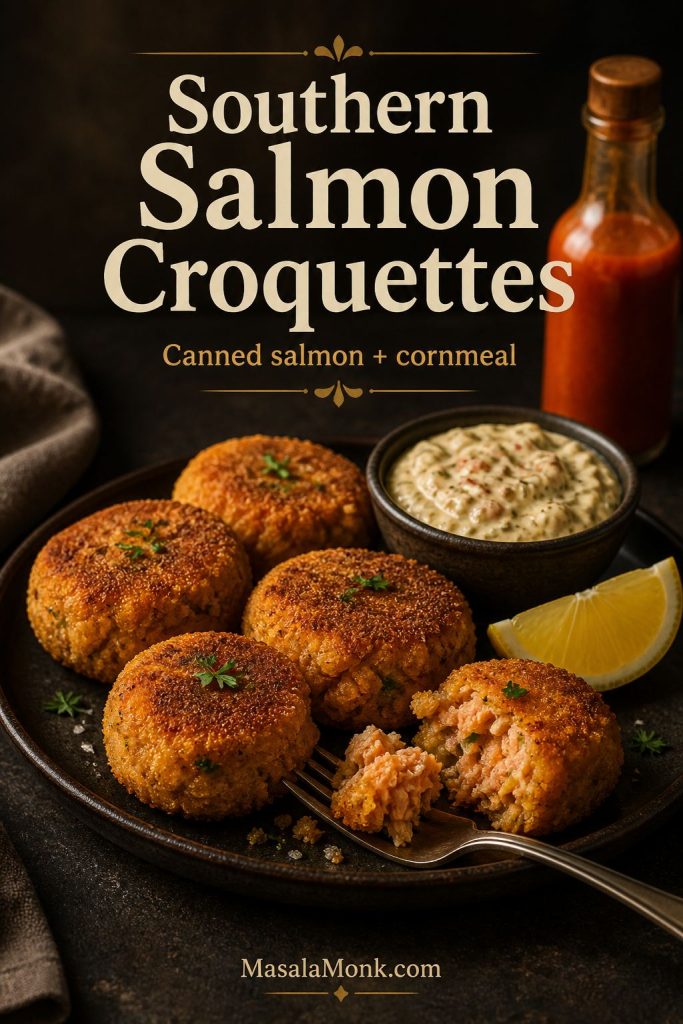
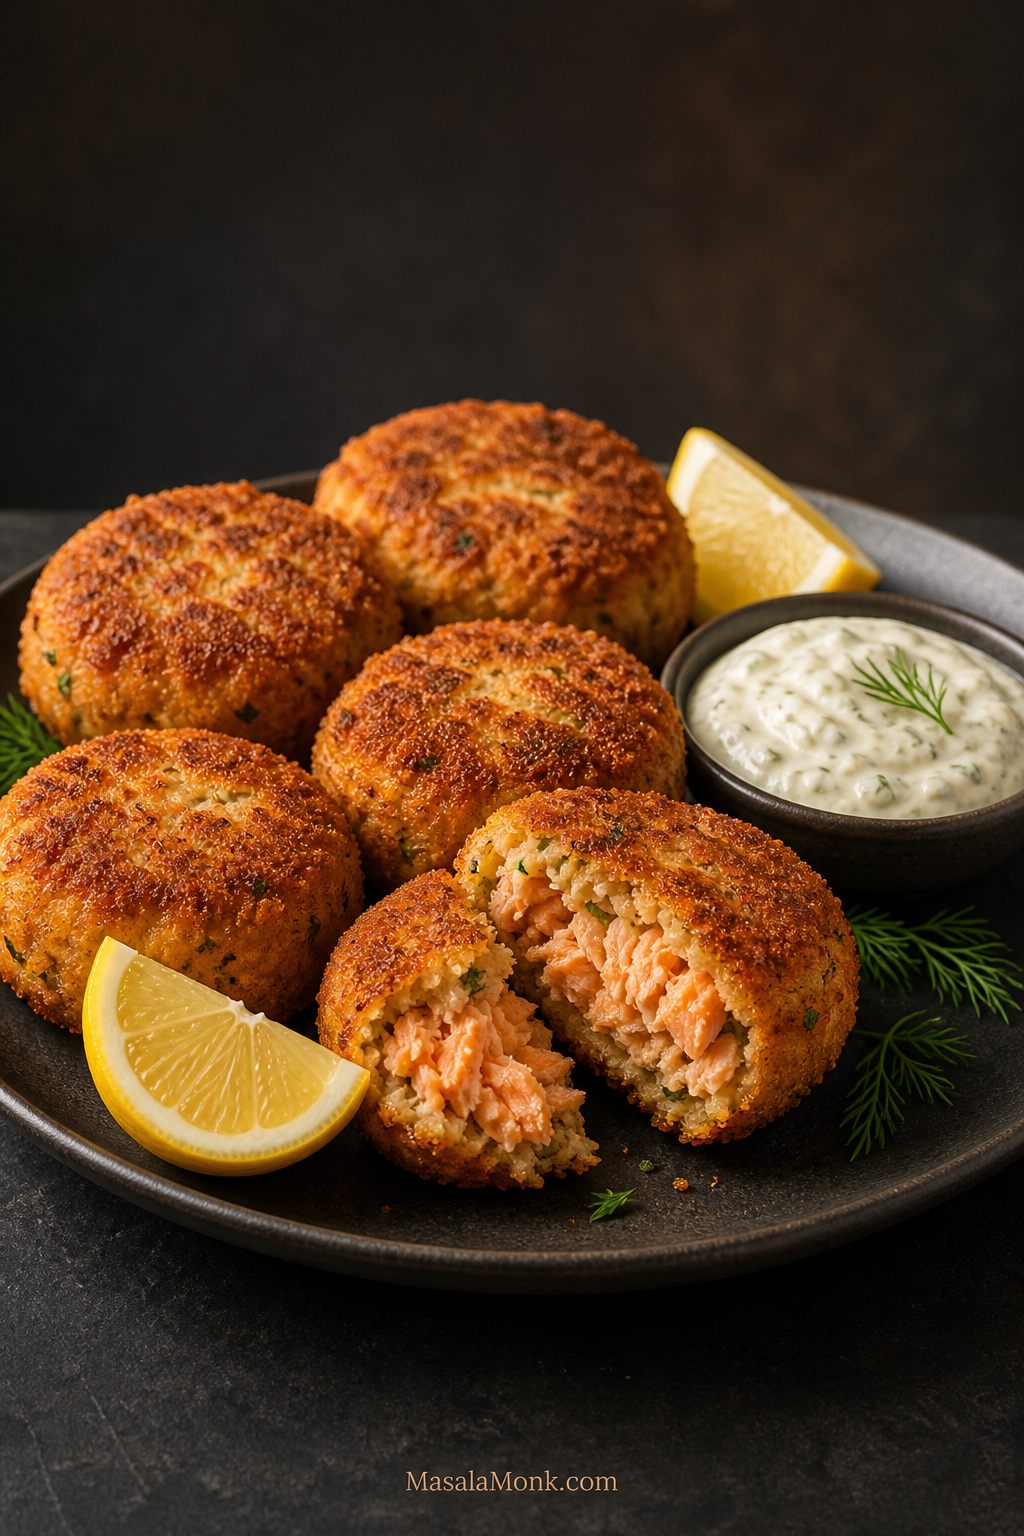
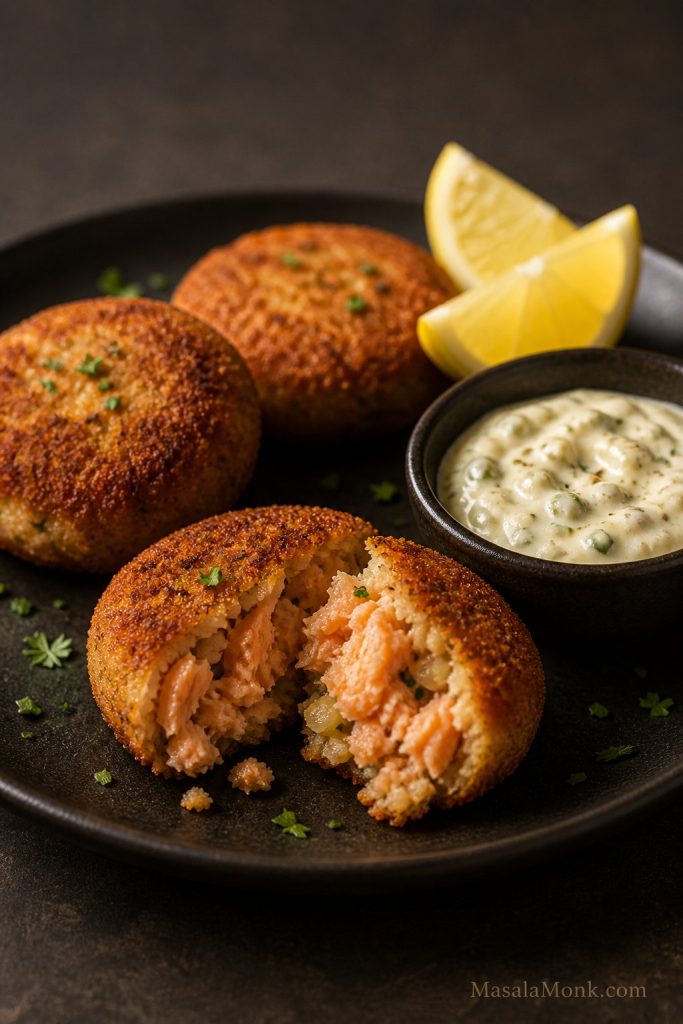
Crispy salmon croquettes on a dark plate with lemon wedges, dipping sauce, herbs, and one croquette broken open

This salmon croquettes recipe gives you crisp, golden patties with a tender, flaky center using canned salmon, egg, cornmeal, flour, onion, bell pepper, lemon, and simple pantry seasoning. The main version is pan-fried and Southern-style, with baked salmon croquettes, air fryer salmon croquettes, and a fresh salmon option included below.

Most importantly, this recipe is built to work on the first try, even if salmon croquettes or salmon patties have fallen apart on you before. You will learn how to drain and bind the salmon, how thick to shape the patties, when to use cornmeal versus panko or crackers, what sauce to serve with them, and how to fix common problems like patties falling apart, turning mushy, or tasting dry.

What Salmon Croquettes Should Look Like

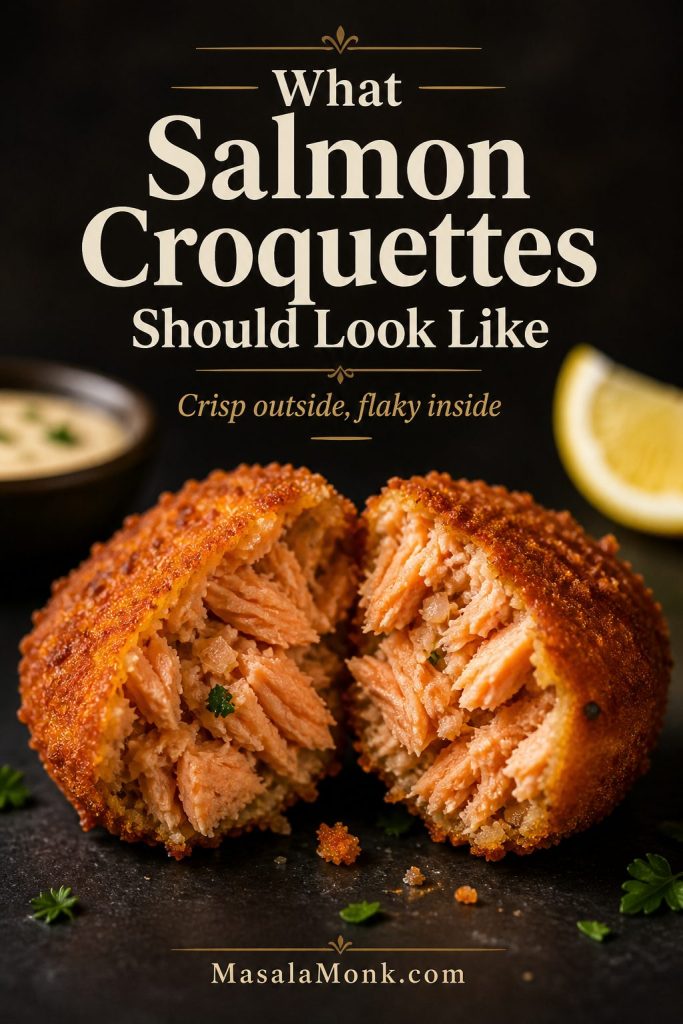
Close-up of a salmon croquette split open to show a crisp crust and flaky salmon filling
A good croquette should not be pasty inside. Instead, the crust should crack slightly while the center stays moist, flaky, and easy to break with a fork.

Quick Answer: How to Make Salmon Croquettes

This salmon croquettes recipe starts with well-drained canned salmon, egg, mayonnaise, cornmeal, flour, onion, bell pepper, Worcestershire sauce, lemon juice, and seasonings. Shape the mixture into ¼-cup patties, then pan-fry them in hot oil for 3–4 minutes per side until crisp and golden.

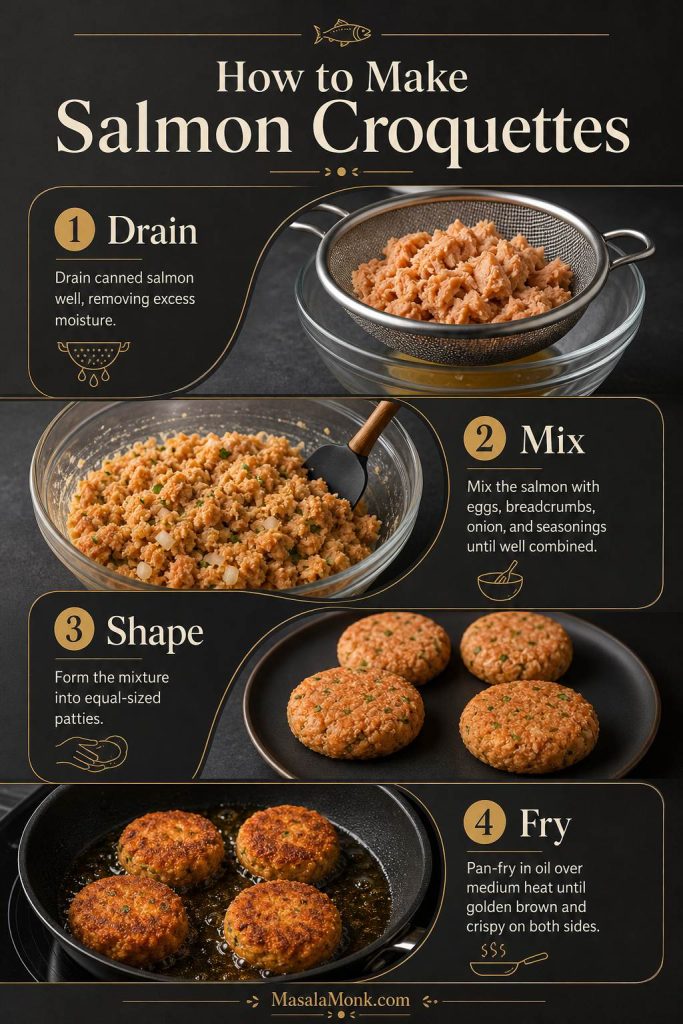
Quick Visual Guide to Salmon Croquettes

Four-step visual guide showing salmon being drained, binder being mixed, patties being shaped, and croquettes being fried
The fastest way to understand this salmon croquettes recipe is to follow the sequence: drain the salmon, mix the binder, shape evenly, and fry only once the pan is hot enough.

At a Glance

Detail Best answer
Yield 8 medium croquettes
Main salmon Canned pink salmon for the classic version
Best binder Egg, mayo, cornmeal, and flour
Best method Pan-fried in a cast iron skillet or heavy skillet
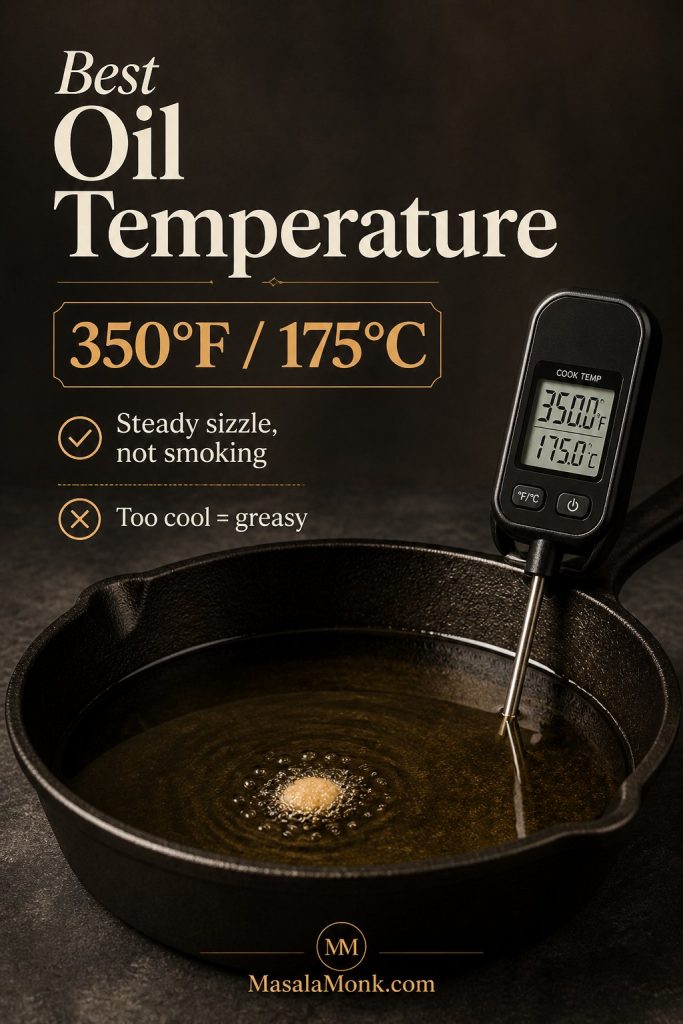
Oil temperature About 350°F / 175°C
Cook time 3–4 minutes per side
Total time 25–45 minutes, depending on whether you chill the patties
Patty size ¼ cup mixture each, about ½–⅔ inch thick
Best sauces Tartar sauce, lemon dill mayo, remoulade, green chutney mayo, tzatziki, or mango mustard
Make-ahead tip Chill shaped patties 10–20 minutes if the mixture feels soft

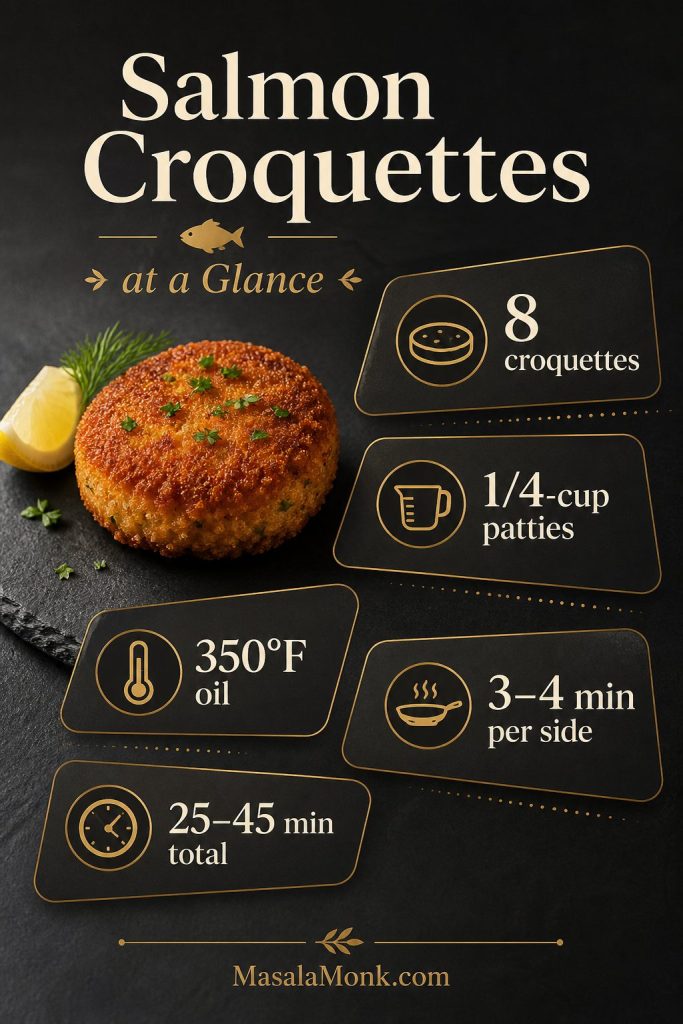
Salmon Croquettes at a Glance

At-a-glance guide for salmon croquettes showing yield, patty size, oil temperature, cook time, and total time
These quick numbers make the salmon croquettes recipe easier to repeat successfully. Once the patties stay near ¼ cup and the oil stays around 350°F, the crust browns evenly while the center stays moist.

Ready to cook? Jump to the recipe card or see the step-by-step method.

Why This Salmon Croquettes Recipe Works

  • Draining the salmon first prevents mushy patties. Too much liquid is one of the biggest reasons croquettes fall apart.
  • Egg, mayo, cornmeal, and flour give balanced structure. The egg binds, the mayo keeps the center tender, the cornmeal adds crispness, and the flour helps the mixture hold together.
  • ¼-cup patties cook evenly. This size gives you crisp edges without drying out the center.
  • Pan-frying gives the best crust. Baked and air fryer versions work, but the skillet method gives the most classic Southern-style texture.
  • The troubleshooting guide fixes common failures. If the mixture is wet, bland, dry, greasy, or falling apart, there is a direct fix below.

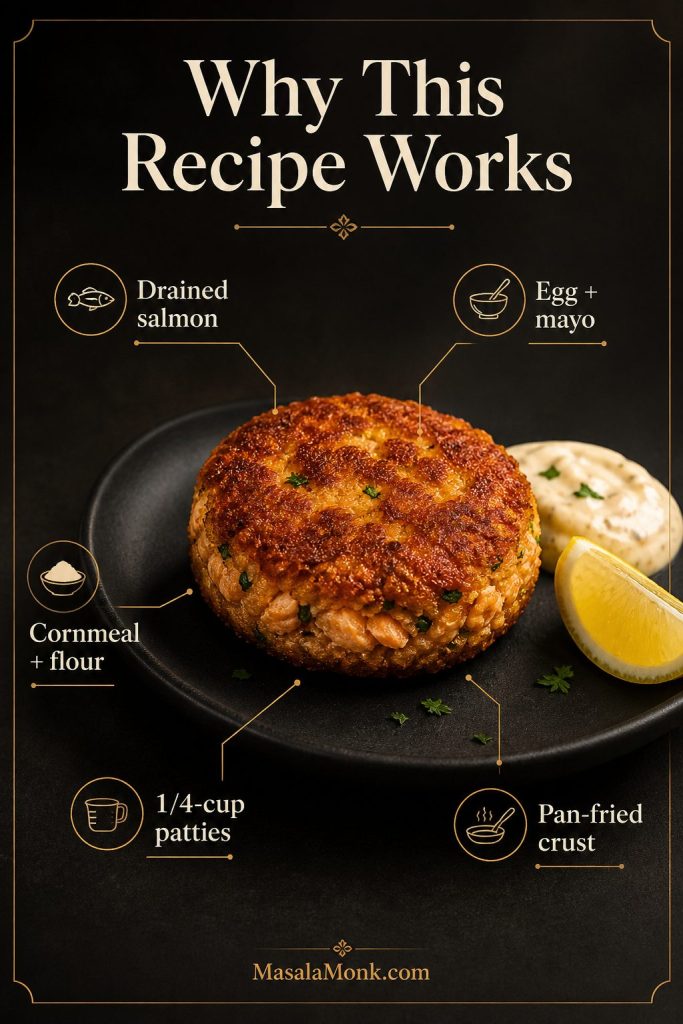
Why This Recipe Works Visually

Visual guide showing drained salmon, egg, mayonnaise, cornmeal, flour, patty size, and pan-fried crust for salmon croquettes
These salmon croquettes hold together because the moisture is controlled first, and then the binder is balanced. As a result, the patties stay crisp outside while still breaking apart in tender flakes.

What Are Salmon Croquettes?

Salmon croquettes are crisp, shaped patties made from flaked salmon, egg, dry binder, aromatics, and seasoning. In many Southern-style versions, they are made with canned salmon, cornmeal or flour, onion, bell pepper, egg, and a hot skillet. They are inexpensive, fast, and deeply satisfying when the outside is crisp and the inside stays tender.

The basic logic is the same as a good croquettes master method: control moisture, bind the filling, shape it evenly, and cook until the outside sets before you flip.

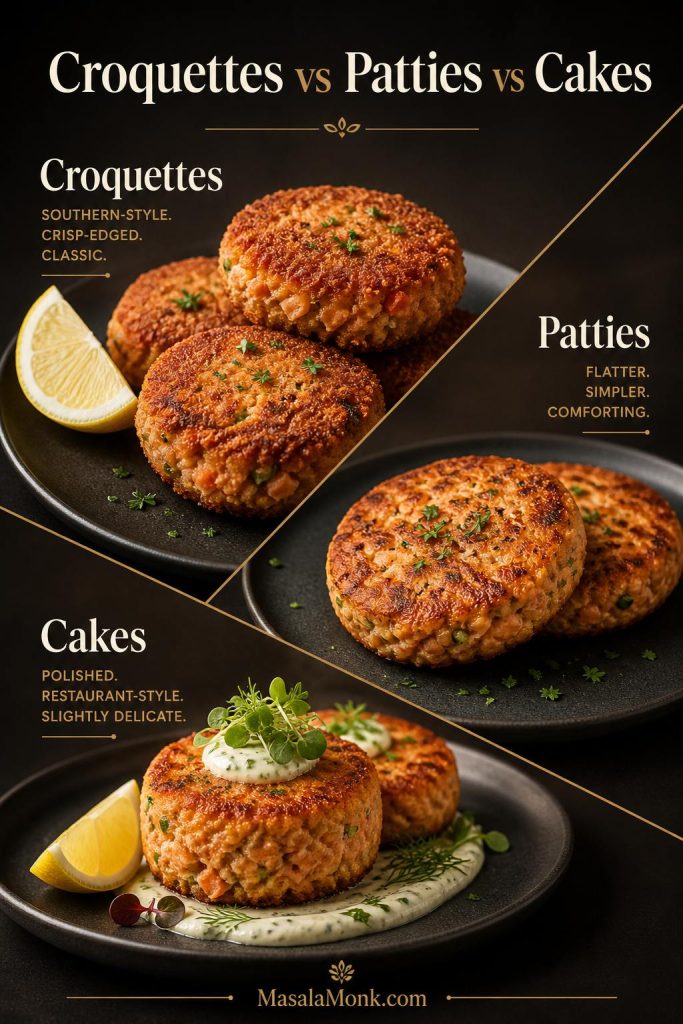
Salmon Croquettes vs Salmon Patties vs Salmon Cakes

These names overlap, and many people use them interchangeably. Still, there are a few useful differences.

Term Usually means How to think about it
Salmon croquettes Often Southern-style, made with canned salmon, binder, and a crisp fried crust. This is the main recipe here.
Salmon patties A broader term for flatter salmon cakes or patties, usually made with canned or leftover cooked salmon. Same family, slightly less specific.
Salmon cakes Often a little more restaurant-style, sometimes made with fresh salmon, panko, herbs, Dijon, or mayo. Use the fresh salmon variation below if you want this style.
Comparison of salmon croquettes, salmon patties, and salmon cakes arranged as three different plated examples
The names overlap, but the texture is the real clue. Croquettes usually lean crisp-edged and Southern-style, patties are often flatter and simpler, while salmon cakes tend to feel more polished.

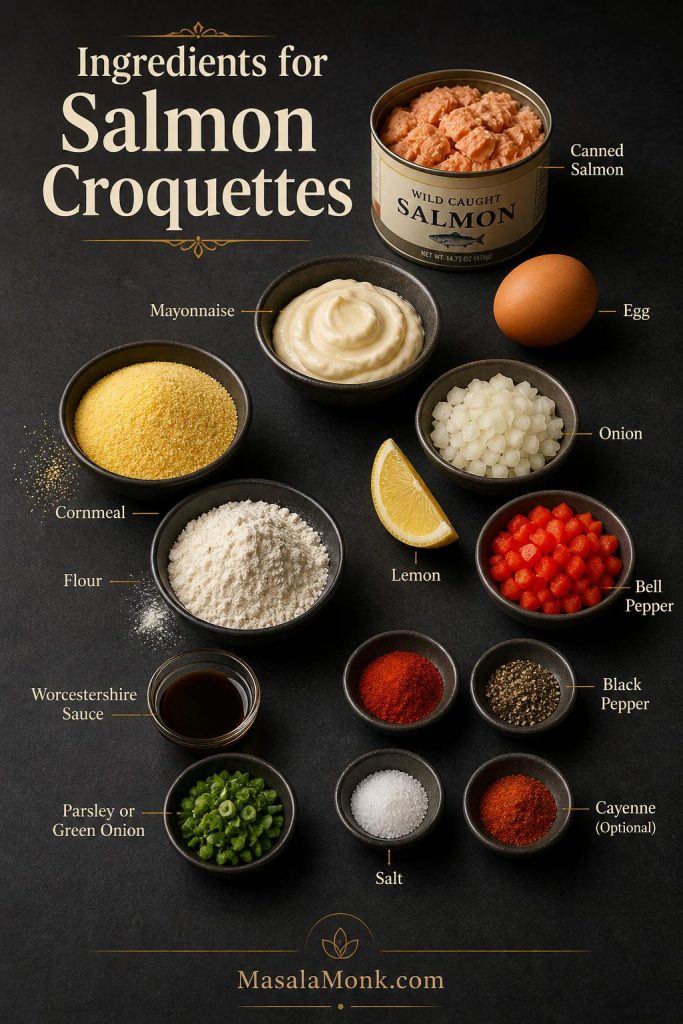
Ingredients for Salmon Croquettes

A good salmon croquettes recipe is simple, but balance still matters. Too much wet binder makes the mixture mushy; meanwhile, too much flour or cornmeal can make the patties dry. This version uses canned salmon, egg, mayo, cornmeal, and flour so the croquettes hold together while the center stays flaky.

Visual Guide to Salmon Croquettes Ingredients

Ingredients for salmon croquettes including canned salmon, egg, mayonnaise, cornmeal, flour, onion, bell pepper, lemon, Worcestershire sauce, herbs, and spices
The ingredient list is simple, but balance matters. Canned salmon gives the base, while egg, mayo, cornmeal, and flour help the croquettes stay moist without falling apart.

Salmon

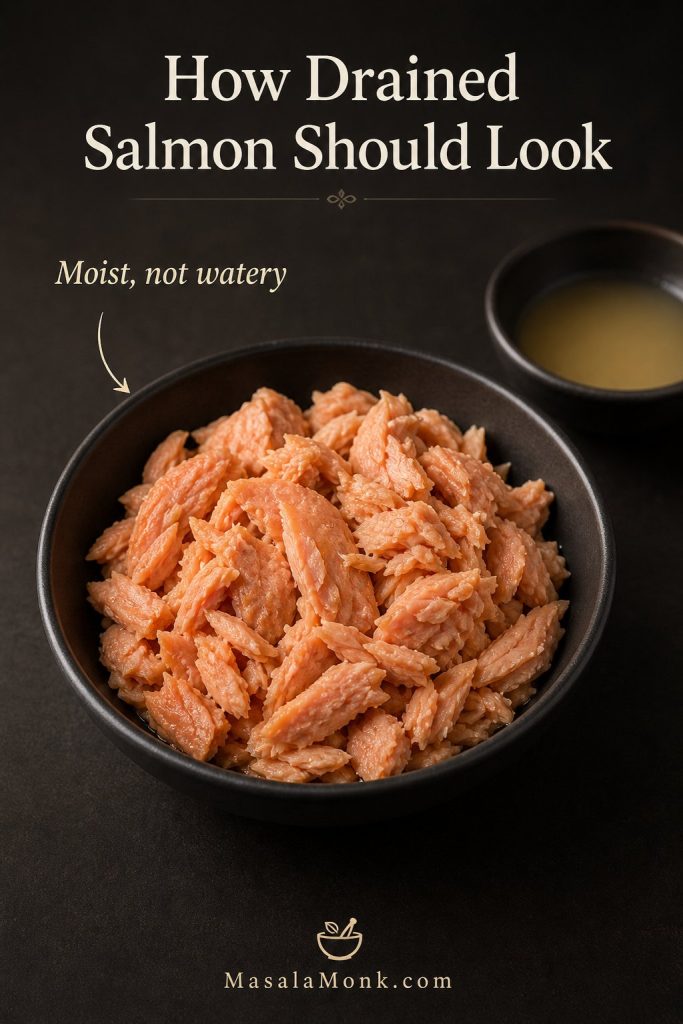
For classic salmon croquettes, use one standard can of pink salmon, usually 14.75–15 ounces / 418–425 grams. Drain off excess liquid, but do not squeeze the salmon completely dry. It should be moist enough to flake, not watery. You can remove the larger bones and skin if you prefer, although many canned salmon recipes leave the small soft bones in because they mash easily and add calcium.

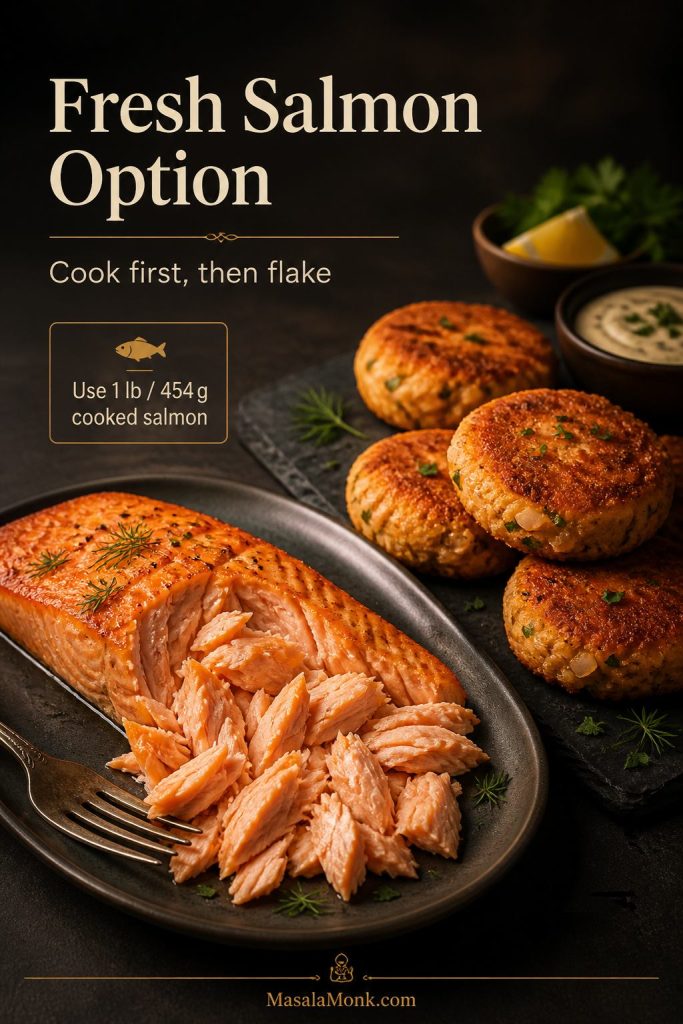
Fresh cooked salmon also works. Use about 1 pound / 454 grams raw salmon, cook it first, cool it slightly, then flake it into the mixture. Leftover cooked salmon is even easier because it is already cooked and ready to flake.

How Drained Salmon Should Look

Drained canned salmon flakes in a bowl with excess liquid shown separately
The salmon should be moist, not watery. Draining off excess liquid prevents mushy croquettes; however, keeping a little moisture helps the center stay tender.

Egg, Mayo, Cornmeal, and Flour

The egg gives structure. Mayo adds moisture and helps keep the center from drying out. Cornmeal adds a crisp, old-fashioned Southern texture. Flour helps the mixture bind without making the croquettes too crumbly.

Mayo also gives you an easy sauce base. If you like homemade condiments, use homemade mayo to make lemon dill mayo, garlic mayo, spicy mayo, tartar sauce, or a quick remoulade-style dip for serving.

Onion, Bell Pepper, Herbs, and Seasoning

Finely diced onion and bell pepper give the croquettes sweetness and texture. Green onion or parsley adds freshness. Worcestershire sauce gives a savory backbone, lemon juice brightens the salmon, and paprika, garlic powder, black pepper, and a little cayenne or hot sauce round out the flavor.

For a seafood-style flavor, add ½ teaspoon Old Bay-style seafood seasoning, Cajun seasoning, or Creole seasoning and reduce the added salt if the blend is already salty.

Texture tip: Dice the onion and bell pepper small. Large pieces can make the patties crack or break apart when you flip them.

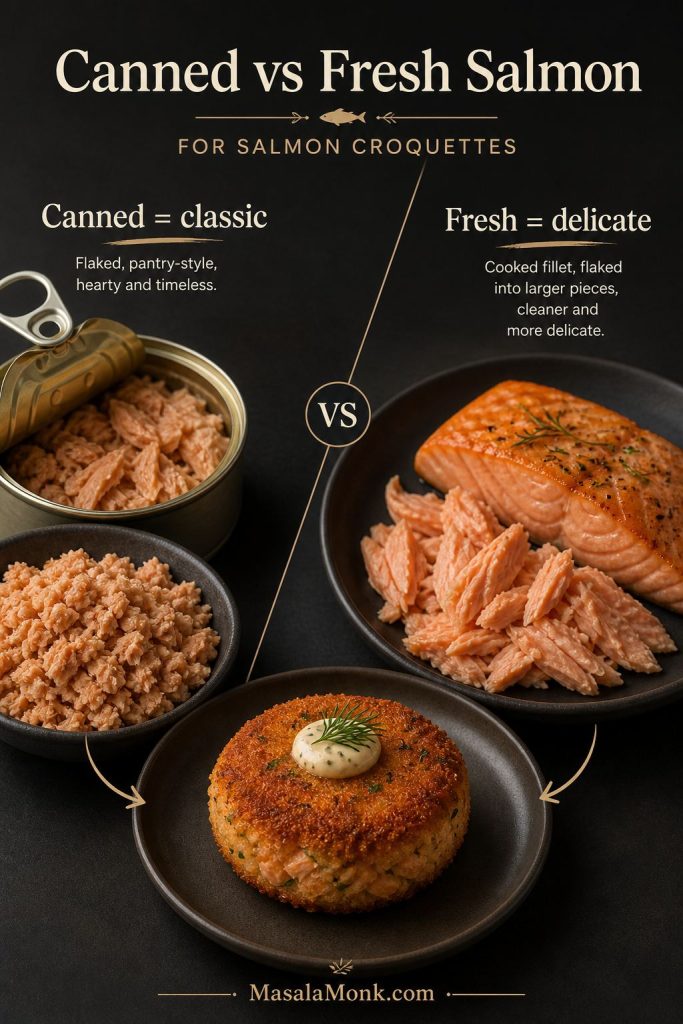
Canned Salmon vs Fresh Salmon for Croquettes

Canned salmon is the best first choice for classic salmon croquettes because it is already cooked, affordable, easy to flake, and traditional in many old-fashioned and Southern-style recipes. Fresh salmon, meanwhile, gives a cleaner flavor and a softer, more delicate texture, but it needs to be cooked before you mix the croquettes.

Canned vs Fresh Salmon at a Glance

Canned salmon and cooked fresh salmon shown side by side for making salmon croquettes
For a classic pantry-style batch, use canned salmon; meanwhile, cooked fresh salmon gives you a cleaner, more delicate croquette when you want a softer salmon cake texture.

Canned Salmon Croquettes

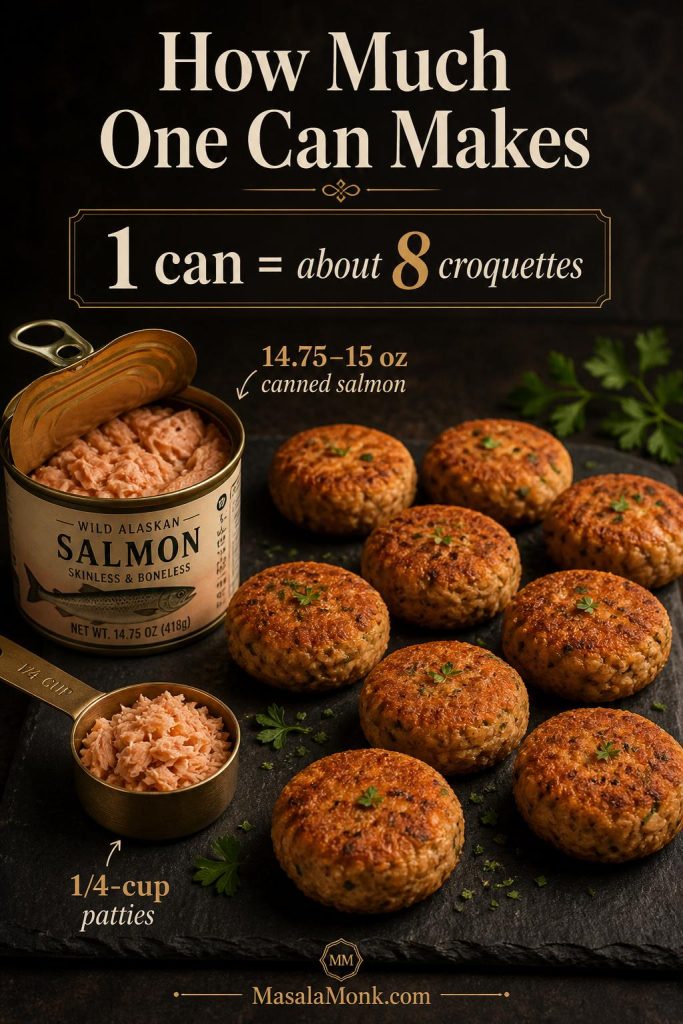
For classic croquettes, canned salmon is the easiest and most traditional choice. Drain it very well, flake it gently, and use one 14.75–15 ounce / 418–425 gram can for about 8 croquettes. In this recipe, canned pink salmon gives a milder, budget-friendly patty, while canned red salmon tastes richer. Remove large pieces of skin or bone if you prefer a smoother texture.

How Much One Can of Salmon Makes

Open can of salmon with a quarter-cup scoop and about eight salmon croquettes on a dark surface
One standard can of salmon makes about eight medium croquettes, so the recipe is easy to scale for dinner or meal prep. If you keep the patties the same size, they also cook more evenly in the skillet.

Once your salmon is drained and flaked, jump to the step-by-step method.

Salmon type Best for How to use it
Canned pink salmon Classic salmon croquettes, Southern salmon croquettes, quick dinners Drain off excess liquid, flake with a fork, and remove large bones or skin if desired. The salmon should be moist, not watery.
Canned red salmon A richer canned salmon version Use the same amount as pink salmon, but reduce added salt if the can tastes salty.
Fresh salmon Fresh salmon croquettes or salmon cakes Cook first, cool slightly, then flake into the binder.
Leftover cooked salmon Fastest fresh-style version Flake gently and reduce salt if the salmon was already seasoned.

If you have extra cooked salmon after dinner, use some for croquettes and turn the rest into a salmon bowl with rice, cucumber, sauce, avocado, herbs, and crunchy toppings.

How to Make Fresh Salmon Croquettes

To use fresh salmon, start with about 1 pound / 454 grams of salmon fillet. Cook it until just done, cool it slightly, then flake it into large pieces before mixing. For food safety, fresh fish should reach 145°F / 63°C, or the flesh should be opaque and separate easily with a fork, according to FoodSafety.gov.

When buying fresh salmon, the FDA’s seafood safety guidance recommends choosing fish that smells fresh and mild, not fishy, sour, or ammonia-like. Fresh fillets should look firm, not dried or discolored around the edges.

How to Use Fresh Salmon Instead

Cooked fresh salmon fillet flaked into pieces with salmon croquettes nearby
Fresh salmon can make excellent salmon croquettes, although the texture is usually cleaner and more delicate than the canned version. For that reason, cook it first, cool it slightly, and then flake it gently before mixing.
Fresh salmon adjustment: Because fresh salmon is usually less salty than canned salmon, taste the mixture before shaping and add a little extra salt, lemon, or Worcestershire if needed.

How to Make Salmon Croquettes Step by Step

This method keeps the salmon flaky and the croquettes sturdy, which is the main thing a good recipe needs to get right. Drain well, mix the wet binder first, fold gently, shape evenly, and avoid flipping until the first side has formed a crust.

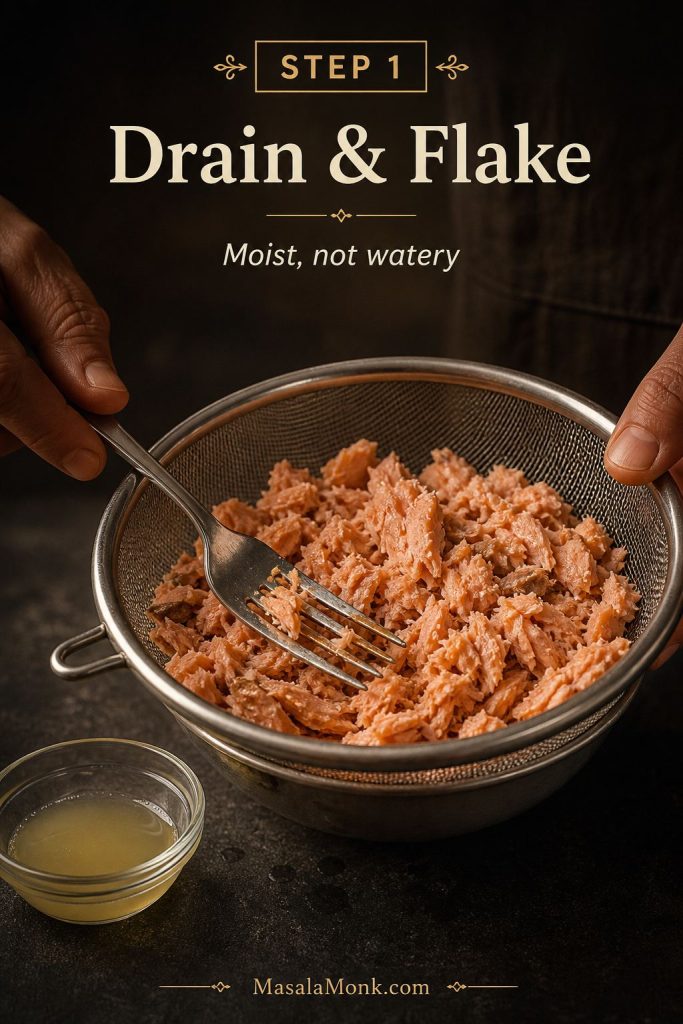
Step 1: Drain and Flake the Salmon

Drain the canned salmon thoroughly. Press out extra liquid if needed, then flake it with a fork. Do not mash it into a paste. A little texture gives the croquettes a better center.

Canned salmon being flaked with a fork in a strainer after draining
Start by draining and flaking the salmon gently. This step removes extra liquid, but it also keeps enough texture so the croquettes do not turn into a paste.

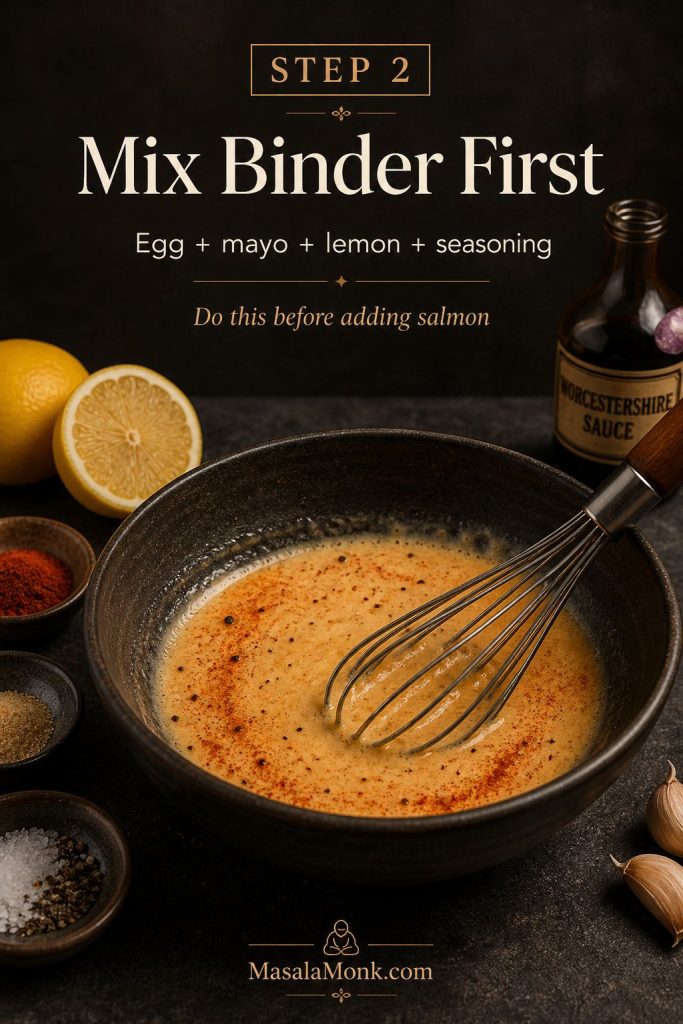
Step 2: Mix the Wet Binder First

In a large bowl, whisk the egg, mayonnaise, Worcestershire sauce, lemon juice, garlic powder, paprika, black pepper, salt, and cayenne or hot sauce if using. Mixing the wet ingredients first helps the seasoning spread evenly.

Egg, mayonnaise, lemon juice, Worcestershire sauce, and seasonings being whisked together in a bowl
Mixing the wet binder first spreads the seasoning evenly. As a result, you can fold in the salmon gently later instead of overworking the mixture.

Step 3: Fold in Salmon, Vegetables, Cornmeal, and Flour

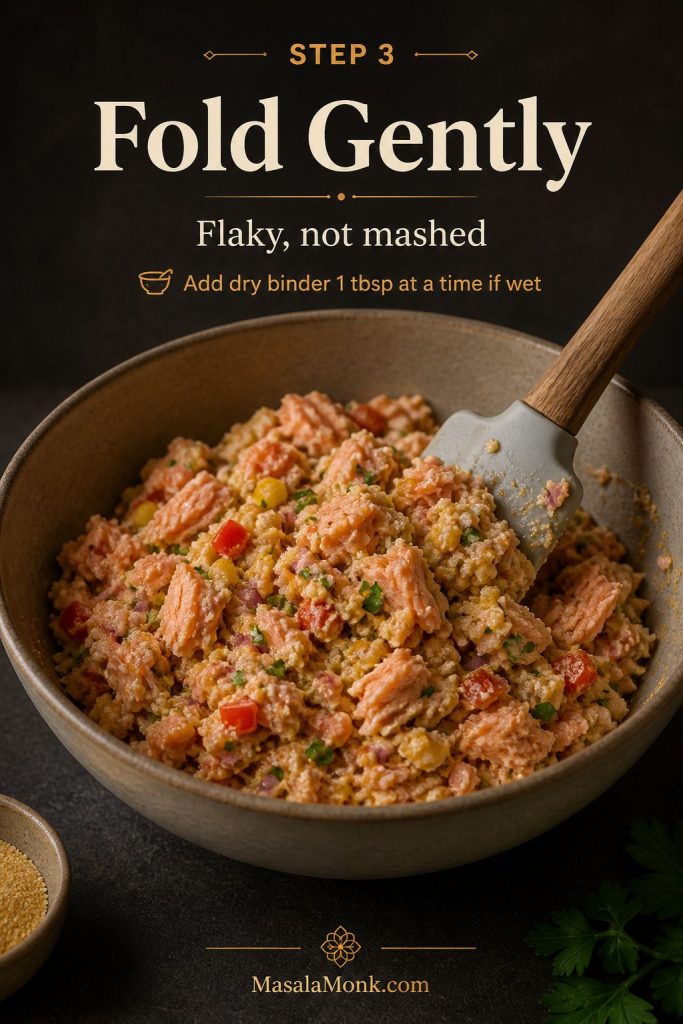
Add the flaked salmon, onion, bell pepper, green onion or parsley, cornmeal, and flour. Fold gently until the mixture holds together when pressed. If it feels very wet, add another tablespoon of cornmeal, flour, panko, or crushed crackers.

Salmon croquette mixture with salmon flakes, onion, bell pepper, cornmeal, flour, and herbs being folded with a spatula
Fold the mixture just until it holds together. You should still see salmon flakes, small vegetables, and binder throughout rather than a smooth mashed filling.

Step 4: Shape Into ¼-Cup Patties

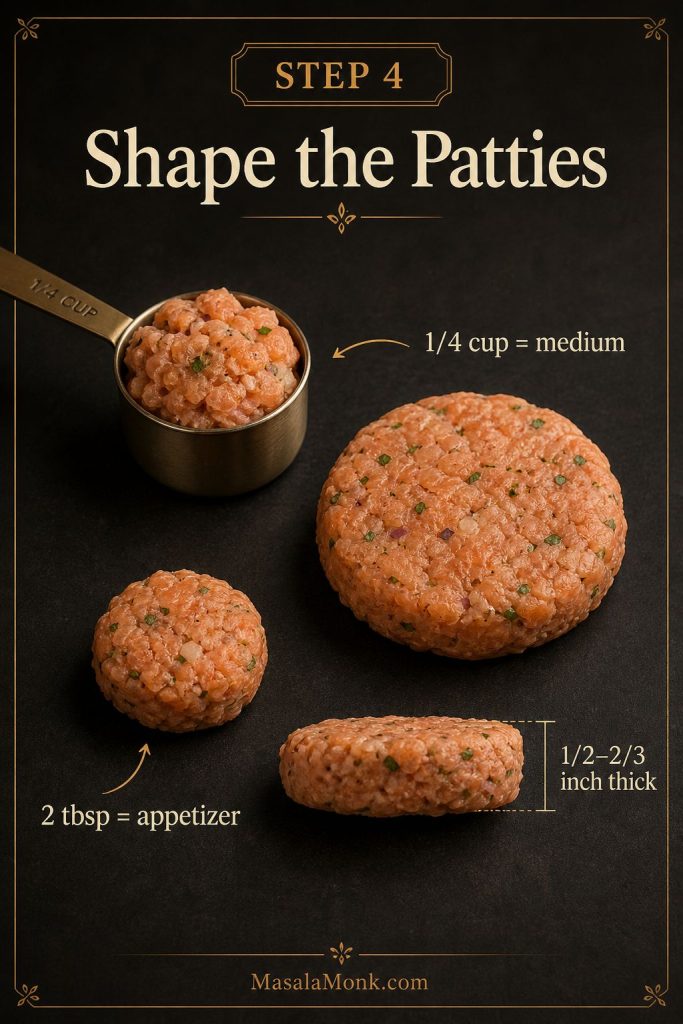
Scoop about ¼ cup of mixture for each croquette. Shape into patties about ½–⅔ inch thick. Do not pack them too tightly; press just enough so they hold together.

Appetizer size: For smaller salmon croquettes, use 2 tablespoons of mixture per patty and cook slightly less, about 2–3 minutes per side.
Quarter-cup scoop, medium salmon croquette patty, smaller appetizer patty, and thickness guide
Even sizing helps the croquettes cook at the same speed. Use ¼ cup for dinner-size patties or 2 tablespoons for smaller appetizer croquettes.

Step 5: Chill if the Mixture Feels Soft

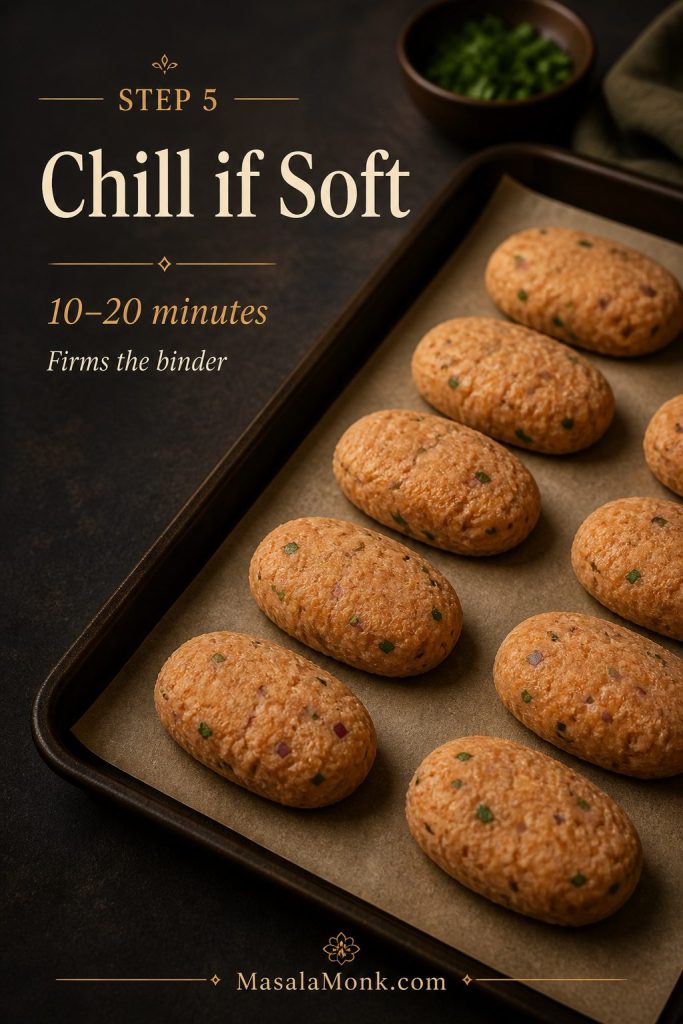
If the croquettes feel delicate, chill them for 10–20 minutes. Chilling firms the binder and makes them easier to flip. This is especially useful if your salmon was very moist or if you used fresh salmon.

Shaped uncooked salmon croquettes resting on a parchment-lined tray before frying
If the patties feel soft, chill them before cooking. This short rest firms the binder and makes the salmon croquettes easier to move without cracking.

Step 6: Pan-Fry Until Crisp

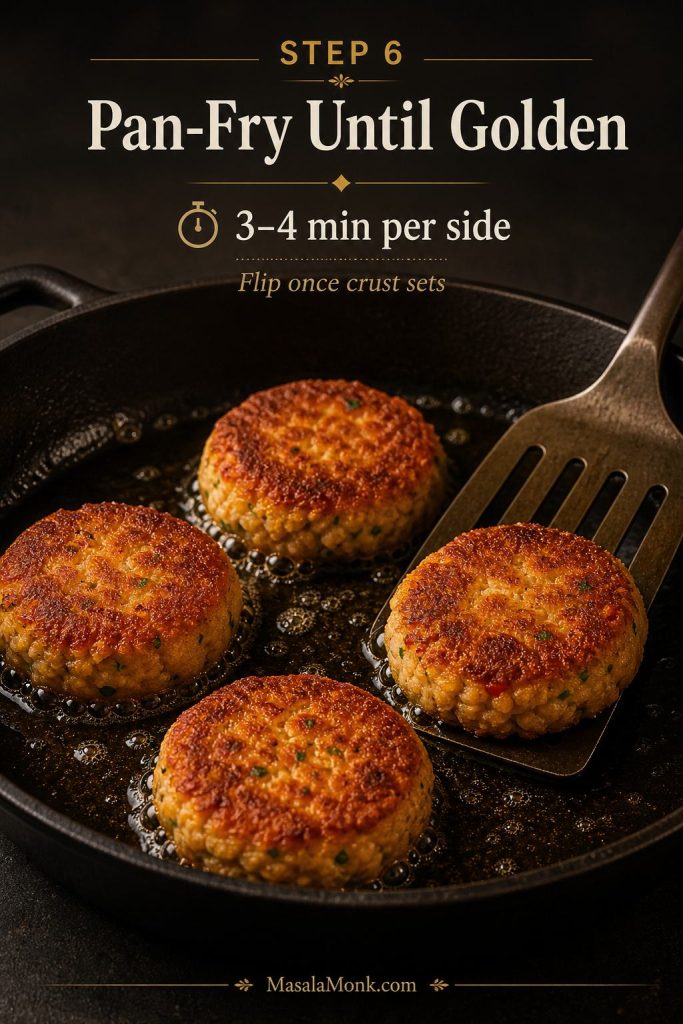
Heat neutral oil in a cast iron skillet or heavy-bottom skillet until it reaches about 350°F / 175°C, or until a small crumb sizzles steadily when dropped in. Fry the croquettes for 3–4 minutes per side, flipping once, until deeply golden and crisp. Drain on a wire rack or paper-towel-lined plate.

Salmon croquettes frying in shallow oil in a skillet until golden brown
Pan-fry the croquettes until the first side is golden and set. Once that crust forms, the patties are much easier to flip cleanly.

Pan-Fried Salmon Croquettes

Pan-frying is the best default method because it gives salmon croquettes the crispest crust and the most classic texture. Use a 10-inch cast iron skillet or heavy-bottom skillet, and fry in batches so the oil temperature does not drop too much.

Because the salmon is already cooked when you use canned salmon, the real goal is to set the croquettes, crisp the crust, and heat the center without drying them out.

You do not need to deep-fry them. A shallow layer of oil is enough. For 8 croquettes, start with about ¼ cup / 60 ml oil and add a little more if the pan looks dry. For a more old-fashioned Southern fry, use closer to ½ cup / 120 ml.

Use a neutral frying oil such as canola, vegetable, avocado, or peanut oil. The oil should shimmer, and a small crumb should sizzle steadily when dropped in. Croquettes that brown too fast need slightly lower heat. Croquettes that absorb oil and taste greasy usually need hotter oil or fewer patties in the pan.

Best Oil Temperature for Salmon Croquettes

Frying thermometer in shallow oil at 350 degrees Fahrenheit with a small crumb sizzling in a cast iron skillet
Oil temperature matters because cool oil makes croquettes greasy, while overheated oil browns the crust too fast. Aim for a steady sizzle around 350°F.

The croquettes are done when the outside is deeply golden, the center feels hot, and the patties feel set when lifted with a spatula.

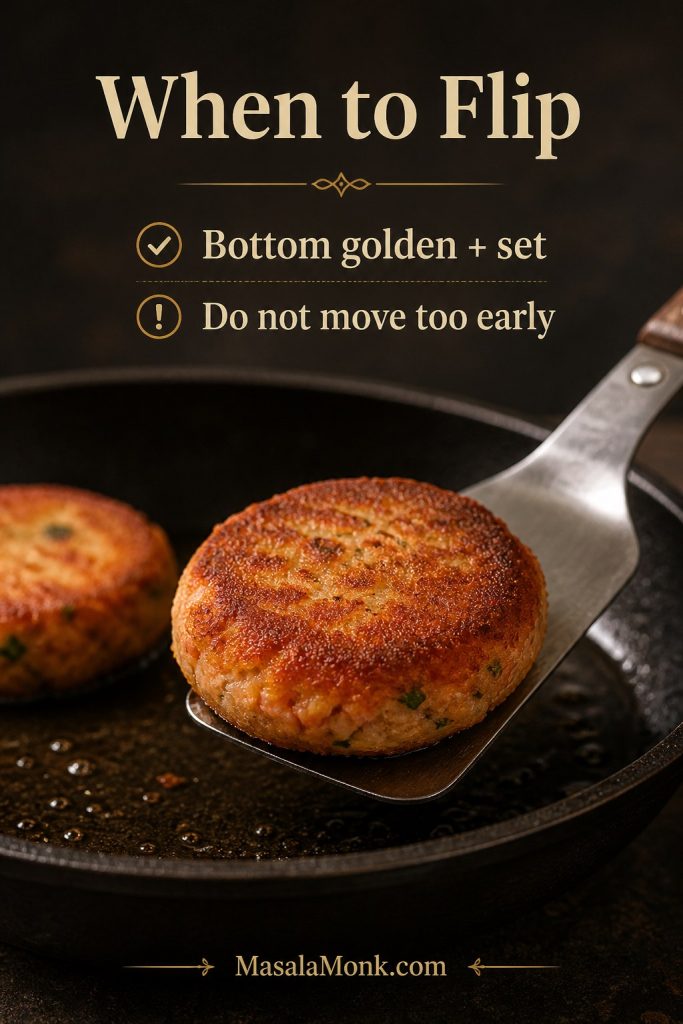
Do not flip too early. If the first side has not formed a crust, the croquette may tear. Let it cook until the edges look set and the bottom is golden.

When to Flip Salmon Croquettes

Salmon croquette lifted on a spatula to show a golden, set underside in a skillet
Flip only when the underside is golden and firm. Otherwise, the crust may tear before it has enough structure to hold the patty together.

Southern Salmon Croquettes

Southern salmon croquettes usually start with canned pink salmon, onion, bell pepper, egg, cornmeal, flour, and a hot skillet. The texture is crisp-edged and old-fashioned, with a savory salmon center and a little sweetness from the vegetables.

For a stronger Southern-style version, keep the cornmeal and flour combination in the recipe card, add a pinch of cayenne or a few dashes of hot sauce, and serve the croquettes with remoulade, lemon dill mayo, green chutney mayo, or hot sauce.

Extra cornmeal on the outside creates a rougher, crunchier crust. For a softer patty, skip the extra coating and let the flour do more of the binding.

Southern Salmon Croquettes Texture Cue

Southern-style salmon croquettes with a cornmeal crust served with sauce, lemon, herbs, and one croquette broken open
Southern salmon croquettes lean into canned salmon, cornmeal, and skillet frying. That combination gives them a crisp old-fashioned crust and a tender, savory center.

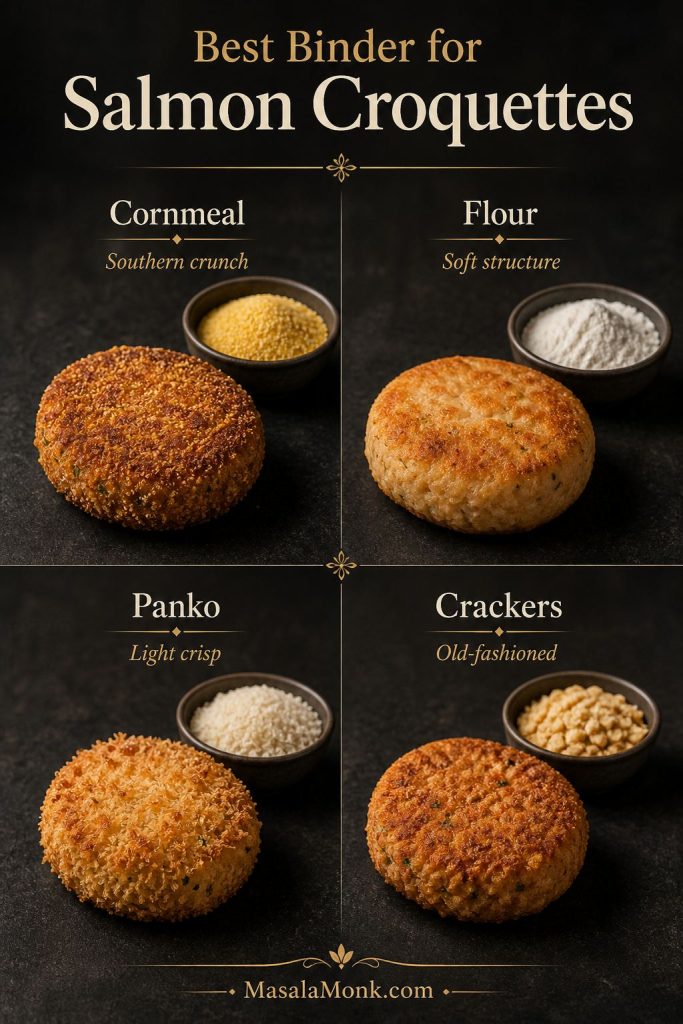
Cornmeal vs Flour vs Crackers vs Panko

The binder changes the texture of salmon croquettes more than most people realize. Cornmeal gives a classic Southern texture. Flour makes the mixture more cohesive. Panko makes the croquettes lighter and crispier. Crushed crackers give an old-fashioned pantry flavor.

Binder or coating Best for Texture
Cornmeal Southern salmon croquettes Crisp, grainy, old-fashioned crust
Flour Softer salmon patties Tender, cohesive, less crunchy
Panko Modern crispy salmon cakes Light, airy crunch
Crushed saltines Pantry-style salmon patties Savory, tender-crisp, nostalgic
Regular breadcrumbs Classic salmon cakes Even structure and mild crust
Almond flour Low-carb or gluten-free variation Softer and less crisp, but useful for dietary swaps

Best Binder for Salmon Croquettes

Four salmon croquettes compared with cornmeal, flour, panko, and crushed crackers as binders
The binder changes the final bite. Cornmeal adds crunch, flour gives structure, panko makes the crust lighter, and crackers create a more old-fashioned pantry-style patty.

For the best first batch, use cornmeal plus flour. If you want a lighter, crispier version, replace some or all of the cornmeal with panko. For old-fashioned salmon patties, crushed saltines work beautifully instead of panko or breadcrumbs.

If your mixture feels too wet or too loose, jump to the troubleshooting guide.

Baked Salmon Croquettes

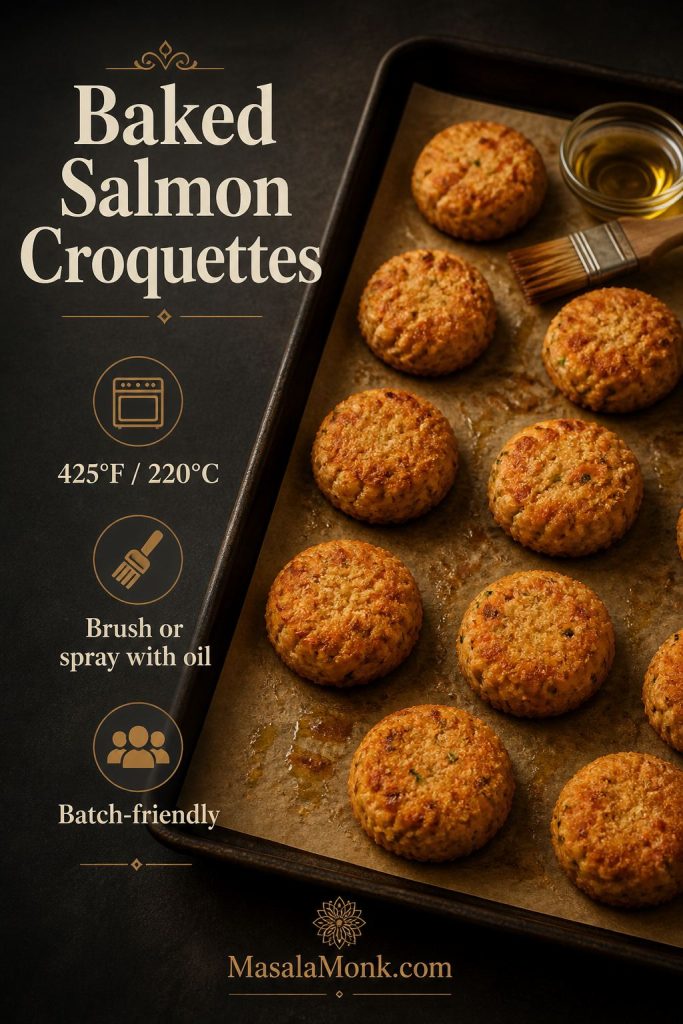
Baked salmon croquettes are useful when you want less oil or need to cook a whole batch at once. Although they will not be quite as deeply crisp as pan-fried croquettes, a hot, well-oiled sheet pan helps them brown.

To bake them, heat the oven to 425°F / 220°C. Place the shaped croquettes on a well-oiled sheet pan, brush or spray the tops lightly with oil, and bake for 15 minutes. Flip carefully, then bake for another 5–7 minutes, until golden and firm.

Baked Salmon Croquettes Texture Cue

Baked salmon croquettes on a parchment-lined sheet pan with oil brush and small bowl of oil
Baked salmon croquettes are useful when you want a lighter batch or need to cook several at once. However, brushing or spraying them with oil helps the surface brown better and keeps the crust from tasting dry.
Baked texture tip: Keep baked croquettes slightly thinner, around ½ inch, so they heat through and brown before drying out.

Want a crisp, lower-oil option without using the oven? See the air fryer method.

Air Fryer Salmon Croquettes

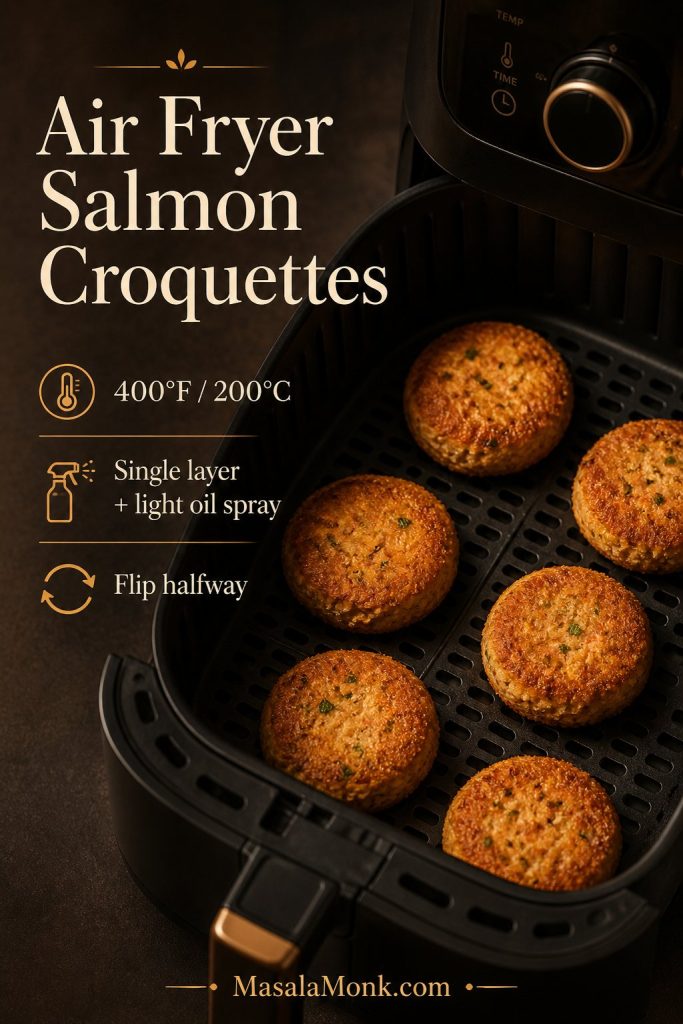
Air fryer salmon croquettes are a good middle ground between pan-fried and baked. They use less oil than skillet frying; however, they can still develop a crisp surface if you spray them lightly and avoid overcrowding the basket.

Preheat the air fryer to 400°F / 200°C. Spray the basket or use perforated parchment. Add the croquettes in a single layer, spray the tops lightly with oil, and air fry for 8–10 minutes. Flip, spray again if needed, and cook for another 3–5 minutes, depending on thickness.

Air Fryer Salmon Croquettes Texture Cue

Salmon croquettes arranged in a single layer inside an air fryer basket
Air fryer salmon croquettes can crisp surprisingly well, provided the patties are spaced apart and lightly oiled. Meanwhile, overcrowding the basket traps steam and makes the crust softer.

If you are building a full air fryer meal, serve the croquettes with something crisp and simple like air fryer hash browns or a cold salad on the side.

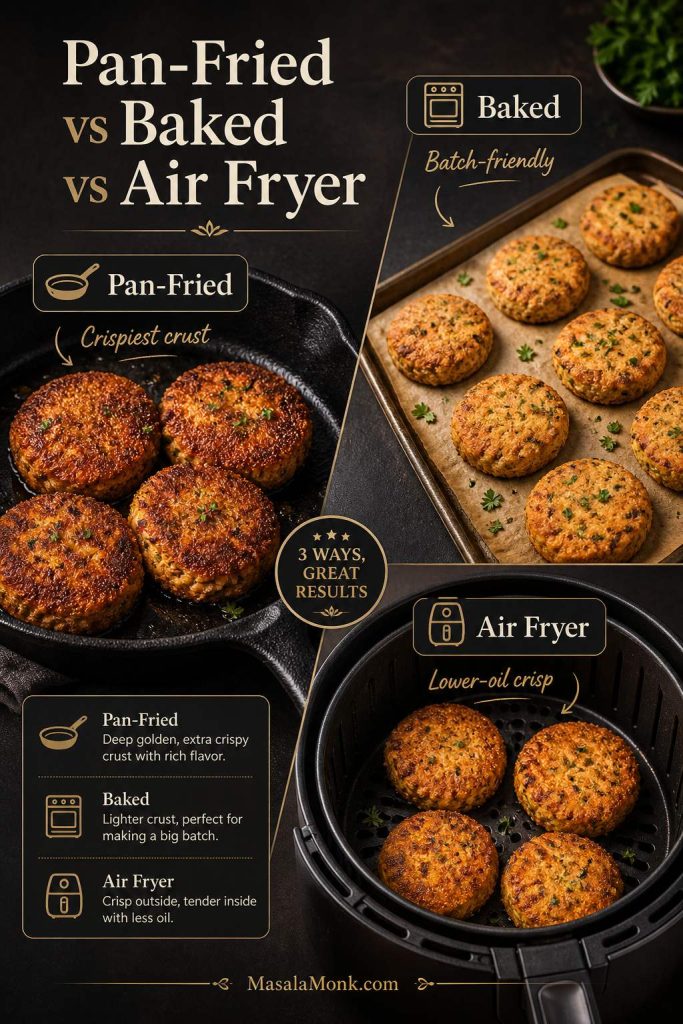
Pan-Fried vs Baked vs Air Fryer Salmon Croquettes

Comparison board showing pan-fried, baked, and air fryer salmon croquettes with different cooking equipment
Each cooking method changes the result a little. Pan-fried salmon croquettes give the boldest crust, baked croquettes are easiest for a larger batch, and the air fryer offers a crisp finish with less oil.

Potato Salmon Croquettes

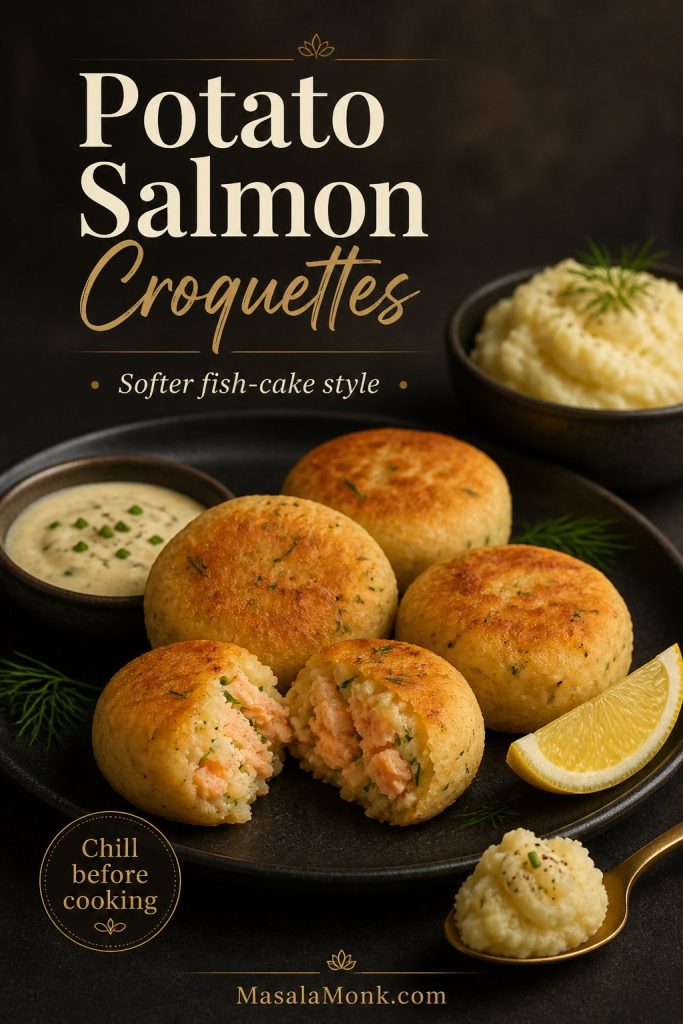
Potato salmon croquettes are softer and more like fish cakes. To make them, mix the drained salmon with about 1 cup mashed potatoes, one egg, onion, herbs, lemon, and seasoning. Reduce the cornmeal and flour because the potatoes already add body.

Chill potato salmon croquettes before cooking. They are more delicate than the canned salmon version, so a short rest in the fridge helps them hold their shape.

Potato Salmon Croquettes Texture Cue

Potato salmon croquettes served with mashed potato, lemon, sauce, and one croquette broken open
Potato salmon croquettes are softer than the cornmeal version. Because the mixture is more delicate, chilling before cooking helps them hold their shape.
Best Sauce for Salmon Croquettes

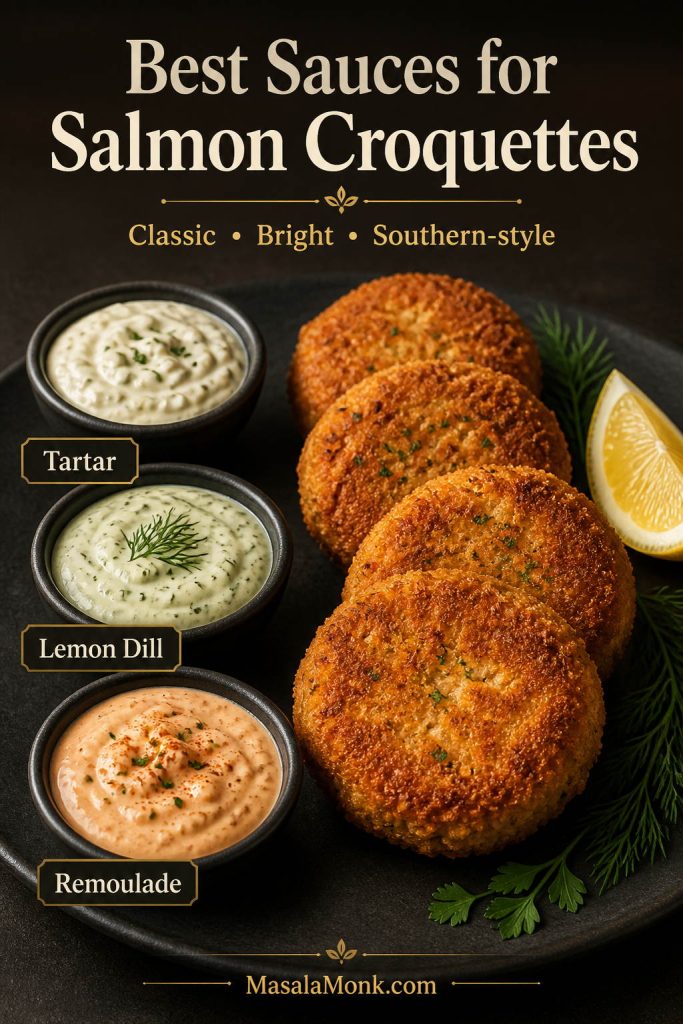
Salmon croquettes need a sauce with acid, creaminess, herbs, or heat. Tartar sauce is the familiar classic, lemon dill mayo is the easiest homemade option, remoulade gives a more Southern seafood-style finish, and brighter sauces like green chutney mayo, tzatziki, mango mustard, or mango habanero can change the whole plate.

Best Sauces for Salmon Croquettes

Salmon croquettes served with three sauces labeled tartar, lemon dill, and remoulade
The best sauce depends on the mood of the plate. Tartar keeps things classic, lemon dill adds brightness, and remoulade gives the croquettes a Southern seafood-style finish.

Quick Tartar Sauce Shortcut

  • ½ cup mayonnaise
  • 1–2 tablespoons chopped pickles or relish
  • 1 teaspoon lemon juice
  • 1 teaspoon Dijon mustard, optional
  • Black pepper, to taste

Stir everything together and chill until serving. This is the easiest classic dip for salmon patties, salmon cakes, and crisp croquettes.

Quick Lemon Dill Sauce

  • ½ cup mayonnaise or Greek yogurt
  • 1 tablespoon lemon juice
  • 1 teaspoon Dijon mustard
  • 1 tablespoon chopped dill or parsley
  • 1 small grated garlic clove
  • Salt and black pepper, to taste

Mix everything together and chill until ready to serve. If the sauce tastes flat, add more lemon. If it tastes too sharp, add a spoonful more mayo or yogurt.

Quick Remoulade-Style Sauce

  • ½ cup mayonnaise
  • 1 teaspoon Dijon mustard
  • 1 tablespoon lemon juice or pickle juice
  • 1 teaspoon hot sauce
  • ½ teaspoon paprika
  • 1 tablespoon chopped pickles, relish, or capers, optional
  • Black pepper, to taste

Mix everything together and chill for 10–15 minutes if you have time. This sauce is especially good with Southern salmon croquettes, cornmeal-crusted croquettes, and fried salmon patties.

For an Indian-style twist, stir green chutney into mayo or yogurt. The coriander, mint, chilli, ginger, cumin, and citrus make a sharp, fresh dip that cuts through the fried crust.

For baked or air fryer croquettes, a cool tzatziki sauce works beautifully. The cucumber and yogurt keep the plate lighter, especially if the croquettes are spicy or served as lunch.

For a sweet, tangy, fish-friendly sauce, try mango mustard sauce instead of plain mustard. For more heat, finish the plate with mango habanero sauce, especially with slaw, rice, or a bowl-style meal.

Building a full plate? See what to serve with salmon croquettes.

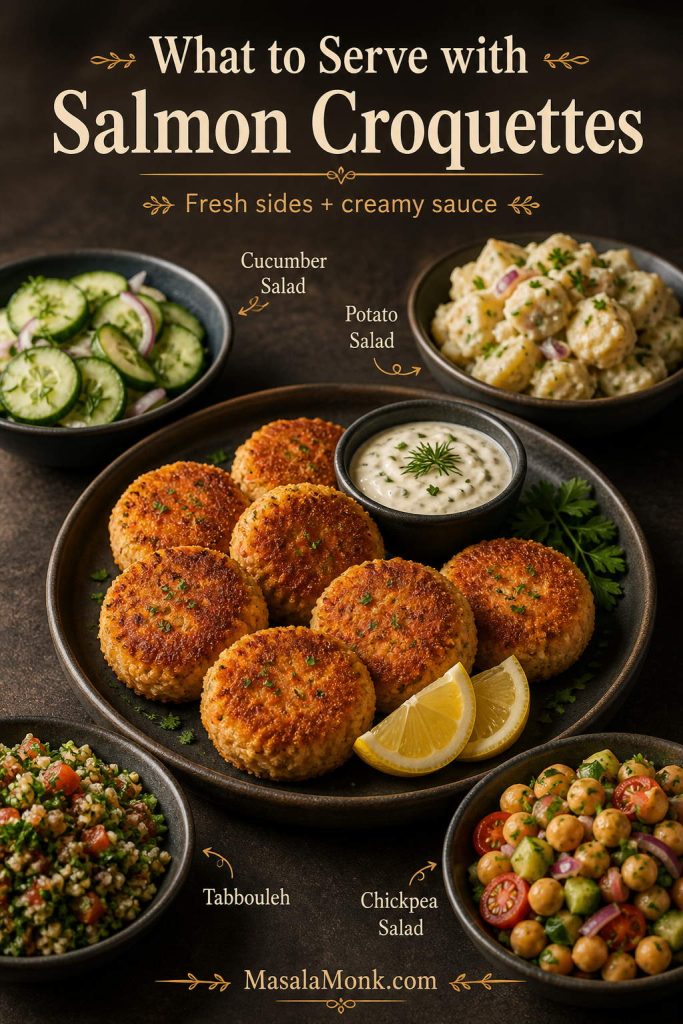
What to Serve with Salmon Croquettes

A cold, crisp cucumber salad is one of the easiest sides for salmon croquettes. The vinegar, dill, onion, and crunch balance the fried crust without making the meal heavy.

Tabbouleh is a brighter herb-heavy side because parsley, mint, lemon, tomato, and bulgur bring freshness to the plate.

For a more filling lunch, add chickpea salad on the side or tuck the croquettes into bowls with greens, cucumber, herbs, and sauce.

A classic comfort-food plate works well with potato salad, fries, roasted potatoes, green beans, coleslaw, or a simple green salad.

During warmer months, serve the croquettes with mango salsa, lime, and shredded cabbage for a fresher, taco-inspired plate.

Visual Side Dish Guide

Salmon croquettes served with cucumber salad, potato salad, tabbouleh, chickpea salad, lemon wedges, and creamy sauce
For a balanced meal, pair crisp salmon croquettes with something fresh and something creamy. Cucumber salad, tabbouleh, chickpea salad, and potato salad all work well because they cut through the richness.

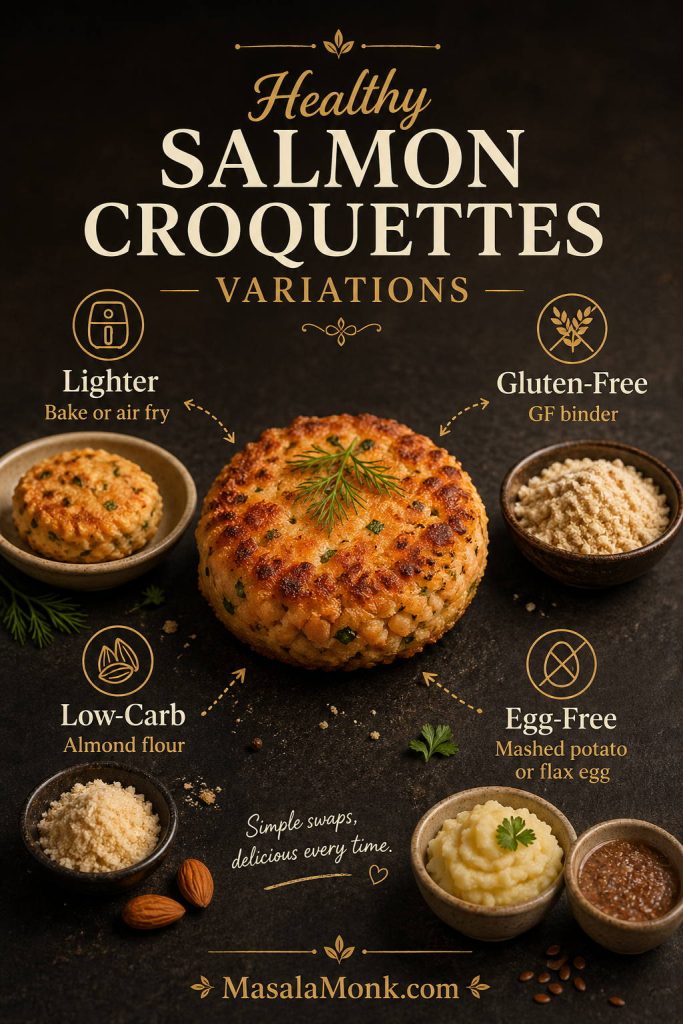
Healthy, Gluten-Free, Low-Carb, and Egg-Free Variations

For a lighter or dietary-specific version, keep the same basic method and adjust the binder, cooking method, or sauce.

Variation How to adjust it
Lighter salmon croquettes Bake or air fry instead of pan-frying, and serve with a yogurt-based sauce like tzatziki.
Gluten-free salmon croquettes Use certified gluten-free cornmeal plus gluten-free flour, gluten-free crackers, gluten-free breadcrumbs, or almond flour. Expect almond flour to make a softer croquette.
Low-carb salmon croquettes Use almond flour in place of flour and skip crackers or breadcrumbs. Expect a softer texture than the cornmeal version.
Egg-free salmon croquettes Use 2–3 tablespoons mashed potato or a flax egg as the binder, then chill the patties well before cooking.
Dairy-free salmon croquettes The base recipe is already dairy-free if your mayo is dairy-free.

Healthy Salmon Croquettes Variations

Healthy salmon croquette variation board showing lighter, gluten-free, low-carb, and egg-free options
You can adapt this salmon croquettes recipe in several directions without starting over. For example, bake or air fry for a lighter version, use a gluten-free binder if needed, or swap the binder to fit low-carb or egg-free needs.

In these gluten-free, low-carb, or egg-free versions, treat the croquette mixture more gently and chill it before cooking. These swaps usually need a short rest because they are softer than the classic canned salmon and cornmeal version.

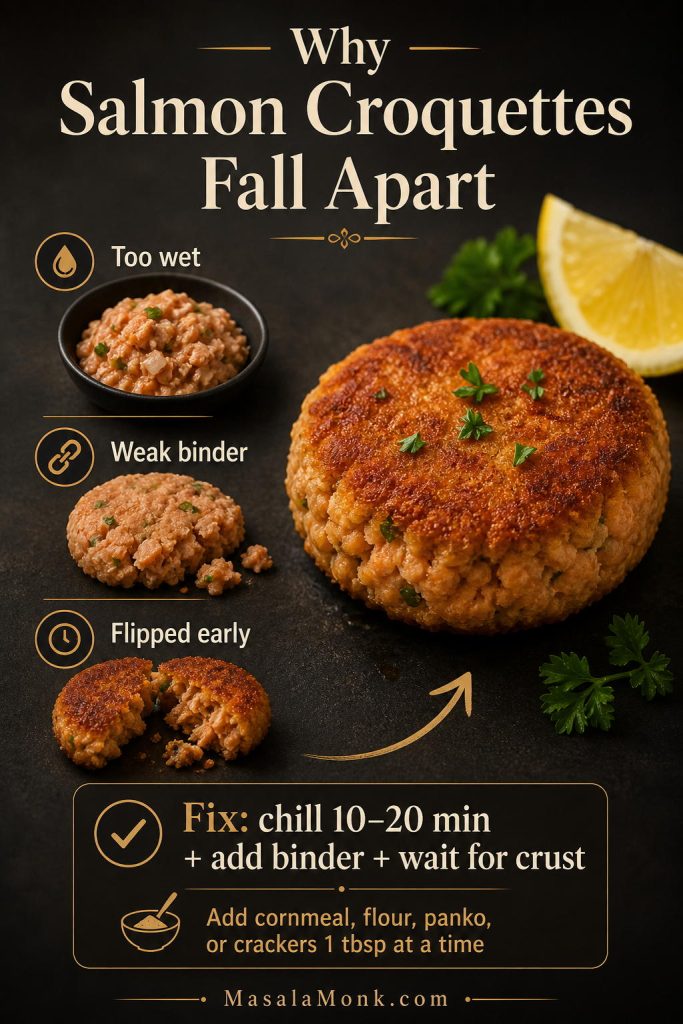
Why Do Salmon Croquettes Fall Apart?

Croquettes usually fall apart when the salmon mixture is too wet, the binder is too weak, the patties were not chilled, or they were flipped before the crust had time to set. Fortunately, the fix is simple: drain the salmon better, add dry binder one tablespoon at a time, chill the shaped patties, and flip only after the bottom is golden.

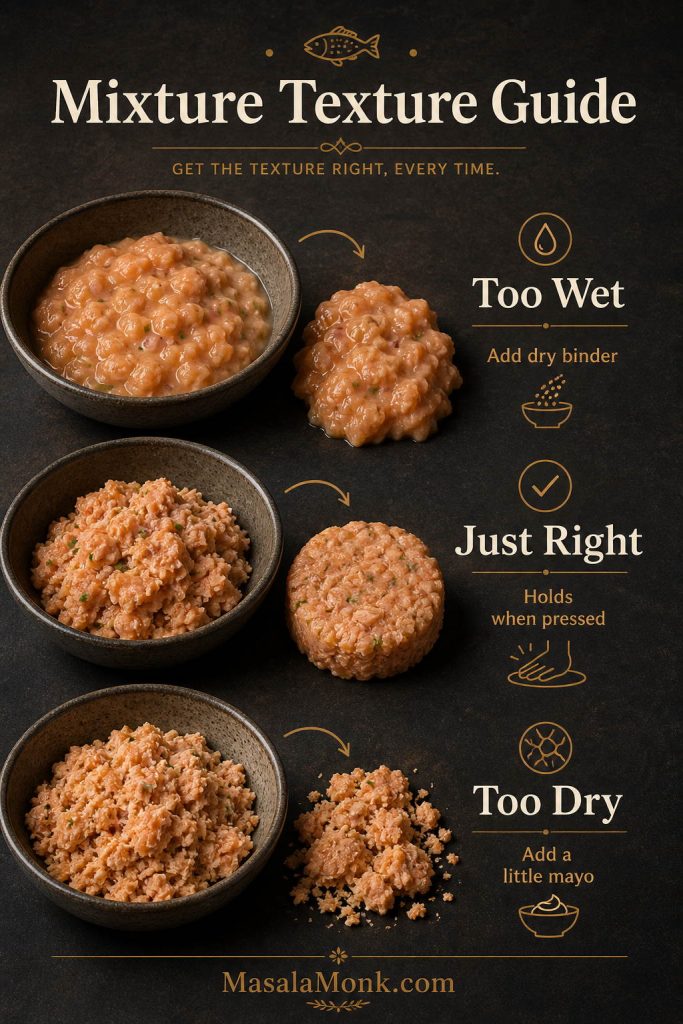
Salmon Croquettes Mixture Texture Guide

Three salmon croquette mixtures labeled too wet, just right, and too dry
The mixture should hold together when pressed, but still look flaky. If it is wet, add dry binder; if it crumbles, add a little mayo.
Problem Why it happens Fix
Croquettes fall apart Too wet, weak binder, or flipped too early. Add 1–2 tablespoons dry binder, chill 10–20 minutes, and flip only after a crust forms.
Mixture is too wet Salmon was not drained well or there is too much mayo. Add cornmeal, flour, panko, or crushed crackers 1 tablespoon at a time.
Croquettes are dry Too much flour or cornmeal, or they cooked too long. Add a little mayo to the mixture next time and serve with sauce.
Croquettes are mushy Too much wet binder or salmon mashed too finely. Drain salmon well, leave some flakes, and reduce mayo slightly.
They stick to the pan Oil was not hot enough or they were moved too soon. Heat oil until shimmering and let the bottom set before flipping.

They taste greasy Oil was too cool or the pan was crowded. Fry hotter, cook in batches, and drain on a wire rack.
They taste bland Not enough salt, acid, or savory seasoning. Add lemon, Worcestershire, herbs, black pepper, cayenne, hot sauce, or a small amount of Old Bay-style seasoning.

Why Salmon Croquettes Fall Apart

Troubleshooting guide showing wet mixture, weak binder, early flipping, and a corrected salmon croquette
Salmon croquettes usually fall apart for one of three reasons: too much moisture, weak binder, or flipping too early. Therefore, chill the patties, adjust the binder, and wait for the crust to set.

Ready to try again? Return to the recipe card.

Storage, Freezing, and Reheating

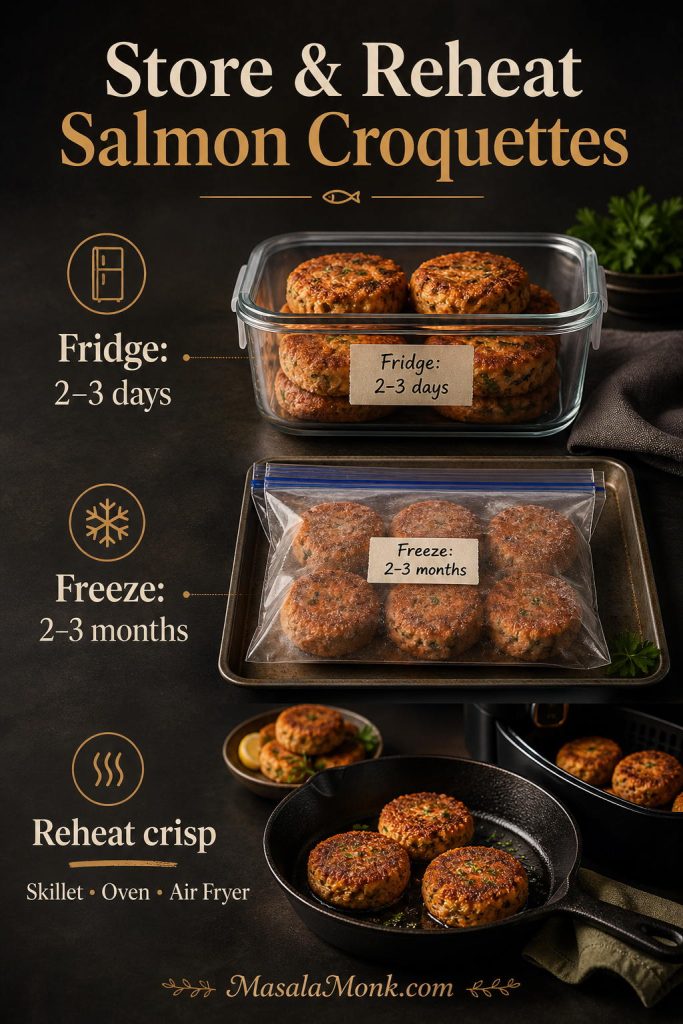
Salmon croquettes are best right after frying, but leftovers reheat well if you use a skillet, oven, or air fryer. Avoid microwaving if you want to keep the crust crisp.

Storage method Time Best reheating method
Fridge 2–3 days Skillet, oven, or air fryer
Make ahead Up to 1 day Shape the croquettes, cover, and refrigerate. Fry straight from the fridge, adding an extra minute if needed.
Freeze uncooked Up to 2–3 months Freeze on a tray first, then transfer to a bag. Thaw before cooking.
Freeze cooked Up to 2–3 months Cool fully, freeze in a single layer, then reheat from thawed.
Skillet reheat 2–3 minutes per side Best for restoring the crust
Air fryer reheat 375°F / 190°C for 4–7 minutes Fast and crisp
Oven reheat 350°F / 175°C for 10–15 minutes Best for larger batches

How to Store and Reheat Salmon Croquettes

Salmon croquettes stored in a fridge container, frozen in a freezer bag, and reheated in a skillet or air fryer
Leftover croquettes keep best when stored properly and reheated with dry heat. Use the fridge for short storage, the freezer for longer storage, and a skillet, oven, or air fryer to bring back the crust.

Saveable Salmon Croquettes Recipe Card

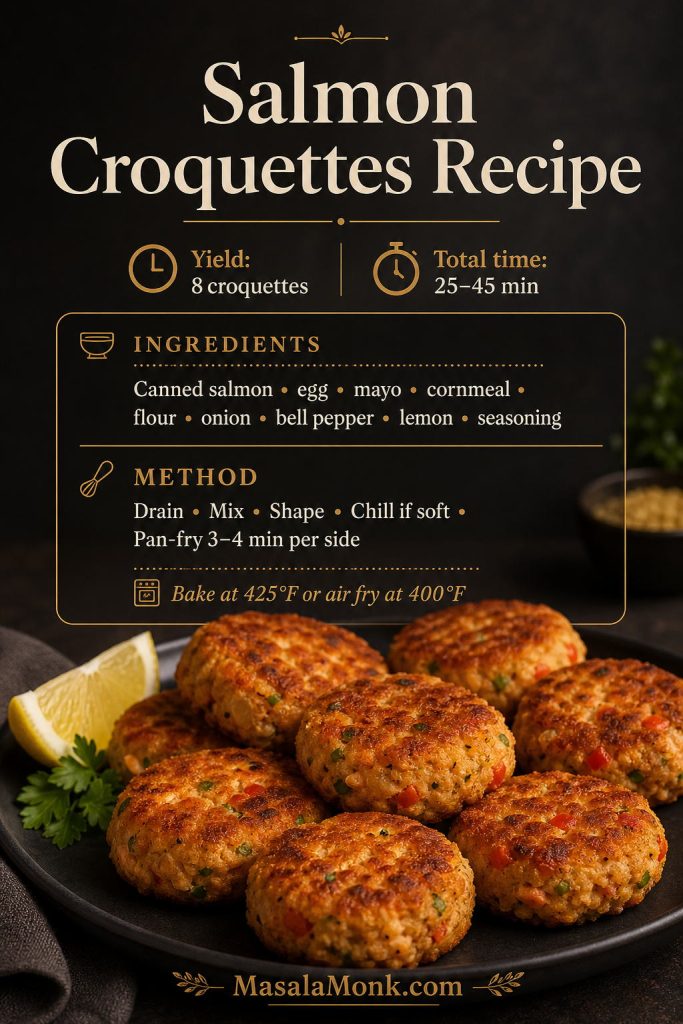
Saveable salmon croquettes recipe card with yield, total time, ingredients, method, and cooked croquettes
This saveable salmon croquettes recipe card keeps the core method simple: drain well, bind carefully, shape evenly, and fry until the crust sets. Therefore, it works as a quick refresher when you do not want to reread the full post.

Crispy Salmon Croquettes Recipe

These salmon croquettes are crisp outside, tender inside, and made with canned salmon, egg, mayo, cornmeal, flour, onion, bell pepper, lemon, Worcestershire, and pantry seasoning. Pan-fry them for the classic version, or use the baked and air fryer notes below.

Prep Time15 minutes
Cook Time8–10 minutes
Optional Chill10–20 minutes
Total Time25–45 minutes
Yield8 croquettes

Equipment

  • Large mixing bowl
  • Fork for flaking salmon
  • ¼-cup measuring cup or scoop
  • 10-inch cast iron skillet or heavy-bottom skillet
  • Thin spatula or fish spatula
  • Wire rack or paper-towel-lined plate
  • Optional instant-read thermometer for oil

Ingredients

  • 1 can canned pink salmon, 14.75–15 oz / 418–425 g, drained well
  • 1 large egg
  • ¼ cup / 60 g mayonnaise
  • ½ cup / about 75 g fine yellow cornmeal
  • ¼ cup / about 30 g all-purpose flour
  • ¼ cup / about 40 g finely diced onion
  • ¼ cup / about 35 g finely diced bell pepper
  • 2 tablespoons chopped green onion or parsley
  • 1 tablespoon / 15 ml Worcestershire sauce
  • 1 tablespoon / 15 ml fresh lemon juice
  • ½ teaspoon garlic powder
  • ½ teaspoon paprika or smoked paprika
  • ¼ teaspoon black pepper
  • ¼–½ teaspoon salt, to taste
  • Pinch of cayenne or a few dashes hot sauce, optional
  • Optional: ½ teaspoon Old Bay-style seafood seasoning, Cajun seasoning, or Creole seasoning; reduce salt if using a salty blend
  • ¼–½ cup / 60–120 ml neutral oil, such as canola, vegetable, avocado, or peanut oil, for frying

Instructions

  1. Drain and flake the salmon. Drain the canned salmon well, but do not squeeze it completely dry. Flake it with a fork, leaving some texture.


  2. Mix the wet binder. In a large bowl, whisk the egg, mayonnaise, Worcestershire sauce, lemon juice, garlic powder, paprika, black pepper, salt, and cayenne or hot sauce.
  3. Add the salmon and dry binder. Fold in the salmon, onion, bell pepper, green onion or parsley, cornmeal, and flour. Mix gently until the mixture holds together when pressed.
  4. Adjust texture if needed. If the mixture feels too wet, add cornmeal, flour, panko, or crushed crackers 1 tablespoon at a time.
  5. Shape. Scoop about ¼ cup mixture per croquette and shape into patties about ½–⅔ inch thick. You should get about 8 croquettes.
  6. Chill if needed. If the patties feel soft, chill them for 10–20 minutes.
  7. Heat the oil. Add oil to a cast iron skillet or heavy-bottom skillet and heat to about 350°F / 175°C.
  8. Fry. Cook the croquettes for 3–4 minutes per side, flipping once, until golden, crisp, hot in the center, and set enough to lift with a spatula.
  9. Drain and serve. Transfer to a wire rack or paper-towel-lined plate. Serve hot with lemon wedges, tartar sauce, lemon dill sauce, remoulade, green chutney mayo, tzatziki, mango mustard, or hot sauce.

Baked Version

Heat oven to 425°F / 220°C. Place croquettes on a well-oiled sheet pan, brush or spray the tops with oil, and bake for 15 minutes. Flip and bake 5–7 minutes more.

Air Fryer Version

Air fry at 400°F / 200°C for 8–10 minutes. Flip, spray lightly with oil, and cook 3–5 minutes more, until crisp and heated through.

Fresh Salmon Version

Use 1 lb / 454 g cooked fresh salmon. Cool slightly, flake, and use in place of canned salmon. Taste before shaping because fresh salmon may need a little extra salt or seasoning.

Notes

  • For a lighter crispy version, replace some or all of the cornmeal with panko.
  • For old-fashioned salmon patties, use crushed saltines instead of panko or breadcrumbs.
  • For gluten-free salmon croquettes, use certified gluten-free cornmeal plus gluten-free flour, gluten-free crackers, gluten-free breadcrumbs, or almond flour.
  • For spicier croquettes, add cayenne, hot sauce, Cajun-style seasoning, or extra black pepper.
  • You can shape the croquettes up to 1 day ahead, cover, and refrigerate. Fry them straight from the fridge, adding an extra minute if needed.
  • Serve with lemon wedges and one creamy sauce, such as tartar sauce, lemon dill mayo, or remoulade.

If this salmon croquettes recipe helped you get crisp patties that actually hold together, save it for the next time you have canned salmon in the pantry. You can also come back to the binder guide, sauce ideas, and troubleshooting table whenever you want to adjust the recipe with panko, crackers, fresh salmon, or the air fryer.

Serving Salmon Croquettes

Finished salmon croquettes served with lemon wedges and creamy dipping sauce, with one croquette broken open
Serve salmon croquettes as soon as they come out of the pan if you want the contrast at its best. The crust stays crispest early on, while lemon and a creamy sauce brighten the rich, savory center.

FAQs About Salmon Croquettes

Are salmon croquettes the same as salmon patties?

They are very similar, and many people use the names interchangeably. Salmon croquettes are often associated with a crisp, Southern-style version made with canned salmon, cornmeal or flour, egg, onion, and skillet frying. Salmon patties is a broader term and can refer to thinner or simpler salmon cakes.

Are salmon croquettes the same as salmon cakes?

They are in the same family, but salmon cakes often sound a little more restaurant-style and may use fresh salmon, panko, herbs, Dijon, or mayo. Croquettes usually feel more old-fashioned, pantry-friendly, and crisp-edged.

Can I use canned salmon?

Yes. Canned salmon is the easiest and most traditional choice for classic salmon croquettes. Drain it well and flake it before mixing.

Do I remove the bones and skin from canned salmon?

You can remove the larger bones and skin if you prefer a smoother texture. The small soft bones are edible and mash easily, but it is fine to take them out if you do not like them.

Is this recipe better with canned salmon or fresh salmon?

For classic croquettes, canned salmon is easier because it is already cooked, budget-friendly, and easy to bind. Fresh salmon also works, but you need to cook it first, cool it slightly, and flake it before mixing the patties.

Can I use fresh salmon?

Yes. Cook fresh salmon first, cool it slightly, then flake it and use it in place of canned salmon. Fresh salmon croquettes usually taste cleaner and more delicate than canned salmon croquettes.

What keeps salmon croquettes from falling apart?

Good drainage, enough binder, even shaping, and patient frying. Use egg plus a dry binder, chill the patties if they feel soft, and do not flip until the first side has formed a crust.

Do you use cornmeal or flour for salmon croquettes?

Use both for the best classic texture. Cornmeal gives crispness and an old-fashioned Southern feel, while flour helps bind the mixture. You can also use panko, breadcrumbs, or crushed crackers.

Can I use crackers instead of breadcrumbs?

Yes. Crushed saltines are a classic pantry binder for salmon patties and croquettes. They give a savory, tender-crisp texture.

Can salmon croquettes be baked?

Yes. Bake them at 425°F / 220°C on a well-oiled sheet pan for 15 minutes, flip, then bake 5–7 minutes more. Brush or spray the tops with oil for better browning.

Can salmon croquettes be cooked in the air fryer?

Yes. Air fry at 400°F / 200°C for 8–10 minutes, flip, then cook 3–5 minutes more. Spray lightly with oil for a crisp surface.

How long do you cook salmon croquettes?

Pan-fried salmon croquettes usually take 3–4 minutes per side. Baked salmon croquettes take about 20–22 minutes total at 425°F / 220°C. Air fryer salmon croquettes usually take 11–15 minutes total at 400°F / 200°C, depending on thickness.

What sauce goes with salmon croquettes?

Tartar sauce, lemon dill mayo, remoulade, green chutney mayo, tzatziki, mango mustard, mango habanero sauce, hot sauce, or a simple garlic mayo all work well.

What sides go with salmon croquettes?

Cucumber salad, tabbouleh, chickpea salad, potato salad, coleslaw, roasted potatoes, rice, green beans, and mango salsa all pair well with salmon croquettes.

Can you freeze salmon croquettes?

Yes. Freeze shaped uncooked croquettes on a tray, then transfer to a freezer bag. You can also freeze cooked croquettes after they cool fully. For best texture, thaw before reheating or frying.

How do you reheat salmon croquettes?

Reheat them in a skillet for 2–3 minutes per side, in an air fryer at 375°F / 190°C for 4–7 minutes, or in the oven at 350°F / 175°C for 10–15 minutes. The microwave works, but it softens the crust.

Are salmon croquettes healthy?

They can be part of a balanced meal, especially if you serve them with salad, vegetables, or a yogurt-based sauce. Pan-fried croquettes use more oil, while baked or air fryer salmon croquettes are lighter.