Posted on — Leave a comment

Cowboy Caviar Recipe: Easy Texas Caviar Dip with Black Beans & Corn

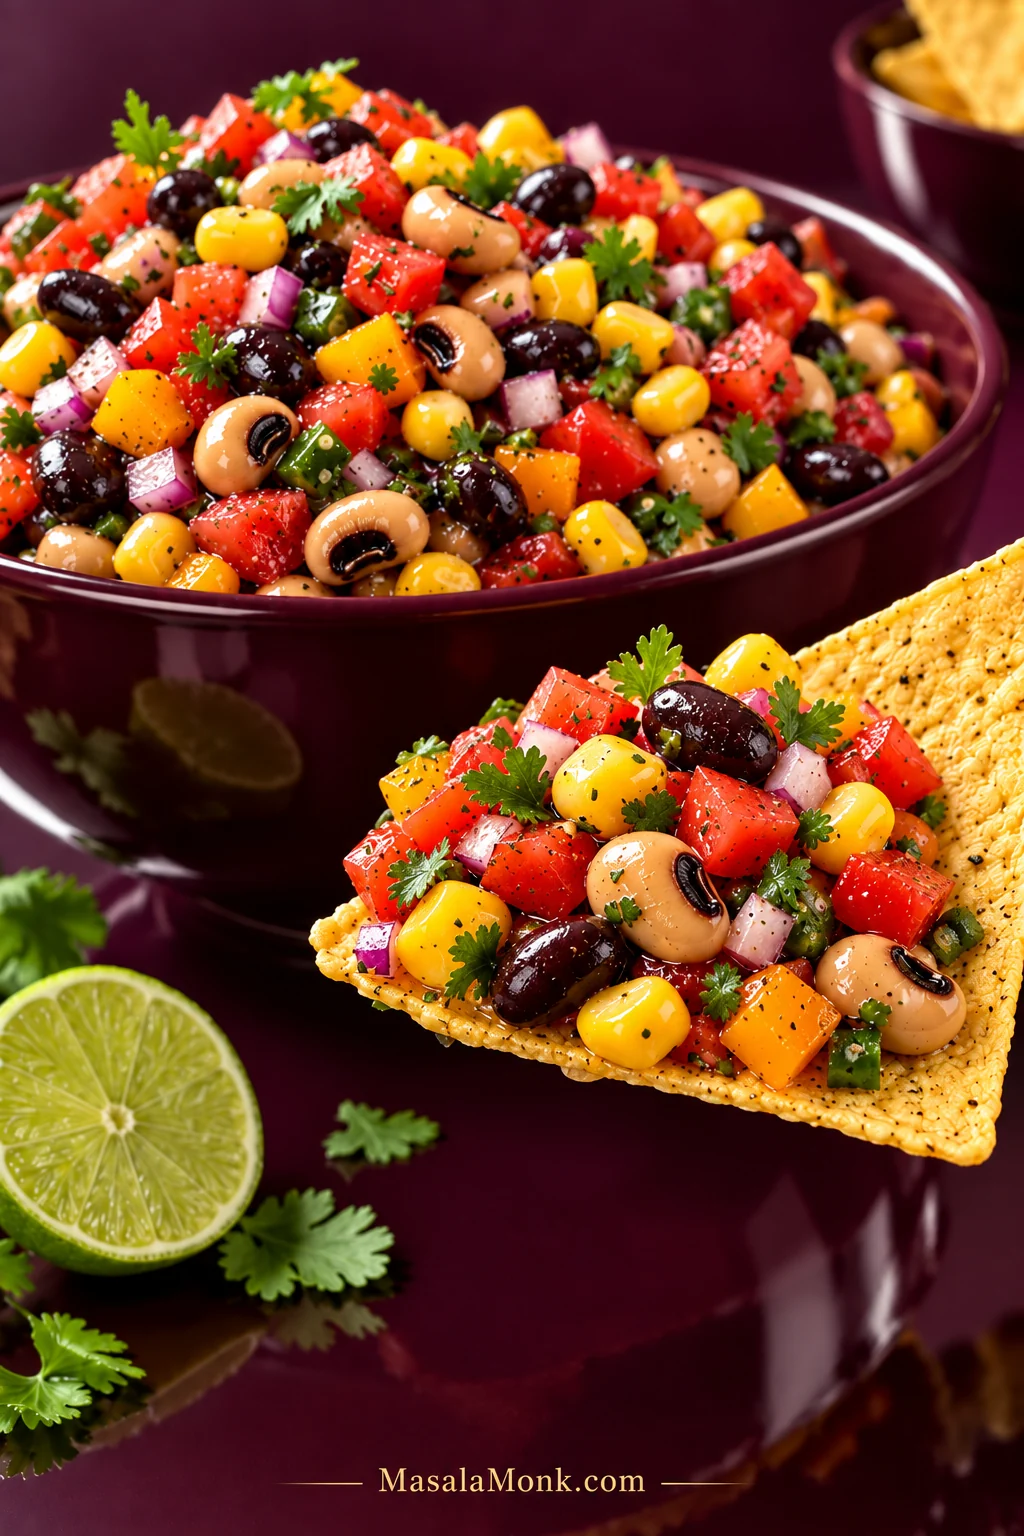
A tortilla chip loaded with Cowboy Caviar, including black-eyed peas, black beans, corn, diced tomato, bell pepper, red onion and cilantro, with a full bowl behind it.

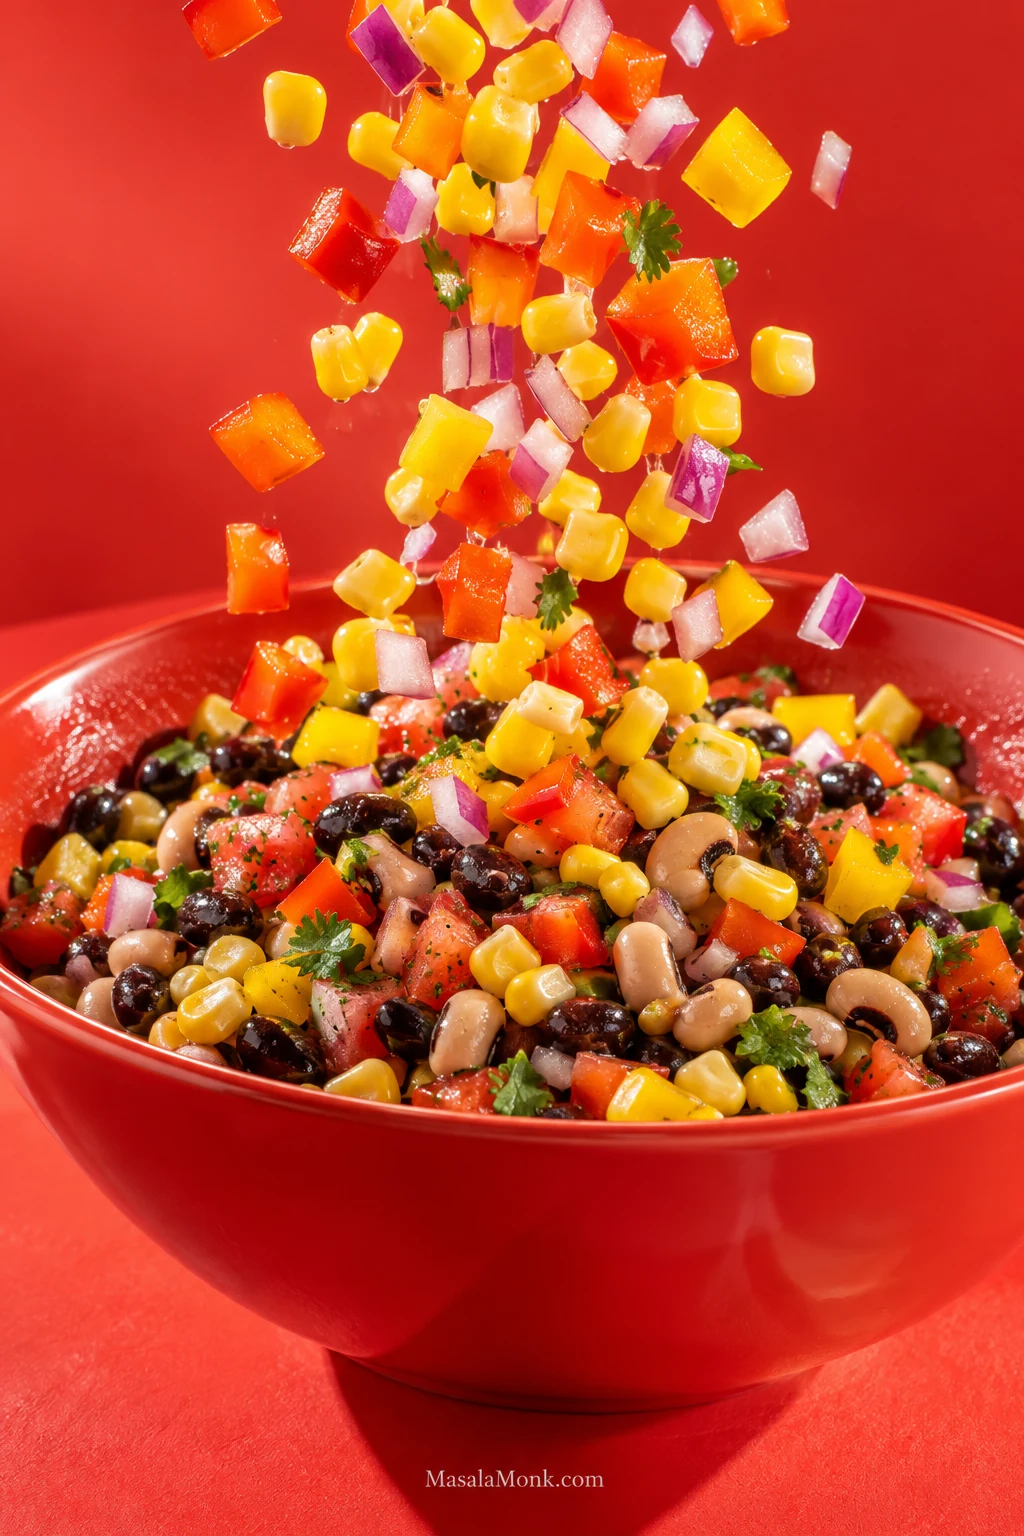
A good Cowboy Caviar recipe should give you a little of everything on one chip: creamy black-eyed peas, firmer black beans, sweet corn, crisp peppers, juicy tomato, fresh herbs and just enough jalapeño to wake it all up. You should not have to chase the good bits around the serving bowl with a broken chip, and the vinaigrette should taste of lime and vinegar rather than oil and sugar.

Cowboy Caviar, also called Texas Caviar, is a chunky bean-and-vegetable salad or dip built around black-eyed peas and dressed with a tangy vinaigrette. Despite the name, there is no fish caviar involved.

Using canned beans and canned corn, there is no cooking at all. The finished dip works with tortilla chips, alongside grilled meat, tucked into tacos or turned into lunch the next day.

Drain well. Cut bean-size. Dress in stages. Taste a bean after it rests.

Cowboy Caviar Recipe

Black-eyed peas, black beans, corn and crisp vegetables tossed with a lime-red-wine vinaigrette.

Prep
25 minutes

Cook
0 minutes with canned corn

Ready to Serve
About 25 minutes

Preferred Rest
30 minutes–2 hours

Yield
About 8 cups / 1.9 L before avocado

As a Side
About 16 × ½-cup portions

As a Party Dip
About 24–32 small portions

Equipment

  • Large mixing bowl, about 4 qt / 4 L
  • Colander or fine-mesh strainer
  • Sharp chef’s knife and cutting board
  • Small bowl or lidded jar for the dressing
  • Whisk or fork

Ingredients

  • 1 (15 oz / 425 g) can black-eyed peas, rinsed and well drained, about 1½ cups / 250 g drained
  • 1 (15 oz / 425 g) can black beans, rinsed and well drained, about 1½ cups / 250 g drained
  • 1¼ cups / about 190 g corn kernels, preferably well-drained canned corn for the no-cook version; see notes for fresh or frozen corn
  • 1½ cups / about 270 g diced Roma tomatoes, about 3 medium; seed only if especially watery
  • 1 cup / about 150 g diced red, orange or yellow bell pepper, about 1 medium-large pepper
  • ½ cup / about 75 g finely diced red onion
  • 1 medium jalapeño, about 15–20 g, ribs and seeds removed for milder heat, finely diced
  • ½ cup loosely packed / about 8–10 g chopped fresh cilantro
  • 1 medium firm-ripe avocado, about 140–150 g flesh, diced, optional

Lime-Vinegar Dressing

  • 3 tablespoons / 45 ml extra-virgin olive oil
  • 2 tablespoons / 30 ml fresh lime juice, from about 1–2 limes depending on size and juiciness
  • 2 tablespoons / 30 ml red wine vinegar
  • 1 small garlic clove, about 3 g, finely grated or minced
  • ½ teaspoon ground cumin
  • ½ teaspoon / about 2 g granulated sugar, optional
  • ¾ teaspoon / about 4 g fine sea salt, divided
  • ¼ teaspoon freshly ground black pepper

Instructions

  1. Rinse and drain the beans. Rinse the black-eyed peas and black beans thoroughly under cool running water, then leave them in the colander while you prepare everything else.
  2. Prepare the vegetables. Drain the canned corn well. Dice the tomatoes, bell pepper and onion into roughly ¼-inch / 6 mm pieces—close to the size of the beans. Finely dice the jalapeño and chop the cilantro.
  3. Taste the onion. Mild and sweet? Use it as it is. Aggressively sharp? Cover the diced onion with cold water for about 10 minutes, then drain and dry it well.
  4. Make the dressing. Whisk the olive oil, lime juice, red wine vinegar, garlic, cumin, sugar, ½ teaspoon of the salt and black pepper. Taste it before it hits the beans. It should seem a little sharper than you want the finished Cowboy Caviar to taste.
  5. Combine and dress. Add the black-eyed peas, black beans, corn, tomatoes, bell pepper, onion, jalapeño and cilantro. Pour in about three-quarters of the dressing and toss gently. Once everything looks evenly coated, stop. Keep the rest.
  6. Serve now or let it rest. Cowboy Caviar can be served immediately. For more integrated seasoning, refrigerate it for 30 minutes to 2 hours. Toss from the bottom and taste a bean, then add up to the remaining ¼ teaspoon salt, more lime, vinegar or reserved dressing as the bowl needs it.
  7. Finish and serve. Fold in avocado gently, if using, just before serving. Serve chilled or cool with sturdy tortilla chips, as a side or as a topping.

Recipe Notes

  • Fresh corn: very tender sweet corn works raw; husk and rinse the ear, then cut off the kernels. If the corn tastes chewy or starchy, blanch or char it first and cool completely.
  • Frozen corn: follow the package cooking directions, cool completely and blot dry before adding it.
  • Beans cooked from dry: replace each can with about 1½ cups / 250 g cooked, cooled and well-drained beans.
  • Italian-dressing shortcut: omit the homemade dressing ingredients and use ⅓ cup / 80 ml zesty Italian dressing plus 1 tablespoon / 15 ml fresh lime juice. Check the salt after mixing because bottled dressings vary.
  • Apple cider vinegar: use the same 2 tablespoons / 30 ml in place of red wine vinegar.
  • Half batch: use about ¾ cup / 125 g each drained black-eyed peas and black beans, ½ cup + 2 tablespoons / about 95 g corn, and halve the remaining ingredients. Expect roughly 4 cups.
  • Double batch: double all ingredients and dressing. Add about three-quarters of the doubled dressing on the first toss and reserve the rest.
  • Dietary note: as written with the homemade dressing, the recipe is vegan and uses no gluten-containing ingredients. For someone with celiac disease, check labels on canned ingredients, seasonings and tortilla chips for cross-contact.
  • Storage: refrigerate promptly; use within 3–4 days for best quality.

Cowboy Caviar Guide
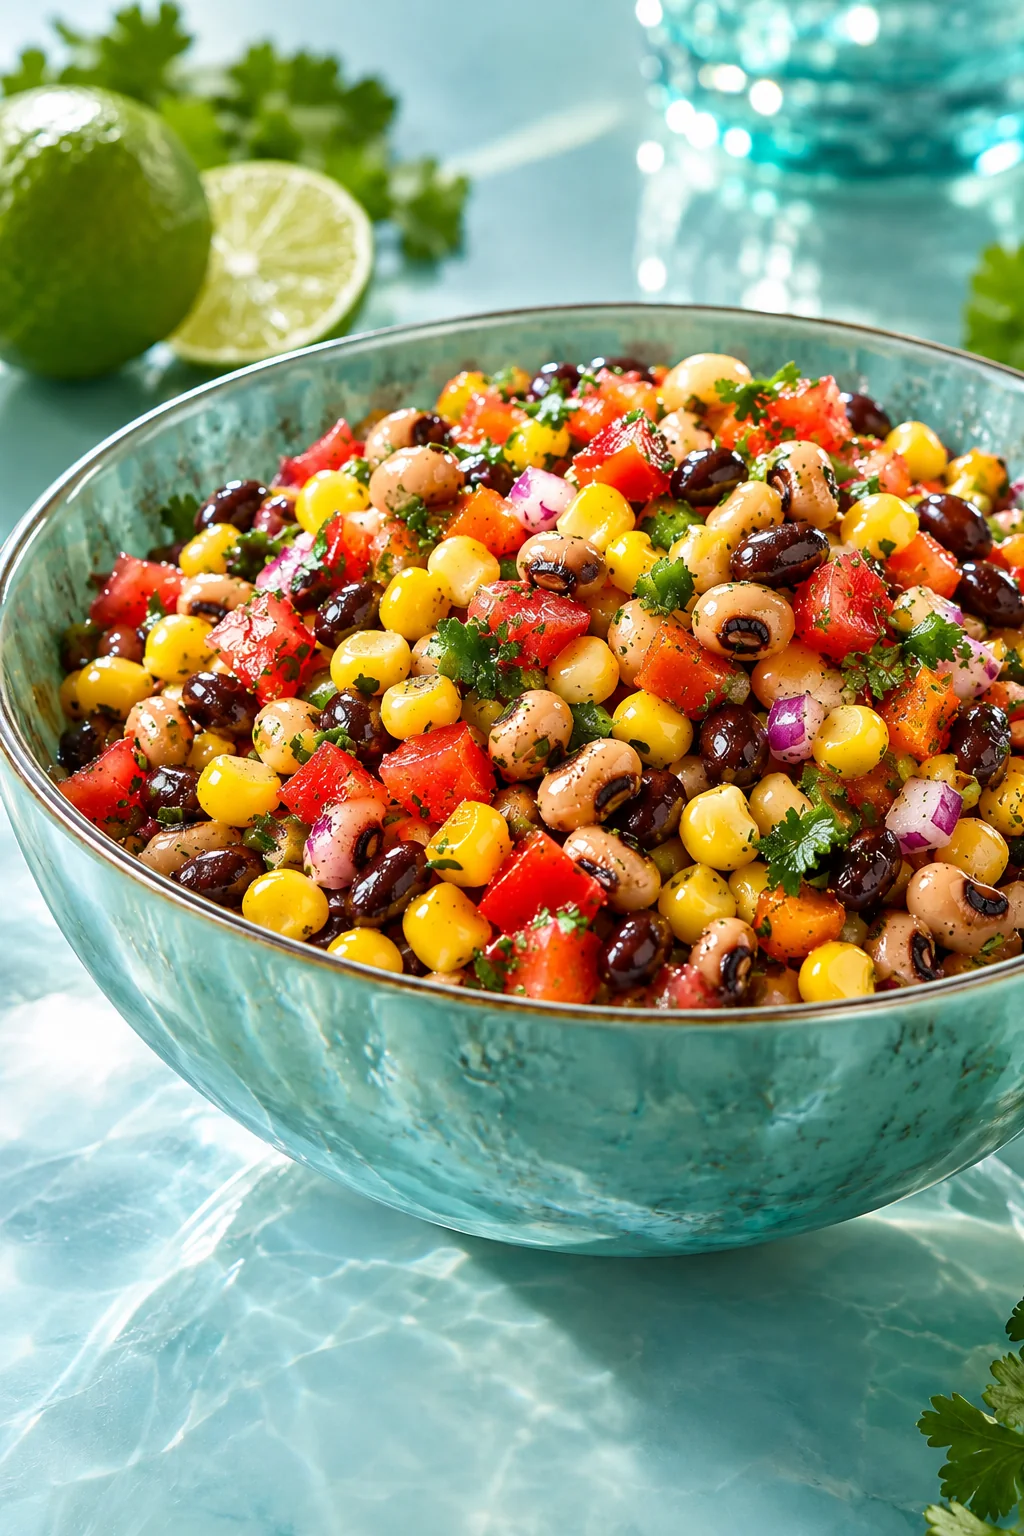
A clear serving bowl filled with Cowboy Caviar made with black-eyed peas, black beans, corn, diced tomatoes, bell pepper, red onion and cilantro.
Look for distinct beans and vegetables with a light gloss, not a wet mixture or a bowl dominated by corn or tomato.

Black-Eyed Peas, Black Beans & Corn

Black-eyed peas are what keep this dish connected to Texas Caviar. The Texas State Historical Association traces Helen Corbitt’s original Texas Caviar to black-eyed peas dressed with oil, vinegar, garlic and onion. As Houstonia notes, the “caviar” name was a tongue-in-cheek comparison with expensive fish roe. Modern versions commonly add ingredients such as black beans, corn, tomatoes and peppers.

Black beans are a particularly good partner because they stay a little firmer than the black-eyed peas. One gives you creaminess; the other gives the scoop more bite.
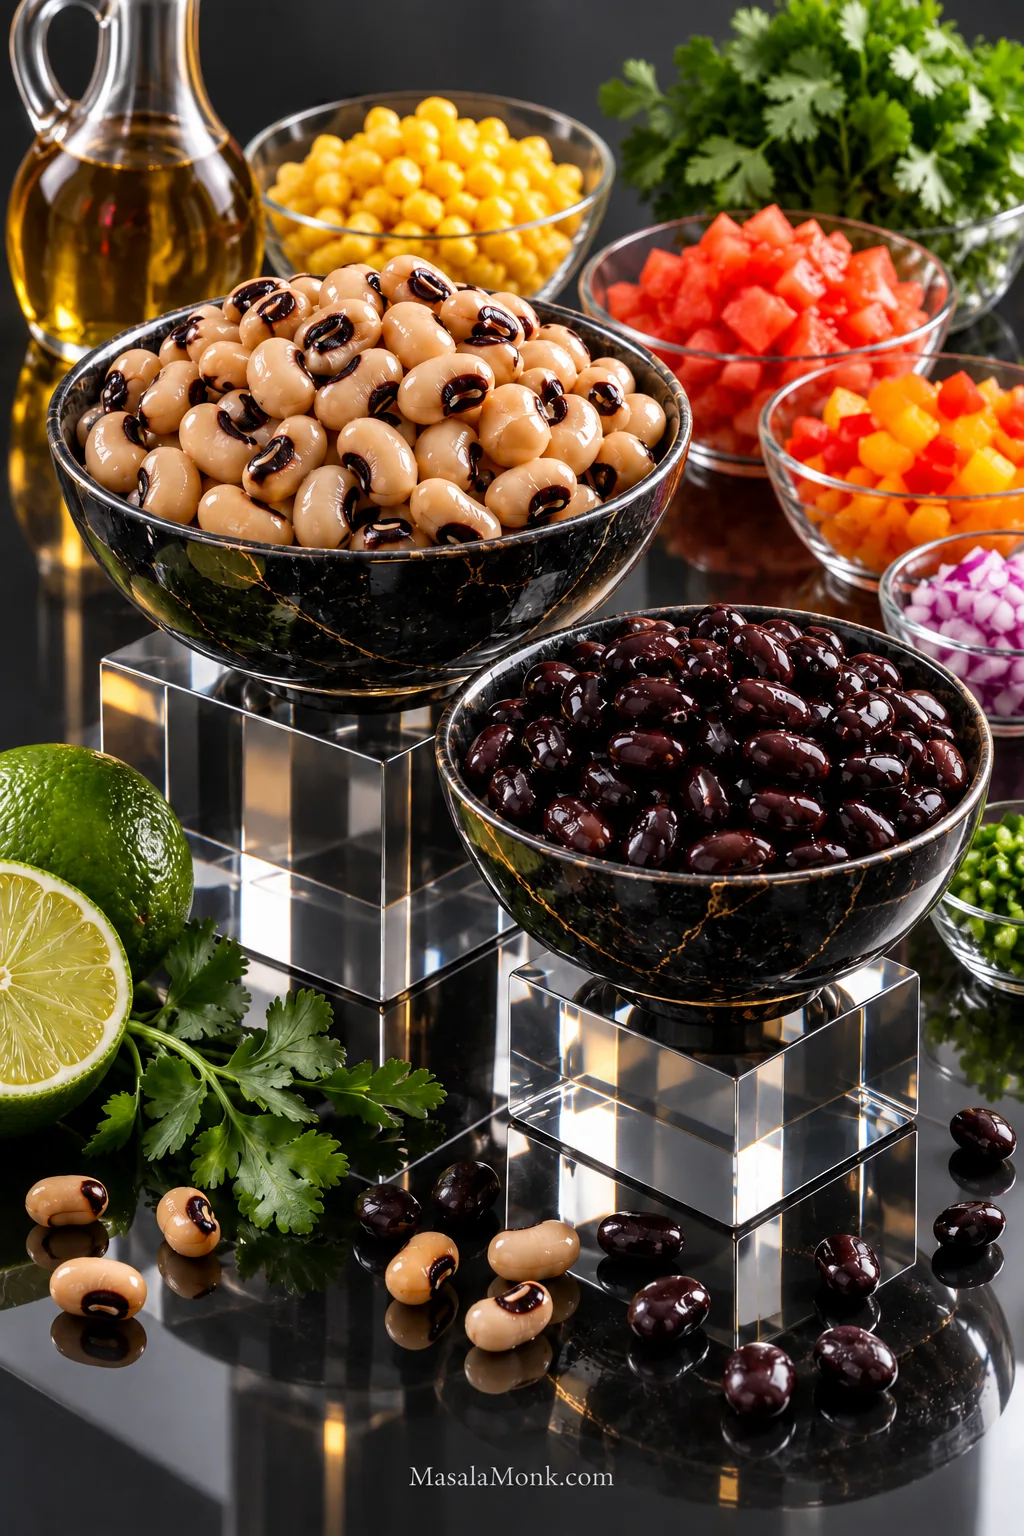
Black-eyed peas and black beans shown as the main Cowboy Caviar ingredients, with corn, tomato, bell pepper, red onion and cilantro around them.
A near 1:1 balance keeps black-eyed peas central while black beans add a firmer bite and darker contrast.

Rinse and Drain the Beans

Give the canned black-eyed peas and black beans a thorough rinse under cool running water and leave them draining while you chop. They can stay slightly damp; they just should not bring a stream of canned liquid into the dressing.
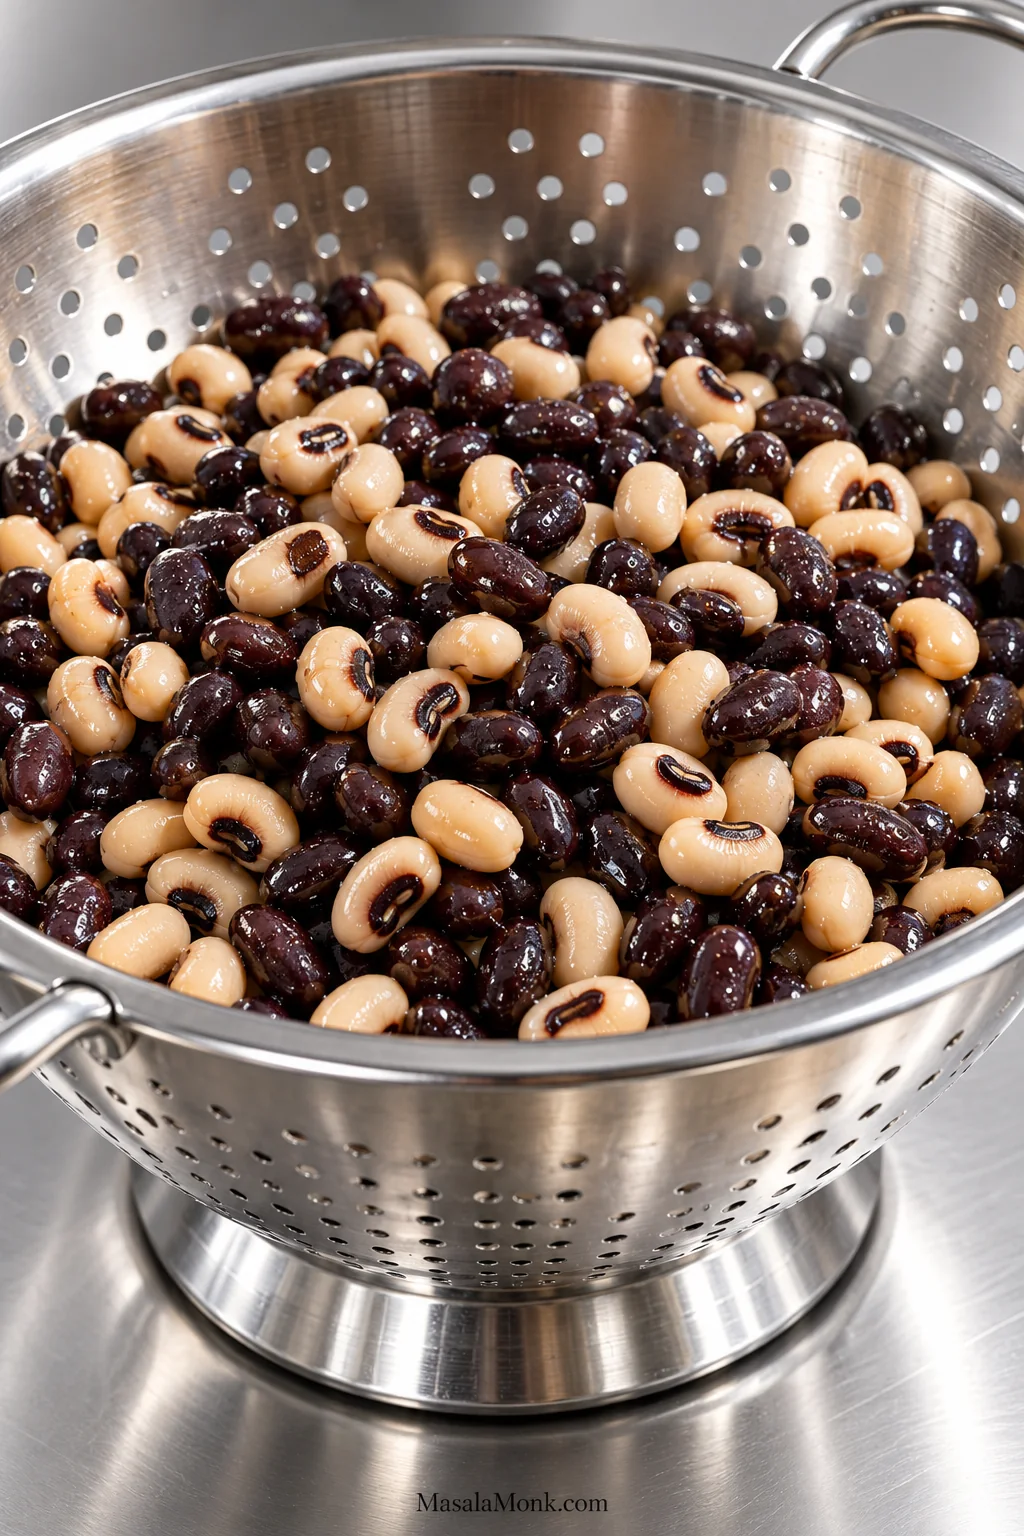
Rinsed black-eyed peas and black beans resting in a stainless steel colander with slight surface moisture and no visible pooled liquid.
Slight surface moisture is harmless; free liquid is what matters. Drain the rinsed beans until nothing is actively collecting beneath them so the measured lime and vinegar are not diluted before the salad even rests.

Fresh, Frozen or Canned Corn

Canned corn is the easiest choice for a completely no-cook batch: drain it well and it is ready. Tender summer corn works raw. If the kernels are chewy, cook them.

For frozen corn, follow the cooking directions on the package, then cool the kernels completely before mixing them with the beans. Blot away obvious moisture first.
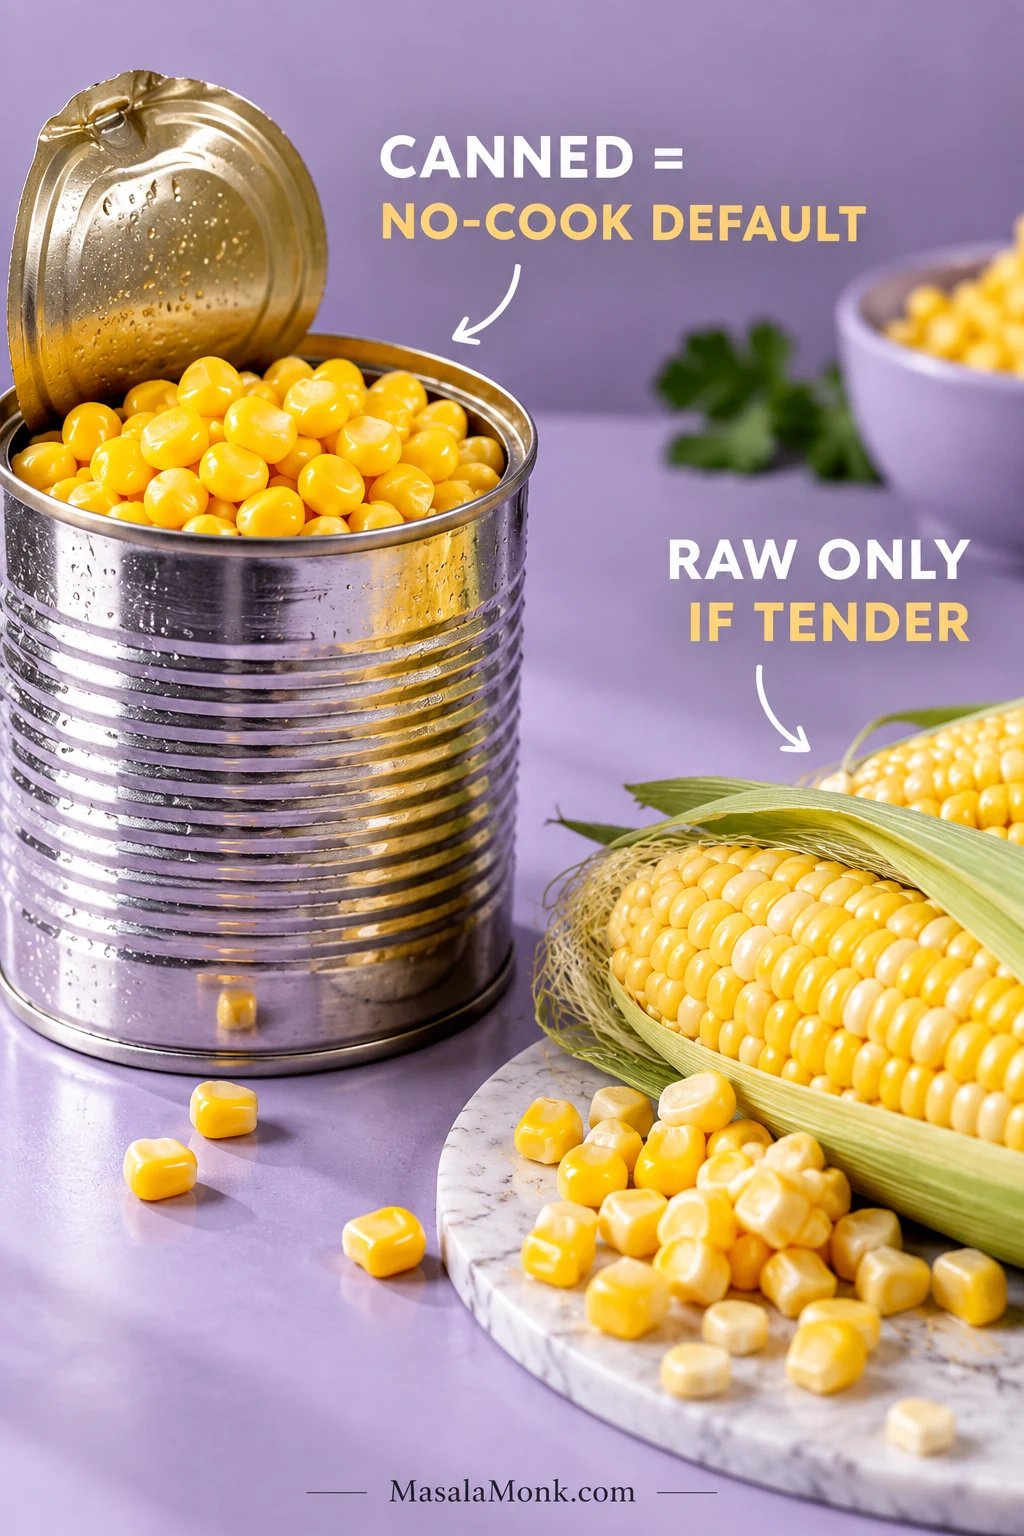
Comparison of canned corn for a no-cook Cowboy Caviar and fresh corn as an alternative when the kernels are tender enough to use raw.
Fresh is not automatically better here; tenderness matters more. Bite through a kernel before using it raw—if it feels dense or starchy rather than juicy and crisp, blanch or char it first.

Shoepeg corn has small, tender kernels that fit nicely onto a loaded chip. Fire-roasted corn adds smoke. Either way, 1¼ cups is plenty here; pile in much more and the sweetness starts pushing the beans into the background.

Cut Everything for the Scoop

Knife work matters because Cowboy Caviar has to fit onto a chip. Huge pieces of tomato and pepper tumble off. Chop everything into confetti and you lose the snap that makes the dip interesting.

For dipping, aim for roughly ¼-inch / 6 mm pieces—about the size of a black bean. You do not need a ruler. Load one chip. It should pick up beans, sweet corn, tomato and pepper together.
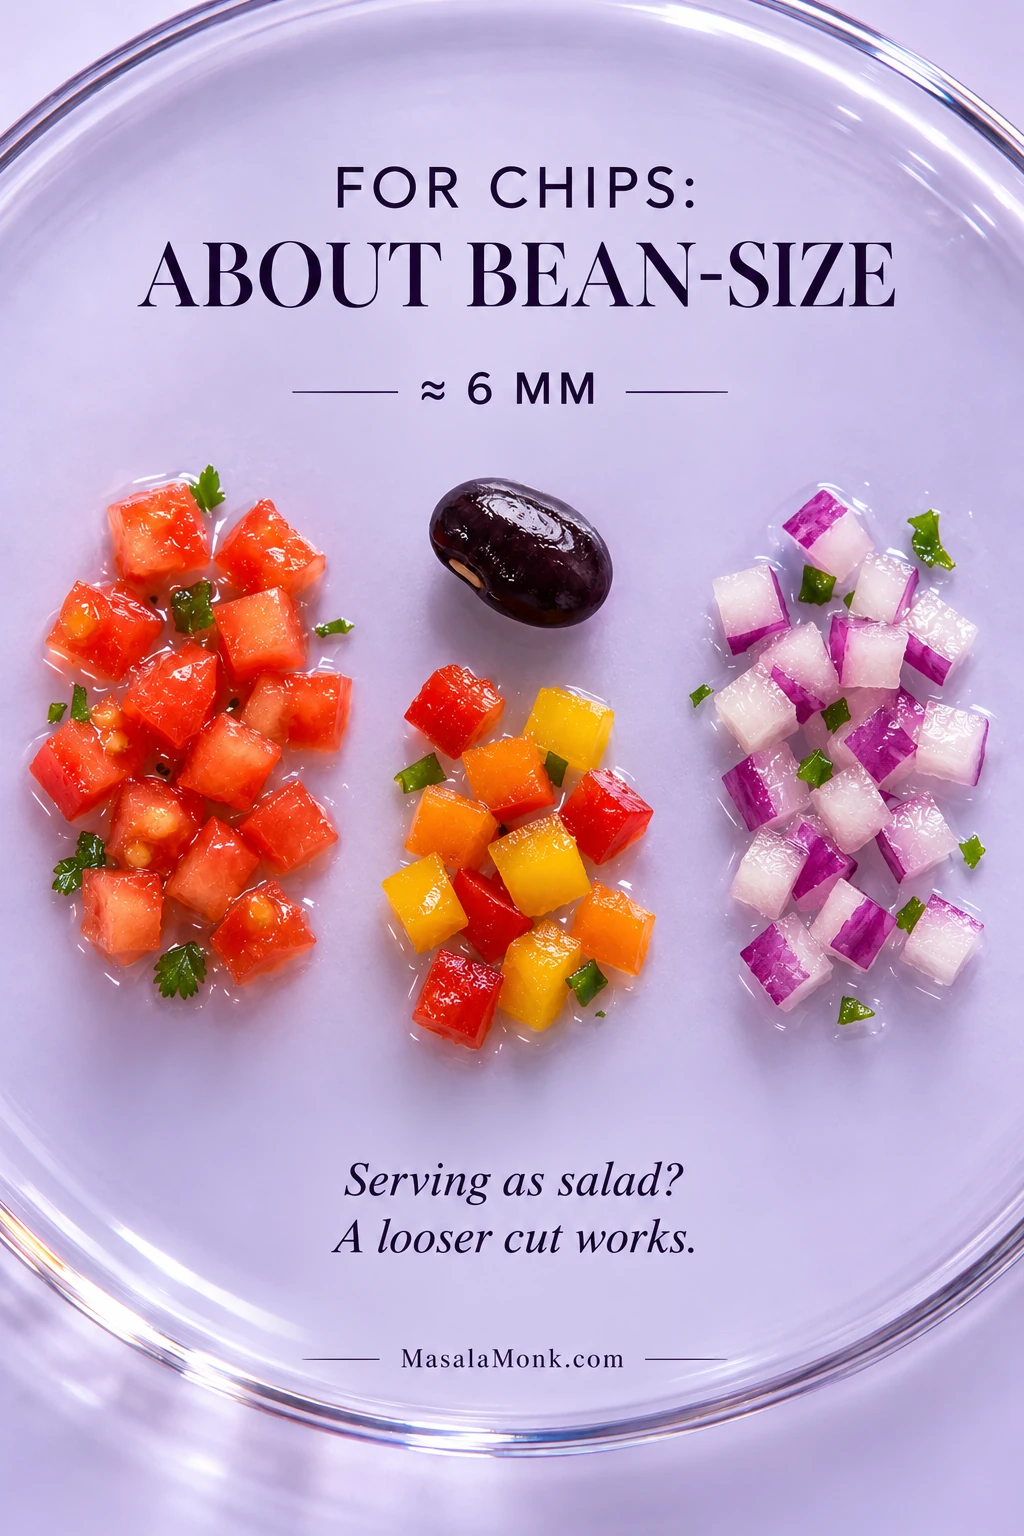
Diced tomato, bell pepper and red onion shown beside a black bean to demonstrate roughly 1/4-inch or 6-millimeter pieces for Cowboy Caviar.
Use a black bean as a visual ruler for tomato and bell pepper, then cut the red onion a little finer. That keeps the scoop substantial while spreading the sharper onion flavor more evenly through each bite.

Serving it mainly as a salad or dinner side? A looser ⅜–½-inch / about 10–13 mm dice is absolutely fine.

Tomatoes: Roma or plum tomatoes hold their shape and usually carry less loose juice than big slicing tomatoes. Scoop out the wettest seed pockets only when the tomatoes are particularly watery. Cherry or grape tomatoes work too. Bad fresh tomatoes are not worth forcing into this; well-drained petite diced tomatoes are the better fallback.

Red onion: taste a piece first. A mild onion can go straight in. A harsh one gets a 10-minute soak in cold water, followed by a thorough drain and dry. Shallot is sweeter and softer; scallions give you a gentler onion bite.

Jalapeño and cilantro: jalapeños vary wildly, so taste yours. Removing the pale ribs and seeds gives you a milder starting point. Serrano gives you more heat. Cilantro can simply be left out, or replaced with a smaller amount of flat-leaf parsley.

Dress It Bright, Not Sweet

For this Cowboy Caviar dressing, use 3 tablespoons / 45 ml olive oil, 2 tablespoons / 30 ml fresh lime juice and 2 tablespoons / 30 ml red wine vinegar, plus garlic, cumin, salt and black pepper. It will taste sharper on its own than it does once spread through the beans, corn and vegetables. The point is not an obviously vinegary salad; it is enough acidity that the finished scoop still tastes lively after the beans have absorbed some of the dressing.

Three clear vessels show a Cowboy Caviar dressing ratio of 3 tablespoons olive oil, 2 tablespoons lime juice and 2 tablespoons red wine vinegar.
The dressing is deliberately acid-forward because a large bowl of beans and vegetables softens that sharpness as it sits.

The ½ teaspoon of sugar is optional. It is there to smooth a particularly sharp batch of lime and vinegar, not to make the salad sweet. When the tomatoes and corn are already sweet, skip it.

Older potluck-style Texas Caviar can be quite different, with beans sitting in a much larger sweet-and-sour marinade before excess liquid is drained away. This version keeps the vinaigrette in the salad, so you need far less of it.

Lime comes through first; as the salad sits, that sharpness softens while the red wine vinegar still gives the beans some tang. Apple cider vinegar works too, with a slightly fruitier edge. Start with ½ teaspoon of cumin so it stays in the background; add more if you want that flavor more pronounced.

Add the Dressing in Two Passes

Pour in about three-quarters first and toss gently until the beans and vegetables are evenly coated. Then stop and keep the rest nearby.
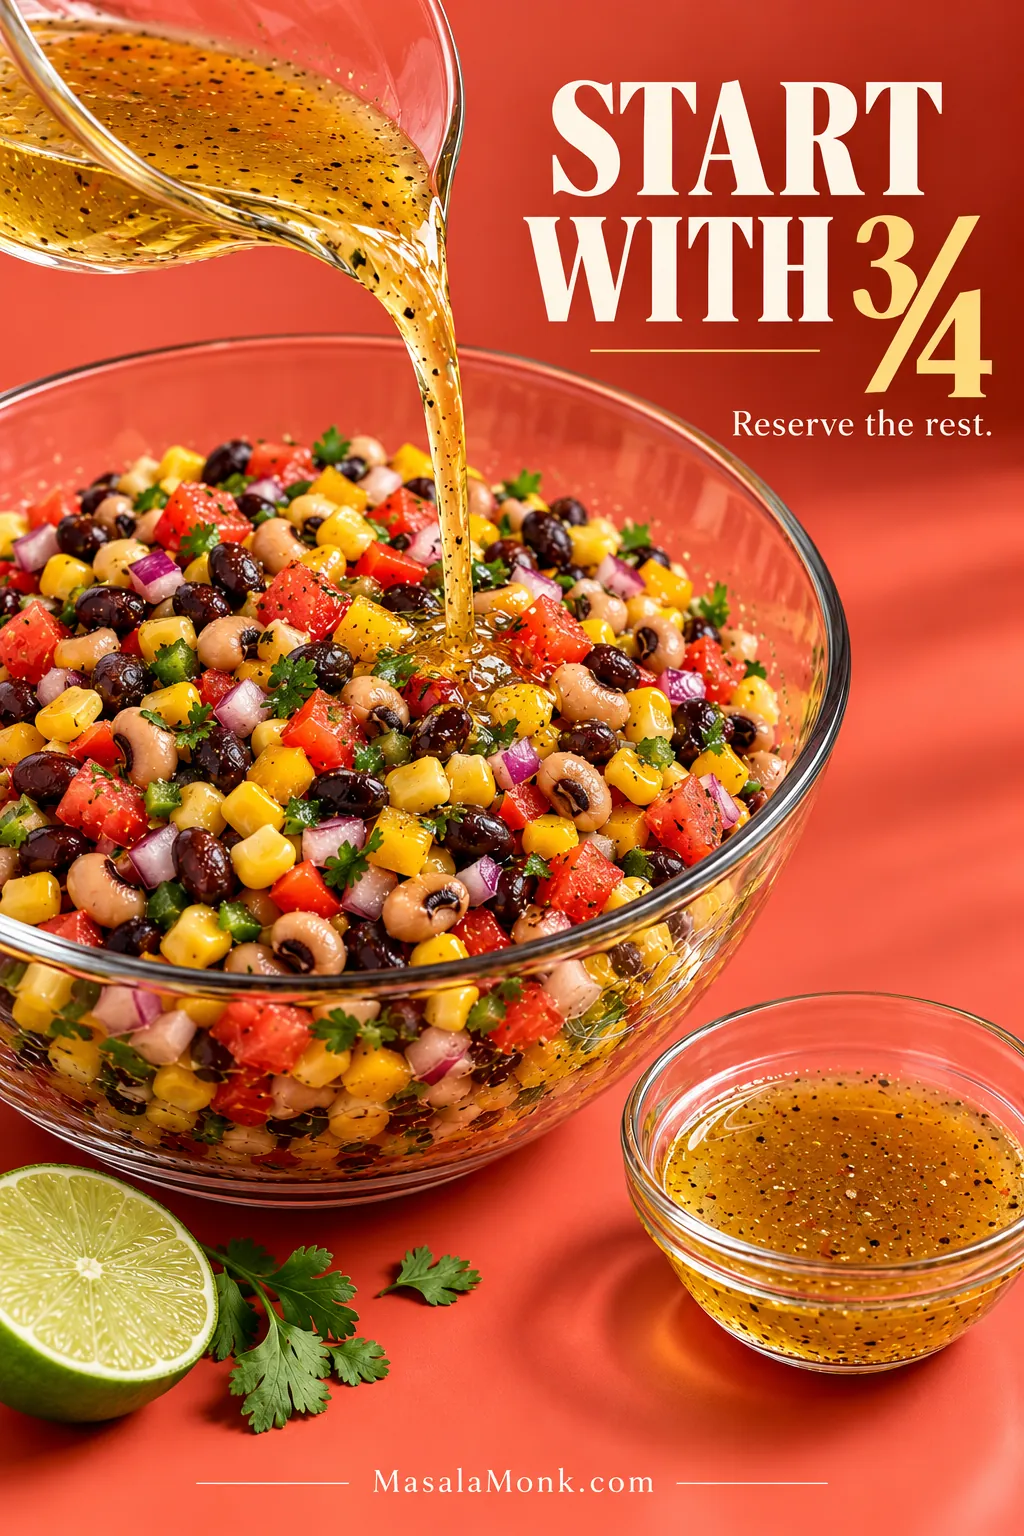
Vinaigrette being poured into Cowboy Caviar while a smaller portion remains reserved, illustrating the instruction to start with about three-quarters of the dressing.
Hold back roughly 2 tablespoons so you can brighten the bowl after it rests without flooding it.

After it rests, decide whether it needs more. Holding some dressing back is much easier than trying to rescue eight cups that have already been overdressed.
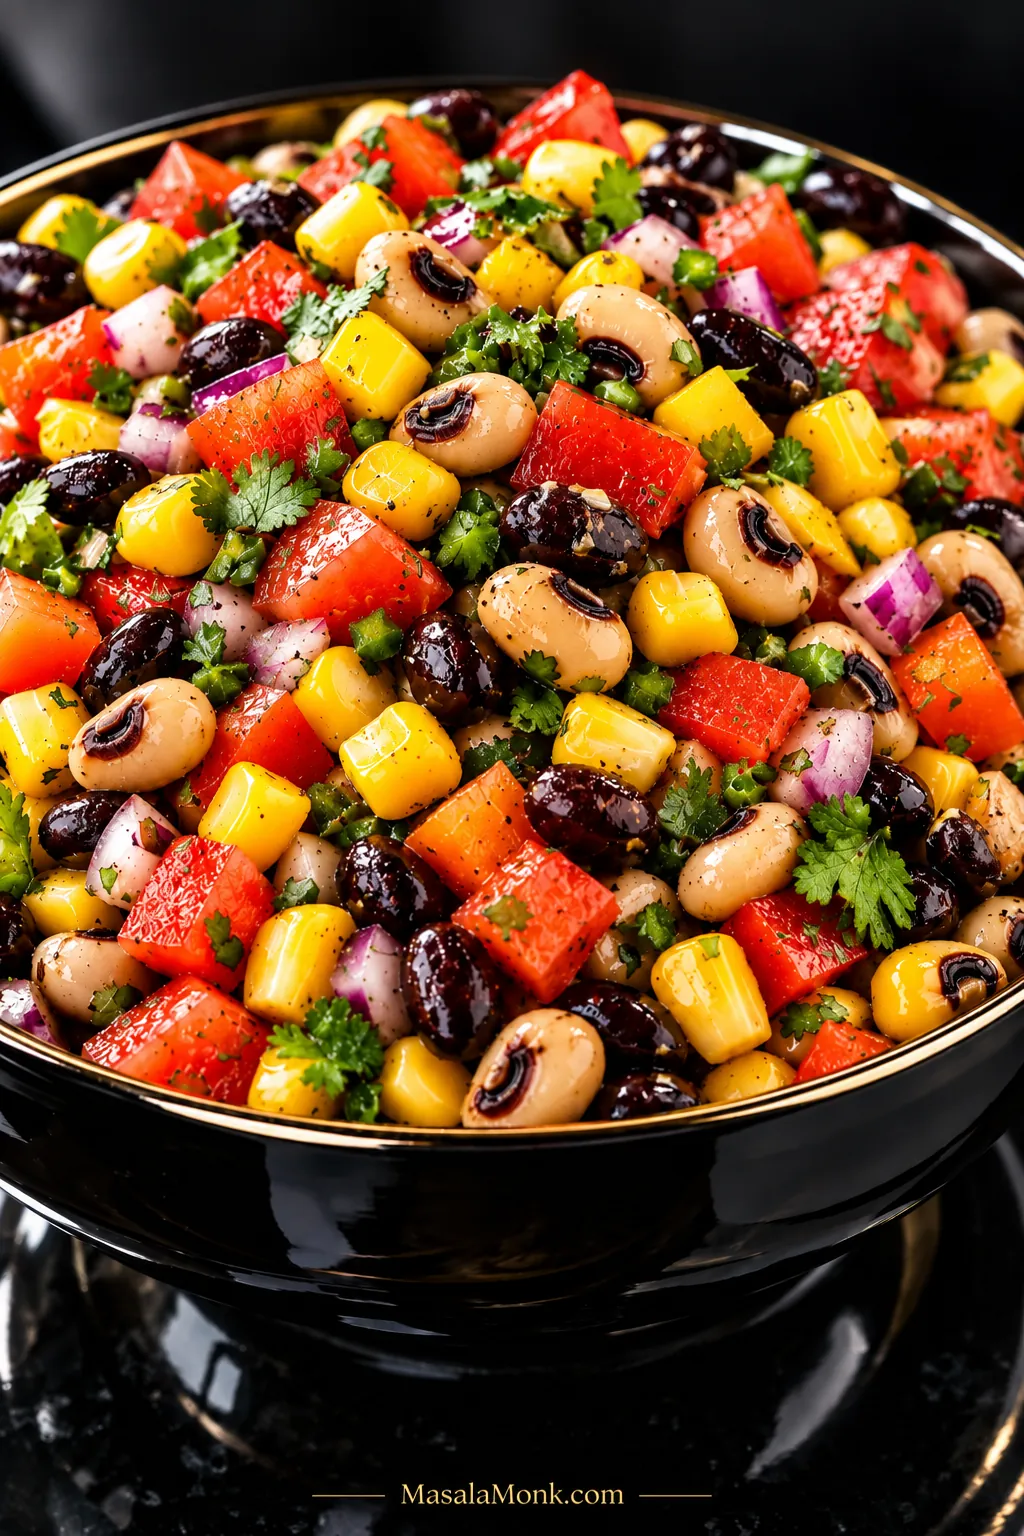
Close-up of Cowboy Caviar with black-eyed peas, black beans, corn, tomato, bell pepper, red onion and cilantro lightly coated in vinaigrette without pooled oil.
An even sheen is enough. Once the beans and vegetables look lightly coated, extra dressing usually adds weight before flavor.

Using bottled Italian dressing? Start with ⅓ cup / 80 ml zesty Italian dressing plus 1 tablespoon / 15 ml fresh lime juice. Check the salt after mixing because brands vary considerably in sweetness and sodium.

Read the Bowl After It Rests

Cowboy Caviar changes while it sits. Beans take up some of the dressing, tomatoes and peppers release a little juice, onion mellows and cilantro softens. A small amount of liquid at the bottom does not mean you ruined it. Toss once before trying to fix anything.
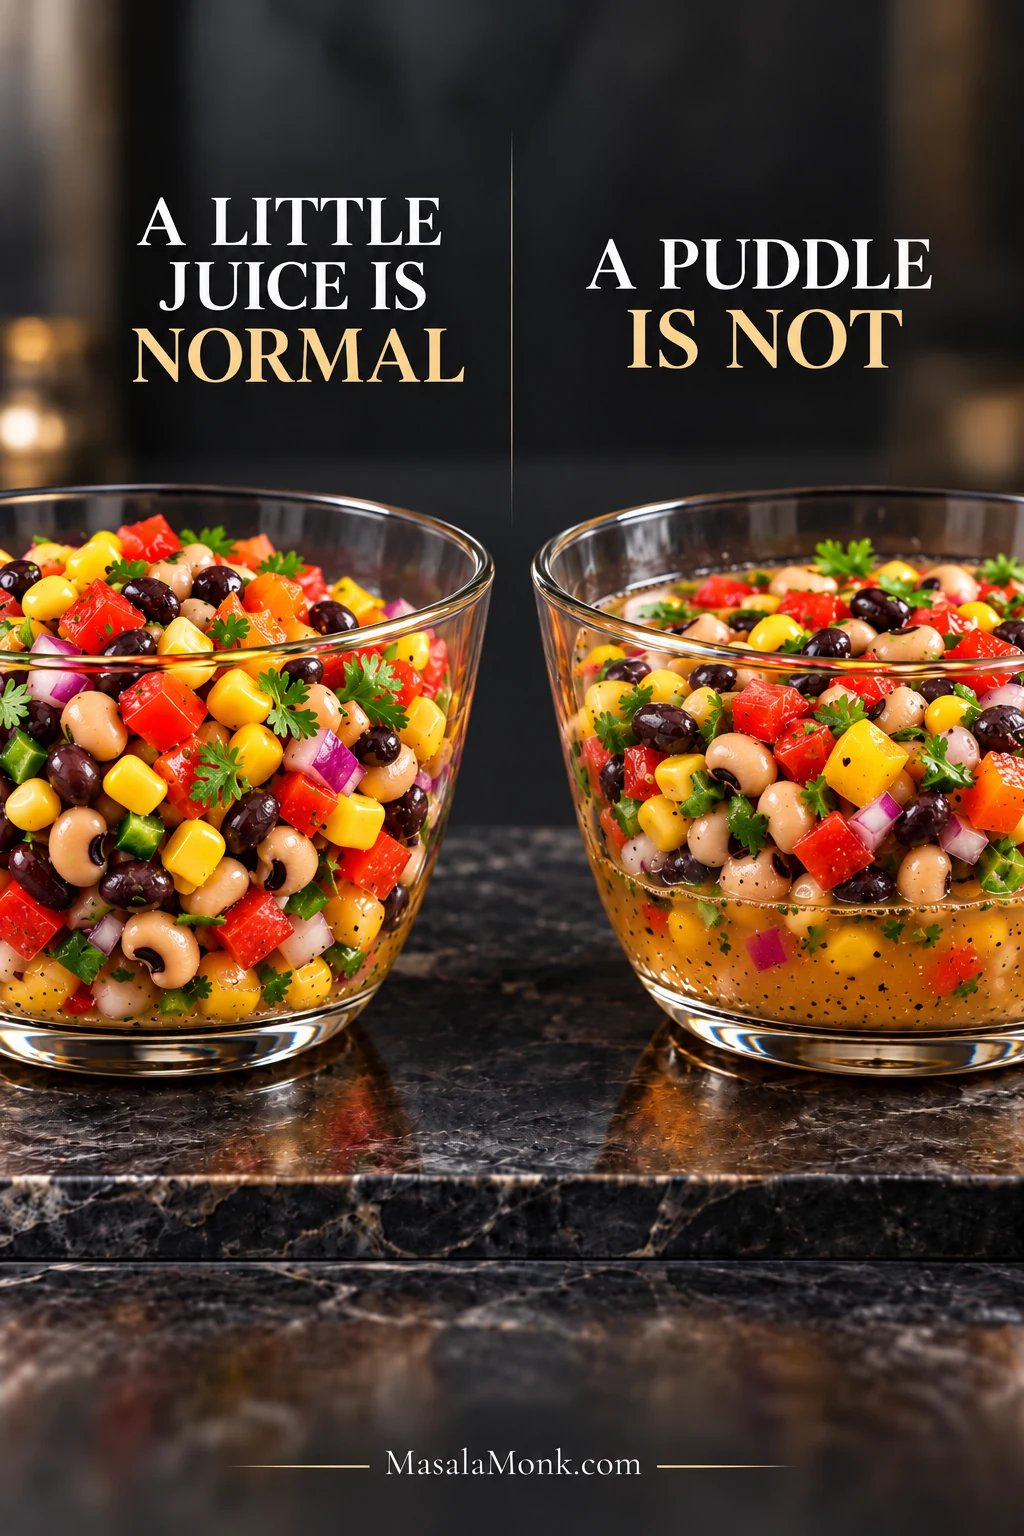
Side-by-side Cowboy Caviar comparison showing a small normal amount of released vegetable juice versus a noticeable puddle of excess liquid.
Run a spoon through the bottom before calling the bowl watery. A thin layer that disappears back into the salad after tossing is normal release; liquid that quickly gathers again in a puddle is a different problem.
After restingWhat to do
Evenly coated and well seasonedLeave it alone. It is ready.
Drier or flatter than beforeAdd a little reserved dressing, lime or salt if the flavor needs lifting.
Some juice appearsToss first. A little released vegetable moisture is normal.
The vegetables are softer but the flavor is goodLeave it alone. The softer texture is simply part of a longer rest.

Still not right after a toss? Jump to Fix Your Cowboy Caviar.

How to Make Cowboy Caviar Ahead

For the best balance of seasoning and crunch, make Cowboy Caviar 30 minutes to 2 hours ahead. If you need more breathing room, 2–4 hours ahead still works well. You do not need to be chopping vegetables as people walk through the door. Get it into the refrigerator, clear the cutting board, and come back later for one final taste.
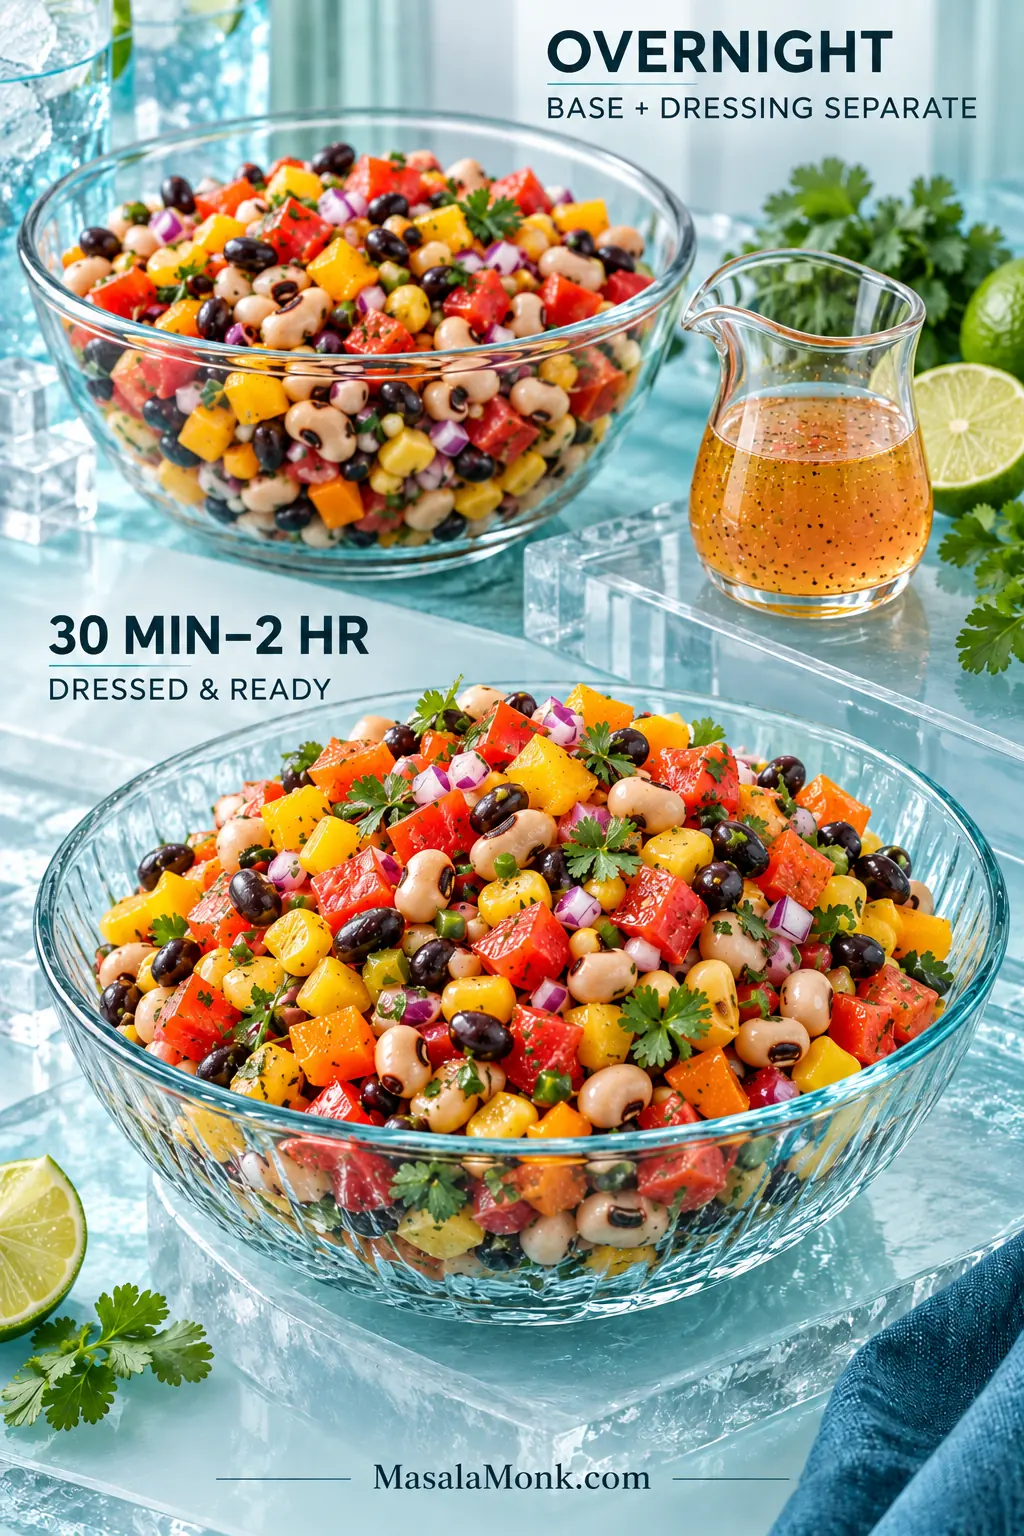
Make-ahead Cowboy Caviar comparison labeled 30 minutes to 2 hours dressed and ready, and overnight base with the dressing kept separate.
Keeping the base and vinaigrette separate overnight protects texture. Once the chopped vegetables are salted and dressed, they gradually release moisture; dressing closer to serving delays that change.
TimingWhat changes
ImmediatelyThe vegetables are at their crunchiest and the individual flavors taste more separate.
30 minutes–2 hoursThis is the preferred window: the beans have time to pick up the dressing while the vegetables keep plenty of snap.
2–4 hours aheadThe flavors are more integrated and the vegetables may soften slightly, but the bowl should still have plenty of crunch. Keep avocado out until serving.
OvernightRefrigerate the chopped base without avocado and keep the dressing separate. Dress it about 30 minutes to 2 hours before serving.

Planning a mostly make-ahead spread? Our creamy macaroni salad can chill alongside it. If you are feeding a crowd, see how much Cowboy Caviar you need.

Fix Your Cowboy Caviar

If the bowl really does need help, identify the problem before changing everything. One odd bite is not a reason to re-season eight cups.

Flavor & Moisture Problems

ProblemWhat to do
Watery or visibly puddledToss once. If excess liquid remains, spoon or tip some away, then recheck the seasoning because salt and acid leave with that liquid too.
Too oilyBalance it with lime or vinegar gradually. Extra beans or vegetables help more than pouring in a large amount of additional acid.
Too sweetUse lime or vinegar a little at a time, followed by a small pinch of salt.
Too acidicSoften the edge with a little olive oil or more beans and vegetables. If needed, a tiny pinch of sugar can help.
Raw onion takes overDilute the onion with more of the other ingredients if available. Next time soak the onion first or switch to shallot or scallion.
Too spicyCool the heat with extra beans, corn or tomato. Avocado also softens it at serving.
Not spicy enoughBuild more heat with jalapeño, serrano or hot sauce after the rest. For mixed heat preferences, serve roasted salsa verde alongside and let everyone adjust their own plate.

Texture & Ingredient Problems

ProblemWhat to do
Corn is toughFirmer fresh kernels need cooking. Blanch or char them next time rather than forcing them into the salad raw.
MushyYou cannot fully restore softened vegetables. If you have them, fold in freshly diced bell pepper, corn or onion for crunch and serve promptly. Next time use firmer tomatoes, toss gently and add avocado at the end.
Beans taste canned or tinnyA strong canned flavor is difficult to remove once everything is mixed. Extra lime, cilantro or fresh tomato may soften it; next time rinse the beans thoroughly and let them drain well.
Fresh diced bell pepper, red onion and corn falling into Cowboy Caviar to add crisp texture back to a softer rested bowl.
Fresh bell pepper, onion or corn can restore contrast, but add them gradually. Because extra vegetables also dilute the seasoning, taste again before automatically reaching for more salt, lime or dressing.

↑ Back to recipe · Back to top

How Much Cowboy Caviar Do You Need?

Plan about ¼–⅓ cup per person when Cowboy Caviar is one of several party dips, ½ cup as a side, or roughly 1 cup for a larger lunch portion. The full recipe makes about 8 cups / 1.9 L before avocado, though produce size and the amount of reserved dressing you use can shift that slightly.
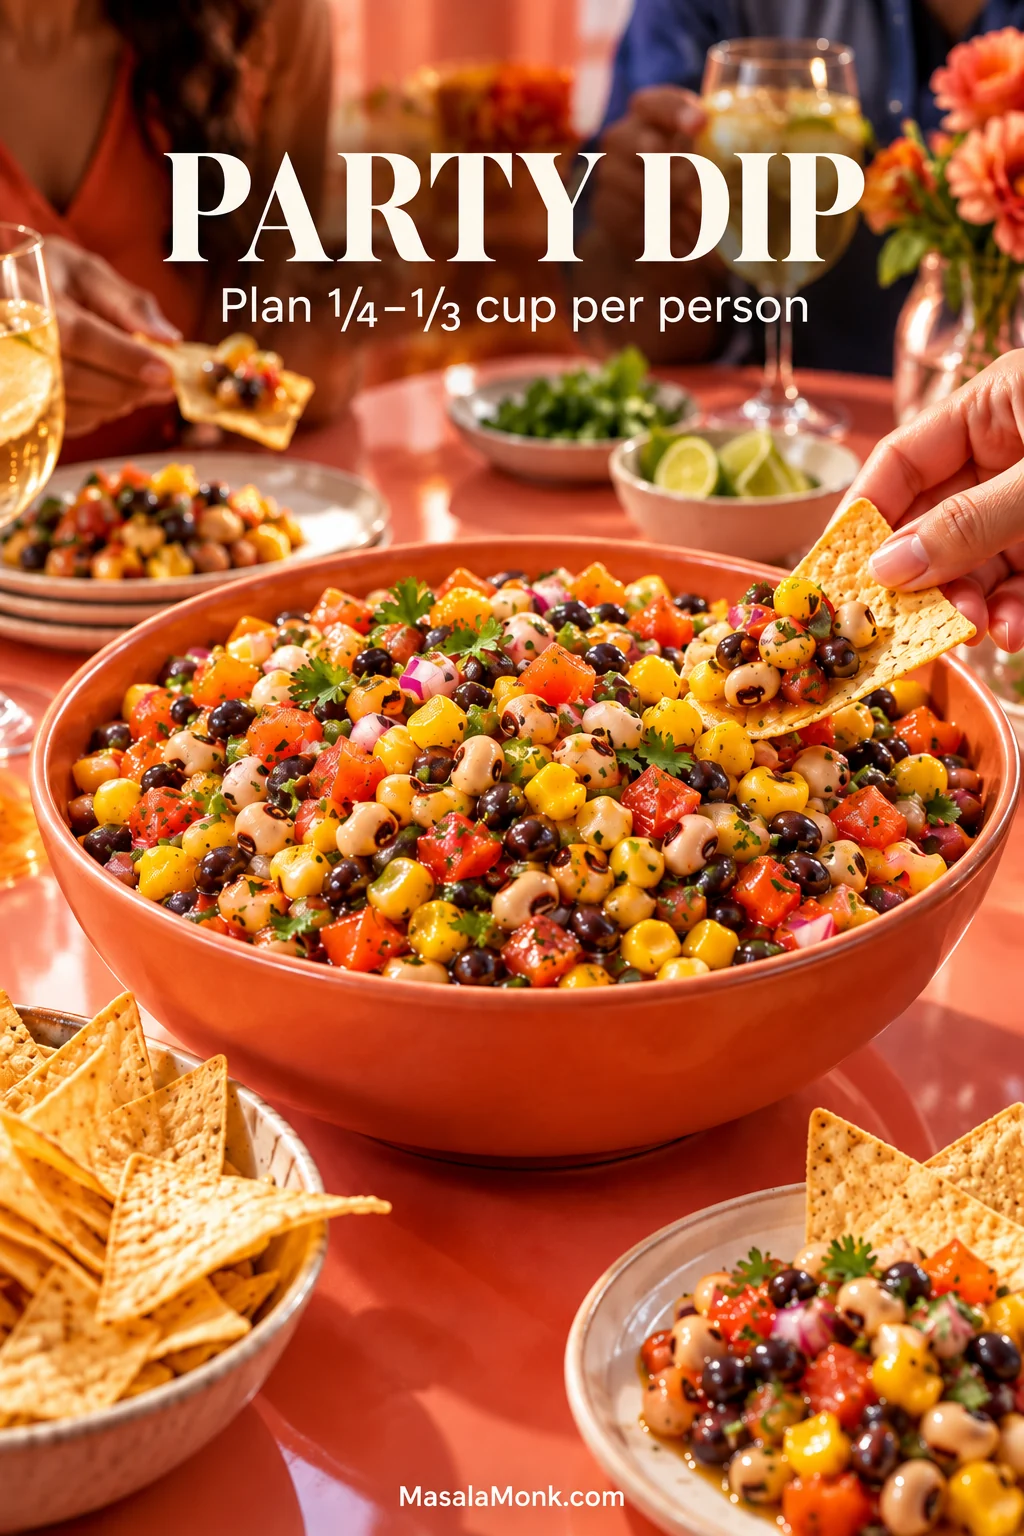
Large party bowl of Cowboy Caviar with tortilla chips and people serving themselves; text reads Party Dip and Plan 1/4–1/3 cup per person.

What else is on the table matters too. Beside something substantial like our slow cooker beef chili, most guests will take a few loaded chips rather than a full side-dish portion.

How you are serving itApproximate yield
Party dip with several other foodsAbout 24–32 small portions at roughly ¼–⅓ cup each
Dinner or BBQ sideAbout 16 portions at ½ cup each
Lunch or main-dish saladAbout 8 generous 1-cup portions

Half batch: it still makes about 4 cups—roughly 12–16 small dip portions, 8 side portions or 4 larger lunch servings. It is the more manageable choice for a smaller gathering or household when you do not want several days of leftovers.

Double batch: double every ingredient, including the dressing, but pour in only about three-quarters of the doubled dressing on the first toss. Reserve the rest and add more after the salad has had time to sit.

Cowboy Caviar Variations

Add avocado: fold it in shortly before serving for softer, creamier bites.

Use Rotel: well-drained Rotel gives you a softer texture and more cooked tomato-chile flavor than fresh tomatoes. Drain it thoroughly before adding it.

Replace the black-eyed peas: pinto beans, chickpeas or additional black beans work in their place. Chickpeas are firmer and nuttier; any of these swaps move the dish farther from traditional Texas Caviar.

How to Store Cowboy Caviar

Cowboy Caviar keeps for about 3–4 days in the refrigerator, though the vegetables have their best snap during the first 1–2 days. Store leftovers promptly in an airtight container. By days 3 and 4, expect softer tomatoes and peppers and more juice underneath.

Keep avocado out of the main batch when you know there will be leftovers. Add fresh avocado to each portion instead.
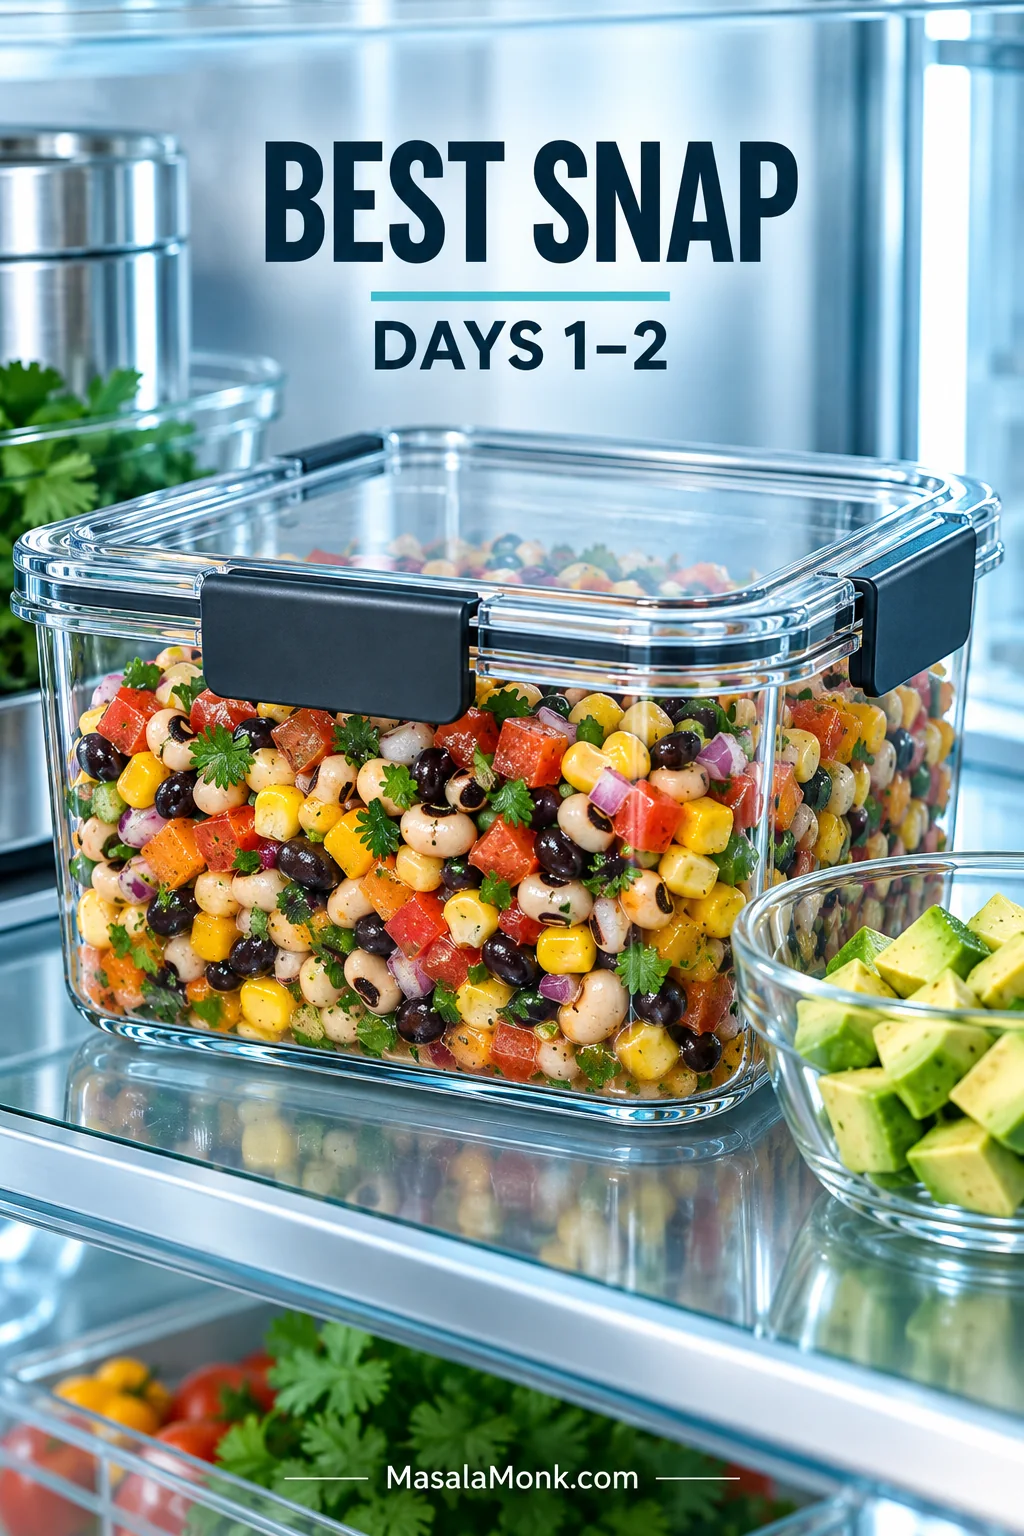
Cowboy Caviar in a clear airtight refrigerator container with avocado stored separately; text reads Best Snap, Days 1–2.
Liquid may settle at the bottom during storage. Toss once before deciding the salad needs more dressing, salt or lime.

Can You Freeze It?

Freezing finished Cowboy Caviar is not worth it for the texture. The beans handle the freezer reasonably well, but tomatoes, peppers, onion and herbs come back much softer.

Use leftovers differently: by the second day, give the chips a break. Drain a scoop and tuck it into a burrito or wrap, serve it beside a crispy chicken quesadilla, spoon it over eggs, or build a rice bowl around it.
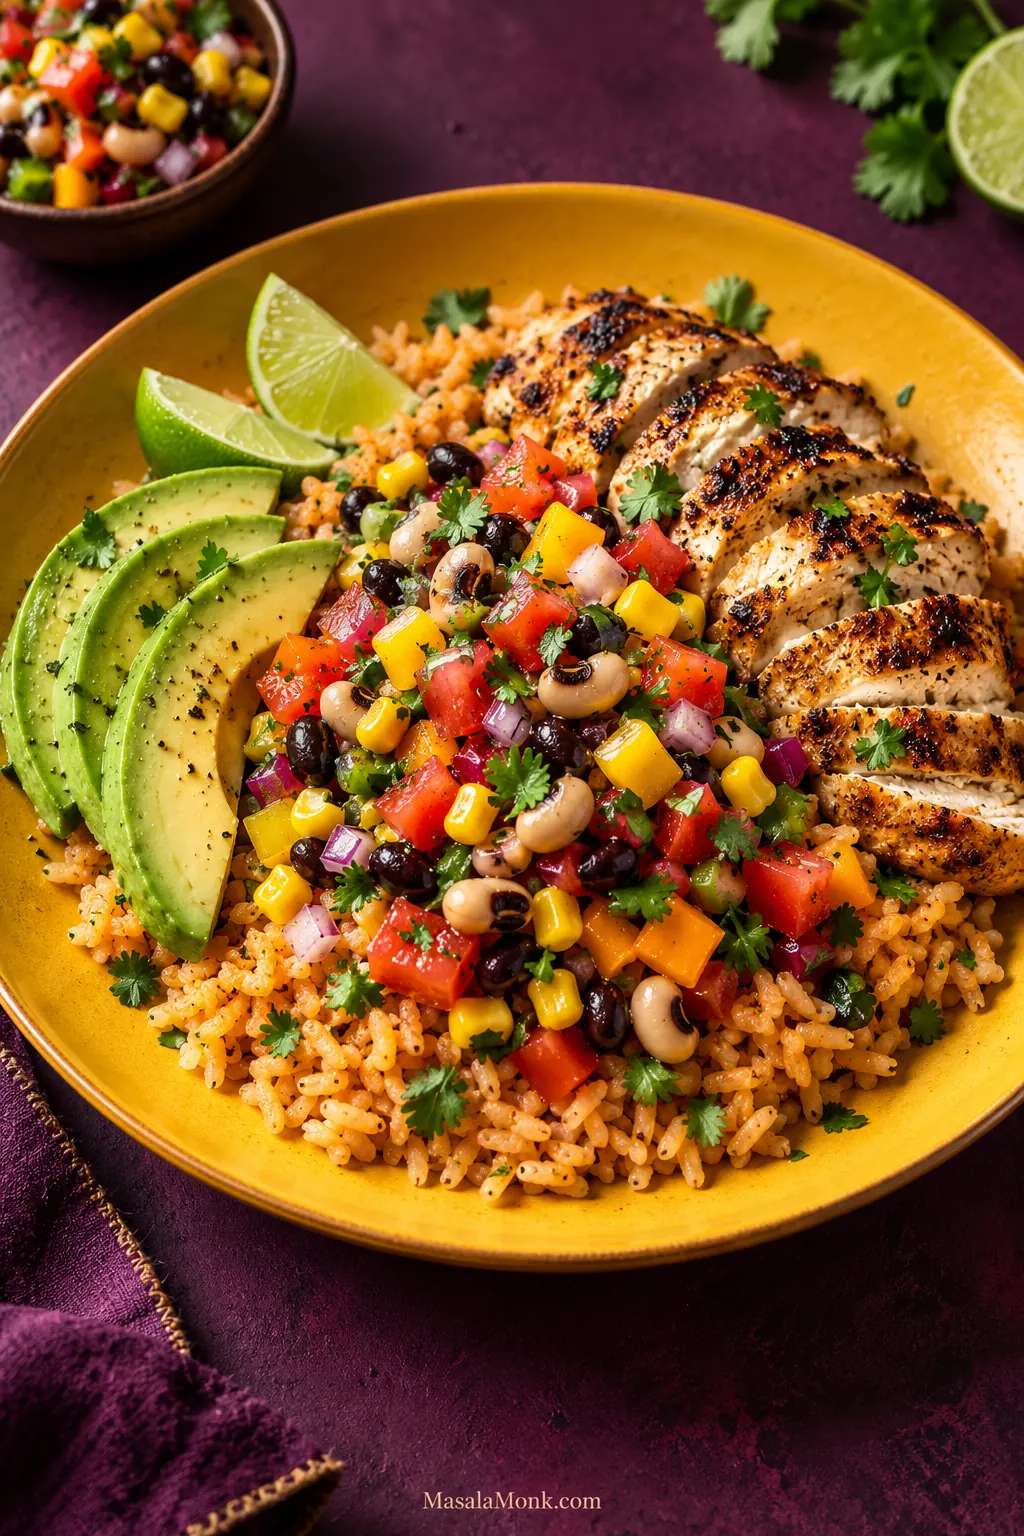
Cowboy Caviar served over Mexican-style rice with sliced grilled chicken, avocado and lime on a golden plate.
For a rice bowl, let the spoonful drain briefly before adding it so the grains underneath stay fluffy rather than soggy.

↑ Back to recipe · Back to top

More Ways to Serve Cowboy Caviar

Sturdy tortilla chips or scoop-shaped corn chips are the obvious first choice. Very thin chips have a habit of snapping just when you finally get the perfect scoop.

Cowboy Caviar is also a cool, sharp contrast to grilled meat. Serve it beside juicy carne asada, grilled chicken or fish and let the lime, tomato and crisp pepper cut through the richer flavors.
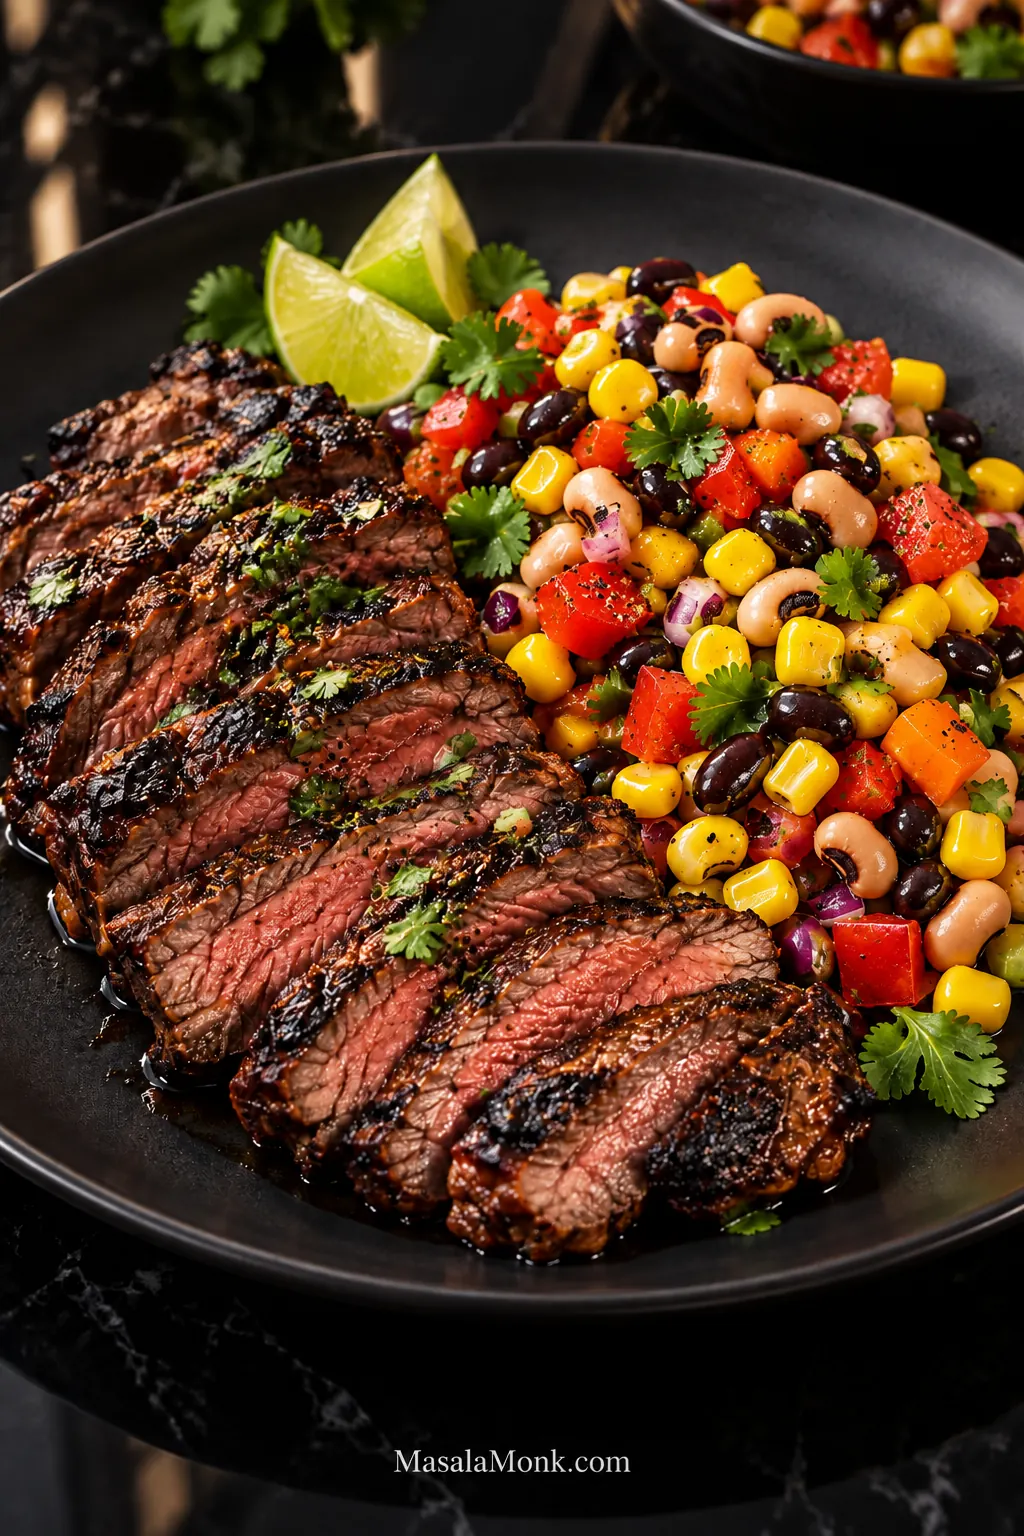
Sliced charred carne asada served beside Cowboy Caviar with black-eyed peas, black beans, corn, tomato, bell pepper, red onion, cilantro and lime wedges.

For tacos and burrito bowls, it can replace separate beans, corn and salsa. Spoon it over our juicy ground beef tacos, or turn a generous serving into lunch over fluffy Mexican rice with avocado, grilled chicken or another protein.
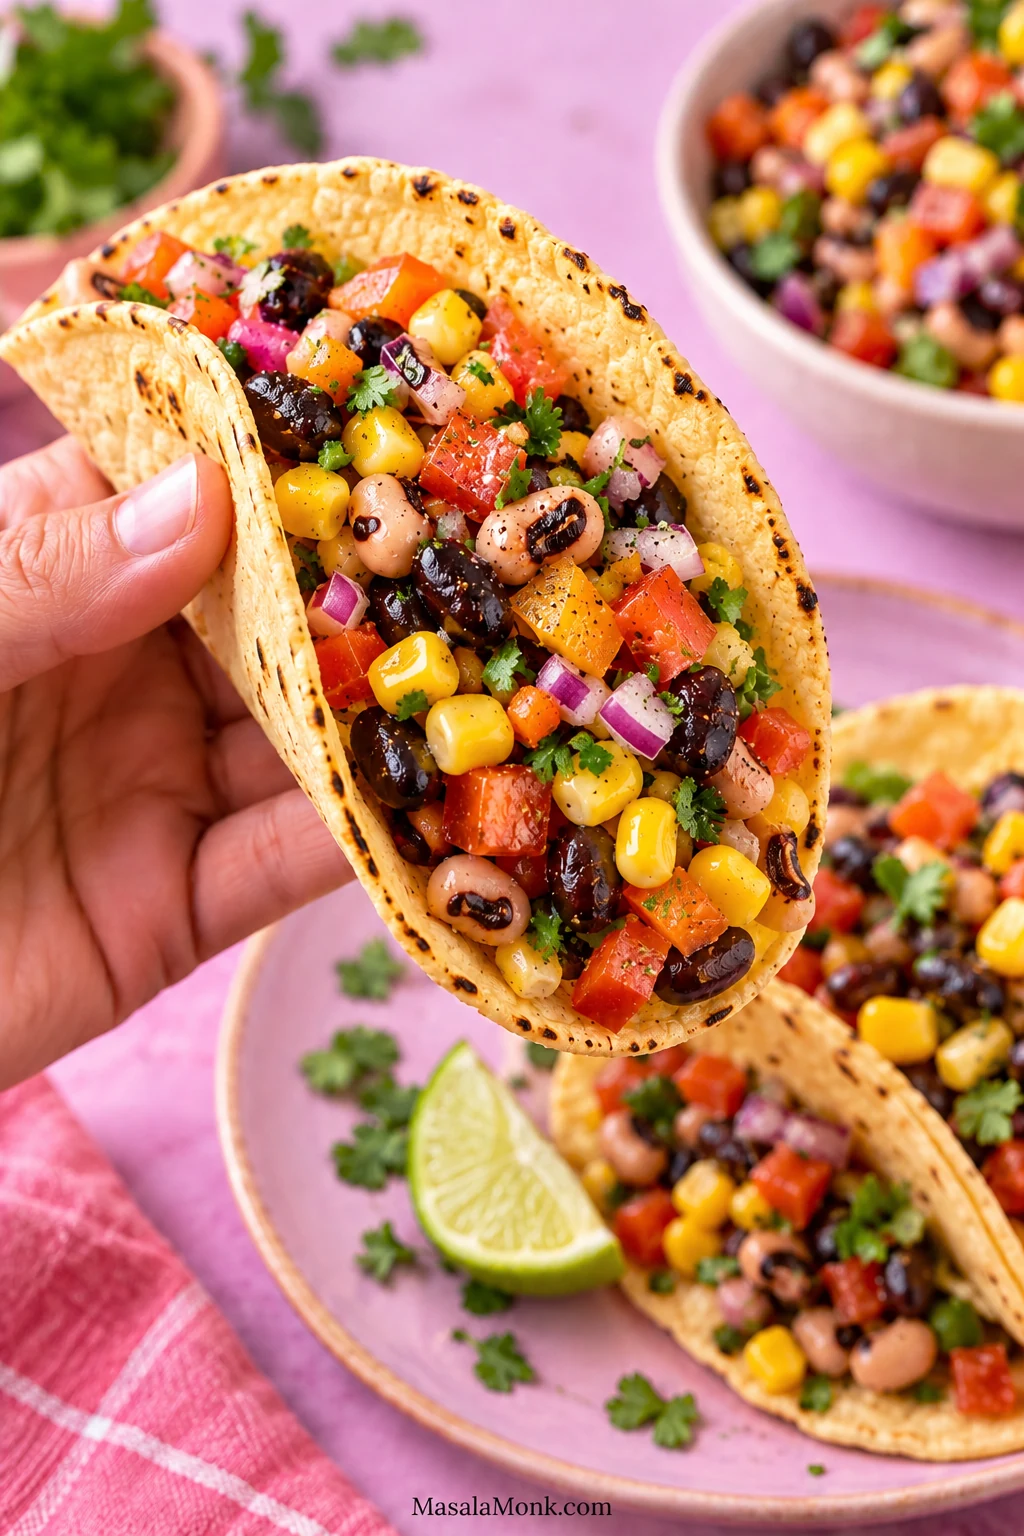
A hand holding a corn tortilla taco filled with Cowboy Caviar made from black-eyed peas, black beans, corn, tomato, bell pepper, red onion and cilantro.
The spoonful already brings beans, corn, tomato and crunch together; leaving excess vinaigrette behind helps the tortilla stay intact.

For Picnics, Cookouts & Tailgates

Keep the salad chilled until serving, and set the serving bowl over ice if it will stay outside for a while. The USDA recommends refrigerating perishable food within 2 hours, or within 1 hour when the temperature is above 90°F / 32°C.
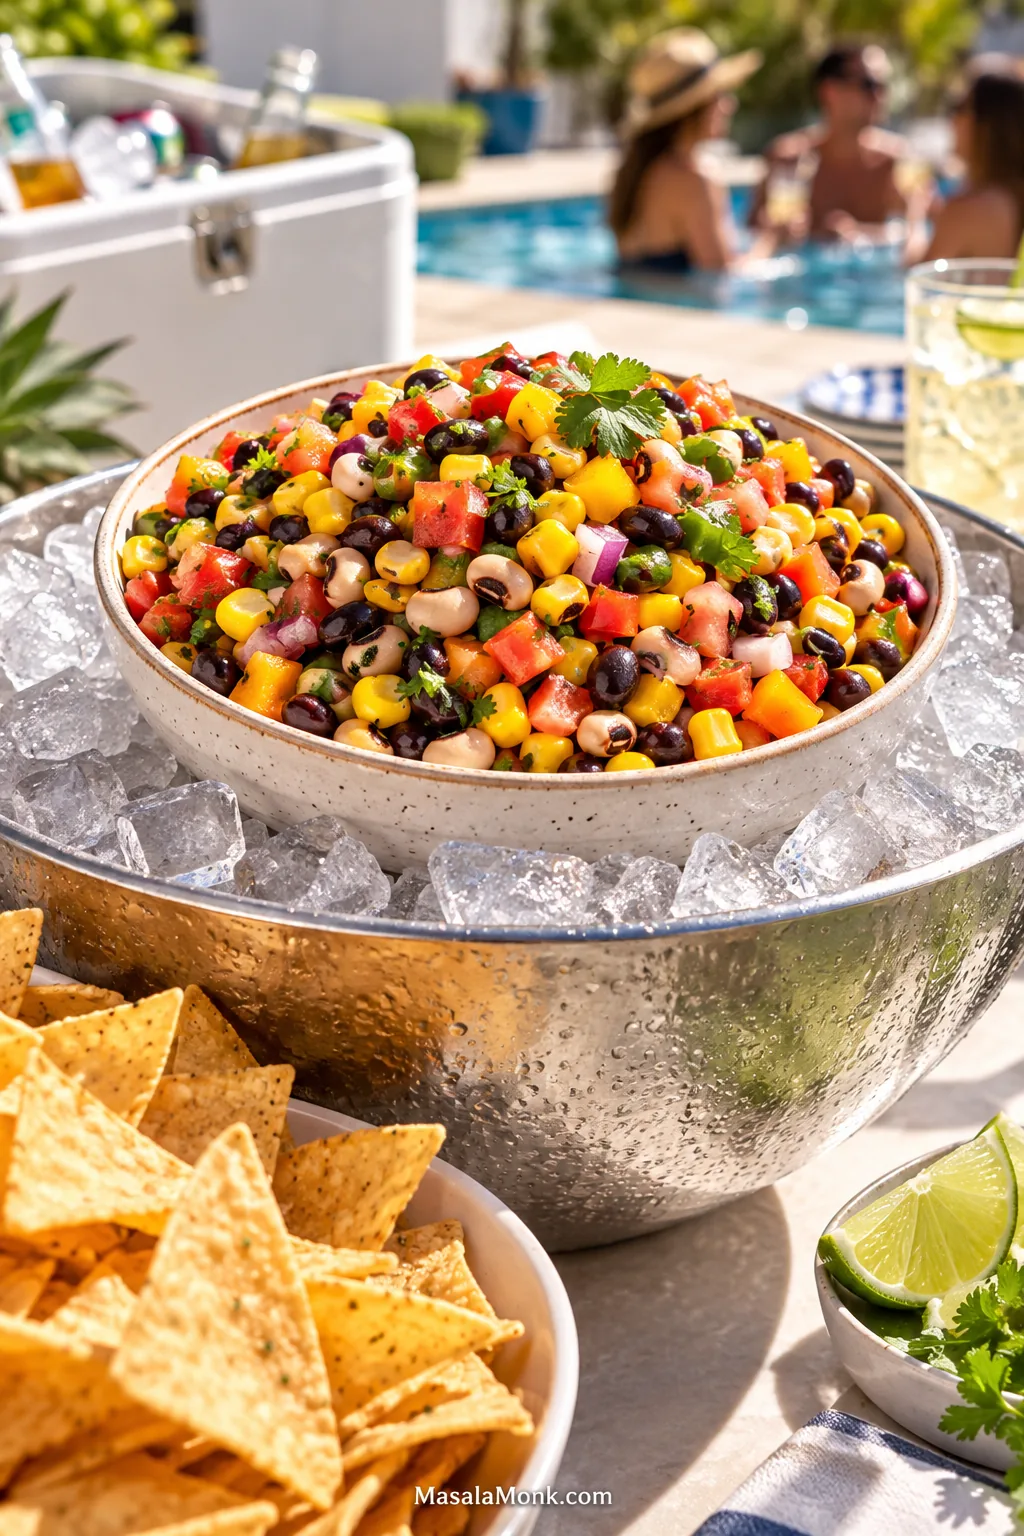
Bowl of Cowboy Caviar nested inside a larger metal bowl filled with ice at an outdoor summer gathering, with tortilla chips nearby.
For a long cookout, put out a smaller bowl over ice and refill it from the refrigerator so each round stays colder and fresher.

One Last Toss Before Serving

Before it reaches the table, give everything one last toss and taste a bean or two. Wake it up with a squeeze of lime if the chilled flavors need it. Then put out the sturdy chips.
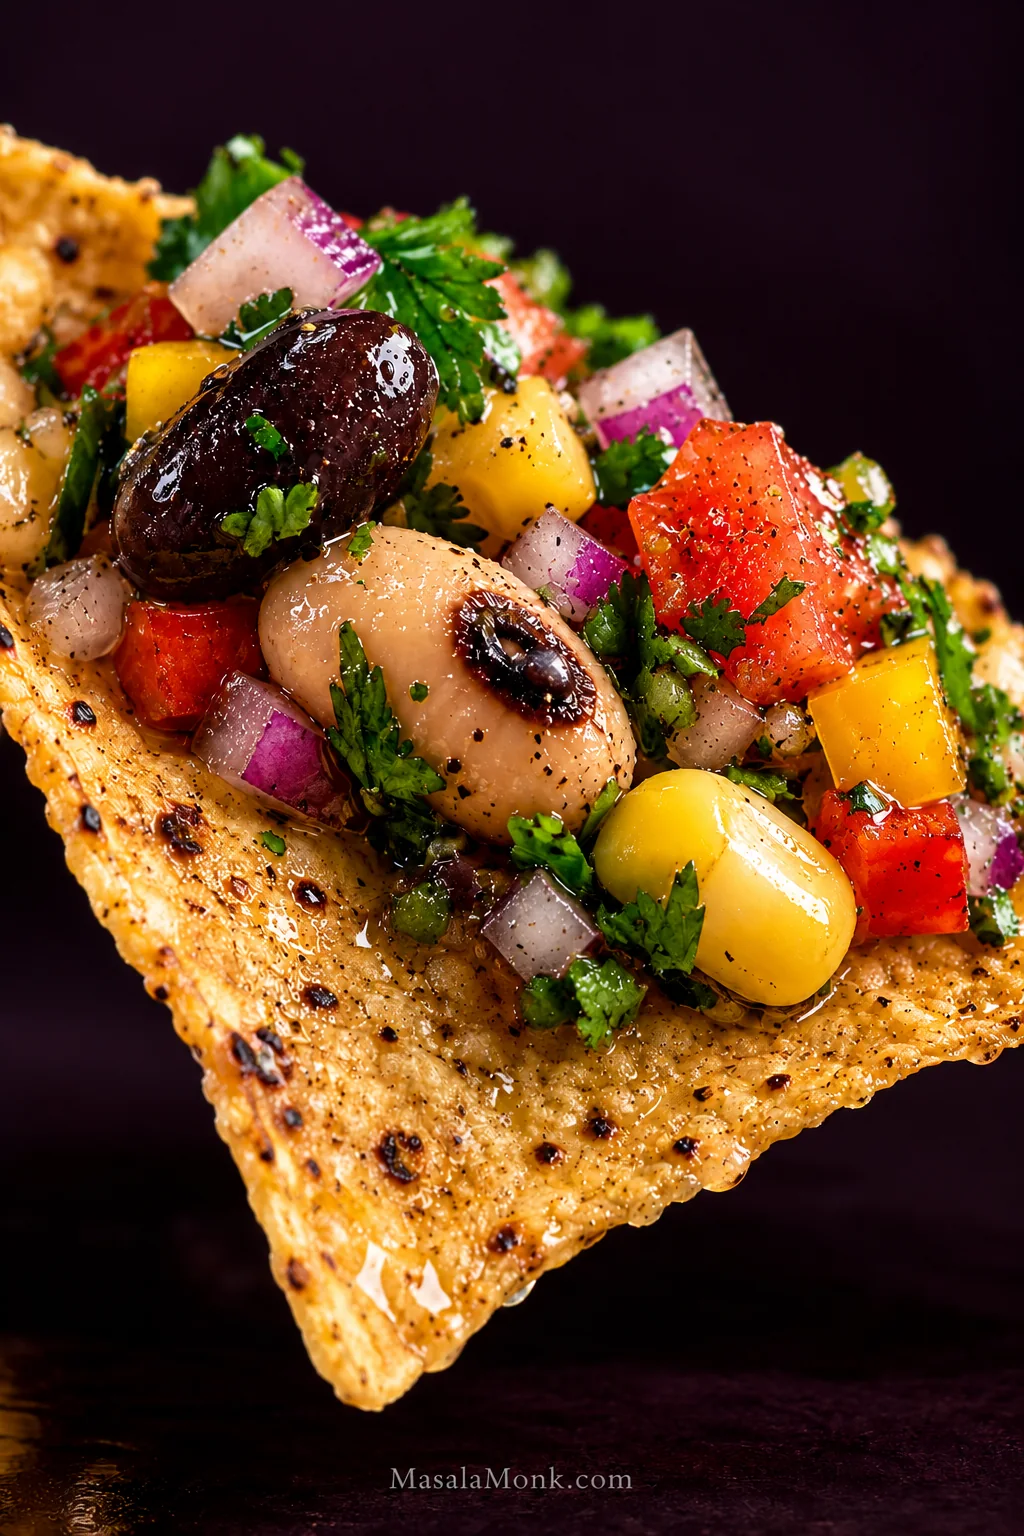
Extreme close-up of a tortilla chip topped with black-eyed peas, a black bean, corn, tomato, red and yellow bell pepper, red onion, cilantro and a light vinaigrette sheen.

A good scoop should bring creamy beans, sweet corn, juicy tomato and crisp pepper together, with enough lime left in the dressing to make the next scoop sound like a very good idea.
↑ Back to recipe · Back to top

Posted on — Leave a comment

Vegetarian Enchiladas Recipe: Easy Black Bean & Veggie Enchiladas

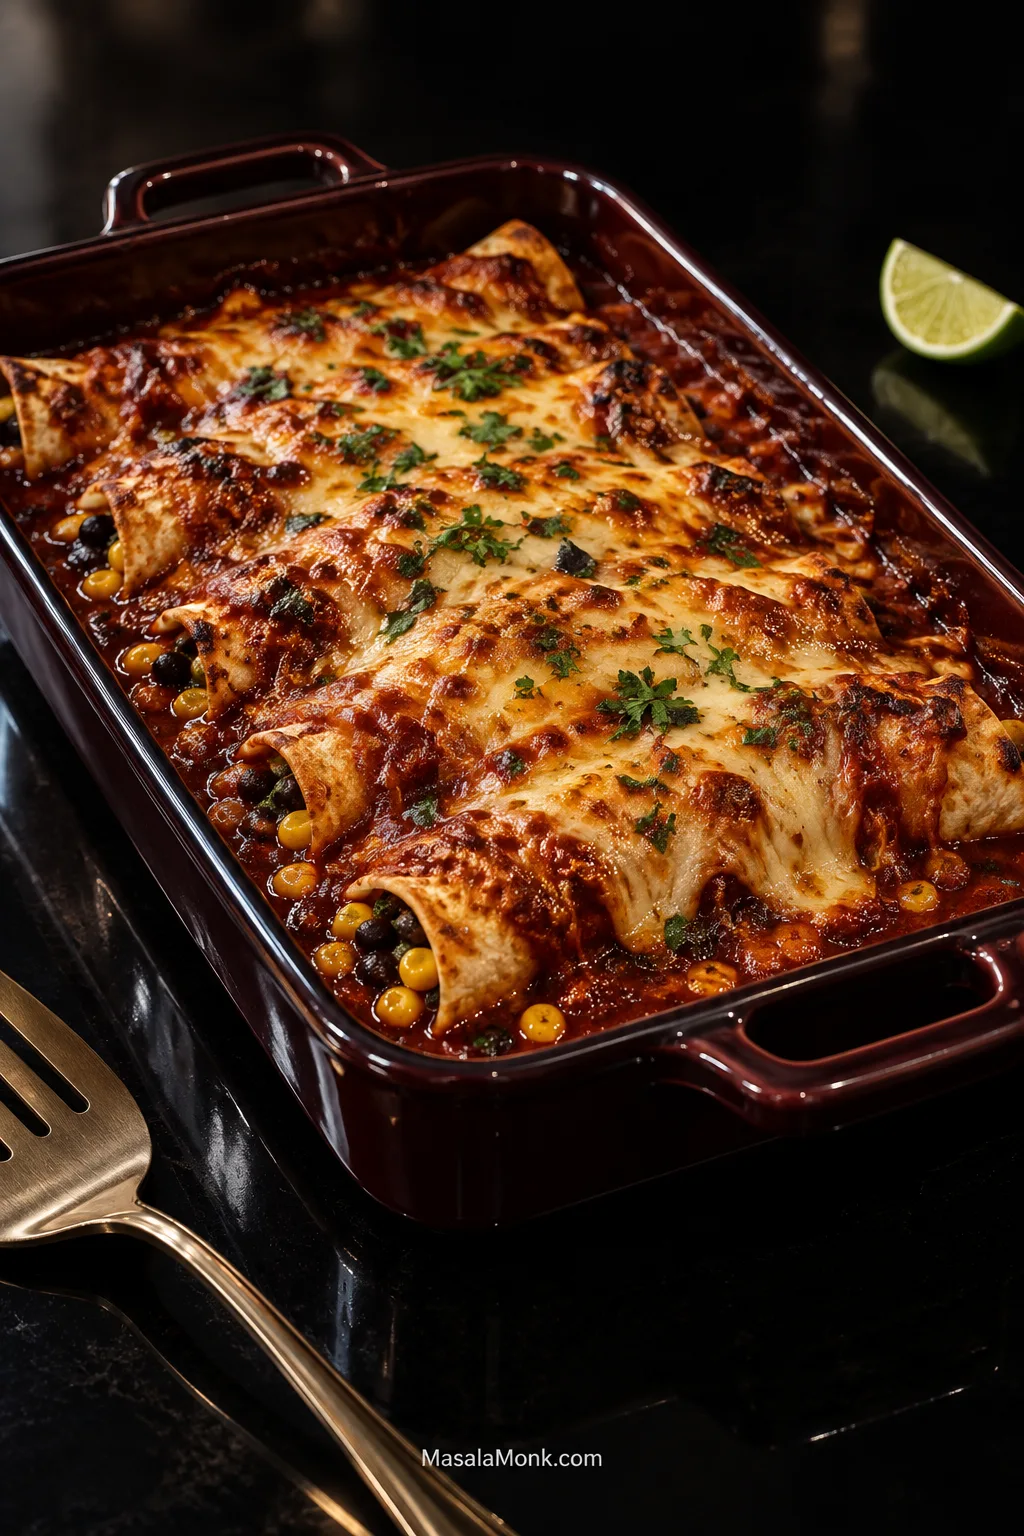
Baked vegetarian enchiladas in a dark red casserole dish with glossy red sauce, browned melted cheese, and black beans and corn visible around some tortilla edges.

A good pan of vegetarian enchiladas comes to the table still bubbling: red sauce in the seams, browned patches of cheese, sweet corn, toasty cumin and lime underneath. The tortillas stay soft through the middle, while a few exposed edges catch enough oven heat to toast.

Keep the easy parts easy. The filling cooks in one skillet, store-bought enchilada sauce works perfectly well, and there is no need to dip every tortilla individually before rolling. What matters more is how wet the filling is, whether the tortillas bend cleanly and how long they sit in sauce.

Black beans, corn, bell pepper, onion and garlic make up the filling. A few of the beans get crushed against the skillet so everything holds together inside the tortilla; the rest stay whole, giving you a hearty center without turning the filling into bean paste.

Saucy, not soggy is the aim. The recipe itself is straightforward; the extra guidance farther down is there for the few places enchiladas tend to get awkward.

Quick answer: To make vegetarian enchiladas, sauté onion, bell pepper and corn until tender and no loose water remains. Add black beans, lightly crush some of them, then season with cumin, chile, lime and a little red enchilada sauce. Taste before rolling. Fill 8 medium flour tortillas or 10–12 small corn tortillas, arrange them in a lightly sauced 9 × 13-inch / 23 × 33-cm dish, top with the remaining sauce and cheese, and bake at 400°F / 200°C for 18–22 minutes.

Jump to: the recipe · corn or flour · prevent sogginess · make ahead & freeze · troubleshooting · what to serve

Black Bean & Veggie Enchiladas

If you have never rolled enchiladas before, don’t let that make the recipe look fussy. Once the tortillas are flexible and you know how much filling they comfortably hold, the rest of the pan goes quickly.

Recipe at a Glance

Yield8 medium flour-tortilla enchiladas or about 10–12 smaller corn-tortilla enchiladas; about 4 servings
Total timeAbout 50–60 minutes, including resting
Active timeAbout 30 minutes
Pan9 × 13 inches / 23 × 33 cm
Bake400°F / 200°C for 18–22 minutes
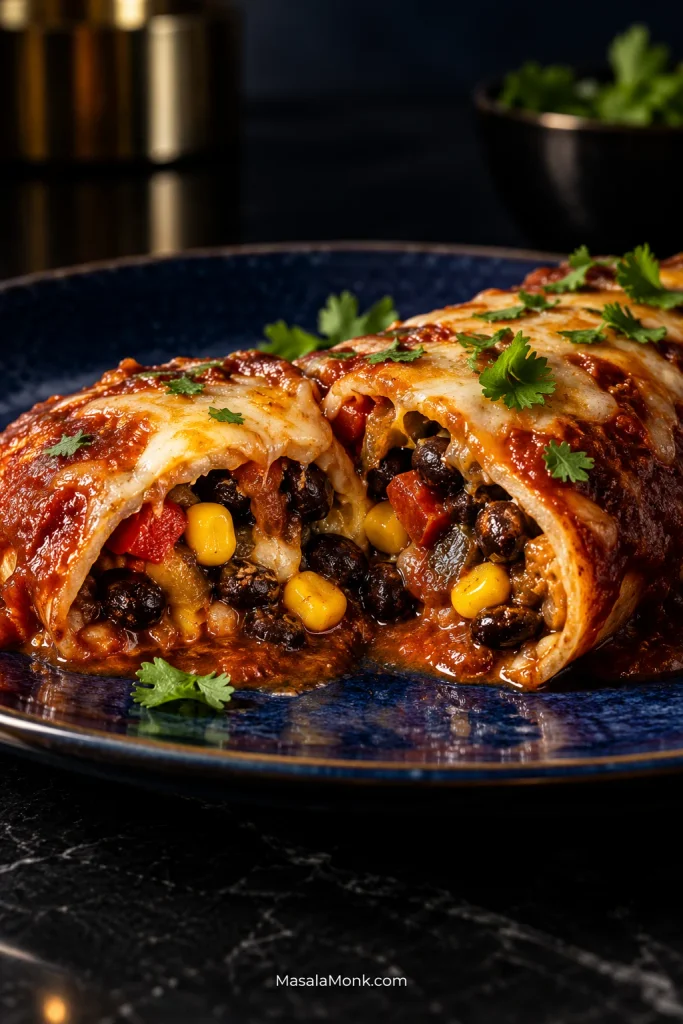
Two cut-open enchiladas on a deep blue plate showing black beans, corn, red bell pepper, onion, melted cheese and red sauce inside the tortillas.
A useful filling should hold together without becoming dense. You still want to see whole black beans, corn and peppers when the enchilada is cut, rather than one compact paste.

Ingredients

  • 1 tablespoon / 15 ml olive oil or neutral cooking oil
  • ½ medium onion, finely diced, about 80 g. Red, yellow or white all work.
  • 1 medium red bell pepper, diced, about 150 g. A small dice makes enchiladas easier to roll and eat.
  • 1 cup corn, about 160 g. Fresh, frozen or well-drained canned corn all work.
  • 3 garlic cloves, minced
  • 1½ teaspoons ground cumin
  • 1 teaspoon American-style chili powder. Use the relatively mild seasoning blend sold as “chili powder” in the US, not pure cayenne or another very hot ground chile.
  • ½ teaspoon smoked or sweet paprika
  • ½ teaspoon dried oregano
  • 1 (15-ounce / 425-g) can black beans, rinsed and thoroughly drained, about 240–260 g drained
  • 2 cups / 475 ml red enchilada sauce, divided. One 19-ounce can usually gives enough. Packaged sauce keeps this easy; this red enchilada sauce recipe makes about the right amount.
  • 1 tablespoon / 15 ml fresh lime juice, plus wedges for serving
  • Fine salt, as needed after tasting
  • 8 ounces / 225 g / about 2 cups shredded melting cheese, divided roughly in half. Monterey Jack is an easy choice; Jack with sharp cheddar adds bite; Oaxaca works well too. Any mild cheese or blend that melts smoothly can stand in.
  • 8 flour tortillas, about 8 inches / 20 cm each
  • Or 10–12 corn tortillas, about 6 inches / 15 cm each. Expect closer to 12 at roughly ⅓ cup filling each; capacity varies with size and thickness.
  • Neutral oil as needed, optional, for corn tortillas that remain fragile after warming

Cooking for vegetarians? Check enchilada sauce for meat stock and choose cheese made with vegetarian or microbial rennet if that matters to you. Canned refried beans may contain lard too, so check the label if using them as a swap.

Before You Start

  • Taste the sauce. A salty or very spicy sauce means the filling needs more cautious seasoning.
  • Bend one corn tortilla. A cracked edge tells you the batch needs warming before you start filling.
  • Drain the beans and canned corn well. Water carried into the filling eventually reaches the tortilla.

1. Sauce the Baking Dish

Heat the oven to 400°F / 200°C.

Spread about ⅓ cup / 80 ml enchilada sauce across the bottom of the baking dish. A thin coating is enough to flavor the underside and prevent sticking.

2. Cook the Vegetables Until the Pan Looks Dry

Heat the oil in a large skillet over medium to medium-high heat. Add the onion and bell pepper and cook for 5–7 minutes, stirring occasionally, until tender and beginning to color.

Add the corn and cook for another 2–3 minutes.

Lower the heat to medium and stir in the garlic, cumin, chili powder, paprika and oregano. Within about 30 seconds the pan should smell warmer and toastier, with the cumin and chile coming through before anything has a chance to scorch.

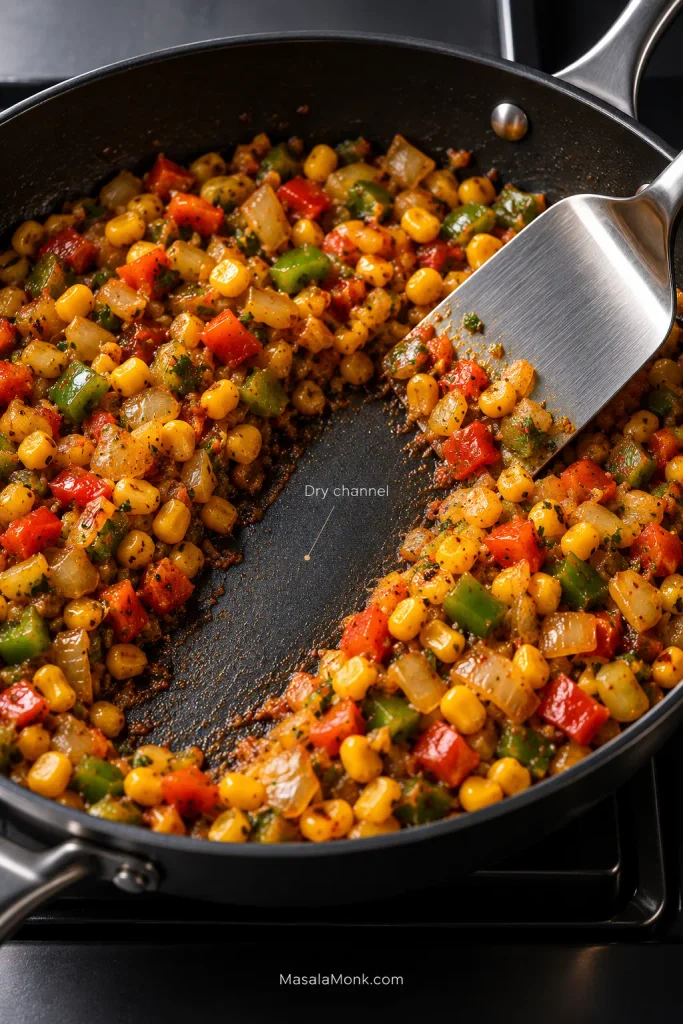
Drag the spatula through the vegetables. Water should not immediately flood back into the cleared path. You want glossy, juicy vegetables with a fairly dry skillet underneath them.

Cooked corn, onion and bell pepper pushed aside by a metal spatula in a dark skillet, leaving a dry strip of pan with no loose liquid running back into it.
This is the easiest moment to catch excess moisture. Once beans and sauce go in, extra vegetable water is harder to recognize—and much more likely to end up inside the tortilla.

3. Add the Black Beans and Finish the Filling

Add the drained black beans. Lightly crush about one-third against the skillet with the back of your spoon; leave the rest whole.

Stir in another ⅓ cup / 80 ml enchilada sauce and the lime juice. Scoop up a spoonful. It should stay together as you carry it to a tortilla, with no watery liquid left behind in the skillet.

If the filling loosens after the sauce goes in, cook it for another minute or two until the excess liquid has reduced and the spoonful holds together again.

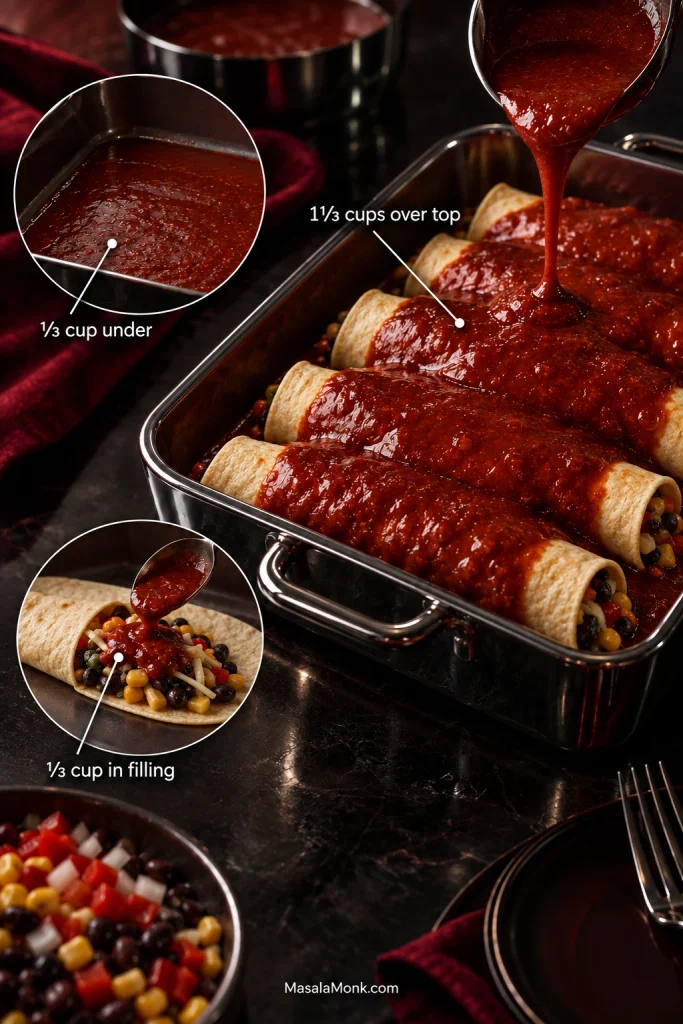
Keep the sauce split simple: ⅓ cup under the rolls, ⅓ cup in the filling and about 1⅓ cups over the top.

Enchilada sauce guide showing one-third cup beneath the rolls, one-third cup mixed into the filling, and one and one-third cups spread over the top while the tortilla ends remain exposed.
The same amount of enchilada sauce behaves very differently depending on where it goes. Distribution matters more than simply cutting the quantity: too much underneath creates pooling, while most belongs over the rolls.

4. Taste Before You Roll

Taste the filling now. Beans soften seasoning, and both the sauce and cheese will add salt later.

Add salt if it needs it. A little more lime can wake up a heavy filling; another small pinch of cumin or chili powder can deepen one that tastes flat. Adjust it now, before the filling disappears inside the tortillas.

5. Warm the Tortillas

Flour tortillas: soft and flexible straight from the packet? Use them. There is no prize for adding an unnecessary warming step.

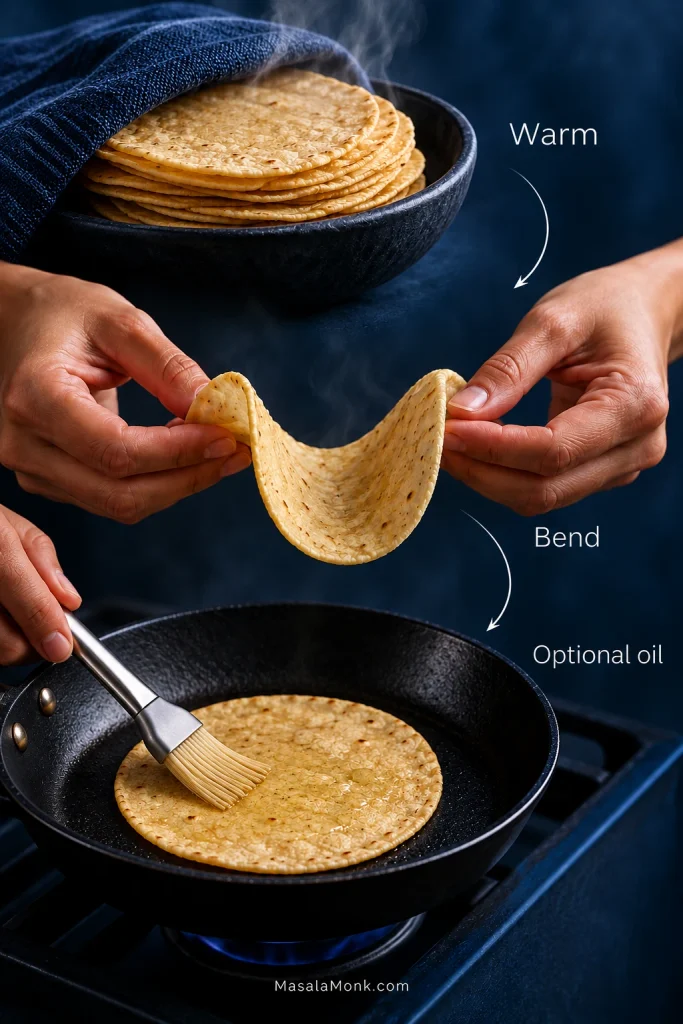
Corn tortillas: wrap the stack in a slightly damp kitchen towel or paper towel and microwave for about 20–30 seconds. Bend one. A batch that still cracks usually needs another 10 seconds. You can also use a hot skillet for about 10–20 seconds per side. Keep the warmed stack covered while you work.

Particularly brittle tortillas may benefit from a very light brush of neutral oil and another few seconds in the skillet. Pull them while they still bend easily.

Three-step corn tortilla guide showing warmed tortillas, one bending into a U shape without cracking, and another being lightly brushed with oil in a skillet as an optional step.
Corn tortillas need enough flexibility to roll, not a mandatory oil treatment. If warmth alone gets them there, stop—extra steps should solve a problem, not become ritual.

6. Fill and Roll

The first tortilla is your test enchilada. A crack means the remaining tortillas need more warmth; filling bulging heavily from both ends means the next one needs a smaller scoop.

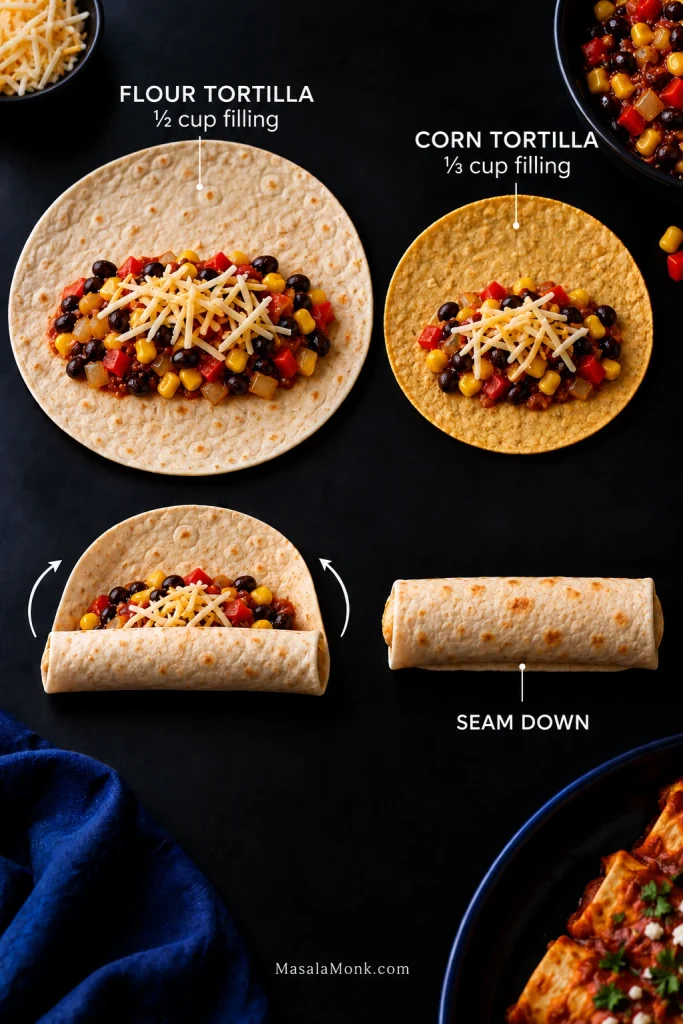
Use about ½ cup / 120 ml filling for each 8-inch / 20-cm flour tortilla or about ⅓ cup / 80 ml for each 6-inch / 15-cm corn tortilla.

Divide about half of the shredded cheese among the tortillas, roughly 1 cup in total.

Roll and place seam-side down in the dish. Don’t chase perfectly tight cylinders. Once the rolls are tucked beside one another, the baking dish does most of the holding. A small split is not a crisis; turn that side down and carry on.

By the third or fourth tortilla, the amount usually starts to feel obvious. From there, the pan fills quickly.

Overhead guide comparing a large flour tortilla with about half a cup of black bean and corn filling and a smaller corn tortilla with about one-third cup, followed by rolling and seam-down placement.
Treat the filling amount as a comfortable maximum, not a target you must force into every tortilla. If the seam strains to close, the better fix is a smaller scoop, not a tighter roll.

7. Add Sauce and Cheese

Sauce the centers and leave a little tortilla exposed at the ends. Spoon over the remaining sauce, about 1⅓ cups / 315 ml, then scatter the remaining half of the cheese over the top.

8. Bake Until Bubbling, Then Rest

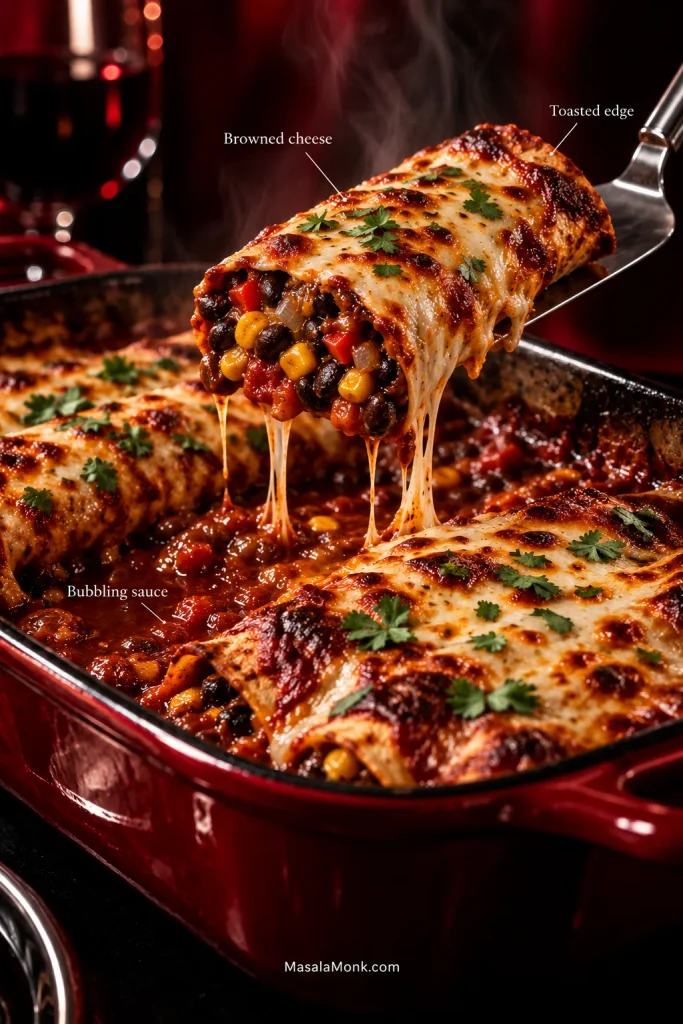
Bake uncovered for 18–22 minutes. Look for red sauce bubbling between the rolls, melted cheese with a few golden patches and tortilla tips beginning to toast.

A hot pan with a pale top only needs a minute or two under the broiler/grill. Leaving the whole dish in the oven longer will only dry the filling and exposed tortilla edges.

Rest for 5–10 minutes. While the pan settles, cut the lime and get any toppings ready. The enchiladas will lift more cleanly when you come back to them.

A spatula lifting a baked enchilada from a red casserole dish, with black beans, corn, red pepper and onion visible inside, surrounded by bubbling sauce, browned cheese and a toasted tortilla edge.
Use a broad spatula when serving: supporting the whole softened roll from underneath matters more than trying to lift it by one end, especially with corn tortillas.

If the pan is already in the oven, dinner is handled. Everything below is optional. Use it when you want to change the tortillas or filling, make the pan ahead, or work out why an earlier batch behaved differently.

Corn or Flour Tortillas for Enchiladas?

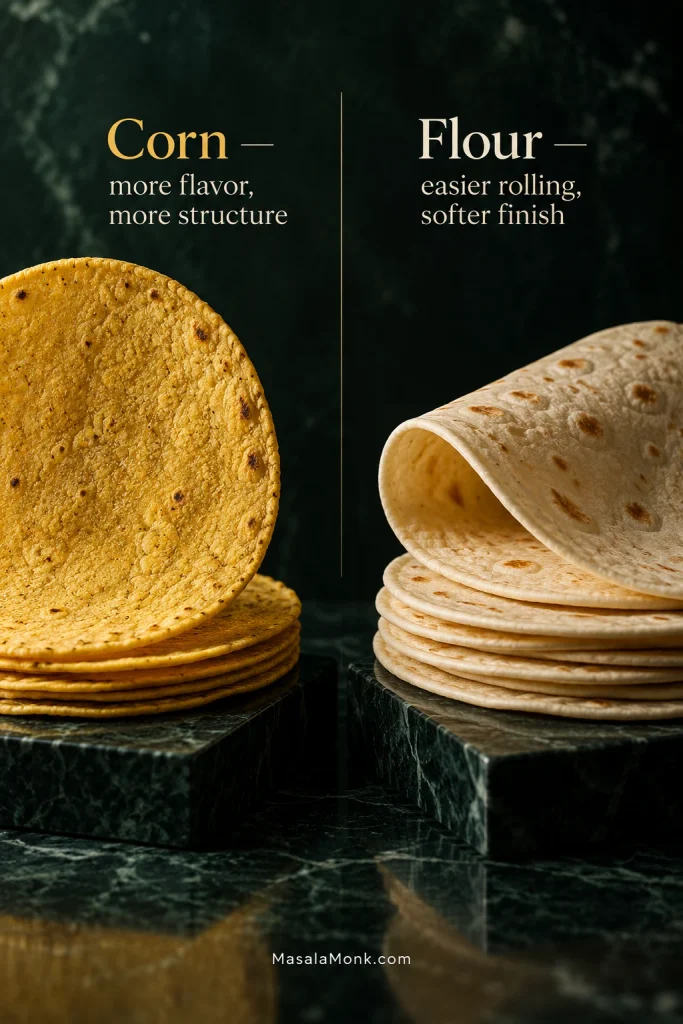
Corn tortillas are the traditional Mexican starting point for enchiladas. For this baked home-style version, flour tortillas are also useful when easy rolling matters more than pronounced corn flavor.

If you want…ChooseWhat changes
More corn flavorCornYou still taste the corn tortilla underneath the sauce.
Firmer tortilla texture under sauceCornProperly warmed corn tortillas keep more of their own texture as they bake.
The easiest rollingFlourThey are soft and forgiving.
A very soft finished enchiladaFlourFlour tortillas soak up sauce faster as they bake and sit.
Side-by-side stacks of yellow corn tortillas and pale flour tortillas, labeled that corn offers more flavor and structure while flour is easier to roll and gives a softer finish.
Think about when you plan to eat them. Flour tortillas are wonderfully forgiving for same-day enchiladas, while corn usually keeps more of its own character after longer contact with sauce.

Do Corn Tortillas Have to Be Fried?

Not for this baked version. A quick oil pass makes corn tortillas easier to roll and gives them a little more protection from the sauce. If yours already bend cleanly after warming, you can skip it.

Freshness, thickness and brand all matter. If you’ve got masa harina and want to make the tortillas too, this homemade corn tortilla recipe explains what properly hydrated, flexible dough should feel like.

For especially fragile tortillas, Bon Appétit also describes a brief oil treatment for sturdier enchiladas. Whatever method you use, the tortilla should still bend easily when it reaches the filling.

Whichever tortilla you choose, moisture eventually matters more than the label on the packet.

Saucy, Not Soggy: How to Keep Enchiladas From Falling Apart

Soggy enchiladas usually come down to moisture and time: a wet filling, sauce pooling underneath, or tortillas sitting in sauce for hours before they bake.

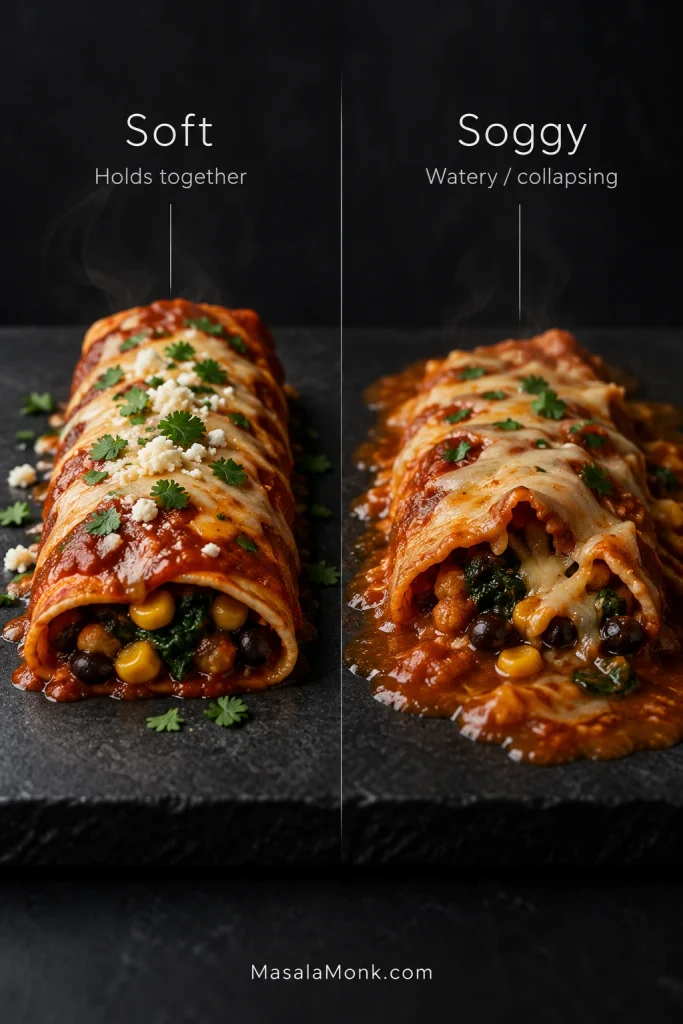
Soft is not the enemy here. A good enchilada should be tender where tortilla meets sauce. The trouble starts when the tortilla becomes watery, gummy or so fragile that it cannot make the trip from baking dish to plate.

Two enchiladas compared side by side: the soft example remains intact, while the soggy example sits in excess watery sauce with a visibly collapsing tortilla.
For vegetarian enchiladas, the useful test is whether the tortilla still has structure. Tender tortillas are normal; pooling liquid plus a roll that collapses when lifted signals a moisture problem.

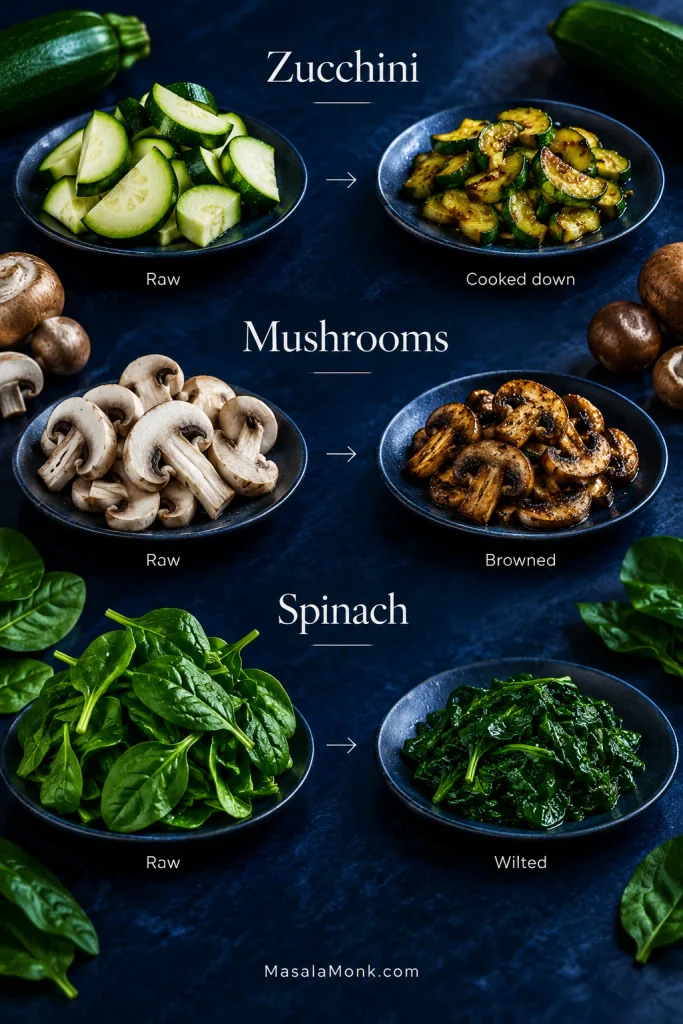
Most of the solution happens before the pan reaches the oven. Corn and peppers are fairly forgiving. Zucchini, mushrooms and spinach release much more water, so give those vegetables enough time in the skillet for that moisture to cook away.

Corn tortillas have the opposite problem at first: too dry and they crack. Warm them until they bend cleanly. Flour tortillas need almost no persuasion to roll, though they soften more quickly once they spend hours in sauce.

With the sauce, restraint underneath matters more than restraint on top. Give the bottom of the dish a thin coating, put a little sauce in the filling, then let most of it sit over the rolls. For a saucier serving, warm extra sauce separately and spoon it on at the table.

Sauce contact matters too. A pan rolled and baked now behaves differently from one that sits sauced for hours before it reaches the oven. If you are assembling ahead, the make-ahead method keeps that exposure under control.

Changing the Vegetarian Enchilada Filling

Poblano is the easiest place to start if you want to change the base without changing its character too much. It brings more chile flavor without adding much extra moisture. Extra corn makes the filling sweeter.

The important thing is volume: replace rather than endlessly add. A cup of something new should take the place of roughly the same amount of the original filling. Otherwise a flexible recipe quietly becomes enough for a second baking dish.

Vegetables That Need More Cooking

Wetter vegetables need a little more care before they go inside a tortilla.

  • Zucchini: dice it small and cook until the water it releases has evaporated.
  • Mushrooms: let them move past the wet, steaming stage and give them time to brown. Once browned, they make the filling much more savory.
  • Spinach: wilt thoroughly. Drain or squeeze frozen spinach before it reaches the filling.
Before-and-after guide showing raw and cooked-down zucchini, raw and browned mushrooms, and fresh spinach beside a much smaller portion of wilted spinach.
Different vegetables change appearance in different ways, so color alone is a poor guide. For an enchilada filling, the more reliable endpoint is simple: the skillet should no longer be releasing loose water.

Sweet potato and butternut squash need a head start too. Cook them until tender before assembly; the short oven bake here is enough to heat the filling and melt the cheese, not enough to soften raw chunks of squash.

Black, Pinto or Refried Beans?

Black beans work especially well here because they hold their shape but crush easily enough to help bind the filling. Pinto beans are softer and milder and can replace them 1:1.

Refried beans give you a denser, creamier center. Check canned versions for lard if you are cooking for vegetarians. If you’d rather keep them on the side, this refried beans recipe from a can is a quick option.

Leaving beans out entirely calls for more cooked vegetables to take their place. Browned mushrooms with roasted cauliflower are one option. The tortillas should still feel properly filled when you roll them.

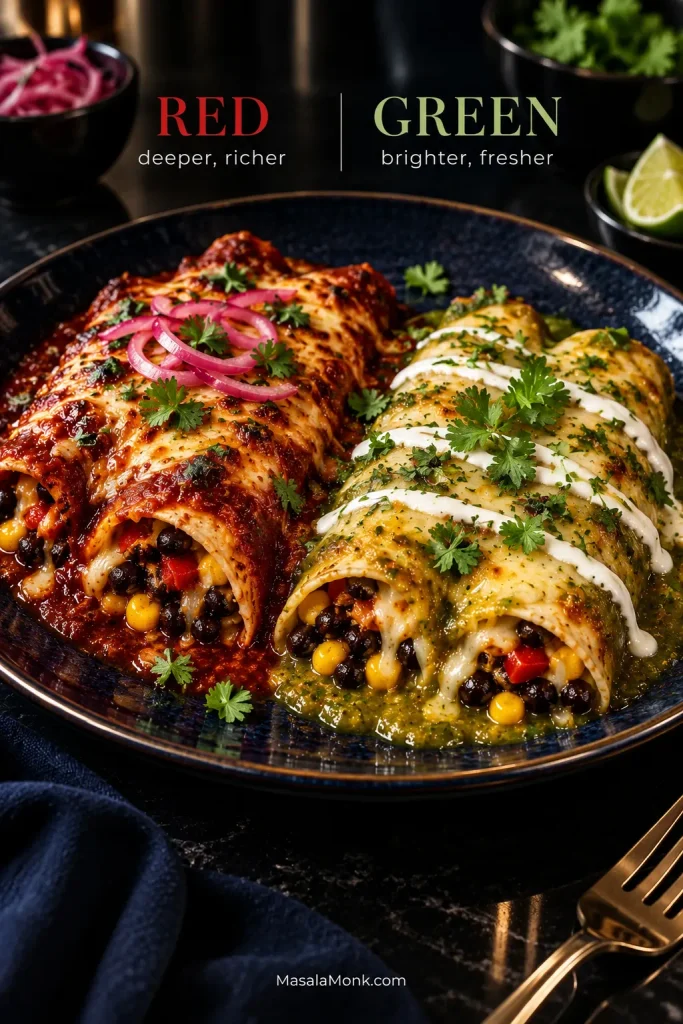
Red or Green Enchilada Sauce?

Red is the natural fit for the base recipe. Cumin, black beans and browned cheese sit especially well with its deeper chile flavor.

Green sauce changes what you notice. Lime, sweet corn, cilantro and the fresh toppings come forward, giving the same filling a brighter finish.

Two enchiladas with the same black bean, corn and red pepper filling; one has deep red sauce and pickled onion, while the other has green tomatillo sauce, crema and cilantro.
If you swap red for green enchilada sauce, keep the filling unchanged the first time. That makes it easier to taste what the sauce itself changes before adjusting lime, cumin or toppings.

Swap green sauce for red roughly 1:1. A pourable bottled green enchilada sauce can go straight in. If you’re using a thicker salsa verde, loosen it with a little water, vegetable broth or cooking liquid until it pours easily and coats the tortillas. This roasted salsa verde explains that adjustment as well.

Give any sauce a taste before it reaches the pan. One that pours almost like broth benefits from a short simmer. A salty sauce means the bean filling will need less salt.

Homemade sauce is worth making when you feel like the extra project. It should not be the admission price for enchiladas on a Wednesday night. Ready to cook? Return to the recipe and assemble the pan as written.

How to Make Vegetarian Enchiladas Ahead Without Getting Soggy

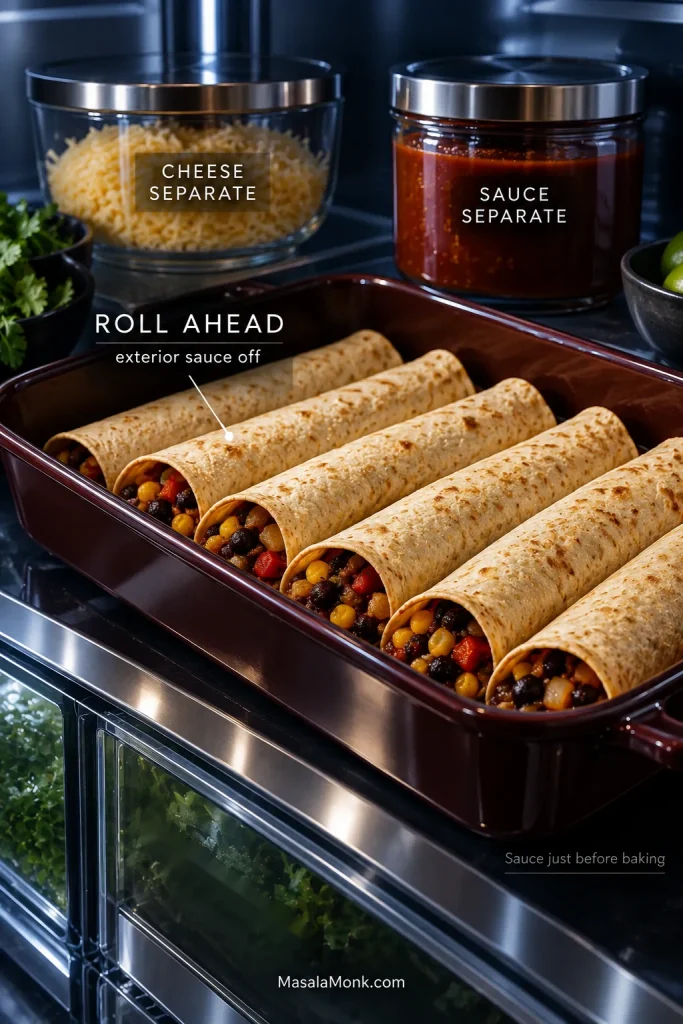
For an overnight pan, use the finished filling exactly as written but keep the exterior sauce off until baking time. That means no sauce in the baking dish and no sauce over the rolled tortillas while they sit in the refrigerator.

Let the cooked filling stop steaming, transfer it to a shallow container and refrigerate promptly. Once chilled, fill and roll the tortillas and keep them covered in the refrigerator. Store the sauce and cheese separately.

A refrigerator shelf holding rolled unsauced enchiladas in a baking dish with separate containers of red enchilada sauce and shredded cheese.
Cooling the filling before rolling keeps residual steam from condensing inside the covered pan. Then hold back the exterior sauce so the tortillas spend less time absorbing liquid before baking.
Prep styleWork before bakingWhat to expect
Components kept separateWarm tortillas, roll, sauce and add cheeseClosest to freshly assembled
Roll ahead; sauce laterAdd sauce and cheeseVery good texture with little work left
Fully assemble overnightBakeLeast work, but noticeably softer tortillas

Baking Chilled Enchiladas

A pan going into the oven straight from the refrigerator will usually need about 25–35 minutes. Cover loosely for the first 15 minutes, then uncover and continue until the sauce is bubbling through the pan and the center is hot. Cooking them fresh instead? Use the standard bake cues and timing.

Refrigerated glass bakeware needs a little extra care. Follow the manufacturer’s instructions before moving a cold glass dish into a hot oven because thermal-shock tolerance varies by product.

How to Freeze Vegetarian Enchiladas

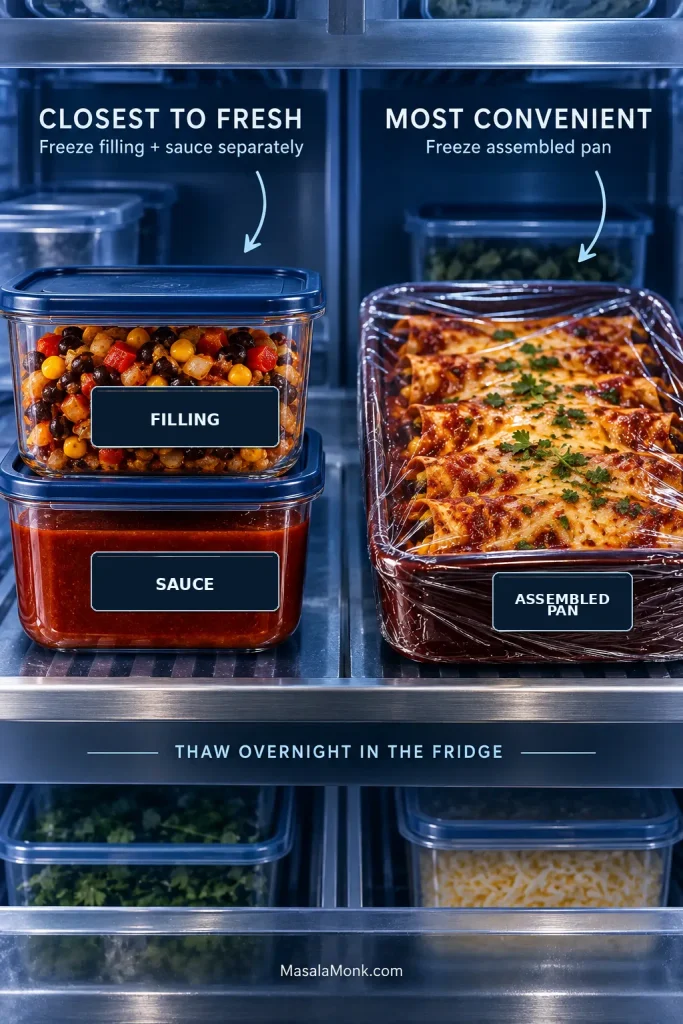
For the closest texture to a fresh pan, freeze the cooked filling and sauce separately. For best quality, use them within 2–3 months. Thaw overnight in the refrigerator, then assemble with tortillas and cheese and bake as written.

A fully assembled pan works too. Chill the cooked filling first, assemble the enchiladas in a freezer-safe baking dish, add the sauce and cheese, wrap tightly and freeze. The tortillas will be softer after thawing, but almost all of the work is already done.

Thaw the assembled pan overnight in the refrigerator, then use the chilled-pan timing above. Straight-from-frozen baking is possible, but timing varies with the pan, its depth and how solidly everything is frozen. Thawing first gives you a more even bake.

Freezer comparison showing cooked black bean and vegetable filling stored separately with red sauce on one side and a wrapped fully assembled pan of sauced, cheese-topped enchiladas on the other.
The freeze-thaw cycle is gentler on tortilla texture when the filling and sauce stay separate. An assembled frozen pan saves more work later, but the tortillas go through that cycle already sauced.

Store and Reheat Leftovers

Refrigerate leftovers promptly. USDA recommends getting perishable cooked food into the refrigerator within 2 hours and using leftovers within 3–4 days. Reheat them to 165°F / 74°C.

For freezer quality, USDA guidance lists casseroles at about 2–3 months. See its food-safety guidance for the broader recommendations.

An oven or toaster oven keeps more texture around exposed edges. The microwave is quicker and gives you a softer tortilla. At lunch, speed may win.

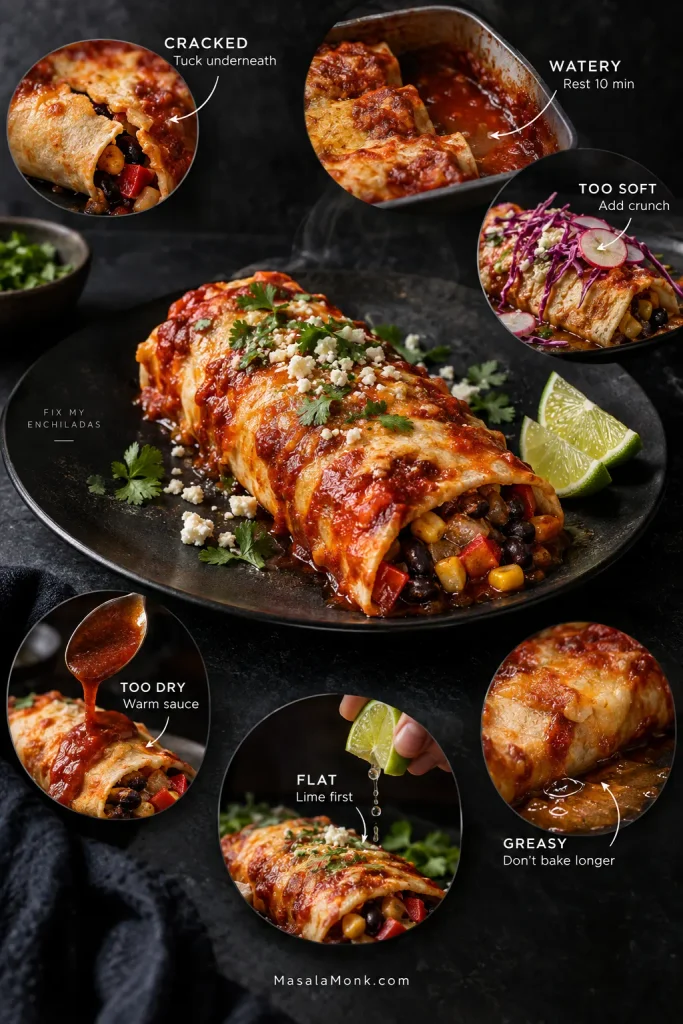
Fix My Enchiladas

Troubleshooting guide around a baked enchilada showing six problems and fixes: cracked, watery, too soft, too dry, flat and greasy.
Most rescue moves change one thing at a time: structure, moisture, brightness or contrast. More oven time is rarely the answer once the enchiladas are already cooked.

My Corn Tortilla Cracked While I Was Rolling It

Tuck the split side underneath and keep going; a small crack rarely matters once the rolls are sitting snugly together. Before you roll the rest, revisit the tortilla warming method.

There Is Water Under the Enchiladas

Give the pan a full 10 minutes to rest before judging it. Some loose liquid may settle as the enchiladas cool slightly. Lift the rolls with a wide spatula and leave excess liquid in the dish. A very watery pan usually traces back to wet vegetables, unusually thin sauce or too much sauce underneath. For prevention next time, the Saucy, Not Soggy section brings those moisture points together.

The Tortillas Have Turned Very Soft

That doesn’t mean the pan is ruined. Let it rest a little longer, lift portions with a wide spatula and add something crisp such as cabbage, radish or pickled onion for contrast. For another overnight batch, use the make-ahead method and keep the exterior sauce separate until baking time.

The Enchiladas Are Too Dry

Warm some extra enchilada sauce and spoon it onto each plate. Crema, salsa or guacamole can bring moisture back too. On another pan, use the full sauce amount and stop baking once the center is hot and the sauce is bubbling.

The Filling Tastes Flat

At the table, lime is the fastest fix. Salsa, pickled onion, jalapeño or Cotija can help too. Next time, taste after the beans, sauce and lime are all together in the skillet.

If the filling falls out: don’t try to re-roll a hot, sauced enchilada. Spoon the filling back beside or over the tortilla and eat it as it is. During assembly, a little less filling and a few lightly crushed beans make the rolls easier to manage.

If the pan looks greasy: that sheen is often fat released by the cheese. Let the pan rest and spoon off any obvious excess around the edges if you want to. Extra oven time usually makes the problem worse.

What to Serve With Vegetarian Enchiladas

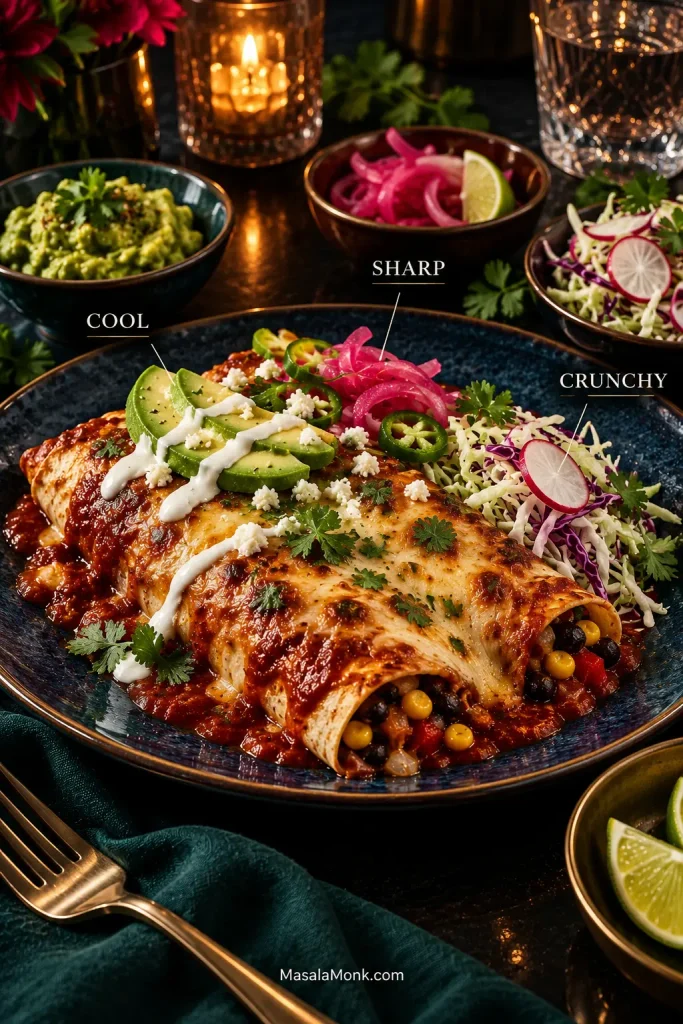
The enchiladas already bring warm tortillas, beans, chile sauce and cheese. You don’t need every topping in the refrigerator. Pick one cool thing, one sharp thing and, if you want it, something crunchy.

  • Cool: avocado, guacamole, sour cream or crema
  • Sharp: lime wedges, pickled red onion, salsa or fresh/pickled jalapeño
  • Crunchy: shredded cabbage, radish or a simple cabbage slaw
  • Cheese at the table: Cotija for a salty, assertive finish or queso fresco for a milder fresh-cheese crumble

Finish with cilantro if you like it. For a fuller meal, Mexican-style rice or a simple salad is enough.

Plated vegetarian enchiladas with avocado and crema marked as cool, pickled red onion and lime marked as sharp, and cabbage and radish marked as crunchy.
Add contrast at the table, not before the bake. Cool crema, sharp lime or pickles, and crisp cabbage or radish stay useful precisely because they have not spent twenty minutes softening in the oven.

Vegetarian Enchiladas FAQs

Can I Use Black Beans Cooked From Dried?

Yes. Use about 1½ cups / 250 g cooked, well-drained black beans in place of the canned beans.

Can I Make These Gluten-Free?

Yes. Use certified gluten-free corn tortillas and check the labels on the enchilada sauce and any packaged seasoning blends.

Can I Make These Vegan?

Yes. The black bean and vegetable filling is already plant-based. Choose an enchilada sauce made without meat stock and use a dairy-free cheese that melts well, or leave the cheese off and finish with avocado, salsa and vegan crema. Without cheese, taste the filling carefully before rolling because you lose some salt and richness.

How Many Enchiladas Should I Serve Per Person?

For a main meal, plan on about 2 medium flour-tortilla enchiladas or 2–3 smaller corn-tortilla enchiladas per person. Substantial sides may bring that down; larger appetites may want more.

Back to the recipe · Back to top


When the pan comes out of the oven, give it those few minutes to settle. The sauce will still be bubbling between the rolls, the cheese will have browned in patches, and a few tortilla corners will be darker and drier than the sauced centers.

At the table, add the cold things: avocado against hot chile sauce, crema melting into the cheese, sharp pickled onion, a squeeze of lime over warm black beans and sweet corn.

Then it is simply dinner: bubbling sauce, browned cheese, lime, sweet corn, and a second enchilada that suddenly seems like a very good idea.
Posted on — Leave a comment

Black Bean Burger Recipe: Easy Patties That Don’t Fall Apart

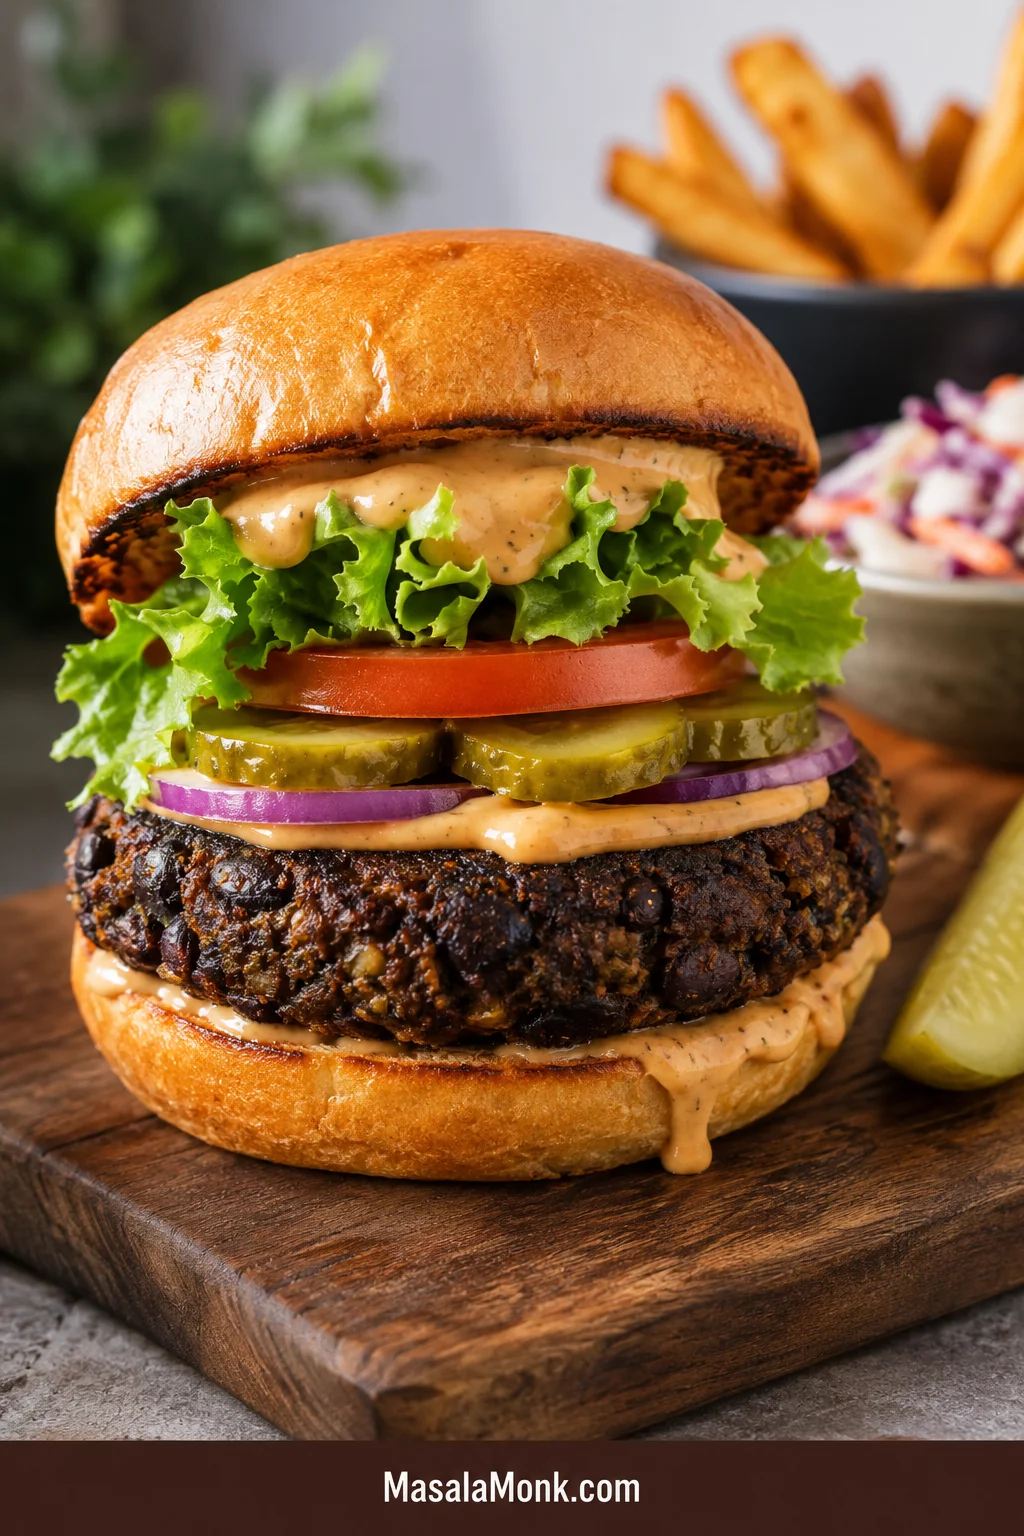
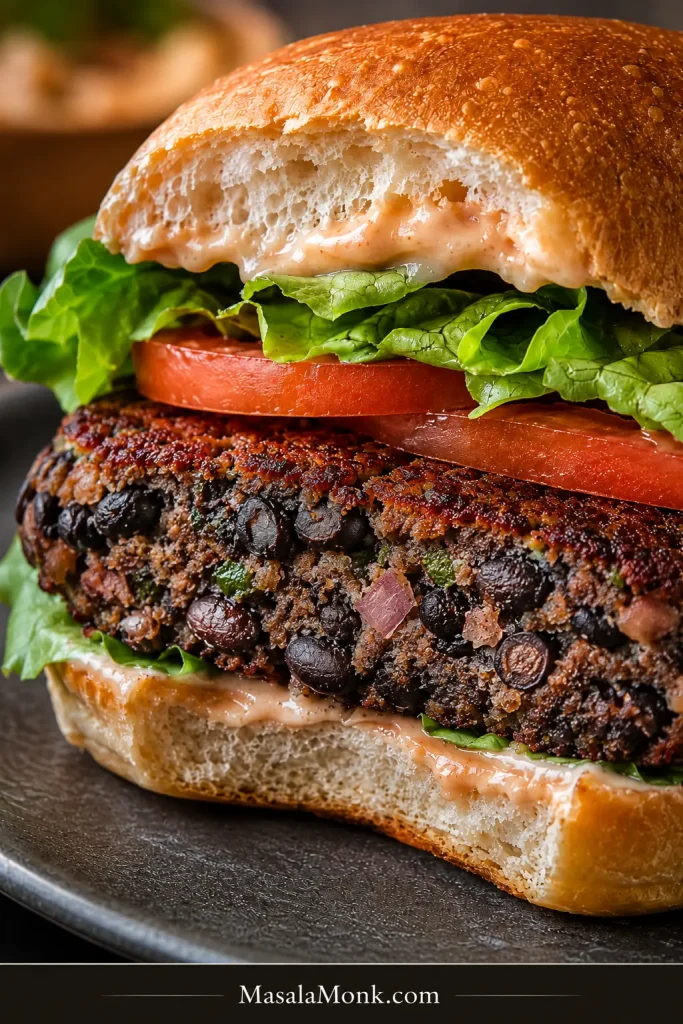
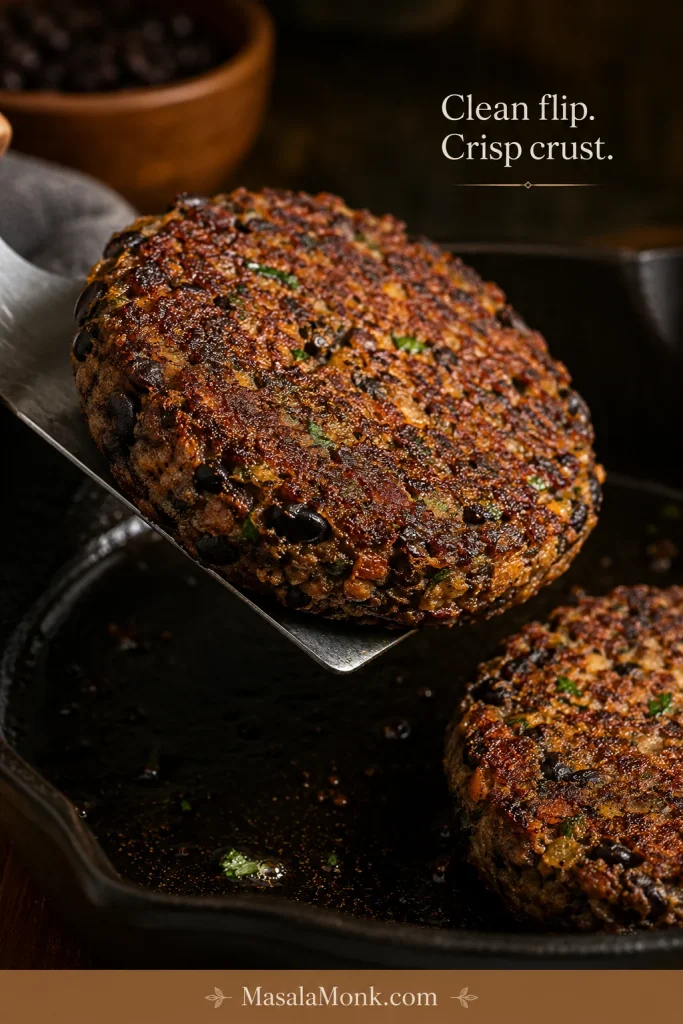
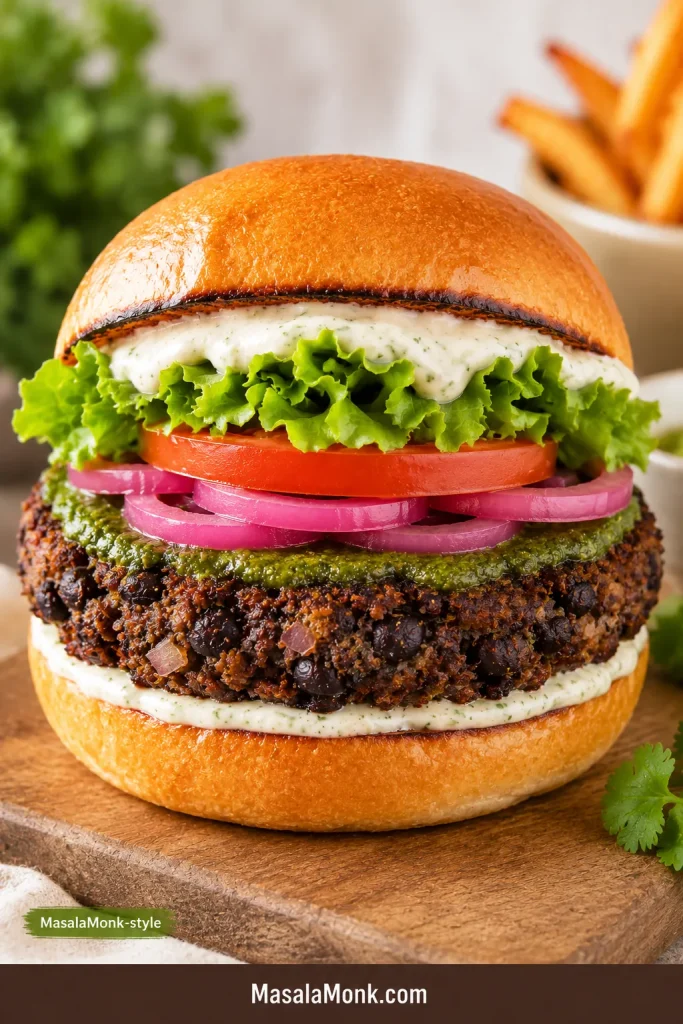
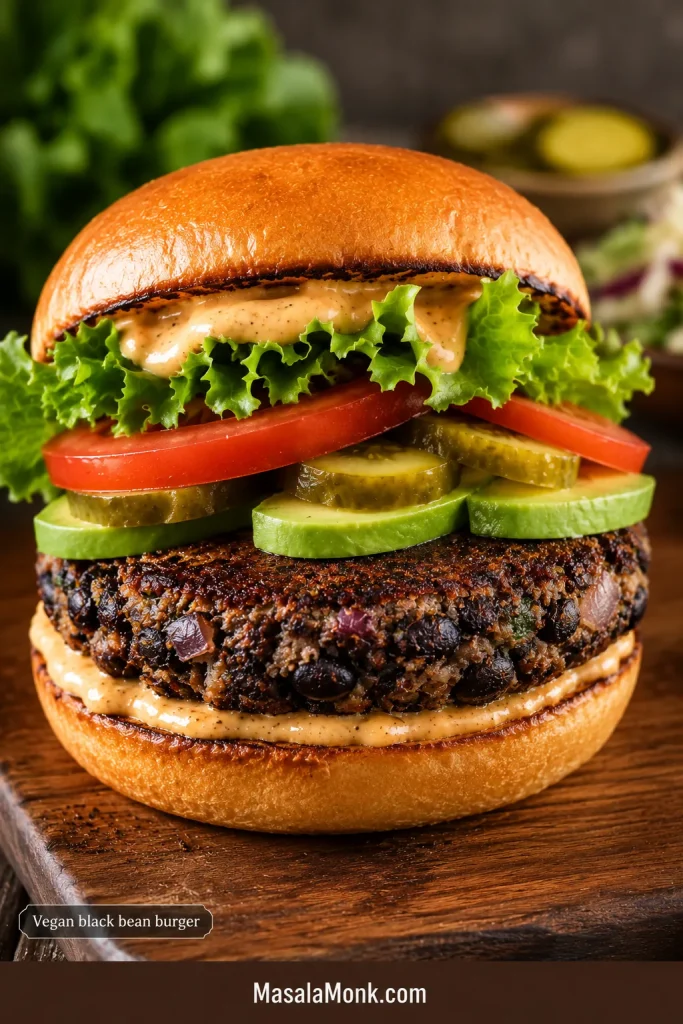
Tall black bean burger on a toasted bun with lettuce, tomato, pickles, creamy sauce, and a dark crisp-edged patty on a wooden board.

Black bean burgers are easy to love and surprisingly easy to mess up. The mixture can turn wet, the patties can crack in the pan, or the center can taste more like mashed beans than a real burger. What you want is a patty that lands on a bun without crumbling, browns at the edges, and feels hearty when you bite into it — not something you have to rescue with extra sauce.

This black bean burger recipe is built for that kind of confidence: crisp edges, smoky flavor, a tender middle, and patties that hold together without first-flip panic. It is the recipe for people tired of mushy, fragile bean burgers and ready for one that actually feels like dinner.

The main version uses canned black beans, egg, panko or oats, onion, garlic, and smoky spices. You will also find vegan, gluten-free, no-breadcrumb, oven, grill, and air fryer options, so the recipe works whether you want a classic veggie burger, a no-egg patty, or a meal-prep-friendly batch for the freezer.

Quick Answer: How to Make Black Bean Burgers That Don’t Fall Apart

To make black bean burgers that do not fall apart, dry the beans first, mash only part of them, use a real binder, and cook the first side until a crust forms before flipping. Wet beans, raw watery vegetables, too little binder, and early flipping are the main reasons homemade black bean burgers turn mushy or break.

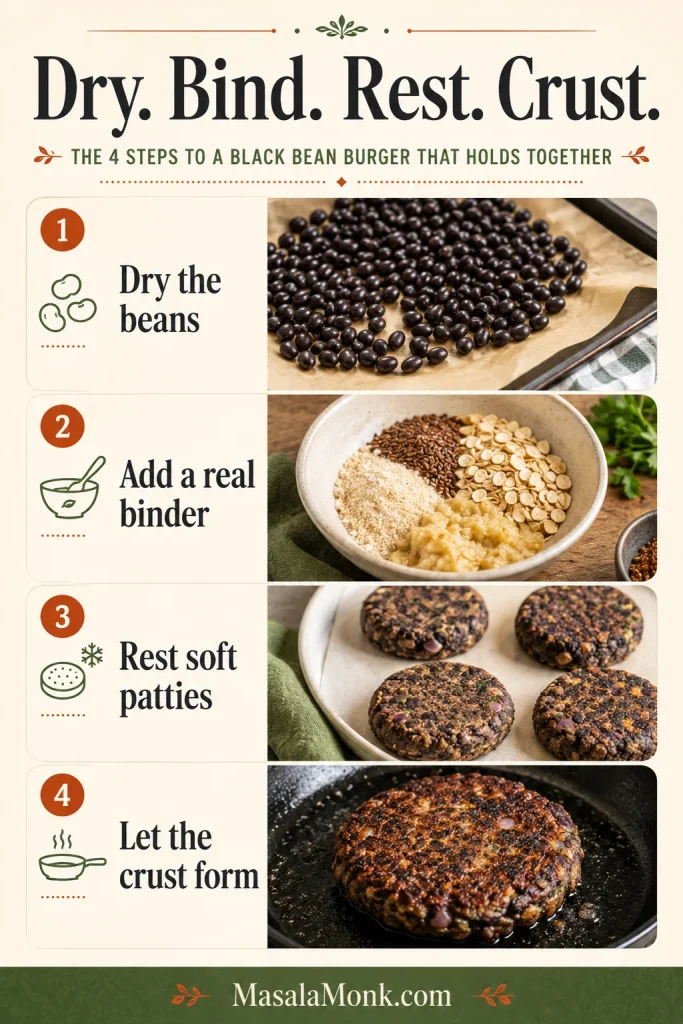
The simple rule is: dry, bind, rest, crust. That means drying the beans, binding the mixture, resting delicate patties, and letting the crust form before flipping.

  • Dry the beans: bake drained beans briefly so the center does not turn pasty.
  • Use a binder: egg plus panko, breadcrumbs, or oats is the easiest vegetarian option.
  • Go egg-free with oats: flax egg plus oats or oat flour works well for vegan patties.
  • Leave texture: mash enough to bind, but keep some visible bean pieces.
  • Rest soft patties: a short chill makes delicate patties easier to move.
  • Wait for the crust: if a patty feels stuck, it probably needs another minute before flipping.

Even if this is your first homemade veggie burger, the cues below will help you fix the bean base before it ever touches the skillet. If it looks like bean dip, it is not ready to be a burger. A pressed handful that holds its shape means you are much closer to a clean flip.

Vertical guide showing four steps for black bean burgers: dried beans, binder ingredients, resting patties, and a browned patty in a skillet.
Before cooking, follow the structure sequence: dry the beans, bind the mixture, rest soft patties, then let the crust set.

Black Bean Burgers at a Glance

Yield6 medium patties
Beans2 cans / about 3 cups drained black beans
Main texture stepDry the beans first
Default binderEgg + panko, breadcrumbs, or oats
Vegan binderFlax egg + oats or oat flour
Main methodSkillet, for crisp edges and control
Texture cueMoist and moldable, not loose like dip

Black Bean Burger Recipe Card

Smoky Black Bean Burgers That Hold Together

These black bean burgers are smoky, hearty, crisp-edged, and firm enough to flip. They are sturdy enough for a bun but still tender in the middle, with enough texture to feel satisfying instead of pasty.

The finished patty should have browned edges, a smoky garlic-cumin aroma, and a middle that feels hearty rather than mashed. Add a toasted bun, creamy sauce, something crunchy, and a little acidity, and it eats like a real burger.

Prep Time15 minutes
Bean-Drying Time12–15 minutes
Patty Cook Time10 minutes for skillet
Total TimeAbout 40–45 minutes
Yield6 patties
Main MethodSkillet
Other MethodsOven, grill, air fryer

If you chill the patties before cooking, add 20–30 minutes of resting time. The wait is useful when the mixture feels soft, especially for vegan, oat-based, or grill-ready patties.

Fast path: For a quicker version, towel-dry the beans very well instead of baking them. The patties will be a little softer than the oven-dried version, but still workable if you use enough binder and let the first side brown before flipping.

Make-ahead path: Shape the patties up to 24 hours ahead and refrigerate them covered. This gives the binder time to settle and makes the patties easier to cook later.

Equipment

  • Rimmed baking sheet
  • Parchment paper
  • Large mixing bowl
  • Fork, potato masher, or food processor
  • Cast-iron or nonstick skillet
  • Thin spatula
  • Optional: grill mat, foil, or air fryer basket

You do not need a food processor. A fork or potato masher gives you more control and makes it easier to leave some texture in the beans.

Ingredients

  • 2 cans black beans, 15 oz / 425 g each, drained and rinsed, about 3 cups / 500–520 g drained beans
  • 1 teaspoon oil, for cooking the onion
  • ½ cup / 75 g finely chopped onion
  • 2–3 garlic cloves, minced
  • 1 large egg
  • ¾ cup panko or breadcrumbs, about 45–55 g, or ¾ cup rolled oats, about 60 g
  • 1 tablespoon tomato paste, ketchup, or barbecue sauce
  • 1 tablespoon tamari, soy sauce, or vegan Worcestershire-style sauce for deeper burger-style flavor
  • 1 teaspoon ground cumin
  • 1 teaspoon smoked paprika
  • ½ teaspoon chili powder
  • ½ teaspoon fine salt, plus more to taste
  • ¼ teaspoon black pepper
  • 1–2 tablespoons chopped cilantro or parsley, optional
  • 1 tablespoon chopped chipotle in adobo, optional for smoky heat
  • 1–2 tablespoons oil, for cooking the patties

Using soy sauce or vegan Worcestershire-style sauce? Taste before adding extra salt because both can make the mixture saltier than expected.

With oat flour: Start with ½ cup / about 50 g oat flour instead of ¾ cup whole oats. Oat flour absorbs more quickly, so add more only when the mixture still feels loose.

Vegan Swap

Replace the egg with 1 flax egg. Mix 1 tablespoon ground flaxseed with 3 tablespoons water and let it thicken for 5–10 minutes. Use rolled oats or oat flour as the dry binder, and chill the shaped patties before cooking.

Instructions

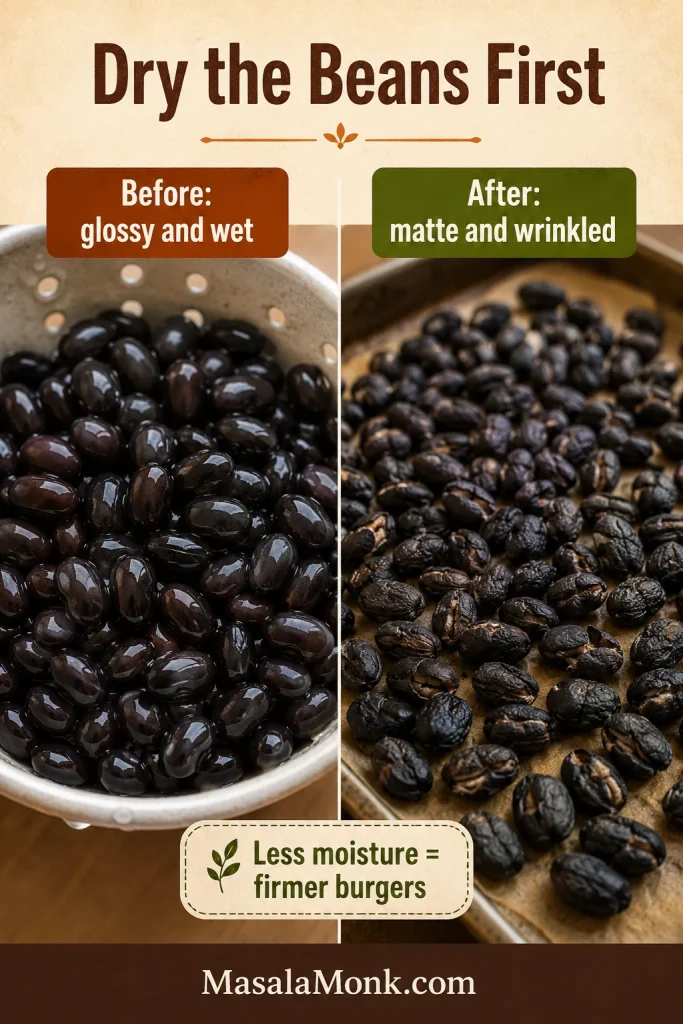
  1. Dry the beans. Heat the oven to 350°F / 175°C. Spread the drained and rinsed black beans on a parchment-lined baking sheet. Bake for 12–15 minutes, until the beans look matte and slightly wrinkled. Cool briefly.
  2. Cook the onion and garlic. Warm 1 teaspoon oil in a skillet. Soften the onion for 3–4 minutes, stir in the garlic for 30 seconds, then cool slightly.
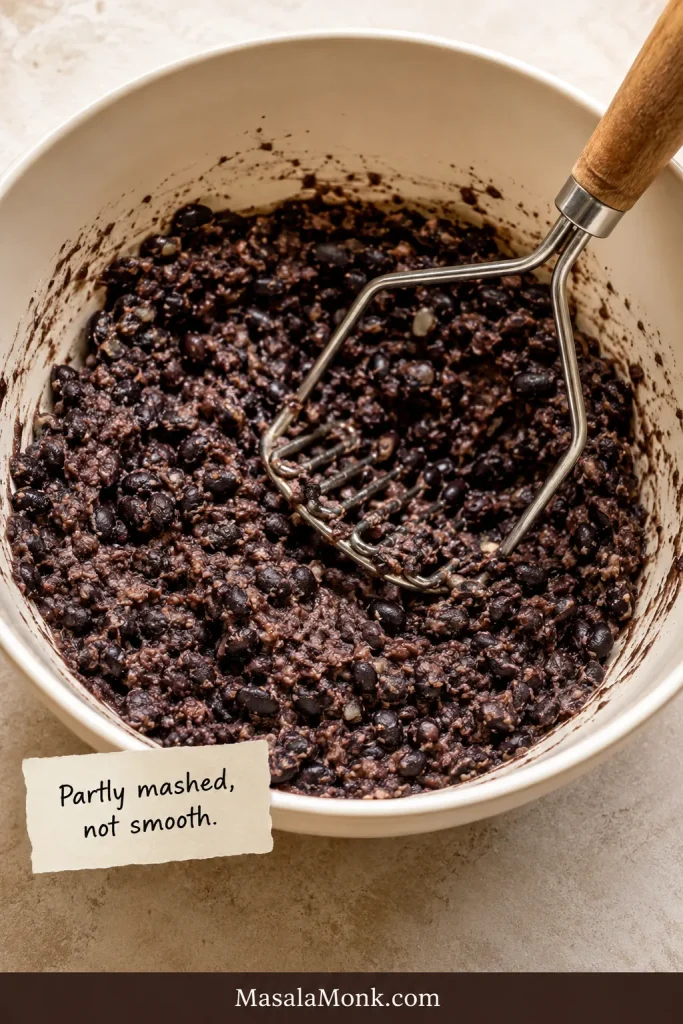
  3. Mash the beans. Transfer the beans to a large bowl. Mash with a fork or potato masher until partly mashed with some visible bean pieces.
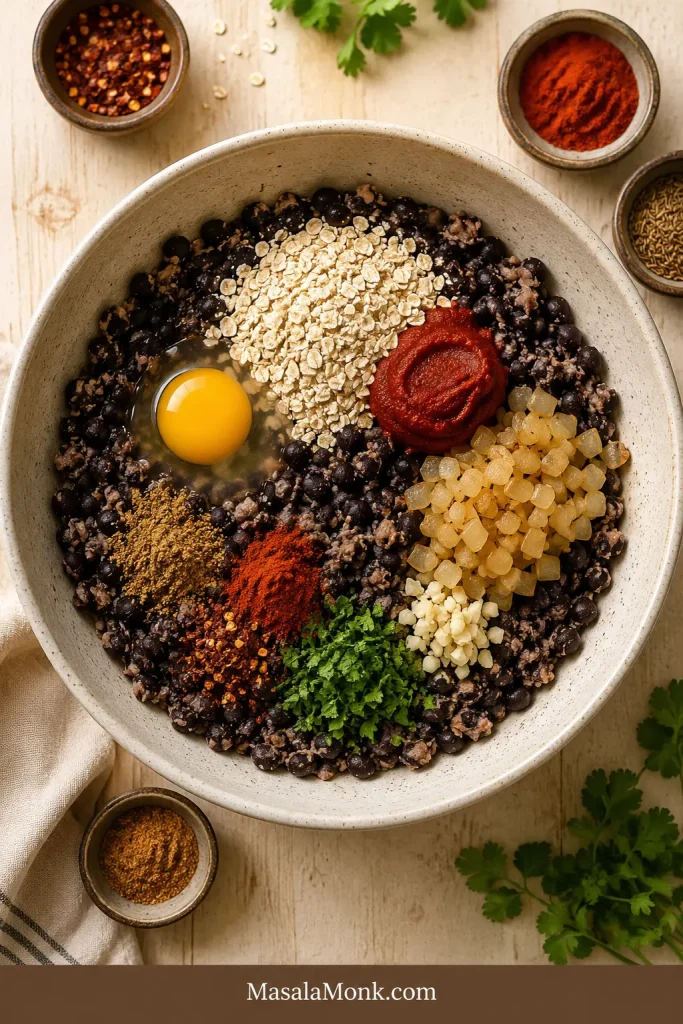
  4. Add binder and seasoning. Stir in the cooked onion and garlic, egg, panko, breadcrumbs, or oats, tomato paste, tamari or soy sauce, spices, herbs, and chipotle if using.
  5. Mix until moldable. Stir and press until the mix holds when squeezed.
  6. Adjust if needed. If the bowl feels wet, add oats or breadcrumbs 1 tablespoon at a time. If it feels dry, work in a teaspoon of sauce, water, or oil.
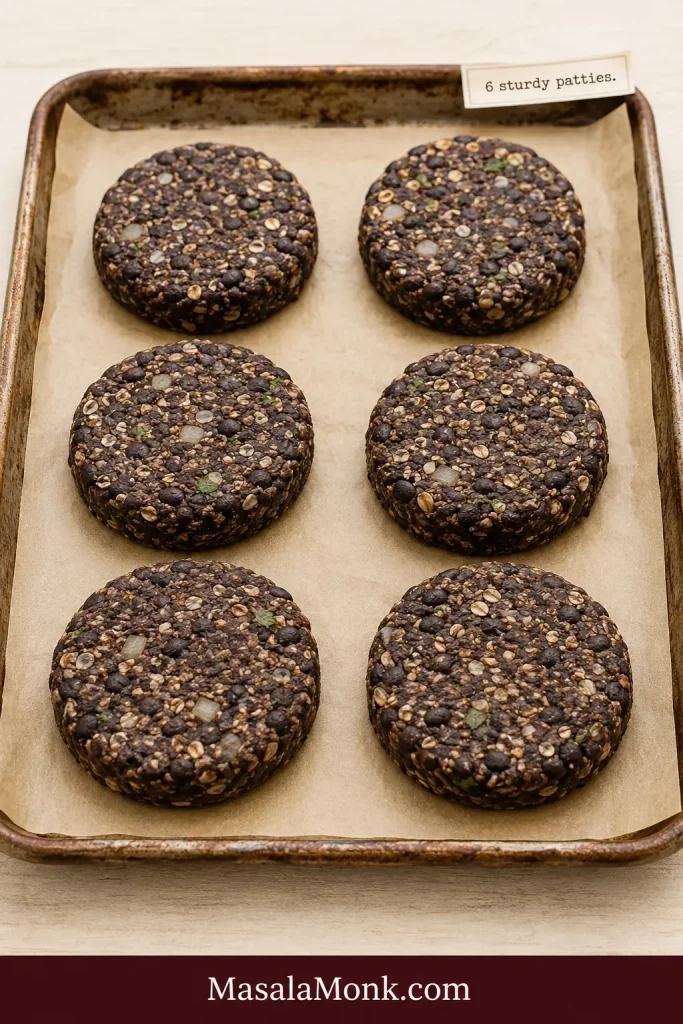
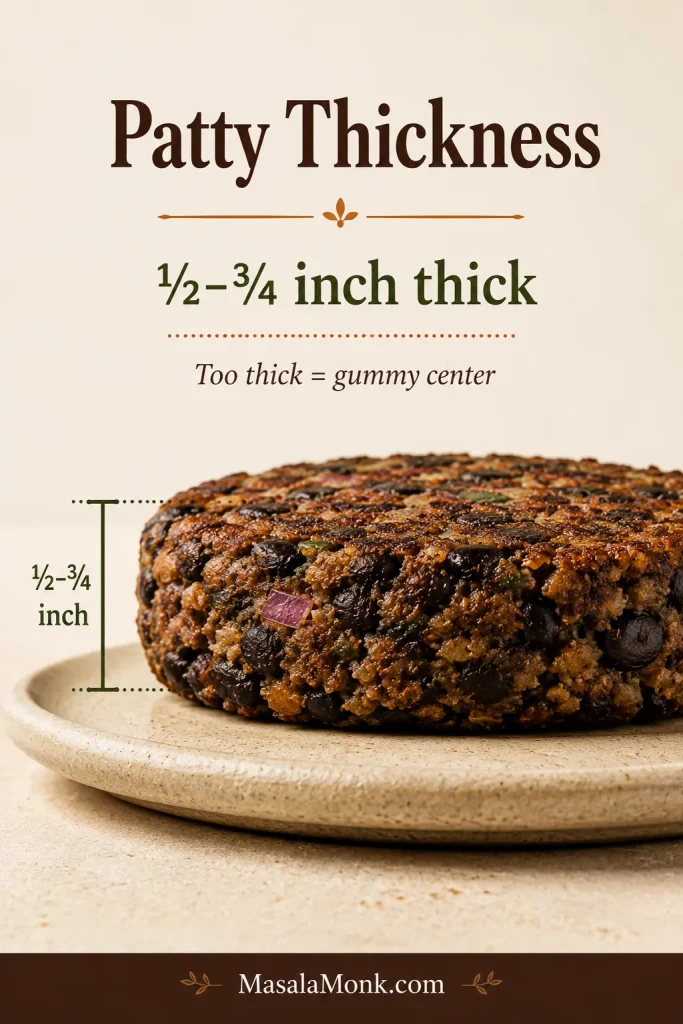
  7. Shape the patties. Divide the bean base into 6 patties, about ½ cup each. Shape them ½–¾ inch thick and press the edges smooth.
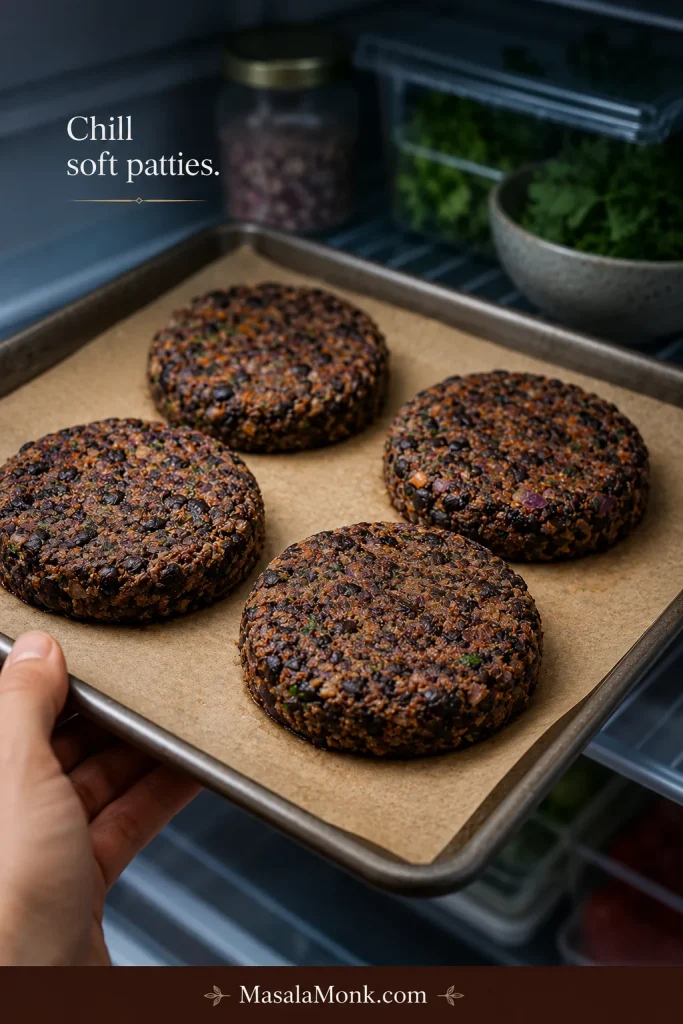
  8. Chill soft patties. Refrigerate for 20–30 minutes when the shaped burgers feel delicate. This helps vegan or grill-ready patties.
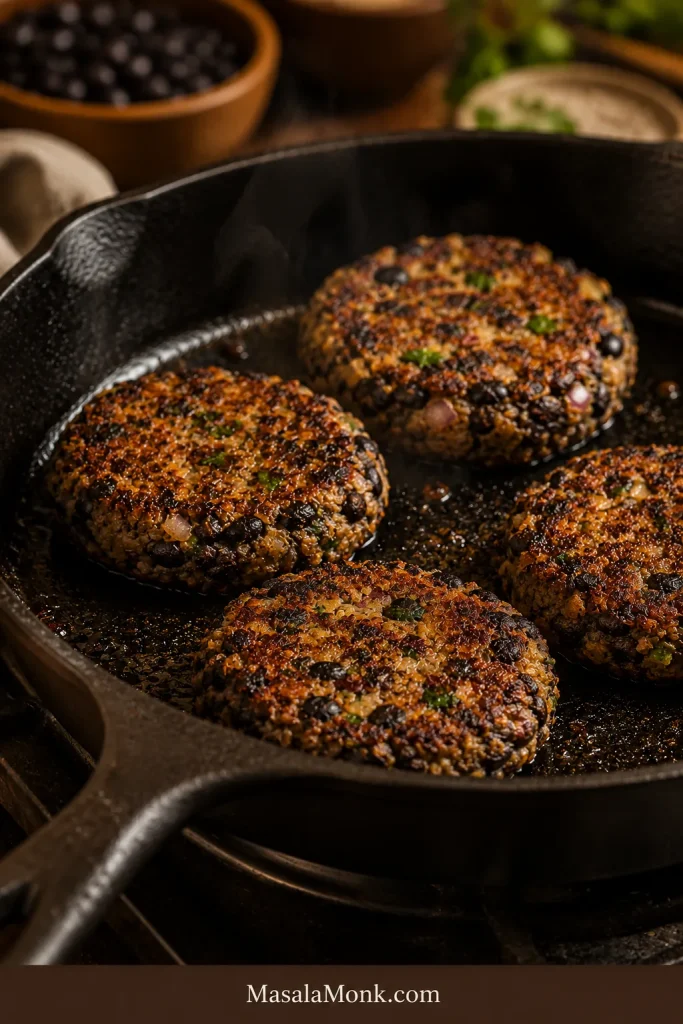
  9. Cook in a skillet. Heat 1 tablespoon oil over medium heat. Cook 4–5 minutes per side, flipping only after the first side browns and releases. Work in batches so each patty has room to brown.
  10. Serve. Build on toasted buns with lettuce, tomato, onion, avocado, pickles, chipotle mayo, garlic aioli, or salsa.
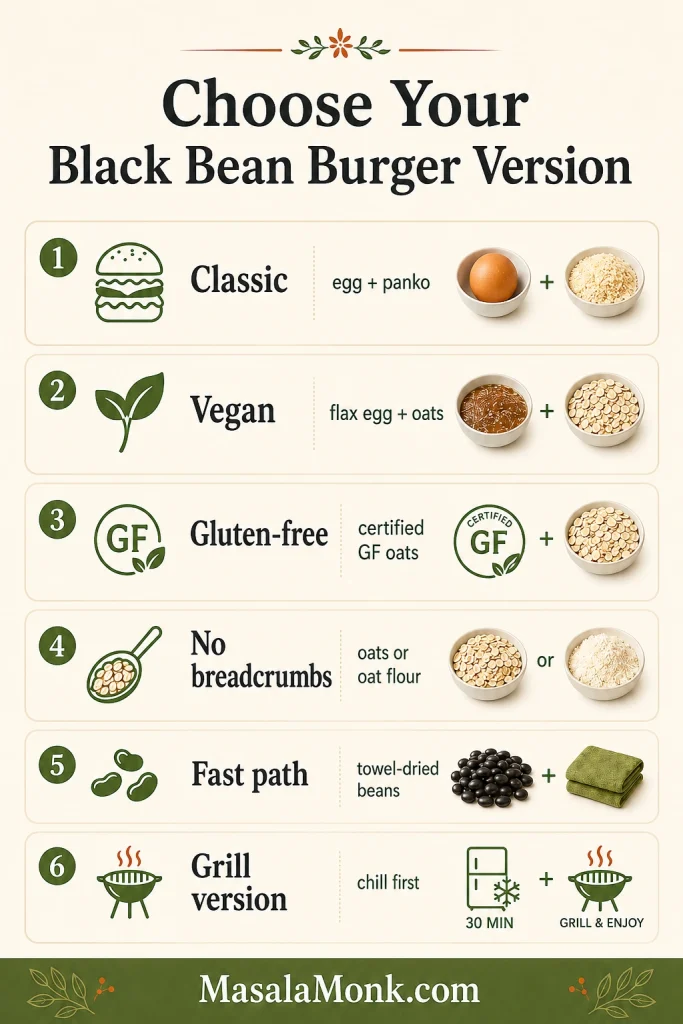
Choose Your Version

Use this quick table if you already know what kind of black bean burger you want. The base method stays the same, but the binder and resting time change depending on your goal.
Choose This VersionUse ThisWhat to Expect
Firmest classic pattyEgg + panko or breadcrumbsClean flipping, crisp edges, sturdy bun-ready texture
Vegan pattyFlax egg + oatsSofter before cooking, firmer after resting and browning
Gluten-free pattyCertified gluten-free oats or oat flourGood structure without panko or breadcrumbs
No-breadcrumb pattyRolled oats, quick oats, or oat flourHearty texture with a little resting time
Fastest versionVery well towel-dried beansSlightly softer, but still workable
Best textureOven-dried beansFirmest patties and least mushy center
Grill versionFirm binder + chilled pattiesBetter handling on hot grates

Next, use the visual cues below to check how the bean base should look and feel before it reaches the pan.

Vertical decision guide comparing classic, vegan, gluten-free, no-breadcrumb, fast, and grill versions of black bean burgers.
First choose the binder: egg and panko for firmness, flax and oats for vegan patties, and certified gluten-free oats when needed.

What Good Black Bean Burgers Should Look Like

Good bean burgers are not perfectly smooth. They should look rustic, with some bean pieces still visible, a firm edge, and enough structure to lift with a spatula. A good black bean burger should be sturdy enough for a bun and tender enough to enjoy.

  • After drying: the beans should look matte and slightly wrinkled, and a few may split open.
  • After mashing: the bowl should have both mashed beans and visible bean pieces.
  • Before shaping: a squeezed handful should hold together without oozing through your fingers.
  • After shaping: each patty should hold its edge instead of slumping on the plate.
  • In the pan: the first side should brown and release more easily once the crust sets.
  • After cooking: the outside should be crisp-edged and the middle should be tender, not wet or gummy.
Close-up of a cut black bean burger showing a dark bean-filled interior, crisp browned edge, bun, lettuce, tomato, and sauce.
The best texture is tender inside but not pasty, with visible bean pieces and a browned exterior that gives each bite structure.

When the mixture looks like bean dip, it needs more dry binder and resting time. If it looks dusty or cracks at the edges, mash a little more or add a tiny splash of moisture. The same basic patty logic applies whether you are shaping beans or meat: control moisture, shape gently, and let the surface set. For a deeper look at patty structure, see this burger patty recipe.

Why This Black Bean Burger Recipe Works

Most black bean burgers fail because they treat beans like ground meat. Beans bring moisture, starch, and softness, so the method has to build structure before the patty ever hits the pan. This version does that with dried beans, cooked aromatics, partial mashing, and a binder that matches your diet.

Control PointWhat It Fixes
Drying the beansPrevents pasty, wet centers
Cooking the onionRemoves raw sharpness and extra water
Partial mashingCreates natural bean paste without losing bite
BinderAbsorbs moisture and helps the patty set
Chilling when neededMakes delicate patties easier to move
Surface browningCreates the crust needed for a clean flip

Do not make the beans smoother. Make the structure smarter. A fully smooth mixture can cook up dense and gummy, while a barely mashed one can crumble. The sweet spot is enough mashed beans to bind, with enough whole pieces to make the burger satisfying.

Ingredients You’ll Need

This ingredient list is short, but a few choices matter more than others: dry beans, controlled onion, a real binder, and bold seasoning. A black bean burger should taste like dinner, not a compromise.

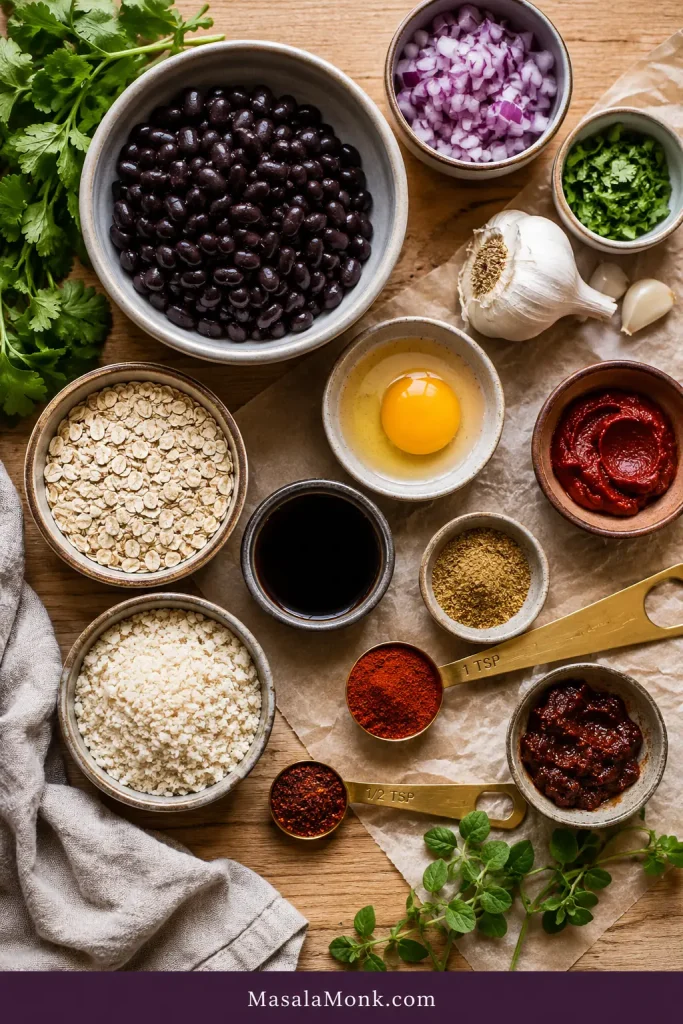
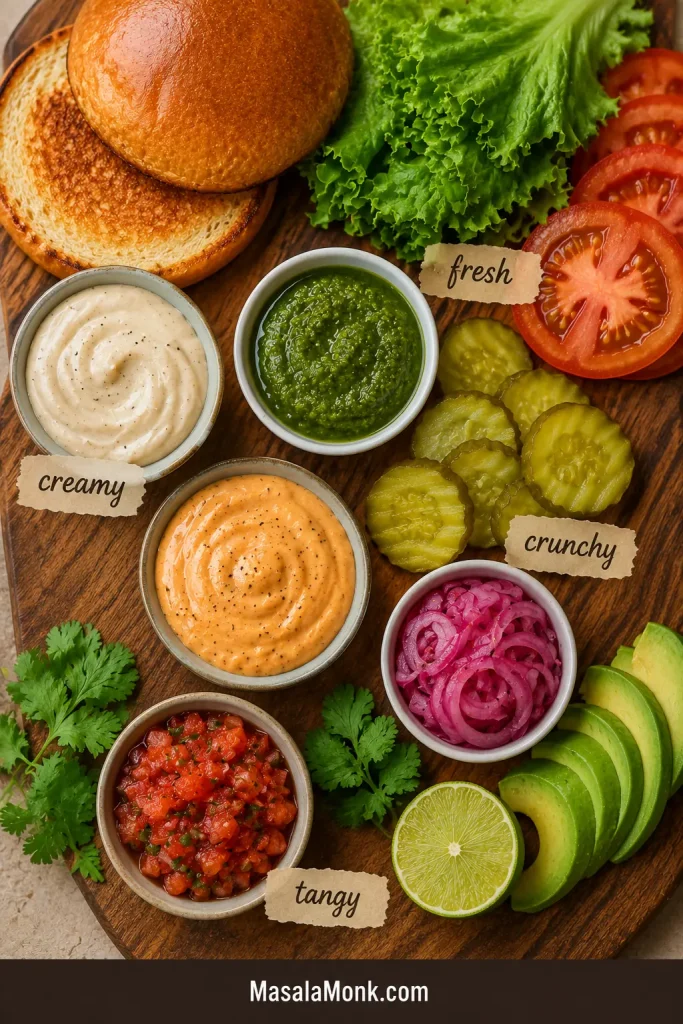
Ingredient board with black beans, onion, garlic, egg, oats, panko, tomato paste, tamari or soy sauce, spices, and herbs in small bowls.
Before shaping, build flavor into the bean base with onion, garlic, smoky spices, tomato paste, herbs, and tamari.

Black Beans

Canned black beans are the easiest choice. Drain, rinse, and dry them well before mixing. Home-cooked black beans also work, but they should be tender, well-drained, and not soupy.

Extra cooked beans do not have to sit around either; they can become a cozy bean stew later in the week.

Onion and Garlic

Onion and garlic give the patties a savory base. Cooking the onion first is worth the extra few minutes because raw onion can release water into the bean base and make the patties softer.

Egg or Flax Egg

Egg is the easiest binder for a vegetarian version because it helps the patty set as it cooks. For an egg-free version, use a flax egg or chia egg with oats.

Panko, Breadcrumbs, Oats, or Oat Flour

Panko and breadcrumbs give a lighter, firmer bite. Rolled oats are great for no-breadcrumb and gluten-free versions. Oat flour binds quickly when the patty mix feels soft, but too much can make the center dense.

Smoky Spices and Flavor Boosters

Cumin, smoked paprika, and chili powder make the burgers warm, smoky, and savory. Tomato paste, ketchup, barbecue sauce, tamari, soy sauce, or vegan Worcestershire-style sauce adds depth, so the burger does not taste like a plain bean patty.

Optional Texture Add-Ins

Chopped walnuts, cashews, sunflower seeds, corn, cooked quinoa, or cooked mushrooms can add bite. Keep add-ins modest because too many extras make the patties harder to bind.

Which Binder Should You Use?

There is no single correct binder. The right choice depends on whether you want the firmest vegetarian patty, a vegan version, or a gluten-free one. Your test is simple: press a handful together. It should hold its shape without oozing, slumping, or crumbling apart.

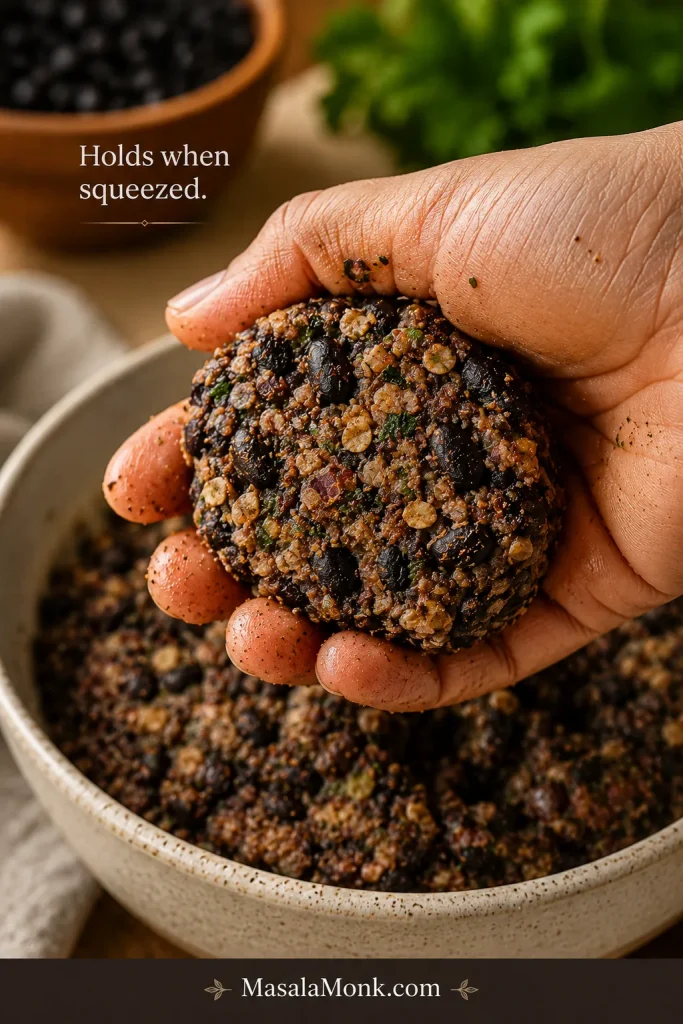
Hand squeezing black bean burger mixture into a firm clump with visible beans, oats, herbs, and spices.
Before shaping, squeeze a small handful. If it holds together without oozing or crumbling, the mixture is ready.
NeedBinderHow to Use It
Firmest vegetarian pattyEgg + panko or breadcrumbsEasiest option for clean flipping
Vegan black bean burgerFlax egg or chia egg + oatsRest and chill so the oats can settle into the mixture
Gluten-freeCertified gluten-free oats or oat flourUse oat flour when a firmer texture is needed
No breadcrumbsRolled oats, quick oats, or oat flourLet the mixture rest before shaping
Grillable pattiesStrong binder + chillingChill 30 minutes or freeze 15–20 minutes before grilling
Softer, richer pattiesAvocado, mashed sweet potato, or a little mayoAdd extra oats or crumbs to balance moisture
More biteChopped nuts, seeds, quinoa, or cornUse as add-ins, not the main binder

In the main recipe, egg plus panko, breadcrumbs, or oats is the most reliable path. For vegan patties, use a flax egg and oats. To keep the burgers gluten-free, use certified gluten-free oats or oat flour and check the sauces you add.

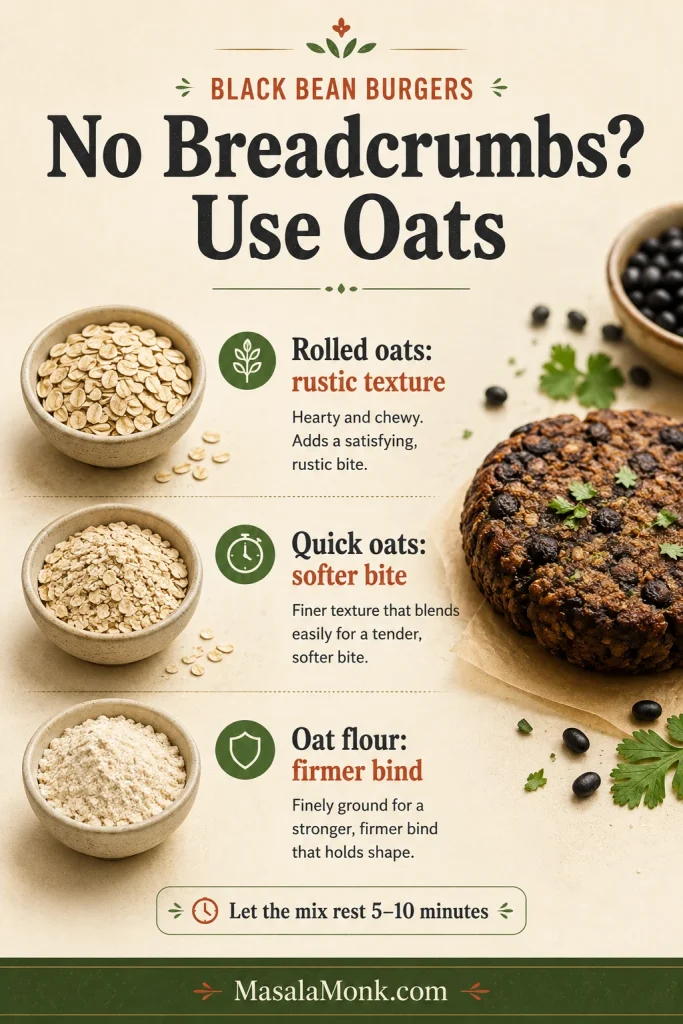
No Breadcrumbs? Use Oats This Way

Breadcrumbs are not required. If oats are what you have, they can do the job well — they just need a few minutes to absorb moisture. They are also useful for vegan and gluten-free versions when certified gluten-free oats are used.

Rolled oats give the most rustic texture. Quick oats blend in faster and make a softer patty. Oat flour binds the fastest and gives a firmer gluten-free patty, but too much can make the center dense.

Start with ¾ cup rolled oats or ½ cup oat flour for 2 cans of black beans. After mixing, let the patty mix rest for 5–10 minutes. Oats firm up as they absorb moisture, so a base that feels slightly soft at first may become easier to shape after resting.

Vertical guide comparing rolled oats, quick oats, and oat flour as no-breadcrumb binders for black bean burgers.
No breadcrumbs? Use oats strategically: rolled oats add chew, quick oats blend in softly, and oat flour binds fastest.

Step-by-Step Method

The steps are simple, but the order matters. Dry the beans first, soften the aromatics, mash for texture, then add the binder and seasonings.

1. Dry the Black Beans

Heat the oven to 350°F / 175°C. Spread drained and rinsed black beans on a parchment-lined baking sheet. Bake for 12–15 minutes, until they look drier and slightly wrinkled. This one step makes the biggest difference in preventing a mushy center.

No oven available? Pat the beans very dry with a clean towel and let them sit uncovered while you prepare the rest of the ingredients. The oven method is stronger, but even towel-drying helps.

Split comparison showing glossy wet black beans before drying and matte wrinkled black beans after drying on parchment.
After drying, the beans look less glossy and hold less moisture. That small step helps the patties firm up in the pan.

2. Cook the Onion and Garlic

Cook the chopped onion in a little oil for 3–4 minutes, then add garlic for 30 seconds. This softens the sharp flavor and cooks off extra moisture. Raw onion can make the bean base wetter than expected.

3. Mash the Beans

Mash the dried beans with a fork or potato masher. Stop when the bowl is partly mashed with some whole or half beans still visible. A food processor can be used, but pulse gently and avoid turning everything into a smooth paste.

Bowl of partly mashed black beans with a fork or masher, showing some mashed beans and some whole bean pieces.
Stop mashing while some beans are still whole. The mix needs both paste for binding and pieces for texture.

4. Add the Binder and Seasonings

Add the egg, panko, breadcrumbs, or oats, cooked onion and garlic, tomato paste or ketchup, tamari or soy sauce, cumin, smoked paprika, chili powder, salt, pepper, and herbs. Stir until the mixture holds together when pressed.

Bowl of mashed black beans topped with egg, oats or breadcrumbs, tomato paste, cooked onion, garlic, spices, and herbs before mixing.
Once the beans are partly mashed, the binder absorbs moisture and helps the patties hold together without becoming heavy.

5. Adjust the Texture

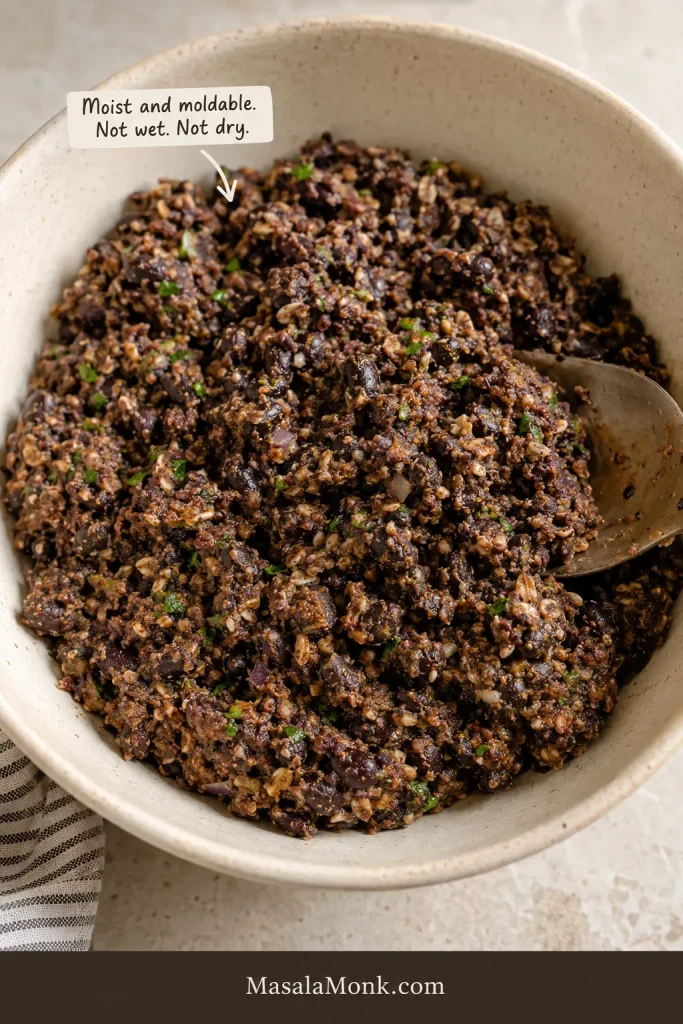
Aim for moist and moldable — closer to soft dough than bean dip. Add oats or breadcrumbs 1 tablespoon at a time when the bowl feels wet. Use a teaspoon of sauce, water, or oil when the base feels dry and cracks at the edges.

Bowl of chunky black bean burger mixture with visible black beans, oats, herbs, onion, and a spoon, labeled moist and moldable.
The ideal mix should be moist and moldable. It should scoop and press easily, not spread like dip or crumble like dry stuffing.

6. Shape the Patties

Divide the mixture into 6 patties. Aim for about ½ cup mixture per patty and keep them ½–¾ inch thick. Press the edges smooth so the shaped burgers do not crumble in the pan.

Six uncooked black bean burger patties on parchment paper on a baking tray, with visible beans, oats, herbs, and onion pieces.
After shaping, smooth the edges and keep the patties even. Clean edges help them cook and flip more reliably.
Side-view guide showing the thickness of a shaped black bean burger patty with a label for ½ to ¾ inch thickness.
Keep patties about ½ to ¾ inch thick. That size browns well without leaving the center gummy.

7. Chill When Needed

If the patties feel delicate, do not panic. Chill them for 20–30 minutes before cooking. Vegan, oat-based, and grill-ready patties benefit the most from this short rest.

Parchment-lined tray of shaped black bean burger patties being chilled or removed from a refrigerator.
Chilling delicate patties before cooking gives the binder time to firm the mixture.

8. Cook Until the Edges Are Crisp

Cook the patties in a lightly oiled skillet over medium heat for 4–5 minutes per side. If a patty feels stuck, do not force it. That usually means the crust has not finished forming. Give it another minute, then slide the spatula under slowly. The patties are done when both sides are browned, the center is hot, and the patty feels set when gently pressed.

Once the crust sets, the burger stops feeling delicate. It lifts cleanly, lands on the bun in one piece, and gives you that crisp-edge, smoky-middle bite that makes a bean burger feel like dinner instead of a backup plan.

Several black bean burger patties browning in a cast iron skillet with crisp edges and an oil sheen.
For the deepest crust, cook in a skillet with space between patties. Crowding makes them steam instead of brown.
Black bean burger patty being lifted cleanly from a cast iron skillet with a metal spatula, showing a browned intact underside.
Once the first side browns, the patty releases more easily. Wait for that crust before flipping so the burger stays intact.
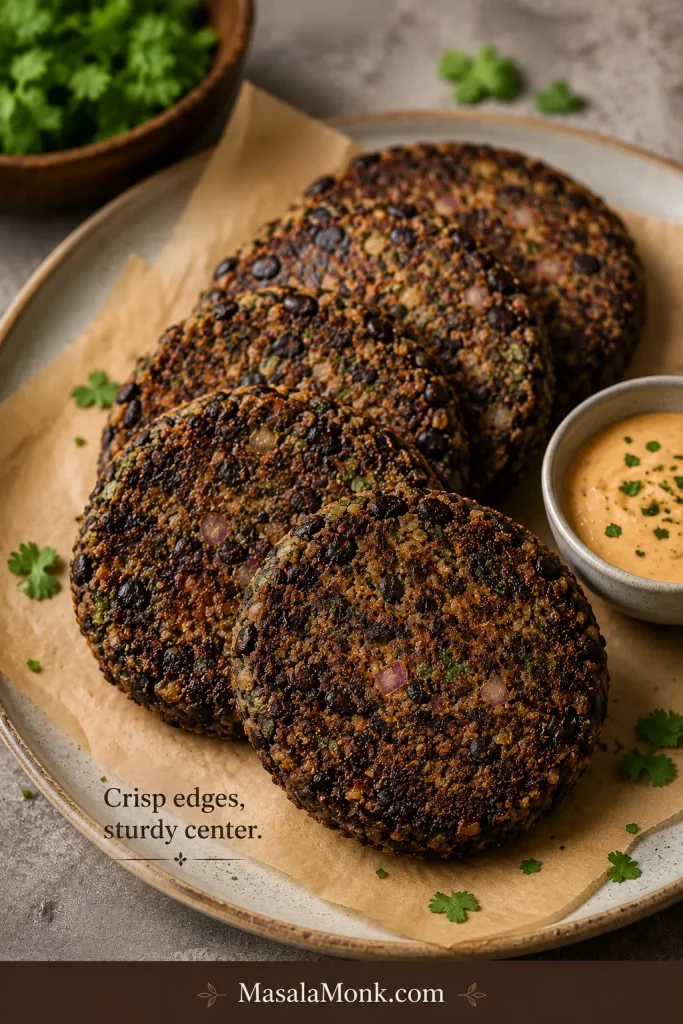
Stack or row of cooked black bean burger patties with browned edges, visible beans, herbs, and a small sauce bowl nearby.
Cooked patties should hold their shape for buns, bowls, wraps, or meal prep without turning soft again.

Fix the Mixture Before You Cook

Most black bean burger problems can be fixed before the patties hit the pan. A soft mixture is not a failed mixture. It usually just needs a little more binder, a little more resting time, or a gentler hand when shaping.

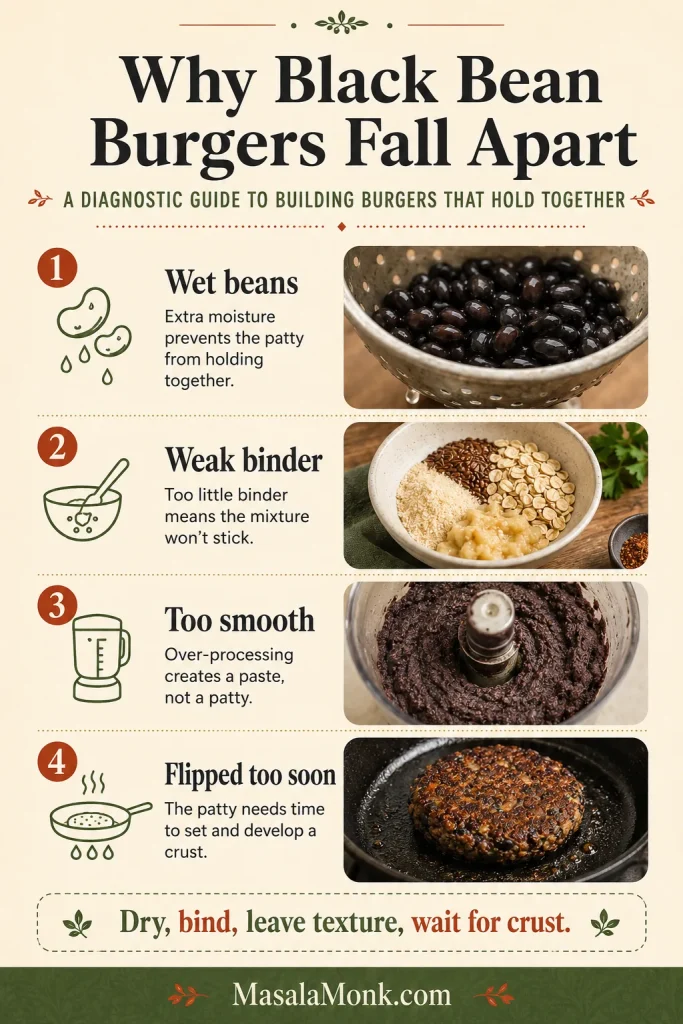
Vertical diagnostic guide listing four reasons black bean burgers fall apart: wet beans, weak binder, too smooth, and flipped too soon.
When patties break, check the cause first: wet beans, weak binder, over-smooth mash, or flipping before the crust sets.

Quick Texture Fixes

ProblemLikely ReasonFix
Mixture looks like bean dipToo much moisture or over-processingAdd oats or breadcrumbs 1 tablespoon at a time and chill
Patties fall apartNot enough binder or not enough mashingMash more beans, add binder, and rest the mixture
Patties slump on the plateMixture is too softAdd oats or crumbs, then chill 20–30 minutes
Patties crack at the edgesMixture is too dryMash more beans or add 1 teaspoon sauce, water, or oil
Patties stick to your handsMixture is moist but workableLightly wet or oil your hands while shaping
Too soft for the grillPatties need more firmnessChill 30 minutes or freeze 15–20 minutes and use foil or a grill mat
Patties stick to the panFlipped too early or surface too dryUse a lightly oiled pan and wait for a crust before flipping
Center is gummyPatties are too thick or mixture is too smoothShape thinner patties and leave more bean texture next time
Burgers taste blandBeans need stronger seasoningAdd chipotle, smoked paprika, cumin, tamari, lime, hot sauce, or more salt

Final Squeeze Test

The final test is simple: press a patty between your palms. When it holds its shape, keeps its edge, and does not feel loose, it is ready to cook.

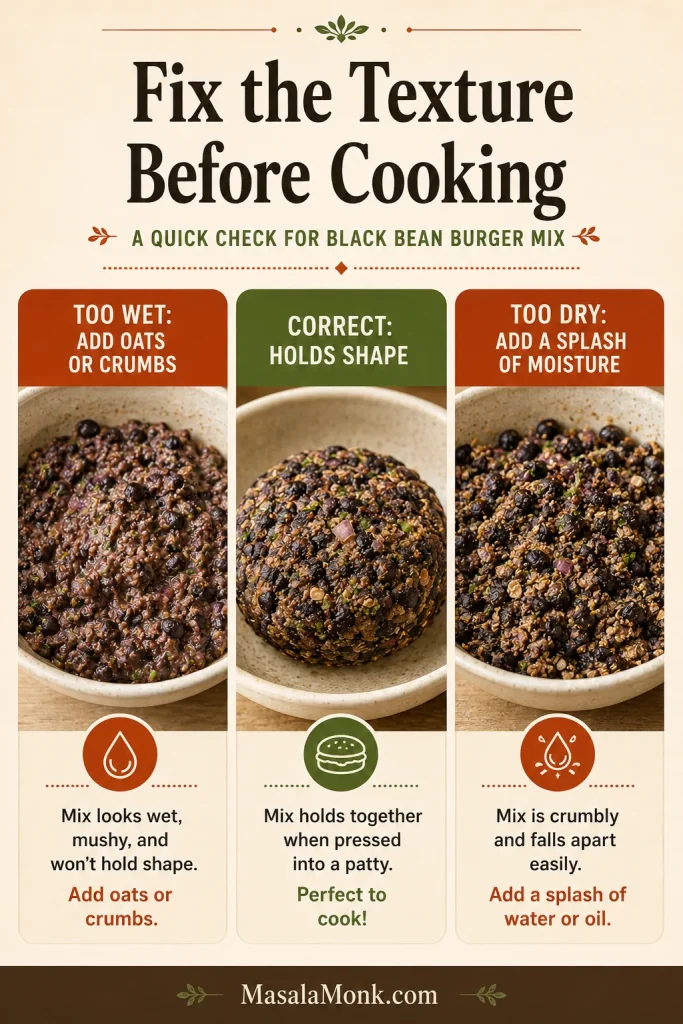
Three-panel guide showing black bean burger mixture that is too wet, correct, and too dry, with short fixing tips.
Fix texture before heat hits the pan: add oats if wet, add moisture if cracked, and shape only when it holds.

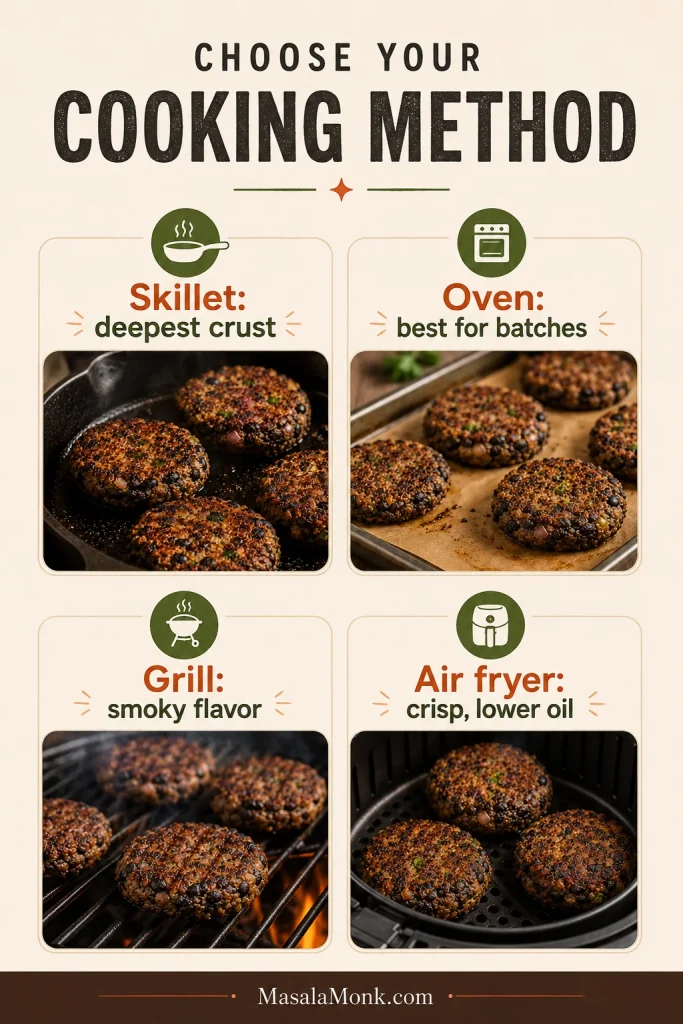
Choose Your Cooking Method: Skillet, Oven, Grill, or Air Fryer

Skillet cooking gives the deepest crust, but these patties can also be baked, grilled, or air fried. A firm patty gives you more freedom: once the mixture holds together, every cooking method becomes easier.

MethodTemperatureTimeGood ForKey Tip
SkilletMedium heat4–5 minutes per sideDeepest crust and flavorLet the first side brown before turning
Oven375°F / 190°C10 minutes per sideBatch cookingRaise the oven after drying the beans
GrillMedium to medium-high5–7 minutes per sideSmoky flavorChill patties and oil the grates well
Air fryer380°F / 193°C10–12 minutes totalCrisp, lower-oil cookingFlip halfway and keep patties about ½ inch thick
Vertical cooking method guide comparing skillet, oven, grill, and air fryer methods for black bean burgers.
Choose the method by goal: skillet for crust, oven for batches, grill for smoke, and air fryer for crisp lower-oil cooking.

Skillet Black Bean Burgers

Heat a thin layer of oil in a cast-iron or nonstick skillet over medium heat. Cook for 4–5 minutes per side. This is the easiest method for crisp edges and a tender center.

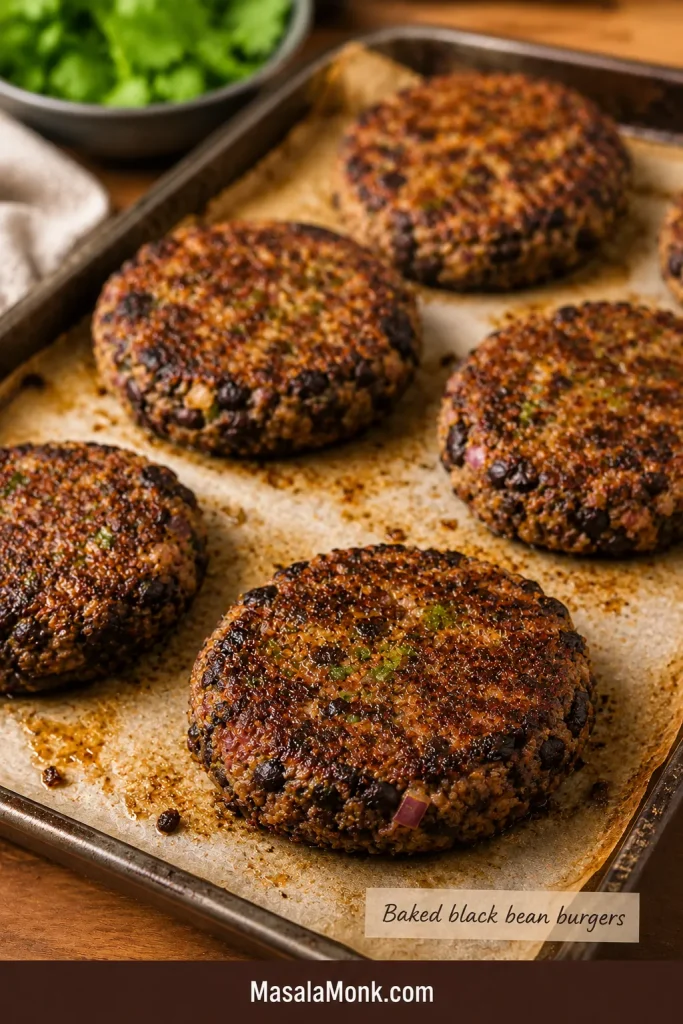
Baked Black Bean Burgers

After drying the beans at 350°F / 175°C, raise the oven to 375°F / 190°C. Place shaped patties on a parchment-lined baking sheet and brush or spray lightly with oil. Bake for 10 minutes, flip carefully, then bake another 10 minutes. Baked patties are convenient for batches, though the crust is gentler than skillet-cooked ones.

Black bean burger patties on a parchment-lined baking sheet with browned tops and a small label for baked black bean burgers.
For batch cooking, bake on parchment and brush lightly with oil so the tops brown without drying out.

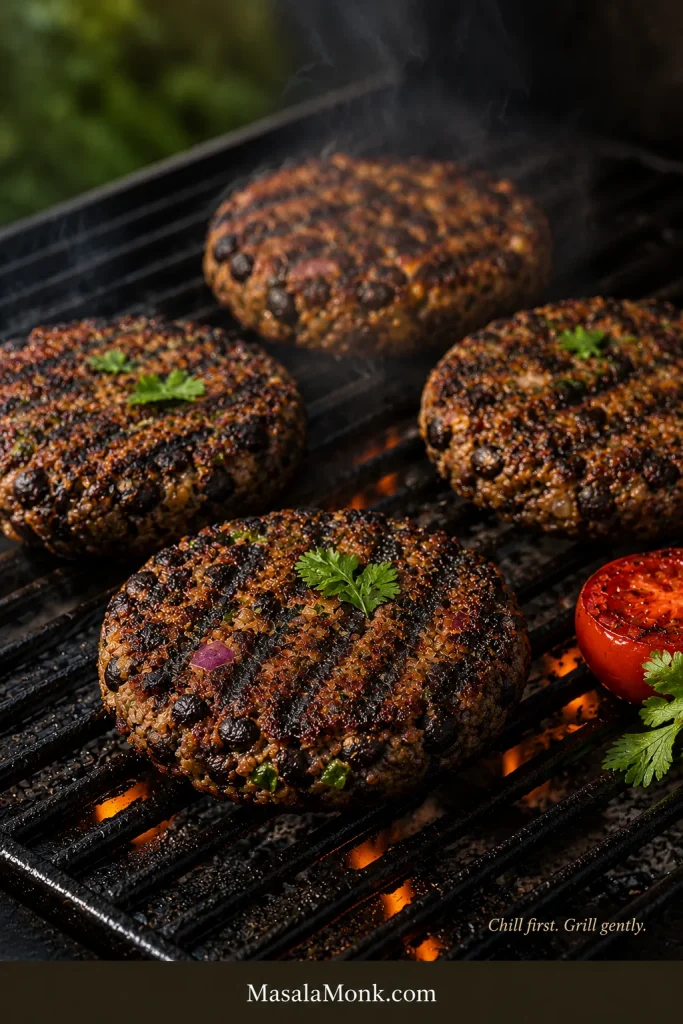
Grilled Black Bean Burgers

Treat grilling as the firm-patty method. Chill the patties for at least 30 minutes, oil the grates well, and cook over medium to medium-high heat for 5–7 minutes per side. Do not grill loose or freshly mixed patties. If they feel delicate in your hand, they will feel even more delicate on hot grates.

For the safest grill version, chill the patties until firm, brush both sides with oil, and use a grill mat or foil for the first try. Once you know how your mixture behaves, you can move them directly onto well-oiled grates.

Black bean burger patties with light char marks cooking on a grill with smoke, herbs, and a grilled tomato nearby.
Grill only firm, chilled patties. Oiled grates, gentle heat, and patience help them stay intact over the fire.

Air Fryer Black Bean Burgers

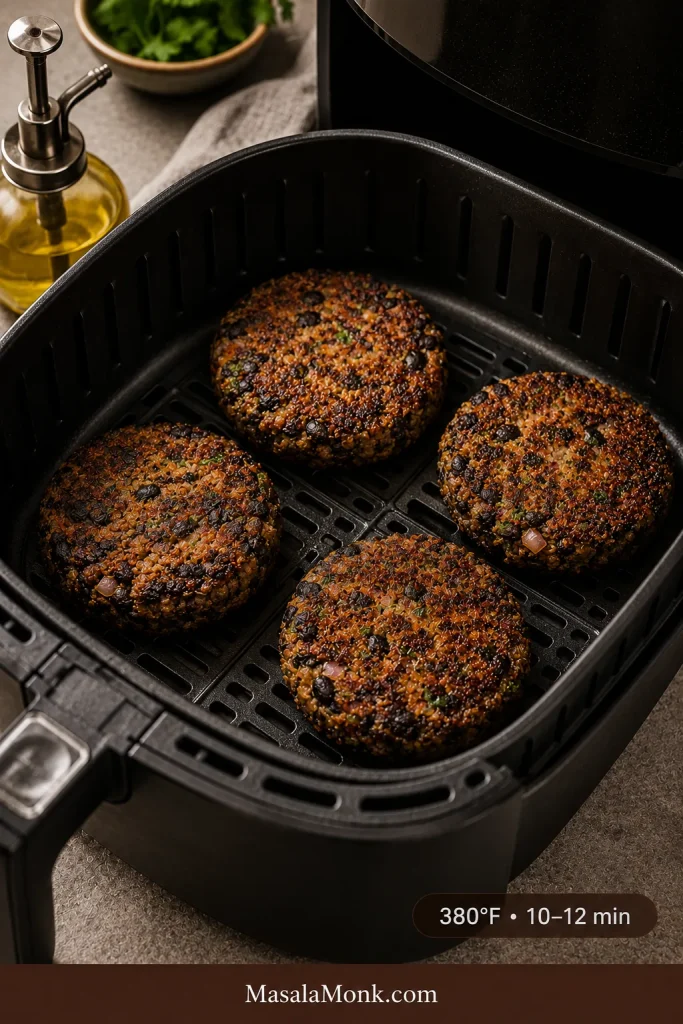
Preheat the air fryer to 380°F / 193°C. Lightly spray the patties and basket with oil. Cook for 10–12 minutes total, flipping halfway. Air fryer patties should be about ½ inch thick so the center heats through before the outside dries. The same thickness-and-flip logic applies to meat burgers too; this air fryer burgers guide is useful if you use your air fryer for burger nights often.

Four black bean burger patties in an air fryer basket with browned tops, an oil bottle nearby, and a 380°F 10 to 12 minute label.
In the air fryer, leave space around each patty so the edges crisp before the centers lose moisture.

Making Them Vegan

For vegan black bean burgers, replace the egg with a flax egg or chia egg and use oats or oat flour as the dry binder. They may feel softer than egg-bound patties at first, but that does not mean they will fail. A short rest and a good crust make them much easier to handle.

Vegan black bean burger on a bun with avocado, lettuce, tomato, pickles, sauce, and a dark black bean patty.
The vegan version should still feel hearty. Avocado, pickles, tomato, lettuce, and egg-free sauce add richness and freshness.

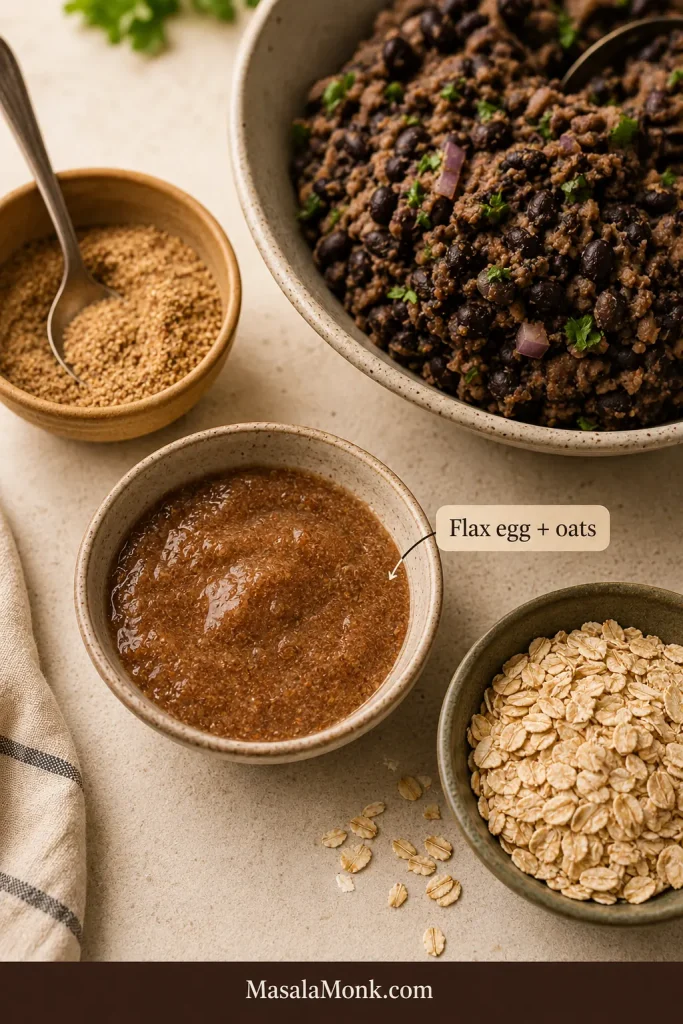
How to Make a Flax Egg

  • Mix 1 tablespoon ground flaxseed with 3 tablespoons water.
  • Let it sit for 5–10 minutes until slightly thickened.
  • Add it to the burger mixture in place of 1 egg.
Small bowl of thickened flax egg beside rolled oats and a bowl of black bean burger mixture on a cream countertop.
For vegan patties, let the flax egg thicken first. Then it can help the oats and beans bind cleanly.

Use tamari, soy sauce, or vegan Worcestershire-style sauce when keeping the recipe fully vegan. For a creamy egg-free topping, this eggless mayonnaise recipe is a useful sauce base.

Making Them Gluten-Free

Making the burgers gluten-free is mostly about the binder and sauces. Use certified gluten-free oats or oat flour instead of panko or breadcrumbs. Check labels on soy sauce, Worcestershire-style sauce, and barbecue sauce. Tamari is a useful gluten-free swap for soy sauce.

Gluten-free patties benefit from a short rest before cooking because oats and oat flour need a few minutes to absorb moisture.

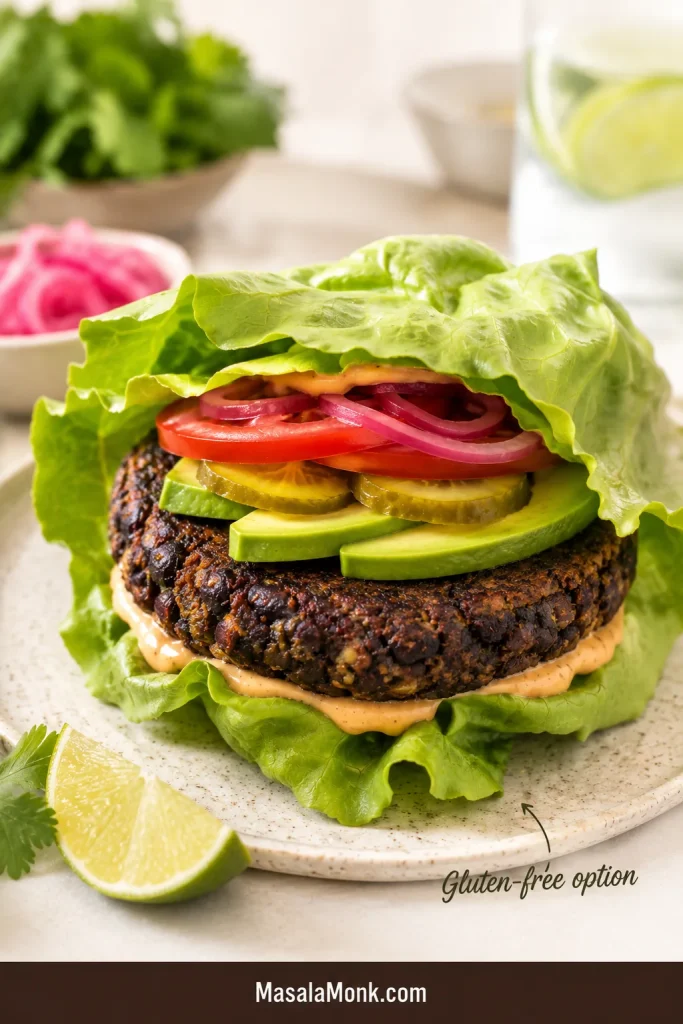
Black bean burger served in a large lettuce wrap with avocado, tomato, pickled onion, pickles, sauce, and lime on a plate.
For a gluten-free option, use a lettuce wrap to keep the bite fresh while the sturdy patty stays the focus.

Flavor Variations

Once the base mixture holds together, black bean burgers are easy to customize. Keep the same structure: beans, binder, seasoning, and a controlled amount of add-ins.

Spicy Black Bean Burger

Add chopped chipotle in adobo, jalapeño, extra chili powder, cayenne, or hot sauce for more heat. Serve with chipotle mayo, avocado, pickled onions, and lettuce. A little mango salsa adds sweet-bright contrast on top or on the side.

Sweet Potato Black Bean Burger

Mix in mashed roasted sweet potato for a softer, sweeter version. Because sweet potato brings extra moisture, balance it with a little more oats or breadcrumbs until the mixture feels sturdy again. This version pairs especially well with smoked paprika, cumin, lime, avocado, and cilantro.

Black Bean Quinoa Burger

Cooked and cooled quinoa adds chew without making the patty heavy. Keep the amount moderate; too much quinoa makes the mixture harder to hold together. It works especially well with garlic, cumin, smoked paprika, and a little lime.

Mushroom Black Bean Burger

Cook chopped mushrooms before adding them. Mushrooms add savory depth, but raw mushrooms release water and can make the patties soft. Sauté until their moisture cooks off, then cool before mixing.

Corn and Southwest Black Bean Burger

A small handful of corn, chopped cilantro, lime zest, cumin, smoked paprika, and chili powder gives the patties a Southwest-style feel. Keep the corn modest so the mixture still binds cleanly.

MasalaMonk-Style Black Bean Burger

Start with the smoky patty, then build the burger with green chutney, pickled onion, sliced tomato, lettuce, and a little yogurt-style sauce or egg-free mayo. The cumin, chili, herbs, and sharp onion make the burger brighter without turning it into a completely different recipe.

Black bean burger on a toasted bun with green chutney, pickled onions, tomato, lettuce, and creamy sauce on a wooden board.
For a brighter MasalaMonk-style burger, pair the smoky patty with green chutney, pickled onion, tomato, lettuce, and creamy sauce.

Mini Patties or Sliders

Shape smaller patties for sliders and reduce the cooking time by 1–2 minutes per side. Because mini patties dry faster, pull them once the edges are browned and the centers are hot.

Cheesy Black Bean Burger

For a vegetarian version, add a small amount of shredded cheese, feta, pepper jack, or cotija. Cheese adds salt, richness, and a little extra structure.

Toppings, Sauces, and Buns That Work Well

Because the patty is smoky and hearty, the toppings should bring contrast: creaminess, crunch, acidity, and freshness. The best bite has a warm smoky patty, cool lettuce, juicy tomato, creamy sauce, and a little sharpness from pickles, salsa, chutney, or onion.

Toppings board with toasted buns, lettuce, tomato slices, pickles, pickled onions, avocado, salsa, green chutney, aioli, chipotle sauce, cilantro, and lime.
Build contrast with toppings: creamy sauce, crunchy pickles, fresh lettuce, tangy salsa, avocado, green chutney, and a toasted bun.
  • Chipotle mayo
  • Garlic aioli
  • Avocado or guacamole
  • Salsa or pico de gallo
  • Pickled onions
  • Lettuce
  • Tomato
  • Red onion
  • Jalapeños
  • Cabbage slaw
  • Lime crema
  • Barbecue sauce
  • Vegan mayo

For sauce, go creamy or sharp. Garlic aioli adds creaminess without covering up the smoky bean flavor. For a brighter MasalaMonk-style twist, use green chutney with sliced onion, tomato, lettuce, and a little mayo or yogurt-style sauce.

Use toasted burger buns, brioche-style buns, whole wheat buns, or lettuce wraps. Toasting helps protect the bun from sauce and keeps the burger from feeling soft-on-soft.

What to Serve With Black Bean Burgers

Serve black bean burgers anywhere a regular burger would feel right. They work with classic sides, fresh salads, roasted vegetables, and bowl-style meals.

  • French fries or sweet potato fries
  • Simple green salad
  • Cabbage slaw
  • Corn salad
  • Roasted vegetables
  • Rice or quinoa bowls
  • Lettuce wraps
  • Pickles and chips
  • Grilled vegetables

Pair the patties with crispy homemade French fries for a classic burger plate. If you want a colder side that cuts through the smoky burger, use this creamy coleslaw.

Roasted vegetables work better than another heavy starch for a lighter dinner plate. These roasted carrots bring sweetness, color, and browned edges without competing with the burger.

To add more protein, use cheese, a Greek-yogurt-style sauce, or serve the patty over a quinoa bowl. On a vegan plate, pair it with hummus, tofu slaw, extra beans, or a hearty salad.

Storage, Freezing, and Reheating

These patties are excellent for meal prep. They store well, freeze well, and reheat best when the crust gets a chance to crisp again.

Fridge

Cooked patties keep for 3–4 days in an airtight container in the refrigerator. Let them cool before storing so trapped steam does not soften the crust too much.

Freezer

Freeze shaped or cooked patties for up to 3 months. Place parchment between patties so they do not stick together, then store in a freezer-safe bag or container.

Black bean burger patties stacked in a freezer-safe container with parchment between each patty and a guide for freezing and reheating.
When freezing, place parchment between patties so they separate easily, then reheat in a skillet or air fryer to bring back the crust.

For general leftover safety, the USDA recommends using refrigerated leftovers within 3–4 days and freezing leftovers for longer storage. Their leftovers and food safety guide is helpful if you want broader storage guidance.

Reheating

Reheat the burgers in a skillet or air fryer for the best texture. A microwave works for speed, but it softens the crust. For frozen patties, start over medium-low heat so the center warms before the outside over-browns, then increase the heat briefly to crisp the edges.

Make-Ahead Patties

Shape the patties up to 24 hours ahead and refrigerate them covered. This helps the binder absorb moisture and makes the patties easier to cook.

Once you learn the feel of the mixture, black bean burgers stop being risky. You know when the beans are dry enough, when the patty is firm enough, and when the crust is ready to flip. That is the real win here: a smoky, satisfying veggie burger you can put on a bun without holding your breath.

Frequently Asked Questions

Why are my black bean burgers mushy?

Usually because the beans, onion, or add-ins brought too much moisture, or because the beans were processed too smoothly. Dry the beans, cook watery vegetables first, leave some bean texture, and add oats or breadcrumbs if the mixture feels loose.

What keeps black bean burgers from falling apart?

A good binder, enough mashing, and proper browning keep the patties from falling apart. Egg and breadcrumbs work well for vegetarian patties, while flax egg and oats work well for vegan patties.

Do black bean burgers need egg?

No. Egg helps, but you can still make a sturdy patty without it. Use a flax egg or chia egg with oats or oat flour, then give the mixture a short rest before cooking.

What can replace breadcrumbs in black bean burgers?

Rolled oats, quick oats, oat flour, crushed crackers, or potato flakes can replace breadcrumbs. Cooked quinoa can add texture, but it works best with another binder because it does not absorb moisture as strongly as oats.

Can I make black bean burgers without a food processor?

A fork or potato masher works very well and gives you more control over the texture. Mash enough beans to bind the mixture, but leave some pieces for a heartier bite.

Are canned black beans okay for black bean burgers?

Canned beans work very well because they are already cooked and consistent. Drain and rinse them well, then dry them in the oven or with a towel before mixing.

Can I use dried black beans?

Dried beans are fine once they are fully cooked, tender, drained, and cooled. They should be soft enough to mash but not watery when they go into the burger mixture.

Are black bean burgers vegan?

Some are vegan, but many recipes use egg, cheese, mayonnaise, or Worcestershire sauce. This recipe can be made vegan with flax egg, oats, and vegan-friendly sauces.

Are black bean burgers gluten-free?

They can be gluten-free; the main things to watch are the binder and sauces. Use certified gluten-free oats or oat flour instead of breadcrumbs or panko, and check sauce labels when gluten is a concern.

Can black bean burgers be grilled?

Yes, but treat grilling as the firm-patty method. Chill the patties before grilling, oil the grates well, and flip carefully. Use foil, a grill mat, or a cast-iron griddle for delicate patties.

How do you make black bean burgers taste better?

Lean on bold seasoning and a little umami. Cumin, smoked paprika, chili powder, chipotle, tamari, tomato paste, lime, garlic, and onion all help the patties taste deeper and more satisfying.

How long do black bean burgers last in the fridge?

Cooked patties last 3–4 days in an airtight container in the refrigerator. Reheat them in a skillet or air fryer for the best texture.

Can black bean burgers be frozen?

Yes. Freeze shaped or cooked patties for up to 3 months. Place parchment between patties so they do not stick together, then thaw overnight or cook with a few extra minutes from frozen.

Are black bean burgers healthy?

These burgers can be a nourishing, filling option because black beans bring plant-based protein, fiber, complex carbohydrates, vitamins, and minerals. Harvard’s Nutrition Source has a helpful overview of legumes and pulses if you want more background. The overall nutrition still depends on the binder, oil, bun, cheese, sauce, and toppings you use.

Posted on — 3 Comments

Food for Constipation Relief & Gut Health : 6 High-Fiber Sandwiches

High-fiber sandwich on whole-grain bread with hummus, spinach, kiwi and carrot sticks; chia seeds and a water glass suggest hydration for digestion.

Constipation is exhausting, but lunch can actually help. These high-fiber sandwiches are built the way your gut prefers: sturdy whole-grain bread for gentle bulk, creamy legume spreads for steady fiber, seed “gel boosters” for softness, and juicy produce for moisture. Moreover, they’re practical—quick to assemble, easy to repeat, and sized to deliver meaningful fiber without feeling heavy.

Now, how much fiber do most adults need? A realistic daily target sits around 25–38 g. However, jumping there overnight can backfire. Instead, increase gradually—about 5 g extra per day each week—and pair each meal with fluids so fiber can actually hold water and move comfortably (see this concise intake overview and NIDDK hydration guidance). Meanwhile, short habits matter: drink a glass of water with your sandwich, then take a 10–15-minute walk. Little by little, those simple moves add up to relief.

Because details determine outcomes, every recipe below was designed with fiber grams, moisture, and texture in mind. In other words, the builds aren’t random—they’re engineered for comfort, regularity, and flavor you’ll actually crave tomorrow.

Also Read: Hemorrhoids High Fiber Diet: Best Foods, What to Avoid, and a 7-Day Plan


How much fiber these sandwiches deliver & of what kinds?

First, how much: each sandwich aims to contribute roughly 12–20 g of fiber toward your day. Which means, two thoughtfully built high-fiber sandwiches can cover most of what you need, leaving breakfast and snacks to top you up gently.

Second, which kinds: not all fibers behave the same, so the layers do different jobs.

  • Viscous, soluble fibers make a soft gel that holds water in the stool, which often makes passing easier. You’ll get these from oats and barley (thanks to β-glucans), plus chia and ground flax (rich in mucilage). we have used oat/barley-leaning breads, avocado-chia mixes, and flax-boosted hummus throughout. If you’re curious about the mechanics, here’s a clear look at β-glucans and stool-softening and a friendly explainer on chia’s mucilage-rich fiber.
  • Insoluble fibers—from bran, leafy greens, and vegetable skins—add gentle bulk and help speed transit. As a result, grated carrots, greens, and crunchy slaws live inside the sandwich, not just on the side, so every bite pulls its weight.
  • Moisture is the multiplier. Because fiber needs water to work, spreads are creamy, fillings are juicy, and sauces are built in rather than left out. Additionally, we suggest sipping water with the meal, since fluids help fiber function.

Finally, how the recipes are structured: each sandwich states its intent (relief or maintenance), lists realistic portions, and includes make-ahead notes, smart swaps, and small finishing touches. Therefore, you can choose what fits today—and repeat it tomorrow—without turning lunch into a project.

Also Read: Prune Juice & Prunes for Constipation: What Works, How Much, and When to Seek Help


Why High-Fiber Sandwiches help (and how to build them)

Put simply, sandwiches make fiber doable. They bundle the right textures (soft + crisp), the right moisture (creamy + juicy), and the right amounts (measured slices and scoops) into a meal you can repeat tomorrow. Moreover, the format nudges consistency—arguably the most important factor for regularity.

They’re effortless to measure—and easy to stick with

Whole-grain slices are pre-portioned, spreads are spoonable, and veg layers are visible. Making it easy for you to assemble, eat, and actually hit useful daily fiber targets with minimal guesswork. If you like to prep once and assemble fast, this MasalaMonk idea for lentil meal-prep (as a sandwich filling) shows how a single batch can anchor multiple sandwiches during the week.

Moisture is built in by design

Dry, dense meals can backfire. We have ensured, each of these high-fiber sandwiches are built in a way that anchors moisture inside the bread: creamy hummus or yogurt-tahini underlayers, avocado folded with seeds, and juicy produce (carrot, greens, citrus segments) on top. That layering keeps bites slick rather than pasty, which, in turn, supports comfortable stool texture. If you like dairy or dairy-free yogurt as a base, a quick example is this hung curd spinach sandwich—the same idea powers our “Green Goddess” stack.

Layer order actually helps transit

Then start with a creamy spread to “seal” the crumb; next, add your fiber engine (chickpeas, lentils, or black beans) so it clings; in the end, finish with watery produce for slip. Additionally, a squeeze of lemon or a spoon of salsa adds acidity and fluid without heaviness. Small choices like these often determine whether a sandwich just sits—or genuinely supports movement.

Seeds add gentle gel—without bulky portions

A teaspoon of chia or finely ground flax disappears into spreads yet changes texture meaningfully after a glass of water. In brief, chia’s soluble, mucilage-rich fiber is well-documented (concise overview, open-access review; see also a broader nutrient profile in this MDPI review of chia’s composition: open access). For flax specifics you can use in everyday cooking, here’s a MasalaMonk primer: flax seeds for strong digestion.

The hand-held format supports satiety and travel

Because each of these high-fiber sandwiches pairs intact grains with legumes and produce, you get slower digestion and steadier fullness; which means, you’re less likely to graze later. For a clear big-picture explainer on fiber’s roles (beyond “roughage”), Harvard’s Nutrition Source summarizes the two fiber types and their effects.

Gentle routines amplify the effect

Right after eating, your body’s gastrocolic reflex naturally increases colon motility—so a brief 10–15-minute walk can nudge momentum in the right direction. For a plain-language primer, see Cleveland Clinic’s overview of the gastrocolic reflex. Moreover, even light movement supports regularity; their constipation guide underscores that exercise can stimulate the intestines. If symptoms persist despite these habits, the NIDDK’s constipation page outlines when to speak with a clinician.

Build template (at a glance)

  • Bread (2 slices): 100% whole-grain or sprouted; look for ≥3–4 g fiber per slice.
  • Spread (2–4 tbsp): hummus, white-bean mash, or yogurt-tahini; optionally stir in 1 tsp chia or ground flax.
  • Engine (⅓–½ cup): chickpeas, lentils, or black beans; lightly mash so it anchors.
  • Produce (heaped): grated carrot + leafy greens + a juicy element (cucumber, tomato, or citrus).
  • Finish: lemon or vinegar splash; herbs; pepper. Additionally, sip water and, if possible, take a short walk afterward.

For background reading that ties food choices to gut comfort more broadly (in case you want to deepen the “why”), this MasalaMonk primer on gut inflammation and digestive health connects everyday plant foods with a calmer baseline—useful context for readers who like understanding the bigger picture.

Also Read: Teas for Digestion, Bloating, and Gut Health.


How to Use These High-Fiber Sandwiches

When constipation drags on, lunch is often the easiest place to add high fiber foods for constipation relief—without cooking an entire pot of anything. In practice, plant based foods high in fiber (beans, chickpeas, lentils, leafy greens) plus high fiber fruits and vegetables for constipation (kiwi, pear, apple, carrots) work together; as a result, you get both moisture and bulk. Along the way, foods rich in soluble fiber—like oats, barley, chia, and ground flax—form a gentle gel that supports softer stools and calmer bellies. Because you asked for a high fiber plant based diet approach, every sandwich below is fully plant-forward, practical for weekdays, and aligned with high fiber foods for gut health, colon health, and everyday digestive health. For hydration cues that make this even easier, see NIDDK’s diet & constipation guidance; for grain choices that add viscous fiber, here’s a friendly β-glucan overview.

Format you’ll see below: brief “why,” a clear ingredient list, step-by-step method, fiber-forward upgrades, and make-ahead tips—so these fiber rich foods for bowel movement become an easy habit, not homework.


1) Hummus–Kiwi–Greens “Softener” — flagship of High-Fiber Sandwiches (Relief)

Estimated fiber: ~17 g • Taste & texture: cool, fresh, silky
When to choose it: stools feel dry; you want gentle moisture without heaviness

Why it works (quickly yet gently)
This is a purpose-built combo of foods that are rich in soluble fiber and high fiber fruits for constipation. Specifically, creamy hummus (legumes = plant based foods high in fiber) and a teaspoon of ground flax (mucilage) create a moist base; then, thin-sliced kiwi and a mound of grated carrot supply juicy volume. Resulting in every bite that stays soft, which supports easier bowel movements and overall gut health. If you’d like a plain-English primer on adding flax safely, skim flax seeds for strong digestion; if you prefer the science on chia/flax-style gels, here’s a concise chia fiber review for later.

Infographic of a high-fiber hummus–kiwi–spinach sandwich for constipation relief, with step-by-step method, 17g fiber badge, hydration reminder, and MasalaMonk.com footer.
Moist hummus + ground flax soften; kiwi and grated carrot add fluid; whole-grain bread supplies gentle bulk. Aim for ~17 g fiber here and drink water with the meal for best effect.

Ingredients (serves 1)

  • 2 slices 100% whole-grain bread (≥3–4 g fiber/slice; oats or barley in the mix add foods rich in soluble fiber)
  • Hummus, 4 tbsp (legume base = high fiber foods for digestive health)
  • Ground flaxseed, 1 tsp (stirred into the spread)
  • Kiwi, 1 medium, thin-sliced (one of the most convenient high fiber fruits for constipation)
  • Baby spinach, big handful (leafy greens = fiber rich foods for gut health)
  • Carrot, finely grated, ½ cup (insoluble lift for bowel movement comfort)
  • Lemon juice, black pepper, tiny pinch of salt

Method

  1. In a small bowl, whisk lemon into the hummus; then stir in ground flax until creamy.
  2. Spread the mixture edge-to-edge on both slices; afterwards, pile on spinach, layer kiwi, and shower with grated carrot.
  3. Season with pepper and a pinch of salt; and then, close gently and press once with your palm.

Fiber-forward upgrades (choose 1–2, not all)

  • Add 2–3 tbsp chickpeas into the hummus; which will make you push the legume count higher for a plant based high fiber diet day.
  • Scatter 1 tsp chia over the carrot before closing; helping you nudge the soluble fiber profile without adding bulk.
  • Swap bread for a dense oat-bran or barley loaf to increase β-glucans (i.e., foods rich in soluble fiber)—see β-glucan basics.

Make-ahead & serving

  • Grate carrot the night before; store sealed so it stays juicy.
  • Assemble within 10 minutes of eating (kiwi looks and tastes brightest right away).
  • Serve with a full glass of water; thus, the high fiber foods to ease constipation you just ate can actually hold fluid as intended.
  • On very sensitive days, replace raw spinach with tender arugula for similar benefits and gentler texture.

Why it fits the brief
This sandwich champions high fiber foods for constipation relief without heaviness—because moisture, viscosity, and volume are layered on purpose. In turn, you’ll notice comfort during the afternoon rather than bloat

Also Read: Peppermint Tea for IBS and Bloating: Natural Relief Backed by Tradition


2) Lentil “Sloppy-Joe” Toastie — cozy High-Fiber Sandwich (Relief with staying power)

Estimated fiber: ~19–20 g • Taste & texture: warm, savory, cohesive
When to choose it: you need relief and long-lasting satiety

Why it works (comfort + momentum)
Here you combine two plant based foods high in fiber—a white-bean mash and saucy lentils—with a crunchy layer of broccoli slaw. Which helps you get soluble-leaning moisture from tomato-braised lentils and insoluble lift from brassica shreds. Because the filling is warm and glossy, this tastes indulgent; nevertheless, it is textbook high fiber foods for bowel movements, colon health, and all-day digestive health. Prefer batch cooking? This lentil meal-prep filling anchors several sandwiches across the week—convenient for a high fiber plant based diet.

Infographic of a Lentil ‘Sloppy-Joe’ Toastie high-fiber sandwich for constipation relief and satiety—white-bean mash base, tomato-braised lentils, broccoli slaw, step-by-step method, and 19–20 g fiber badge.
Warm, saucy lentils + creamy white-bean mash keep the filling moist, while broccoli slaw adds insoluble lift. Press 2–3 min/side for a cohesive, ~19–20 g fiber sandwich—drink water with the meal to help the soluble fibers gel.

Ingredients (serves 1)

  • 2 slices sprouted-grain bread (≥3–4 g fiber/slice; excellent high fiber foods for gut health)
  • White-bean mash, 3 tbsp (blend white beans + lemon + olive oil + pinch salt)
  • Cooked lentils, ½ cup (core legume in any plant based high fiber diet)
  • Broccoli slaw, ½ cup (insoluble crunch from stems + a little prebiotic fiber)
  • Tomato paste, onion, garlic, smoked paprika, olive oil, splash vinegar (for sauce)

Method

  1. Warm a small pan; sauté onion and garlic until tender; then add tomato paste and smoked paprika.
  2. Stir in lentils with 2–3 tbsp water and a splash of vinegar; simmer 3–4 minutes until thick, glossy, and spoonable.
  3. Spread white-bean mash on both bread slices; afterwards, pile on the lentils; then crown with broccoli slaw.
  4. Press in a grill pan or sandwich press 2–3 minutes per side until toasty outside and steamy inside.

Fiber-forward upgrades (pick what fits your day)

  • Fold 1 tsp ground flax into the bean mash; in practice, you add foods that are rich in soluble fiber without changing flavor.
  • Replace one slice with an oat-bran slice for extra β-glucans (again, high fiber foods for colon health).
  • Add 2 tbsp grated carrot to the slaw for more insoluble volume (i.e., fiber rich fruits and vegetables for constipation in practice).

Make-ahead & serving

  • Simmer a bigger batch of lentils on Sunday; cool quickly and refrigerate up to 4 days (or freeze flat in bags).
  • Keep slaw dry until assembly so it stays crisp; alternatively, dress slaw lightly with lemon just before toasting.
  • Serve with a sliced apple or pear (skin on): those are easy fiber rich fruits for constipation that travel well.
  • Hydrate alongside; that helps the sandwich’s foods rich in soluble fiber can do their gel-forming job.

Why it fits the brief
Because it layers legumes two ways, this toastie moves from “filling” to truly high fiber foods to ease constipation. Moreover, it stays moist, which many readers find is the missing piece in at-home “healthy” & high-fiber sandwiches.

Also read: The Ultimate Guide to Lentils: Types, Benefits, and Recipes


3) Barley–Chickpea “Salad” Sandwich — herby High-Fiber Sandwich (Maintenance)

Estimated fiber: ~17 g • Taste & texture: cool, herby, packable
When to choose it: you want balance, not “power relief,” especially on workdays

On days you want reliability rather than “power relief,” this build blends foods rich in soluble fiber (barley’s β-glucans) with legume bulk from chickpeas. Consequently, you get a gentle gel plus comfortable volume—exactly what high fiber foods for digestive health should deliver. If you’re curious about the science behind β-glucans and softness, here’s a clear overview.

Infographic of a Barley–Chickpea ‘Salad’ Sandwich for maintenance: mashed avocado–chia base with chickpeas, cooked barley, celery and dill on whole-grain bread; 3-step method, 17 g fiber badge, and hydration reminder.
Balanced, packable fiber: barley’s β-glucans for gentle softness, chickpeas for comfortable bulk, and an avocado–chia base to keep moisture. Spread thickly on rye/whole-grain (3–4 g fiber/slice) and sip water to help soluble fibers work.

Ingredients (serves 1)

  • 2 slices rye or 100% whole-grain bread (≥3–4 g fiber/slice; supports high fiber foods for gut health)
  • Avocado, ¼ fruit, mashed (creamy base for moisture)
  • Chia seeds, 1 tsp (disappears into the mash; classic foods rich in soluble fiber) — background: chia’s mucilage review
  • Cooked chickpeas, ⅓ cup (plant based foods high in fiber)
  • Cooked barley, ¼ cup (β-glucans for stool comfort)
  • Celery (finely diced), dill, lemon, pepper, small pinch salt

Method

  1. Mash avocado with lemon; then stir in chia and chopped dill until glossy.
  2. Fold in chickpeas, barley, and celery; afterwards, season to taste.
  3. Spread thickly; after that, close and press lightly for a tidy, travel-worthy sandwich.

Fiber-forward upgrades

  • Add 2 tbsp grated carrot for extra insoluble lift—useful among high fiber fruits and vegetables for constipation.
  • Swap one slice for an oat-bran slice to nudge β-glucans (again, foods rich in soluble fiber).
  • For herb lovers, a handful of parsley adds polyphenols without changing fiber math.

Make-ahead & serving

  • Mix the filling up to 48 hours ahead; which means, weekday assembly takes 2 minutes.
  • Serve with apple slices (skin on) for simple fiber rich fruits for constipation and satisfying crunch.
  • Sip water alongside; therefore, the sandwich’s soluble fibers can actually do their job.

Why it fits the brief
This is a dependable high fiber plant based diet lunch: creamy, not dry; hearty, not heavy; and quietly supportive for bowel movements, colon health, and long-term gut health.

Also Read: Chickpeas’ Instead of ‘Sardines’: 5 High Protein Plant-Based Meal Prep Ideas


4) Pear–Walnut “Green Goddess” Stack — bright High-Fiber Sandwich (Gentle maintenance)

Estimated fiber: ~12–13 g • Taste & texture: juicy, herb-bright, light
When to choose it: you want support without heaviness

Why it works (light yet helpful)
Some days you want a lift without intensity. Here, juicy pear (skin on) brings pectin, leafy greens add volume, and a yogurt-tahini herb sauce keeps everything moist. Ultimately you get high fiber foods for constipation relief that feel bright rather than dense—ideal for easy digestive health.

Infographic of a Pear–Walnut ‘Green Goddess’ high-fiber sandwich for gentle maintenance—yogurt-tahini herb sauce, thin-sliced pear (skin on), arugula, and walnuts; 3-step method with a 12–13 g fiber badge.
Light yet effective: pear pectin provides soft, juicy fiber; greens add comfortable volume; yogurt-tahini keeps moisture so bites stay bright—not heavy. Aim for ~12–13 g fiber here and sip water to help soluble fibers do their job.

Ingredients (serves 1)

  • 2 slices oat-bran or whole-grain bread (≥3–4 g fiber/slice)
  • Yogurt-tahini-herb sauce (yogurt + tahini + lemon + herbs)
  • ½ pear, thin-sliced, skin on (simple high fiber fruits for constipation)
  • Arugula or spinach, big handful (fiber rich foods for gut health)
  • Walnuts, 1 tbsp (pleasant crunch)
  • Lemon zest, black pepper

Method

  1. Whisk yogurt, tahini, herbs, and lemon until creamy; then spread generously.
  2. Layer pear, greens, and walnuts; afterwards, finish with zest and pepper.
  3. Close gently; press once to set the layers.

Fiber-forward upgrades

  • Add thin cucumber or tomato slices for extra juiciness (i.e., high fiber fruits and vegetables for constipation that also boost moisture).
  • Stir 1 tsp ground flax into the sauce to tilt toward foods rich in soluble fiber—basic primer: flax for digestion.
  • Prefer curd? The texture tactic mirrors this hung curd spinach sandwich.

Make-ahead & serving

  • The sauce keeps 3–4 days; making weekday builds stay fast.
  • Serve with a small bowl of berries for additional fiber rich fruits for constipation that don’t weigh you down.
  • Drink water; subsequently, the pectin and seed gels work more comfortably.

Why it fits the brief
Although gentle, the stack still qualifies as high fiber foods for bowel movements, and, importantly, it supports colon health without the heaviness that sometimes derails weekday lunches.

Also Read: Bananas for Constipation: Ripe vs Green, Timing & What Works


5) Black Bean–Avocado Salsa Melt — cozy High-Fiber Sandwich (Relief + comfort)

Estimated fiber: ~18.5–19 g • Taste & texture: warm, saucy, satisfying
When to choose it: you need soothing relief and an easy win at dinner

Why it works (warm, saucy, effective)
This is comfort food with a purpose. Black beans (core to any plant based high fiber diet) supply both soluble and insoluble fiber; avocado keeps things lush; and fresh salsa provides juicy acidity so the sandwich never feels dry. Meaning, you get high fiber foods to ease constipation that also satisfy.

Infographic of a Black Bean–Avocado Salsa Melt for constipation relief—sprouted-grain bread with mashed avocado, black beans, fresh salsa and optional cheese; 3-step method, 18.5–19 g fiber badge.
Warm, saucy relief: black beans deliver soluble + insoluble fiber, avocado keeps bites lush, and salsa adds juicy acidity so the sandwich never eats dry. Toast until just melty; aim for ~18.5–19 g fiber and sip water to help fiber work comfortably.

Ingredients (serves 1)

  • 2 slices sprouted-grain bread (≥3–4 g fiber/slice; great for high fiber foods for gut health)
  • Avocado, ¼ fruit, mashed
  • Black beans, ½ cup (lightly mashed so they cling)
  • Fresh tomato-onion salsa, ¼ cup (or tomato-lime if onion-sensitive)
  • Optional: thin slice cheddar or plant cheese
  • Lime, cumin, pinch salt

Method

  1. Mash avocado with lime and a pinch of cumin; spread from edge to edge.
  2. Spoon on black beans; then add salsa; top with cheese if using.
  3. Toast or grill until warmed through and a little melty.

Fiber-forward upgrades

  • Stir 1 tsp ground flax into the avocado to lean toward foods rich in soluble fiber.
  • Add 2 tbsp grated carrot for extra insoluble support (a staple among high fiber fruits and vegetables for constipation).
  • Swap one slice for oat-bran bread to increase β-glucans.

Make-ahead & serving

  • Beans keep 3–4 days; meanwhile, mash just before assembly for best texture.
  • Serve with orange segments or cucumber spears; which makes you add fluid and crunch that amplify results.
  • Hydrate; in turn, these fiber rich foods for bowel movement do their job more comfortably.

Why it fits the brief
It’s a weeknight win: cozy, fast, and firmly in the lane of high fiber foods for colon health and everyday digestive health.

Also Read: 10 Creative Chia Pudding Recipes for Every Taste


6) Tempeh–Kimchi Gut-Health Reuben — tangy High-Fiber Sandwich (Maintenance + microbiome)

Estimated fiber: ~14 g • Taste & texture: savory-tangy, deli-style
When to choose it: things are moving, and you want to keep the gut ecosystem happy

Why it works (tangy and sustaining)
Once things are moving, pairing plant based foods high in fiber with fermented vegetables is a smart way to maintain momentum. Tempeh offers satisfying protein and fiber; kimchi or sauerkraut adds acidity, moisture, and live cultures; as a result, you get high fiber foods for gut health in a deli-style package. For more combinations, browse Probiotic-Rich Sandwiches.

Infographic of a Tempeh–Kimchi Gut-Health Reuben: whole-grain rye with sautéed tempeh, kimchi (or sauerkraut), spinach, and yogurt-mustard; 3 simple steps, 14 g fiber badge, hydration cue.
Steady maintenance, deli-style: fiber-rich tempeh plus fermented kimchi/kraut bring moisture, acidity, and live cultures; rye adds whole-grain fiber. Grill lightly to meld. Tip—stir 1 tsp chia into the sauce or add tomato slices for extra softness and juiciness; sip water alongside.

Ingredients (serves 1)

  • 2 slices whole-grain rye (≥3–4 g fiber/slice)
  • Tempeh, ~100 g, sliced and sautéed
  • Kimchi or sauerkraut, ¼ cup
  • Spinach, big handful
  • Yogurt-mustard (or a dairy-free version)

Method

  1. Sear tempeh in a thin film of oil until browned; then set aside.
  2. Spread yogurt-mustard on bread; afterwards, layer tempeh → kimchi → spinach.
  3. Grill lightly to warm and meld the layers.

Fiber-forward upgrades

  • Add thin tomato slices for juicy slip (handy within high fiber fruits and vegetables for constipation).
  • Stir 1 tsp chia into the yogurt-mustard for a small soluble nudge (again, foods that are rich in soluble fiber).
  • Prefer milder ferments? Use kraut and a dab of pickle brine for acidity without heat.

Make-ahead & serving

  • Cook tempeh 2–3 days ahead; consequently, weekday assembly is trivial.
  • Serve with carrot sticks and apple wedges (skin on) for easy fiber rich fruits for constipation and crunch.
  • Water alongside, then a brief walk; helping the meal support predictable bowel movements.

Why it fits the brief
This one keeps the momentum you’ve built—supporting colon health and digestive health while staying firmly in the high fiber plant based diet lane.

Also Read: Optimize Digestion with These 5 Fruit Juice Recipes


Sidekicks that make High-Fiber Sandwiches even more effective

Kiwifruit (1–2/day)—slice one into Sandwich #1 and enjoy the second on the side. Trials show kiwi improves bowel movements and overall comfort (kiwi RCT overview; gold-kiwi RCT).

Prunes or prune juice—start with 4–6 prunes or ½–1 cup prune juice alongside lunch or dinner. Practical “how much/when” is covered here: prune juice & prunes for constipation. For clinical context, review the trial where prunes beat psyllium in mild–moderate cases.

Chia or ground flax add-ins—a teaspoon whisked into spreads boosts softness without heaviness. Chia’s mucilage is well documented (chia fiber review), and flax blends easily into hummus or avocado (see flax seeds for strong digestion).

Hydration reminder—fluids help fiber function; thus, pair every High-Fiber Sandwich with water or herbal tea (NIDDK guidance).

Also Read: Psyllium Husk (Isabgol/Ispaghula) Side Effects: Risks, Benefits & How to Take It Safely


A day that shows how High-Fiber Sandwiches fit together

Breakfast
Oat-bran toast with avocado + ground flax; sliced kiwi on the side. (Fluids help fiber work—keep a glass of water nearby: NIDDK guidance.)

Lunch
Hummus–Kiwi–Greens “Softener.”

Snack
Whole-grain pita with hummus and grated carrot; sip water.

Dinner
Black Bean–Avocado Salsa Melt.

After meals
A 10–15-minute walk—especially helpful after dinner.

Weekly rotation

  • Power relief days: Lentil Toastie (#2) + Hummus–Kiwi (#1).
  • Steady maintenance days: Barley–Chickpea (#3) + Pear–Walnut (#4).
  • Microbiome-minded days: Tempeh–Kimchi (#6) with a side of berries.

Because the builds repeat cleanly, you’ll hit helpful fiber totals consistently without chasing supplements.

Also Read: Hummus Veggie Sandwich: A Nutritious and Delicious Delight


Shopping once, eating well all week (repeatable High-Fiber Sandwiches)

These staples keep a high fiber plant-based diet effortless across the week.

Breads & grains

  • 100% whole-grain or sprouted sandwich bread (≥3–4 g fiber/slice)
  • Rye; oat-bran loaves
  • Barley (pearled or hulled)

Legumes & spreads

  • Hummus; canned or cooked chickpeas, lentils, black beans; white beans for mash

Seeds & flavor

  • Chia; ground flaxseed; tahini; plain yogurt (dairy or plant-based)
  • Lemons, dill, cumin, smoked paprika, black pepper, olive oil, vinegar

Produce

  • Kiwifruit, pears, apples, oranges, berries, prunes
  • Spinach/greens, carrots, broccoli slaw, cucumbers, tomatoes, onions
  • Kimchi or sauerkraut

Batch tips

  • Cook barley on Sunday; chill and portion for quick fold-ins.
  • Freeze cooked beans flat in bags; they thaw in minutes.
  • Keep a tiny “fiber station” (chia, ground flax) in reach so you never forget the add-ins.
  • Pre-shred carrots and wash greens to make assembly truly five minutes.

Also Read: The Best Greens for Gut Health and Digestive Wellness


Gentle ramp-up (comfort matters with High-Fiber Sandwiches)

If you’re coming from a low-fiber baseline, jumping to 30+ grams immediately can feel rough. Therefore, increase gradually—about 5 g per day each week—and keep fluids steady. On a day that feels gassy, reduce raw brassicas, emphasize oats, barley, chia/flax, and use ripe pears or kiwi for a softer profile; subsequently, bring the extra crunch back as comfort improves. For a neutral reference on intake ranges, most adults do well around 25–38 g/day (scale up gradually: concise intake overview).

Also Read: Top 10 Foods for Gut Health


Put it all together (and keep repeating)

Ultimately, relief comes from meals that are moist, fibrous, and easy to repeat. These six High-Fiber Sandwiches were engineered for exactly that: whole-grain bread for steady bulk, legume spreads for satisfying depth, chia or ground flax for gentle gel, and fruit-veg add-ins—kiwi, pear, apple, carrots, greens—for softness and volume. Add water, take a short walk, and give it a few consistent days. Consequently, your gut will notice; meanwhile, your schedule won’t suffer; and, importantly, your lunches will finally pull their weight.

For quick reference when you need an extra nudge, bookmark prune juice & prunes for constipation; for fermented add-ins that pair well with High-Fiber Sandwiches, explore probiotic-rich sandwiches.

FAQs

1) What makes these High-Fiber Sandwiches good for constipation relief?

Because they combine foods rich in soluble fiber (oats, barley, chia, ground flax) with insoluble sources (bran, leafy greens, vegetable skins), they add moisture and gentle bulk together. Consequently, stools hold water, bowel movements become easier, and overall digestive health feels steadier. Meanwhile, the format is practical—so you actually repeat it.

2) How many grams of fiber should I aim for with a high fiber plant based diet?

Most adults do well around 25–38 g per day. That said, increase gradually. For example, add about 5 g per day each week and space it across meals. In practice, two High-Fiber Sandwiches can provide a big share, while breakfast and snacks top up the rest.

3) Which ingredients are the best high fiber foods for constipation relief inside a sandwich?

Start with plant based foods high in fiber: chickpeas, lentils, and black beans. Then, add foods that are rich in soluble fiber—chia, ground flax, oats, and barley—for gel-forming softness. Finally, tuck in high fiber fruits and vegetables for constipation like kiwi, pear, apple (skin on), carrots, and leafy greens for comfortable volume.

4) Are there specific fiber rich fruits for constipation that work especially well between bread?

Yes—pears and apples (with the skin), berries, and kiwi slot neatly into layers. Moreover, citrus segments and grated carrot add juiciness without heaviness. In turn, those choices support bowel movements while keeping sandwiches fresh and bright.

5) What bread should I pick for high fiber foods for gut health?

Choose 100% whole-grain or sprouted loaves that list whole grain first and give at least 3–4 g fiber per slice. Better yet, rotate rye, oat-bran, and barley-forward breads to keep textures interesting and to boost foods rich in soluble fiber via β-glucans.

6) I feel gassy when I jump into a plant based high fiber diet. What should I tweak?

First, slow the ramp—add fiber gradually. Next, emphasize moist builds with foods that are rich in soluble fiber (chia, ground flax, oats, barley) and slightly reduce raw brassicas for a few days. Subsequently, bring crunch back as comfort improves. Hydration and a brief walk after meals often help.

7) How can I hydrate wisely so high fiber foods to ease constipation actually work?

Pair each sandwich with a full glass of water. Additionally, use juicy layers—tomato, cucumber, citrus segments—to keep bites moist. Consequently, soluble fibers can form the soft gel that supports smoother bowel movements.

8) What are smart add-ins for high fiber foods for colon health?

Sprinkle 1 teaspoon of chia or finely ground flax into spreads; fold beans into hummus; or add a spoon of barley or oat-bran to legume salads. Therefore, you raise soluble fiber without making the sandwich bulky or dry.

9) Can I keep these High-Fiber Sandwiches fully vegan?

Absolutely. In fact, a high fiber plant based diet is the default here. Use hummus, white-bean mash, avocado-chia spreads, and yogurt-style dairy-free sauces. Meanwhile, tempeh, kimchi, and sauerkraut bring plant-forward protein and tang that support gut health.

10) What are easy meal-prep moves so my high fiber foods for digestive health stick all week?

Batch-cook lentils and chickpeas; chill barley; pre-grate carrots; wash greens; and keep ground flax and chia within arm’s reach. Consequently, assembly takes five minutes, and you’ll actually repeat the habit.

11) How do I balance high fiber foods for bowel movements with a sensitive stomach?

Begin with softer, moist builds: creamy spreads, thin-sliced fruit, and tender greens. Moreover, keep portions moderate, chew thoroughly, and add a short post-meal walk. On balance, that trio supports comfort while still moving fiber intake upward.

12) Are raw veggies mandatory, or can I still get high fiber foods for constipation relief with gentler textures?

You can. Lightly sautéed onions/peppers, roasted carrots, or softened greens still count. In practice, you’ll retain fiber while improving tolerance. Therefore, choose textures your gut likes and keep moisture high.

13) Which spreads quietly raise foods rich in soluble fiber without changing flavor?

Hummus mixed with 1 tsp ground flax, avocado blended with 1 tsp chia, or yogurt-tahini whisked with oat-bran. Subsequently, you’ll notice creamier bites and better stool softness—without extra weight.

14) Do I need fruit at every meal to hit high fiber foods for gut health targets?

Not necessarily, but it helps. For instance, one high fiber fruits for constipation choice (pear, apple, berries, or kiwi) inside or beside a sandwich boosts totals and adds moisture. Meanwhile, legumes and whole-grain bread carry the rest.

15) What’s the simplest “starter” High-Fiber Sandwich if I’m brand-new to this?

Begin with whole-grain bread, hummus + 1 tsp ground flax, thin-sliced pear or apple, and a handful of spinach. Therefore, you’ll get foods rich in soluble fiber plus gentle bulk in a mild, friendly package.

16) How do I keep high fiber foods for colon health from feeling dry or dense?

Layer moisture at every step: creamy spread, juicy produce, and a quick acidity hit (lemon, vinegar, salsa). Consequently, the sandwich eats soft, not stodgy—and your bowel movements tend to follow suit.

17) Are there kid-friendly options that still count as plant based foods high in fiber?

Yes: mashed black beans with mild salsa and avocado on soft whole-grain bread; chickpea “salad” with finely diced cucumber; or thin pear slices with yogurt-tahini. Moreover, cutting sandwiches into small squares improves traction with picky eaters.

18) How can I vary flavors yet stay within high fiber foods for digestive health?

Rotate breads (rye, oat-bran, sprouted), spreads (hummus, white-bean, avocado-chia), and high fiber fruits and vegetables for constipation (pear, apple, kiwi, carrot, greens). In turn, you’ll keep taste buds happy while the fiber keeps working.

19) Do these ideas help if I’m focused on high fiber foods for gut health beyond constipation?

Generally, yes. While everyone’s different, a steady mix of soluble and insoluble fiber plus plant diversity often supports gut health and overall comfort. Nevertheless, adjust portions and textures to your tolerance.

20) What’s a quick checklist before I make any High-Fiber Sandwiches?

Whole-grain bread (3–4 g fiber/slice) ✅
Legume base (⅓–½ cup) ✅
Seed booster (1 tsp chia or ground flax) ✅
Juicy produce (heaped) ✅
Water alongside + brief walk ✅
Therefore, you’ve covered high fiber foods for constipation relief and set up a predictable, comfortable day.

Posted on — 1 Comment

Unveiling the Secret of Beans: A Superfood for Weight Loss

SECRET OF BEANS: A SUPERFOOD FOR WEIGHT LOSS

When it comes to superfoods that support weight loss, beans might not be the first to come to mind. Yet, these humble legumes have quietly earned a reputation as nutritional powerhouses capable of transforming your health and slimming your waistline. From chickpeas to black beans, kidney beans to mung beans, incorporating these versatile foods into your daily diet can unlock a host of benefits — including sustainable weight loss.

In this post, we’ll explore why beans are a secret weapon in weight management, dive into the science behind their fat-burning potential, and share practical tips to include them deliciously in your meals.


Why Beans Deserve a Spot on Your Plate

Beans have been a staple in diets worldwide for centuries — and for good reason. Beyond their affordability and accessibility, they pack a powerful nutritional punch:

1. High Fiber Content — Your Ally for Fullness and Fat Loss

Beans are loaded with dietary fiber, especially soluble fiber, which slows digestion and helps keep you feeling full for longer. This satiety reduces hunger pangs and curbs overeating, a crucial factor in weight management.

Fiber also supports healthy digestion by feeding beneficial gut bacteria, which can indirectly influence metabolism and weight regulation. Research suggests that a fiber-rich diet correlates with reduced body weight and fat mass.

2. Plant-Based Protein — Building Blocks for Lean Muscle

Maintaining muscle mass is essential when losing weight, as muscles burn more calories at rest than fat. Beans provide a significant amount of plant-based protein, which supports muscle repair and growth while being lower in calories and saturated fat than animal proteins.

By combining beans with grains like rice or quinoa, you can obtain a complete protein profile with all essential amino acids.

3. Low Glycemic Index — Stable Blood Sugar for Appetite Control

The low glycemic index (GI) of beans means they release glucose slowly into the bloodstream, preventing the spikes and crashes that lead to cravings and overeating. Stable blood sugar levels are linked to better appetite control and reduced fat storage.

4. Micronutrient Powerhouse — Supporting Overall Health

Beans are rich in essential vitamins and minerals like magnesium, potassium, iron, and folate, all of which play roles in energy metabolism and fat burning. Magnesium, for instance, is critical for hundreds of enzymatic reactions, including those that regulate blood sugar and insulin sensitivity.


Scientific Insights: What Research Says About Beans and Weight Loss

Let’s examine some of the latest scientific findings that shed light on how beans support weight loss and metabolic health:

Chickpeas — Beyond Basic Nutrition

A study presented at the American Society for Nutrition conference revealed that adults with prediabetes who consumed chickpeas daily saw significant reductions in total cholesterol. This indicates improved cardiovascular health, which often accompanies weight loss efforts.

Moreover, chickpeas’ high fiber and protein content contributes to increased feelings of fullness, which helps reduce overall calorie intake.

Black Beans — Fighting Inflammation and Supporting Metabolism

Chronic inflammation is a known contributor to obesity and metabolic disorders. Research shows that black beans help reduce levels of inflammatory markers such as interleukin-6, potentially improving insulin sensitivity and fat metabolism.

The antioxidants and phytochemicals in black beans further promote metabolic health and may aid in reducing body fat.

Kidney Beans — Resistant Starch for Fat Burning

Kidney beans contain a type of carbohydrate called resistant starch, which resists digestion and reaches the colon intact. Here, it acts as a prebiotic, feeding good gut bacteria and producing beneficial short-chain fatty acids.

Resistant starch has been linked to increased fat oxidation (fat burning) and improved insulin sensitivity, both important for weight management.

Mung Beans — Easy on the Digestive System and Low-Calorie

Mung beans are low in calories but high in protein and fiber, making them excellent for weight-conscious individuals. Their easy digestibility makes them suitable for sensitive stomachs and supports consistent nutrient absorption.


How to Incorporate Beans into Your Weight Loss Plan

Eating beans regularly doesn’t have to be boring or complicated. Here are practical tips to include beans in your diet for maximum benefit:

Start Slowly and Build Up

Beans are rich in fiber, so if you’re not used to them, start with small portions and gradually increase. This helps your digestive system adjust and reduces the risk of bloating or gas.

Experiment with Varieties and Recipes

Don’t limit yourself to one type of bean. Rotate among chickpeas, black beans, kidney beans, and mung beans to enjoy diverse flavors and nutrients.

  • Add beans to salads for extra texture and protein.
  • Use mashed beans as a spread or dip.
  • Incorporate beans into soups, stews, chili, and casseroles.
  • Swap beans for meat in tacos, burgers, or pasta dishes.

Combine Beans with Whole Grains

Pair beans with whole grains like brown rice, quinoa, or barley to create complete proteins and balanced meals that keep you full and energized.

Opt for Fresh or Dried Beans

While canned beans are convenient, they often contain added sodium. Choose fresh or dried beans whenever possible and soak or cook them yourself to control salt levels.

Spice It Up

Beans absorb flavors well. Use herbs, spices, garlic, lemon, and vinegar to enhance taste without extra calories.


Debunking Common Myths About Beans and Weight Loss

Myth 1: Beans Cause Weight Gain Because They’re Carbs

Truth: The complex carbohydrates in beans digest slowly, promote satiety, and don’t spike blood sugar like refined carbs do. When eaten as part of a balanced diet, beans support weight loss.

Myth 2: Beans Are Just Filler Food

Truth: Beans are nutrient-dense and provide essential vitamins, minerals, fiber, and protein — making them much more than “filler.”

Myth 3: Beans Make You Bloated and Uncomfortable

Truth: While beans can cause gas initially, proper soaking, cooking, and gradual introduction reduce discomfort. Over time, your gut adapts.


The Sustainable Choice: Why Beans Are Good for You and the Planet

Beyond personal health, beans are an environmentally friendly protein source. They require less water and emit fewer greenhouse gases compared to animal proteins. Including beans in your diet is a win-win for your weight and the planet.


Final Thoughts: Unlock the Weight Loss Power of Beans Today

Beans truly deserve their superfood status. With their potent combination of fiber, protein, and micronutrients, they support appetite control, boost metabolism, and promote overall health. Incorporating a variety of beans into your meals can help you achieve sustainable weight loss while enjoying delicious, satisfying food.

Ready to start your bean journey? Try swapping one meat-based meal per week with a bean-based alternative and experience the difference.

FAQs: Beans and Weight Loss

1. Are beans really effective for weight loss?
Yes. Beans are rich in fiber and protein, which promote fullness and reduce overall calorie intake. Their low glycemic index also helps stabilize blood sugar, preventing cravings and supporting weight management.

2. Which type of beans is best for weight loss?
All beans offer benefits, but chickpeas, black beans, kidney beans, and mung beans are especially effective due to their high fiber, protein, and resistant starch content.

3. Can eating beans cause bloating or gas?
Beans contain fermentable fibers that can cause gas initially. To minimize this, start with small portions, soak dried beans well, rinse canned beans, and gradually increase intake to allow your digestive system to adjust.

4. How much beans should I eat daily to aid weight loss?
Studies suggest that about 3/4 cup (around 130 grams) of cooked beans daily can contribute to modest weight loss and improve diet quality.

5. Are canned beans as healthy as dried beans?
Canned beans are convenient and nutritious but often contain added sodium. Rinse them well before use or choose low-sodium versions. Dried beans cooked at home allow better control over salt content.

6. Can beans replace meat in a weight loss diet?
Absolutely. Beans are a great plant-based protein source that can replace or supplement meat, lowering calorie intake and saturated fat while still providing essential nutrients.

7. Will eating beans make me gain weight because of their carbohydrate content?
No. The carbohydrates in beans are complex and digest slowly, promoting fullness and stable blood sugar rather than fat storage, especially when eaten as part of a balanced diet.

8. How can I include beans in my meals without getting bored?
Try diverse recipes like bean salads, soups, stews, dips, or even bean-based burgers and tacos. Experimenting with different herbs and spices also keeps meals flavorful.

9. Are beans suitable for people with diabetes trying to lose weight?
Yes. Beans’ low glycemic index helps regulate blood sugar levels, making them an excellent food choice for people with diabetes aiming to lose weight.

10. How do beans support gut health?
Beans contain prebiotic fibers that feed beneficial gut bacteria, promoting a healthy microbiome, improving digestion, and supporting metabolism, which are all important for weight management.