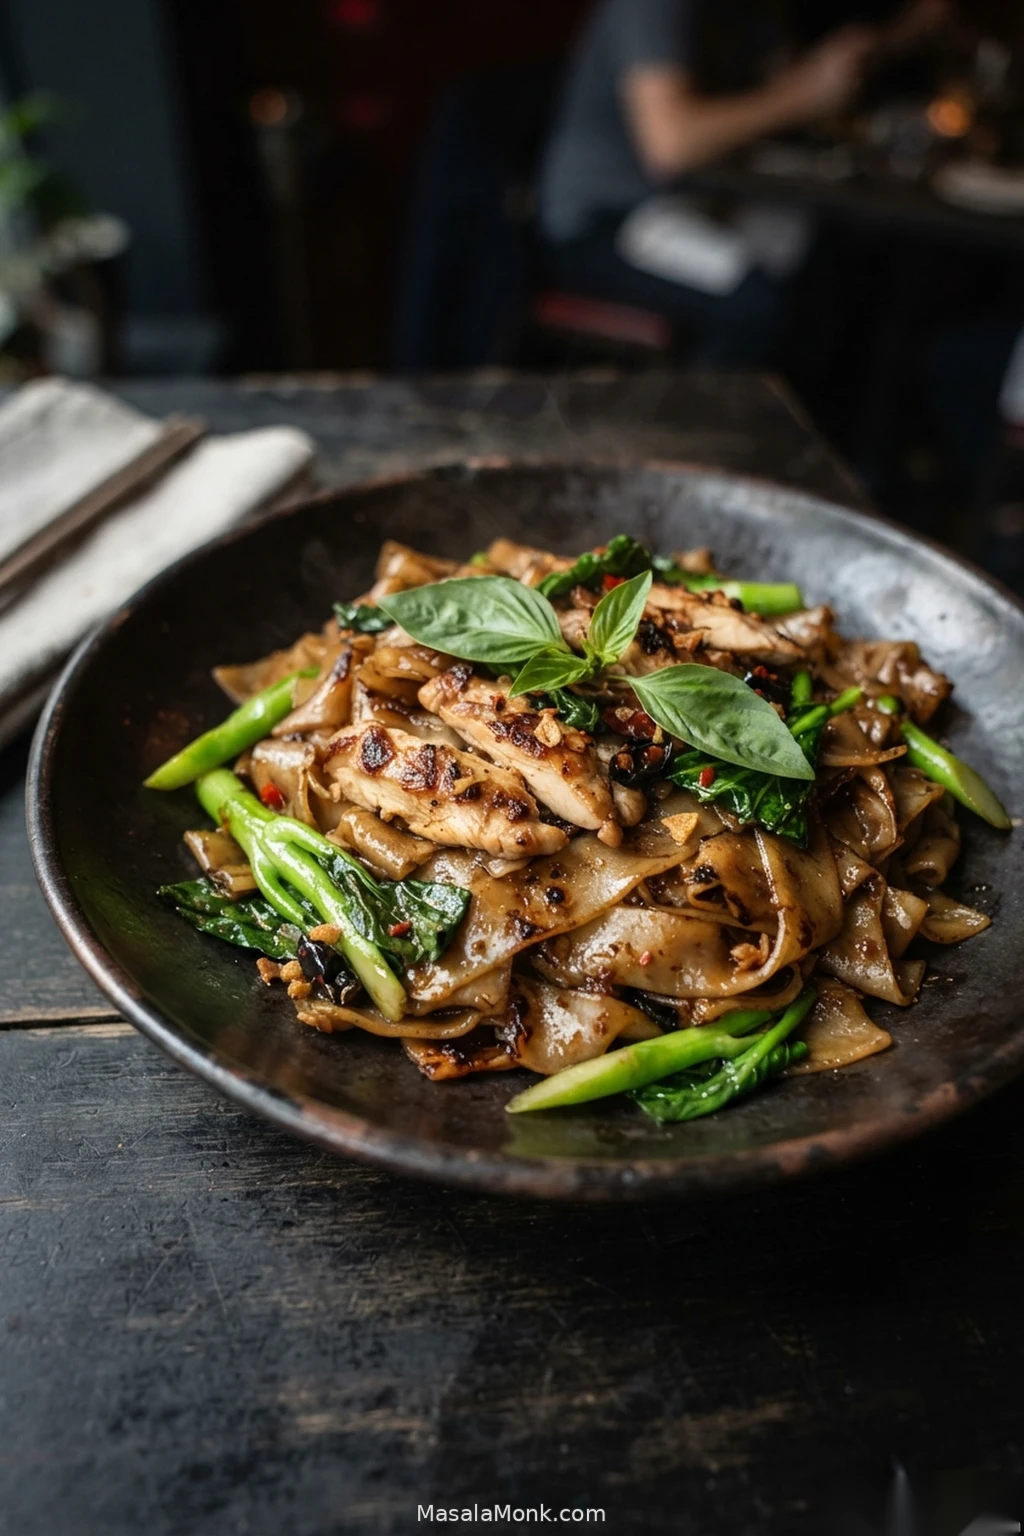
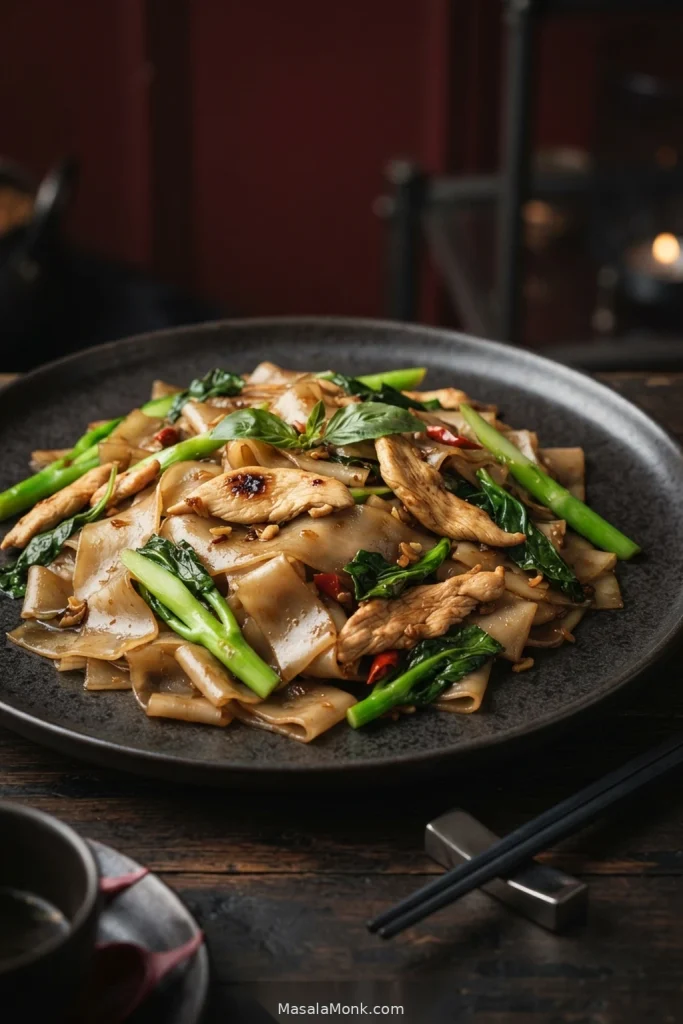
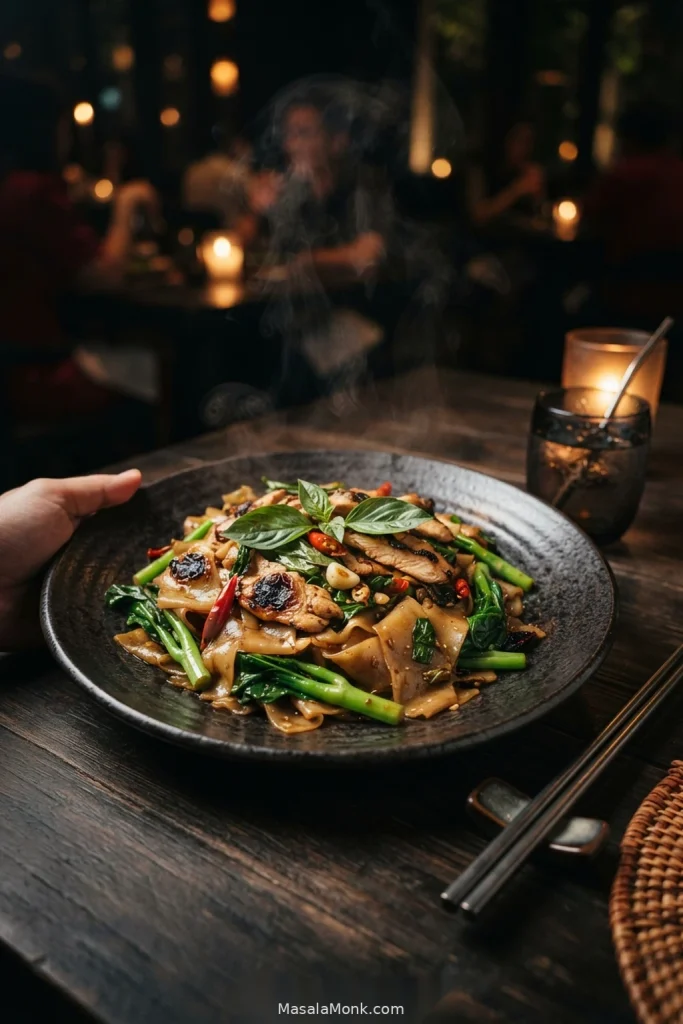
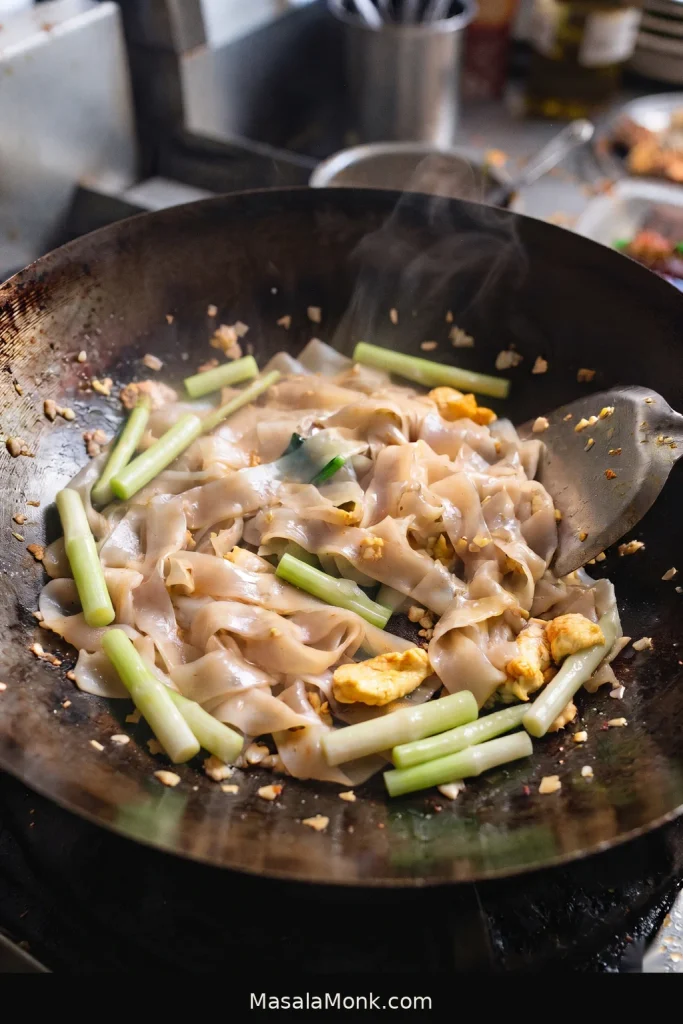
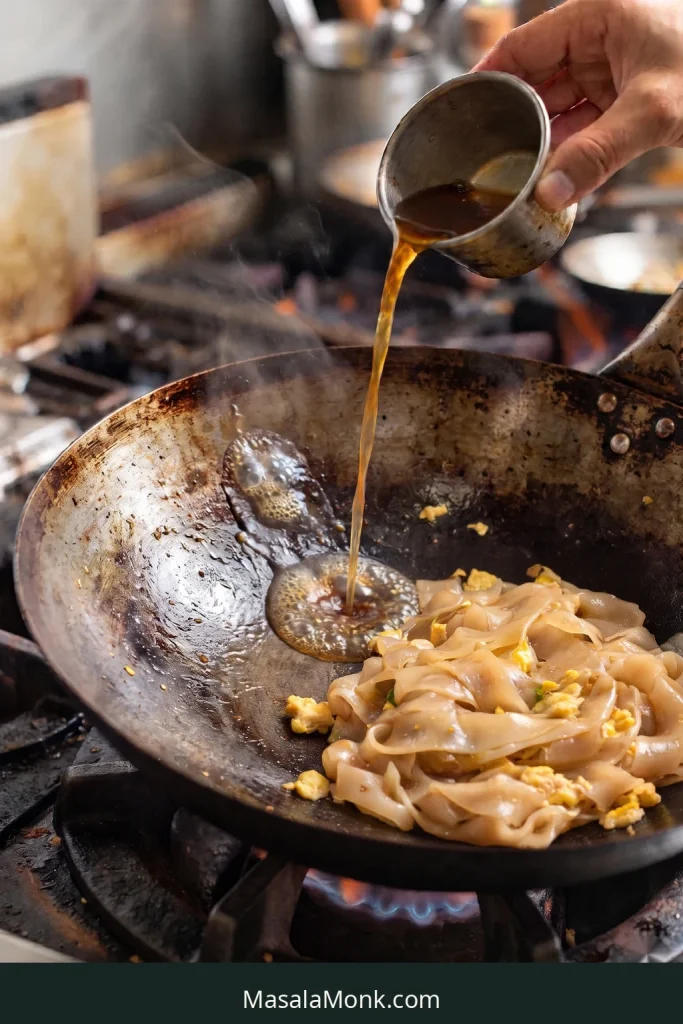
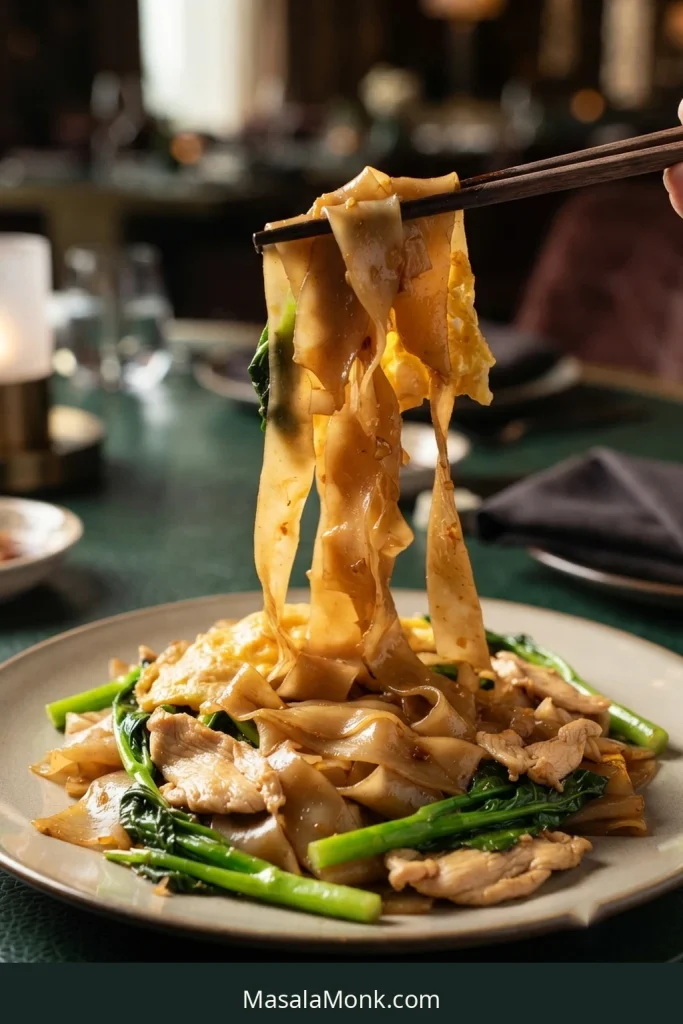
Drunken Noodles, or Pad Kee Mao, are a spicy Thai stir-fry of wide rice noodles with chilli, garlic and basil — and those three flavours should hit you before anything else. The noodles should be chewy and coated in savoury sauce, the chicken juicy, the greens still lively, and a few noodle edges browned where they caught the hot pan.
Sauce isn’t the difficult part here. The trick is getting the noodles, moisture and pan heat to behave at the same time. Fresh and dried wide rice noodles need different preparation, and once they reach the pan, too much water or too much food can turn a fast stir-fry into steaming, sticking and broken noodles.
This version is designed for a normal home kitchen. You can use fresh or dried noodles, a wok or a heavy skillet, and whichever suitable basil you can actually find. The finished dish should stay recognisably Pad Kee Mao: spicy, garlicky, basil-forward, deeply savoury and lightly charred rather than sweet and soupy.
Despite the English name, Drunken Noodles normally contain no alcohol. Several stories connect the name with drinking, late-night eating or particularly fiery food, but no single origin story is universally established.
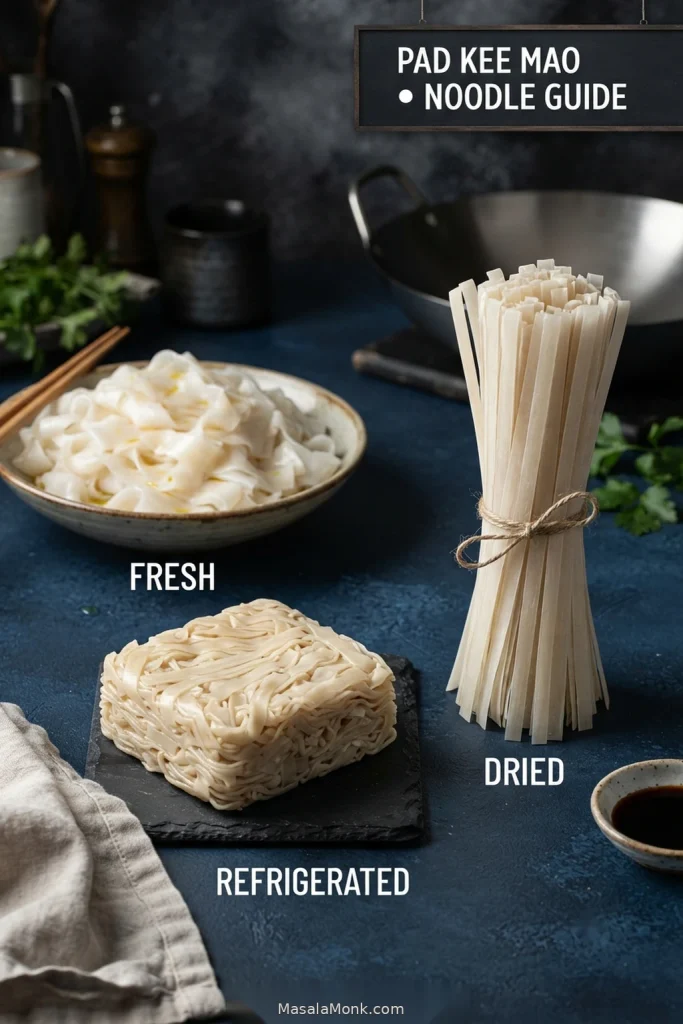
Before You Start: Fresh, Refrigerated or Dried Noodles?
Your noodle type changes how the recipe begins. Fresh and dried rice noodles cannot be prepared the same way.
For the most predictable home-kitchen option, choose extra-wide dried rice noodles. Genuinely fresh wide noodles can be wonderful, but refrigerated fresh noodles vary much more in texture and quality.
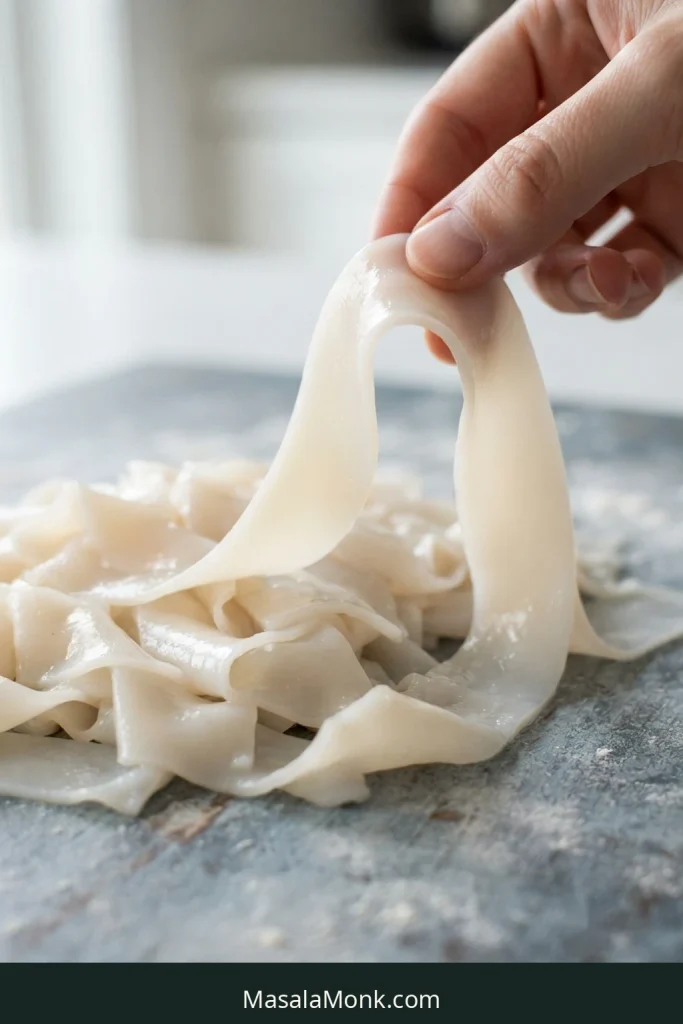
Fresh wide rice noodles: soft and already pliable. Separate them and keep them dry. Do not soak.
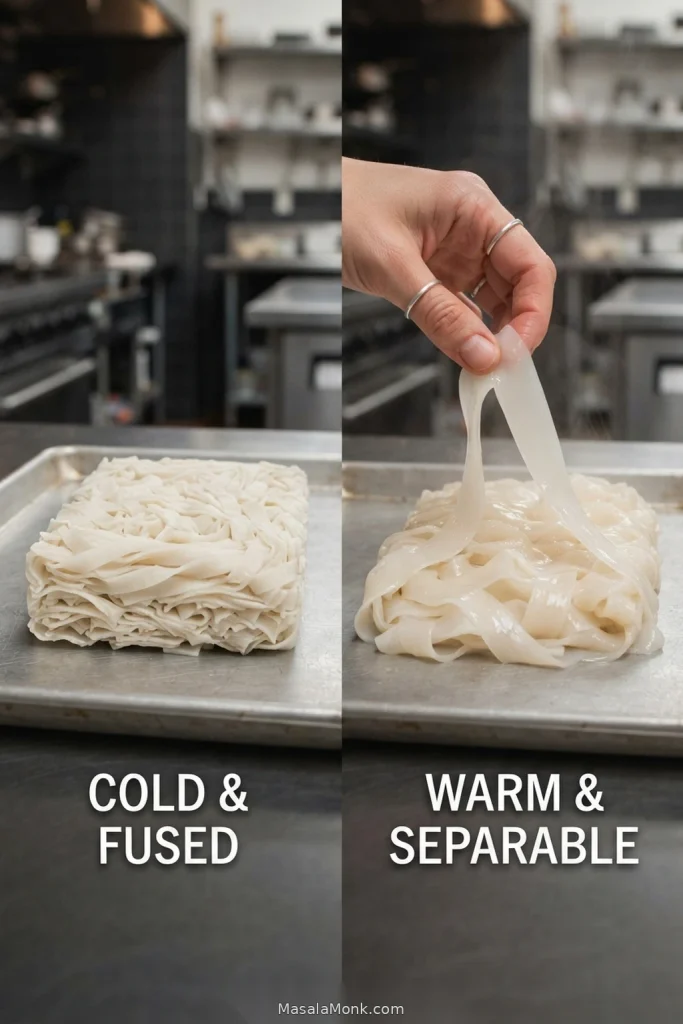
Refrigerated fresh noodles: cold, firm and often fused together. Warm only until flexible enough to separate.
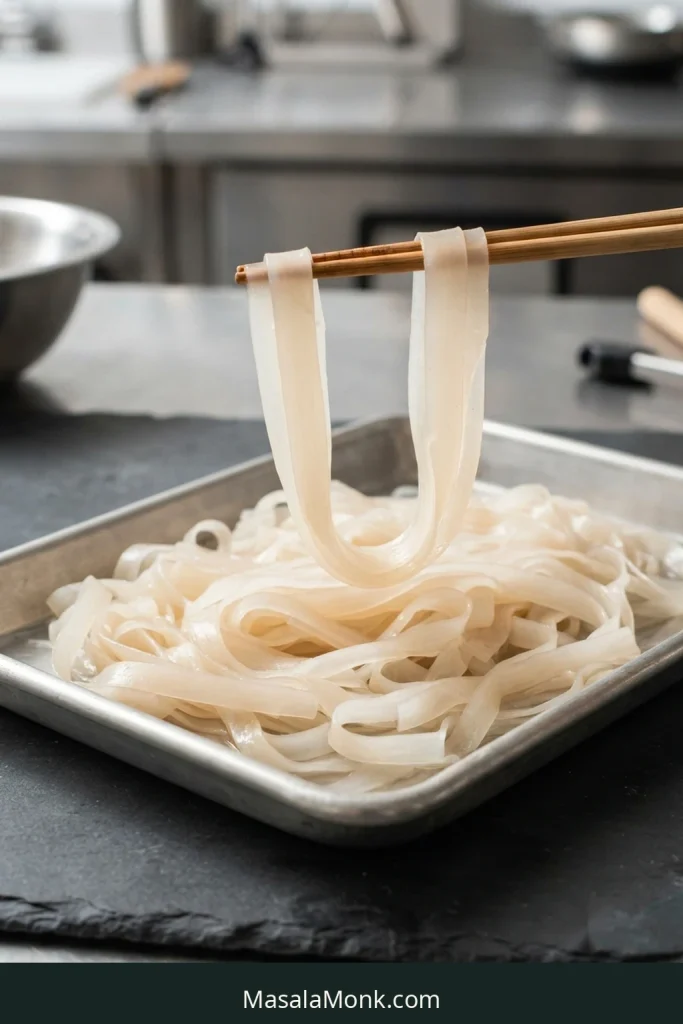
Dried wide rice noodles: hard, rigid sticks. Hydrate them until flexible but still slightly underdone.
Thin dried sheets intended for spring rolls or wrapping are a different product. Dried rice paper is not the same thing as cooked fresh rice noodle sheets.
Fresh noodles already carry much of their water, which is why the recipe uses a very different fresh weight from the dried weight.
Drunken Noodles Recipe (Pad Kee Mao)
Wide rice noodles, chicken, gai lan, fresh chilli, garlic and basil tossed in a concentrated savoury sauce until well coated, with a few browned and blistered noodle edges.
Serves 2 generously
Prep About 20 minutes, much of it while dried noodles soak
Cook 8–10 minutes
Total About 30 minutes
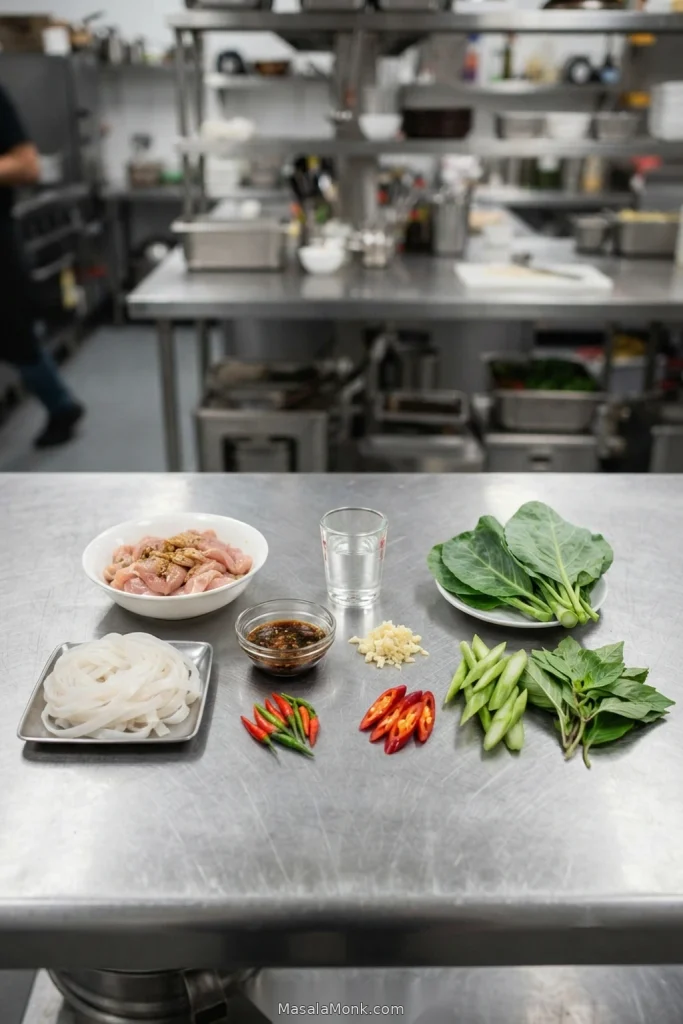
Most of the work happens before the pan gets hot. Once everything is prepared, the actual stir-fry moves quickly.
Pan: A wok or large heavy skillet suited to high heat, around 12 inches / 30 cm across, works well for this amount.
Cooking for four? Double the ingredients but cook two batches. On a weak burner or with particularly delicate fresh noodles, one portion at a time gives even more control.
Noodles — Choose One
180 g / 6.3 oz dried extra-wide rice noodles
or about 400 g / 14 oz fresh wide rice noodles
Fresh noodles already contain a lot of water, so the weights are deliberately different.
Chicken
225 g / 8 oz boneless, skinless chicken thighs, sliced about 5–6 mm / ¼ inch thick
5 ml / 1 teaspoon regular or light soy sauce
5 ml / 1 teaspoon water
5 ml / 1 teaspoon neutral oil
Sauce
30 ml / 2 tablespoons oyster sauce
15 ml / 1 tablespoon regular or light soy sauce
10 ml / 2 teaspoons fish sauce
5 ml / 1 teaspoon dark soy sauce
8 g palm sugar, finely chopped or grated, or about 2 teaspoons brown sugar
15 ml / 1 tablespoon water
Keep another 60 ml / ¼ cup plain water beside the stove. You may need none of it. It is there for dried noodles that are already seasoned but still too firm.
Optional: Thai seasoning sauce such as Golden Mountain can replace about 1 teaspoon of the regular soy sauce. Don’t simply add it on top of the other salty seasonings.
Stir-Fry Ingredients
30 ml / 2 tablespoons neutral high-heat oil, divided
20 g garlic, about 4–5 large cloves
½ to 4 Thai bird’s-eye chillies, according to heat preference; start with about 2 if you’re unsure
Optional: ½ to 1 mild red chilli, thinly sliced, for more fresh-chilli flavour without much extra heat
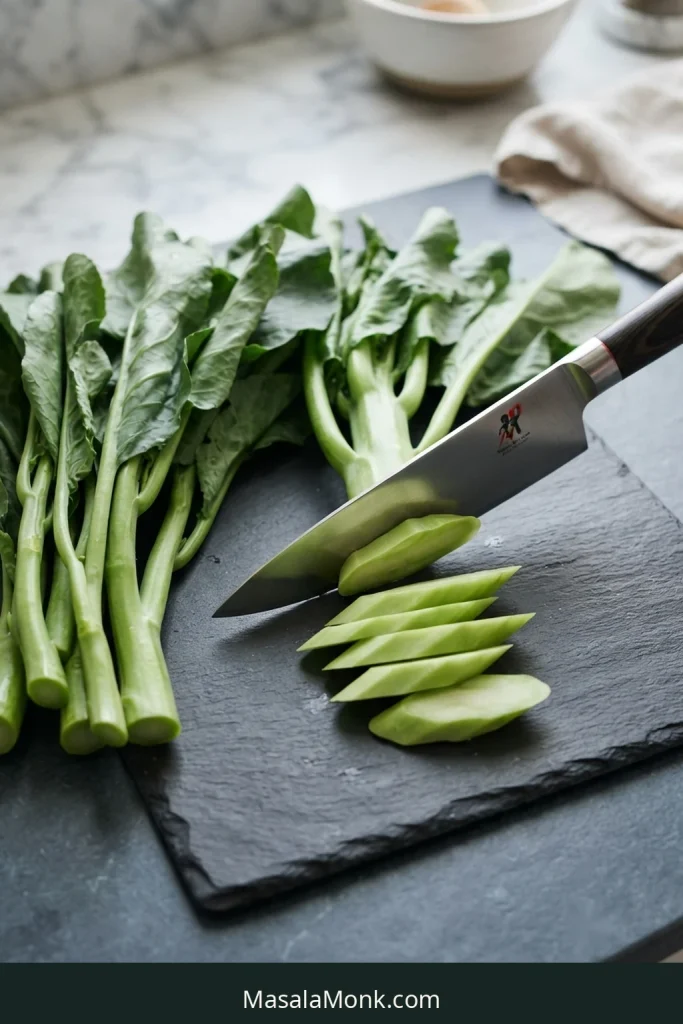
150 g / about 5 oz gai lan or Chinese broccoli
25–30 g holy basil or another suitable fresh basil
Slice the gai lan stems thinly on the diagonal. Cut or tear the leafy portions into larger bite-size pieces and keep them separate from the stems.
Prepare the Noodles
For dried noodles: Put them in a large heatproof bowl and cover with very hot water. Leave them off the heat. Start checking around 10 minutes; some brands may need closer to 20.
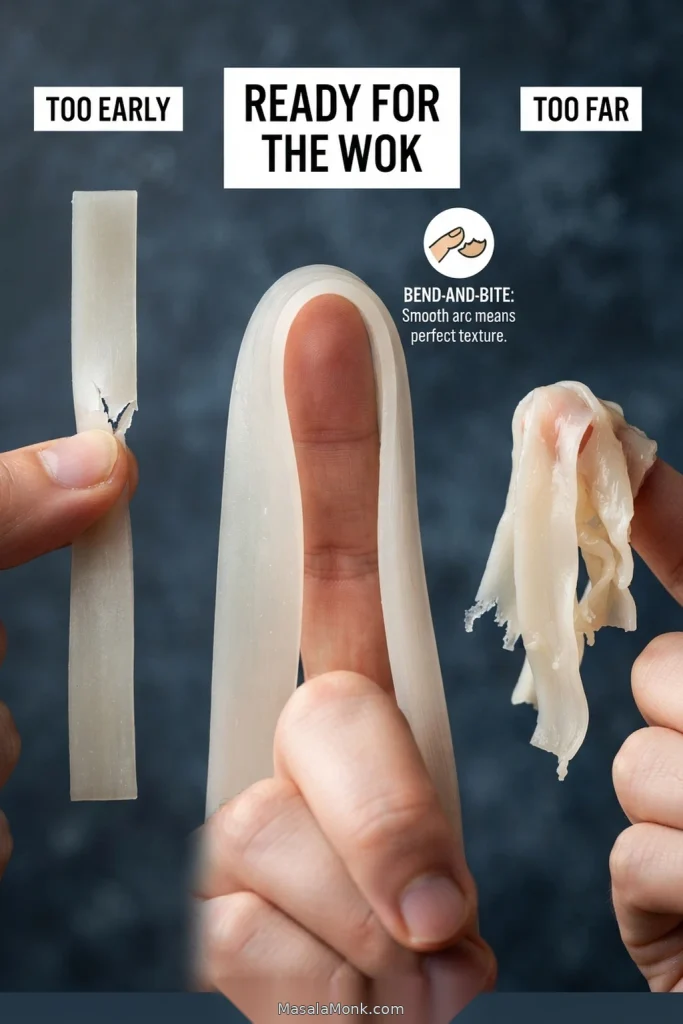
Pick up one noodle. It should bend around your finger without snapping but still resist slightly when bitten. It should not already feel completely tender.
Some extra-wide dried noodles are designed to be boiled rather than soaked. Follow the packet when it specifically calls for boiling, or briefly boil noodles that remain stubbornly rigid after a reasonable hot-water soak. Either way, stop when they are flexible but still slightly underdone. What matters is how the noodle feels, not forcing every brand through the same method.
Drain them really well. A quick cold rinse can slow noodles that keep softening after draining, but drain thoroughly again afterwards. Cook hydrated noodles reasonably soon; leaving them piled together for a long time encourages clumping.
For fresh noodles: Soft noodles need little preparation beyond gentle separation. A cold refrigerated block is different. Microwave it at medium power in short bursts, gently rearranging the block and peeling away noodles as they become pliable. Stop as soon as they separate without cracking. They do not need to become hot, and they do not need a hot-water soak.
Using dried noodles and want a visual doneness check? Jump to the Bend-and-Bite Test; it shows the difference between too firm, ready for the wok and already too soft.
Season the Chicken and Mix the Sauce
Toss the chicken with its soy sauce, water and oil.
In another bowl, combine the oyster sauce, soy sauce, fish sauce, dark soy, sugar and 15 ml / 1 tablespoon water. It should taste intense on its own, with deep savouriness and enough sweetness to round the edges rather than a flat hit of salt.
Get Ready Before the Pan Gets Hot
Crush or finely chop the garlic and bird’s-eye chillies. Keep any sliced mild red chilli ready with them. Have the gai lan stems, leaves and basil in separate piles. Dry the vegetables well and keep the small cup of plain water beside the stove.
Keeping the components separate is what lets a fast stir-fry stay fast once the pan gets hot.
Cook the Drunken Noodles
Build the Stir-Fry
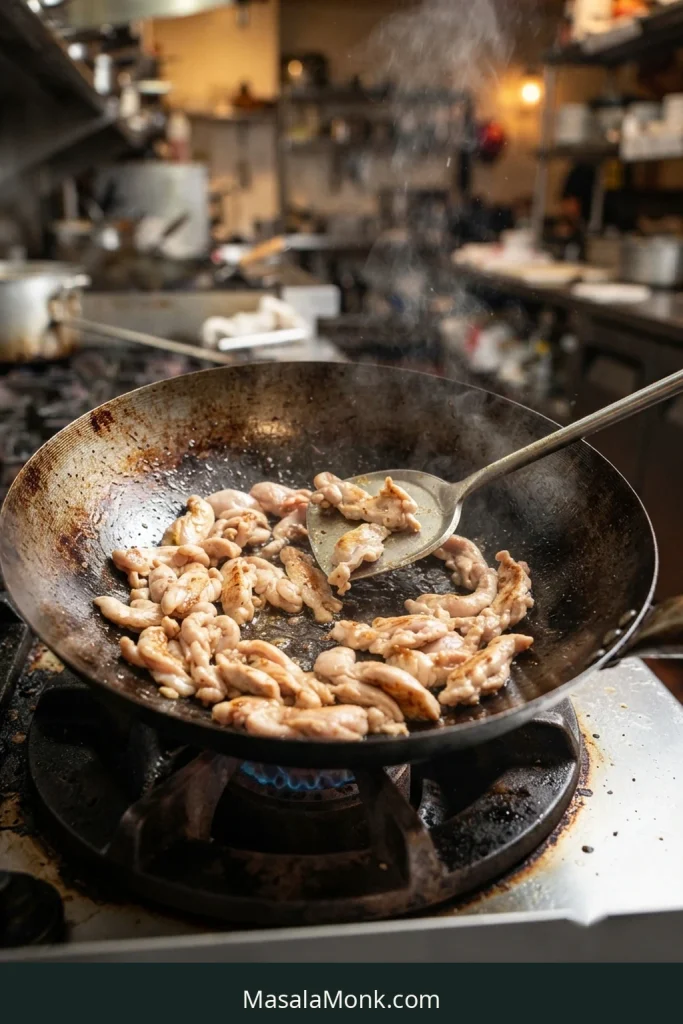
Sear the chicken. Heat the pan well over high heat. Add about 15 ml / 1 tablespoon oil and spread the chicken into a single layer. Leave it alone for roughly 45–60 seconds, then stir-fry until browned and almost cooked through, with only a little rawness left at the centre. Transfer to a plate.
Cook the garlic and chillies. If the pan is fiercely hot after the chicken, drop the heat slightly. Add the remaining oil if needed, then the garlic, bird’s-eye chillies and optional sliced mild chilli. Cook for about 15–30 seconds, just until intensely fragrant and the garlic begins to colour. Dark brown garlic means the pan is too hot for this stage.
Start the gai lan. Add the sliced stems and stir-fry until their colour brightens but they are still crisp. Keep the leaves back for now.
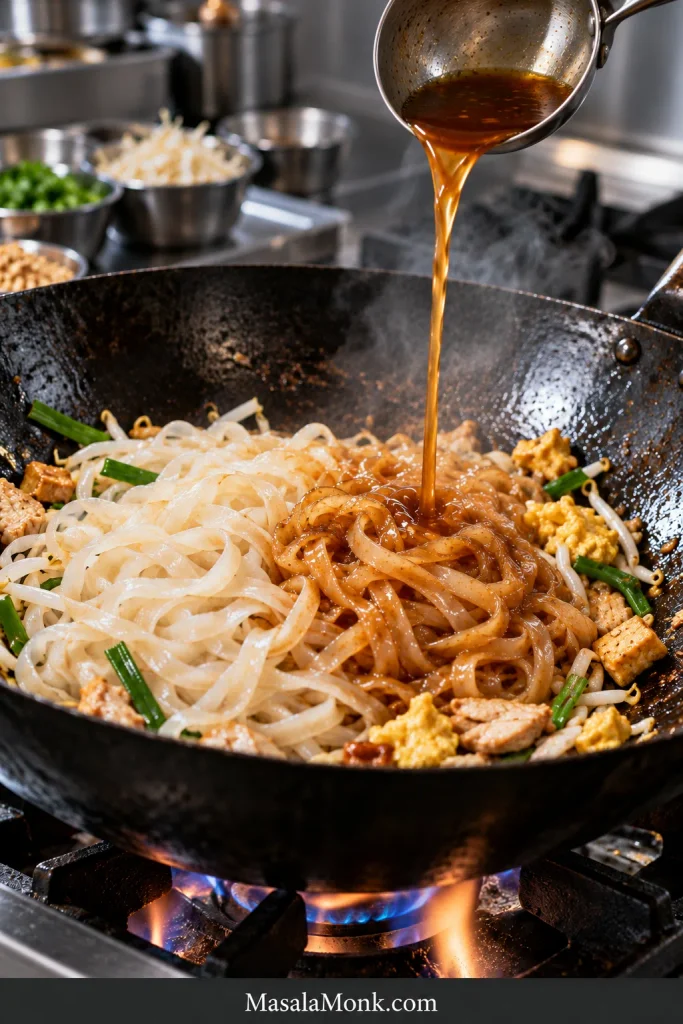
Add noodles and sauce. Return to high heat. Add the noodles and pour the sauce around and over them. Give the sauce a few seconds to heat before moving everything.
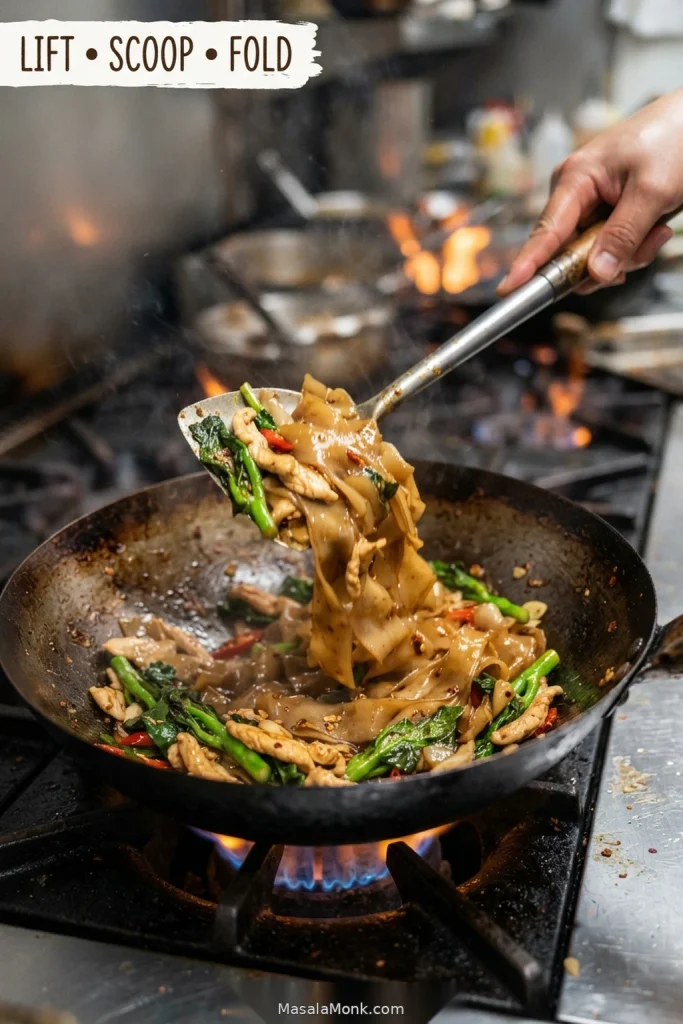
Lift, scoop and fold. Avoid frantic circular stirring. Once the noodles are coated and beginning to soften, add the gai lan leaves.
If the noodles tear even when you lift and fold gently, look beyond your technique. A wet noodle surface, a grabby pan, lost heat or crowding can make broad rice noodles stick before the utensil pulls them apart.
Reduce, Check and Finish
Watch the pan. At first the sauce will look loose. Keep folding until it reduces around the noodles. Push them aside for a second: you should see mostly hot pan, not a puddle of thin sauce.
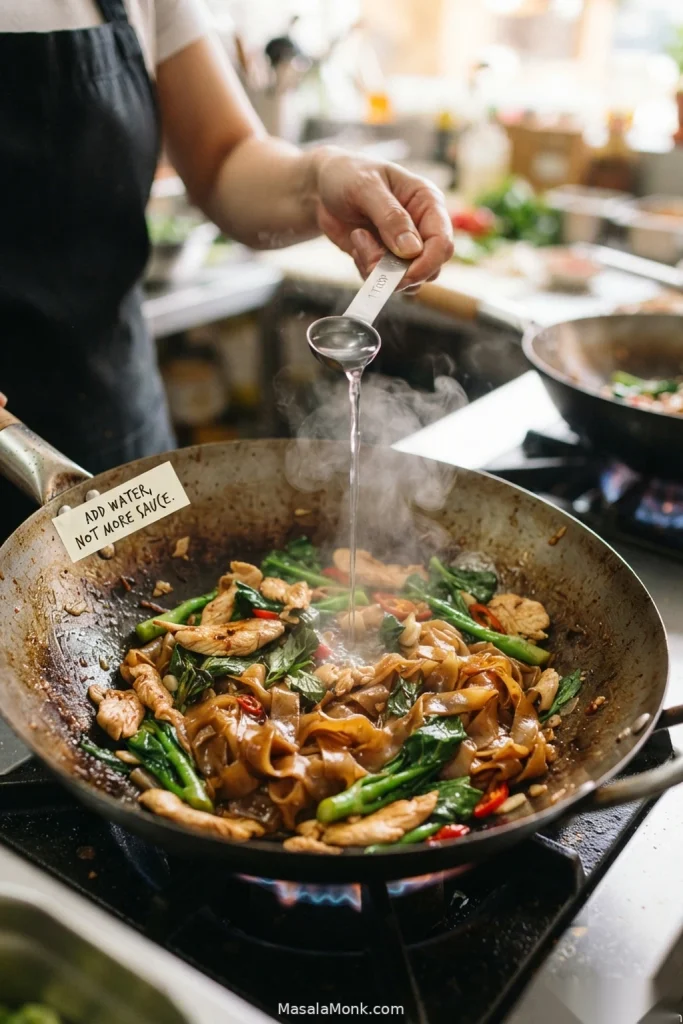
Check dried noodles before going further. When they taste properly seasoned but remain too firm, add 15 ml / 1 tablespoon plain water. Fold, wait a few seconds and bite one again. Add more only if needed.
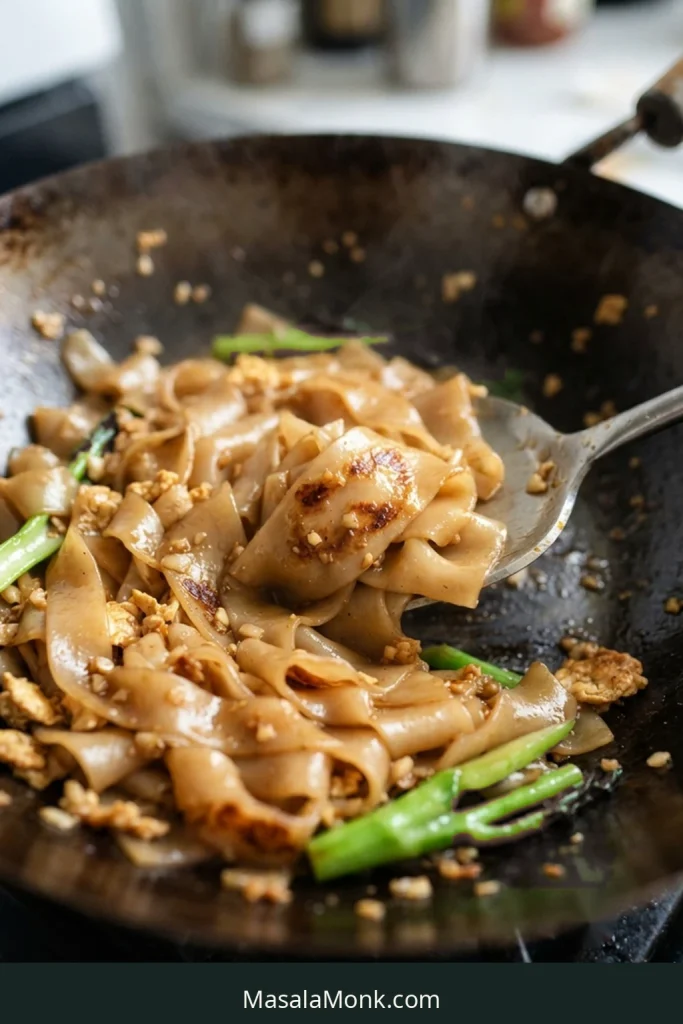
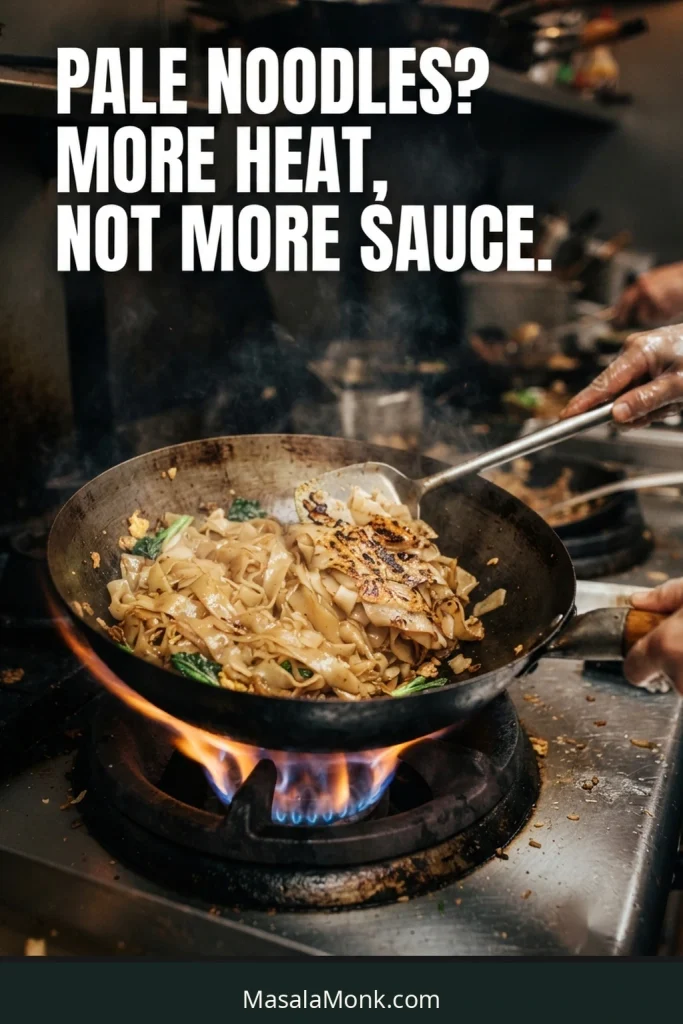
Create a little char. Spread part of the coated noodles against the hot surface and leave them alone for about 15–20 seconds. Fold and repeat once or twice so a few areas become browned or blistered.
Finish the chicken. Return the chicken and its juices. Toss until cooked through. Using a thermometer gives the clearest check: one of the thicker pieces should reach 74°C / 165°F.
Basil goes in last. Turn off the heat, add the basil and fold only until it wilts and becomes aromatic.
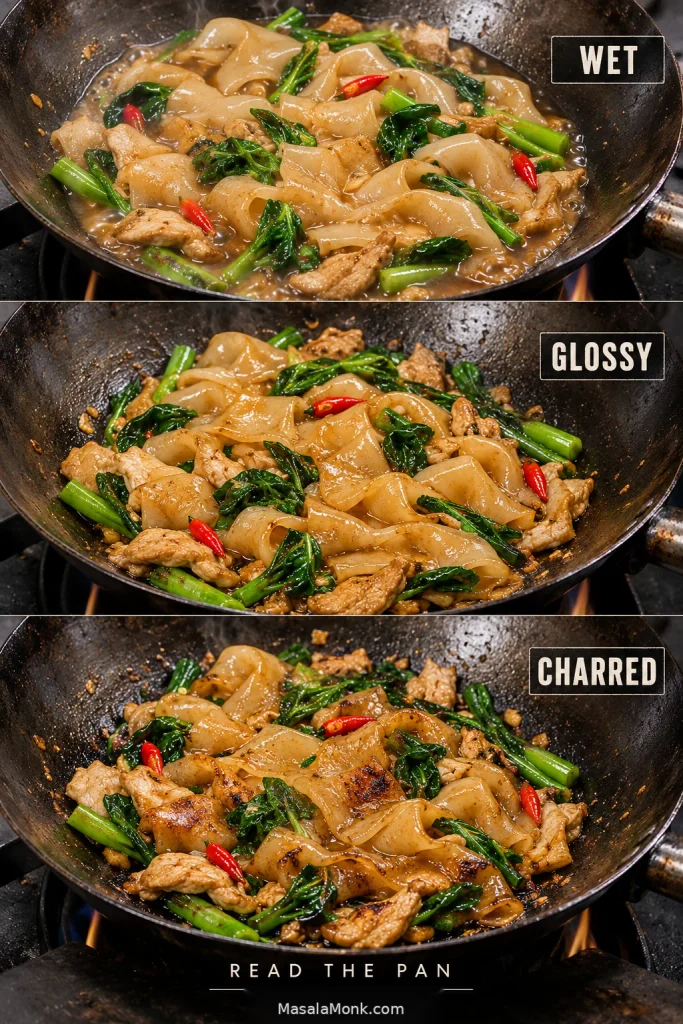
Want a visual pan-state check? See Wet → Glossy → Charred for the point where sauce reduction turns into browning.
How to Know Pad Kee Mao Is Done
Serve immediately. The noodles should be tender but chewy, the vegetables crisp-tender, and the sauce should cling with no puddle underneath.
When it all comes together, the pan is almost dry, the noodles look slick rather than wet, the fresh basil aroma still cuts through the sauce, and browned edges appear between the soft, chewy folds.
Saucy enough to coat, dry enough to stir-fry.
Once the noodles are glossy, chewy and nearly dry underneath, serve them straight away; that ideal texture does not improve by sitting.
If dinner is the priority, you can stop there and cook. If you want to understand why the noodles behave the way they do — or know what to change next time — start with the noodle itself.
Choosing Wide Rice Noodles for Pad Kee Mao
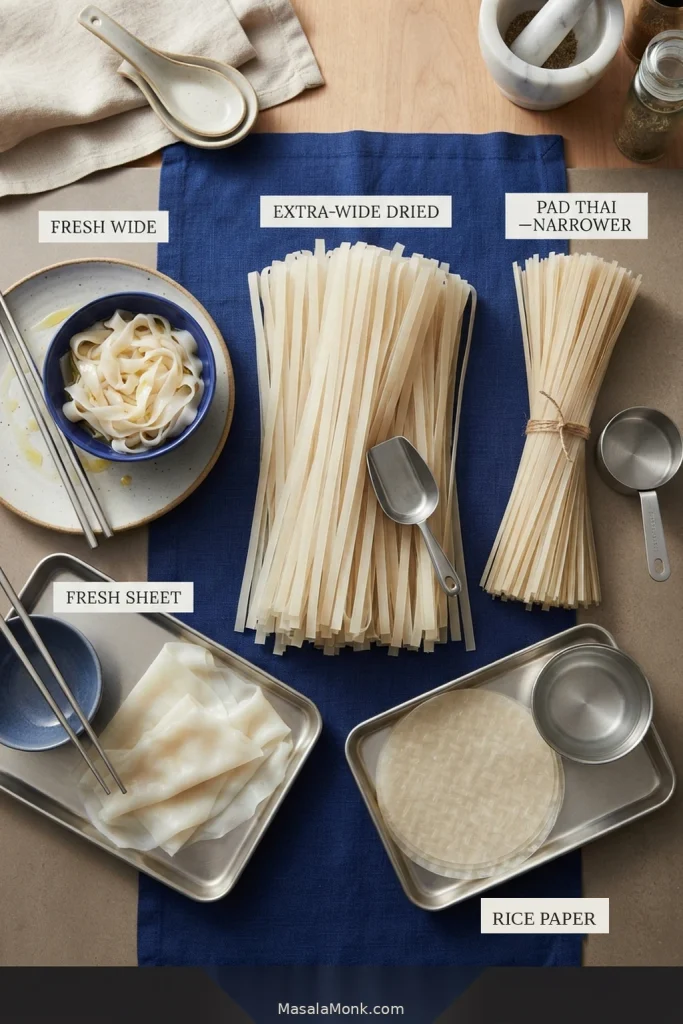
Fresh wide rice noodles, often sold as sen yai, give the most supple, slippery-chewy texture. Extra-wide dried rice noodles are the more predictable choice for most home kitchens.
Can’t find genuinely soft, fresh noodles? Use dried ones with confidence. A good dried noodle prepared to the right stage is far better than an old refrigerated “fresh” noodle that cracks or turns mushy.
What to Look for at the Store
Asian grocery stores do not always label the product as “Drunken Noodles.” Wide noodles may already be cut into ribbons, or cooked fresh rice-noodle sheets may be sold for you to slice yourself.
Product
Use It?
What to Know
Fresh wide rice noodles / sen yai
Yes
Excellent when genuinely fresh and pliable.
Cooked fresh rice noodle sheets
Yes
Cut into wide ribbons.
Extra-wide / XL dried rice noodles
Yes
Reliable and easy to store.
Pad Thai rice noodles
Can work
Narrower, so the bite and surface area are different.
Dried rice paper / spring-roll wrappers
No
A different product.
Already have Pad Thai noodles? Use them. Expect a narrower bite and less of that broad, slippery fold. That’s the noodle style used in Pad Thai.
When buying fresh wide rice noodles, often sold as sen yai, judge the packet as well as the label. Pliable ribbons are a better sign than a hard, cracked block; if the fresh option looks brittle, extra-wide dried noodles are often the safer choice.
Fresh and Refrigerated Noodles
Soft fresh noodles need very little preparation: keep them dry, separate them gently and handle them lightly.
Refrigerated noodles can be more troublesome. Warm a hard block only until the strands peel apart without cracking. Noodles that still crumble badly after gentle warming are unlikely to improve in the wok; a fresher packet or dried noodles will usually behave better.
Cold and fused fresh rice noodles are usually a flexibility problem, not a hydration problem. Warm only until the ribbons separate; adding water at this stage can leave extra surface moisture for the wok to fight later.
Dried Wide Rice Noodles
Stop hydration before the noodles become completely tender because they’ll continue softening in the sauce. The packet may call for soaking, boiling or a combination. What matters is how the noodle feels, not forcing every brand through the same method.
A quick cold rinse can slow noodles that continue softening after draining; drain them extremely well afterwards. Don’t leave hydrated noodles sitting in a heap for a long time either, because they become increasingly prone to sticking.
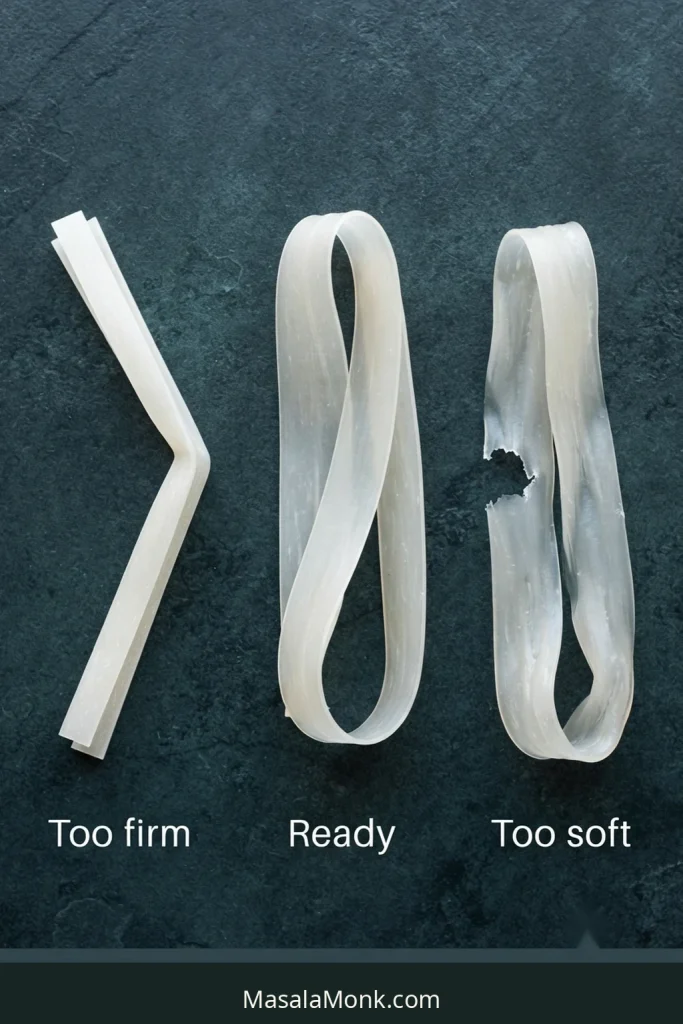
The Bend-and-Bite Test
Too early: the noodle is rigid and snaps instead of bending.
Ready for the wok: it bends around a finger without snapping but still offers slight resistance when bitten.
Too far: it is already completely tender and fragile before stir-frying.
Use the clock to decide when to start checking. Let the noodle decide when to stop.
That slight bite before the wok is deliberate. Dried rice noodles continue softening once sauce surrounds them, so starting fully tender removes the margin you need for coating, reduction and browning without pushing the noodles into mushiness.
Wide noodles give the dish its body. Garlic, chilli and basil give it its identity.
The recipe uses about 20 g garlic for two servings because Pad Kee Mao should smell clearly garlicky. Crushing the garlic and bird’s-eye chillies together spreads their flavour quickly through the oil, although finely chopping works too.
How Spicy Are Drunken Noodles?
Drunken Noodles are normally a spicy dish, but Thai bird’s-eye chillies vary enormously in size and strength. About 2 is a sensible starting point for medium heat in this two-serving batch; adjust according to the chillies you actually have.
Mild: about ½ to 1 Thai chilli. Add some larger mild red chilli if you want more fresh-chilli flavour.
Medium: around 2 Thai chillies.
Hot: around 3–4, depending on the chillies.
Very hot: increase carefully from there.
Reducing the chilli does not require reducing the garlic or basil. A milder plate can still taste unmistakably like Pad Kee Mao.
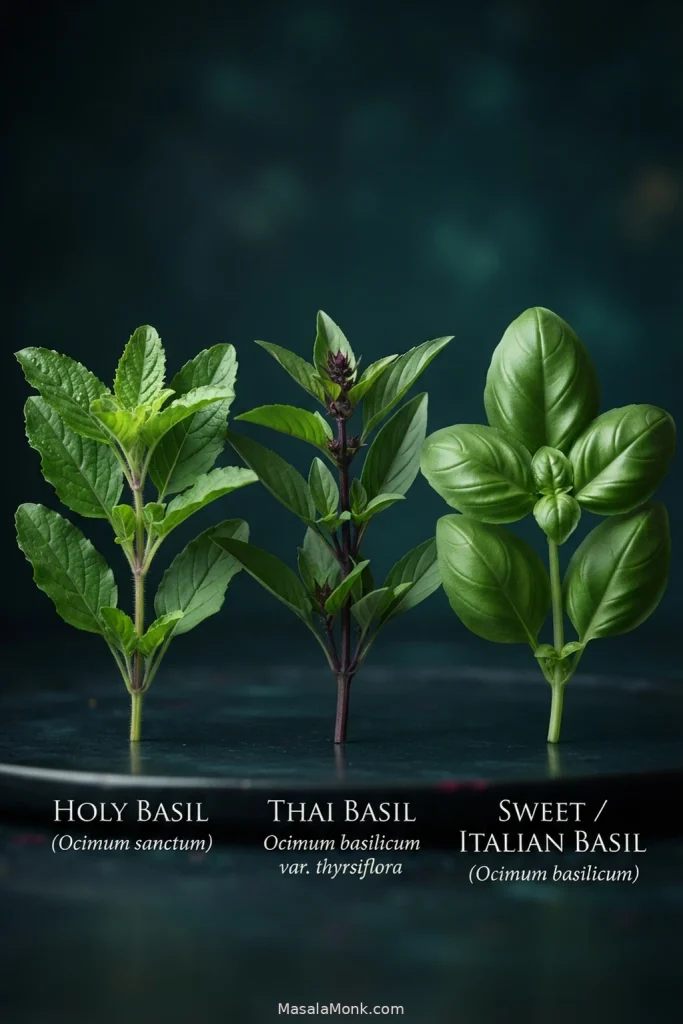
Holy Basil, Thai Basil or Sweet Basil?
Holy basil is the traditional target in many Thai versions, with a peppery, herbal and slightly clove-like aroma.
No holy basil? Thai basil and sweet or Italian basil can both make a good bowl of noodles, but they take the flavour in different directions. Thai basil brings a stronger anise note; sweet or Italian basil is less anise-forward. Use whichever good fresh basil you can reasonably get rather than abandoning dinner over the perfect variety.
Add the basil only at the end, just as you would in Pad Kra Pao, so its aroma stays fresh instead of disappearing into the sauce.
Drunken Noodle Sauce
For two generous servings, the sauce uses 2 tablespoons oyster sauce, 1 tablespoon regular or light soy sauce, 2 teaspoons fish sauce, 1 teaspoon dark soy, 8 g palm sugar or about 2 teaspoons brown sugar, and 1 tablespoon water.
The sauce should coat the noodles without flooding the pan.
Oyster sauce supplies much of the sauce’s body and savoury richness.
Fish sauce brings fermented depth that simply adding more soy does not.
Dark soy is used sparingly for colour and depth; it is not the main seasoning soy.
Sugar rounds out the salty sauces without making the finished noodles taste sweet.
Plain water softens a firm noodle without making the sauce saltier.
Condiment brands vary, so taste the mixed sauce before it reaches the pan. It should be intense but balanced — savoury first, with just enough sweetness to round it out. Dark and black soy sauces also vary considerably by style and brand, so keep the amount small rather than treating them as interchangeable with regular soy sauce.
Add water, not more sauce. Once the seasoning tastes right, use plain water to finish softening a firm noodle instead of adding another dose of salty seasoning.
Use rescue water before you chase browning. First soften a seasoned-but-firm dried noodle, then let that added moisture cook away; once the pan returns to glossy rather than wet, you can create brief browned patches.
Wok, Skillet and Pan Heat
A wok is excellent on a strong gas burner. For most home kitchens, a large heavy skillet is completely fine. On electric or induction, it may even perform better because more of its base sits directly over the heat.
Fresh rice noodles stick easily. A well-seasoned wok or cast-iron skillet is forgiving; otherwise, use a pan you know releases food well and can take high heat. Use the widest pan your burner can still keep properly hot.
Dry ingredients matter too. Wet noodles, dripping greens and a crowded pan all spend heat turning water into steam before browning can begin.
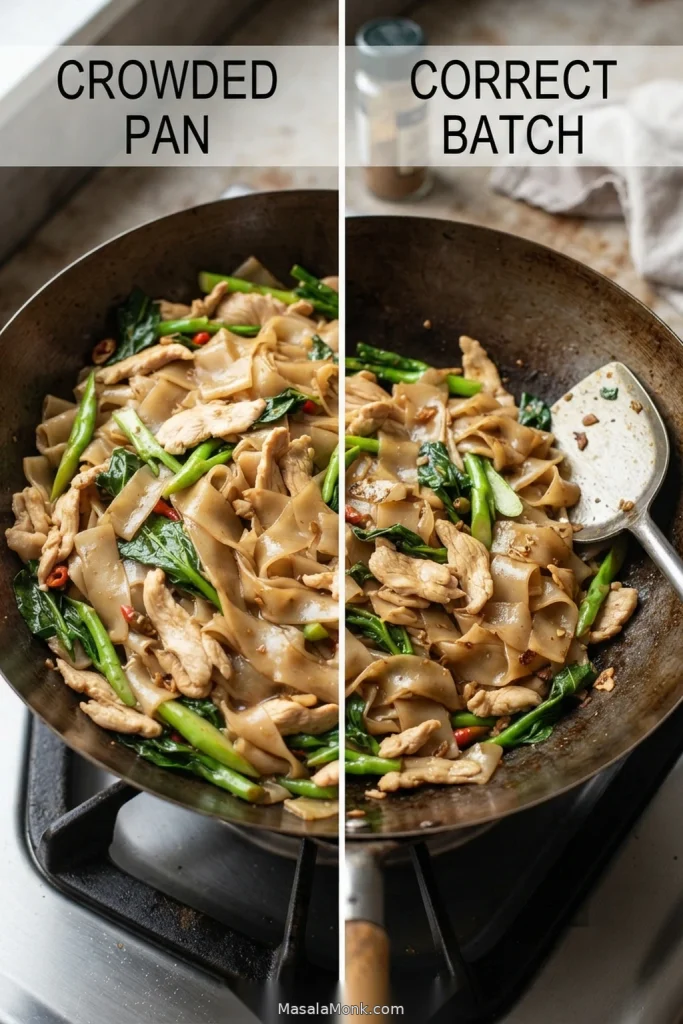
Why Smaller Batches Work
Too much food drops the pan temperature. Vegetables release moisture, noodles start steaming, the sauce takes longer to reduce, and the extra cooking time makes the noodles softer and more fragile.
More stirring will not restore that lost heat. Spread what is already in the pan and give it time to recover; when it is badly overcrowded, taking some food out is the better fix.
For most home stoves, a batch of two generous servings is a sensible upper limit.
Crowding traps moisture and drops pan heat; a smaller batch gives the sauce room to reduce before the noodles soften too far.
The sauce has just gone in and thin liquid is still visible beneath the noodles. Keep cooking; this is too early to chase browning.
Glossy
The sauce has reduced around the noodles and the exposed pan stays mostly clear. Check dried noodles now and add a little water if the centres are still too firm.
Charred
Give sections of coated noodle brief, undisturbed contact with the hot surface. Aim for browned and blistered patches, never blackened noodles.
The glossy stage is the decision point. Taste a dried noodle there: if the centre is still firm, add a little water and reduce again; if it is tender, move on to brief, selective browning.
Why Restaurant Drunken Noodles Can Taste Different
Maybe the version you remember from your neighbourhood Thai place had broad chewy folds, a rush of basil and chilli, concentrated savoury flavour and dark patches where the noodles caught the pan. Your homemade version can taste perfectly good and still somehow miss that combination.
One missing “secret ingredient” is rarely the whole explanation. Start with the aromatics: basil, chilli and garlic. Then look at sauce strength, noodle hydration, pan heat and whether the noodles ever developed browned edges.
Restaurants may also use Thai seasoning sauce, MSG, their own chilli mixture or a house sauce. Some versions layer in additional aromatics such as fresh green peppercorns, grachai (fingerroot) or makrut lime leaves. They can define one restaurant’s version without being essential to every plate of Pad Kee Mao.
For a wetter or sweeter restaurant-style result, make small adjustments only after the basic technique is working. A little extra water, sauce or sugar is easier to judge than changing everything at once.
Darker noodles are not automatically better. Dark soy, seasoning sauces and house blends vary, so judge the result by aroma, noodle texture and browned edges before deciding your Pad Kee Mao needs more dark sauce.
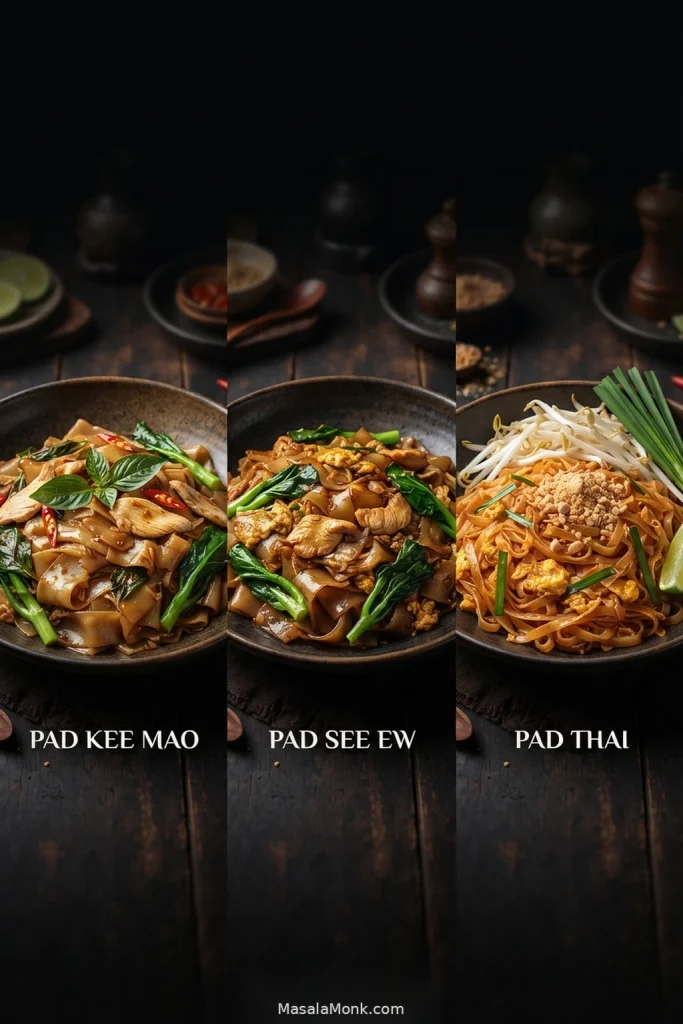
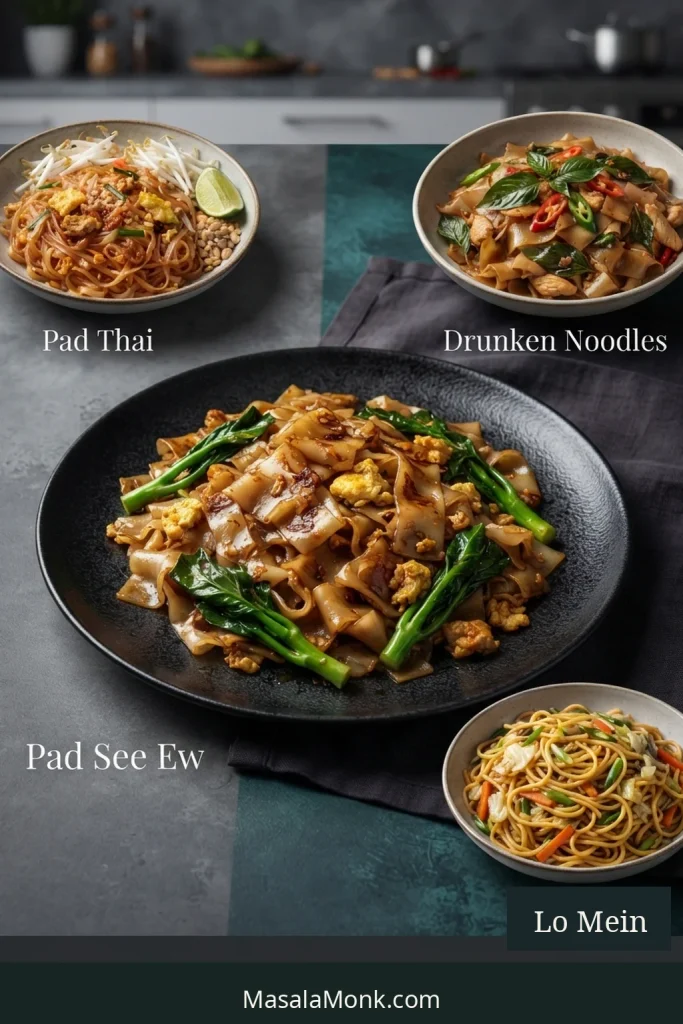
Drunken Noodles vs Pad See Ew vs Pad Thai
Pad Kee Mao is the spicy chilli-basil noodle; Pad See Ew is the milder soy-forward wide noodle; Pad Thai is the tangy tamarind-led noodle.
Pad Kee Mao
Pad See Ew
Pad Thai
Noodle
Wide rice noodles
Wide rice noodles
Usually thinner rice noodles
Main flavour
Chilli, garlic, basil
Soy, browning, gentle sweetness
Tamarind-led sweet-sour balance
Heat
Usually spicy
Usually mild
Usually mild to moderate
Basil
Defining
Not defining
Not defining
Choose it when…
You want spicy basil-garlic noodles
You want milder soy-charred wide noodles
You want tangy, sweet-sour noodles
For broad noodles without the chilli-basil profile, Pad See Ew is the closer match.
Noodle width alone cannot separate Pad Kee Mao from Pad See Ew because both can use broad rice noodles. Use flavour as the stronger clue: chilli-basil versus soy-forward, while Pad Thai usually shifts toward thinner noodles and tamarind.
When Drunken Noodles Go Wrong
A few failures come up again and again. Start with what you actually see in the pan. More sauce or more heat is not the answer to every problem.
The Noodles Are Mushy
Drunken Noodles usually turn mushy because the rice noodles were hydrated too far, cooked too long, or spent too much time steaming in a wet or crowded pan.
Stop cooking as soon as you notice it. Once rice noodles have become fully mushy, there is no reliable way to make them chewy again. Next time, stop the soak sooner, drain thoroughly and reduce the batch size.
The Noodles Are Still Hard
Don’t add more sauce yet. Add 15 ml / 1 tablespoon plain water, fold the noodles through it, wait a few seconds and bite one. Repeat only if necessary.
Repeatedly getting hard centres with the same packet is a useful clue: give that brand a little more hydration before it reaches the wok next time.
Everything Is Steaming Instead of Frying
The pan has probably lost too much heat from crowding, wet ingredients or both.
Don’t keep stirring harder. Spread the food out and let the pan recover. Take some out when it is clearly overcrowded. Next time, dry the ingredients better or cook a smaller batch.
The Sauce Is Too Salty
Condiment brands may be stronger than expected, too much dark soy may have gone in, or extra seasoning sauce may have been added while trying to soften firm noodles.
When the noodles can still absorb moisture, a little plain water can reduce the concentration. There is no perfect way to remove salt already in the dish, so next time reduce the strongest condiment first.
There Is No Char
Noodles that refuse to brown are usually still too wet, sitting in a pan that is too cool, or packed into an oversized batch.
Wait until the sauce has reduced around the noodles. Then leave a section against the hot pan for a few seconds instead of constantly tossing.
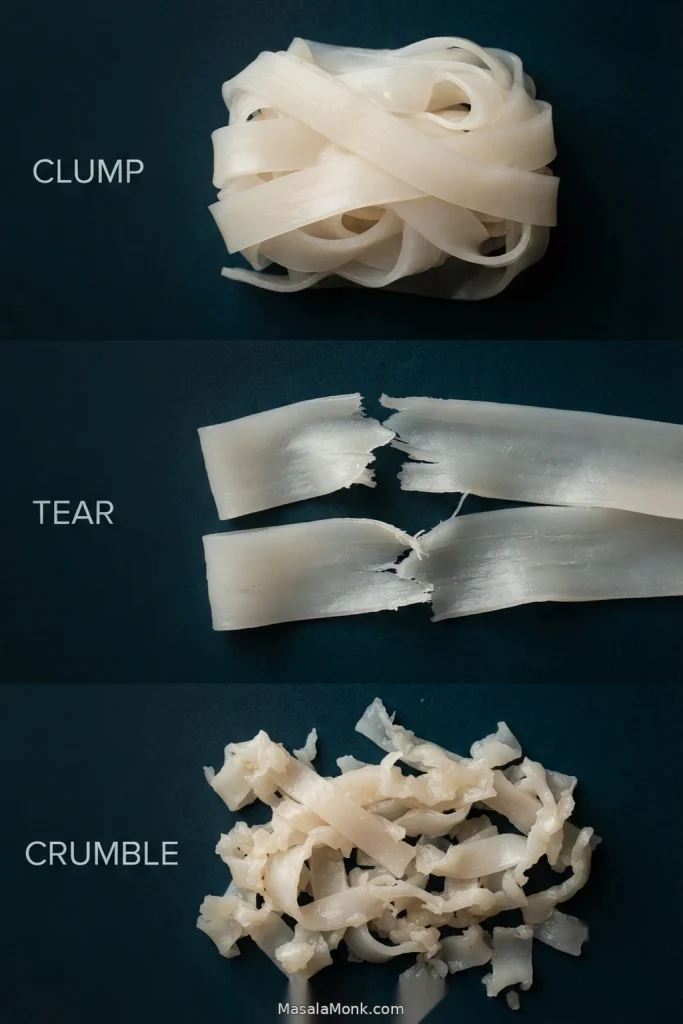
Clumping, Tearing and Other Common Problems
What Happened
Most Likely Reason
Try This
Fresh noodles crumble
Cold, old or brittle noodles
Warm them only until pliable before separating. Noodles that still disintegrate need a fresher packet.
Noodles form one clump
Poor separation or sitting too long after hydration
Loosen them before cooking and get them into the pan sooner.
Noodles stick and tear
Wet noodles, a grabby pan surface, low heat or crowding
Dry them well, use a pan that releases food cleanly and lift rather than scrape.
Garlic tastes bitter
It burned during the aromatic stage
Badly burned garlic is worth restarting before the noodles go in.
The dish is too sweet
Too much sugar or a sweet bottled sauce
Use less sweetener next time. A large dose of fish sauce usually creates a second problem.
It tastes like generic soy noodles
Garlic, chilli, basil or fish-sauce character is too weak
Fix the aromatics and balance first. More soy usually pushes the dish further in the wrong direction.
Finally, diagnose rice-noodle failures by when they appear. Clumps that form before the wok point toward separation or resting; tearing that starts in the pan points toward sticking; crumbling during warm-up often flags brittle refrigerated noodles.
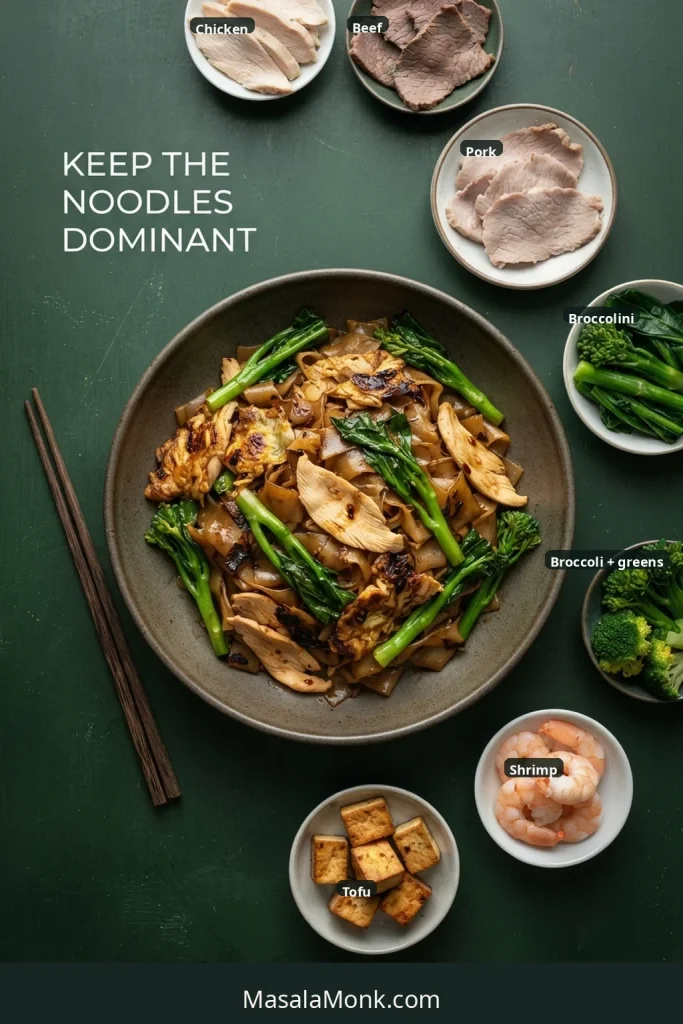
Keep the batch manageable when making substitutions; wetter vegetables or leaner proteins may need slightly different handling.
Protein
Chicken breast: slice thinly and shorten the first sear. It dries faster than thigh.
Beef: slice thinly across the grain and sear quickly. The slicing guide in Beef and Broccoli shows how to identify the grain.
Shrimp or prawns: cook briefly, remove early and return near the end.
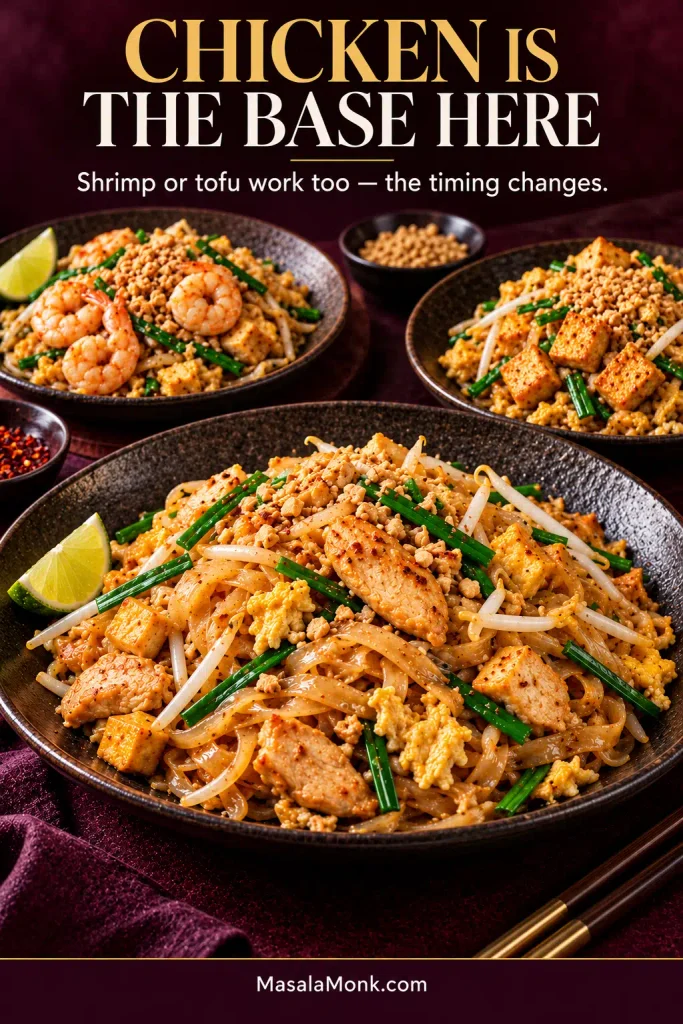
Firm tofu: pat dry, crisp separately and return near the end.
Vegetables
Broccolini: the easiest substitute for gai lan in many supermarkets.
Bok choy: works well but releases more moisture, so give it enough room in the pan.
Ordinary broccoli: cut it fairly small so it cooks in the short stir-fry time.
One or two vegetables is usually enough. Filling the wok with everything in the refrigerator makes heat and moisture much harder to control.
Vegetarian or Vegan
Replacing chicken with tofu is only part of the change because standard oyster sauce and fish sauce are also animal products. Use firm tofu or another suitable plant protein, a vegan oyster-style mushroom sauce, and vegan fish sauce or another balanced savoury alternative.
Taste the sauce before cooking; plant-based condiment brands vary considerably too.
Gluten-Free
Plain rice noodles are typically gluten-free, but the sauces may not be. Check the noodle package when strict gluten avoidance matters, and use suitable gluten-free soy sauce, oyster sauce and seasoning sauce where required.
Chosen your swap?Return to the recipe and keep the same small-batch cooking logic.
Storage, Reheating and Make Ahead
Drunken Noodles are best straight from the pan. Refrigeration firms up rice noodles, and reheating can make already-soft noodles more fragile.
For food safety, cool leftovers promptly, refrigerate them in a covered container and use them within 3–4 days. Texture is usually best much sooner.
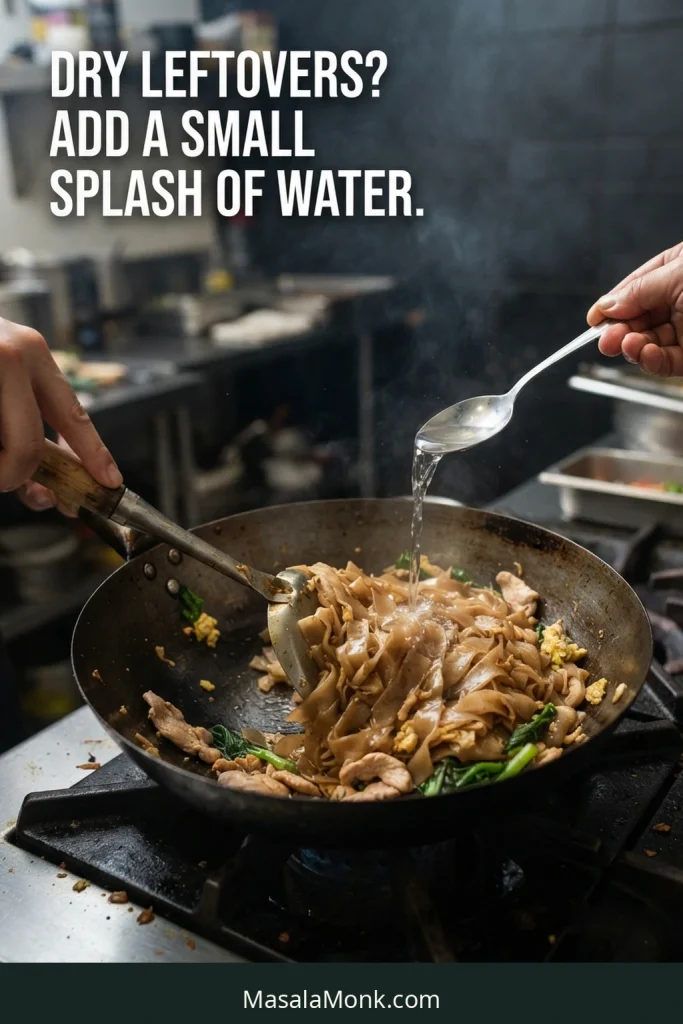
For reheating, a hot skillet works best. Add a small splash of water and turn the noodles only as much as needed to heat them through. In the microwave, cover loosely, heat in short intervals and turn the noodles partway through. For food safety, reheat leftovers until piping hot throughout; USDA guidance uses 74°C / 165°F.
What You Can Prepare Earlier the Same Day
Mix the sauce, cover and refrigerate it.
Slice and season the chicken, then keep it refrigerated until cooking.
Wash, dry and cut the gai lan.
Wash and thoroughly dry the basil, but leave the leaves whole.
Prepare the garlic and chillies closer to cooking, and leave noodle hydration until fairly near the moment the noodles will reach the pan.
If you make these Drunken Noodles, tell us what noodles you used — fresh or dried, the brand if you remember it, and whether you needed any of the rescue water. Rice noodles vary enormously from one packet to another, and those details may help the next person cooking with the same noodles.
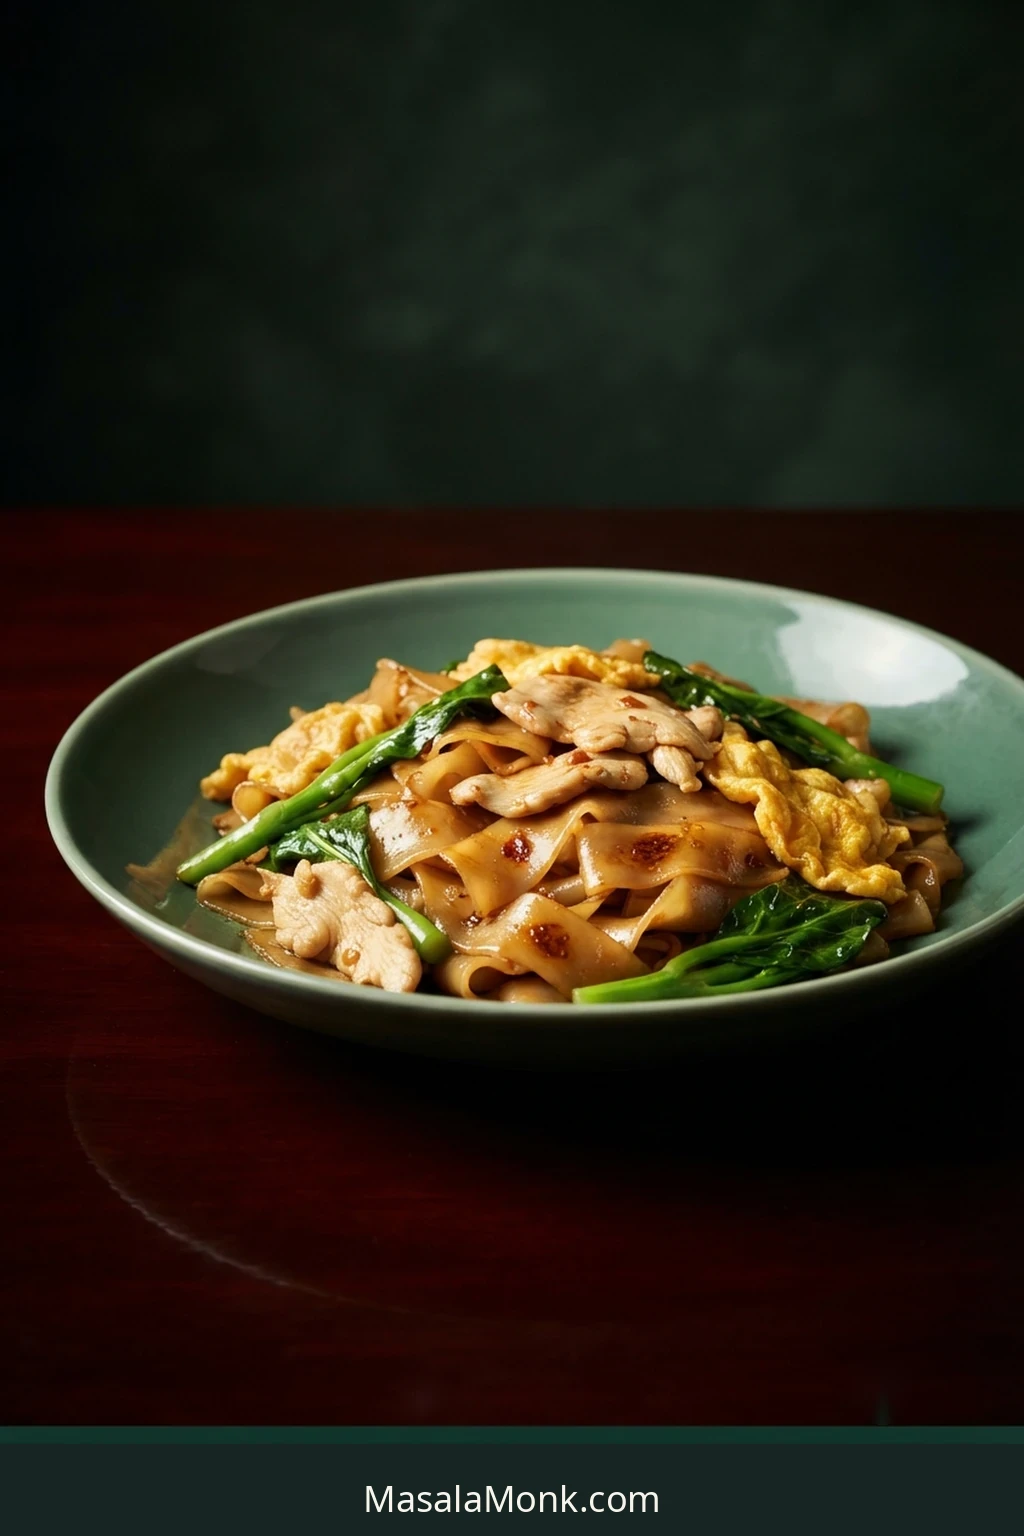
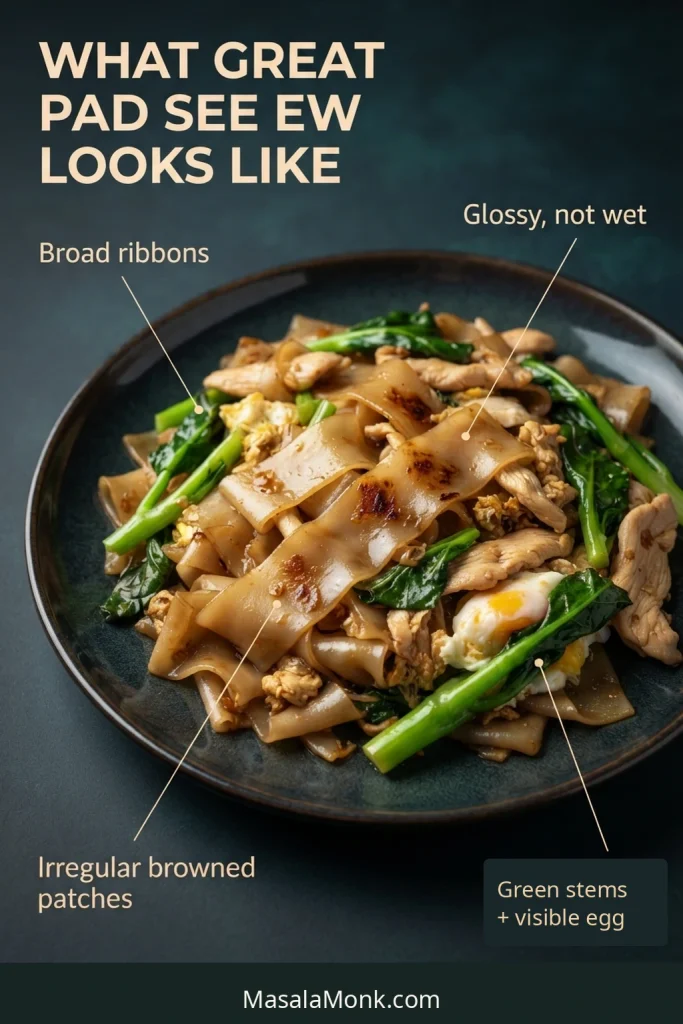
Great Pad See Ew is all about the noodles. They should lift from the plate in broad, chewy ribbons, carrying a glossy savory sauce with darker caramelized patches where they caught the hot pan. Chicken stays juicy, Chinese broccoli keeps some bite, and soft pieces of egg tuck themselves between the noodles.
Pad See Ew is a Thai stir-fried noodle dish of broad rice noodles, soy-based seasoning, egg and Chinese broccoli. The dish is generally mild rather than chile-hot, and its name essentially means “stir-fried soy sauce.”
This Pad See Ew recipe is designed for an ordinary home stove. Once everything is ready beside you, the cooking moves quickly: get the noodles into the right condition, keep the heat lively, and give them enough time against the cooking surface to brown.
Before the wok: check the noodles. They should be separated, pliable and still resilient. Fully cooked fresh noodles should bend without cracking; dried noodles should still have a little firmness left.
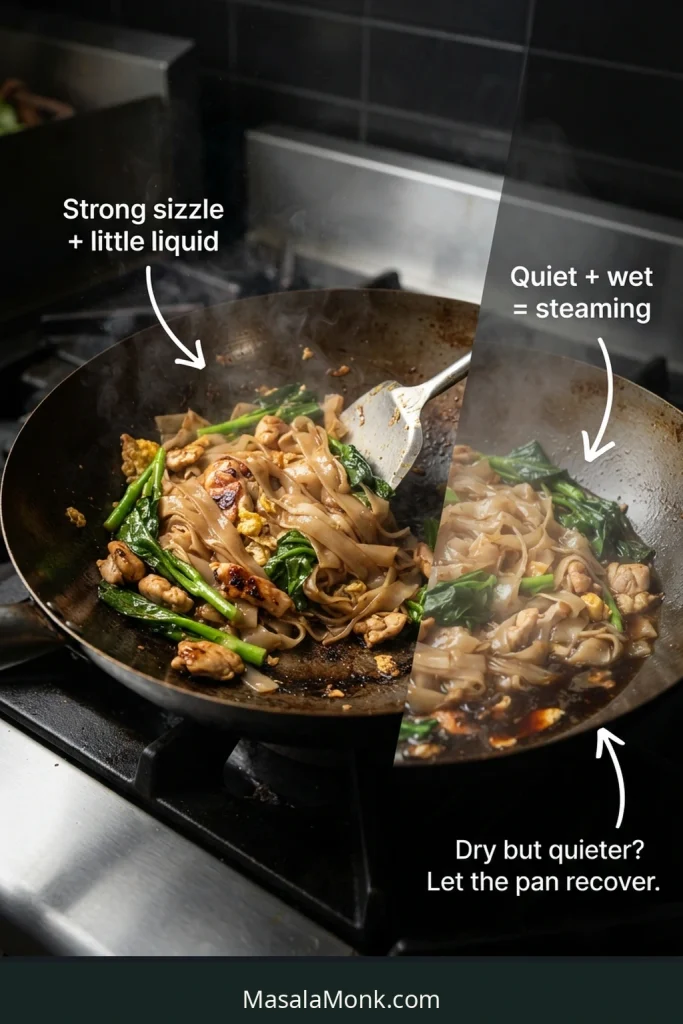
Once they are in the wok: listen to the pan. A lively sizzle with very little loose liquid means the noodles are frying. A quiet, wet pan means they are steaming.
Pad See Ew Recipe
Chewy wide rice noodles with chicken, Chinese broccoli and egg in a savory soy-based sauce. Cooking the noodles in two batches helps a home stove stay hot enough to develop those darker browned patches.
Serves: 2 generously or 3 lighter portions
Prep: about 20 minutes
Cook: about 12–15 minutes
Total: about 32–35 minutes with fresh noodles; allow extra time for dried-noodle hydration
Best pan: seasoned wok or roomy heavy skillet
Noodles
450 g / 1 lb prepared wide rice noodles
Fresh option: 450 g / 1 lb fully cooked fresh sen yai, ho fun, hor fun or other broad rice-noodle sheets or ribbons
Dried option: start with about 10 oz / 280 g wide flat rice noodles. After hydration and draining, weigh out 450 g / 1 lb for the wok; depending on the brand, you may have some left.
Chicken
225 g / 8 oz boneless skinless chicken thighs, sliced about ¼ inch / 6 mm thick
1 tsp / 5 ml Thai light or thin soy sauce
1 tsp / about 3 g cornstarch
1 tsp / 5 ml neutral high-heat oil
Small pinch ground white pepper
Pad See Ew Sauce
2 tbsp / 30 ml oyster sauce
1 tbsp / 15 ml Thai light or thin soy sauce
2 tsp / 10 ml Thai black soy sauce (see ew dum)
1 tsp / 5 ml fish sauce, recommended but optional
2½ tsp / about 10 g granulated sugar
1 tbsp / 15 ml water
¼ tsp ground white pepper
For the Stir-Fry
170 g / 6 oz gai lan (Chinese broccoli), washed and dried very well
2 large eggs
4 garlic cloves, finely chopped
3 tbsp / 45 ml neutral high-heat oil, divided
Optional Quick Chile Vinegar
¼ cup / 60 ml distilled white vinegar
1–2 Thai chiles or another fresh red chile, thinly sliced
Stir the sliced chiles into the vinegar before you begin cooking and leave them to sit until serving.
Method
1. Prepare the Noodles
For fully cooked fresh noodles: If yours come as large sheets, loosen or separate the sheets as their texture allows, then cut them into broad ribbons. Warm them first if they’re too stiff to handle without cracking. Otherwise, separate soft, pliable noodles gently. Fully cooked fresh noodles do not need another boil.
Use the bend as your stop signal when warming refrigerated fresh rice noodles. Once a ribbon flexes easily without cracking, begin separating the noodles; continued warming only uses up more of the noodles’ margin before they reach the wok.
A torn noodle or two is normal. Wholesale shredding is the problem, not an occasional split ribbon.
For dried noodles: Use the package method as a starting point, but begin checking before the stated cooking time. Drain when the noodles bend easily and separate while still retaining a little firmness at the center. If your brand stays especially starchy or sticky, a brief cool rinse can help. Drain extremely well.
After dried wide rice noodles reach the right bend, drain them extremely well. Surface water may seem minor, but it enters the wok with the noodles and spends heat on evaporation instead of frying.
Whichever route you use, weigh out 450 g / 1 lb noodles ready for the wok and divide them into two roughly equal portions.
2. Season the Chicken
Toss the chicken with 1 tsp light soy, cornstarch, 1 tsp oil and a small pinch of white pepper. Let it sit while you mix the sauce and finish the vegetable prep.
3. Mix the Sauce and Prep the Gai Lan
Mix the oyster sauce, light soy, black soy, fish sauce if using, sugar, water and white pepper until the sugar is mostly dissolved. Divide the sauce into two equal portions. Each noodle batch gets one full portion, added in two stages.
Separate the thicker gai lan stems from the leafy portions. Split very thick stems lengthwise or slice them on the diagonal so the pieces are no thicker than roughly ⅓ inch / 8 mm. Leave the leafy tops larger because they cook much faster.
After cutting gai lan, dry the stems and especially the folded leafy tops well. Otherwise, trapped water flashes into steam and cools the wok before the Chinese broccoli or rice noodles get much chance to fry.
4. Cook the Chicken
Heat a wok or large heavy skillet over high heat until thoroughly hot. Add 1 tbsp / 15 ml oil, then spread the chicken into a single layer.
Let the first side sear briefly before tossing. Continue until the chicken is browned in spots and reaches 165°F / 74°C at the thickest piece you can measure accurately, usually around 3–4 minutes for thin slices.
Cooking the chicken separately is also moisture management. Once the slices are browned and cooked through, removing them gives the wok time to recover before the more heat-sensitive noodle stage begins.
Transfer the chicken to a plate. It will come back near the end, once the wok has had a chance to get hot again.
5. Start the First Batch
Let the empty wok heat again. Add 1 tbsp / 15 ml oil, half the garlic and half the gai lan stems.
Stir-fry for about 20–30 seconds, just until the garlic smells fragrant and the stems brighten. Push them toward one side.
Crack in 1 egg. Give the bottom several seconds to begin setting, then scramble it into soft pieces.
6. Add the Noodles
Add one noodle portion. Scoop and fold only enough to distribute the egg, garlic and oil.
Spread the noodles across as much of the hot surface as possible and leave them alone for about 20–30 seconds.
Look at the exposed hot metal around the noodles. If one portion blankets the entire wok edge to edge, the batch may simply be too large for that pan to shed moisture and recover heat efficiently.
Listen. You want an energetic sizzle. A suddenly quiet wok or liquid collecting underneath means the heat needs a few seconds to catch back up before anything else goes in.
7. Sauce and Brown
Turn the noodles once, then add half of this batch’s measured sauce around the hot sides of the wok.
Staging the sauce matters as much as where it lands. Adding part of the measured portion first limits the sudden liquid load, so the wok has a better chance to stay energetic before the final sauce addition.
Scoop and fold just enough to coat. Spread the noodles again and leave them undisturbed for another 15–30 seconds. Irregular darker patches should begin appearing where parts of the noodles have sat directly against the hot surface.
True contact browning looks toasted and comparatively dry, not simply darker and wetter from extra soy sauce. That distinction is useful when deciding whether pale noodles need more pan contact or more seasoning.
Add the remaining sauce for this batch and toss until it is absorbed. The noodles should look glossy, not wet.
8. Finish the Batch
Add half the gai lan leaves and half the cooked chicken. Toss for another 30–60 seconds, just until the leaves wilt and everything is hot.
Move the finished batch straight to a serving platter.
9. Cook the Second Batch
Let the wok become hot again. Add the final 1 tbsp / 15 ml oil and repeat with the remaining garlic, gai lan stems, egg, noodles, sauce, leaves and chicken.
The first batch will tell you a lot about your stove. If it browned slowly or silenced the sizzle, give the wok a little more preheating time before the second batch.
Bring the two finished batches together on the serving platter.
10. Serve
Serve immediately. Put chile vinegar, chile flakes and extra white pepper on the table for anyone who wants more brightness, heat or aromatic warmth.
The movement to remember: spread → wait → sauce → fold → brown → finish. Give the noodles time against the hot surface instead of stirring continuously.
Recipe Notes
Still firm in the wok? Add 1 tbsp / 15 ml water at a time and let it absorb before checking again. If you used dried noodles, see the dried-noodle texture guide before the next batch.
Using nonstick: stay within the cookware manufacturer’s heat limits and avoid leaving an empty nonstick pan over maximum heat while chasing extra browning.
Recipe development note: This recipe synthesizes published Thai-cooking references, established recipe methods and recurring home-cook troubleshooting; it has not been tested in the MasalaMonk kitchen.
What the Finished Noodles Should Look and Feel Like
The clock can only get you close. The noodles themselves tell you when to stop.
A noodle lift can expose texture problems quickly. If picking up a few ribbons drags most of the batch with them, the noodles may be overly sticky or soft; good ribbons still separate with some structure.
Lift: broad ribbons rather than one sticky clump
Chew: supple all the way through, with enough resilience that they do not feel bloated or mushy
Surface: glossy brown overall with irregular darker caramelized patches
Sauce: clings to the noodles, with almost no loose liquid underneath
Gai lan: crisp-tender stems and wilted but still green leaves
Egg: tender pieces still visible between the noodles
Aroma: savory soy with a toasted, lightly smoky edge
No single cue has to look exaggerated. A lighter noodle patch is perfectly normal when the ribbons still separate, the sauce has absorbed and the vegetables and egg have reached their proper texture.
You are not looking for every ribbon to turn dark. A few toasted patches against softer chewy noodles make each bite more interesting. Once those signs are there, stop cooking; another minute is more likely to soften the noodles than improve them.
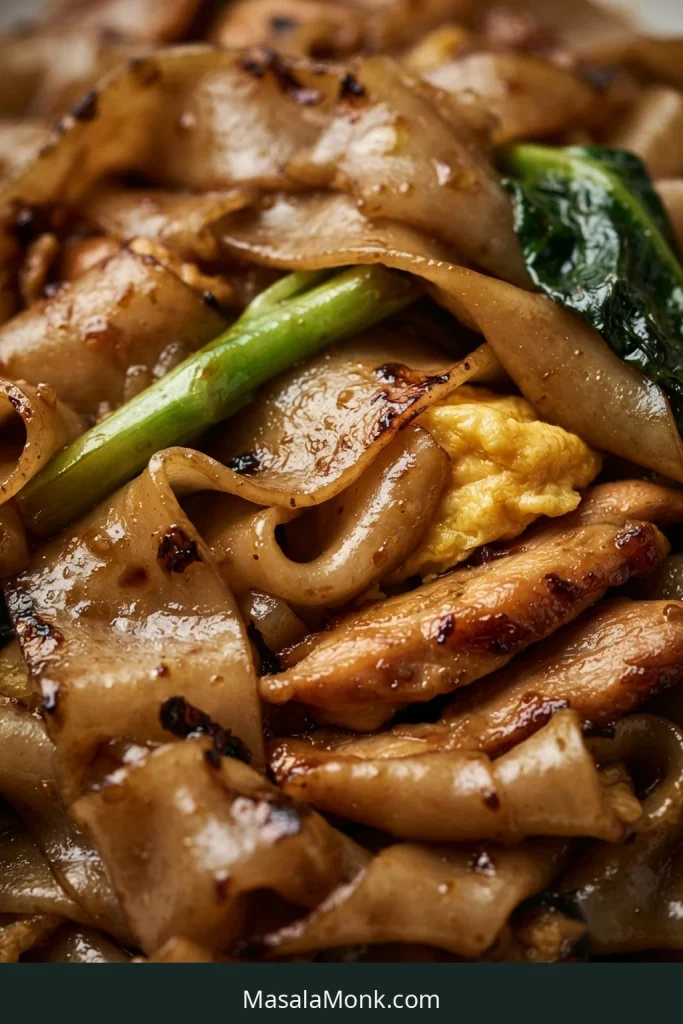
At this distance, the sauce should still let the rice-noodle surface show through. A thin sheen and isolated toasted patches preserve texture; a thick, uniformly dark coating usually tells a very different story.
Pad See Ew Noodles: What to Buy and How to Prepare Them
If you are standing in an Asian grocery store trying to work out which white packet becomes Pad See Ew, the labels do not always make the decision easy.
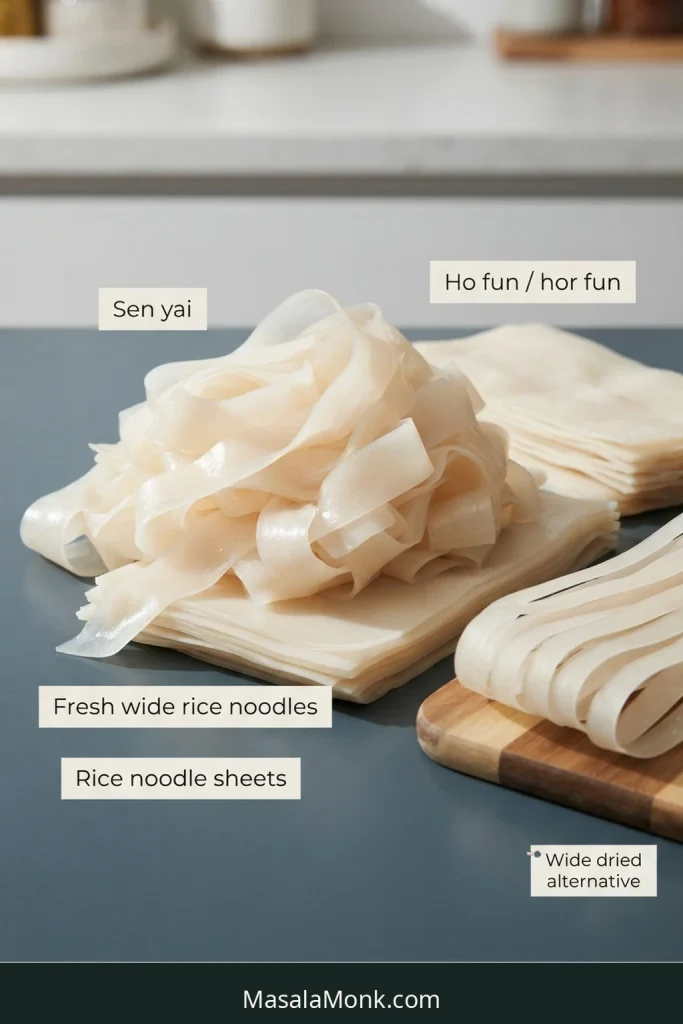
For the broad-noodle version most people associate with Pad See Ew, fresh sen yai give the characteristic wide, supple chew. Depending on the market, you may also see ho fun, hor fun, chow fun noodles, fresh wide rice noodles or rice noodle sheets. Look for broad, pale white-to-translucent sheets or ribbons rather than rice vermicelli or narrow Pad Thai-style sticks.
When package names are inconsistent, look through the wrapper at the noodles themselves. Width, whether the product is loose or stacked, and whether the noodles are soft or rigid can tell you more than an imperfect English translation.
What Kind of Noodle Did You Buy?
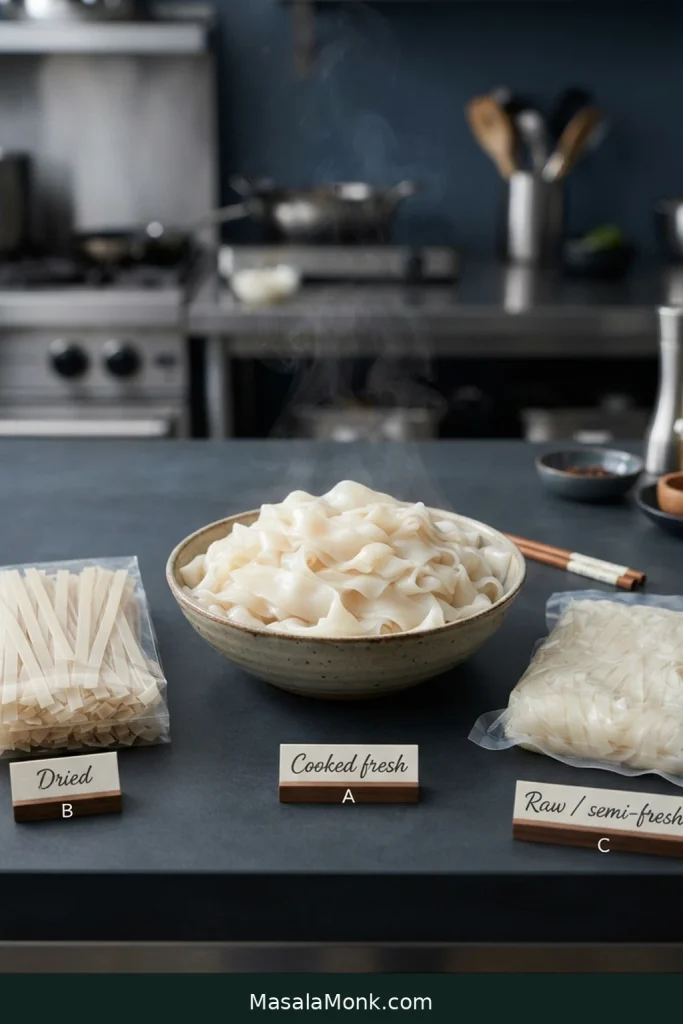
A packet labeled “fresh rice noodles” does not always tell you whether the noodles are already cooked. Look at what is actually inside.
What You Have
What to Do
Soft, fully cooked fresh ribbons or sheets
Warm only if stiff, then separate gently. They do not need another boil.
Dry, rigid flat rice noodles
Hydrate until pliable but still slightly underdone.
Refrigerated or vacuum-packed raw/semi-fresh noodles
Follow the package’s actual cooking method; “fresh” alone does not tell you whether they are already cooked.
Misidentifying the product changes the whole preparation. Boiling already-cooked fresh ribbons removes their remaining margin, while raw or semi-fresh noodles may genuinely need the package’s cooking step before stir-frying.
Fresh Rice Noodles
Fully cooked fresh rice noodles become fragile after refrigeration, which is why a cold block can crack when you pull at it. Warm stiff noodles only until they become flexible enough to separate without fighting you.
Quick check: Bend one ribbon. A noodle that cracks instead of flexing needs a little more warming.
If good fresh noodles are impossible to find and you want to make the sheets themselves, Pailin Chongchitnant’s fresh ho fun noodle guide covers that separate process in detail.
Using Dried Rice Noodles
Dried noodles have the opposite problem. Once they are completely tender before the wok, there is very little margin left for absorbing sauce and surviving the final stir-fry.
Package timing is only a starting point; the noodle’s texture matters more. The noodles should bend and separate easily while the center still retains a little resistance. Drain thoroughly. A brief cool rinse can help if your brand tends to stay especially starchy or sticky.
State
What It Feels Like
What Happens in the Wok
Too firm
Stiff, difficult to bend, noticeably raw at the center
The noodles stay thirsty and can leave the finished pan looking dry
Ready
Pliable and separated but still a little resilient
They finish cooking as the sauce absorbs while keeping their chew
Too soft
Already completely tender, swollen or fragile
They are much more likely to become gummy, tear or turn mushy
Test one noodle rather than judging the whole bowl by time alone. A useful noodle bends without snapping yet still holds itself together; swollen ribbons that slump or tear easily have already moved past the best stir-fry window.
Why Weigh Them After Preparation?
Soak two brands of dried wide rice noodles and they can come out surprisingly different in weight and softness. A single dry-to-fresh conversion sounds neater than it really is.
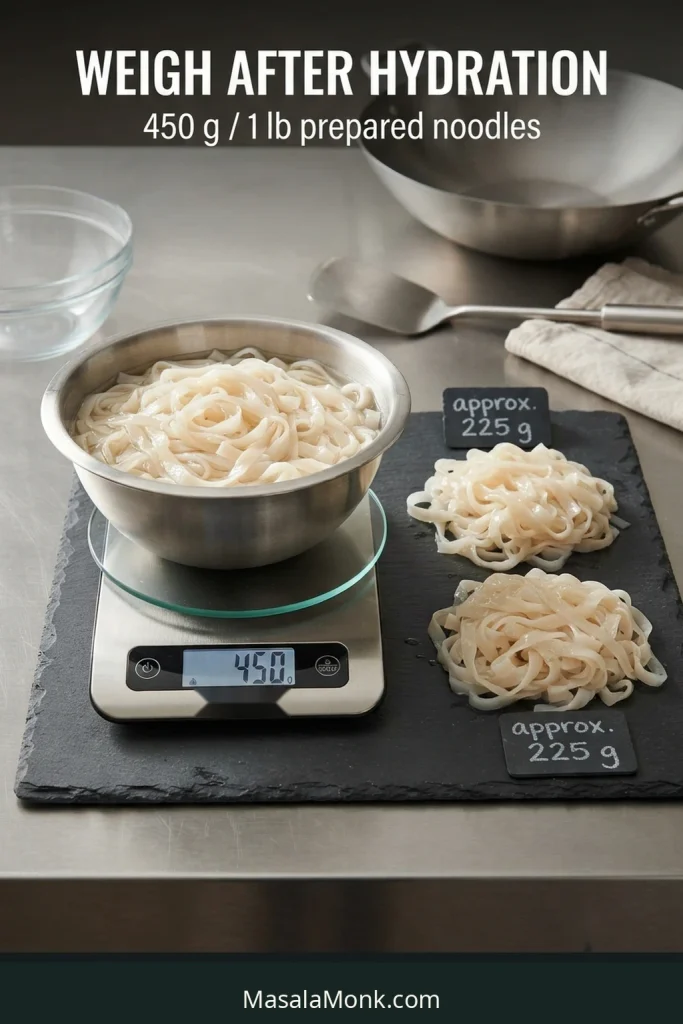
The sauce is calibrated for 450 g / 1 lb of noodles going into the wok. Fresh cooked noodles can be weighed straight from the package; dried noodles are easiest to measure once hydrated and drained. It takes another minute, but it makes the sauce much easier to judge.
Weigh the noodles, not trapped soaking water. Thorough draining makes the 450 g / 1 lb prepared weight a more meaningful calibration for both the sauce and the two home-stove batches.
The soaking logic is similar in our Pad Thai recipe, even though that dish heads in a very different direction once tamarind and its own finishing ingredients enter the pan.
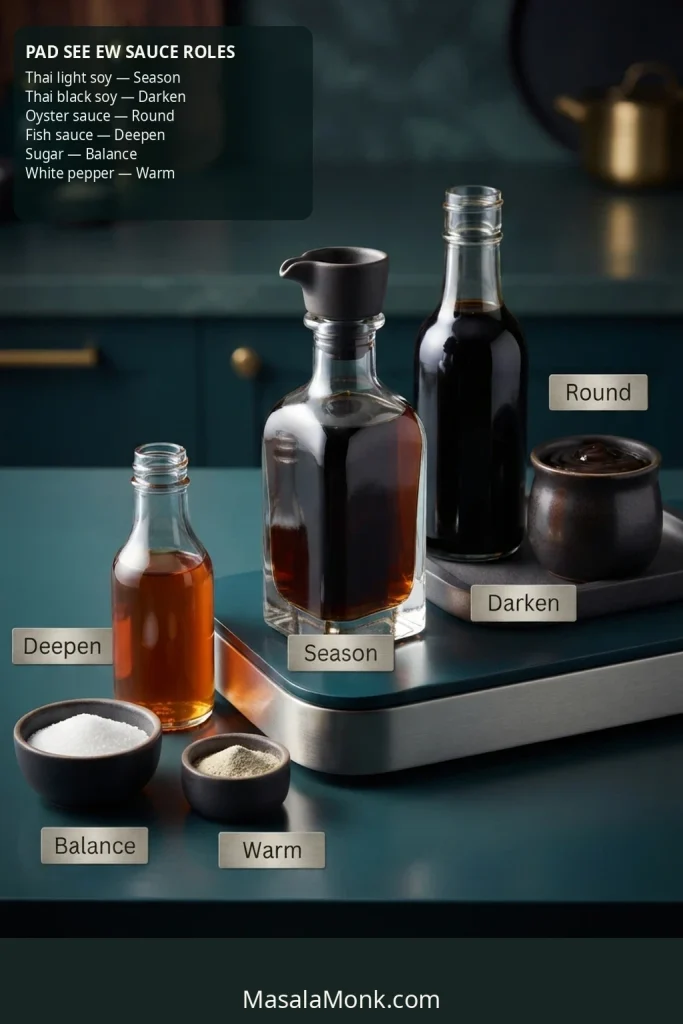
The collection of brown bottles becomes much easier to understand once you stop treating them as interchangeable versions of soy sauce.
Ingredient
Its Job
Thai light/thin soy
Main salty, savory seasoning
Thai black soy
Darker color and deeper soy character
Oyster sauce
Rounded umami and body
Fish sauce
A small layer of fermented savory depth
Sugar
Rounds the salty edges and adds gentle sweetness
White pepper
Aromatic warmth without making the noodles chile-hot
When substituting, match the ingredient’s job rather than its color. In particular, black soy supports color and depth; it should not quietly become the main seasoning just because a replacement produces paler noodles.
The finished sauce should taste deeply savory and gently sweet, with enough oyster sauce to round the soy without leaving the noodles sticky or heavy. The noodles’ exact shade of brown matters much less than that balance.
Soy Sauce Substitutions
No Thai light soy? Regular all-purpose soy sauce or Chinese light soy is a practical fallback. Choose one that is not labeled dark or sweet, and keep in mind that saltiness varies from brand to brand.
Chinese dark soy can replace the measured Thai black soy, but some brands are noticeably saltier. Don’t add extra for color; slightly lighter finished noodles are better than an oversalted dish.
If the labels in your pantry are confusing, our guide to soy sauce styles goes further into light, dark, sweet and all-purpose soy sauces.
Fish Sauce and Acidity
Fish sauce isn’t universal in Pad See Ew. This recipe uses a teaspoon for background fermented depth. Prefer to leave it out? Omit it, then taste the finished noodles before deciding whether the seasoning needs anything else.
Vinegar sometimes appears in the wok sauce too. Here, the sauce stays soy-forward and the bright acidity comes at the table through prik nam som, letting each person sharpen their own plate.
Sizzle or Steam? Read the Wok
That toasted, smoky aroma—part of what people mean by wok hei—comes from intense heat, fast evaporation and rapid contact with the hot cooking surface. Forget chasing an exact temperature. The sound and moisture in front of you tell you more.
Strong sizzle, almost no loose liquid: moisture is cooking off fast enough for parts of the noodles to fry against the wok.
The sizzle fades but the wok stays dry: the metal has cooled under the food. Give it a few seconds to catch back up.
Quiet wok with liquid underneath: now the noodles are steaming. Wet gai lan, poorly drained noodles, too much food or too much sauce at once can all push the cook in that direction.
The easy-to-miss state is a quieter wok that is still dry. That is a heat-recovery pause, not yet a steaming failure, so give the metal a few seconds before adding another cool or wet ingredient.
Think of the wok as having a heat budget. Every cold or wet ingredient spends some of it. Cooking less at once gives a home stove much more chance to keep up.
Gas, Electric or Induction?
A restaurant gas wok burner makes intense browning easier, but gas is not required for good Pad See Ew. A flat-bottom carbon-steel wok works well on many home cooktops, while a broad heavy skillet is a practical alternative when it gives you better contact with the cooktop. Induction and conventional electric burners can brown the noodles too; give the cookware time to get properly hot.
More Browning on a Home Stove
Start with a properly hot wok, keep the noodles and greens well drained, and leave the noodles undisturbed long enough to pick up browned patches. Keep each batch around 225 g / 8 oz so the stove can recover. If the seasoning already tastes right, a pale batch needs more heat, not more sauce.
Use both moisture and flavor to diagnose pale noodles: pale + wet points toward steaming, while pale + dry + already well seasoned points toward insufficient heat or contact time.
Pad See Ew Troubleshooting
Most common failures trace back to noodle preparation, moisture or heat. Match what you see to the problem below before changing the sauce.
Noodle Problems
What Happened
Likely Cause
What to Change
Fresh noodles shattered while separating
Cold, brittle noodles or too much force
Warm until pliable, then peel apart gently
Fresh noodles stuck badly to the wok
Wok not hot enough, too little oil or a sticky cooking surface
Preheat properly, use enough oil and favor cookware you know releases well
Dried noodles turned mushy
They were fully softened before the wok
Stop hydration while they still retain slight resistance
Dried noodles are still hard
They entered the wok underhydrated
Add 1 tbsp / 15 ml water at a time and let it absorb before checking again
Noodles feel gummy
Overhydration, excess surface starch, too much liquid or weak heat
Stop hydration sooner, drain thoroughly and cook smaller batches
Flavor and Heat Problems
What Happened
Likely Cause
What to Change
No smoky or toasted character
The noodles mostly steamed
Use drier ingredients, cook less at once and leave the noodles undisturbed a little longer
Too salty
Wrong soy style/brand or too much sauce for the amount of noodles
Check the soy styles and confirm that 450 g / 1 lb prepared noodles actually went into the wok
Extremely dark or too sweet
A much sweeter or darker soy replaced the primary light soy
Use light/thin soy for most of the seasoning and black soy in the smaller supporting role
Salty enough but still tastes flat
Weak browning or the plate needs brightness
Improve browning next time; at the table, try a little chile vinegar before adding more salty seasoning
Gai lan stems hard but leaves limp
Thick stems and leaves cooked for the same amount of time
Slice or split the stems and give them a head start
A doubled recipe turned soggy
Too much food went into each batch
Cook more batches instead of making each one larger
Pad See Ew is a noodle dish first. Keep the protein and vegetables in supporting proportions so the noodles still have room to fry properly.
Whatever protein or vegetable you swap in, control its moisture before the noodles arrive. Dry tofu, quick-cooked shrimp and separately browned meat all protect the hotter, drier pan conditions the rice noodles need later.
Chicken thigh: the default here and the most forgiving choice at high heat.
Chicken breast: slice it thinly and remove it promptly once cooked through so it does not dry out.
Beef: thin slices work best; a light cornstarch marinade is enough for most cuts.
Pork: use thin slices of a quick-cooking cut and cook them before the noodles.
Shrimp: cook quickly and remove as soon as they turn opaque; return them near the end so they stay tender.
Firm or extra-firm tofu: brown it separately before adding.
Broccolini: the closest widely available stand-in for gai lan.
Broccoli + a leafy green: a workable fallback when gai lan and broccolini are unavailable.
Gai lan’s slight bitterness is especially good against the sweet-savory noodles, so keep some leafy green in the dish even when you substitute the stems.
For beef, thin slicing across the grain matters more than buying an expensive cut. The slicing and light-velveting method in Beef and Broccoli is useful here too.
Vegetarian or Vegan Pad See Ew
Use firm or extra-firm tofu and replace the oyster sauce with a vegetarian mushroom-based oyster-style sauce. Omit the fish sauce or use a suitable vegan savory seasoning. For a vegan version, leave out the eggs as well.
Dry the tofu well and brown it separately before it joins the noodles. Wet tofu cools a hot wok surprisingly quickly.
Pad See Ew vs Pad Thai, Drunken Noodles and Lo Mein
Dish
What Sets It Apart
Pad See Ew
Broad rice noodles, soy-driven seasoning, egg, Chinese broccoli and irregular caramelized edges; generally mild
Pad Thai
Usually thinner rice noodles with a brighter sweet-sour profile led by tamarind
Pad Kee Mao / Drunken Noodles
Usually hotter and more aromatic, commonly using fresh chile and Thai basil
Lo Mein
Chinese-style wheat or egg noodles with a softer, more uniformly sauce-coated finish
Start identification with the noodle itself: broad rice ribbons narrow the choice toward Pad See Ew or drunken noodles, thinner rice noodles suggest Pad Thai, and yellow-tan wheat or egg noodles point toward lo mein. Then use the seasoning and greens to confirm it.
For softer wheat noodles with more uniform sauce coverage, Chicken Lo Mein heads in that direction instead.
Chile Vinegar and Table Seasoning
Pad See Ew works as a one-plate meal. At the table, a few seasonings let each person adjust the noodles to taste.
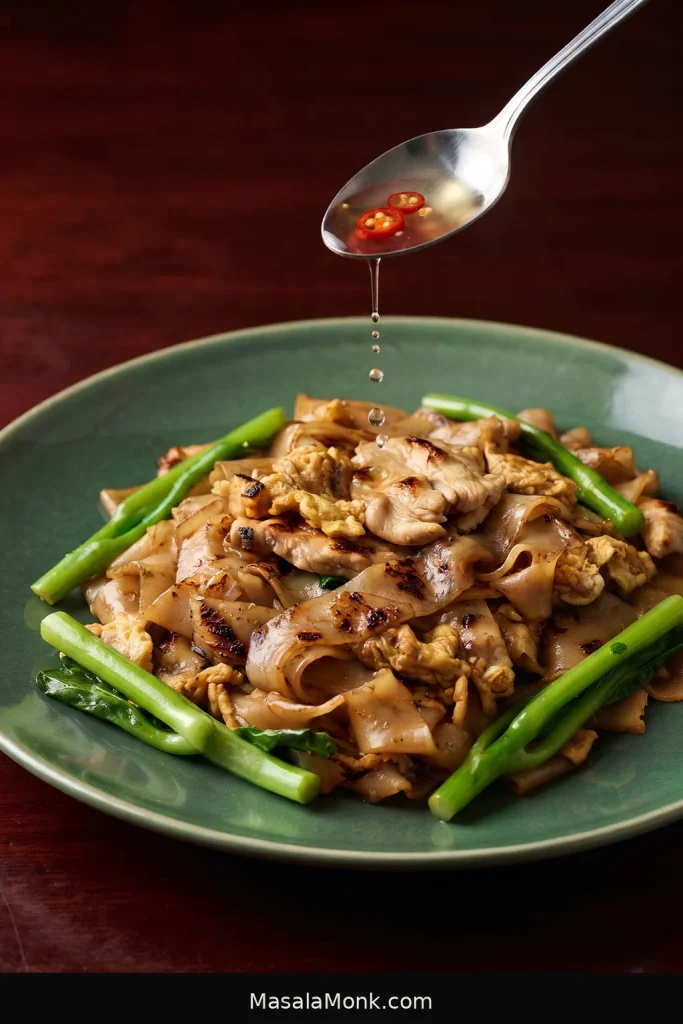
The quick prik nam som from the recipe card is especially useful here. A small spoonful adds acidity and fresh chile heat, cutting through the glossy soy coating without changing the whole wok.
Add chile vinegar like a table seasoning, not a dressing: start with a small spoonful, taste a bite, then decide whether the plate wants more acidity or chile heat. That keeps the adjustment personal instead of soaking the noodles.
Extra white pepper, chile flakes and a little sugar can also go on the table.
If you want something cool and crunchy beside the noodles, a sharp cucumber salad with lime, vinegar, chile and herbs works well.
Prep Ahead, Store and Reheat
You can mix the sauce, season the chicken, wash and cut the gai lan, chop the garlic and make the chile vinegar ahead. Keep the chicken refrigerated until cooking. Leave the final noodle preparation and stir-frying until close to serving.
Leftovers
Refrigerate leftovers within 2 hours—or within 1 hour when the surrounding temperature is above 90°F / 32°C—and use them within 3–4 days. Rice noodles will soften noticeably before that window is over.
Reheat leftovers to 165°F / 74°C. Cold rice noodles can be brittle, so let the heat begin softening them before stirring aggressively.
A dry portion usually needs only a small splash of water. Extra soy-heavy sauce can make the noodles saltier without bringing back the chew they had fresh from the wok.
Let the small splash of water turn to steam and loosen the cold noodles before you start tossing firmly. Once the ribbons move freely again, stop adding water; too much will trade dryness for softness.
Pad See Ew is still at its best straight from the pan, when the noodles have their fullest chew and those browned edges are fresh. Leftovers are still good, but expect softer noodles and let them warm before tossing them around too much.
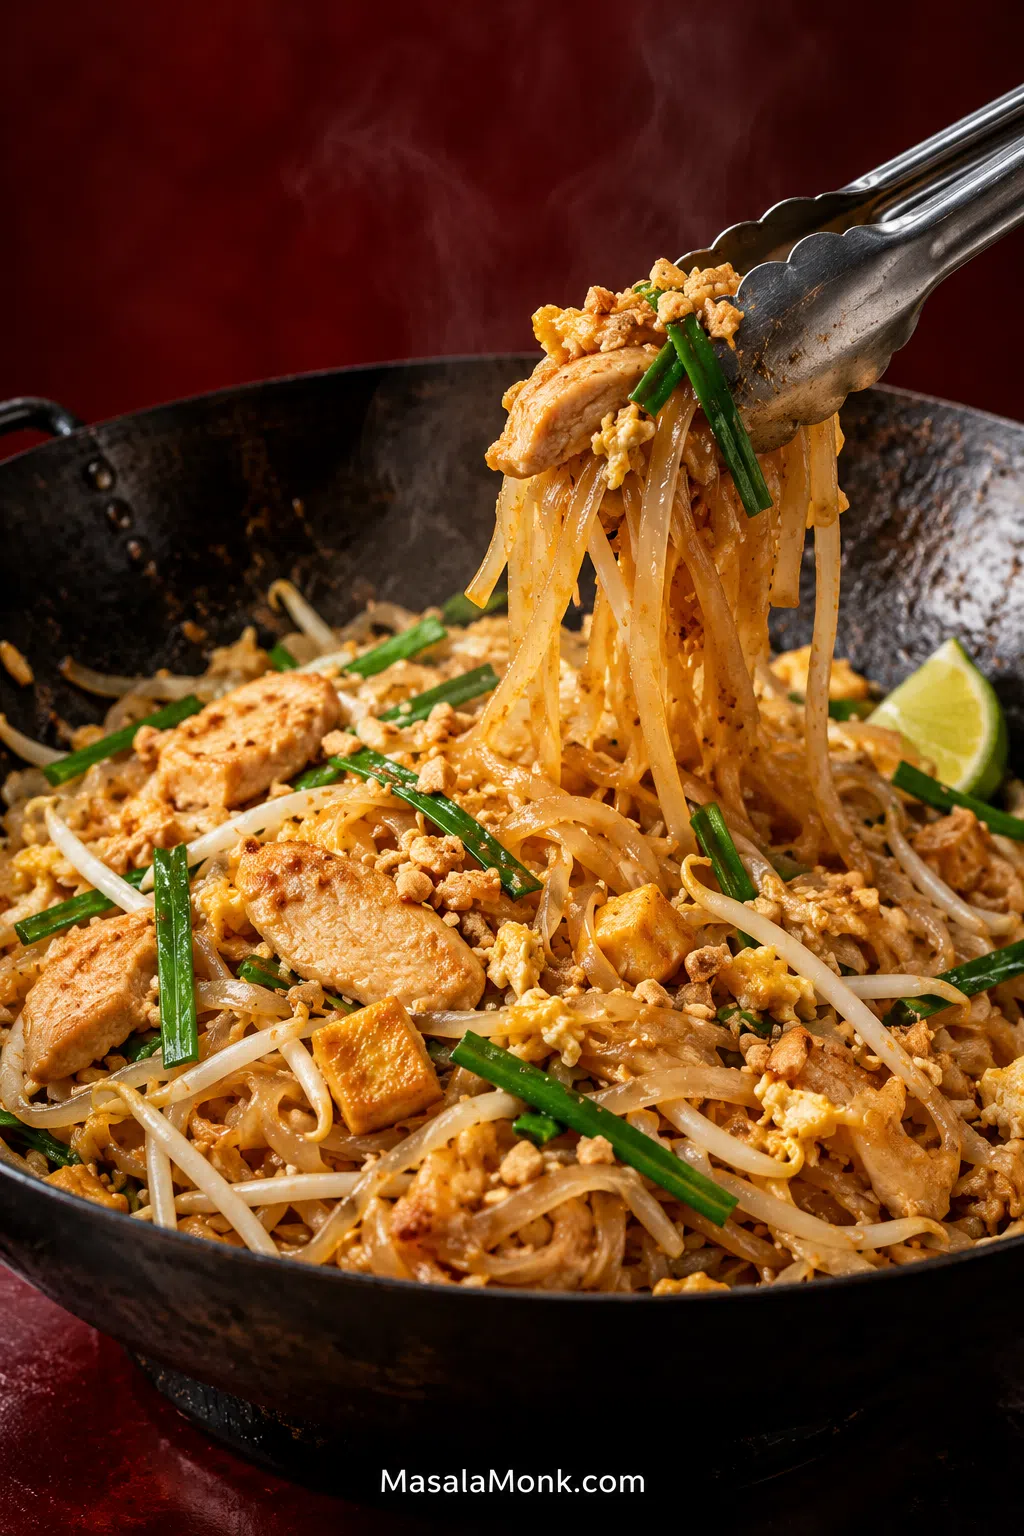
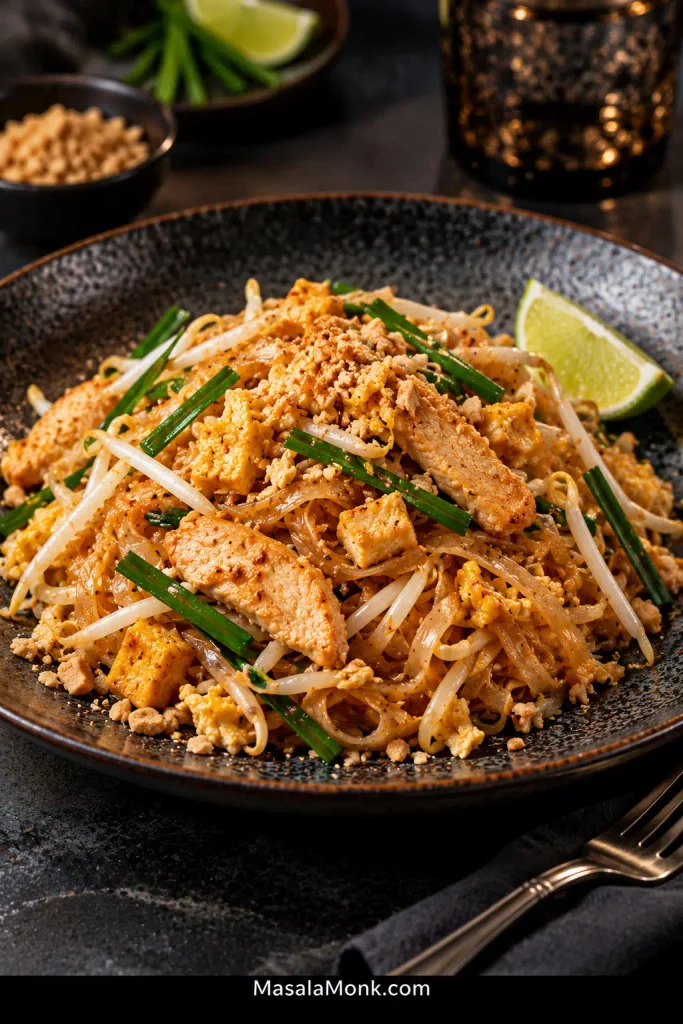
Good Pad Thai is all about contrast: chewy rice noodles glazed with tamarind sauce, tender chicken and egg, crisp bean sprouts, roasted peanuts and fresh lime. Nothing should feel drowned or heavy. You want chew in the noodles, crunch in the sprouts, and sauce that clings rather than pools.
Most trouble starts before the noodles even hit the pan. Soak them too far and they turn soft or gummy. Use an unexpectedly strong tamarind and the sauce can become painfully sour. Crowd the skillet and everything starts steaming together.
Soak the noodles short of done. Let the tamarind, fish sauce and palm sugar season them in the pan. Once the flavor is right, switch to water if they need more cooking.
The clock is only a rough guide. These are the cues that matter.
Watch
What you want
Soaked noodles
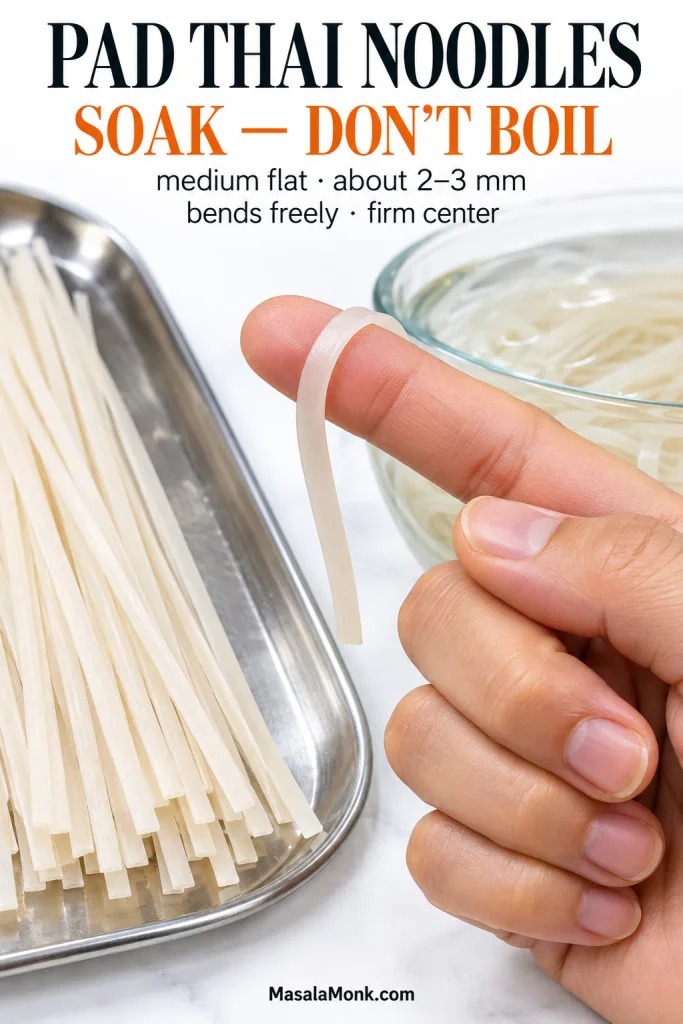
Flexible enough to bend around a finger, with a firm center that is not ready to eat yet.
Crowding
Room to lift and turn the noodles without piling them into a steaming heap.
Sauce
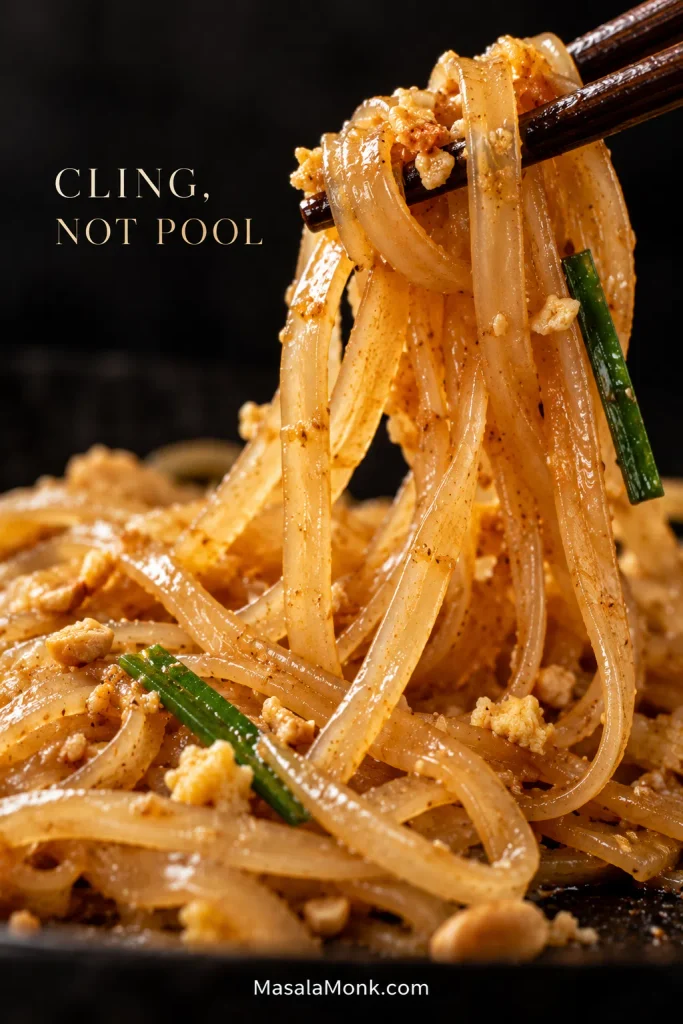
Clinging to glossy noodles, with very little loose liquid underneath.
Finished noodles
Tender through with a pleasant chew.
Sprouts & chives
Warmed and lightly wilted, with fresh crunch left.
After tossing, pull a small patch of noodles aside and look at the pan. If sauce immediately floods the gap, it still needs time to absorb; when the gap stays mostly clear, the glaze is where you want it.
Pad Thai Recipe
Chewy rice noodles, chicken, tofu and egg tossed with tamarind, fish sauce and palm sugar, then finished with crisp mung bean sprouts, garlic chives, roasted peanuts and lime.
Serves 2 generous or 3 lighter servings
Active prep About 25 minutes, mostly during the soak
Noodle soak Brand-dependent; go by texture
Cook About 10 minutes
Elapsed time: about 40–70 minutes, depending on the noodles.
A home stove is enough. Use a wide 12-inch skillet or roughly 14-inch wok and keep the batch small enough to stay lively and sizzling.
Ingredients
Noodles & chicken
4½ oz (125 g) dried medium flat rice noodles, preferably about 2–3 mm wide
5¼ oz (150 g) boneless skinless chicken breast or thigh, thinly sliced
1 tsp fish sauce, for the chicken
1 tsp cornstarch, optional, especially useful with chicken breast to help it stay tender through the fast sear
Pad Thai sauce
1¼ oz (35 g) palm sugar, about 3 tbsp tightly packed when finely chopped or grated; 35 g light brown sugar may be substituted
3 tbsp (45 ml) water
2 tbsp (30 ml) fish sauce
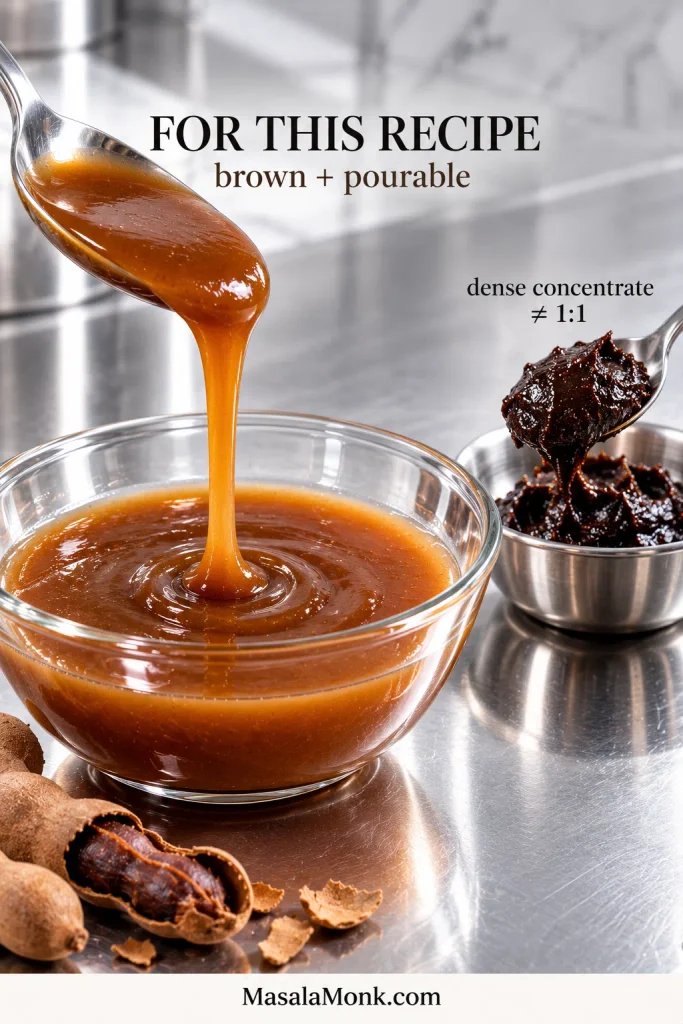
3–4 tbsp (45–60 ml) brown, pourable ready-to-use Thai or Vietnamese cooking tamarind, according to strength
For the stir-fry
2–3 tbsp neutral high-heat cooking oil, divided, plus more only if needed
¼ cup (35–40 g) finely chopped shallot
3 cloves garlic, finely chopped
2½–3 oz (75–85 g) pressed or super-firm tofu, cut into small pieces; if using water-packed extra-firm tofu, press and pat it dry first
2 large eggs
2½ cups (about 120 g) fresh mung bean sprouts
2–2½ oz (60–70 g) garlic chives (Chinese chives), cut into roughly 2-inch pieces
Thai chile flakes or crushed red pepper, for serving, optional
Classic extras — optional
2 tbsp finely chopped Thai sweet preserved radish
1–2 tbsp dried shrimp, quickly rinsed, drained and finely chopped
Instructions
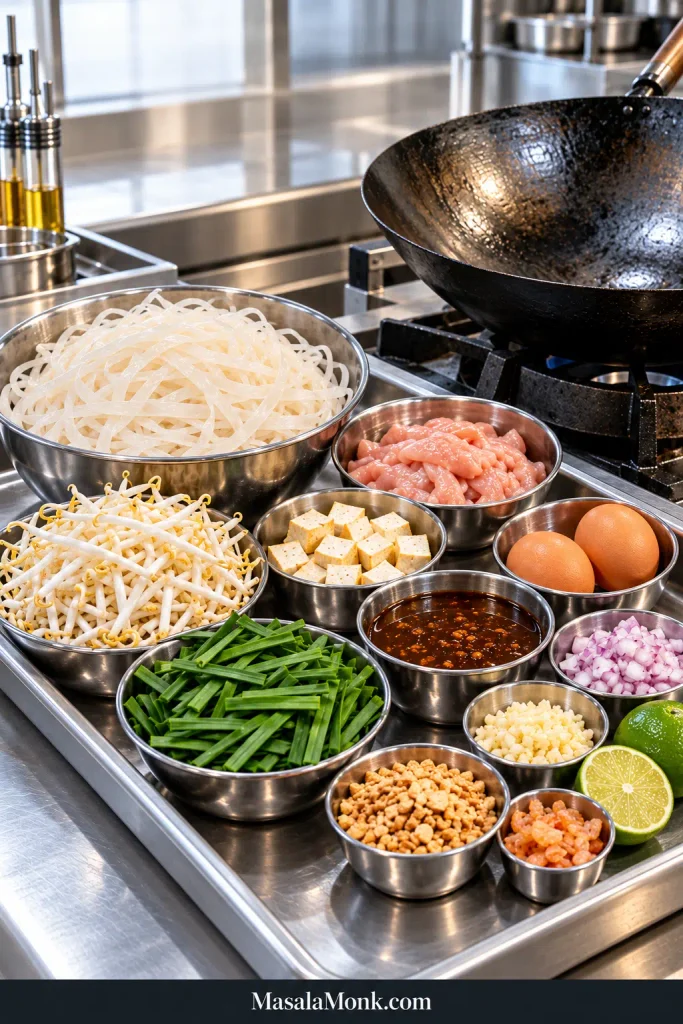
Before you heat the pan: Have the sauce, tofu, shallot, garlic, eggs, sprouts, chives, peanuts and lime ready, plus the preserved radish and dried shrimp if using. Once stir-frying starts, there is very little downtime.
Set up Pad Thai in the order you will cook it. Chicken comes first, then aromatics and tofu, followed by noodles and sauce, eggs, and finally sprouts, garlic chives and peanuts—so the tray becomes a map once the wok gets hot.
Prepare the noodles, sauce & chicken
Hydrate the noodles. Cover the dried rice noodles with room-temperature water. Medium noodles often take roughly 30–60 minutes, though thinner brands can soften sooner. Go by the noodle, not the clock: it should bend freely without snapping but remain noticeably too firm to eat. Drain very well.
Make the sauce. Stir the palm sugar and 3 tbsp (45 ml) water over medium-low heat until the sugar dissolves. Remove from the heat and mix in 2 tbsp (30 ml) fish sauce and 3 tbsp (45 ml) ready-to-use tamarind. Once cool enough to sample, add the final tablespoon of tamarind only if yours is relatively mild.
Season the chicken. Toss the sliced chicken with 1 tsp fish sauce and the optional cornstarch.
Sear the chicken. For a wok, stainless-steel or cast-iron skillet, heat the pan over high heat and then add about 1 tbsp oil. With nonstick, add the oil before heating and use medium to medium-high heat. Spread in the chicken, sear until lightly browned and almost cooked through, then transfer to a plate.
Build the wok base & coat the noodles
Build the savory base. Add another tablespoon of oil if the pan looks dry. Stir-fry the shallot and garlic until the shallot starts to soften and the garlic smells fragrant. Add the tofu, then the preserved radish and dried shrimp if using. Keep tossing until the tofu is hot with a little color around the edges.
Add the noodles and sauce. Tip in the drained noodles followed by the sauce. It should sizzle as it hits the hot pan and start disappearing into the noodles as you toss. Lift and fold the strands instead of chopping down through them.
Check the noodle. When most of the loose sauce has disappeared and the noodles look glossy, bite into one. If the seasoning is right but the center is too firm, add water 1 tbsp (15 ml) at a time. Toss until absorbed and check again.
Finish the Pad Thai
Add the eggs. Push the noodles to one side. Add a little oil to the exposed pan if it looks dry, then crack in the eggs. Break the yolks and let the eggs begin setting for 20–30 seconds before folding the noodles back through them.
Finish the chicken. Return the chicken and toss until completely cooked through. If checking with a thermometer, the thickest piece should reach 165°F / 74°C.
Finish off the heat. Turn off the heat. Add the mung bean sprouts, garlic chives and about half the peanuts, then toss briefly. The residual heat warms them without taking away the fresh snap of the sprouts.
Serve immediately. Divide between plates and scatter over the remaining peanuts. Put lime wedges and chile flakes on the table for anyone who wants more brightness or heat.
Use this as a coating cue rather than an exact ingredient-order snapshot. Even once chicken, egg, sprouts and garlic chives are in the wok, the rice noodles should look glossy and distinct instead of sitting in a pool of loose sauce.
Recipe Notes
Research note: This recipe is research-derived and has not been independently kitchen-tested by MasalaMonk. Rice noodles and tamarind vary considerably between brands, so use the texture and taste cues alongside the measurements.
No tofu? In the chicken or shrimp version, simply leave it out; no sauce adjustment is needed.
No garlic chives? Use a smaller amount of thinly sliced scallions to taste. Scallions are stronger, so do not replace the chives gram-for-gram.
No preserved radish or dried shrimp? Leave them out.
Do not boil dried Pad Thai noodles first. Soak them until flexible but undercooked at the center, then let them finish with the sauce in the pan.
Medium flat dried rice noodles around 2–3 mm wide give you a useful margin between chewy and overdone. Wider noodles can become fragile after soaking, while very thin noodles move through that sweet spot quickly.
Treat soak time as a rough guide and check the noodle itself. Pick one up and bend it around a finger. It should flex without snapping; bite into it and the center should remain firm.
That’s exactly where you want it. The noodle still has sauce and hot-pan time ahead.
Once Pad Thai rice noodles bend easily but still have structure, drain them thoroughly rather than letting them sit wet. Excess surface water can cool the pan and weaken the sauce before the stir-fry even begins.
When the sauce is gone but the noodle is still firm
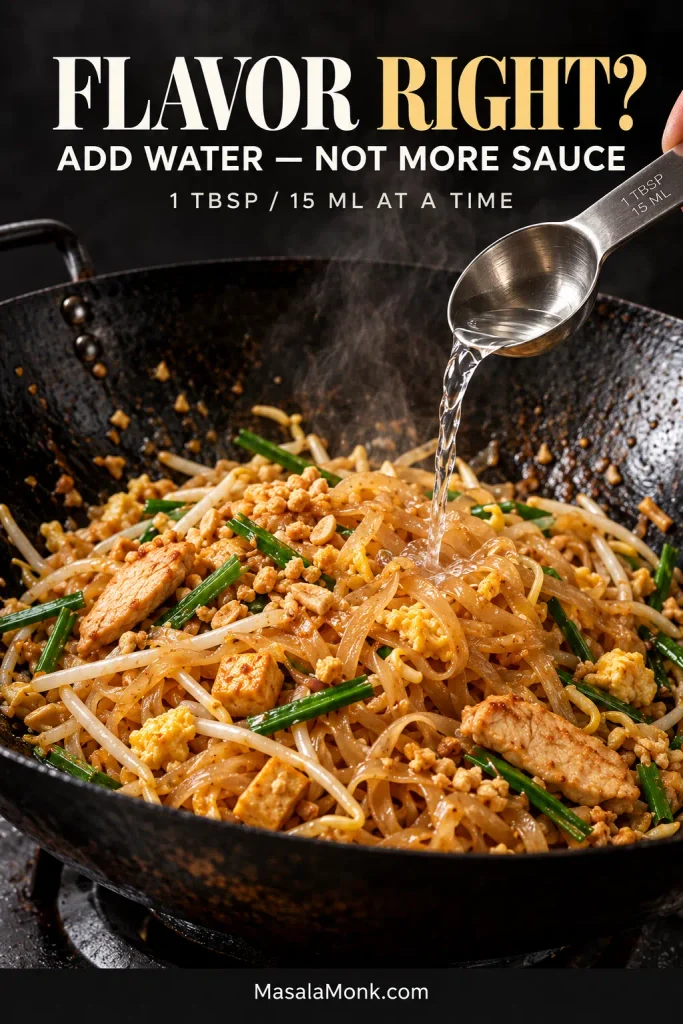
Resist reaching for more sauce. Once the noodles are properly seasoned, extra sauce brings more salt, sugar and tamarind when they may only need moisture.
Add 1 tablespoon (15 ml) water, toss until absorbed and check again. Repeat as needed.
Think of the added water as cooking liquid, not seasoning. Small additions soften the noodle center while preserving the sweet-sour-salty balance you have already built.
If the noodles are showing a different problem, jump to Fix Your Pad Thai for the symptom-by-symptom guide.
Pad Thai Sauce: Build It Around Your Tamarind
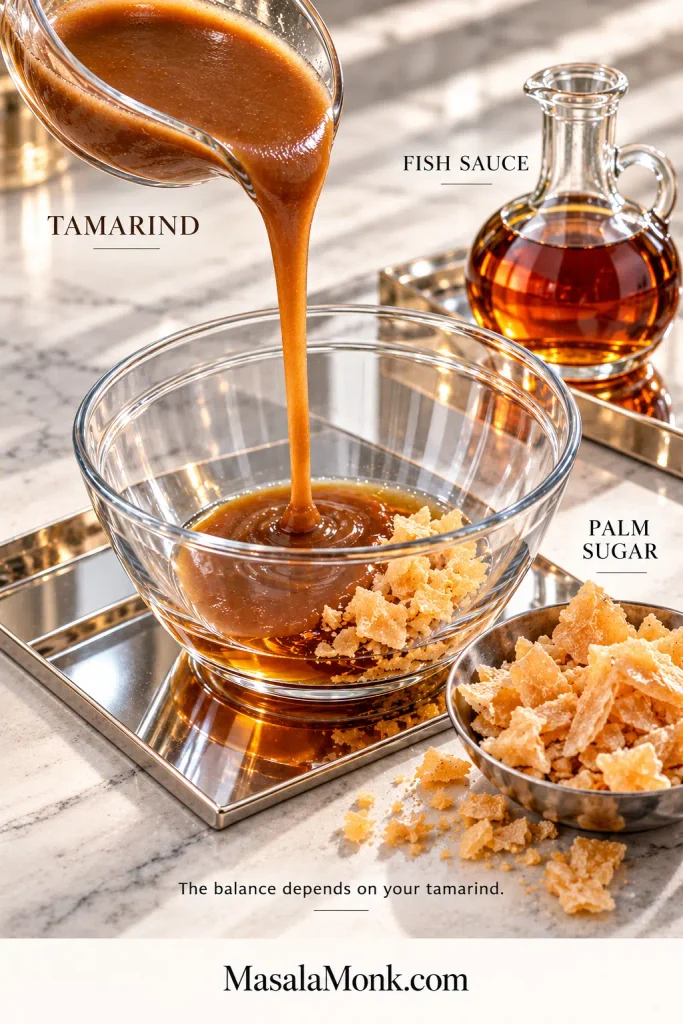
Pad Thai sauce is built from tamarind, fish sauce and palm sugar. Tamarind gives it a tart, fruity edge. Fish sauce brings salty savoriness, while palm sugar rounds out the sharper edges.
For smoother Pad Thai sauce, dissolve the palm sugar first, then stir in fish sauce and tamarind off the heat. That sequence gives you a fully dissolved base before you judge the sweet, sour and salty balance.
Tamarind labels are frustratingly inconsistent. Paste, puree and concentrate can mean very different strengths from one brand to another.
What kind of tamarind should you buy?
For these measurements, look for a brown, pourable ready-to-use Thai or Vietnamese cooking tamarind. Dense black tamarind concentrate is much stronger and should not be measured at the same volume.
Use the spoonful as a final check before you measure. If the tamarind holds a dense mound instead of flowing back into the container, pause before using the recipe’s 3–4 tablespoon range; you may have a stronger concentrate.
Try a tiny bit of the ready-to-use tamarind before making the sauce. If it makes you pucker sharply, begin with 3 tablespoons (45 ml). When it is pleasantly tart rather than fierce, use up to 4 tablespoons (60 ml).
Sweet tamarind sauce or chutney is not a direct substitute here; it is already sweetened and seasoned.
Using a tamarind block? Choose unsweetened sour tamarind pulp rather than sweet tamarind sold for snacking. Soften some pulp in warm water, massage it free, then strain away the seeds, shell and tough fibers. Aim for a loose, spoonable puree similar to ready-to-use tamarind, then judge its strength before working within the same 3–4 tablespoon range.
What should Pad Thai sauce taste like?
On its own, the sauce should taste a little stronger than you want the finished noodles to taste. Chicken, tofu, egg and sprouts will soften it once everything comes together. Sweet, sour and salty should all register without one wiping out the others.
An aggressively sour sauce usually points back to the tamarind itself. Check the product and concentration before trying to bury that acidity under extra sugar.
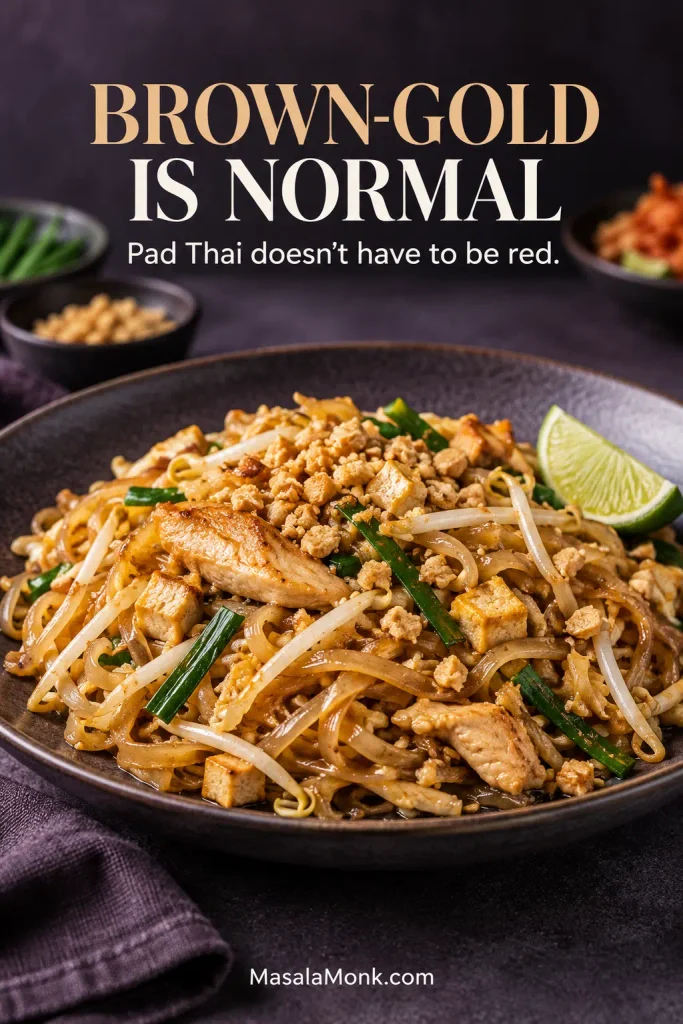
Why isn’t my Pad Thai bright red? Brown-gold Pad Thai is completely normal. Some restaurant-style versions use ketchup or chile sauce, while others use paprika to deepen the red-orange color. This version stays with tamarind, fish sauce and palm sugar.
Look for a translucent amber glaze rather than a specific shade of red. You should still be able to see the rice noodles beneath the sauce; color alone cannot tell you whether the sweet, sour and salty balance is right.
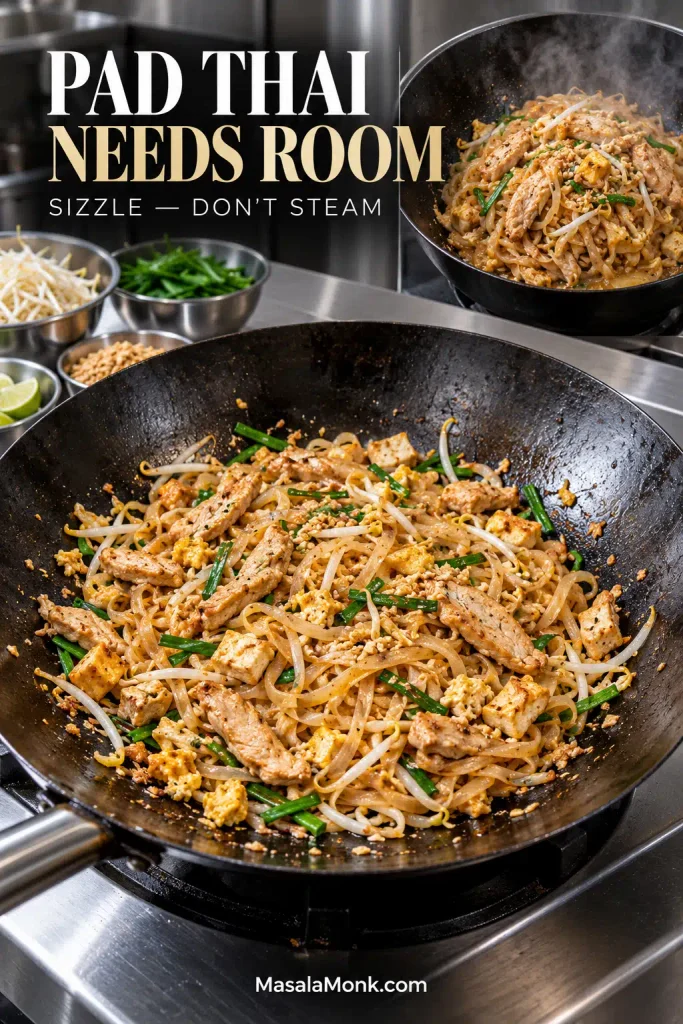
Use a wide 12-inch skillet or roughly 14-inch wok and keep the batch small enough to stay sizzling. The extra surface area gives moisture somewhere to escape instead of collecting underneath the noodles.
A deep heap of noodles surrounded by liquid is the warning sign. The pan cools, steam builds and the strands begin sticking together.
Visible pan around the noodles is the useful crowding cue. Open patches of hot metal give moisture somewhere to escape as you toss, while a smaller batch keeps that escape route open.
Scaling rule: Double the ingredients if you need more food, then cook two batches. Four to six servings are usually better split across the pan than forced through it all at once.
Pad Thai Ingredients Worth Seeking Out
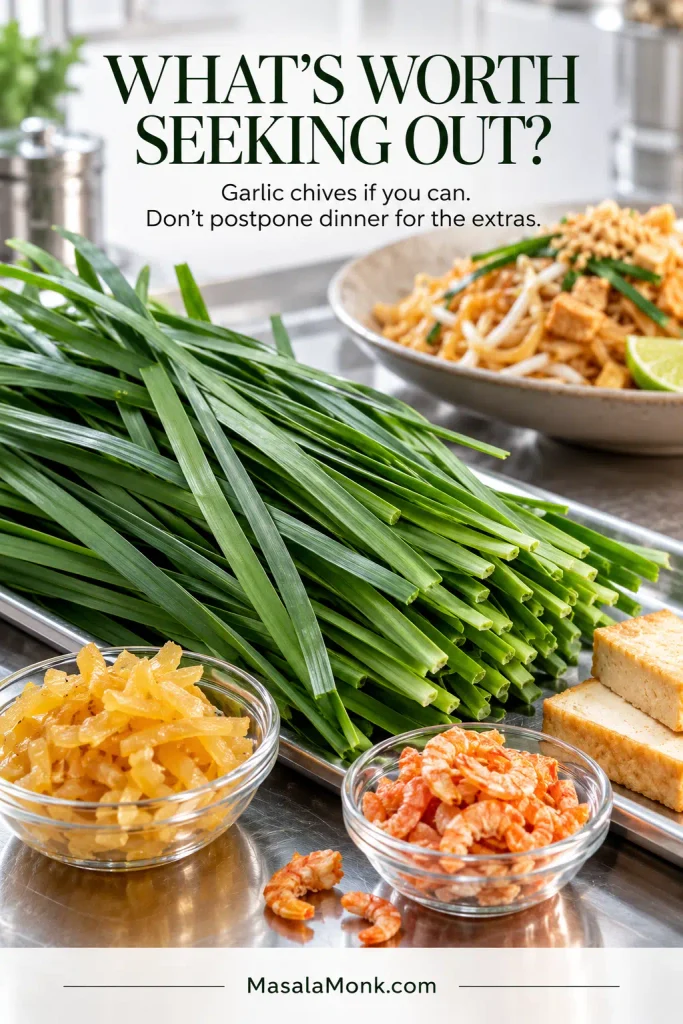
You don’t need to hunt down every specialist ingredient. Garlic chives are worth seeking out if you can; preserved radish and dried shrimp add more classic savory detail, but they aren’t reasons to postpone dinner.
At the market, garlic chives are easy to spot by their long, flat blades rather than hollow scallion tubes. Finely chopped preserved radish and dried shrimp then spread their savory flavor more evenly through the Pad Thai.
Pressed or super-firm tofu can sit alongside chicken or shrimp and survives the tossing well. Thai sweet preserved radish adds salty-sweet flecks through the noodles; Japanese takuan is not identical, but it is a reasonable fallback. Can’t find either one? Move on.
Dried shrimp brings another savory layer. Give it a quick rinse, drain it well and chop it finely so that flavor is distributed through the noodles rather than concentrated in one overwhelmingly fishy bite.
Roasted peanuts belong at the finish, adding crunch against the softer noodles and egg. The tamarind-based sauce itself does not need peanut butter.
If what you really want is the creamy peanut direction, Peanut sauce is better suited to noodles, spring rolls, tofu, chicken and satay-style meals.
Missing tofu, garlic chives, preserved radish or dried shrimp? Find the simplest substitutions and omissions together in the Recipe Notes.
Chicken, Shrimp & Tofu Options
The base recipe uses chicken plus a small amount of tofu. Use the options below when you want cooked chicken, shrimp, tofu-only, vegetarian or vegan Pad Thai.
Chicken thigh is the easiest choice here because it stays forgiving through a fast sear. Breast works too; slice it thinly and use the optional cornstarch if you want a little more protection from drying out.
Keep the Pad Thai base the same and change the protein timing instead. Shrimp needs only a quick sear, while tofu needs a larger portion when it becomes the main protein rather than a supporting ingredient.
Cooked or rotisserie chicken: Skip Steps 3 and 4 for the chicken. Add about the same amount in Step 9, just long enough to heat through.
Shrimp: Skip the chicken seasoning and cornstarch. Use 5–6 oz (140–170 g) peeled shrimp. In Step 4, sear them until just shy of done, remove from the pan, then return them in Step 9 just long enough to finish cooking.
Tofu as the main protein: Increase it to about 6–7 oz (170–200 g), leave out the chicken, and skip Steps 3, 4 and 9.
Vegetarian: Leave out the chicken and dried shrimp, increase the tofu to 6–7 oz (170–200 g), and skip Steps 3, 4 and 9. Use vegan fish sauce in about the same amount as the regular fish sauce, then adjust if your brand runs especially salty. Keep the eggs if you like.
Vegan: Make the vegetarian version and leave out the eggs too.
Without peanuts: Omit them; the sauce needs no adjustment.
Start with strand separation before choosing a fix.
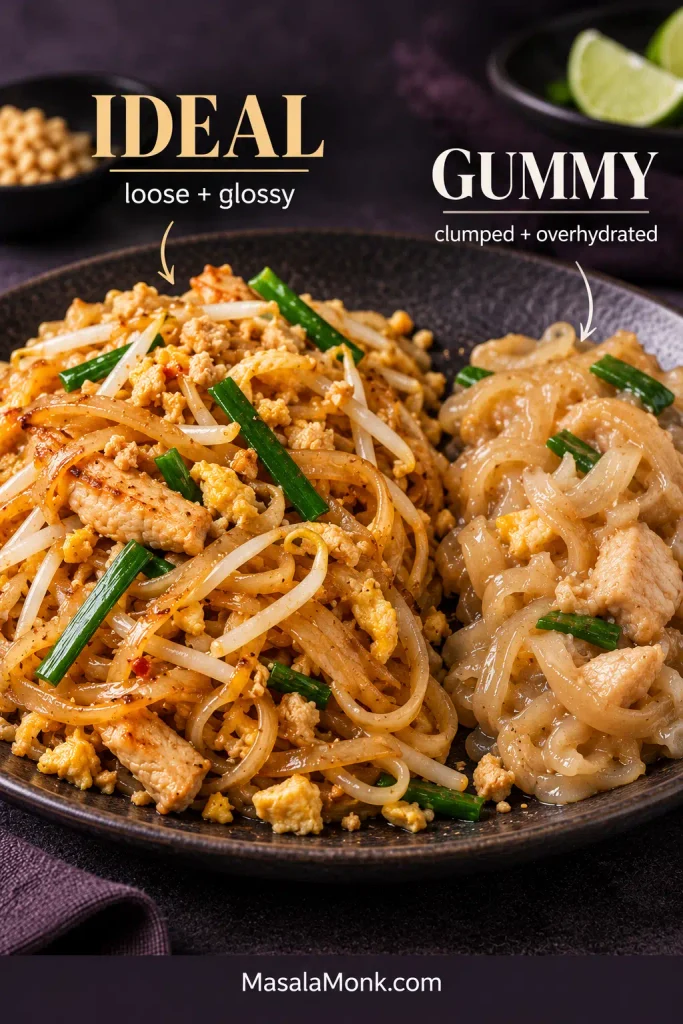
Glossy and gummy are not the same thing: properly cooked Pad Thai noodles can shine while still separating into distinct strands. Once overhydrated, the strands lose definition and begin lifting in clumps.
Problem
Likely cause & what to do
Noodles are mushy
Cause: They entered the pan too hydrated. Right now: If they’re only a little soft, stop cooking and serve them now. Next time: Start with firmer soaked noodles and let them finish in the pan.
Noodles are gummy or sticky
Cause: Overhydration, released starch, low heat or crowding. Right now: Stop cooking; extra oil will not undo overcooked rice starch. Next time: Start firmer and use a smaller, hotter batch.
Noodles are still hard
Cause: The seasoning is ready before hydration is complete. Do now: Add water 1 tbsp (15 ml) at a time, toss until absorbed and check again.
Noodles keep breaking
Cause: They were too soft, especially fragile or handled roughly. Right now: Toss as little as possible and get them out of the pan. Next time: Hydrate less and lift or fold instead of chopping down with the spatula.
Pad Thai is wet or soupy
Cause: The pan is too cool, too crowded or carrying too much liquid. If the noodles are firm, keep tossing briefly over suitable heat so the loose sauce can absorb. Once they are already soft, stop cooking rather than boiling away the sauce and making them mushier. Next time, use a smaller batch.
Sauce is scorching
Cause: The liquid has cooked away and the sugar is catching. If the noodles need more cooking, add a small splash of water and keep them moving. When they are done, get the pan off the heat.
Flavor & Sauce Problems
Problem
Likely cause & what to do
Pad Thai is too sour
Cause: The tamarind is stronger than expected. If the dish is only a little sharp, extra plain noodles, tofu or sprouts can dilute it if you have them ready. A badly over-soured dish has no clean instant fix; use less of that tamarind next time.
Pad Thai is too sweet
Cause: Too much sugar or too little sour and salty balance. If it is only slightly sweet, lime at the table can sharpen the finished dish. For a strongly sweet batch, fix the sauce balance next time rather than trying to cover it with more seasoning.
Pad Thai tastes too fishy
Cause: The fish sauce or dried shrimp is especially assertive. Lime and extra sprouts can make a mildly fishy batch taste fresher at the table; reduce one of those ingredients next time.
Pad Thai tastes flat
Cause: Too many noodles or too much protein for the amount of sauce, or the sauce was under-seasoned. Check the finished dish before adding anything: a little fish sauce may supply salt and savoriness, while lime can wake up a dull plate.
Pad Thai is substantial enough to serve as a one-dish meal. Get it onto the plates while the noodles are loose and glossy, then add the remaining roasted peanuts.
Pad Thai does not need to be spicy. Put lime wedges and Thai chile flakes or crushed red pepper on the table so everyone can add brightness and heat to taste. Extra mung bean sprouts and a few fresh garlic chives can go alongside for more crunch.
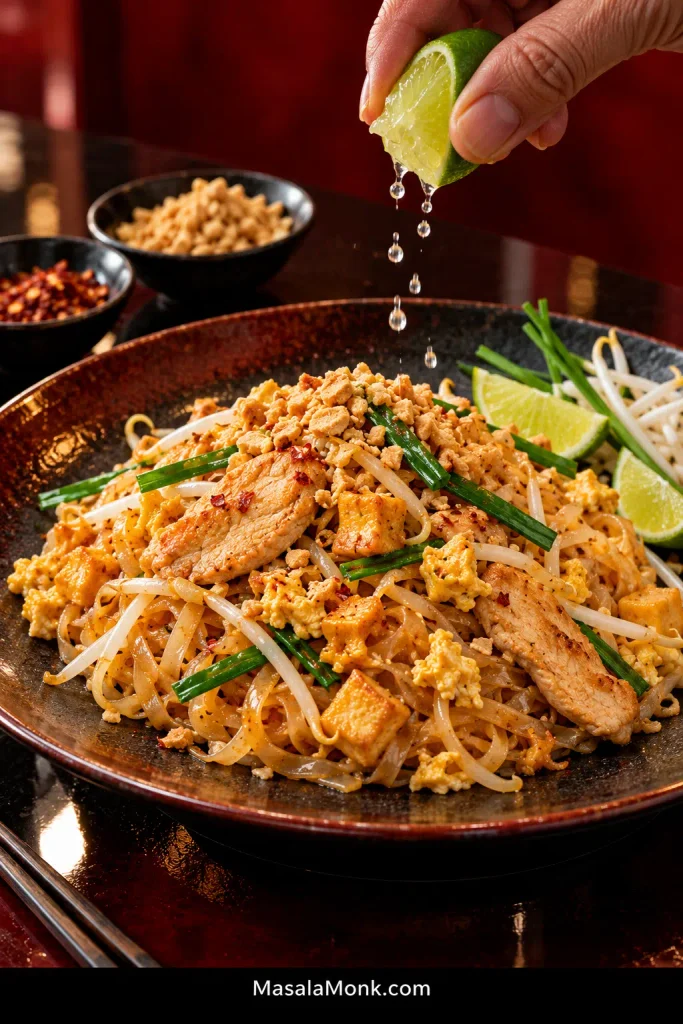
Finish the peanuts after plating so they keep their dry crunch, then squeeze lime over the Pad Thai at the table. That last-minute contrast stays sharper than cooking either finish into the sauce.
A cold Cucumber Salad makes an easy contrast, especially with lime, chile and herbs.
Make-Ahead Pad Thai: Do the Slow Work Before Dinner
Prep the components ahead, but cook the finished Pad Thai just before serving whenever possible.
Keep the make-ahead components separate until the wok is hot. Drain the soaked noodles well, keep the sprouts and garlic chives dry, and store the sauce on its own so the final stir-fry still starts with distinct textures.
Make the sauce up to 3 days ahead and keep it covered in the refrigerator. The noodles are best soaked the same day, but they can be prepared up to 1 day ahead: drain them thoroughly, spread them briefly on a clean towel until they are no longer dripping, then refrigerate in a covered container.
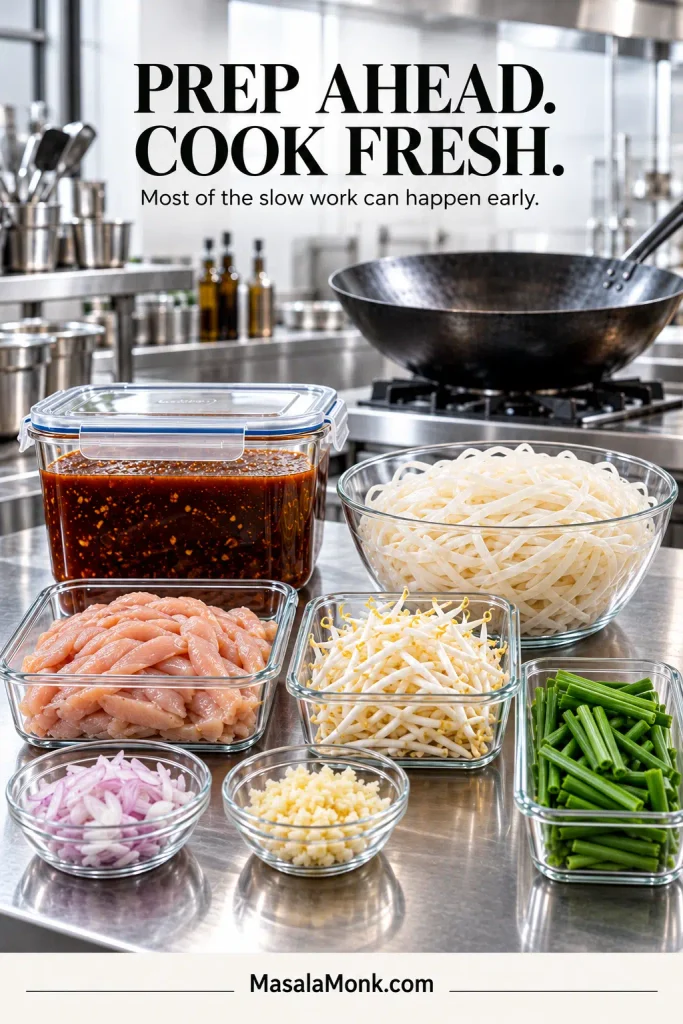
Slice the chicken up to 1 day ahead and keep it refrigerated. The shallot, garlic, tofu and garnishes can be prepared ahead too. Wash and dry the sprouts and chives, crush the peanuts and cut the lime before dinner.
Store & Reheat Pad Thai
Pad Thai is at its best straight from the pan. Rice noodles firm up and stick together as they cool, so leftovers lose some of that freshly tossed texture.
Reheat it more gently than the original stir-fry. Add a small splash of water and warm the noodles in a covered skillet over moderate heat or in short microwave intervals. Still dry? Add another teaspoon or two of water instead of another dose of sauce.
Once you know what a properly soaked rice noodle feels like, Pad Thai becomes a much more relaxed dish to cook. Get it onto the table while the noodles are glossy, the egg is tender, the sprouts have crunch and the lime is waiting.
A finished plate should feel integrated rather than assembled. Chicken, egg, tofu, sprouts and garlic chives should appear throughout the glossy noodles, so no single ingredient dominates the final bite.
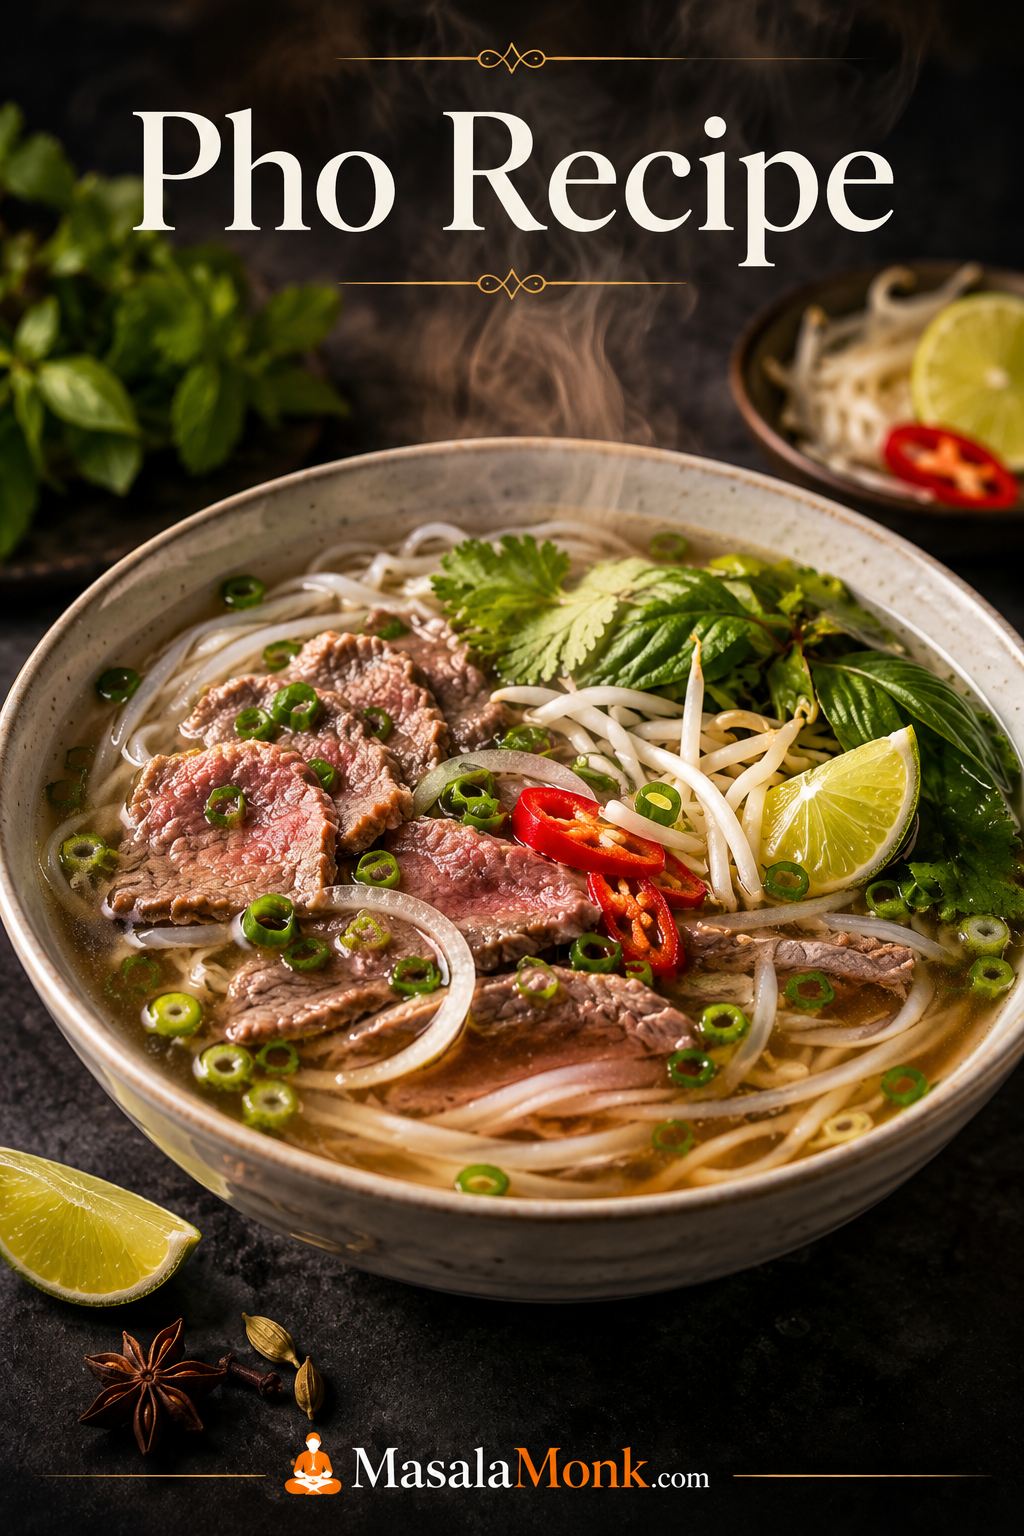
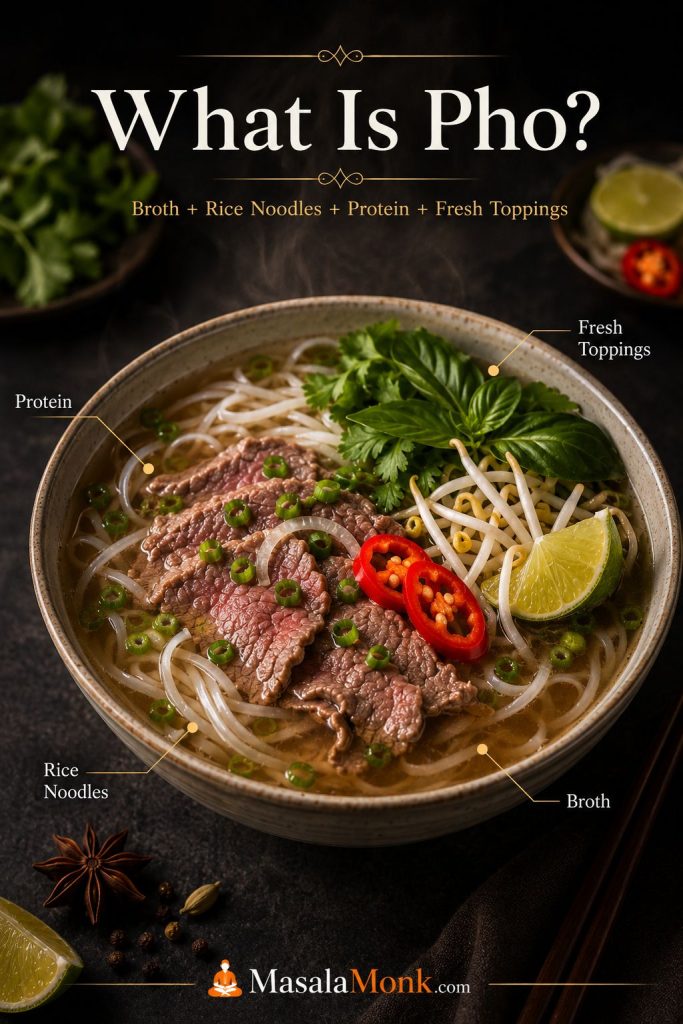
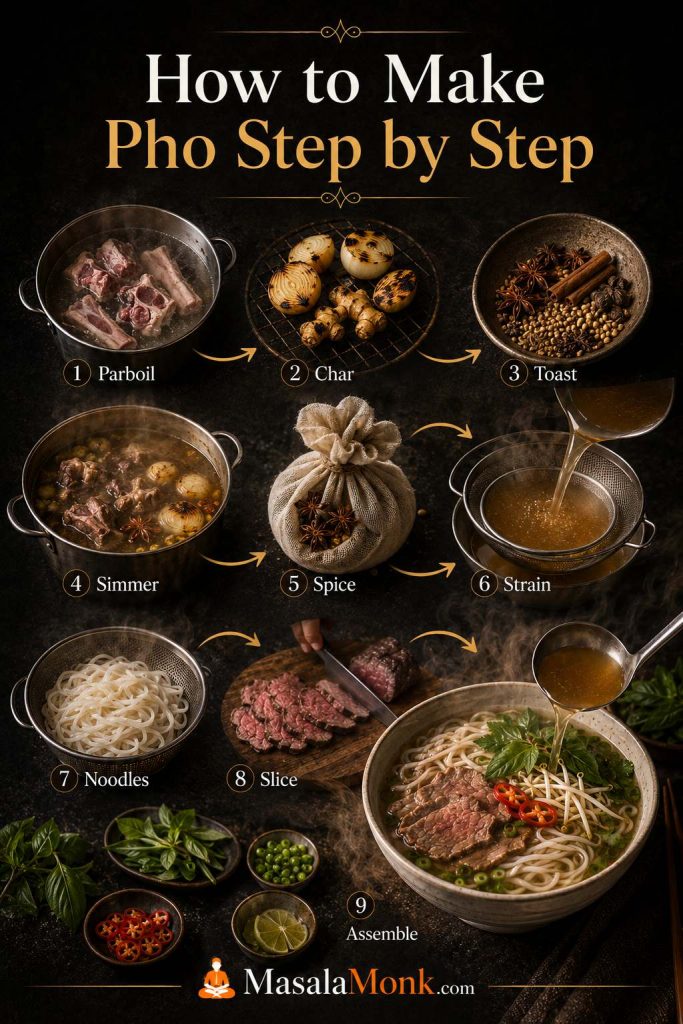
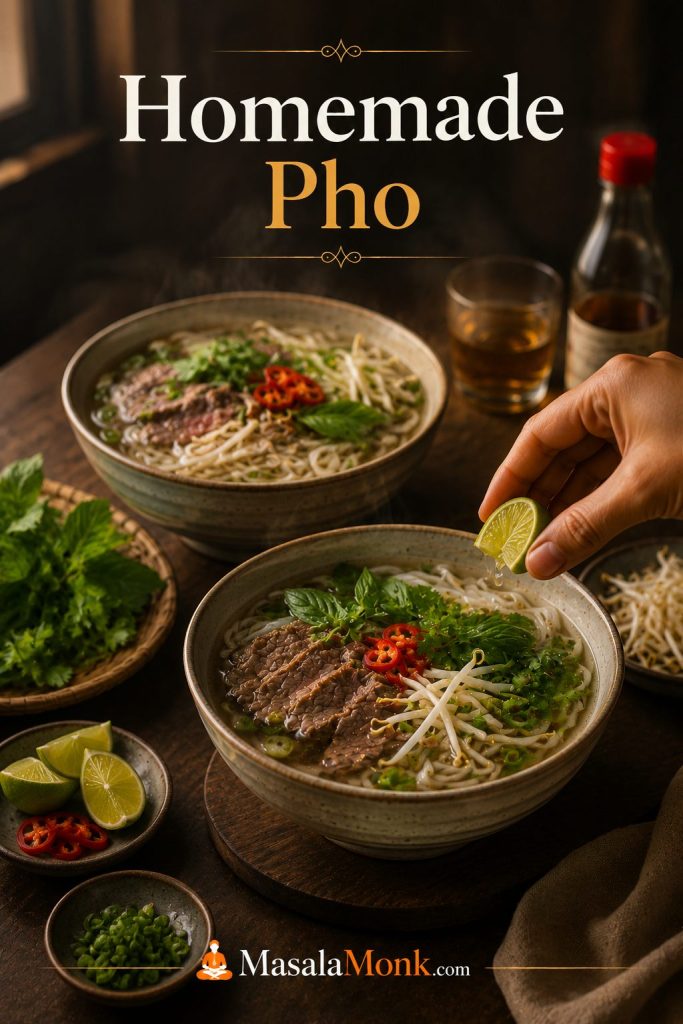
This pho recipe is for the day you want the comfort of a real Vietnamese noodle soup at home, but do not want to get lost in bones, spices, noodles, and conflicting broth advice. The process is easier once you stop treating pho as one giant task and start seeing it as four smaller jobs: build a clean aromatic broth, cook the noodles separately, prepare the beef and toppings, then assemble everything while the broth is steaming hot.
This is a home-style beef pho recipe built for a serious homemade pot, without pretending you need a restaurant setup. You get clear broth, real beef flavor, whole spices, proper rice noodles, and practical fixes for the mistakes that usually make pho taste flat.
Use the full beef version when you want broth depth, the quick pho section when you want a weeknight bowl, and the chicken or vegan notes when those fit your kitchen better. The method changes, but the goal stays the same: clean aroma, balanced broth, separate noodles, fresh toppings, and hot assembly.
Start with the version that fits your day, then use the broth, noodle, topping, and troubleshooting sections to build a bowl that tastes clean, aromatic, and satisfying.
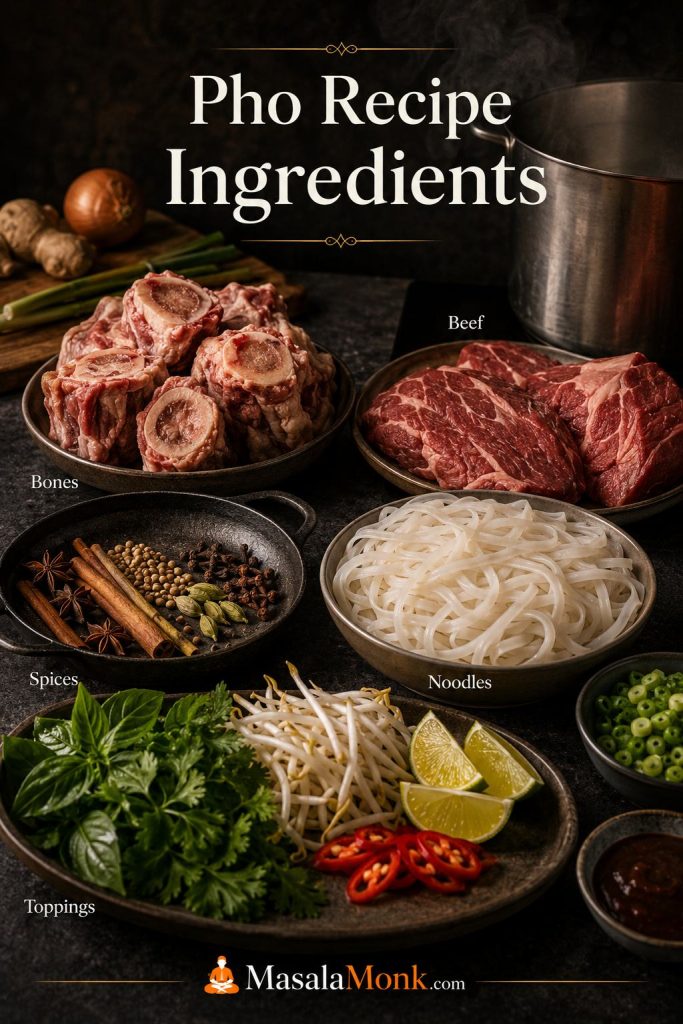
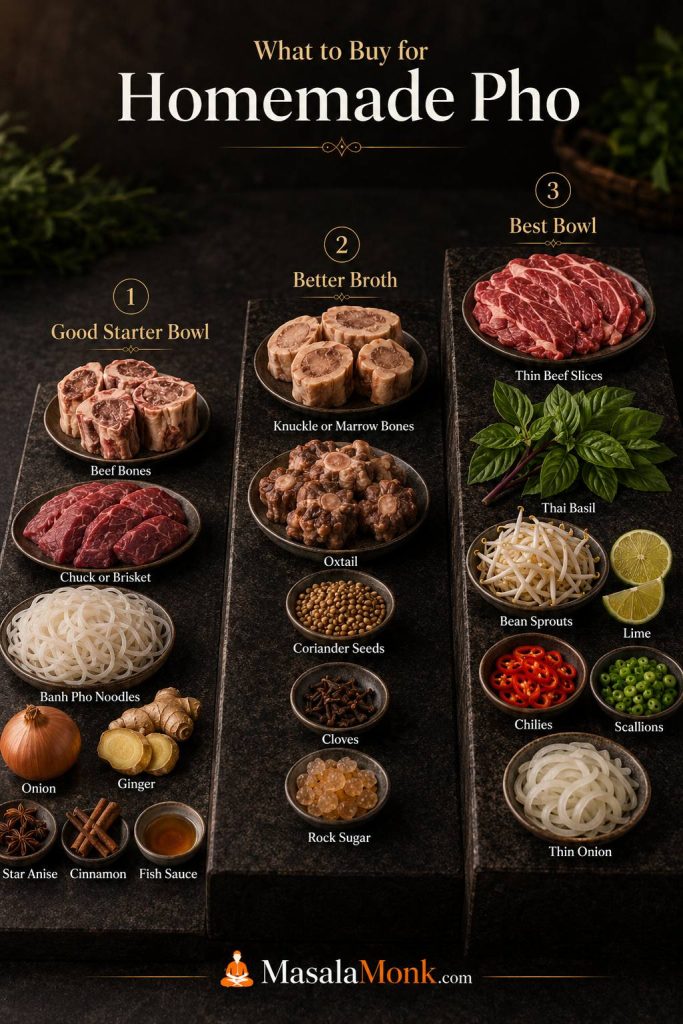
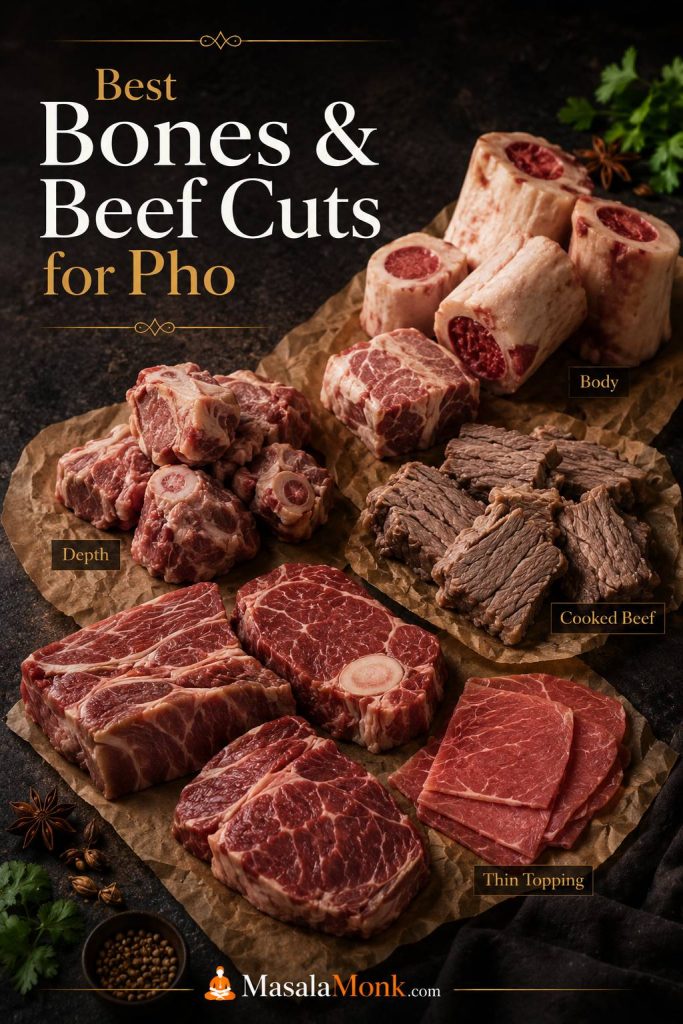
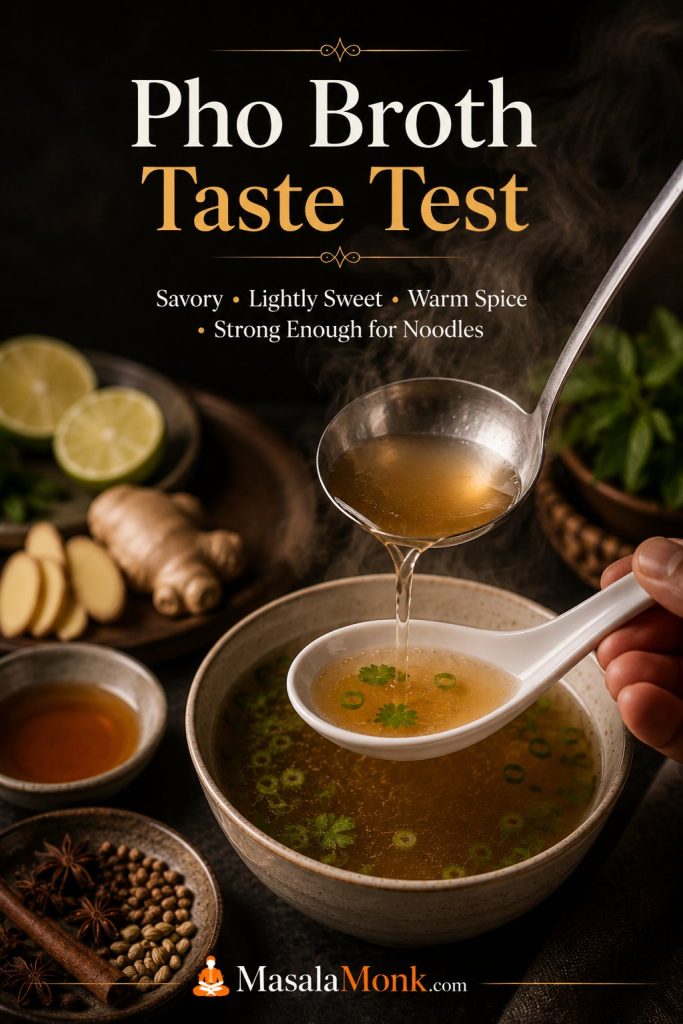
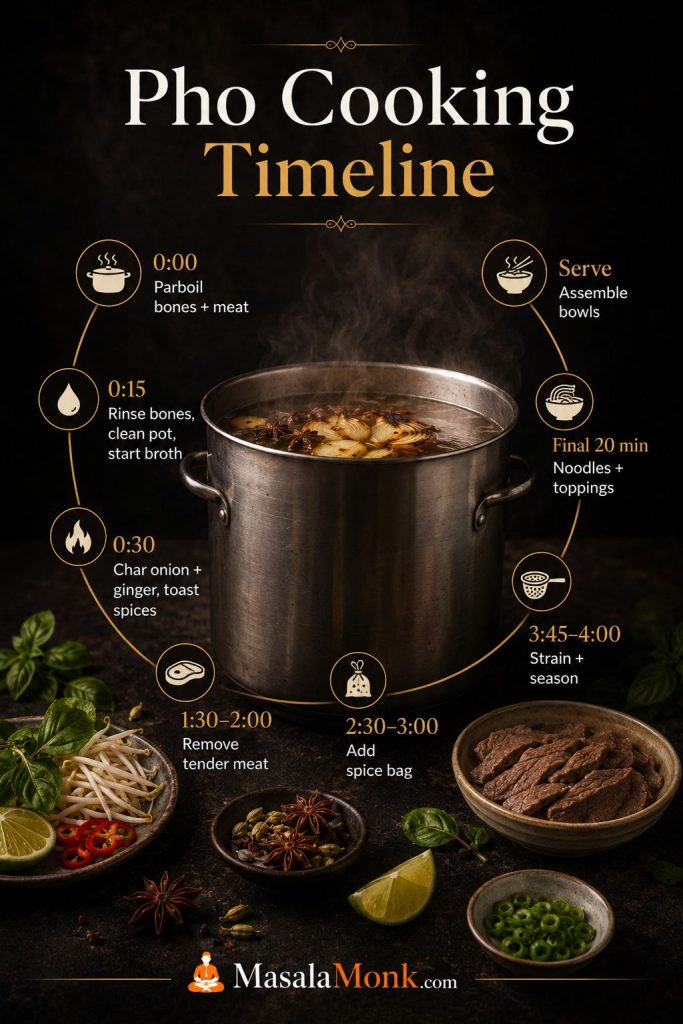
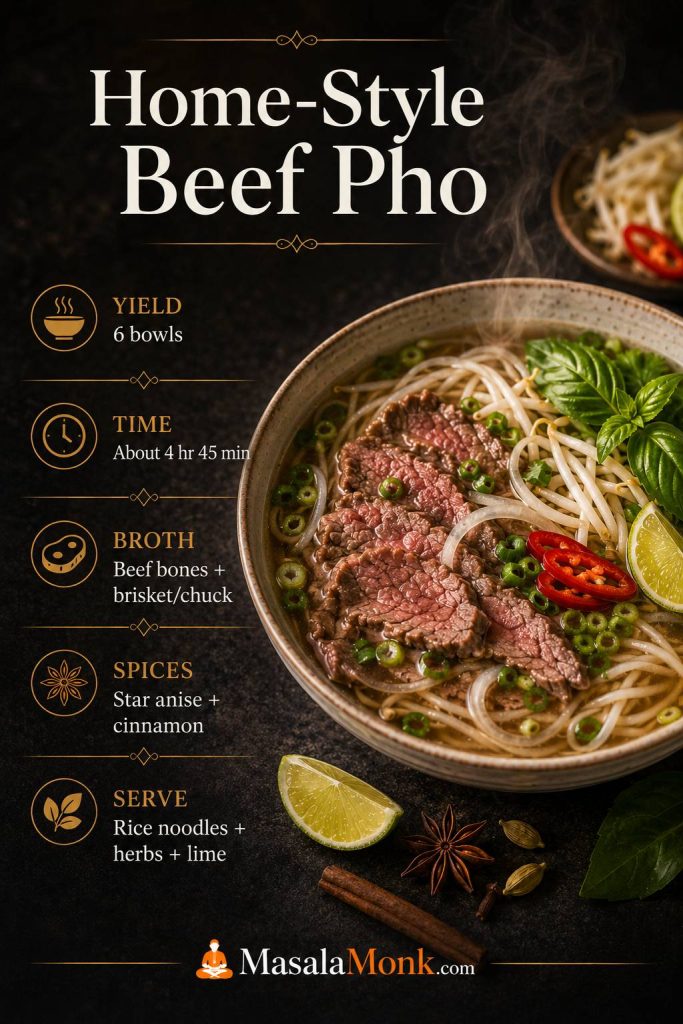
To make pho at home, start with a broth made from beef bones, a flavorful simmering cut such as brisket or chuck, browned onion, ginger, whole spices, fish sauce, salt, and a little rock sugar. Simmer it gently until the broth tastes deep and aromatic, then strain it and season it slightly stronger than a normal soup.
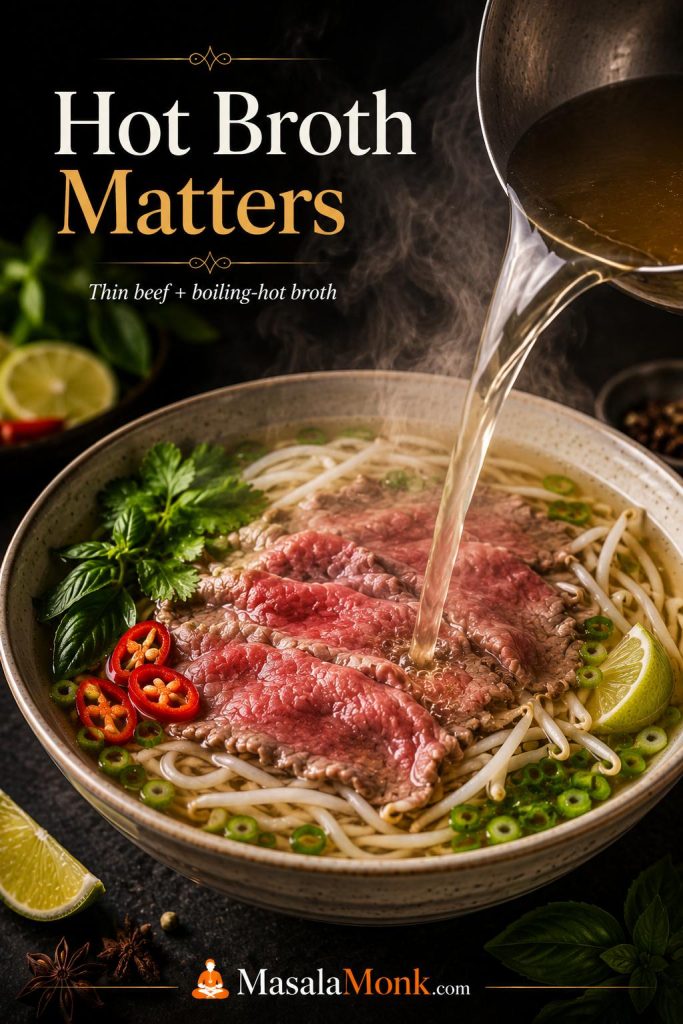
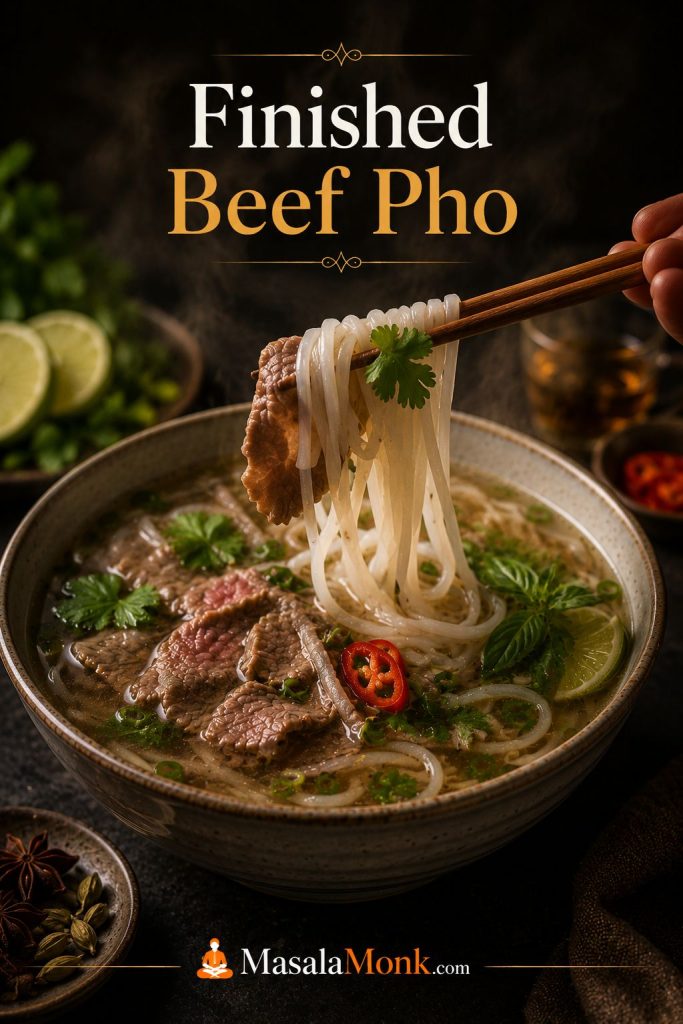
Next, cook the rice noodles separately, divide them into bowls, add sliced cooked beef and paper-thin raw beef if using, then ladle very hot broth over the top. Finish with herbs, bean sprouts, lime, chili, onion, scallions, and optional sauces on the side.
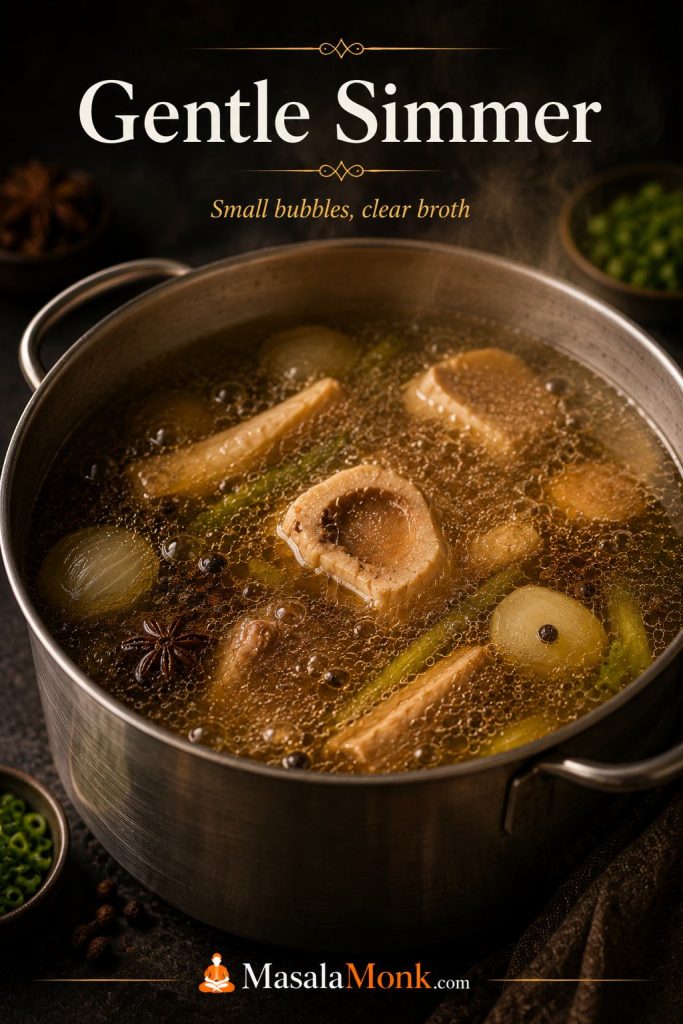
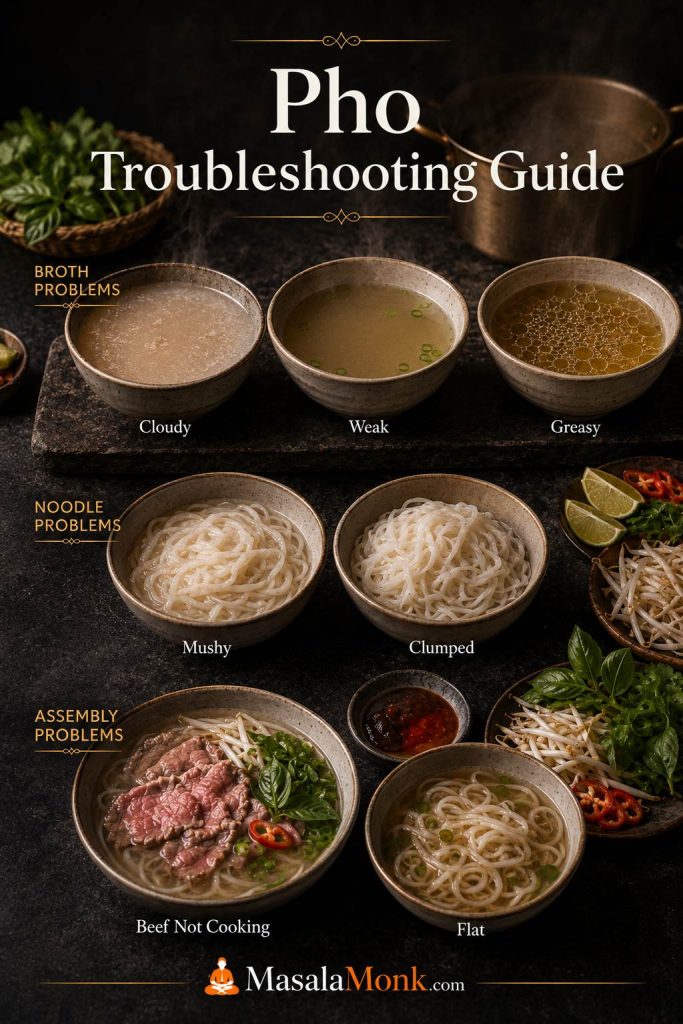
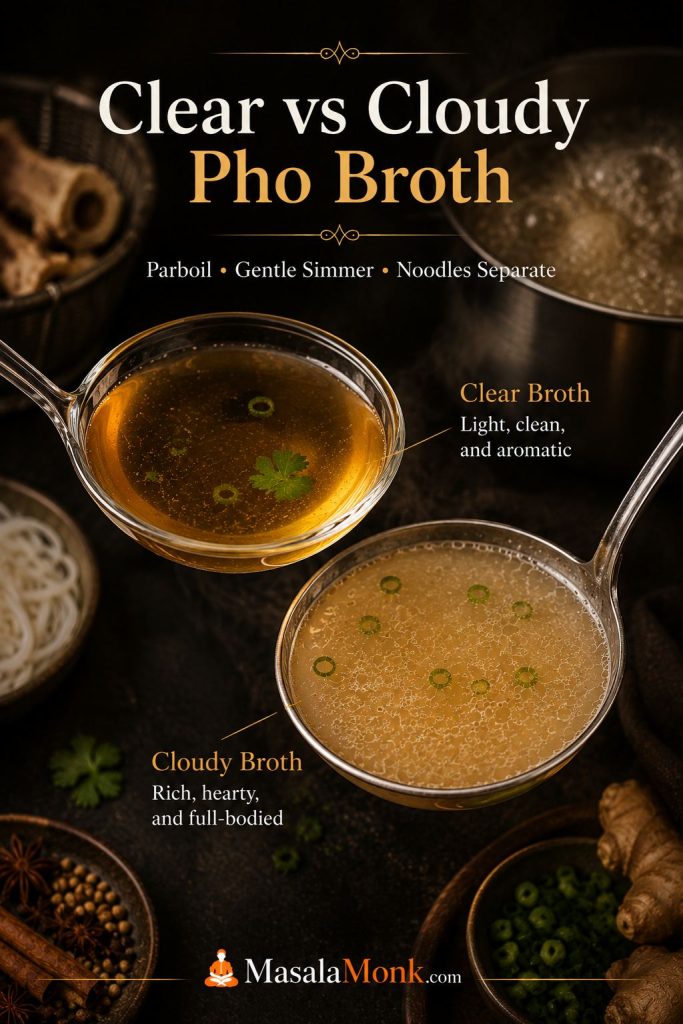
The two biggest mistakes are boiling the broth too hard and letting the noodles cook directly in the broth. Keep the broth at a gentle simmer while it cooks, then bring it back to a full boil only when you are ready to assemble the bowls.
Best first version: make the beef pho below if you want the clearest lesson in how pho works. Once you understand the broth, noodles, and bowl assembly, chicken pho, quick pho, and plant-based pho become much easier to adapt.
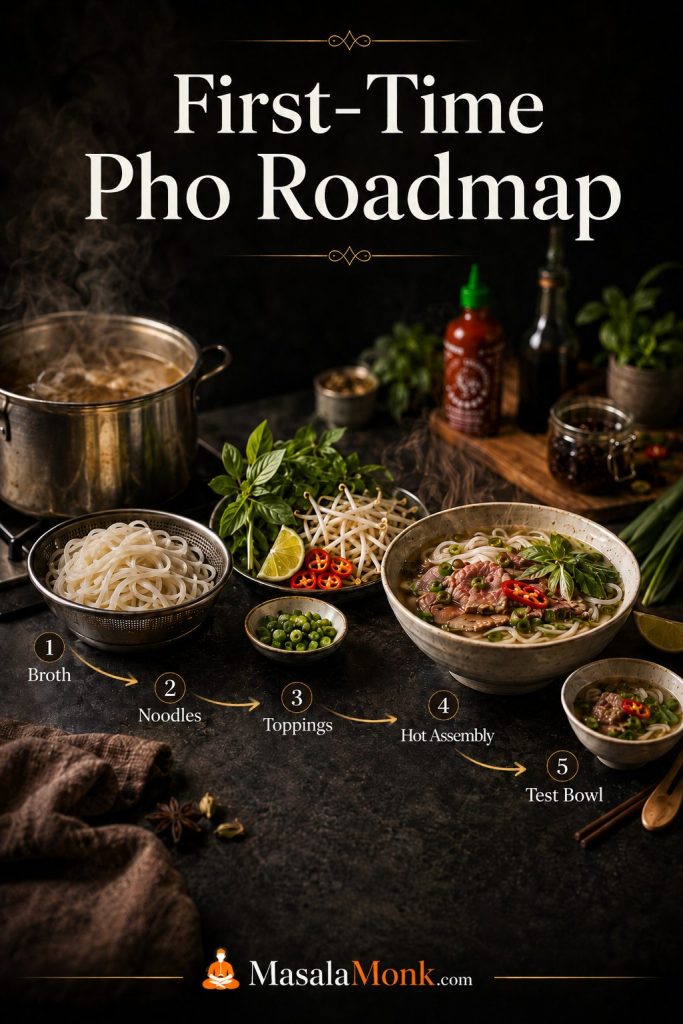
First-Time Pho Recipe Roadmap
If you are making the full beef version, give yourself a few unrushed hours. Homemade pho is not difficult, but it rewards calm timing. You do not want to be slicing beef, washing herbs, boiling noodles, and fixing broth seasoning all at the same time.
If pho feels overwhelming, divide it into four jobs instead: make the broth, prepare the noodles, set up the toppings, and assemble at the end. That rhythm keeps the recipe manageable.
Step
What to do
Why it helps
1
Make the broth on a day when you are not rushed.
The simmer is simple, but it needs time and attention.
2
Prepare noodles and toppings only when the broth is nearly ready.
Noodles stay better, herbs stay fresh, and the final bowl feels cleaner.
3
Taste the broth before assembly.
It should be a little bolder than sipping soup because noodles soften the flavor.
4
Bring the strained broth to a full boil only at serving.
The long simmer should be gentle, but the final pour should be hot.
5
Assemble one test bowl first.
If it tastes flat, you can fix the broth before serving the rest.
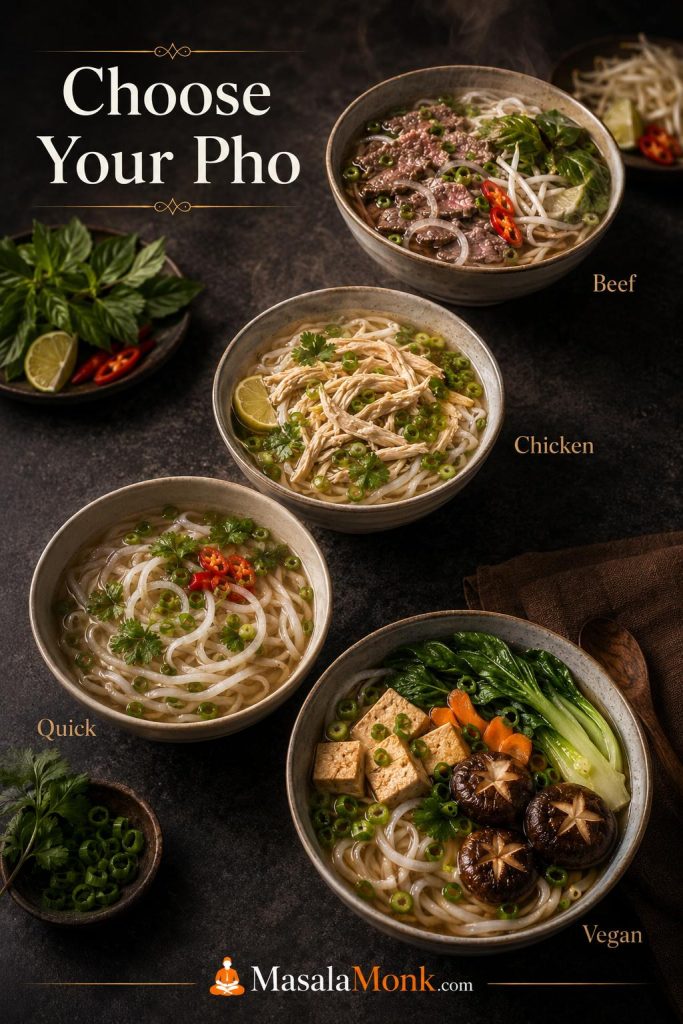
Choose Your Pho: Beef, Chicken, Quick, or Vegan
Pho does not have to mean the same thing every time. It can be a slow weekend broth, a lighter chicken soup, a practical shortcut, or a plant-based bowl with serious flavor. The trick is not to pretend every version is the same.
Beef pho gives the deepest flavor, chicken pho is lighter, quick pho suits busy nights, and vegan pho depends on mushroom depth. Pick the version that fits your day, not the one that sounds most ambitious.
Which Pho Recipe Should You Make?
Choose the path that fits your time and ingredients, then build the bowl with the same basic logic: aromatic broth, rice noodles added at the end, fresh toppings, and hot broth to bring everything together.
Version
Best for
What changes
Time expectation
Traditional beef pho
Deep broth, classic beef noodle soup flavor, weekend cooking
Uses beef bones, brisket or chuck, roasted aromatics, whole spices, and a long gentle simmer
About 4–5 hours
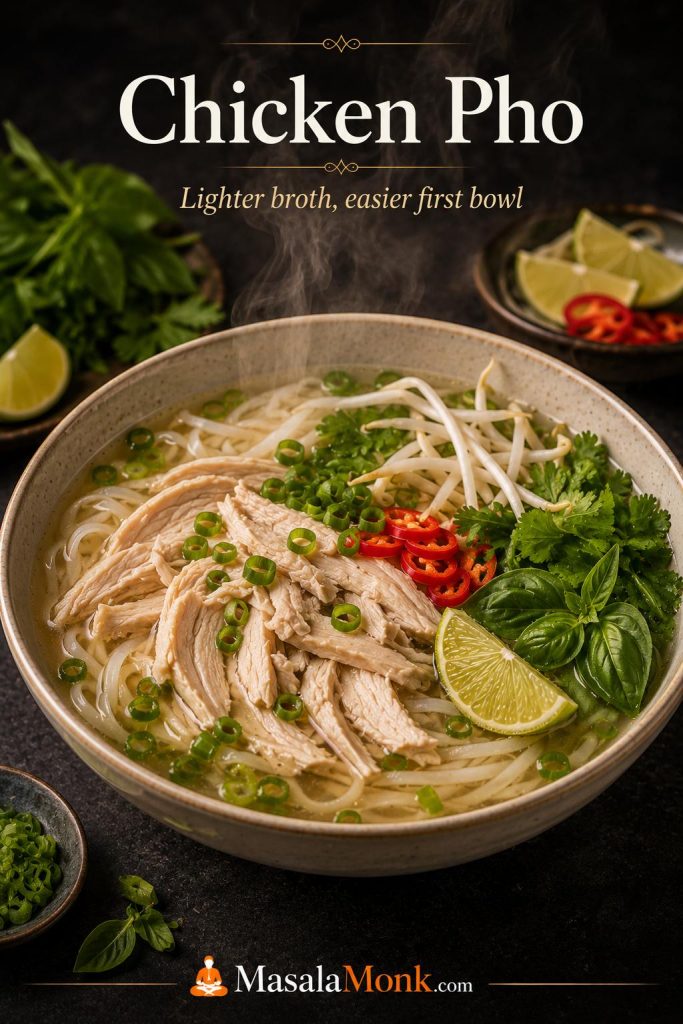
Chicken pho
An easier first pho, lighter broth, fewer hard-to-find ingredients
Uses chicken, chicken broth or a whole-chicken base, similar aromatics, and a shorter simmer
About 45–90 minutes
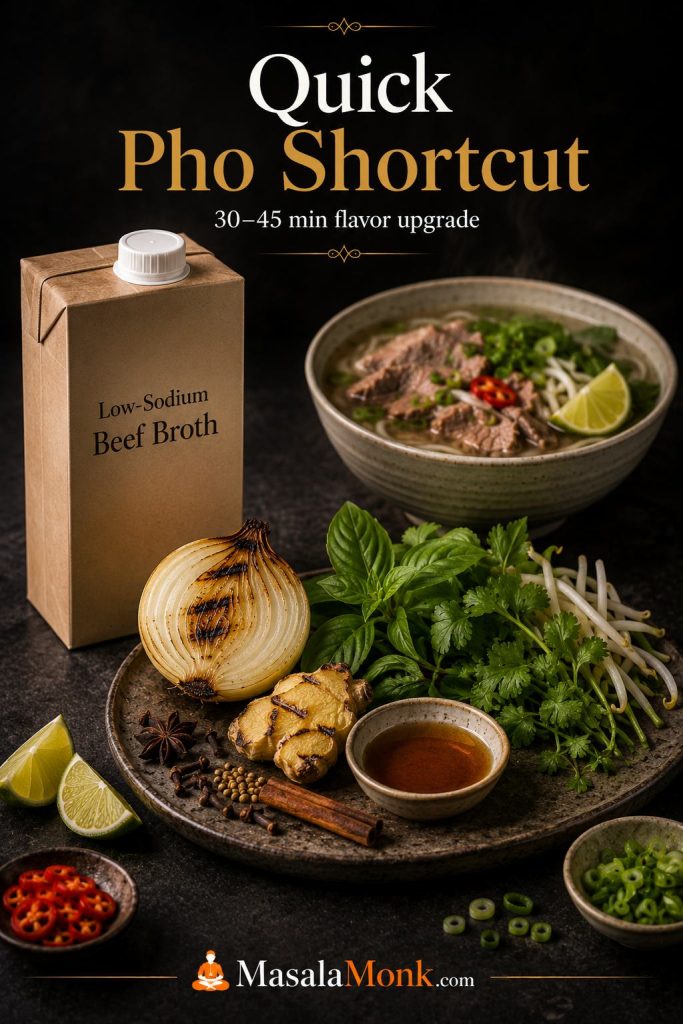
Quick pho
Weeknight cravings when you want a pho-style bowl without a full broth project
Uses good store-bought broth, roasted aromatics, warm spices, fish sauce, and fresh toppings
About 30–60 minutes
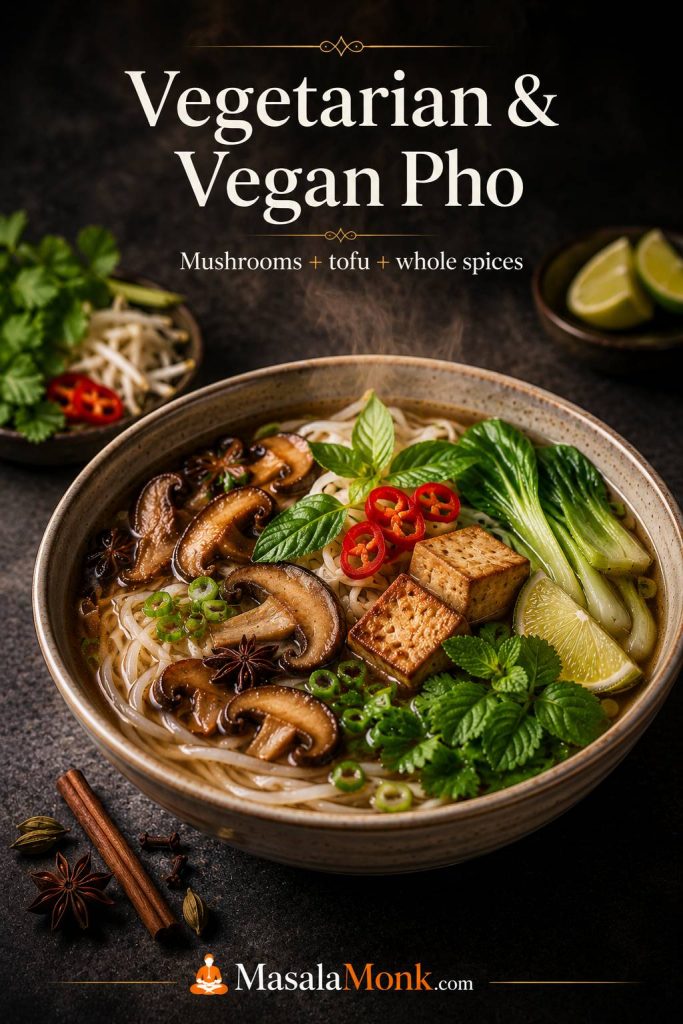
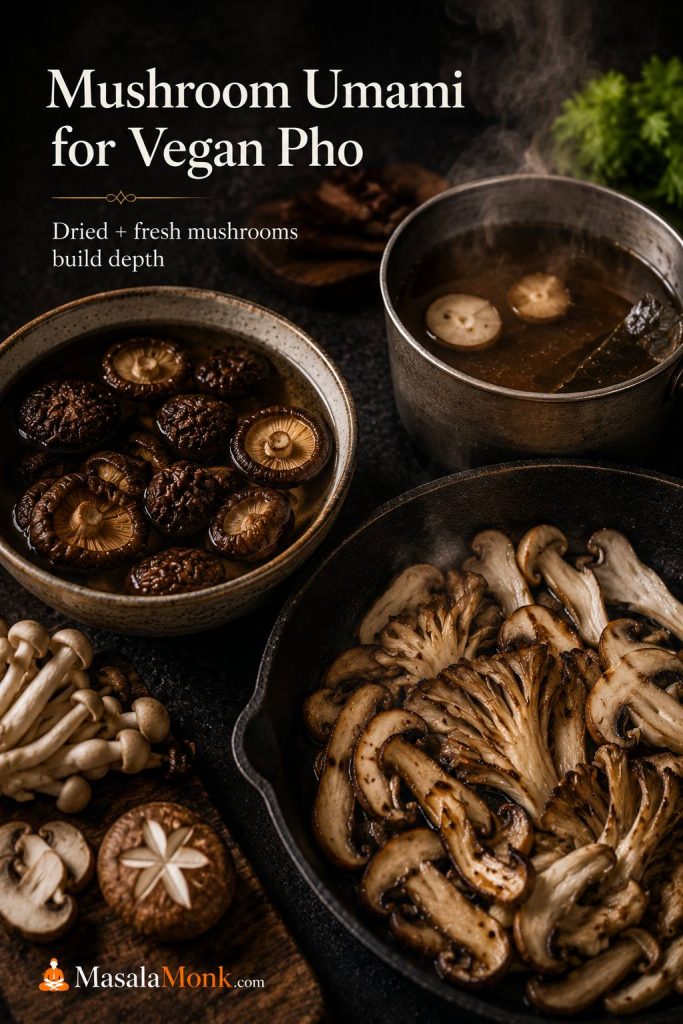
Vegetarian or vegan pho
Plant-based bowls that still need depth and aroma
Uses mushrooms, browned onion and ginger, whole spices, tamari or soy sauce, and tofu or vegetables
About 45–75 minutes
Instant Pot pho
Faster extraction from bones and meat
Uses pressure cooking, then careful straining, skimming, and final seasoning
About 2–3 hours with pressure release
The Best First Pho Recipe to Try
If you have the time, beef pho is the best version for understanding how pho gets its depth. If you are rushed, start with chicken pho or quick pho instead. A calm, well-seasoned shortcut bowl is better than a stressed full beef version.
After you understand the broth, noodles, and bowl assembly, the other versions are not confusing anymore. They are simply different ways of building aroma, body, salt, sweetness, freshness, and heat.
What Is Pho?
Pho, or phở, is a Vietnamese noodle soup built around aromatic broth, flat rice noodles, meat or another protein, and fresh toppings. Beef pho is often called phở bò, while chicken pho is called phở gà. A good bowl tastes savory, fragrant, lightly sweet in the background, and fresh from herbs and lime.
Pho works in layers: the broth carries the bowl, the flat noodles give it body, the protein adds substance, and herbs, lime, sprouts, and chili wake everything up at the table.
In every version, the broth does most of the work. Bones or chicken give body, onion and ginger bring warmth, whole spices create the unmistakable aroma, fish sauce and salt build savoriness, and fresh toppings brighten the finished bowl. If you want a light background read on pho’s place in Vietnamese food culture, Vietnam Travel has a useful overview of the story of Vietnamese pho.
A quick note on style: Pho varies by region, family, restaurant, and personal habit, so this is not the only “correct” way to make it. This version is a practical home-style beef pho built around the core moves that matter most: clean broth, roasted aromatics, whole spices, rice noodles, hot assembly, and fresh toppings.
Pho at a Glance
Recipe type
Home-style beef pho / Vietnamese noodle soup
Yield
6 large bowls
Starting water
4.5 L / 19 cups
Finished broth
About 3.5–4 L / 3.7–4.2 quarts, depending on evaporation
Prep time
45 minutes
Cook time
About 4 hours
Total time
About 4 hours 45 minutes
Pot size
9–10 L / 10-quart stockpot is ideal
Broth temperature while simmering
Gentle simmer, roughly 85–95°C / 185–203°F, not a rolling boil
Noodles per bowl
50–80 g dried banh pho noodles, or about 120 g fresh noodles
Broth per bowl
500–650 ml / 2–2¾ cups hot broth
The starting water is higher than the final broth yield because some liquid evaporates during the long simmer. If the pot reduces too far, add hot water near the end and adjust the seasoning before serving.
Why This Recipe Works
This pho recipe uses both beef bones and a flavorful simmering cut because bones and meat do different jobs. Bones give body, richness, and depth. Brisket, chuck, or shank makes the broth taste more rounded and gives you tender cooked beef for the bowls.
Parboiling keeps the broth cleaner. Browned onion and ginger add roasted aroma, while the toasted spice bundle gives the broth its pho fragrance without leaving grit behind. A gentle simmer keeps the broth clearer instead of greasy and muddy.
The broth is seasoned slightly stronger than a regular soup because rice noodles, herbs, sprouts, beef, and lime will soften the flavor once the bowl is assembled. That one detail is why a broth that tastes bold in the pot can taste balanced at the table.
Pho Recipe Ingredients
Good pho does not need a huge list of fancy ingredients, but each ingredient has a job. The broth needs bones or chicken for body, meat for savoriness, onion and ginger for aroma, spices for warmth, fish sauce and salt for depth, sugar for balance, and noodles that stay silky after hot broth is poured over them.
The ingredient list looks long at first, yet each part has a clear job: bones add body, onion and ginger add warmth, spices build fragrance, and herbs and lime sharpen the final bowl.
Broth Ingredients
Beef bones: marrow, knuckle, leg, neck, oxtail, or meaty soup bones help build flavor and body.
Brisket, chuck, or shank: this seasons the broth and becomes the cooked sliced beef for serving.
Onion and ginger: browning them gives the broth a deeper, lightly smoky aroma.
Water: start with 4.5 L / 19 cups so you end with enough broth for 6 bowls after simmering.
Fish sauce: adds savory depth. Add it near the end so the final seasoning stays controlled.
Salt: seasons the broth itself, not just the toppings.
Rock sugar or regular sugar: rounds the broth without making it taste sugary.
Whole Spices
The classic pho aroma comes from whole spices, not powdered seasoning dumped into the pot. Star anise is the most recognizable note, while cinnamon, cloves, coriander, fennel, and black cardamom add warmth and depth.
Star anise: the signature sweet-spiced aroma.
Cinnamon: warm backbone. Use sticks, not ground cinnamon.
Cloves: powerful and easy to overdo, so use a small amount.
Coriander seeds: gentle citrusy lift.
Fennel seeds: optional, with a sweet herbal edge.
Black cardamom: optional, smoky, and strong. One pod is enough.
Pho Noodles
Use banh pho, the flat rice noodles made for pho. Dried noodles are easier to find and work very well when soaked or cooked separately. Fresh noodles need only a quick blanch. For a deeper noodle guide, Andrea Nguyen’s Viet World Kitchen has a helpful explanation of banh pho flat rice noodles.
If rice-based cooking often gives you texture trouble, MasalaMonk’s guide on how to cook rice perfectly is a useful companion for understanding rinsing, soaking, resting, and why starch control matters.
Beef, Chicken, or Plant-Based Protein
For beef pho, use two kinds of beef: one cut for simmering in the broth and one tender cut for the bowl. Brisket, chuck, or shank are good for simmering. Eye of round, sirloin, tenderloin, or flank can be sliced paper-thin and cooked by the hot broth in the bowl.
For chicken pho, use bone-in chicken, chicken thighs, or a whole-chicken base. For vegetarian or vegan pho, build body with mushrooms, roasted aromatics, whole spices, tamari or soy sauce, and tofu or vegetables.
Toppings, Herbs, and Condiments
Toppings should brighten the bowl, not cover up the broth. Bean sprouts add crunch, herbs add aroma, lime adds lift, chili adds heat, and sauces add sweetness or spice. Hoisin and sriracha are optional. To preserve the broth’s clean flavor, try sauces on the side for dipping meat instead of stirring a lot into the whole bowl.
Bean sprouts
Thai basil, mint, cilantro, or a mix
Lime wedges
Sliced chili or jalapeño
Thinly sliced onion
Scallions
Hoisin sauce, optional
Sriracha or chili sauce, optional
If you want something cool and crunchy on the side, this easy cucumber salad recipe has Asian-style and spicy cucumber variations that work well beside hot, aromatic noodle bowls.
What to Buy for Homemade Pho
If this is your first time making pho, do not worry about buying every possible beef cut, herb, or spice. Focus on the ingredients that change the broth most: bones, one flavorful simmering cut, onion, ginger, whole spices, fish sauce, and proper flat rice noodles.
You do not need every possible cut or garnish to make good pho at home. Start with the essentials, then add better bones, deeper flavor builders, and more toppings when you want a fuller bowl.
Level
Buy this
What it gives you
Minimum good beef pho
Meaty beef bones, chuck or brisket, banh pho noodles, onion, ginger, star anise, cinnamon, fish sauce
A satisfying homemade bowl with real broth character
Better broth
Add knuckle bones, marrow bones, oxtail, coriander seed, cloves, and rock sugar
More body, deeper aroma, and better balance
Best topping setup
Add eye of round or sirloin, Thai basil, bean sprouts, lime, chilies, scallions, and thin onion
A fresher, more complete restaurant-style bowl
Shortcut version
Low-sodium broth, onion, ginger, whole spices, fish sauce, rice noodles, herbs, and lime
A good weeknight bowl, but not the same body as long-simmered beef pho
Think of the shopping list for this pho recipe as a ladder. The first level can still make good pho. The higher levels add body, aroma, and freshness, but they are not worth stressing over if they keep you from cooking.
Best Bones and Beef Cuts for Pho
Great beef pho usually needs both bones and meat. Bones bring body and depth, but meat makes the broth taste more rounded and satisfying. A pot made only with bones can taste thin or hollow, while a pot with only meat can lack the gelatin-rich texture that makes pho broth feel complete.
Good beef pho depends on using the right cut for the right purpose: bones bring body, simmering cuts add richness, and paper-thin beef gives the bowl its classic finishing touch.
Beef or bone
Best use
What it adds
Marrow bones
Broth base
Richness and beef flavor, though they can add fat that needs skimming
Knuckle or leg bones
Broth base
Gelatin and body
Neck bones or oxtail
Broth base
Meatiness and depth
Brisket
Simmered meat and topping
Classic cooked beef slices with rich flavor
Chuck
Simmered meat and topping
Beefy, affordable, and forgiving
Shank
Simmered meat and topping
Deep flavor and a slightly firmer texture
Eye of round, sirloin, tenderloin, or flank
Raw thin-sliced topping
Tender slices that cook in very hot broth
For the easiest home version, use a mix of meaty bones, marrow or knuckle bones, and brisket or chuck. If your butcher has oxtail or neck bones, they are excellent, but you do not need every cut to make a strong homemade bowl.
Thin beef tip: place the raw beef for topping in the freezer for 15–25 minutes before slicing. It should firm up, not freeze solid. This makes it much easier to cut paper-thin slices.
How Thin to Slice Beef for Pho
For raw beef topping, thickness matters more than the exact cut. The slices should be thin enough that hot broth can warm them quickly in the bowl. If the beef is cut too thick, it may stay cold or raw-looking even after the broth is poured.
Chill the beef briefly before slicing, then cut across the grain with a sharp knife. Aim for flexible, paper-thin slices rather than steak-like strips. For a fully cooked bowl, dip the slices into simmering broth first, then add them to the noodles.
Chilled beef slices far more cleanly than warm beef. As a result, it is easier to get the paper-thin slices that hot broth can quickly warm in the bowl.
Pho Spices and Spice Bag
Use whole spices and toast them briefly before they go into the broth. Toasting wakes up the aroma, while a spice bag keeps the broth cleaner and makes it easier to remove the spices before they become too strong.
Whole spices should perfume the pot, not muddy it. A spice bag gives pho its signature fragrance while helping you control when the spices have given enough.
Ground spices are not ideal for the main broth because they can cloud the liquid and leave grit at the bottom of the bowl. If you only have ground spices, use them very sparingly in a shortcut broth, then strain carefully through a fine-mesh strainer lined with cheesecloth.
Spice
Amount for this recipe
Role
Star anise
6–8 pods
Signature pho aroma
Cinnamon sticks
1–2 sticks
Warmth and sweetness
Cloves
4–6 whole cloves
Deep spice; use carefully
Coriander seeds
1 tablespoon
Citrusy lift
Fennel seeds
1–2 teaspoons, optional
Sweet herbal note
Black cardamom
1 pod, optional
Smoky depth
Add the spice bag during the later part of simmering instead of leaving it in for the entire cook. If the broth starts smelling more like a spice cabinet than beef soup, remove the bag early. The spices should support the broth, not take over the bowl.
How to Make Clear Pho Broth
Clear broth comes from good preparation and gentle heat. The goal is not a weak broth; it is a broth that tastes deep but looks clean. Parboil the bones, rinse them well, brown the aromatics, simmer gently, skim when needed, and strain before serving.
The broth should smell warm from the spices, roasted from the onion and ginger, and savory before you ever add noodles. When it is right, it tastes bold on its own but not harsh, with enough salt and fish sauce to carry the plain rice noodles.
Why You Parboil the Bones First
Parboiling removes surface impurities, blood, and loose proteins before the real broth begins. Add the bones and simmering beef to a pot, cover with water, bring to a hard boil for 5–10 minutes, then drain. Rinse the bones and meat under warm water and scrub the pot before starting the actual broth.
This step feels annoying, but it is one of the biggest differences between clear broth and a murky pot. You are not throwing away the good flavor. You are removing the material that would cloud the broth later.
Parboiling may feel like extra work; however, it is one of the best ways to improve pho broth clarity. Once the bones are rinsed and the pot is reset, the real simmer starts much cleaner.
Why You Char the Onion and Ginger
Charring onion and ginger gives pho broth a roasted, lightly smoky aroma. You can do this over a gas flame, in a dry skillet, under a broiler, or on a grill pan. The cut sides should be deeply browned in spots, not just lightly warmed.
Charred onion and ginger add roasted depth that plain raw aromatics cannot match. Because of that, the broth tastes warmer, rounder, and more like pho instead of generic beef soup.
Why You Toast the Spices
Toasting whole spices for 3–5 minutes makes them more fragrant. Use medium heat and keep them moving so they smell warm and aromatic, not burnt. After toasting, tie them in cheesecloth or place them in a spice bag.
Toasting wakes up the spices before they go into the broth. Even a short toast helps star anise, cinnamon, and coriander smell fuller and more alive in the finished pot.
How Long to Simmer Pho Broth
For this beef pho, plan on about 4 hours of gentle simmering after the parboil step. Keep the broth at a quiet simmer, roughly 85–95°C / 185–203°F. You should see small, steady bubbles and gentle movement, not a rolling boil that shakes the whole pot.
A rolling boil can pull fat and loose particles into the broth, which makes it cloudy and greasy. A calm simmer extracts flavor from the bones and meat while keeping the broth cleaner.
Small steady bubbles are the sweet spot for pho broth. The pot should look alive, not violent, so flavor develops without shaking fat and sediment through the liquid.
How to Season Pho Broth
Pho broth should taste slightly stronger than a normal sipping soup before it goes into the bowl. The noodles, meat, herbs, sprouts, and lime will soften the seasoning. If the broth tastes perfect in the pot, it may taste a little flat once the bowl is assembled.
Season near the end with fish sauce, salt, and a little rock sugar or sugar. Look for savory first, gentle sweetness in the background, warm spice in the aroma, and enough clarity that lime and herbs can brighten the bowl at the table.
When the broth is right, it should smell like roasted onion and warm spice first, then taste savory, clean, and slightly rounded. It should not taste like plain beef stock with noodles waiting nearby.
How Pho Broth Should Taste Before Serving
Before serving, taste the strained broth before it hits the bowl. It should feel a little too bold by itself: savory first, lightly sweet in the background, warm with spice, and strong enough to carry plain rice noodles. If it tastes perfect as a sipping soup, it may taste quiet once the noodles, beef, herbs, sprouts, and lime are added.
The broth for this pho recipe is on track when it smells roasted from onion and ginger, warm from star anise and cinnamon, and savory before any noodles are added. It should not smell muddy, greasy, burnt, or aggressively sweet.
Taste the broth before serving, not after the bowls are built. It should seem a little assertive on its own, or it may fade once the noodles and toppings go in.
What you taste
What it means
How to adjust
Thin or watery
The broth needs more concentration or seasoning
Simmer uncovered a little longer, or add fish sauce in small amounts
Salty but flat
It has salt, but not enough aroma or balance
Add a tiny pinch of sugar, more ginger aroma, or brighten later with lime
Sweet but weak
The sugar or onion is louder than the savory base
Add fish sauce or salt gradually
Too spiced
The spice bag stayed in too long
Remove the spices, dilute slightly, and simmer with onion or ginger
Good in the pot but weak in the bowl
The broth was seasoned like soup, not like pho broth
Season the next bowls slightly stronger before ladling
How to Fix Pho Broth Before Serving
Do the final broth check before you assemble the bowls, not after everyone has started eating. At this point, the broth should taste slightly stronger than a normal soup because plain noodles, beef, herbs, sprouts, and lime will soften the flavor once they land in the bowl.
Thin broth should be reduced briefly before you add more seasoning. For sweet but weak broth, add fish sauce or salt in small amounts. When the broth smells too spiced, remove the spice bag and dilute it slightly. Fixing the pot now is much easier than trying to rescue six finished bowls later.
The smartest time to fix pho broth is right before serving. Watery broth often needs reducing, sweet broth needs savory balance, and a quiet-tasting broth usually needs stronger seasoning.
Best Noodles for Pho
The best noodles for pho are banh pho, flat rice noodles. They may be sold dried or fresh. Dried noodles are usually easier to find, and they hold up well when soaked or cooked separately. Fresh noodles are softer and usually need only a quick blanch.
Banh pho, the classic flat rice noodle, gives pho the right texture. It stays tender and slippery without turning the bowl heavy or chewy like the wrong noodle can.
Dried vs Fresh Pho Noodles
Noodle type
Best use
How to handle
Dried banh pho
Most home cooks; easy to store and find
Soak or cook according to the package, drain well, and add to bowls just before serving
Fresh banh pho
Best texture when available
Blanch briefly to loosen and warm; do not boil aggressively
Very wide rice noodles
Better for stir-fry than classic pho bowls
Use only if that is what you have, but expect a heavier bowl
Rice vermicelli
Not ideal for pho
Save it for other Vietnamese noodle bowls rather than using it as the first choice here
What Width of Rice Noodles to Use
Small to medium flat rice noodles are best for pho soup. They should be wide enough to feel silky and satisfying, but not so wide that they dominate the bowl. Very wide noodles are more common in stir-fries and can make pho feel heavy.
How to Cook Pho Noodles Without Making Them Mushy
Cook pho noodles away from the broth. That one habit keeps the liquid clearer and gives the noodles a better texture in the finished bowl. The noodles should meet the broth only at the very end.
Keep the noodles out of the broth pot until serving. This one habit helps the soup stay cleaner and prevents the rice noodles from sitting too long and going soft.
Common mistake: adding noodles to the broth pot. Rice noodles release starch and keep absorbing liquid. Cook them separately, drain them well, and add them to bowls only when serving.
Do not simmer noodles in the broth. They release starch and make the broth cloudy.
Do not store noodles in broth. They keep absorbing liquid and turn mushy.
Do not cook them too early. Prepare them close to serving time when possible.
Use 50–80 g dried noodles per bowl. Use the lower end for lighter bowls and the higher end for noodle-heavy bowls.
Refresh clumped noodles with hot water. Drain again before adding them to bowls.
Pho Noodle Texture Guide
Noodle texture can make a good broth feel better or worse. The goal is not a soft pile of rice noodles that breaks apart, and it is not a stiff noodle that fights the broth. Good pho noodles should bend easily, feel slippery, and still hold their shape when lifted with chopsticks.
If the noodles feel too firm, give them a little more time or refresh them with hot water. If they are already tearing, clumping, or collapsing before they reach the bowl, they have gone too far. Cook them close to serving time whenever possible.
Pho noodles should bend easily and feel silky, yet they still need enough structure to hold their shape once the hot broth is poured over them.
The noodles should be soft and slippery, but still have enough bite that they do not collapse in the hot broth.
How to Assemble Pho Bowls
Once the broth is strained and seasoned, the rest of the recipe moves quickly. Have the noodles cooked, herbs washed, beef sliced, broth hot, and bowls ready before you start assembling.
Bring the final broth to a full boil when it goes into the bowl, especially if you are using raw thin-sliced beef. Keep the simmering stage gentle, but make the serving stage hot and fast.
The bowl is built in layers so each part keeps its texture. Noodles stay silky, beef gets the heat it needs, and herbs and lime stay fresh until the last second.
Add cooked rice noodles to each bowl.
Layer in slices of cooked brisket, chuck, or shank.
Tuck in paper-thin raw beef slices if using.
Ladle very hot broth directly over the beef and noodles.
Top with onion, scallions, herbs, sprouts, chili, and lime.
Serve immediately with optional hoisin and sriracha on the side.
Why the Final Broth Pour Must Be Hot
The long broth simmer should stay calm, but the final pour should be very hot. That last burst of heat warms the noodles, releases the aroma from the broth, and helps thin beef soften or cook in the bowl.
If the broth is only warm, the bowl can taste dull and the beef may not change texture properly. Bring the strained broth back to a full boil right before serving, then ladle it over the noodles and beef immediately.
Hot broth matters most at the final pour. If the liquid is not hot enough, the beef stays too raw and the whole bowl loses some of its aroma and lift.
Raw beef note: the topping beef must be very fresh, kept cold, sliced paper-thin, and covered with boiling-hot broth right away. For children, pregnant guests, older adults, immunocompromised guests, or anyone uncomfortable with rare beef, use cooked beef only or dip the slices directly into simmering broth until fully cooked before adding them to the bowl.
What a Finished Beef Pho Bowl Should Feel Like
A finished beef pho bowl should not feel heavy, muddy, or overloaded. It should taste balanced: savory broth first, then soft noodles, tender beef, fresh herbs, sharp lime, and a little crunch from sprouts or onion.
If the first bowl tastes flat, do not keep assembling the rest. Add more seasoning to the broth, brighten the bowl with lime, or bring the broth back to a stronger boil before serving the next one. One test bowl can save the whole pot.
A finished beef pho bowl should feel balanced rather than heavy: savory broth, tender beef, soft noodles, bright herbs, fresh lime, and just enough crunch from onion or sprouts.
Suggested Pho Cooking Timeline
This timeline keeps the long recipe from feeling chaotic. The exact minutes do not have to be perfect; use it as a rhythm for the pot.
A timeline turns pho from a guessing game into a sequence. Once the broth is underway, you can time the meat, spices, noodles, and toppings without crowding the final 20 minutes.
Time
What to do
0:00
Parboil bones and meat.
0:15
Rinse bones and meat, clean the pot, and start the fresh broth.
0:30
Char onion and ginger, then toast the spices.
1:30–2:00
Remove brisket, chuck, or shank once tender enough to slice later.
2:30–3:00
Add the spice bag for the final stretch of simmering.
Bring broth to a full boil and assemble bowls immediately.
How to Make Pho Step by Step
Every step protects either flavor, clarity, or texture. Parboiling cleans the base, charring builds aroma, straining refines the broth, and separate noodles keep the final bowl clean.
1. Parboil the Bones and Meat
Place the beef bones and brisket, chuck, or shank in a large pot. Cover with water, bring to a hard boil, and boil for 5–10 minutes. Drain everything, rinse the bones and meat under warm water, and scrub the pot clean.
2. Char the Onion and Ginger
Halve the onions and split the ginger lengthwise. Char them over a gas flame, in a dry skillet, under a broiler, or on a grill pan until the surfaces are browned and fragrant. This usually takes 8–12 minutes depending on your heat source.
3. Toast the Spices
Add the star anise, cinnamon, cloves, coriander, fennel, and black cardamom if using to a dry skillet. Toast over medium heat for 3–5 minutes, shaking the pan often. Transfer to a spice bag or wrap in cheesecloth.
4. Start the Broth
Return the rinsed bones and simmering beef to the clean pot. Add 4.5 L / 19 cups fresh water, the charred onion, charred ginger, salt, and rock sugar. Bring to a boil, then immediately lower to a gentle simmer.
5. Simmer Gently
Simmer gently for about 1½–2 hours, skimming the surface when needed. When the brisket, chuck, or shank is tender, remove it from the broth, cool slightly, wrap, and refrigerate until slicing. Continue simmering the bones, keeping them mostly submerged; add hot water if the broth reduces too aggressively.
6. Add the Spice Bag
Add the toasted spice bag for the final 60–90 minutes of simmering. This gives the broth a clear pho aroma without letting the spices become bitter or too dominant. Remove the spice bag early if the broth smells strong enough before the time is up.
7. Strain and Season
Strain the broth through a fine-mesh strainer. Skim excess fat. Season with fish sauce, more salt, and a little sugar if needed. The broth should taste slightly stronger than a normal soup because the noodles and toppings will soften it.
8. Cook the Noodles
Cook or soak the banh pho noodles according to the package directions. Drain well. If they are ready before the broth, rinse lightly and keep them separate, then refresh briefly with hot water before serving.
9. Slice the Beef and Prepare Toppings
Slice the cooked brisket, chuck, or shank against the grain. Thinly slice the raw beef topping if using. Wash the herbs, cut the lime, slice the chilies, and prepare sprouts, scallions, and onion.
10. Assemble and Serve
Bring the strained broth back to a full boil. Divide noodles among bowls, add cooked beef and raw beef slices, then ladle hot broth over the top. Add toppings and serve immediately.
Quick Pho Recipe Shortcut
Shortcut honesty: quick pho is best when you want the aroma and comfort of pho without a full stockpot project. It will not have the same body as long-simmered bone broth, so do not judge it by the same standard. Use it for weeknights; use the full beef version when broth depth matters most.
A quick pho shortcut can still make a good pho-style bowl if you build aroma properly. The key is to improve the broth instead of simply heating stock and adding noodles.
A quick pho shortcut still needs time to build character. Otherwise, it tastes like broth with noodles rather than a proper pho-style bowl with depth and aroma.
How to Upgrade Broth for Quick Pho
The shortcut version should still taste built, not rushed. Give the broth enough time with charred aromatics and whole spices before you season it, then use fresh herbs and lime at the end to make the bowl feel complete.
A fast pho recipe works best when you still give the broth 30–45 minutes with aromatics and spices. Simmer 1.5–2 L / 6–8 cups good low-sodium beef or chicken broth with 1 charred onion, a 2–3 inch piece of charred ginger, 2–3 star anise pods, 1 small cinnamon stick, 2 cloves, and 1 teaspoon coriander seeds. Strain, then season with fish sauce, salt, and a little sugar.
Shortcut pho should still smell like pho before it reaches the bowl. If it only tastes like boxed broth, give the onion, ginger, and spices more time.
Use good low-sodium broth so you can control the final seasoning.
Brown the onion and ginger instead of adding them raw.
Toast the spices before simmering.
Keep the simmer short but focused: 30–45 minutes is enough to perfume the broth.
Keep the noodles out of the broth until serving and finish with fresh herbs, lime, sprouts, and chili.
For a better shortcut beef pho, simmer a piece of brisket, chuck, or shank in store-bought broth for 1½–2½ hours with the aromatics and spices. It is still much faster than a full bone broth, but it gives the bowl more body and real beef flavor.
Chicken Pho Recipe Option
Chicken pho is often the easiest first pho to make at home. It needs less time than beef pho and does not require the same hunt for beef bones. The bowl should taste lighter, cleaner, and brighter than beef pho, not like a forced beef-style broth.
Chicken pho is often the easiest first version to make at home. It cooks faster than beef pho, yet it still rewards good broth, proper noodles, and bright finishing herbs.
For a simple chicken pho, simmer 1.5–2 L / 6–8 cups chicken broth with 1 charred onion, a 2–3 inch piece of charred ginger, 2–3 star anise pods, 1 small cinnamon stick, 2 cloves, and 1 teaspoon coriander seeds. Add 450–700 g / 1–1½ lb chicken thighs, chicken breasts, or bone-in chicken pieces and simmer gently until cooked through. This amount makes about 3–4 bowls, depending on how much broth you like in each bowl.
Remove the chicken, shred or slice it, strain the broth, and season with fish sauce, salt, and a small amount of sugar. Serve with banh pho noodles, herbs, sprouts, lime, chili, onion, and scallions. If you want a richer chicken version, use bone-in chicken and simmer closer to 75–90 minutes.
Vegetarian and Vegan Pho Recipe Options
Vegetarian pho and vegan pho need more than plain vegetable broth. Without bones, meat, or fish sauce, you need to build umami from mushrooms, roasted aromatics, whole spices, and a salty-savory seasoning such as tamari or soy sauce.
Vegetarian and vegan pho need real savory depth to feel satisfying. Mushrooms, tofu, roasted aromatics, and soy or tamari help the broth taste layered instead of thin.
Build a Vegan Pho Broth Base First
A plant-based broth needs extra umami, so start with 1.5–2 L / 6–8 cups vegetable broth or water, charred onion, charred ginger, toasted pho spices, 20–30 g dried shiitake or mixed dried mushrooms, and 225–300 g / 8–10 oz fresh mushrooms. Season with tamari or soy sauce, a little sugar, and salt to taste. Add tofu, bok choy, sautéed mushrooms, or other vegetables to the finished bowl.
Dried mushrooms deepen the broth, while fresh mushrooms improve the bite of the finished bowl. Using both gives vegan pho a fuller, more convincing flavor.
For another simple way to make mushrooms feel satisfying rather than watery, MasalaMonk’s skillet mushroom and zucchini stir fry is a useful side or topping-style idea; just cook the vegetables drier if you want to add them to a noodle bowl.
Flavor Fixes for Vegetarian and Vegan Pho
Use mushrooms: shiitake, cremini, oyster mushrooms, or dried mushrooms add depth.
Keep the charred onion and ginger: they still matter in plant-based pho.
Use whole spices: star anise, cinnamon, cloves, coriander, and fennel still create the pho aroma.
Replace fish sauce: use tamari, soy sauce, or a vegan fish sauce alternative.
Add protein: tofu, mushrooms, bok choy, or other vegetables work well.
Do not overdo sweetness: plant-based broth can become sweet quickly if the vegetables dominate.
Dried mushrooms are especially helpful because they add a deeper savory base and keep the broth from tasting like plain vegetable soup. Strain out the dried mushrooms if they are tough, or slice them thinly and return them to the bowl if they are tender enough to eat.
If soy sauce or tamari starts making the broth taste too salty, dilute gently and rebuild flavor with ginger, herbs, chili, and lime instead of adding more salt. Lower-sodium soy sauce or tamari gives you more room to adjust.
If you use miso or kombu, keep them subtle so the bowl still tastes like pho rather than a different noodle soup.
Pho Troubleshooting: Broth, Noodles, and Beef
Most pho problems come from one of four places: the broth boiled too hard, the seasoning was not balanced, the noodles were handled like pasta in soup, or the final broth was not hot enough for assembly.
Before fixing pho, identify what failed. Cloudy broth points to heat or starch, mushy noodles point to timing, and flat flavor usually points to under-seasoned broth.
Broth Problems in This Pho Recipe
Use this table to fix broth issues before they affect every bowl.
Clear pho broth does not mean weak broth. Instead, it usually means the bones were cleaned well, the simmer stayed gentle, and the noodles were kept out of the pot.
Problem
What probably happened
How to fix it
Cloudy broth
Bones were not parboiled, the pot boiled too hard, or noodles were cooked in the broth
Strain well, avoid stirring aggressively, and simmer gently next time. Cook noodles separately.
Weak broth
Too much water, not enough meat or bones, too short a simmer, or under-seasoning
Simmer longer, reduce slightly, and adjust with fish sauce, salt, and a little sugar.
Greasy broth
Fat from marrow or meat was not skimmed
Skim with a ladle, use a fat separator, or chill the broth and remove the solid fat.
Too salty
Too much fish sauce or salt, or broth reduced more than expected
Dilute with hot water or unsalted broth, then rebalance with aromatics and a tiny amount of sugar if needed.
Too sweet
Too much rock sugar or naturally sweet vegetables
Add fish sauce or salt in small amounts. Brighten the bowl with lime at serving.
Too spice-heavy
The spice bag stayed in too long or the spices were too strong
Remove the spice bag, dilute with broth or water, and simmer with extra onion or ginger if needed.
Noodle and Bowl Problems in This Pho Recipe
Use this table when the broth is good, but the final bowl still feels off.
Problem
What probably happened
How to fix it
Mushy noodles
Noodles were overcooked or sat in hot broth too long
Cook noodles separately and add them to bowls right before serving.
Noodles clumped
Cooked noodles sat too long after draining
Rinse or refresh briefly with hot water, loosen with chopsticks or tongs, then divide into bowls.
Raw beef did not cook in the bowl
Broth was not hot enough or beef slices were too thick
Bring broth to a full boil and slice beef paper-thin. Dip slices in simmering broth first if needed.
Broth tastes flat after assembling
The broth was seasoned perfectly in the pot but diluted by noodles and toppings
Season broth slightly stronger before serving. Add lime, herbs, fish sauce, or chili at the table.
Test One Bowl Before Serving the Pot
If your first bowl tastes flat, fix the broth before assembling the rest. One test bowl can save the whole pot.
The easiest way to avoid most of these issues is to keep the broth and noodles separate until the last moment. Store them separately, reheat them separately, and assemble only as many bowls as you plan to eat right away.
Make-Ahead, Storage, Freezing, and Reheating
Pho is one of the best make-ahead soups if you store the components separately. The broth can be made ahead, chilled, skimmed, and reheated. The noodles and herbs should be prepared close to serving.
Leftover pho works best when it is stored like separate parts, not one finished soup. Keep broth, beef, noodles, herbs, and sprouts apart so the next bowl still tastes fresh.
Broth: refrigerate for 3–4 days, or freeze for about 3 months for best quality.
Cooked beef: refrigerate separately and slice before serving.
Noodles: best cooked fresh. If needed, store separately and refresh with hot water.
Herbs and sprouts: wash and dry, but add only at serving.
Reheating: bring broth back to a boil before assembling bowls.
If the broth tastes too concentrated after refrigeration or reheating, add a little hot water and adjust the seasoning. Reheat only the amount you plan to serve, bring it back to a full boil for assembly, and keep the noodles, herbs, sprouts, and beef stored separately until you build fresh bowls.
Before You Start the Recipe Card
Before starting, read the broth timing, noodle timing, and raw beef note once. The recipe is easiest when the broth is treated as the main project and the noodles, toppings, and bowl assembly happen at the end.
Use this recipe card as a quick memory guide for the full beef pho method: long-simmered broth, whole spices, banh pho noodles, thin beef, fresh herbs, lime, and a hot final pour.
Home-Style Beef Pho Recipe Card
This beef pho recipe makes clear, aromatic Vietnamese-style noodle soup with beef bones, brisket or chuck, roasted onion and ginger, toasted whole spices, rice noodles, thin-sliced beef, herbs, and lime.
Yield6 large bowls
Prep Time45 minutes
Cook Time4 hours
Total Time4 hours 45 minutes
Equipment
9–10 L / 10-quart stockpot
Large skillet, broiler, grill pan, or gas flame for charring
Fine-mesh strainer
Cheesecloth, muslin, or spice bag
Ladle and tongs
Large serving bowls
Sharp knife
Optional: fat separator
Broth Ingredients
1 kg / 2 lb meaty beef bones, such as neck bones, oxtail, or meaty soup bones
1 kg / 2 lb marrow, knuckle, leg, or other beef bones
1.25–1.5 kg / 2¾–3⅓ lb beef brisket, chuck, or shank
4.5 L / 19 cups fresh water, plus more if needed
2 large onions, halved
150 g / 5 oz fresh ginger, split lengthwise
1 tablespoon salt, plus more to taste
25–40 g yellow rock sugar, or 1–2 tablespoons regular sugar
45–60 ml / 3–4 tablespoons fish sauce, plus more to taste
Spice Bag
6–8 star anise pods
1–2 cinnamon sticks
4–6 whole cloves
1 tablespoon coriander seeds
1–2 teaspoons fennel seeds, optional
1 black cardamom pod, optional
For Each Bowl
50–80 g dried banh pho rice noodles, or about 120 g fresh pho noodles
30–45 g / 1–1½ oz raw eye of round, sirloin, tenderloin, or flank, sliced paper-thin
A few slices cooked brisket, chuck, or shank
500–650 ml / 2–2¾ cups boiling-hot broth
Bean sprouts
Thai basil, mint, cilantro, or a mix
Lime wedges
Sliced chili or jalapeño
Thinly sliced onion and scallions
Hoisin and sriracha, optional
Instructions
Build the broth
Parboil the bones and meat. Place the beef bones and brisket, chuck, or shank in a large pot. Cover with water, bring to a hard boil, and boil for 5–10 minutes. Drain, rinse the bones and meat, and clean the pot.
Char the aromatics. Char the halved onions and split ginger over a gas flame, in a dry skillet, under a broiler, or on a grill pan until browned and fragrant.
Toast the spices. Toast the star anise, cinnamon, cloves, coriander, fennel, and black cardamom if using for 3–5 minutes over medium heat. Transfer to a spice bag or cheesecloth bundle.
Start the broth. Add the rinsed bones and meat back to the clean pot. Add 4.5 L / 19 cups fresh water, charred onion, charred ginger, salt, and rock sugar. Bring to a boil, then reduce to a gentle simmer.
Simmer gently. Simmer for 1½–2 hours, skimming as needed. Remove the brisket, chuck, or shank once tender, cool slightly, then refrigerate until slicing. Continue simmering the bones, keeping them mostly submerged; add hot water if the broth reduces too aggressively.
Add the spice bag. Add the toasted spice bag for the final 60–90 minutes of simmering. Remove it earlier if the broth smells strongly spiced.
Strain and season. Strain the broth through a fine-mesh strainer. Skim excess fat. Season with fish sauce, more salt, and a little sugar if needed. The broth should taste slightly stronger than a normal soup.
Finish the bowls
Cook the noodles separately. Cook or soak the banh pho noodles according to package directions. Drain well and keep separate from the broth.
Prepare the beef and toppings. Slice the cooked beef. Slice the raw beef paper-thin. Wash herbs, prepare sprouts, cut lime wedges, and slice onion, scallions, and chili.
Assemble the bowls. Bring the broth back to a full boil. Add noodles, cooked beef, and raw beef slices to bowls. Ladle boiling-hot broth over the top, then finish with herbs, sprouts, lime, chili, onion, scallions, and optional sauces.
Notes
Keep the broth at a gentle simmer, not a rolling boil, for a clearer finish.
Cook noodles separately. Do not simmer them in the broth.
For raw beef topping, slice the beef very thin and use boiling-hot broth. For a fully cooked option, use cooked beef only or dip the slices directly into simmering broth before serving.
Broth should taste slightly stronger in the pot because noodles and toppings dilute the seasoning.
Store broth, noodles, meat, and herbs separately for best leftovers.
Final Adjustments Before Serving Pho
The final adjustment is where homemade pho starts to feel personal. Once the bowl is built, taste it the way you will actually eat it: with noodles, beef, herbs, lime, sprouts, and hot broth together.
A quiet bowl may need more fish sauce or salt in the broth. When the flavor feels heavy, lime and herbs can lift it. Thin-tasting pho usually needs more broth concentration or a stronger simmer before the next bowl. This last check is what turns a good pot of pho into a bowl that tastes right to you.
The final adjustment is where homemade pho becomes personal. A little more lime, fish sauce, salt, or aroma can turn a good bowl into one that tastes exactly right to you.
FAQs
What Pho Tastes Like
Pho tastes savory, aromatic, lightly sweet, and fresh at the same time. The broth should be beefy or chicken-forward, with warm spice from star anise and cinnamon, brightness from herbs and lime, and a clean finish from rice noodles and fresh toppings.
How to Pronounce Pho
Pho is usually pronounced closer to “fuh” than “foe.” The written Vietnamese word is phở.
The Best Noodles for Pho
Flat rice noodles called banh pho are best. Use small or medium-width noodles for soup. Dried banh pho is easy to store and works well; fresh banh pho only needs a quick blanch before serving.
How to Make Pho Without Beef Bones
Use good low-sodium beef broth, charred onion and ginger, toasted pho spices, fish sauce, and a flavorful cut like brisket or chuck if you still want beef depth. The broth will be lighter than bone broth, but it can still make a satisfying shortcut bowl.
When a Pho Spice Packet Works
A whole-spice pho packet can work well, especially for a first batch. Toast the spices briefly if they are loose enough to toast, then simmer them in the broth inside the packet or a spice bag. Powdered seasoning packets are better treated as shortcut helpers, not the whole flavor base.
Why Pho Broth Turns Cloudy
Cloudy pho broth usually comes from skipping the parboil step, boiling the pot too aggressively, stirring too much, or cooking noodles directly in the broth. Parboil and rinse the bones, keep the broth at a gentle simmer, and cook noodles separately.
How Long This Pho Recipe Should Simmer
This pho recipe should simmer for about 4 hours after the parboil step. Some traditional-style beef pho recipes go longer, especially with large bones, while chicken pho and shortcut pho need less time.
The Spices That Give Pho Its Aroma
The most common pho spices are star anise, cinnamon, cloves, coriander seeds, and sometimes fennel seeds or black cardamom. Use whole spices, toast them briefly, and keep them in a spice bag for a cleaner broth.
How to Handle Raw Beef Topping Safely
The beef used as a topping should be very fresh, kept cold, sliced paper-thin, and covered with boiling-hot broth right before serving. For a fully cooked option, use cooked beef only or dip the slices directly into simmering broth until they are no longer raw, then add them to the bowl.
Why Pho Tastes Flat
Flat pho usually needs better seasoning or more balance. Add fish sauce or salt in small amounts, check for a little sweetness, and brighten the finished bowl with lime and herbs. If the finished bowl tastes quiet, the broth was probably seasoned for sipping rather than for noodles.
Where Hoisin and Sriracha Belong
Hoisin and sriracha are optional. They can be delicious with pho, but adding too much directly to the broth can cover the clean flavor you worked to build. Try using them on the side as dipping sauces for the meat.
Beef Pho vs Chicken Pho
Beef pho is usually deeper, richer, and built around beef bones and beef cuts. Chicken pho is lighter, faster, and often easier for a first homemade version. Both use aromatic broth, rice noodles, herbs, and fresh toppings.
The Best Way to Make Pho Ahead
Make the broth ahead, then store the broth, cooked beef, noodles, herbs, and sprouts separately. Chilling the broth also makes it easier to remove excess fat. Reheat the broth until very hot and assemble fresh bowls when ready to eat.
How to Store Pho Leftovers
Store the broth, noodles, beef, and herbs separately. Refrigerate broth for 3–4 days, or freeze it for about 3 months for best quality. Reheat the broth until hot, then assemble fresh bowls with noodles and toppings.
How to Keep Pho Gluten-Free
Pho is often easy to make gluten-free because the noodles are rice-based, but the sauces and packaged ingredients still need a label check. Check fish sauce, hoisin sauce, soy sauce, broth cartons, seasoning packets, and any store-bought sauces before using them.