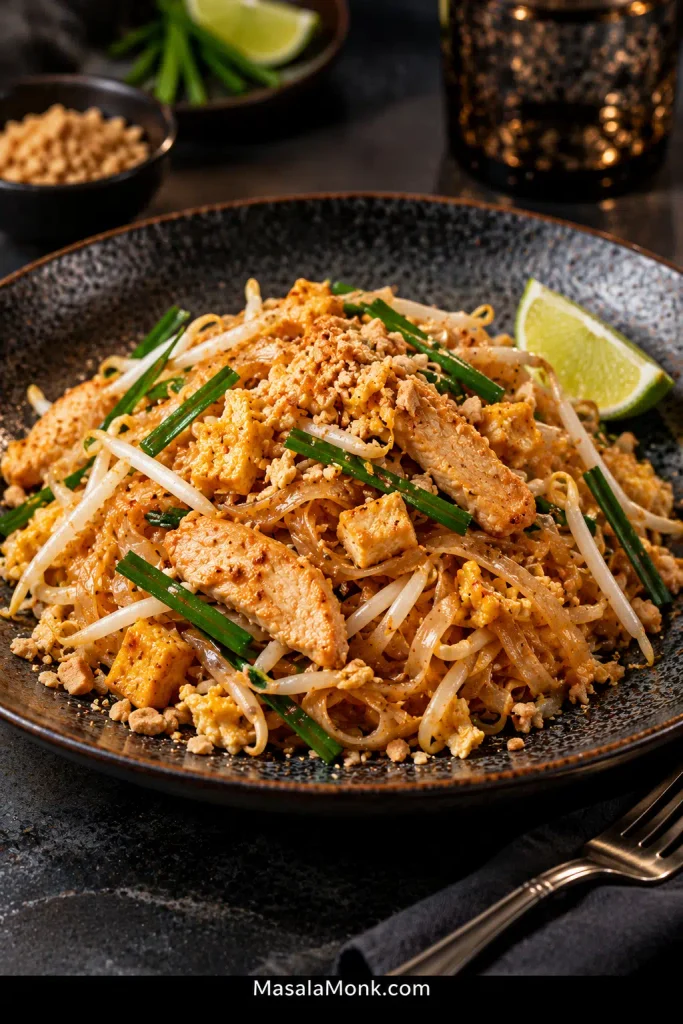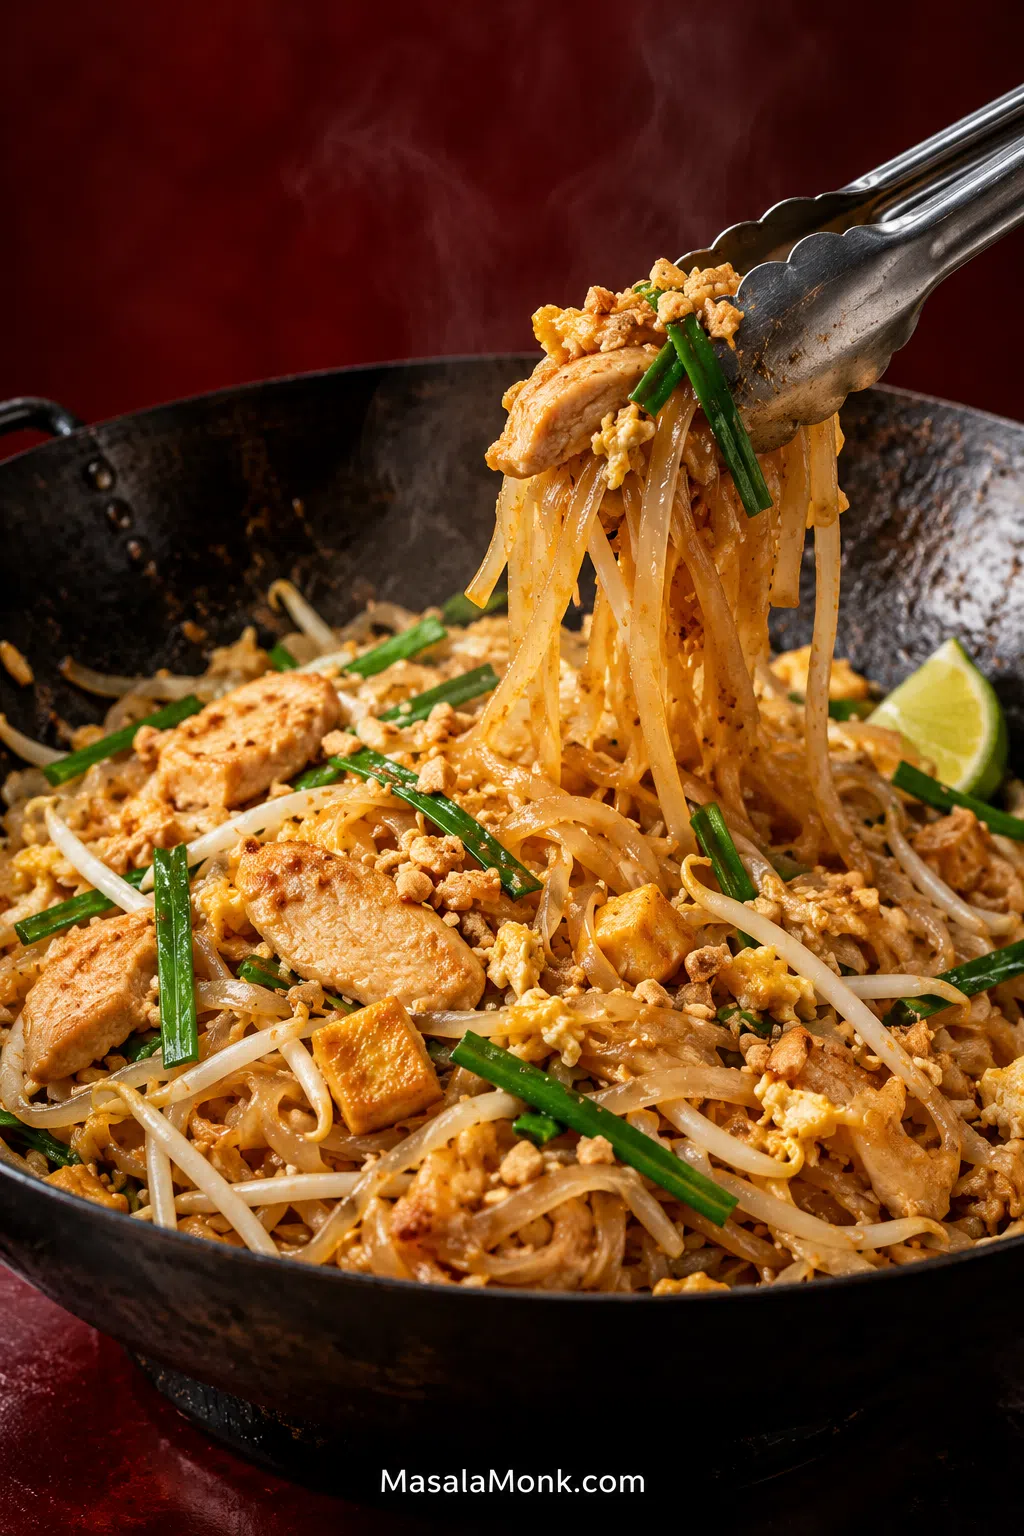
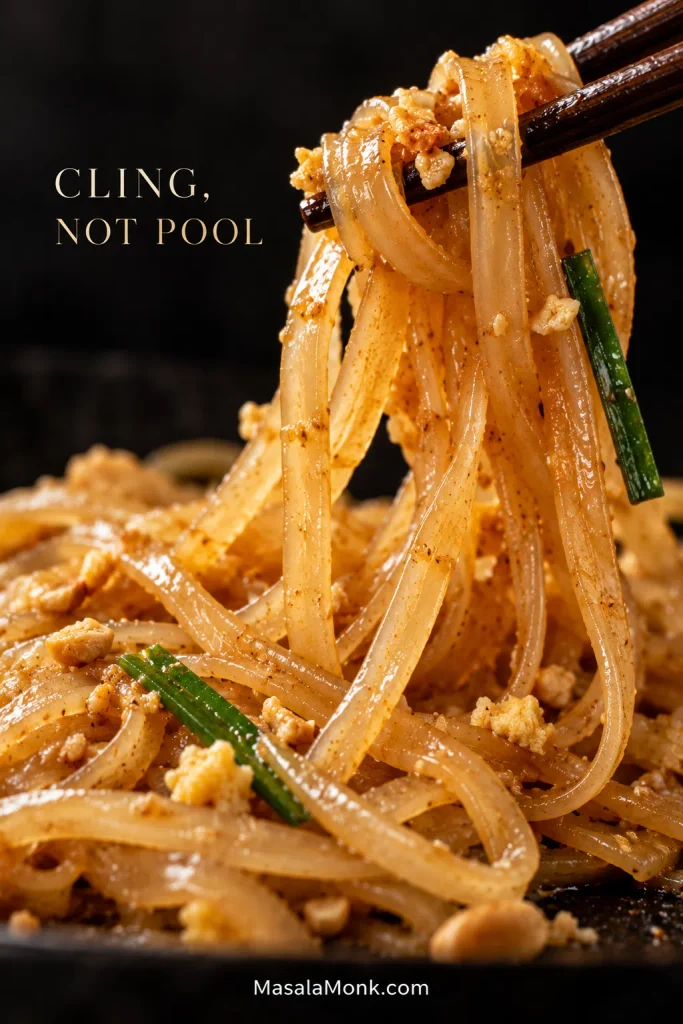
Good Pad Thai is all about contrast: chewy rice noodles glazed with tamarind sauce, tender chicken and egg, crisp bean sprouts, roasted peanuts and fresh lime. Nothing should feel drowned or heavy. You want chew in the noodles, crunch in the sprouts, and sauce that clings rather than pools.
Most trouble starts before the noodles even hit the pan. Soak them too far and they turn soft or gummy. Use an unexpectedly strong tamarind and the sauce can become painfully sour. Crowd the skillet and everything starts steaming together.
Soak the noodles short of done. Let the tamarind, fish sauce and palm sugar season them in the pan. Once the flavor is right, switch to water if they need more cooking.
What to Look For as You Cook Pad Thai
The clock is only a rough guide. These are the cues that matter.
| Watch | What you want |
|---|---|
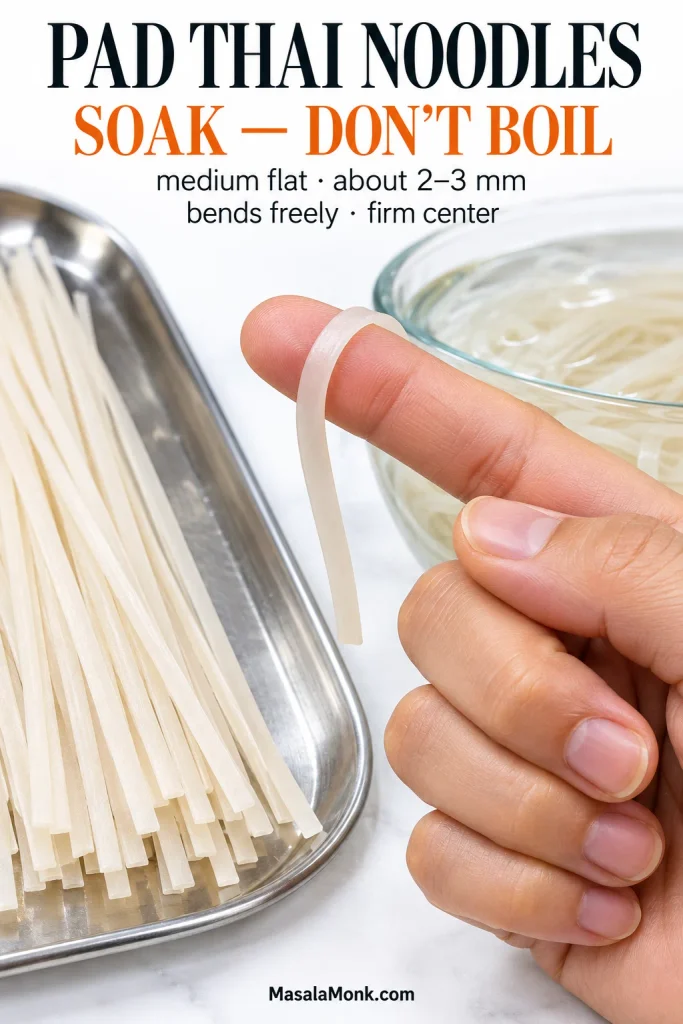
| Soaked noodles | Flexible enough to bend around a finger, with a firm center that is not ready to eat yet. |
| Crowding | Room to lift and turn the noodles without piling them into a steaming heap. |
| Sauce | Clinging to glossy noodles, with very little loose liquid underneath. |
| Finished noodles | Tender through with a pleasant chew. |
| Sprouts & chives | Warmed and lightly wilted, with fresh crunch left. |
Pad Thai Recipe
Chewy rice noodles, chicken, tofu and egg tossed with tamarind, fish sauce and palm sugar, then finished with crisp mung bean sprouts, garlic chives, roasted peanuts and lime.
Elapsed time: about 40–70 minutes, depending on the noodles.
A home stove is enough. Use a wide 12-inch skillet or roughly 14-inch wok and keep the batch small enough to stay lively and sizzling.
Ingredients
Noodles & chicken
- 4½ oz (125 g) dried medium flat rice noodles, preferably about 2–3 mm wide
- 5¼ oz (150 g) boneless skinless chicken breast or thigh, thinly sliced
- 1 tsp fish sauce, for the chicken
- 1 tsp cornstarch, optional, especially useful with chicken breast to help it stay tender through the fast sear
Pad Thai sauce
- 1¼ oz (35 g) palm sugar, about 3 tbsp tightly packed when finely chopped or grated; 35 g light brown sugar may be substituted
- 3 tbsp (45 ml) water
- 2 tbsp (30 ml) fish sauce
- 3–4 tbsp (45–60 ml) brown, pourable ready-to-use Thai or Vietnamese cooking tamarind, according to strength
For the stir-fry
- 2–3 tbsp neutral high-heat cooking oil, divided, plus more only if needed
- ¼ cup (35–40 g) finely chopped shallot
- 3 cloves garlic, finely chopped
- 2½–3 oz (75–85 g) pressed or super-firm tofu, cut into small pieces; if using water-packed extra-firm tofu, press and pat it dry first
- 2 large eggs
- 2½ cups (about 120 g) fresh mung bean sprouts
- 2–2½ oz (60–70 g) garlic chives (Chinese chives), cut into roughly 2-inch pieces
- ¼ cup (about 30 g) roasted unsalted peanuts, coarsely crushed, divided
- 1–2 limes, cut into wedges
- Thai chile flakes or crushed red pepper, for serving, optional
Classic extras — optional
- 2 tbsp finely chopped Thai sweet preserved radish
- 1–2 tbsp dried shrimp, quickly rinsed, drained and finely chopped
Instructions
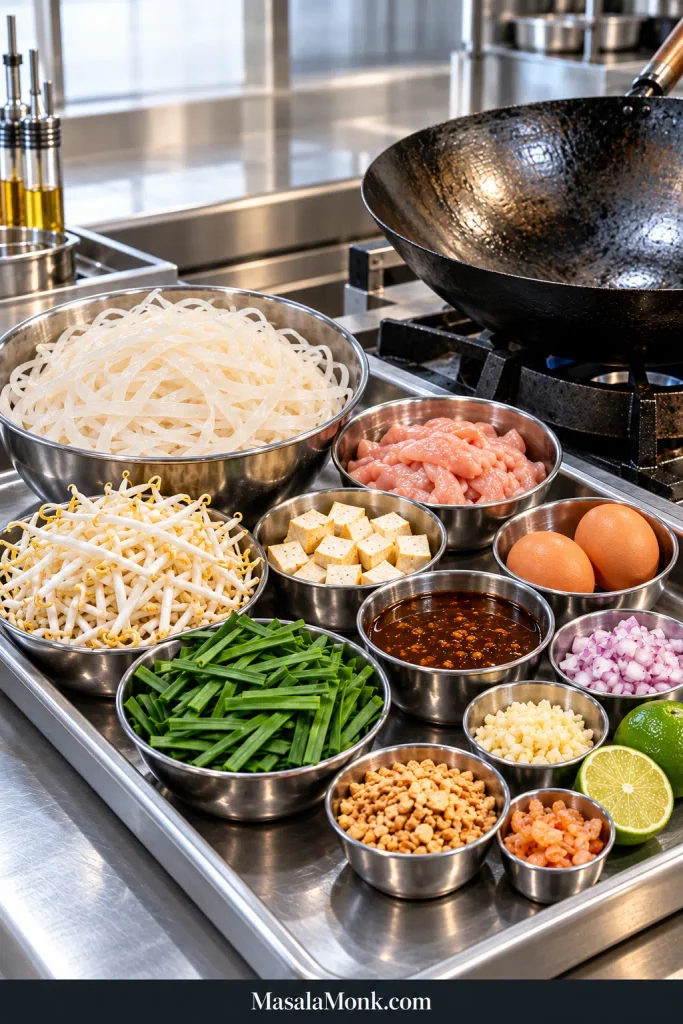
Before you heat the pan: Have the sauce, tofu, shallot, garlic, eggs, sprouts, chives, peanuts and lime ready, plus the preserved radish and dried shrimp if using. Once stir-frying starts, there is very little downtime.
Prepare the noodles, sauce & chicken
- Hydrate the noodles. Cover the dried rice noodles with room-temperature water. Medium noodles often take roughly 30–60 minutes, though thinner brands can soften sooner. Go by the noodle, not the clock: it should bend freely without snapping but remain noticeably too firm to eat. Drain very well.
- Make the sauce. Stir the palm sugar and 3 tbsp (45 ml) water over medium-low heat until the sugar dissolves. Remove from the heat and mix in 2 tbsp (30 ml) fish sauce and 3 tbsp (45 ml) ready-to-use tamarind. Once cool enough to sample, add the final tablespoon of tamarind only if yours is relatively mild.
- Season the chicken. Toss the sliced chicken with 1 tsp fish sauce and the optional cornstarch.
- Sear the chicken. For a wok, stainless-steel or cast-iron skillet, heat the pan over high heat and then add about 1 tbsp oil. With nonstick, add the oil before heating and use medium to medium-high heat. Spread in the chicken, sear until lightly browned and almost cooked through, then transfer to a plate.
Build the wok base & coat the noodles
- Build the savory base. Add another tablespoon of oil if the pan looks dry. Stir-fry the shallot and garlic until the shallot starts to soften and the garlic smells fragrant. Add the tofu, then the preserved radish and dried shrimp if using. Keep tossing until the tofu is hot with a little color around the edges.
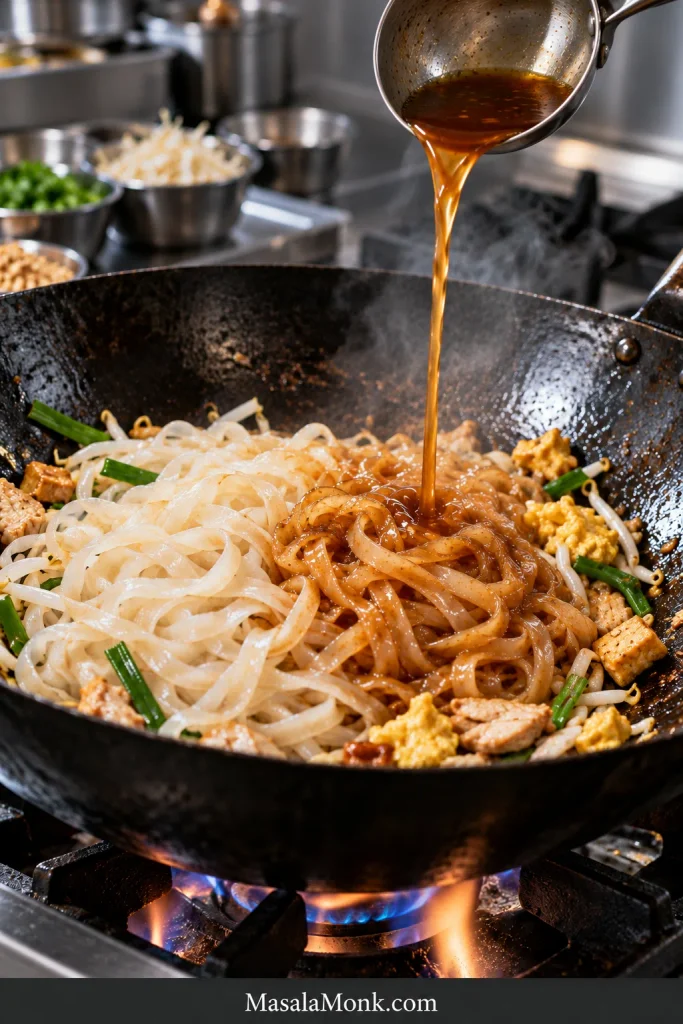
- Add the noodles and sauce. Tip in the drained noodles followed by the sauce. It should sizzle as it hits the hot pan and start disappearing into the noodles as you toss. Lift and fold the strands instead of chopping down through them.
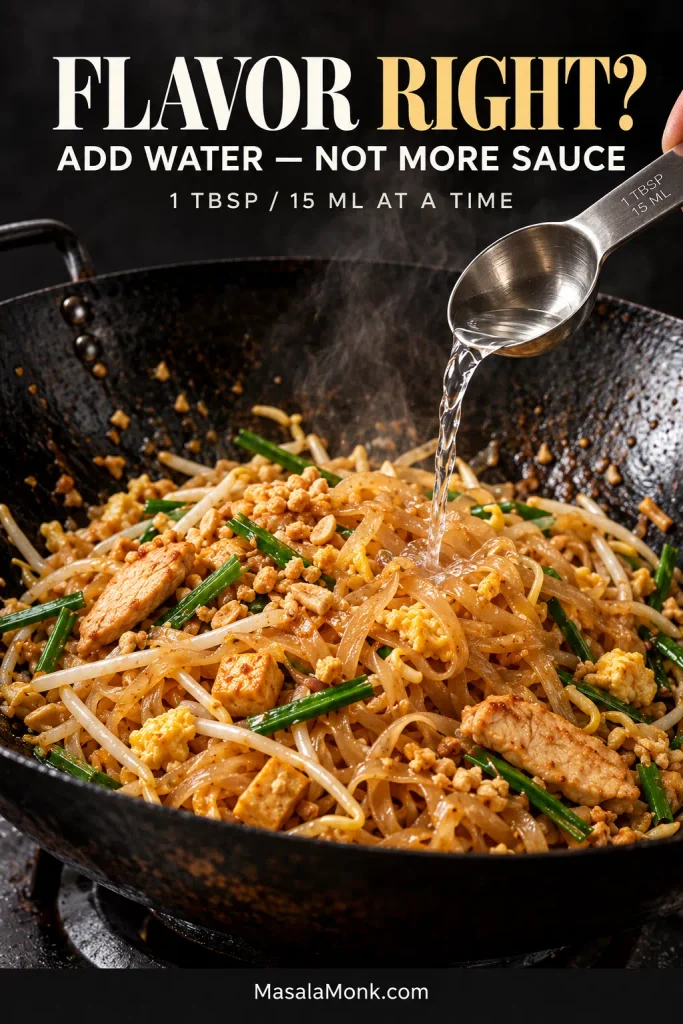
- Check the noodle. When most of the loose sauce has disappeared and the noodles look glossy, bite into one. If the seasoning is right but the center is too firm, add water 1 tbsp (15 ml) at a time. Toss until absorbed and check again.
Finish the Pad Thai
- Add the eggs. Push the noodles to one side. Add a little oil to the exposed pan if it looks dry, then crack in the eggs. Break the yolks and let the eggs begin setting for 20–30 seconds before folding the noodles back through them.
- Finish the chicken. Return the chicken and toss until completely cooked through. If checking with a thermometer, the thickest piece should reach 165°F / 74°C.
- Finish off the heat. Turn off the heat. Add the mung bean sprouts, garlic chives and about half the peanuts, then toss briefly. The residual heat warms them without taking away the fresh snap of the sprouts.
- Serve immediately. Divide between plates and scatter over the remaining peanuts. Put lime wedges and chile flakes on the table for anyone who wants more brightness or heat.
Recipe Notes
- Research note: This recipe is research-derived and has not been independently kitchen-tested by MasalaMonk. Rice noodles and tamarind vary considerably between brands, so use the texture and taste cues alongside the measurements.
- No tofu? In the chicken or shrimp version, simply leave it out; no sauce adjustment is needed.
- No garlic chives? Use a smaller amount of thinly sliced scallions to taste. Scallions are stronger, so do not replace the chives gram-for-gram.
- No preserved radish or dried shrimp? Leave them out.
The Details That Make Pad Thai Work
Core Technique
Ingredients & Variations
Noodles for Pad Thai: The Texture Starts Here
Do not boil dried Pad Thai noodles first. Soak them until flexible but undercooked at the center, then let them finish with the sauce in the pan.
Medium flat dried rice noodles around 2–3 mm wide give you a useful margin between chewy and overdone. Wider noodles can become fragile after soaking, while very thin noodles move through that sweet spot quickly.
Treat soak time as a rough guide and check the noodle itself. Pick one up and bend it around a finger. It should flex without snapping; bite into it and the center should remain firm.
That’s exactly where you want it. The noodle still has sauce and hot-pan time ahead.
When the sauce is gone but the noodle is still firm
Resist reaching for more sauce. Once the noodles are properly seasoned, extra sauce brings more salt, sugar and tamarind when they may only need moisture.
Add 1 tablespoon (15 ml) water, toss until absorbed and check again. Repeat as needed.
If the noodles are showing a different problem, jump to Fix Your Pad Thai for the symptom-by-symptom guide.
Pad Thai Sauce: Build It Around Your Tamarind
Pad Thai sauce is built from tamarind, fish sauce and palm sugar. Tamarind gives it a tart, fruity edge. Fish sauce brings salty savoriness, while palm sugar rounds out the sharper edges.
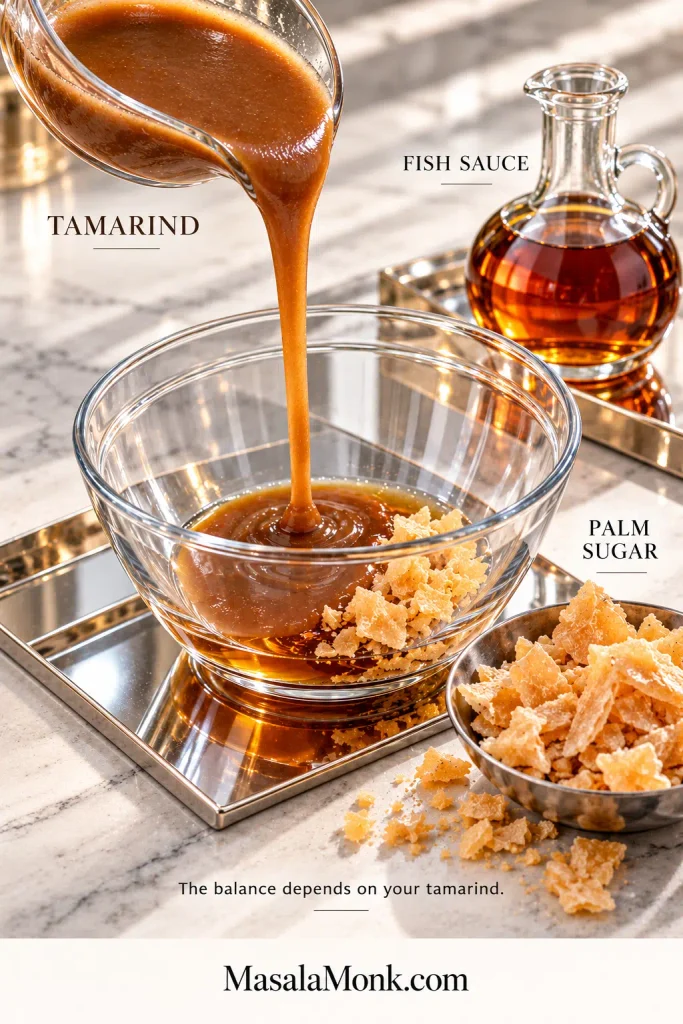
Tamarind labels are frustratingly inconsistent. Paste, puree and concentrate can mean very different strengths from one brand to another.
What kind of tamarind should you buy?
For these measurements, look for a brown, pourable ready-to-use Thai or Vietnamese cooking tamarind. Dense black tamarind concentrate is much stronger and should not be measured at the same volume.
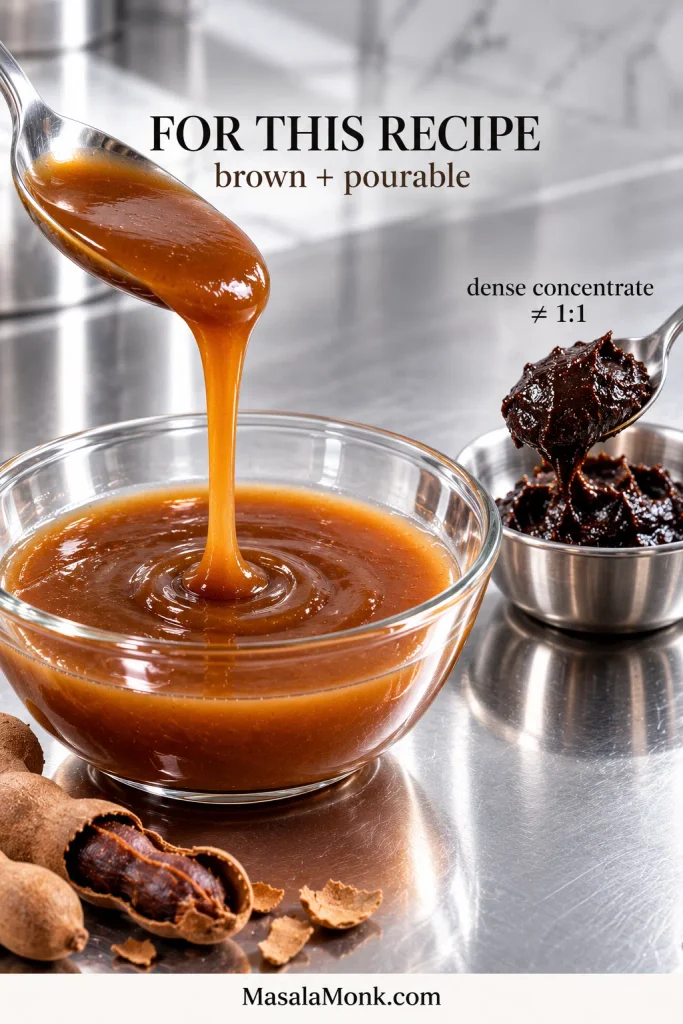
Try a tiny bit of the ready-to-use tamarind before making the sauce. If it makes you pucker sharply, begin with 3 tablespoons (45 ml). When it is pleasantly tart rather than fierce, use up to 4 tablespoons (60 ml).
Sweet tamarind sauce or chutney is not a direct substitute here; it is already sweetened and seasoned.
Using a tamarind block? Choose unsweetened sour tamarind pulp rather than sweet tamarind sold for snacking. Soften some pulp in warm water, massage it free, then strain away the seeds, shell and tough fibers. Aim for a loose, spoonable puree similar to ready-to-use tamarind, then judge its strength before working within the same 3–4 tablespoon range.
What should Pad Thai sauce taste like?
On its own, the sauce should taste a little stronger than you want the finished noodles to taste. Chicken, tofu, egg and sprouts will soften it once everything comes together. Sweet, sour and salty should all register without one wiping out the others.
An aggressively sour sauce usually points back to the tamarind itself. Check the product and concentration before trying to bury that acidity under extra sugar.
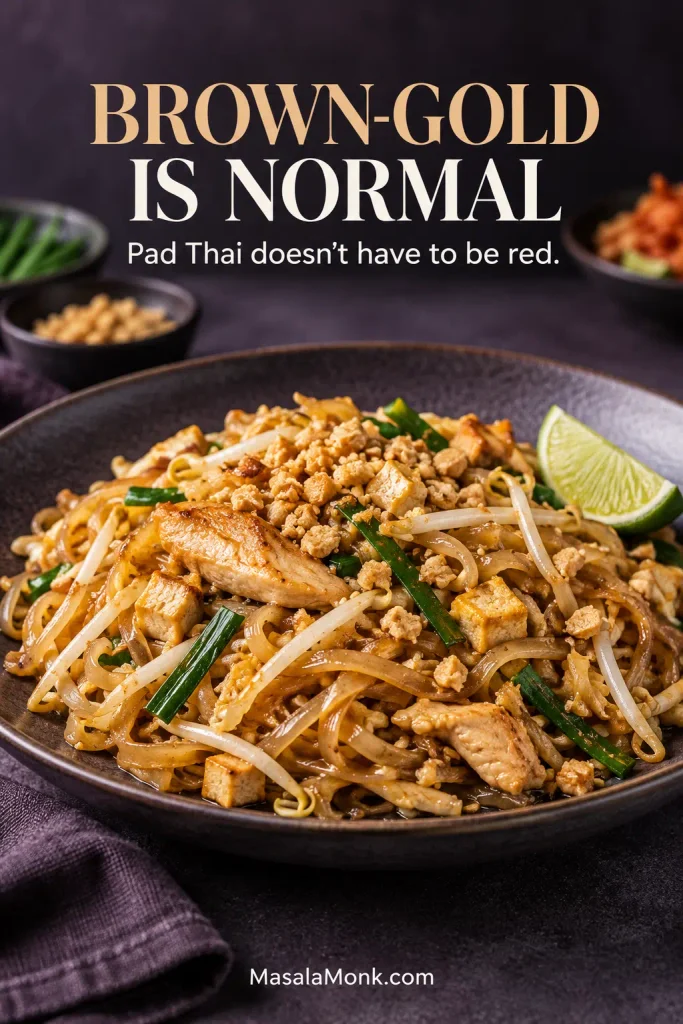
Why isn’t my Pad Thai bright red? Brown-gold Pad Thai is completely normal. Some restaurant-style versions use ketchup or chile sauce, while others use paprika to deepen the red-orange color. This version stays with tamarind, fish sauce and palm sugar.
Give the Noodles Room to Move
Use a wide 12-inch skillet or roughly 14-inch wok and keep the batch small enough to stay sizzling. The extra surface area gives moisture somewhere to escape instead of collecting underneath the noodles.
A deep heap of noodles surrounded by liquid is the warning sign. The pan cools, steam builds and the strands begin sticking together.
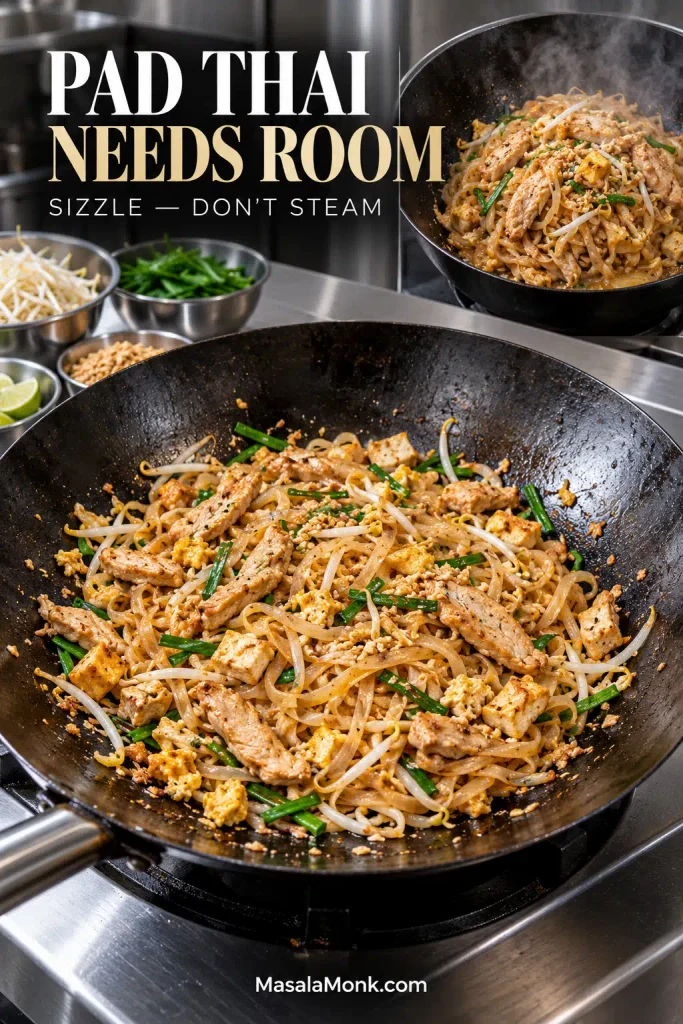
Scaling rule: Double the ingredients if you need more food, then cook two batches. Four to six servings are usually better split across the pan than forced through it all at once.
Pad Thai Ingredients Worth Seeking Out
You don’t need to hunt down every specialist ingredient. Garlic chives are worth seeking out if you can; preserved radish and dried shrimp add more classic savory detail, but they aren’t reasons to postpone dinner.
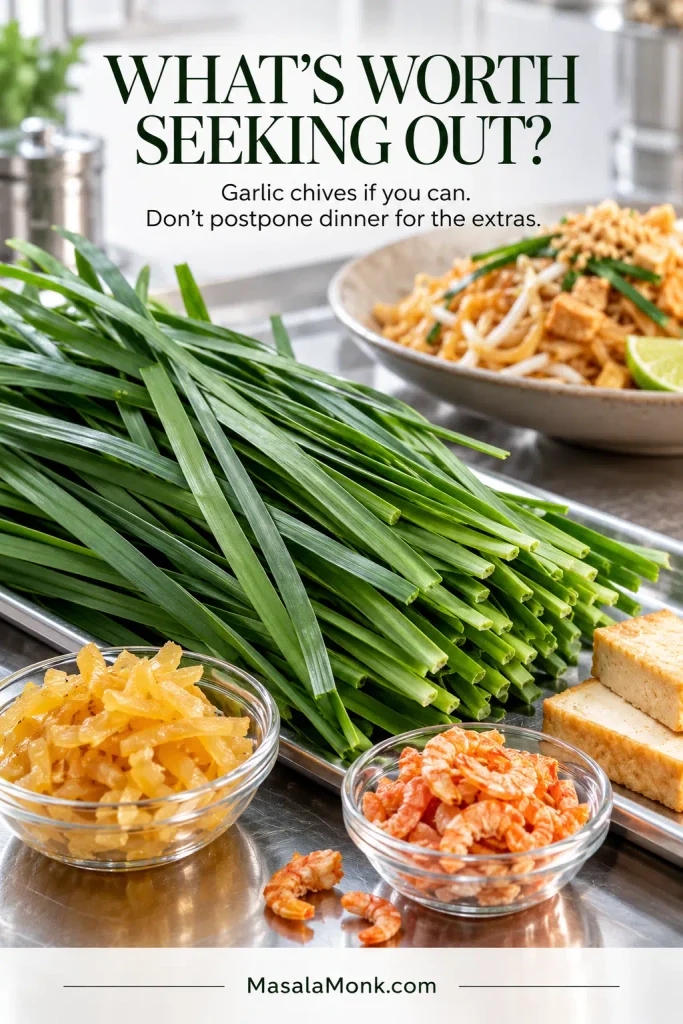
Pressed or super-firm tofu can sit alongside chicken or shrimp and survives the tossing well. Thai sweet preserved radish adds salty-sweet flecks through the noodles; Japanese takuan is not identical, but it is a reasonable fallback. Can’t find either one? Move on.
Dried shrimp brings another savory layer. Give it a quick rinse, drain it well and chop it finely so that flavor is distributed through the noodles rather than concentrated in one overwhelmingly fishy bite.
Roasted peanuts belong at the finish, adding crunch against the softer noodles and egg. The tamarind-based sauce itself does not need peanut butter.
If what you really want is the creamy peanut direction, Peanut sauce is better suited to noodles, spring rolls, tofu, chicken and satay-style meals.
Missing tofu, garlic chives, preserved radish or dried shrimp? Find the simplest substitutions and omissions together in the Recipe Notes.
Chicken, Shrimp & Tofu Options
The base recipe uses chicken plus a small amount of tofu. Use the options below when you want cooked chicken, shrimp, tofu-only, vegetarian or vegan Pad Thai.
Chicken thigh is the easiest choice here because it stays forgiving through a fast sear. Breast works too; slice it thinly and use the optional cornstarch if you want a little more protection from drying out.
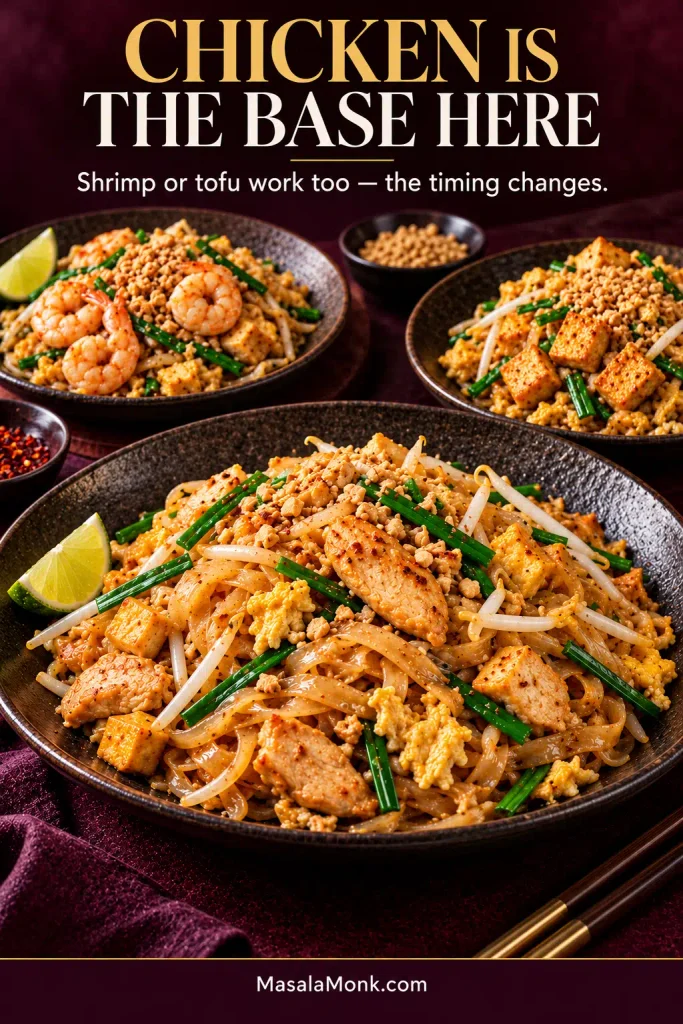
Cooked or rotisserie chicken: Skip Steps 3 and 4 for the chicken. Add about the same amount in Step 9, just long enough to heat through.
Shrimp: Skip the chicken seasoning and cornstarch. Use 5–6 oz (140–170 g) peeled shrimp. In Step 4, sear them until just shy of done, remove from the pan, then return them in Step 9 just long enough to finish cooking.
Tofu as the main protein: Increase it to about 6–7 oz (170–200 g), leave out the chicken, and skip Steps 3, 4 and 9.
Vegetarian: Leave out the chicken and dried shrimp, increase the tofu to 6–7 oz (170–200 g), and skip Steps 3, 4 and 9. Use vegan fish sauce in about the same amount as the regular fish sauce, then adjust if your brand runs especially salty. Keep the eggs if you like.
Vegan: Make the vegetarian version and leave out the eggs too.
Without peanuts: Omit them; the sauce needs no adjustment.
Fix Your Pad Thai
Most Pad Thai problems leave clues in the pan.
Noodle & Pan Problems
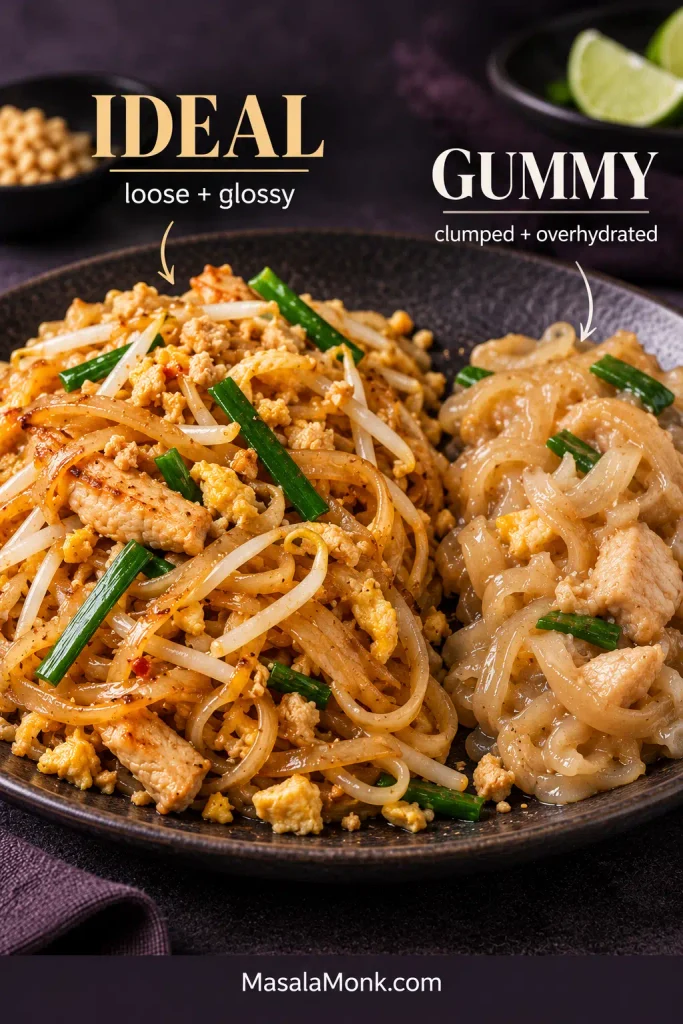
Start with strand separation before choosing a fix.
| Problem | Likely cause & what to do |
|---|---|
| Noodles are mushy | Cause: They entered the pan too hydrated. Right now: If they’re only a little soft, stop cooking and serve them now. Next time: Start with firmer soaked noodles and let them finish in the pan. |
| Noodles are gummy or sticky | Cause: Overhydration, released starch, low heat or crowding. Right now: Stop cooking; extra oil will not undo overcooked rice starch. Next time: Start firmer and use a smaller, hotter batch. |
| Noodles are still hard | Cause: The seasoning is ready before hydration is complete. Do now: Add water 1 tbsp (15 ml) at a time, toss until absorbed and check again. |
| Noodles keep breaking | Cause: They were too soft, especially fragile or handled roughly. Right now: Toss as little as possible and get them out of the pan. Next time: Hydrate less and lift or fold instead of chopping down with the spatula. |
| Pad Thai is wet or soupy | Cause: The pan is too cool, too crowded or carrying too much liquid. If the noodles are firm, keep tossing briefly over suitable heat so the loose sauce can absorb. Once they are already soft, stop cooking rather than boiling away the sauce and making them mushier. Next time, use a smaller batch. |
| Sauce is scorching | Cause: The liquid has cooked away and the sugar is catching. If the noodles need more cooking, add a small splash of water and keep them moving. When they are done, get the pan off the heat. |
Flavor & Sauce Problems
| Problem | Likely cause & what to do |
|---|---|
| Pad Thai is too sour | Cause: The tamarind is stronger than expected. If the dish is only a little sharp, extra plain noodles, tofu or sprouts can dilute it if you have them ready. A badly over-soured dish has no clean instant fix; use less of that tamarind next time. |
| Pad Thai is too sweet | Cause: Too much sugar or too little sour and salty balance. If it is only slightly sweet, lime at the table can sharpen the finished dish. For a strongly sweet batch, fix the sauce balance next time rather than trying to cover it with more seasoning. |
| Pad Thai tastes too fishy | Cause: The fish sauce or dried shrimp is especially assertive. Lime and extra sprouts can make a mildly fishy batch taste fresher at the table; reduce one of those ingredients next time. |
| Pad Thai tastes flat | Cause: Too many noodles or too much protein for the amount of sauce, or the sauce was under-seasoned. Check the finished dish before adding anything: a little fish sauce may supply salt and savoriness, while lime can wake up a dull plate. |
How to Serve Pad Thai
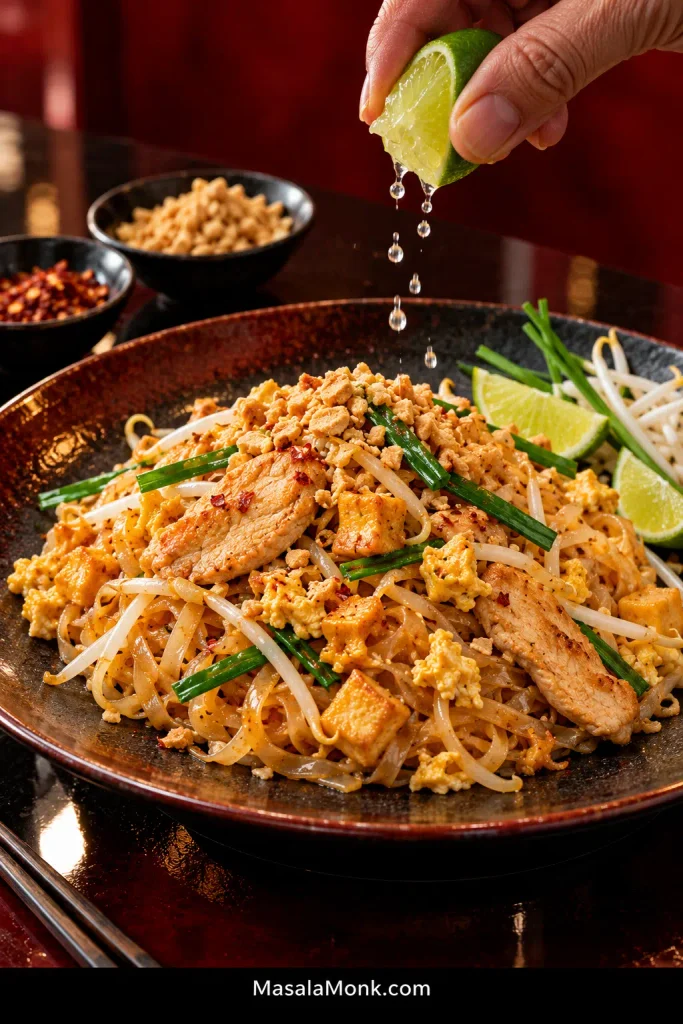
Pad Thai is substantial enough to serve as a one-dish meal. Get it onto the plates while the noodles are loose and glossy, then add the remaining roasted peanuts.
Pad Thai does not need to be spicy. Put lime wedges and Thai chile flakes or crushed red pepper on the table so everyone can add brightness and heat to taste. Extra mung bean sprouts and a few fresh garlic chives can go alongside for more crunch.
A cold Cucumber Salad makes an easy contrast, especially with lime, chile and herbs.
Make-Ahead Pad Thai: Do the Slow Work Before Dinner
Prep the components ahead, but cook the finished Pad Thai just before serving whenever possible.
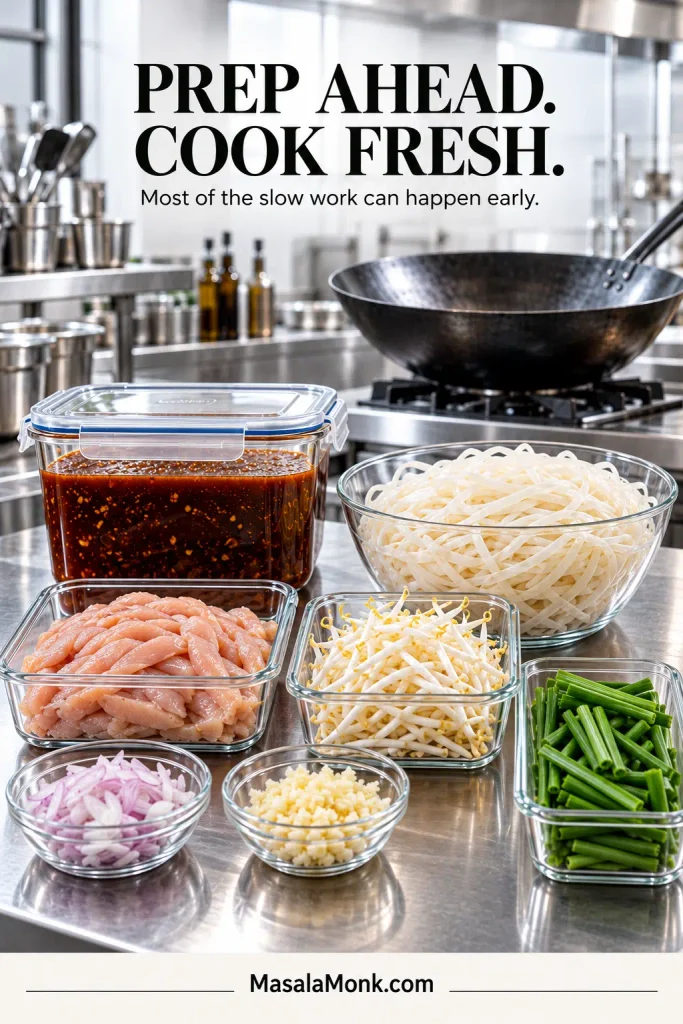
Make the sauce up to 3 days ahead and keep it covered in the refrigerator. The noodles are best soaked the same day, but they can be prepared up to 1 day ahead: drain them thoroughly, spread them briefly on a clean towel until they are no longer dripping, then refrigerate in a covered container.
Slice the chicken up to 1 day ahead and keep it refrigerated. The shallot, garlic, tofu and garnishes can be prepared ahead too. Wash and dry the sprouts and chives, crush the peanuts and cut the lime before dinner.
Store & Reheat Pad Thai
Pad Thai is at its best straight from the pan. Rice noodles firm up and stick together as they cool, so leftovers lose some of that freshly tossed texture.
For the best texture, eat leftover Pad Thai within 1–2 days. Broader USDA guidance allows 3–4 days for properly refrigerated leftovers, but the noodles will continue becoming firmer and more prone to sticking.
Reheat it more gently than the original stir-fry. Add a small splash of water and warm the noodles in a covered skillet over moderate heat or in short microwave intervals. Still dry? Add another teaspoon or two of water instead of another dose of sauce.
Once you know what a properly soaked rice noodle feels like, Pad Thai becomes a much more relaxed dish to cook. Get it onto the table while the noodles are glossy, the egg is tender, the sprouts have crunch and the lime is waiting.