
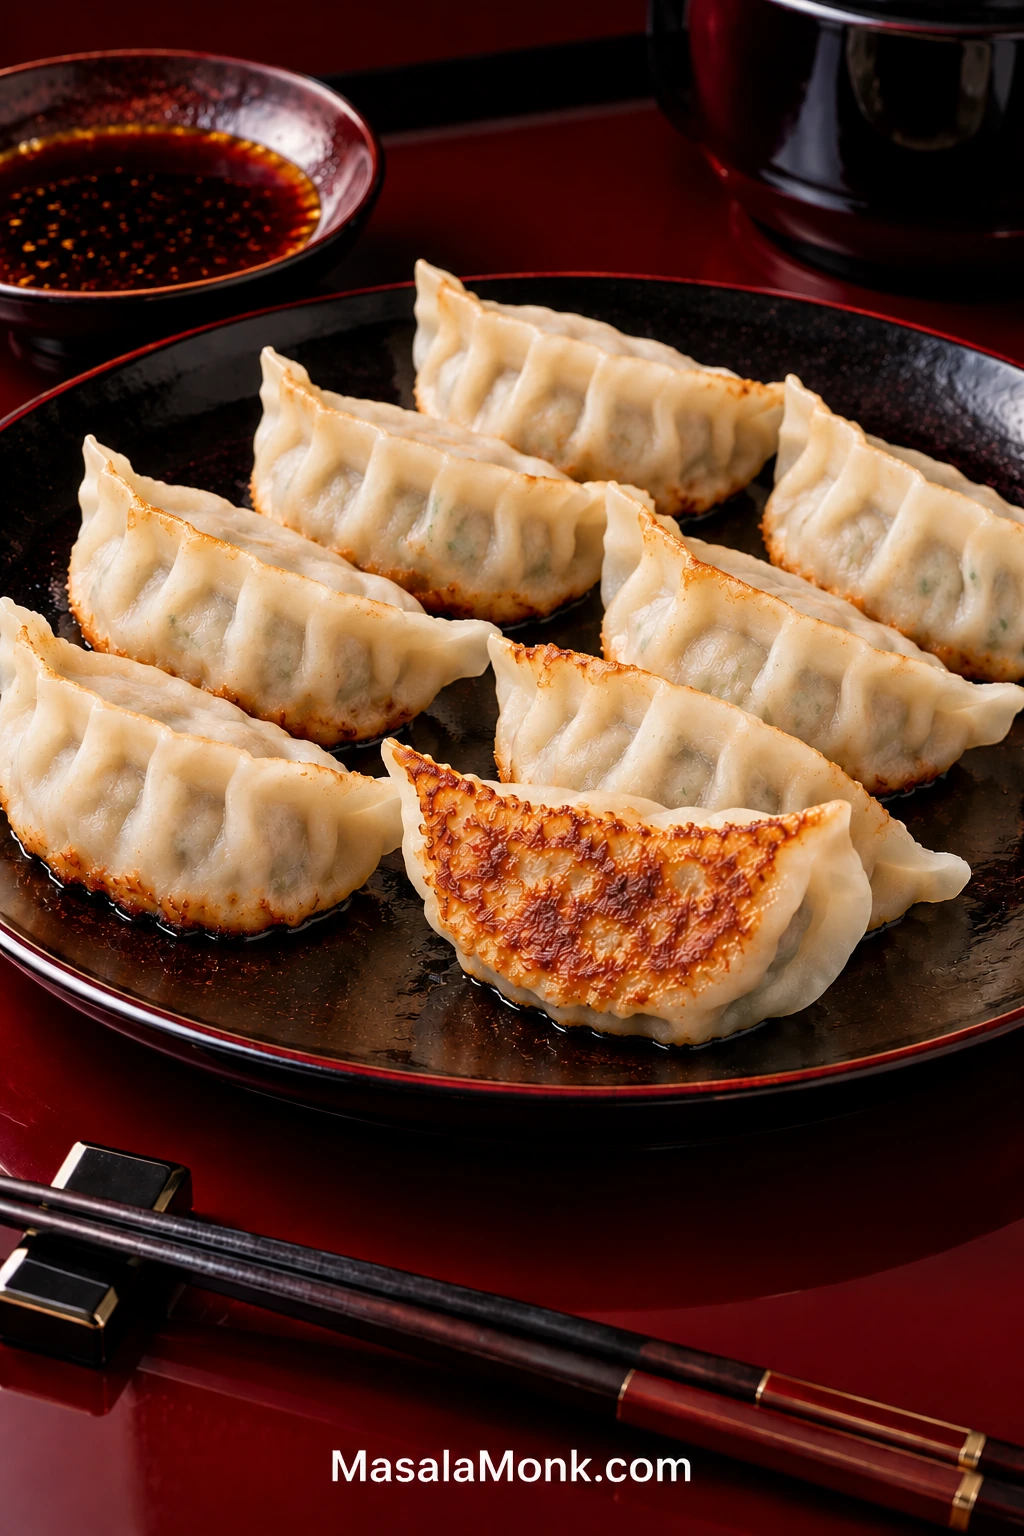
Good pan-fried gyoza have a deeply crisp golden base, a tender upper wrapper and a hot, juicy pork-and-cabbage center. Gyoza are Japanese dumplings, sometimes described as Japanese potstickers on US menus. Known as yaki-gyoza, this pan-fried style browns the bottoms, steams the dumplings under a lid, then lets the base crisp again.
For this gyoza recipe, thin store-bought wrappers keep folding manageable. Moisture is the main thing to control: squeeze excess water from the cabbage, but work a small measured amount into the pork so the filling stays juicy without soaking the wrappers.
Gyoza Recipe
Japanese pan-fried pork and cabbage dumplings seasoned with ginger, garlic and chives, with tender wrappers, juicy filling and crisp golden bottoms.
Equipment
- 10-inch / 25 cm nonstick skillet with a tight-fitting lid
- Large mixing bowl
- Sharp knife and cutting board
- Large tray or sheet pan lined with parchment
- Small bowl of water for sealing wrappers
- Kettle or small saucepan for the steaming water
- Thin flexible spatula
- Instant-read thermometer, optional
A well-seasoned carbon-steel skillet also works, but nonstick is the most forgiving choice for a first batch.
Ingredients
Pork and cabbage filling
- 180 g / 6.3 oz green cabbage, tough core removed, weighed before salting and very finely chopped
- ½ teaspoon fine sea salt, for the cabbage
- 8 oz / 227 g regular ground pork, not extra lean
- 1 tablespoon / 15 ml regular Japanese soy sauce
- 1 tablespoon / 15 ml sake, optional
- 2 teaspoons / 10 ml toasted sesame oil
- 2 teaspoons / about 6 g potato starch or cornstarch
- 1 tablespoon / 15 ml cold water or unsalted chicken stock, plus another 1 tablespoon / 15 ml if omitting the sake
- 2 teaspoons finely grated fresh ginger
- 2 garlic cloves, finely grated or minced
- ¼ teaspoon ground white or black pepper
- 25 g / about ⅓ cup finely chopped garlic chives (nira)
- 2 scallions / about 20 g, finely chopped
Wrappers
- 36–40 thin round gyoza wrappers, about 8.5–9 cm / roughly 3½ inches across
- Water, for sealing as needed
For pan-frying
- Neutral cooking oil, about 2 teaspoons per batch
- Just-boiled water, ⅓ cup / 80 ml for about 12 gyoza
- Toasted sesame oil, optional, about ½ teaspoon per batch for finishing
Gyoza dipping sauce
- 3 tablespoons / 45 ml regular Japanese soy sauce
- 3 tablespoons / 45 ml unseasoned rice vinegar
- 1–2 teaspoons rayu or other chili oil, optional
Instructions
1. Chop, salt and squeeze the cabbage
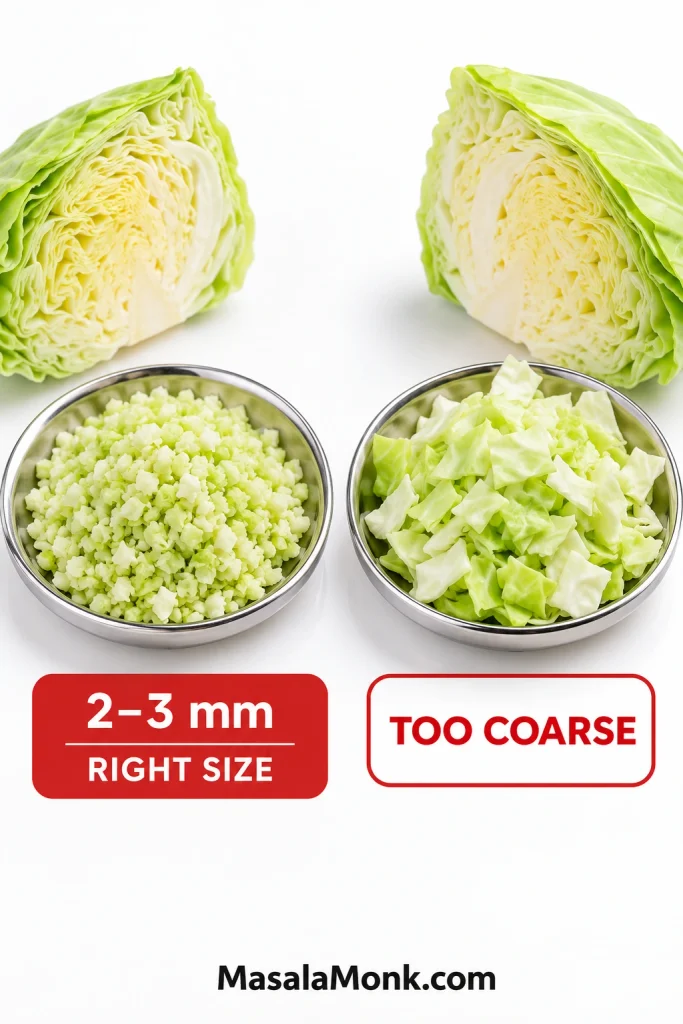
Chop the cabbage very finely, aiming for pieces around 2–3 mm / roughly ⅛ inch. It should be much finer than cabbage for slaw so it disappears into the pork instead of leaving crunchy pockets.
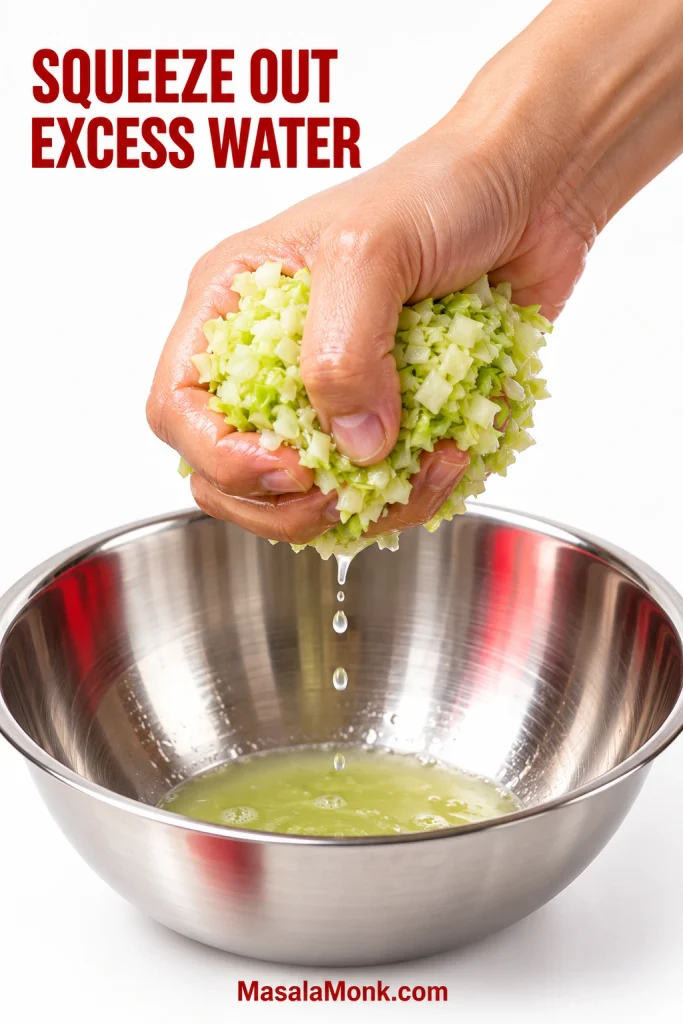
Toss with ½ teaspoon fine sea salt and leave for 10–15 minutes. The cabbage will soften and begin releasing water. Gather it in your hands or a clean kitchen towel and squeeze firmly until very little more liquid comes out when you press it.
2. Mix the filling
Add the pork to a large bowl with the soy sauce, sake if using, sesame oil, potato starch or cornstarch, water or stock, ginger, garlic and pepper. Skipping the sake? Add the extra tablespoon of water or stock.
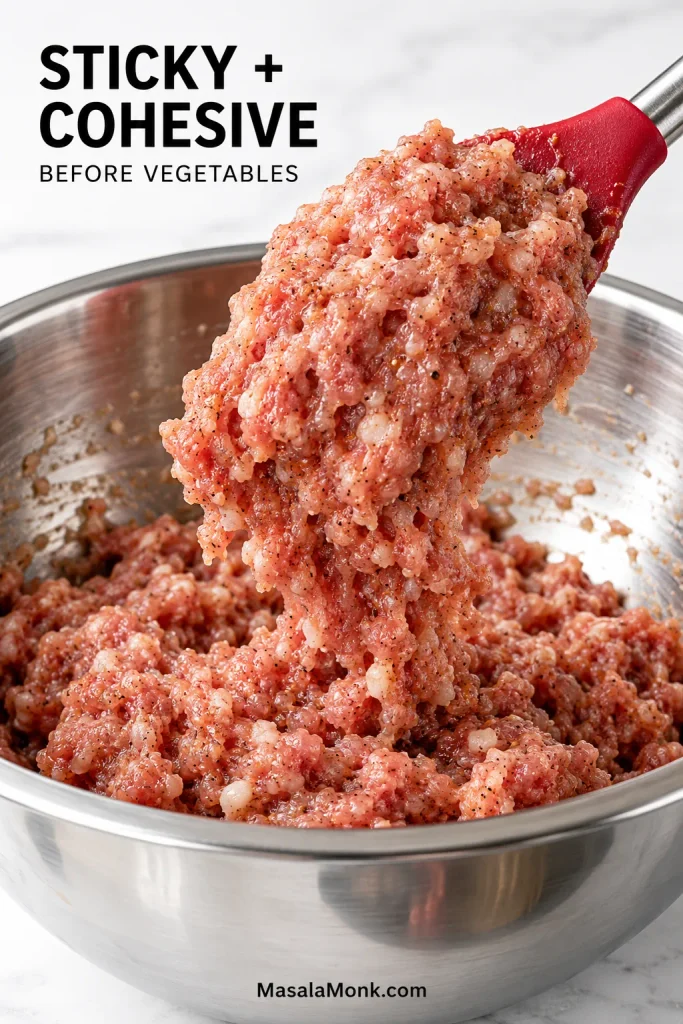
Mix vigorously until the pork turns sticky and tacky and starts holding together as one mass instead of loose crumbles.
Add the squeezed cabbage, garlic chives and scallions and mix them through. Cover and refrigerate for about 15 minutes. While the filling rests, line the tray, mix the dipping sauce and set out the sealing water. Leave the wrappers sealed until you’re ready to fold.
Keep the filling raw when it goes into the wrappers. The covered steaming stage cooks the pork; precooking it first would make the filling drier and more crumbly.
3. Cook a teaspoon before you start folding
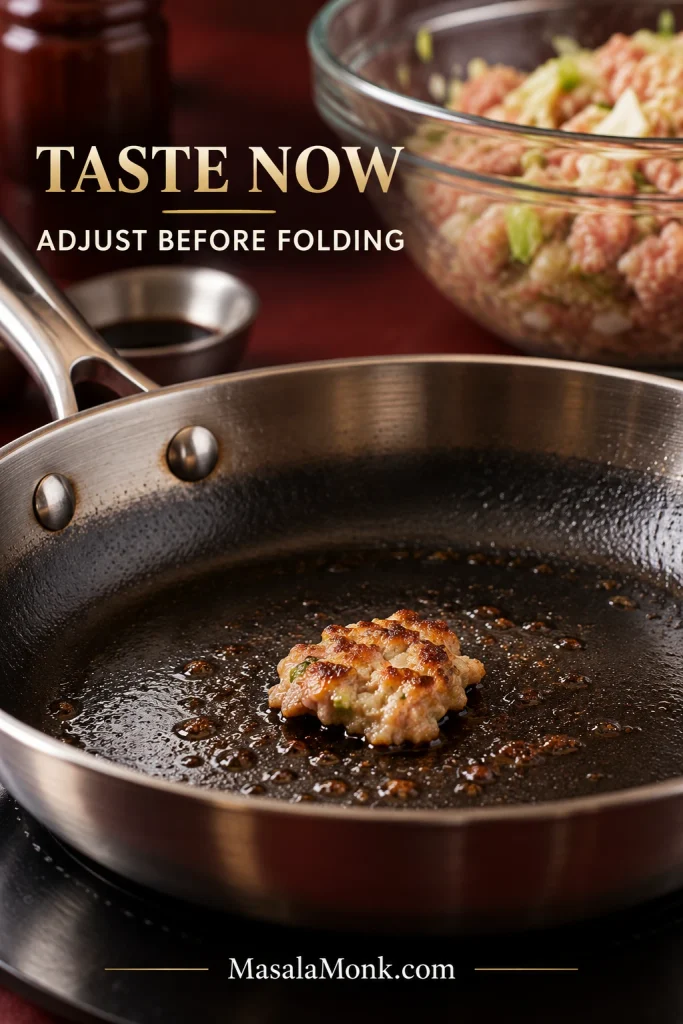
Fry about 1 teaspoon of filling in the skillet until fully cooked, then taste it. Add a little more soy sauce or salt to the main bowl and mix it through if needed. This is the moment to fix the seasoning—not after three dozen dumplings are sealed. Wipe out the skillet afterward.
4. Fill and seal the gyoza
Keep the unused wrapper stack under plastic wrap or a lightly damp kitchen towel and take out one wrapper at a time. New to folding? Start with about 10 g / 2 level teaspoons of filling. Once sealing feels comfortable, move closer to 12 g for a fuller dumpling.
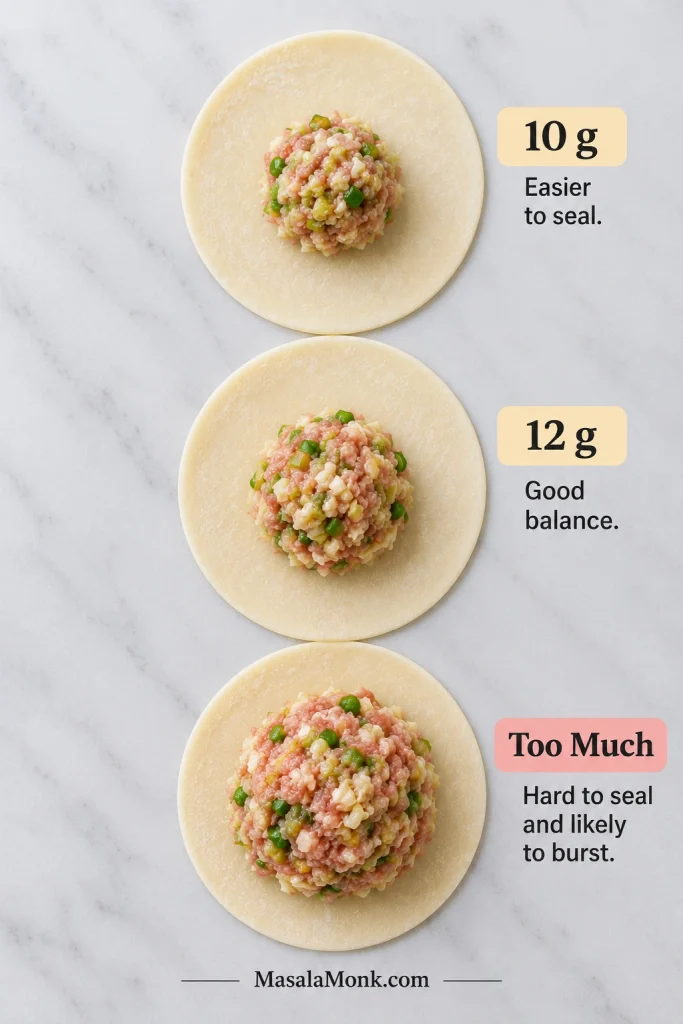
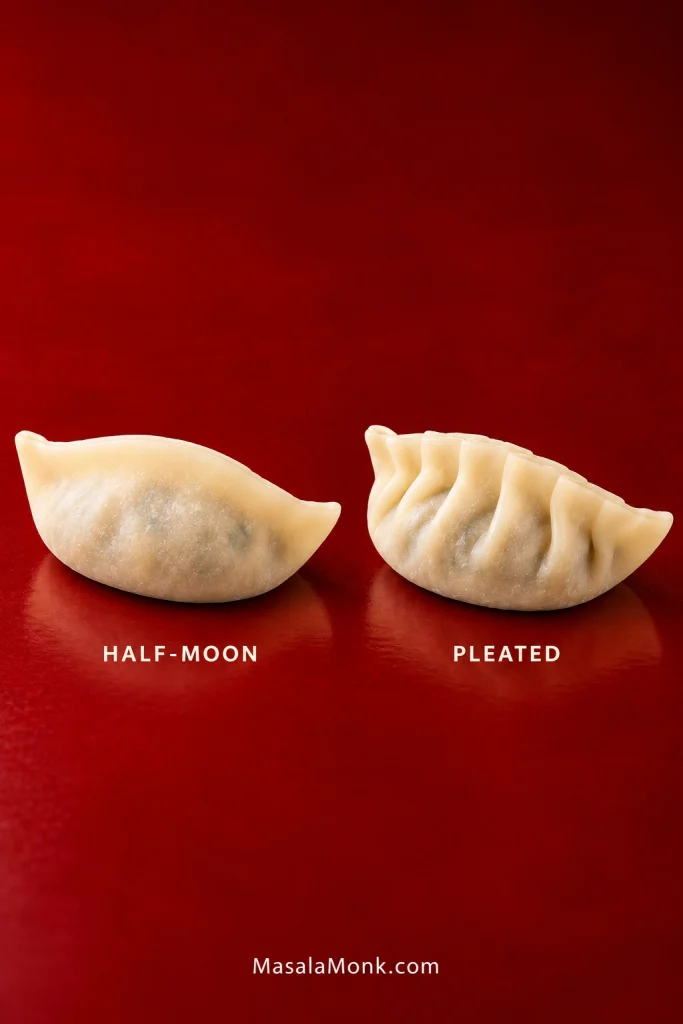
Spread the filling into a compact oval in the center and press out any obvious pockets of air. Moisten the wrapper edge lightly if needed, fold it into a half-moon and pinch the seam firmly shut.
You can stop there. A firmly sealed half-moon cooks perfectly well. For the familiar gyoza shape, make about 4–5 small pleats along the front edge while leaving the back layer relatively flat.
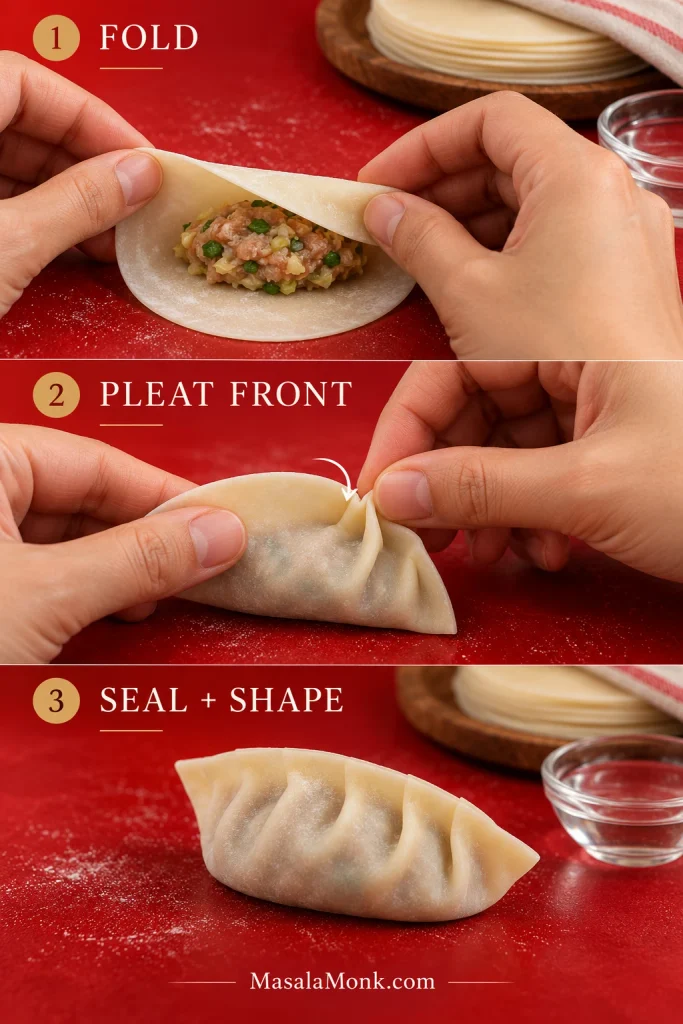
Stand the dumpling upright and press the bottom gently against the tray to give it a flatter base. That wider contact area becomes a broader patch of golden crust in the skillet. Keep the finished gyoza loosely covered with plastic wrap while you fold the rest.
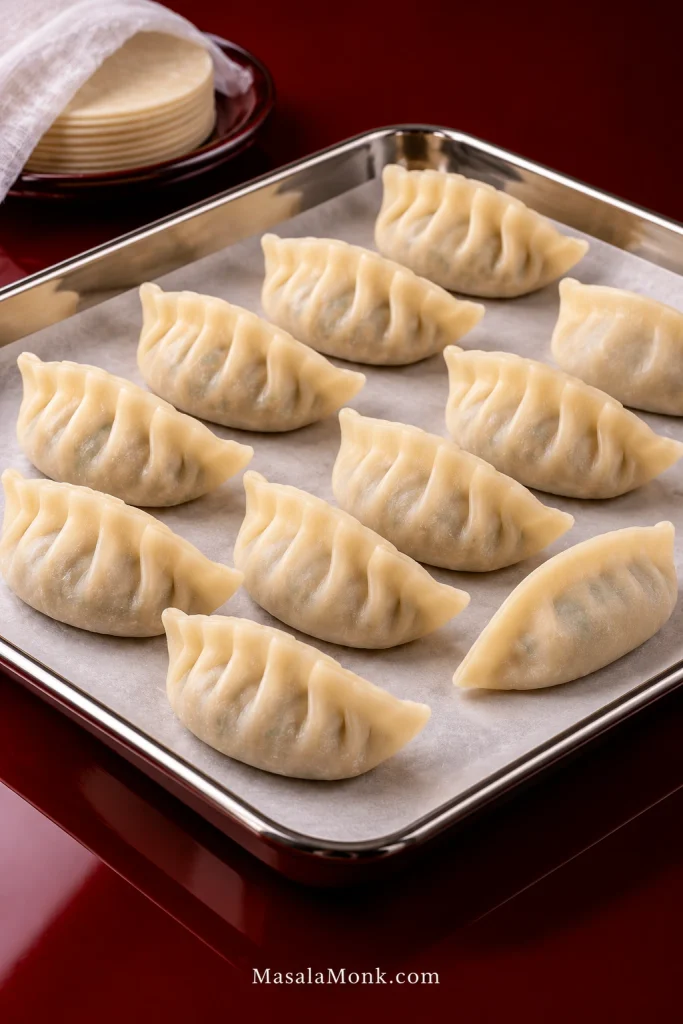
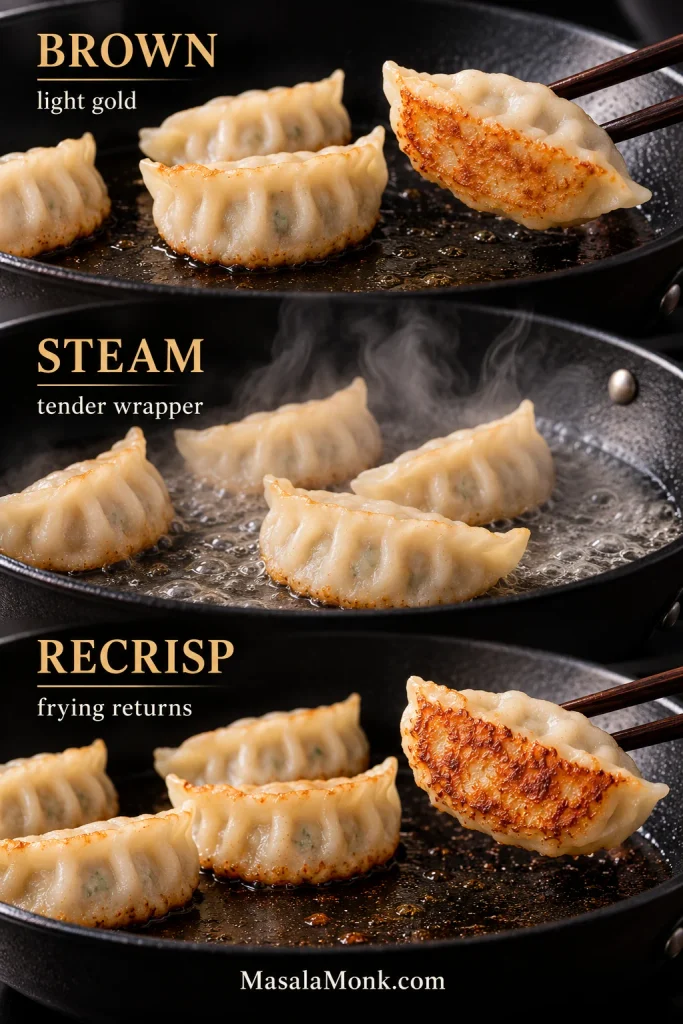
5. Brown the first batch
Bring the steaming water to a boil. Meanwhile, heat a 10-inch / 25 cm nonstick skillet over medium to medium-high heat for about 1 minute. Add about 2 teaspoons neutral oil. It should spread easily over the pan but should not be smoking.
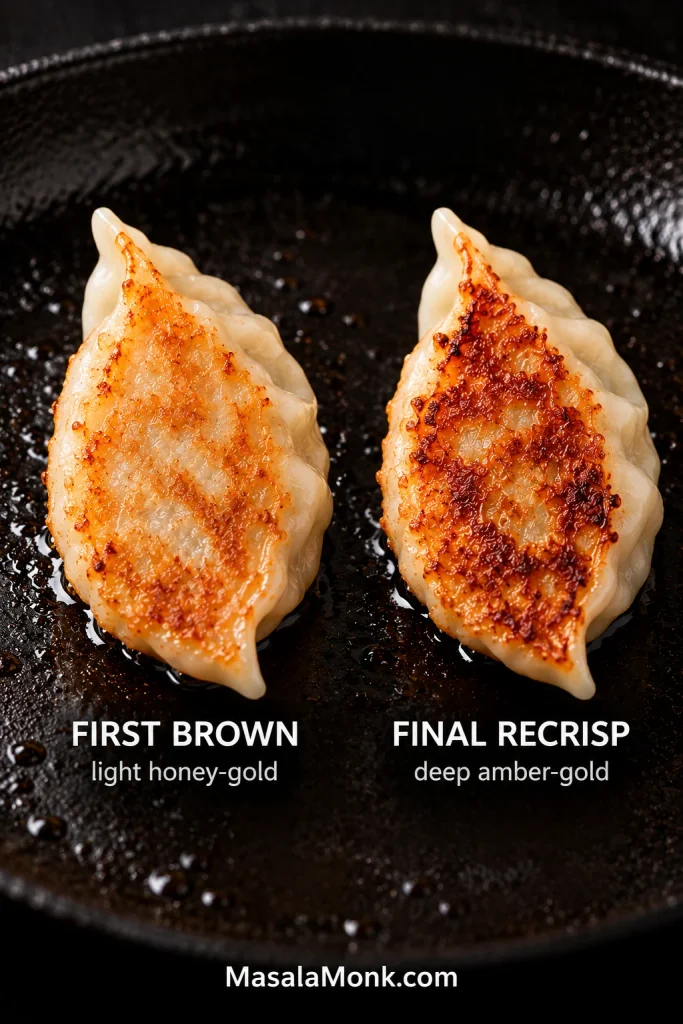
Arrange about 12 gyoza flat-side down with a little room between them. Leave them alone for about 2 minutes, or until the bottoms are light to medium golden. Once that first crust forms, they release much more easily.
6. Add hot water and cover
Carefully pour ⅓ cup / 80 ml just-boiled water around the dumplings and cover the skillet immediately. Pour away from yourself and expect a sharp hiss when the water hits.
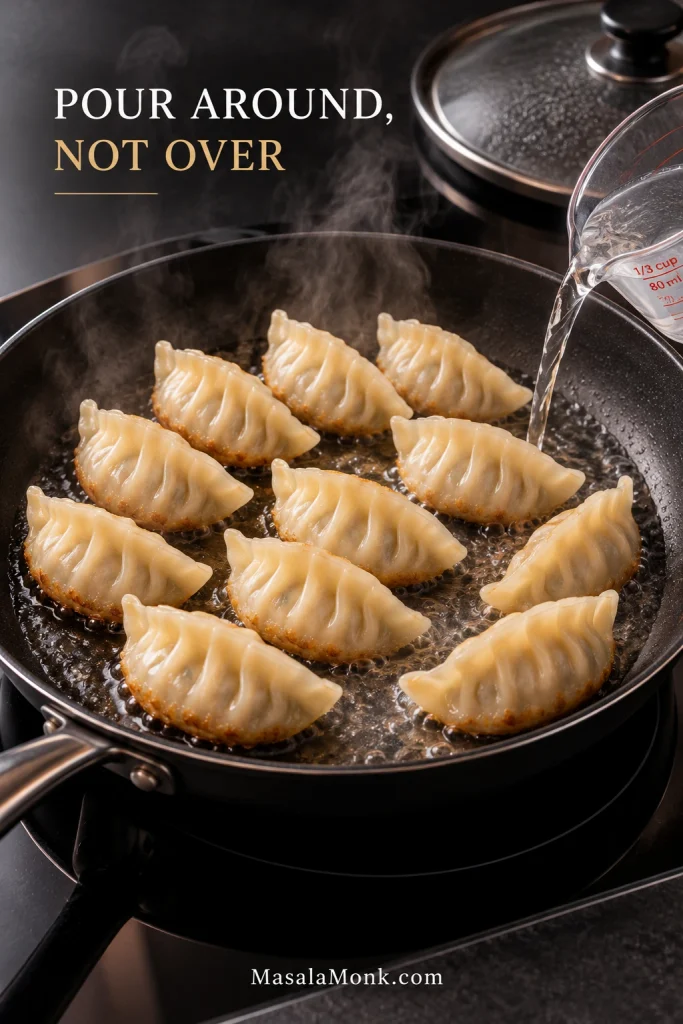
Reduce the heat to medium and steam for about 3–4 minutes. The upper wrappers should soften and become slightly translucent.
7. Let the bottoms crisp again
Listen as well as look. As the water disappears, the softer bubbling gives way to a clearer frying sizzle. Remove the lid when that frying sound returns.
Let any remaining water evaporate, then fry for another 1–2 minutes until the bottoms are deeply golden. Stay close after the water disappears because the skillet heats quickly again.
If you like, drizzle about ½ teaspoon toasted sesame oil around the edge for the final 30 seconds. Lift the gyoza onto a plate crisp-side up and serve them immediately; this is when the contrast between the golden base, tender wrapper and hot, juicy filling is at its best.
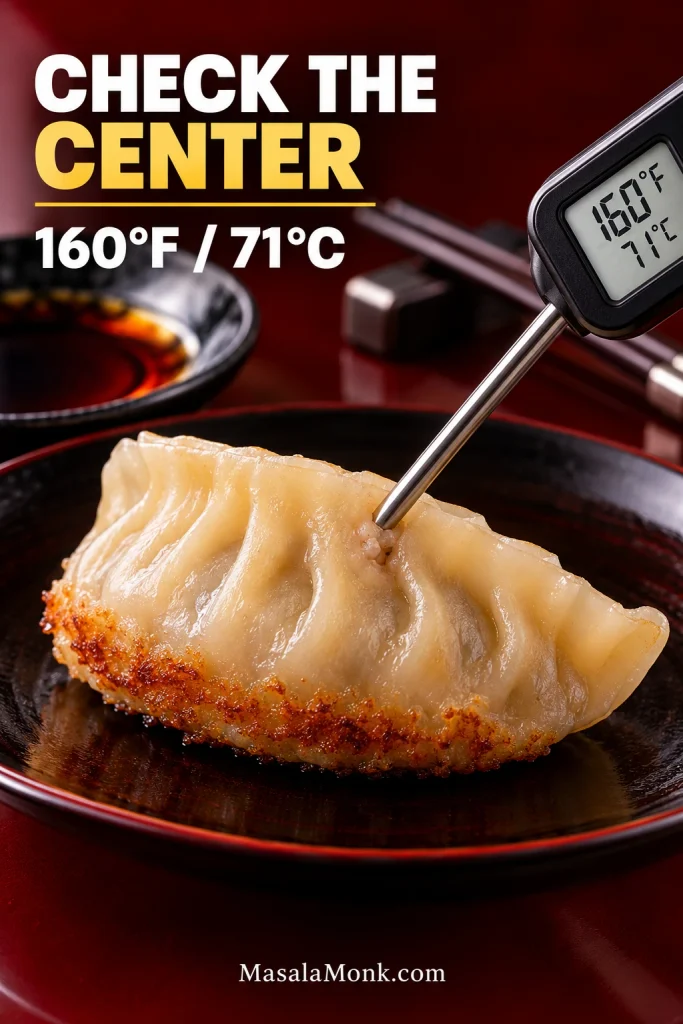
For an extra check on the first batch, insert an instant-read thermometer through the side of one of the fuller dumplings into the center of the pork filling. Ground pork should reach 160°F / 71°C.
Repeat with the remaining gyoza, using fresh oil and another ⅓ cup / 80 ml hot water for each full batch of about 12. Use less water for a small final batch, following the same wrapper-tenderness and evaporation cues.
8. Mix the dipping sauce
Mix the soy sauce and unseasoned rice vinegar 1:1, then add rayu to taste.
Serve the gyoza straight from the skillet while the bottoms are crisp. They work as an appetizer on their own, or beside fried rice for a fuller meal.
Recipe notes
- Napa cabbage: substitute the same weight, then salt and squeeze it very well before adding it to the pork.
- Garlic chive substitute: use regular chives, or add a little more scallion and garlic.
- Skipping sake: add the extra tablespoon of water or unsalted stock instead. Sweet mirin is not a straight 1:1 replacement.
- Potato starch substitute: use cornstarch.
- Wrapper count: keep a few extras nearby. The exact number changes with wrapper diameter, cabbage moisture and how generously you fill them.
- Extra filling: shape it into small patties and cook them thoroughly in a skillet.
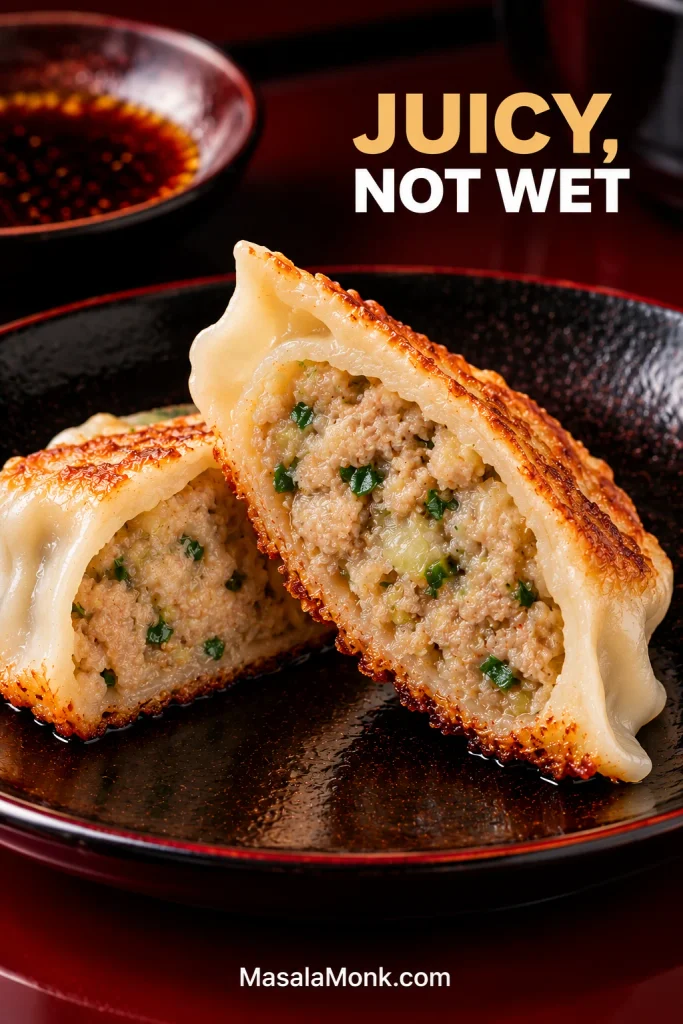
What the Inside Should Look Like
Cut one finished gyoza open before moving on. The center should look moist but set, with pork, cabbage and chives distributed through the crescent rather than pooling liquid or tightening into a dense plug.
Gyoza Guide
Build the Dumpling
Pork and Cabbage Filling
Cabbage keeps the filling lighter, but excess water can soften thin wrappers while they wait. That is why the cabbage gets salted and squeezed before it reaches the pork.
Mix the seasoned pork first, until it turns sticky and cohesive. That helps it hold the added liquid and stay juicy rather than crumbly.
If your pantry has several different soy sauces, our guide to soy sauce styles explains the differences in more detail.
Which Gyoza Wrappers to Use
Use thin round Japanese gyoza wrappers around 8.5–9 cm / roughly 3½ inches across if you can find them. The same style may be labelled gyoza skins.
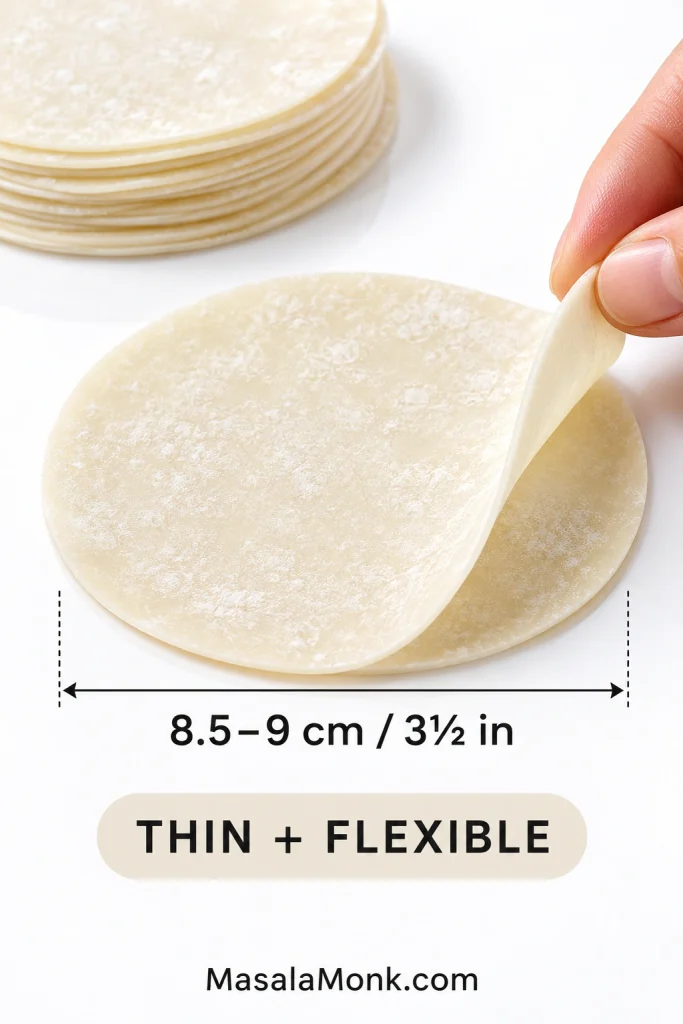
- Good substitute: round potsticker wrappers of similar thickness.
- Useful in a pinch: square wonton wrappers. They may be thicker, give the dumplings a different shape and need slightly longer under the lid.
Already have square wonton wrappers? The wonton soup recipe goes further into handling wonton skins, sticky pork filling, sealing and freezing.
Homemade wrappers are often larger or thicker, so they may take more filling and a little more steaming. Whatever you use, protect the unused wrappers from drying while you work.
Seal First, Pleat Second
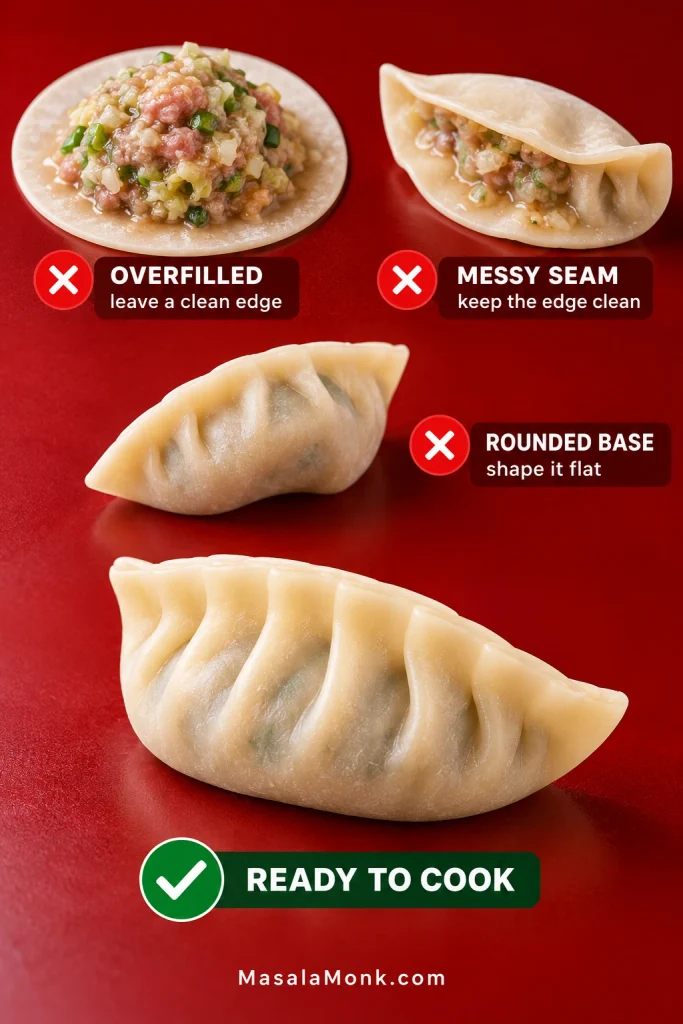
The wrapper should close without stretching. If the seam keeps springing open or filling squeezes into the edge as you pinch, the dumpling is too full. Use a little less and keep the sealing edge clean. Press out trapped air as you close it.
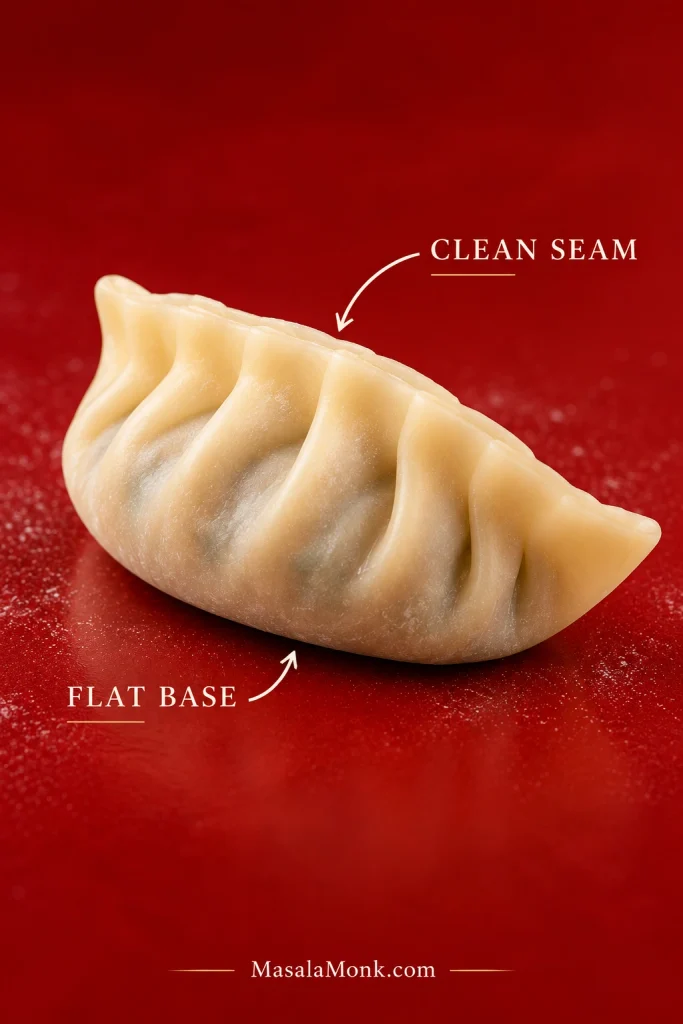
No perfect pleats? Fine. A firmly sealed half-moon is a complete gyoza, not a failed version of the pleated shape; the important checks are a clean seam, no trapped filling at the rim and a base that can sit steadily in the skillet.
The Pan Has Three Modes
Cook gyoza in three stages: brown, steam, then recrisp.
| Stage | What to watch for |
|---|---|
| Brown | Steady frying and a flat side turning light to medium golden. The first crust is forming. |
| Steam | A sharp hiss when the water enters, then softer bubbling. The upper wrapper turns tender and slightly translucent while the filling cooks. |
| Recrisp | The bubbling fades and a clearer frying sizzle returns. Most of the free water is gone and the bottom can brown again. |
Why the Water Is Measured
Water depth is an unreliable guide because it changes with pan diameter and dumpling size. For roughly 12 thin-wrapped gyoza in this 10-inch / 25 cm skillet, use ⅓ cup / 80 ml.
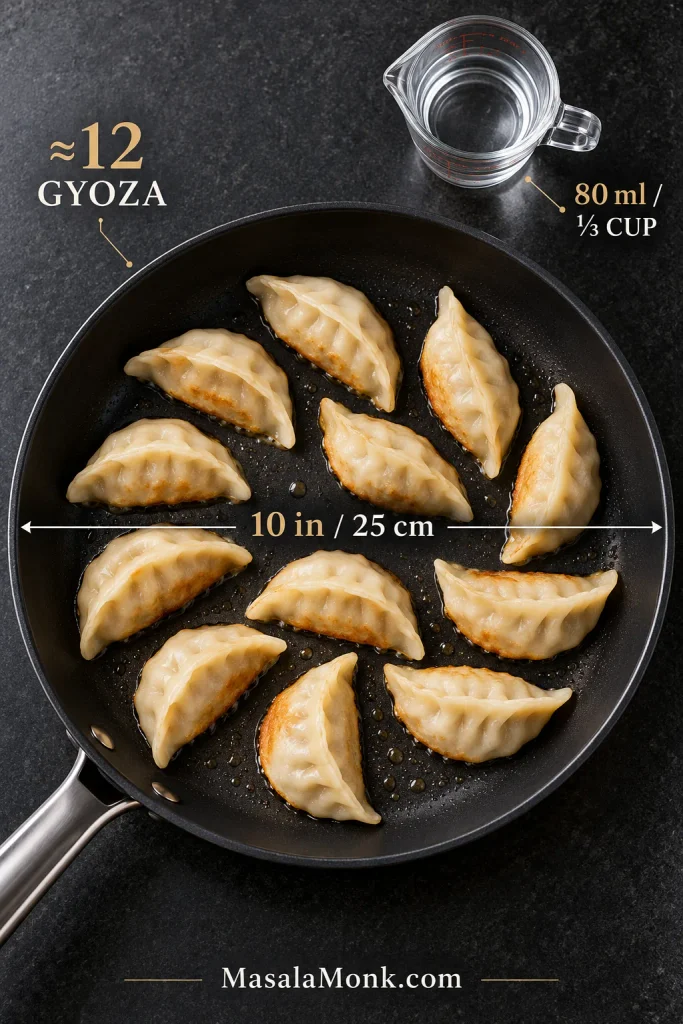
While water remains in the pan, it keeps the temperature in check. After it evaporates, the skillet gets hot quickly again. Stay nearby for that last minute and let the deep golden color and clean release tell you when the bottoms are ready.
Simple Gyoza Dipping Sauce
Treat the sauce ratio in the recipe as a starting point. More rice vinegar makes the dip brighter and sharper; a little more soy sauce makes it saltier and more savory. Rayu brings heat without changing the basic balance too much.
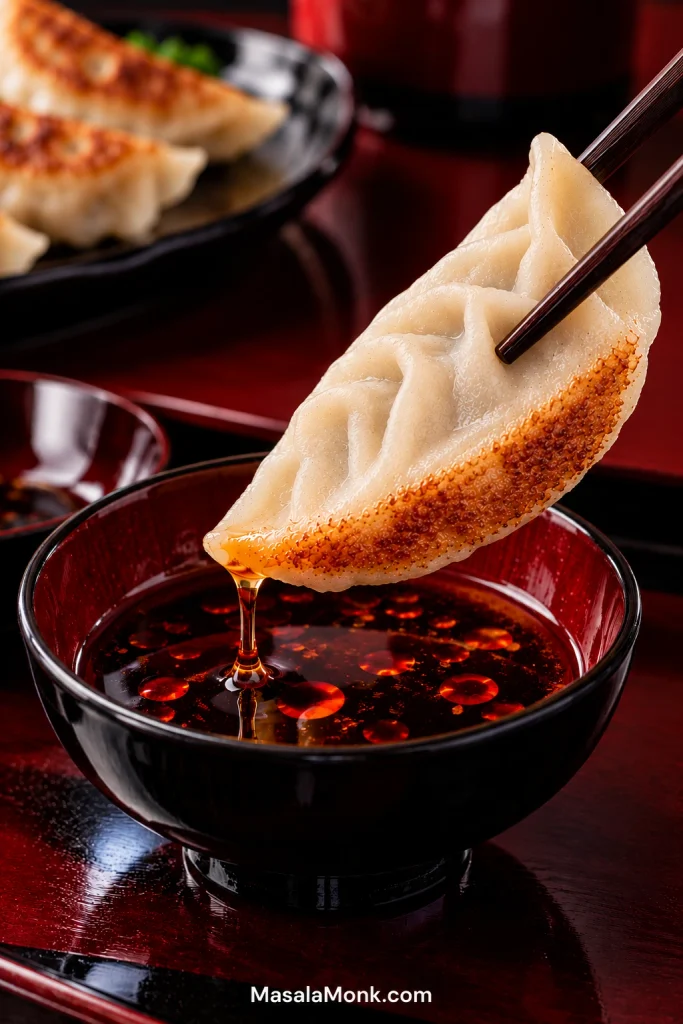
The gyoza should still taste like gyoza.
A crisp cucumber salad gives you a cool, vinegary contrast to the hot pork filling and fried bottoms.
Freeze Them Raw, Cook Them Frozen
Yes—freeze assembled gyoza raw, then cook them directly from frozen without thawing. If you’re folding several hours or days ahead, freeze them rather than keeping the assembled raw dumplings in the refrigerator. You can then cook exactly what you need straight from the freezer.
- Arrange the raw gyoza on a parchment-lined tray without letting them touch.
- Keep them loosely covered until the tray is ready for the freezer.
- Freeze until each dumpling is completely solid, often about 1–2 hours.
- Transfer the solid gyoza to an airtight freezer bag or container and press out excess air.
- For the best quality, use them within about 1 month.
Transfer them to a bag too early, before they are frozen solid, and they can freeze into one clump. Leave them exposed for too long and the opposite happens: the thin skins dry out and become brittle.
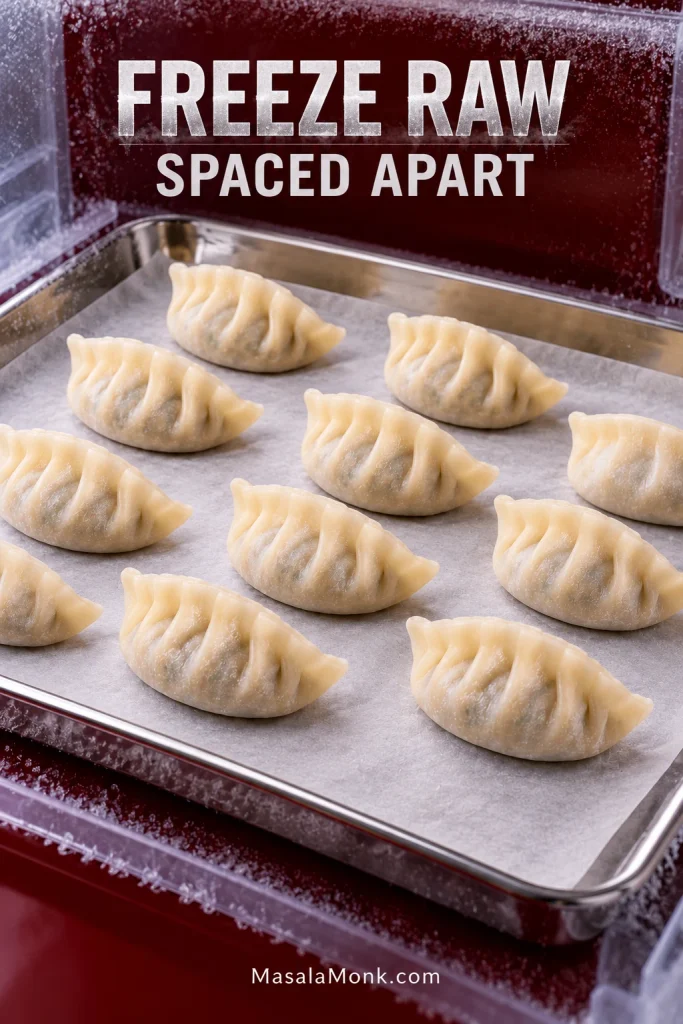
Cook Them Straight from Frozen
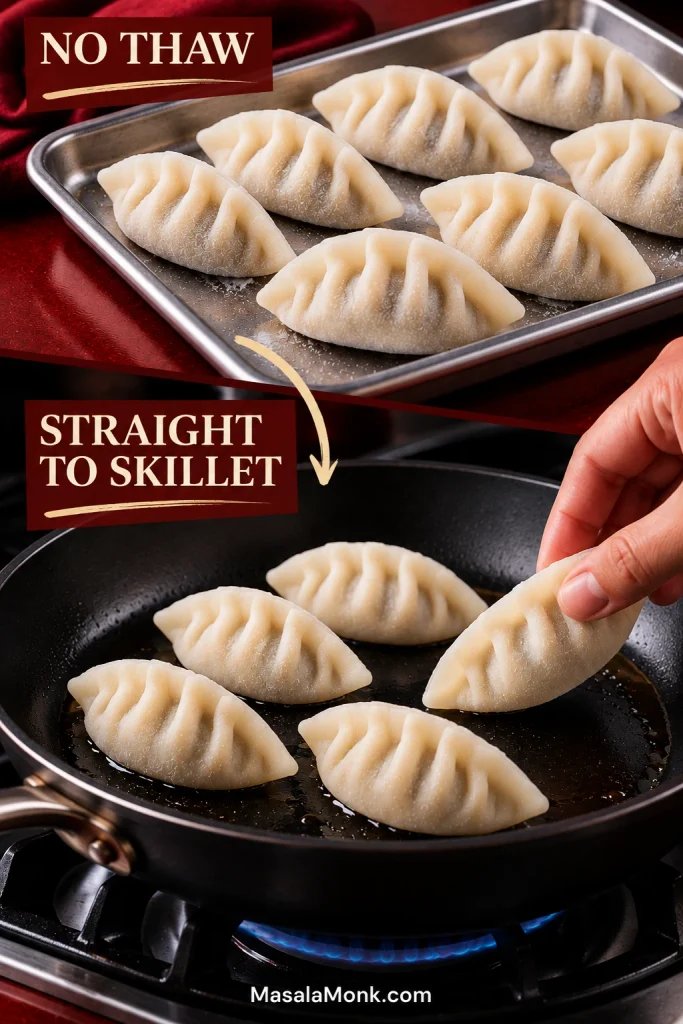
Do not thaw frozen gyoza. Put them straight into the oiled skillet and brown the bottoms as you would with a fresh batch.
For about 12 frozen gyoza, add the same ⅓ cup / 80 ml just-boiled water, cover and give them roughly 1–2 minutes longer under the lid. If the pan dries before the wrappers are tender and the filling is hot through, add a small splash of hot water and cover again briefly. Let the visible water disappear before the final fry.
Making a Larger Batch
For a double batch, keep most of the filling refrigerated and refill a smaller working bowl as needed. That keeps the raw pork cold and gives the vegetables less time to release moisture while you fold.
Move full trays into the freezer as space allows instead of making the first dumplings wait for the last ones. It also keeps the kitchen much calmer once you’re folding fifty or sixty instead of a couple of dozen.
Storing and Reheating Cooked Gyoza
Refrigerate leftover cooked gyoza within 2 hours in a covered container and use them within about 3 days. To reheat, put them in a skillet with a very small splash of water, cover just long enough to heat the centers, then uncover and let the water disappear so the bottoms brown again.
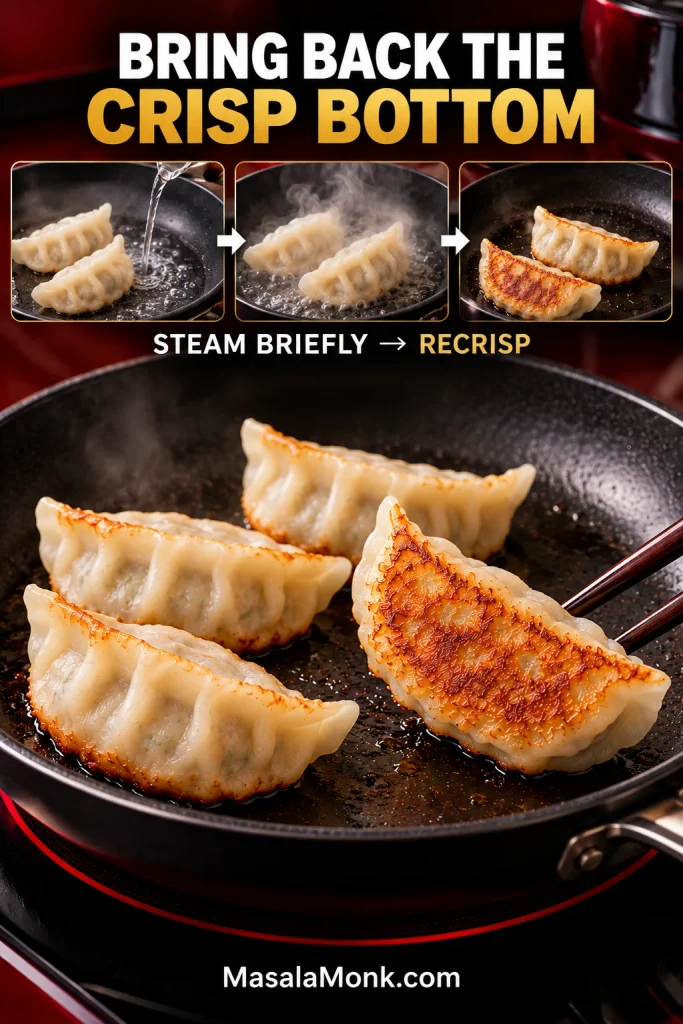
Reheat leftovers until they reach 165°F / 74°C. A microwave is faster, but the wrappers will stay softer.
Gyoza Troubleshooting
When something goes wrong, start with what you can actually see in the dumpling or skillet. Most problems come back to moisture, wrapper handling or pan timing.
Pan and Crisping Problems
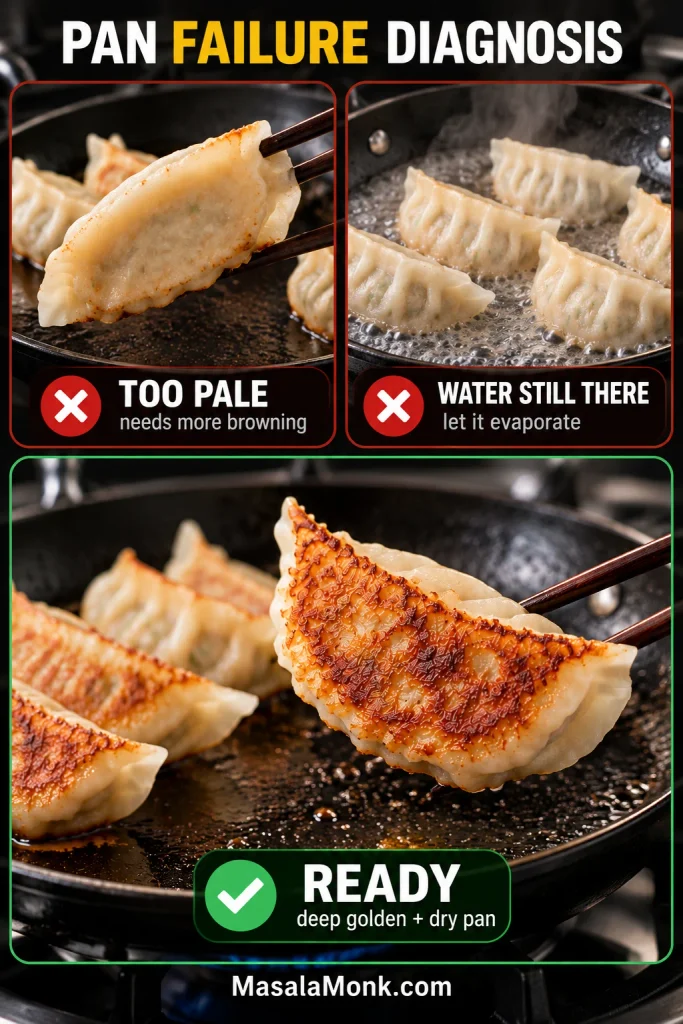
Let the first batch teach you something. Check the bottom color, notice whether water is still visible and listen for the frying sound to return. Those cues tell you whether the pan needs more browning, more evaporation or no more heat at all.
| Problem | Likely cause and what to change |
|---|---|
| Why did my gyoza stick or tear when I lifted them? | The pan may have been too cool, or the dumplings were moved before the first crust formed. Let the oil heat until it spreads easily, leave the gyoza undisturbed until the bottoms set, then lift them with a thin flexible spatula. |
| Why did the bottoms burn? | The heat was too high, the water disappeared sooner than expected or the final fry went too long. Later batches can also brown faster because the skillet is already hot, so stay close when frying returns. |
| Why are my gyoza bottoms soft or soggy? | Water was still in the skillet or cooking stopped when steaming ended. Let the visible water evaporate completely, then give the bottoms their final uncovered fry. |
Filling and Wrapper Problems
If the dumpling itself is watery, damp, leaking or tough, inspect the filling and seal before changing the heat. Those problems usually begin with moisture control, wrapper handling or how the pork was mixed.
| Problem | Likely cause and what to change |
|---|---|
| Why is my gyoza filling watery? | The cabbage may not have been squeezed thoroughly enough, or the seasoned liquid was not fully worked into the pork before the vegetables went in. Squeeze the cabbage firmly and make sure the pork turns sticky and cohesive before adding the vegetables. |
| Why are my assembled gyoza getting damp or soft? | They have probably been sitting too long after filling. Moisture gradually moves into the thin wrappers, so cook the gyoza promptly or move them to the freezer. |
| Why did my gyoza split or leak? | The usual causes are too much filling, dried wrapper edges, trapped air or an incomplete seal. Use a little less filling and leave a clean edge to pinch shut. |
| Why is the pork filling tough or pulling away from the wrapper? | Very lean pork, too little liquid or excessive cooking can make the filling tighten and shrink. Mixing until the pork turns tacky is intentional here; regular ground pork and the measured liquid help keep the center juicy. |
Frozen Gyoza Problems
Freezer problems usually come down to when the gyoza were bagged, how well the wrappers were protected from drying, or whether the dumplings started to thaw before cooking.
| Problem | Likely cause and what to change |
|---|---|
| Frozen gyoza stuck together | They were probably bagged before freezing solid. Freeze them separately on the tray first. |
| Frozen wrappers cracked | The skins probably dried during folding or stayed exposed too long in the freezer. Keep the dumplings covered and bag them once solid. |
| Frozen gyoza turned sticky after thawing | Take them directly from freezer to skillet. Partial thawing lets condensation and filling moisture soften the thin wrappers. |








