Posted on Leave a comment

Hibachi Ginger Sauce Recipe — Japanese Steakhouse Brown Sauce

A small ceramic bowl of brown hibachi ginger sauce with visible ginger and onion flecks, served with shrimp, steak bites, fried rice, zucchini, mushrooms, and onion.

If you have ever dipped hibachi shrimp, steak, or fried rice into that sharp brown ginger sauce and wished you had a jar at home, this is the one to make.

This hibachi ginger sauce is pourable, tangy, salty, lightly sweet, and full of fresh ginger-onion bite. It is the brown dipping sauce from the little Japanese steakhouse cup — not creamy yum yum sauce and not the orange ginger dressing from the salad.

The first spoonful should taste like the dip you remember: salty at the start, bright in the middle from lemon and rice vinegar, and warm with ginger at the end. Blend it in 5 minutes, chill it if you can, and serve it with shrimp, steak, chicken, fried rice, noodles, vegetables, dumplings, tofu, or rice bowls.

Before You Blend

  • Use fresh ginger if possible. Ginger paste works in a pinch, but fresh ginger gives the cleanest bite.
  • Choose low-sodium soy sauce. Regular soy sauce can make this dip too salty after it rests.
  • Pulse, don’t fully puree. Tiny ginger and onion flecks are part of the steakhouse-style texture.
  • Let it chill when you can. One hour in the fridge softens the raw onion and makes the sauce taste more rounded.

Quick Answer: What Is Hibachi Ginger Sauce?

Hibachi ginger sauce is a Japanese steakhouse-style dipping sauce made with fresh ginger, onion, soy sauce, rice vinegar, lemon juice, and a little sugar. It is usually served with grilled meats, seafood, vegetables, noodles, and fried rice.

When people ask for the brown sauce from hibachi restaurants, they usually mean this ginger-soy dipping sauce. Yum yum sauce is the creamy pink-orange one. On salad, the orange or tan sauce is usually Japanese ginger dressing.

It is especially good with shrimp fried rice, steak bites, grilled chicken, sautéed mushrooms, zucchini, dumplings, spring rolls, tofu, salmon, and rice bowls.

Hibachi Ginger Sauce Recipe

A 5-minute no-cook Japanese steakhouse-style ginger sauce made with fresh ginger, onion, soy sauce, rice vinegar, and lemon juice. The flavor is salty-tangy first, then bright and gingery, with a little onion bite that mellows after chilling.

Prep Time5 minutes
Cook Time0 minutes
Optional Chill Time1 hour
Total Time5 minutes, or 1 hour 5 minutes with chilling
YieldAbout 1 cup / 240 ml
Servings8
Serving Size2 tablespoons / 30 ml
TexturePourable, lightly textured

Ingredients

  • 2 tablespoons fresh ginger, peeled and grated or finely chopped, about 15 g
  • ½ cup chopped yellow onion, about 70–80 g
  • ⅓ cup low-sodium soy sauce or tamari, 80 ml
  • 3 tablespoons rice vinegar, 45 ml
  • 2 tablespoons fresh lemon juice, 30 ml
  • 1 teaspoon sugar or brown sugar, 4 g
  • ½ teaspoon lemon zest, optional
  • 1 small garlic clove, optional

Equipment

  • Blender, food processor, or mini chopper
  • Microplane, grater, or sharp knife
  • Cutting board
  • Measuring cups and spoons
  • Small jar or airtight container

No blender? Grate the ginger, mince the onion as finely as possible, then shake everything hard in a jar. The dip will be chunkier and more intense, but it still works for dipping.

Instructions

  1. Peel the ginger and grate it, or chop it finely so it blends easily.
  2. Chop the onion into small pieces. Smaller pieces help the mixture blend faster without turning foamy.
  3. Add the ginger, onion, soy sauce, rice vinegar, lemon juice, sugar, and optional lemon zest or garlic to a blender or food processor.
  4. Pulse until the sauce is loose and spoonable. Stop while tiny pieces of ginger and onion are still visible.
  5. Taste before you change anything. Add more lemon juice if it tastes flat, a tiny pinch of sugar if it tastes too strong, or 1–2 tablespoons water if it tastes too salty.
  6. Serve right away, or cover and chill for 1 hour so the flavor tastes smoother and more rounded.

Recipe Notes

  • Do not judge the sauce in the first minute after blending. Raw onion and ginger taste loud at first; chilling is part of the recipe if you want a smoother restaurant-style flavor.
  • Start with 2 tablespoons fresh ginger. Very mild ginger can take another ½ tablespoon after blending. Older, woody, or very hot ginger should rest in the sauce before you add more.
  • Low-sodium soy sauce keeps the sauce from becoming too salty.
  • Use a food processor for a slightly textured sauce and a blender for a smoother one.
  • The dip may separate in the fridge. Stir or shake before serving.
  • Yield may vary slightly depending on how finely the onion is chopped and blended.
  • Store in an airtight jar in the refrigerator and use within 5 days.

Choose Your Version

The main recipe is balanced for home cooking: bold enough for hibachi-style plates, but not so salty that it overwhelms rice, vegetables, or dumplings. Use this quick guide before you add more soy sauce, sugar, or lemon.

A tabletop guide showing hibachi ginger sauce served with steak bites, dumplings, fried rice, a rice bowl, and a jar method.
Start with the base sauce, then adjust it for the meal in front of you. Keep it loose for fried rice, make it bolder for steakhouse plates, or add garlic and sesame oil when serving it with dumplings.
Want This Result?Do This
Closest steakhouse biteAdd extra soy sauce, rice vinegar, lemon, and ginger from the stronger restaurant-style adjustment below.
Less salty everyday sauceStay with the main recipe and use low-sodium soy sauce.
Best for dumplingsAdd the optional garlic and a few drops of toasted sesame oil.
Best for fried riceKeep it loose and bright. Do not thicken it.
Best texturePulse until tiny ginger and onion flecks remain.
No blender versionGrate the ginger, mince the onion finely, and shake everything in a jar.

Already made the sauce? Jump to adjustments after blending or troubleshooting. Still deciding how you want it to taste? Start with why the balance works.

Why This Ginger Sauce Recipe Works

Some restaurant-style ginger sauces lean hard on soy sauce and vinegar. They taste bold with grilled steak or shrimp, but they can become too salty for home dinners. This version keeps the familiar ginger-onion base and balances it with lemon, rice vinegar, and a small amount of sugar.

The finished sauce should hit salty first, then tangy, then gingery. It should not taste creamy, oily, syrupy, or thick. If the onion tastes raw right away, chill the sauce before changing the recipe.

Quick Taste Check

The dip should taste balanced, not sweet or heavy. Flat sauce needs lemon, a too-strong batch needs chill time, and salty sauce needs water 1 tablespoon at a time. When one bite of rice makes you want another, the balance is right.

Chopsticks holding white rice dipped in brown hibachi ginger sauce above a small bowl of sauce, with grilled vegetables and fresh ginger nearby.
Plain rice is the quickest way to test the flavor because it does not hide the sauce. When the bite tastes lightly salty, bright, and gingery, the hibachi ginger sauce is ready.

That balance is why the dip works with a whole plate, not just one bite. It cuts through butter, soy, and seared edges without covering up the shrimp, steak, rice, or vegetables. Use it as a dip, a spoon-over sauce for fried rice, or a brighter alternative when a thicker stir fry sauce would feel too heavy.

What Is Hibachi Ginger Sauce?

The easiest way to understand hibachi ginger sauce is by where it sits on the plate: beside grilled food, not on salad. It cuts through richness, wakes up rice, and adds a fresh ginger bite to shrimp, steak, chicken, vegetables, and noodles.

You may see it called Japanese steakhouse ginger sauce, Benihana-style ginger sauce, hibachi brown sauce, or simply ginger sauce. Most of those names point to the same ginger-soy dipping cup sauce.

Ingredients You’ll Need

The goal is not to make the strongest sauce possible. Aim for that familiar first dip: bright, salty, gingery, and balanced enough that you keep going back for one more bite of rice.

Fresh ginger root, grated ginger, chopped yellow onion, soy sauce, rice vinegar, lemon halves, sugar, and garlic arranged on a wooden board.
Fresh ginger and onion create the bite, while soy sauce, rice vinegar, lemon, and a small amount of sugar bring balance. Together, they keep the sauce savory and bright instead of flat, sour, or overly salty.

Fresh Ginger

Fresh ginger is the main flavor. It gives the sauce its clean bite, gentle heat, and bright fragrance. Peel it first, then grate or finely chop it so it blends evenly.

Two tablespoons gives the sauce a clear ginger flavor without overwhelming everything else. Use 1½ tablespoons for a milder dip or 2½ tablespoons for a stronger one.

Yellow Onion

Onion is what keeps the dip from tasting like soy sauce with ginger stirred in. Yellow onion gives the best balance; white onion tastes sharper, and red onion changes the color and flavor too much for this style.

Soy Sauce or Tamari

Soy sauce brings salt, color, and savory depth. Low-sodium soy sauce is the safest choice because this is a dipping sauce, and salt builds quickly.

Tamari works well for a deeper flavor or a gluten-free version. Coconut aminos can work for a soy-free version, but it is sweeter and less salty, so reduce or skip the sugar and brighten the sauce with extra vinegar or lemon if needed.

For a sweeter cooked soy-ginger glaze instead of a fresh dipping sauce, this teriyaki sauce recipe is the better direction.

Rice Vinegar

Rice vinegar gives the sauce a clean tang without making it harsh. Unseasoned rice vinegar gives you the most control. If using seasoned rice vinegar, blend first, then add sugar only if the sauce still needs rounding.

Lemon Juice

Fresh lemon juice lifts the ginger, keeps the soy sauce from tasting heavy, and gives the dip a clean finish. Lemon zest is optional; use only a little because too much can make the sauce bitter.

Sugar

The sugar is not there to make the sauce sweet. It just rounds off the raw onion, vinegar, lemon, and ginger so the dip tastes balanced instead of harsh. Brown sugar tastes rounder; white sugar keeps the flavor cleaner.

Garlic, Optional

Garlic pushes the dip away from the clean steakhouse flavor and toward a stronger dumpling or noodle sauce. Add one small clove for that version, or leave it out for a cleaner ginger-onion base.

Fresh Ginger vs Ginger Paste vs Ground Ginger

Fresh ginger is best here because the sauce is supposed to taste lively. Dried ginger cannot give the same clean bite.

Ginger OptionDoes It Work?How to Use It
Fresh gingerBest choiceUse 2 tablespoons / about 15 g for the main recipe.
Ginger pasteWorks in a pinchStart with 1½ tablespoons, blend, then add more after tasting.
Ground gingerEmergency onlyStart with ¼ teaspoon. The flavor will be warmer and duller.

Check the label on ginger paste. Some brands include salt, vinegar, oil, or preservatives, and those can change the balance.

How to Make Ginger Sauce

No cooking needed here — just chop, blend, taste, and rest. A blender or food processor gives the cleanest texture, but a hand-chopped jar version still works when you want the sauce quickly.

1. Prep the ginger and onion

Peel the ginger and grate it, or chop it finely. Cut the onion into small pieces so it breaks down quickly.

Fresh ginger being grated on a metal grater beside chopped yellow onion on a wooden cutting board.
Grating the ginger before blending helps its flavor spread evenly through the sauce. Likewise, chopping the onion small gives body without leaving big raw pieces in the finished dip.

2. Add the sauce ingredients

Add the ginger, onion, soy sauce, rice vinegar, lemon juice, sugar, and optional lemon zest or garlic to a blender or food processor.

Chopped onion, fresh ginger, soy sauce, rice vinegar, lemon juice, and sugar inside a food processor before blending.
This no-cook ginger sauce comes together in the food processor. Add the aromatics and liquids together, then pulse in short bursts so the sauce stays loose and lightly textured.

3. Pulse until spoonable

Pulse until the sauce is loose and easy to pour. Stop before it becomes a creamy puree. Tiny visible bits of ginger and onion are a good sign.

Pulsed brown hibachi ginger sauce inside a food processor with small visible pieces of ginger and onion.
Stop pulsing while tiny ginger and onion flecks are still visible. That light texture is what gives Japanese steakhouse ginger sauce its fresh bite instead of a dull, over-blended finish.

4. Taste and adjust

Taste before you change anything, and do not panic if it feels loud at first. This sauce can swing from perfect to too salty quickly, so small adjustments are better than big ones. Add lemon if it tastes flat, a tiny pinch of sugar if it tastes too strong, or 1–2 tablespoons water if it tastes too salty.

5. Chill for smoother flavor

You can serve the sauce right away, but it tastes better after resting. After about an hour in the fridge, the onion relaxes, the ginger settles, and the sauce starts tasting more like the restaurant cup.

Blender vs Food Processor: What Texture Should Ginger Sauce Have?

Both tools work, but they give slightly different results.

Two bowls of brown ginger sauce on a tray, one labeled blender with a smoother texture and one labeled food processor with more visible flecks.
Use a blender for a smoother ginger sauce and a food processor for a more flecked steakhouse-style dip. Either works, but the tool changes the final texture.
ToolBest ForTexture
BlenderSmoother sauceMore even, less textured, easy to pour.
Food processorSteakhouse-style textureLightly textured, with tiny ginger and onion flecks.
Mini chopperSmall batchesWorks well, but scrape the sides once or twice.
No blenderQuick hand-chopped versionChunkier and stronger, but still useful for dipping.

The ideal texture is pourable and lightly flecked. It should not look like mayonnaise, salad dressing, or a thick glaze.

If the sauce turns pale or foamy after blending, let it sit for a few minutes and stir. Air can lighten the color temporarily; after resting, the sauce usually settles into a deeper brown.

Taste and Texture Target

You’ll know the sauce is right when it smells gingery, pours easily from a spoon, tastes bright but not biting, and leaves tiny flecks behind in the cup. It should be brighter than salad dressing and lighter than teriyaki sauce.
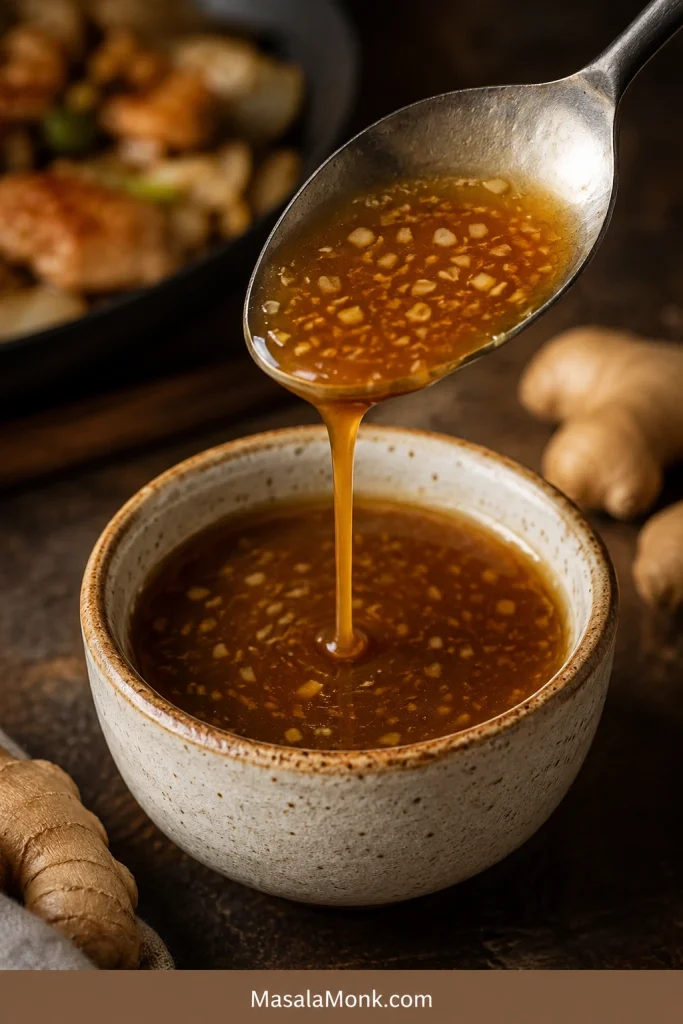
A spoon pouring brown hibachi ginger sauce with small flecks back into a ceramic bowl.
The finished sauce should fall easily from a spoon. That pourable texture lets it brighten rice, shrimp, steak, chicken, and vegetables without feeling heavy like a glaze.

How to Adjust the Sauce After Blending

Once the dip is blended, change it slowly. A spoonful of water, lemon, sugar, or soy sauce can move the whole batch.

GoalWhat to Do
More restaurant-styleAdd 1–2 tablespoons soy sauce, 1 tablespoon rice vinegar, and a little extra grated ginger.
Less saltyAdd 1–2 tablespoons water after blending, or use a little less soy sauce next time.
Less intenseChill for 1 hour and add ½ teaspoon sugar if needed.
More gingeryAdd ½ tablespoon more fresh grated ginger.
More texturedUse a food processor and stop while tiny pieces are visible.
SmootherUse a blender and blend a little longer, but stop before it turns foamy.
Gluten-freeUse tamari or certified gluten-free soy sauce.
Soy-freeUse coconut aminos, reduce or skip the sugar, and add extra vinegar or lemon to balance the sweetness.
Better for dumplingsAdd the optional garlic and a few drops of toasted sesame oil.

Benihana-Style Notes

Think of this as Benihana-style, not a claim that it is the restaurant’s exact formula. Benihana’s own ginger sauce notes emphasize fresh ginger, onion, rice vinegar, lemon juice, and low-sodium soy sauce, which lines up with the flavor profile people expect from the brown dipping sauce.

This version keeps that profile but adjusts the balance for a home kitchen. Use the stronger adjustment below when the sauce in your memory was sharper, saltier, and more intense. For a dip you can spoon over rice and use all week, stay with the main recipe.

A small bowl of dark brown Benihana-style ginger sauce with visible flecks, served near shrimp, steak bites, fresh ginger, lemon, and chopsticks.
For a stronger Benihana-style direction, add soy sauce, rice vinegar, lemon, and extra ginger a little at a time. Small changes matter because this dipping sauce can turn too salty quickly.

For a Stronger Restaurant-Style Sauce

After blending the main recipe, make it sharper and more soy-forward by adding:

  • 1–2 extra tablespoons soy sauce
  • 1 extra tablespoon rice vinegar
  • ½ tablespoon extra lemon juice
  • ½ tablespoon extra grated ginger

Add these slowly and taste as you go. It is easier to make the sauce stronger than to rescue a sauce that has become too salty or too sour.

Ginger Sauce vs Ginger Dressing vs Yum Yum Sauce

These sauces often get mixed up because they all show up around hibachi and Japanese steakhouse meals. The easiest way to tell them apart is to look at where they show up on the table: ginger sauce is for the dipping cup, ginger dressing is for salad, and yum yum sauce is the creamy one people spoon over shrimp and fried rice.

Three small cups labeled ginger sauce, yum yum sauce, and ginger dressing, showing a brown sauce, a creamy pink-orange sauce, and an orange-tan dressing.
This side-by-side view clears up the common hibachi sauce mix-up. Brown ginger sauce is for dipping, yum yum sauce is creamy, and Japanese ginger dressing usually belongs on salad.
SauceTextureMain FlavorBest Use
Hibachi ginger sauceBrown, pourable, lightly texturedGinger, onion, soy, vinegar, lemonShrimp, steak, chicken, vegetables, fried rice
Japanese ginger dressingOrange or tan, dressing-likeCarrot, onion, ginger, oil, vinegarGreen salad
Yum yum sauceCreamy, pale pink or orangeMayo, tomato or ketchup, sugar, spicesShrimp, chicken, fried rice, vegetables
Hibachi mustard sauceSmooth, mustard-forwardMustard, soy, sesame, or cream depending styleSteak and chicken
Ginger scallion sauceOil-based and spoonableGinger, scallions, hot oilRice, noodles, poached chicken, tofu

For salad, ginger dressing is usually the better match. Beside hibachi shrimp, steak, chicken, vegetables, or fried rice, this brown ginger sauce is the right one.

What to Eat With Ginger Sauce

Use this sauce beside something rich: buttery mushrooms, seared shrimp, fried rice, grilled steak, or chicken thighs. It makes rice taste brighter, shrimp taste sweeter, and steak feel less heavy after a few bites.

Hibachi-style favorites

  • Hibachi shrimp
  • Steak bites or grilled steak
  • Chicken thighs or chicken breast
  • Salmon or tuna
  • Grilled zucchini, onion, mushrooms, and broccoli
  • Fried rice
  • Hibachi noodles

Takeout-style snacks

  • Dumplings
  • Potstickers
  • Egg rolls
  • Spring rolls
  • Lettuce wraps

For a creamier dip beside spring rolls or noodles, keep this ginger sauce as the bright option and add a bowl of peanut sauce for contrast.

A wooden appetizer board with dumplings, spring rolls, lettuce wraps, brown ginger sauce, and a separate creamy dipping sauce.
This brown ginger dipping sauce also works beyond hibachi dinners. Try it with dumplings, potstickers, spring rolls, and lettuce wraps when you want a bright soy-ginger dip instead of a creamy sauce.

Everyday bowls and meals

  • Rice bowls
  • Noodle bowls
  • Tofu
  • Roasted vegetables
  • Leftover grilled chicken
  • A flexible salmon bowl when you want the sauce with fish

Complete Your Hibachi Night

For a full hibachi-style plate, serve this ginger sauce with fried rice or steamed rice, sautéed zucchini and mushrooms, shrimp or chicken, and one creamy sauce on the side. The ginger sauce brings the bright tang; the creamy sauce brings richness.

A hibachi-style dinner plate with fried rice, shrimp, steak, chicken, zucchini, mushrooms, onion, and a small bowl of brown ginger sauce.
Serve this ginger sauce beside rich hibachi foods. Its ginger, lemon, vinegar, and soy cut through fried rice, seared shrimp, steak, chicken, mushrooms, and buttery vegetables.

Cold leftover rice works especially well because the sauce cuts through the salty, savory flavor. For a fresh base, use this how to cook rice guide before adding shrimp, steak, chicken, tofu, or vegetables.

Optional Warm Drizzle for Bowls and Noodles

Classic hibachi ginger sauce is served cold or at room temperature. But if you want a warmer drizzle for noodles, bowls, or stir-fried vegetables, you can thicken a small portion.

Quick thickened version

  1. Mix ½ teaspoon cornstarch with 1 tablespoon water.
  2. Add ½ cup ginger sauce to a small pan.
  3. Warm over medium-low heat.
  4. Stir in the cornstarch slurry.
  5. Cook for 1–2 minutes, stirring, until lightly thickened.

Heating changes the personality of the sauce. It becomes more of a warm bowl drizzle, and the fresh ginger-onion bite softens. Thicken only what you plan to use right away and keep the rest cold for dipping.

Troubleshooting Ginger Sauce

Fresh ginger and onion can taste strong before they rest. Most problems are easy to fix with a small adjustment.

A troubleshooting board for hibachi ginger sauce with a bowl of brown sauce, lemon wedges, sugar, soy sauce, water, onion, and text explaining flavor fixes.
Fix the sauce in small steps after blending: lemon wakes up a flat batch, chilling softens onion bite, water reduces saltiness, and sugar rounds out too much acid.
ProblemWhy It HappenedHow to Fix It
Too onionyToo much raw onion or not enough resting timeChill for 1 hour. Add a small splash of soy sauce or lemon juice. Use less onion next time.
Overly saltyRegular soy sauce or too much soy sauceAdd 1–2 tablespoons water, a little more onion, or a squeeze of lemon.
Sharp or sourToo much vinegar or lemon juiceAdd ½–1 teaspoon sugar and a small splash of soy sauce.
Flavor feels intenseGinger, onion, vinegar, and lemon are all strongChill the sauce. Add a tiny bit more sugar. Dilute with 1 tablespoon water if needed.
BitterToo much lemon zest or old gingerSkip zest next time. Add a little sugar to round out the bitterness.
Runny textureClassic ginger sauce is naturally looseServe as-is, or use the warm drizzle variation for bowls and noodles.
Chunky textureNot blended enoughPulse 10–20 seconds more, or strain only if you prefer a cleaner pour.
Smooth or foamyOver-blendedLet it settle and stir. Next time, pulse instead of blending continuously.
Separated in the fridgeNormal for a fresh blended sauceShake or stir before serving.

Storage and Make-Ahead

Store the sauce in an airtight jar in the refrigerator and use it within 5 days for the freshest flavor.

Homemade hibachi ginger sauce stored in a glass jar labeled Hibachi Ginger Sauce, with a spoonful of sauce, fresh ginger, garlic, and kitchen ingredients nearby.
Store homemade hibachi ginger sauce in an airtight jar and shake before serving. As it rests, the fresh ginger, onion, and soy-vinegar base can naturally settle.

The flavor is loudest right after blending. After 1 hour in the fridge, the onion and ginger settle down and the soy, vinegar, and lemon taste more balanced. By the next day, the sauce feels rounder, and it is the kind of small jar you end up spooning over leftover rice, cold chicken, or roasted vegetables without planning to.

Shake or stir before serving because the sauce can separate as it sits.

Can you freeze ginger sauce?

You can freeze it in small portions, but the texture will not be as fresh after thawing. The onion and ginger can become slightly watery. For the best dipping texture, make it fresh and refrigerate it instead.

Can you use ginger sauce as a marinade?

Yes, but it is best as a dipping sauce first and a quick marinade second. Use it for shrimp, chicken, tofu, or vegetables when you want a fast ginger-soy flavor.

Because it contains vinegar and lemon juice, do not marinate delicate seafood for too long. Shrimp or fish only needs 10–15 minutes; chicken or tofu can sit for 15–30 minutes.

FAQ

What is the brown sauce at hibachi restaurants?

It is usually ginger sauce: a soy-based dipping sauce made with fresh ginger, onion, vinegar, and lemon. Restaurants commonly serve it with shrimp, steak, chicken, vegetables, noodles, and fried rice.

Is this the same as Benihana ginger sauce?

It is Benihana-style, not the restaurant’s exact formula. The recipe keeps the fresh ginger, onion, soy, vinegar, and lemon profile while using a balanced home-kitchen ratio. Benihana says its signature ginger sauce is prepared fresh and is not sold in stores or bottles. Read Benihana’s note here.

Is ginger sauce the same as yum yum sauce?

No. Ginger sauce is brown, tangy, and soy-based. Yum yum sauce is creamy, usually mayo-based, and pale pink or orange.

Is hibachi ginger sauce the same as ginger salad dressing?

No. Hibachi ginger sauce is a dipping sauce for grilled food and rice. Japanese ginger dressing is usually smoother, often made with carrot, onion, ginger, oil, vinegar, and soy sauce, and served on salad.

Do you serve ginger sauce hot or cold?

Serve it cold, chilled, or at room temperature. It can sit beside hot steak, shrimp, chicken, vegetables, or fried rice, but the sauce itself does not need to be heated.

How long does homemade ginger sauce last?

Use it within 5 days for the freshest flavor. Keep it in an airtight jar in the refrigerator and stir or shake before serving.

Fresh ginger, paste, or powder — which is best?

Fresh ginger is best. Ginger paste can work as a shortcut, but it may contain salt or vinegar. Ground ginger is not recommended because it does not give the same lively flavor.

Can I make ginger sauce without a blender?

Yes. Grate the ginger, mince the onion very finely, add the remaining ingredients to a jar, and shake hard. The sauce will be chunkier and stronger, but it still works for dipping.

Why does my ginger sauce taste too oniony?

Raw onion can taste strong right after blending. Chill the sauce for 1 hour before judging it. If it still tastes too oniony, add a little soy sauce, lemon juice, or sugar to balance it. Next time, use slightly less onion.

What can I serve with ginger sauce?

Serve it with hibachi shrimp, steak, chicken, fried rice, noodles, grilled vegetables, dumplings, spring rolls, tofu, salmon, rice bowls, or roasted vegetables.

Final Tip

The sauce should taste like the first bright bite at the hibachi table: salty, tangy, gingery, and fresh enough to make you want another spoonful of rice or another piece of shrimp. Blend it, chill it if you can, and keep the texture lightly flecked. That little bit of ginger and onion is the whole point.
Posted on Leave a comment

Shrimp Fried Rice Recipe: Easy, Fluffy & Better Than Takeout

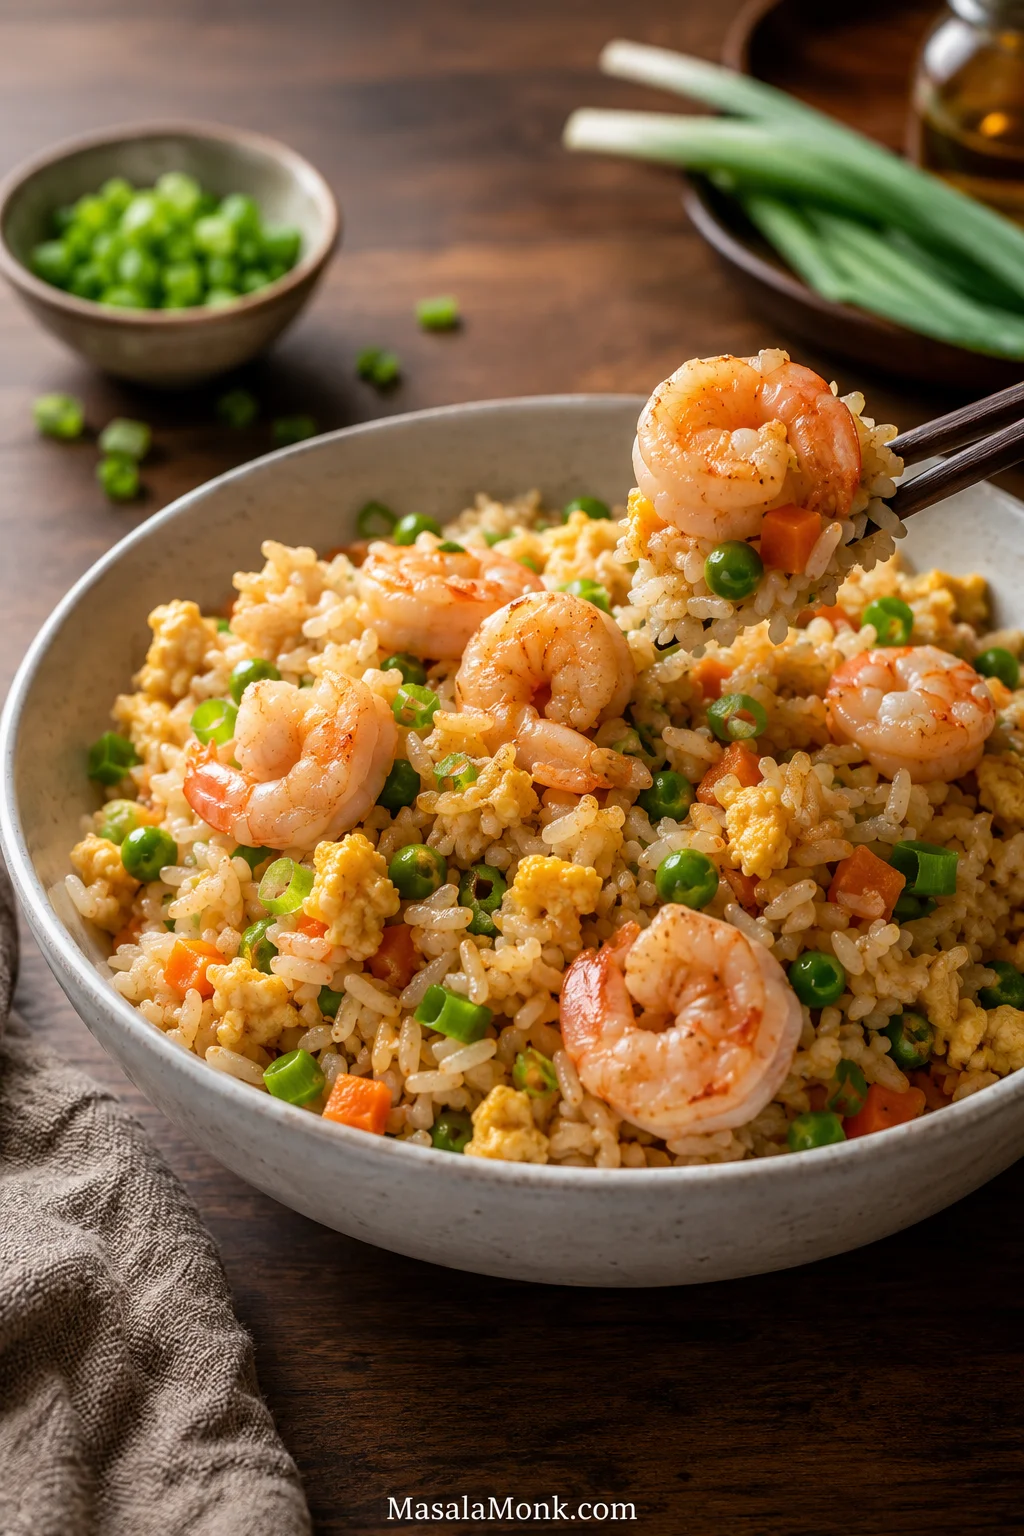
Bowl of shrimp fried rice with plump shrimp, scrambled egg, peas, carrots, scallions, and chopsticks lifting a bite of rice.

This shrimp fried rice recipe is for the night you open the fridge, see cooked rice, and realize dinner is almost already halfway done. A hot skillet turns yesterday’s rice into glossy, savory grains with juicy shrimp, soft egg, garlic, scallions, and vegetables — faster than takeout and fresher from the pan.

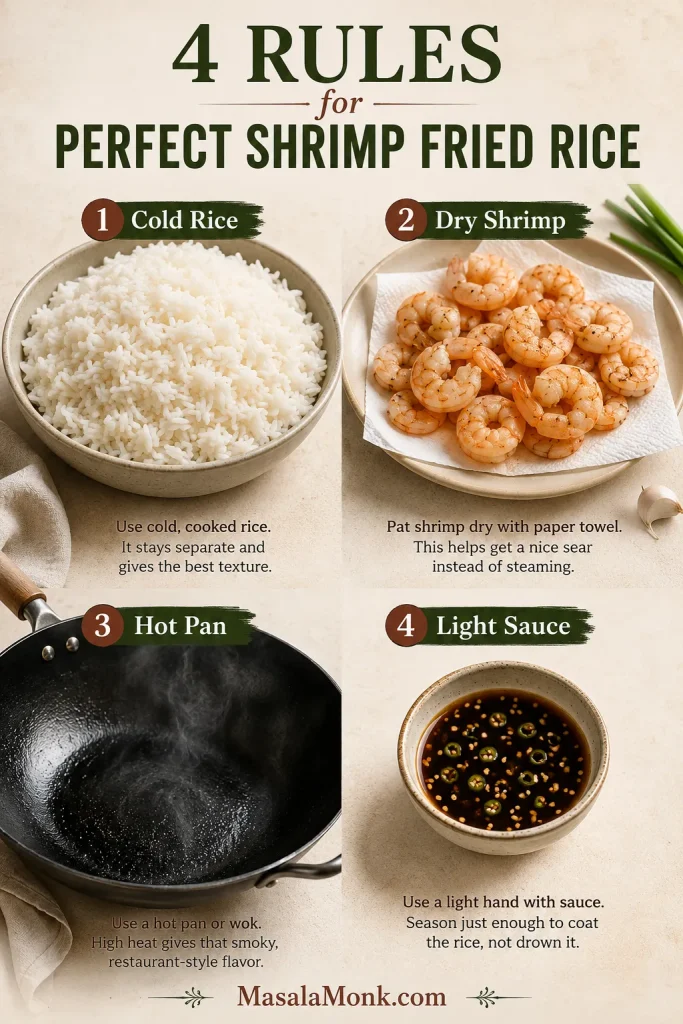
The goal is fluffy rice, tender shrimp, and a dinner that tastes planned, even when it started with leftovers. No restaurant burner needed. Just remember the four things that matter most: cold rice, dry shrimp, hot pan, light sauce.

What makes it better than takeout is control: more shrimp, less grease, tender egg, bright scallions, and rice that tastes soy-sesame savory without turning heavy.

Quick Answer: How to Make Shrimp Fried Rice

To make shrimp fried rice, start with cold cooked rice and break up the clumps. Pat raw shrimp dry, season lightly, then cook it quickly in a hot wok or large skillet until just opaque. Remove the shrimp, scramble the eggs, and cook the vegetables until the skillet looks dry again.

Stir-fry garlic, scallions, and rice, then add a small amount of soy-sesame sauce. Fold the shrimp and egg back in and serve while the rice is hot, loose, and glossy.

What is shrimp fried rice? It is a quick stir-fried rice dish made with cooked rice, shrimp, egg, vegetables, aromatics, and a savory soy-sesame sauce. In the best versions, cold rice and a hot pan keep the grains separate instead of soft or sticky.

Order matters because each ingredient behaves differently. Shrimp cooks fast, frozen vegetables can release water, and rice needs direct contact with heat before it gets sauced. When those pieces happen in the right order, the dish tastes fresh instead of heavy.

Already have cold rice and thawed shrimp? Jump straight to the recipe card. Need rice help first? See the best rice guide.

The 4 Rules for Fluffy Shrimp Fried Rice

Use this quick visual guide as the recipe’s safety net before you start cooking. Each rule protects the final texture in a different way.

Four-part guide showing cold rice, dry shrimp, a hot wok, and light sauce as the key rules for shrimp fried rice.
Use this four-rule system as your fried rice safety net: cold rice protects texture, dry shrimp sears cleanly, high heat adds flavor, and light sauce keeps the grains separate.

Shrimp Fried Rice Recipe

This version is built for real weeknights: cooked rice from yesterday, shrimp from the fridge or freezer, a few vegetables, and a hot pan that makes it all feel deliberate. Leftover rice makes it easiest, but the fresh-rice workaround below gives you a path when you are starting from scratch.

Prep Time10 minutes
Cook Time15 minutes
Total Time25 minutes
Yield4 servings
CourseMain dish, quick dinner
StyleTakeout-style shrimp fried rice

Timing note: The 25-minute total assumes you already have cooked and chilled rice. Cooking rice from scratch adds cooling time before frying. Starting with fresh rice today? Use the fresh-rice workaround before heating the pan.

Before you turn on the stove: Have the rice loosened, shrimp dried, eggs beaten, vegetables ready, and sauce mixed. Fried rice is easy, but it does not wait once the pan is hot.

Equipment

  • Wok or large 12-inch non-stick/heavy skillet
  • Wide spatula
  • Mixing bowl for shrimp
  • Small bowl for sauce
  • Sheet pan or wide plate if cooling fresh rice

Ingredients

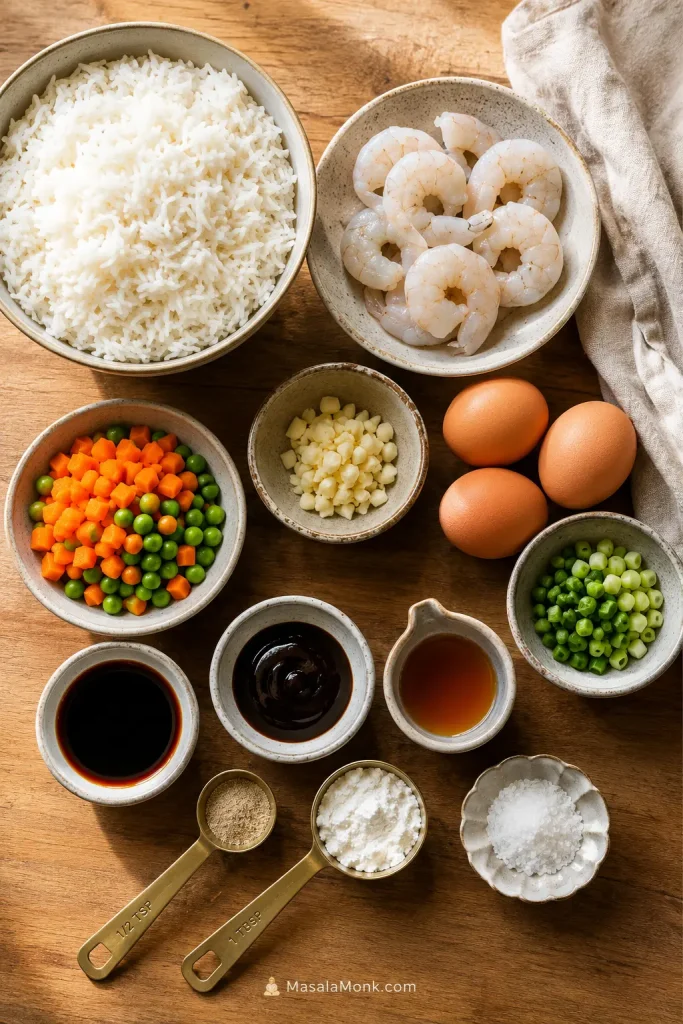
Overhead view of cooked rice, raw shrimp, three eggs, peas, carrots, garlic, scallions, soy sauce, oyster sauce, sesame oil, cornstarch, white pepper, and salt.
Fried rice moves quickly once the pan gets hot, so prep the shrimp, eggs, vegetables, aromatics, rice, and sauce before you start cooking.
IngredientUS MeasureMetric
Cold cooked rice4 cupsabout 600–650 g
Raw peeled and deveined shrimp1 lb450 g
Large eggs, beaten33
Frozen peas and carrots1 to 1 1/2 cups140–200 g
Garlic, minced3 cloves10–12 g
Scallions / green onions, sliced3–425–35 g
Neutral oil2 tbsp30 ml
Light soy sauce2 tbsp30 ml
Oyster sauce, optional1 tbsp15 ml
Toasted sesame oil1 tsp5 ml
White pepper1/4 tspabout 0.5 g
Sugar1/4 tspabout 1 g
Cornstarch1 tspabout 3 g
Salt1/4 tsp for shrimp, then only more after tastingabout 1.5 g, then only more after tasting

Ingredient note: This main method is written for raw shrimp. If you are using cooked shrimp, skip the searing step and add it at the very end just to warm through.

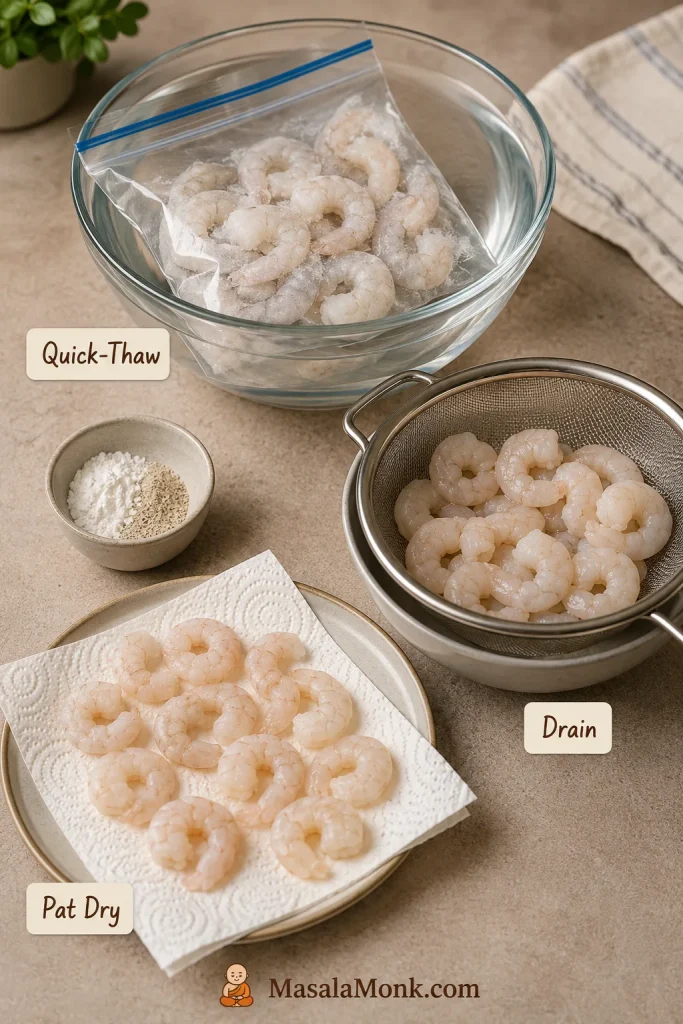
Frozen shrimp note: Frozen shrimp works well once fully thawed and patted dry. To quick-thaw, keep the shrimp sealed in a bag and place it in cold water until thawed, then drain and pat very dry before cooking. The skillet should sear the shrimp, not hiss with extra water. If you are unsure when to pull it from the pan, use the shrimp doneness cues.

Instructions

Prep the Rice and Sauce

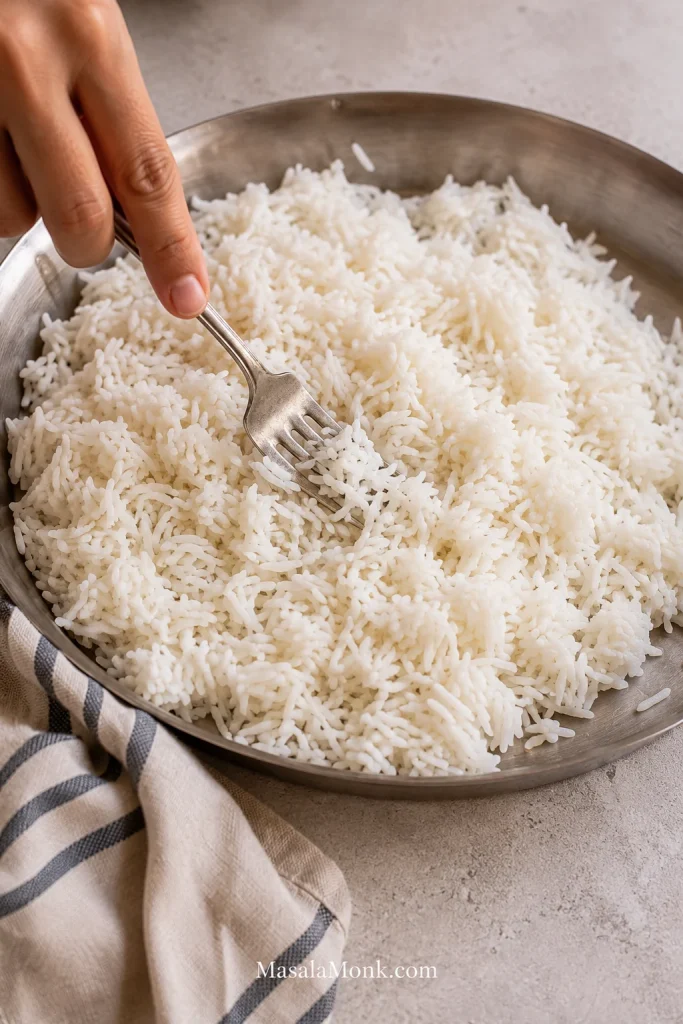
  1. Break up the rice. Use your fingers or a fork to loosen cold cooked rice before it goes into the skillet. Clumps are easier to fix now than once the heat is on.
  2. Mix the sauce. In a small bowl, stir together soy sauce, oyster sauce if using, sesame oil, white pepper, and sugar. Keep it beside the stove so you are not measuring while the rice is cooking.

Season the Shrimp and Heat the Pan

  1. Season the shrimp. Pat shrimp very dry. Toss with salt, cornstarch, and a small pinch of white pepper. A dry surface helps the shrimp cook quickly instead of steaming.
  2. Heat the pan. Place a wok or large skillet over medium-high to high heat. Add 1 tablespoon oil and let the pan get properly hot.

Cook Shrimp Separately So It Stays Tender

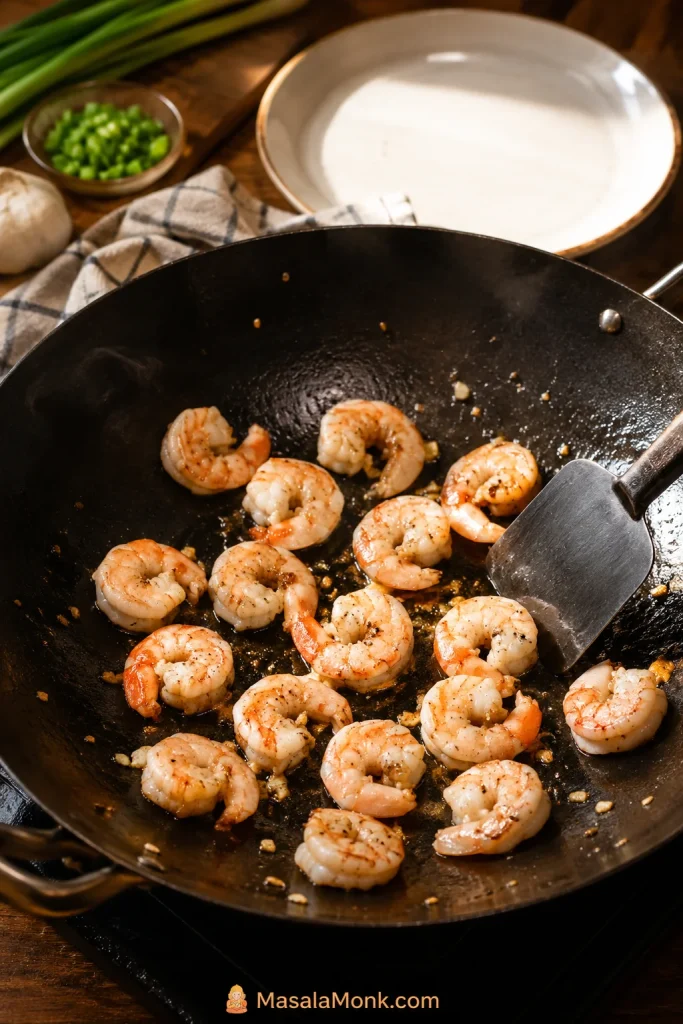
  1. Cook the shrimp. Add shrimp in a single layer. Cook for about 60–90 seconds per side, just until pearly, opaque, and lightly curled. Move it to a plate before it turns tight and firm.
  2. Scramble the eggs. Add 1 teaspoon oil if the pan is dry. Pour in the beaten eggs and scramble until just set. Move them to the plate with the shrimp; they will finish warming when they return to the rice.
Shrimp searing in a black wok with a spatula and an empty plate nearby for removing the shrimp.
Shrimp needs less time than rice, so cook it separately. Pull it while it is still plump, then return it near the end for tender shrimp in every bite.

Cook the Vegetables Until the Pan Looks Dry

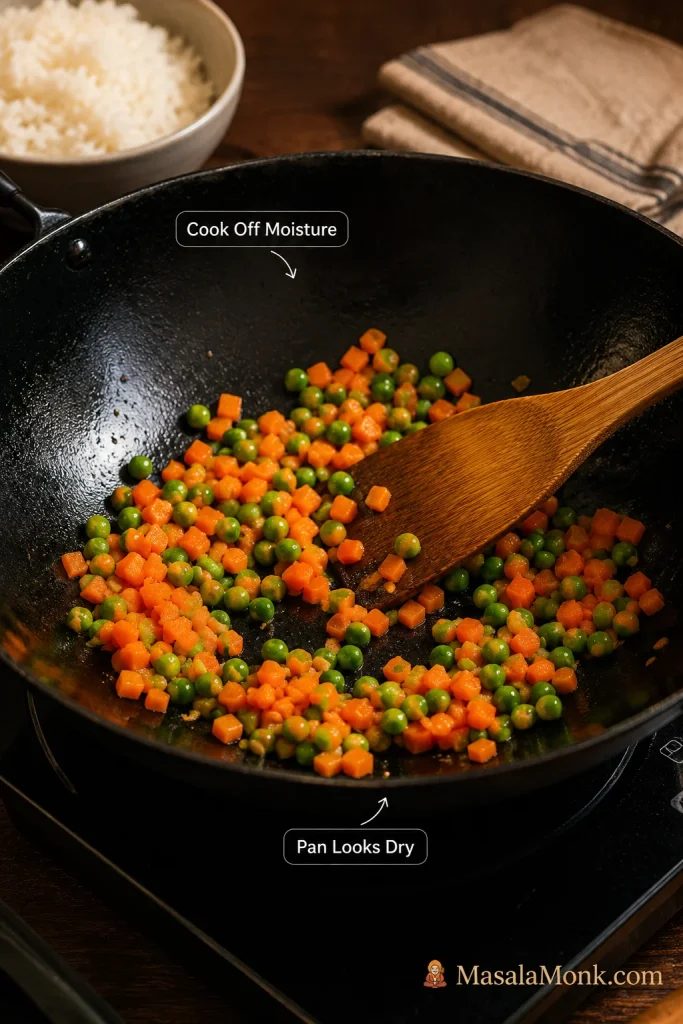
  1. Cook the vegetables. If needed, add the remaining oil, then stir in the peas and carrots. Cook until the skillet looks dry again so their sweetness and color stay bright without softening the rice.
Peas and diced carrots cooking in a black wok with a wooden spatula while a bowl of cooked rice waits nearby.
Once peas and carrots stop releasing moisture, the pan should look dry again. That is when the rice can fry instead of steam.

Garlic and Scallions Build the First Flavor Layer

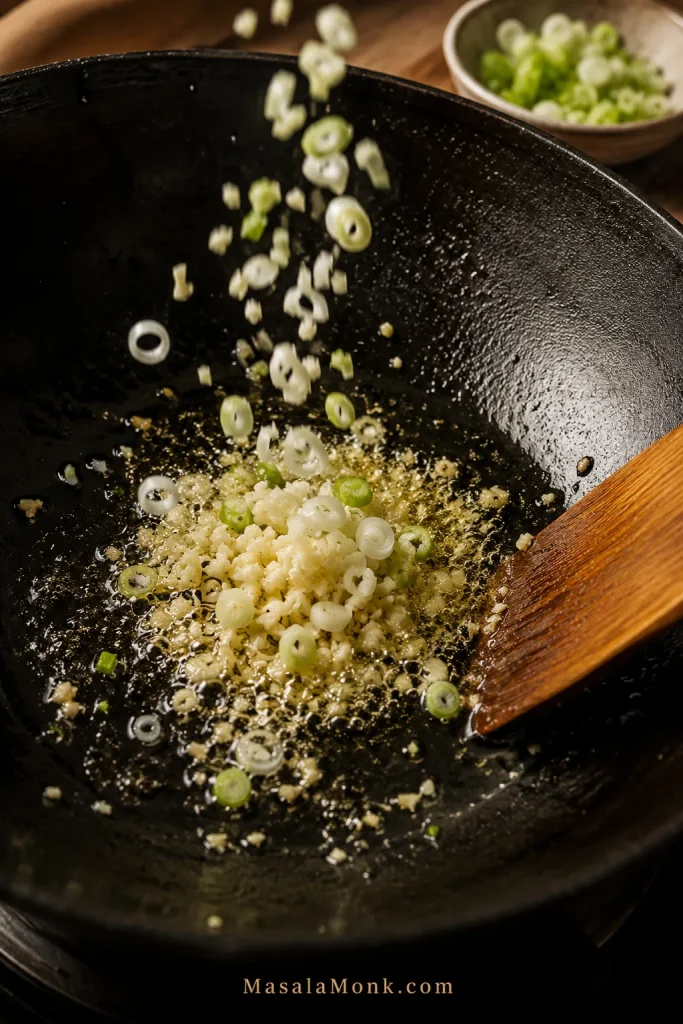
  1. Add aromatics. Stir in garlic and the white/light parts of the scallions. Cook for 15–30 seconds, just until the pan smells garlicky and sharp. You want the garlic lively, not browned.
Minced garlic and sliced scallions sizzling in oil inside a black wok with a wooden spatula.
Garlic and scallion whites flavor the oil almost instantly. Stir just until fragrant, because browned garlic can make the whole pan taste bitter.

Fry the Rice Before Adding Sauce

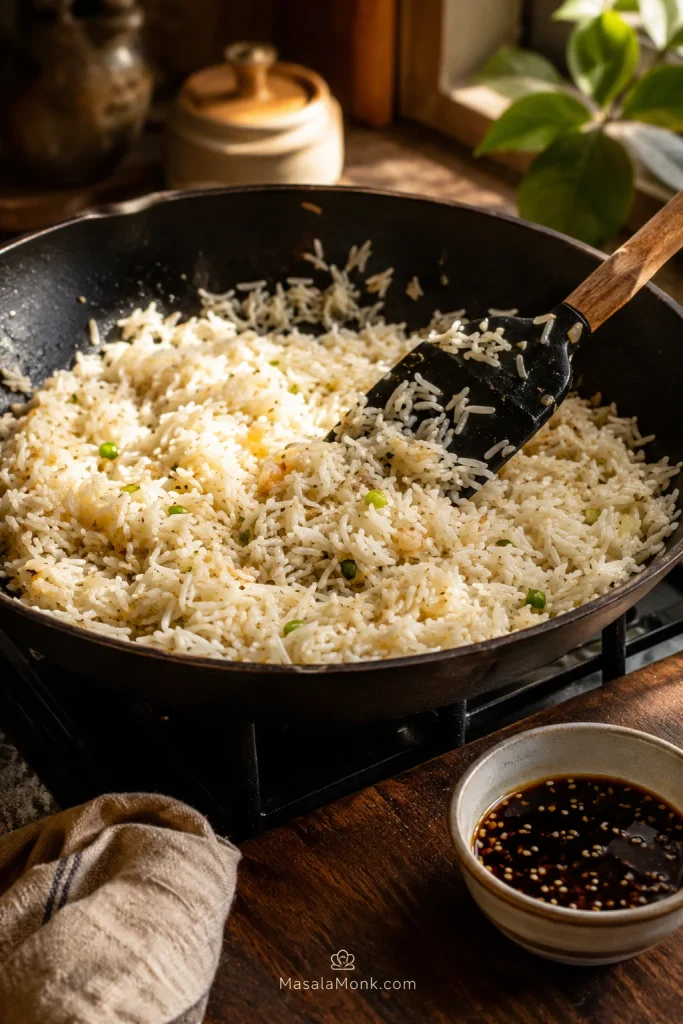
  1. Fry the rice. Add the cold rice, spread it out, and let it sizzle before stirring. The rice should look separate before it looks glossy; sauce comes after the grains are hot, not before.
Cooked rice frying in a wok with a spatula while a small bowl of dark sauce waits beside the pan.
Let the rice spend a little time in the pan before the sauce joins in. That early contact with heat keeps the grains loose instead of heavy.

Add Sauce, Return Shrimp and Egg, Then Finish

  1. Add the sauce. Drizzle in the sauce and toss quickly. The rice should look glossy, separate, and evenly seasoned. Puddles mean keep tossing over heat until the grains absorb the seasoning.
  2. Return shrimp and egg. Add the seared shrimp and scrambled egg back to the pan. Toss for 30–60 seconds, just until everything is hot, the shrimp stays springy, and the egg is tucked through the rice.
  3. Finish and serve. Add the green parts of the scallions so the final pan tastes fresh, sharp, and a little sweet. Taste before adding more soy sauce. If it needs lift, try white pepper, scallion greens, or a tiny pinch of salt before adding more liquid.

Cook’s cue: The pan should sound lively. Quiet, steamy rice usually means the skillet is crowded or something brought in too much moisture. If the rice steamed, clumped, or turned salty, jump to troubleshooting before trying again.

This is the kind of dinner that feels bigger than the effort it asks from you: one hot pan, a bowl of leftover rice, a handful of shrimp, and a few minutes where garlic, scallions, soy, and sesame make the kitchen smell like you planned ahead.

Shrimp Fried Rice Success Formula

Once you know the basic order, the recipe becomes easy to adapt. This quick table helps you adjust for the rice, shrimp, vegetables, or pan you actually have, while still landing in the same place: loose rice, tender shrimp, soft egg, bright scallions, and sauce that clings instead of pools.

If you have…Do this
Day-old riceBreak it up and fry it cold.
Fresh riceSpread, cool, and chill it until the surface feels dry.
Frozen shrimpThaw fully, pat dry, and cook briefly.
Cooked shrimpAdd it at the end just to warm through.
Frozen vegetablesCook them until the skillet looks dry before adding rice.
A small skilletCook in batches instead of crowding the pan.
Flat flavorAdd white pepper, scallions, heat, or a tiny pinch of salt before adding more soy sauce.

Why This Recipe Works

This recipe treats leftovers like an advantage. Cold rice is already drier and firmer, so the hot pan only has to wake it up.

The rest is order: shrimp cooks briefly and comes out, vegetables lose moisture before rice goes in, rice fries before sauce, and egg returns at the end for softness. That is how you get fried rice that tastes fresh instead of heavy.

If you like this leftover-rice style of cooking, MasalaMonk’s Spam fried rice recipe uses the same cold-rice logic with crispy Spam, egg, vegetables, and a quick savory sauce.

Ingredient Notes That Matter

The ingredient list is simple, which is part of the charm. A few ordinary things — cold rice, shrimp, egg, vegetables, garlic, scallions, and soy sauce — turn into a full dinner when the pan is hot and the moisture is under control.

Eggs

Egg makes the rice feel fuller and softer. Scramble it separately for the easiest method. Once you are comfortable, you can drizzle beaten egg over hot rice and stir quickly for a more golden restaurant-style effect. Try that only when the rice is already hot and loose; otherwise the egg can disappear into wet rice.

Soft egg gives the rice richness without needing extra sauce, which helps the whole pan stay savory instead of wet.

Vegetables

Frozen peas and carrots are classic because they are easy, colorful, and already cut small. Loose frozen vegetables can go straight into the hot skillet; just cook them until the pan looks dry again before adding rice. If they are icy or clumped together, thaw briefly and pat dry first.

No peas and carrots? Use corn, cabbage, bell pepper, mushrooms, green beans, or skip vegetables and add extra egg or shrimp. Small, quick-cooking add-ins give you color and texture without stealing heat from the rice.

Aromatics

Garlic and scallions are enough for a clean takeout-style flavor. For a deeper base, add 1/4 cup finely diced onion or 1 teaspoon minced ginger with the garlic. Keep the pieces small so they cook quickly and do not weigh down the rice.

Sauce and Seasoning

Light soy sauce gives salt and color. Oyster sauce adds a deeper takeout-style flavor, but it is optional. Low-sodium soy sauce gives you more control when your oyster sauce is already salty. Toasted sesame oil is strong, so use it sparingly. White pepper gives the rice a familiar restaurant-style warmth.

The goal is not dark, salty rice. Instead, aim for grains that taste seasoned all the way through — soy at the edges, sesame in the background, white pepper for warmth, and scallions keeping each bite fresh.

Want a warmer restaurant-style color? A tiny pinch of turmeric can add a light golden tint without needing food coloring. Use very little so it supports the rice instead of making it taste like turmeric.

For a broader sauce base you can use across vegetables, noodles, chicken, shrimp, tofu, and rice bowls, see this stir fry sauce recipe.

Best Rice for Shrimp Fried Rice

The rice matters, but the texture matters more. Choose a grain that can cool, separate, and move cleanly through a hot pan.

How Cold Rice Should Look Before Frying

Cold rice should feel firm enough to break apart easily. If the grains loosen before cooking, they have a better chance of frying evenly in the pan.

Hand using a fork to break up cold cooked rice in a metal bowl before adding it to the pan.
Break up chilled rice before cooking, not inside a crowded pan, so every grain can touch the heat instead of clumping together.

For the easiest fluffy texture, start with cold cooked rice that separates easily. Freshly cooked rice is usually too soft and steamy for direct frying, while chilled rice has enough structure to move cleanly through the skillet.

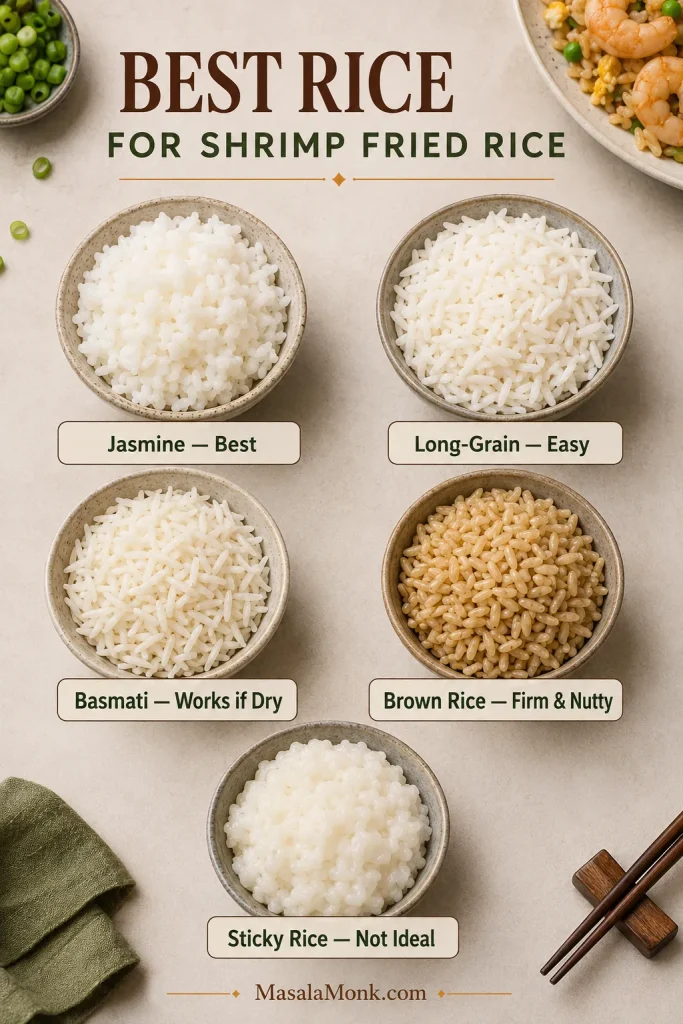
Choose jasmine rice for a takeout-style aroma, long-grain white rice for reliability, basmati rice if that is what you already cook, and brown rice if you want a firmer, nuttier version.

Not every rice behaves the same once it hits high heat, so use this as a quick guide.

Best Rice Types for Shrimp Fried Rice

Rice TypeGood for Shrimp Fried Rice?Notes
Jasmine riceYesAromatic and excellent for takeout-style fried rice.
Long-grain white riceYesReliable, fluffy, and easy to separate.
Basmati riceYes, if dryWorks well when cooked firm, cooled fully, and broken up before frying.
Brown riceYesFirmer and nuttier; taste and adjust seasoning carefully.
Short-grain or sticky riceNot idealCan clump and turn heavy unless you are making a different style intentionally.
Comparison board with bowls labeled jasmine rice, long-grain rice, basmati rice, brown rice, and sticky rice for fried rice.
Jasmine and long-grain rice are the easiest choices for fluffy shrimp fried rice, while basmati and brown rice can also work when cooked firm and cooled well.

Best make-ahead move: Cook the rice the day before, spread it out so steam escapes, then refrigerate it once cool. The next day, break up the grains before frying. This gives you the easiest fluffy texture.

Do not rinse cooked rice before frying. If the grains are clumped, loosen them with your fingers or a fork; adding water brings back the moisture you are trying to avoid.

No Day-Old Rice? Fresh Rice Workaround

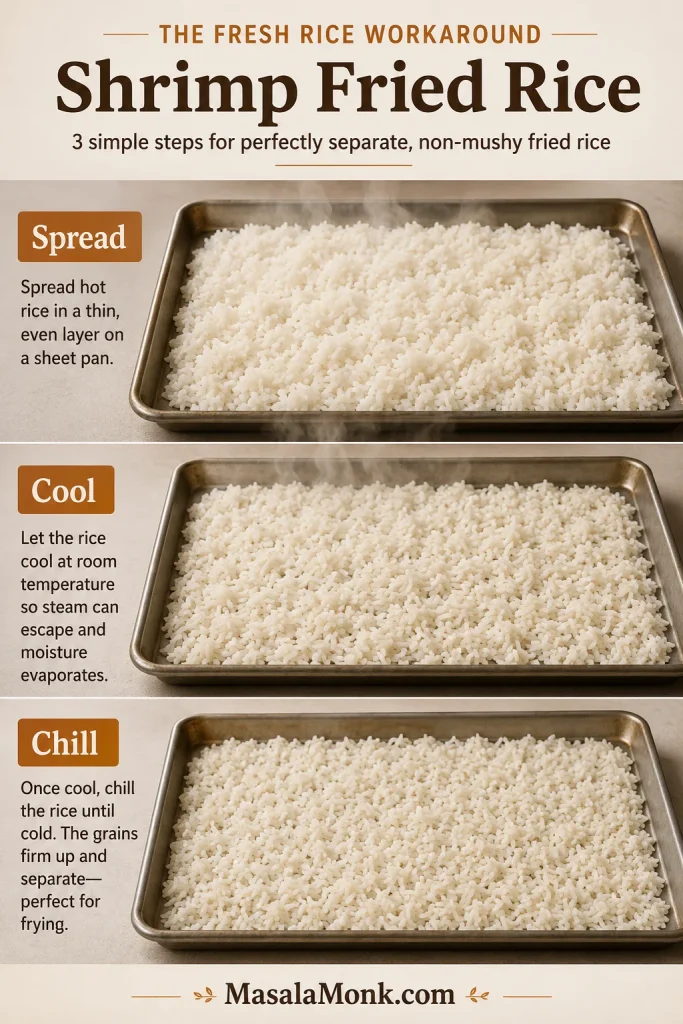
You can make shrimp fried rice with fresh rice, but not while it is hot and steamy. Cook it slightly firm, spread it on a sheet pan so steam escapes, then chill it until the surface feels cool and dry. Once the grains separate easily, it can fry like day-old rice.

  1. Cook the rice with slightly less water than usual so it finishes a little firmer.
  2. Spread the hot rice on a sheet pan or large plate.
  3. Let the steam escape for 10 minutes.
  4. Refrigerate the rice for 30–60 minutes, or freeze it for about 15 minutes if you are rushing.
  5. Break up the cooled rice before frying.
Three-step guide showing fresh rice spread on a sheet pan, cooled, and chilled before being used for fried rice.
No day-old rice? Spread fresh rice thinly, let the steam escape, and chill it until the surface dries so it behaves more like leftover rice.

Fresh rice will not be quite as effortless as day-old rice, but it can still make good fried rice when you cool it properly. You are just trying to give it the same dry surface that leftovers already have.

Shrimp, Prawns, Frozen Shrimp, and Cooked Shrimp

Whether your market sells them as shrimp or prawns, cook them the same way here. Start with seafood that is dry on the surface, cook it briefly, and bring it back only after the rice has had time in the pan.

Size changes the way the fried rice eats, not just how it looks. Choose 26–30 count shrimp for a juicy home-style pan. For smaller restaurant-style pieces through every bite, use 51–60 count shrimp. Very large shrimp are best chopped into bite-size pieces so the rice eats evenly.

Shrimp SizeBest Use
51–60 count / small shrimpBest for restaurant-style fried rice because shrimp pieces mix through every bite.
26–30 count / medium shrimpBest balance for home cooks; juicy but still easy to mix into rice.
16–20 count / large shrimpLooks generous, but may need chopping so the rice eats evenly.
Cooked shrimpUse only in a pinch. Add at the end just to warm through.

How to Thaw and Dry Frozen Shrimp

Frozen shrimp can work as well as fresh shrimp when it is thawed safely and dried thoroughly. The goal is to remove surface moisture before the shrimp hits the hot pan.

Frozen shrimp sealed in a bag thawing in cold water, with drained shrimp and paper towel-dried shrimp beside it.
After a cold-water thaw, dry shrimp well before it hits the pan. A dry surface sears better and keeps the rice from steaming later.

Shrimp Doneness: Loose C, Not Tight Curl

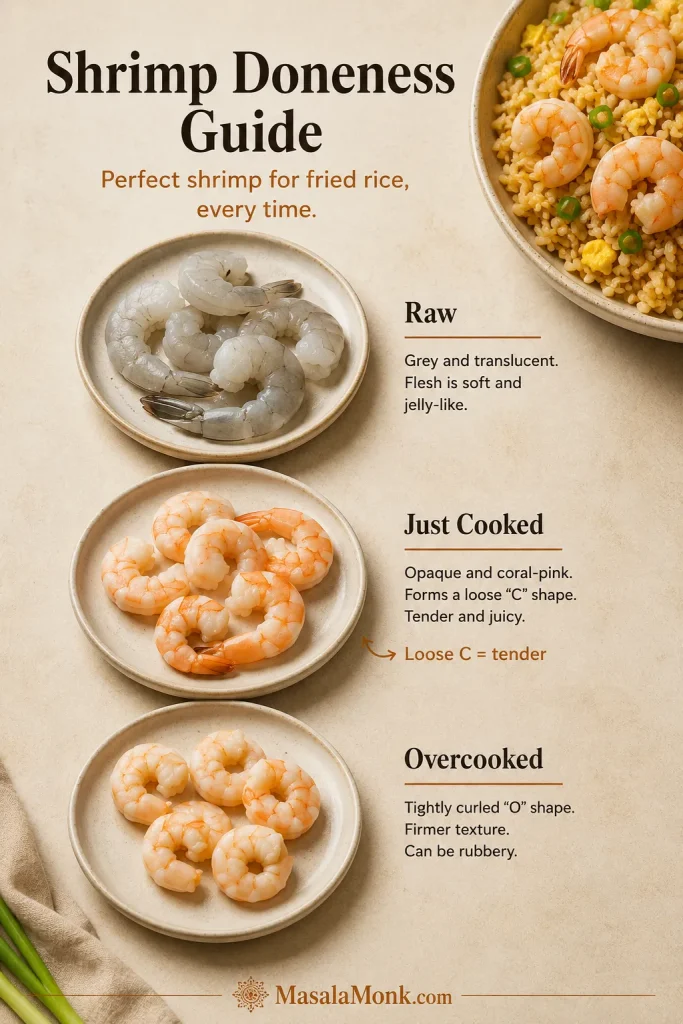
The best doneness cue is visual: shrimp should turn opaque and curl gently. When it tightens into a firm ring, it has usually cooked too long.

Shrimp doneness guide showing raw grey shrimp, just-cooked coral shrimp in a loose C shape, and overcooked tightly curled shrimp.
Watch the shape, not only the color. A loose C-shape usually means tender shrimp, while a tight curl means it has stayed on the heat too long.

If you are using pre-cooked shrimp, do not sear it again. Add it near the end and toss only until warm. For shrimp that starts raw, a loose C-shape is usually a good cue; tight, firm curls usually mean it stayed on the heat too long.

When the shrimp is right, it should feel juicy and springy against the rice, not tight or chewy. That contrast is what makes the bowl feel generous.

The Sauce Ratio That Keeps Fried Rice Glossy, Not Wet

If your fried rice tastes salty but still flat, more soy sauce is usually not the answer. Try aroma, pepper, scallions, chili, or a tiny bit of sweetness before adding more liquid.

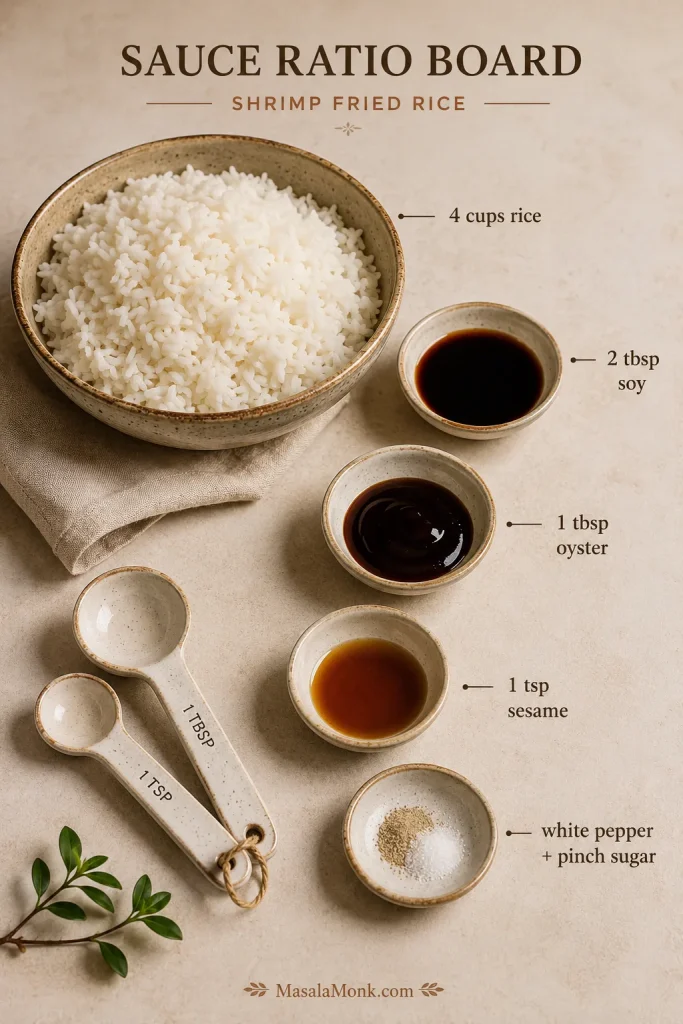
A balanced pan should taste savory all the way through, not sit in a puddle of sauce. For 4 cups cooked rice, this is enough to coat the grains without making them heavy:

  • 2 tbsp / 30 ml light soy sauce
  • 1 tbsp / 15 ml oyster sauce, optional
  • 1 tsp / 5 ml toasted sesame oil
  • 1/4 tsp white pepper
  • 1/4 tsp sugar
Sauce ratio board showing four cups of rice with soy sauce, oyster sauce, sesame oil, white pepper, and sugar.
A good sauce ratio should season the rice, not drown it. Measure first, then add just enough soy, oyster sauce, sesame oil, and white pepper for balance.

Mix the sauce before you start cooking. Fried rice moves quickly, and stopping to measure sauces while the pan is hot can lead to overcooked shrimp or wet rice.

A small splash of dark soy sauce can add color, while light soy sauce stays the main seasoning. Too much dark soy can make the rice look heavy and taste overly salty.

Sauce Ratio by Rice Amount

Sauce is where fried rice can go from balanced to salty fast. Start with these amounts, then taste at the end.

Cooked RiceSoy SauceOyster SauceSesame Oil
2 cups1 tbsp / 15 ml1 1/2 tsp / 7 ml1/2 tsp / 2.5 ml
3 cups1 1/2 tbsp / 22 ml2 tsp / 10 ml3/4 tsp / 4 ml
4 cups2 tbsp / 30 ml1 tbsp / 15 ml1 tsp / 5 ml

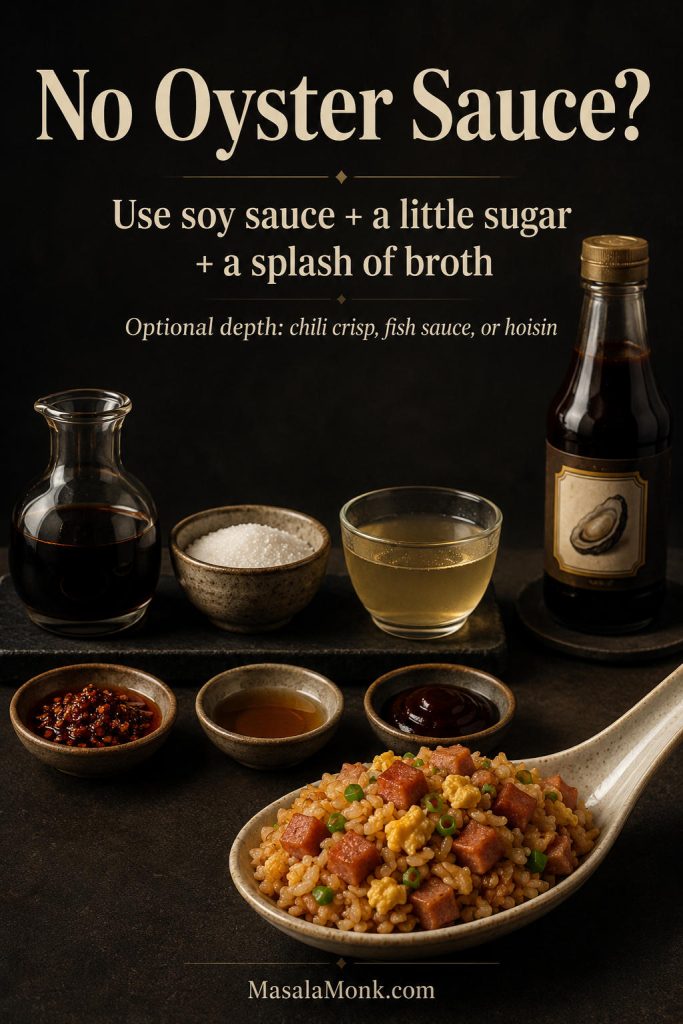
If you skip oyster sauce, keep the soy sauce measured and build flavor with white pepper, scallions, heat, or a tiny pinch of sugar after tasting. If the rice tastes flat or salty, check the pan cues before adding more soy sauce.

Sauce Swaps

  • No oyster sauce: Skip it, then taste for white pepper, scallions, heat, or a tiny pinch of sugar.
  • Gluten-free: Use tamari instead of soy sauce and check the oyster sauce label.
  • No soy sauce: Use coconut aminos, or season lightly with salt and a tiny splash of broth.
  • No sesame oil: Skip it and finish with extra scallions for freshness.
  • Spicy: Add chili crisp, sriracha, sambal, chopped green chili, or red pepper flakes.

Wok vs Skillet: Best Pan for Home Stoves

If you have ever made fried rice in a small pan and wondered why it steamed instead of fried, the pan size is probably the reason — not your cooking skill.

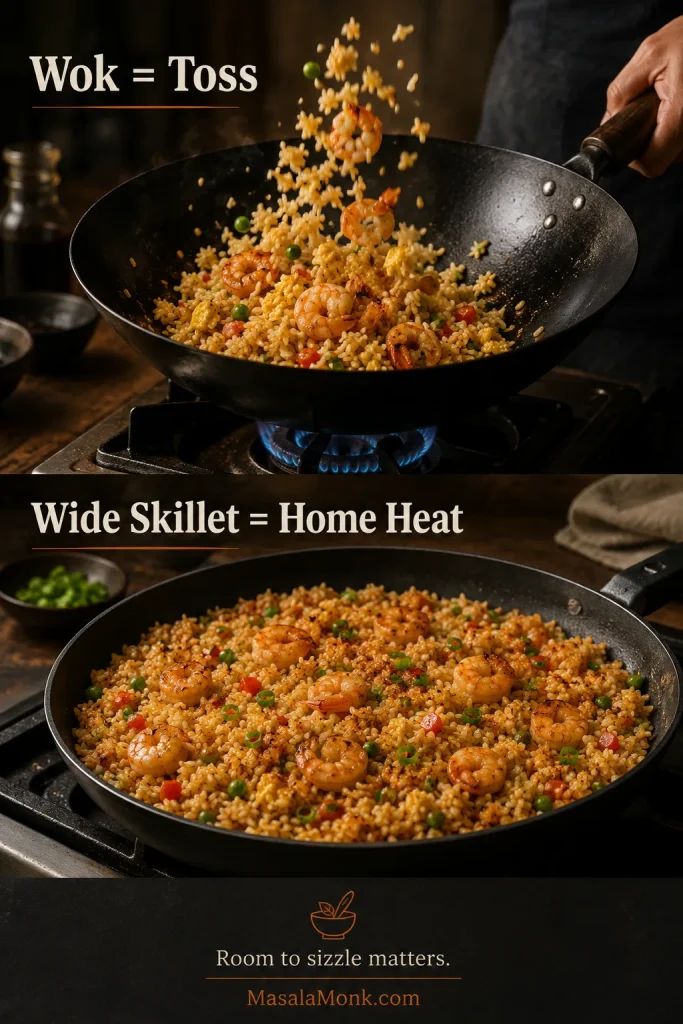
A wok is excellent for fried rice because it gives you room to toss and move ingredients quickly. But a large skillet is often better for home cooks than a small wok on a weak burner.

You do not need restaurant heat; you need restaurant order. A wide hot skillet, dry rice, and a little patience between stirs will get you much closer than a crowded wok on weak heat.

Comparison image showing shrimp fried rice being tossed in a wok and spread across a wide skillet.
On a home stove, a wide skillet often beats a small wok. More surface area lets more rice touch direct heat at once.

With less crowding, the rice has room to sizzle, which is where the better texture comes from. When the pan is too full, the vegetables leak water, the rice steams, and the sauce sits underneath instead of clinging to the grains.

  • Use a wok if your stove gives strong heat and you can toss quickly.
  • Choose a large non-stick skillet for the easiest beginner-friendly option.
  • Try a heavy stainless or cast-iron skillet if it holds heat well and you are comfortable managing sticking.
  • Cook in batches if your pan is small. A small pan can still make good fried rice — it just needs batches.

The Pan Cues That Matter Most

Use this while the rice is still in the pan. The troubleshooting table later is for fixing or understanding what went wrong; this section helps you catch problems before they become permanent.
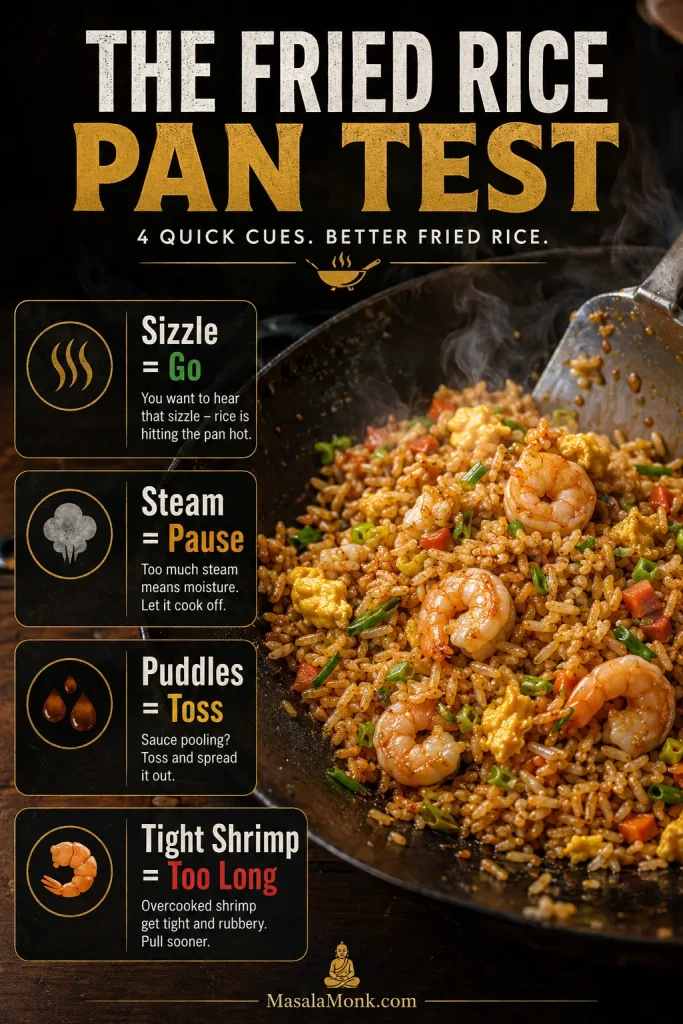
Good fried rice gives you clear signs while it cooks. The pan tells you when to move forward and when to pause: steam, puddles, tight shrimp, or rice that sits in clumps instead of moving freely.

Think of it as the fried rice pan test: sizzle means go, steam means pause, puddles mean keep tossing, and tight shrimp means it cooked too long.

Fried rice pan test infographic showing four cues: sizzle means go, steam means pause, puddles mean toss, and tight shrimp means too long.
Let the pan guide you: sizzle means keep frying, steam means slow down, puddles need tossing, and tight shrimp should come off sooner.
CueWhat It MeansWhat to Do
Rice sizzlesThe pan is hot enough and the grains are frying.Let the rice get contact with the pan before adding sauce.
Rice steams heavilyThe pan is crowded or there is too much moisture.Spread the rice out or cook in batches.
Sauce pools underneathToo much liquid was added or the rice was not hot enough.Keep tossing over heat until the sauce clings to the grains.
Shrimp is tight and firmIt stayed on the heat too long.Cook shrimp briefly next time and return it only at the end.
Flavor tastes flatThe rice may need lift, not more liquid.Add white pepper, scallions, chili, or a tiny pinch of salt before more soy sauce.

When it is ready, you should see loose grains, springy shrimp, soft egg, fresh scallions, and no sauce puddles.

Shrimp Fried Rice Variations

Once the base method works, you can take the same pan in a few different directions: brighter with pineapple and lime, hotter with chili crisp, fuller with chicken, lighter with cauliflower rice, or simpler without egg. Keep the rice dry and the sauce measured, and the texture stays in your control.

Looking for a specific version? Jump to restaurant-style, pineapple, or chicken and shrimp fried rice.

Prawn Fried Rice

Use prawns exactly the same way as shrimp. Medium prawns stay juicy and still mix well with the rice. Very large prawns are easier to eat when cut into bite-size pieces before cooking or after searing.

Restaurant-Style Shrimp Fried Rice

Use jasmine rice, white pepper, scallions, a little oyster sauce, and small shrimp pieces that mix through the rice. Drizzle the sauce around the edge of the hot skillet so it sizzles before coating the grains. Keep the sauce light so the rice tastes restaurant-style without turning dark, salty, or heavy.

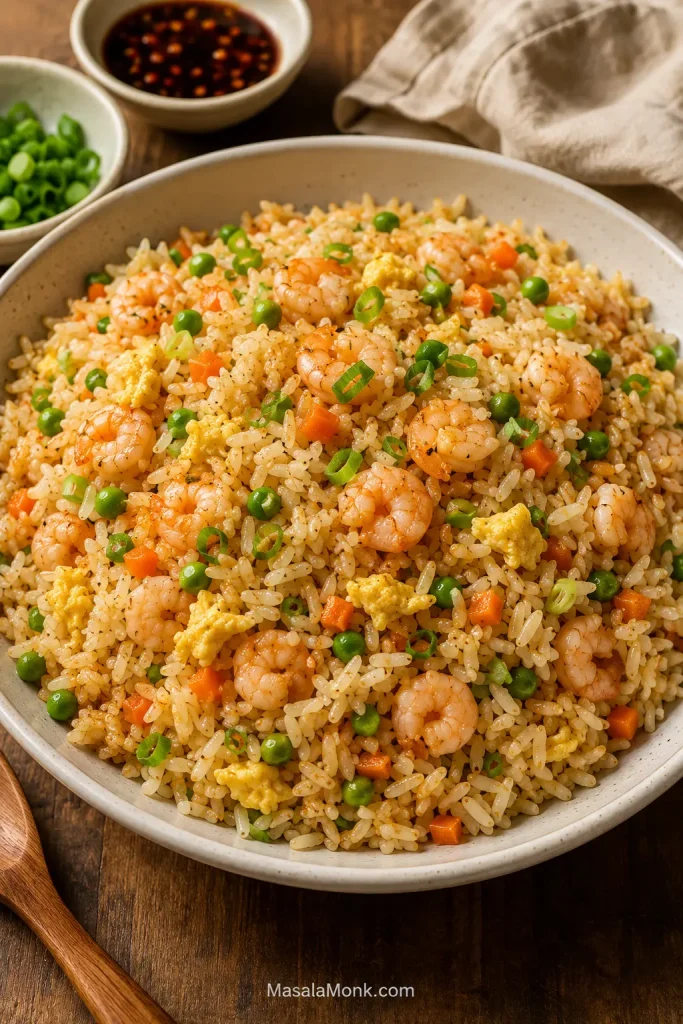
Restaurant-style shrimp fried rice in a bowl with small shrimp, egg, peas, carrots, scallions, and lightly glossy rice.
Restaurant-style shrimp fried rice should taste savory, not heavy. Keep the sauce light, finish with scallions and white pepper, and let the rice stay golden.

Pineapple Shrimp Fried Rice

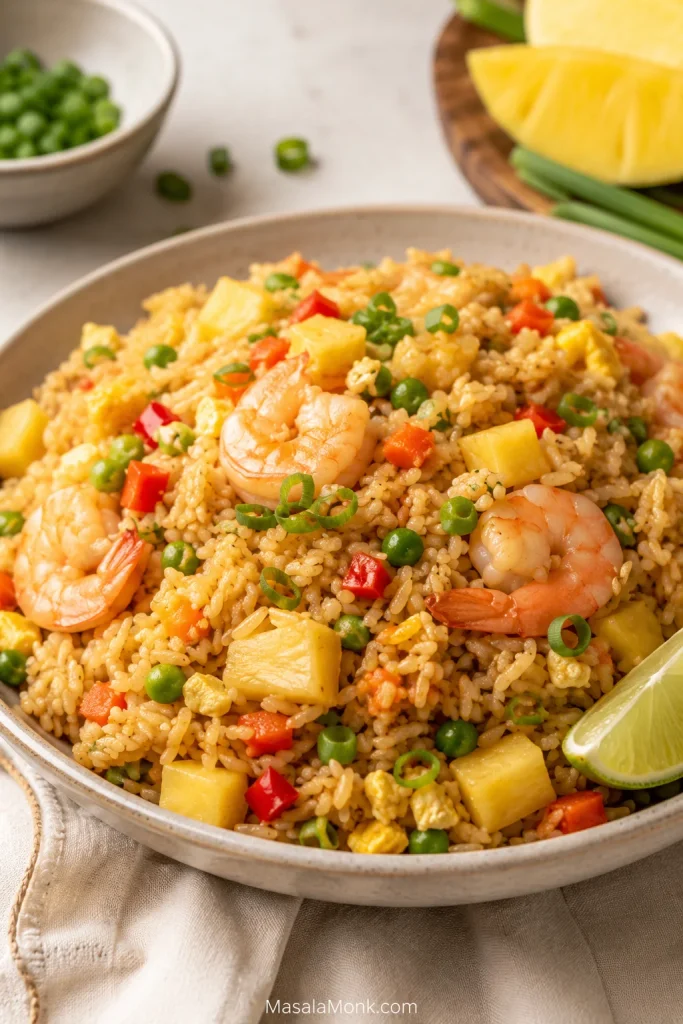
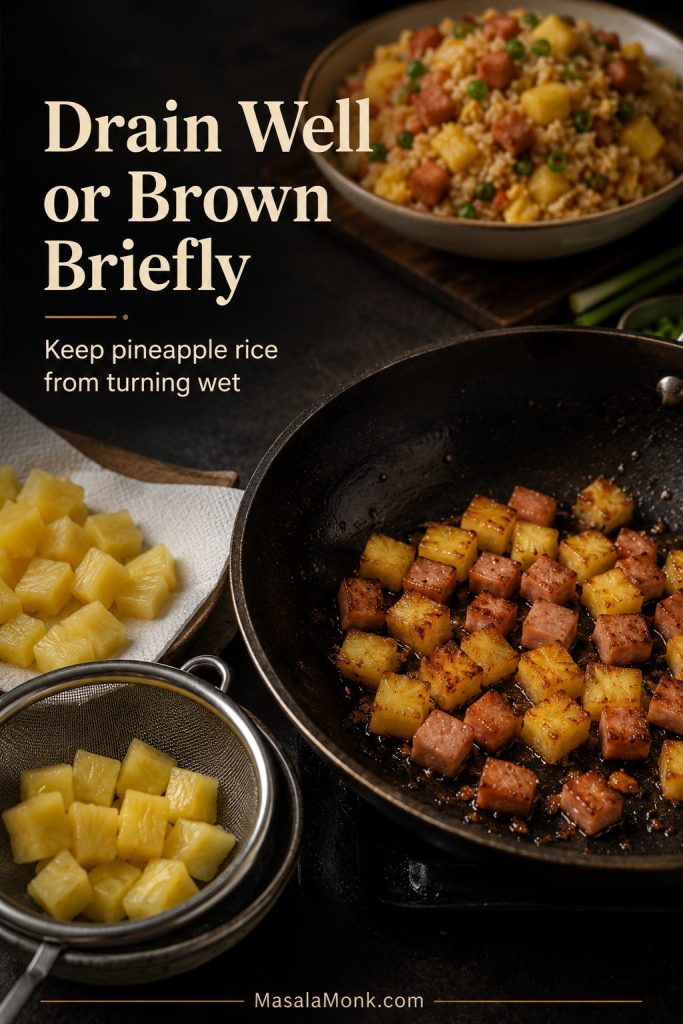
Add 1/2 to 3/4 cup pineapple chunks, diced bell pepper, and a squeeze of lime at the end. Use less sugar in the sauce because pineapple brings sweetness. For a Thai-style direction, add a small splash of fish sauce, chopped chili, and extra scallions. Drain the pineapple well so the rice stays glossy instead of wet.
Pineapple shrimp fried rice with shrimp, pineapple chunks, egg, peas, carrots, red pepper, scallions, and a lime wedge.
Pineapple shrimp fried rice works best when the fruit is bright but not juicy. Drain it well and add it near the end so the rice stays fluffy.

Chicken and Shrimp Fried Rice

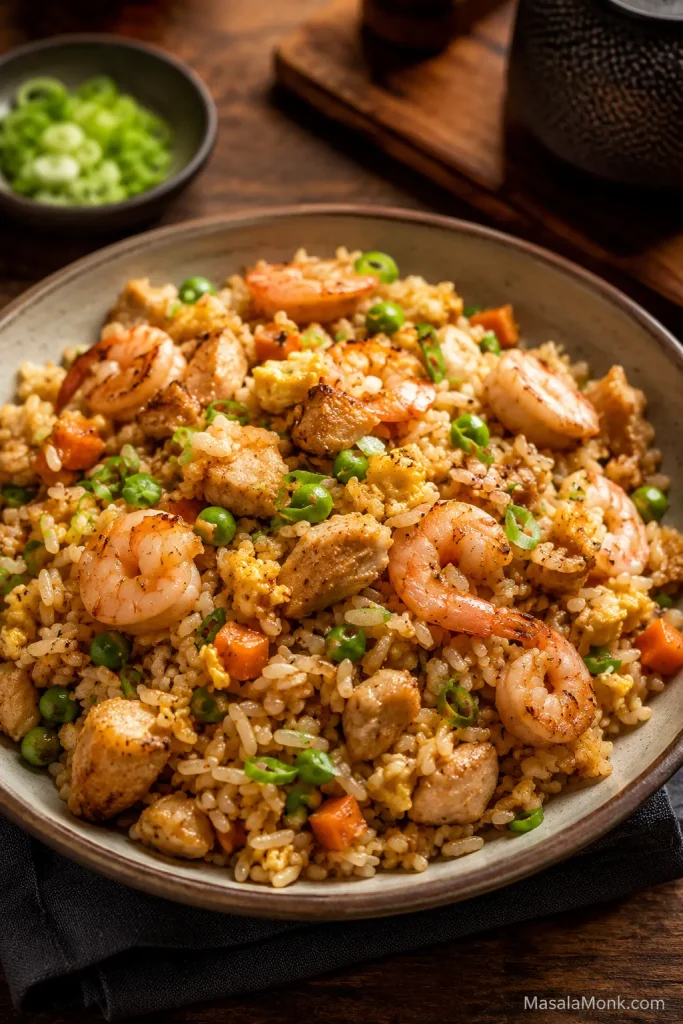
Use small pieces of boneless chicken along with the shrimp. Cook the chicken first until done, remove it, then cook the shrimp briefly. Return both proteins near the end so neither overcooks.

Chicken and shrimp fried rice with plump shrimp, browned chicken pieces, egg, peas, carrots, scallions, and glossy rice.
Chicken and shrimp need different timing. Cook the chicken first for browning, then add shrimp briefly so both proteins stay juicy.

Shrimp Fried Rice Without Egg

Skip the eggs and add more vegetables, tofu, or extra shrimp. Since egg adds richness, finish with scallions, white pepper, and a small amount of sesame oil to keep the rice flavorful.

Shrimp Fried Rice Without Soy Sauce

Use coconut aminos for a sweeter soy-free version, or season with salt, white pepper, sesame oil, and a tiny splash of broth. Add less liquid than you think you need, then taste after tossing.

Spicy Shrimp Fried Rice

Add chili crisp, sambal, sriracha, chopped green chili, or red pepper flakes. For the best texture, add chili oil or chili crisp near the end instead of flooding the rice early.

Cauliflower Shrimp Fried Rice

Use cauliflower rice instead of cooked rice for a lighter version. Frozen cauliflower rice should be thawed and squeezed dry first. Fry it in a wide skillet and leave it uncovered so it does not turn watery.

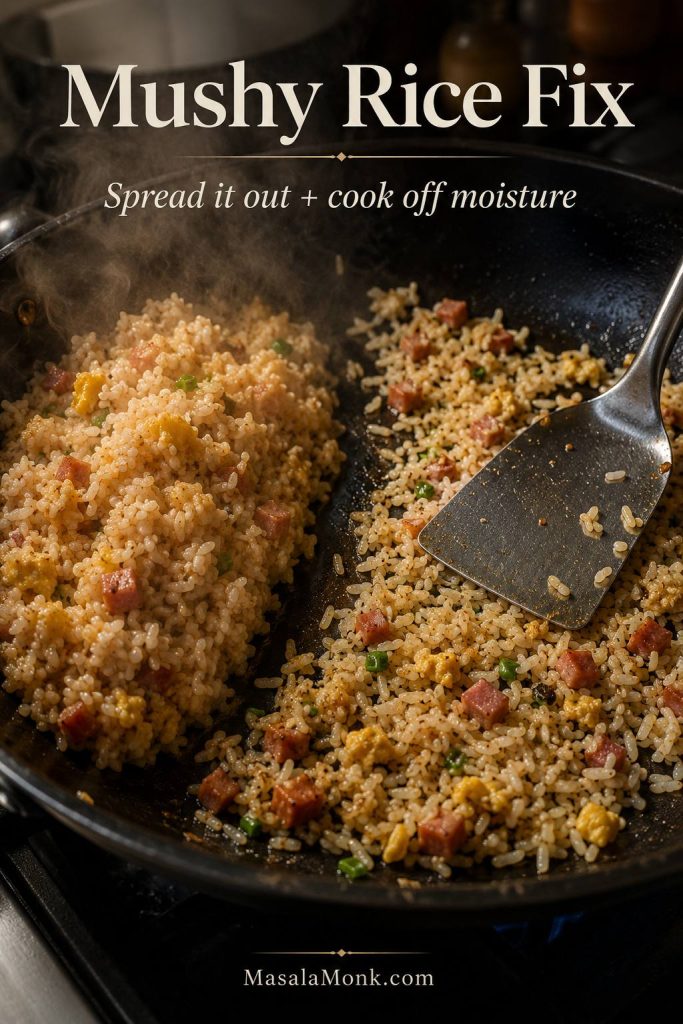
Why Fried Rice Turns Mushy — and How to Fix It

A difficult pan of fried rice is usually not a disaster. It is feedback: too much moisture, not enough heat, too much sauce, or shrimp that stayed in the pan too long.

Most fried rice problems are easy to diagnose once you know what to look for. Steam means moisture, puddles mean liquid, clumps mean the rice needed breaking up earlier, and tight shrimp means it stayed in the heat too long.

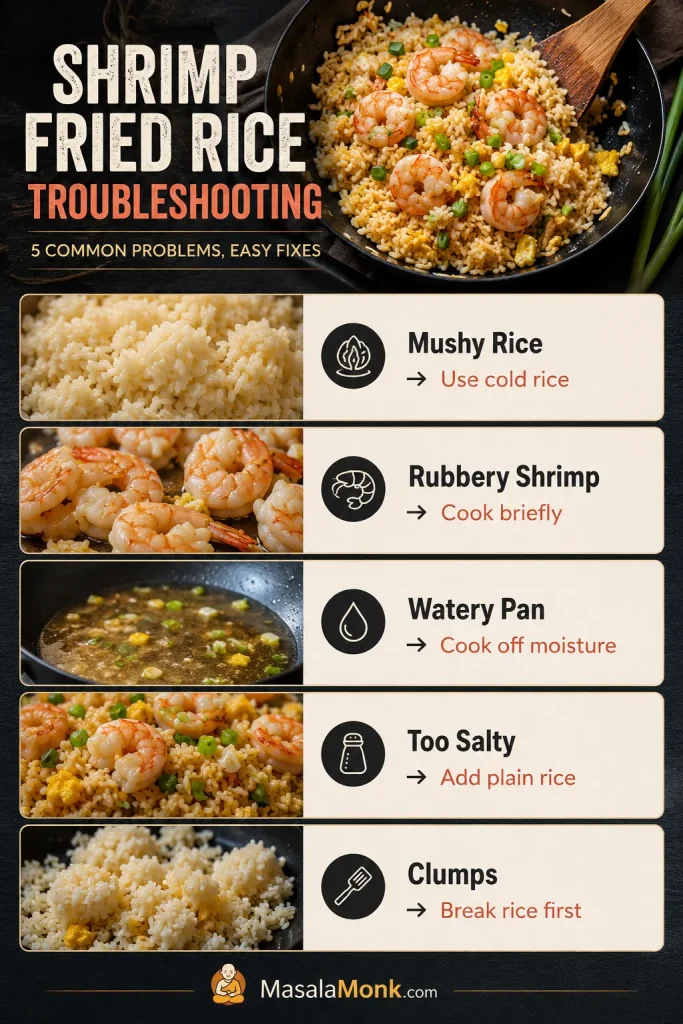
Troubleshooting board with fixes for mushy rice, rubbery shrimp, watery pan, salty rice, and rice clumps.
Mushy shrimp fried rice usually starts with excess moisture. Dry rice, dry add-ins, measured sauce, and enough pan space fix most texture issues.
ProblemWhy It HappenedFix
Rice is mushyRice was warm or wet, sauce was too heavy, or the pan was crowded.Use cold rice, reduce sauce, use a wider pan, and cook in batches.
Shrimp is rubberyShrimp cooked too long or stayed in the pan while the rice finished.Cook shrimp briefly, remove it, and return it at the end.
Rice tastes blandSauce was uneven or the rice was not seasoned enough.Mix sauce before cooking and taste for salt, white pepper, scallions, and heat before adding more sauce.
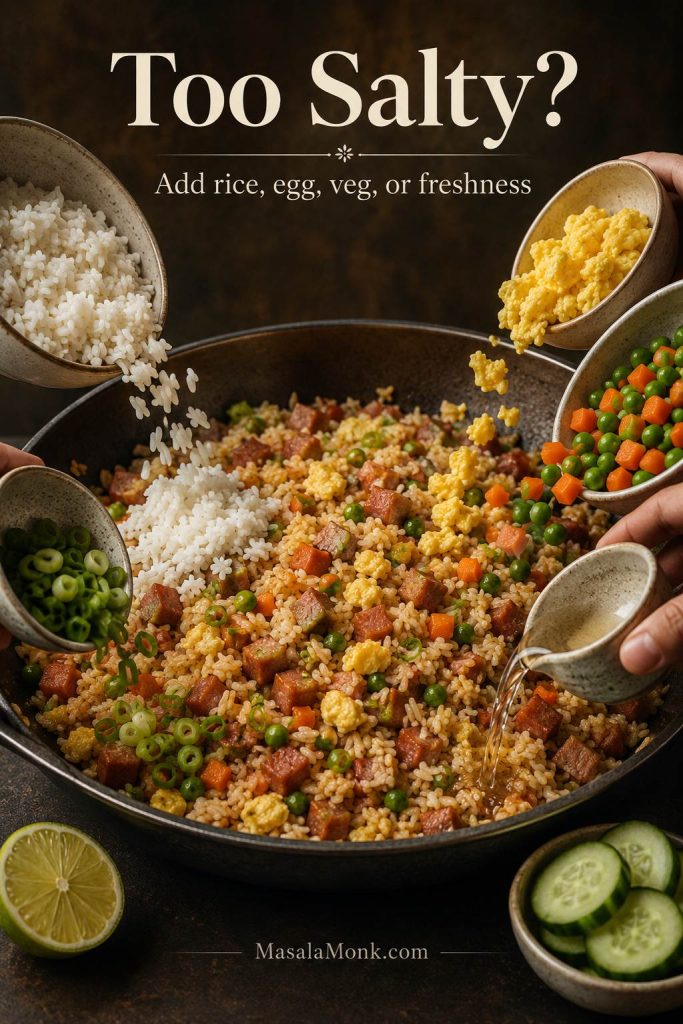
Rice is too saltyToo much soy sauce, oyster sauce, or dark soy sauce was added.Add plain rice, egg, or extra vegetables to balance it.
Rice is clumpyCold rice was added in large chunks.Break rice apart before it goes into the pan.
Fried rice is wateryFrozen shrimp, frozen vegetables, or pineapple added too much moisture.Dry shrimp well, cook off vegetable moisture, and drain pineapple before adding.
Egg disappeared into the riceEgg was mixed into wet rice or over-stirred.Scramble egg separately, then return it near the end.

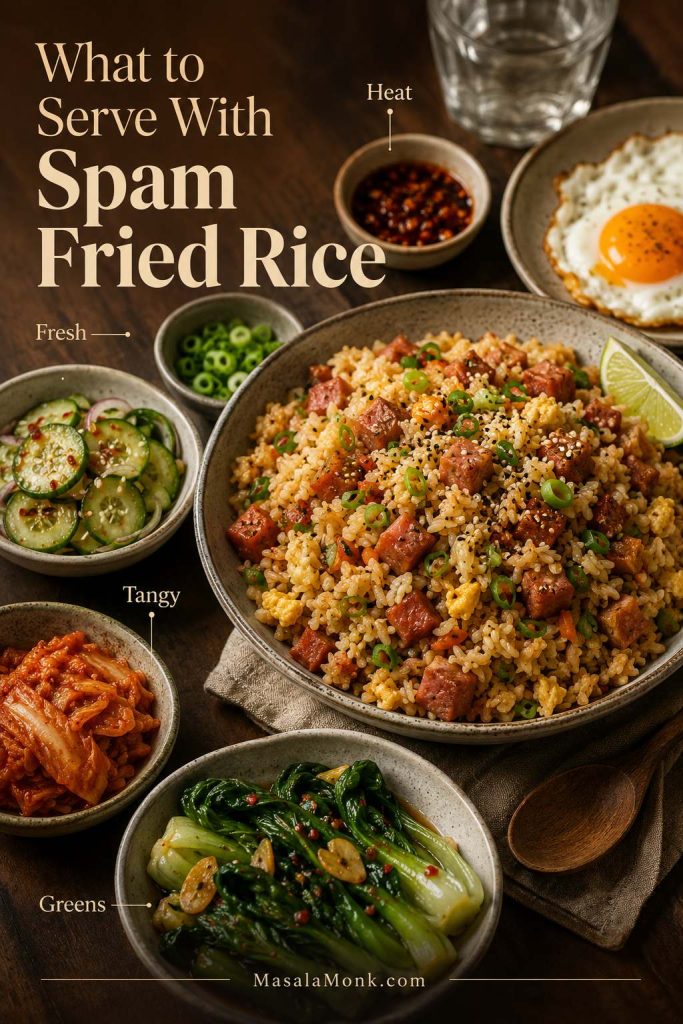
What to Serve with Shrimp Fried Rice

This can be dinner on its own, especially with egg and vegetables. Because the rice is savory and glossy, the best sides bring crunch, acidity, freshness, or heat.

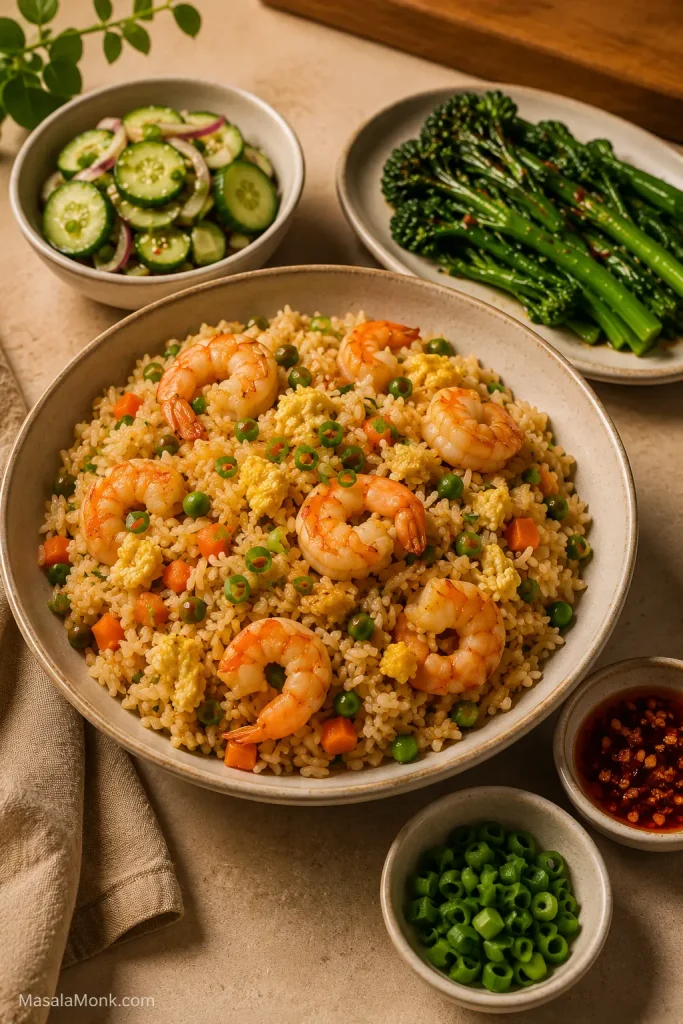
Shrimp fried rice served with cucumber salad, broccolini, chili crisp, scallions, and small side dishes.
Because shrimp fried rice is savory and rich, pair it with something crisp, green, acidic, or spicy. That contrast makes the meal feel fresher.
  • Cucumber salad or quick pickled cucumbers
  • Steamed or stir-fried greens
  • Spring rolls or lettuce wraps
  • Clear soup or hot and sour soup
  • Chili oil, chili crisp, or extra scallions on top

For a cold, crisp contrast, MasalaMonk’s cucumber salad recipe works especially well beside salty, glossy rice. For another quick shrimp dinner in a different direction, the shrimp scampi recipe gives you garlic butter, lemon, and tender shrimp instead of soy-sesame rice.

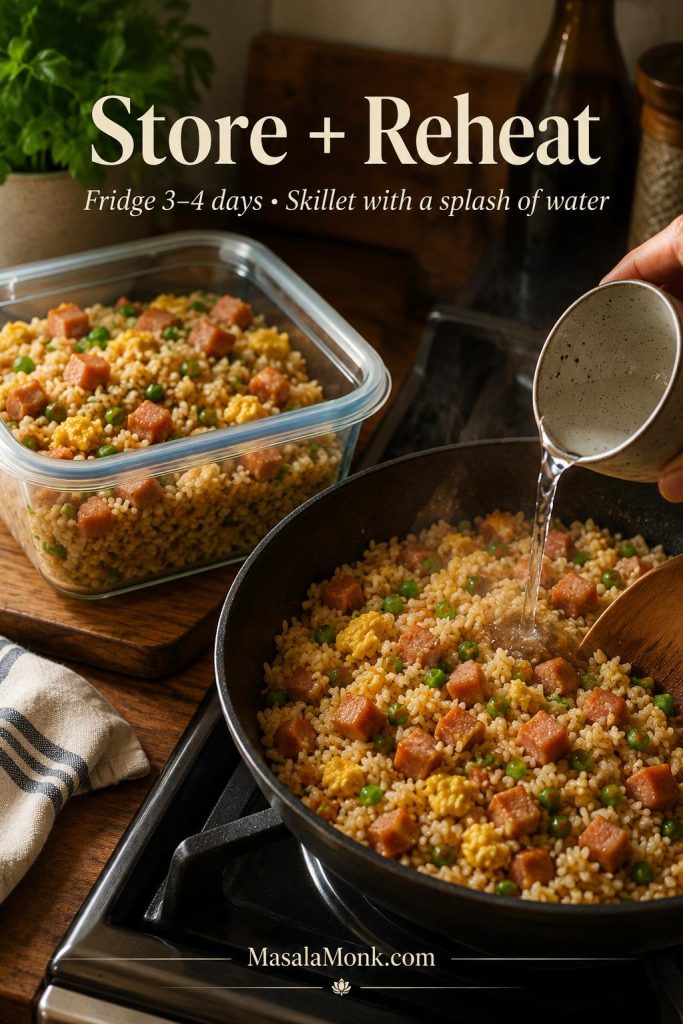
Storage and Reheating

This dish tastes best fresh from the pan, but leftovers can still be good when they are cooled, stored, and reheated properly.

  • Refrigerate: Store cooled shrimp fried rice in an airtight container for up to 3 days.
  • Reheat in a skillet: Warm over medium heat with a few drops of oil or water. Stir gently until hot.
  • Microwave carefully: Use short bursts and stop as soon as the rice is hot. Shrimp can get rubbery if overheated.
  • Freezing: Freezing is possible, but the shrimp and egg texture may not be as good after reheating.

Leftover rice note: Because this recipe often starts with leftover rice, cooling and reheating matter. If you cook rice ahead for fried rice, cool it quickly in a shallow container and refrigerate it within 2 hours. Do not leave cooked rice sitting out for hours before chilling. Reheat shrimp fried rice until hot all the way through, and reheat only the portion you plan to eat. For more detail, see the USDA leftover food safety guidance.

FAQs About Shrimp Fried Rice

What is the best rice for shrimp fried rice?

Cold cooked jasmine or long-grain white rice is the easiest choice because the grains stay separate in a hot skillet. Dry basmati can also work well when it has been cooked firm and cooled fully.

Do you need cold rice for shrimp fried rice?

Cold rice is easiest because the grains are firmer and drier on the surface. Fresh rice can work too, but it needs cooling time first so it stops steaming.

Can you use freshly cooked rice for shrimp fried rice?

Yes, but not straight from the cooker. Cook it slightly firm, spread it out so steam escapes, then chill it until the surface feels dry. Break up the grains before adding them to the pan.

How do you make shrimp fried rice not mushy?

Use cold rice, a hot wide pan, and a measured amount of sauce. Pat shrimp dry, cook off moisture from frozen vegetables, and avoid crowding the pan.

What shrimp works best for fried rice?

Raw peeled and deveined medium shrimp is the easiest choice. Smaller shrimp give a more restaurant-style bite, while very large shrimp are better chopped.

Should shrimp be cooked before adding rice?

Yes. Cook shrimp briefly first, remove it from the pan, then return it after the rice is fried. This keeps the shrimp tender while the rice gets enough time on the heat.

How much sauce should you add to shrimp fried rice?

For 4 cups cooked rice, start with 2 tablespoons soy sauce, 1 tablespoon oyster sauce, 1 teaspoon sesame oil, white pepper, and a small pinch of sugar. Add more only after tasting.

Is oyster sauce necessary?

No. Oyster sauce gives a deeper takeout-style flavor, but the rice still works without it. Keep the soy sauce measured, then use white pepper and scallions for extra flavor.

How do you make shrimp fried rice with frozen shrimp?

Thaw frozen shrimp fully and pat it dry. Season it, cook it briefly in a hot pan, then remove it before frying the rice so it stays juicy and the skillet stays dry.

Do prawns work instead of shrimp?

Yes. Prawns work the same way in this recipe. Use raw peeled and deveined prawns, dry them well, cook them briefly, and return them at the end.

How do you make shrimp fried rice without egg?

Skip the egg and add more shrimp, vegetables, or tofu. Since egg adds richness, finish with scallions, white pepper, and a small amount of sesame oil.

How long does shrimp fried rice keep?

Shrimp fried rice keeps for up to 3 days in the refrigerator when stored in an airtight container. Cool it before storing and reheat only the portion you plan to eat.

What is the best way to reheat shrimp fried rice?

A skillet over medium heat gives the best texture. Add a few drops of oil or water and stir gently until hot. Use short microwave bursts if reheating quickly.

Back to recipe card · Back to quick answer

The Takeaway

Good shrimp fried rice is not about a long ingredient list. It is about giving the rice enough heat, keeping the shrimp tender, and using just enough sauce to season every grain.

Once you hear the rice sizzling instead of steaming, you are on the right track. Keep the shrimp brief, the sauce measured, and the pan wide, and this becomes the kind of fried rice you can repeat with whatever is already in the fridge.

The best version does not taste like leftovers. It tastes like a hot pan gave yesterday’s rice a second life.

Posted on Leave a comment

Easy Spam Fried Rice Recipe

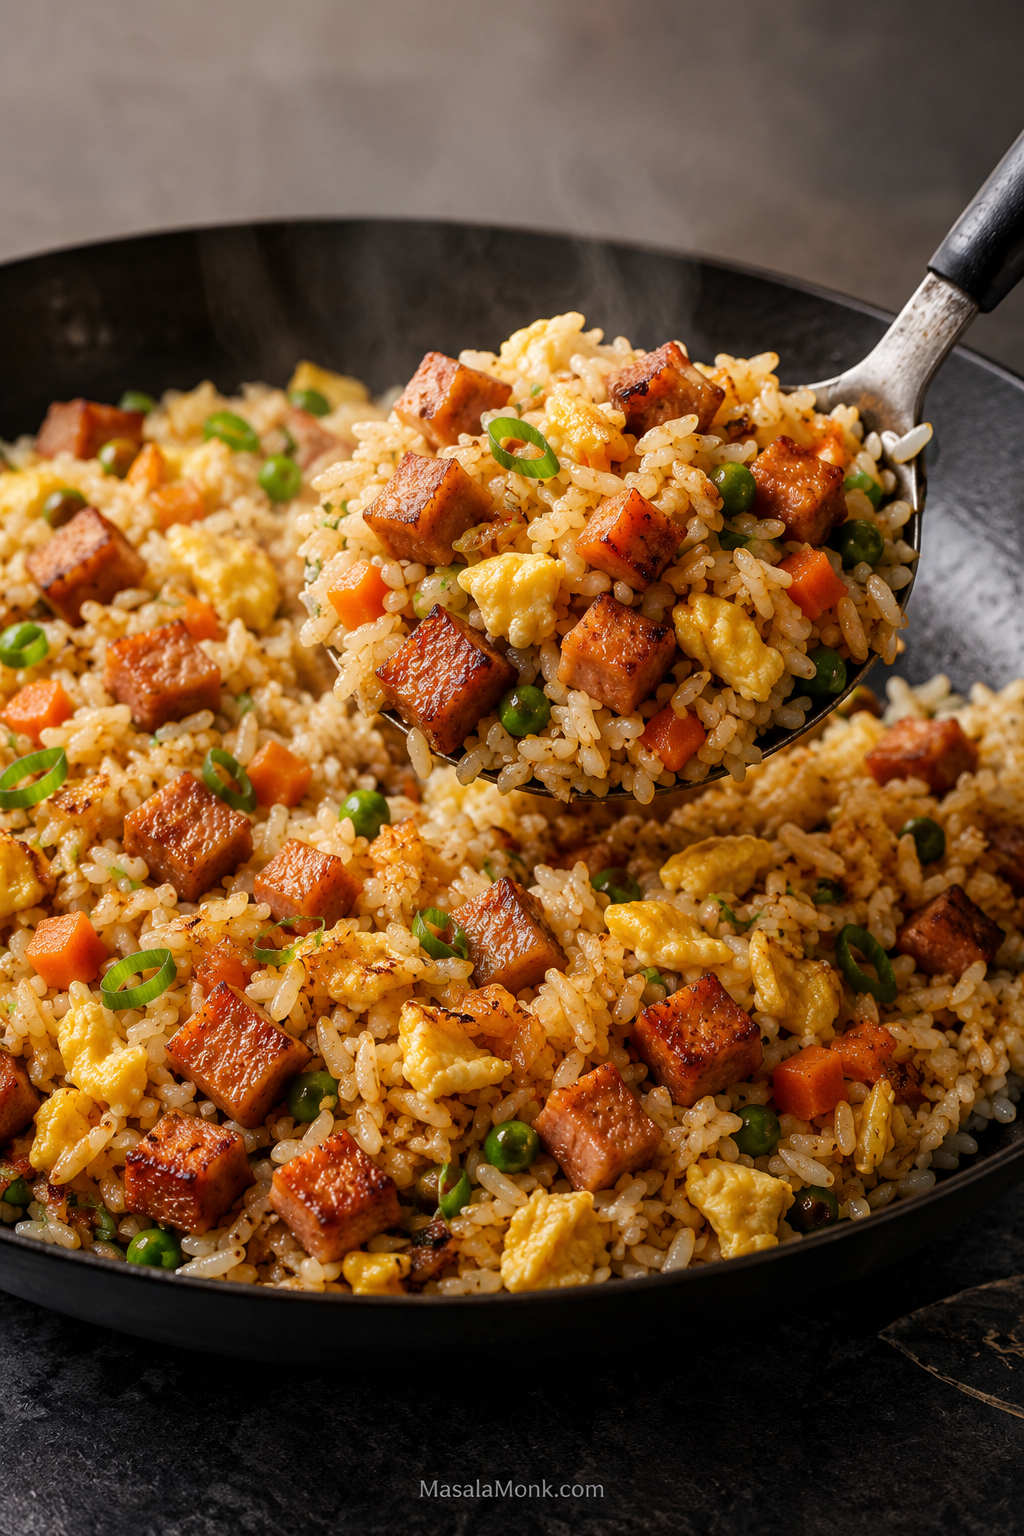
A skillet of fried rice with browned Spam cubes, soft scrambled egg, peas, carrots, scallions, and glossy separated rice being lifted with a spoon.

This Spam fried rice recipe is for the night you have cold rice in the fridge, a can of Spam in the pantry, and no patience for a complicated dinner. The pan does the heavy lifting: crisp salty cubes, soft egg, garlic, scallions, vegetables, and loose grains tossed with just enough soy-oyster-sesame seasoning to make everything savory and glossy.

The trick is not adding everything at once. Brown the Spam until the edges crisp, cook the egg gently, let the rice loosen in a hot pan, and season near the end so the grains stay separate instead of turning soft and salty. Once everything is prepped, the cooking part takes about 12–15 minutes.

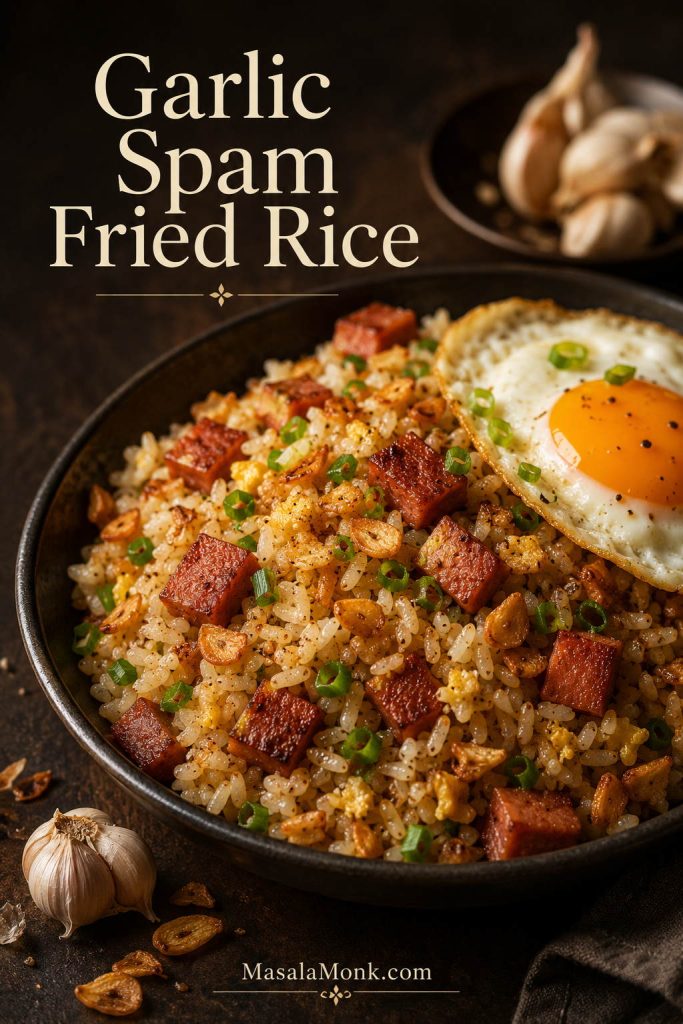
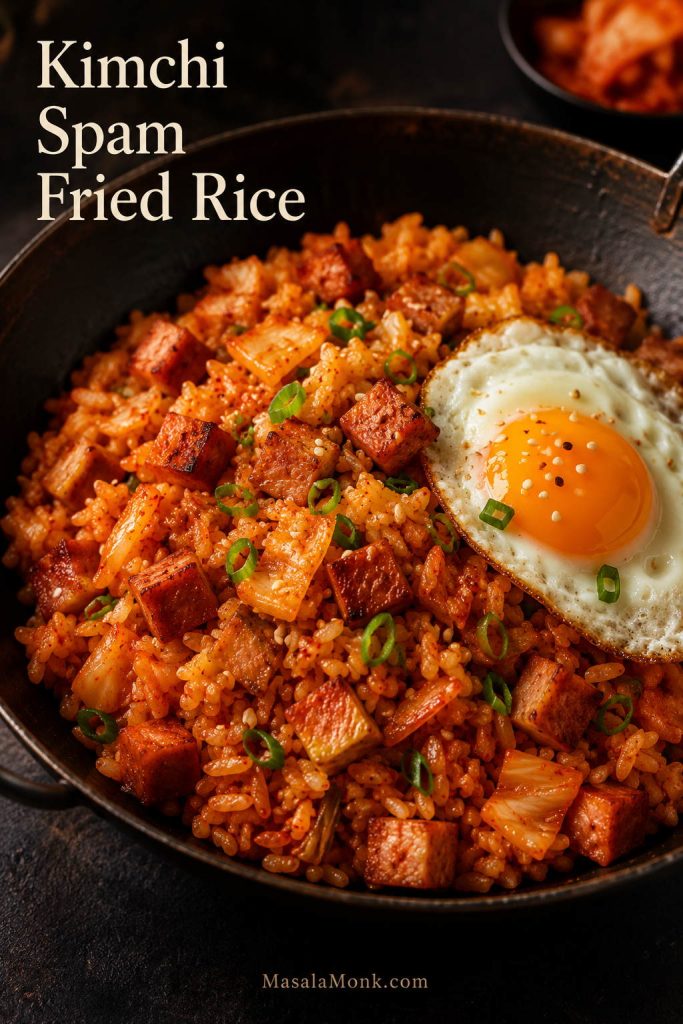
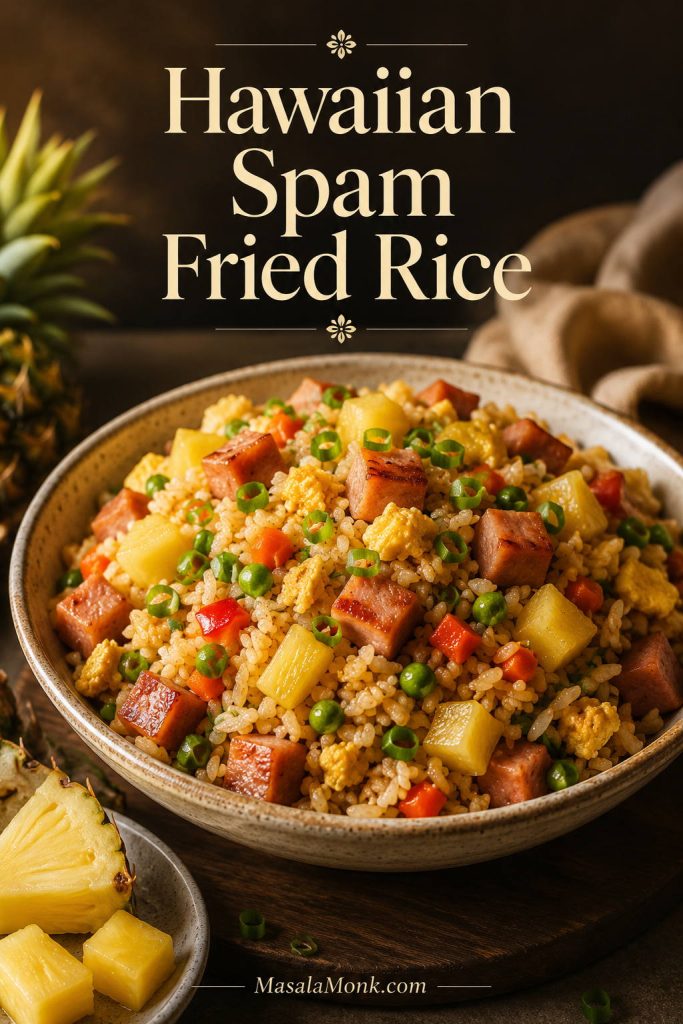
After that base makes sense, you can take the same method toward kimchi Spam fried rice, Hawaiian pineapple Spam fried rice, garlic-heavy Filipino-style rice, or a spicy chili-crisp version without losing the texture that makes the dish work.

Spam Fried Rice Guide

Start with the quick method, then use the rice, sauce, egg, variation, serving, and troubleshooting sections to adjust the pan you are actually cooking.

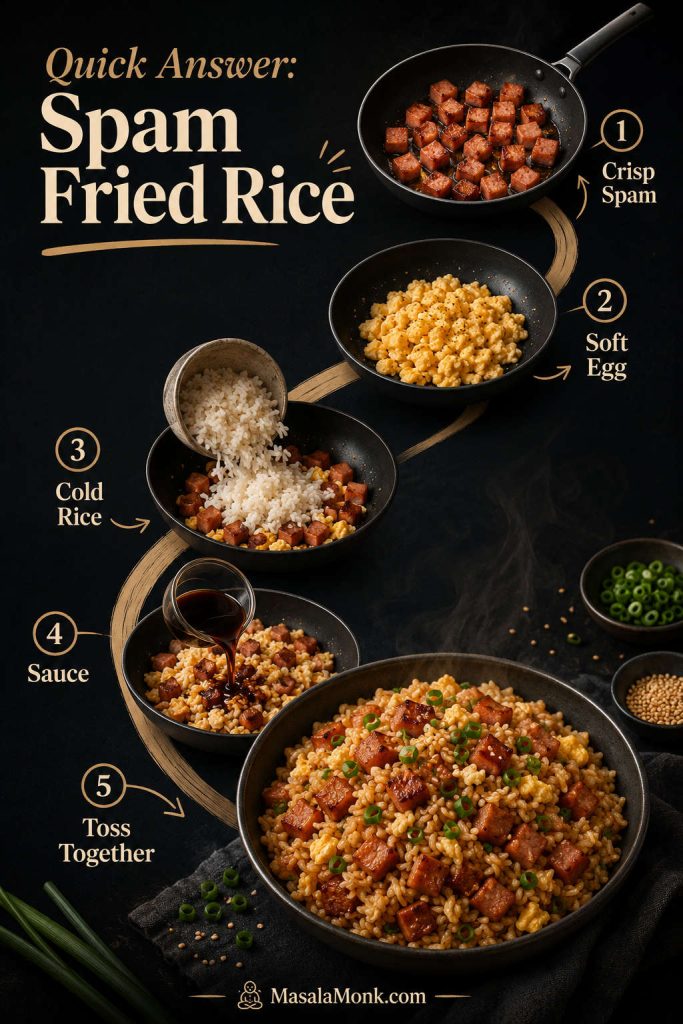
Quick Answer: How to Make Spam Fried Rice

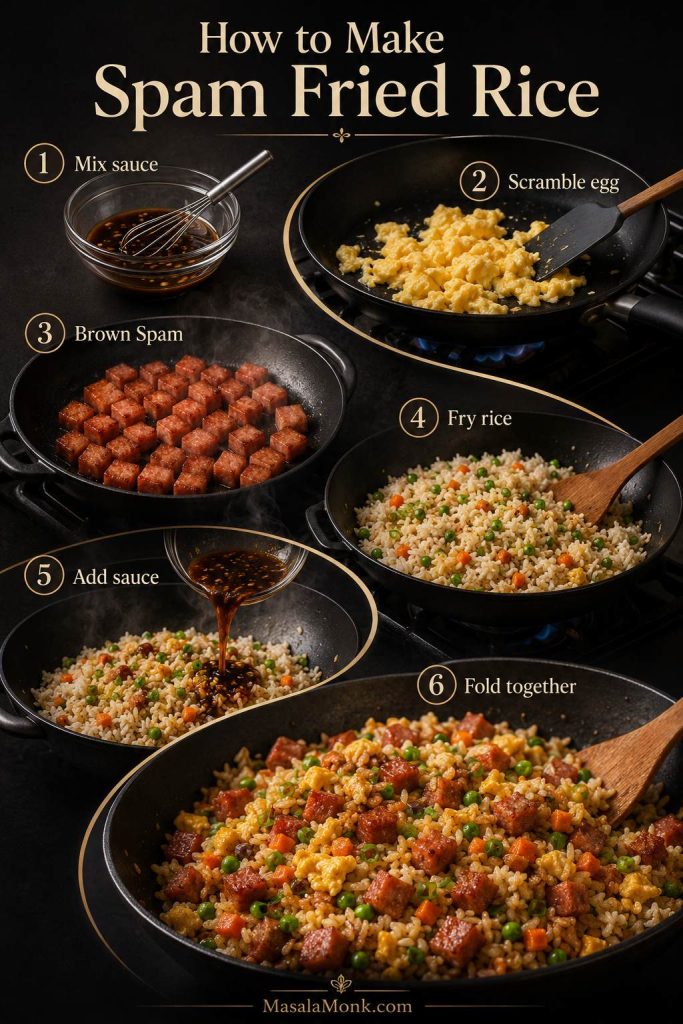
Dice the Spam and brown it in a hot wok or large skillet until the edges look crisp and toasted. Scramble the eggs and set them aside. Stir-fry garlic, scallion whites, vegetables, and cold cooked rice, then add a simple sauce of soy sauce, oyster sauce, sesame oil, and pepper. Fold the crispy Spam and soft egg back through the rice and finish with scallion greens.

A quick visual guide showing browned Spam, soft scrambled egg, cold rice, sauce, and the finished fried rice pan.
The order matters here: brown the Spam, cook the egg gently, fry the cold rice, and add sauce near the end, because that sequence gives the rice its best texture.

Spam Fried Rice at a Glance

  • Main ratio: 1 can Spam + 4 cups cold cooked rice + 3 eggs
  • Base sauce: 2 tbsp soy sauce + 1 tbsp oyster sauce + 2 tsp toasted sesame oil
  • Rice to start with: cold day-old jasmine, long-grain, or medium-grain rice
  • Spam cut: ½-inch cubes for crisp edges and visible bites
  • Pan choice: wok, carbon-steel skillet, cast iron, or large nonstick skillet
  • Heat level: medium-high to high
  • Cook time: 12–15 minutes once everything is prepped

The rice does most of the texture work here. Because chilled rice has less surface moisture, it separates and fries instead of clumping into soft, steamy pockets. If your rice is freshly cooked, there is a quick fix in the rice section below.

Why This Version Works

This dish works best when every ingredient gets a quick moment in the pan before everything comes together. The Spam needs time against the hot surface, the rice needs enough heat to loosen, and the sauce should season the grains without drowning them.

  • Browned Spam comes first. Crisp edges give the finished rice salty-crisp bites instead of soft, barely warmed pieces.
  • Chilled rice keeps the texture loose. Drier grains separate more easily and give you a fluffier pan.
  • Soft egg goes back in near the end. Scrambling it first keeps it tender instead of dry or rubbery.
  • A measured sauce keeps the salt in check. Spam already brings salt, so the soy sauce and oyster sauce need a lighter hand.
  • Vegetables bring contrast. Peas, carrots, scallions, corn, cabbage, or bell pepper help lighten the richness.

Flavor balance: Spam brings salt and richness, rice softens everything, egg adds body, vegetables add relief, and scallions wake the pan up at the end. If the dish tastes heavy, do not add more sauce first. Add freshness, heat, acid, or crunch.

Texture cue: The rice should look glossy and separate, not wet. The Spam should stay visible in browned cubes, and the egg should be soft pieces folded through the rice rather than tiny dry crumbs.

Ingredients You Need

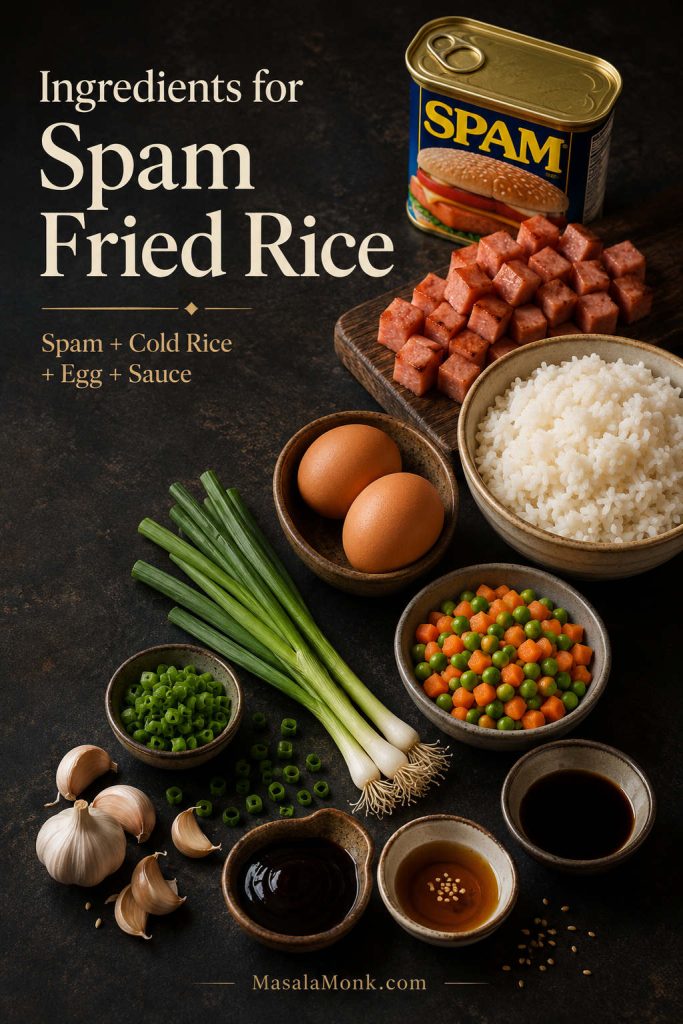
The ingredient list is short, but each piece matters. For the first batch, keep the base simple. After that, use the variation section to move toward kimchi, pineapple, garlic-heavy, spicy, or teriyaki-style fried rice.

Ingredients for Spam fried rice arranged on a dark surface, including Spam, cold cooked rice, eggs, peas, carrots, scallions, garlic, soy sauce, oyster sauce, and sesame oil.
The base is simple, yet the balance matters: Spam brings salt, rice softens it, egg adds body, and the sauce should pull everything together without taking over.

Spam

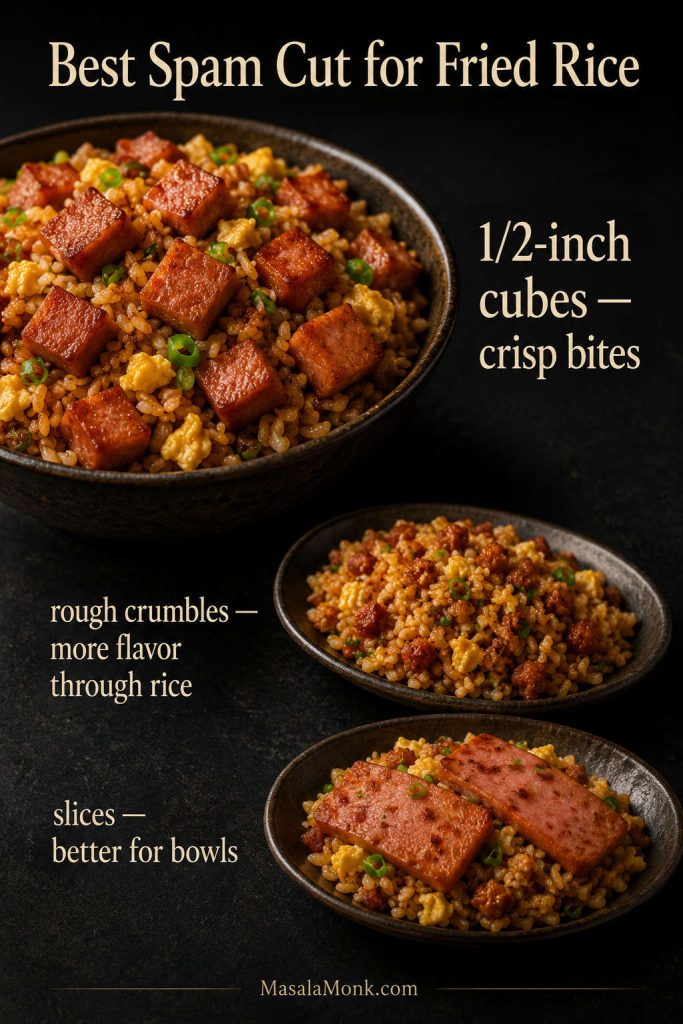
Use one 12 oz / 340 g can of Spam. SPAM 25% Less Sodium is helpful if you have it, especially because the sauce also includes soy sauce and oyster sauce. Cut the Spam into ½-inch cubes so the pieces brown quickly while still staying chunky enough to notice in the rice.

For extra texture, dice most of the Spam and roughly mash or crumble a small portion. The cubes give you crisp bites, while the rough pieces spread more savory flavor through the rice.

Comparison of Spam cut styles for fried rice, showing browned half-inch cubes, rough crumbles, and rectangular slices.
Half-inch cubes are the easiest first cut because they brown well and stay visible in the rice, while crumbles spread flavor more widely and slices suit simpler rice bowls.

Cold Cooked Rice

Use 4 cups cold cooked rice, about 680–730 g depending on the rice type and how tightly it is packed. Jasmine rice, long-grain white rice, and medium-grain rice all work well once chilled.

Eggs

Three large eggs are the most balanced amount for 4 cups of rice. Use 2 eggs for a lighter pan or 4 eggs if you want a more breakfast-style Spam egg rice.

Vegetables

Frozen peas and carrots are the easiest classic choice. Before adding them, rinse them briefly under warm water and drain them well. Corn, cabbage, bell pepper, onion, edamame, and extra scallions also work, but avoid adding too many watery vegetables at once.

Aromatics

Garlic and scallions are enough for the base recipe. Add garlic after the Spam has browned so it does not burn before the meat gets crisp. Use the scallion whites while cooking and save the green tops for the finish.

Sauce

The base sauce uses soy sauce, oyster sauce, toasted sesame oil, a little sugar, and white pepper. Soy sauce seasons the rice, oyster sauce adds depth, sesame oil brings aroma, sugar rounds the edges, and white pepper gives the rice a gentle fried-rice finish without making it hot.

The Rice That Gives You Separate Grains

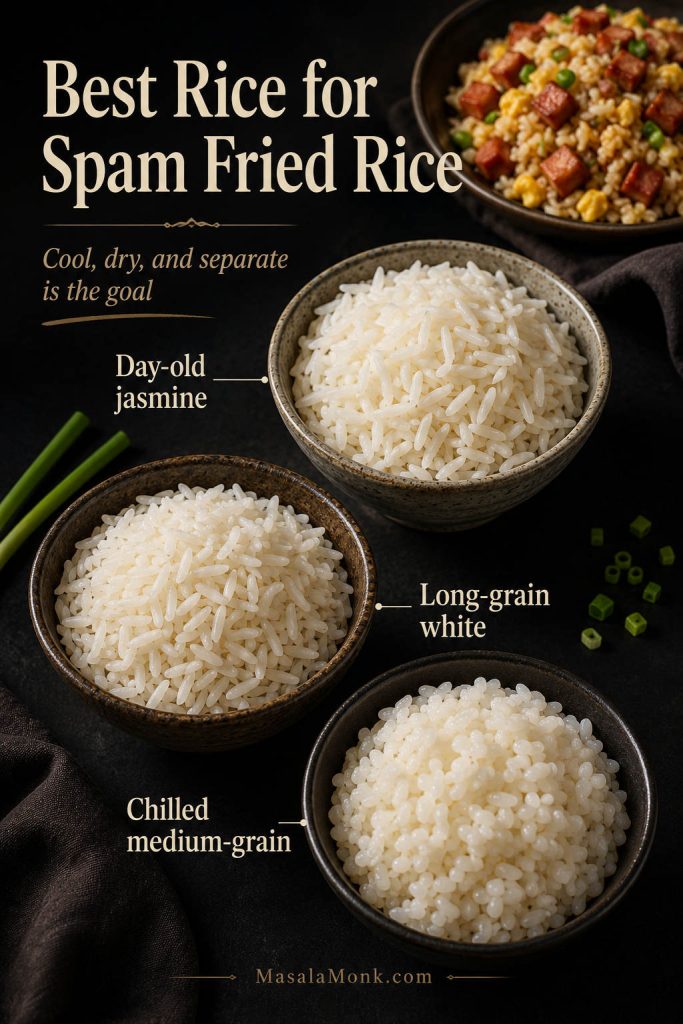
The easiest rice to work with is cold, cooked, and slightly dry on the surface. It should not be hard or stale, but it should not be hot and steamy when it hits the pan.

Three bowls of rice labeled day-old jasmine, long-grain white, and chilled medium-grain rice for making fried rice.
Good fried rice starts before the pan gets hot. If the grains are cool, lightly dry, and easy to separate, they are much more likely to fry instead of clump.

If you are starting from uncooked rice, this guide on how to cook rice perfectly is useful for getting the base right before you chill it for fried rice.

Cold Day-Old Rice

Day-old rice is the most forgiving option at home. After a night in the refrigerator, the grains lose some surface moisture and separate more easily in a hot pan.

Jasmine Rice

Jasmine rice is the easiest everyday choice because it separates well once chilled but still tastes soft and fragrant.

Long-Grain White Rice

Long-grain white rice gives you a fluffier, more separate pan, especially if you want the grains to stay distinct.

Medium-Grain Rice

Medium-grain rice works well when it is fully chilled. It gives the dish a slightly chewier, more cohesive texture. Before cooking, break up the clumps so the rice does not go into the pan in large blocks.

Fresh Rice Emergency Fix

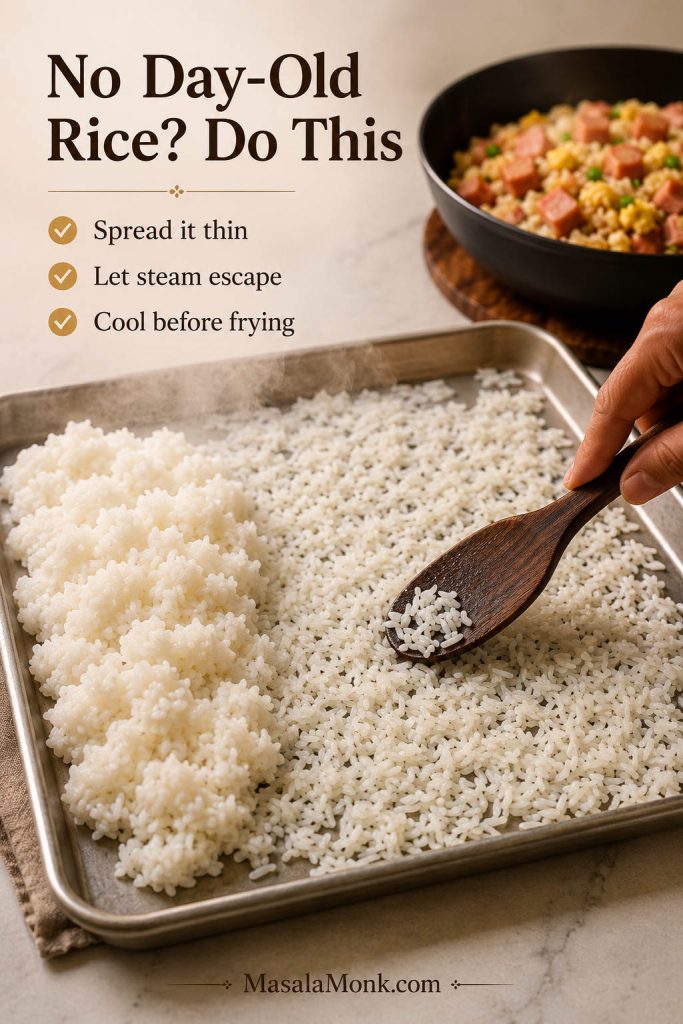
No day-old rice? You can still make this work. Spread freshly cooked rice in a thin layer on a tray or large plate, let the steam escape, and chill it uncovered until the surface feels cooler and drier. Even 20–30 minutes of cooling is better than adding hot rice straight from the cooker.

Freshly cooked rice spread thinly across a tray to cool before being used for fried rice.
Fresh rice is not a dealbreaker; however, the steam needs to escape first, so spreading it out gives the grains a better chance of frying well.

If the rice still feels damp, use a slightly wider pan, give it more time before adding the sauce, and avoid stirring nonstop. The pan should sound active, not steamy. Also, if you have more cooked rice than you need, save the rest for something sweet like rice pudding with cooked rice.

Avoid this: Very wet rice, overcooked rice, and hot rice straight from the pot. Those are the main reasons fried rice goes soft.

How to Make It

The basic rhythm is simple: crisp the Spam, scramble the egg, fry the rice, season lightly, and fold everything together.

Once the pan is hot, everything moves quickly, so dice the Spam, break up the rice, beat the eggs, drain the vegetables, and mix the sauce before you turn on the stove.

A step-by-step visual guide showing sauce mixing, egg scrambling, Spam browning, rice frying, sauce adding, and the finished fried rice.
Once the pan is hot, everything moves quickly, so having the Spam, rice, eggs, vegetables, and sauce ready makes the method easier and more reliable.

1. Mix the Sauce

In a small bowl, stir together soy sauce, oyster sauce, toasted sesame oil, sugar, white pepper, and optional water, broth, or Shaoxing wine. This gives you one seasoning mix to add later, instead of measuring bottles over a hot pan.

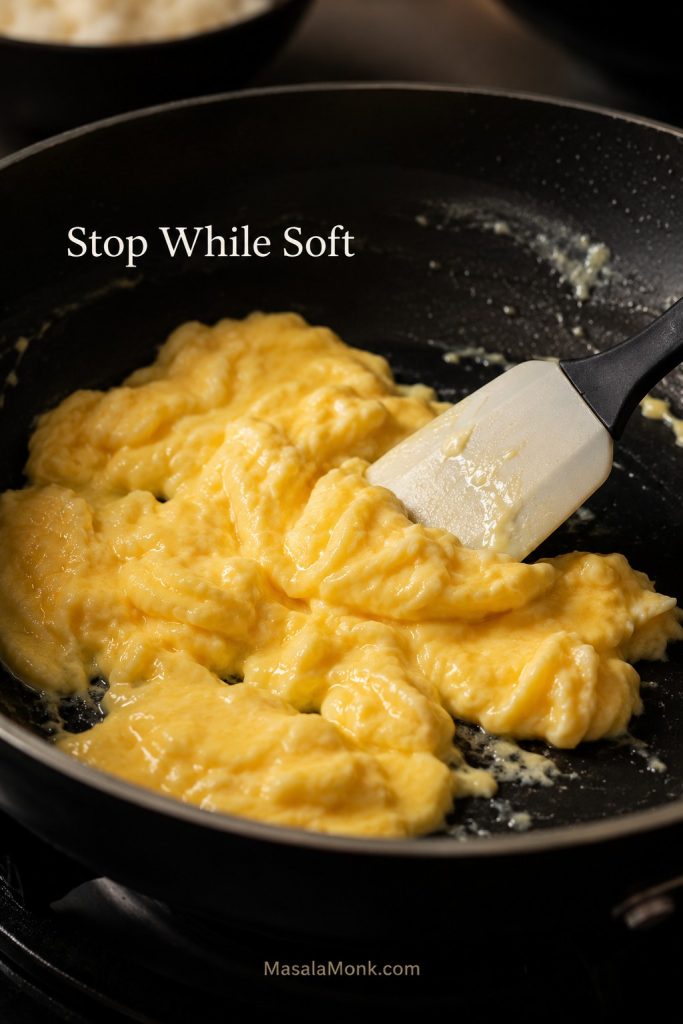
2. Scramble the Eggs

Heat 1 teaspoon of the neutral oil in a wok or large skillet over medium-high heat. Add the beaten eggs and scramble just until softly set. They should still look tender when you move them to a plate, because they will warm through again at the end.

Soft scrambled eggs in a skillet being moved with a spatula while still glossy and tender.
Pull the eggs while they still look soft and glossy. Later, they will finish gently in the hot rice instead of turning dry.

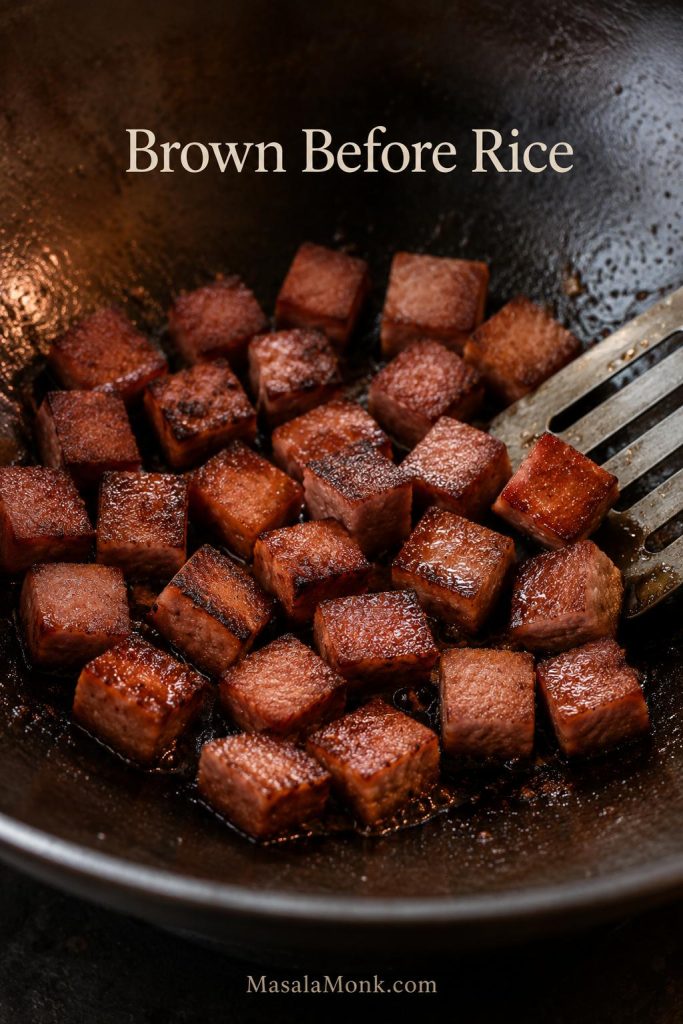
3. Brown the Spam

Add another teaspoon or two of oil only if the pan looks dry, then add the diced Spam. Spread it into a single layer and let it sit long enough to brown before stirring. The pieces should look darker at the edges and smell toasted, not just warmed through.

Cubes of Spam browning in a skillet until the edges look crisp and caramelized.
Give the Spam enough contact with the pan before stirring, because those browned edges bring much of the dish’s salty, savory character.

This step gives the finished rice its best salty-crisp bites. If your pan is crowded, transfer the browned Spam to a plate and add it back with the eggs near the end. In a wide wok, you can leave it in the pan or push it to one side.

4. Add Garlic, Scallion Whites, and Vegetables

Scatter in the garlic and scallion whites and stir for about 20–30 seconds, just until fragrant. Add the peas and carrots and cook until they are hot and dry. If the vegetables release water, pause and let that moisture cook off before adding the rice.

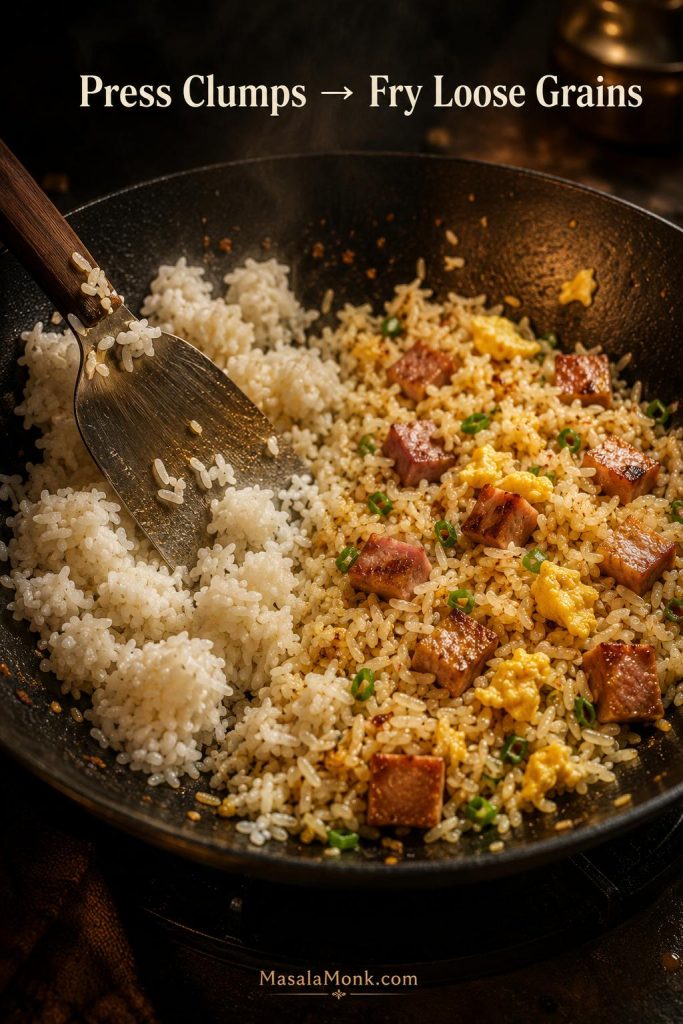
5. Add the Rice

Add the cold rice and press gently on any clumps with the spatula. At first, the grains may feel firm from the fridge. Keep tossing and pressing until they loosen, turn hot, and start to separate. If the pan sounds steamy instead of sizzling, give the rice another minute before adding the sauce.

Cold rice in a skillet being pressed from clumps into loose grains with a spatula.
Cold rice often goes in stiff and clumped, but gentle pressure and steady heat help the grains loosen and fry instead of steaming.

For a few crisp bits, spread the rice across the pan and let it sit undisturbed for 30–60 seconds before tossing again.

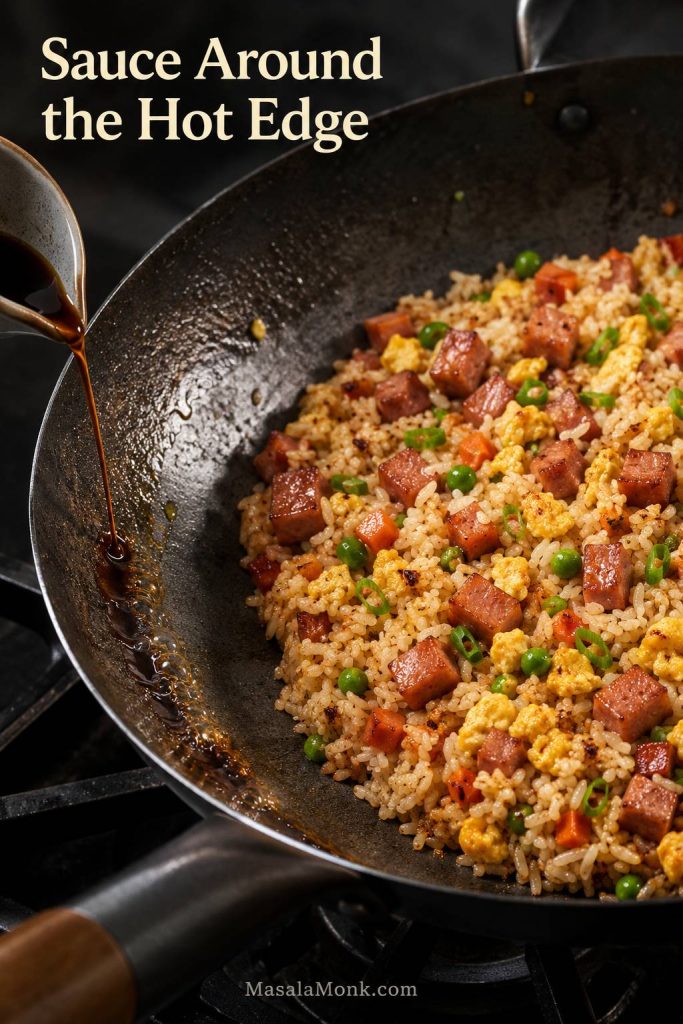
6. Add the Sauce Around the Pan Edge

In a wok, stainless skillet, or cast-iron pan, pour the sauce around the hot edge so it sizzles briefly before you toss it through the rice. If you are using nonstick, drizzle the sauce evenly over the rice and toss right away. Either way, stop and taste before adding more soy sauce; the Spam will keep seasoning the dish as you eat.

Sauce being poured around the exposed hot edge of a wok while fried rice cooks in the center.
When sauce hits the hot pan edge first, it wakes up quickly before coating the rice, which gives the whole pan a cleaner, more even savory finish.

7. Fold the Egg Back In

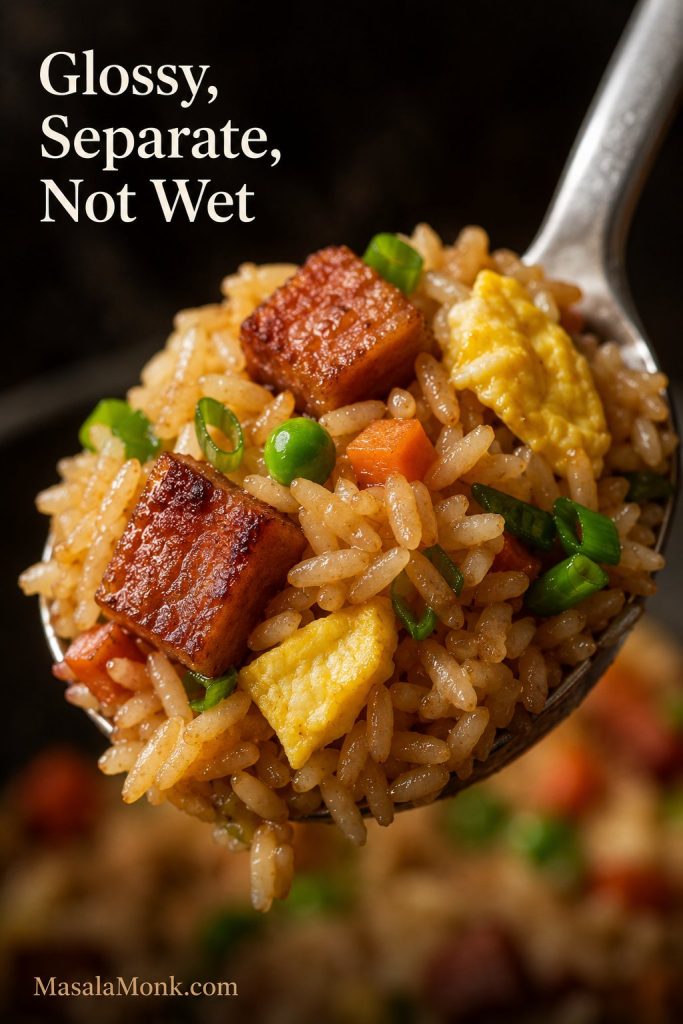
Add the soft scrambled eggs back to the pan and fold them through the rice with the crispy Spam. The finished pan should taste salty-savory, a little rich, and balanced by scallions or vegetables. Finish with scallion greens, extra white pepper, sesame seeds, chili crisp, or a tiny drizzle of sesame oil.

A close-up spoonful of finished fried rice with separate grains, browned Spam cubes, egg, scallions, peas, and carrots.
The finished texture should look glossy and loose rather than wet, with crisp Spam and tender egg balancing the richness of the rice.

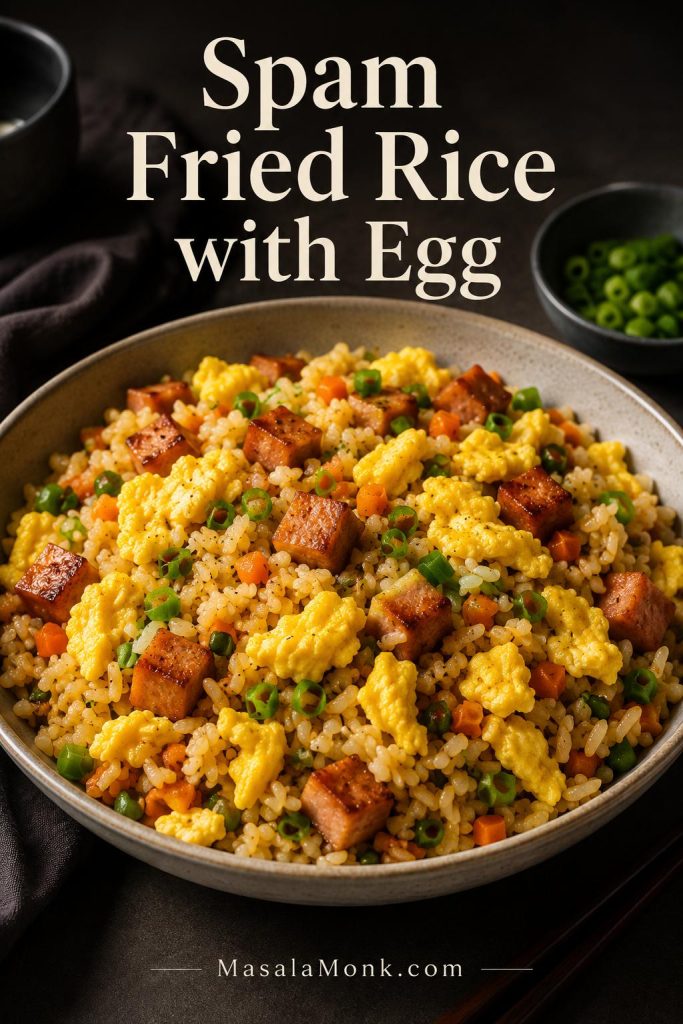
Spam Fried Rice with Egg

Egg belongs in the base version because it balances the salty Spam and makes the rice more filling. It also gives the dish that familiar Spam-and-eggs comfort without turning the whole pan into a breakfast scramble.

A bowl of fried rice with visible scrambled egg, browned Spam cubes, scallions, peas, and carrots.
Egg does more than add protein. It also softens the salty edge of the Spam and makes the whole pan feel rounder and more complete.

For 4 cups of cooked rice, 3 large eggs give you visible pieces of egg without overwhelming the grains. Use 2 eggs if you want a lighter pan, or 4 eggs if you want the dish more protein-heavy.

The easiest method is to scramble the eggs first, remove them while still soft, and fold them back in at the end. You can also push the rice aside and scramble the eggs in an open space in the pan, but that works best in a wide wok or large skillet.

If you often have eggs to use up, these easy egg dishes are useful for quick meals beyond fried rice.

Best egg texture: Take the eggs off the heat when they are just set. If they cook all the way through at the start, they can turn dry by the time the rice is finished.

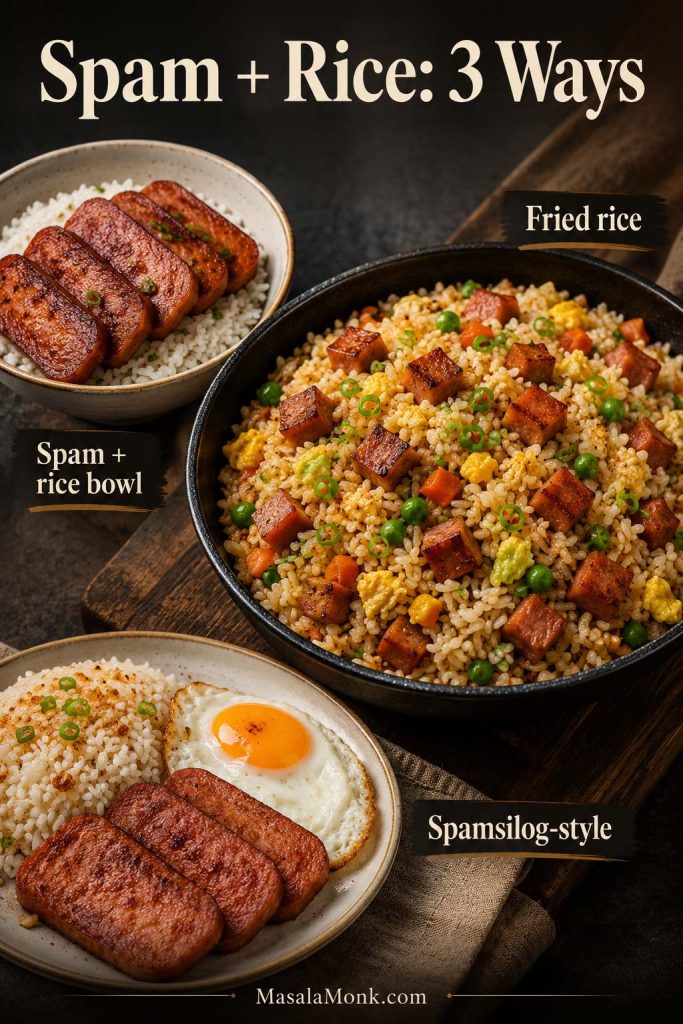
Spam and Rice vs Spam Fried Rice

People use “Spam and rice” to mean a few different meals, from a simple bowl to a full fried rice pan. The difference matters because the cooking method changes the texture.

  • Spam and rice is usually browned Spam served over plain white rice.
  • Spam egg rice is often a simple bowl or plate with Spam, egg, and rice.
  • Spam fried rice means the rice itself is stir-fried with Spam, egg, sauce, aromatics, and vegetables.
  • Spamsilog is a Filipino-style plate with Spam, garlic rice, and egg, usually served as separate components.
Three dishes labeled Spam and rice bowl, fried rice, and spamsilog-style, showing different ways to serve Spam with rice.
Spam and rice can be a simple bowl, a full fried rice pan, or a spamsilog-style plate; therefore, the cooking method changes the texture, flavor, and feel of the meal.

In this version, the rice actually fries with the Spam, egg, sauce, and aromatics, so every grain picks up flavor. If you want a simpler bowl instead, brown Spam slices, fry an egg, and serve both over hot white rice with scallions and chili crisp.

Sauce Guide

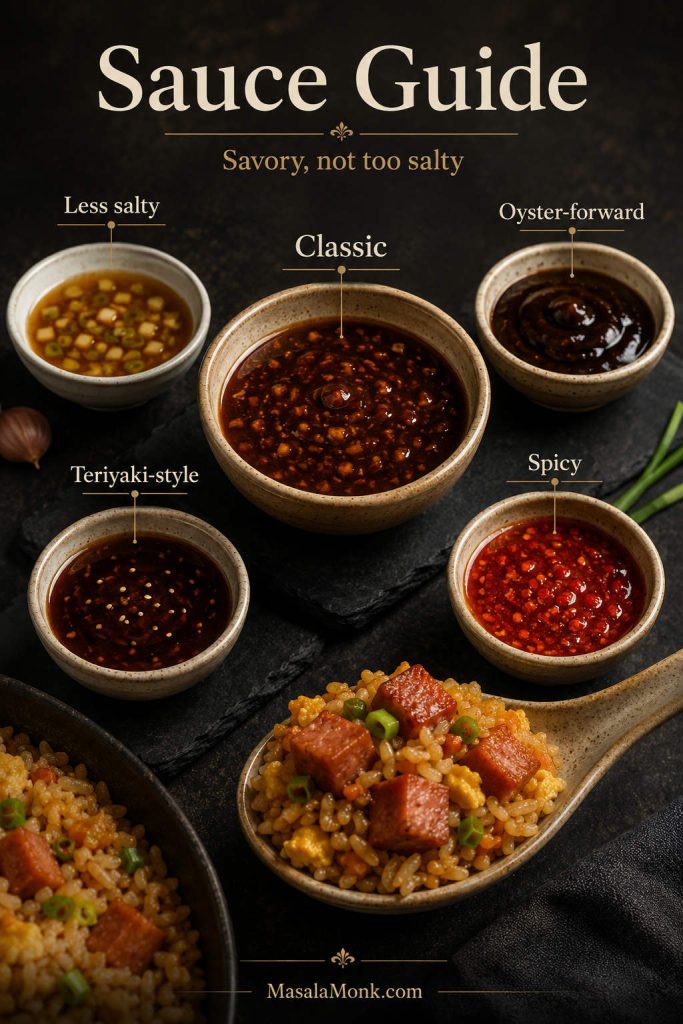
The sauce should make the rice savory, not salty for the sake of being salty. Start with the measured amount, toss well, then taste. It is much easier to add a splash more soy sauce at the end than to fix a pan that has gone too far.

A sauce guide showing small bowls labeled classic, less salty, oyster-forward, teriyaki-style, and spicy beside a spoonful of fried rice.
Start with less sauce than you think you need. Since Spam keeps seasoning the rice as you eat, a lighter hand usually gives the pan a better finish.
Sauce Style Formula Best For
Balanced classic 2 tbsp soy sauce + 1 tbsp oyster sauce + 2 tsp toasted sesame oil The main recipe and most everyday versions.
Less salty 1½ tbsp low-sodium soy sauce + 1 tbsp oyster sauce + 1 tbsp water or broth Regular Spam, salty rice, or anyone sensitive to salt.
Oyster-forward 1 tbsp soy sauce + 1½ tbsp oyster sauce + white pepper A deeper, rounder, more savory fried rice.
Teriyaki-style 2 tbsp soy sauce + 1 tbsp mirin + 1 tsp sugar A slightly sweeter Spam fried rice variation.
Garlic-butter Base sauce + 1 tbsp butter at the end + extra garlic Richer comfort-food style fried rice.
Spicy Base sauce + chili crisp, sriracha, gochujang, gochugaru, or sliced chilies Heat lovers and kimchi-style variations.

No Oyster Sauce?

You can make this without oyster sauce. Use 2 tablespoons low-sodium soy sauce, 1 teaspoon sugar, and a small splash of water or broth. For more depth, add a few drops of fish sauce, a small spoon of hoisin, or a little chili crisp. Start light, because Spam already brings plenty of salt.

A substitution guide showing soy sauce, sugar, broth, chili crisp, fish sauce, hoisin, and a spoonful of fried rice as alternatives when oyster sauce is missing.
No oyster sauce is not a dead end. Soy sauce, a little sugar, and a splash of broth still build a savory base, while chili crisp, fish sauce, or hoisin can deepen the flavor.

Start with the less-salty formula when your Spam is regular or the rice already tastes seasoned. When the rice tastes flat, go with the balanced classic. For a deeper, takeout-style flavor, lean slightly more oyster-forward.

Use a neutral oil for stir-frying and save toasted sesame oil for the sauce or final drizzle. Otherwise, the sesame oil can taste flat before the rice is finished. Added near the end, it keeps its aroma fresher.

Variations: Kimchi, Pineapple, Garlic, and Spicy

Choose the variation based on what you want from the bowl. Kimchi makes it tangy and bold, while pineapple pushes it sweet-salty. Extra garlic makes it more comforting, chili crisp makes it louder, and teriyaki-style sauce gives you a slightly sweeter weeknight version.

Kimchi Spam Fried Rice

Kimchi is the boldest direction here. Use ripe kimchi with good sourness, chop it into small pieces, and drain or squeeze it lightly if it is very wet. Fry the kimchi after browning the Spam and before adding the rice so the flavor deepens and extra moisture cooks off.

Kimchi fried rice in a bowl with red-orange rice, crispy Spam cubes, kimchi pieces, scallions, sesame seeds, and a fried egg.
Kimchi takes the rice in a tangier, bolder direction, adding acid, heat, and depth without needing many extra ingredients.

If you want stronger kimchi flavor without soggy rice, squeeze the chopped kimchi over a small bowl, fry the kimchi until it smells deeper and less raw, then add a spoonful of the reserved juice only after the rice is hot and separate.

Chopped kimchi being squeezed over a bowl to remove excess liquid, with fried kimchi cooking in a pan nearby.
For kimchi fried rice, control the liquid before it reaches the pan. Squeezing first lets you add tang later without making the grains soggy.

Use less soy sauce than the base recipe because both Spam and kimchi bring salt. Add a spoonful of kimchi juice only if the rice is dry enough to handle it. For more heat, add gochujang, gochugaru, chili crisp, or sliced chilies. A fried egg on top works especially well.

Hawaiian Spam Fried Rice with Pineapple

For a Hawaiian-style pan, add ½ to 1 cup diced pineapple. Fresh pineapple gives the cleanest texture, but canned pineapple works if it is drained very well. Add pineapple near the end for juicy pieces, or brown it briefly with the Spam if you want caramelized edges.

Hawaiian-style fried rice with pineapple, browned Spam cubes, egg, scallions, and vegetables in a bowl.
Pineapple gives the rice a sweet-salty contrast, but it works best when the fruit is well drained and added near the end so the grains stay loose.

A lighter hand with sauce works better here. Too much soy sauce plus pineapple juice can make the rice wet. Bell pepper, scallions, peas, carrots, and a little ginger all fit nicely with the sweet-salty flavor.

Drained pineapple in a strainer and lightly browned pineapple pieces in a pan beside fried rice ingredients.
To keep pineapple fried rice from turning watery, drain canned fruit well or brown fresh pineapple briefly before it reaches the rice.

Filipino Garlic Spam Fried Rice

For a Filipino-inspired garlic version, use extra garlic and keep the seasoning simple. Brown the Spam, fry plenty of minced garlic until fragrant, then add cold rice and season lightly with soy sauce or a small splash of fish sauce. Finish with scallions and serve with a fried egg if you want a spamsilog-style plate.

Garlic fried rice with crispy Spam, fried egg, scallions, and golden garlic pieces served on a plate.
A garlic-heavy version needs less sauce because the garlic, Spam, rice, and egg already create a deep comfort-food flavor on their own.

The difference is mostly in the format. Garlic Spam fried rice mixes diced Spam into the rice, while spamsilog usually serves fried Spam slices, garlic rice, and egg as separate parts on the same plate.

Spicy Spam Fried Rice

For heat, add chili crisp, sriracha, gochujang, gochugaru, sambal, sliced fresh chilies, or extra black pepper. Chili crisp is the easiest option because it brings heat, oil, crunch, and savoriness at the same time. Start small if your Spam and sauce are already salty.

Spicy fried rice with chili crisp being spooned over rice, Spam cubes, egg, and scallions.
Chili crisp is one of the easiest spicy finishes, since it adds heat, crunch, oil, and extra savoriness in one spoonful.

Spam Fried Rice with Peas and Carrots

Peas and carrots are the classic low-effort vegetable mix. Use ¾ to 1 cup for 4 cups of rice. Before adding them, rinse frozen vegetables briefly under warm water, drain them well, and add them before the rice so excess moisture can cook off.

Fried rice in a skillet with peas, carrots, browned Spam cubes, egg, and scallions being lifted with a spatula.
Peas and carrots are the easiest vegetable mix for this recipe, especially when they are drained well and heated long enough for extra moisture to cook off.

If you like the same leftover-rice logic with a different protein, MasalaMonk’s ground pork recipes include budget-friendly weeknight ideas that fit the same quick-dinner mood.

Teriyaki Spam Fried Rice

For a teriyaki-style version, replace the oyster sauce with a simple mix of soy sauce, mirin, and a little sugar. Ginger works nicely here. Keep the sweetness controlled so the rice still tastes savory, not sticky or glazed like a teriyaki bowl.

Teriyaki-style fried rice with glossy rice, browned Spam cubes, scallions, and sesame seeds.
A teriyaki-style version can be slightly sweeter and darker, but the sauce should glaze the rice lightly rather than make it sticky or heavy.

How to Fix Spam Fried Rice

If the pan is not perfect the first time, it is usually easy to understand what happened. Most problems come from moisture, heat, salt, or crowding. First, check the texture. Then, adjust the seasoning only after the rice has had enough time in the pan.

A troubleshooting image showing fixes for mushy fried rice, overly salty rice, and Spam that is not crispy enough.
Most fried rice problems come from moisture, salt, heat, or crowding, so the right fix depends on whether the pan looks steamy, tastes too salty, or never browned properly.

Texture Problems

Mushy fried rice being spread across a skillet with a spatula so excess moisture can cook off.
If the rice turns soft or clumpy, spread it out and pause before stirring again, because more pan contact helps moisture cook away.
Problem What Happened How to Fix It
Rice is mushy The rice was too warm, wet, or freshly cooked. Spread it out in the pan and let moisture cook off without stirring constantly. Next time, use cold day-old rice or chill fresh rice on a tray first.
Rice is dry The rice was very old or cooked too long after adding sauce. Add 1–2 tablespoons water or broth and toss quickly over heat.
Rice is clumping The rice was not broken up before cooking, or the pan was too small. Break up cold rice before adding it. Also, use a wide pan and enough heat to fry the grains.

Seasoning Problems

A pan of fried rice with plain rice, egg, vegetables, scallions, cucumber, and a bright finishing ingredient shown as ways to balance too much salt.
When the pan tastes too salty, add plain rice, egg, vegetables, or a fresh finish such as scallions or cucumber; more soy sauce will only push it further out of balance.
Problem What Happened How to Fix It
Fried rice is too salty The Spam, soy sauce, and oyster sauce added up quickly. Add more plain rice, egg, or vegetables. Then finish with scallions or a tiny splash of rice vinegar instead of more soy sauce.
Rice tastes bland The sauce did not spread evenly, or the rice needed a little more seasoning. Add a small splash of soy sauce around the hot pan edge, toss, and taste again before adding more.
Fried rice is greasy Too much oil was added before the Spam rendered. Use less oil next time and let the Spam release some fat before adding more oil.

Spam, Egg, and Add-In Problems

Problem What Happened How to Fix It
Spam is not crispy The pan was crowded or the Spam was stirred too often. Brown the Spam before adding rice. Let it sit in contact with the pan so the edges can crisp.
Egg is rubbery The eggs cooked too long at the beginning. Scramble eggs separately and remove them while still soft. Then fold them back in at the end.
Pineapple made it wet The pineapple was too juicy or added too early. Drain pineapple well and add it near the end. Alternatively, brown it briefly with the Spam before the rice goes in.
Kimchi made it soggy The kimchi carried too much liquid into the pan. Squeeze or drain very wet kimchi. Then fry it before adding rice so the extra moisture cooks off.

What to Serve with Spam Fried Rice

This fried rice can be dinner on its own, especially with egg and vegetables, but a fresh or tangy side makes the plate feel brighter.

Choose the side based on what the pan needs. For a rich-tasting pan, add cucumber salad, kimchi, or pickled vegetables. To make dinner fuller, add garlicky greens, bok choy, broccoli, or a fried egg. When the bowl needs more energy, finish with chili crisp, sesame seeds, scallions, or a squeeze of lime.

A serving spread with fried rice, cucumber salad, kimchi, greens, fried egg, chili crisp, scallions, and lime.
Choose sides based on what the rice needs: fresh or tangy dishes brighten a rich pan, while greens or a fried egg turn it into a fuller meal.

For another pantry-friendly dinner built around a canned protein, these salmon croquettes with canned salmon are a good next recipe to keep in rotation.

  • Cucumber salad, kimchi, or quick pickled vegetables
  • A fried egg on top
  • Chili crisp, hot sauce, sesame seeds, or extra scallions
  • Steamed bok choy, broccoli, or garlicky greens
  • Sliced avocado with lime or sesame seeds
  • A simple broth, miso soup, or clear vegetable soup

Storage and Reheating

Store leftover Spam fried rice in an airtight container in the refrigerator and use it within 3–4 days. That matches the USDA leftover guidance for cooked leftovers. You can also freeze portions, though the texture is best when the rice is freshly made or reheated from the fridge.

Fried rice stored in a clear airtight container and reheated in a skillet with a small splash of water.
A skillet gives leftovers a better second life than the microwave alone. Meanwhile, a small splash of water helps reheat the rice without making it dry or brittle.

For the best texture, reheat fried rice in a skillet over medium heat with a small splash of water or broth. Stir until hot, then let it sit briefly in the pan if you want the rice to regain a few crisp edges.

For a faster option, microwave the rice in a covered bowl with a damp paper towel. Stir halfway through so it heats evenly. After reheating, add scallions, sesame oil, or chili crisp to freshen it up.

The finished fried rice should not feel heavy or wet. You want separate grains, crisp-edged Spam, soft pieces of egg, and enough scallion or vegetable freshness to balance the salty richness. Once you know that texture, the recipe becomes easy to adjust with whatever is already in your fridge.

Spam Fried Rice Recipe

Crispy browned Spam, cold leftover rice, soft scrambled egg, vegetables, and a quick soy-oyster-sesame sauce come together in this easy one-pan fried rice.

Prep Time10 minutes
Cook Time12–15 minutes
Total Time22–25 minutes
Yield4 servings
CourseMain dish, quick dinner
StyleSpam fried rice with egg

Equipment

  • Wok, carbon-steel wok, cast-iron skillet, or large 12-inch nonstick skillet
  • Wide spatula
  • Small bowl for sauce
  • Plate or bowl for holding cooked egg and Spam if needed

Ingredients

  • 1 can Spam, 12 oz / 340 g, preferably low sodium, cut into ½-inch cubes
  • 4 cups cold cooked rice, about 680–730 g
  • 3 large eggs, beaten
  • 2 tablespoons / 30 ml neutral oil, divided, plus a little more only if the pan looks dry
  • 2 cloves garlic, minced
  • 2 green onions, whites and greens separated
  • ¾ to 1 cup frozen peas and carrots, thawed or rinsed and drained
  • Optional: ½ cup corn, diced bell pepper, cabbage, or edamame

Sauce

  • 2 tablespoons / 30 ml soy sauce, preferably low sodium
  • 1 tablespoon / 15 ml oyster sauce
  • 2 teaspoons / 10 ml toasted sesame oil
  • 1 teaspoon sugar, optional
  • ¼ teaspoon white pepper or black pepper
  • Optional: 1 tablespoon / 15 ml water, broth, or Shaoxing wine

Instructions

  1. Mix the sauce. In a small bowl, stir together soy sauce, oyster sauce, sesame oil, sugar, pepper, and optional water, broth, or Shaoxing wine.
  2. Scramble the eggs. Heat 1 teaspoon neutral oil in a wok or large skillet over medium-high heat. Add the beaten eggs and scramble until softly set. Then transfer to a plate.
  3. Brown the Spam. Add another teaspoon or two of oil only if the pan looks dry, then add the diced Spam. Cook until browned and crisp at the edges, about 4–6 minutes. If the pan is crowded, transfer the Spam to a plate and add it back near the end.
  4. Add aromatics and vegetables. Stir in garlic and scallion whites for 20–30 seconds, then add peas and carrots and cook until hot and dry.
  5. Add the rice. Add cold cooked rice and break up clumps with a spatula. Stir-fry until the rice is hot and the grains separate.
  6. Add the sauce. In a wok, stainless skillet, or cast-iron pan, pour the sauce around the hot edge and let it sizzle briefly. If using nonstick, drizzle it evenly over the rice and toss right away.
  7. Finish. Fold the scrambled egg and browned Spam back through the rice. Add scallion greens, taste, and adjust only if needed.
  8. Serve hot. Top with sesame seeds, chili crisp, extra scallions, or a fried egg if desired.

Notes

  • Cold day-old rice gives the best texture.
  • Use low-sodium Spam or low-sodium soy sauce if you are worried about saltiness.
  • Taste before adding extra soy sauce at the end.
  • If you skip oyster sauce, use the no-oyster-sauce option in the sauce section above.
  • For kimchi Spam fried rice, use ripe chopped kimchi and reduce the soy sauce.
  • For pineapple Spam fried rice, drain pineapple well and add it near the end.

Storage

Refrigerate leftovers in an airtight container and use within 3–4 days. Reheat in a skillet with a splash of water or broth for the best texture.

A saveable recipe card showing the base ratio of one can of Spam, four cups of rice, three eggs, and a 25-minute cooking time.
Remember the ratio first: one can of Spam, four cups of cold rice, and three eggs. Once that works, the sauce and vegetables are easy to adjust.

Before the FAQs, use the final serving cue as a quick check: the bowl should look loose, glossy, crisp-edged, and balanced by something fresh or spicy.

A plated serving of fried rice with browned Spam cubes, egg, scallions, chili crisp, cucumber, and kimchi side dishes.
A good final bowl has separate grains, crisp Spam, soft egg, and a fresh side or spicy finish to keep the dish lively from the first bite to the last.

For saving or sharing, this version is the simplest promise of the recipe: cold rice, crisp Spam, soft egg, vegetables, and a fast savory sauce.

A close-up image of easy Spam fried rice with crispy Spam cubes, egg, vegetables, scallions, and a bold title overlay.
Save this easy Spam fried rice idea for nights when there is cold rice in the fridge and dinner needs to be fast, savory, and still intentional.

FAQs

What rice is best for Spam fried rice?

Cold day-old jasmine rice is the easiest everyday choice because it separates well and stays fragrant. Long-grain white rice gives a fluffier texture, while medium-grain rice works if it is fully chilled and broken up before cooking.

Can I make Spam fried rice with fresh rice?

Yes, but do not add hot rice straight from the cooker. Instead, spread fresh rice on a tray, let the steam escape, and chill it uncovered until the surface feels cooler and drier. Fresh rice needs more help because it can steam in the pan instead of frying.

Is egg necessary in Spam fried rice?

Egg is not mandatory, but it makes the pan feel more complete. It softens the salty edges of the Spam, adds protein, and gives the rice those tender golden pieces people expect in fried rice.

Can I make Spam fried rice without oyster sauce?

Yes. Use low-sodium soy sauce, a little sugar, and a small splash of water or broth. For more depth, add a few drops of fish sauce, a small spoon of hoisin, or chili crisp. Start lightly because Spam is already salty.

Why is my Spam fried rice mushy?

Mushy fried rice usually starts before the sauce ever goes in. Hot, wet, or overcooked rice steams in the pan instead of frying, so the grains collapse together. Cold rice, a hot pan, and a light hand with sauce fix most of the problem.

How do I make Spam fried rice less salty?

Use low-sodium Spam or low-sodium soy sauce, start with less sauce, and add more rice, egg, or vegetables if the pan already tastes too salty. After that, scallions, cucumber, or a tiny splash of rice vinegar can help balance the flavor.

What vegetables go well with Spam fried rice?

Peas, carrots, corn, cabbage, bell pepper, onion, scallions, and edamame all work well. Keep vegetables cut small and avoid adding too many watery ingredients at once.

How do I make kimchi fried rice with Spam?

Brown the Spam first, then fry chopped ripe kimchi before adding the rice. Since kimchi and Spam are both salty, use less soy sauce than the base recipe. Finish with sesame oil, scallions, and egg.

How do I make Hawaiian Spam fried rice?

Add ½ to 1 cup diced pineapple, keep the sauce slightly lighter, and drain the pineapple well. Then add it near the end for juicy pieces, or brown it briefly with the Spam for caramelized edges.

If you make it, choose your direction: classic egg, kimchi, pineapple, garlic-heavy, or chili crisp. Leave a comment with the version you tried and whether you like your Spam cubed, sliced, or extra crispy.