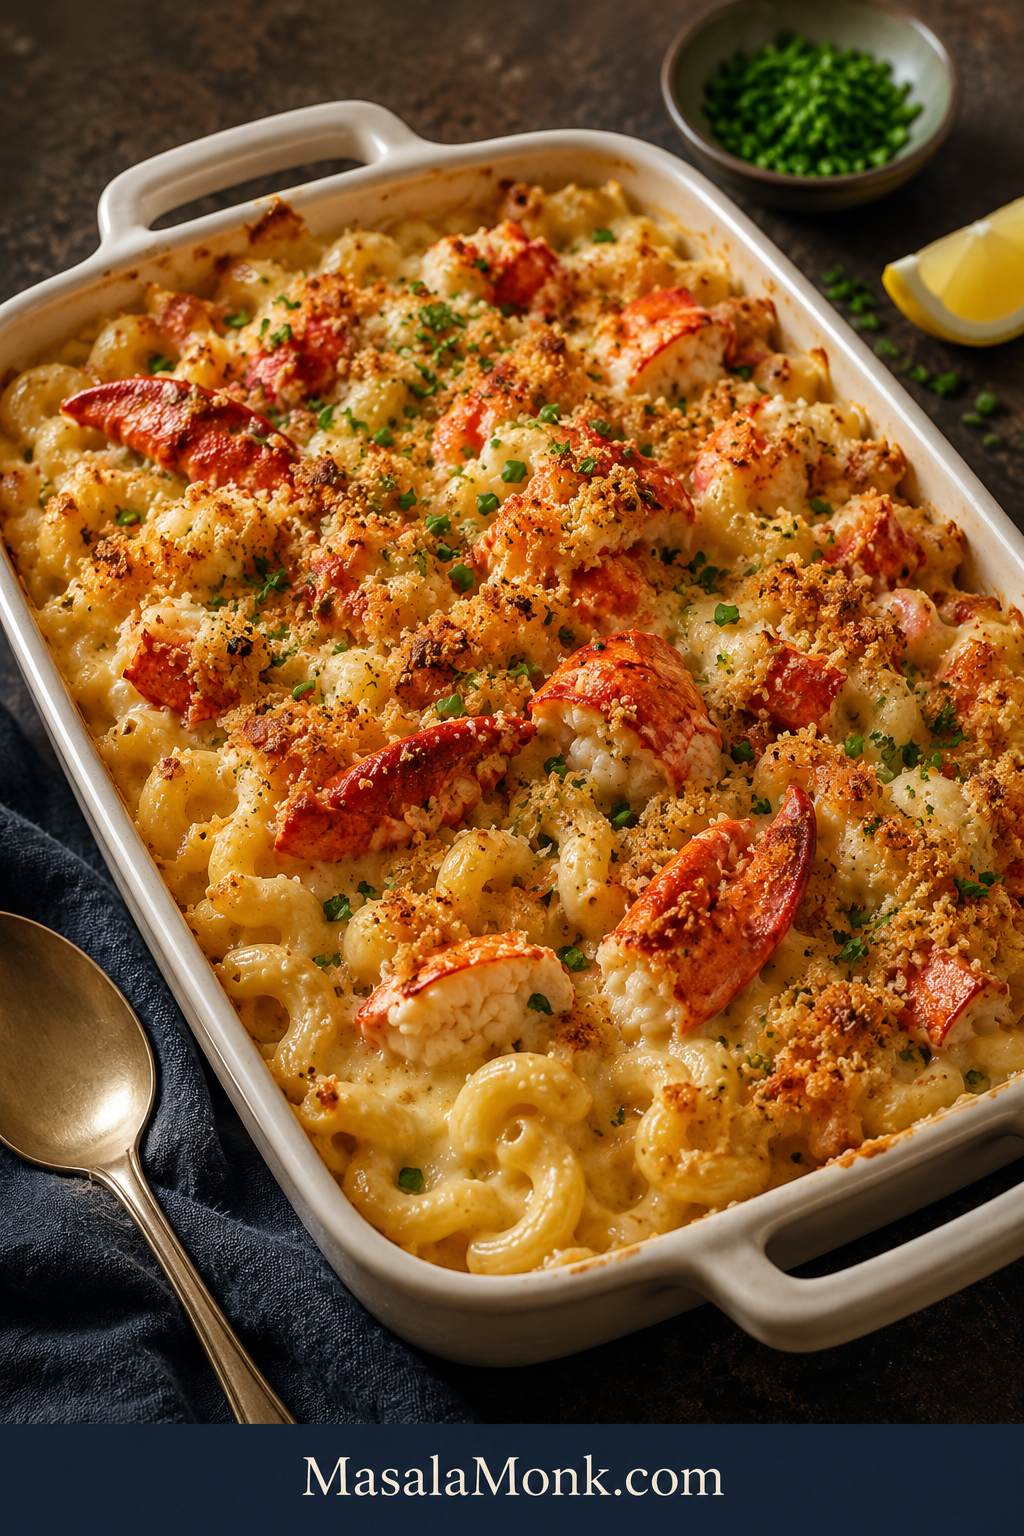
Lobster mac and cheese is what you make when regular mac and cheese is not enough. It should be creamy, buttery, golden, and generous, with real pieces of lobster in every serving — not a dry baked casserole where the seafood turns chewy and disappears into the sauce.
This version is built around three details: a smooth cheese sauce, tender lobster, and a short bake. The sauce starts a little loose, the cheese melts gently, and the lobster goes in after the pasta is already coated so it stays sweet and soft.
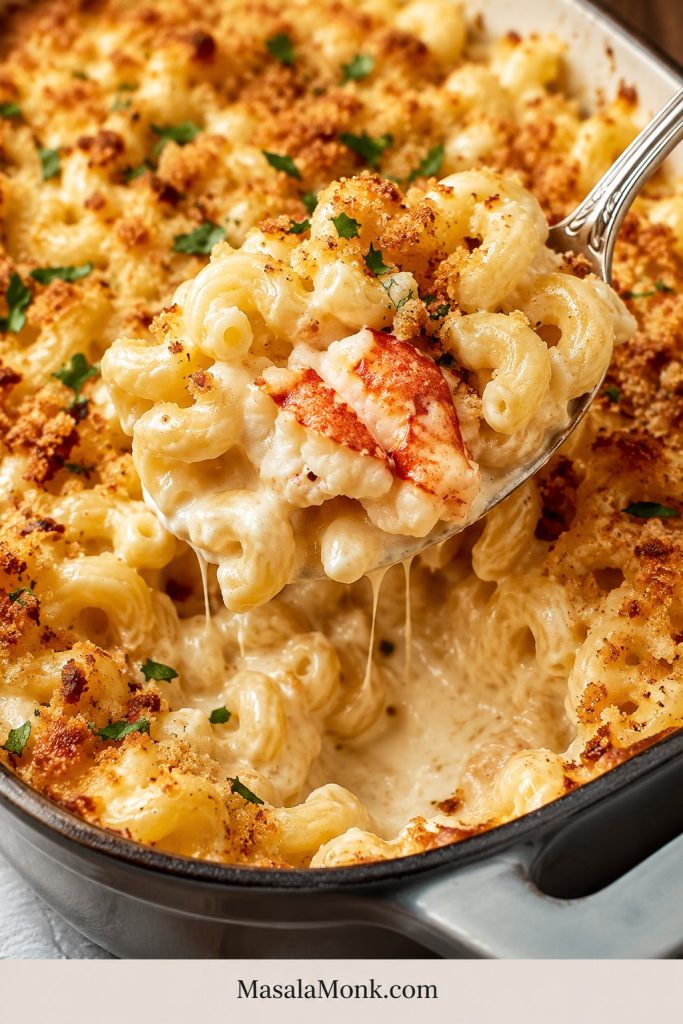
In the best spoonful, you get creamy pasta, buttery crumbs, and a piece of lobster you can actually see. Make it for a holiday side, a steakhouse-style dinner, a seafood night, a date night, or any meal where comfort food needs to feel special.
If lobster makes you nervous because it feels expensive or easy to overcook, this guide gives you the calm path: what to buy, how much to use, which cheese melts best, when to add the lobster, and how to bake the pan without drying it out.
Jump to: Quick Answer · Recipe Card · Best First Version · Best Lobster · Best Cheese · How to Make · Keep It Creamy · Troubleshooting · FAQ
Quick Answer: How to Make Lobster Mac and Cheese
A great lobster mac and cheese starts with short pasta, a generous cheese sauce, and lobster that is treated like a finishing ingredient. Cavatappi, elbow macaroni, shells, and other short pasta shapes work well because they hold the sauce instead of letting it slide off.
Cook the pasta about 2 minutes short of al dente. Before baking, the pasta should look saucier than you want the final serving to be. Saucy before baking means creamy after baking.
Use 12 oz / 340 g cooked lobster meat for a rich side dish, or 16 oz / 454 g when the mac is meant to feel like the main event. Keep the pieces generous and reserve a few for the top so the lobster looks as generous as it tastes.
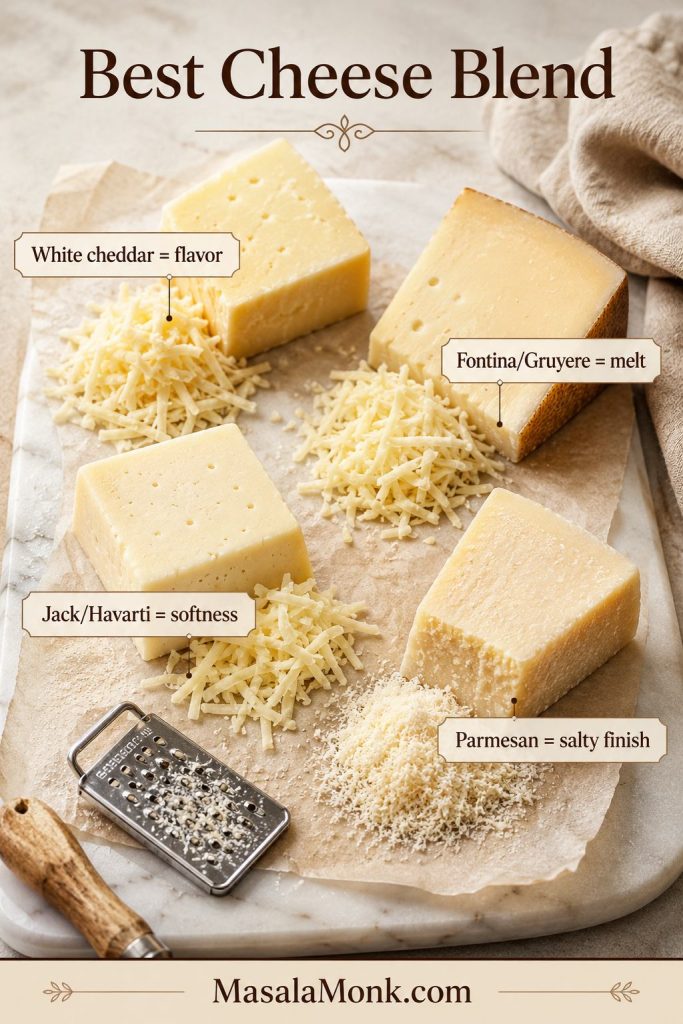
The cheese blend matters because lobster is sweet and delicate. White cheddar gives classic flavor, fontina or Gruyere gives a smooth restaurant-style melt, Monterey Jack or Havarti adds softness, and parmesan gives salty depth. Freshly grated cheese melts more smoothly than pre-shredded cheese.
Bake at 375°F / 190°C for 20 to 25 minutes, just until the edges bubble and the topping turns golden. The oven is there to finish the dish, not to cook the lobster.
Before you start cooking, notice the texture target: the finished pan should scoop creamy, not stiff. This is the visual cue to keep in mind as you build the sauce and bake briefly.
Lobster Mac and Cheese at a Glance
| Detail | Recommendation |
|---|---|
| Pasta | 1 lb / 454 g cavatappi, elbows, shells, or another short pasta |
| Lobster amount | 12 oz / 340 g for a rich side, 16 oz / 454 g for a main-event pan |
| Lobster tail amount | Enough tails to yield 12 to 16 oz / 340 to 454 g cooked meat, usually 4 to 5 medium tails |
| Lobster tail cue | Cook gently until opaque, white, and just firm; timing is only a guide |
| Cheese amount | About 22 oz / 620 g freshly grated cheese total |
| Cheese blend | White cheddar + fontina or Gruyere + Monterey Jack or Havarti + parmesan |
| Oven temperature | 375°F / 190°C |
| Bake time | 20 to 25 minutes |
| Texture target | Sauce should look slightly loose before baking |
| Lobster rule | Cook gently, add after the sauce is ready, and keep the bake short |
| Topping | Buttered panko for crispness, crushed Ritz for buttery holiday flavor |
| Servings | 8 main-dish servings or 10 to 12 side-dish servings |
Here is the full recipe first, with the deeper lobster, cheese, and baking notes right after it.
Creamy Baked Lobster Mac and Cheese Recipe Card
Recipe name: Creamy Baked Lobster Mac and Cheese
Description: Rich, creamy baked lobster mac and cheese with tender lobster, a smooth cheese sauce, and a buttery golden topping.
Servings: 8 as a main dish, or 10 to 12 as a side
Prep time: 25 minutes
Cook time: 30 minutes
Total time: 55 minutes
Good for: holidays, date nights, steak dinners, seafood dinners, and special occasion sides
Equipment
- Large pot for pasta
- Large saucepan or Dutch oven for the cheese sauce
- Whisk
- 9×13-inch baking dish
- Box grater
- Kitchen shears, if using lobster tails
- Small bowl for the topping
- Rimmed baking sheet, optional, to catch any bubbling sauce
Ingredients
For the Pasta and Lobster
- 1 lb / 454 g cavatappi, elbow macaroni, shells, or another short pasta
- 12 to 16 oz / 340 to 454 g cooked lobster meat, chopped into generous pieces
- Or enough lobster tails to yield 12 to 16 oz / 340 to 454 g cooked meat, usually 4 to 5 medium tails
- Salt, for the pasta water
For the Cheese Sauce
- 6 tbsp / 85 g unsalted butter
- 1/3 cup / about 42 g all-purpose flour
- 3 cups / 720 ml whole milk
- 1 cup / 240 ml heavy cream or evaporated milk
- 8 oz / 225 g white cheddar, freshly grated
- 8 oz / 225 g fontina or Gruyere, freshly grated
- 4 oz / 115 g Monterey Jack or Havarti, freshly grated
- 2 oz / 55 g parmesan, finely grated
- Dijon mustard: 1 to 2 tsp, or dry mustard powder: 1 tsp
- Garlic powder: 1 tsp
- Onion powder: 1 tsp
- Old Bay or Cajun seasoning: 1/2 to 1 tsp, optional
- Paprika: 1/4 tsp, optional
- Black pepper, to taste
- Salt, to taste
For the Topping
- 3/4 to 1 cup panko breadcrumbs or crushed Ritz crackers
- 2 to 3 tbsp / 28 to 43 g melted butter
- 2 tbsp grated parmesan
- 1 tbsp chopped parsley or chives, plus more for serving
- Optional: 1/2 tsp lemon zest
Instructions
Cook the Pasta and Lobster
- Preheat the oven. Heat the oven to 375°F / 190°C. Lightly butter a 9×13-inch baking dish.
- Cook the pasta. Bring a large pot of salted water to a boil. Cook the pasta about 2 minutes less than the package directions. It should still have a little firmness. Drain and set aside.
- Prepare the lobster. If using cooked lobster meat, chop it into generous pieces and pat it dry. If using lobster tails, cook enough tails to yield 12 to 16 oz / 340 to 454 g cooked meat. For 4 to 6 oz tails, this often takes about 4 to 6 minutes, but trust the look and feel more than the timer. The meat should look white and opaque, not glassy. Remove the meat from the shells, chop, and set aside.
Build the Cheese Sauce
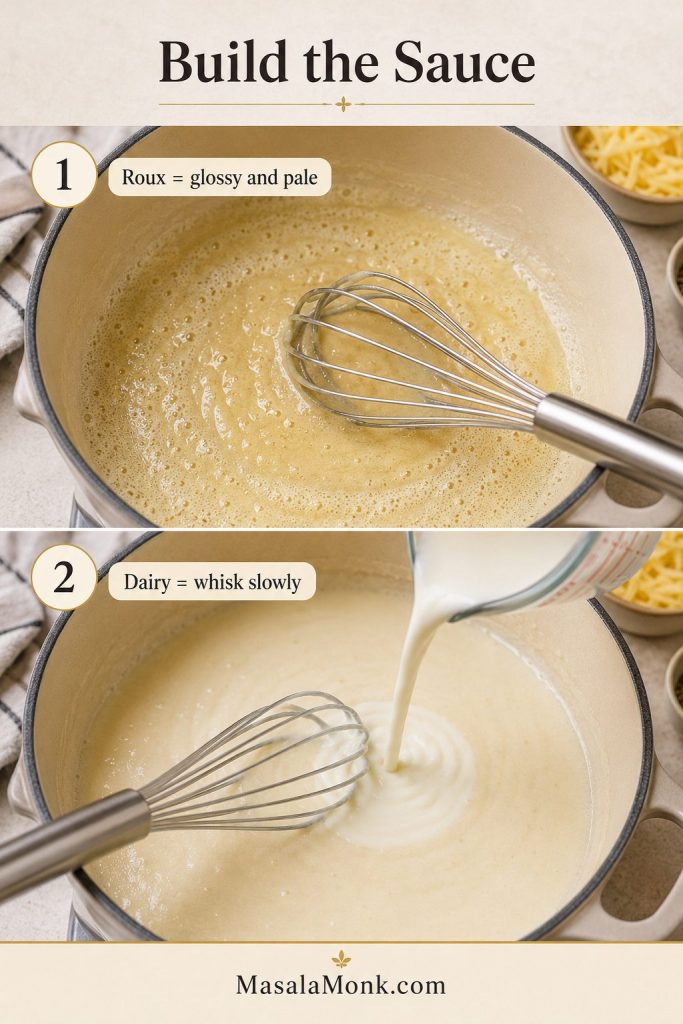
- Make the roux. In a large saucepan or Dutch oven, melt 6 tbsp butter over medium heat. Add the flour and whisk for 1 to 2 minutes, until smooth and lightly foamy. The roux should look glossy, not deeply browned.
- Add the dairy. Slowly whisk in the milk, then the cream or evaporated milk. Cook, whisking often, until the sauce thickens enough to lightly coat a spoon. This usually takes 3 to 6 minutes.
- Season the sauce. Stir in the Dijon or dry mustard, garlic powder, onion powder, optional Old Bay or Cajun seasoning, paprika, black pepper, and a small pinch of salt. Taste before adding more salt, especially if using parmesan, Old Bay, Cajun seasoning, or salted lobster meat.
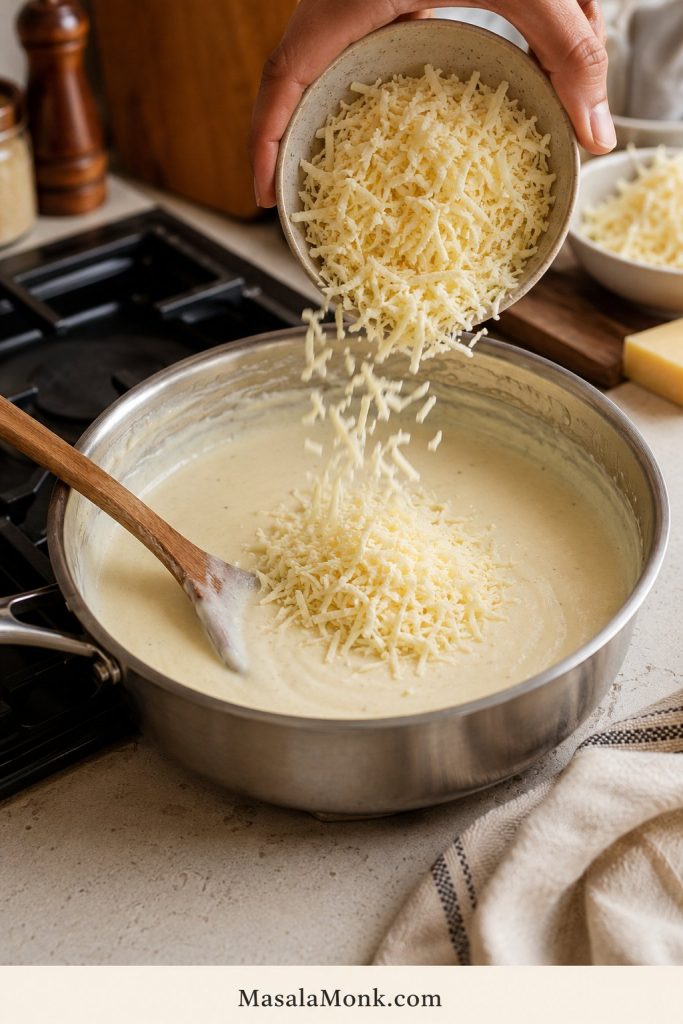
- Add the cheese gently. Lower the heat or turn it off. Add the grated cheeses a handful at a time, stirring until melted before adding more. The sauce should be smooth, loose, and pourable, not stiff.
Assemble, Bake, and Rest
- Combine pasta and sauce. Fold the drained pasta into the cheese sauce. If the mixture looks too thick, add a splash of milk. Before baking, the pasta should look a little saucier than you want the final serving to be.
- Add the lobster. Gently stir in most of the lobster once the pasta is coated. Reserve a few pieces for the top if you want the lobster to stay visible after baking.
- Transfer to the baking dish. Spoon the mixture into the prepared dish. Scatter the reserved lobster pieces over the top.
- Add the topping. In a small bowl, mix panko or crushed Ritz crackers with melted butter, parmesan, parsley or chives, and optional lemon zest. Sprinkle evenly over the mac and cheese.
- Bake. Bake for 20 to 25 minutes, until the edges are bubbling and the topping is golden. If you want more browning, broil for 1 to 3 minutes, watching carefully.
- Rest and serve. Let the pan rest for 8 to 10 minutes before serving. This helps the sauce settle without becoming stiff.
Recipe Notes
- Freshly grated cheese melts better than pre-shredded cheese.
- Stop cooking lobster as soon as it is opaque and tender. It will warm again in the pasta.
- Pull the dish while the center still looks creamy. The edges should bubble and the topping should be golden.
- For a stovetop version, skip the baking step and top each serving with toasted buttered panko.
- For deeper seafood flavor, use a small splash of seafood stock or lobster stock without thinning the sauce too much.
Need more help before you start? See which lobster to use, the best cheese blend, how to keep it creamy, or how to avoid rubbery lobster.
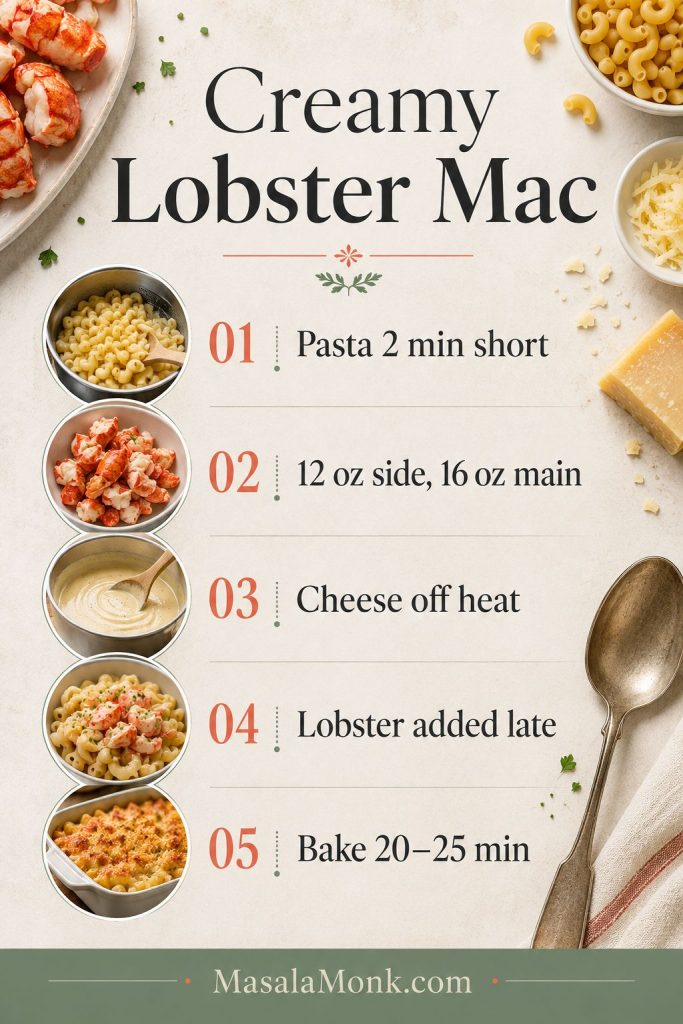
Use the guide below as the short visual version of the method before you move into the deeper lobster, cheese, and baking notes.
Why This Lobster Mac and Cheese Works
This recipe works because every part protects the final texture. The pasta starts firm, the sauce starts loose, the cheese melts gently, and the lobster warms through instead of cooking twice.
- The sauce is generous. Baked mac thickens in the oven, so the sauce begins a little looser than a stovetop version.
- The pasta has bite. Stopping early keeps it from turning soft after baking.
- The cheese blend is balanced. White cheddar gives flavor, while fontina, Havarti, Monterey Jack, or Gruyere helps keep the sauce smooth.
- The lobster stays protected. It is already tender before it reaches the oven, so the bake only warms it through.
- The topping browns quickly. Buttered panko or Ritz gives crunch without forcing the casserole to bake too long.
- The method gives you options. Bake it for a crisp top, or keep it stovetop for the creamiest possible finish.
If you already love classic mac and cheese, this is the richer seafood version: more luxurious, more buttery, and built for a special table.
Start Here: The Best First Version
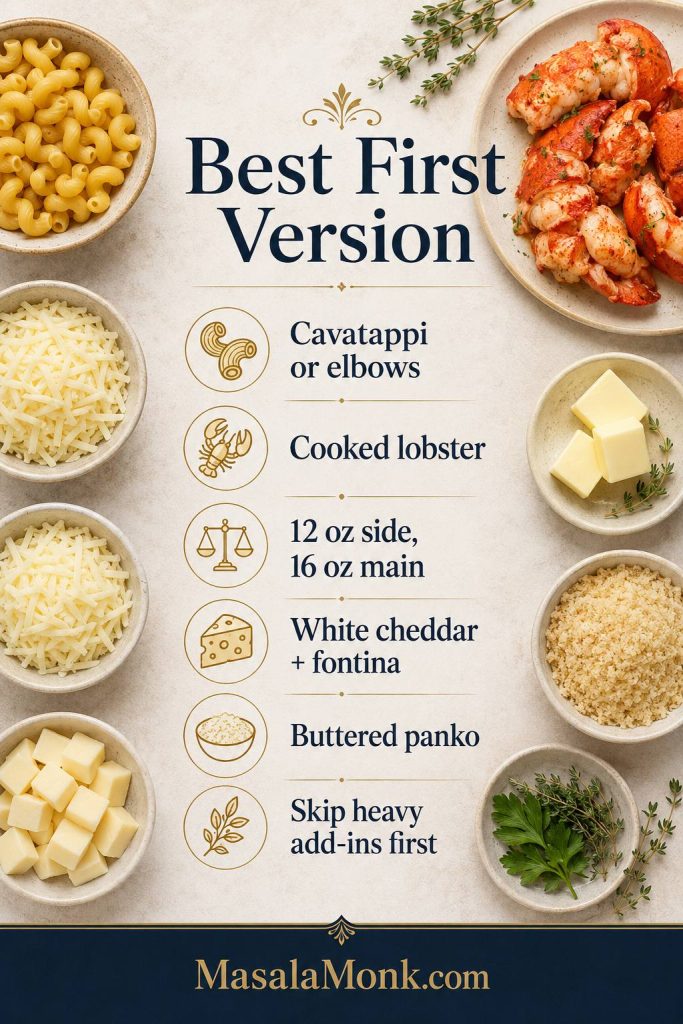
The first time you make lobster mac and cheese, keep the choices simple. This is the calmest path to a creamy, generous pan:
Best First Version
- Pasta: cavatappi or elbows
- Lobster: cooked lobster meat, or gently cooked lobster tails
- Amount: 12 oz for a rich side, 16 oz for a main-event pan
- Cheese: white cheddar + fontina, with Monterey Jack or Havarti for extra softness
- Topping: buttered panko
- Skip the first time: bacon, truffle oil, heavy Cajun seasoning, and too many seafood add-ins
This version lets the lobster stay visible, the sauce stay smooth, and the bake stay short. Once that base works, the variations become much easier to trust.
The first pan should be steady before it gets fancy: a simple cheese blend, cooked lobster, short pasta, and a topping that browns fast.
Next: Check the ingredient notes, or jump straight to how to make lobster mac and cheese.
When to Make It
Make this when the mac and cheese is supposed to be part of the occasion, not just a side dish.
- Holiday dinners that need something richer than regular mac and cheese
- Steakhouse-style dinners at home
- Seafood nights with lobster, crab, shrimp, or fish
- Date nights that feel cozy but still special
- Dinner parties where one dish should feel like the splurge
- Meals where cooked lobster or lobster tails need to stretch into a full pan
It is the kind of dish people notice before they even take a bite. The pan looks generous, the top smells buttery, and the first scoop should feel creamy instead of heavy.
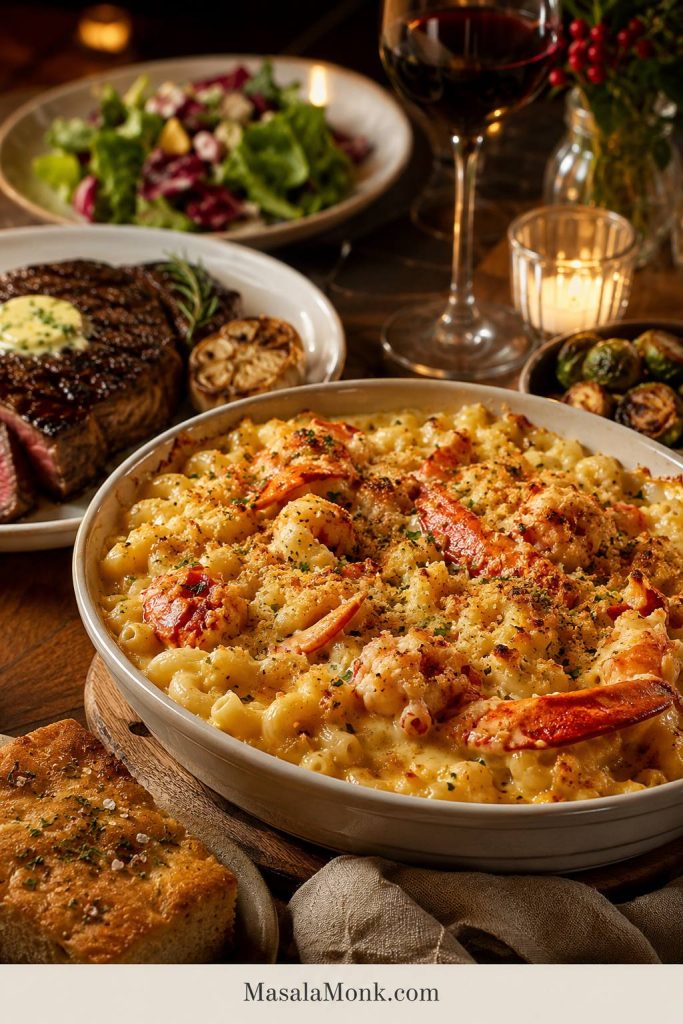
For a dinner-table version, use the mac as the rich centerpiece and let the rest of the plate bring freshness, crunch, or simple protein.
Need a Specific Tip?
Jump to the lobster, cheese, baking, storage, and troubleshooting sections below.
Make the Recipe
Choose Lobster, Cheese, and Bake Style
Ingredients and Substitutions
The ingredient list is not complicated, but nothing is here as filler. The pasta holds sauce, the cheese melts into the body of the dish, the lobster brings the sweetness, and the topping gives every scoop a little crunch.
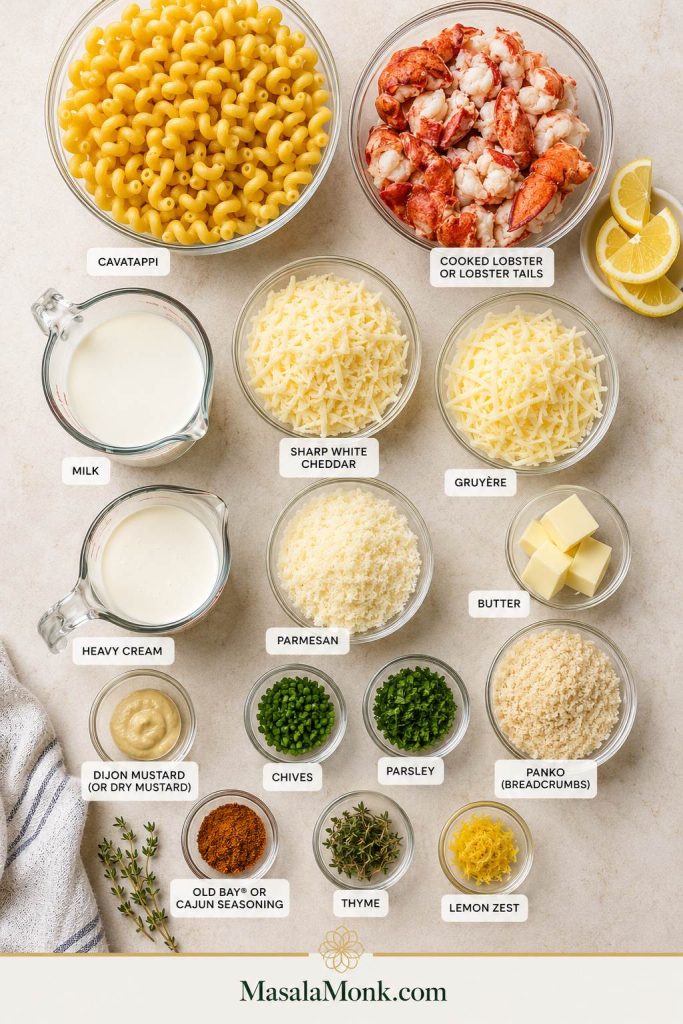
Here is the ingredient logic in one place before the detailed substitutions begin.
Pasta
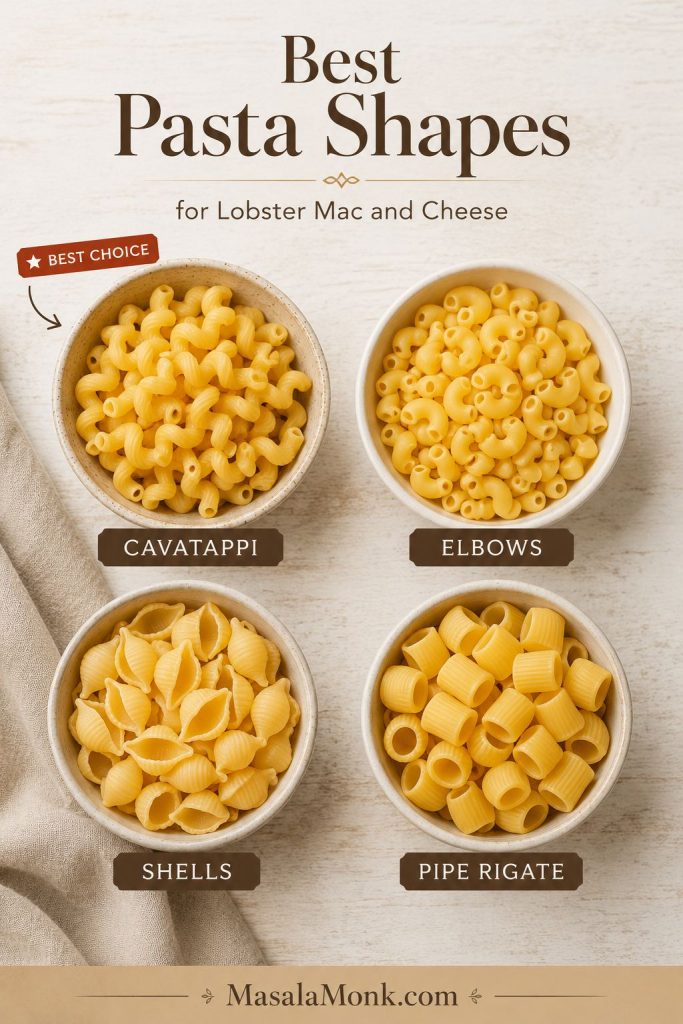
Cavatappi is worth using here because the curls and ridges hold sauce well and make the pan look a little more restaurant-style. Elbow macaroni is classic and easy to find. Medium shells, pipe rigate, small rigatoni, and other short pasta shapes also work.
Very thin pasta shapes can overcook quickly and disappear into the sauce. For a baked pan, stop cooking the pasta about 2 minutes before it reaches al dente.
Lobster
Cooked lobster meat is the easiest option. Lobster tails give you prettier, larger chunks. Claw and knuckle meat can be especially sweet and tender. Frozen lobster meat works too, but it needs to be thawed fully, drained well, and patted dry before it goes into the sauce.
For 1 lb / 454 g pasta, use 12 oz / 340 g lobster for a rich side dish or 16 oz / 454 g when the mac is meant to feel like the main event. Lobster tail yield varies, so buy by cooked meat weight when possible.
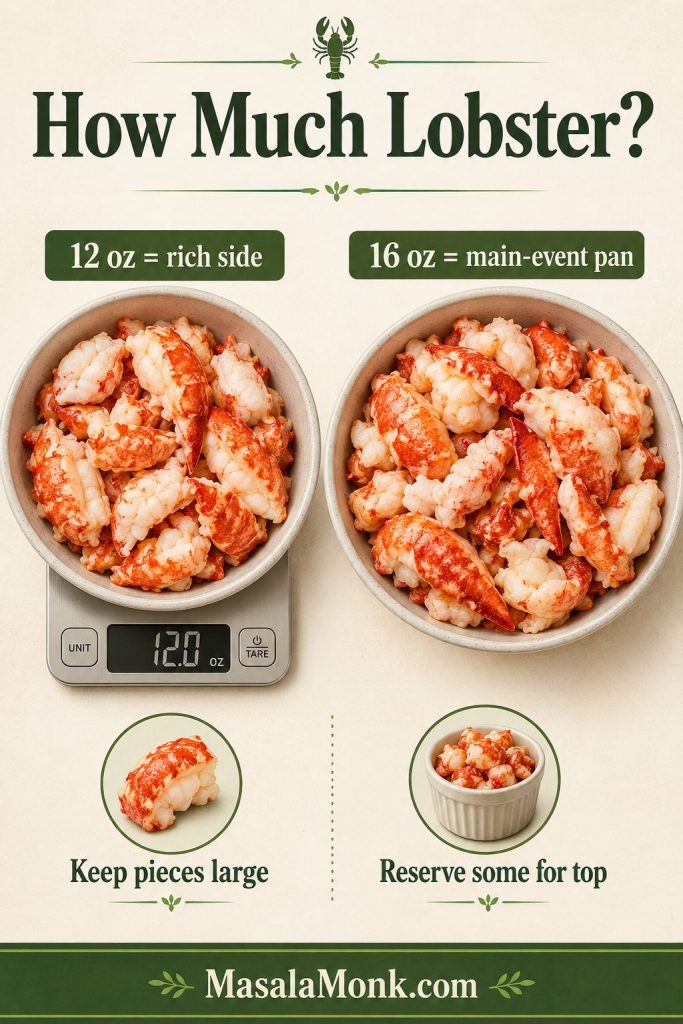
Big pieces make the pan feel generous. Keep the lobster chunks large enough to notice, and reserve a few pieces for the top instead of chopping everything tiny.
You do not need the most expensive lobster pieces for this to work. Claw, knuckle, frozen cooked meat, or a smaller amount of tail meat can still make the pan feel special if the sauce is smooth and the lobster is treated gently.
Cheese
One cheese rarely gives you everything this dish needs. White cheddar gives familiar mac-and-cheese flavor. Fontina, Havarti, Monterey Jack, or Gruyere helps with melt and creaminess. Parmesan adds salty depth, but it should be an accent, not the main cheese.
Sharp cheddar works best when it has help from smoother melting cheeses. On its own, it can taste bold but turn heavy or grainy if the heat gets too high.
Milk, Cream, or Evaporated Milk
Whole milk gives the sauce body, while cream makes it feel more luxurious. Evaporated milk is a useful middle path: creamy, stable, and less likely to feel thin after baking. You can use all whole milk for a lighter version, but the finished sauce will be less rich.
Seasonings
Dijon or dry mustard balances the richness without making the dish taste mustardy. Garlic powder and onion powder give the sauce a familiar savory base. Old Bay or Cajun seasoning is optional, but it works beautifully with lobster. Use it lightly if you want the seafood flavor to stay delicate, and taste before adding extra salt.
For a Cajun-style seafood feel, you can use a little more seasoning and serve the mac with something like this seafood boil sauce on the side for people who want extra buttery heat.
Topping
Panko gives a crisp, light topping that lets the lobster stay the focus. Crushed Ritz crackers make the top richer, saltier, and more holiday-casserole style. Parmesan helps with browning. Lemon zest is optional, but even a small pinch makes the lobster taste brighter and keeps the cheese from feeling too heavy.
Which Lobster Should You Use?
There is no single right lobster for this dish. The right choice depends on your budget, what you can buy easily, and how showy you want the final pan to look. Fresh lobster is lovely, but it is not the only way to make a great pan. What matters more is how gently you cook it and how dry it is before it meets the sauce.
Best Lobster Options for Mac and Cheese
Use this section as the buying guide: cooked meat is easiest, tails look showy, claw and knuckle meat stay sweet, and frozen lobster works if it is thawed and dried well.
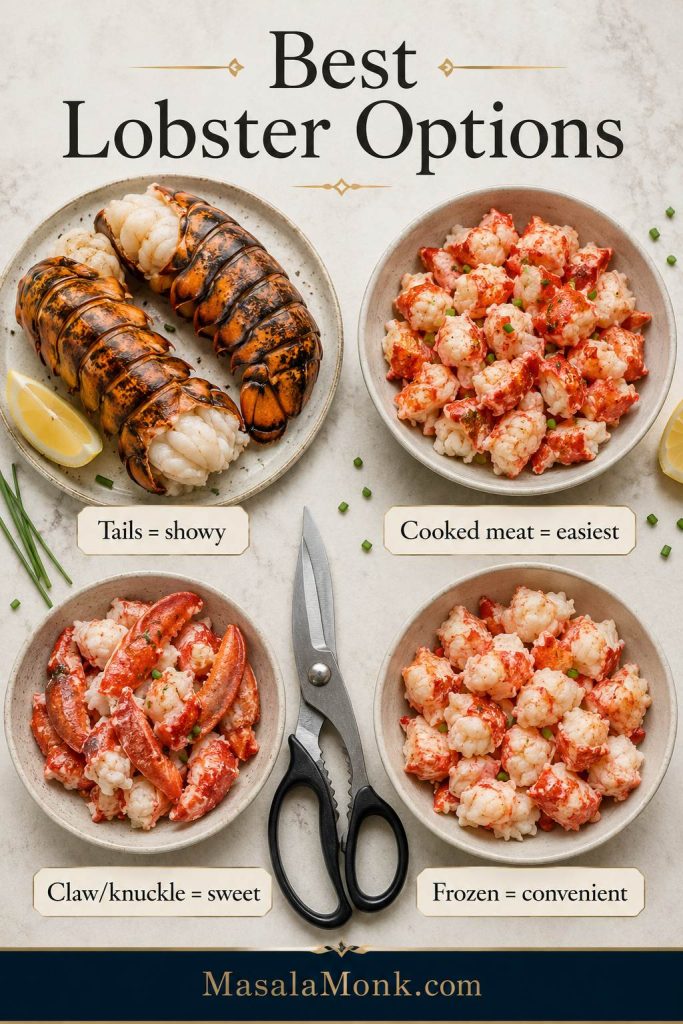
How to Use Each Lobster Type
| Lobster Type | Works Well For | How to Use It |
|---|---|---|
| Cooked lobster meat | Easiest method | Chop into large pieces, pat dry, and add after the pasta is coated. |
| Lobster tails | Showy presentation | Steam, poach, or simmer gently until opaque and just firm, then chop. |
| Claw and knuckle meat | Sweet, tender flavor | Use like cooked lobster meat and fold it in gently. |
| Frozen lobster meat | Convenience | Thaw overnight, drain well, pat dry, and stir in once the sauce is ready. |
| Leftover lobster | Quick upgrade | Add at the end just to warm through. |
| Langostino | Budget-friendly substitute | Use as a lobster-style substitute, but call it langostino clearly. |
Lobster Tail and Frozen Lobster Notes
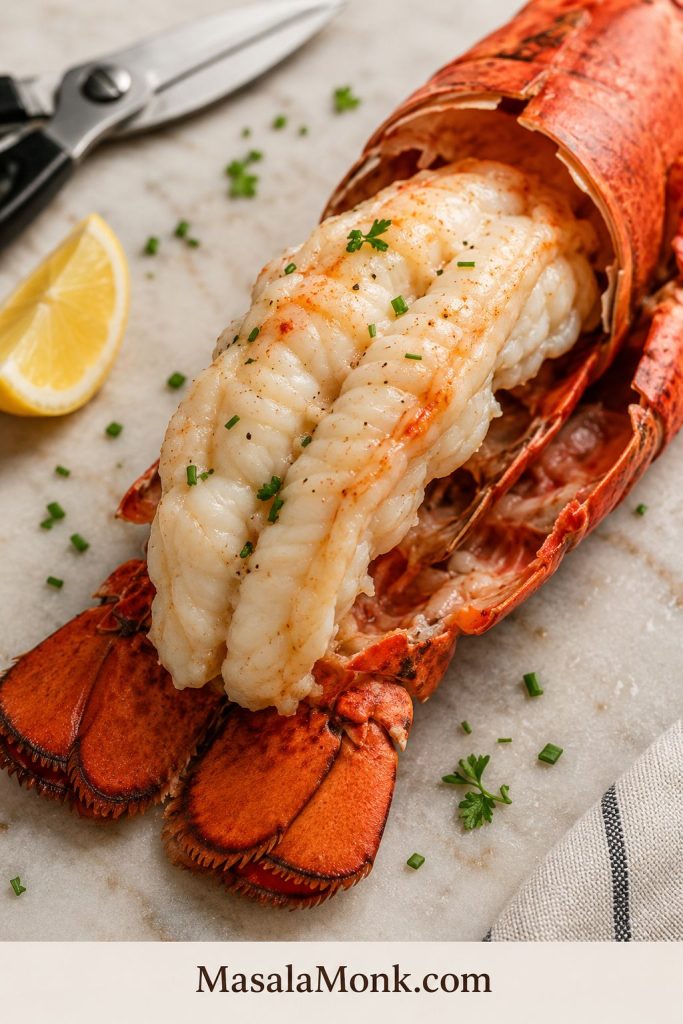
If you are using lobster tails, kitchen shears make the shells easier to open. Cook the tails only until the meat is opaque, white, and just firm. Time is only a guide; stop when the lobster looks tender and pulls from the shell easily because it will warm again in the pasta.
If lobster tails are the part that makes you nervous, this guide to grilled lobster tails goes deeper into thawing, cutting the shell, checking doneness, and avoiding rubbery lobster.
If you have extra cooked lobster after making this dish, save the larger pieces for buttery lobster rolls instead of chopping every last bit into the mac.
Raw lobster is better cooked gently first, rather than relying on the casserole to cook it evenly. That way the pasta does not have to stay in the oven too long, and the lobster can warm through without turning tough.
If you are starting with frozen lobster, thaw it overnight in the refrigerator when possible. The FDA’s seafood safety guide is a helpful reference for choosing, thawing, and handling seafood safely.
Once the lobster is dry, tender, and cut into real pieces, half the battle is already won.
Next step: Once the lobster is chosen, see which cheeses melt best or jump to the cooking steps.
Best Cheese for Lobster Mac and Cheese
Best Cheese Blend for Lobster Mac
The best cheese is a blend, not a single cheese. Lobster is sweet and delicate, so the sauce should be creamy, rich, and flavorful without overpowering the seafood.
The cheese should make the lobster taste richer, not cover it up. If the sauce tastes heavy before the lobster goes in, it will feel even heavier after baking.
Think of the blend as flavor, melt, and finish: one sharp cheese, one smooth melting cheese, and one salty accent cheese.
The blend should support the lobster instead of covering it. Use one cheese for flavor, one for smooth melt, and one small finishing cheese for depth.
Cheese Options and What They Do
| Cheese | Use? | Why It Works or Does Not Work |
|---|---|---|
| White cheddar | Yes | Gives classic mac-and-cheese flavor and sharpness. |
| Fontina | Yes | Melts smoothly and keeps the sauce creamy. |
| Gruyere | Yes | Adds nutty, restaurant-style flavor. |
| Havarti | Yes | Mild, creamy, and smooth-melting. |
| Monterey Jack | Yes | Melts easily and keeps the sauce soft. |
| Parmesan | Accent only | Adds salty depth, but does not melt like a main sauce cheese. |
| Smoked Gouda | Optional | Good in small amounts, but too much can overpower lobster. |
| Cream cheese or mascarpone | Optional | Adds extra creaminess and helps stabilize the sauce. |
| Blue cheese or feta | Skip | Too strong, too crumbly, and likely to fight the lobster. |
| Pre-shredded cheese | Only if needed | Convenient, but anti-caking starch can make the sauce less smooth. |
The finished sauce should taste rich but not loud. You should still be able to taste the sweetness of the lobster through the cheese.
What the Cheese Sauce Should Look Like
When the sauce looks glossy and loose enough to move, it has room to thicken in the oven without turning heavy.
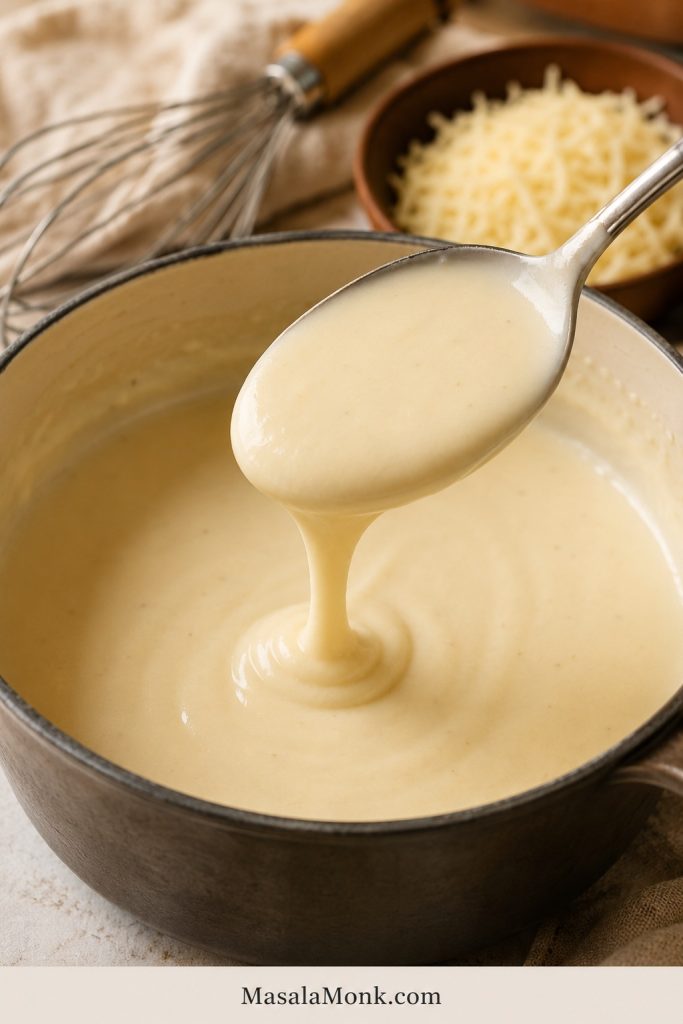
For the smoothest sauce, grate the cheese yourself and add it off heat or over very low heat. High heat is one of the most common reasons cheese sauce turns grainy or oily.
If cheese sauce is where your mac usually goes wrong, read through the tips in this cheese sauce recipe. The same rules apply here: gentle heat, freshly grated cheese, and enough liquid to keep the sauce smooth.
Sauce help: If your cheese sauce usually turns thick or grainy, jump to how to keep lobster mac creamy.
Baked vs Stovetop Lobster Mac and Cheese
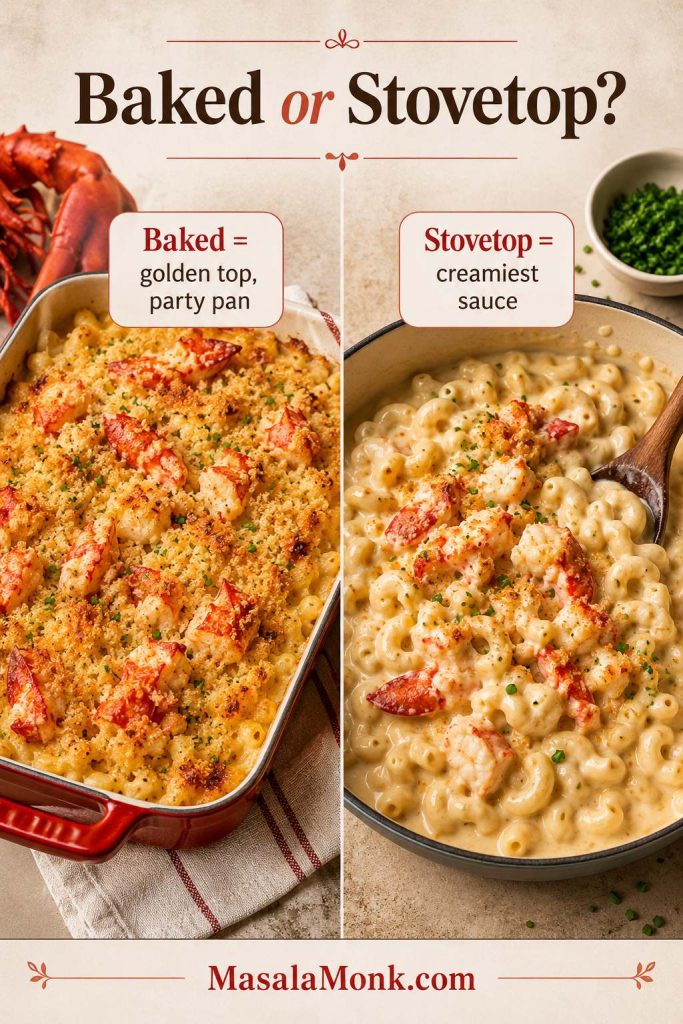
Baked lobster mac and cheese gives you the crisp top, bubbling edges, and holiday casserole feeling most people expect. It is the strongest version when you want a dramatic side dish or a special dinner centerpiece.
Stovetop lobster mac is creamier and gentler for the seafood because it avoids extra oven time. Make the pasta and sauce on the stove, add the lobster at the end, and top each serving with toasted buttered panko.
Choose the method based on the texture you want: baked for a browned top, stovetop for the softest sauce.
| Version | Works Well For | Texture Note |
|---|---|---|
| Baked | Golden top, holidays, parties, steak dinners | Pull the pan while the center still looks creamy. |
| Stovetop | Maximum creaminess and tender seafood | Add toasted crumbs separately for crunch. |
| Covered-then-uncovered bake | Make-ahead casseroles | Add topping near the end so it stays crisp. |
This recipe uses the baked method but keeps the bake short. You still get bubbling edges and buttery crumbs, while the lobster stays tender inside the sauce.
Choosing baked? See the right oven temperature and how to keep the center creamy. Choosing stovetop? Skip to variation ideas or what to serve with it.
How to Make Lobster Mac and Cheese
The recipe feels much easier once you follow the right order: cook the pasta short, prepare the lobster gently, build the sauce slowly, melt the cheese off heat, fold the lobster in near the end, and bake only until the edges bubble.
Preheat the Oven and Butter the Dish
Heat the oven to 375°F / 190°C and lightly butter a 9×13-inch baking dish. Set the dish nearby so the pasta can move into it while the sauce is still loose and warm.
Cook the Pasta Short of Al Dente
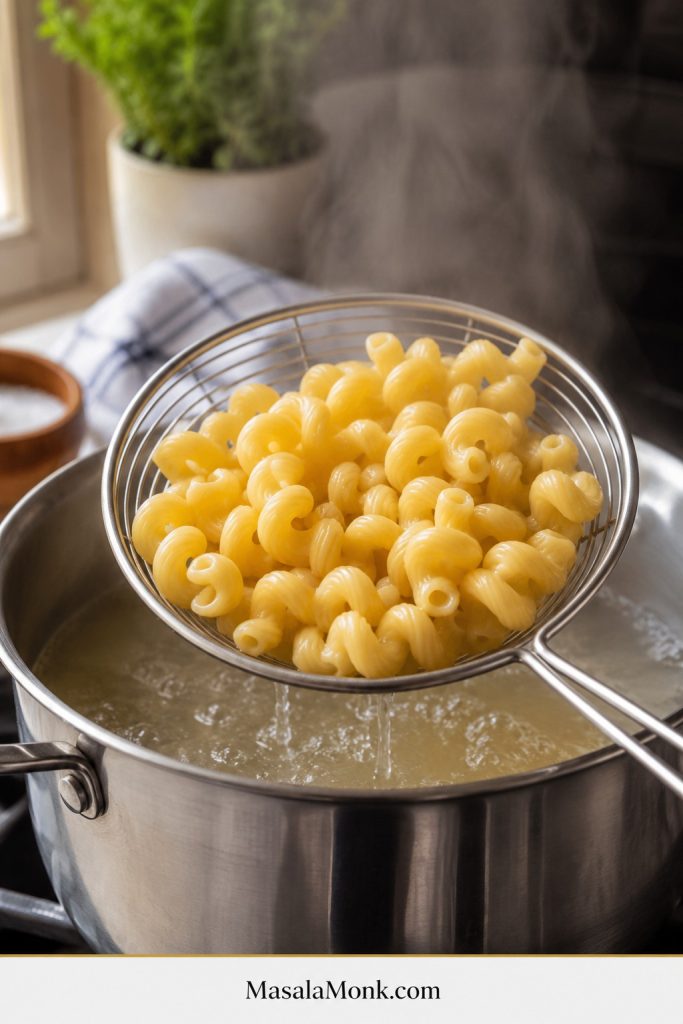
Boil the pasta in salted water and stop about 2 minutes before the package says it is done. The pasta should still have a little firmness. This prevents it from turning soft after baking.
Drain the pasta and keep it nearby. Rinsing is usually unnecessary unless the pasta is sticking badly. A little starch helps the cheese sauce cling.
Prepare the Lobster
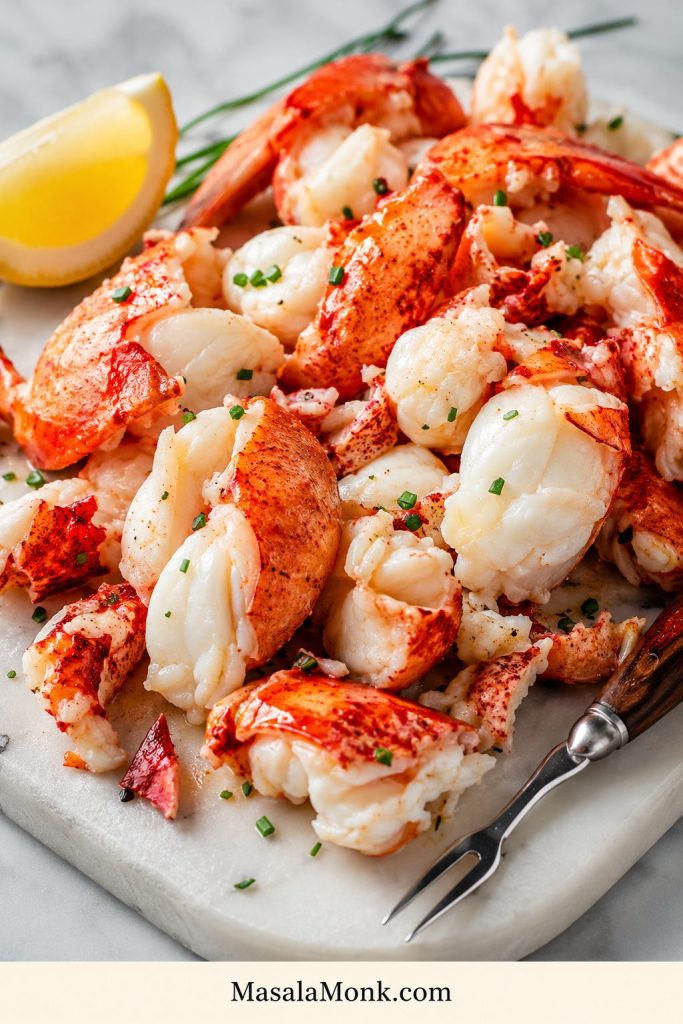
If using cooked lobster meat, chop it into generous pieces and pat it dry. Frozen lobster should be thawed completely and dried well so it does not water down the sauce.
If using lobster tails, cook them gently until opaque and just firm. You can steam, poach, or simmer them. Once cooked, remove the meat from the shells and cut it into bite-size chunks. Keep the lobster separate while you make the sauce.
Cut the Lobster into Generous Pieces
Treat lobster like a finishing ingredient. It only needs to warm through later, after the pasta and sauce are ready, so the pieces should stay large enough to notice in every serving.
Make a Pale Roux
Melt butter in a large saucepan or Dutch oven, then whisk in flour. Cook for 1 to 2 minutes so the flour loses its raw taste. The roux should look smooth, glossy, and lightly foamy, not deeply browned.
Whisk in the Milk and Cream
Add the milk slowly while whisking, then add the cream or evaporated milk. Let the sauce simmer until it thickens enough to coat a spoon. Keep it loose enough to flow from the spoon; baked mac needs more moisture than it looks like it needs at first.
Season the Sauce
Stir in the Dijon or dry mustard, garlic powder, onion powder, optional Old Bay or Cajun seasoning, paprika, black pepper, and a small pinch of salt. Taste before adding more salt, especially if using parmesan, Old Bay, Cajun seasoning, or salted lobster meat.
Add the Cheese Off Heat
Lower the heat or turn it off before adding the cheese. Stir it in gradually, a handful at a time. This helps the sauce melt smoothly instead of separating.
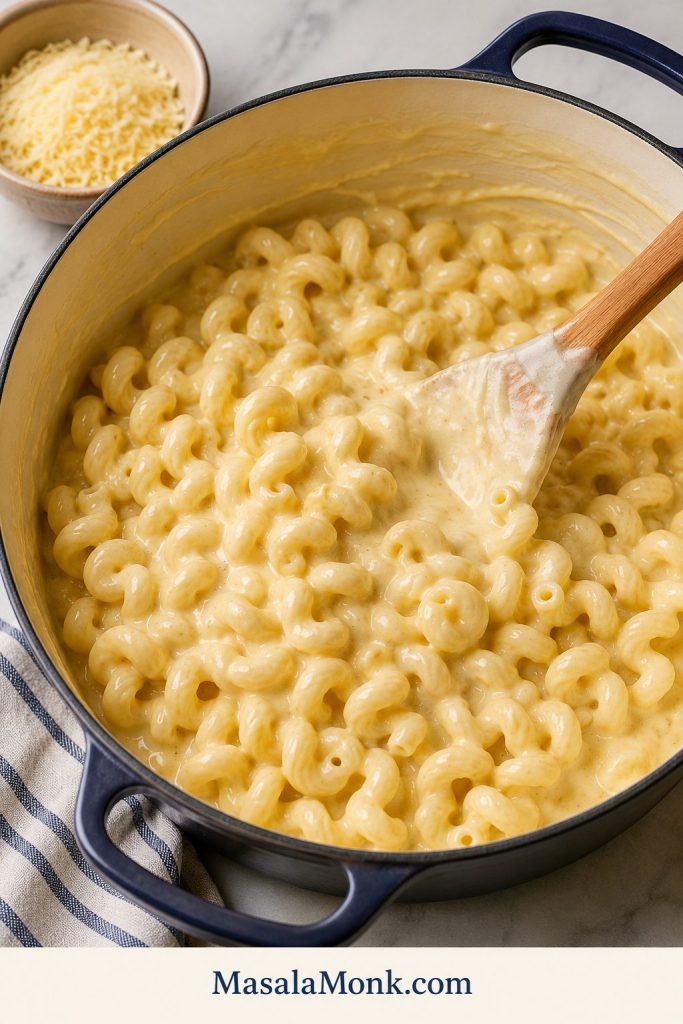
Aim for creamy and pourable, not stiff. The pasta should look almost too creamy before it bakes. That is the trick.
Coat the Pasta First
Fold the pasta into the sauce before the lobster goes in. This gives every curve of pasta a chance to catch the sauce and keeps the seafood from being stirred too aggressively.
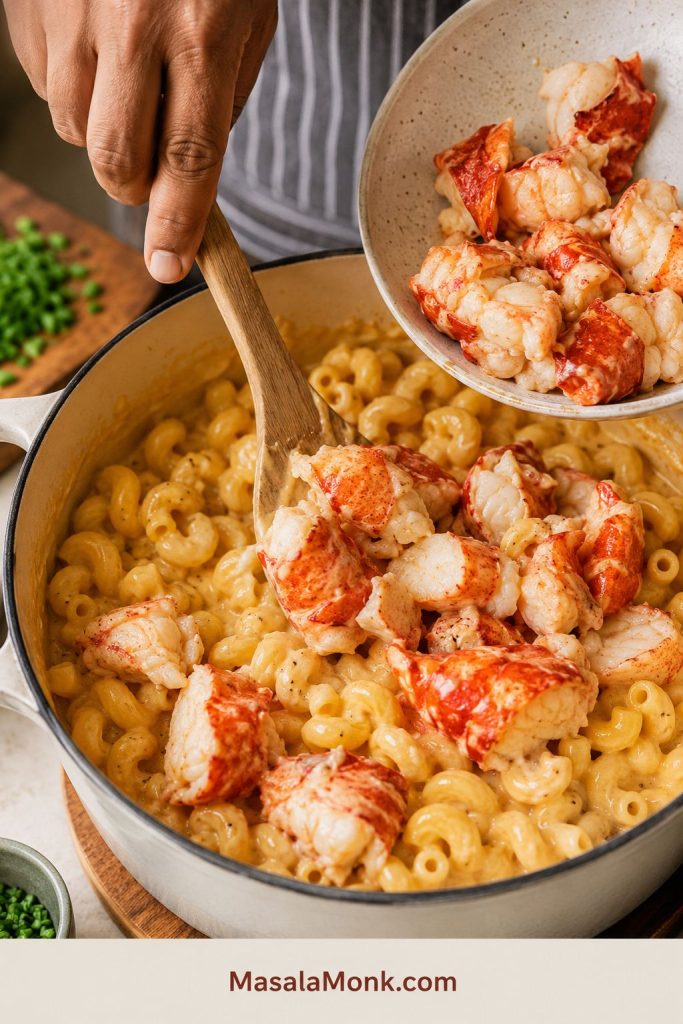
Add the Lobster Last
Once the pasta is coated, gently add the lobster. This keeps the pieces from breaking apart and lets them stay sweet, soft, and noticeable in every scoop.
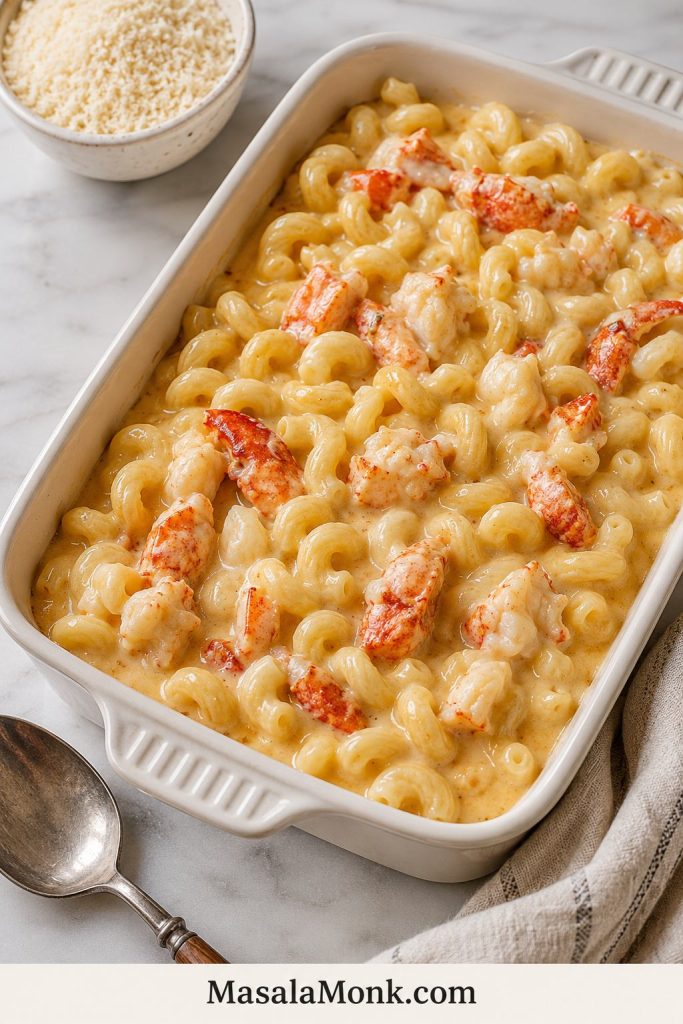
Transfer to the Baking Dish
Spoon the mixture into the prepared dish. For a more generous-looking pan, reserve a few pieces of lobster and place them on top before adding the crumb topping.
Check the Pan Before Topping
Before the topping goes on, the pasta should look glossy and slightly loose, with lobster pieces still visible. This is the best time to add a splash of milk if the mixture already looks tight.
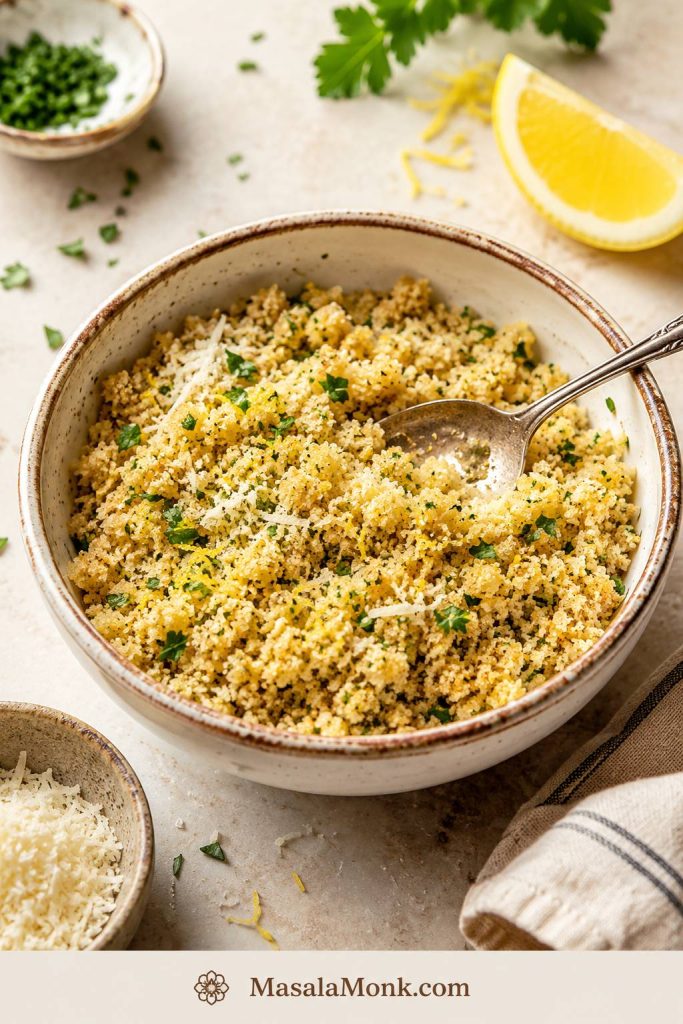
Add the Buttered Panko Topping
Mix panko or crushed Ritz crackers with melted butter, parmesan, herbs, and optional lemon zest. Sprinkle the topping evenly over the pan so it can brown quickly.
Bake Until Bubbling and Golden
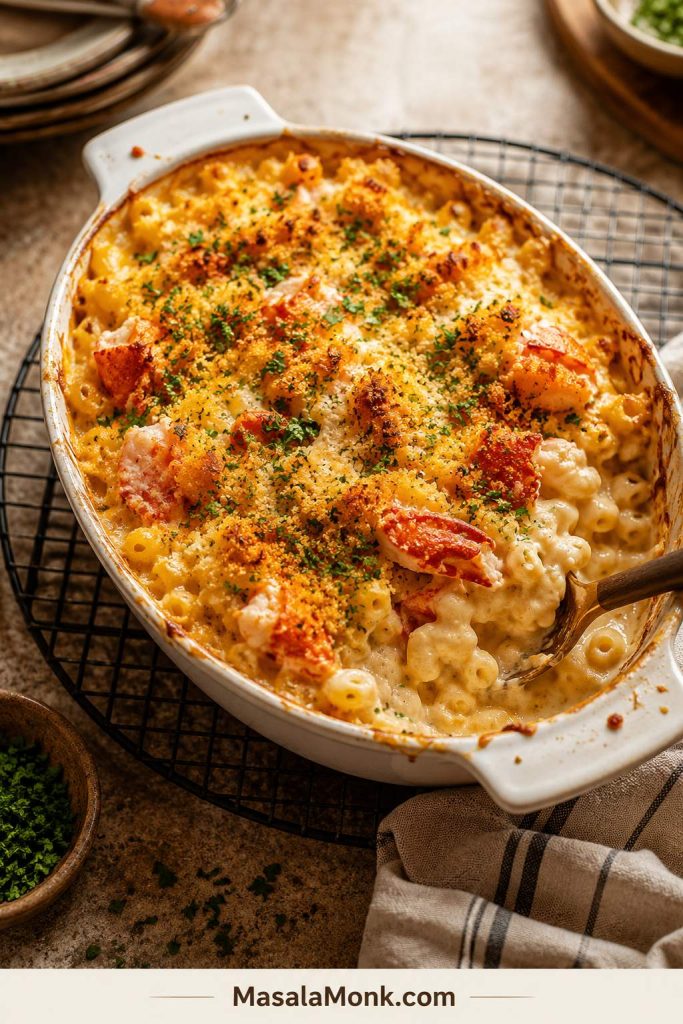
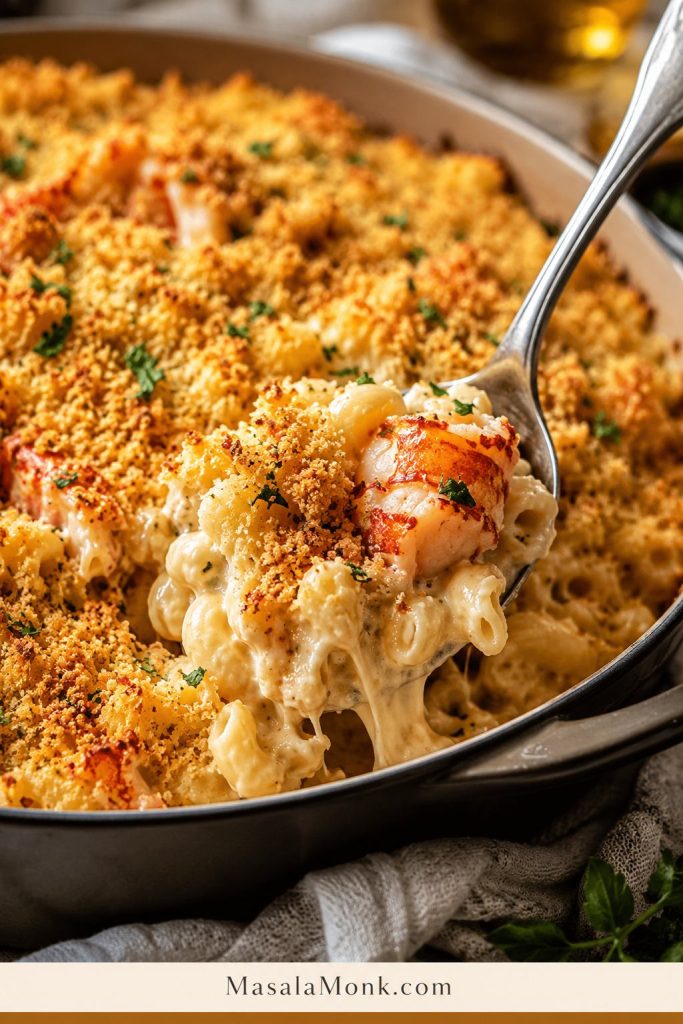
Bake at 375°F / 190°C for 20 to 25 minutes. The edges should bubble and the topping should be golden, while the center still looks creamy when you scoop into it.
Rest Before Serving
Let the dish rest for 8 to 10 minutes before serving. A short rest helps the sauce settle so the first scoop holds together without turning stiff.
Back to recipe card · Fix dry mac before baking · Keep lobster tender
The Right Oven Temperature
The safest default oven temperature is 375°F / 190°C. It is hot enough to brown the topping and bubble the sauce, but not so hot that the lobster is likely to overcook before the casserole is ready.
- 350°F / 175°C is gentler and useful for reheating or make-ahead pans, but browning takes longer.
- 375°F / 190°C gives this recipe the best balance: bubbling edges, toasted crumbs, and a creamy center.
- 400°F / 200°C can brown quickly, but it gives you less room for error with lobster and cheese sauce.
For this recipe, bake at 375°F / 190°C for 20 to 25 minutes. If the topping needs more color, broil briefly at the end instead of baking the whole dish longer.
How to Keep Lobster Mac and Cheese Creamy
If baked mac turns dry, it is usually a few small things adding up: pasta cooked too far, sauce too thick, cheese overheated, or the pan left in the oven too long.
Use these visual checks before the pan goes into the oven and again when it comes out.
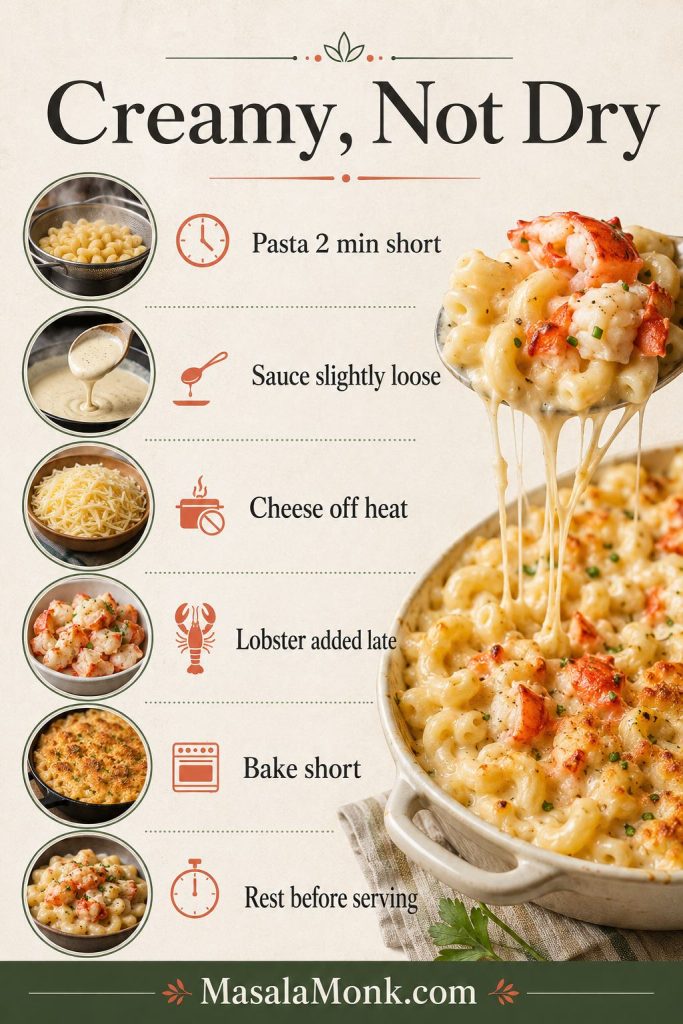
- Use enough sauce. Pasta absorbs moisture in the oven, so the mixture should look a little loose before baking.
- Undercook the pasta. Stop about 2 minutes before al dente for a baked pan.
- Grate the cheese yourself. Freshly grated cheese melts more smoothly.
- Add cheese off heat. Gentle heat keeps the sauce smoother and less oily.
- Add seafood after the sauce is ready. Lobster only needs to warm through inside the pasta.
- Pull it at the right moment. The edges should bubble, the topping should brown, and the center should still look creamy.
- Rest before serving. A short rest helps the sauce settle without becoming watery.
A thick-looking pan needs help before it reaches the oven. Add 1/4 cup / 60 ml milk at a time until the pasta looks glossy and saucy again.
Still troubleshooting? See how to avoid rubbery lobster or jump to common fixes.
How to Avoid Rubbery Lobster
Lobster gets rubbery when it is cooked too long or reheated too aggressively. Since it warms again inside the mac, it should stay on the tender side before it goes into the dish.
The easiest way to protect the lobster is to cook it gently first, add it late, and avoid repeated high heat.
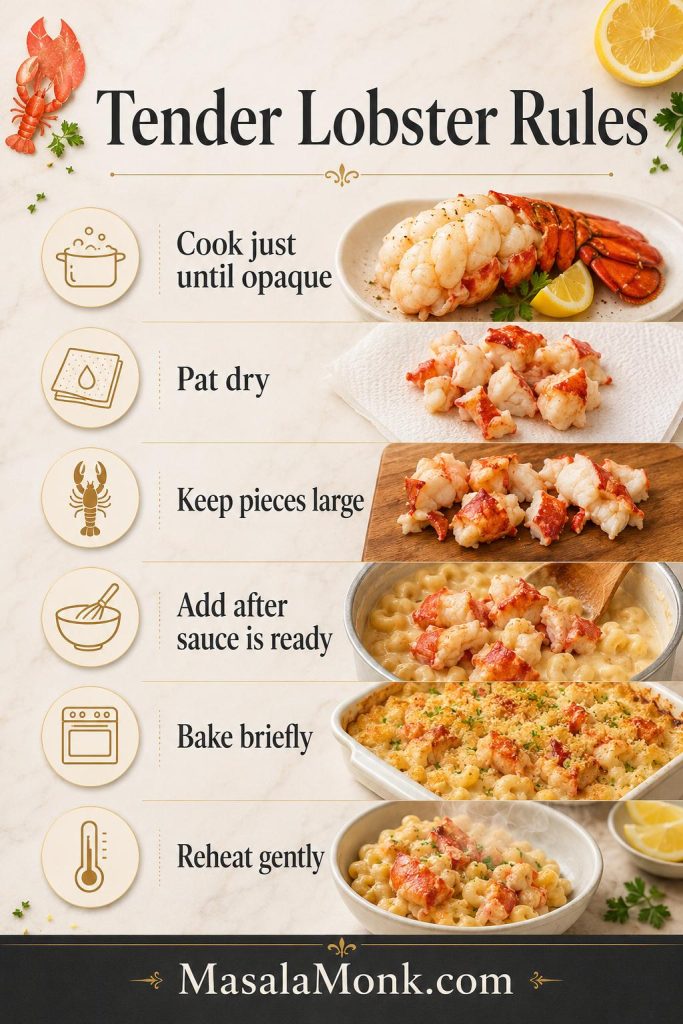
- Cook lobster tails only until the meat turns opaque and just firm.
- Use cooked lobster meat if you want the easiest method.
- Pat lobster dry so extra moisture does not thin the sauce.
- Cut lobster into generous chunks instead of tiny bits.
- Add the lobster after the pasta is already coated in sauce.
- Keep the uncovered bake short.
- Reheat leftovers gently with a splash of milk or cream.
Lobster should feel like the prize in the bite, not the thing you have to chew around. If it is already tender before baking, your job is to protect it.
How to Make It Taste Restaurant-Style
Restaurant-style lobster mac and cheese usually feels more polished because of the pasta shape, the cheese blend, the visible lobster pieces, and the finishing touches. The dish should look generous before anyone tastes it.
- Use cavatappi. The curls hold sauce and make the pan look special.
- Choose a white cheese blend. White cheddar, Gruyere, fontina, and parmesan give a steakhouse-style look and flavor.
- Keep some lobster visible. A few reserved pieces on top make the whole pan feel more generous.
- Finish with chives or parsley. A little green makes the rich sauce look brighter.
- Add a small splash of sherry, seafood stock, or lobster cooking liquid. Use just enough to add depth, not enough to make the sauce taste boozy or fishy.
- Broil briefly if needed. A quick 1 to 3 minute broil can give the topping a golden steakhouse finish.
Optional Lobster-Shell Flavor Boost
If you cooked lobster tails yourself, you can use the shells for a subtle restaurant-style boost. Simmer the shells gently in the milk and cream for about 10 minutes with a small piece of onion or a bay leaf, then strain before making the sauce. Keep the heat gentle and do not reduce the dairy too much.
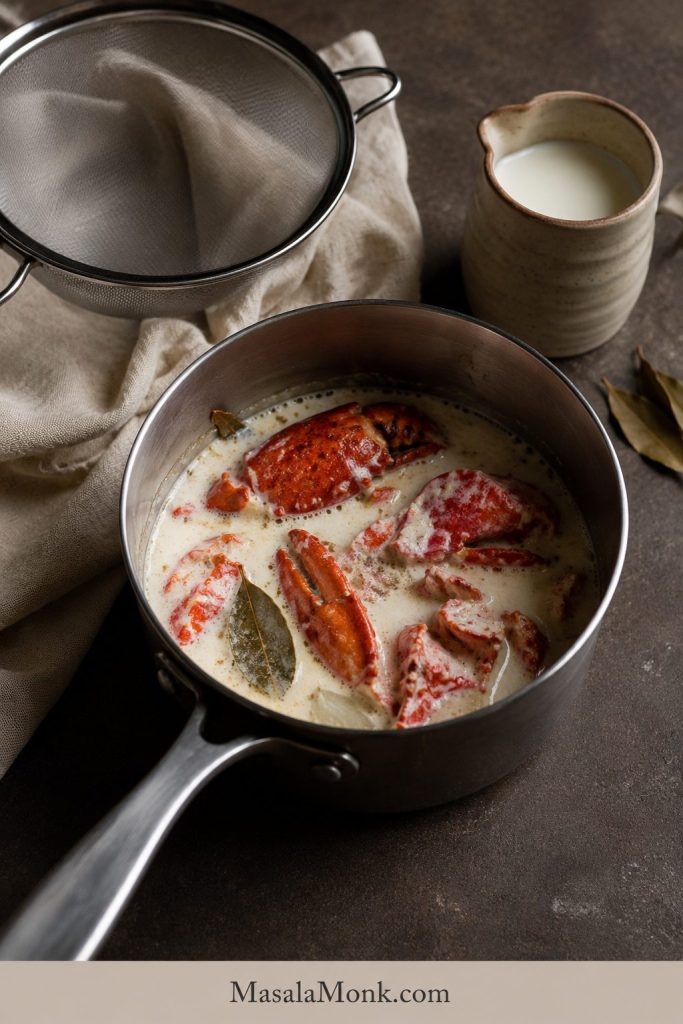
This step is optional. The base recipe works without it, but it adds a little more lobster depth when you want the dish to feel extra special.
For a bigger seafood-table mood, serve it next to a Cajun seafood boil and keep the mac slightly milder so the lobster flavor still comes through.
Make-Ahead Lobster Mac and Cheese
The safest plan is to prep the lobster, cheese, and topping ahead, but assemble and bake the pasta fresh when possible. That gives you the creamiest sauce and the most tender lobster.
For hosting, the goal is to reduce last-minute work without sacrificing the fresh-baked texture.
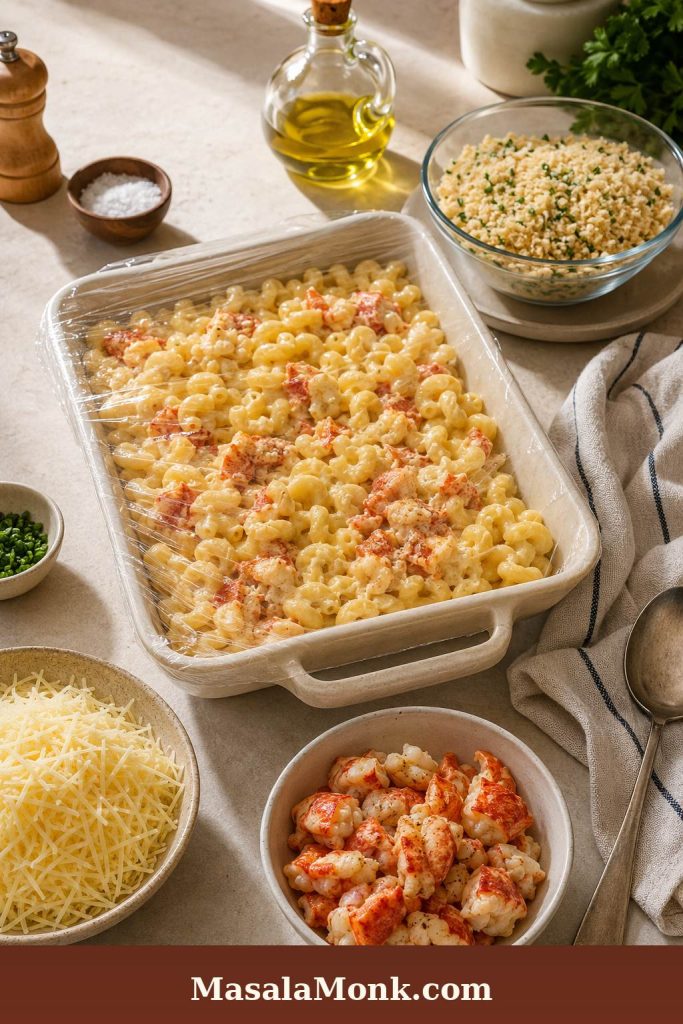
Recommended Make-Ahead Method
- Grate the cheese up to 1 day ahead.
- Cook and chop the lobster up to 1 day ahead.
- Mix the panko or Ritz topping ahead and refrigerate it separately.
- Cook the pasta and make the sauce closer to baking time for the best texture.
- Assemble and bake just before serving.
For guests, prepping the parts early and baking the pan fresh is the sweet spot: less last-minute work, but still a creamy center and tender lobster.
If You Need to Assemble It Ahead
If you need to assemble the whole dish ahead, transfer the pasta, sauce, and lobster to the baking dish, but keep the topping separate. Cover and refrigerate for up to 24 hours. Before baking, let the dish sit at room temperature for about 30 minutes while the oven heats.
Bake covered at 350°F / 175°C until warmed through, then uncover, add the topping, and continue baking until golden. Add a splash of milk or cream if the pasta looks dry before baking.
Fully baking, chilling, and rebaking the whole pan is less ideal for a special meal because the lobster and sauce both lose some tenderness. It can work for leftovers, but fresh assembly gives the best texture.
Planning leftovers too? See how to store and reheat lobster mac and cheese.
How to Store and Reheat Lobster Mac and Cheese
This mac is at its best when it is freshly baked and creamy, but leftovers can still be good if you reheat them gently and add moisture back into the sauce.
Storage
- Cool leftovers, then transfer to an airtight container.
- Refrigerate for up to 3 days, though the texture is best within the first 1 to 2 days. For general leftover safety timing, see the USDA leftover food safety guide.
- Keep the topping if already baked, but know it will soften in the fridge.
- Freezing is possible, but not ideal because creamy cheese sauces can separate after thawing.
Oven Reheating
Place leftovers in a baking dish and add a splash of milk or cream. Cover with foil and reheat at 300°F to 325°F / 150°C to 165°C until warmed through. Remove the foil for the last few minutes if you want to refresh the topping.
Microwave Reheating
For single servings, add a splash of milk or cream and microwave in short bursts, stirring gently between each one. Use lower power if possible. Heating it until boiling can toughen the lobster and make the sauce split.
Try to reheat only what you plan to eat. Repeated reheating is hard on both lobster and cheese sauce.
Lobster Mac and Cheese Variations
Once the base pan works, the variations become fun — not stressful experiments with expensive seafood. Keep the same sauce logic: gentle cheese heat, gently warmed seafood, and a sauce that stays slightly loose if the pan will be baked.
Use the base method first, then change one flavor direction at a time so the seafood and sauce stay balanced.
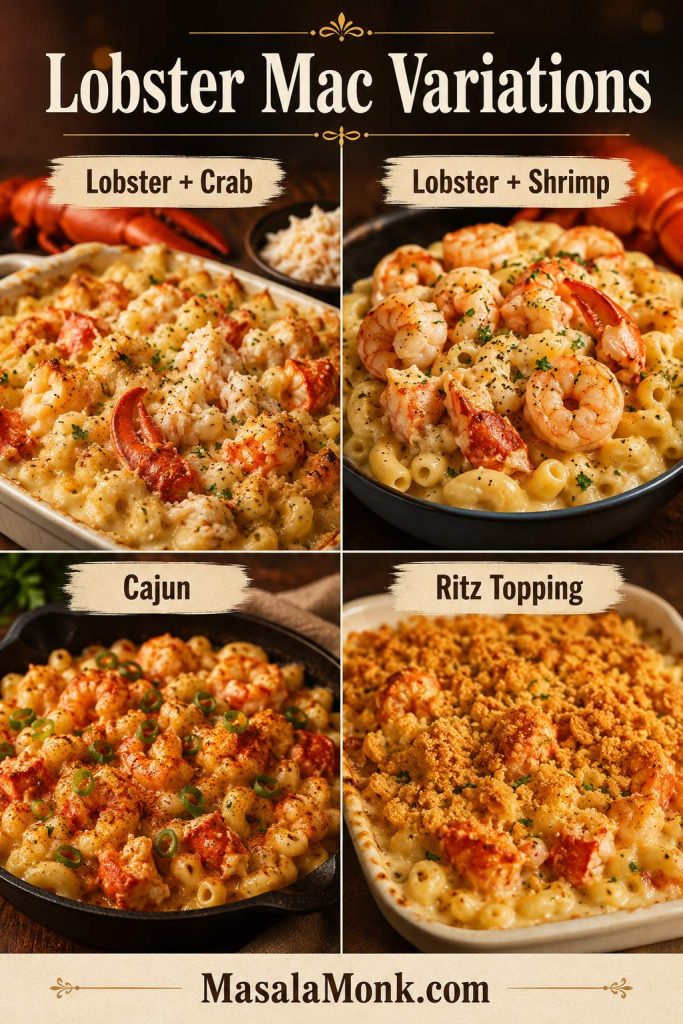
Lobster Crab Mac and Cheese
Choose this version when you want the pan to feel softer, sweeter, and more holiday-table than steakhouse. Use half lobster and half lump crab meat, then fold the crab in gently at the end so the pieces stay intact.
Lobster Shrimp Mac and Cheese
Choose this when you want a fuller seafood mac without buying more lobster. Add cooked medium or large shrimp near the end, and chop them only if they are very large so they stay juicy instead of tight.
Seafood Mac and Cheese
Use lobster, crab, and shrimp when you want the pan to feel more like a seafood feast than a side dish. Old Bay, Cajun seasoning, or a small pinch of cayenne can push it toward seafood-boil flavor.
Cajun Lobster Mac and Cheese
Choose this version when you want seafood-boil energy: a little bolder, a little warmer, and still creamy underneath. Pepper Jack can replace part of the Monterey Jack or Havarti if you want gentle heat.
Truffle Lobster Mac and Cheese
Choose this for steakhouse polish. Add a small amount of truffle butter or truffle oil at the end, and use restraint; too much truffle can take over before the lobster has a chance to shine.
Bacon Lobster Mac and Cheese
Keep bacon on top, where it gives smoky crunch without taking over the whole sauce. Stirring too much bacon into the cheese sauce can make the dish taste saltier and heavier than it needs to be.
Ritz Cracker Topping
Choose Ritz when you want buttery, nostalgic holiday-casserole flavor. The crumbs brown beautifully and make the top taste richer than panko.
Extra Creamy Stovetop Lobster Mac
Choose stovetop when sauce texture matters more than a baked crust. Make the sauce, add the pasta and lobster, and serve immediately with toasted buttered panko on top.
What to Serve With Lobster Mac and Cheese
This dish is rich, so the right sides either make the meal feel more special or cut through the creaminess with freshness.
For the most balanced table, pair the creamy pasta with something crisp, green, lemony, roasted, or simply cooked.
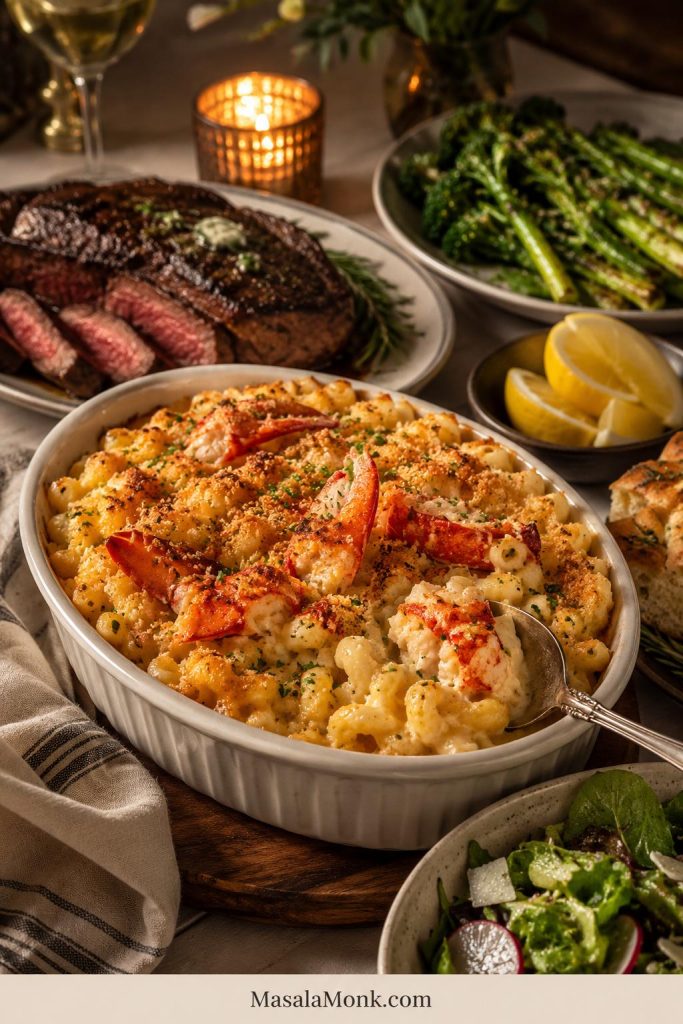
- Steak or roast beef for a steakhouse-style dinner
- Roasted carrots or asparagus with lemon
- Sourdough focaccia, garlic bread, or soft dinner rolls
- Simple green salad with vinaigrette
- Roasted broccoli or broccolini
- Tomato cucumber salad
- Roasted Brussels sprouts
- Holiday mains like turkey, prime rib, or ham
If you want a lighter seafood main beside a smaller scoop of mac, baked tilapia keeps the plate from feeling too heavy. For a full seafood dinner, pair smaller portions with lobster bisque and something bright on the side.
For a lighter starter before a rich pan of lobster mac, tomato soup, cucumber salad, or a bright vinaigrette salad works better than adding another heavy cream-based dish.
Homemade vs Frozen Lobster Mac and Cheese
Frozen and prepared lobster mac and cheese can be convenient, especially from grocery stores like Costco, Whole Foods, or Aldi. Homemade gives you more control over the lobster pieces, cheese blend, sauce texture, and topping.
The biggest difference is the lobster. In a homemade pan, the pieces can stay larger and sweeter instead of disappearing into the sauce. To improve a store-bought version, add a splash of cream, a handful of freshly grated cheese, extra lobster if you have it, and a fresh buttery breadcrumb topping.
Troubleshooting Lobster Mac and Cheese
If something feels off, it is usually fixable. Most problems come down to heat, moisture, or timing.
Use the guide below as the quick fix map before you adjust the sauce, seafood, or topping.
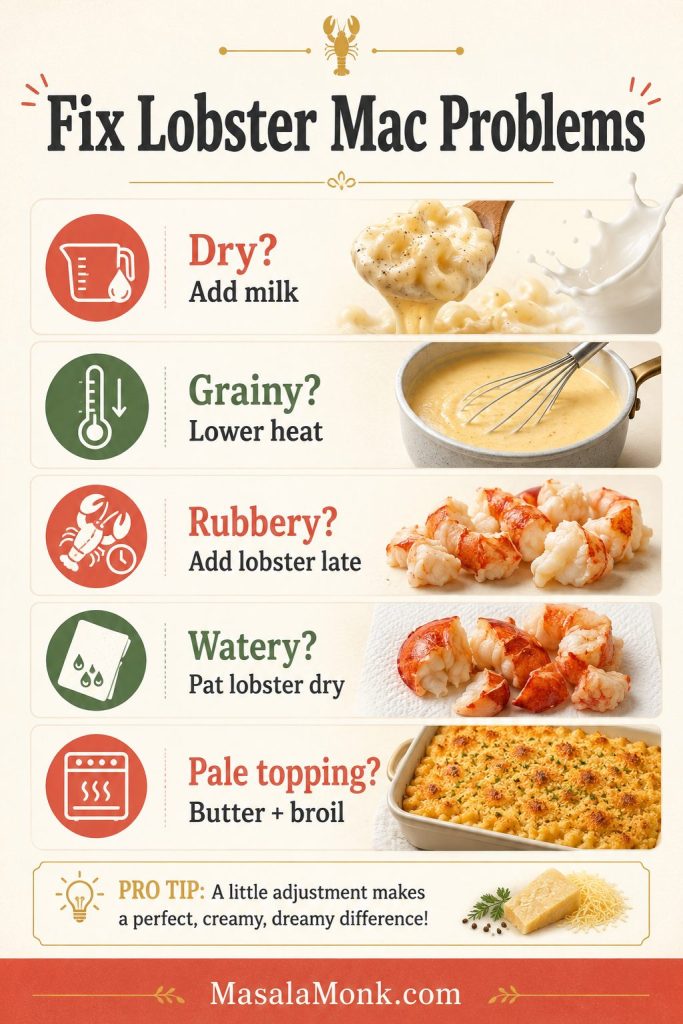
| Problem | Likely Cause | Fix |
|---|---|---|
| Mac and cheese is dry | Not enough sauce, pasta overcooked, or baked too long | Add more milk before baking and pull the dish when edges bubble. |
| Cheese sauce is grainy | Cheese was overheated or pre-shredded cheese was used | Add cheese off heat and use freshly grated cheese next time. |
| Cheese sauce is oily | Heat was too high or cheese separated | Lower the heat, add cheese gradually, and avoid boiling the sauce. |
| Lobster is rubbery | Lobster was overcooked or baked too long | Cook lobster gently, add it late, and bake briefly. |
| Sauce is watery | Frozen lobster was not drained or sauce was too thin | Pat lobster dry and simmer the sauce until it lightly coats a spoon. |
| Mac tastes bland | Not enough salt, mustard, or seasoning | Season the sauce before adding pasta; use Dijon, garlic powder, and a little seafood seasoning. |
| Topping is pale | Not enough butter or too little oven time | Use buttered crumbs and broil briefly at the end. |
| Topping burns before center is hot | Oven too hot or topping added too early for make-ahead bake | Bake covered first, then add topping near the end. |
Back to recipe card · Back to quick answer
FAQ
What is the best cheese for lobster mac and cheese?
Use white cheddar, fontina or Gruyere, Monterey Jack or Havarti, and a little parmesan. White cheddar gives flavor, the smoother cheeses keep the sauce creamy, and parmesan adds salty depth.
Do lobster tails work in mac and cheese?
Yes. Lobster tails give you large, impressive pieces. Cook them gently until opaque, white, and just firm, then chop the meat and add it after the sauce is ready.
Should lobster be cooked before adding it?
Yes. Cook the lobster gently first, then let it warm through in the sauce. The oven should not be responsible for cooking raw lobster inside the casserole.
How much lobster do I need per person?
For this recipe, 12 to 16 oz / 340 to 454 g cooked lobster meat gives about 1.5 to 2 oz lobster per main-dish serving, or less if served as a holiday side. Use 16 oz if you want visible lobster in every scoop.
How do you keep baked lobster mac from drying out?
Use enough sauce, cook the pasta 2 minutes short of al dente, melt the cheese gently, and pull the pan while the center still looks creamy. The pasta should look slightly loose before it goes into the oven.
Why did my cheese sauce turn grainy?
Cheese sauce usually turns grainy when the cheese is overheated or when pre-shredded cheese is used. Lower the heat or turn it off before adding cheese, and stir in freshly grated cheese a handful at a time.
What is the best make-ahead method?
Prep the components ahead and bake fresh. Grate the cheese, cook the lobster, and prepare the topping in advance. If assembling the whole dish ahead, keep the topping separate and add it near the end of baking.
Is frozen lobster meat okay?
Yes. Thaw frozen lobster meat overnight in the refrigerator, drain it well, and pat it dry before adding it. Extra moisture can make the sauce watery.
Can I use imitation lobster or imitation crab?
You can, but the flavor and texture will be different from real lobster. Add imitation lobster or imitation crab near the end just to warm through.
Is stovetop lobster mac better than baked?
Stovetop lobster mac is usually creamier because it avoids oven time. Baked lobster mac gives you a crisp topping and bubbling casserole texture. Choose stovetop for maximum creaminess and baked for special-occasion presentation.
What pasta shape works best?
Cavatappi is one of the best choices because the curls hold sauce and make the finished pan look restaurant-style. Elbow macaroni, shells, and other short pasta shapes also work well.
Can you freeze lobster mac and cheese?
You can freeze it, but it is not ideal. Creamy cheese sauces can separate after thawing, and lobster can become tougher when reheated. Thaw overnight, add milk or cream, cover, and reheat gently.
How do I turn this into seafood mac and cheese?
Use a mix of lobster, crab, and shrimp. Keep the seafood cooked gently and add it after the sauce is ready so it stays tender. Add Old Bay or Cajun seasoning for a stronger seafood-style flavor.
Lobster mac and cheese is rich, cozy, and impressive, but it should not feel risky. Once you know the three main rules — keep the sauce loose, melt the cheese gently, and add the lobster after the sauce is ready — the dish becomes much easier. Serve it bubbling from the oven, or keep it stovetop and extra silky. Either way, the goal is the same: tender lobster, smooth sauce, buttery crumbs, and a first scoop that makes the whole pan feel worth the occasion.