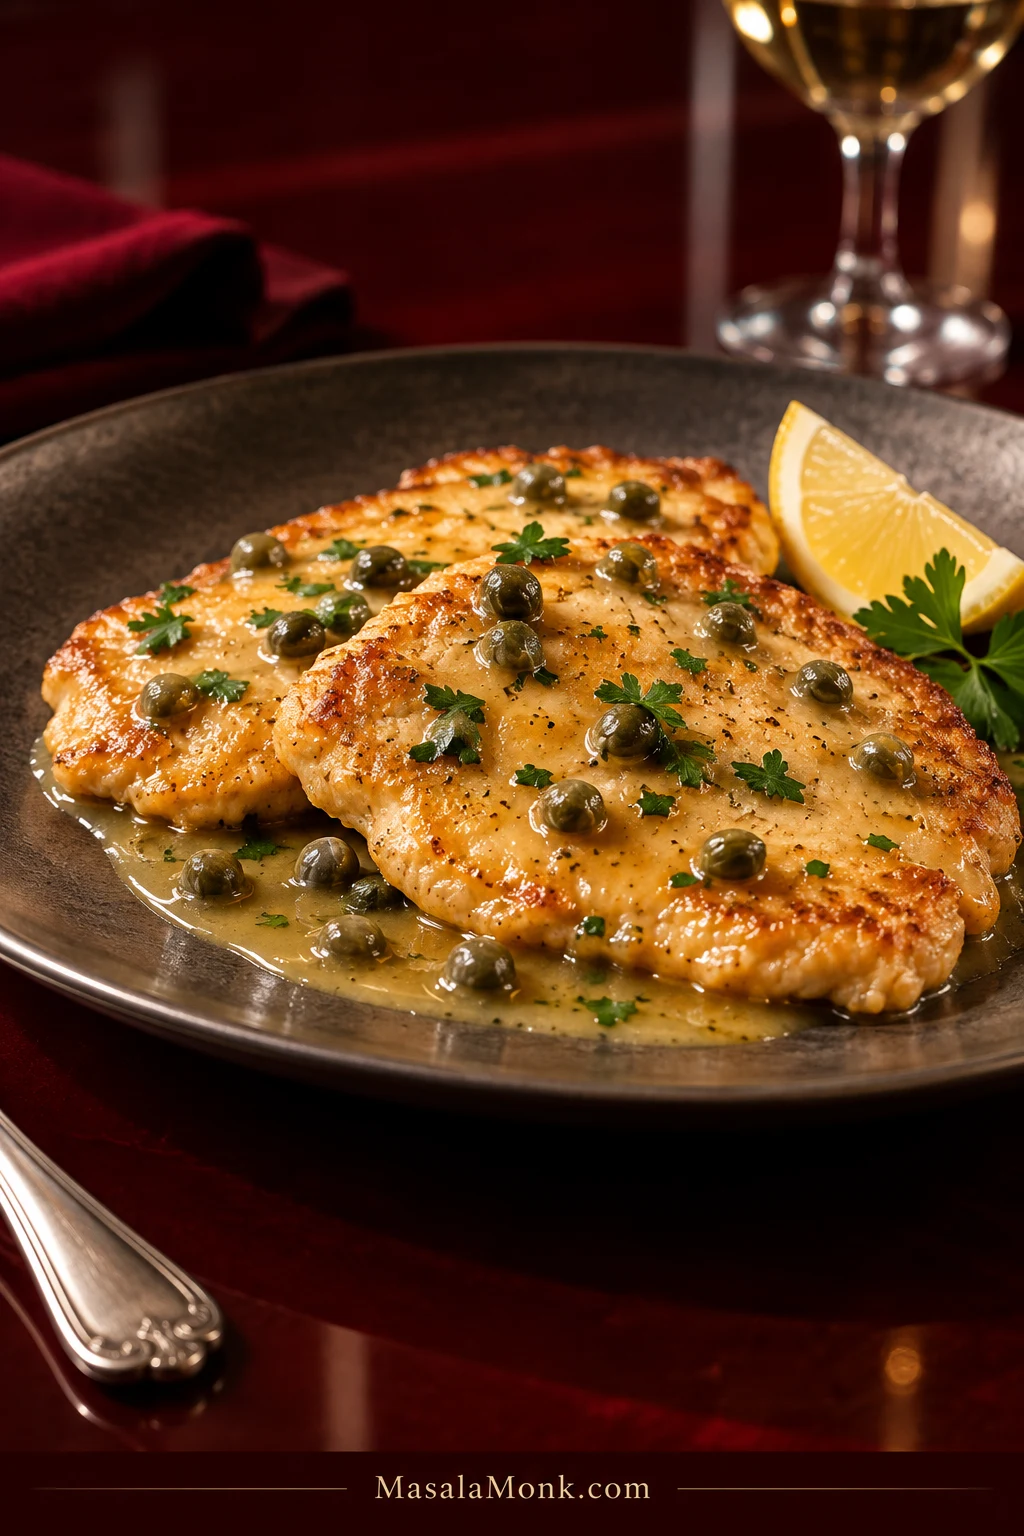
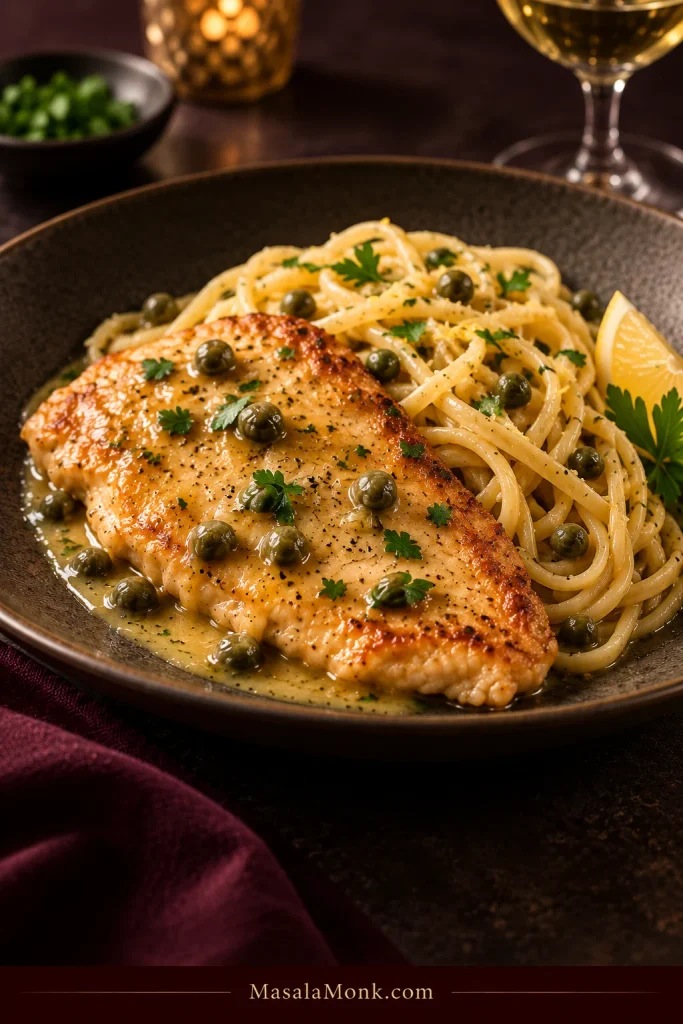
Chicken piccata gives you thin golden cutlets and a silky lemon-butter-caper sauce in about half an hour. It feels like a proper sit-down dinner, even though everything happens in one skillet.
The chicken stays tender, the edges pick up real color, and the sauce tastes clearly of lemon without becoming sharply sour. Any sauce left in the skillet is exactly what you want crusty bread or mashed potatoes to catch.
Piccata is simple until the sauce goes wrong. Stop reducing too soon and it stays watery; keep the pan too hot and the sauce can turn greasy; push the lemon too far and it becomes sharply sour. This version is built around recognizing those moments as you cook.
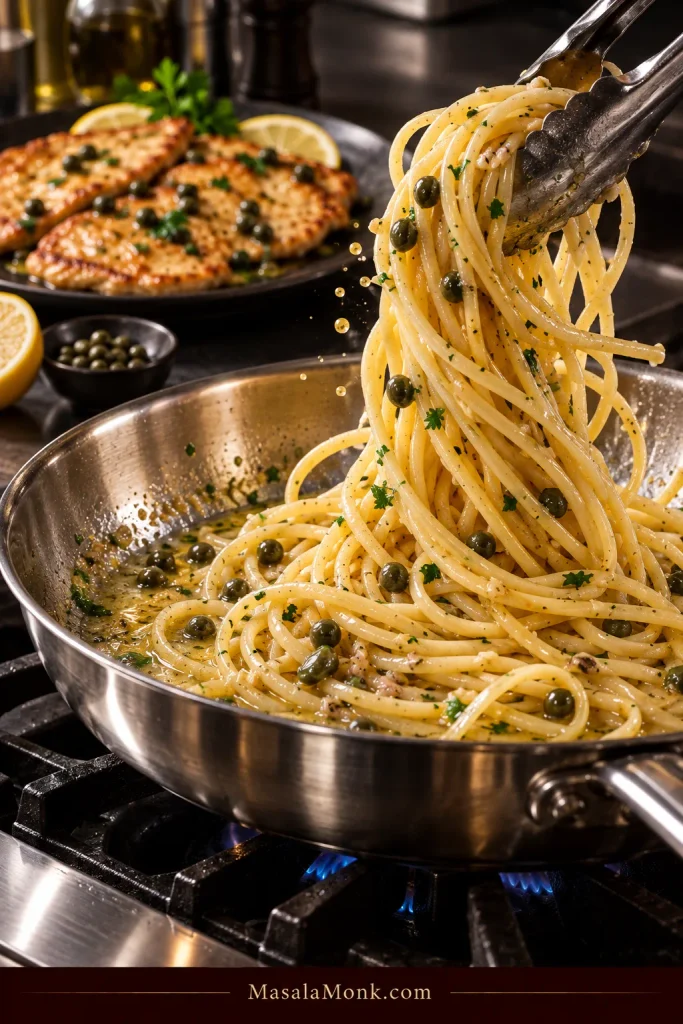
If pasta is part of dinner, there is a larger sauce formula too. Noodles need more sauce—not simply twice as much lemon.
Thin chicken. Reduce first. Butter gently. Adjust the lemon last.
Once those four things make sense, the dish becomes much easier to read while you cook.
Chicken Piccata Recipe
Tender, lightly floured chicken cutlets with a bright lemon-butter-caper sauce. One skillet · 30–35 minutes · Serves 4.
Serves 4
Prep 15 minutes
Cook 15–20 minutes
Total 30–35 minutes
Equipment
12-inch / 30-cm skillet, preferably stainless steel; well-seasoned cast iron also works
Meat mallet or rolling pin
Shallow dish for flour
Tongs or a thin spatula
Instant-read thermometer
Ingredients
For the Chicken
1½ lb / 680 g boneless, skinless chicken breasts, usually enough for 4 large or 6 smaller cutlets
About 1 tsp kosher salt, adjusting for the salt you use
½ tsp freshly ground black pepper
½ cup / 60 g all-purpose flour, for dredging; some will be left over
Up to 3 tbsp / 45 ml olive oil, divided and used only as needed
For the Lemon Butter Caper Sauce
1 small shallot / 30–40 g, finely chopped
2 garlic cloves, finely minced
½ cup / 120 ml dry white wine, such as Pinot Grigio or Sauvignon Blanc
½ cup / 120 ml low-sodium chicken broth
2 tbsp / 30 ml fresh lemon juice, plus up to 1 tbsp / 15 ml more to taste
½ tsp finely grated lemon zest
3 tbsp / about 25–30 g capers, drained
4 tbsp / 56 g cold unsalted butter, cut into small pieces
2 tbsp / about 8 g flat-leaf parsley, chopped
Method
Prepare and Brown the Chicken
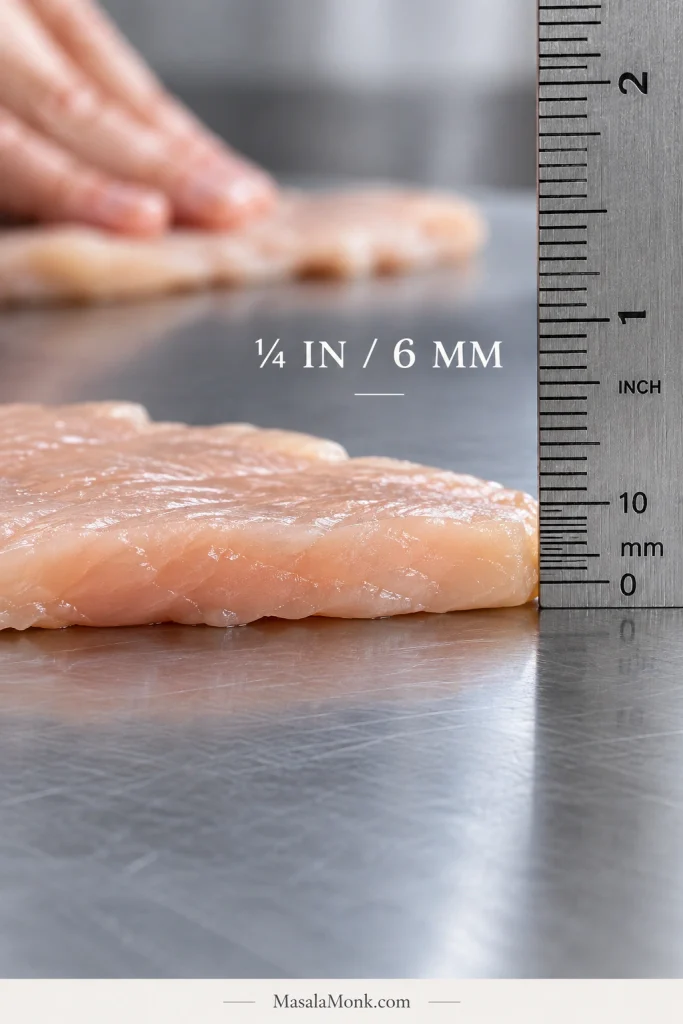
Prepare the chicken. Depending on their size, slice each thick breast horizontally into two or three cutlets. Pound any bulky spots until the pieces are about ¼ inch / 6 mm thick. Pat them very dry and season with salt and pepper. Keep the flour nearby, but wait to dredge until the skillet is almost ready.
Have the sauce ingredients ready. Measure the wine, broth and lemon juice. Drain the capers, cube the cold butter, chop the shallot and parsley, mince the garlic, and zest the lemon. Once the chicken leaves the skillet, things move quickly.
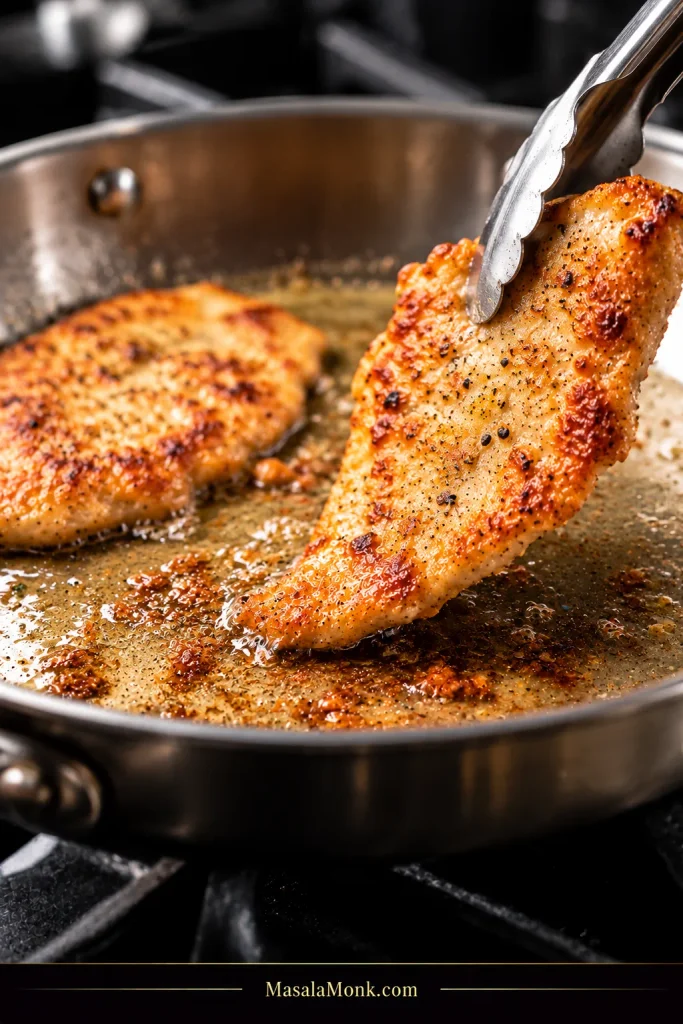
Dredge and brown the first side. Heat 2 tbsp / 30 ml olive oil over medium-high heat. Lightly dredge the chicken and shake off enough flour that you can still see the meat beneath it. When the oil shimmers but does not smoke, add the chicken without crowding the skillet. Cook for roughly 2–3 minutes, until deeply golden and easy to release.
Turn and finish the chicken. Cook the second side for about 1–2 minutes, using the clock only as a guide. Start checking early and cook until the thickest part reaches 165°F / 74°C. Transfer the cooked cutlets to a warm plate, work through the remaining batches, and add more oil only if the skillet becomes dry. Discard any flour left in the dredging dish after it has contacted the raw chicken.
Build the Lemon Butter Caper Sauce
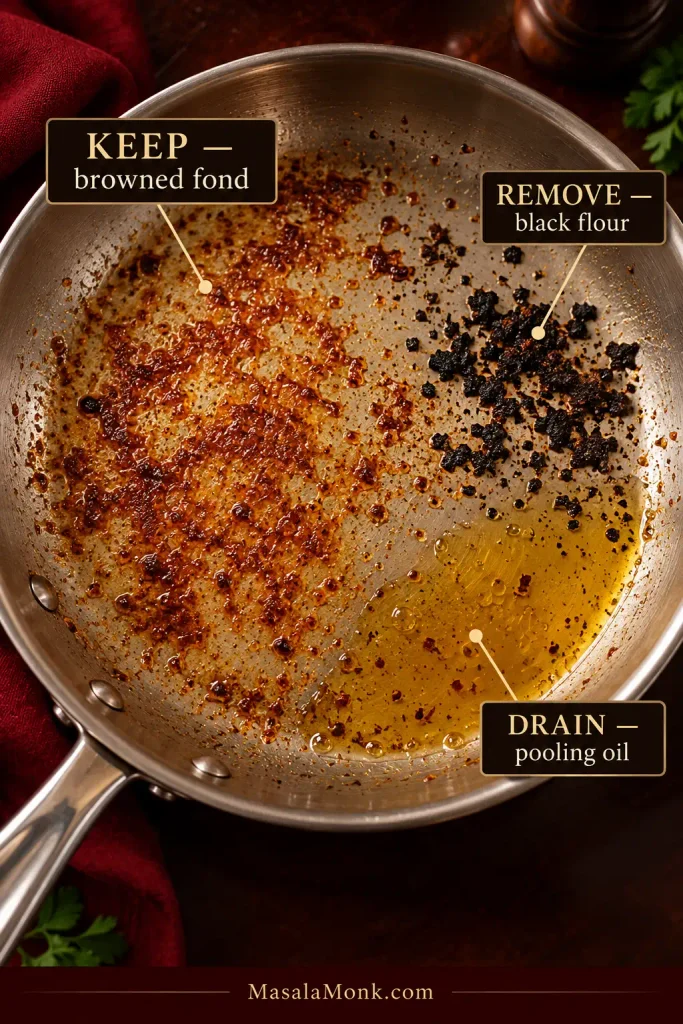
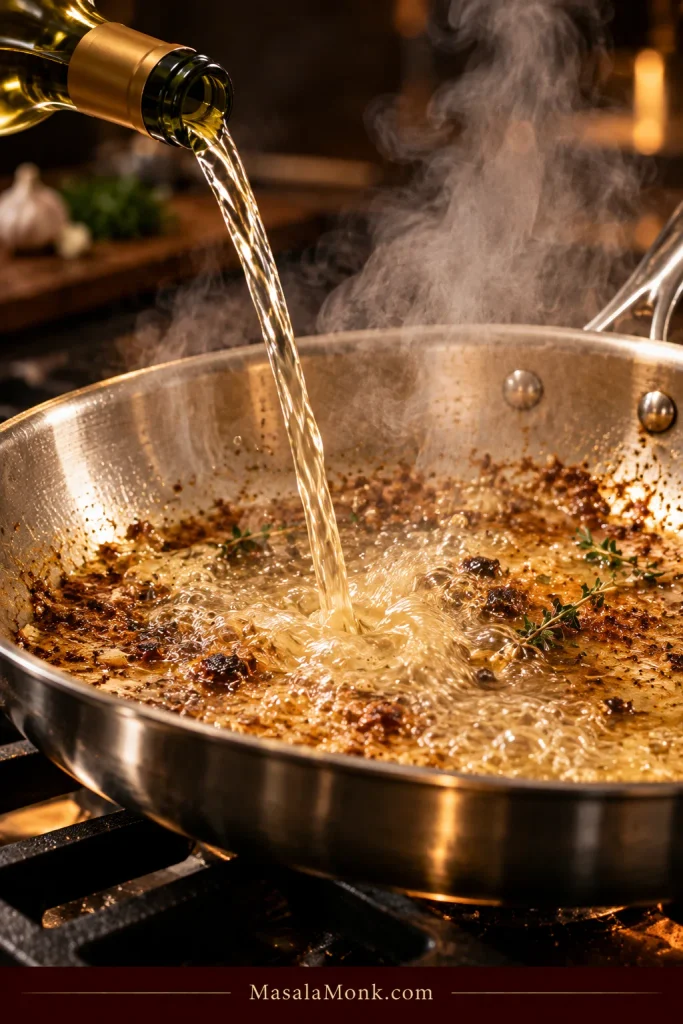
Read the skillet. Pour off any puddle of frying oil and remove black flour crumbs, but leave the browned fond. Lower the heat to medium, cook the shallot for 1–2 minutes, then add the garlic. As soon as it smells fragrant—usually after 20–30 seconds—pour in the wine. Don’t wait for the garlic to brown.
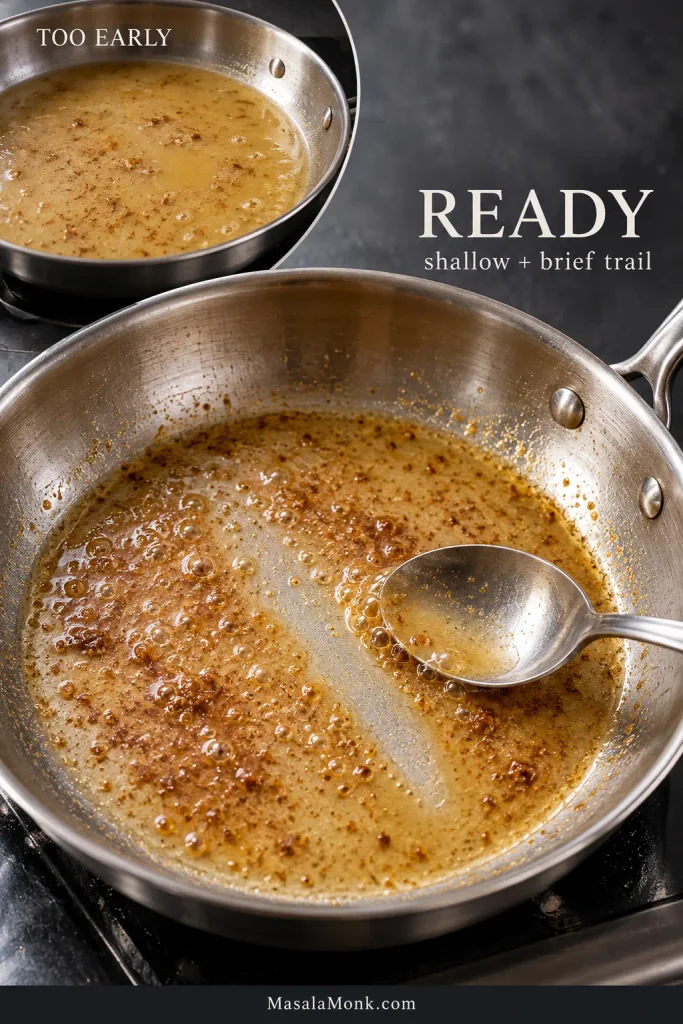
Reduce the wine, then the broth. Scrape the browned bits into the wine. At first the bottom of the skillet will look flooded; give it time. Once the wine has reduced by roughly two-thirds, add the broth and keep simmering. Drag a spoon across the pan. When it briefly leaves a trail before the liquid flows back together, you’re ready for the lemon.
Add the first lemon. Stir in 2 tbsp / 30 ml lemon juice, the zest and capers. Let the capers heat through and become fragrant.
Finish the Sauce and Serve
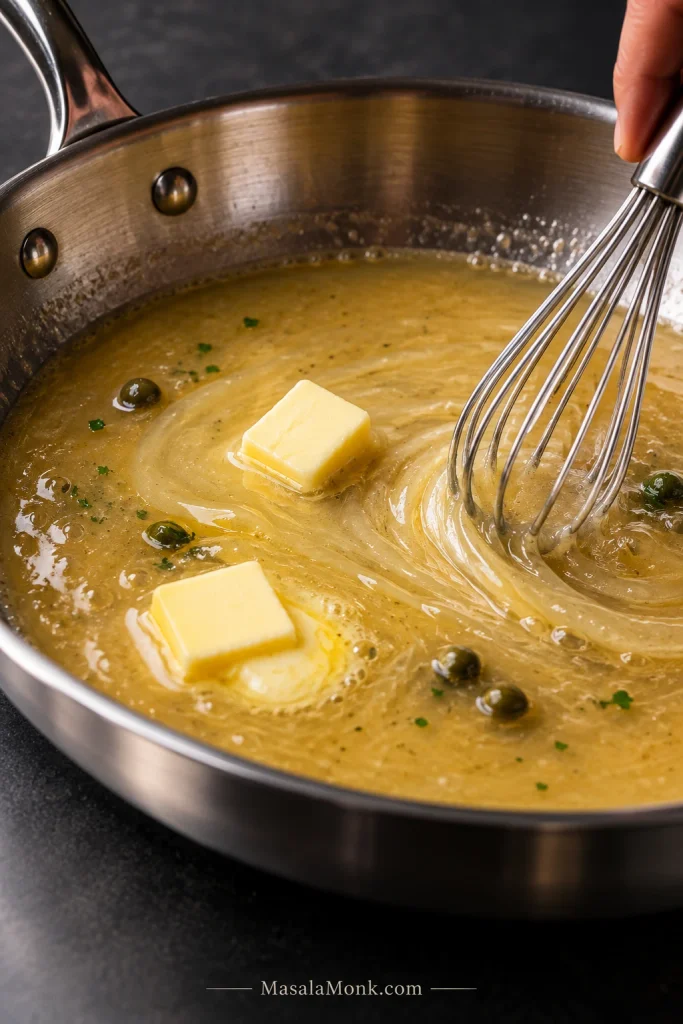
Let the pan calm down, then add butter. Take the skillet off direct heat and give the bubbling a few seconds to settle. Whisk or swirl in the cold butter a few pieces at a time until the sauce comes together.
Taste before adding more lemon. Stir in the parsley. Add the reserved lemon juice 1 teaspoon at a time, up to another 1 tbsp / 15 ml, until the sauce tastes bright without becoming sharply sour. Check the salt only now.
Bring everything together. For the crispest browned edges, leave the cooked cutlets out of the skillet and spoon the sauce over at serving. If you prefer the chicken fully coated, turn it briefly through the finished sauce—just long enough to coat it.
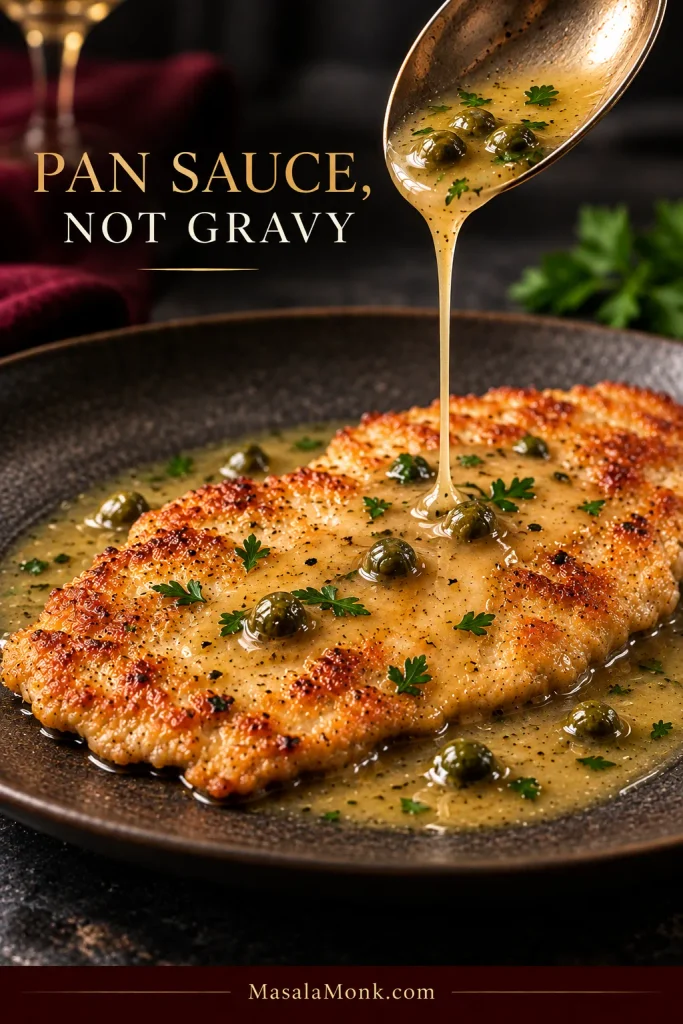
Think pan sauce, not gravy. It should pour freely from a spoon and cling only lightly to the chicken. For the reduction and emulsion cues, go to the glossy sauce guide.
Small Choices That Change the Result
Salt: kosher salts vary in density. Season the chicken evenly, then make the final salt adjustment only after the broth and capers have reduced into the sauce.
Shallot: it adds gentle sweetness and a fuller savory base, but the sauce still works without it.
Wine: use a crisp, dry white such as Pinot Grigio or Sauvignon Blanc. Avoid sweet wine and salty bottled cooking wine.
Capers: use the small jarred buds rather than the much larger caper berries. If they taste especially salty, rinse them briefly under cool water and drain well.
What to Watch While You Cook
If the recipe card gives you everything you need, you can stop there. The sections below are for the moments when you want to understand the pan more closely, make extra sauce for pasta, or fix something that doesn’t look right.
Aim for about ¼ inch / 6 mm thick. Store-bought cutlets are absolutely fine. If one end is noticeably thicker, give it a few gentle taps so the pieces cook at roughly the same speed.
Check the thickest part after pounding rather than the naturally tapered edge. The goal is an evenly thin chicken piccata cutlet, so one section does not finish long before another.
Don’t chase perfect geometry. You just don’t want one paper-thin end drying out while a thick middle is still catching up.
Pat the chicken very dry before it touches the flour. Surface moisture has to steam away before useful browning can begin, and it can turn the flour tacky if the dredged cutlets sit around for too long.
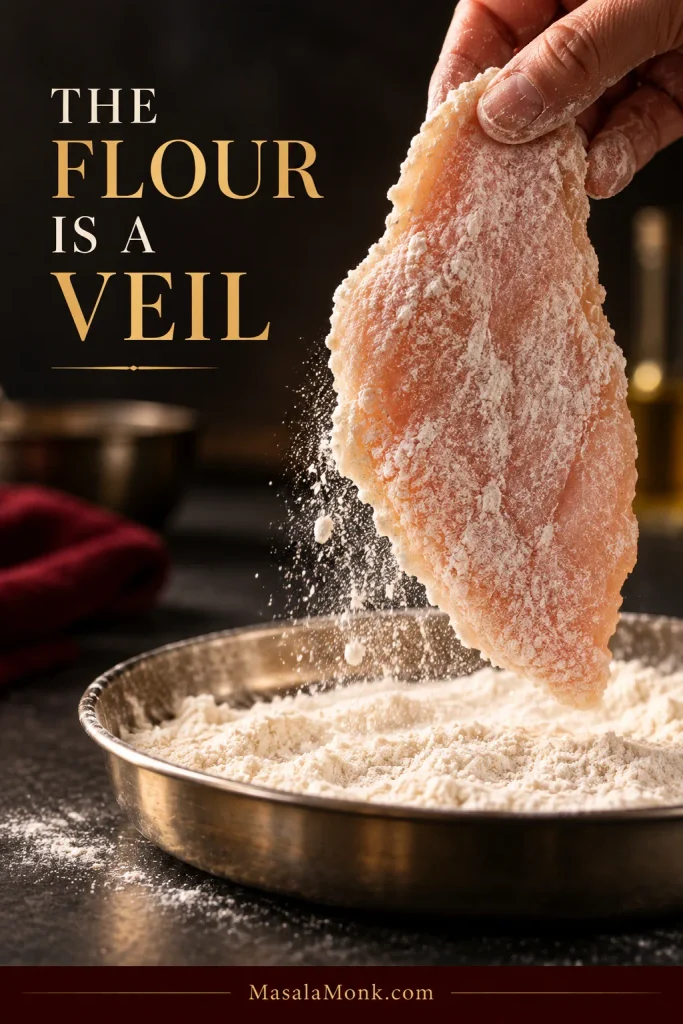
The Flour Is a Veil, Not Breading
Shake off enough flour that you can still see the chicken beneath it. That’s all you need.
Give the cutlet a light shake before it reaches the skillet. Loose flour should fall away; flour packed into folds and edges is the coating most likely to turn pasty instead of crisp.
Use an instant-read thermometer rather than judging doneness by color; the thickest part should reach 165°F / 74°C, the endpoint listed for poultry in the USDA safe temperature chart.
Look for Deep Golden Browning Before You Turn
The clock is only a guide here; the first side is ready when the coating has real color and the cutlet releases without a fight.
Peek at one edge before trying to turn the whole cutlet. When the underside has developed an even golden crust, it should release with much less persuasion from the skillet.
Browned fond. Those caramelized bits dissolve into the wine and carry the chicken’s browned flavor into the sauce.
Remove
Black flour crumbs. If they smell burnt, they will taste burnt too.
Drain
Pooling oil. A thin film is fine. A puddle can make the finished sauce greasy.
Deglaze the Fond While the Wine Is Plentiful
This is the point where the browned fond stops being residue and becomes part of the sauce.
Once the wine is in, work across the skillet while there is still enough liquid to carry the loosened fond. The aim is to dissolve those brown bits into the sauce rather than simply scrape them loose.
How to Get Glossy Piccata Sauce
At first the wine will flood the bottom of the pan. Let it cook down until it sits shallow around the browned bits instead of sloshing from side to side. Add the broth and let that concentrate too.
By the time the lemon goes in, the sauce should already taste savory and concentrated.
Give the skillet a few seconds to calm down before adding the cold butter. You want gentle heat now, not an angry boil.
Keep the pan moving as the butter melts; the sauce should turn uniform and glossy rather than separating into yellow fat droplets.
The whisk should leave a brief wake without streaks of yellow fat collecting around it. If hard bubbling returns, pause and let the pan settle before adding the next pieces of cold butter.
Only then decide whether it needs more lemon. You should taste it clearly, but it shouldn’t make you squint.
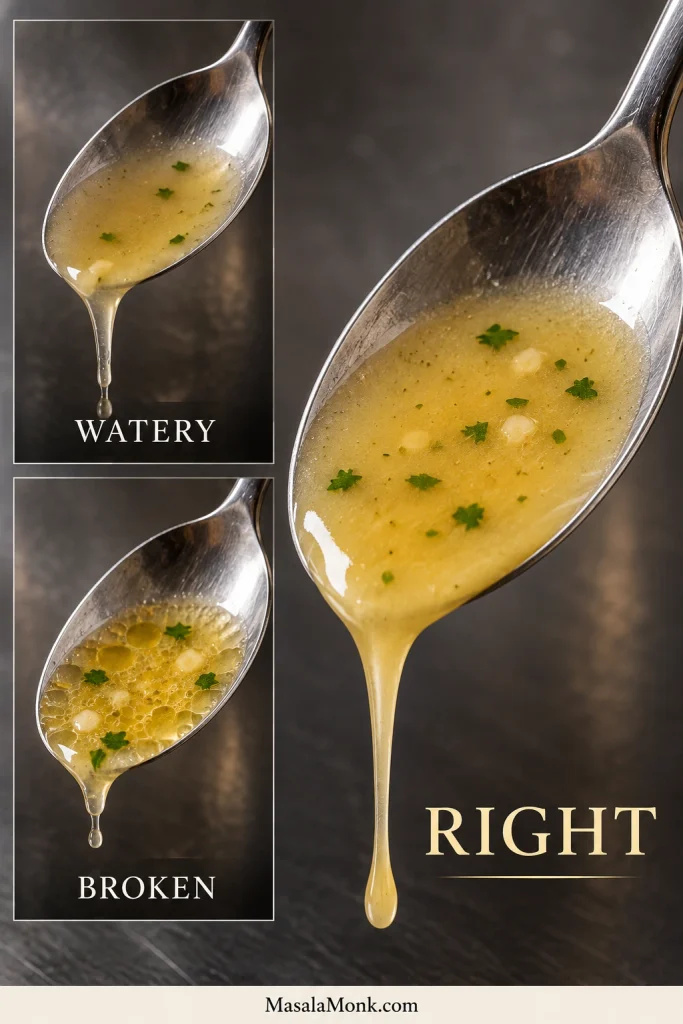
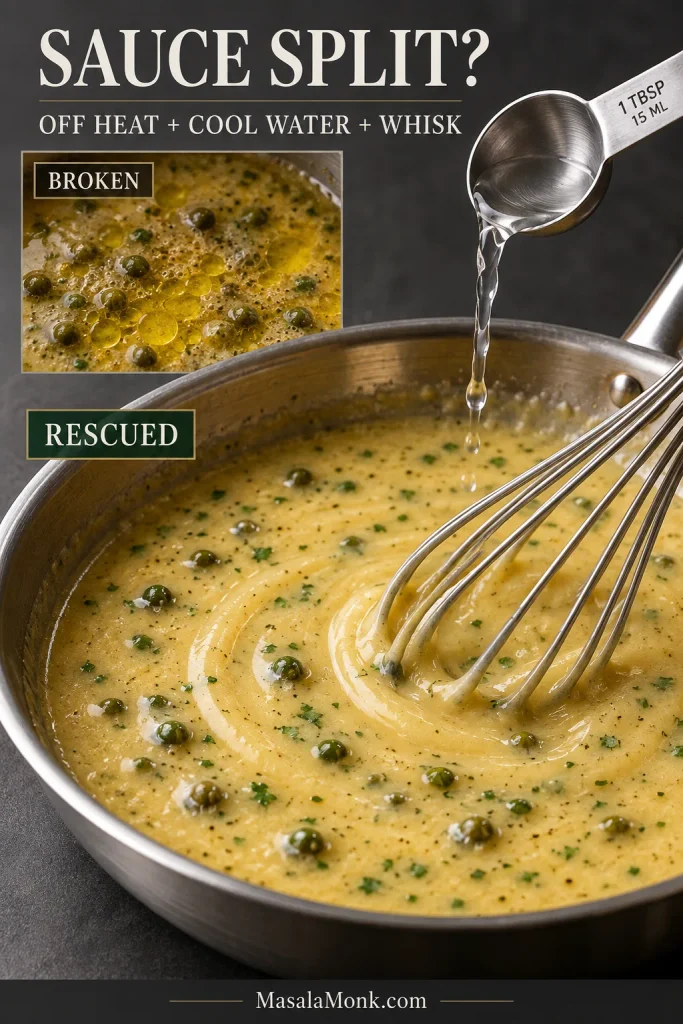
Three Sauce States to Recognize
Watery: thin like broth and immediately runs away from the spoon.
Right: smooth, fluid and just thick enough to cling lightly to the chicken.
Broken: yellow fat forms droplets or an oily layer over thinner liquid.
Serving Chicken Piccata With Pasta? Make More Sauce
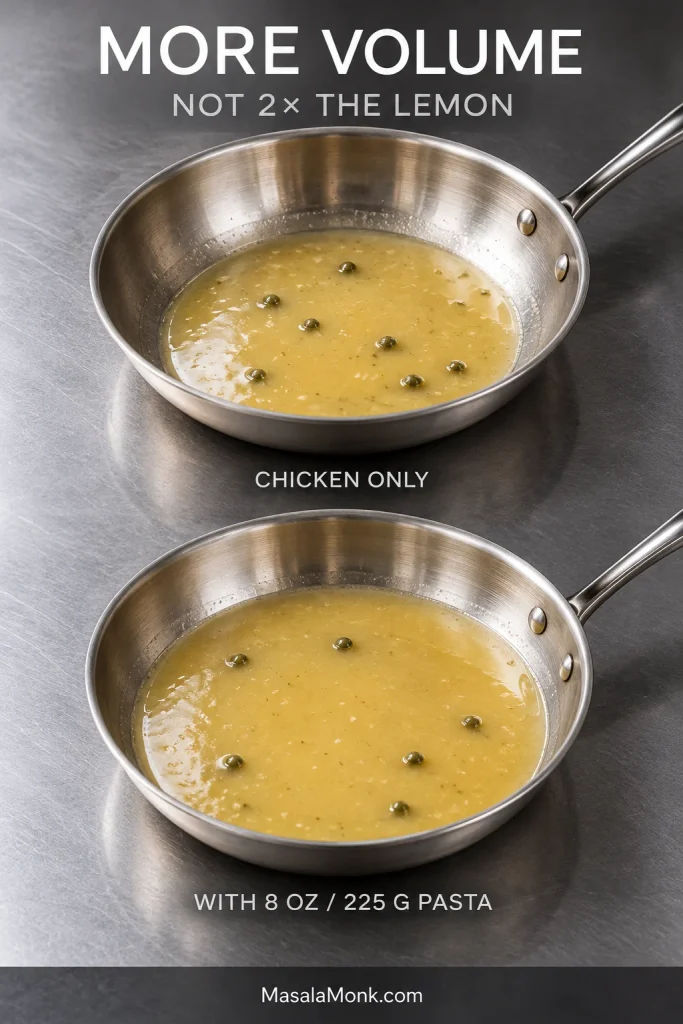
For 8 oz / 225 g pasta, use the larger sauce formula below. Pasta needs substantially more liquid, while the lemon and capers should rise much more modestly.
The finished pasta should look glossy and lightly dressed, not surrounded by a deep pool of sauce. Enough sauce still needs to remain, however, to season the chicken once everything reaches the plate.
A normal batch looks generous around four chicken cutlets. Add pasta and it disappears surprisingly fast.
Angel hair cooks in only a few minutes, so don’t drop it until the sauce is already underway. Thin spaghetti gives you a little more breathing room; linguine gives you more bite.
Scale the Sauce Without Doubling the Lemon
Ingredient
Chicken only
Chicken + 8 oz / 225 g pasta
Dry white wine
½ cup / 120 ml
¾ cup / 180 ml
Low-sodium chicken broth
½ cup / 120 ml
1 cup / 240 ml
Fresh lemon juice
2 tbsp / 30 ml + up to 1 tbsp / 15 ml to taste
2½ tbsp / about 38 ml + up to 1 tbsp / 15 ml to taste
Capers
3 tbsp / about 25–30 g
3½ tbsp / about 30–35 g
Cold unsalted butter
4 tbsp / 56 g
5 tbsp / 70 g
Reserved pasta water
—
Reserve ½ cup / 120 ml; use only as needed
Expect the larger batch to take a little longer to reduce; more liquid simply needs more time. Cook it until it reaches the same light body as the standard sauce rather than following the smaller batch’s clock.
The pasta pan should look fuller, not thicker. If the larger batch is already syrupy before the noodles go in, it has reduced too far to coat them lightly and evenly.
Toss the Pasta, Then Plate the Chicken
Reserve ½ cup / 120 ml pasta water before draining. Keep the chicken on its plate while you toss the drained pasta briefly through part of the sauce. Loosen it with pasta water only if needed, a tablespoon or two at a time, then plate the chicken over or beside the pasta and spoon the remaining capers and sauce over the top.
If the sauce doesn’t look right, don’t start adding things at random. What you see usually tells you what happened.
When Chicken Piccata Goes Wrong
What you notice
Likely cause
What to do
Watery sauce
Wine or broth was not reduced enough
Reduce before adding butter
Oily or split sauce
Pan too hot, butter added too quickly or excess frying oil remained
Off heat + 1 tbsp / 15 ml cool water + whisk
Too sour
Too much lemon or too much reduction after acid was added
Add unsalted broth and a little butter
Too salty
Salty broth, capers and reduction compounded
Dilute with unsalted broth or water
Lemony but still bland
Wine and broth were not concentrated enough, or the fond was lost
Build the savory base instead of adding more lemon
Bitter or burnt
Burnt garlic or black flour residue
If strongly bitter, restart the sauce in a clean skillet
Pale chicken
Wet chicken, cool pan or crowding
Dry well and brown in batches
Gummy coating
Too much flour or dredged too early
Use less flour and dredge last
Soft coating
Chicken sat in the sauce too long
Spoon sauce over at serving
Two sauce problems deserve a slower hand. For a split sauce, get the skillet completely off the heat and whisk or swirl in 1 tbsp / 15 ml cool water. If it starts coming back together but still looks oily, add another teaspoon.
Too sour? Start with a small splash of unsalted broth and a little butter, warm gently, then taste again. Too salty? Dilute with unsalted broth or water before adding anything else. Skip the sugar; piccata should stay savory. If you need to compare the sauce visually again, return to the glossy sauce guide.
No Wine, No Gluten—or No Capers?
No wine: use 1 cup / 240 ml low-sodium chicken broth total. Add the first ½ cup / 120 ml where the wine normally goes and reduce it the same way, then add the remaining ½ cup / 120 ml and continue with the recipe.
After the broth has concentrated, 1 tsp / 5 ml white wine vinegar can restore some of the acidity the wine would have brought; then be conservative with the optional finishing lemon.
Gluten-free: white rice flour gives a particularly light dredge. A 1:1 gluten-free all-purpose blend also works.
No capers: you can leave them out. Finely chopped green olives can supply some briny saltiness, but they do not taste the same as capers, so start modestly and add more only after tasting.
If what you really want is bright lemony chicken without wine or capers, MasalaMonk’s lemon pepper chicken is the cleaner route rather than trying to turn piccata into a completely different dish.
What Goes With Chicken Piccata?
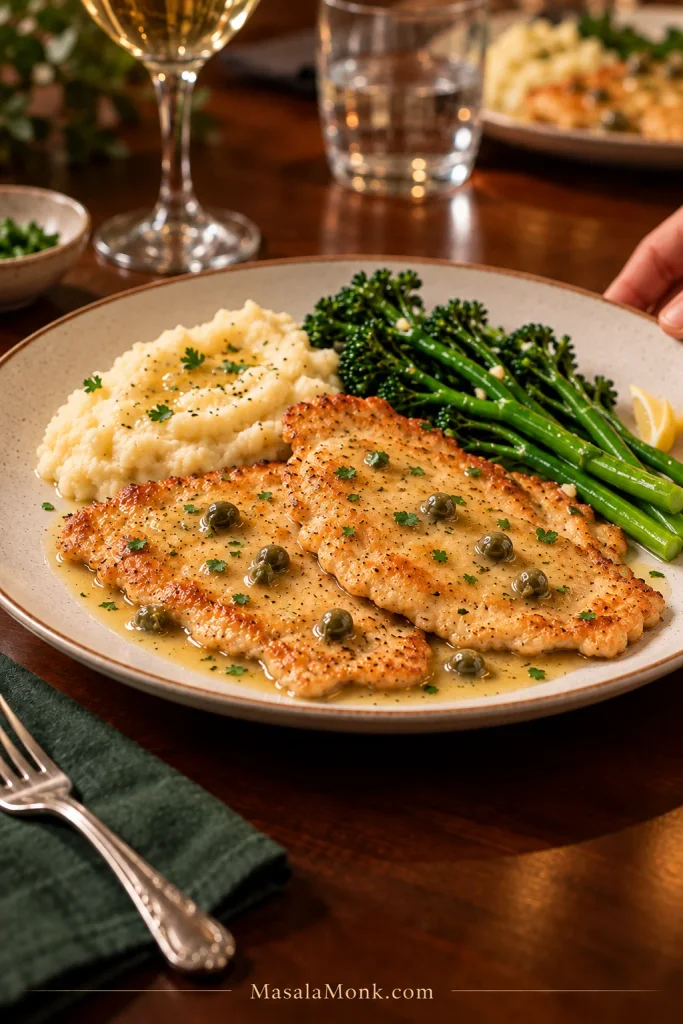
MasalaMonk’s creamy mashed potatoes give the lemon-butter sauce somewhere to settle and make the meal feel softer and richer.
For something greener, asparagus or broccolini need little more than salt and olive oil. Green beans almondine add crisp-tender beans and toasted almonds against the soft chicken and sauce.
A sharp leafy salad or cucumber-and-tomato salad works well when you want something fresh to cut through the butter.
Make It Ahead—or Save the Leftovers
Make ahead: slice and pound the chicken, then cover and refrigerate it until you’re ready to cook. You can also chop the shallot and parsley, measure the wine and broth, drain the capers, and zest and juice the lemon ahead of time. Leave the flour dredge until shortly before the chicken goes into the skillet so its surface stays dry enough to brown well.
Storage and Reheating
Refrigerate cooked leftovers promptly, ideally within 2 hours, in a covered shallow container. Use them within 3–4 days; the USDA leftovers guidance gives the same refrigerator window.
Reheat the chicken and sauce gently in a covered skillet with a splash of broth or water until the chicken reaches 165°F / 74°C. Chilled butter sauce can look a little separated as it warms; if that happens, take the pan off direct heat and swirl in a teaspoon or two of cool water.
The first time you make piccata, you may watch the sauce like a hawk. After a batch or two, the signs become familiar: chicken that releases when it’s properly browned, concentrated liquid, butter that settles smoothly, lemon that tastes bright instead of sharp. Then it becomes an easy skillet dinner that still feels special when it reaches the table.
Eggs Benedict looks calm and polished on a brunch plate, but the sauce is usually where the nerves begin. The muffins are toasting, the eggs are poaching, the butter is melting, and suddenly one small bowl of hollandaise can decide whether breakfast feels effortless or chaotic.
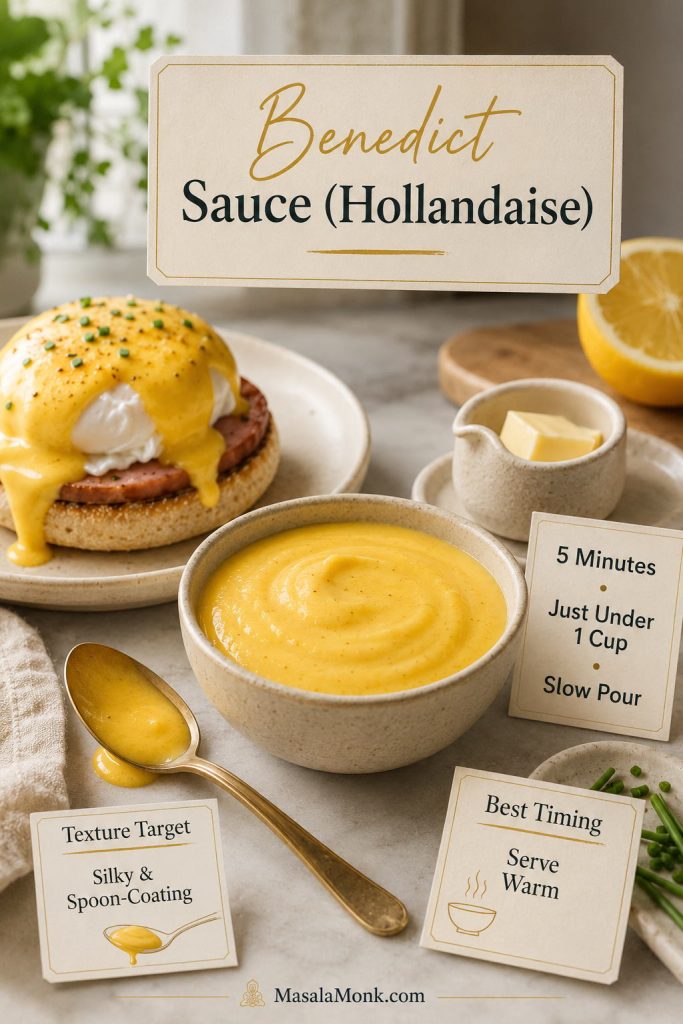
This easy Benedict sauce recipe keeps that moment simple. It makes a warm, buttery, lemony blender hollandaise in about 5 minutes, without standing over a double boiler or worrying that the sauce will split before the eggs are ready.
This is not just a fast hollandaise. It is a no-panic Benedict sauce guide with the cues that matter most: hot butter, a slow pour, the right glossy texture, the right amount for brunch, and a rescue plan if the sauce starts to split.
Already dealing with an oily or broken sauce? Jump to the troubleshooting guide and come back to the method once the sauce is stable.
Benedict sauce is hollandaise by its brunch name: warm, buttery, lemony, and built for poached eggs. Once the cues are clear, it stops feeling fragile and starts feeling like something you can actually trust on a busy brunch morning.
Benedict sauce is hollandaise sauce, the warm sauce traditionally served over Eggs Benedict and sometimes simply called Eggs Benedict sauce. It is made by emulsifying egg yolks, melted butter, lemon juice, salt, and a little cayenne or white pepper into a smooth, buttery sauce.
So if a restaurant menu, recipe card, or brunch guide says hollandaise, it is talking about the same sauce many home cooks mean when they search for Benedict sauce.
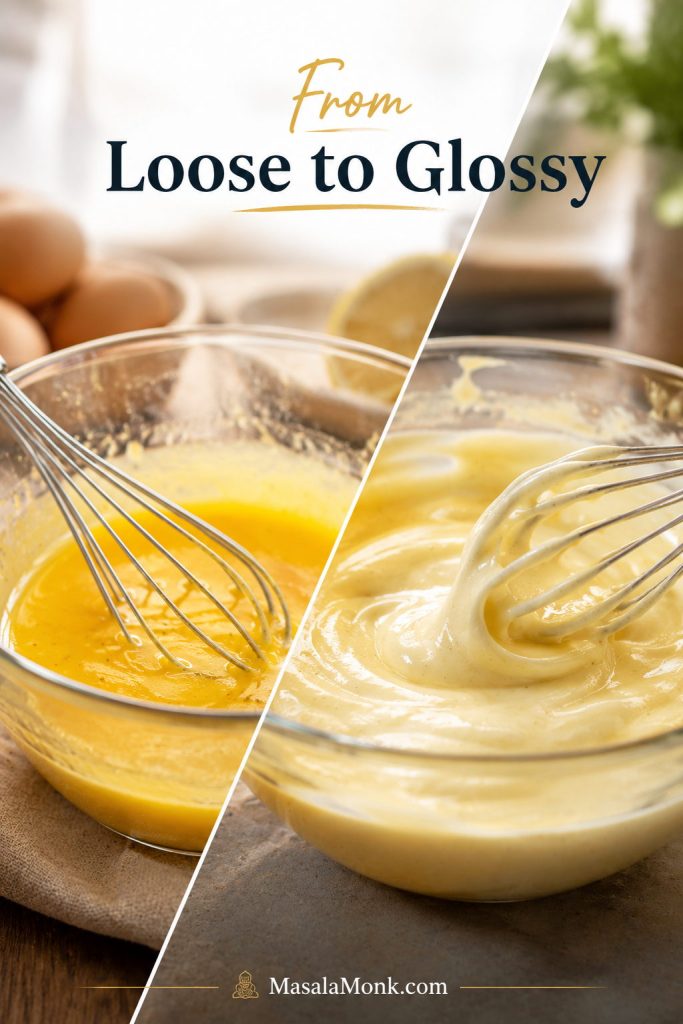
In the classic method, the yolks are whisked gently over heat while butter is slowly added. In this blender version, the machine does the whisking for you. Melted butter is streamed into seasoned yolks, and the mixture turns from loose yellow liquid into a pale, creamy sauce in minutes.
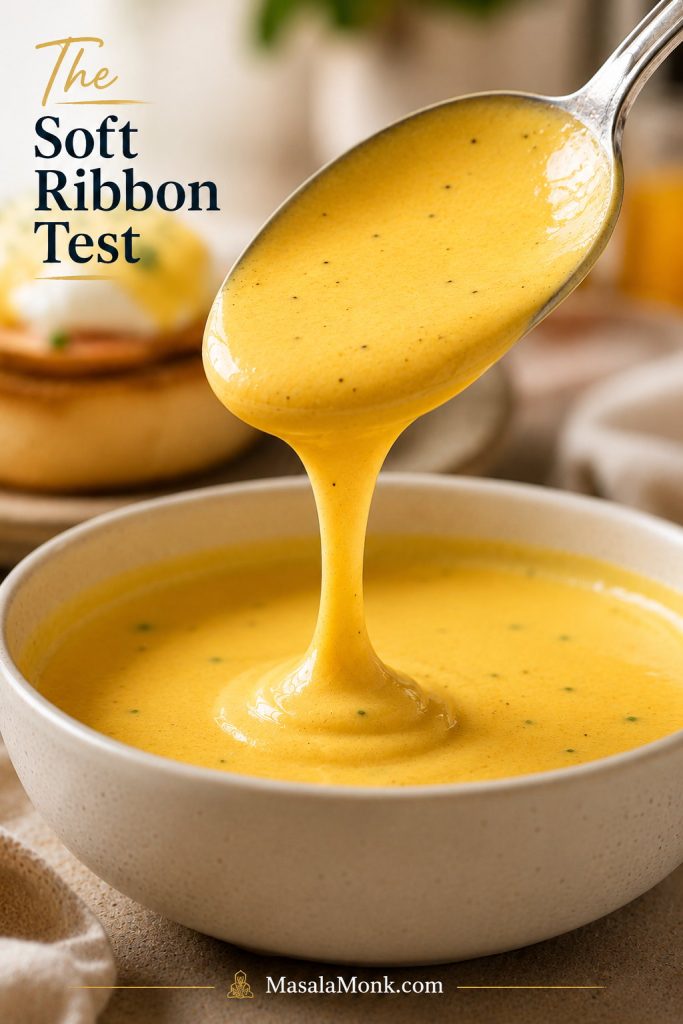
A good batch tastes rich, bright, and lightly tangy. It should fall in a soft ribbon and settle over poached eggs instead of sliding straight off like melted butter.
Benedict Sauce vs Hollandaise Sauce
The name changes with the setting. Restaurants and classic cookbooks usually call it hollandaise; at home, many people call it Benedict sauce because that is the dish they know and love. “Eggs Benedict sauce” is another everyday name for the same butter-and-yolk emulsion.
Either way, the sauce has one job: make poached eggs taste like brunch. A good batch lands between melted butter and mayonnaise: soft, warm, and able to settle over the egg. The texture matters more than the name.
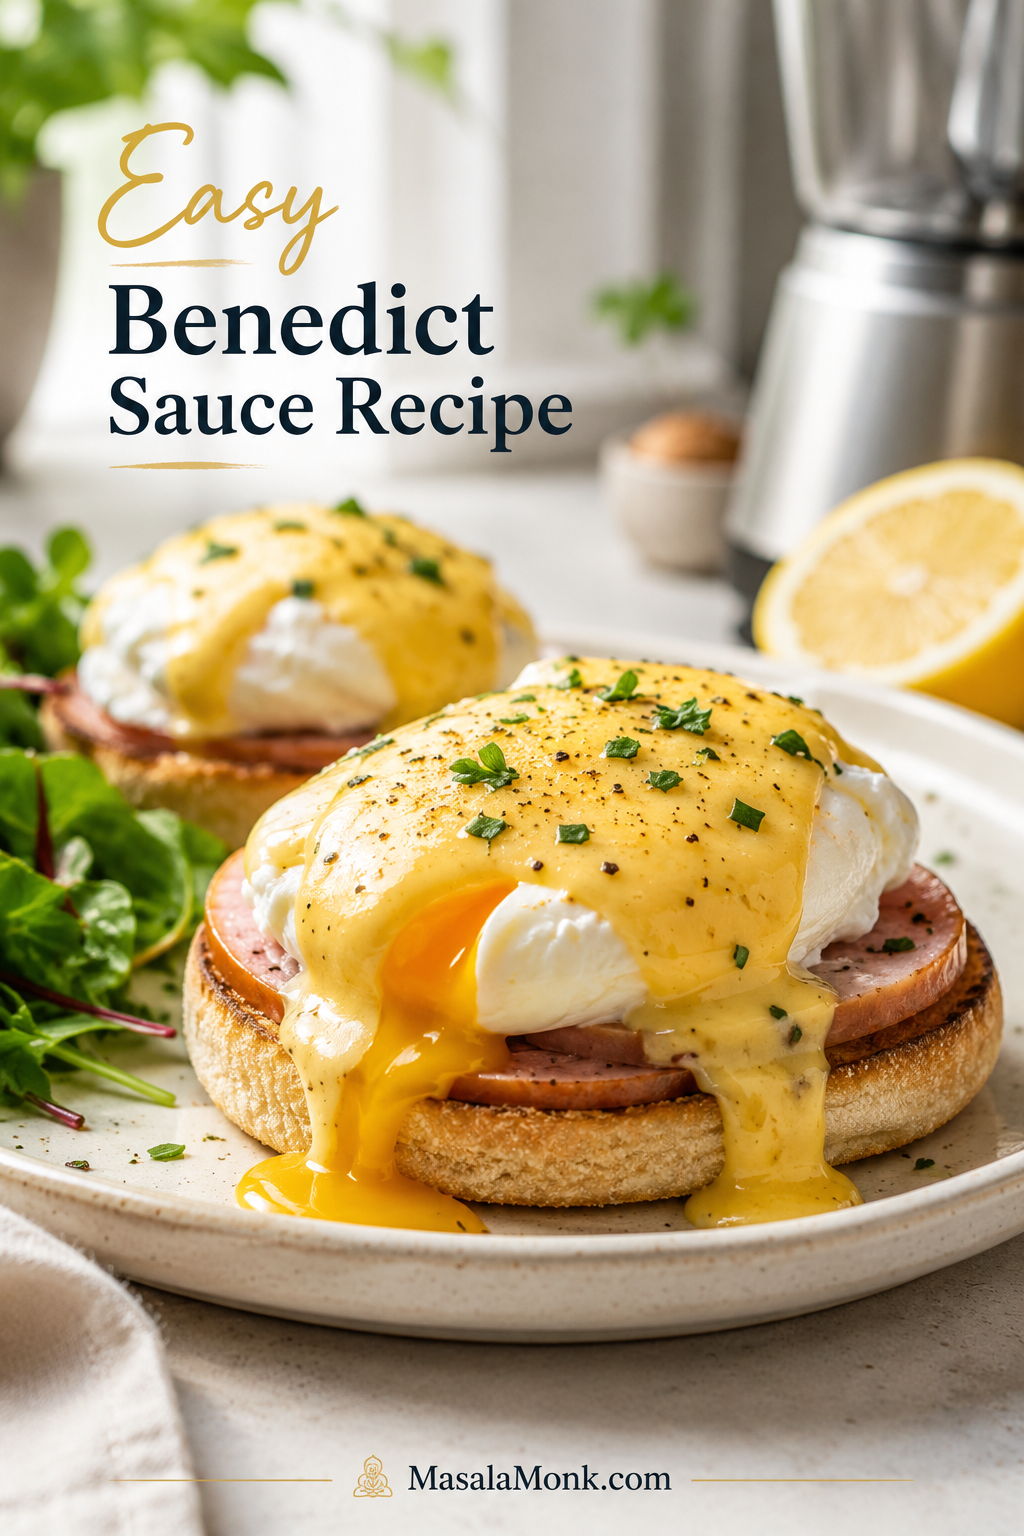
For classic Eggs Benedict, this sauce goes over toasted English muffins, ham or Canadian bacon, and poached eggs. If you like building breakfast around eggs and bread, these breakfast sandwich ideas are useful for English muffin, bagel, croissant, and waffle-style brunch bases.
Benedict Sauce At-a-Glance
Detail
What to Know
Time
About 5 minutes
Yield
About 220–240 ml / just under 1 cup
Serves
4 generous Eggs Benedict plates or 6–8 individual Benedict halves
Main method
Standard blender
Most important cue
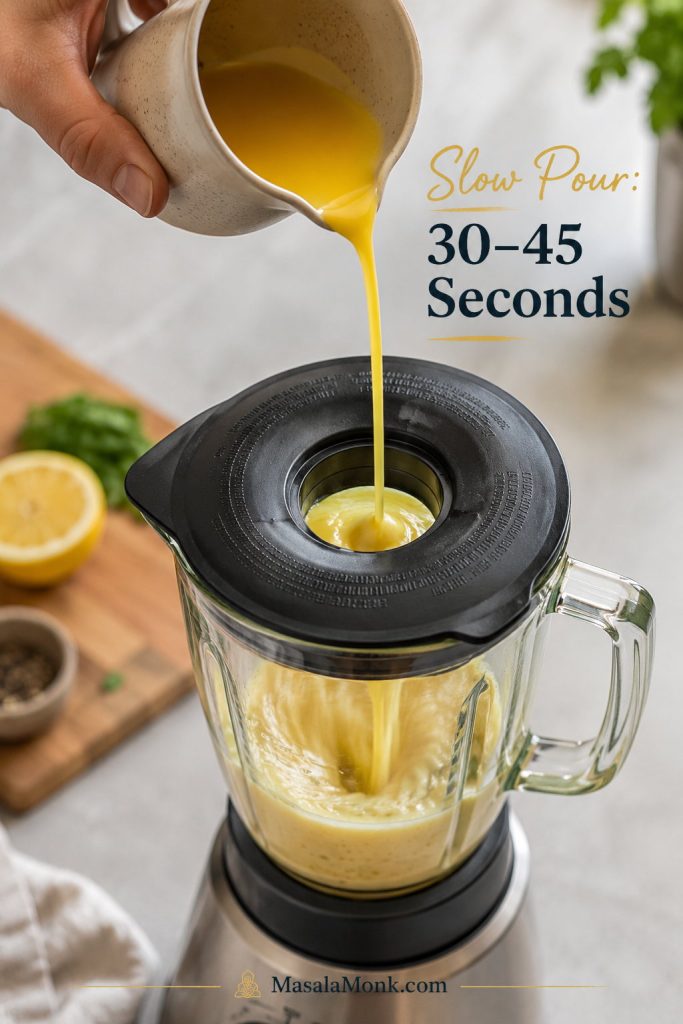
Pour hot melted butter slowly over 30–45 seconds
Texture target
Silky, spoon-coating, and pourable
Best timing
Make it near the end and serve warm
Best with
Eggs Benedict, poached eggs, salmon, crab, asparagus, and roasted vegetables
Start with the numbers that prevent guesswork: about 5 minutes, just under 1 cup of sauce, and a slow butter pour. Once those cues are clear, the whole brunch feels easier to manage.
Ingredients That Make It Work
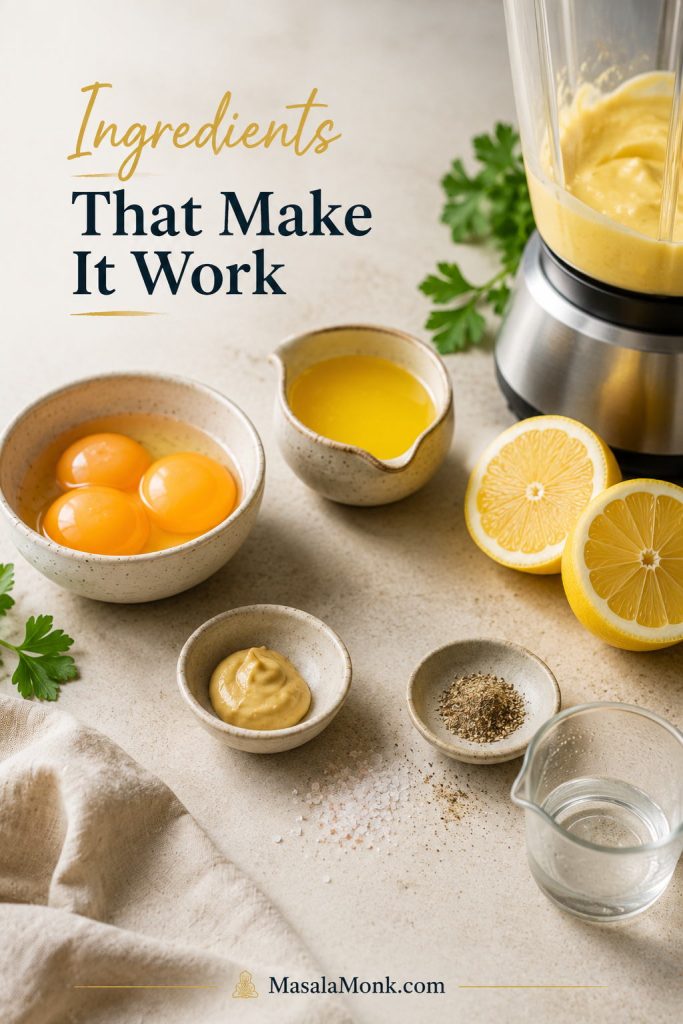
With a sauce this simple, there is nowhere for dull lemon or lukewarm butter to hide. Fresh lemon, hot melted butter, and a slow enough pour do most of the work; the yolks and butter build the body while the seasonings keep the richness balanced.
For a reliable batch, use:
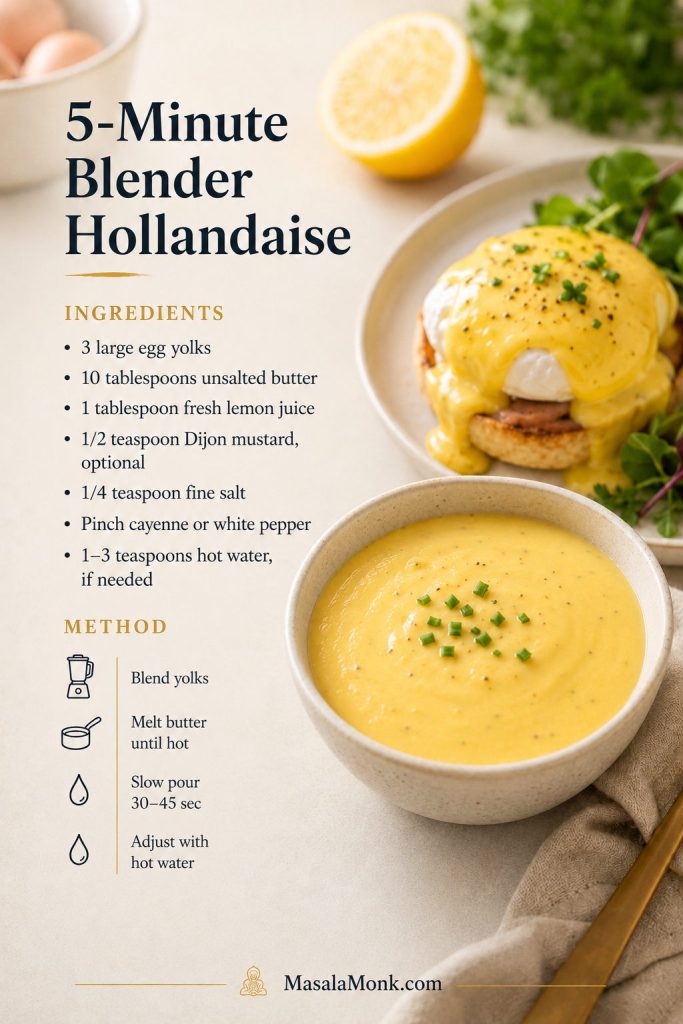
3 large egg yolks, about 50–55 g total
10 tablespoons unsalted butter, 142 g / 5 oz
1 tablespoon fresh lemon juice, 15 ml
½ teaspoon Dijon mustard, optional
¼ teaspoon fine salt, plus more to taste
Small pinch cayenne pepper or white pepper
1–3 teaspoons hot water, only if needed to thin
Each ingredient has a specific job. Yolks hold the emulsion, hot butter builds body, lemon keeps the sauce bright, and a little hot water lets you fine-tune the final pour.
Egg Yolks
Egg yolks give hollandaise its color, body, and ability to hold the butter. They are the reason the sauce becomes creamy instead of separating into lemon juice and melted fat.
Use large eggs if possible. Very small eggs may make the finished batch looser, while extra-large yolks can make it thicker and richer. Large yolks give the most predictable result.
Unsalted Butter
Use 10 tablespoons unsalted butter, or about 142 g / 5 oz. This gives about 220–240 ml / just under 1 cup of sauce: enough for a small brunch, without leaving you with a large bowl of delicate leftover hollandaise.
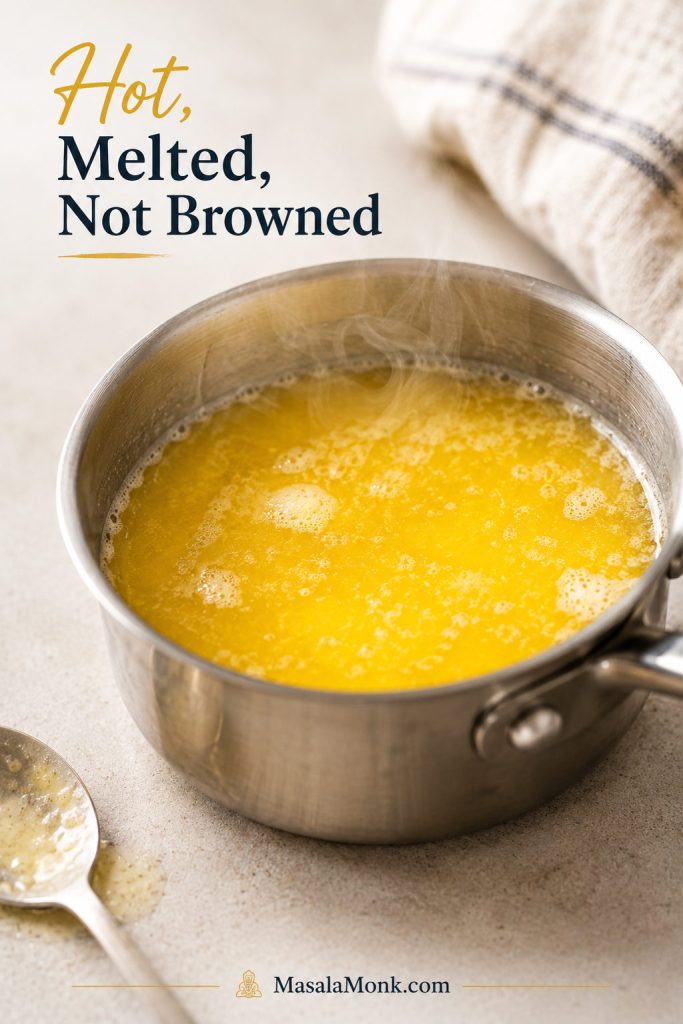
The butter should be fully melted before it goes into the blender. Look for butter that is liquid, lightly steaming, and possibly gently foaming. It should not be browned. If it has melted but no longer feels hot, rewarm it briefly before pouring.
Hot butter is one of the biggest success cues in blender hollandaise. It should be fully melted and lightly steaming, because “just melted” butter may not give the yolks enough warmth to thicken properly.
You do not need a thermometer. The practical cue is enough: hotter than “just melted,” but not cooked into browned butter. Salted butter also works, but start with less added salt and adjust after blending.
The pour matters as much as the heat, so check the slow butter pour cue before you start blending.
Lemon, Dijon, Salt, and Pepper
Fresh lemon keeps the sauce from tasting heavy. Dijon is optional, but it gives the flavor a rounder tang without making the finished sauce taste like mustard.
Start with ¼ teaspoon fine salt, then adjust at the end. A small pinch of cayenne or white pepper should lift the butter and lemon, not make the sauce spicy.
Hot Water
Hot water is your texture adjustment. If the hollandaise tightens as it sits, a teaspoon or two brings it back to a softer pour without restarting.
Useful ratio: for about 220–240 ml / just under 1 cup Benedict sauce, use 3 large yolks, 10 tablespoons hot melted butter, 1 tablespoon lemon juice, salt, and a small pinch of cayenne or white pepper. Dijon is optional, but helpful.
Once everything is measured, move to the blender method so the butter can go in while it is still hot.
How to Make This Blender Hollandaise
Once the butter is hot, the recipe moves fast. Measure the ingredients first, melt the butter, then pour slowly while the blender does the hard part. After the butter is melted, the actual blending takes less than a minute.
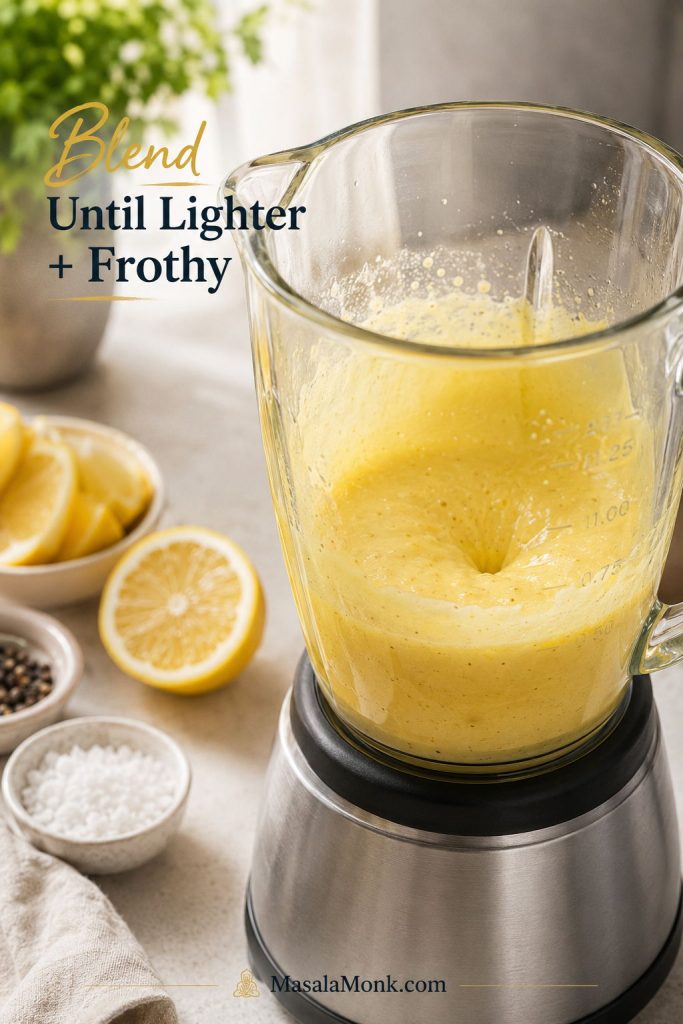
1. Blend the Yolks Until Lighter and Frothy
Add the egg yolks, lemon juice, Dijon mustard if using, salt, and cayenne or white pepper to the blender.
Blend for 15–30 seconds, until the yolks look slightly lighter and a little frothy. This gives the butter a better base to blend into.
Blend the yolks before adding butter so the sauce has movement from the start. This quick frothy stage helps the butter blend in smoothly instead of breaking the emulsion.
2. Melt the Butter Until Hot and Lightly Steaming
Melt the butter in a small saucepan over low to medium-low heat, or in the microwave in short bursts. It should be fully liquid and lightly steaming. A little foam is fine; browning is not needed.
If the butter cools while you are setting up the blender, warm it again for a few seconds. Starting with butter that is still hot gives the sauce a better chance of thickening properly.
3. Stream the Butter Slowly for 30–45 Seconds
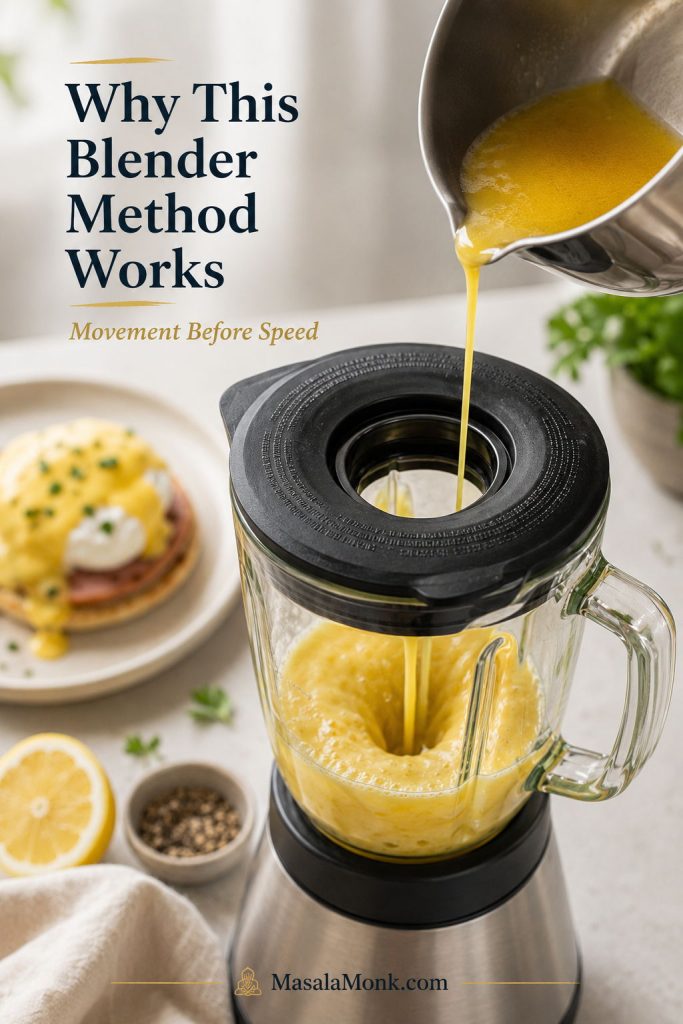
Turn the blender on low to medium-low. Remove the center cap from the lid. With the blender running, pour the butter through the opening in a thin, steady stream.
Think of the butter pour as the whole recipe: slow enough for the yolks to keep up, warm enough to help them thicken, steady enough to stay smooth. If the butter goes in all at once, the emulsion is more likely to break.
The slow pour is the heart of this easy hollandaise sauce. When the butter goes in over 30–45 seconds, the yolks have time to absorb it and turn creamy instead of greasy.
Avoid jumping straight to high speed once the butter starts going in. Too much splashing can coat the sides of the blender instead of feeding the sauce evenly.
After blending, use the ribbon test to confirm the sauce is thick enough for poached eggs.
4. Adjust Until Glossy and Spoon-Coating
Once all the butter is blended in, stop and check the sauce. It should look paler, thicker, and creamier than when you started, with a buttery-lemon smell rather than an eggy one.
The payoff is immediate: a pale, glossy sauce that smells like butter and lemon and falls from the spoon in a soft yellow ribbon. That is the point where Eggs Benedict stops feeling like a restaurant trick.
The shift from loose to glossy tells you the emulsion has formed. Once the sauce turns paler, thicker, and smoother, it is ready for tasting, adjusting, and spooning over eggs.
Too thick: loosen with hot water, one teaspoon at a time.
Flat flavor: add a tiny pinch of salt or a few drops of lemon.
Too sharp: blend in a little more warm melted butter.
Greasy or split: use the rescue method in the troubleshooting section.
Taste before you fix. Hollandaise often needs one tiny adjustment, not a full rescue.
Perfect Texture Cues
Perfect hollandaise should feel like a warm custard sauce, not melted butter and not mayonnaise. It should cling, move, and pour.
The Soft Ribbon Test
The spoon test is the easiest check. Dip a spoon into the sauce. It should coat the back, then fall in a soft ribbon when lifted. It should not look oily around the edges, grainy, foamy, or separated.
A proper ribbon should fall slowly from the spoon and settle back into the bowl. That tells you the sauce is thick enough for poached eggs while still loose enough to pour.
When it coats, ribbons, and shines, the batch is ready. Oily edges, however, mean the sauce needs fixing before it reaches the eggs.
Oily edges mean it is time to use the boiling-water rescue, not keep pouring the sauce over eggs.
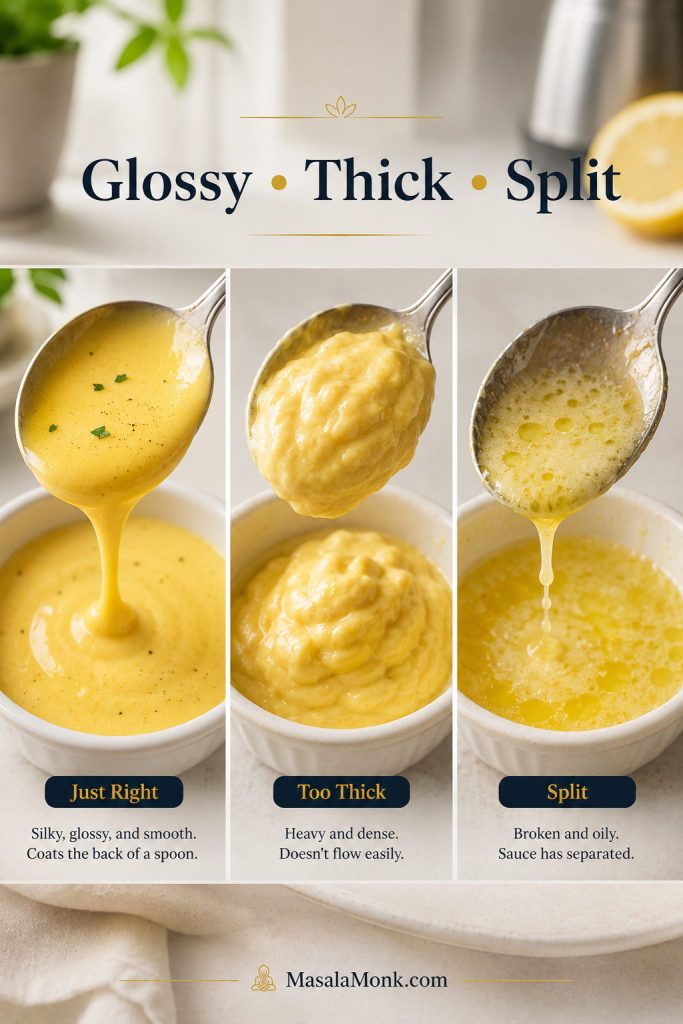
Texture Guide: Glossy, Thick, or Split
Texture tells you what to do next. Glossy Benedict sauce is ready, thick sauce needs hot water, and split sauce needs a rescue before it ever reaches the eggs.
What You See
What It Means
What to Do
Silky, warm, and pourable
The sauce is right
Serve soon or hold gently warm
Very thick or mayonnaise-like
The sauce is too tight or has cooled
Blend or whisk in hot water 1 teaspoon at a time
Thin and weak
The emulsion may not have fully formed
Blend a little longer; warm very gently if needed
Greasy or separated
The emulsion broke
Use the boiling-water rescue below
Grainy or scrambled
The yolks overheated
Restart for the smoothest result
A sauce that thickens as it sits is not ruined. Hollandaise naturally tightens as it cools. A teaspoon or two of hot water can bring it back to a softer pouring texture.
At this point, you know the three things that protect the sauce: warmth, movement, and a little patience. The recipe card below keeps those cues in one place.
A quick blender Benedict sauce made with egg yolks, hot melted butter, lemon juice, and a pinch of cayenne. It turns glossy, buttery, and spoon-coating in minutes, ready for poached eggs, smoked salmon, asparagus, or crab.
Prep Time 2 minutes
Melt Time 3 minutes
Total Time 5 minutes
Yield About 220–240 ml / just under 1 cup
Servings 4 plates or 6–8 halves
Method Standard blender
Best Served Fresh and warm
Hold Time 15–30 minutes over hot water
Ingredients
3 large egg yolks, about 50–55 g total
10 tablespoons unsalted butter, 142 g / 5 oz
1 tablespoon fresh lemon juice, 15 ml
½ teaspoon Dijon mustard, optional
¼ teaspoon fine salt, plus more to taste
Small pinch cayenne pepper or white pepper
1–3 teaspoons hot water, only if needed to thin
Instructions
Add the egg yolks, lemon juice, Dijon mustard if using, salt, and cayenne or white pepper to a blender.
Blend for 15–30 seconds, until the yolks look slightly lighter and a little frothy.
Melt the butter until fully liquid, hot, and lightly steaming. Do not brown it.
With the blender running on low to medium-low, slowly pour the hot butter through the lid opening in a thin stream. Aim to pour over 30–45 seconds.
Blend for a few more seconds, then stop and check the sauce. It should be smooth, warm, and spoon-coating.
Taste and adjust with a few drops of lemon juice, a tiny pinch of salt, or a little cayenne if needed.
If the sauce is too thick, blend in hot water 1 teaspoon at a time until it pours smoothly.
Serve warm over Eggs Benedict, poached eggs, smoked salmon, asparagus, crab cakes, or vegetables.
Recipe Notes
Use fully melted butter that is still hot enough to steam lightly.
Give the butter 30–45 seconds to stream in. That slow pour is what helps the sauce stay smooth.
The finished batch should be warm, silky, and pourable. If it tightens, loosen it with a small splash of hot water.
Best served fresh. Hold briefly over hot water if needed, and try the boiling-water rescue if the sauce splits.
Keep the recipe card close for the two cues that matter most: hot butter and a slow pour. With blender hollandaise, those small checks protect the texture before the sauce ever reaches the eggs.
Why This Blender Method Works
Hollandaise works because egg yolks can hold butter and lemon together when they are blended gradually. The blender is not replacing technique completely; it is giving you constant movement while the yolks slowly accept the butter.
The blender helps most at the moment where hollandaise usually fails: the first few seconds of adding butter. The yolks need movement before they need speed. That is why this recipe starts by blending the yolks alone, then adds hot butter slowly instead of dumping everything in at once.
The blender helps most at the fragile beginning, when the yolks first meet the butter. Instead of relying on frantic whisking, you get steady movement while the emulsion forms.
If you enjoy understanding sauces, the same emulsion idea shows up in homemade mayonnaise too: the yolks help hold fat and liquid together so the sauce turns creamy instead of separated.
Yolks create the base. They give the butter and lemon a structure to blend into.
Hot butter adds body. It warms and loosens the yolks while building richness.
A slow pour protects the emulsion. The yolks get time to absorb the butter instead of breaking.
Lemon and water keep it balanced. Lemon cuts the richness; water lets you soften the texture if it tightens.
Once you see the emulsion form, the sauce feels much less mysterious. It is not magic; it is just a slow pour, steady movement, and a little heat working together.
Best Blender, Jar, or Bowl to Use
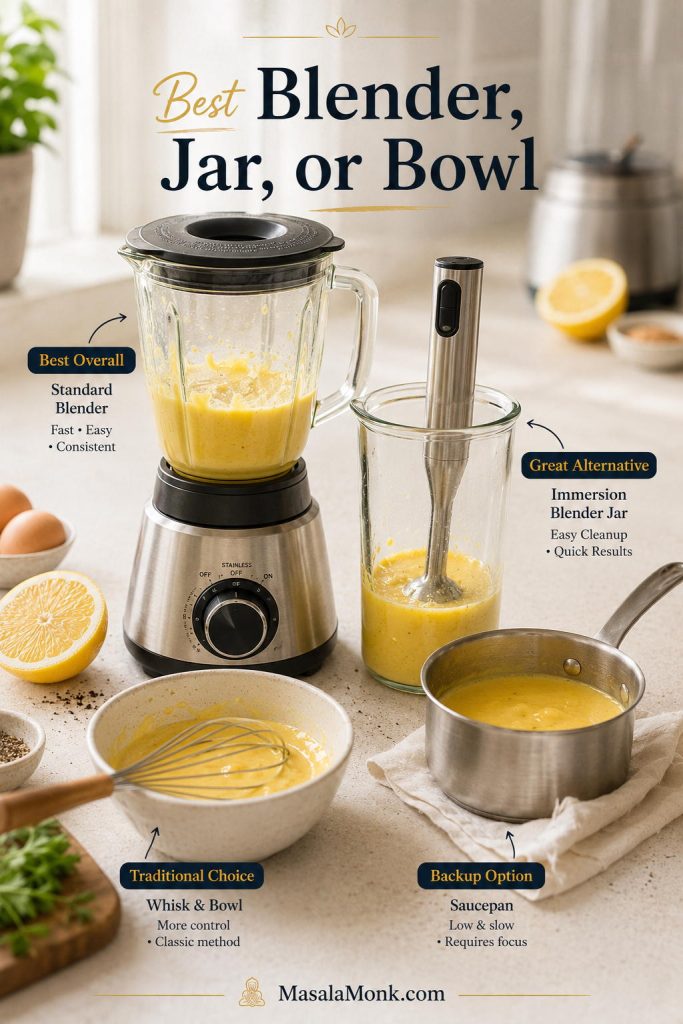
Tiny batches sound convenient, but many full-size blenders struggle when there is not enough yolk mixture for the blades to catch. This batch size is intentional: large enough for most standard blenders to work properly, but not so large that you end up with a bowl of fragile leftover sauce.
Use a standard blender for the easiest full small-batch brunch sauce.
Use an immersion blender if you have a tall, narrow jar that lets the sauce pull into the blade.
Use a double boiler if you want more deliberate yolk heating and do not mind whisking.
Use a bowl and whisk if you have no appliance and can work slowly over gentle heat.
Use a food processor only in a pinch; wide bowls can make small batches harder to emulsify.
A standard blender is the easiest tool for this batch, although a tall jar or whisk bowl can work when needed. Choose the setup that gives the sauce movement without overheating it.
For the blender method, use a blender with a lid that has a removable center cap. That opening lets you pour in the butter while the blender runs. You will also need a small saucepan or microwave-safe cup for melting butter, a measuring cup with a spout, and a spatula.
Once you know your blender can handle the batch, the next question is how much sauce to make.
How Much Sauce to Make for Brunch
How Much Sauce Per Plate?
Plan on 1½–2 tablespoons sauce per Benedict half, or 3–4 tablespoons per plate when each plate has two halves. On most plates, that gives you a generous pour without flooding the muffin.
A normal Eggs Benedict plate needs enough hollandaise to coat the egg, not drown the muffin. Use 3–4 tablespoons per plate, then make a 1.5x batch if potatoes, asparagus, salmon, or crab are joining the table.
Serving Need
Sauce Amount
Practical Note
1 Benedict half
1½–2 tablespoons
Enough to coat the egg without flooding the muffin
1 plate / 2 halves
3–4 tablespoons
A normal restaurant-style pour
2 plates
⅓–½ cup
A small amount; some blenders may struggle with tiny batches
4 plates
¾ cup to just under 1 cup
The ideal home brunch batch
8 Benedict halves
Just under 1 cup
A lighter pour for each half
Extra saucy brunch
1¼ cups or 1.5x batch
Useful if serving asparagus, salmon, or potatoes too
Yield and Batch Size
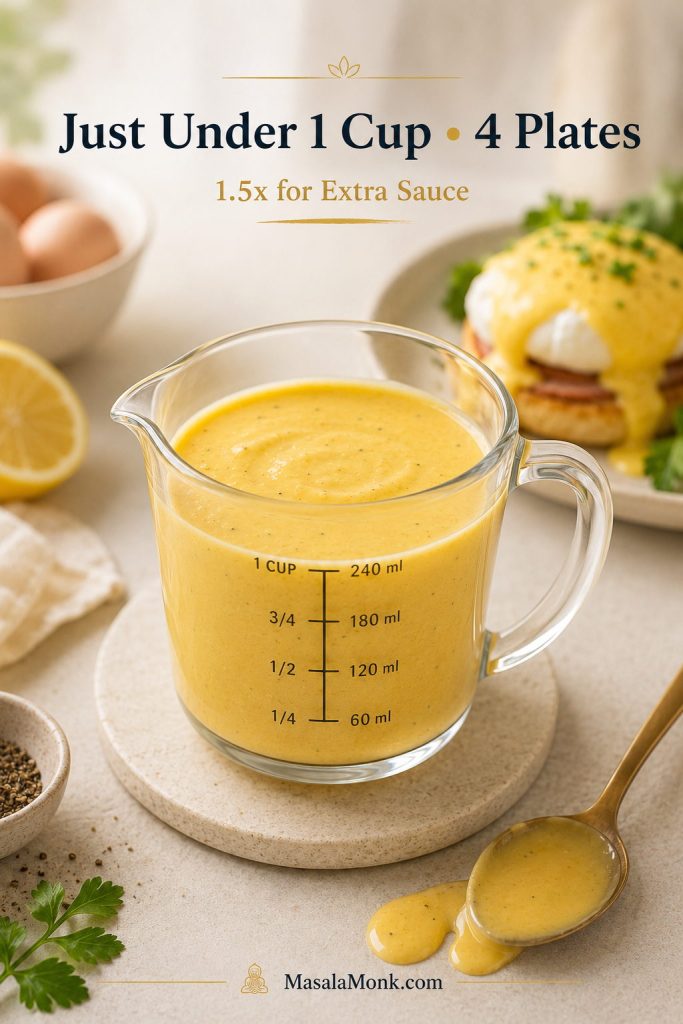
You will get about 220–240 ml / just under 1 cup, depending on yolk size and how much water you use to adjust the texture. That is enough for 4 generous plates or 6–8 individual Benedict halves, depending on how heavy your pour is.
This batch makes just under 1 cup, enough for about four generous plates. That keeps the recipe practical for brunch without leaving too much delicate sauce behind.
This is also the part of brunch where people quietly ask for “just a little more sauce,” so make the 1.5x batch if potatoes, asparagus, or salmon are also on the table.
For the least stressful cooking order, use the brunch timing sequence before you start poaching eggs.
The Easiest Brunch Timing Order
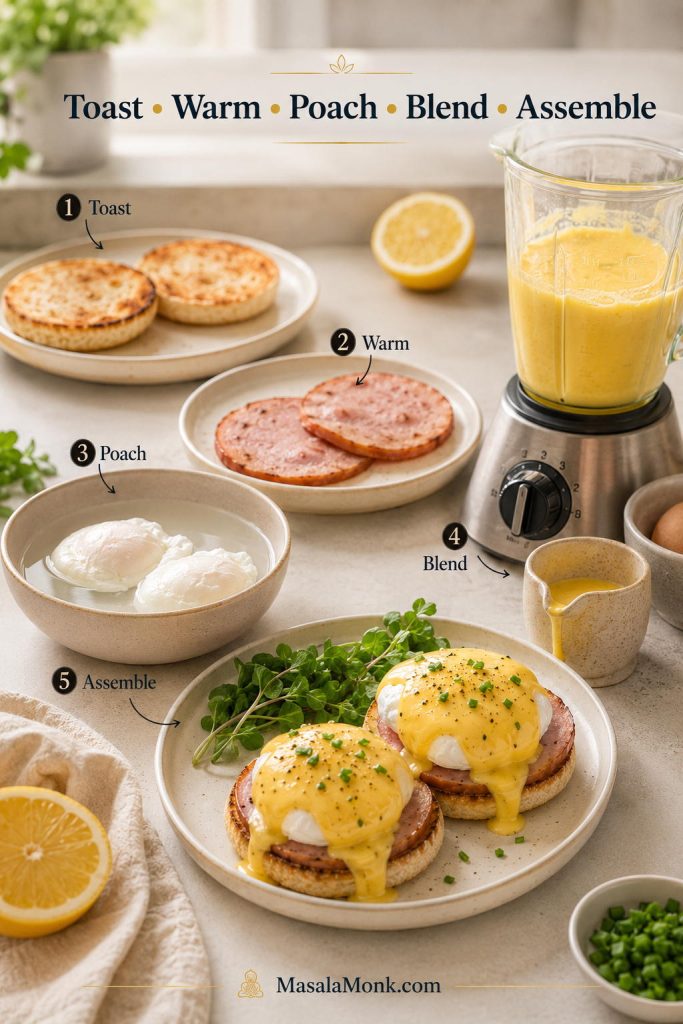
Eggs Benedict is not difficult because of one step. It feels difficult because everything wants to be warm at the same time. The easiest rhythm is simple: toast, warm, poach, blend, assemble.
Eggs Benedict feels calmer when the order is clear: toast, warm, poach, blend, assemble. The sauce comes last so it lands on the eggs while still warm and glossy.
Feeding a table and want something lower-pressure? A breakfast casserole with hash browns is easier to make ahead than poaching eggs one by one.
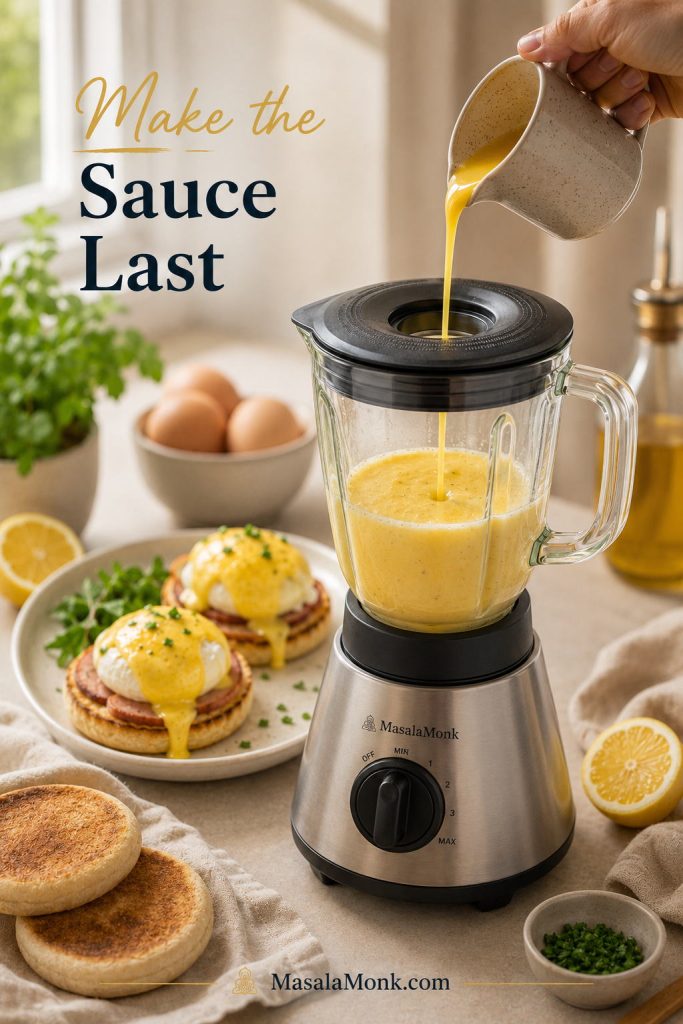
Make the Sauce Last
Toast the English muffins first and keep them warm.
Warm the ham, Canadian bacon, smoked salmon plate, spinach, or other base.
Have the poaching water ready and poach the eggs close to serving time.
Make the blender hollandaise last, once the other parts are almost ready.
Assemble immediately and spoon the sauce over the eggs while it is warm.
Make the hollandaise after the muffins, base, and poached eggs are nearly ready. That way, the sauce spends less time waiting and more time coating the plate beautifully.
When the eggs finish before the sauce, hold the poached eggs briefly in warm water. When the sauce finishes first, keep it gently warm over hot water and loosen it before serving if needed.
How to Hold Hollandaise Without Splitting It
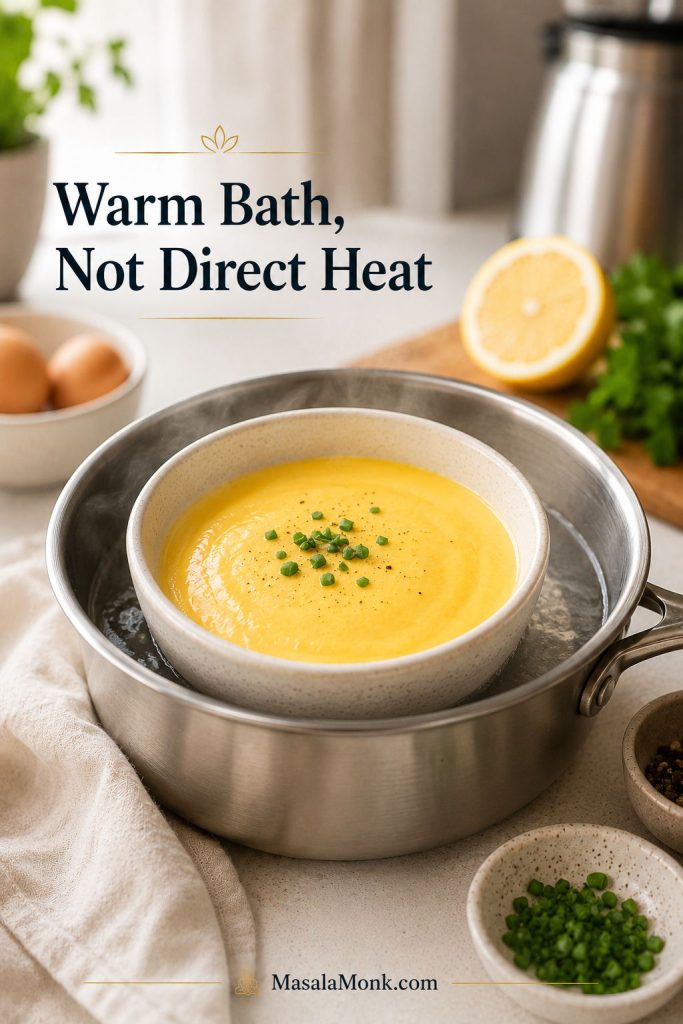
This sauce is smoothest right after blending, but short holding is fine. Think warm bath, not stovetop cooking. You are keeping the sauce comfortable, not cooking it again.
A warm water bath buys you time without turning holding into cooking. Keep the bowl gently warm, then loosen the hollandaise with hot water if it thickens before serving.
Spoon the sauce into a warm bowl.
Set the bowl over a pan of hot water, not boiling water.
The bowl should feel warm, not aggressively hot.
Stir occasionally so the edges do not overheat.
Hold for 15–30 minutes if needed.
If it thickens, loosen it with a teaspoon or two of hot water.
That gentle hold buys you time without making the sauce feel like another thing to manage. Do not put hollandaise over direct high heat; too much heat can make it grainy or cause the yolks to scramble.
Brunch timing tip: make the sauce last whenever possible. If the rest of the plate is ready, fresh blender hollandaise makes Eggs Benedict feel much easier.
If the sauce thickens or separates while waiting, use the troubleshooting guide before serving.
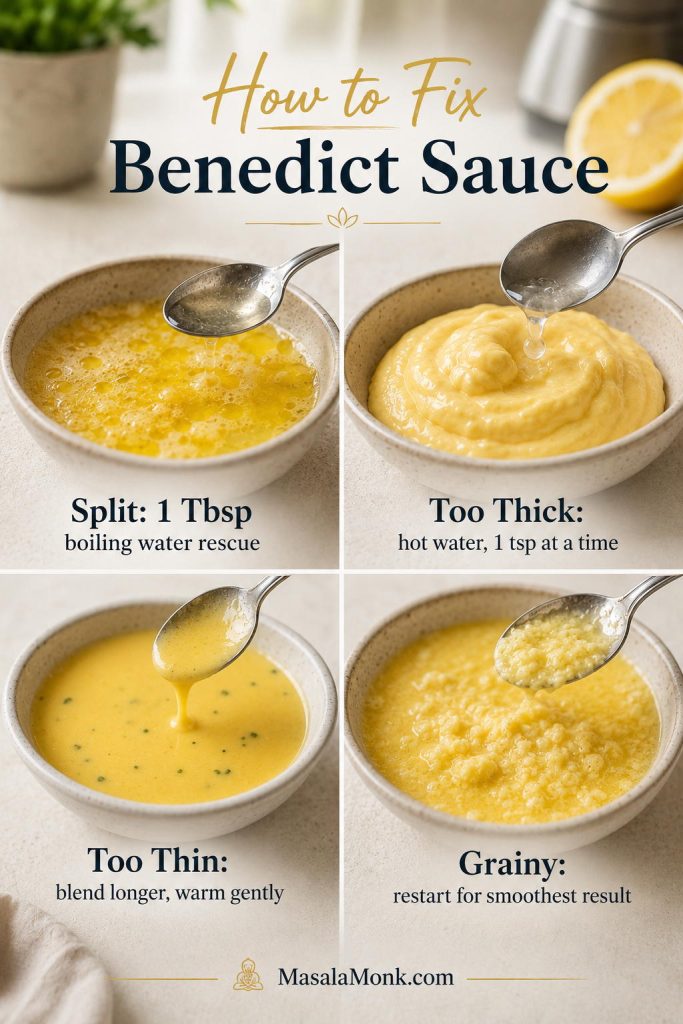
Troubleshooting: How to Fix Benedict Sauce
If the sauce breaks, thickens, or looks wrong, pause before throwing it away. Most problems are fixable unless the yolks have fully scrambled.
A sauce that looks wrong for a moment is not a failed brunch. It is usually just asking for heat, water, or a slower hand. Look first, fix second.
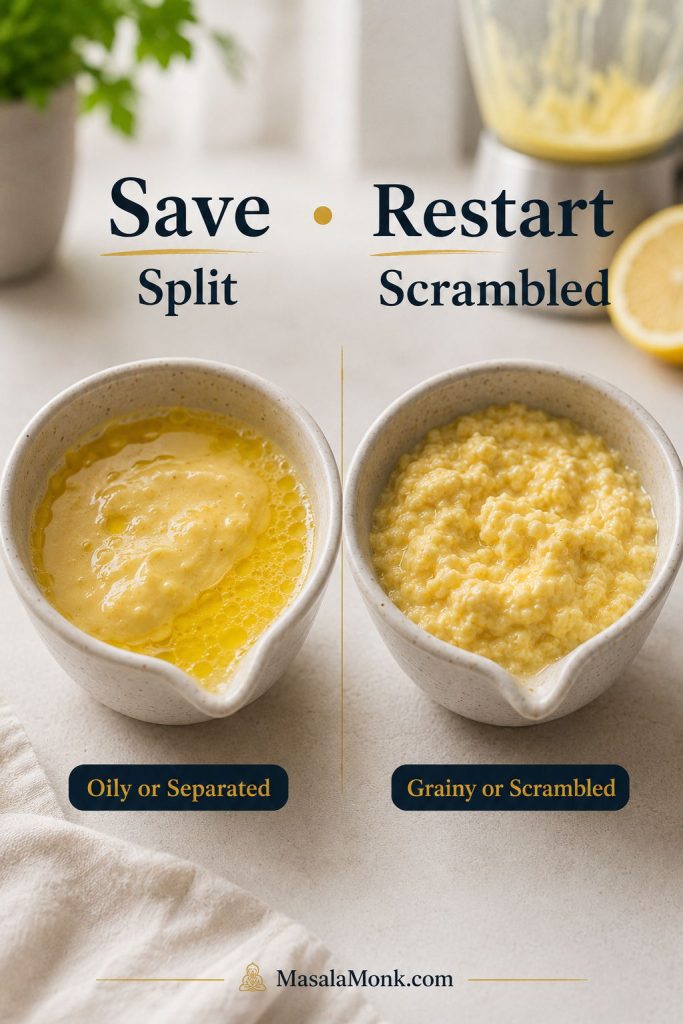
Save split sauce. Restart scrambled sauce. If the sauce is oily or separated, the emulsion can often come back. If the yolks have turned grainy or scrambled, the smooth texture is usually gone.
Split hollandaise and scrambled hollandaise need different decisions. If it looks oily, try saving it; however, once the yolks turn grainy, restarting is usually the smoother path.
The 3 Mistakes That Usually Break It
Adding the butter too fast. The yolks need time to absorb the butter.
Using butter that has cooled too much. Lukewarm butter can make the sauce weak or greasy.
Heating the finished sauce too aggressively. Direct heat can scramble the yolks or split the sauce.
Most hollandaise problems are easier to fix when you identify the texture first. Thick sauce needs a little hot water, thin sauce needs more blending, and a broken emulsion needs the rescue step.
Problem
Likely Cause
Fix Now
Split or greasy texture
Butter went in too fast, butter cooled too much, or the emulsion broke
Blend in 1 tablespoon boiling water slowly. Add a second tablespoon only if needed.
Too thick
It cooled down or the emulsion is too tight
Whisk or blend in hot water 1 teaspoon at a time.
Too thin
Butter was not hot enough, yolks were under-blended, or the sauce needs a little more time
Blend a little longer. If needed, warm very gently while whisking.
Grainy texture
Yolks overheated or started to scramble
Straining may help slightly, but restarting usually gives the best result.
Too lemony
Too much acid for the amount of butter
Blend in a little more warm melted butter.
Flat flavor
Not enough salt, lemon, or gentle heat
Add a tiny pinch of salt or a few drops of lemon juice.
Cooled before serving
It sat too long or the bowl was cold
Warm gently over hot water and loosen with hot water if needed.
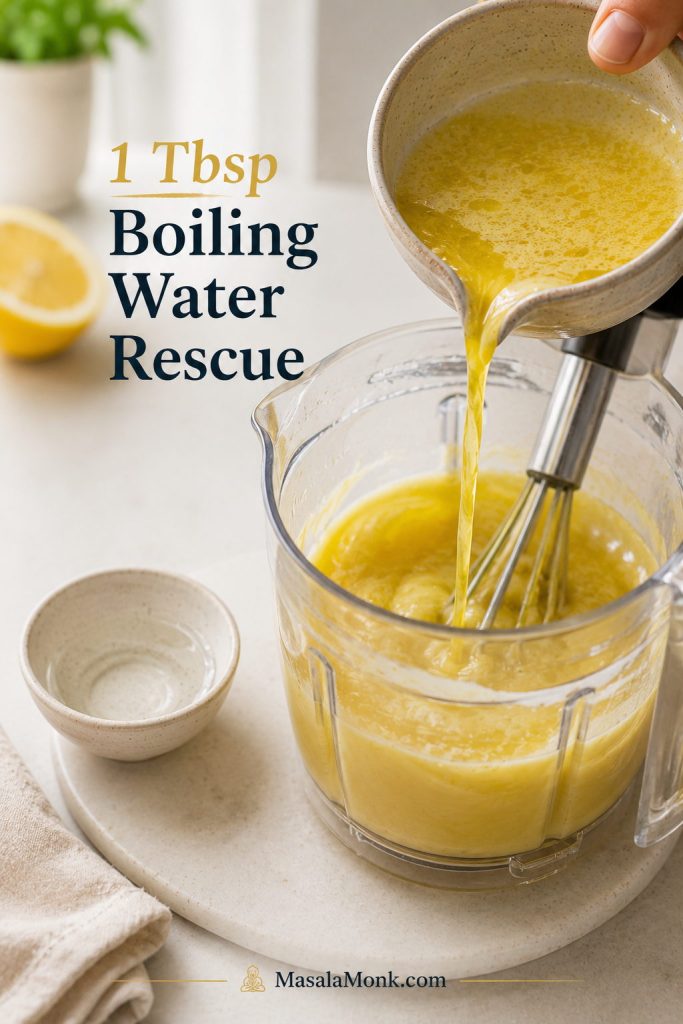
The Boiling-Water Rescue for Split Sauce
If your sauce looks greasy or separated, add 1 tablespoon boiling water to a clean blender or bowl. With the blender running, or while whisking constantly, slowly drizzle the broken sauce into the hot water. The heat and water can help pull the emulsion back together.
The boiling-water rescue gives split hollandaise a clean place to rebuild. Add the broken sauce slowly, because the emulsion needs a fresh start, not another rushed pour.
If the sauce improves but still looks slightly broken, add another tablespoon of boiling water only if needed. Do not keep adding water blindly, or the sauce can become too thin.
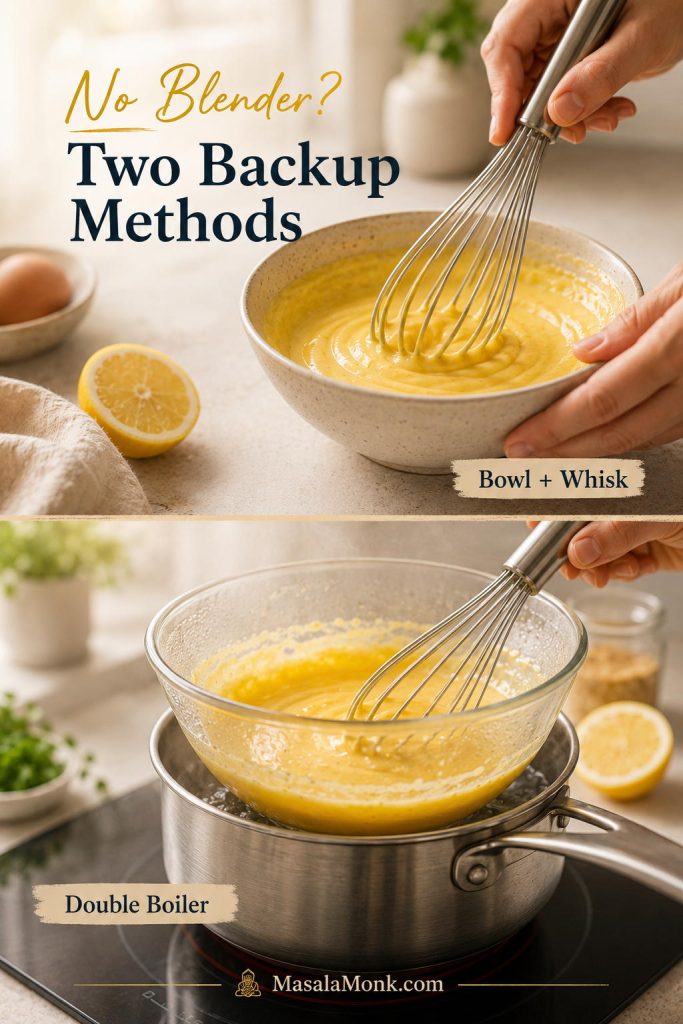
No blender does not mean no hollandaise. Use the bowl-and-whisk path when equipment is the issue; use the double-boiler path when you want more deliberate yolk heating.
No blender does not mean no hollandaise. A bowl and whisk solves the equipment problem, while a double boiler gives you gentler control over yolk heating.
Bowl-and-Whisk Hollandaise
Use the same ingredient amounts. Set a heatproof bowl over barely simmering water, making sure the bottom of the bowl does not touch the water. Whisk the yolks, lemon juice, and 1 tablespoon water until the mixture looks lighter and slightly thickened, then remove the bowl from the heat and slowly whisk in the melted butter.
It works well, although it needs a slower hand and more attention than the blender version. Keep the heat gentle, whisk constantly, and do not let the bowl get too hot.
Double-Boiler Hollandaise
For a more traditional cooked-yolk approach, set a heatproof bowl over a pan of barely simmering water, again making sure the bowl does not touch the water. Whisk the egg yolks, lemon juice, and 1 tablespoon water until the mixture looks slightly lighter, warm, and a little thicker.
Remove the bowl from the heat, then gradually whisk in warm melted butter. If the sauce tightens too much, loosen it with warm water in small splashes.
This method takes longer than the blender version, but it gives you more control over warming the yolks. Keep the heat gentle; hollandaise likes warmth, not aggression.
Food Safety Note for Blender Hollandaise
Blender hollandaise is warmed mostly by the melted butter. Because of that, the yolks may not get as thoroughly heated as they would in a custard or double-boiler sauce. For young children, pregnant people, older adults, or anyone immunocompromised, use pasteurized eggs or choose the double-boiler method above. For general egg-safety guidance, see the FDA egg safety guide.
This is not meant to make the sauce feel intimidating; it simply gives careful households a clear path: use pasteurized eggs, or choose the double-boiler method above.
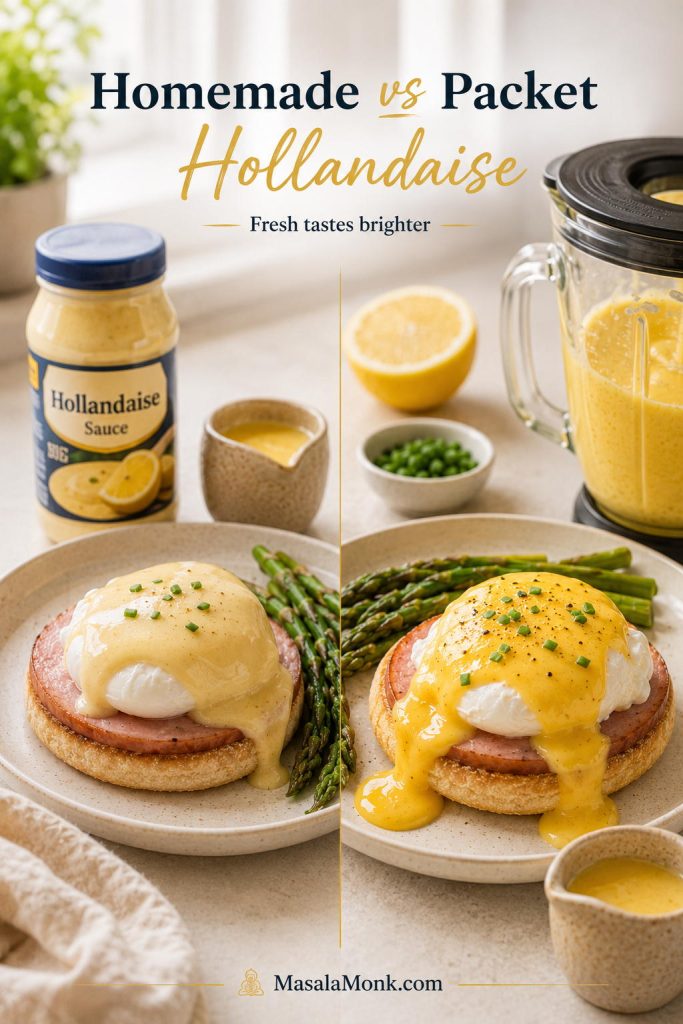
Homemade vs Packet Hollandaise
There is no shame in packet or jarred hollandaise on a chaotic morning. Convenience has its place, especially for casseroles, breakfast bakes, or low-pressure sides. For classic Eggs Benedict, though, fresh blender sauce tastes brighter, warmer, and more buttery-lemony.
Packet hollandaise can help on a busy morning, but homemade blender sauce gives you more control: brighter lemon, softer texture, and a warmer, fresher pour.
The homemade version also lets you adjust the plate in real time: more lemon for salmon, a thicker pour for eggs, a looser sauce for asparagus, or a little cayenne for crab. Packet sauce rarely gives you that kind of control.
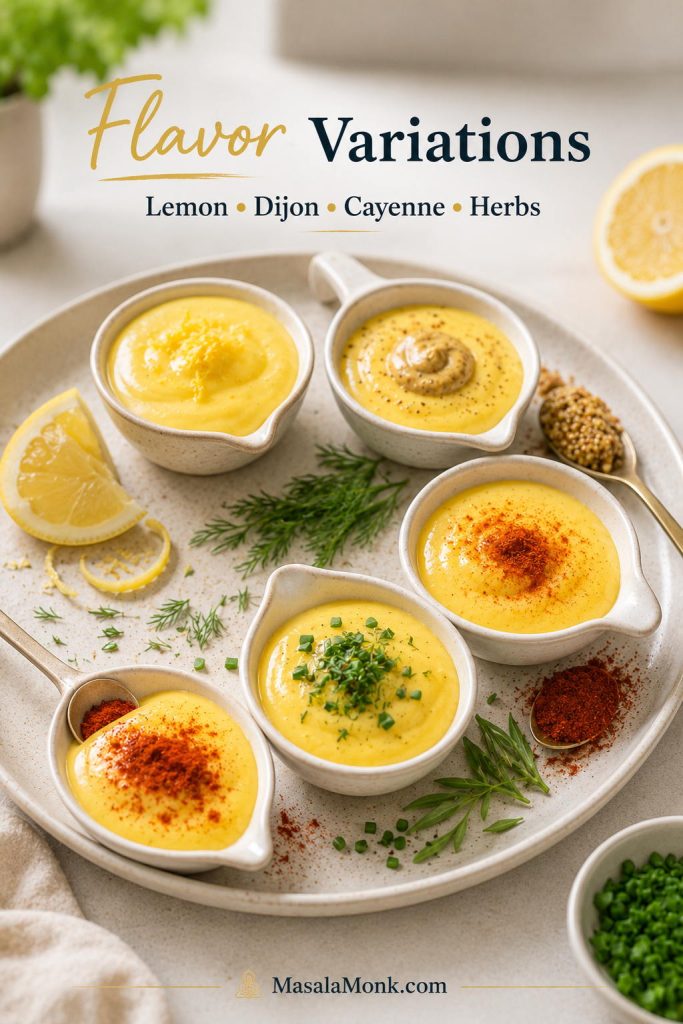
Flavor Variations
Think of the base sauce as the calm version. Lemon makes it brighter, Dijon makes it rounder, cayenne makes it warmer, and herbs make it feel fresher.
Once the base sauce is smooth, small flavor changes can match the plate. Lemon sharpens salmon, Dijon rounds out ham, cayenne suits crab, and herbs brighten spring vegetables.
Extra lemon: add a few more drops at the end for smoked salmon, asparagus, or crab.
Dijon hollandaise: use ½–1 teaspoon Dijon for classic Eggs Benedict, ham, or breakfast potatoes.
Cayenne hollandaise: add a slightly larger pinch for crab Benedict, steak and eggs, or rich seafood plates.
White pepper hollandaise: use white pepper instead of cayenne for a more traditional brunch flavor.
Herb hollandaise: stir in chopped chives, dill, or tarragon after blending for salmon, asparagus, or spring brunch plates.
Smoked paprika hollandaise: add a small pinch for potatoes, steak, or roasted vegetables.
For dietary swaps, a good dairy-free butter can make a hollandaise-style sauce closest to the original. Yogurt or mayo-based versions are lighter shortcuts, while cashew or tofu sauces belong more in vegan Benedict territory. They can be useful, but they are alternatives rather than classic hollandaise.
More Ways to Use It
Once the main Benedict plate is handled, this lemony butter sauce can stretch into the rest of brunch: vegetables, seafood, potatoes, and simple egg plates.
Spoon it over asparagus with black pepper, smoked salmon with extra lemon, crab cakes with a little cayenne, or breakfast potatoes when you want the plate to feel more like brunch than leftovers.
Beyond Eggs Benedict, hollandaise works best where butter, lemon, and warmth already make sense: asparagus, salmon, crab cakes, potatoes, and simple egg plates.
Egg dishes: classic Eggs Benedict, Eggs Florentine, poached eggs on toast, steak and eggs, or a slice of frittata when you want a brunch plate that still feels egg-forward.
Toast and brunch plates: spoon a little over poached eggs, sautéed greens, or avocado toast when you want something richer than lemon or hot sauce.
Seafood: try it with smoked salmon, crab cakes, salmon croquettes, shrimp, scallops, or grilled salmon.
Vegetables and potatoes: use it with asparagus, roasted broccoli, broccolini, breakfast potatoes, grain bowls, or vegetable plates topped with eggs.
If the food underneath is rich, use a slightly sharper sauce with a few extra drops of lemon. If the food is lean or vegetable-heavy, the classic version works beautifully.
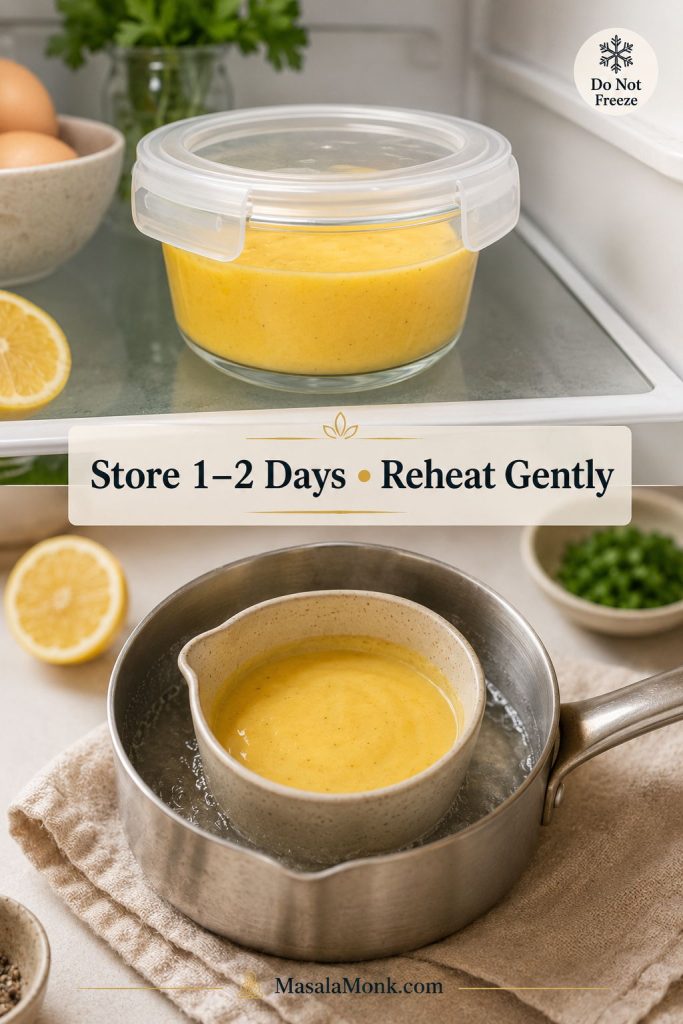
Storage and Reheating
Hollandaise is at its best right after blending, while it is still warm, glossy, and loose enough to spoon over eggs.
If you have leftovers, refrigerate them in a covered container and use them within 1–2 days for best quality. The sauce will thicken when cold and may separate slightly. That does not always mean it is ruined, but reheating needs to be gentle.
Freezing is not recommended. The emulsion usually suffers when thawed and reheated, so the texture will not be as smooth as a fresh batch.
Fresh hollandaise has the smoothest pour, although a short fridge stay is manageable. Reheat slowly over warm water; freezing and harsh heat both work against the emulsion.
How to Reheat It
Set the sauce in a heatproof bowl over warm water.
Whisk gently as it loosens.
Add small splashes of hot water if it is too thick.
Use very low heat only; do not boil.
If using a microwave, use very short bursts and whisk between each one.
You can hold it briefly and reheat leftovers carefully, but if texture really matters, make the sauce fresh.
For meal-prep mornings, sturdy egg dishes are much easier to store. These egg muffin cups are a better make-ahead option when you want eggs ready for the week instead of a delicate sauce.
The Brunch Payoff
Once you know the slow pour, the soft ribbon, and the gentle warm hold, the final plate feels much less fragile.
This is the brunch payoff: warm hollandaise, a runny yolk, and a toasted muffin catching the sauce. Once you know the cues, Benedict sauce feels far less fragile than it looks.
Need a quick answer instead? The Benedict sauce FAQs cover storage, reheating, salted butter, lemon swaps, and sauce amounts.
Benedict Sauce FAQs
Is Benedict sauce the same as hollandaise?
Yes. Benedict sauce is the everyday name many home cooks use for hollandaise when it is served on Eggs Benedict. The recipe is the same basic butter, yolk, lemon, and seasoning emulsion.
What is Eggs Benedict sauce made of?
Eggs Benedict sauce is usually made with egg yolks, melted butter, lemon juice, salt, and cayenne or white pepper. This blender version also includes optional Dijon mustard for a little extra brightness.
Why did my sauce split?
It usually splits when the butter goes in too quickly, cools too much, or the emulsion never fully forms. If it looks oily or separated, try the boiling-water rescue before restarting.
How do I fix sauce that is too thin or too thick?
For a thick sauce, whisk in small splashes of hot water until it loosens. For a thin sauce, blend a little longer; if needed, warm it gently while whisking. Avoid high heat because the yolks can scramble.
How long can hollandaise stay warm?
Hold it for 15–30 minutes over hot water, not direct heat. Stir now and then, and loosen it if it thickens. If the bowl feels hot enough to cook eggs, it is too hot for holding hollandaise.
Can I make or reheat it ahead of time?
It is best made fresh. You can hold it warm for 15–30 minutes, and leftovers can be reheated gently over warm water, but hollandaise thickens and can separate as it cools. Treat reheating as a careful rescue, not a full make-ahead plan.
Does blender hollandaise cook the egg yolks?
The melted butter warms the yolks, but blender hollandaise may not cook them fully like a custard. Use pasteurized eggs or the double-boiler method if that matters for your household.
Can I make it without a blender?
Yes. Use the same ingredients in a heatproof bowl over barely simmering water. It takes more whisking than the blender method, but the cue is the same: gentle heat, slow butter, smooth texture.
Is Dijon mustard required?
Dijon is optional. Use it when you want a rounder, slightly tangier sauce; leave it out when you want a more classic hollandaise flavor.
Can I use salted butter?
Salted butter works, but treat the recipe salt as optional at first. Blend the sauce, taste it, then add only what it needs.
What can I use instead of lemon juice?
Fresh lemon is best because it gives hollandaise a clean brightness. White wine vinegar can work in a pinch, but start with less because it can taste sharper and more pointed than lemon.
How much sauce do I need for four Eggs Benedict plates?
For four plates with two Benedict halves each, plan on ¾ cup to just under 1 cup sauce. This recipe makes enough for a normal pour; make 1.5x if everyone likes extra sauce or if potatoes, asparagus, or salmon are also on the table.
Why is my hollandaise pale instead of bright yellow?
Egg yolk color varies. Some yolks make a deeper yellow sauce, while others make a paler one. If the flavor and texture are right, the color is not a problem.