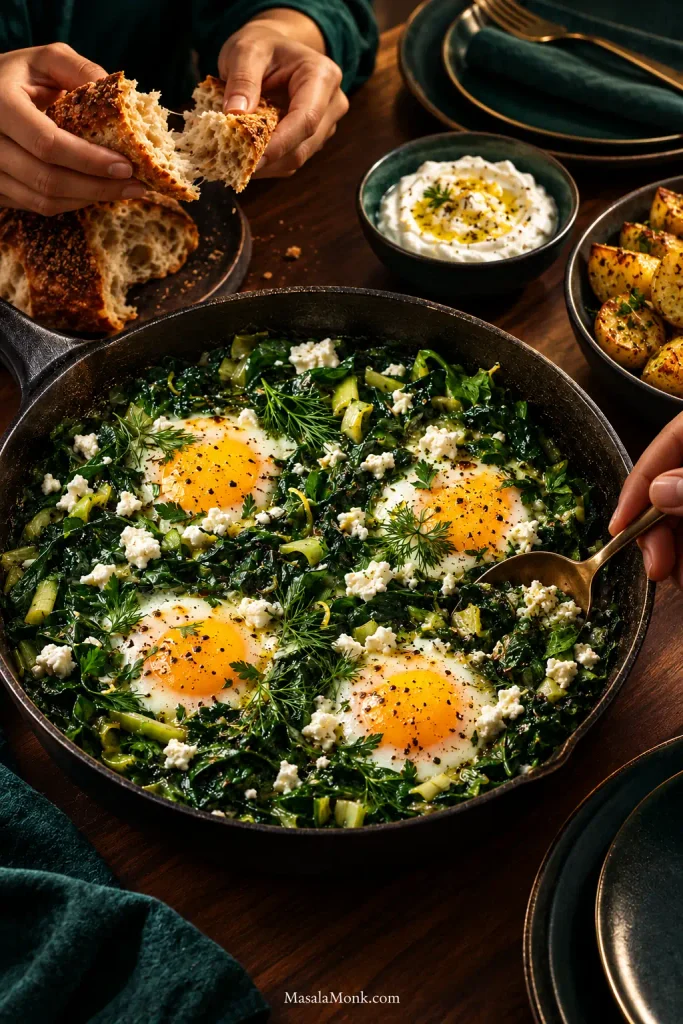
Scoop through this green shakshuka and the spoon should catch soft spinach and herbs, salty feta and enough warm yolk to coat the greens underneath. Tear off a piece of bread and you get all three in one bite. Instead of the familiar tomato base, this version builds the pan around spinach, leek and herbs.
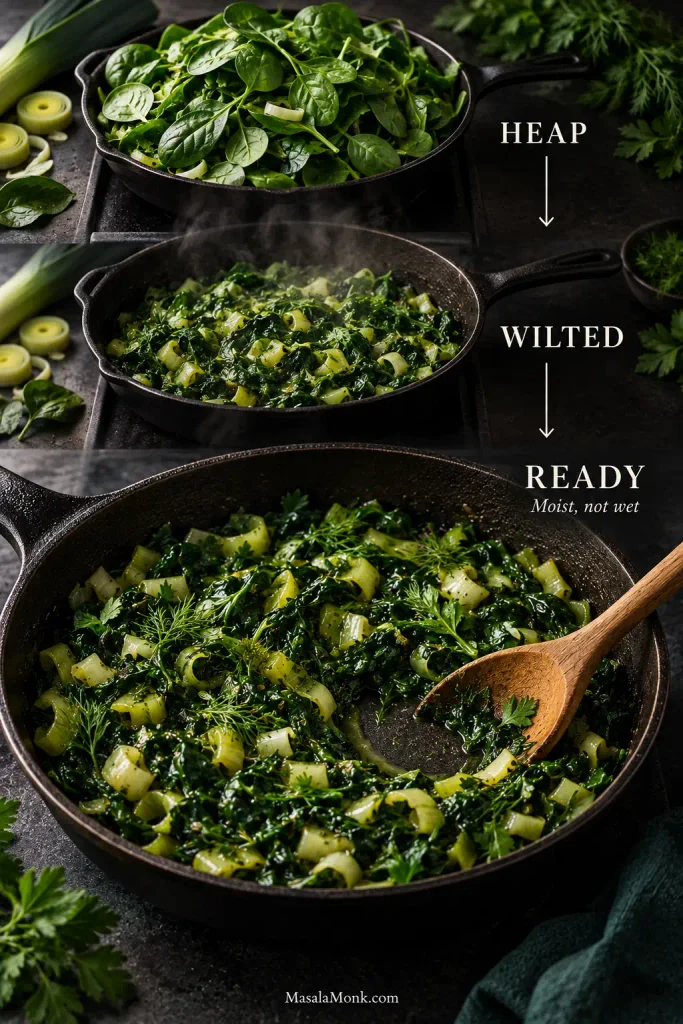
The spinach starts as a heap and quickly folds down around the sweet leek and warm spices. Watch the pan most closely before the eggs: the greens should still be juicy, but there should not be loose water underneath them. After that, the skillet is forgiving. Feta, reserved herbs and a little extra lemon turn a handful of ordinary ingredients into a meal that feels surprisingly generous.
Spinach and leek cook down with warm spices, herbs and lemon before four eggs settle into deep wells and cook gently under a lid. The whole skillet comes together in about 30 minutes, with feta, the remaining herbs and extra lemon added at the end.
Serves 2 as a main dish or 4 smaller brunch portions
Prep About 10 minutes
Cook About 20 minutes
Total About 30 minutes
Pan 10-inch / 25 cm skillet with lid
Eggs Covered stovetop
Useful equipment: a 10-inch / 25 cm skillet, a lid (clear if you have one), a flexible spatula or wooden spoon, and a small bowl or ramekin for cracking the eggs. Without a matching lid, use another heatproof lid that covers the skillet or tent it snugly with foil.
Ingredients
For the skillet
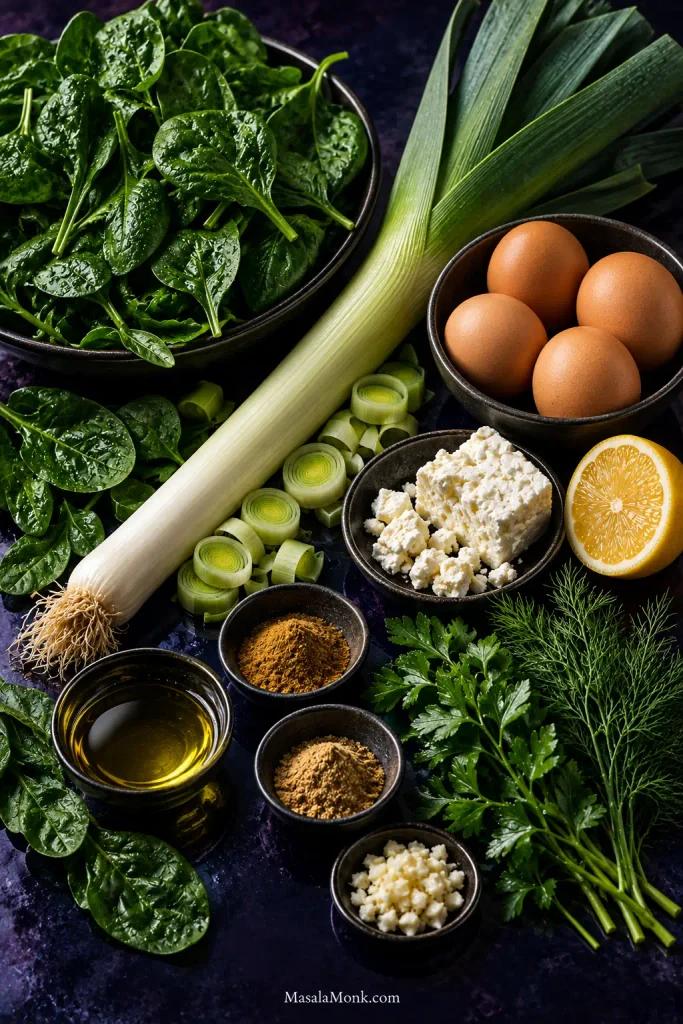
2 tablespoons / 30 ml extra-virgin olive oil
1 large leek, about 6 oz / 170 g trimmed white and light-green parts, washed thoroughly and thinly sliced
3 garlic cloves, about 9 g, finely chopped
1 teaspoon ground cumin
½ teaspoon ground coriander
½ teaspoon Aleppo pepper, optional
10 oz / 285 g baby spinach
½ oz / 15 g flat-leaf parsley, roughly one generous handful, chopped and divided
⅓ oz / 10 g fresh dill, roughly one small handful, chopped and divided
Finely grated zest of ½ lemon
1 tablespoon / 15 ml fresh lemon juice, plus more to taste
¼ teaspoon fine salt, plus more to taste
Freshly ground black pepper
4 large eggs
For the table
3 oz / 85 g feta, crumbled
Lemon wedges
Harissa, Aleppo pepper or chile oil, optional
Warm pita or crusty bread
Leek and warm spices build the base; meanwhile, lemon, herbs and feta arrive later so the spinach stays fresh and distinctly green.
Method
Build the Green Base
Soften the leek. Heat the olive oil over medium heat. Add the leek and ¼ teaspoon salt. Cook for 5–7 minutes, until soft and sweet-smelling. A little color is fine.
Add the garlic and spices. Stir in the garlic, cumin, coriander and optional Aleppo pepper. Cook for about 30 seconds, until fragrant.
Wilt the spinach in batches. Add several handfuls at a time, folding them into the leek as they collapse.
Cook away the loose water. Leave the skillet uncovered and stir occasionally. Make a hollow with the back of a spoon. Thin liquid rushing straight into it means the spinach needs longer.
Season, then check the pan. Stir in about half of the parsley and dill, the lemon zest and 1 tablespoon / 15 ml lemon juice. Add black pepper, taste, and add more salt only if needed. Make another hollow with the spoon. The spinach is ready for the eggs when no loose puddle remains, the spoon-made well mostly holds, and the spinach tastes properly seasoned.
Use the right-hand “READY” stage as the cue: the greens should look glossy rather than puddled, and the spoon track should stay visible for a moment. Volume alone is misleading because spinach collapses long before all of its released water is gone.
Load the Eggs
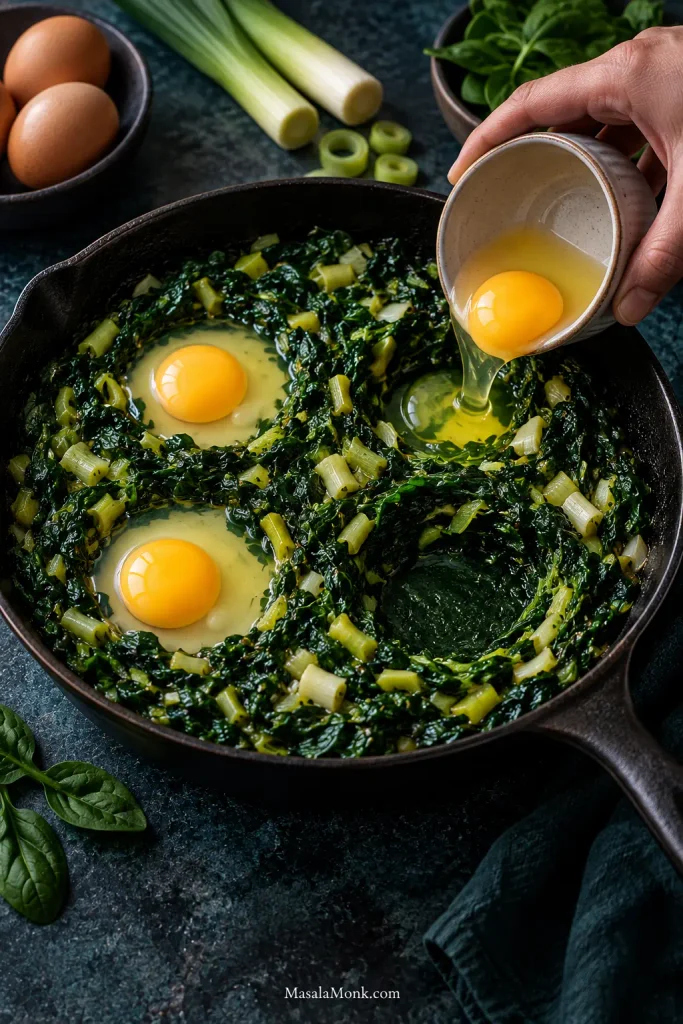
Make four deep wells. Take the skillet off the heat. Crack each egg into a small bowl first, then slide it into a well. Loading all four eggs off heat keeps the first from cooking far ahead of the last.
Aim to keep most of each white inside its well while the yolk sits near the surface. If a white starts running sideways, deepen the next well rather than trying to push the egg back through the greens.
Cook and Finish
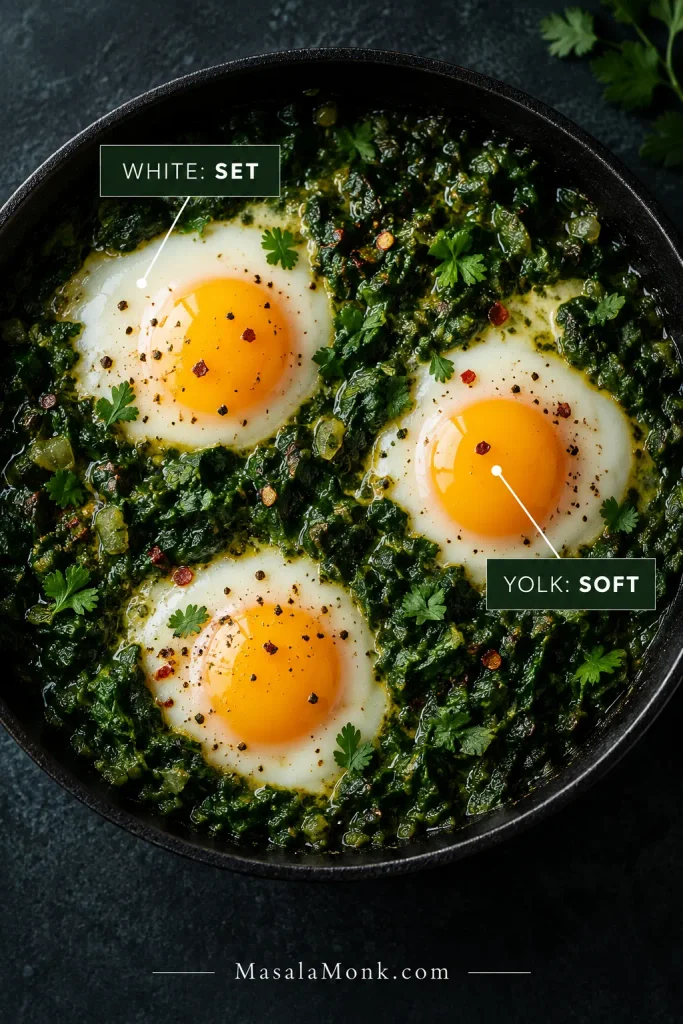
Cover and cook gently. Return the skillet to low or medium-low heat and check at around 3 minutes. For soft yolks, look for set whites and moving yolks. Rotate the pan if one side is cooking faster, then remove it just before the yolks reach the texture you want. The hot skillet will carry them a little farther.
Add the feta and serve. Scatter over the feta and remaining herbs. Taste the spinach around an egg, then add more lemon, salt or chile if needed.
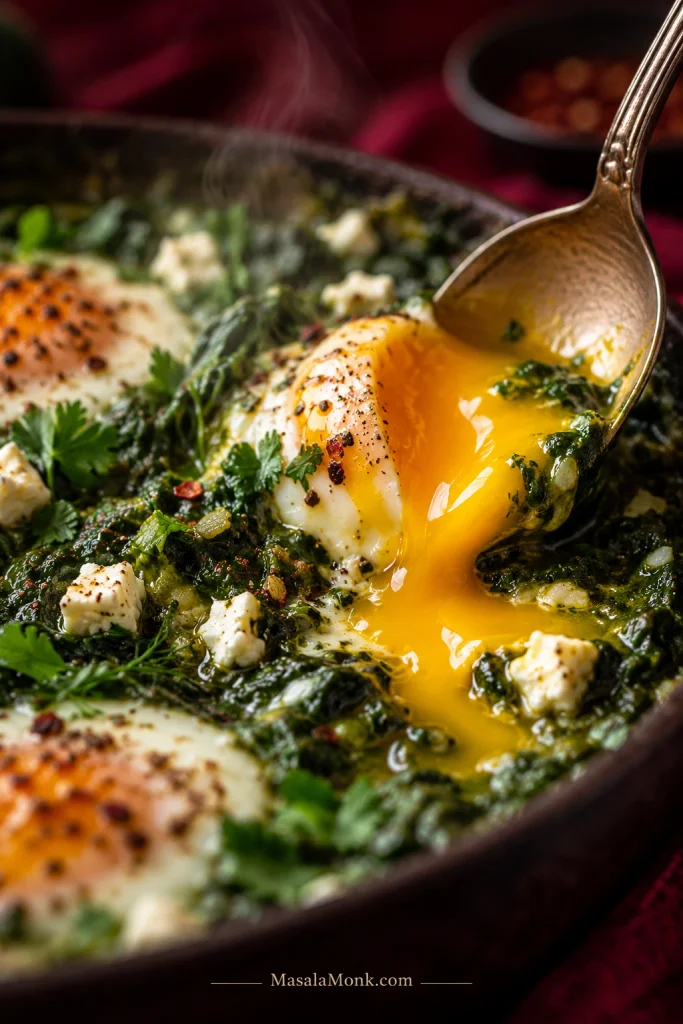
Spoon into one of the eggs while the skillet is still hot and let the yolk run through the spinach.
Once the yolk breaks, it becomes part of the sauce. That is why a little lemon at the finish matters: its acidity keeps the combination of soft yolk, feta and cooked greens rich without feeling heavy.
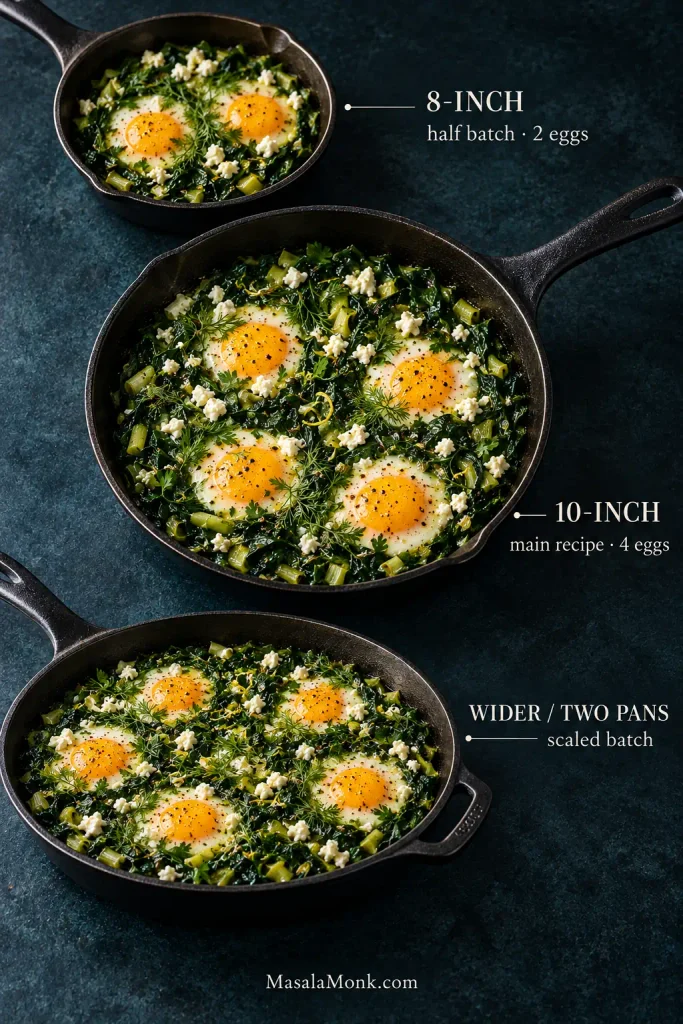
A 10-inch / 25 cm skillet gives this amount of spinach enough depth without trapping too much water underneath it. Wider skillets dry the greens faster; smaller ones hold water longer.
The same principle matters when scaling up. Twice the spinach packed into the original skillet takes longer to reduce, so a wider pan—or two skillets—is easier to manage.
Smaller Batches
Reduce the pan size along with the food. For roughly half the spinach and two eggs, an 8-inch / 20 cm skillet is a useful starting point. Spread that smaller amount through the original 10-inch pan and it will reduce faster.
Use the 10-inch pan as the depth reference when scaling: the greens should spread in a similarly shallow layer. Keeping roughly the same depth preserves evaporation better than simply adding more cooking time.
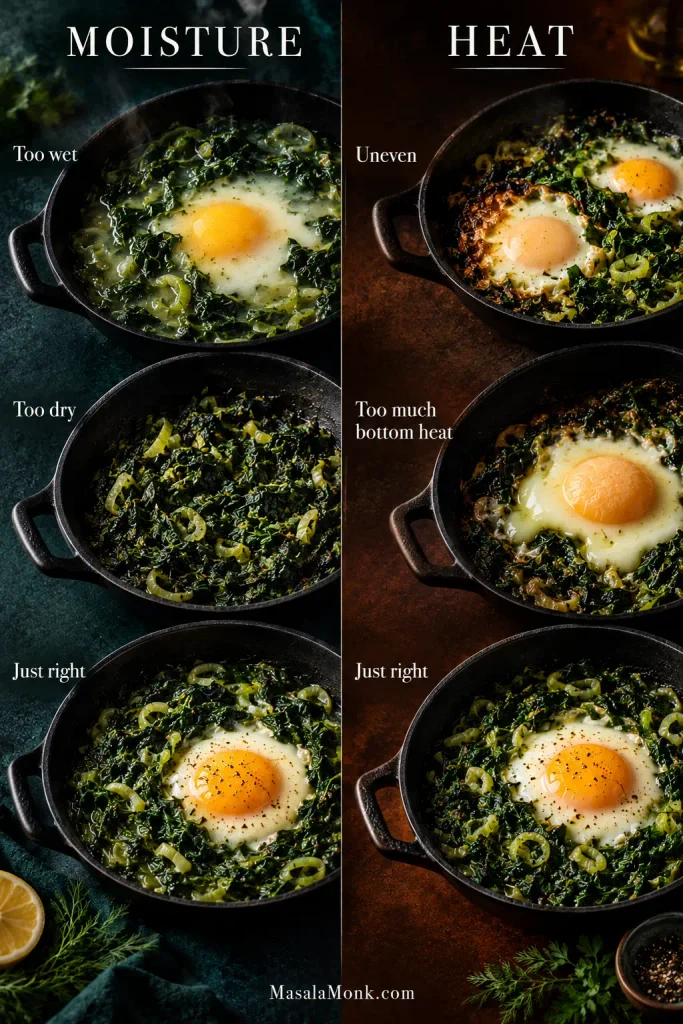
The target is simple: not soup, and not a pan of dry sautéed spinach. Get that balance right and the yolk clings to the greens instead of disappearing into liquid underneath them.
Set Whites, Soft Yolks
For soft yolks, pull the skillet when the whites are set but the yolks still move when the pan is gently nudged.
With a clear lid, watch the whites turn opaque without releasing the steam that sets their tops. Pull the pan while the yolks are still glossy; carryover heat will firm them further.
A little unevenness is normal when four eggs share one skillet. Heat reaches the eggs from below while steam sets the tops, and some burners or pans run hotter on one side.
If one side gets ahead, rotate the skillet. A heavy pan keeps cooking after it leaves the burner, too. Cast iron makes this especially obvious: a yolk that looks loose when you switch off the heat can be noticeably firmer by the time the pan reaches the table.
If everyone wants roughly the same doneness, add the eggs together as in the main recipe. When preferences differ, stagger them deliberately: give the eggs destined for firm yolks a short head start, then add the softer-yolk eggs later. Dinner survives and everyone gets the yolk they wanted.
Egg safety: When cooking for someone who needs fully cooked eggs, take both whites and yolks through until firm. FDA guidance recommends firm whites and yolks; pasteurized eggs are the safer choice when eggs are served undercooked, especially for people at higher risk from foodborne illness.
When the Burner Is Too Uneven
An oven can take the burner out of the equation. Preheat it to 375°F / 190°C, use an oven-safe skillet and transfer the pan once the eggs are in. Start checking at about 4 minutes; many pans will need longer, so judge the eggs by the whites and yolks rather than the clock.
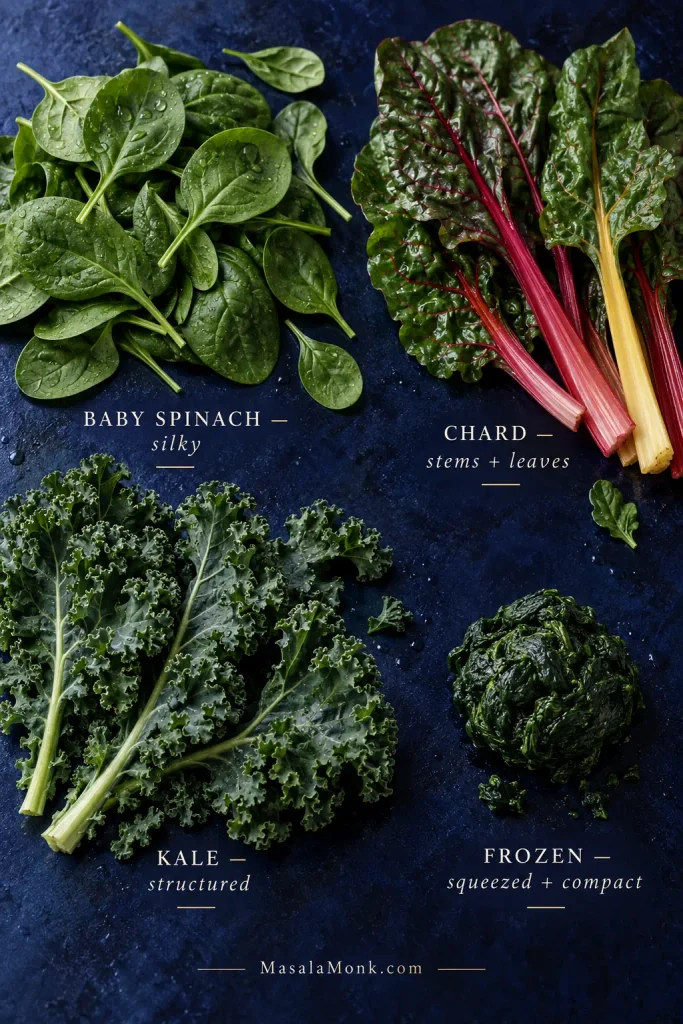
Softest and fastest; collapses dramatically and releases plenty of water.
Cook uncovered until the loose liquid is gone.
Swiss chard
More structure, with tender leaves and useful stems.
Slice the stems finely and cook them with the leek before adding the leaves.
Kale
Heartier and chewier; keeps more of its shape.
Remove tough stems, slice finely and give it longer to soften.
Frozen spinach
Already collapsed and much more compact than fresh spinach.
Use about 6–7 oz / 170–200 g by package weight as a starting point. Thaw completely, squeeze very dry and add it after the aromatics. Brands vary, so treat this as a practical starting quantity rather than an exact fresh-spinach equivalent.
Choose greens by the cooked texture you want: baby spinach turns silky, chard stays more substantial, kale keeps the most structure, and squeezed frozen spinach starts compact.
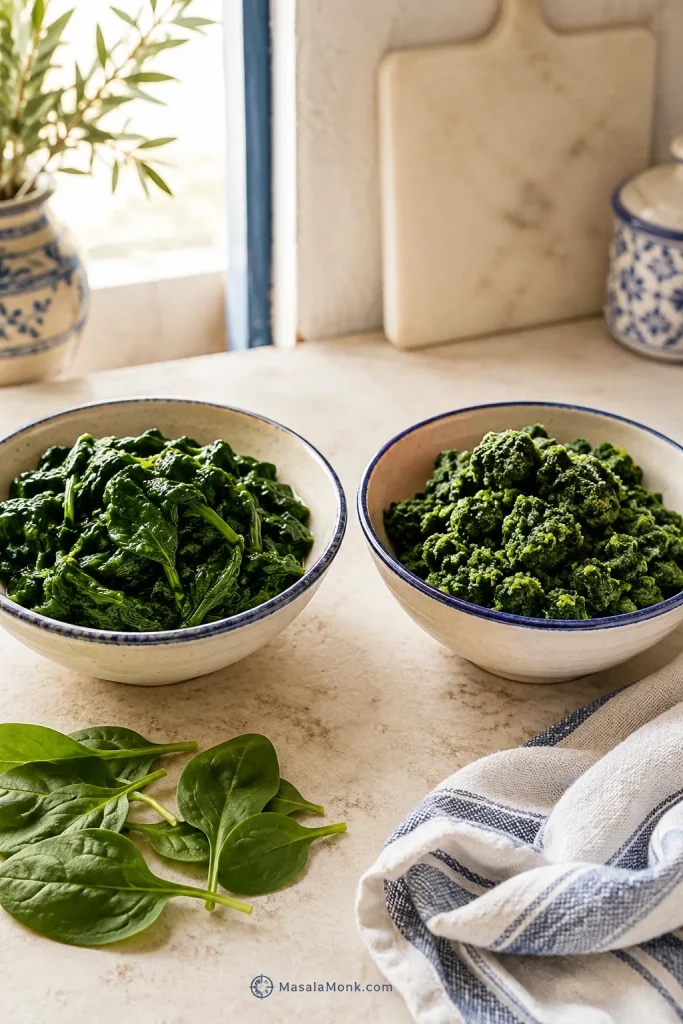
Frozen spinach looks surprisingly small after a proper squeeze. That’s useful here: the water left in the towel is water you no longer have to drive out of the skillet. The same issue shows up in homemade spanakopita, where wet spinach can soften both the filling and the pastry around it.
When mixing greens, give chard or kale a head start and add tender spinach later. Save some parsley and dill for scattering over the cooked eggs so the herbs still taste lively when the skillet reaches the table.
What You Can Swap
Leek: a medium yellow or white onion is fine. Let it soften before adding the garlic.
Feta: goat cheese gives a similar tangy contrast. Thick yogurt or labneh works better spooned alongside than stirred into the spinach.
Dill: use more parsley, some cilantro, or a smaller amount of mint.
Heat: skip the Aleppo pepper for a mild skillet, or add harissa or chile oil to individual portions.
Most problems here come down to two things: moisture and heat. If the greens are swimming, deal with the water before the eggs go in. Eggs racing ahead usually mean the heat needs lowering or redistributing.
Use timing to diagnose the pan: problems before the eggs usually point to moisture; problems during egg cooking usually point to heat. Fix the cause, not the clock.
What You See
Likely Cause
What to Do
Water pooling under the spinach
The leaves have wilted but their released liquid has not evaporated.
Keep cooking uncovered before adding the eggs.
Spinach looks dry
The pan reduced too far.
Add water 1 tablespoon / 15 ml at a time until the greens loosen.
The spinach tastes flat
It may need freshness or acidity more than another layer of seasoning.
Try lemon and fresh herbs before reaching for more spice or salt.
An egg spreads through the spinach
The greens are too wet, the well is too shallow, or both.
Reduce remaining liquid and make the next wells deeper.
One side cooks much faster
The burner or skillet has a hot spot.
Rotate the skillet or move it to the oven.
Yolk is firm while the white still looks loose
Strong bottom heat is cooking the yolk faster than steam sets the top, or the egg is sitting too high.
Use deeper wells, gentler heat and a snug cover. Move to the oven if the same problem keeps returning.
Yes, you can make green shakshuka ahead—just stop before the eggs. Cook the leek, spices and spinach, cool and refrigerate the mixture, then reheat it and add fresh eggs shortly before serving. Add the feta after the eggs are cooked.
Leftover shakshuka can be reheated, but the yolks will firm up. For freezing, portion the cooked spinach mixture without eggs or feta, thaw it in the refrigerator, reheat thoroughly and add fresh eggs at the end.
If you want an egg dish that reheats well as a whole, an oven-baked frittata is a better fit.
What to Serve With Green Shakshuka
Bread earns its place here. Warm homemade pita, sourdough or another crusty loaf is ideal for scooping the greens and wiping up the yolk left around the edges of the skillet.
Greek lemon potatoes turn it into a more substantial meal. Thick yogurt, labneh or a plate of crisp raw vegetables bring something cool alongside.
Green shakshuka suits the middle of the table: every scoop lands a little differently—more yolk, more feta, more greens—while bread turns whatever is left in the skillet into the best part of the meal.
Put the skillet in the middle and let the bread do most of the serving.
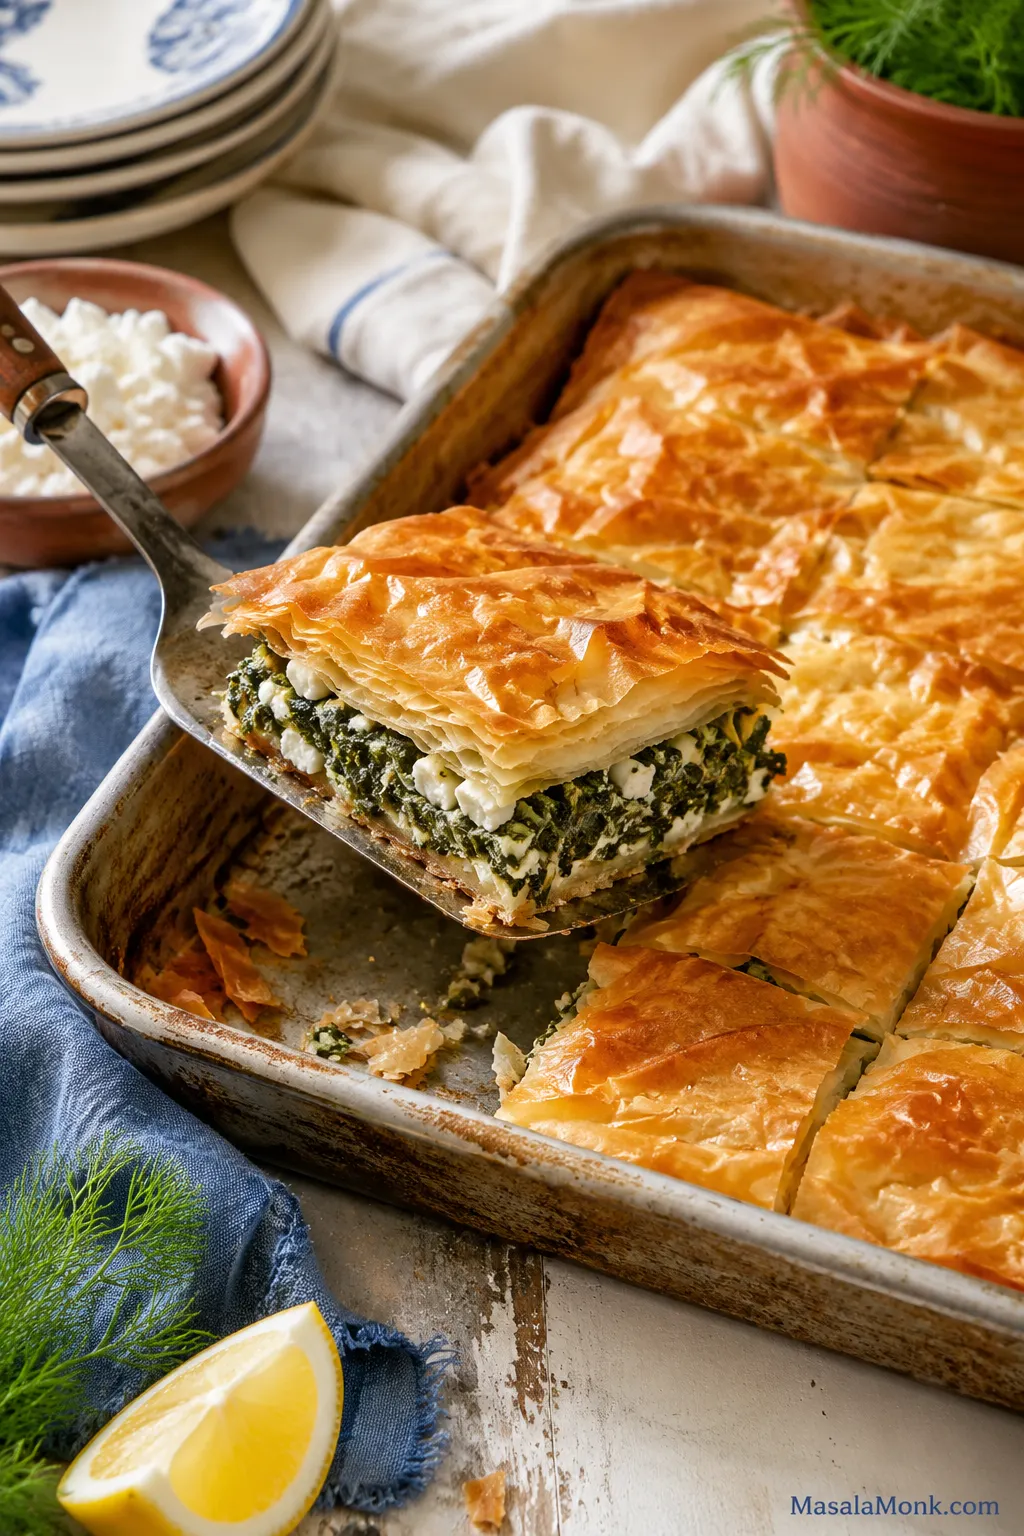
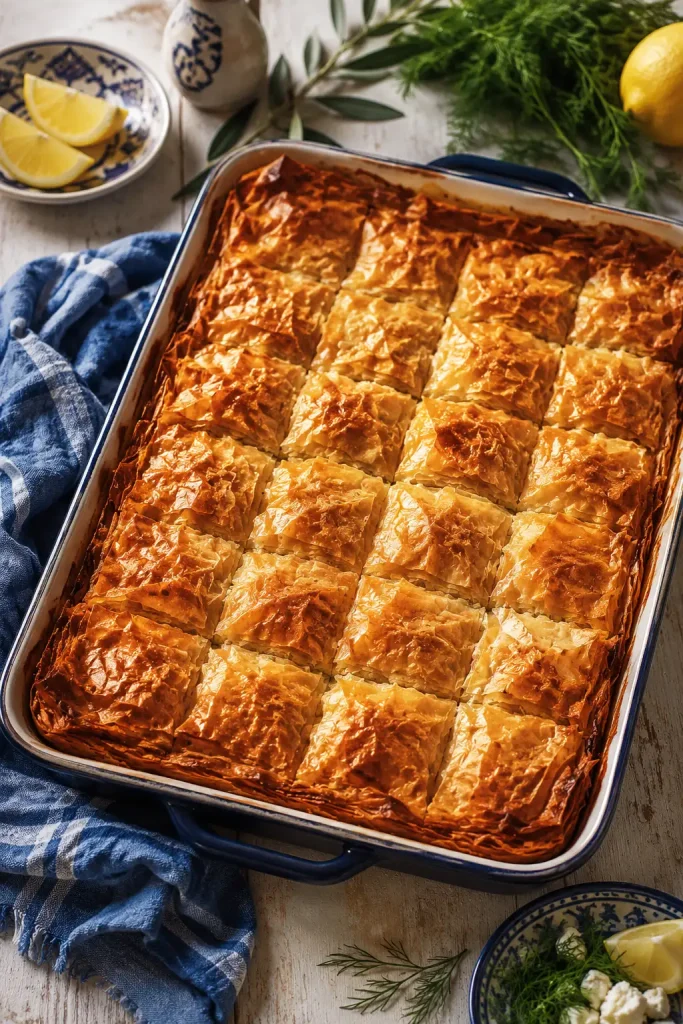
You know spanakopita is right when the knife crackles through the golden top and the first corner lifts cleanly from the pan. Under those flaky phyllo layers should be warm spinach, salty feta, fresh herbs, and enough structure to slice without the bottom turning wet.
This is a practical home-kitchen spanakopita: store-bought phyllo, a well-drained spinach-feta filling, clear success cues, and a crisp base that does not depend on perfect pastry work. You still get the drama of a flaky Greek spinach pie, but the process stays manageable: dry the greens, mix the filling, layer, bake, rest, and slice.
If phyllo makes you nervous, you are in good company. It tears, dries, and wrinkles, but this pie does not need perfect sheets. The hidden layers can be patchwork, the top can be a little rustic, and the tray will still bake into something golden, flaky, and shareable.
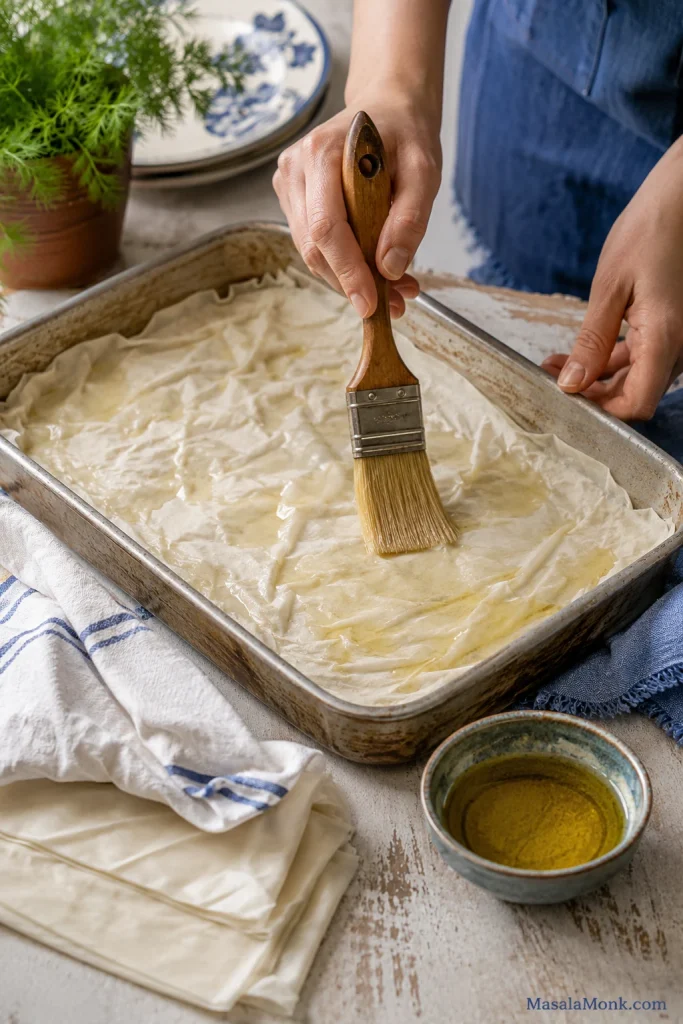
Wrinkled phyllo is still usable phyllo. Once it is lightly brushed and layered, those folds become extra flaky edges instead of a problem to fix.
Fastest reliable path: use frozen spinach, block feta, 14 phyllo sheets, and a 9 x 13 inch pan. Fresh spinach works too, but frozen keeps the filling easier to control for a first tray.
This is the version for the cook who wants spanakopita to feel doable before it feels impressive.
Spanakopita Recipe Snapshot
Recipe type
Greek spinach pie / spinach and feta phyllo pie
Prep time
35–45 minutes with frozen spinach; longer with fresh bunch spinach
Cook time
45–55 minutes
Total time
1 hour 20 minutes to 1 hour 40 minutes, not including phyllo thawing
Advance step
Thaw frozen phyllo overnight in the refrigerator
Yield
10–12 pieces
Pan size
9 x 13 inch / 23 x 33 cm baking dish or pan
Oven temperature
350°F / 180°C
Oven rack
Lower-middle rack
Spinach
500 g / 16 oz frozen spinach or 700–900 g / 1½–2 lb fresh spinach
Resting time
15–20 minutes, uncovered, before slicing
Jump to the full recipe, or keep reading for the spinach, phyllo, and crisp-bottom tips that make the tray work.
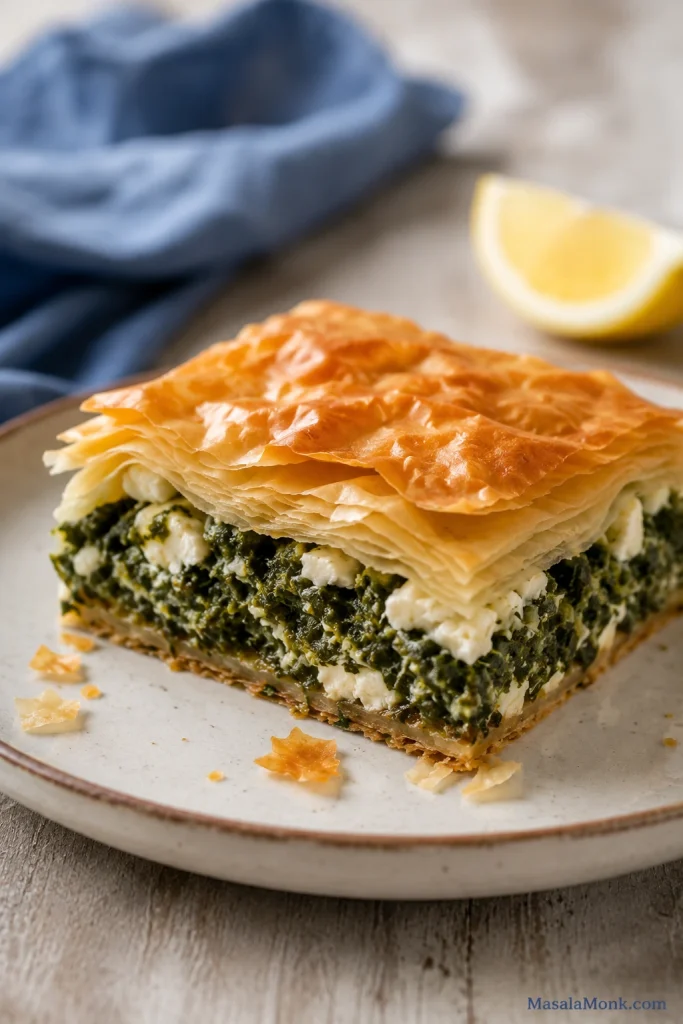
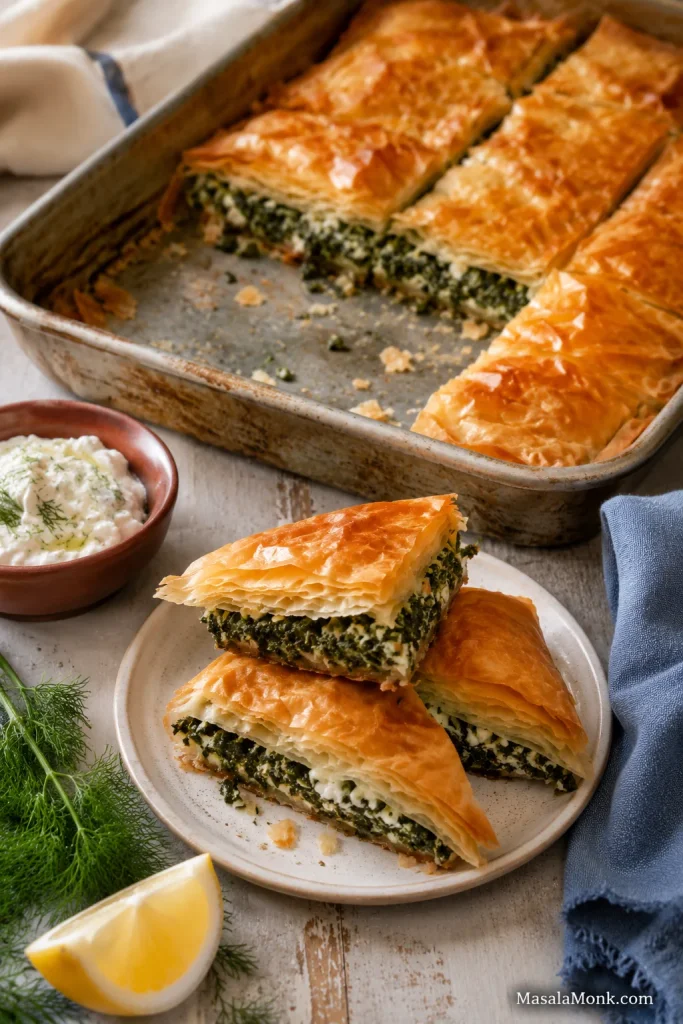
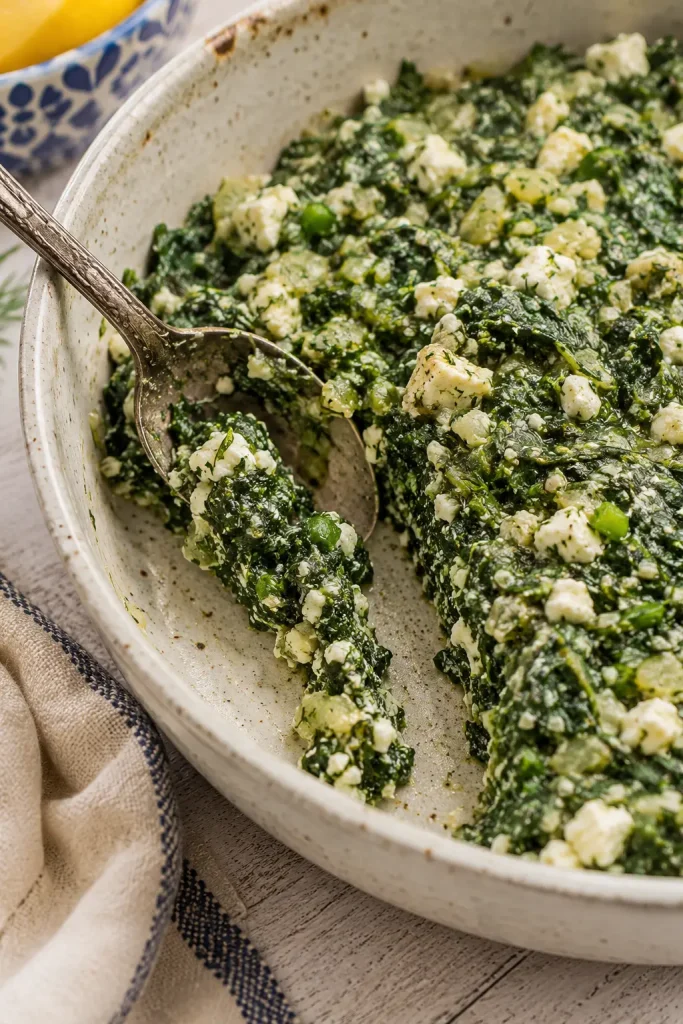
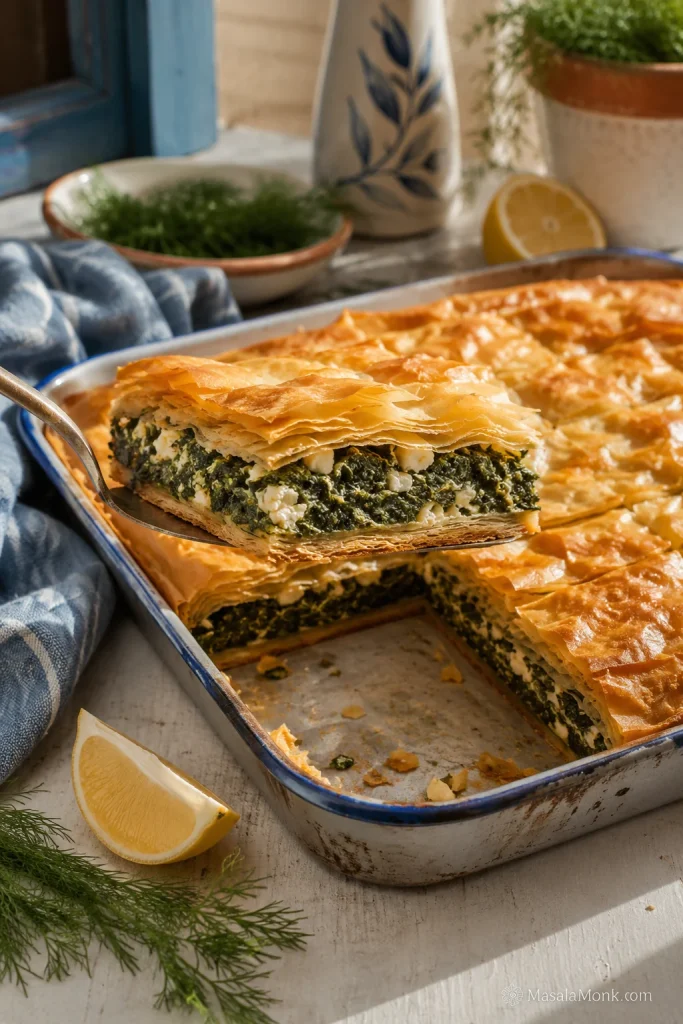
Before we get into the details, this is the texture you are aiming for: crisp pastry outside, green spinach through the middle, and small feta pieces that stay visible after baking.
A good Greek spinach pie slice should show contrast: crisp pastry outside, herby spinach inside, and small feta pockets throughout. That uneven texture is part of what makes spanakopita feel homemade.
Why This Spanakopita Works
The goal here is not perfect pastry work. It is a tray that lifts cleanly, tastes generous, and gives you flaky layers without asking you to baby every sheet. Frozen spinach takes one variable off your hands, block feta gives better texture, seven bottom phyllo sheets create structure, and the lower-middle rack helps the base bake through before the top gets too dark.
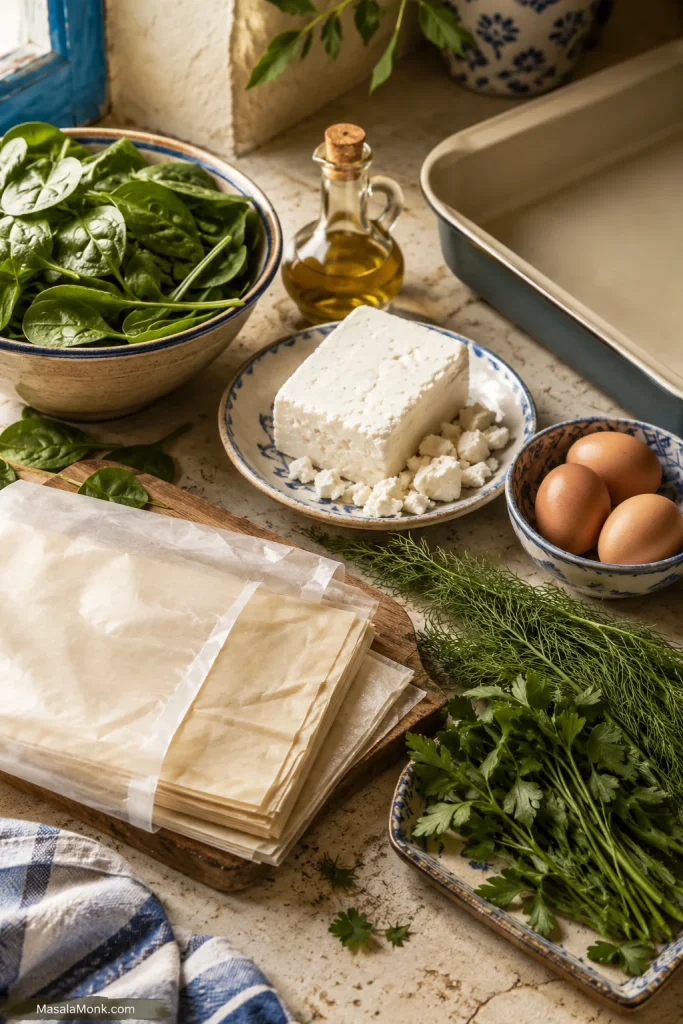
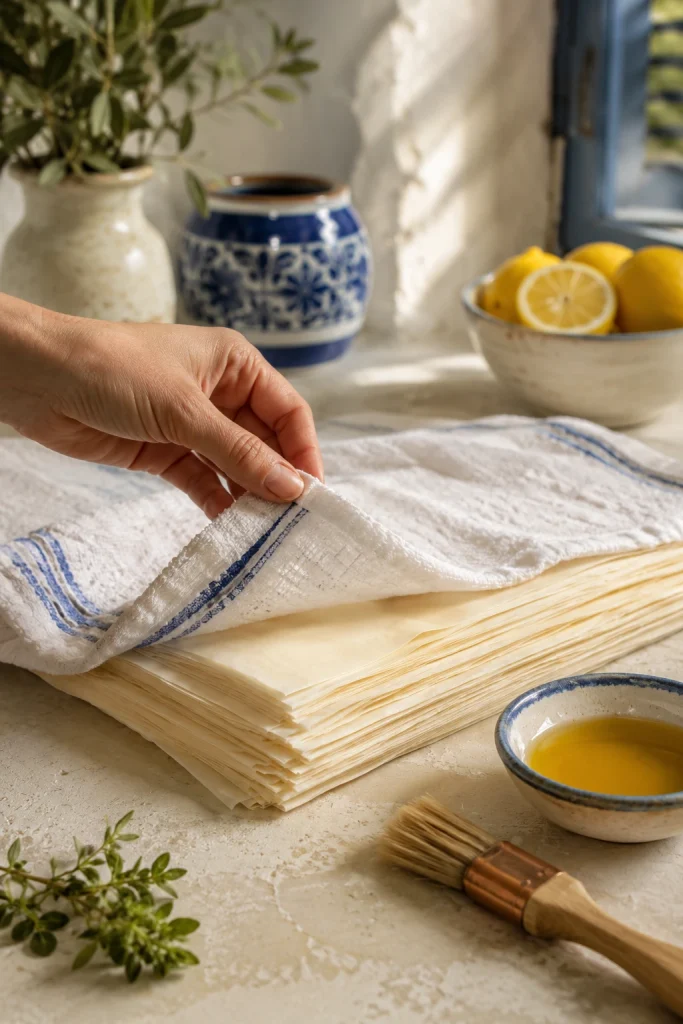
This is the practical spanakopita setup: filling ingredients ready, phyllo still protected, and the pan waiting before assembly begins.
Set up the spanakopita station before opening the phyllo: spinach, feta, herbs, eggs, oil, brush, and pan. Then the delicate sheets spend less time drying on the counter.
Frozen spinach makes the filling easier to control. Fresh works too, but frozen is already wilted, so once it is pressed well, the tray becomes more predictable.
Block feta gives creamy, salty pockets. It tastes fuller than very dry pre-crumbled feta.
Seven bottom sheets support the filling. They help the pie slice cleanly.
The lower-middle rack helps the base cook. This is especially useful in glass or ceramic pans.
A short rest finishes the texture. The filling settles, the pastry stays flaky, and the pieces cut cleaner.
The tray format is forgiving in a way triangles are not. Torn sheets disappear inside, the filling spreads evenly, and the lower layers have enough time to firm up before slicing.
You still get the flavor of a classic Greek spinach pie, just with store-bought phyllo, a forgiving tray format, and enough structure that the first slice does not collapse.
What Is Spanakopita?
Spanakopita is a Greek spinach pie made with thin phyllo pastry and a savory filling of spinach, feta cheese, herbs, and often eggs.
You may see the pastry spelled as phyllo or filo. They are the same thing: paper-thin pastry sheets that bake into crisp, flaky layers when brushed with olive oil or melted butter.
Greek spinach pies vary by family and region. Some use leeks, some add more herbs, some use homemade phyllo, and some keep the filling very simple. Here, the spirit is classic — greens, feta, herbs, olive oil, and crisp phyllo — while the handling is modern and practical: store-bought pastry, clear texture cues, and a tray format that gives the filling room to settle.
For dinner and clean slices, the tray version is the easiest path; triangles are better when you want appetizers, lunch boxes, or party bites.
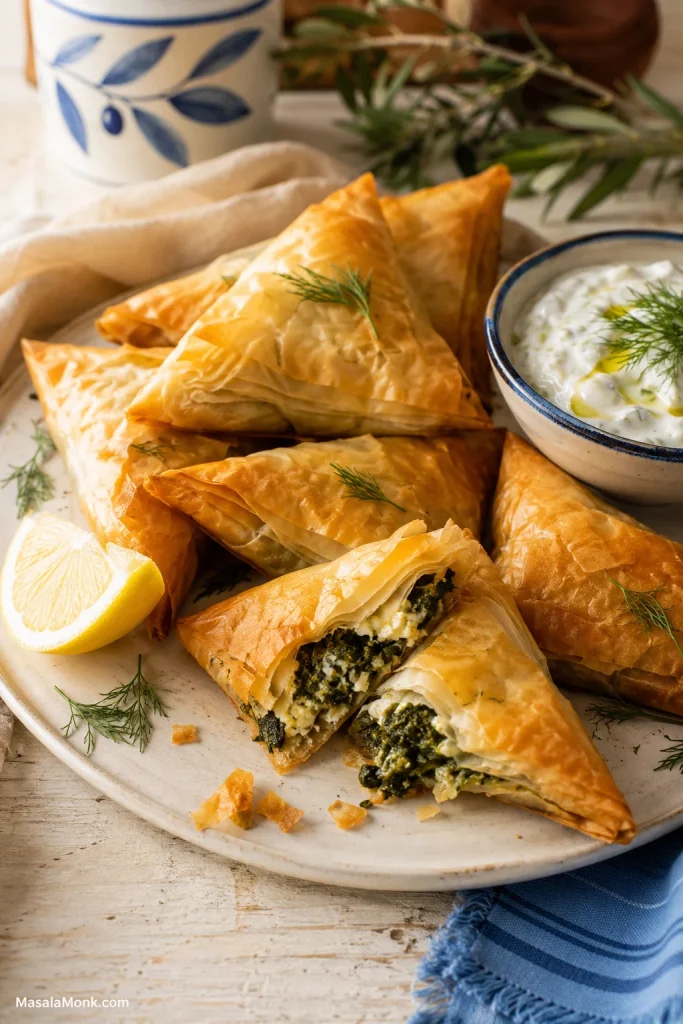
The same spinach-feta filling can become a full tray or folded spanakopita triangles. Choose the tray for an easier family-style bake, or make triangles when you want appetizer-sized pieces.
Spanakopita is not meant to be creamy like spinach dip. The filling should be savory, herby, and moist enough to taste generous, but firm enough that the phyllo bakes into layers instead of steaming from underneath.
In either shape, the best pieces have contrast: brittle golden corners, soft salty feta tucked into the greens, and a herby filling that smells good before the tray even reaches the oven.
Ingredients and Substitutions
The filling is simple, which is why the details show up in the finished slice. Good feta gives salty pockets, fresh herbs keep the spinach lively, and well-prepared greens let the phyllo stay flaky instead of heavy. If spinach is your main question, jump to the fresh vs frozen spinach guide before mixing.
Spinach and feta are the two ingredients that matter most. Spinach controls texture; feta controls flavor. Loose spinach weakens the pastry, while bland feta makes the whole filling taste flat.
This amount gives a generous but sliceable filling: enough spinach and feta to taste full, but not so much that the lower layers steam. If you add extra greens, keep the final squeezed amount close to the recipe amount.
Spanakopita Ingredient Amounts
Ingredient
Amount
Notes
Frozen chopped spinach
500 g / 16 oz
Thaw fully and press well.
OR fresh spinach
700–900 g / 1½–2 lb
Wilt in batches, cool, chop if needed, then squeeze well.
Feta cheese
300 g / about 10½ oz
Block feta gives better flavor and texture than very dry pre-crumbled feta.
Large eggs
2
Help bind the filling so the pieces slice more cleanly.
Phyllo sheets
14 sheets
Use 7 sheets on the bottom and 7 on top.
Olive oil, divided
120 ml / ½ cup for brushing, plus 1–2 tablespoons for cooking
You may not use all of it. Sheets should look lightly glossy, not heavy.
Onion or scallions
1 small onion or 4–6 scallions
Adds sweetness and depth.
Garlic
1–2 cloves, minced, optional
Adds extra savory depth.
Dill, fresh
¼ cup chopped
Classic fresh herb flavor.
Parsley, fresh
¼ cup chopped
Adds brightness.
Mint, fresh
1–2 tablespoons, optional
Adds a brighter, more aromatic note.
Lemon zest
½ teaspoon, optional
Adds brightness if your feta is mild or the filling tastes flat.
Black pepper
To taste
Use generously if your feta is mild.
Nutmeg
Pinch, optional
Works well with spinach and cheese.
Before the eggs go in, taste the filling so you can judge the feta’s saltiness. Some feta needs no added salt at all.
Feta Cheese
Most of the salt and tang comes from the feta, so it matters. Block feta is the better choice if you can get it. Crumble it yourself for a softer, creamier texture. Pre-crumbled feta works, but it can be drier.
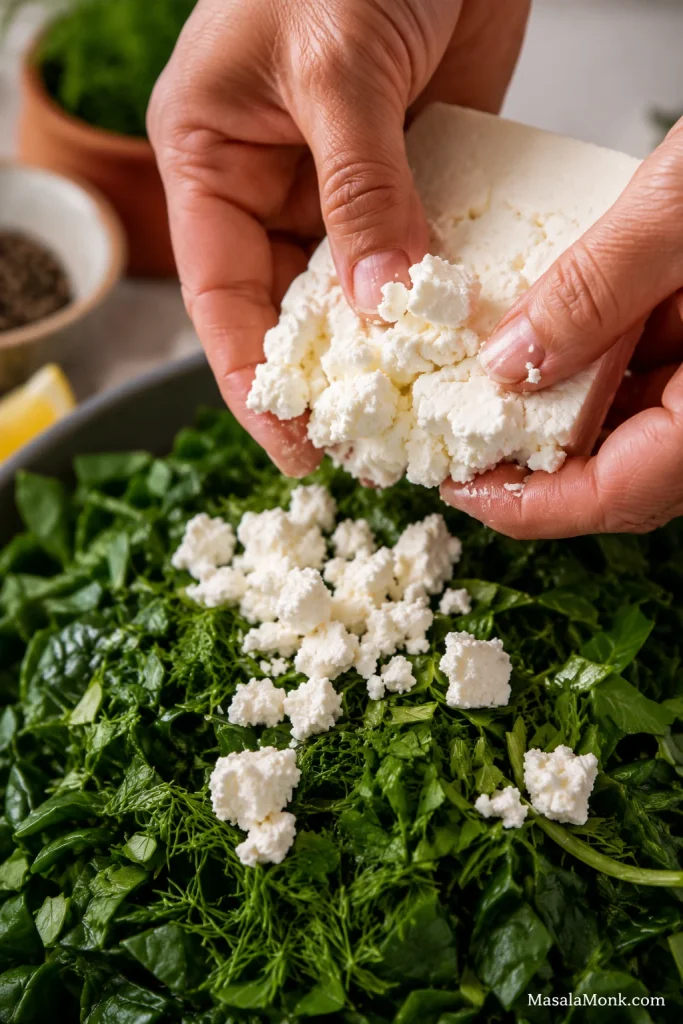
Crumble block feta unevenly instead of mashing it smooth. Those small salty pockets give the filling better flavor and a more satisfying bite.
Use 300 g / about 10½ oz as the default. If your feta is very salty, use a little less and skip extra salt. If your feta is mild, lean on black pepper, herbs, and a little lemon zest before adding more salt.
Olive Oil or Butter?
Olive oil gives the pie a more classic Greek flavor. Melted butter makes the pastry richer and more golden. Both work, and you can also use half olive oil and half melted butter.
Brush lightly. The pastry needs enough fat to crisp, but it should not feel soaked or heavy.
Can You Add Ricotta, Cream Cheese, or Yogurt?
You can add a little ricotta, cream cheese, or Greek yogurt for a creamier filling, but use a light hand. Too much soft cheese makes the mixture wetter and heavier. It should mound softly on a spoon, not spread like dip. If what you really want is a creamy spinach appetizer, MasalaMonk’s spinach dip recipes are a better fit.
Fresh Herbs and Dried Herb Substitutes
Fresh dill and parsley give the filling its best flavor. If using dried dill, start with about 1 teaspoon dried dill for every 1 tablespoon fresh dill. Dried parsley is milder, so fresh parsley is better when possible. Dried mint can be strong, so use only a small pinch.
Leeks, Chard, and Other Greens
Leeks add sweetness and depth. Chard or silverbeet can replace part of the spinach, especially if you like a stronger green flavor. Kale, mushrooms, artichokes, and pine nuts can work too, but treat them as variations. For the cleanest first tray, keep the filling simple: spinach, feta, herbs, onion, and eggs.
Fresh or Frozen Spinach: Which Works Better?
Best spinach for spanakopita: frozen chopped spinach is the most reliable choice for a first tray because it is already wilted and easier to drain evenly. Fresh spinach gives brighter flavor, but it takes more prep and still needs to be cooked, cooled, chopped, and pressed before mixing.
Fresh spinach gives a brighter taste, while frozen spinach is easier and more predictable. Either way, the winning move is removing moisture before the filling touches the phyllo.
Use this
Best when
Watch out for
Frozen spinach
You want the most reliable first tray.
It must be fully thawed and pressed well.
Fresh bunch spinach
You want brighter flavor and a more traditional fresh-greens feel.
It takes longer and cooks down heavily.
Baby spinach
You want faster fresh spinach prep.
The filling can be softer and milder.
Chard or silverbeet
You want a deeper greens flavor.
Stems need chopping finely or removing.
Use about 700 g for tender baby spinach and closer to 900 g for mature bunch spinach with stems. After wilting and squeezing, you want roughly the same packed amount you would get from 500 g / 16 oz thawed frozen spinach.
Fresh spinach always looks like too much at first. Then it wilts down dramatically, which is exactly why the recipe starts with such a large amount.
Spinach Dryness Test
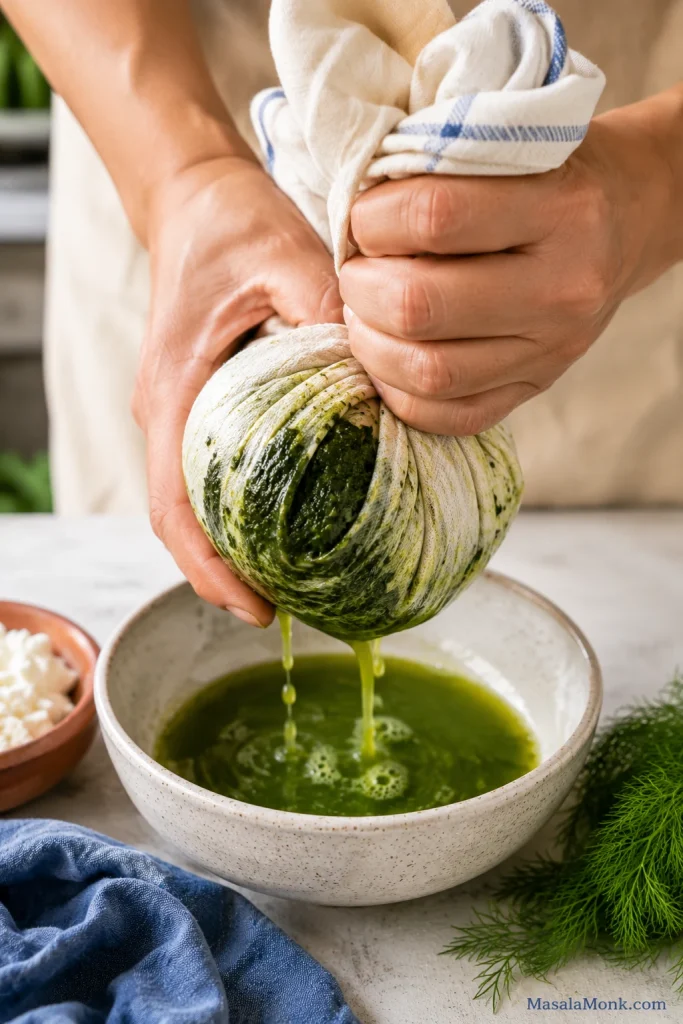
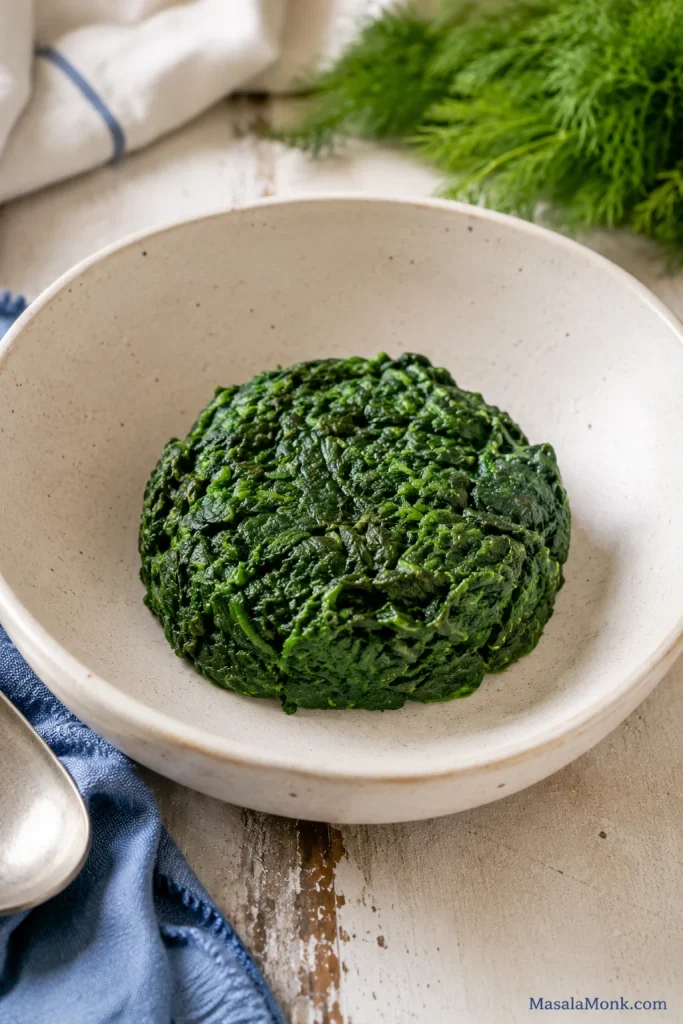
After squeezing, press the spinach with your hand or the back of a spoon. It should hold together in a soft mound, but the bowl should stay dry. If green liquid gathers at the bottom, squeeze again.
First, squeeze out the hidden water. This one step does more for crisp spanakopita than almost any extra seasoning or topping.
For frozen spinach, squeeze it in a clean kitchen towel in small handfuls rather than one large mass; it is easier to remove more liquid that way.
The Dry-Bowl Cue
Here, the greens stop being watery and become a proper filling. Spanakopita can handle moist spinach. It cannot handle dripping spinach.
After pressing, the spinach should sit in a compact mound with no liquid pooling below it. That dry-bowl cue tells you the filling is ready to mix.
How to Make Spanakopita
Once the spinach is ready and the filling tastes good, assembly is straightforward. The prep work is what makes the tray easy; now it comes together quickly. If the phyllo is the stressful part, the phyllo help section has the calmer fixes.
This method makes one large 9 x 13 inch / 23 x 33 cm Greek spinach pie. It is easier than folding triangles and gives you generous pieces with firm edges, flaky tops, and warm spinach-feta filling.
The tray may look a little untidy before baking. That is normal. Phyllo has a way of looking chaotic in the pan and beautiful after heat does its work.
Step 1: Thaw the Phyllo
Thaw frozen phyllo overnight in the refrigerator, or according to package directions. Before assembling, let the sealed package sit briefly at room temperature so the sheets are easier to unroll. Open the package only when the filling and pan are ready.
Step 2: Prepare the Spinach
For frozen spinach, thaw it completely and press out as much liquid as possible. For fresh spinach, wilt it in batches in a large pan, let it cool, chop it if the leaves are large, and squeeze well. If liquid gathers in the bowl after squeezing, press it again.
Step 3: Cook the Aromatics
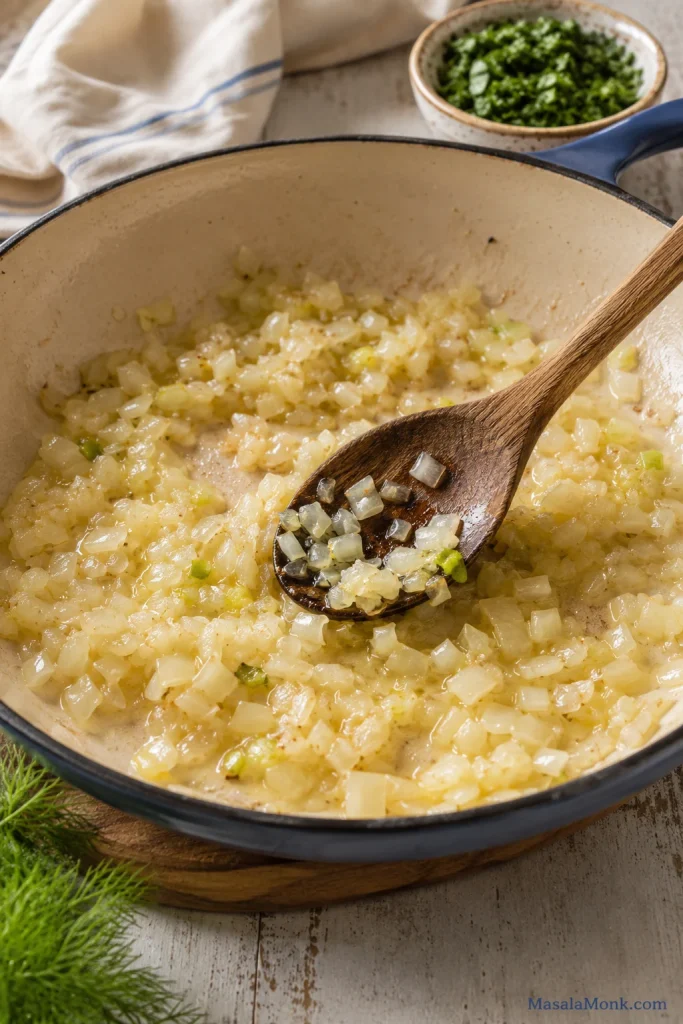
Warm 1–2 tablespoons olive oil in a skillet. Add the onion or scallions and cook until softened. Add optional garlic and cook briefly until fragrant. Let the mixture cool slightly.
The onion should smell sweet and mellow, not sharp, before it goes into the spinach.
Let the aromatics soften until they smell mellow and sweet. This gives the spinach-feta filling depth without making the Greek spinach pie taste heavy.
Step 4: Mix and Taste the Filling Before Adding Eggs
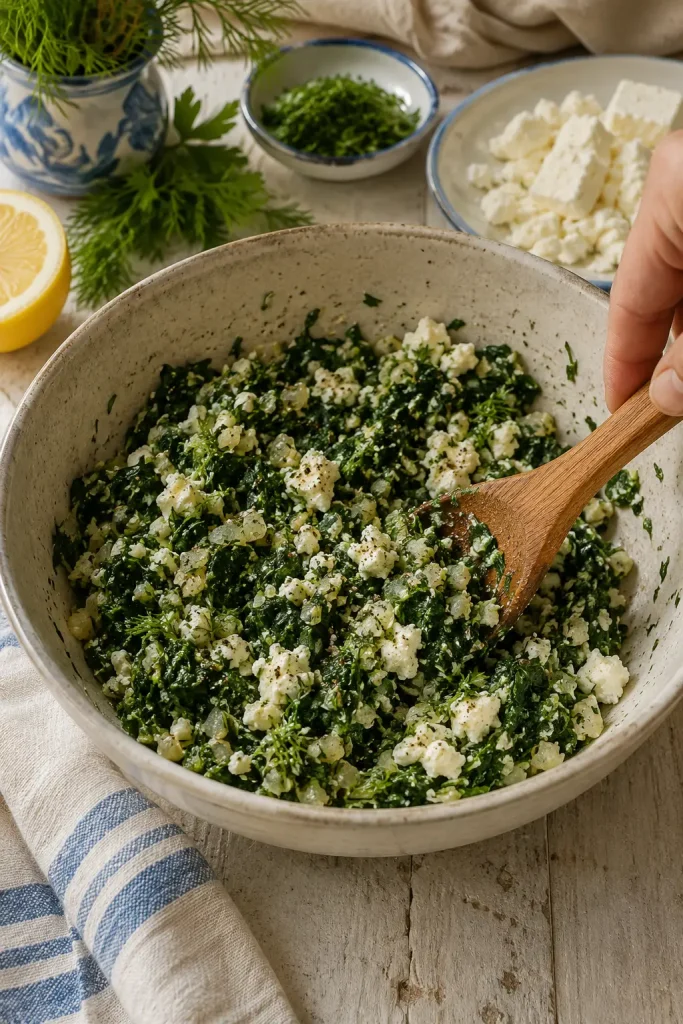
In a large bowl, combine the squeezed spinach, cooked aromatics, crumbled feta, dill, parsley, black pepper, optional lemon zest, and any optional mint or nutmeg. Taste this mixture before adding salt, because feta can be very salty. Once the seasoning tastes right, mix in the eggs.
Before the eggs go in, the filling should look textured rather than creamy. Visible herbs, spinach, and feta pieces mean every slice will have better flavor contrast.
The Filling Texture Test
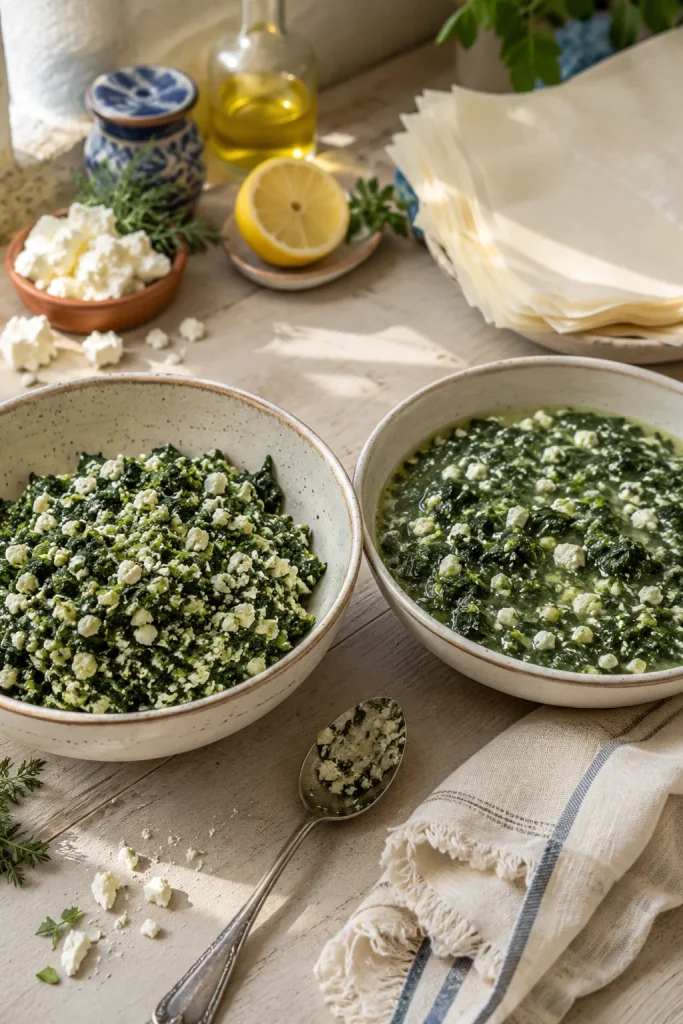
You should have a generous bowl of filling that looks clumpy and spoonable, with little white pieces of feta still visible in the greens. When you drag a spoon through it, it should not leave watery liquid behind.
Use the spoon trail as a quick filling test. If water does not rush back into the line, the mixture is clumpy enough to protect the phyllo layers.
By this point, the bowl should already smell like the finished pie: salty feta, green herbs, softened onion, and clean spinach.
Step 5: Heat the Oven and Ready the Pan
Heat the oven to 350°F / 180°C and place a rack in the lower-middle position. Brush a 9 x 13 inch / 23 x 33 cm baking dish or pan with olive oil.
For a fan or convection oven, start around 170°C and check a little early, since the top may brown faster.
Step 6: Layer the Bottom Phyllo
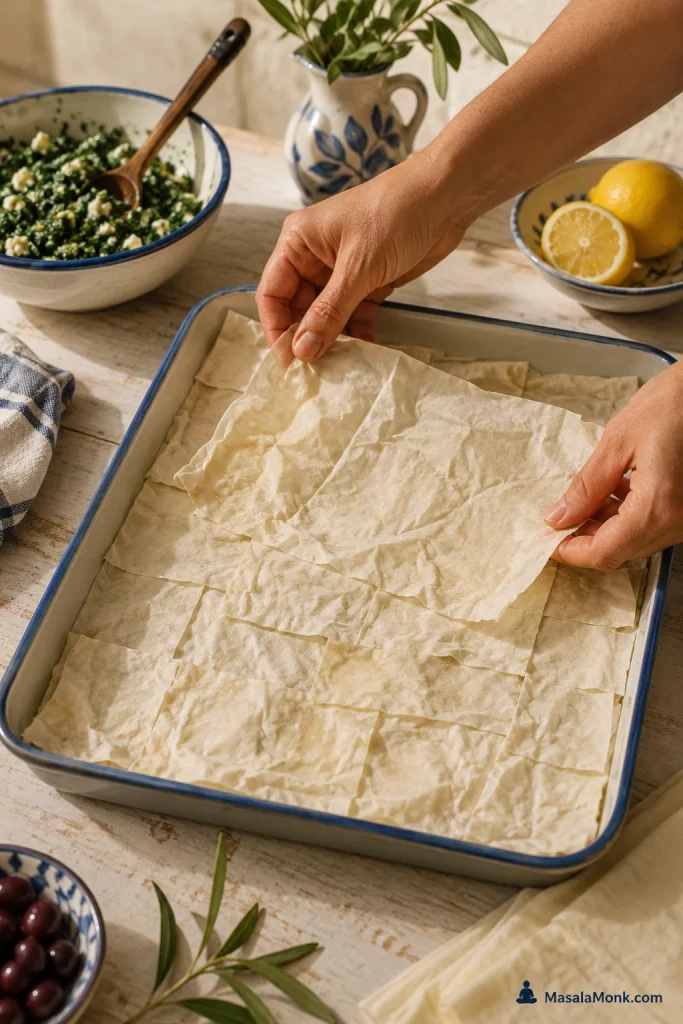
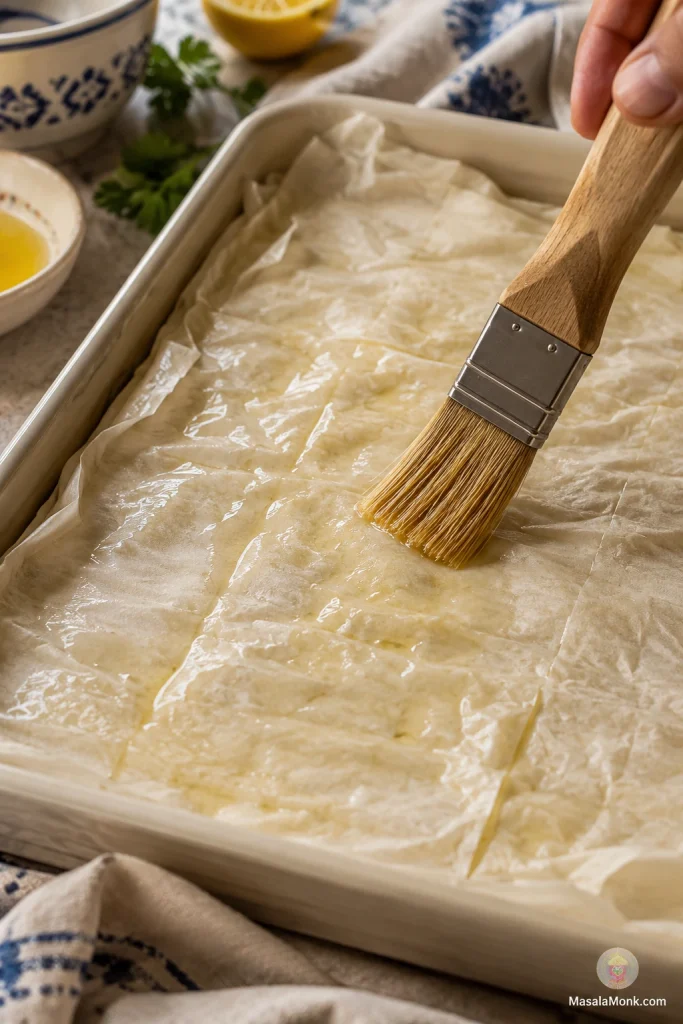
Now comes the part that looks fancier than it is. Open the phyllo and keep the unused sheets covered with a barely damp towel. Place one sheet in the dish and brush lightly with olive oil. Repeat until you have 7 bottom sheets. Torn or wrinkled sheets can go here; save the neatest ones for the top.
Cover the phyllo between layers, but keep the towel only barely damp. The goal is flexible sheets, not wet pastry.
Patchwork the Hidden Layers
Use torn or smaller phyllo pieces where they will be hidden. Overlapping the gaps gives the filling support without requiring perfect sheets.
Torn sheets belong in the bottom layers. Overlap them like patchwork, then keep building; the filling needs coverage and structure, not perfect rectangles.
Step 7: Add the Filling
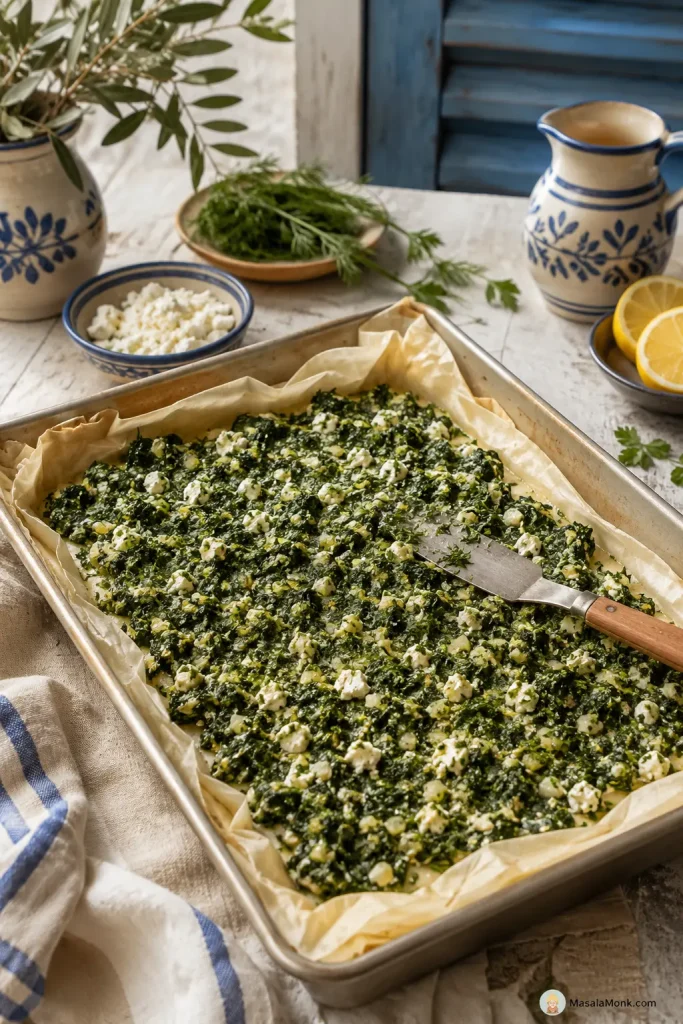
Spread the spinach-feta filling evenly over the phyllo. Keep it loose and even rather than pressing it down hard. The filling should sit in a generous layer, not a compacted block.
Spread the filling evenly, then stop. Pressing it down too hard can make the pie dense instead of giving you a lighter, layered spanakopita.
Step 8: Add the Top Phyllo
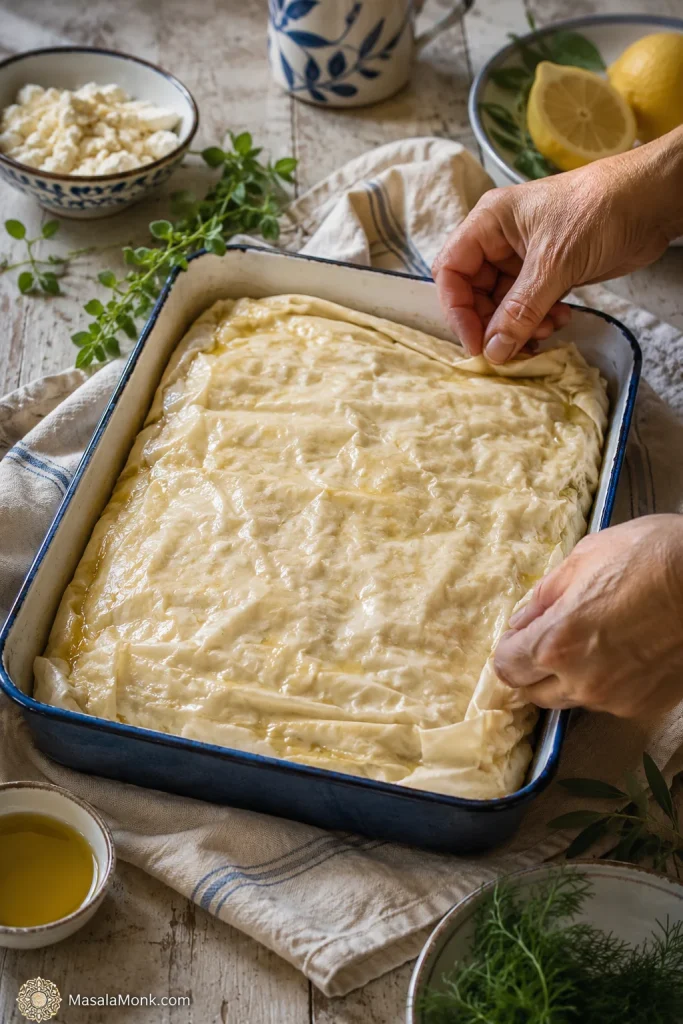
Layer 7 more phyllo sheets over the filling, brushing each sheet lightly with olive oil. Tuck or fold the edges into the pan. The sheets should look lightly glossy in spots. They do not need to shine like they are soaked.
Brush just enough oil to leave a light sheen. Too much fat can weigh down the phyllo, while a thin coat helps the layers crisp and separate.
Tuck the Top Edges
Fold the overhanging sheets inward so the top looks tidy and the corners have enough pastry to crisp.
Tuck the top sheets inward for a tidy edge and better corner texture. Those folded bits often bake into the crispiest parts of the tray.
Step 9: Score the Top
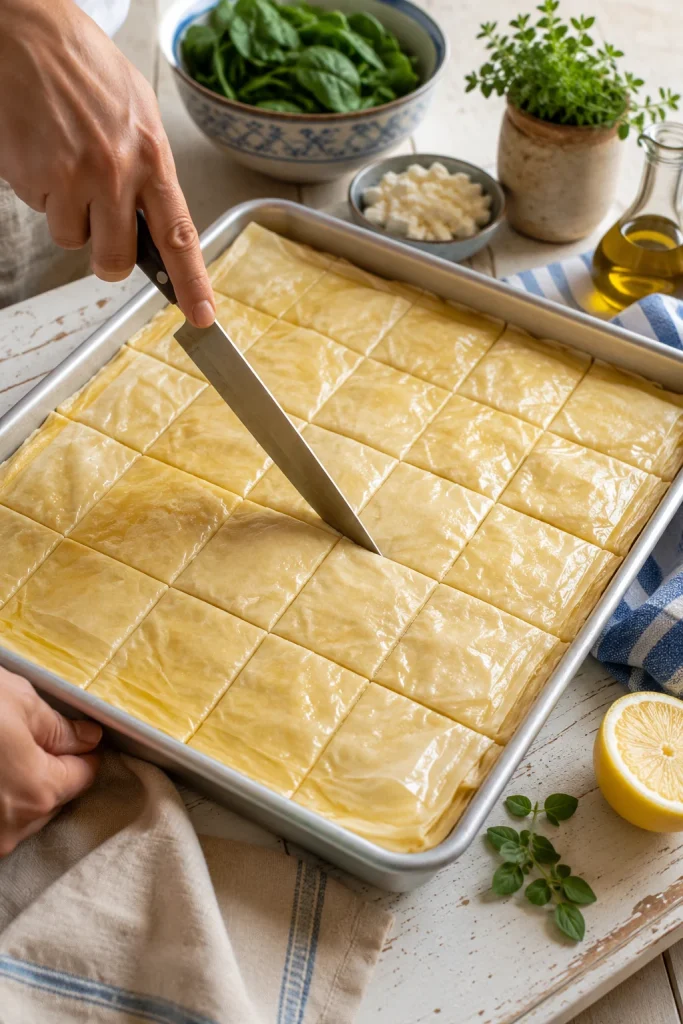
Use a sharp knife to score the top layers into squares, rectangles, or diamonds. You do not need to cut all the way through the filling before baking. Scoring now makes the finished pie easier to slice without shattering the top.
Score before baking, while the phyllo is still soft enough to guide. Once crisp, those shallow lines help the knife move cleanly instead of crushing the top.
Squares are easiest for weeknights. Diamonds make the same tray look instantly party-ready once the golden top opens along the scored lines.
Step 10: Bake Until Golden-Brown and Crisp
Bake for 45–55 minutes, until the top is golden-brown, the edges are firm, and the filling is hot and set. Start checking at 45 minutes, but trust the pastry more than the clock. If the top browns too quickly, tent it loosely with foil and keep baking. Not sure yet? Compare it with the doneness cues before pulling the tray.
Step 11: Rest, Then Slice
Let the spanakopita rest uncovered for 15–20 minutes before cutting fully through the scored lines. The wait is annoying, but it is what turns a hot, loose filling into clean pieces with flaky tops and edges that hold.
If you only follow the method above, you can make a good tray. The next sections are for the moments that make cooks nervous: a soft base, fussy phyllo, loose filling, make-ahead timing, and slices that need to hold together.
How to Keep the Bottom Crisp
To keep spanakopita from getting soggy: remove excess spinach moisture, avoid loose or creamy filling, use enough bottom phyllo, bake until the pastry is fully golden, and rest the pie uncovered before slicing.
If the bottom turns soft, the pie is usually telling you one of two things: the filling was too wet, or the base needed more heat and time. For specific fixes, use the troubleshooting table.
What Actually Keeps the Bottom Crisp
Moisture first: no liquid pooling in the filling.
Structure second: enough bottom phyllo to support the greens and feta.
Heat third: lower-middle rack so the base bakes before the top over-browns.
Rest last: 15–20 minutes so the filling settles before slicing.
If the filling looks wet, drain off any visible liquid before layering. If the mixture still looks loose, stir in 1–2 tablespoons breadcrumbs, fine semolina, or crushed crackers to absorb extra moisture. This is a rescue trick, not something you should need every time.
Clean First Corner Lift
When the bottom is right, the first corner lifts cleanly instead of slumping, and that is the moment you know the tray worked.
The first lifted piece is the real test. If it holds shape on the spatula, the spinach was drained well and the bottom phyllo had enough time to crisp.
If Phyllo Makes You Nervous
The method above is enough for most cooks, but these small phyllo habits make the first tray feel calmer. Most of the fear disappears once you stop trying to keep every sheet perfect.
Thaw phyllo overnight in the refrigerator, then let the sealed package sit at room temperature until pliable. Rushing the thaw can make sheets crack, stick, or turn damp in patches. Once opened, keep unused sheets covered with a barely damp towel.
For this recipe, 14 sheets is the default: 7 on the bottom and 7 on top. Very thin brands can take up to 16 sheets.
Smaller phyllo sheets can be overlapped to make one layer. Larger sheets can climb the sides of the pan and fold inward. The goal is layered coverage, not perfect single-sheet geometry.
If a sheet tears, use it in the bottom or middle layers and overlap the gaps. If a sheet dries out, discard it or tuck it into the middle rather than forcing it across the top.
Think of the inner sheets as patchwork. Nobody will see them, and they still bake beautifully. Once the first few sheets are down, the rest feels much less precious.
Since phyllo brands vary, follow your package first. For a deeper handling reference, Athens Foods has a practical guide to phyllo storage, thawing, and handling.
How to Tell When Spanakopita Is Done
For a 9 x 13 inch / 23 x 33 cm tray, bake at 350°F / 180°C for 45–55 minutes. Your oven and pan matter, but the pastry will tell you when it is ready.
A pale top usually means the lower layers need more time too. A deeply golden top, dry scored lines, and a firm first corner matter more than hitting exactly 50 minutes.
Golden Tray Doneness
Look for a tray that reads crisp before you cut into it: browned edges, dry scoring lines, and a top that no longer looks soft or steamed.
Check more than color. A finished spanakopita tray should have browned edges, dry scored seams, and a top that looks crisp rather than steamed.
Top: deeply golden and crisp, not pale.
Edges: flaky, browned, and firm.
Scored lines: dry-looking, not wet.
Filling: hot and set, not leaking.
Bottom: firm enough that a corner lifts with a spatula instead of drooping back into the pan.
When the pie is close, the kitchen starts to smell like toasted pastry, herbs, and warm feta.
A metal pan gives the crispest bottom. Glass or ceramic works too; just give the base a few extra minutes if it still looks soft. If using a metal baking pan, setting it on a preheated sheet pan can help the bottom crisp. If using glass or ceramic, avoid sudden temperature changes, especially if the dish is cold from the refrigerator.
Spanakopita Success Cues
Before assembly: the filling smells herby and salty, with no liquid pooling in the bowl.
While layering: the phyllo looks lightly glossy, not wet or heavy.
Before baking: the top is scored and the edges are tucked into the pan.
After baking: the top is deeply golden and the scored lines look dry.
After resting: the first corner lifts cleanly instead of collapsing.
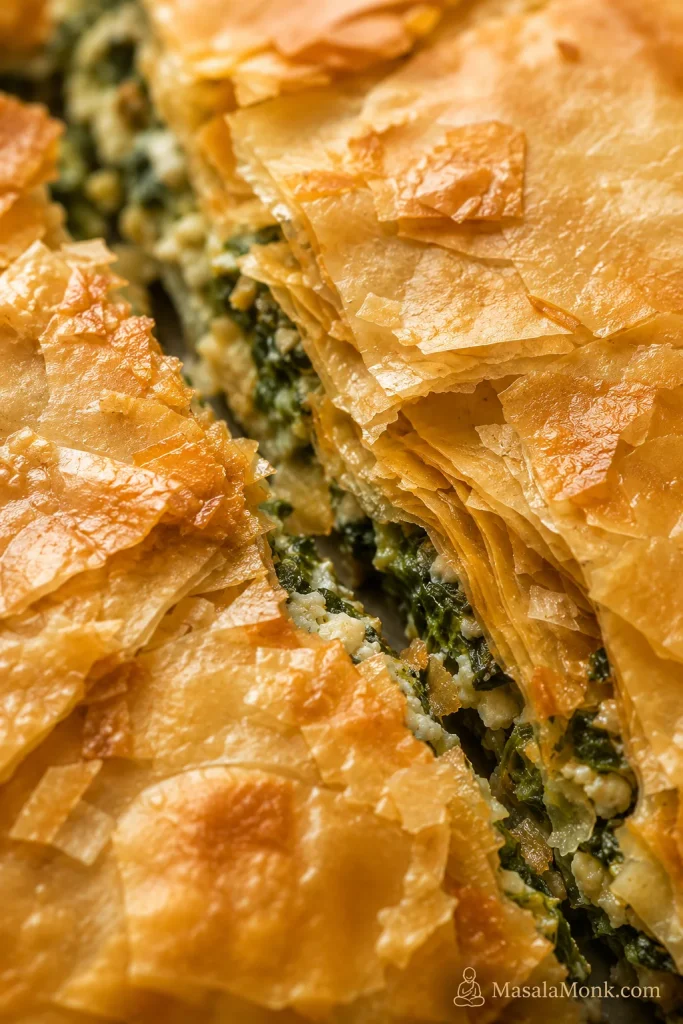
Crisp Flaky Phyllo Layers
Close up, the finished pastry should look brittle and layered, with small shards breaking away from the spinach-feta filling beneath.
This close-up shows the payoff of careful layering: brittle phyllo on top, tender spinach-feta filling below, and flaky shards that break cleanly when cut.
Troubleshooting Spanakopita
Most spanakopita problems are not mysterious. A soggy bottom, leaking filling, or shattered top usually comes from one of three things: too much moisture, not enough baking time, or slicing before the filling has settled.
Correct Filling vs Loose Filling
Before assembly, compare the filling texture instead of guessing. A clumpy mixture protects the pastry; a loose mixture brings too much steam and moisture into the tray.
For troubleshooting, compare the two textures before assembly. The thicker filling bakes into cleaner slices, while the loose mixture can soften the pastry and make cutting messier.
Problem
Likely cause
Fix
Soggy bottom
Wet filling or underbaked base
Press more moisture from the spinach, bake longer, and use a lower rack.
Top browns too fast
Oven runs hot or tray is too high
Tent loosely with foil and continue baking.
Bottom is soft but top is done
Weak bottom heat
Move lower and bake 10 more minutes with foil over the top.
Phyllo tears
Sheets are dry, cold, or handled slowly
Keep covered and use torn sheets inside.
Leaking filling
Too much moisture or overfilling
Drain the filling better and keep the layer even.
Bland filling
Mild feta or not enough herbs
Add dill, parsley, black pepper, or a little lemon zest.
Too-salty filling
Very salty feta
Add more spinach or herbs if available; serve with yogurt sauce or a lemony salad.
Dense filling
The spinach layer was packed down too hard
Spread loosely next time; do not compress the spinach layer.
Top shatters badly when slicing
Not scored before baking or cut too soon
Score before baking, rest 15–20 minutes, then cut through the same lines.
Slices fall apart
Cut too soon or filling too loose
Rest 15–20 minutes before slicing fully.
Pastry soft after storage
Fridge moisture or trapped steam
Reheat uncovered in the oven or air fryer.
Variations and Shortcuts
The large tray is the main recipe. Once you understand that filling and layering method, these variations become easy to judge.
Spanakopita Triangles
Once the filling is made, triangles are just a folding project. They are great for appetizers, mezze platters, lunch boxes, and party trays. The first triangle is usually the clumsiest. By the third or fourth, your hands understand the fold.
For appetizer-style spanakopita triangles, use less filling than you think. Snug folds and modest filling help the phyllo seal, brown, and crisp all the way around.
If the filling squeezes out as you fold, use less. A neat triangle needs less filling than you think. The triangles are done when the seams look dry, the corners are golden, and the pastry feels crisp enough to pick up. For dips and sides, jump to the serving ideas.
Puff Pastry Shortcut
Puff pastry makes a delicious shortcut, though the texture is thicker and more buttery than classic phyllo. It is a good option when you want a spinach-feta pie without layering many thin sheets.
Puff pastry should be pliable but still cold; once it warms too much, it gets sticky and bakes less cleanly. Use the same filling, place one puff pastry sheet on the bottom, add the spinach mixture, cover with a second sheet, seal the edges, and cut a few slits in the top so steam can escape.
For a full puff pastry pie, start checking around 35 minutes and expect 40–50 minutes depending on the thickness of the filling and pastry. For small puff pastry parcels, start checking around 20–25 minutes.
Gluten-Free Spanakopita
Use gluten-free phyllo if available, or gluten-free puff pastry as a shortcut. If neither is available, make a crustless spinach-feta bake with the same filling flavors.
Vegan or Dairy-Free Spanakopita
Use olive oil for brushing and replace feta with a salty vegan feta or a firm tofu-cashew mixture. Keep the filling well-seasoned because feta normally provides both salt and tang.
Egg-Free Spanakopita
You can skip the eggs, but the slices will be looser. Keep the spinach very well pressed, avoid wet cheeses, and rest the pie before cutting.
Make It Ahead Without Losing the Crisp Layers
Spanakopita is one of those recipes you can do in pieces. For the best make-ahead texture, assemble it unbaked, refrigerate it for up to 24 hours, then bake until golden and crisp. For longer storage, freeze it unbaked.
Make the filling ahead: Prepare up to 1 day ahead and refrigerate. Drain off any liquid before assembling.
Assemble unbaked: Refrigerate the covered tray for up to 24 hours, then bake from chilled with a few extra minutes if needed.
Freeze unbaked: Score the top while the phyllo is still soft, wrap tightly, and freeze.
Bake from frozen: Add 15–25 minutes and cover loosely with foil if the top browns early.
Store leftovers: Cool fully, refrigerate for 3–4 days, and reheat uncovered in the oven or air fryer.
If making the filling ahead, check it again before assembling. Spinach can release more liquid in the fridge, so drain or squeeze off any liquid before layering it with phyllo. Use the filling texture comparison if it looks loose.
For a party, serve the pie warm after a 15–20 minute rest, or at room temperature on a mezze table. Let hot spanakopita breathe; trapped steam softens the pastry. Room temperature is fine for serving, but refrigerate leftovers rather than leaving them out for a long time.
This is the kind of dish that solves more than one meal: dinner tonight, brunch tomorrow, party squares on a platter, or a cold leftover piece eaten straight from the fridge.
Reheating Frozen or Leftover Spanakopita
Best way to reheat spanakopita: reheat pieces uncovered in the oven or air fryer. Dry heat helps the phyllo crisp again, while covered reheating traps steam and softens the pastry. The microwave is fast, but it will not bring back the flaky texture.
Situation
Method
Time
Frozen spanakopita triangles
Air fryer at 350°F / 177°C
8–12 minutes
Frozen spanakopita
Oven at 400°F / 200°C
17–20 minutes
Leftover homemade slice
Oven at 350°F / 175°C
8–13 minutes
Leftover homemade slice
Air fryer at 325–350°F / 160–177°C
4–7 minutes
Microwave
Fastest, but softens pastry
Use only if needed
For frozen or store-bought spanakopita, follow the package instructions first because sizes vary. If using a thermometer, the center should reach 165°F / 74°C. FoodSafety.gov gives the same 165°F / 74°C target for reheated leftovers in its safe minimum internal temperature chart.
These general notes can help with Costco, Trader Joe’s, Aldi, or other frozen spanakopita, but start checking early because every brand and size cooks differently.
What to Serve with Spanakopita
A good tray of spanakopita does not need much ceremony. Cut it warm, let the flaky shards fall where they want, and serve it with something cold and lemony.
It is the kind of food that does not need to be piping hot to be loved; even warm or room temperature, the salty filling and flaky edges still do their job.
For a full Greek-inspired spread, keep the sides cool, bright, and simple so they balance the rich phyllo instead of competing with it.
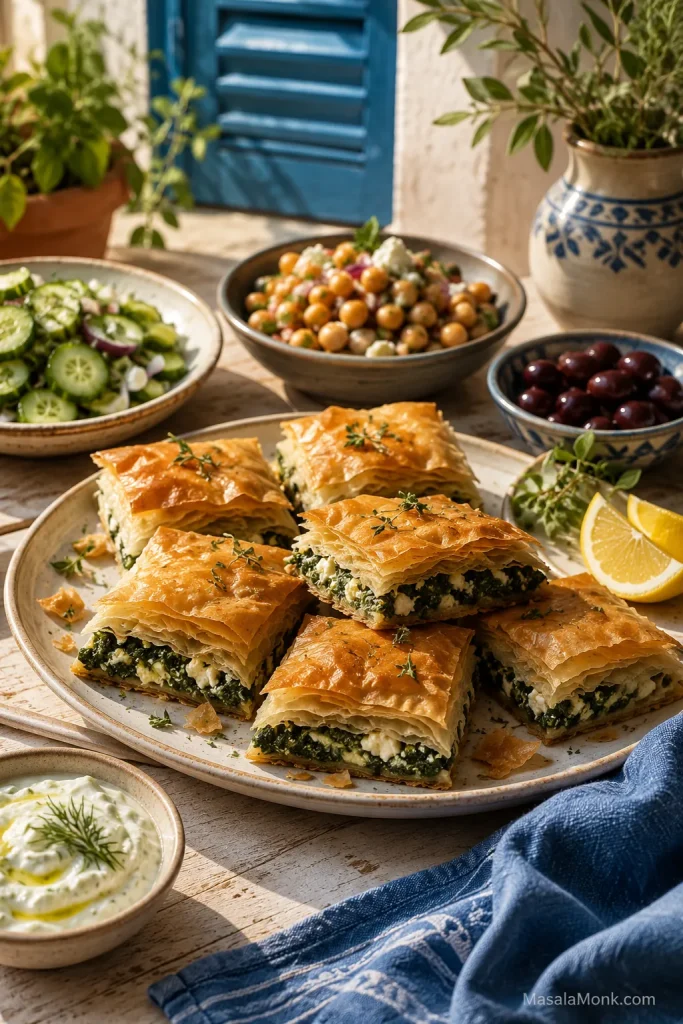
Serve rich spanakopita with cool and bright sides. Tzatziki, cucumber salad, chickpeas, olives, lemon, and herbs balance the salty feta and crisp phyllo without distracting from the pie.
Greek-Inspired Dinner
Serve warm pieces with Greek salad, roasted potatoes, red lentil soup, baked chicken breast, fish, lamb, olives, and lemon wedges.
Vegetarian Mezze Table
Cut smaller pieces and serve with tzatziki, hummus, pita, roasted vegetables, olives, cucumber salad, and homemade falafel.
Brunch or Lunch Boxes
Room-temperature pieces are excellent with cucumber salad, chickpea salad, yogurt sauce, eggs, fresh fruit, or a tomato cucumber salad.
Tabbouleh is also a strong side because the lemon, parsley, mint, and tomato cut through the rich pastry.
Quick lemon-dill yogurt sauce: Mix Greek yogurt with lemon juice, minced garlic, chopped dill, a little olive oil, salt, and black pepper. It is especially good with warm triangles.
Full Spanakopita Recipe
This tray-style spanakopita gives you flaky top layers, a firm base, and a spinach-feta filling that settles into clean pieces after resting.
Recipe name: Spanakopita Recipe: Greek Spinach Pie with Feta and Phyllo
Description: A generous Greek spinach pie recipe with crisp golden phyllo, salty feta, fresh herbs, and a spinach filling that slices cleanly after resting.
Yield: 10–12 pieces
Prep time: 35–45 minutes with frozen spinach, longer with fresh bunch spinach. This does not include overnight phyllo thawing.
Cook time: 45–55 minutes
Total time: 1 hour 20 minutes to 1 hour 40 minutes, plus phyllo thawing
Equipment: 9 x 13 inch / 23 x 33 cm baking dish or pan, large skillet, mixing bowl, colander, clean kitchen towel or cheesecloth, pastry brush, sharp knife, barely damp towel for phyllo.
Before you start: Make sure the spinach is pressed well, the phyllo is fully thawed, and the filling is mixed before you open the phyllo package. Once phyllo is exposed to air, the recipe moves much faster.
Ingredients
500 g / 16 oz frozen chopped spinach, thawed and squeezed well or 700–900 g / 1½–2 lb fresh spinach, wilted, cooled, and squeezed well
300 g / about 10½ oz feta cheese, crumbled
2 large eggs
14 sheets phyllo pastry, thawed
Olive oil, divided: 120 ml / ½ cup for brushing, plus 1–2 tablespoons for cooking the onion
1 small onion, finely chopped, or 4–6 scallions, sliced
1–2 garlic cloves, minced, optional
¼ cup chopped fresh dill
¼ cup chopped fresh parsley
1–2 tablespoons chopped fresh mint, optional
½ teaspoon lemon zest, optional
Black pepper, to taste
Pinch of nutmeg, optional
Salt, only if needed after tasting the filling before adding eggs
Instructions
Prepare the Filling
Thaw the phyllo. Thaw frozen phyllo overnight in the refrigerator, or according to package directions. Let the sealed package sit briefly at room temperature before opening. Open the phyllo only when the filling is mixed, the oil is ready, and the pan is brushed.
Prepare the spinach. If using frozen spinach, thaw completely and press out as much liquid as possible. If using fresh spinach, wilt it in batches in a large pan, cool it, chop if needed, and squeeze well. The bowl should not show liquid pooling when pressed.
Cook the aromatics. Heat 1–2 tablespoons olive oil in a skillet. Add onion or scallions and cook until softened. Add optional garlic and cook briefly until fragrant. Let cool slightly.
Mix and taste before adding eggs. In a large bowl, mix spinach, cooked aromatics, feta, dill, parsley, optional mint, optional lemon zest, black pepper, and optional nutmeg. Taste and add salt only if needed. Then mix in the eggs. The filling should hold together without liquid pooling at the bottom of the bowl.
Layer the Spanakopita
Prepare the pan and oven. Heat oven to 350°F / 180°C. Place a rack in the lower-middle position. Brush a 9 x 13 inch / 23 x 33 cm baking dish or pan with olive oil.
Layer the bottom phyllo. Open the phyllo and cover unused sheets with a barely damp towel. Place one sheet in the dish and brush lightly with olive oil. Repeat until you have 7 bottom sheets. Use torn or wrinkled sheets here if needed.
Add the filling. Spread the spinach-feta filling evenly over the phyllo. Keep it loose and even rather than pressing it down hard.
Add the top phyllo. Layer 7 more sheets over the filling, brushing each sheet lightly with olive oil. Tuck or fold the edges into the pan. The sheets should look lightly glossy, not soaked.
Bake, Check, and Rest
Score the top. Use a sharp knife to score the top layers into squares, rectangles, or diamonds. You do not need to cut all the way through the filling yet.
Bake. Bake for 45–55 minutes, until the top is golden-brown, the edges are firm, and the filling is hot and set. If the top browns too quickly, tent loosely with foil and keep baking.
Check for doneness. The top should be golden and crisp, the scored lines should look dry, and a corner should lift without sagging. If the top is brown but the bottom feels soft, cover loosely with foil and bake 5–10 minutes longer.
Rest and slice. Let the spanakopita rest uncovered for 15–20 minutes. Cut fully through the scored lines and serve warm or at room temperature.
Recipe Notes
Block feta gives better flavor and texture. Use slightly less if it is very salty, or up to 340 g / 12 oz for a cheesier filling.
Lemon zest is optional but useful if your feta is mild or the filling tastes flat. Avoid adding much lemon juice because extra liquid can loosen the filling.
If your phyllo sheets are very thin, use up to 16 sheets total.
You may not use all the oil. The phyllo should look lightly glossy, not soaked.
A metal pan gives the crispest bottom. Glass or ceramic works too, but may need a few extra minutes.
For a fan/convection oven, start around 170°C and check a little early because the top can brown faster.
If the filling looks wet, drain visible liquid and mix in 1–2 tablespoons breadcrumbs, fine semolina, or crushed crackers.
Let hot spanakopita breathe. Steam softens the pastry if it is covered tightly.
Frequently Asked Questions
These are the questions that usually come up the first time you make spanakopita.
Spanakopita Basics
Is spanakopita the same as Greek spinach pie?
Yes. Spanakopita is Greek spinach pie made with phyllo pastry and a filling of spinach, feta, herbs, and often eggs.
Is it phyllo or filo?
Both spellings refer to the same thin pastry sheets. Phyllo is common in the US, while filo is common in the UK and other places.
Ingredients, Spinach, and Phyllo
Fresh spinach or frozen spinach: which is better for spanakopita?
Frozen spinach is easier and more predictable because it is already chopped and wilted. Fresh spinach gives brighter flavor, but it takes more prep and still needs to be pressed well before mixing.
Should fresh spinach be cooked before adding it to spanakopita?
Yes. Fresh spinach should be wilted, cooled, chopped if needed, and pressed well before mixing. Raw spinach releases too much moisture as it bakes and can make the filling loose.
How many phyllo layers should spanakopita have?
Use 14 sheets as a reliable default: 7 on the bottom and 7 on top. If your phyllo is very thin, you can use up to 16 sheets.
Do torn phyllo sheets matter?
No. Use torn sheets in the bottom or middle layers and save the neatest sheets for the top. Once baked, the inner patchwork still turns flaky.
Why did my spanakopita turn soggy?
The most common cause is excess spinach moisture or underbaking. Press the spinach well, keep the filling moundable instead of loose, and bake until the pastry is fully golden-brown.
What cheese can I use besides feta?
Feta gives spanakopita its classic salty tang, so keep it as the main cheese if possible. For a milder filling, replace a small portion with ricotta or cottage cheese, but keep the mixture firm and well-drained so the phyllo does not soften.
Make-Ahead, Freezing, and Reheating
How far ahead can I assemble spanakopita?
You can assemble it unbaked and refrigerate it for up to 24 hours. Check for released liquid before baking and add a few extra minutes if baking from chilled.
Does spanakopita freeze better baked or unbaked?
Unbaked usually gives the best texture because the phyllo crisps for the first time in the oven. Score the top before freezing while the sheets are still soft, wrap tightly, and bake from frozen with extra time. Baked leftovers can also be frozen, but the pastry is more likely to soften after reheating.
What is the best way to reheat spanakopita?
Reheat it uncovered in the oven or air fryer. Dry heat helps the phyllo crisp again. The microwave works for speed, but it softens the pastry.
Diet and Serving Questions
Should spanakopita be served hot or room temperature?
Spanakopita is good warm or at room temperature. Let it rest after baking so the filling settles and the pieces slice more cleanly.
Can spanakopita be made without eggs?
Yes, but the filling will be looser. Keep the spinach especially well pressed, avoid wet cheeses, and rest the pie before cutting.
Puff pastry or phyllo: which is better for spanakopita?
Phyllo is better for classic spanakopita because it bakes into thin, crisp, flaky layers. Puff pastry works as a shortcut, but it gives a thicker, buttery crust and a less traditional texture.
Is classic spanakopita gluten-free?
No. Classic spanakopita uses wheat-based phyllo, so it is not usually gluten-free. For a gluten-free version, use gluten-free phyllo if available, gluten-free puff pastry as a shortcut, or make a pastryless spinach-feta bake inspired by the same flavors.
If you make it, I would love to know which route you took: frozen spinach tray, fresh spinach tray, triangles, or puff pastry shortcut.
The first tray may look a little rustic before it goes into the oven, and that is part of the charm. Once the phyllo turns golden and the spinach-feta filling settles, you get the kind of pie people keep returning to, knife in hand, promising they are cutting “just one more” piece.