Eggs are the chameleons of the kitchen—simple, nutritious, and endlessly adaptable. But let’s be honest: plain eggs can get boring fast. What transforms basic eggs into crave-worthy bites? Seasoning! In this guide, we’ll explore classic and trending seasonings, global flavors, pro techniques, and real user-tested combos—all to help you level up your egg game, whether you’re a weekday cook or a weekend brunch boss.
Why Seasonings Matter for Eggs
Eggs have a mild flavor and a rich texture, acting as a blank canvas for spices, herbs, and condiments. The right seasoning can:
Bring out the eggs’ natural flavor
Add texture and color
Elevate simple dishes to gourmet experiences
Keep breakfasts exciting and varied
Whether you love soft-scrambled, fried, boiled, or baked eggs, the right seasoning makes all the difference.
Classic Seasonings: Simple, Reliable, and Delicious
Let’s start with the basics that never disappoint:
Salt & Pepper: The foundation of every great egg dish. Try kosher salt for its clean taste and fresh-cracked black or white pepper.
Paprika: Adds color and a mild, smoky warmth. Smoked paprika is especially good on fried or deviled eggs.
Garlic Powder & Onion Powder: Give savory depth—perfect for scrambled eggs and omelets.
Chili Flakes or Cayenne: For a gentle heat that wakes up your taste buds.
Pro Tip: For scrambled eggs, add seasonings before cooking for even distribution. For fried or boiled eggs, sprinkle immediately after cooking.
Trending Now: Everything Bagel & More
In 2025, “egg flights”—six eggs, six toppings—are a social media sensation. People are getting creative, topping boiled or fried eggs with everything bagel seasoning, kimchi, hot honey, truffle salt, or even balsamic-mozzarella. Everything bagel seasoning, with its mix of garlic, sesame, onion, and poppy seeds, adds crunch and flavor. Try frying your eggs with a sprinkle of this blend to crisp up the bits!
User Story: “Soft scramble them with sour cream, sharp cheddar, and everything bagel seasoning. Legit my favorite way to eat eggs.” – Reddit user
Global Flavors: Take Your Tastebuds on a Trip
Why limit yourself to salt and pepper? Eggs are a global staple, and so are their seasonings:
Za’atar (Middle Eastern): Thyme, sesame, sumac—delicious on poached or hard-boiled eggs with olive oil.
Shichimi Togarashi (Japanese): Chili, sesame, nori, and orange peel—sprinkle over sunny-side eggs for zing.
Dukkah (Egyptian): A mix of nuts, seeds, and spices. Try on sliced boiled eggs.
Curry Powder or Garam Masala (Indian): Add warmth and depth to scrambles and omelets.
Adobo/Sazón (Latin): Garlic, oregano, cumin, and more for a vibrant twist.
Quick Fix: Toast a slice of bread, top with mashed avocado, a poached egg, and a dusting of za’atar. Thank us later.
Creative Add-Ons & Modern Favorites
If you want to get truly egg-citing, try these:
Everything Bagel Seasoning: The reigning champion for fried and boiled eggs.
Old Bay: Popular with home cooks, especially for deviled eggs or scrambled with a touch of hot sauce.
Kala Namak (Black Salt): Adds a sulfurous, “eggy” flavor—especially loved in vegan tofu scrambles.
Cheese and Dairy Mix-ins: Stir in a spoonful of sour cream, cottage cheese, or crème fraîche for creamy scrambled eggs.
Fresh Herbs: Chives, parsley, dill, and tarragon bring color and freshness.
Kimchi, Salsa, or Hot Sauce: Add a punch to eggs, especially for breakfast tacos or bowls.
Umami Boosters: Finish eggs with a sprinkle of bonito flakes, miso, or even truffle oil for extra savoriness.
Pro Techniques from Real Cooks
Salt Early: Whisk salt into eggs before cooking for fluffier texture and better moisture. Let the mixture sit for a minute if you can.
Watch the Pan: Use moderate heat and enough fat (butter/oil) for creamy, non-rubbery eggs—especially on cast iron.
Season as You Go: For fried eggs, season as soon as they hit the pan for best flavor.
Don’t Overcrowd: Add delicate herbs at the end to preserve their brightness.
Reddit Wisdom: “I add seasoning to scrambled eggs before cooking. I add seasoning to fried eggs as soon as I get them in the pan.”
Practical Ideas: Seasoned Eggs, Six Ways
Classic Scramble: Salt, pepper, chives, with a touch of parmesan.
Southwest Kick: Cumin, chili powder, cheddar, and salsa.
Asian-Inspired: Shichimi togarashi, scallions, a dash of soy sauce.
Herby Omelet: Fresh dill, parsley, and a sprinkle of feta.
Creole Deviled Eggs: Replace salt with Tony Chachere’s Creole Seasoning, add a dash of hot sauce.
Egg Flight: Six halves of boiled eggs, each topped with a different seasoning (Old Bay, everything bagel, dukkah, za’atar, harissa, black pepper).
Reader Challenge: Your Egg-Seasoning Adventure
Ready to experiment? Here’s a fun challenge for your next brunch or meal prep:
Pick 3–6 seasonings or blends from this list.
Cook a batch of eggs (scrambled, fried, boiled).
Top each portion with a different seasoning—from classic to wild.
Snap a photo and taste test—share with friends or on social media (tag #EggcellentSeasoning!).
Record your favorites and try them in different dishes (avocado toast, breakfast bowls, salads).
Closing Thoughts
Eggs are a blank canvas for flavor. With the right seasonings—classic, trendy, or global—you can turn the simplest meal into something memorable. Don’t be afraid to experiment and have fun! The world of egg seasonings is vast, and the best discovery might just be your next breakfast.
What’s your favorite egg seasoning or combo? Share your tips and results below!
Sources: Food & Wine, Better Homes & Gardens, Reddit r/Cooking, Simply Recipes, Carolina Ingredients, and more food trend experts from 2025.
10 FAQs for Egg Seasoning Options
1. What’s the best time to add seasoning to eggs? For scrambled eggs, add salt and spices during whisking before cooking for even flavor and fluffier texture. For fried eggs, season as soon as they hit the pan or immediately after. For boiled eggs, season just before serving or use seasoning blends in fillings for deviled eggs.
2. What are the healthiest seasonings to use on eggs? Fresh herbs (like parsley, chives, dill), spices (turmeric, paprika, black pepper), and low-sodium blends are healthiest. They add antioxidants and flavor without extra calories or sodium. Avoid overusing salty mixes if watching your intake.
3. What’s the best seasoning for deviled eggs? Classic choices include paprika, mustard, and chives. Trendy options are everything bagel seasoning, Creole seasoning (like Tony Chachere’s), Old Bay, or smoked paprika. Mix into the yolk filling or sprinkle on top for flavor and color.
4. Can I use the same seasoning for scrambled, fried, and boiled eggs? Yes, but some seasonings work best in specific dishes. Everything bagel, paprika, or herbs are versatile, while blends with crunchy bits (like dukkah) shine as toppings on boiled or fried eggs rather than scrambled.
5. How do I keep eggs from tasting bland without adding too much salt? Use herbs, spices, citrus zest (lemon/lime), black pepper, or umami-rich add-ins like nutritional yeast, miso, or a dash of soy sauce. These boost flavor without much sodium.
6. Are there seasoning blends for vegan egg alternatives? Yes! Kala namak (black salt) gives vegan scrambles an “eggy” flavor. Combine with turmeric, garlic powder, and nutritional yeast for savory depth in tofu or chickpea “eggs.”
7. What global seasonings pair well with eggs? Try za’atar, shichimi togarashi, curry powder, dukkah, harissa, or adobo. These bring global flair and work in scrambles, omelets, or as a topping for poached and boiled eggs.
8. Can I make my own egg seasoning blend? Absolutely. Start with a base of kosher salt, pepper, garlic powder, onion powder, and paprika. Add herbs or spice blends to taste. Store in a small jar and shake before use.
9. What’s the secret to fluffy, restaurant-style scrambled eggs? Salt your eggs when whisking, use a little milk or cream (optional), and cook slowly over medium-low heat, stirring gently. Butter or oil helps prevent sticking and adds richness.
10. What’s a quick way to elevate eggs for guests or brunch? Create an “egg flight”—top boiled or fried eggs with different seasonings (everything bagel, dukkah, smoked paprika, kimchi, hot honey, etc.). Serve with toast or salad for a colorful, flavorful spread.
At its most familiar, falafel starts with soaked chickpeas, herbs and spices, pulsed to a coarse crumb and cooked until the outside turns crisp while the middle stays tender. That basic idea fits surprisingly well into an Indian kitchen, where cumin, coriander, green chilli, ginger, amchur, chaat masala and chutneys already feel at home.
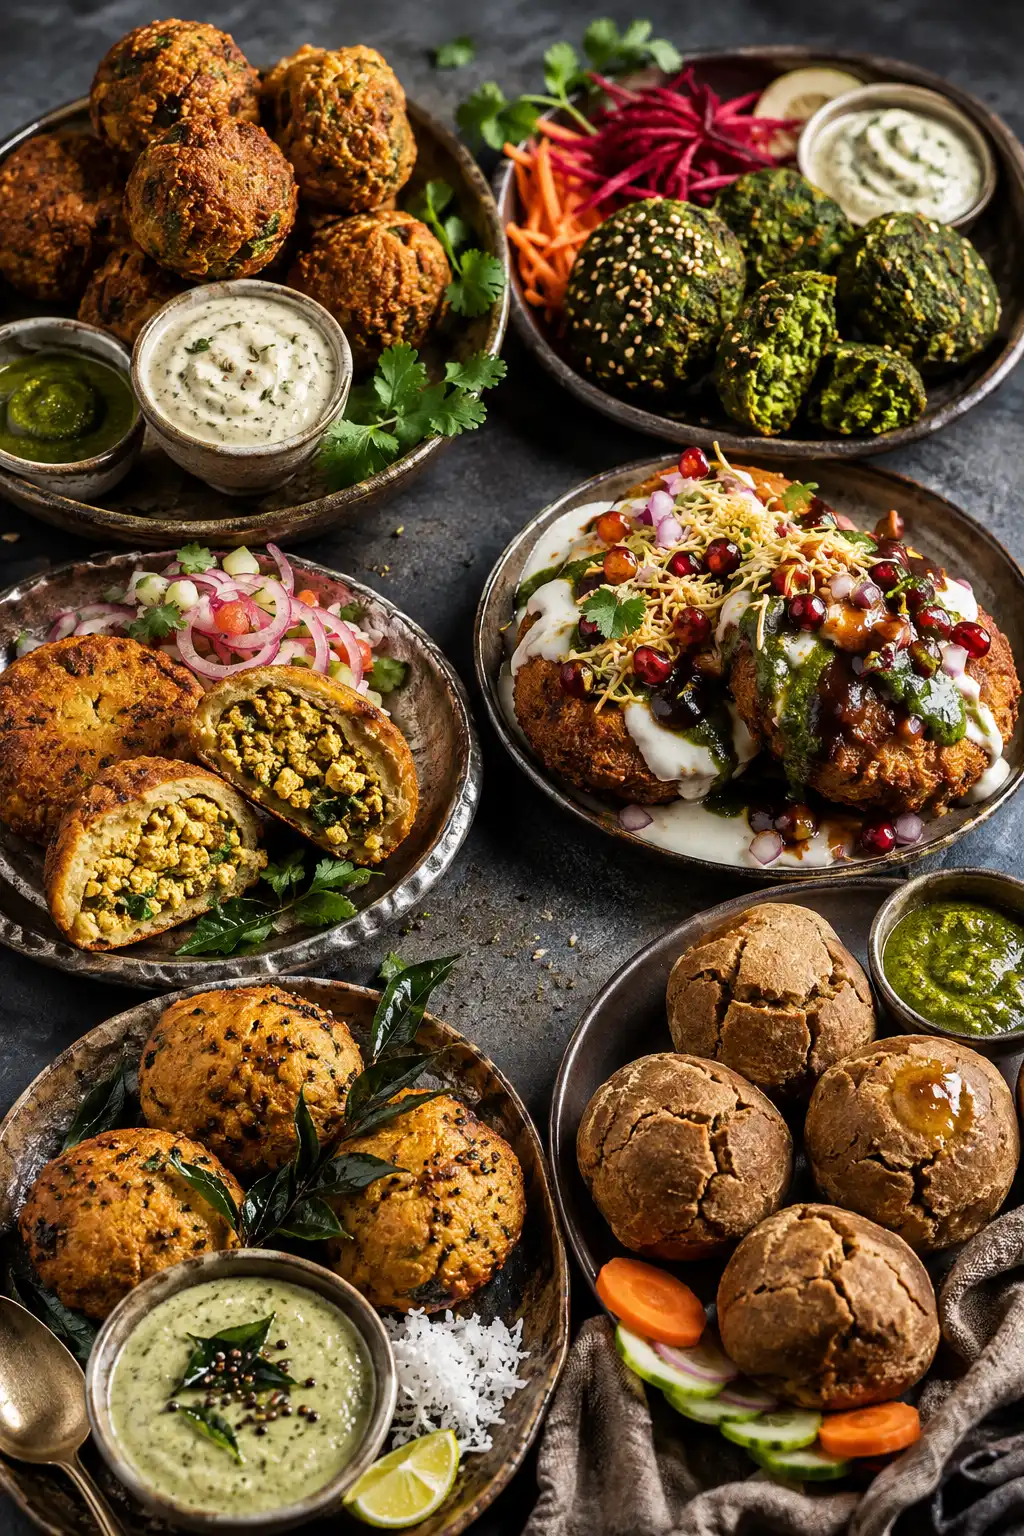
The recipes here take that starting point in six different directions. Masala Chana stays closest to classic falafel; Methi-Palak goes greener and softer; Aloo Tikki turns flat and chaat-ready; Paneer Bhurji becomes a filling rather than part of the shell; Curry Leaf brings mustard, ginger and coconut chutney into the picture; and Daal Bati deliberately leaves chickpea falafel furthest behind.
You do not need to cook them all the same way, either. Some want hot oil, one wants the broad crust of a frying pan, two sit happily in an appe/paniyaram pan, and the Daal Bati version belongs in the oven.
If you already know what sounds good, use the first column to jump straight to that recipe. If not, the texture and cooking method usually make the decision easier.
Earthy, firm and rustic with a cracked bati-like crust
Bake
Green chutney, onion, lemon, ghee
What Makes a Good Falafel Base?
For the Masala Chana, Methi-Palak, Paneer-Stuffed and Curry Leaf recipes, begin with dried chickpeas soaked in plenty of cold water for 8–12 hours or overnight in the refrigerator. Drain and rinse well before using. The Aloo Tikki version is different on purpose: cooked chickpeas suit the softer potato-based texture we want there.
Dry ingredients before adding more flour. Wet chickpeas or greens lead to more besan, and more besan can make falafel dense. This matters most with spinach: squeeze blanched palak until it feels almost surprisingly dry.
Pulse; do not purée. Falafel mixture should resemble coarse crumbs rather than hummus. A small handful may look loose in the bowl but should hold when firmly compressed.
Add besan cautiously. Start small and adjust only when the mixture genuinely needs help holding together.
For traditional falafel technique, classic serving ideas, baking and deeper air-fryer guidance, see our complete homemade falafel recipe.
1. Masala Chana Falafel
Masala Chana stays closest to familiar falafel: crisp outside, coarse within, but warmer with garam masala and cumin and a little sharper from amchur. Keep the garam masala measured so the chickpeas, coriander and garlic still come through.
Yield: about 14–16 falafel Soaking: 8–12 hours or overnight in the refrigerator Active prep: about 20 minutes Chilling: 30 minutes Cooking: about 15 minutes total, 4–5 minutes per fried batch
Ingredients
1 cup (about 200 g) dried chickpeas
½ medium onion, roughly chopped
3 garlic cloves
¾ cup loosely packed fresh coriander
1 green chilli
1 teaspoon ground cumin
1 teaspoon ground coriander
¾ teaspoon garam masala
½ teaspoon amchur
¼ teaspoon Kashmiri chilli powder, optional
1 teaspoon fine salt, or to taste
1 tablespoon besan, plus more only if needed
½ teaspoon baking powder
Neutral oil, for frying
Method
Soak the chickpeas as described above, then drain, rinse and pat away obvious surface moisture.
Add chickpeas, onion, garlic, coriander and green chilli to a food processor. Pulse in short bursts until the mixture resembles coarse crumbs.
Transfer to a bowl and mix in cumin, ground coriander, garam masala, amchur, chilli powder if using, salt and 1 tablespoon besan.
Squeeze a spoonful firmly in your palm. It should hold together. If it is genuinely wet or still breaks after compression, add a little more besan.
Cover and refrigerate for 30 minutes.
Stir in the baking powder, then shape into 14–16 compact balls.
Heat frying oil to about 170–175°C / 340–350°F. Fry one test falafel first. If it holds, cook the remaining falafel in small batches for about 4–5 minutes, until deeply golden and crisp.
Air-Fryer Option
Shape the falafel slightly flatter than perfect spheres, brush or spray the surfaces with oil and air-fry at 190°C / 375°F for about 12–15 minutes, turning halfway. Start checking early toward the end rather than relying only on the clock.
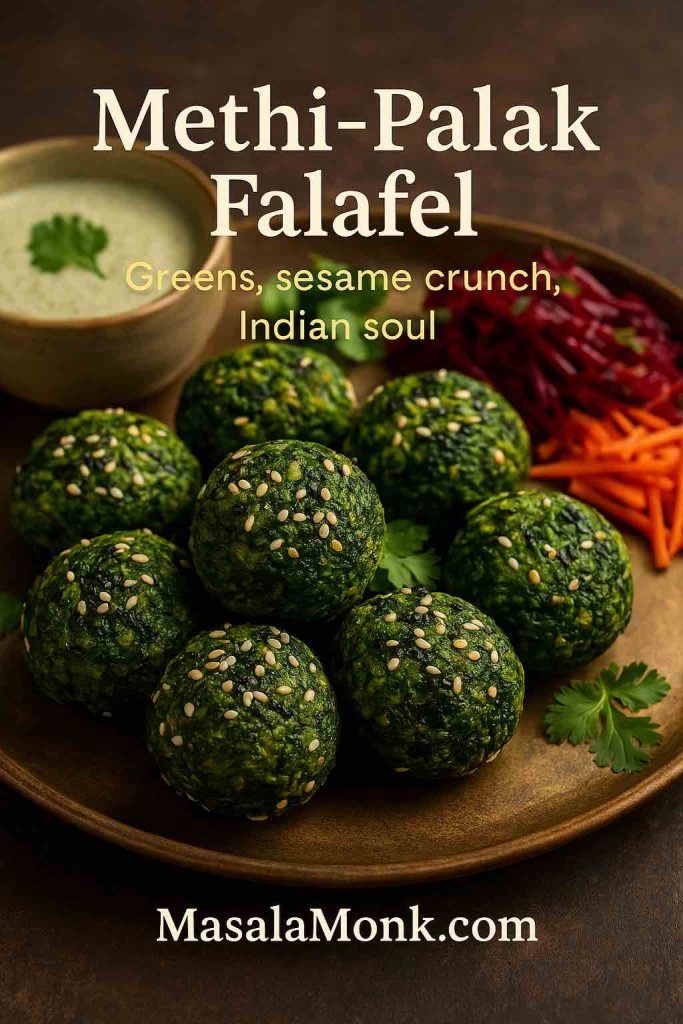
Spinach turns these falafel unmistakably green, but methi is what gives them character. Mint and coriander keep the flavour fresh, while sesame adds nuttiness and a light crust around the outside.
The important step is simple: squeeze the spinach properly dry. Not casually dry. Not “I shook the colander twice” dry. Properly dry.
Yield: about 14 small falafel Soaking: 8–12 hours or overnight in the refrigerator Active prep: about 25 minutes Chilling: 30 minutes Cooking: about 12 minutes
Ingredients
1 cup (about 200 g) dried chickpeas
60 g fresh spinach
½ cup loosely packed fresh methi leaves
½ cup fresh coriander
¼ cup mint leaves
¼ small onion
2 garlic cloves
1 green chilli
¾ teaspoon ground cumin
½ teaspoon ground coriander
½ teaspoon amchur
Tiny pinch of nutmeg, optional
1 teaspoon fine salt
1 tablespoon besan, plus more only if required
½ teaspoon baking powder
2 tablespoons white sesame seeds
Oil, for cooking
Method
Soak, drain and rinse the chickpeas as described above.
Blanch the spinach for about 30–60 seconds, just until wilted. Cool immediately, then squeeze firmly until very little liquid comes out.
Add chickpeas, squeezed spinach, methi, coriander, mint, onion, garlic and green chilli to a food processor. Pulse to a coarse green mixture rather than a paste.
Mix in cumin, ground coriander, amchur, nutmeg if using, salt and 1 tablespoon besan.
Chill for 30 minutes, then stir in the baking powder. Add a little more besan only if a firmly compressed portion will not hold.
Shape into small round falafel and lightly roll or press each one in sesame seeds.
Appe/Paniyaram Pan Method
Brush the cavities lightly with oil. Add one falafel per cavity and cook over medium to medium-low heat, rotating as each surface firms. Cook until the falafel feels firm through the centre and no longer looks wet or pasty when one is broken open, usually around 10–12 minutes for small falafel.
Air-Fryer Option
Brush or mist lightly with oil and air-fry at 190°C / 375°F for about 12–14 minutes, turning once. Check early toward the end: small green falafel can dry out quickly.
Serve with: a creamy yogurt or coconut-yogurt dip, shredded beetroot, shredded carrot, coriander and lemon. That presentation also stays true to the vivid green falafel already shown in the article.
3. Aloo Tikki Falafel Chaat
Aloo tikki pulls this variation away from classic falafel in exactly the right direction. Cooked chickpeas keep the connection, potato gives the centre its softness, and ajwain, cumin, amchur and chaat masala take it straight toward North Indian street food.
Yield: 8 medium tikkis Prep: about 25 minutes Optional chilling: 20–30 minutes Cooking: about 16 minutes total, around 8 minutes per batch
Ingredients for the Tikkis
300 g boiled potatoes, cooled completely
150 g cooked chickpeas, drained and dried well
1 green chilli, finely chopped
3 tablespoons chopped fresh coriander
¾ teaspoon roasted cumin powder
½ teaspoon ground coriander
¾ teaspoon chaat masala
½ teaspoon amchur
¼ teaspoon ajwain, lightly crushed
¼–½ teaspoon Kashmiri chilli powder, optional
¾ teaspoon salt, or to taste
2 tablespoons cornflour/cornstarch or rice flour
1–2 tablespoons besan only if additional binding is needed
Oil, for shallow-frying
Method
Use completely cooled potatoes. Coarsely crush the cooked chickpeas and mash the potatoes until mostly smooth but not gluey.
Combine potatoes and chickpeas with green chilli, coriander, cumin, ground coriander, chaat masala, amchur, ajwain, chilli powder if using, salt and cornflour.
Mix gently until the mixture holds together. Divide into eight portions and shape into broad patties about 1.5 cm thick.
If the tikkis feel very soft, refrigerate for 20–30 minutes. If they are still too fragile after chilling, work a small amount of besan into the mixture.
Heat a thin layer of oil in a heavy frying pan over medium heat.
Cook the tikkis for about 3–4 minutes on the first side without constantly moving them. Flip once a proper crust has formed, then brown the second side.
Turn Them into Falafel Chaat
For all eight hot tikkis, have ready:
1 cup plain yogurt, whisked smooth
6 tablespoons green coriander-mint chutney
4–6 tablespoons tamarind chutney
½ small red onion, finely chopped
4–6 tablespoons fine sev
4 tablespoons pomegranate arils
Chaat masala
Chopped coriander
Arrange the hot tikkis on a plate, spoon over yogurt, then add green chutney and tamarind chutney. Finish with onion, sev, pomegranate, chaat masala and coriander. Serve immediately, while the tikki is still hot and crisp underneath the cool, tangy toppings.
Air-fryer option: brush both sides with oil and air-fry at 190°C / 375°F, turning once, until browned and firm. Start checking around 12 minutes. Shallow-frying still gives the more characteristic tikki crust.
4. Paneer Bhurji-Stuffed Falafel
Paneer works better here as a surprise in the centre than blended through the chickpea mixture. Keep the shell coarse and chickpea-heavy, then tuck a dry, fragrant paneer bhurji inside so the contrast is obvious when you cut one open.
Yield: about 10–12 stuffed falafel Soaking: 8–12 hours or overnight in the refrigerator Active prep: about 30 minutes Chilling: 30 minutes Cooking: about 12 minutes total, 5–6 minutes per fried batch
For the Falafel Shell
1 cup (about 200 g) dried chickpeas
½ small onion
3 garlic cloves
½ cup fresh coriander
1 green chilli
¾ teaspoon ground cumin
½ teaspoon ground coriander
½ teaspoon garam masala
¾ teaspoon fine salt
1 tablespoon besan, plus more only if required
½ teaspoon baking powder
For the Paneer Bhurji Filling
100 g paneer, finely crumbled
1 teaspoon oil or ghee
1 teaspoon finely grated ginger
½ green chilli, finely chopped
¼ teaspoon turmeric
½ teaspoon garam masala
½ teaspoon kasuri methi, crushed
Small pinch of salt
1 teaspoon lemon juice
Method
Heat 1 teaspoon oil or ghee in a small pan. Add ginger and green chilli and cook briefly until aromatic.
Add paneer, turmeric, garam masala, kasuri methi and salt. Cook for a few minutes until fragrant and deliberately fairly dry. Remove from the heat, stir in lemon juice and cool completely.
Soak, drain and rinse the chickpeas as described above. Pulse them with onion, garlic, coriander and green chilli until coarse and crumbly.
Mix in cumin, ground coriander, garam masala, salt and 1 tablespoon besan. Refrigerate for 30 minutes.
Stir in the baking powder. If the shell mixture will not hold when firmly compressed, add a little more besan.
Take roughly 2 tablespoons of falafel mixture and flatten it in your palm. Put about 1½–2 teaspoons of cooled paneer filling in the middle.
Bring the chickpea mixture completely around the filling. Pinch any cracks closed and shape into a thick ball or slightly flattened oval. Keep the paneer completely enclosed.
Fry at about 170–175°C / 340–350°F for roughly 5–6 minutes, until the shell is deeply golden and crisp.
Serve with: soft whole-wheat roti, kachumber, pickled red onion, coriander and lemony yogurt. If you want to make the filling from scratch, our guide to making paneer at home is useful here.
5. Curry Leaf Falafel with Mustard, Ginger & Green Chilli
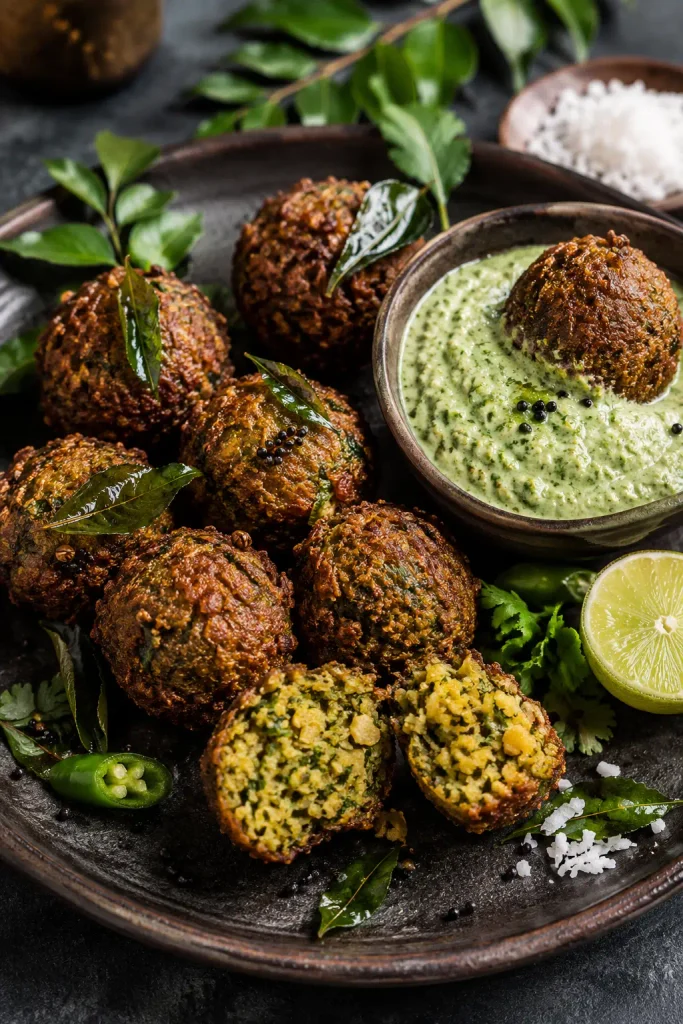
Curry leaves change the aroma immediately. Ginger and green chilli bring a very different sort of heat from garam masala, while cumin, coriander and a small mustard tempering push the flavour toward South Indian pulse snacks without turning the recipe into a renamed vada.
Yield: about 14 falafel Soaking: 8–12 hours or overnight in the refrigerator Active prep: about 20 minutes Chilling: 30 minutes Cooking: about 10 minutes total, 4–5 minutes per fried batch
Ingredients
1 cup (about 200 g) dried chickpeas
½ small onion
3 garlic cloves
2.5 cm / 1 inch fresh ginger
1–2 green chillies
15 fresh curry leaves
½ cup fresh coriander
½ teaspoon cumin seeds
½ teaspoon coriander seeds
¼ teaspoon black mustard seeds
1 teaspoon neutral oil, for tempering the mustard
¼ teaspoon freshly ground black pepper
Small pinch of hing, optional
1 teaspoon fine salt
1 tablespoon besan, plus more only if needed
½ teaspoon baking powder
2 tablespoons desiccated coconut, optional
Neutral oil, for cooking
Method
Soak, drain and rinse the chickpeas as described above.
Toast the cumin and coriander seeds briefly in a dry pan until aromatic. Cool, then crush roughly.
Heat 1 teaspoon neutral oil in the same small pan. Add the mustard seeds and let them crackle. Remove from the heat and cool.
Add chickpeas, onion, garlic, ginger, green chilli, curry leaves and coriander to a food processor. Pulse until coarse.
Mix through the toasted spices, cooled mustard tempering, black pepper, hing if using, salt, 1 tablespoon besan and desiccated coconut if using.
Chill for 30 minutes, then stir in baking powder. Add a little more besan only if a compressed portion will not hold.
Shape into about 14 compact falafel.
Fry at 170–175°C / 340–350°F for about 4–5 minutes, until golden and crisp.
Appe/paniyaram pan option: oil the cavities lightly and cook over medium to medium-low heat, rotating the falafel as each side firms and browns.
Serve with: coconut-coriander chutney, lemon and a few crisp fried curry leaves. The creamy coconut softens the chilli and mustard without hiding the curry-leaf aroma.
6. Daal Bati Falafel
Daal Bati is the outlier of the six, and it should be. Instead of copying the coarse chickpea interior of classic falafel, it leans into lentils, atta, ajwain and ghee. The result is firmer and more rustic, with the cracked golden surface of a tiny bati.
Yield: about 10–12 small bites Prep: about 25 minutes Resting: 15 minutes Baking: about 25 minutes
Ingredients
½ cup total dry dal, using roughly equal amounts moong dal, masoor dal and urad dal; cook and drain well, then measure 1 cup for the dough
1 cup (about 120 g) whole-wheat flour, plus more if required
2 tablespoons fine semolina/sooji
2 tablespoons melted ghee or mustard oil
½ teaspoon ajwain, lightly crushed
¼ teaspoon cumin
Small pinch of hing
1 green chilli, very finely chopped
½ teaspoon grated ginger
¼ teaspoon turmeric
¾ teaspoon salt, or to taste
Water only if required
A little additional ghee for brushing, optional
Method
Cook the ½ cup mixed dry dals until tender but not watery. Drain very thoroughly, then measure 1 cup of cooked dal for the dough. Reserve any extra.
Mash the drained dal coarsely.
Add whole-wheat flour, semolina, ghee or mustard oil, ajwain, cumin, hing, green chilli, ginger, turmeric and salt.
Bring everything together into a firm dough. If sticky, add whole-wheat flour 1 tablespoon at a time. If too dry to hold, add water 1 tablespoon at a time.
Rest for 15 minutes while the oven heats to 200°C / 400°F.
Divide into 10–12 small balls. Leave a slightly rugged surface rather than smoothing every crack away.
Arrange on a baking tray, brush lightly with ghee or oil and bake for 22–28 minutes, turning once, until browned and firm outside.
If desired, brush the hot bites very lightly with ghee as soon as they leave the oven.
Serve with: green chutney, sliced onion, carrot or cucumber and lemon wedges. Because this recipe contains atta, it is not gluten-free. If finished with ghee, it is not vegan either; mustard oil keeps the bites themselves plant-based.
Which Cooking Method Works Best?
The best cooking method changes with the mixture. A chickpea ball wants something different from a soft potato tikki or an atta-and-dal bite.
Method
Best for
What to expect
Deep-frying
Masala Chana, Paneer-Stuffed, Curry Leaf
Deepest colour and crispest falafel-style crust
Shallow-frying
Aloo Tikki
Broad golden crust with a soft potato-chickpea centre
Air fryer
Masala Chana, Methi-Palak, Aloo Tikki
Good browning with less oil; slightly drier than frying
Appe/paniyaram pan
Methi-Palak, Curry Leaf
Small rounded bites with low oil and good support while cooking
Oven
Daal Bati
Firm, rustic, bati-like crust rather than a fried falafel shell
For the chickpea-heavy versions, frying gives the clearest contrast between crisp exterior and coarse interior. For Aloo Tikki, broad contact with a hot pan is the point. Methi-Palak benefits from the support of an appe/paniyaram pan, while Daal Bati belongs in the oven. Use the method that suits the texture of each variation rather than forcing every recipe into every appliance.
More Indian Ways to Serve Falafel
Falafel Chaat
Put several hot Masala Chana or Methi-Palak falafel on a plate and lightly crack them open. Add whisked yogurt, green chutney, tamarind chutney, finely chopped red onion, chaat masala, sev, pomegranate and coriander. Assemble just before eating so the base keeps some crunch.
Falafel Pav
Split and toast pav with a little butter or oil. Spread one side with green chutney and the other with tamarind chutney. Add a slightly flattened Masala Chana Falafel, sliced onion and something crisp such as cucumber or cabbage. A little chaat masala over the filling ties it together.
Paneer-Stuffed Falafel Roti Roll
Warm a soft roti and add sliced Paneer Bhurji-Stuffed Falafel, kachumber, pickled onion, coriander and lemony yogurt. Because the paneer is already inside, the wrap does not need another heavy filling.
Indian-Style Mezze Plate
Try Masala Chana Falafel with hummus, cucumber, kachumber, pickled onions, green chutney, lemon and warm flatbread. If you are making the bread too, use our homemade pita bread recipe. For a sharper mango-pickle note, a spoonful of amba sauce fits naturally beside falafel and hummus.
Falafel Bowl
Start with rice, millet, couscous or chopped salad. Add falafel, cucumber, tomato, onion and something creamy such as hummus or yogurt. Then choose one strong Indian accent—green chutney, tamarind, achar, chaat masala or coconut chutney—rather than using every condiment at once.
Fixing These Indian Falafel Variations
Problem
Likely cause
Fix
Masala or Curry Leaf falafel breaks in oil
Mixture too wet, too loose or oil too cool
Drain thoroughly, compress firmly, fry one tester and add a little besan only if needed
Methi-Palak falafel is soggy
Spinach retained too much water
Squeeze blanched spinach much more thoroughly before processing
Paneer falafel cracks open
Wet filling, too much filling or paneer too close to the surface
Cook bhurji drier, cool completely and use a smaller amount
Aloo Tikki sticks or breaks when flipped
Turned before the crust formed
Leave it undisturbed longer and flip only when it releases more easily
Air-fried green falafel is dry
Too little surface oil or too much cooking time
Lightly oil and begin checking earlier
Daal Bati mixture is sticky
Cooked dal retained too much water
Drain longer and add atta gradually rather than dumping in a large amount
If the first chickpea falafel disintegrates, stop there. One tester is enough to tell you whether the mixture needs drying, firmer shaping or hotter oil.
Make Ahead, Store & Freeze
Masala Chana and Curry Leaf: the mixture can be prepared ahead and refrigerated, with baking powder stirred in shortly before shaping and cooking.
Methi-Palak: shorter holding is better because fresh greens continue releasing moisture as they sit.
Paneer-Stuffed: prepare the dry paneer bhurji and chickpea shell mixture separately, refrigerate them, then stuff closer to cooking.
Aloo Tikki: shape the patties, freeze in a single layer until firm, then transfer to a freezer-safe container with parchment between layers if stacking.
Daal Bati: bake, cool and refrigerate. Reheat in a hot oven or air fryer to restore the firmer exterior.
For broader freezing and reheating guidance for classic chickpea falafel, see the full falafel guide.
Indian Falafel FAQs
Can you put garam masala in falafel?
Yes. Classic falafel already uses spices such as cumin and coriander, so a restrained amount of garam masala fits naturally. In the Masala Chana version, it adds an Indian finish without masking the chickpeas and fresh herbs.
Which Indian chutney goes best with falafel?
Coriander-mint green chutney is the most versatile choice for Masala Chana, Methi-Palak and Paneer-Stuffed Falafel. Tamarind works particularly well with Aloo Tikki Falafel Chaat or falafel pav, while coconut chutney makes the most sense beside Curry Leaf Falafel.
Can I make falafel in an appe or paniyaram pan?
Yes. It is particularly useful for Methi-Palak and Curry Leaf Falafel because the cavities support the mixture while each surface cooks. Brush the cavities with a little oil and rotate the falafel as they firm and brown.
Why is my spinach falafel soggy?
Usually because the spinach contains too much water. After blanching, cool it and squeeze aggressively before adding it to the chickpeas. Removing moisture is preferable to compensating later with a large amount of besan.
Can falafel be made with moong dal?
Yes, but replacing chickpeas with another pulse changes both texture and technique. Whole or split moong can make excellent falafel-inspired fritters and patties, but it should be treated as its own formulation rather than a blind one-for-one substitution.
How do you make falafel chaat?
Put hot falafel or Aloo Tikki Falafel on a plate and add whisked yogurt, green chutney, tamarind chutney, onion, chaat masala, sev, pomegranate and coriander. Assemble just before serving so some of the crust stays crisp.
Can paneer be added to falafel?
Yes. Stuffing works particularly well because the paneer remains a distinct soft centre rather than changing the texture of the entire chickpea mixture. Keep the bhurji fairly dry and cool it completely before stuffing.
Which Indian falafel works best in an air fryer?
Masala Chana is the easiest starting point. Methi-Palak also works well, but check it early because small green falafel can dry out. Aloo Tikki can be air-fried, although shallow-frying gives the more characteristic crust. Daal Bati belongs in the oven, and frying remains the most reliable method for the stuffed paneer version.
Imagine harvesting a basket of super-nutritious greens in just 7–14 days, no matter the season, climate, or size of your home. Welcome to the world of microgreens—a vibrant, health-boosting, and surprisingly easy indoor gardening revolution that’s taking over windowsills and kitchen counters worldwide.
Microgreens aren’t just a foodie trend; they’re a science-backed, space-saving, and delicious way to supercharge your meals. This 2025 guide explores the latest research, the five must-grow microgreens, and step-by-step advice to help you become a microgreen maestro—no green thumb required.
Why Microgreens?
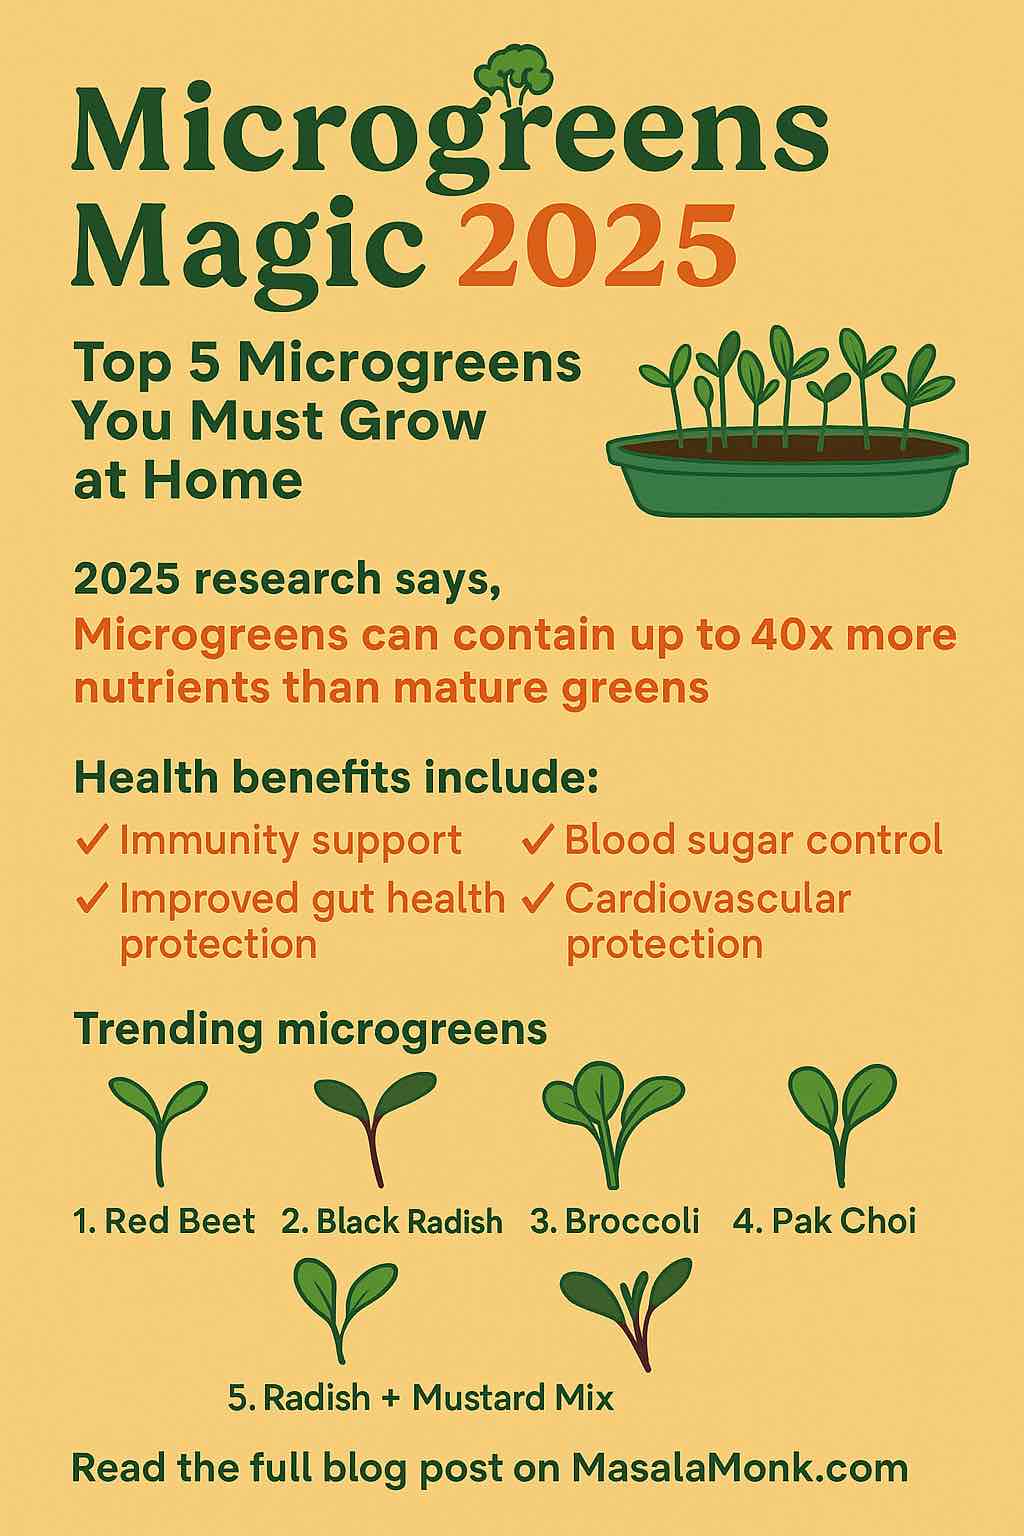
Nutrient Powerhouses: Studies in 2025 confirm that microgreens can contain up to 40× more nutrients per gram than their mature counterparts (Nature, 2025).
Fast, Year-Round Harvest: Most are ready to eat within 1–2 weeks.
Minimal Space & Gear: A sunny window and a tray are all you need.
Flavors for Every Palate: From peppery to nutty to sweet—there’s a microgreen for everyone.
The Latest Science (2025 Update)
This year, microgreens have made headlines in scientific journals and urban kitchens alike:
Red Beet & Black Radish: A Scientific Reports study crowned red beet and black radish microgreens as leaders in flavonoids and antioxidants—key compounds for fighting inflammation, aging, and disease.
Gut & Heart Health: Microgreens like radish and mustard show promise in supporting the microbiome, reducing blood sugar spikes, and helping manage heart risk (Cleveland Clinic, 2025).
Biofortification: Growers are now using controlled environments to “supercharge” microgreens with extra vitamins and minerals, boosting their natural health benefits.
The Top 5 Microgreens to Grow at Home (2025 Edition)
1. Red Beet Microgreens
Why: Outrageous levels of flavonoids, vibrant color, earthy flavor.
Nutrition: The highest flavonoid content tested (1,625 mg/100g), plus iron and betalains.
Time to Harvest: 10–15 days.
How to Use: Add to salads, wraps, or as a colorful topping for rice bowls.
2. Black Radish Microgreens
Why: Antioxidant superstar with a spicy kick.
Nutrition: Rich in vitamin C, folate, and glucosinolates.
Time to Harvest: 6–8 days (one of the fastest).
How to Use: Perfect for adding zip to tacos, sandwiches, or savory pancakes.
3. Broccoli Microgreens
Why: Most beginner-friendly, with proven anticancer compounds (sulforaphane).
Nutrition: Up to 40× the sulforaphane of mature broccoli.
Time to Harvest: 7–10 days.
How to Use: Sprinkle on eggs, blend in smoothies, or layer in Buddha bowls.
4. Pak Choi (Bok Choy) or Kale Microgreens
Why: Easy to grow, very nutrient-dense, mild flavor.
Nutrition: Vitamins A, C, K, calcium, magnesium.
Time to Harvest: 10–14 days.
How to Use: Stir into stir-fries, soups, or use as a bed for grilled proteins.
5. Radish + Mustard Mix
Why: Super fast, zesty, and excellent for gut health.
Nutrition: Vitamin A, C, E, and microbiome-enhancing fibers.
Time to Harvest: 6–8 days.
How to Use: Mix into slaws, use as a pizza topping, or garnish noodle dishes.
Practical Guide: Growing Microgreens at Home—Step by Step
Growing Medium: Coconut coir, peat moss, or quality potting soil.
Spray Bottle: For gentle, even misting.
Light: A sunny windowsill (4–6 hours sunlight) or a basic LED grow light.
How to Grow Microgreens—The 7-Day Routine
Prep Your Tray Fill your tray with 2–3 cm of moist growing medium. Level the surface.
Sow Seeds Generously Scatter seeds thickly, almost like “carpet sowing.” Gently press them into the medium.
Mist & Cover Mist seeds until moist but not soggy. Cover with another tray or a lid (blackout phase) for 2–3 days until most seeds sprout.
Let There Be Light Remove the cover. Move tray to a sunny spot or under a grow light. Mist daily to keep soil moist (not wet).
Airflow is Key Ensure good air movement to avoid mold—use a small fan if needed, or open a window nearby.
Harvest at the Peak Once microgreens have their first true leaves (usually days 6–14), snip above the soil with clean scissors.
Rinse & Store Store dry, unwashed in the fridge (in a container or ziplock), and rinse just before use for best shelf life.
Advanced Tips: Supercharge Your Microgreens
Rotate Varieties: Grow 2–3 kinds together for a nutritional and flavor boost.
Biofortification: Experiment by adding a pinch of Epsom salt or kelp to the water for extra magnesium and micronutrients.
Hydroponic Options: Try growing on coconut coir mats or hemp pads—no soil needed, less mess!
Troubleshooting: Yellow leaves? Add light. Mold? Increase airflow and lower watering. Slow growth? Check temperature (ideal: 20–24°C).
Real Stories & Urban Inspiration
“I started with radish microgreens in a repurposed sushi tray by my kitchen window. Now I have a full ‘microgreens bar’—every meal gets a fresh, crunchy upgrade.” — Aman S., Delhi
Urban micro-farms are thriving from New York to Bangalore, with chefs and home cooks using microgreens for vibrant, Instagram-worthy, and health-conscious cooking. You don’t need a garden—just a little curiosity and a bit of sunlight.
Conclusion: Your Microgreen Journey Starts Now
Microgreens are one of the most rewarding (and forgiving) ways to garden at home. You’ll eat fresher, feel better, and impress friends with your new “indoor harvests.” Start with red beet or broccoli for science-backed health, add a spicy radish mix for flavor, and let your kitchen become a green oasis—365 days a year.
Ready to sow your first tray? Share your progress, questions, or recipe wins below. Let’s grow!
10 Most Relevant FAQs About Growing Microgreens at Home
1. Can I grow microgreens without soil? Yes. You can use soilless media like coconut coir, hemp mats, or even paper towels. Many growers prefer coconut coir for its cleanliness, water retention, and eco-friendliness.
2. How much light do microgreens really need? Most microgreens thrive with 4–6 hours of bright, indirect sunlight per day. If you lack natural sunlight, a simple LED grow light will give you faster, greener, and more uniform results.
3. Which microgreens are the easiest for total beginners? Broccoli, radish, sunflower, and pea shoots are the most forgiving. They germinate quickly, grow evenly, and have minimal issues with mold.
4. How do I avoid mold or fungus on my microgreens? Use clean trays and tools, sow seeds in a single, even layer, ensure good air circulation (a small fan helps), and avoid overwatering. Remove trays from blackout as soon as seeds sprout.
5. How often should I water my microgreens? Mist once or twice a day—enough to keep the medium moist but not soggy. Too much water is the main cause of mold and rot.
6. Can I reuse soil or grow mats for another crop? It’s not recommended due to potential disease buildup. Compost spent soil/growing media and start each batch fresh for best results.
7. How long do microgreens last after harvesting? Stored dry and unwashed in an airtight container in the refrigerator, most microgreens last 5–7 days. Wash them right before eating, not before storage.
8. Are microgreens safe to eat raw? Yes, provided you use clean seeds and growing materials. Always rinse before eating. If you’re immunocompromised, consider giving them a quick dip in vinegar water.
9. Do I need special “microgreen” seeds or can I use regular seeds? You can use regular seeds of edible plants, but always choose seeds labeled untreated and preferably organic. Avoid seeds intended for field crops (which may have chemical coatings).
10. Can I grow microgreens year-round—even during winter or rainy season? Absolutely! Microgreens are perfect for year-round growing indoors. Just ensure steady temperature (18–24°C), humidity, and adequate light.