Posted on 1 Comment

Homemade Strawberry Ice Cream Recipe

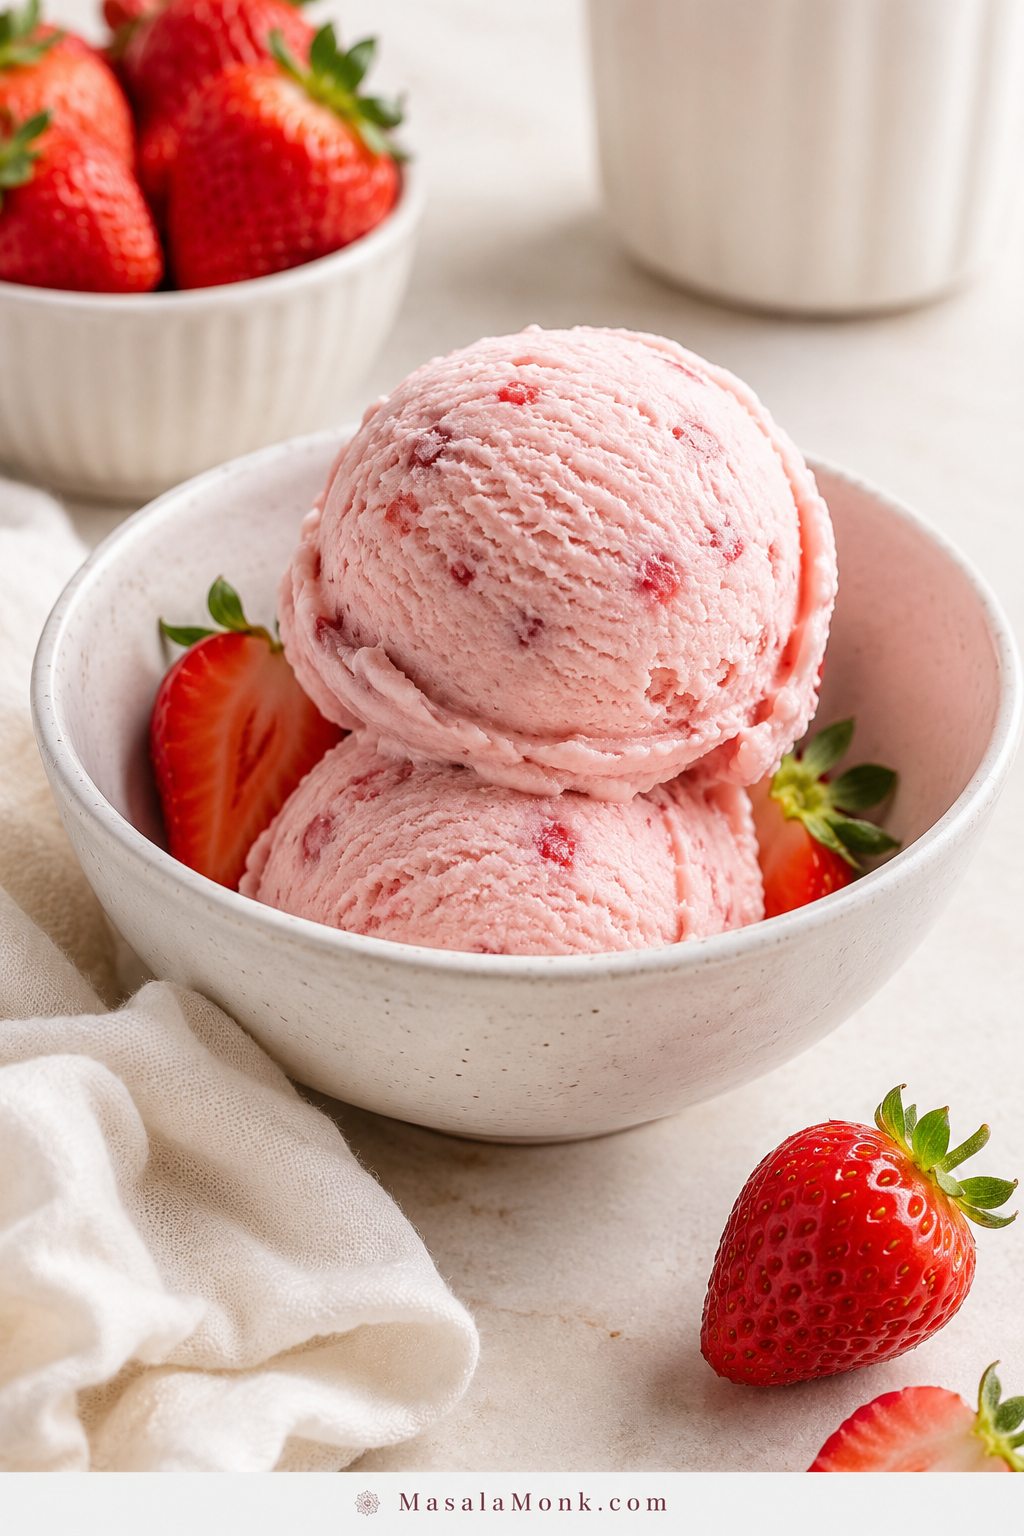
Homemade strawberry ice cream scooped into a pale bowl with fresh strawberries nearby

Strawberry Ice Cream Recipe sounds simple until the freezer gets involved. Sweet berries, cream, sugar, and vanilla should turn into something creamy and bright. Instead, homemade strawberry ice cream can come out icy, pale, too hard to scoop, or strangely bland after one night in the freezer.

If that has happened to you, it was probably not because you “failed” at ice cream. Strawberry is one of the easiest flavors to make taste good while the mixture is fresh, and one of the easiest to ruin after freezing. The berries bring the flavor, but they also bring water, and water is what turns into frozen crunch.

This recipe fixes that by concentrating the strawberries first, so the finished scoop tastes like ripe berries and cream instead of frozen pink milk. You can make it with an ice cream maker for a classic churned texture, or use the no-churn condensed milk method if you do not have a machine.

This is an eggless strawberry ice cream recipe, so the berry flavor stays bright instead of getting buried under a heavy custard.

When it works, the first spoonful should feel creamy from the edge of the scoop, smell like strawberries before you even taste it, and leave you with that clean berries-and-cream flavor instead of a crunchy, icy finish. The color should be soft and natural, not neon, and the flavor should come from cooked-down berries rather than bottled strawberry flavoring.

On this page

Start with the quick answer and method chooser if you are deciding how to make it. Use the second group when you want texture fixes, storage tips, variations, and serving ideas.

Quick Answer: The Best Strawberry Ice Cream Recipe

The best strawberry ice cream recipe starts with ripe strawberries, heavy cream, whole milk or half-and-half, sugar, vanilla, lemon juice, and a small texture helper such as light corn syrup, glucose, or honey. For the creamiest result, cook off some of the berry juice first, until the strawberries become thick, glossy, and jammy rather than loose and watery.

For the best all-around version, use an ice cream maker with a stovetop strawberry reduction. No machine? Use the no-churn version with reduced strawberries, sweetened condensed milk, and whipped cream. In both cases, the strawberry reduction is what keeps the freezer from turning the fruit into a grainy, hard scoop.

The rule is simple: do not blend watery raw strawberries straight into cream and expect smooth ice cream. Make the berries freezer-ready first, chill the mixture well, and freeze it in a shallow airtight container.
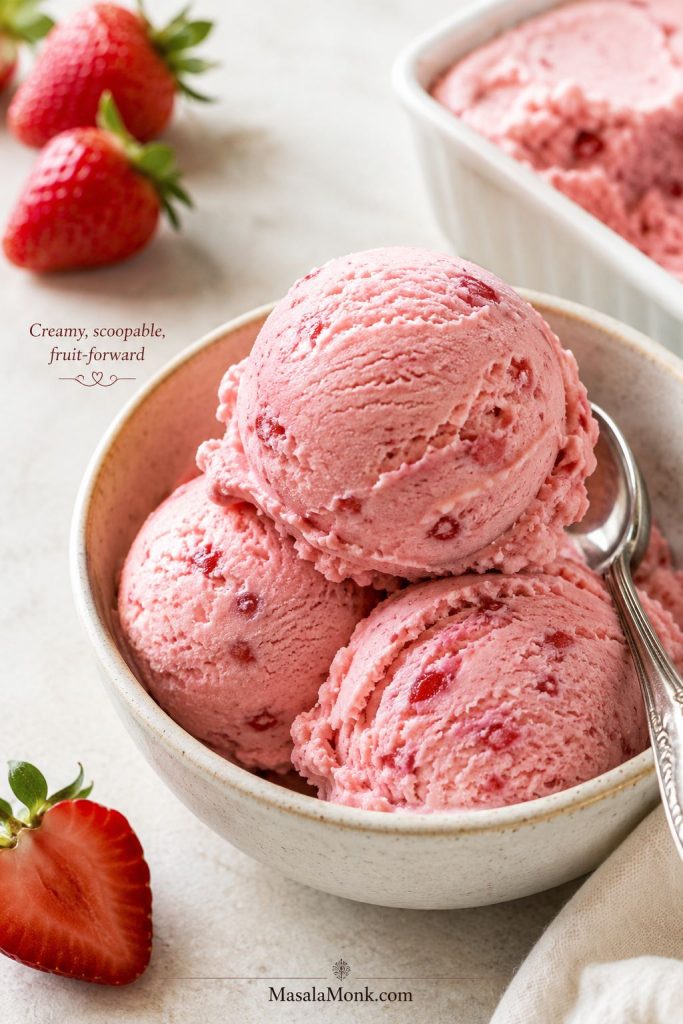
Close-up scoops of creamy strawberry ice cream with smooth texture and fresh strawberries
The finished scoop should be smooth, creamy, and fruit-forward, with enough strawberry flavor to stand out after freezing.

Best first batch: Make the stovetop strawberry reduction and churn it in an ice cream maker. Use the no-churn condensed milk method when you want the easiest freezer version without special equipment.

At a Glance
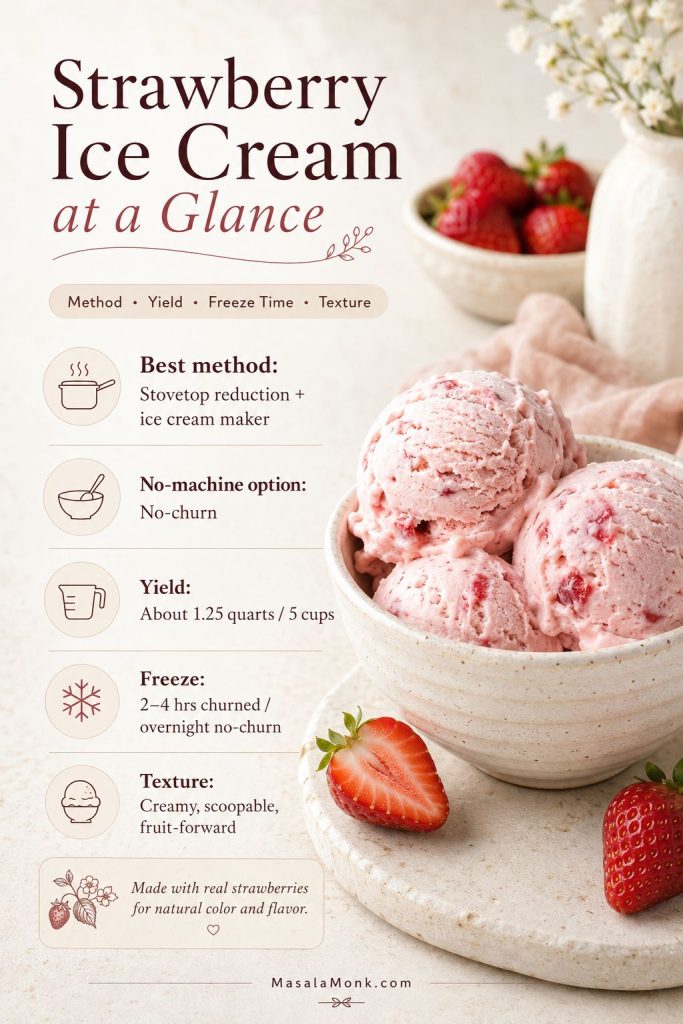
Best method Stovetop strawberry reduction + ice cream maker
No-machine option Reduced strawberries + condensed milk + whipped cream
Yield About 1.25 quarts / 5 cups / 8 servings
Texture Creamy, scoopable, fruit-forward, not icy
Reduction time 15–20 minutes on the stovetop
Churn time Usually 20–30 minutes
Freeze time 2–4 hours after churning, or overnight for no-churn
Best berries Ripe fresh strawberries, or thawed frozen berries that are drained and reduced
At-a-glance strawberry ice cream guide showing method, yield, freeze time, and texture notes
Before starting, check the method, yield, freeze time, and texture goal so the recipe fits your equipment and schedule.

Choose Your Path

If you are standing in the kitchen with strawberries, cream, and a freezer container, this is the fastest way to decide what to do next.

Use this shortcut guide before you start

  • Want the best texture? Use the ice cream maker version with stovetop strawberry reduction.
  • No ice cream maker? Use the no-churn condensed milk version below.
  • Berries smell flat? Roast them for deeper, jammy strawberry flavor.
  • Using frozen strawberries? Thaw, drain, and reduce them before adding dairy.
  • Want eggless strawberry ice cream? You are already in the right place; both versions are eggless.
  • Hate seeds? Blend and strain the reduced purée before mixing the base.

Smell the strawberries before you decide. When they are sweet and floral, the stovetop reduction is enough. If they look red but smell quiet, roast them for deeper flavor. With frozen berries, thaw and drain them before they go anywhere near the cream.

Choose this method Best for What to expect
Stovetop reduction + ice cream maker Best all-around strawberry ice cream Classic churned texture, strong berry flavor, reliable scoop
Roasted strawberries + ice cream maker Deepest fruit flavor Jammy, richer fruit taste; best when berries smell mild
Reduced strawberries + condensed milk + whipped cream No-churn strawberry ice cream Easy, creamy, no machine needed; freeze overnight
Frozen strawberries + reduction Off-season batches Works well if berries are thawed, drained, and cooked first
Raw purée shortcut Fastest possible version Fresh-tasting but more likely to freeze icy

If you are not sure, start with the ice cream maker method and stovetop reduction. It is the most balanced route: not the longest, not the richest, and not the riskiest.
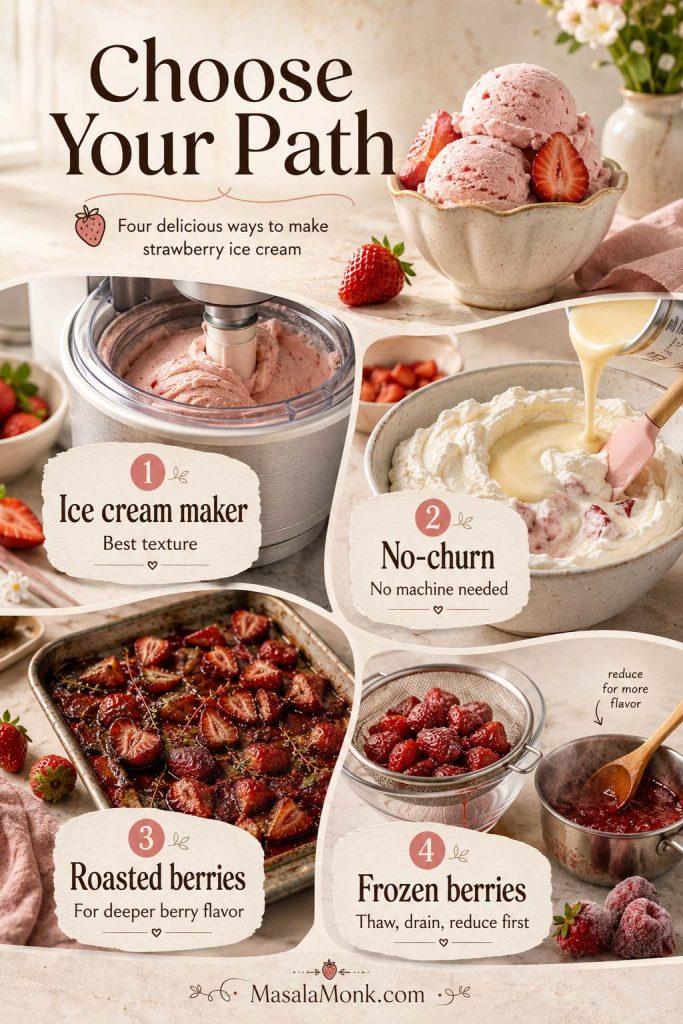
Strawberry ice cream method chooser showing ice cream maker, no-churn, roasted berry, and frozen berry options
Choose the ice cream maker method for the cleanest scoop, the no-churn version for ease, and roasted berries when the fruit needs deeper flavor.

Why This Strawberry Ice Cream Stays Creamy

Creamy ice cream depends on five things working together: water, fat, sugar, milk solids, and air. Strawberries make that balance tricky because they bring flavor and water at the same time. Extra water freezes hard, low fat tastes thin, not enough sugar makes the scoop stiff, and too little air leaves it heavy instead of creamy.

This recipe fixes the balance before the mixture ever reaches the freezer. The strawberries are reduced or roasted, the dairy stays full-fat, the sugar is high enough to soften the freeze, and the base is chilled before churning. In the no-churn version, whipped cream brings the air while condensed milk brings sweetness and body.

The reduction is not a fussy extra step. It is the moment the strawberries stop being watery fruit and become ice-cream flavor.
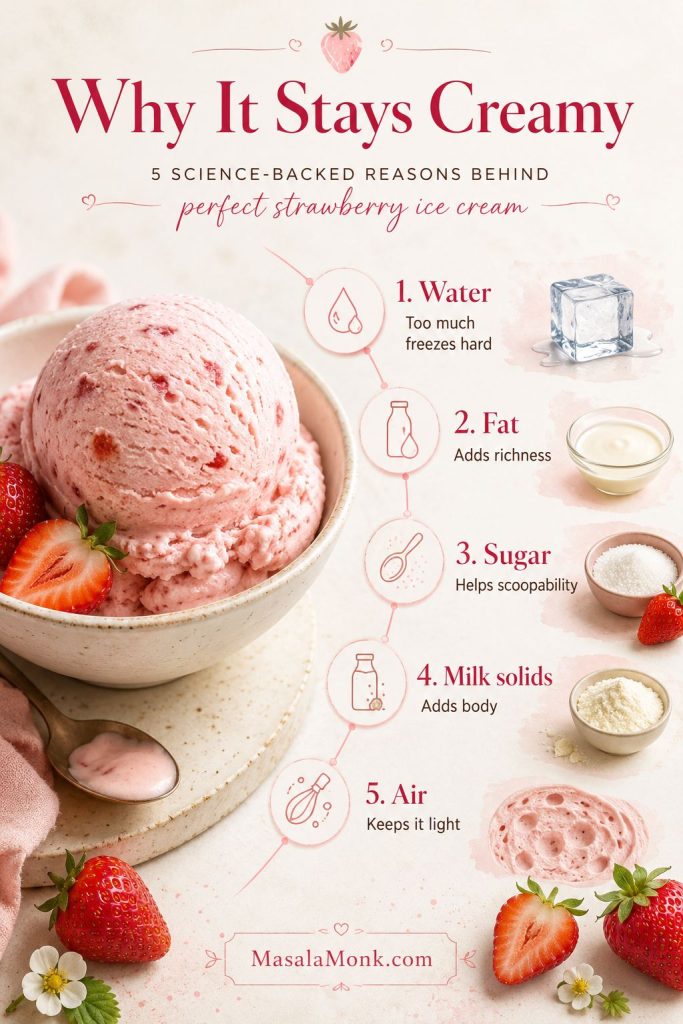
Strawberry ice cream texture guide showing water, fat, sugar, milk solids, and air as key factors
A smooth scoop starts before churning: cooked-down berries reduce free moisture, while cream, sugar, milk solids, and air support the final texture.

Why Homemade Strawberry Ice Cream Turns Icy

The freezer is where weak strawberry flavor goes to disappear. Fresh berries taste juicy and bright at room temperature, but that same juice becomes the problem once frozen. Too much free moisture in the mixture creates a crunchy, grainy texture instead of a creamy one.

The answer is not to use less fruit. Less fruit gives you pale, timid ice cream. The better fix is to turn loose berries into a thicker purée before they meet the dairy. Simmering or roasting drives off excess moisture while keeping the berry flavor. That gives you a scoop that still tastes like strawberries after a night in the freezer.

Large raw strawberry chunks cause another common disappointment. They look beautiful in the bowl, but they freeze harder than the creamy base around them. Tiny macerated pieces can work; big raw pieces often turn into frozen fruit pebbles. A smooth purée or thick strawberry ripple usually eats better.

If your last batch froze hard, tasted weak, or had icy fruit pieces, the troubleshooting section will help you match the problem to the fix.
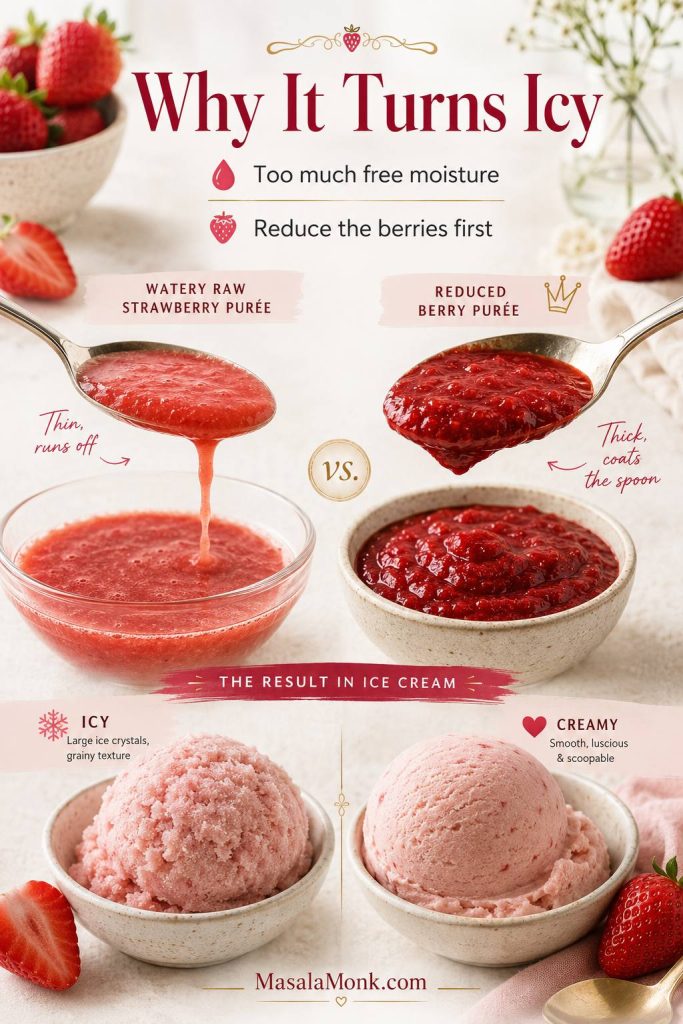
Comparison of watery strawberry purée and thick reduced strawberry base for ice cream texture
Strawberry ice cream usually turns icy when too much free berry moisture goes into the freezer, which is why reducing the fruit first matters.

Ingredients You Need

Think of the base as a balance: strawberries for flavor, cream for richness, milk for lightness, sugar for scoopability, and lemon, salt, and vanilla to keep the fruit from tasting flat once frozen.
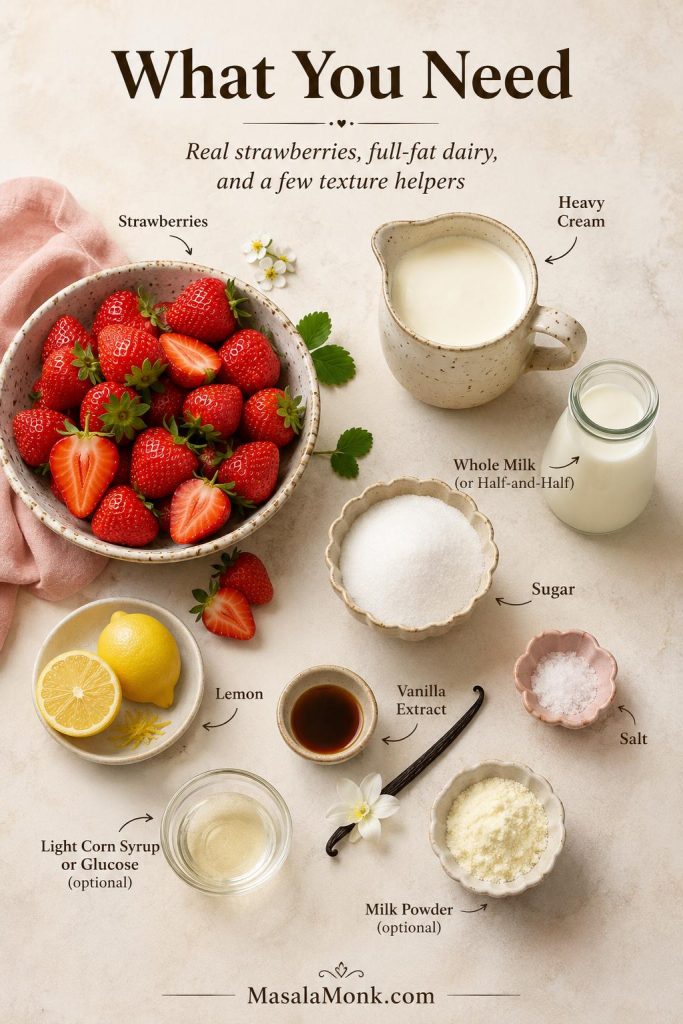
Ingredients for homemade strawberry ice cream including strawberries, cream, milk, sugar, lemon, vanilla, salt, and milk powder
Simple ingredients do more than add flavor here: the dairy builds body, lemon sharpens the berries, and sugar helps the ice cream scoop cleanly.

Strawberries

Use strawberries that smell sweet before you cut them. Aroma matters more than perfect color. Deep red berries are helpful, but a fragrant berry will give you better ice cream than a glossy berry that tastes watery.

The churned recipe uses 680g / 1 1/2 lb strawberries. After cooking, that fruit should reduce to about 1 1/4 to 1 1/2 cups of thick strawberry purée. The no-churn version uses closer to 900g to 1kg / about 2 lb because condensed milk and whipped cream can support a stronger fruit layer.
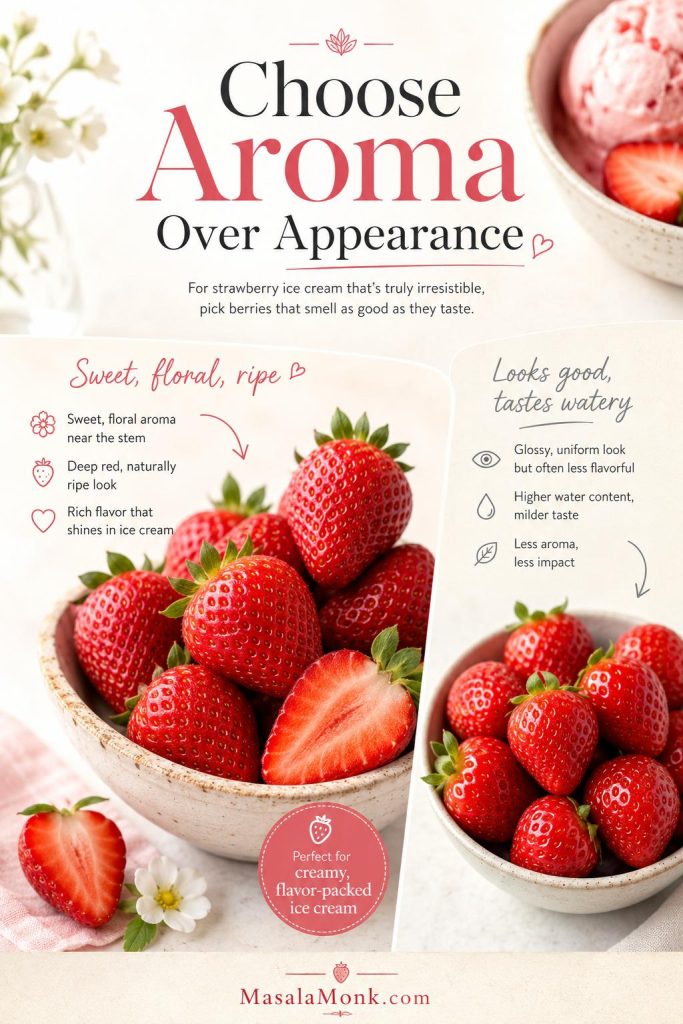
Guide comparing fragrant ripe strawberries with glossy watery strawberries for ice cream
For the best strawberry ice cream, aroma matters more than perfect color because fragrant berries usually give stronger flavor after freezing.

Cream and Milk

Heavy cream gives the scoop its plush, rounded texture, while whole milk or half-and-half keeps the bowl from feeling like frozen whipped cream. Low-fat milk makes fruit ice cream more likely to freeze hard and icy, so this is not the recipe where skim milk quietly behaves like cream.

For a richer batch, use heavy cream plus half-and-half. For a lighter but still creamy version, use heavy cream plus whole milk. Either way, keep the dairy full-fat enough to support the fruit.

Sugar, Glucose, Corn Syrup, or Honey

Sugar is doing more than sweetening the bowl. It helps decide whether the finished ice cream scoops cleanly or freezes into something too firm. A base that tastes just right before freezing may taste dull later because cold mutes flavor, so the unfrozen mixture should taste slightly sweeter and more intense than the final scoop you want.

For the smoothest texture, use 3 tablespoons light corn syrup or glucose in the churned version. Honey also works, but it brings its own flavor. The amount is small; it will not make the ice cream syrupy. It simply helps soften the freeze.

If you enjoy the technical side of homemade ice cream, King Arthur Baking’s strawberry ice cream formula is a useful reference for how corn syrup, optional xanthan gum, and careful chilling can support a smoother frozen texture.

Lemon, Vanilla, and Salt

Lemon juice should not announce itself. It is there to make the strawberries taste more awake. Vanilla rounds out the cream, while salt sharpens the fruit and stops the flavor from feeling flat. When berries are decent rather than spectacular, these small ingredients matter even more.

Optional Milk Powder Upgrade

Milk powder is the quiet upgrade here. A spoonful or two adds body without adding more liquid, which is exactly what a fruit-heavy ice cream needs. Use 1 to 2 tablespoons in the churned base, or 1 tablespoon in the no-churn version, for a creamier scoop.

A tiny pinch of xanthan gum can also help advanced batches, but it is optional. Too much can make ice cream feel gummy, so milk powder is the easier first upgrade.

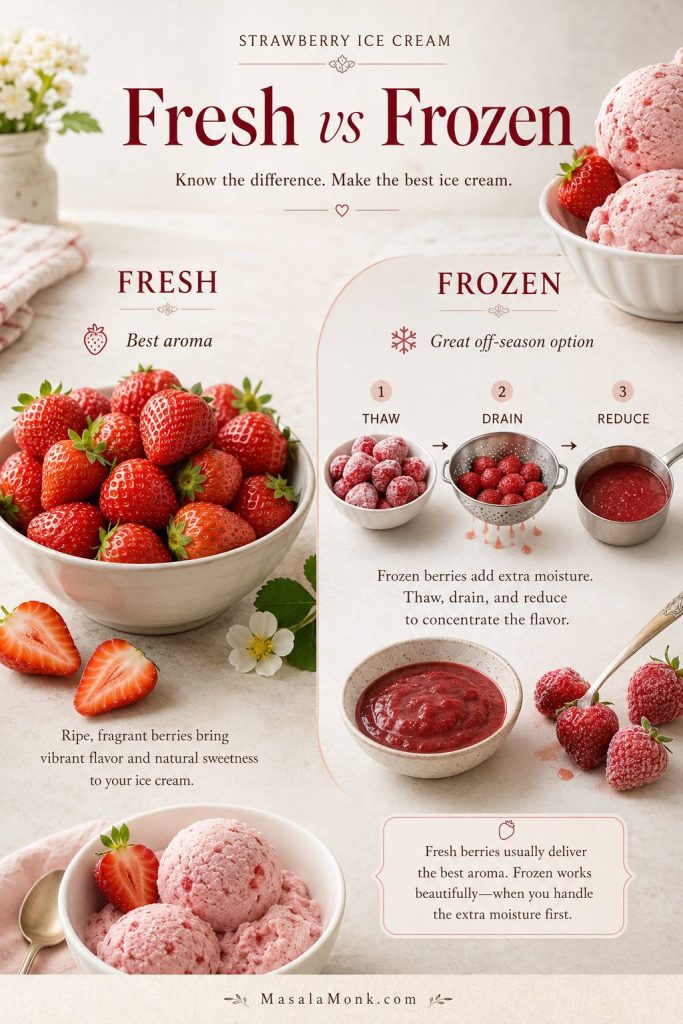
Fresh vs Frozen Strawberries for Strawberry Ice Cream

Fresh ripe strawberries give the best aroma. When they are truly in season, they make the ice cream taste bright before you add anything extra. Still, even fresh berries need concentration because juicy fruit still brings water into the base.

Frozen strawberries can make very good ice cream, but only if you treat them correctly. Thaw them first, drain off excess liquid, and then reduce the fruit on the stovetop. Pouring thawed strawberry water into cream is one of the fastest ways to make icy ice cream.

Strawberry type Best use What to watch
Fresh ripe strawberries Best flavor and aroma Still reduce or roast them for the creamiest texture
Fresh but mild strawberries Good with roasting Need more flavor concentration, lemon, and salt
Frozen strawberries Reliable off-season option Thaw, drain, and reduce before adding to dairy
Raw chopped strawberries Use only in tiny amounts Large pieces freeze hard and icy
Fresh and frozen strawberries compared for homemade strawberry ice cream with thaw, drain, and reduce guidance
Fresh strawberries usually give better aroma; however, frozen strawberries can still work well once they are thawed, drained, and reduced.

If you already use frozen berries in smoothies, the difference here is texture. A smoothie can stay thick because it is blended and served right away. Ice cream has to freeze, sit, and scoop later. MasalaMonk’s strawberry smoothie recipe guide is useful for drink-style berry texture, while this recipe focuses on controlling water for a creamy frozen scoop.

Made it with frozen strawberries? The detail that helps other readers most is whether you thawed, drained, and reduced them first.

Ice Cream Maker Method

Use the ice cream maker when you want that classic churned scoop: smooth, creamy, and light enough to taste like berries instead of heavy frozen cream. The base is eggless, so the strawberry flavor stays clean and bright.

If your machine uses a freezer bowl, freeze the bowl completely before starting. Overnight is safest. A half-frozen bowl gives you slush, not ice cream. The base also needs to be cold before churning, so do not rush the chill time.

Every machine is a little different, so follow your model’s timing and capacity notes. Cuisinart’s official ice cream maker manuals are useful if you need to check whether your bowl needs longer freezing, how much base your model can hold, or when to add mix-ins.
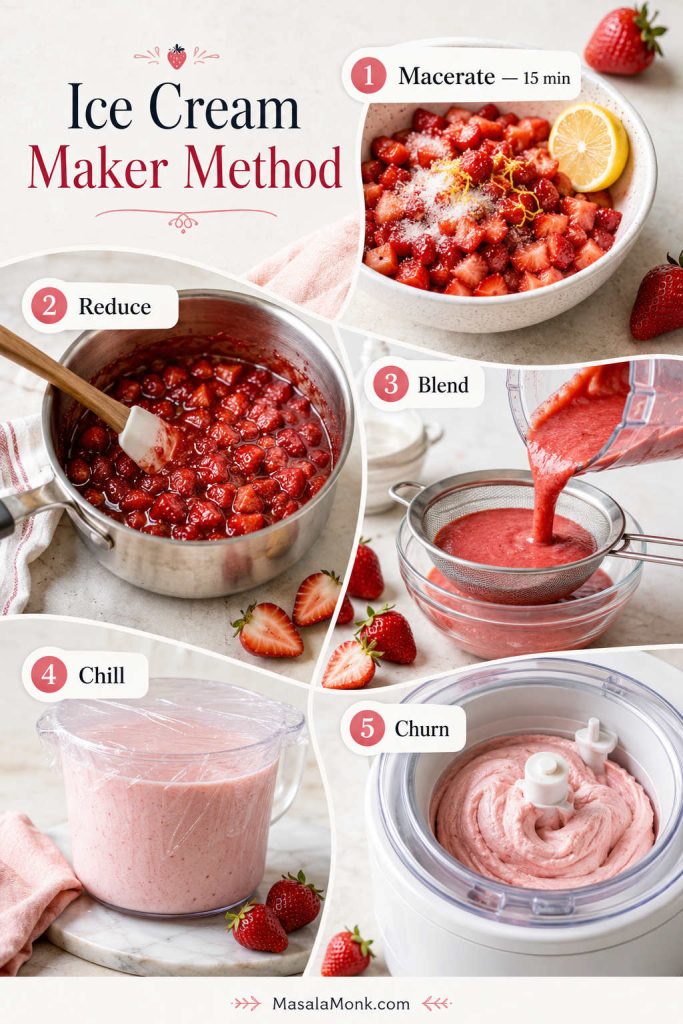
Step-by-step ice cream maker method for strawberry ice cream showing macerating, reducing, blending, chilling, and churning
For the churned method, reduce the berries, chill the base fully, and start with an ice cream maker that is already cold and ready.

Step 1: Macerate the Strawberries

Hull and chop the strawberries. Add them to a saucepan with half the sugar and the lemon juice, then let them sit for about 15 minutes. The sugar pulls juice from the berries and starts building the syrupy layer that will later cook down into stronger strawberry flavor.

Step 2: Reduce the Fruit

Cook the strawberries over medium heat, stirring often, for 15 to 20 minutes. Stop when the mixture looks glossy and thick, and a spatula dragged through the pan briefly leaves a trail. From 680g / 1 1/2 lb strawberries, you want roughly 1 1/4 to 1 1/2 cups of reduced strawberry mixture.
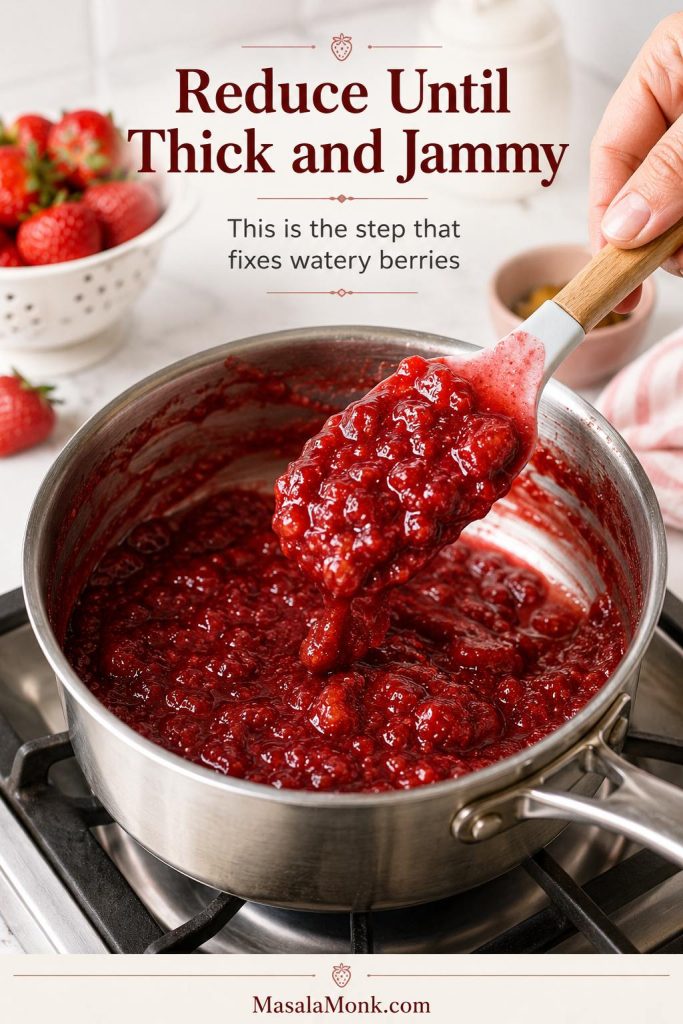
Thick reduced strawberries in a saucepan with a spoon showing jammy texture for ice cream
The strawberry mixture should move from loose and juicy to glossy and spoon-coating before it joins the ice cream base.

This is the moment the recipe starts smelling like dessert. The berries go from juicy and loose to glossy and almost jammy, and that concentrated fruit is what keeps the finished ice cream tasting alive after freezing.

The pan should smell like warm strawberry jam, and the purée should look rich enough to coat the spoon instead of running straight off it.
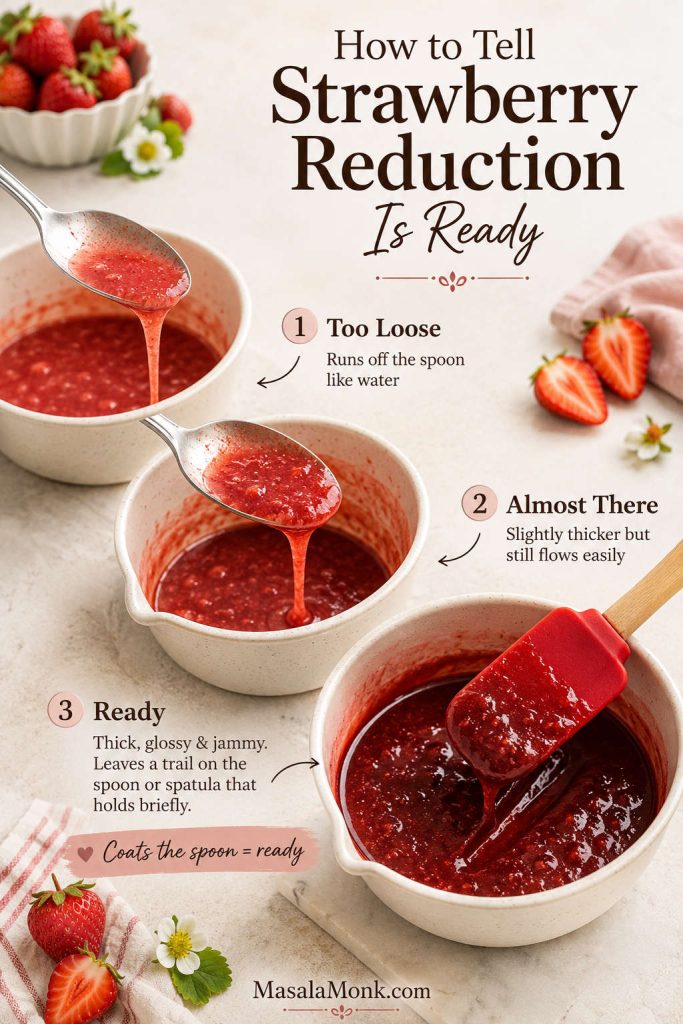
Three stages of strawberry reduction showing too loose, almost ready, and thick jammy purée
Time helps, but texture matters more; the strawberry reduction is ready when it coats the spoon and no longer runs like juice.

Step 3: Blend and Strain

Cool the reduced strawberries, then blend until smooth. For the silkiest texture, strain the purée through a fine-mesh sieve to remove seeds. Skipping the sieve is fine if you like a more rustic fruit texture, but the smooth version usually feels more polished.

Step 4: Mix and Chill the Base

Whisk the strawberry purée with heavy cream, whole milk or half-and-half, the remaining sugar, light corn syrup or glucose, vanilla, salt, and optional milk powder. Taste the base. It should taste slightly too sweet and very strawberry-forward because freezing will soften the flavor.

If the base tastes bold before it goes into the machine, you are on the right track.

Cover and chill for at least 4 hours. Overnight is even better. A very cold base churns faster, forms smaller ice crystals, and gives a smoother texture.
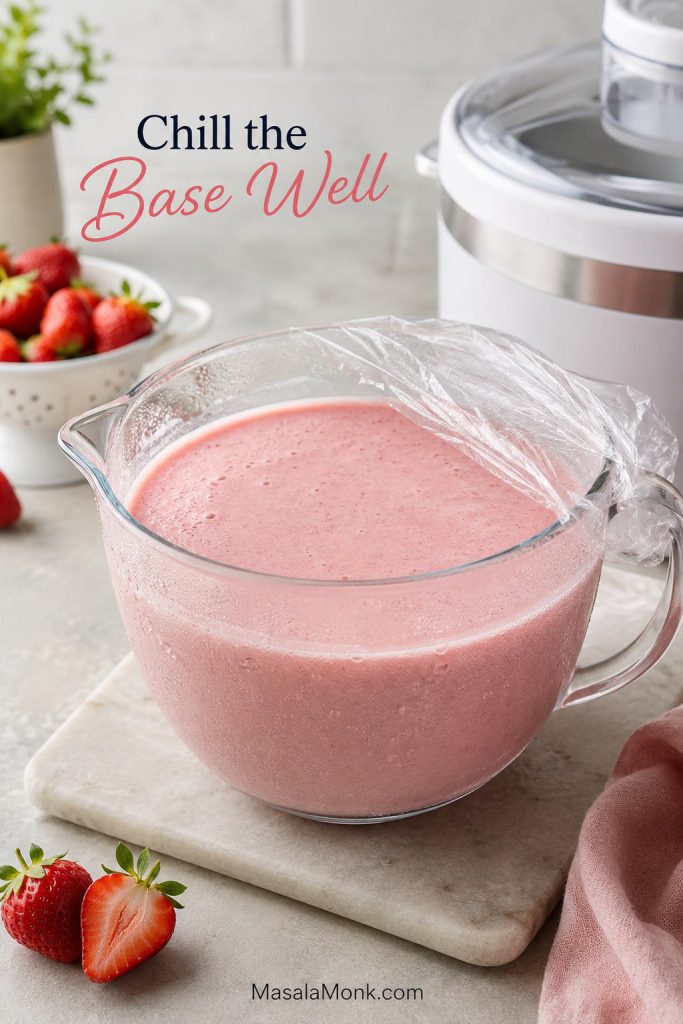
Chilled pink strawberry ice cream base in a covered glass bowl beside an ice cream maker
Chilling gives the ice cream maker a head start, so the base thickens faster and forms a smoother frozen texture.

Not sure whether it is ready to scoop after freezing? Use the texture guide before serving.

Step 5: Churn Until Thick

Pour the cold base into your ice cream maker and churn according to the machine instructions, usually 20 to 30 minutes. The ice cream should look like thick soft serve when it is ready. Stop there. Churning beyond that point can make the texture grainy, especially in a cream-rich base.

Step 6: Freeze Until Scoopable

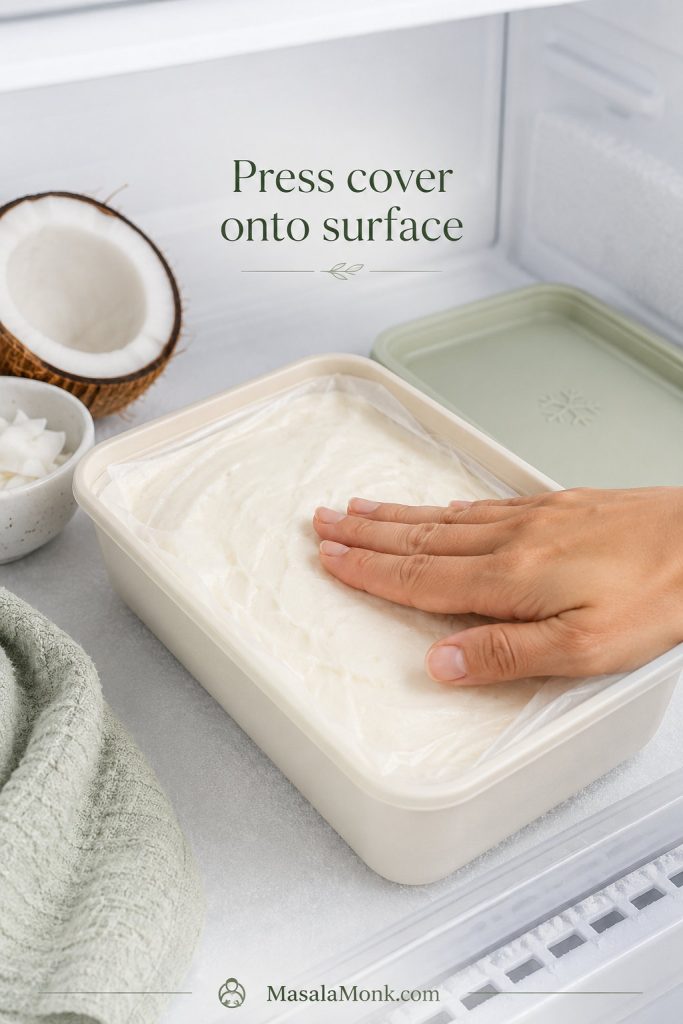
Freshly churned strawberry ice cream is soft and spoonable. For clean scoops, transfer it to a shallow freezer-safe container, press parchment or plastic wrap directly onto the surface, cover tightly, and freeze for 2 to 4 hours.

After an overnight freeze, let the container sit at room temperature for 5 to 10 minutes before scooping. You should not need to wait 30 minutes for dessert. If you do, the batch was likely too watery, too low in sugar, or too low in fat.

No-Churn Strawberry Ice Cream Without an Ice Cream Maker

Why No-Churn Needs a Different Structure

No-churn strawberry ice cream can be excellent, but it needs a different kind of structure. Since there is no machine to churn in air, whipped cream has to do that job, while condensed milk brings sweetness, milk solids, and body. The strawberries still need to be reduced first; condensed milk can make the base creamy, but it cannot erase watery fruit.
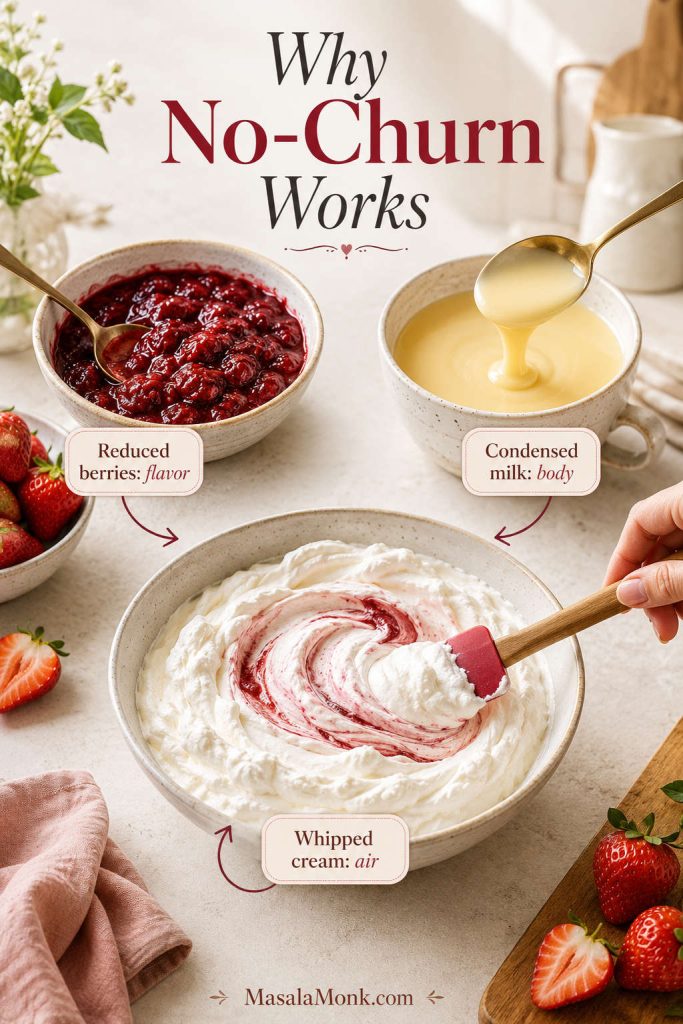
No-churn strawberry ice cream ingredients showing reduced berries, condensed milk, and whipped cream being folded together
In no-churn strawberry ice cream, each part has a job: thick berries carry the flavor, condensed milk softens the freeze, and whipped cream keeps it light.

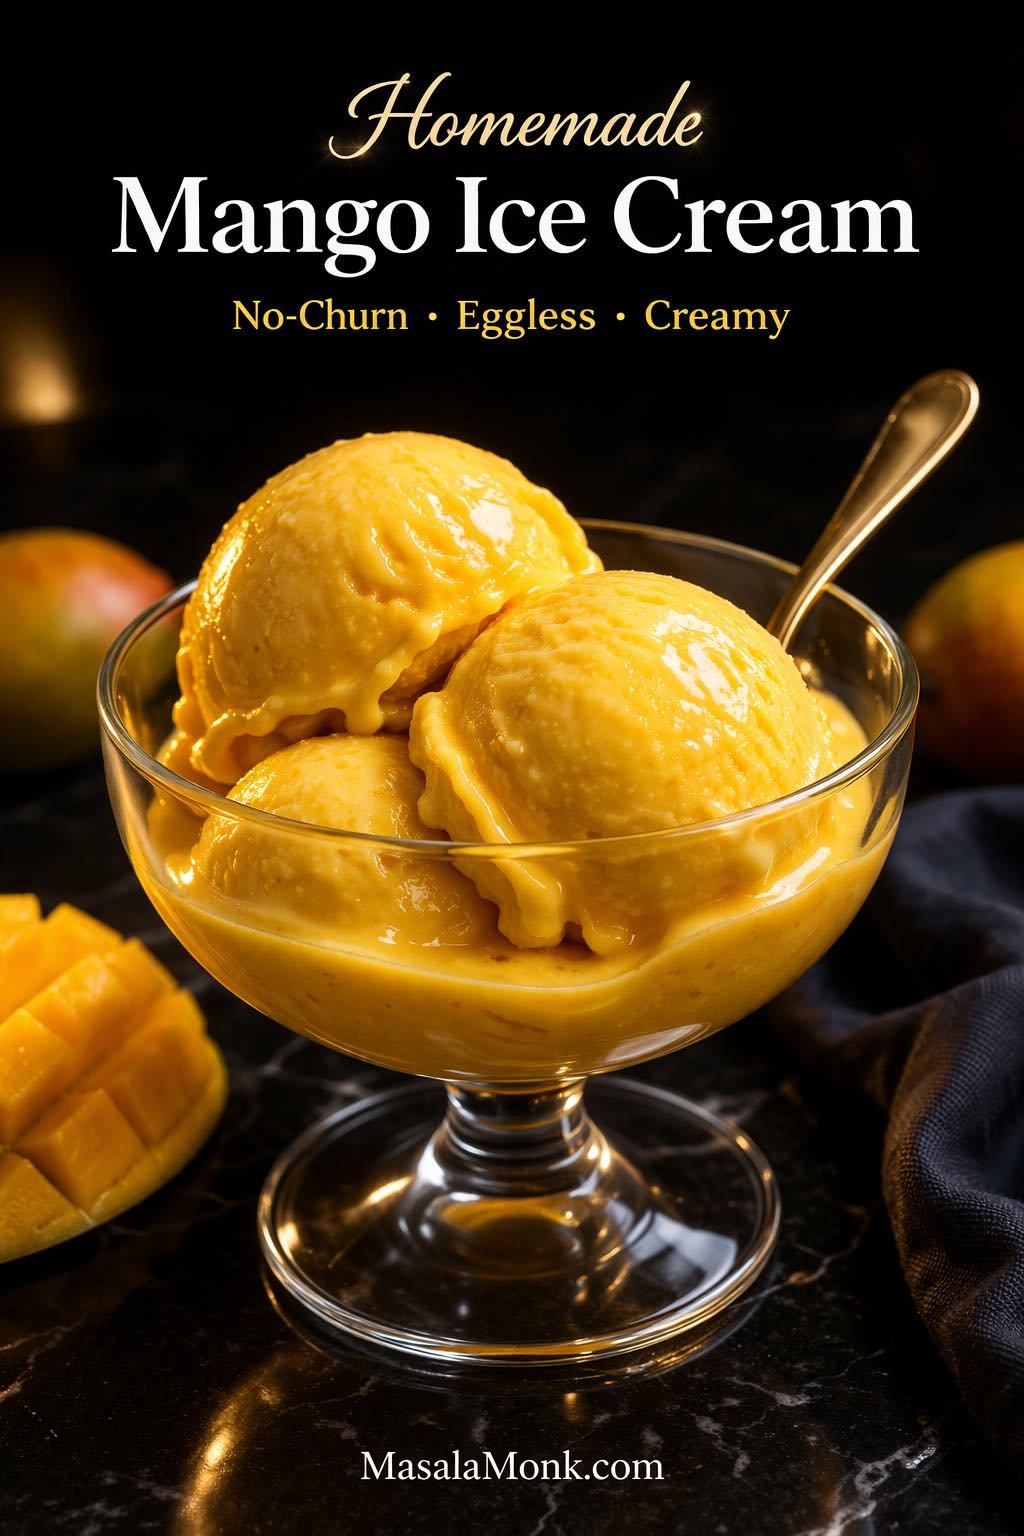
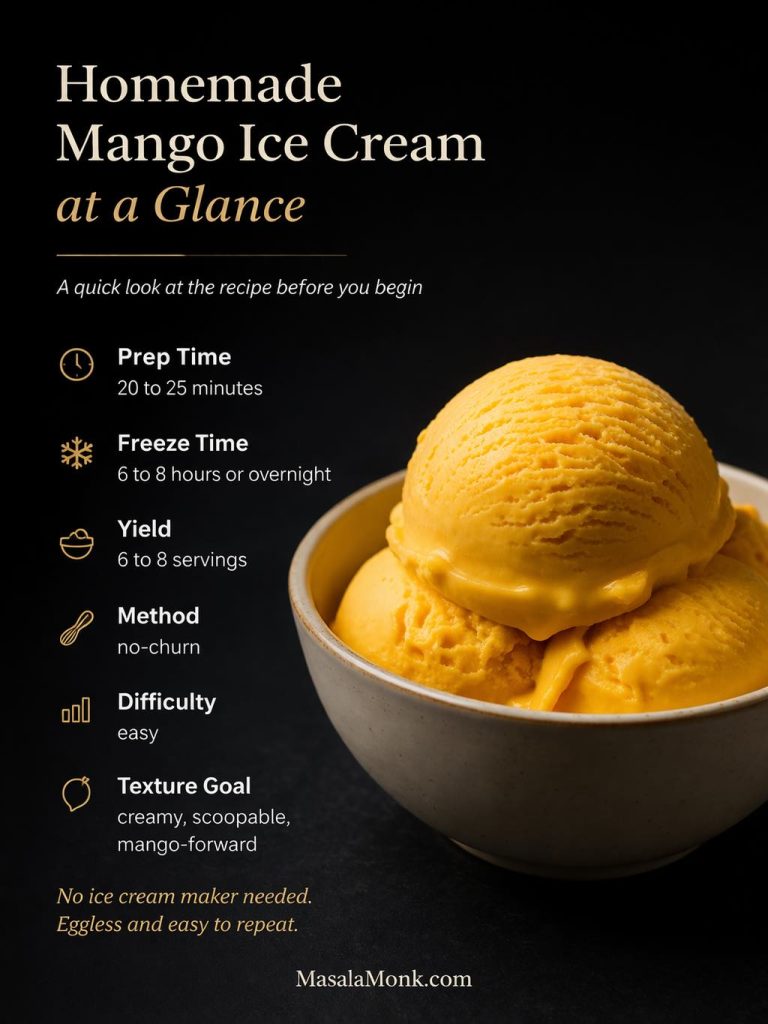
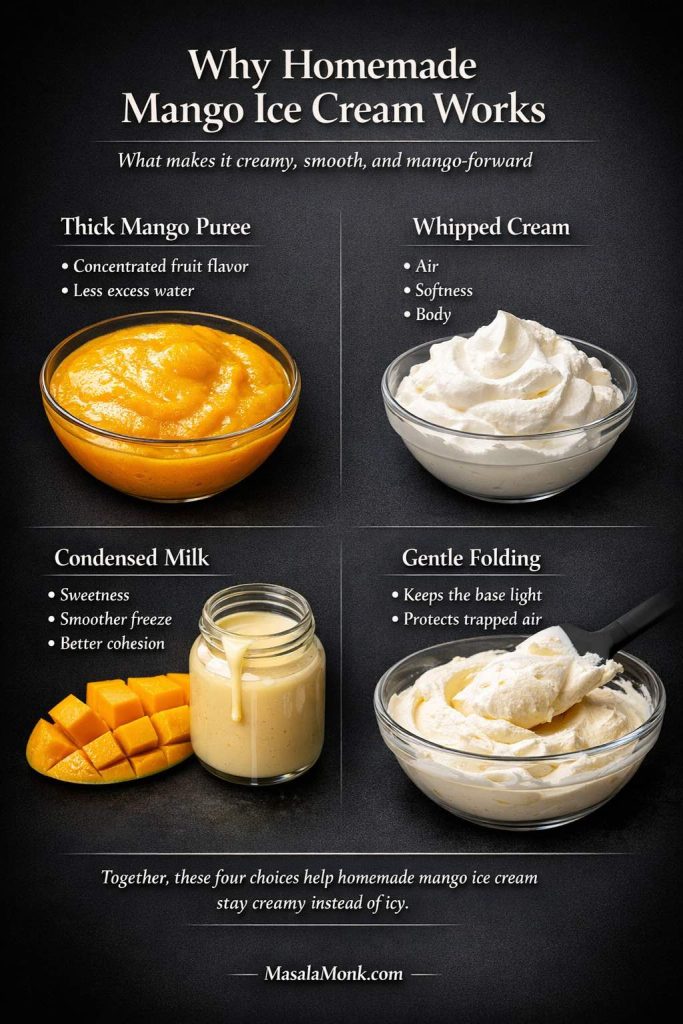
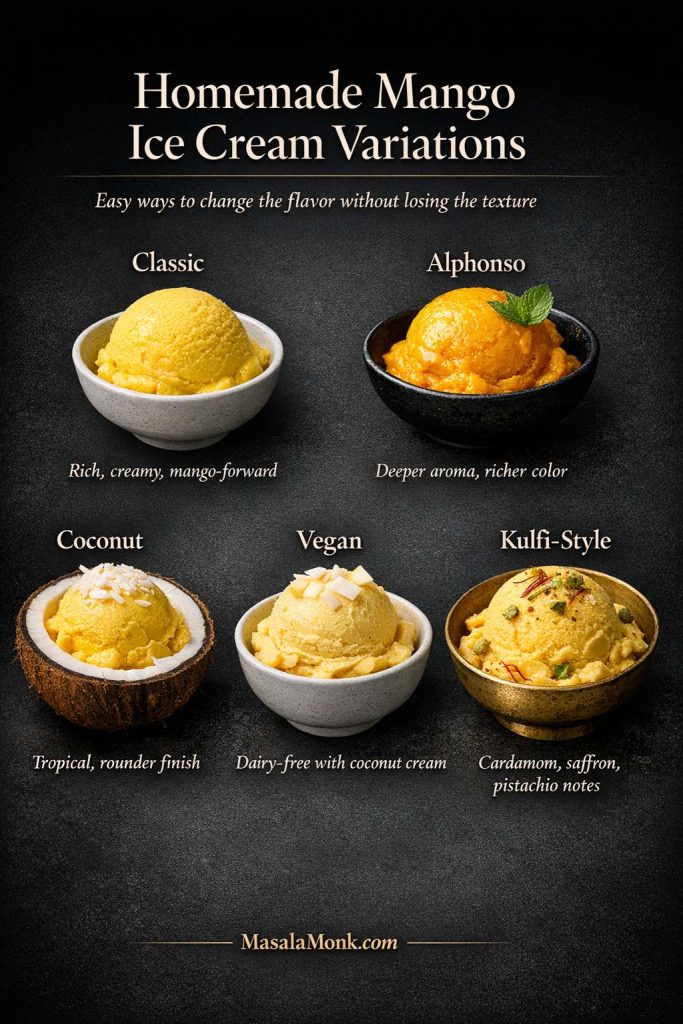
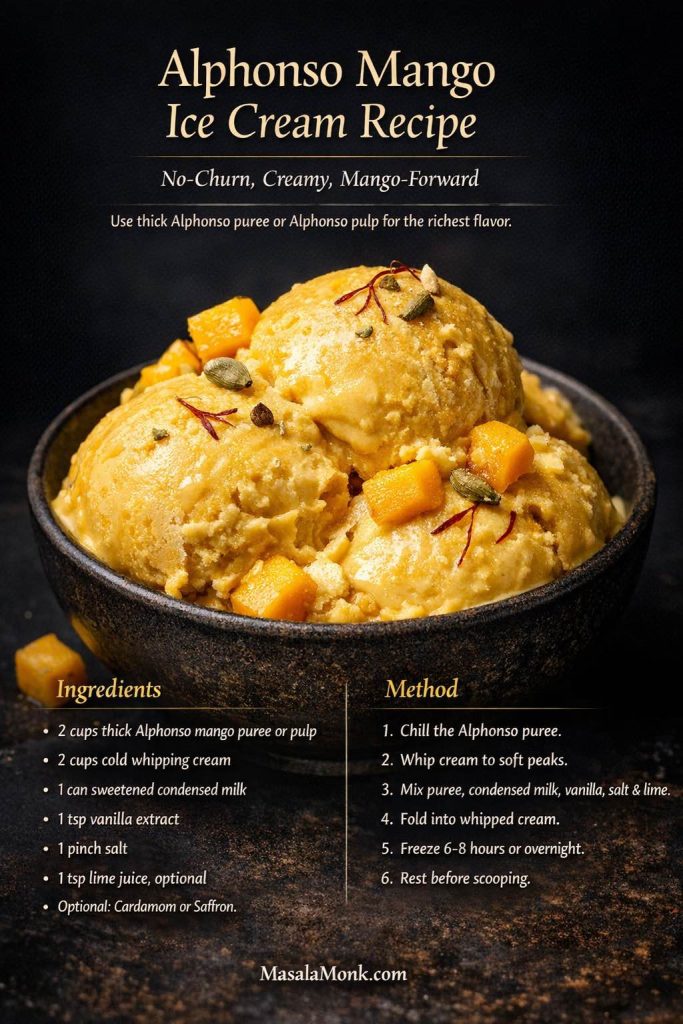
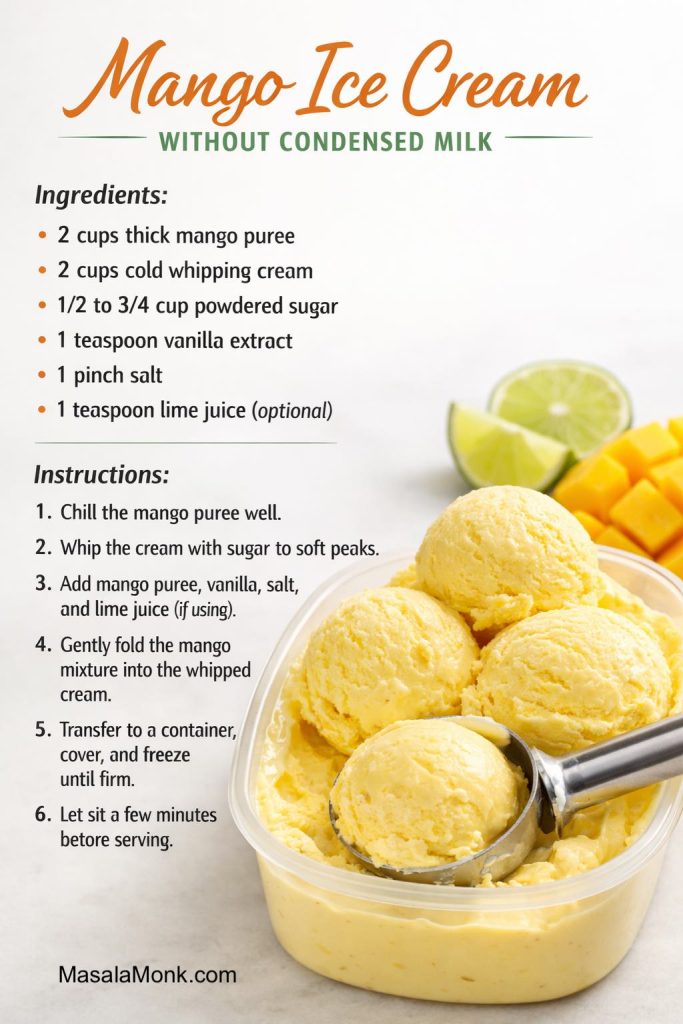
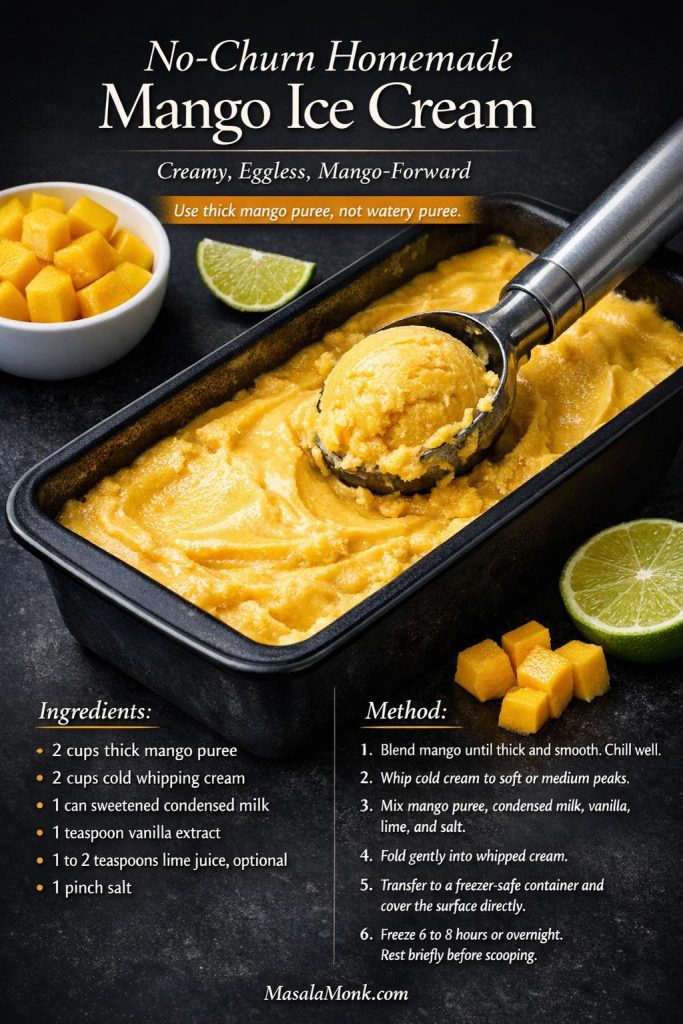
If you want to see the same no-churn logic in another fruit dessert, MasalaMonk’s homemade mango ice cream recipe shows how thick fruit purée, whipped cream, and condensed milk work together for a creamy freezer scoop.

The Simple No-Churn Formula

The simplest reliable formula is this: reduce 2 lb strawberries, stir the cooled fruit into 14 oz condensed milk, fold in 2 cups whipped cream, and freeze overnight. That is the no-churn version worth making.

For the no-churn version, 2 lb strawberries usually gives about 3 to 3 1/2 cups purée; reduce it to about 1 1/2 to 1 3/4 cups before cooling. That smaller, thicker amount gives the whipped cream and condensed milk a better chance of freezing creamy instead of icy.

The finished scoop is richer than the churned version, but when the fruit is cooked down properly, it still tastes like strawberries rather than just condensed milk and cream.

When it is ready, the scoop should feel rich and soft-set, with the cooked strawberry flavor cutting through the condensed milk instead of getting buried under it.

If you are making this for guests, make the no-churn version the night before. It needs time to settle into a clean scoop, and rushing it is the fastest way to end up with soft edges and a frozen center.

Roasted Strawberry Method

Roasting gives the deepest strawberry flavor. Toss hulled strawberries with 1 to 2 tablespoons sugar, spread them on a parchment-lined tray, and roast at 160°C / 320°F until the berries collapse and the juices thicken. This usually takes 45 to 60 minutes.

Use this route when your berries are good but not wildly fragrant. The oven concentrates their flavor and gives the ice cream a richer, almost strawberry-jam taste.

Stovetop Strawberry Reduction Method

The saucepan is the practical way to get there on an ordinary day. Chop or blend the berries, simmer them with a little sugar, and stop when the mixture looks thick, glossy, and jammy rather than loose.

This is the better choice when you want homemade strawberry ice cream today without keeping the oven on for an hour. It is also the best way to handle frozen strawberries because it lets you cook off the extra thawed liquid.
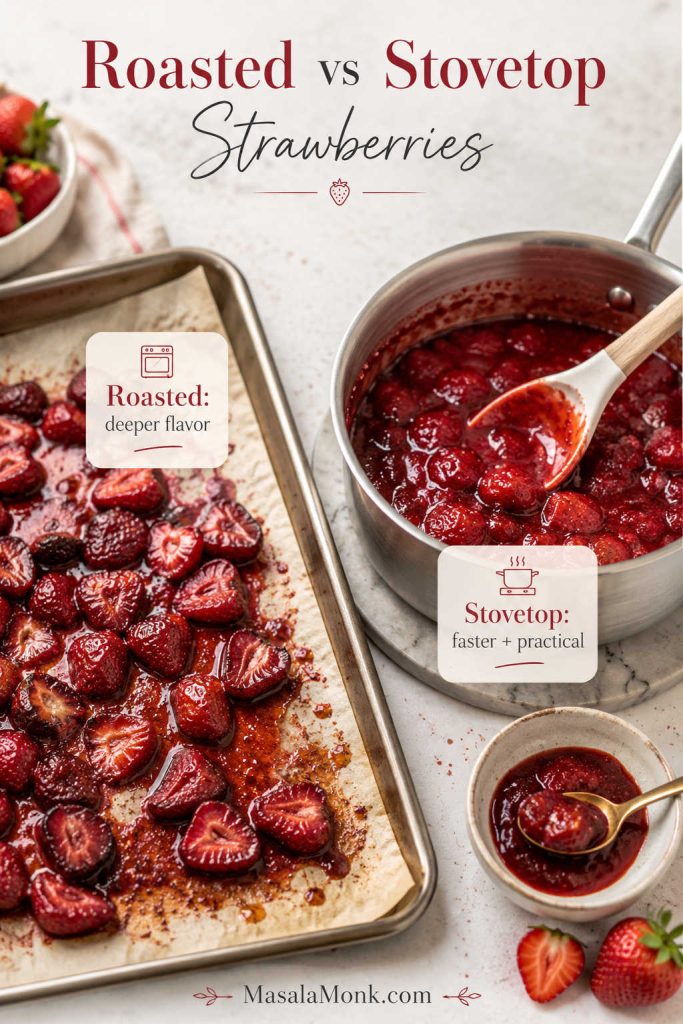
Roasted strawberries on a tray compared with stovetop strawberry reduction in a saucepan
Roast strawberries when you want a darker, jammy flavor; use the stovetop when you want a faster, more controlled reduction.

How to Assemble the No-Churn Version

  1. Make the roasted or reduced strawberry purée and cool it completely.
  2. Stir the cooled purée into sweetened condensed milk with vanilla, lemon juice, and salt.
  3. Whip cold heavy cream to medium peaks. It should hold shape but still look smooth.
  4. Fold the whipped cream into the strawberry condensed milk mixture in two or three additions.
  5. Transfer to a shallow freezer-safe container.
  6. Press parchment or plastic wrap onto the surface, cover tightly, and freeze for 8 hours or overnight.

Do not over-whip the cream, and do not beat the folded mixture aggressively. No-churn ice cream depends on trapped air. Knock out too much air and the finished texture becomes dense.
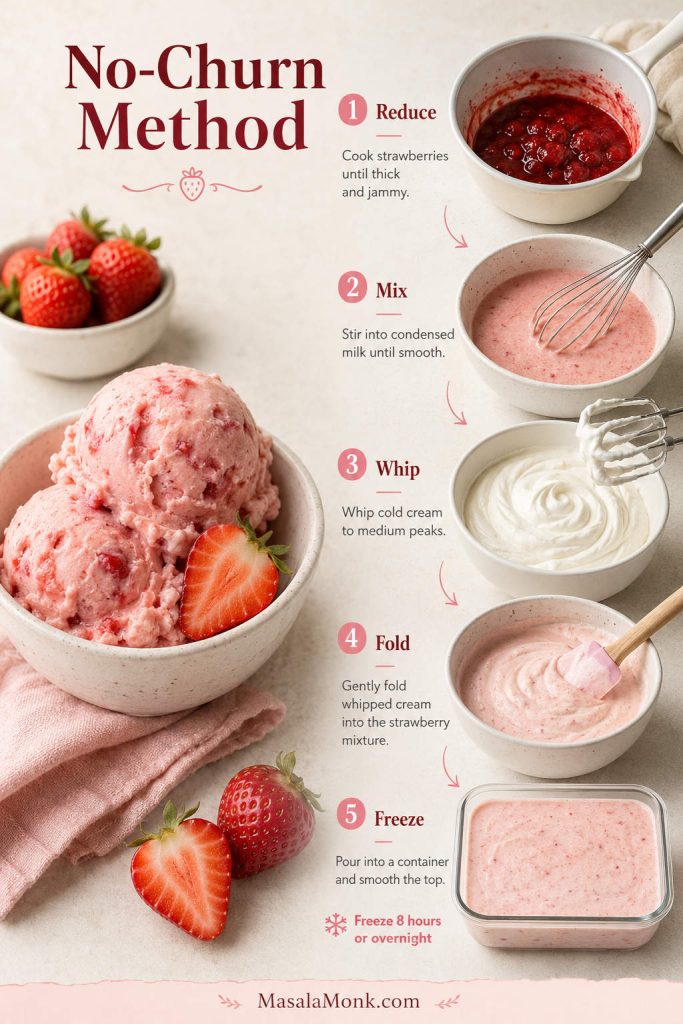
Step-by-step no-churn strawberry ice cream method showing reduced berries, condensed milk, whipped cream, folding, and freezing
For no-churn strawberry ice cream, thick berry reduction, airy whipped cream, and an overnight freeze make the biggest texture difference.

Shortcut that still works: Use the stovetop reduction instead of roasting. It is faster, easier to measure, and still removes enough water to keep the no-churn version creamy.

Recipe Card: Creamy Strawberry Ice Cream

This card gives you two clear paths: the main ice cream maker version first, then a no-churn version for anyone working without a machine. Both start with concentrated strawberries so the finished ice cream tastes bright instead of icy.

YieldAbout 1.25 quarts / 5 cups
Servings8
Prep + cook35–40 minutes
Freeze time2–4 hours after churning; overnight for no-churn

Equipment

  • Ice cream maker
  • Medium saucepan
  • Blender or food processor
  • Fine-mesh sieve, optional
  • Mixing bowl
  • Whisk
  • Freezer-safe shallow container or loaf pan
  • Parchment paper or plastic wrap for the surface

Ingredients: Ice Cream Maker Version

  • 680g / 1 1/2 lb ripe strawberries, hulled and chopped
  • 150g / 3/4 cup granulated sugar, divided
  • 1 tablespoon lemon juice, plus more to taste
  • 360 ml / 1 1/2 cups heavy cream
  • 240 ml / 1 cup whole milk or half-and-half
  • 3 tablespoons light corn syrup or glucose, or honey if preferred
  • 1 teaspoon vanilla extract
  • 1/4 teaspoon fine salt
  • Optional: 1 to 2 tablespoons milk powder for extra body
  • Optional: 1 tablespoon vodka or orange liqueur for a slightly softer adult version

Method: Ice Cream Maker Version

  1. Macerate the berries. Add the chopped strawberries to a saucepan with 75g / about 6 tablespoons of the sugar and the lemon juice. Let sit for 15 minutes.
  2. Reduce the strawberries. Cook over medium heat, stirring often, for 15 to 20 minutes. Stop when the fruit looks glossy and thick, and has reduced to about 1 1/4 to 1 1/2 cups.
  3. Cool and blend. Let the strawberry mixture cool, then blend until smooth. Strain through a fine-mesh sieve if you want a silky texture.
  4. Mix the base. Whisk the strawberry purée with heavy cream, whole milk or half-and-half, remaining sugar, corn syrup or glucose, vanilla, salt, and optional milk powder.
  5. Taste and adjust. The base should taste slightly sweeter and more intense than the final ice cream. Add a little more lemon juice if the strawberries taste flat.
  6. Chill thoroughly. Cover and refrigerate for at least 4 hours, or overnight for the smoothest churn.
  7. Churn. Pour the cold base into a prepared ice cream maker and churn according to the machine instructions, usually 20 to 30 minutes, until thick and soft-serve-like.
  8. Freeze until scoopable. Transfer to a shallow freezer-safe container. Press parchment or plastic wrap directly onto the surface, cover tightly, and freeze for 2 to 4 hours.
  9. Serve. Let the ice cream stand for 5 to 10 minutes after an overnight freeze, then scoop.

Ingredients: No-Churn Version

  • 900g to 1kg / about 2 lb strawberries, hulled
  • 1 to 2 tablespoons sugar
  • 395g to 400g / 13 to 14 oz sweetened condensed milk
  • 480 ml / 2 cups cold heavy whipping cream
  • 1 teaspoon vanilla extract
  • 1 to 2 teaspoons lemon juice
  • Pinch of fine salt
  • Optional: 1 tablespoon milk powder for extra body

Method: No-Churn Version

  1. Concentrate the strawberries. Roast the berries with sugar at 160°C / 320°F for 45 to 60 minutes, or simmer them on the stovetop until reduced by about half. Cool completely.
  2. Blend. Blend the cooled strawberries into a thick purée.
  3. Mix with condensed milk. Stir the strawberry purée into the condensed milk with vanilla, lemon juice, salt, and optional milk powder.
  4. Whip the cream. Beat cold heavy cream to medium peaks.
  5. Fold gently. Fold the whipped cream into the strawberry condensed milk mixture in two or three additions.
  6. Freeze. Transfer to a shallow freezer-safe container, press parchment or plastic wrap against the surface, cover tightly, and freeze for 8 hours or overnight.
  7. Scoop. Rest for 5 to 15 minutes before scooping, depending on your freezer.

Recipe Notes

  • Use ripe strawberries for the best flavor.
  • Frozen strawberries work if thawed, drained, and reduced first.
  • Do not add large raw strawberry chunks unless you like icy fruit pieces.
  • The base should taste slightly too sweet before freezing because cold mutes flavor.
  • Homemade strawberry ice cream is best within the first week.
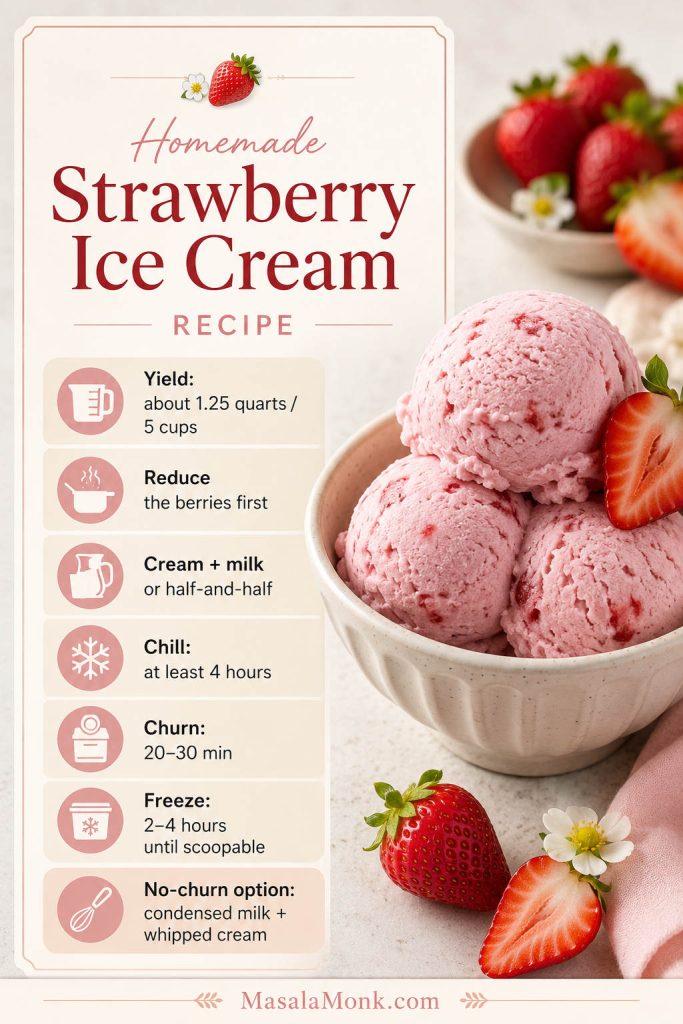
Homemade strawberry ice cream recipe card with yield, reduced strawberries, dairy, chill time, churn time, and no-churn option
Keep the main formula in mind: reduce the strawberries first, chill the base well, then churn or freeze until the ice cream is scoopable.

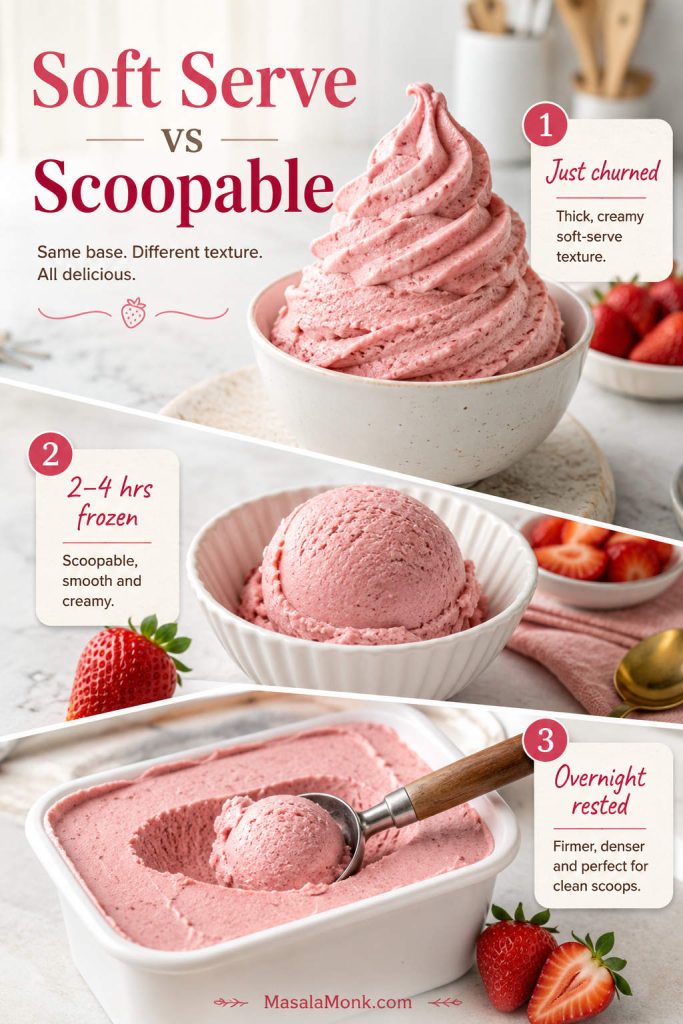
Texture Guide: Soft Serve vs Scoopable

Freshly churned strawberry ice cream should look like thick soft serve. It will taste good immediately, but it will not hold round scoops yet. After 2 to 4 hours in the freezer, it becomes firmer and easier to serve in bowls or cones.

No-churn strawberry ice cream needs more time because it is not partially frozen in a machine. Give it 8 hours if possible. Overnight is better. The surface should feel firm, but after a short rest at room temperature, a scoop should move through without a fight.

Stage What it looks like Best use
Just churned Thick, smooth, soft-serve texture Eat right away or freeze for scoops
2–4 hours frozen Firm enough to scoop cleanly Best window for bowls and cones
Overnight frozen Firm but scoopable after a short rest Let stand 5–10 minutes first
Several days later May be firmer Rest longer and use a warm scoop
Strawberry ice cream texture stages showing just churned soft serve, frozen scoopable ice cream, and overnight rested ice cream
Freshly churned ice cream is soft and spoonable; after a few hours in the freezer, it firms into clean, rounded scoops.

A short rest before scooping is normal. A long thaw is not. If strawberry ice cream needs 30 minutes on the counter every time, the mixture likely carried too much water or did not have enough sugar, fat, or milk solids to stay soft enough to serve.

Notice how long your container needed to sit before scooping. Five minutes means the balance was close; 25 minutes usually means the batch carried too much water or not enough sugar.

Troubleshooting: Icy, Hard, or Weak Flavor

Most strawberry ice cream problems show up when you open the freezer, but the mistake usually happened much earlier. If your last batch looked promising when it went into the freezer and came out hard or crunchy the next day, you are not alone. Strawberry ice cream is one of the easiest flavors to make taste good fresh and one of the easiest to ruin after freezing.

Use this quick diagnosis first, then read the details below if you want the full fix.
Troubleshooting guide for strawberry ice cream problems including icy texture, hard scoops, weak flavor, dense no-churn texture, and frozen chunks
When strawberry ice cream turns icy, hard, bland, dense, or chunky, the fix usually starts with moisture control, better balance, or gentler handling.
Problem Most likely cause Fix next batch
Icy texture Too much water from strawberries Reduce or roast the berries before mixing
Rock-hard scoop Not enough sugar, fat, or milk solids Use full-fat dairy and add glucose, corn syrup, or milk powder
Weak strawberry flavor Fruit was not concentrated enough Reduce berries more, then brighten with lemon and salt
Dense no-churn texture Whipped cream lost too much air Whip to medium peaks and fold gently
Frozen fruit pebbles Large raw strawberry chunks Use smooth purée, a ripple, or tiny macerated pieces

Once you know the likely cause, check the storage and scooping tips too, because freezer storage can make a good batch feel harder than it should.

Why Is My Strawberry Ice Cream Icy?

Too much water is the usual reason. Raw purée, thawed frozen berries, low-fat milk, or not enough sugar can all create a crunchy frozen texture. Next time, reduce or roast the strawberries first, use full-fat dairy, and avoid adding watery fruit directly to the cream mixture.

When the Scoop Is Rock Hard

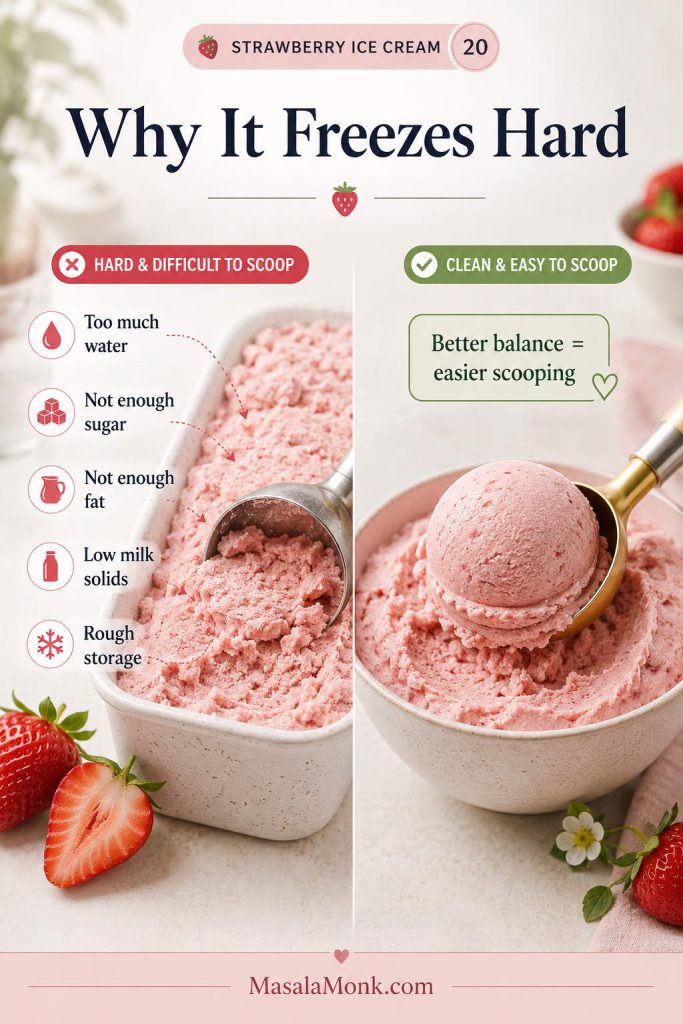
The formula may need more softness. Sugar, glucose, corn syrup, honey, condensed milk, cream, and milk powder all help. Storage matters too. A shallow airtight container with parchment pressed onto the surface protects the texture better than a half-empty tub with air sitting above the ice cream.
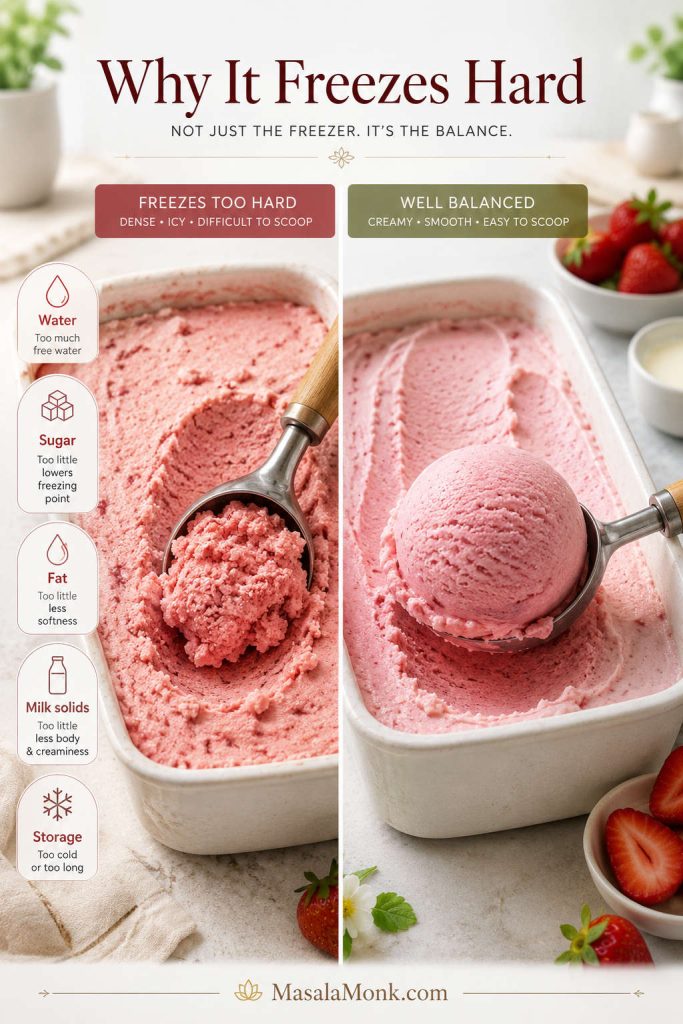
Homemade strawberry ice cream comparison showing hard difficult-to-scoop texture versus smooth balanced scoop
Rock-hard homemade ice cream is not just a freezer problem. Water, sugar, fat, milk solids, and storage all affect how easily it scoops.

When the Strawberry Flavor Disappears After Freezing

Cold dulls flavor. If the finished scoop tastes faint, the chilled mixture probably did not taste intense enough before freezing. Reduce the strawberries more next time, add a little lemon juice, use the full amount of salt, and taste before it goes into the fridge.

How to Avoid Frozen Strawberry Pebbles

Large pieces of raw fruit freeze harder than the ice cream around them. Chop them very small, macerate them with sugar first, or skip chunks and use a thick strawberry ripple. A smooth strawberry cream usually gives a better bite than frozen fruit pieces.
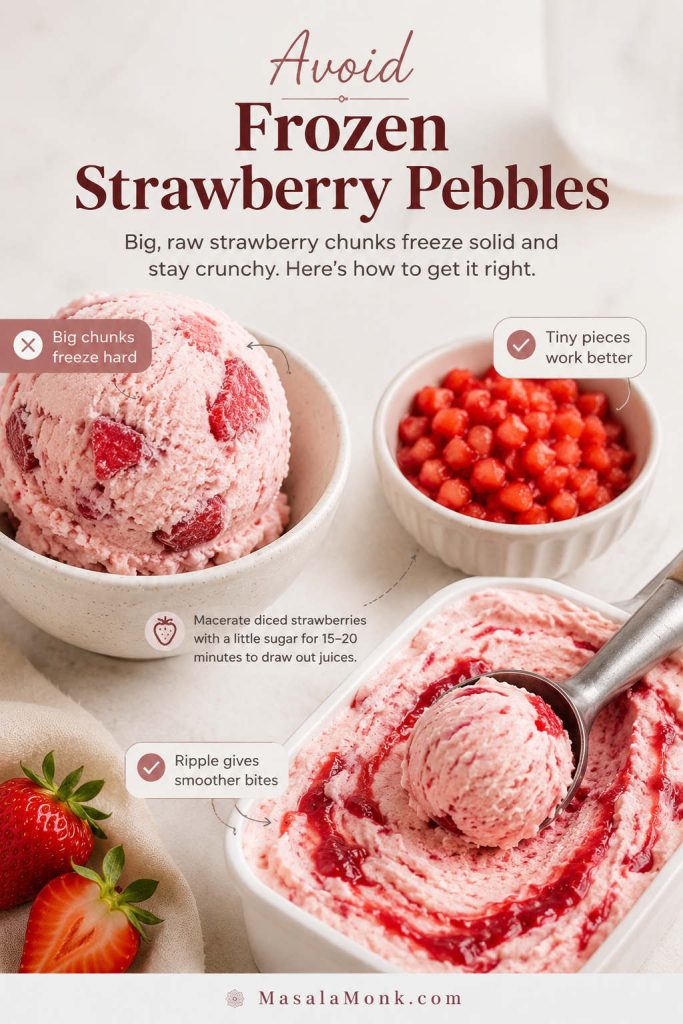
Guide showing large frozen strawberry chunks, tiny macerated strawberry pieces, and strawberry ripple in ice cream
Big raw strawberry chunks may look tempting, but they often freeze hard; instead, use tiny macerated pieces or a thick ripple for smoother bites.

Why No-Churn Ice Cream Turns Dense

The whipped cream may have been overmixed, underwhipped, or folded too aggressively. Whip to medium peaks, then fold gently. The mixture should look airy and smooth before freezing, not deflated or stiff.

Grainy Texture After Churning

Graininess can come from over-churning, a warm base, or cream that starts turning buttery. Chill the mixture thoroughly and stop churning once the ice cream reaches thick soft-serve consistency.

When the Ice Cream Tastes Too Sweet

The base needs to taste a little sweeter before freezing, but it should not taste cloying. If the finished ice cream is too sweet, add more lemon juice to the strawberry reduction next time, reduce the sugar slightly, or serve it with fresh berries for contrast.

Strawberry Ice Cream Variations

Once the core scoop is creamy, the variations become much easier. The rule stays the same: bring in flavor, not extra water.

If you have not made the base yet, start with the recipe card first, then come back here once you know whether you are making the churned or no-churn version.
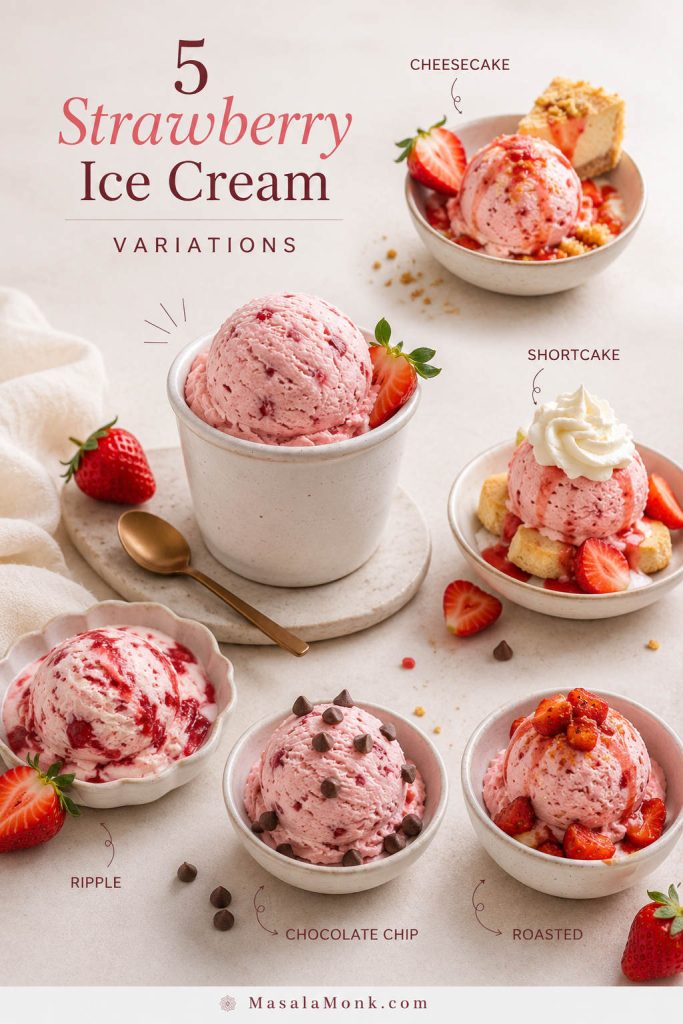
Five strawberry ice cream variations including cheesecake, shortcake, ripple, chocolate chip, and roasted strawberry
Once the base scoop is creamy, variations become simple: add flavor, texture, or richness without bringing extra water into the mix.

Strawberry Cheesecake Ice Cream

This is the richest variation, especially if you want the tang of cheesecake without making a full dessert. Beat 85g / 3 oz softened cream cheese until smooth, then whisk it into the dairy base before chilling. Layer in small graham cracker crumbs as you pack the churned ice cream into the container.
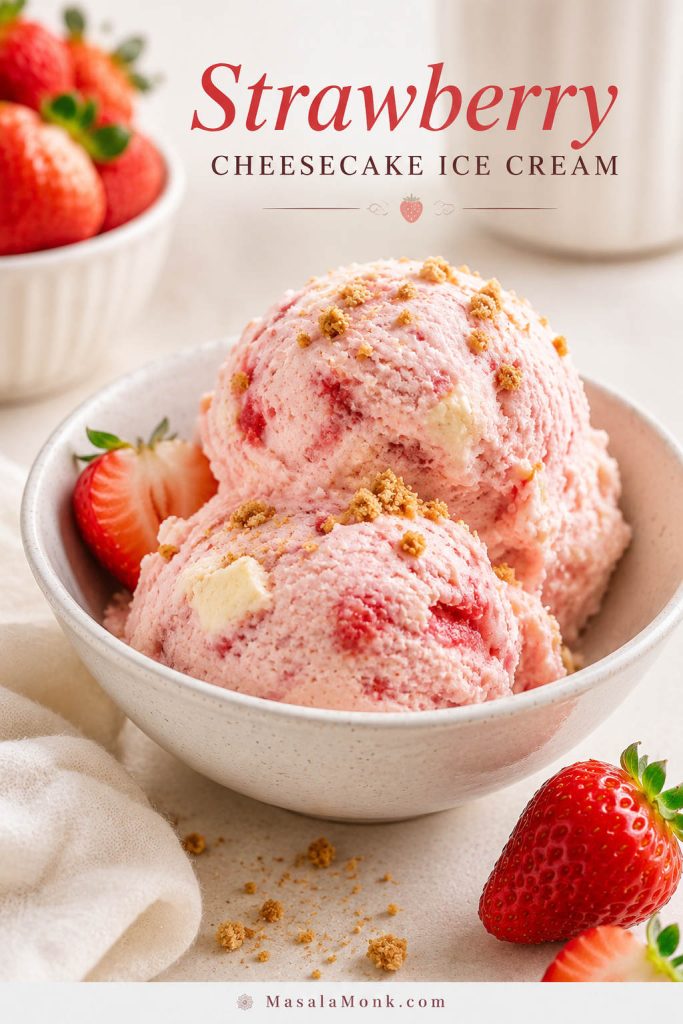
Strawberry cheesecake ice cream scoops with graham crumbs, strawberry pieces, and creamy cheesecake-style swirls
Strawberry cheesecake ice cream is the richest variation, with graham crumbs and a tangy cream cheese note that make each scoop feel like dessert.

Strawberry Shortcake Ice Cream

This is the one to make when you want strawberry ice cream to feel like a summer dessert bowl, not just a scoop. Layer the finished ice cream with small pieces of shortbread, pound cake crumbs, or vanilla cookie crumbs. Add them while transferring the ice cream to the freezer container so they keep some texture.
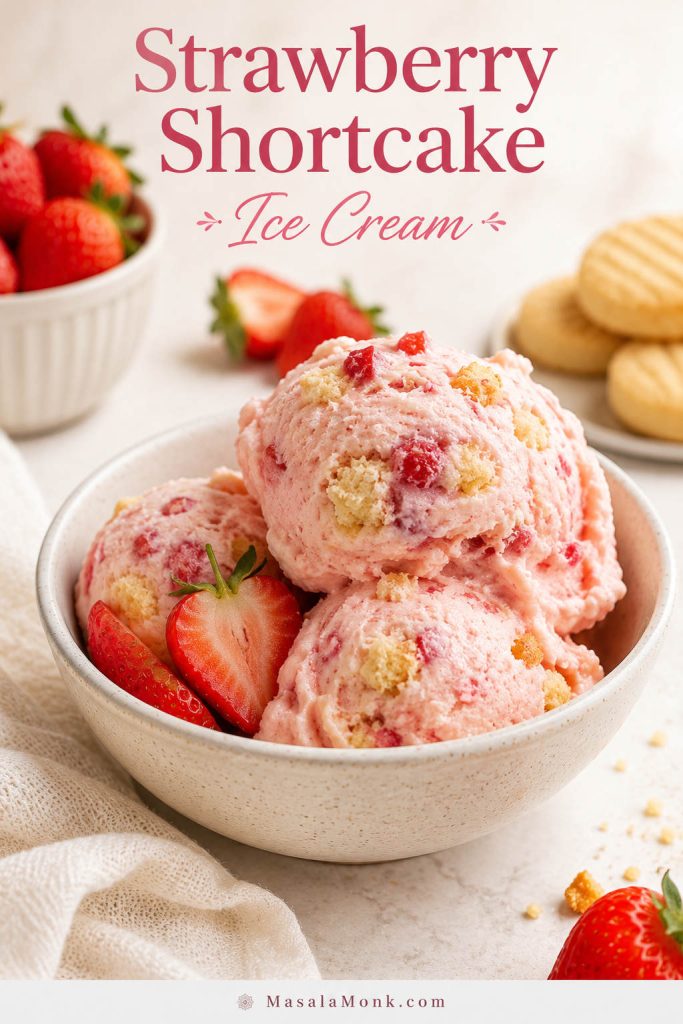
Strawberry shortcake ice cream scoops with cake crumbs, strawberries, and a pale dessert bowl
Strawberry shortcake ice cream turns a simple berry scoop into a nostalgic summer dessert, especially when the cake pieces stay small and soft.

Strawberry Ripple Ice Cream

Reserve a few tablespoons of thick strawberry reduction and swirl it through the ice cream as you pack it into the container. Do not fully mix it in. Those streaks give you pockets of stronger fruit flavor without watering down the whole base.
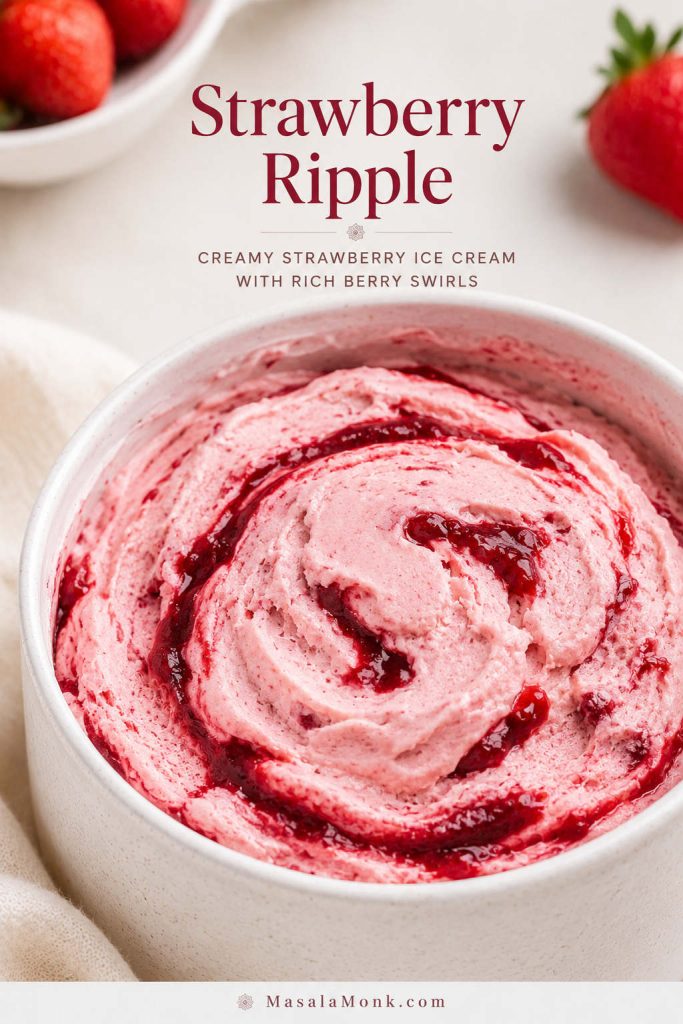
Close-up strawberry ripple ice cream with thick red berry swirls through a pale pink base
A thick strawberry ripple gives concentrated berry flavor in each spoonful without loosening the whole ice cream base.

Strawberry Chocolate Chip Ice Cream

Add finely chopped dark chocolate or mini chocolate chips near the end of churning. Small pieces are better than large chunks because frozen chocolate gets very firm.

Roasted Strawberry Ice Cream

Roast the berries instead of simmering them when you want deeper fruit flavor. This is the variation to use when strawberries look good but taste a little quiet; the oven makes them darker, jammy, and more intense.
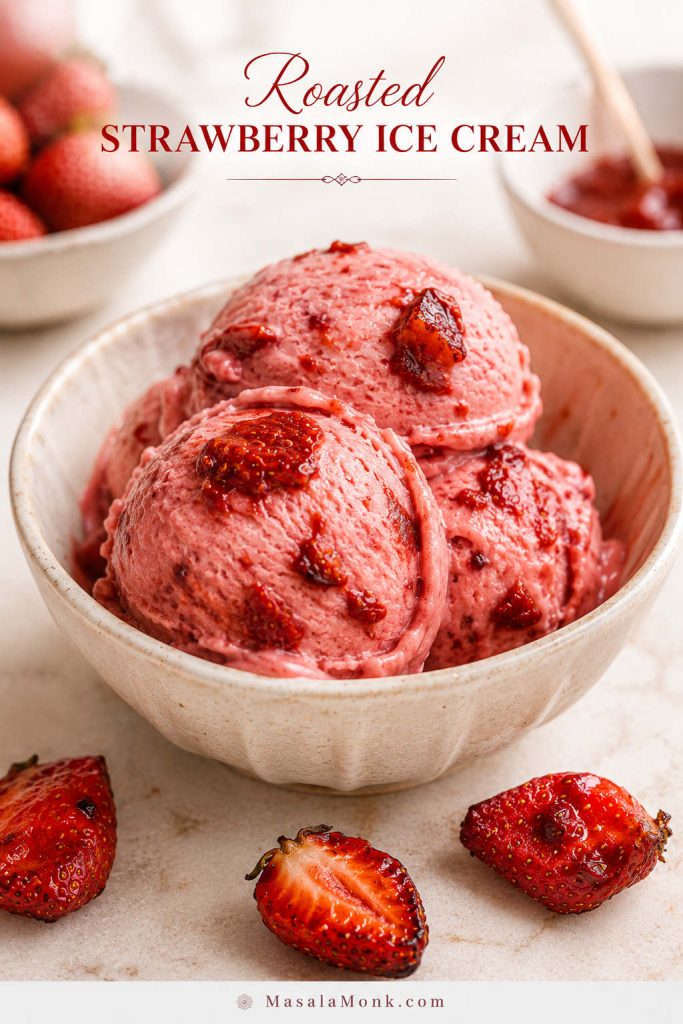
Roasted strawberry ice cream scoops with jammy roasted strawberry pieces and deep berry sauce
Roasted strawberry ice cream is best when the berries look good but taste quiet, because roasting makes the fruit darker, sweeter, and more intense.

Strawberry Protein Ice Cream Direction

Protein ice cream needs a different formula because protein powder can make frozen desserts chalky or firm. If that is the direction you want, start with MasalaMonk’s protein ice cream recipe and use the strawberry lessons here: concentrate the fruit, keep the mixture smooth, and avoid watery berries.

Tried the cheesecake, shortcake, ripple, or chocolate chip version? Mention which one you made, because mix-ins can change the texture more than people expect.

Storage and Scooping Tips

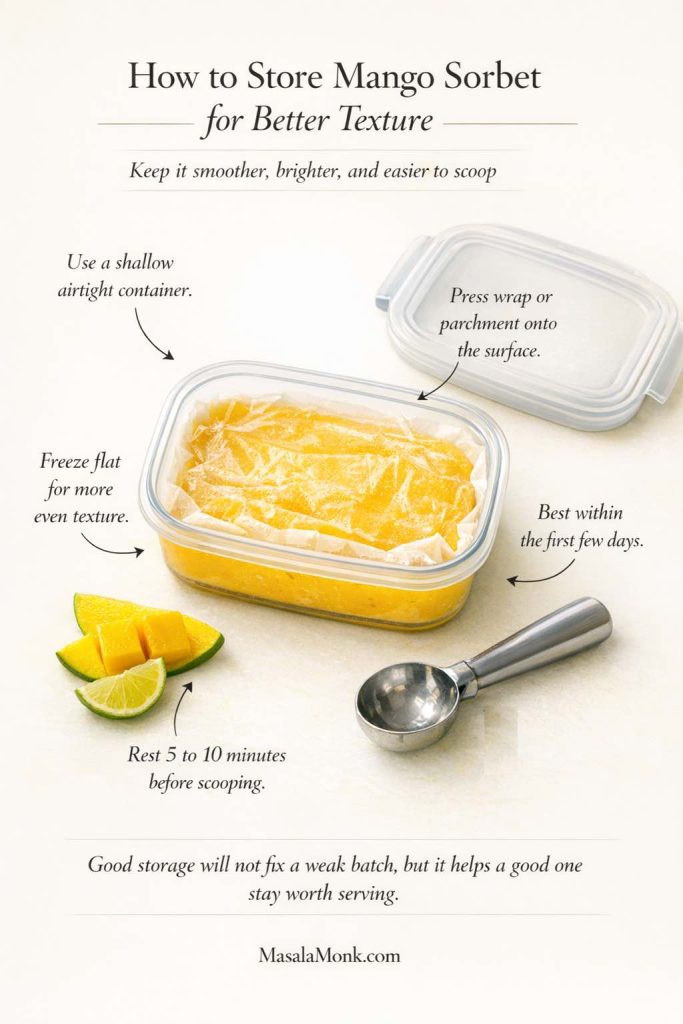
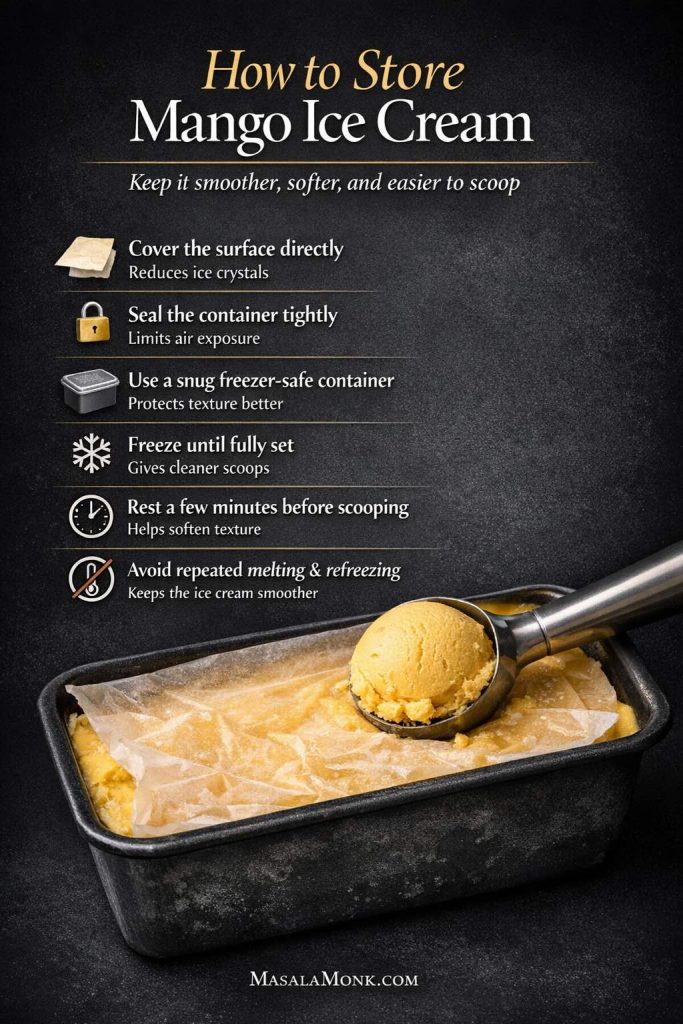
Homemade strawberry ice cream is at its best in the first few days, when the berry flavor still tastes fresh and the texture has not picked up freezer burn. It can keep longer, but the first week is the sweet spot.

  • Use a shallow airtight freezer-safe container.
  • Press parchment paper or plastic wrap directly onto the surface before adding the lid.
  • Store the container toward the back of the freezer, where the temperature is steadier.
  • Let the ice cream rest for 5 to 10 minutes before scooping after an overnight freeze.
  • Use a warm scoop for cleaner portions.
  • Return the container to the freezer quickly after serving.
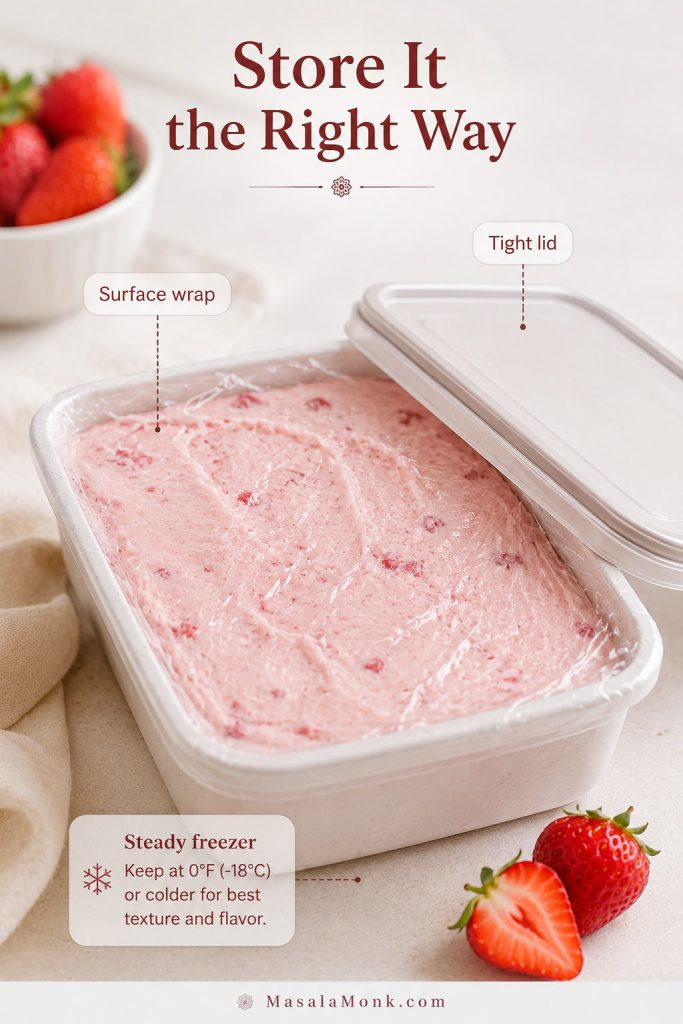
Homemade strawberry ice cream in a shallow container with surface wrap and a tight lid for freezer storage
Covering the surface before freezing limits air exposure, which helps protect homemade strawberry ice cream from freezer burn and rough texture.

A wide, shallow container freezes faster and scoops more evenly than a deep narrow tub. Every long thaw and refreeze makes the next scoop a little rougher, so scoop what you need, smooth the surface, cover it again, and freeze it quickly.
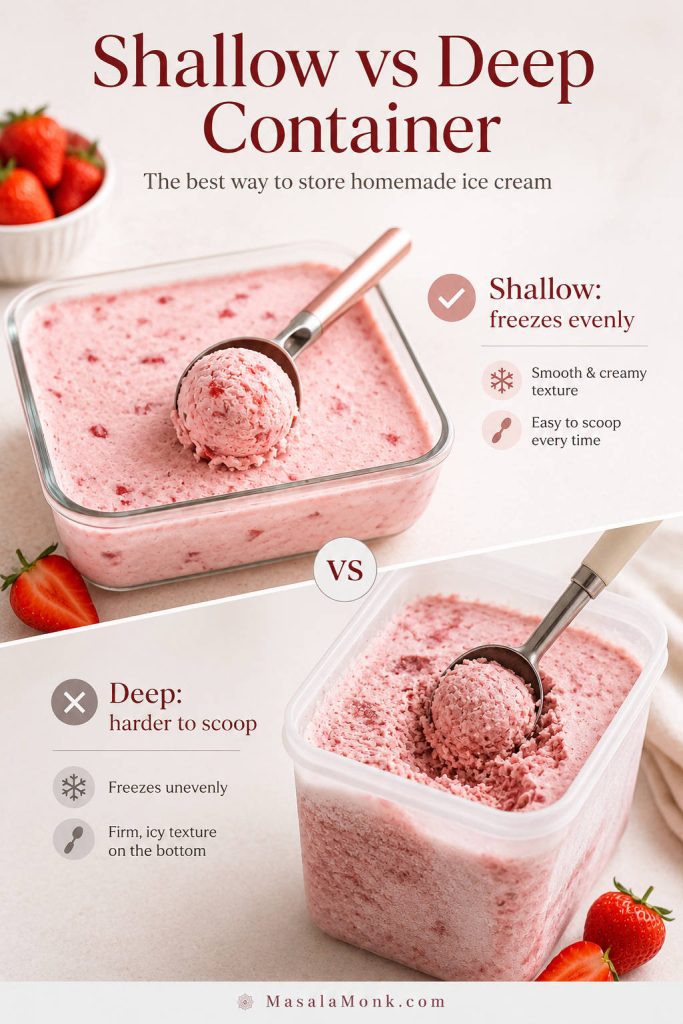
Shallow container and deep container compared for storing homemade strawberry ice cream
A shallow container gives the ice cream more surface area, so it firms more evenly and is easier to scoop later.

If the container still needs a long thaw every time, compare your batch with the troubleshooting guide; the issue may be water, sugar, fat, or milk solids rather than storage alone.

When you are ready to serve, let the container rest briefly and warm the scoop under hot water, then dry it before scooping. That small step helps the scoop glide through the ice cream instead of tearing it into rough shards.
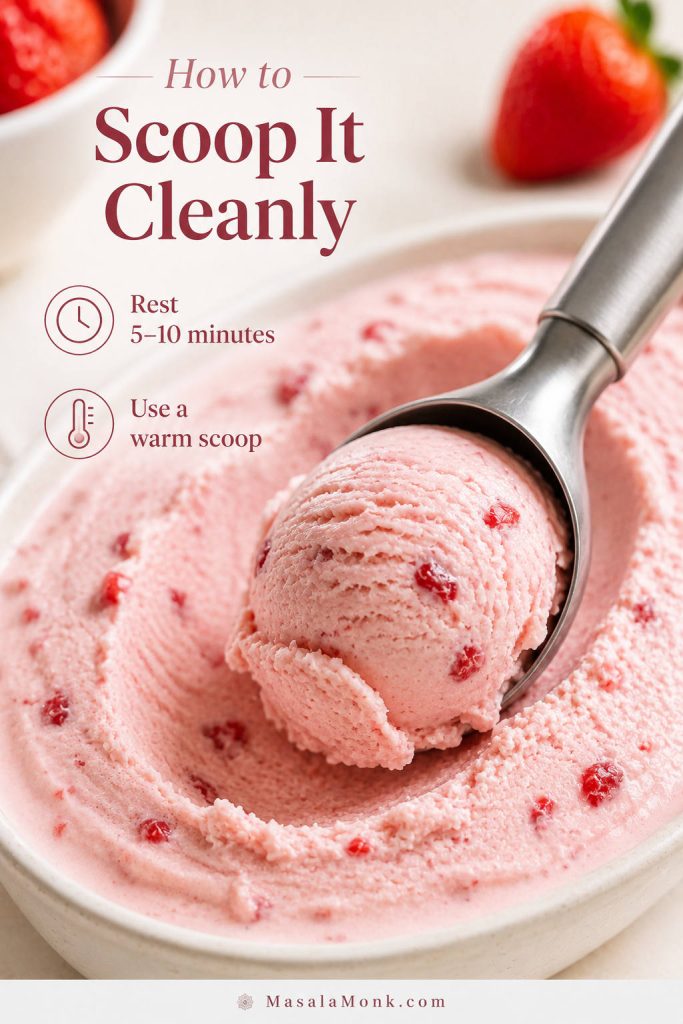
Close-up of a warm scoop lifting strawberry ice cream cleanly from a container
Letting the container rest briefly and using a warm scoop helps homemade strawberry ice cream lift cleanly instead of tearing through the texture.

What to Serve with Strawberry Ice Cream

Strawberry ice cream is bright enough to serve on its own, especially when the fruit has been reduced properly. The best pairings either echo the berries or give the scoop contrast: buttery shortbread, lemon cake, brownies, waffles, crumbles, fresh strawberries, or a spoonful of thick strawberry sauce.

A warm fruit dessert works beautifully too. Serve it with MasalaMonk’s peach cobbler with canned peaches, where the cold scoop melts into the buttery topping and warm fruit.

On a summer dessert table, pair it with vanilla cookies, pound cake, crisp wafers, or a fresh berry platter. The contrast works because the ice cream is creamy and cold while the sides bring crunch, warmth, or sharper fruit flavor.
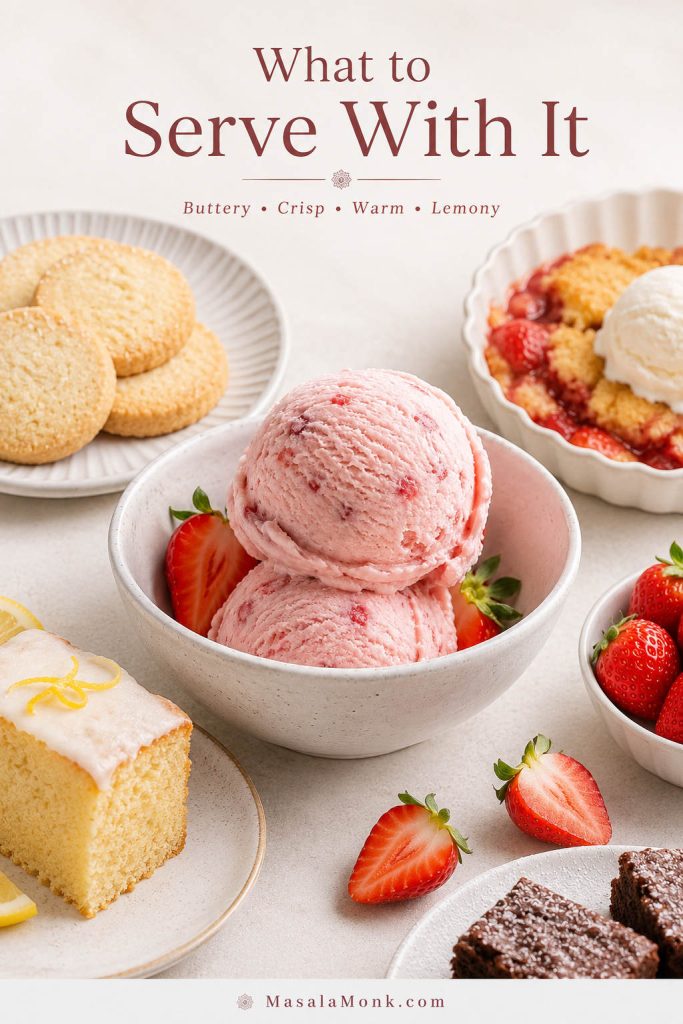
Strawberry ice cream served with shortbread cookies, lemon cake, cobbler, brownies, and fresh strawberries
Strawberry ice cream pairs best with desserts that add crunch, warmth, citrus, chocolate, or buttery contrast without overwhelming the berries.

For a frozen strawberry drink instead of dessert, MasalaMonk’s frozen strawberry daiquiri recipe uses berries in a completely different way: frozen for slushy texture rather than concentrated for a scoopable ice cream base.

FAQs

Fresh or frozen strawberries: which makes better ice cream?

Fresh ripe strawberries usually give the best aroma and flavor. Frozen strawberries can still work well, but they should be thawed, drained, and reduced before being added to the base. Watery thawed berries are one of the main reasons homemade strawberry ice cream turns icy.

What if I do not have an ice cream maker?

Use the no-churn method with reduced strawberries, sweetened condensed milk, and whipped cream. The churned version is cleaner and lighter; the no-churn version is easier and still creamy when the strawberries are concentrated first.

Is this strawberry ice cream recipe eggless?

Yes. This recipe is eggless. Eggs can make ice cream rich, but they are not required for a creamy strawberry scoop. In fact, an eggless base often lets the berry flavor taste brighter and fresher.

Why does homemade strawberry ice cream freeze so hard?

Hard texture usually comes from too much water, too little sugar, too little fat, or not enough milk solids. Strawberry ice cream is especially sensitive because the fruit brings extra water. Reducing the berries first and using full-fat dairy helps the scoop stay softer.

Where condensed milk helps most in no-churn strawberry ice cream

Condensed milk is most useful in no-churn strawberry ice cream. It adds sweetness, body, and milk solids without adding as much water as regular milk. It is less necessary in the ice cream maker version because churning helps build texture.

Roasted vs stovetop strawberries: which gives better flavor?

Roasting gives deeper, more jammy strawberry flavor, especially when the berries smell mild. Simmering on the stovetop is faster and works very well. The important part is concentration: do not add watery raw fruit to the base if you want the creamiest result.

What is the best way to add strawberry pieces without icy chunks?

Keep the pieces tiny and macerate them with sugar first. Large raw strawberry pieces freeze hard. A smooth purée or thick strawberry ripple usually gives a better eating experience than big frozen chunks.

How long does homemade strawberry ice cream last?

It tastes best within the first week. It can keep longer in an airtight container, especially with parchment or plastic wrap pressed against the surface, but homemade ice cream gradually becomes firmer and icier over time.

Final Scoop

A good strawberry ice cream recipe should taste like strawberries first. Not pink milk. Not frozen cream with a hint of berry. The difference comes from one decision: concentrate the fruit before freezing it.

Once the strawberries are thick and flavorful, the rest of the recipe becomes much easier. Chill the base well, use enough cream and sugar to support the texture, churn until soft-serve thick, and freeze it in a shallow covered container. The result is creamy, bright, scoopable strawberry ice cream that still tastes like real fruit when you open the freezer tomorrow.

If you try it, the most useful note to leave is which path you used: churned, no-churn, roasted berries, or stovetop reduction. That helps other readers choose their first batch too.
Posted on 2 Comments

Coconut Ice Cream Recipe: Coconut Milk, Coconut Cream, Cream of Coconut and No-Churn Options

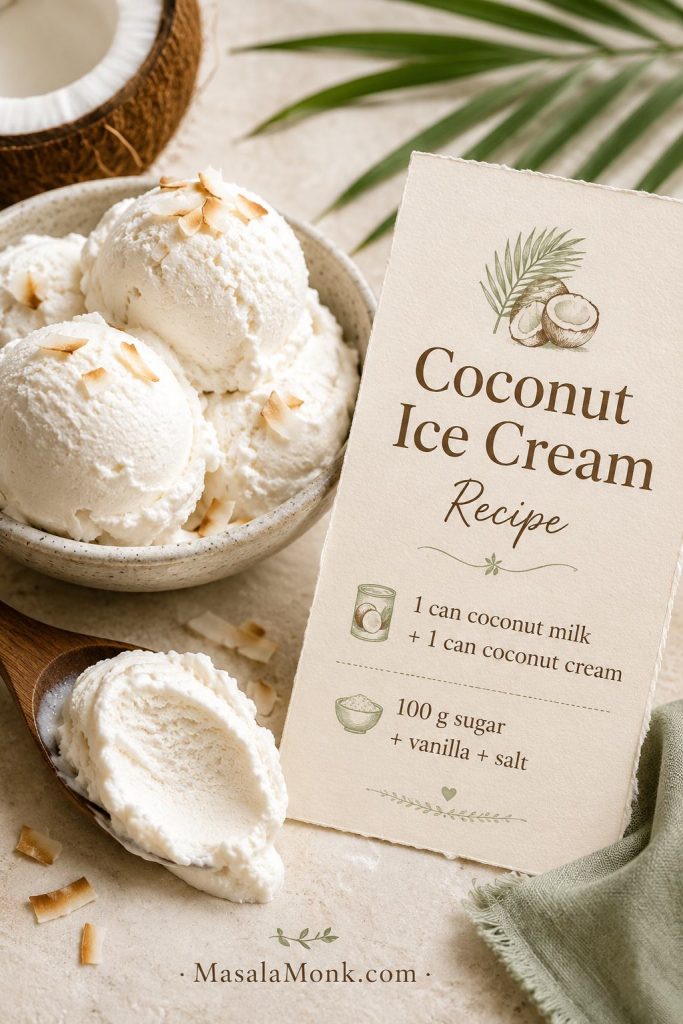
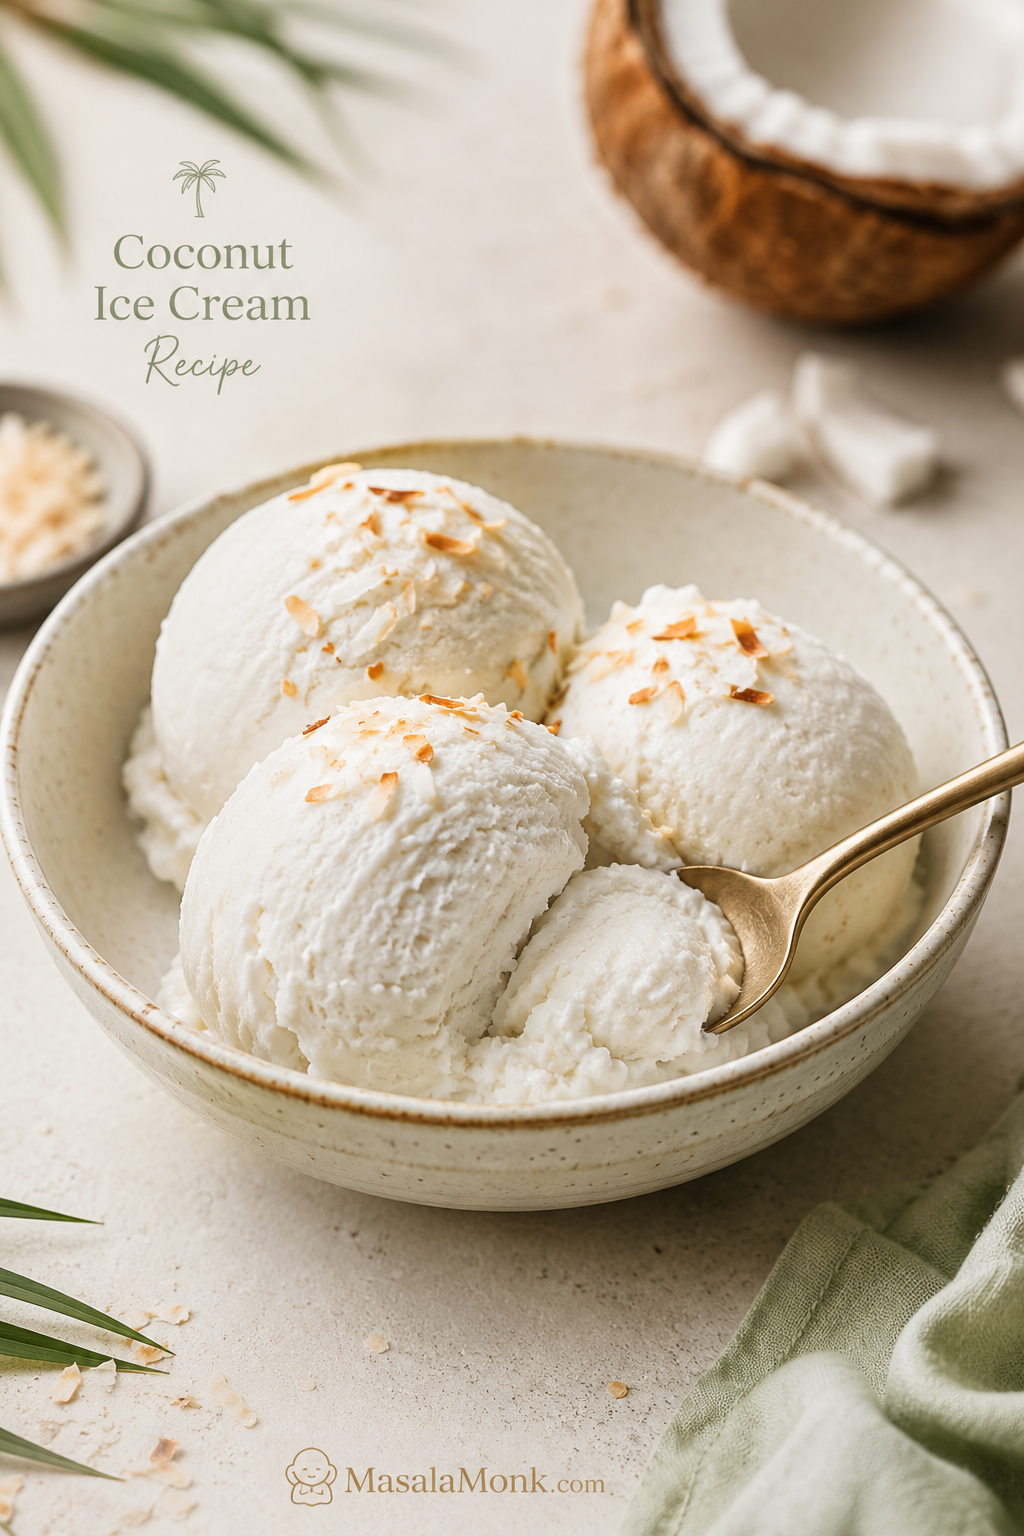
Three scoops of creamy coconut ice cream in a light ceramic bowl with toasted coconut flakes and a spoon cutting into one scoop.

This coconut ice cream recipe is for the kind of scoop that tastes deeply coconutty, creamy, and smooth—not icy, watery, or rock-hard straight from the freezer. The base uses full-fat coconut milk and coconut cream for a rich dairy-free texture, with just enough sugar to keep it soft enough to scoop.

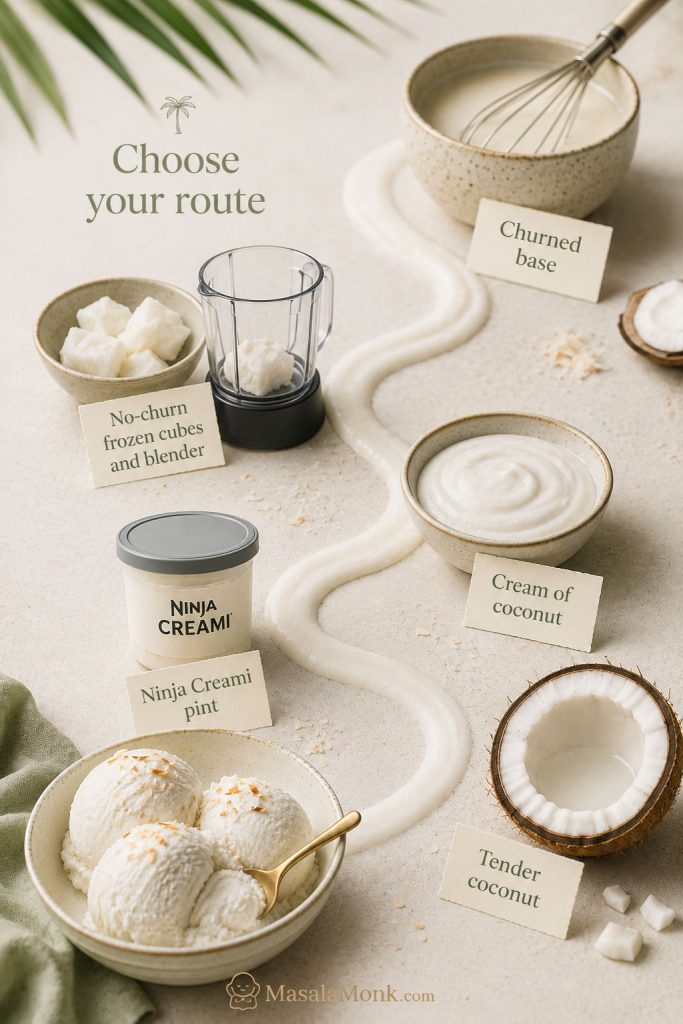
You can churn it for the smoothest, parlor-style finish, or use the no-churn freeze-and-blend method when you do not have an ice cream maker. There is also a sweeter cream of coconut batch, a condensed milk shortcut, Ninja Creami notes, and tender coconut and Thai-style ideas if you want a more tropical bowl.

The only part of this coconut ice cream recipe that really needs care is choosing the right coconut product. Coconut milk, coconut cream, and cream of coconut sound similar, but they behave very differently once frozen. Get that part right, and you are already most of the way to a creamy scoop.

Quick Answer: The Best Coconut Ice Cream Recipe

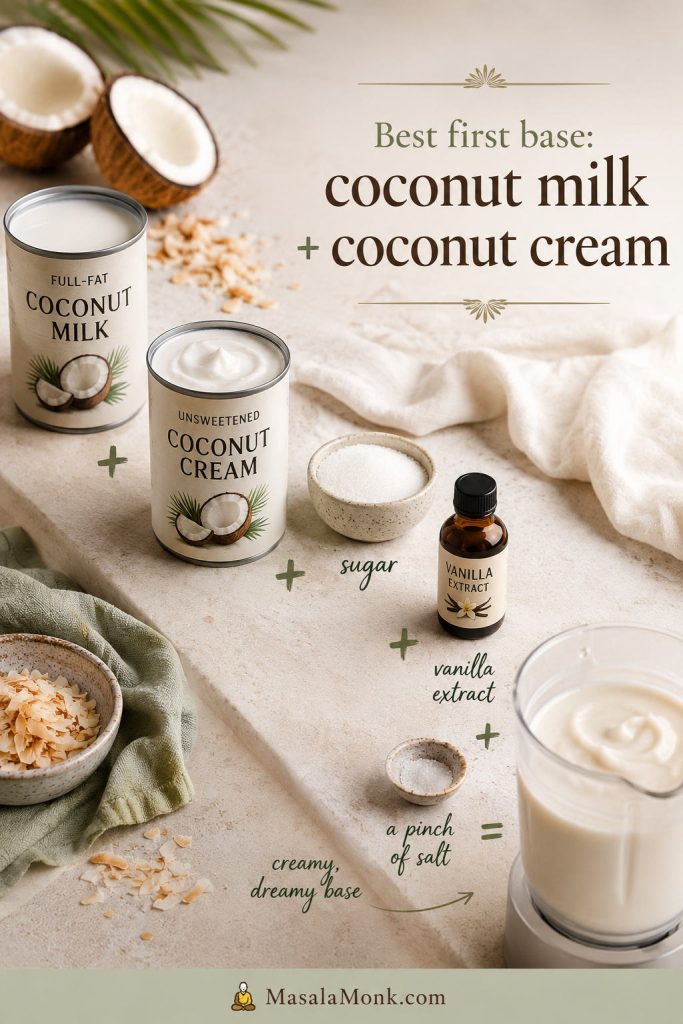
The creamiest dairy-free coconut ice cream starts with 1 can full-fat coconut milk plus 1 can unsweetened coconut cream, blended with sugar, vanilla, and salt. Churn it for the smoothest, parlor-style texture, then freeze until firm. If you do not have an ice cream maker, freeze the base in cubes and blend it until creamy. For a richer dairy-style shortcut, use the condensed milk method below.

Best base 1 can full-fat coconut milk + 1 can unsweetened coconut cream
Best method Ice cream maker for the smoothest texture; freeze-and-blend for no-churn
Texture Creamy, coconut-forward, scoopable after resting briefly
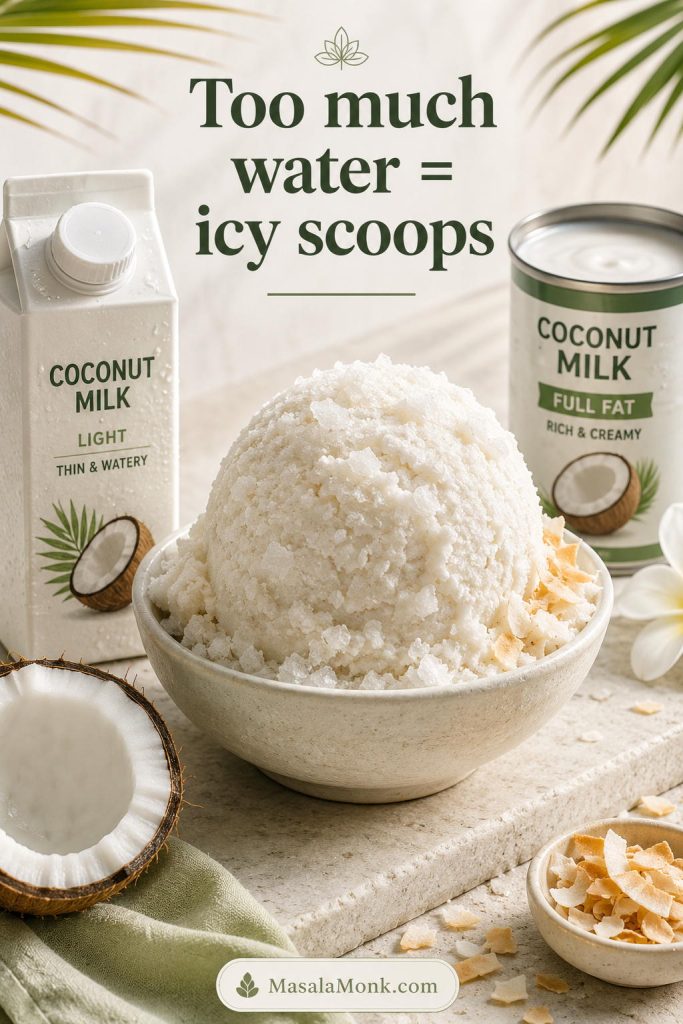
Avoid Thin carton coconut milk, lite coconut milk, and using sweetened cream of coconut without reducing sugar

Still deciding? See coconut milk vs coconut cream vs cream of coconut, or skip straight to the recipe card.

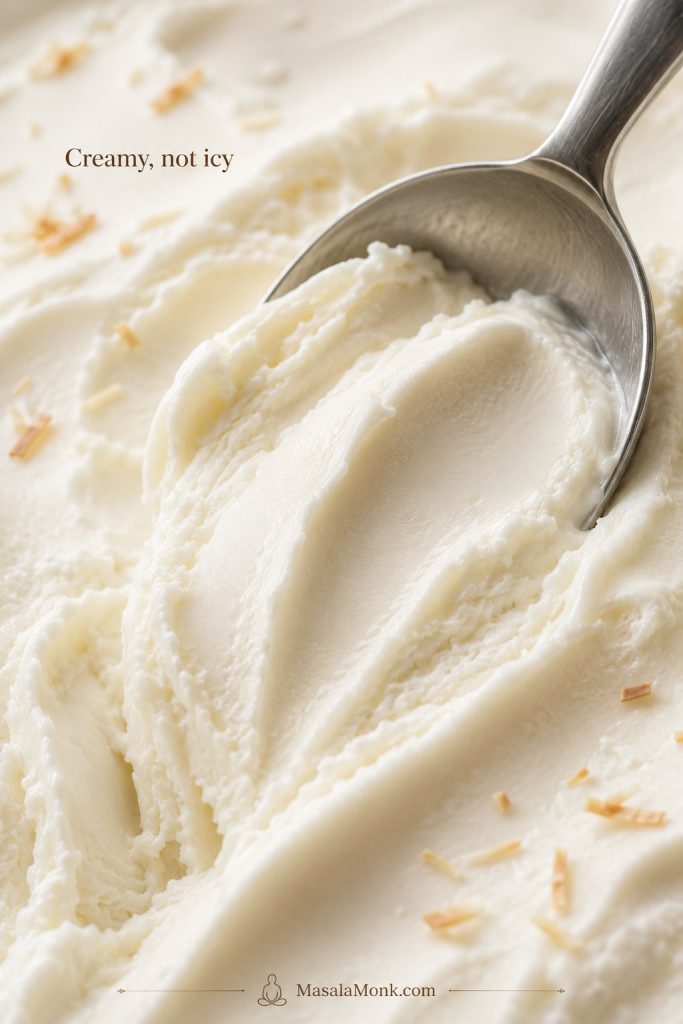
Before you choose a method, look at the texture you are aiming for: smooth, dense, creamy coconut ice cream that drags softly on the spoon instead of breaking into icy crystals.

Close-up of a spoon dragging through smooth coconut ice cream, showing soft creamy ridges and a dense but scoopable texture.
A smooth spoon drag is the texture cue to look for; if the scoop looks brittle or crystalline, the base usually needs better fat balance, chilling, or liquid control.

At a Glance

Yield About 1 quart / 900 ml to 1 liter
Prep time 10 minutes
Base chill time At least 4 hours; overnight is better
Churn time 20–30 minutes for most machines
Final freeze 4–6 hours for firm scoops
No-machine option Freeze the blended base in ice cube trays, then blend the frozen cubes
Equipment Blender, ice cream maker, freezer-safe container, spatula, measuring cups or scale

Why This Coconut Ice Cream Recipe Works

This coconut ice cream recipe works because it balances coconut flavor, fat, sugar, and temperature instead of relying on coconut milk alone. Because of that, the goal is a scoop that tastes rich and coconut-forward, but still feels smooth on the spoon—not icy, brittle, greasy, or waxy.

  • Coconut milk keeps the base pourable. It brings clean coconut flavor without making the mixture too heavy.
  • Coconut cream adds body. The extra fat helps the finished scoop feel creamier and less icy.
  • Sugar improves scoopability. It is not only for sweetness; cutting it too far can make homemade coconut ice cream freeze harder.
  • Blending and chilling protect the texture. Blending dissolves the sugar and smooths the coconut fat, while a cold base churns thicker and faster.

The easiest way to remember the main base is simple: coconut milk keeps it fluid, coconut cream gives it body, and sugar helps the finished scoop stay softer.

Coconut milk, coconut cream, sugar, vanilla, and salt arranged as the base ingredients for homemade coconut ice cream.
Coconut milk keeps the base fluid, while coconut cream adds body; together, they create a creamier first batch than either one usually gives alone.

Which Coconut Ice Cream Version Should You Make?

Start here if you are staring at coconut milk, coconut cream, or cream of coconut and wondering whether you bought the right can. You probably can still make a good batch, but the method changes depending on what is in front of you.

If you have ever bought the wrong can for a coconut dessert, this is the section that saves the batch. From there, pick the row that matches your pantry, then follow that route instead of forcing every coconut product into the same recipe.

Visual guide showing coconut ice cream options including churned, no-churn, cream of coconut, Ninja Creami, and tender coconut versions.
Start with what you already have, then choose the method that fits your tools, since coconut milk, cream of coconut, and a Ninja Creami all need slightly different handling.
What you have or want Best route to take What to expect
Full-fat coconut milk + unsweetened coconut cream Best first version Balanced coconut flavor, creamy texture, dairy-free, and less icy than coconut milk alone
Only full-fat canned coconut milk Coconut milk ice cream Lighter coconut flavor, slightly icier texture
Unsweetened coconut cream Coconut cream ice cream Richer, smoother, more indulgent
Sweetened cream of coconut Cream of coconut ice cream Sweeter, stronger coconut flavor, pina-colada-style
No ice cream maker Freeze-and-blend no-churn method Soft-serve texture first, firmer after a short freeze
Heavy cream + condensed milk Condensed milk no-churn shortcut Very creamy and easy, but not dairy-free
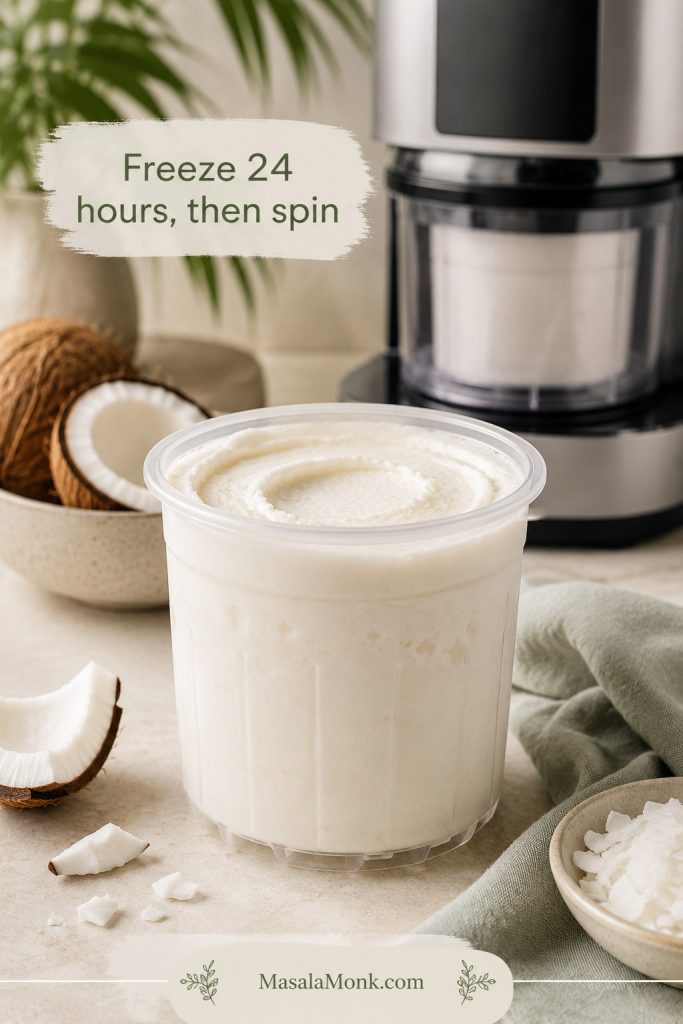
Ninja Creami Ninja Creami method Freeze 24 hours, spin, then Re-Spin if crumbly
Tender coconut malai Tender coconut style Fresh coconut texture, Indian-style flavor
Palm sugar or pandan Thai coconut style More fragrant, street-dessert-style coconut flavor
Keto or sugar-free goal See the keto note in variations Needs sweetener-specific testing because texture changes

Picked your path? Jump to the ice cream maker method, no-churn coconut ice cream, cream of coconut ice cream, or Ninja Creami method.

Coconut Milk vs Coconut Cream vs Cream of Coconut

The wrong-can mistake

This is where most coconut ice cream problems start. The names sound almost interchangeable, but the products are not the same. For the main base, reach for full-fat canned coconut milk and unsweetened coconut cream. Save sweetened cream of coconut for the separate cream of coconut batch below.

If you have ever stood in the aisle wondering whether coconut cream and cream of coconut are the same thing, this is the section that prevents the wrong-can mistake.

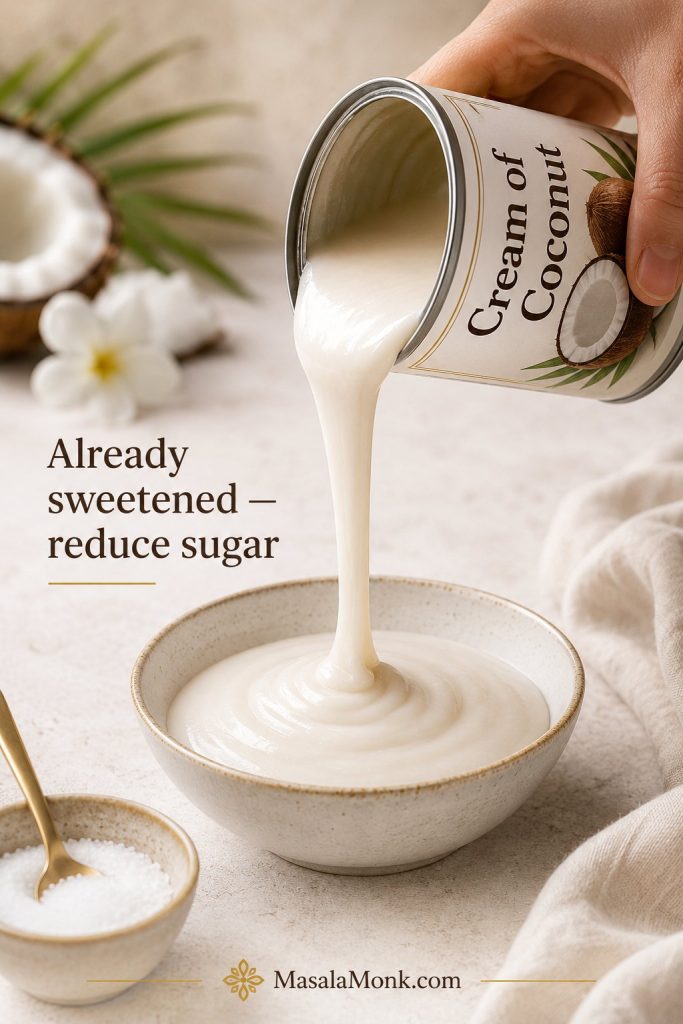
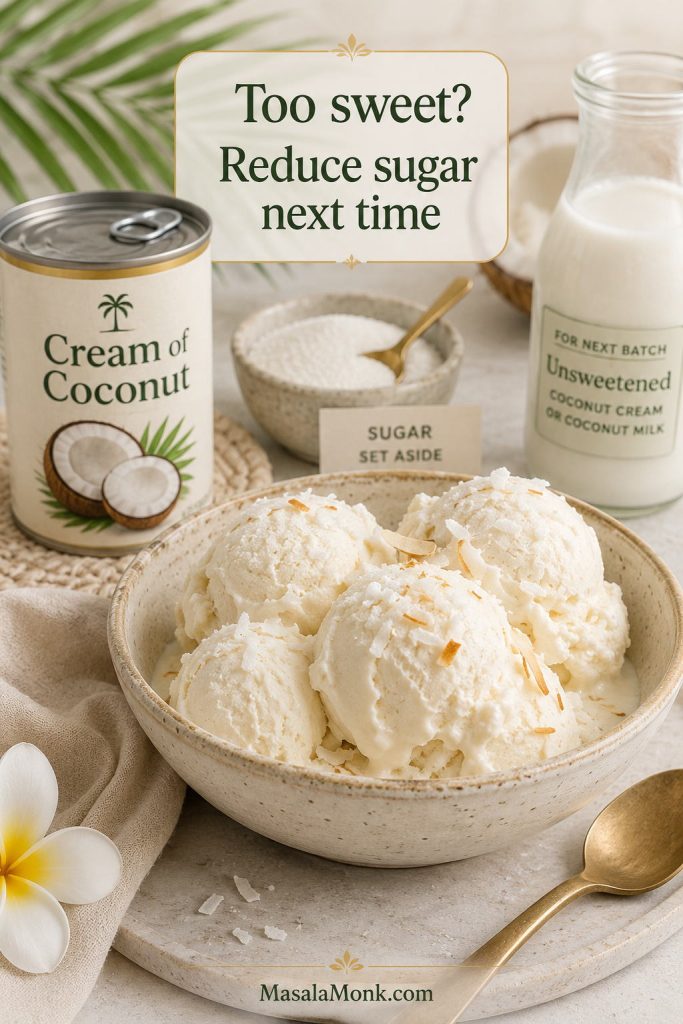
Do not pour cream of coconut into the main recipe as a straight swap. It is already sweetened, so the batch can turn too sweet and heavy unless you reduce the sugar. Instead, use it in the separate cream-of-coconut version below.

Thick cream of coconut being poured into a bowl with a sugar bowl set aside nearby.
Cream of coconut is already sweetened, so reducing added sugar keeps the finished batch rich and coconut-forward without turning heavy or candy-sweet.

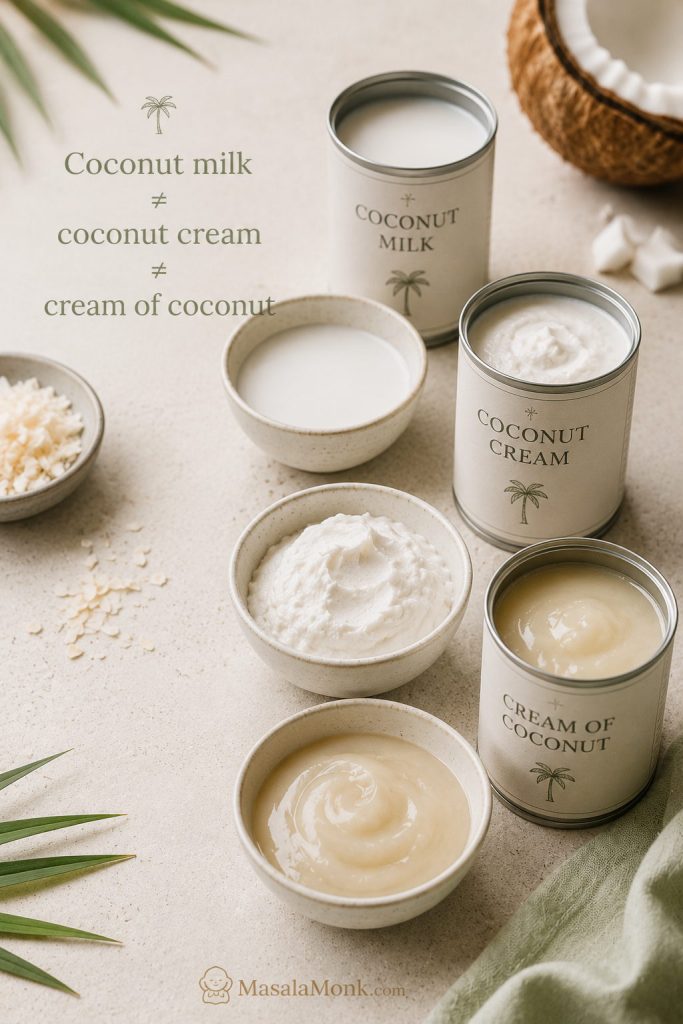
Before you open a can, it helps to see the three products side by side: coconut milk is pourable, coconut cream is thicker, and cream of coconut is sweetened and glossy.

Three coconut products—coconut milk, coconut cream, and cream of coconut—shown in separate bowls beside their containers.
These three coconut products can look similar on the shelf, yet each one changes sweetness, richness, and freezer texture in a different way.

What each can actually does

Coconut product What it is Best use in coconut ice cream Important note
Full-fat canned coconut milk A pourable coconut base with moderate fat Main dairy-free coconut milk ice cream Choose canned full-fat coconut milk, not thin drinking coconut milk
Unsweetened coconut cream Thicker, richer coconut base with more fat Creamier coconut ice cream with better body Best paired with coconut milk so the texture is rich but not waxy
Cream of coconut Sweetened coconut product used in drinks and desserts Sweet, pina-colada-style coconut ice cream Already sweetened, so reduce or skip added sugar
Carton coconut milk Thin drinking-style coconut milk Usually not ideal Often too watery and can freeze icy
Condensed coconut milk Sweetened vegan condensed milk alternative Vegan no-churn or Ninja Creami routes Counts as both sweetener and texture helper
Tender coconut flesh Soft coconut malai from young coconut Tender coconut ice cream style Add it for flavor and texture, not as the only base

Helpful ingredient note: for a deeper ingredient explanation, Epicurious has a useful guide to cream of coconut, including how it differs from coconut cream and coconut milk.

Now that the coconut products are clear, head to the ingredients list, the cream of coconut batch, or the main recipe card.

Ingredients

You do not need a long ingredient list for good coconut ice cream. Instead, what matters most is using full-fat coconut products, dissolving the sugar well, and giving the base enough time to chill before freezing.

In this coconut ice cream recipe, sugar is important not only for sweetness but also for scoopability. When the sweetener is reduced too aggressively, the finished scoop often freezes harder and icier.

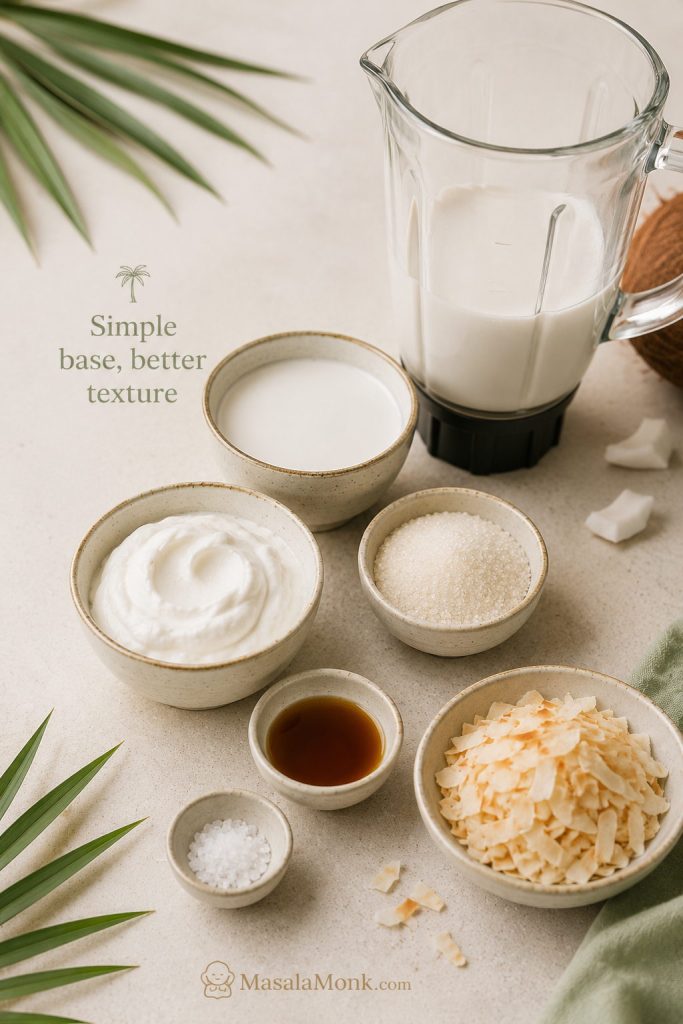
Coconut milk, coconut cream, sugar, vanilla, salt, and toasted coconut arranged around a blender jar for coconut ice cream.
The ingredient list is short, yet full-fat coconut products, enough sugar, vanilla, and salt do most of the work in building a smooth homemade scoop.
Ingredient US amount Metric amount Why it matters
Full-fat canned coconut milk 1 can, 13.5–14 oz 400 ml Gives the ice cream its coconut base without making it too heavy
Unsweetened coconut cream 1 can, 13.5–14 oz 400 ml Adds richness and helps prevent an icy texture
Granulated sugar 1/2 cup 100 g Sweetens and improves scoopability
Fine salt 1/8 tsp About 0.7–1 g Makes the coconut flavor taste fuller
Vanilla extract 2 tsp 10 ml Rounds out the coconut flavor
Toasted coconut, optional 1/3–1/2 cup 25–40 g Adds texture and stronger coconut flavor
Coconut extract, optional 1/4 tsp 1 ml Useful if your coconut milk tastes mild

Taste before chilling: the base should taste slightly sweeter than you want the finished ice cream to taste. Cold dulls sweetness, so a base that tastes just right before freezing can taste a little flat once frozen.

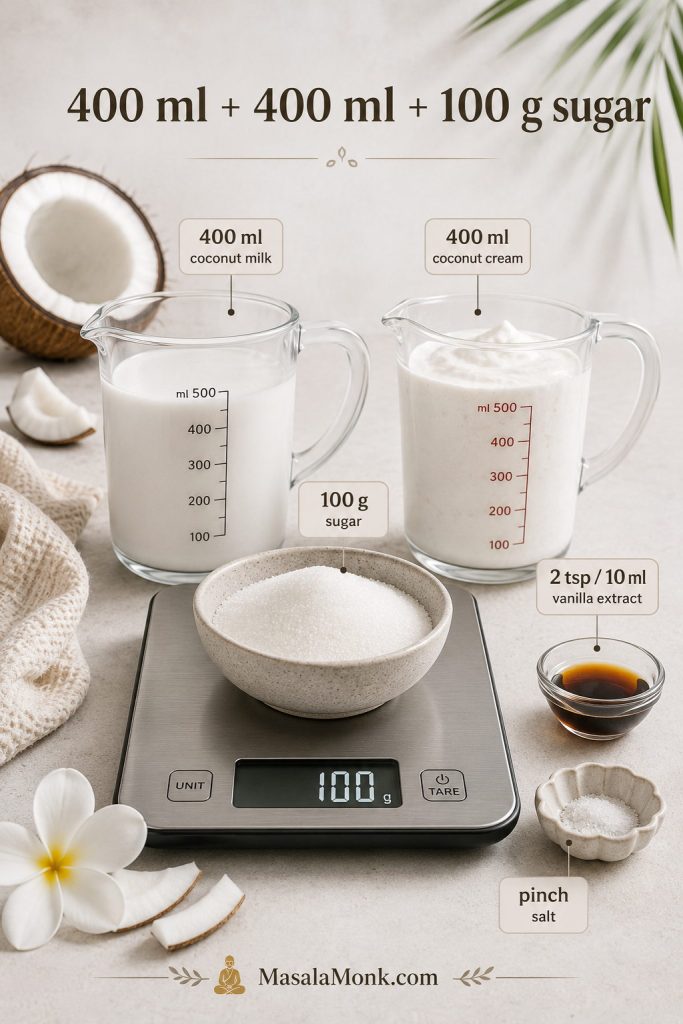
Use the measurements below as a quick check before you blend, especially if you are switching between cans, cups, grams, and milliliters.

Measured coconut milk, coconut cream, sugar, vanilla extract, and salt displayed with quantity labels for coconut ice cream.
Accurate measurements keep the coconut ice cream base balanced, especially when you switch between cans, cups, grams, and milliliters.

Start with full-fat canned coconut milk

For the coconut milk-only version, use canned full-fat coconut milk rather than the thin drinking-style cartons. The canned product has more body, while carton coconut milk is usually too watery for a creamy frozen dessert.

Add unsweetened coconut cream for richness

The cream adds body, but balance matters. One can of each gives you richness without the waxy heaviness that can happen when the base is all cream.

A little salt makes the flavor fuller

A tiny amount of salt makes the coconut and vanilla taste more complete. It should not make the ice cream taste salty; it simply keeps the sweetness from tasting flat.

Ice Cream Maker Method

For this coconut ice cream recipe, an ice cream maker is the easiest route to a smooth, parlor-style scoop because it freezes the base while keeping it moving. That movement keeps ice crystals smaller, which matters with coconut bases because they can freeze firmer than dairy ice cream.

Blend and chill the coconut base

  1. Freeze the ice cream maker bowl. If your machine uses a freezer bowl, freeze it for 12–24 hours, or according to the manufacturer’s directions.
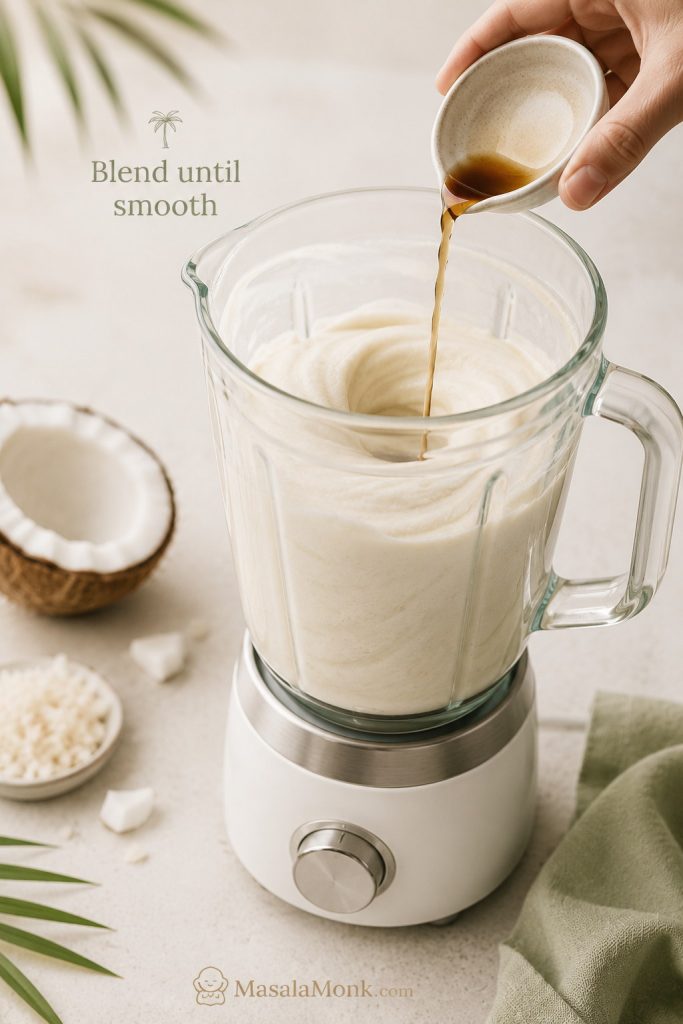
  2. Blend the base. Add coconut milk, coconut cream, sugar, salt, and vanilla to a blender. Blend for 1–2 minutes, until smooth and the sugar is fully dissolved.
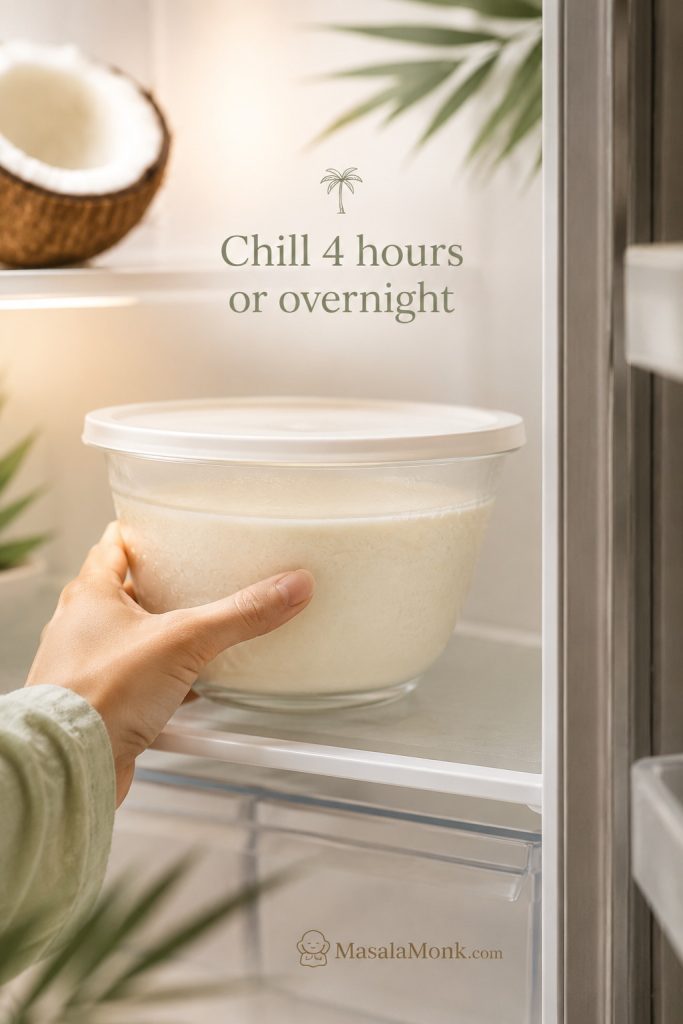
  3. Chill the base. Refrigerate for at least 4 hours, preferably overnight. A cold base churns thicker and faster.

Blend until the base looks completely smooth, because this step helps dissolve sugar and even out the coconut fat before the mixture chills.

Coconut ice cream base blending in a clear blender jar while ingredients are added.
Blending is not just mixing; it helps dissolve the sugar and smooth the coconut fat so the finished ice cream tastes cleaner and creamier.

After blending, chill the base until it is properly cold; this gives the machine a better chance to thicken the mixture quickly.

Covered bowl of coconut ice cream base chilling in a refrigerator before churning.
A colder base gives the churn a head start, which means the mixture can thicken faster before large ice crystals have time to form.

Churn, freeze, and rest before scooping

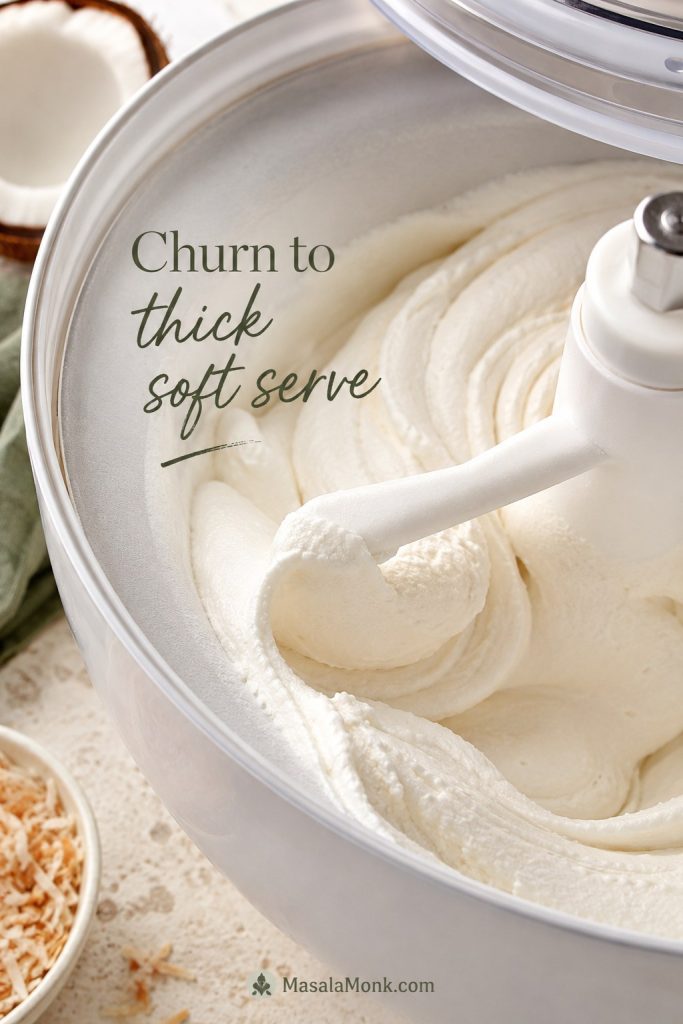
  1. Churn. Pour the chilled base into the ice cream maker and churn for 20–30 minutes, or until it looks like thick soft serve.
  2. Add coconut texture. Fold in toasted coconut at the end if you want little chewy-crisp coconut pieces.
  3. Freeze until scoopable. Transfer to a freezer-safe container and freeze for 4–6 hours.
  4. Rest before scooping. Let the ice cream sit at room temperature for 5–15 minutes before scooping, especially if it has been frozen overnight.

During churning, watch the texture rather than the clock alone; the base should look thick and soft-serve-like before you transfer it to the freezer.

Coconut ice cream churning in an ice cream maker until thick and soft like soft serve.
Stop churning when the base looks like thick soft serve; at this point, the machine has done its job and the freezer finishes the texture.

Texture cue: after churning, the coconut ice cream should look like thick soft serve. It will not be fully firm until it has had several hours in the freezer.

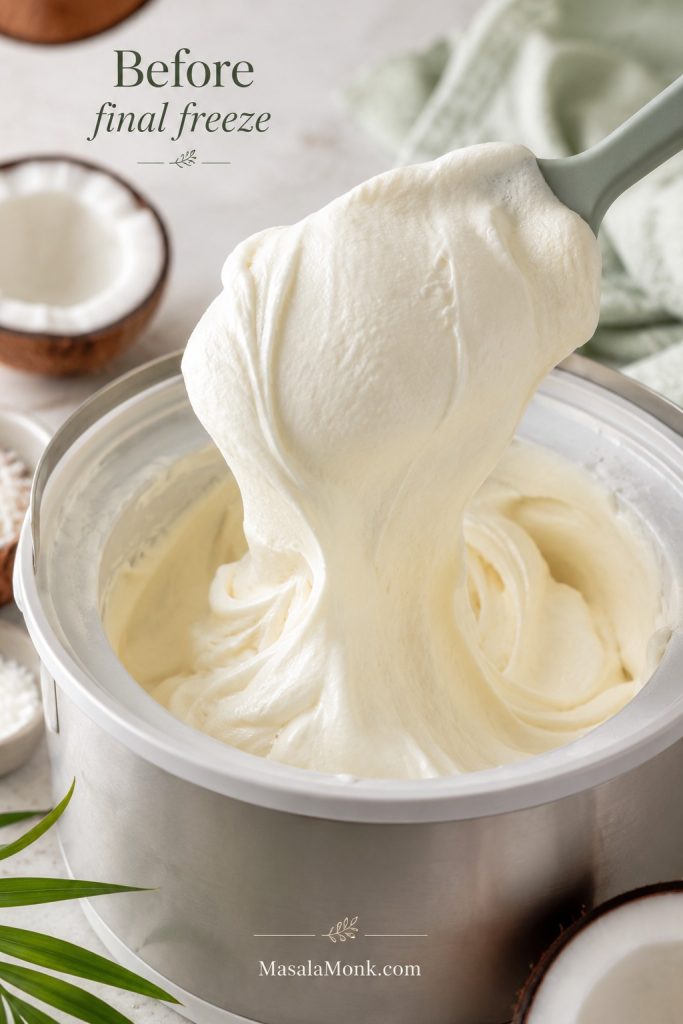
Do not panic if the freshly churned batch is still soft; that soft-serve stage is exactly what should happen before the final freezer rest.

Soft churned coconut ice cream lifted with a spatula, showing a thick creamy fold before final freezing.
This soft stage is normal after churning, so do not keep running the machine just because the coconut ice cream is not scoop-firm yet.

No-Churn Coconut Ice Cream Without an Ice Cream Maker

No ice cream maker? This coconut ice cream recipe still gives you two solid routes. The freeze-and-blend method keeps things dairy-free and fresh-tasting; meanwhile, the condensed milk route gives you the easiest rich, creamy no-churn scoop.

For more no-machine dessert methods, this guide to homemade ice cream without a machine is also useful, while the coconut method below gives more specific coconut milk and coconut cream guidance.

Option 1: Dairy-free freeze-and-blend coconut ice cream

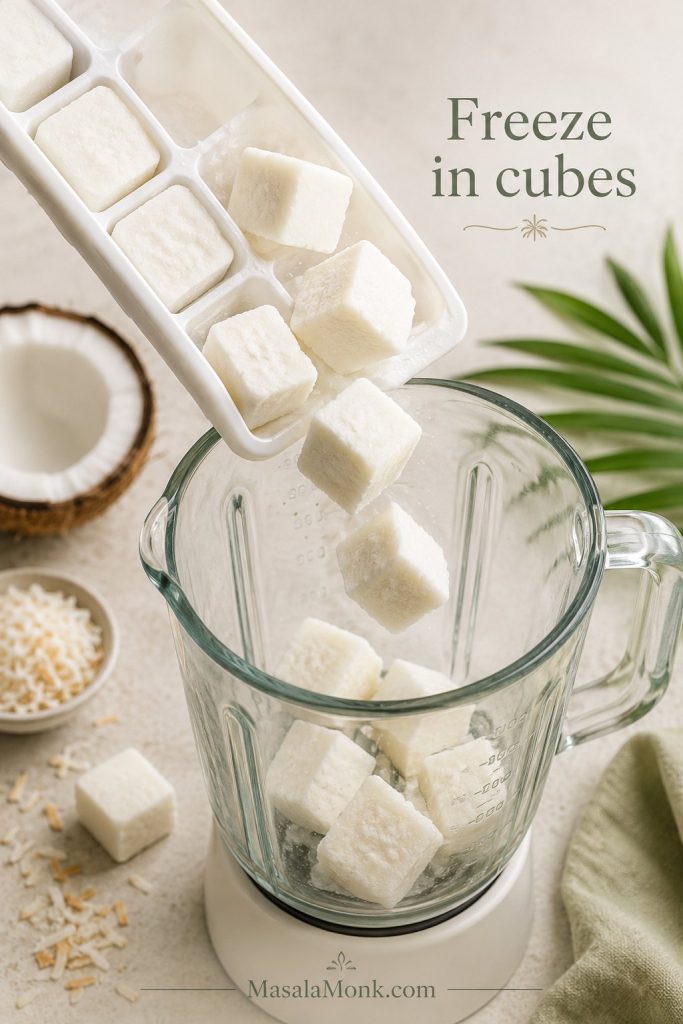
Blend the main coconut base, then pour it into ice cube trays. Freeze for at least 6 hours or overnight. Smaller cubes are easier for the blender to turn smooth than one large frozen block.

Frozen cubes of coconut ice cream base being tipped from an ice cube tray into a blender jar.
Freezing the base in cubes gives the blender smaller pieces to work through, which helps the no-churn method turn creamy instead of chunky.

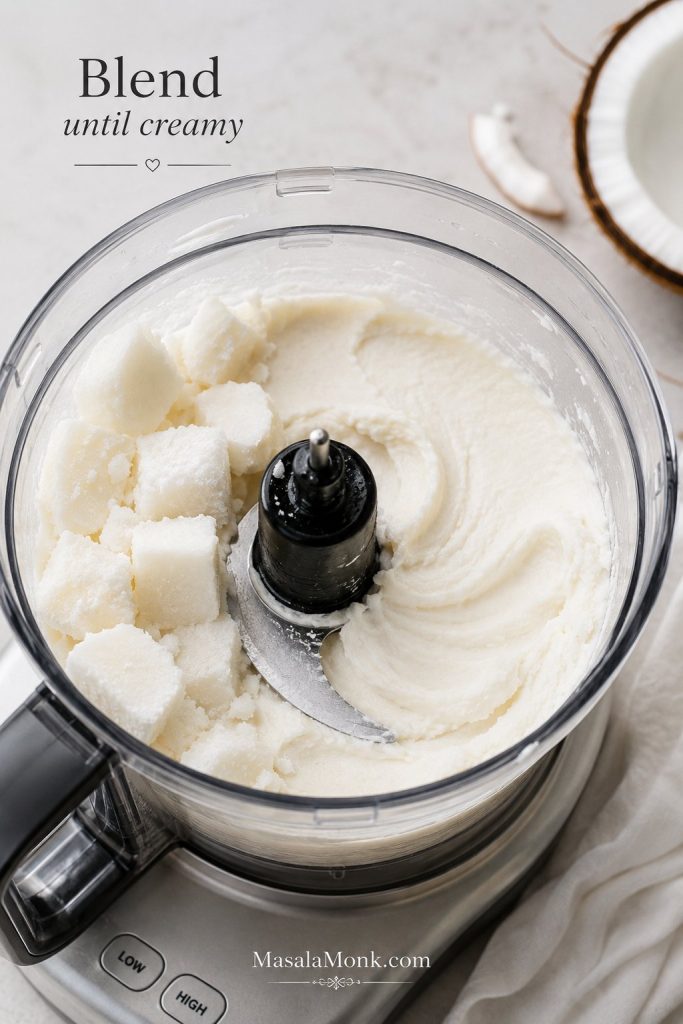
Blend the frozen cubes in a strong blender or food processor until creamy and soft-serve-like, then eat immediately or freeze briefly for firmer scoops.

Frozen coconut base cubes blending into a creamy no-churn coconut ice cream texture.
Once the frozen cubes break down, the mixture turns creamy quickly, so stop blending as soon as it looks smooth and soft.

Option 2: Condensed milk no-churn coconut ice cream

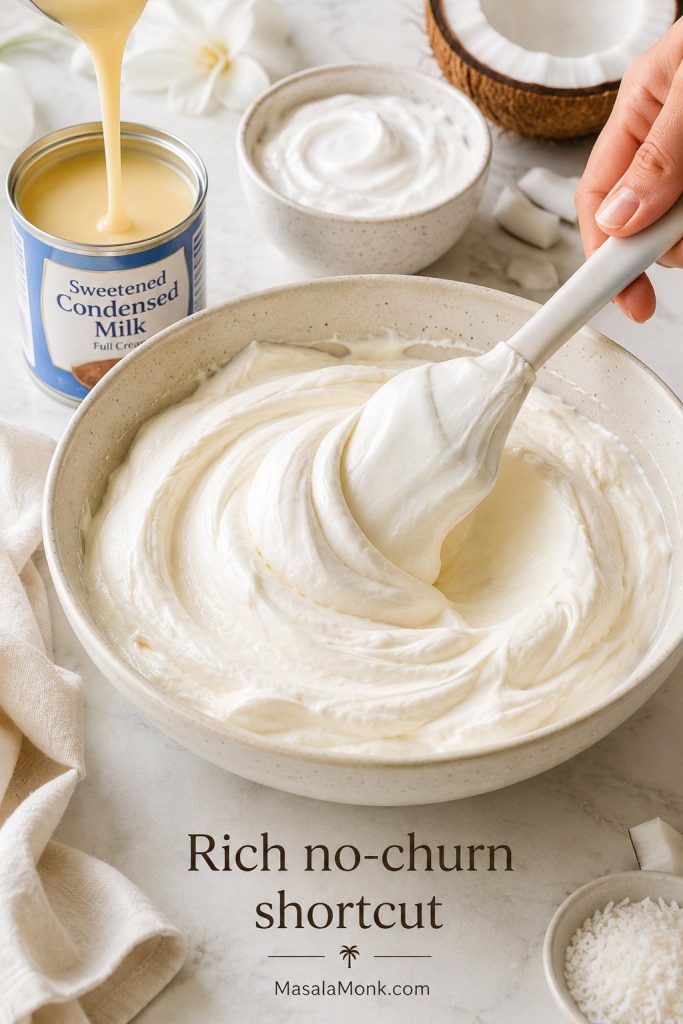
For a richer dairy-style no-churn version, whip 2 cups / 480 ml heavy cream to stiff peaks, then fold in 1 can / 14 oz sweetened condensed milk, 1 can / 400 ml unsweetened coconut cream, 1/8 tsp salt, and 1/2 tsp coconut extract. Freeze in a loaf pan or freezer container for 8 hours or overnight.

Whipped cream, condensed milk, and coconut cream being folded together in a bowl for no-churn coconut ice cream.
The condensed milk version is richer and easier, although it gives a softer, sweeter, more dessert-like scoop than the dairy-free cube-and-blend method.
No-churn method Best for Texture Trade-off
Freeze-and-blend Dairy-free or vegan batches Soft and creamy when freshly blended Needs a strong blender or food processor
Whipped cream + condensed milk Easy no-churn dessert Rich, creamy, softer Not dairy-free unless using vegan alternatives

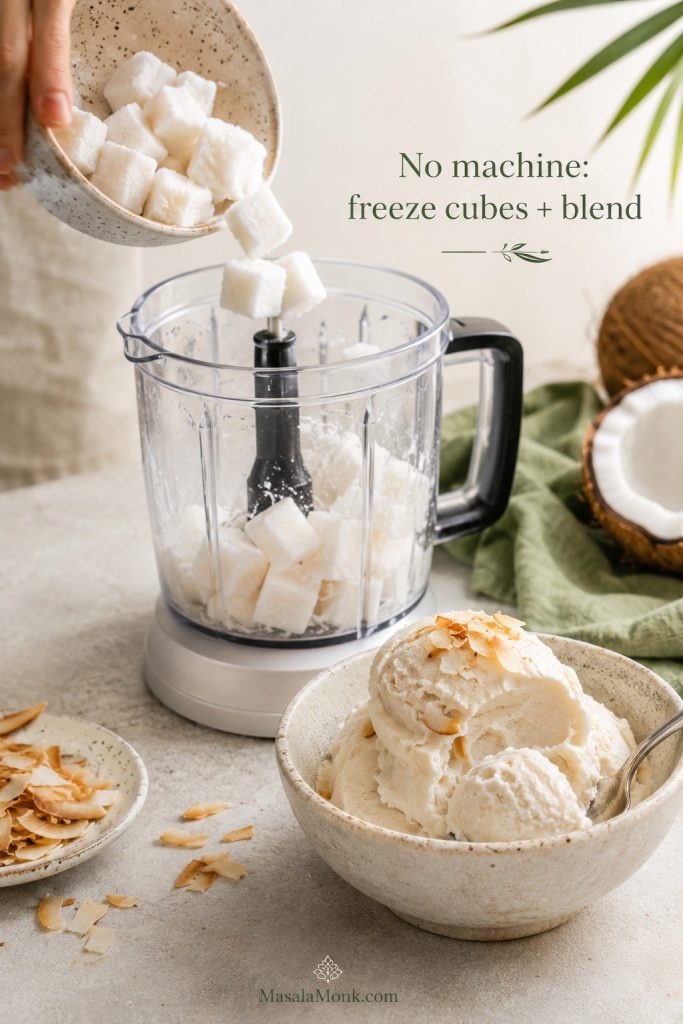
If you want the most coconut-forward no-machine route, use the freeze-and-blend method rather than the dairy shortcut.

Summary scene showing the no-churn coconut ice cream method from frozen cubes to a creamy blended result.
The freeze-and-blend method is the cleanest dairy-free no-churn route, since it keeps the coconut flavor fresh without depending on whipped cream.

Using the no-churn method? You may also want the troubleshooting guide or the full recipe card.

Coconut Ice Cream Recipe

This coconut ice cream recipe is made with full-fat coconut milk, unsweetened coconut cream, sugar, vanilla, and salt. Churn it in an ice cream maker for the smoothest texture, or use the no-churn freeze-and-blend method if you do not have a machine.

Yield About 1 quart / 900 ml to 1 liter
Prep Time 10 minutes
Chill + Freeze 8–10 hours total
Method Ice cream maker or no-churn

Ingredients

  • 1 can full-fat canned coconut milk, 13.5–14 oz / 400 ml
  • 1 can unsweetened coconut cream, 13.5–14 oz / 400 ml
  • 1/2 cup / 100 g granulated sugar
  • 1/8 teaspoon fine salt
  • 2 teaspoons / 10 ml vanilla extract
  • 1/3–1/2 cup / 25–40 g toasted coconut, optional
  • 1/4 teaspoon coconut extract, optional, for stronger coconut flavor

Ice Cream Maker Method

  1. If using a freezer-bowl ice cream maker, freeze the bowl for 12–24 hours.
  2. Add coconut milk, coconut cream, sugar, salt, and vanilla to a blender.
  3. Blend for 1–2 minutes, until completely smooth and the sugar is dissolved.
  4. Cover and chill the base for at least 4 hours, preferably overnight.
  5. Pour the chilled base into the ice cream maker and churn for 20–30 minutes, or until it reaches thick soft-serve texture.
  6. Fold in toasted coconut, if using.
  7. Transfer to a freezer-safe container and freeze for 4–6 hours, until scoopable.
  8. Rest at room temperature for 5–15 minutes before scooping.

No-Churn Freeze-and-Blend Method

  1. Blend the coconut milk, coconut cream, sugar, salt, and vanilla until smooth.
  2. Pour into ice cube trays and freeze for at least 6 hours or overnight.
  3. Blend the frozen cubes in a strong blender or food processor until creamy.
  4. Serve as soft-serve coconut ice cream, or freeze briefly for firmer scoops.

Notes

  • Use full-fat canned coconut milk, not thin carton coconut milk.
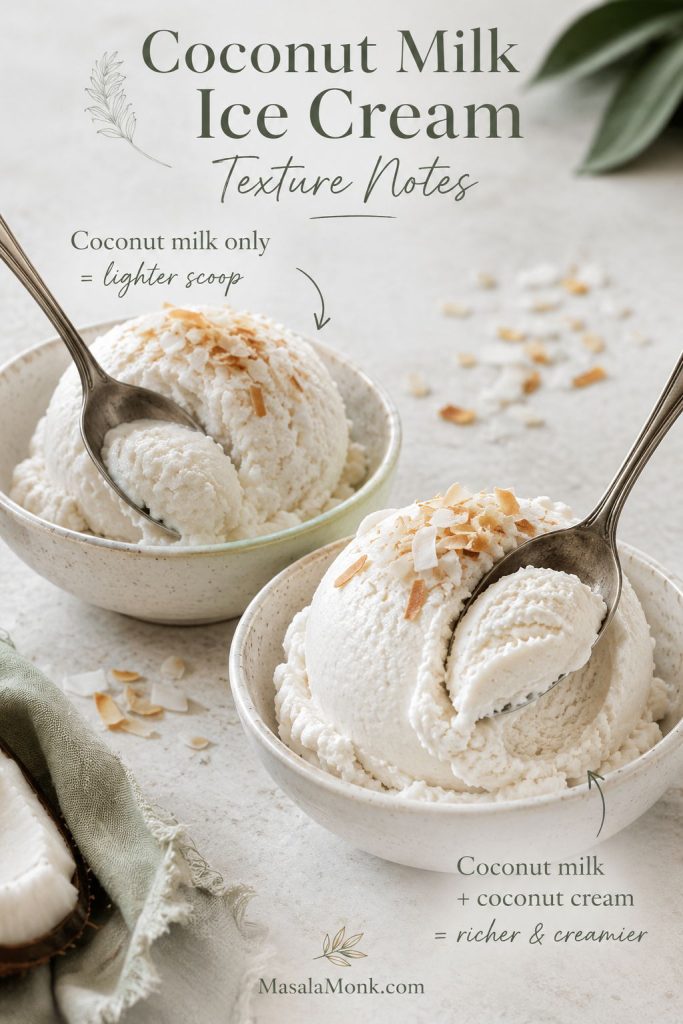
  • A coconut milk-only batch can be made with 2 cans full-fat coconut milk, but the texture will be slightly lighter.
  • A coconut cream-heavy batch still needs some coconut milk so the texture does not turn too heavy or waxy.
  • A cream-of-coconut version should skip the added sugar because cream of coconut is already sweetened.
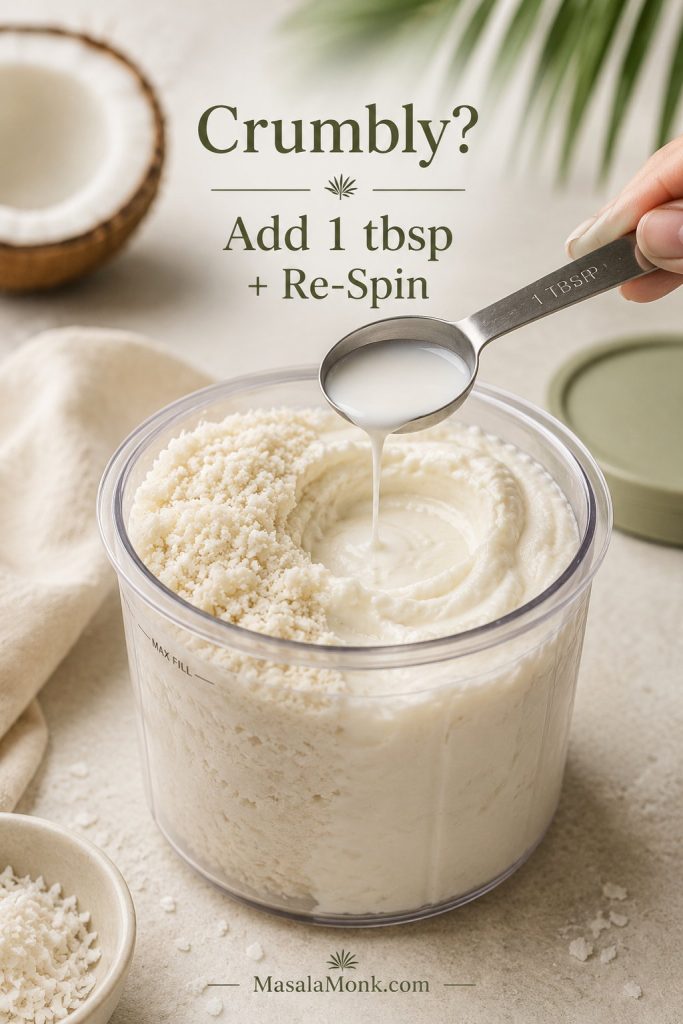
  • The Ninja Creami method needs a 24-hour freeze in the Creami pint; if the first spin looks crumbly, add 1 tablespoon coconut milk and Re-Spin.
  • For a slightly softer scoop, replace 1–2 tablespoons of the sugar with golden syrup, maple syrup, or agave. Do not remove too much sweetener, or the ice cream may freeze harder.

Use this visual recipe card when you want the core formula without scrolling back through every method note.

Saveable recipe card image showing coconut ice cream ingredients and a finished creamy scoop.
This recipe card gives you the core formula at a glance, which is useful when you want the main coconut ice cream base without scrolling through the full guide.

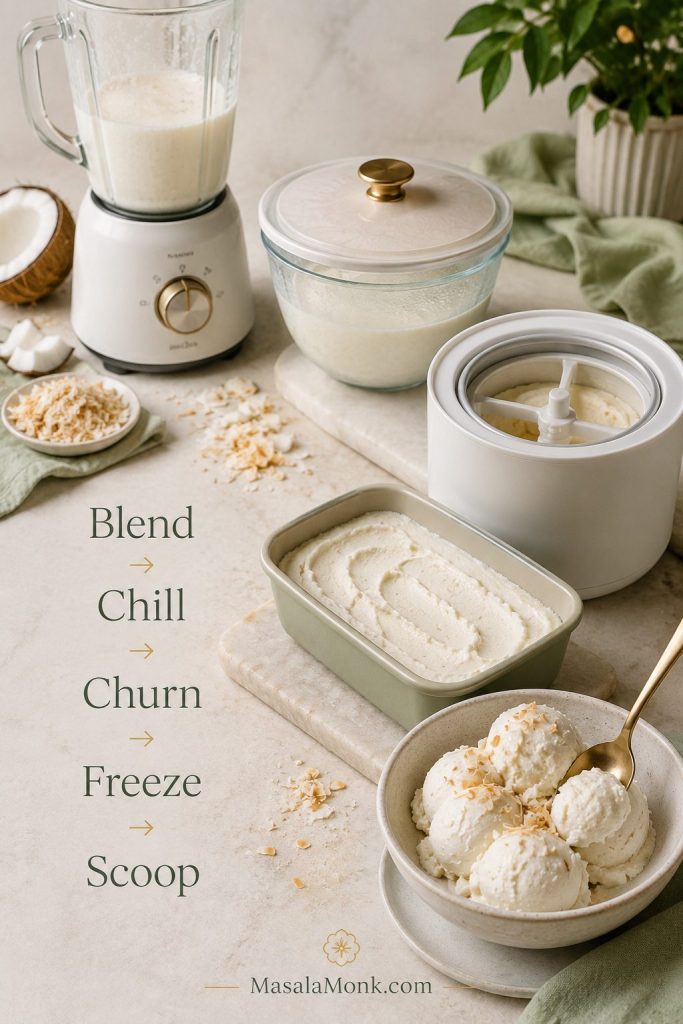
The full workflow is easier to follow when you keep the order clear: blend, chill, churn, freeze, and rest before scooping.

Step-by-step visual showing the coconut ice cream process from blending and chilling to churning, freezing, and scooping.
The sequence matters: blend until smooth, chill until cold, churn until thick, freeze until firm, then rest briefly before scooping.

Easy 2-Ingredient and 3-Ingredient Shortcuts

When speed matters more than the creamiest possible scoop, these shortcut batches can help. They are useful for quick desserts, but the texture will be different from the full coconut milk and coconut cream base.

Shortcut Ingredients Best for Texture note
2-ingredient cream of coconut ice cream Cream of coconut + heavy cream Fast no-churn dessert Sweet, rich, not dairy-free
3-ingredient coconut milk ice cream Full-fat coconut milk + sugar + vanilla Simple dairy-free coconut ice cream Lighter and icier than the coconut cream base
3-ingredient Ninja Creami coconut ice cream Coconut milk + sweetener + vanilla Creami users Needs a 24-hour freeze and usually benefits from a Re-Spin

Coconut Milk Ice Cream Recipe Notes

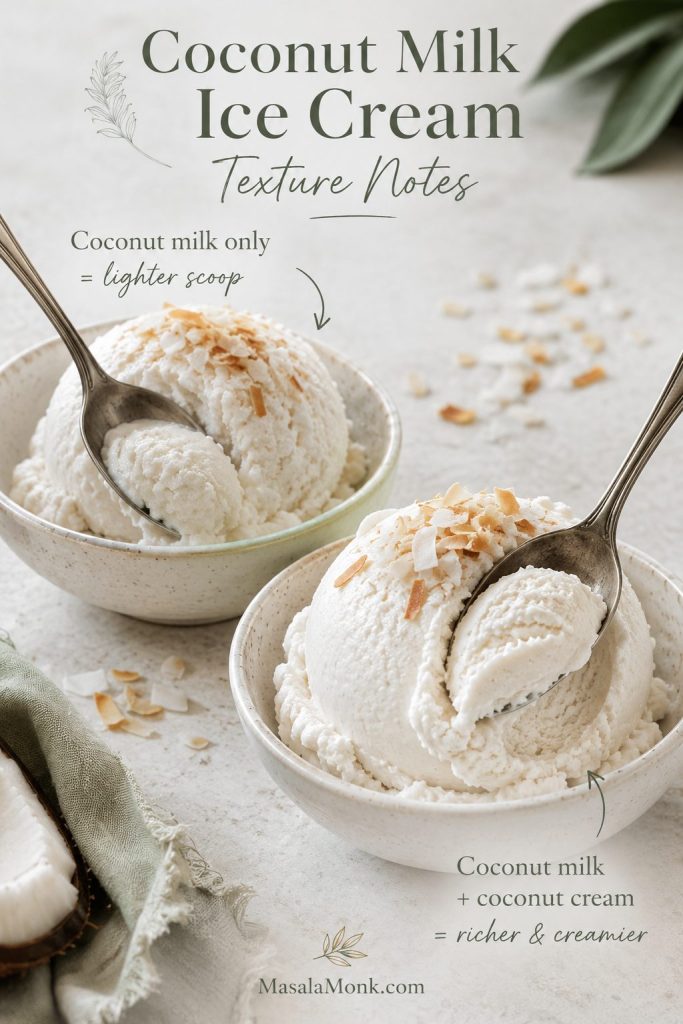
If you only have full-fat canned coconut milk, the recipe will still work. Use 2 cans / about 800 ml full-fat coconut milk in place of the coconut milk and coconut cream combination. The flavor will still be good, but the texture may be slightly lighter and a little icier than the batch made with one can of coconut cream.

Comparison of a lighter coconut milk-only ice cream scoop and a richer scoop made with coconut milk plus coconut cream.
A coconut milk-only batch can still be good; however, it usually tastes lighter and freezes a bit firmer than the milk-and-cream version.

For a smoother coconut milk-only batch, chill the cans overnight and use the thick coconut layer from the top if your coconut milk separates. You can also add 1 tablespoon cornstarch or tapioca starch to a cooked base if you want a more custard-like dairy-free texture.

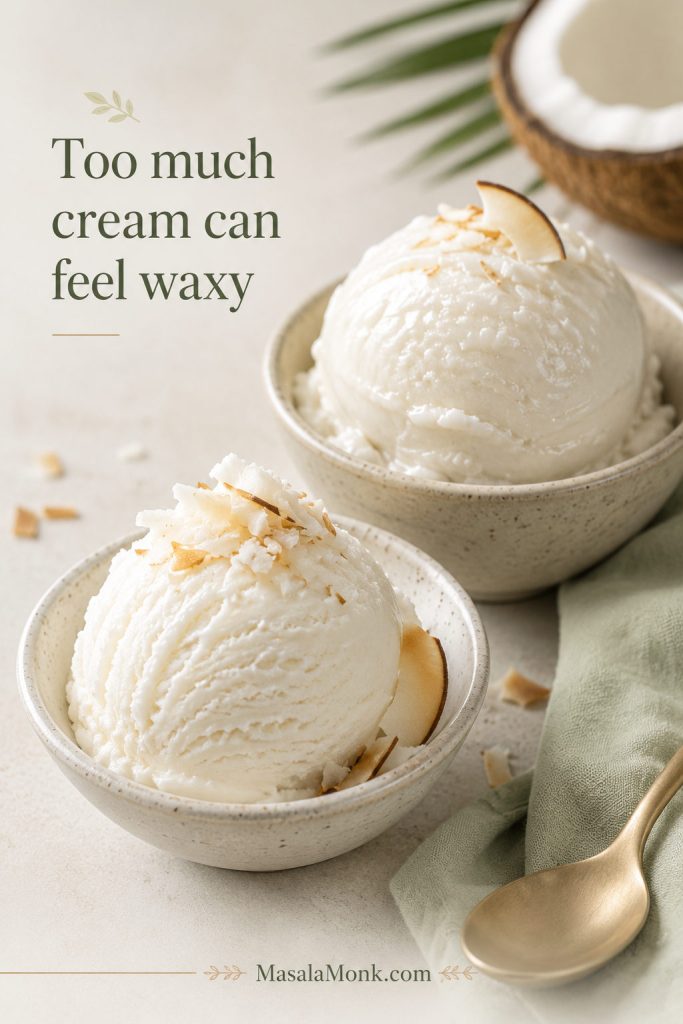
Coconut Cream Ice Cream Recipe Notes

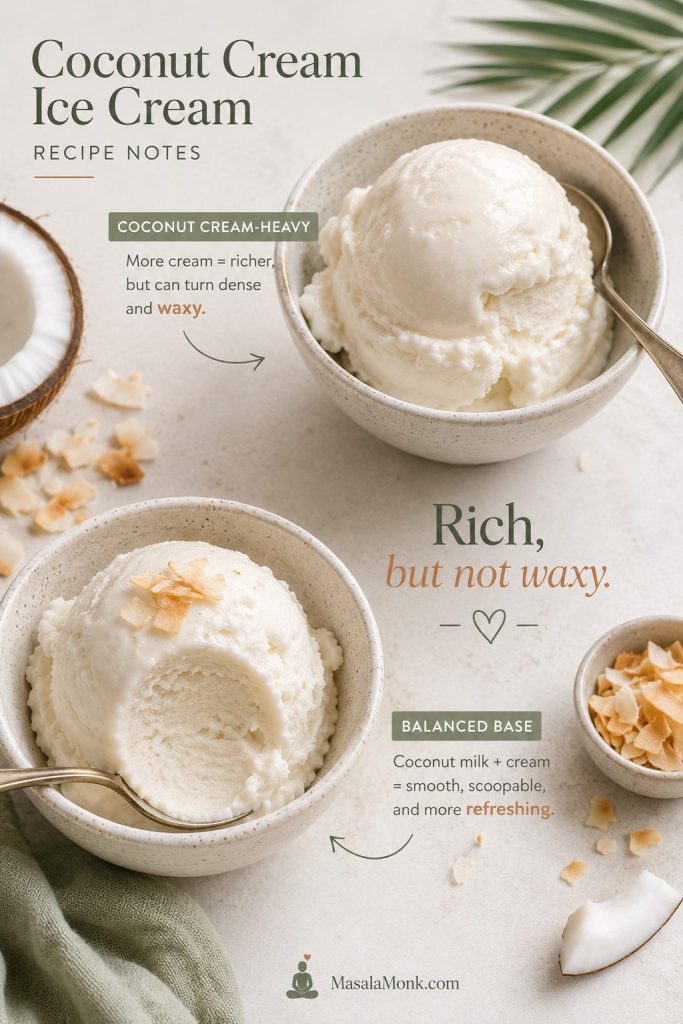
Coconut cream ice cream is richer because the cream has more fat and less water. For the best balance, combine one can of coconut milk with one can of coconut cream. If the base is made only with cream, the result can be very rich but sometimes heavier on the palate.

Comparison between a dense coconut cream-heavy ice cream scoop and a smoother scoop made with a balanced coconut milk and coconut cream base.
More coconut cream does not always mean better texture, because too much richness can feel waxy instead of smooth on the palate.

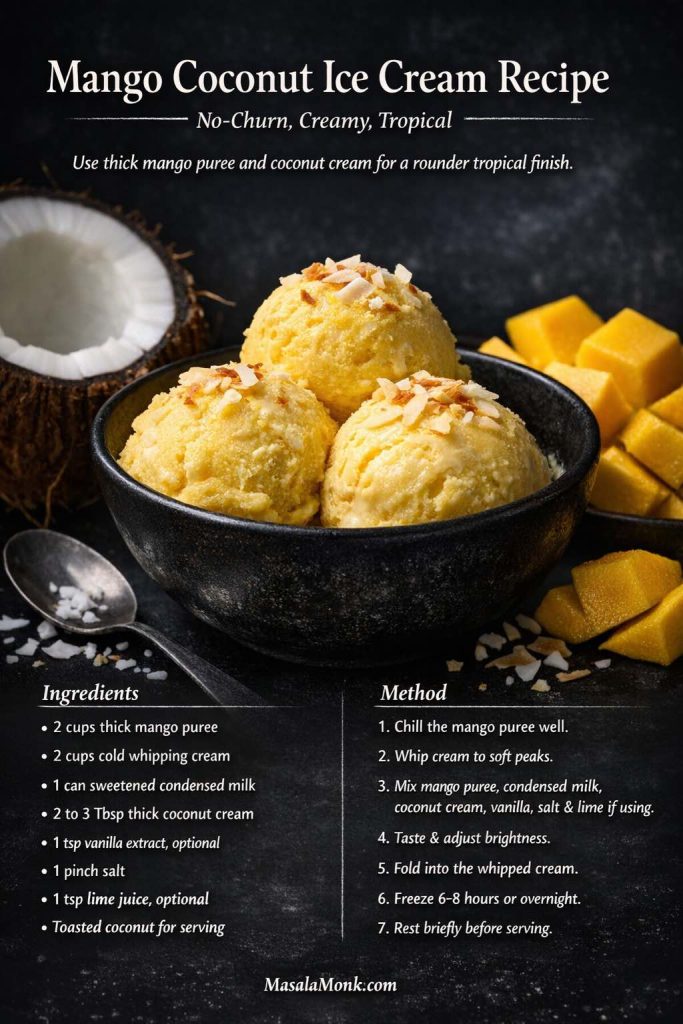
This is the route to choose when you want a vegan scoop that still feels creamy and indulgent. It also works well with toasted coconut, vanilla bean, dark chocolate pieces, mango puree, or pineapple.

Cream of Coconut Ice Cream

The cream-of-coconut version is its own style because the product is already sweetened. As a result, it gives the finished scoop a stronger, sweeter, almost pina-colada-style flavor. Choose this route when you want a richer dessert-style batch rather than a cleaner coconut milk base.

Important: cream of coconut is not the same as unsweetened coconut cream. If you use cream of coconut, skip the 1/2 cup sugar from the main recipe.

For a cream of coconut batch, blend 1 can / 14–15 oz cream of coconut with 1 cup / 240 ml milk or coconut milk, 1 1/2 cups / 360 ml heavy cream or coconut cream, and a pinch of salt. Churn as directed, or freeze and blend for a softer no-churn result.

Cream of coconut ice cream with cream of coconut and sugar shown nearby to explain how to fix an overly sweet batch.
If a cream-of-coconut batch tastes too sweet, reduce the added sugar next time; that small adjustment usually restores balance without losing coconut flavor.

For a very simple no-churn cream of coconut ice cream, whip 2 cups / 480 ml cold heavy cream to soft peaks, then fold in 1 can / 14–15 oz cream of coconut and a pinch of salt. Freeze for 8 hours or overnight. This shortcut is rich and sweet, so it does not need extra sugar.

Using cream of coconut? Check why coconut ice cream turns too sweet or icy, or compare it again with coconut milk and coconut cream.

Vegan and Dairy-Free Notes

The main coconut milk and coconut cream base is naturally dairy-free and vegan as long as your sugar is vegan-friendly. It does not need eggs, heavy cream, or condensed milk. For the creamiest vegan coconut ice cream, keep the fat level high and avoid thin coconut beverages.

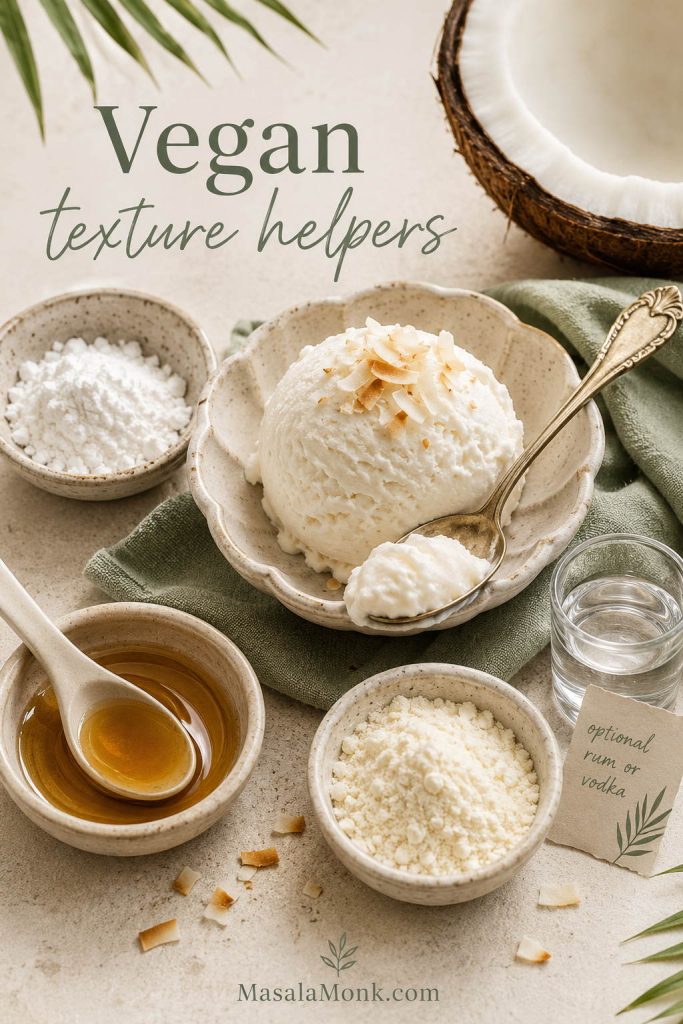
For an even smoother vegan batch, however, one of these optional helpers can improve the texture:

Vegan coconut ice cream texture helpers including starch, syrup, coconut milk powder, and a small optional alcohol cue around a spoonful of ice cream.
Vegan texture helpers can improve the scoop, but they work best as support tools; fat balance, sugar level, and chill time still matter most.
  • 1 tablespoon cornstarch or tapioca starch, cooked briefly into the base for a vegan custard feel.
  • 1–2 tablespoons golden syrup, maple syrup, or agave, replacing part of the sugar for softer scooping.
  • 1–2 tablespoons coconut milk powder, for extra coconut flavor and body.
  • 1 teaspoon vodka or rum, optional, to slightly soften the freeze and add a grown-up note.

Thai-Style and Tender Coconut Notes

Thai coconut ice cream and tender coconut ice cream are related to this recipe, but they have their own flavor logic. Thai-style coconut ice cream often uses coconut milk, coconut cream or coconut water, palm sugar, salt, and sometimes pandan. Tender coconut ice cream usually includes soft tender coconut flesh, also called malai, for a fresh coconut texture.

Thai coconut ice cream variation

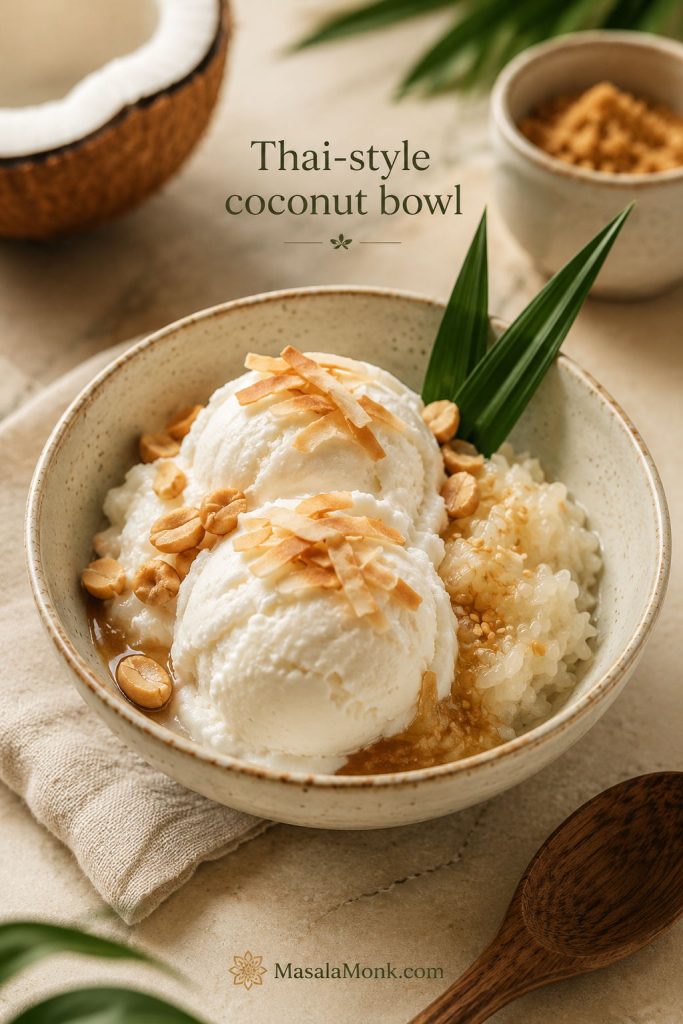
For a Thai-inspired batch, replace the granulated sugar with palm sugar, add a pandan leaf while gently warming the base, then remove it before chilling. Serve with roasted peanuts, sticky rice, toasted coconut, jackfruit, or sweet corn if you want a Thai street-dessert style bowl.

Thai-style coconut ice cream in a bowl with roasted peanuts, sticky rice, toasted coconut, and palm sugar.
Thai-style coconut ice cream leans fragrant and textured, so toppings like sticky rice, peanuts, palm sugar, and toasted coconut add contrast as well as flavor.

Tender coconut ice cream variation

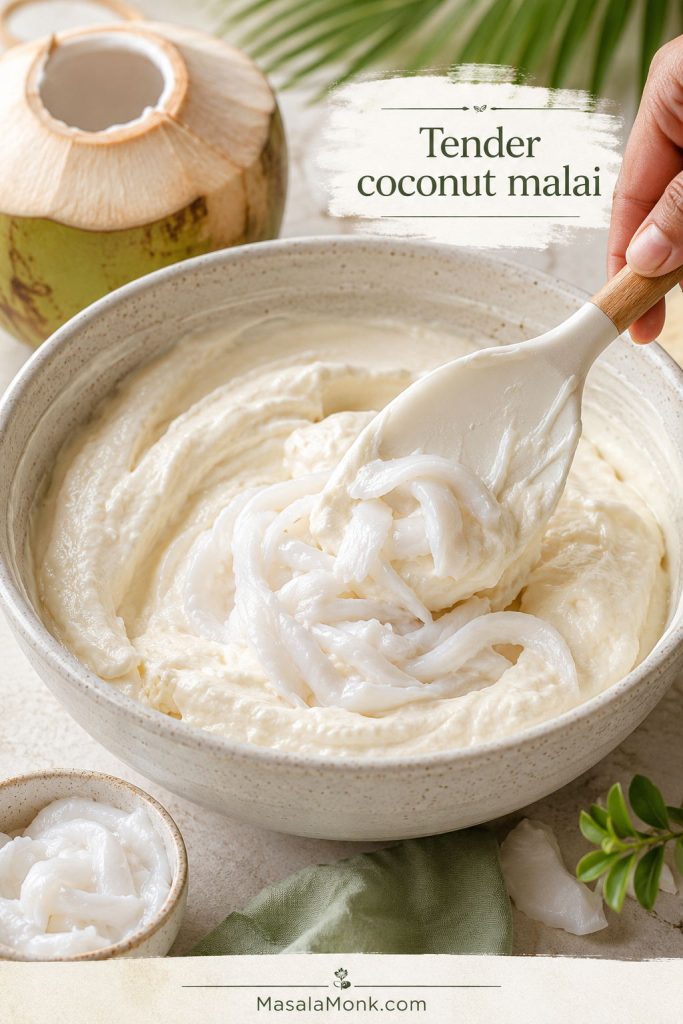
For tender coconut ice cream, blend the main coconut base and add chopped tender coconut flesh after churning, or pulse some of the tender coconut into the base before chilling. A small splash of tender coconut water can brighten the flavor, but too much will make the ice cream icier.

Tender coconut flesh being folded into a creamy coconut ice cream base.
Tender coconut flesh adds soft texture and a delicate fresh-coconut note; however, too much coconut water can make the batch icier.

Ninja Creami Coconut Ice Cream

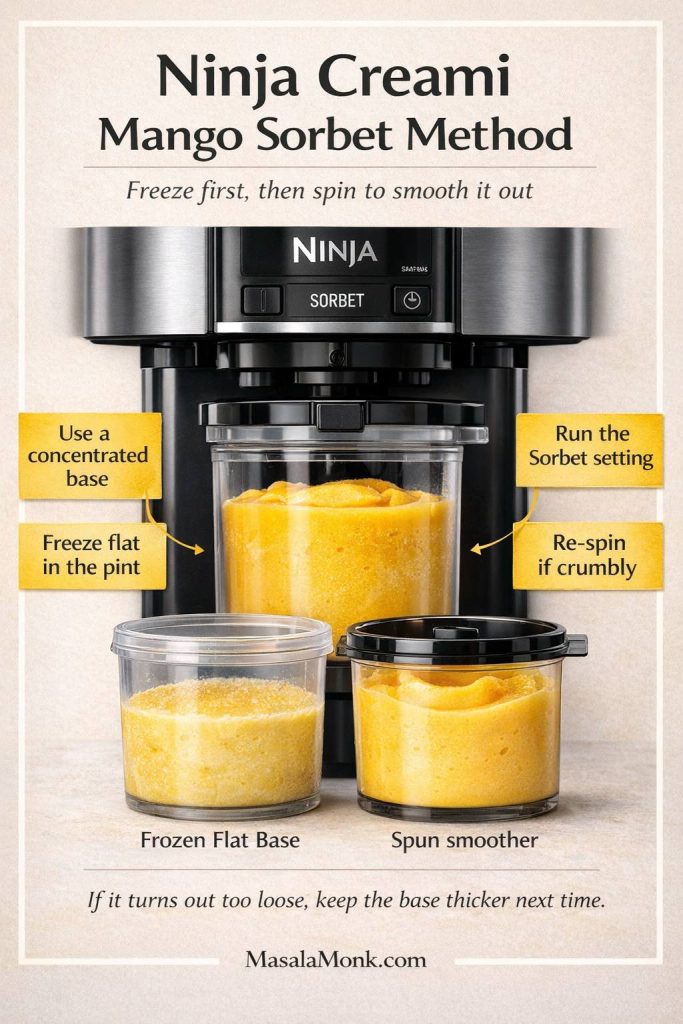
To make coconut ice cream in a Ninja Creami, blend the main base until smooth, pour it into the Creami pint without passing the max fill line, and freeze it level for 24 hours. Process on the Ice Cream or Lite Ice Cream setting depending on your machine and base.

Coconut ice cream in a Ninja Creami-style pint after spinning, with the machine softly visible in the background.
For the Ninja Creami method, a fully frozen pint is essential, since the machine needs a solid base before it can spin the mixture into a creamy texture.

If the mixture looks crumbly after the first spin, add 1 tablespoon coconut milk or coconut cream and use Re-Spin. After that, add toasted coconut, chocolate chips, or chopped fruit with the Mix-In function once the base is creamy.

Freeze the pint level and keep the mixture below the max fill line. If the surface is uneven after freezing, let it sit for a few minutes and level the top before spinning so the blade processes the base evenly.

Creami result What to do
Powdery or crumbly Add 1 tablespoon coconut milk or coconut cream, then Re-Spin.
Too soft Freeze the pint longer and make sure the base was not overfilled or too warm before freezing.
Uneven top Let it sit briefly, level the surface, then process so the blade catches evenly.
Weak coconut flavor Add toasted coconut as a Mix-In or use a small amount of coconut extract next time.

If the Creami pint looks powdery or crumbly after the first spin, use a small splash of coconut milk or coconut cream before you change the whole base.

Ninja Creami coconut ice cream showing a crumbly texture being improved with a tablespoon of liquid before re-spinning.
If a Creami pint comes out crumbly, add about 1 tablespoon of coconut milk or coconut cream and re-spin before changing the whole recipe.

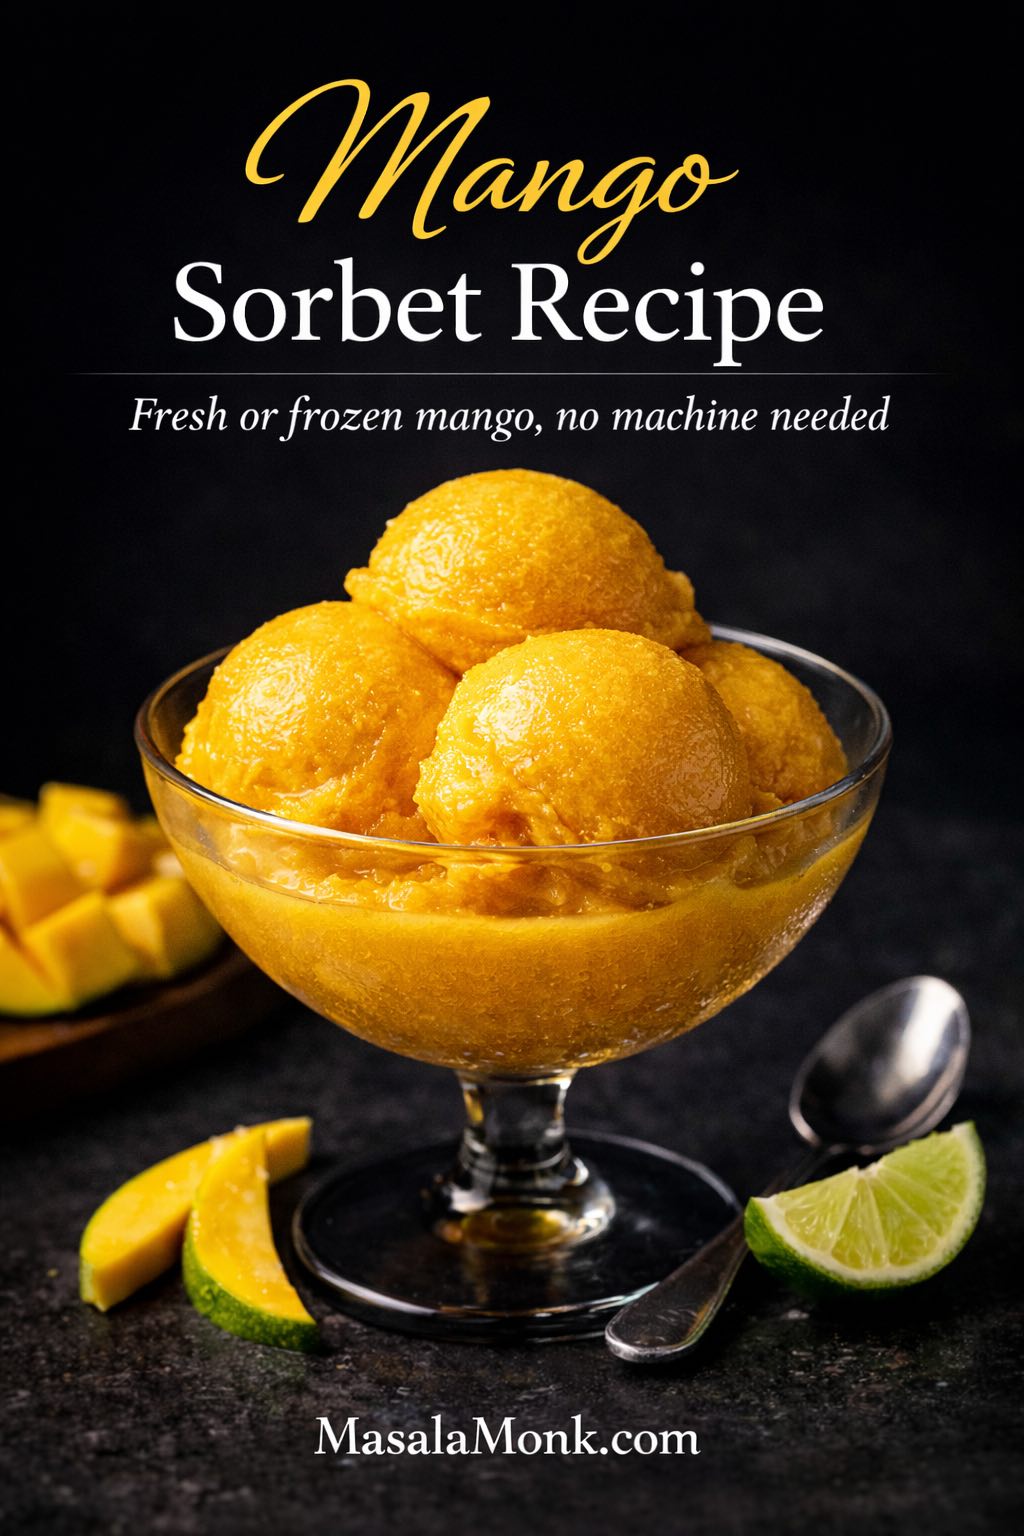
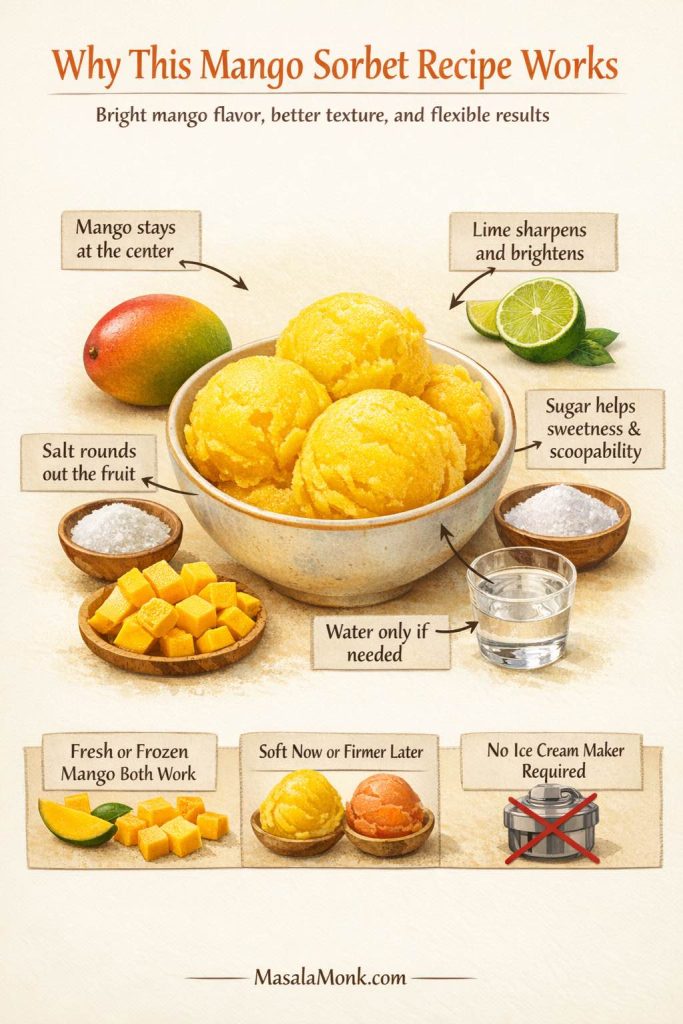
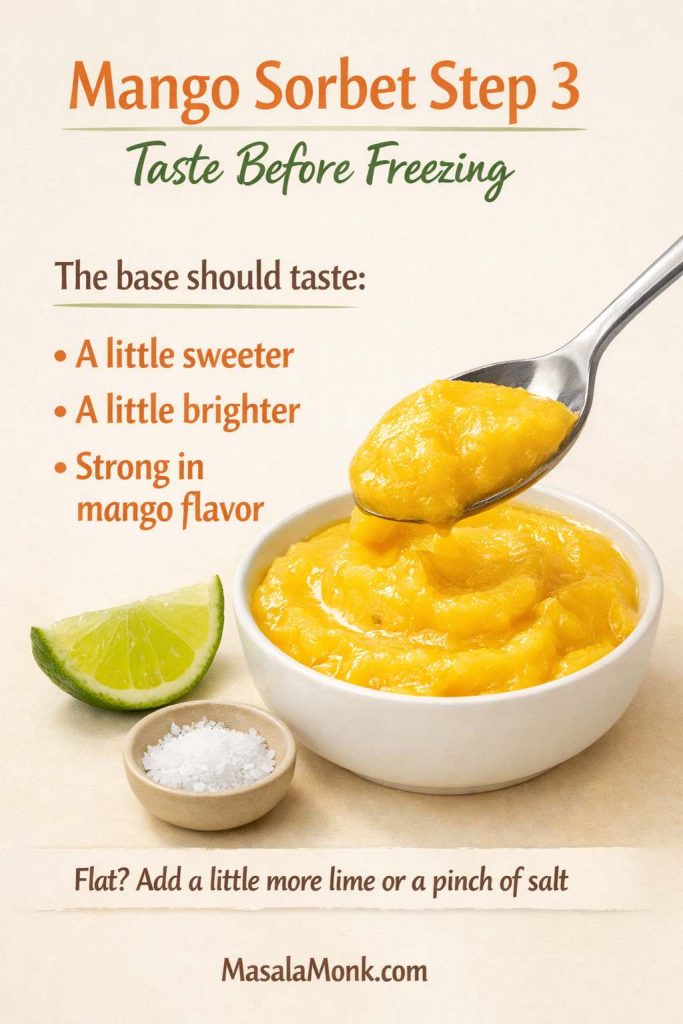
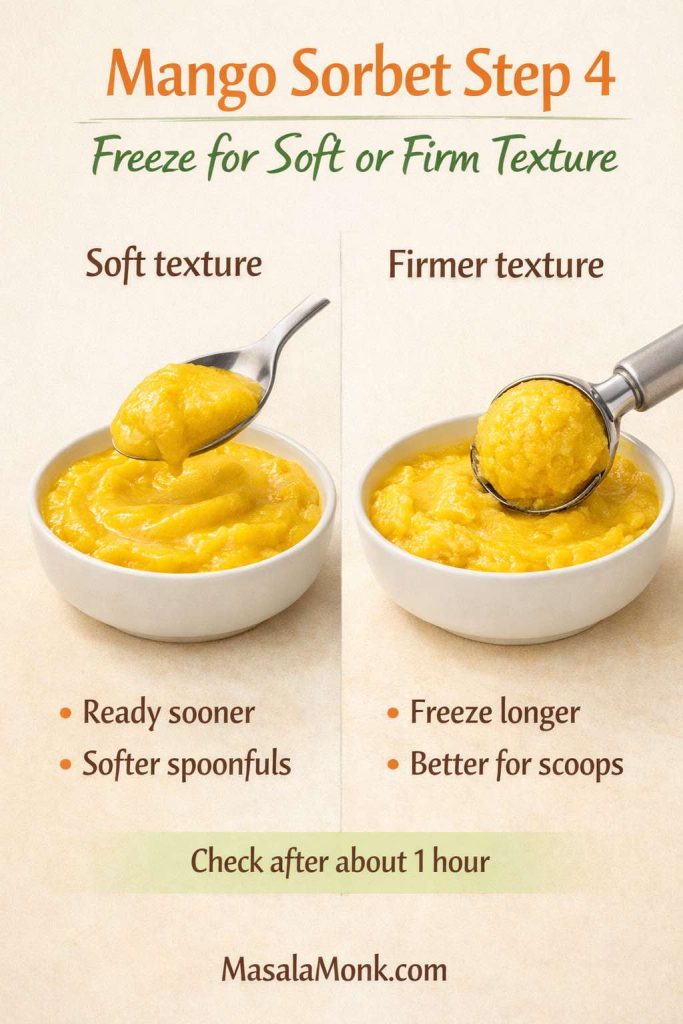
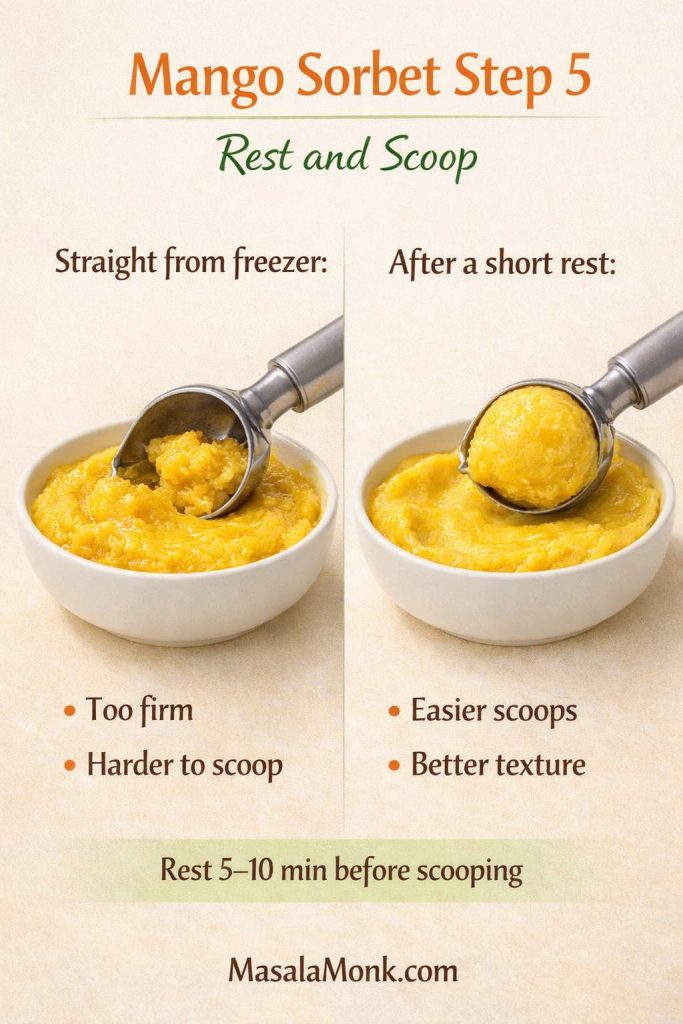
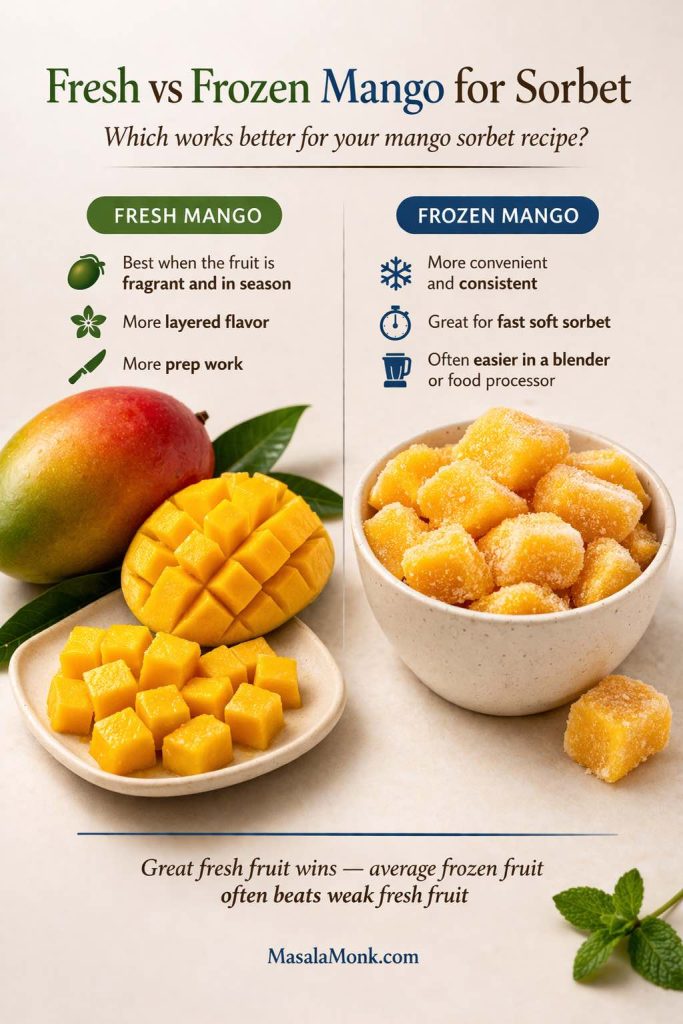
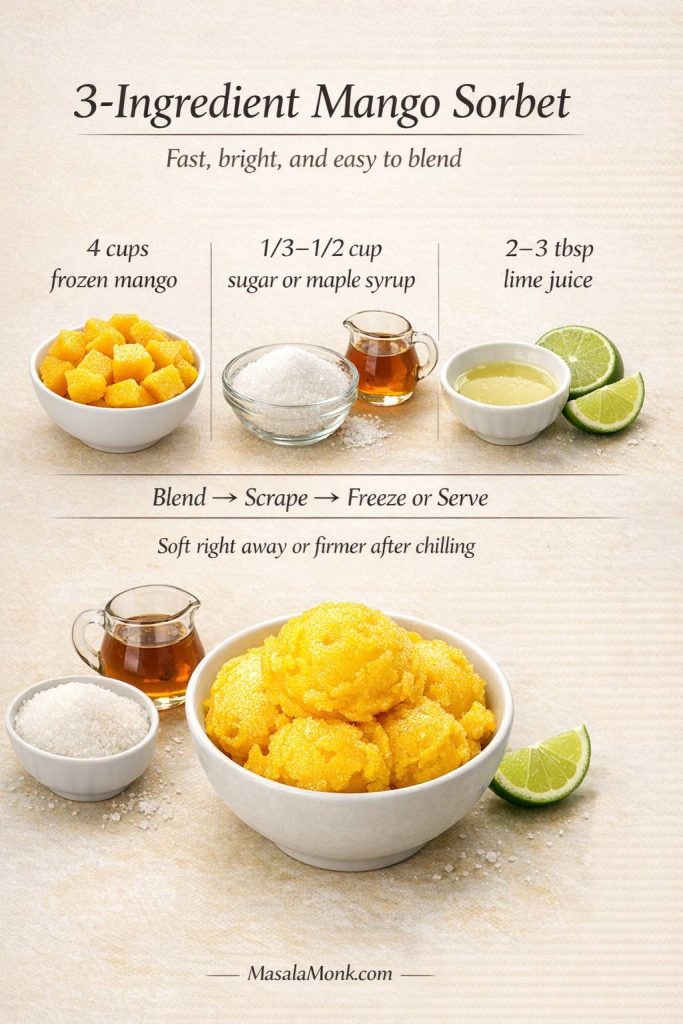
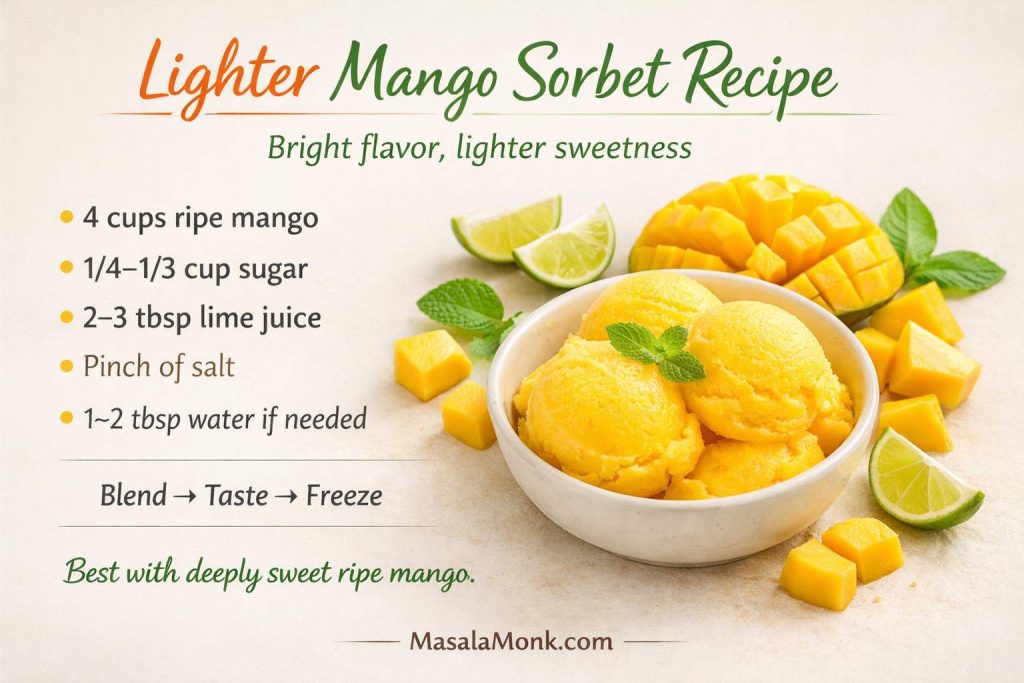
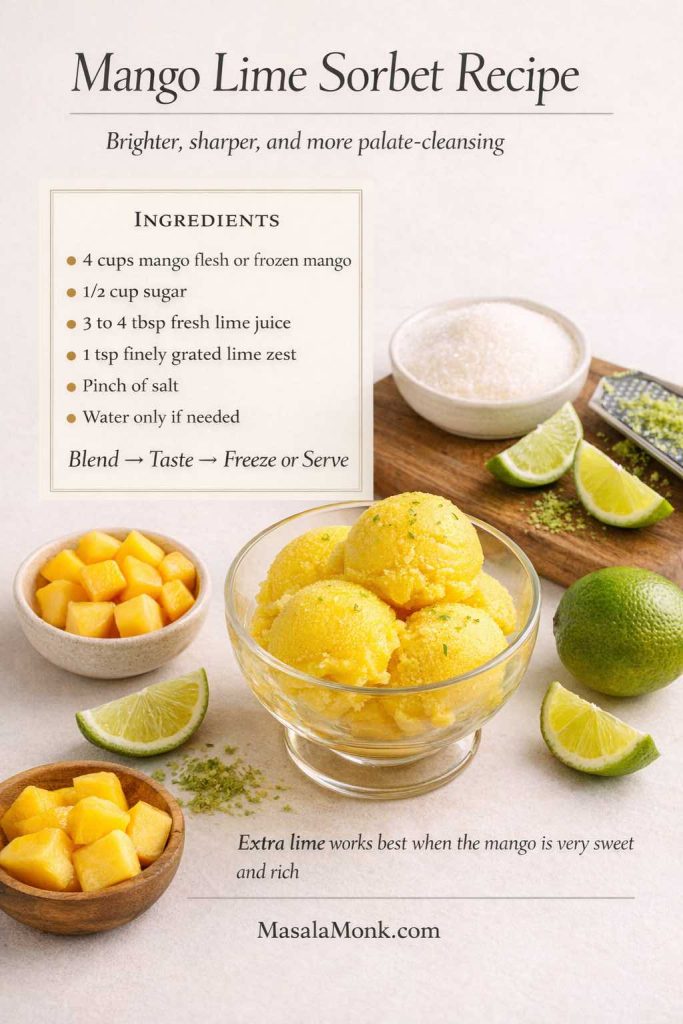
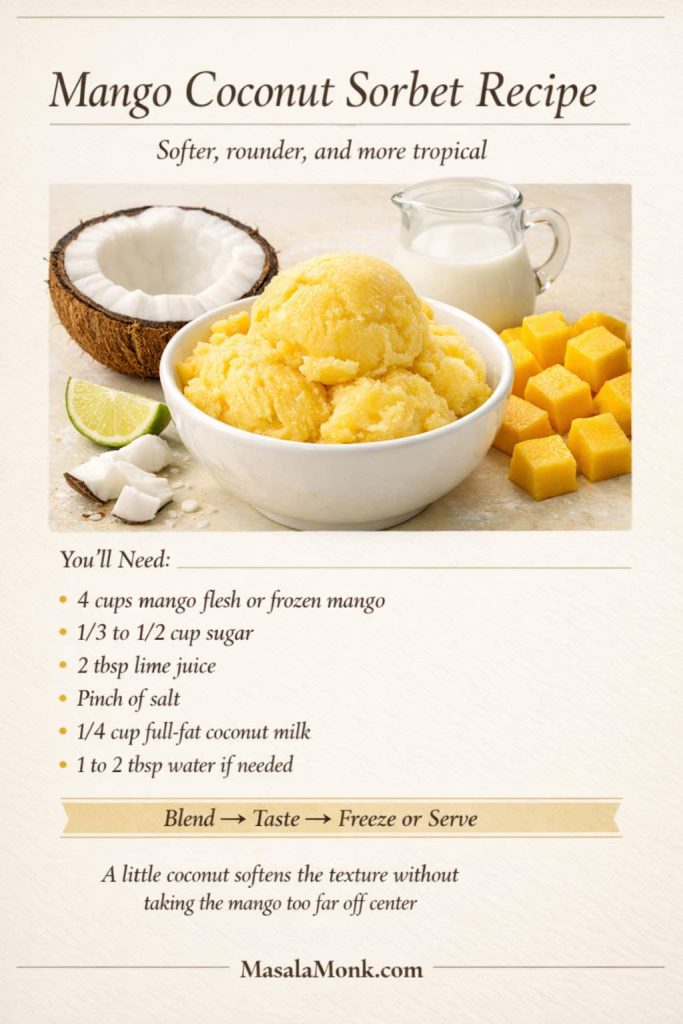
For another fruit-based frozen dessert with blender, no-machine, ice cream maker, and Ninja Creami notes, this mango sorbet recipe is a useful companion.

Flavor Variations

Once the base is balanced, you can take it in several directions without wrecking the texture. Mango makes it sunny and tropical, pineapple pushes it toward a pina-colada-style scoop, chocolate makes it deeper and richer, and toasted coconut gives every bite a stronger coconut finish.

Variation How to make it Best note
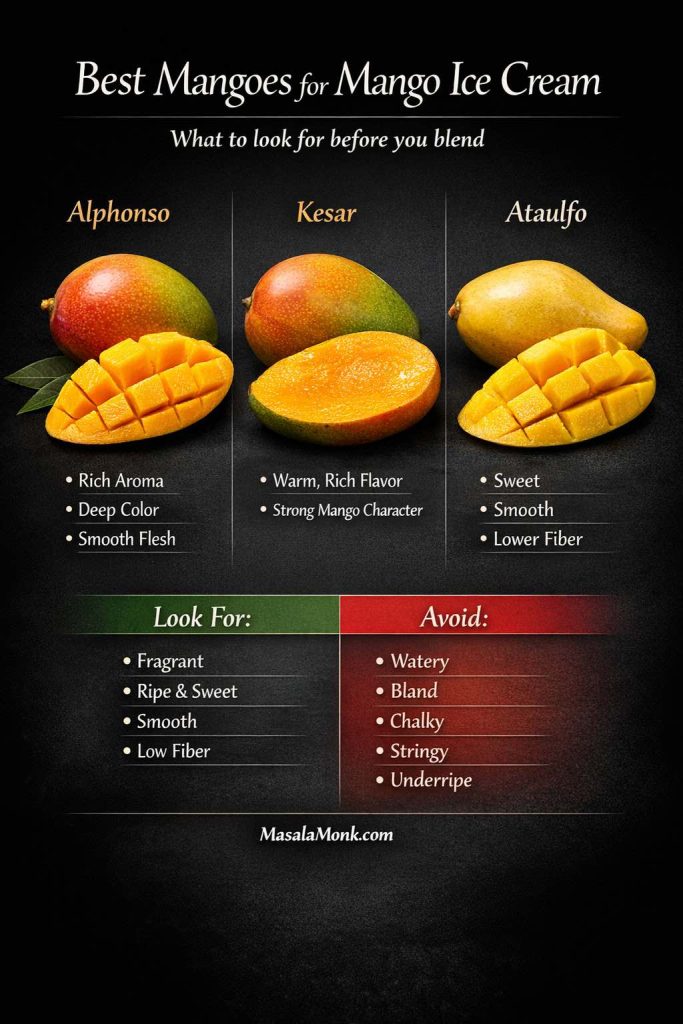
Mango coconut ice cream Use thick mango puree, not thin mango juice. If adding a full cup, reduce the coconut milk by 1/4 cup. For a mango-first route, start with this homemade mango ice cream recipe, then use coconut cream or coconut milk as the tropical variation.
Pineapple coconut ice cream Use drained crushed pineapple or thick pineapple puree. Avoid loose pineapple juice unless you want a more icy, sorbet-like result.
Pina colada ice cream Use cream of coconut, pineapple, and optional rum. Reduce added sugar because cream of coconut is sweet.
Chocolate coconut ice cream Use cocoa powder for the easiest version, or cooled melted dark chocolate for a richer texture. Add a pinch more salt to deepen the chocolate flavor.
Mint chocolate coconut ice cream Add peppermint extract and chopped dark chocolate or mini chips to the chilled base. For a classic dairy-style flavor path, see this mint chocolate chip ice cream recipe.
Toasted coconut ice cream Fold toasted coconut into the churned base. Best for stronger coconut flavor and texture.
Old-fashioned coconut custard ice cream Use coconut milk with cream, sugar, egg yolks, vanilla, and salt; cook to a custard before chilling and churning. Richest dairy-style route, but not vegan or egg-free.
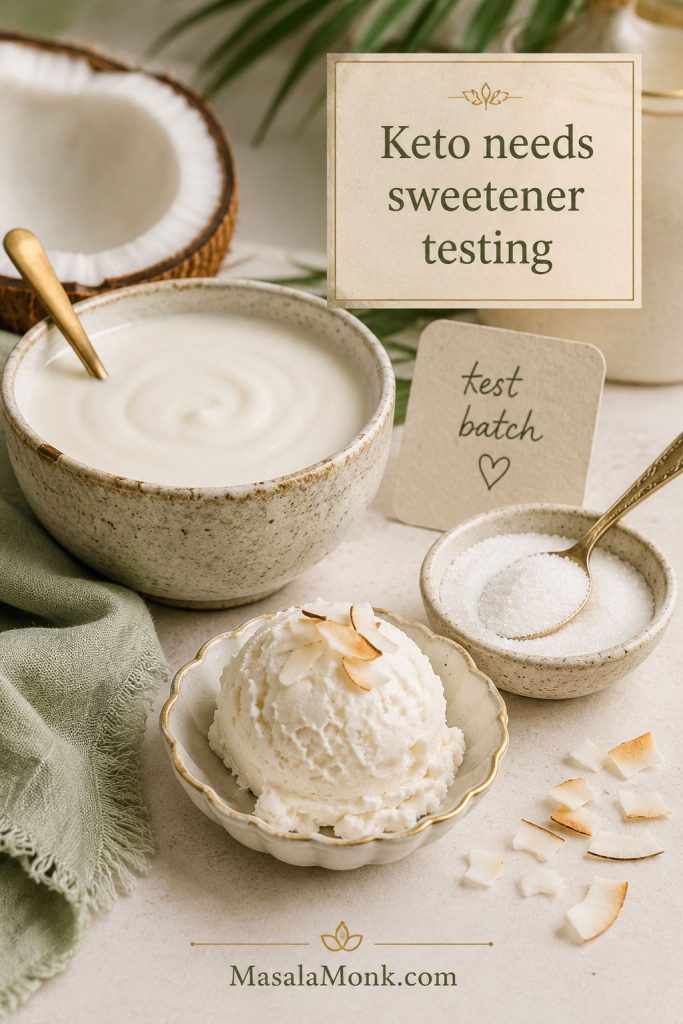
Keto coconut ice cream Use coconut cream and a freezer-friendly low-carb sweetener. Needs separate sweetener testing because many keto sweeteners freeze harder.

Keto coconut ice cream note

Keto coconut ice cream needs a freezer-friendly sweetener because many low-carb sweeteners freeze harder than sugar. Allulose usually behaves better than many granular sugar alcohol blends, but the texture still needs separate testing.

Coconut cream, low-carb sweetener, and a small test batch of coconut ice cream arranged to illustrate keto sweetener testing.
Keto coconut ice cream depends heavily on sweetener choice, because replacing sugar affects not only sweetness but also softness and freezer texture.

If you are building a low-carb dessert menu rather than only one frozen recipe, this keto cheesecake recipe is a better tested make-ahead option because frozen keto desserts need more careful sweetener choices.

Want to try one of these flavors? Go back to the main recipe card, or revisit coconut cream ice cream notes if you want a richer base.

Troubleshooting

Start with the likely cause

If your first batch is not perfect, do not toss the recipe. Coconut ice cream is sensitive to fat, sugar, water, and temperature, so small changes can make a big difference in how creamy, scoopable, or icy it turns out.

Most failed batches come down to one of four things: too much water, not enough fat, not enough sugar, or a base that was not cold enough. Rather than changing the whole recipe, find the likely problem below and adjust from there.

Three coconut ice cream textures shown together: icy, smooth and just right, and dense or too heavy.
Most texture problems come down to water, fat, sugar, or temperature, so this guide helps you diagnose the batch before changing the whole recipe.

Fix icy or hard coconut ice cream first

Icy coconut ice cream usually points to too much water, too little fat, thin carton coconut milk, or a base that was not chilled enough before churning.

Thin coconut milk and icy coconut ice cream shown together to explain why a batch can freeze hard and crystalline.
Icy texture usually means the base had too much water or too little fat; therefore, full-fat canned coconut milk works better than thin carton milk.
Problem Likely cause Fix
Icy coconut ice cream Low fat, too much water, carton coconut milk, or warm base Use full-fat canned coconut milk and coconut cream; chill the base at least 4 hours
Too hard to scoop Low sugar, low fat, or long freezer time Rest 5–15 minutes before scooping; slightly increase sugar next time
Grainy texture Sugar not dissolved or coconut fat separated Blend the base for 1–2 minutes; avoid overheating coconut cream
Slushy after churning Ice cream bowl or base was not cold enough Freeze the bowl fully and chill the base overnight if possible
Too sweet Cream of coconut or condensed milk used with extra sugar Use unsweetened coconut cream next time or skip added sugar with cream of coconut
Weak coconut flavor Mild coconut milk or too much vanilla/sugar Add toasted coconut, coconut extract, or more coconut cream
Fatty or waxy mouthfeel Too much coconut cream and not enough coconut milk Use the balanced 1 can coconut milk + 1 can coconut cream formula
Crumbly Ninja Creami result Base froze very hard Add 1 tablespoon coconut milk or cream and Re-Spin

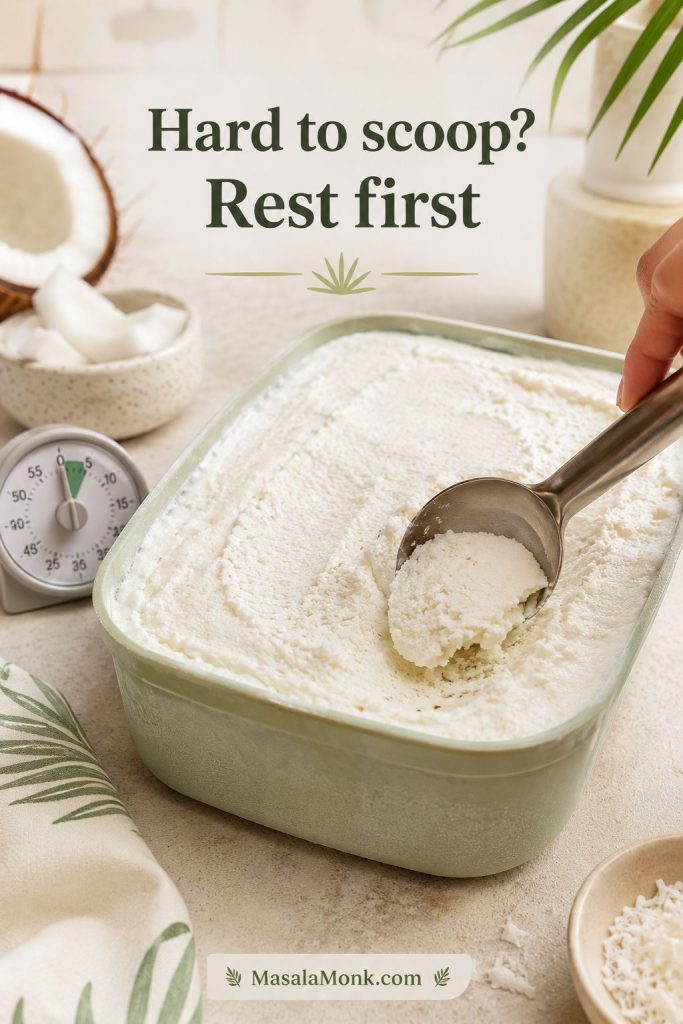
If the batch is hard but not icy, start with resting time before you change the recipe. Coconut-based ice cream often needs a few minutes on the counter.

Firm coconut ice cream resting on the counter with a timer and scoop to show how to soften it before serving.
If the batch freezes too hard, let it rest for a few minutes before scooping; often, that simple pause is enough to improve the texture.

Fix grainy, weak, or waxy batches

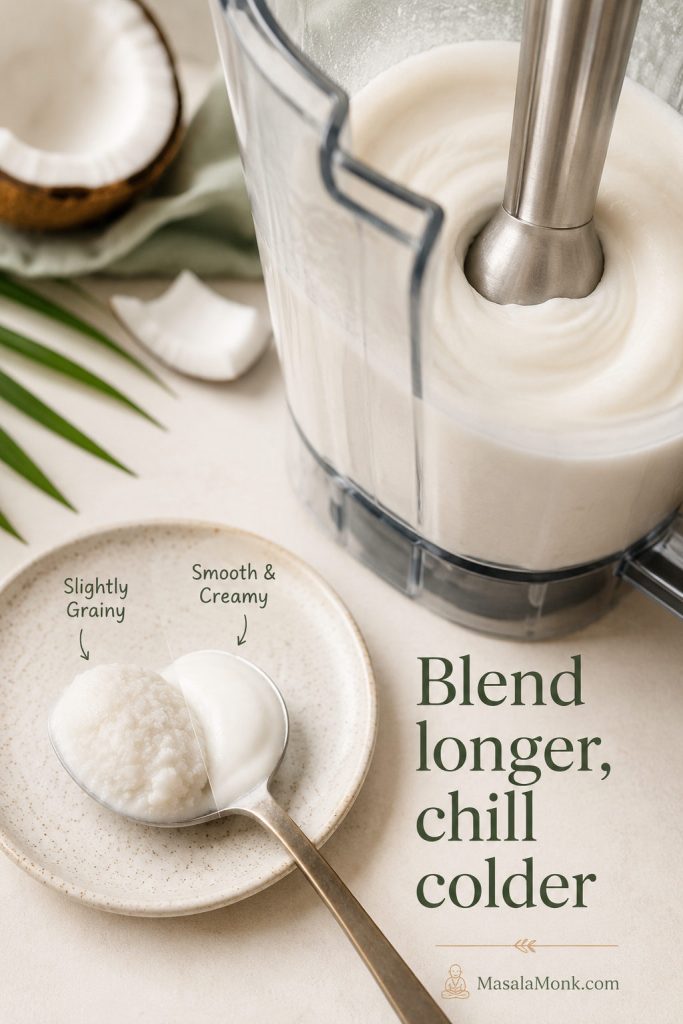
If the texture tastes grainy, the base usually needs better blending, better chilling, or gentler handling so the sugar dissolves and the coconut fat stays smooth.

Coconut ice cream base being blended smooth, with spoon samples showing a smoother texture compared with a slightly grainy one.
Graininess usually points to undissolved sugar or separated coconut fat, so thorough blending and proper chilling can make the next batch smoother.

When the texture is fine but the flavor tastes quiet, strengthen the coconut note with toasted coconut, coconut extract, or a slightly richer base.

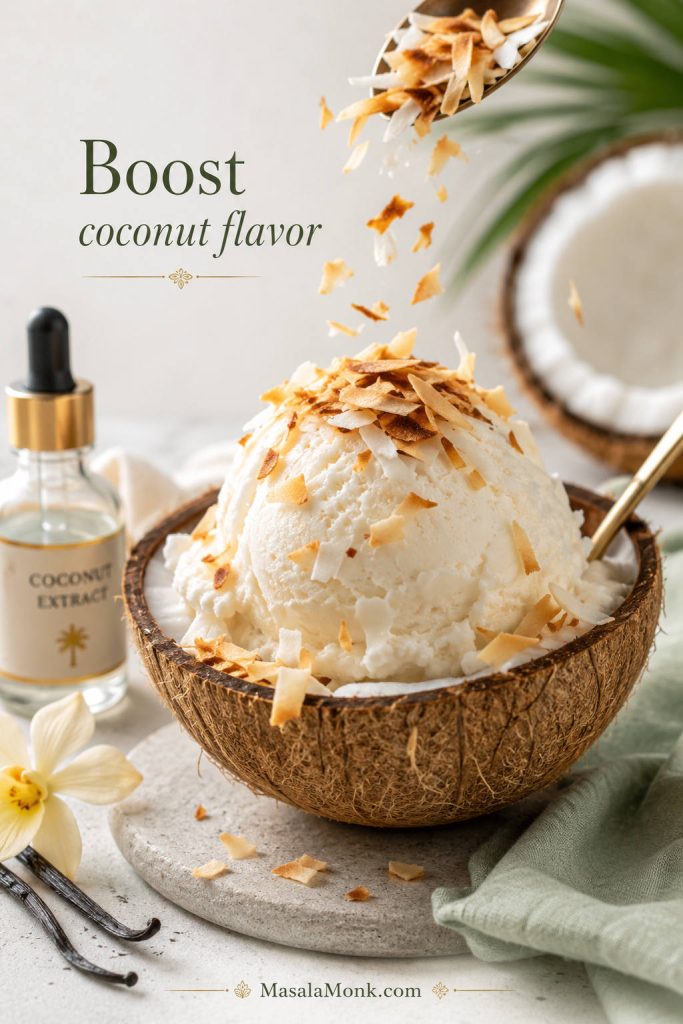
Coconut ice cream topped with toasted coconut flakes, with coconut extract and vanilla nearby to show ways to strengthen coconut flavor.
If the flavor tastes mild, toasted coconut is the easiest boost; meanwhile, a small amount of coconut extract can add depth without taking over.

If the scoop tastes rich but leaves a heavy coating on the palate, the base may have too much coconut cream and not enough coconut milk.

Comparison of a dense glossy coconut cream-heavy scoop and a smoother balanced coconut ice cream scoop.
A waxy mouthfeel usually means the base leaned too far toward coconut cream, whereas a balanced mix of coconut milk and cream feels cleaner.

Texture note: sugar affects more than sweetness in homemade ice cream. King Arthur Baking has a helpful explainer on how sugar affects scoopability and freezer texture, which is why this recipe does not cut the sweetener too aggressively.

Storage and Scooping

In practice, homemade coconut ice cream is usually at its best when it is treated a little differently from store-bought dairy ice cream. The container, surface protection, and resting time all matter.

Store it in a shallow freezer-safe container with a tight lid. Press parchment paper or plastic wrap directly against the surface before closing the lid if you want to reduce ice crystals. The texture is best in the first 1–2 weeks.

Coconut ice cream spread in a shallow freezer container with plastic wrap or parchment pressed directly onto the surface.
Pressing wrap or parchment directly onto the surface limits air exposure, which helps reduce ice crystals during freezer storage.

Dairy-free coconut ice cream often freezes firmer than dairy ice cream. Let it sit at room temperature for 5–15 minutes before scooping. If it has been frozen for several days, use a warm scoop and drag firmly through the ice cream rather than forcing it straight down.

Coconut ice cream being scooped cleanly after resting at room temperature with a small timer nearby.
After a short rest at room temperature, the scoop moves more cleanly and the texture tastes softer, creamier, and less frozen-solid.

If this is your first homemade coconut ice cream, do not judge the batch straight from the freezer. First, let it rest for a few minutes; then scoop it with a warm spoon and decide whether it needs more sugar, more coconut cream, or a longer chill next time.

Before you start, check which route fits your ingredients or skim the common coconut ice cream problems if you want to avoid icy, hard, or overly sweet results.

FAQs

Need the main recipe again? Jump back to the recipe card or the quick answer.

What coconut milk works best for coconut ice cream?

Full-fat canned coconut milk works best because it has enough fat and body to freeze into a creamier scoop. Skip thin carton coconut milk for this recipe; it is usually too watery and can leave you with a hard, icy texture.

What is the difference between coconut cream and cream of coconut?

Coconut cream is usually unsweetened and thick. Cream of coconut is sweetened and syrupy. Use coconut cream for the main base. Use cream of coconut only for the sweeter cream-of-coconut batch, and reduce or skip added sugar.

Why did my coconut ice cream turn icy?

Coconut ice cream usually turns icy when the base is too watery, too low in fat, too warm before churning, or made with thin carton coconut milk. Full-fat canned coconut milk, coconut cream, and a fully chilled base make the texture smoother.

Can I make coconut ice cream without an ice cream maker?

The best dairy-free no-churn method is to freeze the blended coconut base in ice cube trays, then blend the frozen cubes until creamy. For a richer dairy route, whipped cream plus sweetened condensed milk makes a softer no-churn coconut ice cream.

Do I need eggs for coconut ice cream?

This coconut ice cream recipe does not need eggs because coconut cream gives the base enough richness. Egg yolks can be used for a custard-style coconut ice cream, but they are not necessary for the main dairy-free method.

How long should I chill the coconut ice cream base?

Chill the base for at least 4 hours, though overnight is better. If the base goes into the machine cold, it churns thicker and smoother; if it starts warm, it can stay loose and slushy for too long.

How do I make coconut ice cream easier to scoop?

Sugar, fat, and a fully chilled base all help the finished scoop stay softer. Let the container sit at room temperature for 5–15 minutes before scooping, especially with dairy-free batches, and use a warm scoop instead of forcing it straight from the freezer.

Is this coconut ice cream vegan?

The main base is vegan and dairy-free as long as your sugar is vegan-friendly. It gets richness from coconut milk and coconut cream instead of heavy cream, condensed milk, or eggs.

Why does keto coconut ice cream need a separate approach?

Keto coconut ice cream needs separate sweetener testing because many low-carb sweeteners freeze harder than sugar. Coconut cream gives a strong base, but the sweetener choice matters for texture. Allulose usually behaves better than many granular sugar alcohol blends.

Once you understand the difference between coconut milk, coconut cream, and cream of coconut, homemade coconut ice cream becomes much easier to control. After one batch, this coconut ice cream recipe becomes easy to adjust: start with the churned base for the smoothest scoop, use the freeze-and-blend method if you do not have a machine, and do not worry if the first try needs a small adjustment. A little more fat, sugar, chill time, or resting time can be the difference between icy and creamy.

Posted on 8 Comments

Mango Sorbet Recipe: Healthy & Plant Based Dessert

Hero cover for a mango sorbet recipe showing bright smooth mango sorbet scoops in a coupe glass with mango slices, lime, and text overlay reading “Mango Sorbet Recipe” and “Fresh or frozen mango, no machine needed.”

If you want a mango sorbet recipe that tastes vividly of mango, feels refreshing instead of icy, and works in an ordinary home kitchen, this is the version to make. It does not assume you own an ice cream maker, and it does not bury a naturally simple dessert under ingredients that do not meaningfully improve the result. It is built around what people actually want from homemade mango sorbet: bright fruit flavor, a smooth spoonable texture, and a finish that feels clean and cooling rather than sugary, heavy, or dull.

That sounds simple enough. Yet mango sorbet often goes wrong in familiar ways. One batch freezes into a hard block. Another turns watery. A third tastes good before freezing and then falls flat once cold because the mango weakens, the sweetness drops back, and the texture loses all charm. A really good mango sorbet recipe has to account for those problems before they happen.

That is what this version is designed to do. It works with fresh mango or frozen mango, gives you a reliable mango sorbet recipe without ice cream maker equipment first, and then shows you how to adapt the same base for a blender, food processor, ice cream maker, or Ninja Creami. It also covers the questions that matter once the fruit is in your kitchen: how sweet the base should taste before freezing, how thick it should look before you stop blending, how to make frozen mango sorbet without diluting it, how to vary the flavor without losing the mango, and how to store it so it still feels worth scooping later.

Why This Mango Sorbet Recipe Works

A lot of sorbet recipes are so minimal that they stop being helpful. They tell you to blend fruit, add something sweet, freeze it, and trust that it will all come together. That can work on a good day with good fruit. It does not give you a dependable result.

Guide showing why a mango sorbet recipe works, with mango kept at the center, lime for brightness, sugar for sweetness and scoopability, salt to round out the fruit, water only if needed, and notes that fresh or frozen mango both work, the sorbet can be served soft or firmer later, and no ice cream maker is required.
A dependable mango sorbet recipe works because each part of the formula solves a real problem instead of filling space. Mango stays in the lead, lime keeps the flavor bright, sugar helps both sweetness and freezer texture, salt rounds out the fruit, and water is treated as a last resort, while the same base still adapts easily to fresh or frozen fruit, softer immediate serving, or firmer make-ahead scoops.

This recipe works because it keeps mango at the center while still respecting texture. Lime sharpens the fruit, sugar supports both flavor and freezing behavior, salt rounds everything out, and water is treated as a last resort rather than a standard ingredient. That matters because a good mango sorbet recipe should taste like ripe mango first, not like anonymous tropical coldness.

It also works because it stays flexible in the ways that actually matter. Fresh mango can give you a more layered result when the fruit is in season and deeply fragrant. Frozen mango is often the smarter route when fresh fruit is disappointing, expensive, or inconsistent. The same base also adapts well to different needs: it can give you a fast soft-sorbet texture for immediate serving or firmer make-ahead scoops for later. Just as importantly, it does not depend on special equipment. A very good mango sorbet recipe without ice cream maker equipment is completely realistic.

Also Read: Protein Ice Cream Recipe: 10 Creamy Homemade Recipes

Ingredients for This Mango Sorbet Recipe

The ingredient list is short, which is exactly why each ingredient has to do real work. Sorbet is not the kind of dessert where weak fruit or casual proportions disappear behind cream, butter, eggs, or flour. Everything shows.

Ingredient guide for a mango sorbet recipe showing mango, sugar, lime juice, salt, water, and optional extras like glucose or corn syrup and a little alcohol, with notes explaining what each ingredient does for flavor and texture.
A short ingredient list only works when every part of it earns its place. Mango brings the body and main flavor, sugar helps both sweetness and freezer texture, lime keeps the fruit bright, salt rounds out the finish, and water should be used only when the blender truly needs help, while extras like glucose, corn syrup, or a little alcohol are optional texture tools rather than essentials.

Mango

Mango provides the body, perfume, sweetness, color, and most of the character. For this recipe, you want about 4 cups mango flesh or frozen mango chunks, which usually means around 4 to 5 medium mangoes, depending on size and variety. If you are using frozen mango, measure it straight from the bag. If you are using fresh mango, peel it, remove the pit, dice the flesh, and then measure.

A useful rule is this: if the mango tastes merely decent at room temperature, it will usually taste less impressive once frozen. Strong sorbet begins with strong fruit.

Sugar

Sugar is not here only to make the sorbet sweet. It changes the way the mixture freezes. That is why a base can taste fine before chilling and then become hard and frustrating later if it does not contain enough sweetness.

Ordinary white sugar is the best default for a clean, fruit-forward result. It dissolves well and does not compete with the mango. Maple syrup and honey can work, but both bring more of their own flavor.

Lime Juice

Lime is what keeps mango from feeling sleepy. Without it, the sorbet can drift toward sweetness without enough lift. With it, the fruit tastes brighter, colder, and more alive.

Fresh lime juice is worth using here. Sorbet has nowhere to hide dull flavors. Even a simple mango sorbet recipe becomes noticeably more vivid when the citrus is fresh.

Salt

A small pinch of salt helps the fruit taste fuller. It should not announce itself. You are not trying to make the sorbet taste salty. You are simply helping the mango feel rounder and less one-note.

Water, Only If Needed

Some batches need none. Some need a small splash just to help the blender or food processor move. The important thing is to treat water as a tool, not a standard ingredient. Too much liquid is one of the quickest ways to make sorbet icy.

Optional Extras

Some recipes use glucose, corn syrup, or a spoonful of alcohol to soften freezer texture. Those tools can work, but a very good homemade version does not need to become complicated to succeed. For most readers, mango, sugar, lime, salt, and only as much water as necessary are enough.

If you want the deeper freezing-point explanation without turning dessert into a chemistry lecture, Serious Eats’ guide to the science of sorbet texture is a helpful outside reference.

Also Read: Homemade Mango Ice Cream Recipe

Best Mangoes for Mango Sorbet

The best fruit for a mango sorbet recipe is mango that tastes fully ripe, fragrant, and alive before it ever sees the freezer. Cold temperatures mute aroma and sweetness slightly, so the fruit has to start stronger than you think.

A mango for sorbet should smell fragrant, taste clearly sweet, and feel rich rather than watery. If it tastes merely acceptable at room temperature, it will rarely become impressive once frozen. Sorbet rewards perfume and concentration. It does not flatter weak produce.

Guide for choosing the best mango for a mango sorbet recipe, showing key qualities like fragrant aroma, deeply ripe sweet flesh, lower fiber for smoother texture, and a reminder that weak fresh mango can make dull sorbet.
A great mango sorbet recipe starts before blending, because the fruit decides more than any other ingredient. Use this guide to look for fragrant, deeply ripe, less fibrous mangoes with concentrated sweetness, since weak or watery fruit will taste even duller once frozen and can leave the sorbet less vibrant than you want.

This is one reason alphonso mango sorbet sounds so appealing. Rich, perfumed mangoes naturally lend themselves to sorbet. Still, you do not need one famous variety to make a successful batch. What matters most is not prestige, but flavor concentration. If you have access to excellent local mangoes, trust the fruit that actually tastes best rather than chasing a name.

Even less-than-perfect fruit can still make good sorbet, but it helps to adjust with some honesty. Watery mango needs little or no added liquid. Fibrous mango should be blended thoroughly and, if needed, strained before freezing. Bland mango can be lifted with sugar and lime, though they cannot replace fragrance that was never there. And when the fruit is very sweet yet still tastes flat, a little more lime and a pinch of salt can often bring it back into balance.

Also Read: Cookie Pie Recipe: 10 Best Flavors, Fillings and Variations

The Best Mango Sorbet Recipe to Start With

This is the version most readers should begin with. It works especially well with frozen mango, but it also works beautifully with good fresh mango. It does not require an ice cream maker, gives you a fast path to dessert, and still leaves room for firmer scoops later.

Recipe card for mango sorbet showing a bowl of smooth mango sorbet with fresh mango, lime, ingredient list, quick method, expert tip, prep time, and serving yield.
This mango sorbet recipe card gives you the core ratio at a glance: mango, sugar, lime juice, salt, and only enough water to help the machine move. It is the fastest way to remember the base formula before you blend, taste, freeze, and scoop.

Yield: 4 to 6 servings
Prep time: 15 minutes
Freeze time: none for a soft texture with frozen mango, or 1 to 3 hours for firmer scoops
Total time: 15 minutes to 3 hours, depending on the texture you want

Ingredients

  • 4 cups ripe mango flesh or frozen mango chunks
  • 1/2 cup sugar
  • 2 to 3 tablespoons fresh lime juice
  • pinch of salt
  • 2 to 4 tablespoons water, only if needed

This ratio gives you the widest margin for success. The flavor stays clean, the method stays approachable, and the texture is easy to judge before freezing. It is a better place to begin than a machine-first sorbet because it shows what the dessert should taste and feel like without asking for special equipment up front.

If your mango is especially sweet, start at the lower end of the lime range and taste before adding more sugar. If your mango is juicy or watery, be even more careful with added liquid. The strongest batches stay concentrated.

Also Read: Punjabi Mutton Bhuna – Amritsari Village-Style Gosht Recipe

How to Make Mango Sorbet

This is the central method for the mango sorbet recipe and the one that anchors the whole guide. Once you understand this base, the appliance-specific sections become much easier to adapt.

Mango sorbet texture guide showing three stages of a mango sorbet recipe: a thin watery base that may freeze icy, a thick glossy blended base that is spoonable, and properly frozen mango sorbet that is smooth, scoop-able, and firm but not rock hard.
Texture is one of the biggest dividing lines between a disappointing mango sorbet recipe and one worth making again. A base that looks loose and watery usually freezes icier than you want, while a thick glossy purée gives you a much better shot at a smoother final sorbet that scoops cleanly instead of turning hard, dull, or coarse.

Step 1: Prepare the Mango

If you are using fresh mango, peel it, cut away the flesh, and dice it. Measure after cutting so you know you truly have 4 cups.

Step 1 mango sorbet guide showing how to prepare fresh mango and frozen mango for a mango sorbet recipe, with fresh mango cut and measured on one side and frozen mango used straight from frozen on the other.
Step 1 in this mango sorbet recipe is choosing and preparing the fruit properly. Fresh mango should be peeled, cut, and measured, while frozen mango can go in straight from frozen unless it is so hard the machine struggles. This simple choice affects texture, blending ease, and how quickly your sorbet comes together.

If you are using frozen mango, there is usually no need to thaw it fully. Let it sit for 5 to 10 minutes only if the pieces are rock hard and your machine struggles with very dense frozen fruit. The goal is not softness. The goal is simply to avoid making the blender fight a frozen brick.

Step 2: Blend Until Thick, Smooth, and Concentrated

Add the mango, sugar, lime juice, and salt to a blender or food processor. Blend until completely smooth. If the mixture will not move, add water 1 tablespoon at a time.

Step 2 mango sorbet graphic showing mango, sugar, lime juice, and salt blended into a thick glossy smooth base in a food processor, with texture cues and a tip that thin sorbet base may turn icy.
Step 2 is where this mango sorbet recipe starts to earn its texture. Blend the mango with sugar, lime juice, and salt until the base looks thick, glossy, smooth, and spoonable. If it stays too thin, the sorbet can freeze icier than you want, so blending in more mango is the better correction.

This is the most important texture checkpoint in the whole recipe. The base should look thick, glossy, smooth, spoonable, and almost creamy rather than juicy. If it pours like a loose smoothie, it is too thin and will usually freeze more icily than you want. If it is so stiff that the blades cannot move even after scraping down the sides and pulsing again, it needs only a touch more liquid.

A good base should hold its shape for a moment when you drag a spoon through it. It should mound softly rather than run immediately flat.

Step 3: Taste Before Freezing

Before the sorbet ever sees the freezer, taste it carefully. It should be a little sweeter than you think it needs to be, a little brighter than you think it needs to be, and strong enough in mango flavor that you would happily eat it by the spoonful even now.

Step 3 mango sorbet guide showing a spoon tasting thick mango sorbet base with lime and salt, explaining that the base should taste a little sweeter, brighter, and strong in mango flavor before freezing.
Step 3 is where this mango sorbet recipe gets corrected before the freezer locks everything in. The base should taste a little sweeter, a little brighter, and clearly mango-forward, because freezing softens flavor. If it tastes flat at this stage, a little more lime or a pinch of salt can bring it back into balance.

If it tastes flat, add a little more lime or a tiny pinch more salt. And if it tastes too sharp, add a little more mango or sugar rather than trying to fix it with water. And then if it tastes diluted, stop adding liquid unless the machine truly needs help.

This is one of the real dividing lines between a thoughtful homemade mango sorbet and a bland frozen fruit purée.

Step 4: Decide Whether You Want Soft Sorbet Now or Scoopable Sorbet Later

If you used frozen mango, you may already have a thick, soft, almost instant sorbet that is ready to eat right away. That is one of the biggest pleasures of the frozen-fruit method.

Step 4 mango sorbet texture guide comparing soft mango sorbet ready sooner with firmer mango sorbet frozen longer for scoops, showing two bowls with different spoon textures and a note to check after about 1 hour.
Step 4 helps you choose the final texture for this mango sorbet recipe. A shorter freeze gives you a softer, more immediately spoonable result, while a longer freeze creates a firmer texture that holds cleaner scoops. This is the point where mango sorbet stops being one fixed outcome and becomes the version you actually want to serve.

If you want firmer scoops, transfer the mixture to a chilled shallow container and freeze until it is more set. Start checking after about 1 hour. For a firmer dessert, it may need 2 to 3 hours.

Step 5: Serve at the Right Texture

For a softer result, stop when the sorbet feels firm around the edges but still easy to scoop through the center. For a make-ahead dessert, freeze until fully set, then let it soften briefly before serving.

Step 5 mango sorbet guide comparing sorbet scooped straight from the freezer with sorbet after a short rest, showing that resting 5 to 10 minutes makes mango sorbet easier to scoop and improves texture.
Step 5 is the serving checkpoint in this mango sorbet recipe. Straight from the freezer, the sorbet can feel too firm and harder to scoop cleanly. A short 5 to 10 minute rest softens it just enough for easier scoops, better texture, and a more inviting final bowl.

If the sorbet has been in the freezer for several hours or overnight, let it sit out for 5 to 10 minutes before scooping. That short rest can make a dramatic difference. Sorbet served too cold often tastes harder, flatter, and less fragrant than it should.

Also Read: Peach Cobbler with Canned Peaches (Dessert Recipe)

Fresh vs Frozen Mango for This Mango Sorbet Recipe

This choice changes the mango sorbet recipe more than it may seem at first.

Fresh mango is worth using when the fruit is truly excellent. If the mangoes are in season, fragrant, richly sweet, and not overly fibrous, fresh fruit often gives the most layered and expressive flavor. It is especially worth using when you are serving guests, when the fruit is at seasonal peak, when you want the most natural mango perfume possible, or when you do not mind a little more prep work.

Comparison graphic for mango sorbet showing fresh mango versus frozen mango, with notes on flavor, convenience, prep work, and which option works better for a mango sorbet recipe.
Fresh mango can give a mango sorbet recipe its most layered flavor when the fruit is fragrant and fully ripe, while frozen mango is often more convenient, more consistent, and especially useful for fast soft sorbet. This side-by-side guide helps you choose the route that best fits your fruit, your timing, and the texture you want.

Frozen mango is often the smarter everyday route. It is already peeled and chopped, removes some of the guesswork, and works particularly well for quick sorbet because the fruit begins cold from the start. Frozen mango is ideal when fresh mango is inconsistent, convenience matters, you want a fast dessert, you are making sorbet in a blender or food processor, or you want an almost instant soft-sorbet texture.

In fact, frozen mango sorbet is often more reliable than sorbet made from mediocre fresh mango. Great fresh fruit beats frozen fruit. Average frozen fruit often beats weak fresh fruit.

Fresh mango can also be juicier and sometimes more fibrous. Frozen mango tends to be more consistent, though not always more aromatic. Either way, the same rule holds: add less liquid than you think you need, then increase only if necessary. And always taste the base before freezing. A fixed recipe is helpful, but the fruit gets the last word.

Also Read: Avocado Chocolate Mousse Recipe

Mango Sorbet Recipe Without an Ice Cream Maker

A lot of readers want a mango sorbet recipe without ice cream maker equipment, and the good news is that sorbet is especially friendly to that kind of kitchen.

The simplest no-machine method is to blend the mixture until smooth, transfer it to a shallow container, freeze it, and soften briefly before serving. This is the easiest route, and for many people it is the right one. It may not produce the most polished restaurant-style scoop on earth, but it produces a very good homemade dessert with very little effort.

Step-by-step mango sorbet without ice cream maker guide showing a thick blended mango sorbet base, freezing in a shallow pan, scraping once or twice for smoother texture, and resting 5 to 10 minutes before scooping.
A no-machine mango sorbet recipe works best when the base stays thick, the pan stays shallow, and the final freeze is handled with a little restraint. Scraping once or twice can improve texture, but the bigger difference often comes at the end: a short 5 to 10 minute rest before scooping makes homemade mango sorbet easier to serve and noticeably more pleasant to eat.

If you want to improve the texture a little more without buying equipment, use a shallow metal or freezer-safe pan rather than a deep tub. As the edges begin to firm, scrape and stir the mixture, then return it to the freezer. Repeating this once or twice breaks up larger ice crystals and creates a more even texture.

Check it after about 30 to 45 minutes, depending on your freezer and container. If the edges are starting to set, stir or scrape it well. Then check once more after another 30 to 45 minutes. For most home cooks, one or two rounds are enough to improve the texture without turning dessert into a project.

If convenience matters most, use the direct freeze-and-temper method. If you want a slightly more polished texture and do not mind one or two quick interventions, use the shallow pan method. Neither is difficult. The better one is the one you are actually willing to repeat.

Also Read: Falafel Recipe: Crispy Homemade, Air Fryer and Baked Falafel

Blender, Food Processor, Ice Cream Maker, and Ninja Creami for Mango Sorbet

Different tools can take the same base in slightly different directions. The goal is not to pretend they all behave identically. The goal is to understand where each one helps.

Comparison guide for a mango sorbet recipe showing four methods: blender for very smooth purée, food processor for frozen mango and thick mixtures, ice cream maker for polished churned scoops, and Ninja Creami for freeze-first re-spin texture recovery.
Not every mango sorbet recipe works best in the same machine. This quick guide helps you choose the right method for your kitchen: use a blender for a very smooth base, a food processor for thick frozen mango, an ice cream maker for a more polished churned finish, or a Ninja Creami when you want freeze-first convenience with a re-spin option.

Blender vs Food Processor for Mango Sorbet

Many people search for how to make mango sorbet in a blender, but a food processor often deserves just as much attention.

A blender is excellent when you want a very smooth purée, you are using fresh mango, you own a high-powered model, or the mixture contains enough natural moisture to move well. With frozen mango, a blender can still work beautifully, but it usually needs more patience and a very controlled amount of added liquid.

A food processor often handles dense frozen fruit more comfortably than a standard blender. If you are making mango sorbet with frozen mango and want the least amount of struggle, it can be the easier route. It is especially helpful when the fruit is still very cold, the mixture is thick, and you want a soft-sorbet texture without diluting the base too much.

If the blender struggles, stop and scrape down the sides, pulse instead of running continuously, let the fruit sit briefly if it is rock hard, and add water only 1 tablespoon at a time. The usual mistake is not that the blender needs help. It is that the mixture gets diluted too quickly.

How to Use an Ice Cream Maker for Mango Sorbet

This recipe does not require an ice cream maker, but the machine can still be useful if you already own one and want a smoother, more worked finish.

Ice cream maker mango sorbet method guide showing a mango sorbet base blended smooth, chilled before churning, strained if fibrous, churned until softly frozen, and briefly frozen again for firmer scoops.
An ice cream maker gives mango sorbet a more polished churned texture, but the machine works best when the base goes in cold, smooth, and already well balanced. Churn only until the sorbet looks softly frozen rather than fully finished, then let a short final freeze firm it up for cleaner scoops without pushing the texture too far.

Use it when you want a more polished scoop, when you are serving guests, when you enjoy the classic churned sorbet feel, or when you already have the machine ready. Blend the base until very smooth, then chill it thoroughly before churning. A cold base freezes faster and more evenly in the machine, which helps keep the texture smooth. If you are using fresh mango and the purée still feels fibrous, strain it before chilling.

The sorbet is ready when it looks softly frozen and lighter than it did at the start. It should mound gently rather than run like liquid, but it will still be looser than the final texture you want in the bowl. Transfer it as soon as it reaches that stage. Do not leave it churning endlessly in the hope that it will finish itself into perfection.

If you enjoy homemade frozen desserts more broadly, MasalaMonk’s guide on how to make ice cream with a KitchenAid mixer is a useful companion read.

Ninja Creami Mango Sorbet Recipe Method

A ninja creami mango sorbet version deserves its own method because the machine works differently from both a blender and a classic churned setup.

Start with a concentrated base. Blend the mango, sugar, lime juice, salt, and only enough water to smooth everything out. The base should taste strong and stay fairly thick. A loose, diluted purée is not what you want here.

Ninja Creami mango sorbet method guide showing the Ninja Creami machine, a frozen flat mango base in the pint, a smoother spun mango sorbet result, and key tips to use a concentrated base, freeze flat, run the sorbet setting, and re-spin if crumbly.
The Ninja Creami works best when the mango base goes into the pint thick, concentrated, and frozen flat rather than loose and watery. Once the sorbet setting does its work, a re-spin can smooth out a crumbly first result, while a thicker base on the next batch usually fixes a finish that turns too soft or slushy.

Pour the mixture into the Creami pint, level the surface, and freeze it completely according to the machine’s instructions. A flat, even freeze helps the spin work more consistently.

Run the sorbet setting. If the first spin looks crumbly, shaved, or slightly powdery, do not panic. That is common. A re-spin often transforms it into a much smoother texture. If it still looks too dry, re-spin. If it looks too loose, the base was probably too thin before freezing, so keep the next batch more concentrated.

Compared with the blender method, the Creami route takes longer because of the freeze time. In return, it often gives a more even, more worked final texture once the base is right.

Also Read: Mango Margarita Recipe (Frozen or On the Rocks)

3-Ingredient Mango Sorbet Recipe

There are days when you want the shortest possible path to dessert, and that is where a 3 ingredient mango sorbet version makes sense.

Yield: 2 to 4 servings
Prep time: about 10 minutes
Freeze time: none to 2 hours
Best texture: soft immediately, firmer after a short freeze

Recipe card for 3 ingredient mango sorbet showing frozen mango, sugar or maple syrup, lime juice, quick method steps, and a bowl of bright mango sorbet.
This 3 ingredient mango sorbet keeps the formula simple without losing the point of the dessert. Frozen mango gives it body, lime keeps the flavor bright, and the sweetener helps both taste and texture, so you get a fast mango sorbet that can be served soft right away or chilled for firmer scoops.

Ingredients

  • 4 cups frozen mango
  • 1/3 to 1/2 cup sugar or maple syrup
  • 2 to 3 tablespoons lime juice

Method
Add the frozen mango, sweetener, and lime juice to a food processor or strong blender. Blend until thick and smooth, scraping down as needed. If the machine truly cannot move the fruit, let it sit for a few minutes before adding even a spoonful of liquid. Eat immediately for a soft sorbet texture, or freeze for 1 to 2 hours for firmer scoops.

This version is best for hot afternoons, last-minute dessert cravings, quick weeknight cooking, and days when the fruit already tastes good enough to carry everything. What it gives up is some control. Salt, careful liquid management, and a slightly more thoughtful build can give you a more balanced batch.

Also Read: Sourdough Pizza Dough Recipe (Crispy Crust & Easy Pizza Base)

Lighter Mango Sorbet Recipe

A lot of readers search for healthy mango sorbet because sorbet already sounds lighter than ice cream. In many cases, it is. But lighter should not become an excuse to strip away what makes the dessert worth eating.

Why a Lighter Mango Sorbet Recipe Can Still Work

A proper mango sorbet vegan version requires almost no special effort as long as you stick to plant-based sweeteners. Sorbet is already naturally dairy-free, which is one of its quieter strengths.

The smartest move is not to slash sugar aggressively. Sorbet that is not sweet enough often freezes harder and tastes less satisfying. A better strategy is to use excellent fruit, add only the sweetness the texture truly needs, keep portions sensible, and let brightness do some of the work.

Here is a lighter version that still behaves like dessert rather than a compromise.

Use this lighter version when your mangoes are already deeply sweet and fragrant, because lower sugar leaves less room to hide weak fruit. It is a good option when you want a cleaner, brighter finish while still keeping the sorbet balanced, smooth enough to enjoy, and clearly centered on mango flavor.

Recipe: Lighter Mango Sorbet

Yield: 4 servings
Prep time: about 15 minutes
Freeze time: 1 to 3 hours

Ingredients

  • 4 cups ripe mango
  • 1/4 to 1/3 cup sugar
  • 2 to 3 tablespoons lime juice
  • pinch of salt
  • 1 to 2 tablespoons water if needed

Method
Blend all ingredients until thick and smooth. Taste carefully, because with lower sugar the balance matters even more. Freeze in a shallow container, scraping once if desired for a finer texture. Rest briefly at room temperature before serving.

This lighter mango sorbet recipe works best when the mango itself is deeply sweet and aromatic. If the fruit is mediocre, lower sugar will expose that weakness rather than hide it.

When Coconut Milk Helps

A small amount of coconut milk can soften the texture and add a tropical note. Used lightly, it can be lovely. Used heavily, it starts changing the dessert away from true sorbet and toward something creamier and less clean on the finish. If you want a richer chilled dessert in a completely different direction, avocado chocolate mousse makes a good contrast.

Also Read: Balti Paneer Gravy (Restaurant-Style, Creamy + Bold Recipe)

Easy Mango Sorbet Recipe Variations

Once the base recipe is right, variations become much more rewarding because you are building on something stable rather than trying to rescue a weak foundation. These are not vague flavor ideas. They are real usable versions.

Mango Lime Sorbet Recipe

Choose this when your mango is very sweet, very rich, or a little sleepy in flavor. Extra lime gives the dessert a colder, sharper finish and makes the fruit taste more awake.

Mango lime sorbet recipe card showing a bowl of bright mango sorbet with lime wedges, mango pieces, sugar, lime zest, and ingredient notes for a mango sorbet recipe with extra lime flavor.
Extra lime gives mango sorbet a sharper, colder finish that works especially well when the fruit is already very sweet and rich. The added juice and zest brighten the base, keep the flavor from drifting into softness, and turn a simple mango sorbet recipe into something a little more vivid and palate-cleansing.

Yield: 4 to 6 servings
Prep time: about 15 minutes
Freeze time: none to 3 hours

Ingredients

  • 4 cups mango flesh or frozen mango
  • 1/2 cup sugar
  • 3 to 4 tablespoons fresh lime juice
  • 1 teaspoon finely grated lime zest
  • pinch of salt
  • 1 to 3 tablespoons water, only if needed

Method
Blend the mango, sugar, lime juice, zest, and salt until completely smooth. Add only enough water to help the machine move. Taste before freezing. The base should feel vividly bright, but mango should still lead. Serve immediately for a soft sorbet or freeze until scoopable.

This version feels sharper, cooler, and more palate-cleansing than the base recipe. Just do not let the lime push the mango aside.

Mango Coconut Sorbet Recipe

This version is for readers who want a more tropical profile and a slightly softer mouthfeel without fully crossing into sherbet territory.

Mango coconut sorbet recipe card showing a bowl of mango sorbet with coconut milk, fresh coconut, mango cubes, lime, and ingredients for a tropical mango sorbet variation.
A little coconut changes the texture of mango sorbet more than it changes the flavor. Used lightly, it softens the base, rounds the edges, and gives the sorbet a more tropical finish without pushing the mango out of the lead, which is exactly why this version works best when you want something gentler and slightly creamier while still staying in sorbet territory.

Yield: 4 to 6 servings
Prep time: about 15 minutes
Freeze time: 1 to 3 hours

Ingredients

  • 4 cups mango flesh or frozen mango
  • 1/3 to 1/2 cup sugar
  • 2 tablespoons lime juice
  • pinch of salt
  • 1/4 cup full-fat coconut milk
  • 1 to 2 tablespoons water if needed

Method
Blend the mango, sugar, lime juice, salt, and coconut milk until smooth. Add water only if needed to keep the machine moving. Taste and adjust with a touch more lime if the coconut makes the mixture feel too mellow. Freeze until softly scoopable or fully firm.

Coconut rounds the edges and makes the sorbet feel a little softer and more luxurious. Too much, however, turns the dessert away from true sorbet and toward something creamier and less fruit-led. If you enjoy that pairing, MasalaMonk’s piece on mango with coconut milk gives it more room.

Mango Passion Fruit Sorbet Recipe

This is one of the best pairings for very sweet mango. Passion fruit brings acidity, perfume, and a little intensity that can make the whole batch feel more vivid and slightly more grown-up.

Mango passion fruit sorbet recipe card showing bright mango sorbet with passion fruit halves, lime, mango cubes, and ingredient notes for a mango sorbet variation with passion fruit pulp.
Passion fruit gives mango sorbet a more aromatic, vivid edge without changing the dessert’s center of gravity when the balance is right. Used well, it adds perfume, acidity, and extra lift, so the sorbet tastes brighter and a little more grown-up while the mango still stays clearly in the lead.

Yield: 4 to 6 servings
Prep time: about 15 minutes
Freeze time: 1 to 3 hours

Ingredients

  • 3 1/2 cups mango flesh or frozen mango
  • 1/2 cup passion fruit pulp
  • 1/3 to 1/2 cup sugar
  • 1 to 2 tablespoons lime juice
  • pinch of salt
  • 1 to 3 tablespoons water if needed

Method
Blend the mango, passion fruit pulp, sugar, lime juice, and salt until smooth. Taste before freezing. It should feel vivid and aromatic, but mango should still sit at the center. Freeze or churn as desired. Rest briefly before serving if fully frozen.

This variation often tastes especially bright and fragrant. Just do not let the passion fruit dominate. The goal is still a better mango sorbet recipe, not a passion fruit sorbet with some mango in the background.

Pineapple & Mango Sorbet Recipe

Pineapple adds extra brightness and a little bite. It works best when you want something particularly lively and summery.

Pineapple and mango sorbet recipe card showing bright scoops of mango sorbet with pineapple pieces, mango cubes, lime, and a quick ingredient list for a lively tropical mango sorbet variation.
Pineapple gives this mango sorbet recipe a brighter, juicier edge and a little more bite, which makes it especially good for hot-weather serving. The key is keeping the pineapple lively without letting it overtake the mango, so the finished sorbet still tastes centered, balanced, and clearly worth calling mango sorbet first.

Yield: 4 to 6 servings
Prep time: about 15 minutes
Freeze time: none to 3 hours

Ingredients

  • 3 cups mango flesh or frozen mango
  • 1 cup frozen pineapple
  • 1/3 to 1/2 cup sugar
  • 1 to 2 tablespoons lime juice
  • pinch of salt
  • 1 to 3 tablespoons water if needed

Method
Blend all ingredients until thick and smooth. Taste before freezing to make sure the pineapple has not overtaken the mango. Adjust with a little more mango or sugar if the result feels too sharp. Serve soft or freeze for firmer scoops.

This one feels lively, juicy, and playful. Too much pineapple, however, can shift the whole flavor profile away from mango.

Mango Sherbet Adaptation

If what you want is not sorbet but something creamier, you can turn the same basic idea toward sherbet by introducing a small amount of dairy.

Mango sherbet adaptation recipe card showing a creamier mango frozen dessert with milk or half-and-half, lime, mango cubes, and a softer scoop texture than classic mango sorbet.
A little dairy moves this mango dessert away from classic sorbet and toward something softer, gentler, and creamier. That shift matters because the mango still stays present, but the finish becomes rounder and less sharp, making this a useful adaptation when you want the brightness of fruit with a little more comfort and body.

Yield: 4 to 6 servings
Prep time: about 15 minutes
Freeze time: 2 to 4 hours

Ingredients

  • 4 cups mango flesh or frozen mango
  • 1/3 cup sugar
  • 2 tablespoons lime juice
  • pinch of salt
  • 1/2 cup milk or half-and-half

Method
Blend all ingredients until smooth. Chill thoroughly. Churn if using a machine, or freeze in a shallow pan and scrape once or twice. Let it soften briefly before serving.

The dairy makes the dessert softer, gentler, and creamier. Once dairy enters, it no longer behaves like a classic mango sorbet recipe. That is not a flaw. It is simply a different destination.

Also Read: Paloma Recipe: 12 Paloma Cocktail Drinks

Troubleshooting This Mango Sorbet Recipe

Sorbet is simple, but simplicity means the mistakes stay visible.

Mango sorbet troubleshooting guide showing four common problems in a mango sorbet recipe: icy sorbet from too much liquid, hard sorbet from not enough sweetness, flat flavor needing more lime or salt, and fibrous texture that should be strained.
This mango sorbet troubleshooting guide helps you fix the most common problems before the next batch goes wrong. If the sorbet turns icy, the base was likely too loose. If it freezes too hard, it often needs more sweetness. And if the flavor tastes flat, lime or salt can wake it up, and if the texture feels fibrous, straining the purée makes the final sorbet smoother.

Why It Turned Icy

This usually happens because of too much added liquid, watery fruit, or not enough sugar for the amount of water present. Keep the next batch thicker and more concentrated. Resist the temptation to fix every blending problem with extra water.

Why It Froze Too Hard

The base was probably under-sweetened, over-frozen, or both. Let the sorbet soften before scooping and increase sweetness slightly next time if needed.

Why It Stayed Too Soft

If the sorbet never firms up enough, the base may contain too much sugar, too much added liquid, or a large amount of coconut milk or syrupy sweetener. Keep future batches a little leaner and more fruit-dense.

Why the Flavor Tastes Flat

Flat sorbet usually comes from weak mango, too little lime, not enough salt, too much water, or not tasting before freezing. A frozen dessert needs the unfrozen base to taste slightly stronger than the final target.

Why the Blender Struggled

The fruit may have been too hard, the batch may have been too small, or the mixture may have been too dry for the blades to catch. Let the fruit soften slightly, scrape down the sides, pulse again, and add liquid in tiny amounts rather than pouring recklessly.

Why It Feels Fibrous

Fresh mango can leave fibers behind, especially with certain varieties. Thorough blending helps. Straining helps even more if the texture still feels rough.

How to Rescue a Batch That Is Too Firm

Let it rest on the counter for several minutes, then scoop. If it is still too hard, cut it into chunks and briefly reprocess it in a food processor for a softer texture.

Also Read: Air Fryer Donuts Recipe (2 Ways): Glazed Homemade Donuts + Biscuit Donuts

How to Store Mango Sorbet

Good storage will not rescue a weak batch, but it will preserve a good one much better.

Use a shallow airtight container rather than a deep one. A shallow container freezes and softens more evenly, and it makes scooping easier later. If you want to reduce surface crystals, press a layer of wrap or parchment directly against the top before sealing the container. Homemade sorbet is usually at its best within the first few days, when the mango still tastes especially vivid. And always give it a short rest before scooping. Even excellent sorbet benefits from 5 to 10 minutes on the counter before serving.

Mango sorbet storage guide showing homemade mango sorbet in a shallow airtight container with wrap or parchment pressed onto the surface, plus tips to freeze flat, enjoy within the first few days, and rest 5 to 10 minutes before scooping.
Good homemade mango sorbet keeps its texture better when it is stored shallow, covered closely at the surface, and served with a little patience. Pressing wrap or parchment directly onto the sorbet helps limit surface crystals, while a short 5 to 10 minute rest before scooping makes the texture softer, easier to serve, and more enjoyable to eat.

Mango Sorbet vs Sherbet

Readers often search for both, sometimes as though they are interchangeable. They are related, but they are not the same dessert.

Sorbet is fruit-forward, dairy-free, and refreshing. The mango is meant to lead clearly, and the finish should feel clean. Sherbet usually includes some dairy, which gives it a softer, creamier texture. It still tastes fruity, but the fruit is no longer doing all the work alone.

If you want the fuller distinction, MasalaMonk’s guide to the difference between sorbet and sherbet explains it more directly.

Comparison guide showing mango sorbet versus sherbet versus ice cream, with sorbet labeled dairy-free and fruit-forward, sherbet shown as softer and lightly creamy with some dairy, and ice cream described as dairy-rich, creamier, and less fruit-led.
Sorbet, sherbet, and ice cream may sit in the same frozen-dessert conversation, but they are built around different priorities. Mango sorbet keeps the fruit in the lead with a clean dairy-free finish, sherbet softens that profile with some dairy and a gentler creaminess, while ice cream moves furthest toward richness, weight, and a more dairy-driven texture.

Mango Sorbet vs Ice Cream vs Gelato

These desserts appear in the same search universe, but they are not trying to deliver the same thing.

Sorbet is bright, fruit-led, and dairy-free. Ice cream is richer, creamier, and more dairy-driven. Gelato is denser, smoother, and part of a different frozen dessert tradition. If what you really want is a creamier mango dessert, homemade mango ice cream is the better direction. This guide stays firmly in sorbet territory: bright, clean, and fruit-first.

Also Read: Tapas Recipe With a Twist: 5 Indian-Inspired Small Plates

What to Serve with Mango Sorbet

A bowl of mango sorbet can stand on its own, but it also fits beautifully into a larger warm-weather dessert spread.

Keep the pairings light. Simple butter cookies, crisp shortbread, and fresh fruit usually work better than anything too rich or sticky. For guests, a little lime zest, a few mint leaves, or a tiny pinch of chili salt can be a lovely contrast if used carefully. Sorbet also works especially well after a heavier meal because it refreshes the palate rather than weighing it down.

Serving guide for mango sorbet showing a bowl of bright mango sorbet with shortbread cookies, fresh fruit, mint, lime, and a small bowl of chili salt as light pairings.
Light pairings keep mango sorbet refreshing instead of weighing it down. Shortbread or butter cookies add a little contrast, fresh fruit keeps the plate bright, mint or lime zest sharpens the finish, and even a very small pinch of chili salt can work when you want the mango to taste a little livelier without losing its place at the center.

If you want another chilled dessert on the table, no-bake banana pudding offers a softer, creamier contrast. And if you are building out a brighter summer spread, watermelon desserts keep the mood light without repeating the same fruit.

Why This Mango Sorbet Recipe Is Worth Keeping

A really good mango sorbet recipe does not need to be flashy. It only needs to do a few things very well: let the mango speak clearly, balance sweetness with brightness, and freeze into something that still feels inviting when you come back with a spoon. When those pieces fall into place, sorbet stops feeling like a lighter substitute for ice cream and starts feeling complete on its own terms.

That is the real pleasure of it. One day, it can be a quick bowl of soft homemade mango sorbet made from frozen fruit and eaten almost immediately. Another day, it can be a firmer make-ahead dessert waiting in the freezer for a warm evening. It can stay simple with mango, sugar, and lime, or lean gently toward coconut or passion fruit without losing its center.

So start with the base method, taste before freezing, and trust the fruit. If the mango is good, the sorbet does not need much else. This mango sorbet recipe is worth keeping because it stays practical, flexible, and genuinely repeatable: good with fresh mango, smart with frozen mango, possible without special equipment, and strong enough to become the version you return to instead of the one you merely tried once.

Closing hero image for a mango sorbet recipe showing three smooth scoops of bright homemade mango sorbet in a white bowl with a spoonful beside it, plus soft mango and lime accents in the background.
A mango sorbet recipe worth keeping is the one that stays simple without feeling plain, bright without turning sharp, and easy enough to make again when the weather calls for it. These smooth scoops capture exactly what the whole guide is aiming for: clear mango flavor, inviting texture, and a dessert that feels light, repeatable, and genuinely satisfying.

Also Read: Air Fryer Salmon Recipe (Time, Temp, and Tips for Perfect Fillets)


Mango Sorbet Recipe FAQs

1. Can I make mango sorbet without an ice cream maker?

Yes. Mango sorbet is one of the easiest frozen desserts to make without an ice cream maker. If you start with frozen mango, a blender or food processor can give you a thick soft-sorbet texture almost immediately. If you want firmer scoops, freeze the blended mixture in a shallow container until more set. That flexibility is one of the biggest reasons homemade mango sorbet is so practical.

2. Is fresh or frozen mango better for mango sorbet?

It depends on the fruit and the result you want. Fresh mango can give you the most fragrant and layered flavor when the fruit is excellent. Frozen mango is often more reliable, more convenient, and especially helpful when you want a thick fast sorbet texture. Great fresh fruit wins, but average frozen fruit often beats weak fresh fruit.

3. Why did my mango sorbet turn icy?

Mango sorbet usually turns icy because the base was too thin, the fruit was watery, too much liquid was added, or there was not enough sugar for the amount of water in the mixture. Keep the base thick and concentrated, add water only in very small amounts, and store the sorbet well so the surface stays protected.

4. Why did my mango sorbet freeze too hard?

Homemade sorbet often freezes hard when the base is under-sweetened or the freezer is very cold. Sugar affects texture as well as sweetness, which is why low-sugar sorbet can become stubbornly firm. Let the sorbet rest briefly at room temperature before scooping, and make sure the base tastes slightly sweeter than the final result you want.

5. Should mango sorbet taste sweeter before freezing?

Yes, slightly. Cold temperatures mute sweetness and soften flavor, so the unfrozen base should taste a little sweeter and brighter than the finished sorbet should taste. If the base tastes merely balanced before freezing, the final sorbet can end up flatter than you want.

6. Can I reduce the sugar in mango sorbet?

You can reduce it somewhat, especially if your mangoes are naturally very sweet, but the texture usually becomes firmer and less scoopable as sugar drops. Sugar is not only a sweetener here. It also helps control how the sorbet freezes. That means it is better to reduce carefully than to remove it aggressively and expect the same result.

7. How long should I freeze mango sorbet?

That depends on the texture you want. If you are blending frozen mango, you can eat it immediately for a soft spoonable texture. If you want firmer scoops, a couple of hours in the freezer is usually enough for the first set. Churned versions often still need more freezing after the machine stage.

8. How long does homemade mango sorbet last in the freezer?

It will keep longer, but it is usually best while the texture still feels fresh and the mango still tastes vivid. In most home kitchens, homemade mango sorbet is at its best within the first several days. After that, it can still be good, but it is more likely to become firmer or more crystalline.

9. Can I make mango sorbet in a blender instead of a food processor?

Yes, but the method may need a little more care. A blender can work very well, especially with fresh mango or slightly softened frozen fruit, but a food processor often handles dense frozen fruit more comfortably. If you use a blender, add liquid very carefully and only when the machine truly needs help.

10. How do I make mango sorbet smoother?

Use ripe or high-quality frozen mango, keep the base concentrated, strain it if the fruit is fibrous, and store it in an airtight container with the surface protected from air. Those steps do more for smoothness than piling on extra ingredients. If your first batch is a little coarse, fruit quality and liquid balance are usually the first things to check.

Posted on 8 Comments

Homemade Mango Ice Cream Recipe

Homemade mango ice cream in a glass dessert coupe with smooth creamy scoops, deep mango color, and a dark luxe background, styled as a no-churn eggless mango ice cream hero image.

If you want homemade mango ice cream that is no-churn, eggless, creamy instead of icy, and full of real mango flavor, this is the version to make. It is for home cooks who want an easy recipe without ending up with a frozen block that tastes more like sweet cream than mango. The method is simple, the ingredient list is manageable, and the result is soft enough to scoop, rich enough to feel indulgent, and fruity enough to earn a repeat spot in your freezer.

That matters because mango ice cream can go wrong in predictable ways. Sometimes the puree is too thin, so the dessert freezes harder than it should. Sometimes the mango itself is weak, so the cream takes over. At other times, the base is overmixed, the airy texture drops, and the final scoop feels dense rather than lush. It sounds easy on paper. In practice, a few small choices decide whether it feels special or merely cold.

So this post is built to solve those problems before they happen. It shows you how to make mango ice cream at home with better odds from the start: use good mangoes, keep the puree thick, whip the cream to the right stage, fold gently, freeze in the right container, and soften slightly before serving. Get those parts right, and the recipe becomes far more dependable. More importantly, it becomes the kind of mango ice cream recipe you actually want to repeat.

This homemade mango ice cream gives you:

  • a no-churn method with no ice cream maker required
  • an eggless base that stays simple and approachable
  • creamy, scoopable texture instead of icy hardness
  • real mango flavor rather than diluted sweetness
  • clear fixes for watery puree, fibrous fruit, and weak flavor
  • enough flexibility for Alphonso, coconut, vegan, and no-condensed-milk variations

Homemade Mango Ice Cream Recipe at a Glance

Before getting into the full method, it helps to know what kind of recipe this is. It is not a churned custard or a sorbet, and it is not a technical project that asks you to babysit a machine. It is a practical, home-friendly route to creamy mango ice cream with a richer texture than fruit-only frozen desserts and a stronger fruit identity than many shortcut versions.

Quick recipe facts:

  • Prep time: about 20 to 25 minutes
  • Freeze time: 6 to 8 hours, or overnight
  • Yield: about 1 loaf-pan-sized batch, roughly 6 to 8 servings
  • Method: no-churn
  • Difficulty: easy
  • Texture goal: creamy, scoopable, and mango-forward
At-a-glance guide for homemade mango ice cream showing prep time, freeze time, yield, method, difficulty, and texture goal beside a bowl of creamy mango ice cream.
Before you start, it helps to know what kind of recipe this is: quick to prepare, slow to freeze, easy to execute, and aimed at a creamy, scoopable mango-forward result. That makes it a good fit for home cooks who want homemade mango ice cream without an ice cream maker, without eggs, and without a complicated method.

This is a no-churn mango ice cream recipe, an eggless mango ice cream, and an easy dessert for home cooks who do not want to rely on special equipment. If you enjoy lighter frozen fruit desserts too, you can always explore mango sorbet or read the broader comparison between sherbet and sorbet. Here, though, the goal is different: a creamy scoop that still tastes unmistakably of mango.

Also Read: Cookie Pie Recipe: 10 Best Flavors, Fillings and Variations

Why This Homemade Mango Ice Cream Recipe Works

A good homemade mango ice cream recipe succeeds because it balances fruit, richness, sweetness, and air. Mango provides the flavor that makes the dessert memorable. Cream brings body and softness. Condensed milk adds sweetness, but it also helps the frozen texture stay smoother and more forgiving. Then the whipped cream gives the mixture air, which is why a no-churn base can still feel plush and light.

The fruit, however, is the real deciding factor. Thick mango puree gives you concentrated flavor and a better frozen texture, while thin puree weakens both. That is the central rule of this recipe.

At its best, this recipe works because it balances:

  • thick mango puree for concentrated fruit flavor
  • whipped cream for lift, softness, and body
  • condensed milk for sweetness and a smoother freeze
  • gentle folding for a lighter final texture
Explainer graphic for homemade mango ice cream showing thick mango puree, whipped cream, condensed milk, and gentle folding as the key elements that create a creamy smooth mango-forward texture.
Homemade mango ice cream turns out better when each part of the base is doing the right job. Thick mango puree brings concentrated fruit flavor with less excess water, whipped cream adds air and softness, condensed milk helps the mixture freeze more smoothly, and gentle folding keeps the base light instead of dense. Put together, these small choices are what help homemade mango ice cream stay creamy, scoopable, and clearly mango-forward instead of turning icy or flat.

That combination is what turns a short ingredient list into something much more satisfying. Mango ice cream should still taste clearly of mango, but the fruit should arrive wrapped in richness rather than icy sharpness.

Also Read: Punjabi Mutton Bhuna – Amritsari Village-Style Gosht Recipe

Ingredients for Homemade Mango Ice Cream

One reason how to make homemade mango ice cream appeals to so many home cooks is that the ingredient list is short. Still, a short list only works when each ingredient is doing the right job. This recipe depends less on complexity and more on choosing the right form of a few important things.

Best Mangoes for Mango Ice Cream

The best mangoes for mango ice cream are ripe, sweet, fragrant, and thick-fleshed. You want fruit that smells fruity near the stem, yields slightly when pressed, and tastes excellent on its own. If a mango is bland, watery, or chalky, the final dessert will never feel as vivid as it should.

Alphonso mangoes are especially good here because they usually bring strong aroma, rich color, and smooth flesh. That is exactly why Alphonso mango ice cream is such a compelling variation. Kesar mangoes can also work beautifully when you want deep mango character and a warm, rich profile. Ataulfo, often called honey mango, is another strong choice because it is usually sweet, smooth, and relatively low in fiber.

Guide to the best mangoes for homemade mango ice cream comparing Alphonso, Kesar, and Ataulfo, with notes on what to look for and what to avoid when choosing mangoes for a smooth creamy puree.
The best homemade mango ice cream starts with mangoes that already taste good before blending. Alphonso brings rich aroma and deep color, Kesar offers warm strong mango character, and Ataulfo is a great choice when you want smooth, sweet, lower-fiber fruit. No matter the variety, look for mangoes that smell fragrant, taste sweet, and blend into thick smooth puree, because watery, bland, or stringy fruit can weaken both the flavor and texture of the final ice cream.

More broadly, the best mangoes for homemade mango ice cream tend to share the same qualities:

  • dense, smooth flesh
  • strong fragrance
  • natural sweetness
  • low fiber
  • good flavor even before blending

Avoid mangoes that smell weak, taste flat, feel watery, or leave a lot of stringy fiber behind. Overly fibrous mangoes can still be used, but only if you blend and strain them well. Unripe mangoes are not a good shortcut here either. They may give acidity, but they will not deliver the rich fruit depth this dessert depends on.

In practical terms, a ripe mango for ice cream should feel slightly soft rather than hard, smell appealing rather than faint, and taste good enough to eat plain. That test matters more than any label.

Fresh Mango vs Canned Pulp vs Frozen Mango for Mango Ice Cream

Fresh mango is often the most satisfying route because it gives you full control over ripeness, sweetness, and flavor. When the fruit is excellent, fresh puree makes mango ice cream at home feel intensely seasonal and rewarding.

Canned mango pulp can be genuinely useful. It is convenient, often smoother than home-blended fruit, and usually more consistent than whatever fresh mangoes happen to be available that week. Frozen mango is useful too, especially when fresh fruit is poor or out of season, but it still needs thawing, blending, and texture checking.

The simplest way to think about the three options is this:

  • Fresh mango is best when the fruit is truly ripe, fragrant, and in season.
  • Canned pulp is best when you want consistency, convenience, and often smoother texture.
  • Frozen mango is best when fresh fruit quality is disappointing but you still want a homemade result.
Comparison guide for homemade mango ice cream showing fresh mango, canned mango pulp, and frozen mango, with notes on when each option works best for a thick smooth mango puree.
Not every mango option works the same way in homemade mango ice cream. Fresh mango is best when the fruit is ripe and in season, canned mango pulp is often the easiest route to smooth and consistent puree, and frozen mango is a useful fallback when fresh fruit is disappointing. The best choice is the one that gives you thick, strongly flavored, low-water puree, because that is what helps mango ice cream stay creamy instead of freezing hard or icy.

For most readers, the best choice is the one that gives you thick, smooth, strongly flavored puree most reliably. Excellent fresh mango is wonderful. Good canned Alphonso pulp is often easier than people expect. Frozen mango is a respectable fallback when handled properly.

Why Cream and Condensed Milk Matter in Mango Ice Cream

Cream gives the dessert richness, volume, and softness. Once whipped, it also introduces air, which helps the finished creamy mango ice cream feel lighter and easier to scoop.

Condensed milk is just as important. It sweetens the base, yes, but it also improves body and makes the no-churn texture much more forgiving. That is one reason so many successful homemade ice cream recipes rely on it. If you already enjoy the way it works in other sweetened condensed milk desserts or milk-rich favorites like tres leches cake, the same principle applies here.

Mango ice cream with condensed milk works so well because condensed milk is doing more than one job at once. It adds sweetness, contributes to a smoother freeze, and helps the dessert feel cohesive rather than harsh from the freezer.

A pinch of salt matters too. It does not make the dessert salty. Instead, it sharpens the sweetness and makes the mango feel more vivid.
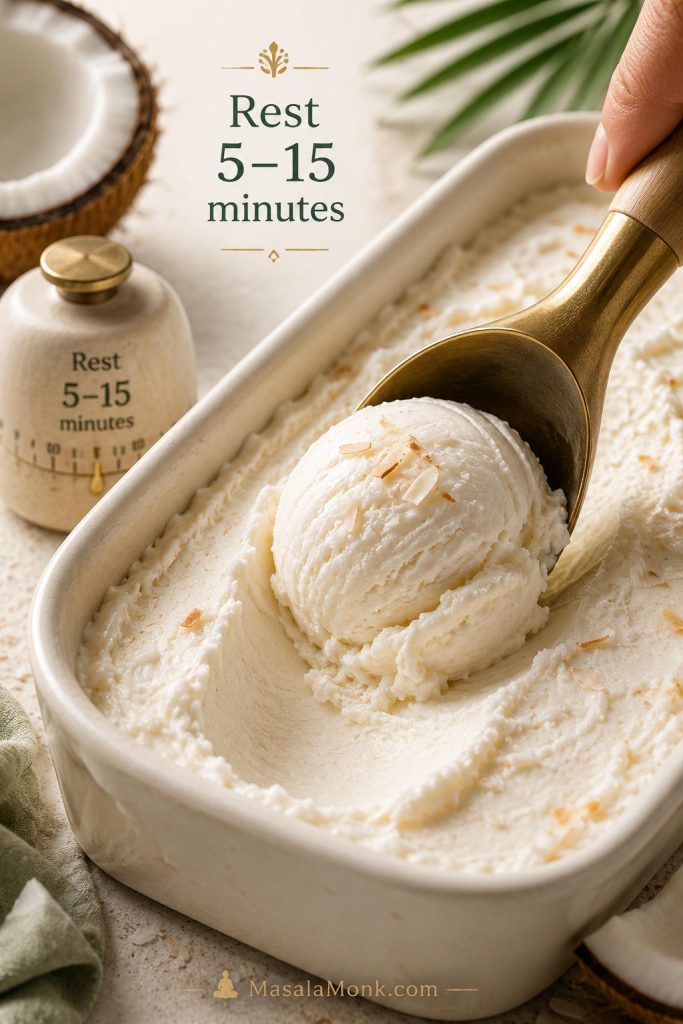
Flavor Boosters for Homemade Mango Ice Cream

Once the main structure is in place, a few optional additions can shape the flavor beautifully.

  • Vanilla smooths the flavor and rounds the dessert out.
  • Lime or lemon juice brightens the mango and keeps the sweetness from feeling flat.
  • Cardamom gives the dessert a warmer Indian-style character.
  • Saffron adds a richer, more festive depth.
  • Coconut opens the door to a softer tropical version, especially if you already enjoy mango with coconut milk.
Flavor boosters for homemade mango ice cream showing vanilla, lime or lemon, cardamom, saffron, and coconut, with notes on how each addition changes the flavor without overpowering the mango.
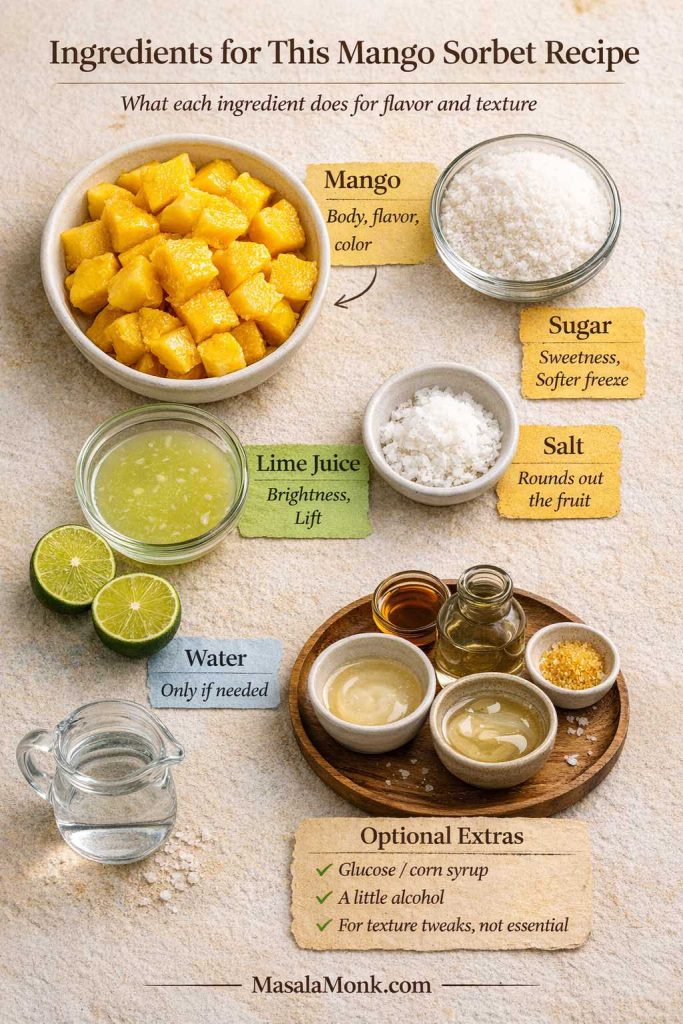
A few small additions can change the direction of homemade mango ice cream without taking away its mango-forward character. Vanilla rounds the flavor, lime or lemon brightens it, cardamom adds warmth, saffron brings a richer festive note, and coconut softens the finish with a more tropical edge. The key is to use these as accents that support the fruit rather than letting them overpower it.
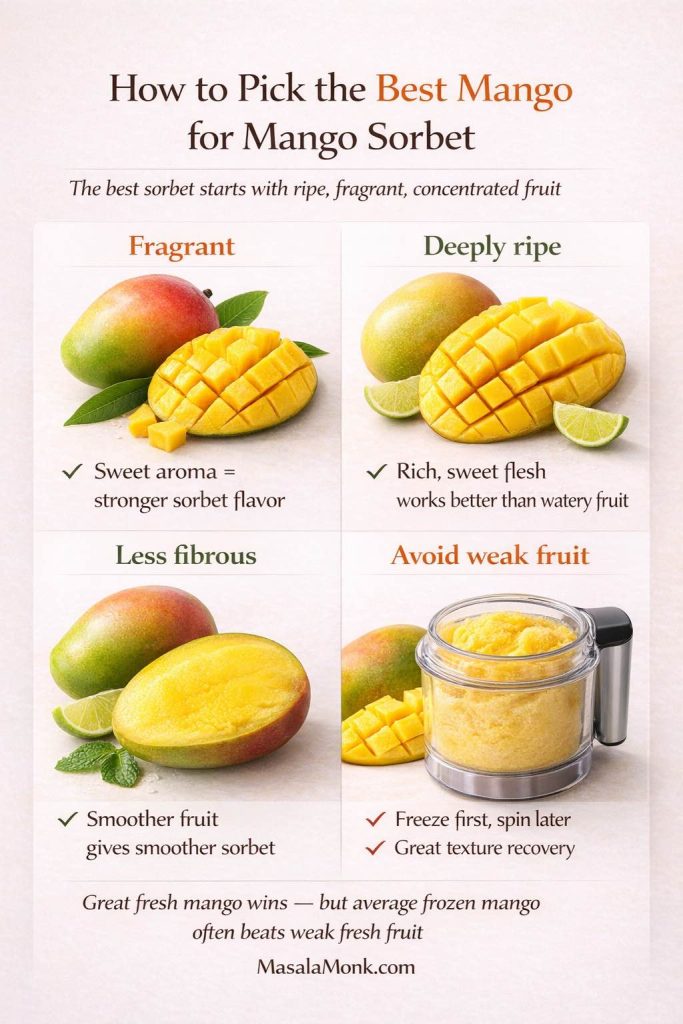
These are optional accents, not required for the best basic mango ice cream recipe. Use them to support the fruit, not distract from it. Mango should still stay in charge.

Also Read: Peach Cobbler with Canned Peaches (Dessert Recipe)

Exact Ingredients for the No-Churn Mango Ice Cream Recipe

For the main no-churn base, gather:

  • 2 cups thick mango puree, measured after blending
  • 2 cups cold whipping cream
  • 1 can sweetened condensed milk
  • 1 teaspoon vanilla extract
  • 1 to 2 teaspoons lime juice, optional
  • 1 small pinch of salt
Ingredients for homemade mango ice cream laid out on a dark background, including thick mango puree, whipping cream, condensed milk, vanilla, lime juice, and salt for a creamy no-churn mango ice cream recipe.
The best homemade mango ice cream starts with a short ingredient list, but each one has a job to do. Thick mango puree brings the real fruit flavor, whipping cream gives the base body and softness, and condensed milk helps the ice cream freeze smoother instead of turning hard or icy. Vanilla rounds the flavor, lime brightens the mango, and a small pinch of salt keeps the sweetness from feeling flat.


Optional flavor accents:

  • a pinch of cardamom
  • a few strands of saffron, bloomed in a teaspoon of warm milk or cream
  • 2 to 3 tablespoons thick coconut cream for a tropical edge

This list stays intentionally simple. The point is not to complicate the dessert. The point is to build a base that gives you strong flavor and reliable texture with as little friction as possible.

A few ingredient notes make this recipe easier to get right:

  • Use thick mango puree, not watery blended fruit.
  • Use cold whipping cream straight from the fridge.
  • Use sweetened condensed milk for the easiest creamy no-churn texture.
  • Add lime only to brighten the fruit, not to make the dessert taste citrusy.
  • Use Alphonso pulp when you want a richer, more perfumed mango result.

Also Read: Avocado Chocolate Mousse Recipe

Check the Mango Puree Before You Start

Before you whip the cream or mix the base, stop and look carefully at the puree. This is the most important decision point in the whole recipe.

Thick smooth mango puree lifted on a spoon over a bowl, showing the right puree texture for creamy homemade mango ice cream.
Before you whip the cream or freeze the base, check the mango puree first. For creamy homemade mango ice cream, the puree should look thick, smooth, and spoonable rather than thin or watery. Getting this stage right gives you stronger mango flavor and helps the final ice cream freeze softer, smoother, and less icy.

A good puree should be:

  • thick
  • smooth
  • spoonable
  • strongly flavored

Most importantly, it should mound lightly on a spoon and fall slowly rather than pour off like juice.

If it is too thin, simmer it gently for a few minutes to cook off excess water, then chill it fully before using. If it is fibrous, press it through a fine sieve. And if it is a little too sweet, a small amount of lime can often bring back balance.

Infographic showing how to make mango puree thick and spoonable for homemade mango ice cream, including thin versus thick puree comparison and tips to blend, strain, reduce, and chill.
For creamy homemade mango ice cream, the puree needs to be thick enough to hold on a spoon instead of running off like juice. If it is too thin, blend it smooth, strain out fiber, reduce excess water, and chill it before mixing with the cream. That one adjustment gives the mango flavor more strength and helps the final ice cream freeze smoother instead of turning icy.

This one checkpoint changes a lot. Thick puree gives you stronger mango flavor and a softer frozen texture. Thin puree makes the whole recipe more fragile.

Also Read: Falafel Recipe: Crispy Homemade, Air Fryer and Baked Falafel

How to Make Mango Ice Cream at Home

This is the full method. It is easy, but each stage has a purpose. Once you understand that sequence, how to make mango ice cream becomes much less intimidating.

4-step no-churn mango ice cream method showing blend, whip, fold, and freeze stages for homemade mango ice cream.
This homemade mango ice cream comes together in four simple moves: blend the mango until smooth, whip the cream only to soft peaks, fold gently so the base stays airy, and freeze until set. If the puree is thick and the folding stays light, the final texture has a much better chance of turning out creamy and scoopable instead of icy or heavy.

Make the Mango Puree Thick, Smooth, and Cold

Peel and chop the mangoes, then blend until completely smooth. After that, assess the puree honestly. It should sit thickly on a spoon rather than pour easily. If it looks loose, reduce it gently over low heat for a few minutes or strain it, then chill it well.

The puree also needs to taste good before it enters the base. The final mango ice cream recipe can only taste as vivid as the fruit you start with. If the puree is weak or watery, the finished dessert will lean more toward sweet cream than real mango.

Once the puree is thick enough, chill it fully. Cold puree is much easier to fold into the whipped base without disturbing its structure.

Chill Your Bowl and Keep the Cream Cold

A chilled bowl is not absolutely required, but it helps more than many people expect. Cold cream whips faster, holds better, and gives you more control, especially if your kitchen is warm. So if you have a few minutes, chill the mixing bowl and beaters first.

Whip the Cream to Soft or Medium Peaks

Pour the cold cream into the chilled bowl and whip until it reaches soft or medium peaks. The cream should look fluffy and plush, not stiff or grainy. When you lift the whisk, the tip should curl over softly rather than stand rigidly upright.

Whipped cream at soft peak stage in a mixing bowl, showing the right texture for no-churn homemade mango ice cream.
For no-churn mango ice cream, stop whipping when the cream holds a peak but the tip still bends softly. This stage gives the base lift and structure without making it dense or grainy, which is exactly why the final ice cream stays lighter, smoother, and easier to scoop after freezing.

That visual cue matters. Underwhipped cream does not give the base enough structure. Overwhipped cream gets heavy and can make the final dessert feel denser than it should.

The right stage looks smooth, billowy, and flexible. Once you reach it, stop.

Mix the Mango Base Separately

In a second bowl, stir together the chilled mango puree, condensed milk, vanilla, salt, and lime juice if using. Mix until smooth, then taste.

At this point, the base should taste slightly stronger and a little sweeter than the final frozen dessert will seem. Freezing softens flavor, so this is your chance to correct it early. If the mango tastes flat, add a touch more lime. If it already tastes bright and balanced, leave it alone.

Fold Gently to Keep the Base Airy

Add the mango mixture to the whipped cream in batches. Fold slowly by sweeping down through the bowl and lifting upward rather than stirring hard. Keep going just until the mixture looks thick, airy, and evenly colored.

Folded mango ice cream base in a mixing bowl with a spatula, showing an airy evenly mixed texture before freezing for no-churn homemade mango ice cream.
This is the stage where the recipe either stays light or starts losing lift. After the mango mixture is folded into the whipped cream, the base should look airy, evenly colored, and softly billowy rather than flat or streaky. Stop folding once it looks uniform, because overmixing can knock out the air that helps homemade mango ice cream freeze smoother and feel less dense.

This is where separate ingredients become true homemade mango ice cream. The base should look soft, billowy, and uniform. It should not look runny, deflated, or aggressively smoothed out.

Do not keep folding just to make it look perfect. Once the color is even, stop.

Transfer and Freeze

Spoon the mixture into a freezer-safe container and smooth the top. A shallow container often gives a better serving texture than a very deep one. Then press parchment paper or plastic wrap directly against the surface before sealing with a lid. That extra layer helps reduce ice crystals.

For general freezer-storage best practices, the FDA’s frozen food storage guidance and Illinois Extension’s freezer storage advice are helpful references. In practical terms, the main point is simple: use a good container, cover the surface directly, and keep the batch steadily cold.

Freeze for at least 6 to 8 hours, though overnight is easiest. When ready to serve, let the ice cream sit out for a few minutes first. That short rest is usually all it needs to become properly scoopable.

If you later want a churned version, this guide on how to make ice cream with a KitchenAid mixer fits naturally into that next step.

Also Read: Mango Margarita Recipe (Frozen or On the Rocks)

What Mango Ice Cream Should Look Like at Every Stage

This is one of the most useful practical sections in the whole post because it helps you catch mistakes before they harden into the final dessert.

Soft scoopable homemade mango ice cream in a loaf pan with visible scoop marks, showing a creamy smooth texture after freezing.
This is the finished texture the recipe is aiming for: mango ice cream that freezes firm enough to hold a scoop but softens into a creamy, smooth spoonful after a short rest. If your puree was thick, the cream was whipped to soft peaks, and the base was folded gently, the result should look rich and scoopable like this rather than icy, grainy, or rock hard.

Here is what you want to see:

  • Mango puree: thick, smooth, and spoonable
  • Whipped cream: soft to medium peaks that look fluffy and supple
  • Mango base: bright, balanced, and slightly sweeter than the final frozen dessert will taste
  • Folded mixture: airy, evenly colored, and softly billowy with no cream streaks
  • Frozen ice cream: firm, but scoopable after a short rest at room temperature

If one stage looks wrong, fix it before moving on rather than hoping the freezer will correct it later.

Side-by-side comparison of creamy vs icy homemade mango ice cream on a dark background, showing smooth scoopable texture versus grainy hard texture and the factors that affect the final result.
Not all homemade mango ice cream freezes the same way. A creamy, scoopable batch usually starts with thick mango puree, softly whipped cream, gentle folding, and a well-covered container, while icy mango ice cream is often the result of watery puree, overmixing, overwhipping, or repeated melting and refreezing. This comparison makes the texture difference easier to spot before the mistakes become permanent in the freezer.

Final Pre-Freezing Checklist

Before the container goes into the freezer, check these five things:

  • the mango puree was thick, not runny
  • the cream was whipped only to soft or medium peaks
  • the folded mixture still looks airy
  • the surface is covered directly
  • the container is sealed tightly
Final homemade mango ice cream checklist showing thick mango puree, whipped cream at soft peaks, airy folded base, surface covered directly, and sealed container before freezing.
Before homemade mango ice cream goes into the freezer, a few final checks make a real difference. The mango puree should still look thick, the cream should be whipped only to soft peaks, the folded base should stay airy, the surface should be covered directly, and the container should be sealed tightly. Catching those details before freezing helps the recipe hold a smoother texture, stronger mango flavor, and a better scoop later.

If all five look right, the freezer is far less likely to surprise you later.

Also Read: Sourdough Pizza Dough Recipe (Crispy Crust & Easy Pizza Base)

Tips for Creamy Homemade Mango Ice Cream

The difference between a decent batch and truly creamy mango ice cream usually comes down to a few quiet choices. None of them are dramatic, but together they shape the final result.

  • Use thick mango puree, not watery puree. This is the single biggest texture decision in the recipe.
  • Keep all the ingredients cold. Cold cream whips better, and chilled puree folds in more cleanly.
  • Do not overwhip the cream. Soft to medium peaks give you structure without heaviness.
  • Fold with patience. Gentle folding preserves the trapped air in the mixture.
  • Choose the right container. A snug freezer-safe container protects the texture better than a loosely packed tub.
  • Let the ice cream sit for a few minutes before scooping. Serving straight from the freezer can make even a good batch feel firmer than it really is.

Taken together, these choices are what make the recipe feel reliable rather than lucky.

Common Homemade Mango Ice Cream Mistakes and How to Fix Them

Many recipe pages rush this part, yet it is exactly where a post becomes more useful than a basic formula. Real readers do not only need the ideal method. They also need help when the first batch teaches them something.

Troubleshooting guide for homemade mango ice cream showing common problems like icy texture, hard freezing, weak mango flavor, and grainy texture.
If homemade mango ice cream goes wrong, the problem usually starts earlier than the freezer. Thin puree can lead to icy texture, weak fruit can leave the flavor flat, and overwhipped cream can make the final result feel rough instead of smooth. Use these checks to trace the problem back to the stage that needs fixing, then adjust the puree, cream, or balance before making the next batch.

Why Homemade Mango Ice Cream Turns Icy

The most common reason is excess water. Either the mango puree was too thin, the container was not covered properly, or the dessert softened and refroze too often.

To fix it next time:

  • reduce or strain watery puree before mixing
  • press a layer directly onto the surface before sealing
  • return the container to the freezer promptly after scooping

In most cases, icy texture starts with excess water in the fruit.

Why Homemade Mango Ice Cream Freezes Too Hard

This usually means the balance shifted too far toward fruit water and away from sugar or fat. It can also happen if your freezer runs extremely cold.

To fix it next time:

  • let the ice cream rest briefly before scooping
  • check whether the puree was too loose
  • avoid reducing the cream or condensed milk without replacing their role in the base

Sometimes the formula is fine and the serving temperature is the real issue.

Why the Mango Flavor Tastes Weak

Weak mango flavor usually points to weak fruit or diluted puree. If the mango itself was bland or the puree was too loose, the cream will dominate.

To fix it next time:

  • choose more fragrant mangoes
  • reduce watery puree slightly
  • add a little lime to brighten the fruit

This matters because readers searching for real mango ice cream are usually after fruit flavor first.

Why Homemade Mango Ice Cream Tastes Too Creamy and Not Mango-Forward

Sometimes the mango is not bad, yet the balance still tips too heavily toward dairy. This usually happens when the fruit is mild, the puree lacks concentration, or the base never gets brightened before freezing.

To fix it next time:

  • use mangoes that taste vivid before blending
  • make sure the puree is concentrated, not merely smooth
  • taste the mango-condensed-milk mixture before folding
  • add a little lime or lemon only if the fruit tastes flat

Mango ice cream should feel rich, but mango should still lead the dessert.

Why the Texture Looks Grainy

Graininess usually comes from overwhipped cream or from working with a base that lost its smoothness.

To fix it next time:

  • stop whipping at soft or medium peaks
  • chill the puree fully before mixing
  • fold gently instead of stirring hard

Those corrections solve most grainy batches.

What to Do if the Mangoes Are Fibrous

Fibrous mangoes can still be used, but only after a little cleanup.

To fix it next time:

  • blend the fruit very thoroughly
  • press the puree through a sieve
  • discard the stringy residue before mixing with the cream

Smooth puree is far more important than perfect mango variety.

What to Do if the Ice Cream Feels Too Sweet

A little extra lime or a pinch more salt can sometimes bring the flavor back into balance. More importantly, taste the mango base before folding so you can correct sweetness early.

To fix it next time:

  • taste the fruit base before combining it with cream
  • brighten with lime instead of only reducing sugar
  • remember that frozen desserts taste softer and less vivid straight from the freezer

The base should taste a little bolder before it freezes than you want the final scoop to taste.

Also Read: Pork Tenderloin in Oven (Juicy, Easy, 350°F or 400°F) Recipe

Homemade Mango Ice Cream Variations

One reason homemade mango ice cream is worth mastering is that it adapts beautifully once the texture logic is in place. You can change the flavor direction without losing what makes the dessert work.

Guide to homemade mango ice cream variations showing classic, Alphonso, coconut, vegan, and kulfi-style mango ice cream in separate bowls on a dark background.
Once the base recipe is right, homemade mango ice cream becomes easy to adapt without losing its creamy texture. This guide shows how the same core method can branch into a classic mango-forward version, a richer Alphonso variation, a tropical coconut version, a dairy-free vegan option, and a kulfi-style twist with saffron, cardamom, and pistachio notes.

Alphonso Homemade Mango Ice Cream

If you can get Alphonso mangoes or Alphonso pulp, this is the variation to make when you want maximum perfume, color, and richness. Alphonso mango ice cream tends to feel deeper, fuller, and more luxurious almost immediately.

Photo recipe card for Alphonso mango ice cream showing rich golden scoops in a dark bowl with saffron, cardamom, mango cubes, and a no-churn method overlay.
If you want a richer, more perfumed version of homemade mango ice cream, Alphonso is the variation to reach for. Its deeper aroma, fuller color, and smoother pulp give the final scoop a more luxurious feel, while saffron or cardamom can take it further without pulling it away from the mango. This is the kind of no-churn variation to make when you want the fruit to taste more intense, rounder, and a little more special.

Cardamom and saffron are especially lovely here. If you enjoy mango desserts with a richer Indian milk-based character, instant mango rasmalaai sits in a similar flavor world.

Mango Coconut Homemade Mango Ice Cream

For mango coconut ice cream, replace part of the dairy with coconut cream or add a little thick coconut milk to the mango base. The flavor becomes rounder and more tropical while the mango still stays clear.

Photo recipe card for mango coconut ice cream showing creamy scoops in a dark bowl with toasted coconut, coconut halves, mango cubes, and a no-churn method overlay.
Mango coconut ice cream is the variation to make when you want the fruit to stay clear but feel rounder, softer, and more tropical. A little coconut cream shifts the flavor without burying the mango, while toasted coconut on top adds texture and a fuller finish. This version works especially well when you want a no-churn homemade mango ice cream that feels slightly richer and more vacation-like without becoming heavy.

This version is especially nice when the mangoes are slightly tart, because coconut smooths the edges beautifully.

Can You Make Mango Ice Cream Without Condensed Milk?

Yes, homemade mango ice cream without condensed milk can be made, but the recipe becomes less forgiving. Condensed milk is not only providing sweetness. It is also helping with body, softness, and texture in a no-churn base.

Once you remove it, you need another way to replace those jobs, whether that means a cooked milk base, a more deliberate sugar balance, or a custard-style method.

Photo recipe card for mango ice cream without condensed milk showing creamy mango scoops in a tub with a scoop, plus ingredient and method text for a no-churn eggless version.
This version skips condensed milk but still aims for a smooth, scoopable mango ice cream by relying on thick mango puree, properly sweetened whipped cream, and a gentle fold that keeps the base light. It is a good option when you want homemade mango ice cream with a slightly leaner ingredient list, but the texture still depends on getting enough sweetness into the base and freezing it well before serving.

That does not make the variation bad. It simply makes it less beginner-friendly. For most readers, the main recipe remains the easiest place to begin.

Homemade Mango Ice Cream Without an Ice Cream Maker

The main recipe here is already a mango ice cream without ice cream maker method, which is one of its biggest strengths. You do not need specialized equipment to get a satisfying result.

That said, if you already own a churner or stand mixer attachment, a machine-based route can create an even more classic texture. This is where the KitchenAid ice cream guide becomes a useful internal next step.

Vegan Mango Ice Cream

A vegan version can be made with coconut cream instead of dairy cream. The flavor profile changes slightly, but it can still be rich and deeply mango-forward. If you also enjoy lighter mango desserts, mango chia pudding is another natural branch.

Vegan mango ice cream options chart comparing coconut cream, cashew cream, oat cream, and almond cream, with notes on texture, flavor, and the best use for each dairy-free base.
A vegan mango ice cream can go in a few different directions depending on the dairy-free base you choose. Coconut cream gives the richest and most tropical result, cashew cream stays smoother and more neutral, oat cream makes a softer lighter version, and almond cream keeps the scoop cleaner and less rich. The key in every case is the same: start with thick mango puree, use a thick dairy-free base, and chill well before freezing so the final texture stays more creamy than icy.

Can You Use Frozen Mango?

Yes, you can use frozen mango for homemade mango ice cream, but thaw it first, then blend it and check the texture just as you would with fresh fruit. The same rule still applies: the puree should be thick, smooth, and strongly flavored before it goes into the base.

Frozen mango can still make excellent homemade mango ice cream, but only when the fruit is thawed, blended smooth, and checked for thickness before it goes into the base. That extra step matters because frozen fruit often carries more excess water, and if the puree stays too loose, the final scoop can turn harder and less creamy than it should.

That makes frozen mango a useful option when fresh fruit is not ideal, but it does not remove the need to judge the puree properly.

Mango Kulfi-Style Ice Cream

If you want a slightly more Indian-style flavor profile without turning this into a full kulfi recipe, add cardamom, saffron, and a few chopped pistachios. The result still behaves like this mango ice cream recipe, but the flavor moves in a richer festive direction.

Photo recipe card for mango kulfi-style ice cream showing a creamy mango scoop with pistachios and saffron, plus a no-churn method and ingredient overlay on a dark background.
This mango kulfi-style ice cream is the variation to make when you want a richer, more festive finish without leaving the no-churn format behind. Cardamom adds warmth, saffron deepens the flavor, and pistachios bring a little texture on top, while the mango still stays at the center of the scoop. It is a good choice when you want homemade mango ice cream to feel more Indian-style, more aromatic, and a little more special than the classic version.

It is an especially good variation when using Alphonso pulp.

Also Read: Chicken Pesto Pasta (Easy Base Recipe + Creamy, One-Pot, Baked & More)

How to Store Homemade Mango Ice Cream

Store the ice cream in a tightly sealed freezer-safe container, ideally with a layer pressed directly against the surface before the lid goes on. That helps reduce air exposure and protect the texture. It also helps to use a container that fits the batch well rather than one with lots of empty air above the dessert.

For the best texture in storage:

  • use a freezer-safe container with a tight lid
  • cover the surface directly
  • keep the batch in the coldest stable part of the freezer
  • scoop quickly and return it promptly
  • avoid repeated melting and refreezing
Storage guide for homemade mango ice cream showing a loaf pan with the surface covered directly, a scoop, and tips for keeping mango ice cream smoother, softer, and easier to scoop.
Good homemade mango ice cream can lose its texture in storage if it is not covered and sealed properly. Pressing a layer directly onto the surface helps reduce ice crystals, a snug freezer-safe container protects the texture better, and a short rest before scooping makes the ice cream feel softer and easier to serve. These small storage habits help creamy mango ice cream stay closer to the texture you worked for.

As a practical rule, this ice cream is at its best within the first several days, when the mango still tastes bright and the texture remains especially soft. For broader freezer-care guidance, Colorado State University’s discussion of ice cream storage is also useful.

Also Read: Slow Cooker Pork Tenderloin (Crock Pot Recipe) — 3 Easy Ways

Serving Ideas for Mango Ice Cream at Home

Serve mango ice cream at home in chilled bowls, crisp waffle cones, or small dessert cups. Fresh mango cubes on top make the fruit feel even more immediate.

Simple toppings:

  • fresh mango cubes
  • lime zest
  • toasted coconut
  • chopped pistachios
  • a tiny pinch of cardamom
Serving guide for homemade mango ice cream showing a scoop in a dessert cup with fresh mango cubes, toasted coconut, chopped pistachios, lime zest, cardamom, and a waffle cone on a dark background.
Homemade mango ice cream gets even better when the toppings support the fruit instead of covering it up. Fresh mango cubes make the flavor feel brighter, toasted coconut adds texture and tropical depth, pistachios bring crunch, lime zest sharpens the finish, and a light pinch of cardamom gives the scoop a warmer spiced edge. These are simple ways to make mango ice cream at home feel more finished, more intentional, and more fun to serve.

Richer serving ideas:

  • waffle cones
  • shortbread or crisp butter cookies
  • alongside sticky-rice-inspired coconut elements
  • with chilled pudding-style desserts
  • as part of a mango dessert spread

If you want to build it into a broader dessert table, it pairs naturally with mango pudding, mango cheese mousse cake, or creamy chilled desserts like banana pudding. The main goal of this post, though, is to help you get the mango ice cream right first.

Also Read: Keto Mocktails: 10 Low Carb, Sugar Free Recipes

Why This Homemade Mango Ice Cream Is Worth Making Again

This recipe is built for readers who want real mango flavor, a creamy, scoopable texture, and clear fixes for watery puree or icy results. Once you understand what matters most, making homemade mango ice cream becomes much less about luck and much more about sequence.

Use good mangoes. Keep the puree thick. Chill the base properly. Whip the cream to the right stage. Fold gently. Freeze it well. Let it soften briefly before serving.

That is the rhythm.

Recipe card for no-churn homemade mango ice cream showing a loaf pan, scoop, mango cubes, lime, ingredients list, and method for a creamy eggless mango ice cream recipe.
This no-churn homemade mango ice cream recipe card brings the full method into one quick visual: thick mango puree for real fruit flavor, whipped cream for body, condensed milk for a smoother freeze, and a gentle fold that helps the final scoop stay creamy instead of icy. It is the kind of saveable reference that makes mango ice cream at home easier to repeat when you want a simple eggless dessert with strong mango flavor and a softer, scoopable texture.

Follow it, and you get a dessert that feels more luxurious than the effort suggests: rich, fruity, soft enough to scoop, and genuinely full of mango flavor. More importantly, you get a recipe that solves the real failure points from the start and earns a place in mango season after mango season.

Also Read: Crock Pot Pork Chops and Sauerkraut (No Dry Chops Recipe)

Frequently Asked Questions About Homemade Mango Ice Cream

1. Can I make mango ice cream without an ice cream maker?

Yes. This recipe is already designed as a no-churn mango ice cream, so you do not need an ice cream maker to get a good result. The structure comes from whipped cream, condensed milk, and thick mango puree rather than from churning. That is why texture control matters so much here. If the puree is thick, the cream is whipped to the right stage, and the base is folded gently, the final dessert can still freeze soft enough to scoop and rich enough to feel properly indulgent.

2. Which mango is best for mango ice cream?

The best mangoes for mango ice cream are ripe, fragrant, sweet, and relatively low in fiber. Alphonso is excellent when you want a deeper aroma, richer color, and a more luxurious finish. Kesar also works well, and Ataulfo is a very good choice when you want smooth texture and dependable sweetness. More important than the variety, though, is the fruit itself. If the mango tastes bland or watery before blending, the ice cream will never taste as vivid as it should.

3. Can I use frozen mango for homemade mango ice cream?

Yes, you can. Frozen mango works well when fresh fruit is out of season or disappointing, but it still needs proper handling. Thaw it first, then blend it and check the texture just as you would with fresh mango. The puree should be thick, smooth, and strongly flavored before it goes into the base. Frozen fruit is convenient, but it does not remove the need to judge the puree properly.

4. Why is my homemade mango ice cream icy?

Icy mango ice cream usually comes down to excess water. The most common cause is thin puree, but poor surface covering and repeated softening and refreezing can also make things worse. If you want a creamier result, start by fixing the fruit. Reduce watery puree slightly if needed, chill it fully, and cover the surface of the ice cream directly before sealing the container. In most cases, the problem starts before the batch ever reaches the freezer.

5. Why does mango ice cream freeze too hard?

Usually because the balance has shifted too far toward fruit water and away from enough sweetness and fat. Thin puree is a common cause. Very cold freezers can also make the texture feel harder than expected. Letting the container sit out for a few minutes before scooping often solves part of the problem. If it still freezes too hard every time, look first at the puree rather than assuming the whole recipe is wrong.

6. Can I make mango ice cream without condensed milk?

Yes, but it becomes less forgiving. Condensed milk is not only sweetening the mixture. It is also helping with body and smoother texture in a no-churn base. Once you remove it, you need another way to replace those jobs, whether that means a cooked milk base, a more deliberate sugar balance, or a custard-style method. It can be done, but it is no longer the easiest version of the recipe. For most readers, the condensed milk route is still the best place to begin.

7. How long does homemade mango ice cream last in the freezer?

It will keep longer than a few days, but for the best texture and brightest mango flavor, it is usually nicest within the first several days after freezing. Over time, homemade ice cream can lose some of its softness and develop a rougher texture, especially if it softens and refreezes repeatedly. A tight container, direct surface covering, and steady freezer temperature all help it hold up better.

8. Can I make vegan mango ice cream?

Yes. A vegan version can be made by replacing the dairy cream with coconut cream. The flavor changes slightly, but it can still be rich, smooth, and very mango-forward. This works especially well if you already like mango with coconut. Just keep the same core rule in mind: the puree still needs to be thick and strongly flavored, because that is what keeps the dessert tasting like mango rather than just cold sweetness.

Posted on 1 Comment

Sherbet and Sorbet Difference

SHERBET VS. SORBET WHAT'S THE DIFFERENCE?

Understanding These Frozen Treats the Masala Monk Way

If you’ve ever stood frozen (pun intended) in front of a dessert counter, puzzled over whether to choose sherbet or sorbet, you’re not alone. These two icy desserts may look similar, but their ingredients, texture, taste, and even cultural history tell a story of their own.

At Masala Monk, where flavor meets tradition, we believe understanding your food is just as satisfying as tasting it. So let’s clear the confusion: What is sherbet? What is sorbet? Which one is dairy-free? And most importantly — which one is better for you?

This deep-dive will answer all your questions and maybe even inspire you to churn out your own version at home.


❄️ What Is Sorbet?

Sorbet is a frozen dessert made primarily from fruit purée or juice, water, and sugar. It contains no dairy, no eggs, and is naturally vegan and lactose-free.

✨ Key Features of Sorbet:

  • Ingredients: Fruit (or fruit juice), water, sugar
  • Texture: Smooth and icy
  • Flavor: Refreshingly tart or sweet, depending on the fruit
  • Dietary Friendly: Vegan, dairy-free, gluten-free

📜 Origins:

The word “sorbet” is derived from the Arabic “Sharbat”, a chilled drink made with fruit and sugar, which later influenced the Italian “sorbetto.” Historically, sorbet was enjoyed in the Middle East and Europe as a palate cleanser between meals — long before refrigeration was even invented.

🥭 Common Sorbet Flavors:

  • Mango
  • Raspberry
  • Lemon
  • Passionfruit
  • Watermelon
  • Amla-Ginger (our Masala Monk fusion twist!)

🍦 What Is Sherbet?

Sherbet (or sherbert in American English) is the creamier cousin of sorbet. Though it also contains fruit, sugar, and water, it includes a small amount of dairy — often milk or cream — which gives it a richer, smoother texture than sorbet.

✨ Key Features of Sherbet:

  • Ingredients: Fruit, sugar, water, and dairy (typically 1–2%)
  • Texture: Creamy and smoother than sorbet, but lighter than ice cream
  • Flavor: Fruit-forward with a hint of richness
  • Dietary Notes: Not vegan, but lower in fat than ice cream

📜 Origins:

Sherbet’s name also comes from “Sharbat”, but in Western contexts, it evolved separately. In the U.S., the FDA even has a legal requirement: for a dessert to be called “sherbet,” it must contain between 1–2% milk fat.

🍊 Common Sherbet Flavors:

  • Orange
  • Pineapple
  • Lime
  • Strawberry
  • Guava-Coconut (try this Masala Monk recipe!)

🔬 Sorbet vs Sherbet – Side-by-Side Comparison

FeatureSorbetSherbet
Dairy❌ No✅ Yes (1–2%)
Vegan-Friendly✅ Yes❌ No
TextureIcy and refreshingCreamy and smooth
CaloriesGenerally lowerSlightly higher
MouthfeelLight, sharp, coolingRicher, smoother
Common BaseFruit purée, waterFruit + milk/cream
Traditional UsePalate cleanser, dessertDessert, sweet snack

🥛 Why the Dairy Matters

The tiny amount of dairy in sherbet plays a big role. It:

  • Softens the texture, making it smoother than icy sorbet.
  • Adds creaminess, but not enough to qualify it as “ice cream.”
  • Changes the dietary category — a deal-breaker for those who are lactose intolerant or vegan.

🍨 Sorbet, Sherbet & Ice Cream – A Spectrum of Frozen Delights

To understand sherbet and sorbet fully, it helps to place them on a spectrum of frozen desserts:

  • Sorbet: All fruit, zero dairy. The lightest.
  • Sherbet: A hybrid with just enough cream to feel indulgent.
  • Ice Cream: Rich, creamy, custard-like — typically over 10% milk fat.

🧠 Fun Facts About Sherbet and Sorbet

  • In the UK, “sherbet” may refer to a fizzy powder sweet, not a frozen dessert.
  • Sorbet was served to ancient Roman emperors, flavored with honey and snow.
  • Sherbet often appears in nostalgic American flavors like rainbow sherbet — a mix of orange, lime, and raspberry.
  • Some Indian sharbat drinks are closer to sorbet in flavor profile — think rose or khus frozen with lemon and mint.

🧘‍♀️ Which One Is Healthier?

It depends on what you’re looking for.

  • For dairy-free or vegan diets: Choose sorbet.
  • For a lower-fat alternative to ice cream: Sherbet is your go-to.
  • For pure fruit flavor and hydration: Sorbet wins.
  • For creaminess without the calorie load of ice cream: Sherbet is perfect.

Both can be part of a mindful diet when consumed in moderation.


🍋 Masala Monk Tip: Make Your Own Sorbet or Sherbet at Home!

Here’s a quick recipe base to experiment with:

🌿 Basic Sorbet Formula:

  • 2 cups fruit purée (mango, lychee, watermelon)
  • ½ cup water
  • ¼ cup honey or jaggery syrup
  • 1 tsp lemon juice
  • Optional: pinch of salt or black pepper

Freeze, churn, or blend periodically for a smooth texture.

🥥 Basic Sherbet Add-On:

To the above sorbet base, add:

  • ¼ cup full-fat milk or coconut cream
  • Optional: roasted cardamom, saffron, rose water

A perfect fusion of East and West!


🧾 Final Scoop – Sorbet vs. Sherbet: It’s All About Taste and Texture

Both sherbet and sorbet are delightful frozen treats, each with its own appeal:

  • Choose sorbet for fruit-forward, icy refreshment and clean, dairy-free indulgence.
  • Go for sherbet when you want a touch of creaminess without diving fully into ice cream territory.

At Masala Monk, we celebrate these sweet creations — and even give them a healthy, exotic twist. Whether you’re scooping out mango sorbet on a summer day or enjoying homemade jamun sherbet with a hint of chaat masala, there’s joy in every bite.


🍧 Hungry for more frozen secrets and delicious recipes?

Read more on MasalaMonk.com – where taste meets tradition in the most flavorful way.

❓ FAQs: Sherbet vs. Sorbet

1. What is the main difference between sherbet and sorbet?
The key difference is dairy. Sorbet contains no dairy—just fruit, water, and sugar—while sherbet includes a small amount of milk or cream, giving it a creamier texture.


2. Is sorbet dairy-free and vegan?
Yes, sorbet is naturally dairy-free and vegan as it’s made with fruit, sugar, and water—perfect for lactose-intolerant or plant-based diets.


3. Can vegans eat sherbet?
Typically, no. Sherbet contains milk or cream, making it unsuitable for vegans. Always check the label if you’re unsure.


4. Does sherbet contain more fat than sorbet?
Yes, but only slightly. Sherbet usually contains 1–2% milk fat, while sorbet contains zero fat, making it a lighter choice for those watching fat intake.


5. Is sorbet healthier than sherbet?
In general, yes. Sorbet is lower in fat and calories, especially if it’s made with real fruit and minimal added sugar. But the “healthier” choice depends on ingredients and portion size.


6. Can I make sorbet or sherbet at home without an ice cream machine?
Yes! Both can be made at home using a blender and freezer. Churn by hand every few hours or use a food processor for a smooth texture.


7. What fruits work best for sorbet?
Fruits with high water content and bold flavor like mango, raspberry, lemon, lychee, and watermelon are excellent for sorbet.


8. Is there an Indian version of sherbet or sorbet?
Absolutely! The traditional “sharbat” in India — a sweetened fruit or flower-based drink — is a precursor. When frozen, drinks like rose sharbat, khus, or aam panna can become Indian-style sorbets.


9. Why is sherbet sometimes spelled “sherbert”?
“Sherbert” is a common American mispronunciation and alternate spelling of “sherbet.” While both refer to the same dessert, “sherbet” is the correct spelling.


10. Is rainbow sherbet made from natural ingredients?
Not always. Commercial rainbow sherbet may contain artificial colors and flavors. Look for natural or organic brands, or make your own for better control over ingredients.