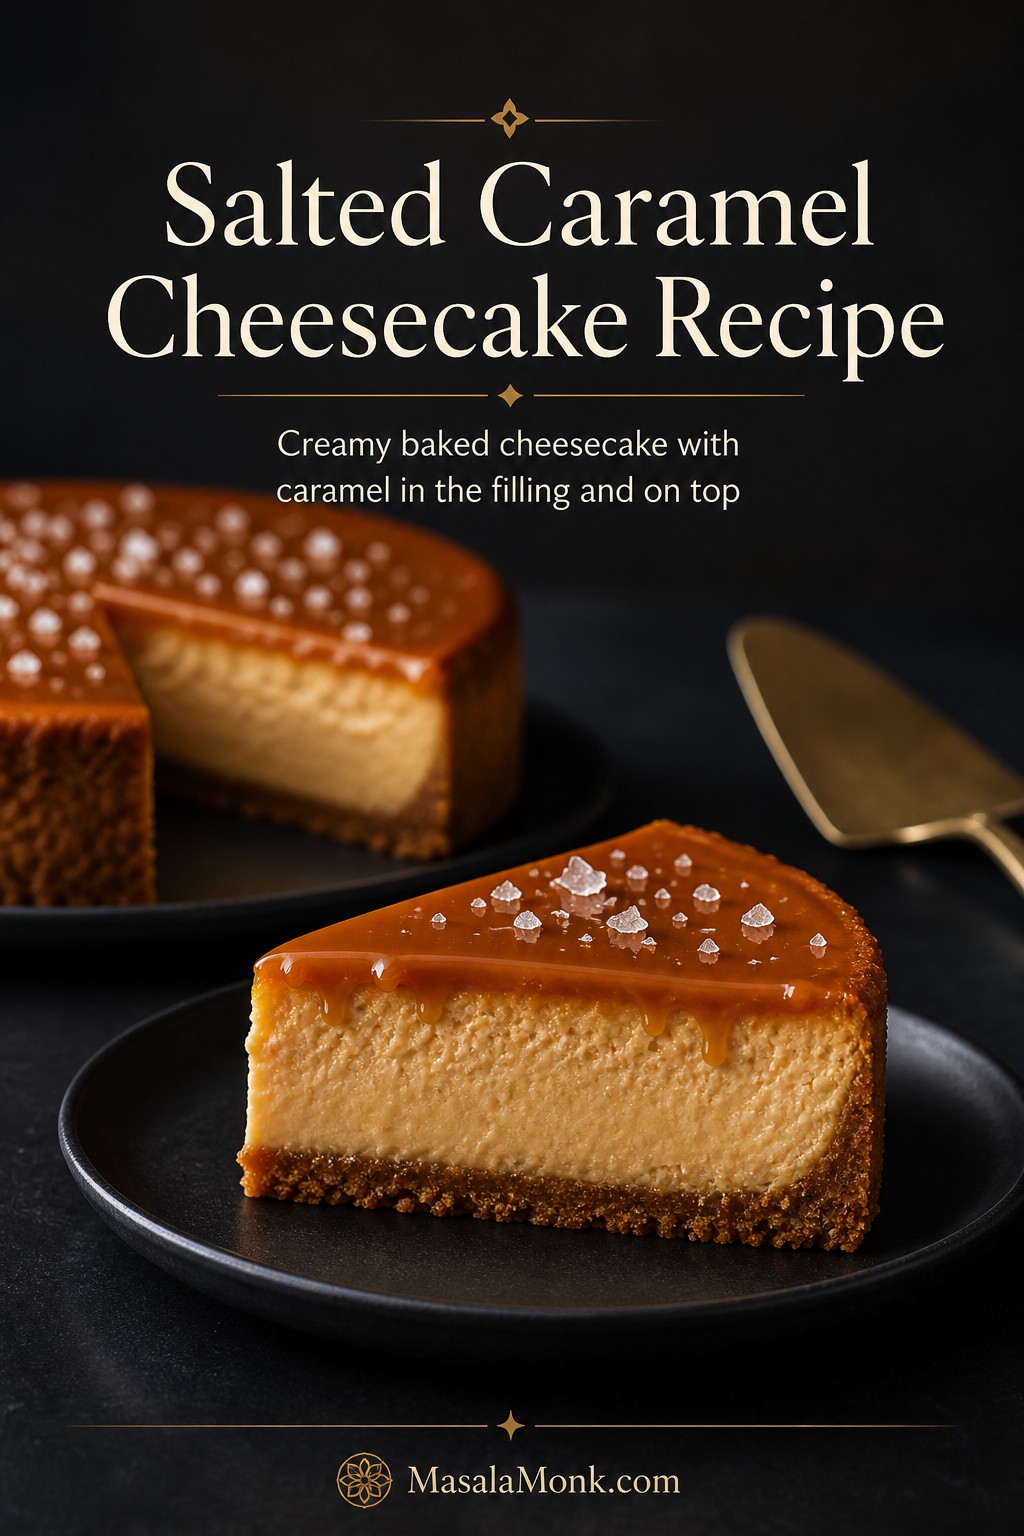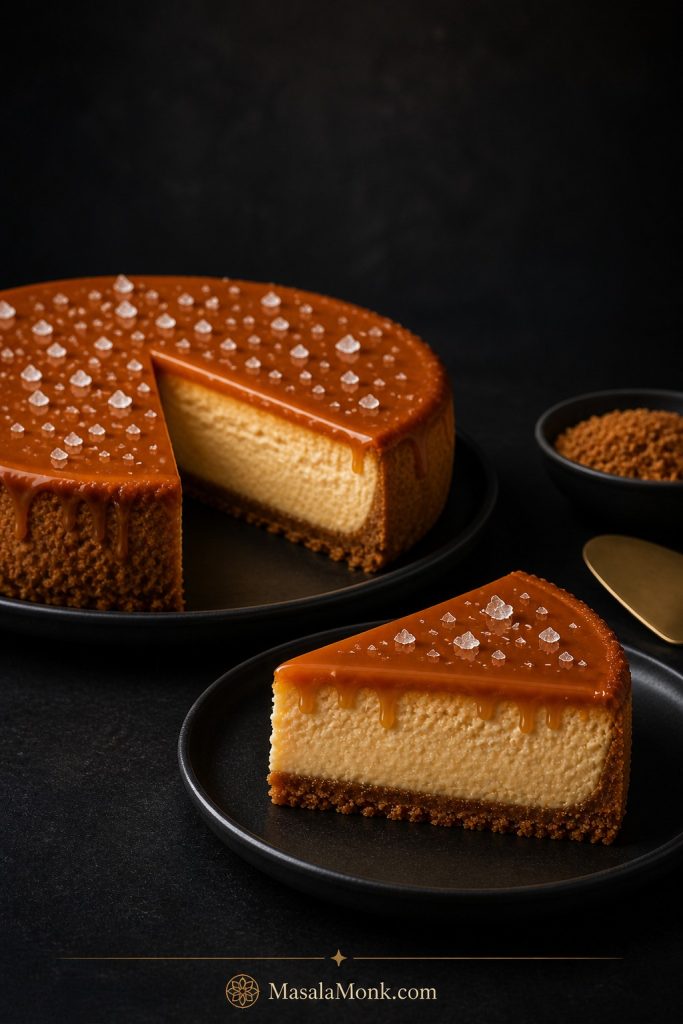
A proper New York cheesecake recipe should feel calm, classic, and worth the wait: a tall creamy slice, a buttery crumb crust, a dense but smooth center, and clean edges that hold when you lift the fork.
The part that makes people nervous is rarely the ingredient list. It is the moment when the cheesecake still wobbles, the water bath looks intimidating, or the top seems too delicate to touch. This guide walks you through those moments clearly, so you know when the cheesecake is done, how to cool it slowly, and how to slice it cleanly the next day.
This is a classic baked New York-style cheesecake with full-fat cream cheese, sour cream tang, a little heavy cream for smoothness, and a graham cracker or digestive biscuit crust. The main method uses a water bath for the safest creamy texture, but you will also find a steam-pan compromise and a no-water-bath option if you prefer not to place a springform pan directly in water.
Instead of relying only on a timer, this guide gives you visual cues, global ingredient swaps, and three baking paths: classic water bath, steam-pan compromise, and no-water-bath.
This New York cheesecake recipe is built for a tall, creamy, make-ahead slice that tastes even better after a full night in the fridge. It is the cheesecake you bake before a birthday dinner, a holiday table, or any night when you want dessert already waiting calmly in the fridge. The hard part is not the mixing; it is trusting the gentle wobble, cooling it gradually, and not cutting into it too soon.
Table of Contents
Make the Cheesecake
Quick Answer: How to Make New York Cheesecake
To make New York cheesecake, press a buttery graham cracker or digestive biscuit crust into a 9-inch springform pan, pre-bake it briefly, then fill it with a smooth mixture of full-fat cream cheese, sugar, sour cream, heavy cream, eggs, vanilla, lemon, and a little cornstarch. Bake the cheesecake gently in a water bath at 325°F / 160–165°C until the edges are set but the center has a soft custard-like wobble. Then cool it slowly in the turned-off oven, bring it to room temperature, and chill it for at least 8 hours, preferably overnight.
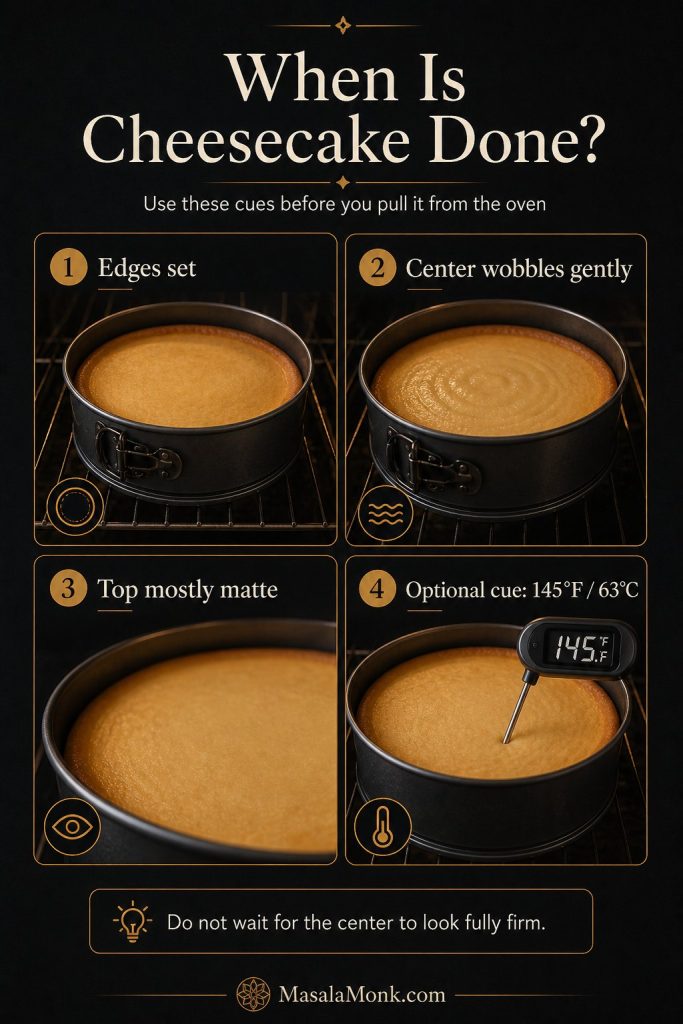
The timer helps, but the texture cue matters more. A New York cheesecake should not look fully firm when it leaves the oven. The center should still move gently because it will continue setting as it cools and chills.
Best result: Use a 9-inch springform pan, full-fat cream cheese, room-temperature ingredients, a gentle water bath, gradual cooling, and an overnight chill.
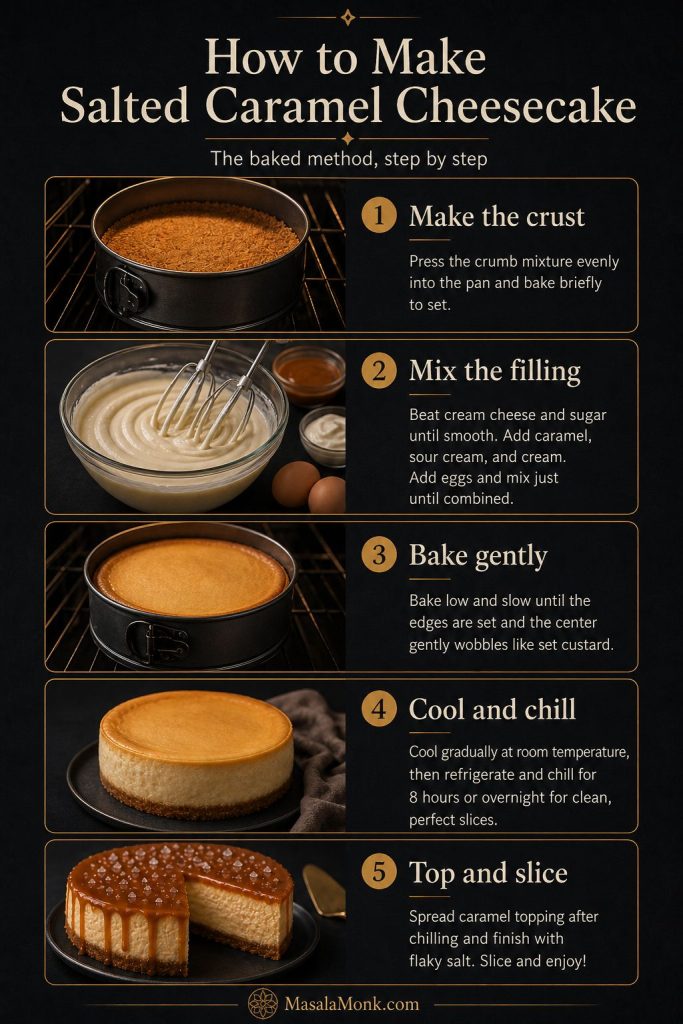
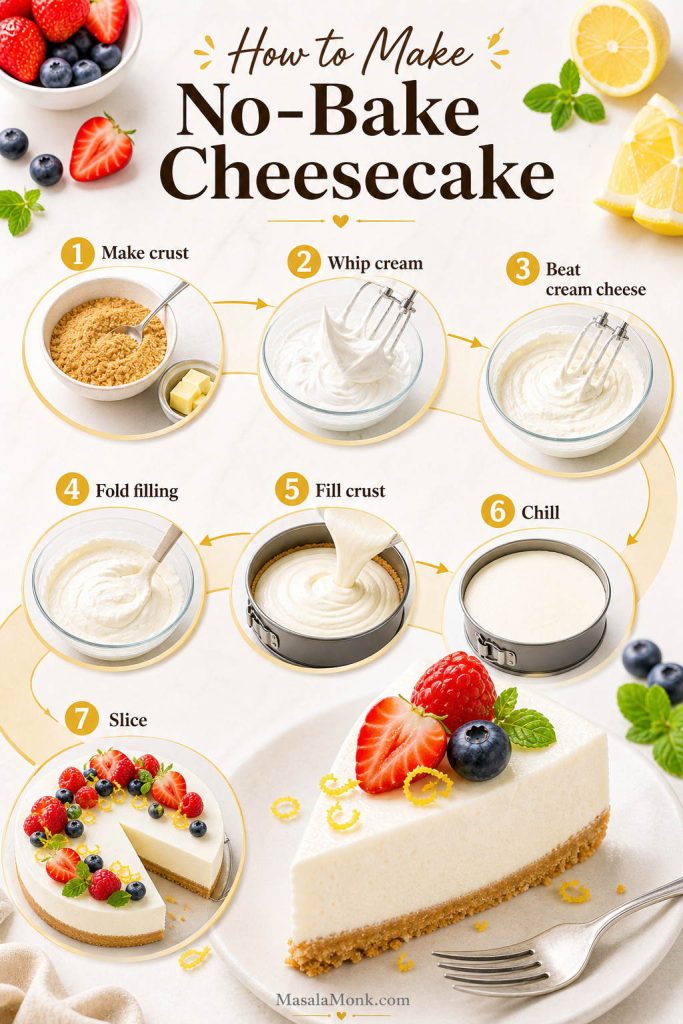
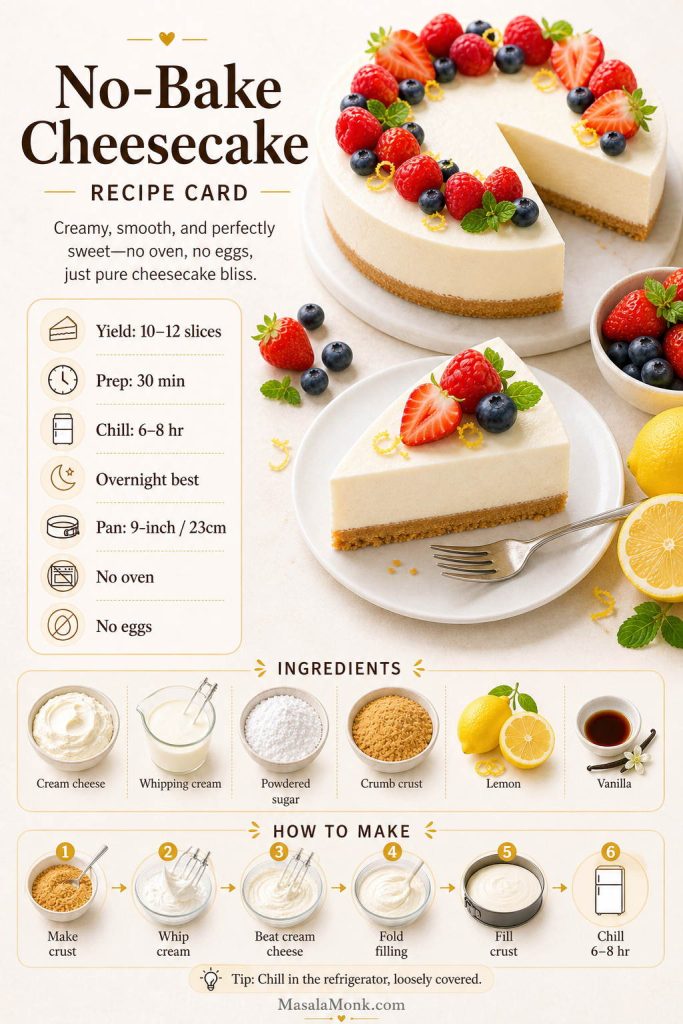
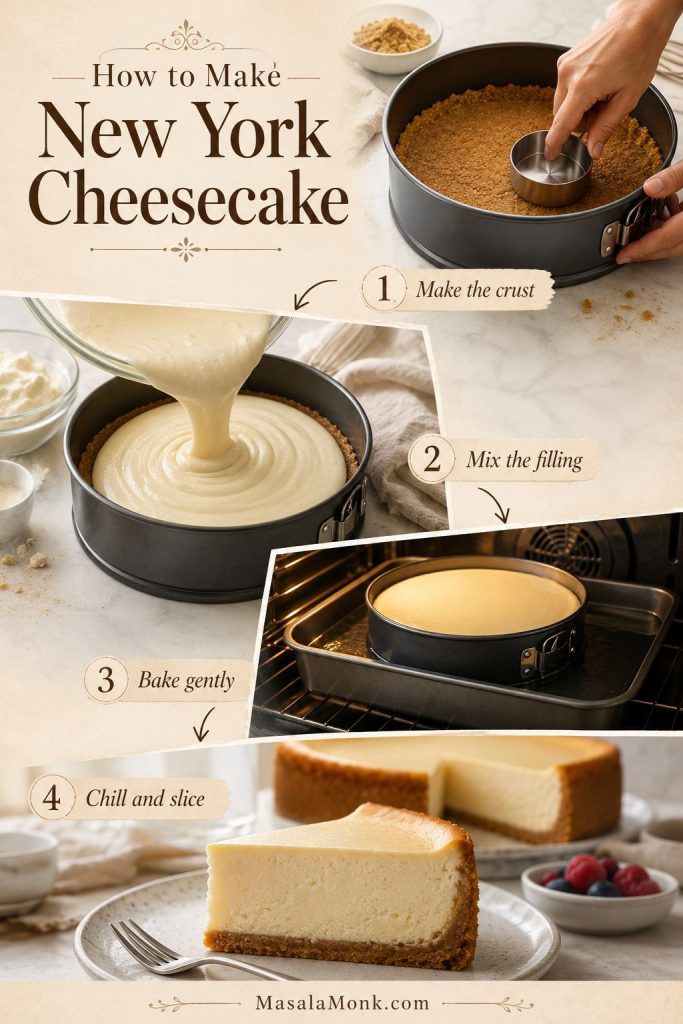
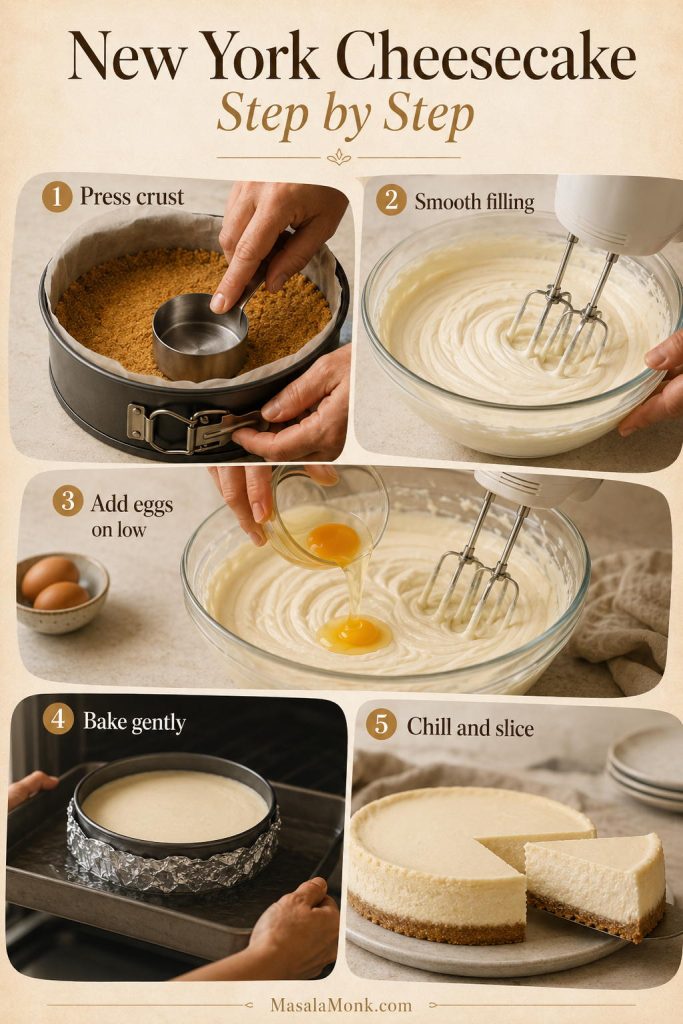
Start here: This overview shows the full cheesecake flow before the detailed method: crust, filling, gentle baking, and chilling.
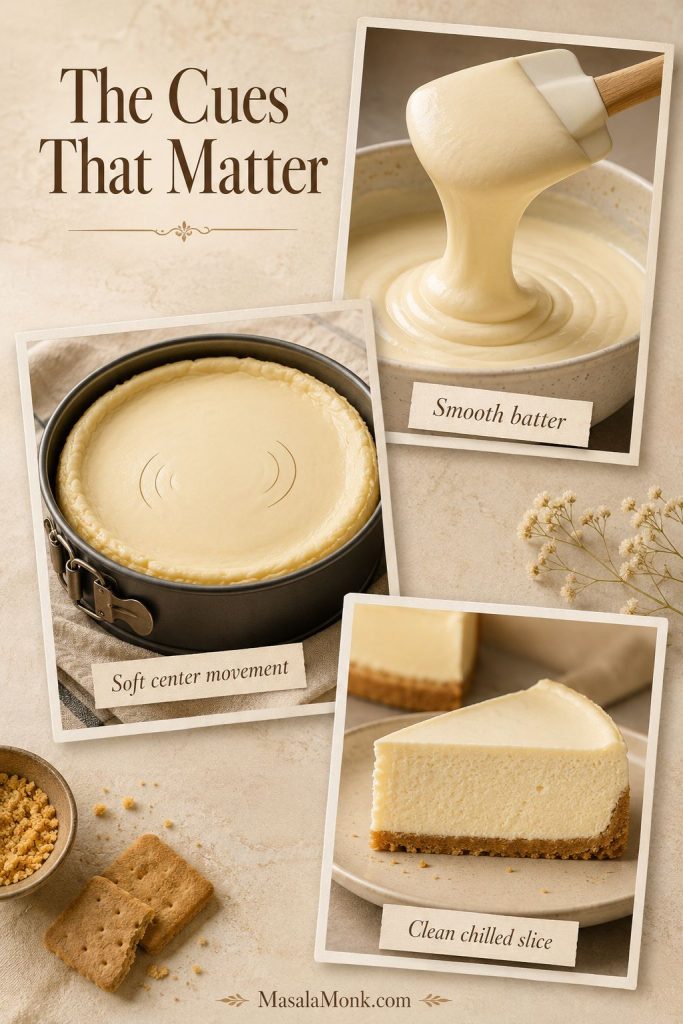
What to watch for: The most useful cheesecake signs are texture-based, so watch the batter, the center movement, and the final slice.
Need the exact details? Jump to the recipe card, compare water bath options, or check the doneness cues before you bake.
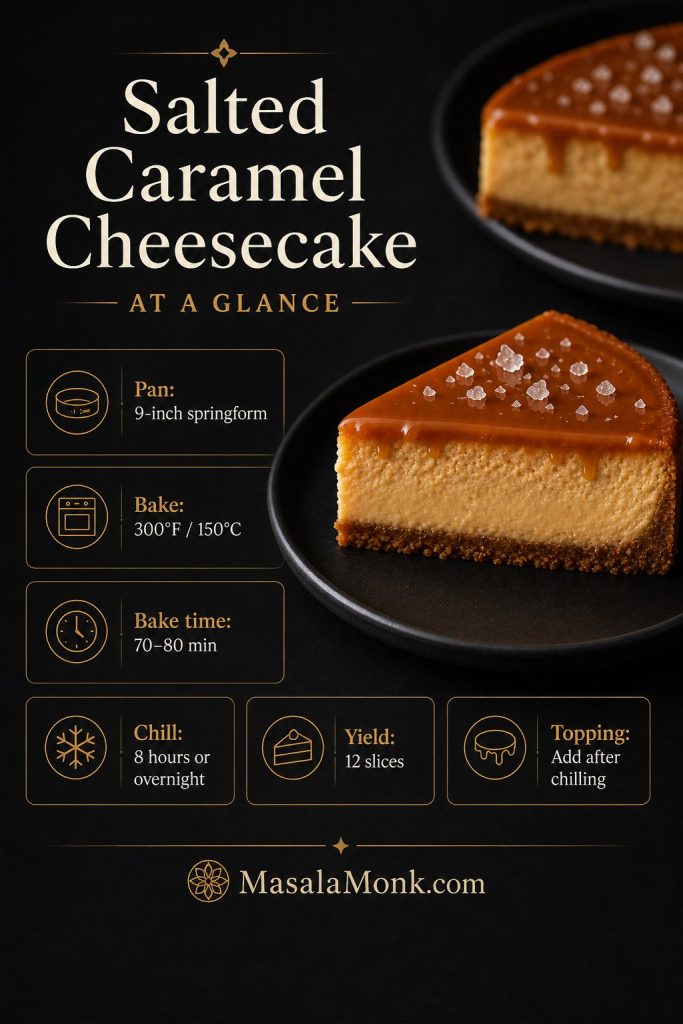
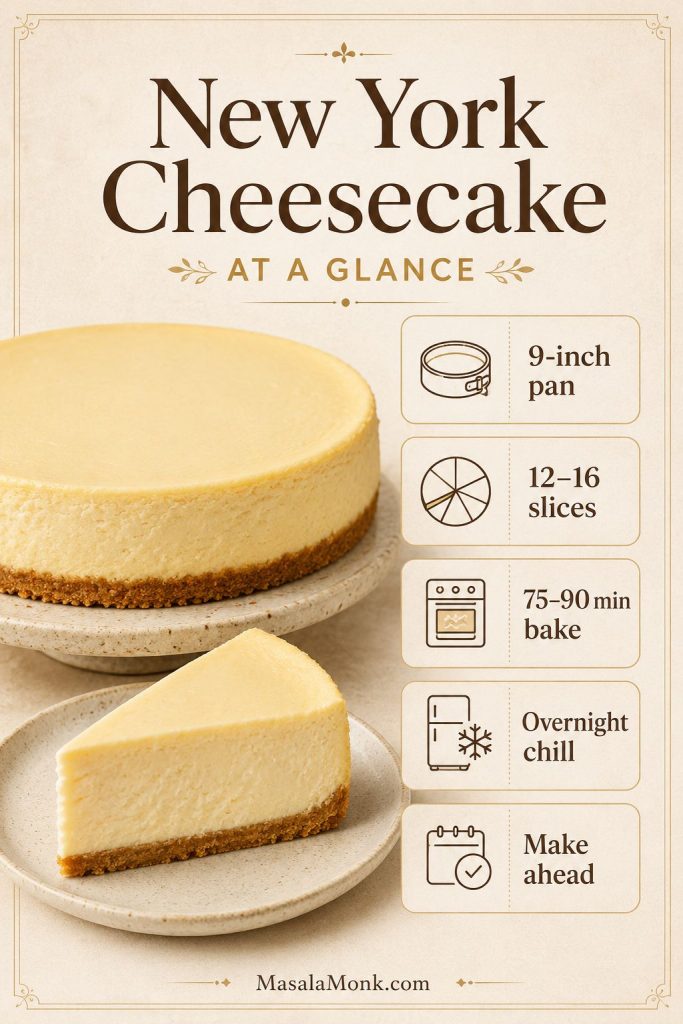
New York Cheesecake at a Glance
Timing note: Use this timing and pan summary before you decide when to bake and serve the cheesecake.
Baking today? Keep the full recipe card open for measurements, then use the cue images below for batter texture, pan setup, doneness, cooling, and troubleshooting.
Why This New York Cheesecake Recipe Works
The key is to treat cheesecake like a custard, not a cake. Full-fat cream cheese gives the dense New York-style body, sour cream adds tang, heavy cream softens the texture, and a small amount of cornstarch helps the filling set smoothly without becoming heavy.
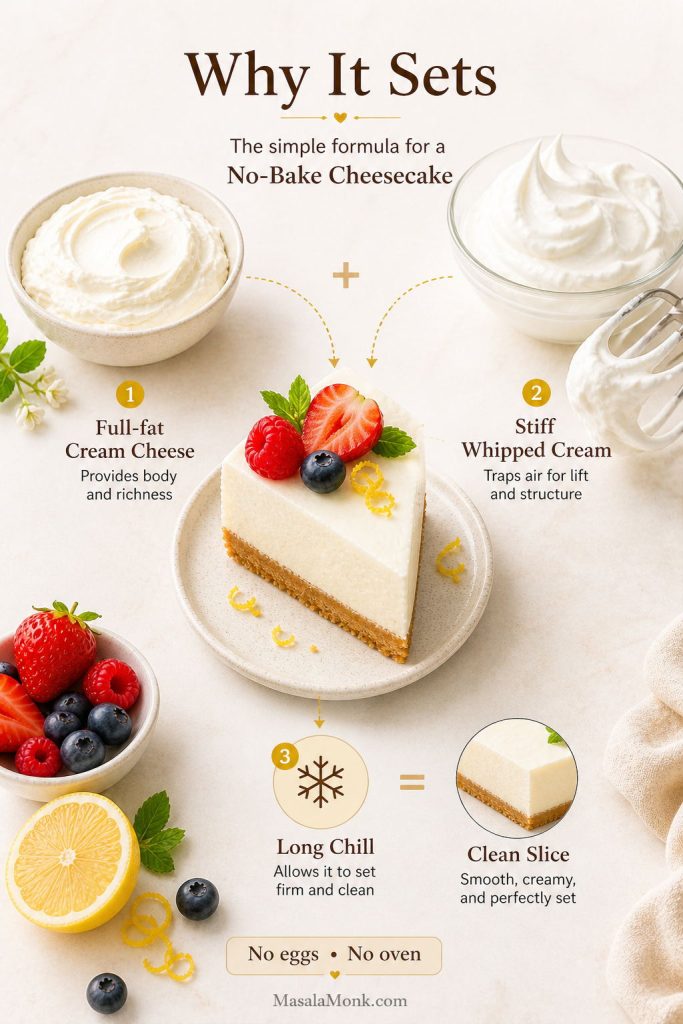
The water bath protects the edges from overbaking before the center is ready, while gradual oven cooling prevents the sudden temperature shock that often causes cracks. Finally, the overnight chill is where the cheesecake becomes itself: the soft baked custard settles into a cool, creamy slice that cuts cleanly and holds its shape on the plate.
You also get a little room to choose the baking method that feels least stressful. You can use the gentler classic bake, the steam-pan compromise, or the simpler low-and-slow route without losing sight of the same goal: a smooth filling, a steady set, and sliceable texture after chilling.
What Makes New York Cheesecake Different?
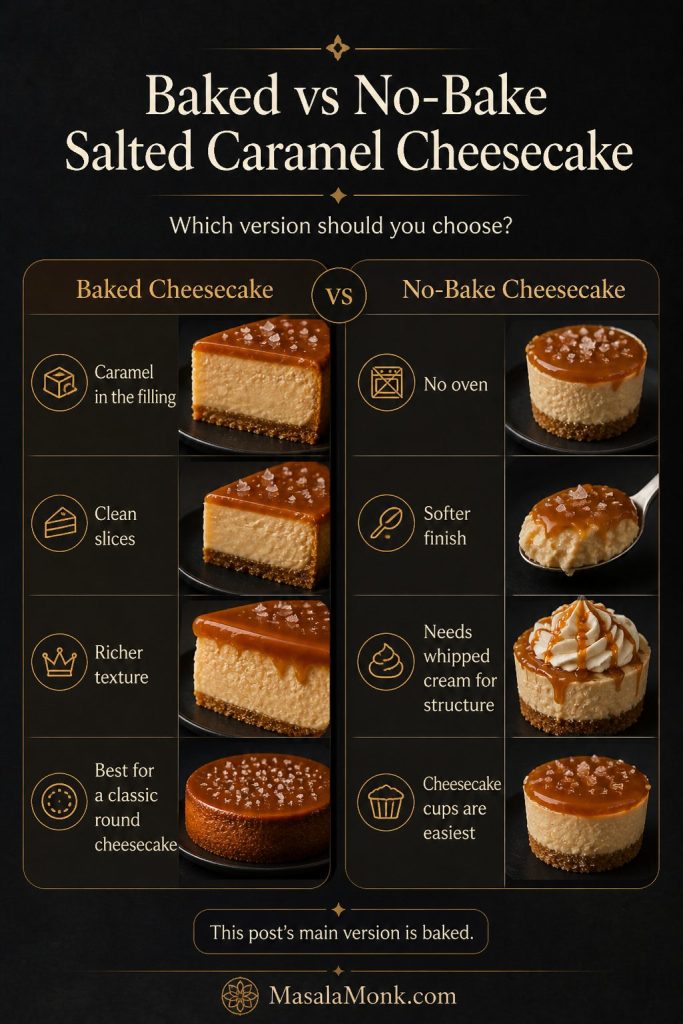
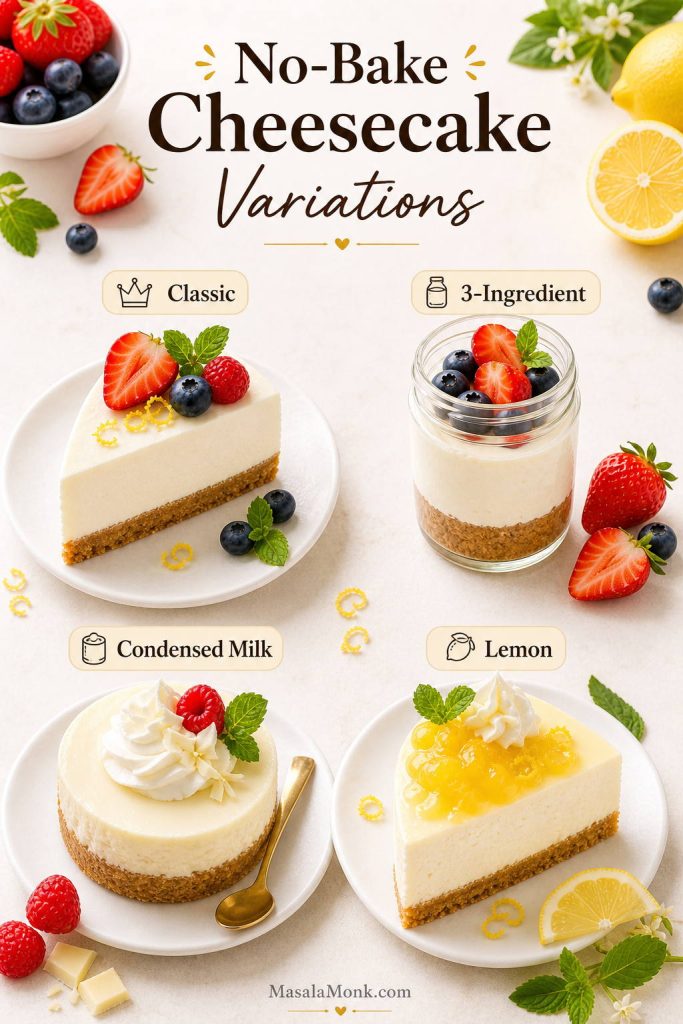
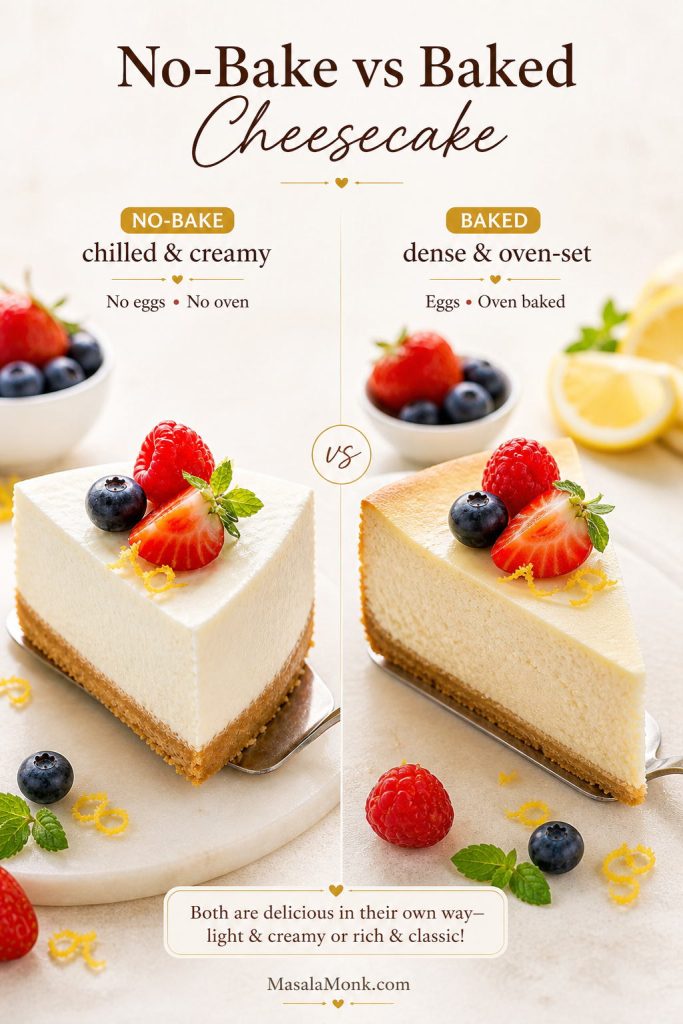
New York cheesecake is richer, denser, and more cream-cheese-forward than many lighter cheesecake styles. It is usually baked, set like a custard, and chilled until firm enough to slice cleanly. It should feel creamy and smooth on the fork, but it should not be airy like mousse or soft like a no-bake cheesecake.
The classic flavor comes from full-fat cream cheese, sugar, eggs, vanilla, and a little acidity. Some recipes lean on sour cream, some use heavy cream, and some use both. In this version, sour cream gives the cheesecake its gentle tang, while heavy cream rounds out the filling and keeps the texture smooth.
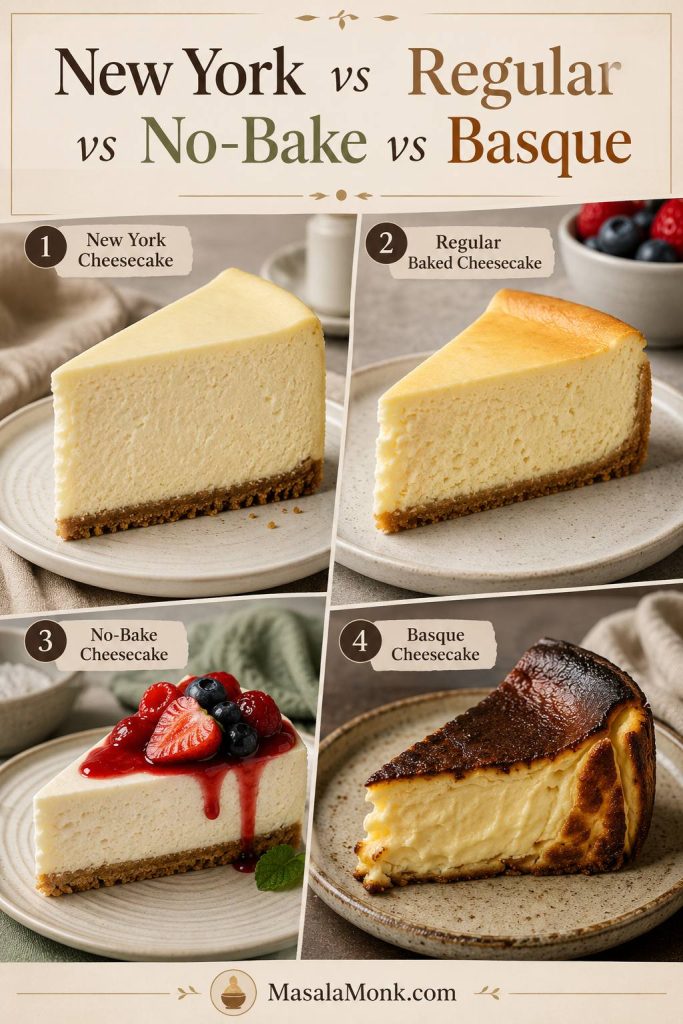
Think of regular cheesecake as flexible; New York cheesecake is specific. It should be rich, baked, cream-cheese-forward, and firm enough to cut into tall, clean slices. That is why a good New York cheesecake feels substantial without feeling heavy.
| Cheesecake Style | Texture | Method | Best For |
|---|---|---|---|
| New York cheesecake | Dense, rich, cream-cheese-forward | Baked, then fully chilled | Tall classic slices |
| Regular baked cheesecake | Creamy, often lighter | Baked | Flexible flavors and toppings |
| No-bake cheesecake | Softer, mousse-like | Chilled, not baked | Easy make-ahead dessert |
| Basque cheesecake | Custardy, deeply browned top | High-heat bake, usually no crust | Rustic caramelized flavor |
Style check: This is where New York cheesecake separates itself from lighter baked, no-bake, and Basque-style cheesecakes.
What This Cheesecake Should Taste and Feel Like
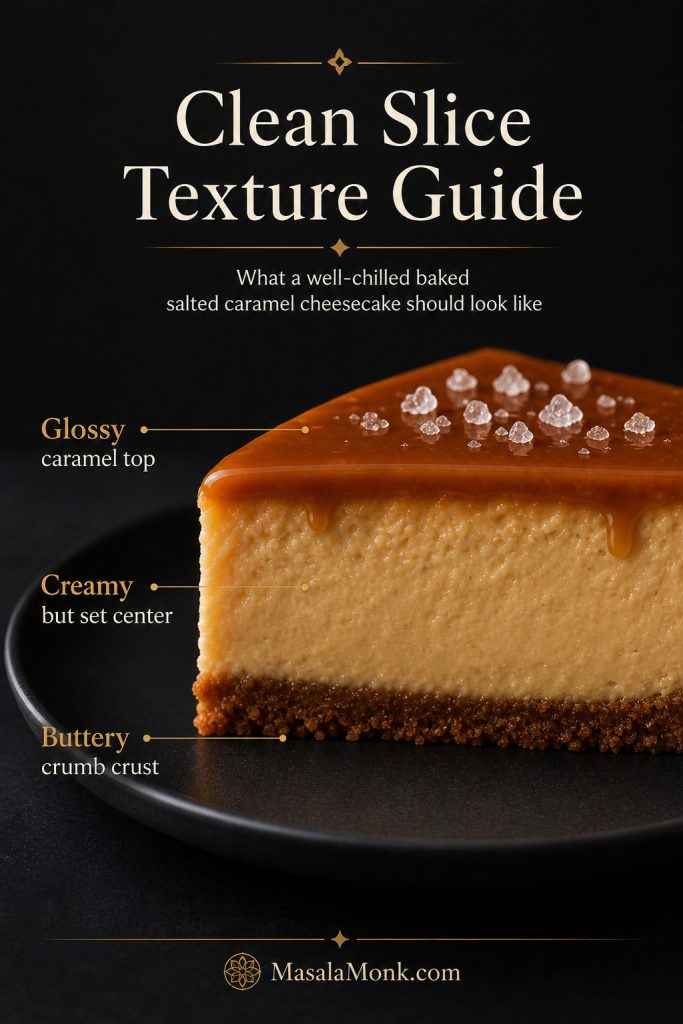
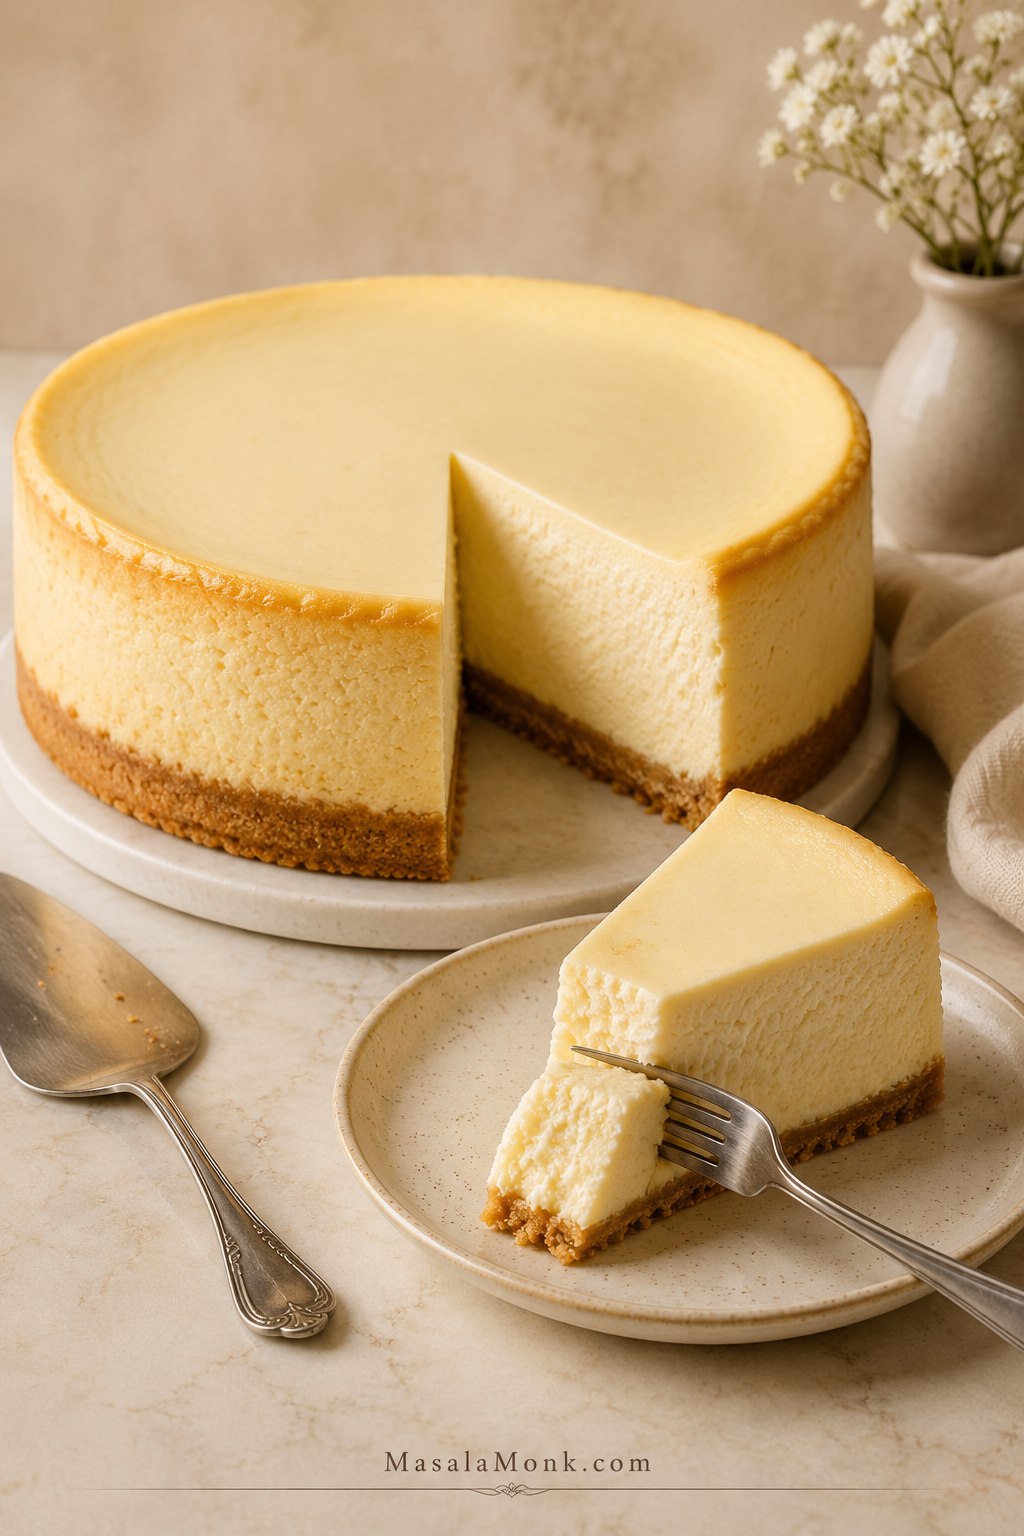
The finished cheesecake should be dense in the New York style, but not dry or heavy. A fork should slide through the filling smoothly, and each bite should feel cool, creamy, lightly tangy, and rich without tasting flat.
Texture target: Look for a slice that holds its shape but still feels creamy when the fork goes through it.
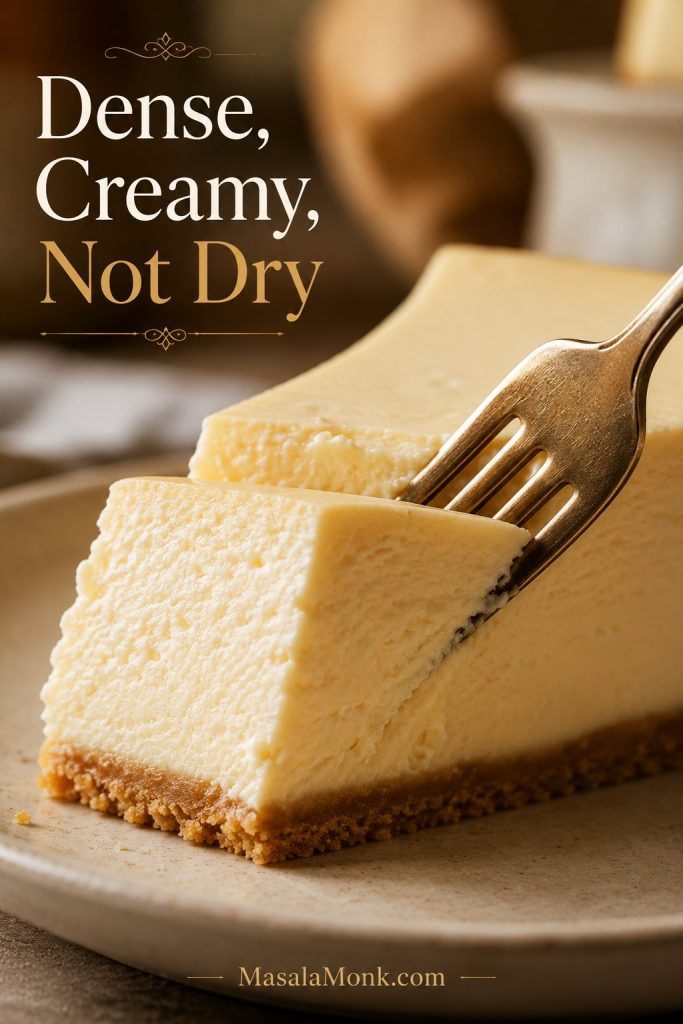
The crust should give a gentle buttery crunch, not a hard snap. Meanwhile, the filling should taste mostly of cream cheese and vanilla, with sour cream and lemon quietly brightening the richness in the background.
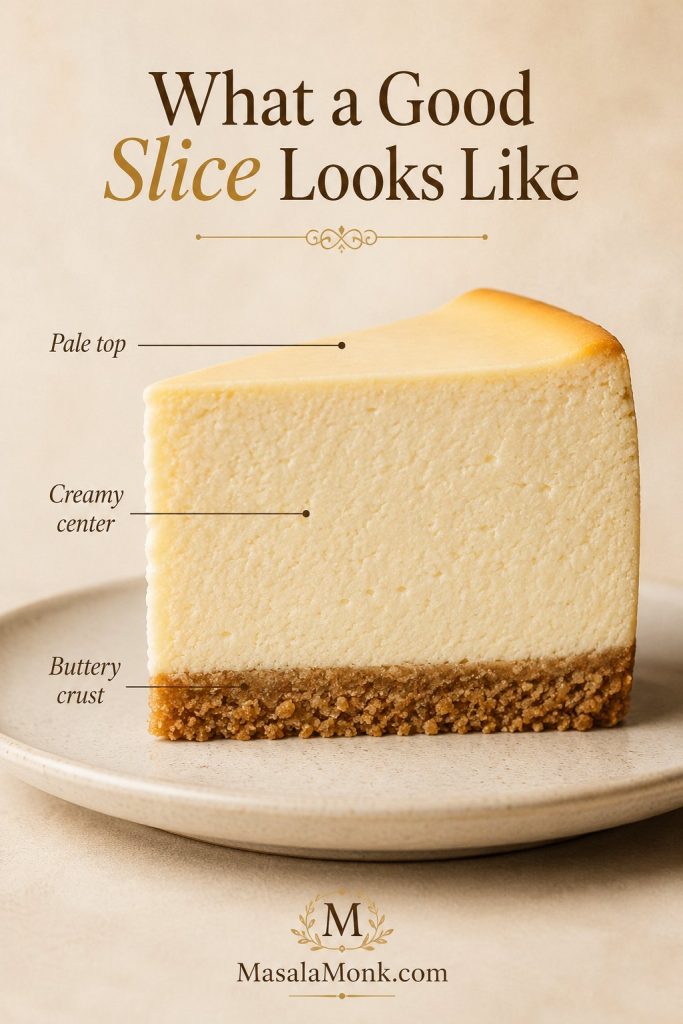
If the slice stands tall, the center looks softly set, and the texture feels creamy rather than airy, you are exactly where this cheesecake is meant to be.
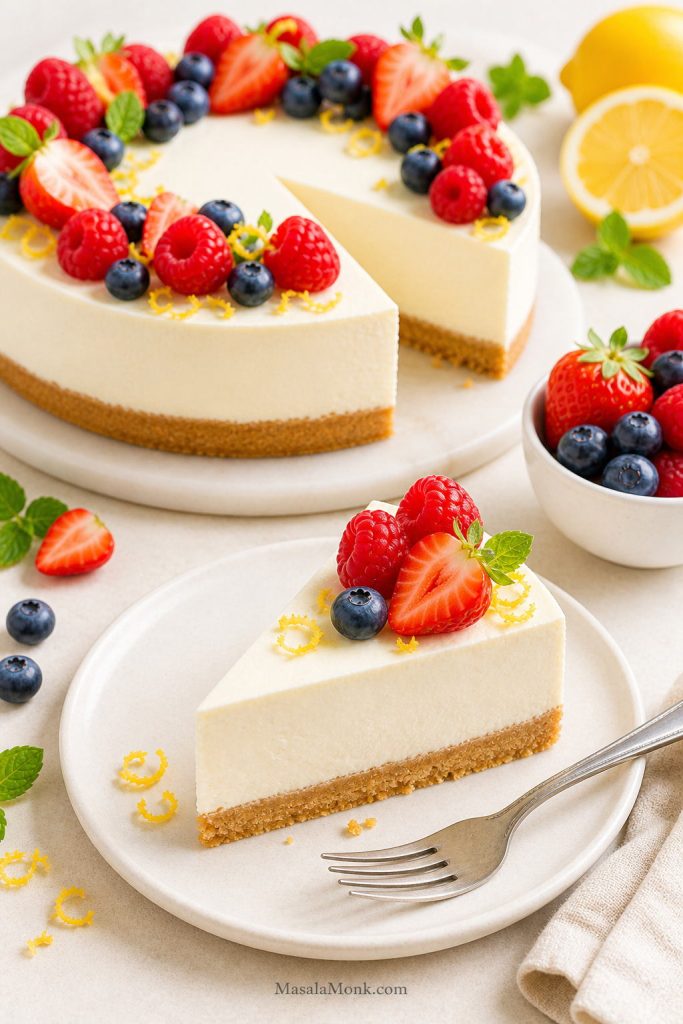
Slice target: A clean side profile helps you see the balance between pale top, creamy center, and sturdy crumb crust.
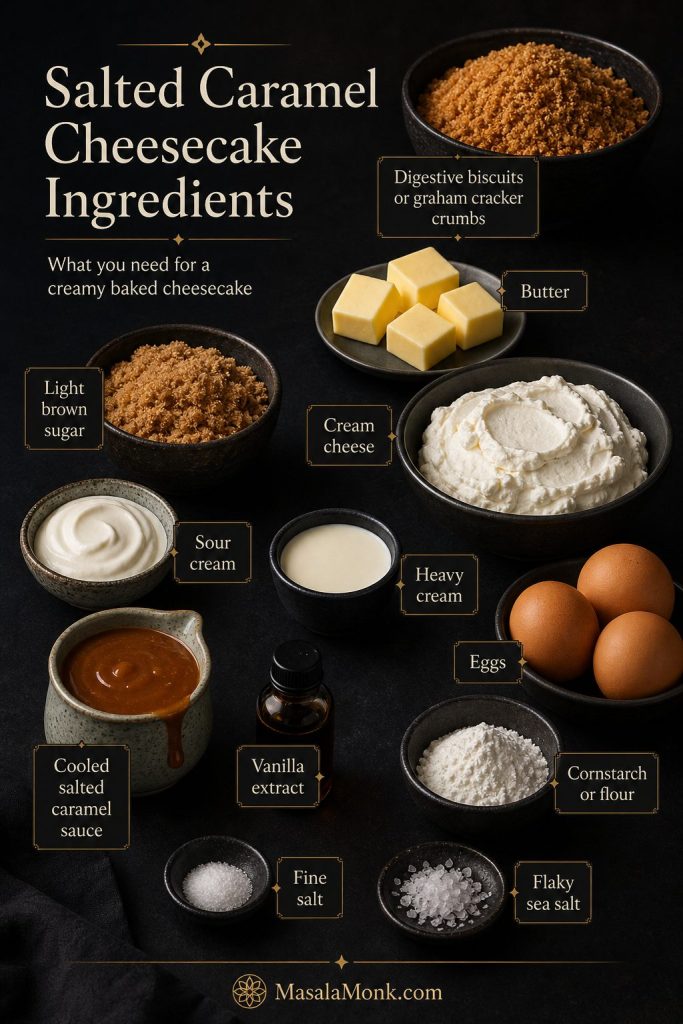
Ingredients for New York Cheesecake
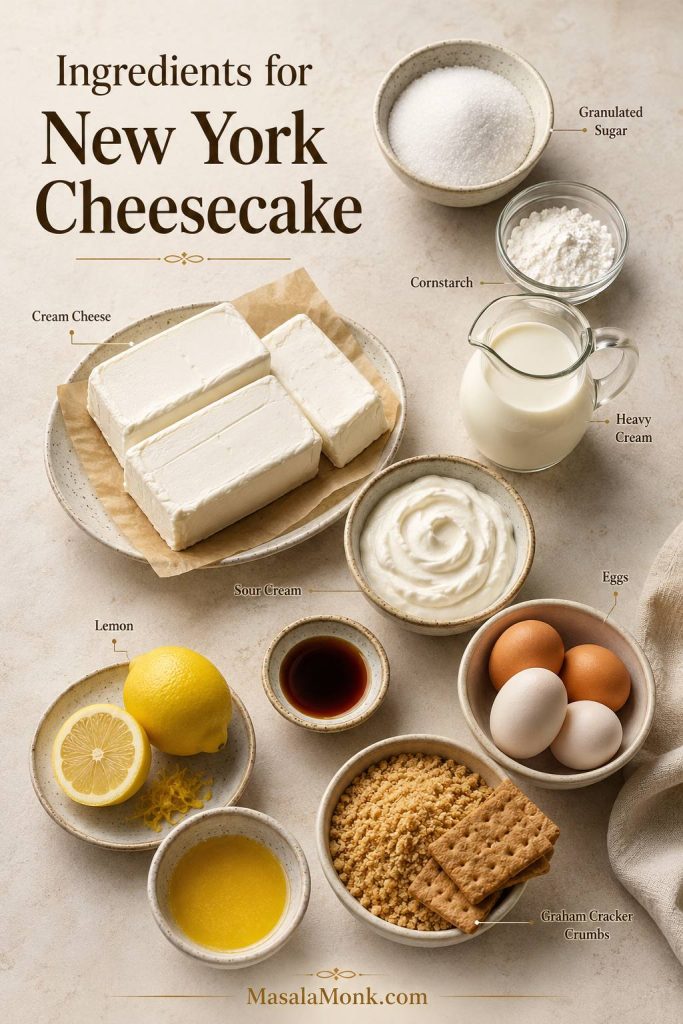
The ingredient list is short, but the details matter more than they do in many cakes. Full-fat cream cheese, room-temperature dairy, and gentle mixing make the difference between a smooth bakery-style cheesecake and a lumpy, cracked, or grainy one.
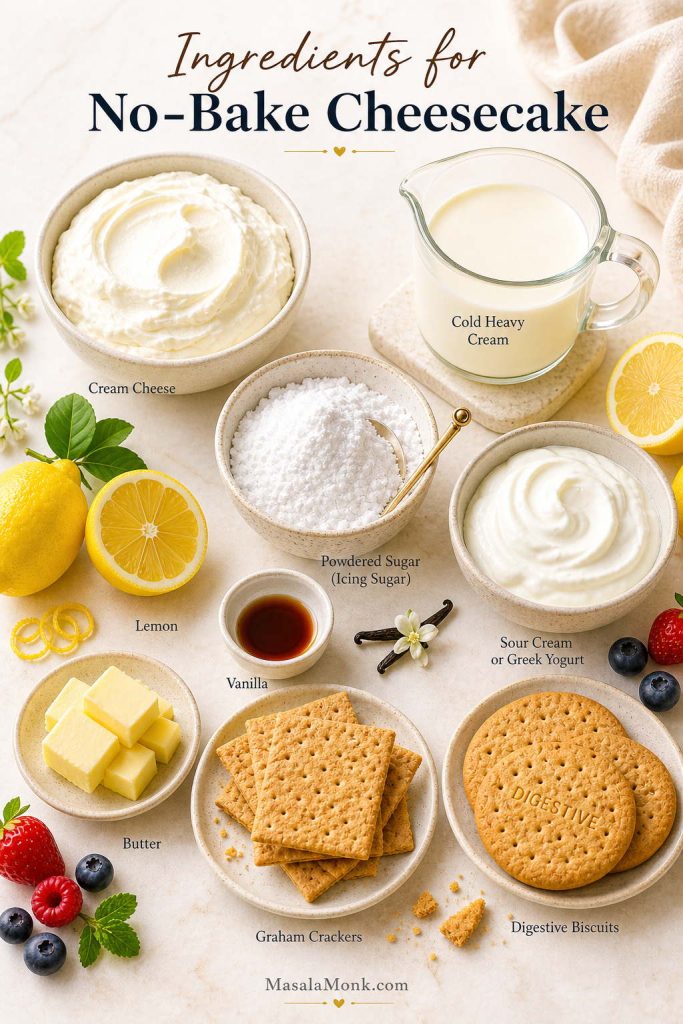
Ingredient check: These are the ingredients that build the crust, body, tang, and smooth set of the cheesecake.
Cream Cheese
Use full-fat cream cheese. For a tall 9-inch New York cheesecake, you need 32 oz / 907g. Brick-style cream cheese is ideal because it is firm, rich, and consistent.
Before you buy: The right cream cheese choice matters before you even start mixing, because it controls the body of the filling.
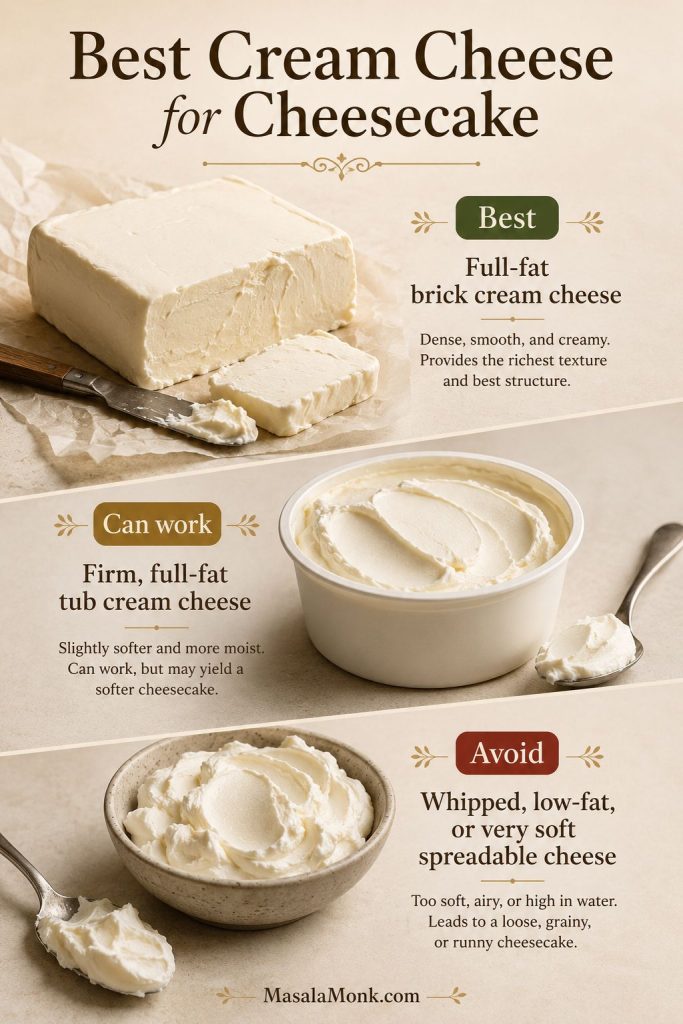
Avoid whipped cream cheese, low-fat cream cheese, flavored cream cheese, and watery spreadable cheese. They can make the filling loose, airy, salty, or grainy. If you are using tub-style cream cheese outside the US, choose the firmest full-fat version you can find, and avoid sandwich spreads that are very soft, heavily salted, or already flavored.
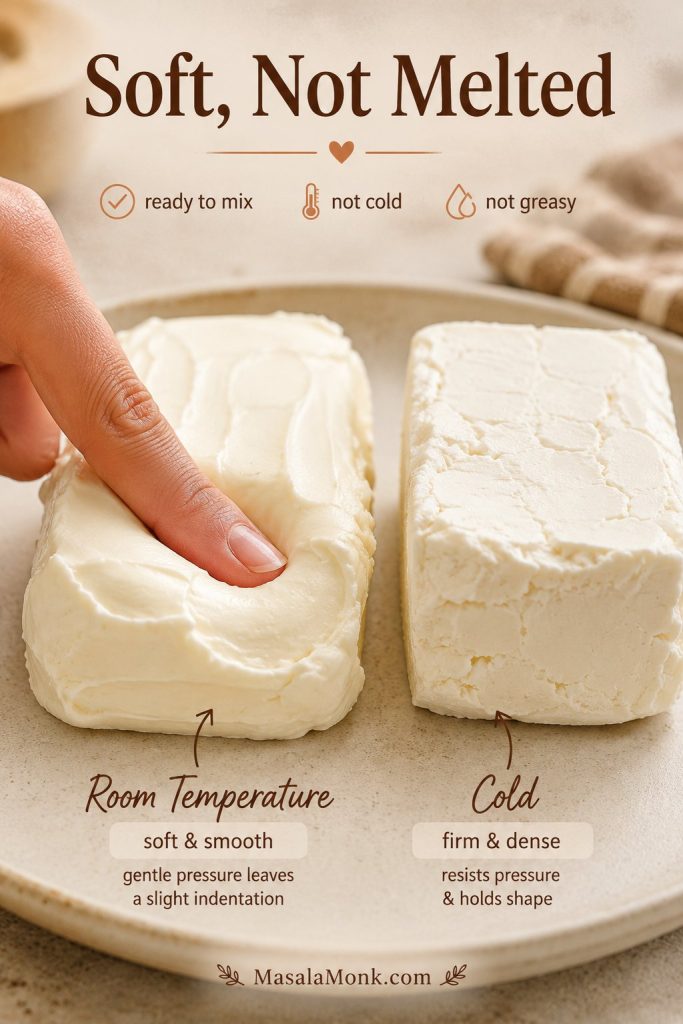
Before mixing, the cream cheese must be at room temperature. It should feel soft enough to press with a finger, but not melted, greasy, or warm. Otherwise, cold cream cheese will not blend smoothly, and once the eggs go in, it becomes much harder to beat out lumps without overmixing the batter.
Timing tip: Take the cream cheese, sour cream, heavy cream, and eggs out of the fridge about 1–2 hours before mixing. If your kitchen is very warm, check sooner; the cream cheese should be soft, not oily or melted.
Room-temperature shortcut: Cut the cream cheese into cubes and leave it on the counter until softened. If your eggs are cold, place them in a bowl of warm water for 10 minutes before using.
Softness test: Room-temperature cream cheese should press easily, but it should still look creamy and stable rather than melted.
Sour Cream and Heavy Cream
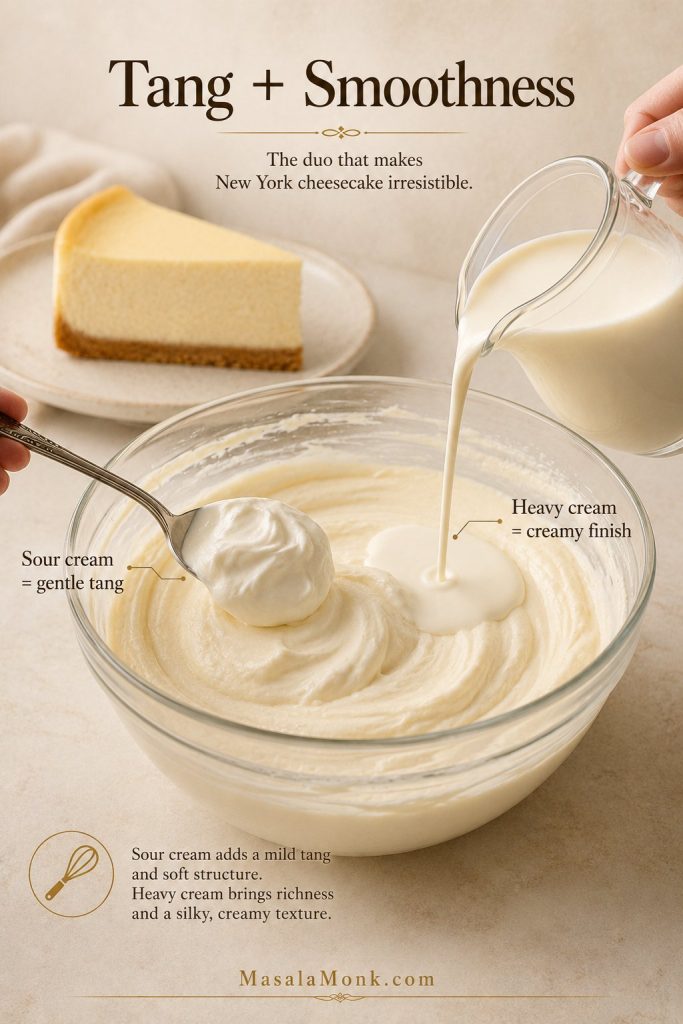
Sour cream gives New York cheesecake a gentle tang and helps balance the richness of the cream cheese. Heavy cream makes the filling a little silkier and softer without turning it into a no-bake style dessert.
Good to know: Sour cream and heavy cream do different jobs, so both help balance the rich filling.
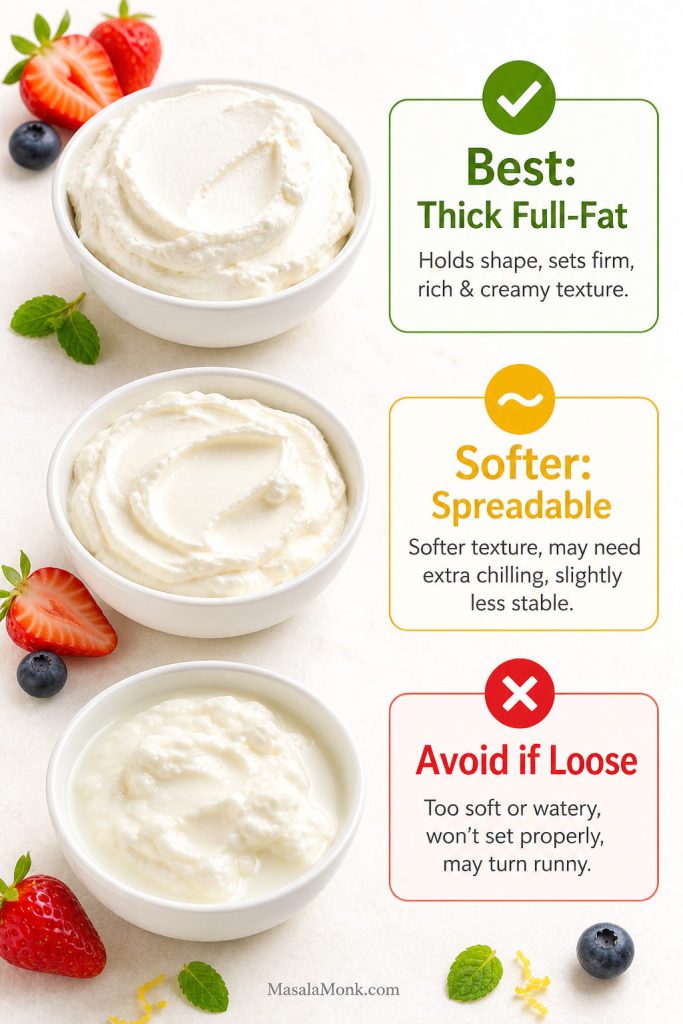
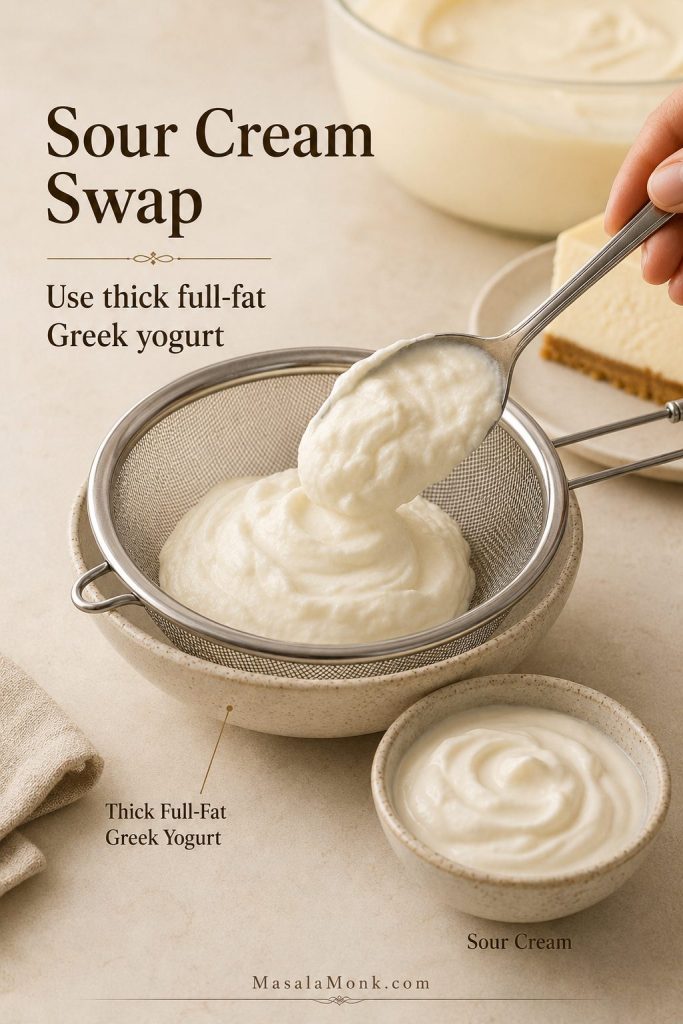
If sour cream is not easy to find where you live, thick full-fat Greek yogurt is the closest practical swap. If the yogurt looks loose, strain it first. The flavor will be slightly different, but the cheesecake will still bake well if the texture is thick enough.
Swap smart: If you are using Greek yogurt, choose a thick full-fat version so the filling stays stable.
Eggs
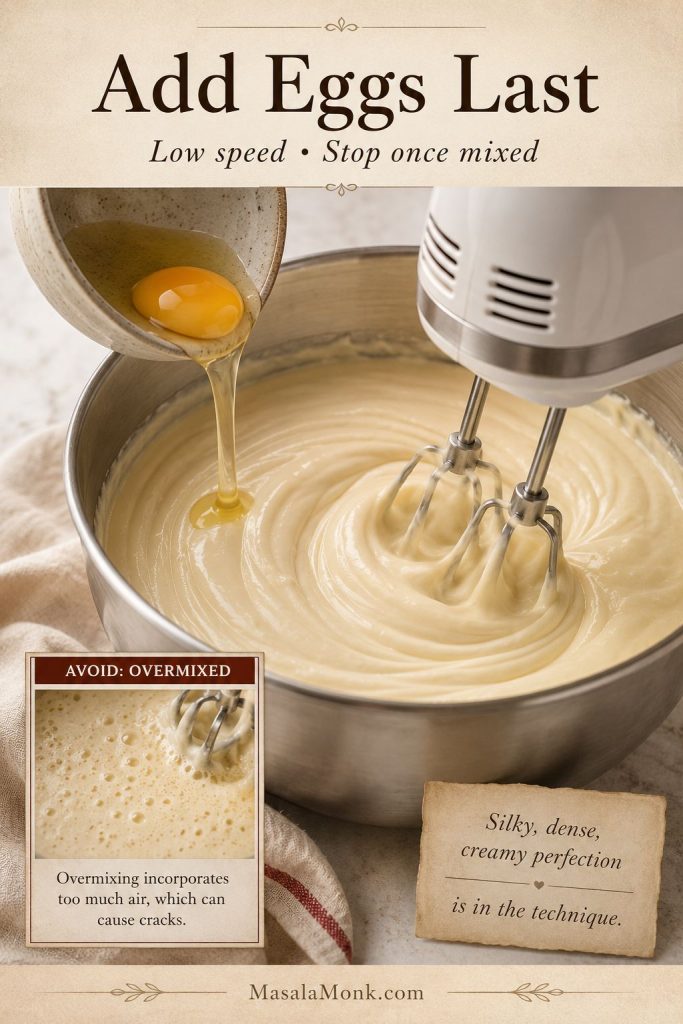
Eggs set the cheesecake. They turn the cream cheese mixture into a baked custard, which is why overmixing after adding the eggs can cause problems. Too much air can make the cheesecake puff in the oven, then sink or crack as it cools.
Add the eggs one at a time on low speed, just until each one disappears into the batter. The filling should look smooth and creamy, not foamy.
Mixing note: Eggs should go in gently and late, because this is the stage where too much air causes trouble later.
Cornstarch or Flour
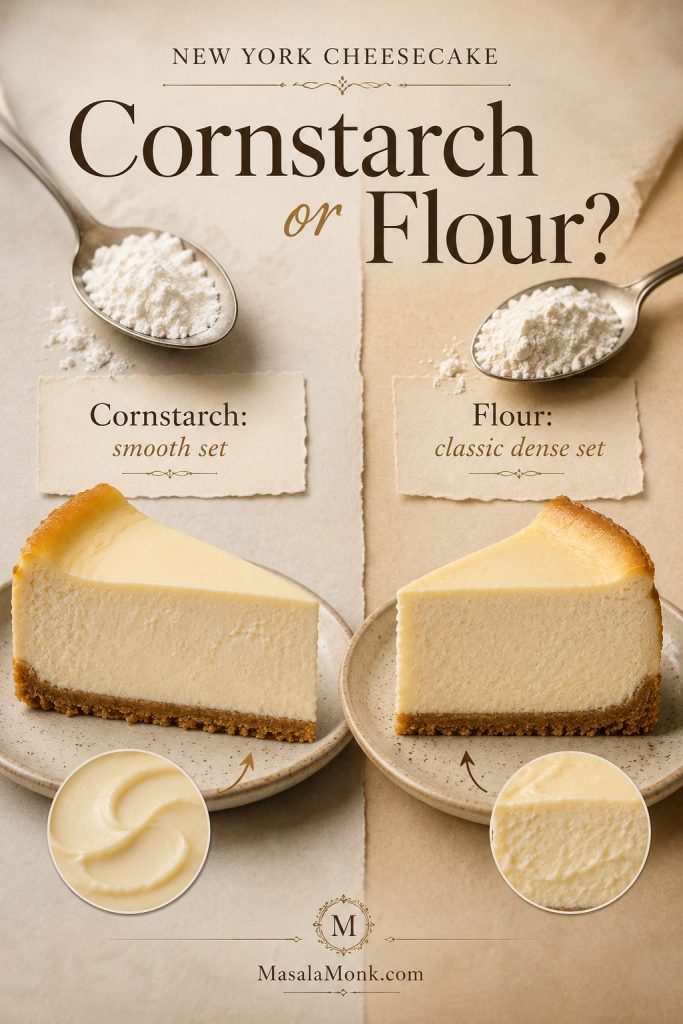
A small amount of starch helps stabilize the filling. Cornstarch gives a smooth set and keeps the recipe more flexible for readers who avoid flour. All-purpose flour gives a slightly more classic dense structure. Use one or the other, not both.
For this recipe, cornstarch is the default. If you prefer flour, use 3 tablespoons / about 24g all-purpose flour instead of the cornstarch.
Texture choice: Cornstarch and flour both help the cheesecake set, but they nudge the final texture in slightly different directions.
Lemon and Vanilla
Vanilla gives warmth, and lemon brightens the filling. The lemon should not make this taste like lemon cheesecake. Instead, it should simply cut through the richness so the cheesecake tastes creamy rather than flat.
Global Ingredient Notes
Not every kitchen has the same cheesecake ingredients. Graham crackers, brick-style cream cheese, and sour cream are easy to find in some places and harder in others, so the notes below give you practical swaps without changing the spirit of the recipe.
| Ingredient | Practical Notes |
|---|---|
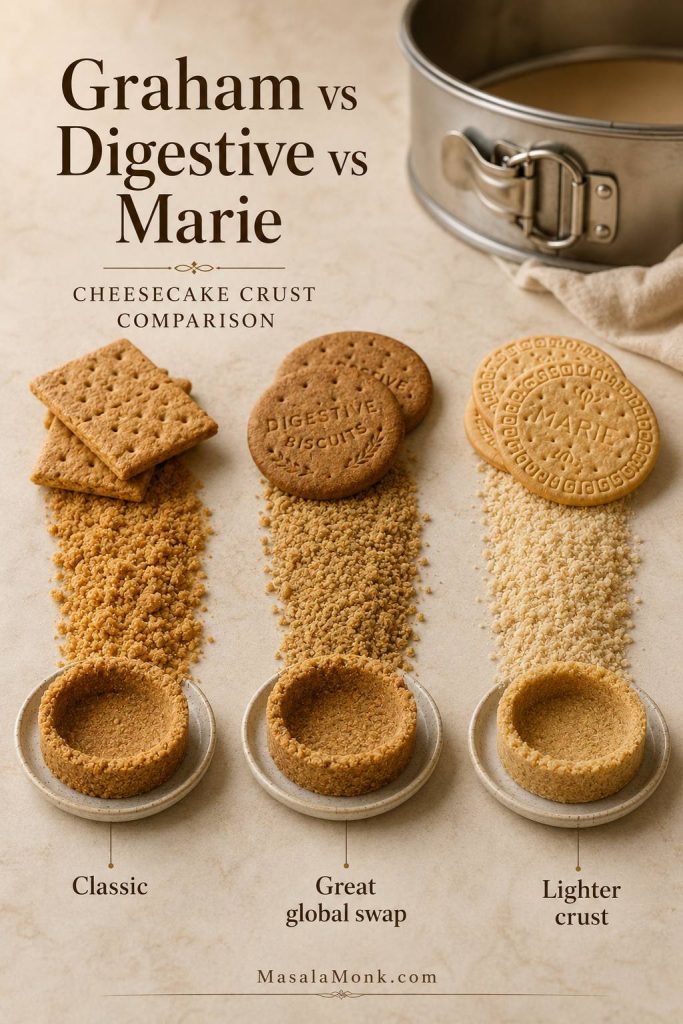
| Graham crackers | Use digestive biscuits if graham crackers are hard to find. Marie biscuits can work, but the crust will be lighter and less buttery. |
| Cream cheese | Use full-fat block or firm tub cream cheese. Avoid whipped, low-fat, flavored, salty, or very soft spreadable cheese. |
| Sour cream | Thick full-fat Greek yogurt can work if sour cream is unavailable. Strain it first if it looks watery. |
| Heavy cream | Use heavy cream or whipping cream rather than very thin low-fat cream. A richer cream gives the filling a smoother, rounder texture. |
| Cornstarch vs flour | Cornstarch gives a smooth set. Flour gives a slightly denser classic set. Use one, not both. |
| Oven behavior | Cheesecake prefers gentle heat. If your oven runs hot, browns quickly, or has strong top heat, check earlier and rely on the jiggle test rather than the timer alone. |
Using digestive biscuits or a different pan? Check the crust guide and pan-size notes before mixing.
Graham Cracker Crust or Digestive Biscuit Crust?
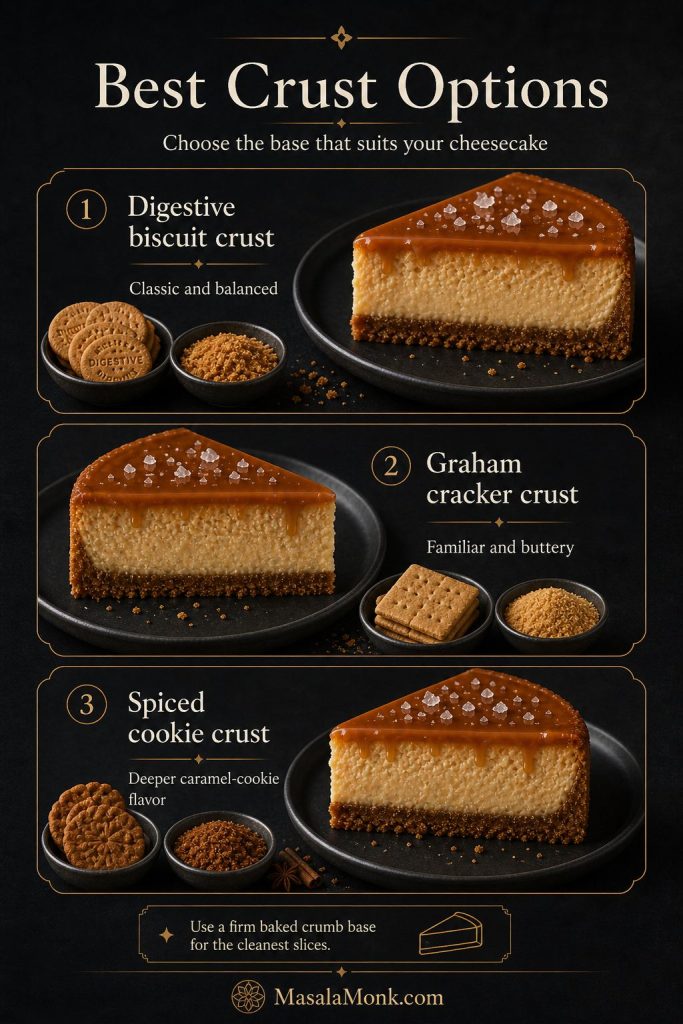
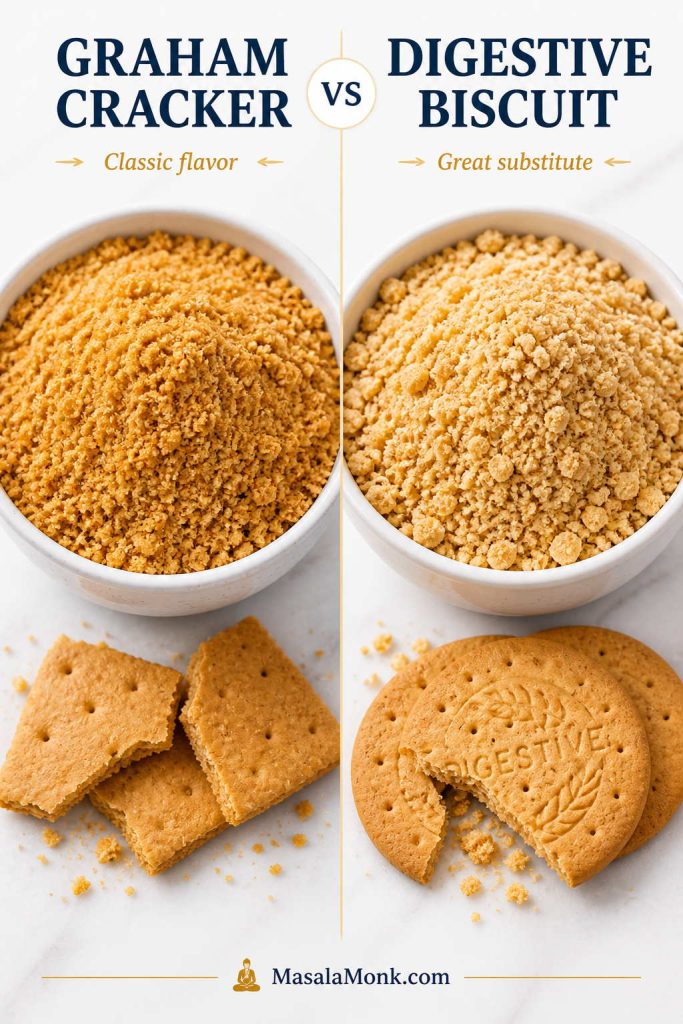
For a classic US-style cheesecake, use graham cracker crumbs. For UK, Indian, and many global kitchens, digestive biscuits are often easier to find and make an excellent crust. They are slightly more buttery and wheaty, which works beautifully with dense cheesecake filling.
Marie biscuits can also work, but they are usually lighter and less buttery, so the crust may taste milder. If using Marie biscuits, add a pinch of salt and make sure the crumbs are finely crushed so the base holds together.
| Crust Option | Use This Amount | Notes |
|---|---|---|
| Graham cracker crumbs | 1½ cups / about 180g | Classic New York cheesecake crust. |
| Digestive biscuit crumbs | About 200g | Great global substitute; use 75–85g butter depending on biscuit dryness. |
| Marie biscuit crumbs | About 190–200g | Milder flavor; add a pinch of salt and press gently. |
How the Cheesecake Crust Should Look and Feel
Crust choice: Choose the crumb base that fits your kitchen, then adjust butter and sugar so the crust still holds together.
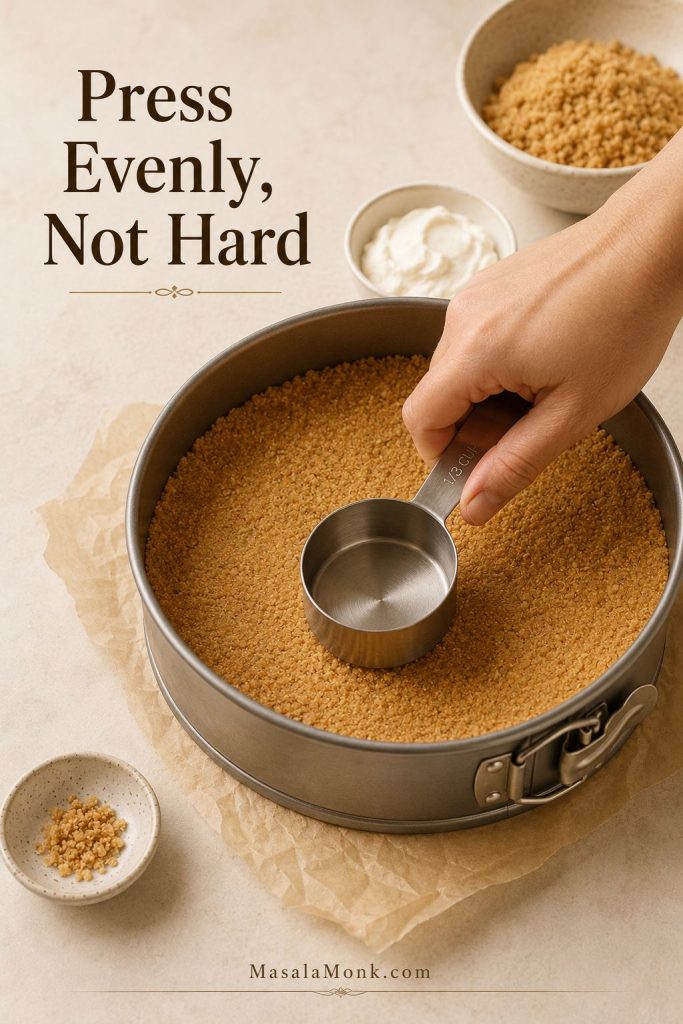
Whichever crust you choose, do not pack it too aggressively. A firm, even press is enough. If the crust is compressed too hard, it can become difficult to cut after chilling.
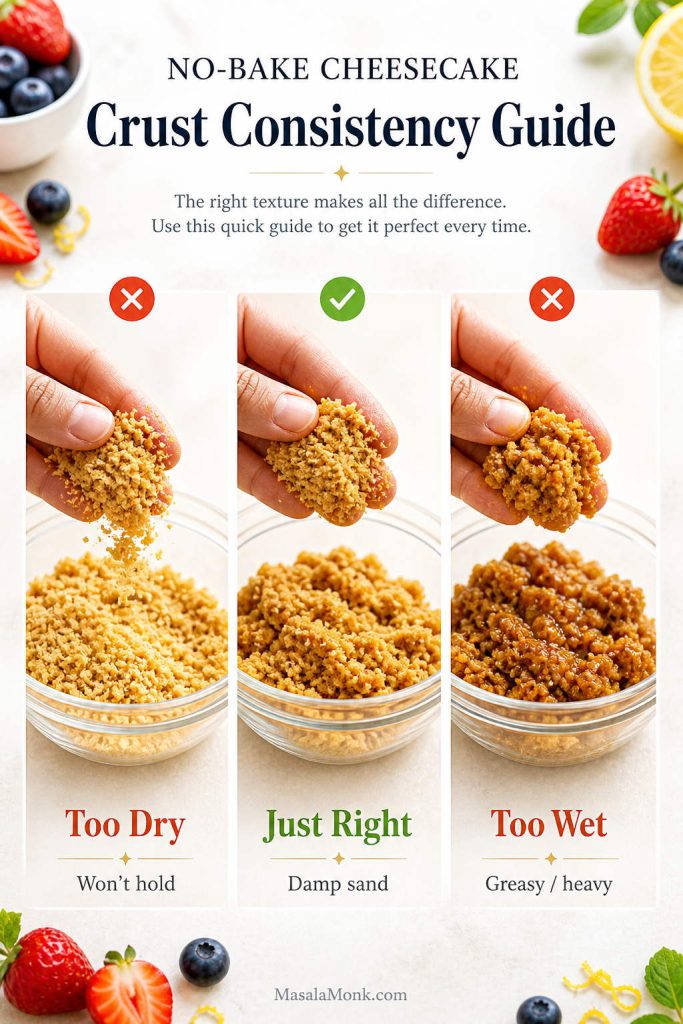
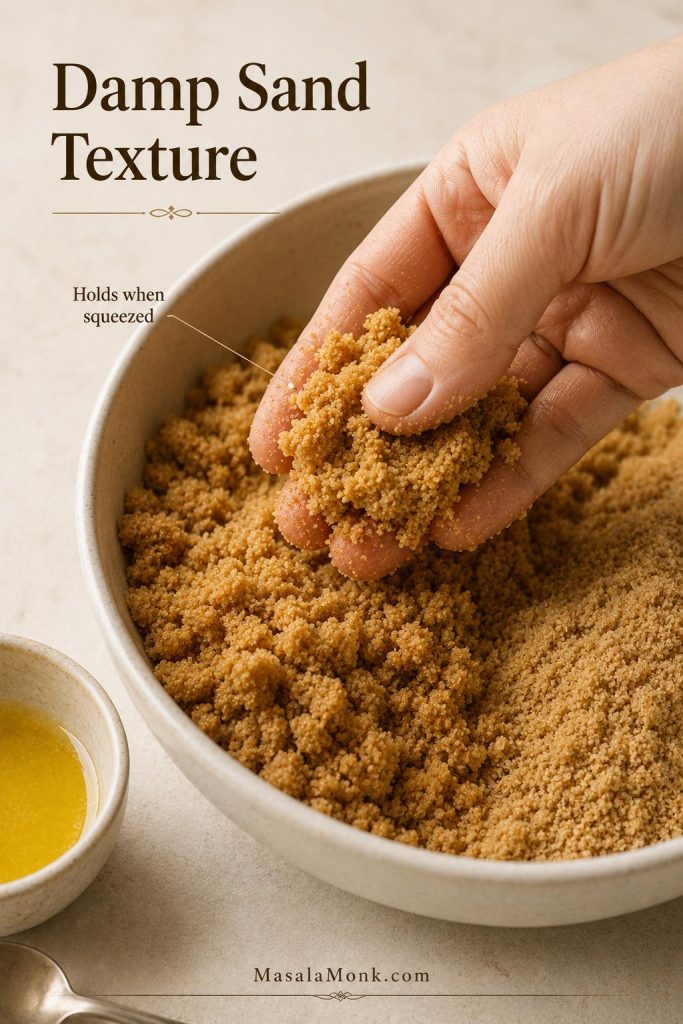
Before pressing: Before pressing the base, check that the buttered crumbs hold like damp sand without turning oily.
Pressing note: Even pressure gives the crust structure, while overpacking can make the chilled base too hard to cut.
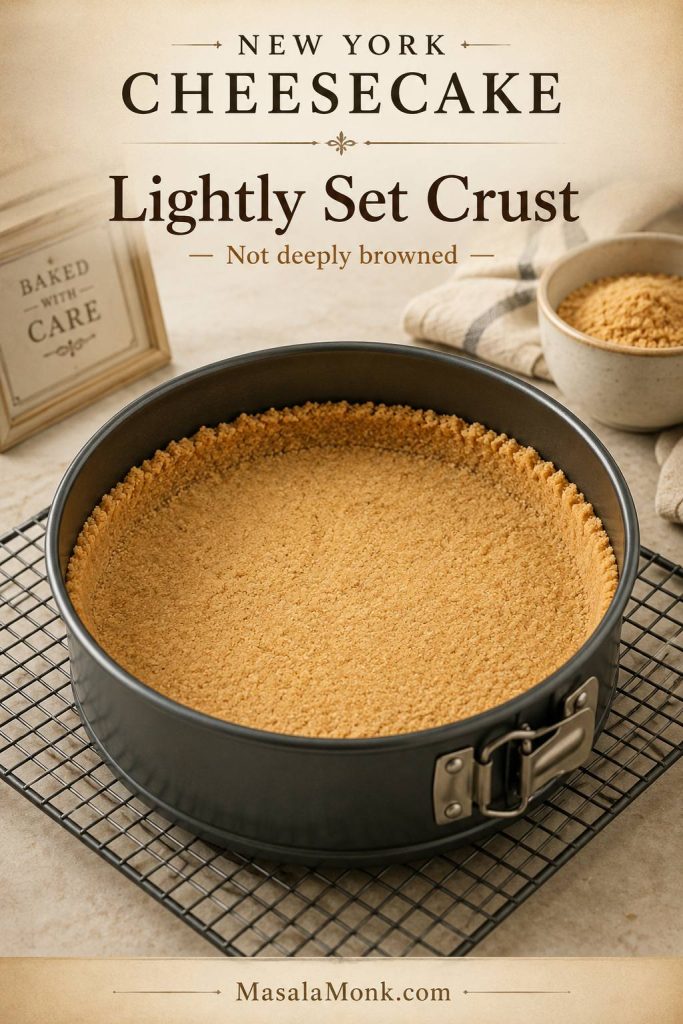
After pre-baking: The crust only needs to set before the filling goes in; deep browning is not the goal.
Best Pan for New York Cheesecake
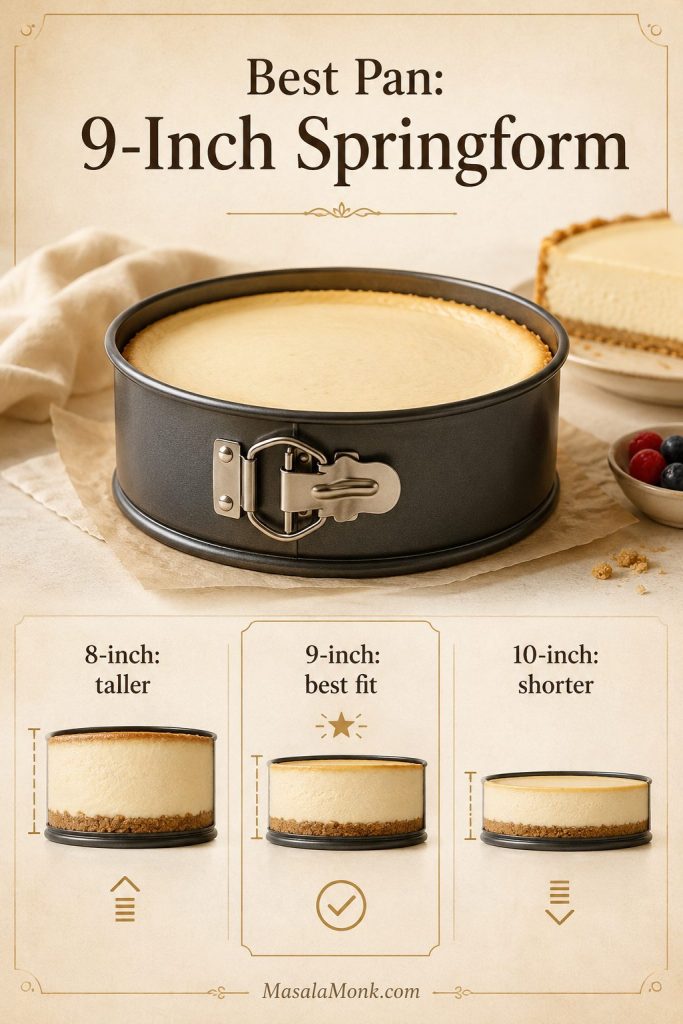
A 9-inch / 23cm springform pan is the best pan for this cheesecake. It gives enough height for a proper New York-style slice while still allowing the filling to bake evenly.
Pan check: The 9-inch springform is the safest default, but pan width changes height, timing, and doneness cues.
9-Inch Springform Pan
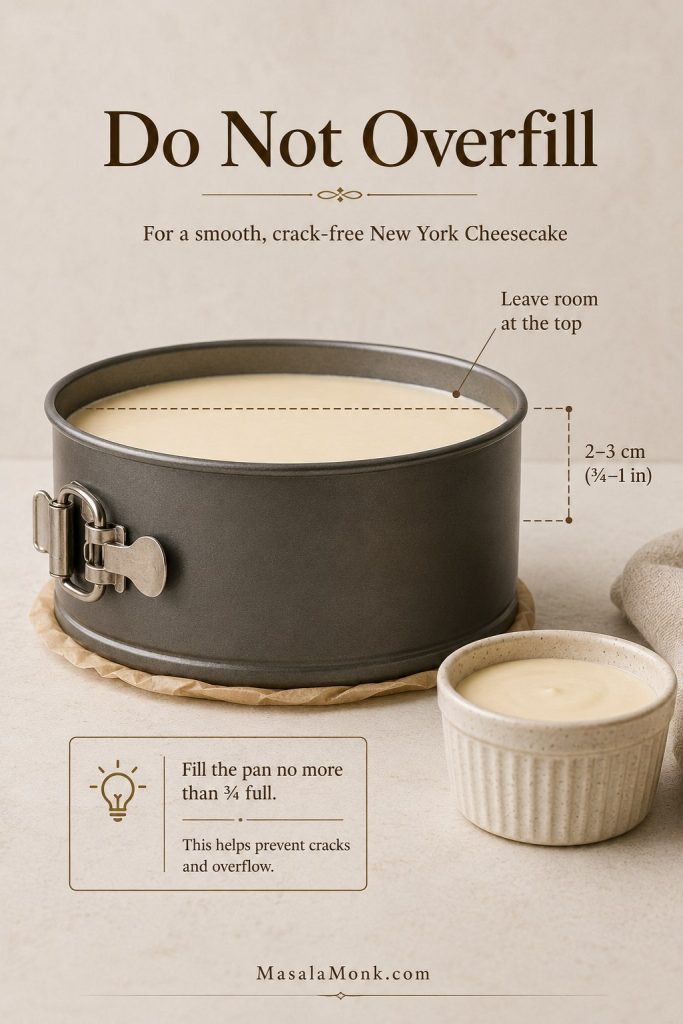
This is the main pan size for the recipe. A pan that is at least 2.5 inches deep is ideal because the filling is generous. If your springform pan is shallow, do not fill it to the very top. Reserve any extra filling for a small ramekin and bake it separately until just set.
Fill line: A deep pan should still have room at the top; if your pan is shallow, bake extra filling separately.
Once your pan is sorted, move to the water bath options so the cheesecake bakes gently and evenly.
Using a 10-Inch Pan
A 10-inch pan works, but the cheesecake will be shorter and may bake faster. Therefore, start checking early because the center will set more quickly in a wider pan.
Using an 8-Inch Pan
An 8-inch pan is not a direct swap for the full amount of batter. The cheesecake will be taller, the filling may rise too close to the rim, and the bake time will change. If you only have an 8-inch pan, scale the recipe down or bake extra filling separately in ramekins.
Making Cheesecake Without a Springform Pan
A deep cake pan lined with parchment can work if you are comfortable lifting the chilled cheesecake out carefully. However, for the cleanest slices and easiest release, a springform pan is still the best choice.
Water Bath vs No Water Bath
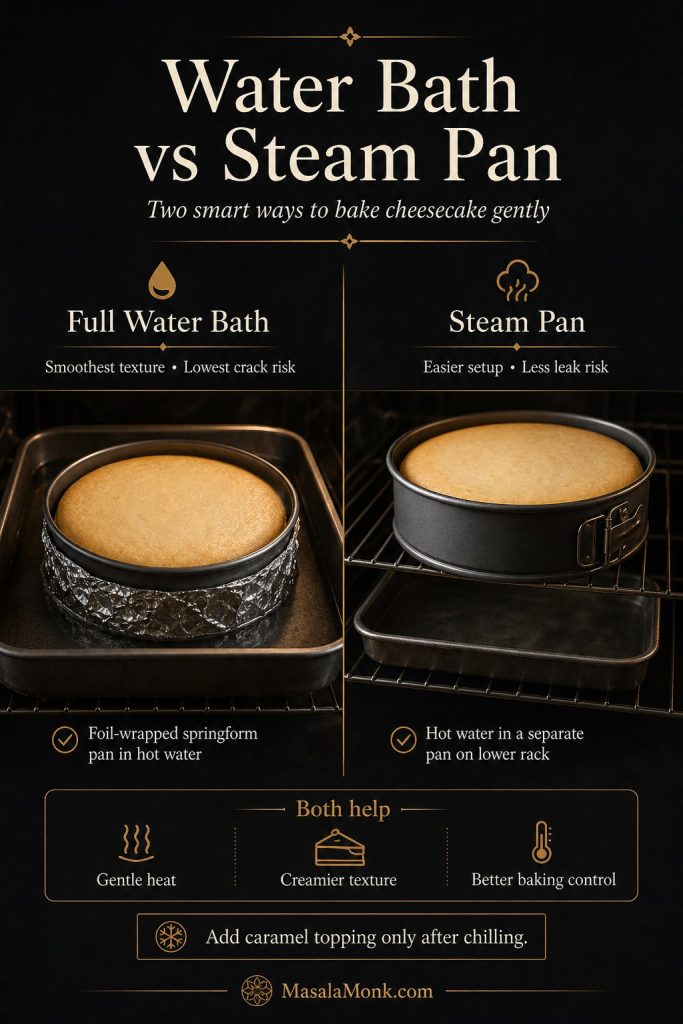
A water bath is the safest way to bake a creamy New York cheesecake with a pale top and fewer cracks. It surrounds the pan with gentle heat and steam, helping the filling bake slowly and evenly.
If the water bath is the part that makes you hesitate, you are not alone. The goal is not to make the process fussy; it is to protect the filling from harsh heat so the cheesecake bakes like a custard instead of drying at the edges.
That said, you may not want to put a springform pan directly into water. So this recipe gives you three paths: a classic water bath, an easier steam-pan compromise, and a no-water-bath option.
Choose your bake: Choose the classic water bath for the smoothest result, or use the steam-pan or no-water-bath paths when convenience matters more.
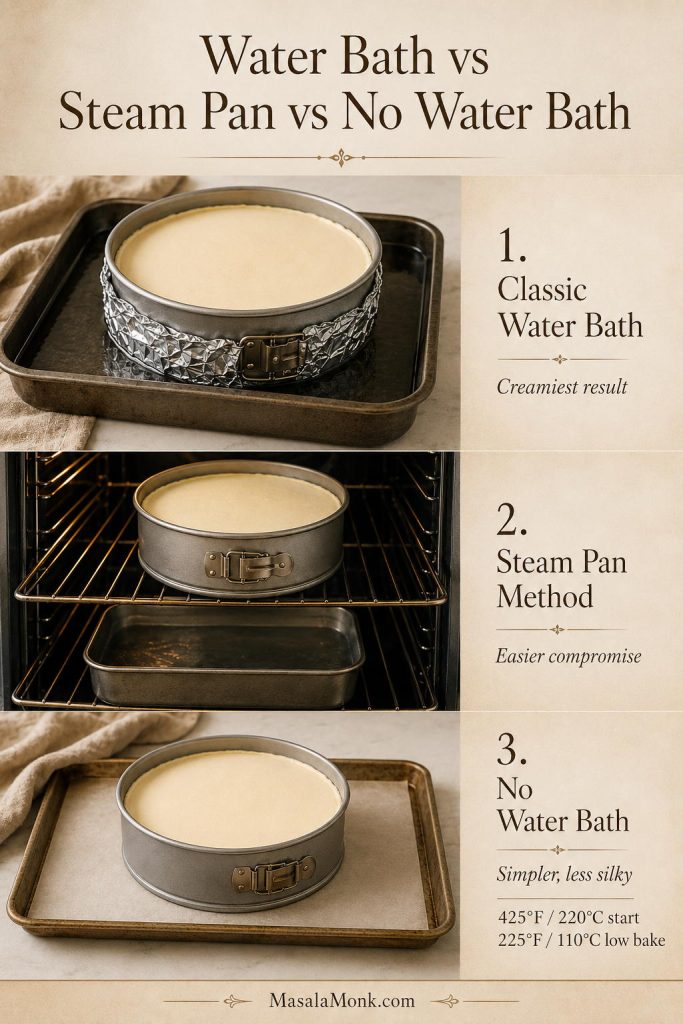
| Method | Best For | Tradeoff |
|---|---|---|
| Classic water bath | Creamiest texture, pale top, fewer cracks | Requires careful wrapping to prevent leaks. |
| Steam pan below | Gentler oven moisture without placing the springform pan in water | Helpful, but not quite as protective as a true water bath. |
| No water bath | Simpler baking and no leak risk | Top may brown more and the texture may be slightly less silky. |
Choosing your method? Read the leak-proof water bath setup, try the steam-pan method, or use the no-water-bath option.
Why Use a Water Bath?
A water bath helps prevent harsh oven heat from hitting the cheesecake too quickly. If the edges overcook before the center sets, the texture can become dry around the outside while the middle still looks loose. Because of that, the water bath gives you a wider margin of safety and keeps the texture smoother from edge to center.
How to Stop a Cheesecake Water Bath from Leaking
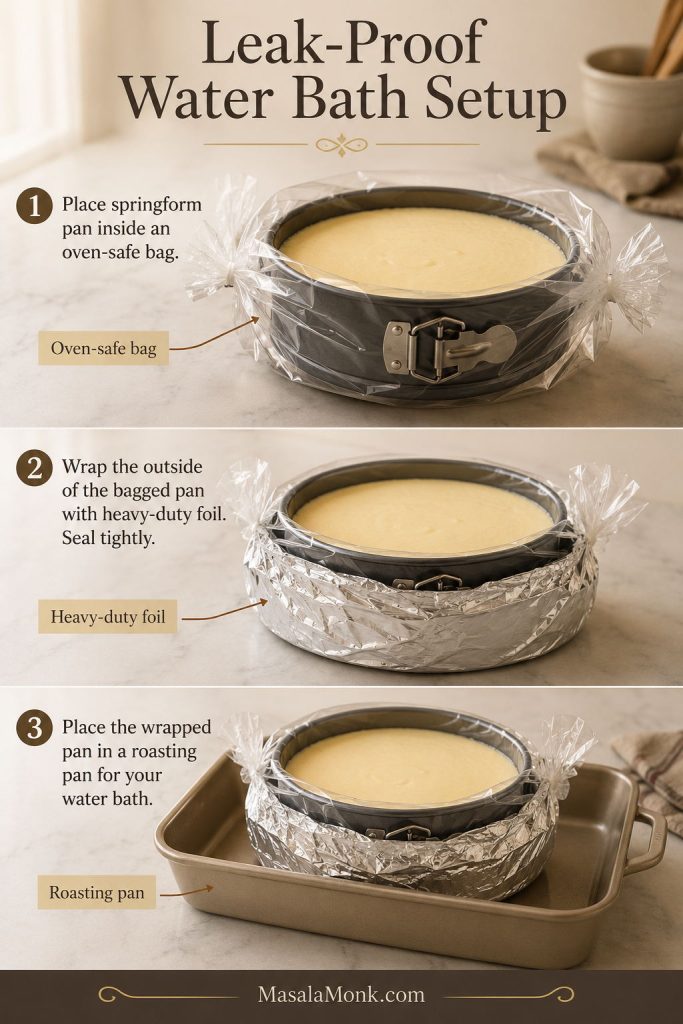
The most common water-bath problem is a soggy crust. To avoid that, wrap the outside of the springform pan with two layers of heavy-duty foil before placing it in the roasting pan. For extra insurance, place the springform pan inside an oven-safe roasting bag first, then wrap the outside with foil.
Leak protection: Wrap the pan before it goes near hot water, because leak protection is what keeps the crust from turning soggy.
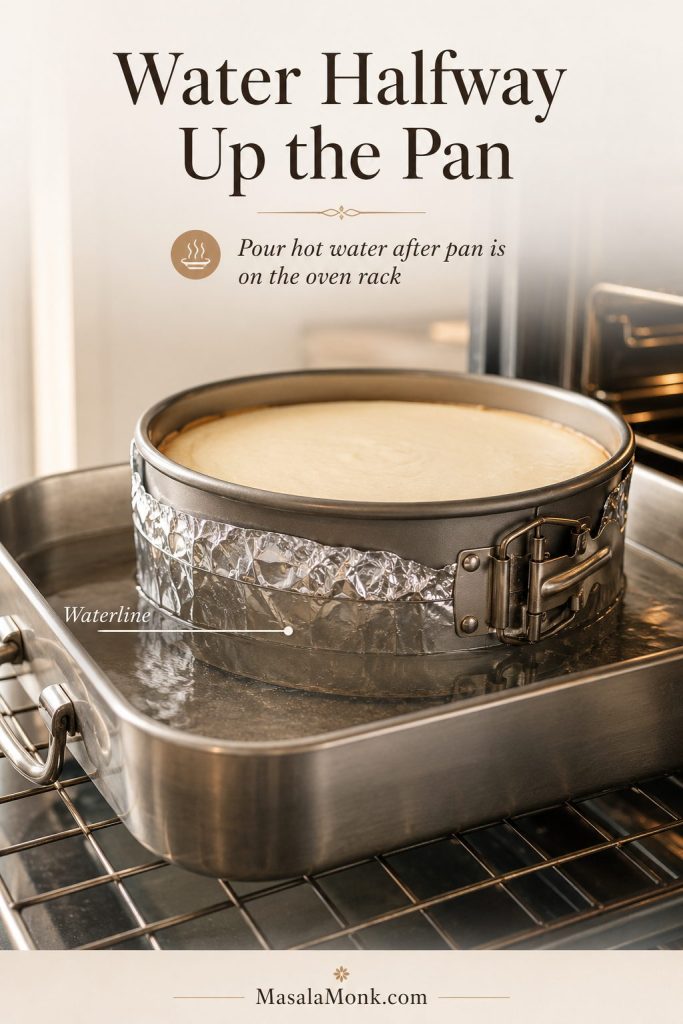
Use hot water, not cold water, and pour it into the roasting pan after the cheesecake is already sitting on the oven rack. The water should come about halfway up the sides of the springform pan, but it should not rise so high that it risks splashing into the cheesecake.
Water level: The water should come about halfway up the pan, not so high that it risks splashing into the cheesecake.
Steam-Pan Method: Easier Than a Full Water Bath
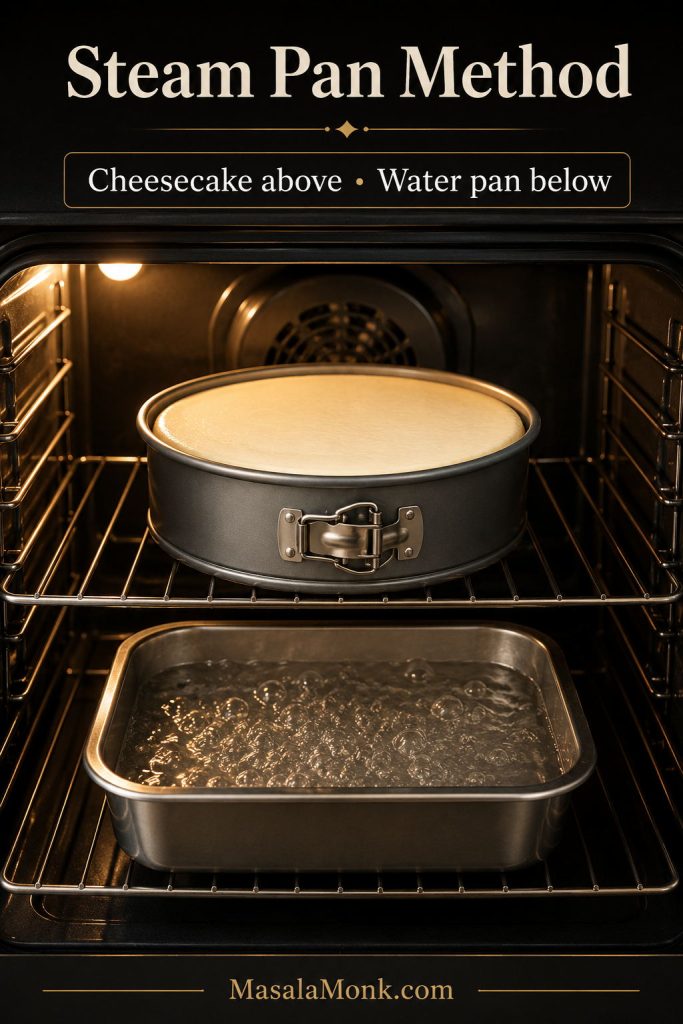
If you do not want to place the springform pan directly in water, place the cheesecake on the center rack and set a metal baking pan with boiling water on the lower rack. This adds steam to the oven and reduces harsh dry heat, so it is a useful middle path when you want crack protection without risking water leaking into the crust.
Middle path: This method keeps the cheesecake above the water while still adding moisture to the oven.
No-Water-Bath Option
For a no-water-bath New York cheesecake, bake the crust as usual. Add the filling, place the pan on a baking sheet, and bake at 425°F / 220°C for 10 minutes. Without leaving the oven open for long, reduce the temperature to 225°F / 110°C and bake for about 60–80 minutes, or until the edges are set and the middle still moves like soft-set custard.
Skipping the bath: If you skip the water bath, rely on the high-heat start, low bake, and gradual cooling to protect the texture.
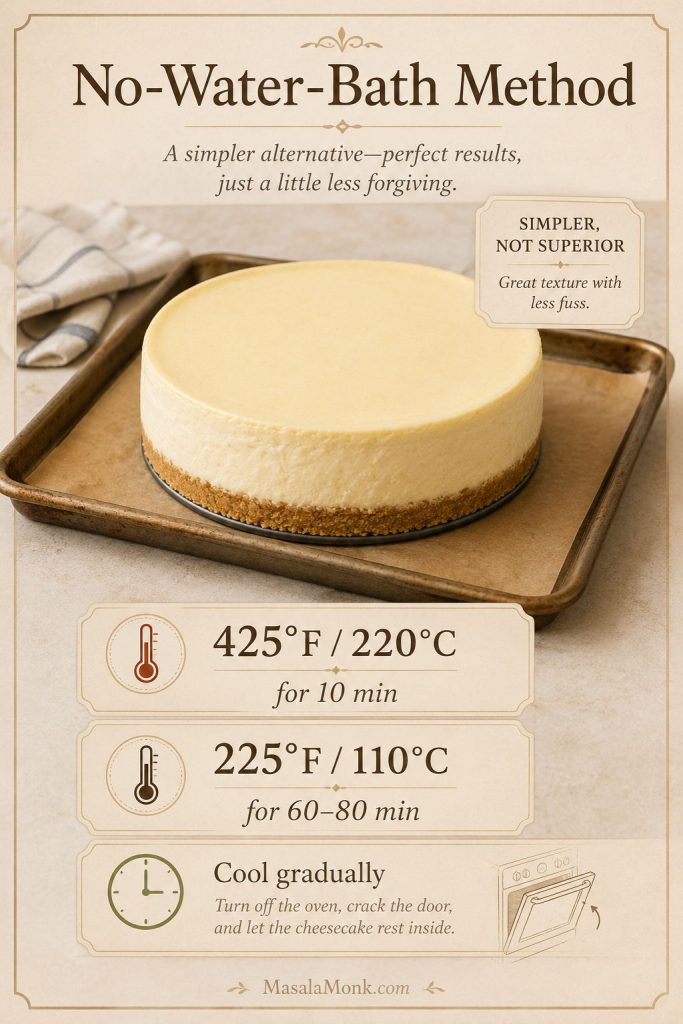
If you choose the no-water-bath method, the lower baking temperature and gradual cool-down become even more important. The method is easier and avoids leaks, but the top may brown slightly more and the texture may be a little less silky than the classic water-bath version.
Before You Start: The 5 Rules That Matter Most
- Soften the cream cheese first. Smooth cream cheese before the eggs go in is the easiest way to avoid lumps.
- Mix gently after adding eggs. Too much air can make the cheesecake puff, sink, or crack.
- Do not bake until firm. Pull it when the edges are set and the center still moves softly.
- Cool gradually. Sudden temperature changes are one of the biggest causes of cracks.
- Chill overnight if you can. The fridge finishes the texture and gives you sharp-edged slices.
What Each Stage Should Look Like
| Stage | What You Should See |
|---|---|
| Crust | Damp-sand crumbs pressed evenly, lightly set after baking, not deeply browned. |
| Cream cheese | Smooth, soft, and spreadable before the eggs are added. |
| Batter | Thick, glossy, and calm rather than foamy or full of bubbles. |
| Baked cheesecake | Set edges with a softly moving center. |
| Chilled cheesecake | Firm enough to slice cleanly, creamy through the middle, and not airy. |
Before you start mixing, review the stage-by-stage cues or keep the recipe card open for measurements.
How to Make New York Cheesecake
The method is all about smooth mixing and gentle baking. Do not rush the room-temperature step, and do not beat the filling hard once the eggs are added.
Step 1: Make the Crust
Mix the graham cracker or digestive biscuit crumbs with melted butter, sugar, and a pinch of salt. The mixture should feel like damp sand and hold together when squeezed. Press it evenly into the bottom of a 9-inch springform pan. You can press it only across the base or bring it slightly up the sides.
Bake the crust at 350°F / 175°C for 10 minutes, then let it cool slightly while you make the filling.
At this stage, the crust should look lightly set and smell buttery. It does not need to brown deeply.
Step 2: Beat the Cream Cheese First
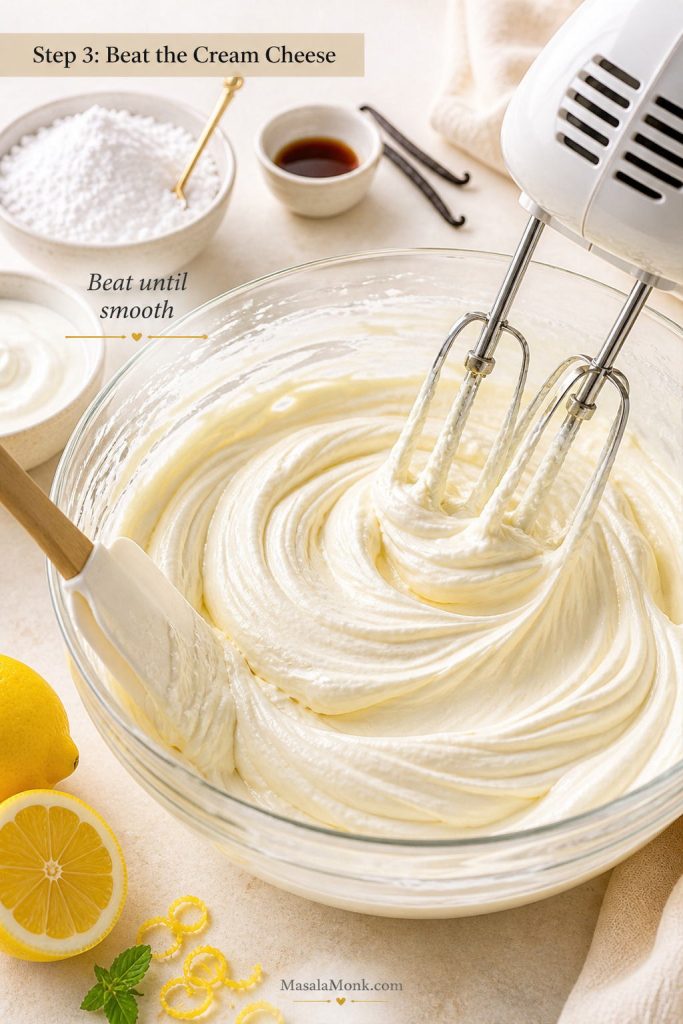
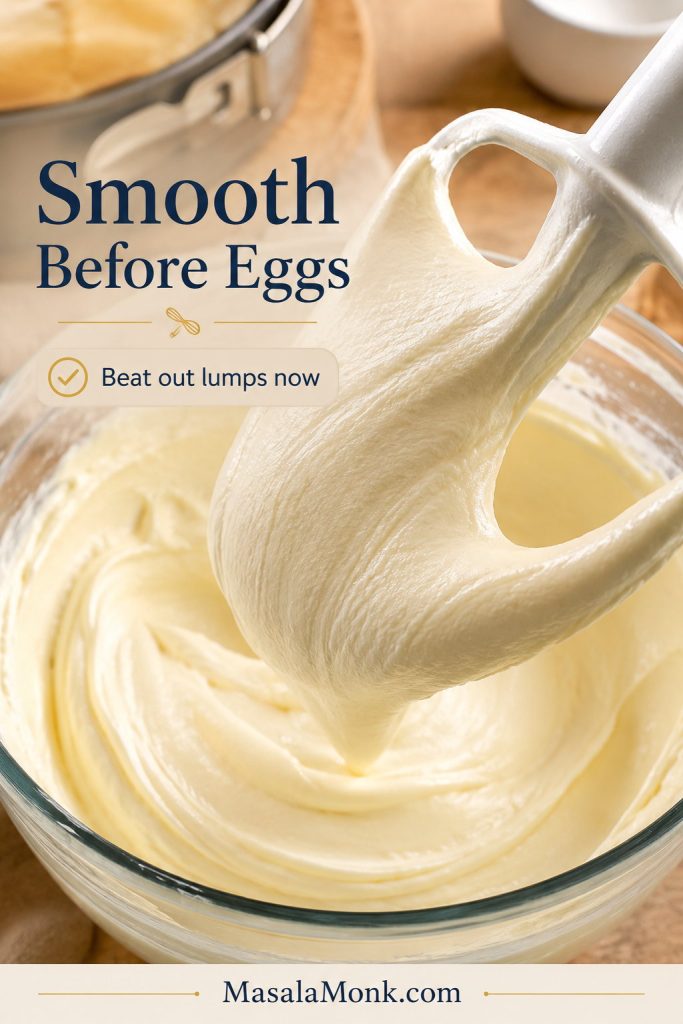
Add the room-temperature cream cheese to a large mixing bowl and beat until completely smooth. Scrape the sides and bottom of the bowl. This is the moment to remove lumps. Once the eggs are added later, you want to mix as little as possible.
Before moving on, the cream cheese should look smooth and spreadable, with no obvious cold lumps clinging to the paddle or beaters.
Before eggs: This is the moment to beat out lumps, because the batter should be handled gently once eggs are added.
Step 3: Add Sugar, Cornstarch, Sour Cream, Cream, Vanilla and Lemon
Add the sugar, cornstarch, and salt, then beat until smooth. Add the sour cream, heavy cream, vanilla, lemon juice, and lemon zest. Mix on low to medium-low speed until creamy, scraping the bowl once or twice so the filling is even.
Step 4: Add the Eggs Slowly
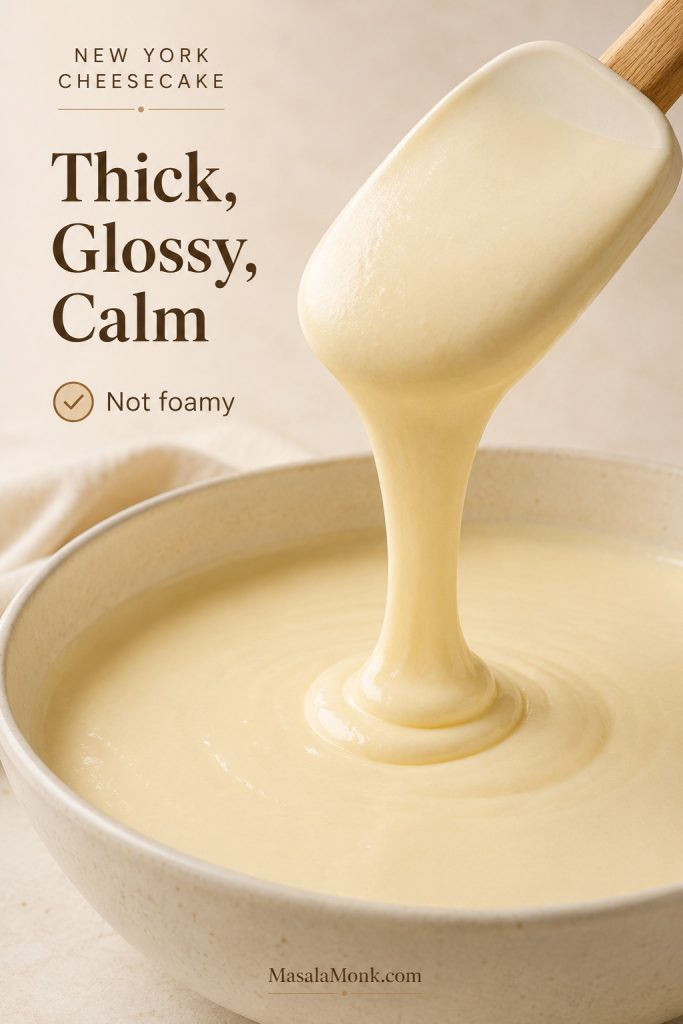
Add the eggs one at a time on low speed. Add the extra yolk last. Stop mixing as soon as the eggs are incorporated. The batter should look glossy and smooth, but not airy or bubbly.
Stop while the batter still looks thick, glossy, and calm. If it becomes foamy or full of tiny bubbles, it has likely been mixed longer than it needs.
After eggs: After the eggs are mixed in, the batter should look glossy and calm rather than aerated.
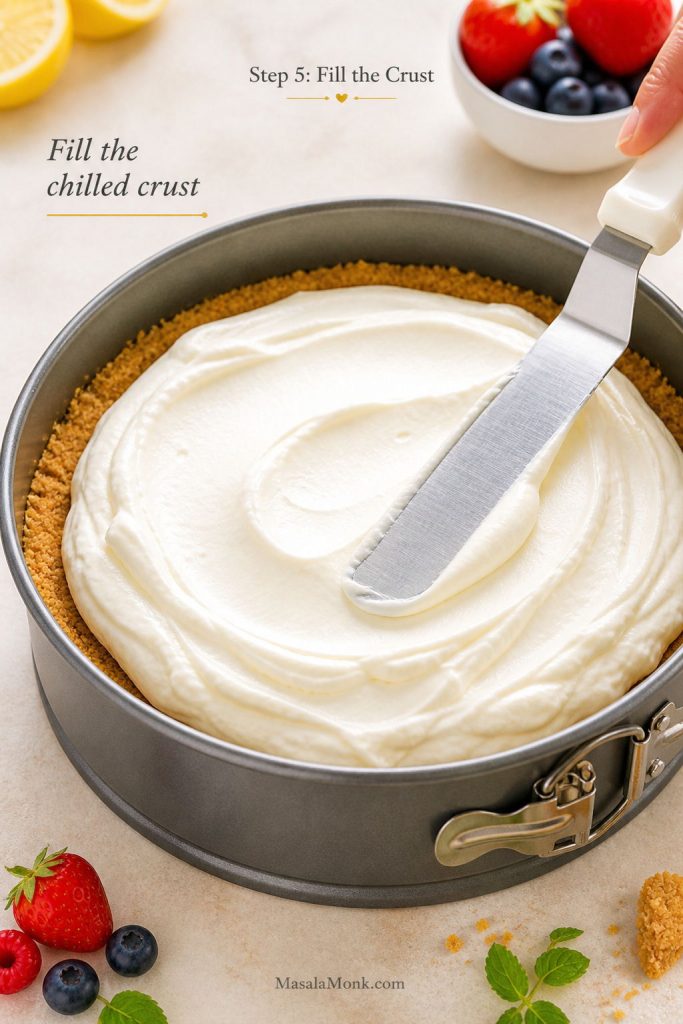
Step 5: Fill the Pan and Prepare the Water Bath
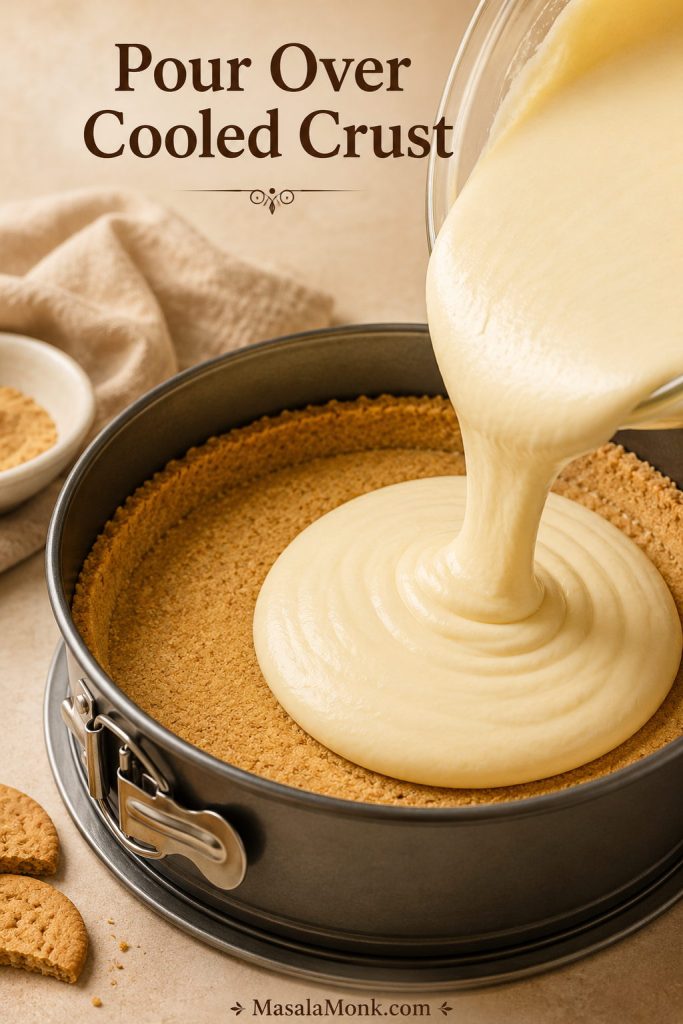
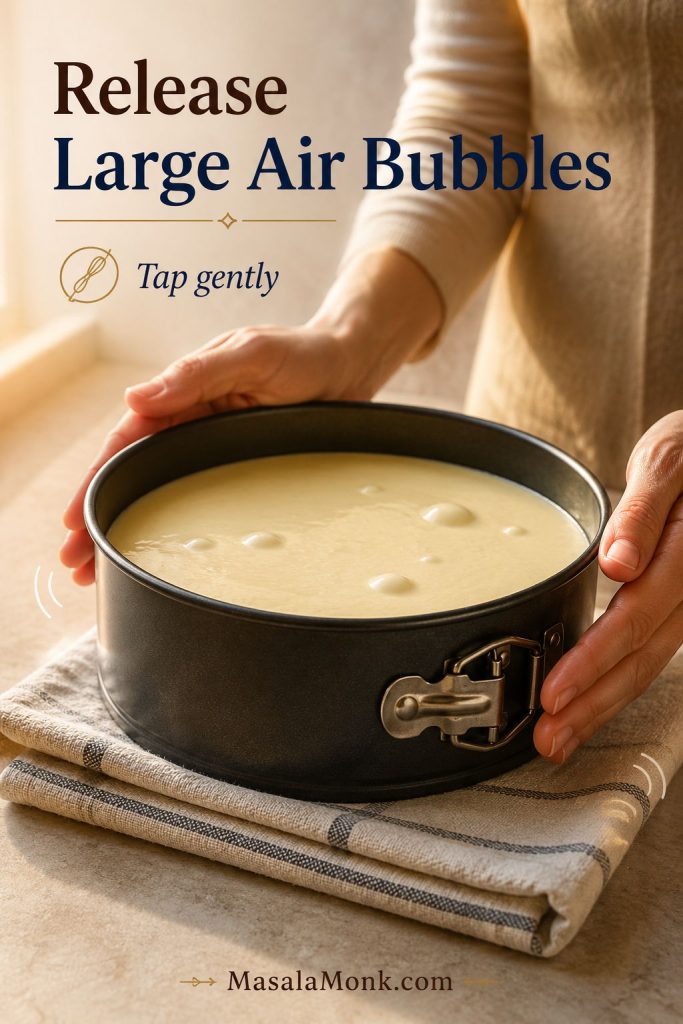
Pour the filling over the cooled crust and smooth the top. Tap the pan gently on the counter once or twice to release large air bubbles. Wrap the outside of the springform pan well, then place it in a large roasting pan.
Pouring stage: Let the crust cool before pouring so the base stays set under the creamy filling.
Transfer the roasting pan to the oven rack. Carefully pour hot water into the roasting pan until it reaches about halfway up the sides of the springform pan.
Bubble check: Tap gently only once or twice, because the goal is to release large bubbles without disturbing the filling.
Once the cheesecake is in the oven, the next important skill is knowing when the center is done.
Step 6: Bake Until the Edges Set
Bake at 325°F / 160–165°C for about 75–90 minutes. Start checking around 70 minutes. The edges should look set and slightly puffed, while the center should still have a gentle wobble.
Do not wait for the center to become firm in the oven. That usually means the cheesecake has gone too far.
Fan Oven and OTG Notes
If using a fan oven, reduce the main bake temperature slightly to about 150–155°C. In an OTG, bake on the middle rack and avoid placing the cheesecake too close to the top element. Cheesecake needs steady gentle heat, not aggressive browning, so use the rack position and temperature that give you the calmest, most even bake.
If your oven runs hot, the cheesecake may brown, crack, or set too quickly at the edges. An inexpensive oven thermometer is helpful for cheesecake because even a small temperature difference can change the texture.
Step 7: Cool Slowly
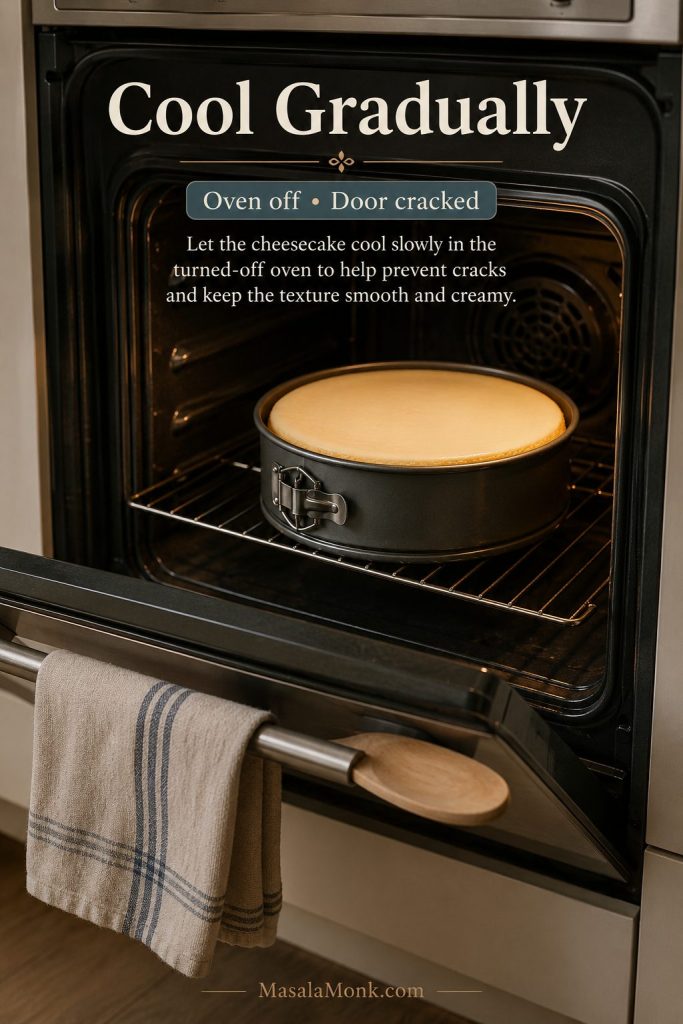
When the edges are set and the center still moves slightly, turn the oven off. Crack the door and let the cheesecake rest inside for 1 hour. After that, remove it from the water bath, unwrap the foil, and let it cool to room temperature. Chill for at least 8 hours, preferably overnight, before slicing.
Method checkpoints: Use these visual checkpoints as you move from crust to filling, oven, cooling, and slicing.
How to Know When New York Cheesecake Is Done
Cheesecake doneness can feel confusing because the center should not look fully set when you turn off the oven. A perfectly baked cheesecake still needs time to finish setting as it cools.
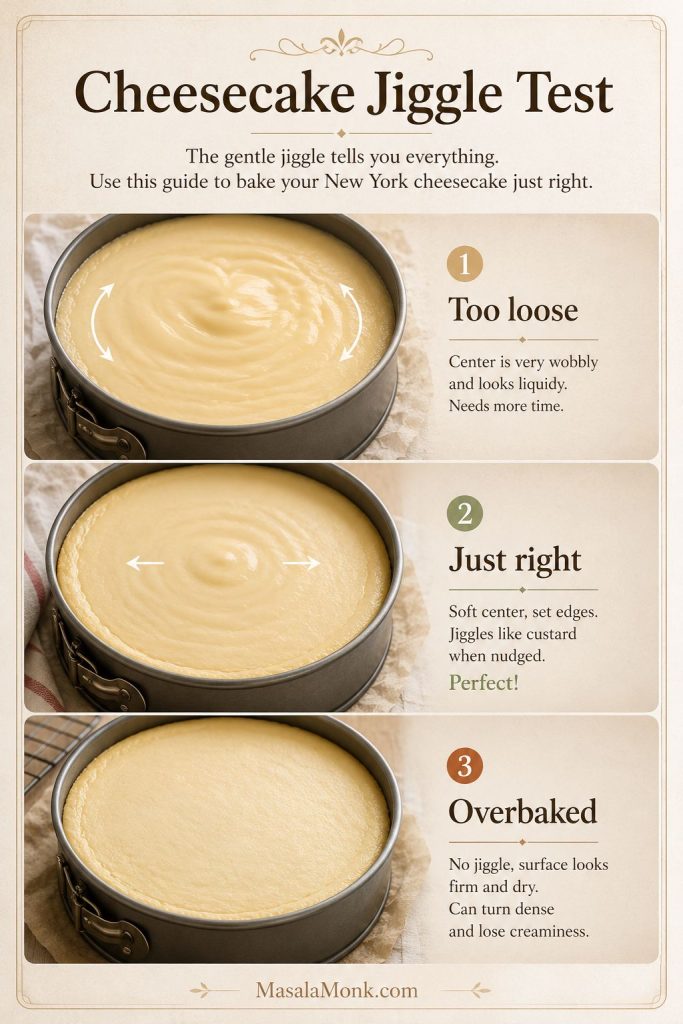
Jiggle check: Use this movement check when the edges look set but the center still looks slightly soft.
Look at the Edges
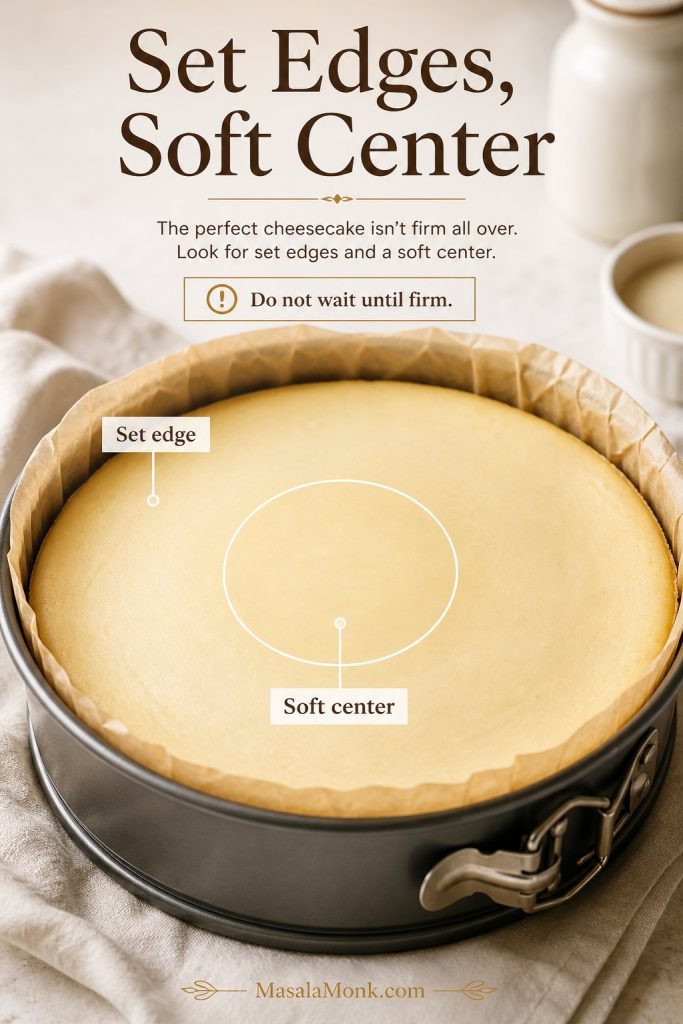
The outer edges should look set, slightly puffed, and no longer wet. The cheesecake may have a soft matte look around the edges while the middle still looks a little glossy.
Doneness target: The goal is set edges with a soft center, not a cheesecake that looks firm all the way through.
Use the Jiggle Test
Gently nudge the pan. The center should jiggle like soft set custard or Jell-O, not ripple like a loose wave. If the whole cheesecake sloshes or moves in a wide liquid motion, it needs more time. If nothing moves at all, it may already be overbaked.
Do not panic: A cheesecake that looks slightly soft in the center is usually doing exactly what it should. The filling keeps setting as it cools, and the overnight chill is what turns it into clean, sliceable cheesecake.
Do Not Use the Toothpick Test
Do not test cheesecake with a toothpick or knife the way you would test a cake. It can crack or mark the surface, and it does not tell you much about the final chilled texture. Use the edge-set cue, the gentle jiggle test, and overnight chilling instead.
Optional Thermometer Cue
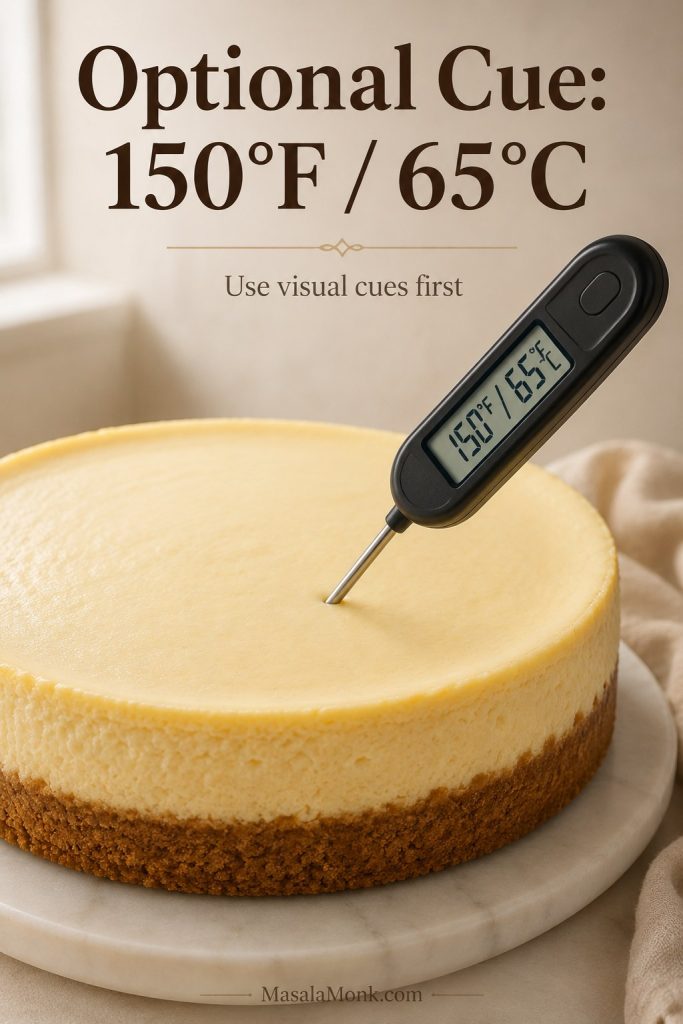
An instant-read thermometer can help, but it should be a backup cue, not the only test. If you use one, aim for roughly 150°F / 65°C in the center, then stop checking. Cheesecake is delicate, and repeated poking can mark the surface, so the visual set and center movement still matter most.
Temperature backup: Use 150°F / 65°C as a backup check, while still judging the cheesecake by its edge set and center movement.
After the center has the right movement, follow the cooling schedule so the surface settles without cracking.
For a deeper technical reference on cheesecake baking behavior, King Arthur Baking has a useful New York cheesecake guide here: King Arthur Baking’s NY Cheesecake Recipe.
How to Cool Cheesecake Without Cracks
Cracks usually happen because the cheesecake was overbaked, overmixed, or cooled too quickly. Sudden temperature changes make the surface contract before the inside has settled. Gradual cooling gives the custard time to relax and finish setting.
This is the quiet part of the recipe, but it is where many cracks are prevented. Use this cooling schedule:
- Turn the oven off when the edges are set and the center still has slight movement.
- Crack the oven door open.
- Leave the cheesecake inside for 1 hour.
- Remove it from the water bath.
- Cool to room temperature on a rack.
- Chill for at least 8 hours, preferably overnight.
Cooling stage: The oven-door rest is part of the recipe, because a sudden temperature change can crack the surface.
Fully chilled now? Use the clean slicing guide before releasing and cutting the cheesecake.
Finally, do not move a hot cheesecake straight to the fridge. That shock can cause condensation, cracks, and a less even texture.
How to Slice New York Cheesecake Cleanly
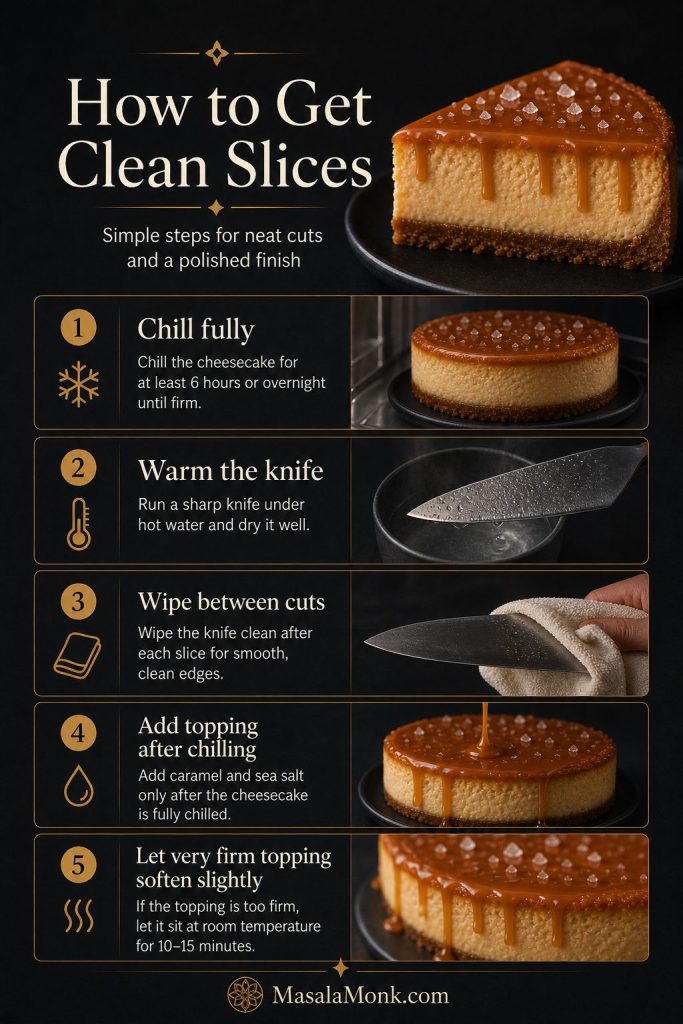
Clean cheesecake slices come from patience as much as technique. The cheesecake must be fully chilled before cutting. If you slice it too soon, even a perfectly baked cheesecake can smear, sag, or look softer than it really is.
Before releasing: Wait until the cheesecake is fully chilled before removing the ring, so the sides stay neat and stable.
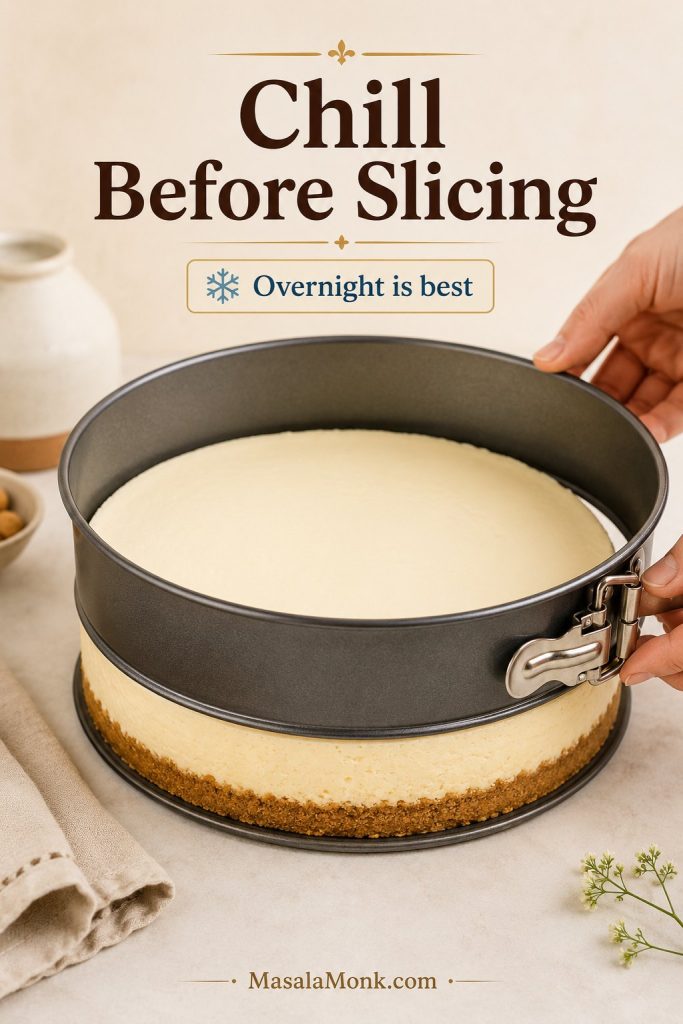
- Chill the cheesecake overnight if possible.
- Run a thin knife around the edge before releasing the springform ring.
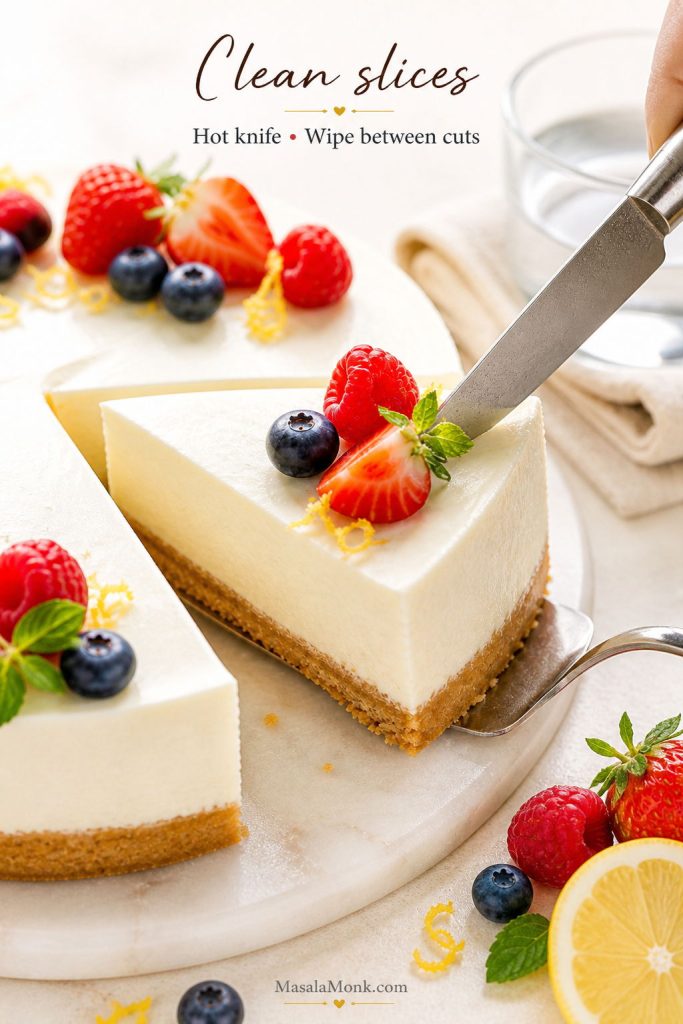
- Dip a sharp knife in hot water.
- Wipe the blade dry.
- Make one clean cut.
- Wipe and warm the knife again before the next cut.
Clean-cut method: Clean cuts come from a warm knife and a wiped blade, not from pressing harder.
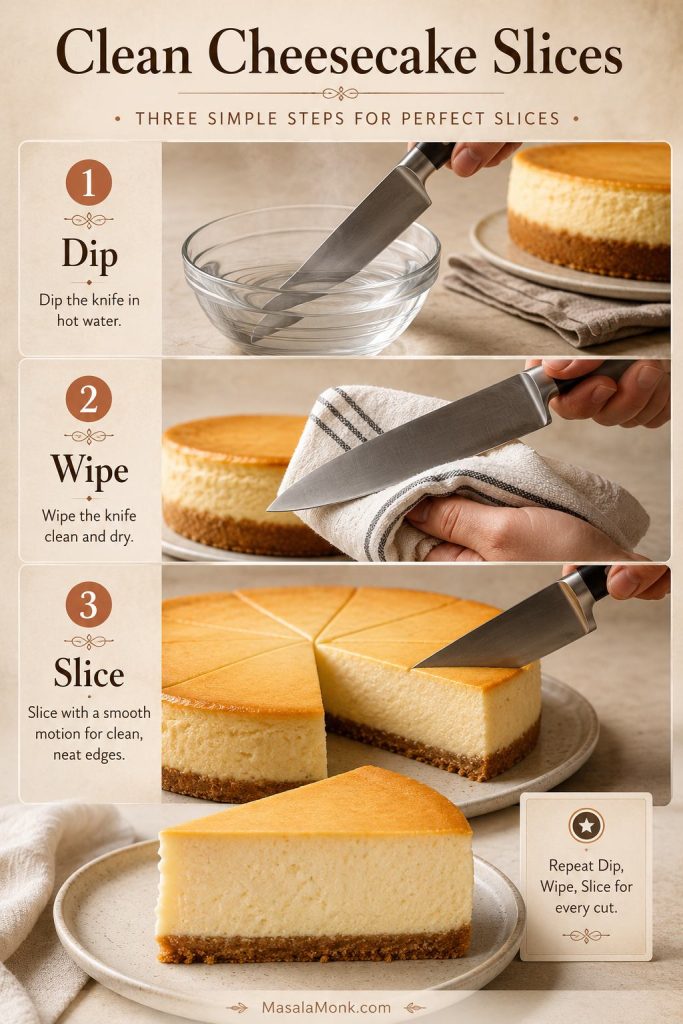
This small step makes a big difference. That first clean slice is the payoff for the overnight wait. A hot, clean knife gives you smooth sides and neat slices instead of dragging creamy filling through the crust.
If you want to move the cheesecake off the springform base, do it only after it is fully chilled. Slide a thin offset spatula between the crust and the base, then transfer carefully to a flat serving plate. If the cheesecake feels delicate, serve it from the springform base instead.
Serving tip: Slice the cheesecake cold for the cleanest cuts. For the creamiest eating texture, let slices sit at room temperature for 10–15 minutes before serving.
Optional Sour Cream Topping
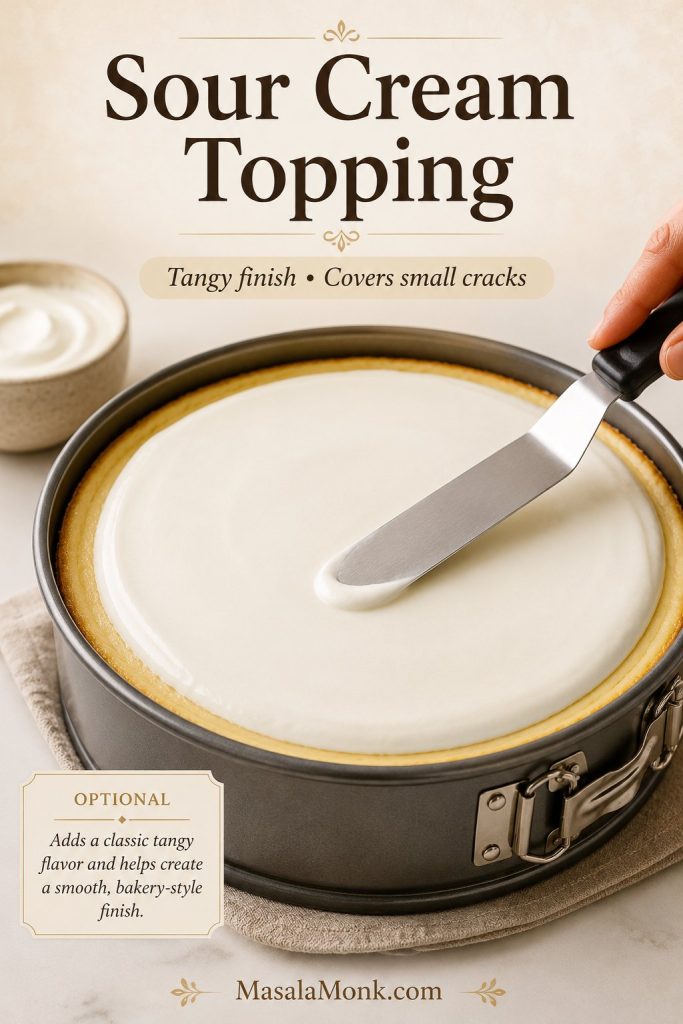
A sour cream topping is optional, but it is a lovely old-school finish if you like a tangier cheesecake. It gives the top a clean white layer, softens the richness, and quietly covers small cracks so the cheesecake still looks dinner-party ready.
To make it, stir together:
- 1 cup sour cream / 240g
- 2 tablespoons sugar
- ½ teaspoon vanilla extract
- Pinch of salt
After the main bake, while the cheesecake is still hot and before the long oven-cooling step, spread the topping gently over the surface. Return the cheesecake to the oven for 8–10 minutes, then turn the oven off, crack the door, cool slowly, and chill as usual. This topping is especially useful if you like a more old-school cheesecake flavor, want extra tang, or need a simple way to cover a small crack.
Topping finish: Spread the sour cream layer gently while the cheesecake is still warm, so it smooths the surface without feeling like frosting.
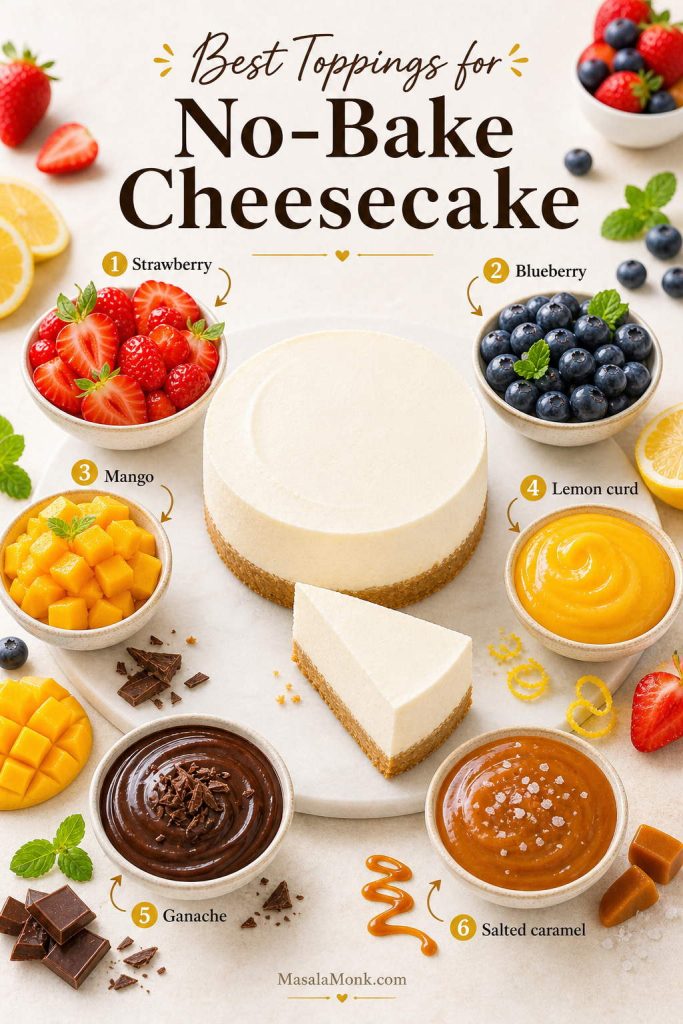
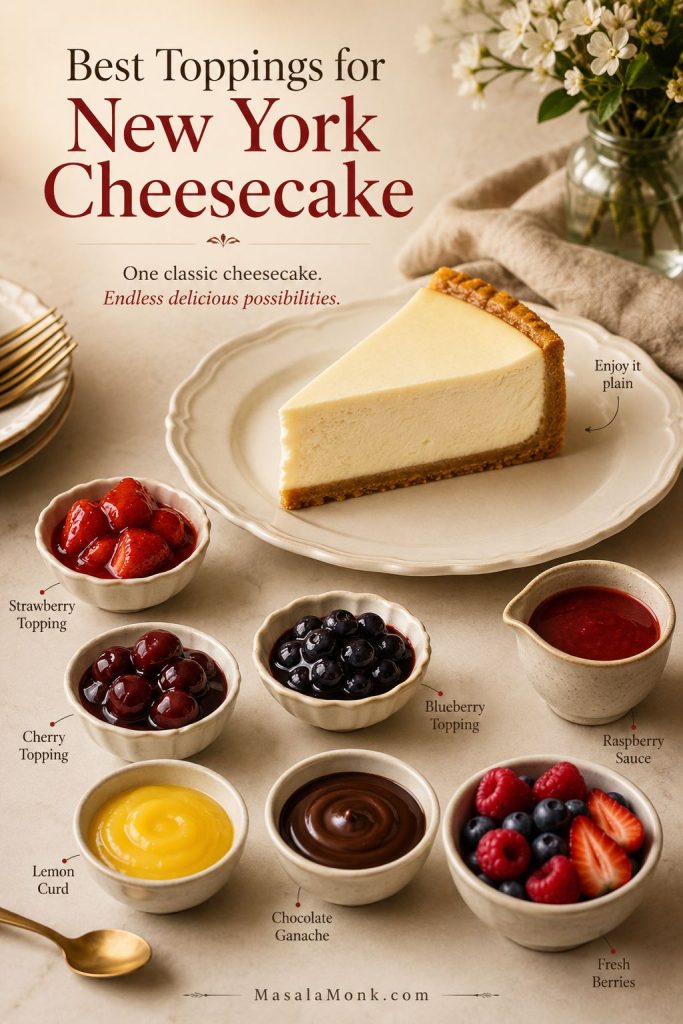
Best Toppings for New York Cheesecake
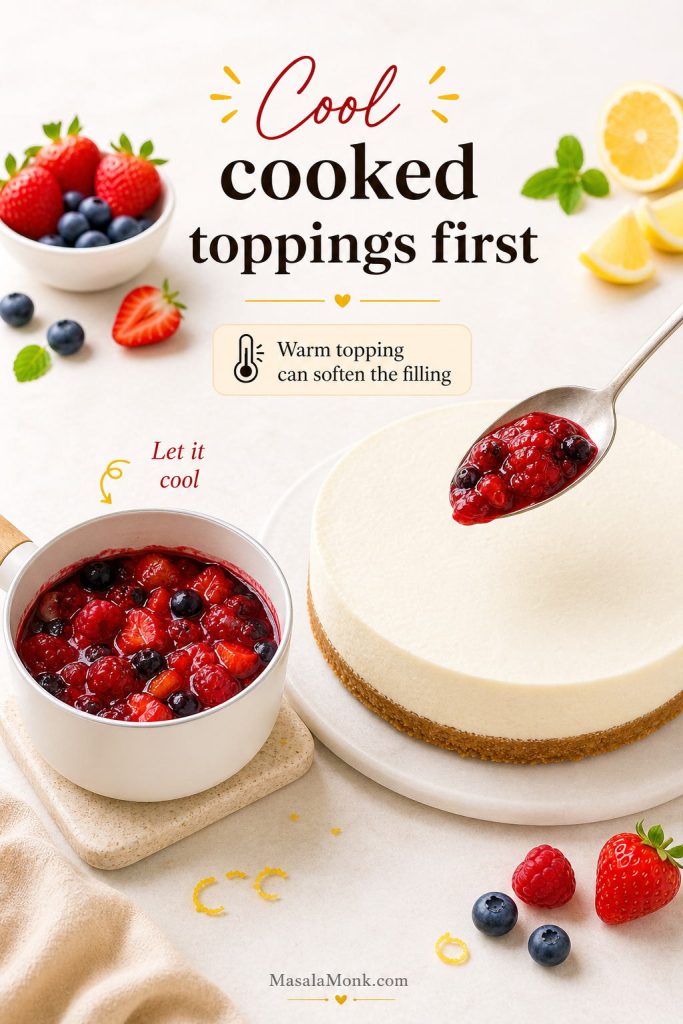
New York cheesecake is rich enough to serve plain, but toppings can make it feel more special. Add fresh or cooked toppings after the cheesecake has chilled, not before baking, unless you are following a specific swirl recipe.
For the cleanest New York cheesecake flavor, serve the first slice plain. If the cheesecake tastes balanced on its own, toppings become a choice rather than a cover-up.
| Topping | Best For | Tip |
|---|---|---|
| Strawberry topping | Classic bakery-style serving | Use a glossy cooked sauce or fresh berries with a little sugar. |
| Cherry topping | Retro New York cheesecake flavor | Keep it lightly tart so the cheesecake does not become too sweet. |
| Blueberry topping | Deep fruit flavor | A small amount of lemon juice keeps blueberry sauce bright. |
| Raspberry sauce | Sharper contrast | Strain seeds if you want a smooth sauce. |
| Lemon curd | Bright, tangy finish | Use a thin layer because lemon curd is intense. |
| Chocolate ganache | Richer dessert feel | Let ganache cool slightly before pouring over chilled cheesecake. |
| Fresh berries | Simple, elegant serving | Add right before serving so the berries stay fresh. |
Serving options: Plain cheesecake should taste complete first, and toppings should add contrast rather than cover a weak filling.
If you prefer fruit-forward cheesecakes, you may also like this No Bake Mango Cheesecake. For a lighter high-protein variation, see this Cottage Cheese Cheesecake Recipe.
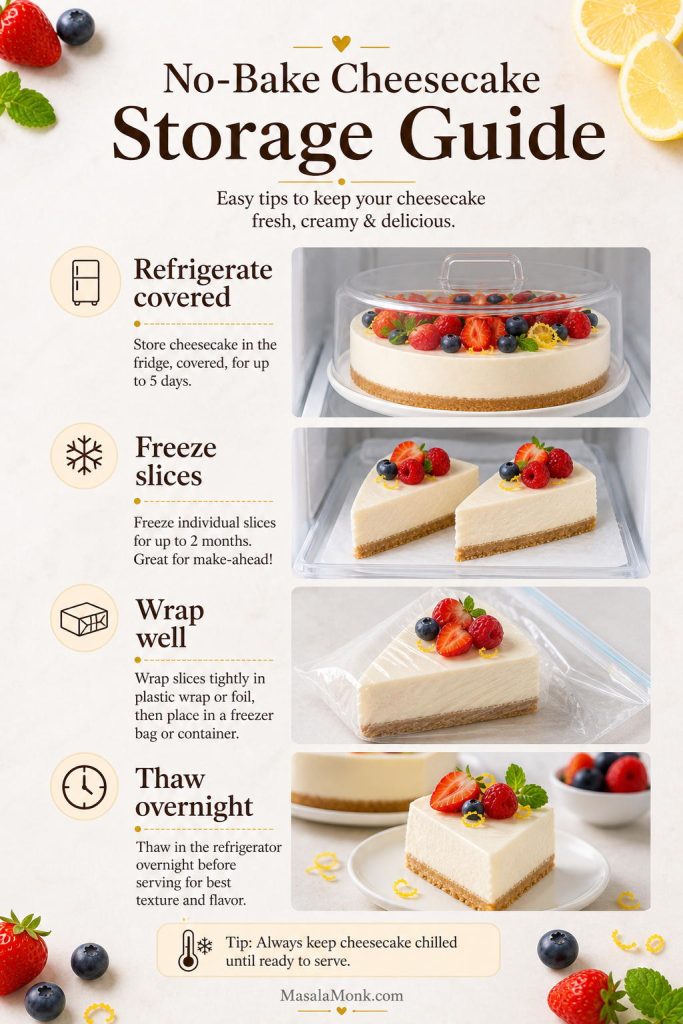
Make Ahead, Storage and Freezing
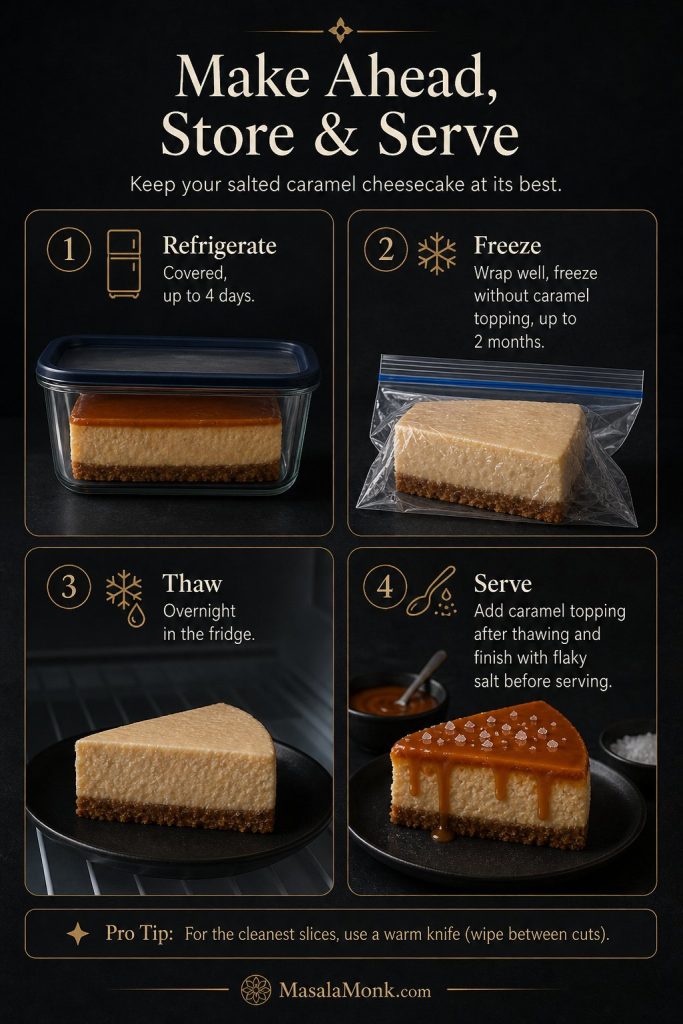
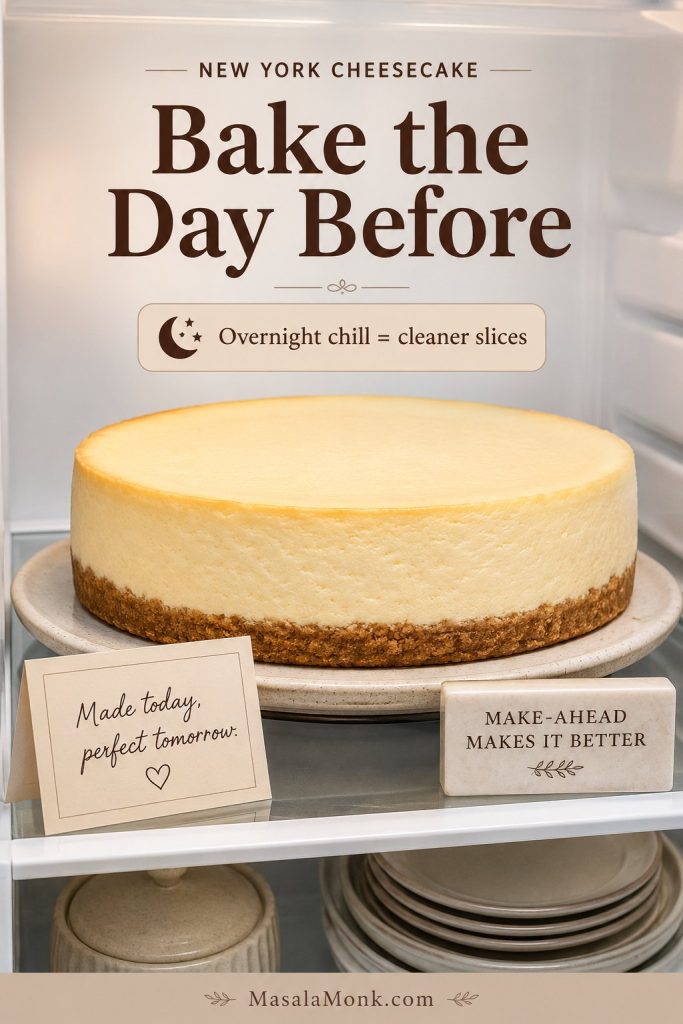
This New York cheesecake recipe is best baked the day before serving because it actually improves after chilling. The texture becomes cleaner, the flavor settles, and the slices cut more neatly.
Best Make-Ahead Timeline
For the smoothest serving day, bake the cheesecake the day before you need it. Cool it slowly in the oven, let it come to room temperature, chill it overnight, then release, slice, and add toppings the next day.
Make-ahead note: Cheesecake is easier to serve when it has already chilled overnight and the slicing work is not rushed.
Fridge Storage
Store the cheesecake covered in the refrigerator for 4–5 days. Keep it in the pan until fully chilled if possible, then cover loosely once the surface is cold.
Freezing
Cheesecake freezes well. Chill it completely first, then freeze whole or in slices. Wrap tightly in plastic wrap and foil, or use an airtight freezer-safe container. For best quality, use frozen cheesecake within 1–2 months. Thaw overnight in the refrigerator, then add fresh fruit or sauces after thawing.
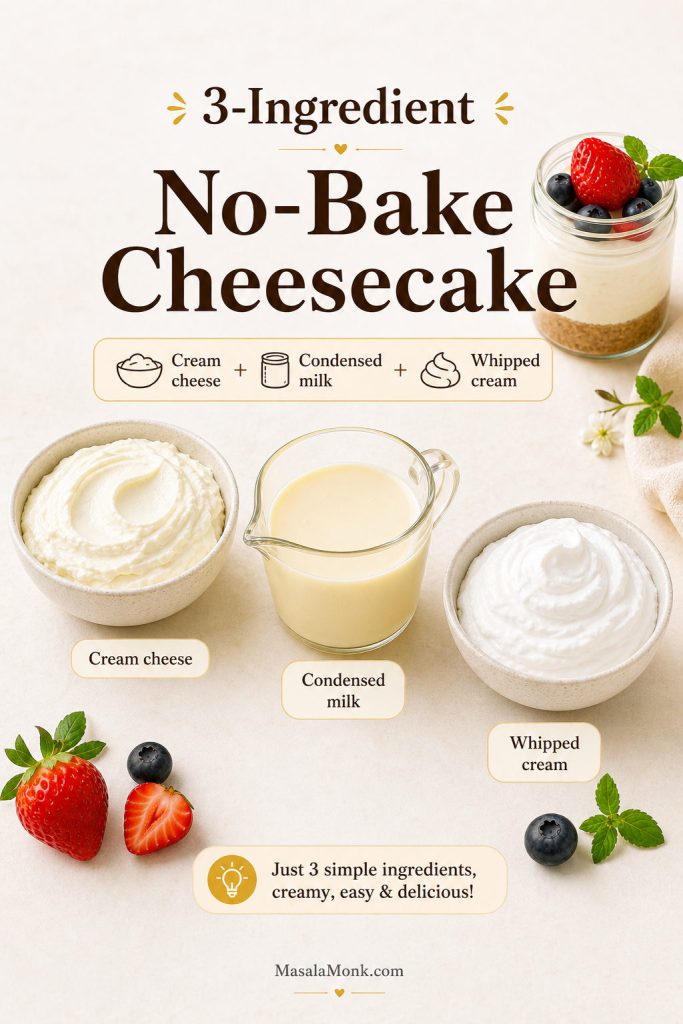
For a different make-ahead cheesecake style that does not require baking, see this No Bake Cheesecake Recipe. If you need a low-carb version, this Keto Cheesecake Recipe is the better fit.
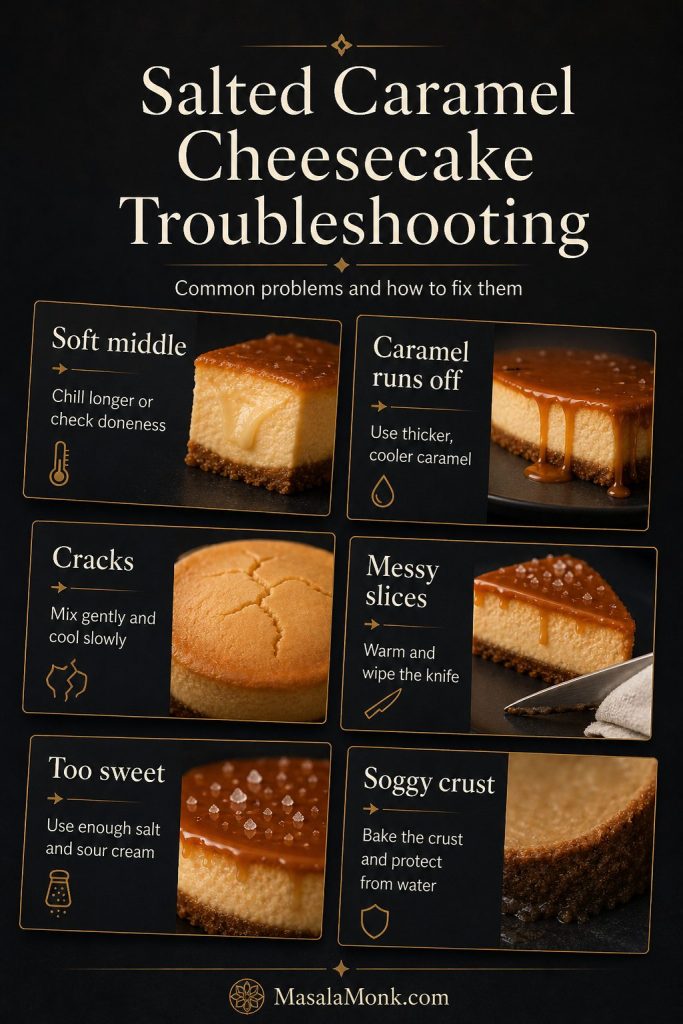
New York Cheesecake Troubleshooting
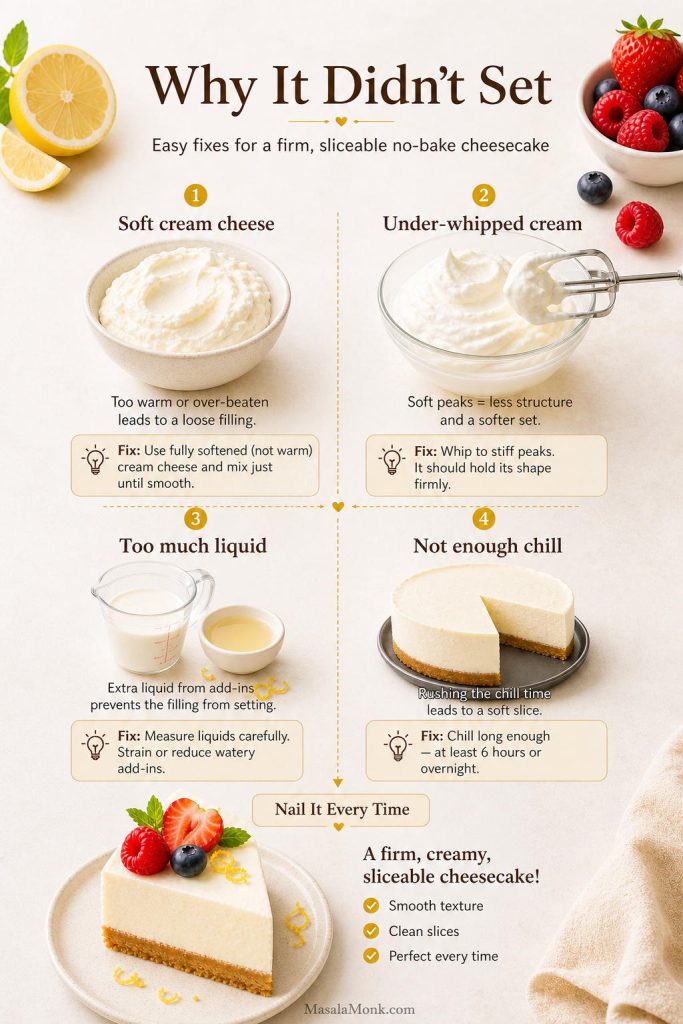
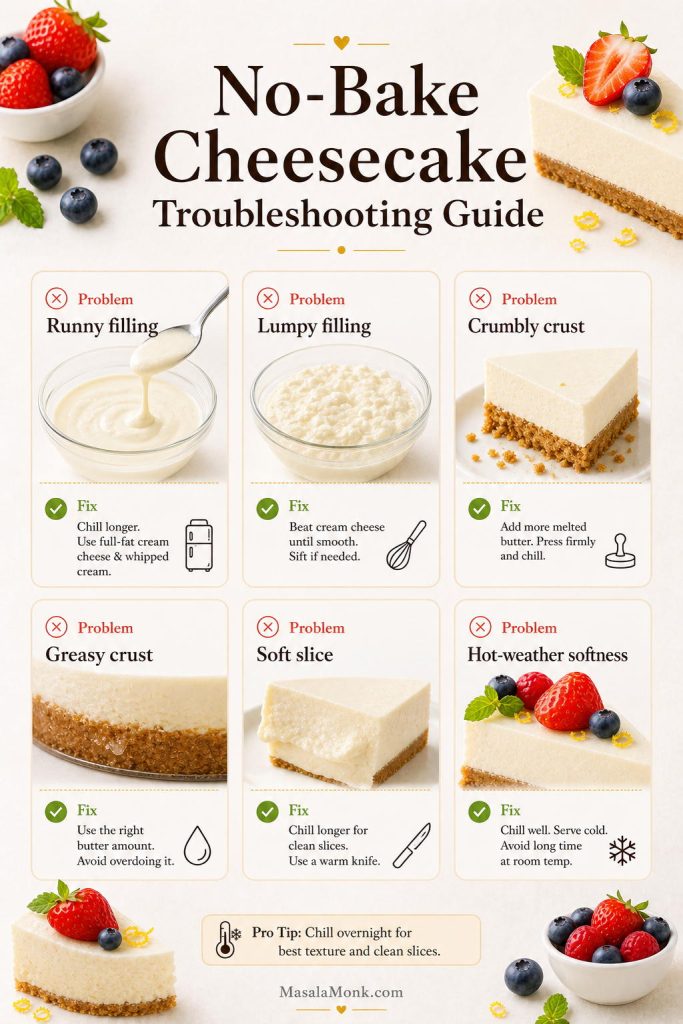
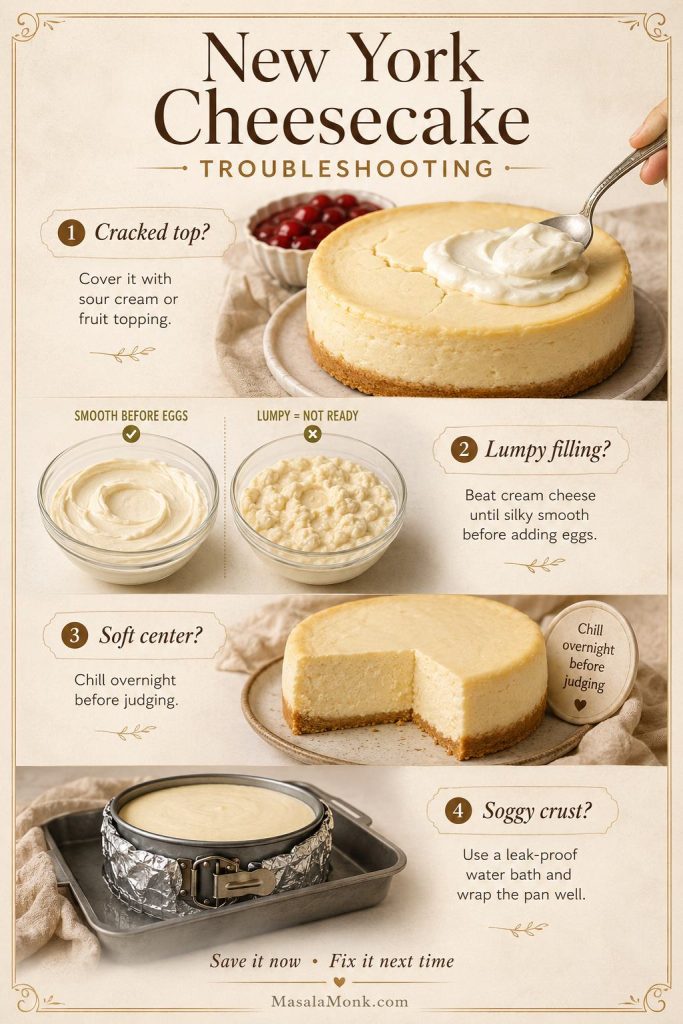
Most cheesecake problems are fixable once you know what caused them. The most common issues come from one of four things: cold cream cheese, too much mixing after the eggs, baking until the center is firm, or cooling too quickly.
Trying to diagnose what happened? Most issues trace back to cream cheese texture, baking method, doneness, or cooling.
Fix-it guide: Use this section to decide whether to save the cheesecake now or adjust the method next time.
Quick Fixes for the Cheesecake You Already Baked
First, do not judge the cheesecake while it is still warm. A center that looks slightly soft can firm up beautifully after an overnight chill. If the top cracked, browned, or dipped slightly, a topping can still make the cheesecake look polished and taste excellent.
What to Change Next Time
The table below gives you both kinds of help: how to save the cheesecake now, and what to adjust the next time you bake it.
| Problem | Save It Now | Fix It Next Time |
|---|---|---|
| Cheesecake cracked | Add sour cream topping, fruit topping, chocolate ganache, caramel, or whipped cream. | Pull it while the center still has movement, mix gently after adding eggs, and cool slowly in the oven. |
| Filling is lumpy | Serve with a fruit sauce or topping to distract from the texture. | Use fully room-temperature cream cheese and beat it smooth before adding eggs. |
| Center seems soft | Chill overnight before judging. Cheesecake firms dramatically in the fridge. | Bake until the edges are set and the center moves softly, not loosely. |
| Texture is dry or chalky | Serve with berry sauce, cream, caramel, or ganache. | Start checking earlier and do not wait for the center to become firm in the oven. |
| Crust is soggy | Chill fully and serve carefully. A topping can shift attention away from the crust. | Use two layers of heavy-duty foil or place the pan in an oven-safe bag before wrapping. |
| Top is too brown | Cover with sour cream topping, fruit topping, ganache, or powdered sugar. | Bake on a lower rack and use a water bath for a paler top. |
| Cheesecake sank | Serve chilled with topping; slight sinking is usually cosmetic. | Mix on low after adding eggs and use the slow oven-cooling method. |
| Crust is too hard | Let slices sit at room temperature for a few minutes before serving. | Press evenly but gently. Do not compact the crumbs aggressively. |
Small Cheesecake Imperfections Are Normal
Small imperfections are normal with cheesecake, even when you do almost everything right. A slight dip, a tiny crack, or a darker edge does not mean the dessert failed. Once it is chilled, sliced, and served with a topping, most cosmetic flaws disappear.
For more detail on water baths and why they help cheesecakes bake gently, this Simply Recipes guide to cheesecake water baths is a useful technical reference.
By the time the cheesecake is fully chilled, the texture should feel completely different from the soft center you saw in the oven. That is the quiet magic of baked cheesecake: the fridge finishes what the oven starts.
Need a quick check before the recipe card? Review the 5 rules, doneness cues, or troubleshooting before you start baking.
New York Cheesecake Recipe Card
Here is the full New York cheesecake recipe in one place.
Description
A classic baked New York cheesecake with a buttery graham cracker or digestive biscuit crust, dense creamy cream-cheese filling, sour cream tang, gradual cooling, and clean-slice texture.
Equipment
- 9-inch / 23cm springform pan, ideally at least 2.5 inches deep
- Large roasting pan for water bath
- Heavy-duty foil or oven-safe roasting bag
- Stand mixer or hand mixer
- Mixing bowls
- Silicone spatula
- Kettle or saucepan for hot water
- Cooling rack
- Sharp knife for slicing
Ingredients
For the Crust
- 1½ cups graham cracker crumbs / about 180g
- 5 tablespoons unsalted butter, melted / about 70g
- 2 tablespoons granulated sugar / about 25g
- Pinch of salt
Digestive biscuit option: Use about 200g digestive biscuit crumbs with 75–85g melted butter. Reduce or skip the sugar if the biscuits are already sweet.
For the Filling
- 32 oz full-fat cream cheese / 907g, room temperature
- 1¼ cups granulated sugar / 250g
- 2 tablespoons cornstarch / about 16–18g
- ¼ teaspoon salt
- 1 cup sour cream / 240g, room temperature
- ½ cup heavy cream / 120ml, room temperature
- 4 large eggs, room temperature
- 1 large egg yolk, room temperature
- 2 teaspoons vanilla extract
- 1 tablespoon lemon juice
- 1 teaspoon finely grated lemon zest
Flour option: Use 3 tablespoons / about 24g all-purpose flour instead of cornstarch.
Optional Sour Cream Topping
- 1 cup sour cream / 240g
- 2 tablespoons granulated sugar
- ½ teaspoon vanilla extract
- Pinch of salt
Instructions
Prepare the Crust and Pan
- Bring ingredients to room temperature. Let the cream cheese, sour cream, heavy cream, and eggs come to room temperature before mixing. This helps the filling become smooth without overbeating.
- Prepare the pan. Heat the oven to 350°F / 175°C. Grease a 9-inch springform pan lightly and line the base with parchment if desired.
- Make the crust. Mix the crumbs, melted butter, sugar, and salt until the mixture resembles damp sand. Press evenly into the bottom of the pan. Bake for 10 minutes, then cool slightly.
- Lower the oven temperature. Reduce the oven to 325°F / 160–165°C.
Mix the New York Cheesecake Filling
- Beat the cream cheese. In a large bowl, beat the cream cheese until completely smooth. Scrape the sides and bottom of the bowl.
- Add sugar and starch. Add the sugar, cornstarch, and salt. Beat until smooth and creamy.
- Add dairy and flavorings. Mix in the sour cream, heavy cream, vanilla, lemon juice, and lemon zest. Scrape the bowl again.
- Add eggs on low speed. Add the eggs one at a time, mixing on low speed just until each egg is incorporated. Add the egg yolk last. Do not overmix.
- Fill the pan. Pour the filling over the cooled crust and smooth the top. Tap the pan gently once or twice to release large air bubbles.
Bake, Cool and Chill the New York Cheesecake
- Prepare the water bath. Wrap the outside of the springform pan with two layers of heavy-duty foil, or place it in an oven-safe bag and then wrap with foil. Set the pan in a large roasting pan.
- Bake. Place the roasting pan on the oven rack. Pour hot water into the roasting pan until it reaches about halfway up the springform pan. Bake for 75–90 minutes, or until the edges are set and the center still has a slight jiggle.
- Cool slowly. Turn the oven off, crack the door open, and leave the cheesecake inside for 1 hour.
- Cool to room temperature. Remove the cheesecake from the water bath, unwrap the foil, and cool completely on a rack.
- Chill. Refrigerate for at least 8 hours, preferably overnight.
- Slice and serve. Run a thin knife around the edge before releasing the springform ring. Slice with a hot, clean knife, wiping between cuts.
Steam-Pan Option
Place the cheesecake on the center rack and set a metal baking pan filled with boiling water on the lower rack. Bake as directed. This adds moisture to the oven without placing the springform pan directly in water, though it is not quite as protective as a full water bath.
No-Water-Bath Option
Bake the crust as written. Add the filling, then bake the cheesecake at 425°F / 220°C for 10 minutes. Reduce the oven to 225°F / 110°C and bake for 60–80 minutes, until the edges are set and the center moves like soft-set custard. Turn the oven off, crack the door, cool inside for 1 hour, then cool to room temperature and chill overnight.
This method is simpler and avoids water-bath leaks, but the classic water bath gives the smoothest texture and palest top.
Optional Sour Cream Topping Method
After the main bake, stir together sour cream, sugar, vanilla, and salt. Spread gently over the hot cheesecake, then return it to the oven for 8–10 minutes. Turn the oven off, crack the door, cool slowly, and chill as directed.
Fan Oven and OTG Note
For a fan oven, reduce the main water-bath bake temperature to about 150–155°C. In an OTG, bake on the middle rack and avoid strong top heat. Gentle, steady baking matters more than browning.
Notes
- Do not use whipped or low-fat cream cheese.
- Room-temperature ingredients are essential for a smooth filling.
- Mix on low speed after adding eggs to avoid excess air.
- Do not fill a shallow springform pan to the very top; bake any extra filling separately in a ramekin.
- The center should still move slightly when the cheesecake leaves the oven; it will finish setting as it cools.
- Do not use a toothpick test for cheesecake.
- Overnight chilling gives the cleanest slices.
- Slice straight from the fridge for neat cuts, then rest slices 10–15 minutes before serving.
- Add fruit toppings after the cheesecake has chilled.
Storage
Store covered in the refrigerator for 4–5 days. To freeze, chill completely, wrap tightly, and freeze whole or in slices. For best quality, use within 1–2 months. Thaw overnight in the refrigerator.
How Did Yours Turn Out?
If you make this cheesecake, leave a comment with three details: which crust you used, whether you baked it in a full water bath, steam-pan method, or no-water-bath method, and how long it took for the center to reach the right wobble. If your oven ran fast or slow, mention that too. Those details help the next baker more than a simple “it worked.”
And if something went sideways — a crack, a damp crust, or a softer center than expected — share that too. Cheesecake is one of those recipes where real kitchen notes are genuinely useful.
Once you have made cheesecake this way, the process feels much less mysterious. The wobble makes sense, the gradual cool-down feels worth it, and the overnight wait becomes part of the recipe instead of a frustrating delay.
FAQs About New York Cheesecake
What is the difference between New York cheesecake and regular cheesecake?
New York cheesecake is usually denser, richer, taller, and more cream-cheese-forward than regular cheesecake. It is baked until just set, chilled thoroughly, and sliced cleanly. Regular cheesecake can be lighter, softer, whipped, or no-bake depending on the recipe.
Does New York cheesecake need a water bath?
A water bath is the safest path for a creamy texture, pale top, and fewer cracks, but it is not the only option. You can use the steam-pan compromise or the lower-temperature no-water-bath method, as long as you cool the cheesecake slowly.
What should I do if the water bath leaks?
Let the cheesecake chill fully before judging it. A slightly damp crust often firms up after refrigeration. Next time, use two layers of heavy-duty foil or place the springform pan inside an oven-safe bag before wrapping it in foil.
Why did my cheesecake crack?
Cracks usually come from overbaking, overmixing after the eggs go in, or cooling the cheesecake too quickly. Pull it from the oven while the center still moves slightly, mix gently, and let it cool slowly in the turned-off oven.
How can I save a cracked cheesecake?
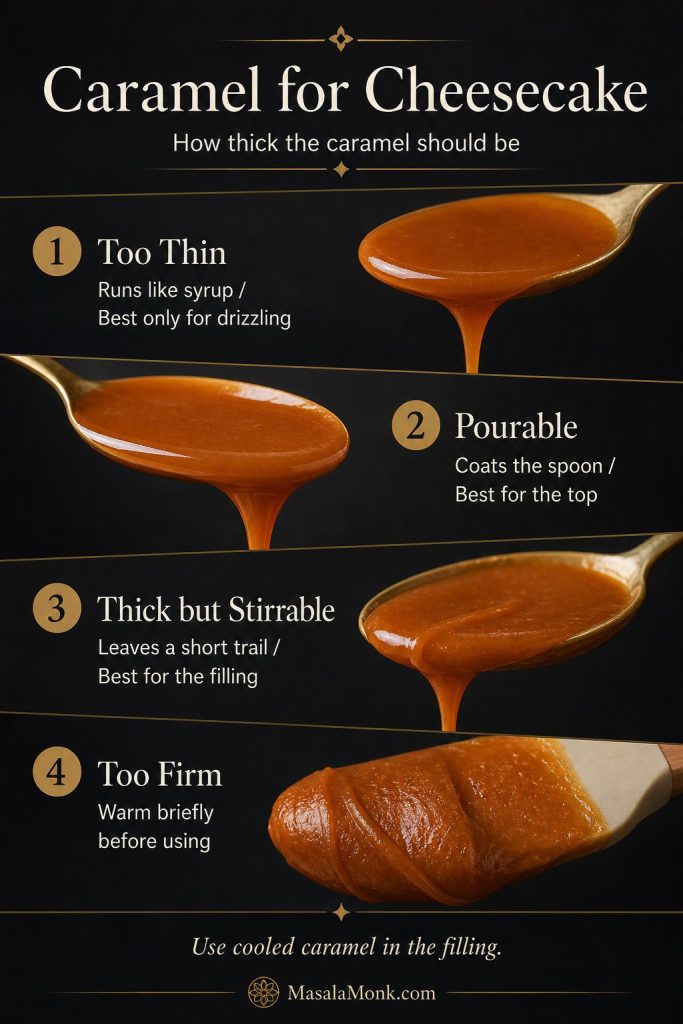
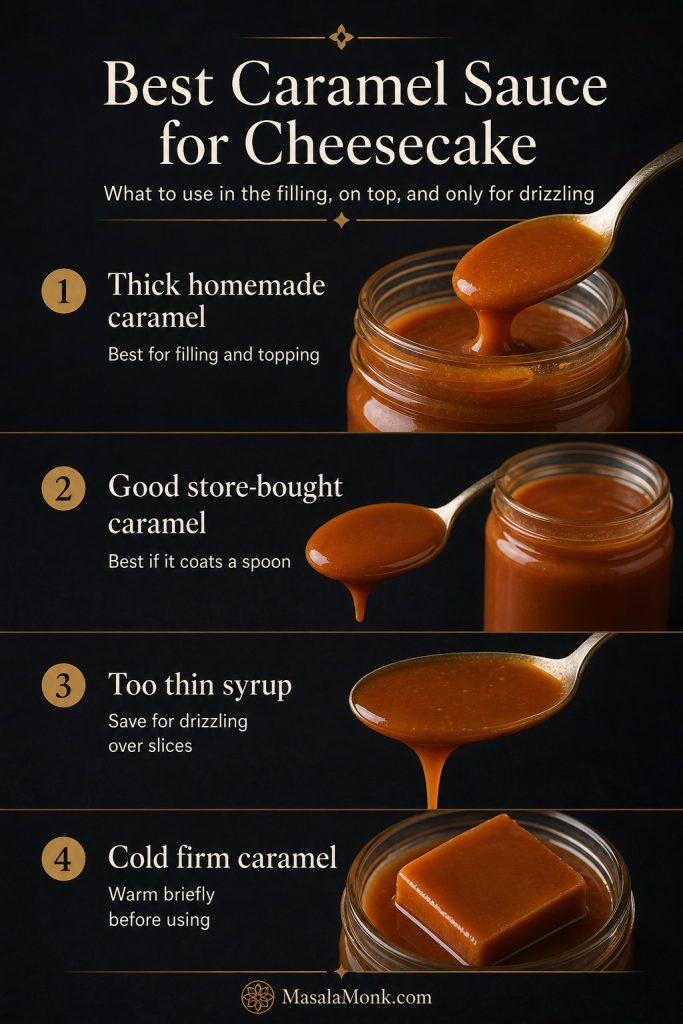
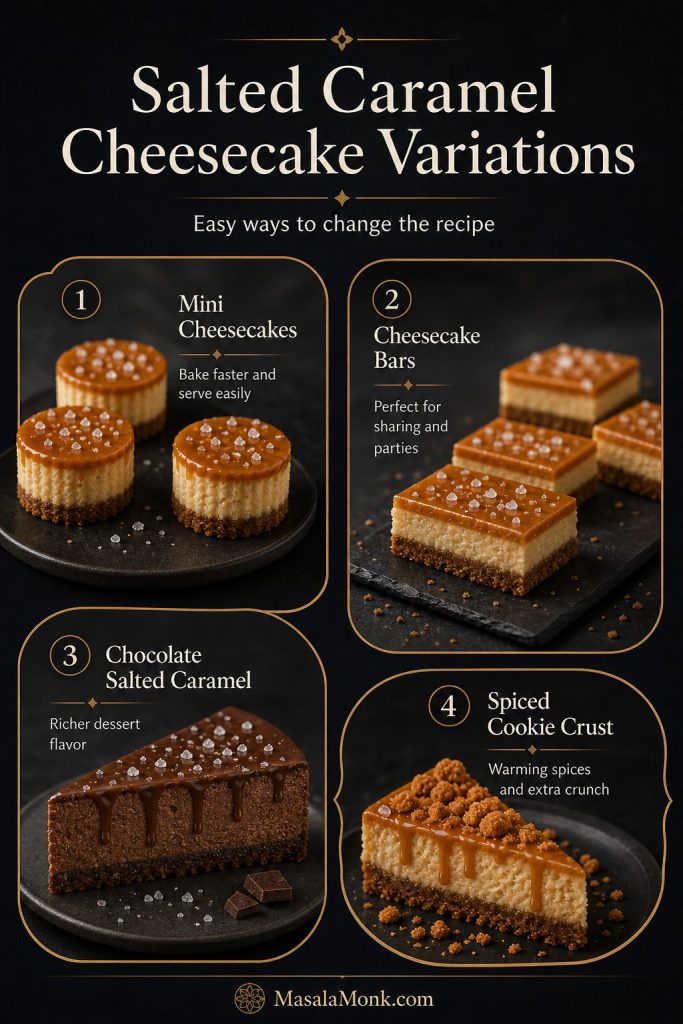
A cracked cheesecake is usually a visual problem, not a flavor problem. Cover the top with sour cream topping, strawberry sauce, cherry topping, blueberry compote, chocolate ganache, caramel, or whipped cream.
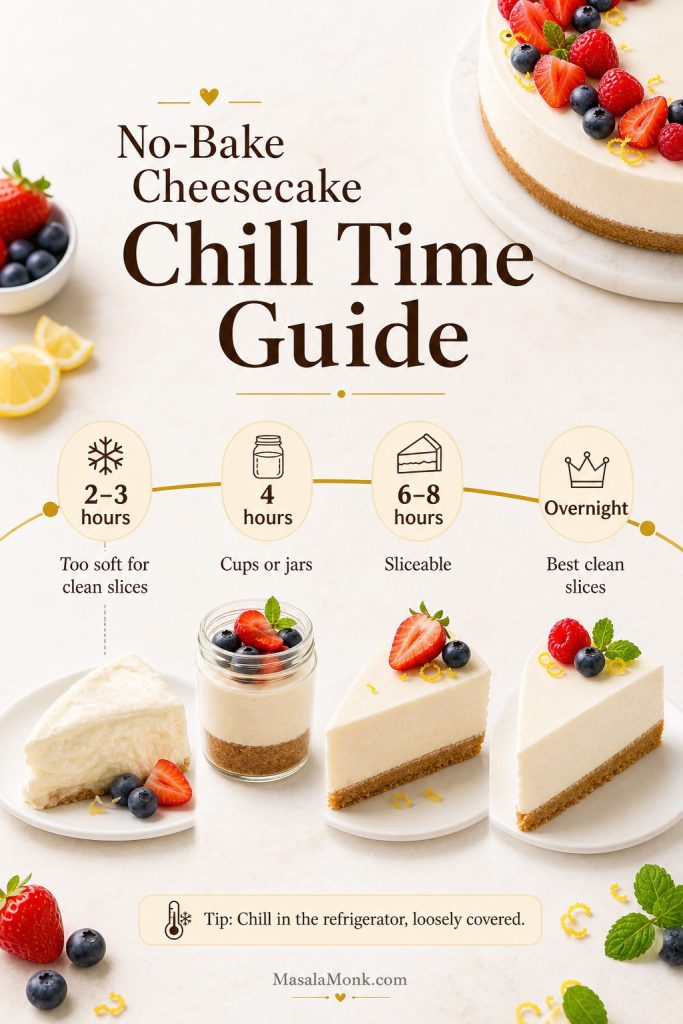
How long should New York cheesecake chill?
Give it at least 8 hours in the refrigerator. Overnight is better because the filling firms up, the flavor settles, and the slices cut more cleanly.
What can I use instead of sour cream?
Thick full-fat Greek yogurt is the best substitute. If it looks watery, strain it first. You can also replace some sour cream with more heavy cream, but the cheesecake will taste less tangy.
Does this New York cheesecake recipe use both sour cream and heavy cream?
Yes, but they do different jobs. Sour cream adds the classic tang, while heavy cream softens and rounds out the filling so the cheesecake stays dense without feeling dry.
Do digestive biscuits work instead of graham crackers?
Digestive biscuits work very well for cheesecake crust. Use about 200g crumbs and 75–85g melted butter, depending on how dry the biscuits are. Reduce or skip the sugar if the biscuits are already sweet.
Will this recipe fit an 8-inch pan?
The full batter amount is too much for many 8-inch pans unless the pan is very deep. An 8-inch cheesecake will be taller and the bake time will change, so it is better to scale the recipe down or bake extra filling separately in ramekins.
How do I get clean cheesecake slices?
Chill the cheesecake overnight, then cut it with a sharp knife dipped in hot water. Wipe the blade clean between cuts so the creamy filling does not drag through the crust.
Does New York cheesecake freeze well?
It freezes well once fully chilled. Wrap the whole cheesecake or individual slices tightly, freeze, then thaw overnight in the refrigerator. For the best texture, serve within 1–2 months and add fresh fruit or sauces after thawing.