Posted on Leave a comment

Cottage Cheese Cheesecake Recipe

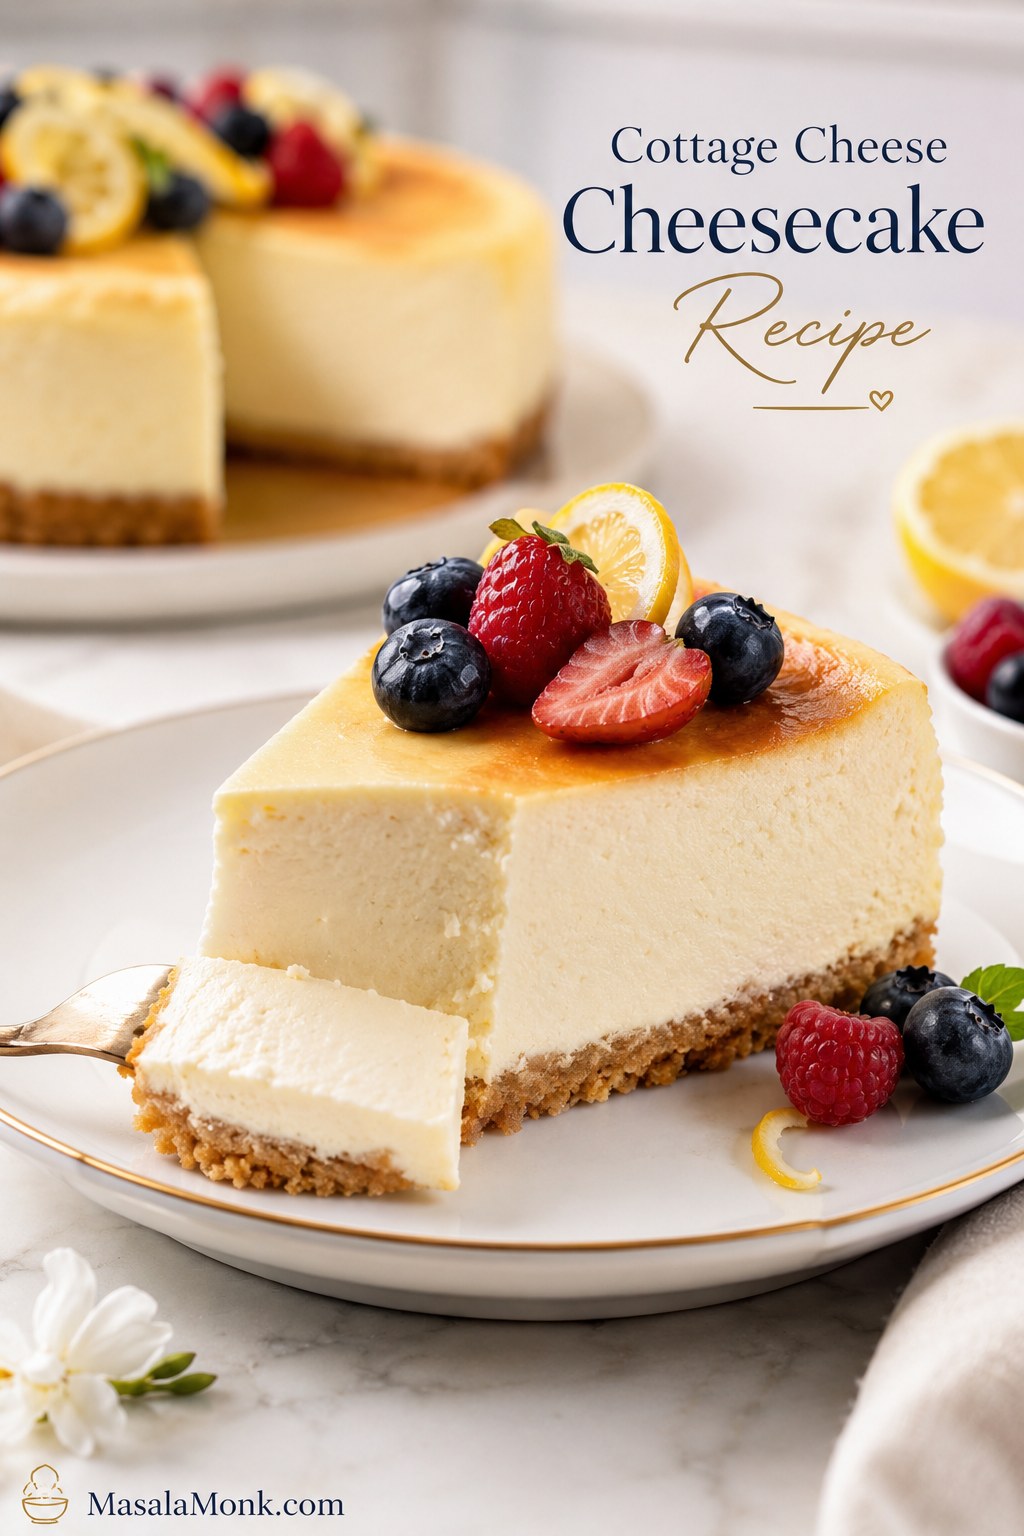
Finished cottage cheese cheesecake slice with creamy filling, crumb crust, berries, and lemon on a dessert plate

This cottage cheese cheesecake recipe is built for the two worries people usually have before they try it: grainy curds and a watery filling. The cottage cheese is blended until completely smooth, supported with thick Greek yogurt, eggs, vanilla, lemon, and a little cornstarch, then baked gently and chilled until creamy and sliceable.

It is lighter than a classic cream cheese cheesecake, but it still tastes like dessert. You can bake it with a buttery crumb crust, make it crustless, or add a little cream cheese when you want a richer, more traditional slice — no protein powder needed.
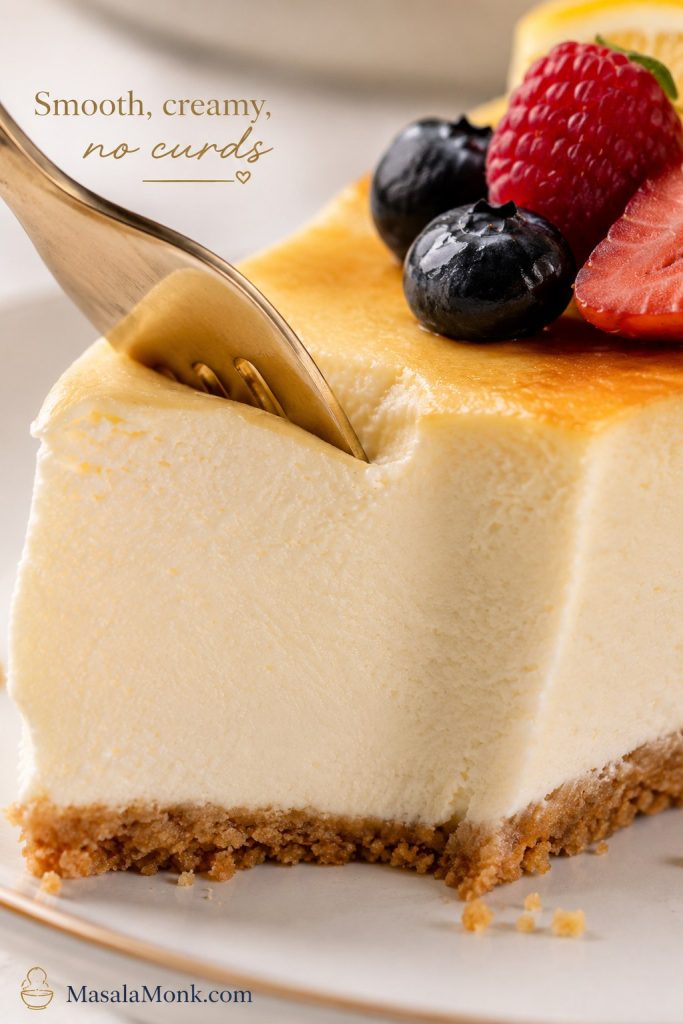
Close-up of a fork cutting into a smooth cottage cheese cheesecake slice with no visible curds
A clean fork cut should reveal a creamy interior — the first sign that the cottage cheese has blended fully into the filling.

Quick Answer: Can You Make Cheesecake with Cottage Cheese?

Yes, you can make cheesecake with cottage cheese. The key is to blend the cottage cheese until smooth before baking it with eggs, Greek yogurt, vanilla, lemon, and a little cornstarch. Once baked and chilled, the filling becomes creamy, lightly tangy, and sliceable.

The best version should not remind you of eating cottage cheese from a tub. Once blended, baked, and chilled, the cottage cheese melts into the filling and gives the cheesecake body, tang, and a lighter feel than a cream cheese-only base.
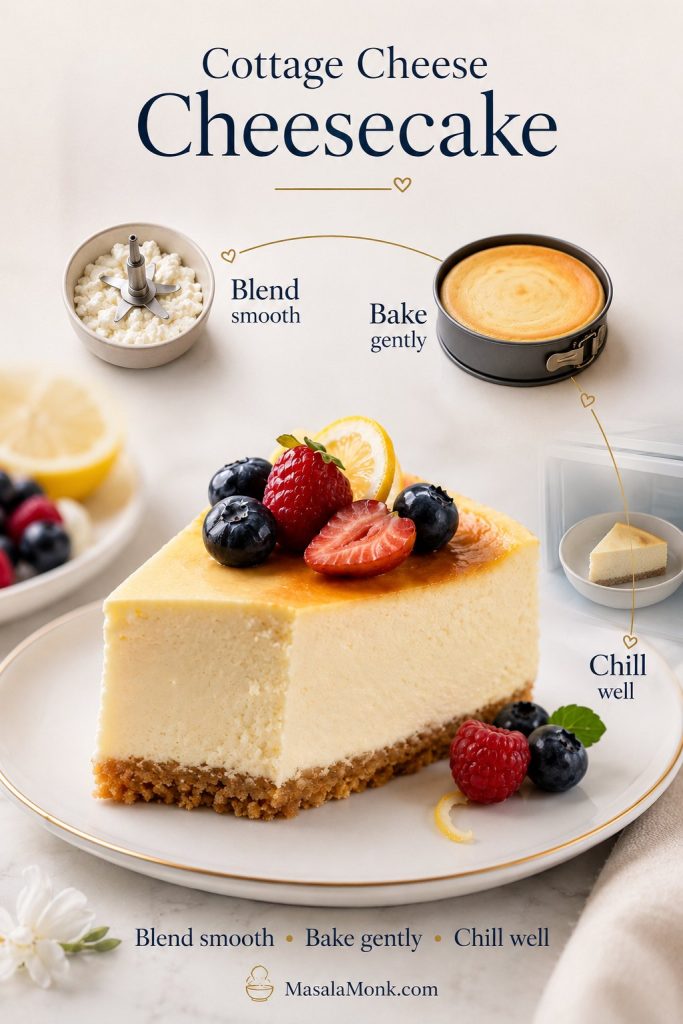
Cottage cheese cheesecake quick answer visual showing the blend, bake, and chill method
For a reliable result, think in three moves: smooth the dairy first, set the filling gently, then chill before slicing.

Before You Bake: Texture Rules and Timing

At a glance: This is a smooth baked cottage cheese cheesecake with Greek yogurt, vanilla, lemon, and an optional crumb crust. Bake it in an 8-inch springform pan at 325°F / 160°C until the edges are set and the center softly wobbles, then cool slowly and chill at least 4 hours or overnight.
Why you’ll love it:
  • It tastes like cheesecake, not cottage cheese. Blending smooths the curds into the filling.
  • It is lighter but still dessert-like. Greek yogurt adds tang without making the slice feel flat.
  • No protein powder needed. Cottage cheese and Greek yogurt give the filling its protein-rich base without making the cheesecake taste chalky.
  • It works with or without a crust. Make it classic, crustless, or low-carb.
  • It is better the next day. Overnight chilling gives the cleanest, creamiest slices.
The 4 texture rules:
  • Drain cottage cheese when it looks watery.
  • Use thick Greek yogurt, not loose regular yogurt.
  • Blend the dairy completely smooth before adding eggs.
  • Chill the cheesecake overnight before judging the final texture.
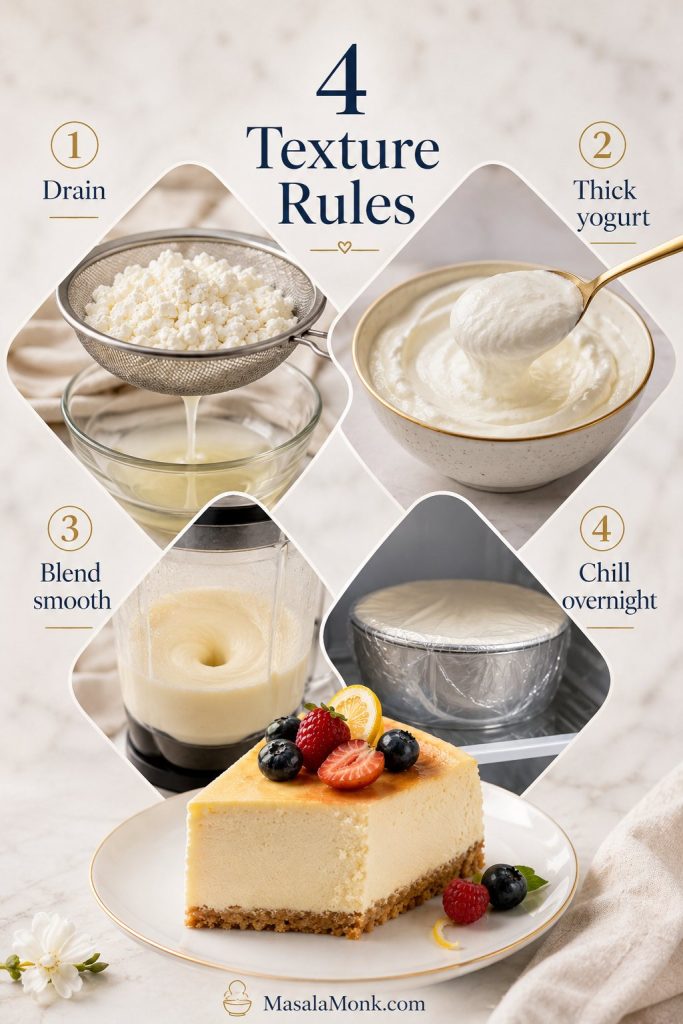
Four cottage cheese cheesecake texture rules showing draining, thick yogurt, smooth blending, and overnight chilling
Before baking, these four rules matter most: control moisture, use thick yogurt, blend thoroughly, and give the cheesecake enough chill time.

Need the visual version? Jump to how to make the filling smooth or troubleshooting if your batter looks loose, grainy, or hard to slice.

What Does Cottage Cheese Cheesecake Taste Like?

A good cottage cheese cheesecake tastes creamy, lightly tangy, and familiar — closer to a lighter cheesecake than a cottage cheese dessert. The vanilla gives it warmth, the lemon adds classic cheesecake brightness, and the Greek yogurt rounds out the dairy flavor.

The texture is softer and a little lighter than a dense New York-style cheesecake, especially with the Greek yogurt version. The cream cheese variation makes it richer, denser, and closer to the classic slice many people expect.

The cottage cheese should not stand out. Once it is blended and chilled properly, it should support the cheesecake rather than announce itself.

For Cottage Cheese Skeptics

If the words cottage cheese cheesecake make you imagine curds in dessert, you are not alone. That is exactly what this recipe is designed to avoid. Once the filling is blended, baked, and chilled, the cottage cheese should disappear into the texture.

The goal is not a “healthy dessert” that tastes like a compromise. It should taste like a lighter, tangier cheesecake: cold, creamy, smooth, and familiar enough that nobody is thinking about cottage cheese curds.
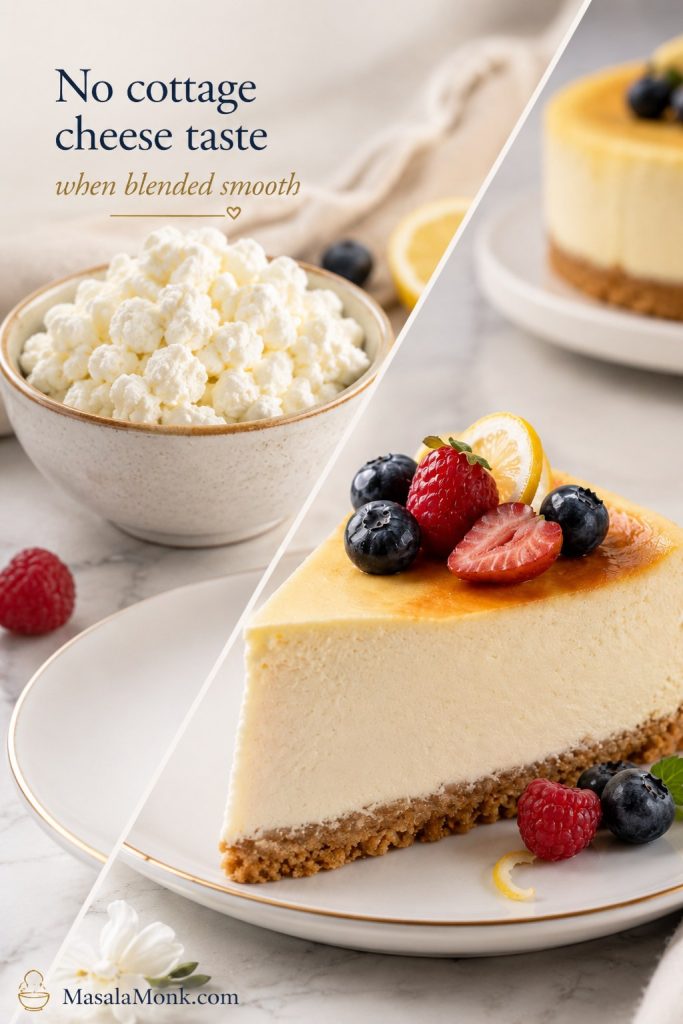
Curdy cottage cheese transforming into a smooth cheesecake slice with no visible curds
If cottage cheese flavor worries you, this is the goal: the dairy disappears into the cheesecake instead of standing out.

Why This Cottage Cheese Cheesecake Works

Cottage cheese can make a beautiful cheesecake, but it needs the right support. This recipe is built around the two things that matter most: blending the curds completely smooth and keeping extra moisture under control.

The goal is not to hide cottage cheese under a pile of sugar. It is to make it behave like a cheesecake filling: smooth enough to slice, tangy enough to taste familiar, and rich enough that it still feels like dessert.

Cottage Cheese Adds Protein and Body

Cottage cheese gives the filling body, mild tang, and a naturally higher-protein foundation than a cream cheese-only filling. Full-fat cottage cheese gives the richest result, while 2% cottage cheese works well for a lighter slice that still tastes balanced.

Greek Yogurt Adds Tang and Creaminess

Greek yogurt keeps the filling from tasting flat. It brings the tang people expect from cheesecake, but it needs to be thick; loose yogurt can push the batter toward watery.

Eggs Help the Cheesecake Set

This version uses 4 large eggs for a reliable set. Add them last and blend briefly; too much air in the batter can make the cheesecake puff in the oven and crack as it cools.

Cornstarch Gives Extra Insurance

A small amount of cornstarch helps the filling hold together without making it heavy. It is especially useful when cottage cheese has a little extra liquid. All-purpose flour works too, but cornstarch keeps the texture softer and cleaner.

Low, Gentle Baking Prevents Cracks

This cheesecake bakes at 325°F / 160°C after the crust is pre-baked. The lower heat helps the filling set slowly, which reduces the chance of a cracked top, dry edges, or a firm, rubbery center.

Texture tip: Do not bake this cheesecake until the center looks completely firm. Pull it when the edges are set and the center still has a soft wobble. Warm cheesecake is supposed to look a little underdone; the refrigerator does the final work.

How to Avoid Grainy or Watery Cottage Cheese Cheesecake

This recipe is built around moisture control. Cottage cheese and Greek yogurt both bring liquid to the filling, so the best texture comes from using thick dairy, adding enough egg structure, and including a small amount of cornstarch.

Granulated sugar keeps the batter more predictable than liquid sweeteners. Watery cottage cheese should be drained before measuring. Eggs should go in last so the batter does not become over-aerated. After baking, the cheesecake may look softer than expected, but the texture changes as it cools and chills.

Ingredients for Cottage Cheese Cheesecake

This cottage cheese cheesecake uses familiar cheesecake ingredients, but the balance is slightly different from a classic cream cheese version. The goal is a filling that feels smooth and sliceable without losing the lighter character that makes cottage cheese useful in the first place.
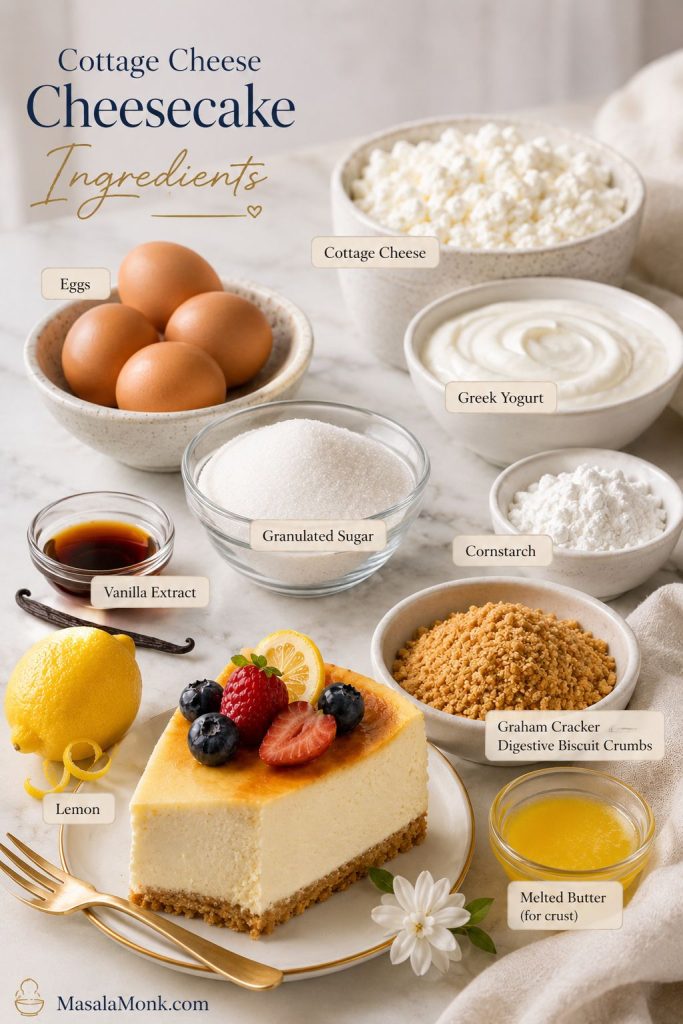
Cottage cheese cheesecake ingredients including cottage cheese, Greek yogurt, eggs, lemon, vanilla, cornstarch, and crumb crust
Each ingredient has a clear job: cottage cheese builds body, Greek yogurt adds tang, eggs set the filling, and cornstarch helps protect the structure.

Cottage Cheese

Use full-fat or 2% cottage cheese for the best balance of richness and structure. Small-curd cottage cheese is easiest to blend, but large-curd cottage cheese also works with a good blender or food processor.

Greek Yogurt

Plain Greek yogurt adds tang and keeps the cheesecake from tasting flat. Whole milk Greek yogurt gives the richest texture, while low-fat or nonfat Greek yogurt makes the cheesecake lighter. Avoid regular yogurt unless it has been strained until thick.

Eggs

Eggs help the filling set. Use room-temperature eggs so they blend evenly into the batter. The cheesecake should not taste eggy when it is baked gently and pulled while the center still has a soft wobble.

Sugar or Sweetener

Regular granulated sugar gives the cleanest cheesecake flavor. A cup-for-cup monk fruit blend or allulose can work for a lower-sugar version. For a fully low-carb cheesecake with a more classic structure, this keto cheesecake recipe goes deeper into almond flour crusts, sugar-free sweeteners, crustless cheesecake, and no-crack baking.

Cornstarch

Cornstarch helps the cottage cheese and yogurt filling bake into clean slices. Use 2 tablespoons of all-purpose flour instead when cornstarch is not available.

Vanilla and Lemon

Vanilla adds warmth. Lemon zest and a little lemon juice give the cheesecake its familiar brightness. The lemon does not need to make the cheesecake taste sharply lemony; it simply makes the dairy taste more like cheesecake.

Graham Cracker or Digestive Biscuit Crust

The crust is optional, but it makes the cheesecake feel more classic. Graham crackers, digestive biscuits, or similar plain sweet biscuits all work. Pre-baking the crust for a few minutes helps it hold together under the filling.

Best Cottage Cheese to Use

The cottage cheese you choose has a direct effect on texture. Since this is a blended cheesecake, you do not need perfect curds, but you do need cottage cheese that is not overly watery.
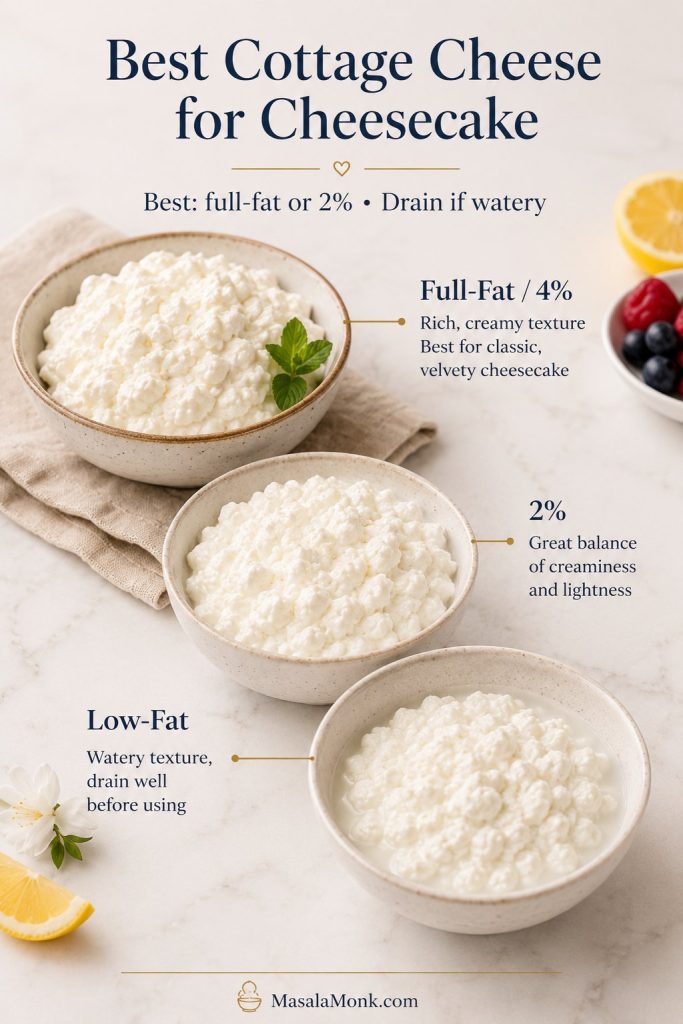
Cottage cheese comparison showing full-fat, two percent, and watery low-fat cottage cheese for cheesecake
Full-fat or 2% cottage cheese is usually the safest choice because it gives the filling more body and a smoother baked result.
Cottage Cheese Type Result in Cheesecake Best Use
Full-fat / 4% Richest, most forgiving texture Best overall choice
2% Still creamy, slightly lighter Best balance for a lighter cheesecake
Low-fat Can work, but may be thinner or tangier Use only when thick; drain when watery
Fat-free Least rich, more likely to taste tangy or thin Use only for a very lean version
Small-curd Blends easiest Best default
Large-curd Works when blended very well Use a strong blender or food processor

When to Drain Watery Cottage Cheese

When cottage cheese looks loose or has a lot of liquid in the container, drain it through a fine-mesh sieve before measuring. That one small step can prevent a watery cheesecake.
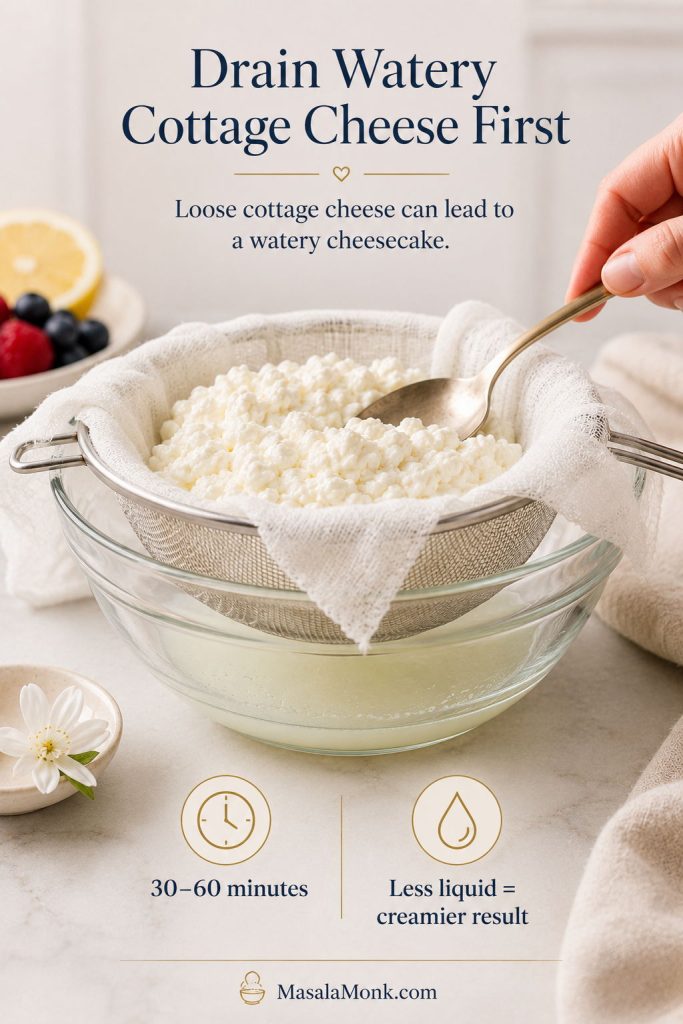
Watery cottage cheese draining in a fine-mesh sieve over a bowl before making cheesecake
Draining loose cottage cheese first removes extra moisture, which means the finished cheesecake is less likely to turn soft or watery.

Once you know which cottage cheese to use, the next important step is blending it smooth before the eggs go in.

For official nutrient data on different cottage cheese varieties, you can check USDA FoodData Central cottage cheese data.

How to Make Cottage Cheese Cheesecake Smooth

Graininess is what can ruin the illusion, so the blender step matters more than anything else. The dairy should look glossy and smooth before the eggs go in.

Use a Blender or Food Processor

A high-speed blender gives the silkiest filling. A food processor also works, especially when you scrape down the sides once or twice. An immersion blender can work in a pinch, but the finished texture may not be quite as polished.

Blend the Dairy Before Adding Eggs

Add the cottage cheese, Greek yogurt, sugar, vanilla, lemon zest, lemon juice, salt, and cornstarch to the blender first. Blend until the mixture looks glossy and even. Add the eggs only after that base is smooth.
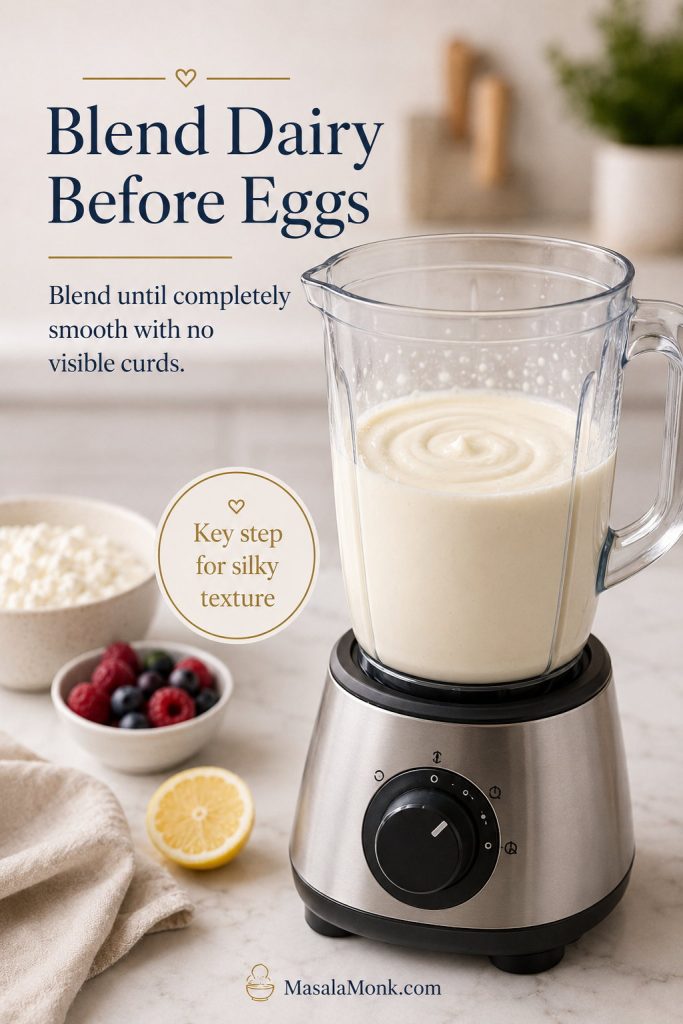
Cottage cheese cheesecake filling being blended smooth in a blender before eggs are added
Blend the dairy before the eggs go in; this is the step that turns a curdy base into cheesecake-ready filling.

What the Batter Should Look Like

The batter should look glossy, smooth, and pourable before it goes into the crust. If it still looks grainy, blend again or strain it before baking.
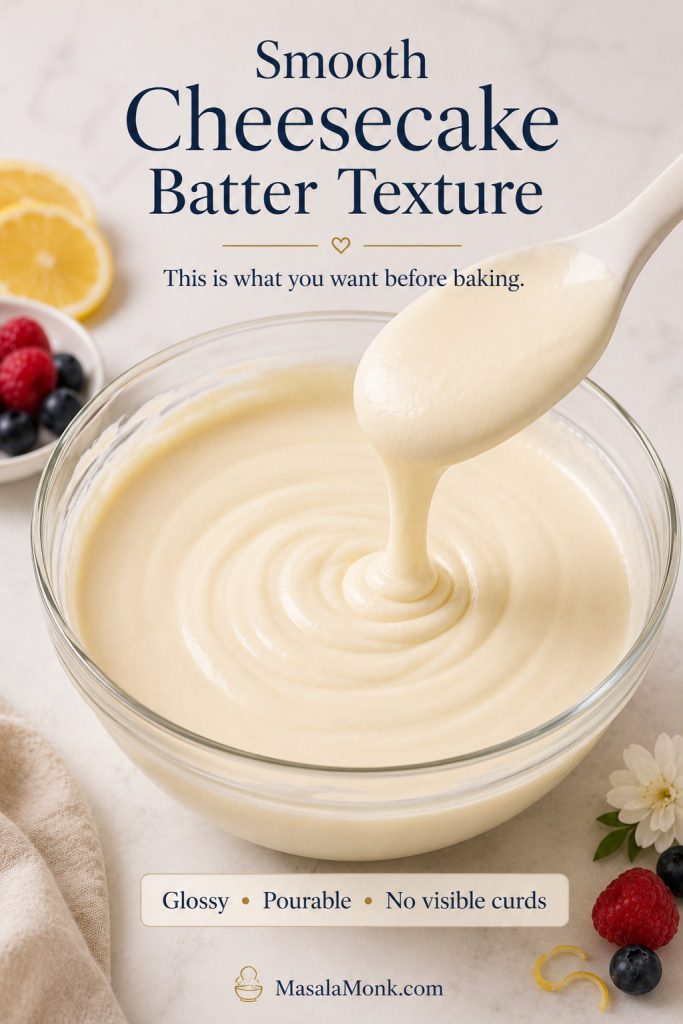
Smooth cottage cheese cheesecake batter lifting from a spatula in a glossy ribbon
The batter should fall in a glossy ribbon, because a smooth pour now usually means a cleaner texture after baking.

Strain the Batter When Needed

When the blender is not very powerful and the batter still looks slightly grainy, pour it through a fine-mesh sieve before baking. It is an optional step, but it can rescue the texture.

After the batter looks glossy and pourable, move to the step-by-step method and then use the doneness cues before chilling.

How to Make Cottage Cheese Cheesecake

The method follows classic cheesecake logic: prepare the pan, pre-bake the crust, blend the filling, bake gently, cool slowly, and chill before slicing. Once the filling is smooth, the oven and refrigerator do most of the work.
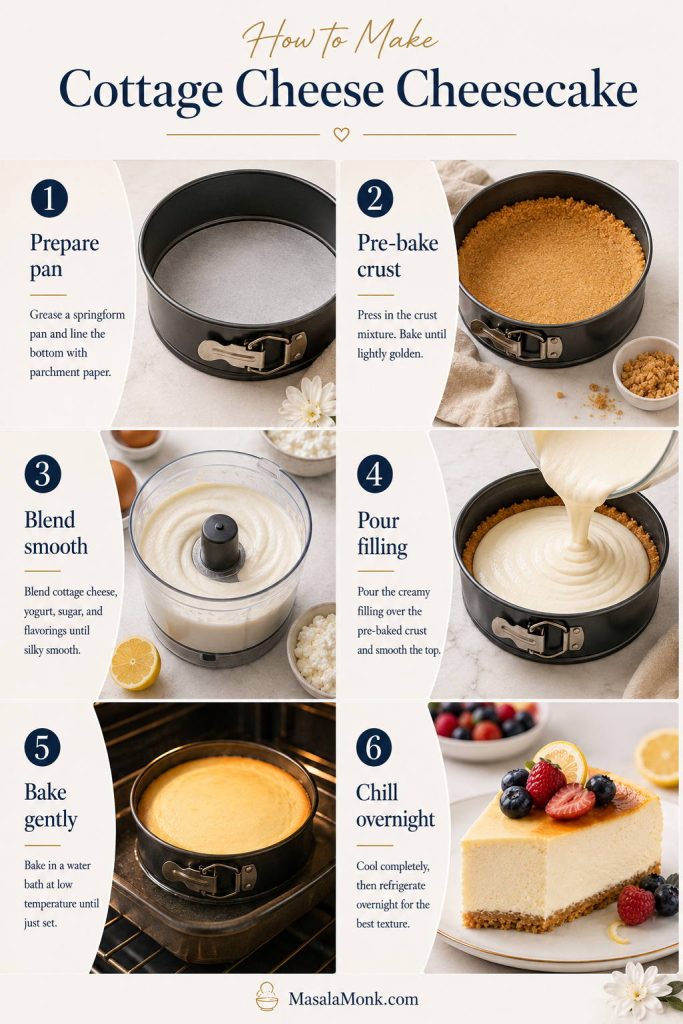
Step-by-step cottage cheese cheesecake guide showing pan prep, crust, blended filling, pouring, baking, and chilling
The method stays simple: prepare the pan, pre-bake the crust, blend the filling, bake until just set, and chill for the cleanest slice.

Step 1: Prepare the Pan

Line the bottom of an 8-inch / 20cm springform pan with parchment paper. Lightly grease the sides. For a water bath, wrap the outside of the pan with heavy-duty foil or place the springform pan inside a larger oven-safe bag before setting it in the roasting pan.

Step 2: Make and Bake the Crust

Mix the graham cracker or digestive biscuit crumbs with melted butter, sugar, and a pinch of salt. Press the mixture firmly into the bottom of the pan. Bake at 350°F / 177°C for 8 to 10 minutes, then lower the oven temperature to 325°F / 160°C.

Step 3: Blend the Filling

Blend the cottage cheese, Greek yogurt, sugar, cornstarch, vanilla, lemon zest, lemon juice, and salt until completely smooth. Scrape down the sides, then blend again. Add the eggs and blend briefly, just until the batter is even.

Step 4: Pour the Filling and Bake Low and Slow

Pour the filling over the crust and smooth the top. Bake at 325°F / 160°C for 55 to 70 minutes, or until the edges are set and the center still has a soft wobble. The center should jiggle gently, not slosh.
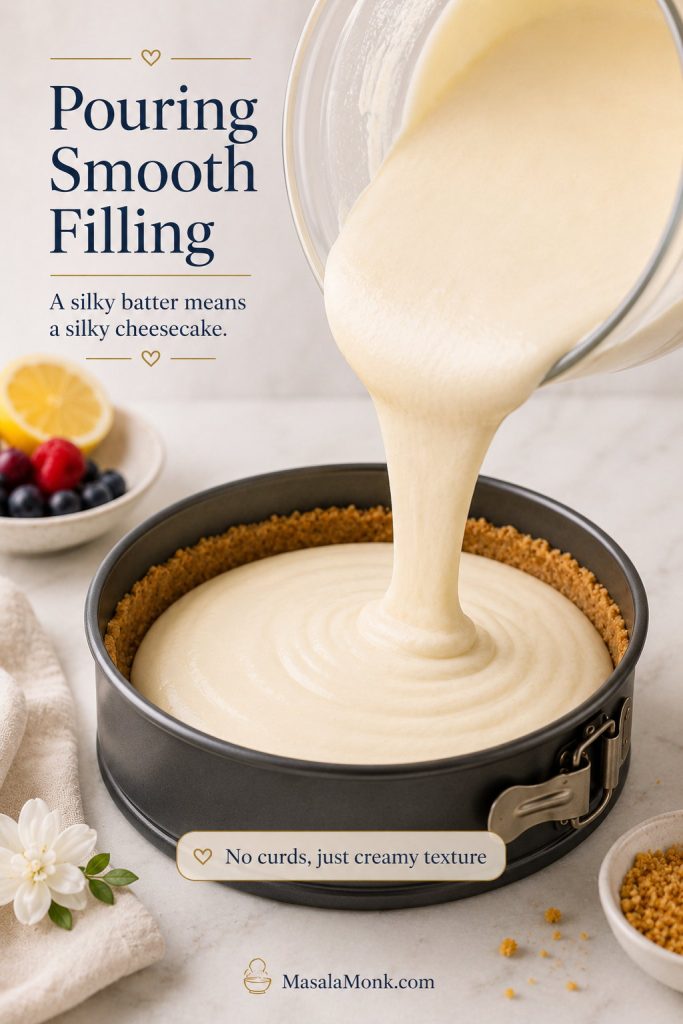
Smooth cottage cheese cheesecake filling being poured from a blender into a prepared crumb crust
When the filling pours smoothly into the crust, it is a good sign that the blender has done its job.

Step 5: Cool Gradually

Turn off the oven, crack the door open, and let the cheesecake sit inside for 30 to 45 minutes. This gradual cooling helps prevent cracks. Then move it to the counter and let it cool to room temperature.

Step 6: Chill Before Slicing

Refrigerate the cheesecake for at least 4 hours. Overnight is better. Do not panic if it looks soft when it first comes out of the oven. Warm cheesecake is supposed to look a little underdone; the refrigerator does the final work.

Do You Need a Water Bath?

A water bath is optional. Skip it for the easiest version; use it when you want the smoothest texture and the lowest chance of cracks.

To use one, wrap the springform pan well, set it in a roasting pan, and pour hot water around it until the water reaches about 1 inch up the side of the pan. Make sure the pan is protected so water cannot leak into the crust.
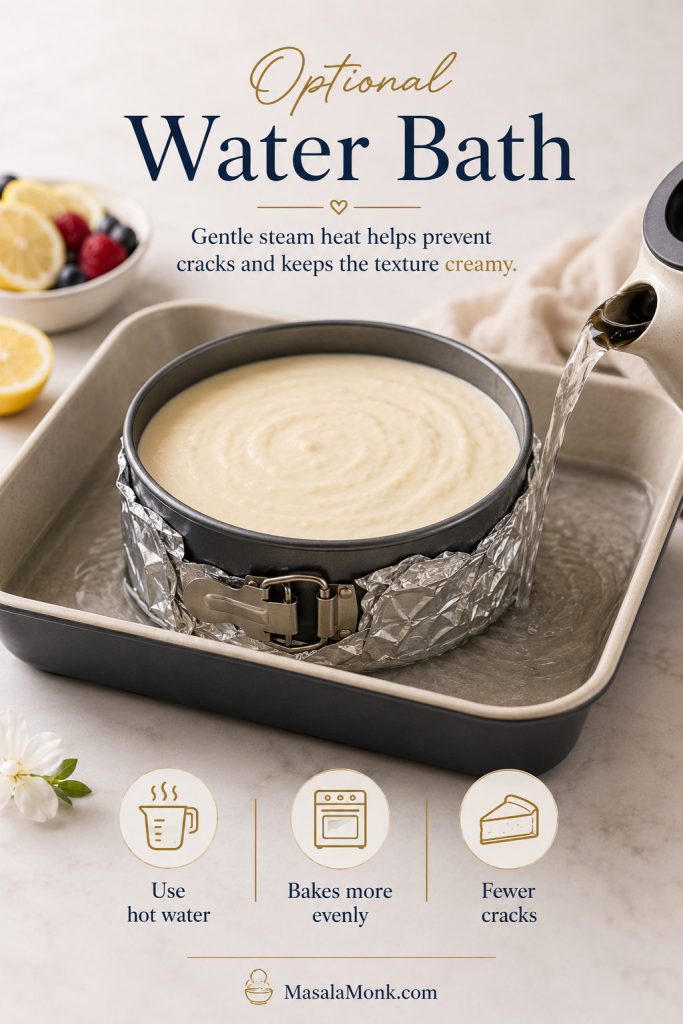
Wrapped springform pan sitting in a roasting pan with hot water for an optional cheesecake water bath
A water bath is optional; however, it can help the cheesecake bake more gently and reduce cracking on the surface.

A water bath usually pushes the cheesecake toward the longer end of the bake time. The texture is worth it when you want a cleaner, more classic cheesecake finish.

For more general cheesecake guidance, including room-temperature ingredients, water bath baking, and crack prevention, King Arthur Baking has a helpful guide to cheesecake tips.

Pan Size and Bake Time Guide

Cottage cheese cheesecake recipes often use different pan sizes, which can make bake times confusing. A smaller pan makes a taller cheesecake and usually needs more time. A larger pan makes a thinner cheesecake and may finish sooner.
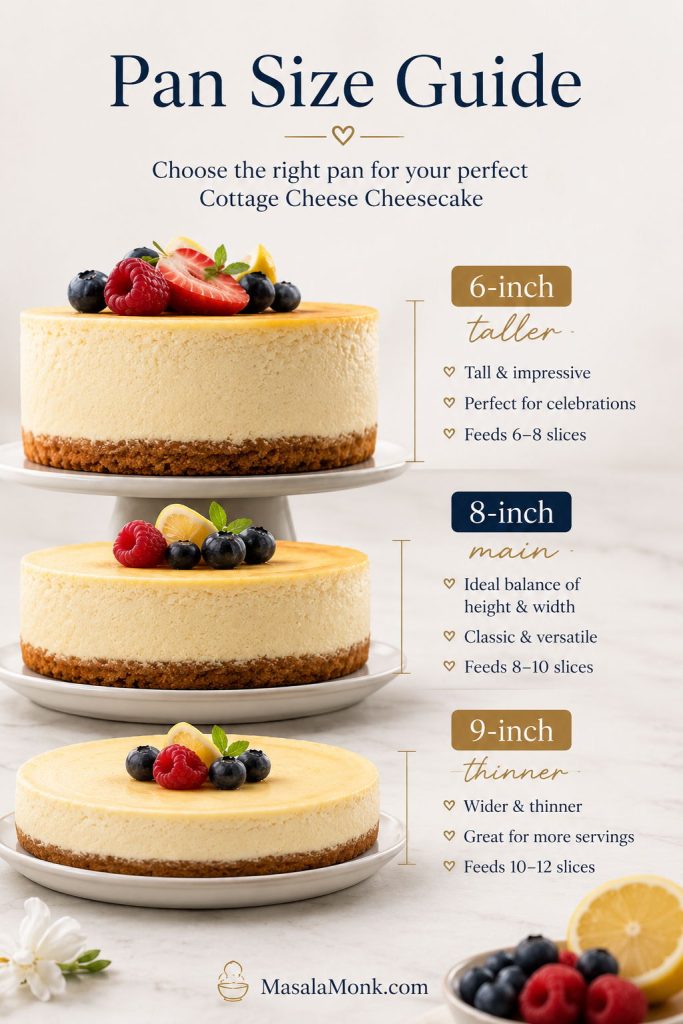
Pan size guide comparing six-inch, eight-inch, and nine-inch cottage cheese cheesecakes with different heights
Pan size changes both height and bake time, so visual cues matter more than the timer when you move away from the 8-inch pan.
Pan or Format Best For Bake Guidance
6-inch springform Small-batch, taller cheesecake Use about two-thirds of the recipe or expect a deeper filling and longer bake time.
8-inch springform Main recipe Bake 55–70 minutes at 325°F / 160°C.
9-inch springform Thinner full-size cheesecake Start checking around 45–55 minutes.
Muffin tin Mini cheesecakes Bake about 16–22 minutes, depending on filling depth.
Ramekins Single-serve cheesecakes Bake about 20–30 minutes.

Use the visual cues more than the clock. Cheesecake does not care what the timer says when the center is still loose or the edges are already firm. A thin cheesecake in a 9-inch pan may be done before the timer says so, while a deep 6-inch cheesecake may need longer.

Changing pan size also changes doneness timing, so use the set-edge and soft-wobble cues before relying on the clock alone.

How to Know When Cottage Cheese Cheesecake Is Done

Cheesecake keeps setting after it leaves the oven. Baking until the center looks completely firm can leave you with a dry, cracked, or rubbery cheesecake after chilling.

The Edge Test

The outer 2 inches should look set. The edges may be slightly puffed, but they should not be deeply browned or pulling hard away from the pan.

The Center Wobble Test

Gently nudge the pan. The center should wobble softly like set custard. It should not ripple like liquid. A soft wobble is good; a loose slosh means it needs more time.
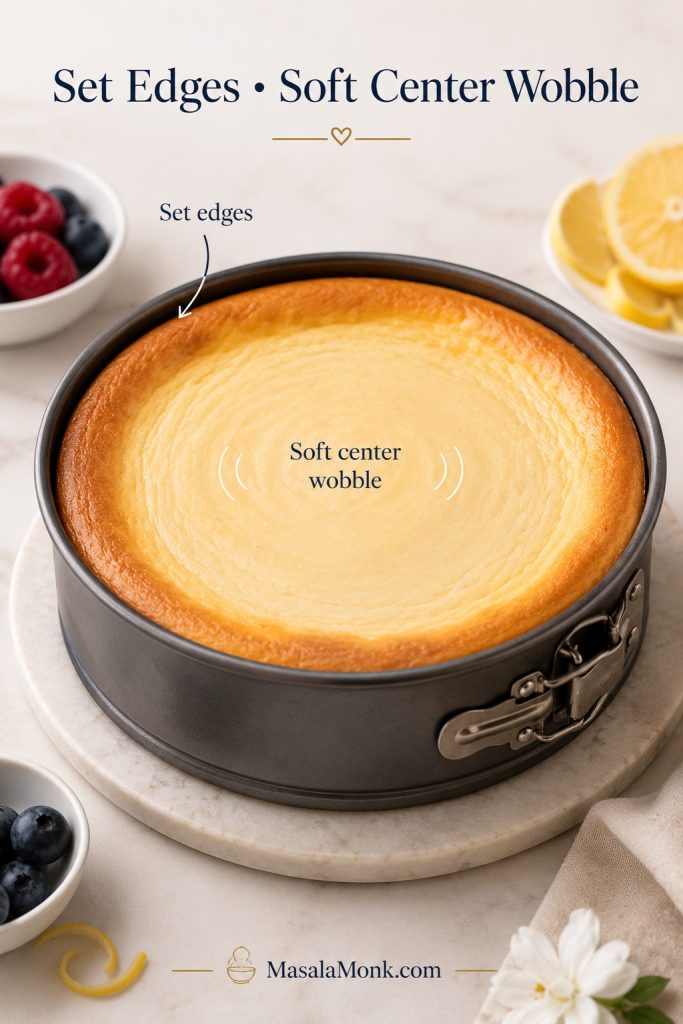
Baked cottage cheese cheesecake in a springform pan with set edges and a soft center wobble cue
Look for set edges and a soft center wobble, because the cheesecake will continue firming as it cools and chills.

Internal Temperature

For extra precision, check the center with an instant-read thermometer. The center should be around 155–160°F / 68–71°C. Insert the thermometer gently so you do not tear the top.

Why It Still Looks Soft

A warm cheesecake is not supposed to look like a fully chilled cheesecake. The filling firms as it cools and then tightens further in the refrigerator. That is why chill time is part of the recipe, not an optional waiting period.

If you like baked cheesecakes with clean slices and a slow-chilled texture, this salted caramel cheesecake recipe uses similar doneness cues: set edges, a softly wobbly center, and enough chill time before slicing.

Which Cottage Cheese Cheesecake Version Should You Make?

The right version depends on who you are serving and how close you want the slice to feel to classic cheesecake. Use the Greek yogurt base for the lighter, higher-protein style. Add cream cheese for something richer. Skip the crust when you want the easiest version.

If you are serving cottage cheese skeptics, the cream cheese variation is the safest first choice. If you are making it for yourself as a lighter dessert, start with the Greek yogurt version.
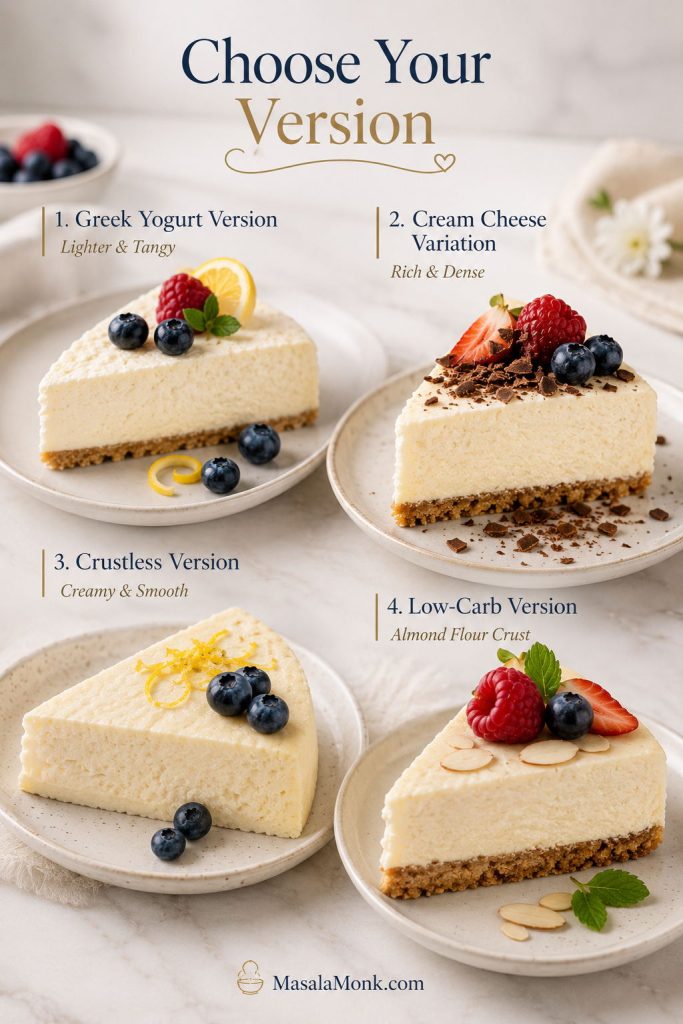
Four cottage cheese cheesecake versions showing Greek yogurt, cream cheese, crustless, and low-carb slices
Choose the version by the result you want: Greek yogurt for lighter tang, cream cheese for richness, crustless for ease, or almond crust for low-carb.
Craving or Need Make This Version Why It Works
The lightest higher-protein version Cottage cheese + Greek yogurt Best balance of protein, tang, and creamy texture.
The most classic cheesecake texture Cottage cheese + cream cheese Richer, denser, and closer to New York-style cheesecake.
The easiest version Crustless cottage cheese cheesecake No crumb crust, fewer steps, lighter slice.
The lowest-carb version Almond flour crust or crustless + low-carb sweetener Keeps the cheesecake closer to keto or low-carb needs.
The cleanest slices Crumb crust + overnight chill The crust gives structure and the long chill firms the filling.
The most dessert-like flavor Full-fat cottage cheese + vanilla + lemon + berry topping Richer dairy and bright toppings make it taste more like a classic dessert.

After choosing your version, go straight to the recipe card for the base formula and notes for cream cheese, crustless, and low-carb changes.

Cottage Cheese + Greek Yogurt

This is the main version of the recipe. It is lighter than a cream cheese cheesecake, with a tangy, creamy filling and a higher-protein dairy base. Use thick plain Greek yogurt for the best texture.

Cottage Cheese + Cream Cheese

For a richer cottage cheese cheesecake with a more classic texture, replace 1 cup / 225g of the cottage cheese with 8 oz / 225g softened cream cheese. Blend the cottage cheese first until smooth, then add the cream cheese and blend again before adding the eggs.

Crustless Cottage Cheese Cheesecake

For a crustless version, skip the crumb crust, line the bottom of the pan with parchment, and grease the sides well. Bake the filling directly in the pan and start checking 5 to 10 minutes earlier. Chill fully before releasing the pan, because a warm crustless cheesecake is more delicate than one with a crumb base.

Low-Carb Cottage Cheese Cheesecake

For a low-carb version, use an almond flour crust or skip the crust, then use a cup-for-cup low-carb sweetener in the filling. For more low-carb baking help, especially when an almond flour crust turns crumbly or soft, this keto-friendly flour guide explains how almond flour behaves and how to fix texture problems.

How to Make the Crust

The classic version uses a simple graham cracker or digestive biscuit crust. It gives the cheesecake a buttery base, a little crunch, and the familiar contrast people expect from a chilled cheesecake slice.
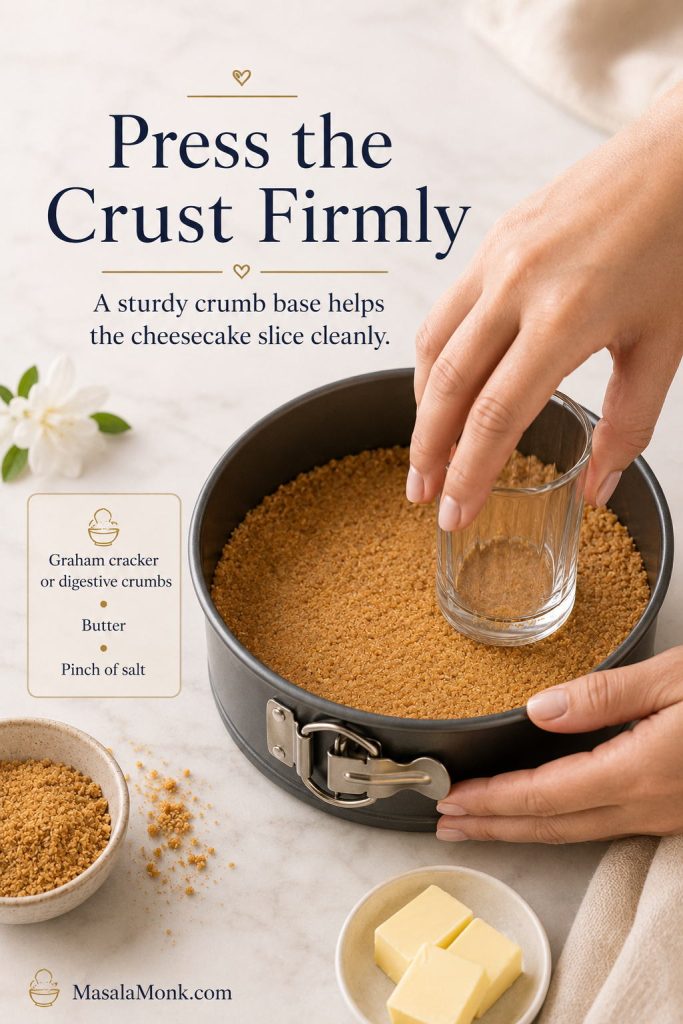
Hands pressing a graham cracker crumb crust firmly into a springform pan for cottage cheese cheesecake
A firmly packed crumb crust gives the creamy filling contrast, structure, and a more classic cheesecake feel.

Graham Cracker or Digestive Crust

This is the most classic option. Mix the crumbs with melted butter, a little sugar, and a pinch of salt, then press the mixture firmly into the bottom of the pan.

When to Pre-Bake the Crust

Pre-bake any crumb-style crust for 8 to 10 minutes before adding the filling. It helps the butter bind the crumbs and keeps the base from tasting raw. Let the crust cool slightly before pouring in the cottage cheese filling.

Is Cottage Cheese Cheesecake Healthy or High Protein?

This is still cheesecake, and that is the point. The goal is not to turn dessert into something joyless. It is to use cottage cheese and Greek yogurt in a way that gives you a cold, creamy, satisfying slice with a little more protein and a lighter feel.

You do not need protein powder for the main recipe. The higher-protein advantage comes from using cottage cheese and Greek yogurt as the main dairy base. If you already use vanilla whey and want a more macro-focused version, add one scoop and loosen the batter with 1 to 2 tablespoons of Greek yogurt or milk only if it becomes too thick.

The exact protein, calories, and carbs per slice will depend on your cottage cheese, Greek yogurt, crust, sweetener, and slice size. As a rough estimate, using full-fat or 2% cottage cheese, plain Greek yogurt, 4 eggs, and the crumb crust, a 10-slice cheesecake usually lands around 280–300 calories and 12–13g protein per slice. A crustless version will usually be lighter, while the cream cheese variation will be richer. For the most accurate number, calculate from the labels on your own ingredients.
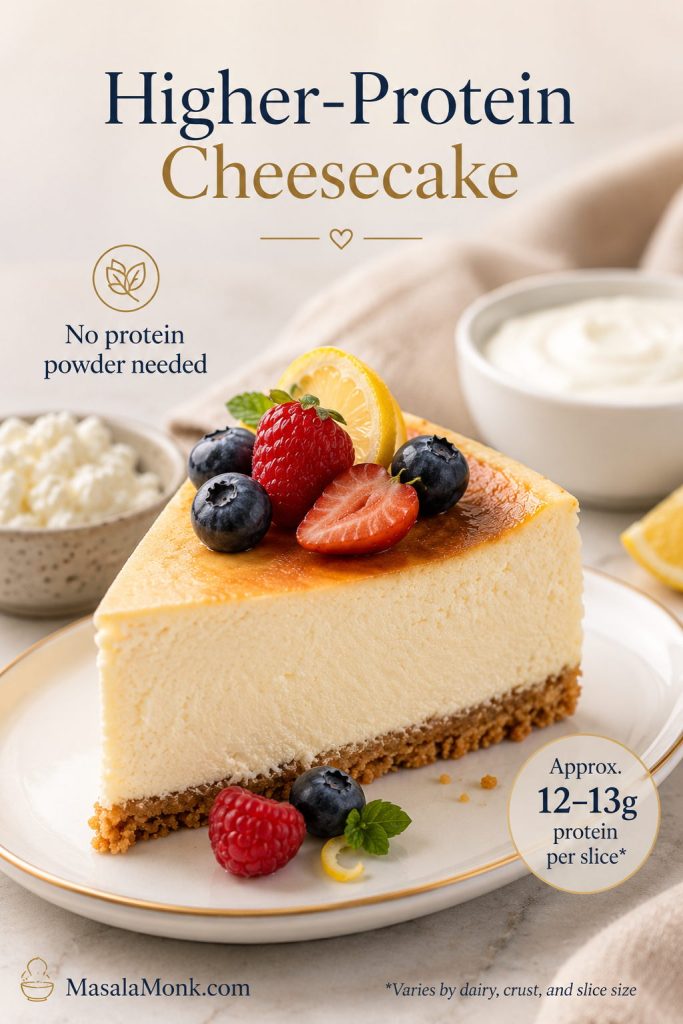
Higher-protein cottage cheese cheesecake slice with cottage cheese, Greek yogurt, berries, and a protein estimate note
Cottage cheese and Greek yogurt give this cheesecake a higher-protein base without protein powder, though exact macros depend on your dairy, crust, and slice size.

For another higher-protein dessert, you may also like this protein ice cream recipe, which uses Greek yogurt, cottage cheese, and protein powder options without making the texture feel chalky.

The same idea works outside dessert, too: this high-protein oatmeal guide shows how simple add-ins like Greek yogurt and cottage cheese can make everyday recipes more filling.

Baked vs No-Bake Cottage Cheese Cheesecake

This recipe is baked because baking gives cottage cheese cheesecake the cleanest slices and the most reliable set. Eggs and gentle heat help the filling turn into a creamy custard.

A no-bake cottage cheese cheesecake needs a different setting system — usually gelatin, whipped cream, cashews, melted chocolate, or a very thick dairy base. This baked filling is not meant to be poured into a crust and chilled without baking.
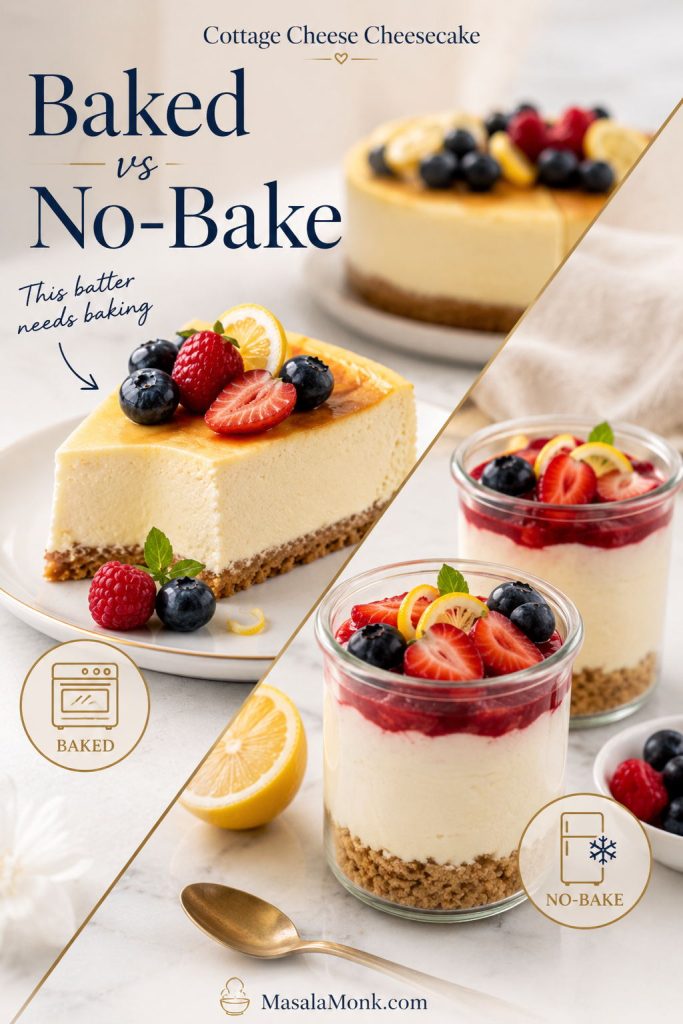
Baked cottage cheese cheesecake slice compared with no-bake cheesecake cups in jars
This batter is built for baking because eggs help it set, while a no-bake version needs a different setting method.

For an oven-free cheesecake, start with this no bake cheesecake recipe. The method is different, but the setting logic will help you understand why no-bake cheesecakes need enough fat, air, structure, and chill time.

Best choice: Make this baked version when clean slices matter most. Save no-bake cottage cheese cheesecake for jars, cups, bars, or a separate recipe built with a proper setting method.

Flavor Variations

Once the base recipe works, cottage cheese cheesecake is easy to adapt. Keep the basic structure the same, then adjust flavor carefully so the filling does not become too loose.

Pumpkin Cottage Cheese Cheesecake

Add pumpkin puree, pumpkin pie spice, and a little extra cornstarch to help absorb the added moisture. Start with 3/4 cup pumpkin puree, reduce the Greek yogurt to 1/2 cup, add 1 extra teaspoon cornstarch, and bake until the center has the same soft wobble as the original version.

Chocolate Cottage Cheese Cheesecake

Add unsweetened cocoa powder or melted dark chocolate to the blended filling. Cocoa powder thickens the batter, so you may need a spoonful or two of extra Greek yogurt. Melted chocolate gives a richer texture but makes the cheesecake less light.

Lemon Cottage Cheese Cheesecake

Increase the lemon zest and add a little extra lemon juice. Do not add too much liquid or the filling may need longer to set. Lemon works especially well with a graham cracker crust and fresh berries.

Berry-Topped Cottage Cheese Cheesecake

Keep the filling plain and add berries after chilling. Fresh strawberries, blueberries, raspberries, or a spoonable berry compote all work. Avoid adding too much watery fruit directly to the batter unless you are making a tested swirl version.

Mini Cottage Cheese Cheesecakes

Use a lined muffin tin and bake until the centers are just set. Mini cheesecakes chill faster and are easier for parties, lunchboxes, or portioned desserts.

How to Serve Cottage Cheese Cheesecake

Serve this cheesecake cold, when the filling is fully set and the flavor has had time to settle. A plain slice is creamy and tangy on its own, but toppings make it feel more finished.

  • Fresh berries: Best when you want a lighter, brighter slice.
  • Berry compote: Best when you want it to feel like a classic dessert-table cheesecake.
  • Lemon zest: Best when you want more freshness and lift.
  • Honey drizzle: Best for a simple, soft sweetness.
  • Chocolate drizzle: Best with the cream cheese variation or a crustless slice.

For a dinner-party version, use the crumb crust and berry compote. For an everyday higher-protein dessert, keep it crustless and serve it with berries or a spoonful of Greek yogurt.

After a night in the refrigerator, the filling settles into a cold, creamy slice with a clean fork cut and a soft lemon-vanilla tang. The crumb crust adds contrast, but the filling should still be the point: smooth, cool, lightly tangy, and rich enough to feel like dessert.

Troubleshooting Cottage Cheese Cheesecake

Most cottage cheese cheesecake problems come from four things: watery dairy, not blending enough, overbaking, or cutting before the cheesecake has chilled.
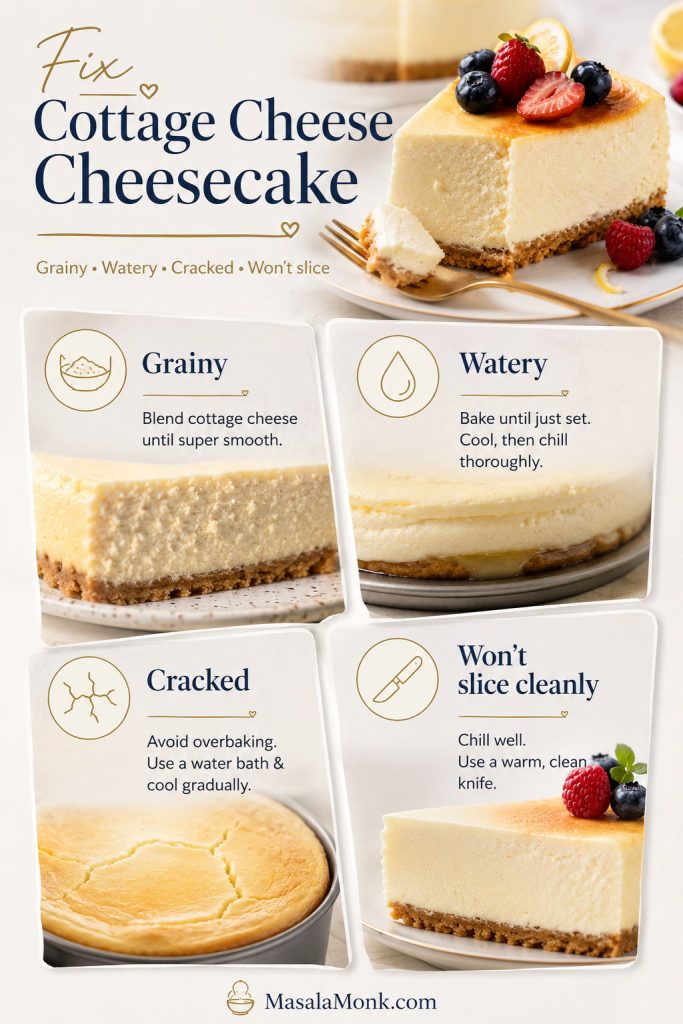
Troubleshooting guide for cottage cheese cheesecake showing grainy, watery, cracked, and hard-to-slice problems
If the cheesecake turns grainy, watery, cracked, or hard to slice, start by checking moisture, blending, bake time, and chill time.
Problem Likely Cause Fix
Grainy texture Cottage cheese was not blended fully. Blend the dairy before adding eggs. Scrape down the sides. Strain the batter when needed.
Watery filling Cottage cheese or yogurt was too loose, or the cheesecake was underbaked. Drain watery cottage cheese, use thick Greek yogurt, bake until the edges are set, and chill overnight.
Cracked top Overbaking, too much air in the batter, or cooling too quickly. Add eggs last, do not over-blend, bake gently, and cool with the oven door cracked.
Rubbery texture Too much high-speed blending after eggs were added, or baking too long. Add eggs last, pulse briefly, and pull the cheesecake while the center still wobbles.
Tastes too much like cottage cheese Very lean cottage cheese, not enough vanilla/lemon/sweetener, or not enough chill time. Use 2% or full-fat cottage cheese, add lemon zest and vanilla, and chill overnight.
Soggy crust Crust was not pre-baked, filling was too wet, or water bath leaked into the pan. Pre-bake the crust and protect the pan well when using a water bath.
Won’t slice cleanly The cheesecake has not chilled long enough. Chill at least 4 hours. Overnight is best for clean slices.

For prevention before the next bake, return to the 4 texture rules or check the doneness cues again.

How to Store and Freeze Cottage Cheese Cheesecake

Cottage cheese cheesecake is a make-ahead dessert. In fact, it tastes better after a full night in the refrigerator because the filling has time to firm up and the flavor settles.
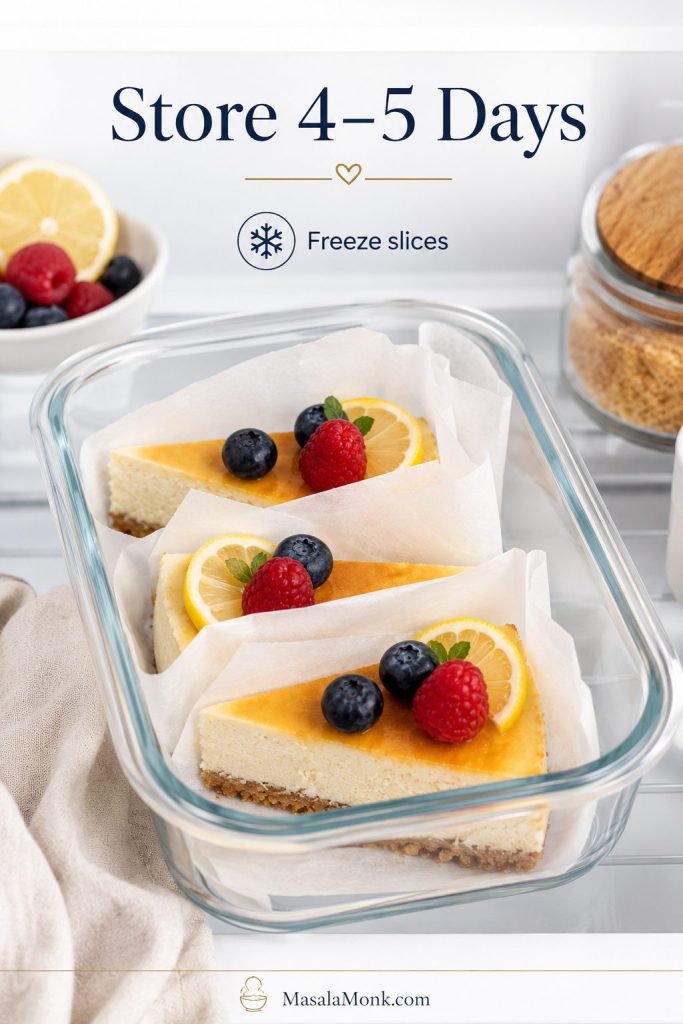
Cottage cheese cheesecake slices stored in a glass container with parchment for refrigeration or freezing
This works well as a make-ahead dessert because the filling firms, the flavor settles, and the slices cut cleaner after chilling.

Refrigerating

Store the cheesecake covered in the refrigerator for 4 to 5 days. Chill it uncovered until fully cold first, then cover it so condensation does not drip onto the surface. Once the cheesecake has cooled to room temperature, move it to the refrigerator rather than leaving it out for hours.

Freezing

You can freeze cottage cheese cheesecake, but the texture may soften slightly after thawing. Freeze individual slices on a tray first, then wrap and store them in an airtight container.

Thawing

Thaw frozen slices overnight in the refrigerator. Avoid thawing at room temperature for long periods, because the dairy filling should stay cold.

Cottage Cheese Cake vs Cottage Cheese Cheesecake

Cottage cheese cake and cottage cheese cheesecake are sometimes used to describe similar desserts, but they are not always the same thing. A cottage cheese cheesecake is usually a blended dairy custard made with cottage cheese, eggs, vanilla, lemon, and sometimes yogurt or cream cheese. It bakes gently, chills, and slices like cheesecake.

Cottage cheese cake can mean something different. Some versions are closer to a flour-based cake or snacking cake, while others are simple cottage-cheese-based cakes that taste cheesecake-like but use fewer ingredients. This version is a true cheesecake: a blended dairy filling that bakes gently, cools slowly, and chills into clean, creamy slices.

Cottage Cheese Cheesecake Recipe

This cottage cheese cheesecake recipe bakes into a creamy, higher-protein cheesecake with Greek yogurt, vanilla, lemon, and an optional graham cracker or digestive biscuit crust. Blend the cottage cheese until silky, bake gently, cool slowly, and chill well before slicing.

Yield10 slices
Prep Time20 minutes
Cook Time55–70 minutes
Chill Time4 hours minimum
Total TimeAbout 7 hours, mostly cooling and chilling
Pan8-inch springform
Oven325°F / 160°C
TextureCreamy, smooth, sliceable

Ingredients

For the crust

  • 1 1/4 cups / 135g graham cracker or digestive biscuit crumbs
  • 5 tbsp / 70g melted butter
  • 1 1/2 tbsp / 18g sugar or sweetener
  • Pinch of fine salt

For the filling

  • 3 cups / 680g / 24 oz full-fat or 2% cottage cheese, drained first when watery
  • 3/4 cup / 180g plain Greek yogurt
  • 4 large eggs, room temperature
  • 2/3 cup / 135g granulated sugar
  • 2 tbsp / 16g cornstarch
  • 2 tsp / 10ml vanilla extract
  • 1–2 tsp lemon zest
  • 1 tbsp / 15ml lemon juice
  • 1/4 tsp fine salt

Instructions

Prepare the Pan, Crust, and Filling

  1. Prepare the pan. Line the bottom of an 8-inch / 20cm springform pan with parchment paper and lightly grease the sides.
  2. Heat the oven. Preheat the oven to 350°F / 177°C for the crust.
  3. Make the crust. Mix the crumbs, melted butter, sugar, and salt until evenly moistened. Press firmly into the bottom of the pan.
  4. Pre-bake the crust. Bake for 8 to 10 minutes. Remove from the oven and reduce the oven temperature to 325°F / 160°C.
  5. Blend the dairy. Add cottage cheese, Greek yogurt, sugar, cornstarch, vanilla, lemon zest, lemon juice, and salt to a blender or food processor. Blend until completely smooth, scraping down the sides once.
  6. Add the eggs. Add the eggs and blend briefly, just until combined. Do not over-blend after the eggs are added.
  7. Check the batter. It should look smooth and pourable, but not watery. If it looks thin because the cottage cheese was loose, let it sit for 5 minutes before pouring so the cornstarch can hydrate slightly.

Bake, Cool, Chill, and Slice

  1. Fill the pan. Pour the filling over the crust and smooth the top.
  2. Optional water bath. For the creamiest texture, place the wrapped springform pan in a roasting pan and pour hot water around it until the water reaches about 1 inch up the side of the pan. Make sure the pan is well protected so water cannot leak into the crust.
  3. Bake. Bake at 325°F / 160°C for 55 to 70 minutes, until the edges are set and the center still has a soft wobble. If using a thermometer, the center should be about 155–160°F / 68–71°C.
  4. Cool slowly. Turn off the oven, crack the door open, and let the cheesecake sit inside for 30 to 45 minutes. Then move it to the counter and cool to room temperature.
  5. Chill. Refrigerate for at least 4 hours, preferably overnight.
  6. Slice and serve. Run a thin knife around the edge before releasing the springform pan. Slice with a clean, warm knife for neat pieces.

Notes

  • For a cream cheese version: Replace 1 cup / 225g cottage cheese with 8 oz / 225g softened cream cheese.
  • For a crustless version: Skip the crust, line the pan well, and start checking 5 to 10 minutes earlier.
  • For a low-carb version: Use an almond flour crust and a cup-for-cup low-carb sweetener.
  • If your cottage cheese is watery: Drain it before measuring.
  • With a water bath: Wrap the pan very well and expect the cheesecake to bake toward the longer end of the time range.
  • Without a water bath: The cheesecake still works, but the top may look a little more rustic.
  • For the smoothest filling: Blend the dairy fully before adding the eggs.

FAQs

Does cottage cheese cheesecake taste like cottage cheese?

Not when it is blended well and flavored properly. The finished cheesecake should taste creamy, tangy, lightly sweet, and cheesecake-like. Vanilla, lemon, sugar, and enough chill time help soften the cottage cheese flavor.

How do you make cottage cheese cheesecake smooth?

Blend the cottage cheese and Greek yogurt until glossy before adding the eggs. A high-speed blender gives the best texture, but a food processor can work if you scrape down the sides.

Why is my cottage cheese cheesecake watery?

Watery cheesecake usually comes from loose cottage cheese, thin yogurt, underbaking, or cutting before the cheesecake has chilled. Drain watery dairy, bake until the edges are set, and chill overnight.

Can I make cottage cheese cheesecake without cream cheese?

Yes. This main recipe uses cottage cheese and Greek yogurt without cream cheese. Add cream cheese only when you want a richer, more traditional cheesecake texture.

How much cream cheese should I add?

Replace 1 cup / 225g cottage cheese with 8 oz / 225g softened cream cheese for a richer version that tastes closer to classic cheesecake.

Can I make it crustless?

Yes. Line the pan with parchment, grease the sides well, skip the crumb crust, and bake the filling directly in the pan. Start checking a little earlier and chill fully before releasing it.

Is cottage cheese cheesecake high protein?

It is usually higher in protein than classic cream-cheese cheesecake because the main dairy base is cottage cheese and Greek yogurt. Exact protein depends on your brands, crust, and slice size.

Can I make it low carb or keto?

Use an almond flour crust or skip the crust, then replace the sugar with a low-carb sweetener such as allulose or a monk fruit blend. The final texture will depend on the sweetener and crust you choose.

How long should cottage cheese cheesecake chill?

Chill it for at least 4 hours. Overnight is best because the filling firms, the flavor settles, and the slices come out cleaner.

Can you freeze cottage cheese cheesecake?

Yes. Freeze it in slices, then thaw overnight in the refrigerator. The texture may be slightly softer after thawing, but it still works well for make-ahead servings.

Baked vs no-bake cottage cheese cheesecake: what changes?

A baked version sets with eggs and oven heat. A no-bake version needs a separate setting system, such as gelatin, whipped cream, cashews, melted chocolate, or a very thick dairy base.

Cottage cheese cake vs cottage cheese cheesecake: what is the difference?

A cottage cheese cheesecake is a blended dairy custard that bakes and chills like cheesecake. By contrast, cottage cheese cake is usually more cake-like, often made with flour, baking powder, and sometimes fruit.

The First Slice Is the Real Test
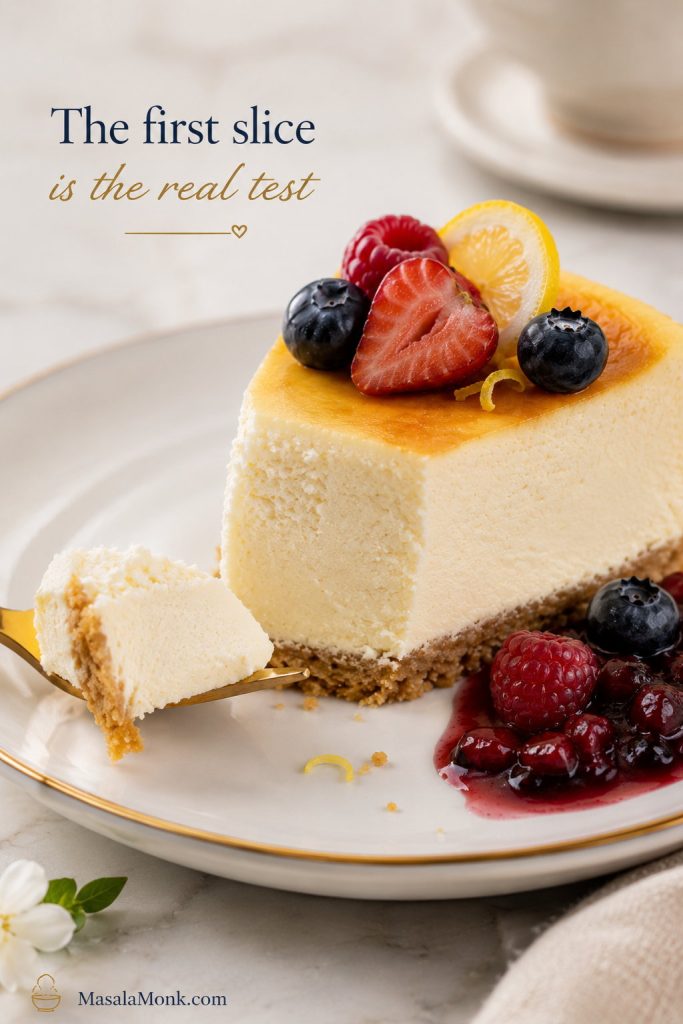
Final cottage cheese cheesecake slice with berries, lemon, berry sauce, and a forkful removed
The first slice is the real test: smooth texture, clean edges, and a cold creamy bite that tastes like cheesecake, not cottage cheese.

When the cheesecake is cold, creamy, and smooth enough that nobody stops to ask where the cottage cheese went, the recipe has done its job.

Try the Greek yogurt version first for a lighter cheesecake, and try the cream cheese variation when you want something closer to the classic. When you make it, I’d love to know which version won in your kitchen — the lighter Greek yogurt cheesecake, the cream cheese variation, the classic crust, or the crustless slice.
Posted on 2 Comments

Keto Cheesecake Recipe

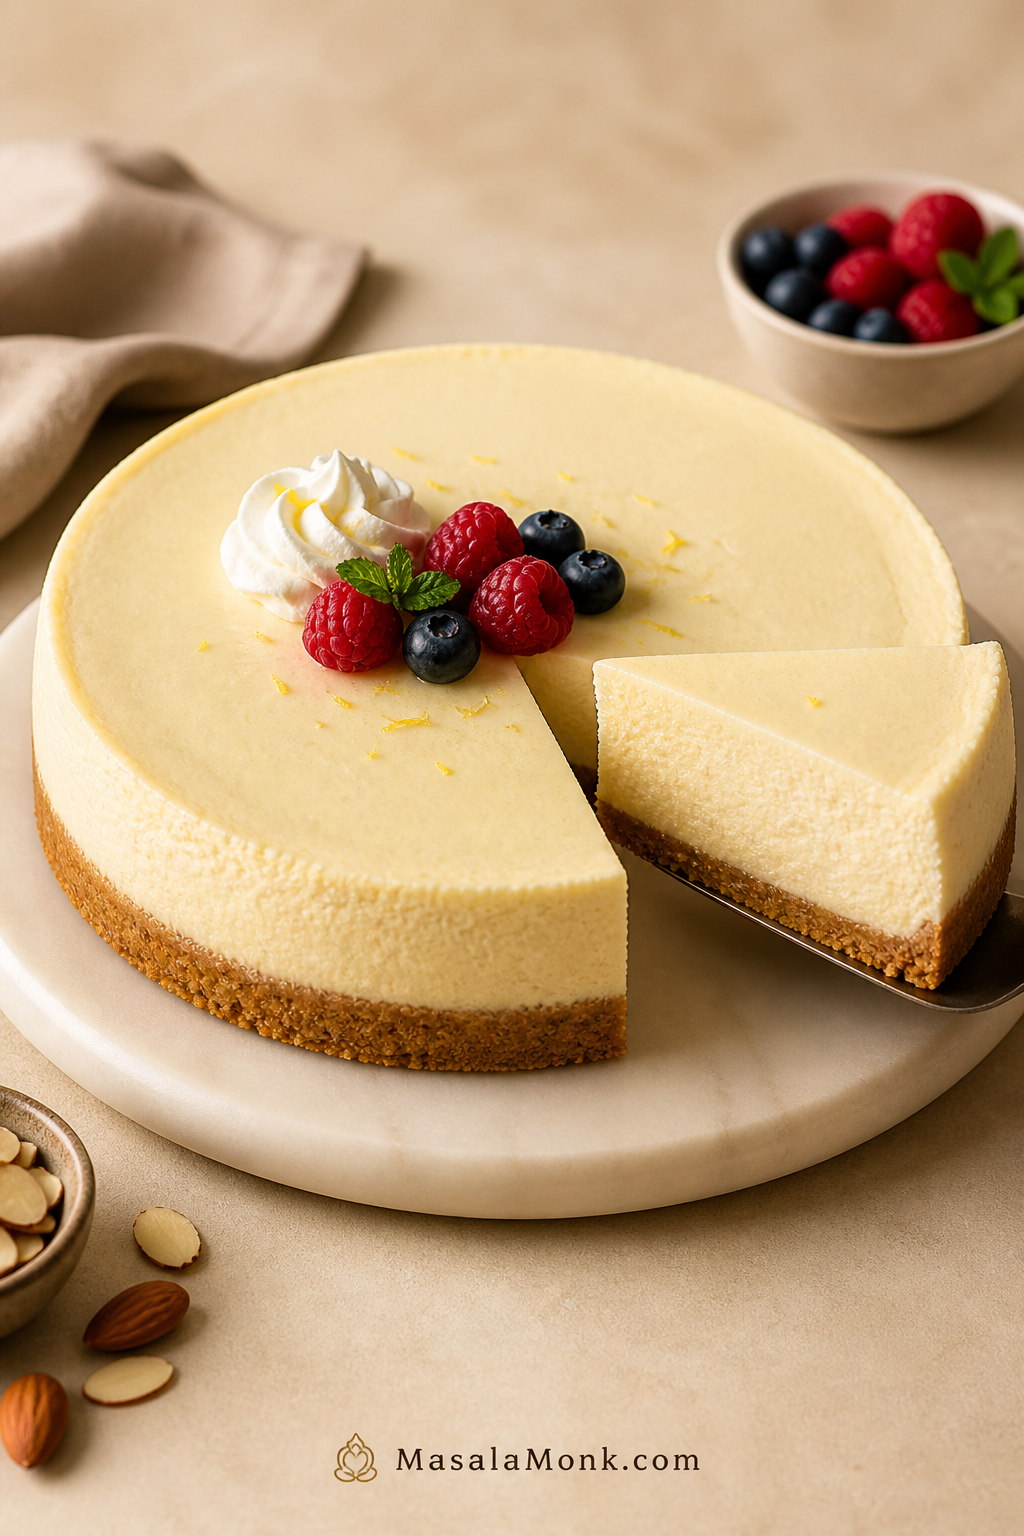
Finished keto cheesecake with one slice removed, showing creamy filling and a golden almond flour crust with berries nearby.

This keto cheesecake recipe gives you the kind of slice people actually want from cheesecake: cool, creamy, rich, smooth, and firm enough to cut cleanly. It has a buttery almond flour crust, a full-fat cream cheese filling, and a slow-cooling method that helps prevent cracks without needing a complicated water bath.

The flavor is classic first and keto second. You get the tang of cream cheese and sour cream, the warmth of vanilla, a little brightness from lemon juice, and a low-carb crust that feels much closer to a traditional cheesecake base than a dry “diet dessert” crust.

Use this as your classic baked cheesecake base. You will also find a crustless option, a no-bake option, sweetener guidance, pan-size help, storage tips, and fixes for common problems like cracks, grainy filling, soggy crust, and a runny center.

Quick Answer: The Best Keto Cheesecake Recipe

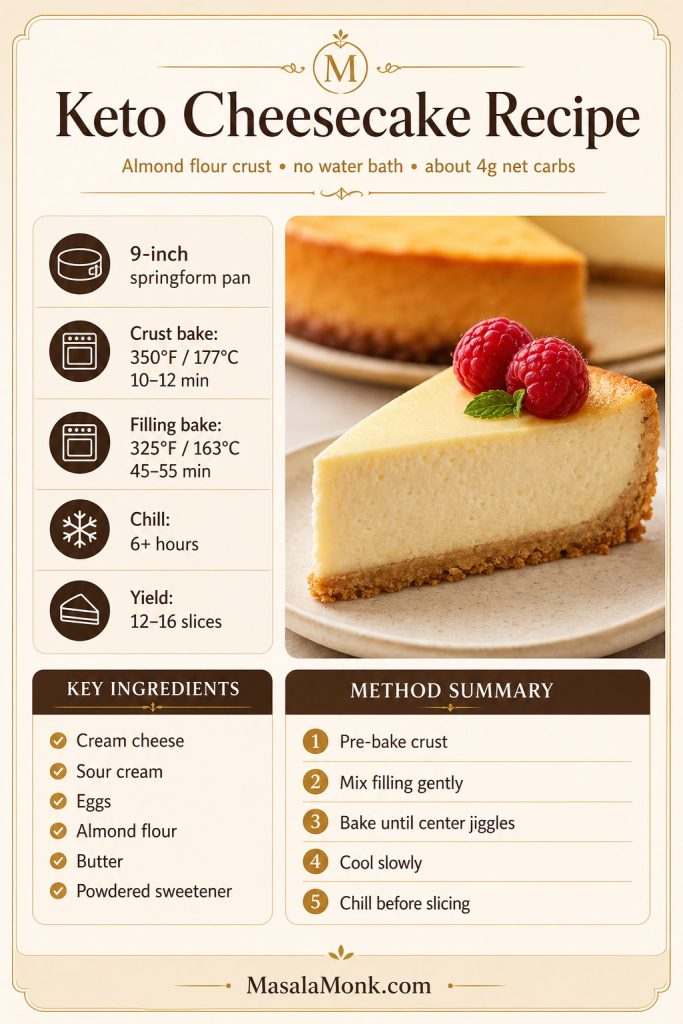
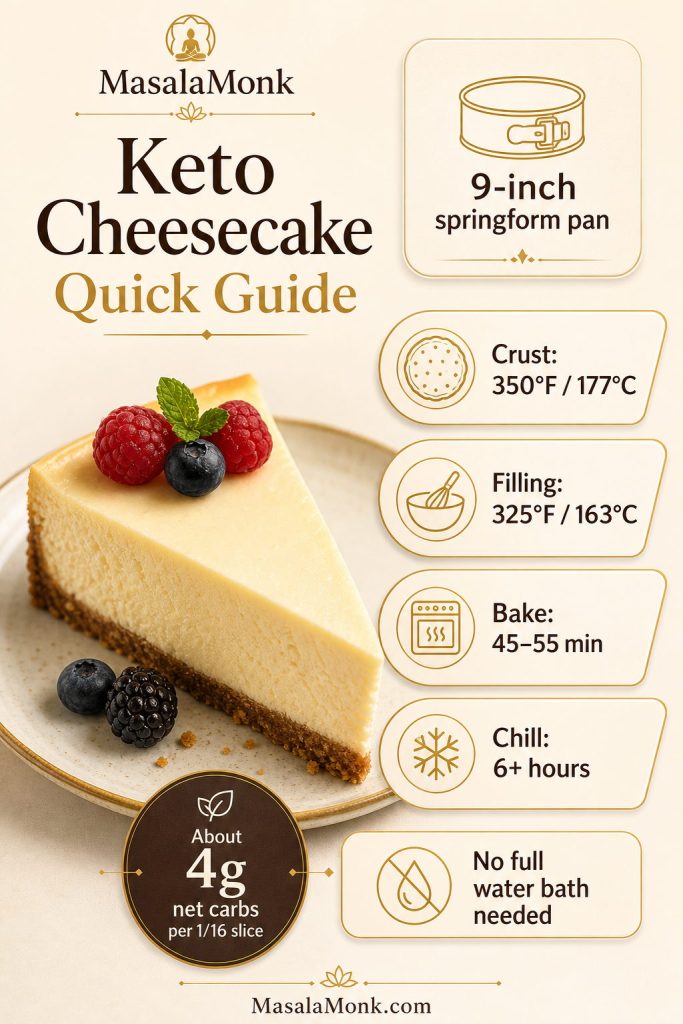
For the best keto cheesecake, make a baked full-fat cream cheese filling in a 9-inch springform pan with a pre-baked almond flour crust. Bake the crust at 350°F / 177°C for 10–12 minutes, then lower the oven to 325°F / 163°C and bake the cheesecake for 45–55 minutes, until the edges are set and the center still has a soft jiggle.

Let it cool slowly, then chill for at least 6 hours or overnight before slicing. A powdered allulose or monk fruit/allulose blend gives the smoothest texture because it dissolves better than coarse granulated sweeteners.

Pan 9-inch springform pan
Crust Almond flour crust
Crust Bake 350°F / 177°C for 10–12 minutes
Filling Bake 325°F / 163°C for 45–55 minutes
Chill Time 6 hours minimum, overnight best
Yield 12 generous or 16 smaller slices
Net Carbs About 4g per 1 of 16 slices
Water Bath Not required
Texture Cool, creamy, dense, and sliceable
Keto cheesecake quick guide showing a cheesecake slice with baking temperature, pan size, chill time, and net carb notes.
Start here if you want the main numbers before baking: pan size, oven temperature, chill time, and approximate net carbs all shape the final keto cheesecake texture.

Need the full formula? Jump to recipe card · Back to guide

Before you start: Soften the cream cheese fully, bring the eggs and sour cream to room temperature, line the springform pan with parchment, use powdered sweetener for the filling, and plan for at least 6 hours of chilling. These five details matter more than any fancy technique.
Texture tip: The cheesecake should not look fully firm when it comes out of the oven. If the center is completely set in the oven, it is more likely to be overbaked after chilling.

Why This Keto Cheesecake Works

A good keto cheesecake has to solve three problems at once: it needs to taste like classic cheesecake, avoid a gritty sweetener texture, and hold together without flour or sugar. This version uses full-fat brick cream cheese for structure, sour cream for a smooth tangy finish, eggs for setting, and powdered keto sweetener so the filling stays creamy.

The almond flour crust is pre-baked before the filling goes in. That gives it a warmer, nuttier flavor and helps it hold together under the cheesecake layer. The filling bakes low and slow at 325°F / 163°C, then cools gradually so the center can finish setting without a dramatic temperature shock.

That slow method is what makes this sugar free cheesecake more reliable. You do not need a full water bath, but you do need room-temperature ingredients, gentle mixing, and enough chill time.

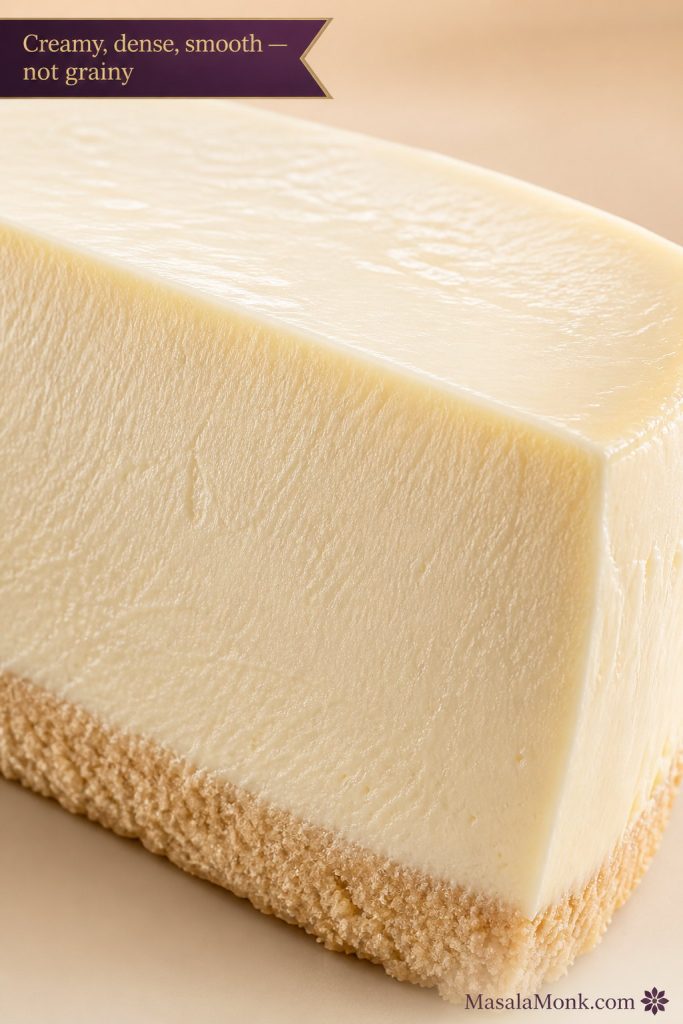
Close-up of a creamy keto cheesecake slice with smooth dense filling and a visible almond flour crust.
This is the texture goal: creamy, dense, and cleanly cut. If the filling looks grainy, the issue usually starts with cold cream cheese or coarse sweetener.

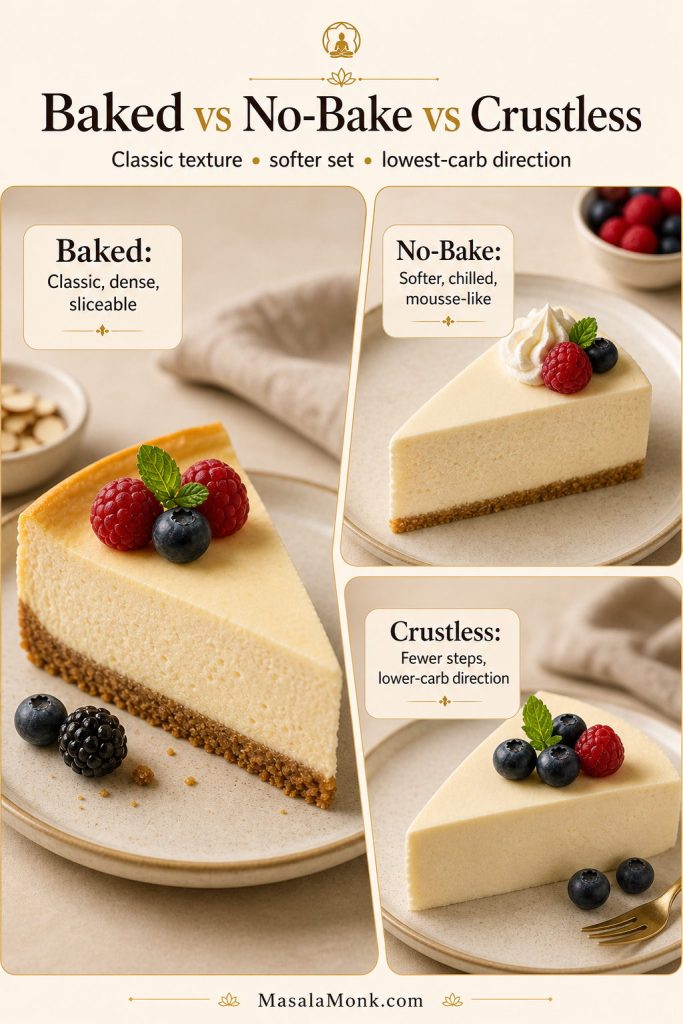
Baked vs No-Bake vs Crustless Versions

Before you start, choose the right style. A baked cheesecake gives the most classic texture, a no-bake version is easier and lighter, and a crustless cheesecake is the simplest way to reduce carbs and skip the almond flour crust.

Comparison board showing baked keto cheesecake, no-bake keto cheesecake, and crustless keto cheesecake slices with texture notes.
Before choosing a method, decide what texture you want. Baked keto cheesecake is classic, no-bake cheesecake is softer, and crustless cheesecake keeps things simpler.
Version Best For Texture Main Watch-Out
Baked keto cheesecake Classic cheesecake flavor and clean slices Dense, creamy, rich Do not overbake; cool slowly to prevent cracks
No-bake keto cheesecake Easy summer dessert or oven-free prep Lighter, softer, mousse-like Needs enough chill time to set properly
Crustless keto cheesecake Lower carbs, fewer steps, no almond flour Creamy and simple Pan lining matters so it releases cleanly

The baked version is the focus here because it gives the most traditional cheesecake texture. The crustless and no-bake sections below show how to adapt the base without turning the main recipe into three different desserts at once.

Is Keto Cheesecake Low Carb or No Carb?

Keto cheesecake is low carb, but it is usually not truly zero carb. Cream cheese, sour cream, eggs, almond flour, lemon juice, and even some keto sweeteners can contribute small amounts of total carbs depending on the brands you use.

Think of this as a low carb cheesecake or sugar free cheesecake, not a misleading zero-carb dessert. If you want the lowest-carb version, make the crustless option and cut the cheesecake into 16 smaller slices. That gives you the creamy filling with fewer carbs from the almond flour crust.

Lowest-carb direction: Make it crustless, use a powdered sweetener that fits your carb target, and keep toppings simple. Fresh berries are usually a better choice than thick sauces if you are watching carbs closely.

If you like make-ahead low-carb desserts, this keto chia pudding with almond milk is another easy no-sugar option with simple net-carb math.

Equipment You Need

You do not need complicated bakery equipment, but a few tools make this cheesecake much easier and cleaner.

  • 9-inch springform pan: The best standard size for this recipe.
  • Parchment paper: Helps the crust release and makes slicing easier.
  • Mixing bowls: One for the crust and one large bowl for the filling.
  • Hand mixer or stand mixer: Helps make the filling smooth without lumps.
  • Rubber spatula: Useful for scraping the bowl and smoothing the top.
  • Flat-bottom cup or measuring cup: Presses the almond flour crust firmly into the pan.
  • Baking sheet: Makes the springform pan easier to move in and out of the oven.
  • Sharp knife: For clean slices after the cheesecake is fully chilled.
Optional but helpful: Place a pan of hot water on the lower oven rack while the cheesecake bakes. This is not a full water bath, but it adds a little humidity and can help the cheesecake bake more gently.

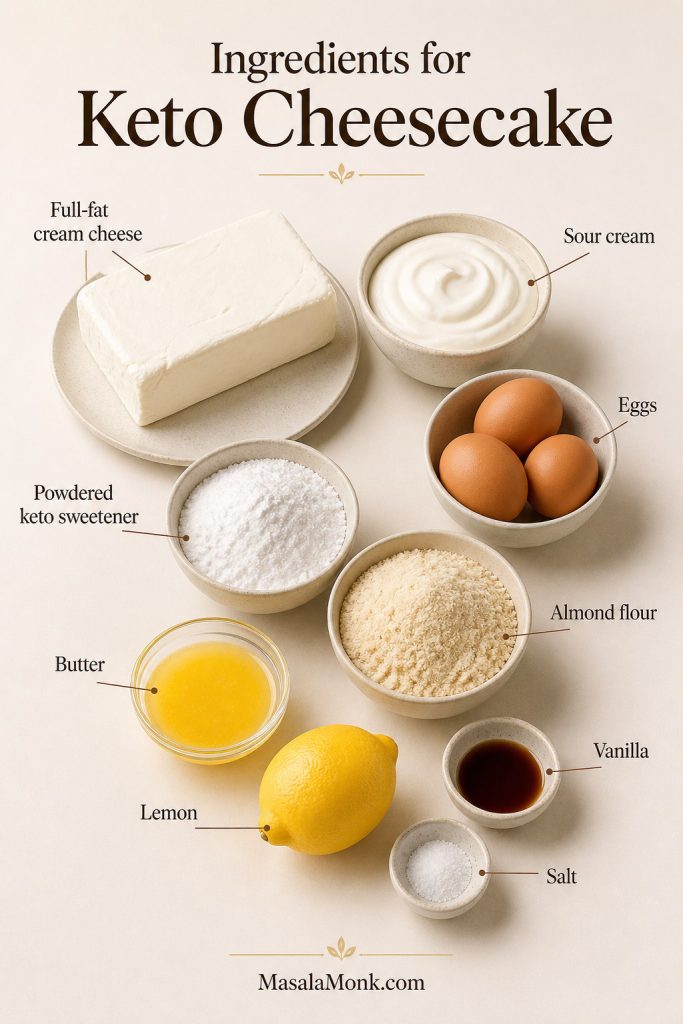
Ingredients for Keto Cheesecake

The ingredient list is simple, but the details matter. For the smoothest low carb cheesecake, use full-fat dairy, room-temperature ingredients, almond flour for the crust, and a powdered sweetener rather than a coarse granulated one.

Labeled keto cheesecake ingredients including cream cheese, sour cream, eggs, powdered sweetener, almond flour, butter, lemon, vanilla, and salt.
Keto cheesecake uses simple ingredients, but they need to behave well together. Therefore, full-fat dairy, powdered sweetener, and room-temperature eggs matter more than extra add-ins.

Next step: choose sweetener · make the crust

Cream Cheese

Use 32 oz / 907 g full-fat brick cream cheese, softened to room temperature. Brick-style cream cheese gives the cheesecake body and structure. Tub-style spreadable cream cheese is usually softer and can make the filling looser.

The cream cheese should be soft enough to beat smoothly, but not melted or oily. If it is too cold, the filling can turn lumpy. If it is too warm, the batter can become loose and overmixed.

Sour Cream

Sour cream adds a classic tang and softens the richness of the cream cheese. Use 1/2 cup / 120 g sour cream at room temperature. Full-fat sour cream works best here because low-fat versions can make the texture thinner and less creamy.

Eggs

Use 3 large eggs, also at room temperature. Eggs help the cheesecake set, but they should be mixed in gently. Once the eggs go in, do not whip the batter aggressively. Too much air can make the cheesecake puff up in the oven and crack as it cools.

Sweetener

Use 1 cup to 1 1/4 cups powdered keto sweetener. The exact amount depends on how sweet you like cheesecake and how sweet your specific sweetener tastes. A powdered allulose or monk fruit/allulose blend gives the smoothest texture.

If you use a strong erythritol-heavy sweetener, the cheesecake may have a cooling finish. If you use a coarse granulated sweetener, the filling can taste slightly grainy.

Lemon Juice, Vanilla, and Salt

Fresh lemon juice brightens the filling and makes the cheesecake taste more classic. Vanilla rounds out the sweetness, while salt keeps the flavor from tasting flat.

  • Lemon juice: 1 tablespoon fresh lemon juice
  • Vanilla extract: 2 teaspoons
  • Fine salt: 1/4 teaspoon

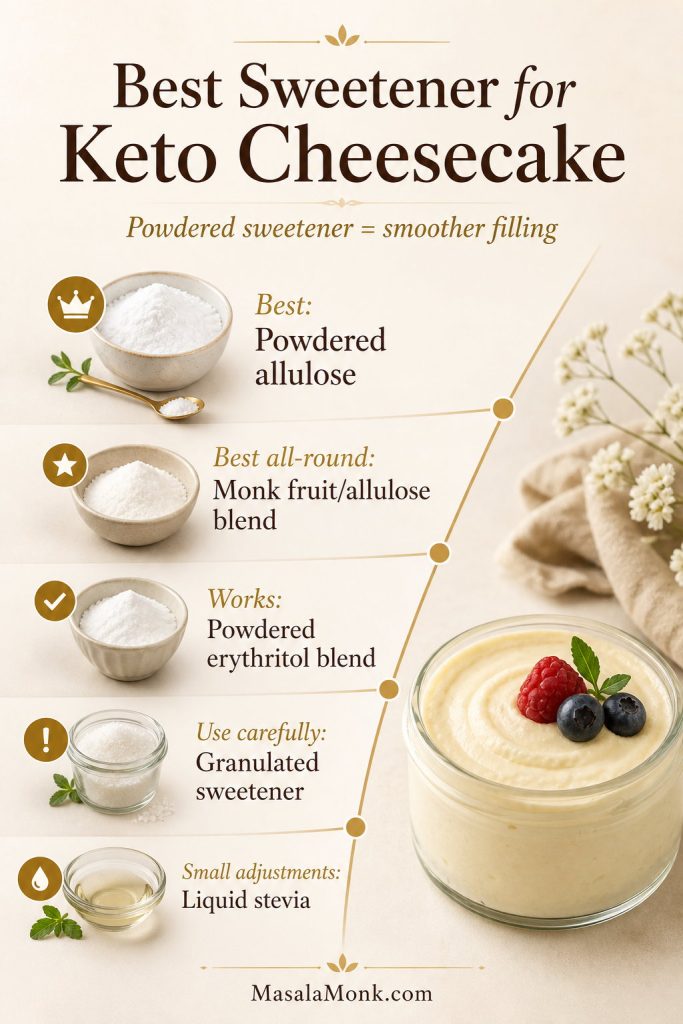
Best Sweetener for a Smooth Cheesecake Filling

The best sweetener for keto cheesecake is one that dissolves smoothly and does not leave the filling gritty. Powdered sweetener is usually better than granulated sweetener for the filling because it blends more evenly into the cream cheese. For a broader baking overview, this low-carb baking guide explains why ingredient choice can affect texture, browning, and aftertaste.

The sweetener matters even more after chilling. Some erythritol-heavy blends can recrystallize in cold desserts, which is why a cheesecake may taste smooth on day one but slightly gritty after a night in the fridge.

Keto cheesecake sweetener guide comparing powdered allulose, monk fruit allulose blend, erythritol blend, granulated sweetener, and liquid stevia.
The best sweetener for keto cheesecake is not only about sweetness. Powdered allulose or a monk fruit/allulose blend helps the filling stay smoother after chilling.

Using the right sweetener? Continue to crust · fix grainy texture

Sweetener Best Use What to Know
Powdered allulose Smoothest filling texture Less likely to taste grainy; may brown slightly faster in some baked goods
Powdered monk fruit/allulose blend Best all-round choice Good sweetness and smooth texture when powdered
Powdered erythritol blend Works if you like the taste Can leave a cooling effect or slight crystallized texture
Granulated keto sweetener Better for crust than filling Can make the filling grainy unless blended very well
Liquid stevia Small sweetness adjustment Does not add bulk; too much can taste bitter
Best choice for this recipe: Use powdered allulose or a powdered monk fruit/allulose blend in the filling. For the crust, powdered or finely granulated keto sweetener both work.

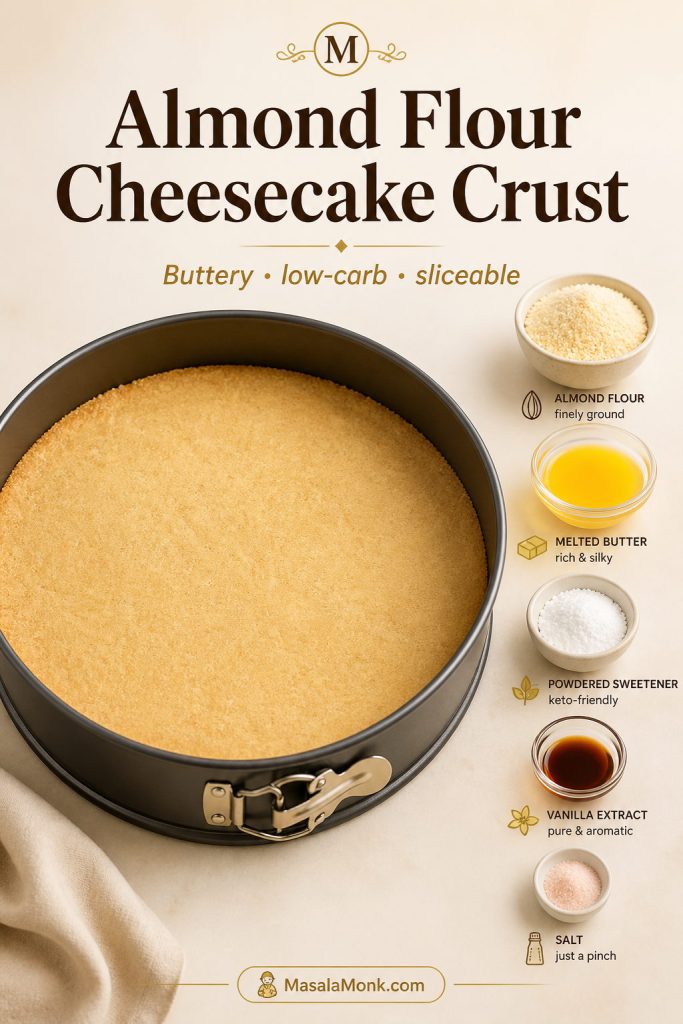
Almond Flour Cheesecake Crust

The almond flour cheesecake crust is one of the most important parts of this recipe. A good cheesecake crust with almond flour should still taste buttery, hold together under the filling, and slice cleanly after chilling.

It replaces the usual graham cracker crust with a gluten-free, low-carb base that still feels like a real cheesecake crust.

Pressed almond flour cheesecake crust in a springform pan with almond flour, melted butter, powdered sweetener, vanilla, and salt.
A good almond flour cheesecake crust should feel compact before it goes into the oven. Pressing firmly helps the low-carb crust bake into a sliceable base.

Need sizing help? See crust ratios · continue to method

For the crust, use:

  • 2 cups / about 224 g blanched almond flour
  • 1/3 cup / 75 g unsalted butter, melted
  • 2 tablespoons powdered keto sweetener
  • 1 teaspoon vanilla extract
  • 1/4 teaspoon fine salt

Mix everything until the almond flour looks evenly moistened. It should feel like damp sand and hold together when pressed. Press it firmly into the bottom of a parchment-lined 9-inch springform pan, then bake at 350°F / 177°C for 10–12 minutes, until lightly golden and fragrant.

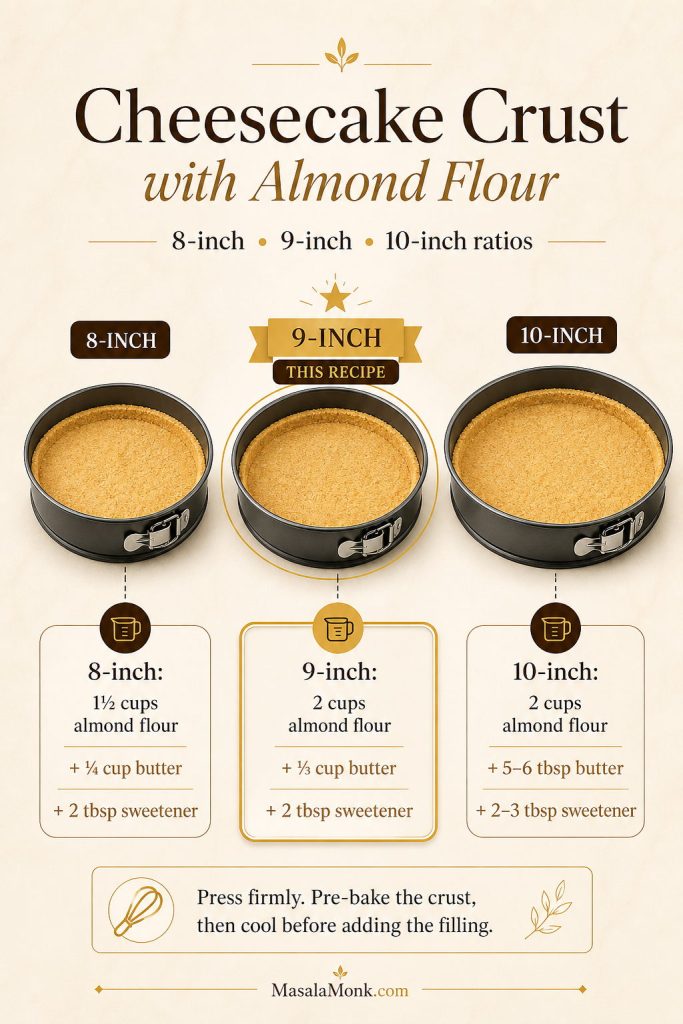
Almond Flour Crust Ratio Guide

The same almond flour cheesecake crust does not behave the same in every pan. A smaller pan makes the crust feel thicker, while a wider pan spreads the mixture thinner and may need a little more butter to stay sliceable.

Use the 9-inch ratio for this keto cheesecake recipe as written. If you change pan size, press the crust firmly, pre-bake it until lightly golden, and let it cool before adding the filling.

Pan Size Almond Flour Butter Sweetener Best Use
8-inch 1 1/2 cups / about 168 g 1/4 cup / 57 g 2 tbsp Thicker cheesecake or smaller batch
9-inch 2 cups / about 224 g 1/3 cup / 75 g 2 tbsp This recipe as written
10-inch 2 cups / about 224 g 5–6 tbsp / 70–85 g 2–3 tbsp Thinner, wider cheesecake
Almond flour cheesecake crust ratio guide for 8-inch, 9-inch, and 10-inch pans with butter and sweetener amounts.
When making cheesecake crust with almond flour, pan size changes everything. As a result, the right butter-to-flour ratio keeps the crust from turning greasy or crumbly.

Crust ready? check pan size · start the method

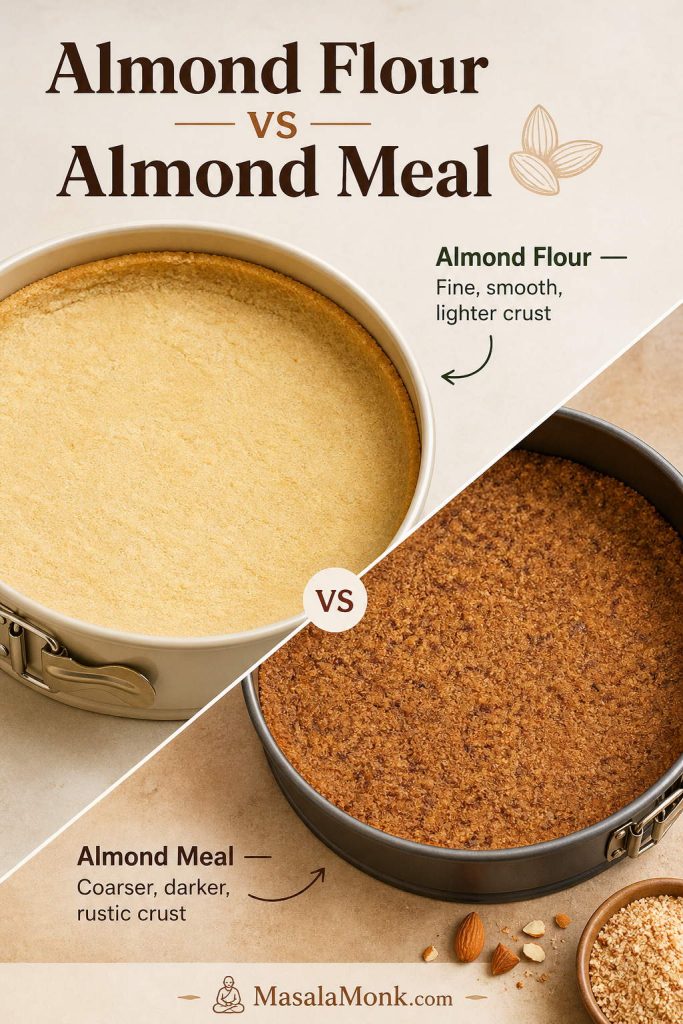
Almond Flour vs Almond Meal

Blanched almond flour gives the neatest crust because it is finer and lighter. Almond meal can work, but it is usually coarser and may make the crust more rustic or crumbly. For a smooth, classic cheesecake look, use fine blanched almond flour.

If you are searching for an almond meal crust for cheesecake, the same basic idea works, but the texture will be darker, coarser, and more rustic. Fine blanched almond flour gives a smoother shortbread-style crust, while almond meal gives a nuttier, more graham-cracker-like look.

Comparison of almond flour cheesecake crust and almond meal cheesecake crust, showing a smoother lighter crust and a darker coarser crust.
Almond flour and almond meal are not identical in cheesecake crust. Almond flour gives a smoother finish, while almond meal creates a darker, more rustic bite.

Chosen your flour? Check crust ratios · jump to recipe

How to Keep the Crust from Crumbling

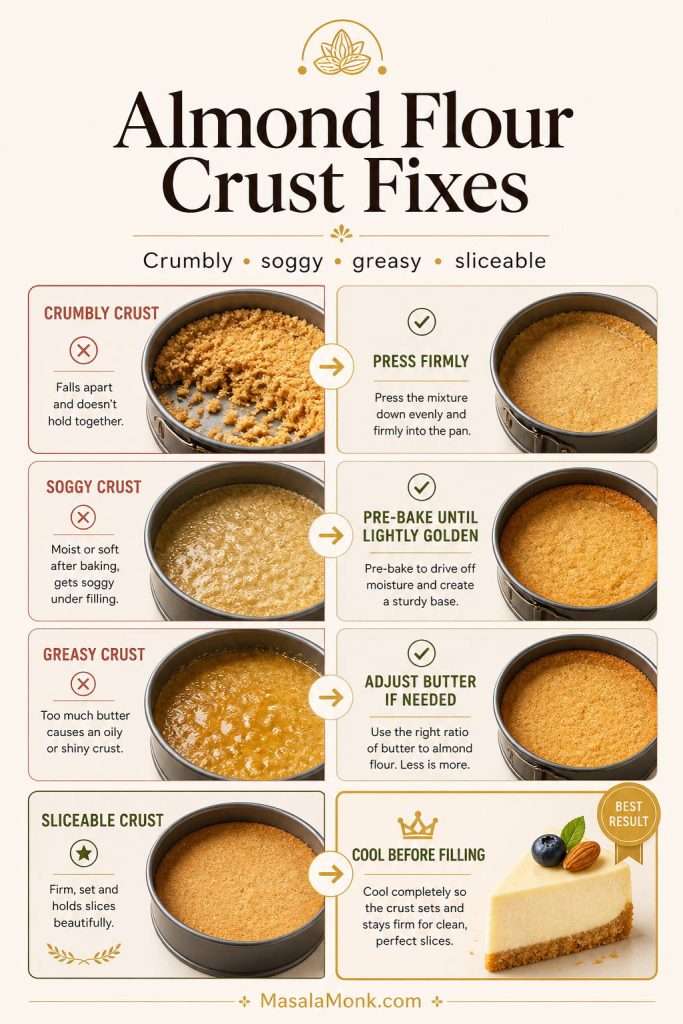
A crumbly keto cheesecake crust usually means one of three things: not enough butter, not enough pressing, or not enough baking. The crust should be pressed firmly with the bottom of a cup, especially around the edges. After baking, let it cool for a few minutes before adding the filling.

If the crust still seems loose, add 1 extra tablespoon melted butter next time. If it seems greasy, reduce the butter slightly or bake the crust a minute or two longer.

How to Avoid a Soggy Almond Flour Crust

Pre-baking is the easiest fix. A lightly golden crust holds up better under the filling than a raw almond flour crust. You should also avoid pouring very warm or loose filling onto the crust. The cream cheese filling should be smooth and room temperature, not runny.

Cheesecake Crust Without Almond Flour

You can make the crust without almond flour, but do not swap coconut flour 1:1. Coconut flour absorbs much more liquid and will make the crust dry and dense if used in the same amount.

For a nut-free direction, use a tested sunflower seed flour crust or skip the crust completely and make the crustless option below.

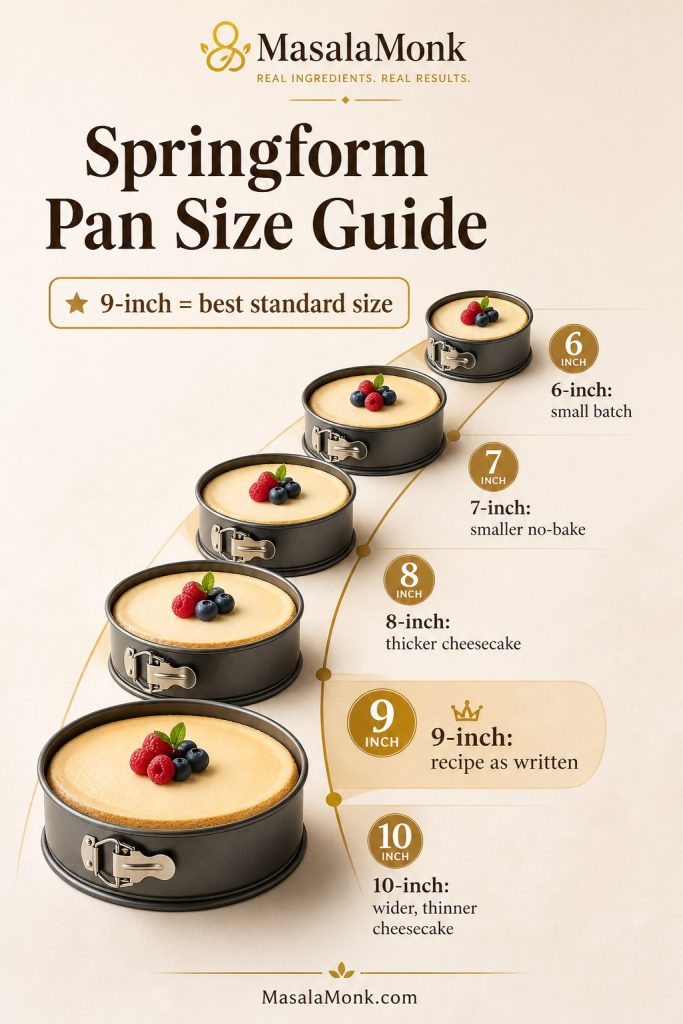
Springform Pan Size Guide

This recipe is designed for a 9-inch springform pan. Different pan sizes change the height, bake time, and texture, so use the table below if you need to adjust.

Springform pan size guide for keto cheesecake showing 6-inch, 7-inch, 8-inch, 9-inch, and 10-inch pan options.
A 9-inch springform pan is the safest standard for this keto cheesecake recipe. Smaller pans create more height, while larger pans bake thinner and faster.

Using a 9-inch pan? Start baking · see exact recipe

Pan Size Best Use What Changes
6-inch Small batch or shortcut cheesecake Use a scaled-down recipe; bake time will be shorter
7-inch Taller no-bake cheesecake Works well for smaller no-bake versions
8-inch Thicker baked cheesecake May need a little more bake time because the filling is deeper
9-inch Best standard size Use the recipe as written
10-inch Wider, slightly thinner cheesecake May bake faster; watch the center jiggle carefully

How to Make Keto Cheesecake

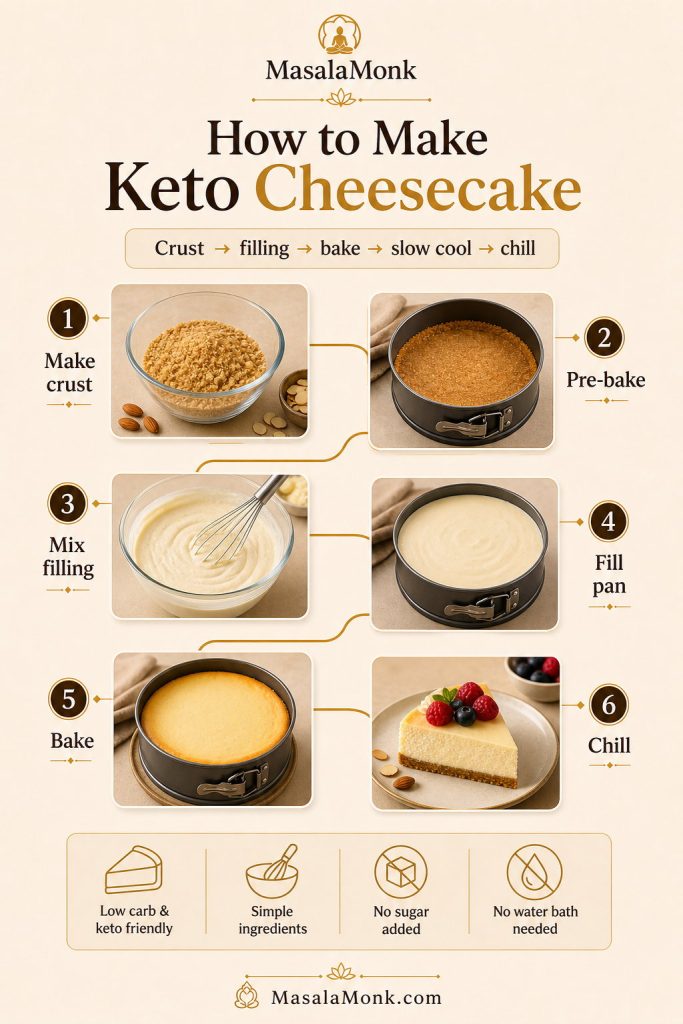
The method is simple, but the order matters. Make the crust first, reduce the oven temperature, mix the filling gently, then cool the cheesecake slowly.

Step-by-step keto cheesecake guide showing crust mixing, pre-baking, filling, baking, cooling, and chilling.
The best keto cheesecake method is not rushed. First build the crust, then mix the filling gently, bake until softly set, cool slowly, and chill before slicing.

Mixing the filling? check texture cues · see doneness

Step 1: Prepare the Pan

Line the bottom of a 9-inch springform pan with parchment paper. Lightly grease the sides. If your springform pan is older or tends to leak butter, place it on a baking sheet before it goes into the oven.

Step 2: Make the Almond Flour Crust

In a bowl, stir together almond flour, melted butter, sweetener, vanilla, and salt. The mixture should look like damp crumbs. Press it firmly into the bottom of the prepared pan. Use a flat-bottom cup to compact it evenly.

Bake the crust at 350°F / 177°C for 10–12 minutes, until it smells nutty and looks lightly golden at the edges. Remove it from the oven and let it cool slightly while you make the filling.

Step 3: Mix the Cheesecake Filling

Lower the oven to 325°F / 163°C. Beat the softened cream cheese on medium-low speed until smooth. Add the powdered sweetener and beat again until combined. Scrape the bowl well so no dense pockets of cream cheese remain.

Add the sour cream, lemon juice, vanilla, and salt. Mix until smooth. Add the eggs one at a time, mixing on low speed just until each egg disappears into the batter.

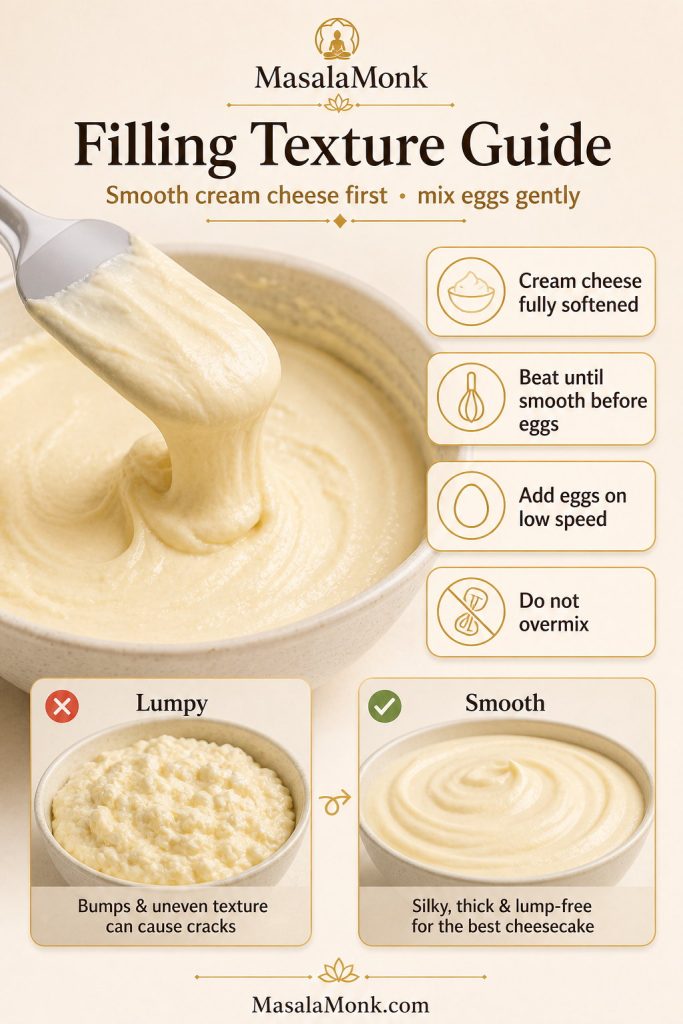
Keto cheesecake filling texture guide showing smooth batter, lumpy filling, and reminders to soften cream cheese and mix eggs gently.
Smooth cheesecake filling starts before the eggs are added. Once the cream cheese is fully beaten, switch to gentle mixing so the batter does not trap excess air.

Ready to bake? check doneness · avoid cracks

Do not overmix after adding eggs. Extra air can make the cheesecake rise too much in the oven and crack as it cools.

Step 4: Fill the Pan

Pour the filling over the cooled almond flour crust. Smooth the top with a spatula. Tap the pan gently on the counter once or twice to release large air bubbles, but do not bang it aggressively.

Step 5: Bake Low and Slow

Bake at 325°F / 163°C for 45–55 minutes. The edges should look set and slightly puffed, while the center should still wobble gently when the pan is nudged.

If the center looks liquid and sloshes, bake for another 5 minutes and check again. If the entire cheesecake looks fully firm in the oven, it is likely overbaked.

Step 6: Cool Slowly

Turn off the oven. Crack the oven door open and leave the cheesecake inside for 20–30 minutes. Then move it to the counter and let it cool to room temperature.

Once cool, cover and refrigerate for at least 6 hours. Overnight chilling gives the cleanest slices and best texture.

How to Know When the Cheesecake Is Done

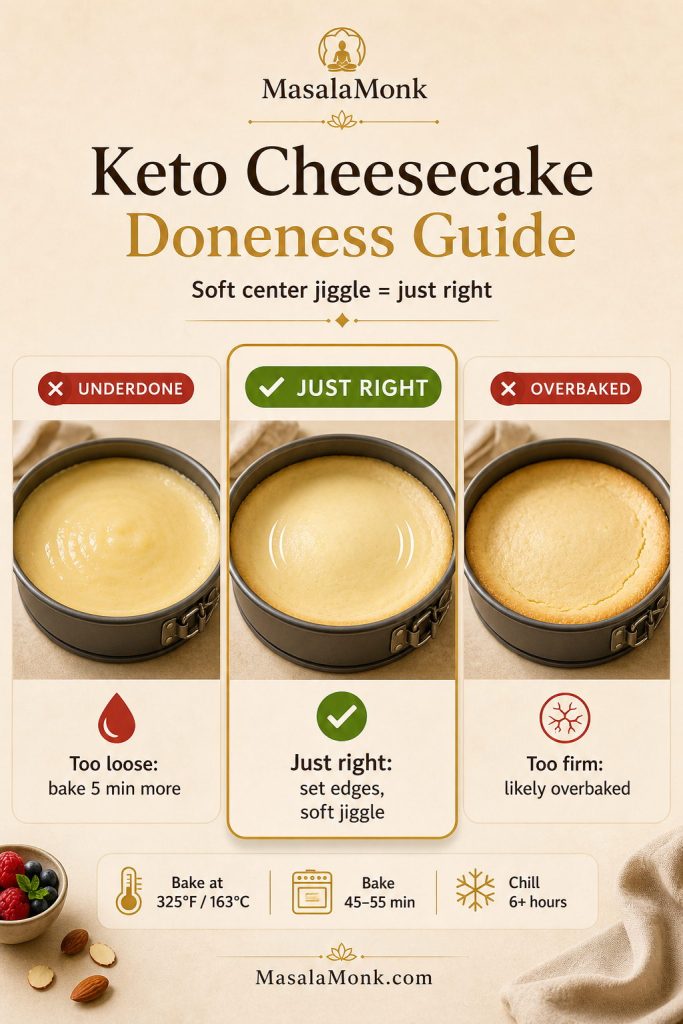
The most reliable doneness cue is the jiggle test. The outer 2–3 inches should look set, while the center should still wobble like soft gelatin. It should not look wet, soupy, or liquid, but it should not be completely firm either.

Cheesecake keeps setting as it cools. That is why a slightly jiggly center is correct. If you bake until the center is completely firm, the final chilled cheesecake can turn dense, dry, or cracked.

Doneness guide showing underbaked, just right, and overbaked keto cheesecake centers with a soft jiggle cue.
A softly jiggly center is not a mistake. Instead, it means the cheesecake can finish setting as it cools, which helps prevent a dry or cracked texture.

Center still jiggly? cool without cracks · store it right

What You See What It Means What to Do
Edges set, center softly jiggles Done Turn off oven and begin slow cooling
Center sloshes like liquid Underdone Bake 5 more minutes, then check again
Top is puffed and fully firm Likely overbaked Cool slowly; serve with topping if cracked
Top has deep cracks before cooling Too much heat, air, or bake time Use troubleshooting tips next time

How to Prevent Cracks

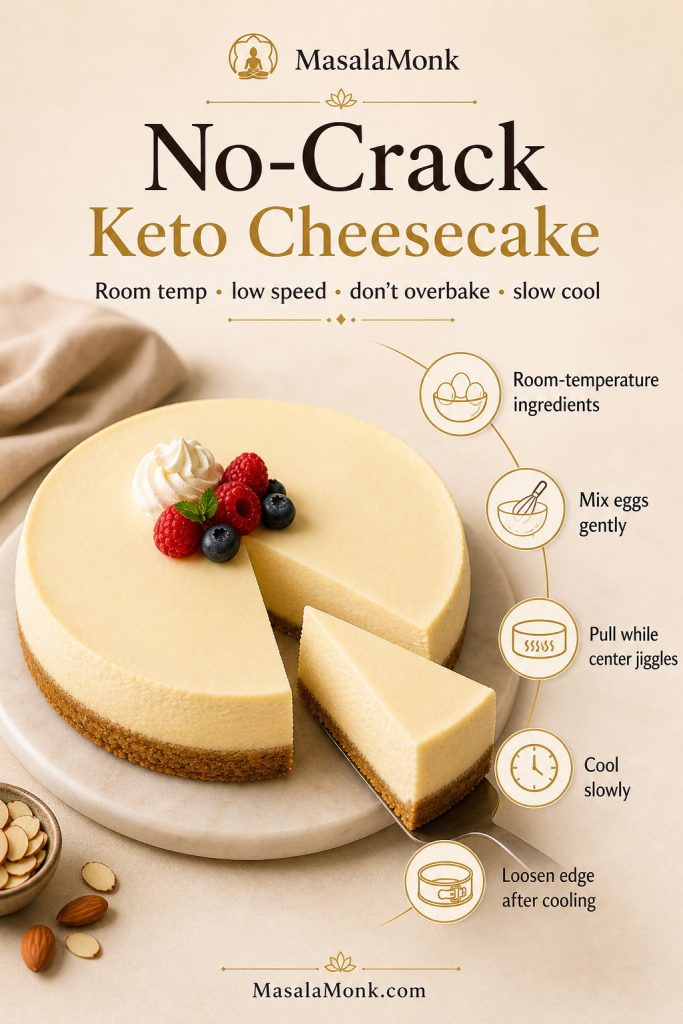
Cracks do not ruin cheesecake, but they are easy to reduce. Most cracks come from cold ingredients, overmixing, overbaking, or cooling too quickly.

  • Use room-temperature ingredients: Cold cream cheese creates lumps, and cold eggs can make the batter harder to mix evenly.
  • Mix gently after adding eggs: Eggs trap air quickly. Too much air makes the cheesecake puff and collapse.
  • Do not overbake: The center should still jiggle softly when the cheesecake comes out.
  • Cool gradually: Leave the cheesecake in the turned-off oven with the door cracked before moving it to the counter.
  • Loosen the edge: After cooling slightly, run a thin knife around the edge so the cheesecake does not pull against the pan as it contracts.
No-crack keto cheesecake guide with a smooth cheesecake top and tips for room-temperature ingredients, low-speed mixing, and slow cooling.
No-crack keto cheesecake depends on temperature control. Room-temperature ingredients, low-speed mixing, and slow cooling give the filling a better chance to settle evenly.

Want extra insurance? compare water bath options · fix common issues

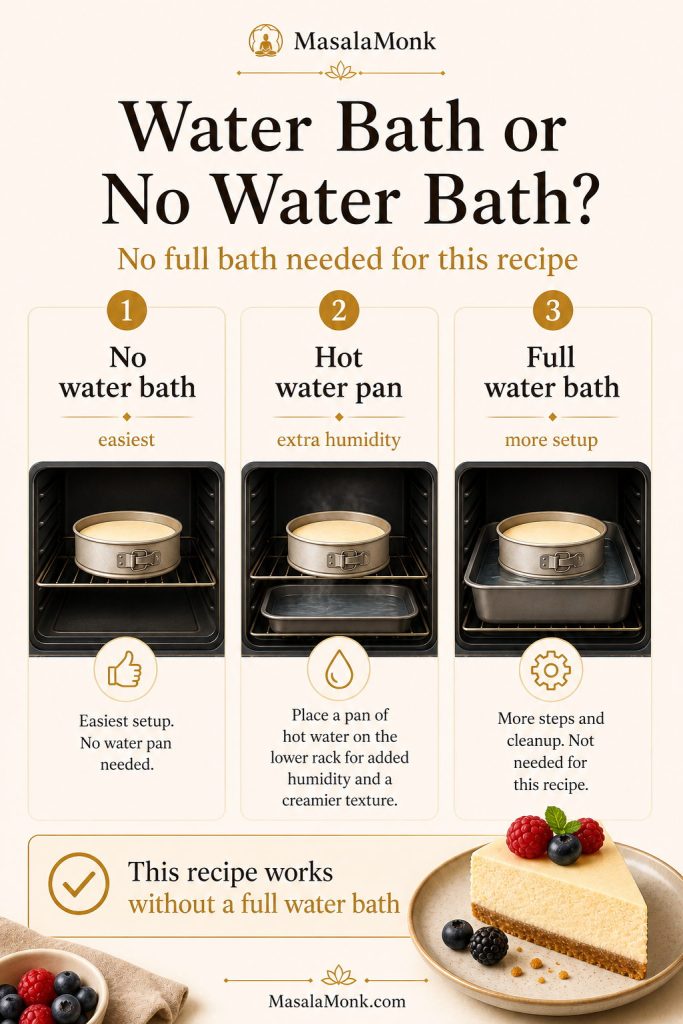
No water bath required: This recipe is written to work without a full water bath. If your oven runs hot or you want extra insurance, place a pan of hot water on the lower rack for gentle humidity.

Water Bath or No Water Bath?

You do not need a full water bath for this keto cheesecake recipe. The slow bake at 325°F / 163°C, room-temperature ingredients, gentle mixing, and gradual cooling are enough for a smooth cheesecake in most ovens.

A full water bath can help cheesecakes bake gently, but it also adds extra steps and can leak into a springform pan if the wrapping is not secure. King Arthur Baking explains that a water bath can help reduce cracks, but for this recipe the easier option is to place a pan of hot water on the lower oven rack. It adds a little humidity without putting the cheesecake pan directly in water.

Water bath comparison for keto cheesecake showing no water bath, hot water pan, and full water bath baking setups.
You can make this keto cheesecake without a full water bath. However, a hot water pan on the lower rack can add humidity if your oven tends to run dry.

No full bath needed? Use the recipe card · check doneness cues

Method Best For Downside
No water bath Simplest method; works well with slow cooling Needs careful bake time and cooling
Pan of hot water on lower rack Easy extra insurance against drying Still not a guarantee if the cheesecake is overbaked
Full water bath Very gentle baking More setup; springform pans can leak

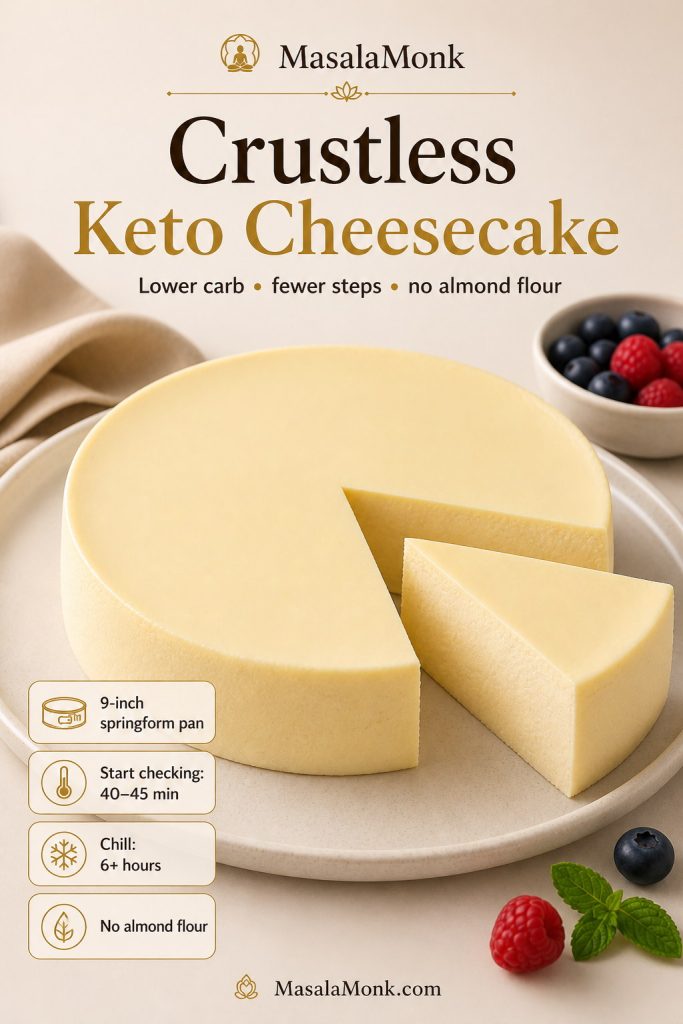
Crustless Keto Cheesecake Option

You can make this cheesecake without the almond flour crust. A crustless keto cheesecake is slightly lower in carbs, simpler to prepare, and useful if you are avoiding nuts.

To make it crustless, skip the crust ingredients and line the bottom of the springform pan with parchment. Grease the sides well. Pour the filling directly into the pan and bake at 325°F / 163°C until the edges are set and the center still jiggles softly.

The bake time may be slightly shorter because there is no crust layer. Start checking around 40–45 minutes. Chill completely before slicing, because crustless cheesecake needs time to firm up for clean edges.

Crustless keto cheesecake with a clean slice removed, smooth filling, and notes for checking bake time and chilling.
Crustless keto cheesecake removes the almond flour base, so the pan matters more. Line it well, chill fully, and slice cold for the cleanest edges.

Skipping crust? adapt the recipe · chill and store properly

Best crustless tip: Do not skip the parchment. Without a crust, the filling sits directly against the pan, so lining and chilling are what help the slices release cleanly.

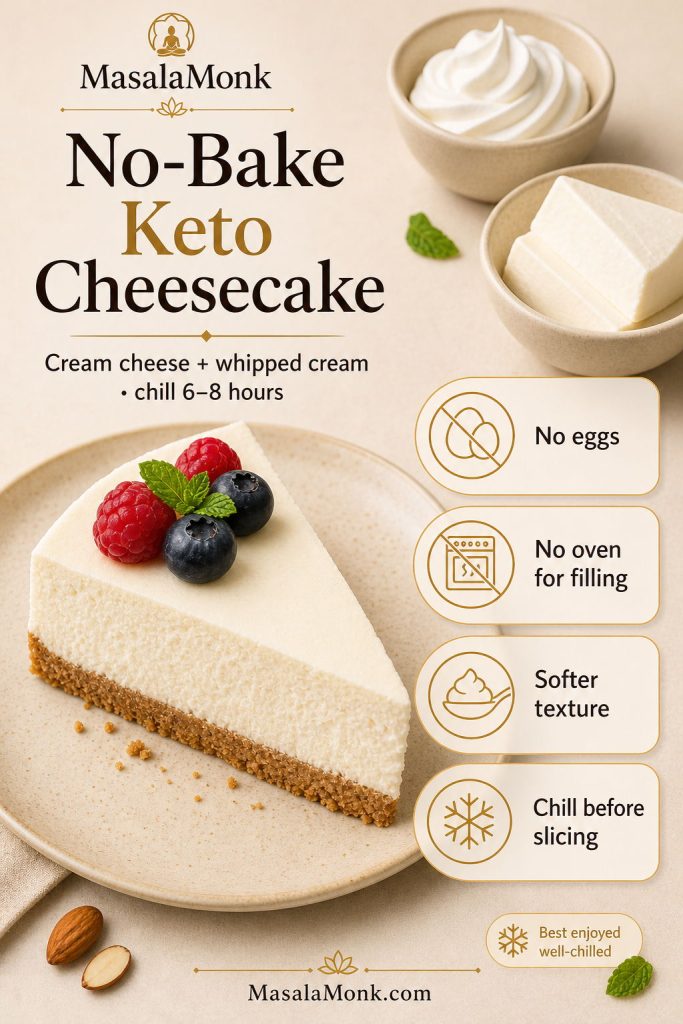
No-Bake Keto Cheesecake Option

A no-bake keto cheesecake is a different style of cheesecake. It is lighter, softer, and more mousse-like because it sets in the refrigerator instead of baking with eggs.

For a 9-inch no-bake keto cheesecake, use the almond flour crust as written, then chill or briefly bake the crust before adding the filling. For the filling, beat 24 oz / 680 g softened full-fat cream cheese with 3/4 to 1 cup powdered keto sweetener, 2 teaspoons vanilla, 1 tablespoon lemon juice, and a pinch of salt until smooth. In a separate bowl, whip 1 cup / 240 ml heavy cream to soft peaks, then fold it into the cream cheese mixture.

No-bake keto cheesecake slice with cream cheese, whipped cream, chilling time, and no-egg filling notes.
No-bake keto cheesecake is a separate style, not just an unbaked version of the main filling. It relies on whipped cream and long chilling instead of eggs.

Making it no-bake? choose pan size · compare with baked recipe

This makes a slightly lower 9-inch no-bake cheesecake. For a taller no-bake keto cheesecake, use an 8-inch springform pan and chill it overnight before slicing.

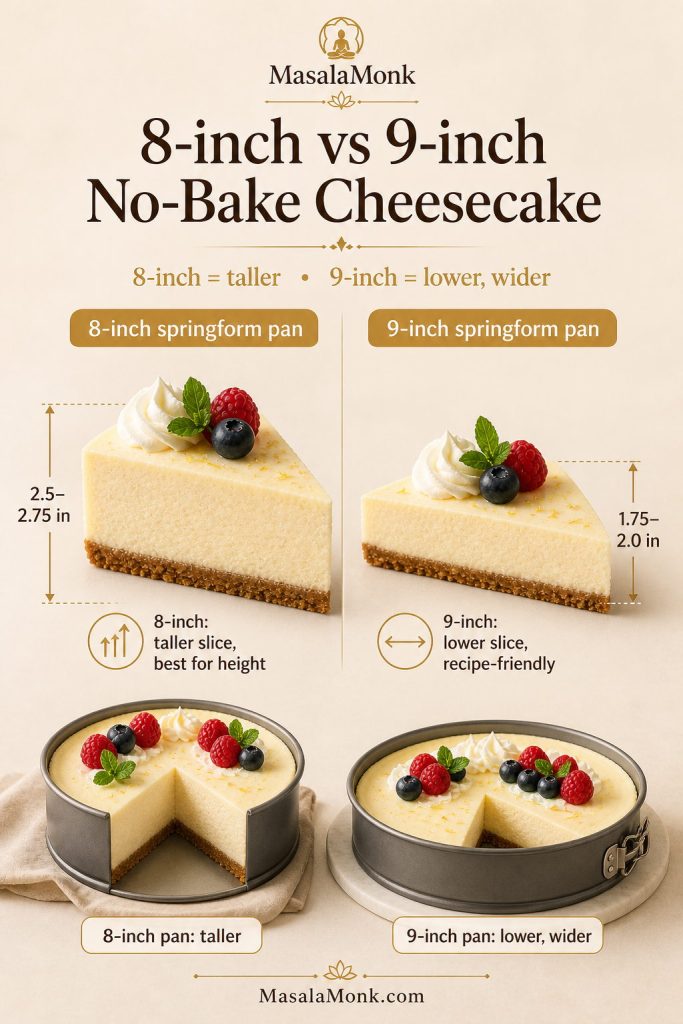
8-Inch vs 9-Inch No-Bake Keto Cheesecake

No-bake cheesecake height depends heavily on pan width because the filling sets in the refrigerator instead of rising or firming in the oven. An 8-inch pan gives a taller, more bakery-style slice, while a 9-inch pan gives a wider cheesecake with a slightly lower profile.

Both pan sizes work, but the chilling time matters more in the taller version. If you use an 8-inch pan, chill overnight before slicing so the center has enough time to set cleanly.

Comparison of 8-inch and 9-inch no-bake keto cheesecakes showing a taller cheesecake and a lower wider cheesecake.
For no-bake keto cheesecake, pan width changes the look of the slice. An 8-inch pan gives height, while a 9-inch pan gives a lower, wider cheesecake.

Picked your pan? return to no-bake method · see variations

Spread the filling over the crust, smooth the top, cover, and refrigerate for at least 6–8 hours. Overnight is better. If the cheesecake is sliced too soon, it can look soft or collapse at the edges.

Important: Do not use the baked filling from the recipe card for the no-bake version. The baked filling relies on eggs and oven heat to set. The no-bake version needs whipped cream and long chilling instead.

If you want the classic non-keto version with a sweeter filling and regular crumb crust, use this no bake cheesecake recipe instead.

Best use: Choose baked keto cheesecake when you want classic dense cheesecake texture. Choose the no-bake version when you want an easier, lighter, oven-free dessert.

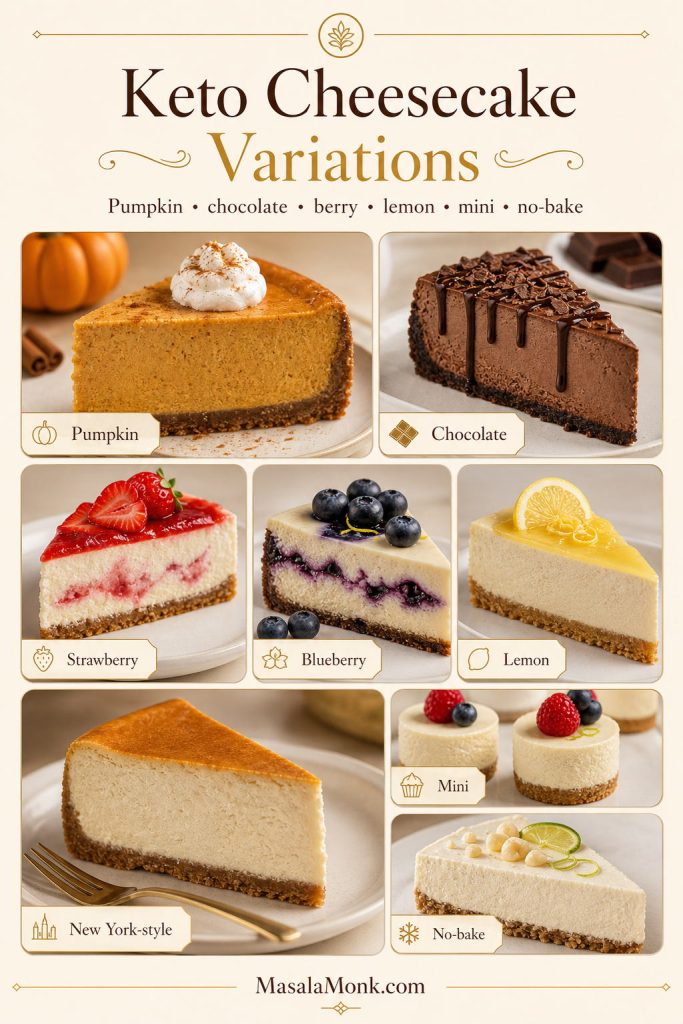
Keto Cheesecake Variations

Once you understand the base, you can use it for other low carb cheesecake flavors. Keep the structure the same, then adjust carefully so the filling still sets properly. In most cases, toppings are safer than mix-ins because they add flavor without loosening the cheesecake.

Keto cheesecake variations board with pumpkin, chocolate, strawberry, blueberry, lemon, New York-style, mini, and no-bake cheesecake options.
Keto cheesecake variations work best when the base stays stable. Therefore, toppings and small flavor accents are safer than adding too much liquid to the filling.

Need a classic slice first? Jump to recipe · see New York-style

Keto Pumpkin Cheesecake

Pumpkin cheesecake needs pumpkin puree, pumpkin pie spice, and a little cinnamon in the filling. Since pumpkin adds moisture, it works better as a dedicated variation than as a casual stir-in. With this base cheesecake, a spoonful of pumpkin spice whipped cream on top gives you the flavor without changing the bake.

Keto Chocolate Cheesecake

A chocolate version works best with melted sugar-free chocolate or cocoa powder in the filling. Chocolate changes both sweetness and texture, so taste the filling before adding eggs and adjust the sweetener if needed. If you want a separate creamy chocolate dessert instead, this avocado chocolate mousse stays in the same rich, spoonable dessert lane.

Keto Strawberry Cheesecake

The cleanest strawberry version keeps the filling vanilla and adds a sugar-free strawberry topping after baking. Fresh berry toppings are easier to control than mixing watery fruit into the batter. Cooked and cooled strawberry sauce gives stronger flavor without making the cheesecake soft.

Keto Blueberry Cheesecake

A thick low-carb blueberry sauce works best as a topping or light swirl. If using a swirl, keep it concentrated and spoon it lightly over the top before baking. Too much fruit sauce can make the center loose.

Keto Lemon Cheesecake

To make the cheesecake brighter, add lemon zest to the filling. Zest gives strong lemon flavor without adding much liquid. Avoid adding too much extra lemon juice because excess liquid can soften the filling.

Mango Cheesecake and Keto Limits

Mango is not usually the easiest strict-keto cheesecake flavor because it brings natural sugar and extra moisture. If you are not keeping the dessert strictly keto and want a fruit-forward no-bake version, this no bake mango cheesecake recipe is the better fit.

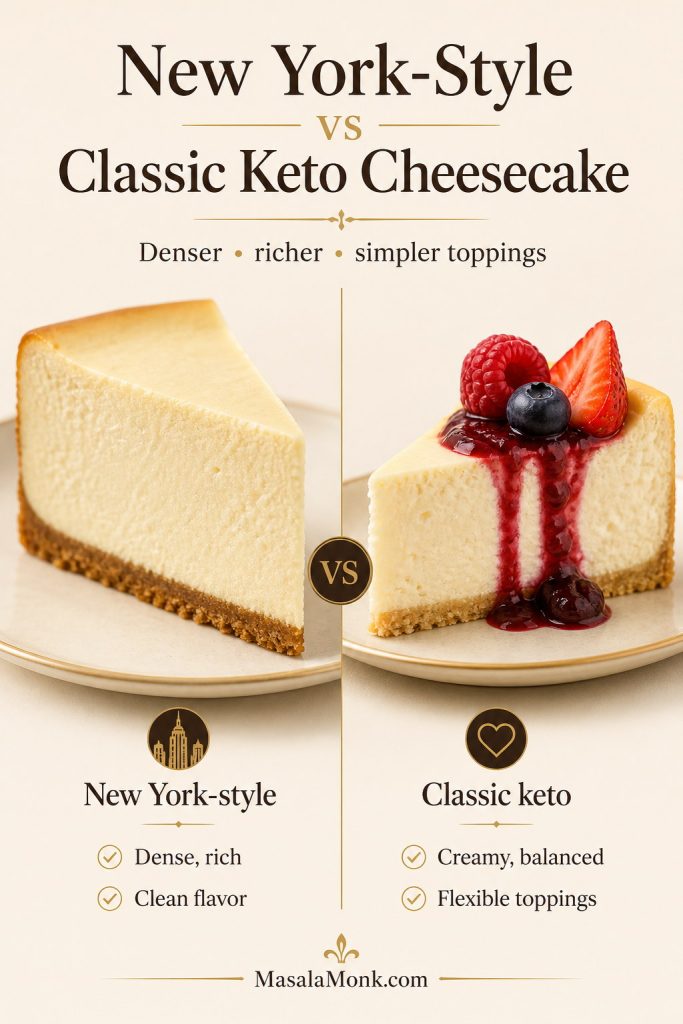
Keto New York Cheesecake

For a New York-style keto cheesecake, keep the flavor simple and focus on a dense, creamy texture. Use full-fat brick cream cheese, sour cream, eggs, vanilla, lemon juice, and the almond flour crust. Avoid fruit puree or chocolate in the filling because those move it away from the classic New York-style profile.

The biggest difference is texture. A New York-style keto cheesecake should feel rich, smooth, and slightly dense rather than fluffy. Chill it overnight before slicing, and serve toppings on the side so the clean cheesecake flavor stays central.

Comparison of New York-style keto cheesecake and classic keto cheesecake slices, showing a denser plain slice and a berry-topped slice.

New York-style keto cheesecake should feel denser and cleaner, while classic keto cheesecake is more flexible. Keep toppings lighter if you want that rich bakery-style texture.

Prefer smaller portions? See mini cheesecakes · return to recipe

Keto Ricotta Cheesecake

Ricotta gives keto cheesecake a lighter, slightly more Italian-style texture. It is less dense than an all-cream-cheese filling and can taste a little grainier unless blended very smooth. Use full-fat ricotta, drain excess liquid if it looks wet, and blend it with cream cheese rather than using ricotta alone.

For the most reliable result, treat ricotta cheesecake as a separate variation rather than a direct one-for-one swap. If you are experimenting, replace only part of the cream cheese with smooth ricotta and keep the eggs, lemon, vanilla, and sweetener balanced so the cheesecake still sets.

High-Protein Keto Cheesecake

For a higher-protein direction, cottage cheese, Greek yogurt, ricotta, or protein powder can be used in separate cheesecake styles. For a breakfast-style version of that idea, these high-protein low-carb pancakes use similar cottage cheese and low-carb logic.

Protein powder needs care in cheesecake because it can make the filling dry, chalky, or rubbery if added casually. If using cottage cheese, blend it completely smooth before adding it to a cheesecake filling. A high-protein low carb cheesecake works best as its own tested variation rather than a direct swap inside this classic baked version.

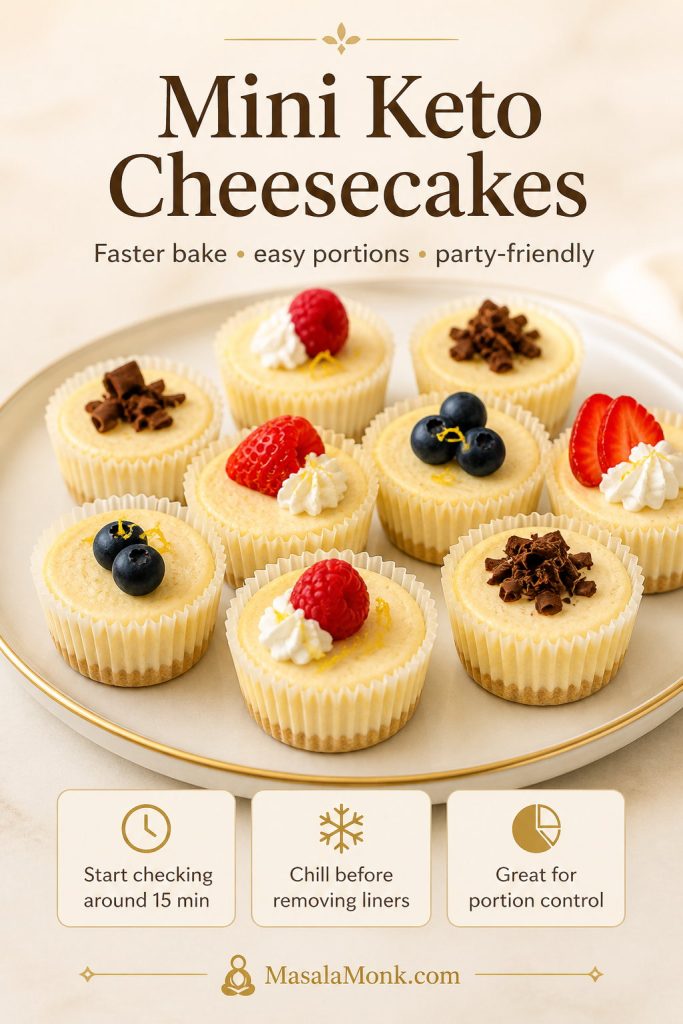
Mini Keto Cheesecakes, Cups, and Bites

You can turn the same flavor idea into mini keto cheesecakes by baking the crust and filling in a lined muffin pan. Mini versions bake faster, chill faster, and are easier to portion for parties, lunch boxes, or meal prep.

Start checking mini cheesecakes around 15 minutes. They are done when the edges look set and the centers still have a slight wobble. Chill them fully before removing the liners. For true keto cheesecake bites or fat bombs, use a separate no-bake cream cheese mixture instead of this baked filling.

Mini keto cheesecakes in paper liners topped with berries, whipped cream, lemon zest, and chocolate shavings.
Mini keto cheesecakes are great for portion control, but they still need proper chilling. Since they bake faster, start checking early and let them set before serving.

Baking minis? use the same doneness cues · store leftovers

3 Ingredient Keto Cheesecake Shortcut

A 3 ingredient keto cheesecake is usually a no-bake shortcut made with cream cheese, keto sweetener, and another creamy ingredient such as whipped cream, Greek yogurt, or keto vanilla yogurt. It is useful for a quick dessert, but it will not have the same baked cheesecake texture as this full recipe.

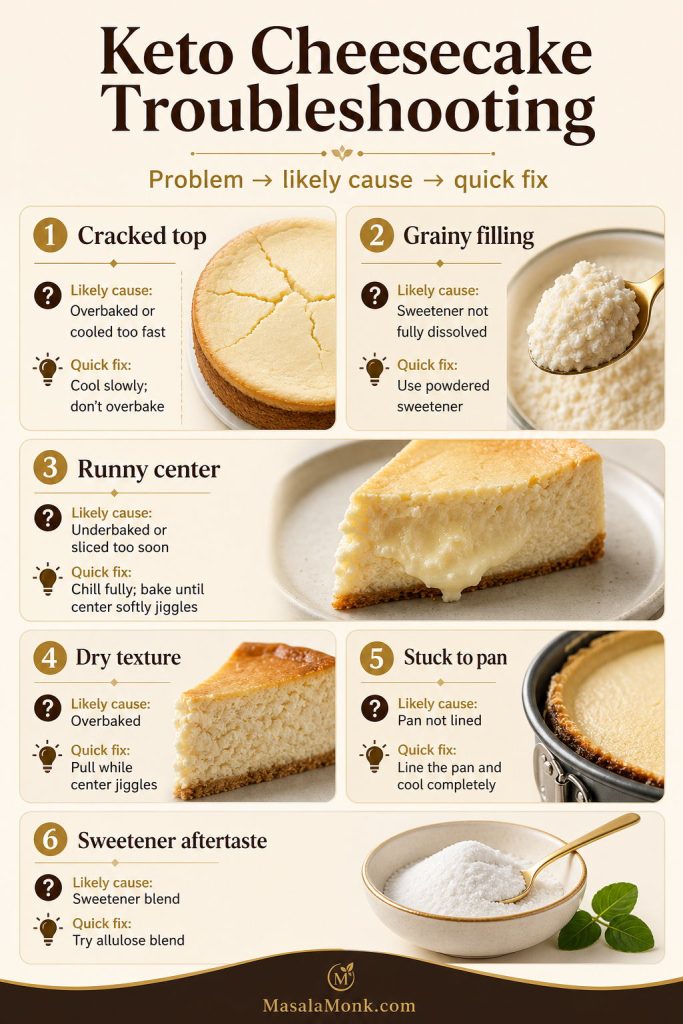
Keto Cheesecake Troubleshooting

Most keto cheesecake problems are easy to diagnose. Use this table to fix the current cheesecake if possible and prevent the issue next time.

Keto cheesecake troubleshooting board showing cracked top, grainy filling, runny center, dry texture, stuck pan, and sweetener aftertaste fixes.
Troubleshooting keto cheesecake is easier when you match the problem to the cause. Cracks, graininess, runny centers, and stuck slices each need a different fix.

Need a crust fix too? See crust fixes · retry with recipe card

Problem Likely Cause Fix
Cracked top Overbaking, too much air, or fast cooling Cool slowly next time; serve current cheesecake with whipped cream or berry topping
Lumpy filling Cream cheese was too cold Use fully softened cream cheese and beat it smooth before adding eggs
Grainy texture Coarse sweetener or crystallizing sweetener Use powdered allulose or powdered monk fruit/allulose blend
Soggy crust Crust was not pre-baked enough or filling was too loose Pre-bake crust until lightly golden and let it cool before filling
Crumbly crust Not enough butter or not pressed firmly Add 1 extra tablespoon melted butter next time and press with a flat-bottom cup
Runny center Underbaked or sliced too soon Bake until softly jiggly, then chill at least 6 hours before slicing
Dry texture Overbaked cheesecake Pull it from the oven while the center still jiggles
Cheesecake stuck to pan No parchment or not enough chilling Line the pan and chill fully before removing the springform ring
Sweetener aftertaste Sweetener blend does not suit your taste Try allulose or a monk fruit/allulose blend; add lemon and vanilla for balance

Almond Flour Crust Fixes

Almond flour crust problems usually come from pressure, butter balance, or bake time. If the crust crumbles, it often needed firmer pressing or a touch more butter. If it turns soggy, it usually needed a longer pre-bake or more cooling time before the filling went in.

The goal is a crust that feels compact, lightly golden, and sturdy enough to lift with the cheesecake slice. Fixing the crust separately is useful because the filling can be perfect while the base still needs adjustment.

Almond flour crust fixes board showing crumbly, soggy, greasy, and sliceable cheesecake crust results with correction tips.
Almond flour crust problems usually come down to pressure, butter, or baking time. Press firmly, pre-bake until lightly golden, and cool before adding filling.

Crust sorted? continue method · jump to recipe

What the Finished Cheesecake Should Be Like

After chilling, the cheesecake should slice cleanly, hold its shape on a plate, and feel dense but creamy when you cut through it. The center should not be runny, the filling should not taste grainy, and the almond flour crust should stay firm enough to lift with the slice.

The flavor should be rich and tangy, not flat or overly sweet. If your cheesecake tastes slightly muted when cold, let slices sit at room temperature for 10–15 minutes before serving.

Storage and Freezing

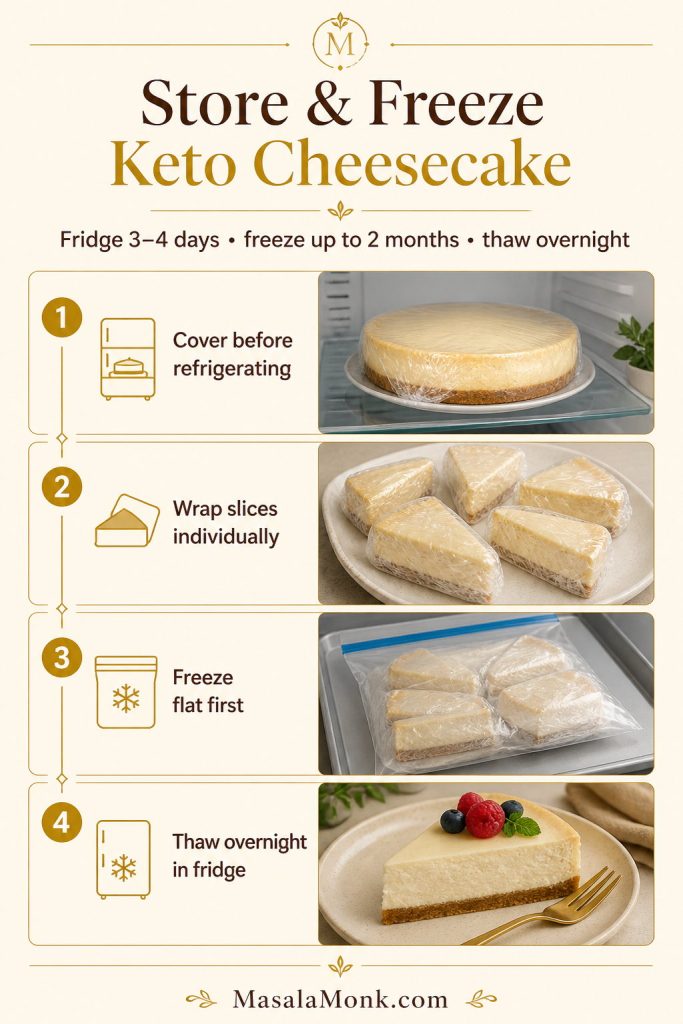
Keto cheesecake is an excellent make-ahead dessert because the texture improves after chilling. Keep it covered in the refrigerator until ready to serve. For food safety, the USDA recommends using refrigerated leftovers within 3–4 days or freezing them for longer storage.

Storage guide showing covered keto cheesecake in the refrigerator, wrapped slices, frozen slices, and a thawed slice ready to serve.
Keto cheesecake is one of the better make-ahead desserts. For the best texture, refrigerate covered, freeze slices individually, and thaw overnight before serving.

Serving later? slice cleanly · add toppings

  • Refrigerator: Store covered for 3–4 days for the best balance of texture and food safety.
  • Freezer: Freeze slices or the whole cheesecake for up to 2 months for best quality.
  • Thawing: Thaw overnight in the refrigerator for the best texture.
  • Serving: Slice cold, then let slices sit at room temperature for 10–15 minutes if you prefer a softer texture.

For freezing, place chilled slices on a parchment-lined tray until firm, then wrap individually. This keeps the slices from sticking together and makes it easier to thaw only what you need.

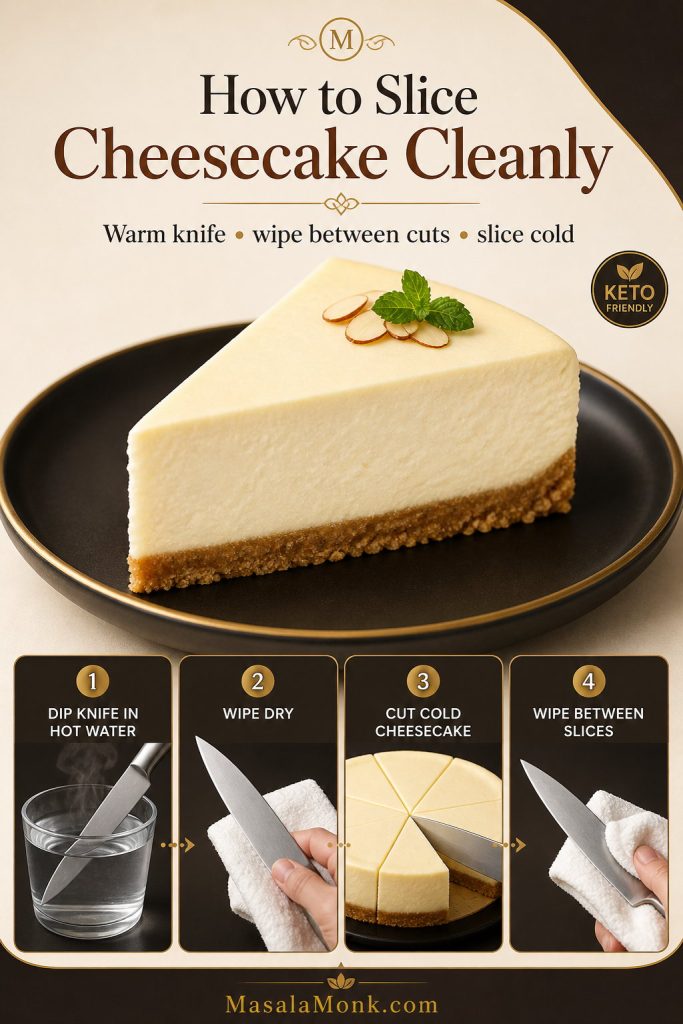
How to Slice Cheesecake Cleanly

For clean slices, chill the cheesecake fully before cutting. Use a sharp knife, dip it in hot water, wipe it dry, then cut one slice. Wipe the knife between cuts so the filling stays smooth and the almond flour crust does not drag through the slice.

Clean cheesecake slicing guide showing a hot knife, wiping the blade, cutting cold cheesecake, and a neat slice on a plate.
Clean cheesecake slices come from cold cheesecake and a warm knife. Wipe between cuts so the creamy filling and almond flour crust stay neat.

Ready to serve? see toppings · save the recipe

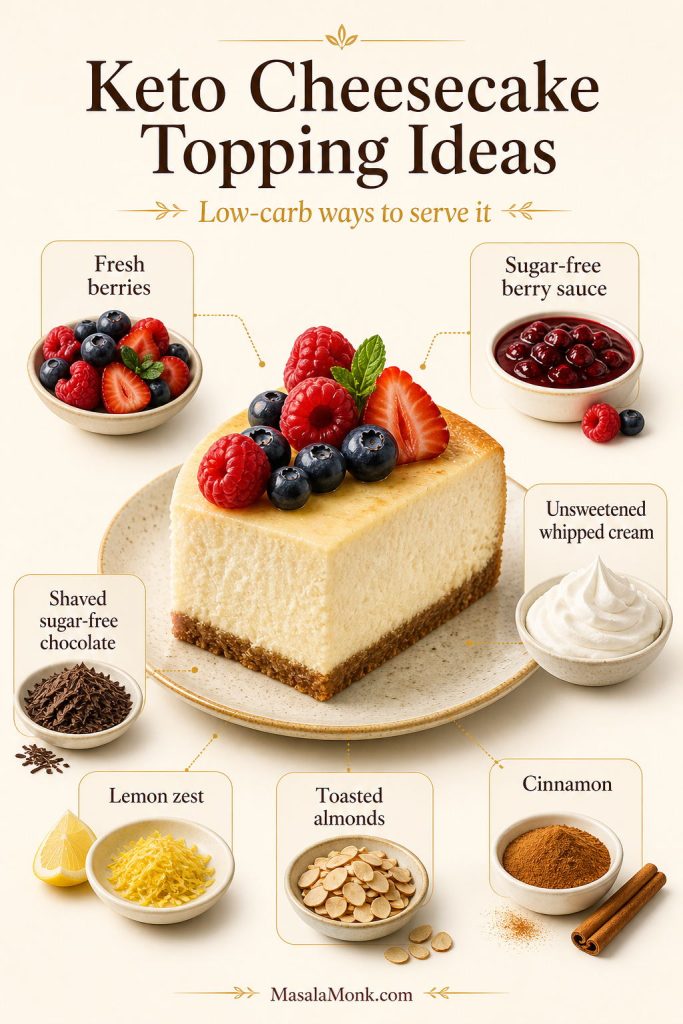
Serving Ideas

This keto cheesecake is rich enough to serve plain, but toppings can make it feel more special without adding much sugar.

  • Fresh strawberries, raspberries, or blueberries
  • Sugar-free berry sauce
  • Unsweetened whipped cream
  • Shaved sugar-free chocolate
  • Lemon zest
  • Toasted sliced almonds
  • A light dusting of cinnamon for a warmer flavor
Keto cheesecake topping ideas with fresh berries, sugar-free berry sauce, whipped cream, shaved chocolate, lemon zest, toasted almonds, and cinnamon.
Low-carb toppings should support the cheesecake, not bury it. Fresh berries, whipped cream, lemon zest, shaved chocolate, toasted almonds, and cinnamon all keep the flavor balanced.

Want exact amounts? Jump to recipe card · check FAQs

Keep toppings simple if you want the cheesecake texture to stay the focus. Watery fruit sauces should be cooked down and cooled before adding.

For a cozy pairing, serve a small slice with keto hot chocolate instead of a sugary drink.

Keto Cheesecake Recipe Card

This creamy keto cheesecake has a buttery almond flour crust, smooth sugar-free cream cheese filling, and a slow-cooling method that helps prevent cracks. It is rich, low carb, gluten-free, and made without a water bath.

Prep Time 25 minutes
Crust Bake 10–12 minutes
Cheesecake Bake 45–55 minutes
Cooling Time 1½–2 hours
Chill Time 6 hours minimum, overnight best
Total Time About 9 hours, plus overnight chill if preferred
Yield 12–16 slices
Pan 9-inch springform
Net Carbs About 4g per 1 of 16 slices
Water Bath Not required
Method Baked cheesecake
Difficulty Easy with slow cooling

Ingredients

For the Almond Flour Crust

  • 2 cups / about 224 g blanched almond flour
  • 1/3 cup / 75 g unsalted butter, melted
  • 2 tablespoons powdered keto sweetener
  • 1 teaspoon vanilla extract
  • 1/4 teaspoon fine salt

For the Cheesecake Filling

  • 32 oz / 907 g full-fat brick cream cheese, softened
  • 1 cup to 1 1/4 cups powdered keto sweetener, preferably allulose or monk fruit/allulose blend
  • 1/2 cup / 120 g sour cream, room temperature
  • 3 large eggs, room temperature
  • 1 tablespoon fresh lemon juice
  • 2 teaspoons vanilla extract
  • 1/4 teaspoon fine salt

Instructions

  1. Prepare the pan. Line the bottom of a 9-inch springform pan with parchment paper and lightly grease the sides.
  2. Heat the oven for the crust. Preheat the oven to 350°F / 177°C.
  3. Make the crust. Stir almond flour, melted butter, sweetener, vanilla, and salt until the mixture looks like damp crumbs.
  4. Press and bake the crust. Press the crust firmly into the pan using the bottom of a cup. Bake for 10–12 minutes, until lightly golden. Let it cool slightly.
  5. Lower the oven temperature. Reduce the oven to 325°F / 163°C.
  6. Beat the cream cheese. In a large bowl, beat softened cream cheese until smooth. Scrape the bowl well.
  7. Add sweetener. Add 1 cup powdered keto sweetener and beat until smooth. Taste before adding eggs and add up to 1/4 cup more sweetener if you prefer a sweeter cheesecake.
  8. Add sour cream and flavorings. Mix in sour cream, lemon juice, vanilla, and salt until smooth.
  9. Add eggs gently. Add eggs one at a time on low speed, mixing only until each egg is incorporated. Do not overmix.
  10. Fill the pan. Pour the filling over the cooled crust and smooth the top.
  11. Bake. Bake at 325°F / 163°C for 45–55 minutes, until the edges are set and the center still jiggles softly.
  12. Cool slowly. Turn off the oven, crack the door open, and leave the cheesecake inside for 20–30 minutes.
  13. Cool at room temperature. Move the cheesecake to the counter and cool completely.
  14. Chill. Cover and refrigerate for at least 6 hours, preferably overnight.
  15. Slice and serve. Run a thin knife around the edge before releasing the springform ring. Slice cold with a sharp knife.

Recipe Notes

  • For the smoothest filling, use powdered sweetener rather than coarse granulated sweetener.
  • Do not overbake. The center should still wobble gently when the cheesecake comes out of the oven.
  • For a crustless version, skip the crust, line and grease the pan well, and start checking the bake around 40–45 minutes.
  • For a more New York-style texture, chill the cheesecake overnight and serve toppings on the side rather than mixing fruit into the filling.
  • For the lowest-carb version, make the cheesecake crustless and slice it into 16 smaller portions.
  • Nutrition will vary by brand of sweetener, cream cheese, sour cream, and almond flour.

Approximate Nutrition

Approximate per 1 of 16 slices: 330–360 calories, 7–9 g protein, 32–35 g fat, and about 4 g net carbs. For 12 larger slices, net carbs are closer to about 5 g per slice. Exact values depend on the brands used.

Keto cheesecake recipe card with a cheesecake slice, almond flour crust, no water bath note, baking temperatures, chill time, and key ingredients.
Save this keto cheesecake recipe card for the key numbers: almond flour crust, 9-inch pan, gentle bake, slow cooling, and at least 6 hours of chilling.

Still deciding? Read FAQs · Back to guide

FAQs

Is cheesecake keto?

Traditional cheesecake is usually not keto because the filling contains sugar and the crust is often made with graham crackers. This version uses an almond flour crust and keto sweetener to keep the carbs low.

Is keto cheesecake zero carb?

No. It is usually low carb, not zero carb. Dairy, eggs, almond flour, lemon juice, and some sweeteners can all add small amounts of carbs. For the lowest-carb version, make it crustless and keep toppings simple.

How many net carbs are in keto cheesecake?

This recipe has about 4 g net carbs per slice if cut into 16 slices, or about 5 g net carbs if cut into 12 larger slices. The exact number depends on the almond flour, cream cheese, sour cream, and sweetener brands you use.

What can I use instead of almond flour?

The easiest option is to make the crustless version. You can also use a tested nut-free crust, but coconut flour should not be swapped 1:1 for almond flour because it absorbs much more moisture.

How do I make keto cheesecake no crust?

For keto cheesecake no crust, skip the almond flour base, line the pan with parchment, grease the sides well, and pour the filling directly into the pan. Start checking the cheesecake a little earlier because there is no crust layer.

How is no-bake keto cheesecake different?

A no-bake version uses a different filling structure. It usually sets with whipped cream and long chilling instead of eggs and baking, so the texture is softer and more mousse-like.

Do I need a water bath for keto cheesecake?

A full water bath is not required. This recipe uses room-temperature ingredients, gentle baking at 325°F / 163°C, careful mixing after the eggs go in, and slow cooling. For extra insurance, place a pan of hot water on the lower oven rack.

What is the best sweetener for keto cheesecake?

Powdered allulose or a powdered monk fruit/allulose blend gives the smoothest filling. Coarse granulated sweeteners can taste gritty, and some erythritol-heavy blends can leave a cooling finish.

Why did my keto cheesecake crack?

Cracks usually happen because the filling was overmixed, the cheesecake was overbaked, or it cooled too quickly. Use room-temperature ingredients, mix gently after adding eggs, pull it from the oven while the center still jiggles, and cool it slowly.

Why is my cheesecake grainy?

Grainy cheesecake often comes from coarse sweetener or a sweetener that crystallizes as it chills. Use powdered sweetener in the filling and avoid overmixing once the eggs are added.

Does coconut flour work for the crust?

Not as a direct swap. Coconut flour is much more absorbent than almond flour, so it needs a different ratio of fat and liquid. For this recipe, almond flour is the better choice unless you are using a tested coconut flour crust.

Ricotta vs cottage cheese: do they work?

Both can work in separate cheesecake styles, but the texture will be different. Ricotta gives a lighter, slightly grainier cheesecake, while cottage cheese needs blending until completely smooth. For this classic version, brick cream cheese gives the best result.

How long do mini keto cheesecakes bake?

Mini cheesecakes usually bake faster than a full cheesecake, often around 15–22 minutes depending on size. Use a muffin pan with liners, watch for set edges and slightly wobbly centers, then chill well before serving.

How do you freeze keto cheesecake?

Freeze it only after the cheesecake has chilled completely. Wrap slices individually or freeze them on a parchment-lined tray first, then store them in an airtight container. Thaw overnight in the refrigerator for the best texture.