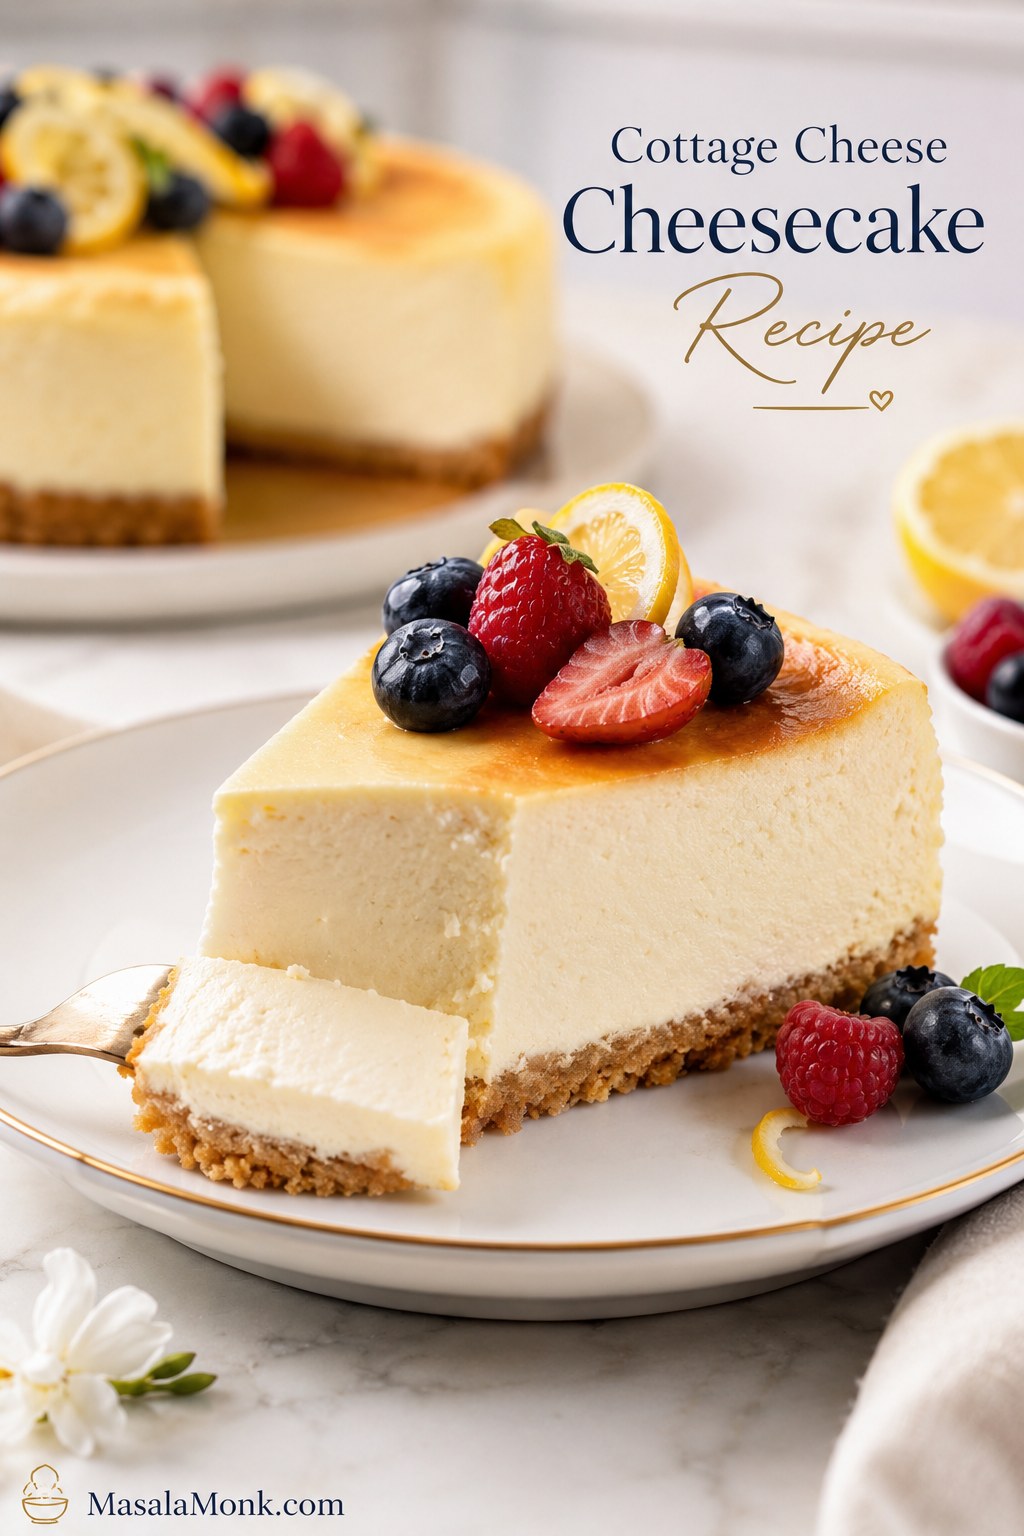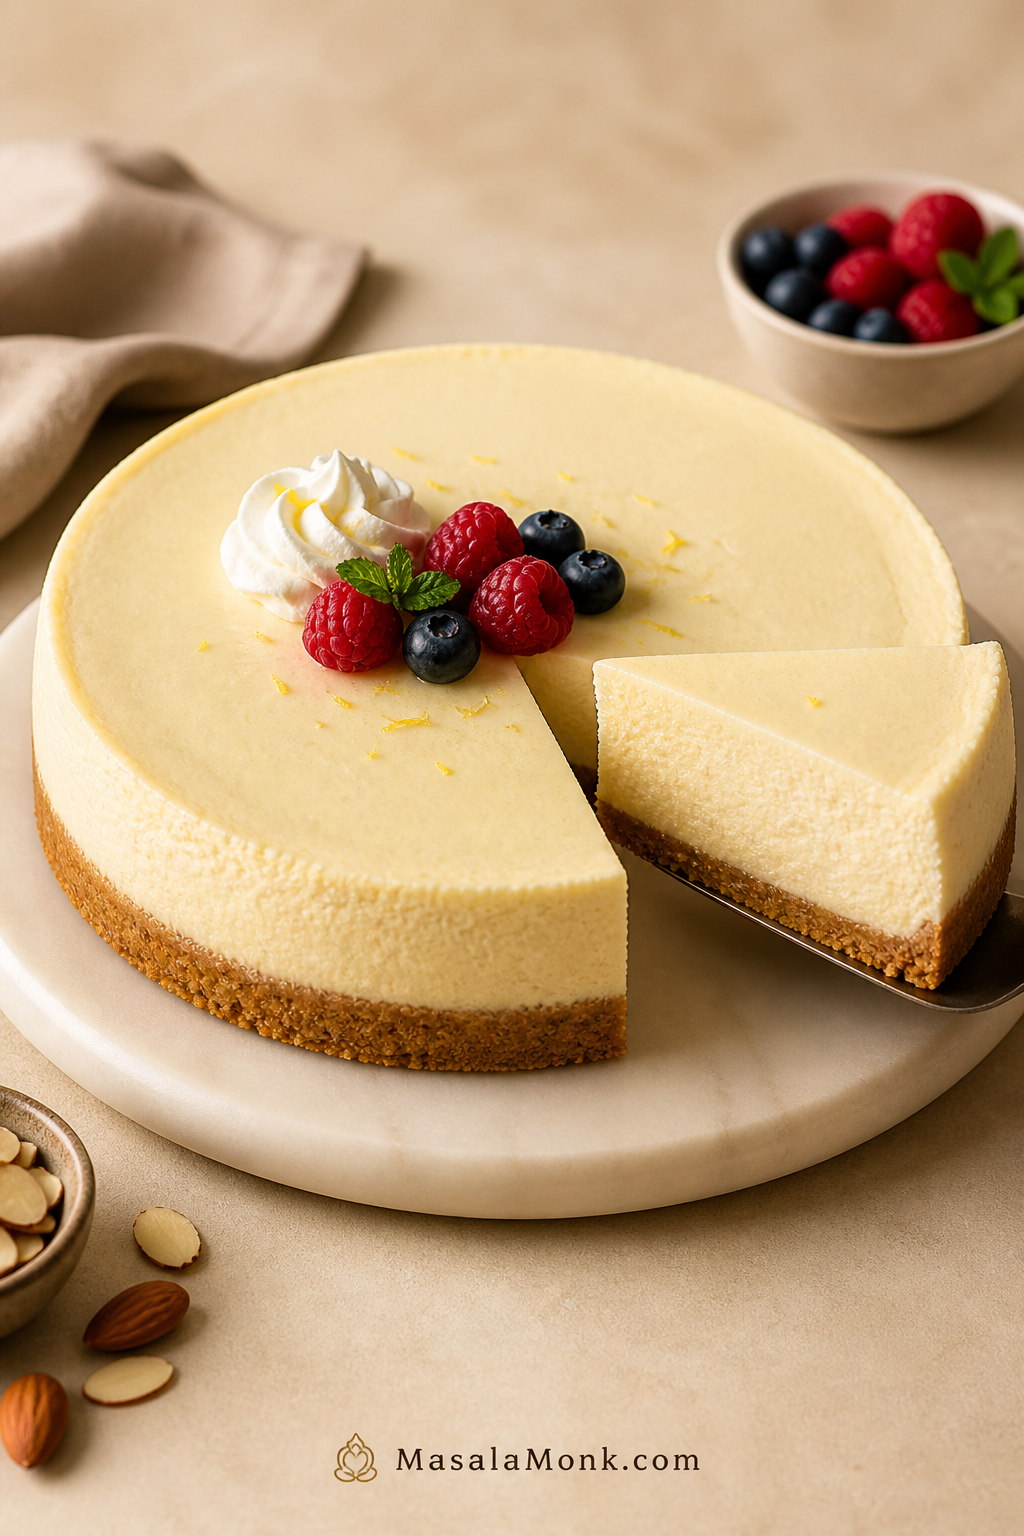
Ricotta cheesecake is the softer, lighter cousin of a dense New York cheesecake. A good slice is cool and creamy, gently citrus-lifted, just sweet enough, and tender on the fork without falling apart on the plate.
The tricky part is the ricotta. If the cheese is too wet, the filling can turn loose or weepy. If it is too grainy, the cheesecake can taste rough instead of silky. This ricotta cheesecake recipe is built for people who want real ricotta flavor without the heartbreak of a watery, crumbly, or gritty cake.
This is not the most rustic all-ricotta cheesecake, and it is not a heavy New York cheesecake with a little ricotta stirred in. It is the reliable middle version: ricotta-forward, creamy, sturdy enough to slice, and flexible enough to make with a crumb crust or as a lighter crustless dessert.
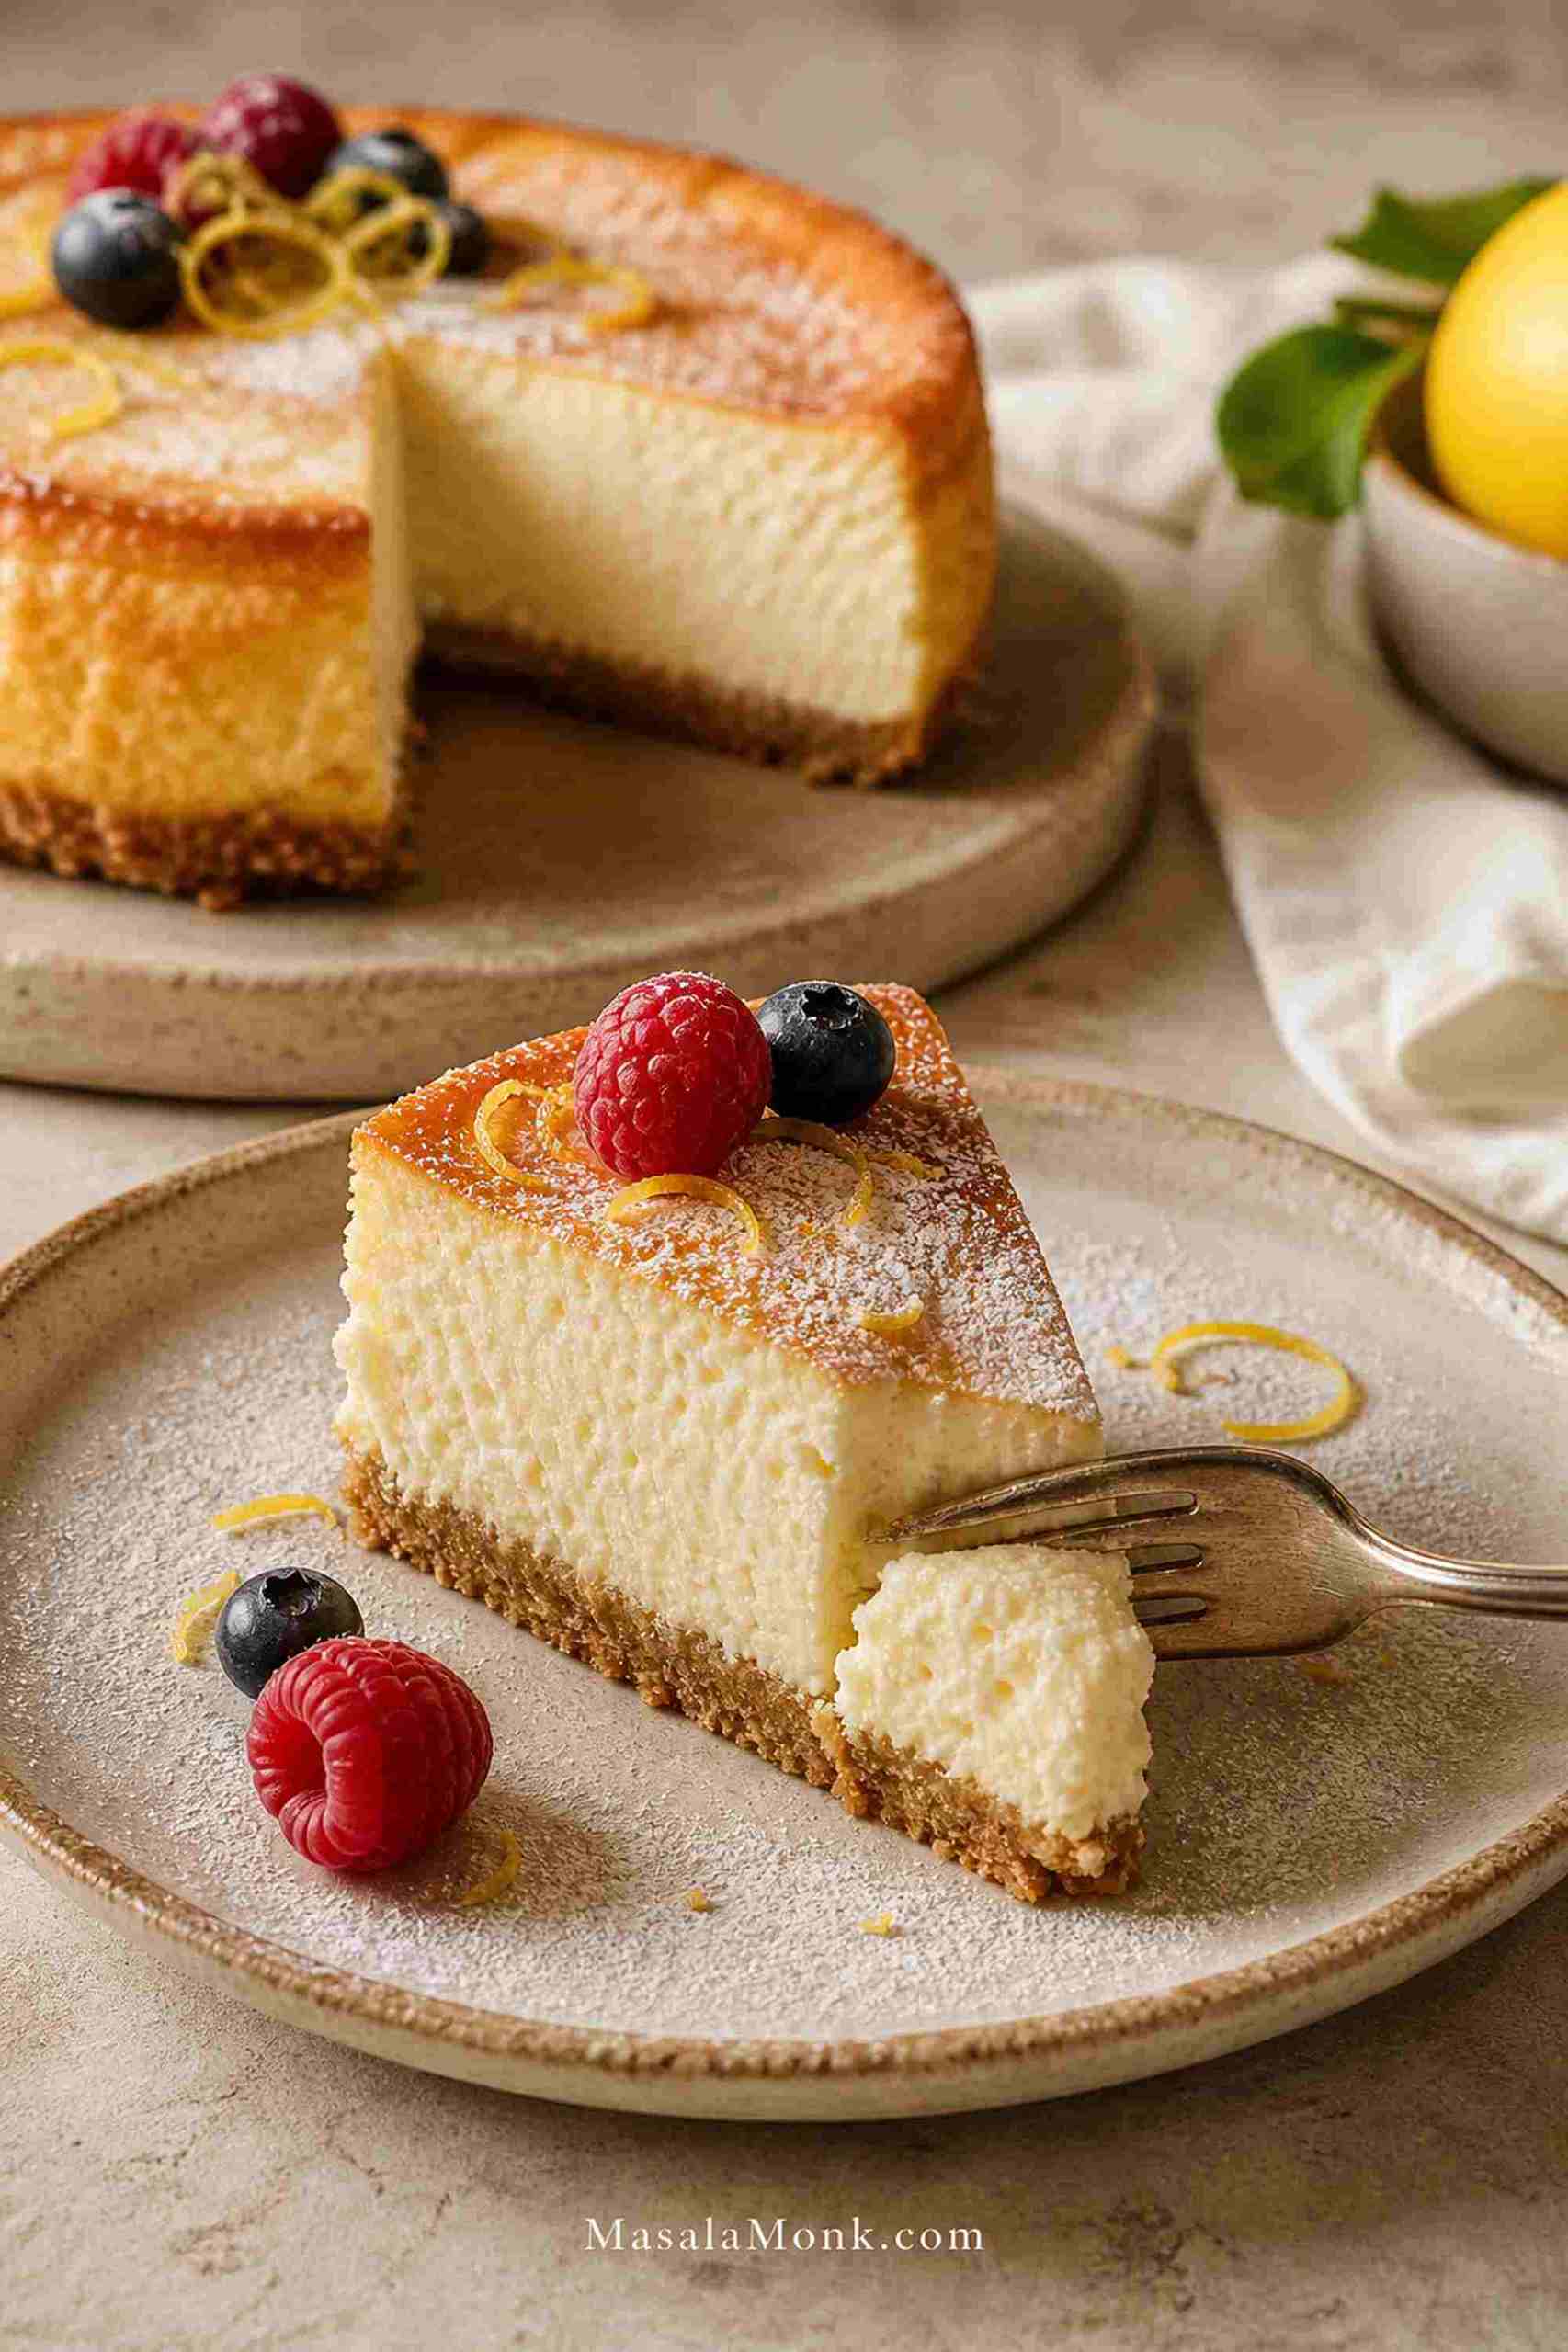
After a full chill, the slice should look clean at the edge but still feel soft under the fork, with vanilla, lemon, and ricotta coming through before the sweetness.
Ricotta Cheesecake Guide
Use this guide to choose your cheesecake style, handle the ricotta properly, bake it gently, and chill it into a creamy, sliceable dessert.
Make the Cheesecake
Quick Answer: How to Make Ricotta Cheesecake
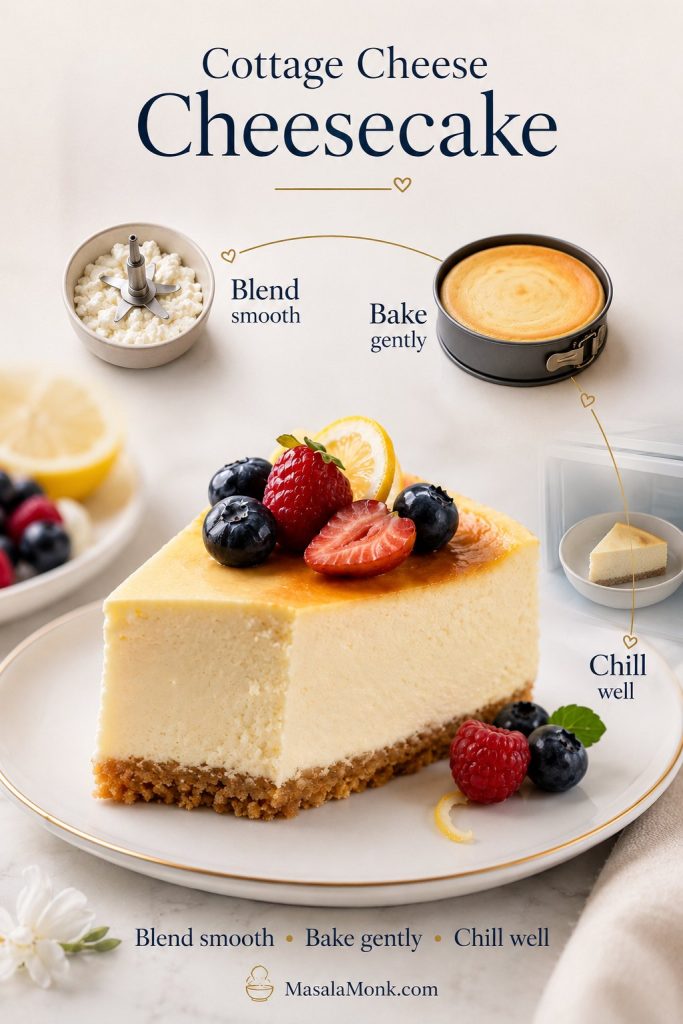
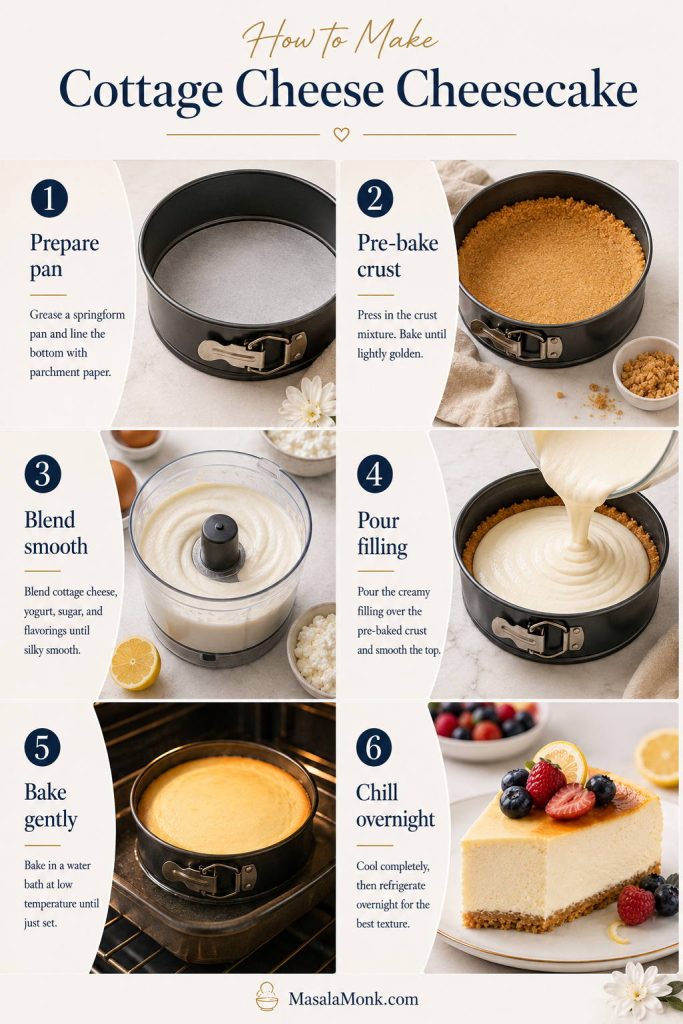
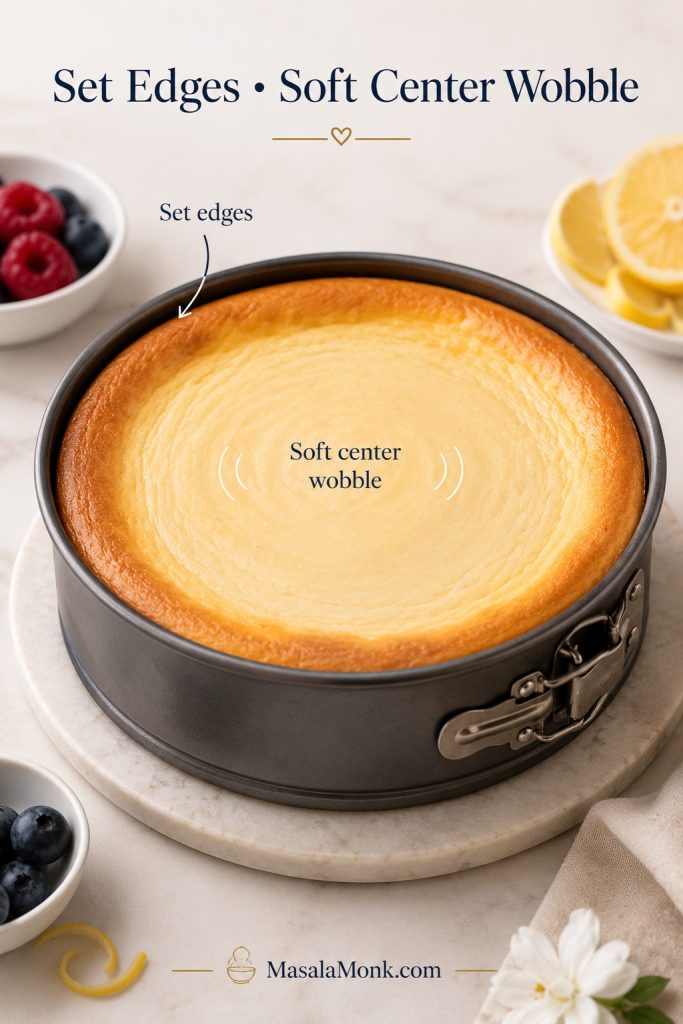
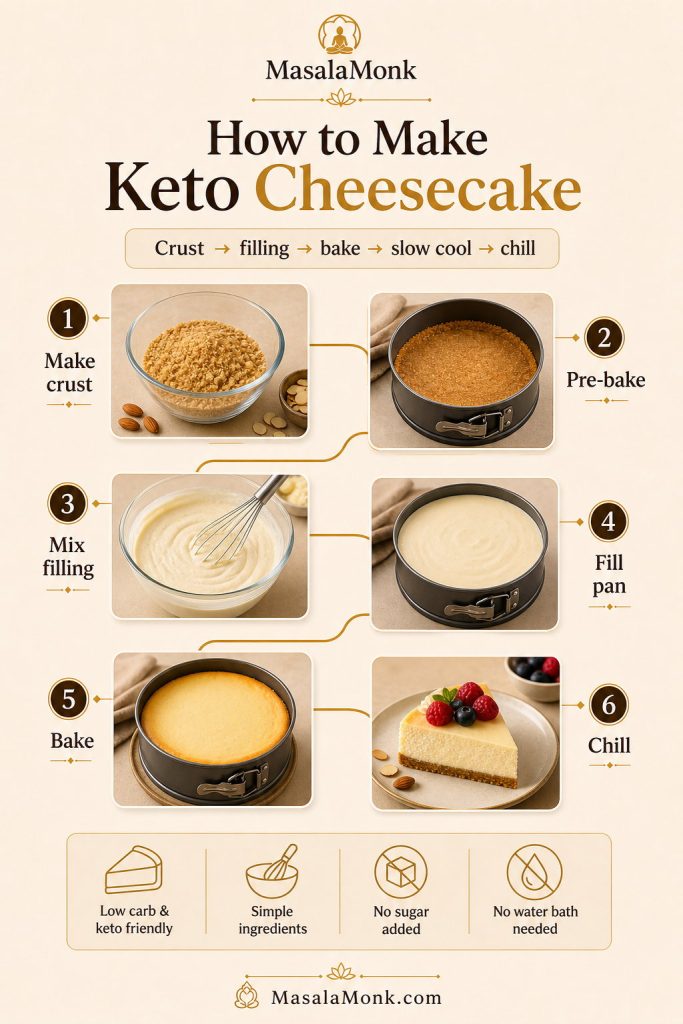
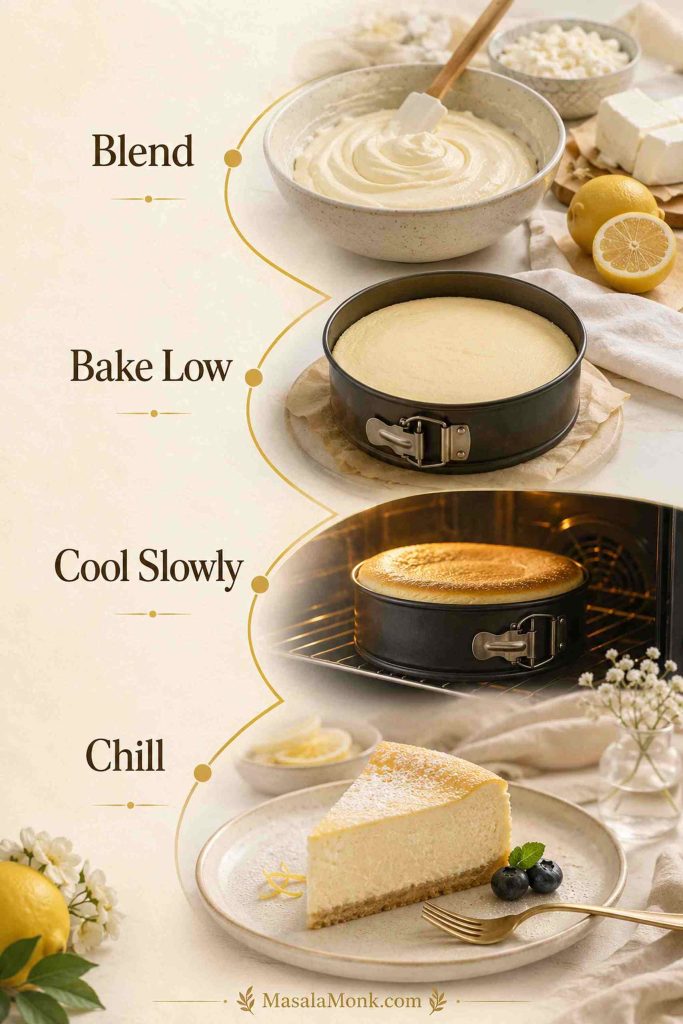
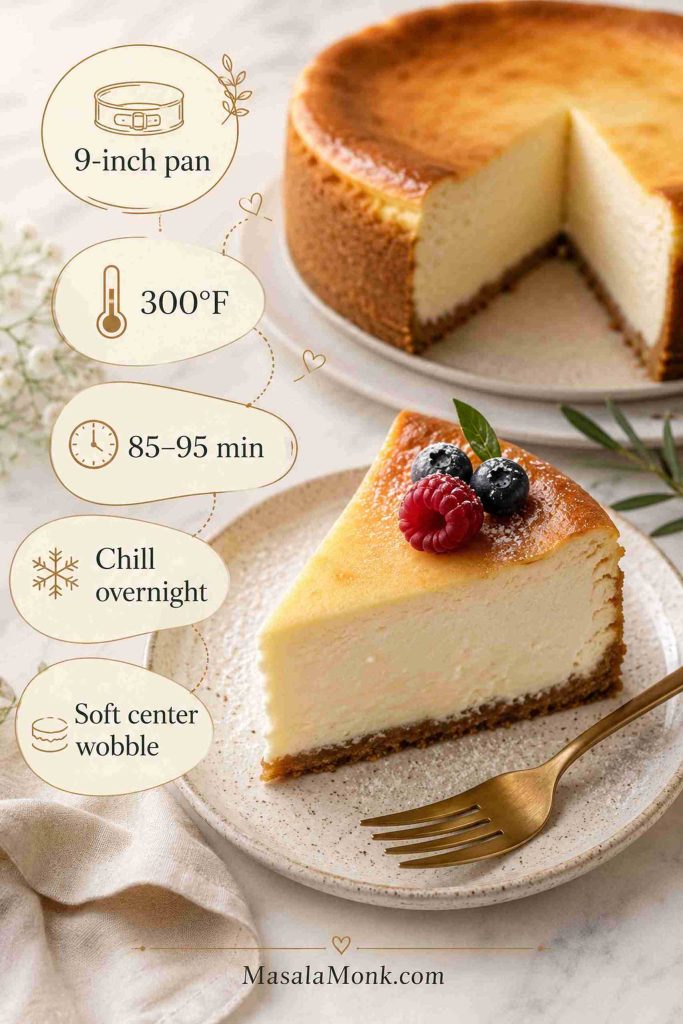
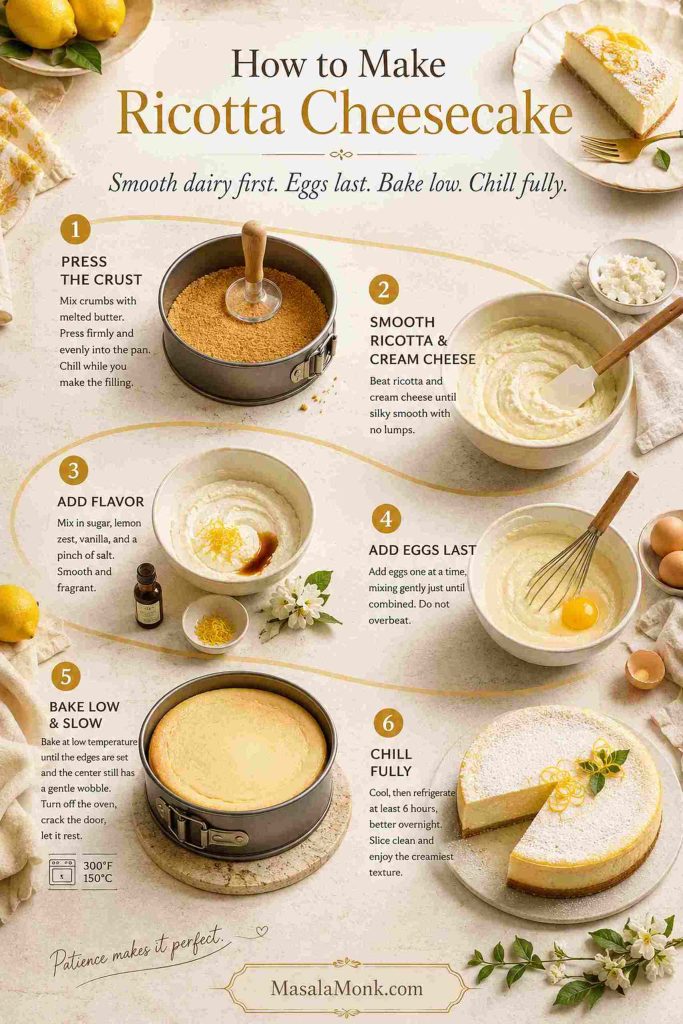
To make ricotta cheesecake, blend whole-milk ricotta and softened cream cheese until smooth, then mix in sugar, lemon zest, vanilla, salt, and eggs. Pour the filling into a 9-inch springform pan with an optional crumb crust, bake at 300°F / 150°C until the edges are set and the center still wobbles softly, then cool slowly and chill for at least 6 hours.
Think of this as the reliable home-baker version. Ricotta gives the cake its softer Italian-style character, while cream cheese gives the filling enough structure to cut cleanly after chilling.
Make it when you want a dessert that feels polished but not fussy: easy to prepare ahead, light enough after dinner, and still rich enough to feel special.
Texture tip
Do not judge the cheesecake while it is warm. It should look slightly soft in the center when it leaves the oven. The filling finishes setting as it cools and chills, which is why overnight refrigeration gives the cleanest slices.
At a Glance
Think of this as a gentle baked cheesecake: steady heat, patient chilling, and a filling that should set softly rather than bake firm like a cake.
| Style | Baked ricotta cheesecake with cream cheese, lemon, vanilla, and optional crust |
|---|---|
| Best For | A ricotta-forward cheesecake that feels lighter than classic cheesecake but still slices cleanly |
| Pan | 9-inch / 23 cm springform pan |
| Oven | 300°F / 150°C |
| Bake Time | 85–95 minutes, depending on pan, oven, and ricotta moisture |
| Doneness | Set edges, soft center wobble, about 150–155°F / 65–68°C in the center |
| Chill Time | 6 hours minimum; overnight is best |
| Yield | 10–12 slices |
It should taste softly sweet, creamy, and lightly citrusy — more delicate than a classic cheesecake, but still satisfying.
Why This Recipe Works
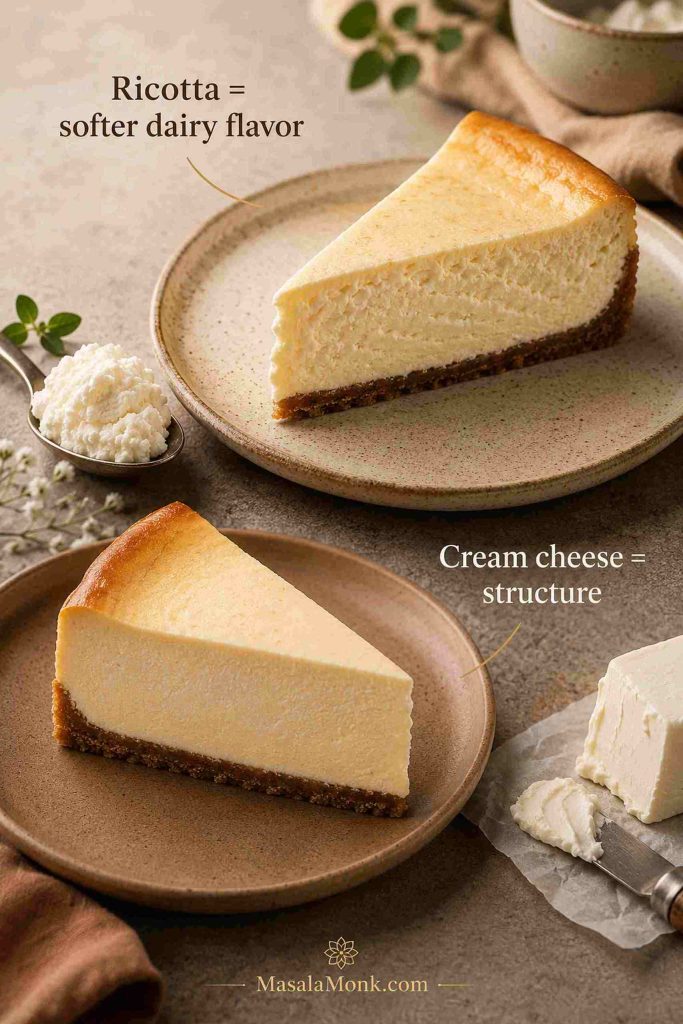
This recipe uses ricotta and cream cheese together because each one solves a different problem. Whole-milk ricotta gives the cheesecake its lighter Italian-style character, while cream cheese makes the filling smoother, richer, and easier to cut neatly.
The cream cheese is not there to hide the ricotta. It smooths the edges of the filling so the cheesecake keeps its soft dairy flavor, but still cuts like a dependable baked cheesecake.
The method is built around patience rather than fuss. Drain the ricotta only if it looks wet, blend the dairy before adding eggs, mix the eggs gently, bake with steady heat, then use the texture checkpoints before the cheesecake goes into the oven. None of the steps are difficult, but together they make the difference between a rough, weepy cheesecake and one that settles into a cool, creamy slice.
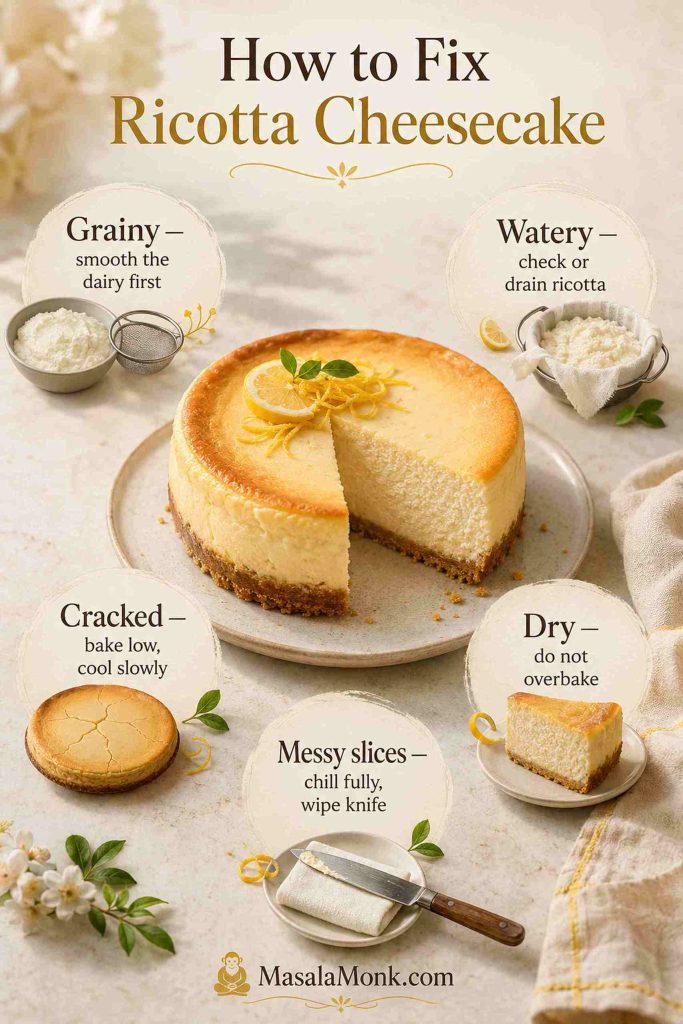
| Problem | Recipe Choice That Prevents It |
|---|---|
| Grainy filling | Whole-milk ricotta, room-temperature dairy, and blending ricotta before eggs |
| Watery center | Drain wet ricotta and bake until the center wobbles softly, not sloshes |
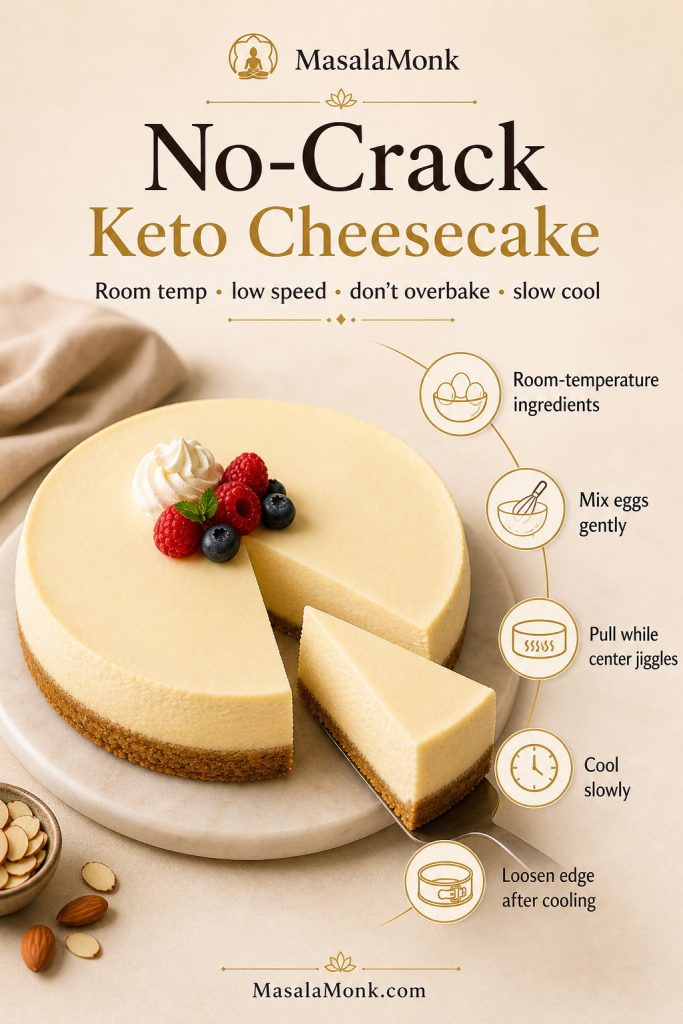
| Cracked top | Low oven temperature, gentle egg mixing, and slow oven cooling |
| Dry cheesecake | Pull the cheesecake before the center looks fully firm |
| Messy slices | Overnight chill and slicing cold with a wiped knife |
What Is Ricotta Cheesecake?
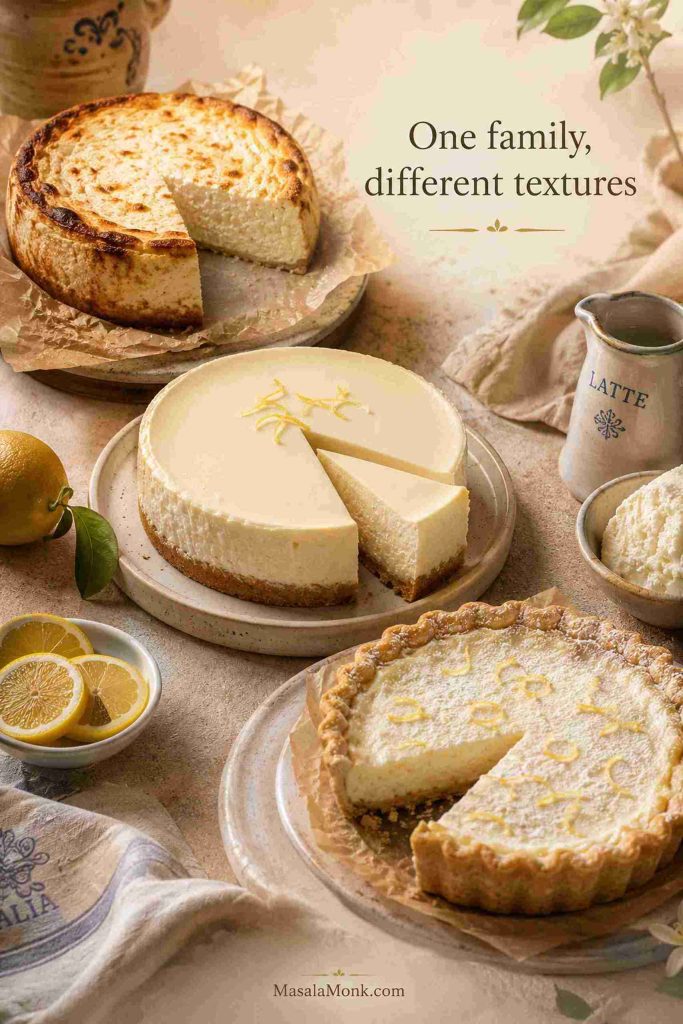
Ricotta cheesecake is less one fixed recipe and more a family of desserts. Some versions are rustic and all-ricotta, some are creamy and cream-cheese-supported, some are crustless, and some move closer to ricotta pie.
This version sits in the middle: enough ricotta for a lighter dairy flavor, enough cream cheese for smoothness and structure, and enough lemon and vanilla to keep the filling bright without making it sharp.
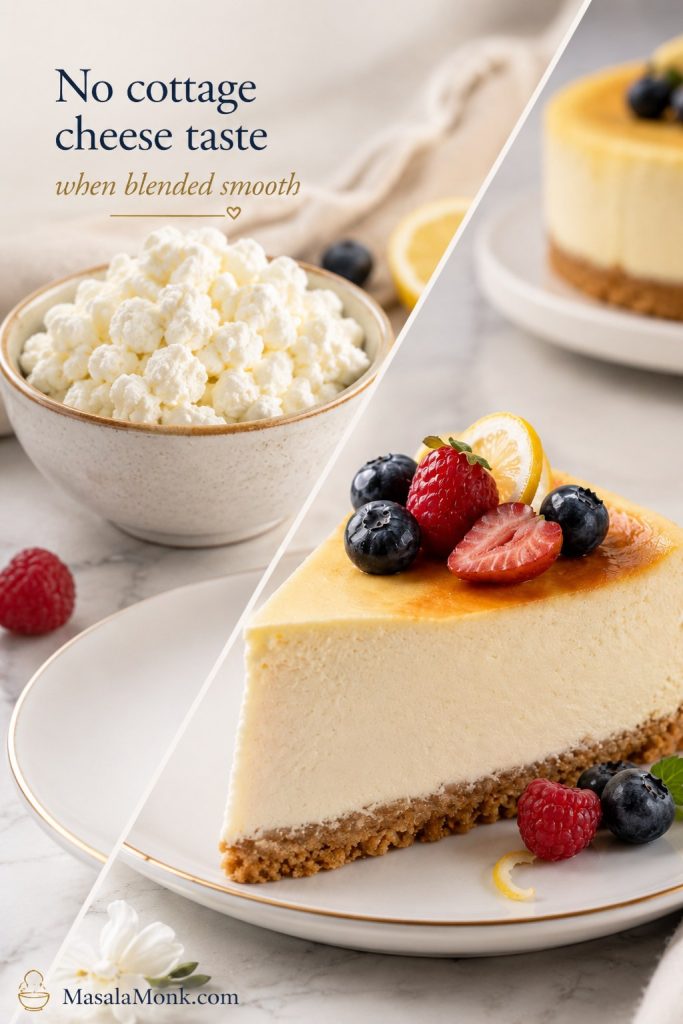
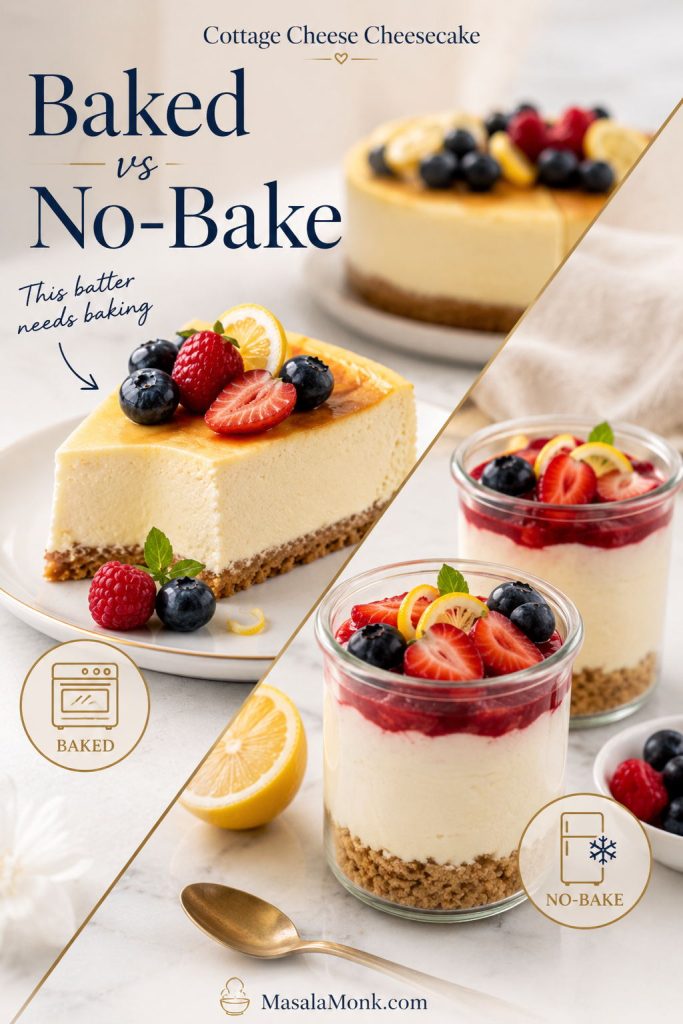
If you like lighter dairy-based cheesecakes, it belongs in the same family as a cottage cheese cheesecake recipe, where the main challenge is also turning a textured dairy into a smooth, sliceable filling.
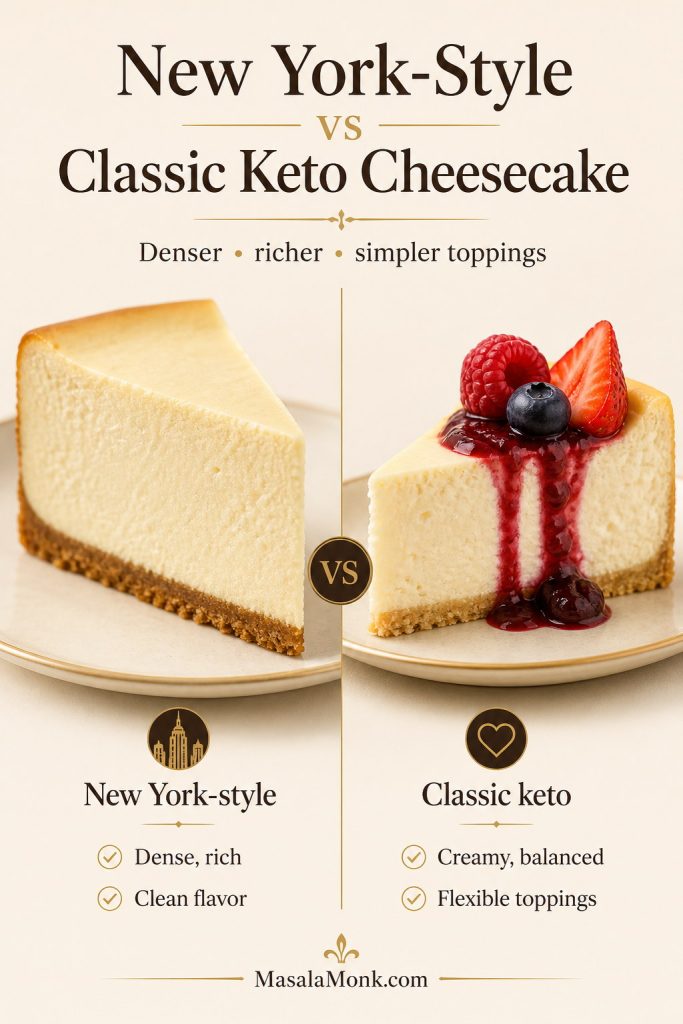
Ricotta Cheesecake vs New York Cheesecake
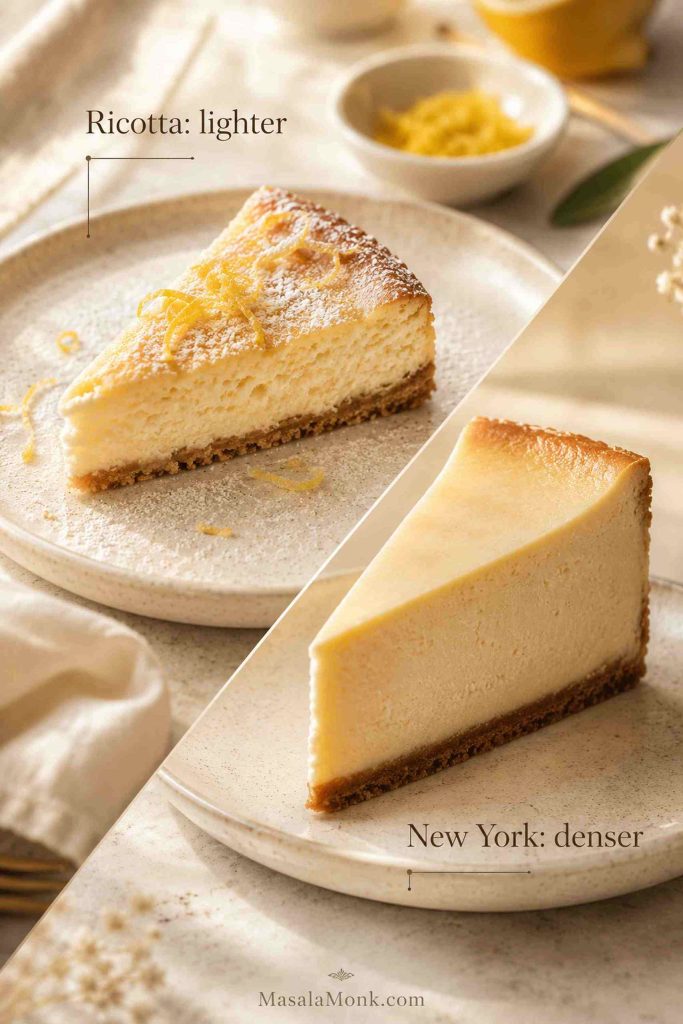
A New York cheesecake is dense, rich, and cream-cheese-forward. Ricotta cheesecake is lighter and a little more delicate, especially when lemon or vanilla is used. It can still be creamy and sliceable, but it should not feel as heavy as a classic New York-style cheesecake.
The biggest difference is texture control. With New York cheesecake, the goal is to avoid overbaking a dense cream cheese filling. With ricotta cheesecake, the ricotta itself matters more: if it is wet, gritty, or not blended well, the final slice will show it.
| Feature | Ricotta Cheesecake | New York Cheesecake |
|---|---|---|
| Main dairy | Ricotta with support from cream cheese or mascarpone | Mostly cream cheese |
| Texture | Lighter, softer, more dairy-forward | Dense, rich, and tangy |
| Main risk | Wet or grainy ricotta | Overbaking, cracking, or heaviness |
| Best cue | Thick ricotta, smooth batter, soft center movement | Gentle bake, gradual cooling, full chill |
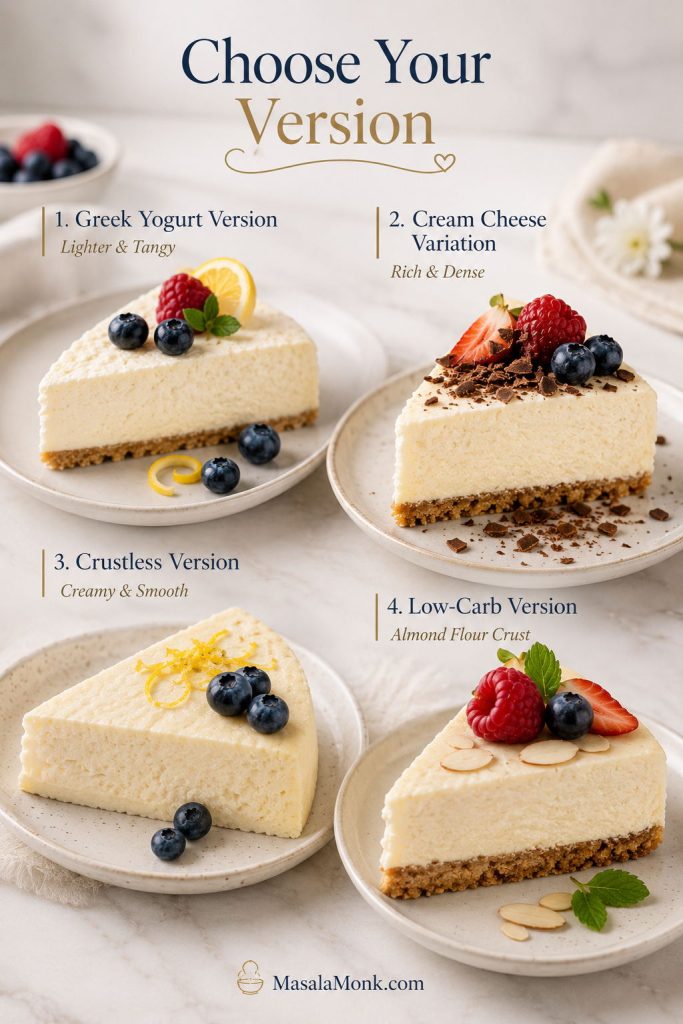
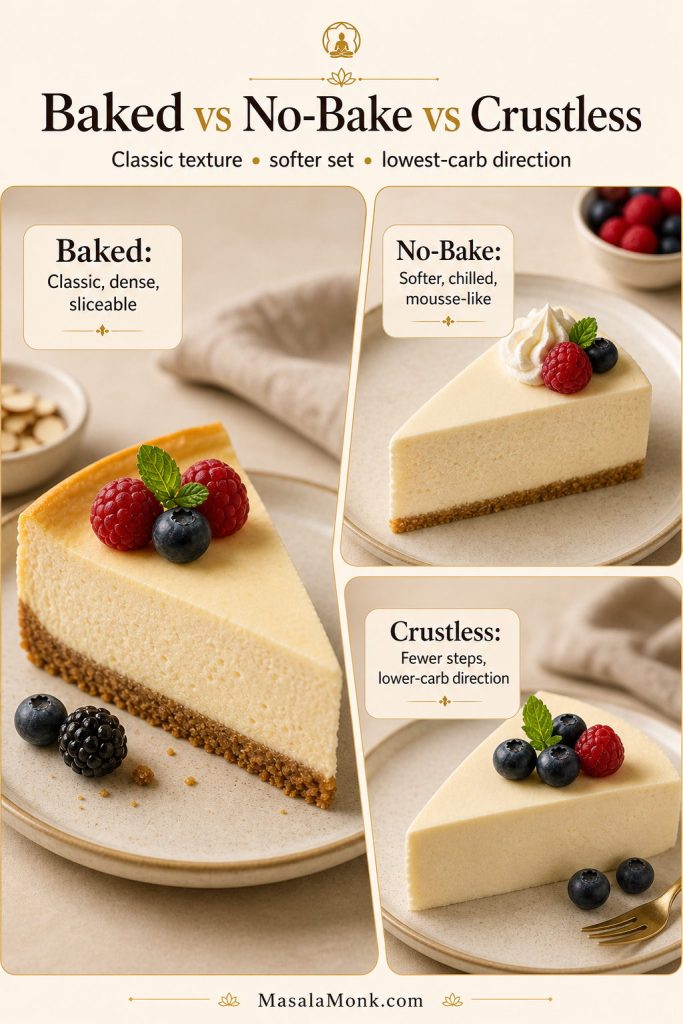
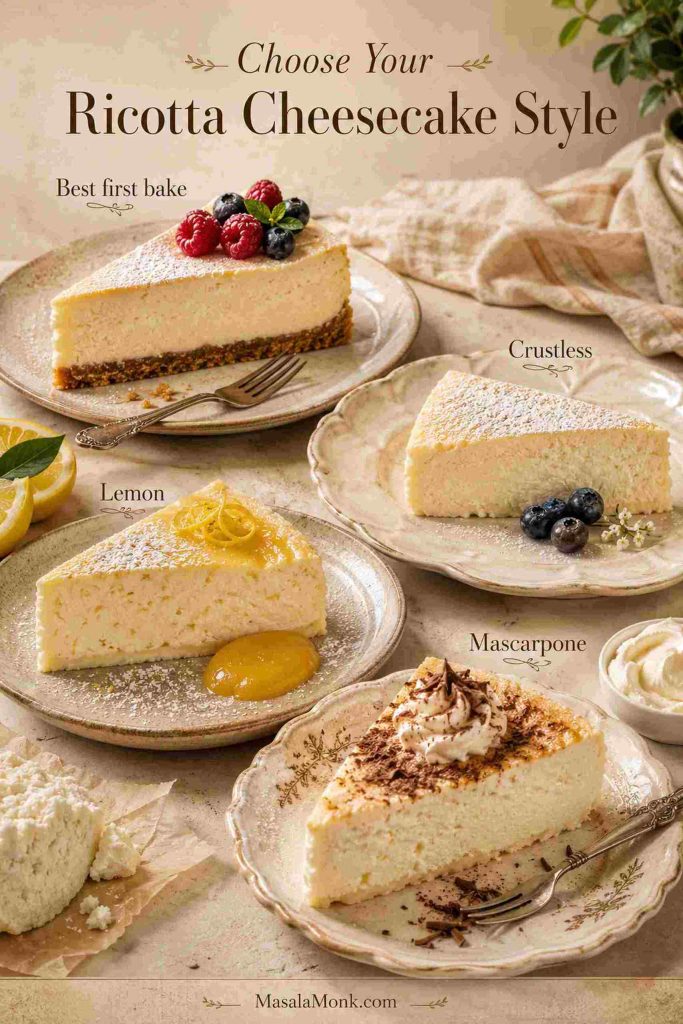
Choose Your Ricotta Cheesecake Style
This is where ricotta cheesecake gets confusing: some recipes are crustless and rustic, some are creamy and cream-cheese-supported, some are lemon-forward, and some use mascarpone. None of those versions are wrong. They are just different styles.
The main recipe below is the safest starting point because it gives you ricotta flavor with enough structure to slice neatly. Once you know the base, you can move toward a lighter crustless cake, a brighter lemon version, or a softer mascarpone-style filling without losing the basic baking cues.
Which Version Should You Make?
| Style | Best For | Texture | Use This Recipe How? |
|---|---|---|---|
| Ricotta + cream cheese | Best first bake | Creamy, smooth, sliceable | Use the main recipe |
| Crustless ricotta cheesecake | Lighter Italian-style dessert | More delicate, softer, less dense | Skip the crust and chill fully |
| All-ricotta cheesecake | Traditional or rustic ricotta flavor | Lighter, more custardy, more ricotta-forward | Use very thick whole-milk ricotta and drain if wet |
| Lemon ricotta cheesecake | Brighter dessert flavor | Creamy with more citrus lift | Increase lemon zest and lemon juice slightly |
| Ricotta mascarpone cheesecake | Softer Italian bakery-style version | Rich, delicate, less tangy | Replace cream cheese with mascarpone |
| Italian Easter / ricotta pie style | Readers looking for ricotta pie or holiday ricotta desserts | More custardy, often baked in a crust | Use the ricotta pie comparison section |
If you are choosing between a crumb base and a lighter version, start with the crust or no crust section before moving into the variation notes.
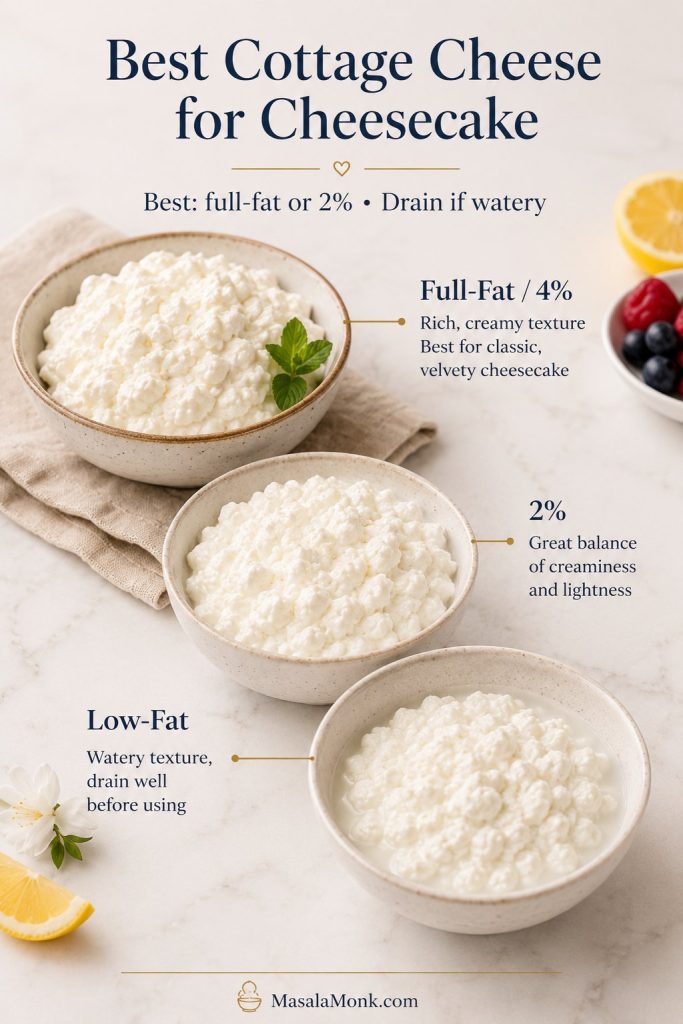
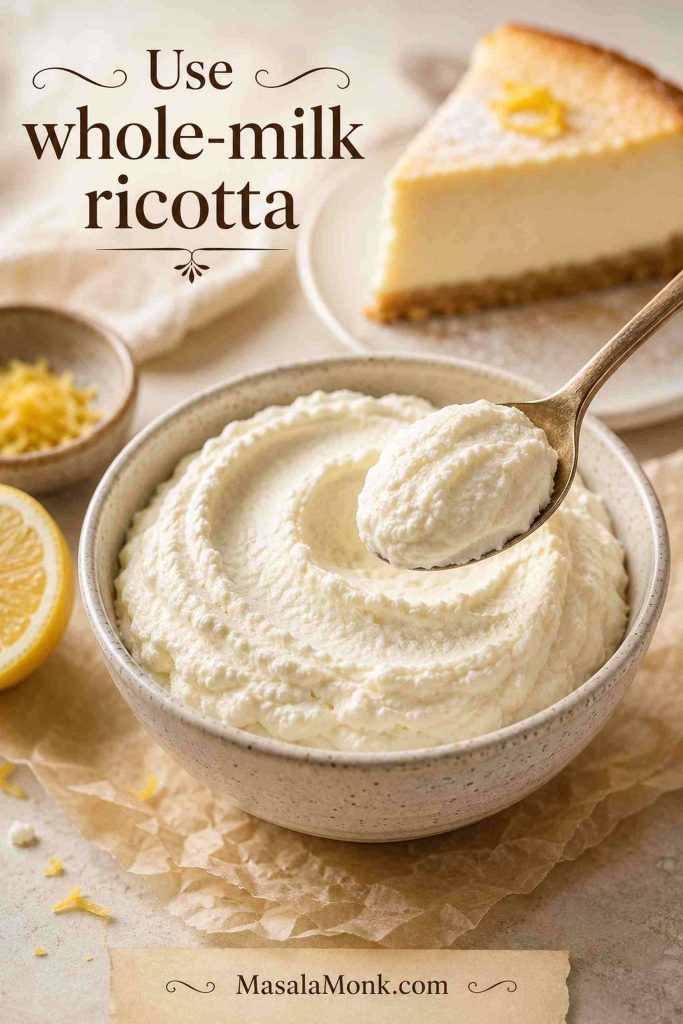
Best Ricotta to Use
Use whole-milk ricotta for the best texture. It gives the filling body, richness, and a softer finish than low-fat ricotta. Fresh ricotta can be excellent, but it is sometimes wetter than supermarket tub ricotta, so check the texture before adding it to the batter.
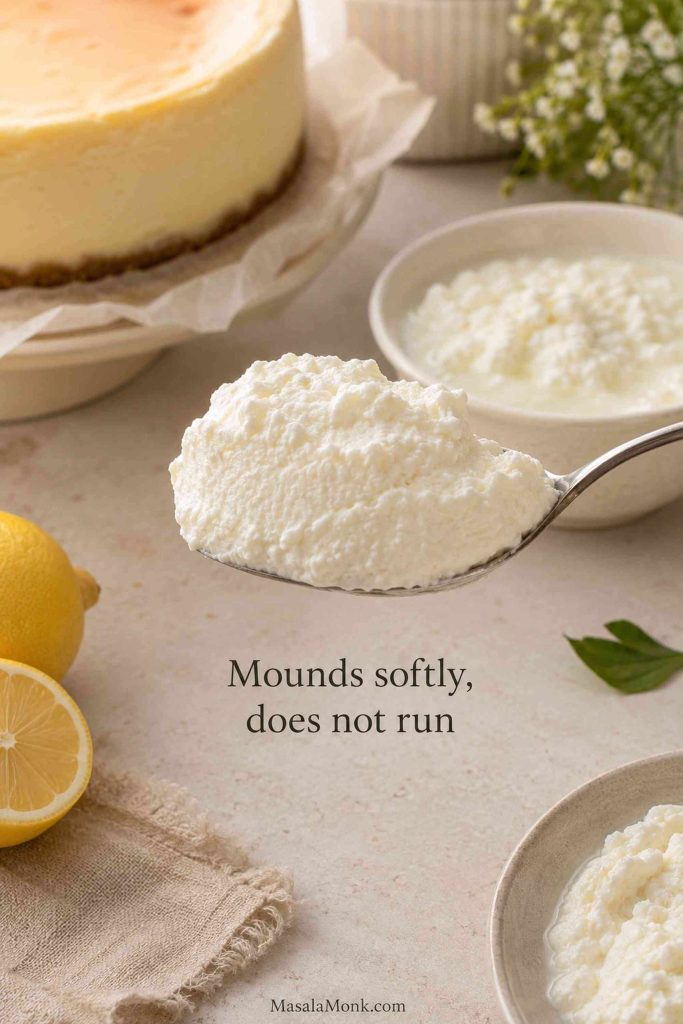
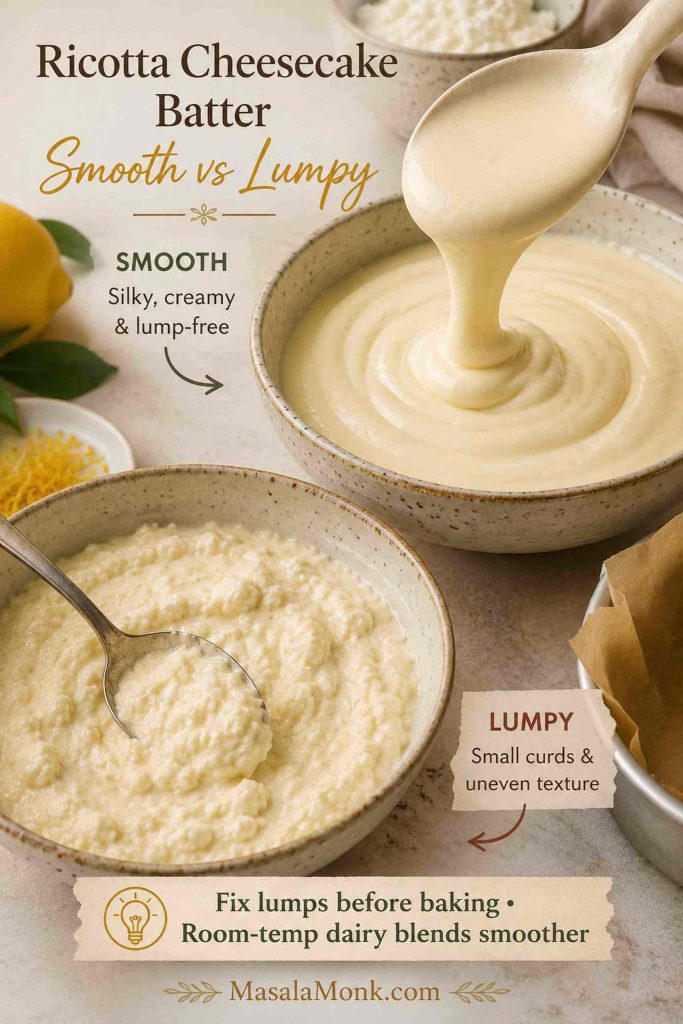
The Spoon Test
The easiest test is the spoon test: good ricotta should mound softly on a spoon, not run across it. If it looks puddled, loose, chalky, or visibly curdy before baking, the finished cheesecake will be harder to make silky.
The ricotta is the one ingredient worth being picky about. Everything else can be measured carefully, but the cheese itself decides whether the filling tastes creamy or rough. Blending can improve slightly grainy ricotta, but it cannot turn poor ricotta into excellent ricotta, so start with the best full-fat ricotta you can reasonably find.
If the ricotta looks loose once you open the tub, use the draining guide before mixing the filling.
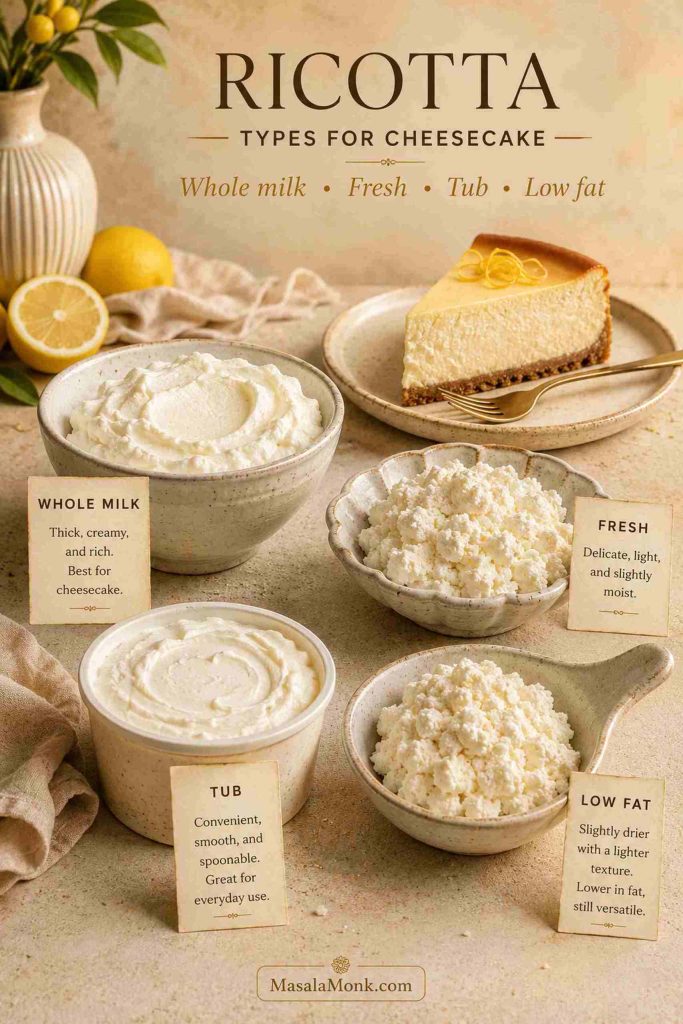
Ricotta Types Compared
| Ricotta Type | Result in Cheesecake | Best Use |
|---|---|---|
| Whole-milk ricotta | Creamiest, richest, most forgiving | Best default choice |
| Fresh ricotta | Beautiful flavor, but moisture varies | Use when thick; drain if wet |
| Supermarket tub ricotta | Convenient and reliable when good quality | Check for graininess and liquid |
| Low-fat ricotta | Less rich, sometimes drier or slightly chalkier | Use only for a lighter variation |
| Part-skim ricotta | Can work, but less creamy | Acceptable if thick and smooth |
| Watery ricotta | Can make the cheesecake loose or weepy | Drain before using |
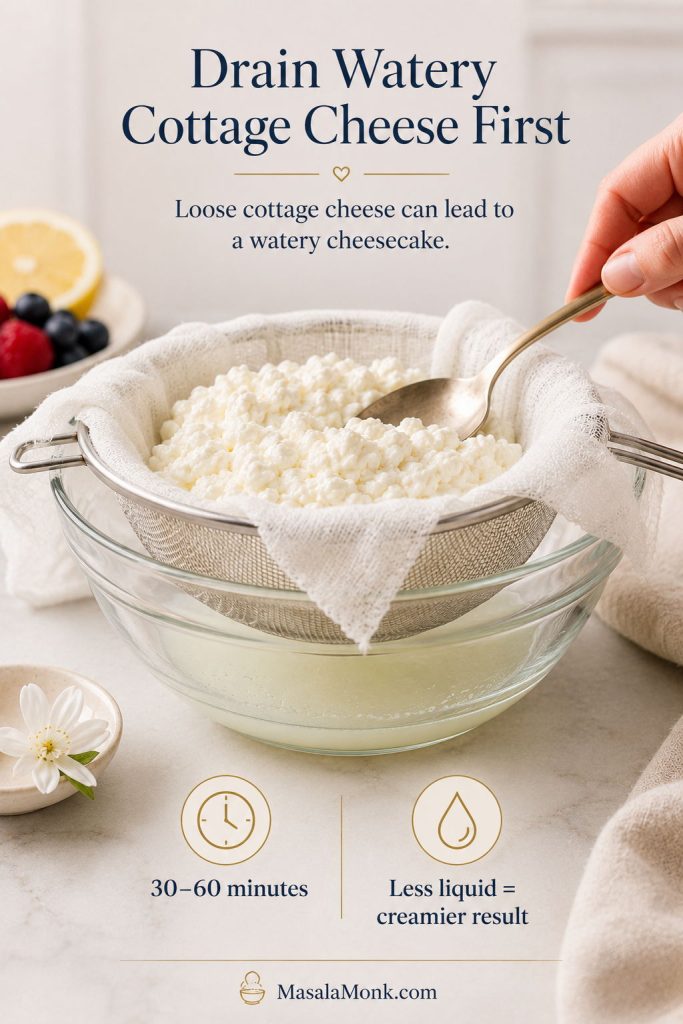
Should You Drain Ricotta First?
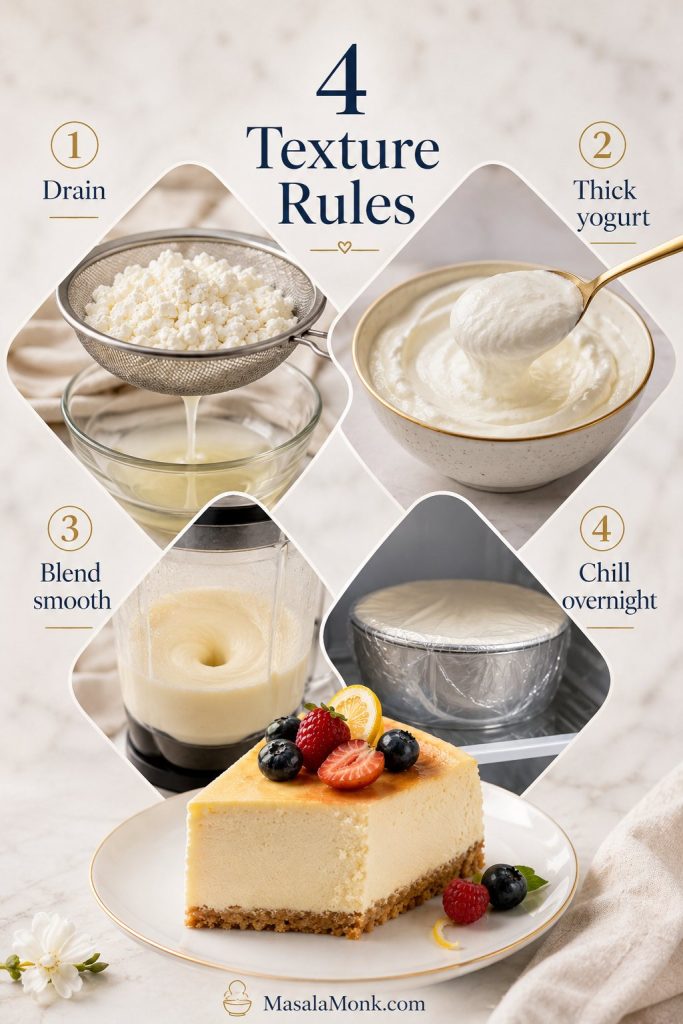
You only need to drain ricotta if it looks wet. Thick, creamy, spoonable ricotta can go straight into the filling. Ricotta with visible liquid in the container, or cheese that looks loose, should be drained before mixing.
To drain ricotta, spoon it into a fine-mesh strainer set over a bowl. Let it sit for 30–60 minutes in the refrigerator. For very wet ricotta, line the strainer with cheesecloth and drain it for several hours or overnight. The goal is not to make it dry; the goal is to remove excess liquid so the cheesecake bakes creamy instead of watery.
Do not try to fix very wet ricotta by adding lots of cornstarch or flour. That can make the filling dull or pasty. It is better to strain the ricotta first and use cornstarch only as light insurance.
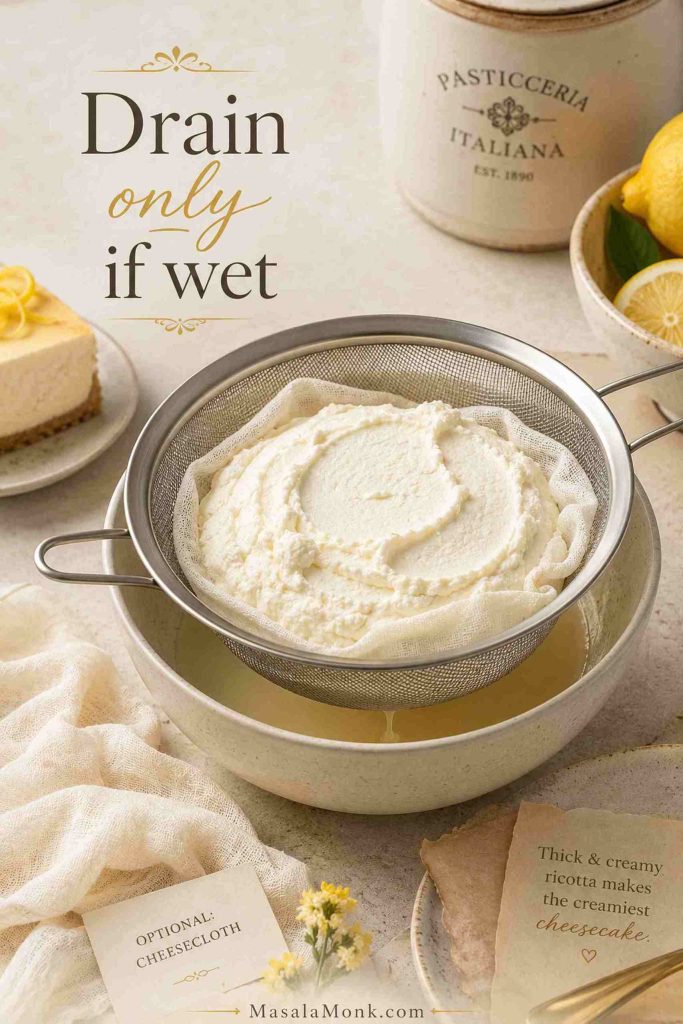
Simple rule
Ricotta that holds its shape on a spoon probably does not need draining. When it spreads, puddles, or looks loose, drain it first.
Equipment You Need
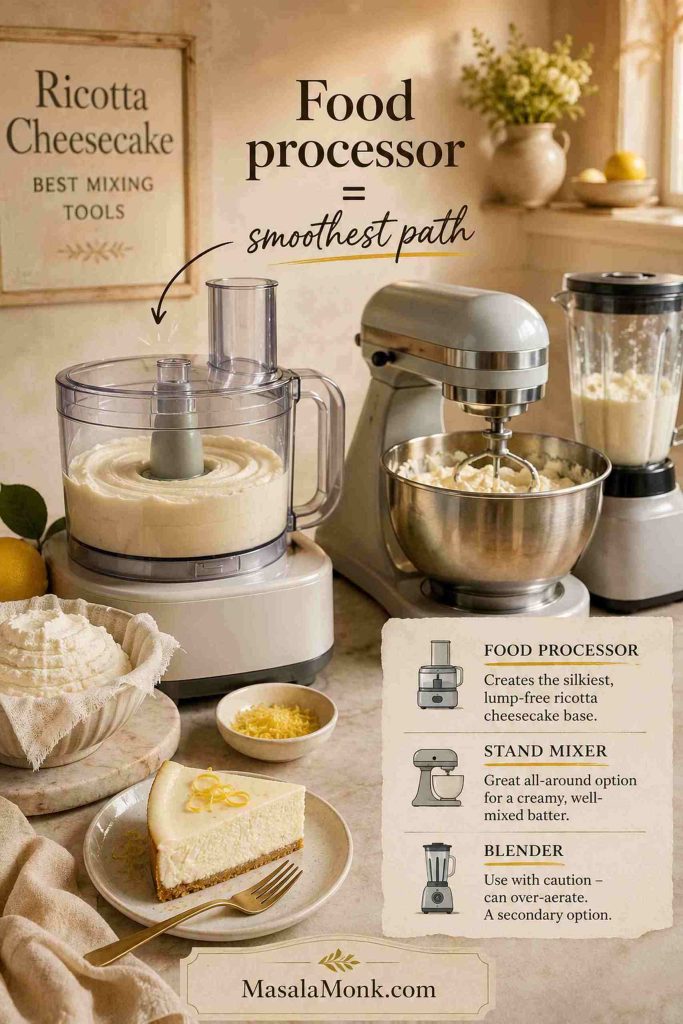
You do not need professional baking equipment, but the mixing tool matters because ricotta can stay textured if it is not smoothed properly. A food processor gives the easiest path to a creamy filling, while a mixer works best when your ricotta is already fairly smooth.
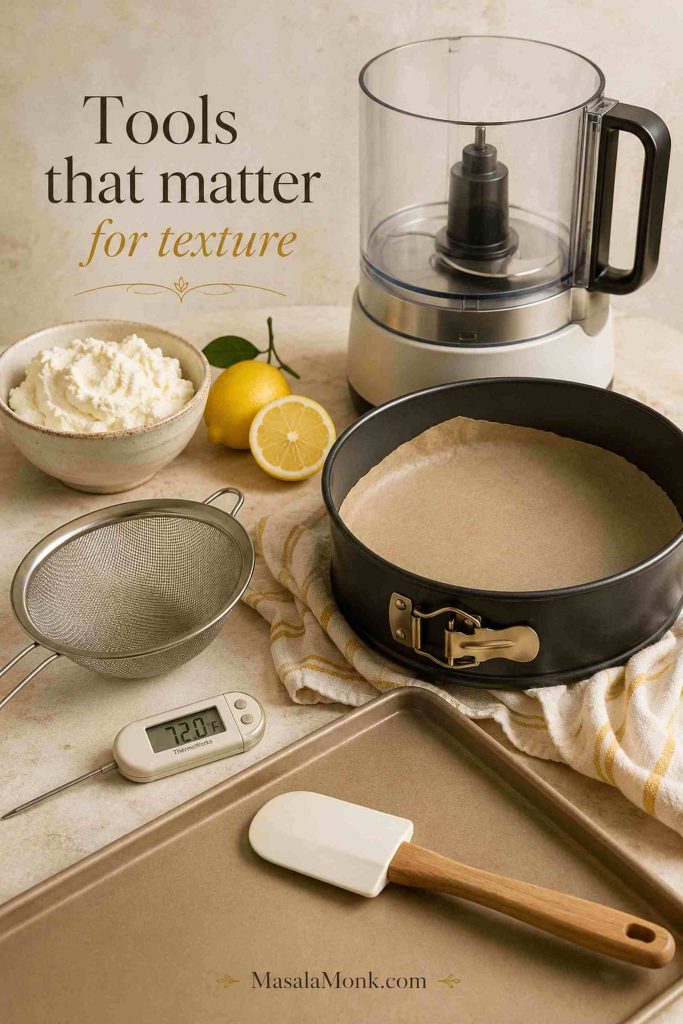
- 9-inch springform pan: the default pan for this recipe.
- Food processor: best for smoothing ricotta and cream cheese together.
- Stand mixer or hand mixer: works well if your ricotta is already smooth.
- Fine-mesh strainer: useful if the ricotta needs draining.
- Flexible spatula: for scraping the bowl and smoothing the filling.
- Baking sheet: catches any butter drips from the crust and makes the pan easier to move.
- Instant-read thermometer: optional, but helpful for checking the center.
- Thin knife or offset spatula: helps loosen the cheesecake from the pan after cooling.
Ingredients for Ricotta Cheesecake
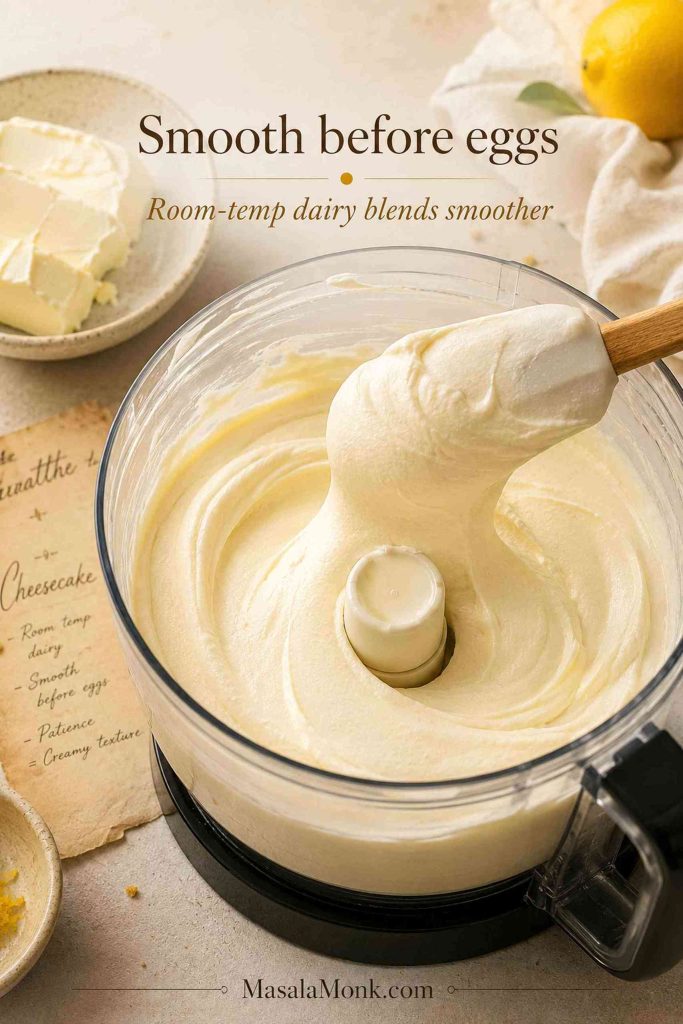
This recipe uses simple ingredients, but each one affects the final structure. Bring the ricotta, cream cheese, and eggs close to room temperature before mixing so the filling blends evenly; the mixing tool matters most if your ricotta is not already smooth.
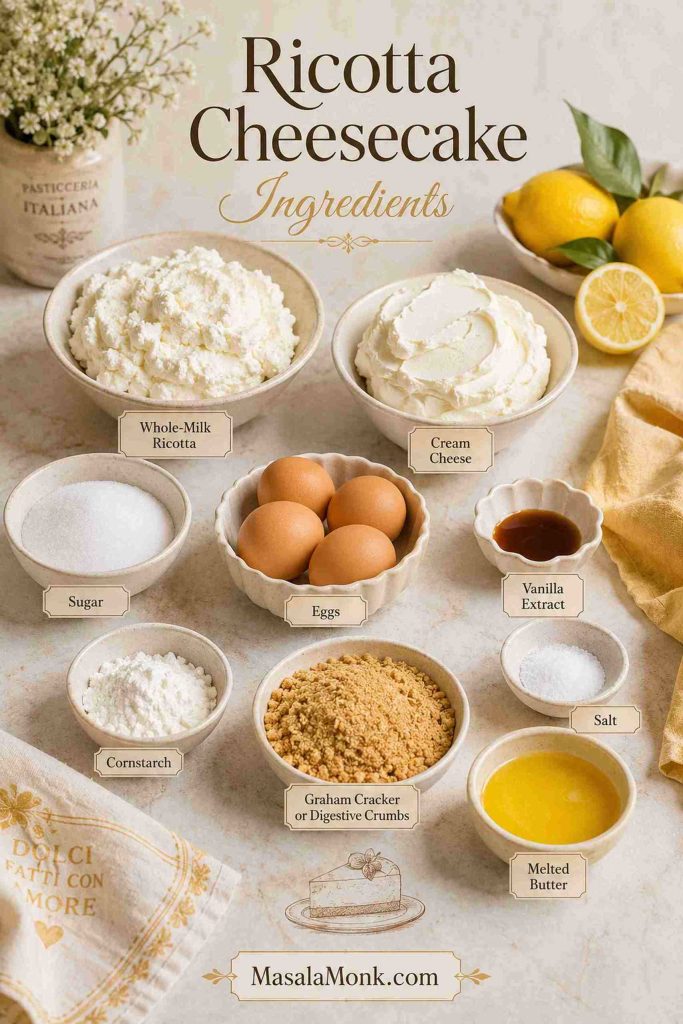
For the Optional Crust
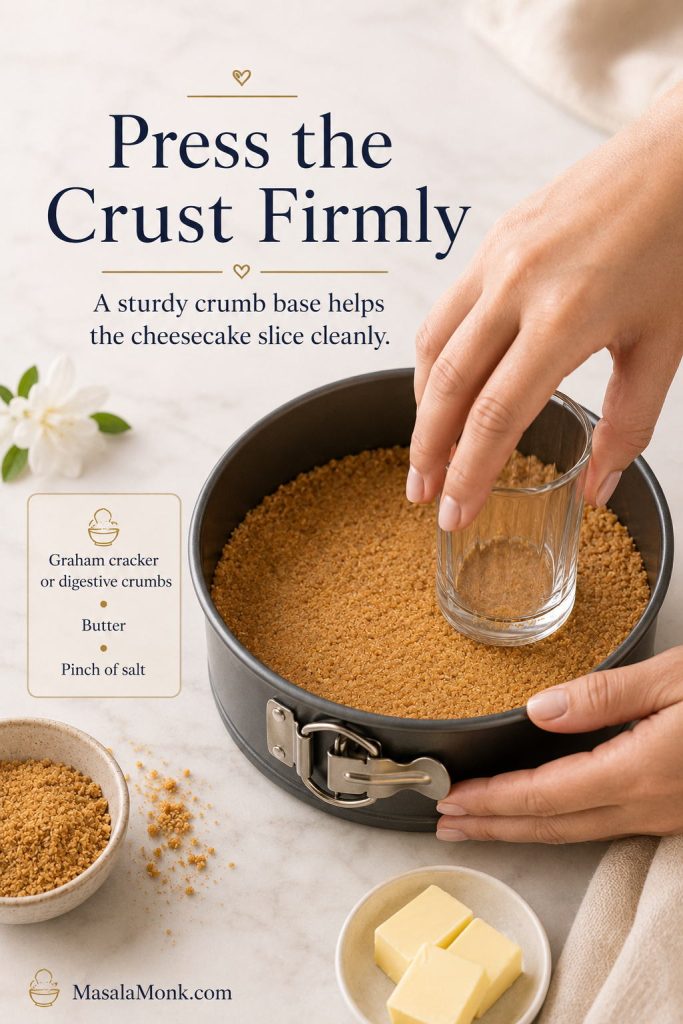
- 1 1/2 cups / 150–170 g graham cracker or digestive biscuit crumbs
- 5 tbsp / 70 g unsalted butter, melted
- 1–2 tbsp granulated sugar, optional
- Pinch of fine salt
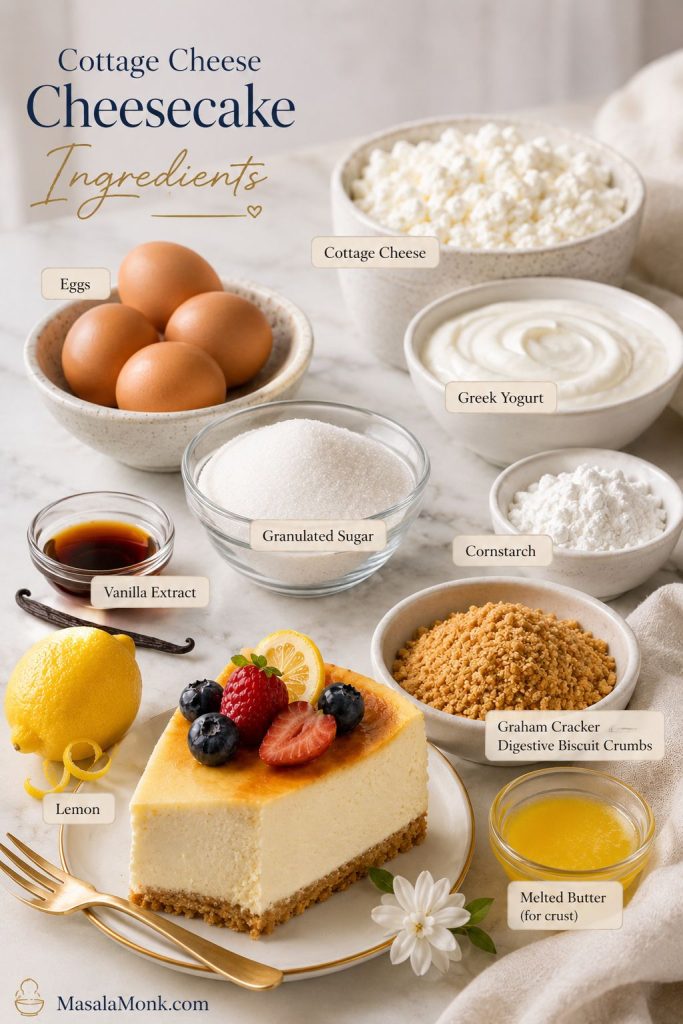
For the Filling
- 16 oz / 454 g whole-milk ricotta, room temperature, drained only if watery
- 16 oz / 454 g full-fat cream cheese, softened to room temperature
- 1 cup + 2 tbsp / about 225 g granulated sugar
- 5 large eggs, room temperature
- Zest of 1 large lemon
- 1 tbsp / 15 ml fresh lemon juice
- 2 tsp / 10 ml vanilla extract
- 1/2 tsp kosher salt, or 1/4 tsp fine salt
- 1 tbsp cornstarch, optional, for slightly cleaner slices
The cornstarch is optional. It gives the cheesecake a little more insurance against weeping and helps the slices hold neatly, especially if your ricotta is slightly soft. Skip it if you prefer a softer, more custardy center.
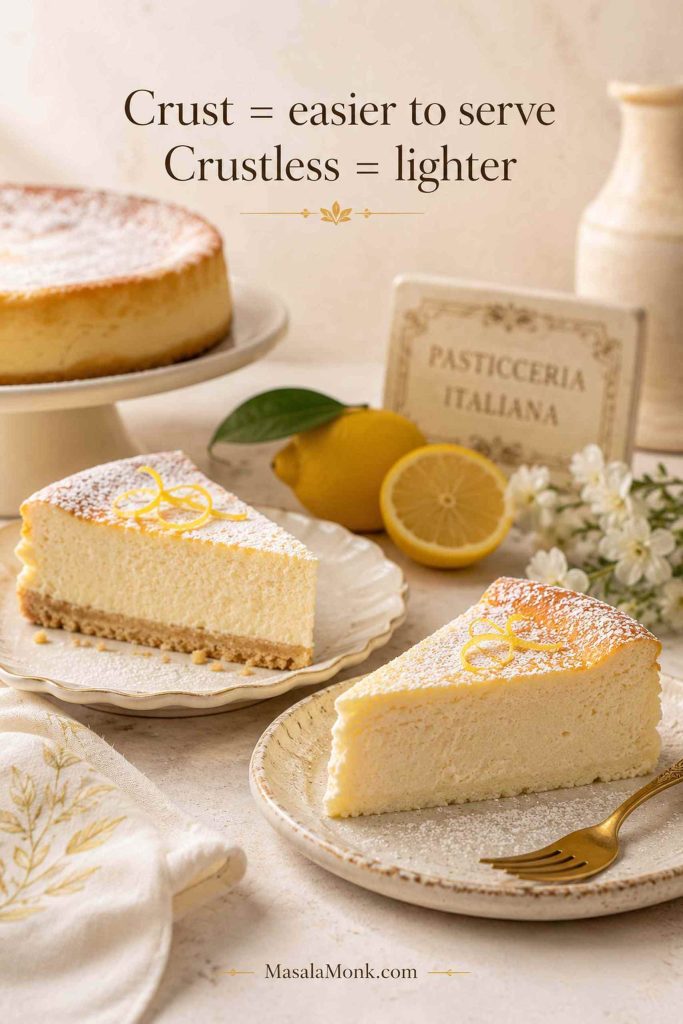
Crust or No Crust?
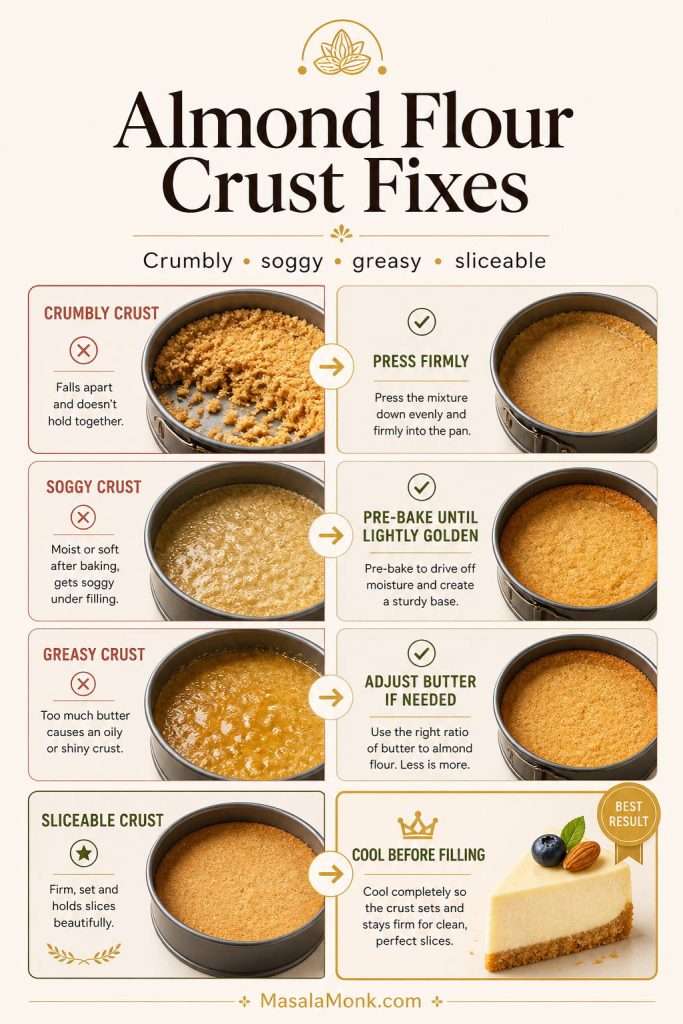
Use a crust if you want a familiar cheesecake slice that is easy to move, serve, and cut cleanly. A graham cracker crust tastes classic, while digestive biscuits give a slightly less sweet, buttery base.
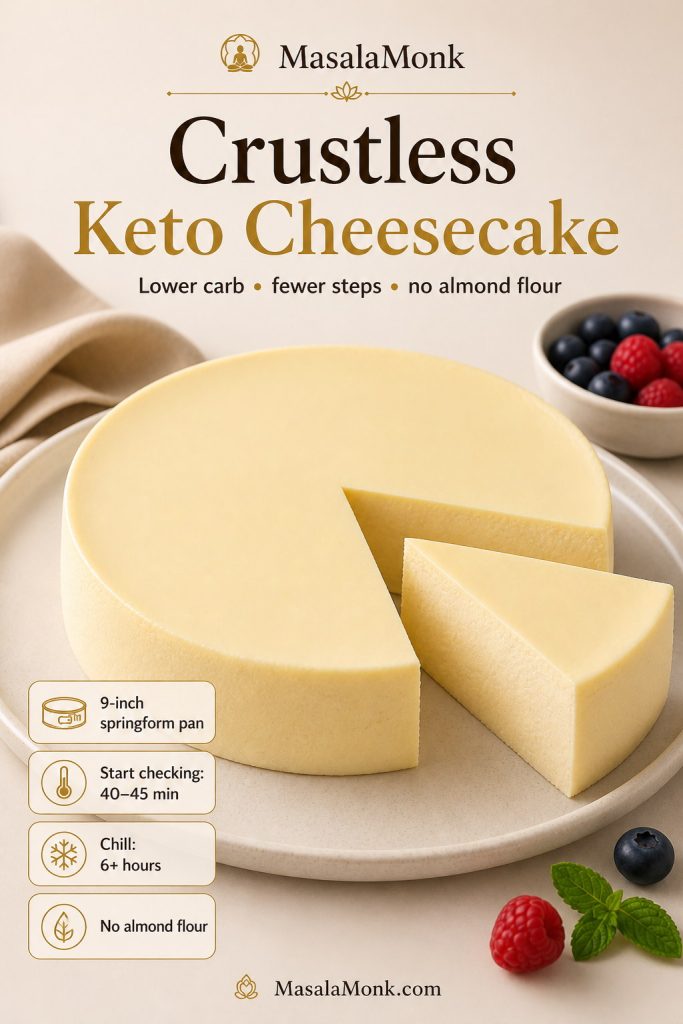
Skip the crust if you want a lighter Italian-style ricotta cheesecake where the filling is the main event, then check the crustless variation notes before baking. Just line the pan carefully, grease the sides well, and chill the cheesecake fully before slicing.
For a first bake, the crusted version is easier. The crumb base gives the soft filling a little support and makes the finished cheesecake simpler to serve. If you are drawn to the crumb crust but do not want to bake a cheesecake at all, this no bake cheesecake recipe uses a similar graham cracker or digestive biscuit base with a refrigerator-set filling instead.
Either way, the filling should stay the main event: cool, lightly citrusy, and tender under the fork.
How to Make Ricotta Cheesecake
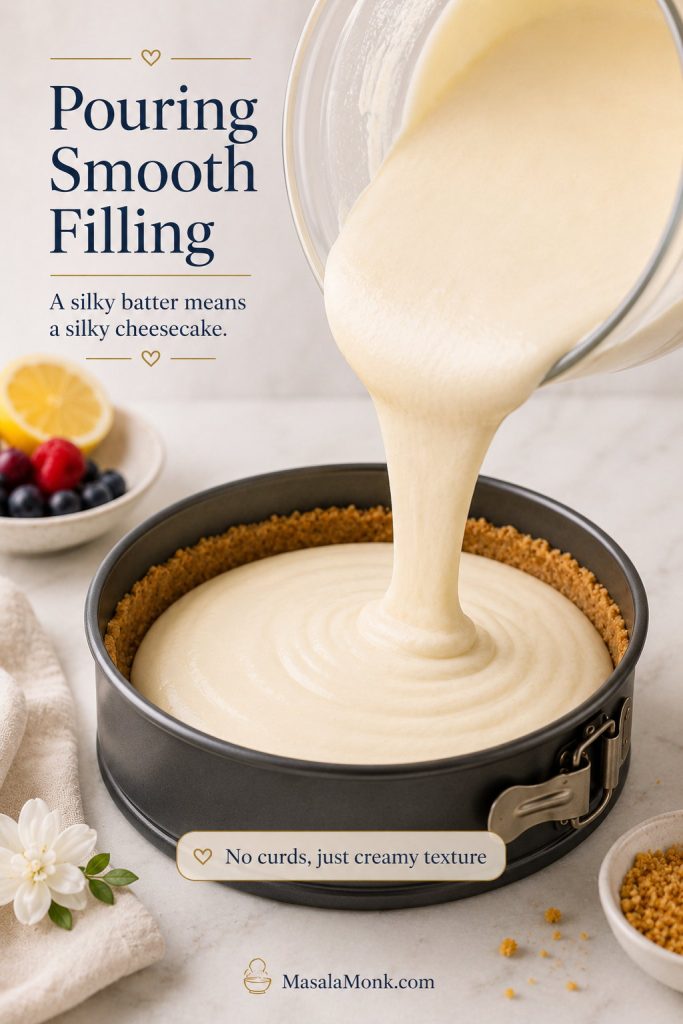
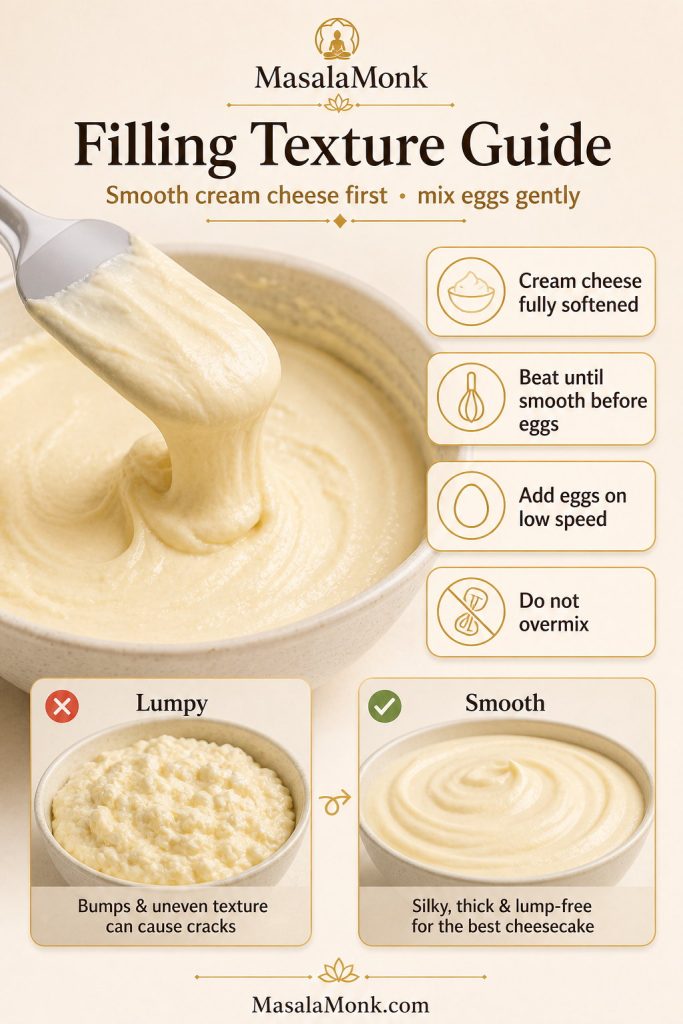
The most important technique is the mixing order. Smooth the dairy first, then add the eggs gently. Once the eggs go in, avoid whipping extra air into the batter.
1. Prepare the Pan
Line the bottom of a 9-inch springform pan with parchment paper and lightly grease the sides. If you are making the crustless version, be extra careful with the parchment and greasing because the filling will touch the pan directly.
2. Make and Prebake the Crust
Mix the crumbs, melted butter, sugar, and salt until the mixture looks like damp sand. Press it firmly into the bottom of the pan with a flat-bottomed cup. Bake at 350°F / 177°C for 8–10 minutes, then let it cool while you make the filling.
3. Smooth the Ricotta and Cream Cheese
In a food processor, blend the ricotta and cream cheese until smooth. Scrape down the sides and process again if needed. If using a stand mixer, beat the cream cheese first, then add the ricotta and beat until the mixture looks even.
This step matters more than it may seem. If the ricotta stays lumpy at this stage, the finished cheesecake will probably taste textured too.
4. Add Sugar, Lemon, Vanilla, Salt, and Cornstarch
Add the sugar, lemon zest, lemon juice, vanilla, salt, and cornstarch if using. Mix until smooth and scrape the bowl again. The batter should look creamy before the eggs are added.
5. Add the Eggs Briefly
Add the eggs one at a time and mix on low speed, or pulse briefly if using a food processor. Stop as soon as the eggs disappear into the batter. Overmixing after the eggs go in can trap air, which makes cheesecake puff in the oven and crack as it cools.
Before the pan goes into the oven, use the texture checkpoints to catch lumps, loose batter, or wet ricotta early.

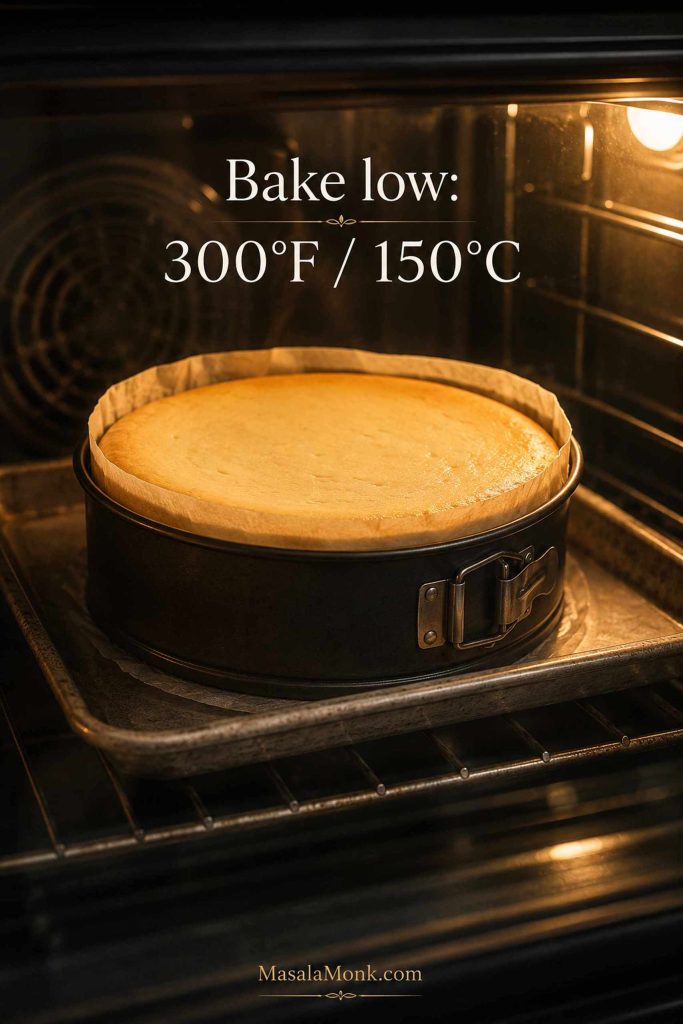
6. Bake Low and Slow
Lower the oven to 300°F / 150°C. Pour the filling over the cooled crust, smooth the top, and set the springform pan on a baking sheet. Bake for about 85–95 minutes, until the edges are set and the center still has a soft wobble.
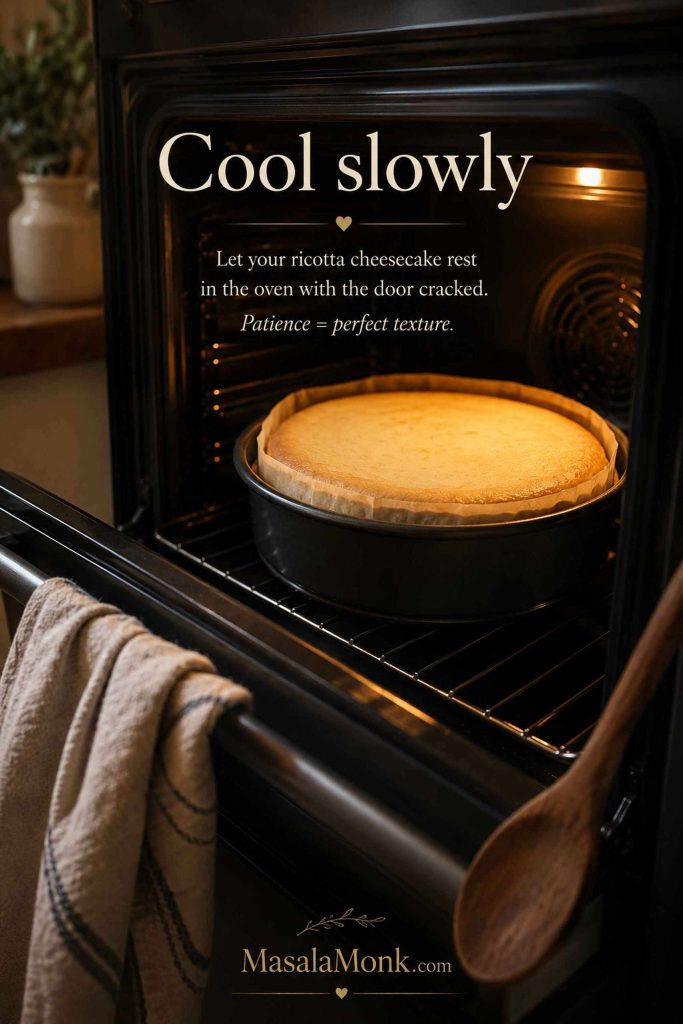
7. Cool Gradually
Turn off the oven, crack the door slightly, and let the cheesecake rest inside for 45–60 minutes. Then move it to a rack and let it cool to room temperature. This slow cooling helps prevent sudden sinking and cracks.
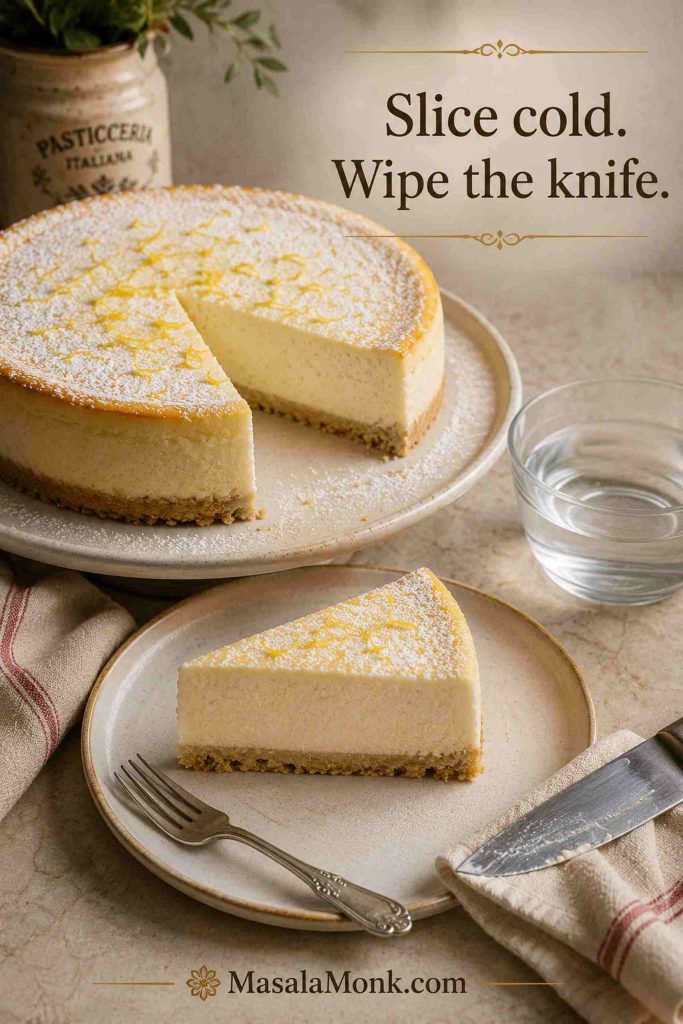
8. Chill Before Slicing
Cover the cooled cheesecake and refrigerate it for at least 6 hours. Overnight is better. Slice it cold with a sharp knife, wiping the blade between cuts.
By the time it has chilled, the lemon softens into the dairy and the filling settles into a cool, creamy slice that tastes calmer than it did straight from the oven.
Texture Checkpoints: Check These Before the Cheesecake Goes Into the Oven
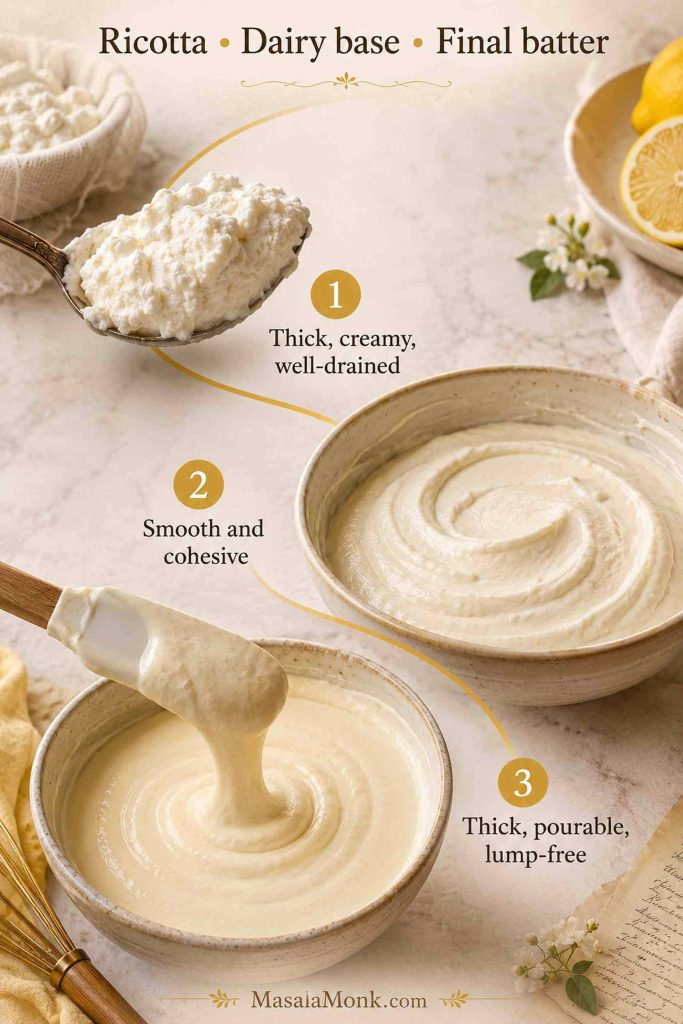
Before the cheesecake goes into the oven, pause for a few quick checks. The ricotta should not be watery, the dairy mixture should look mostly smooth before the eggs are added, and the final batter should be pourable but still thick. If the batter looks thin, loose, or full of large curds, fix that before baking rather than hoping the oven will solve it.
- Ricotta: thick and spoonable, not puddled with liquid.
- Dairy base: creamy before the eggs go in.
- Final batter: pourable, but not thin like milk.
- Pan: crust cooled, sides lightly greased, batter smoothed on top.
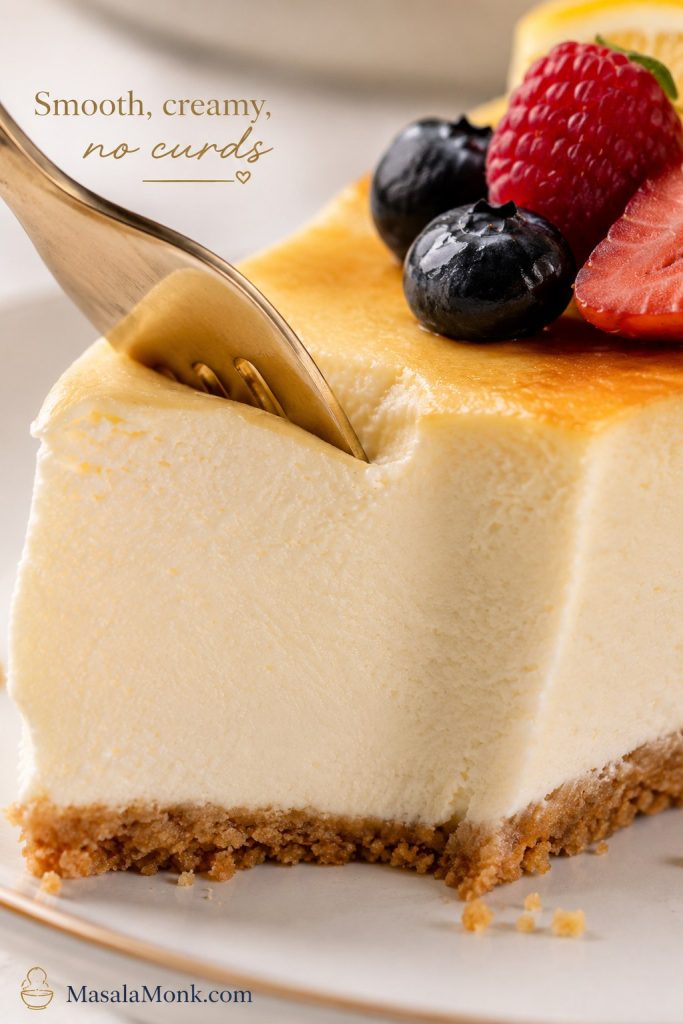
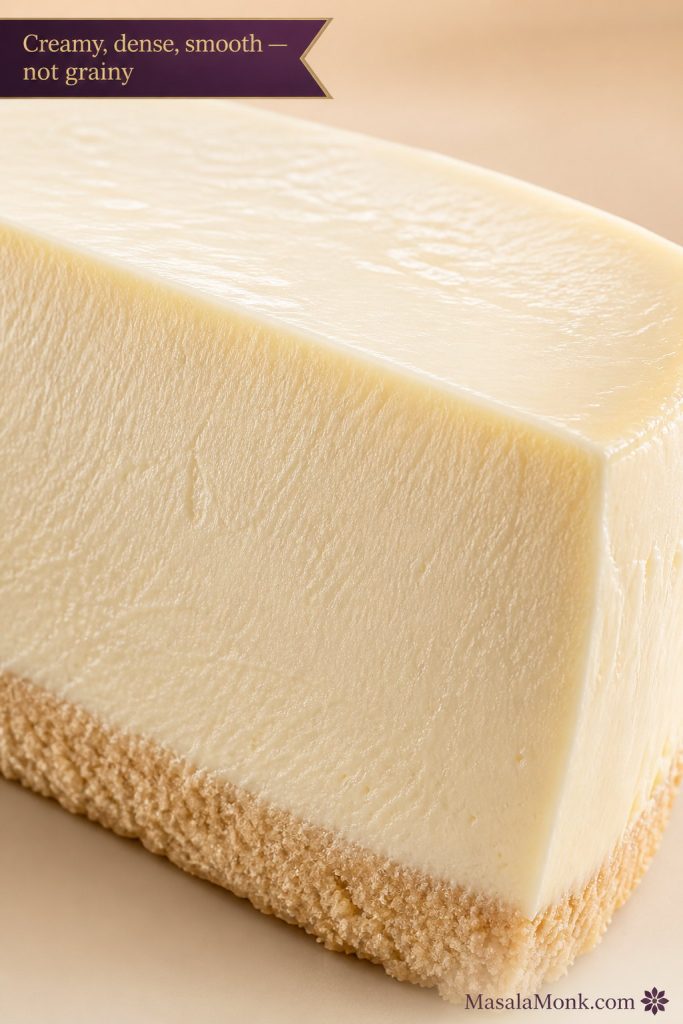
What ricotta cheesecake should feel like
Ricotta cheesecake should be creamy and softly set, but it will not always feel exactly like a dense cream-cheese-only cheesecake. A little delicacy is normal. What you do not want is visible liquid, large curds, a gritty bite, or a center that sloshes when the pan moves.
Food Processor vs Blender vs Stand Mixer
A food processor is the best default for a velvety filling because it breaks down the ricotta and cream cheese quickly without needing too much air. Other tools can work, but they need a little more attention.
| Tool | Best For | Watch Out For |
|---|---|---|
| Food processor | Smoothest filling and best ricotta texture | Pulse gently after eggs are added |
| Stand mixer | Classic cheesecake mixing | Ricotta may stay slightly textured if it starts grainy |
| Hand mixer | Simple home baking | Scrape often and do not whip after adding eggs |
| Blender | Loose batter and very smooth dairy | Thick batter can trap air or strain the motor |
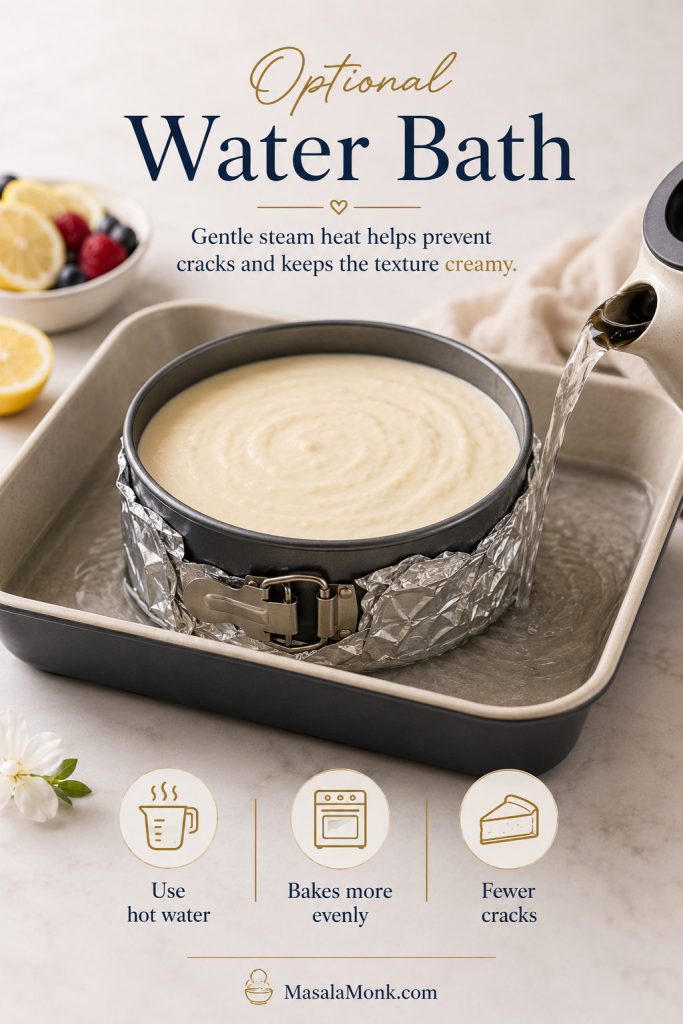
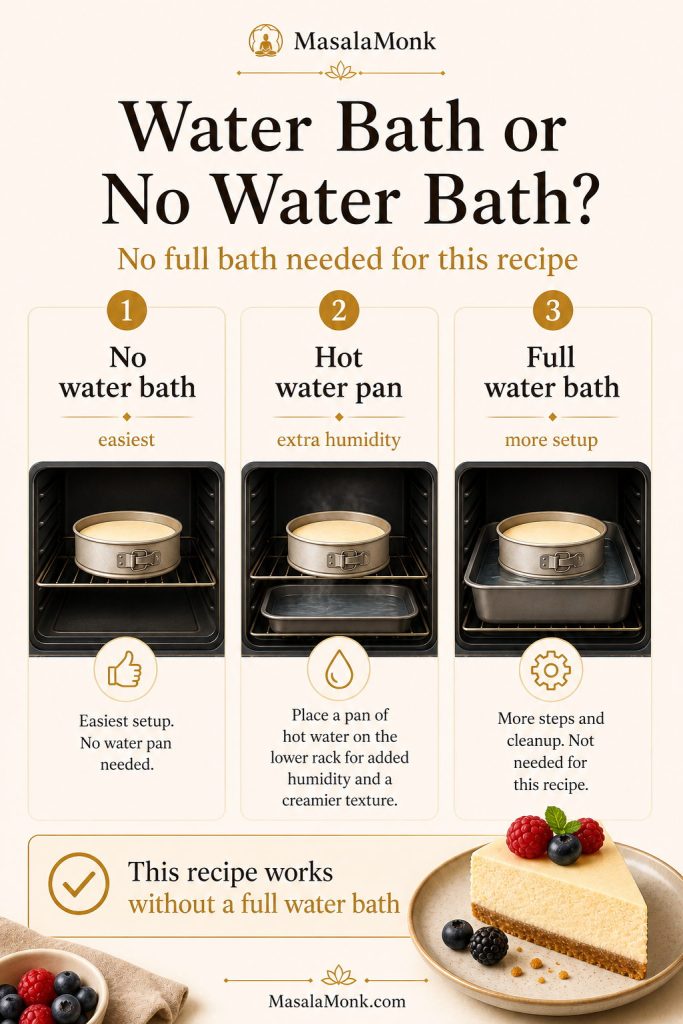
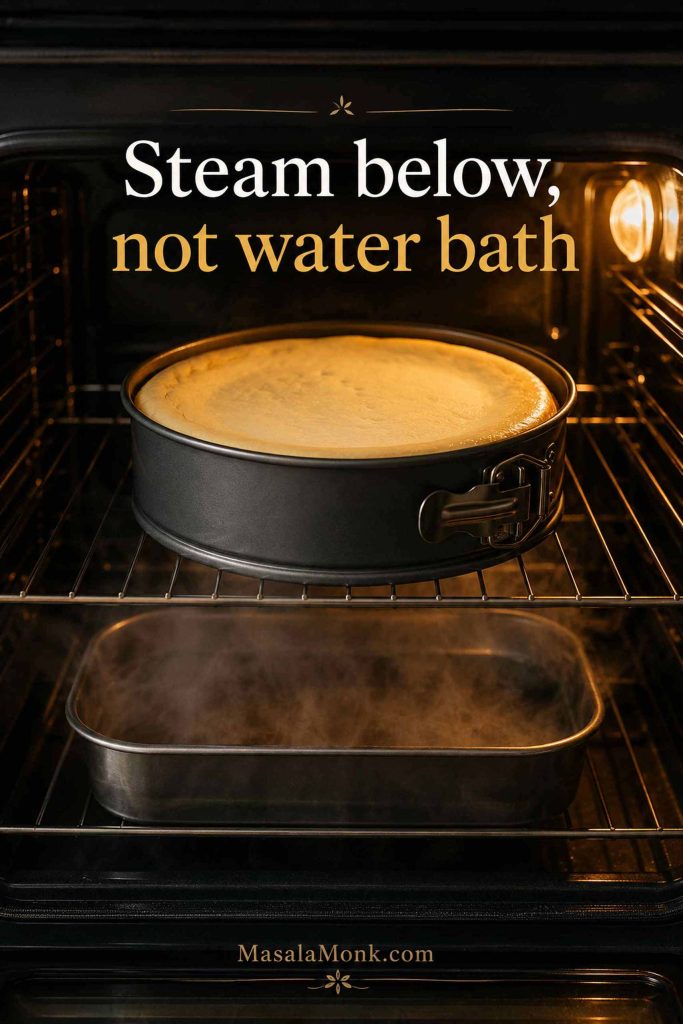
Water Bath or No Water Bath?
This cheesecake does not require a water bath because it bakes at a low temperature and cools slowly. A water bath gives cheesecake gentle, even heat. This recipe gets a similar benefit in a simpler way: it bakes at 300°F / 150°C and cools gradually in the turned-off oven.
Use a water bath only if your oven runs hot, you are very worried about cracks, or you want extra insurance for an ultra-smooth top. If you use one, wrap the springform pan very well in heavy-duty foil, place it in a roasting pan, and pour hot water around it after the cheesecake is in the oven.
Steam, not submersion
If you do not trust your springform pan, place a pan of hot water on the lower oven rack instead of putting the cheesecake pan directly in water. It adds gentle moisture without risking a leaky crust.
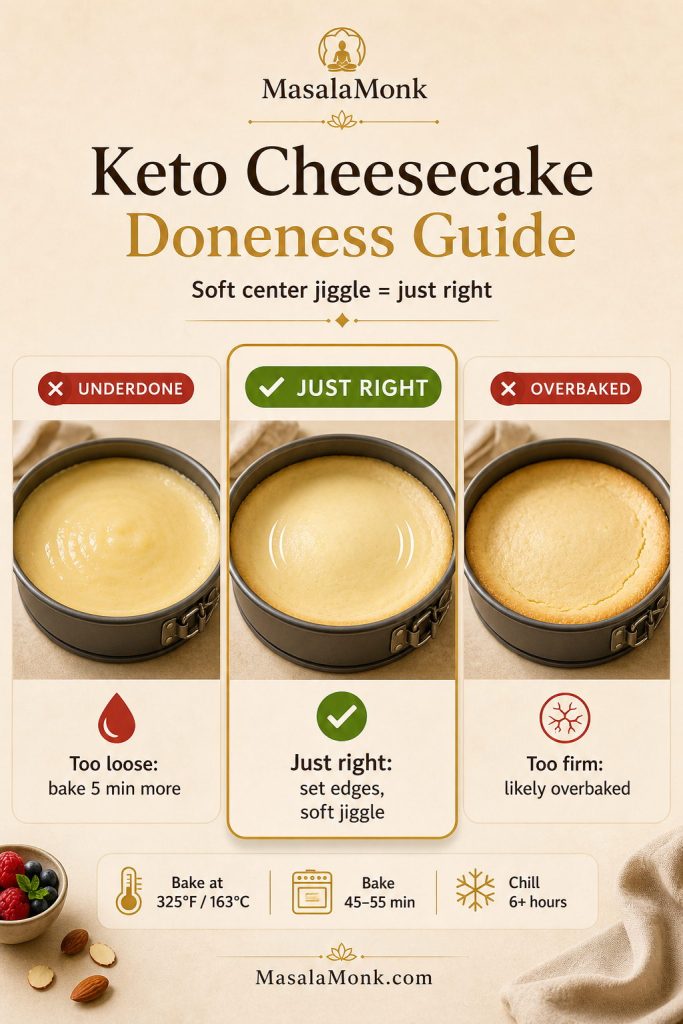
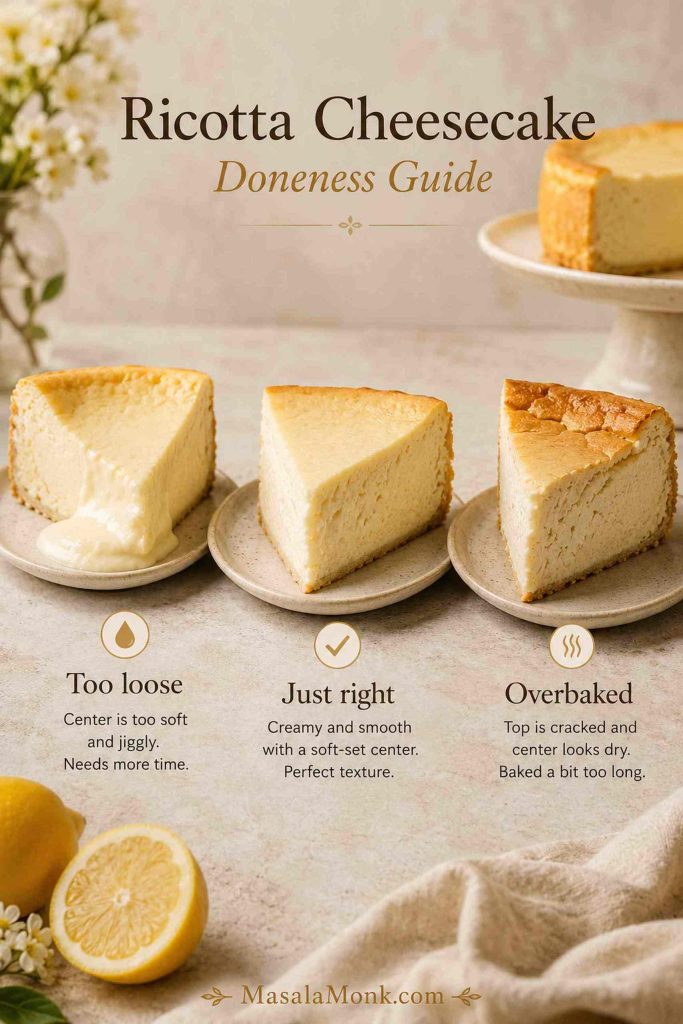
How to Know When Ricotta Cheesecake Is Done
The cheesecake is done when the outer edges are set and the center still wobbles softly when you nudge the pan. The center should not look liquid, but it should not look fully firm either.
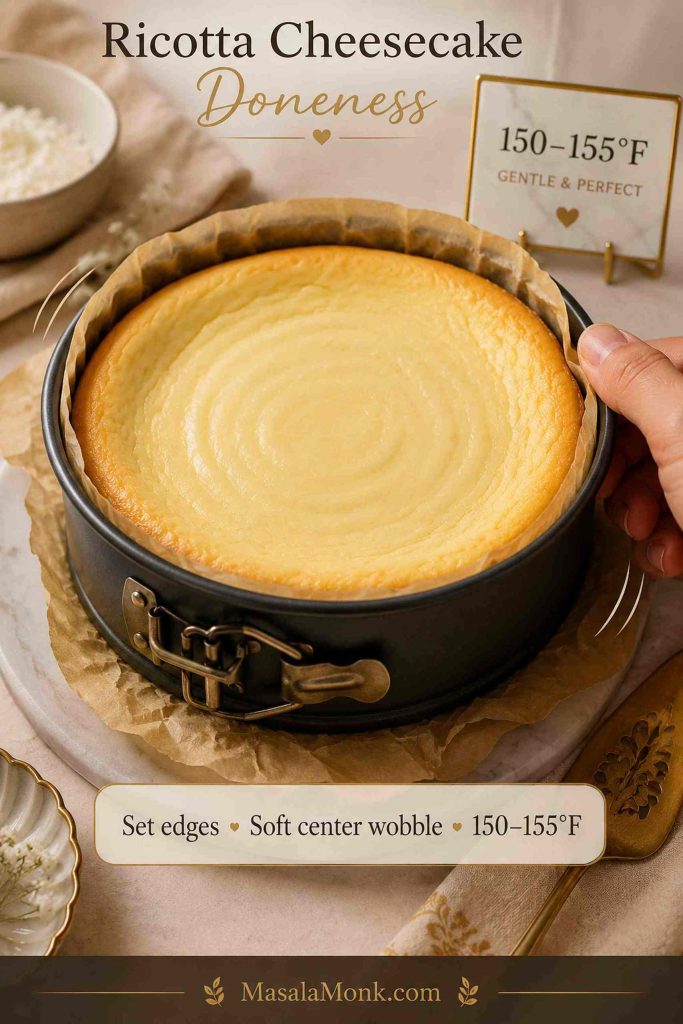
If using an instant-read thermometer, start checking around 150°F / 65°C. For this ricotta and cream cheese cheesecake, 150–155°F / 65–68°C is a good target range. Cheesecake continues setting as it cools, so do not bake until the center looks completely solid. For a broader baking reference, Better Homes & Gardens explains cheesecake doneness tests, including the jiggle, touch, and temperature methods.
| Sign | What It Means |
|---|---|
| Edges are set | The cheesecake has structure and can finish setting as it cools |
| Center wobbles softly | Good; it should not be fully firm in the oven |
| Center sloshes like liquid | Needs more baking time |
| Top is deeply browned and puffed | Likely overbaked or oven too hot |
| Center reads 150–155°F / 65–68°C | Good target for a creamy chilled cheesecake |
If your cheesecake looks too loose, cracked, or dry, use the troubleshooting guide before changing the recipe next time.
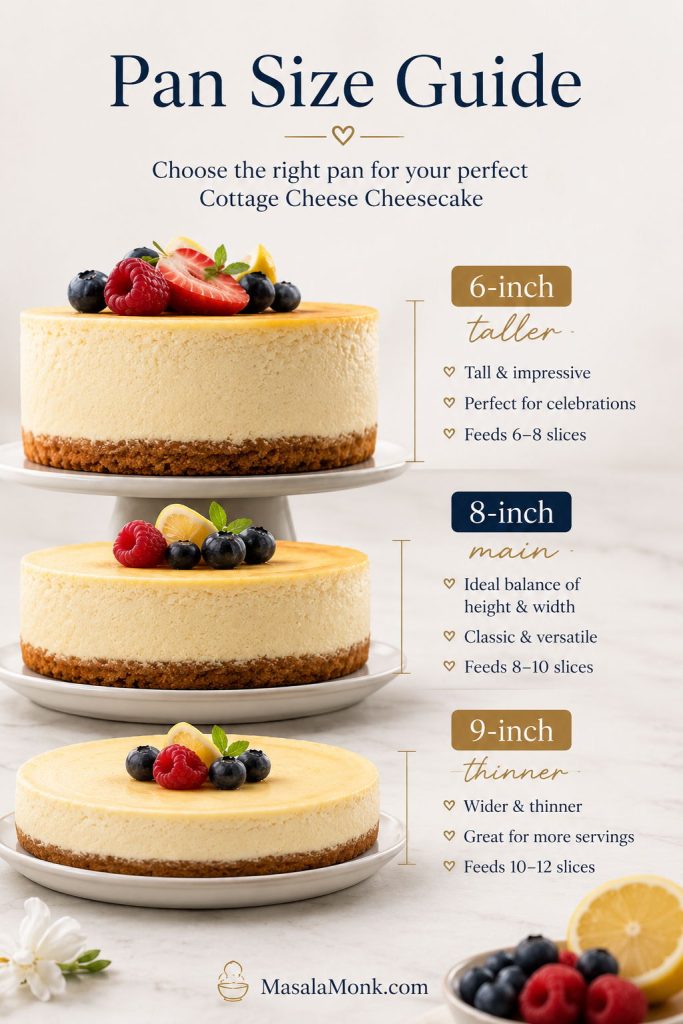
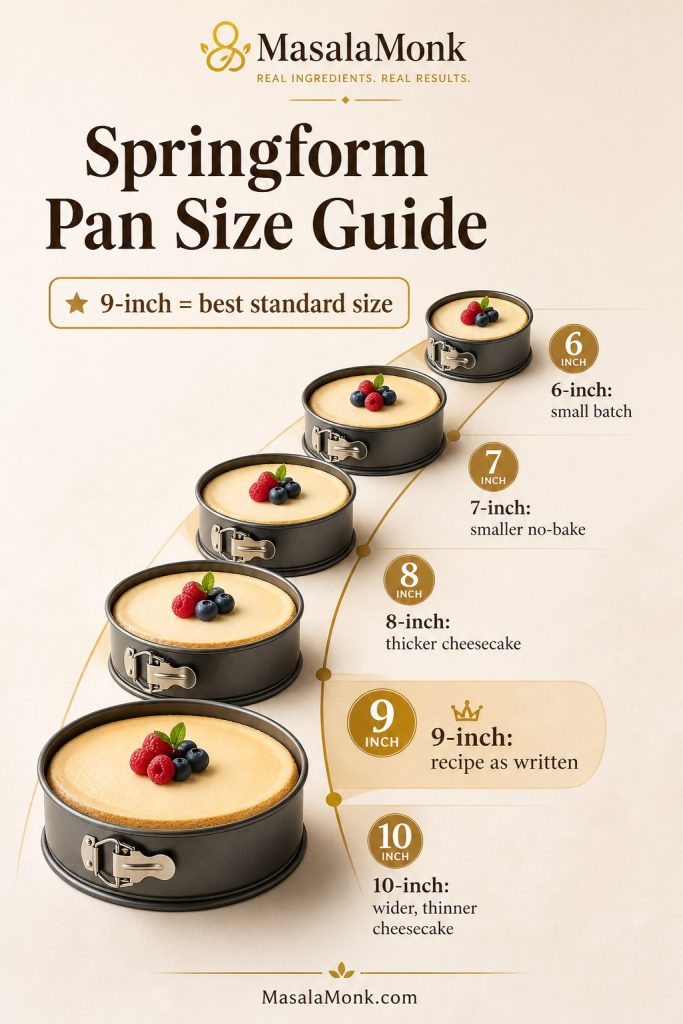
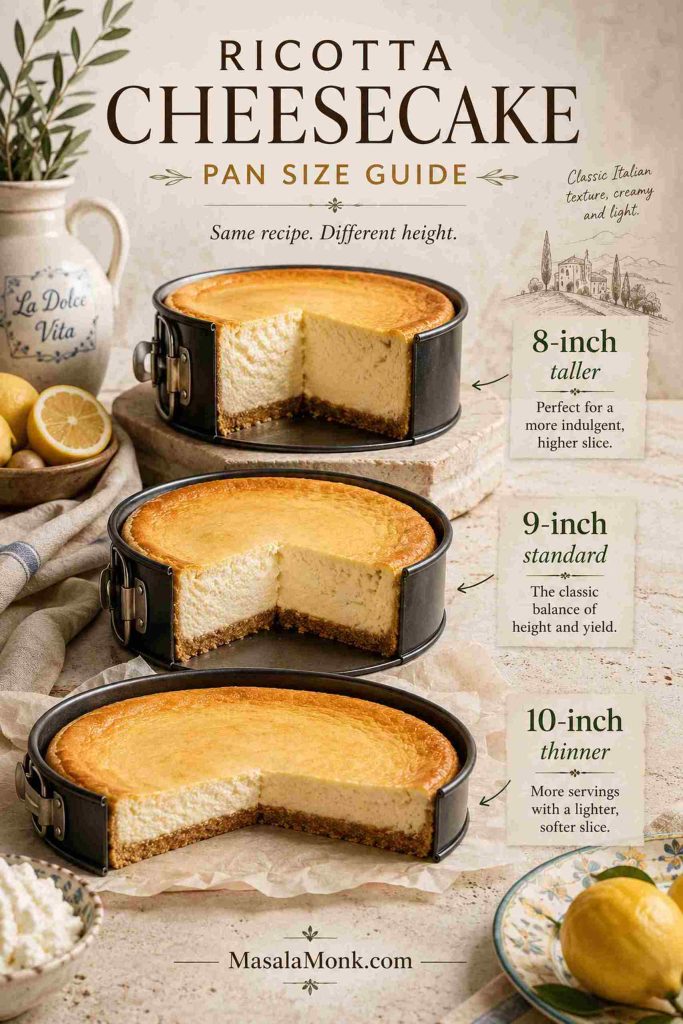
Pan Size Notes: 8-Inch, 9-Inch, and 10-Inch Pans
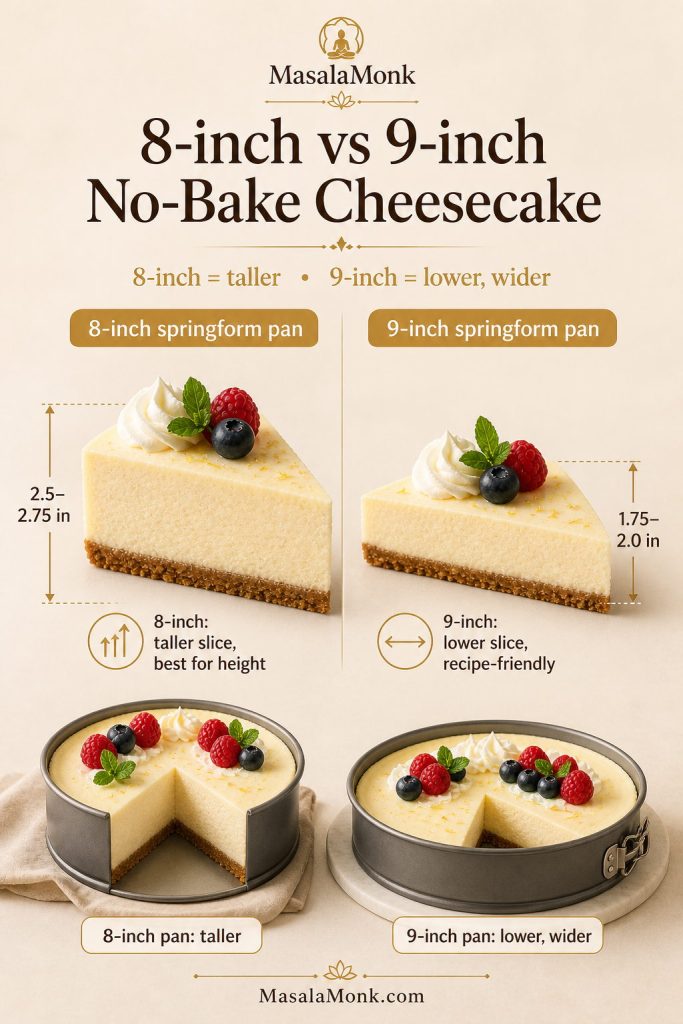
This recipe is written for a 9-inch / 23 cm springform pan. Other pan sizes can work, but the cheesecake thickness and bake time will change. Always use the wobble test and internal temperature cue instead of relying only on the clock.
Pan size changes the personality of the cheesecake. A smaller pan makes it taller and softer in the middle; a wider pan makes it thinner and faster to bake.
| Pan Size | What Changes? | How to Adjust |
|---|---|---|
| 9-inch springform | Default size for this recipe | Bake about 85–95 minutes at 300°F / 150°C |
| 8-inch springform | Taller cheesecake with a thicker center | Expect a longer bake; check for a soft wobble and 150–155°F / 65–68°C center |
| 10-inch springform | Thinner cheesecake that bakes faster | Start checking around 70–80 minutes |
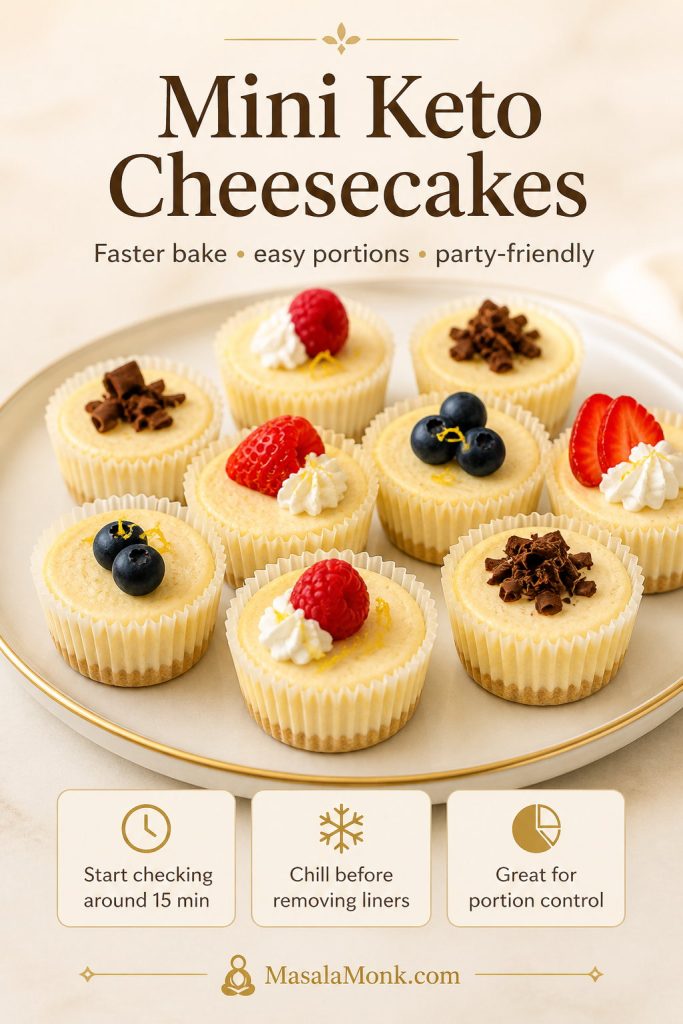
| Mini cheesecakes | Different timing and texture management | Better as a separate mini ricotta cheesecake recipe |
| Pie pan | Moves closer to ricotta pie | Use the ricotta pie comparison rather than forcing this recipe into a pie pan |
After the pan-size and doneness cues, cooling is still part of texture control: sudden temperature changes can make a delicate ricotta cheesecake crack or sink.
How Long to Chill Before Slicing
The refrigerator is not just storage here; it is part of the recipe. Ricotta cheesecake needs that cold rest to settle into a clean, creamy slice.
Chill the cheesecake for at least 6 hours before slicing. Overnight is best. The long chill gives the filling time to firm, settle, and cut neatly.
For the neatest slices, cut it cold. Dip a sharp knife in hot water, wipe it dry, cut one slice, then wipe the knife again before the next cut. Let individual slices sit at room temperature for 10–15 minutes before serving if you want a softer, creamier bite.
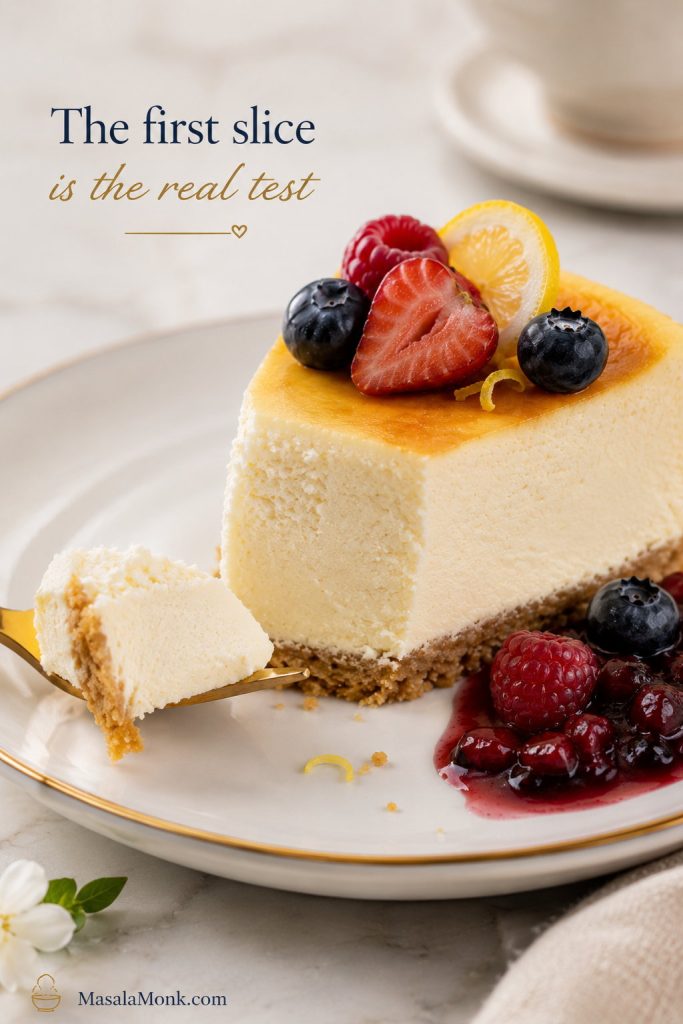
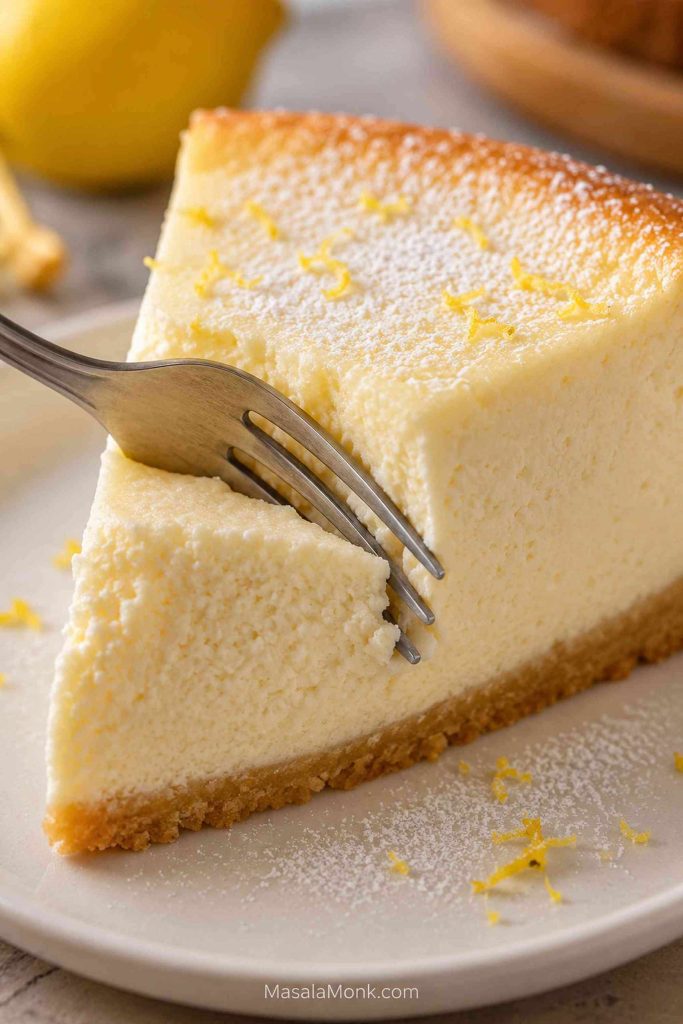
A good chilled slice should hold its shape on the plate, but the fork should still glide through the filling.

Once the cake is fully cold, slicing technique matters too: a warm knife and a quick wipe between cuts keep the soft filling from dragging.
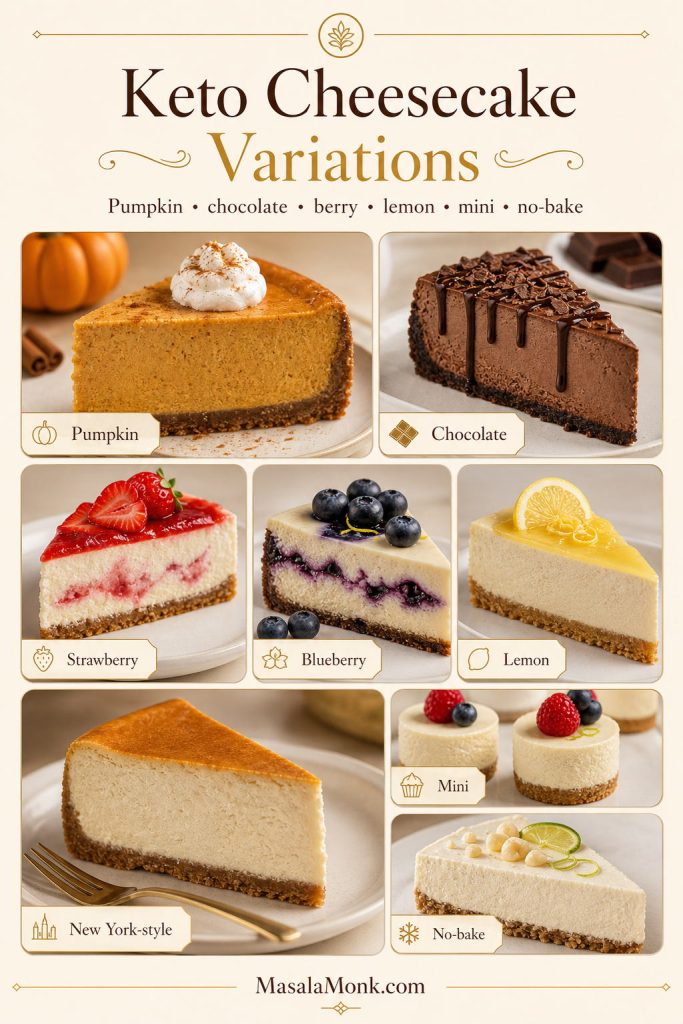
Ricotta Cheesecake Variations
Use the main recipe first if you want the safest structure. Once you understand the base, these variations let you move toward lemon, crustless Italian-style, mascarpone, or lighter versions.
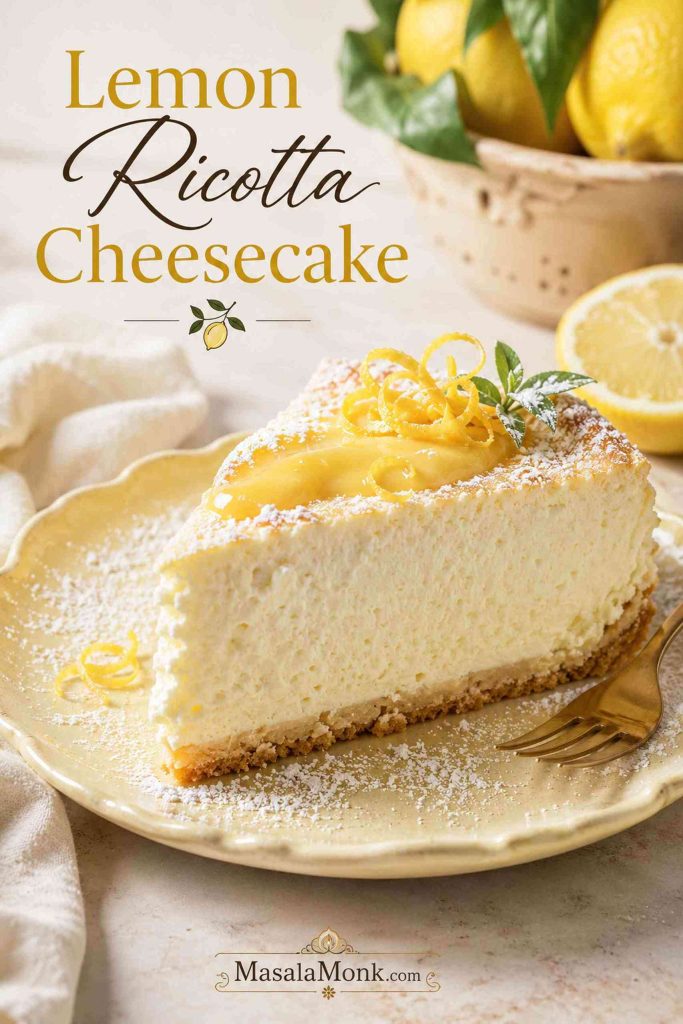
Lemon Ricotta Cheesecake
For a brighter lemon version, increase the zest to 2 lemons and use 2 tablespoons / 30 ml lemon juice. You can also serve the cheesecake with lemon curd, fresh berries, or a light dusting of powdered sugar.
Do not add a large amount of extra lemon juice without adjusting the recipe. Too much liquid can loosen the filling and make the cake harder to set.
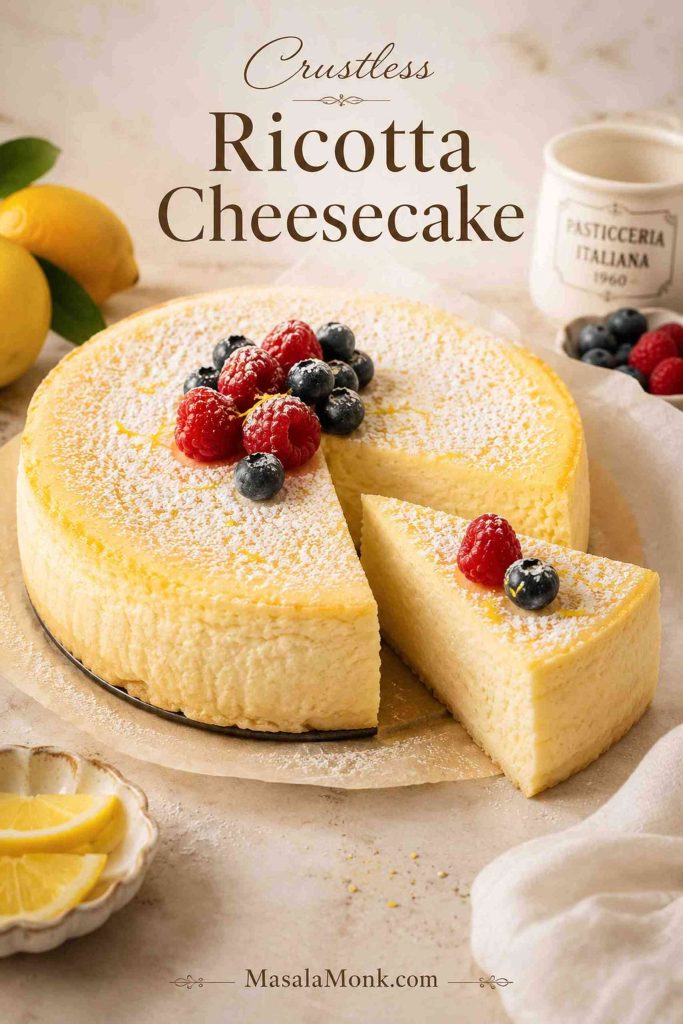
Italian-Style Crustless Ricotta Cheesecake
For a more Italian-style version, skip the crust, line the pan with parchment, and grease the sides well. You can keep the main ricotta and cream cheese filling for the most reliable texture, or make it more ricotta-forward by replacing 8 oz / 225 g of the cream cheese with extra whole-milk ricotta.
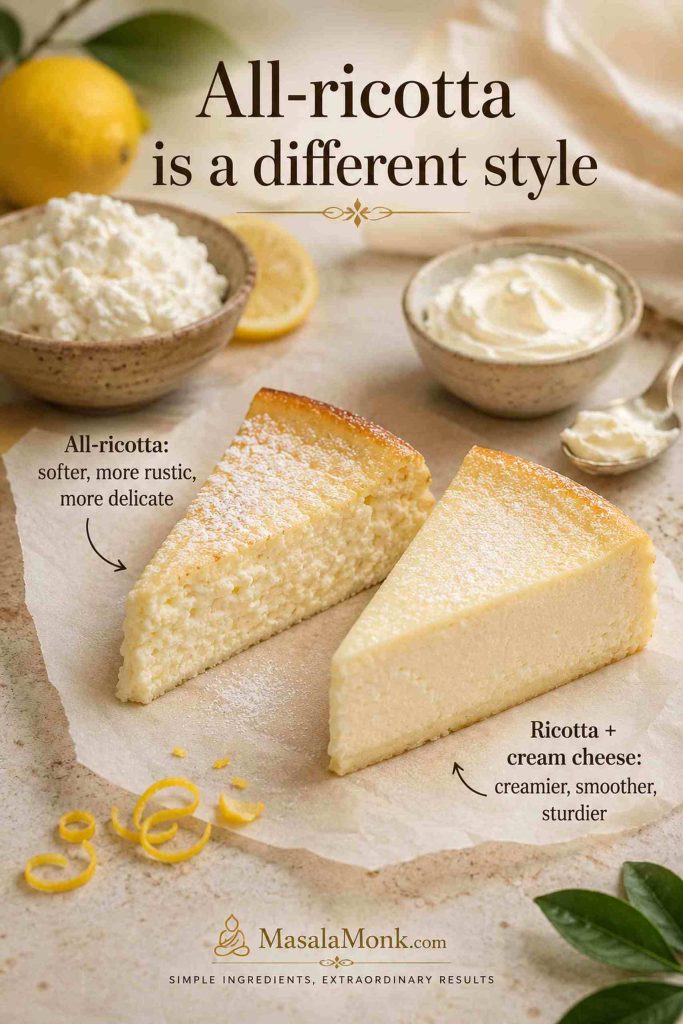
An all-ricotta cheesecake is possible, but think of it as a different style rather than a direct shortcut from the main recipe. It will be lighter, more custardy, more rustic, and more dependent on the quality and moisture level of the ricotta.
For the safest first bake, use the main recipe. For a more traditional crustless version, use very thick full-fat ricotta, drain it well if needed, and give the cheesecake a full overnight chill before judging the texture.
If you remove all the cream cheese, you are making a different style of ricotta cheesecake, so expect a softer and more rustic texture.
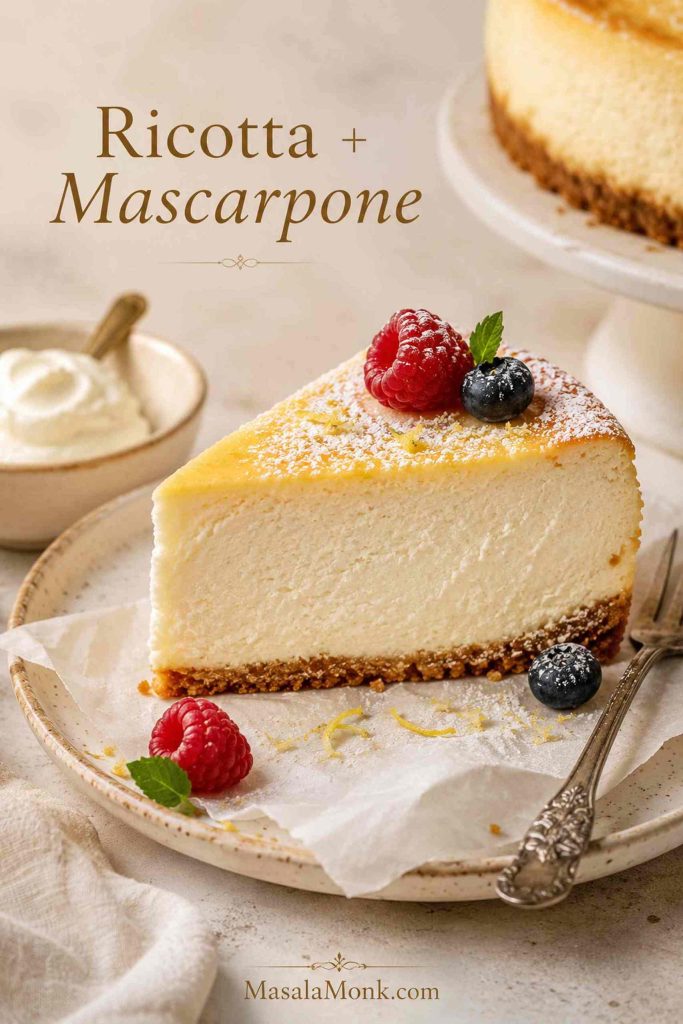
Ricotta Mascarpone Cheesecake
For a softer, richer Italian-style variation, replace the cream cheese with mascarpone. Mascarpone gives the cheesecake a delicate dairy sweetness and less tang than cream cheese. Because mascarpone is softer, chill the cheesecake overnight before slicing.
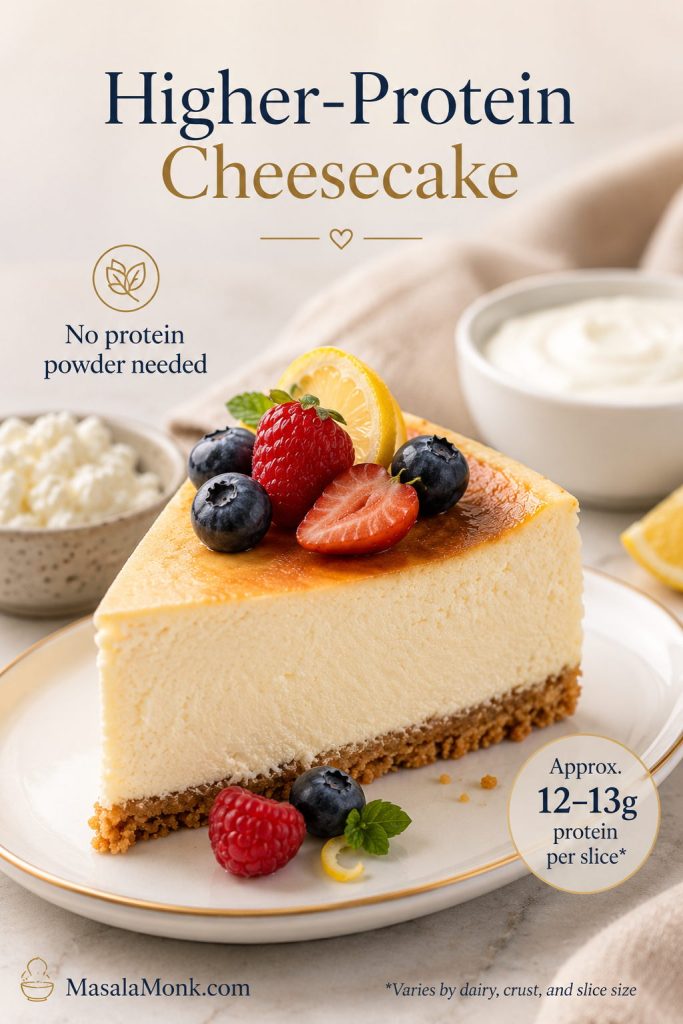
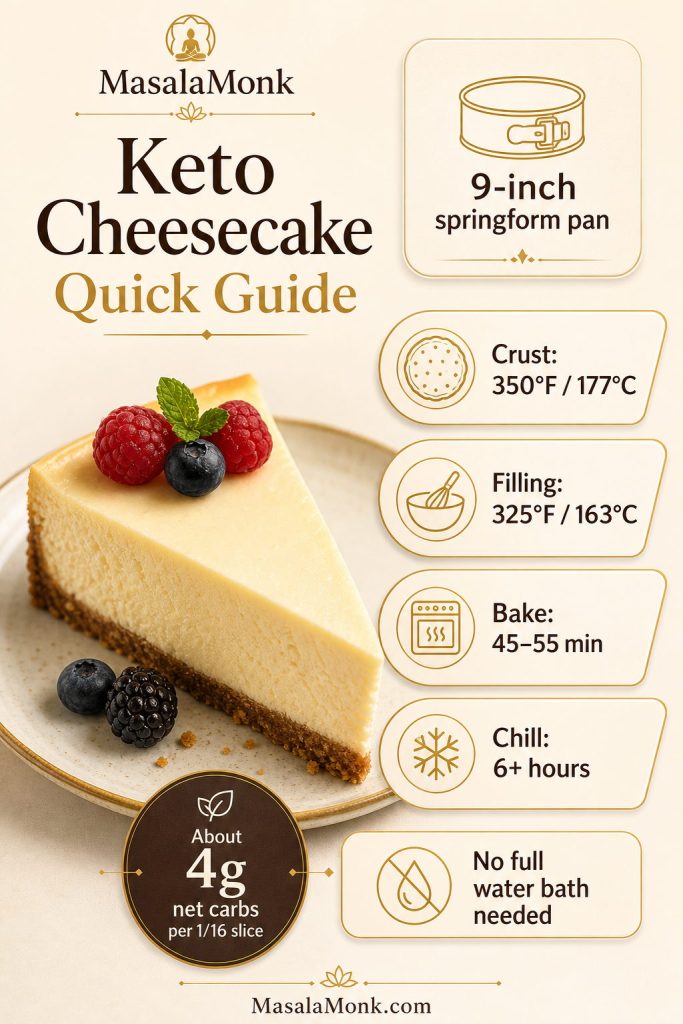
Healthy, Low-Fat, or Keto Ricotta Cheesecake
You can make a lighter version, but the texture will change. Low-fat ricotta can bake drier and less creamy. Greek yogurt, protein powder, or sugar-free sweeteners turn the recipe into a different style of cheesecake rather than a simple swap.
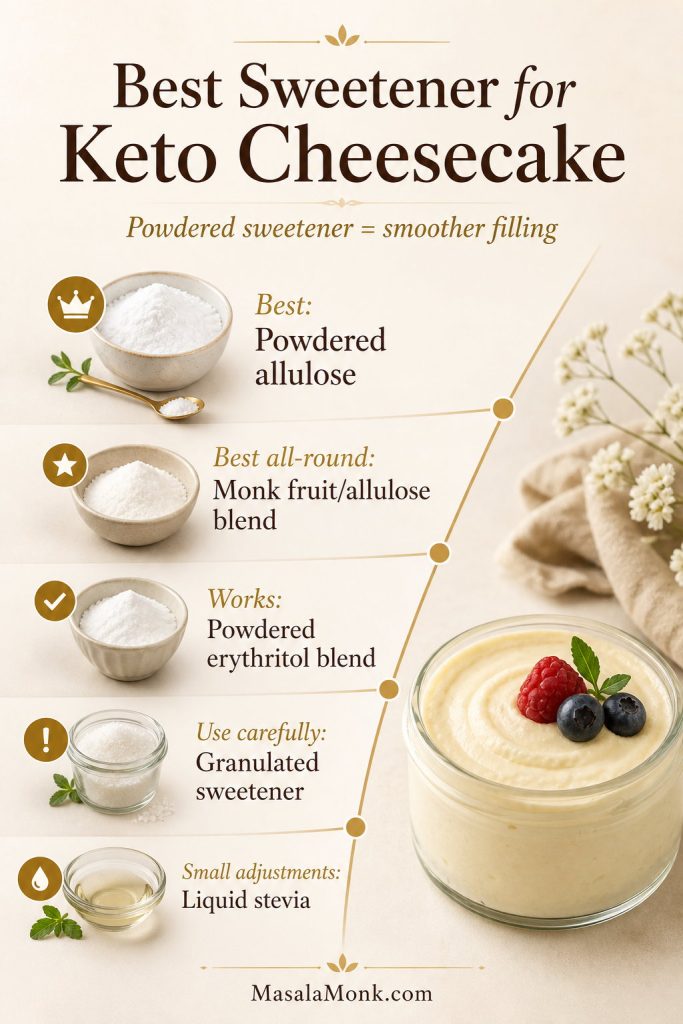
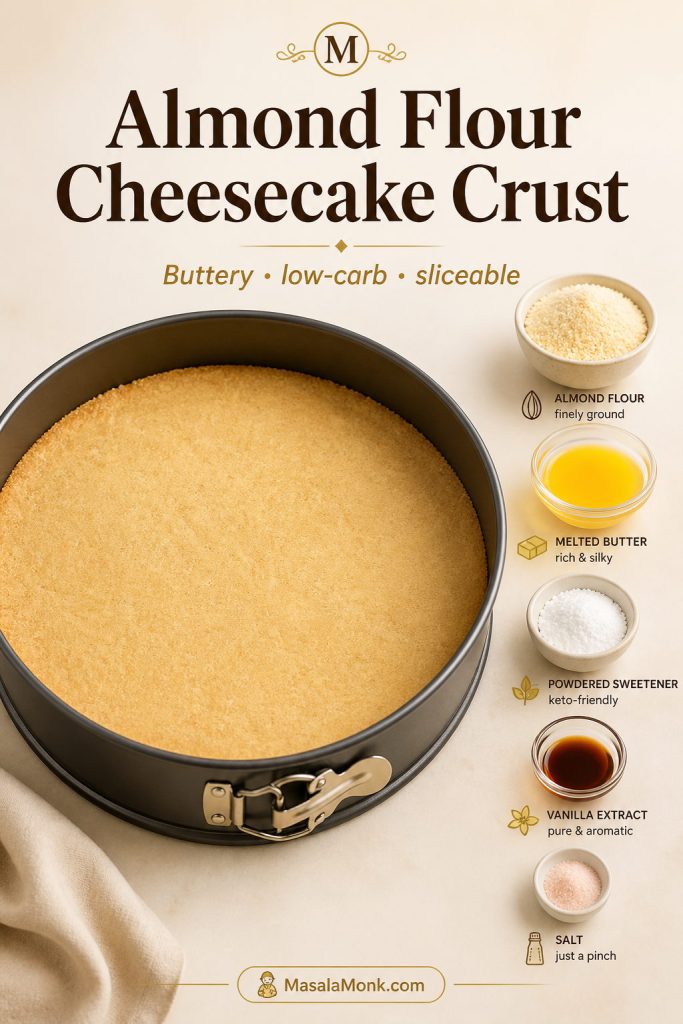
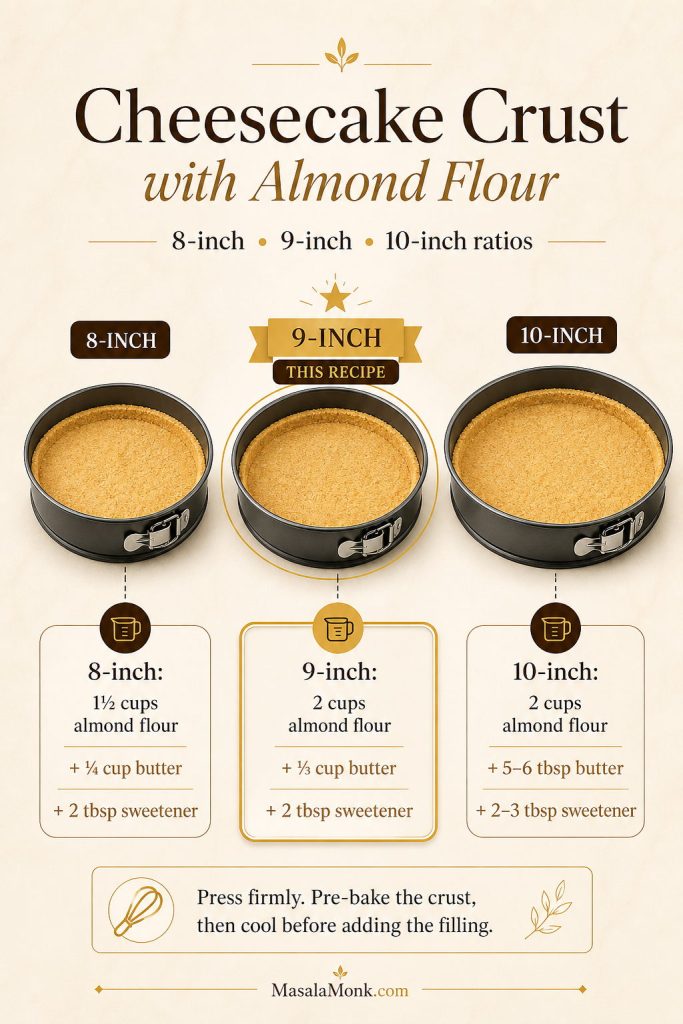
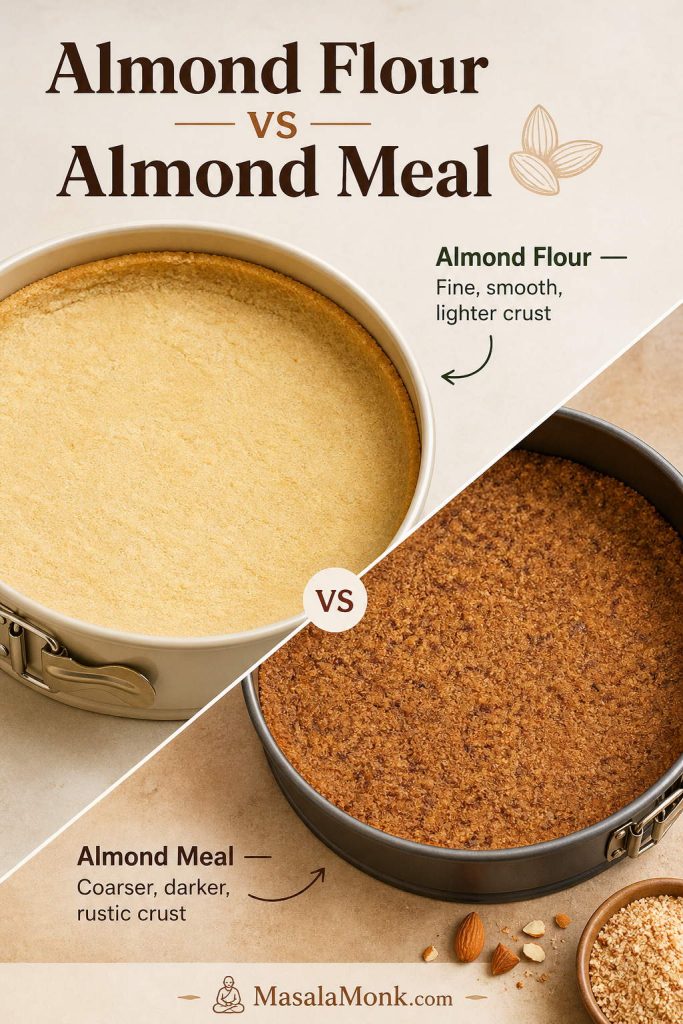
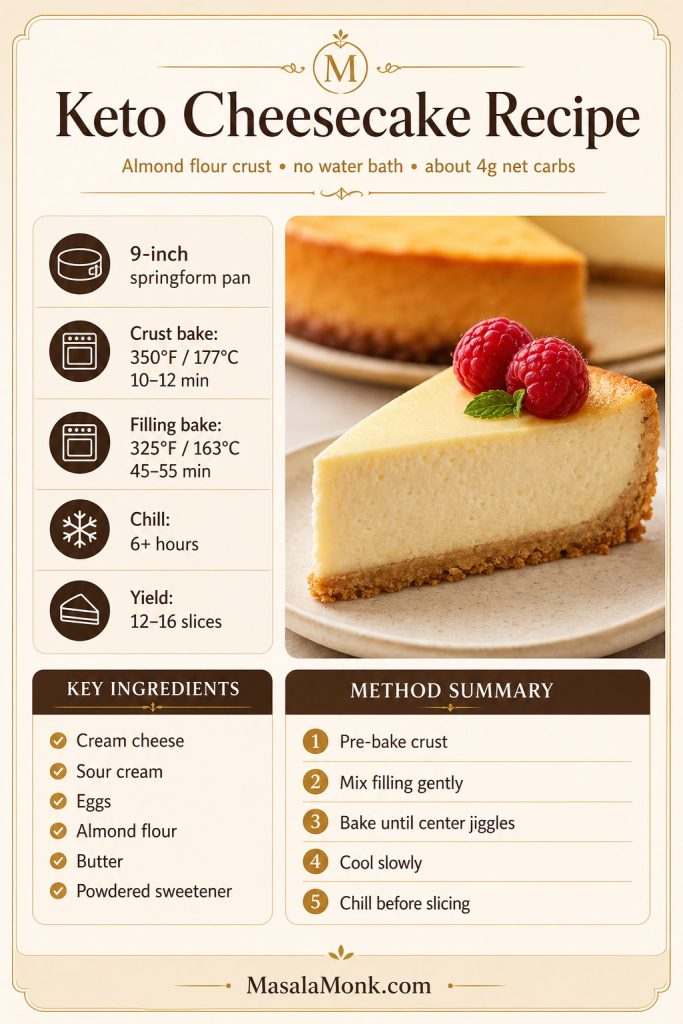
For a fully low-carb dessert, start with this keto cheesecake recipe instead. It is built around sugar-free sweeteners, almond flour crust, and low-carb texture fixes.
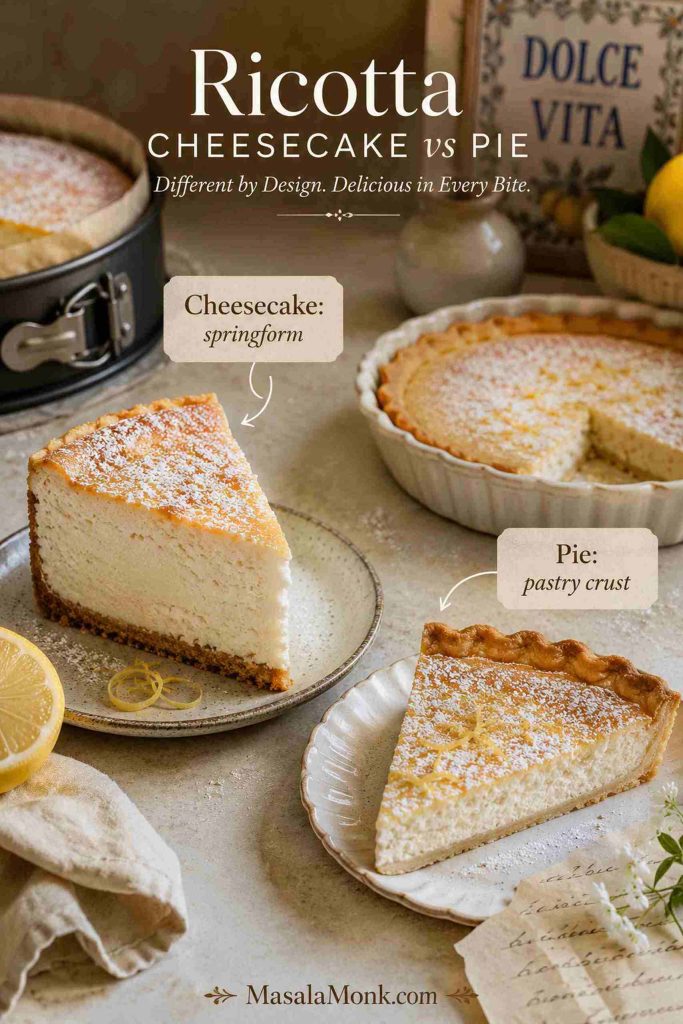
Ricotta Cheesecake and Ricotta Pie: What’s the Difference?
These two desserts are related, but they are not the same. A ricotta cheesecake is usually baked in a springform pan and sliced like cheesecake. By contrast, ricotta pie is usually baked in a pie crust or pie pan and often appears as an Italian Easter dessert.
The filling can overlap — ricotta, eggs, sugar, vanilla, citrus — but the structure is different. When the dessert is baked in a pie crust and eats more like sweet ricotta custard, you are probably thinking of ricotta pie.
Can You Make Ricotta Cheesecake Ahead?
Yes, and it is actually better that way. Ricotta cheesecake needs time in the refrigerator for the filling to settle, the lemon and vanilla to soften into the dairy, and the slices to cut neatly. Make it the day before serving if you can.
This is exactly the kind of dessert that rewards doing less on the day you serve it. If you are serving it for a holiday or dinner party, bake it the night before, chill it overnight, and add berries, lemon curd, honey, or powdered sugar shortly before serving.
It is especially useful for spring dinners, Easter, Mother’s Day, Italian-style meals, and holidays when you want dessert ready before guests arrive.
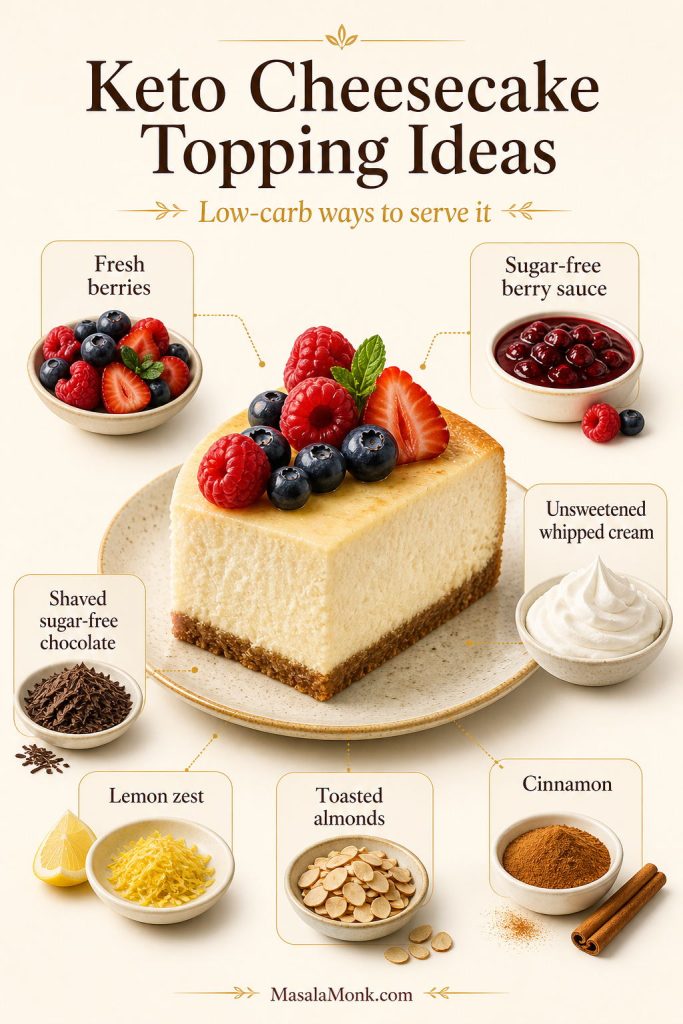
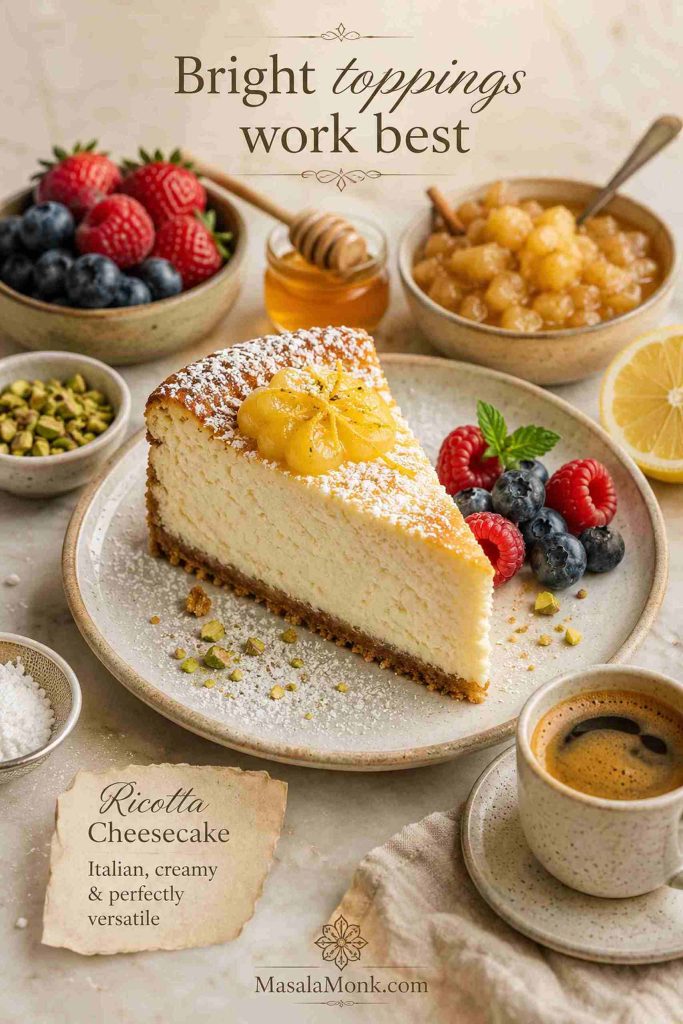
What to Serve with Ricotta Cheesecake
This dessert is rich but lighter than a dense New York cheesecake, so it works well with bright, simple toppings. You do not need a heavy sauce unless you want a more dramatic dessert.
The best toppings are the ones that keep the cheesecake feeling light: something tart, fresh, floral, or gently sweet rather than heavy caramel or chocolate sauce.
Plain is lovely here. A good ricotta cheesecake does not need much more than a little powdered sugar or a handful of berries; the point is the cool dairy flavor, the soft lemon, and the clean slice. A cold piece with coffee is often the best version of it.
- Fresh berries: strawberries, raspberries, blueberries, or blackberries.
- Lemon curd: best for a more lemon-forward cheesecake.
- Powdered sugar: simple and classic for an Italian-style look.
- Honey: a light drizzle works especially well with a crustless version.
- Berry compote: good if you want a saucier dessert plate.
- Apple topping: for a fall-style dessert, spoon on chilled homemade apple pie filling instead of berries.
- Toasted almonds or pistachios: adds crunch without making the cheesecake too heavy.
For the softest bite, let each slice stand for 10 minutes before serving so the ricotta and lemon flavor opens up. If you are serving it later, check the storage and freezing guide before adding toppings.
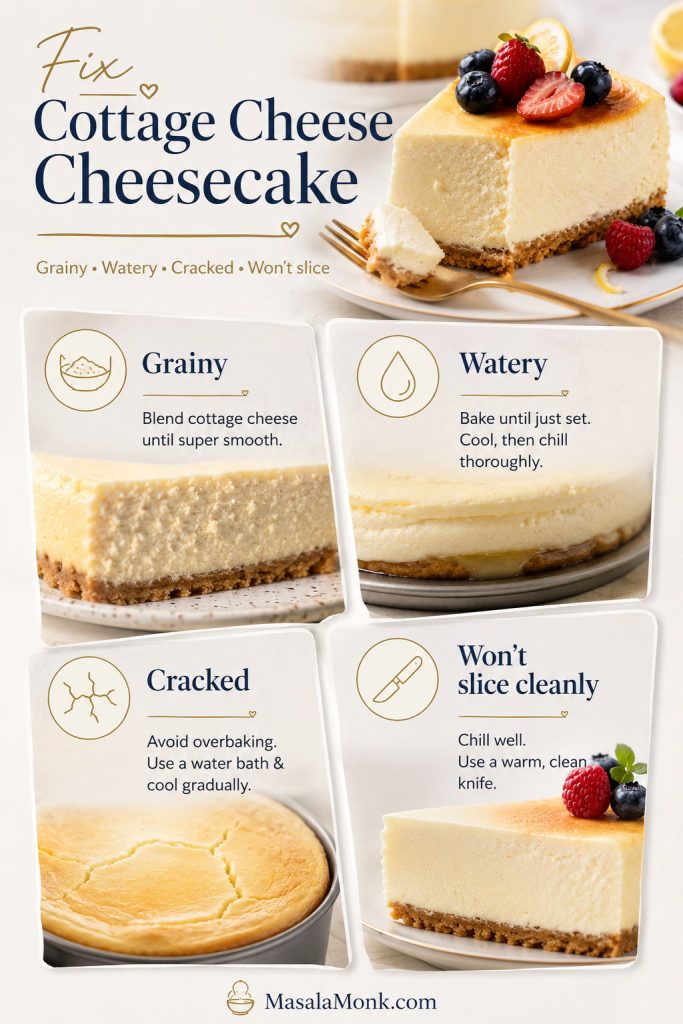
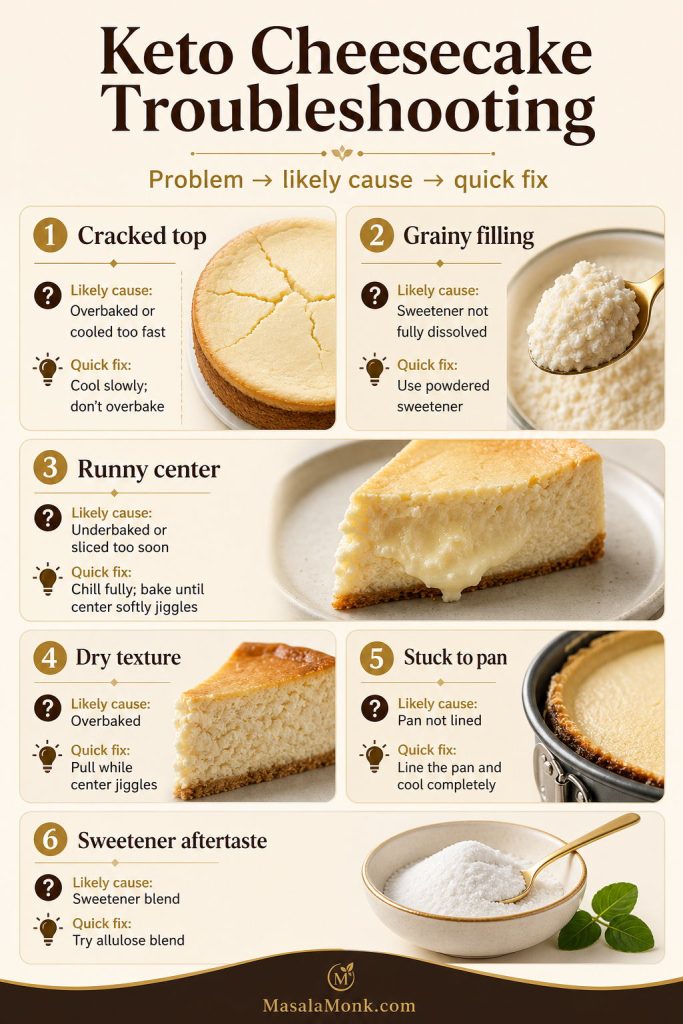
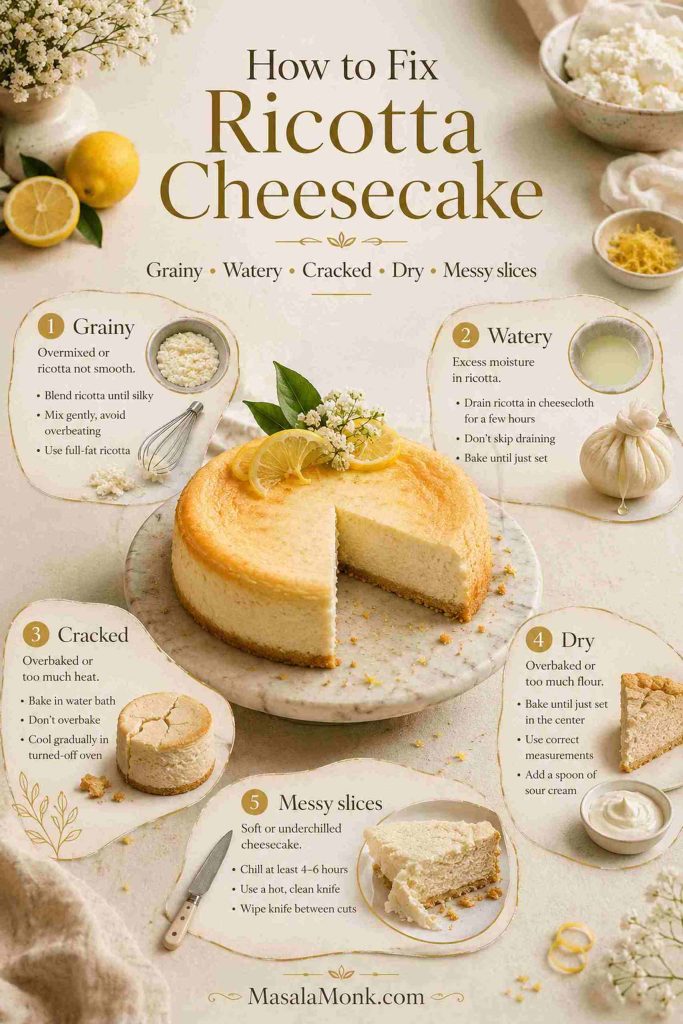
How to Fix Ricotta Cheesecake Problems
If your ricotta cheesecake does not come out exactly as planned, the problem is usually fixable next time. Most issues trace back to moisture, heat, mixing, or slicing before the cheesecake has fully chilled.
Texture and Baking Problems
| Problem | Likely Cause | How to Fix It Next Time |
|---|---|---|
| Filling has tiny lumps before baking | Cold cream cheese or under-blended ricotta | Stop and blend the dairy base smoother before adding eggs. Once eggs are added, avoid aggressive mixing |
| Grainy filling | Grainy ricotta, cold dairy, or not enough blending | Use smoother whole-milk ricotta, bring dairy to room temperature, and process ricotta with cream cheese before adding eggs |
| Watery cheesecake | Wet ricotta, underbaked center, or not enough chill time | Drain loose ricotta, bake until the center softly wobbles instead of sloshes, and chill overnight |
| Cracked top | Overmixed eggs, oven too hot, overbaking, or sudden cooling | Add eggs last, mix briefly, bake low, and cool gradually in the oven |
| Dry texture | Overbaking or low-fat ricotta | Use whole-milk ricotta and pull the cheesecake while the center still wobbles softly |
For watery centers and cracked tops, focus on moisture control, gentle heat, and slow cooling before changing the recipe.
Cooling, Slicing, and Serving Problems
| Problem | Likely Cause | How to Fix It Next Time |
|---|---|---|
| Center sank | Underbaking, too much air, or fast cooling | Do not whip after adding eggs, bake a little longer, and cool slowly |
| Soggy crust | Crust not prebaked or filling too wet | Prebake the crust and drain watery ricotta before mixing |
| Messy slices | Cheesecake was sliced warm or not chilled long enough | Chill at least 6 hours, preferably overnight, and slice cold with a wiped knife |
| Cheesecake seems too soft after baking | It may be underbaked, too warm, or not chilled long enough | Chill it overnight before judging. If it still will not slice cleanly, serve it cold in bowls with berries or compote instead of forcing neat slices |
| It tastes good but looks imperfect | Minor cracks, slight sinking, or a rustic top are normal with ricotta cheesecakes | Chill fully, dust with powdered sugar, and serve with berries, honey, or compote |
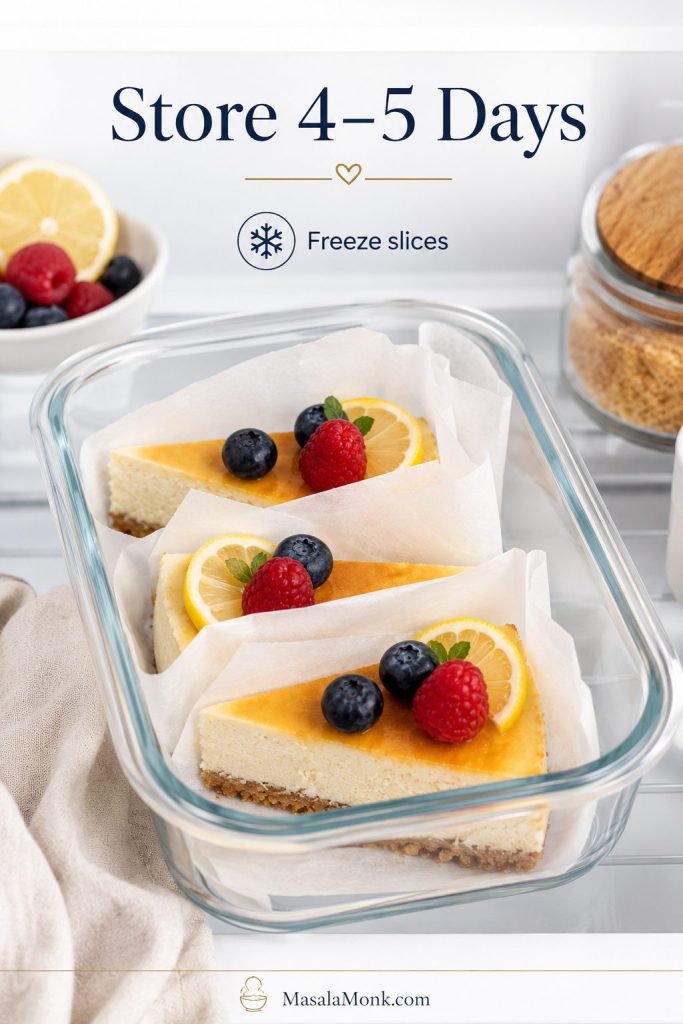
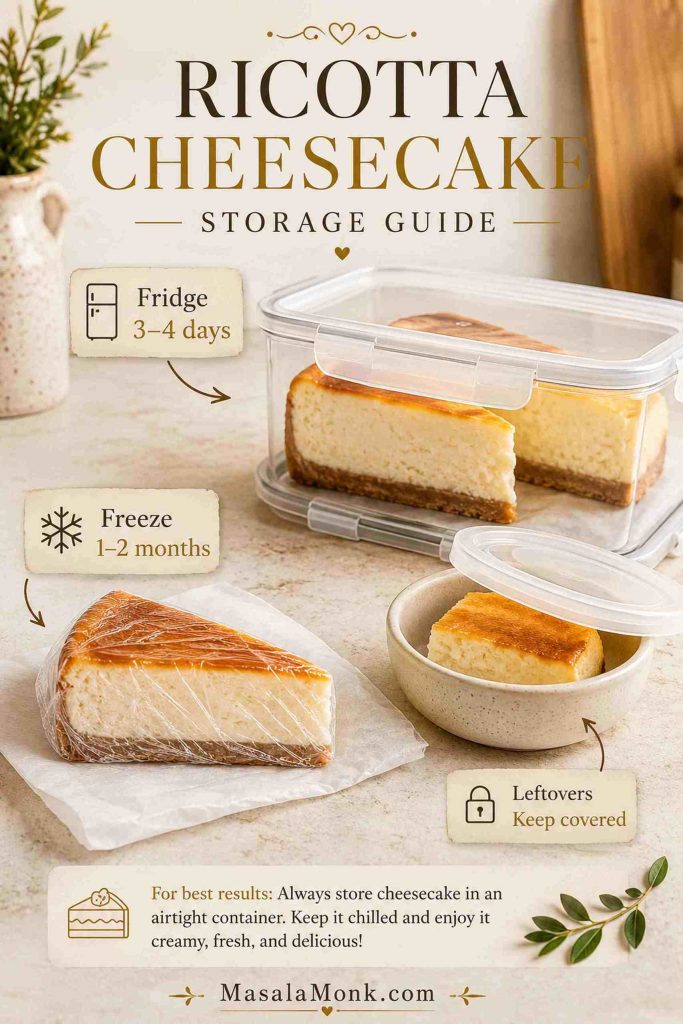
How to Store and Freeze Ricotta Cheesecake
Ricotta cheesecake tastes best cold from the refrigerator, especially during the first two days after baking. Keep it covered so the delicate dairy flavor does not pick up refrigerator odors.
For safest home storage, use refrigerated leftovers within 3–4 days. Keep the cheesecake tightly wrapped or in an airtight container.
You can freeze it, although the texture is best within 1–2 months. Chill the cheesecake completely first, then wrap the whole cake or individual slices tightly in plastic wrap and foil. Thaw overnight in the refrigerator before serving.
For general leftover food safety, the USDA Food Safety and Inspection Service recommends refrigerating leftovers promptly and using refrigerated leftovers within 3–4 days.
Ricotta Cheesecake Recipe Card
Ricotta Cheesecake Recipe
This creamy baked ricotta cheesecake uses whole-milk ricotta, cream cheese, lemon, vanilla, and an optional crumb crust for a cool, softly set slice that feels lighter than classic cheesecake but still cuts cleanly.
Serve it plain and chilled, or dress it up with berries, lemon curd, honey, or powdered sugar.
Ingredients
For the Optional Crust
- 1 1/2 cups / 150–170 g graham cracker or digestive biscuit crumbs
- 5 tbsp / 70 g unsalted butter, melted
- 1–2 tbsp granulated sugar, optional
- Pinch of fine salt
For the Filling
- 16 oz / 454 g whole-milk ricotta, room temperature, drained only if watery
- 16 oz / 454 g full-fat cream cheese, softened to room temperature
- 1 cup + 2 tbsp / about 225 g granulated sugar
- 5 large eggs, room temperature
- Zest of 1 large lemon
- 1 tbsp / 15 ml fresh lemon juice
- 2 tsp / 10 ml vanilla extract
- 1/2 tsp kosher salt, or 1/4 tsp fine salt
- 1 tbsp cornstarch, optional, for cleaner slices
If making it crustless: skip the crust ingredients and crust steps. Line the bottom of the springform pan with parchment, grease the sides well, and preheat directly to 300°F / 150°C. Use the wobble and temperature cues rather than relying only on the exact time.
Instructions
- Prepare the pan. Line the bottom of a 9-inch springform pan with parchment paper and lightly grease the sides.
- Heat the oven. For the crusted version, preheat to 350°F / 177°C for the prebake. For a crustless cheesecake, preheat directly to 300°F / 150°C.
- Make the crust. Mix the crumbs, melted butter, sugar, and salt until evenly moistened. Skip this step for a crustless cheesecake.
- Press and prebake. Press the crust firmly into the bottom of the pan. Bake for 8–10 minutes, then let it cool. Lower the oven to 300°F / 150°C. Skip this step for a crustless cheesecake.
- Smooth the dairy. In a food processor, blend the ricotta and cream cheese until smooth. Scrape down the sides and blend again if needed.
- Add flavor and sugar. Add sugar, lemon zest, lemon juice, vanilla, salt, and cornstarch if using. Mix until smooth.
- Add the eggs gently. Add eggs one at a time, pulsing or mixing on low speed only until incorporated. Do not overmix after the eggs go in.
- Fill the pan. Pour the filling over the cooled crust, or directly into the lined pan if making it crustless. Smooth the top and set the springform pan on a baking sheet.
- Bake gently. Bake at 300°F / 150°C for 85–95 minutes, until the edges are set and the center still wobbles softly. If using a thermometer, aim for about 150–155°F / 65–68°C in the center.
- Cool gradually. Turn off the oven, crack the door slightly, and leave the cheesecake inside for 45–60 minutes.
- Cool at room temperature. Move the cheesecake to a rack and cool completely.
- Chill. Cover and refrigerate for at least 6 hours, preferably overnight.
- Slice and serve. Run a thin knife around the edge before releasing the springform ring. Slice cold with a sharp knife, wiping the blade between cuts.
Recipe Notes
- If your ricotta looks watery, drain it before making the filling.
- For a crustless version, skip the crust, line the pan well, grease the sides, and rely on the wobble and temperature cues rather than the exact time.
- For a stronger lemon flavor, use the zest of 2 lemons and up to 2 tbsp / 30 ml lemon juice.
- For a softer Italian-style variation, replace the cream cheese with mascarpone and chill overnight before slicing.
- Do not bake until the center is fully firm. A softly wobbly center is correct; use the doneness cues if you are unsure.
Storage
Store covered in the refrigerator for 3–4 days. Freeze whole or sliced cheesecake for 1–2 months for best texture. Thaw overnight in the refrigerator.
If the texture seems off after baking, check the troubleshooting guide before changing the formula.
FAQs
What happens if you skip the cream cheese?
You can make ricotta cheesecake without cream cheese, and many Italian-style versions do. The texture will be different: lighter, more delicate, more custardy, and often a little more rustic. The ricotta and cream cheese version is smoother and easier to slice, which is why it is the best first version for most home bakers.
Why does ricotta cheesecake taste lighter than regular cheesecake?
Ricotta has a softer dairy flavor than cream cheese, so the finished cheesecake tastes familiar but less dense. You still get the creamy sweetness of cheesecake, plus a little brightness from the lemon and a gentler finish from the ricotta.
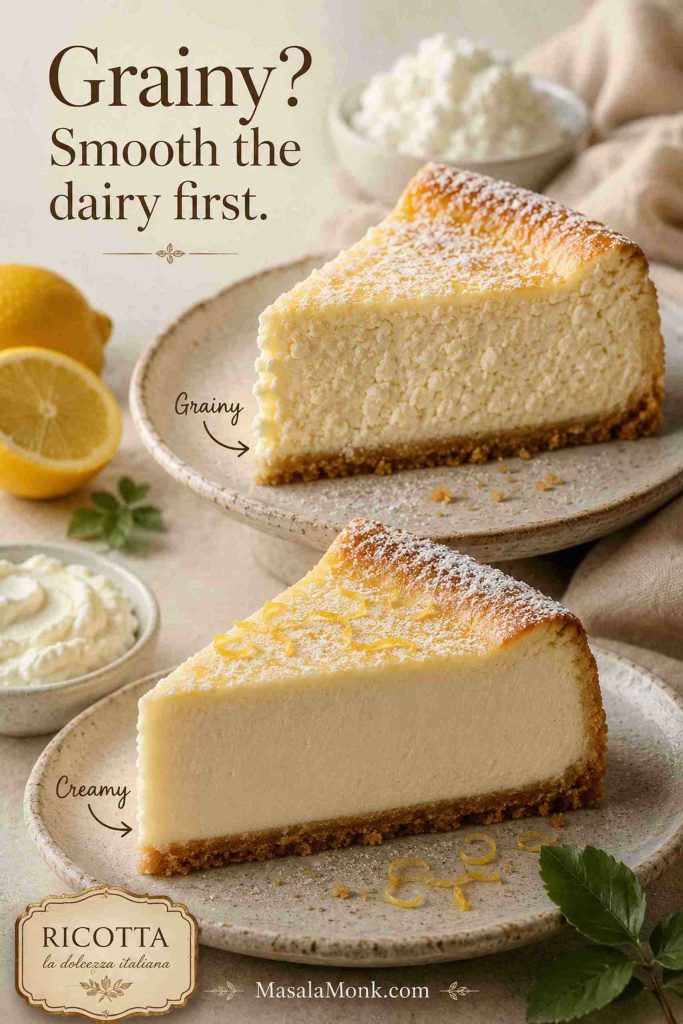
How do you keep ricotta cheesecake from turning grainy?
Start with the smoothest full-fat ricotta you can find, bring the dairy to room temperature, and blend the ricotta with cream cheese before adding eggs. If the ricotta tastes gritty before baking, blending can improve it, but it may not disappear completely.
When does ricotta need draining?
Check the container before you start. Thick ricotta can go straight into the batter, but ricotta with visible liquid should be strained first. Removing that extra moisture gives the cheesecake a steadier center and a cleaner cut.
Which pan size gives the best texture?
A 9-inch springform pan is the best default. An 8-inch pan makes a taller cheesecake and may need more time. A 10-inch pan makes a thinner cheesecake and may bake faster. Use the wobble and temperature cues instead of relying only on time.
How delicate is a crustless ricotta cheesecake?
A crustless ricotta cheesecake works well, but it is more delicate. Line the pan carefully, grease the sides, chill it fully, and release the springform ring only after the cake is cold.
What replaces a water bath in this recipe?
A low oven temperature, slow cooling, and full chilling replace the need for a water bath here. If you want extra moisture without risking a leak, place a pan of hot water on the lower oven rack instead of submerging the springform pan.
What should the center look like when it leaves the oven?
The edges should be set and the center should wobble softly. It should not slosh like liquid, but it should not look fully firm either. If using a thermometer, aim for about 150–155°F / 65–68°C in the center.
Mascarpone or cream cheese: which is better?
Cream cheese is better for the most reliable structure and cleanest slices. Mascarpone gives a softer, richer, less tangy Italian-style filling, but the cheesecake may feel more delicate and should be chilled overnight before slicing.
How well does ricotta cheesecake freeze?
Ricotta cheesecake freezes well enough for planning ahead, especially in slices. Chill it completely, wrap it tightly, and use it within 1–2 months for best texture. Thaw overnight in the refrigerator.
Should you serve ricotta cheesecake cold or closer to room temperature?
Slice it cold for the cleanest look. For a softer bite, let individual slices sit at room temperature for 10–15 minutes before serving. That short rest opens up the ricotta and lemon flavor without making the slice messy.
Ricotta cheesecake or ricotta pie: which one are you making?
A springform-pan dessert that slices like cheesecake is ricotta cheesecake. A pie-crust or pie-pan version that eats more like sweet ricotta custard is closer to ricotta pie. The ingredients can overlap, but the structure and eating experience are different.
Final Tip
The best ricotta cheesecake is not about chasing a perfect bakery surface. It is about giving the ricotta the right support: remove excess moisture, blend the filling well, bake gently, and let the refrigerator finish the work. Do that, and you get a cheesecake that feels creamy, calm, and elegant rather than heavy or fussy.