Posted on — Leave a comment

Japanese Pancakes Recipe: Tall, Fluffy Soufflé Pancakes

Tall Japanese soufflé pancakes stacked on a pale plate with whipped cream, powdered sugar, and syrup nearby.

Japanese pancakes look magical until you try to make them at home. They rise like little clouds, jiggle when the plate moves, and seem soft enough to collapse under a spoon. Then the real fear arrives: what if they spread flat, burn on the bottom, stay raw in the center, or puff up beautifully in the pan and sink the second you serve them?

The real challenge is technique, not ingredients. That is the moment this Japanese pancakes recipe is built for. The ingredients are simple, but the method matters. These are not regular pancakes with extra baking powder. They are small soufflés cooked like pancakes, and once you treat them that way, the method starts to make sense.

The secret is a stable meringue, gentle folding, controlled heat, a little steam, and patience. In this guide, you will get exact grams and spoon measures, the right batter texture, the meringue stage to aim for, ring-mold and no-mold methods, a pancake-mix shortcut, and clear fixes for deflating, spreading, burning, shrinking, and raw centers. If you only remember one framework, start with the 3 checks that decide whether Japanese pancakes rise or collapse.

By the time you reach the pan, you will know what the meringue should look like, how the batter should stand, when to flip, and why a pancake that looks almost ready often needs one more covered minute. That extra minute is not hesitation; it is usually the difference between a pancake that holds and one that sinks as it cools.

If you want a more classic pancake stack instead of the tall soufflé style, you may also like these fluffy buttermilk pancakes with stewed cinnamon apples. This recipe is for the café-style Japanese soufflé pancakes that are tall, soft, jiggly, and best eaten right away.

This is the home-cook target: soft, tall pancakes that feel special without needing every edge to look like a perfect café cylinder.

Homemade fluffy Japanese soufflé pancakes stacked on a plate with powdered sugar and a fork nearby.
A home batch does not need perfect café edges; instead, aim for fluffy soufflé pancakes with height, softness, and a fully set center.

Quick Answer: How Do You Make Fluffy Japanese Pancakes?

Japanese pancakes, often called Japanese soufflé pancakes, are tall pancakes made by folding whipped egg whites into a small yolk batter and cooking the batter slowly in a covered pan. The fluff comes mostly from meringue, not from baking powder alone.

For the best height, beat the egg whites to glossy stiff peaks, fold gently, scoop the batter into tall mounds, cook on gentle heat, and use a little steam so the center sets before the outside over-browns. A ring mold gives the neatest shape, but the no-mold Japanese pancake method works by stacking the batter in layers. If your first batch spreads, burns, or sinks, use the troubleshooting guide before changing the whole recipe. Serve them immediately because this soufflé-style texture naturally settles as it cools.

What Jiggly but Cooked Through Looks Like

The pancake should move softly, but it should still feel set. Think gentle spring, not wet batter hiding under a browned top.

A fork gently pressing into a soft Japanese soufflé pancake to show its springy texture.
Jiggly should mean soft and bouncy, not wet. If the pancake springs back gently, the center is much closer to ready.

Japanese Pancakes at a Glance

Yield2–3 thick pancakes
Texture goalTall, soft, airy, gently jiggly, cooked through
Meringue targetGlossy firm/stiff peaks
Batter textureThick and spoonable; it should mound, not pour
Pan targetAbout 300°F / 150°C
Workable pan range285–320°F / 140–160°C
First side6–8 minutes covered, depending on size
Second side4–6 minutes covered
Cook timeAbout 12–15 minutes per batch
MoldOptional; no-mold method included
Best servedImmediately, ideally within 5–10 minutes
Japanese pancake quick guide showing two eggs, a 300°F pan cue, a lid, a water spoon, and pancakes.
Before cooking, remember the working numbers: two eggs, low heat near 300°F, a covered pan, steam, and quick serving.

What Are Japanese Pancakes?

In this tall, café-style version, Japanese pancakes means Japanese soufflé pancakes: soft, airy pancakes made with whipped egg whites and cooked gently until they rise into a thick, delicate stack.

They are different from regular pancakes. A normal pancake batter is mixed, poured, and cooked fairly quickly. Japanese soufflé pancake batter is built around foam. The egg whites are beaten into a meringue, folded into a yolk mixture, then cooked low and slow so the foam has time to set.

That is why the method feels more precise than a usual pancake recipe. You are not only browning batter on a pan. You are setting a fragile structure full of air. Once that idea clicks, the recipe stops feeling mysterious and starts feeling manageable.

Regular pancakes compared with taller Japanese soufflé pancakes and a meringue bowl in the background.
Because this batter is lifted by whipped egg whites, it behaves more like a delicate pan-cooked soufflé than a regular pancake.

Japanese Hotcakes vs Japanese Soufflé Pancakes vs Fuwa Fuwa Pancakes

The names can get confusing because several styles of Japanese pancakes appear in cafés, cookbooks, and social videos. Here is the simple difference.

TermWhat it usually meansTexture
Japanese hotcakesThicker, sweeter, more regular-style pancakes, often made from a batter or mixSoft, cakey, and sturdy
Japanese soufflé pancakesTall pancakes lifted with whipped egg whites and cooked slowlyAiry, jiggly, delicate, and cloudlike
Fuwa fuwa pancakesA texture-focused name for soft, fluffy pancakesLight, soft, and pillowy
Jiggly pancakesA social-media-friendly name for Japanese soufflé pancakesWobbly and tall, but still cooked through
Japanese hotcakes, Japanese soufflé pancakes, and a soft fuwa fuwa pancake texture shown together.
Japanese hotcakes are sturdier and more cake-like; soufflé pancakes need meringue, low heat, and steam for their tall café-style texture.

This recipe focuses on the tall, meringue-based pancake version. Japanese soufflé cake is a different dessert, usually closer to Japanese cheesecake or cotton cheesecake, which is baked rather than cooked on a skillet. There is a short note on that difference later in the post.

So if you came here for the tall, jiggly café pancakes, you are in the right place. If you wanted a sturdier everyday hotcake, treat this as the soufflé-style weekend version instead.

What Does Fuwa Fuwa Mean?

Fuwa fuwa is a Japanese expression used for something soft, airy, and fluffy. In a pancake context, it describes the texture people want from café-style Japanese pancakes: tall, tender, light, and gently wobbly.

Fuwa fuwa texture does not come from making the batter sweeter or loading it with baking powder. It comes from air. The egg whites trap tiny bubbles, sugar helps stabilize those bubbles, and gentle heat gives the pancake enough time to cook without collapsing too quickly.

Texture target: A good Japanese soufflé pancake should feel soft and airy, with a gentle jiggle. It should not be wet, runny, or raw in the center.

A Japanese pancake being pulled open to show a soft airy interior crumb.
Fuwa fuwa is the soft, airy texture you are chasing, so protect the foam from mixing bowl to pan.

Before You Start: Set Yourself Up to Win

This small setup step makes the recipe much easier. Once the meringue is folded into the batter, the clock starts. The batter slowly loses air as it sits, so you do not want to stop halfway through to find a lid, wash a spatula, or clear space on the stove.

  • Use clean, dry bowls and beaters. Grease or yolk in the egg whites can weaken the meringue; the meringue guide shows what the right texture should look like.
  • Have the pan, lid, spatula, water, and serving plates ready. The batter should be cooked soon after folding.
  • Start with gentle heat. You can always cook a little longer, but you cannot un-burn the outside.
  • Make only 2–3 pancakes at once. Crowding makes flipping harder and lowers control.
  • Serve immediately. These pancakes are meant to be eaten fresh, while the structure is still warm and lifted.

Why the Egg White Bowl Must Be Clean

Before you beat the whites, check the bowl and beaters. This tiny setup detail protects the foam that gives the pancakes their height.
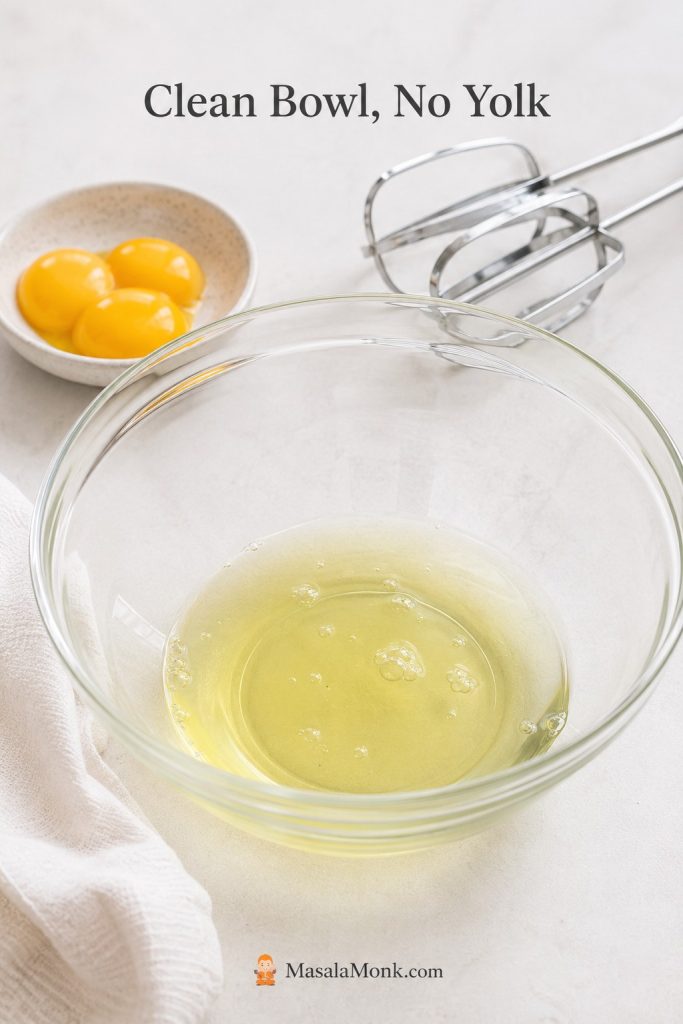
Egg whites in a clean bowl with separated yolks and beaters nearby for making meringue.
Start with spotless egg whites. Even a small streak of yolk or grease can keep the meringue from whipping properly.

Beginner reassurance: Your first batch may not look like a café stack, and that is completely normal. If the pancakes taste good but sit a little lower, you are already close. The next batch usually improves once you understand your pan heat and meringue texture.

Why This Japanese Pancakes Recipe Works

Home kitchens are messy in the best way: one stove runs hot, another pan holds heat differently, and not everyone has a ring mold. Instead of asking you to trust the timer blindly, this method shows you what to look for at each stage.

  • Meringue gives height. The whipped egg whites are the main lift in this style. Baking powder helps a little, but it cannot replace a strong foam.
  • A small amount of flour keeps the pancakes light. Too much flour makes them cakey and heavy; too little structure makes them fragile.
  • Cornstarch gives extra support. A teaspoon helps the delicate foam hold together without making the pancake dense.
  • Slow covered cooking sets the middle. Tall pancakes need more time than normal pancakes. High heat gives you a browned outside and a wet center.
  • Steam helps the pancake set. A covered pan traps moisture and heat around the tall batter so the inside cooks through.
  • Layered scooping builds height without a mold. Instead of pouring all the batter at once, you add it in mounds so the pancake rises upward, not outward.

The 3 Checks That Decide Whether They Rise or Collapse

If the recipe starts to feel fussy, bring it back to three checks: the meringue should hold itself, the batter should stand in a mound, and the heat should be gentle enough that the middle sets before the bottom browns too deeply.

CheckWhat you wantWhat it tells you
MeringueShiny, firm peaks that hold their shapeA drooping meringue usually leads to spread; a dry, clumpy one is hard to fold smoothly.
BatterThick, airy, and able to mound on a spoonA batter that slides off the spoon instead of sitting in a mound will usually cook flatter.
HeatGentle enough to cook slowly under a lidThe bottom should set and lightly color while the center has time to catch up.

Meringue Stages for Japanese Pancakes

Use the meringue stage as your first checkpoint. Foam is too early, soft peaks are usually weak, glossy firm peaks are the target, and dry clumps mean you went too far.
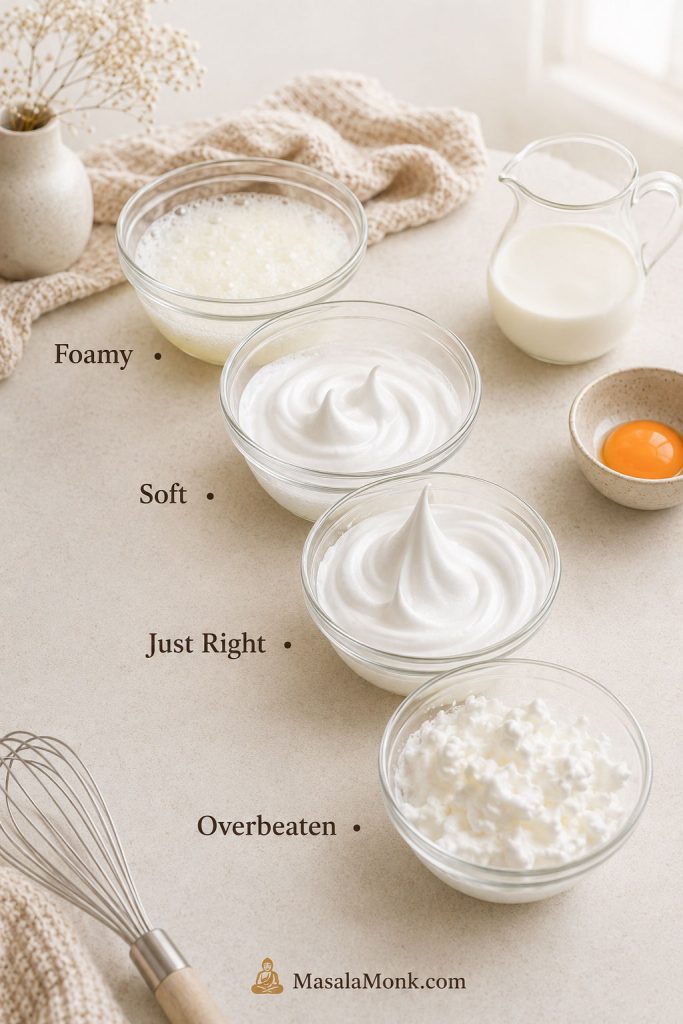
Four meringue stages for Japanese pancakes showing foamy, soft, glossy stiff, and overbeaten egg whites.
Use the stages as a checkpoint: keep beating past foam and soft peaks, then stop at glossy firm peaks before the meringue breaks.

A pancake that looks tall but feels liquid under the spatula needs more covered time, not a brave flip. In testing, the pancakes that looked almost ready were usually the ones that needed one more covered minute.

Ingredients for Japanese Soufflé Pancakes

Use a scale if you have one. This is a tiny batter, so small changes matter. An extra splash of milk can make the batter slide instead of mound, and a heavy scoop of flour can make the pancakes feel cakey instead of cloudlike. The gram amounts in this recipe are the ones to follow here. After mixing, compare your bowl with the batter texture cues before scooping.
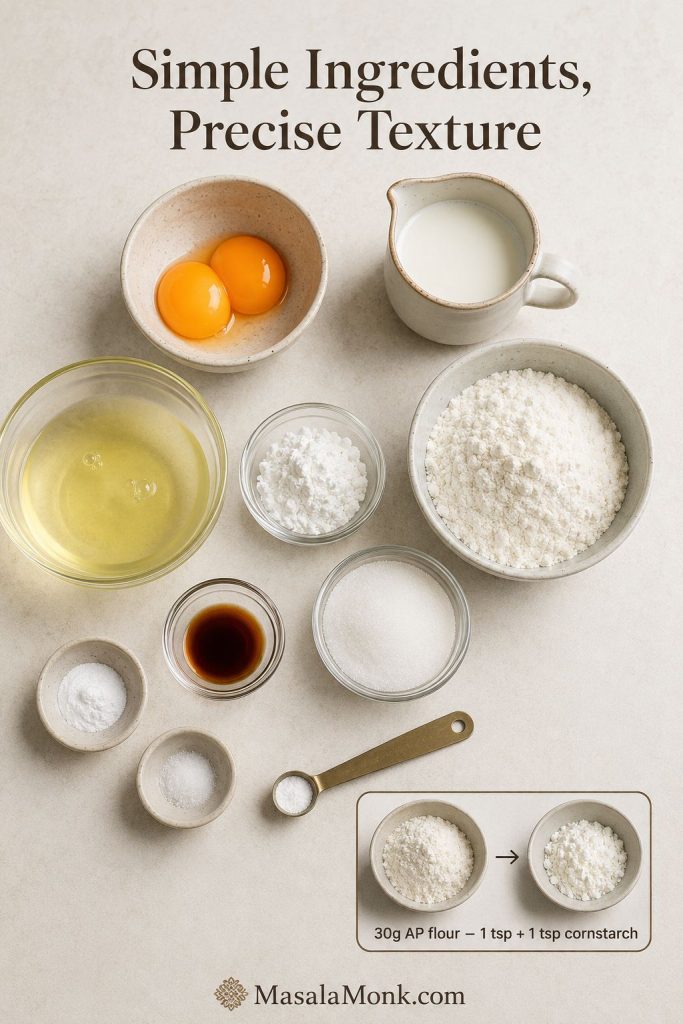
Ingredients for Japanese soufflé pancakes arranged on a counter with eggs, milk, flour, sugar, cornstarch, and a cake flour swap note.
Small measurements matter here: too much milk loosens the batter, while careful flour and cornstarch balance keeps the texture light.
IngredientAmountWhy it matters
Large egg yolks2 yolks, about 35–40gMake the rich base of the batter
Large egg whites2 whites, about 60–65gCreate the main soufflé lift
Whole milk20ml / 1 tbsp + 1 tspLoosens the yolk batter without making it runny
Vanilla extract½ tspSoftens the eggy flavor
Cake flour30g / about ¼ cup spooned and leveledGives light structure
Cornstarch1 tsp / about 3gHelps support the delicate foam
Baking powder¼ tspAdds a little backup lift
Fine saltPinchBalances the sweetness
Granulated sugar24–25g / 2 tbspSweetens and stabilizes the meringue
Cream of tartar¼ tspHelps stabilize the egg whites
Neutral oil or melted butterFor greasingPrevents sticking without frying the pancake
Water1–2 tbsp totalCreates steam under the lid

Ingredient Notes and Substitutions

Cake flour: Cake flour gives a lighter pancake. If you do not have it, measure 30g all-purpose flour, remove 1 teaspoon, and replace that teaspoon with cornstarch.

Cream of tartar: This helps the egg whites whip into a more stable meringue. If you do not have it, use 1 teaspoon lemon juice or ½ teaspoon white vinegar instead.

Egg temperature: Cold eggs can be easier to separate cleanly, while room-temperature whites usually whip faster. Either works here as long as the bowl is clean and the whites are beaten to the right stage.

Milk: Whole milk gives the best body. Add more only if the yolk batter is too stiff to mix. The finished batter should feel light but not loose.

Optional taller version: For a taller café-style pancake, use 3 egg whites and 2 yolks. Keep the other ingredients the same, but fold carefully because the batter becomes more delicate. Start with the basic 2-white version if this is your first try.

Equipment: What You Need and What You Don’t

You do not need a professional kitchen to make fluffy Japanese pancakes. The most important “equipment” is really control: a clean bowl for the whites, a pan that heats gently, and a lid that traps steam around the tall batter. If you have molds, see how to use a ring mold; if not, the no-mold method is built for a normal home pan.
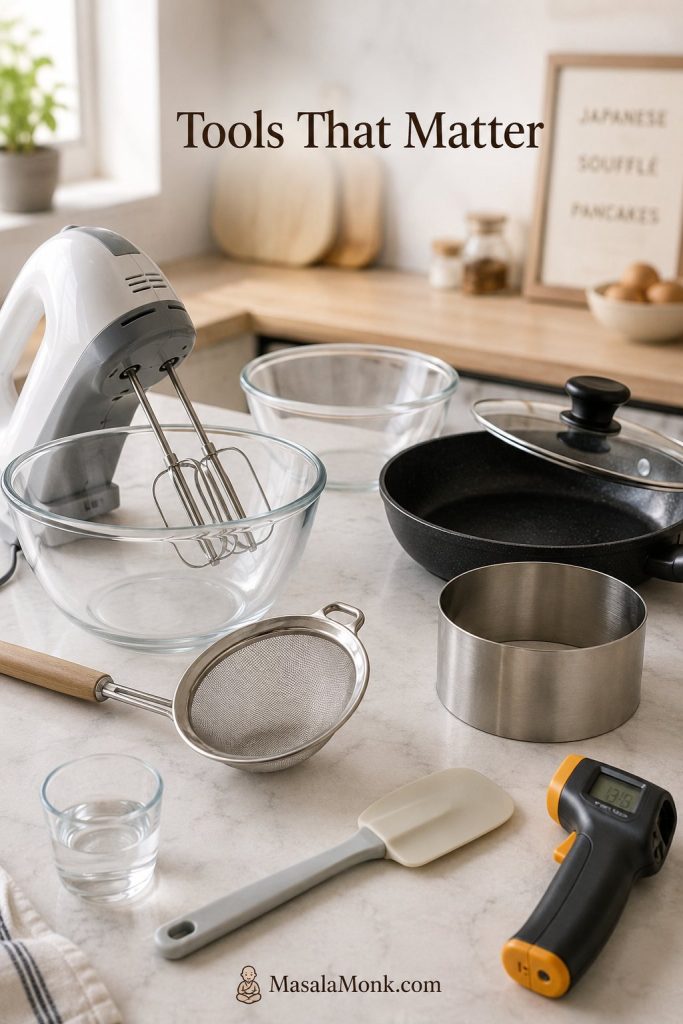
Equipment for Japanese soufflé pancakes including mixing bowls, beaters, a pan, lid, spatula, ring mold, and thermometer.
The most useful tools are the ones that give control: clean bowls, steady heat, a lid for steam, and a thin spatula.

Essential Equipment

  • Electric hand mixer or stand mixer
  • Two clean mixing bowls
  • Fine mesh sieve
  • Nonstick pan or electric griddle
  • Tight-fitting lid, preferably tall enough not to touch the pancakes
  • Thin flexible spatula
  • Paper towel for spreading a thin film of oil

Helpful but Optional

  • Cookie scoop or disher for even mounds
  • Piping bag for cleaner shaping
  • Ring molds for straighter sides
  • Infrared thermometer for checking pan surface temperature
  • Instant-read thermometer for checking the center of the pancake

Choose Your Method: Ring Mold, No Mold, or Pancake Mix

There is more than one way to make these pancakes, and the best path depends on your tools and comfort level. A ring mold gives the neatest sides, the no-mold method is friendlier for home cooks, and pancake mix is a convenience shortcut rather than a magic fix.

MethodBest forWhat to watch
Basic 2-white batterFirst attempts and best controlStart here before trying a taller, more delicate version.
No moldHome cooks who want fewer toolsThe batter must be thick enough to mound; the shape will be softer.
Ring moldVery tall, straight-sided pancakesGrease the mold well and fill only halfway to two-thirds full.
Pancake mix shortcutConvenienceThe mix replaces the dry base, not the whipped egg whites.
3-white versionExtra height after you know the methodFold carefully because the batter becomes more delicate.
A straight-sided ring mold Japanese pancake beside a softer no-mold Japanese pancake on plates.
Ring molds give cleaner sides, but a strong no-mold batter can still make fluffy Japanese pancakes worth serving proudly.

A ring mold can make the pancakes look more like café cylinders, but it is not required for a lovely plate. Without a mold, expect softer café-style mounds rather than perfectly vertical sides. The texture can still be airy, tender, and special.

How to Make Japanese Pancakes Without a Mold

For the no-mold method, scoop the batter into tall mounds instead of pouring it. Use about two-thirds of the batter for the first mounds and reserve the rest for topping them after the base starts to set.

No-Mold First Layer

The first scoop should sit tall in the pan. Once that base begins to set, it can hold more batter without spreading as much.
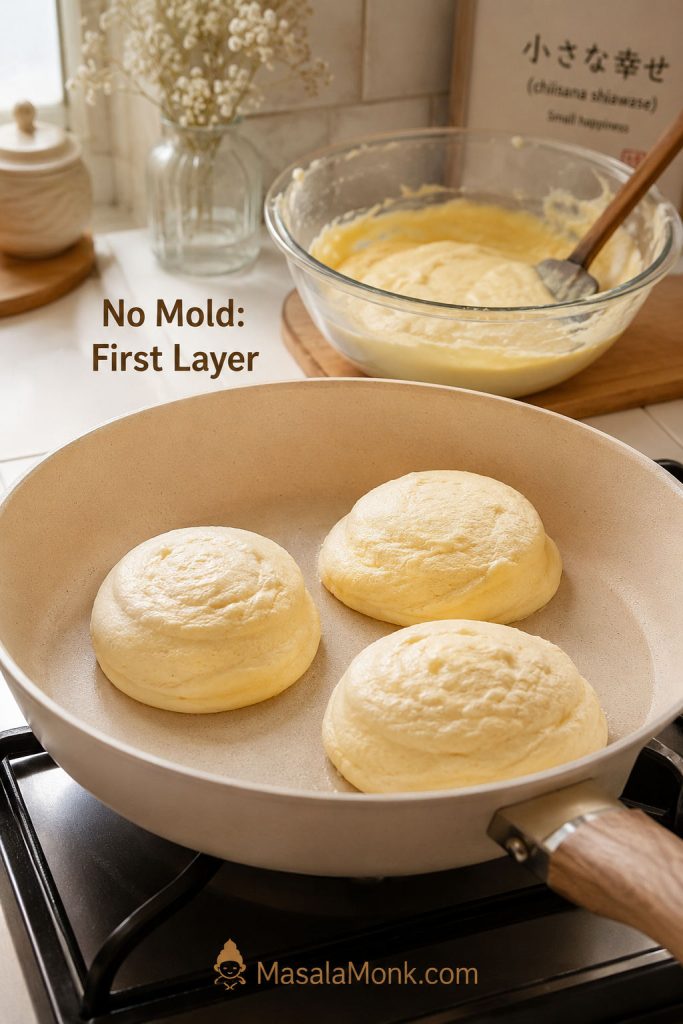
Three no-mold Japanese pancake batter mounds cooking in a pan with a bowl of batter behind them.
For the no-mold method, start with thick first-layer mounds; once they begin to set, they can support the second scoop.
  1. Preheat the pan on gentle heat and wipe it with a thin film of oil.
  2. Scoop 2–3 tall mounds of batter into the pan, leaving space between them.
  3. Add 2 teaspoons water to the empty space in the pan, away from the batter.
  4. Cover and cook for 3–4 minutes, until the bottom layer starts to set.
  5. Add the reserved batter on top of each pancake.
  6. Cover again and cook until the sides look less glossy and the base releases cleanly.
  7. Flip gently, add another small splash of water, cover, and finish cooking.

How to Layer No-Mold Japanese Pancakes

Add the reserved batter after the first layer has started to hold its shape. This gives the pancake height without needing a ring mold.
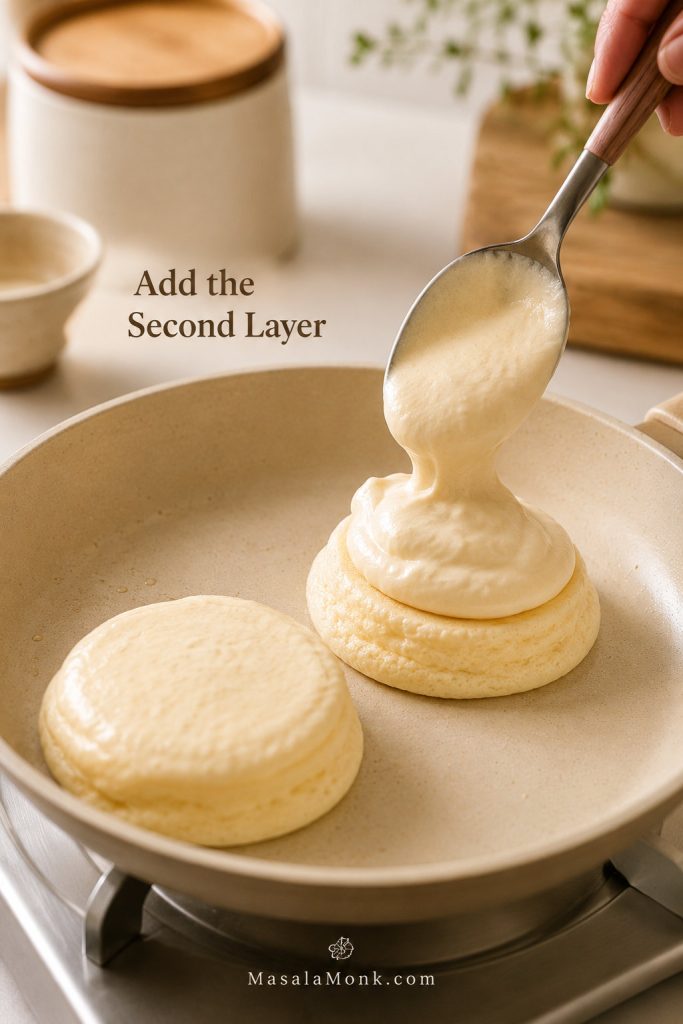
Reserved batter being spooned on top of a partially set no-mold Japanese pancake in a pan.
Add the second layer only after the base starts to set; otherwise, the batter spreads outward instead of stacking upward.

The no-mold pancakes may lean a little, and their edges may look softer. That is not failure. The win is a pancake that rises upward, cooks through, and lands on the plate warm and tender.

How to Use a Ring Mold

Use a ring mold about 2.5–3 inches wide and roughly 2 inches high. Grease the inside very well, place it in the pan, and fill it only halfway to two-thirds full. The batter needs room to rise.

How High to Fill a Ring Mold

Leave visible headroom in the mold. Filling to the top looks dramatic, but it gives the batter nowhere to rise.
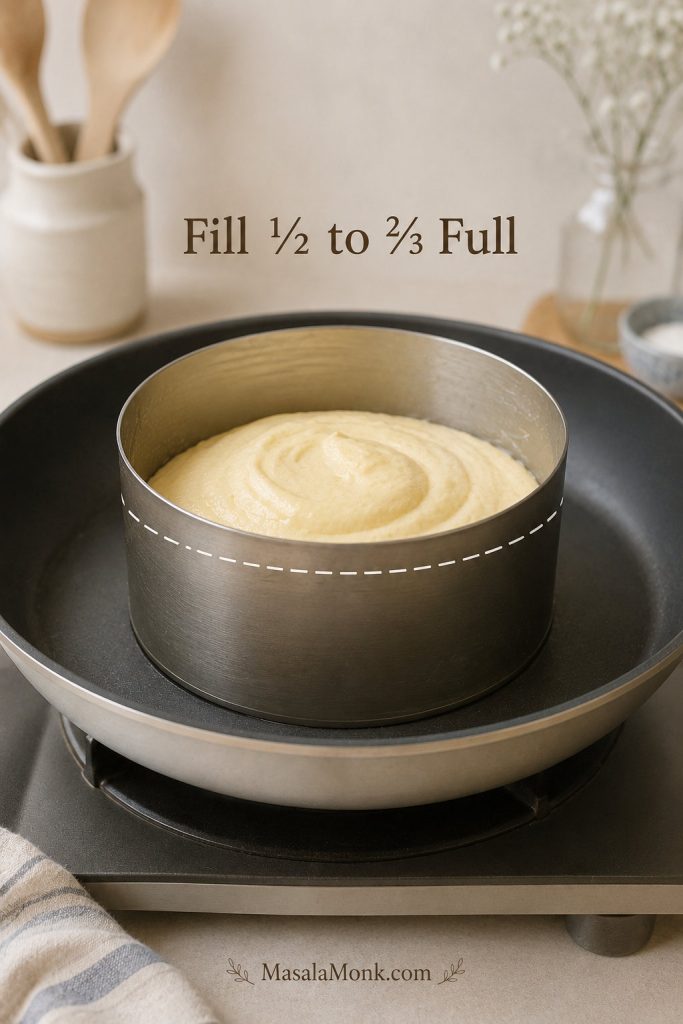
Japanese pancake batter inside a metal ring mold in a pan with a fill-height guide line.
Fill the ring mold only halfway to two-thirds full. The batter needs headroom to rise without spilling or compressing.

When flipping, slide a thin spatula under the mold and use tongs to steady the ring. A pancake that resists or looks wet at the sides is asking for more time. Ring molds get hot, so use tongs or a towel when adjusting them.

Meringue Guide: The Most Important Step

The meringue is where these pancakes get their height. Think of it as the scaffolding inside the pancake: too soft and the batter spreads; too dry and it becomes hard to fold smoothly.

A good meringue looks shiny and confident. It should not slide around the bowl like foam, and it should not break into dry chunks. When the peak stands with only a small bend at the tip, you are in the right zone. In testing, batter made with soft peaks spread quickly, even when the pan heat was right.

The Glossy Firm Peak Target

The target is not just “fluffy.” It is glossy, structured foam that can hold the batter up once it reaches the pan.
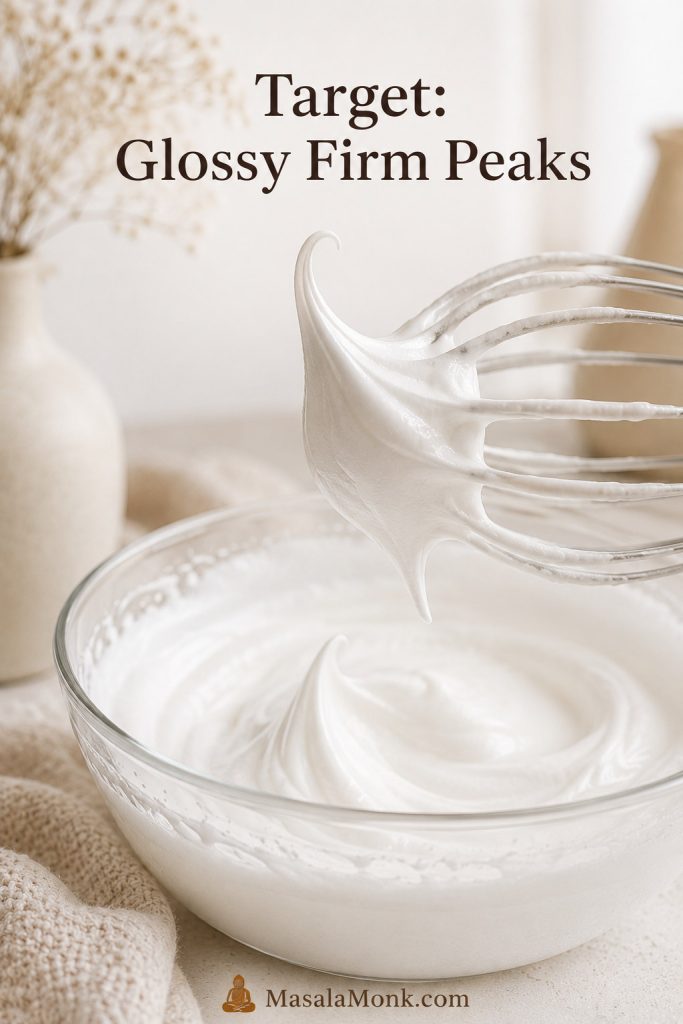
Glossy stiff meringue peak lifted from a bowl with a mixer beater.
This is the target texture: shiny, strong, and stable enough to help the batter mound in the pan instead of spread.

Soft Peaks vs Stiff Peaks

Soft peaks may seem close, but this batter needs a stronger foam. A drooping peak often becomes a spreading pancake.

Soft meringue peaks compared with stiff glossy peaks for Japanese pancake batter.
Soft peaks can look promising, but they often collapse after folding. Beat a little longer until the peaks stand firmly.
Meringue stageWhat it looks likeUse it?
FoamyBubbles with no real shapeNo. Too early.
Soft peaksPeak forms but droops overUsually too weak for tall pancakes.
Firm/stiff glossy peaksPeak stands upright or nearly upright; meringue looks smooth and shinyYes. This is the target.
Dry or clumpy peaksGrainy, dull, broken-looking foamNo. Overbeaten and harder to fold.

What Overbeaten Meringue Looks Like

The other mistake is going too far. Once the meringue looks dry, dull, and broken, it becomes harder to fold into a smooth, airy batter.
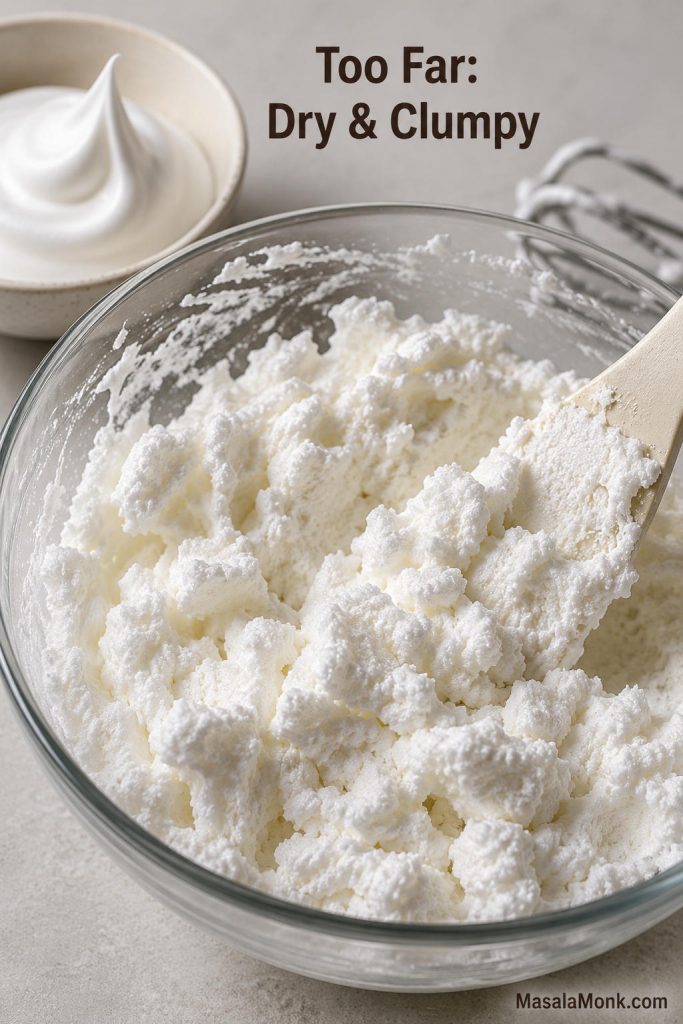
Dry clumpy overbeaten meringue in a bowl with a glossy peak comparison in the background.
Once meringue turns dry and clumpy, it becomes harder to fold evenly; next time, stop at glossy firm peaks.
  1. Use a clean, dry bowl. Any grease or yolk can weaken the foam.
  2. Start beating the egg whites with cream of tartar until foamy.
  3. Add the sugar gradually, not all at once.
  4. Beat until the meringue is shiny and structured enough to hold strong peaks.
  5. Stop before it turns dry, grainy, or chunky.

If the whites refuse to foam after a minute or two, it is usually better to start over in a clean bowl than to keep trying to rescue them. A little yolk or grease can quietly ruin the lift.

What the Batter Should Look Like

The batter should be thick, airy, and spoonable. It should hold its shape when dropped into the pan. It should not pour like crepe batter or spread immediately into a flat circle.
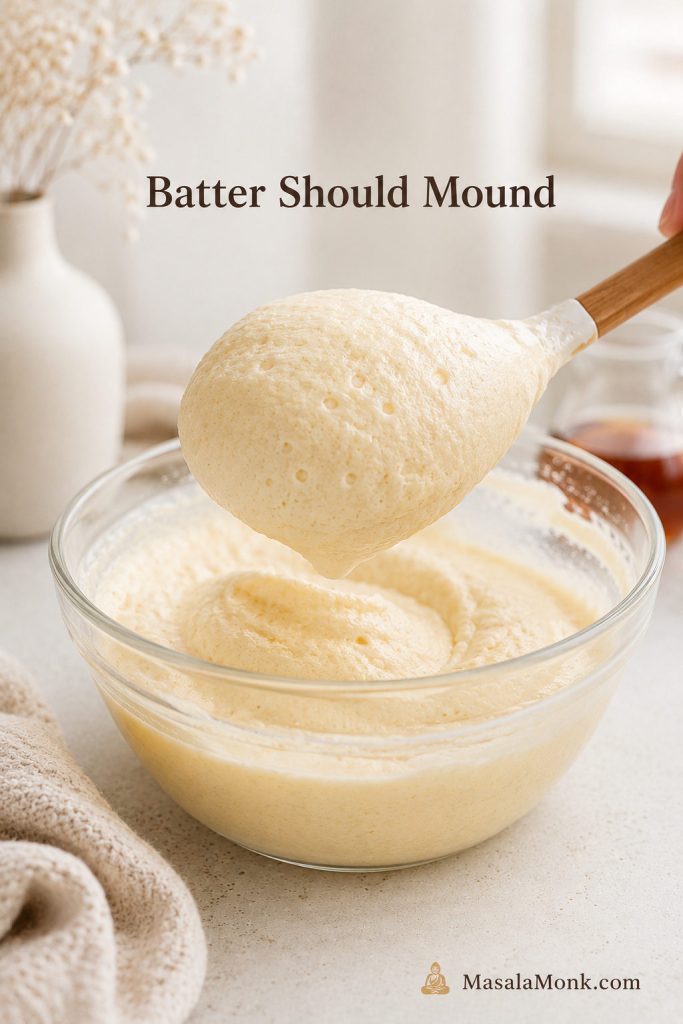
Thick Japanese pancake batter holding a mound on a spoon above a mixing bowl.
The batter should sit in a soft mound on the spoon. If it slides away quickly, the pancakes will likely spread.

When folding, keep the movement calm and broad. Sweep under the batter, turn it over itself, and stop before you flatten the air out of it. A few faint streaks are better than a perfectly smooth batter that has lost its lift.

Batter cueWhat it means
Thick and mounds on a spoonGood. The meringue is holding structure.
Loose and pourableMeringue may be underwhipped, overfolded, or the batter has too much liquid.
Lumpy with dry white clumpsMeringue may be overbeaten or not folded evenly.
Watery at the bottomBatter has started breaking down. Cook immediately, but expect less height.

Runny vs Moundable Batter

Before the pan gets involved, the bowl already tells you a lot. Batter that sits in a mound has structure; batter that flows quickly is already warning you it may spread.
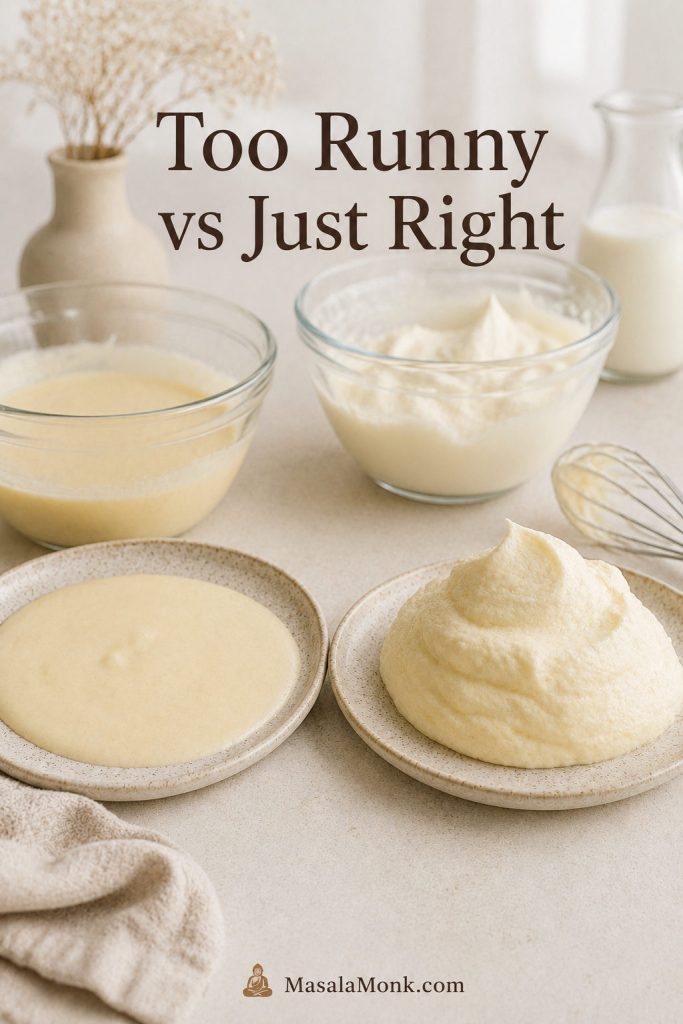
Runny Japanese pancake batter compared with thicker moundable batter in two bowls.
Check texture before cooking: moundable batter rises upward, while runny batter usually flattens before it can set.

How to Make Japanese Soufflé Pancakes Step by Step

Read through the method once before starting. The batter is best cooked soon after folding, so it helps to have the pan, lid, spatula, water, and serving plates ready.

First-batch reality check: The first pancake is where you learn your pan. A quick-browning bottom means the heat needs to come down. A spreading mound points back to the meringue or batter texture. A shorter but cooked-through pancake is still progress.

1. Separate the Eggs

Separate 2 large eggs into yolks and whites. Keep the whites completely free of yolk. If you separated the eggs while cold, let the whites sit for a few minutes while preparing the yolk batter. They do not need to be perfectly room temperature; the final meringue stage matters more.

2. Make the Yolk Batter

In a medium bowl, whisk the egg yolks, milk, vanilla, and salt until smooth. Sift in the cake flour, cornstarch, and baking powder. Whisk just until the batter is smooth and thick. Add extra milk only if the batter is too stiff to mix.

3. Beat the Meringue

In a clean bowl, beat the egg whites and cream of tartar until foamy. Add the sugar gradually while beating. Continue until the meringue is smooth, shiny, and firm enough to stand. If the peak stage feels unclear, check the glossy firm peak cue before folding. Soft peaks make soft pancakes; firm peaks give the batter a chance to rise tall.

4. Fold the Batter

Add about one-third of the meringue to the yolk batter and mix it in more freely to lighten the base. Add the remaining meringue in two additions, folding with a spatula until the batter is mostly even, thick, and airy.

Before scooping, the batter should match the moundable batter cues. A batter that sits proudly on the spoon is ready for the pan; one that slides away quickly will usually cook flatter, so move quickly and keep the mounds smaller.
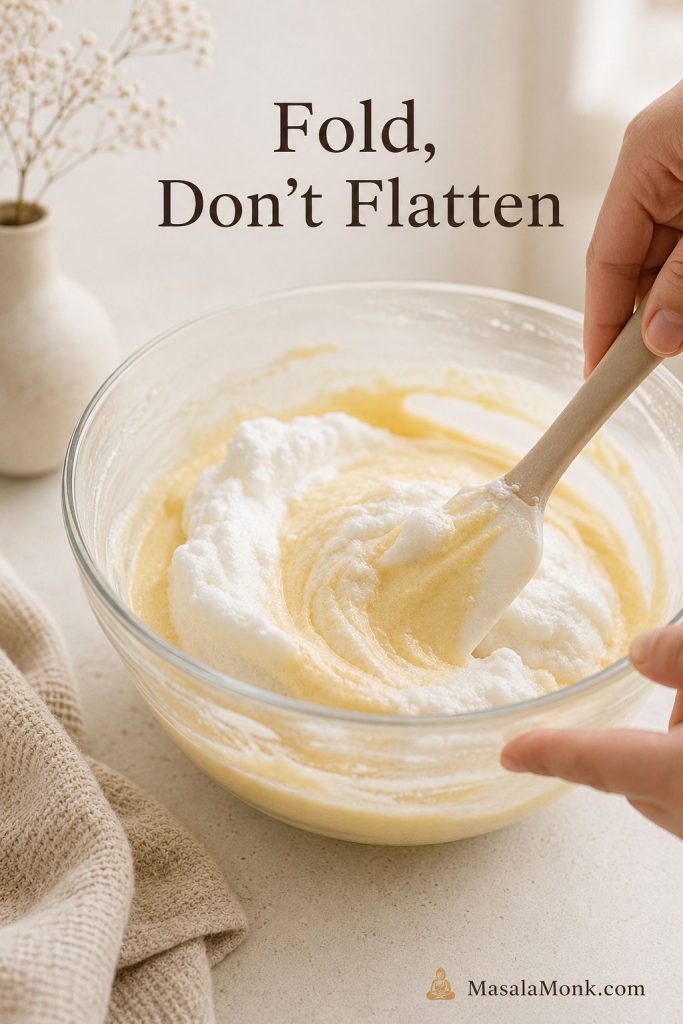
A spatula gently folding whipped meringue into Japanese pancake batter in a glass bowl.
Fold with broad, gentle strokes. A few faint streaks are better than a smooth batter that has lost its air.

5. Preheat the Pan Gently

Set a nonstick pan over gentle heat. If using an infrared thermometer, aim for about 300°F / 150°C, with a workable range of 285–320°F / 140–160°C. Wipe the pan with a very thin film of oil.

If your lid is low, use smaller mounds so the batter does not touch the lid as it rises.

6. Scoop and Steam

Scoop the batter into 2 or 3 tall mounds. Use about two-thirds of the batter for this first layer and reserve the rest for building height. Add 2 teaspoons water to the empty area of the pan, away from the batter, and cover immediately.
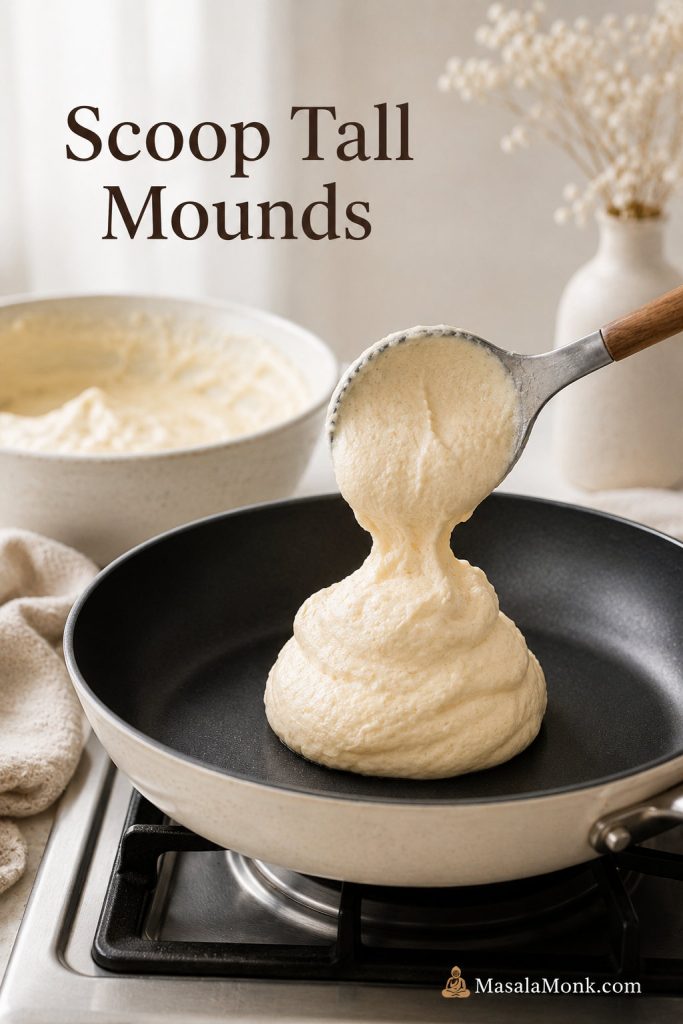
Thick Japanese pancake batter being scooped into a tall mound in a nonstick pan.
Scoop upward, not outward. Tall mounds give no-mold Japanese pancakes a better chance to rise instead of spreading flat.

7. Build Height

After 3–4 minutes, the first layer should look slightly more set around the base. Add the reserved batter on top of each mound. Cover again and continue cooking.

8. Flip Gently

Flip when the sides look less glossy, the bottom is lightly golden, and the pancake feels like it has a body of its own. The spatula should slide under with support, not drag through wet batter.

How to Know When Japanese Pancakes Are Ready to Flip

This is the part where most people want to move too soon. Wait for the sides to lose their wet gloss and for the pancake to feel supported under the spatula.
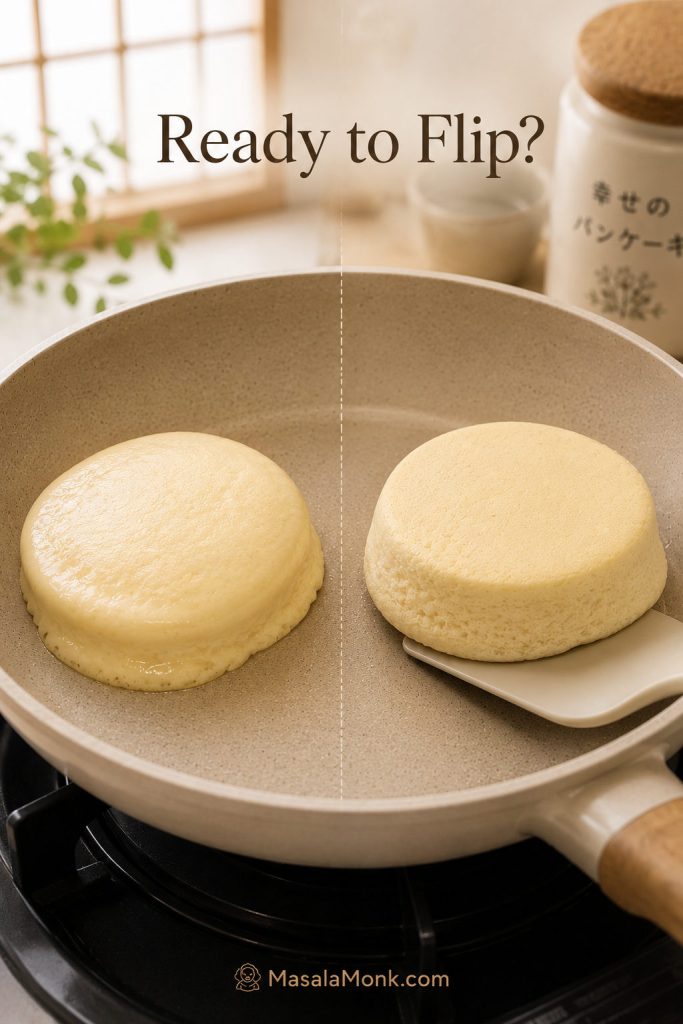
Two Japanese pancakes in a pan showing a glossy pancake that needs more time and a set pancake ready for a spatula.
Flip when the sides lose their wet gloss and the spatula slides underneath with support. If it drags, wait longer.

If you are nervous here, that is normal. The safer move is usually one more covered minute, not forcing the spatula under a pancake that is still wet at the sides. Use the flip-readiness cues before trying again.

After flipping, add another small splash of water, cover, and cook until the second side is set. Let the pancake keep the air you built into it; a gentle flip is enough.

A tall Japanese soufflé pancake being lifted gently with a thin spatula in a pan.
Use a thin spatula and a calm hand. A rough flip can press out the air you worked so hard to keep.

9. Serve Immediately

These pancakes have a short golden window. Bring the plate to the table first, then bring the pancakes. A little settling is normal because the hot air inside cools, but they are at their softest and tallest right away.

The best bite is warm, soft, and custard-tender in the center without being wet. The pancake should give under the fork, then spring back just a little. That is the café-at-home moment you are cooking toward.

Low Heat and Steam: Time, Temperature, and Doneness

Most failed Japanese pancakes come down to heat. Tall batter needs time. When the pan is too hot, the outside browns before the inside cooks. When the pan is too cool and the lid is lifted too often, the center can stay gummy.

Best Pan Temperature for Japanese Pancakes

Think gentle surface heat, not a hot pancake rush. A pan near 300°F gives the foam time to set before the bottom goes too dark.
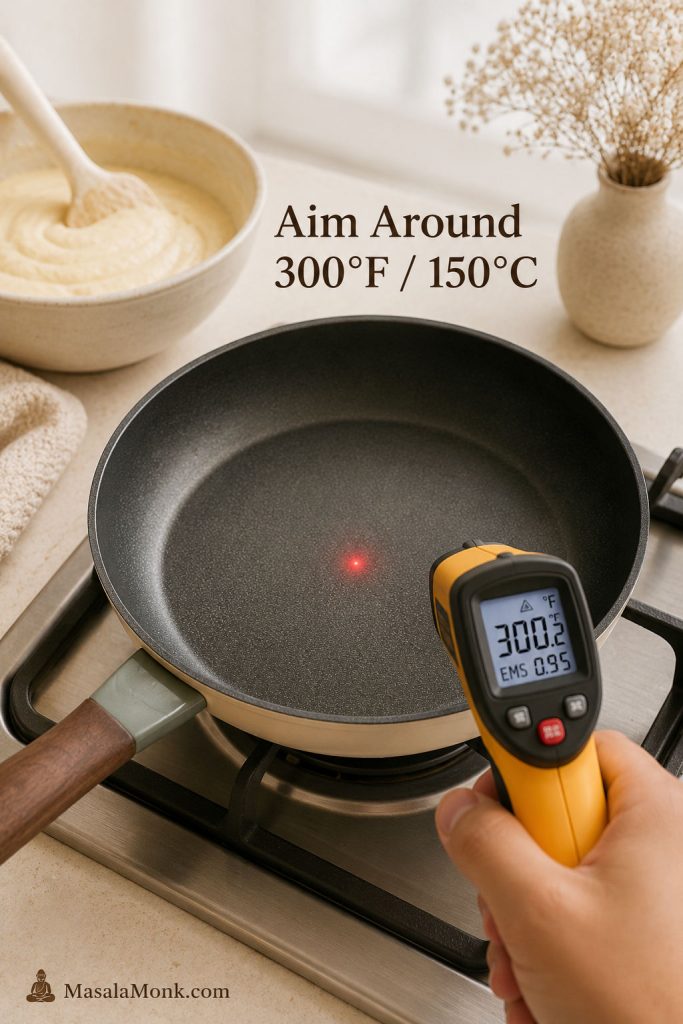
Infrared thermometer aimed at a nonstick pan to check the temperature for Japanese soufflé pancakes.
Keep the pan gentle, not blazing hot. Around 300°F gives the center time to cook before the outside browns too fast.

The bottom should not race ahead of the middle. A sweet, warm pancake smell is fine; a toasted smell before the sides look set is your cue to lower the heat. The batches that browned fastest were also the ones most likely to stay wet inside. If the outside is browning while the middle stays wet, go straight to the raw center fix.

Cooking cueBest target
Pan surface temperature285–320°F / 140–160°C
Ideal targetAbout 300°F / 150°C
First side6–8 minutes total, covered
Second side4–6 minutes, covered
Steam water2 teaspoons to 1 tablespoon at a time
Optional center temperatureAbout 160°F / 71°C
Best serving windowImmediately, ideally within 5–10 minutes

The water should go into the empty space in the pan, not on top of the batter. You only need enough to create a quiet puff of steam under the lid, not a puddle.

Where to Add Water for Steam

Place the water beside the batter so the steam can circulate around the pancakes. Pouring on top can thin or disturb the mounds you just built.
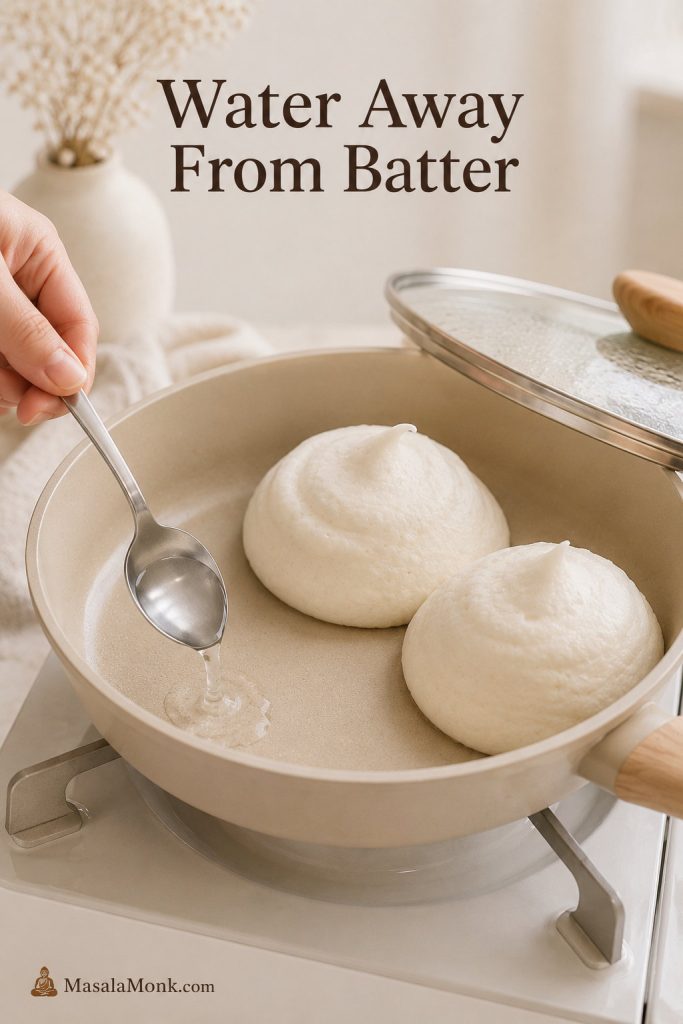
A spoon adding water to the empty space beside Japanese pancake batter in a pan.
Add water to the empty pan space, then cover. That way, steam surrounds the pancakes without thinning the batter.

Why Covered Steam Cooking Matters

Once covered, the pan becomes a small steam chamber. Keep the lid on long enough for the center to set instead of chasing color too early.
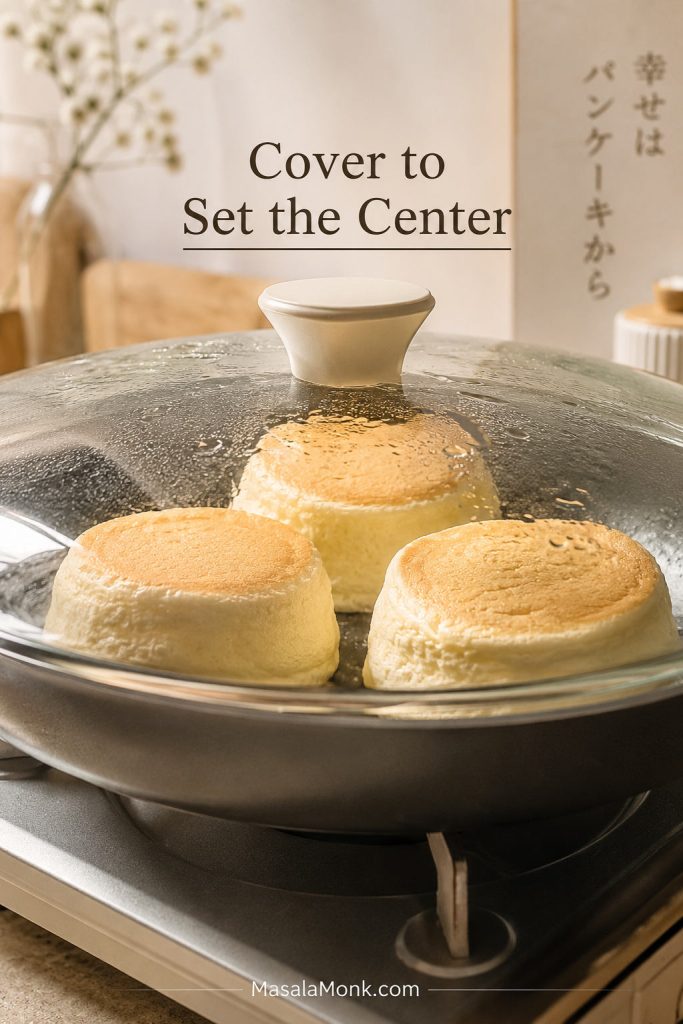
Japanese soufflé pancakes cooking under a clear glass lid with steam and condensation.
Once the lid goes on, let the steam work. Opening too often releases heat and slows the center from setting.

How to Tell If the Pan Is Too Hot or Too Cool

What you seeWhat it meansWhat to do
Bottom browns deeply in 2–3 minutesPan is too hotLower the heat and move the pan off the burner briefly
Edges look cooked but center feels liquidHeat is too high or pancake is too thickCover longer on low heat and make smaller mounds next time
Pancake barely colors after 8 minutesPan may be too coolIncrease heat very slightly, but keep it gentle
Pancake deflates when lid opensStructure is not set yetCover again and give it more time before flipping

Keep the lid on as much as possible. Every time you lift it, you release heat and steam, and the pancakes may take longer to set.

Optional safety cue: If using a thermometer, aim for about 160°F / 71°C in the center. The pancake should also feel softly bouncy, not liquid, when touched gently. For general egg-dish temperature guidance, see the USDA egg safety guide.

Can You Make Japanese Soufflé Pancakes With Pancake Mix?

Yes, you can make a shortcut version with pancake mix, but use it for fewer dry ingredients, not to skip the soufflé technique. The height still comes from whipped egg whites.

Think of pancake mix as a replacement for the flour, baking powder, and part of the dry base. It does not replace separated eggs, meringue, slow covered cooking, steam, or gentle folding.

Japanese hotcake mix or regular pancake mix can both work, but the result may be a little sweeter, cakier, or more mix-flavored than the main recipe. Keep the heat low because mixes with sugar can brown faster.

If you want a more everyday pancake-mix direction instead of the soufflé method, this guide to blueberry pancakes and homemade pancake mix is the better place to go.

Simple Pancake Mix Shortcut Formula

IngredientAmount
Large eggs2, separated
Pancake mix3 tablespoons / about 25–30g
Milk1½–2 tablespoons / 22–30ml, added gradually
Vanilla½ teaspoon
Sugar2 tablespoons / 24–25g
Cream of tartarPinch to ¼ teaspoon, or a few drops of lemon juice

Start with 1½ tablespoons milk. Add the remaining ½ tablespoon only if the yolk batter is too stiff to mix. Pancake mixes vary, and a looser shortcut batter is harder to stack tall.

Make the yolk batter with the yolks, milk, vanilla, and pancake mix. Beat the whites with the acid and sugar until the meringue is glossy and holds its shape, then fold and cook the same way as the main recipe.

Shortcut truth: Pancake mix can make the dry ingredients easier, but it will not save a weak meringue. If the egg whites are not whipped well, the pancakes will still spread or deflate.

What Success Looks Like

A good batch does not have to look identical to a café pancake. Look for these signs instead.

  • The batter rises upward more than it spreads outward.
  • The sides look set instead of glossy-wet.
  • The pancake releases from the pan without tearing.
  • The center feels softly bouncy, not liquid.
  • The inside is moist and airy, not raw.
  • The pancakes settle slightly after serving, but do not collapse into flat rounds.

Normal settling means the pancakes soften and lower slightly as they cool. A failure collapse means they flatten quickly, slump into the plate, or look wet in the middle.

Save the batch: If the first pancakes are shorter than expected but cooked through and soft, serve them proudly with toppings. A slightly shorter pancake with a set center is better than a dramatic tall pancake that is wet inside.

Troubleshooting Japanese Pancakes

Most pancake problems are not disasters. They are clues. Find the problem you actually saw, not the problem you are afraid of, and the next batch becomes much easier.

This style is technique-sensitive, but the fixes are usually simple: strengthen the meringue, fold less, lower the heat, cook longer covered, or make smaller mounds.

Troubleshooting board showing Japanese pancakes that spread flat, burned on the bottom, collapsed, and stuck to a ring mold.
Use the failure shape as a clue: spreading points to batter, burning points to heat, collapse points to structure, and sticking points to mold prep.

Rise, Spread, and Collapse Problems

ProblemLikely causeFix nowNext time
Pancakes never roseMeringue was too soft, batter was overfolded, or the pan was too hot too soonCook them through, stack with toppings, and serve as soft pancakesBeat to firm peaks that hold their shape and fold more gently
Pancakes rose in the pan but collapsed on the plateCenter was undercooked or structure was too weakServe quickly; texture may still be pleasantCook longer covered and make slightly smaller mounds
Batter spread flatMeringue was underwhipped, batter was too loose, or too much milk was addedUse a ring mold if you have oneBatter should hold a mound, not pour

Heat, Doneness, and Texture Problems

ProblemLikely causeFix nowNext time
Outside burnedPan was too hotLower heat immediately and move pan briefly off the burnerUse gentle heat and aim for 285–320°F / 140–160°C
Center stayed rawPancakes were too tall, flipped early, or cooked too hot outsideCover and cook longer on low heatMake smaller mounds and use steam
Pancakes wrinkled or shrank at the sidesSudden cooling, undercooked center, or weak structureServe quickly while still warmCook until the center is set and avoid opening the lid too often
Eggy flavorUnderseasoned batter or undercooked centerAdd toppings such as fruit, cream, or syrupUse vanilla, salt, and enough cook time

Flipping, Batch, and Mold Problems

ProblemLikely causeFix nowNext time
Pancake cracked while flippingIt was flipped before the base setSupport with a second spatula if neededWait until the sides look less glossy and the base releases cleanly
Second batch was flatterBatter sat too long and lost airCook immediately if possibleMake a small batch or use two pans
Pancakes stuck to moldMold was not greased well enoughLoosen gently with a thin knifeGrease the inside of the ring generously before filling

Why Did My Japanese Pancakes Deflate?

The most common reasons are weak meringue, overfolded batter, heat that was too high, or an undercooked center. Some settling is normal after cooking, but a full collapse usually means the pancake did not have enough structure to hold itself.

Why Are My Pancakes Raw Inside?

The pan was probably too hot or the pancakes were too large. High heat browns the outside before the center has time to set. Lower the heat, cover the pan, use a little steam, and make slightly smaller mounds next time.
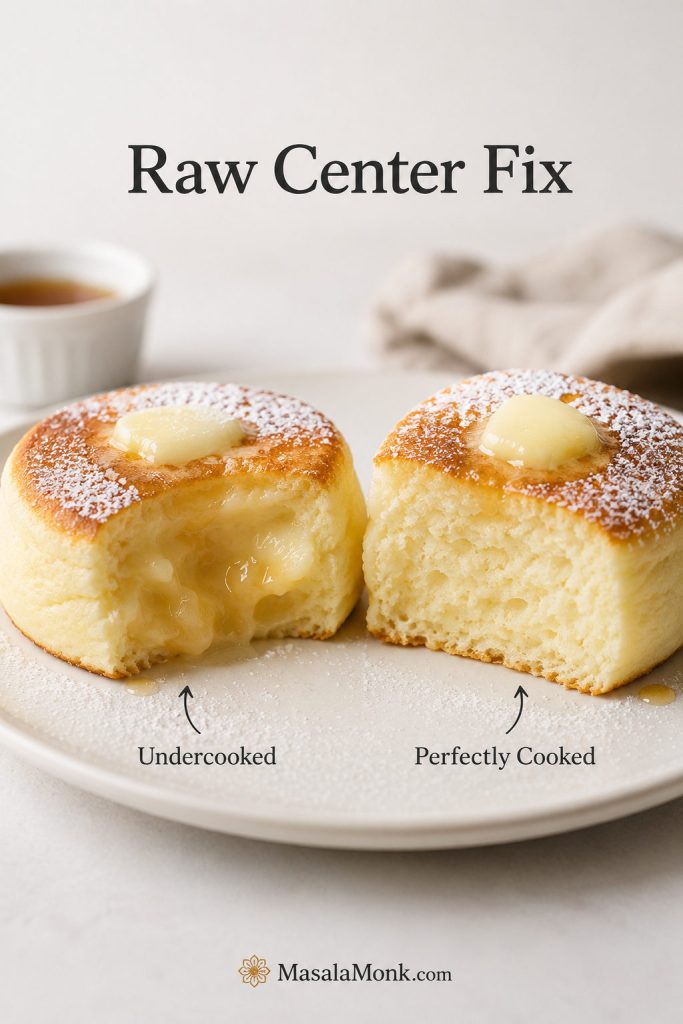
Cut Japanese pancakes showing an undercooked raw center beside a properly cooked airy center.
A raw center usually means the outside cooked too quickly. Lower the heat, cover longer, and let steam help next time.

Why Is My Batter Runny?

Runny batter usually means the meringue was underwhipped, overmixed into the yolk batter, or left sitting too long. The batter should look airy and thick enough to hold a mound.

Why Are They Not Jiggly?

They may be too thin, overcooked, or made with batter that lost too much air. The jiggle comes from height, moisture, and a set-but-soft center. Aim for thick mounds, gentle heat, and a center that feels bouncy rather than dry.

Why Was the Second Pancake Worse Than the First?

Soufflé pancake batter loses air as it sits. If the first pancake was tall and the later ones were flatter, the batter probably waited too long. For best results, cook all the batter at once in one large pan, use two pans, or make a smaller batch.

Best Toppings for Japanese Pancakes

Japanese soufflé pancakes are delicate, so the best toppings should make them feel café-special without crushing them. Think light cream, soft fruit, a little syrup, or a sauce served mostly to the side. The pancakes are the drama; the toppings should frame them.

Classic Café-Style Toppings

  • Powdered sugar
  • Softened butter
  • Maple syrup
  • Whipped cream
  • Fresh strawberries or mixed berries

For a warmer fruit topping, spoon over a little homemade apple pie filling; keep the portion light so it does not flatten the stack.

Japanese-Inspired Toppings

  • Matcha whipped cream
  • Sweet red bean paste
  • Black sesame cream
  • Kinako sugar
  • Yuzu honey

Dessert-Style Toppings

For the tallest look, finish with powdered sugar, berries, or a light cream first. Add heavier sauces at the table, after the pancakes have had their moment.

Can You Make Japanese Pancakes Ahead?

This is a cook-and-eat-now recipe, and that is part of its charm. The batter should not be made ahead because the meringue loses air as it sits. Cooked pancakes also deflate as they cool, which is normal for this style.

If you have leftovers, refrigerate them in an airtight container for up to 1 day. Reheat gently in a covered pan over low heat or microwave briefly at low power. They will still be soft, but they will not be as tall or jiggly as freshly cooked pancakes.

Japanese Soufflé Pancakes vs Japanese Soufflé Cake

Japanese soufflé pancakes and Japanese soufflé cake sound similar, but they are different recipes. The pancake version is cooked in a pan or on a griddle and served like breakfast pancakes. Japanese soufflé cake usually refers to Japanese cheesecake or cotton cheesecake, which is baked, sliced, and served as a dessert.

Both use meringue logic, so they share that soft, airy personality. However, the method, texture, and serving style are different. If you wanted the cake version, see this Japanese cheesecake recipe.

FAQs About Japanese Pancakes

Are Japanese pancakes and soufflé pancakes the same thing?

For this tall, café-style version, yes. Here, Japanese pancakes means Japanese soufflé pancakes: thick pancakes made with whipped egg whites and cooked slowly until soft, airy, and jiggly.

Do I need a ring mold?

No. A ring mold gives cleaner sides and more dramatic height, but the no-mold method still works if the batter is thick enough to mound. The shape will be softer, but the pancakes can still be fluffy and tender.

Why did my pancakes collapse after cooking?

A little settling is normal. A dramatic collapse usually means the meringue was too weak, the batter was overmixed, or the center needed more covered cooking time. The fix is usually stronger peaks, gentler folding, and a lower, slower pan.

How do I know when to flip them?

Flip when the bottom is lightly golden, the sides look less glossy, and the pancake releases cleanly from the pan. If the spatula drags through wet batter, cover the pan again and give it another minute.

Can I use pancake mix?

Yes, but pancake mix only replaces the dry base. You still need separated eggs, whipped egg whites, gentle folding, steam, and slow covered cooking for the soufflé height.

Can I make the batter ahead?

No. Once the meringue is folded in, the batter starts losing air. Make it, scoop it, and cook it right away for the best rise.

Can I double this recipe?

You can, but only if your pan or griddle can cook the batter right away. Soufflé pancake batter loses air as it waits, so a small fresh batch is usually better than a large bowl sitting on the counter.

Can I make them without cake flour?

Yes. Use 30g all-purpose flour, remove 1 teaspoon, and replace that teaspoon with cornstarch. The pancakes may be slightly less delicate than the cake-flour version, but the swap works well for this small batch.

Can I make them gluten-free?

A cup-for-cup gluten-free flour blend is the safest first experiment, but this batter is delicate, so results can vary. Almond flour is heavier and can make soufflé pancakes collapse more easily. For a more reliable gluten-free-style pancake, try almond flour pancakes instead.

Can I make these eggless or vegan?

Classic Japanese soufflé pancakes depend on egg-white meringue, so eggless or vegan versions need a separate tested formula. For an easier egg-free or vegan-friendly pancake direction, a recipe like oat pancakes is a better place to start.

Can I make keto Japanese soufflé pancakes?

Not cleanly with this exact recipe. Low-carb flours and sweeteners change the batter structure, and soufflé pancakes are already delicate. Use a dedicated keto pancake formula rather than adapting this one directly.

Why do they taste eggy?

Eggy flavor usually comes from undercooking, skipping vanilla or salt, or using a formula with a very high egg ratio. Cook the center through, keep the vanilla and salt, and serve with fruit, cream, or syrup.

What does fuwa fuwa mean?

Fuwa fuwa means soft, fluffy, and airy. For Japanese pancakes, it describes the cloudlike texture created by whipped egg whites and gentle cooking.

Once you understand the three checks — meringue that holds, batter that mounds, and heat that stays gentle — these pancakes stop feeling like a café trick. They become a small weekend project you can actually pull off, one covered minute at a time.

Serve Japanese Pancakes While They Are Tall and Warm

Bring the plate to the table first, then bring the pancakes. The reward is that first soft bite while the stack is still warm, lifted, and a little magical.

Tall Japanese soufflé pancakes with syrup, whipped cream, and a forkful showing the soft cooked interior.
Once the meringue, batter, and heat checks click, the final stack feels less like a café trick and more like a weekend win.

Japanese Pancakes Recipe Card

Japanese Pancakes Recipe: Fluffy Soufflé Pancakes

Tall, soft, jiggly Japanese soufflé pancakes made with whipped egg whites, a light yolk batter, gentle heat, and steam. Use the no-mold method for a simple home version or ring molds for straighter café-style sides.

Yield2–3 thick pancakes
Prep Time20 minutes
Cook Time12–15 minutes per batch
Total Time35–50 minutes

Ingredients

Yolk Batter
  • 2 large egg yolks, about 35–40g
  • 20ml whole milk, about 1 tablespoon + 1 teaspoon
  • ½ teaspoon vanilla extract
  • 30g cake flour, about ¼ cup spooned and leveled
  • 1 teaspoon cornstarch, about 3g
  • ¼ teaspoon baking powder
  • Pinch of fine salt
Meringue
  • 2 large egg whites, about 60–65g
  • 24–25g granulated sugar, about 2 tablespoons
  • ¼ teaspoon cream of tartar, or 1 teaspoon lemon juice, or ½ teaspoon white vinegar
For Cooking
  • Neutral oil or melted butter, for greasing
  • 1–2 tablespoons water, for steam, used in small splashes
  • Powdered sugar, whipped cream, berries, maple syrup, or toppings of choice

Instructions

Make the Batter
  1. Prepare the pan and tools. Set out the pan, lid, spatula, water, and serving plates before mixing.
  2. Separate the eggs. Place the yolks in one bowl and the whites in a clean, dry mixing bowl. Make sure no yolk gets into the whites.
  3. Make the yolk batter. Whisk the yolks, milk, vanilla, and salt. Sift in the cake flour, cornstarch, and baking powder. Whisk just until thick and smooth.
  4. Start the meringue. Beat the egg whites with cream of tartar until foamy. Add the sugar gradually.
  5. Beat to glossy stiff peaks. Continue beating until the meringue is shiny and holds strong peaks. Stop before it turns dry or clumpy.
  6. Fold the batter. Lighten the yolk batter with one-third of the meringue, then fold in the rest until the batter is thick, airy, and mostly even.
Cook and Serve
  1. Preheat gently. Heat a nonstick pan over low heat. If using a thermometer, aim for about 300°F / 150°C. Wipe with a thin film of oil.
  2. Scoop the pancakes. Add 2 or 3 tall mounds of batter, using about two-thirds first and reserving the rest. Add 2 teaspoons water away from the batter and cover.
  3. Build height. After 3–4 minutes, add the reserved batter on top. Cover again and cook until the sides look less glossy and the bottom releases cleanly.
  4. Flip carefully. Slide a thin spatula under each pancake and flip gently. Add another small splash of water, cover, and cook for 4–6 minutes more.
  5. Check doneness. The pancakes should be lightly golden, softly bouncy, and set in the center. If using a thermometer, aim for about 160°F / 71°C.
  6. Serve immediately. Dust with powdered sugar and add toppings. Some settling is normal as the pancakes cool.

Recipe Notes

  • Best cue: The batter should hold a soft mound, and the cooked pancakes should feel gently bouncy in the center.
  • If the batter spreads: The meringue was likely too soft, the batter was overfolded, or too much liquid was added.
  • If the center is raw: Lower the heat, cover longer, and make smaller mounds next time.
  • No-mold layering: Use about two-thirds of the batter for the first mounds and reserve the rest for topping.
  • For ring molds: Grease well and fill only halfway to two-thirds full.
  • For taller pancakes: Use 3 egg whites and 2 yolks, keeping the other ingredients the same, but fold carefully.
  • Pancake mix shortcut: Use the shortcut formula in the guide above; the mix replaces the dry base, not the whipped egg whites.
  • Storage: Best fresh. Leftovers can be refrigerated for 1 day, but they will lose height and jiggle.
Back to top

Posted on — Leave a comment

Fig Jam Recipe

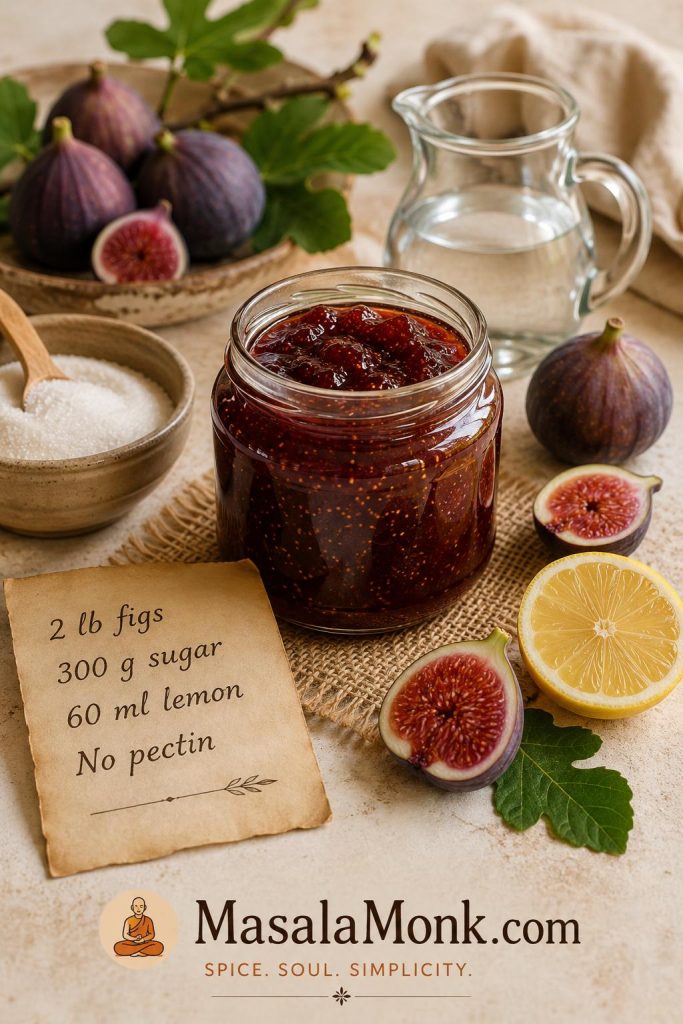
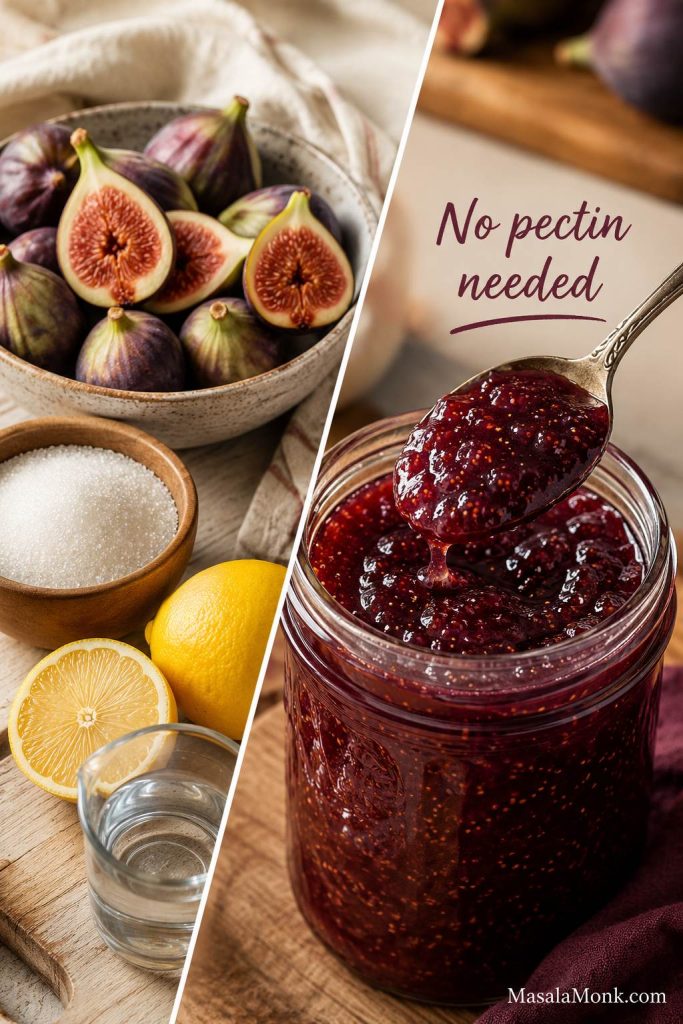
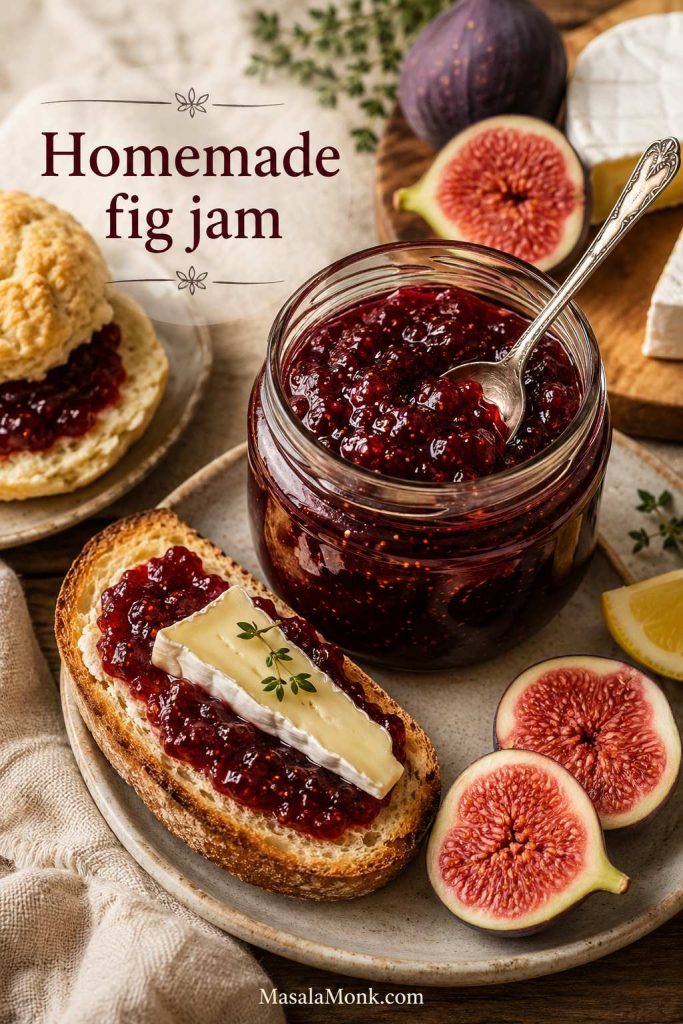
Open jar of homemade fig jam with a spoon lifting glossy no-pectin jam, fresh halved figs, lemon, and toast nearby.

When figs are good, they do not wait. They soften quickly, bruise easily, split at the seams, and can go from perfect to overripe almost overnight. Fig jam is one of the best ways to save that short, honeyed moment before it slips away.

This is the recipe for the day the figs finally give in — too soft to ignore, too fragrant to waste, and exactly ready for a pot of glossy, spoonable jam. The finished jar should taste like figs first: gently sweet, lifted by lemon instead of dulled by sugar, thick enough to spread, and soft enough to spoon over toast, yogurt, brie, goat cheese, cakes, cookies, sandwiches, flatbreads, and roasted meats.

The main method stays simple: fresh figs, sugar, lemon, a little water, and no commercial pectin. This is a fresh fig jam recipe first — soft-set, fruit-forward, and written for the refrigerator or freezer. Once the main method is clear, you will find dried fig, frozen fig, low-sugar, honey, cheese-board, and canning-safe notes clearly separated so you do not have to guess your way through substitutions.

So instead of giving you only one pot of jam, this guide shows you how to choose the right version for the figs you actually have.

Close-up spoonful of glossy fresh fig jam with visible fig seeds and soft fruit pieces.
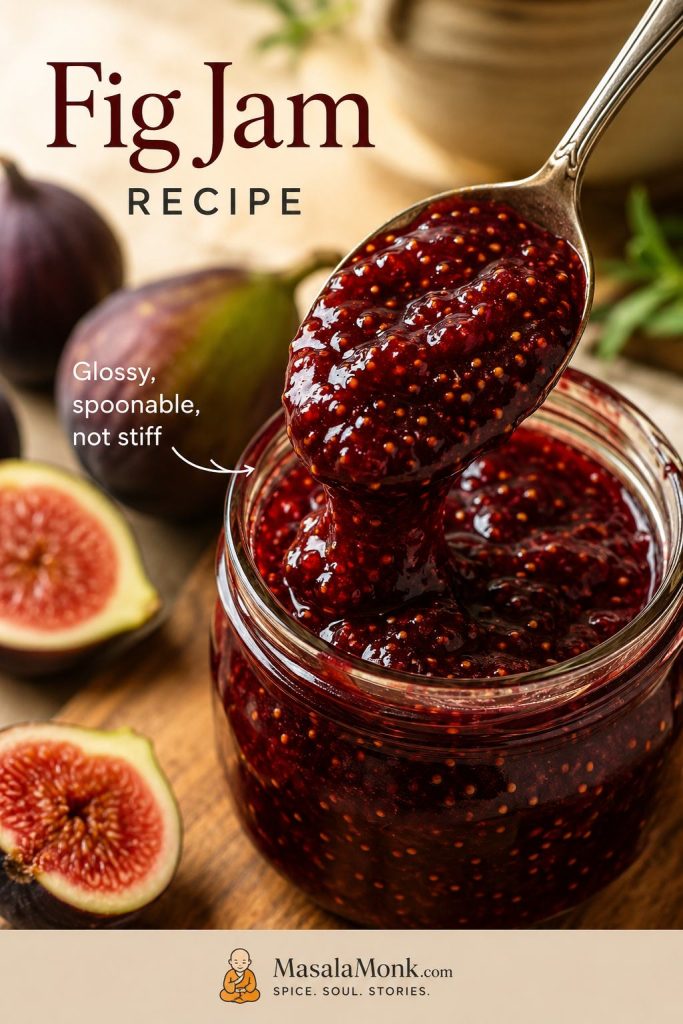
Because fig jam firms as it cools, the best stopping point is shiny, slow-moving, and spoonable rather than stiff.

In This Guide

Start with the quick answer, or use the deeper sections for dried figs, lower sugar, canning questions, cheese-board ideas, and quick fixes if a batch looks too loose or too thick.

Quick Answer: How to Make Fig Jam

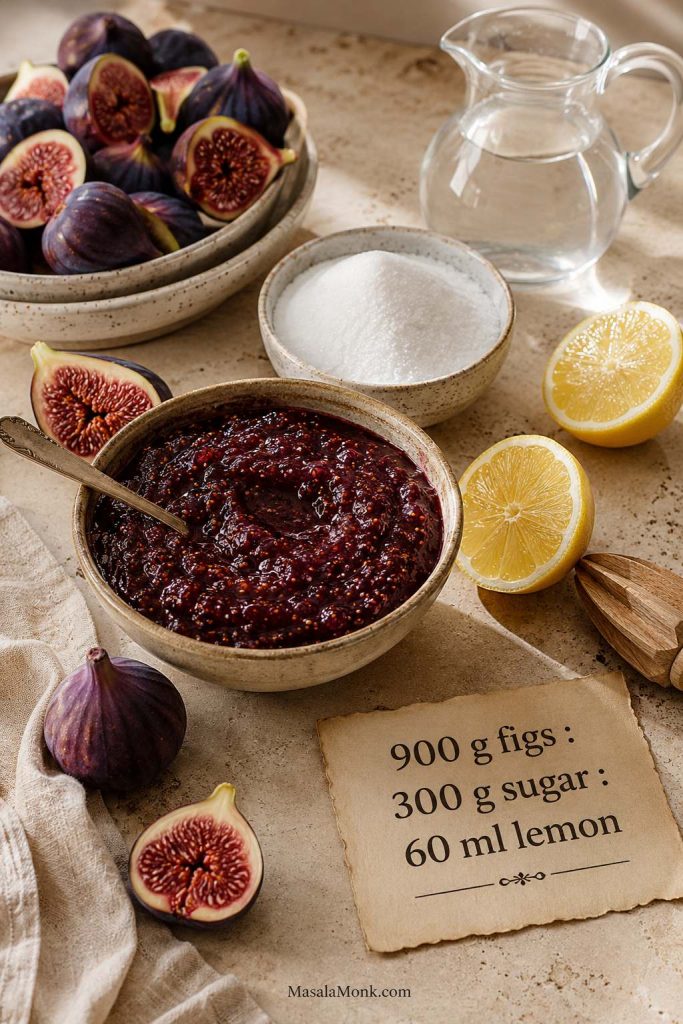
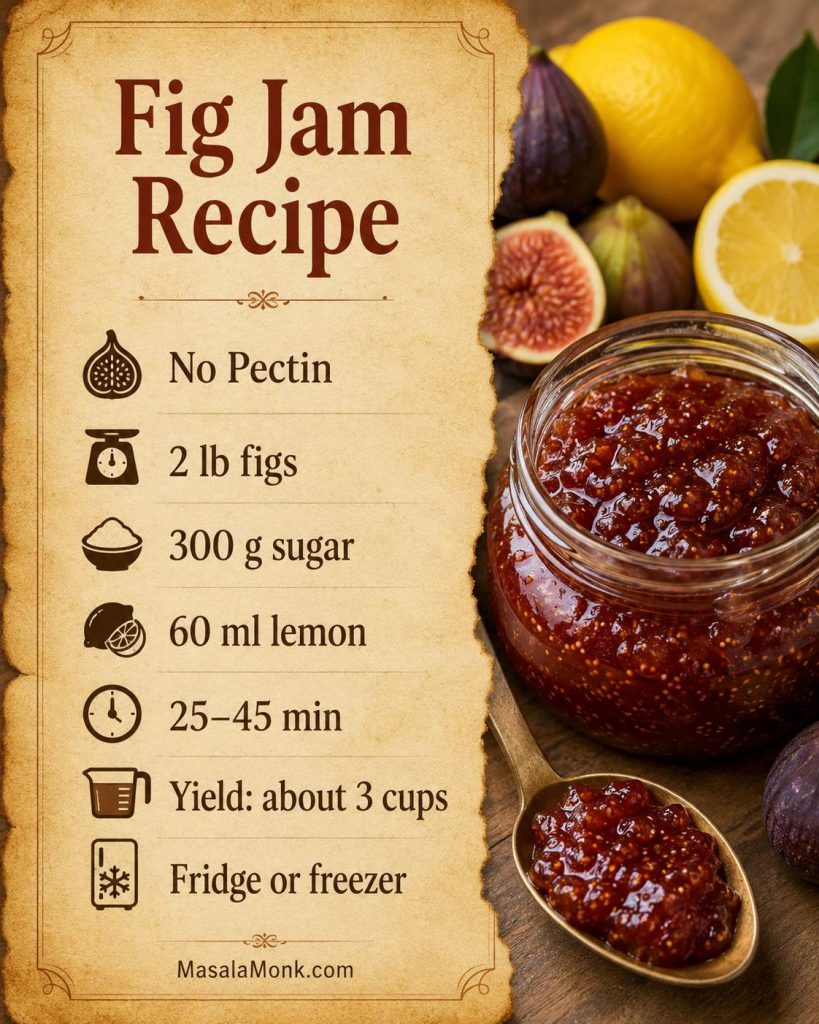
To make easy homemade fig jam, combine 2 lb / 900 g ripe fresh figs, 1½ cups / 300 g sugar, ¼ cup / 60 ml lemon juice, and ¼–½ cup / 60–120 ml water as needed. Start with the smaller amount of water.

Simmer uncovered until the figs soften, collapse, and turn shiny enough to coat the spoon, then mash or blend to your preferred texture. You do not need to peel the figs or add commercial pectin. The jam usually takes 25–45 minutes to cook, yields about 3 cups / 720 ml, and thickens more as it cools.

Keep these four things in mind as you cook: the figs should still smell sweet, the water should start low, the finish should be slow-moving rather than stiff, and this batch belongs in the fridge or freezer unless you use a tested canning recipe.

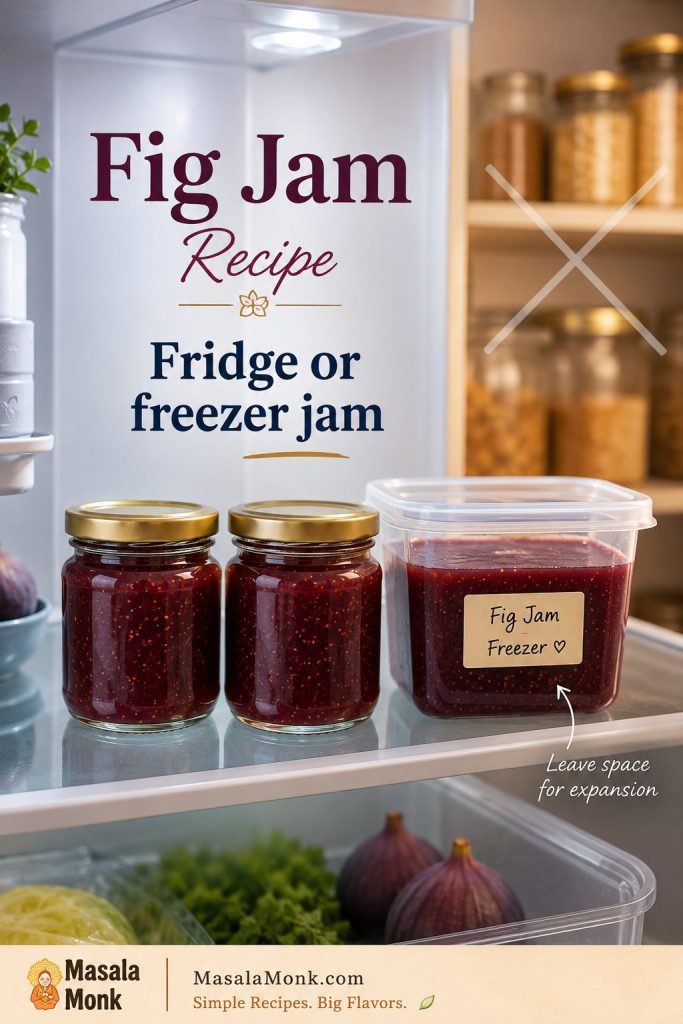
This recipe is written for the fridge or freezer. Do not water-bath can it unless you switch to a tested canning formula with exact acid, sugar, jar size, headspace, and processing instructions.

That may sound strict, but it keeps the recipe low-stress: make the jam, chill it, use it generously, and freeze the extra.

If the pan still looks loose near the end, use the doneness tests before cooking it much longer.

Recipe Snapshot

Here is the whole batch at a glance before the deeper choices begin.

Fig jam recipe snapshot with fresh figs, sugar, lemon, water, and a no-pectin measurement card.
The simplest fig jam recipe starts with ripe fruit, measured sugar, enough lemon for lift, and only enough water to protect the pan.
Figs to useRipe fresh figs that smell sweet and feel soft, but not sour, fizzy, or moldy
Base ratio900 g figs : 300 g sugar : 60 ml lemon juice : 60–120 ml water
PectinNot needed for this soft-set version
Peel figs?No. Remove stems, but leave the skins on.
Cook timeUsually 25–45 minutes, depending on fig moisture and pan width
Texture to aim forLoose enough to spoon, thick enough to stay on toast
StorageRefrigerator or freezer, unless using a tested canning recipe
Full recipeJump to the recipe card

Before You Start: What This Recipe Gives You

Good fit if you want…

  • A fresh fig jam recipe first
  • No commercial pectin
  • A soft-set, fruit-forward jar
  • Refrigerator or freezer storage
  • Clear notes for dried figs, honey, and lower sugar

Not the right fit if you want…

  • A stiff store-bought jelly set
  • Shelf-stable canning as written
  • Traditional whole-fig preserves
  • No-sugar pantry storage
  • Peeling, deseeding, or a firm jelly finish

With that boundary clear, the actual cooking is simple. Start with ripe figs, use just enough water to protect the pan, and let the fruit tell you when it has softened into jam.
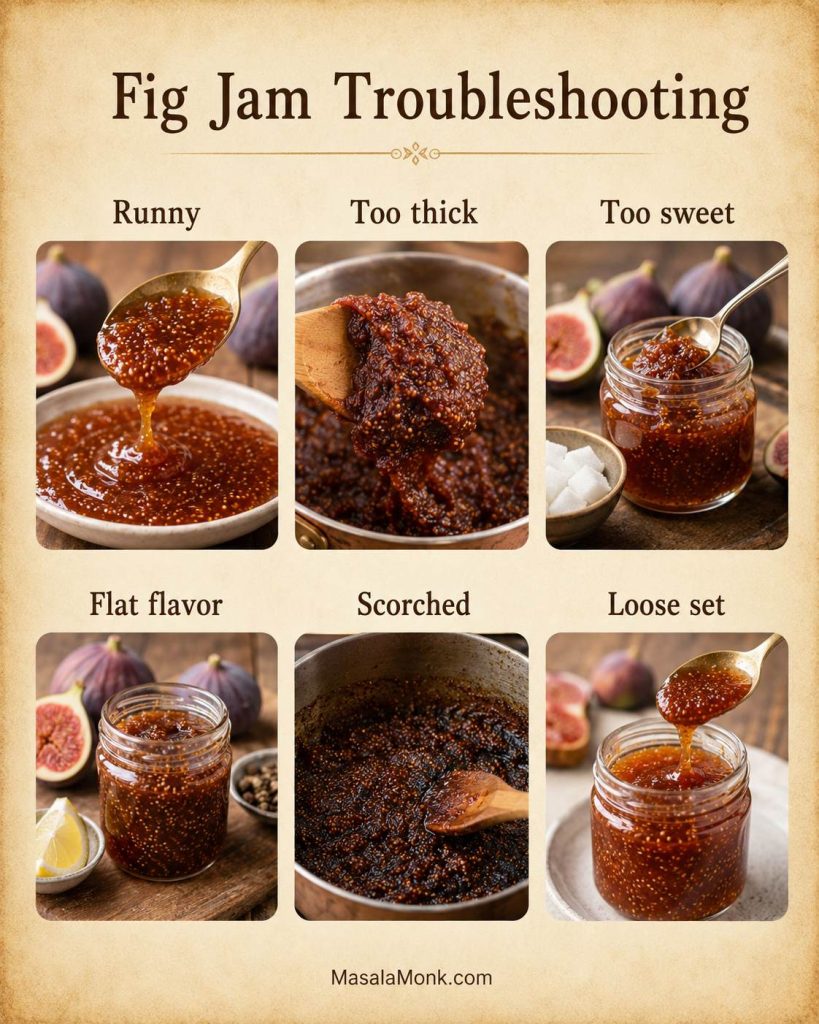
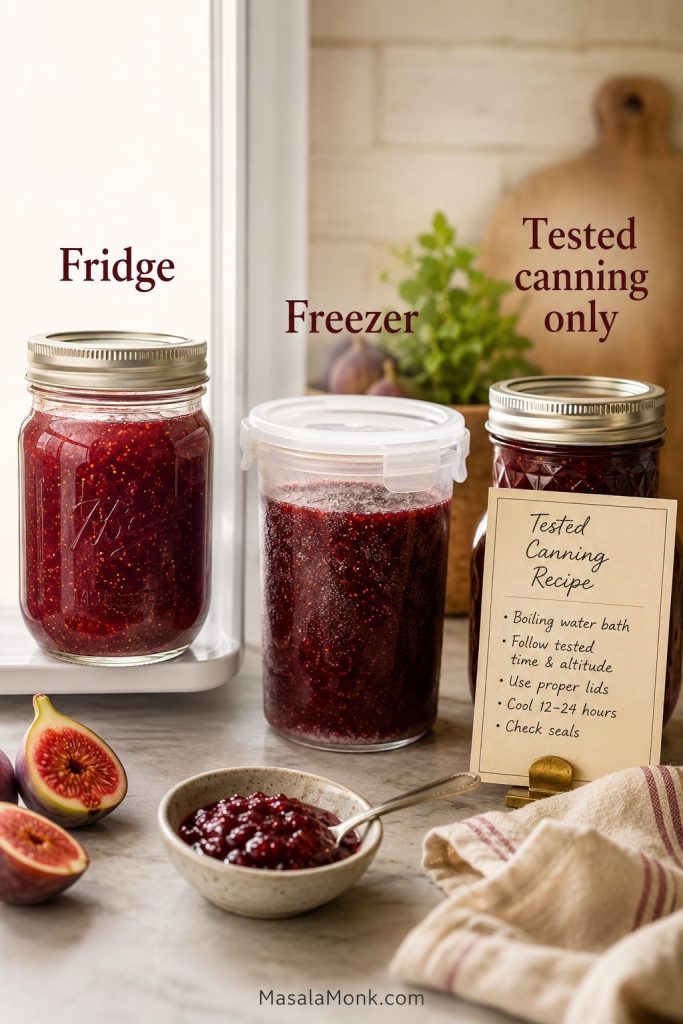
Fig jam jars shown for refrigerator storage, freezer storage, and tested canning only.
Treat this as fridge or freezer fig jam unless you are following tested canning directions with exact acid, jar size, and processing time.
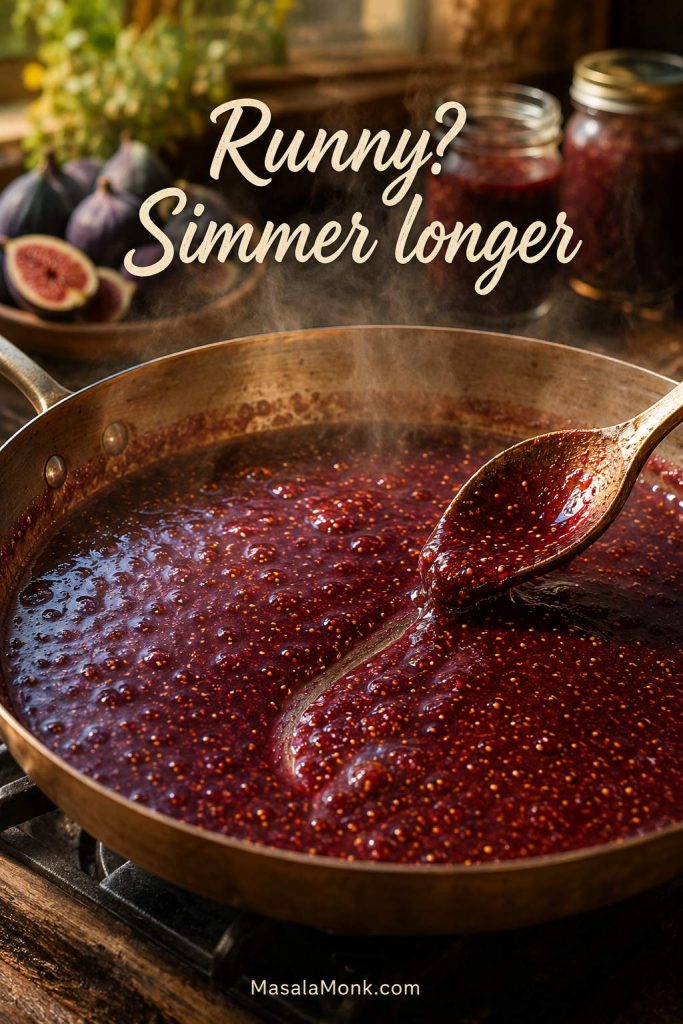
What Is Fig Jam?

Fig jam is made by cooking figs with sugar and acid, usually lemon juice, until the fruit softens and the mixture thickens into a spread. Because figs are full of tiny edible seeds, the texture is naturally a little rustic. It is not usually clear or glassy like jelly. Instead, it is rich, slightly seedy, and naturally honeyed, with a texture that can lean chunky or smooth depending on how much you mash it.
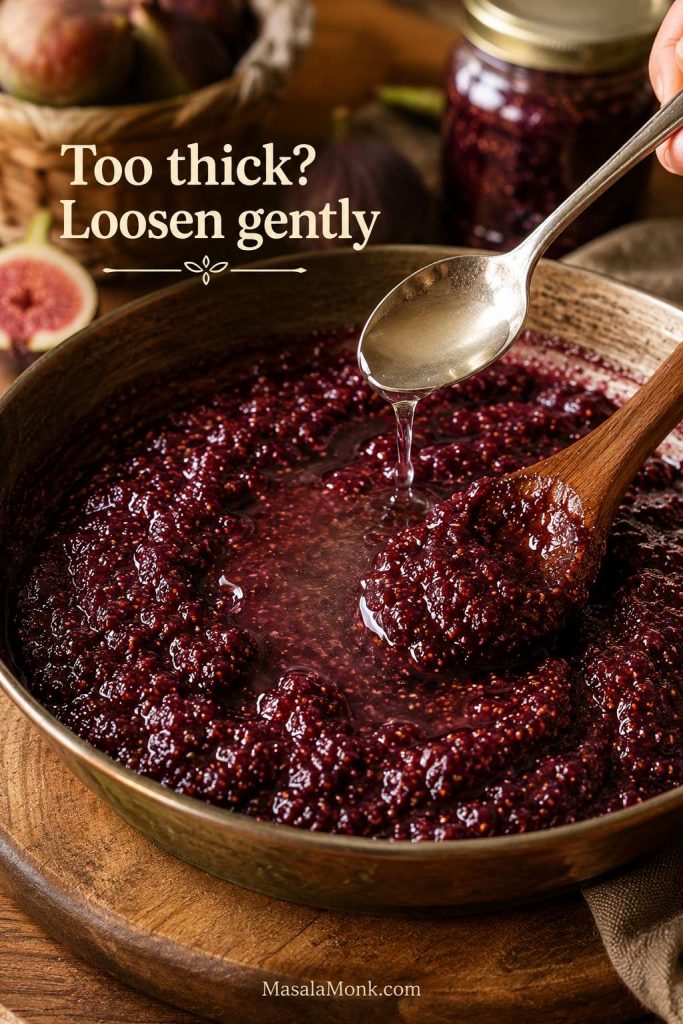
It will not set like a stiff jelly, and it is not supposed to. This is a softer, fruit-forward jar — the kind that spreads on toast but still spoons over yogurt, cheese, cake, or roasted meat.

The best version has balance. Figs are naturally sweet, so lemon stops the jar from tasting like flat sugar syrup. Sugar gives body and shine. A small pinch of salt can make the fruit taste rounder, especially if you plan to serve the finished spread with cheese or savory food.

Fig Jam vs Fig Preserves vs Fig Spread

Fig jam, fig preserves, fig spread, fig jelly, and fig confiture often overlap in everyday use. Still, the texture and best use can be slightly different.

NameUsual TextureWhere It Shines
JamCooked figs, usually mashed or partly broken downToast, yogurt, cheese, pastries, desserts, sandwiches
PreservesChunkier, often with larger pieces of fig or whole small figsBiscuits, cheese boards, spooning over desserts
SpreadSmoother and softer, often less stiff than classic jamCrackers, brie, sandwiches, flatbreads, charcuterie boards
JellyClearer and more strained, with less fruit pulpClassic jelly use, though figs are more commonly made into jam or preserves
ConfitureA French-style word often used for jam or preservesBreakfast, pastry, cheese, gifting
Paste or butterThicker, denser, and more concentratedCookies, fig bars, cheese plates, baking fillings

The finished texture sits between classic jam and a softer fig spread: fruit-forward, spoonable, and easy to adapt. Cook it less for a softer spread, longer for a thicker set, or mash lightly for a preserve-style texture.

Fresh Figs vs Dried Figs: Which Should You Use?

Fresh figs and dried figs both work well, but they make different jars. And then fresh figs also give you a brighter, softer, more seasonal jam. Dried figs make a deeper, denser, more concentrated spread that is useful year-round. Neither is wrong; fresh figs are for a lighter fruit-forward batch, while dried figs are especially good when you want a rich cheese-board spread.

Fresh fig jam is the version you make because the fruit is already asking for it — soft at the neck, fragrant on the counter, and too delicate to keep waiting. Dried fig jam belongs to a different mood: less about saving summer, more about building a rich pantry spread for cheese, toast, and cooler-weather boards.

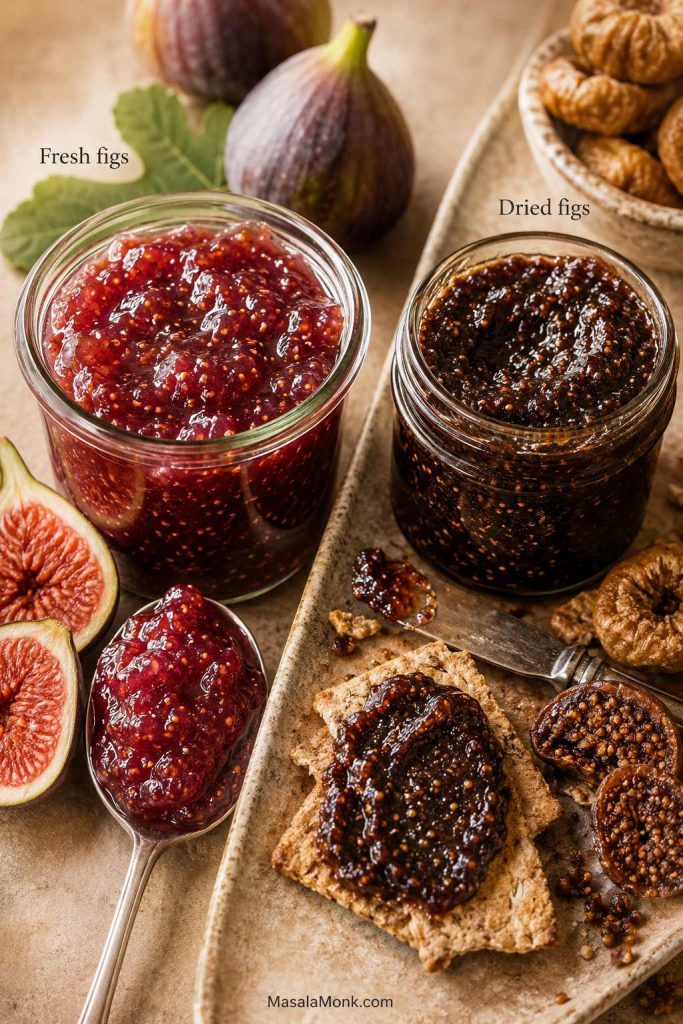
Fresh fig jam compared with darker dried fig jam, with fresh figs on one side and dried figs on the other.
Fresh fig jam tastes brighter and softer, while dried fig jam turns deeper, darker, and more spread-like for year-round use.
Use ThisWhenWhat to Expect
Fresh figsYou want a brighter, softer, seasonal jamQuick cook time, fresh fruit flavor, soft set
Dried figsYou want a darker, thicker, year-round cheese-board spreadDeeper flavor, denser texture, more water needed
Frozen figsYou already have figs in the freezerMore released liquid and usually a longer simmer
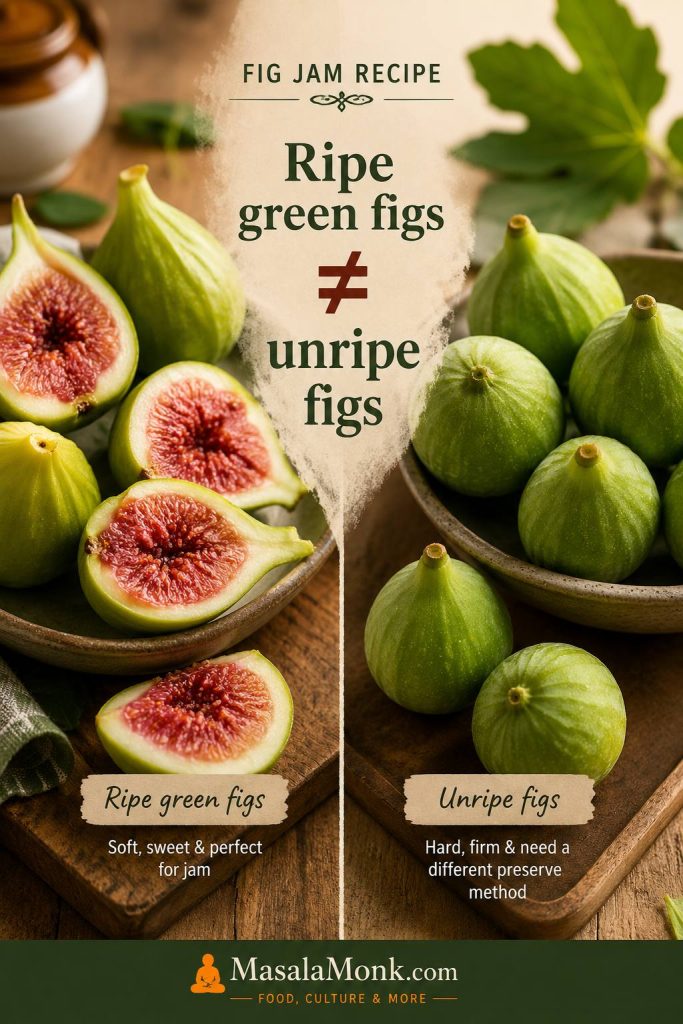
Ripe green-skinned figsThey are soft, sweet, and ripe insideUse them like any other ripe fig
Truly unripe figsThey are hard, dry, bitter, or not sweet yetUse a dedicated green fig preserve method instead

Using dried figs instead of fresh? Go straight to the dried fig jam variation once you understand the main texture cues.

Fresh figs

Fresh figs are the best choice for a classic, bright homemade batch. They are tender, juicy, and quick to cook down when ripe. The flavor can be floral, honeyed, berry-like, or lightly caramelized depending on the variety and ripeness.

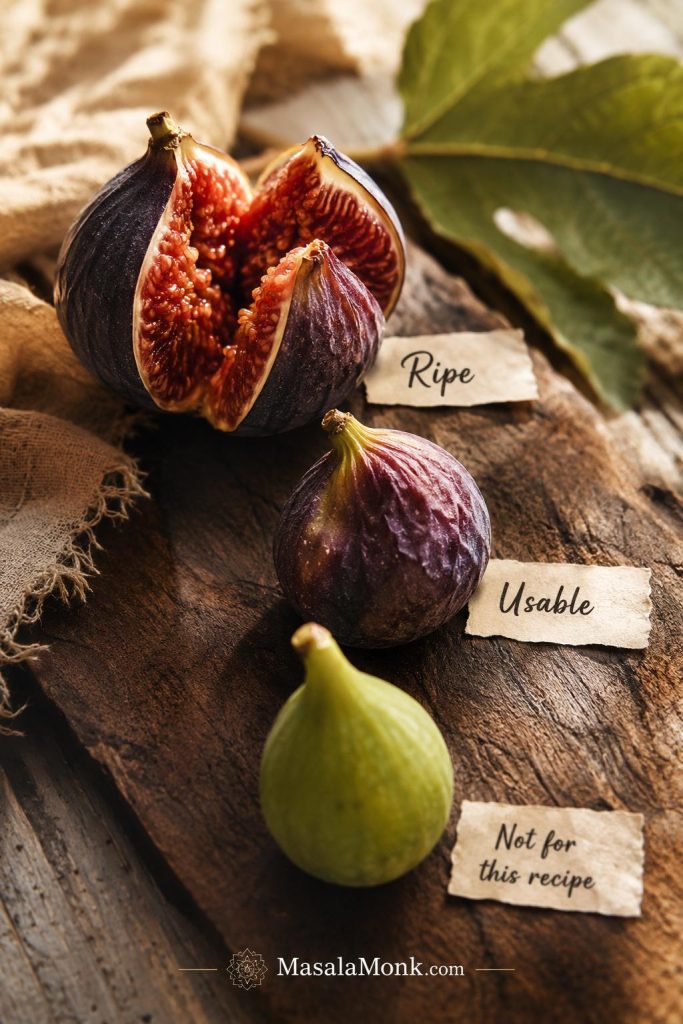
Fresh fig ripeness guide showing ripe, usable wrinkled, and hard unripe figs for jam.
Sweet-smelling, soft figs make the best fresh fig jam; meanwhile, hard green figs need a slower preserve-style method.
  • Use ripe figs that feel soft but not fermented.
  • Remove the stems, but do not peel the figs.
  • Quarter or chop them so they cook evenly.
  • Add water only as needed; very juicy figs may need little or none.

Dried figs

Dried figs are sweeter, denser, and lower in moisture. They need water to soften before they can become jam. Once cooked and blended, they make a thick fig spread that gives brie, goat cheese, blue cheese, crackers, toast, and sandwiches a darker, almost caramel-like contrast.

  • Remove any tough stems before cooking.
  • Chop the figs so they soften faster.
  • Simmer with water until very tender before blending or mashing.
  • Use less sugar if the dried figs are already very sweet.

Frozen figs

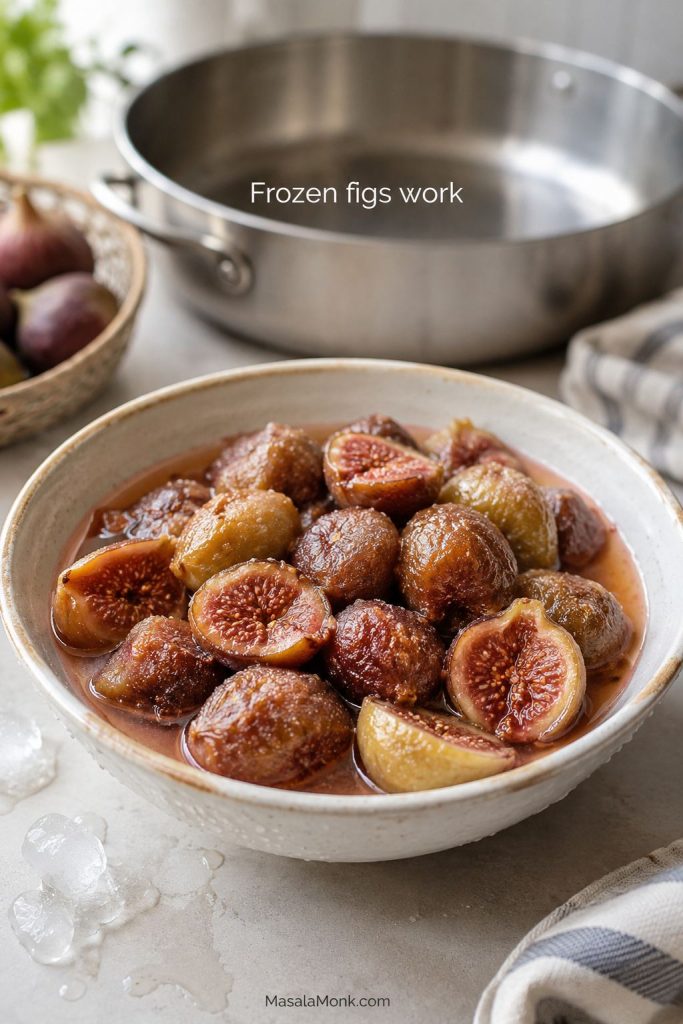
Frozen figs can work for jam. Thaw them first if possible, then use the fruit and any juices that collect. Frozen figs often release extra liquid, so the batch may need a slightly longer cook time. If you are using a weight-based recipe, weigh the figs consistently either before freezing or after thawing and draining lightly.

Thawed frozen figs in a bowl with released juices and a jam pan in the background.
Frozen figs are useful for jam, although their extra thawed juices usually need more time to simmer down.

Because thawed figs release extra liquid, check the doneness tests carefully before deciding the batch is finished.

What about green or unripe figs?

Green-skinned ripe figs are fine. Truly unripe figs are different. They can be firmer, less sweet, and sometimes bitter or latex-like. Green fig preserves are usually a separate style of recipe and often involve soaking, boiling, draining, and then cooking in syrup. If your figs are ripe but green on the outside, use them here. If they are hard and unripe, use a dedicated green fig preserve method instead.

Ripe green-skinned figs with pink centers compared with hard unripe green figs.
Ripe green-skinned figs can go straight into this recipe; hard unripe figs are less sweet and belong in a different preserve.

Ingredients You Need

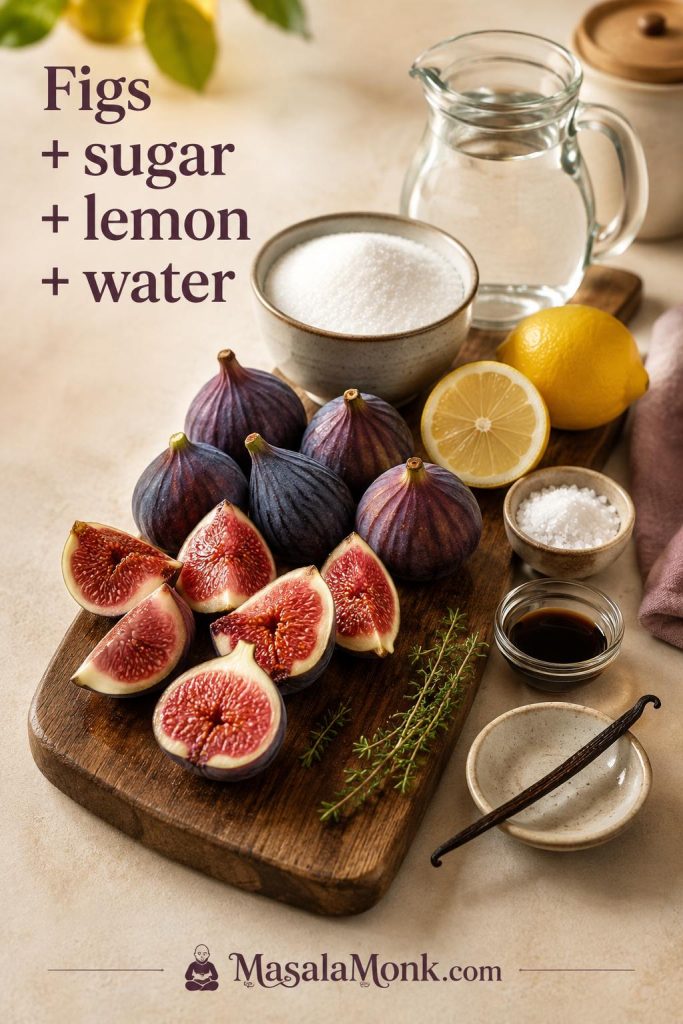
The ingredient list is short, which is part of the charm: ripe figs, enough sugar to make them shine, lemon to wake them up, and just enough water to keep the pot moving before the fruit releases its own syrup.

Fresh figs, sugar, lemon, water, salt, vanilla, balsamic, and herbs arranged as ingredients for fig jam.
Figs provide body, sugar helps the jam set, lemon keeps the flavor awake, and small add-ins should stay in the background.

Fresh figs

Use ripe fresh figs for the main version. Black Mission, Brown Turkey, Kadota, Adriatic, or other edible fig varieties can all work. The exact flavor will change, but the method stays the same. Trim away the stems and any spoiled spots. The skins and seeds are edible, so there is no need to peel or deseed the fruit.

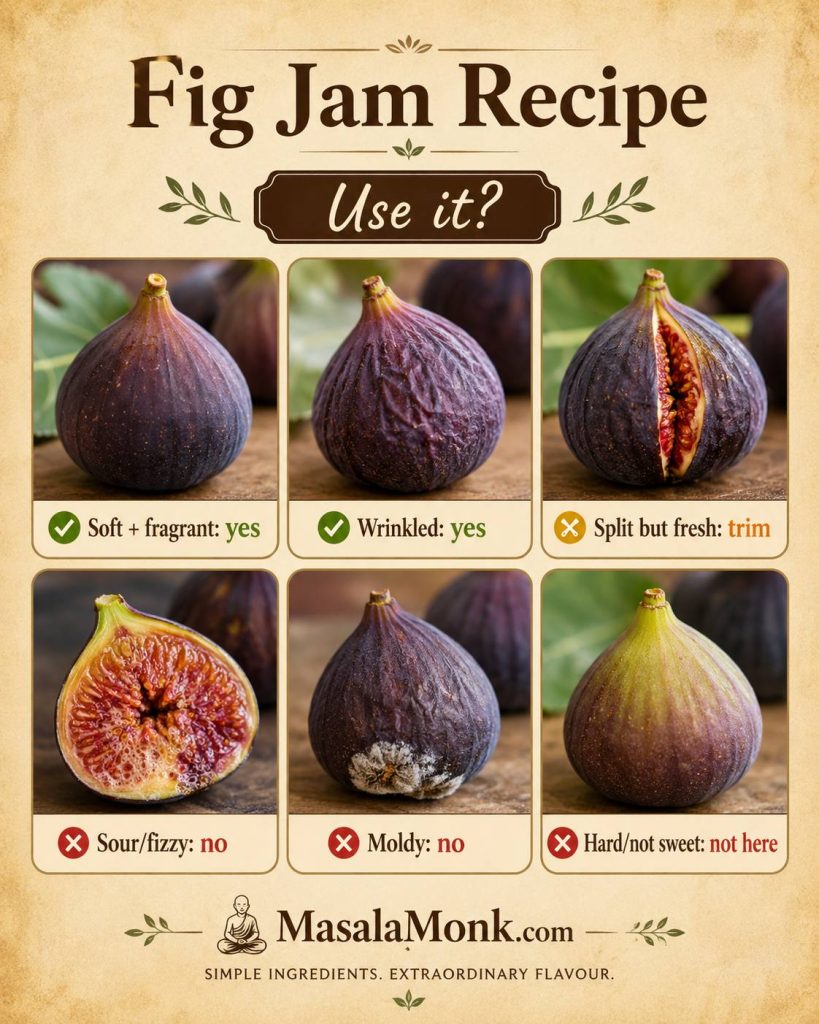
Fig condition guide: Fig jam is forgiving, but spoiled fruit is not. Use the table below when the figs are soft enough to make you wonder.

Fig ConditionUse It?What to Do
Soft, fragrant, and sweetYesPerfect for jam
Slightly wrinkledYesTrim stems and use
Split but fresh-smellingUsuallyTrim dry or exposed spots first
Sour, fizzy, or fermented smellNoDiscard
MoldNoDiscard
Hard and not sweetNot for this recipeUse a green fig preserve method instead
Guide showing which figs to use or discard for jam, including soft, wrinkled, split, sour, moldy, and hard figs.
Slightly wrinkled or very soft figs can still work, but sour, fizzy, or moldy fruit should be discarded before cooking.

Sugar

Sugar is not just there for sweetness; it gives the syrup its shine, helps the fruit look glossy instead of dull, and gives the finished jar a little more body. The amount here is moderate compared with many old-fashioned preserves, so the figs still lead. If your fruit is extremely sweet, you can reduce the sugar, but the batch will usually set softer, cook longer, and have a shorter refrigerator life.

Lemon juice

Lemon is what keeps the jar from tasting heavy. It lifts the fig flavor, sharpens the sweetness, and helps the mixture thicken. For refrigerator jam, fresh lemon juice works well. For pantry jars, switch to a tested preservation recipe and follow it exactly; many canning formulas call for bottled lemon juice because its acidity is standardized.

Water

Water keeps the figs from scorching before they release their own juices. Very ripe, juicy figs may need only a splash. Firmer figs, drier figs, or dried figs need more. Start with the smaller amount first; you can always add a little more if the pot looks dry.

Salt

A small pinch of salt is optional, but it makes the fig flavor taste rounder and less flat. It is especially useful if you plan to serve the jam with cheese or savory dishes.

Vanilla, citrus zest, balsamic, or herbs

These are optional, not required. Vanilla makes the jam more dessert-like. Lemon or orange zest adds fragrance. Balsamic pulls the jam into savory territory, where it tastes less like breakfast and more like something you would spoon beside brie, pork, or sharp cheese. Rosemary or thyme makes it more savory.

Equipment That Makes Fig Jam Easier

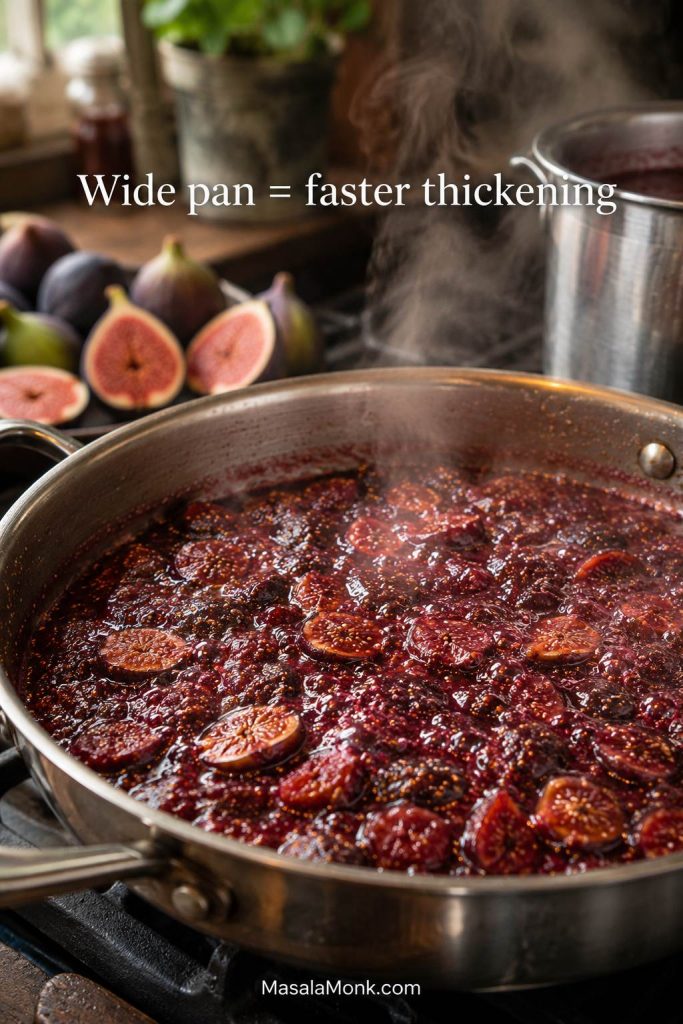
You do not need special jam gear here, but the pan matters more than most people expect. A wide pan is not fancy equipment; it lets steam escape quickly, so the figs thicken before their flavor turns dull. A masher or blender simply lets you choose whether the fruit stays chunky or turns smooth.

Wide pan of fig jam beginning to simmer with steam rising and a narrower pot in the background.
A wide pan gives steam room to escape, helping the jam thicken before the fig flavor turns dull.
  • Wide heavy-bottomed pan: a saucepan, sauté pan, or Dutch oven with enough surface area for steady evaporation.
  • Non-reactive material: stainless steel or enameled cast iron is best because the recipe includes lemon juice.
  • Wooden spoon or silicone spatula: useful for stirring and checking whether the jam leaves a trail on the bottom of the pan.
  • Potato masher or immersion blender: use a masher for rustic texture or an immersion blender for a smoother spread.
  • Small plate or spoon: chill it in the freezer for a simple doneness test.
  • Clean jars and a kitchen scale: clean jars help with storage, and a scale helps because figs vary so much in size.

A ladle and funnel are helpful but not essential. A narrow pot can still work, but the jam will usually need more time because evaporation is slower. If your pan is thin, keep the heat moderate and stir often so the sugar and fruit do not scorch before the mixture thickens.

The Best Fig Jam Ratio

The sweet spot is enough sugar to make the figs shine, enough lemon to keep the flavor bright, and only enough water to keep the fruit moving. This is not meant to be a stiff, candy-sweet preserve. It is a softer, fruit-forward jar you can use generously.

900 g fresh figs : 300 g sugar : 60 ml lemon juice : 60–120 ml water

Fig jam ratio guide with measured fresh figs, sugar, lemon, and water on a warm kitchen surface.
A reliable fig jam ratio gives the fruit enough sugar for body, enough lemon for balance, and no excess water to cook off later.

In US kitchen measurements, that is about 2 lb fresh figs, 1½ cups sugar, ¼ cup lemon juice, and ¼–½ cup water. The result is sweet enough to feel like jam, but still fig-forward enough that you taste the fruit, not just sugar.

Because this is less sugar-heavy than many old-fashioned preserves, it is best treated as a refrigerator or freezer batch.

BatchFresh FigsSugarLemon JuiceWaterApprox. Yield
Small batch1 lb / 450 g¾ cup / 150 g2 tbsp / 30 ml2–4 tbsp / 30–60 mlAbout 1½ cups / 360 ml
Standard batch2 lb / 900 g1½ cups / 300 g¼ cup / 60 ml¼–½ cup / 60–120 mlAbout 3 cups / 720 ml
Large batch3 lb / 1.35 kg2¼ cups / 450 g6 tbsp / 90 ml⅓–¾ cup / 80–180 mlAbout 4½ cups / 1 liter

The yield is approximate because figs vary in moisture. Very juicy fruit cooks down differently from firmer, drier fruit.

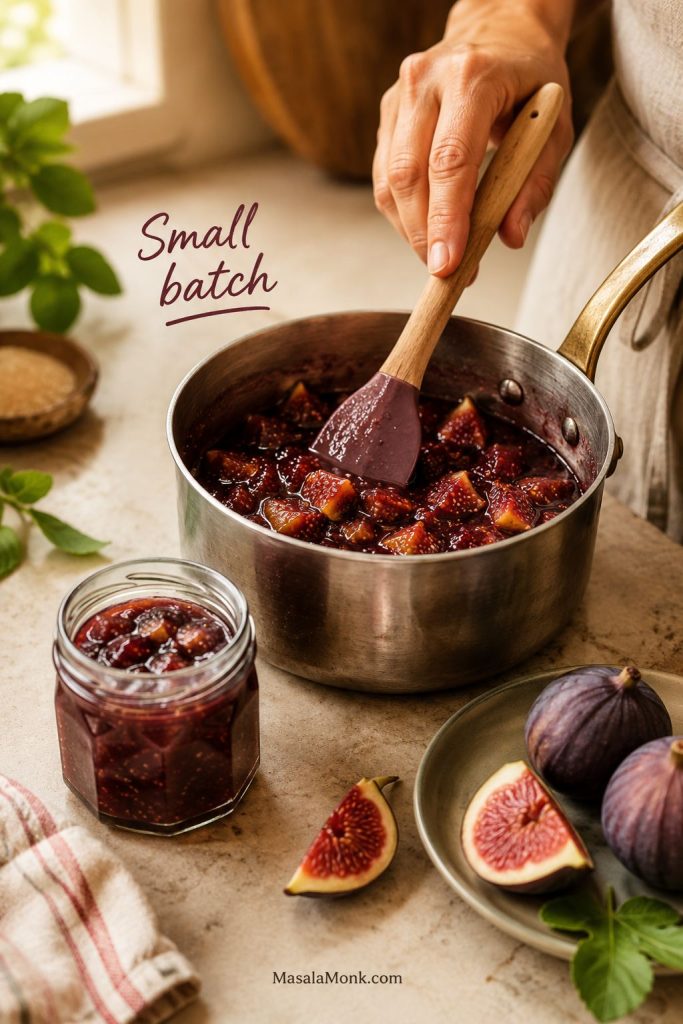
Small-Batch Fig Jam

If you only have a small basket of figs, make a half batch. Use 1 lb / 450 g fresh figs, ¾ cup / 150 g sugar, 2 tbsp / 30 ml lemon juice, and 2–4 tbsp / 30–60 ml water. A small batch usually cooks faster, often in about 20–30 minutes, especially in a wide pan.

This is a good option when you have a few ripe figs that need using immediately. It gives you enough jam for toast, yogurt, a small cheese board, or a quick baked brie without committing to several jars.

Small saucepan of chopped figs cooking into jam beside a small finished jar.
Small-batch fig jam is the right move when a few ripe figs need saving but you do not want multiple jars.

Why This Fig Jam Recipe Works

The pot does most of the work once the balance is right: enough sugar for gloss, enough lemon for brightness, and enough time for the figs to thicken naturally.

  • Moderate sugar keeps the fig flavor clear. The jam tastes sweet and glossy, but not like sugar syrup.
  • Lemon keeps the flavor bright. Without enough acid, the finished jar can taste heavy, flat, or overly sweet.
  • A short maceration helps the figs release juice. This makes the jam easier to start and reduces scorching risk.
  • A wide pan thickens the jam faster. More surface area means better evaporation and less overcooking.
  • No pectin keeps the texture soft and homemade. The jam thickens through cooking, but stays spoonable rather than stiff.
  • Stopping slightly early prevents over-thick jam. It continues to firm as it cools.

Figs are delicate. If you cook them too hard for too long, the flavor can move from honeyed and rounded to dull and sticky. The goal is to reduce the syrup, not punish the fruit.

How to Make Fig Jam

Start with ripe fresh figs and let simmering, lemon, sugar, and evaporation do the thickening. Read through the steps once before starting, especially the texture cues, because the jam thickens more after it cools.

Step 1: Prep the figs

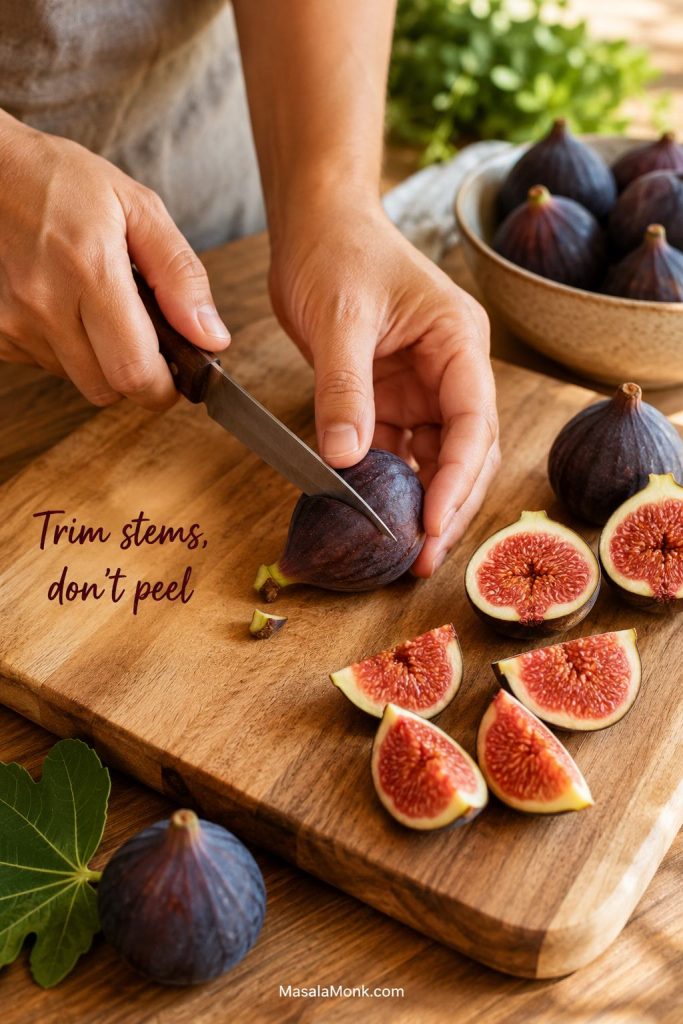
Rinse the figs gently and pat them dry. Trim off the tough stems. Quarter small figs or chop larger figs into small pieces. You do not need to peel them. The skins soften as the jam cooks, and the seeds are part of its natural texture.

Hands trimming stems and quartering fresh figs on a cutting board for homemade jam.
Trim the stems and cut the figs evenly, but skip peeling because the skins soften into the finished jam.

Step 2: Combine figs, sugar, lemon, and water

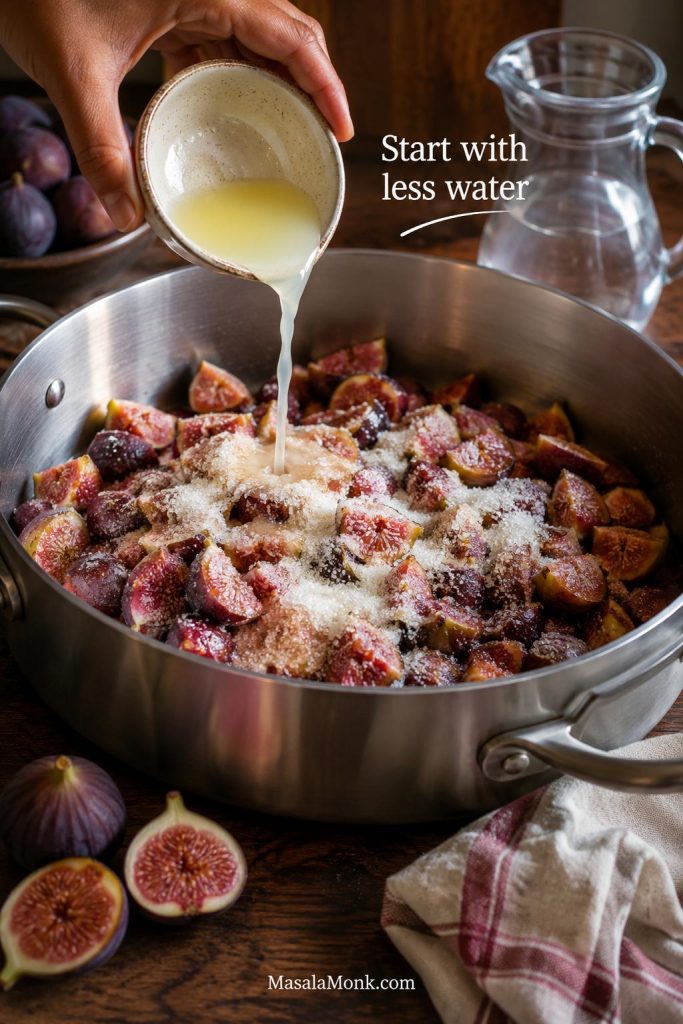
Add the figs, sugar, lemon juice, a pinch of salt if using, and ¼ cup / 60 ml water to a wide heavy pan. Stir well so the sugar, lemon, and fruit are evenly distributed before heat goes on.

Fresh figs and sugar in a pan while lemon juice is poured in and water waits nearby.
Start with less water, then add a splash only if the figs stick before their own juices release.

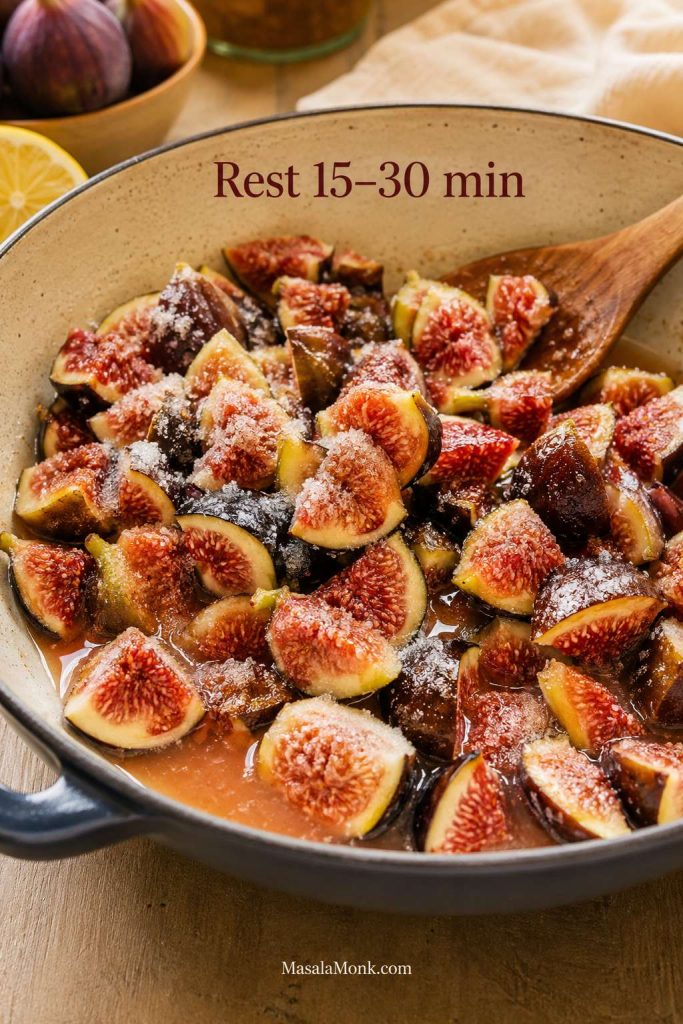
If you have time, let the mixture sit for 15–30 minutes before cooking. This short rest helps the sugar draw juice from the figs, so the fruit starts cooking in its own syrup instead of scorching against the pan.

Chopped figs resting with sugar and lemon juice as syrup begins forming in the bowl.
A short rest with sugar and lemon draws juice from the figs, so the batch begins glossy instead of dry.

Add the remaining water only if the figs look dry, stick before releasing juices, or need a little help softening. Starting with less water prevents a thin batch that needs extra time to reduce.

Step 3: Bring the mixture to a simmer

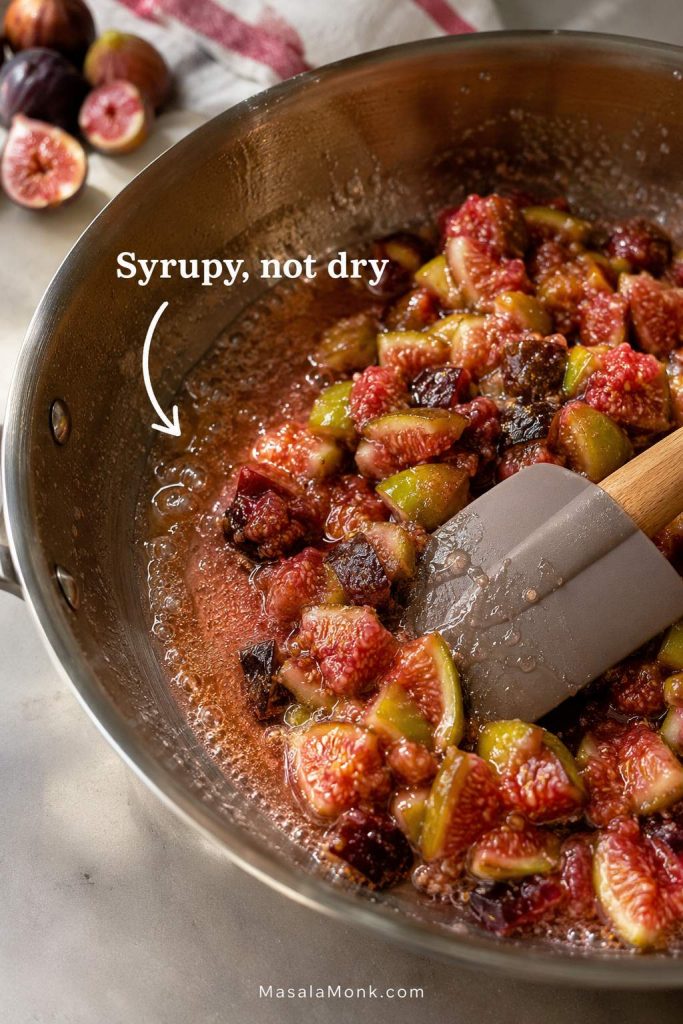
Set the pan over medium heat and stir until the sugar dissolves. Once the mixture starts bubbling, reduce the heat as needed to maintain a steady simmer. You want active bubbling, but not a violent boil that splashes, scorches, or caramelizes too fast.

At this point the pan should look syrupy around the edges, not dry and sandy. If the figs are still sitting in dry sugar, add a splash more water and give them time.

Chopped figs in a pan with syrupy edges forming as a spatula pulls through the mixture.
When syrup forms around the pan edges, the figs are ready to soften evenly without scorching on dry sugar.

Cook uncovered once the figs are simmering. Covering the pan traps moisture and slows thickening.

Step 4: Cook until the figs soften and collapse

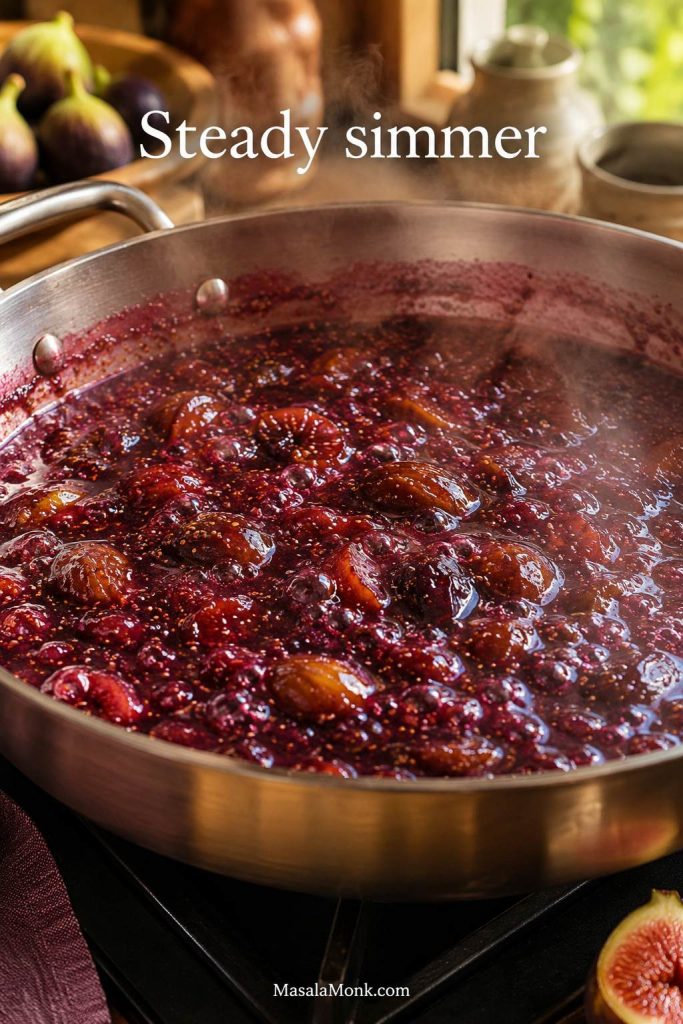
Simmer the jam, stirring often, until the figs soften, slump, and begin to collapse into the syrup. The kitchen should smell like warm figs and lemon, not burnt sugar. This usually takes 25–45 minutes. The exact time depends on fig ripeness, moisture, pan width, and heat level.

Fig jam simmering in a wide pan with steady bubbles and softened fruit.
A steady simmer concentrates the syrup gently, which keeps homemade fig jam glossy, rounded, and fruit-forward.

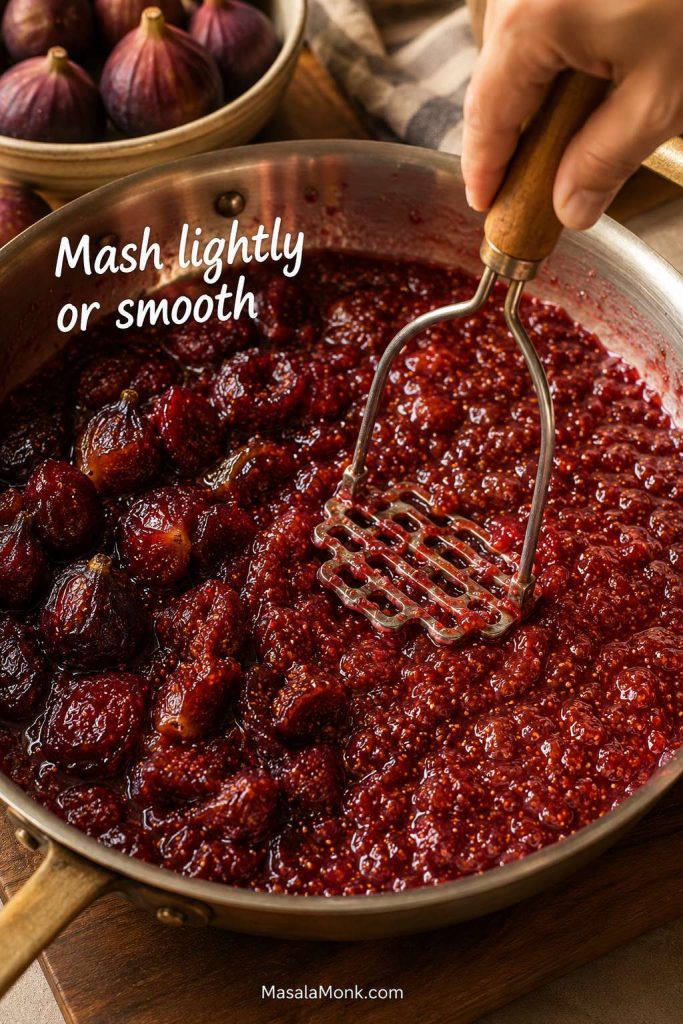
As the fruit softens, mash it with the back of a spoon or a potato masher. For a chunky preserve-style texture, mash lightly and leave some pieces intact. For a smoother spread, mash more thoroughly or blend briefly later.

Potato masher pressing softened figs in a pan to adjust the jam texture.
Mash lightly for a chunky fig preserve feel, or mash longer when you want a smoother spoonable jam.

If foam gathers on the surface, you can skim it off for a clearer finish. A little foam is not a problem for refrigerator jam.

Step 5: Adjust the texture

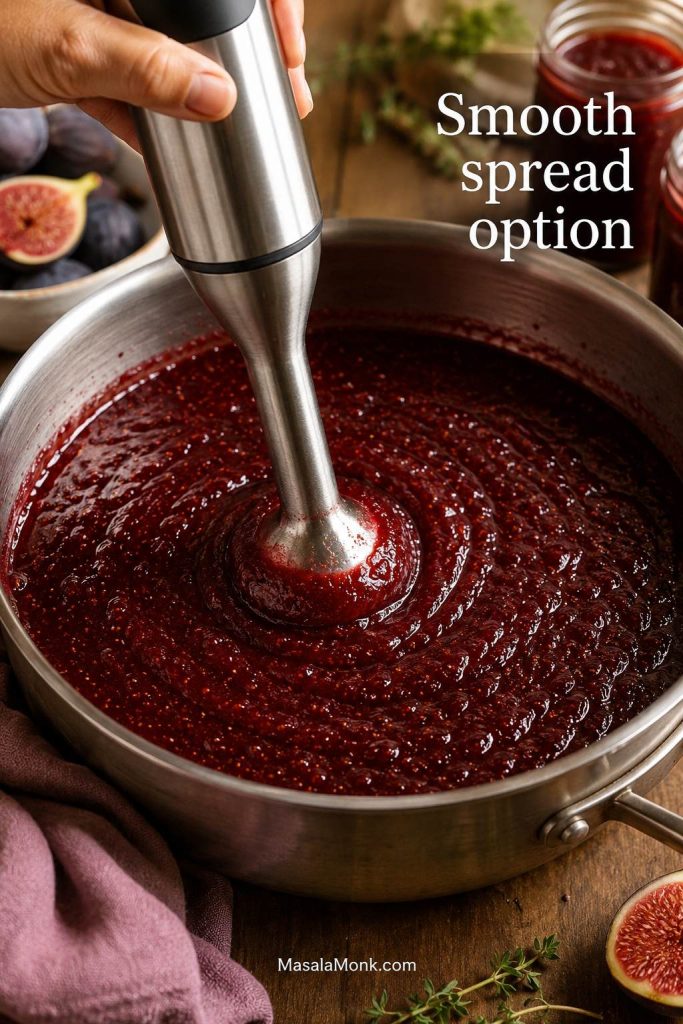
If you like a rustic jam, leave it slightly chunky. For a smoother fig spread for crackers, cheese boards, sandwiches, or cookies, use an immersion blender for a few short pulses. Do not overblend unless you want a very smooth paste.

Immersion blender smoothing fig jam in a pan into a glossy fig spread.
A brief blend makes fig spread smoother for crackers, cheese boards, cookies, and sandwiches without losing its homemade texture.

After blending, simmer for another few minutes so the texture settles and any extra moisture evaporates.

Step 6: Test the jam

It is ready when it looks shiny, moves slowly, and mounds softly on a spoon. The syrup should bubble slowly, not splash like water. A spoonful should fall slowly, not pour like syrup or sit like paste. A spatula dragged through the pan should leave a short trail before the mixture flows back. You can also use a cold plate test or a thermometer; both are explained below.

If the jam looks too loose or too stiff at this point, use the troubleshooting guide before changing the recipe.

Step 7: Jar, cool, and store

Spoon the hot jam into clean jars. Let it cool, then refrigerate. Do not worry if it looks slightly loose while hot; it will thicken more as it cools. For longer storage, freeze it in freezer-safe containers with headspace.

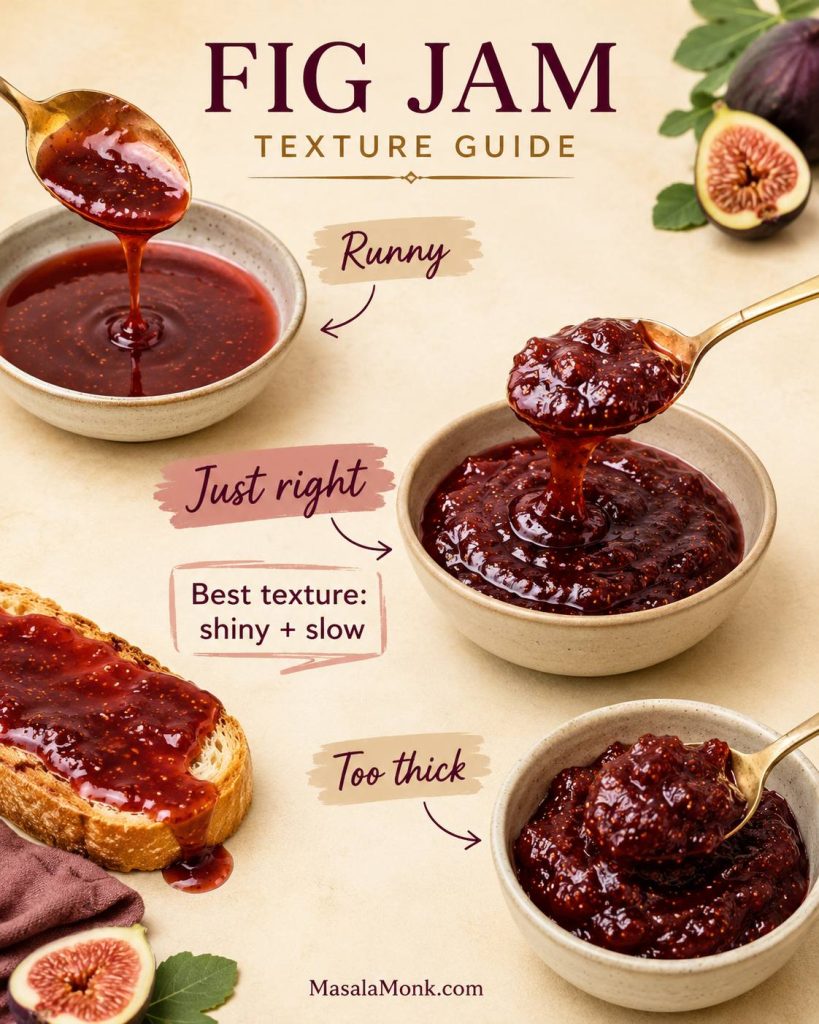
Texture Target

The target is not a firm jelly set. The best texture for this recipe is thick enough to spread on toast, but loose enough to spoon over yogurt or cheese. Stop when the jam looks shiny and slow, not stiff. If it looks firm in the boiling pan, it will likely cool too thick.

Fig jam texture guide comparing runny, just right, and too thick jam on spoons or toast.
Aim for a texture that clings to toast but still spoons easily over yogurt, brie, pancakes, or desserts.

How to Tell When Fig Jam Is Done

The tricky part is that jam can look loose while hot and much thicker after cooling. Look for several signs together rather than relying on one exact minute mark.

  • Shiny look: the liquid around the figs should look syrupy, not watery.
  • Soft fruit: the figs should be tender, slumped, and partly collapsed.
  • Slow bubbles: the bubbles become thicker and slower as water evaporates.
  • Spatula trail: a spoon or spatula should leave a short path through the jam before it closes.
  • Spoon mound: the jam should mound lightly on a spoon instead of running off like juice.
  • Cold plate test: a small spoonful on a chilled plate should move slowly when tilted.
  • Temperature cue: at sea level, a firmer jam set is often around 220°F / 104°C, but texture matters more than the thermometer reading.
  • Aroma: the jam should smell bright and honeyed, not burnt or overly caramelized.

Spatula Trail Test

Drag a spatula through the pan when the jam looks close. If the path opens briefly and then closes slowly, the texture is moving toward a soft set.

Spatula dragged through thick fig jam in a pan, leaving a short trail that slowly closes.
The spatula trail is a visual doneness cue: it should open briefly, then close slowly as the jam settles.

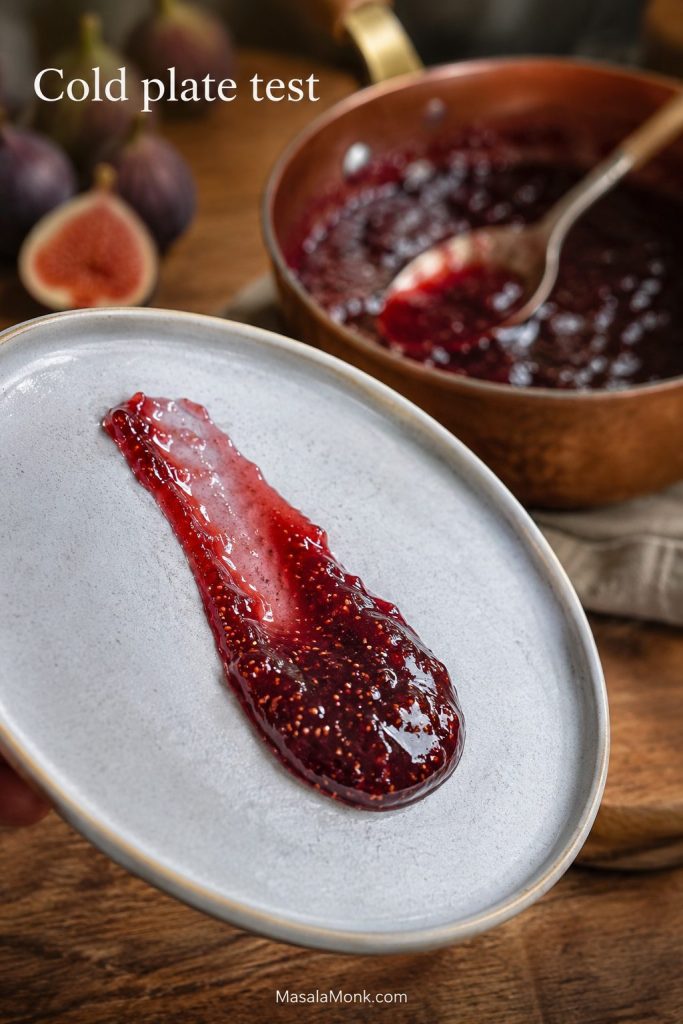
Cold Plate Test

Chill a small plate, add a spoonful of jam, and tilt it. The cooled jam should move slowly, which helps you avoid overcooking the hot batch.

Spoonful of fig jam on a tilted chilled plate during a cold plate doneness test.
The cold plate test shows the cooled texture, so it prevents overcooking a batch that still looks loose while hot.

Important: Stop slightly before the jam looks perfect in the pot. If it looks stiff while boiling, it may cool into something too thick or sticky. You can always simmer a loose batch a little longer, but it is much harder to undo a stiff, overcooked one.

Do You Need Pectin for Fig Jam?

No, you do not need commercial pectin for this style of fig jam. Figs, sugar, lemon juice, and evaporation can create a soft, spoonable jam on their own. The finished texture will usually be softer than a firm store-bought jelly, but that is exactly why it works so well as both a jam and a fig spread.

Do not chase a store-bought jelly wobble here. For a homemade spread, a softer set is often better because it spoons more easily over cheese, yogurt, toast, desserts, and savory dishes. A soft no-pectin set is not a failure; it is part of what makes the jar so useful.

No-pectin fig jam shown with fresh figs, sugar, lemon, water, and a spoonful of finished jam.
With enough simmering and lemon balance, no-pectin fig jam thickens naturally without needing a boxed setting mix.

If you want a very firm set, commercial pectin can help, but it changes the method. Boxed pectin and products like Sure-Jell often require specific sugar and liquid ratios, so follow the instructions for that product rather than adding it casually to this recipe.

Let the pan do the work: steady simmering, a wide surface, and a few spoon tests matter more than extra thickeners.

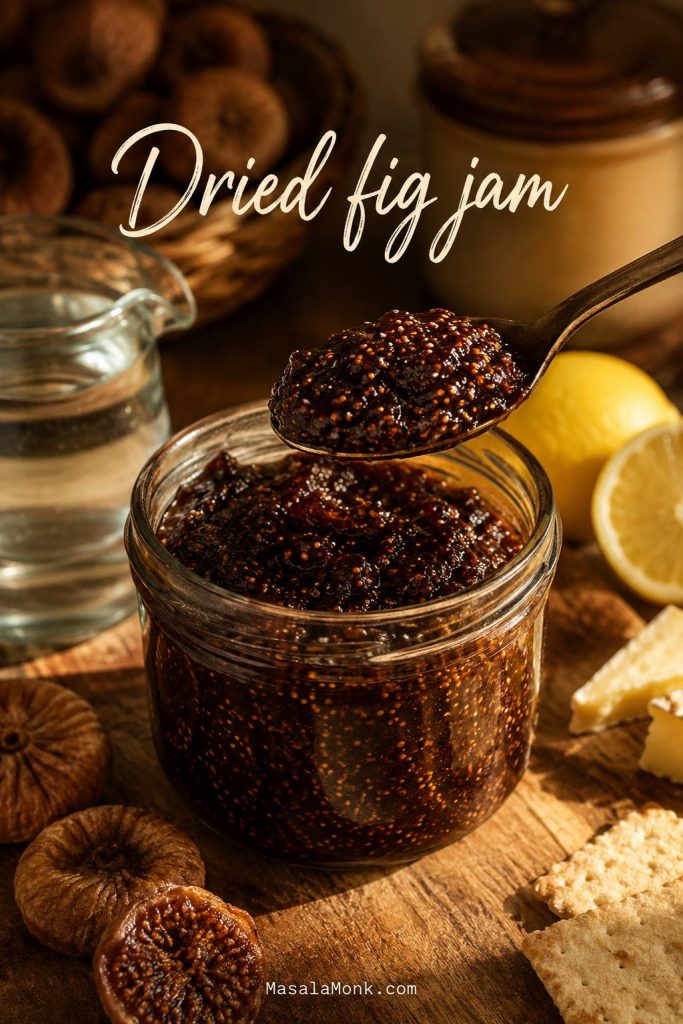
Dried Fig Jam Variation

Dried figs are not second-best; they simply make a different kind of jar. The flavor is deeper, darker, and more concentrated, closer to a thick fig spread than a bright fresh-fruit jam. This is the version to make when fresh figs are out of season, expensive, or hard to find.

Think of it as a pantry-friendly spread with a darker mood: less fresh summer fruit, more rich fig, caramel, and cheese-board depth.

Dried fig jam served on a spoon with dried figs, lemon, water, crackers, and cheese-board elements nearby.
Dried fig jam is darker and denser than fresh fig jam, which makes it especially good with crackers and cheese.

Dried Fig Jam Formula

  • Dried figs: 12–14 oz / 340–400 g, stems removed and chopped
  • Water: 2 cups / 480 ml, plus more if needed
  • Sugar: ½–1 cup / 100–200 g to start, plus more to taste
  • Lemon juice: 2 tbsp / 30 ml
  • Optional flavorings: orange zest, vanilla, balsamic vinegar, rosemary, thyme, or a pinch of salt

To make it, simmer the chopped dried figs with water until very soft, usually 20–40 minutes depending on how dry they are. Blend or mash the softened figs, then add sugar and lemon juice. Simmer again until thick and spoonable. Add more hot water if it becomes too dense before the figs fully soften, especially before adding more sugar.

Start with ½ cup / 100 g sugar for a less-sweet fig spread, or 1 cup / 200 g sugar for a sweeter jam. Add more only after tasting. Dried figs are already concentrated, so use up to 1½ cups / 300 g sugar only if you want a very sweet, glossy jam.

The dried fig version thickens quickly after blending, so keep it slightly looser than you want while it is hot. If it looks perfect in the pot, it may cool into a paste.

Low-Sugar, Honey, and No-Added-Sugar Options

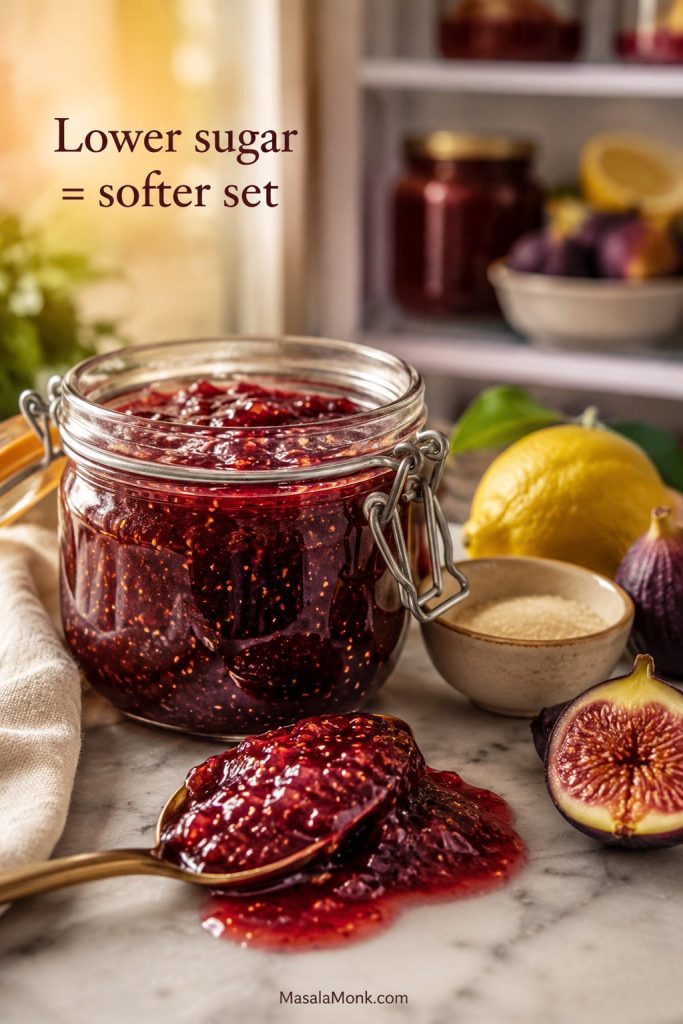
Lower sugar changes more than sweetness. It changes set, cook time, and storage life. Figs are naturally sweet, so reducing sugar can work, but the batch will usually be softer, a little less glossy, and shorter-lived in the refrigerator.
Low-sugar fig jam

For a lower-sugar version, use 150–200 g sugar per 900 g figs instead of 300 g. Cook the jam a little longer and expect a softer, more fruit-spread-like texture. A lower-sugar batch may never pass the cold-plate test as firmly as a higher-sugar jam. If it is shiny, thick, and spoonable, it can still be done.

Low-sugar fig jam in a jar with lemon and a smaller amount of sugar nearby.
Lower-sugar fig jam often tastes fruitier, although the softer set makes fridge or freezer storage more important.

Store low-sugar batches in the refrigerator and use within 1–2 weeks for best quality, or freeze for longer storage.

Honey fig jam

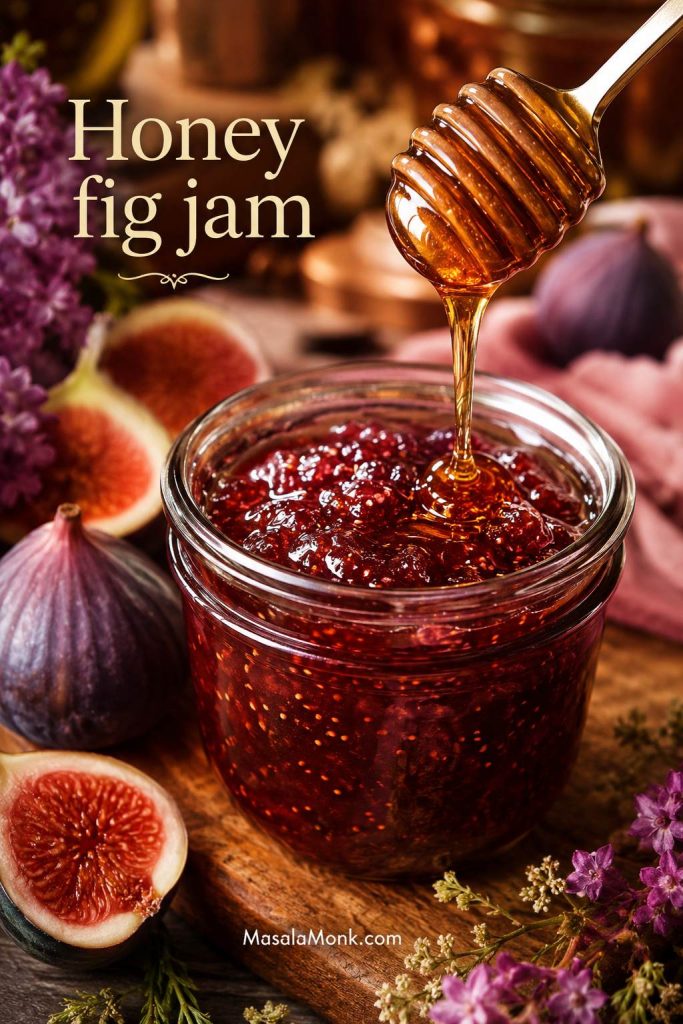
Honey adds a floral sweetness that works beautifully with figs. Replace part of the sugar with honey rather than all of it for the best texture. For example, use 200 g sugar plus ¼ cup honey for 900 g figs. Honey-sweetened jam may be softer, darker, and more aromatic than the granulated-sugar version.

Honey being drizzled into glossy fig jam with fresh figs nearby.
Honey brings floral sweetness to fig jam, but it also softens the set and works best as a chilled variation.

Keep honey-sweetened batches refrigerated or frozen for the best texture and freshness.

No-added-sugar fig spread

If you are searching for no-sugar fig jam, think of this version as a no-added-sugar fig spread instead of a classic jam. Cook ripe figs with lemon juice and a splash of water until very soft and thick, then mash or blend. Refrigerate and use within about 5–7 days, or freeze for longer storage.

Storage note: Low-sugar, honey, and no-added-sugar versions are softer, shorter-life batches. Keep them refrigerated or frozen rather than treating them like pantry preserves.

Before reducing sugar further, read the storage and canning safety notes so you choose the right storage path.

Fig Jam Variations

Once you understand the base recipe, the flavor is easy to adjust. Start small with add-ins because figs are delicate and can be overwhelmed by strong spices, vinegar, or herbs.

The Best First Variations

  1. Lemon-orange: brighter and more fragrant for breakfast and desserts.
  2. Vanilla: softer, rounder, and more dessert-like.
  3. Balsamic: deeper and better for cheese, pork, chicken, and sandwiches.
  4. Rosemary or thyme: savory enough for boards, baked brie, and grilled cheese.
  5. Chili: just enough heat for cheese, flatbreads, and sandwiches.
Five fig jam variations in small bowls labeled citrus, vanilla, balsamic, herbs, and chili.
Use fig jam flavor variations sparingly: citrus brightens, vanilla rounds, balsamic deepens, herbs turn savory, and chili adds heat.
VariationWhat to AddWhere It Shines
LemonExtra lemon zest or a little extra lemon juiceToast, yogurt, scones, breakfast boards
OrangeOrange zest, or a mix of orange and lemonCroissants, cakes, desserts, cheese boards
VanillaVanilla bean or vanilla extractPastries, cakes, ice cream, cheesecake
Balsamic1–2 tbsp balsamic vinegar near the endBrie, goat cheese, blue cheese, pork, chicken, sandwiches
HoneyReplace part of the sugar with honeySoft floral jam, yogurt, toast, cheese
Brown sugarReplace part or all of the white sugar with light brown sugarA deeper caramel note, toast, baking, cheese boards
GingerFresh grated ginger or a pinch of ground gingerWinter breakfasts, cheese boards, roasted meats
Rosemary or thymeA small herb sprig while cooking, removed before jarringSavory boards, baked brie, grilled cheese
ChiliA small pinch of chili flakesCheese, sandwiches, flatbreads
StrawberryReplace part of the figs with strawberriesA fruitier Southern-style jam
Fig onion-style condimentOnions, vinegar, and savory cookingA separate condiment, better treated as its own recipe

For cheese boards, the best directions are balsamic, rosemary, thyme, honey, orange, brown sugar, and chili. For breakfast and desserts, vanilla, lemon, orange, ginger, and strawberry are especially good.

How to Store Fig Jam

Think of this as the kind of jam you keep in the fridge and actually use: spooned over breakfast, tucked beside cheese, or frozen in small jars for later. It is flexible, lower-stress, and less sugar-heavy than a shelf-stable canning preserve.

Fig jam storage guide showing a refrigerator jar, freezer container, and tested canning-only jar cue.
For this recipe, choose fridge or freezer storage; pantry jars need tested canning instructions, not casual adjustments.

Refrigerator storage

Cool the jam, transfer it to clean jars, and refrigerate. For best quality, use the main version within 2–3 weeks. Always use a clean spoon, keep the jar chilled, and discard it if you see mold, fermentation, off smells, or unusual bubbling.

Freezer storage

The jam freezes well. Spoon it into freezer-safe jars or containers, leaving headspace because it expands as it freezes. Freeze for up to 3 months for best quality. Thaw overnight in the refrigerator and stir before using.

Canning fig jam

For pantry jars, switch to a tested preservation recipe and follow it exactly. Canning safety depends on the exact fruit, sugar, acid, headspace, jar size, and processing time. Figs also need proper acidification for safe boiling-water canning.

Canning safety setup for fig jam with jars, lemon juice, jar lids, water-bath pot, and a tested recipe checklist.
Shelf-stable fig jam depends on tested acidity, headspace, jar size, and processing time, so do not guess with canning.

Canning safety: Do not can this version as written. Sterilized jars do not make an untested refrigerator jam shelf-stable.

For shelf-stable jars, use a tested canning recipe and follow its processing instructions exactly. The National Center for Home Food Preservation has a tested fig jam without pectin formula, and Oregon State University Extension explains why figs need added acid for safe preservation.

Do not use low-sugar, honey-sweetened, or no-added-sugar variations for room-temperature storage unless you are following a tested recipe designed for that exact style.

What to Eat With Fig Jam

This is where the jar earns its space in the fridge. A spoonful can rescue plain yogurt, make toast feel planned, or turn a last-minute cheese plate into something generous. The easiest rule: pair it with something creamy, salty, tangy, smoky, or crisp so the sweetness has contrast.

Fig jam served with yogurt, cheese and crackers, grilled cheese, pork, tart, and cookies.
After chilling, fig jam moves easily from breakfast to cheese boards, savory glazes, sandwiches, and simple desserts.
UseTexture to Aim ForFlavor Direction
Toast, yogurt, oatmealSoft and spoonableLemon, vanilla, honey
Brie or goat cheeseSlightly thicker spreadBalsamic, orange, rosemary
Sandwiches and grilled cheeseSmooth or lightly chunkyChili, balsamic, thyme
Cookies, cakes, tartsThicker jamVanilla, orange, brown sugar
Pork or chicken glazeLoosened with acid or pan juicesBalsamic, chili, thyme

For cheese-specific serving ideas, jump to fig jam with brie and cheese boards.

Breakfast ideas

At breakfast, use it where you would use berry jam, but expect a deeper, honeyed flavor.

  • Spread on toast, English muffins, biscuits, or croissants
  • Spoon over Greek yogurt or labneh
  • Swirl into oatmeal or overnight oats
  • Serve with pancakes, waffles, or French toast
  • Add to a bowl of granola, nuts, and fruit

If you like breakfast bowls, fig jam pairs naturally with nuts, oats, yogurt, and dried fruit. Spoon it into overnight oats, or serve it with a crunchy bowl of this homemade granola recipe.

It is also excellent with warm toast, biscuits, or English scones, especially when the jam is soft enough to spoon rather than slice.

Cheese and board ideas

On a cheese board, fig jam gives you the sweet-tart contrast that makes salty, creamy, sharp, and funky cheeses taste better. Brie loves lemon, orange, balsamic, or rosemary. Goat cheese works beautifully with honey or vanilla. Blue cheese needs a smaller spoonful and a stronger direction like balsamic, orange, or chili.

  • Brie or baked brie
  • Goat cheese or whipped goat cheese
  • Blue cheese or Gorgonzola
  • Camembert
  • Manchego
  • Cream cheese
  • Sharp cheddar
  • Charcuterie boards with crackers, nuts, fruit, and cured meats
Cheese board with fig jam, brie, goat cheese, blue cheese, cheddar, crackers, nuts, figs, and sliced fruit.
On a cheese board, fig jam bridges creamy, salty, sharp, and tangy cheeses with one sweet-tart spoonful.

For party boards, fig jam fits naturally into a larger spread like this charcuterie board guide.

Savory uses

In savory food, use fig jam like a sweet-tart glaze or condiment, especially with salty, smoky, roasted, or sharp flavors.

Fig jam grilled cheese: Spread a thin layer inside the sandwich so the jam melts into the salty cheese instead of overwhelming it.

Grilled cheese sandwich with melted cheese and a visible layer of fig jam, served with a jar and fresh figs.
Inside grilled cheese, a thin layer of fig jam melts into the salty cheese and adds sweet-tart contrast.
  • Use in turkey, ham, or chicken sandwiches
  • Brush over pork or chicken as a glaze
  • Spoon onto pizza or flatbread with cheese and herbs
  • Serve with roasted vegetables
  • Stir into a pan sauce with vinegar or mustard

For meat, loosen the jam with lemon juice, vinegar, or pan juices and brush it over something simple like pork tenderloin in oven.

Pork tenderloin brushed with glossy fig jam glaze beside lemon, herbs, and a small bowl of jam.
For a quick fig jam glaze, loosen the jam with lemon, vinegar, or pan juices before brushing it over pork or chicken.

Dessert uses

For desserts, choose a thicker batch or simmer the jam a little longer so it holds its place in cookies, cakes, and tarts.

Fig jam used in a tart slice, thumbprint cookies, cream topping, and a spoonful of dessert.
A thicker fig jam holds its shape in cookies, tarts, and cream desserts while adding a glossy fruit center.
  • Fill thumbprint cookies
  • Use in fig bars or Fig Newton-style cookies
  • Layer into cakes
  • Spoon over cheesecake
  • Serve with vanilla ice cream
  • Use as a tart or galette filling
  • Swirl into whipped cream or mascarpone

For tart-style desserts, use a thicker batch the way you would use a glossy fruit layer in an apple tart recipe.

Fig Jam With Brie, Goat Cheese, and Cheese Boards

With cheese, the sweetness and texture do the heavy lifting. The jam brings fruit, acidity, and softness, while the cheese brings salt, fat, and creaminess. The combination tastes generous without needing much work.

For an easy baked brie-style appetizer, use about 2–3 tablespoons per 8 oz brie wheel. Place the brie in a small oven-safe dish, warm it until soft but not completely melted and leaking, then spoon the jam over the top. Add toasted walnuts, pecans, or pistachios. Finish with honey, thyme, rosemary, orange zest, or a few drops of balsamic vinegar. Serve with crackers, baguette slices, apple slices, or pear wedges.

Warm brie topped with glossy fig jam, nuts, crackers, and fresh figs.
Fig jam with brie works because sweet fruit, lemon brightness, creamy cheese, and crunchy nuts balance one another.

If you are serving the brie as part of a drinks-and-snacks spread, a bright French 75 works well because lemon and bubbles cut through creamy cheese and sweet jam.

Add nuts after warming if you want them to stay crisp. A balsamic variation is especially good with stronger cheeses because the vinegar keeps the sweetness from becoming heavy.

Goat cheese is especially good with a spoonful of jam, cracked pepper, toasted nuts, and a drizzle of olive oil or honey. Blue cheese is stronger, so use a smaller spoonful and choose a sharper variation like balsamic, orange, or chili. Sharp cheddar and Manchego work best with a thicker batch, crackers, and crisp fruit.

Want a savory path instead? Use the fig jam glaze idea for pork or chicken.

Fig Jam Troubleshooting

Most jam problems look dramatic while the pot is hot. Usually, they are texture problems — and texture problems can often be fixed before the jar cools. Use this table before adding thickeners or throwing anything away.

Fig jam troubleshooting guide with examples of runny, too thick, too sweet, flat, scorched, and loose-set jam.
Troubleshooting fig jam is easier once you know whether the problem is moisture, heat, sweetness, acid, or cook time.

If you are unsure whether the batch is actually done, compare it with the doneness tests before making a fix.

Common Problems and Fixes

ProblemLikely CauseFix NowNext Time
RunnyToo much water, undercooking, very juicy figs, or low sugarSimmer longer in a wide pan, stirring oftenStart with less water, cook to the doneness tests, and avoid rushing
Too thickOvercooking or too much evaporationStir in a spoonful of hot water or lemon juice until loosenedStop cooking when the jam is shiny and spoonable, not stiff
Too sweetVery ripe figs or too much sugarAdd lemon juice a teaspoon at a timeChoose the lower end of the sugar range
Flat flavorNot enough acid or saltAdd lemon juice and a tiny pinch of saltBuild in zest, lemon juice, or a small balsamic finish
ScorchedHeat too high, pan too thin, or not enough stirringDo not scrape burnt bits into the jam; move unburnt jam to a clean potKeep the heat lower, use a heavier pan, and stir more often
Loose setNo pectin, low sugar, or not enough reductionTreat it as fig spread or simmer longerCheck with the cold plate test or thermometer cue
Noticeable seedsFigs naturally have many tiny seedsBlend the jam smootherChoose a smoother fig spread texture from the start
Dried fig version too denseDried figs absorbed too much liquid or cooked down too farBlend in hot water a spoonful at a timeSimmer figs until fully soft before reducing hard

Runny Fig Jam Fix

A loose batch usually needs more evaporation before it needs anything else, so return it to a wide pan and simmer gently.

Runny fig jam simmering again in a wide pan to thicken.
Runny fig jam usually needs patience, not cornstarch; simmer it in a wide pan until the extra moisture leaves.

Too-Thick Fig Jam Fix

A stiff batch can often be saved while warm if you add liquid slowly and stop as soon as the jam relaxes.

Thick fig jam being loosened with a small amount of liquid from a spoon.
If the jam becomes too thick, loosen it while warm with a small splash of hot water or lemon juice.

About cornstarch: Cornstarch can thicken many fruit sauces, but it is not the best fix for classic fig jam and should not be used in anything you plan to can. If the jam is runny, simmering longer is usually the better solution.

FAQs About Fig Jam

Do figs need to be peeled before making jam?

No. The skins are edible and soften as the fruit cooks. Remove the stems and any damaged spots, but leave the skins on for better texture, color, and flavor.

What kind of figs are best for fig jam?

Use ripe, flavorful figs. Black Mission, Brown Turkey, Kadota, Adriatic, and other edible varieties can all work. Ripeness matters more than the exact variety: the fruit should be sweet and soft, not hard, dry, sour, or spoiled.

Fresh figs or dried figs — which makes better jam?

Fresh figs make a brighter, more classic batch. Dried figs make a darker, denser spread that is available year-round and excellent with cheese. If fresh figs are in season, use them. If not, dried figs are a very good option.

Can green figs be used for fig jam?

Ripe green-skinned figs can be used. Truly unripe figs are different and usually need a separate green fig preserve method with soaking or boiling steps to reduce bitterness and firmness. If the figs are hard, dry, and not sweet yet, do not treat them like ripe figs in this quick jam.

Why is lemon juice used in fig jam?

Lemon juice balances the natural sweetness of figs, brightens the flavor, and helps the mixture thicken. It also matters in canning safety, although shelf-stable canning requires a tested recipe rather than casual adjustments.

Does fig jam need pectin?

No, not for a soft homemade version. This recipe thickens through sugar, lemon juice, and evaporation. Commercial pectin gives a firmer set, but it requires different ratios and instructions.

Why is my fig jam runny?

It may need more cooking time. Runny jam usually comes from too much water, very juicy figs, low sugar, a narrow pot, or stopping before enough moisture has evaporated. Simmer it longer in a wide pan and test again.

How long does homemade fig jam last?

For the main refrigerator version, use it within 2–3 weeks for best quality. Low-sugar batches are best within 1–2 weeks, and no-added-sugar spread is best within about 5–7 days. You can also freeze it for about 3 months. Room-temperature jars require a tested preservation method and proper processing.

Is this fig jam recipe safe for canning?

The version here is meant for refrigerator and freezer storage. For shelf-stable canning, use a tested canning formula and processing time from a trusted source. Sterilized jars alone do not make refrigerator jam safe for room-temperature storage. Do not can low-sugar, honey, or no-added-sugar versions unless the recipe is specifically tested for that method.

Can frozen figs be used for jam?

Frozen figs work well, but they usually bring extra liquid. Thaw the fruit first if possible and include the juices unless they seem excessive. The batch may need a longer simmer to thicken.

Can I double this recipe?

Yes, but use a very wide pan and expect a longer cook time. Jam thickens through evaporation, so one large deep pot can take much longer and may cook unevenly. For the best texture control, two smaller batches are usually easier than one oversized batch.

Brown sugar in fig jam — does it work?

Yes. You can replace part or all of the white sugar with light brown sugar for a deeper, warmer, slightly caramel-like flavor. The finished jar will taste less bright, so lemon juice becomes even more important.

What cheese goes best with fig jam?

Brie, goat cheese, blue cheese, Camembert, Manchego, cream cheese, sharp cheddar, and Gorgonzola all pair well with it. Use a balsamic or herb variation for a more savory board.

Final Tips Before You Make It

  • Do not peel the figs; the skins soften during cooking.
  • Start with less water and add more only if the pot looks dry.
  • Cook uncovered so moisture can evaporate.
  • Use a wide pan so the jam reduces efficiently.
  • Stop cooking before the jam looks stiff; it thickens as it cools.

Once the figs soften and the kitchen smells warm and lemony, the rest is patience: stir, test, stop early, and let the jar finish thickening as it cools.

Fig Jam Recipe

A soft-set fresh fig jam made without commercial pectin. It cooks down into a shiny, fruit-forward spread for toast, yogurt, cheese boards, baked brie, desserts, sandwiches, and savory glazes. Keep it refrigerated or frozen unless you switch to a tested canning recipe.

YieldAbout 3 cups / 720 ml, or three 8 oz jars
Prep Time15 minutes
Cook Time25–45 minutes
Total Time40–60 minutes, plus optional resting and cooling
Saveable fig jam recipe card with no pectin, 2 pounds figs, 300 grams sugar, 60 milliliters lemon, cook time, yield, and fridge or freezer storage.
Keep this no-pectin fig jam card handy for the core ratio, cook-time window, yield, and fridge-or-freezer reminder.

Ingredients

  • Ripe fresh figs: 2 lb / 900 g, stems removed, chopped or quartered
  • Granulated sugar: 1½ cups / 300 g
  • Fresh lemon juice: ¼ cup / 60 ml, plus more to taste
  • Water: ¼–½ cup / 60–120 ml, as needed
  • Fine salt: ⅛ tsp, optional
  • Lemon or orange zest: 1 tsp finely grated, optional
  • Vanilla: 1 tsp vanilla extract or ½ vanilla bean, optional
  • Balsamic vinegar: 1–2 tbsp, optional for a cheese-board variation

Instructions

  1. Prep the figs. Rinse gently, pat dry, remove stems, and chop or quarter the figs. Do not peel them; fig skins soften during cooking.
  2. Combine the ingredients. Add figs, sugar, lemon juice, ¼ cup / 60 ml water, and salt if using to a wide heavy-bottomed pan. Stir well. Let sit for 15–30 minutes if you have time.
  3. Start cooking. Set the pan over medium heat and stir until the sugar dissolves and the figs begin to release juice. Add the remaining water only if the pot looks dry or the figs start sticking before they soften.
  4. Simmer uncovered. Reduce the heat to maintain a steady simmer. Cook uncovered, stirring often, until the figs soften, slump, and begin to collapse, about 25–45 minutes.
  5. Mash or blend. Mash lightly for fig preserves-style texture with visible pieces. Mash more for rustic jam. For a smoother fig spread, pulse briefly with an immersion blender.
  6. Cook to thickness. Continue simmering until the jam looks shiny, mounds softly on a spoon, and moves slowly on a chilled plate. At sea level, a thermometer may read around 220°F / 104°C for a firmer set, but texture matters more than temperature alone.
  7. Adjust flavor. Add more lemon juice if the jam tastes too sweet or flat. Stir in vanilla, zest, or balsamic vinegar near the end if using.
  8. Jar and cool. Spoon into clean jars. Cool, then refrigerate. The jam will thicken more as it cools.

Dried Fig Variation

Use 12–14 oz / 340–400 g dried figs, 2 cups / 480 ml water, ½–1 cup / 100–200 g sugar to start, and 2 tbsp / 30 ml lemon juice. Simmer the chopped dried figs with water until very soft, 20–40 minutes. Mash or blend, add sugar and lemon, then simmer until thick and spoonable. Add more sugar only after tasting. Keep the jam slightly loose while hot because dried fig jam firms quickly as it cools.

Small-Batch Version

Use 1 lb / 450 g fresh figs, ¾ cup / 150 g sugar, 2 tbsp / 30 ml lemon juice, and 2–4 tbsp / 30–60 ml water. Cook time is usually shorter, about 20–30 minutes.

Sugar Notes

For a lower-sugar version, use 150–200 g sugar per 900 g fresh figs and expect a softer set; refrigerate and use within 1–2 weeks. For no-added-sugar fig spread, cook ripe figs with lemon juice and a splash of water until thick, then refrigerate and use within about 5–7 days or freeze.

Storage and Canning

Keep this batch refrigerated and use within 2–3 weeks for best quality, or freeze for up to 3 months. Do not can this version as written. For shelf-stable jars, switch to a tested canning formula.

Once the jars are cool, keep one where you can reach it easily. This is the spoonful that turns plain toast, cheese, or a quick dessert into something finished.

Open jar of homemade fig jam with a spoon, toast with brie, fresh halved figs, lemon, and a linen cloth.
Once cooled, homemade fig jam becomes the jar you reach for at breakfast, with cheese, or when dessert needs fruit.

Back to top

Posted on — Leave a comment

Cream of Mushroom Pork Chops Recipe

Cream of mushroom pork chops with glossy mushroom gravy, browned pork edges, sliced mushrooms, parsley, and mashed potatoes on a warm plate.

You are not here for a complicated pork chop dinner. You have pork chops, a can of cream of mushroom soup, and the hope that the gravy turns creamy while the pork stays juicy. This recipe keeps that old-school shortcut, then gives it better timing, better gravy, and fewer dry-pork surprises.

These cream of mushroom pork chops are built for a real weeknight: brown the pork, loosen condensed soup into mushroom gravy, simmer gently, and stop before the chops turn tough. It is cozy pantry cooking, handled with just enough care.

The simple formula is 4 pork chops, 1 can of condensed cream of mushroom soup, and ⅓ to ½ cup broth, milk, or water. Use ⅓ cup liquid for thicker gravy, ½ cup for a looser sauce, and chicken broth when you want fuller flavor without making the recipe harder.

The fast skillet version comes first because it is the easiest dinner for most nights. If you meant baked pork chops, crock pot pork chops, pork chops and rice, potatoes, stuffing, Campbell’s-style pork chops, or extra-smothered gravy, those notes are included too — because each version cooks differently.

Quick Answer: Cream of Mushroom Pork Chops with Mushroom Soup Gravy

To make cream of mushroom pork chops, brown 4 seasoned pork chops in a skillet, whisk 1 can of condensed cream of mushroom soup with ⅓ to ½ cup chicken broth, milk, or water, then simmer gently until the thickest chop reaches 145°F / 63°C. Rest for 3 minutes and spoon the creamy mushroom gravy over the top.

Good default: use ¾–1 inch pork chops, ⅓ cup chicken broth, a 12-inch skillet, and low heat once the soup goes in. That combination gives you golden-edged pork and gravy thick enough to settle into mashed potatoes, rice, or egg noodles.

Bare pantry version: pork chops, condensed cream of mushroom soup, ½ cup water, and black pepper. It tastes simpler and more nostalgic, but it still works when dinner just needs to happen.

Gravy can wait. Pork cannot. Let the gravy be flexible, but treat the pork like it has a deadline. If the chops are done before the sauce is perfect, move them out and fix the gravy by itself.

This is the kind of dinner where the gravy matters as much as the pork: thick enough for mashed potatoes, loose enough to spoon, and savory enough to make a plain side feel finished.

If you are not making the skillet version, jump to the baked version, crock pot version, or pork chops and rice version.

Skillet Recipe Snapshot

Use4 pork chops, preferably ¾–1 inch thick
Soup1 can condensed cream of mushroom soup, 10.5 oz / 298 g
Liquid⅓ cup broth for thick gravy; up to ½ cup milk, broth, or water for looser sauce
Optional upgrade8 oz mushrooms, ½ onion, garlic, Worcestershire, Dijon
MethodBrown chops, make mushroom gravy, simmer gently, rest before serving
TimeAbout 30 minutes for the skillet version
Doneness145°F / 63°C plus a 3-minute rest
Skillet recipe snapshot showing raw pork chops, cream of mushroom soup, broth, mushrooms, onion, herbs, and the formula four chops plus one can plus one-third to one-half cup liquid.
Keep the skillet formula simple: pork chops, one can of cream of mushroom soup, and just enough liquid to turn condensed soup into spoonable gravy.

Many old canned-soup pork chop recipes simmer everything by time. This version uses the same pantry shortcut but changes the control point: the gravy can be adjusted by texture, while the pork is cooked by temperature.

Cooking with chicken instead tonight? Our cream of mushroom chicken recipe uses the same cozy canned-soup idea, but the timing and doneness are built around chicken instead of pork.

At a Glance: Gear, Sides, and Watchouts

QuestionQuick answer
SkilletUse a 12-inch skillet if adding mushrooms and onions; a 10-inch skillet works for the simplest pantry version.
Helpful equipmentTongs, whisk or sturdy spoon, instant-read thermometer, and a plate for resting pork.
Method choiceUse the skillet for speed, the oven for covered bakes, and a casserole method for raw rice, potatoes, or stuffing.
Easy sidesMashed potatoes, rice, egg noodles, green beans, peas, broccoli, biscuits, or a sharp salad.
Biggest mistakes to avoidOvercooking thin chops, hard-boiling the sauce, adding too much liquid, and salting too early.

Skillet, Baked, Crock Pot, or Rice: Which Cream of Mushroom Pork Chops Version Should You Make?

The same can of soup can become several different dinners. A quick skillet meal, an oven bake, a slow cooker dinner, and pork chops with rice all sound similar, but they do not need the same amount of liquid or time. Pick the path first, then the recipe gets much easier.

If you want…Use this methodWatch out for
Fast creamy pork chopsMain skillet methodThin chops overcook quickly once they go back into the sauce.
The old-school canned-soup shortcutCampbell’s-style pork chopsWater is classic, but broth gives a more savory gravy.
Oven-baked pork chopsCovered baked versionDo not bake lean chops by the clock; check early.
Crock pot pork chopsSlow cooker versionVery thin boneless chops can dry out before they taste tender.
Rice versionCooked rice side or baked rice casseroleUncooked rice needs more liquid and longer covered heat than skillet pork.
Potato versionMashed potatoes side or covered potato bakeRaw potatoes must be sliced thin and cooked like a casserole.
Stuffing versionCovered stuffing bakeDry stuffing steals moisture unless it is hydrated first.
Extra gravy / smothered pork chopsSmothered variationLet the pork rest while you make the extra gravy rich.
Visual chooser showing skillet, baked, crock pot, rice, potato, stuffing, and smothered cream of mushroom pork chop versions.
Start by choosing the dinner path: skillet stays quick, baked and crock pot need longer heat, and rice, potatoes, or stuffing need their moisture planned from the beginning.

Easy distinction: the skillet recipe cooks pork chops in a creamy sauce. Rice, potatoes, stuffing, and slow-cooker versions also have to manage starch or long heat, so the moisture and timing change.

Why This Recipe Works

This recipe keeps the part people love — pork chops in creamy mushroom soup gravy — while fixing the parts that usually go wrong.

  • Browning gives the pork a savory edge. The mushroom gravy softens everything later, but the first sear keeps the chops from tasting flat.
  • The soup-to-liquid ratio stays controlled. Condensed soup needs a little help becoming gravy, not a whole pan of liquid.
  • Mushrooms and onion make the shortcut taste more like dinner. They are optional, but they add sweetness, texture, and deeper mushroom flavor.
  • A gentle simmer protects lean pork. Once the sauce goes in, slow bubbles are your friend. A hard boil is how creamy dinners turn tough.
  • A thermometer separates the pork from the gravy problem. Once the chops are done, the sauce can keep thickening without them.

The result is still the creamy canned-soup dinner people remember, but with browned edges, a spoonable sauce, and pork that does not need to hide under the gravy.

This is not a recipe that asks you to pretend a can of soup is fancy. It simply helps that can do its job better: make creamy gravy, keep dinner simple, and give the pork chops something comforting to sit in.

Ingredients for Pork Chops with Cream of Mushroom Soup

The ingredient list is short, which is exactly why the small choices matter. The soup brings the creamy base, the liquid sets the gravy texture, and the chop thickness decides how much breathing room you have before dinner goes from juicy to dry.

Ingredients for cream of mushroom pork chops, including pork chops, cream of mushroom soup, broth, mushrooms, onion, garlic, Worcestershire sauce, parsley, and black pepper.
Even with condensed soup, the flavor improves when mushrooms, onion, broth, and black pepper turn the shortcut into a real mushroom gravy.

Bare pantry version: pork chops + condensed cream of mushroom soup + water + black pepper. Better weeknight version: add chicken broth, mushrooms, onion, garlic, Worcestershire, and thermometer timing. Both are valid; one is just more layered.

Core Ingredients and Optional Upgrades

Split image comparing bare pantry pork chops with cream of mushroom soup, water, and pepper against an upgraded version with mushrooms, onion, garlic, broth, Worcestershire sauce, and parsley.
The bare pantry version works when dinner just needs to happen. Mushrooms, onion, broth, and a savory booster make the same shortcut taste fuller.
IngredientAmountWhy it matters
Pork chops4 chops, about 1½–2¼ lb / 680 g–1 kg totalBoneless or bone-in both work. Chops around ¾–1 inch thick are easiest to keep juicy.
Condensed cream of mushroom soup1 can, 10.5 oz / 298 gThe shortcut base for the creamy mushroom gravy. Low-sodium soup gives you more control if using broth or seasoning mix.
Chicken broth, milk, or water⅓–½ cup / 80–120 mlTurns condensed soup into sauce. Broth is savory, milk is creamy, water is classic.
Fresh mushrooms8 oz / 225 g, slicedOptional but recommended for deeper mushroom flavor and a more homemade texture.
Onion½ medium / 75–100 g, thinly sliced or dicedAdds sweetness and helps the sauce taste less like it came straight from the can.
Garlic2–3 cloves, mincedAdds savory depth; use garlic powder if that is what you have.
Oil + butter1 tablespoon eachOil helps sear the pork; butter helps sauté mushrooms and onion.
Black pepper½ teaspoon, plus more to tasteBalances the creamy sauce and keeps the flavor from tasting sleepy.
Worcestershire sauce1–2 teaspoons / 5–10 ml, optionalAdds a savory edge that makes the gravy taste fuller.
Dijon mustard1 teaspoon / 5 g, optionalAdds a small sharp note without making the sauce taste mustardy.
Parsley1–2 tablespoons, chopped, optionalFreshens the finished plate.

Salt note: start light. Condensed soup already brings salt, and the final gravy can get too salty if you also add regular broth, bouillon, onion soup mix, gravy mix, ranch seasoning, or seasoned salt. Taste the sauce before adding more.

Can You Skip the Fresh Mushrooms and Onion?

Pork chops, condensed soup, a little liquid, and black pepper will still get dinner on the table. Fresh mushrooms and onion make the gravy taste more layered, but the simple canned-soup version is the classic route. If you skip them, add garlic powder, Worcestershire sauce, or extra black pepper so the sauce does not taste flat.

How to Make It Taste Less Canned

The goal is not to hide the shortcut. It is to make the shortcut taste more like dinner.

  • Fastest fix: add black pepper and a splash of Worcestershire so the gravy tastes savory instead of flat.
  • Better fix: cook fresh mushrooms and onion until the mushroom water cooks off and the edges color.
  • Most flavorful fix: use chicken broth, properly browned mushrooms, and a tiny spoon of Dijon or a tablespoon or two of dry white wine for a less canned finish.
Three-level guide for making cream of mushroom pork chops taste less canned, with fastest fix, better fix, and most flavorful fix.
To make the shortcut taste less canned, layer flavor in stages: pepper first, then browned mushrooms and onion, then broth or a small savory booster.

Choosing Pork Chops That Stay Juicy

The pork chop you choose decides how forgiving this dinner will be. A thick chop gives you a little breathing room. A thin cutlet needs a short leash.

Pork chop selection guide showing thin cut, center cut, ribeye cut, bone-in center cut, and bone-in ribeye chops with thickness tips.
Chop thickness decides how forgiving this recipe feels; thin chops need a short simmer, while ¾–1 inch chops give the gravy time to come together.

Boneless Pork Chops

Boneless pork chops are the easiest choice when you want dinner fast. They brown neatly, sit nicely under the mushroom gravy, and slice cleanly on the plate. Just watch the timing, because thin boneless chops do not forgive a long simmer.

For a reliable result, use boneless chops that are about ¾ to 1 inch thick. They are thick enough to brown well and stay juicy, but not so thick that the sauce is finished long before the pork is cooked.

Bone-In Pork Chops

Bone-in pork chops are often more forgiving. The bone and surrounding fat help protect the meat, so these are a good choice if you are nervous about dry pork chops. They may need a few extra minutes near the bone, so check the temperature in the thickest meaty part without touching the bone.

If the gravy thickens before the meat near the bone is done, add a splash of broth and keep the simmer gentle. The sauce is more forgiving than the pork; you can loosen it, thicken it, or adjust it later.

Boneless vs Bone-In Pork Chops

Use this comparison when you are choosing between speed and forgiveness: boneless chops cook faster, while bone-in chops give the gravy a little more time before the meat dries out.

Boneless and bone-in pork chops shown side by side with creamy mushroom soup gravy and labels explaining that boneless is faster while bone-in is more forgiving.
Boneless pork chops are fast and convenient, while bone-in chops give you a little more forgiveness once the mushroom soup gravy starts simmering.

Pork Loin Chops with Cream of Mushroom Soup

Pork loin chops work well in this recipe when they are sliced into chops and are about ¾ to 1 inch thick. They are lean, so cook them by temperature rather than by a long simmer time.

A whole pork loin roast does not use this skillet timing, and pork tenderloin is a different cut entirely. If you have a roast instead of chops, use a roast-specific method like our slow cooker pork loin recipe.

Three-panel guide comparing pork loin chops, pork tenderloin, and pork loin roast, with notes that pork loin chops work for this recipe while tenderloin and loin roast cook differently.
Pork loin chops work when they are sliced as chops, but pork tenderloin and a whole pork loin roast need different cooking methods.

Thin Pork Chops and Pork Cutlets

Thin pork chops and pork cutlets need a very different rhythm. They brown quickly, cook quickly, and can go from tender to tough while you are still stirring the sauce.

For thin chops, sear briefly, make the sauce, then return them to the skillet only long enough to warm through and finish. Do not simmer thin pork chops for 20–30 minutes in cream of mushroom soup.

Side-by-side guide showing a thin pork chop and a thick pork chop with ruler cues and text explaining that thin chops cook fast while thick chops give more room.
Thin pork chops can finish before the gravy looks done, so check them early; thicker chops give you more room for browning, simmering, and sauce-building.

Frozen Pork Chops

Thaw frozen pork chops before making this skillet recipe. Thawed pork browns better, cooks more evenly, and does not release as much water into the pan. Frozen or half-thawed chops can make the sauce watery before the pork is cooked through.

Before simmering, check the pork chop timing guide so thin chops do not get thick-chop timing.

How to Make Pork Chops with Cream of Mushroom Soup in a Skillet

A 12-inch skillet is best if you are using mushrooms and onions. It gives the chops room to brown and the mushrooms space to release moisture, then brown instead of steam.

Step-by-step image showing pork chops being seared, mushrooms browning, gravy being built, pork chops simmering gently, resting, and serving.
Follow the skillet in stages: first build browning, then turn the soup into gravy, and finally let the pork rest before the sauce goes over the plate.

1. Pat the Pork Chops Dry and Season Lightly

Pat the pork chops dry with paper towels. Season both sides with black pepper, garlic powder or paprika if using, and only a small pinch of salt. Dry surfaces brown; wet surfaces steam.

2. Brown the Pork Chops

Heat the oil over medium-high heat. Add the pork chops in a single layer, working in batches if needed. Sear until the chops have golden edges instead of a gray steamed surface, about 3–5 minutes per side for ¾–1 inch chops.

Transfer the browned chops to a plate. They do not need to be fully cooked yet. You are building flavor before the creamy mushroom gravy goes in.

Pork chops searing in a skillet with golden-brown edges, pepper specks, and the text golden edges not gray steam.
A real sear gives mushroom gravy something savory to build on; pale steamed pork cannot add the same depth.

3. Cook the Mushrooms and Onion

Reduce the heat to medium. Add the butter, mushrooms, and onion. Mushrooms usually go through three stages: first they look dry, then they release water, then that water cooks off and the edges begin to brown. Do not rush this stage if you added fresh mushrooms; the moment their water cooks off and the edges start to brown is the moment the sauce stops tasting like plain condensed soup.

Sliced mushrooms and onions browned in a skillet with caramelized edges and the text wait for this stage.
Once mushrooms stop steaming and start browning, they bring the savory flavor that keeps cream of mushroom gravy from tasting flat.

4. Add Garlic and Make the Mushroom Gravy

Add the garlic and cook for about 30 seconds. Whisk in the condensed soup and ⅓ cup chicken broth, milk, or water. Add Worcestershire and Dijon if using. The sauce should be loose enough to spoon, but thick enough to coat the pork. Add more liquid a tablespoon at a time.

Cream of mushroom soup being stirred into browned mushrooms and pan drippings to make creamy mushroom gravy.
The soup becomes gravy when it loosens into browned mushrooms, pan juices, and just enough liquid to coat the pork.

5. Simmer the Pork Chops Gently

Return the pork chops and any plate juices to the skillet. Spoon gravy over the top, reduce the heat to medium-low, cover loosely, and simmer with slow, lazy bubbles. A rolling boil is too hard for lean pork and can make the gravy feel heavy.

Check the thickest part; when it reaches 145°F / 63°C, move the chops to a plate. If the gravy still needs work, fix the sauce without the pork in the pan.

Pork chops simmering gently in creamy mushroom gravy with small bubbles around the edges and text reading slow lazy bubbles.
At this stage, slow bubbles are enough; a hard boil can tighten the pork and make creamy mushroom gravy feel heavy instead of silky.

6. Rest, Taste, and Serve

Rest the pork chops for 3 minutes. While they rest, taste the mushroom gravy. Add black pepper, a splash of broth or milk, parsley, or a tiny squeeze of lemon if the sauce tastes too heavy.

Spoon the creamy gravy over the pork and give it somewhere to land: mashed potatoes, rice, egg noodles, biscuits, or green beans all make the plate feel complete. The sauce should settle over the chop and drift into the side, not run across the plate like soup.

Cream of Mushroom Pork Chops Recipe Card

Classic skillet cream of mushroom pork chops with tender pork, creamy mushroom gravy, optional mushrooms and onions, and enough sauce for potatoes, rice, noodles, or green beans.

Recipe note: once the chops are done, move them out of the skillet and finish the gravy separately if needed.

Prep Time
10 minutes
Cook Time
20 minutes
Total Time
30 minutes
Servings
4

Equipment

  • 12-inch skillet, preferably heavy-bottomed
  • Tongs
  • Whisk or sturdy spoon
  • Instant-read thermometer
  • Plate for resting the pork chops

Ingredients

  • 4 pork chops, about 1½–2¼ lb / 680 g–1 kg total, preferably ¾–1 inch thick
  • ½ teaspoon black pepper, plus more to taste
  • ½ teaspoon garlic powder or paprika, optional
  • Small pinch of salt, optional
  • 1 tablespoon oil / 15 ml
  • 1 tablespoon butter / 14 g
  • 8 oz / 225 g fresh mushrooms, sliced, optional but recommended
  • ½ medium onion / 75–100 g, thinly sliced or diced, optional but recommended
  • 2–3 garlic cloves, minced
  • 1 can condensed cream of mushroom soup, 10.5 oz / 298 g, regular or low-sodium
  • ⅓–½ cup / 80–120 ml chicken broth, milk, or water
  • 1–2 teaspoons Worcestershire sauce / 5–10 ml, optional
  • 1 teaspoon Dijon mustard / 5 g, optional
  • 1–2 tablespoons chopped parsley, optional

Instructions

  1. Pat the pork chops dry. Season both sides with black pepper, garlic powder or paprika if using, and only a small pinch of salt.
  2. Heat the oil in a 12-inch skillet over medium-high heat. Add pork chops in a single layer, browning in batches if needed.
  3. Sear until golden, about 3–5 minutes per side for ¾–1 inch chops. Transfer to a plate. The pork does not need to be fully cooked yet.
  4. Reduce heat to medium. Add butter, mushrooms, and onion. Cook 5–7 minutes, until the mushrooms release moisture and begin to brown.
  5. Add garlic and cook for 30 seconds.
  6. Whisk in condensed cream of mushroom soup and ⅓ cup broth, milk, or water. Add Worcestershire and Dijon if using. Add more liquid a splash at a time if you want looser gravy.
  7. Return pork chops and plate juices to the skillet. Spoon gravy over the chops. Reduce heat to medium-low, cover loosely, and simmer gently until the thickest part reaches 145°F.
  8. If the pork is done before the gravy is thick enough, move the chops to a plate and simmer the sauce uncovered by itself.
  9. Rest pork chops for 3 minutes. Taste gravy and adjust with pepper, parsley, or a splash of liquid if needed.
  10. Serve hot with mushroom gravy spooned over the top.

Notes

  • Use ⅓ cup liquid for thicker gravy and ½ cup for a looser sauce.
  • Chicken broth is a good default liquid; milk is creamier; water is the classic canned-soup version.
  • Thin pork chops cook fast. Check them early and do not simmer them like thick chops.
  • Bone-in chops may need a few extra minutes near the bone.
  • Once the soup is in the skillet, keep the heat low enough for slow bubbles.
  • For baked, crock pot, rice, potato, or stuffing versions, the method and timing change.

Need to adjust the sauce? Use the mushroom gravy fixes for watery, thick, or salty gravy.

Creamy Mushroom Gravy Success Cues: Not Watery, Not Pasty

A strong version should feel like gravy dinner, not soup poured over meat. When you cut into the chop, the inside should still look moist, and the sauce should drag slowly from the spoon into potatoes, rice, or noodles.

Sliced pork chop with creamy mushroom gravy, visible mushrooms, parsley, and mashed potatoes on a warm plate.
Look for juicy slices and gravy that settles into the side, so the plate feels creamy and complete instead of soupy.
Success cueWhat you wantWhat to fix
Gravy textureCoats a spoon and moves slowlyWatery ring around the pan or paste-like sauce
Pork textureSlices easily and looks moist insideDry, gray, tight meat from overcooking
FlavorSavory, creamy, mushroom-forwardToo salty, bland, or flat
Core fixAdjust the sauce after the chops are doneLeaving done pork in the pan while fixing gravy

How Long to Cook Pork Chops in Cream of Mushroom Soup

This is where most pork chop dinners are won or lost. The gravy can look perfect while a thin chop quietly overcooks, so timing has to follow thickness, not habit.

Timing by Pork Chop Thickness

Pork chop typeSear timeSauce simmer timeTiming note
Thin pork cutlets, about ¼ inch1–2 minutes per side1–3 minutesMost of the cooking happens during the sear. Check early.
½-inch boneless pork chops2–3 minutes per side3–5 minutesFast, but easy to overcook.
¾-inch boneless pork chops3–4 minutes per side4–7 minutesOne of the easiest sizes for this recipe.
1-inch boneless pork chops4–5 minutes per side6–10 minutesJuicier than thin chops; use a thermometer.
1-inch bone-in pork chops4–5 minutes per side8–12 minutesMay need a little longer near the bone.

Most forgiving range: ¾–1 inch chops are the easiest size for this recipe. They brown well, stay juicier than thin cutlets, and give the gravy enough time to come together. Thin ½-inch chops still work, but they need a short simmer. Bone-in chops are forgiving, but check the meat near the bone.

Pork chop timing guide showing thin, medium, and thick pork chops with cues to check the center and avoid relying only on time.
Timing depends on thickness, so use chop size as your guide and check the center instead of trusting the clock alone.

Temperature and Resting Note

Treat the table as a starting point, not a contract. Thin chops may finish during the sear; thicker bone-in chops may need more time near the bone. The thermometer gets the final vote: 145°F / 63°C plus a 3-minute rest, which matches FoodSafety.gov’s safe minimum internal temperature guidance for pork chops.

A slightly pink center is not automatically a problem when pork has reached temperature and rested. Dry, gray pork usually comes from chasing old timing habits instead of stopping at the right doneness.

The same temperature-first idea matters with other lean pork cuts; our pork tenderloin in oven guide uses that same rest-before-slicing approach.

5 Ways This Dinner Goes Wrong — and How to Avoid Them

Most cream of mushroom pork chop problems come from one of five small choices. Fix these before they happen and the whole dinner feels easier.

  • Do not cook thin chops like thick chops. They can turn tough before the gravy is done, so sear them briefly and return them only long enough to finish.
  • Do not boil the sauce hard. Once the soup goes in, keep slow bubbles so the pork stays tender and the gravy stays creamy.
  • Do not add all the liquid at once. Start with ⅓ cup and loosen gradually so the gravy does not turn soupy.
  • Do not salt heavily before tasting the soup. Condensed soup and seasoning mixes can make the final gravy too salty.
  • Do not fix gravy while finished pork keeps cooking. Move done chops out first, then thin, thicken, or reduce the sauce.
Common mistakes guide for cream of mushroom pork chops showing thin chops cooked too long, hard-boiled sauce, too much liquid, too much salt early, and fixing gravy while pork keeps cooking.
Most cream of mushroom pork chop problems start small: thin chops stay on too long, sauce boils too hard, liquid gets added too fast, or seasoning happens before tasting.

How to Make the Mushroom Gravy Creamy, Not Watery

The gravy should act like a blanket, not soup. It should coat the pork, slide slowly into mashed potatoes or rice, and taste savory instead of simply salty. Think of it as a mushroom cream sauce for pork chops: creamy enough to coat, but loose enough to spoon.

Mushroom Gravy Spoon Test

The easiest visual cue is the spoon: the gravy should cling lightly, then slide off slowly instead of running like broth or sitting like paste.

Spoon lifting creamy mushroom gravy with mushroom pieces and black pepper over a skillet of pork chops.
A good mushroom gravy coats the spoon, but still slides easily over pork chops and into whatever side you serve underneath.
  • Chicken broth gives the most savory, balanced mushroom gravy and is a reliable everyday default.
  • Milk makes the sauce softer and creamier, with a milder comfort-food flavor.
  • Water keeps the classic canned-soup taste and works well for the pantry version.
  • A small splash of white wine brightens the gravy when you are using fresh mushrooms and onion.

For one 10.5-ounce can of condensed cream of mushroom soup, start with ⅓ cup liquid if you want thick gravy. Use up to ½ cup when you want more sauce for rice, noodles, or potatoes. Add extra liquid in tablespoons, not big pours.

Too Thin, Just Right, or Too Thick Mushroom Gravy

Use the texture as your guide before serving. Thin gravy needs reducing, thick gravy needs a splash of liquid, and just-right gravy should look glossy and spoonable.

Three-part gravy texture guide showing too thin, just right, and too thick mushroom gravy on spoons and in bowls.
If the gravy looks watery, simmer it down; if it turns too thick, loosen it slowly until the sauce becomes glossy and spoonable again.

How to Thicken Mushroom Gravy

If the gravy is too thin, remove the pork chops and simmer the sauce uncovered until it coats a spoon. For a faster fix, whisk 1 teaspoon cornstarch with 1 tablespoon cold water, stir that slurry into the simmering gravy, and cook for a minute or two.

How to Thin Mushroom Gravy

If the gravy turns pasty, lower the heat and add broth, milk, or water a splash at a time. Stir until the sauce loosens and looks glossy again. A thick sauce is easy to fix as long as the pork is not still sitting in it over heat.

How to Keep the Gravy from Tasting Too Salty

Use low-sodium broth if your soup is salty, and be careful with onion soup mix, bouillon, gravy packets, ranch seasoning, or seasoned salt. If the finished sauce tastes too salty, soften it with milk, cream, unsalted broth, or sour cream, then serve it with plain potatoes, rice, noodles, or vegetables.

If the pork is already cooked and the sauce still needs help, use the troubleshooting guide instead of simmering the chops longer.

Campbell’s-Style Cream of Mushroom Pork Chops

This is the version many people remember: pork chops, condensed cream of mushroom soup, water, black pepper, and a short simmer. It is not fancy, and it does not need to be. The one upgrade worth keeping is temperature control instead of simmering by habit.

Campbell’s-style cream of mushroom pork chops in a skillet with browned pork chops, creamy mushroom gravy, mushrooms, parsley, and a generic soup bowl.
Campbell’s-style pork chops are the nostalgic shortcut version, but browning the meat and simmering gently make the gravy taste more like dinner.

Campbell’s-style shortcut: brown 4 pork chops, stir 1 can condensed cream of mushroom soup with ½ cup water, return the chops to the pan, cover, and simmer gently until the pork reaches 145°F. Rest 3 minutes before serving.

That simple brown-soup-simmer idea is also the classic pattern behind Campbell’s Tasty 2-Step Pork Chops.

Use the classic version when you want the childhood shortcut. Use the upgraded version when you want the same comfort with deeper flavor and better gravy texture.

Water, Broth, or Milk for Campbell’s-Style Pork Chops

VersionLiquid / add-insFlavor
Campbell’s-style classic½ cup waterNostalgic, simple, most like the old shortcut
Better weeknight version⅓–½ cup chicken brothSavory, fuller, still easy
Creamier version⅓–½ cup milkSofter, richer, milder
Less canned versionBroth + mushrooms + onion + WorcestershireMore homemade without losing the shortcut
Four-way comparison of cream of mushroom gravy made classic, with broth upgrade, creamier milk version, and less-canned upgrade.
Water gives the classic canned-soup flavor, broth adds savory depth, milk softens the sauce, and browned mushrooms make the shortcut taste more complete.

The thermometer is the reliability upgrade. The classic recipe tells you to simmer until done; this version gives the pork a clear stopping point.

Baked, Crock Pot, Rice, Potatoes, and Stuffing Versions

These versions are popular because they solve different dinner problems. The baked version is hands-off, the crock pot version waits for you, and rice, potatoes, or stuffing can turn pork chops into a full casserole. The tradeoff is that each version needs its own moisture and timing.

Baked Pork Chops with Cream of Mushroom Soup

Oven answer: brown the pork chops first, cover them with cream of mushroom soup gravy, bake covered at 350°F, and stop when the chops are just done. Keep the dish covered for a creamy bake; uncover only briefly if the gravy needs to reduce.

For many ¾–1 inch chops, start checking around 25 minutes after browning; thicker covered versions may take longer, but doneness decides.

  • Thin or ½-inch boneless chops need a short covered bake after a brief sear. Check early; they should not get thick-chop timing.
  • ¾–1 inch boneless chops are the most reliable baked version because they brown well and give the sauce time to heat through.
  • 1-inch bone-in chops make a cozier, more forgiving oven dinner, but check the meat near the bone.

Check early; baked chops can dry out if they sit too long after they are done. The oven should not become a holding place for already-finished lean pork.

Baked pork chops with cream of mushroom soup gravy in a casserole dish with mushrooms, onions, parsley, and foil partly lifted.
In a baked version, the covered dish protects the gravy. The main job is checking the pork before the oven turns it dry.

Crock Pot Cream of Mushroom Pork Chops

Slow cooker answer: use thawed thicker pork chops, condensed cream of mushroom soup, a little broth, and optional onion soup mix or mushrooms. For sliceable chops, start checking earlier; for fall-apart-style chops, many slow-cooker recipes run 6–8 hours on low. Very thin boneless chops are the riskiest choice, and the sauce can be thickened at the end if it looks loose.

A crock pot version is best treated as its own recipe, not as the skillet method stretched over several hours. Slow cookers trap liquid, so the gravy will usually be thinner than skillet gravy. Very thin boneless chops are convenient, but they can dry out before they become truly tender.

For a tangier slow-cooker pork chop dinner, our crock pot pork chops and sauerkraut goes in a different comfort-food direction.

  • Thin boneless chops: use the skillet method if possible because they dry out easily under long heat.
  • Thicker boneless chops: a better slow-cooker option because they give you more room before overcooking.
  • Bone-in chops: good if they fit in one layer; the bone helps protect the meat a little.
  • Loose sauce at the end: thicken it after the chops are cooked rather than cooking the pork longer.
Crock pot cream of mushroom pork chops with creamy gravy, mushrooms, onions, parsley, and a spoon lifting sauce from the slow cooker.
For crock pot cream of mushroom pork chops, thicker cuts and enough sauce matter because slow heat rewards moisture but can punish very thin chops.

Pork Chops and Rice with Cream of Mushroom Soup

Rice is where this recipe stops being a simple skillet dinner and starts behaving like a casserole. That is why the liquid changes so much.

For the quickest dinner, make the skillet pork chops first, then spoon the mushroom gravy over cooked rice.

Pork chops and rice casserole with creamy mushroom sauce, browned pork chops, visible rice, mushrooms, parsley, and a plated serving.
For pork chops and rice with cream of mushroom soup, decide early: serve skillet pork over cooked rice, or build a covered rice casserole from the start.

Cooked Rice Side vs Baked Rice Casserole

If you want…Do thisWhy
Skillet pork chops with riceCook rice separately and spoon mushroom gravy over itThe pork timing stays short and controlled.
One-pan pork chops and riceUse a covered baked casserole methodUncooked rice needs more liquid, tight coverage, and longer cooking.
Uncooked riceAdd enough broth/water and bake until rice is tenderA skillet sauce for pork chops does not contain enough liquid for raw rice.
Leftover cooked riceWarm separately or fold into the sauce after the pork is doneIt should heat through, not keep the pork cooking.
Split comparison showing cream of mushroom pork chops served over cooked rice on one side and baked rice casserole with pork chops on the other.
Cooked rice is the easiest side for skillet pork chops, while a baked rice casserole needs its liquid, cover, and timing planned from the beginning.

For the safest weeknight version, make the skillet pork chops and serve them over cooked rice. For a true pork chops and rice casserole, build that dish around the rice from the beginning.

Simple Baked Rice Starting Point

Simple baked rice direction: as a starting point for a casserole-style version, use 1 cup long-grain rice, 1 can condensed cream of mushroom soup, and about 1½ cups broth in a tightly covered dish, then bake at 350°F until the rice is tender and the pork is just done. If the pork finishes before the rice, lift the chops out and let the rice continue covered.

If adding rice to a slow cooker version, do not add it at the very beginning unless you are following a dedicated slow-cooker rice recipe. Rice can absorb too much liquid and turn mushy; add it later or serve the pork over separately cooked rice.

Pork Chops with Cream of Mushroom Soup and Potatoes

Easiest potato shortcut: serve the skillet version over mashed potatoes so the gravy has somewhere soft to land. For raw sliced potatoes, cut them thin, add enough liquid, cover tightly, and treat the dish like a casserole rather than a skillet pork chop recipe.

Pork chops with cream of mushroom gravy and a potato version with sliced golden potatoes in a casserole dish and on a plate.
Potatoes make the meal heartier; however, sliced potatoes need covered moisture and enough time, so they behave more like a casserole than a skillet add-in.

Pork Chops, Stuffing, and Cream of Mushroom Soup

Easiest stuffing shortcut: hydrate the stuffing first, then bake it covered with the pork and mushroom sauce. Dry stuffing should not be scattered into the pan because it will pull moisture from the gravy and make the whole dish feel dry.

Pork chops with stuffing and cream of mushroom gravy in a casserole dish with moist golden stuffing, mushrooms, onions, and parsley.
Stuffing needs moisture to stay soft, so treat this as a covered bake rather than a quick skillet add-in.

Easy Variations

Use these variations to change the flavor while keeping the same easy skillet rhythm.

Soup Swaps

  • Golden mushroom soup pork chops: use golden mushroom soup when you want a darker, tangier, more brown-gravy style sauce. It is less creamy than classic cream of mushroom.
  • Cream of chicken soup substitute: use cream of chicken when you want a milder sauce or do not have mushroom soup. Add sautéed mushrooms if you still want mushroom flavor.

Flavor Boosters

  • Onion soup mix: adds strong savory flavor, but use low-sodium soup or broth if possible because the gravy can get salty quickly.
  • Ranch seasoning: gives a tangy, family-style flavor. Start with less than a full packet and taste before adding more.
  • Worcestershire and Dijon: make the sauce taste fuller without changing the comfort-food feel.

Smothered Pork Chops with Cream of Mushroom Soup

For a smothered version, make extra gravy and use mushrooms, onions, and a little more liquid. Brown the chops, build the sauce, simmer gently, then remove the pork as soon as it is done. Reduce or thicken the gravy separately so the chops stay juicy while the sauce gets rich.

Smothered cream of mushroom pork chops with extra mushroom gravy, onions, sliced mushrooms, parsley, and mashed potatoes in the background.
Smothered cream of mushroom pork chops should feel extra saucy, with mushrooms and onions making the gravy rich enough to carry the whole plate.

Richer Finishes

  • Sour cream finish: take the skillet off the heat and stir in a spoonful of sour cream at the end for a tangier, creamier sauce.
  • Extra mushrooms and onions: double the mushrooms if you want the gravy to feel more homemade and less like a plain soup sauce.
  • Small splash of cream: useful if the sauce tastes sharp or salty and needs softening.

Double Batch for a Family Dinner

For 8 pork chops, use 2 cans of condensed cream of mushroom soup and about ⅔ to 1 cup liquid. Brown the pork in batches so it does not steam, then finish in a large skillet, braiser, or baking dish. Check chops individually because crowded pans do not cook evenly.

What to Serve with Cream of Mushroom Pork Chops

This is a gravy dinner, so give the gravy somewhere to land. The easiest sides are simple enough to carry the gravy or fresh enough to balance it.

  • Mashed potatoes: the classic choice when you want a cozy plate with plenty of mushroom gravy.
  • White rice or brown rice: easy, filling, and ideal when the rice is cooked separately from the skillet pork chops.
  • Egg noodles: a stroganoff-style direction without changing the recipe.
  • Green beans: crisp and fresh enough to balance the richness.
  • Peas: sweet, simple, and very good with salty-creamy mushroom gravy.
  • Broccoli: roasted or steamed, especially with extra black pepper on the sauce.
  • Biscuits: useful when you want a very cozy, gravy-heavy plate.
  • Simple salad: useful when the meal needs something bright and clean beside it.
Serving plate of cream of mushroom pork chops with mashed potatoes, rice, egg noodles, green beans, peas, and broccoli as side options.
Creamy mushroom pork chops pair best with sides that catch gravy or add freshness, such as mashed potatoes, rice, egg noodles, green beans, peas, or broccoli.

If the gravy tastes rich or salty, choose a plain side like rice, potatoes, noodles, or steamed vegetables. If the plate feels a little too beige, add green beans, peas, broccoli, or a sharp salad. Let the mushroom sauce be the comfort; let the side bring the lift.

Storage and Reheating

Store leftover pork chops with the mushroom gravy when possible. The sauce helps protect the meat from drying out in the fridge and makes reheating easier.

Storage questionQuick answer
FridgeStore in an airtight container for 3–4 days.
FreezerFreeze up to 2–3 months, though creamy gravy may look slightly separated after thawing.
Gentlest reheating methodWarm gently in a covered skillet over low heat with a splash of broth or milk.
MicrowaveUse lower power, cover loosely, and heat in short bursts.
What to avoidDo not boil leftovers hard; it tightens the pork and can make the sauce split.
Storage and reheating guide showing cream of mushroom pork chops in a glass container and a skillet with broth or milk being added to loosen the gravy.
Store the pork with its mushroom gravy when possible; later, a small splash of broth or milk helps the sauce loosen without boiling the meat again.

If the pork chops are thick, slicing them before reheating can help them warm faster and more evenly. Add a spoonful of extra gravy over the slices before serving. Reheat gently; boiling leftover pork in the sauce can make it tighter.

Troubleshooting the Pork Chops and Mushroom Gravy

The mistake section prevents problems. This section is for the moment when dinner is already in the pan and you need a fix. When the chops are already done, move them out first, then repair the gravy.

ProblemFix nowFix next time
Pork chops turned toughSlice thinly across the grain and spoon hot gravy over the slices.Use thicker chops, simmer gently, and check temperature earlier.
Sauce is too thickAdd broth, milk, or water a splash at a time over low heat.Start with ⅓ cup liquid, then adjust gradually.
Gravy looks wateryRemove pork and simmer the sauce uncovered until it coats a spoon.Thaw pork fully, pat dry, and avoid adding too much liquid at the start.
Gravy tastes too saltyStir in milk, cream, unsalted broth, or sour cream; serve with plain sides.Use low-sodium soup or broth and go easy on seasoning mixes.
Pork tastes blandAdd black pepper, Worcestershire, Dijon, parsley, or extra sautéed mushrooms to the gravy.Brown the pork harder and build more flavor before the soup goes in.
Troubleshooting guide showing fixes for watery gravy, thick sauce, salty gravy, dry pork, and bland flavor with mushroom gravy bowls, pork slices, liquid, browned mushrooms, and seasonings.
When dinner is already in the pan, protect the pork first; then simmer watery gravy, loosen thick sauce, dilute salty gravy, or spoon extra sauce over dry slices.

Ready to cook? Return to the recipe card or review the common mistakes before you start.

FAQs

How long do pork chops cook in cream of mushroom soup?

After browning, thin pork chops may need only 1–3 minutes in the sauce. Chops around ¾ to 1 inch thick usually need about 4–10 minutes, depending on whether they are boneless or bone-in. The thickest part should reach 145°F, followed by a 3-minute rest.

What temperature keeps pork chops juicy and safe?

Pork chops should reach 145°F / 63°C, followed by a 3-minute rest. That keeps the pork juicier than old-school overcooked chops while still giving you a safe finished dinner.

How much water do you add to cream of mushroom soup for pork chops?

For one 10.5-ounce can of condensed cream of mushroom soup, use ⅓ to ½ cup liquid. Use ⅓ cup for thicker gravy and ½ cup for a looser sauce. Water is classic, broth is more savory, and milk makes the sauce creamier.

Is milk, broth, or water best for the gravy?

Chicken broth is a good default because it makes the gravy taste more savory without much effort. Milk gives a softer, creamier sauce. Water gives the most classic Campbell’s-style flavor and is useful when the soup or seasoning mix is already salty.

Boneless or bone-in pork chops: which is better?

Boneless chops cook faster and are easiest for a quick skillet dinner. Bone-in chops are often more forgiving and can stay juicier, but they may need a little more time near the bone.

Thin pork chops keep drying out. What should I do?

Sear them briefly, make the sauce, then return them only long enough to warm through and finish. Very thin chops should not simmer like thick chops.

Skillet or oven: which method is easier?

The skillet is faster and gives you better control over the gravy. The oven is easier when you want a covered baked version or when you are adding rice, potatoes, or stuffing. Either way, brown the pork first when possible and cook by temperature.

Crock pot pork chops with cream of mushroom soup: what should I know?

Use thawed, thicker chops rather than very thin boneless chops. Slow cookers trap moisture, so the sauce may look loose at the end; thicken it after cooking if needed. For fall-apart-style chops, many slow-cooker recipes run longer, often 6–8 hours on low.

Can I cook rice in the same pan?

Not for the quick skillet method. Uncooked rice needs extra liquid, covered heat, and more time than skillet pork chops should spend cooking. Use cooked rice as a side, or make a covered baked casserole built around the rice.

Why did the pork chops turn tough?

They were probably too thin for the timing, simmered too hard, or cooked past the right doneness point. Creamy gravy helps the plate, but it cannot fully undo overcooked lean pork.

Final Thoughts

Cream of mushroom pork chops are not trying to be fancy. They earn their place because they ask so little and give back so much: browned pork, creamy mushroom gravy, and a plate that feels complete with rice, potatoes, noodles, or whatever simple side you already have.

Keep the gravy spoonable, keep the heat gentle, and stop while the chops are still juicy. That is the whole promise of this dinner: one can of soup, one skillet, and a plate of creamy mushroom pork chops that tastes like you gave it more effort than you did.

Back to top

Posted on — Leave a comment

Panang Curry Recipe: Chicken Panang with Store-Bought Paste

Bowl of chicken Panang curry with orange-red coconut sauce, sliced chicken, Thai basil, crushed peanuts, makrut lime leaves, and jasmine rice.

A good Panang curry starts changing the moment the paste hits hot fat: the raw edge softens, the chile smell deepens, and the pan begins to smell warmer almost immediately. When the coconut goes in, it turns orange-red around the paste. By the time the chicken is done, the curry should look glossy and generous, not thin or tired.

This Panang curry recipe is built for the home-cook problem most recipes do not talk about enough: store-bought paste can taste flat, watery, harsh, or too much like ordinary red curry when it is rushed. The fix is not a longer shopping list. It is better paste frying, full-fat coconut, and a few clear texture cues.

The result is a 40-minute curry that still feels special: tender chicken, glossy coconut sauce, fresh basil, jasmine rice, and enough depth that the store-bought paste never feels like a compromise. The base version is chicken Panang curry, also called Panang gai, but the same method works for beef, tofu, shrimp, or vegetables once you understand the texture.

It is generous weeknight food: fragrant, creamy, a little sweet, a little spicy, and made to spoon over rice. If you like fast Thai basil-heavy dinners, this Pad Kra Pao recipe is another bold option to keep nearby.

Table of Contents

Use this guide to make Panang curry that tastes creamy, balanced, aromatic, and clearly different from ordinary red curry.

Panang Curry Recipe: Quick Answer

Remember it as 3–400–680: 3 tablespoons / about 45g Panang curry paste, 13.5–14 oz / 400ml full-fat coconut milk or coconut cream, and 1½ lb / 680g thinly sliced chicken for a generous 4-serving curry.

Fry the paste first in oil or thick coconut cream until it smells deeper and less raw. Stir in the coconut gradually, then add fish sauce, palm sugar or brown sugar, torn makrut lime leaves, and peanuts or peanut butter. Simmer gently until the chicken is cooked through, finish with Thai basil, and serve with jasmine rice.

Think of this as your safe starting bowl: enough paste to taste full, enough coconut to feel creamy, and enough body for the curry to settle over rice instead of running through it. Add 1–1½ cups vegetables if you want a fuller chicken curry; keep the amount modest so the flavor stays focused.

Most important cue: the spoon tells you more than the timer. The curry should coat the back of a spoon in a glossy layer while still being loose enough to serve over rice. Need the exact visual cue? Jump to the spoon-coating test. Ready to cook? Go straight to the recipe card.

Close-up of chicken Panang curry with creamy sauce coating sliced chicken, red chile, Thai basil, peanuts, and makrut lime leaf garnish.
Look for sauce that clings to the chicken but still moves when spooned; that balance keeps Panang curry rich without making it heavy.

The Easy Panang Curry Formula

The 3–400–680 formula is not a test; it is a starting point. From there, you can adjust for paste strength, vegetable volume, protein choice, and how rich you want the final curry. More vegetables usually need a little more paste and a little more time in the pan. Saltier paste needs less fish sauce. Sweeter coconut needs less sugar.

Panang curry formula guide showing 3 tablespoons curry paste, 400 milliliters coconut milk, and 680 grams chicken.
The 3–400–680 formula gives you a reliable starting point before you adjust for paste strength, vegetable volume, or spice preference.
For 4 ServingsAmountWhy It Matters
Panang curry paste3 tbsp / about 45gThe flavor base. Start lower if your paste is very spicy or salty.
Coconut milk or coconut cream13.5–14 oz / 400mlThe body of the curry. Coconut cream gives the lushest result.
Chicken or other protein1½ lb / 680g chicken, or equivalentEnough protein for a full dinner without overcrowding the pan.
Fish sauce1–1½ tbsp / 15–22mlAdds salt and savory depth. Use less at first if your paste is salty.
Palm sugar or brown sugar2 tsp–1 tbsp / 8–15gRounds heat and salt. Start low if your paste or coconut tastes sweet.
Makrut lime leaves4–6 leavesTorn leaves perfume the simmering sauce; finely sliced tender leaves can finish the curry.
Peanuts or peanut butter2 tbsp / about 15g crushed peanuts, or 1 tbsp / about 16g peanut butterBrings Panang’s quiet nutty note without turning the sauce into satay.

Taste after the curry has simmered for a few minutes, not when the paste first hits the pan. Early tasting can trick you because the coconut is still loose, the paste has not settled, and the salt has not concentrated yet. If your paste tastes too mild or too harsh, use the store-bought paste guide before changing the whole recipe.

Why This Recipe Works

The difference between a forgettable Panang curry and a good one is usually not the ingredient list. It is the order. Curry paste needs fat and heat before the coconut goes in. The pan sauce needs enough time to come together. Basil needs to go in at the end, when its aroma will stay bright instead of disappearing into a long simmer.

If your first few homemade Thai curries have tasted thinner than takeout, this is usually where things change. You are not adding fancy ingredients; you are simply giving the paste and coconut enough time to become a sauce.

Frying the paste prevents flat flavor
Let it sizzle in fat first, and the smell changes from sharp to warm, deep, and curry-like.

Full-fat coconut gives the curry body
Light coconut milk makes the flavor feel spread out. Coconut cream gives the richest result.

The final balance happens at the end
Fish sauce, sugar, lime leaves, peanuts, and basil let you tune salt, sweetness, aroma, and nuttiness before serving.

The finished curry lands rich without feeling greasy, spicy without tasting harsh, and gently sweet without becoming sugary. It tastes like Panang curry, not red curry with peanut butter stirred in.

What Is Panang Curry?

Panang curry, also written as Phanaeng, Phanang, or Panaeng, is a Thai coconut curry with a richer, more concentrated character than a loose red curry. The easiest way to recognize a good Panang is this: if red curry pours, Panang clings.

In the bowl, Panang feels creamy, rounded, aromatic, and concentrated enough to coat the protein. Coconut gives body, curry paste gives heat and depth, makrut lime leaves give a citrusy lift, basil adds freshness, and peanuts add a quiet roasted note in the background.

Peanut belongs in the background here; it rounds the curry without turning it into satay. Chicken Panang curry is often called Panang gai or gaeng Panang gai. “Gai” means chicken, so Panang gai simply means the chicken version.

Panang Curry vs Red Curry

Panang curry and Thai red curry are related, but they should not taste identical. Red curry is usually looser and more chile-forward. Panang is creamier, richer, lightly sweet, and gently nutty. When homemade Panang tastes too much like red curry, the first fix is usually texture, then peanut and aromatic finish.

FeaturePanang CurryThai Red Curry
TextureThicker, creamier, more clingyLooser, saucier, more broth-like
FlavorRich, lightly sweet, savory, nuttyBrighter, chile-forward, more flexible
Paste profileRed-curry-style base with peanut and spice depthRed chile and aromatic base
Best cueCoats the protein clearlyPours more freely around the ingredients
Split-panel comparison of thicker Panang curry and looser Thai red curry with labels explaining texture and flavor differences.
Panang curry and red curry are related, but Panang is usually richer, thicker, and gently nutty, while red curry is looser and more chile-forward.

Quick fix: bring the curry back toward Panang by simmering the coconut base until it looks glossy, then finishing with peanut richness, Thai basil, and finely sliced tender makrut lime leaves if you have them.

If you are using red curry paste as a shortcut, add peanuts and a tiny pinch of warm spice so the sauce does not taste like ordinary red curry with coconut milk.

Panang Curry Ingredients

These ingredients are not equal. The paste, coconut, fish sauce, and lime leaves decide whether the curry tastes complete. Peanuts and basil finish the personality. Sugar is there to round the edges, not make the curry sweet.

The most important thing is timing. Paste goes first, coconut goes in gradually, protein cooks once the base has formed, and basil waits until the heat is low or off.

Panang curry ingredients including curry paste, coconut milk, chicken, fish sauce, sugar, makrut lime leaves, peanuts, Thai basil, and red bell pepper.
The ingredients work as a team: paste brings depth, coconut gives body, lime leaves add aroma, and peanuts round the curry without turning it into satay.

Panang curry paste

Use Thai Panang curry paste if you can find it. Some brands are stronger, saltier, and spicier than others, so start with a balanced amount and adjust. Thai Kitchen-style supermarket pastes are often milder, while Mae Ploy and Maesri-style Thai pastes are usually stronger, saltier, and more concentrated. Start lower if the brand is new to you.

Guide comparing milder supermarket-style Panang curry paste with stronger Thai-style paste for homemade Panang curry.
Because Panang curry paste brands vary in salt, heat, and intensity, taste after simmering before adding more fish sauce, sugar, or paste.

If your paste is very salty, begin with 1 tablespoon fish sauce, simmer, then add the remaining ½ tablespoon only if the curry needs it. When homemade Panang tastes flat, the paste often needed a better start: fat, heat, and enough time to smell cooked before the coconut went in. For the deeper technique, see how to bloom the paste in fat first.

Coconut milk or coconut cream

Coconut cream gives the lushest result. Full-fat coconut milk also works well; it just needs a few extra minutes in the pan. Light coconut milk makes the curry harder to concentrate and easier to dilute.

Comparison board showing light coconut milk, full-fat coconut milk, and coconut cream for Panang curry sauce texture.
For the richest Panang curry texture, full-fat coconut milk or coconut cream works better than light coconut milk, which can make the sauce feel thin.

How to use thick coconut cream first

If the can has a thick layer of coconut cream at the top, scoop that into the pan first and use it to fry the curry paste. Then add the thinner coconut milk gradually. This gives the pan a richer start and helps the paste bloom in fat.

Thick coconut cream being added to fried Panang curry paste in a skillet to begin the curry sauce.
When a can has thick cream on top, use it first so the curry paste gets the fat it needs to bloom properly.

Fish sauce

Fish sauce keeps the coconut from tasting flat. You should not notice it as “fishy”; you should notice that the curry tastes deeper, saltier, and more complete. Add it gradually because the paste may already be salty.

For a vegan version, use soy sauce, tamari, or a vegetarian fish-sauce alternative. The flavor will be different, but the curry still needs savory depth.

Palm sugar or brown sugar

The sweetness should round the chile and salt; it should not announce itself first. Palm sugar gives a softer sweetness, while brown sugar works well in a home kitchen. Start with 2 teaspoons if your paste or coconut milk already tastes sweet.

Makrut lime leaves

Makrut lime leaves, often sold as kaffir lime leaves, are the ingredient that makes the curry smell alive. Tear whole leaves before adding them to the simmering coconut sauce so their oils release into the pan. If you have tender leaves, slice a small amount very finely and use it at the end for a sharper aromatic finish.

Fresh or frozen leaves are best. Torn whole leaves can be left in the curry for aroma and picked out while eating. Lime juice is not a true replacement; if you need a backup, a little lime zest is closer than bottled lime juice, but use it gently. The goal is aroma, not sourness.

Makrut lime leaves shown whole, torn, and finely sliced, with guidance for simmering and finishing Panang curry.
Makrut lime leaves, often sold as kaffir lime leaves, give Panang curry its fresh citrus aroma without making the sauce sour.

Peanuts or peanut butter

Crushed roasted peanuts give texture and a more traditional feel. Peanut butter is a practical shortcut that blends smoothly into the sauce. Either works, but keep the amount modest. The peanut note should sit in the background, not make the curry taste like peanut sauce.

Split image comparing crushed roasted peanuts and peanut butter for adding a nutty note to Panang curry.
Crushed peanuts add texture, while peanut butter blends in smoothly; either way, the peanut flavor should stay gentle and balanced.

Thai basil

Thai basil gives the finished dish a fresh, peppery lift. Add it after the sauce thickens and the heat is low or off. If it simmers for several minutes, that fragrance fades quickly.

Thai basil being added to finished Panang curry as a final aromatic, with text about fresh peppery lift.
Add Thai basil near the end, because its peppery fragrance is strongest when it meets the hot curry right before serving.

How to Make Store-Bought Panang Curry Paste Taste Better

This is a home-kitchen Panang curry built around store-bought paste, but the technique is the point: fry the paste properly, use full-fat coconut, simmer until glossy, and finish with basil and lime leaf.

Fry it first
Cook the paste in oil or coconut cream until it smells warmer, deeper, and less raw.

Use full-fat coconut
Thin coconut milk makes the curry taste weaker. Full-fat coconut milk or cream gives body.

Finish the flavor
Fish sauce, sugar, lime leaves, peanuts, and basil make the sauce taste complete.

Bloom the paste in fat first

Traditional Panang methods often fry the paste in coconut cream until the oil separates. At home, canned coconut milk does not always separate well, so oil or the thick cream from the top of the can is more reliable.

Panang curry paste frying in a skillet with oil or coconut cream while a wooden spatula stirs it.
Frying the paste first is the flavor-building step that makes store-bought Panang curry paste taste fuller and less raw.

What fried Panang curry paste should look like

The color change is subtle but useful: the paste turns a little darker, smells rounder, and loses the raw edge before the coconut is stirred in.

Side-by-side comparison of raw Panang curry paste and darker fried Panang curry paste in a pan.
The paste does not need to burn or dry out; it just needs to darken slightly and smell warmer before the coconut goes in.

Choose the right paste amount

For one 13.5–14 oz / 400ml can of coconut milk or cream, use this as your starting point:

StylePaste AmountBest For
Mild2 tbsp / about 30gKids, spice-sensitive eaters, or very strong paste brands
Balanced3 tbsp / about 45gMost homemade Panang curry
Stronger4 tbsp / about 60gRestaurant-style intensity or a pan with more protein and vegetables

Adjust after simmering

If the curry tastes weak after simmering, check the texture first. A thin coconut base can make even a strong paste taste dull because the flavor is spread across too much liquid. Let the pan settle into a glossy consistency, then decide if you need more paste.

When you do add more paste, avoid stirring it in raw. Fry another teaspoon or two in a small pan with a spoon of coconut cream, then stir that back into the curry. This keeps the added flavor cooked and rounded. For a deeper look at the paste itself, Serious Eats has a helpful Panang curry paste guide that explains the peanut and warm-spice notes that separate it from a basic red curry paste.

Using red curry paste instead? For every 2–3 tablespoons red curry paste, add 1 tablespoon crushed roasted peanuts or peanut butter, a tiny pinch of nutmeg, and a small pinch of ground coriander or cumin if the sauce tastes plain. Add torn makrut lime leaves if you have them. This shortcut is best for a weeknight curry, not for a strict traditional version.

Check labels for vegan or vegetarian versions

If you are cooking for vegan or vegetarian eaters, check the paste label carefully. Many Thai curry pastes contain shrimp paste, fish sauce, or other seafood ingredients. Use a vegan Panang curry paste, or use vegan red curry paste and adjust it with peanuts and warm spices.

How to Make Panang Curry

Once the paste and coconut are ready, the cooking moves quickly. A wide skillet, wok, or 12-inch saucepan gives the paste room to fry and helps the coconut base come together faster. Have the chicken sliced, vegetables cut, herbs ready, and rice started before the paste hits the pan.

Visual overview: how to make Panang curry

Step-by-step Panang curry board showing prep, frying paste, adding coconut, cooking chicken, adjusting, and finishing with basil.
Follow the visual order before you start cooking: prep first, fry the paste, build the coconut base, cook gently, adjust, then finish fresh.

1. Slice the protein thinly

Thin slices cook quickly and pick up the curry better. Cut chicken across the grain into bite-size strips. Slice beef very thinly against the grain. For tofu, cut into cubes or slabs and pat dry before cooking.

Avoid large chunks of chicken here. Thick pieces take longer to cook, which can push the pan past its best texture before the center is done.

Hand slicing raw chicken into thin strips on a cutting board for Panang curry, with herbs and curry ingredients nearby.
Thin chicken slices cook quickly and absorb the curry better, so the meat stays tender while the sauce settles into the right texture.

2. Fry the curry paste

Heat neutral oil, or the thick cream from the top of the coconut milk can, in a wide skillet, wok, or 12-inch saucepan over medium heat. Add the paste and fry for 1–2 minutes for softer supermarket paste, or 3–5 minutes for a thicker Thai paste, stirring often, until it smells deeper and turns slightly darker.

When the paste starts sticking, lower the heat and loosen it with a spoonful of coconut cream or coconut milk. Water cools the pan, so use it only when you have no other choice.

This is the moment the curry starts smelling less like paste from a tub and more like dinner: chile, coconut fat, warm spice, and lime leaf waiting to open up.

3. Build the coconut sauce

Stir in the coconut milk or coconut cream gradually until the paste dissolves into a smooth sauce. Add fish sauce, palm sugar or brown sugar, torn makrut lime leaves, and peanuts or peanut butter. Keep the curry at a gentle bubble, not a hard boil.

At this point, the pan should look creamy and red-orange. Let it bubble for a few minutes before adding delicate vegetables or herbs. A good Panang base looks slightly more intense than you think it needs to be; rice will soften everything later. When you are unsure, use the spoon-coating test before serving.

Coconut milk being poured into fried Panang curry paste in a wok, creating orange-red swirls as the sauce forms.
Add coconut gradually so the fried paste dissolves evenly; as it blends, the curry changes from separate ingredients into one smooth base.

4. Cook the protein and vegetables

Add chicken and firm vegetables such as carrots, green beans, baby corn, or broccoli stems first. Simmer gently until the chicken is cooked through; the thickest piece should reach 165°F / 74°C.

Add bell pepper, snap peas or snow peas, zucchini, or spinach later so they stay brighter and release less water. Save finely sliced makrut lime leaves for the end if you are using them as garnish.

Beef and shrimp go in later. Browned tofu can go in near the end so it keeps its shape.

Chicken Panang curry gently simmering in a wide pan with small bubbles, orange-red sauce, chicken pieces, and herbs.
A gentle simmer gives the chicken time to cook while the coconut base thickens softly, without the rough look that comes from hard boiling.

5. Taste and finish

Give the curry a few uncovered minutes before final tasting. The flavor changes as the coconut settles: salt becomes clearer, sweetness rounds out, and the paste tastes less scattered.

Turn off the heat and stir in Thai basil right before serving. Add extra finely sliced makrut lime leaves, crushed peanuts, or sliced red chile for a stronger finish. The basil should smell fresh as soon as it hits the hot curry.

Hand adding Thai basil to finished chicken Panang curry in a pan with red chile and creamy orange-red sauce.
Stir basil in right at the end, then stop cooking; as a result, the curry keeps its fresh Thai basil aroma.

Chicken safety note: chicken should reach 165°F / 74°C in the thickest piece. FoodSafety.gov lists this as the safe minimum internal temperature for poultry in its safe minimum internal temperatures chart.

The Spoon-Coating Test for Panang Curry Sauce

When you are not sure whether the curry is ready, trust the spoon more than the clock. Dip a spoon into the pan and lift it out. The sauce should coat the back in a visible layer instead of sliding off immediately.

Spoon lifted from Panang curry showing orange-red coconut sauce coating the back of the spoon above the pan.
Once the curry coats the spoon in a smooth layer, it is concentrated enough for rice but still loose enough to serve generously.

When it is right, the sauce leaves a glossy trail on the spoon and settles over rice instead of disappearing into it. If it becomes too heavy, loosen it with a spoonful of coconut milk, water, or stock. Cornstarch can rescue a rushed sauce, but it should not be the first fix. If the texture is already off, go to the sauce fixes before serving.

How thick should Panang curry sauce be?

The best texture sits between runny and pasty: it coats the spoon, moves slowly in the pan, and still spoons easily over rice.

Three-panel guide comparing Panang curry sauce that is too thin, just right, and too thick.
Use this texture guide before serving: thin curry needs more simmering, while overly thick curry needs a small splash of coconut milk or water.

Texture goal: glossy and spoonable, rich enough to coat the protein, but still loose enough for rice.

Best Vegetables for Panang Curry

Vegetables can make Panang curry feel fuller and fresher, but they need good timing. Add firm vegetables first, tender vegetables later, and basil at the very end.

Vegetable guide for Panang curry showing green beans, red bell pepper, mushrooms, snap peas, baby corn, zucchini, eggplant, carrots, and broccoli.
Choose vegetables that hold their shape so the curry stays colorful, balanced, and concentrated instead of turning watery.

Keep watery vegetables modest, especially mushrooms, zucchini, and spinach. They are delicious here, but a crowded pan can turn a glossy Panang into a thinner curry.

When to add vegetables to Panang curry

Vegetable timing guide for Panang curry with early, midway, and late groups for vegetables and Thai basil.
Add firmer vegetables first and delicate ones later; this way, the curry keeps both texture and fresh color.
Add EarlyAdd MidwayAdd Late
CarrotsMushroomsBell pepper
Green beansSmall eggplant piecesSnap peas or snow peas
Small cauliflower floretsBroccoli floretsZucchini
Broccoli stemsBamboo shootsSpinach
Baby cornThai basil

For a vegetable-heavy curry, use a little more paste and give the coconut base extra time to settle into the right texture. If you are skipping meat completely, jump to the vegetable Panang curry variation.

Chicken, Beef, Tofu, Shrimp and Vegetable Panang Curry

The curry base stays mostly the same, but each version has one thing to protect: juicy chicken, tender beef, intact tofu, just-cooked shrimp, or vegetables that do not water down the pan.

VersionHow Much to UseBest Method
Chicken Panang curry1½ lb / 680g chicken thighs or breastSlice thin and simmer until just cooked through. Thighs are juicier; breast cooks faster.
Beef Panang curry1–1¼ lb / 450–570g tender beefSlice thinly against the grain and add near the end so it stays tender.
Tofu Panang curry14–16 oz / 400–450g firm tofuPress if watery, brown if desired, then add after the sauce has reduced.
Shrimp Panang curry1 lb / 450g peeled shrimpAdd during the final few minutes and cook only until opaque.
Vegetable Panang curry3–4 cups mixed vegetablesAdd firm vegetables first and quick-cooking vegetables later.

Chicken Panang Curry

Chicken is the best first version because it is easy to cook and lets the curry shine. Thighs are the most forgiving choice because they stay juicy. Breast also works, but it needs thin slicing and close timing.

For the most reliable chicken version, use 1½ lb / 680g chicken, 3 tablespoons curry paste, one 400ml can of coconut milk or coconut cream, and 1–1½ cups vegetables. Red bell pepper, green beans, baby corn, mushrooms, and snap peas or snow peas all work well.

Beef Panang Curry

Use sirloin, ribeye, flank steak, flat iron, or another tender cut. Slice it thinly against the grain, then add it after the sauce is mostly finished. Simmer just until cooked through.

Beef Panang curry with thin slices of beef in orange-red coconut curry sauce, basil, makrut lime leaf garnish, and red chile.
Beef Panang curry works best with thin slices added near the end, so the beef stays tender instead of becoming chewy.

Do not simmer thin steak-style beef for 15 minutes the way you might simmer chicken. It can turn chewy, especially if it is very lean. For a slow-cooked beef Panang, use a tougher cut such as chuck or short rib and treat it as a separate slow-braised version.

Tofu or Vegan Panang Curry

Tofu Panang curry can be excellent, but the tofu needs texture and the curry paste needs a label check if you are cooking vegan. Use firm or extra-firm tofu. Press it for 15–20 minutes if it is watery, then cut it into cubes or slabs. For better texture, brown the tofu before adding it to the sauce.

Tofu Panang curry with tofu pieces in coconut curry sauce, Thai basil, peanuts, red chile, and makrut lime leaf garnish.
Press and brown tofu before adding it to the curry; then it holds its shape and gives the sauce something firm to coat.

Vegan paste warning: many Thai curry pastes contain shrimp paste, fish sauce, or other seafood ingredients. Use a vegan Panang curry paste, or use vegan red curry paste and adjust it with peanuts, a tiny pinch of nutmeg, and a little coriander or cumin.

Replace fish sauce with soy sauce or tamari. Add tofu after the sauce has reduced so it does not break apart while the curry thickens. Finish with basil and crushed peanuts.

Shrimp Panang Curry

Shrimp Panang is the fastest version, but it asks for restraint. The sauce should be ready before the shrimp goes in, because shrimp only needs a few minutes to turn sweet, opaque, and tender.

Shrimp Panang curry with curled shrimp in creamy orange-red coconut curry sauce, Thai basil, red chile, and lime leaf garnish.
Shrimp needs only a short finish in Panang curry, so build and balance the sauce before the shrimp goes into the pan.

Once the shrimp is in the pan, simmer only until it curls gently and loses its translucency. Serve right away.

Vegetable Panang Curry

Vegetable Panang curry works best when you choose vegetables that hold their shape. Green beans, bell peppers, mushrooms, broccoli, snap peas or snow peas, baby corn, carrots, zucchini, and eggplant can all work, but they should not all go in at once.

Vegetable Panang curry with green beans, bell pepper, mushrooms, baby corn, zucchini, eggplant, snap peas, and basil in coconut curry sauce.
Vegetable Panang curry works best when the vegetables stay distinct, bright, and lightly tender instead of collapsing into the coconut sauce.

Add firm vegetables first, quick-cooking vegetables later, and basil at the very end. For a vegetable-heavy curry, start with 1 extra teaspoon of paste. A very full pan may need up to 1 extra tablespoon. Once you have chosen the version, return to the recipe card for the base method.

How to Fix Panang Curry Sauce

This is the section to use when the curry looks wrong five minutes before dinner. Most Panang problems are not disasters; they are small balance problems. A watery vegetable, a salty paste, thinner coconut milk, or too much heat can throw the pan off, but most of it is fixable.

You are looking for sauce that visibly coats the protein, but still has enough movement to spoon over rice. When the protein is already cooked, remove it with a slotted spoon and fix the sauce on its own.

Quick fixes for Panang curry sauce

Panang curry sauce troubleshooting board with fixes for watery, thick, flat, salty, spicy, split, oily, or red-curry-like sauce.
Use this rescue guide before serving: most Panang curry sauce problems can be fixed with better simmering, coconut, paste, seasoning, or heat control.
Sauce ProblemWhat It Feels LikeHow to Fix It
Too wateryThe chicken looks like it is floating instead of coated.Simmer uncovered. If the protein is cooked, remove it and reduce the sauce alone. Use coconut cream next time.
Too thickThe curry looks heavy, pasty, or dry instead of glossy.Add coconut milk, water, or stock one spoonful at a time, then stop as soon as it turns spoonable.
Tastes flatThe curry smells fine but tastes dull or unfinished.Fry extra paste separately and stir it in. Add fish sauce, sugar, lime leaves, or basil.
Too saltyThe salt hits first and the coconut sweetness disappears.Add unsalted bulk such as coconut milk, vegetables, tofu, or chicken. Balance with a tiny amount of sugar.
Too spicyThe heat overwhelms the coconut and aromatics.Add coconut cream or coconut milk and serve with extra rice.
Oily or splitThe curry looks greasy around the edges.Lower the heat, stir gently, and add a splash of coconut milk.
Tastes like red curryThe curry is loose, chile-forward, and missing the rounded Panang note.Add peanuts or peanut butter, simmer briefly, and finish with Thai basil and finely sliced tender makrut lime leaves.

Panang Curry Recipe Card

A creamy chicken Panang curry with store-bought paste, full-fat coconut, makrut lime leaves, peanuts, and Thai basil. Rich, spoonable, and easy to adapt for beef, tofu, shrimp, or vegetables.

Yield
4 servings
Prep Time
15 minutes
Cook Time
25 minutes
Total Time
40 minutes

Ingredients

  • 1½ lb / 680g boneless chicken thighs or chicken breast, thinly sliced
  • 3 tbsp / about 45g Panang curry paste
  • 1 tbsp / 15ml neutral oil, or thick coconut cream from the top of the can
  • 13.5–14 oz / 400ml full-fat coconut milk or coconut cream
  • 1–1½ tbsp / 15–22ml fish sauce, plus more to taste, depending on paste saltiness
  • 2 tsp–1 tbsp / 8–15g palm sugar or brown sugar
  • 4–6 makrut lime leaves, torn, plus optional finely sliced tender leaves for finishing
  • 2 tbsp / about 15g crushed roasted peanuts, or 1 tbsp / about 16g peanut butter
  • 1 red bell pepper, thinly sliced, or 1–1½ cups mixed vegetables for the chicken version
  • ½ cup loosely packed Thai basil leaves
  • Optional garnish: sliced red chile, extra basil, crushed peanuts, finely sliced makrut lime leaves
  • Steamed jasmine rice, for serving

Instructions

  1. Prep. Slice the chicken thinly and prepare the vegetables, herbs, and garnishes before cooking.
  2. Fry the paste. Heat oil or thick coconut cream in a wide skillet, wok, or 12-inch saucepan over medium heat. Add the Panang curry paste and cook, stirring often, until fragrant and slightly darker — about 1–2 minutes for softer paste or 3–5 minutes for thicker Thai paste.
  3. Build the sauce. Stir in coconut milk or coconut cream gradually until smooth. Add fish sauce, sugar, torn makrut lime leaves, and peanuts or peanut butter.
  4. Simmer. Add chicken and firm vegetables such as carrots, green beans, or baby corn. Simmer gently until the chicken is cooked through: about 6–8 minutes for thin chicken breast or 8–12 minutes for thin chicken thighs. The thickest piece should reach 165°F / 74°C. Add bell pepper, snap peas or snow peas, zucchini, or spinach near the end.
  5. Adjust. If the sauce looks loose, simmer uncovered until glossy and spoonable. Taste after thickening, then adjust with fish sauce, sugar, coconut milk, or extra fried paste if needed.
  6. Finish. Turn off the heat and stir in Thai basil. Garnish with extra basil, crushed peanuts, sliced chile, or finely sliced makrut lime leaves.
  7. Serve. Serve hot with steamed jasmine rice.

Recipe Notes

  • Beef: use 1–1¼ lb / 450–570g thinly sliced sirloin, ribeye, flank steak, or another tender cut. Add near the end and simmer briefly.
  • Tofu: use firm or extra-firm tofu. Press if watery, brown first if desired, and add after the sauce has reduced.
  • Vegan Panang: use vegan curry paste and replace fish sauce with soy sauce or tamari.
  • Shrimp: build and thicken the sauce first, then add shrimp near the end and cook only until opaque.
  • Vegetable Panang: use 3–4 cups mixed vegetables and add 1 teaspoon to 1 tablespoon extra paste depending on volume.
  • Richer sauce: use coconut cream. For a milder curry, start with 2 tbsp paste and add more after tasting.

Once the paste smells cooked, the coconut turns glossy, and the basil hits the pan, the curry feels much easier to trust. Spoon it beside jasmine rice, add the final herbs, and you have the kind of weeknight Panang that tastes deliberate instead of rushed.

Instant Pot or Slow Cooker Panang Curry

Panang rewards stovetop control, so treat Instant Pot and slow cooker versions as backup methods. They are useful for convenience, but both need a final look at the sauce before serving.

Backup-method guide for Panang curry showing Instant Pot and slow cooker options with sauté first, cook, reduce after, and check sauce cues.
Instant Pot and slow cooker Panang curry can be convenient, but the final sauce check still matters before the curry reaches the table.

Instant Pot Panang curry

Use sauté first. Fry the paste in oil or thick coconut cream for 1–2 minutes, then stir in coconut milk or cream, fish sauce, sugar, torn lime leaves, and thin chicken pieces. Pressure cook on high for 3–4 minutes, then quick release. Use sauté again to bring the sauce back to a spoonable texture, then finish with basil.

Slow cooker Panang curry

Slow cooker Panang works best with chicken thighs or beef, not thin chicken breast. Fry the paste separately first, then add it to the slow cooker with coconut milk, seasoning, and protein. Cook on low until the meat is tender, usually about 2–3 hours for boneless chicken thighs. If the sauce is thin at the end, reduce it uncovered in a saucepan before adding basil.

What to Serve with Panang Curry

Panang is rich, so the best sides either catch the sauce or cut through it. Jasmine rice catches the glossy curry; cucumber, herbs, lime, green beans, or Som Tam keep the bowl from feeling heavy. Planning leftovers too? Jump to storage and reheating.

What goes well with Panang curry?

Panang curry served with jasmine rice, cucumber, herbs, lime, and a fresh Som Tam-style side dish on a warm table.
Pair Panang curry with jasmine rice and a crisp side so the meal has both coconut richness and fresh contrast.

Spoon the curry beside the rice rather than burying it. That way the first few bites stay glossy and concentrated, and the rice catches the sauce slowly instead of muting it all at once. If rice is the part that usually goes wrong, this guide to cooking perfect rice can help.

Serve WithWhy It Works
Steamed jasmine riceBest default; it absorbs the sauce without competing with the curry.
Cucumber salad, herbs, lime, or lightly steamed green beansFresh sides balance the coconut richness.
Roti, flatbread, rice noodles, or coconut riceComfort options for a fuller, more restaurant-style meal.

For a crisp Thai-style side, this Vegan Som Tam Salad gives the fresh, sharp contrast that works well beside a creamy coconut curry.

Storage, Freezing and Reheating

How to store Panang curry leftovers

Store leftover Panang curry in an airtight container in the refrigerator for 3–4 days. The sauce will thicken as it chills, so add a splash of coconut milk, water, or stock when reheating.

Panang curry leftovers stored in an airtight glass container on a refrigerator shelf with text saying store three to four days.
Leftover Panang curry keeps well for 3–4 days in an airtight container; for the brightest flavor, add fresh basil after reheating.

How to reheat Panang curry

Reheat gently on the stovetop over low to medium-low heat. Avoid hard boiling because coconut-based sauces can split. If the curry looks oily after reheating, lower the heat and stir in a small splash of coconut milk.

Panang curry reheating gently in a saucepan while coconut milk is poured in and the sauce is stirred with a wooden spoon.
Reheat Panang curry gently, adding a splash of coconut milk if needed, so the sauce turns smooth again instead of splitting.

The curry reheats well, but fresh basil does not. For make-ahead cooking, stop before adding the basil if you can, then add it after reheating so the curry tastes fresh again.

You can freeze Panang curry for up to 2 months, but the sauce may look slightly separated or grainy after thawing. Reheat gently and stir in a little coconut milk to smooth it out. Shrimp Panang curry is less ideal for freezing because shrimp can become rubbery after thawing and reheating. Tofu may soften slightly after storage, but it still tastes good.

Panang Curry FAQs

Is Panang curry supposed to be thick?

Panang curry is usually thicker and more concentrated than Thai red curry. It should coat the chicken, tofu, shrimp, beef, or vegetables instead of running like soup.

Is Panang curry very spicy?

Most bowls land in the medium-spicy range, but the paste controls the heat. Start with 2 tablespoons for a gentler curry and add more after tasting.

What does Panang curry taste like?

It tastes creamy, savory, lightly sweet, and aromatic, with a quiet peanut note. Peanut belongs in the background; it rounds the curry without turning it into satay sauce.

Why does my Panang curry taste like red curry?

The curry may be too loose or missing the rounded peanut and lime-leaf finish. Simmer the coconut base until glossy, then add peanut richness, basil, and finely sliced tender makrut lime leaves if you have them.

Can I use red curry paste instead of Panang curry paste?

Yes, as a shortcut. Add peanuts or peanut butter, a tiny pinch of nutmeg, and a little coriander or cumin to move it closer to Panang flavor.

What is the best coconut milk for Panang curry?

Full-fat coconut milk works well, while coconut cream gives the richest result. Light coconut milk makes the curry thinner and less satisfying.

Is Panang curry the same as Panang gai?

Panang gai means chicken Panang curry. “Gai” means chicken, so the method is the same here: thin chicken, coconut sauce, and a fresh basil finish.

Can I make Panang curry without fish sauce?

Use soy sauce, tamari, or a vegetarian fish-sauce alternative. Taste after simmering because substitutes vary in saltiness and depth.

Why is my Panang curry watery?

The coconut may need more time, the milk may be too thin, or the vegetables may have released water. Simmer uncovered before reaching for cornstarch.

Can I make Panang curry ahead?

Chicken, beef, tofu, and vegetable versions reheat well. For the freshest flavor, hold back the basil and add it after reheating.

What vegetables go well in Panang curry?

Green beans, bell peppers, mushrooms, broccoli, snap peas, baby corn, carrots, zucchini, and eggplant all work. Add watery vegetables late.

Can I make this with shrimp?

Build and thicken the sauce first, then add shrimp near the end and cook just until opaque. Do not reduce the curry after shrimp goes in.

Back to top

Posted on — Leave a comment

Pinakbet Tagalog Recipe

Bowl of Pinakbet Tagalog with pork, squash, okra, eggplant, ampalaya, long beans, and tomato-bagoong sauce, served with rice nearby.

Pinakbet Tagalog is the kind of vegetable dish that makes rice feel necessary. The best spoonful has salty bagoong-rich juices, sweet squash, silky eggplant, tender okra, a little bitter ampalaya, and enough porky depth to make the vegetables feel like the meal.

It is generous, home-style Filipino cooking: vegetables cooked until they soften into each other, but not so far that everything turns muddy. The squash should become creamy at the edges, the eggplant should turn soft and shiny, and the bitter melon should balance the sweetness instead of taking over.

If your pinakbet has ever turned watery, too salty, too bitter, or too soft, the problem usually is not the ingredient list. It is the order. Squash needs a head start, okra needs restraint, and bagoong needs to be cooked with the tomatoes instead of dumped in heavily at the end.

This is a Pinakbet Tagalog-style home recipe: squash-forward, shrimp-paste seasoned, saucy enough for rice, and built to keep the vegetables tender but distinct. It also includes notes for a sharper Ilocano direction, no-bagoong substitutions, and the small timing cues that keep pakbet from becoming mushy.

Quick Answer: What Is Pinakbet?

Pinakbet is a Filipino vegetable stew made with bagoong, tomatoes, and vegetables such as squash, okra, eggplant, bitter melon, and long beans. This version is Pinakbet Tagalog, made with bagoong alamang, pork, squash, and mixed vegetables in a salty, savory sauce that is meant for rice.

For the easiest balanced version, cook pork with onion, garlic, tomatoes, and shrimp paste. Add squash first, long beans next, and eggplant, ampalaya, and okra near the end. That order keeps the vegetables tender without turning everything into one soft mixed stew; the full vegetable cooking order is below.

  • Main seasoning: bagoong alamang, or shrimp paste
  • Protein: pork belly or pork shoulder, cut into 1-inch pieces
  • Vegetables: squash, long beans, okra, eggplant, and ampalaya
  • Liquid: 1 cup / 240 ml water or light stock, plus more only if needed
  • Texture goal: glossy and saucy, not soupy or mushy

Start here: Use 1 tablespoon bagoong first, then adjust with 1–3 teaspoons more near the end. Bagoong brands vary a lot, and starting low gives you room to correct the seasoning.

Pinakbet at a Glance

Yield4 generous servings with rice, or 5–6 smaller side servings
Prep time20 minutes
Cook timeAbout 40 minutes
Total timeAbout 1 hour
Best pan12-inch wide pan, wok, deep skillet, or wide Dutch oven
Main flavorSalty, savory, lightly sweet, earthy, and a little bitter
Main fixGive squash a head start and add delicate vegetables near the end
Pinakbet at a glance guide showing yield, prep time, cook time, best pan, flavor profile, and texture goal.
Use this Pinakbet Tagalog snapshot to set the cooking target early: tender vegetables, modest sauce, and a spoonable finish that stays clear of watery or mushy.

Why these amounts work: This recipe starts with 1 tablespoon bagoong and 1 cup / 240 ml water because both salt and liquid build as the vegetables cook. Bagoong tastes sharper before it softens into the tomatoes and squash, and the vegetables release liquid as they simmer. If you are unsure how saucy the finished dish should look, use the texture guide below before adding more water.

Pinakbet Tagalog vs Ilocano: What This Recipe Is

This is a Pinakbet Tagalog-style recipe: squash-forward, seasoned with bagoong alamang, and saucy enough to spoon over rice. It is the style many home cooks expect when they want pakbet with pork, shrimp paste, kalabasa, eggplant, okra, ampalaya, and long beans.

A stricter Ilocano-style pinakbet is often more closely tied to bagoong isda or fermented fish seasoning, and the finish can be drier and more vegetable-forward. To move this recipe in that direction, use bagoong isda, reduce the liquid slightly, stir less, and let the vegetables cook down more quietly.

Side-by-side comparison of Pinakbet Tagalog and Ilocano-style pinakbet with notes about bagoong and texture differences.
Pinakbet Tagalog usually leans rounder, saucier, and squash-forward. By contrast, Ilocano-style pinakbet often tastes sharper and drier, so the bagoong choice changes the whole direction of the dish.

Cook’s clarity: Follow the recipe as written for a rounder, shrimp-paste Tagalog-style pakbet. Use the Ilocano notes if you want a sharper, drier, more fermented-fish direction. The bagoong guide below explains when to use bagoong alamang, bagoong isda, or a lighter substitute.

Why This Pinakbet Recipe Works

Good pinakbet is not about throwing every vegetable into the pan and hoping for the best. Squash, okra, eggplant, long beans, and bitter melon do not cook at the same speed, and shrimp paste is strong enough that small choices matter.

The goal is a pan of vegetables that has softened into itself without losing every shape and texture. Squash should yield but still stay visible. Eggplant should look silky and soft. Okra should be tender, not slippery across the whole dish. Ampalaya should bring enough bitterness to balance the squash and tomato, not dominate every bite.

Brown the pork first

Pork belly or pork shoulder gives the tomato and seasoning mixture more depth. Let a little fat render before the aromatics go in.

Bloom the bagoong with tomatoes

Cooking the shrimp paste with softened tomatoes rounds out the sharp saltiness and helps the flavor spread through the pan.

Stage the vegetables

Squash needs a head start. Eggplant, okra, and ampalaya go in later so they soften without collapsing.

Tested texture target: In a wide pan, 1 cup / 240 ml water is usually enough to soften the pork and start the vegetables. Add up to 1/2 cup / 120 ml more only if the pork or squash needs extra time. The finished dish should have shallow glossy juices that cling lightly to the vegetables, not a soup-like broth.

Pinakbet Ingredients

The amounts below make 4 generous servings with rice, or 5–6 smaller servings as part of a larger meal. You get enough pork for richness, enough fermented seasoning for depth, enough tomato for body, and enough vegetable contrast to make the dish feel generous.

If you are cooking outside the Philippines, check Filipino or broader Asian groceries for long beans, bitter melon, Filipino eggplant, kalabasa, and bagoong alamang. Green beans, kabocha, butternut squash, and slender eggplant can still make a good home version if you keep the same balance of sweet, bitter, tender, and firm. If your market does not carry every Filipino vegetable, the substitution guide shows which swaps keep the dish closest to the original balance.

If you cannot find every traditional ingredient, do not let that stop you. The dish still works when the pan has the same basic shape: something sweet, something bitter if possible, something tender, something green, and enough savory depth to make it feel complete.

Ingredient board for Pinakbet Tagalog with pork, bagoong alamang, tomatoes, onion, garlic, squash, long beans, okra, eggplant, and ampalaya.
These ingredients show why Pinakbet Tagalog works before the pan even heats up: pork adds richness, bagoong brings depth, tomatoes give body, and the vegetables create the sweet, bitter, tender, and crisp-tender contrast that defines the dish.

Ingredient Amounts and Why They Matter

IngredientUS measureMetricWhy it matters
Pork belly or pork shoulder1/2 lb225 gPork belly gives richness; shoulder is leaner and may need a little more time.
Cooking oil1 tbsp15 mlUse less if the pork is very fatty.
Onion1 medium110–150 gBuilds sweetness in the savory foundation.
Garlic3–4 cloves12–16 gAdd after the onion so it does not burn.
Tomatoes2 mediumAbout 225 gCook down into the savory juices.
Bagoong alamang1 tbsp to start, plus 1–3 tsp more to taste15 g to start, plus more to tasteStarting low helps prevent the dish from becoming too salty.
Water or light stock1 cup, plus up to 1/2 cup more as needed240 ml, plus up to 120 ml more as neededLoosens the tomato-bagoong mixture without making the dish soupy.
Kalabasa / squash2 cups cubed250–300 gAdds sweetness and body.
Sitaw / long beans1–1 1/2 cups cut100–150 gAdds green bite and structure.
Okra6–8 pieces100–150 gAdd late so it keeps its shape.
Ampalaya / bitter melon1/2 medium, or up to 1 medium if you enjoy bitternessAbout 100–225 gGives the signature bitter edge.
Eggplant1 large or 2 small170–250 gAdd late so it softens without dissolving.
Black pepper1/4 tspAbout 0.5 gOptional, but rounds the flavor.

Best Vegetables for Pinakbet

The best bites have contrast: sweet squash, bitter ampalaya, silky eggplant, tender okra, and salty tomato-bagoong juices that pull everything together.

Guide showing squash, okra, eggplant, ampalaya, long beans, and tomatoes used in pinakbet, with short role labels.
Each vegetable does something different in pakbet, so the mix matters as much as the seasoning. Kalabasa brings sweetness, long beans keep the dish structured, eggplant turns silky, okra adds body, and ampalaya brings the bitter edge that keeps the dish from tasting flat.

Kalabasa / Squash

This sweet squash makes the salty seasoning feel round. Cut it into sturdy chunks so the edges turn creamy without the pieces disappearing.

Okra

Okra is there for softness and body, but it needs a light hand. Trim only the ends, add it late, and let it turn tender without stirring it into the whole pan.

Eggplant

Eggplant is at its best when it turns silky and soaks up the tomato-bagoong juices. Keep the pieces thick so they soften without vanishing.

Ampalaya

Ampalaya is the edge of the dish. Use less if you want a milder pan, but do not erase all the bitterness; that little bite is what keeps the squash and tomato from tasting too sweet.

Sitaw / Long Beans

Long beans keep the dish from feeling too soft, especially beside squash and eggplant. Cut them into 2- to 3-inch pieces so they cook evenly and keep a little bite.

Tomatoes

Once tomatoes soften into the pan, they make the fermented seasoning taste fuller and less sharp. Give them time to collapse before adding water.

Best Cut Sizes for Pinakbet

Pinakbet is forgiving, but the knife work quietly decides a lot. Small squash collapses too early, thin eggplant disappears, and overcut okra can make the texture slippery.

Cut size guide showing pork pieces, squash chunks, long beans, eggplant pieces, ampalaya half-moons, okra pods, and chopped tomatoes for pinakbet.
Good knife work quietly improves Pinakbet Tagalog. Larger squash chunks hold shape better, thick eggplant pieces soften without disappearing, and lightly trimmed okra stays cleaner in texture, so the finished dish feels tender rather than collapsed.
IngredientBest cut sizeWhat to watch
Pork belly or shoulderAbout 1-inch piecesSmall enough to tenderize, large enough to stay juicy.
Squash / kalabasa1 to 1 1/2-inch chunksHolds shape while becoming tender.
Long beans / sitaw2 to 3-inch piecesCooks evenly and stays easy to serve.
EggplantThick diagonal pieces or large chunksSoftens without dissolving into the dish.
AmpalayaThin half-moonsDistributes bitterness without taking over every bite.
OkraWhole small pods or halved large podsLess cutting means a cleaner texture.
TomatoesRough choppedBreaks down into the tomato-bagoong mixture without needing perfect dice.

How to Reduce Ampalaya Bitterness

Optional ampalaya tip: For milder bitter melon, soak the sliced ampalaya in water with a big pinch of salt for 20–30 minutes, then drain before cooking. Skip this if you enjoy the stronger bitter edge.

Ampalaya bitterness guide showing sliced bitter melon, soaking in salted water for 20 to 30 minutes, draining, and keeping some bitterness.
Ampalaya should soften its bitterness, not lose it completely. A short salted-water soak helps mellow the sharpness; however, keeping a little bitterness in the final dish is exactly what makes Pinakbet Tagalog taste balanced instead of one-note.

Ingredient Substitutes If You Cannot Find Everything

Pinakbet is best with traditional vegetables, but a home pot can still work when the market does not give you everything. Think about what each ingredient brings to the pan: sweetness from squash, bitterness from ampalaya, body from okra, and salty depth from the fermented seasoning.

Ingredient substitutes guide for pinakbet showing alternatives for long beans, squash, bitter melon, eggplant, and pork.
Traditional ingredients are ideal, yet pinakbet can still work when the pot keeps the same shape: something sweet, something green, something tender, a little bitterness if possible, and enough savory depth to make the vegetables feel complete.
Traditional ingredientGood substituteWhat to watch
Sitaw / long beansGreen beansGreen beans cook faster, so add them a little later.
KalabasaKabocha, pumpkin, or butternut squashSweetness and cooking time vary by squash type.
AmpalayaUse less, or skip if unavailableThe dish becomes less bitter and milder.
Filipino eggplantAny slender eggplantSimilar texture; avoid tiny pieces because they collapse.
Pork bellyPork shoulder, shrimp, chicken thighs, or tofuChanges richness and cooking time.

From here, the seasoning does the heavy lifting. This is where pinakbet can become deep and rounded, or too salty too quickly, so taste slowly and let the tomatoes do their work.

Bagoong Alamang vs Bagoong Isda

Bagoong is the ingredient that makes pinakbet taste like pinakbet. In this Tagalog-style version, bagoong alamang gives a round shrimp-paste flavor. To move the dish in a sharper Ilocano direction, use bagoong isda or bagoong monamon instead. For more background on Filipino pantry staples like bagoong and patis, this Filipino pantry guide is helpful.

Comparison guide showing bagoong alamang and bagoong isda for Pinakbet Tagalog and Ilocano-style pinakbet.
Bagoong does more than add salt; it gives pinakbet its fermented depth and unmistakable savory backbone. For a rounder Tagalog-style flavor, bagoong alamang fits naturally, while bagoong isda pushes the dish toward a sharper Ilocano direction.

Raw vs Ginisang Bagoong

Raw bagoong alamang tends to taste sharper and saltier, so it benefits from being cooked briefly with tomatoes before the water goes in. Ginisang bagoong is already sautéed and often tastes rounder, but many jars are also sweeter. Taste before adding more, especially if the jar is meant to be eaten as a condiment.

If your ginisang bagoong tastes sweet straight from the jar, be slower with extra squash and do not add more seasoning until the vegetables are cooked. Sweet jarred shrimp paste can taste pleasantly round at first, then too sweet once the squash softens.

Taste Before Adding More

Bagoong is powerful, so use it with patience. Let it bloom with the tomatoes, then taste again later when the vegetables have softened around it. A spoonful of cooking liquid may taste strong by itself; taste with squash or rice before deciding whether the dish needs more. If you cannot use shrimp paste at all, skip ahead to the without-bagoong options.

Bagoong typeStart withAdd more when
Very salty bagoong alamang1 tbspThe vegetables are cooked but the dish tastes flat.
Sweeter ginisang bagoong1 tbsp, then adjustThe dish needs more savory depth, not more sweetness.
Bagoong isda1 tbspYou want a sharper Ilocano-style flavor.
Fish sauce substitute1 tbspOnly after tasting near the end.

Bloom the bagoong: Cook it briefly with the tomatoes before adding water. Raw-stirred bagoong can taste sharp; cooked shrimp paste tastes rounder and spreads better through the dish.

Equipment You Need

A 12-inch wide pan, wok, deep skillet, or wide Dutch oven works best. Pinakbet has bulky vegetables, so a narrow pot forces you to stir more aggressively, which can break the squash and eggplant. Use a lid for gentle steaming and a wooden spoon or silicone spatula for turning.

How to Cook Pinakbet

Once everything is cut, the cooking is mostly patience. Brown the pork, soften the aromatics, let the tomatoes collapse, then cook the bagoong long enough for the smell to turn round and savory instead of sharply salty.

Do not rush the beginning. The tomato and shrimp paste mixture is what makes the vegetables taste complete, not like plain vegetables wearing salt. Once the squash and beans are in, give the pan enough time before you decide it needs more water. If your past batches turned watery, salty, bitter, or mushy, the troubleshooting table after the method will help you fix the problem.

A wide cooking surface helps everything cook in a shallow layer instead of being crushed. Do not stir just because the pan is quiet. You are looking for pieces that have softened into each other without losing themselves.

Best Vegetable Cooking Order

Slow-cooking vegetables and fast-cooking vegetables should not be treated the same way. This is the order that keeps pinakbet tender without making it mushy.

Three-stage guide showing the cooking order for pinakbet: base ingredients, squash and long beans, then eggplant, ampalaya, and okra.
The cooking order keeps Pinakbet Tagalog from turning into one soft pile. Build the savory base first, let the sturdier vegetables get started, then finish with the delicate ones so every bite still has contrast.
Add firstAdd in the middleAdd last
Pork, onion, garlic, tomatoes, bagoongSquash, kamote if using, long beansEggplant, ampalaya, okra
Builds the savory foundationNeeds time but should hold shapeOvercooks faster and can turn too soft

Step-by-Step Method

Build the Pork, Tomato, and Bagoong Base

  1. Brown the pork. Heat oil in a wide pan over medium heat. Add pork in one layer and cook for 5–8 minutes, until lightly browned and some fat has rendered. Spread the pork out so it browns instead of steaming.

Visual Cue: Brown the Pork

Pork pieces browning in a wide pan at the beginning of making Pinakbet Tagalog.
Browning the pork first builds flavor before the vegetables ever hit the pan. As the fat renders and the edges deepen in color, the base becomes richer, which means the later tomato-bagoong mixture tastes fuller without needing extra seasoning.
  1. Cook the aromatics. Add onion and cook for about 2 minutes, until softened. Add garlic and cook for 30 seconds to 1 minute, just until fragrant.
  2. Soften the tomatoes. Add tomatoes and cook for 3–5 minutes, pressing them gently with the spoon. They should lose their raw shape and look juicy around the edges.
  3. Bloom the bagoong. Stir in 1 tablespoon bagoong and cook for 1–2 minutes. The smell should become rounder and more savory.

Visual Cue: Build the Tomato-Bagoong Base

Pork, onion, garlic, softened tomatoes, and bagoong being stirred together in a wide pan for Pinakbet Tagalog.
This step is where Pinakbet Tagalog starts tasting like itself. Once the tomatoes soften and the bagoong cooks into them, the flavor turns rounder and less harsh, so the vegetables later absorb something savory rather than just salty.
  1. Simmer the pork. Add 1 cup water or light stock. Cover and simmer for 15–20 minutes, or until the pork starts to become tender. If using pork shoulder and it still feels firm, simmer 5–10 minutes longer before adding squash. If the liquid already looks high before the squash goes in, do not add more yet; the vegetables will release more as they cook.

Visual Cue: Simmer the Pork

Pork simmering in shallow tomato-bagoong liquid in a wide pan with steam rising.
Simmer the pork before adding the vegetables, especially if you are using pork shoulder instead of belly. That little bit of patience lets the meat start tenderizing early, while the squash and softer vegetables can still cook on their own schedule later.

Add the Vegetables and Finish the Dish

  1. Add the squash. Add kalabasa and cook for 5–7 minutes. It should begin to soften, but it should not be falling apart. Add up to 1/2 cup / 120 ml more water only if the pan looks dry or the squash needs more time.

Visual Cue: Add Squash First

Orange squash chunks being added to pork and tomato-bagoong sauce in a wide pan for pinakbet.
Squash goes in first because it is the vegetable that changes the dish’s body. As the edges soften, it thickens the pan slightly and rounds out the stronger bagoong flavor without making the pakbet taste sweet.
  1. Add the long beans. Add sitaw and cook for 2–3 minutes. The beans should brighten and begin to soften while still keeping some bite.

Visual Cue: Add Long Beans Next

Long beans being added to partially cooked squash and pork in a wide pan of Pinakbet Tagalog.
Long beans belong in the middle of the cooking process rather than at the beginning or the very end. This timing helps them stay green and tender, so the final pakbet still has a little structure instead of turning uniformly soft.
  1. Finish with eggplant, ampalaya, and okra. Cover and cook for 4–6 minutes, turning gently once or twice. The eggplant should look silky, the okra should still hold shape, and the ampalaya should soften without taking over the whole pan.

Visual Cue: Finish with Eggplant, Ampalaya, and Okra

Eggplant, ampalaya, and okra being added last to a pan of Pinakbet Tagalog with squash and long beans already cooking.
Eggplant, ampalaya, and okra cook quickly, so they should finish the dish instead of starting it. Added late, they keep their character: the eggplant turns silky, the okra stays tender, and the ampalaya gives bitterness without taking over the whole pot.
  1. Taste and adjust. Add 1–3 teaspoons more bagoong, pepper, or a small splash of water only if needed. The cooking liquid should cling lightly to the vegetables, with no large pool of broth at the bottom. Serve hot with rice.

Visual Cue: Taste, Adjust, and Finish

Finished Pinakbet Tagalog in a wide pan with a spoon lifting vegetables and glossy sauce.
The final texture should look moist and glossy, not brothy. Before adding more bagoong, taste with squash or rice, because the seasoning settles once the vegetables soften into the sauce.

How Long to Cook Pinakbet

Pinakbet is a stovetop dish, so the “temperature” is really about heat control. Medium heat is enough for most of the recipe. If the pan gets too hot, the juices can stick and the vegetables can break before they cook through.

StageHeatTimeVisual cue
Brown porkMedium to medium-high5–8 minutesEdges lightly browned, fat beginning to render
AromaticsMedium2–3 minutesOnion softened, garlic fragrant
Tomato and bagoongMedium3–5 minutesTomatoes juicy, bagoong darker and aromatic
Pork simmerMedium-low15–20 minutes, longer if needed for pork shoulderPork starting to tenderize
SquashMedium5–7 minutesFork enters but squash holds shape
Long beansMedium2–3 minutesBrighter, tender-crisp
Eggplant, ampalaya, okraMedium4–6 minutesTender, silky, and not collapsed

How Pinakbet Should Look When It Is Done

The best pinakbet does not look perfect. It looks generous, saucy, and ready for rice. The squash should be creamy at the edges but still in chunks. The long beans should keep a little bite. The eggplant should turn silky, not disappear. The okra should be tender without making the whole dish slippery.

If there is a lot of loose liquid, simmer uncovered for a few minutes. If the pan is dry before everything is tender, add a small splash of water, cover again, and continue gently. The final texture should feel saucy and spoonable, with shallow coated juices rather than loose broth. For a quick visual check, compare your pan with the watery vs right vs mushy guide.

You are done when the squash is fork-tender, the eggplant is silky, the long beans still have bite, and the cooking liquid lightly clings to the vegetables.

Finished Pinakbet Tagalog with notes showing tender squash, silky eggplant, long beans with slight bite, and glossy sauce that is not soupy.
Good pinakbet should look soft, but not sloppy. The vegetables ought to be tender and comfortable in the sauce, yet still easy to recognize, while the liquid should lightly coat them instead of drifting around like a separate broth.

Too Watery, Just Right, or Too Mushy

Three-panel comparison showing pinakbet that is too watery, just right, and too mushy.
This is one of the easiest ways to judge your Pinakbet Tagalog at a glance. If it looks watery, simmer uncovered; if it looks mushy, the vegetables likely stayed in too long, while the ideal version holds shape and still looks glossy.

Pinakbet Recipe Card

Pinakbet Tagalog Recipe

This Filipino Pinakbet Tagalog recipe builds a savory pork, tomato, and bagoong mixture first, then adds the vegetables in stages. The squash softens, the eggplant turns silky, and the okra and long beans keep their shape.

Yield
4 generous servings

Prep Time
20 minutes

Cook Time
40 minutes

Total Time
1 hour

Ingredients

  • 1/2 lb / 225 g pork belly or pork shoulder, cut into 1-inch pieces
  • 1 tbsp / 15 ml cooking oil
  • 1 medium onion, chopped
  • 3–4 garlic cloves, minced
  • 2 medium tomatoes, chopped
  • 1 tbsp / 15 g bagoong alamang, plus 1–3 tsp more to taste
  • 1 cup / 240 ml water or light stock, plus up to 1/2 cup / 120 ml more as needed
  • 2 cups / 250–300 g kalabasa or squash, cut into 1 to 1 1/2-inch chunks
  • 1 to 1 1/2 cups / 100–150 g sitaw or long beans, cut into 2- to 3-inch pieces
  • 6–8 okra, trimmed
  • 1/2 medium ampalaya, or up to 1 medium if you enjoy bitterness, seeded and sliced into thin half-moons
  • 1 large eggplant or 2 small eggplants, cut into thick pieces
  • 1/4 tsp black pepper, optional

Instructions

  1. Heat oil in a wide pan over medium heat. Add pork in one layer and cook for 5–8 minutes, until lightly browned and some fat has rendered.
  2. Add onion and cook for about 2 minutes, until softened. Add garlic and cook for 30 seconds to 1 minute, just until fragrant.
  3. Add tomatoes and cook for 3–5 minutes, pressing them gently, until softened and juicy around the edges.
  4. Stir in 1 tablespoon bagoong and cook for 1–2 minutes, until the smell becomes rounder and more savory.
  5. Add 1 cup water or light stock. Cover and simmer for 15–20 minutes, until the pork starts to become tender. If using pork shoulder and it still feels firm, simmer 5–10 minutes longer before adding the squash. Add up to 1/2 cup more water only if needed.
  6. Add squash and cook for 5–7 minutes, until a fork starts to enter but the pieces still hold shape.
  7. Add long beans and cook for 2–3 minutes, until brighter and beginning to soften.
  8. Finish with eggplant, ampalaya, and okra. Cover and cook for 4–6 minutes, turning gently once or twice, until the vegetables are tender but still distinct.
  9. Taste and adjust with 1–3 teaspoons more bagoong or pepper if needed. The finished dish should be moist and spoonable, with no large pool of broth at the bottom of the pan. Serve hot with rice.

Notes

  • Use a wide 12-inch pan so the vegetables cook evenly without being crushed.
  • Start with 1 tablespoon bagoong, especially if your brand is very salty.
  • For milder ampalaya, soak the slices in salted water for 20–30 minutes, then drain.
  • Add extra water only if the pork or squash needs more time.
  • Add crispy pork, bagnet, or lechon kawali just before serving so it does not become soggy.

A good batch should make rice feel like part of the recipe, not just a side. The juices should be salty enough to carry the vegetables, but not so strong that the squash, eggplant, okra, and ampalaya disappear.

Cook’s confidence: Flexible: exact vegetable mix, protein, and bitterness level. Not flexible: cooking the seasoning with the tomatoes, keeping the liquid modest, and giving slower vegetables more time than delicate ones.

What Pinakbet Should Feel Like

Pinakbet is not meant to eat like a smooth stew. It is a dish of contrast: squash softening at the edges, bitter melon cutting through sweetness, eggplant soaking up salty juices, and rice pulling everything together.

Some homes make it drier and sharper; others prefer it saucier and sweeter from squash. This version stays in the Pinakbet Tagalog lane while giving you room to adjust the bitterness, protein, and finish toward your own table.

Pakbet is simply the everyday shorter name many people use for pinakbet. The more useful difference is style: Pinakbet Tagalog is often shrimp-paste and squash-forward, while Ilocano pinakbet often leans more toward fermented fish seasoning and a drier finish.

Can You Make Pinakbet Without Bagoong?

You can make pinakbet without bagoong, but it becomes a pinakbet-inspired vegetable stew. Bagoong does three jobs at once: it adds salt, fermentation, and deep umami. Replacing it means rebuilding all three, not just adding something salty.

If seafood is fine, fish sauce is the closest simple substitute. For seafood-free versions, use soy sauce or tamari for salt, mushroom powder for umami, and a little miso or extra cooked tomato for depth. Add these slowly and taste with a piece of squash or rice, because substitutes can become too salty fast.

  • No bagoong available: start with 1 tablespoon fish sauce, then adjust once the vegetables are tender.
  • Seafood-free version: use soy sauce or tamari plus mushroom powder and extra tomato.
  • Vegetarian or vegan direction: use miso, tamari, mushroom powder, and tomato to rebuild depth.
  • Lower-sodium attempt: use less bagoong rather than removing it completely, if possible.
Guide to making pinakbet without bagoong using fish sauce, soy sauce or tamari, mushroom powder, miso, and extra tomato.
Without bagoong, the dish changes, but it does not have to become bland. Instead of replacing only the salt, rebuild the missing layers with umami, depth, and a little extra tomato so the vegetables still taste grounded and complete.

Pinakbet Variations

You can change the protein, but do not rush the vegetables; they are still the heart of the dish.

Pinakbet with Pork Belly

This is the richest everyday version. Brown the pork first so the rendered fat flavors the tomatoes and shrimp paste.

Pinakbet with Bagnet

Stir some bagnet or lechon kawali in near the end, then reserve a few crisp pieces for topping. If all of it simmers too long, it will soften.

Pinakbet with crispy bagnet pieces on top, mixed vegetables, glossy sauce, and rice nearby.
Bagnet gives pinakbet a completely different texture, especially when the crisp pieces are added close to serving time. That way, you get crunchy pork against soft vegetables and savory sauce instead of letting everything turn uniformly tender.

Pinakbet with Shrimp

Add shrimp in the final 2–3 minutes, after the vegetables are almost tender. Shrimp cooks quickly and turns rubbery if simmered too long.

Pinakbet with shrimp, squash, long beans, okra, eggplant, ampalaya, tomatoes, and glossy sauce served with rice.
Shrimp pinakbet needs a lighter hand than the pork version because shrimp cooks quickly and can toughen fast. Add it when the vegetables are almost done, and the dish stays sweet, seafood-forward, and still recognizably pakbet.

Chicken Pinakbet

Use boneless chicken thighs rather than chicken breast. Brown them first, then simmer until nearly tender before adding the squash.

Ginataang Pinakbet

Add coconut milk after the pork has softened and the squash has started cooking. Simmer gently; hard boiling can make coconut milk split.

Ginataang pinakbet with creamy coconut milk sauce, squash, long beans, eggplant, okra, and ampalaya in a shallow serving pan.
Ginataang pinakbet is richer, although it should still feel like a vegetable dish rather than a coconut stew. Simmer gently once the coconut milk goes in, because that softer cooking keeps the sauce smooth and the vegetables clear and distinct.

Meatless Pinakbet

Skip the pork but build depth with extra tomato, mushroom powder, and careful seasoning. If using tofu, add it near the end so it does not break apart.

Meatless pinakbet with squash, long beans, okra, eggplant, ampalaya, tomatoes, and glossy savory sauce in a bowl.
A meatless pinakbet can still taste full when the vegetables are cooked carefully and the seasoning is layered thoughtfully. Mushrooms, miso, soy, or extra tomato can help, yet the real success still comes from keeping the vegetables varied in texture and flavor.

Timing is what keeps each vegetable from disappearing into the next. Pork and chicken need time early, shrimp goes in late, crispy pork is best partly reserved for the top, and coconut milk needs gentle heat.

How to Fix Common Pinakbet Problems

Pinakbet is forgiving, but it tells on you quickly. Too much water pools under the vegetables, too much bagoong shows up in the first bite, and too much stirring shows up in the squash.

Start With the Problem You See

Troubleshooting guide for pinakbet showing fixes for watery texture, too much salt, too much bitterness, mushy vegetables, slimy okra, and flat flavor.
Most pinakbet problems come from the same few places: too much liquid, too much bagoong, bitter melon used too heavily, or vegetables added all at once. Fix what you can in the pan, then use the next batch to correct the timing.

Problem-by-Problem Fixes

ProblemFix nowNext time
Too waterySimmer uncovered for 3–5 minutes.Use less water and add extra only if pork or squash needs more time. Remember that the vegetables release liquid too.
Too saltyAdd more squash, eggplant, or tomato. Serve with plain rice.Start with less bagoong and adjust after vegetables cook.
Too bitterAdd a little more squash or tomato.Use less ampalaya, slice it thinner, or soak it briefly.
Vegetables are mushyYou cannot fully reverse this, but you can simmer uncovered if watery.Add vegetables in stages and turn gently.
Squash collapsedLet it thicken the dish and avoid more stirring.Use larger chunks and do not add squash too early.
Okra made it slimySimmer uncovered briefly and avoid stirring hard.Trim only the ends and add okra near the end.
Tastes flatAdd a little more bagoong, fish sauce, or tomato, then simmer briefly.Bloom the seasoning with the tomatoes before adding water.
Bagoong tastes too strongAdd tomato or squash, simmer gently, and serve with plain rice.Use less at the start and adjust later.
Dish tastes too sweetAdd a little fish sauce or bagoong.Watch sweet ginisang bagoong and very sweet squash.
Too oilySpoon off excess fat before serving.Render pork first and remove extra fat before adding vegetables.
Pork is toughSimmer the pork pieces longer before serving if vegetables can handle it.Give pork more time before adding squash and delicate vegetables.

What to Serve With Pinakbet

Filipino meal spread with Pinakbet Tagalog, steamed rice, adobo, fried fish, grilled pork, dipping sauce, and calamansi.
Pinakbet shines beside plain steamed rice because the sauce is bold enough to carry the plate. For a fuller Filipino-style meal, add adobo, fried fish, or grilled pork while keeping pinakbet at the center.

Pinakbet is best with hot steamed rice. Because the tomato-bagoong mixture is bold, plain rice is not an afterthought here; it is part of how the dish works. If you want a dependable pot of rice, MasalaMonk’s guide on how to cook rice covers stovetop, cooker, and Instant Pot methods.

For a fuller Filipino-style meal, pinakbet sits naturally beside a savory protein dish like chicken adobo. Fried fish, grilled pork, simple chicken, or crispy pork also work well. If the pinakbet itself already has pork belly or bagnet, keep the rest of the meal simple.

Pinakbet is at its best when it tastes like more than the sum of its vegetables: salty enough for rice, sweet from squash, bitter enough to stay interesting, and saucy without becoming soup.

How to Store, Reheat, and Freeze Pinakbet

Cool leftovers quickly and store them in a shallow airtight container in the refrigerator. Pinakbet is best eaten within 3–4 days because it contains cooked vegetables and often pork or seafood-based seasoning. Store rice separately so the vegetables do not continue softening in the rice.

To reheat, warm it gently in a pan over low to medium-low heat. Add a splash of water only if the vegetables look dry. Avoid aggressive stirring because the squash and eggplant can break apart.

Microwaving is fine for a quick lunch, but the vegetables will soften more than they do in a pan. Freezing is possible, but not ideal; squash, eggplant, and okra soften further after thawing.

For general leftover safety, follow the USDA FSIS guidance on leftovers and food safety.

Some families prefer pinakbet drier and sharper; others like it saucier and sweeter from squash. Once you understand the timing, you can move the dish toward your table without losing its shape.

Back to top

FAQs About Pinakbet

What is pinakbet made of?

Most pinakbet starts with bagoong, tomatoes, and mixed vegetables such as squash, okra, eggplant, ampalaya, and long beans. Pork, shrimp, fish, bagnet, or crispy pork may be added depending on the household version.

Is pinakbet the same as pakbet?

Yes. Pakbet is the everyday shorter name many people use for pinakbet, though the exact style can change by region and household.

What does pinakbet taste like?

Pinakbet is savory, salty, earthy, lightly sweet, and a little bitter. The squash and tomatoes bring sweetness, while bagoong gives deep umami. A good version should taste balanced, not simply salty.

What is the difference between Pinakbet Tagalog and Ilocano pinakbet?

Pinakbet Tagalog usually uses bagoong alamang and squash, while Ilocano pinakbet is more closely tied to bagoong isda and a drier, more vegetable-forward finish. This recipe is Tagalog-style, with notes for adjusting it in a sharper Ilocano direction.

What is the best bagoong for pinakbet?

For Pinakbet Tagalog, bagoong alamang is the easiest fit because it gives a rounded shrimp-paste flavor. For a sharper Ilocano-style direction, use bagoong isda or bagoong monamon.

How do you keep pinakbet from getting mushy?

Add vegetables in stages and stir gently. Squash needs a head start, long beans need only a few minutes, and eggplant, ampalaya, and okra should go in near the end. A wide pan also helps because the vegetables steam and simmer instead of being crushed together.

Is pinakbet supposed to be soupy?

No. Pinakbet should be moist and saucy, not soupy. The vegetables should soften and shrink slightly, with cooking liquid clinging to them rather than floating in broth. If there is too much liquid, simmer uncovered for a few minutes.

Why is my pinakbet watery?

Pinakbet can turn watery if too much water was added or if the vegetables released more liquid than expected. Simmer uncovered until the liquid reduces and clings lightly to the vegetables. Next time, start with less water and add extra only if the pork or squash needs more time.

How do you reduce ampalaya bitterness in pinakbet?

Use less ampalaya, slice it evenly, and avoid overcooking it. For a milder flavor, soak the sliced bitter melon in lightly salted water for 20–30 minutes, then drain before cooking. A little bitterness should remain because it keeps the dish balanced.

What can I use instead of bagoong alamang?

Fish sauce is the easiest substitute if seafood is not a problem. For seafood-free versions, use soy sauce or tamari with mushroom powder and extra tomato. The flavor will not be the same, but it will have more depth than plain salt.

What is the difference between pinakbet and dinengdeng?

Both are Filipino vegetable dishes, but they eat differently. Pinakbet is usually a sautéed or simmered vegetable stew with bagoong, tomatoes, and often pork or seafood, while dinengdeng is generally lighter and more broth-like.

How long does pinakbet last in the fridge?

Pinakbet is best eaten within 3–4 days when stored in a shallow airtight container in the refrigerator. Reheat gently so the squash, eggplant, and okra do not break apart.