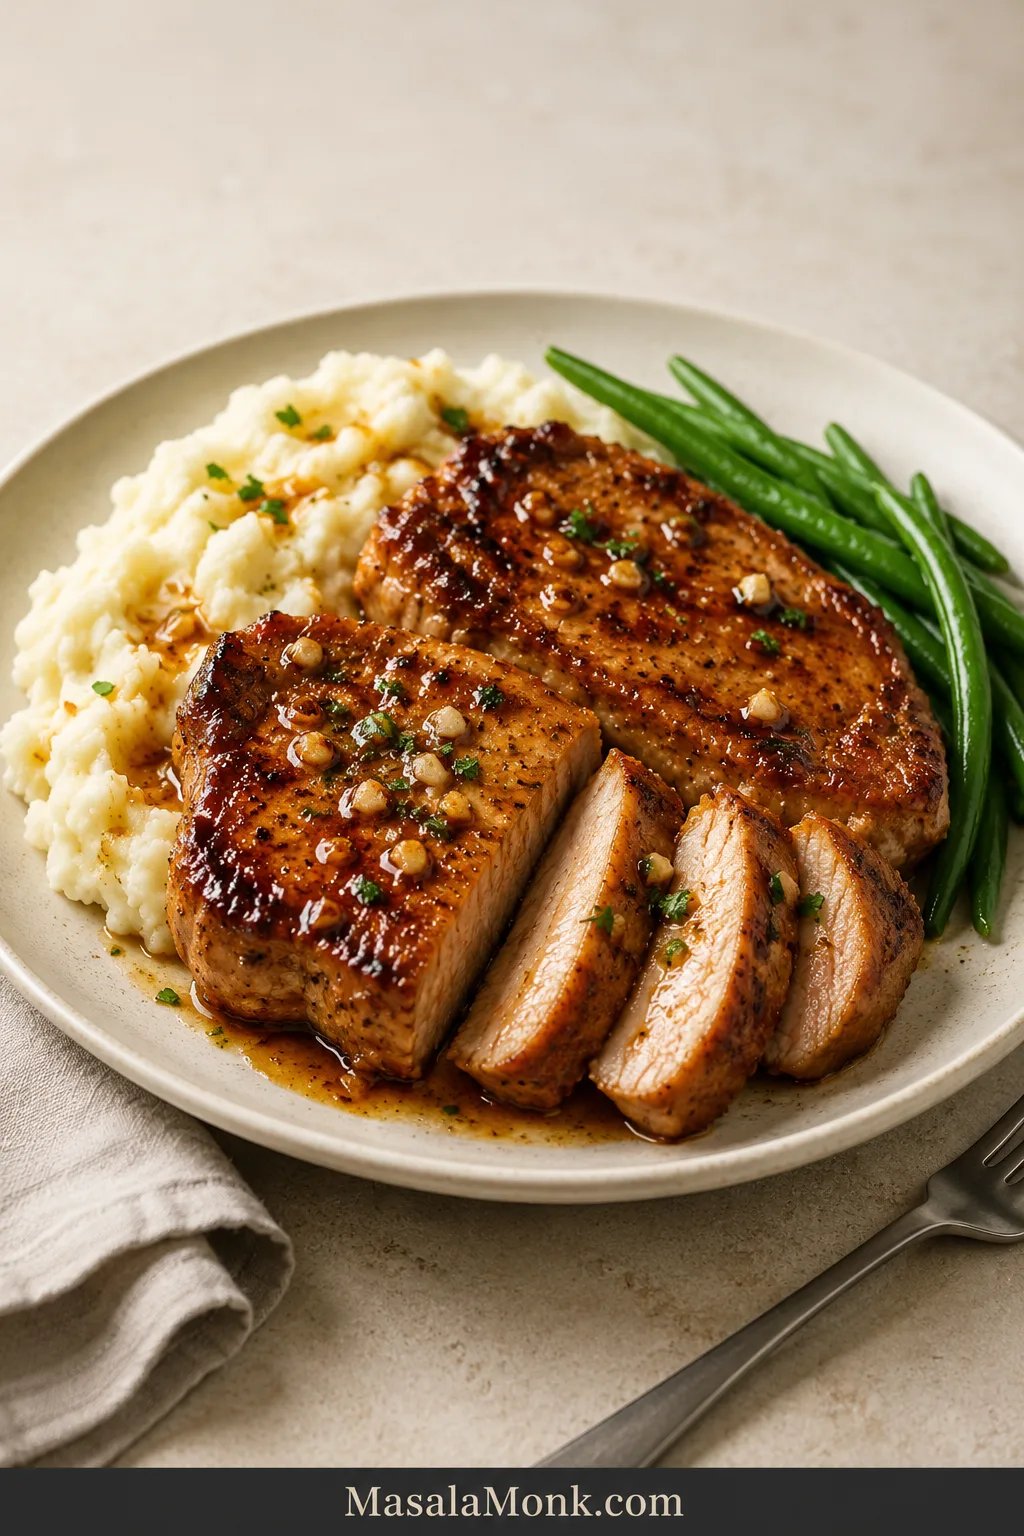
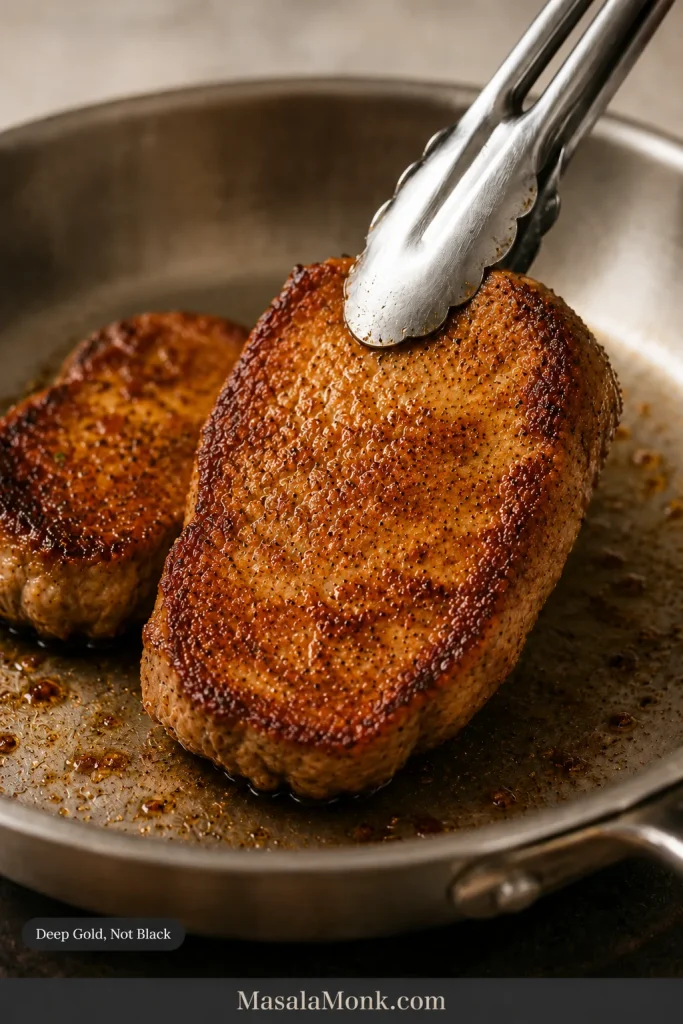
Some weeknight dinners simply get the job done. These honey garlic pork chops feel like you made an effort—golden at the edges, juicy in the center, and finished with a savory-sweet glaze that slips into the rice or mashed potatoes underneath.
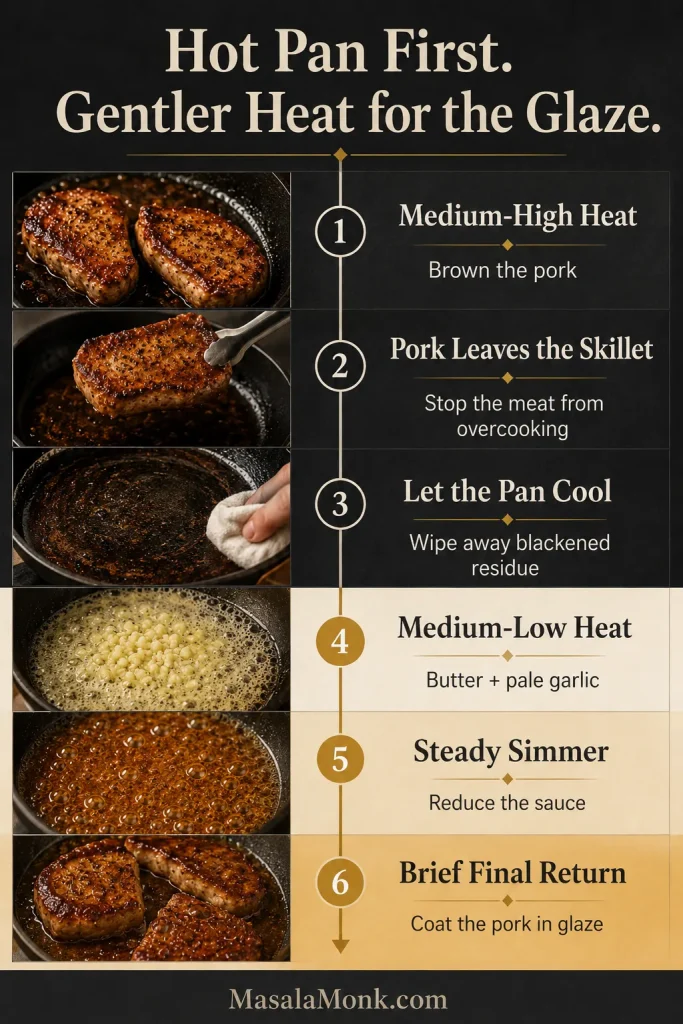
In about 30 minutes—slightly longer if the chops need to brown in batches—one skillet takes the pork from deeply browned to glossy and glazed. It starts hot enough for golden edges, then cools before the honey and garlic go in, so the sauce turns shiny instead of scorched.
Pork chops rarely come home from the store perfectly matched. Timing tells you when to check, the thermometer tells you when to stop, and thinner pieces can come out before thicker ones.
For four chops about ¾–1 inch / 19–25 mm thick, the first side commonly needs 3–4 minutes and the second 2–3 minutes. Those times tell you when to check; thickness and internal temperature tell you when to stop.
Move the pork out before it is fully done, lower the heat, and simmer the honey mixture until the bubbles become smaller and the sauce lightly coats a spoon. Return each chop only long enough to reach 145°F / 63°C, then rest for at least 3 minutes.
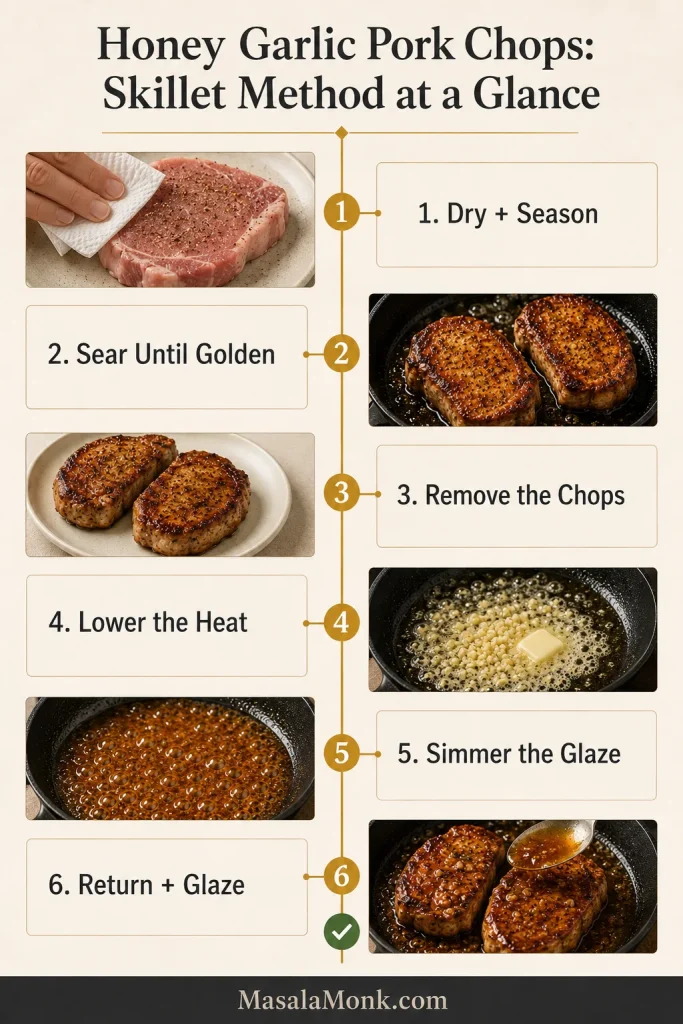
The method: sear first, lower the heat, sauce second, glaze last.
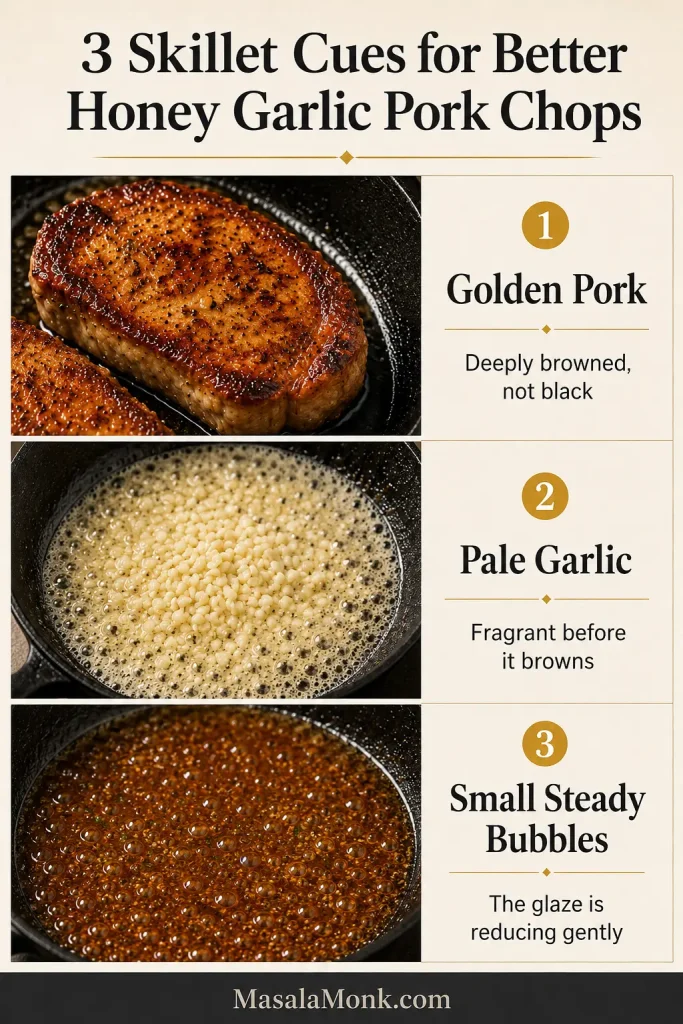
The visual cues: golden pork, pale garlic, small steady bubbles.
When one cue is missing, pause and adjust: pale pork needs more browning, darkening garlic needs a cooler pan, and large bubbles signal that the sauce still contains excess water.
Honey Garlic Pork Chops Recipe
Recipe at a Glance
Prep Time10 minutes
Cook Time15–18 minutes
Total TimeAbout 30 minutes
Servings4
Best Chop¾–1 inch / 19–25 mm
Best Pan12 inch / 30 cm skillet
Final Temperature145°F / 63°C
RestAt least 3 minutes
Equipment
12-inch / 30-cm heavy skillet
Instant-read meat thermometer
Tongs and a wooden or silicone spoon
Small bowl or liquid measuring jug
A clean plate for holding the seared pork
Ingredients
For the pork chops
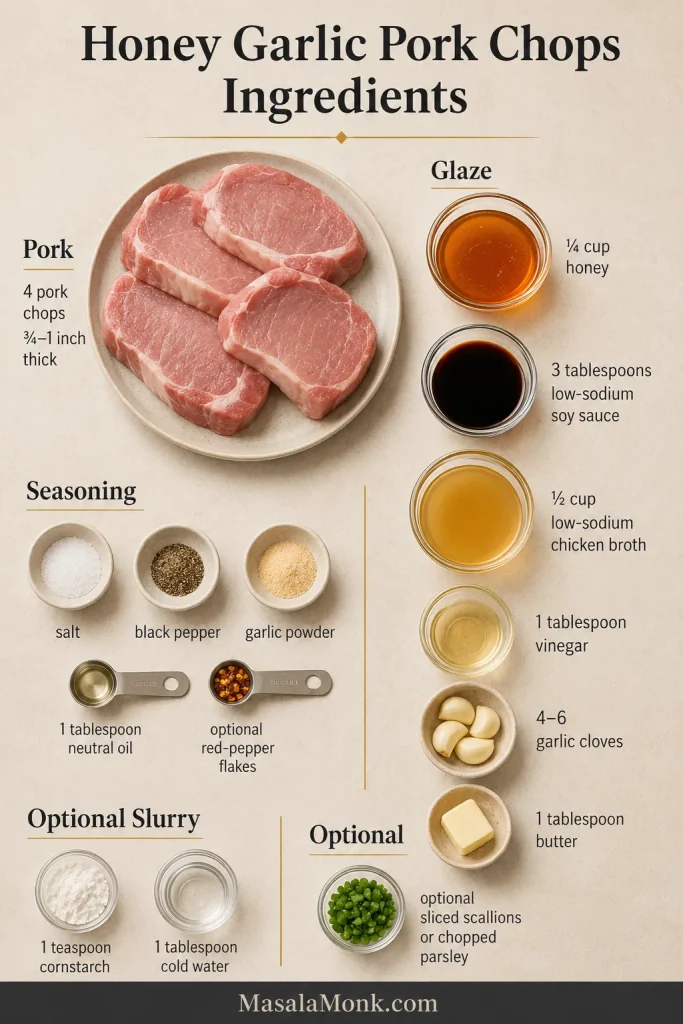
4 pork chops, preferably ¾–1 inch / 19–25 mm thick, about 6–8 oz / 170–225 g each
Fine salt: ¼ teaspoon, about 1.5 g, plus more only after tasting the reduced sauce
Black pepper: ½ teaspoon, about 1 g
Garlic powder: ½ teaspoon, about 1.5 g
Neutral cooking oil: 1 tablespoon / 15 ml, plus a little more if cooking in batches
For the sauce
¼ cup honey, about 3 oz / 85 g
3 tablespoons low-sodium soy sauce, 45 ml
½ cup low-sodium chicken broth, 4 fl oz / 120 ml
1 tablespoon apple cider vinegar or unseasoned rice vinegar, 15 ml
4–6 garlic cloves, finely chopped, about 12–18 g; use 4 for gentler garlic or 6 for a bolder glaze
1 tablespoon unsalted butter, about ½ oz / 14 g
¼ teaspoon red-pepper flakes, optional
Sliced scallions or chopped parsley, optional, for serving
Optional, for a thicker glaze
1 teaspoon cornstarch, about 3 g
1 tablespoon cold water, 15 ml
Low-sodium soy sauce and broth give the glaze room to reduce without becoming overly salty; taste only after the sauce has concentrated.
Method
The skillet method for honey garlic pork chops has two separate stopping points: temperature decides when the meat leaves, while texture decides when the glaze is ready.
Prepare and Sear
Mix the sauce. Whisk the honey, soy sauce, broth, vinegar, and optional red-pepper flakes. Keep the garlic and butter separate. If using cornstarch, stir it with the cold water in a second bowl.
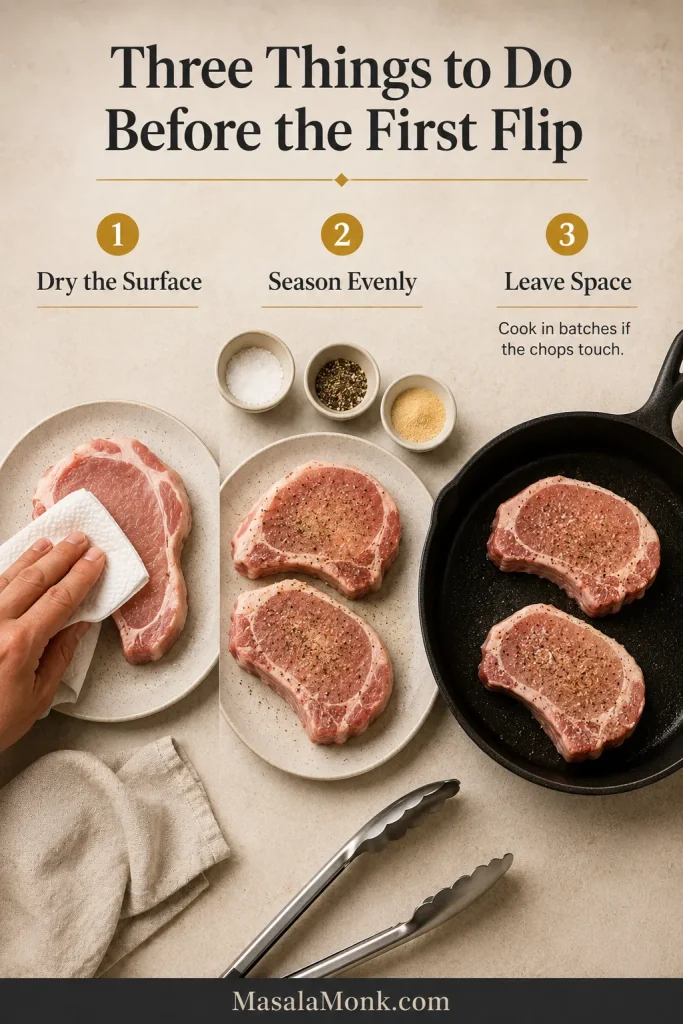
Prepare the pork. Pat the chops thoroughly dry and season both sides with salt, pepper, and garlic powder. If a chop has a firm fat rim, make two or three shallow cuts through the fat so it lies flat.
Sear the first side. Heat the skillet over medium-high for about 2 minutes, then add the oil. Add the chops with space between them and cook without moving until golden, commonly 3–4 minutes. Work in two batches if they touch.
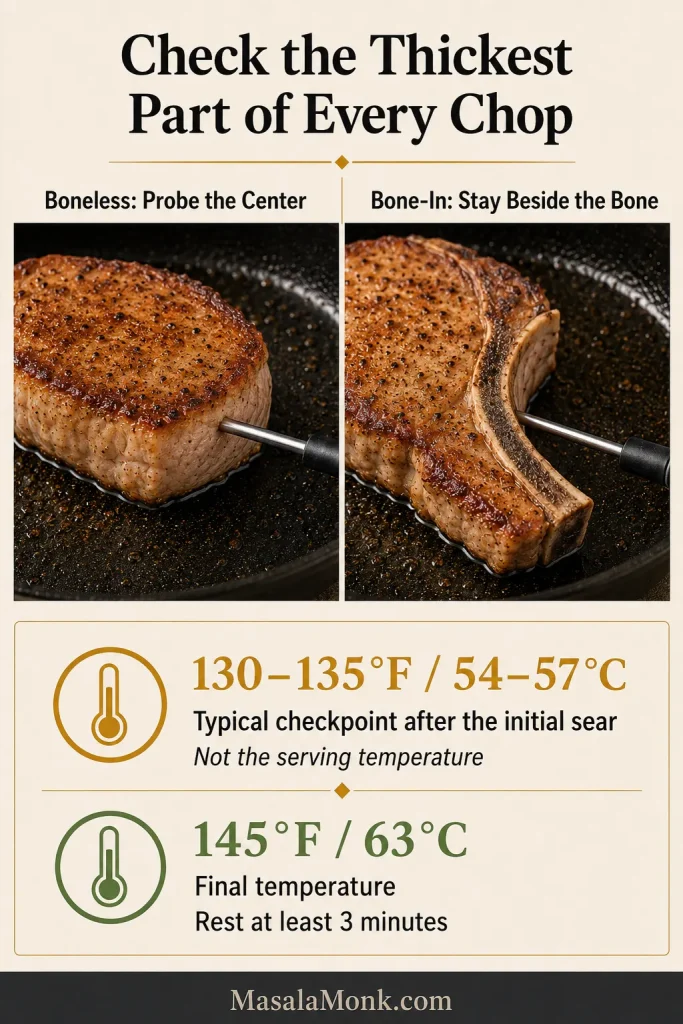
Turn, check, and remove. Cook the second side for about 2–3 minutes, checking early if the chops are thin. Remove each piece when it is roughly 10–15°F / 6–8°C below the final temperature—usually around 130–135°F / 54–57°C for standard chops. This is only an interim checkpoint, not the serving temperature.
Make the Glaze and Finish
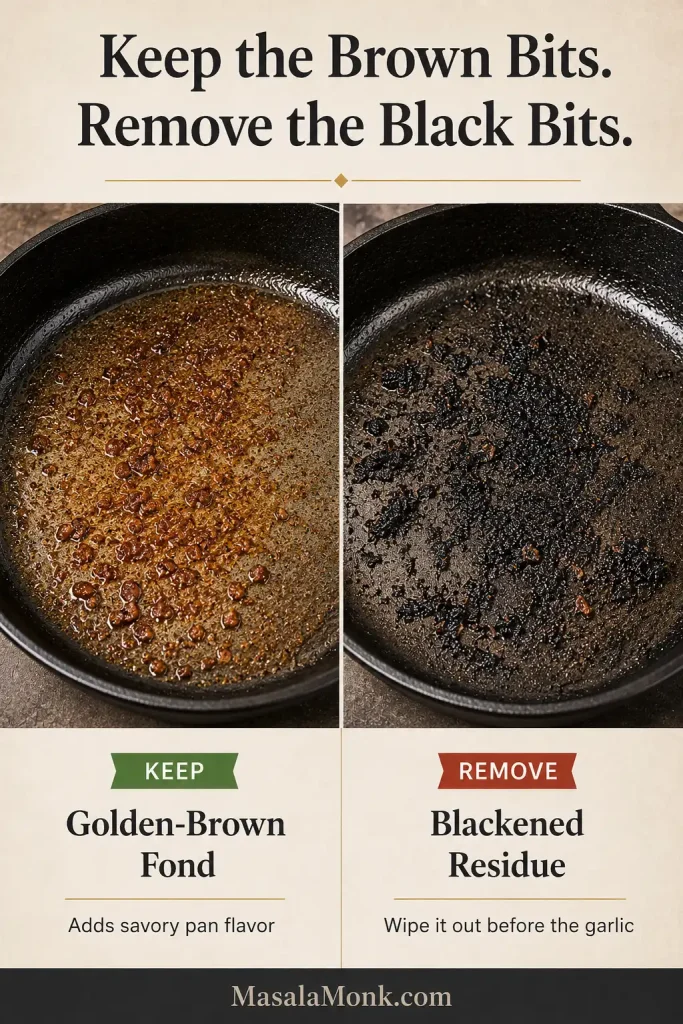
Lower the heat and check the skillet. Golden-brown residue adds flavor; black residue tastes bitter. Wipe out blackened bits, lower the heat to medium-low, and move the skillet off the burner briefly if it is still fiercely hot.
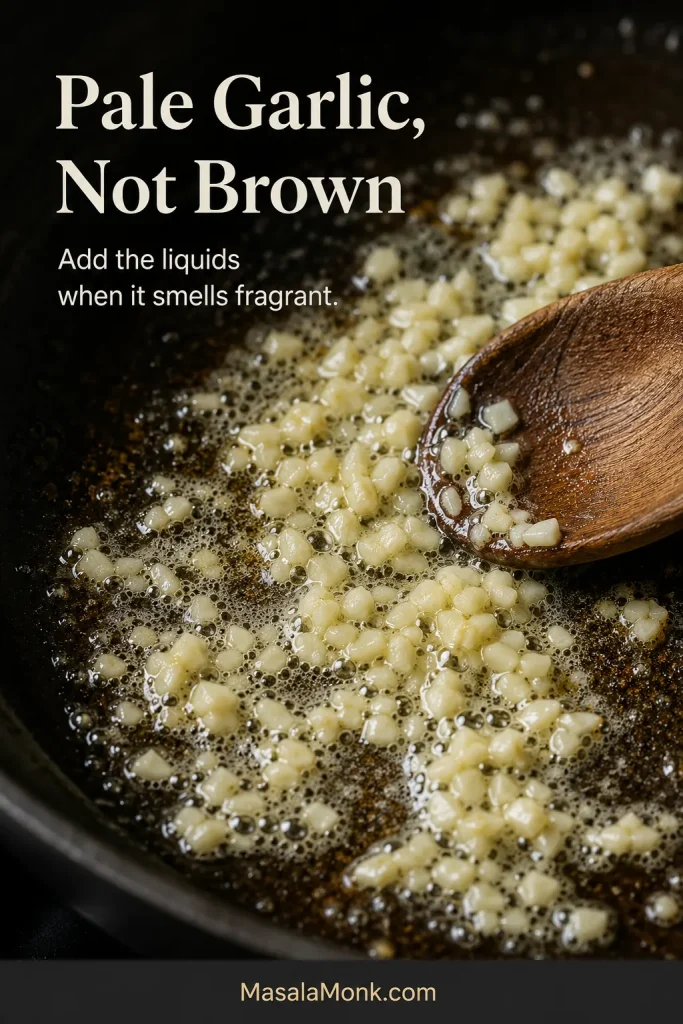
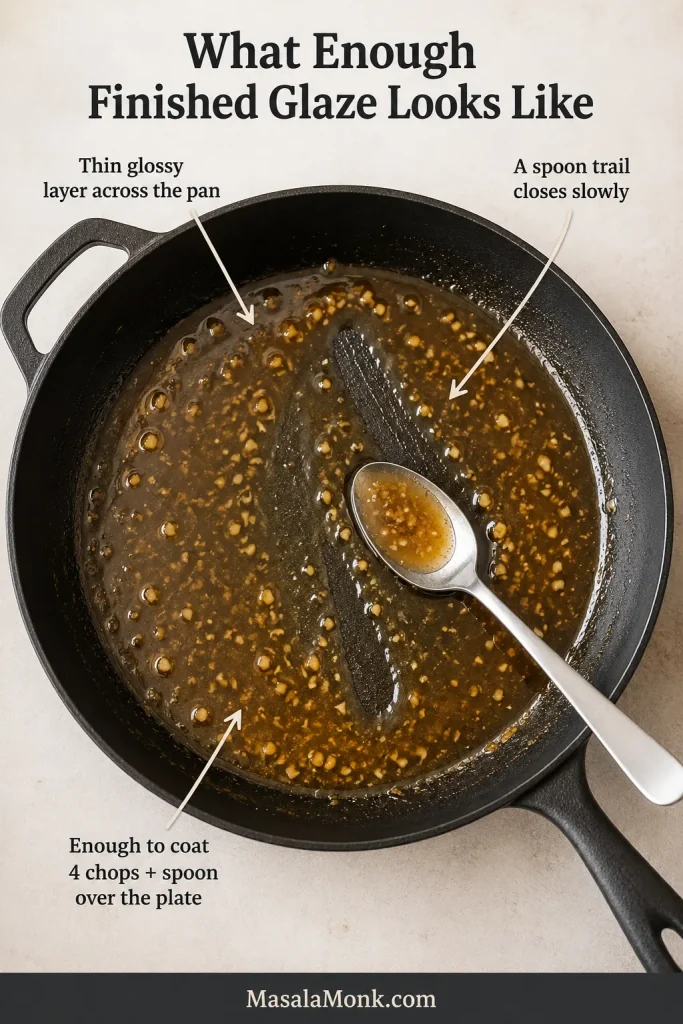
Make the pan sauce. Melt the butter and stir in the garlic for 20–30 seconds, keeping it pale. Pour in the honey mixture and scrape up the golden pan juices. Maintain a gentle, steady simmer until the bubbles tighten and the sauce leaves a brief trail behind the spoon, usually 4–6 minutes.
Glaze the pork. If the sauce remains watery, add half the cornstarch slurry and simmer for 20–30 seconds. Add more only if it still runs quickly from the spoon. Return the pork and any plate juices, turning each chop through the glaze only until its thickest part reaches 145°F / 63°C.
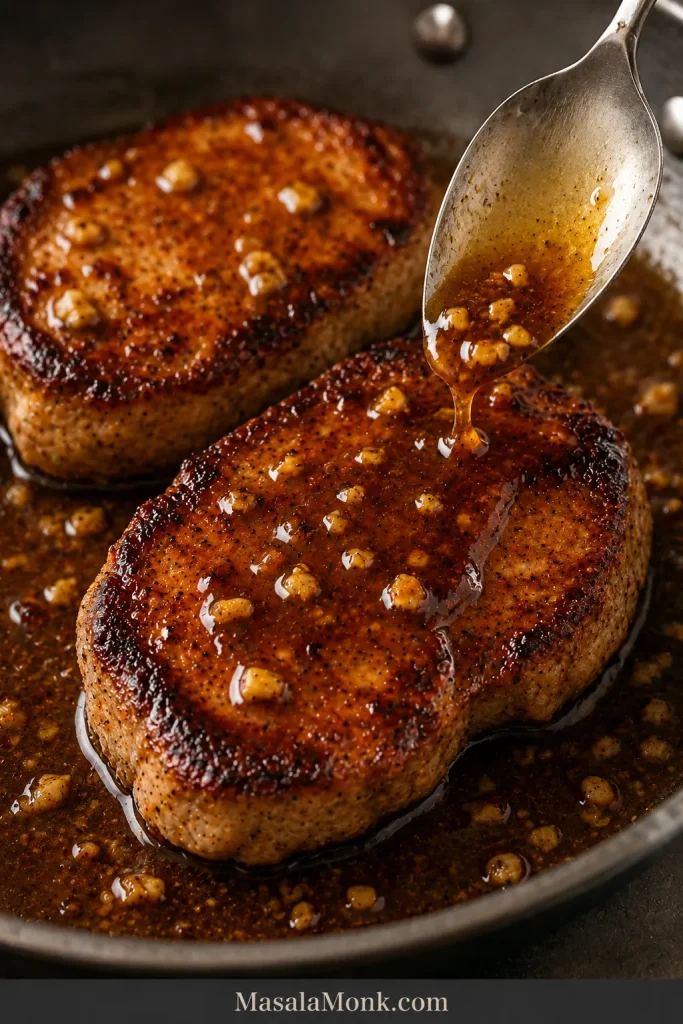
Rest and serve. Move the chops to a clean plate and rest for at least 3 minutes. Spoon over the glaze. If it tightens too much, loosen it with broth or water, 1 tablespoon / 15 ml at a time.
The thinnest chop is allowed to finish first. Dinner does not improve by making every piece wait for the slowest one.
Recipe Notes
Thin chops: Start checking after about 2 minutes on the first side and 1–2 minutes on the second.
Thick chops: Chops thicker than 1¼ inches / 32 mm are easier to finish in a 400°F / 200°C oven after searing.
Bone-in chops: Measure beside the bone without touching it.
Enhanced or pre-brined pork: Omit the added salt at first and adjust the finished sauce only after tasting.
Food safety: Whole pork chops should reach 145°F / 63°C and rest for at least 3 minutes.
Once the pork is browned and resting, the most time-sensitive part is over. The sauce can reduce without leaving the pork in the skillet long enough to dry out.
Why This Method Works
Removing the pork gives the skillet time to cool before the garlic goes in. The sauce can then reduce without overcooking the meat.
Heavy skillets retain heat after the burner is lowered. A brief pause off the heat can protect the butter and garlic before the sauce ingredients enter the pan.
Honey alone would taste sweet but flat. Soy sauce brings savory depth, broth loosens the browned pan juices and gives the sauce enough volume to reduce gradually, and vinegar keeps the final glaze bright. Fresh garlic leads the aroma, while garlic powder seasons the meat beneath the sauce.
Use oil for the hot sear, then add butter after the pan cools to soften and round out the sauce. Maple syrup can replace the honey for a softer maple-garlic variation, though the flavor and final texture will be different.
Choose Your Pork Chops by Thickness
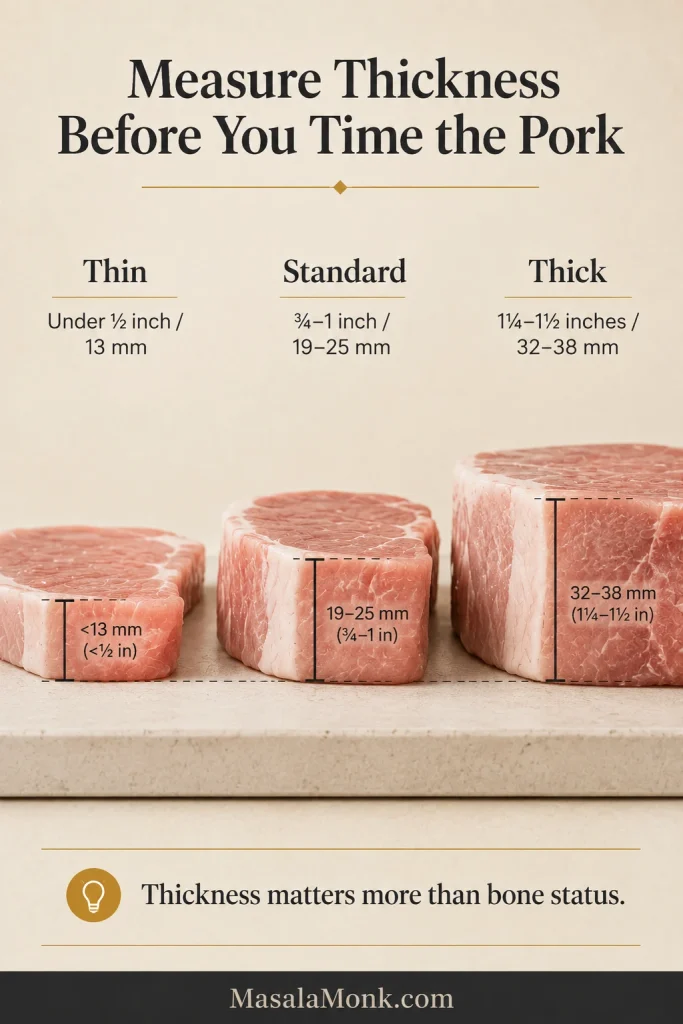
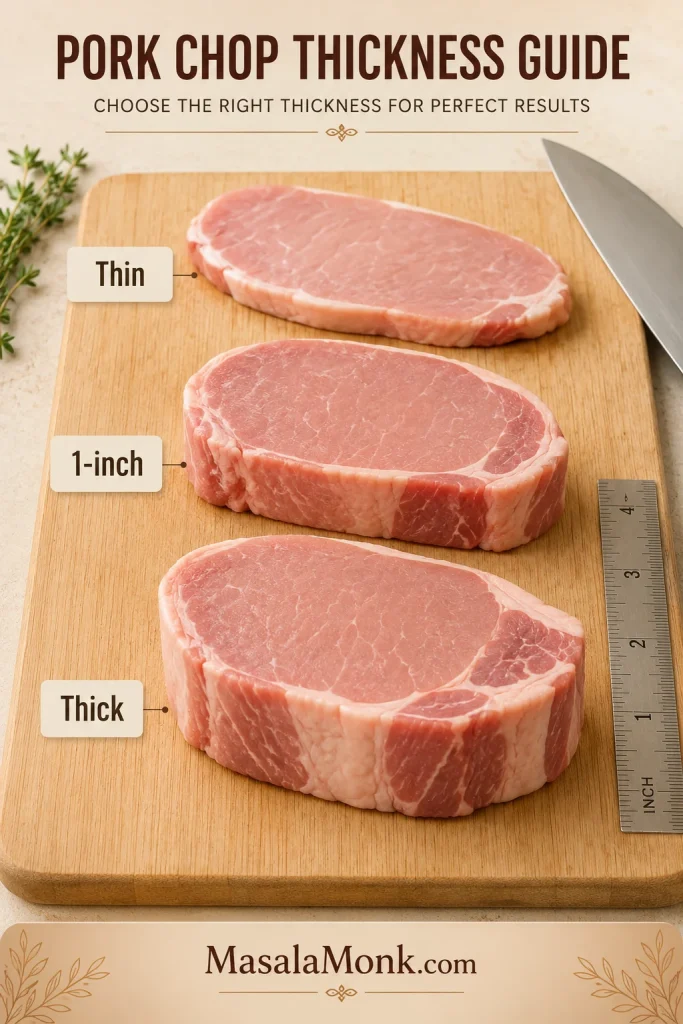
Thickness matters more than bone status. Use the package measurement as a starting point, then let the thermometer decide when each chop leaves the heat.
Sort the chops by thickness before cooking and remember where each one sits in the skillet. That makes it easier to check and remove the thinnest piece first.
Thickness
How to cook it
When to begin checking
Under ½ inch / 13 mm
Brief skillet sear; glaze off the heat if already done
After about 2 minutes on the first side
¾–1 inch / 19–25 mm
Use the main skillet method
During the second side
1¼–1½ inches / 32–38 mm
Sear, then finish in the oven
About 4 minutes after entering the oven
Boneless chops are often more uniform and may cook a little faster. Bone-in chops can be more forgiving, but place the thermometer beside the bone without touching it. Brown the batch together, then let every chop finish on its own time.
Check every chop individually rather than treating the skillet as one piece of meat; shape, thickness and pan position can produce different temperatures within the same batch.
Different cut? Pork tenderloin needs its own oven method; its long, narrow shape cooks differently from individual chops.
Read the Skillet: Golden Pork, Pale Garlic, Small Bubbles
Those three cues tell you more than the clock. They show when the pork has browned, when the pan is cool enough for garlic, and when the loose sauce is becoming a glaze.
Build the Sear
Listen after the pork enters the pan: a clear searing sound is useful, but a weak watery hiss often means surface moisture or crowding is slowing the browning.
Golden pork: Dry chops brown faster. Give them space and leave the first side alone until a real crust forms; in cast iron or stainless steel, the meat often releases more easily at that point.
Do not wait for perfectly uniform color. A real skillet crust usually combines deep-golden areas with a few darker caramelized patches and naturally lighter edges.
After the pork leaves the skillet, inspect what remains before building the sauce. Golden-brown fond can enrich the glaze, while genuinely black residue should be wiped away so it does not add bitterness.
Keep caramel-brown fond; wipe away genuinely black flakes before adding the sauce.
Control the Garlic and Glaze
Pale garlic: Let the skillet settle before the butter and garlic go in. Add the liquid when the garlic smells warm and savory but still looks pale.
Use aroma as the first signal: once the garlic loses its raw sharpness and smells warm and savory, the liquids can go in before the color changes.
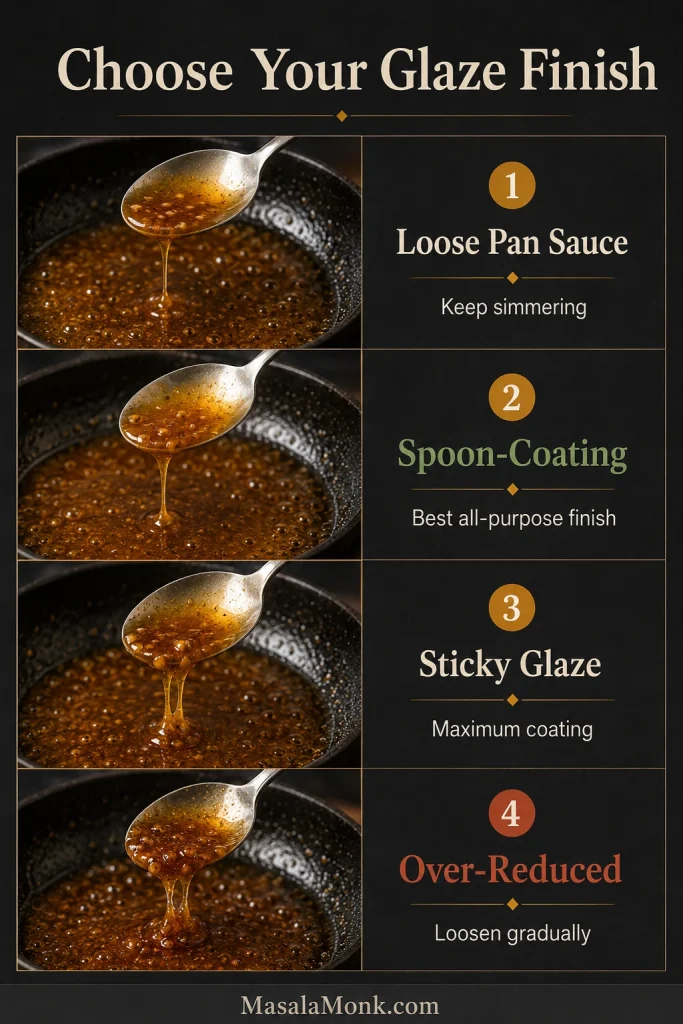
Small steady bubbles: The sauce begins loose with large bubbles. As water evaporates, the bubbles become smaller, the surface turns shiny, and a spoon leaves a short trail through the pan. When that happens, the glaze is ready to settle over the pork and whatever you have waiting underneath.
Stage
What it looks like
Best use
Loose pan sauce
Runs quickly from a spoon
Keep simmering, or use extra over rice
Spoon-coating sauce
Clings, then slides slowly
Best all-purpose finish
Sticky glaze
Holds firmly to the chops
Maximum coating on the pork
Over-reduced
Dense, tacky, or stringy
Loosen with broth or water
Choose the finish for the meal: spoon-coating sauce spreads well over rice or potatoes, while a stickier glaze keeps more flavor concentrated on the pork.
Honey tightens as it cools, so give the glaze the three-minute rest before deciding it needs more thickening. Cornstarch is optional; natural reduction is usually enough when the sauce simmers steadily. Once the glaze turns shiny, there is very little left to manage—coat the chops, let them rest, and bring the plate together.
Tilt the skillet once to judge the quantity. A finished glaze should move as a shallow glossy sheet rather than collect like a deep pool in the center.
What to Expect from the Finished Dish
Expect garlic and savory pan juices first, with honey softening the edges and vinegar keeping the finish clean. The glaze clings to the browned pork but stays loose enough to spoon over the plate.
Turn each chop through the sauce once, then spoon glaze over the top. Prolonged bubbling after the pork returns adds more heat than useful flavor.
Should You Marinate the Pork?
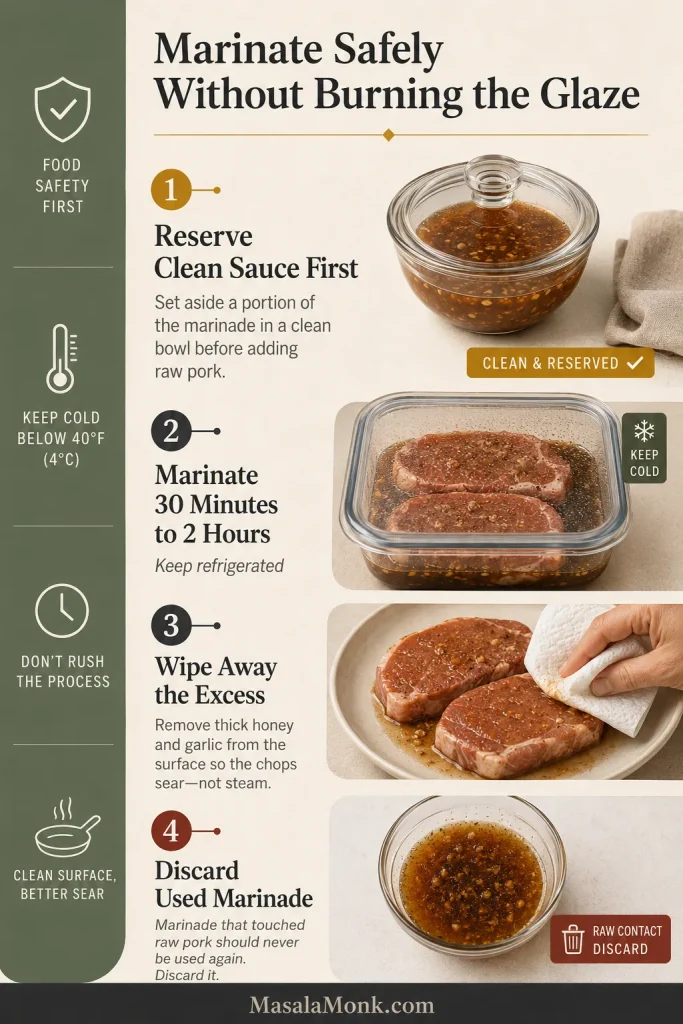
You can, but the main method is easier to control. Honey and chopped garlic left on the surface can darken quickly during the sear. To marinate, reserve a clean portion of sauce, refrigerate the pork for 30 minutes to 2 hours, wipe away excess marinade before cooking, and discard anything that touched raw meat.
Marinating changes the surface flavor, but it does not guarantee juicy pork. Thickness, internal temperature and timely removal from the heat still control the final texture.
Other Ways to Cook Honey Garlic Pork Chops
The skillet method gives the best control over browning and reduction. The same flavor still works in the oven, air fryer, and on the grill as long as the glaze arrives late.
For honey garlic pork chops, choose by batch and cut: skillet for control, oven for thick pieces, air fryer for two or three chops, and grill when smoky flavor matters most.
Baked Honey Garlic Pork Chops
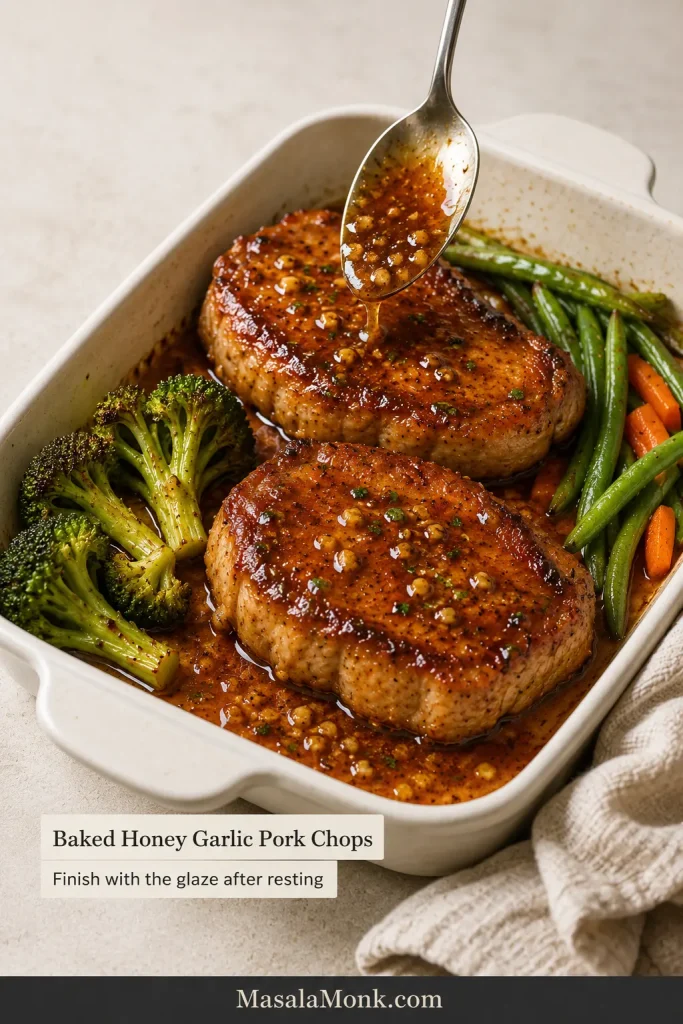
Heat the oven to 400°F / 200°C. Sear thick chops for about 2–3 minutes per side, then move them to a small baking dish or sheet pan. Use the skillet to make the pan sauce while the pork finishes in the oven.
Begin checking the chops after about 4 minutes and remove each one at 145°F / 63°C. Rest for at least 3 minutes, then spoon on the glaze off the heat so the pork stays juicy.
Move thick chops to the oven when the crust is ready but the center still needs time. The gentler finish prevents the exterior from becoming too dark.
Oven-only option: Bake seasoned chops at 375°F / 190°C until they reach 145°F / 63°C. Make the sauce separately in a small saucepan and glaze the rested pork.
Air Fryer Honey Garlic Pork Chops
Air fry the seasoned pork first and make the sauce separately. Boneless chops around ¾–1 inch commonly take about 8–12 minutes at 380°F / 190°C, turning halfway; begin checking early because models vary. Remove each chop at 145°F / 63°C, rest for at least 3 minutes, then brush on the glaze. This air fryer timing guide handles thin and thick boneless chops separately.
Basket space matters more than squeezing in an extra portion. Two well-separated chops usually brown better than four crowded pieces surrounded by trapped moisture.
Grilled Honey Garlic Pork Chops
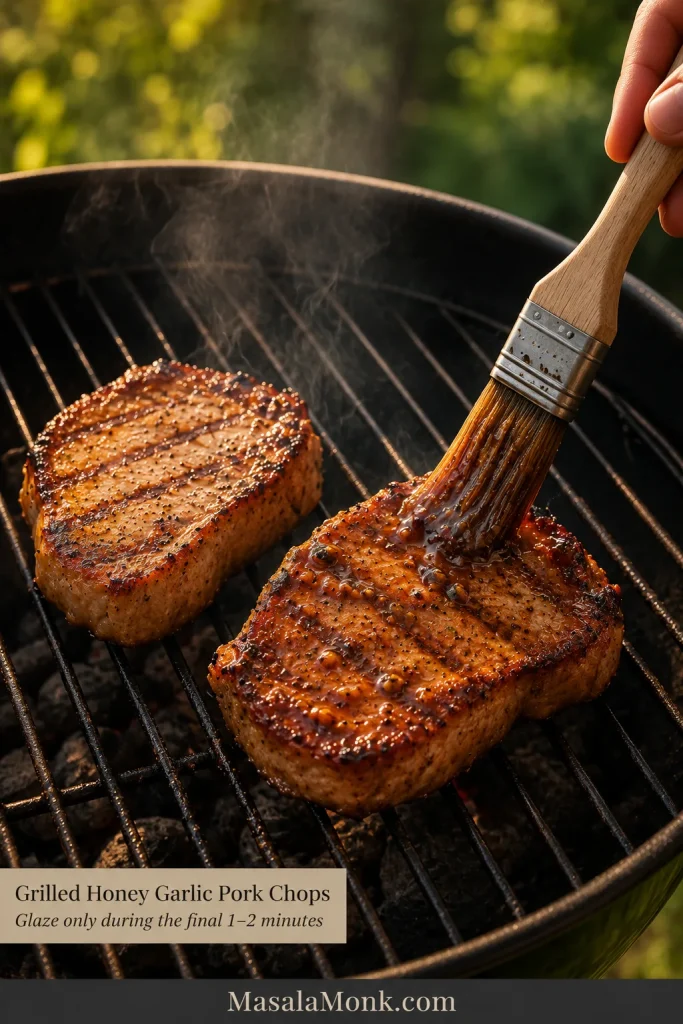
Heat the grill to about 400–450°F / 200–230°C. Grill 1-inch chops for roughly 4–5 minutes per side, but begin checking before the full time because thickness and temperature override the clock. Remove each chop at 145°F / 63°C, rest for at least 3 minutes, and brush on the glaze only during the final 1–2 minutes or after cooking.
Set up a cooler section of the grill before cooking. If the honey causes a flare-up, move the pork away from direct heat instead of letting the glaze burn.
About the slow cooker: This skillet glaze does not convert directly because trapped moisture keeps it thin and lean chops can dry out over several hours. A slow-cooker version needs different liquid proportions and its own timing.
Honey Garlic Pork Chop Variations
Change one direction at a time before combining variations: acidity sharpens, chili contrasts, ginger brightens, mushrooms deepen, and smaller pork pieces alter the cooking speed.
Dijon: Whisk in 1–2 teaspoons. One teaspoon quietly sharpens the sweetness; two makes mustard more prominent.
Spicy: Add ½ teaspoon red-pepper flakes, 1–2 teaspoons sriracha, chili-garlic sauce, or a thinly sliced fresh chili.
Ginger: Stir 1 tablespoon finely grated fresh ginger in with the garlic.
Mushrooms: Brown 8 oz / 225 g sliced mushrooms after removing the pork. Let their moisture evaporate before adding the butter and garlic.
Pork bites: Cut boneless pork into even pieces and sear in batches. The smaller pieces cook much faster than chops.
Gluten-free: Use certified gluten-free tamari and check that the broth is labeled gluten-free.
Soy-free: Use verified soy-free broth in place of the soy sauce, then season the reduced sauce gradually. Suitable coconut aminos can also work but are usually sweeter.
Cooking more chops: Brown them in batches and reduce the sauce before returning the pork.
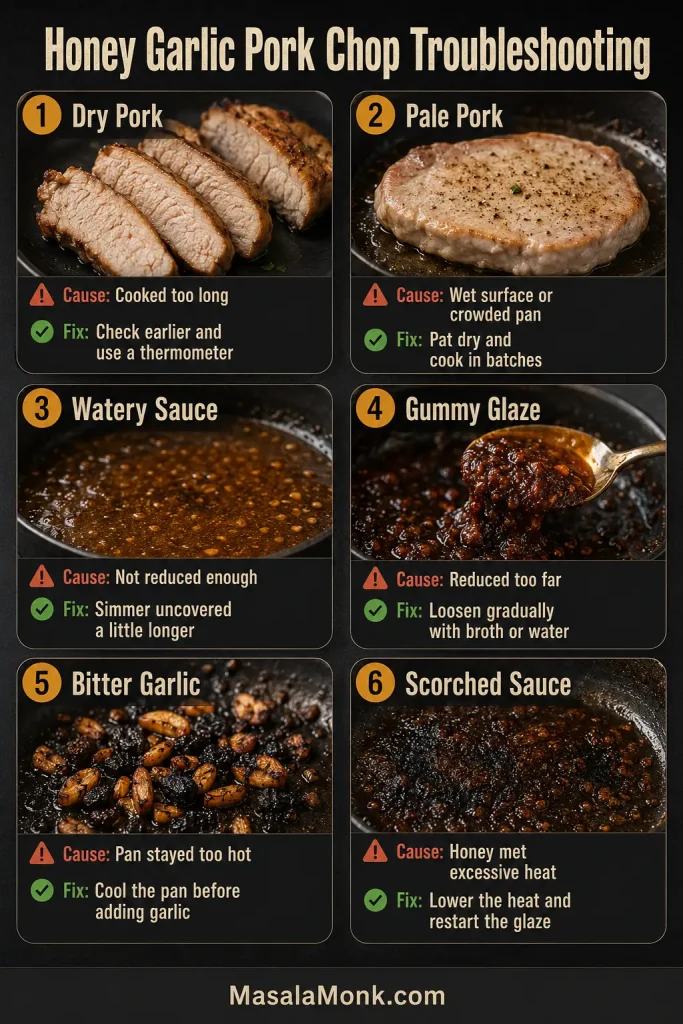
If dinner is already in the skillet, most problems are still fixable. First decide whether the pork or the sauce needs attention.
When honey garlic pork chops need rescuing, remove the meat first and troubleshoot the sauce separately. Cooked pork should not remain in the skillet while the glaze is corrected.
Pork Problems
Problem
Likely reason
What to do
Pork is dry
Thin chops or too much finishing time
Check earlier and remove each piece as soon as it reaches 145°F / 63°C
Pork is pale
Wet surface or crowded skillet
Pat it dry and brown in batches
Chops finish unevenly
Different thicknesses
Remove each chop individually instead of waiting for the batch
Sauce and Glaze Problems
Problem
Likely reason
What to do
Sauce is watery
Not enough reduction or extra pork juices
Remove the pork and simmer the sauce alone
Glaze is too thick
Reduced too far or cooled
Add broth or water 1 tablespoon at a time
Glaze is too sweet
Not enough acid
Add vinegar ½ teaspoon at a time
Glaze is too salty
Regular soy sauce or heavy reduction
Add low-sodium broth and a little honey
Glaze is gummy
Too much cornstarch
Whisk in broth gradually and simmer gently
Garlic tastes bitter
It browned too far
Remake the sauce in a cooler skillet
Sauce tastes scorched
The skillet or residue was too dark
Clean the pan and restart over gentler heat
Glaze slides off
It is still too thin
Reduce it separately before coating the pork
A thick glaze can be loosened; a scorched sauce cannot be hidden. If the pork is cooked and the sauce is not scorched, the dish is usually recoverable: broth loosens, honey softens a sharp edge, and vinegar restores brightness.
Build the Plate
Give the glaze something soft to soak into and something green or crisp on the side.
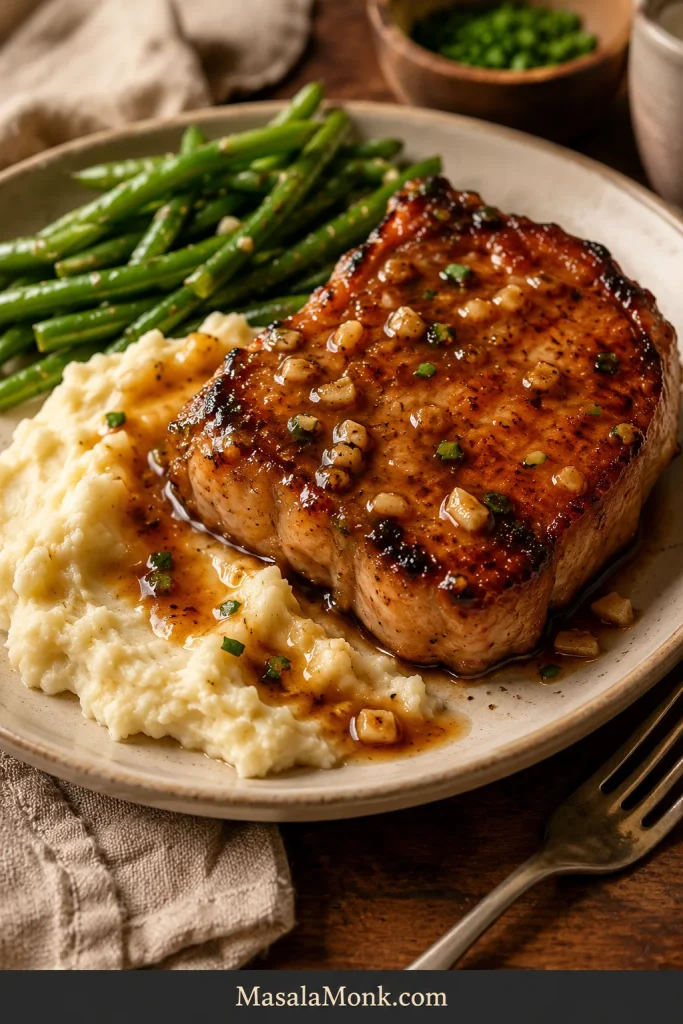
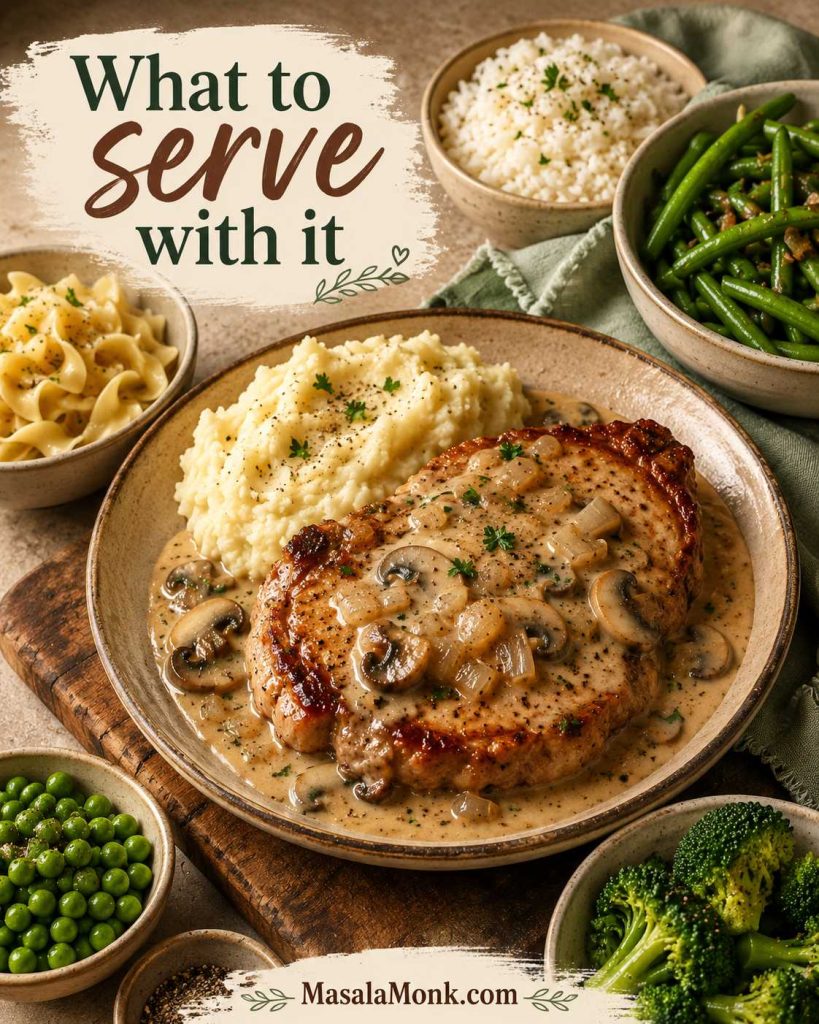
For the coziest plate, spoon the chops and glaze over garlic mashed potatoes and add green beans or broccoli.
Spoon most of the glaze beside the pork rather than covering every browned edge. The potatoes will catch the runoff while the crust keeps its texture.
For a lighter bowl, serve the pork over rice with cucumber salad, cabbage, or sugar snap peas.
Use cool, undressed vegetables beside the warm pork for stronger contrast. Add the glaze mainly to the meat and rice so the cabbage and cucumber stay crisp.
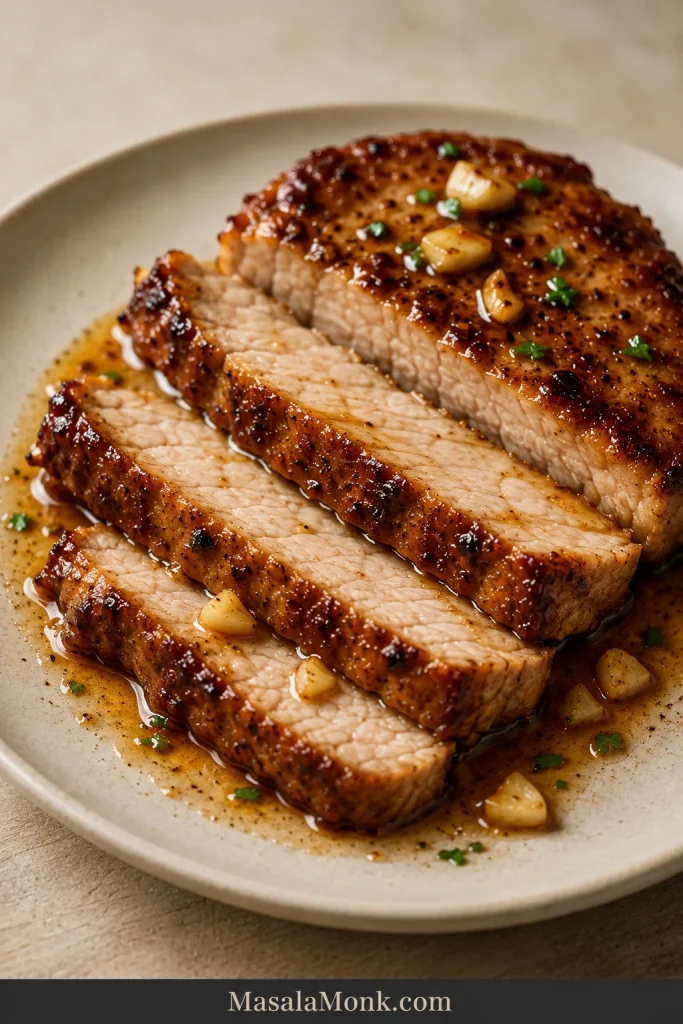
Slice the pork before adding the final spoonful of glaze so some of it catches along the freshly cut edges. Buttered noodles, soft polenta, roasted potatoes, slaw, corn, or a make-ahead potato salad can round out the plate.
Keep the serving slices reasonably thick. Thin decorative slices cool quickly and expose more surface area, whereas substantial pieces retain warmth and moisture longer.
Want a richer comfort-food direction? Smothered pork chops replace the sticky glaze with a deep onion gravy.
Storage, Reheating, and Leftovers
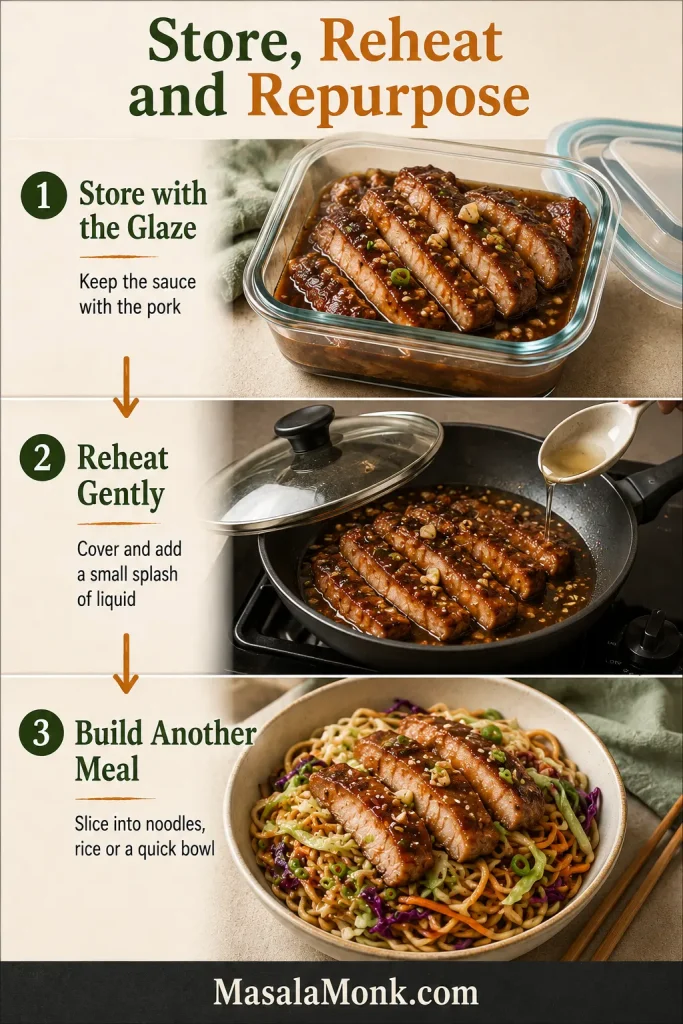
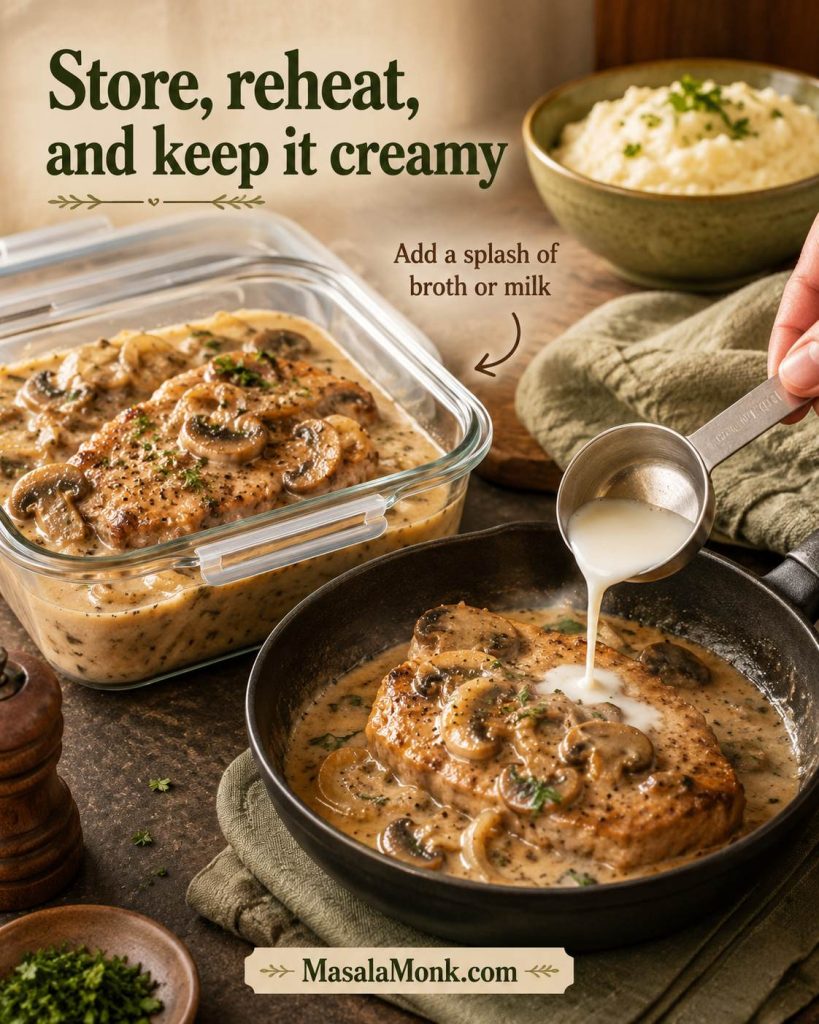
Keep the pork and glaze together so every piece has some moisture around it. That small amount of sauce makes reheating much kinder to a lean chop.
Portion leftover honey garlic pork chops before reheating so only the amount being served is warmed. Repeated heating is more likely to dry out the lean meat.
Refrigerate: Cool the pork and sauce, then store them in a covered container within 2 hours. FoodSafety.gov recommends using cooked leftovers within 3–4 days.
Freeze: Freeze individual portions with some glaze in tightly closed containers. The pork may feel slightly firmer after reheating, but the sauce helps protect it from drying out.
Reheat: Warm the pork and glaze in a covered skillet over low heat with 1–2 tablespoons / 15–30 ml broth or water until the leftovers reach 165°F / 74°C. In the microwave, use reduced power and short intervals.
Use leftovers in: rice bowls, noodles, wraps, chopped salads, fried rice, or a quick vegetable stir-fry. Slice the pork while cold and fold it into the new dish near the end.
Regular soy sauce works, but start with 2 tablespoons instead of 3 because it becomes saltier as the sauce reduces. Add more only after tasting.
Can I Make the Sauce Ahead?
Prepare the honey, soy sauce, broth, vinegar, and red-pepper flakes up to 2 days ahead and refrigerate. Keep the garlic separate so its flavor stays fresher.
Can I Make Extra Sauce?
For extra sauce, use 1½ to 2 times the listed quantities, depending on how much you want for rice or vegetables. Reduce the larger batch before returning the pork so the chops do not overcook.
Can I Start with Frozen Pork Chops?
Thawing first gives better browning and more predictable timing. Frozen pork releases water, weakens the sear, and dilutes the sauce. Thaw safely in the refrigerator and dry thoroughly.
Brown First, Glaze Last
Brown the pork while the skillet is hot, then make the sauce after the heat comes down. The edges stay golden, the center stays juicy, and the glaze tastes balanced instead of merely sweet.
It still feels like a proper plated dinner, even though the whole thing came from one skillet on an ordinary evening. Keep the glaze spoonable or reduce it until it clings to every bite—the method works either way.
If you make it, tell us what kind of chops you used—thin, thick, bone-in, or boneless—and whether you kept the glaze glossy or took it all the way to sticky.
Dry pork chops are usually not a pork chop problem — they are a timing problem. Air fryers cook lean pork quickly, which is great for dinner, but it also means a thin or boneless chop can turn tough if it stays in the basket just a little too long.
If you have ever pulled pork chops out of the air fryer looking perfect on the outside but tight and dry inside, the fix is usually not a complicated marinade. It is better timing, enough space, and knowing when to stop.
This recipe is built around a no-dry timing guide, so you can match the method to the pork chop you actually bought — boneless, bone-in, thin, thick, breaded, frozen, or air fryer oven-style.
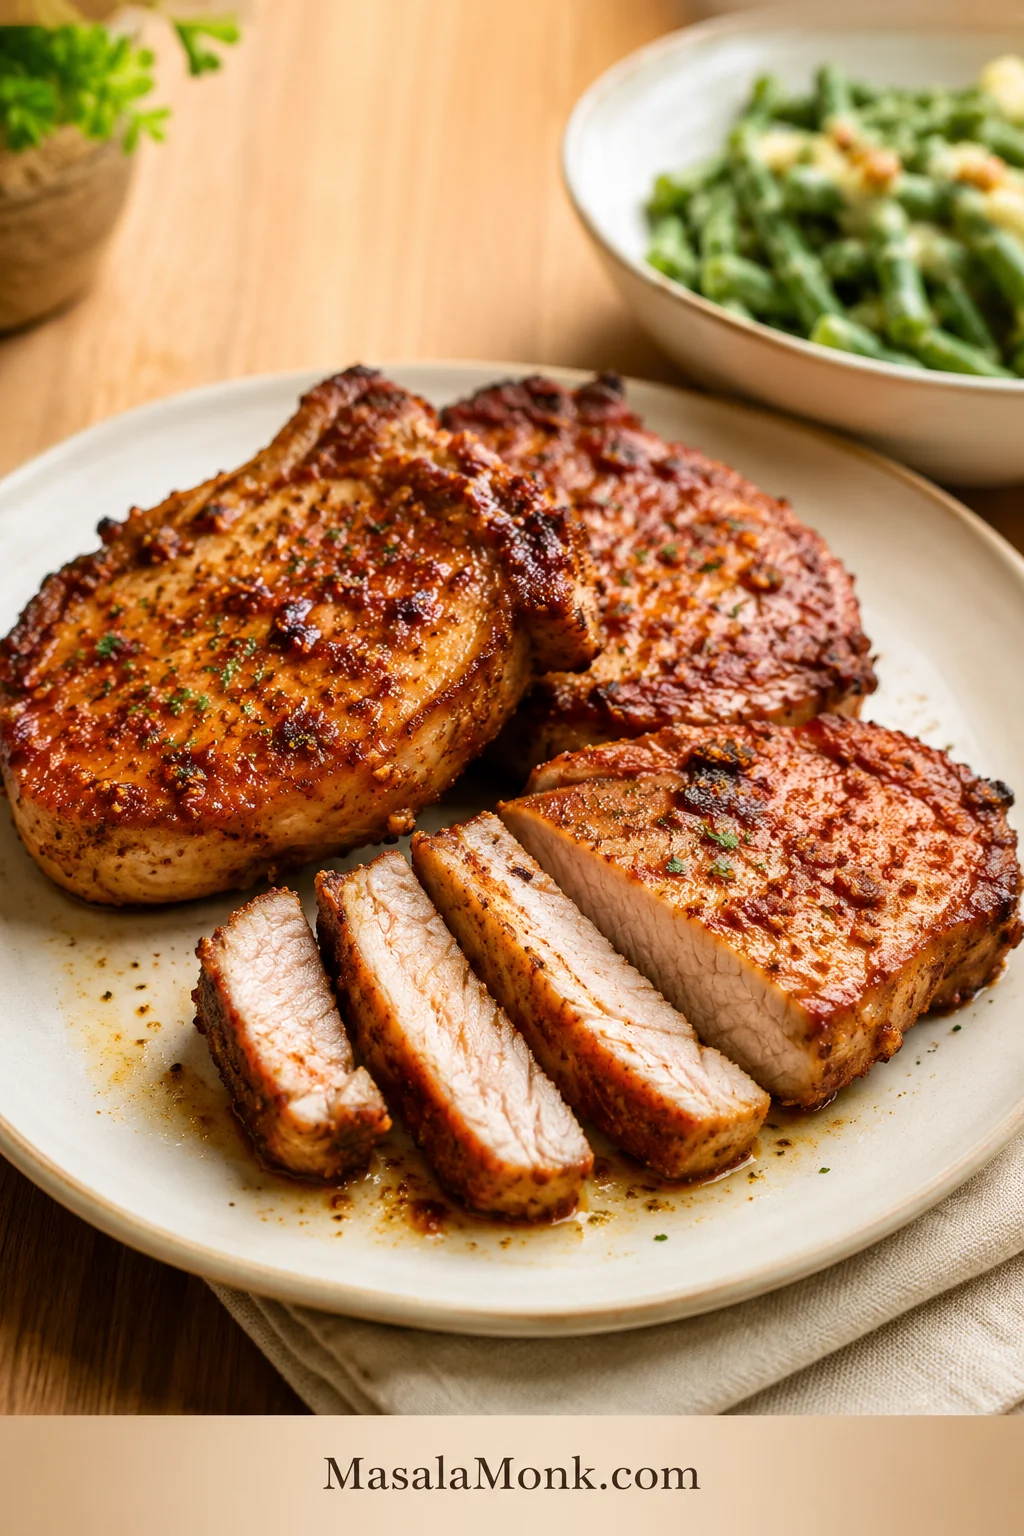
When it works, the edges are browned, the paprika-garlic rub smells warm and smoky, and the inside stays tender enough to slice cleanly without losing all its juices. The timer gives you a starting point; the thermometer gives you the answer.
Quick Time and Temperature Answer
For most 1-inch boneless pork chops, air fry at 380°F / 193°C for 10 to 12 minutes, flipping halfway, until the center reaches 145°F / 63°C. Rest for 3 to 5 minutes before slicing. Use 390°F to 400°F / 199°C to 204°C for breaded chops or crispier edges, and start checking earlier for thin chops.
Many recipes use 400°F, and that can work. This recipe uses 380°F as the default because it gives lean pork a little more time to cook through before the outside tightens up.
Quick No-Breading Recipe for 1-Inch Boneless Chops
Need dinner moving now? This is the fast path for the most common version: 1-inch boneless pork chops with no breading.
For 1-inch boneless air fryer pork chops, this is the simplest starting point: season, arrange, cook, and check the center. Then adjust the timing if your chops are thin, thick, bone-in, breaded, or frozen.
Preheat the air fryer to 380°F / 193°C for 3 to 5 minutes.
Pat dry 4 pork chops, about 6 oz / 170 g each.
Rub with oil: use 1½ tbsp / 22 ml olive oil or avocado oil.
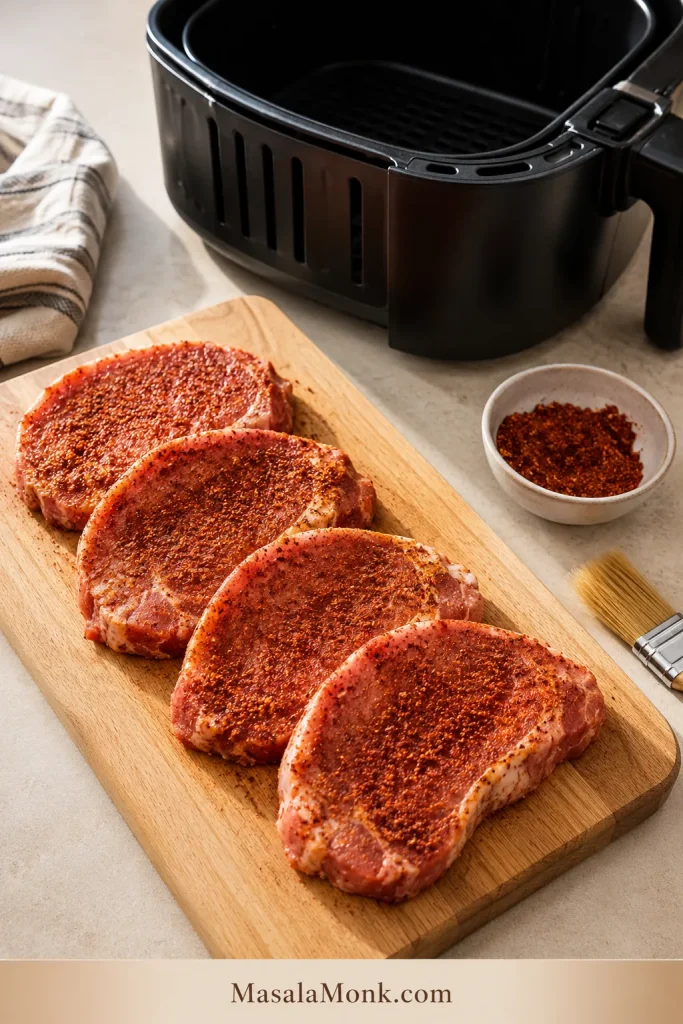
Season with 2 tsp smoked paprika, 1 tsp garlic powder, ½ tsp onion powder, 1 tsp fine salt, ½ tsp black pepper, ½ tsp thyme, Italian seasoning, or ground mustard, and 1 tbsp brown sugar if you want a lightly caramelized edge.
Air fry in a single layer for 10 to 12 minutes, flipping halfway.
Remove when the center reaches 145°F / 63°C.
Rest loosely for 3 to 5 minutes, then serve.
The goal is not a perfect-looking chop that eats dry. What you want is pork that still feels tender when you cut into it.
Once you have made this basic version once, the rest is just adjusting for the chop in front of you: thinner, thicker, bone-in, breaded, or frozen.
If your chops are thinner, thicker, bone-in, breaded, or still frozen, do not force the 10 to 12 minute timing. Use the air fryer pork chops time and temperature chart and start checking early.
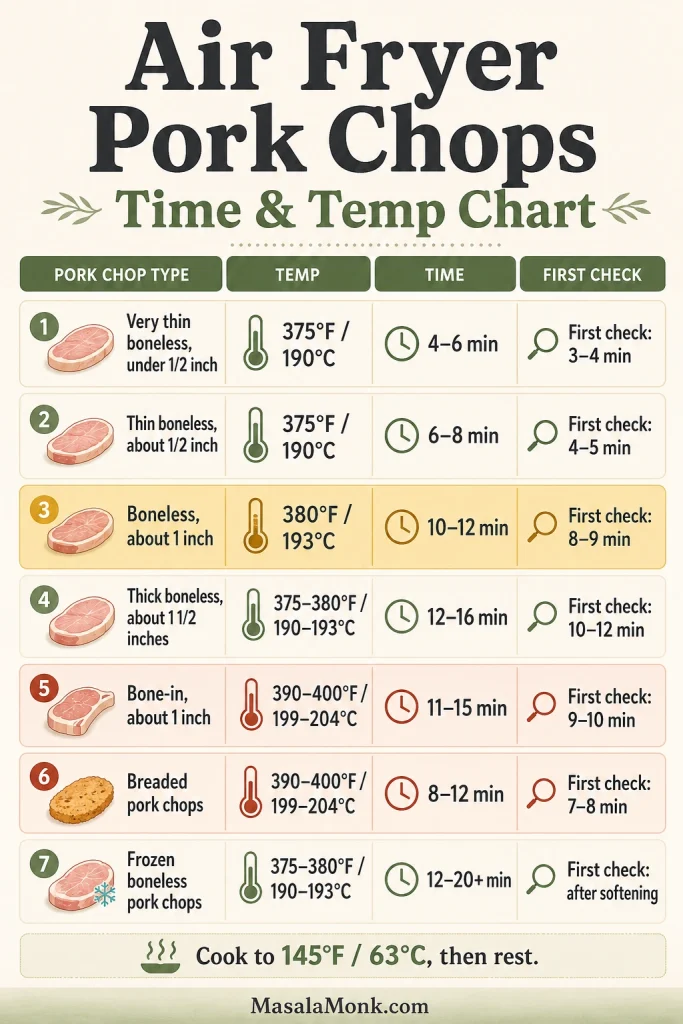
Air Fryer Pork Chops Time and Temperature Chart
Use this chart when your pork chops are not the exact 1-inch boneless chops in the quick recipe. Pick the row closest to your chop thickness. The “first check” column tells you when to start checking so you can stop before lean pork overcooks.
Timing by Pork Chop Type
Pork Chop Type
Air Fryer Temp
Cook Time
First Check
Best Note
Very thin boneless, under ½ inch / 1.25 cm
375°F / 190°C
4–6 minutes
3–4 minutes
Fast cook; stay close.
Thin boneless, about ½ inch / 1.25 cm
375°F / 190°C
6–8 minutes
4–5 minutes
Do not use thick-chop timing.
Boneless, about ¾ inch / 2 cm
380°F / 193°C
8–10 minutes
6–7 minutes
Good everyday size.
Boneless, about 1 inch / 2.5 cm
380°F / 193°C
10–12 minutes
8–9 minutes
Best default for this recipe.
Thick boneless, about 1½ inches / 4 cm
375–380°F / 190–193°C
12–16 minutes
10–12 minutes
Use patience, not high heat.
Bone-in, about 1 inch / 2.5 cm
390–400°F / 199–204°C
11–15 minutes
9–10 minutes
Check the meat near the bone.
Bone-in, about 1½ inches / 4 cm
380–400°F / 193–204°C
14–18 minutes
12–14 minutes
Rest well before slicing.
Breaded pork chops
390–400°F / 199–204°C
8–12 minutes
7–8 minutes
Spray dry spots with oil.
Shake and Bake pork chops
390–400°F / 199–204°C
8–12 minutes
7–8 minutes
Single layer matters.
Frozen boneless pork chops
375–380°F / 190–193°C
12–20+ minutes
After softening, then often
Season after the surface softens.
Reheating cooked pork chops
350°F / 175°C
3–5 minutes
3 minutes
Warm gently.
Use this air fryer pork chops time and temperature chart as a starting range, not a strict countdown. The first-check column matters because lean pork can move from tender to overdone quickly.
Why Thin and Thick Pork Chops Need Different Timing
Before choosing a cook time, look at thickness first. Thin pork chops can finish quickly even without deep browning, while thick chops need enough time for the center to cook through gently.
In plain terms: thin chops need speed, thick chops need patience, breaded chops need oil-kissed crumbs, and frozen chops need the thermometer more than the timer.
These are ranges, not promises. Air fryer model, chop thickness, bone, breading, and basket crowding all change the final time. For safe, juicy pork chops, the important number is 145°F / 63°C with at least a 3-minute rest. If you are deciding between 375°F, 380°F, and 400°F, use the temperature comparison next.
Air Fryer Pork Chops at 375°F, 380°F, or 400°F
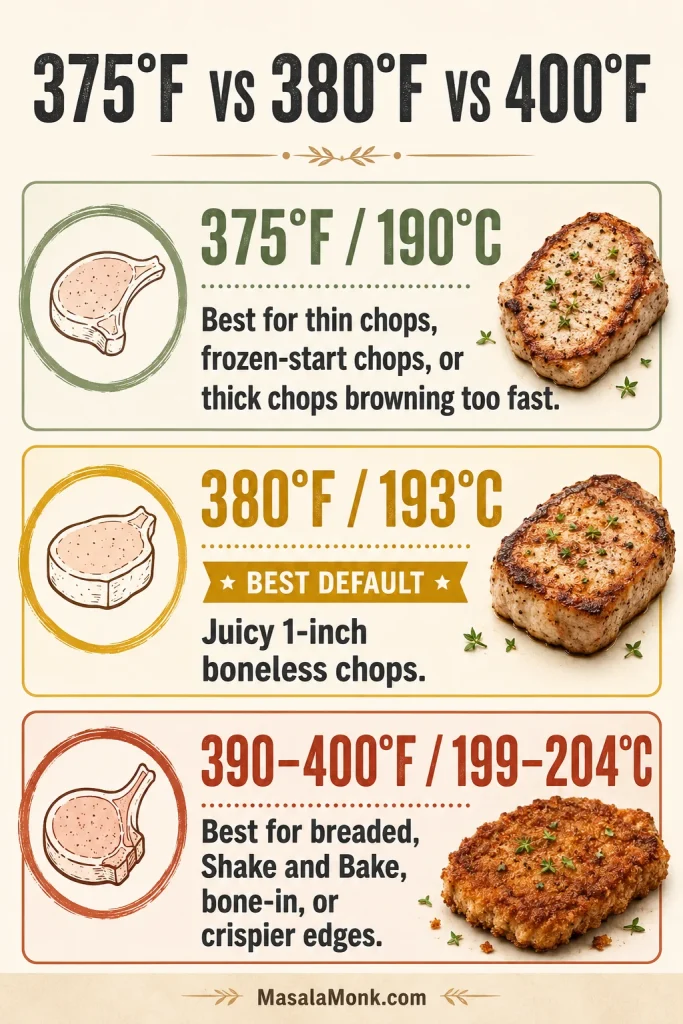
The temperature question matters because lean pork can move from juicy to tough quickly. Use lower heat when you need control, and higher heat when you want crisping.
Choosing 375°F, 380°F, or 400°F
Temperature should match the job. Use 375°F for control, 380°F for everyday boneless pork chops, and 390–400°F when breading, Shake and Bake, or stronger browning needs extra heat.
Temperature
Best For
Watch Out For
375°F / 190°C
Thin chops, frozen-start chops, thick chops that are browning too fast
Slower browning
380°F / 193°C
Default juicy boneless chops, especially around 1 inch thick
Less aggressive crisping than 400°F
390–400°F / 199–204°C
Breaded chops, Shake and Bake, bone-in chops, crispier edges
Lean boneless chops can overcook faster
For most people making plain boneless chops tonight, 380°F is the easiest place to start. Move hotter when you want crisp coating, stronger browning, or a bone-in chop that needs more edge color; for coating-specific guidance, jump to the breaded pork chops section.
If the pork reaches 145°F earlier than the chart says, take it out. The timer is not the goal; juicy pork is.
Best Pork Chops to Use
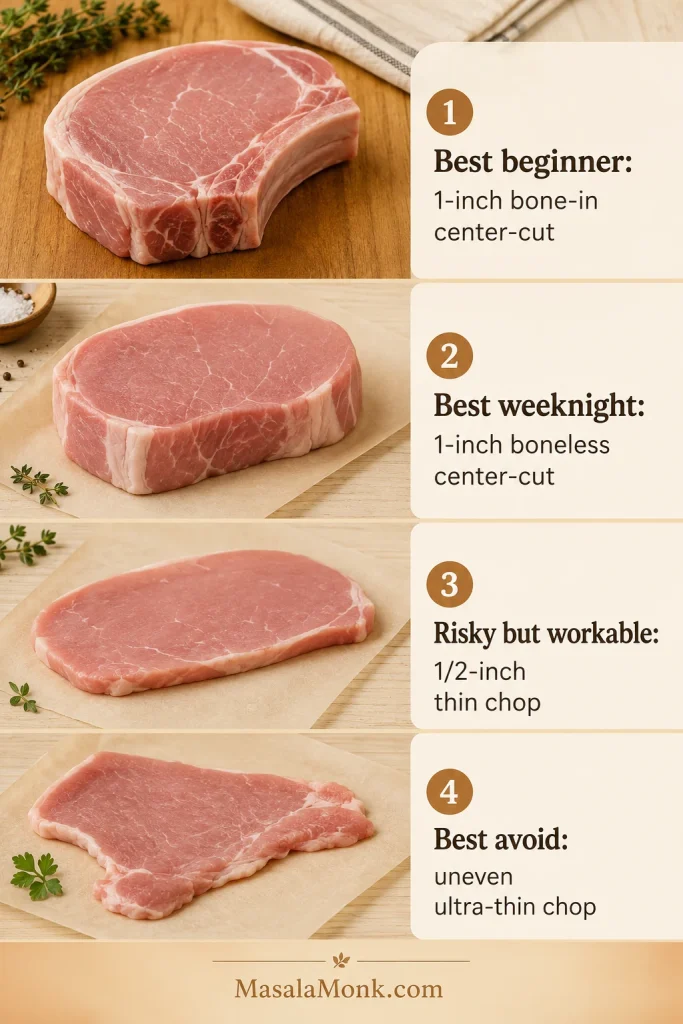
The right chop gives you more forgiveness before you even start cooking. If you are standing at the store, choose chops that are evenly thick, not paper-thin on one end and thick on the other.
The best pork chops for the air fryer are evenly thick because they cook more predictably from edge to center. If the chop is very thin or uneven, start checking earlier than the timer suggests.
Choice
Best For
Why It Works
Best beginner choice
1-inch bone-in center-cut chops
Juicier and more forgiving.
Best weeknight choice
1-inch boneless center-cut chops
Fast, easy, and reliable with the chart.
Best crispy option
1-inch boneless or bone-in chops with breading
Enough thickness to cook through while the coating browns.
Risky but workable
½-inch thin chops or cutlets
Fast dinner, but they need early checking.
Best to avoid
Uneven ultra-thin chops
One part dries out before the thicker part finishes.
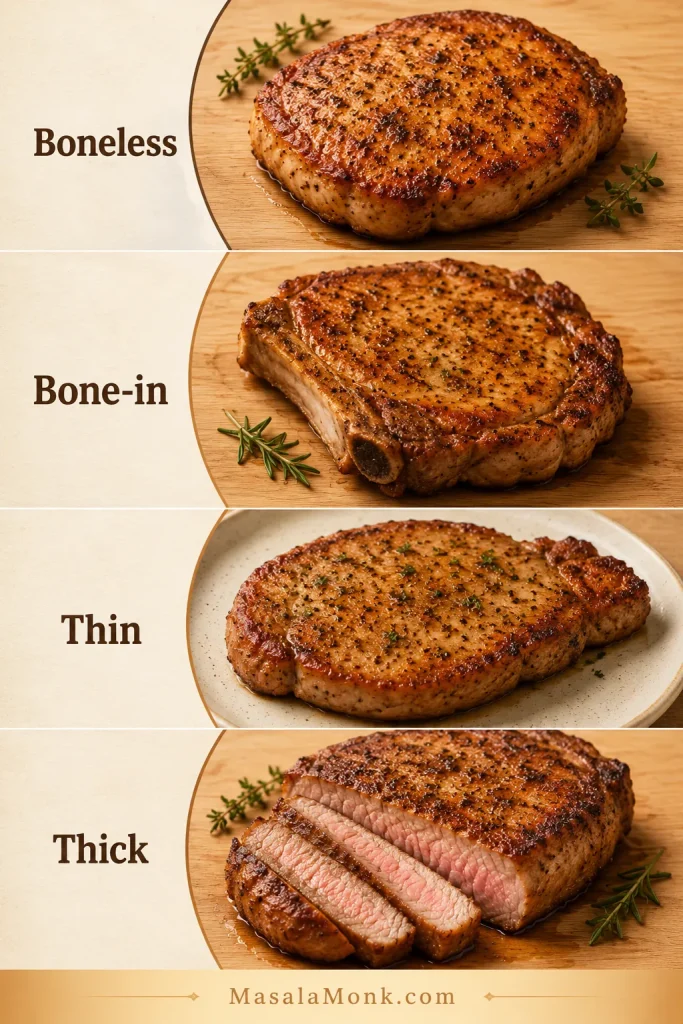
Bone-in cuts are a little more forgiving if you are worried about dryness. Boneless cuts are faster and convenient, but they need closer attention. Around 1 inch thick is the easiest size to cook well. Already bought a different cut? Use the boneless, bone-in, thin, and thick chop guide before choosing a final cook time.
Ingredients and Equipment
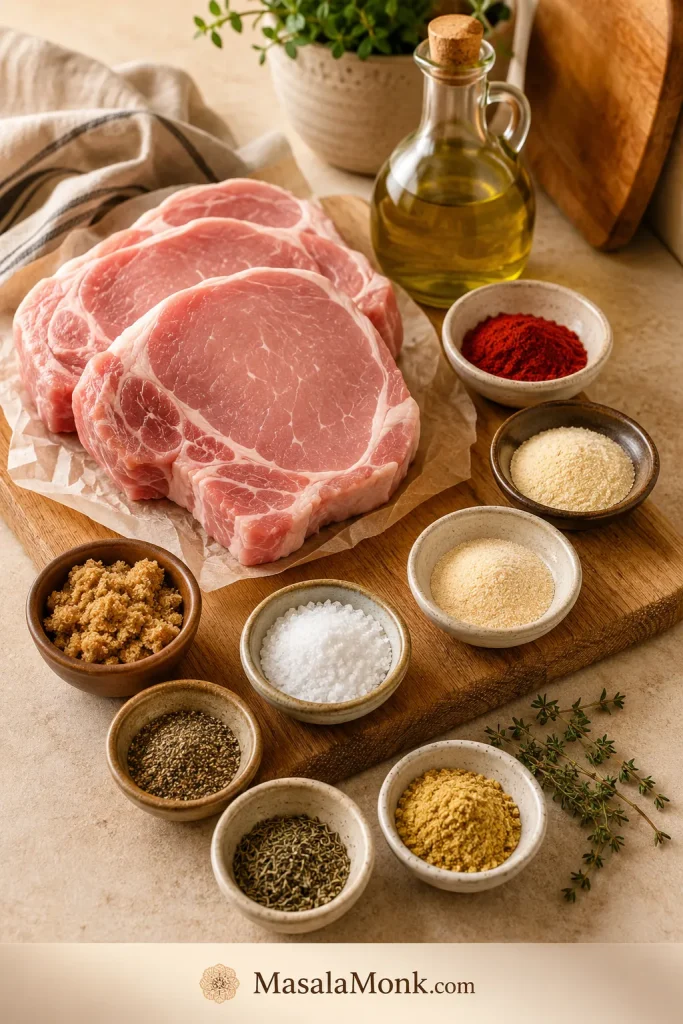
The rub is not trying to hide the pork. It helps the edges brown and gives every bite a little garlic-smoky warmth. If you are cooking from the pantry, the essentials are simple: pork chops, oil, salt, garlic powder, paprika, and pepper. For the full measured version, jump to the recipe card.
This pork chop seasoning builds flavor without a long ingredient list. Paprika helps the surface look warm and browned, garlic and onion add savory depth, and optional brown sugar encourages caramelized edges.
Pork Chop Seasoning Ingredients
Ingredient
US Amount
Metric Amount
Pork chops
4 x 6 oz chops
4 x 170 g chops
Olive oil or avocado oil
1½ tbsp
22 ml
Brown sugar, optional
1 tbsp
12 g
Smoked paprika
2 tsp
4–5 g
Garlic powder
1 tsp
3 g
Onion powder
½ tsp
1–2 g
Fine salt
1 tsp
5–6 g
Black pepper
½ tsp
1 g
Dried thyme, Italian seasoning, or ground mustard
½ tsp
about 1 g
Salt note: If your pork chops are labeled enhanced, pre-brined, or already seasoned, reduce the salt slightly.
Brown sugar note: It helps the edges caramelize, but you can skip it for a sugar-free version.
Oil note: Use just enough to lightly coat the surface. Greasy pork will not brown better.
Equipment
Air fryer: Basket-style or oven-style both work.
Instant-read meat thermometer: The most important tool for avoiding dry pork chops.
Paper towels: For drying the surface before seasoning.
Small bowl: For mixing the rub.
Tongs: For flipping without scraping off the seasoning.
Perforated parchment, optional: Use only if sticking is a problem; do not preheat loose parchment without food weighing it down.
Why These Air Fryer Pork Chops Stay Juicy
These are the small details that make the difference between pork chops that only look done and pork chops that actually eat juicy. Need a visual doneness check later? Use the done pork chops guide.
Match the chop, not the clock. Thin, thick, bone-in, breaded, and frozen chops all need different timing.
Dry, oil, season. A dry surface and a light oil coating help the rub brown instead of steam. This is the same reason air fryer chicken wings crisp better when the skin is dry.
Give the air space. Cook in a single layer so the hot air can reach the edges.
Check before the timer ends. Especially with thin chops, small chops, or compact basket-style air fryers.
Rest loosely. A tight foil wrap can soften the crust, while a short loose rest lets the juices settle.
Quick Visual Steps Before Air Frying
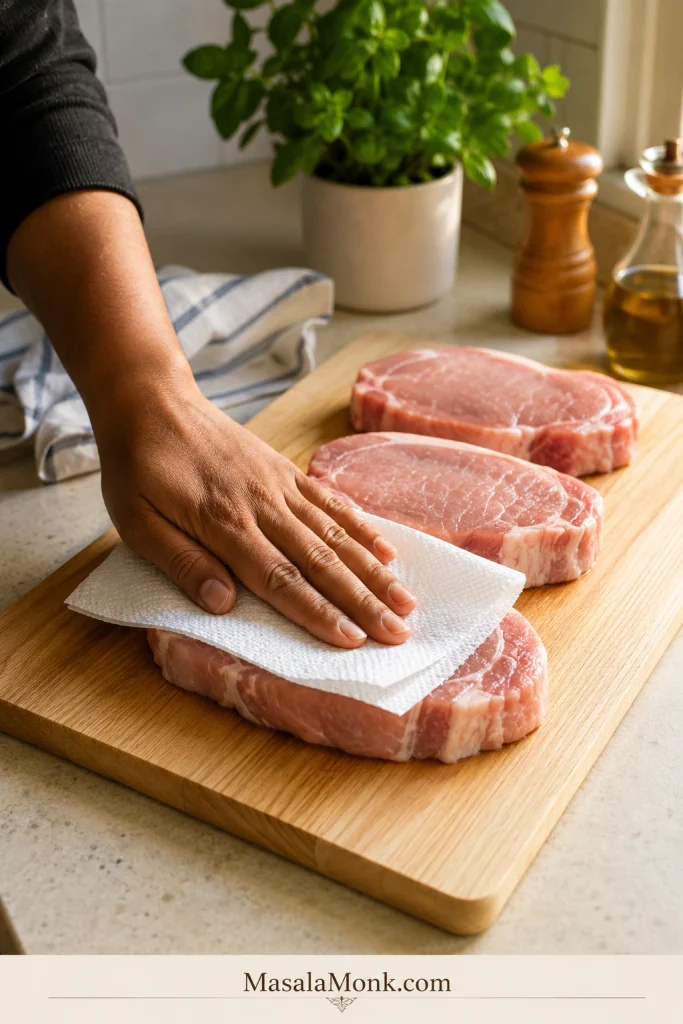
Pat the Pork Chops Dry
Before seasoning, blot the surface well so the rub has something dry to cling to. This visible step supports the pat-dry instruction in the quick recipe.
Blotting the pork chops dry before seasoning helps the rub cling instead of sliding around. As a result, the surface browns better and the air fryer does less steaming.
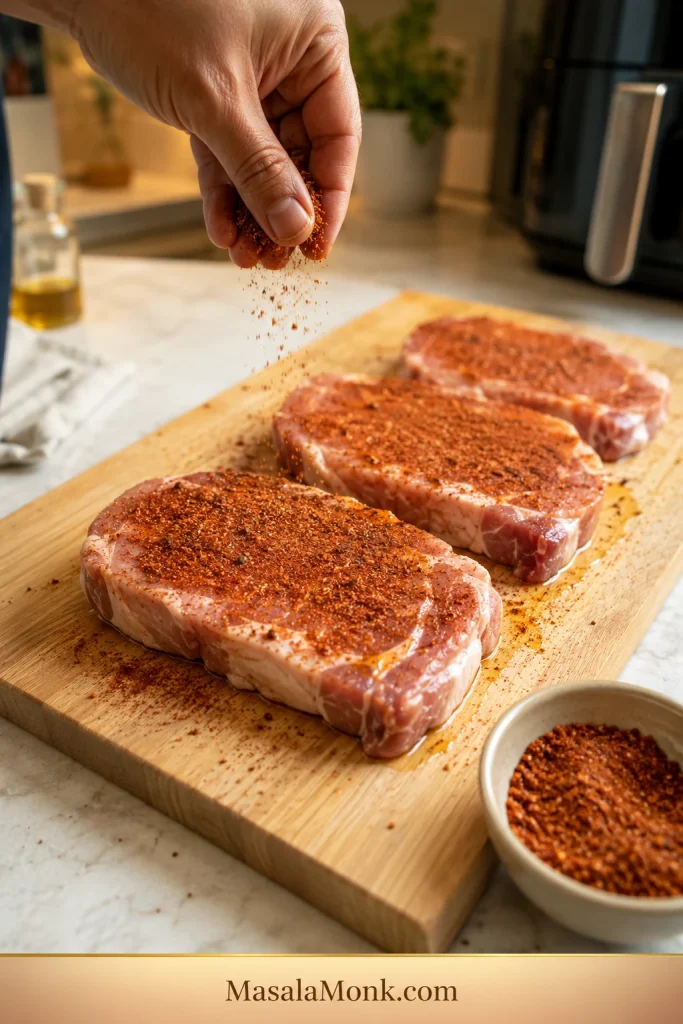
Season Both Sides Evenly
Next, coat both sides with oil and seasoning, then press the rub in lightly. This is where the no-breading version gets most of its color and aroma.
Season both sides and press the rub in lightly so it stays attached during cooking. Since these are no-breading pork chops, that spice layer becomes the main source of color, aroma, and flavor.
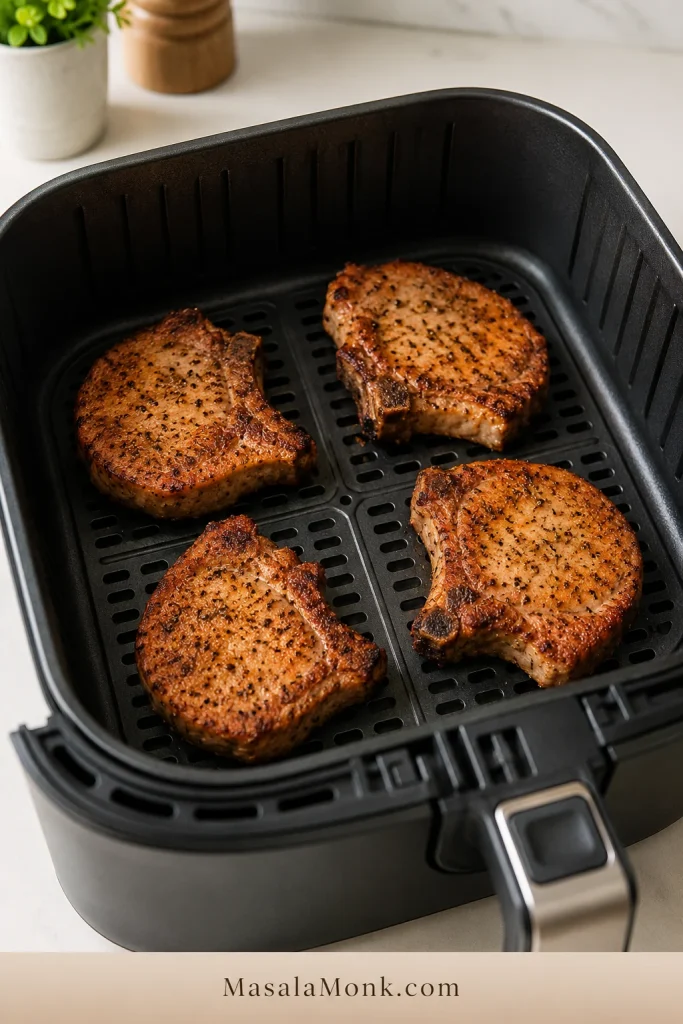
Leave Space in the Basket
Arrange the pork chops in a single layer instead of stacking or overlapping them. Space around the edges helps the air fryer brown the surface more evenly.
A single layer lets hot air reach the top, sides, and edges of each pork chop. If the basket is crowded, the chops can steam where they touch and brown unevenly.
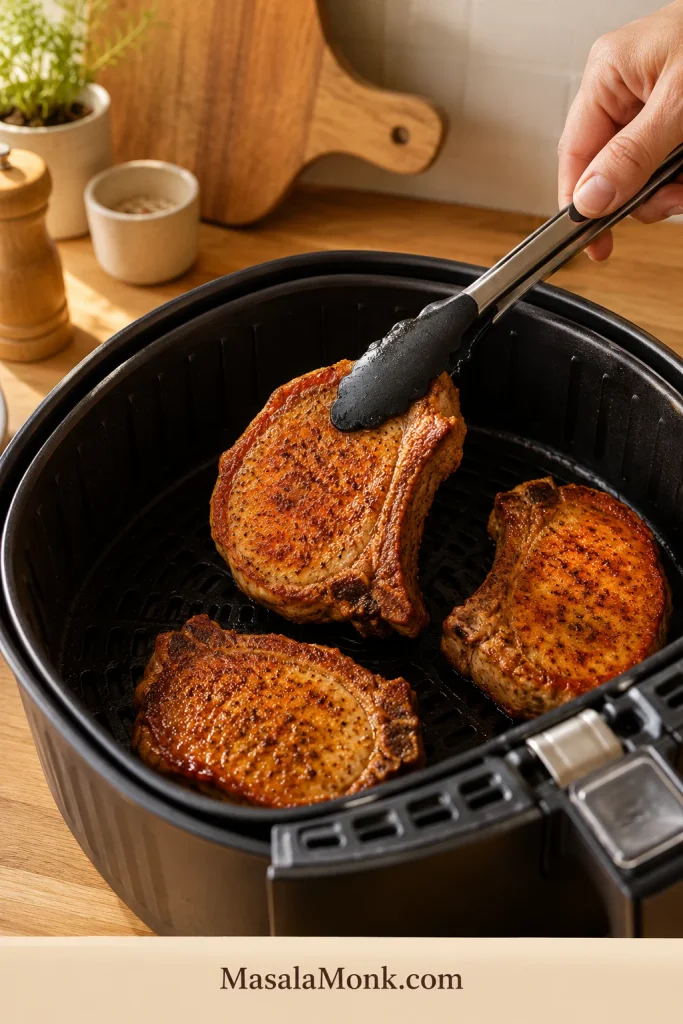
Flip Halfway Through Cooking
Halfway through the cook time, turn the chops gently with tongs. This gives both sides direct heat and helps prevent one pale side.
Flip pork chops halfway through air frying so both sides get direct heat. For breaded chops, lift gently with tongs instead of dragging, which helps keep the coating intact.
Once the main method is clear, the rest is just small adjustments: the chop you bought, the air fryer you own, and how crisp you want the edges.
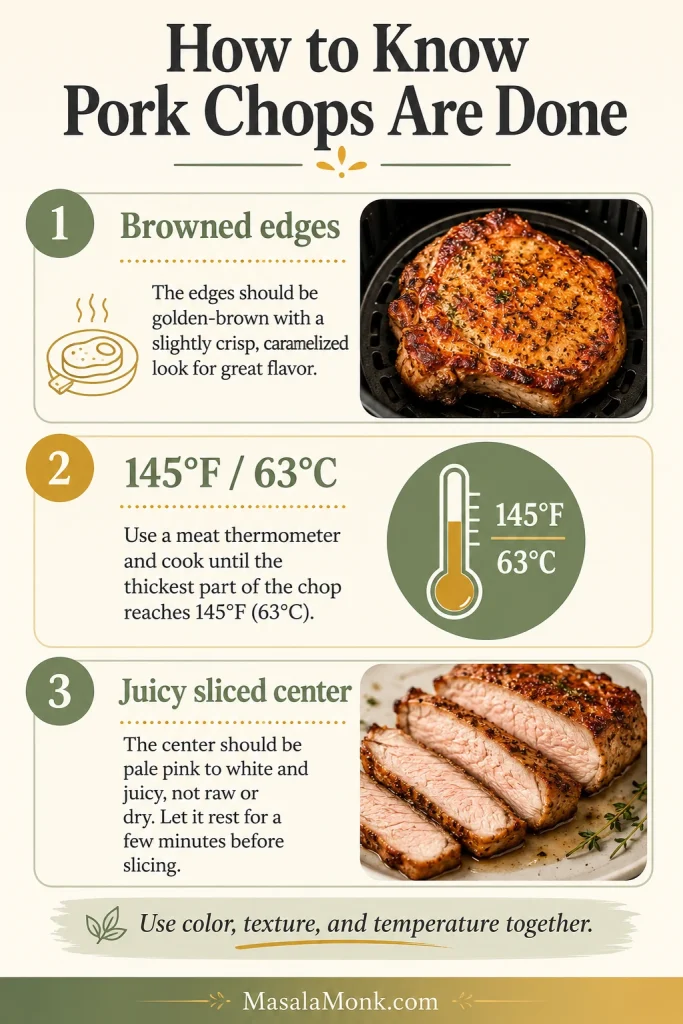
What Done Pork Chops Look and Feel Like
The best batch should look roasted at the edges, smell garlicky and smoky, and slice without turning chalky. The seasoning should look darker and fragrant, and the surface should look browned rather than wet. Breaded chops should be golden, not pale or dusty.
Browned edges are helpful, but color alone is not enough for pork chops. For better doneness confidence, combine a 145°F / 63°C center with a short rest and a tender-looking slice.
If you grew up thinking pork had to be cooked until completely white, this may feel different. A slight blush can be normal when pork reaches 145°F / 63°C and rests. The thermometer matters more than fear.
Use 145°F as the Stop Point
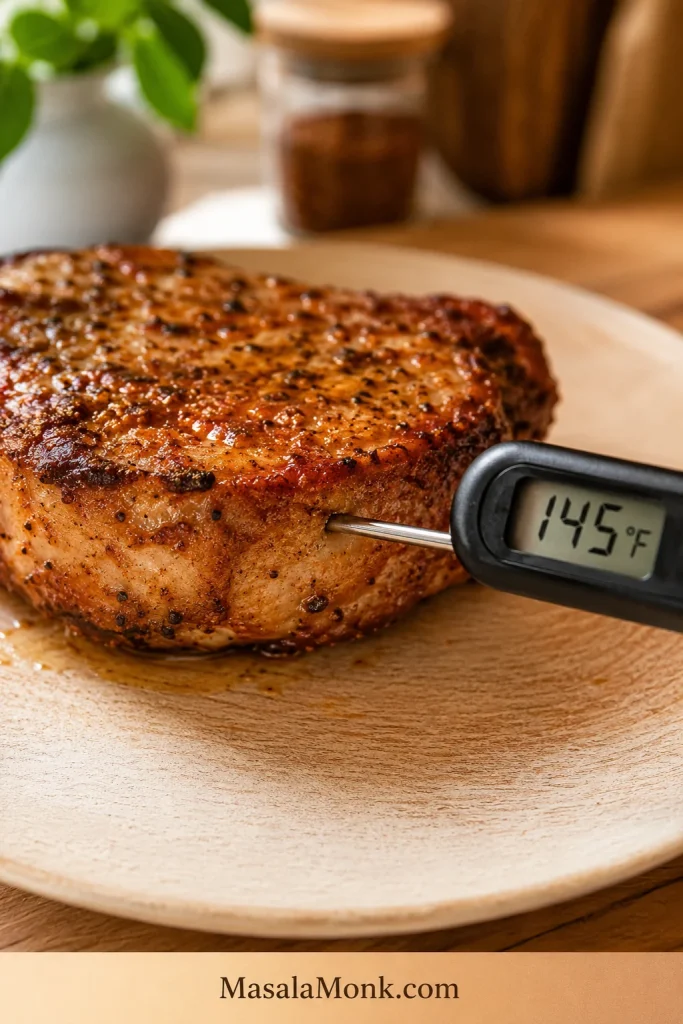
The timer tells you when to check, but the thermometer tells you when the pork is actually done. Aim for 145°F / 63°C in the thickest part, then rest the chops before cutting.
When the outside is browning too fast but the center is not done, lower the temperature to 350°F / 175°C and cook for a few more minutes. That is better than burning the crust while waiting for the inside.
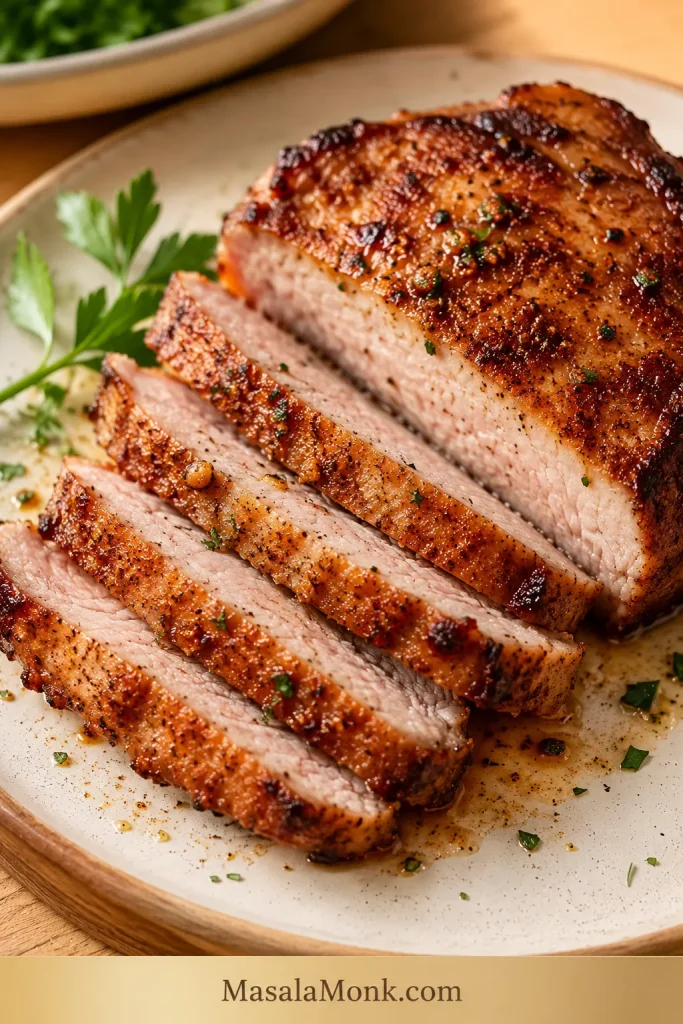
Check the Slice After Resting
After resting, a good air fryer pork chop should slice cleanly and still look tender inside. If the meat looks tight or chalky, check the next batch sooner and rely on temperature instead of time alone.
If your pork chops still turn out dry or tough after checking temperature, use the troubleshooting guide before the next batch.
If you want the complete measured version in one place, use the recipe card below.
Air Fryer Pork Chops Recipe Card
This is the full recipe card version for 1-inch boneless chops. Use the chart above for thin, thick, bone-in, breaded, or frozen chops.
Recipe Details
Prep Time
10 minutes
Cook Time
10–12 minutes
Resting Time
3–5 minutes
Total Time
About 25 minutes
Servings
4
Cooking Method
Air fryer
Best For
1-inch boneless chops; see chart for other cuts
Ingredients
4 pork chops, about 6 oz / 170 g each, preferably 1 inch thick
1½ tbsp / 22 ml olive oil or avocado oil
1 tbsp / 12 g brown sugar, optional
2 tsp / 4–5 g smoked paprika
1 tsp / 3 g garlic powder
½ tsp / 1–2 g onion powder
1 tsp / 5–6 g fine salt
½ tsp / 1 g black pepper
½ tsp dried thyme, Italian seasoning, or ground mustard
Instructions
Preheat. Set the air fryer to 380°F / 193°C and preheat for 3 to 5 minutes.
Dry. Pat both sides of the pork chops dry with paper towels.
Oil and season. Rub both sides lightly with oil, then coat with the spice mixture.
Arrange. Place pork chops in a single layer. Cook in batches if needed.
Air fry. Cook for 10 to 12 minutes for 1-inch boneless chops, flipping halfway through.
Check doneness. Remove when the center reaches 145°F / 63°C.
Rest. Rest loosely for 3 to 5 minutes before slicing.
Recipe Notes
Bone-in chops may need 2 to 3 extra minutes; check near, but not touching, the bone.
Thin chops can be ready quickly, so start checking around 4 to 5 minutes.
Thick chops do better at 375°F to 380°F with internal temperature as the final guide.
Crispier edges usually need heat closer to 400°F / 204°C, but lean boneless chops need close attention.
If using enhanced, pre-brined, or already seasoned pork chops, reduce the salt slightly.
Nutrition will vary most by chop size, breading, oil, sugar, and sauces. If you are tracking closely, use the cooked chop weight and adjust for toppings. For a deeper look, see this guide to calories in a pork chop.
If you already bought a different chop, you do not need a different recipe. You just need to adjust the timing.
The seasoning can stay the same, but the cooking approach should change by cut. Boneless chops cook fast, bone-in chops are more forgiving, thin chops need attention, and thick chops need patience.
Boneless pork chops: Fast and convenient, but less forgiving. Best around 1 inch thick.
Bone-in pork chops: Usually juicier and more forgiving. Check the meaty area near the bone without touching the bone.
Thin pork chops: Not difficult, but they do not forgive distraction. Start checking early and do not walk away.
Thick pork chops: Better texture potential, but they need patience. Lower the heat if the outside browns too fast.
The seasoning can stay the same; the timing cannot.
Breaded or Fried-Style Pork Chops
The base version skips breading: oil, seasoning, air fryer, done. Breading changes the job. Now you are cooking the pork and managing the crust at the same time. Air fryers crisp oil-kissed crumbs; they do not magically brown dry flour.
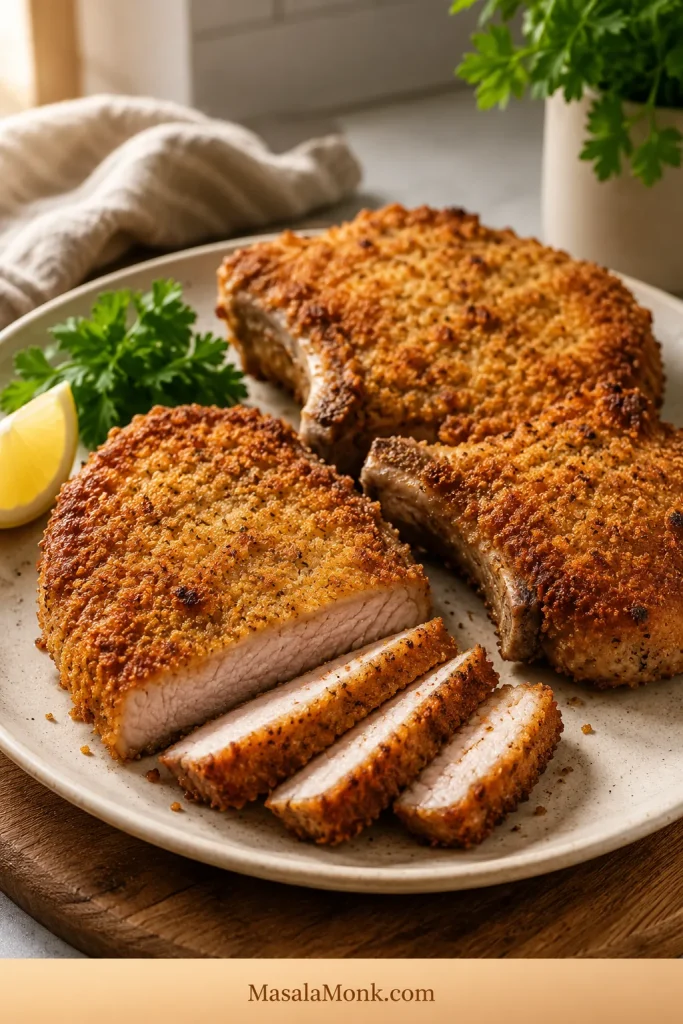
Breaded air fryer pork chops crisp best with a thin coating and a light oil mist. That way, the crumbs turn golden before the pork underneath has a chance to overcook.
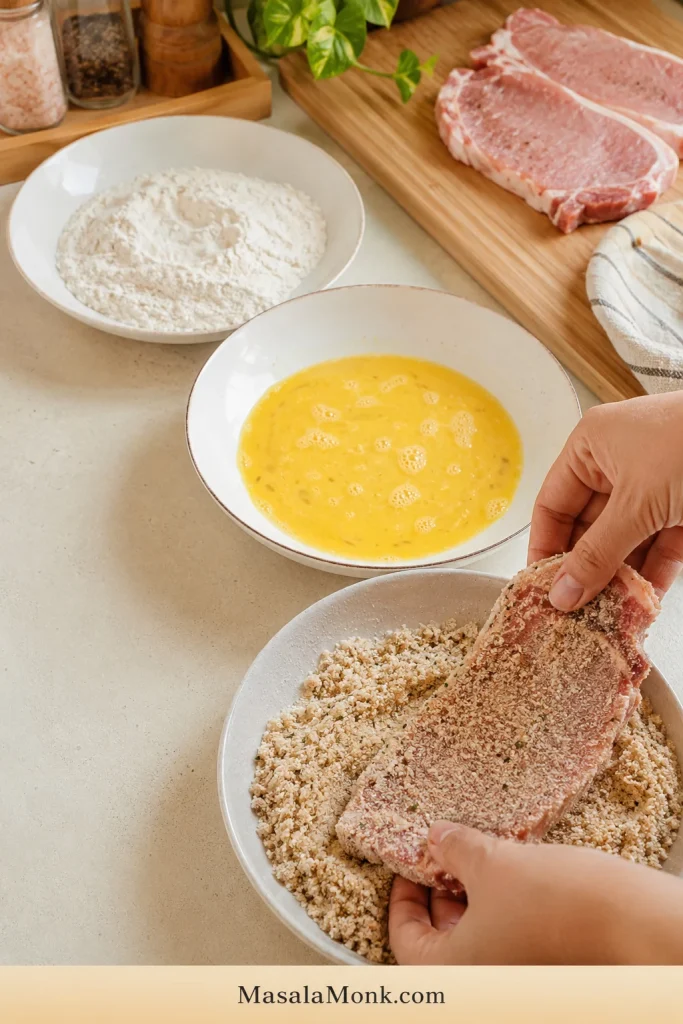
How to Bread Pork Chops for the Air Fryer
For crispy breaded pork chops, keep the flour, egg, and breadcrumb layers even rather than thick. Too much coating can stay pale while the meat continues cooking underneath.
For breaded chops, use 2 tbsp / 15 g flour, 1 egg, ½ cup / 30 g panko or breadcrumbs, optional ¼ cup / 20–25 g parmesan, and oil spray. Air fry at 390°F to 400°F / 199°C to 204°C, flip halfway, and spray pale or dusty spots lightly with oil.
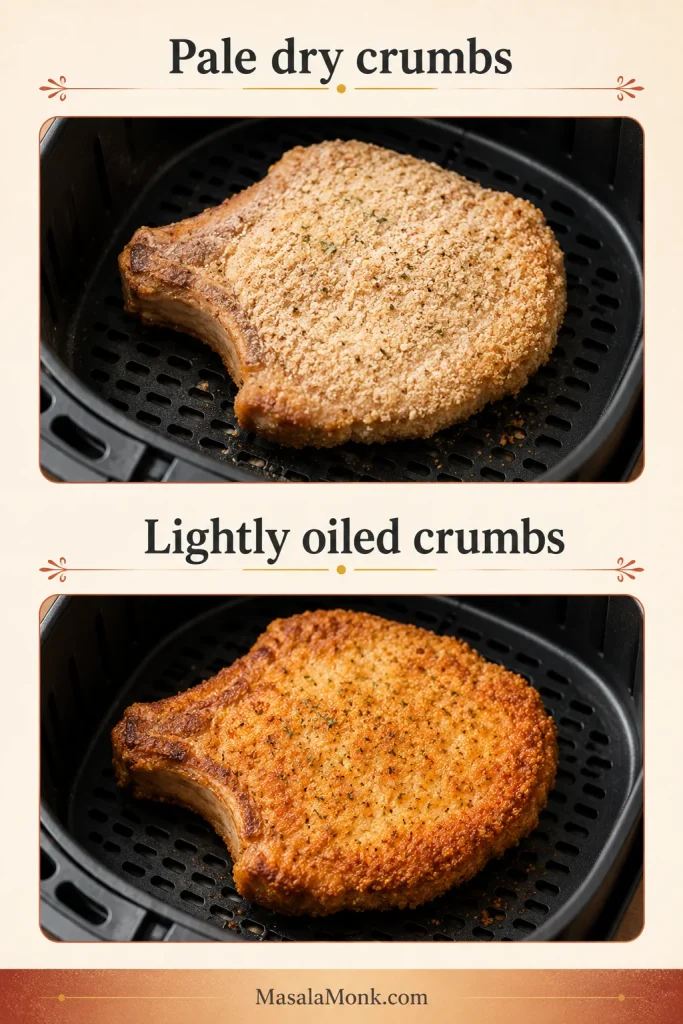
Why Breaded Pork Chops Look Pale in the Air Fryer
If breaded pork chops look pale, the coating usually needs a light mist of oil, not several extra minutes. Dry crumbs do not brown well in the air fryer, and overcooking the pork just to darken the crust can make the center tough.
If breaded pork chops look pale, the coating may need a light mist of oil, not more time. Adding several extra minutes can brown the crumbs but push the pork past its best texture.
If the coating browns before the pork is done, lower the heat and finish gently. Do not bread frozen chops directly; thaw first or use the frozen pork chops method before seasoning. If the crust stays pale or the center finishes unevenly, check the troubleshooting guide.
Frozen Pork Chops in the Air Fryer
Frozen pork chops are not the most even-cooking option, but they can still work when dinner needs to happen now. It will not be quite as even as thawed pork, but it can still save dinner if you check the center instead of trusting the timer. For the target temperature and visual cues, use the done pork chops guide.
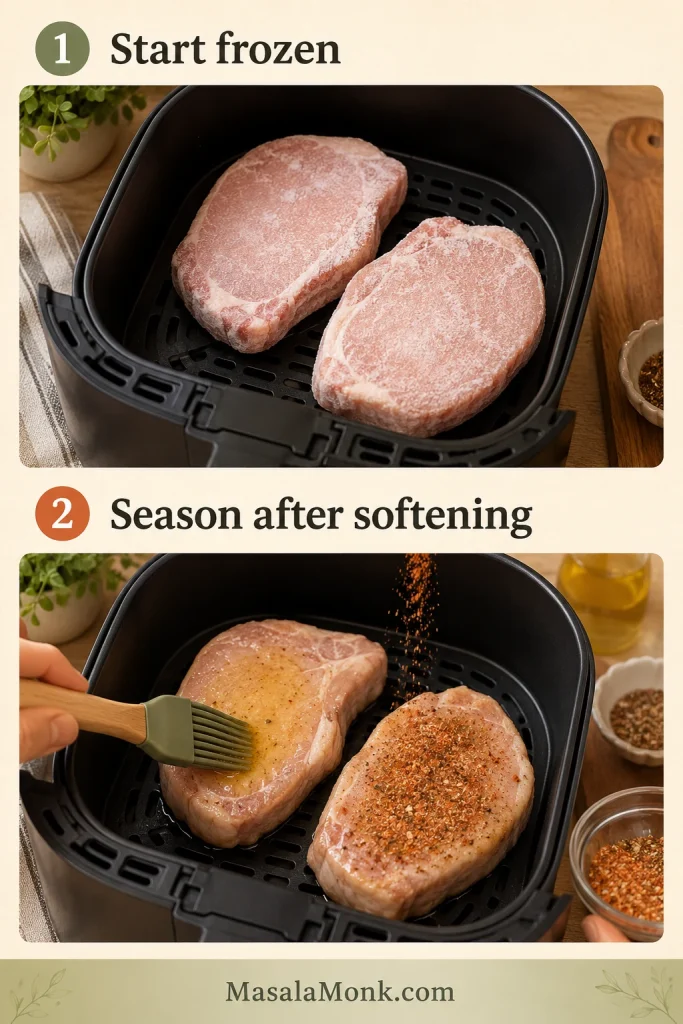
Frozen pork chops are easier to season after the surface softens. Start them plain in the air fryer, then add oil and seasoning once the rub can stick evenly.
Preheat the air fryer to 375°F / 190°C.
Place frozen chops in a single layer.
Air fry for 5 to 8 minutes, just until the surface starts to soften.
Brush lightly with oil or melted butter.
Add seasoning to both sides.
Continue air frying, flipping occasionally, until the center reaches 145°F / 63°C.
Rest for 3 to 5 minutes before serving.
Frozen timing varies heavily. Thin frozen chops may cook fairly quickly, while thick frozen chops may take 20 minutes or more. For another frozen air fryer example, see these frozen chicken wings in the air fryer.
Basket vs Oven-Style Air Fryers
Different air fryers do not behave exactly the same, so treat your first batch as a calibration batch. Compact basket-style air fryers may brown faster, while oven-style models may need rack rotation.
Basket-style and oven-style air fryers can brown pork chops at different speeds because the airflow is different. Keep the same internal temperature goal, but adjust the timing for your machine.
Basket-style air fryers: Start checking early if your machine browns food quickly.
Oven-style air fryers: Rotate racks if one level cooks faster than another.
Ninja Foodi, Cosori, Instant Vortex, PowerXL, Philips, and similar models: Use the chart as a starting point, then adjust by a minute or two after your first batch.
Small baskets: Cook in batches instead of stacking.
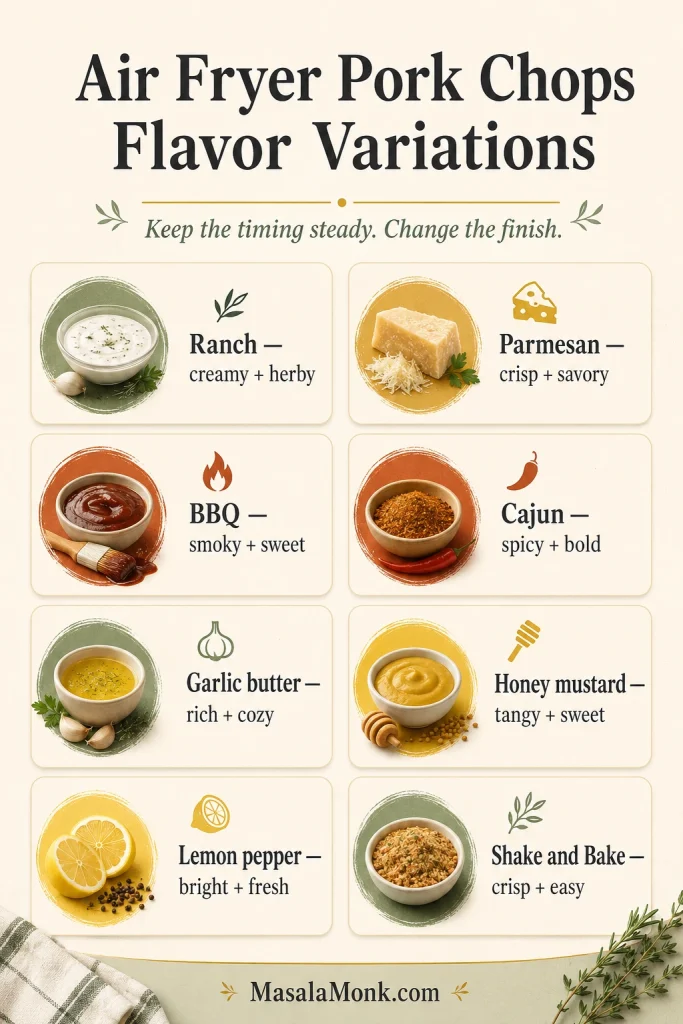
Keep the base timing steady, then change the finish based on the kind of dinner you want: creamy, smoky, spicy, sweet, or crisp. After choosing a flavor, use the serving ideas to build the plate.
Once the basic air fryer pork chop timing works, change the finish to fit the meal. Ranch feels creamy and herby, BBQ adds smoky sweetness, Cajun brings heat, and lemon pepper keeps the plate brighter.
Variation
Add This
When to Add
Best With
Ranch
Ranch seasoning
Before cooking
Potatoes, green beans, salad
Parmesan crusted
Finely grated parmesan
Before cooking or in crumbs
Caesar-style salad or roasted vegetables
BBQ
BBQ sauce
Last 1–2 minutes
Baked beans, coleslaw, applesauce
Cajun
Cajun seasoning
Before cooking
Rice, corn, creamy slaw
Garlic butter
Melted garlic butter
After cooking
Mashed potatoes or roasted vegetables
Honey mustard
Honey mustard glaze
Near the end
Carrots, potatoes, green salad
Lemon pepper
Lemon pepper and lemon juice
Before cooking, then finish after
Asparagus, rice, crisp salad
Shake and Bake
Packaged seasoned coating
Before cooking, with oil spray
Mac and cheese, green beans, slaw
What to Serve with Them
The easiest plate is creamy potatoes, something green, and a little sweetness on the side. That gives you comfort, freshness, and balance without making dinner complicated.
Build the plate around contrast so the pork chop dinner feels complete. Pair the savory chop with something creamy, something green, and something a little sweet for better balance.
Let leftovers cool, then store them in an airtight container in the refrigerator. Keep sauce separate when possible so the surface does not turn soggy.
Reheat cooked chops at 350°F / 175°C for 3 to 5 minutes, just until warmed through. When the chops are very lean, brush with a little butter, broth, or sauce before reheating. Breaded chops usually reheat better in the air fryer than in the microwave because the coating can crisp again.
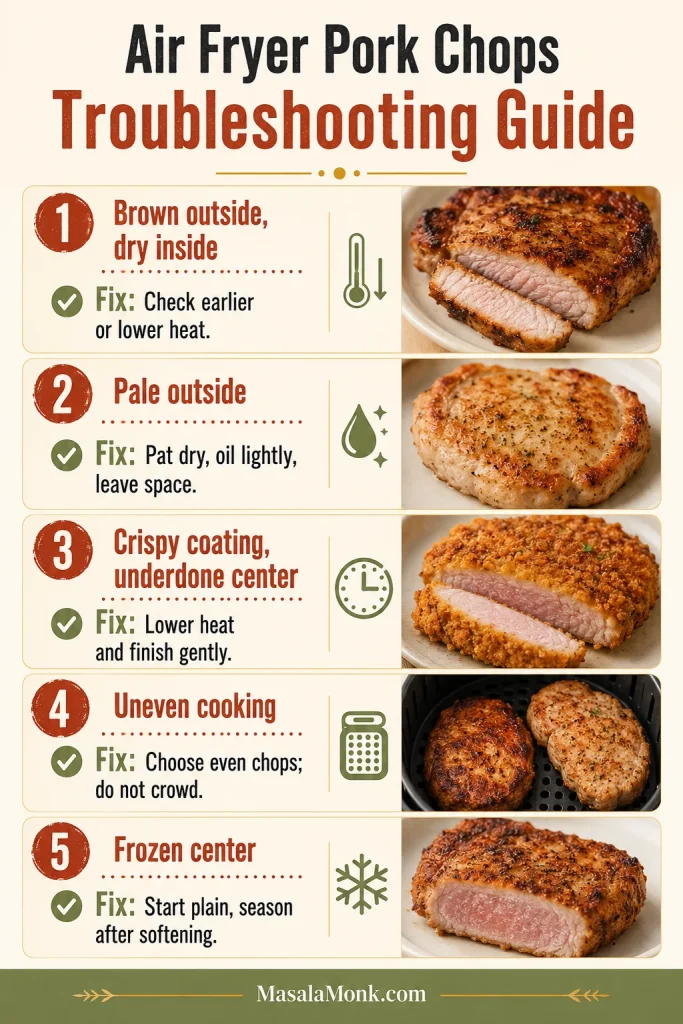
When pork chops turn out dry, the fix is usually small. Change the check time, the temperature, or the thickness next time.
When air fryer pork chops go wrong, match the fix to the symptom. Dry centers, pale crusts, uneven cooking, and frozen middles usually point to timing, heat, spacing, or thickness.
What Happened
Likely Cause
Fix Next Time
Brown outside, dry inside
Heat too high, chop too thin, or cooked too long
Check earlier or use 375°F to 380°F.
Pale outside, cooked inside
Surface too wet or basket crowded
Pat dry, oil lightly, and leave space.
Crispy coating but undercooked center
Breading browned too fast
Lower heat and finish gently.
One side dry, one side juicy
Uneven chop thickness
Choose more even chops or check the thinner side early.
Tough even though timing seemed right
Very lean boneless chop or no rest
Use 1-inch chops, rest before slicing, and add sauce if needed.
Frozen chop browned outside but cold inside
Frozen center needed more time
Use the staged frozen method and check the center.
The first time you make these, check early and note your air fryer’s timing. After that, this becomes the kind of weeknight recipe you can repeat without hovering: same seasoning, same method, and one small adjustment based on the chop in front of you.
Most 1-inch boneless pork chops take 10 to 12 minutes at 380°F / 193°C. Thin chops cook faster; thick or bone-in chops need more time.
What temperature is best for air fryer pork chops?
380°F / 193°C is the best default for juicy pork chops. Use 390°F to 400°F / 199°C to 204°C for breaded or crispier chops.
How do you keep pork chops from drying out in the air fryer?
Use chops around 1 inch thick, cook in a single layer, and stop when the center reaches 145°F / 63°C. The biggest fix is not overcooking them.
Do boneless pork chops work well in the air fryer?
Boneless pork chops work well in the air fryer when they are close to 1 inch thick. They cook quickly, so start checking before they turn tight or dry.
Are bone-in pork chops better in the air fryer?
Bone-in pork chops are often more forgiving because the bone slows the cook slightly. Check the thickest meaty part without touching the bone.
How long do thin pork chops take in the air fryer?
Thin chops around ½ inch thick may take 6 to 8 minutes. Very thin cuts can be done in 4 to 6 minutes, so check early.
How long do thick pork chops take in the air fryer?
Thick chops around 1½ inches may take 12 to 16 minutes for boneless cuts and longer for bone-in cuts.
Do you flip pork chops in the air fryer?
Yes. Flip halfway through for more even browning and better texture on both sides.
Is slightly pink pork safe?
A slight blush can be safe when pork reaches 145°F / 63°C and rests for at least 3 minutes. Temperature matters more than color alone.
No-breading pork chops: what changes?
No-breading pork chops rely on a dry surface, light oil, and a flavorful rub instead of crumbs. They are faster and less fussy than breaded chops.
Breaded air fryer pork chops: what changes?
Breaded pork chops need a thin coating, a light oil spray, and enough basket space for the crumbs to crisp. The internal temperature still needs to reach 145°F / 63°C.
Frozen pork chops: what is the safest method?
The safest frozen method is staged: soften the chops first, then oil, season, and finish cooking until the center reaches 145°F / 63°C.
Does Shake and Bake work in the air fryer?
Shake and Bake works in the air fryer when the coated chops are sprayed lightly with oil, cooked in a single layer, flipped halfway, and checked with a thermometer.
Should you preheat the air fryer?
Preheating helps pork chops cook evenly and brown better. If there is no preheat setting, run the air fryer empty at the cooking temperature for about 3 minutes.
Why are my pork chops tough?
They were probably overcooked, too thin for the timing, or sliced before resting. Next time, start checking earlier, especially if your chops are thin or boneless.
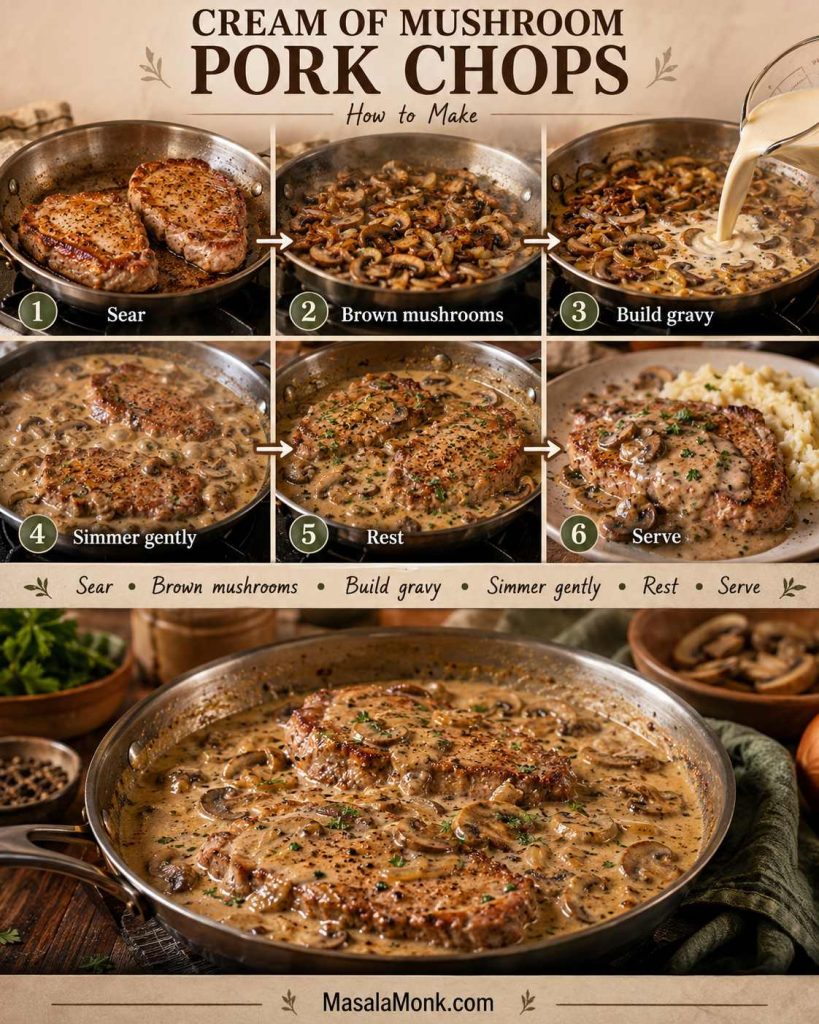
You are not here for a complicated pork chop dinner. You have pork chops, a can of cream of mushroom soup, and the hope that the gravy turns creamy while the pork stays juicy. This recipe keeps that old-school shortcut, then gives it better timing, better gravy, and fewer dry-pork surprises.
These cream of mushroom pork chops are built for a real weeknight: brown the pork, loosen condensed soup into mushroom gravy, simmer gently, and stop before the chops turn tough. It is cozy pantry cooking, handled with just enough care.
The simple formula is 4 pork chops, 1 can of condensed cream of mushroom soup, and ⅓ to ½ cup broth, milk, or water. Use ⅓ cup liquid for thicker gravy, ½ cup for a looser sauce, and chicken broth when you want fuller flavor without making the recipe harder.
The fast skillet version comes first because it is the easiest dinner for most nights. If you meant baked pork chops, crock pot pork chops, pork chops and rice, potatoes, stuffing, Campbell’s-style pork chops, or extra-smothered gravy, those notes are included too — because each version cooks differently.
Quick Answer: Cream of Mushroom Pork Chops with Mushroom Soup Gravy
To make cream of mushroom pork chops, brown 4 seasoned pork chops in a skillet, whisk 1 can of condensed cream of mushroom soup with ⅓ to ½ cup chicken broth, milk, or water, then simmer gently until the thickest chop reaches 145°F / 63°C. Rest for 3 minutes and spoon the creamy mushroom gravy over the top.
Good default: use ¾–1 inch pork chops, ⅓ cup chicken broth, a 12-inch skillet, and low heat once the soup goes in. That combination gives you golden-edged pork and gravy thick enough to settle into mashed potatoes, rice, or egg noodles.
Bare pantry version: pork chops, condensed cream of mushroom soup, ½ cup water, and black pepper. It tastes simpler and more nostalgic, but it still works when dinner just needs to happen.
Gravy can wait. Pork cannot. Let the gravy be flexible, but treat the pork like it has a deadline. If the chops are done before the sauce is perfect, move them out and fix the gravy by itself.
This is the kind of dinner where the gravy matters as much as the pork: thick enough for mashed potatoes, loose enough to spoon, and savory enough to make a plain side feel finished.
1 can condensed cream of mushroom soup, 10.5 oz / 298 g
Liquid
⅓ cup broth for thick gravy; up to ½ cup milk, broth, or water for looser sauce
Optional upgrade
8 oz mushrooms, ½ onion, garlic, Worcestershire, Dijon
Method
Brown chops, make mushroom gravy, simmer gently, rest before serving
Time
About 30 minutes for the skillet version
Doneness
145°F / 63°C plus a 3-minute rest
Keep the skillet formula simple: pork chops, one can of cream of mushroom soup, and just enough liquid to turn condensed soup into spoonable gravy.
Many old canned-soup pork chop recipes simmer everything by time. This version uses the same pantry shortcut but changes the control point: the gravy can be adjusted by texture, while the pork is cooked by temperature.
Cooking with chicken instead tonight? Our cream of mushroom chicken recipe uses the same cozy canned-soup idea, but the timing and doneness are built around chicken instead of pork.
At a Glance: Gear, Sides, and Watchouts
Question
Quick answer
Skillet
Use a 12-inch skillet if adding mushrooms and onions; a 10-inch skillet works for the simplest pantry version.
Helpful equipment
Tongs, whisk or sturdy spoon, instant-read thermometer, and a plate for resting pork.
Method choice
Use the skillet for speed, the oven for covered bakes, and a casserole method for raw rice, potatoes, or stuffing.
Easy sides
Mashed potatoes, rice, egg noodles, green beans, peas, broccoli, biscuits, or a sharp salad.
Biggest mistakes to avoid
Overcooking thin chops, hard-boiling the sauce, adding too much liquid, and salting too early.
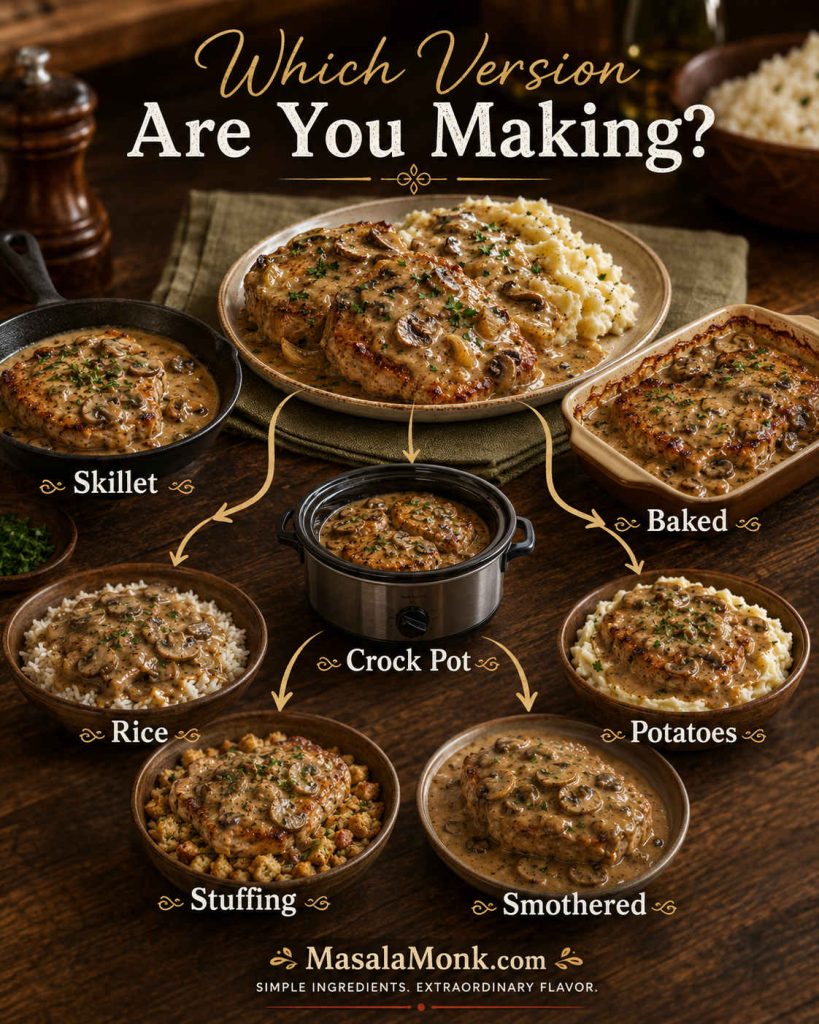
Skillet, Baked, Crock Pot, or Rice: Which Cream of Mushroom Pork Chops Version Should You Make?
The same can of soup can become several different dinners. A quick skillet meal, an oven bake, a slow cooker dinner, and pork chops with rice all sound similar, but they do not need the same amount of liquid or time. Pick the path first, then the recipe gets much easier.
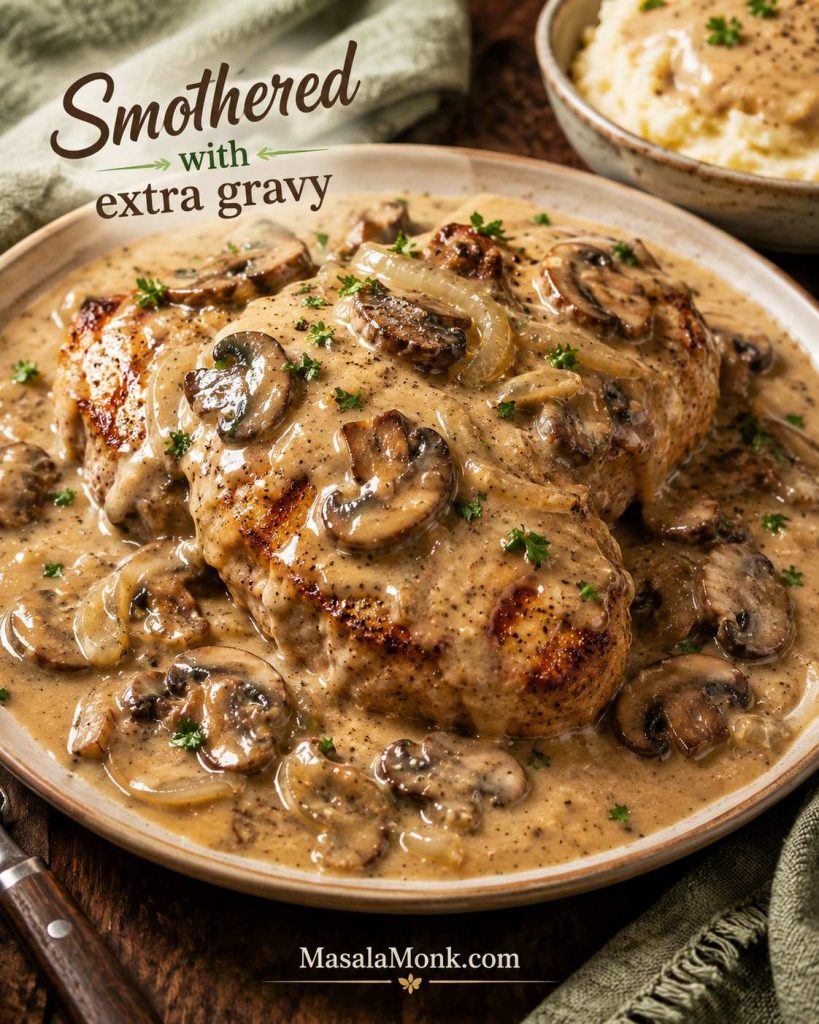
Let the pork rest while you make the extra gravy rich.
Start by choosing the dinner path: skillet stays quick, baked and crock pot need longer heat, and rice, potatoes, or stuffing need their moisture planned from the beginning.
Easy distinction: the skillet recipe cooks pork chops in a creamy sauce. Rice, potatoes, stuffing, and slow-cooker versions also have to manage starch or long heat, so the moisture and timing change.
Why This Recipe Works
This recipe keeps the part people love — pork chops in creamy mushroom soup gravy — while fixing the parts that usually go wrong.
Browning gives the pork a savory edge. The mushroom gravy softens everything later, but the first sear keeps the chops from tasting flat.
The soup-to-liquid ratio stays controlled. Condensed soup needs a little help becoming gravy, not a whole pan of liquid.
Mushrooms and onion make the shortcut taste more like dinner. They are optional, but they add sweetness, texture, and deeper mushroom flavor.
A gentle simmer protects lean pork. Once the sauce goes in, slow bubbles are your friend. A hard boil is how creamy dinners turn tough.
A thermometer separates the pork from the gravy problem. Once the chops are done, the sauce can keep thickening without them.
The result is still the creamy canned-soup dinner people remember, but with browned edges, a spoonable sauce, and pork that does not need to hide under the gravy.
This is not a recipe that asks you to pretend a can of soup is fancy. It simply helps that can do its job better: make creamy gravy, keep dinner simple, and give the pork chops something comforting to sit in.
Ingredients for Pork Chops with Cream of Mushroom Soup
The ingredient list is short, which is exactly why the small choices matter. The soup brings the creamy base, the liquid sets the gravy texture, and the chop thickness decides how much breathing room you have before dinner goes from juicy to dry.
Even with condensed soup, the flavor improves when mushrooms, onion, broth, and black pepper turn the shortcut into a real mushroom gravy.
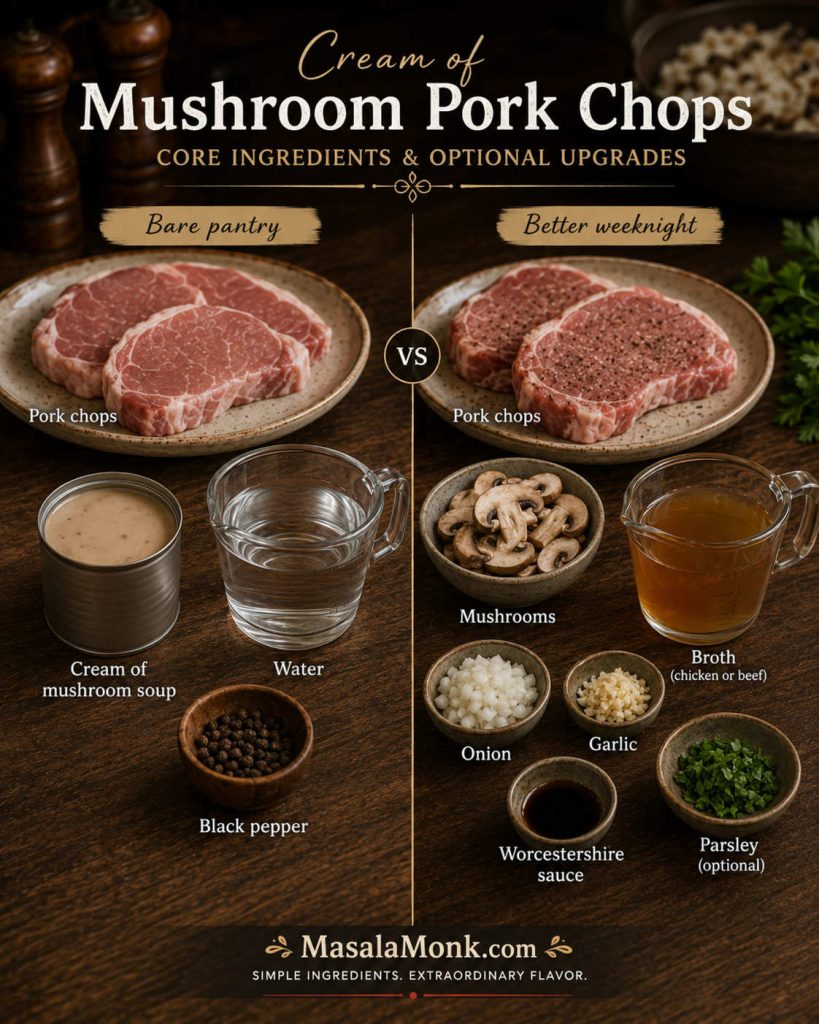
Bare pantry version: pork chops + condensed cream of mushroom soup + water + black pepper. Better weeknight version: add chicken broth, mushrooms, onion, garlic, Worcestershire, and thermometer timing. Both are valid; one is just more layered.
Core Ingredients and Optional Upgrades
The bare pantry version works when dinner just needs to happen. Mushrooms, onion, broth, and a savory booster make the same shortcut taste fuller.
Ingredient
Amount
Why it matters
Pork chops
4 chops, about 1½–2¼ lb / 680 g–1 kg total
Boneless or bone-in both work. Chops around ¾–1 inch thick are easiest to keep juicy.
Condensed cream of mushroom soup
1 can, 10.5 oz / 298 g
The shortcut base for the creamy mushroom gravy. Low-sodium soup gives you more control if using broth or seasoning mix.
Chicken broth, milk, or water
⅓–½ cup / 80–120 ml
Turns condensed soup into sauce. Broth is savory, milk is creamy, water is classic.
Fresh mushrooms
8 oz / 225 g, sliced
Optional but recommended for deeper mushroom flavor and a more homemade texture.
Onion
½ medium / 75–100 g, thinly sliced or diced
Adds sweetness and helps the sauce taste less like it came straight from the can.
Garlic
2–3 cloves, minced
Adds savory depth; use garlic powder if that is what you have.
Oil + butter
1 tablespoon each
Oil helps sear the pork; butter helps sauté mushrooms and onion.
Black pepper
½ teaspoon, plus more to taste
Balances the creamy sauce and keeps the flavor from tasting sleepy.
Worcestershire sauce
1–2 teaspoons / 5–10 ml, optional
Adds a savory edge that makes the gravy taste fuller.
Dijon mustard
1 teaspoon / 5 g, optional
Adds a small sharp note without making the sauce taste mustardy.
Parsley
1–2 tablespoons, chopped, optional
Freshens the finished plate.
Salt note: start light. Condensed soup already brings salt, and the final gravy can get too salty if you also add regular broth, bouillon, onion soup mix, gravy mix, ranch seasoning, or seasoned salt. Taste the sauce before adding more.
Can You Skip the Fresh Mushrooms and Onion?
Pork chops, condensed soup, a little liquid, and black pepper will still get dinner on the table. Fresh mushrooms and onion make the gravy taste more layered, but the simple canned-soup version is the classic route. If you skip them, add garlic powder, Worcestershire sauce, or extra black pepper so the sauce does not taste flat.
How to Make It Taste Less Canned
The goal is not to hide the shortcut. It is to make the shortcut taste more like dinner.
Fastest fix: add black pepper and a splash of Worcestershire so the gravy tastes savory instead of flat.
Better fix: cook fresh mushrooms and onion until the mushroom water cooks off and the edges color.
Most flavorful fix: use chicken broth, properly browned mushrooms, and a tiny spoon of Dijon or a tablespoon or two of dry white wine for a less canned finish.
To make the shortcut taste less canned, layer flavor in stages: pepper first, then browned mushrooms and onion, then broth or a small savory booster.
Choosing Pork Chops That Stay Juicy
The pork chop you choose decides how forgiving this dinner will be. A thick chop gives you a little breathing room. A thin cutlet needs a short leash.
Chop thickness decides how forgiving this recipe feels; thin chops need a short simmer, while ¾–1 inch chops give the gravy time to come together.
Boneless Pork Chops
Boneless pork chops are the easiest choice when you want dinner fast. They brown neatly, sit nicely under the mushroom gravy, and slice cleanly on the plate. Just watch the timing, because thin boneless chops do not forgive a long simmer.
For a reliable result, use boneless chops that are about ¾ to 1 inch thick. They are thick enough to brown well and stay juicy, but not so thick that the sauce is finished long before the pork is cooked.
Bone-In Pork Chops
Bone-in pork chops are often more forgiving. The bone and surrounding fat help protect the meat, so these are a good choice if you are nervous about dry pork chops. They may need a few extra minutes near the bone, so check the temperature in the thickest meaty part without touching the bone.
If the gravy thickens before the meat near the bone is done, add a splash of broth and keep the simmer gentle. The sauce is more forgiving than the pork; you can loosen it, thicken it, or adjust it later.
Boneless vs Bone-In Pork Chops
Use this comparison when you are choosing between speed and forgiveness: boneless chops cook faster, while bone-in chops give the gravy a little more time before the meat dries out.
Boneless pork chops are fast and convenient, while bone-in chops give you a little more forgiveness once the mushroom soup gravy starts simmering.
Pork Loin Chops with Cream of Mushroom Soup
Pork loin chops work well in this recipe when they are sliced into chops and are about ¾ to 1 inch thick. They are lean, so cook them by temperature rather than by a long simmer time.
A whole pork loin roast does not use this skillet timing, and pork tenderloin is a different cut entirely. If you have a roast instead of chops, use a roast-specific method like our slow cooker pork loin recipe.
Pork loin chops work when they are sliced as chops, but pork tenderloin and a whole pork loin roast need different cooking methods.
Thin Pork Chops and Pork Cutlets
Thin pork chops and pork cutlets need a very different rhythm. They brown quickly, cook quickly, and can go from tender to tough while you are still stirring the sauce.
For thin chops, sear briefly, make the sauce, then return them to the skillet only long enough to warm through and finish. Do not simmer thin pork chops for 20–30 minutes in cream of mushroom soup.
Thin pork chops can finish before the gravy looks done, so check them early; thicker chops give you more room for browning, simmering, and sauce-building.
Frozen Pork Chops
Thaw frozen pork chops before making this skillet recipe. Thawed pork browns better, cooks more evenly, and does not release as much water into the pan. Frozen or half-thawed chops can make the sauce watery before the pork is cooked through.
Before simmering, check the pork chop timing guide so thin chops do not get thick-chop timing.
How to Make Pork Chops with Cream of Mushroom Soup in a Skillet
A 12-inch skillet is best if you are using mushrooms and onions. It gives the chops room to brown and the mushrooms space to release moisture, then brown instead of steam.
Follow the skillet in stages: first build browning, then turn the soup into gravy, and finally let the pork rest before the sauce goes over the plate.
1. Pat the Pork Chops Dry and Season Lightly
Pat the pork chops dry with paper towels. Season both sides with black pepper, garlic powder or paprika if using, and only a small pinch of salt. Dry surfaces brown; wet surfaces steam.
2. Brown the Pork Chops
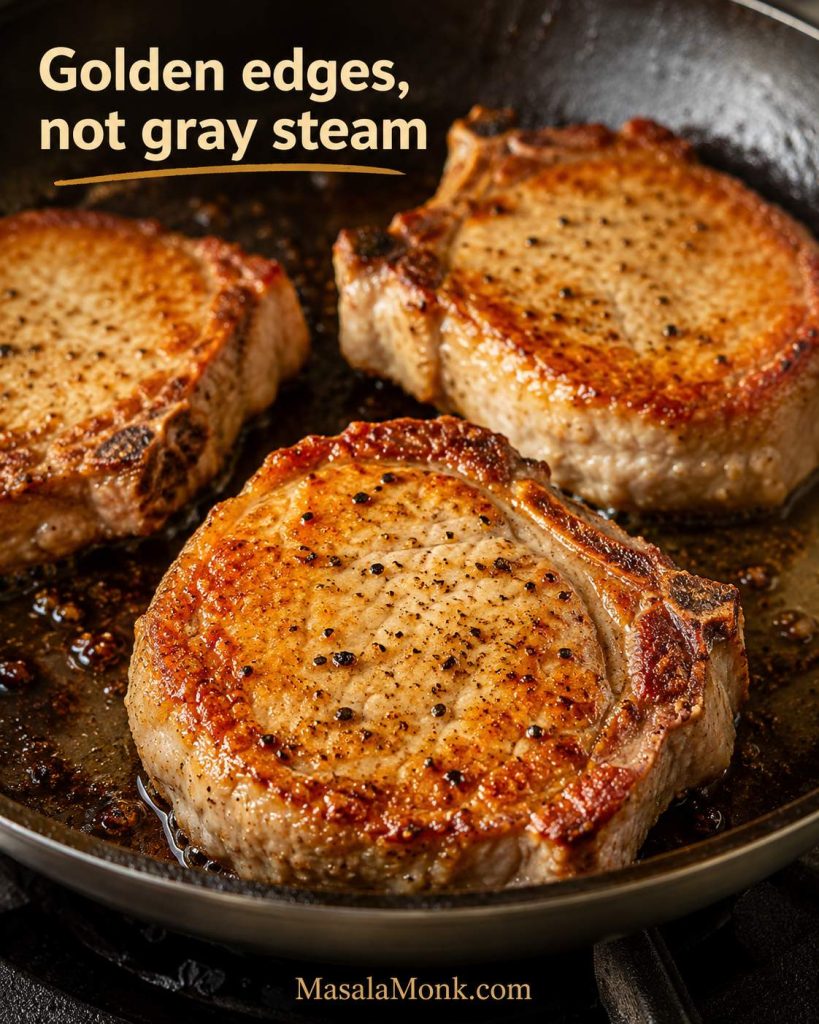
Heat the oil over medium-high heat. Add the pork chops in a single layer, working in batches if needed. Sear until the chops have golden edges instead of a gray steamed surface, about 3–5 minutes per side for ¾–1 inch chops.
Transfer the browned chops to a plate. They do not need to be fully cooked yet. You are building flavor before the creamy mushroom gravy goes in.
A real sear gives mushroom gravy something savory to build on; pale steamed pork cannot add the same depth.
3. Cook the Mushrooms and Onion
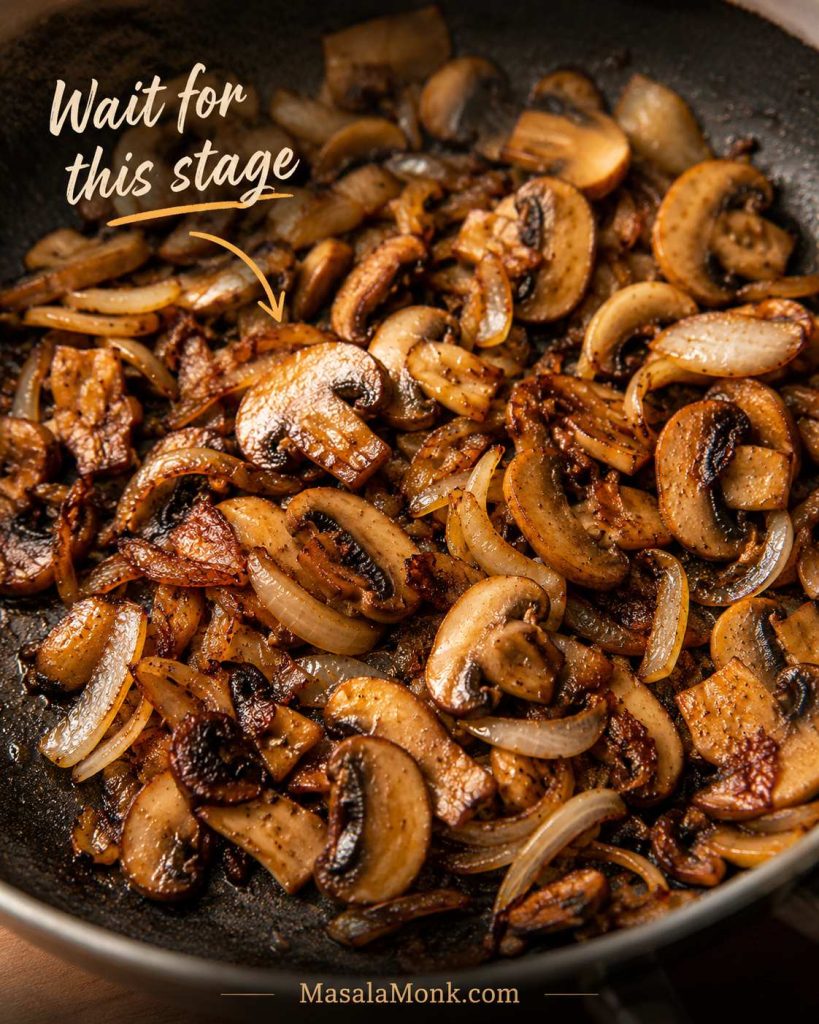
Reduce the heat to medium. Add the butter, mushrooms, and onion. Mushrooms usually go through three stages: first they look dry, then they release water, then that water cooks off and the edges begin to brown. Do not rush this stage if you added fresh mushrooms; the moment their water cooks off and the edges start to brown is the moment the sauce stops tasting like plain condensed soup.
Once mushrooms stop steaming and start browning, they bring the savory flavor that keeps cream of mushroom gravy from tasting flat.
4. Add Garlic and Make the Mushroom Gravy
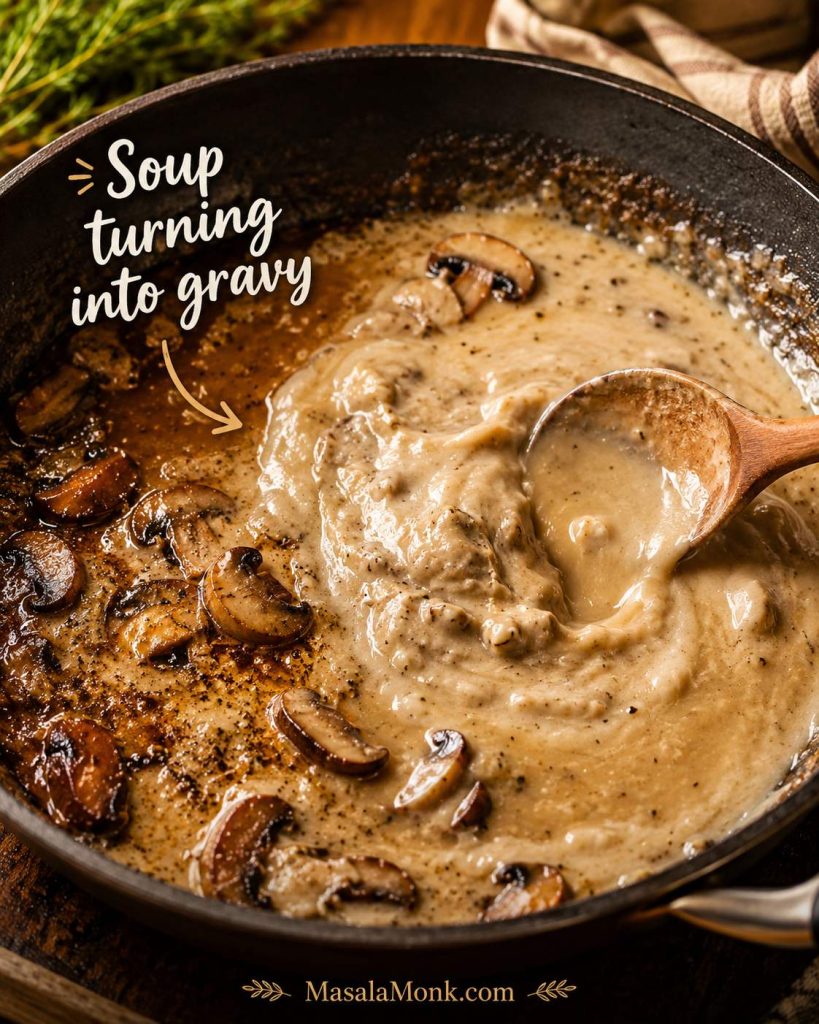
Add the garlic and cook for about 30 seconds. Whisk in the condensed soup and ⅓ cup chicken broth, milk, or water. Add Worcestershire and Dijon if using. The sauce should be loose enough to spoon, but thick enough to coat the pork. Add more liquid a tablespoon at a time.
The soup becomes gravy when it loosens into browned mushrooms, pan juices, and just enough liquid to coat the pork.
5. Simmer the Pork Chops Gently
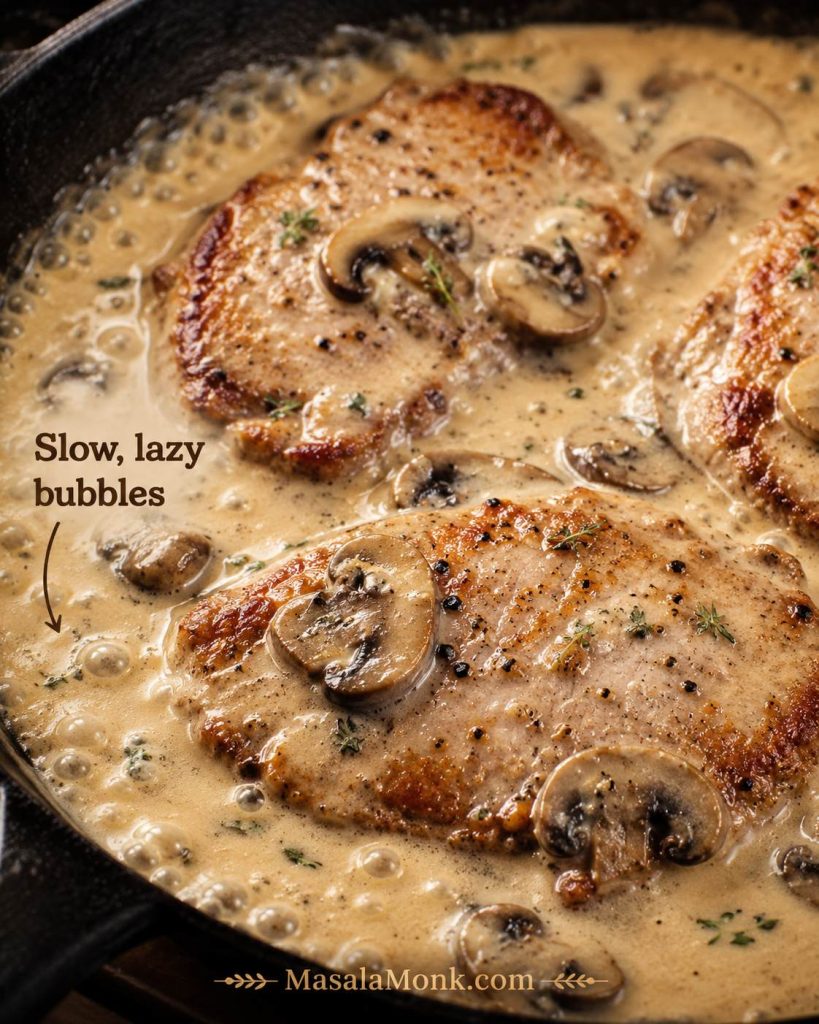
Return the pork chops and any plate juices to the skillet. Spoon gravy over the top, reduce the heat to medium-low, cover loosely, and simmer with slow, lazy bubbles. A rolling boil is too hard for lean pork and can make the gravy feel heavy.
Check the thickest part; when it reaches 145°F / 63°C, move the chops to a plate. If the gravy still needs work, fix the sauce without the pork in the pan.
At this stage, slow bubbles are enough; a hard boil can tighten the pork and make creamy mushroom gravy feel heavy instead of silky.
6. Rest, Taste, and Serve
Rest the pork chops for 3 minutes. While they rest, taste the mushroom gravy. Add black pepper, a splash of broth or milk, parsley, or a tiny squeeze of lemon if the sauce tastes too heavy.
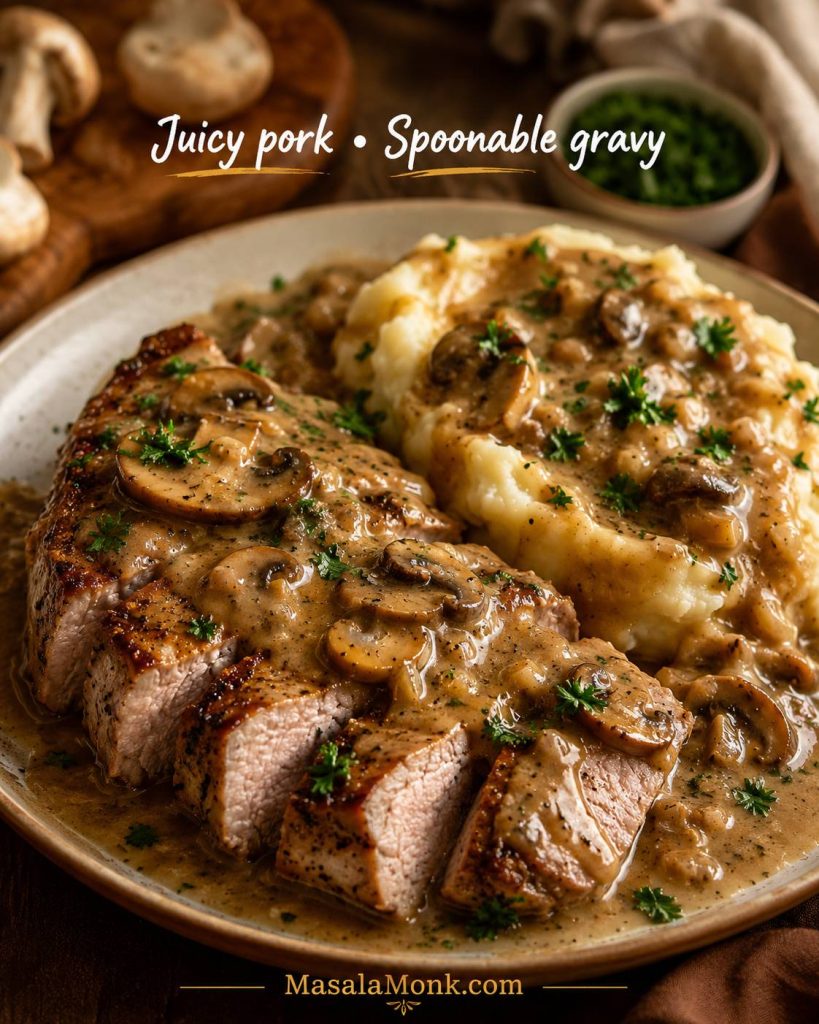
Spoon the creamy gravy over the pork and give it somewhere to land: mashed potatoes, rice, egg noodles, biscuits, or green beans all make the plate feel complete. The sauce should settle over the chop and drift into the side, not run across the plate like soup.
Cream of Mushroom Pork Chops Recipe Card
Classic skillet cream of mushroom pork chops with tender pork, creamy mushroom gravy, optional mushrooms and onions, and enough sauce for potatoes, rice, noodles, or green beans.
Recipe note: once the chops are done, move them out of the skillet and finish the gravy separately if needed.
Prep Time 10 minutes
Cook Time 20 minutes
Total Time 30 minutes
Servings 4
Equipment
12-inch skillet, preferably heavy-bottomed
Tongs
Whisk or sturdy spoon
Instant-read thermometer
Plate for resting the pork chops
Ingredients
4 pork chops, about 1½–2¼ lb / 680 g–1 kg total, preferably ¾–1 inch thick
½ teaspoon black pepper, plus more to taste
½ teaspoon garlic powder or paprika, optional
Small pinch of salt, optional
1 tablespoon oil / 15 ml
1 tablespoon butter / 14 g
8 oz / 225 g fresh mushrooms, sliced, optional but recommended
½ medium onion / 75–100 g, thinly sliced or diced, optional but recommended
2–3 garlic cloves, minced
1 can condensed cream of mushroom soup, 10.5 oz / 298 g, regular or low-sodium
Pat the pork chops dry. Season both sides with black pepper, garlic powder or paprika if using, and only a small pinch of salt.
Heat the oil in a 12-inch skillet over medium-high heat. Add pork chops in a single layer, browning in batches if needed.
Sear until golden, about 3–5 minutes per side for ¾–1 inch chops. Transfer to a plate. The pork does not need to be fully cooked yet.
Reduce heat to medium. Add butter, mushrooms, and onion. Cook 5–7 minutes, until the mushrooms release moisture and begin to brown.
Add garlic and cook for 30 seconds.
Whisk in condensed cream of mushroom soup and ⅓ cup broth, milk, or water. Add Worcestershire and Dijon if using. Add more liquid a splash at a time if you want looser gravy.
Return pork chops and plate juices to the skillet. Spoon gravy over the chops. Reduce heat to medium-low, cover loosely, and simmer gently until the thickest part reaches 145°F.
If the pork is done before the gravy is thick enough, move the chops to a plate and simmer the sauce uncovered by itself.
Rest pork chops for 3 minutes. Taste gravy and adjust with pepper, parsley, or a splash of liquid if needed.
Serve hot with mushroom gravy spooned over the top.
Notes
Use ⅓ cup liquid for thicker gravy and ½ cup for a looser sauce.
Chicken broth is a good default liquid; milk is creamier; water is the classic canned-soup version.
Thin pork chops cook fast. Check them early and do not simmer them like thick chops.
Bone-in chops may need a few extra minutes near the bone.
Once the soup is in the skillet, keep the heat low enough for slow bubbles.
For baked, crock pot, rice, potato, or stuffing versions, the method and timing change.
Need to adjust the sauce? Use the mushroom gravy fixes for watery, thick, or salty gravy.
Creamy Mushroom Gravy Success Cues: Not Watery, Not Pasty
A strong version should feel like gravy dinner, not soup poured over meat. When you cut into the chop, the inside should still look moist, and the sauce should drag slowly from the spoon into potatoes, rice, or noodles.
Look for juicy slices and gravy that settles into the side, so the plate feels creamy and complete instead of soupy.
Success cue
What you want
What to fix
Gravy texture
Coats a spoon and moves slowly
Watery ring around the pan or paste-like sauce
Pork texture
Slices easily and looks moist inside
Dry, gray, tight meat from overcooking
Flavor
Savory, creamy, mushroom-forward
Too salty, bland, or flat
Core fix
Adjust the sauce after the chops are done
Leaving done pork in the pan while fixing gravy
How Long to Cook Pork Chops in Cream of Mushroom Soup
This is where most pork chop dinners are won or lost. The gravy can look perfect while a thin chop quietly overcooks, so timing has to follow thickness, not habit.
Timing by Pork Chop Thickness
Pork chop type
Sear time
Sauce simmer time
Timing note
Thin pork cutlets, about ¼ inch
1–2 minutes per side
1–3 minutes
Most of the cooking happens during the sear. Check early.
½-inch boneless pork chops
2–3 minutes per side
3–5 minutes
Fast, but easy to overcook.
¾-inch boneless pork chops
3–4 minutes per side
4–7 minutes
One of the easiest sizes for this recipe.
1-inch boneless pork chops
4–5 minutes per side
6–10 minutes
Juicier than thin chops; use a thermometer.
1-inch bone-in pork chops
4–5 minutes per side
8–12 minutes
May need a little longer near the bone.
Most forgiving range: ¾–1 inch chops are the easiest size for this recipe. They brown well, stay juicier than thin cutlets, and give the gravy enough time to come together. Thin ½-inch chops still work, but they need a short simmer. Bone-in chops are forgiving, but check the meat near the bone.
Timing depends on thickness, so use chop size as your guide and check the center instead of trusting the clock alone.
Temperature and Resting Note
Treat the table as a starting point, not a contract. Thin chops may finish during the sear; thicker bone-in chops may need more time near the bone. The thermometer gets the final vote: 145°F / 63°C plus a 3-minute rest, which matches FoodSafety.gov’s safe minimum internal temperature guidance for pork chops.
A slightly pink center is not automatically a problem when pork has reached temperature and rested. Dry, gray pork usually comes from chasing old timing habits instead of stopping at the right doneness.
The same temperature-first idea matters with other lean pork cuts; our pork tenderloin in oven guide uses that same rest-before-slicing approach.
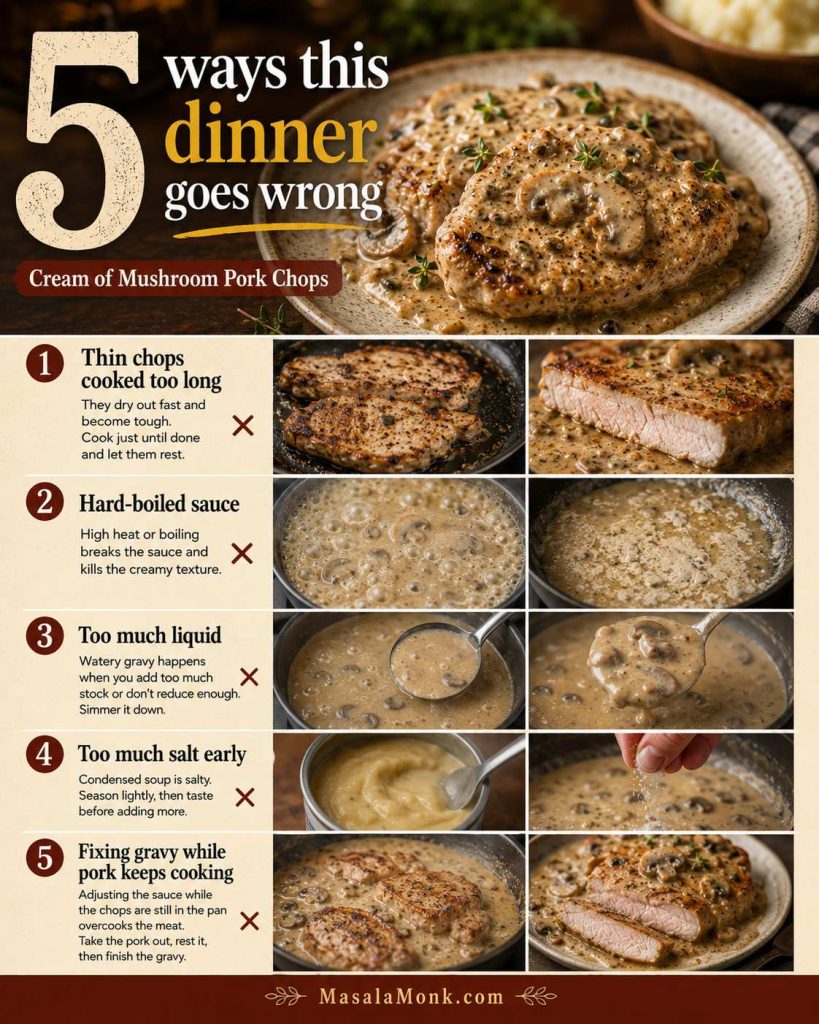
5 Ways This Dinner Goes Wrong — and How to Avoid Them
Most cream of mushroom pork chop problems come from one of five small choices. Fix these before they happen and the whole dinner feels easier.
Do not cook thin chops like thick chops. They can turn tough before the gravy is done, so sear them briefly and return them only long enough to finish.
Do not boil the sauce hard. Once the soup goes in, keep slow bubbles so the pork stays tender and the gravy stays creamy.
Do not add all the liquid at once. Start with ⅓ cup and loosen gradually so the gravy does not turn soupy.
Do not salt heavily before tasting the soup. Condensed soup and seasoning mixes can make the final gravy too salty.
Do not fix gravy while finished pork keeps cooking. Move done chops out first, then thin, thicken, or reduce the sauce.
Most cream of mushroom pork chop problems start small: thin chops stay on too long, sauce boils too hard, liquid gets added too fast, or seasoning happens before tasting.
How to Make the Mushroom Gravy Creamy, Not Watery
The gravy should act like a blanket, not soup. It should coat the pork, slide slowly into mashed potatoes or rice, and taste savory instead of simply salty. Think of it as a mushroom cream sauce for pork chops: creamy enough to coat, but loose enough to spoon.
Mushroom Gravy Spoon Test
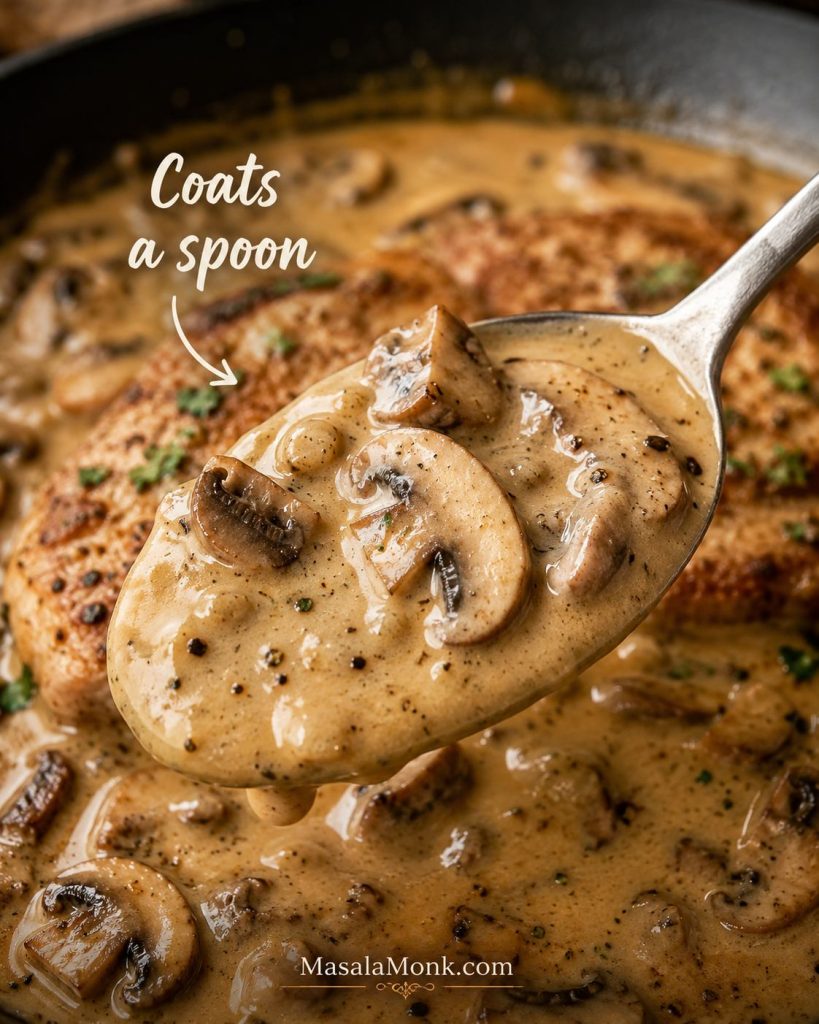
The easiest visual cue is the spoon: the gravy should cling lightly, then slide off slowly instead of running like broth or sitting like paste.
A good mushroom gravy coats the spoon, but still slides easily over pork chops and into whatever side you serve underneath.
Chicken broth gives the most savory, balanced mushroom gravy and is a reliable everyday default.
Milk makes the sauce softer and creamier, with a milder comfort-food flavor.
Water keeps the classic canned-soup taste and works well for the pantry version.
A small splash of white wine brightens the gravy when you are using fresh mushrooms and onion.
For one 10.5-ounce can of condensed cream of mushroom soup, start with ⅓ cup liquid if you want thick gravy. Use up to ½ cup when you want more sauce for rice, noodles, or potatoes. Add extra liquid in tablespoons, not big pours.
Too Thin, Just Right, or Too Thick Mushroom Gravy
Use the texture as your guide before serving. Thin gravy needs reducing, thick gravy needs a splash of liquid, and just-right gravy should look glossy and spoonable.
If the gravy looks watery, simmer it down; if it turns too thick, loosen it slowly until the sauce becomes glossy and spoonable again.
How to Thicken Mushroom Gravy
If the gravy is too thin, remove the pork chops and simmer the sauce uncovered until it coats a spoon. For a faster fix, whisk 1 teaspoon cornstarch with 1 tablespoon cold water, stir that slurry into the simmering gravy, and cook for a minute or two.
How to Thin Mushroom Gravy
If the gravy turns pasty, lower the heat and add broth, milk, or water a splash at a time. Stir until the sauce loosens and looks glossy again. A thick sauce is easy to fix as long as the pork is not still sitting in it over heat.
How to Keep the Gravy from Tasting Too Salty
Use low-sodium broth if your soup is salty, and be careful with onion soup mix, bouillon, gravy packets, ranch seasoning, or seasoned salt. If the finished sauce tastes too salty, soften it with milk, cream, unsalted broth, or sour cream, then serve it with plain potatoes, rice, noodles, or vegetables.
If the pork is already cooked and the sauce still needs help, use the troubleshooting guide instead of simmering the chops longer.
Campbell’s-Style Cream of Mushroom Pork Chops
This is the version many people remember: pork chops, condensed cream of mushroom soup, water, black pepper, and a short simmer. It is not fancy, and it does not need to be. The one upgrade worth keeping is temperature control instead of simmering by habit.
Campbell’s-style pork chops are the nostalgic shortcut version, but browning the meat and simmering gently make the gravy taste more like dinner.
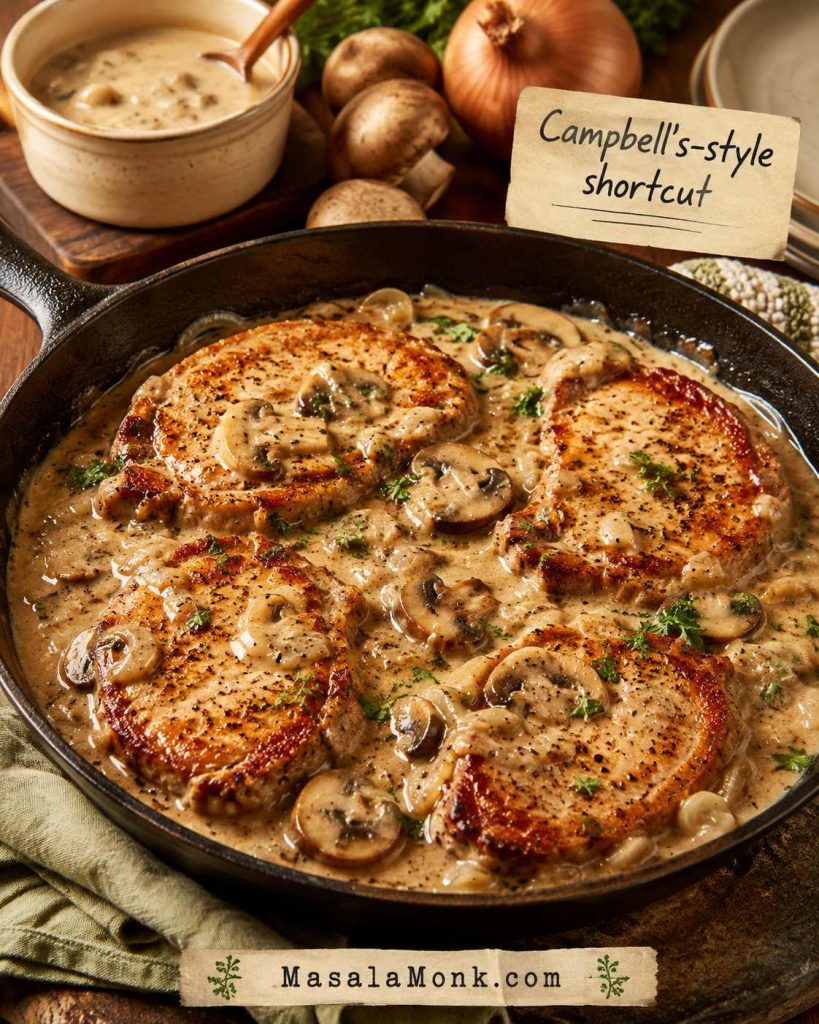
Campbell’s-style shortcut: brown 4 pork chops, stir 1 can condensed cream of mushroom soup with ½ cup water, return the chops to the pan, cover, and simmer gently until the pork reaches 145°F. Rest 3 minutes before serving.
Use the classic version when you want the childhood shortcut. Use the upgraded version when you want the same comfort with deeper flavor and better gravy texture.
Water, Broth, or Milk for Campbell’s-Style Pork Chops
Version
Liquid / add-ins
Flavor
Campbell’s-style classic
½ cup water
Nostalgic, simple, most like the old shortcut
Better weeknight version
⅓–½ cup chicken broth
Savory, fuller, still easy
Creamier version
⅓–½ cup milk
Softer, richer, milder
Less canned version
Broth + mushrooms + onion + Worcestershire
More homemade without losing the shortcut
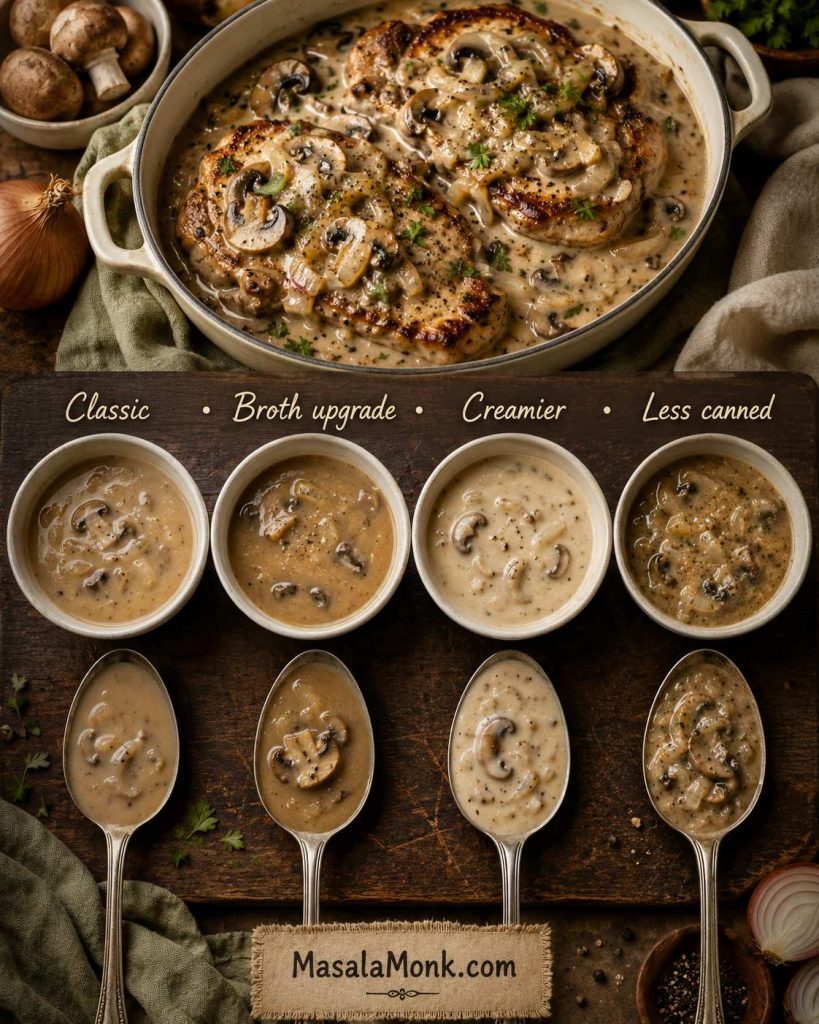
Water gives the classic canned-soup flavor, broth adds savory depth, milk softens the sauce, and browned mushrooms make the shortcut taste more complete.
The thermometer is the reliability upgrade. The classic recipe tells you to simmer until done; this version gives the pork a clear stopping point.
Baked, Crock Pot, Rice, Potatoes, and Stuffing Versions
These versions are popular because they solve different dinner problems. The baked version is hands-off, the crock pot version waits for you, and rice, potatoes, or stuffing can turn pork chops into a full casserole. The tradeoff is that each version needs its own moisture and timing.
Baked Pork Chops with Cream of Mushroom Soup
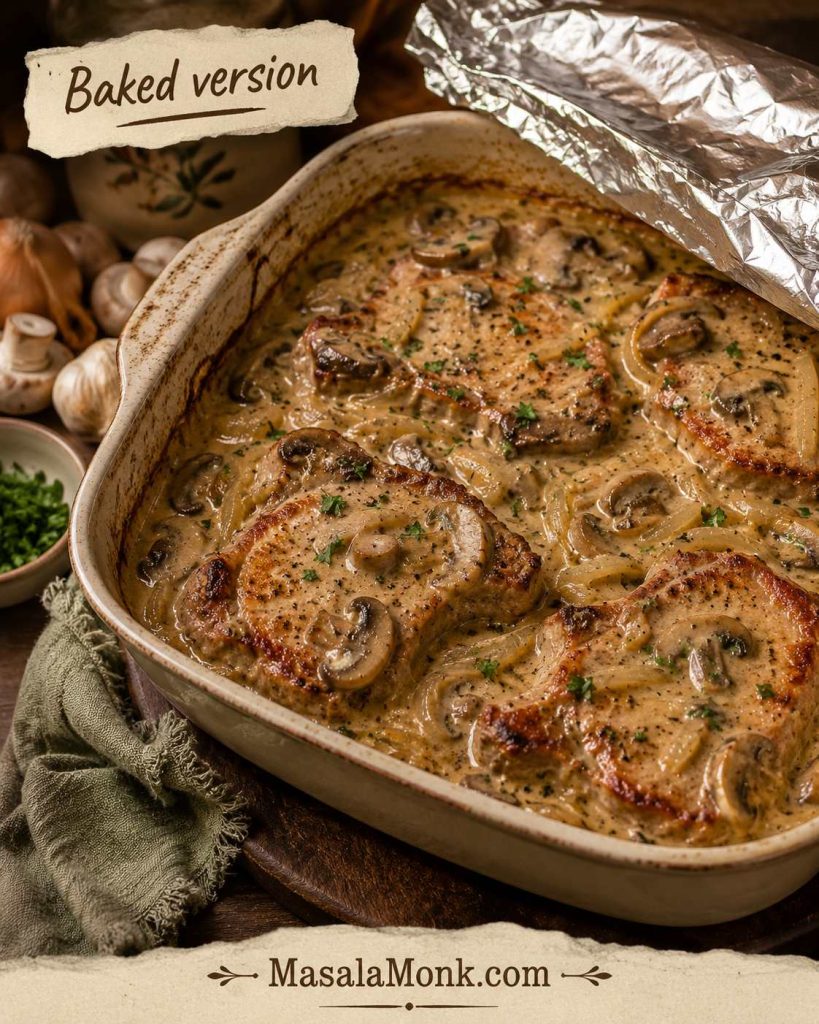
Oven answer: brown the pork chops first, cover them with cream of mushroom soup gravy, bake covered at 350°F, and stop when the chops are just done. Keep the dish covered for a creamy bake; uncover only briefly if the gravy needs to reduce.
For many ¾–1 inch chops, start checking around 25 minutes after browning; thicker covered versions may take longer, but doneness decides.
Thin or ½-inch boneless chops need a short covered bake after a brief sear. Check early; they should not get thick-chop timing.
¾–1 inch boneless chops are the most reliable baked version because they brown well and give the sauce time to heat through.
1-inch bone-in chops make a cozier, more forgiving oven dinner, but check the meat near the bone.
Check early; baked chops can dry out if they sit too long after they are done. The oven should not become a holding place for already-finished lean pork.
In a baked version, the covered dish protects the gravy. The main job is checking the pork before the oven turns it dry.
Crock Pot Cream of Mushroom Pork Chops
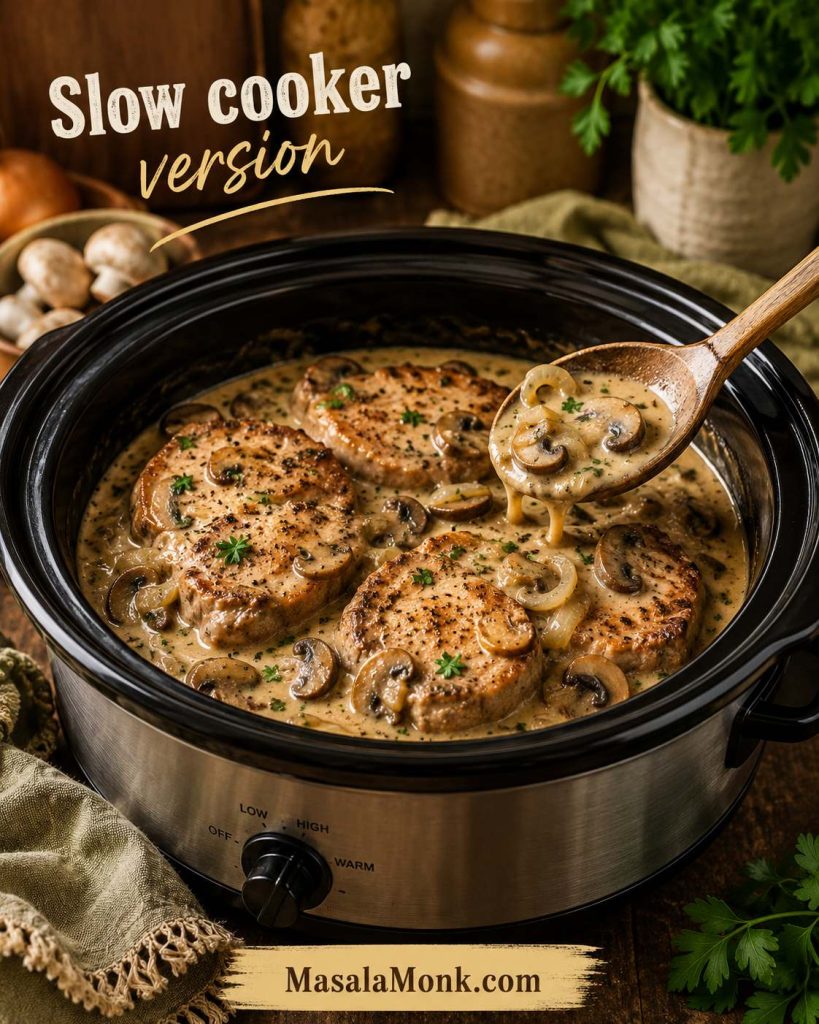
Slow cooker answer: use thawed thicker pork chops, condensed cream of mushroom soup, a little broth, and optional onion soup mix or mushrooms. For sliceable chops, start checking earlier; for fall-apart-style chops, many slow-cooker recipes run 6–8 hours on low. Very thin boneless chops are the riskiest choice, and the sauce can be thickened at the end if it looks loose.
A crock pot version is best treated as its own recipe, not as the skillet method stretched over several hours. Slow cookers trap liquid, so the gravy will usually be thinner than skillet gravy. Very thin boneless chops are convenient, but they can dry out before they become truly tender.
Thin boneless chops: use the skillet method if possible because they dry out easily under long heat.
Thicker boneless chops: a better slow-cooker option because they give you more room before overcooking.
Bone-in chops: good if they fit in one layer; the bone helps protect the meat a little.
Loose sauce at the end: thicken it after the chops are cooked rather than cooking the pork longer.
For crock pot cream of mushroom pork chops, thicker cuts and enough sauce matter because slow heat rewards moisture but can punish very thin chops.
Pork Chops and Rice with Cream of Mushroom Soup
Rice is where this recipe stops being a simple skillet dinner and starts behaving like a casserole. That is why the liquid changes so much.
For the quickest dinner, make the skillet pork chops first, then spoon the mushroom gravy over cooked rice.
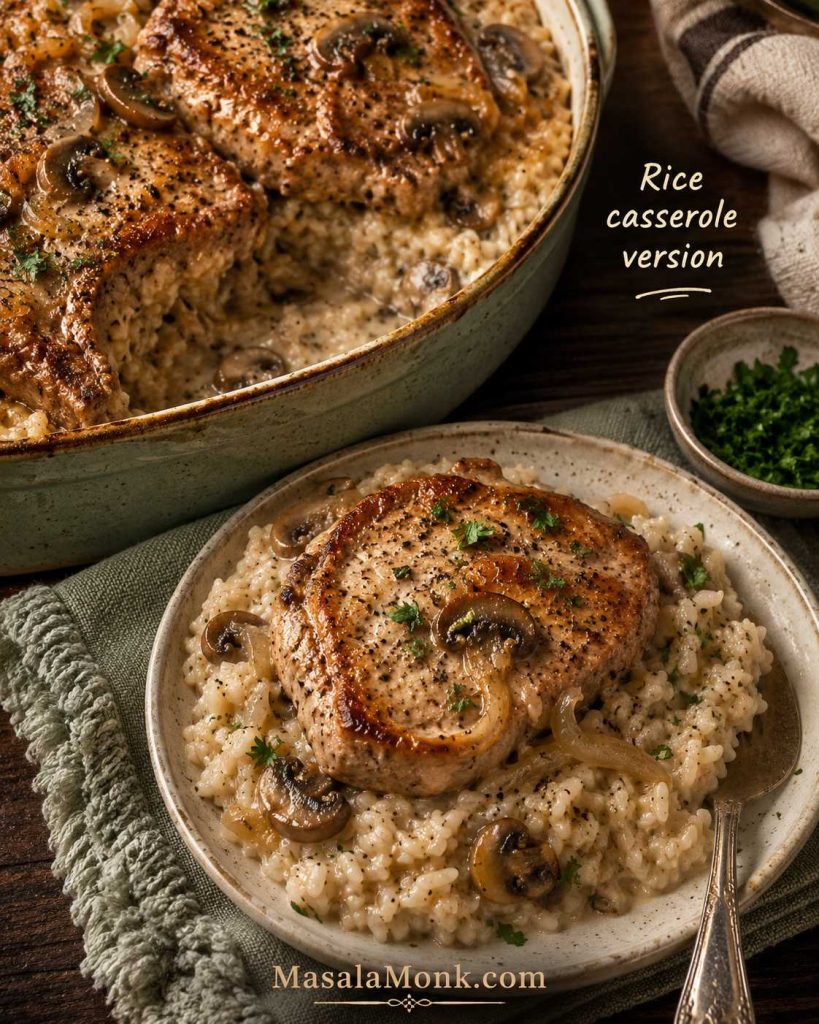
For pork chops and rice with cream of mushroom soup, decide early: serve skillet pork over cooked rice, or build a covered rice casserole from the start.
Cooked Rice Side vs Baked Rice Casserole
If you want…
Do this
Why
Skillet pork chops with rice
Cook rice separately and spoon mushroom gravy over it
The pork timing stays short and controlled.
One-pan pork chops and rice
Use a covered baked casserole method
Uncooked rice needs more liquid, tight coverage, and longer cooking.
Uncooked rice
Add enough broth/water and bake until rice is tender
A skillet sauce for pork chops does not contain enough liquid for raw rice.
Leftover cooked rice
Warm separately or fold into the sauce after the pork is done
It should heat through, not keep the pork cooking.
Cooked rice is the easiest side for skillet pork chops, while a baked rice casserole needs its liquid, cover, and timing planned from the beginning.
For the safest weeknight version, make the skillet pork chops and serve them over cooked rice. For a true pork chops and rice casserole, build that dish around the rice from the beginning.
Simple Baked Rice Starting Point
Simple baked rice direction: as a starting point for a casserole-style version, use 1 cup long-grain rice, 1 can condensed cream of mushroom soup, and about 1½ cups broth in a tightly covered dish, then bake at 350°F until the rice is tender and the pork is just done. If the pork finishes before the rice, lift the chops out and let the rice continue covered.
If adding rice to a slow cooker version, do not add it at the very beginning unless you are following a dedicated slow-cooker rice recipe. Rice can absorb too much liquid and turn mushy; add it later or serve the pork over separately cooked rice.
Pork Chops with Cream of Mushroom Soup and Potatoes
Easiest potato shortcut: serve the skillet version over mashed potatoes so the gravy has somewhere soft to land. For raw sliced potatoes, cut them thin, add enough liquid, cover tightly, and treat the dish like a casserole rather than a skillet pork chop recipe.
Potatoes make the meal heartier; however, sliced potatoes need covered moisture and enough time, so they behave more like a casserole than a skillet add-in.
Pork Chops, Stuffing, and Cream of Mushroom Soup
Easiest stuffing shortcut: hydrate the stuffing first, then bake it covered with the pork and mushroom sauce. Dry stuffing should not be scattered into the pan because it will pull moisture from the gravy and make the whole dish feel dry.
Stuffing needs moisture to stay soft, so treat this as a covered bake rather than a quick skillet add-in.
Easy Variations
Use these variations to change the flavor while keeping the same easy skillet rhythm.
Soup Swaps
Golden mushroom soup pork chops: use golden mushroom soup when you want a darker, tangier, more brown-gravy style sauce. It is less creamy than classic cream of mushroom.
Cream of chicken soup substitute: use cream of chicken when you want a milder sauce or do not have mushroom soup. Add sautéed mushrooms if you still want mushroom flavor.
Flavor Boosters
Onion soup mix: adds strong savory flavor, but use low-sodium soup or broth if possible because the gravy can get salty quickly.
Ranch seasoning: gives a tangy, family-style flavor. Start with less than a full packet and taste before adding more.
Worcestershire and Dijon: make the sauce taste fuller without changing the comfort-food feel.
Smothered Pork Chops with Cream of Mushroom Soup
For a smothered version, make extra gravy and use mushrooms, onions, and a little more liquid. Brown the chops, build the sauce, simmer gently, then remove the pork as soon as it is done. Reduce or thicken the gravy separately so the chops stay juicy while the sauce gets rich.
Smothered cream of mushroom pork chops should feel extra saucy, with mushrooms and onions making the gravy rich enough to carry the whole plate.
Richer Finishes
Sour cream finish: take the skillet off the heat and stir in a spoonful of sour cream at the end for a tangier, creamier sauce.
Extra mushrooms and onions: double the mushrooms if you want the gravy to feel more homemade and less like a plain soup sauce.
Small splash of cream: useful if the sauce tastes sharp or salty and needs softening.
Double Batch for a Family Dinner
For 8 pork chops, use 2 cans of condensed cream of mushroom soup and about ⅔ to 1 cup liquid. Brown the pork in batches so it does not steam, then finish in a large skillet, braiser, or baking dish. Check chops individually because crowded pans do not cook evenly.
What to Serve with Cream of Mushroom Pork Chops
This is a gravy dinner, so give the gravy somewhere to land. The easiest sides are simple enough to carry the gravy or fresh enough to balance it.
Mashed potatoes: the classic choice when you want a cozy plate with plenty of mushroom gravy.
White rice or brown rice: easy, filling, and ideal when the rice is cooked separately from the skillet pork chops.
Egg noodles: a stroganoff-style direction without changing the recipe.
Green beans: crisp and fresh enough to balance the richness.
Peas: sweet, simple, and very good with salty-creamy mushroom gravy.
Broccoli: roasted or steamed, especially with extra black pepper on the sauce.
Biscuits: useful when you want a very cozy, gravy-heavy plate.
Simple salad: useful when the meal needs something bright and clean beside it.
Creamy mushroom pork chops pair best with sides that catch gravy or add freshness, such as mashed potatoes, rice, egg noodles, green beans, peas, or broccoli.
If the gravy tastes rich or salty, choose a plain side like rice, potatoes, noodles, or steamed vegetables. If the plate feels a little too beige, add green beans, peas, broccoli, or a sharp salad. Let the mushroom sauce be the comfort; let the side bring the lift.
Storage and Reheating
Store leftover pork chops with the mushroom gravy when possible. The sauce helps protect the meat from drying out in the fridge and makes reheating easier.
Storage question
Quick answer
Fridge
Store in an airtight container for 3–4 days.
Freezer
Freeze up to 2–3 months, though creamy gravy may look slightly separated after thawing.
Gentlest reheating method
Warm gently in a covered skillet over low heat with a splash of broth or milk.
Microwave
Use lower power, cover loosely, and heat in short bursts.
What to avoid
Do not boil leftovers hard; it tightens the pork and can make the sauce split.
Store the pork with its mushroom gravy when possible; later, a small splash of broth or milk helps the sauce loosen without boiling the meat again.
If the pork chops are thick, slicing them before reheating can help them warm faster and more evenly. Add a spoonful of extra gravy over the slices before serving. Reheat gently; boiling leftover pork in the sauce can make it tighter.
Troubleshooting the Pork Chops and Mushroom Gravy
The mistake section prevents problems. This section is for the moment when dinner is already in the pan and you need a fix. When the chops are already done, move them out first, then repair the gravy.
Problem
Fix now
Fix next time
Pork chops turned tough
Slice thinly across the grain and spoon hot gravy over the slices.
Use thicker chops, simmer gently, and check temperature earlier.
Sauce is too thick
Add broth, milk, or water a splash at a time over low heat.
Start with ⅓ cup liquid, then adjust gradually.
Gravy looks watery
Remove pork and simmer the sauce uncovered until it coats a spoon.
Thaw pork fully, pat dry, and avoid adding too much liquid at the start.
Gravy tastes too salty
Stir in milk, cream, unsalted broth, or sour cream; serve with plain sides.
Use low-sodium soup or broth and go easy on seasoning mixes.
Pork tastes bland
Add black pepper, Worcestershire, Dijon, parsley, or extra sautéed mushrooms to the gravy.
Brown the pork harder and build more flavor before the soup goes in.
When dinner is already in the pan, protect the pork first; then simmer watery gravy, loosen thick sauce, dilute salty gravy, or spoon extra sauce over dry slices.
How long do pork chops cook in cream of mushroom soup?
After browning, thin pork chops may need only 1–3 minutes in the sauce. Chops around ¾ to 1 inch thick usually need about 4–10 minutes, depending on whether they are boneless or bone-in. The thickest part should reach 145°F, followed by a 3-minute rest.
What temperature keeps pork chops juicy and safe?
Pork chops should reach 145°F / 63°C, followed by a 3-minute rest. That keeps the pork juicier than old-school overcooked chops while still giving you a safe finished dinner.
How much water do you add to cream of mushroom soup for pork chops?
For one 10.5-ounce can of condensed cream of mushroom soup, use ⅓ to ½ cup liquid. Use ⅓ cup for thicker gravy and ½ cup for a looser sauce. Water is classic, broth is more savory, and milk makes the sauce creamier.
Is milk, broth, or water best for the gravy?
Chicken broth is a good default because it makes the gravy taste more savory without much effort. Milk gives a softer, creamier sauce. Water gives the most classic Campbell’s-style flavor and is useful when the soup or seasoning mix is already salty.
Boneless or bone-in pork chops: which is better?
Boneless chops cook faster and are easiest for a quick skillet dinner. Bone-in chops are often more forgiving and can stay juicier, but they may need a little more time near the bone.
Thin pork chops keep drying out. What should I do?
Sear them briefly, make the sauce, then return them only long enough to warm through and finish. Very thin chops should not simmer like thick chops.
Skillet or oven: which method is easier?
The skillet is faster and gives you better control over the gravy. The oven is easier when you want a covered baked version or when you are adding rice, potatoes, or stuffing. Either way, brown the pork first when possible and cook by temperature.
Crock pot pork chops with cream of mushroom soup: what should I know?
Use thawed, thicker chops rather than very thin boneless chops. Slow cookers trap moisture, so the sauce may look loose at the end; thicken it after cooking if needed. For fall-apart-style chops, many slow-cooker recipes run longer, often 6–8 hours on low.
Can I cook rice in the same pan?
Not for the quick skillet method. Uncooked rice needs extra liquid, covered heat, and more time than skillet pork chops should spend cooking. Use cooked rice as a side, or make a covered baked casserole built around the rice.
Why did the pork chops turn tough?
They were probably too thin for the timing, simmered too hard, or cooked past the right doneness point. Creamy gravy helps the plate, but it cannot fully undo overcooked lean pork.
Final Thoughts
Cream of mushroom pork chops are not trying to be fancy. They earn their place because they ask so little and give back so much: browned pork, creamy mushroom gravy, and a plate that feels complete with rice, potatoes, noodles, or whatever simple side you already have.
Keep the gravy spoonable, keep the heat gentle, and stop while the chops are still juicy. That is the whole promise of this dinner: one can of soup, one skillet, and a plate of creamy mushroom pork chops that tastes like you gave it more effort than you did.
Ground pork recipes, or pork mince recipes in many regions, are one of the easiest ways to get a flavorful, affordable dinner on the table fast. One pound can become a quick stir fry, juicy tacos, tender meatballs, fried rice, pasta, burgers, or a comforting rice-based skillet. That range is what makes ground pork one of the most useful proteins to keep around for busy nights.
Still, not every ground pork dinner solves the same problem. Some are best when dinner needs to happen in 20 minutes, while others stretch a pound farther, reheat better the next day, or feel more comforting when you want something steadier and heartier. So, the smartest move is to start with the kind of night you are actually having.
These 10 ground pork recipes cover the weeknight dinners people reach for most: fast skillets, tacos, burgers, pasta, meatballs, fried rice, lighter bowls, and a few deeper comfort-food options. Use the quick picks below when you want the answer fast, or scroll straight to the recipe that sounds right for tonight.
Use this quick chooser to match your night to the right ground pork dinner, whether you need speed, budget value, leftovers, comfort, or something lighter.
Quick Answers: Best Ground Pork Recipes for Weeknights
Need the short version? Start here.
Fastest Dinner
Go with ground pork stir fry. It is the fastest all-around option, works with whatever vegetables you have, and still feels like a complete dinner instead of a backup plan.
10 Easy Ground Pork Recipes for Dinner on Busy Weeknights
Each one is here because it solves a real weeknight dinner problem. Some are built for speed, some for leftovers, some for comfort, and some for stretching a pound of pork into a fuller, more affordable meal.
1. Ground Pork Stir Fry Recipe
Because stir fry is the fastest pick in this roundup, the real win is contrast: browned pork, bright vegetables, and just enough rice to turn fridge odds and ends into a proper dinner.
Choose this if: dinner needs to happen fast and you want the most flexible recipe on the page.
When the fridge is full of odds and ends, stir fry is usually the smartest move. The pork browns quickly, stays juicy enough to support a lot of vegetables, and carries sauce well. That makes it especially useful on nights when dinner depends on what is already in the fridge.
Time: about 20 minutes Serves: 4 Best for: speed, flexibility, and using up vegetables
What you need
1 pound ground pork
1 tablespoon neutral oil, only if needed
1 small onion or 3 to 4 scallions, chopped
3 to 4 cloves garlic, minced
1 tablespoon grated ginger
4 to 5 cups mixed vegetables, cut into bite-size pieces
3 tablespoons soy sauce
1 to 2 teaspoons chili paste or chili flakes
1 teaspoon sesame oil
1 to 2 teaspoons rice vinegar or lime juice
1/2 teaspoon black pepper
Cooked rice or noodles, for serving
Proper browning is what gives this stir fry real flavor, while the vegetables should stay bright and the skillet should look glossy, not watery.
How to make ground pork stir fry
Heat a large skillet or wok over medium-high to high heat. Add the pork and let it sit for 45 to 60 seconds before stirring so it browns instead of steaming.
Break up the meat and cook until no longer pink and browned in spots, about 5 to 6 minutes. Add a little oil only if the pan looks dry.
If the skillet looks very greasy, spoon off some fat, but leave enough behind to carry flavor.
Add the onion, garlic, and ginger. Cook for about 1 minute, stirring often, until fragrant.
Add the vegetables that take longer first, such as broccoli or carrots. Follow with faster-cooking vegetables like mushrooms, peppers, cabbage, or spinach.
Stir in the soy sauce, chili, sesame oil, vinegar or lime juice, and black pepper. Toss until the vegetables are just tender and the skillet looks glossy rather than watery.
Taste and adjust. Add more soy for depth or more acid for brightness.
Best ways to serve it
Serve the stir fry over 3 to 4 cups cooked rice or with about 8 ounces cooked noodles. For a lighter plate, spoon it over shredded cabbage or cauliflower rice and add cucumber on the side for contrast.
Easy variations and leftovers
Add a sweeter savory finish with a quick teriyaki sauce for a glossier version. You can also lean hotter with chili crisp and extra scallions. Leftovers reheat well for lunch, especially when you keep the rice separate so the vegetables stay in better shape overnight.
Best result: do not crowd the pan. The browning is what keeps this from tasting flat.
Juicy pork, soft tortillas, and just enough fresh topping make these tacos one of the easiest crowd-pleasing dinners in the whole post.
Choose this if: you want a fast, flexible family dinner that still feels generous.
Tacos are one of the easiest ways to turn one pound of pork into a dinner that feels bigger than it is. Pork stays juicy, takes spice well, and works with enough toppings, slaws, and sides that the meal feels generous without getting expensive.
Time: about 25 minutes Serves: 4 Best for: family dinners, easy customization, and stretching one pound of pork
Ingredients for ground pork tacos
1 pound ground pork
1 small onion, finely chopped
2 to 3 cloves garlic, minced
1 tablespoon chili powder
1 teaspoon cumin
1 teaspoon paprika
1/2 teaspoon oregano
3/4 teaspoon kosher salt, or to taste
1/2 teaspoon black pepper
1 tablespoon tomato paste
2 to 4 tablespoons water
8 to 12 tortillas, flour or corn
Toppings such as slaw, salsa, avocado, cilantro, lime, pickled onions, or shredded lettuce
How to cook the filling
A good taco filling should look deeply browned, richly seasoned, and moist enough to spoon easily into tortillas without turning greasy or dry.
Cook the ground pork in a skillet over medium-high heat until browned and broken up well, about 5 to 6 minutes.
Add the onion and cook until softened, about 3 minutes, then stir in the garlic.
Add the chili powder, cumin, paprika, oregano, salt, and pepper. Cook for 30 seconds so the spices bloom instead of tasting dusty.
Stir in the tomato paste and water. The filling should stay juicy enough to spoon into tortillas easily, not dry and crumbly.
Warm the tortillas while the filling finishes.
Squeeze lime over the meat just before serving for a brighter finish.
Toppings and serving ideas
Build the tacos with one crunchy element and one fresh one. Slaw, shredded lettuce, salsa, chopped onion, cilantro, avocado, and lime are enough for a strong version. For a more relaxed family dinner, set everything out taco-bar style so everyone can build their own plate.
Leftover ideas
For a creamier taco, add a quick eggless mayonnaise-based sauce or a spoonful of green chutney for something brighter. Leftover taco meat also works well in rice bowls, quesadillas, stuffed peppers, or a quick breakfast hash with eggs.
Watch out for this: the filling should stay juicy. A dry taco filling makes the whole dinner feel flatter than it needs to.
Related next pick: want the same kind of fast dinner in burger form instead? Try Ground Pork Burgers.
Tender meatballs and a glossy, controlled sauce make this one of the easiest dinners in the post to cook once and enjoy again later.
Choose this if: you want the best all-around meal-prep and leftovers option in the guide.
Meatballs are the easiest make-ahead winner in the lineup. Pork stays tender naturally, the mixture is forgiving, and the finished meatballs can move into pasta, rice bowls, sandwiches, or freezer meals without much extra work.
Time: about 35 minutes Serves: 4 Makes: about 16 medium meatballs Best for: leftovers, freezer cooking, and versatile dinners
What you need
1 pound ground pork
1 egg
1/2 cup breadcrumbs, panko or fine dried crumbs
1/4 cup grated Parmesan, optional
2 to 3 cloves garlic, minced
2 tablespoons finely chopped parsley or onion
3/4 teaspoon kosher salt
1/2 teaspoon black pepper
1 tablespoon milk or water if the mixture feels tight
Oil for the pan or a parchment-lined baking sheet
Sauce for serving
How to make them
Heat the oven to 425°F if baking.
Combine the pork, egg, breadcrumbs, Parmesan, garlic, parsley or onion, salt, pepper, and milk or water.
Mix gently and stop as soon as everything holds together. Overmixing makes meatballs dense.
Form into evenly sized meatballs, about 1 1/2 inches wide, so they cook at the same rate.
Bake for 12 to 15 minutes, or until cooked through and lightly browned. You can also sear them in a skillet and finish in sauce.
The finished meatballs should feel lightly firm and springy, not tight or dry.
Simmer the cooked meatballs in sauce for a few minutes when using one, so they stay moist and pick up more flavor.
This is the point where ground pork meatballs prove why they are one of the smartest make-ahead dinners in the post: even sizing and light browning give you a tender batch that can head to sauce, pasta, subs, or the freezer without falling apart.
How to serve them
Serve them with marinara sauce and pasta, over rice with a gingery glaze, in sub rolls, or with roasted vegetables and salad. Because the seasoning starts fairly neutral, the same batch can move in several directions without feeling repetitive.
Make-ahead and freezer notes
Double the batch when possible. You can freeze cooked meatballs for quick dinners later, or freeze them uncooked on a tray first and then transfer them to a container once firm. Either way, they are one of the best meal-prep dinners in the whole guide.
Best result: mix gently and stop early. Tender meatballs come from restraint, not extra mixing.
Meatloaf is the slow, hearty comfort turn in this roundup, and the beef-and-pork mix earns its place by staying juicier than all-beef while giving you the kind of leftovers that justify the longer cook time.
Choose this if: you want the most classic, hearty comfort dinner on the page with especially good leftovers.
When you want something slower, steadier, and more classic than the skillet dinners, meatloaf makes sense. The beef brings familiar meatloaf depth, while the pork keeps the slices juicy. It takes longer, but the leftovers are strong enough to make that extra time feel worth it.
Time: about 70 minutes including rest time Serves: 6 Best for: comfort food, planned leftovers, and make-ahead dinners
Ingredients for the loaf
1/2 pound ground beef
1/2 pound ground pork
1 egg
3/4 cup breadcrumbs
1 small onion, finely chopped
2 cloves garlic, minced
2 tablespoons ketchup or tomato paste
1 tablespoon Worcestershire sauce or soy sauce
1 teaspoon kosher salt
1/2 teaspoon black pepper
For the top: 3 tablespoons ketchup, 1 teaspoon brown sugar or honey, and 1 teaspoon vinegar
How to bake it
Heat the oven to 375°F.
Mix the beef, pork, egg, breadcrumbs, onion, garlic, ketchup or tomato paste, Worcestershire, salt, and pepper just until combined.
The mixture should feel moist enough to hold together but not wet or loose.
Shape into a loaf in a loaf pan or on a lined sheet tray.
Stir together the glaze ingredients and spread over the top.
Bake for 45 to 55 minutes, or until the loaf is cooked through and firm but still juicy.
Rest for 10 minutes before slicing so it does not crumble and lose its juices.
Clean slices and a glossy set glaze are the payoff for letting meatloaf rest before cutting into it too early.
How to serve it
Serve meatloaf with mashed potatoes, roasted carrots, green beans, or a crisp salad to balance the richness. Plain steamed vegetables also work especially well here because the loaf brings enough flavor on its own.
Leftover ideas
Leftover slices make excellent sandwiches, rice bowls, or quick dinner plates. You can also pan-crisp a slice the next day so the leftovers feel more deliberate and less like repetition.
Watch out for this: let the loaf rest before slicing. Cutting too early is the easiest way to lose juices and structure.
Related next pick: want another leftovers-friendly option that cooks faster? Try Ground Pork Meatballs.
A juicy ground pork burger works best with a well-browned patty, a soft toasted bun, and crisp toppings that keep the dinner rich but still balanced.
Choose this if: you want a classic burger-night dinner with a juicier, slightly richer twist than beef.
Burger night does not need to rely on beef. Ground pork makes especially juicy patties, and the flavor works best when the seasoning stays simple and the toppings bring a little crunch or brightness.
Time: about 25 to 30 minutes Serves: 4 Best for: burger night, family dinners, and classic comfort
What you need
1 pound ground pork
1 teaspoon kosher salt
1/2 teaspoon black pepper
1/2 teaspoon garlic powder or 1 small clove garlic, finely grated
1 teaspoon Worcestershire sauce or soy sauce, optional
4 burger buns or sturdy lettuce leaves
Cheese, pickles, lettuce, onion, tomato, or slaw for serving
Oil for the pan, only if needed
How to make the patties
A good pork burger patty should look well browned, gently handled, and juicy enough to rest briefly before it ever goes into the bun.
Combine the pork, salt, pepper, garlic, and Worcestershire if using. Mix just until the seasoning is distributed.
Divide into 4 patties and shape them slightly wider than the buns. Keep them a little thicker in the center than you would with very lean beef.
Chill the patties for 10 minutes if you have time. That helps them hold together more neatly in the pan.
Cook in a hot skillet or grill pan over medium-high heat for about 4 to 5 minutes per side, or until cooked through and browned well on the outside.
Add cheese during the last minute if using, then rest the patties briefly so the juices settle.
Best ways to serve them
Keep the toppings simple so the burger still tastes like pork. Pickles, slaw, onion, lettuce, tomato, and cheese all work well. A swipe of eggless mayonnaise or a spoonful of chimichurri can brighten the burger without making it fussy.
Easy variations and leftovers
Serve them in buns for a classic burger dinner or in lettuce leaves when you want something lighter. Leftover patties also work well sliced into rice bowls or chopped into a breakfast hash the next day.
Watch out for this: do not overwork the meat. The more you mix and press, the less juicy the burgers feel.
Related next pick: want a handheld dinner with more spice and less assembly? Try Ground Pork Tacos.
When the lighter skillet dinners do not sound satisfying enough, ground pork pasta is the fast comfort turn in this roundup: tomato sauce, browned pork, and pantry pasta that still feel like a proper dinner.
Choose this if: you want a fast comfort dinner that feels fuller and more familiar than rice or stir fry.
This is the pasta option for nights when you want a quick tomato-pork sauce without spending all evening on it. The pork brings richness, garlic and onion build the base, and a modest amount of tomato turns everything into a weeknight sauce that clings to the pasta instead of pooling underneath it.
Time: about 25 to 30 minutes Serves: 4 Best for: comfort dinners, pantry cooking, and easy leftovers
Ingredients
1 pound ground pork
8 ounces pasta such as spaghetti, penne, or rigatoni
1 small onion, finely chopped
3 to 4 cloves garlic, minced
2 tablespoons tomato paste
1 cup crushed tomatoes or tomato sauce
1/2 teaspoon chili flakes, optional
1/2 teaspoon black pepper
Salt, to taste
1/4 to 1/2 cup pasta water, as needed
Parmesan and basil or parsley, optional
How to cook it
A good skillet finish leaves the pasta evenly coated and glossy, with the pork worked into the sauce instead of sitting loose underneath it.
Cook the pasta in salted water until just shy of done. Save some pasta water before draining.
Brown the ground pork in a large skillet until cooked through and lightly caramelized.
Add the onion and cook until softened, then stir in the garlic and chili flakes if using.
Stir in the tomato paste and cook for 30 to 60 seconds so it darkens slightly and loses its raw edge.
Add the crushed tomatoes or sauce and a splash of pasta water. Simmer for a few minutes until the sauce looks savory and lightly concentrated.
Add the pasta and toss until the sauce coats it well. Use more pasta water as needed so the pan looks glossy rather than dry.
Finish with Parmesan and herbs if you like.
How to serve it
Serve it with Parmesan, herbs, and a simple salad when you want a fuller plate. Mushrooms, spinach, or zucchini also fit naturally here if you want more volume. For a deeper tomato route, a fuller Bolognese sauce style can pull this dinner in a richer direction.
Leftover notes
Leftovers reheat well with a splash of water so the sauce loosens instead of tightening up. That small step keeps the pasta from feeling dry the next day.
Best result: use the pasta water. It is what helps the sauce cling instead of sitting loose in the bowl.
Related next pick: want another comfort dinner with even better next-day leftovers? Try Ground Beef and Pork Meatloaf.
Fried rice is the best budget-first pick in the post because leftover rice stretches the pork beautifully, while separate grains, egg, and vegetables keep the bowl from feeling flat or skimpy.
Choose this if: you have leftover rice and want one of the best budget-friendly dinners in the roundup.
Fried rice is the budget-first answer when there is already rice in the fridge. The rice stretches the pork, the eggs and vegetables fill out the bowl, and the whole thing comes together quickly once the prep is done.
Time: about 20 to 25 minutes Serves: 4 Best for: leftover rice, budget dinners, and quick one-pan meals
What you need
1 pound ground pork
3 to 4 cups cold cooked rice
2 eggs
1 small onion or several scallions
2 to 3 cloves garlic
1 to 2 cups mixed vegetables such as peas, carrots, mushrooms, or cabbage
2 to 3 tablespoons soy sauce
1 teaspoon sesame oil
1/2 teaspoon black pepper
Chili crisp or hot sauce, optional
How to make ground pork fried rice
Separate grains, browned pork, and just enough gloss are what make fried rice feel properly stir-fried instead of soft, sticky, or clumped together.
Heat a large skillet well and brown the ground pork first. Remove excess fat if needed, but keep enough for flavor.
Push the pork aside or remove it briefly, then scramble the eggs.
Add the onion, garlic, and vegetables. Cook until the vegetables soften but still keep some texture.
Add the cold rice and break up any clumps. Let it sit in the pan for a minute or two so some grains pick up light toasty color.
Return everything together, then season with soy sauce, sesame oil, pepper, and chili if using. Seasoning near the end helps keep the rice from turning mushy.
Finish with scallions for freshness.
How to serve it
Serve fried rice as a complete bowl, or top it with extra chili crisp, sliced cucumber, or a fried egg. If you need a refresher on getting the grains right before they ever hit the pan, this guide on how to cook rice is a useful starting point.
Easy variations and leftovers
Kimchi, leftover roasted vegetables, chopped greens, or mushrooms all fit naturally here. Leftovers also reheat well in a skillet, and the flavor often improves slightly the next day once everything settles together.
Watch out for this: use cold rice and let it toast a little. Fresh hot rice is much more likely to turn soft and clumpy.
Related next pick: want another rice-friendly comfort dinner? Try Pork Giniling.
This ground pork egg roll bowl works best when the pork is well browned, the cabbage stays tender-crisp, and the whole bowl looks glossy and savory rather than wet or heavy.
Choose this if: you want the best one-pan mix of speed, value, and a lighter overall feel.
Ground pork egg roll bowl is one of the easiest one-pan dinners here. It works best when you want something fast, lighter, and practical enough to repeat often, especially if you are using a bag of slaw mix or extra cabbage that needs using.
It lands between the other lighter options: warmer and easier than lettuce wraps, but still cleaner and less heavy than the richer comfort dinners.
Time: about 20 to 25 minutes Serves: 4 Best for: one-pan dinners, cabbage-heavy meals, and lighter weeknights
Ingredients for the skillet
1 pound ground pork
1 small onion, chopped
3 cloves garlic, minced
1 tablespoon grated ginger
5 to 6 cups shredded cabbage or slaw mix
2 to 3 tablespoons soy sauce
1 teaspoon sesame oil
1 to 2 teaspoons rice vinegar or lime juice
Scallions, sesame seeds, peanuts, or chili crisp for topping
Optional rice for serving
How to cook it
This is the texture you want before serving: the cabbage should be softened and glossy but still distinct, so the bowl stays lighter and fresher than a heavier pork skillet or a soggy cabbage stir-fry.
Brown the pork in a large skillet until cooked through.
Add the onion, garlic, and ginger, then cook until fragrant.
Add the cabbage in batches if needed. It will look like too much at first, but it cooks down quickly.
Season with soy sauce and sesame oil. Taste before topping. The skillet should already taste savory and balanced on its own.
Cook until the cabbage is tender but still slightly crisp, not limp or watery.
Finish with rice vinegar or lime so the dish stays bright.
Toppings and serving
You can serve it straight from the pan, which is part of the appeal. For a fuller dinner, spoon it over rice or add a fried egg. Scallions, sesame seeds, peanuts, or chili crisp make the bowl feel more finished without adding much work.
Leftover notes
Reheat leftovers quickly over medium heat so the cabbage keeps some texture. Otherwise, slow reheating softens the vegetables too much and makes the bowl feel flatter the second time around.
Best result: stop while the cabbage still has a little bite. Once it goes limp, the whole skillet feels heavier.
Crisp lettuce, glossy pork filling, and a few bright toppings turn this into the freshest dinner in the lineup without making it feel skimpy.
Choose this if: you want the freshest, brightest, most hands-on dinner on the page.
Lettuce wraps work best when the filling is seasoned more assertively than usual, because the lettuce softens the impact and needs a punchier pork mixture to keep the wraps lively.
It is not only lighter. It is fresher, crisper, and more interactive at the table.
Time: about 20 to 25 minutes Serves: 4 Best for: lighter dinners, interactive meals, and crisp fresh textures
What you need
1 pound ground pork
2 to 3 cloves garlic, minced
1 tablespoon grated ginger, optional but useful
2 to 3 tablespoons soy sauce
1 teaspoon chili paste or chili flakes
1 teaspoon brown sugar or honey, optional
1 to 2 teaspoons lime juice or rice vinegar
Butter lettuce, romaine leaves, or another sturdy lettuce
Toppings such as herbs, peanuts, scallions, shredded carrots, or cucumber
How to make the filling
Brown the pork in a skillet and cook until lightly caramelized.
Add the garlic and ginger, then stir in the soy sauce, chili, and sugar or honey if using.
Cook until the filling is glossy and well seasoned. It should taste slightly stronger than you think it needs to, because the lettuce will soften the impact.
Brighten with lime juice or vinegar at the end so the richness stays under control.
Wash and dry the lettuce well so the wraps stay crisp instead of slippery.
How to serve it
The trick with lettuce wraps is not to overfill them: a modest spoonful of pork, a little crunch, and a squeeze of lime keep this dinner feeling fresher and lighter than the warmer bowl-style recipes in the roundup.
Set out the lettuce, warm filling, and toppings separately so everyone can build their own wraps. Butter lettuce makes softer, neater wraps, while romaine gives more crunch. Extra lime, cucumber, herbs, peanuts, and scallions make the whole meal feel brighter and more complete.
Easy swaps and leftovers
When the lettuce is not great or the leftovers feel awkward the next day, turn the filling into rice bowls or noodle bowls instead. That backup plan makes this recipe even more practical on a busy night.
Best result: season the filling a little harder than usual. The lettuce mutes it more than most people expect.
Tomato-based pork, tender vegetables, and white rice make this one of the steadier, more comforting dinners in the whole lineup.
Choose this if: you want a practical, tomato-based rice dinner that feels especially comforting and complete.
Pork giniling brings a different kind of comfort to the lineup. Instead of soy, cabbage, or noodles, it gives you a tomato-based, rice-first dinner that feels warm, homey, and complete in a way the faster skillet meals do not.
Time: about 35 to 40 minutes Serves: 4 Best for: rice-based comfort food, homey dinners, and tomato-forward ground pork meals
Ingredients
1 pound ground pork
1 small onion, chopped
3 cloves garlic, minced
2 tomatoes, chopped, or 1 cup tomato sauce
1 to 2 tablespoons tomato paste for deeper flavor
1 potato, diced small
1 carrot, diced small
1/2 cup peas, optional but useful
3/4 teaspoon salt, or to taste
1/2 teaspoon black pepper
1 to 2 teaspoons soy sauce or fish sauce, optional
Steamed rice, for serving
How to make it
This is the stage that makes pork giniling different from taco meat or pasta sauce: the tomato base should be cooked down and spoonable, with tender potatoes and carrots turning the skillet into a true rice dinner rather than just seasoned mince.
Brown the pork in a skillet or sauté pan until cooked through.
Add the onion and garlic, then cook until softened and fragrant.
Add the tomatoes and tomato paste, then cook until the mixture looks saucy rather than raw.
Add the potato and carrot with 1/2 to 3/4 cup water so they can soften as the sauce simmers.
Season with salt, pepper, and soy sauce or fish sauce if using.
Add peas near the end so they stay bright, then simmer until the vegetables are tender and the sauce lightly coats the pork.
How to serve it
Serve pork giniling over steamed rice first and keep the rest of the plate simple. The rice and saucy pork do most of the work together, which is why the meal feels complete even without many side dishes.
Leftover notes
Leftovers reheat well and often taste even better the next day once the tomato and pork have had more time together. For a looser bowl, keep it slightly saucier. For a thicker finish, reduce it a little more before serving.
Best result: let the tomatoes cook down properly before adding water. That is what gives the dish a deeper, rounder base.
Related next pick: want another rice-based dinner that is faster and cheaper? Try Ground Pork Fried Rice.
Ground pork cooks fast, but a few small mistakes can make dinner taste flat. In most cases, bland results come from weak browning, weak seasoning, or no contrast to cut through the richness. A little better browning and seasoning makes a big difference.
Build flavor in the pan, season it clearly, and finish with something bright, fresh, or sharp so the dish does not feel heavy. That balance is what makes dinner taste finished rather than flat.
Use this card as the fast reset: brown harder, grease less, season with intent, stop before the meat dries out, and finish with something that brings the whole dish back to life.
How to Brown the Meat for Better Flavor
Use enough heat and enough pan space. When the pan is crowded, the meat releases moisture and steams. When you let it sit before stirring too much, you get caramelized bits that deepen the flavor of the whole dish.
How Much Fat to Leave in the Pan
Leave enough fat behind to carry flavor, especially in stir fries, fried rice, and bowl dinners. However, when the pan looks greasy rather than lightly slick, spoon off some excess before adding the aromatics. That keeps the finished dish savory instead of heavy.
Best Seasoning for Tacos
Chili powder, cumin, paprika, garlic, onion, oregano, salt, pepper, lime, and a spoonful of tomato paste make a strong taco base. The tomato paste helps round out the meat so it tastes fuller and less dry.
Best Seasoning for Stir Fries and Bowls
Soy sauce, garlic, ginger, chili, sesame, scallions, and something bright like rice vinegar or lime work especially well. That combination keeps the meat savory and flavorful without letting it feel too rich.
Best Seasoning for Meatballs, Meatloaf, and Patties
Garlic, onion, black pepper, herbs, and either tomato-based or smoky-savory accents usually work best. Meatballs can go more herby, meatloaf benefits from a stronger savory base and glaze, and burgers work best when the seasoning stays fairly simple.
How to Keep It Juicy
Do not overcook it, and use ingredients that support juiciness too. Sauces, tomatoes, cabbage, rice, noodles, and fresh toppings all help keep it satisfying. For food safety, cook it to a safe internal temperature and check the USDA safe temperature chart when you need a quick reference.
How to Keep It From Tasting Bland
Brown it properly, season it with purpose, and balance the richness with something bright. Lime, vinegar, herbs, scallions, chili, pickled toppings, and crisp vegetables all help. The best dinners work because they combine savory depth with a little lift.
You can make all ten recipes on this page with about one pound, though some stretch better than others. Tacos, fried rice, egg roll bowl, lettuce wraps, and pork giniling are especially strong when you want that pound to go farther with rice, cabbage, tortillas, vegetables, or toppings.
In most recipe contexts, yes. Ground pork is the more common label in some regions, while pork mince is the usual wording in others. For this kind of weeknight cooking, they usually refer to the same ingredient.
Can It Replace Ground Beef?
Yes, in many recipes it can. It is often juicier and a little richer, so it works especially well in meatballs, meatloaf, tacos, burgers, bowls, and sauces. The final flavor will still be different, though, so the best results usually come from choosing recipes that genuinely suit it.
What Vegetables Pair Best?
Cabbage, mushrooms, carrots, peppers, broccoli, greens, onions, and scallions all pair especially well with it. For contrast, cucumber, herbs, and crunchy slaws help brighten richer dishes.
What Seasonings Work Best?
Garlic, onion, black pepper, soy, ginger, chili, lime, herbs, paprika, cumin, and tomato all work well. The smartest approach is to match the flavor profile to the dinner you want rather than look for one universal spice blend.
How Long Do Leftovers Keep?
As a general rule, cooked leftovers keep well for a few days in the fridge and longer in the freezer. For current food-safety guidance, see the USDA leftovers and food safety guide.
Start with stir fry for speed, tacos for family-friendly flexibility, burgers for classic comfort, meatballs for leftovers, fried rice for budget value, or egg roll bowl for one-pan ease. That is the strength of ground pork, or pork mince if that is the label you usually buy: it can turn into several very different dinners without making weeknights harder. A quick marinara sauce can push meatballs or pasta in a more classic comfort-food direction, while a fresh green chutney or bright chimichurri can change tacos, burgers, bowls, and wraps completely. Pick the dinner that fits tonight, and one pound of pork can take you a long way.