Posted on Leave a comment

Minestrone Soup Recipe

Bowl of minestrone soup with tomato broth, white beans, kidney beans, small pasta, carrots, zucchini, greens, herbs, and bread on the side.

A good minestrone soup should look generous before you even take the first spoonful: tender vegetables, creamy beans, small pasta, herbs, and a tomato broth that tastes rich instead of watery. The first spoonful should catch a little of everything — a soft bean, a piece of pasta, sweet carrot, zucchini, greens, and enough tomato broth to pull it all together.

This pot works because it protects the three things that matter most in minestrone: rich tomato broth, vegetables with texture, and pasta that does not turn the leftovers into mush. Even a half-used zucchini, a tired carrot, two cans of beans, and the last handful of pasta can become a proper dinner.

Homemade minestrone also gives you something canned soup rarely does: better texture. The vegetables do not have to be overcooked, the pasta can stay tender, and you control the salt, broth, and finish.

Cooking now? Jump to the recipe card. The notes below help keep the broth rich, the vegetables tender, and the leftovers useful.

What a Good Minestrone Spoonful Should Show

Before you start, notice the target balance: beans, vegetables, pasta, greens, and tomato broth should all show up in the same spoonful.

Spoon lifting minestrone soup with small pasta, white bean, kidney bean, carrot, zucchini, greens, and tomato broth dripping back into the bowl.
This spoonful shows the balance you want: beans for body, vegetables for freshness, small pasta for comfort, and tomato broth tying everything together.

Recipe at a Glance

Prep time20 minutes
Cook time45 minutes
Total time1 hour 5 minutes
Faster versionAbout 40 to 45 minutes with smaller diced vegetables, the full 6 cups broth, and a shorter 15 to 20 minute base simmer
Servings6 generous bowls
YieldAbout 11 to 13 cups soup
MethodStovetop
Best pot5 to 6 quart / 5 to 6 liter Dutch oven or heavy soup pot
Best forWeeknight dinner, meal prep, and freezer-friendly soup base
DietMeatless when made with vegetable broth; vegan option

The Minestrone Rule of 5: soften the aromatics, build the tomato base, add beans for body, keep the pasta small, and save tender greens for the end. Vegetables can change; the rhythm is what keeps the pot balanced.

Why this works: tomato paste gives the soup depth, beans make it feel full, late-added vegetables keep their shape, and pasta goes in only when the broth already tastes good. That is what keeps the soup hearty without letting it turn heavy or dull.

The Minestrone Rule of 5

This visual is the memory hook for the whole recipe: keep the rhythm steady, even when the vegetables change.

Rustic board showing minestrone ingredients arranged as aromatics, tomato base, beans, small pasta, and leafy greens.
Use the Minestrone Rule of 5 when you want the recipe to feel flexible: aromatics, tomato base, beans, small pasta, and greens are the core building blocks.

Easy minestrone ratio: for 6 bowls, use about 5 to 6 cups broth, 2 cans beans, 4 to 5 cups chopped vegetables, and 3/4 cup small pasta.

Short on time? Dice the vegetables smaller, use the full 6 cups broth, and simmer the soup base for 15 to 20 minutes before adding pasta and greens. The full cook gives deeper flavor, but the faster version still makes a good weeknight bowl.


Minestrone Soup Recipe Card

Description: A hearty minestrone soup with vegetables, beans, small pasta, and a rich tomato broth. It is meatless when made with vegetable broth, cozy without cream, and easy to adjust for leftovers or a thicker dinner-style bowl.

Prep: 20 minutes | Cook: 45 minutes | Total: 1 hour 5 minutes | Serves: 6 generous bowls | Yield: about 11 to 13 cups

Equipment: 5 to 6 quart / 5 to 6 liter Dutch oven or heavy soup pot, knife, cutting board, can opener, colander, wooden spoon, and ladle.

Ingredients

Base

  • 2 tablespoons olive oil, plus more for finishing, about 30 ml
  • 1 medium yellow onion, diced, about 150 to 180 g
  • 2 medium carrots, diced, about 130 to 160 g
  • 2 celery ribs, diced, about 90 to 120 g
  • 4 garlic cloves, minced
  • 3 tablespoons tomato paste, about 45 g

Broth and Seasoning

  • 1 can crushed or diced tomatoes, 28 oz / 794 g
  • 5 to 6 cups vegetable broth, 1.2 to 1.4 liters
  • 1 bay leaf
  • 1 1/2 teaspoons Italian seasoning
  • 1/2 teaspoon dried oregano, optional
  • 1/4 teaspoon red pepper flakes, optional
  • 1 teaspoon kosher salt or 3/4 teaspoon fine salt, plus more to taste; start with less if your broth is salted
  • 1/2 teaspoon black pepper, plus more to taste
  • 1 parmesan rind, optional; skip for vegan minestrone

Beans, Vegetables, and Pasta

  • 1 can cannellini beans or white beans, 15 oz / 425 g, drained and rinsed
  • 1 can kidney beans, 15 oz / 425 g, drained and rinsed
  • 1 cup chopped green beans, about 100 to 125 g
  • 1 medium zucchini, diced, about 180 to 220 g
  • 3/4 cup small pasta such as ditalini, small shells, elbows, or macaroni, about 75 to 90 g
  • 2 cups packed spinach or chopped kale, about 60 to 80 g

Finish

  • 1 to 2 teaspoons lemon juice or red wine vinegar, 5 to 10 ml
  • 1/4 cup chopped parsley or basil, about 10 to 15 g
  • Extra olive oil, for finishing
  • Grated parmesan, optional, for serving

Instructions

  1. Heat olive oil in a 5 to 6 quart / 5 to 6 liter Dutch oven or heavy soup pot over medium heat.
  2. Add onion, carrot, celery, and salt. Cook for 7 to 10 minutes, stirring often, until softened and fragrant.
  3. Add garlic and tomato paste. Cook for 1 to 2 minutes, stirring often, until the tomato paste darkens slightly.
  4. Add crushed or diced tomatoes, vegetable broth, bay leaf, Italian seasoning, oregano if using, red pepper flakes if using, black pepper, and parmesan rind if using. Stir well and scrape the bottom of the pot.
  5. Add the cannellini beans and kidney beans. Bring to a boil, then reduce to a gentle simmer.
  6. Simmer partly covered for 20 to 25 minutes, until the broth tastes developed. Add firm vegetables such as cabbage, potato, or squash during this simmer if using them.
  7. Add green beans, zucchini, and pasta. Cook for 8 to 10 minutes, or until the pasta is just tender.
  8. Stir in spinach or kale and cook for 1 to 3 minutes, just until wilted.
  9. Remove the bay leaf and parmesan rind. Stir in lemon juice or red wine vinegar, parsley or basil, and a drizzle of olive oil.
  10. Taste and adjust salt, pepper, and acidity. Let the soup rest for 5 minutes before serving.
  11. Serve hot with parmesan, extra herbs, crusty bread, garlic bread, or a simple salad.

Recipe Notes

  • Brothier soup: use 3/4 cup pasta and the full 6 cups broth.
  • Thicker soup: use 1 cup pasta or mash 1/2 cup beans into the broth.
  • Firmer zucchini: add zucchini during the final 5 minutes instead of with the pasta.
  • Better leftovers: cook pasta separately and add it to bowls.
  • Vegan version: use vegetable broth and skip parmesan rind and parmesan cheese.
  • Meal prep: toss separately cooked pasta with a tiny drizzle of olive oil after draining so it does not clump.
  • Gluten-free version: use gluten-free pasta or rice, preferably cooked separately.
  • Rice version: cooked rice is easiest. Add it near the end or directly to bowls because rice absorbs broth quickly.
  • Extra richness: simmer with a parmesan rind or finish with olive oil and herbs.

The recipe works on its own, but the notes below help you adjust the beans, pasta, vegetables, storage, and appliance methods without losing the minestrone feel. If leftovers matter, the storage and freezing notes are especially useful.

Before the deeper notes, this quick visual ratio gives you a flexible way to adjust the pot without losing the minestrone balance.

Easy Minestrone Ratio

Use this ratio when you want to adjust the recipe without losing the soup’s balance.

Broth, beans, chopped vegetables, and small pasta arranged on a rustic counter as an easy minestrone ratio guide.
Instead of measuring every vegetable perfectly, follow the ratio: broth keeps it loose, beans make it filling, vegetables add bulk, and pasta should stay modest.

What Is Minestrone Soup?

Minestrone is an Italian vegetable soup made with vegetables, beans, tomatoes, broth, herbs, olive oil, and usually pasta or rice. Classic minestrone is not about one fixed vegetable list; it is about building a generous, seasonal soup with enough beans and starch to feel like a meal.

That is why one pot might have zucchini and green beans while another has cabbage, kale, potato, or squash. A good bowl should be crowded, not dry: enough vegetables and beans to make it feel like dinner, but enough tomato broth to keep it unmistakably soup.

Why You’ll Like This Recipe

  • The broth tastes built, not diluted. Tomato paste, sautéed aromatics, herbs, beans, and olive oil give it a rounded tomato flavor.
  • The vegetables keep their texture. Firm vegetables simmer first, while zucchini and greens go in later.
  • The pasta will not hijack the leftovers. Cook it in the soup when serving right away, or separately when you want better storage.
  • It starts meatless. Use vegetable broth, and the whole pot stays hearty without meat.
  • It gives you room to use what you have. Small shells, elbows, ditalini, zucchini, green beans, cabbage, kale, spinach, white beans, kidney beans, or chickpeas can all work.
  • It can be lighter or heartier. Use more greens and less pasta for a lighter bowl, or extra beans and a little more pasta for a thicker dinner-style soup.

Minestrone feels hearty without cream because beans, vegetables, pasta, and olive oil do the work. If you like cozy tomato-and-pasta dinners, this sits near the same comfort zone as baked ziti, but it is lighter, brothier, and packed with vegetables.

Minestrone Soup Ingredients

These ingredients follow the same Rule of 5: aromatics, tomato broth, beans, small pasta or rice, and tender greens at the end. Do not worry if you are missing one vegetable. Minestrone is forgiving as long as the base stays balanced.

If you are missing one vegetable or bean, check the easy minestrone swaps before changing the broth or pasta ratio.

Ingredients for minestrone soup on a counter, including tomatoes, broth, beans, pasta, carrots, celery, onion, garlic, zucchini, green beans, greens, herbs, olive oil, and parmesan rind.
Each minestrone ingredient has a role: aromatics create sweetness, tomatoes shape the broth, beans add substance, pasta brings comfort, and greens freshen the finish.

If you remember one thing: taste the broth before adding pasta. When it tastes thin or flat at that point, fix the broth first; pasta will not rescue a weak soup.

Build the Aromatic Base

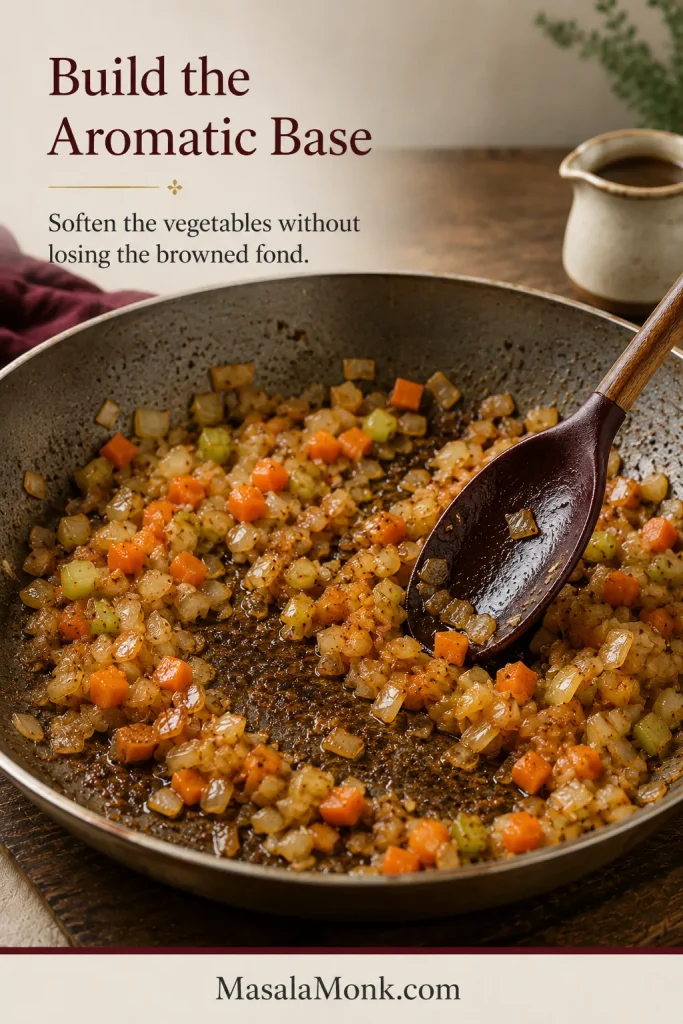
Onion, carrot, celery, garlic, and olive oil create the base. Cook the onion, carrot, and celery until the sharp onion smell softens and the pot starts smelling sweet. The onion should look translucent and the carrot edges should soften. This is the first moment the soup starts smelling like dinner instead of chopped vegetables.

Onion, carrot, and celery sautéing in olive oil inside a Dutch oven with a wooden spoon.
First, cook the onion, carrot, and celery until they soften and smell sweet. This step gives homemade minestrone a deeper base before the tomatoes arrive.

Cook the Tomato Paste Before Broth


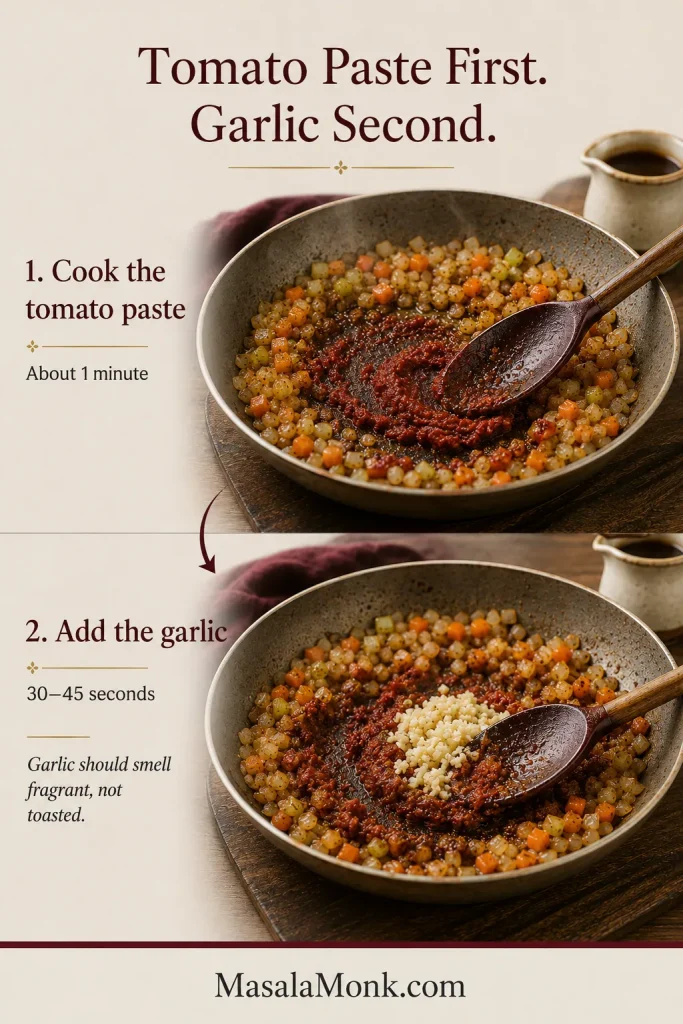
Tomato paste and a large can of crushed or diced tomatoes give the broth its color and flavor. Cook the tomato paste until it darkens slightly; it should leave orange-red streaks on the bottom of the pot, not black bits. Crushed tomatoes make a fuller, smoother broth, while diced tomatoes give a chunkier texture.

Tomato paste cooked with onion, carrot, and celery in a pot, with a wooden spoon dragging through the red paste.

Next, let the tomato paste cook briefly with the aromatics. It deepens the soup base and helps the broth taste rich instead of thin.

Broth


Vegetable broth keeps the soup meatless and easy to make vegan. Chicken broth also works if you are not keeping the soup vegetarian. Low-sodium broth gives you more control because canned beans, tomatoes, pasta, and cheese can all add salt.

Beans


White beans and kidney beans are a strong everyday combination. The white beans soften into the tomato broth and make the soup feel fuller, almost as if it simmered longer than it did. Kidney beans add color, bite, and the familiar minestrone look. Rinse canned beans before adding them so the broth stays clean and balanced.

Pasta or Rice


Small pasta is what keeps minestrone easy to eat by the spoonful. Ditalini is classic, but small shells, elbows, macaroni, or orzo all work. Use 3/4 cup for a brothier soup and up to 1 cup for a thicker bowl. Cooked rice also works when you want a pasta-free version. If you are cooking for leftovers, see how to keep minestrone pasta from getting mushy before adding pasta directly to the pot.

Vegetables


Zucchini, green beans, spinach, kale, cabbage, potato, peas, squash, carrots, and celery can all work. Dense vegetables such as potato, squash, cabbage, and carrots need more time. Zucchini, peas, spinach, and tender greens should go in later so they keep some color and shape.

Minestrone is not a test of whether you bought the exact vegetables; it is a way to turn the vegetables you have into a balanced soup.

Herbs and Finishers


Italian seasoning, oregano, basil, thyme, bay leaf, black pepper, parsley, and fresh basil all fit well. A parmesan rind is optional for extra depth, but use vegetarian-style parmesan if that matters to you, or skip cheese completely for a vegan version.

A small splash of lemon juice or red wine vinegar wakes up the whole pot at the end, especially after the beans and pasta have softened the broth. A spoonful of pesto can make the finish taste brighter; these basil pesto variations are useful if you like that herby direction.

How to Make Minestrone Soup

The steps follow the same rhythm as the Rule of 5: sauté, deepen, simmer, add quick-cooking ingredients late, finish fresh.

1. Sauté the Onion, Carrot, and Celery


Heat olive oil in a large Dutch oven or heavy soup pot over medium heat. Add onion, carrot, celery, and salt. Cook for 7 to 10 minutes, stirring often, until the vegetables soften and the onion turns translucent. The pot should smell sweet and savory before you move on.

2. Add Garlic and Tomato Paste


Stir in the garlic and tomato paste. Cook for 1 to 2 minutes, stirring often. The tomato paste should darken slightly and smell richer, but it should not scorch. A watery minestrone usually means the base was rushed, so give this step its minute.

3. Build the Broth


Add crushed or diced tomatoes, broth, Italian seasoning, bay leaf, black pepper, and parmesan rind if using. Scrape the bottom of the pot so all the tomato paste and aromatics dissolve into the broth.

Minestrone soup base in a Dutch oven with tomato broth, beans, carrots, celery, and firm vegetables before pasta and greens are added.

Let the tomato broth, beans, and firm vegetables simmer before adding pasta. As a result, the base tastes rounded instead of rushed.

4. Add Beans and Simmer Gently


Add the rinsed beans and any firm vegetables such as cabbage, potato, or squash. Bring the soup to a boil, then reduce it to a gentle simmer. You want small bubbles, not a rolling boil. Cook partly covered for 20 to 25 minutes, until the broth tastes fuller and the vegetables are tender.

Taste the broth before adding pasta. If it tastes thin or flat now, give it more simmering time, adjust the salt, or brighten it with a little lemon juice or vinegar. The broth should already taste good before the pasta goes in; if it still tastes weak, use the troubleshooting section before adding pasta.

Minestrone soup gently simmering in a Dutch oven with tomato broth, beans, carrots, celery, pasta, and vegetables.

Keep minestrone at a gentle simmer, not a hard boil. Small bubbles build flavor while helping the vegetables stay tender and intact.

5. Add Quick-Cooking Vegetables and Pasta


Add green beans, zucchini, and small pasta near the end. Cook for 8 to 10 minutes, or until the pasta is just tender. Stop while it still has a little structure, because it will keep softening in the hot broth.

Small pasta being poured into a pot of minestrone soup with spinach added near the end of cooking.

Add pasta and greens near the end. This keeps the soup brighter, protects the greens, and helps prevent pasta from swelling in the pot.

6. Finish with Greens, Herbs, and Brightness


Stir in spinach or kale for the final 1 to 3 minutes. The greens only need to wilt; they do not need to cook down into the broth. Remove the bay leaf and parmesan rind. Finish with parsley or basil, a drizzle of olive oil, and lemon juice or red wine vinegar. Rest the soup for 5 minutes before serving so the broth settles and the flavors come together.

Finished pot of homemade minestrone soup with tomato broth, beans, pasta, carrots, zucchini, green beans, greens, herbs, and olive oil.

When the pot is ready, it should look colorful and ladle easily. If it feels crowded, loosen it with a splash of broth before serving.

Easy Minestrone Swaps

Once the base makes sense, the soup becomes forgiving. You do not need the exact same vegetables every time; you just need the right balance of broth, beans, pasta or rice, and timing.

Use What You Have

Use this section when the pot needs to adapt to the vegetables, beans, and pasta you already have.

Rustic board with minestrone swaps including zucchini, carrot, cabbage, kale, potato, white beans, green beans, herbs, and small pasta.

Minestrone is made for flexible cooking. Therefore, zucchini, cabbage, kale, potato, beans, herbs, and small pasta can all work when you add them at the right time.

If you do not have Use this instead
Cannellini beans Navy beans, great northern beans, white beans, or chickpeas
Kidney beans More white beans, borlotti beans, chickpeas, or lentils
Zucchini Cabbage, green beans, peas, spinach, kale, or squash
Ditalini Small shells, elbows, macaroni, or orzo
Vegetable broth Water with extra tomato paste, herbs, olive oil, and careful seasoning
Fresh greens Frozen spinach, frozen kale, or chopped cabbage added earlier
Parmesan rind Skip it, or finish with olive oil, herbs, and a little lemon juice or vinegar

This is also where minestrone becomes personal. One cook adds cabbage, another adds potato, another uses chickpeas, and another keeps it brothy. The base stays the same, but the pot can still feel like yours. For more timing help, see the firm-early, tender-late vegetable guide.

What the Soup Should Look and Taste Like

You are looking for a soup that is chunky but still brothy. The tomato broth should taste rounded rather than sharp or thin. Vegetables should be tender without collapsing, beans should stay creamy but mostly intact, and the pasta should be just tender, not swollen.

Finished Bowl Texture Check

Use the finished bowl as a quick check before serving: the soup should look full, but it should still move like soup.

Close-up bowl of finished minestrone soup with tomato broth, white beans, kidney beans, pasta, carrots, zucchini, greens, and herbs.

Use the finished bowl as a texture check. The vegetables and beans should stand out clearly, while the tomato broth still fills the gaps around them.

Chunky but Still Soup

If the pot looks crowded but still has enough broth to move around the vegetables, you are in the right place. You should be able to drag the spoon through the bowl and see vegetables and beans settle back into the tomato broth, not sit in a dry pile. The final olive oil, herbs, and lemon juice or vinegar should make the bowl taste brighter, not sour.

Close bowl of chunky but brothy minestrone soup with visible tomato broth, beans, pasta, carrots, zucchini, greens, and herbs.

Aim for chunky but not dry. The spoon should catch vegetables and beans, while the broth still makes the bowl feel like soup.

Best Beans, Pasta, and Vegetables for Minestrone

Beans, pasta, and vegetables are where minestrone becomes dinner. The choices do not need to be fancy; they just need to make sense together in the spoon.

Best Beans and Pasta for Minestrone

Start with spoon-friendly beans and small pasta shapes, then choose vegetables that match the season and cooking time.

Bowls and spoons of cannellini beans, kidney beans, ditalini pasta, small shells, elbows, and orzo for minestrone soup.

Choose beans and pasta that fit easily on a spoon. Cannellini beans, kidney beans, ditalini, elbows, or small shells keep minestrone hearty without making it clumsy.

Best Beans


  • Cannellini or white beans: creamy, mild, and classic.

  • Kidney beans: firmer, colorful, and familiar in restaurant-style minestrone.

  • Borlotti beans: rustic and soft with a fuller bean flavor.

  • Chickpeas: nutty and firmer, good when you want more bite.

  • Lentils: useful for a thicker, higher-protein variation.

Best Pasta


  • Ditalini: classic and spoon-friendly.

  • Small shells: good for catching tomato broth.

  • Elbows or macaroni: easy pantry choice.

  • Orzo: soft and pleasant, but it thickens leftovers quickly.

  • Rice: useful if you do not want pasta. Cooked rice is easiest.

Once the beans and pasta are chosen, the vegetables are mostly about timing: firm ones early, tender ones late. That is what keeps the bowl generous without making it taste tired.

Firm Vegetables Early, Tender Vegetables Late


A good minestrone should never feel trapped by one vegetable list. Keep the tomato broth, aromatics, beans, herbs, and small pasta structure, then choose vegetables that fit the pot.

  • Summer: zucchini, green beans, fresh tomatoes, basil, spinach.

  • Winter: cabbage, kale, potato, squash, carrots, celery.

  • Spring: peas, asparagus, spinach, leeks, fresh herbs.

  • Pantry version: canned tomatoes, canned beans, frozen vegetables, cabbage, carrots, small pasta.

Add dense vegetables like potato, squash, cabbage, and carrots earlier. Add zucchini, peas, spinach, and tender greens near the end. Try not to overload the pot; minestrone should be hearty, but it should still have enough broth to feel like soup.

Rustic vegetable timing board showing firm vegetables like potato, cabbage, carrot, and squash beside tender vegetables like zucchini, peas, spinach, kale, and herbs.

Vegetable timing matters more than a perfect shopping list. Add firm vegetables early, then save tender greens, zucchini, peas, and herbs for the final minutes.

How to Fix Minestrone Soup Problems

If your minestrone tastes bland, watery, too thick, too acidic, or overcooked, it can usually be fixed. Most problems come down to seasoning, simmering, pasta timing, vegetable timing, or broth balance.

Fix Bland Minestrone Soup

Before rebuilding the whole pot, taste for salt, acid, herbs, pepper, and olive oil; those small finishes often fix a flat bowl.

Bowl of minestrone soup beside salt, lemon wedge, red wine vinegar, olive oil, parsley or basil, and black pepper.

Bland minestrone often needs a finish, not a rebuild. Salt, lemon or vinegar, herbs, black pepper, and olive oil can wake up the whole pot.

Problem Fix
Soup tastes flat Add salt first, then a small splash of lemon juice or red wine vinegar.
Broth is too thin Simmer uncovered for a few minutes or mash 1/2 cup of beans into the broth.
Soup is too thick Add broth or water until it becomes spoonable again.
Pasta is too soft Add more broth, fresh herbs, and a little acidity. Next time, cook pasta separately.
Vegetables are overcooked Freshen the bowl with herbs, olive oil, and extra broth. Next time, add zucchini and greens later.
Soup tastes too acidic Add a drizzle of olive oil or a tiny pinch of sugar to round the tomato flavor.
Soup is too salty Add unsalted broth, water, extra beans, or more vegetables.

Most of the time, the fix is smaller than you think. A little salt, a little acid, a splash of broth, or a few mashed beans can bring the pot back.

Fix Watery Minestrone Soup

When the broth looks thin, mashed white beans are the quickest natural thickener because they add body without changing the soup into cream sauce.

Two bowls of minestrone comparing thin watery broth with richer tomato broth, with mashed white beans shown as the thickening fix.

If the broth tastes watery, mash a few white beans into the soup and simmer briefly. This thickens minestrone naturally without cream or flour.

How to Make Minestrone Richer

  • Cook the onion, carrot, and celery until they soften and smell sweet.

  • Cook the tomato paste before adding broth.

  • Use crushed tomatoes for a fuller broth.

  • Add a parmesan rind if you are using cheese.

  • Mash some of the beans into the soup for natural body.

  • Simmer partly uncovered when the soup looks too thin.

  • Finish with olive oil, herbs, and a small splash of lemon juice or vinegar.

How to Keep Pasta from Getting Mushy


Minestrone pasta gets mushy when it sits in hot broth for too long or stays in the soup through storage. The safest method depends on how you plan to serve it.

  • Serving immediately: add dry pasta during the final 8 to 10 minutes.

  • Meal prep: cook pasta separately and add it to each bowl.

  • Freezing: freeze the soup without pasta and add fresh pasta later.

  • Thick leftovers: reheat with extra broth or water.

Glass containers showing minestrone soup base stored separately from cooked small pasta, with pasta being added to a serving bowl.

For better leftovers, store the soup base and pasta separately. Then add pasta to each serving so the next bowl stays fresh instead of soggy.

Slow Cooker and Instant Pot Minestrone

Slow Cooker vs Instant Pot Minestrone

For both appliance methods, the texture rule is the same: cook the base first and keep pasta and greens late. The pasta texture notes are especially useful for meal prep.

Slow cooker and Instant Pot filled with minestrone soup, with small bowls of pasta and greens nearby for adding near the end.

Whether you use a slow cooker or Instant Pot, cook the soup base first. Meanwhile, keep pasta and greens for the end so the texture stays better.

Slow Cooker Minestrone

Slow cooker minestrone is best for a hands-off soup base. Cook the broth, beans, aromatics, and firm vegetables first, then add zucchini, pasta, and greens near the end so they do not overcook.

  1. Add onion, carrot, celery, garlic, tomato paste, tomatoes, broth, herbs, bay leaf, beans, and firm vegetables to the slow cooker.

  2. Cook on low for 6 to 8 hours or high for 3 to 4 hours.

  3. Add zucchini and green beans during the final 30 minutes.

  4. Add pasta only during the final 20 to 30 minutes, or cook pasta separately.

  5. Stir in spinach or kale at the end, then finish with herbs, olive oil, and lemon juice or vinegar.

Instant Pot Minestrone


Instant Pot minestrone is best for a fast soup base. Pressure cook the broth, beans, and firm vegetables, then add cooked pasta and greens at the end so the pasta does not turn soft under pressure.

  1. Use sauté mode to cook onion, carrot, celery, and olive oil for 4 to 5 minutes.

  2. Add garlic and tomato paste. Cook for 1 minute.

  3. Add tomatoes, broth, herbs, bay leaf, beans, and firm vegetables.

  4. Pressure cook on high for 4 to 5 minutes.

  5. Let pressure release naturally for 5 to 10 minutes, then quick release carefully.

  6. Stir in greens and cooked pasta, then finish with herbs, olive oil, and lemon juice or vinegar.

Olive Garden-Style Minestrone Soup

If you like Olive Garden’s lighter tomato-broth style, use these adjustments while keeping the main recipe homemade. Olive Garden describes its minestrone as vegetables, beans, and pasta in a light tomato broth, so this is a home version in that familiar direction, not the official recipe. You can see Olive Garden’s menu description for the style reference.

Light tomato-broth minestrone soup in a cream bowl with kidney beans, white beans, pasta, carrots, zucchini, green beans, celery, spinach, and herbs.

For Olive Garden-style minestrone at home, keep the broth lighter, the beans whole, the vegetables small, and the pasta modest.

  • Use diced tomatoes instead of crushed for a lighter restaurant-style texture.

  • Do not mash the beans into the broth.

  • Keep the pasta modest so the soup stays brothy.

  • Use kidney beans, white beans, zucchini, green beans, carrots, celery, and spinach.

  • Finish with herbs and acidity so the bowl tastes bright, not heavy.

Minestrone Soup Variations

After the base tastes good, you can take the soup in a few different directions without losing the minestrone feel. Keep the tomato base, beans, vegetable timing, and small pasta structure in place, then adjust the bowl you want. For gluten-free, rice-based, or pasta-free versions, the storage section is useful if you plan to cook the starch separately.

Three bowls of minestrone variations showing a vegan version, a gluten-free or rice version, and a thicker bean-rich version on a rustic table.

Once the tomato-bean base tastes good, you can take minestrone in several directions: vegan, gluten-free, rice-based, or thicker and extra hearty.

  • Vegan minestrone: use vegetable broth and skip parmesan rind, parmesan cheese, meat, and egg pasta. Finish with olive oil, herbs, nutritional yeast, or vegan pesto.

  • Gluten-free minestrone: use gluten-free pasta or rice. Cook gluten-free pasta separately for the best texture. Do not use barley or farro.

  • Minestrone without pasta: skip the pasta and add extra beans, cabbage, zucchini, potato, kale, spinach, or cooked rice.

  • Thick and hearty minestrone: use crushed tomatoes, 1 cup pasta, extra white beans, and a small potato. Mash some beans into the broth.

  • Brothy minestrone: use 3/4 cup pasta, unmashed beans, and an extra cup of broth for a lighter, restaurant-style bowl.

  • Low-sodium minestrone: start with low-sodium broth, rinse canned beans well, and choose no-salt-added tomatoes if available. Use garlic, herbs, lemon juice, vinegar, and olive oil to build flavor.

  • Add meat: brown Italian sausage or ground beef before adding the aromatics, or stir in shredded cooked chicken near the end.

Think of these as directions, not separate recipes. The same pot can become lighter, heartier, vegan, gluten-free, or meatier without losing its minestrone backbone.

What to Serve with Minestrone Soup

Minestrone can stand alone as dinner, especially with beans and pasta, but a simple side makes the meal feel complete.

  • A lighter meal: serve minestrone with a crisp salad, roasted vegetables, or something bright like beet salad.

  • For a heartier dinner: add garlic bread, focaccia, grilled cheese, parmesan toast, or pesto toast.

Bowl of minestrone soup served with garlic bread, a green salad with tomatoes, herbs, and a spoon on a wooden table.

Minestrone can stand alone, but the sides change the meal. Garlic bread makes it heartier, while a fresh salad keeps dinner lighter.

The best side is something that balances the tomato broth without making the meal feel heavy.

Make-Ahead, Storage, Freezing, and Reheating

Make-Ahead Plan


Yes, you can make minestrone ahead of time. For the best texture, make the soup base without pasta, refrigerate it, and add freshly cooked pasta when serving.

  • Chop the onion, carrot, celery, zucchini, and green beans up to 1 day ahead.

  • Drain and rinse the beans ahead of time.

  • Make the soup base without pasta up to 3 days ahead.

  • Add greens when reheating so they stay brighter.

  • Cook pasta fresh, or store cooked pasta separately with a tiny drizzle of olive oil.

Store and Freeze Minestrone with Pasta Separately

This storage setup keeps the soup base useful and protects the pasta from swelling before the next serving.

Glass containers of minestrone soup base and a separate bowl of cooked small pasta for storing and freezing.

For freezing, leave pasta out of the soup base. This way, the broth, beans, and vegetables reheat well, and fresh pasta can be added later.

Fridge

Store minestrone soup in an airtight container in the fridge for 3 to 4 days, which matches the USDA’s general guidance for refrigerated leftovers. The next-day soup is often thicker and more flavorful. Loosen it with broth before reheating.

Freezer


Minestrone freezes best without pasta. Freeze the soup base for up to 3 months, then add freshly cooked pasta when reheating. If you freeze it with pasta, the flavor will still be good, but the pasta will become softer.

Reheating


Reheat gently on the stovetop over low to medium-low heat. Add broth or water to loosen the soup. After reheating, freshen the bowl with olive oil, herbs, lemon juice, vinegar, or parmesan. For the fastest fix when leftovers get thick, see the troubleshooting table.

Serve Minestrone Family-Style

Family-style Dutch oven of minestrone soup on a wooden table with a ladle, bowls of soup, bread, herbs, cheese, and a hand serving soup.

Serve minestrone family-style when you want the meal to feel relaxed and generous, with herbs, cheese, bread, or extra broth added at the table.

Once you have the rhythm down, minestrone becomes one of those soups you can make again and again without overthinking it. Keep the tomato broth, beans, small pasta, and vegetable timing in place, then let the pot change with the season.

The best minestrone is not the one with the longest ingredient list; it is the one where the broth, beans, vegetables, and pasta all still feel like they belong in the same spoonful.

Minestrone changes from kitchen to kitchen. If your pot had cabbage, potato, chickpeas, kale, extra zucchini, or a pasta shape that worked beautifully, tell us. Those small choices are often what help the next person make a better pot from what they already have.


Frequently Asked Questions

What is minestrone soup made of?


Minestrone soup is an Italian vegetable soup made with vegetables, beans, tomatoes, broth, herbs, olive oil, and usually pasta or rice. Common vegetables include onion, carrot, celery, zucchini, green beans, cabbage, spinach, kale, potato, and peas.

Is minestrone soup vegetarian?


Minestrone soup is vegetarian when it is made with vegetable broth and no meat. If you add parmesan, choose vegetarian-style parmesan if that matters to you.

Is minestrone soup vegan?


Minestrone soup is vegan when it is made with vegetable broth and no parmesan, parmesan rind, meat, or egg pasta. For a vegan finish, use olive oil, herbs, nutritional yeast, or vegan pesto.

What is the best pasta for minestrone?


Ditalini is one of the best pasta shapes for minestrone because it is small and spoon-friendly. Small shells, elbows, macaroni, and orzo also work.

What beans are best for minestrone?


Cannellini beans, white beans, and kidney beans are the best everyday beans for minestrone. Borlotti beans, navy beans, chickpeas, and lentils also work.

Why does my minestrone taste bland?


Bland minestrone usually needs salt, acidity, or more simmering time. Cook the aromatics well, cook the tomato paste until it darkens slightly, taste the broth before adding pasta, then finish with lemon juice or vinegar if the tomato flavor tastes flat.

How do you make minestrone less watery?


To make minestrone less watery, simmer it uncovered, mash some beans into the broth, use crushed tomatoes, or add a parmesan rind if you are using cheese. A watery soup often means the aromatics or tomato paste needed more time at the beginning.

How do you keep pasta from getting mushy in minestrone?


To keep pasta from getting mushy in minestrone, add it only near the end and stop when it is just tender. For leftovers, meal prep, or freezing, cook pasta separately and add it to each bowl.

Can you make minestrone soup ahead of time?


Yes, minestrone is a good make-ahead soup, especially if you make the soup base without pasta. Refrigerate the base for 3 to 4 days, then add freshly cooked pasta when serving.

Can you freeze minestrone soup?


Yes, minestrone soup freezes well, but it freezes best without pasta. Freeze the soup base for up to 3 months, then add freshly cooked pasta when serving.

What is the difference between minestrone and vegetable soup?


Minestrone is usually heartier than plain vegetable soup because it often includes beans, pasta or rice, tomatoes, Italian herbs, and olive oil. Vegetable soup can be any broth-based soup made with vegetables.

What is the difference between minestrone and pasta e fagioli?


Minestrone is a vegetable-heavy soup that often includes beans plus pasta or rice. Pasta e fagioli means pasta and beans, so it is more focused on those two ingredients and is often thicker and more bean-forward.

Can I make minestrone without pasta?


Yes, you can make minestrone without pasta. Add extra beans, cabbage, zucchini, potato, kale, spinach, or cooked rice instead.

Can I use frozen vegetables in minestrone?


Yes, frozen peas, green beans, spinach, kale, and mixed vegetables can work well in minestrone. Add quick-cooking frozen vegetables near the end unless they are dense vegetables. If frozen spinach releases too much water, squeeze it before adding.

Can I make minestrone with canned vegetables?


Yes, canned vegetables can work in minestrone when you need a pantry version. Drain them well and add them near the end because they are already cooked and can become too soft if simmered for a long time.

Posted on Leave a comment

Lobster Roll Recipe (Maine & Connecticut Styles)

Two lobster rolls in toasted split-top buns, one filled with creamy Maine-style lobster and one filled with warm buttered lobster, served with lemon wedges, chips, pickles, and melted butter.

A great lobster roll should feel generous, buttery, and worth the lobster. The meat should stay sweet and tender, the bun should be soft with golden toasted sides, and the dressing should know when to step back.

This recipe gives you both classic styles: a cold Maine-style lobster roll with light mayo and a warm Connecticut-style lobster roll with melted butter. You can make one or serve both side by side. There is also an optional home-cook hybrid for buttery warm bread with cool, lightly dressed lobster.

Choosing a style? Compare Maine vs Connecticut lobster rolls before you start.

If this is your first time making lobster rolls at home, keep the goal simple: buy enough lobster, keep the pieces chunky, toast the bun well, and do not bury expensive seafood under too much mayo, too much butter, or a hard roll that fights every bite.

Quick Lobster Roll Recipe

With cooked lobster meat ready, lobster rolls come together quickly. Toast the buns, choose cold mayo or warm butter, fill generously, and serve while the bread is still warm.

Servings4 lobster rolls
Total TimeAbout 20 minutes with cooked lobster meat
Lobster Meat1 lb / 454 g cooked lobster meat
Lobster Per Roll4 oz / 113 g standard, 5–6 oz / 140–170 g generous
Best Beginner RouteCooked picked lobster meat + split-top buns + Maine-style finish
Classic StylesMaine-style = cold lobster + light mayo. Connecticut-style = warm lobster + melted butter.

For four standard rolls, use 1 lb / 454 g cooked lobster meat. For four generous rolls, buy 1¼–1½ lb / 565–680 g. Keep the lobster in large, recognizable pieces so each roll feels full.

Shopping first? Use the lobster amount guide before buying cooked meat, tails, or whole lobster.

Quick Ingredients

  • 1 lb / 454 g cooked lobster meat
  • 4 split-top buns or soft hot dog buns
  • 2 tbsp / 30 ml butter for the buns
  • Lemon juice, chives, salt, and black pepper
  • For Maine-style: mayonnaise and optional celery
  • For Connecticut-style: extra butter

Choose One Finish

StyleAddMethod
Maine-style2–4 tbsp mayo + ¼ cup finely diced celery, optionalFold cold with mayo; serve in warm toasted buns.
Connecticut-style4–6 tbsp butter + lemon + chivesWarm in butter for 2–3 minutes; serve hot.
Optional home-cook hybridButter-toasted buns + very light mayo dressingServe cool lobster in buttery warm bread.

Quick Method

  1. Check the lobster meat for shell pieces, pat it dry, and keep it chunky.
  2. Butter the sides of the buns and toast for 1–2 minutes per side, until golden outside and soft inside.
  3. For Maine-style, fold lobster with mayo, lemon, celery, chives, salt, and pepper.
  4. For Connecticut-style, warm lobster gently in melted butter with lemon and chives for 2–3 minutes.
  5. Fill each bun with about 4 oz / 113 g lobster meat, or more for a generous roll, and serve right away.

You’ll know it’s right when: the bun is golden on the sides but soft inside, the lobster pieces still look chunky, the dressing looks glossy instead of creamy-heavy, and the roll looks slightly overfilled.

Visual guide: Use this visual guide to check the roll before serving: golden bun sides, visible lobster pieces, a glossy coating, and a generous fill.

Four-panel lobster roll guide showing golden toasted bun sides, chunky lobster meat, glossy dressing, and a generously filled bun.
Before serving, look for four signs of a good lobster roll: golden bun sides, large lobster pieces, a glossy coating, and a generous fill. These cues help you judge the roll by sight before the first bite.

Maine vs Connecticut Lobster Rolls

Lobster roll arguments usually come down to two styles: Maine-style with cool, lightly dressed lobster, or Connecticut-style with warm butter. Both start with sweet lobster and a soft butter-toasted bun, but the filling changes the whole mood of the sandwich.

Choose ThisFor This Kind of Roll
Maine-styleCool lobster, light mayo, lemon, chives, a little crunch, and a warm toasted bun.
Connecticut-styleWarm lobster, melted butter, no mayo, and a richer seafood-shack feel.
Optional home-cook hybridCool lightly dressed lobster with buttery warm bread.

Visual guide: Use this comparison before choosing your style: Maine is cool and lightly mayo-dressed, while Connecticut is warm and buttery.

Side-by-side comparison image showing a Maine-style lobster roll labeled cool with light mayo and a Connecticut-style lobster roll labeled warm with butter.
Maine-style lobster rolls are cool and lightly mayo-dressed, while Connecticut-style rolls are warm and buttery. Therefore, the easiest choice is whether you want a chilled, fresh filling or a richer warm butter roll.

Simple decision: Choose Maine-style for cool, lightly creamy lobster. Choose Connecticut-style for warm, buttery, no-mayo lobster. Use the optional hybrid only for the comfort of buttered bread with the freshness of a cold lobster salad filling.

Why This Lobster Roll Recipe Works

Everything here is designed to protect the expensive part: the lobster. Dry lobster keeps the dressing clean. Big chunks keep the roll luxurious. Butter-toasted sides give the bun flavor and structure. Light mayo or gentle butter lets the lobster stay sweet.

The best lobster roll feels almost too simple when you read it, then completely right when you take the first bite: warm golden bread at the edges, sweet lobster in the middle, a little lemon, and just enough richness to make the meat glisten.

It is the kind of sandwich that looks casual on the plate but feels special the second you pick it up.

Ingredients

The ingredient list is short because lobster is doing the expensive work. Butter, lemon, chives, and a soft bun are there to support it, not compete with it.

Starting with tails, frozen lobster, or whole lobster? Jump to the lobster options guide.

Visual guide: Use this ingredient visual as a setup check before cooking, especially if you are choosing between the mayo and butter versions.

Ingredients for lobster rolls arranged on a light surface, including cooked lobster meat, split-top buns, butter, mayonnaise, lemon, celery, chives, salt, and black pepper.
Lobster roll ingredients should stay simple because the seafood is already doing the expensive work. Butter, lemon, chives, mayo, and soft buns should support the lobster rather than cover it up.

For the Rolls

  • Cooked lobster meat: Use 1 lb / 454 g for 4 standard rolls, or more for generous rolls.
  • Buns: New England split-top buns are the most reliable, but soft brioche or regular hot dog buns can work.
  • Butter: Used for toasting the buns and, in the Connecticut version, for dressing the lobster.
  • Lemon: Brightens the sweet lobster and balances the richness.
  • Chives: Add freshness without taking over.
  • Salt and pepper: Use lightly.

For the Maine-Style Mayo Version

  • 2–4 tbsp / 30–60 ml mayonnaise
  • ¼ cup finely diced celery, optional
  • Extra chives or scallions, optional
  • Tiny pinch of celery salt or Old Bay, optional

Celery is common because it adds crunch, but it is not required. Dice it finely and keep the amount modest so each bite still tastes like lobster.

Because the dressing is so simple, the mayo matters. For a cleaner homemade base, use this homemade mayo recipe in the Maine-style version.

For an egg-free roll, use a thick eggless mayo and keep the rest of the filling the same. MasalaMonk’s eggless mayonnaise recipe is the better fit for that swap.

For the Connecticut-Style Butter Version

  • 4–6 tbsp / 60–90 ml butter
  • 1 tbsp lemon juice or a little lemon zest
  • 1–2 tbsp chopped chives
  • Optional tiny amount of garlic

Garlic can join the butter, but it should whisper. Lemon, butter, and lobster should still be the main story.

How Much Lobster to Buy

Buying enough lobster is the part that makes most home cooks nervous. Use about 4 oz / 113 g cooked lobster meat per standard roll. For a very generous restaurant-style roll, use 5–6 oz / 140–170 g.

Buying shell-on lobster? Check the whole lobster yield shortcut before you shop.

NeedCooked Lobster Meat
1 standard lobster roll4 oz / 113 g
1 generous lobster roll5–6 oz / 140–170 g
4 standard lobster rolls1 lb / 454 g
4 generous lobster rolls1¼–1½ lb / 565–680 g
6 standard lobster rolls1½ lb / 680 g
1 mini lobster rollAbout 2 oz / 55–60 g
8 mini lobster rollsAbout 1 lb / 454 g

Visual guide: Use this portion guide when deciding how much cooked lobster meat to buy for standard, generous, or very generous rolls.

Portion guide showing three lobster roll amounts labeled 4 ounces standard, 5 ounces generous, and 6 ounces very generous.
Use about 4 ounces of cooked lobster meat for a standard lobster roll. However, for a more abundant restaurant-style roll, plan on 5 to 6 ounces per bun.

For the least stressful route, buy cooked picked lobster meat. With lobster tails or whole lobsters, plan with a buffer because shell weight is not meat weight.

Whole Lobster Yield Shortcut

Whole lobster yield varies by size, shell hardness, season, and how carefully the meat is picked. As a rough planning shortcut, a 1½ lb whole lobster may give about 6–8 oz cooked picked meat.

Buying Whole LobsterRough Picked Meat YieldApproximate Rolls
1 × 1½ lb lobsterAbout 6–8 oz1 generous roll or 2 small rolls
2 × 1½ lb lobstersAbout 12–16 oz3–4 standard rolls
3 × 1½ lb lobstersAbout 18–24 oz4 generous rolls

Visual guide: Use this whole-lobster yield guide as a buying shortcut when you are starting with shell-on lobster instead of picked meat.

Infographic showing a one and a half pound whole lobster yielding about six to eight ounces of picked meat for one generous roll or two small rolls.
Whole lobster yield varies, so treat this as a planning shortcut. In general, one 1½ pound lobster may give about 6 to 8 ounces of picked meat, which is enough for one generous roll or two smaller rolls.

For four full rolls with the least guesswork, cooked picked lobster meat is still the easiest choice. Whole lobsters give excellent flavor and texture, but they add work and yield uncertainty.

What Lobster Meat Is Best?

The best lobster meat for lobster rolls is a mix of claw, knuckle, and tail meat. Claw and knuckle meat are sweet and tender. Tail meat gives larger, meatier pieces. Together, they make the roll feel full and balanced.

Visual guide: Use this meat comparison to understand why claw, knuckle, and tail pieces give a lobster roll better texture than one uniform cut.

Three bowls of lobster meat labeled claw meat, knuckle meat, and tail meat for comparing lobster roll filling options.
The best lobster meat for lobster rolls is usually a mix of claw, knuckle, and tail. Claw and knuckle meat bring tenderness, while tail meat adds larger, meatier bites.
Lobster OptionVerdictNotes
Cooked picked lobster meatEasiestBest route for beginners and the easiest way to control quantity.
Claw and knuckle meatBest textureSweet, tender, and ideal for a soft lobster roll filling.
Tail meatGoodMeaty and easy to buy, but can turn firmer if overcooked.
Frozen cooked lobster meatWorks wellThaw overnight, drain, and pat dry.
Lobster tailsPracticalGood when whole lobster or picked meat is not available.
Whole lobsterClassicGreat flavor and a mix of meat, but takes more work.
Canned lobsterEmergency optionUsable in a pinch, but usually softer and less sweet.
Imitation lobsterBudget-style variationNot classic, but usable for a casual seafood-style roll.

A full lobster roll should look almost overfilled when it lands on the plate. Do not use the filling to stretch lobster salad; build a roll that feels abundant.

Best Buns for Lobster Rolls

The most reliable bun for lobster rolls is a New England-style split-top hot dog bun. It opens from the top, has soft sides, and toasts beautifully in butter.

A split-top bun is not just tradition. It gives you two flat sides to toast, so the outside browns evenly while the inside stays soft enough to cradle the lobster. If the bun is soft, warm, and buttery, you are already halfway there.

Bun Comparison

Bun TypeVerdictNotes
New England split-top bunBestClassic shape, soft texture, easy to toast on the sides.
Split-top brioche bunGoodRicher and slightly sweeter, but very usable.
Regular hot dog bunWorksTrim the sides and butter-toast well.
Soft bakery rollOkayUse only if soft, light, and not crusty.
Hawaiian-style rollPossibleBetter for mini rolls or party sliders.
Crusty rollAvoidToo hard and distracting.
Burger bunNot idealBetter for a lobster sandwich variation than a classic roll.

Visual guide: Use this bun comparison before shopping: split-top buns are best, soft alternatives can work, and hard crusty rolls are the one to avoid.

Bun comparison guide showing a split-top bun marked best, a brioche bun marked good, a regular hot dog bun marked works, and a crusty roll marked avoid.
Split-top buns are best for lobster rolls because their flat sides toast evenly in butter while the center stays soft. Meanwhile, crusty bread can make the sandwich harder to bite and distract from the lobster.

Bun workaround: If you cannot find split-top buns, use regular hot dog buns and trim a thin strip from both outer sides. This exposes more soft bread, so the sides can brown in butter like a classic lobster roll bun.

Ready to cook? Move to the step-by-step lobster roll method.

Visual guide: Use this workaround if regular hot dog buns are all you have: trim the sides, butter them, and toast until golden.

Three-step image showing a regular hot dog bun being trimmed on the sides, buttered, and toasted golden in a skillet.
If New England split-top buns are not available, trim the sides of regular hot dog buns before butter-toasting them. This simple workaround creates golden sides and a softer lobster roll bite.

How to Make Lobster Rolls

Once the meat and buns are ready, the job is simple: keep the lobster chunky, toast the bread well, dress lightly, and serve before the bun loses its contrast.

Visual guide: Use this step-by-step visual to keep the method in order: dry the lobster, toast the bread, finish the filling, then assemble.

Four-step process image showing cooked lobster being dried, buns being toasted, lobster being dressed or warmed, and a bun being filled generously.
This step-by-step lobster roll image shows the order that matters most: remove excess moisture first, toast the bread second, then finish the lobster and fill the bun while everything still has texture.

Step 1: Prepare the Lobster

Check the lobster meat for shell pieces. Pat it dry with paper towels, then cut or tear it into large chunks. Keep the pieces big enough that every bite still feels like lobster.

Step 2: Toast the Buns

Butter the outside of the buns. Heat a skillet or griddle over medium heat and toast for 1–2 minutes per side, until the cut sides are golden and the center still feels soft when pressed.

Step 3: Choose the Filling

Make the Maine-style version for cool lobster with a light mayo dressing. For warm lobster with melted butter and no mayo, choose the Connecticut-style version.

Need exact seasoning? Check the seasoning guide before adjusting mayo, butter, lemon, or herbs.
Step 4: Fill Generously

Add about 4 oz / 113 g lobster meat to each bun, or more for a generous roll. Pile the lobster loosely so the roll looks full, abundant, and a little over the top.

Step 5: Serve

Lobster rolls are best when the bun is freshly toasted and the filling has the right texture. Serve with lemon wedges, chips, pickles, fries, coleslaw, corn, or a simple salad.

Maine-Style Lobster Roll

This is the cool, lightly creamy version: sweet lobster, warm buttery bread, lemon, chives, and optional celery for crunch. The bite should feel cool and soft in the middle, buttery at the edges, and bright enough from lemon that the lobster still tastes sweet.

Maine-Style Ingredients

  • 1 lb / 454 g cooked lobster meat
  • 2–4 tbsp / 30–60 ml mayonnaise
  • ¼ cup finely diced celery, optional
  • 1–2 tbsp lemon juice
  • 1–2 tbsp chopped chives
  • Salt and black pepper, to taste
  • 4 butter-toasted split-top buns

Maine-Style Method

  1. Add 2 tablespoons mayonnaise, celery, lemon juice, chives, salt, and pepper to a mixing bowl.
  2. Stir until smooth.
  3. Add the lobster and fold gently so the pieces stay chunky.
  4. If the lobster looks dry, add more mayo 1 tablespoon at a time.
  5. Chill for 15–30 minutes for a colder filling.
  6. Spoon into warm butter-toasted buns close to serving time.

Visual guide: Use this texture cue for Maine-style filling: the lobster should be lightly coated and still easy to see, not stirred into a heavy salad.

Cooked lobster chunks being folded in a bowl with light mayonnaise dressing, diced celery, chives, lemon, and toasted buns nearby.
For a Maine-style lobster roll, fold the dressing through the lobster gently instead of stirring hard. Aim for a light coating, with the lobster pieces still easy to see.

Look for a lightly glossy filling, not lobster buried in a thick creamy coating. Mayo should hold the pieces together, not turn them into seafood salad.

Maine-style filling does not need to be ice-cold. Slightly chilled lobster has a cleaner, sweeter flavor than lobster served straight from the coldest part of the refrigerator.

Visual guide: Use this finished Maine-style roll as the serving cue: chilled, fresh lobster in a warm toasted bun with a light creamy coating.

Finished Maine-style lobster roll with cold lightly dressed lobster, diced celery, chives, potato chips, pickles, lemon wedges, and a toasted bun.
This Maine-style lobster roll should look chilled and fresh, not heavy. The light mayo coating, celery, chives, and warm toasted bun give the classic cold lobster roll its clean contrast.

Connecticut-Style Lobster Roll

A Connecticut-style lobster roll is warm, buttery, and usually made without mayo. For this version, gently warm the lobster in melted butter, then tuck it into a hot butter-toasted bun.

A good warm version should smell like buttered toast first, then sweet lobster. Butter should coat the meat like a gloss, not pool in the bun. Think gentle warming, not a second cook.

Connecticut-Style Ingredients

  • 1 lb / 454 g cooked lobster meat
  • 4–6 tbsp / 60–90 ml butter
  • 1 tbsp lemon juice or a little lemon zest
  • 1–2 tbsp chopped chives
  • Salt and black pepper, to taste
  • 4 butter-toasted split-top buns

Connecticut-Style Method

  1. Melt the butter in a skillet over medium-low heat.
  2. Add the cooked lobster meat.
  3. Warm gently for 2–3 minutes, just until heated through. The pieces should look glossy, not browned or curled tight.
  4. Add lemon juice or zest, chives, salt, and pepper.
  5. Keep the butter gently melted, not sizzling hard.
  6. Fill hot butter-toasted buns and serve while warm.

Visual guide: Use this skillet cue for Connecticut-style rolls: the lobster should look warm and glossy, not fried, browned, or curled tight.

Chunks of cooked lobster meat warming gently in melted butter in a skillet with lemon, chives, and butter nearby.
In a Connecticut-style lobster roll, the butter is used for gentle warming, not frying. Once the lobster looks glossy and hot, it is ready for the bun.

If you are starting with raw lobster meat instead of cooked lobster, cut it into even pieces and cook gently in butter until opaque and just cooked through, usually about 6–8 minutes depending on size. Stir gently and stop as soon as the meat is no longer translucent.

Visual guide: Use this finished Connecticut-style roll as the no-mayo serving cue: warm buttered lobster, soft toasted bun, and lemon on the side.

Finished Connecticut-style lobster roll with warm buttered lobster in a toasted bun, served with melted butter, a lemon wedge, and a blue napkin.
This warm butter lobster roll is the no-mayo version: rich, simple, and focused on the sweetness of the lobster. Serve it right away while the bun is still warm.

Using Lobster Tails, Frozen Lobster, or Whole Lobster

You can make excellent lobster rolls with different forms of lobster. However you start, the finished meat should be sweet, springy, and just opaque — never tight, dry, curled hard, or rubbery.

Starting PointWhat to DoBest Use
Cooked lobster meatCheck for shell, pat dry, and cut into chunks.Maine or Connecticut rolls
Frozen cooked lobsterThaw overnight, drain well, and pat dry.Best when convenience matters
Lobster tailsThaw if frozen, then steam or boil gently until opaque.Good when picked meat is unavailable
Whole lobsterCook, cool, crack, pick, and check carefully for shell.Classic texture and flavor

Using Lobster Tails

Small to medium lobster tails often take about 4–6 minutes once the water is steaming or boiling gently. Larger tails can take longer, so start checking early. The meat should be opaque, no longer translucent, and still springy when cut. If the tail meat curls tight or feels rubbery, it has gone too far.

For Maine-style rolls, cool the cooked tail meat before chopping and dressing. For Connecticut-style rolls, you can use the lobster while it is still warm and finish it gently in butter.

Visual guide: Use this doneness guide when cooking lobster tails so the meat turns opaque and springy instead of translucent or rubbery.

Three-panel lobster tail doneness guide labeled undercooked, just right, and overcooked, showing lobster tail meat at different stages.
When using lobster tails for lobster rolls, look for opaque, springy meat. Translucent meat needs more time, while overcooked lobster can turn tight, dry, and rubbery.

Using Frozen Cooked Lobster

Frozen cooked lobster can still make a good roll, but it needs a little patience before it meets the mayo or butter. Thaw it overnight in the refrigerator, drain it well, then spread it on paper towels for 10–15 minutes if it still seems watery. For Maine-style rolls, start with slightly less mayo. For Connecticut-style rolls, warm the lobster gently and leave excess liquid behind.

Visual guide: Use this frozen-lobster prep cue before adding mayo or butter: thaw, drain, and blot until the meat no longer looks wet.

Thawed cooked lobster meat spread on white paper towels with chives, lemon, and a tray of lobster meat nearby.
The key to using frozen lobster meat is moisture control. Paper towels pull away extra liquid, so the final lobster roll tastes clean instead of watery.

Using Whole Lobster

If using whole lobster, cook it first, then cool it enough to handle. Crack the claws, knuckles, and tail, remove the meat, and check carefully for shell fragments. You can cook and pick the lobster a day ahead, then dress it close to serving.

Visual guide: Use this whole-lobster picking visual to see the mix you want in the bowl: claw, knuckle, and tail meat checked for shell.

Picked lobster meat in a bowl beside cooked lobster shells, cracked claws, a tail shell, lobster crackers, lemon, and a kitchen towel.
Picking a whole lobster gives you different textures in one bowl: tender claw and knuckle meat plus firmer tail pieces. That mix makes the finished lobster roll feel more complete.

How to Season a Lobster Roll Without Overpowering It

A lobster roll does not need a heavy sauce. The goal is simple: enough richness to keep the lobster juicy, enough lemon to brighten it, and no seasoning that steals the first bite.

If you are unsure, season the mayo or butter first, then fold in the lobster. It is easier to adjust lemon, salt, or mayo before the meat goes in than to fix an overworked filling later.

  • Mayo: Use just enough to lightly coat Maine-style lobster.
  • Butter: Use enough to gloss the lobster for Connecticut-style rolls, not soak the bun.
  • Lemon: Add brightness in both versions.
  • Celery and chives: Use lightly for crunch and freshness.
  • Old Bay, celery salt, or hot sauce: Optional, but keep them in the background.

For a best-of-both-worlds roll, butter-toast the buns and keep the lobster cold with a very light mayo dressing. You get buttery bread and cool lobster salad without turning the filling heavy.

If you are serving the rolls with fries, a bowl of homemade tartar sauce works better on the side than inside the lobster roll.

Mini Lobster Rolls and Sliders

Mini lobster rolls are the party version of this recipe: easier to serve, easier to refill, and less risky than assembling full rolls too early. They work well for brunches, summer appetizers, or a seafood snack board.

Serving later? Read the make-ahead and seafood safety notes before filling a party tray.

  • Use about 2 oz / 55–60 g lobster meat per mini roll.
  • 1 lb / 454 g lobster meat makes about 8 mini lobster rolls.
  • Toast the buns close to serving time.
  • Keep Maine-style filling chilled until needed.
  • Serve Connecticut-style mini rolls warm and fresh.
  • For parties, keep extra filling chilled and refill buns as needed instead of assembling everything too early.

Visual guide: Use this party-board visual when scaling the recipe down into mini lobster rolls that can be filled close to serving.

Several mini lobster rolls on a wooden board with lemon wedges, pickles, chips, chives, and extra lobster filling in a bowl.
Mini lobster rolls are ideal for parties because they are easier to serve, refill, and eat. For the best texture, keep the filling chilled and assemble the rolls close to serving.

Variations

Once the classic version makes sense, variations are easy. Keep the seafood generous and change only the accents.

  • No mayo lobster roll: Make the Connecticut-style version with warm lobster, melted butter, lemon, and chives.
  • Brown butter lobster roll: Brown the butter lightly before adding the lobster, but keep it gentle so it does not taste bitter.
  • Spicy lobster roll: Add a few drops of hot sauce or a tiny pinch of cayenne to the mayo dressing.
  • Lobster and shrimp roll: Use half lobster and half cooked shrimp for a more budget-friendly version.
  • Crab roll: Use lump crab meat instead of lobster and keep the dressing light.
  • Langostino roll: Use cooked langostino tails as a lobster-style variation.
  • Egg-free mayo version: Use a thick eggless or plant-based mayo and keep the filling lightly dressed.
  • Extra lemon-herb lobster roll: Add more lemon zest, chives, dill, or parsley for a fresher version.

What to Serve with Lobster Rolls

Lobster rolls are rich, so the best sides add contrast: something crisp, something cold, something acidic, or something salty.

  • Classic: potato chips, pickles, lemon wedges, and coleslaw.
  • Seafood-shack plate: fries, tartar sauce on the side, and corn on the cob.
  • Picnic-style: potato salad, cucumber salad, iced tea, or lemonade.
  • Lighter: green salad, tomato salad, or a vinegar-based cucumber salad.

Visual guide: Use this sides visual to build a complete plate with crunch, acidity, and contrast around the rich lobster roll.

Lobster roll served on a plate with French fries, coleslaw, pickles, potato chips, lemon wedges, and a blue napkin.
Classic lobster roll sides should add crunch, acidity, and contrast. Fries, coleslaw, pickles, chips, and lemon wedges turn the roll into a complete seafood-shack meal.

For a seafood-shack-style plate, serve them with crispy homemade French fries, pickles, and lemon wedges.

The cold, crunchy side that makes the plate feel complete is this easy creamy coleslaw. A more picnic-style meal works well with potato salad. For something lighter and sharper, a chilled cucumber salad with vinegar, dill, and onion cuts through the richness nicely.

Make-Ahead, Storage, and Food Safety

Lobster rolls are best assembled close to eating. You can prepare parts of the recipe ahead, but filled rolls and toasted buns do not hold well for long.

  • Cooked lobster meat: Can be prepared up to 1 day ahead and stored covered in the refrigerator.
  • Maine-style filling: Can be mixed a few hours ahead, but tastes best when freshly dressed.
  • Connecticut-style filling: Best served warm, close to eating.
  • Buns: Toast just before serving so they stay crisp outside and soft inside.
  • Assembled rolls: Fill close to eating so the bread keeps its contrast.
  • Leftover filling: Store chilled and use within 1–2 days.

Keep cold lobster filling refrigerated until serving, especially in warm weather. As a general food-safety rule, do not leave seafood or other perishable foods out for more than 2 hours, or more than 1 hour if the temperature is above 90°F / 32°C. For official seafood doneness and holding guidance, you can also check FoodSafety.gov’s safe minimum internal temperature chart.

If you are pregnant, use fully cooked, freshly handled lobster and keep the filling cold. Avoid lobster rolls made with pre-made seafood salad unless you are sure it has been stored safely. For more detail, read MasalaMonk’s guide to lobster and pregnancy.

For broader seafood choices during pregnancy and breastfeeding, the FDA’s fish advice explains the 8–12 oz weekly recommendation for a variety of lower-mercury seafood: FDA advice about eating fish.

Common Mistakes

Most disappointing lobster rolls fail for simple reasons, and all of them are easy to avoid.

Visual guide: Use this mistake checklist before serving so you can catch watery meat, too much sauce, tough lobster, hard bread, or early assembly.

Checklist infographic titled five common lobster roll mistakes, listing too much mayo, watery lobster, overcooked lobster, hard bread, and assembled too early.
Most lobster roll mistakes come from losing contrast: too much sauce, wet meat, tough lobster, hard bread, or a bun filled too early. Fix those and the sandwich feels fresher immediately.

Quick Fixes for Common Lobster Roll Mistakes

  1. Using too much mayo: Start with 2 tablespoons per pound of lobster and add more only if needed.
  2. Overheating cooked lobster: For the warm version, gently heat it through instead of cooking it again.
  3. Using watery frozen lobster: Thaw, drain, and pat dry before mixing or warming.
  4. Chopping lobster too small: Keep the pieces chunky and visible.
  5. Using crusty bread: The bun should support the lobster, not fight it.
  6. Skipping the toast: Butter-toasting gives the bun flavor and structure.
  7. Underfilling the roll: Use about 4 oz / 113 g lobster meat per standard roll.
  8. Dressing too early: Freshly dressed lobster has the cleanest texture.
  9. Over-seasoning: Season lightly and let lemon do most of the lifting.
  10. Assembling too far ahead: The bun will soften and lose its contrast.
  11. Cold bun with cold filling: Chilled lobster is fine for Maine-style rolls, but the bun should still be warm and butter-toasted.

If something goes wrong, it is usually one of three things: the lobster was overcooked, the meat was too wet, or the bun was not toasted properly. Fix those, and the recipe becomes much more reliable.

Once the lobster is dry, the bun is warm, and the dressing is light, stop adjusting. A good lobster roll should taste expensive in the simplest possible way.

FAQs

What is the difference between a Maine and Connecticut lobster roll?

Maine-style lobster rolls are usually served cold with a light mayo dressing. Connecticut-style lobster rolls are served warm with melted butter and no mayo. Both are usually served in soft butter-toasted buns.

Are lobster rolls served hot or cold?

They can be either. Maine-style is chilled lobster with light mayo; Connecticut-style is warm lobster with butter. In both cases, the bun should be warm and freshly toasted.

What is the best lobster meat for lobster rolls?

A mix of claw, knuckle, and tail meat is best. Claw and knuckle meat are sweet and tender, while tail meat gives larger, meatier pieces. Lobster tails still work well when cooked gently.

How much lobster meat do I need per lobster roll?

Use about 4 oz / 113 g cooked lobster meat per standard roll. A very generous lobster roll uses 5–6 oz / 140–170 g. Four standard rolls need 1 lb / 454 g cooked lobster meat. Four generous rolls need 1¼–1½ lb / 565–680 g.

How much meat does a whole lobster give?

Yield varies, but as a rough home-cook shortcut, one 1½ lb whole lobster may give about 6–8 oz picked meat. Shell hardness, lobster size, and careful picking all affect the final amount.

What kind of bun is best for lobster rolls?

New England split-top hot dog buns are best because they toast beautifully on the sides while staying soft enough to cradle the lobster. Soft brioche or regular hot dog buns can also work when butter-toasted.

Can I use regular hot dog buns?

Yes. For the best result, trim a thin strip from both outer sides of regular hot dog buns, then toast those sides in butter until golden. This makes them behave more like split-top lobster roll buns.

Should lobster rolls have lettuce?

Traditional lobster rolls usually skip lettuce so the lobster stays the focus. For party serving, a small soft lettuce leaf can help protect the bun from moisture, but use it lightly.

Can I use lobster tails for lobster rolls?

Yes. Lobster tails are practical when whole lobster or picked lobster meat is not available. Thaw frozen tails first, cook gently until opaque and no longer translucent, then cut the meat into large chunks.

Can I use raw lobster meat?

Yes, especially for Connecticut-style rolls. Cut raw lobster meat into even pieces and cook it gently in butter until opaque and just cooked through. Stop before the pieces curl tight or feel rubbery.

Can I make lobster rolls with frozen lobster?

Yes. Thaw frozen cooked lobster overnight in the refrigerator, drain it well, and pat it dry before using. The drying step keeps the filling clean instead of watery.

How do I keep lobster rolls from getting watery?

Drain the lobster well, then pat it dry with paper towels before mixing. If frozen cooked lobster still seems wet, let it sit on paper towels for 10–15 minutes. Start with less mayo and add more only as needed.

Can I make lobster rolls without mayo?

Yes. Make Connecticut-style lobster rolls with warm lobster, melted butter, lemon, and chives. This is the classic no-mayo path.

Should lobster rolls have celery?

Celery is common in Maine-style lobster rolls because it adds crunch, but it is optional. Dice it finely and keep the amount modest so the lobster stays central.

Can I make mini lobster rolls?

Yes. Use mini buns or slider buns and about 2 oz / 55–60 g lobster meat per roll. One pound of lobster meat makes about 8 mini lobster rolls.

Can I make lobster rolls for a party?

Yes, but do not assemble all the rolls too early. Keep the filling chilled, toast buns in batches, and fill close to serving so the bread stays soft inside and crisp at the edges.

Can I make lobster roll filling ahead of time?

You can cook and pick lobster meat a day ahead. Maine-style filling can be mixed a few hours ahead, but it is best dressed close to serving. Connecticut-style warm butter lobster rolls should be made right before eating.

How long does lobster roll filling last?

Lobster filling is best fresh, but leftovers can be stored covered in the refrigerator and used within 1–2 days. Do not leave seafood filling at room temperature for more than 2 hours, or more than 1 hour above 90°F / 32°C.

Can pregnant women eat lobster rolls?

If you are pregnant, use fully cooked, freshly handled lobster and keep the filling cold. Avoid lobster rolls made with pre-made seafood salad unless you are sure it has been stored safely.

Posted on Leave a comment

Air Fryer Pork Chops Recipe: Juicy Boneless, Bone-In, Thin & Thick Chops

No-breading air fryer pork chops on a cream plate, with one pork chop sliced open to show the cooked center.

Dry pork chops are usually not a pork chop problem — they are a timing problem. Air fryers cook lean pork quickly, which is great for dinner, but it also means a thin or boneless chop can turn tough if it stays in the basket just a little too long.

If you have ever pulled pork chops out of the air fryer looking perfect on the outside but tight and dry inside, the fix is usually not a complicated marinade. It is better timing, enough space, and knowing when to stop.

This recipe is built around a no-dry timing guide, so you can match the method to the pork chop you actually bought — boneless, bone-in, thin, thick, breaded, frozen, or air fryer oven-style.

When it works, the edges are browned, the paprika-garlic rub smells warm and smoky, and the inside stays tender enough to slice cleanly without losing all its juices. The timer gives you a starting point; the thermometer gives you the answer.

Quick Time and Temperature Answer

For most 1-inch boneless pork chops, air fry at 380°F / 193°C for 10 to 12 minutes, flipping halfway, until the center reaches 145°F / 63°C. Rest for 3 to 5 minutes before slicing. Use 390°F to 400°F / 199°C to 204°C for breaded chops or crispier edges, and start checking earlier for thin chops.

Many recipes use 400°F, and that can work. This recipe uses 380°F as the default because it gives lean pork a little more time to cook through before the outside tightens up.

Jump to What You Need

Quick No-Breading Recipe for 1-Inch Boneless Chops

Need dinner moving now? This is the fast path for the most common version: 1-inch boneless pork chops with no breading.

Seasoned boneless pork chops on a wooden board beside an air fryer basket, spice bowl, and oil brush.
For 1-inch boneless air fryer pork chops, this is the simplest starting point: season, arrange, cook, and check the center. Then adjust the timing if your chops are thin, thick, bone-in, breaded, or frozen.
  1. Preheat the air fryer to 380°F / 193°C for 3 to 5 minutes.
  2. Pat dry 4 pork chops, about 6 oz / 170 g each.
  3. Rub with oil: use 1½ tbsp / 22 ml olive oil or avocado oil.
  4. Season with 2 tsp smoked paprika, 1 tsp garlic powder, ½ tsp onion powder, 1 tsp fine salt, ½ tsp black pepper, ½ tsp thyme, Italian seasoning, or ground mustard, and 1 tbsp brown sugar if you want a lightly caramelized edge.
  5. Air fry in a single layer for 10 to 12 minutes, flipping halfway.
  6. Remove when the center reaches 145°F / 63°C.
  7. Rest loosely for 3 to 5 minutes, then serve.

The goal is not a perfect-looking chop that eats dry. What you want is pork that still feels tender when you cut into it.

Once you have made this basic version once, the rest is just adjusting for the chop in front of you: thinner, thicker, bone-in, breaded, or frozen.

If your chops are thinner, thicker, bone-in, breaded, or still frozen, do not force the 10 to 12 minute timing. Use the air fryer pork chops time and temperature chart and start checking early.

Air Fryer Pork Chops Time and Temperature Chart

Use this chart when your pork chops are not the exact 1-inch boneless chops in the quick recipe. Pick the row closest to your chop thickness. The “first check” column tells you when to start checking so you can stop before lean pork overcooks.

Timing by Pork Chop Type

Pork Chop TypeAir Fryer TempCook TimeFirst CheckBest Note
Very thin boneless, under ½ inch / 1.25 cm375°F / 190°C4–6 minutes3–4 minutesFast cook; stay close.
Thin boneless, about ½ inch / 1.25 cm375°F / 190°C6–8 minutes4–5 minutesDo not use thick-chop timing.
Boneless, about ¾ inch / 2 cm380°F / 193°C8–10 minutes6–7 minutesGood everyday size.
Boneless, about 1 inch / 2.5 cm380°F / 193°C10–12 minutes8–9 minutesBest default for this recipe.
Thick boneless, about 1½ inches / 4 cm375–380°F / 190–193°C12–16 minutes10–12 minutesUse patience, not high heat.
Bone-in, about 1 inch / 2.5 cm390–400°F / 199–204°C11–15 minutes9–10 minutesCheck the meat near the bone.
Bone-in, about 1½ inches / 4 cm380–400°F / 193–204°C14–18 minutes12–14 minutesRest well before slicing.
Breaded pork chops390–400°F / 199–204°C8–12 minutes7–8 minutesSpray dry spots with oil.
Shake and Bake pork chops390–400°F / 199–204°C8–12 minutes7–8 minutesSingle layer matters.
Frozen boneless pork chops375–380°F / 190–193°C12–20+ minutesAfter softening, then oftenSeason after the surface softens.
Reheating cooked pork chops350°F / 175°C3–5 minutes3 minutesWarm gently.
Air fryer pork chops time and temperature chart with cook times and first-check times for different pork chop cuts.
Use this air fryer pork chops time and temperature chart as a starting range, not a strict countdown. The first-check column matters because lean pork can move from tender to overdone quickly.

Why Thin and Thick Pork Chops Need Different Timing

Three raw pork chops of different thicknesses on a cutting board, labeled as thin, one-inch, and thick chops.
Before choosing a cook time, look at thickness first. Thin pork chops can finish quickly even without deep browning, while thick chops need enough time for the center to cook through gently.

In plain terms: thin chops need speed, thick chops need patience, breaded chops need oil-kissed crumbs, and frozen chops need the thermometer more than the timer.

These are ranges, not promises. Air fryer model, chop thickness, bone, breading, and basket crowding all change the final time. For safe, juicy pork chops, the important number is 145°F / 63°C with at least a 3-minute rest. If you are deciding between 375°F, 380°F, and 400°F, use the temperature comparison next.

Air Fryer Pork Chops at 375°F, 380°F, or 400°F

The temperature question matters because lean pork can move from juicy to tough quickly. Use lower heat when you need control, and higher heat when you want crisping.

Choosing 375°F, 380°F, or 400°F

Temperature guide comparing 375°F, 380°F, and 390 to 400°F for cooking different air fryer pork chops.
Temperature should match the job. Use 375°F for control, 380°F for everyday boneless pork chops, and 390–400°F when breading, Shake and Bake, or stronger browning needs extra heat.
TemperatureBest ForWatch Out For
375°F / 190°CThin chops, frozen-start chops, thick chops that are browning too fastSlower browning
380°F / 193°CDefault juicy boneless chops, especially around 1 inch thickLess aggressive crisping than 400°F
390–400°F / 199–204°CBreaded chops, Shake and Bake, bone-in chops, crispier edgesLean boneless chops can overcook faster

For most people making plain boneless chops tonight, 380°F is the easiest place to start. Move hotter when you want crisp coating, stronger browning, or a bone-in chop that needs more edge color; for coating-specific guidance, jump to the breaded pork chops section.

If the pork reaches 145°F earlier than the chart says, take it out. The timer is not the goal; juicy pork is.

Best Pork Chops to Use

The right chop gives you more forgiveness before you even start cooking. If you are standing at the store, choose chops that are evenly thick, not paper-thin on one end and thick on the other.

Raw bone-in, boneless, thin, and uneven pork chops shown as a visual guide for air fryer cooking.
The best pork chops for the air fryer are evenly thick because they cook more predictably from edge to center. If the chop is very thin or uneven, start checking earlier than the timer suggests.
ChoiceBest ForWhy It Works
Best beginner choice1-inch bone-in center-cut chopsJuicier and more forgiving.
Best weeknight choice1-inch boneless center-cut chopsFast, easy, and reliable with the chart.
Best crispy option1-inch boneless or bone-in chops with breadingEnough thickness to cook through while the coating browns.
Risky but workable½-inch thin chops or cutletsFast dinner, but they need early checking.
Best to avoidUneven ultra-thin chopsOne part dries out before the thicker part finishes.

Bone-in cuts are a little more forgiving if you are worried about dryness. Boneless cuts are faster and convenient, but they need closer attention. Around 1 inch thick is the easiest size to cook well. Already bought a different cut? Use the boneless, bone-in, thin, and thick chop guide before choosing a final cook time.

Ingredients and Equipment

The rub is not trying to hide the pork. It helps the edges brown and gives every bite a little garlic-smoky warmth. If you are cooking from the pantry, the essentials are simple: pork chops, oil, salt, garlic powder, paprika, and pepper. For the full measured version, jump to the recipe card.

Raw pork chops with olive oil, smoked paprika, garlic powder, onion powder, salt, pepper, brown sugar, and herbs.
This pork chop seasoning builds flavor without a long ingredient list. Paprika helps the surface look warm and browned, garlic and onion add savory depth, and optional brown sugar encourages caramelized edges.

Pork Chop Seasoning Ingredients

IngredientUS AmountMetric Amount
Pork chops4 x 6 oz chops4 x 170 g chops
Olive oil or avocado oil1½ tbsp22 ml
Brown sugar, optional1 tbsp12 g
Smoked paprika2 tsp4–5 g
Garlic powder1 tsp3 g
Onion powder½ tsp1–2 g
Fine salt1 tsp5–6 g
Black pepper½ tsp1 g
Dried thyme, Italian seasoning, or ground mustard½ tspabout 1 g
  • Salt note: If your pork chops are labeled enhanced, pre-brined, or already seasoned, reduce the salt slightly.
  • Brown sugar note: It helps the edges caramelize, but you can skip it for a sugar-free version.
  • Oil note: Use just enough to lightly coat the surface. Greasy pork will not brown better.

Equipment

  • Air fryer: Basket-style or oven-style both work.
  • Instant-read meat thermometer: The most important tool for avoiding dry pork chops.
  • Paper towels: For drying the surface before seasoning.
  • Small bowl: For mixing the rub.
  • Tongs: For flipping without scraping off the seasoning.
  • Perforated parchment, optional: Use only if sticking is a problem; do not preheat loose parchment without food weighing it down.

Why These Air Fryer Pork Chops Stay Juicy

These are the small details that make the difference between pork chops that only look done and pork chops that actually eat juicy. Need a visual doneness check later? Use the done pork chops guide.

  • Match the chop, not the clock. Thin, thick, bone-in, breaded, and frozen chops all need different timing.
  • Dry, oil, season. A dry surface and a light oil coating help the rub brown instead of steam. This is the same reason air fryer chicken wings crisp better when the skin is dry.
  • Give the air space. Cook in a single layer so the hot air can reach the edges.
  • Check before the timer ends. Especially with thin chops, small chops, or compact basket-style air fryers.
  • Rest loosely. A tight foil wrap can soften the crust, while a short loose rest lets the juices settle.

Quick Visual Steps Before Air Frying

Pat the Pork Chops Dry

Before seasoning, blot the surface well so the rub has something dry to cling to. This visible step supports the pat-dry instruction in the quick recipe.

A hand pats raw pork chops dry with a paper towel on a wooden cutting board.
Blotting the pork chops dry before seasoning helps the rub cling instead of sliding around. As a result, the surface browns better and the air fryer does less steaming.

Season Both Sides Evenly

Next, coat both sides with oil and seasoning, then press the rub in lightly. This is where the no-breading version gets most of its color and aroma.

A hand sprinkles paprika-garlic seasoning over raw pork chops on a wooden cutting board.
Season both sides and press the rub in lightly so it stays attached during cooking. Since these are no-breading pork chops, that spice layer becomes the main source of color, aroma, and flavor.

Leave Space in the Basket

Arrange the pork chops in a single layer instead of stacking or overlapping them. Space around the edges helps the air fryer brown the surface more evenly.

Seasoned pork chops arranged in a single layer with space between them inside a black air fryer basket.
A single layer lets hot air reach the top, sides, and edges of each pork chop. If the basket is crowded, the chops can steam where they touch and brown unevenly.

Flip Halfway Through Cooking

Halfway through the cook time, turn the chops gently with tongs. This gives both sides direct heat and helps prevent one pale side.

Tongs lift a browned pork chop from an air fryer basket while other pork chops cook nearby.
Flip pork chops halfway through air frying so both sides get direct heat. For breaded chops, lift gently with tongs instead of dragging, which helps keep the coating intact.

Once the main method is clear, the rest is just small adjustments: the chop you bought, the air fryer you own, and how crisp you want the edges.

What Done Pork Chops Look and Feel Like

The best batch should look roasted at the edges, smell garlicky and smoky, and slice without turning chalky. The seasoning should look darker and fragrant, and the surface should look browned rather than wet. Breaded chops should be golden, not pale or dusty.

Doneness guide for air fryer pork chops showing browned edges, 145°F internal temperature, and a sliced cooked center.
Browned edges are helpful, but color alone is not enough for pork chops. For better doneness confidence, combine a 145°F / 63°C center with a short rest and a tender-looking slice.

If you grew up thinking pork had to be cooked until completely white, this may feel different. A slight blush can be normal when pork reaches 145°F / 63°C and rests. The thermometer matters more than fear.

Use 145°F as the Stop Point

A meat thermometer inserted into a cooked pork chop shows an internal temperature of 145°F.
The timer tells you when to check, but the thermometer tells you when the pork is actually done. Aim for 145°F / 63°C in the thickest part, then rest the chops before cutting.

When the outside is browning too fast but the center is not done, lower the temperature to 350°F / 175°C and cook for a few more minutes. That is better than burning the crust while waiting for the inside.

Check the Slice After Resting

Sliced air fryer pork chop with a browned crust and moist cooked center on a wooden board.
After resting, a good air fryer pork chop should slice cleanly and still look tender inside. If the meat looks tight or chalky, check the next batch sooner and rely on temperature instead of time alone.

If your pork chops still turn out dry or tough after checking temperature, use the troubleshooting guide before the next batch.

If you want the complete measured version in one place, use the recipe card below.

Air Fryer Pork Chops Recipe Card

This is the full recipe card version for 1-inch boneless chops. Use the chart above for thin, thick, bone-in, breaded, or frozen chops.

Recipe Details

Prep Time10 minutes
Cook Time10–12 minutes
Resting Time3–5 minutes
Total TimeAbout 25 minutes
Servings4
Cooking MethodAir fryer
Best For1-inch boneless chops; see chart for other cuts

Ingredients

  • 4 pork chops, about 6 oz / 170 g each, preferably 1 inch thick
  • 1½ tbsp / 22 ml olive oil or avocado oil
  • 1 tbsp / 12 g brown sugar, optional
  • 2 tsp / 4–5 g smoked paprika
  • 1 tsp / 3 g garlic powder
  • ½ tsp / 1–2 g onion powder
  • 1 tsp / 5–6 g fine salt
  • ½ tsp / 1 g black pepper
  • ½ tsp dried thyme, Italian seasoning, or ground mustard

Instructions

  1. Preheat. Set the air fryer to 380°F / 193°C and preheat for 3 to 5 minutes.
  2. Dry. Pat both sides of the pork chops dry with paper towels.
  3. Oil and season. Rub both sides lightly with oil, then coat with the spice mixture.
  4. Arrange. Place pork chops in a single layer. Cook in batches if needed.
  5. Air fry. Cook for 10 to 12 minutes for 1-inch boneless chops, flipping halfway through.
  6. Check doneness. Remove when the center reaches 145°F / 63°C.
  7. Rest. Rest loosely for 3 to 5 minutes before slicing.

Recipe Notes

  • Bone-in chops may need 2 to 3 extra minutes; check near, but not touching, the bone.
  • Thin chops can be ready quickly, so start checking around 4 to 5 minutes.
  • Thick chops do better at 375°F to 380°F with internal temperature as the final guide.
  • Crispier edges usually need heat closer to 400°F / 204°C, but lean boneless chops need close attention.
  • If using enhanced, pre-brined, or already seasoned pork chops, reduce the salt slightly.

Nutrition will vary most by chop size, breading, oil, sugar, and sauces. If you are tracking closely, use the cooked chop weight and adjust for toppings. For a deeper look, see this guide to calories in a pork chop.

Back to top ↑

Boneless, Bone-In, Thin, and Thick Chops

If you already bought a different chop, you do not need a different recipe. You just need to adjust the timing.

Cooked boneless, bone-in, thin, and thick air fryer pork chops shown in a labeled comparison guide.
The seasoning can stay the same, but the cooking approach should change by cut. Boneless chops cook fast, bone-in chops are more forgiving, thin chops need attention, and thick chops need patience.
  • Boneless pork chops: Fast and convenient, but less forgiving. Best around 1 inch thick.
  • Bone-in pork chops: Usually juicier and more forgiving. Check the meaty area near the bone without touching the bone.
  • Thin pork chops: Not difficult, but they do not forgive distraction. Start checking early and do not walk away.
  • Thick pork chops: Better texture potential, but they need patience. Lower the heat if the outside browns too fast.

The seasoning can stay the same; the timing cannot.

Breaded or Fried-Style Pork Chops

The base version skips breading: oil, seasoning, air fryer, done. Breading changes the job. Now you are cooking the pork and managing the crust at the same time. Air fryers crisp oil-kissed crumbs; they do not magically brown dry flour.

Golden breaded air fryer pork chops with crisp breadcrumb coating on a plate.
Breaded air fryer pork chops crisp best with a thin coating and a light oil mist. That way, the crumbs turn golden before the pork underneath has a chance to overcook.

How to Bread Pork Chops for the Air Fryer

Pork chops being coated in flour, egg, and breadcrumbs at a breading station.
For crispy breaded pork chops, keep the flour, egg, and breadcrumb layers even rather than thick. Too much coating can stay pale while the meat continues cooking underneath.

For breaded chops, use 2 tbsp / 15 g flour, 1 egg, ½ cup / 30 g panko or breadcrumbs, optional ¼ cup / 20–25 g parmesan, and oil spray. Air fry at 390°F to 400°F / 199°C to 204°C, flip halfway, and spray pale or dusty spots lightly with oil.

Why Breaded Pork Chops Look Pale in the Air Fryer

If breaded pork chops look pale, the coating usually needs a light mist of oil, not several extra minutes. Dry crumbs do not brown well in the air fryer, and overcooking the pork just to darken the crust can make the center tough.

Comparison guide showing pale dry breading and lightly oiled golden breading on air fryer pork chops.
If breaded pork chops look pale, the coating may need a light mist of oil, not more time. Adding several extra minutes can brown the crumbs but push the pork past its best texture.

If the coating browns before the pork is done, lower the heat and finish gently. Do not bread frozen chops directly; thaw first or use the frozen pork chops method before seasoning. If the crust stays pale or the center finishes unevenly, check the troubleshooting guide.

Frozen Pork Chops in the Air Fryer

Frozen pork chops are not the most even-cooking option, but they can still work when dinner needs to happen now. It will not be quite as even as thawed pork, but it can still save dinner if you check the center instead of trusting the timer. For the target temperature and visual cues, use the done pork chops guide.

Two-step guide showing frozen pork chops in an air fryer basket before seasoning and then brushed with oil after softening.
Frozen pork chops are easier to season after the surface softens. Start them plain in the air fryer, then add oil and seasoning once the rub can stick evenly.
  1. Preheat the air fryer to 375°F / 190°C.
  2. Place frozen chops in a single layer.
  3. Air fry for 5 to 8 minutes, just until the surface starts to soften.
  4. Brush lightly with oil or melted butter.
  5. Add seasoning to both sides.
  6. Continue air frying, flipping occasionally, until the center reaches 145°F / 63°C.
  7. Rest for 3 to 5 minutes before serving.

Frozen timing varies heavily. Thin frozen chops may cook fairly quickly, while thick frozen chops may take 20 minutes or more. For another frozen air fryer example, see these frozen chicken wings in the air fryer.

Basket vs Oven-Style Air Fryers

Different air fryers do not behave exactly the same, so treat your first batch as a calibration batch. Compact basket-style air fryers may brown faster, while oven-style models may need rack rotation.

Comparison of basket-style and oven-style air fryers cooking pork chops in separate labeled sections.
Basket-style and oven-style air fryers can brown pork chops at different speeds because the airflow is different. Keep the same internal temperature goal, but adjust the timing for your machine.
  • Basket-style air fryers: Start checking early if your machine browns food quickly.
  • Oven-style air fryers: Rotate racks if one level cooks faster than another.
  • Ninja Foodi, Cosori, Instant Vortex, PowerXL, Philips, and similar models: Use the chart as a starting point, then adjust by a minute or two after your first batch.
  • Small baskets: Cook in batches instead of stacking.

Back to top ↑

Flavor Variations

Keep the base timing steady, then change the finish based on the kind of dinner you want: creamy, smoky, spicy, sweet, or crisp. After choosing a flavor, use the serving ideas to build the plate.

Flavor variation guide for air fryer pork chops with ranch, parmesan, BBQ, Cajun, garlic butter, honey mustard, lemon pepper, and Shake and Bake ideas.
Once the basic air fryer pork chop timing works, change the finish to fit the meal. Ranch feels creamy and herby, BBQ adds smoky sweetness, Cajun brings heat, and lemon pepper keeps the plate brighter.
VariationAdd ThisWhen to AddBest With
RanchRanch seasoningBefore cookingPotatoes, green beans, salad
Parmesan crustedFinely grated parmesanBefore cooking or in crumbsCaesar-style salad or roasted vegetables
BBQBBQ sauceLast 1–2 minutesBaked beans, coleslaw, applesauce
CajunCajun seasoningBefore cookingRice, corn, creamy slaw
Garlic butterMelted garlic butterAfter cookingMashed potatoes or roasted vegetables
Honey mustardHoney mustard glazeNear the endCarrots, potatoes, green salad
Lemon pepperLemon pepper and lemon juiceBefore cooking, then finish afterAsparagus, rice, crisp salad
Shake and BakePackaged seasoned coatingBefore cooking, with oil sprayMac and cheese, green beans, slaw

What to Serve with Them

The easiest plate is creamy potatoes, something green, and a little sweetness on the side. That gives you comfort, freshness, and balance without making dinner complicated.

Three air fryer pork chop dinner plates with mashed potatoes, mushroom sauce, baked beans, coleslaw, salad, and roasted carrots.
Build the plate around contrast so the pork chop dinner feels complete. Pair the savory chop with something creamy, something green, and something a little sweet for better balance.

Storage and Reheating

Let leftovers cool, then store them in an airtight container in the refrigerator. Keep sauce separate when possible so the surface does not turn soggy.

Reheat cooked chops at 350°F / 175°C for 3 to 5 minutes, just until warmed through. When the chops are very lean, brush with a little butter, broth, or sauce before reheating. Breaded chops usually reheat better in the air fryer than in the microwave because the coating can crisp again.

Back to top ↑

Troubleshooting Dry or Tough Pork Chops

When pork chops turn out dry, the fix is usually small. Change the check time, the temperature, or the thickness next time.

Troubleshooting guide for air fryer pork chops with fixes for dry centers, pale outsides, uneven cooking, and frozen centers.
When air fryer pork chops go wrong, match the fix to the symptom. Dry centers, pale crusts, uneven cooking, and frozen middles usually point to timing, heat, spacing, or thickness.
What HappenedLikely CauseFix Next Time
Brown outside, dry insideHeat too high, chop too thin, or cooked too longCheck earlier or use 375°F to 380°F.
Pale outside, cooked insideSurface too wet or basket crowdedPat dry, oil lightly, and leave space.
Crispy coating but undercooked centerBreading browned too fastLower heat and finish gently.
One side dry, one side juicyUneven chop thicknessChoose more even chops or check the thinner side early.
Tough even though timing seemed rightVery lean boneless chop or no restUse 1-inch chops, rest before slicing, and add sauce if needed.
Frozen chop browned outside but cold insideFrozen center needed more timeUse the staged frozen method and check the center.

For a slower comfort-food pork chop dinner next time, try cream of mushroom pork chops, smothered pork chops, or crock pot pork chops and sauerkraut.

The first time you make these, check early and note your air fryer’s timing. After that, this becomes the kind of weeknight recipe you can repeat without hovering: same seasoning, same method, and one small adjustment based on the chop in front of you.

Back to top ↑

FAQs

How long do pork chops take in the air fryer?

Most 1-inch boneless pork chops take 10 to 12 minutes at 380°F / 193°C. Thin chops cook faster; thick or bone-in chops need more time.

What temperature is best for air fryer pork chops?

380°F / 193°C is the best default for juicy pork chops. Use 390°F to 400°F / 199°C to 204°C for breaded or crispier chops.

How do you keep pork chops from drying out in the air fryer?

Use chops around 1 inch thick, cook in a single layer, and stop when the center reaches 145°F / 63°C. The biggest fix is not overcooking them.

Do boneless pork chops work well in the air fryer?

Boneless pork chops work well in the air fryer when they are close to 1 inch thick. They cook quickly, so start checking before they turn tight or dry.

Are bone-in pork chops better in the air fryer?

Bone-in pork chops are often more forgiving because the bone slows the cook slightly. Check the thickest meaty part without touching the bone.

How long do thin pork chops take in the air fryer?

Thin chops around ½ inch thick may take 6 to 8 minutes. Very thin cuts can be done in 4 to 6 minutes, so check early.

How long do thick pork chops take in the air fryer?

Thick chops around 1½ inches may take 12 to 16 minutes for boneless cuts and longer for bone-in cuts.

Do you flip pork chops in the air fryer?

Yes. Flip halfway through for more even browning and better texture on both sides.

Is slightly pink pork safe?

A slight blush can be safe when pork reaches 145°F / 63°C and rests for at least 3 minutes. Temperature matters more than color alone.

No-breading pork chops: what changes?

No-breading pork chops rely on a dry surface, light oil, and a flavorful rub instead of crumbs. They are faster and less fussy than breaded chops.

Breaded air fryer pork chops: what changes?

Breaded pork chops need a thin coating, a light oil spray, and enough basket space for the crumbs to crisp. The internal temperature still needs to reach 145°F / 63°C.

Frozen pork chops: what is the safest method?

The safest frozen method is staged: soften the chops first, then oil, season, and finish cooking until the center reaches 145°F / 63°C.

Does Shake and Bake work in the air fryer?

Shake and Bake works in the air fryer when the coated chops are sprayed lightly with oil, cooked in a single layer, flipped halfway, and checked with a thermometer.

Should you preheat the air fryer?

Preheating helps pork chops cook evenly and brown better. If there is no preheat setting, run the air fryer empty at the cooking temperature for about 3 minutes.

Why are my pork chops tough?

They were probably overcooked, too thin for the timing, or sliced before resting. Next time, start checking earlier, especially if your chops are thin or boneless.

Posted on Leave a comment

Stuffed Shells Recipe: Easy Baked Ricotta Pasta Shells

Baked ricotta stuffed shells with marinara sauce and melted mozzarella in a cream baking dish.

Stuffed shells are the kind of baked pasta that makes the table feel full before anyone even sits down: tender jumbo shells, creamy ricotta filling, tomato sauce bubbling around the edges, and mozzarella melted over the top. They give you lasagna-level comfort without all the layering, and the recipe is much more forgiving than it looks.

This version is built to avoid the usual stuffed shell problems: loose ricotta filling, dry pasta edges, shells that turn mushy after baking, and a tray that looks good on top but tastes flat in the middle. Think of it as the no-dry-shell method: thick filling, enough sauce, a covered bake first, and tender shells all the way through.

It fits one classic 9×13-inch baking dish: about 20–24 filled jumbo shells, a seasoned ricotta-mozzarella filling, marinara under and over the pasta, and mozzarella melted on top. A few shells may tear while boiling. The first few you fill may look messy. That is normal. Once everything is tucked into sauce and baked until bubbling, nobody at the table can tell which ones were imperfect.

Stuffed Shells at a Glance

No long planning needed. Here is the quick version before you start.

  • Start with a 12 oz / 340g box of jumbo pasta shells, or enough to cook 28–30 shells.
  • Aim to fill about 24 shells. If your shells are very large, you may fit closer to 20–22 in the baking dish.
  • Mix 15–16 oz / 425–454g ricotta with mozzarella, parmesan, egg, garlic, herbs, salt, and pepper.
  • Use about 3 cups / 720ml marinara sauce, with sauce under and over the shells.
  • Bake at 375°F / 190°C for 25 minutes covered, then 8–10 minutes uncovered.
  • Rest for 5–10 minutes before serving so the filling settles and the shells lift more cleanly.

Boil, fill, sauce, cover, bake, rest — that is the whole recipe. This is also a good one to save because the base method stays the same even when the filling changes.

Quick answers: Yes, you boil the shells first for this version. Use about 3 cups sauce for one 9×13-inch baking dish. Egg helps the filling set, but you can skip it if you prefer a softer filling. Stuffed shells freeze best before baking.

Jumbo pasta shells, ricotta, marinara sauce, mozzarella, parmesan, egg, garlic, herbs, and a baking dish on a kitchen counter.
Start with the essentials: jumbo shells, thick ricotta filling, marinara, mozzarella, parmesan, egg, garlic, and herbs.

Why This Stuffed Shells Recipe Works

This method is built around four small choices that make the biggest difference: undercook the shells slightly, keep the ricotta filling thick, use sauce under and over the pasta, and bake covered before browning the cheese.

  • Shells stay tender. Boiling them just shy of al dente keeps them flexible enough to fill, but firm enough to finish in the oven.
  • Filling stays creamy, not runny. Ricotta gives body, mozzarella gives melt, parmesan adds savory depth, and egg helps everything set.
  • Sauce protects the pasta. Marinara on the bottom keeps the shells from sticking, while sauce over and around the shells prevents dry edges.
  • A covered bake does the work. Foil traps heat and steam so the pasta finishes cooking gently before the cheese browns.
  • Flexibility is built in. Keep it classic, add spinach, stir meat into the sauce, swap in cottage cheese, or freeze a batch for later.

Best of all, the edge of the baking dish tells you dinner is almost ready: sauce bubbling up around the shells, little golden patches of mozzarella, and the smell of garlic, tomato, and browned cheese.

Filled jumbo shells sitting in marinara sauce with foil partly covering the baking dish before baking.
The no-dry-shell method is simple: sauce underneath, sauce around the edges, and foil on top for the first bake.

Ingredients You Need

Stuffed shells do not need complicated ingredients, but they do need the right balance: sturdy shells, thick ricotta filling, enough sauce, and mozzarella that melts without making the pasta watery.

Jumbo Pasta Shells

Choose a 12 oz / 340g box of jumbo pasta shells. These are the large shells made for stuffing, not small shell pasta or macaroni-style shells. Cook 28–30 jumbo shells for one baking dish, or cook the whole box if you like having extra backups.

Some shells will split or fold while boiling, so cook a few extras and move on. The sauce and cheese hide almost everything.

Ricotta Cheese

Use 15–16 oz / 425–454g ricotta cheese. Whole milk ricotta gives the creamiest filling. Loose or watery ricotta should be drained for 10–15 minutes in a fine-mesh strainer or on a few layers of paper towel before mixing. For the right texture, the ricotta filling section shows what the mixture should look like before stuffing.

Ricotta draining in a fine-mesh strainer with thick cheese filling nearby.
Loose ricotta should be drained first; thick filling is what prevents watery stuffed shells after baking.

Mozzarella

You need 3 cups shredded low-moisture mozzarella, about 12 oz / 340g, divided between the filling and topping. Low-moisture mozzarella melts into the filling and gives the top a bubbly finish without watering down the pasta. Fresh mozzarella can be used on top in small amounts, but it is softer and wetter.

Parmesan or Pecorino

Use ½ cup / 45–55g grated parmesan or pecorino. Ricotta gives you the creamy center, but parmesan or pecorino is what makes the filling taste seasoned and savory instead of just milky.

Egg

One large egg helps bind the ricotta filling so it holds together after baking. You can skip it, but the filling will be softer. If you leave out the egg, add a little extra parmesan or mozzarella to help the filling hold.

Marinara Sauce

About 3 cups / 720ml marinara sauce gives one baking dish enough sauce for the bottom, top, and edges. A 24 oz / 680g jar is the practical shortcut and usually gives enough sauce for one batch. A good jarred marinara is not a shortcut to apologize for here; stuffed shells are mostly about enough sauce and a well-seasoned filling. If you want to make your own, this homemade marinara sauce gives you a classic base plus spicy, dipping, low-sodium, and sugar-free variations.

Very thick marinara benefits from 2–4 tablespoons of water before baking. If your jar is slightly short or extra thick, loosen it with a splash of water and save a little warm sauce for serving.

Garlic, Herbs, Salt, and Pepper

Ricotta needs seasoning. Garlic, Italian seasoning or fresh herbs, salt, pepper, and optional red pepper flakes make the filling taste like dinner instead of plain cheese. Use ½ teaspoon salt if your parmesan and sauce are already salty. Use closer to ¾ teaspoon if your ricotta is mild and your sauce is lower in salt.

Dried Italian seasoning is the easiest pantry option. Fresh parsley adds brightness, basil gives a sweeter flavor, and oregano gives the filling a stronger Italian-American note. Save fresh basil partly for the top after baking.

Optional Spinach

Either fresh or frozen spinach works; the real rule is to squeeze out as much moisture as possible. Wet spinach can turn a creamy filling loose and watery. For the full version, jump to spinach ricotta stuffed shells.

Optional Meat

The main recipe below is a classic cheese stuffed shells recipe, but cooked ground beef or Italian sausage can make the meal heartier. Brown the meat fully before adding it to the sauce or filling, then drain off excess fat so the pasta does not turn greasy. For the heartier version, see meat stuffed shells.

Tools That Help

You do not need special tools. A large pot, colander, mixing bowl, 9×13-inch / 23×33 cm baking dish, foil, and a spoon or zip-top bag are enough. A zip-top bag with one corner snipped off can make filling the shells faster and neater, but a spoon works perfectly well.

The first few shells are usually the messiest; by the fifth or sixth one, you will know exactly how much filling your shells can hold.

What Pasta Shells Should You Use?

Jumbo pasta shells are the shape you want here. They are large enough to hold ricotta filling and sturdy enough to bake in sauce. Small shells, medium shells, macaroni shells, and regular conchiglie are better for tossing with sauce, not stuffing.

Boil the shells 2–3 minutes shy of al dente. They should be flexible enough to open and fill, but not fully soft. Spread them on a tray to cool; rinse only if they are sticking badly or too hot to handle.

Depending on shell size and your baking dish, you may fit 20–24 filled shells. Aim for 24, but do not force them in. A slightly looser baking dish bakes better than crushed shells.

Cooked jumbo pasta shells spread on a tray with one torn shell visible.
Cook jumbo shells just shy of al dente and boil a few extras, because a torn shell or two is normal when stuffing pasta.

The Best Ricotta Filling for Stuffed Shells

The filling should look thick and scoopable, more like a cheese spread than a sauce. It should mound on a spoon without running off. If it spreads like sauce, it is too wet; if it feels dry or crumbly, a spoonful of ricotta or sauce will loosen it.

A good stuffed shells filling uses ricotta for creaminess, mozzarella for melt, parmesan or pecorino for savory depth, egg for structure, and garlic, herbs, salt, and pepper for flavor. To check the seasoning safely, mix the cheeses, garlic, herbs, salt, and pepper first, taste, then add the egg last.

Thick ricotta cheese filling with herbs mounding on a spoon above a bowl.
A good ricotta filling should mound on a spoon, not drip, so it stays creamy inside each pasta shell.

Save This Stuffed Shells Filling Ratio

For one 9×13-inch baking dish, use:

  • 15–16 oz / 425–454g ricotta
  • 2 cups / about 225g mozzarella inside the filling
  • ½ cup / 45–55g parmesan or pecorino
  • 1 large egg
  • 1–2 garlic cloves
  • Herbs, salt, and pepper
  • 1 cup / about 115g mozzarella for the top

Once the filling looks thick and scoopable, you are in good shape.

How Much Sauce Do Stuffed Shells Need?

Use about 3 cups / 720ml marinara for one 9×13-inch baking dish. The shells should sit in sauce and have sauce spooned over and around them, but they do not need to be buried.

  • 1 cup / 240ml goes on the bottom of the baking dish
  • 1½–2 cups / 360–480ml goes over and around the filled shells
  • Extra warm sauce can be served on the side if you like a saucier plate

Before baking, you should still see the shape of each shell, but the edges should be surrounded by sauce.

Filled stuffed shells in a baking dish with marinara sauce spooned around and between them.
The shells should stay visible, but the edges need enough marinara to finish tender instead of drying out.

How to Make Stuffed Shells

With the shells, filling, and sauce sorted, assembly is simple: sauce, filled shells, more sauce, cheese, foil, and oven. While the shells boil, mix the filling and spread sauce in the baking dish. By the time the shells are cool enough to handle, the filling and baking dish are ready.

1. Boil the shells

Bring a large pot of salted water to a boil. Add the jumbo shells and cook them 2–3 minutes less than the package says for al dente. Drain and let them cool until they are easy to handle.

2. Make the ricotta filling

In a large bowl, mix ricotta, 2 cups mozzarella, parmesan, egg, garlic, herbs, salt, pepper, and optional red pepper flakes. The filling should be creamy but thick enough to hold its shape on a spoon.

3. Add sauce to the baking dish

Spread about 1 cup of marinara sauce across the bottom of a 9×13-inch / 23×33 cm baking dish. This layer keeps the shells from sticking and protects the bottom of the pasta.

4. Fill the shells

Fill each shell with about 1½–2 tablespoons / about 30g of ricotta filling, depending on shell size. Use a spoon, piping bag, or zip-top bag. Fill generously, but not so much that the shells split. Do not worry if a little filling shows or the shells sit at slightly different angles.

A hand filling a jumbo pasta shell with ricotta mixture using a spoon.
Fill each shell generously, then stop before the pasta stretches or splits around the ricotta filling.

5. Arrange and sauce

Place the filled shells in the baking dish, filling-side up. Spoon the remaining sauce over and around the shells. You want the pasta to look full and well-coated, not dry or sparse.

Ricotta-filled jumbo shells arranged in marinara sauce in a baking dish before baking.
Once the filled shells sit in sauce, cover the dish so the pasta can finish baking gently and evenly.

6. Bake covered, then uncovered

Cover the baking dish with foil without pressing it into the shells. If the foil may touch the sauce or cheese, place a sheet of parchment under the foil or tent the foil slightly. Bake at 375°F / 190°C for 25 minutes.

Stuffed shells in a baking dish loosely covered with foil before baking.
Foil traps steam during the first bake, which helps stuffed pasta shells stay soft and tender.

Remove the foil, sprinkle the remaining mozzarella over the top, and bake for another 8–10 minutes, until the cheese is melted and the sauce is bubbling. The uncovered bake is where the top gets those golden spots.

Shredded mozzarella being sprinkled over sauced stuffed shells in a baking dish.
Add mozzarella after the covered bake, then uncover the dish so the cheese melts and lightly browns.

7. Rest before serving

Let the stuffed shells rest for 5–10 minutes before serving. This is the hardest part because it smells ready, but the short rest makes serving much cleaner. After resting, the shells should lift from the baking dish without spilling all their filling.

Rested stuffed shells being lifted from a baking dish with sauce and melted cheese.
Rest baked stuffed shells before serving so the filling settles and each shell lifts cleanly from the sauce.

How to Know When Stuffed Shells Are Done

The stuffed shells are done when the sauce is bubbling around the edges, the cheese is melted and lightly browned in spots, and the filling is hot in the center. The best bite is fork-tender pasta, thick ricotta filling, tangy tomato sauce, and a little golden mozzarella from the top.

Close-up of baked stuffed shells with bubbling marinara sauce and browned mozzarella at the edge of the baking dish.
Check the edge of the baking dish: bubbling sauce and melted cheese mean the shells are hot through the center.

If the top cheese browns before the center is hot, cover the pasta loosely with foil again and keep baking until the filling is hot through the middle.

Stuffed Shells Recipe

This is the full classic version: jumbo shells filled with seasoned ricotta, tucked into marinara, covered until tender, then finished uncovered so the mozzarella melts into golden spots.

  • Yield:
    6 servings
  • Prep time:
    30 minutes
  • Cook time:
    35 minutes
  • Total time:
    1 hour 5 minutes
  • Oven temperature:
    375°F / 190°C
  • Baking dish:
    9×13-inch / 23×33 cm

Ingredients

  • 12 oz / 340g jumbo pasta shells, or enough to cook 28–30 shells
  • 3 cups / about 720ml marinara sauce, or one 24 oz / 680g jar, divided
  • 15–16 oz / 425–454g ricotta cheese
  • 3 cups shredded low-moisture mozzarella, about 12 oz / 340g, divided
  • ½ cup / 45–55g grated parmesan or pecorino
  • 1 large egg
  • 1–2 garlic cloves, minced or grated
  • 1 tsp dried Italian seasoning, or 2–3 tbsp chopped fresh parsley or basil
  • ½–¾ tsp salt, plus more for pasta water
  • ¼–½ tsp black pepper
  • Pinch of red pepper flakes, optional
  • A few drops of olive oil, only if needed to keep cooked shells from sticking

Instructions

  1. Heat the oven. Preheat the oven to 375°F / 190°C.
  2. Cook the shells. Bring a large pot of salted water to a boil. Add 28–30 jumbo shells and cook 2–3 minutes less than the package directions for al dente. Drain and let cool until easy to handle. If the shells start sticking, spread them on a tray or toss with only a few drops of olive oil.
  3. Make the filling. In a large bowl, combine ricotta, 2 cups mozzarella, parmesan, garlic, Italian seasoning or herbs, salt, pepper, and red pepper flakes if using. Taste the cheese mixture before adding the egg, then mix in the egg last.
  4. Prepare the baking dish. Spread about 1 cup of marinara sauce over the bottom of a 9×13-inch / 23×33 cm baking dish.
  5. Fill the shells. Spoon about 1½–2 tablespoons / about 30g filling into each shell. Arrange the filled shells in the dish, filling-side up. Aim for 24 filled shells; if your shells are very large, 20–22 may fit better.
  6. Add sauce. Spoon the remaining marinara sauce over and around the shells. Cover the baking dish tightly with foil, tenting it slightly so it does not press into the cheese or filling.
  7. Bake covered. Bake for 25 minutes, until the shells are hot and the sauce is bubbling around the edges.
  8. Finish uncovered. Remove the foil, sprinkle the remaining 1 cup mozzarella over the top, and bake uncovered for 8–10 minutes, until the cheese is melted and lightly browned in spots.
  9. Rest and serve. Let the stuffed shells rest for 5–10 minutes before serving. Serve with extra warm marinara if you like a saucier plate.

Recipe Notes

  • Softer top cheese: Add all the mozzarella before covering and baking if you want a fully melted top.
  • Stretchier browned top: Save the final cup of mozzarella and add it after the covered bake.
  • Spinach shells: Add 5 oz / 140g cooked fresh spinach or 8 oz / 225–250g thawed frozen spinach, squeezed very dry.
  • Meat sauce version: Add ½–1 lb / 225–450g cooked ground beef or Italian sausage to the sauce, and increase sauce by ½–1 cup if the pasta looks dry.
  • Cottage cheese swap: Blend cottage cheese briefly for a smoother filling and drain it first if it looks watery.

Small Details That Make Better Stuffed Shells

  • Cook 28–30 shells. You need backups for the ones that tear.
  • Drain watery ricotta. Loose ricotta makes the filling run instead of mound.
  • Taste before adding egg. It is easier to fix bland filling before the egg goes in.
  • Loosen very thick marinara. A few tablespoons of water help the sauce move around the shells.
  • Cover first. The pasta finishes cooking in the sauce before the cheese browns.
  • Rest before serving. The filling firms slightly as it sits.

Make-Ahead, Freezer, and Reheating Instructions

Stuffed shells are one of the best baked pasta dinners to prepare ahead. The shells, filling, sauce, and cheese all hold up well, and a freezer batch feels like a future dinner already handled. This is also a good place to make two baking dishes: bake one tonight and freeze the second before baking.

Best Make-Ahead Option

Assemble the stuffed shells up to 24 hours ahead. Fill the shells, arrange them in sauce, cover tightly, and refrigerate. Let them sit at room temperature only while the oven preheats, about 20–30 minutes. If baking straight from the fridge, add 5–10 minutes to the covered baking time.

Unbaked stuffed shells in a baking dish partly covered with foil, with sauce nearby.
Stuffed shells are ideal for make-ahead dinners because you can refrigerate or freeze them before baking.

Best Freezer Option

Freeze stuffed shells before baking. Assemble the shells in a freezer-safe baking dish, cover tightly with plastic wrap and foil or a freezer-safe lid, and freeze for up to 2–3 months for best quality.

If you froze the shells in a glass or ceramic baking dish, thaw them overnight unless the dish is labeled freezer-to-oven safe. That helps prevent sudden temperature shock. You can also freeze the filled shells separately and transfer them to an oven-safe dish with sauce before baking.

Best Small-Batch Freezer Option

Freeze filled shells on a tray until firm, then transfer them to a freezer-safe bag or container. Later, place only the number of shells you need into a baking dish with sauce and cheese. This is useful when you want 2–4 servings instead of a full batch.

Ricotta-filled jumbo pasta shells spaced apart on a parchment-lined tray before freezing.
Freeze stuffed shells in a single layer first so they do not stick together; once firm, you can transfer them for easy small-batch freezer meals later.

Best Texture After Freezing

For the best texture, thaw frozen stuffed shells overnight in the refrigerator before baking. Before baking, remove any plastic wrap and cover the baking dish again with foil. Bake as directed, adding 5–10 extra minutes if the pasta is still cold.

How to Bake Frozen Stuffed Shells

To bake from frozen, cover the baking dish with foil and bake at 350°F / 175°C for about 60–75 minutes, or until the center is steaming hot. Uncover, add cheese if needed, and bake 10–15 minutes more until bubbling and melted.

How to Store Leftovers

Store leftover stuffed shells in an airtight container in the refrigerator for 3–4 days. A 3–4 day refrigerator window is also the general USDA guidance for cooked leftovers, so it is a good limit to use here.

How to Reheat Stuffed Shells

Reheat covered in the oven at 350°F / 175°C until hot, or microwave individual portions. Add a spoonful of extra sauce or a small splash of water before reheating so the pasta does not dry out.

Leftover Ideas

Leftover stuffed shells are best reheated with extra sauce, but you can also chop them into smaller pieces and reheat them like baked pasta. Add fresh herbs, parmesan, or a little extra marinara to wake the flavor back up. This is the sort of dinner that makes leftovers feel like a reward.

Stuffed Shells Variations

Think of the recipe card as the house version. The variations are how you adjust the pasta for the people eating it — greener for spinach lovers, meatier for Sunday dinner, lighter with cottage cheese, or richer with Alfredo.

Which Stuffed Shells Variation Should You Make?

Spinach Ricotta Stuffed Shells

Add spinach to the ricotta filling for a classic spinach stuffed shells variation. Fresh spinach and frozen spinach both work, but the spinach needs to be cooked, chopped, and squeezed very dry before it goes into the filling. Use about 5 oz / 140g fresh spinach or 8 oz / 225–250g frozen spinach.

Spinach ricotta stuffed shells arranged in marinara sauce in a cream baking dish.
For spinach ricotta stuffed shells, squeeze the spinach dry so the filling stays creamy instead of watery.

Beef Stuffed Shells

For the cleanest shells, keep the ricotta filling mostly cheese-based and put the browned meat in the sauce. That gives every bite a hearty meat sauce without making the shells heavy or hard to close. Brown ½–1 lb / 225–450g ground beef with a little salt, pepper, garlic, and Italian seasoning, then drain excess fat before adding it to the marinara.

Sausage Stuffed Shells

Italian sausage brings more seasoning than ground beef, so it is the easiest way to make the sauce taste deeper. Remove it from the casing if needed, brown it well, and drain any excess fat. Sausage brings more salt and spice than plain ground beef, so taste before adding extra seasoning.

Ricotta stuffed shells with chunky beef or sausage marinara sauce spooned around them.
For meat stuffed shells, keep the cheese inside the pasta and stir browned beef or sausage into the marinara.

Cottage Cheese Stuffed Shells

Cottage cheese is the easiest ricotta swap and a good option if you want a lighter, higher-protein filling. Replace ricotta 1:1 by weight, drain it if watery, and blend it briefly for a smoother texture. The flavor is a little tangier and less classic than ricotta, but it bakes up creamy when mixed with mozzarella, parmesan, egg, garlic, and herbs.

Stuffed Shells Without Ricotta

If you do not have ricotta, use cottage cheese, a mix of cream cheese and mozzarella, a meat filling, roasted vegetables, or tofu ricotta for a dairy-free version. This helps if you dislike ricotta or simply do not have it. The recipe can still work well as long as the filling is thick and not watery.

A jumbo pasta shell being filled with smooth blended cottage cheese mixture.
For stuffed shells without ricotta, blend cottage cheese until smooth so the filling holds its shape inside the pasta.

Alfredo Stuffed Shells

For a creamy white-sauce version, use Alfredo sauce instead of marinara. Because Alfredo is rich, spinach or chicken works especially well here. For more creamy pasta dinner ideas, see this chicken Alfredo pasta guide.

Alfredo stuffed shells with creamy white sauce, spinach, and melted mozzarella in a baking dish.
Alfredo stuffed shells are the creamy white-sauce variation to choose when you want spinach, chicken, or a richer pasta bake.

No-Boil Stuffed Shells

No-boil stuffed shells can work, but they need a different sauce ratio and a longer covered bake. This recipe is written for boiled shells because it gives the most predictable texture: shells that are flexible enough to fill, tender after baking, and less likely to stay firm in the center. If you want a true no-boil version, increase the sauce or liquid and keep the dish tightly covered until the pasta is fully tender.

Serving and Scaling

How Many Stuffed Shells Per Person?

Plan on 3–4 stuffed shells per adult if serving with salad, bread, or vegetables. Plan on 4–5 shells per person for a heartier main dish with fewer sides. A 9×13-inch baking dish with about 20–24 stuffed shells serves 6 people generously.

A plate of ricotta stuffed shells with marinara sauce, parmesan, herbs, and a fork.
For dinner portions, plan on three to four ricotta stuffed shells per adult with salad, garlic bread, or vegetables.

Can You Double This Recipe?

Yes. To double the recipe, use two 9×13-inch baking dishes instead of crowding everything into one deep dish. If baking both at the same time, rotate them halfway through if your oven has hot spots. If the pans are cold from the fridge, they may need a few extra minutes of covered baking time. You can also bake one now and freeze one for later.

What to Serve with Stuffed Shells

Stuffed shells are rich, cheesy, and well-sauced, so they pair best with something crisp, green, garlicky, or simple. On a weeknight, salad is enough. When serving company, add garlic bread and something fresh on the side.

Classic Comfort Sides

Light and Fresh Sides

  • Simple green salad with vinaigrette
  • Cucumber salad with vinegar, dill, and onion
  • Arugula salad with lemon

Extra Vegetable Sides

  • Roasted broccoli
  • Sautéed spinach or greens
  • Roasted zucchini or eggplant
  • Steamed green beans

Bigger Dinner Add-Ons

A fresh side can still feel filling: this chickpea salad brings lemon, herbs, cucumber, and crunch beside the cheesy shells.

Troubleshooting Stuffed Shells

Problem Cause Fix
Shells tear Overcooked or handled too hot Undercook slightly, cool, and boil extras
Shells stick Cooled in a pile Spread on a tray or use a few drops of oil
Filling is watery Wet ricotta or spinach Drain ricotta and squeeze spinach dry
Filling leaks Too much filling or loose filling Use about 30g filling per shell and keep filling thick
Shells are dry Too little sauce or uncovered too long Use sauce under and over; bake covered first
Edges dry out Not enough sauce near edges Spoon extra sauce around edges
Filling tastes bland Ricotta under-seasoned Add salt, parmesan, garlic, herbs, and pepper
Pasta is mushy Shells fully cooked before baking Boil 2–3 minutes shy of al dente
Top browns too fast Uncovered too long Cover loosely and keep baking
Frozen center is cold Covered bake too short Keep baking covered until center is hot
Cheese turns rubbery Overbaked or poor melting cheese Bake just until melted and use low-moisture mozzarella
Pasta looks watery Wet filling or vegetables Drain ingredients and rest before serving

If the shells or edges look dry after baking, spoon warm marinara around the pasta before serving. Sauce brings moisture back better than adding more cheese.

Extra marinara sauce being spooned around the edge of baked stuffed shells.
When the edges look dry, spoon warm marinara around the shells before serving to soften them again.

Frequently Asked Questions

A few common questions come up once you start adjusting the recipe. These quick answers should help you choose the right shells, filling, sauce, and make-ahead method.

What pasta shells do I use for stuffed shells?

Use jumbo pasta shells. Small shells, medium shells, and macaroni-style shells are not large enough for stuffing.

Do you have to boil shells before stuffing them?

For this version, yes. Boiling first gives you shells that are soft enough to fill but firm enough to finish in the oven. No-boil shells need more liquid and a longer covered bake.

What is the best cheese filling for stuffed shells?

The best classic filling uses ricotta, mozzarella, parmesan or pecorino, egg, garlic, herbs, salt, and pepper. Ricotta makes it creamy, mozzarella adds melt, parmesan adds depth, and egg helps it hold together.

Do I need egg in stuffed shells?

Egg helps the filling set so the shells lift more cleanly. You can skip it, but the filling will be softer. If skipping egg, add a little extra parmesan or mozzarella.

Can I use cottage cheese instead of ricotta?

You can replace ricotta 1:1 by weight, drain cottage cheese if watery, and blend it first if you want a smoother filling. The no-ricotta section gives more options.

Can I make stuffed shells without ricotta?

Yes — use cottage cheese, cream cheese mixed with mozzarella, a meat filling, roasted vegetables, or tofu ricotta. Keep the filling thick so it does not run out of the shells.

How much sauce do stuffed shells need?

For one 9×13-inch baking dish, use about 3 cups / 720ml sauce. Spread about 1 cup on the bottom and spoon the rest over and around the filled shells.

Do you bake stuffed shells covered or uncovered?

Bake them covered for most of the time so the pasta stays moist and the filling heats through. Uncover at the end to melt and lightly brown the cheese.

How do you keep stuffed shells from drying out?

Use sauce under and over the shells, cover the baking dish for the first bake, and reheat leftovers with extra sauce or a small splash of water. That is the same no-dry-shell method used in the main recipe.

Can I make stuffed shells ahead of time?

Yes. Assemble stuffed shells up to 24 hours ahead, cover, and refrigerate. The make-ahead section explains the timing and freezer options.

Can stuffed shells be frozen?

Freeze them before baking for the best texture, either as a full baking dish or as individual filled shells. Use within 2–3 months for best quality.

Can I bake stuffed shells from frozen?

You can bake them covered at 350°F / 175°C for 60–75 minutes, or until the center is hot. Then uncover and bake until the sauce bubbles and the cheese melts.

Can I add meat to stuffed shells?

Meat works best in the sauce, where it makes the dish heartier without weighing down the ricotta filling. Brown and drain the meat before adding it.

How many stuffed shells per person?

Plan on 3–4 stuffed shells per adult with sides, or 4–5 shells per person for a heartier main dish.

How long do leftover stuffed shells last?

Leftovers keep for 3–4 days and reheat best with extra sauce. Store them in an airtight container in the refrigerator and reheat until hot.

Make It Your Own

A good batch of stuffed shells should feel generous: pasta tucked into sauce, cheese bubbling around the edges, and enough filling in every shell that nobody feels shortchanged. The whole recipe comes back to the same simple method: thick filling, enough sauce, covered bake, tender shells.

This is the kind of tray that looks a little messy in the best way: sauce at the edges, cheese pulling from the spoon, and enough shells for someone to quietly go back for one more.

A family-style baking dish of stuffed shells served with garlic bread, salad, plates, and a fork.
Serve stuffed shells family-style with garlic bread and salad; this is the pasta bake people come back to for one more shell.

You can keep the recipe classic, add spinach, make it meaty with beef or sausage, swap in cottage cheese, use Alfredo sauce, or freeze a batch for another night. For another cozy pasta dinner after this one, save this broccoli pasta too.

If you make these stuffed shells, tell us which version landed on your table: classic ricotta, spinach, meat sauce, cottage cheese, Alfredo, or extra saucy. I especially want to know if you froze a batch for later — that is where this recipe really earns its keep.

Back to top ↑

Posted on Leave a comment

Korean Beef Bowl Recipe: 20-Minute Ground Beef Rice Bowls

Ceramic bowl of white rice topped with glossy ground beef, sliced cucumber, scallions, sesame seeds, kimchi, and chopsticks lifting a bite.

This Korean beef bowl recipe is for the nights when you have ground beef in the fridge, rice ready or almost ready, and no patience for a complicated dinner. In about 20 minutes, the beef turns saucy, garlicky, a little sweet, and deeply savory, with browned edges and a pan sauce that clings to every crumble.

With rice, beef, and one fresh topping, this is already dinner. Everything else — kimchi, carrot, sesame seeds, a fried egg, or a creamy gochujang drizzle — just makes it feel more complete.

You do not need a perfect topping spread. One crunchy or bright thing is enough to make the bowl work.

The idea is simple: one sauce ratio, three flavor paths, and a bowl you can build around whatever you have. Keep it mild, add gochujang for heat, or make it rounder and more bulgogi-style with grated apple or pear.

Small effort, big dinner: saucy beef, warm rice, one fresh crunch, and a sauce you can keep mild or make spicy. This is a 20-minute recipe when cooked rice is ready. If you are starting rice from scratch, this guide to cooking perfect rice helps with stovetop, rice cooker, and Instant Pot timing.

Make This Tonight

If you want the fastest path to dinner, start here. This gives you the full sweet-savory Korean-inspired beef bowl feeling with the fewest moving parts.

Beef1 lb / 450–500 g ground beef or beef mince
Sauce¼ cup soy, 2–3 tbsp sweetener, 1 tbsp vinegar, 2 tsp sesame oil, garlic, ginger
Rice3–4 cups cooked rice, warm before the beef is done
Best toppingsCucumber, scallions, sesame seeds, fried egg if you have time

Bowl formula: warm base + saucy beef + one fresh crunch + one finish. That can be as simple as rice, beef, cucumber, and sesame seeds.

The key move is to brown the beef first, then add the sauce. If the sauce goes in too early, the beef simmers and tastes flatter. Brown it first, and the sauce clings to deeper, better-tasting crumbles.

Dark skillet of saucy ground beef beside white rice, sliced cucumber, scallions, and sesame seeds on a warm kitchen counter.
For a 20-minute dinner, keep rice and cucumber ready while the beef simmers; once the sauce thickens, the skillet can go straight into bowls.

What You’ll Need

You do not need much to make this taste good. The beef brings richness, the sauce brings that salty-sweet garlic-soy flavor, and the toppings keep everything fresh enough to go back for another bite.

Ground beef, cooked rice, soy sauce, sesame oil, garlic, ginger, scallions, cucumber, carrot, cabbage, and sesame seeds arranged for cooking.
The ingredient list stays weeknight-friendly: ground beef for speed, rice for comfort, sauce for flavor, and fresh toppings for balance.

Ground Beef or Beef Mince

Use 1 lb / 450–500 g ground beef or beef mince for 4 bowls. The method is the same either way, so use the pack size and wording common where you live.

If you only remember one thing, use 90/10. It browns nicely, stays juicy, and does not leave the bowl greasy. 85/15 tastes richer but often needs draining, while 93/7 is leaner and needs a little more care so it does not dry out.

Beef type Best for Cooking note
85/15 Juicier bowls, better browning, richer flavor. Drain excess fat if the pan looks greasy before adding sauce.
90/10 Best all-purpose choice. Enough flavor, but not too greasy.
93/7 Leaner meal prep bowls. Add a little oil if needed and avoid overcooking.

Aromatics

Fresh garlic and ginger make the pan smell like dinner almost immediately. Use 3–4 garlic cloves and about 1 teaspoon grated ginger. Scallion whites or a little grated onion can also go into the pan for extra depth.

Rice and Toppings

Warm cooked rice is the easiest base. For toppings, use cucumber, carrot, cabbage, scallions, sesame seeds, kimchi, or egg. Even a simple bowl with rice, beef, scallions, and sesame seeds can still feel complete.

US and Metric Measurements

Measurements are forgiving here. The sauce does not need laboratory precision, but these amounts give you a reliable starting point before you adjust sweetness, heat, or salt at the end.

Ingredient US measure Metric measure
Ground beef / beef mince 1 lb 450–500 g
Low-sodium soy sauce ¼ cup 60 ml
Brown sugar 2–3 tbsp about 25–38 g
Honey, if using instead 2–3 tbsp about 42–63 g
Rice vinegar 1 tbsp 15 ml
Toasted sesame oil 2 tsp 10 ml
Gochujang, optional 1–2 tbsp 18–36 g
Cooked rice 3–4 cups about 500–750 g, depending on rice type
Grated apple or pear, optional 2–3 tbsp 30–45 g
Grated onion, optional 1–2 tbsp 15–30 g

Korean Beef Bowl Sauce

The sauce is what makes the beef taste deeper than a 20-minute dinner usually does. It works because every bite has balance: salty soy, sweetness from brown sugar or honey, acidity from rice vinegar or kimchi, fat from beef and sesame oil, heat if you add gochujang, and crunch from cucumber or cabbage.

That is why the bowl tastes complete even when the topping list is short.

Small ceramic bowl of dark soy-garlic-sesame sauce being whisked, with garlic, ginger, brown sugar, sesame seeds, and sauce ingredients nearby.
The base sauce sets the flavor before heat: soy sauce, sweetener, rice vinegar, sesame oil, garlic, and ginger create the salty-sweet backbone.

Save This Sauce Ratio

For 1 lb / 450–500 g beef, remember this base formula:

  • ¼ cup / 60 ml low-sodium soy sauce for salt and savoriness
  • 2–3 tablespoons brown sugar or honey for sweetness and gloss
  • 1 tablespoon rice vinegar for balance
  • 2 teaspoons toasted sesame oil for aroma
  • Garlic + ginger for the flavor base
  • Optional: 1–2 tablespoons gochujang for heat, or grated apple/pear for bulgogi-style sweetness

Make It Mild, Medium, Spicy, or Bulgogi-Style

  • Mild: skip the gochujang and use the soy-garlic-sesame sauce as written.
  • Medium: add 1 tablespoon gochujang for color, depth, and gentle heat.
  • Spicy: add 2 tablespoons gochujang, then balance the bowl with cucumber, cabbage, rice, or egg.
  • Bulgogi-style: add 2–3 tablespoons grated apple or pear and 1–2 tablespoons grated onion.

Not sure which one to make? Start with the mild version. For the best all-around bowl, add 1 tablespoon gochujang and 2 tablespoons grated apple or pear; it stays balanced, slightly spicy, and deeper without becoming difficult.

Central bowl of dark soy-garlic sauce with red gochujang on a spoon, grated apple or pear, grated onion, garlic, ginger, sesame oil, and scallions nearby.
From that same sauce base, gochujang adds heat, while grated apple or pear and onion create a sweeter, rounder bulgogi-style beef bowl.
Sesame oil note: toasted sesame oil tastes strongest when it is not cooked hard for too long. Whisk it into the sauce for ease, or save half to drizzle in at the end if you want a stronger sesame aroma.

Quick Sauce Adjustments

  • Less sweet: use 2 tablespoons brown sugar or honey instead of 3.
  • More saucy: add 1–2 tablespoons water while simmering.
  • Spicier: add more gochujang, gochugaru, chili flakes, or sriracha-style sauce.
  • Brighter: finish with a small splash of rice vinegar.
  • More sesame-rich: finish with sesame seeds or a tiny drizzle of toasted sesame oil.

Ingredient Swaps

Dinner can still happen even if you are missing one ingredient. The flavor will change slightly, but these swaps keep the bowl moving in the same sweet-savory direction.

If you do not have… Use instead
Rice vinegar Apple cider vinegar, white vinegar, or a squeeze of lime juice.
Gochujang Chili flakes, gochugaru, sriracha-style sauce, or simply skip it.
Fresh ginger ¼–½ teaspoon ground ginger, or leave it out if needed.
Brown sugar Honey, maple syrup, white sugar, or coconut sugar.
Soy sauce Tamari for gluten-free, or coconut aminos for a milder option.
Sesame oil Skip it if needed, then finish with sesame seeds for some nuttiness.
Apple or pear Leave it out, or use a little grated onion for body.

Back to top ↑

Simple Equipment

No special equipment is needed, but a wide skillet makes a real difference. A crowded pan traps moisture, which makes the beef steam instead of brown. You only need a wide skillet, a small bowl for the sauce, and a spatula or wooden spoon.

Before you start: have cooked rice and toppings ready. The beef cooks quickly, and the bowl tastes best when the hot, saucy beef goes straight over warm rice.

How to Make the Bowls

Once the sauce is mixed, the skillet part moves fast: brown the beef, simmer until the sauce coats the crumbles, then build the bowls while everything is still hot.

Step 1: Make the Sauce

In a small bowl, whisk together soy sauce, brown sugar or honey, rice vinegar, garlic, ginger, and optional gochujang. Whisk in the sesame oil too, or save half to drizzle in at the end for a stronger sesame aroma. For the bulgogi-style version, add grated apple or pear, grated onion, and optional mirin.

Whisk until the sugar dissolves and the gochujang, if using, is fully mixed in.

Step 2: Brown the Beef

Heat a wide skillet over medium-high heat. Add the beef. If it is very lean, add 1 tablespoon neutral oil first.

Press the beef into an even layer and let it cook undisturbed for 1–2 minutes before breaking it apart. That short pause helps the bottom brown instead of turning gray and watery.

Browned ground beef crumbles cooking in a dark skillet with a wooden spatula and steam rising.
Before the sauce goes in, brown the ground beef well; those caramelized edges keep the finished bowl from tasting flat.

Step 3: Break It Into Crumbles

Use a wooden spoon or spatula to break the beef into small crumbles. Cook until browned and fully cooked. If the pan looks watery before the sauce goes in, drain it; sauce clings to browned beef, not liquid.

Food safety note: ground beef should be cooked to 160°F / 71°C. A thermometer is the most reliable check; color alone can be misleading. If you do not have one, cook until the beef is steaming hot throughout and fully cooked through.

Step 4: Add the Sauce

Pour the sauce into the skillet and stir well. When the garlic and ginger hit the hot beef, it should smell savory and warm almost immediately. If anything smells sharp or scorched, lower the heat before the sauce reduces too far.

Hand pouring dark soy-garlic sauce from a small bowl into browned ground beef in a skillet.
After browning, let the sauce bubble briefly so the soy-garlic flavor coats the beef instead of staying loose in the pan.

What Glossy Korean Ground Beef Should Look Like

Let the sauce bubble gently for 2–4 minutes, until it looks glossy, reduced, and clings to the beef instead of running across the pan. It should coat the crumbles, not pool like soup.

Saucy Korean-style ground beef in a dark skillet with a spoon dragged through the thickened sauce.
Once the sauce clings to the crumbles, the beef is ready; that texture helps it season the rice without making the bowl watery.

Taste the beef before you build the bowls. Too salty? Add more rice or cucumber. Flat? Splash in rice vinegar. Want more heat? Stir in a little gochujang at the end.

Step 5: Build the Bowls

Divide warm rice between bowls. Spoon the saucy beef over the rice. Add cucumber, carrot, cabbage or lettuce, scallions, sesame seeds, kimchi, and egg if using.

Spoon adding saucy ground beef over white rice in a ceramic bowl, with cucumber slices and chopped scallions nearby.
Next, spoon the beef over hot rice, then keep the bowl simple with one fresh crunch and one finish instead of overloading the toppings.

Step 6: Finish and Serve

Finish with extra sesame seeds, sliced scallions, a drizzle of sesame oil, or a spoonful of gochujang sauce. For a creamy drizzle, mix 2 tablespoons mayo with 1–2 teaspoons gochujang and a few drops of rice vinegar. Add a tiny splash of water only if you want it thinner. For a homemade version, this mayo guide includes a gochujang mayo variation.

Serve while the beef is hot, the rice is warm, and the vegetables are still crisp.

Korean Beef Bowl Recipe

Easy ground beef or beef mince rice bowls with sticky soy-garlic beef, warm rice, crunchy toppings, optional gochujang heat, and a bulgogi-style apple or pear upgrade.

Prep Time5 minutes
Cook Time15 minutes
Total Time20 minutes
Servings4 bowls

Total time assumes cooked rice is ready and toppings are simple. Add about 5 minutes for several toppings, fried eggs, or the bulgogi-style upgrade.

Equipment

  • 12-inch skillet or large nonstick skillet
  • Small mixing bowl
  • Whisk or fork
  • Spatula or wooden spoon
  • Rice cooker or pot, if cooking rice fresh
  • Optional microplane or box grater

Ingredients

For the Beef and Bowls

  • 1 lb / 450–500 g ground beef or beef mince, preferably 90/10
  • 3–4 cups cooked rice, warm and ready before the beef starts cooking
  • 1 tablespoon neutral oil, only if using very lean beef
  • 2–3 scallions, sliced, whites and greens separated if possible
  • 1 small cucumber, sliced
  • 1 medium carrot, shredded or julienned
  • 1 cup shredded cabbage or lettuce
  • 1–2 teaspoons sesame seeds
  • Kimchi, optional
  • 4 fried eggs or soft-boiled eggs, optional

For the Sauce

  • ¼ cup / 60 ml low-sodium soy sauce
  • 2–3 tablespoons brown sugar or honey
  • 1 tablespoon rice vinegar
  • 2 teaspoons toasted sesame oil
  • 3–4 garlic cloves, minced
  • 1 teaspoon fresh ginger, grated
  • 1–2 tablespoons gochujang, optional
  • 1–2 tablespoons water, if needed

Optional Bulgogi-Style Upgrade

  • 2–3 tablespoons grated apple or Asian pear
  • 1–2 tablespoons grated onion
  • 1 tablespoon mirin or rice wine, optional

Instructions

  1. Have the rice ready. This recipe moves quickly once the beef starts cooking, so use warm cooked rice, leftover rice, microwave rice, or rice already prepared in a cooker.
  2. Make the sauce. In a small bowl, whisk together soy sauce, brown sugar or honey, rice vinegar, garlic, ginger, and optional gochujang. Whisk in the sesame oil too, or save half to drizzle in at the end for a stronger sesame aroma. If using the bulgogi-style upgrade, whisk in grated apple or pear, grated onion, and mirin.
  3. Brown the beef. Heat a large skillet over medium-high heat. Add the beef. Press it into an even layer and let it brown for 1–2 minutes before breaking it apart.
  4. Cook through. Break the beef into small crumbles and cook until browned, steaming hot, and cooked through. Drain excess liquid if the pan looks watery.
  5. Add the sauce. Pour the sauce over the beef and stir well. Simmer for 2–4 minutes, until it looks glossy, reduces slightly, and coats the crumbles. Add a splash of water if it becomes too thick.
  6. Build the bowls. Divide warm rice between bowls. Spoon the saucy beef over the rice.
  7. Add toppings. Top with cucumber, carrot, cabbage or lettuce, scallions, sesame seeds, kimchi, and egg if using.
  8. Serve. Finish with extra sesame seeds, a drizzle of sesame oil, extra gochujang sauce, or a little gochujang mayo if you want a creamy finish.

Recipe Notes

  • Cook ground beef to 160°F / 71°C for food safety.
  • Use low-sodium soy sauce because the sauce reduces in the skillet.
  • Total time assumes cooked rice is ready and toppings are simple.
  • If you only have beef, sauce, rice, scallions, and sesame seeds, the bowl still works.
  • Mild bowl: skip the gochujang or serve it on the side.
  • Medium heat: use 1 tablespoon gochujang.
  • Spicier version: use 2 tablespoons gochujang.
  • Bulgogi-style flavor: add grated apple or pear and grated onion.
  • Store beef, rice, and fresh toppings separately for the best meal prep texture.

What Makes This a Korean-Inspired Beef Bowl?

Think of this as a weeknight shortcut built from the flavors people love in Korean BBQ-style beef: soy, garlic, ginger, sesame, sweetness, and optional gochujang. Ground beef or beef mince makes it fast. Rice makes it filling. Cucumber, cabbage, kimchi, scallions, or egg make it feel like a complete bowl instead of just beef over rice.

Korean Beef Bowl vs Bulgogi vs Bibimbap

This bowl borrows the sweet-savory garlic-soy comfort people love in bulgogi-style beef, but it keeps the method simple. Here is the quick difference, so expectations are clear.

Dish What it usually means How this recipe relates
Korean beef bowl A beef and rice bowl with Korean-inspired sauce and toppings. This recipe fits that style directly.
Bulgogi Traditional Korean marinated beef, usually thinly sliced and cooked quickly. This version uses ground beef, so it is faster but not traditional bulgogi.
Bulgogi bowl A rice bowl built around bulgogi or bulgogi-style beef. Add apple or pear and onion to the sauce for a closer bulgogi-style flavor.
Bibimbap Korean mixed rice bowl with vegetables, gochujang, egg, and often beef. Add egg and vegetables for a similar feel, while keeping this recipe simpler.

For traditional bulgogi, use thinly sliced beef and marinate it before cooking. The Smithsonian Center for Folklife and Cultural Heritage describes bulgogi as thinly sliced beef marinated with soy sauce, sugar or honey, sesame oil, garlic, onion, and often Asian pear. That is why the apple-or-pear upgrade works so well in this shortcut version. Read more about bulgogi.

For tonight, ground beef gives you the shortcut: the same garlic-soy-sesame comfort, but in a pan that can be done while the rice is still steaming.

Back to top ↑

How to Brown Ground Beef Without Steaming It

If your beef turns gray or watery, the pan is usually crowded or stirred too soon. Use this checklist before adding sauce so the finished bowl tastes browned, not boiled.

  • Use a wide pan. A crowded skillet traps moisture.
  • Start with medium-high heat. The beef should sizzle when it hits the pan.
  • Do not stir immediately. Let the beef sit for 1–2 minutes so it can form browned edges.
  • Drain excess liquid. Sauce sticks better to browned beef than to watery beef.
  • Add sauce after browning. If sauce goes in too early, the beef simmers before it browns.

Best Rice to Use

Warm white rice gives this bowl its soft, comforting base, especially when the beef is glossy and salty-sweet. Jasmine rice, short-grain rice, or medium-grain rice all work well because they catch the sauce and let the beef stay the main event.

Close-up of fluffy white rice in a ceramic bowl with a small amount of saucy ground beef being added to one side.
Warm rice works as the soft base because it catches the sauce; even a small spoonful of beef can season the grains.
Base Best for
White rice Classic, soft, comforting bowl base.
Jasmine rice Fragrant weeknight rice bowls.
Short-grain rice Stickier bowl texture.
Brown rice Meal prep and nuttier flavor.
Cauliflower rice Low-carb bowls.
Noodles Turning the beef into a noodle bowl.
Lettuce cups A lighter, hand-held version.

If using leftover rice, cool it quickly, refrigerate it in a covered container, and reheat it until steaming hot.

Best Toppings, Sides, and Finishes

The toppings are not decoration here; they are what make a fast bowl feel fresh instead of tired. A little cold crunch, a little acid, and maybe an egg can make ground beef and rice feel like dinner you planned.

Hands slicing cucumber on a wooden board with shredded cabbage, carrot, scallions, sesame seeds, and kimchi nearby.
Meanwhile, fresh toppings do the work the beef cannot: cucumber cools, kimchi sharpens, cabbage crunches, and scallions wake up each bite.

If you only have rice, beef, scallions, and sesame seeds, you still have a good bowl. Add cucumber, kimchi, cabbage, or pickled onions when you want freshness. Add egg, avocado, noodles, or extra rice when you want it heartier.

Type Options Why it helps
Fresh and crunchy Cucumber, carrot, cabbage, lettuce, scallions Balances the rich beef and keeps the bowl from feeling heavy.
Acidic or fermented Kimchi, quick cucumber topping, pickled onions Adds brightness and cuts through the sweet-savory sauce.
Rich Fried egg, soft-boiled egg, avocado, gochujang mayo Makes the bowl more filling and satisfying.
Simple sides Cucumber salad, cabbage slaw, steamed broccoli, mushrooms, spinach Adds freshness or vegetables without changing the beef.
Flavor finish Sesame seeds, sesame oil, gochugaru, chili flakes Adds aroma, heat, and texture at the end.

The same bowl logic works beyond beef: warm base, protein, sauce, crunch, and a fresh finish. Once that structure is clear, you can turn the beef into rice bowls, lettuce cups, noodle bowls, or meal prep boxes without starting over.

Add an Egg

A fried egg makes the bowl richer and gives it a bibimbap-style feel. The yolk mixes into the rice and beef like a quick sauce. For meal prep, soft-boiled or jammy eggs are easier to make ahead; this air fryer hard-boiled eggs guide is useful if you want soft, jammy, or fully set eggs without boiling water.

Korean beef rice bowl topped with a fried egg, ground beef, sliced cucumber, scallions, sesame seeds, and white rice.
Add a fried egg when you want the bowl to feel richer; the yolk softens the rice and gives the beef a bibimbap-style finish.

Quick Cucumber Topping

For a fast cucumber topping, mix thinly sliced cucumber with rice vinegar, a pinch of sugar or honey, a pinch of salt, sesame seeds, and optional chili flakes. Let it sit while the beef cooks.

Ceramic bowl of sliced cucumber tossed with sesame seeds, chili flakes, and a glossy vinegar-style dressing.
A quick cucumber sesame topping is the easiest way to add crunch and acid when the beef sauce is sweet, salty, and rich.

It is not a full cucumber salad, but it gives the bowl a fresh, tangy contrast in just a few minutes. For a colder, crunchier side, this cucumber salad recipe works especially well with sweet-savory beef bowls.

Easy Bowl Builds

Use these when you want a quick decision instead of a long topping list. The beef is the same; the bowl changes depending on what you need that night.

Pantry Korean Beef Bowl

Use this build when you need dinner with the fewest toppings: rice, saucy beef, scallions, sesame seeds, and optional chili flakes.

Simple ceramic bowl of white rice topped with ground beef, chopped scallions, sesame seeds, and chili flakes.
The pantry bowl proves the formula works with almost nothing extra: rice, beef, scallions, sesame, and chili flakes are enough for dinner.

Fresh Korean Beef Bowl

Choose this version when the beef tastes rich and you want more crunch: rice, beef, cucumber, carrot or cabbage, kimchi, and scallions.

Bright rice bowl with ground beef, sliced cucumber, shredded carrot, purple cabbage, kimchi, scallions, and sesame seeds.
In the fresh bowl build, let cucumber, carrot, cabbage, kimchi, scallions, and sesame take up more space so the saucy beef feels lighter.

Loaded Gochujang Beef Bowl

Make this one when you want heat and fullness: gochujang beef, rice, fried egg, kimchi, cucumber, sesame, scallions, and a light creamy drizzle.

Loaded gochujang beef rice bowl with fried egg, kimchi, cucumber slices, scallions, sesame seeds, creamy drizzle, and white rice.
The loaded version uses gochujang beef, kimchi, cucumber, egg, sesame, scallions, and a light drizzle for a spicier bowl.
Choose your night: In a rush? Use rice, beef, scallions, and sesame. Need freshness? Add cucumber, cabbage, or kimchi. Need more protein? Add egg or extra beef. Need lower carb? Use cabbage, lettuce cups, cucumber, or cauliflower rice.

Other Ways to Use the Beef

Once you have the beef, it can go a lot of places: lettuce wraps, tacos, noodle bowls, fried rice, salad bowls, and meal prep boxes.

Low-Carb Korean Beef Bowl

For a lower-carb version, use cauliflower rice, shredded cabbage, lettuce cups, cucumber, or sautéed greens instead of rice. Keep the same sauce and add enough fresh crunch so the bowl still feels full and satisfying.

Lettuce cups filled with saucy ground beef, cucumber slices, scallions, sesame seeds, shredded cabbage, and a small red sauce drizzle.
Instead of rice, use lettuce cups or cabbage to keep the same saucy Korean beef flavor with more crunch and fewer carbs.

You can also use ground pork, turkey, or chicken with the same sauce. Pork tastes richer, while turkey and chicken are leaner and may need a little oil. Brown them well, cook them through, then let the sauce reduce until it coats the meat.

For a gluten-free bowl, use tamari or gluten-free soy sauce. Check your gochujang label too, because some brands contain wheat.

Back to top ↑

Meal Prep, Storage, and Reheating

These bowls work well for meal prep, but the best texture comes from storing the hot and fresh parts separately. The beef and rice can reheat together; the cold toppings should stay cold.

The only thing that really suffers in the fridge is the crunch, so keep cucumber, cabbage, kimchi, scallions, and creamy drizzles in separate containers. Add them after reheating so the bowl still tastes fresh.

Glass meal prep containers with ground beef, white rice, sliced cucumber, kimchi, scallions, and sesame on a wooden table.
Meal prep works best when beef and rice stay separate from cucumber and kimchi, so reheated bowls still finish crisp.

Best Meal Prep Order

  1. Cook or reheat the rice.
  2. Cook the beef and sauce.
  3. Slice cucumber, carrots, cabbage, and scallions.
  4. Store beef and rice separately from fresh toppings if possible.
  5. Add egg, kimchi, cucumber, and drizzles just before serving.
Part How to store Best note
Cooked beef 3–4 days in an airtight container in the fridge. Reheat with a splash of water to loosen the sauce.
Rice Store separately from fresh toppings. Cool quickly, refrigerate covered, and reheat until steaming hot.
Cucumber and lettuce Keep cold and separate. Add after reheating so they stay crisp.
Egg Cook fresh if fried; soft-boiled eggs can be made ahead. Best added just before serving.
Freezer Freeze cooked beef for 2–3 months. Freeze beef only, not assembled bowls.

Troubleshooting: If Something Feels Off

Most problems come from pan size, beef fat, sauce balance, or simmering time. The good news is that this bowl is easy to fix before it reaches the table.

Problem Why it happened How to fix it
Beef tastes greasy The meat was fatty or the pan had too much rendered fat. Drain excess fat before adding sauce. Use 85/15, 90/10, or leaner beef next time.
Beef is dry The beef was very lean or overcooked. Add a splash of water while reheating, or use 85/15 or 90/10 beef.
Beef steamed instead of browned The pan was crowded or stirred too often. Use a wider skillet, medium-high heat, and let the beef sit before breaking it up.
Sauce is too salty Regular soy sauce was used or the sauce reduced too much. Add more rice, vegetables, water, or a little honey. Use low-sodium soy next time.
Sauce is too sweet Too much sugar or honey. Add rice vinegar, gochujang, or a small splash of soy sauce.
Sauce is watery Too much liquid in the pan. Simmer uncovered until reduced. Drain beef better next time.
Sauce is too thick It reduced too long or gochujang made it dense. Add 1–2 tablespoons water and stir.
Too spicy Too much gochujang or chili. Add more rice, cucumber, honey, or a creamy drizzle.
Bowl tastes flat It needs acid, freshness, or heat. Add cucumber, kimchi, scallions, rice vinegar, or chili flakes.

Nutrition Estimate

Nutrition will change depending on beef fat percentage, rice amount, egg, mayo drizzle, and toppings. As a rough estimate, one bowl made with 90/10 beef, about ¾ cup cooked white rice, sauce, cucumber, scallions, and sesame seeds is around 480–560 calories with about 26–32 g protein.

  • Higher protein: use a generous beef portion or add an egg.
  • Lower calorie: use leaner beef, less rice, more cucumber or cabbage, and skip mayo drizzle.
  • Lower carb: use cauliflower rice, shredded cabbage, lettuce cups, or cucumber as the base.
  • More filling: add egg, avocado, extra vegetables, or brown rice.

Frequently Asked Questions

Can I make Korean beef bowls with ground beef?

Yes. Ground beef is one of the easiest ways to make this bowl fast because it browns quickly and soaks up the soy-garlic-sesame sauce.

Can I use beef mince instead of ground beef?

Yes. Beef mince works just like ground beef here. Use 450–500 g and brown it well before adding the sauce.

Is Korean beef bowl the same as bulgogi?

Not exactly. Traditional bulgogi usually uses thinly sliced marinated beef. This recipe uses ground beef or beef mince with a bulgogi-style sauce, so it is faster and easier for weeknights.

Is this the same as bibimbap?

No. Bibimbap is a Korean mixed rice bowl with vegetables, gochujang, egg, and often beef. This bowl is simpler and centered around saucy ground beef over rice, though egg and vegetables can give it a similar feel.

What sauce goes in a Korean beef bowl?

A simple sauce usually includes soy sauce, brown sugar or honey, garlic, ginger, sesame oil, and rice vinegar. Add gochujang for heat or grated apple and onion for a deeper bulgogi-style sauce.

Do I need gochujang?
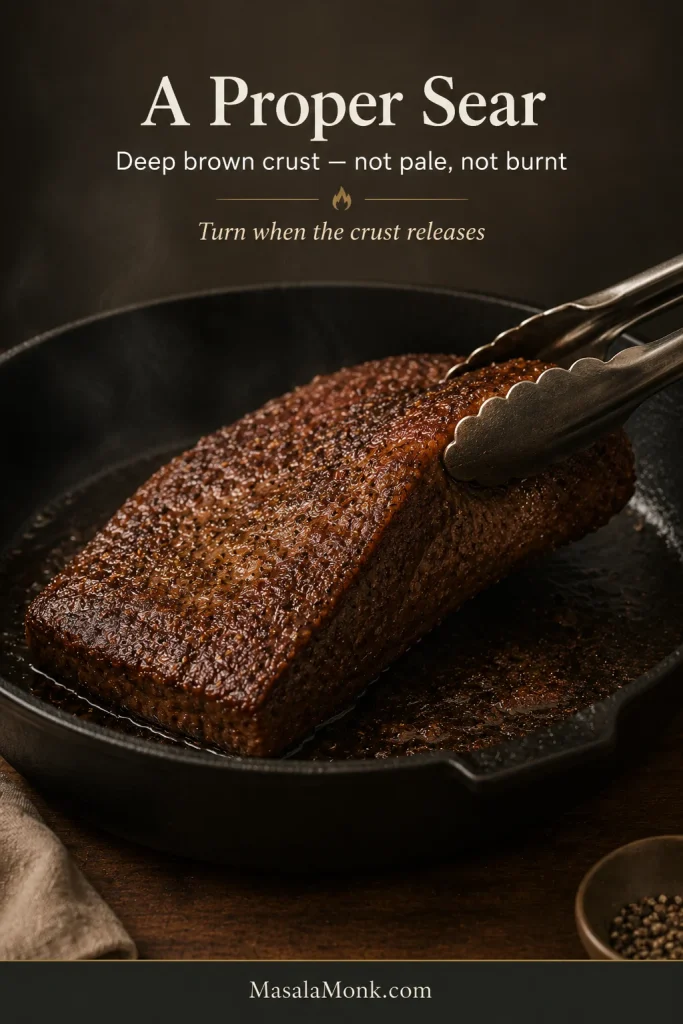
No. The bowl still tastes complete with just the mild soy-garlic-sesame sauce. Gochujang adds heat, color, and deeper flavor, but it is not required. For a family-friendly pan, skip it and let people add gochujang or chili at the table.

What can I use instead of gochujang?
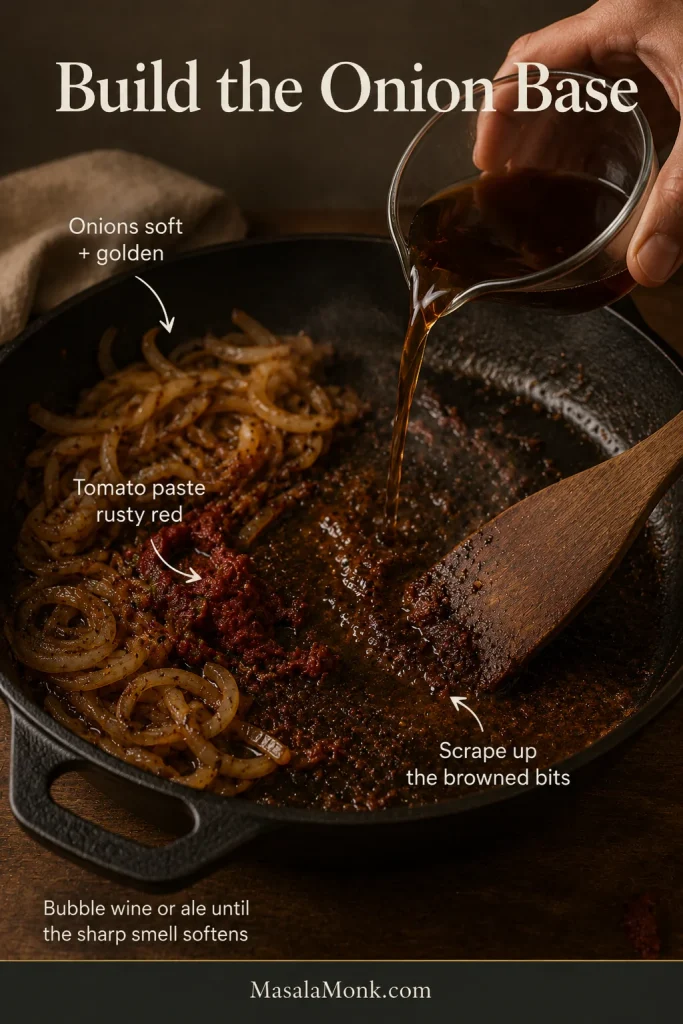
Use chili flakes, gochugaru, sriracha-style sauce, or another chili paste you like. The flavor will not be exactly the same, but it will still add heat.

What rice is best for Korean beef rice bowls?
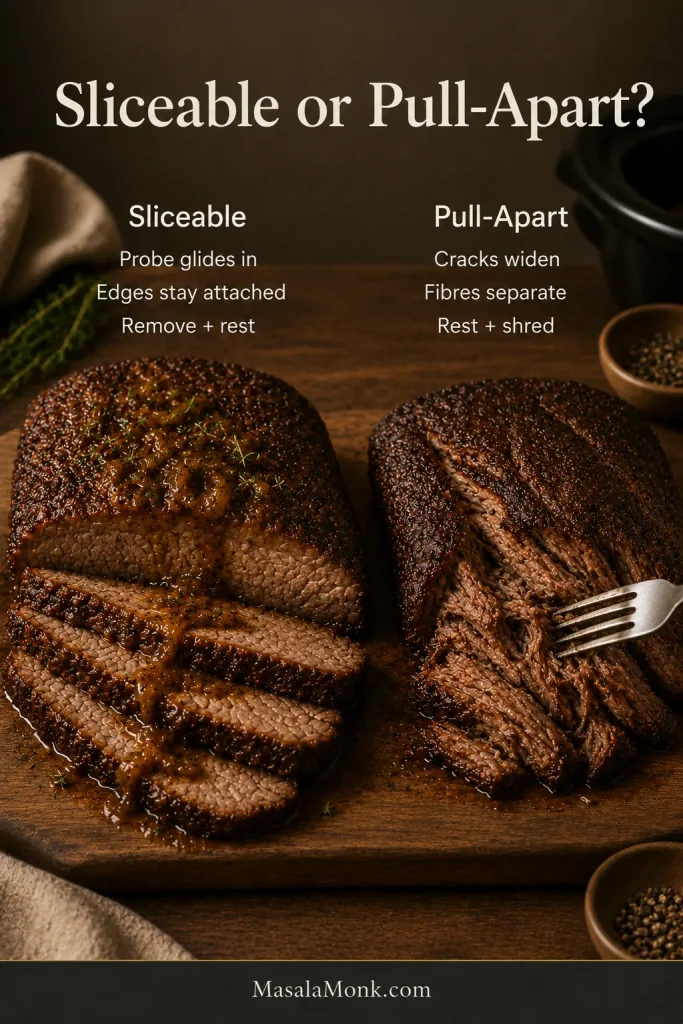
White rice is the easiest, jasmine rice is fragrant, short-grain rice feels stickier, and brown rice works well for meal prep. For a lower-carb bowl, use cauliflower rice, cabbage, or lettuce cups.

What vegetables go with it?

Fresh cucumber, cabbage, carrot, lettuce, and scallions are best when you want crunch. Broccoli, mushrooms, spinach, zucchini, bell pepper, and snap peas work well if you want cooked vegetables. Add tender greens at the end so they do not overcook.

Can I add an egg?
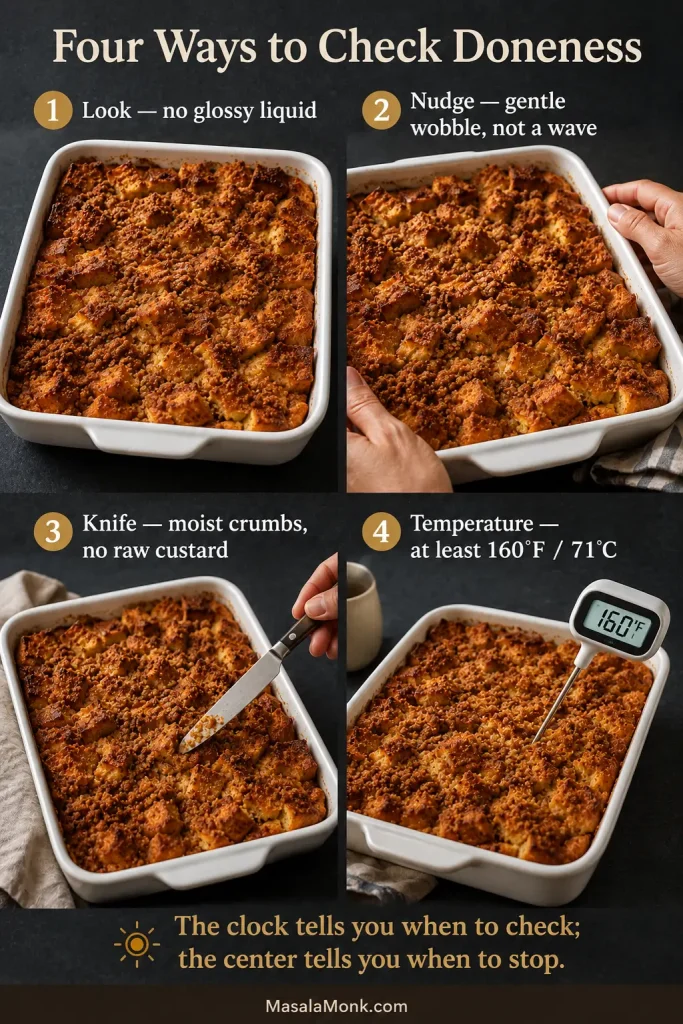
Yes. A fried egg is best when serving right away; soft-boiled or jammy eggs are easier for meal prep. Add the egg after reheating so it stays tender.

How do I make it more like bulgogi?
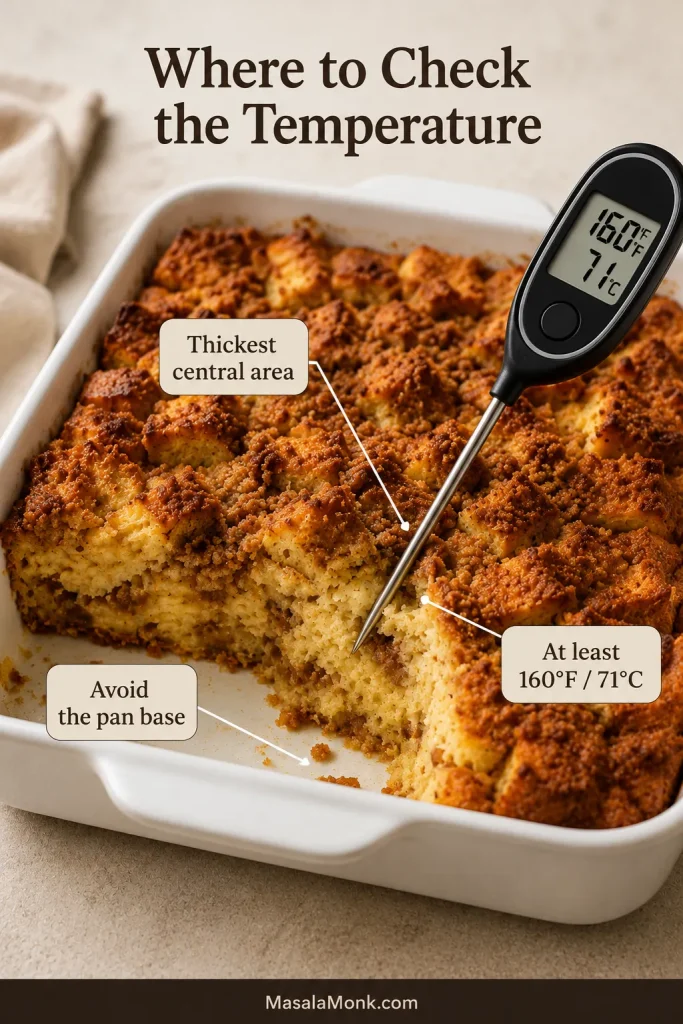
Add grated apple or Asian pear, grated onion, and optional mirin to the sauce. This gives the ground beef a sweeter, rounder, more bulgogi-style flavor.

Can I make this gluten-free?

Yes. Use tamari or gluten-free soy sauce. Check your gochujang label too, because some brands contain wheat.

Can I make this low-carb?

Yes. Serve the beef over cauliflower rice, shredded cabbage, lettuce, or cucumber instead of rice. Keep the same sauce and add plenty of crunchy toppings.

Can I meal prep it?

Yes. The beef reheats well, so it is a good meal-prep protein. Store beef and rice separately from cucumber, cabbage, scallions, kimchi, egg, and creamy drizzles. Reheat the beef and rice first, then add the cold toppings.

How long does the cooked beef last in the fridge?

Cooked beef keeps for 3–4 days in an airtight container in the fridge.

Can I freeze the beef?

Yes. Freeze the cooked beef for up to 2–3 months. Freeze the beef by itself, not the assembled bowls. Thaw overnight in the fridge and reheat with a splash of water to loosen the sauce.

Final Thoughts

Once you know the sauce ratio, this stops being one recipe and becomes a dinner you can rebuild all week: rice bowl tonight, lettuce wraps tomorrow, noodles for lunch, or meal prep boxes with cucumber and egg.

Try it mild first, then make the next pan yours: more gochujang, more cucumber, extra sesame, a creamy drizzle, or a fried egg on top. Once you make it once, it stops being a recipe you follow and becomes a bowl you know how to build.

Back to top ↑