Posted on Leave a comment

Sausage Rolls Recipe: Easy Homemade Puff Pastry Sausage Rolls

Homemade puff pastry sausage rolls on parchment with one roll cut open beside a small bowl of mustard.

If you have puff pastry and sausages, you are already close to a tray of homemade sausage rolls: buttery layers, savory filling, crisp bottoms, and the kind of warm snack people reach for before you have even moved the tray to the table.

Sausage rolls are savory pastry rolls filled with seasoned sausage meat and baked until flaky, golden, and hot in the center. This version keeps the classic idea but makes it practical for real kitchens: store-bought puff pastry, everyday sausages if that is what you have, clear cutting sizes, and enough small technique to avoid greasy, soft pastry.

The method itself is simple: fill, roll, seal, cut, glaze, and bake. You do not need special sausage meat, you do not need to guess the bake time, and you do not have to settle for soggy bottoms.

Make them large for dinner, small for parties, or freeze them unbaked for later. Once you know the basic shape, the same method works for lunchboxes, snack trays, and the kind of warm batch that disappears faster than expected.

Quick Answer: How to Make Sausage Rolls

To make sausage rolls, fill cool puff pastry with seasoned sausage meat or regular sausages with the skins removed, roll and seal the pastry, brush with egg wash, then bake at 200°C / 400°F, or 180°C fan / convection, until the pastry is puffed and well browned.

Large sausage rolls usually take 25–30 minutes, 16 medium rolls usually take 22–25 minutes, and mini sausage rolls usually take 18–22 minutes.

The easiest version uses puff pastry, sausages, and egg wash. The better version adds softened onion, breadcrumbs, herbs, and a little mustard, so the filling tastes rounder, stays juicy, and does not soak the pastry as it bakes.

For pork or beef sausage rolls, the filling should reach 160°F / 71°C in the center. For chicken or turkey sausage rolls, use 165°F / 74°C. If the pastry browns before the center is done, lower the oven slightly and bake a few minutes longer.

When they come out right, you get the best kind of contrast: flaky pastry on top, a clean, crisp base, and a savory filling that stays juicy without soaking through.

Hands holding a sausage roll broken open to show flaky puff pastry layers and cooked sausage filling.
When the roll breaks open, the pastry should flake instead of collapse, and the filling should look moist, cooked, and evenly packed.

Sausage Rolls Recipe Card

Easy Homemade Puff Pastry Sausage Rolls

This recipe makes flaky homemade sausage rolls with ready-rolled puff pastry and sausage meat, or regular sausages with the skins removed. Make them big enough for lunchboxes, small enough for party trays, or somewhere in the middle for the kind of snack that disappears while it is still warm.

Prep time20 minutes
Optional chill time10–20 minutes
Cook time18–30 minutes, depending on size
Total time40–60 minutes
Yield8 large, 16 medium, or 24–32 mini sausage rolls
Oven200°C / 400°F, or 180°C fan / convection

Equipment: You need a baking sheet, parchment paper, mixing bowl, small pan, sharp knife, pastry brush, and wire rack. An instant-read thermometer is helpful for large rolls or chicken and turkey fillings.

Sausage Roll Ingredients

Puff pastry, sausage meat, onion, garlic, breadcrumbs, egg, mustard, herbs, and seeds arranged on a kitchen work surface.
This ingredient mix shows why the full version tastes rounder: breadcrumbs hold moisture, onion adds sweetness, and mustard sharpens the sausage filling.
  • 320–375g / 11–13 oz ready-rolled puff pastry, thawed if frozen but still cool
  • 450–500g / about 1 lb sausage meat, or 6–8 medium sausages with skins removed
  • 1 teaspoon oil or butter, for softening the onion
  • 1 small onion, about 70–90g / ½ cup very finely chopped
  • 1–2 garlic cloves, minced
  • 35–40g / about ½ cup panko breadcrumbs or fresh breadcrumbs, plus more if the filling feels loose
  • 1 egg for the filling
  • 1 egg for egg wash
  • 1 tablespoon / 15ml Dijon mustard or English mustard, optional
  • 1 teaspoon dried sage or thyme, or 1 tablespoon finely chopped fresh herbs
  • ½–1 teaspoon fennel seeds, lightly crushed, optional
  • Black pepper, to taste
  • Salt, only if using plain ground meat instead of seasoned sausage meat or sausages
  • Sesame seeds or nigella seeds, optional topping

If using plain ground pork or beef: start with about ¾ teaspoon fine salt per 500g / 1 lb meat. To check the seasoning safely, cook a tiny pinch of the filling in a pan before shaping the rolls.

Make the Filling and Shape the Rolls

  1. Preheat and line the tray. Preheat the oven to 200°C / 400°F, or 180°C fan / convection. Line a large baking sheet with parchment paper.
  2. Prepare the pastry. If frozen, thaw the puff pastry until flexible but still cool. It should unroll without cracking.
  3. Cook the onion. Warm the oil or butter in a small pan. Soften the onion for a few minutes, then add garlic for 30 seconds. Cool completely.
  4. Prepare the sausage meat. If using regular sausages, slit the skins lengthwise and squeeze the meat into a mixing bowl.
  5. Mix the filling. Combine sausage meat, cooled onion and garlic, breadcrumbs, 1 egg, mustard, herbs, optional fennel, and black pepper. Mix gently.
  6. Check the texture. You want a soft log that holds together without spreading like paste or crumbling apart. Add 1–2 tablespoons more panko if it feels loose, or 1–2 teaspoons cold water or milk if it feels dry.
  7. Cut the pastry. For one 320–375g sheet, cut the pastry in half lengthwise to make 2 long strips. If your pastry sheet is a different size, aim for strips wide enough to wrap around the filling without stretching.
  8. Add the filling. Divide the sausage filling into 2 even logs and place one log down the center of each pastry strip. For mini sausage rolls, shape thinner logs rather than simply cutting overfilled rolls smaller.
  9. Seal. Leave a small border beside the filling. Brush the edge lightly with beaten egg, fold the pastry over, and press just enough to close. Place seam-side down. Too much egg wash can make the edge slippery, and too much pressure can flatten the layers.
  10. Chill if soft. Chill the shaped rolls for 10–20 minutes if the pastry feels sticky, warm, or loose.

Cut, Bake, and Cool

  1. Cut and glaze. Cut each long roll into 4 pieces for 8 large rolls, 8 pieces for 16 medium rolls, or 12–16 pieces for 24–32 mini rolls. Brush tops with egg wash, add seeds if using, and slash lightly.
  2. Bake. Space the rolls at least 2.5cm / 1 inch apart on the baking sheet. Bake large rolls for 25–30 minutes, 16 medium rolls for 22–25 minutes, or mini rolls for 18–22 minutes.
  3. Cool. Rest for a few minutes on the tray, then move to a wire rack so the bottoms stay crisp.

Doneness: Look for well-browned pastry and cooked-through filling. Pork or beef sausage filling should reach 160°F / 71°C. Chicken or turkey filling should reach 165°F / 74°C.

What good looks like: the rolls should feel firm before baking, sit seam-side down, and come out browned on top with crisp bottoms and hot filling.

Freezer note: For best texture, freeze sausage rolls unbaked after shaping and cutting. Bake from frozen at 200°C / 400°F, or 180°C fan / convection, and add extra time. Do not thaw first unless your pastry packet specifically recommends it.

First batch recommendation: make the full version with onion, breadcrumbs, mustard, and herbs. It gives you the best balance of juicy filling and crisp pastry. Once you know how your pastry and sausages behave, use the 3-ingredient shortcut for faster batches.

The 3 Rules for Better Sausage Rolls

Good sausage rolls do not need fancy pastry or special sausage meat. They need three small things done well: filling that tastes good before it goes in, pastry that stays cool enough to puff, and a filling log slim enough for the pastry to close without a fight.

Visual guide showing flavorful filling, cool pastry, and a slim filling log for making sausage rolls.
Think of this as the sausage roll safety net: seasoned filling for flavor, cold pastry for lift, and a slim log for a clean seal.
  • Use filling that tastes good before it goes in. Sausage rolls are simple, so bland sausage has nowhere to hide.
  • Keep the pastry cool. Sticky, greasy, or slack pastry is a sign to pause and chill the tray.
  • Shape thinner than you think. The pastry should close like a wrapper, not stretch like a blanket.

Get those right and the rolls bake neater, crisper, and juicier, with fewer split seams, fewer soggy bottoms, and a center that cooks through before the pastry over-browns. Next, choose the filling, pastry, and size that fit the batch you actually want to make.

Need the exact amounts now? Jump back to the recipe card, or compare options in Choose the Sausage Roll Version You Want.

Choose the Sausage Roll Version You Want

A party tray, lunchbox roll, freezer batch, and fast snack all use the same base method, but the size and filling choices change slightly. Start with the version that fits the moment, then use the rest of the guide to fine-tune it.

Decision board showing sausage rolls for a fast snack, party tray, lunchbox, dinner, air fryer batch, freezer batch, and bakery-style serving.
Once the base method is clear, the same sausage roll recipe can become a snack, party tray, lunchbox option, air fryer batch, or freezer prep.
SituationBest sausage roll version
Fast snack3-ingredient sausage rolls with puff pastry, sausages, and egg wash
Best flavorMain recipe with onion, breadcrumbs, mustard, herbs, and optional fennel
Party trayMini sausage rolls, shaped thinner and frozen unbaked if making ahead
LunchboxesMedium rolls, cooled completely before packing
DinnerLarger rolls with salad, beans, soup, or potatoes
Air fryer batchMini or medium rolls cooked in one layer
Rich bakery-stylePork sausage, all-butter puff pastry, generous egg wash, and a short chill before baking

Can I Use Regular Sausages?

Yes. Most people do not buy “sausage meat” every week. Regular sausages are usually easier to find, and they work beautifully when the flavor is already good. Slit the skins, squeeze out the meat, and loosen it with a fork so it shapes evenly inside the pastry.

Hands opening regular sausages and shaping the sausage meat into a log on a kitchen counter.
Regular sausages can become sausage roll filling once the skins are removed; after that, shape the meat evenly so the pastry wraps cleanly.

Choose sausages you already like because the filling is the main flavor of the roll. If the sausage tastes bland before it goes in, the pastry cannot fix it.

Ingredient note: In the UK and Australia, “sausage meat” usually means seasoned loose sausage filling. In the US, look for bulk sausage, breakfast sausage meat, or simply remove the meat from sausages. Plain ground pork works too, but it needs proper seasoning.

  • Sausage meat: fastest and most classic, but check salt before adding more.
  • Regular sausages: easiest supermarket shortcut; slit the skins and use the filling.
  • Plain ground pork or beef: works if you season it properly and keep enough fat or moisture for juiciness.
  • Chicken, turkey, or vegetarian sausage: useful alternatives, but watch dryness or excess moisture.

Check the Seasoning Safely

Salt note: most sausages are already seasoned, so cook a tiny test piece before adding more salt. If you are using plain ground pork or beef instead, season it properly and test a small cooked piece before shaping.

Small cooked spoonful of sausage roll filling on a plate with a bowl of filling in the background.
A tiny cooked test piece lets you adjust seasoning before the pastry is involved, so the final sausage rolls taste balanced from the center out.

Which Sausages Make the Best Filling?

The best sausage rolls start with sausages you would happily eat on their own: savory, well-seasoned, and juicy without flooding the pan. Pork sausages are the classic choice because they usually have enough fat to stay tender. Breakfast sausage, Cumberland-style sausage, mild Italian sausage, chicken, turkey, and vegetarian sausage can all work too, as long as they are not too lean or watery.

For your first batch, avoid sausages that release a lot of liquid in the pan. Extra moisture can soften the pastry before it has time to crisp.

Simple rule: use sausage meat when you want speed, sausages when that is what you already have, and plain ground meat only when you are ready to season the filling properly.

What Pastry Is Best for Sausage Rolls?

Puff pastry is best for classic sausage rolls because it gives them lift, flakes, and crisp edges. Store-bought puff pastry is the right choice here because the point is a reliable homemade roll, not a pastry project.

All-butter puff pastry gives the richest flavor and the cleanest flaky bite: the kind that shatters a little when you bite in. Standard ready-rolled puff pastry still works well, especially if it stays cold and is not stretched around too much filling.

Close-up of a baked sausage roll with flaky puff pastry layers and cooked sausage filling on parchment.
Puff pastry gives sausage rolls their classic lift and crisp edges; keeping it cool helps those layers rise instead of melting flat.

Shortcrust pastry gives a firmer, more crumbly shell. Crescent roll dough makes a softer, breadier shortcut. Both can work, but neither gives the same flaky puff pastry bite.

How Much Filling Fits the Pastry?

Puff pastry sheets vary by country and brand. Use this table to avoid overfilling the pastry.

Pastry-to-filling ratio guide showing too little, just right, and too much sausage filling on puff pastry strips.
The best sausage roll ratio leaves a visible pastry border, so the roll seals better, puffs cleaner, and leaks less.
Pastry amountFilling amountBest use
280g / 10 oz puff pastry350–400g / 12–14 oz fillingSmaller batch or mini rolls
320g / 11 oz puff pastry400–450g / 14–16 oz fillingOne ready-rolled sheet
375g / 13 oz puff pastry450–500g / about 1 lb fillingStandard full batch
1 smaller US puff pastry sheet, about 225–250g / 8–9 oz275–350g / 10–12 oz fillingSmall batch
2 US puff pastry sheets, about 450–500g / 16–18 oz450–500g / about 1 lb fillingFull batch

When in doubt, use the visual cue: the filling log should let the pastry wrap around it without stretching. Think slim log, not stuffed tube. A sausage roll that looks slightly modest before baking often comes out neater, flakier, and better balanced after the pastry puffs.

The pastry is a wrapper, not a stretchable blanket. If you have to pull it hard to close, the roll is overfilled.

What Makes the Filling Better?
Cooked onion gives the filling deeper flavor without raw sharpness. Breadcrumbs are not just filler; they catch juices from the sausage so the filling stays tender without soaking the base. Mustard adds lift, sage and thyme bring classic savory flavor, and fennel seeds give pork sausage rolls a more aromatic, bakery-style finish.

Egg wash note: A whole beaten egg gives good shine and color. Egg yolk gives a deeper golden finish. Milk gives a softer, lighter color. For vegan sausage rolls, use plant milk, aquafaba, or a little oil depending on the finish you want.

The 3-Ingredient Sausage Roll Shortcut

Yes, you can make 3-ingredient sausage rolls with puff pastry, sausages, and egg wash. They will be simpler than the full recipe, but still good if the sausages are well seasoned and the pastry stays cool.

Use the full recipe when you want a juicier filling with onion, breadcrumbs, mustard, and herbs.

  • Unroll the pastry and cut it into strips.
  • Remove the sausage skins and shape the meat into logs.
  • Roll, seal, brush with beaten egg, and bake until golden and cooked through.

Step-by-Step Visual Cues for Better Sausage Rolls

The recipe card tells you what to do. This section shows you what to look for, because sausage rolls are much easier when you know how the pastry and filling should feel before they go into the oven.

1. Look for Pastry That Bends Without Grease

The puff pastry needs to unroll without cracking while still feeling cool to the touch. Sticky pastry is a sign to pause, not push through. A few minutes in the fridge gives the butter a cleaner start in the oven.

2. Cook the Onion Until Soft, Not Wet

The onion should be soft and fragrant before it goes into the sausage mixture, but not watery. Cooking it first gives sweetness and keeps raw onion moisture from softening the pastry.

Finely chopped onion softened in a pan with a wooden spoon for sausage roll filling.
Softened onion should look glossy and dry around the edges; that gives the filling sweetness without adding steam inside the pastry.

3. Shape a Filling Log That Holds Together

A good filling log holds its shape without slumping across the pastry. Loose filling needs a little more panko before it reaches the pastry. Dry, crumbly filling can take a teaspoon or two of cold water or milk.

Mixed sausage roll filling in a bowl with a shaped sausage filling log on parchment.
A filling that holds as a soft log is easier to roll, seal, and bake evenly; loose filling is more likely to soften the pastry.

4. Place the Filling on the Pastry

The pastry needs to wrap easily around the filling. If you have to pull hard to close it, the log is too thick. Shape thinner than you think, especially for mini sausage rolls.

A slim sausage filling log placed down the center of a puff pastry strip with clear pastry borders.
Center the filling like a narrow ridge, not a mound; then the pastry can wrap around it without stretching thin at the seam.

5. Seal with a Light Line of Egg Wash

Brush the edge lightly with egg wash, fold the pastry over, and press just enough to close. The seam needs to hold, but the layers should not be flattened.

A pastry brush applying egg wash along the edge of puff pastry beside sausage filling.
Egg wash works best as a thin glue line; a heavy brush of liquid can make the pastry edge slide open.

6. Bake Seam-Side Down

The sealed edge should sit against the tray, not face up. That way, the baking sheet supports the roll while the filling heats and the pastry expands.

Unbaked sausage rolls brushed with egg wash and arranged seam-side down on a parchment-lined tray.
Seam-side down placement turns the tray into support, so the pastry stays closed while the sausage filling heats and expands.

7. Cut Large, Medium, or Mini Sausage Rolls

Cut larger rolls for dinner or lunchboxes, medium rolls for snacks, and mini rolls for parties. Small rolls need thinner filling logs, not just shorter pieces of an overfilled roll.

Guide showing large, medium, and mini sausage rolls cut into different sizes.
Size changes the eating moment: large rolls suit dinner, medium rolls suit snacks, and mini sausage rolls suit parties or lunchboxes.

8. What the Tray Should Look Like Before Baking

The final tray should look tidy but not crowded: glossy tops, clear gaps between rolls, and pastry that still holds its shape when moved.

Unbaked sausage rolls brushed with egg wash, topped with seeds, and spaced on a parchment-lined tray.
Before baking, the best tray looks tidy but not crowded: glazed tops, visible gaps, and pastry firm enough to hold its shape.

9. Look for Bronzed Tops and Clean Bottoms

Look for deeply browned tops, set seams, and bottoms that lift cleanly from the paper. If the pastry bends or feels damp underneath, it likely needs more time or better air circulation after baking.

10. Cool on a Rack, Not a Plate

Let the rolls sit briefly on the tray, then move them to a wire rack. A plate traps steam underneath; a rack keeps the base crisp while the filling settles.

Before baking check: the rolls should be easy to lift, not stretched tight, with the seam tucked underneath and small gaps between each piece. If the pastry feels greasy or the filling is bulging through the seam, chill the tray before baking.

Changing the size? Check sausage roll cooking times before baking. If the pastry feels soft or crowded, go to How to Stop Soggy Sausage Rolls.

How Long to Cook Sausage Rolls

Once the rolls pass that before-baking check, size matters more than anything else. A mini party roll and a thick lunchbox roll should not bake for the same amount of time.

Most homemade sausage rolls bake best at 200°C / 400°F, or 180°C fan / convection. That temperature is hot enough to puff and brown the pastry while giving the sausage filling time to cook through.

The goal is not pale pastry with cooked meat, or dark pastry with a doubtful center. The sweet spot is a bronzed top, a clean base, and filling that is hot all the way through.

Cooking time guide for mini, medium, large, and frozen unbaked sausage rolls.
Size is the reason one timing never fits all; mini rolls, large rolls, and frozen unbaked rolls each need their own bake cue.
TypeTemperatureApprox. timeDoneness cue
Large fresh sausage rolls, 8 pieces200°C / 400°F, or 180°C fan25–30 minWell browned pastry, hot center
Medium sausage rolls, 16 pieces200°C / 400°F, or 180°C fan22–25 minGolden, crisp, cooked through
Mini sausage rolls, 24–32 pieces200°C / 400°F, or 180°C fan18–22 minPuffed, browned, and crisp
Frozen unbaked sausage rolls200°C / 400°F, or 180°C fanAdd 6–10 min to the fresh time for that sizeGolden pastry with bubbling edges
Reheating baked rolls180°C / 350°F, or 160°C fan8–12 minHot center and crisp pastry

When they are ready, look for bronzed, firm tops, set seams, and bottoms that lift cleanly from the paper instead of bending or feeling damp.

Check the Internal Temperature

Instant-read thermometer inserted into the cooked filling of a baked sausage roll.
A thermometer checks what pastry color cannot show: whether the center of a thicker sausage roll is cooked through.

Use color as a clue, not the only test. Puff pastry should look well browned, but thick rolls can brown before the center is fully cooked. For a safe check, use an instant-read thermometer in the thickest part of the filling. For the official temperature chart, FoodSafety.gov has a simple safe minimum internal temperatures guide.

Making a batch for later? Go to Freezing, Reheating, and Making Ahead, or jump back to the recipe card.
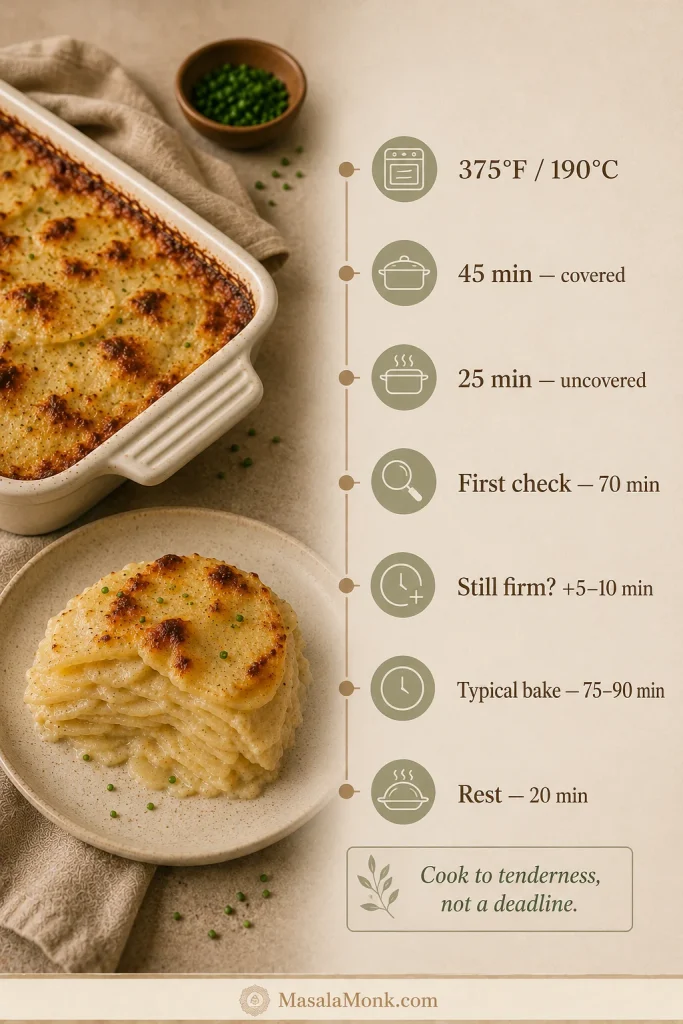
How to Stop Soggy Sausage Rolls

Soggy sausage rolls are disappointing, but they are rarely mysterious. If the base is soft, the seam opens, or fat leaks around the edges, the problem usually started before the tray went into the oven: wet filling, warm pastry, overfilling, or trapped steam after baking.

The oven can brown pastry, but it cannot fully rescue a filling that went in too wet.

Troubleshooting guide showing wet filling, warm pastry, crowded tray, and trapped steam as causes of soggy sausage rolls.
Soggy sausage rolls usually start before serving, with wet filling, warm pastry, crowding, or trapped steam weakening the crisp base.
ProblemLikely causeFix
Soggy bottomWet filling or pastry sitting in steamUse breadcrumbs, cool cooked onion, avoid watery vegetables, and move baked rolls to a wire rack.
Pastry leaking fatVery fatty filling, warm pastry, or oven too lowChill the shaped rolls if needed, bake at the right heat, and space rolls apart.
Pastry split openOverfilled rolls or weak sealUse egg wash on the edge, press firmly, and bake seam-side down.
Pale pastryWeak egg wash or underbakingBrush well with beaten egg and bake until golden and firm.
Dry fillingMeat too lean or filling overmixedUse sausage with enough fat, mix gently, and do not overbake.
Soft after bakingRolls cooled on a plate or covered too tightlyCool on a wire rack and avoid trapping steam.

A sturdy metal baking sheet also helps. Very thin trays can brown unevenly, and crowded trays trap steam. For extra-crisp bottoms, place the rolls on parchment on a hot tray only if you can transfer them safely.

What a Crisp Bottom Looks Like

A baked sausage roll lifted with a spatula to show an evenly browned crisp bottom.
A golden underside shows the pastry baked instead of steamed, which is why rack cooling matters as much as oven heat.

Cold pastry, confident bake: if the puff pastry feels greasy, sticky, or slack, pause and chill the tray before it goes into the oven.

Most batches do not need every fix here. If the pastry is cool, the rolls are not overfilled, and the tops are deeply browned, you are already most of the way there.

That is the sweet spot: hot filling, crisp base, and pastry that flakes instead of bending.

Mini Sausage Rolls for Parties, Lunchboxes, and Snacks

Mini sausage rolls are the party version for a reason: they bake faster, serve neatly, and disappear from a platter while people are still deciding what to drink. They are the thing people pick up while talking, then return for before they realize they have already had three.

Mini sausage rolls on a wooden party platter with dips and a hand reaching for one roll.
Mini sausage rolls stay easy to grab, dip, and share, which makes them especially useful for appetizers, party boards, and casual snack trays.
  • Cut each long roll into 12–16 small pieces for party-size sausage rolls.
  • Bake mini sausage rolls at 200°C / 400°F, or 180°C fan, for 18–22 minutes.
  • Shape thinner filling logs so each mini roll is balanced, not overstuffed.
  • Leave space between pieces so the pastry can puff.
  • Use sesame or nigella seeds if you want a more finished party-platter look.
  • Cool fully before packing into lunchboxes so steam does not soften the pastry.

Party math is simple: plan on 3–4 mini sausage rolls per person if they are one of several snacks, and more if these are the main warm bite on the table. Think two-bite snacks, not tiny overstuffed parcels.

How to Keep Sausage Rolls Warm for a Party

Keep baked sausage rolls in a low oven, loosely covered, so steam can escape. Wrapping them tightly in foil while hot softens the pastry. Softened rolls come back quickly in the oven or air fryer for a few minutes before serving.

For another easy party appetizer in the same make-ahead lane, these grape jelly meatballs are a useful option beside mini sausage rolls.

If you are baking a full party tray, the oven is still easier. For a handful of mini rolls, leftovers, or a small frozen batch, the air fryer is the faster tool.

Baking only a few? The air fryer section covers small batches. Planning ahead? Go to freezing and reheating.
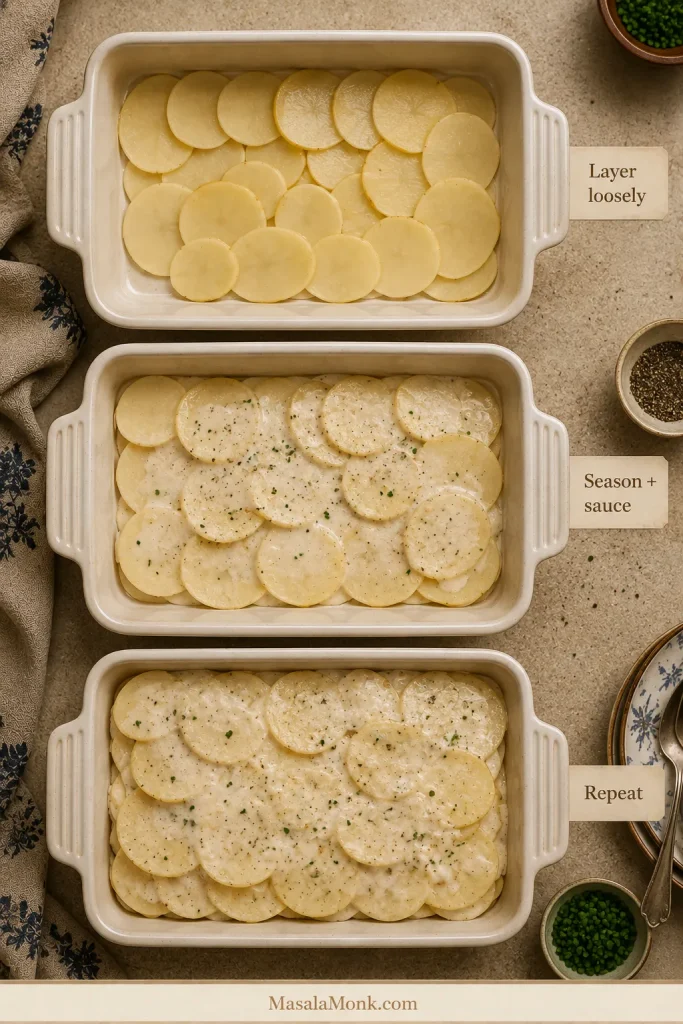
Air Fryer Sausage Rolls

The air fryer is not the best tool for a full tray, but it is excellent for small batches, leftovers, and frozen mini sausage rolls when you want hot pastry without heating the oven.

It is especially useful for the last few frozen rolls in the bag: enough for a snack, not enough to justify a full oven.

Golden sausage rolls arranged in one layer inside a clean air fryer basket.
Air fryer sausage rolls need breathing room; with one open layer, hot air can reach the pastry instead of steaming it.
Air fryer useTemperatureApprox. time
Fresh mini sausage rolls180–190°C / 350–375°F10–14 min
Fresh medium sausage rolls190°C / 375°F13–16 min
Frozen unbaked sausage rolls180°C / 350°F18–22 min
Reheating cooked sausage rolls180°C / 350°F4–6 min

These air fryer times are for homemade sausage rolls. Store-bought frozen mini sausage rolls can vary by brand, so start checking early and use the package instructions as the first guide.

Air fryer timing is most reliable for mini and medium rolls. Cook in one layer with space for the pastry to expand, and start checking early the first time because machines vary. Large rolls can brown outside before the middle is hot, so lower the heat and cook a little longer if needed.

Freezing, Reheating, and Making Ahead

This is the kind of tray that earns its keep: hot enough for dinner, small enough for a party, and easy enough to freeze before you need it.

Freeze sausage rolls unbaked for the best texture. Shape, cut, freeze on a tray, then bake from frozen with extra time whenever you want a hot batch later.

When the rolls bake for the first time from frozen, the pastry stays fresher than it does after being baked, frozen, and reheated. It is the quiet freezer win: a tray you shaped when you had time, ready to bake when you do not.

That is the freezer version at its best: no flour on the counter, no filling bowl to wash, just a cold tray becoming hot, flaky sausage rolls when you need them.

Freezing Unbaked Sausage Rolls

Unbaked sausage rolls on a parchment-lined tray beside a freezer bag labeled for sausage rolls.
Freezing unbaked keeps the pastry from drying out twice; when baking from frozen, use the size of the roll to judge the extra time.
  1. Shape and cut the sausage rolls.
  2. Place them on a parchment-lined tray.
  3. Freeze until firm.
  4. Transfer to a freezer-safe bag or container.
  5. Bake from frozen at 200°C / 400°F, or 180°C fan, adding extra time.

Frozen unbaked sausage rolls usually need 6–10 minutes longer than fresh rolls, depending on size; very large rolls may need a few minutes more. Brush with egg wash before baking if possible. If the egg wash does not stick well to frozen pastry, bake the rolls plain or brush lightly after the first few minutes. Bake unbaked frozen rolls straight from the freezer unless the pastry packet says otherwise.

Simple Party-Day Plan

  • A few hours ahead: shape and cut the sausage rolls, then refrigerate until baking.
  • The day before or earlier: freeze them unbaked for the best texture.
  • Before guests arrive: brush with egg wash and bake until golden and cooked through.
  • To hold briefly: keep warm in a low oven, loosely covered, so steam can escape.
  • To refresh: return softened rolls to the oven or air fryer for a few minutes instead of wrapping them tightly.
  • For the table: serve with mustard or chutney, one creamy dip, and one fresh side so the pastry does not feel too heavy.

Can You Freeze Baked Sausage Rolls?

Yes, baked sausage rolls can be frozen, but the pastry is usually better when the rolls are frozen unbaked. If you freeze baked rolls, cool them completely first, pack airtight, and reheat in the oven or air fryer until hot and crisp again.

Storing Leftovers

Sausage rolls are best the day they are baked, especially while the pastry is crisp. Once cooled, store leftovers in an airtight container in the fridge for up to 3 days. Try to refrigerate them within 2 hours of baking.

Reheating Without Soft Pastry

Reheat baked sausage rolls in the oven at 180°C / 350°F, or 160°C fan, for 8–12 minutes. You can also use the air fryer at 180°C / 350°F for 4–6 minutes. Avoid the microwave when you want crisp pastry. It heats quickly, but it makes puff pastry soft.

Making Them Ahead

You can assemble sausage rolls a few hours ahead and keep them covered in the fridge until baking. For longer storage, freeze them unbaked. If the pastry softens while sitting, give the tray a short fridge rest before baking.

Serving a tray now? See what to serve with sausage rolls, or go back to top.

Sausage Roll Variations

Once the base recipe works, sausage rolls become easy to riff on. Keep the filling savory and not too wet, then change the mood: fennel for bakery-style rolls, apple for sweetness, cheddar for comfort, chili for heat, or cranberry and sage for a holiday tray.

  • Pork and fennel sausage rolls: add ½–1 teaspoon lightly crushed fennel seeds for an aromatic, bakery-style finish.
  • Pork and apple sausage rolls: add a small amount of grated apple, squeezed dry, for gentle sweetness.
  • Beef sausage rolls: use beef sausage meat and stronger seasoning such as mustard, pepper, or Worcestershire-style flavor.
  • Chicken sausage rolls: use chicken sausage or ground chicken and cook to 165°F / 74°C.
  • Cheese and onion sausage rolls: add grated cheddar and softened onion for a richer, more savory filling, but avoid overfilling.
  • Spicy sausage rolls: add chili flakes, smoked paprika, black pepper, or mustard.
  • Christmas sausage rolls: use sage, onion, apple, cranberry, chutney, or a little stuffing-style seasoning.
  • Bakery-style sausage rolls: keep the filling simple, use well-seasoned sausages, chill before baking, and egg wash generously.

When adding vegetables, be careful with moisture. Carrot, zucchini, mushrooms, spinach, and apple can all work, but watery ingredients should be cooked, squeezed, or used sparingly so the pastry does not turn soggy. For a completely different sausage dinner, this smoky kielbasa pasta is better when you want a full meal instead of a pastry snack.

Vegetarian, Vegan, Gluten-Free, and Lighter Sausage Rolls

Vegetarian, vegan, gluten-free, and lighter sausage rolls can all work, but they need the same care as the classic version. The filling needs body, the pastry needs to stay cool, and anything watery needs to be cooked, squeezed, or used sparingly before it is wrapped.

Vegetarian Sausage Rolls

For vegetarian sausage rolls, build savoriness first. Mushrooms, lentils, cheese, paneer, onions, herbs, and plant-based sausage can all work, but the mixture should be thick enough to shape into a log. If it slumps before baking, it will likely soften the pastry.

Vegan Sausage Rolls

For vegan sausage rolls, use vegan puff pastry and a plant-based filling. Replace egg wash with plant milk, aquafaba, or a little oil depending on the finish you want. Check both the pastry and the filling: many puff pastries are accidentally vegan, but not all are.

Gluten-Free Sausage Rolls

For gluten-free sausage rolls, check the pastry, sausage, breadcrumbs, mustard, and sauces. Gluten-free pastry can crack more easily, so let it soften just enough to fold, then chill again before baking if it turns sticky or fragile.

Healthy or Lighter Sausage Rolls

For a lighter version, make smaller rolls, use leaner sausage or chicken/turkey filling, add cooked vegetables, and serve with salad instead of heavier sides. Keep the promise honest: these are lighter sausage rolls, not diet food. Puff pastry and sausage are still rich ingredients.

What to Serve with Sausage Rolls

The best sausage rolls do not need much around them; they just need contrast. Add one sharp thing, one fresh thing, or one dip that cuts through the buttery pastry and makes people reach for another. A crisp wedge salad works especially well because the cold lettuce and creamy dressing balance the hot, flaky pastry.

Warm sausage rolls served on a wooden board with mustard, chutney, pickles, and green salad.
Sharp mustard, chutney, pickles, or fresh salad cut through the buttery pastry and make sausage rolls feel complete on the plate.
  • Sharp: English mustard, Dijon mustard, brown sauce, steak sauce, onion chutney, apple chutney, or pickles.
  • Fresh: green salad, wedge salad, slaw, cucumber salad, or a simple tomato salad.
  • Cozy: baked beans, soup, mashed potatoes, potato wedges, or chips.
  • Party-style: ketchup, creamy dips, chutney, mustard, pickles, or a cheese ball.

For a party platter, serve mini sausage rolls with two or three dips rather than too many sides. In lunchboxes, cool the rolls completely before packing so the pastry does not steam itself soft. On another sausage dinner night, this slow cooker sausage casserole gives you the opposite comfort-food mood: soft sausages, beans, vegetables, and a spoonable sauce.

FAQs About Sausage Rolls

Do you need sausage meat for sausage rolls?

No. Sausage meat is convenient, but regular sausages work well. Slit the skins, squeeze out the meat, and loosen the filling before shaping.

Do you cook sausage meat before making sausage rolls?

No. The sausage meat usually goes into the pastry raw and cooks as the pastry bakes. Cook only the onion, garlic, or watery vegetables first, then cool them before mixing. The filling is done at 160°F / 71°C for pork or beef, and 165°F / 74°C for chicken or turkey.

How do you make sausage rolls with regular sausages?

Remove the skins, loosen the meat with a fork, shape it into logs, and roll it inside cool puff pastry. Season only if needed because most sausages are already salted.

What pastry is best for sausage rolls?

Puff pastry is best for classic sausage rolls because it bakes flaky, crisp, and golden. All-butter puff pastry gives the richest flavor, but standard ready-rolled puff pastry works well if you keep it cool.

Can you use crescent dough instead of puff pastry?

Yes, but the result will be softer and breadier. Puff pastry gives the classic flaky sausage roll texture. Crescent dough is better for a quick shortcut than for a bakery-style sausage roll.

How long do sausage rolls take to cook?

Large sausage rolls usually take 25–30 minutes at 200°C / 400°F, or 180°C fan. Medium rolls usually take 22–25 minutes, while mini sausage rolls usually take 18–22 minutes. Frozen unbaked rolls need extra time.

What temperature should sausage rolls be cooked at?

Cook sausage rolls at 200°C / 400°F, or 180°C fan, for the best balance of puffed pastry and cooked filling. For reheating, use a slightly lower temperature such as 180°C / 350°F, or 160°C fan.

How do you know sausage rolls are cooked inside?

Use three checks: browned pastry, a base that lifts cleanly from the paper, and hot filling in the center. For thick rolls, use a thermometer rather than color alone.

Why is my sausage roll filling still pink?

Some sausage fillings stay slightly pink because of seasoning, curing ingredients, or the type of meat used. Use temperature, not color alone, as the final check. Pork or beef filling should reach 160°F / 71°C, and chicken or turkey filling should reach 165°F / 74°C.

Why are my sausage rolls soggy underneath?

Usually, moisture got trapped somewhere: wet filling, warm pastry, underbaking, or cooling on a tray. Breadcrumbs, a hot bake, and a wire rack solve most of it.

Why did my sausage rolls burst open?

Sausage rolls usually burst open when they are overfilled, sealed weakly, or baked seam-side up. Leave a pastry border, seal with a little egg wash, press gently, and bake seam-side down.

Should sausage rolls be frozen before or after baking?

Before baking is best. Shape and cut the rolls, freeze them on a tray, then store them in a freezer-safe bag or container. They bake up fresher because the pastry gets its first full bake from frozen.

Can sausage rolls be served cold?

Yes, sausage rolls can be served cold once they are fully cooked and properly cooled. They are best warm if you want crisp pastry, but cold rolls work well for lunchboxes, picnics, and party platters. Keep leftovers refrigerated.

How do you keep sausage rolls warm for a party?

Keep sausage rolls in a low oven, loosely covered, so steam can escape. Avoid wrapping them tightly while hot. If the pastry softens, refresh the rolls in the oven or air fryer for a few minutes before serving.

How do you reheat sausage rolls without making them soft?

Reheat sausage rolls in the oven at 180°C / 350°F for 8–12 minutes or in the air fryer for 4–6 minutes. Avoid the microwave if you want crisp pastry.

What is the best way to make mini sausage rolls?

Use thinner filling logs, then cut each long roll into small pieces before baking. Mini sausage rolls usually bake in 18–22 minutes at 200°C / 400°F, or 180°C fan.

Final Tip for Better Sausage Rolls

Good sausage rolls come down to three things: filling that tastes good before it goes in, pastry that stays cool and relaxed, and a bake that goes far enough for real color. Once those are right, the same base method works for regular sausages, mini party rolls, freezer batches, and air fryer snacks.

Make the first batch plain and classic. After that, sausage rolls become the kind of recipe you can adapt without overthinking: a warm tray for dinner, a freezer stash for later, lunchbox rolls for the next day, or the party snack people keep circling back to while pretending they are only having one more.

Back to top

Posted on Leave a comment

Air Fryer Boneless Pork Chops: Juicy Time & Temp Guide

Sliced air fryer boneless pork chops served with mashed potatoes and green beans on a white plate.

Boneless pork chops look like the easy dinner choice until you remember how quickly lean pork can turn dry. This air fryer method is built around the moment that usually ruins them: the last few minutes, when the outside looks done but the center can go from juicy to tight if you wait too long.

For juicy air fryer boneless pork chops, cook 1-inch chops at 380°F / 193°C for 10–12 minutes, flipping halfway, until the thickest center reaches 145°F / 63°C. Rest them for 3–5 minutes before slicing. The pork should come out lightly browned at the edges, with a savory rub that clings and a center that stays moist instead of chalky.

This is the no-dry method by thickness: start with the 1-inch timing, then adjust for the chop in front of you. Thin chops need an early check at the center, thick chops need steadier heat, frozen chops need a few minutes before seasoning will stick, and breaded chops usually need a little more heat for crisping.

Quick Answer: How Long to Cook Boneless Pork Chops in the Air Fryer

Best temperature380°F / 193°C for juicy unbreaded boneless pork chops
Default cook time10–12 minutes for 1-inch chops
Flip?Yes, flip halfway through cooking
Safe internal temperature145°F / 63°C in the thickest part
Rest time3–5 minutes before slicing
Most useful toolAn instant-read thermometer

For most 1-inch chops, that answer is enough to get dinner moving. If your pork is thinner, thicker, frozen, or breaded, use the shortcut below first, then fine-tune with the detailed chart after the recipe.

Start Here: Time by Pork Chop Type

If your chops are already on the counter, match them to the closest situation here. The goal is to know when to use the thermometer, not to guess from color alone.

SituationStarting point
Standard 1-inch chops380°F / 193°C for 10–12 minutes
Thin chopsStart around 4 minutes
Thick chops380°F / 193°C; start around 12 minutes
Breaded chops390°F–400°F / 199°C–204°C with a light oil spray
Frozen chopsCook 5 minutes first, then oil, season, and finish

Need the special version? Jump to thin boneless pork chops, thick boneless pork chops, breaded and Shake-and-Bake pork chops, or frozen boneless pork chops.

The easy rule: 1-inch chops usually need 10–12 minutes at 380°F. Thin chops need an early check at the center, thick chops need steadier heat, and every chop should come out when the center reaches 145°F / 63°C.

Why Thickness Matters Before You Start

Use thickness as the first decision point. It tells you when to start checking the center and keeps the air fryer timer from turning into guesswork.

Three raw boneless pork chops of different thicknesses arranged on butcher paper.
Thickness changes the cook time more than the package name. Thin, 1-inch, and thick boneless pork chops need different air fryer timing.

Ready to cook the standard 1-inch version? Start with the recipe below. If one chop is smaller than the others, it is not cheating to pull it first; it is how you keep every piece from drying out while the thicker ones finish.

Air Fryer Boneless Pork Chops Recipe

The most reliable version starts with 4 boneless pork chops about 1 inch thick — thick enough to stay juicy, but still quick enough for a weeknight dinner. This recipe makes 4 pork chops and takes about 20 minutes total, including rest time.

Using a different thickness? Check the air fryer pork chops time chart before you start, then come back to the recipe steps.

Ingredients

IngredientAmount
Boneless pork chops4 chops, about 1 inch thick, 5–6 oz / 140–170 g each
Olive oil or avocado oil1½ tbsp / 22 ml
Brown sugar, optional1 tbsp / 12 g
Smoked or sweet paprika2 tsp / about 4–5 g
Garlic powder1 tsp / about 3 g
Onion powder½ tsp / about 1–1.5 g
Fine salt¾–1 tsp / about 4–6 g
Black pepper½ tsp / about 1 g
Dried thyme or sage, optional½ tsp

What You Need Before Cooking

Raw boneless pork chops with oil, paprika, garlic powder, onion powder, salt, pepper, brown sugar, and herbs.
Before the chops go in the basket, oil and pantry spices build color, flavor, and a better browned surface in the air fryer.

Brown sugar is optional, but it helps the pork brown and balances the savory seasoning. Without it, the chops may brown a little less but still cook well. Smoked paprika gives deeper color and a subtle smoky edge; sweet paprika keeps the flavor milder.

If using kosher salt, the volume can vary by brand. Use the lower amount for smaller chops, salty seasoning blends, or if you are unsure. You can always add a pinch more at the table, but you cannot take salt back once it is cooked in.

Instructions

Prep and Season the Pork Chops

These first steps set up the crust and flavor. Dry the surface, oil lightly, and press the rub in so the pork browns instead of steaming.

  1. Pat the pork chops dry. Use paper towels to remove surface moisture. Dry pork browns better and holds seasoning more evenly.
  2. Oil both sides. Rub the chops with olive oil or avocado oil. You want a light coating, not a greasy layer.
  3. Mix the seasoning. In a small bowl, combine the brown sugar, paprika, garlic powder, onion powder, salt, black pepper, and thyme or sage if using.
  4. Season generously. Sprinkle the seasoning over both sides and press it in gently so it clings.

Pat the Pork Chops Dry Before Seasoning

A hand patting raw boneless pork chops dry with a paper towel on a cutting board.
A dry surface helps the spice rub cling and gives the pork a better chance to brown instead of steam.

Season the Pork Evenly

Raw boneless pork chops coated with paprika seasoning on a wooden cutting board.
The seasoning should look evenly pressed onto the pork, so every bite tastes finished even without breading.

Air Fry, Check, and Rest

The cooking stage is about control: space the chops, flip once, measure the thickest center, and rest before slicing.

  1. Preheat if needed. If your air fryer recommends preheating, preheat to 380°F / 193°C for 3–5 minutes. If the chops are straight from the fridge, they may need an extra minute. Do not leave raw pork sitting out for long; just season while the air fryer preheats.
  2. Arrange in one layer. Place the chops in the basket with a little space between them. Do not stack or overlap. If one piece is thinner than the others, plan to take its temperature first and remove it early if needed.
  3. Cook and flip. Air fry at 380°F / 193°C for 5–6 minutes, flip, then cook 4–6 minutes more depending on thickness.
  4. Take the temperature. Around the 9-minute mark, slide an instant-read thermometer into the thickest center of the chop, not the edge. The pork is done at 145°F / 63°C.
  5. Rest before slicing. Transfer the chops to a plate and rest uncovered for 3–5 minutes. If they are very thick, you can tent them loosely. That short pause helps the juices stay in the meat instead of running out onto the cutting board.

Give the Chops Space in the Basket

Air fryer heat works best when it can move around the food. If the chops overlap, the covered spots steam and cook unevenly.

Four seasoned boneless pork chops spaced apart in an air fryer basket.
Visible space around each chop helps air fryer boneless pork chops brown at the edges instead of steaming in the basket.

Flip Halfway Through Cooking

Metal tongs flipping a boneless pork chop in an air fryer basket.
Halfway through cooking, flipping gives both sides direct heat and helps powerful basket-style air fryers brown more evenly.

Check the Thickest Center

The edge can read hotter than the middle. Aim the thermometer into the thickest center so you pull the pork at the right moment.

Instant-read thermometer inserted into the center of a cooked boneless pork chop.
The thermometer belongs in the thickest center, not the edge. That is the safest way to stop at 145°F / 63°C without drying the pork.

Rest Before Slicing

Cooked air fryer boneless pork chops resting on a plate before slicing.
A short rest makes the first cut cleaner and keeps more juice in the meat instead of on the plate.

Look for a Moist Sliced Center

The slice should look moist and gently firm, not hard or chalky. Color can vary, so use this cue with the thermometer instead of replacing it.

Cooked boneless pork chop sliced into pieces with a moist pale center.
The sliced center should look moist and clean, not fibrous. Dry-looking edges usually mean the pork cooked a little too long.

When the chops are close to 145°F but not quite there, give them another 1–2 minutes and take another reading. At 145°F / 63°C, take them out right away. The best batch should have browned, seasoned edges, a juicy center, and enough flavor from the rub that you do not need to hide it under sauce.

When they are done, the outside should look browned and seasoned, not wet or pale. The rub should taste savory and a little smoky-sweet, with enough browned edge to make the pork feel finished even without breading. The center should feel firm but not hard when pressed, and it may still have a slight blush if it has reached temperature. Trust the thermometer more than color alone.

For more help with doneness, use the time and temperature chart, the thin chop notes, or the thick chop notes below.

More Air Fryer Pork Chop Help

Air Fryer Boneless Pork Chops Time and Temperature Chart

For most 1-inch chops, the recipe timing above is enough. Use this chart when the pork is thinner, thicker, frozen, or breaded so you know when to start and when to pull it from the air fryer.

These ranges are starting points, not promises, because air fryers and pork chop thickness vary. A thin ½-inch chop and a thick 1½-inch chop need different treatment, even if both packages say “boneless pork chops.”

Boneless pork chop typeAir fryer tempFirst readingLikely total timeInternal targetRest
Thin ½-inch / 1.25 cm chops375°F–380°F / 190°C–193°C4 min5–8 min145°F / 63°C3 min
¾-inch chops380°F–390°F / 193°C–199°C8 min9–11 min145°F / 63°C3–5 min
1-inch chops380°F / 193°C9 min10–12 min145°F / 63°C3–5 min
Thick 1¼–1½ inch chops380°F / 193°C12 min13–16 min145°F / 63°C5 min
Very thick 2-inch chops375°F–380°F / 190°C–193°C16 min18–22 min145°F / 63°C5–8 min
Breaded 1-inch chops390°F–400°F / 199°C–204°C9 min10–12 min145°F / 63°C3–5 min
Frozen boneless chops360°F–380°F / 182°C–193°CAfter first 5 min15–23 min total145°F / 63°C5 min

Breaded, frozen, or unusually thin pork chops can move quickly. Use the breaded pork chop section, the frozen pork chop method, or the thin chop guide for the closest match.

Visual Time Chart by Thickness

The visual chart works as a quick reminder; the full table above gives exact ranges for thin, thick, breaded, or frozen pork chops.

Air fryer boneless pork chops time and temperature chart organized by thickness.
The visual time chart is a quick thickness reminder. Confirm the pork with a thermometer before serving.

Once you know where your chop fits, the rest is simple: give it space, use the thermometer well, and pull it before the center tightens. Go with 375°F for very lean thin chops if you are worried about overcooking. Use 400°F / 204°C for thin chops only if you are watching them closely. Choose 390°F–400°F when breading needs help crisping.

If one chop is smaller than the others, pull it when it reaches 145°F / 63°C and let the thicker pieces keep cooking. For the clearest home-cook rule, cook the thickest part to 145°F / 63°C, then rest before slicing.

Why This Method Works

Boneless pork chops are lean, so they cook quickly and tighten quickly once they pass the right temperature. The air fryer gives you fast browning, but the method needs enough control to keep the center juicy.

That is why 380°F / 193°C works well for lean, unbreaded chops. The outside still browns, but the center has a little breathing room. Breaded chops or thicker pieces can handle more heat when they need extra browning.

Oil helps the seasoning cling, flipping evens out the browning, and resting keeps the first slice from losing all its juice. Spacing matters too: when food is crowded, the air fryer cannot move hot air around the surface properly. If your air fryer meals often turn out uneven, this guide to common air fryer mistakes is a helpful companion.

For food safety, pork chops should reach 145°F / 63°C with a 3-minute rest. You can confirm the current safety guidance through the FoodSafety.gov safe minimum internal temperatures chart. At this temperature, pork can still have a slight blush in the center; the thermometer matters more than color alone.

Thin Boneless Pork Chops in the Air Fryer

Thin chops are not hard, but they are unforgiving. The good news is that they cook fast, so one early check at the center is usually all it takes. This is the version where you do not want to set the timer and walk away.

If your chops are about ½ inch / 1.25 cm thick, start around 4 minutes and expect them to finish around 5–8 minutes in many air fryers. For very thin, lean pieces, 375°F / 190°C gives you more control. If you use 390°F–400°F / 199°C–204°C, stay close during the final stretch.

Thin chops are often done before they look deeply browned, so do not wait for a dramatic crust before measuring the center. A lighter crust is better than a dry center, especially with thin pork. If the chops are breaded, be even more careful because the coating can brown before the meat is perfectly cooked.

Thin Chop Doneness Cue

Thin air fryer pork chop sliced on a white plate with a light golden crust.
Thin boneless pork chops can finish before they look deeply browned. Stop at the right center temperature instead of chasing a darker crust.

Thick Boneless Pork Chops in the Air Fryer

Thicker chops need patience more than extra heat. A 1-inch chop is the easiest size for this recipe. Once you get into 1¼-inch, 1½-inch, or 2-inch chops, the outside can brown while the center is still catching up.

For thick chops, use 375°F–380°F / 190°C–193°C and let the heat work more steadily. Take your first thermometer reading around 12 minutes for 1¼–1½ inch chops and around 16 minutes for very thick 2-inch chops. Slide the probe into the middle of the meat, not near the edge, because the edge can read hotter than the center.

If the outside is getting dark before the center reaches temperature, lower the heat slightly next time rather than blasting the pork hotter. A thick chop should feel springy when pressed, not stiff, and the first slice should look moist rather than fibrous.

Thick Chop Sliced Center

Thick air fryer boneless pork chop sliced on a cutting board with broccoli in the background.
Thick boneless pork chops need steadier heat so the center can catch up. Look for a moist interior, not a stiff or fibrous slice.

Thicker pieces also benefit from a slightly longer rest. Five minutes is usually enough for 1¼–1½ inch chops. Very thick ones can rest closer to 8 minutes without losing their warmth, especially if you tent them loosely.

Best Boneless Pork Chops to Buy for the Air Fryer

For the easiest air fryer pork chops, buy center-cut boneless chops that are ¾ inch to 1 inch thick. That size cooks quickly but still gives you enough room to keep the center juicy.

If your package just says “boneless pork chops,” measure thickness first. That matters more than the exact label. When two packs look similar, choose the one with even thickness over the one with the prettiest label.

Choose Even-Thickness Chops

Even thickness helps every piece finish at about the same time. It also keeps you from sacrificing a thin chop while waiting for a thicker one.

Even-thickness raw center-cut boneless pork chops arranged on butcher paper.
At the store, even thickness matters more than the prettiest package. Similar-size chops cook more predictably and stay juicier.
  • Boneless pork loin chops: Lean and common; avoid pushing them past temperature.
  • Center-cut boneless pork chops: Best default for this recipe.
  • Boneless ribeye pork chops: Often more forgiving because they can have more marbling.
  • Butterfly pork chops: Often thinner once opened; use thin-chop timing if needed.
  • Pork cutlets: Very thin; take the first reading sooner than standard chops.
  • Boneless sirloin chops: Can be uneven or a little tougher; the thermometer matters.

Very thin pieces cook fast but dry out quickly. Very thick ones can be juicy, but they need more careful temperature checks. If you are comparing lean pork cuts beyond chops, this pork tenderloin in oven guide follows the same basic idea: cook gently, check the center, and rest before slicing.

No Breading, Breaded, and Shake-and-Bake Pork Chops

Once thickness is sorted, the next question is usually coating: plain seasoning, breadcrumbs, or Shake-and-Bake. The main recipe uses oil and a dry seasoning rub, but breaded chops and Shake-and-Bake style chops also work well in the air fryer.

VersionBest tempLikely timeKey move
Unbreaded 1-inch chops380°F / 193°C10–12 minOil first, then season well.
Thin unbreaded chops375°F–380°F / 190°C–193°C5–8 minTake an early reading.
Breaded 1-inch chops390°F–400°F / 199°C–204°C10–12 minSpray the coating lightly with oil.
Thin breaded cutlets390°F / 199°C6–10 minWatch closely; coating browns fast.
Shake-and-Bake chops390°F–400°F / 199°C–204°C6–12 minOil first, coat well, and spray dry patches.

Oil Spray for Breaded Pork Chops

Breaded chops need a little surface fat to crisp in the air fryer. Spray lightly, especially on dry patches, instead of soaking the coating.

Breaded boneless pork chops being sprayed with oil in an air fryer basket.
A light oil spray helps breaded air fryer pork chops turn crisp and golden instead of staying pale or powdery.

For thin unbreaded chops, a hotter setting can work only if you are watching closely. If the pork is very lean or very thin, the lower temperature gives you more room to catch it before it dries out.

No-Breading Air Fryer Boneless Pork Chops

Choose the dry-rub version when you want a quick weeknight dinner without flour, egg, or crumbs. Oil the pork first, then season both sides generously. The oil helps the spice rub cling and keeps the surface from tasting dry.

Because there is no coating, these chops can cook a little faster than breaded ones, especially when they are thin. A 1-inch chop works best at 380°F / 193°C. Smaller pieces should stay near the lower end of the time range.

Breaded Boneless Pork Chops

For breaded boneless pork chops, use a simple flour, egg, and panko or breadcrumb coating. Air fry at 390°F–400°F / 199°C–204°C until the coating is crisp and the pork reaches 145°F / 63°C in the center.

Crispy Breaded Pork Chop Doneness Cue

A golden crust is only part of the signal. The pork inside still needs to reach 145°F / 63°C before it rests.

Crispy breaded air fryer pork chop sliced on a plate with slaw and green beans.
Breaded boneless pork chops should be crisp outside but still moist inside. The crust can brown before the center is done, so check the pork itself.

The small but important detail is oil spray. Spray the breaded surface lightly before cooking, then look for dry patches after flipping. Dry crumbs stay pale and powdery in the air fryer; a little oil helps them crisp and brown. The goal is a coating that tastes crisp, not dusty. Use a refillable oil sprayer, brush, or the type of oil spray your air fryer manufacturer recommends.

Shake-and-Bake Pork Chops in the Air Fryer

Shake-and-Bake style pork chops work well in the air fryer if the coating has enough moisture to stick. Oil the pork first, coat it well, shake off the excess, and place the chops in a single layer.

Boneless pork chop being coated in seasoned crumbs with tongs in a bowl.
Oil the pork first for Shake-and-Bake style chops so the coating sticks, then shake off extra crumbs before air frying.

Cook at 390°F–400°F / 199°C–204°C and use a thermometer in the center instead of judging only by the crust. If the coating still looks dusty after flipping, spray those spots lightly with oil and continue cooking. Give the chops space in the basket so the coating can crisp instead of steaming.

Frozen Boneless Pork Chops in the Air Fryer

Frozen chops are not ideal, but they are absolutely workable when dinner needs to happen. You are not trying to make them perfect from frozen; you are trying to make them seasoned, safe, and still pleasant to eat.

Give Frozen Chops a Short Head Start

Start frozen pork chops plain for a few minutes. That softens the surface so seasoning can cling instead of falling off ice.

Frozen boneless pork chops arranged in one layer in an air fryer basket.
Frozen boneless pork chops need a short head start in the air fryer. Once the icy surface softens, oil and seasoning can actually stick.

Thawed chops usually cook more evenly and hold seasoning better, but frozen pieces can still come out well if you season them after the surface softens. The same staged approach works for other frozen air fryer foods too, including these frozen chicken wings in the air fryer.

  1. Place the frozen pork chops in the air fryer basket.
  2. Air fry at 380°F / 193°C for 5 minutes to soften the surface.
  3. If the chops are stuck together, separate them carefully.
  4. Brush or rub with oil, then season both sides.
  5. Return to the basket in a single layer.
  6. Cook 10–18 minutes more, depending on thickness, flipping halfway.
  7. Use a thermometer in the center and cook until the pork reaches 145°F / 63°C.
  8. Rest for 5 minutes before slicing.

Season Frozen Chops After Softening

After the first few minutes, the surface is ready for oil and spices. This is the point where seasoning starts doing real work.

Frozen pork chops being brushed with oil and seasoning in an air fryer basket.
Once the frozen chops soften, add oil and seasoning before finishing the cook. This gives the pork better flavor than seasoning an icy surface.

A thin frozen chop may finish quickly after the first softening step, while a thick frozen chop may need the full range or a little more. Very thick frozen chops can take longer than the chart, so the thermometer matters more than the timer. Seasoning sticks much better after those first few minutes, so do not waste your best rub on an icy surface.

Air Fryer Model Notes: Ninja Foodi, Cosori, Instant Vortex, PowerXL

Most basket-style air fryers can use this timing. The brand matters less than basket size, airflow, and how aggressively your model browns. That includes Ninja Foodi, Cosori, Instant Vortex, PowerXL, and similar air fryers.

  • 5–6 quart basket: Best size for 4 average chops.
  • 3–4 quart basket: Cook in batches if the chops crowd or overlap.
  • Large basket air fryer: May brown faster, so take a reading sooner.
  • Oven-style air fryer: Can cook less evenly, so rotate or flip carefully.
  • Ninja Foodi or multicooker style: Use the air crisp or air fry setting and learn how quickly your model runs.
  • Very powerful model: Reduce the time slightly or use the lower end of the range.

Your first batch is the calibration batch. After that, you will know whether your air fryer runs fast, slow, or a little aggressive around the edges. When the pork reaches temperature early, reduce the time next round. Slow browning usually needs another minute or two while you watch the internal temperature.

Troubleshooting Air Fryer Boneless Pork Chops

A dry, pale, or uneven batch usually comes back to thickness, crowding, heat, or a few minutes too long. Start with the table below, then check the timing chart again before the next batch.

Avoid Overcrowding the Basket

Crowding is one of the easiest problems to fix. Leave space around each piece so the air fryer can brown the pork instead of steaming it.

Boneless pork chops crowded and overlapping in an air fryer basket.
A crowded basket traps moisture and makes pork chops brown unevenly. Instead, cook in batches when the pieces overlap.
ProblemLikely reasonFix next time
Pork chops are dryOvercooked, very thin, sliced too soon, or reheated too longShorten the cook, check the center earlier, and rest before slicing.
Outside browned but inside underdoneHeat too high for the thicknessUse 375°F–380°F and cook more steadily.
Seasoning tastes flatNot enough salt or seasoning did not stickOil first, season both sides, and press the rub in gently.
Chops steamed instead of brownedBasket overcrowdedCook in one layer or use batches.
Breaded coating has dry patchesNot enough oil spraySpray lightly before cooking and again after flipping if needed.
Frozen chops taste blandSeasoning was added while the surface was icyCook frozen chops 5 minutes first, then oil and season.
Chops cooked unevenlyUneven thickness or oven-style air fryer airflowFlip, rotate if needed, and check the thickest part.

What to Serve With Air Fryer Boneless Pork Chops

Because the pork is lean and savory, it loves something creamy, crisp, or sweet-tangy on the plate. The best plate is simple: juicy pork, a side that balances it, and something that catches the seasoned juices.

Comfort Plate

A classic comfort plate can start with garlic mashed potatoes, gravy, roasted potatoes, or buttered rice. If you want a classic vegetable side, green bean casserole works especially well with juicy pork chops.

Air fryer boneless pork chops served with mashed potatoes and green beans.
Mashed potatoes and green beans turn air fryer pork chops into a comfort dinner while catching the seasoned juices on the plate.

Next time you want a saucier pork chop dinner, MasalaMonk’s smothered pork chops with onion gravy takes the same comfort-food mood even further.

Lighter Plate

A crisp, fresh plate can start with a wedge salad with blue cheese and bacon, cucumber salad, coleslaw, cabbage slaw, steamed broccoli, green beans, or asparagus.

Air fryer boneless pork chops served with slaw, greens, and tomatoes.
Crisp slaw or salad brings freshness to air fryer boneless pork chops and balances the savory browned edges.

Cookout or Leftover Plate

Cookouts, leftovers, or a colder plate pair well with this potato salad guide, which gives you creamy, tangy, warm, chilled, and lighter directions. Leftover sliced pork chops also work well in sandwiches, rice bowls, salads, wraps, or quick breakfast plates with eggs.

Planning for leftovers? Jump to storage and reheating so the pork stays useful without drying out the next day.

Sauces That Work Well

  • Honey mustard or mango mustard sauce
  • Garlic butter
  • BBQ sauce
  • Apple chutney or applesauce
  • Quick pan-style gravy

Storage and Reheating

These chops taste best fresh from the air fryer, when the edges are still warm and the center has just rested. Leftovers can still be useful, but the key is to warm them gently instead of cooking them all over again.

  • Refrigerate: Store cooled pork chops in an airtight container for 3–4 days.
  • Freeze: Freeze cooked pork chops if needed, though the texture is best when fresh.
  • Reheat in the air fryer: Warm at 350°F / 177°C for 3–5 minutes, just until hot.
  • Avoid repeated reheating: Cooked pork dries out quickly when warmed again and again.

Reheat Gently in the Air Fryer

Cooked pork chops reheating in an air fryer basket with tongs on a plate nearby.
Gentle reheating is the goal for leftover pork chops: warm them through in the air fryer without cooking them all over again.

If you know you are saving some for later, pull the chops from the air fryer as soon as they reach temperature and avoid slicing until you are ready to eat or pack them.

Flavor Variations

Once the time and temperature feel easy, the seasoning can change with dinner. Keep the oil, salt, spacing, and thermometer habit the same, then adjust the flavor around the sides or sauce you want.

  • Garlic herb: Use garlic powder, onion powder, thyme, black pepper, and a little lemon zest after cooking. Best with mashed potatoes, green beans, or a simple salad.
  • Smoky paprika: Use smoked paprika, garlic powder, onion powder, black pepper, and a pinch of brown sugar. Good with roasted potatoes, corn, or slaw.
  • BBQ-style: Season with paprika, garlic, onion, and pepper, then brush lightly with BBQ sauce near the end. Serve with potato salad, coleslaw, or buttered rice.
  • Ranch-style: Use ranch seasoning lightly, then reduce added salt if the mix is salty. Pair with fries, salad, or roasted vegetables.
  • Spicy: Add cayenne, chili powder, or Cajun seasoning to the dry rub. Good in rice bowls, wraps, or with a cooling creamy side.
  • Garlic parmesan: Add grated parmesan after cooking or use it in a breaded coating. Serve with pasta, salad, or roasted broccoli.
  • Marinated: Marinate briefly, then pat the chops dry before air frying so the surface browns instead of steaming.

For a creamy pork chop direction, these cream of mushroom pork chops are a cozy pantry-style option.

Once you know the thickness and trust the thermometer, the guesswork drops quickly. Give the chops space, pull them when the center reaches 145°F / 63°C, and let them rest before slicing. The next batch will feel less like guessing and more like dinner on purpose.

FAQ

How long do boneless pork chops take in the air fryer?
Most 1-inch boneless pork chops take 10–12 minutes at 380°F / 193°C. Thin chops may finish in 5–8 minutes, while thick chops can need 13–16 minutes or more. Cook to 145°F / 63°C in the thickest center.

What temperature is best for air fryer boneless pork chops?

For juicy unbreaded chops, 380°F / 193°C is a strong default. Breaded chops usually crisp better at 390°F–400°F, while very thick chops can benefit from 375°F–380°F.

How do you keep boneless pork chops juicy in the air fryer?
Choose chops that are not too thin, oil and season the surface, cook in one layer, take the temperature before they overcook, and rest before slicing.

Do thin boneless pork chops cook faster?
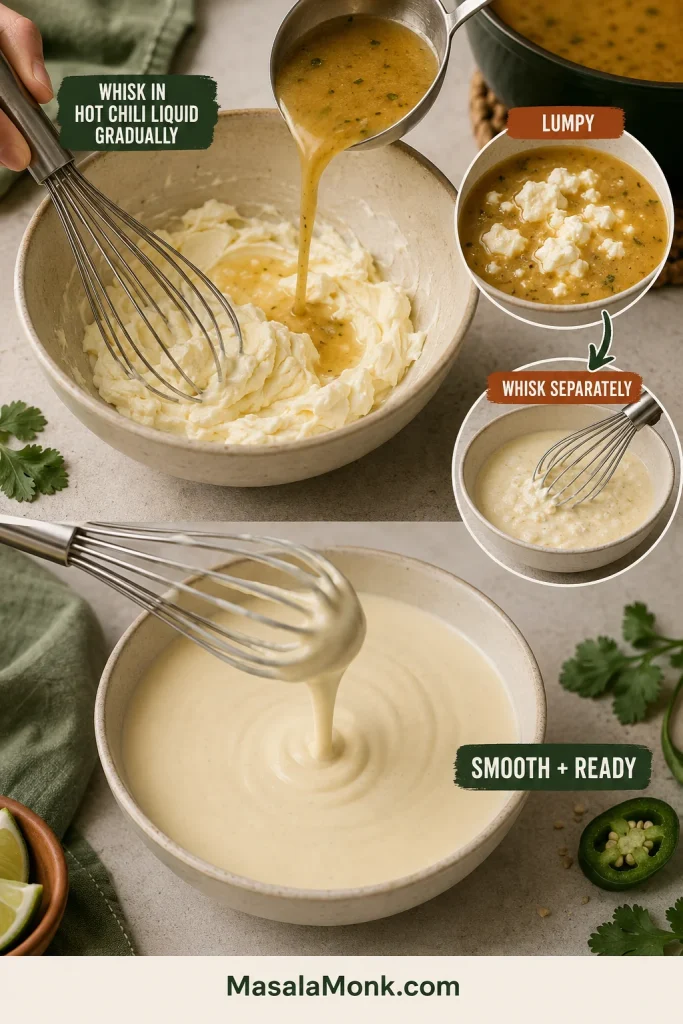
Yes. Thin ½-inch / 1.25 cm chops can cook in about 5–8 minutes. Start around 4 minutes because thin pieces dry out quickly once they pass the right temperature.

What about thick boneless pork chops?

Thick chops need steadier heat and more time. Cook 1¼–1½ inch chops at 380°F / 193°C for about 13–16 minutes. Very thick 2-inch chops may need 18–22 minutes at 375°F–380°F.

Should boneless pork chops be flipped in the air fryer?

Yes. It is a small step, but it helps both sides cook and brown more evenly, especially in powerful basket-style air fryers.

Is 145°F safe for pork chops?

Yes. Pork chops are considered safe when they reach 145°F / 63°C in the thickest part and rest for at least 3 minutes. The center may still have a slight blush. The National Pork Board’s pork cooking temperature guide also uses 145°F followed by a 3-minute rest for fresh pork cuts.

Why did my air fryer pork chops turn out dry?

They were probably overcooked, very thin, cooked too hot for their thickness, sliced too soon, or reheated too long. Check the center earlier next time and rest before cutting.

Can you cook frozen boneless pork chops in the air fryer?

Yes. Cook frozen chops for 5 minutes first to soften the surface, then oil and season them. Most frozen chops take about 15–23 minutes total depending on thickness, and the center should reach 145°F / 63°C.

Do breaded boneless pork chops need more time?

Not always, but they usually need a hotter setting for better crisping. Use 390°F–400°F, spray the coating lightly with oil, and use a thermometer instead of relying only on crust color.

Can Shake-and-Bake pork chops go in the air fryer?

Yes. Oil the pork first, coat it well, place the chops in a single layer, and air fry at 390°F–400°F. Spray dry patches lightly with oil so the coating crisps instead of staying powdery.

Are boneless pork loin chops the same as boneless pork chops?

Boneless pork loin chops are one common type of boneless pork chop. They work well here, but they are lean, so avoid overcooking them.

Does this timing work for bone-in pork chops?

Use it as a starting point, but bone-in pork chops usually need a little more time than boneless chops of the same thickness. Use a thermometer in the center.

Will this work in a Ninja Foodi or Cosori air fryer?

Yes. It works in Ninja Foodi, Cosori, Instant Vortex, PowerXL, and most similar air fryers. Since models vary, start a little earlier the first time.

Posted on Leave a comment

French Onion Soup Recipe: Classic, Vegetarian, Slow Cooker & No-Wine Options

Classic French onion soup in a ceramic bowl with bubbling browned cheese, toasted bread, and dark onion broth.

This is the kind of soup that rewards the cook who lets the kitchen slow down for a little while. A mountain of sharp raw onions softens in butter, collapses into the pot, turns golden, and slowly becomes mellow, savory, and almost jammy. Then the broth goes in, the bread gets toasted, and the cheese melts over the top until every spoonful breaks through something crisp, bubbling, and deeply comforting.

The best part is that first spoonful: the cheese stretches, the toast softens at the edges, and the broth underneath tastes darker and fuller than the simple ingredient list suggests.

This recipe is built around the three places French onion soup usually fails: pale onions, weak broth, and a risky cheese finish.

This version starts with the classic bistro-style bowl: beef broth, wine or sherry, toasted bread, and Gruyère. The main path is simple — caramelize the onions, deglaze the pot, simmer with broth, toast the bread, and melt the cheese — and every variation in this guide follows that same path.

It is not a weeknight-speed soup. It is the kind of recipe you make when you want a few ordinary onions to slowly turn into something that feels like dinner out, only warmer.

Make It Now

  • Total time: About 1 hour 45 minutes to 2 hours
  • Onion time: 45 to 70 minutes for proper caramelization
  • Best broth: Beef broth for classic; mushroom broth or dark vegetable stock for vegetarian
  • Best cheese: Gruyère, Swiss, or a melty cheese blend
  • No crocks: Broil the cheesy toast separately, then place it on the soup
  • Ready to cook? Jump to the classic recipe

The 3 Things That Make This Soup Work

  1. Cook the onions until deep golden and jammy, not just soft.
  2. Use broth that tastes savory before it goes in.
  3. Toast the bread firmly so the cheese has somewhere to land.

Keep these three foundations in mind as you cook.

Caramelized onions, dark broth, toasted bread, cheese, and French onion soup arranged on a rustic table.
Before assembling the bowl, get the three foundations right: deeply browned onions, broth with real depth, and a cheese finish your kitchen setup can handle safely.

Jump to

Quick Answer

French onion soup is onion soup built around slowly caramelized onions, savory broth, toasted bread, and melted cheese. The cheese-topped version is what most people mean by classic bistro-style French onion soup.

You do not have to use wine or beef broth. For no-wine soup, deglaze with broth and finish with a small splash of vinegar or lemon after simmering. For vegetarian French onion soup, use mushroom broth or dark vegetable stock, then add one savory booster such as vegetarian Worcestershire, tamari, or browned mushrooms.

Need the swaps first? Jump to the vegetarian and no-wine options.

Choose Your French Onion Soup Version

Start with the classic path, then adjust only what your kitchen needs. The onions stay at the center; the broth, wine, cheese, and finishing method can move around them.

Make this when you want a bowl that feels special without needing expensive ingredients. Most of the flavor comes from time, not fuss.

What you wantBest versionRemember
Classic bistro flavorBeef broth, wine or sherry, GruyèreReduce wine before adding broth.
No beef, still savoryDark vegetable stock or mushroom brothAdd one savory booster.
No wine, still balancedDeglaze with brothReplace wine’s acid and fond-loosening job.
Vegetarian, not thinVegetable or mushroom broth plus acid and umamiDo not add every booster at once.
Less stove-watchingSlow cooker onions, then stovetop finish if possibleConvenience improves; browning still matters.
No crocks, no riskBroil cheesy toasts separatelyTop hot soup just before serving.

Classic French Onion Soup Recipe

Start with this stovetop version for the most classic bowl. It looks like restaurant soup, but the actual work is simple: slice onions, cook them slowly, simmer, toast, and melt cheese.

French Onion Soup

Servings: 4 main-course bowls or 6 starter bowls
Prep time: 20 minutes
Cook time: 1 hour 25 minutes to 1 hour 40 minutes
Total time: About 1 hour 45 minutes to 2 hours
Equipment: Large heavy pot or Dutch oven, wooden spoon, baking sheet, broiler-safe crocks or regular bowls plus the separate cheesy-toast method

The timing is flexible because onions vary. Trust the color, smell, and texture more than the clock.

Ingredients

  • 3 lb / 1.35 kg yellow onions, thinly sliced, about 1/8 inch / 3 mm thick
  • 3 tablespoons unsalted butter
  • 1 tablespoon olive oil or neutral oil
  • 1/2 teaspoon fine salt, plus more to taste after simmering
  • 1/2 teaspoon sugar, optional, only if your onions need help browning
  • 3 cloves garlic, minced
  • 1 tablespoon all-purpose flour, optional, for light body
  • 1/2 cup / 120 ml dry white wine or dry sherry, or 1/2 cup / 120 ml extra broth for no-wine soup
  • 6 cups / 1.4 liters beef broth or stock, or up to 7 cups / 1.65 liters for a brothier soup
  • 2 fresh thyme sprigs or 1/2 teaspoon dried thyme
  • 1 bay leaf
  • 1 teaspoon Worcestershire sauce, or vegetarian Worcestershire/tamari for vegetarian soup
  • 1 to 2 teaspoons apple cider vinegar, sherry vinegar, balsamic vinegar, or lemon juice, as needed after simmering
  • Black pepper, to taste
  • 4 to 6 slices baguette, sourdough, or sturdy crusty bread
  • 1 1/2 to 2 cups / 170 to 225 g grated Gruyère, Swiss, provolone, mozzarella, or a mix
  • 2 tablespoons grated Parmesan, optional, for extra savory flavor

Quick notes before you cook: Start light on salt because broth, cheese, Worcestershire, and Parmesan can all be salty. Skip the sugar if your onions brown well. Use 6 cups broth for a thicker bowl, or 7 cups for a brothier one.

Method

Cook the onions

  1. Slice the onions evenly. Aim for about 1/8 inch / 3 mm. Thin, even slices cook more predictably. Too thick and they take much longer; too thin and they can break down or burn at the edges.
  2. Start the onions. Set a large heavy pot or Dutch oven over medium heat. Add the butter and oil. When the butter melts, add the onions and 1/2 teaspoon salt. Stir until coated.
  3. Soften and collapse. Cook for 10 to 15 minutes, stirring often, until the onions release water and shrink down. Do not panic when the pot looks watery at first. That moisture has to cook off before browning can begin.
  4. Caramelize slowly. Lower the heat to medium-low and cook for 35 to 55 minutes more, stirring every few minutes. The onions should turn golden, then deep golden brown, and become soft and jammy. If they hiss loudly, stick hard, or darken too quickly, lower the heat. If the pot gets dry, add a splash of water or broth and scrape the golden browned bits into the onions.
  5. Check before adding liquid. The onion base should already smell like dinner. Look for soft strands, deep golden color, glossy texture, sweet roasted aroma, and browned—not black—bits on the bottom of the pot. If the onions are pale and wet, keep cooking. If the pot smells acrid or the bits are black, do not scrape those burnt spots into the soup.

Build and simmer the base

  1. Add garlic and flour. Stir in the garlic and cook for 30 seconds. If using flour, sprinkle it over the onions and cook for 1 minute, stirring well. The flour should disappear into the onions, not sit in dry clumps.
  2. Deglaze. Add wine or sherry, if using. Scrape the bottom of the pot and simmer until the liquid reduces and no longer smells sharp, about 5 to 8 minutes. The onions should look glossy again. For no-wine soup, use 1/2 cup broth instead.
  3. Add broth and herbs. Pour in 6 cups broth for a thicker onion-forward soup, or up to 7 cups for a brothier bowl. Add thyme, bay leaf, Worcestershire if using, and black pepper. Bring to a simmer.
  4. Simmer and taste. Simmer gently for 20 to 30 minutes. Taste and adjust salt. If the soup tastes too sweet or flat, add 1 teaspoon vinegar or lemon juice, then taste again before adding more. The base should taste savory before the bread and cheese go on. Cheese hides many things, but it will not fix weak broth.

Toast, broil, and serve

  1. Toast the bread. While the soup simmers, toast the bread until dry and crisp. Use a 400°F / 205°C oven for 6 to 10 minutes, or toast it in a skillet or toaster. Cut the bread so it sits just inside the bowl or crock.
  2. Finish with cheese. Ladle hot soup into broiler-safe crocks or bowls. Place toasted bread on top, cover with cheese, and broil for 2 to 5 minutes, watching closely, until melted and browned. Without broiler-safe bowls, broil the cheesy toasts separately on a baking sheet and place them on top of the soup.
  3. Serve hot. Let the bowls sit for a minute before serving. The cheese and soup will be very hot.

Short Recipe Notes

  • Vegetarian: Use mushroom broth or dark vegetable stock, plus one savory booster such as tamari, vegetarian Worcestershire, or browned mushrooms.
  • No wine: Deglaze with broth, then add a small splash of vinegar or lemon after simmering to keep the onion sweetness in check.
  • Slow cooker: Cook onions with butter/oil and salt on LOW for 8 to 10 hours, then finish in a pot on the stove for 10 to 15 minutes for better color.
  • Cheese: Gruyère is classic, but Swiss, provolone, mozzarella with Parmesan, or aged cheddar can work.
  • Broiler safety: Only broil in bowls marked broiler-safe. When in doubt, broil the toast, not the bowl.

Why This Recipe Works

The magic is not in a long ingredient list. It is in what happens when onions are given enough time. They lose their sharpness, release their moisture, brown slowly, and turn into the kind of base that makes the whole pot taste more satisfying than it should.

This is the part where the kitchen starts smelling like dinner is worth waiting for.

The broth matters too, but it should not have to do all the work. Beef broth gives the classic bistro flavor. Mushroom broth or dark vegetable stock can still make a satisfying vegetarian version when the onions are cooked well and the seasoning has a little lift.

That final lift is important because caramelized onions are naturally sweet. Wine, sherry, vinegar, lemon juice, Worcestershire, tamari, or a well-seasoned broth can wake up the pot just enough so the bowl tastes savory instead of syrupy.

Toasted bread gives the melted cheese structure, so it can sit on top instead of disappearing into the soup. That final bubbling layer turns a humble onion soup into the bowl people remember.

Back to top

Ingredients and Onion Tips

You do not need rare ingredients, but each one has a job. The onions bring sweetness, the broth brings backbone, the bread supports the topping, and the cheese makes the bowl feel finished.

How to Choose the Ingredients

Onions: Yellow onions are the safest all-purpose choice. They become sweet without making the soup sugary, and they give the broth a savory backbone. Sweet onions work too, but the finished bowl can taste noticeably sweeter. Red onions make a darker soup with a slightly sharper flavor.

Butter and oil: Butter is where the soup starts to smell like something is happening. A little oil helps keep the butter from scorching during the long cook. All butter is fine too, but keep the heat gentle and watch the bottom of the pot.

Broth, Wine, and Seasoning Choices

Taste the Broth Before It Goes In

If the broth tastes watery now, it will taste watery later. Use better stock, simmer weak broth for a few minutes to concentrate it, or add one savory booster before relying on cheese to rescue the bowl.

Dark broth in a measuring cup with a spoon for tasting before making French onion soup.
Taste the broth before it joins the onions. If it tastes weak by itself, add savory support now instead of hoping cheese will fix it later.

If the broth tastes flat or the onions seem too sweet, jump to troubleshooting before adding cheese.

Broth or stock: Classic French onion soup usually uses beef broth or beef stock. For a vegetarian version, use dark vegetable stock or mushroom broth. The broth should taste good before it meets the onions, because a pale base and thin broth will not become deeply savory just because cheese goes on top.

Wine, sherry, or no wine: Dry white wine or dry sherry adds character and helps keep the onion sweetness in check. It is helpful, but not mandatory. In a no-wine version, broth loosens the browned bits and vinegar or lemon replaces the brightness wine would have added.

Flour: Flour is optional, but a small spoonful gives the broth just enough body to cling to the onions. It should not turn the soup into gravy. Skip it for a thinner, clearer broth. When using flour, cook it briefly with the onions before adding liquid so it does not taste raw.

Herbs and seasoning: Thyme and bay leaf should stay in the background. You want people to taste onion first. Garlic helps, but it should not dominate. Worcestershire, tamari, soy sauce, or a small splash of vinegar can round out the pot, especially in no-wine or vegetarian versions. For vegetarian soup, use vegetarian Worcestershire, tamari, or soy sauce instead of regular Worcestershire.

Best Onions for French Onion Soup

The best onions for French onion soup are usually yellow onions. They are savory, reliable, and easy to find. They caramelize well without making the soup taste too sweet.

  • Yellow onions: balanced, savory, gently sweet, and the best everyday choice.
  • Sweet onions: softer and sweeter; good for a sweeter soup, but even better mixed with yellow onions.
  • Red onions: sharper, darker, and slightly fruitier; useful for variation, but they change the color and flavor.
  • White onions: cleaner and sharper; best used with yellow onions instead of alone.
  • Shallots: delicate and sweet; lovely as part of a mix, but expensive for the whole pot.

The slicing matters almost as much as the onion type. Aim for slices about 1/8 inch / 3 mm thick. Very thick slices take longer to soften. Paper-thin slices can break down too much or burn at the edges before the rest of the pot is ready.

Thinly sliced yellow onions piled high in a Dutch oven before cooking French onion soup.
Do not panic when the pot looks crowded. A mountain of sliced onions will shrink down before it ever starts to caramelize.

How to Caramelize Onions Properly

When it feels like nothing is happening for the first 20 minutes, you are probably doing it right. The onions soften before they brown. The waiting is part of the recipe, not a sign that something has gone wrong. Once the onions are glossy and deep gold, the soup starts doing some of the work for you.

Softened sliced onions with visible moisture in a pot during the early stage of French onion soup.
The onions soften and release water before they begin to brown. Keep cooking past this steamy stage so the flavor can move from raw and sharp to sweet.

Read the Onion Stages

StageWhat you seeWhat to do
Wet and paleSteamy, crowded onionsKeep cooking
Soft and glossySharp smell fadesKeep cooking
GoldenFond starts formingStir and scrape gently
Deep golden and jammySweet roasted smell, soft strandsReady for liquid
Black or acridBurnt smell, black bitsDo not scrape burnt fond into the soup

If the pot looks boring for a while, that is normal. The reward comes late: first the sharp smell fades, then the onions turn glossy, and only near the end does the soup begin to smell deep and savory.

Pale softened onions beside deep golden caramelized onions for French onion soup comparison.
This is the color difference that changes the whole pot. Pale onions give you a lighter soup; deep golden onions give you classic French onion soup flavor.

Control Heat and Fond

Use a heavy pot if possible. A Dutch oven, heavy stainless steel pot, or heavy-bottomed saucepan gives the onions time to brown without scorching too quickly. A thin pot can create hot spots, which makes some onions burn while others stay pale.

Golden onions with browned fond forming on the bottom of a pot while cooking French onion soup.
As the onions turn golden, the brown film on the pot becomes part of the flavor. Scrape it in early, while it tastes toasted instead of burnt.

Keep the heat moderate. When the onions are not browning after a long time, raise the heat slightly. When they are sticking hard or the bottom of the pot is getting too dark, add a splash of water or broth and scrape the browned bits into the onions. Golden brown fond is flavor. Black scorched fond is bitterness.

Brown fond and black scorched bits on the bottom of a pot during onion cooking.
Brown bits can enrich the broth, but black scorch can make it bitter. Deglaze before the bottom of the pot crosses that line.

When the fond stays brown and the onions turn glossy, soft, and deep golden, you have the flavor base the soup needs. This is the success state before adding liquid.

Deep golden jammy caramelized onions in a pot, ready for broth in French onion soup.
The target is glossy, soft, and deep golden. Pale onions need more time before they can carry the soup.

For a deeper look at onion color, Serious Eats has a helpful French onion soup guide that explains why rich golden brown is better than burnt-dark.

A small pinch of sugar can help stubborn onions brown, but do not rely on sugar to replace time. This soup should taste like slowly cooked onions, not sweet onion syrup.

Back to top

How the Stovetop Method Works

The stovetop method gives you the most control. Once you understand what each stage is doing, the recipe feels much less mysterious.

On the stove, the onions release water, collapse, and slowly move from pale to golden to deep golden brown. Wine, sherry, or broth lifts the browned bits from the pot, and the final simmer lets the onion base and broth become one soup.

Broth being poured into caramelized onions in a pot to deglaze for French onion soup.
Deglazing turns the browned bits into soup flavor. Wine, sherry, or broth can all loosen the fond and pull it back into the base.

Taste near the end, before the bread and cheese go on. A little salt, acid, or umami can wake up the pot while you can still adjust it easily.

Finished French onion soup base with caramelized onions and dark broth in a pot before adding bread and cheese.
Before any toast or cheese is added, the soup base should already taste complete: onion-rich, savory, gently sweet, and balanced.

Once the stovetop method makes sense, every variation becomes easier. You are not learning four different soups. You are keeping the onions strong, then changing the broth, deglazing liquid, or finishing method to fit your kitchen.

No broiler-safe bowls? Jump to the no-crock cheese method before you finish the topping.

Back to top

Vegetarian and No-Wine Options

Vegetarian French Onion Soup

Vegetarian French onion soup should not taste like onions floating in weak vegetable broth. The stock needs to be dark, savory, and strong enough to support the caramelized onions.

Use mushroom broth or dark vegetable stock when available. Mushroom broth works especially well because it brings earthy savoriness that helps replace some of the depth people expect from beef broth.

Mushroom broth, browned mushrooms, tamari, and caramelized onions for vegetarian French onion soup.
For vegetarian French onion soup, do not rely on plain vegetable stock alone. Mushroom broth, browned mushrooms, tamari, or vegetarian Worcestershire add the missing savory depth.

For the cleanest vegetarian version, choose one savory booster and one brightener. That keeps the soup controlled instead of turning it into a pantry experiment.

NeedUse one of these
More savory depthMushroom broth, browned mushrooms, tamari, vegetarian Worcestershire
More brightnessSherry vinegar, apple cider vinegar, lemon juice
More bodyLonger simmer, stronger stock, slightly more onions

A vegetarian bowl should still feel complete, not like a compromise. When the stock is dark, the onions are properly browned, and the finish has a little brightness, the soup keeps its cozy bistro feel.

  • Replace beef broth: use mushroom broth or dark vegetable stock.
  • Swap regular Worcestershire: use vegetarian Worcestershire, tamari, or soy sauce.
  • Skip the wine: deglaze with broth, then add vinegar or lemon after simmering.
  • For the cheese topping: use Gruyère, Swiss, provolone, mozzarella, or a vegetarian cheese that melts well.

Cheese eaters can finish the soup with Gruyère, Swiss, provolone, mozzarella, or a mix. For strictly vegetarian soup, check the cheese label because some cheeses use animal rennet. For a vegan version, use olive oil instead of butter, vegan Worcestershire or tamari, and your preferred vegan cheese or cheesy toast alternative.

Skipping wine too? Jump to the no-wine method for deglazing and acid balance.

No-Wine French Onion Soup

No-wine French onion soup can still taste deep and complete. You only need to replace wine’s two jobs: loosening the browned bits from the pot and balancing the natural sweetness of the onions.

Broth, vinegar, lemon, and caramelized onions arranged for no-wine French onion soup.
For a no-wine version, use broth to loosen the fond, then add a tiny splash of vinegar or lemon to balance the onions’ sweetness.

For a no-wine version, deglaze with broth instead of wine. Scrape up the browned bits, then simmer as usual. After the soup has simmered, taste it and add a small balancing ingredient if needed. Start with 1 teaspoon, taste, and stop as soon as the bowl feels brighter.

  • Apple cider vinegar: gently brightens the soup.
  • Balsamic vinegar: adds roundness and a little sweetness.
  • Lemon juice: lifts heavy flavors.
  • Worcestershire sauce: adds savory weight.
  • Vegetarian Worcestershire: adds weight without meat-based ingredients.
  • Tamari or soy sauce: adds umami and saltiness, so use carefully.

The point is not to make the soup sour. The point is to wake up the sweetness of the onions so the bowl tastes rounded instead of heavy.

Making it vegetarian as well? Jump back to the vegetarian broth tips and choose one savory booster.

Back to top

Slow Cooker Option, Plus an Instant Pot Note

Slow Cooker French Onion Soup

The slow cooker does not make the soup faster; it makes the waiting easier. It can handle the long onion softening while you do something else. A short stovetop finish is only there if you want deeper color and a more developed base.

Soft onions cooked down in a slow cooker for French onion soup.
Slow cooker onions save attention, not time. For deeper flavor, give pale or wet onions a quick stovetop finish before adding broth.

For the easiest version, add sliced onions, butter or oil, and salt to a 5-quart or larger slow cooker. Cook on LOW for 8 to 10 hours, until the onions are very soft and browned around the edges. If they look pale and wet, transfer them to a pot and cook for 10 to 15 minutes to concentrate the color and flavor.

Slow cooker baseAmount
Sliced onions3 lb / 1.35 kg
Butter and oil3 tablespoons butter + 1 tablespoon oil
Salt1/2 teaspoon to start
Slow cooker time8 to 10 hours on LOW
Best flavor finish10 to 15 minutes on the stove
Broth simmer20 to 30 minutes on the stove, or 1 to 2 hours more in the slow cooker

Using pressure cooking instead? Jump to the Instant Pot note.

After the onions are ready, add broth, thyme, bay leaf, and seasoning, then simmer until the soup tastes rounded. Finish with toasted bread and cheese.

If you like cozy slow cooker dinners built around French onion flavor, this Slow Cooker French Onion Chicken is another easy comfort-food option.

Instant Pot Note

You can make the soup in an Instant Pot, but pressure cooking does not replace caramelization. Use sauté mode first, give the onions 20 to 30 minutes to soften and brown, then add broth and seasonings. Pressure cook for 5 to 6 minutes, release pressure carefully, taste and adjust, then finish with toasted bread and cheese. If the onions are pale before pressure cooking, the finished soup will taste less developed.

Onions browning on sauté mode inside an Instant Pot for French onion soup.
In an Instant Pot, sauté first and pressure cook second. The onion color has to develop before the broth goes in.

Back to top

Cheese, Bread, and Bowls

Best Cheese for French Onion Soup

Gruyère is the classic choice because it melts smoothly and has a nutty, savory flavor that suits the sweet onions. The best topping melts well, browns in spots, and still tastes good once it stretches.

Close-up of bubbling browned cheese on top of French onion soup after broiling.
Broil just until the cheese bubbles and browns in patches. Pull it before the golden spots turn black.
  • Gruyère: the classic choice; nutty, rich, and beautifully melty.
  • Swiss: mild, melty, and a good substitute for Gruyère.
  • Provolone: smooth, stretchy, and mild.
  • Mozzarella: excellent for cheese pull, but mild in flavor.
  • Parmesan: salty and savory; best mixed with another cheese.
  • Aged cheddar: not classic, but flavorful and practical.
  • Processed cheese: melts easily, but can make the soup taste saltier and more snack-like.

If Gruyère is too expensive or hard to find, use mozzarella for melt and add Parmesan, aged cheddar, or a sharper cheese for flavor. Mostly mozzarella needs a small amount of Parmesan or sharp cheddar so the topping has flavor, not just stretch.

Spoon lifting French onion soup with melted cheese stretching from toasted bread.
When the bread is sturdy and the cheese melts properly, each spoonful catches the best parts: broth, onions, toast, and a satisfying cheese pull.

Best Bread for French Onion Soup

The toast keeps the cheese from sinking straight into the soup. It should be crisp enough to hold, but porous enough to soften at the edges. Baguette is classic because it is sturdy and easy to slice into rounds, but you have options.

Firm toasted bread held above a bowl of French onion soup base to show size and texture.
Toast the bread until it feels dry and firm. That structure helps it support melted cheese without disappearing into the broth.
  • Baguette: classic, sturdy, and ideal for individual bowls.
  • Sourdough: flavorful and strong enough for soup.
  • Country bread: good for larger bowls if cut to fit.
  • Crusty rolls: useful when baguette is not available.
  • Regular sandwich bread: only use if toasted very firm; otherwise it gets soggy quickly.

Cut the bread so it sits just inside the bowl or crock. It should cover much of the surface without forcing you to wrestle with it. Toast it before adding cheese. Soft bread under melted cheese may look good for a moment, but it sinks and turns mushy quickly.

If your cheese sinks or the bread turns soggy, jump to troubleshooting before serving.

For a homemade bread side on another soup night, this Homemade Garlic Bread Loaf can be torn, toasted, or served beside a cheesy bowl.

No Broiler-Safe Crocks? Broil the Toast, Not the Bowl

French onion soup is often served in handled crocks because they can go under the broiler and hold heat well. But you do not need special crocks, and you should not risk a favorite bowl just for melted cheese.

Bowls marked only oven-safe are not automatically safe under the broiler. Broilers use intense direct heat, and some ceramic, stoneware, or glass dishes can crack or break if they are not made for it. For cookware safety, Southern Living’s guide on oven-safe versus broiler-safe dishes is worth checking before putting bowls under direct heat.

Cheesy toasts broiled on a sheet pan with bowls of French onion soup nearby.
Instead of putting regular bowls under intense heat, melt the cheese on toast separately. You still get the browned French onion soup topping without risking cracked dishes.

No-Crock Method

  1. Toast the bread until dry and crisp.
  2. Add cheese on top of the toast.
  3. Broil the cheesy toasts on a baking sheet until melted and browned.
  4. Ladle hot soup into regular bowls.
  5. Place the cheesy toast on top just before serving.

This gives you the same bubbling, browned cheese moment without guessing whether your bowls can handle the heat.

Broiled cheesy toast being placed with tongs on top of French onion soup in a regular bowl.
After broiling, move the cheesy toast onto the hot soup right before serving. The edges stay crisp while the center softens into the onion broth.

Back to top

Troubleshooting French Onion Soup

Most problems show up before the bowls reach the table, which is good news. Taste the pot while you can still fix it.

Scan the row that matches your pot; you do not need to read the whole table before cooking.

ProblemLikely causeHow to fix it
Soup tastes too sweetSweet onions, sugar, or not enough acidAdd a small splash of vinegar, lemon juice, Worcestershire, or tamari. Next time, use yellow onions and skip the sugar.
Soup tastes bitterBurnt onions or blackened fondDo not scrape black bits into the pot. Lower the heat next time and deglaze earlier.
Soup tastes like wineWine was not reduced enoughSimmer longer so the sharp wine flavor cooks off. Next time, reduce wine until the onions look glossy and jammy again.
Soup is too saltySalty broth, bouillon, Worcestershire, cheese, or reduced liquidDilute with unsalted broth or water. Add a small splash of acid to balance. Be careful adding more cheese.
Soup tastes wateryWeak stock or rushed onionsSimmer longer, use better stock, or add a small umami boost like Worcestershire, tamari, or mushroom broth.
Soup tastes flatNot enough salt, acid, or savory weightAdd salt carefully, then a tiny splash of vinegar or lemon. For vegetarian soup, add tamari or vegetarian Worcestershire.
Cheese sinksBread was too soft or too thinUse sturdier bread and toast it until crisp before adding cheese.
Bread turns soggy immediatelyBread was not toasted enoughToast bread until dry and firm. Add it right before serving.
No safe bowls for broilingBowls are not broiler-safeBroil cheesy toasts separately on a baking sheet and place them on top of the soup.

Back to top

Shortcuts and Lighter Options

Shortcut Reality Check

Shortcuts can help on a busy night, but they cannot replace the slow onion flavor that makes the bowl taste homemade.

  • French onion soup mix: seasoning, not a real soup base. Use it for dips, casseroles, and quick pantry meals.
  • Canned, condensed, or frozen soup: convenient, but better with extra caramelized onions, black pepper, thyme, toasted bread, and better cheese.
  • Best homemade shortcut: caramelize the onions ahead, store the base, and finish the soup fresh later.

For less stovetop attention, you can also caramelize onions in a covered Dutch oven in the oven, stirring occasionally, then finish the soup on the stove. It still takes time, but it needs less watching.

Lighter and Special-Diet Options

Once the classic bowl is understood, you can lighten it without losing the point of the soup. The onions still need time, and the broth still needs flavor.

  • Lower sodium: use low-sodium or unsalted broth, start with less salt, and season at the end. Remember that cheese, Worcestershire, bouillon, and Parmesan can all add salt.
  • Lower carb: use a smaller piece of toast or make cheese toasts separately and use less bread. The onions still contain natural carbohydrates, so this is lower-carb, not zero-carb.
  • Gluten-free soup: skip the flour, use gluten-free bread, and check broth, Worcestershire, and tamari labels.
  • Lighter bowl: use less cheese and a slightly brothier ratio, but do not rush the onion caramelization.
  • Lighter vegetarian version: use vegetable or mushroom broth and moderate the cheese, but avoid weak stock or the soup will taste watery.

For a broader look at onions in lower-carb eating, see MasalaMonk’s guide to whether onions are suitable for a keto diet.

Back to top

Storage, Reheating, and Serving

Storage, Freezing, and Reheating

The soup stores best before the bread and cheese are added. Keep the soup base separate, then finish each bowl fresh when you are ready to eat.

French onion soup base stored in glass containers with toasted bread and cheese kept separate.
For the best make-ahead texture, store only the onion soup base. Add fresh toast and cheese after reheating, not before storage.
  • Refrigerator: Store the soup base in an airtight container for 3 to 5 days.
  • Freezer: Freeze the soup base for up to 3 months.
  • Reheating: Reheat gently on the stove until hot. Taste again because salt and sweetness can feel stronger after storage.
  • Bread and cheese: Add fresh toast and cheese after reheating. Do not freeze fully assembled soup with bread and cheese if you care about texture.

If the soup thickens in the fridge, loosen it with a splash of broth or water while reheating. If it tastes flat after reheating, a few drops of vinegar or lemon juice can bring it back.

What to Serve with French Onion Soup

Serve it in small bowls as a starter, or make it the whole dinner with extra toast and a sharp salad. Because the soup is rich, salty, sweet, and cheesy, it pairs best with something fresh, crisp, or simple.

  • A crisp green salad with vinaigrette
  • Roast chicken
  • Steak or simple grilled meat
  • Roasted vegetables
  • Grilled cheese or cheese toast
  • Crusty bread and butter
  • A simple pasta or baked potato on the side

For a crisp, steakhouse-style side, MasalaMonk’s Wedge Salad Recipe works well beside a cheesy bowl because the cold lettuce and sharp dressing cut through the sweetness of the onions.

If you are planning a soup night with more vegetables, beans, and pasta, MasalaMonk’s Minestrone Soup Recipe is a lighter, hearty bowl to keep in rotation.

Give the onions time, finish the bread and cheese safely, and the bowl gives you everything French onion soup is supposed to give: sweet onions, savory broth, crisp toast, bubbling cheese, and that first spoonful that makes the wait feel sensible.

Back to top

FAQs

What are the best onions for French onion soup?

Yellow onions are the best all-purpose choice. They caramelize well and give the soup a rounded, savory-sweet flavor without making it too sweet.

How long should onions caramelize for French onion soup?

Plan on 45 to 70 minutes. The onions should be soft, deep golden brown, and jammy, not pale and not blackened.

Do you need beef broth for French onion soup?

No. Beef broth is classic, but mushroom broth or dark vegetable stock can also work. Taste the broth first; if it tastes weak before simmering, the soup will need help.

How do you make vegetarian French onion soup taste rich?

Use mushroom broth or dark vegetable stock, then add one savory booster such as vegetarian Worcestershire, tamari, or browned mushrooms.

What can replace wine in French onion soup?

Use broth to deglaze the pot, then add 1 teaspoon vinegar or lemon juice near the end. The goal is balance, not sourness.

Which cheese melts best on French onion soup?

Gruyère is classic because it melts smoothly and tastes nutty. Swiss, provolone, mozzarella, and aged cheddar can also work; if using mostly mozzarella, add Parmesan or a sharper cheese for flavor.

What bread works best for French onion soup?

Baguette is classic, but sourdough, country bread, crusty rolls, or any sturdy toasted bread can work. Toast it until dry and firm.

Do you need oven-safe crocks?

No. Without broiler-safe crocks, broil the cheesy toasts separately on a baking sheet and place them on top of the hot soup.

Is slow cooker French onion soup as good as stovetop?

It can be very good, but the flavor is usually deeper when the onions get a short stovetop finish before the broth goes in.

Is French onion soup mix the same as French onion soup?

No. French onion soup mix is a dry seasoning blend; it does not replace the flavor of slowly caramelized onions.

Why is my French onion soup too sweet?

Very sweet onions, extra sugar, or too little acid can make the soup taste sweet. Add a small splash of vinegar or lemon juice to balance it.

Why does French onion soup taste bitter?

Bitterness usually comes from burnt onions or blackened bits scraped from the pot. Brown fond is good; do not scrape black scorched bits into the soup.

Can French onion soup be frozen?

Yes. Freeze the soup base without bread and cheese for up to 3 months, then reheat and finish with fresh toast and cheese.

Back to top

Posted on Leave a comment

Ham and Cheese Quiche Recipe: Creamy, Easy, Crustless Option

Whole ham and cheese quiche in a white ceramic pie dish with one slice lifted, showing golden crust, creamy custard, diced ham, melted cheese, and chives.

Ham and cheese quiche is what you make when brunch needs to feel special but you do not want to stand at the stove. It uses cooked ham, a simple egg custard, plenty of cheese, and a crust that can be homemade, refrigerated, frozen, or skipped completely.

The most satisfying bites have smoky ham, melted cheese, and soft custard against the flaky edge of the crust. This version is creamy without being loose, savory without being too salty, and practical enough for a holiday brunch, a quiet lunch, or a weeknight dinner with salad.

Close-up of a ham and cheese quiche slice on a white plate, with a fork cutting into the creamy custard and flaky crust.
A good slice should hold together but still look soft inside; that creamy custard is what keeps this from feeling like a firm egg bake.

This ham and cheese quiche is built for real kitchens: the kind with leftover holiday ham, a frozen crust in the freezer, or a bit of cheese that needs using. As long as the ham is cooked, diced small, and not wet, the recipe is flexible.

The base is simple: 5 large eggs, 1 cup dairy, 1½ cups diced ham, and 1½ cups cheese for one 9-inch / 23 cm quiche. That ratio keeps the center creamy but sliceable, so you do not end up with a stiff egg pie or a watery middle.

Start with the quick answer and recipe if you are ready to bake. The extra notes are there for frozen crusts, crustless baking, make-ahead timing, variations, and troubleshooting.

Quick Answer

For one 9-inch / 23 cm ham and cheese quiche, use 5 large eggs, 1 cup dairy, 1½ cups cooked diced ham, and 1½ cups shredded cheese. Par-bake the crust, fill it, bake at 375°F / 190°C until the edges are set and the center is soft-set, then rest for 10 minutes before slicing.

Quiche ElementUse This
Eggs5 large eggs
Dairy1 cup / 240 ml / 8 fl oz half-and-half, or cream + milk
Ham1½ cups / 200–225 g / 7–8 oz cooked diced ham, loosely measured
Cheese1½ cups / 150–170 g / 5–6 oz shredded cheese, loosely measured
Oven375°F / 190°C for a crusted quiche
Done whenEdges are set and the center is soft-set, not liquid

For a first bake, keep it simple: deep-dish frozen or refrigerated pie crust, half-and-half, 1 cup sharp cheddar, ½ cup Swiss, and diced cooked ham. Once you see how the center should wobble, the variations become much easier.

Eggs, dairy, diced cooked ham, shredded cheese, chopped chives, and a pie crust arranged on a kitchen prep surface.
Use the base as a balance check: eggs help the custard set, dairy keeps it tender, and ham and cheese make the filling generous without weighing it down.

Choose Your Ham and Cheese Quiche Path

Start with the same creamy base, then choose the version that fits your day: frozen crust for ease, crustless for meal prep, or extra vegetables when the fridge needs clearing.

If This Is Your SituationBest Path
You want the easiest brunchUse a deep-dish frozen crust, half-and-half, sharp cheddar, Swiss, and cooked diced ham.
You have leftover holiday hamDice it small, pat it dry if needed, reduce the salt, and balance sweet glaze with Dijon and black pepper.
You want no crustGrease the pie dish well and bake the same egg mixture at 350°F / 175°C until just set.
You want the creamiest textureUse half-and-half, or equal parts heavy cream and whole milk.
You are adding vegetablesCook, drain, and cool them before they touch the egg mixture.
You are meal-preppingBake the quiche first, cool it, slice it, then refrigerate or freeze the slices.

Ham and Cheese Quiche Recipe

Description

This easy quiche has a creamy egg custard, diced cooked ham, plenty of cheese, and a crisp-tender pie crust. Use a frozen deep-dish crust for the easiest version, or make it with homemade or refrigerated crust. Serve it for brunch, lunch, holidays, meal prep, or an easy dinner with salad.

Crustless note: For a no-crust version, use the same filling in a well-greased 9-inch / 23 cm pie dish and bake at 350°F / 175°C for 30–40 minutes. See the crustless ham and cheese quiche section for the full method.

  • Prep Time: 15 minutes
  • Par-Bake Time: 10–12 minutes
  • Final Bake Time: 35–45 minutes
  • Resting Time: 10 minutes
  • Total Time: About 1 hour 10 minutes to 1 hour 20 minutes
  • Servings: 6–8 slices

Equipment

  • 9-inch / 23 cm pie dish or 9-inch deep-dish frozen pie shell
  • Rimmed baking sheet
  • Mixing bowl
  • Whisk
  • Measuring cups and spoons
  • Fork
  • Foil or pie shield
  • Wire rack
  • Instant-read thermometer, optional

Ingredients

  • 1 9-inch / 23 cm deep-dish pie crust, homemade, refrigerated, or frozen
  • 5 large eggs
  • 1 cup / 240 ml / 8 fl oz half-and-half, or ½ cup / 120 ml heavy cream plus ½ cup / 120 ml whole milk
  • 1½ cups / 200–225 g / 7–8 oz cooked diced ham, measured loosely, not packed
  • 1½ cups / 150–170 g / 5–6 oz shredded cheese, measured loosely, not packed
  • 2–3 tablespoons chopped green onions or chives
  • 1 teaspoon Dijon mustard
  • ¼ teaspoon black pepper
  • ¼–½ teaspoon salt
  • Small pinch of nutmeg, optional
  • 1 tablespoon butter or oil, optional, if sautéing onion, mushrooms, spinach, or other vegetables

Use ¼ teaspoon salt if your ham or cheese is salty. Use ½ teaspoon only if your ham is mild and your cheese is not very salty.

Instructions

1. Preheat and Set Up

Heat the oven to 375°F / 190°C and set a rack in the middle or lower-middle position. Place the pie crust on a rimmed baking sheet so it is easier to move and any overflow is caught.

2. Par-Bake the Crust

Give the crust a short head start for 10–12 minutes, or follow the package timing if using a frozen shell. The surface should look dry and lightly set, even if it is still pale. Gently press down any puffed spots with a spoon.

Lightly par-baked pie crust with fork holes in a pie dish on a rimmed baking sheet.
Par-bake the crust until the surface looks dry and lightly set; it should not be deeply browned yet because it bakes again with the custard.

3. Whisk the Custard

Combine the eggs, half-and-half, Dijon mustard, black pepper, salt, and nutmeg in a mixing bowl until the mixture looks smooth and evenly yellow. Stop once it is blended; the custard should not be bubbly or foamy.

Hands whisking a pale egg custard mixture in a glass bowl with dairy, Dijon mustard, pepper, and seasonings nearby.
Whisk the eggs and dairy just until smooth; a calm, even custard bakes more neatly than one whipped full of foam.

4. Layer the Ham, Cheese, and Chives

Scatter the diced ham evenly over the warm par-baked crust. Add the shredded cheese and green onions or chives so the filling is spread across the base before the custard goes in.

Diced ham, shredded cheese, and chopped chives spread evenly inside a par-baked pie crust.
Layer the ham, cheese, and chives before the custard goes in so every slice gets flavor throughout instead of one heavy layer at the bottom.

5. Pour Without Overfilling

Add the egg mixture slowly over the ham and cheese so it can settle into the gaps. Stop before it touches the rim, especially if the crust is shallow. A clean oven is worth more than one extra spoonful.

Egg custard being poured from a glass measuring cup into a pie crust filled with ham, cheese, and chives.
Pour slowly so the custard settles between the ham and cheese; this helps the quiche bake evenly from the crust edge to the center.

A shallow crust may not hold every drop of custard. When the filling looks close to the top, save the extra for a greased ramekin instead of risking overflow.

Unbaked quiche filling sitting below the visible rim of a deep pie crust in a white ceramic dish.
Stop before the filling reaches the rim; leaving visible crust above the custard is one of the easiest ways to prevent overflow in a deep-dish quiche.

6. Bake Until Soft-Set

Slide the quiche into the oven for 35–45 minutes, until the edges are set and the center moves like soft-set pudding when you gently nudge the pan. Cover the crust edge with foil or a pie shield if it browns too quickly, and tent the whole quiche loosely if the top colors before the center is ready.

Whole baked ham and cheese quiche in a white ceramic pie dish resting on a wire cooling rack.
A softly puffed top, golden cheese spots, and a browned crust edge are better doneness clues than waiting for the center to look firm.

7. Rest Before Slicing

Set the quiche on a wire rack for 10 minutes before cutting. The center settles as it cools, which helps the slices lift cleanly instead of slumping.

8. Serve Warm or Room Temperature

Bring slices to the table warm or at room temperature for the creamiest texture. Chilled leftovers are fine for quick lunches, but the custard tastes better once the chill comes off.

A good slice should look softly set in the center, with ham and cheese suspended through the custard instead of sunk into one dense layer.

Slice of ham and cheese quiche lifted on a pie server, showing creamy custard, diced ham, melted cheese, and an intact bottom crust.
A clean cross-section shows the target texture: ham suspended through the custard, a tender middle, and a crust strong enough to lift.

Recipe Notes

  • This recipe card is for the crusted version. For crustless baking, use the crustless note above or jump to the crustless quiche section.
  • If using frozen crust, make it deep-dish. Regular frozen shells can work, but they often cannot hold all the filling; the frozen crust notes explain why.
  • If using homemade or refrigerated pie dough, chill it in the dish, line it with parchment, add pie weights, dried beans, or uncooked rice, and par-bake until the edges begin to set. Frozen crusts can usually follow package directions.
  • Cook, drain, and cool vegetables before adding them so they do not throw off the texture.
  • Do not overfill a shallow crust. Extra egg mixture can be baked in a small greased ramekin.

Why This Recipe Works

That ratio does most of the work here: 5 large eggs + 1 cup dairy + 1½ cups ham + 1½ cups cheese. Five eggs give the slice structure, one cup of dairy keeps the center soft instead of omelet-like, and the ham and cheese stay generous without weighing down the custard.

The goal is a slice that lifts cleanly but still tastes soft and creamy, with little pockets of ham and melted cheese all the way through.

A short head start in the oven also protects the crust. It keeps the bottom from turning pale and soft once the wet custard goes in, and it helps you avoid the usual quiche problems: too much liquid, wet add-ins, a soft bottom crust, and eggs baked until rubbery.

Ingredients and Key Tips

Quiche is forgiving, but it is not random. Once you control moisture, salt, and bake time, the rest becomes flexible.

Ham

Almost any cooked ham works here: leftover holiday ham, ham steak, smoked ham, or thick-cut deli ham. Dice it small so it spreads evenly through the custard.

This is especially useful after a holiday meal, Sunday dinner, or any time you have cooked ham in the fridge. The ham is already seasoned and ready to help; you are not building brunch from nothing, just giving leftovers a better second life.

For deli ham, choose thicker slices and dice them small. Watery packages need a quick blot before the ham goes into the crust because extra moisture can affect the custard just like wet vegetables can.

Salty ham needs less salt in the egg mixture. You can always add a little salt at the table, but you cannot remove it once it is baked into the dish.

With sweet glazed ham, trim away any thick sticky edges before dicing. A little sweetness is fine, but too much glaze can make the quiche taste sweeter and more casserole-like than classic ham quiche. Dijon mustard, black pepper, cheddar, Swiss, or Gruyère will help balance it.

Diced cooked ham on a wooden cutting board with a towel blotting some pieces and a glazed ham edge being trimmed.
Blot wet ham before adding it; this small step helps prevent watery quiche, especially with deli ham or glazed leftovers.

Brown the ham if it is pale, wet, or mild. Skip this step if the ham is already smoky, dry, or strongly flavored. A quick 2–3 minutes in a dry skillet or a little butter gives the edges more savory flavor.

Eggs

Five eggs is the sweet spot for this size: enough structure to slice, but not so many that the center turns firm and omelet-like.

Dairy

For the creamiest everyday texture, half-and-half gives you the easiest balance. If half-and-half is not available where you live, use equal parts heavy cream and whole milk.

Whole milk also works for a lighter quiche. The center will be less rich, but it will still set if you keep the egg-to-dairy ratio steady.

Cheese

For cheese, stay with something that actually has flavor. Sharp cheddar gives the quiche that familiar melted ham-and-cheese pull, Swiss is mild and classic, and Gruyère makes the dish feel more brunch-table polished.

Measure shredded cheese loosely, not packed tightly into the cup. Too much cheese can make the quiche greasy, salty, or heavy. Freshly shredded cheese melts most smoothly, but pre-shredded cheese is fine when convenience matters.

Avoid fresh mozzarella unless it is very well drained. It can release water into the custard. Low-moisture mozzarella is safer, but it is mild, so it works better as part of a blend than as the main cheese.

Green Onions, Chives, Onion, or Garlic

Green onions and chives are the easiest because they can go straight into the egg mixture. If using yellow onion, shallot, or garlic, sauté them first so the flavor softens before baking.

Dijon, Pepper, and Nutmeg

Dijon mustard adds gentle sharpness without making the quiche taste mustardy. Black pepper keeps the custard from tasting flat. A tiny pinch of nutmeg is optional, but it works beautifully with eggs, cream, cheese, and ham.

Before You Bake, Check These 5 Things

If you remember only three things, par-bake the crust, control wet add-ins, and pull the quiche before the center turns firm. If the center still makes you nervous, the doneness cues below explain the wobble, resting time, and thermometer range.

  • The crust is par-baked and lightly set.
  • The ham is diced small and patted dry if it feels wet.
  • Any vegetables are cooked, drained, and cooled slightly.
  • The cheese and ham are measured loosely, not packed down.
  • The egg mixture sits below the rim of the crust.

Best Crust, Dairy, and Cheese Choices

This is where you can make the recipe fit your kitchen. Frozen crust, homemade crust, cream, milk, cheddar, Swiss, or Gruyère can all work — the goal is to keep the custard balanced and the crust from going soft.

Using a Frozen Pie Crust

If you are using a frozen crust, you are not cheating; you are making brunch easier. Choose a 9-inch deep-dish frozen crust if you can. Regular frozen shells can work, but they often cannot hold all the filling.

Keep the crust in its tin if it comes that way, place it on a rimmed baking sheet, prick the base lightly, and par-bake for 10–12 minutes before filling. Do not worry if it is not deeply browned after the first bake. It will go back into the oven with the custard.

Deep-dish frozen pie crust in a foil tin set on a rimmed baking sheet on a kitchen counter.
A deep-dish frozen pie crust makes frozen crust quiche easier because it gives the egg custard enough room and helps reduce spillover.

Homemade or Regular Pie Crust

Not every 9-inch crust holds the same amount of custard. A regular 9-inch crust can still work, but you may not need every drop of the egg mixture.

If using homemade pie dough, chill it in the dish before blind baking. Line it with parchment, fill with pie weights, dried beans, or uncooked rice, and bake until the edges begin to set before removing the weights.

Pie crust lined with parchment paper and filled with pie weights in a glass pie dish.
With homemade or refrigerated dough, blind-baking with parchment and pie weights helps the crust hold its shape before the wet filling goes in.

Do not fill the crust all the way to the rim. Quiche can puff as it bakes. If you have extra egg mixture, bake it in a small greased ramekin instead of forcing it into the crust.

What Dairy Makes the Creamiest Texture?

The dairy is where you can quietly change the whole personality of the quiche. Cream makes it rich, milk makes it lighter, and half-and-half sits comfortably in the middle.

DairyTexture and FlavorGood Use
Heavy creamRichest, softest, most custardySpecial brunch or holiday quiche
Half-and-halfCreamy but not too heavyEveryday choice
Whole milkLighter and less richLighter quiche that still sets
Low-fat milkLess creamy and slightly less forgivingUse only if you accept a lighter texture
½ cream + ½ whole milkRich and balancedEasy substitute for half-and-half

If you do not have half-and-half, use ½ cup / 120 ml heavy cream + ½ cup / 120 ml whole milk. To make the quiche without heavy cream, use 1 cup / 240 ml whole milk.

Cheddar, Swiss, or Gruyère?

Ham needs cheese with enough flavor to stand up to it. Sharp cheddar gives bold, familiar flavor. Swiss gives a mild, nutty, classic brunch taste. Gruyère makes the custard richer and deeper.

For an everyday version, use 1 cup sharp cheddar + ½ cup Swiss. For a richer brunch version, use 1 cup Gruyère + ½ cup cheddar or Swiss. A little Parmesan can also be added for salty, nutty depth, but use it lightly.

Shredded cheddar and pale Swiss or Gruyère cheese on a board with a grater and chopped chives nearby.
Sharp cheddar with Swiss or Gruyère gives ham quiche familiar melt plus a more brunch-ready finish.

Bake Time, Doneness, and Visual Cues

For a crusted quiche, use 375°F / 190°C for 35–45 minutes. A shallow quiche may finish closer to 35 minutes, while a deep-dish or vegetable-heavy one may need closer to 45–50 minutes.

Use 350°F / 175°C for the crustless version or a very deep filling. Save 400°F / 200°C mainly for par-baking crust or quick browning, not for the full custard bake.

Visual Doneness Cues

  • After par-baking: the crust should look dry and lightly set, not deeply browned.
  • After whisking: the egg mixture should look smooth and lightly yellow, not frothy.
  • Before baking: the egg mixture should sit below the rim, with a little breathing room.
  • Near the end: the top may puff slightly and turn golden in spots.
  • When done: the center should move like soft-set pudding, not ripple like raw liquid.
  • After resting: the center should look calmer, and the slice should hold when lifted.

If the crust browns too quickly, cover the edges with foil or a pie shield and keep baking until the center is set. If the top browns before the center is ready, tent the whole quiche loosely with foil.

The first time you bake quiche, the wobble can feel wrong. It is not. The quiche is done when the edges are puffed and set, the center is soft-set but not liquid, and the top is lightly golden in places.

Thermometer and Resting Cues

If using a thermometer, the center should reach at least 160°F / 71°C for egg safety. For a tender, sliceable quiche, start checking around 165°F / 74°C and avoid pushing far past 185°F / 85°C. Carryover heat and resting time will help the center finish setting.

Instant-read thermometer inserted into the center of a baked ham and cheese quiche in a white ceramic pie dish.
A thermometer gives extra confidence with quiche doneness: the center should be safe and set without baking until the eggs turn rubbery.

If you are unsure, give the quiche a few more minutes of rest before cutting rather than putting it back into the oven too quickly. Resting often fixes a soft-looking center; overbaking does not.

Whole baked ham and cheese quiche resting on a wire rack with a knife and pie server nearby.
Let the quiche rest before slicing; this pause helps the center settle so the slices lift cleaner and taste creamier.

Crustless Ham and Cheese Quiche and Easy Variations

Once the base is steady, this quiche is easy to bend toward the day: crusted for brunch, crustless for meal prep, mini for parties or lunchboxes.

If You Want…Do This
Classic ham and cheese quicheUse cheddar + Swiss in a par-baked crust
Richer brunch quicheUse Gruyère and a cream + milk mixture
Lighter quicheUse whole milk instead of cream or half-and-half
Crustless quicheGrease the dish well and bake at 350°F / 175°C
Vegetable quicheCook and cool vegetables before adding them
Mini quichesUse muffin tins and fill each cup about ¾ full
Leftover ham quicheDice ham small and reduce added salt if needed

Crustless Ham and Cheese Quiche

The crustless version is not just the fallback. It is the faster, lighter version for meal prep or for anyone skipping pastry.

To make it crustless, skip the pie crust and bake the egg mixture in a well-greased 9-inch / 23 cm pie dish. Use the same base: 5 eggs, 1 cup / 240 ml dairy, 1½ cups ham, 1½ cups cheese, Dijon, pepper, and herbs.

Bake at 350°F / 175°C for 30–40 minutes, or until the center is just set. The crustless version is softer than the crusted version, so let it rest for at least 10 minutes before slicing.

Crustless ham and cheese quiche in a white baking dish with one wedge removed, showing set custard, ham, cheese, and chives.
The lighter crustless ham and cheese quiche uses the same creamy filling but bakes directly in a greased dish.

For another no-crust egg bake, the frittata recipe is the skillet-style route; for muffin-tin meal prep, use the egg muffins recipe.

Ham and Swiss Quiche

Ham and Swiss quiche has a mild, nutty, classic brunch flavor. Use Swiss for all or part of the cheese. A good blend is 1 cup Swiss + ½ cup sharp cheddar. Dijon mustard and chives work especially well with this version.

Ham and Spinach Quiche

For ham and spinach quiche, use either 1 cup cooked fresh spinach or ½ cup frozen spinach that has been thawed and squeezed very dry. Spinach pairs well with Swiss, Gruyère, cheddar, feta, or goat cheese.

Wet spinach is not a small issue. It can make the center watery, even if the egg ratio is right.

Ham and spinach quiche with a wedge cut out, showing spinach ribbons, diced ham, creamy custard, and golden crust.
Cook or squeeze spinach dry before making ham and spinach quiche; the greens should add color and flavor, not extra water.

Broccoli Ham and Cheese Quiche

For broccoli ham quiche, use 1 cup small broccoli florets. Steam, blanch, microwave, or sauté them first, then drain well and chop small. Sharp cheddar is the easiest pairing, but Swiss or Gruyère also work.

Slice of broccoli ham and cheese quiche on a plate with visible broccoli florets, diced ham, creamy custard, and crust.
Small cooked broccoli florets keep broccoli ham and cheese quiche tender, balanced, and easy to cut.

Mushroom, Onion, Asparagus, and Other Add-Ins

Add-ins are where a good quiche can go watery, so treat them before they reach the crust. A few minutes in a skillet can save the whole dish.

Add-InAmountPrep
Mushrooms¾–1 cup slicedSauté until the moisture evaporates
Onion or shallot¼–½ cup choppedSauté until softened
Asparagus¾–1 cup choppedBlanch or sauté if thick
Bell pepper½ cup dicedSauté for better texture
TomatoSmall amountRemove seeds and excess moisture

Let cooked vegetables cool for a few minutes before adding them. Hot add-ins can start setting the eggs unevenly before the dish even reaches the oven.

Sautéed mushrooms and onions in a skillet with a spatula, browned and cooked down with no pooled liquid.
Sauté mushrooms and onions until their moisture cooks off; this is a simple fix for watery quiche.

Mini Ham and Cheese Quiche

Mini ham and cheese quiches are best when you want party bites, brunch trays, lunchboxes, or freezer-friendly portions. Use the same egg mixture, but cut the ham and add-ins smaller so each bite gets ham, cheese, and custard. For leftovers, use the make-ahead, storage, and reheating cues below.

The full filling usually makes about 10–12 regular muffin-size mini quiches or 24–30 mini muffin-size bites, depending on how much crust and add-ins you use.

  • Regular muffin tin: bake at 350°F / 175°C for 18–25 minutes.
  • Mini muffin tin: bake at 350°F / 175°C for 14–20 minutes.
  • With crust: press small pie crust or puff pastry rounds into greased cups before filling.
  • Without crust: grease the tin very well or use silicone liners.
  • Filling level: fill each cup about ¾ full so the egg mixture has room to puff.

Let mini quiches cool for 5 minutes before loosening them with a small knife. They freeze well after baking; reheat from chilled or thawed in a 325°F / 160°C oven until warmed through.

Mini ham and cheese quiches with small golden pastry crusts baked in a muffin tin, with a few placed on a nearby plate.
Party-size mini ham and cheese quiches work best with small pastry crusts, visible ham, and room for the custard to puff.

Other Shortcut Variations

Puff pastry works well for mini quiches and party bites. Crescent dough gives a softer, breadier crust. A Bisquick-style ham and cheese bake is closer to an impossible pie than a classic quiche, so it is better treated as a separate recipe rather than a small swap.

For an old-fashioned ham and cheese quiche, keep it simple: pie crust, cooked ham, cheddar and Swiss, half-and-half, green onions or chives, and black pepper.

Make Ahead, Storage, and Reheating

Quiche is one of the rare egg dishes that actually likes being made ahead. It can rest, settle, reheat, and still taste good when everyone finally reaches the table.

This is also why quiche works so well for hosting: it gives you something generous to serve without asking you to cook every egg to order. When the timing is sorted, jump to what to serve with it for plate ideas.

For a crisper crust, do not pour the raw egg mixture into the shell many hours before baking. The crust can absorb moisture and soften before it ever reaches the oven. If you want to prep ahead, par-bake the crust, dice the ham, shred the cheese, cook any vegetables, and keep the egg mixture separate until baking.

For safety, cooked egg dishes should not sit at room temperature for more than 2 hours; the FDA gives the same basic egg-safety guidance.

Fridge

Let the quiche cool completely, then cover it and refrigerate for 3–4 days, whole or in slices. That timing lines up with USDA leftover food safety guidance.

Freezer

Quiche freezes more cleanly after baking. Cool it completely, wrap it tightly, and freeze it whole or sliced for up to 2 months for the creamiest texture.

The crust may soften slightly after freezing, but reheating in the oven helps bring it back. If freezing slices, wrap them individually or place parchment between them so they do not stick together.

For a freezer breakfast that reheats faster than quiche, MasalaMonk’s breakfast burrito recipe is the better handheld option.

Reheating

For a better texture, reheat slices in a 325°F / 160°C oven until warmed through. Reheat loosely covered with foil, then uncover for the last few minutes if the crust needs crisping.

The microwave works for individual slices when speed matters, but it will soften the crust. If reheating from frozen, thaw overnight in the refrigerator first.

Slices of ham and cheese quiche stored in clear containers with one slice on a parchment-lined reheating tray.
Make-ahead ham and cheese quiche slices store well once cooled; reheat them in the oven or toaster oven when you want the crust to stay crisp.

What to Serve with Ham and Cheese Quiche

The quiche already brings richness, salt, and comfort. The best sides simply make the plate feel fresher. A crisp salad or fresh fruit keeps each creamy, salty bite from feeling heavy.

Plated slice of ham and cheese quiche served with greens, cucumber slices, tomatoes, fruit, and coffee on a brunch table.
Serve the rich quiche with fruit, greens, cucumber, or coffee so the creamy, salty slices feel balanced.

How to Avoid Watery, Soggy, or Rubbery Quiche

When quiche goes wrong, it usually gives you clues. A watery middle, soggy bottom, rubbery texture, or salty bite can almost always be traced back to moisture, timing, salt, or overfilling — not to quiche being difficult.

Once you know what the center should look like, quiche stops feeling mysterious.

ProblemMost Likely CauseFix Next Time
Watery centerWet vegetables, watery ham, too much dairy, or underbakingCook and drain add-ins, keep the ratio steady, and rest before slicing
Soggy crustCrust not par-baked or custard sat in crust too longPar-bake first and assemble close to baking
Rubbery textureOverbakingPull while the center is still soft-set
Too saltySalty ham and cheese plus full added saltUse ¼ teaspoon salt or less with salty ham
OverflowShallow crust or filling too close to rimUse deep-dish crust and stop below the rim

The 3 Biggest Quiche Mistakes

  • Skipping the par-bake: this is the fastest path to a soft bottom crust.
  • Adding wet ingredients: watery ham, spinach, mushrooms, and tomatoes can loosen the custard.
  • Baking until fully firm: pull it while the center is still soft-set, then let it rest.

Why is my quiche watery?

Watery quiche is almost always a moisture or timing problem. The usual culprits are wet spinach, raw mushrooms, watery ham, too much dairy, underbaking, or slicing before the center has had time to settle.

  • Cook and drain vegetables before adding them.
  • Squeeze spinach very dry.
  • Pat wet ham dry.
  • Use the 5 eggs to 1 cup dairy ratio.
  • Bake until the center is just set.
  • Rest for 10 minutes before slicing.

Why is my crust soggy?

A soggy crust usually means the crust was not par-baked, the egg mixture sat in the crust too long before baking, or wet ingredients released moisture into the bottom. Par-bake the crust, cook and drain vegetables, and avoid assembling the raw custard in the crust too far ahead.

Lifted slice of ham and cheese quiche showing a clean, firm bottom crust, creamy custard, diced ham, melted cheese, and golden edge.
The best no-soggy-bottom proof is underneath: the crust should look firm enough to lift, not pale, wet, or collapsed.

Why is my quiche rubbery?

Rubbery quiche is usually overbaked. Eggs become firm and tough when they cook too long. Remove the quiche when the center still has a gentle wobble. It will finish setting as it rests.

Why did the center not set?

The center may not set if the quiche is very deep, the oven temperature is too low, the mixture has too much liquid, or it simply needs more time. Cover the crust edges with foil if needed and continue baking until the center no longer looks liquid.

Why is it too salty?

Ham and cheese both bring salt. If your ham is salty, use less salt in the egg mixture. Dijon, black pepper, green onions, chives, and a small amount of cream can help balance the flavor without adding more salt.

Why did it overflow?

The crust may have been too shallow or filled too close to the top. Use a deep-dish crust when possible, stop before the egg mixture reaches the rim, and always bake the quiche on a rimmed baking sheet.

FAQs

Does ham and cheese quiche work without crust?

Yes. Grease a 9-inch / 23 cm pie dish, add the filling, and bake at 350°F / 175°C for 30–40 minutes. Rest before slicing so the center can settle.

Milk instead of cream: will the quiche still set?

Yes. Whole milk works. Keep it to 1 cup / 240 ml so the center still slices cleanly. It will taste lighter than a cream version, but it will still be a proper, sliceable quiche.

Best substitute for half-and-half

Use ½ cup / 120 ml heavy cream plus ½ cup / 120 ml whole milk. You can also use 1 cup / 240 ml whole milk for a lighter version.

Best cheese for ham quiche

Sharp cheddar gives bold flavor, Swiss gives a classic ham quiche taste, and Gruyère makes it richer. A cheddar-Swiss blend is the easiest everyday choice.

Frozen pie crust: deep-dish or regular?

Deep-dish is better because regular frozen shells may not hold all the filling. Par-bake the crust first, place it on a rimmed baking sheet, and avoid overfilling it.

Spinach in quiche: fresh, frozen, cooked, or raw?

Fresh spinach should be wilted first, and frozen spinach should be thawed and squeezed very dry. Raw or wet spinach can make the quiche watery.

Make-ahead quiche: bake first or assemble later?

Bake it first for the easiest make-ahead plan. To prep parts ahead, keep the par-baked crust, cooked add-ins, cheese, ham, and egg mixture separate until baking.

Freezing ham and cheese quiche: whole or sliced?

Both work. Bake it first, cool it completely, then freeze it whole or in slices. Slices are easier for quick meals. Thaw overnight in the refrigerator and reheat in the oven for the best texture.

Doneness cues for creamy, sliceable quiche

The edges should be set, and the center should look soft-set, not liquid. A gentle wobble is okay. If using a thermometer, the center should reach at least 160°F / 71°C.

Watery quiche: what went wrong?

Quiche usually turns watery because of wet vegetables, watery ham, too much dairy, underbaking, or slicing too soon. Cook and drain add-ins, use the right egg-to-dairy ratio, and rest it before slicing.

Is ham and cheese quiche the same as quiche Lorraine?

Not exactly. Quiche Lorraine is traditionally made with bacon or lardons and a savory custard. Ham and cheese quiche has a similar creamy egg base, but uses cooked ham and usually includes cheese like cheddar, Swiss, or Gruyère.

Final Thoughts

Once the ratio makes sense, this stops feeling like a recipe you have to follow tightly and starts feeling like a brunch formula you can use. Cooked ham after a holiday, spinach from the fridge, cheddar one week, Swiss the next, crusted for brunch, crustless for meal prep — it all works as long as the base stays steady.

That is the kind of recipe worth keeping: calm, flexible, and good enough for both leftover ham and a proper brunch table. Slice it warm, serve it with something crisp or fresh, and let the ham, cheese, custard, and flaky crust do the quiet work.

If you make it, start with the cheddar-Swiss version once, then tell me where you took it: crustless, extra herbs, leftover holiday ham, spinach, broccoli, or a different cheese blend.

Posted on Leave a comment

Béarnaise Sauce Recipe: Easy Blender Method, Classic French Sauce & Steakhouse Tips

Sliced steak on a plate with pale yellow béarnaise sauce spooned over the meat, visible tarragon flecks, and steak juices.

Béarnaise is the sauce that makes steak night feel special before anyone even takes a bite. It is warm, buttery, sharp with vinegar and shallot, and full of fresh tarragon. Spoon it over seared steak and it melts into the juices on the plate in the best possible way.

This is an easy blender béarnaise sauce for steak, made with a sharp tarragon reduction, egg yolks, and hot clarified butter or ghee — no double boiler required. You still get the classic French steakhouse flavor, but the blender does the hard part.

This is the version for the night you want the steakhouse feeling without turning dinner into a project. Make the tarragon reduction first, cook your steak, then blend the sauce while the steak rests. The whole recipe takes about 15–20 minutes, but the actual blending takes under 2 minutes once the butter and reduction are ready.

The first spoonful should feel rich, then wake up with vinegar, shallot, and tarragon so the steak tastes bigger, not heavier.

Table of Contents

Blender Béarnaise Sauce Recipe

Cooking right now? Start here. The notes below are for butter choices, reduction cues, storage, substitutions, and split-sauce fixes.

At a glance: make the reduction, blend it with yolks, slowly stream in hot butter, then finish with fresh tarragon. That is the whole sauce.

Best for: steak frites, filet mignon, ribeye, prime rib, salmon, lobster, asparagus, roasted potatoes, and eggs.

Yield: about 1 cup / 240 ml, enough for 4 generous portions or 6 smaller spooned servings. Total time: 15–20 minutes. Method: immersion blender or stick blender. Serve: warm.

For the easiest version, use ghee or clarified butter and an immersion blender in a tall narrow jar. Make the reduction before the steak goes on, then blend while the steak rests. Aim for a sauce thicker than cream, looser than mayo, and warm enough to melt into the steak juices without turning oily.

Need help mid-recipe? Jump to troubleshooting, substitutions, or make-ahead tips.

Why the Tall Jar Matters

This blender method works best when the jar is narrow enough for the blender head to stay covered. That setup helps the sauce form before too much butter is added.

Finished béarnaise sauce in a tall glass jar with an immersion blender beside it on a wooden surface.
For blender béarnaise, the tall narrow jar matters because it helps the immersion blender pull the yolks and hot butter into one smooth sauce.

Reduction Ingredients

These aromatics make the reduction taste like béarnaise before the butter and yolks turn it into a sauce.

Fresh tarragon, shallot slices, peppercorns, wine, and vinegar cooking together in a stainless saucepan.
First, simmer wine, vinegar, shallot, peppercorns, and tarragon together; this gives the sauce its sharp steakhouse flavor before any butter is added.
IngredientUS MeasureMetric
Dry white wine¼ cup60 ml
White wine vinegar or Champagne vinegar2 tbsp30 ml
Small shallot, minced or sliced1 small20–30 g
Fresh tarragon stems or whole sprigs2–3 sprigs4–6 g
Black peppercorns, lightly crushed¼–½ tsp1–2 g

Sauce Ingredients

IngredientUS MeasureMetric
Large egg yolks, room temperature3 yolksAbout 54 g total
Hot clarified butter or ghee¾ cup170–175 g
Kosher salt¼ tsp, plus more to taste1–1.5 g
Lemon juice1–2 tsp5–10 ml
Fresh tarragon leaves, finely chopped1 tbsp3–4 g
Chervil or parsley, optional1 tbsp3–4 g
Warm water, only if needed1 tsp at a time5 ml at a time

Quick Method

  1. Simmer the wine, vinegar, shallot, tarragon stems, and peppercorns until reduced to about 1½–2 tablespoons / 22–30 ml of strained liquid.
  2. Strain the reduction and let it cool for a few minutes. The pan should still have a small puddle of liquid before straining, not just wet shallots.
  3. Add egg yolks, reduction, salt, and 1 teaspoon lemon juice to a tall narrow jar.
  4. Blend briefly on medium to high speed, then slowly stream in hot clarified butter or ghee while the blender runs.
  5. Blend until thick, glossy, and spoonable. Stop once it comes together. Stir in chopped tarragon and adjust with salt, lemon, or warm water.

Success check: the finished béarnaise should coat the back of a spoon and drip slowly. Before serving, taste for three things: salt, brightness, and tarragon. Flat sauce usually needs salt. Heavy sauce needs a few drops of lemon. Buttery sauce that does not taste like béarnaise needs more chopped tarragon.

Check the Sauce Before Serving

A spoon test is faster than guessing. If the sauce clings and drips slowly, it is ready for steak.

Béarnaise sauce coating the back of a spoon with a slow drip forming at the edge.
Use the spoon test before serving: béarnaise should cling to the spoon and fall slowly, not run off like thin cream.

Why this works: hot butter gently warms the yolks, the wine-vinegar reduction brings acidity and tarragon flavor, and the tall narrow jar helps the blender pull everything into a stable emulsion.

Egg safety note: Béarnaise is gently warmed, not boiled, so use fresh, clean, uncracked eggs. For pregnant people, elderly guests, young children, or anyone immunocompromised, use pasteurized eggs or choose a fully cooked sauce instead. The FDA recommends pasteurized eggs or egg products for menu items made with raw or lightly cooked shell eggs, including sauces such as hollandaise and béarnaise.

Ingredients

Each ingredient has a job: butter gives body, vinegar keeps it bright, and tarragon makes it taste like béarnaise.

Béarnaise Sauce Ingredients at a Glance

A good béarnaise does not need many ingredients, but each one should earn its place: fat, acidity, herbs, aromatics, and yolks.

Ingredients for béarnaise sauce arranged on a table, including egg yolks, clarified butter, tarragon, shallot, wine, vinegar, lemon, salt, and peppercorns.
Before you start, gather the real flavor builders: tarragon, shallot, wine, vinegar, peppercorns, egg yolks, and clarified butter or ghee.
  • Egg yolks give the sauce body and help the butter hold with the reduction.
  • Clarified butter or ghee creates the smooth, buttery base. Clarified butter is more stable than regular melted butter.
  • White wine and vinegar bring acidity so the sauce does not feel heavy.
  • Shallot and black pepper add savory depth to the reduction.
  • Tarragon gives béarnaise its signature fresh, lightly sweet, anise-like flavor.
  • Lemon juice brightens the finished sauce. Start with 1 teaspoon, then add more only after tasting.
  • Chervil or parsley adds a fresh herb finish, but it is optional.

Butter gives béarnaise its luxury, but vinegar, shallot, and tarragon give it a reason to exist.

Tarragon matters most. Use stems or whole sprigs in the reduction, then fresh chopped leaves at the end. Chervil is lovely if you have it, but the recipe still works without it.

The shallot can be minced or sliced, the wine only needs to be dry, and ghee is completely fine. Focus on a concentrated-but-not-dry reduction and a slow butter stream at the start.

Best Butter, Wine, and Vinegar for Béarnaise

You do not need rare ingredients, but you do want the right kind of butter, a dry wine, and a clean vinegar. If you like sauces where acid and herbs do the heavy lifting, this chimichurri recipe is the brighter, no-butter steak sauce to keep in the same rotation.

Clarified butter is the most reliable choice because the water and milk solids have been removed. Ghee is the easiest shortcut because it is already clarified. Regular unsalted melted butter works in a pinch, though the finished sauce may be slightly looser. Salted butter can work too; reduce the added salt and taste at the end. Brown butter changes the flavor too much for this tarragon sauce.

To clarify butter quickly, start with about 1 cup / 225 g unsalted butter. Melt it gently, let it sit for a minute, skim off any foam if you like, then pour off the clear golden butter and leave the white solids behind. For this recipe, you need about ¾ cup / 170–175 g clarified butter.

What Clarified Butter Should Look Like

The clear golden butter is what you want to pour into the sauce. Leave the cloudy milk solids behind so the emulsion has a better chance of staying smooth.

Clear golden clarified butter in a glass pouring jug with milk solids left behind in a saucepan.
Clarified butter or ghee is the easiest fat for blender béarnaise because it blends smoothly and leaves most milk solids behind.

For wine, use a dry white wine such as Sauvignon Blanc, Pinot Grigio, Pinot Gris, dry Chardonnay, or dry vermouth. Avoid sweet wine, heavily oaked wine, and harsh cooking wine. The reduction makes every flavor louder, so use something clean and dry.

White wine vinegar is the easiest traditional choice. Champagne vinegar is softer. Tarragon vinegar is excellent if you want to boost the herb flavor. Red wine vinegar works, but tastes sharper and a little darker. Apple cider vinegar can work in a pinch, but it is less traditional.

Best Blender, Jar, and Tools for Béarnaise

Most important: use an immersion blender or stick blender in a tall narrow jar. The jar should be just wide enough for the blender head, which helps the yolks and butter pull into a stable sauce.

Also useful: a small saucepan for the reduction, a fine-mesh strainer for a smoother sauce, and a measuring cup or jug for pouring the butter slowly.

Optional: a thermometer helps if you want to check butter temperature, and a warmed thermos can hold the sauce briefly for serving.

A regular blender or Vitamix can work, but use low to medium speed and stream the butter slowly. Because the contents are warm, vent the lid slightly or remove the center cap and cover the opening with a folded towel.

No immersion blender? You can still use the classic whisked method, which uses the same reduction and butter.

In a cold kitchen, pre-warm the jar with hot water, then dry it before adding the yolks.

How to Make Blender Béarnaise

The blender does most of the work here. Your job is to make the reduction, keep the butter hot, and pour slowly at the beginning.

Keep the sauce warm and off direct heat; that is where béarnaise stays smoothest.

1. Make the Tarragon Reduction

Add the wine, vinegar, shallot, tarragon stems or sprigs, and crushed peppercorns to a small saucepan. Simmer gently until you have about 1½–2 tablespoons / 22–30 ml of strained liquid. This usually takes 5–8 minutes.

The reduction should smell sharp, herbal, and slightly sweet from the shallot. The pan should still have a small puddle of liquid, not just wet shallots. That little bit of liquid is part of the sauce.

This is where the sauce starts to smell like dinner instead of separate ingredients.

If the reduction goes too far, add 1–2 teaspoons warm water to the pan, swirl, and strain. You want concentrated flavor, not sticky syrup.

What the Tarragon Reduction Should Look Like

This is the point where the flavor is concentrated but the pan is not dry. You want enough liquid left to carry the tarragon, shallot, pepper, and vinegar into the sauce.

Small glossy puddle of concentrated tarragon reduction left in a saucepan with shallots and herbs pushed to one side.
Stop reducing when only a small glossy puddle remains; that liquid is concentrated béarnaise flavor, not something to cook away completely.

2. Strain and Cool Slightly

Pour the reduction through a fine-mesh strainer. Press gently on the shallot and herbs to get the flavorful liquid out, then discard the solids.

Straining gives you a smoother finish. A little minced shallot left in the sauce is fine for a rustic version, but the smooth version is easier for this blender method.

Tarragon reduction being poured through a fine mesh strainer into a small glass bowl, with shallots and herbs caught in the strainer.
Next, strain the tarragon reduction so the blender sauce gets the flavor of the shallot and herbs without the rough pieces.

3. Add the Yolks

Add the egg yolks, strained reduction, salt, and 1 teaspoon lemon juice to your blending jar. This is the base that will catch the hot butter and turn it into béarnaise.

Room-temperature yolks emulsify more easily than cold yolks. Take eggs out 20–30 minutes before making the sauce, or place cold whole eggs in a bowl of warm water for 5 minutes before separating the yolks.

Egg yolks and strained tarragon reduction in the bottom of a tall glass blending jar before butter is added.
Start with yolks and cooled reduction in the jar; this base gives the hot butter something stable to blend into.

4. Heat the Butter

A thermometer is helpful but not required. Heat the clarified butter or ghee until hot and fully liquid. If using a thermometer, aim for about 160–180°F / 71–82°C.

Without a thermometer, the butter should be fully melted, lightly steaming, and hot to the touch if a drop hits a spoon. Keep it away from browning or smoking.

Butter that is too cool can leave the finished sauce thin. Butter that is aggressively hot can push the yolks too far.

5. Blend and Stream Slowly

Place the immersion blender at the bottom of the jar. Blend the yolks and reduction for 5–10 seconds on medium to high speed.

With the blender running, slowly stream in the hot butter. Start with a very thin stream. Once the sauce begins to thicken, you can pour a little faster.

Hot clarified butter poured in a thin stream into a glass jar while an immersion blender runs.
Then, pour the hot butter slowly at first. A thin stream helps the béarnaise thicken instead of separating.

6. Finish and Taste

Blend until the sauce is thick, pale yellow, glossy, and spoonable. Near the end, move the blender gently up and down to bring everything together.

Once it looks smooth, stop. Over-blending can make the sauce too warm or loosen the texture, so treat the glossy emulsion as the cue to finish.

Pale yellow béarnaise sauce thickening around an immersion blender inside a tall glass jar.
As the immersion blender runs, the sauce changes from loose yellow liquid to pale, glossy béarnaise with visible tarragon flecks.

Stir in the chopped tarragon and optional chervil or parsley. Taste once more and adjust with salt, lemon, or tarragon if needed.

Finish with Fresh Tarragon

Add the chopped herb once the sauce is already smooth. This keeps the final flavor fresh and unmistakably béarnaise.

Fresh chopped tarragon being folded into pale yellow béarnaise sauce in a small bowl.
Finally, fold in fresh tarragon off the heat so the herb stays bright and the sauce tastes like true béarnaise.

Texture target: thicker than cream, looser than mayo, rich enough to coat steak, and loose enough to drip slowly from a spoon.

When it falls from the spoon in a slow ribbon, stop blending. That is the moment to serve, not the moment to keep fixing it.

The Slow Ribbon Texture

This is the finished texture to look for: thick enough to coat food, but still soft enough to drip from a spoon.

Thick béarnaise sauce falling from a spoon into a bowl in a slow ribbon.
Once the sauce drops in a slow ribbon, it is thick enough for steak but still loose enough for asparagus, salmon, or potatoes.

If it is too thick, blend in warm water, 1 teaspoon / 5 ml at a time, until it loosens.

Most béarnaise problems come from speed, heat, or a reduction that has gone too dry. The troubleshooting guide below shows how to spot the issue and bring the sauce back calmly.

Troubleshooting

Most béarnaise problems fall into two buckets: the sauce never formed, or it formed and then broke. If it never thickened, slow down and give the emulsion time. If it broke, start clean with warm water or a fresh yolk and blend the broken sauce back in slowly.

A slightly thick béarnaise is easier to fix than a broken one, so stop blending as soon as it looks smooth and spoonable.

How to Tell Béarnaise Has Split

A split sauce usually shows oily edges, butter pooling, or a grainy look. Stop adding butter and rebuild it slowly instead of pushing harder.

Split béarnaise sauce in a small bowl with oily butter separated from the thicker sauce.
If béarnaise splits, look for oily edges or butter pooling on top; that means the emulsion has broken.

Béarnaise Troubleshooting Chart

Use this chart when the sauce looks wrong but you are not sure why. Match the symptom first, then choose the gentlest fix.

ProblemWhy It HappenedHow to Fix It
Sauce split or looks oilyButter was added too fast, the sauce got too hot, or the emulsion broke.Start with 1 teaspoon warm water or 1 fresh egg yolk in a clean jar. Blend while slowly adding the broken sauce back in.
Sauce is too thinThe emulsion has not thickened enough, or there is too much liquid.Blend a little longer. If needed, heat very gently over barely simmering water while whisking.
Sauce is too thickToo much butter, or the sauce has cooled and tightened.Blend in warm water, 1 teaspoon / 5 ml at a time, until spoonable.
Scrambled bitsThe egg yolks overheated.If there are only a few bits, strain the sauce. If it tastes grainy or eggy, it is better to restart.
Too sourThe reduction was too sharp or too concentrated.Add a little more warm butter first, then taste for salt. If the vinegar still feels harsh, round it out with a very small pinch of sugar.
Too saltySalted butter, salty ghee, or too much added seasoning.Add a few drops of lemon and a little more unsalted melted butter if available. Serve with unsalted steak, potatoes, or vegetables.
BlandNot enough salt, tarragon, or acidity.Add salt, chopped tarragon, and a few drops of lemon juice.
Butter pooling on topThe emulsion has broken.Re-emulsify slowly into a clean jar with warm water or a fresh yolk.

A broken sauce looks more dramatic than it is. Pause, start clean, and rebuild it slowly.

How to Rescue Split Béarnaise

The safest rescue starts in a clean jar. Give the broken sauce a new base, then add it back slowly so the emulsion can reform.

Broken béarnaise sauce being poured into a tall glass jar with egg yolk and an immersion blender nearby.
To rebuild split béarnaise, add the broken sauce slowly into a clean yolk or a little warm water instead of whisking harder in the same bowl.

What Fixed Béarnaise Should Look Like

Once the sauce is rescued, it should look glossy and unified again. No greasy layer should be sitting on top.

Smooth rescued béarnaise sauce in a glass jar with a spoon lifting glossy sauce.
After the rescue, the fixed béarnaise should look smooth again, with no greasy layer separating from the sauce.

Once the sauce is fixed, return to serving ideas or holding and reheating tips.

Béarnaise for Steak and Other Uses

Restaurant béarnaise feels fancy because it arrives warm, glossy, and perfectly timed with the steak. At home, the trick is not restaurant equipment. It is making the reduction first and blending the sauce right before serving.

Béarnaise is famous with steak because it gives you richness and brightness at the same time. Plan on about 2–3 tablespoons per steak portion. This is not a sauce you pour like gravy. A few spoonfuls are enough to change the plate.

Spoon it over sliced steak so it catches in the juices. Use it on filet mignon when you want richness, ribeye when you want acidity against the fat, and prime rib when you want something brighter than gravy.

When the sauce meets hot steak, it should loosen at the edges, catch the meat juices, and leave a buttery tarragon trail on the plate.

How Much Béarnaise to Spoon Over Steak

A controlled pour gives the steak enough sauce for richness while still leaving the seared crust visible.

Béarnaise sauce being poured from a small jug over sliced steak with a browned crust and pink center.
Pour béarnaise just before serving, using enough to coat the steak without hiding the crust or flooding the plate.

This is the sauce to make when the main dish is simple but you want the plate to feel like someone cared.

Blend the Sauce While the Steak Rests

This is the easiest timing move for steak night. The steak relaxes, the juices settle, and the béarnaise comes together right before serving.

Sliced steak resting on a wooden board while béarnaise sauce is blended in a tall jar nearby.
Meanwhile, let the steak rest while the sauce comes together; that timing keeps dinner calm and the béarnaise warm.

A cold wedge salad with blue cheese and bacon is a natural starter because it gives you crunch before the butter-rich sauce arrives.

For a classic side, serve béarnaise with creamy garlic mashed potatoes, roasted potatoes, or steak frites. These crispy battered fries are sturdy enough to dip into leftover sauce.

For a deeper, earthier steak sauce on another night, this creamy mushroom sauce goes in a different direction.

Build a Steakhouse-Style Plate at Home

Once the sauce is ready, the rest of the plate can stay simple: steak, potatoes, something green, and a warm spoonful of béarnaise.

Steak dinner plate with béarnaise sauce, roasted potatoes, asparagus, salad greens, a fork, and a knife.
With steak, potatoes, greens, and a spoonful of béarnaise, a simple plate starts to feel like a steakhouse dinner at home.

Making this for guests? Use the make-ahead reduction method, then blend the béarnaise close to serving.

Steak Timing

The smoothest workflow is:

  1. Make the tarragon reduction first.
  2. Cook the steak.
  3. Rest the steak for 5–10 minutes.
  4. Blend the béarnaise while the steak rests.
  5. Spoon the sauce over the steak just before serving.

Béarnaise is especially good with steak frites, filet mignon, ribeye, New York strip, sirloin, chateaubriand, and prime rib. It gives lean cuts richness and fatty cuts contrast.

What to Serve with Béarnaise Sauce

Steak is the classic pairing, but béarnaise is useful beyond beef.

  • Steakhouse pairings: prime rib, steak frites, roasted potatoes, fries, and asparagus.
  • Seafood pairings: salmon, white fish, lobster, crab, and crab cakes.
  • Brunch and leftovers: eggs, mushrooms, grilled chicken, and roasted vegetables.

Asparagus and roasted potatoes are the easiest vegetable wins. With seafood, salmon and lobster are the strongest pairings. Leftover sauce also works beautifully with eggs, mushrooms, and roasted vegetables. A spoonful is enough to make simple food feel cared for.

Béarnaise for Asparagus

Asparagus is the easiest vegetable pairing because the sauce adds richness while the vinegar keeps the spears lively.

Roasted asparagus spears topped with pale yellow béarnaise sauce and chopped tarragon on an off-white plate.
Because of the vinegar and tarragon, béarnaise gives roasted asparagus richness while keeping the spears fresh and bright.

Béarnaise for Salmon

Salmon gives the sauce another place to shine beyond steak. Keep the spoonful small so the fish stays the focus.

Seared salmon fillet served with béarnaise sauce, fresh tarragon leaves, and a lemon wedge on a plate.
Salmon works well with béarnaise because the butter adds luxury, while the tarragon and lemon keep the fish from feeling heavy.

Béarnaise is less ideal with very spicy dishes, tomato-heavy sauces, or delicate plates where a rich butter sauce would overwhelm the main ingredient.

For fish and chips or fried seafood, a cold, pickle-forward homemade tartar sauce may fit better.

What Is Béarnaise Sauce?

Béarnaise sauce is a warm French butter-and-egg-yolk sauce flavored with tarragon, shallot, pepper, white wine, and vinegar. It is a close relative of hollandaise, but it tastes sharper, more herbal, and is most often served with steak.

In plain terms, béarnaise is hollandaise’s steak-night cousin: buttery like hollandaise, but brighter, more savory, and built for browned meat.

A good béarnaise should not taste like plain melted butter. It should taste creamy at first, then bright and herbal enough to make you want the next bite. Tarragon gives it that lightly sweet, anise-like flavor that makes the sauce instantly recognizable.

Béarnaise vs Hollandaise

Béarnaise and hollandaise work the same basic magic: egg yolks help butter and a little liquid hold together as one smooth sauce. The difference is where they want to be served.

SauceMain FlavorPairs Well With
HollandaiseButter, egg yolk, lemonEggs Benedict, asparagus, brunch dishes
BéarnaiseButter, egg yolk, tarragon, shallot, vinegar, wine, pepperSteak, prime rib, salmon, lobster, crab, potatoes, asparagus

If hollandaise is the brunch sauce, béarnaise is the steak-night version: richer in herbs, sharper with vinegar, and built to stand up to browned meat. For the brunch side of this sauce family, this 5-minute Benedict sauce recipe uses a quick blender hollandaise method for eggs Benedict.

Classic Béarnaise Method

The blender method is the main recipe here. This classic whisked method is included for comparison, tradition, and anyone who wants the old-school French technique.

The classic method uses the same ingredients, but instead of using a blender, you whisk the yolks and reduction over gentle heat, then slowly whisk in clarified butter.

  1. Make the same wine, vinegar, shallot, tarragon, and pepper reduction.
  2. Strain the reduction and let it cool slightly.
  3. Add egg yolks and reduction to a heatproof bowl set over a saucepan of barely simmering water.
  4. Whisk constantly until the yolks thicken slightly and look pale and creamy.
  5. Lift the bowl from the heat as needed if it feels too hot.
  6. Slowly whisk in warm clarified butter, a few drops at first, then in a thin stream.
  7. Finish with chopped tarragon, lemon juice, and salt.

The biggest danger with the classic method is overheating the yolks. Keep the heat gentle. If the bowl feels too hot to comfortably touch, lift it off the pan and keep whisking.

Make Ahead & Reheating

The best make-ahead move is simple: prepare the reduction early, then blend the sauce close to serving.

For guests, make the reduction before anyone arrives, then blend the sauce when the steak is resting. It gives you the calmest version of a sauce that looks much fussier than it is.

Making the Reduction Ahead

Simmer and strain the wine-vinegar-tarragon mixture, then refrigerate it for 1–2 days. Bring it back to room temperature before blending with the yolks.

Holding It for Dinner

Finished béarnaise is best fresh. If you need to hold it, keep it at serving temperature only as long as needed, ideally under an hour, in a warmed thermos or a bowl set near gentle heat. Keep it away from direct heat and boiling.

Béarnaise is an emulsion, not a simmering gravy. Make the reduction ahead, then finish the sauce close to serving whenever possible.

Refrigerating Leftover Sauce

You can refrigerate leftovers, but the texture changes. Because béarnaise is butter-based, it firms up in the fridge and may split when reheated. If storing leftovers, refrigerate them promptly in an airtight container and use within 1–2 days.

How to Reheat It Without Breaking the Sauce

Reheat it slowly. A warm water bath is safer than direct heat. Place the sauce in a heatproof bowl over warm water and whisk slowly until it loosens. If it is too thick, whisk in warm water a few drops at a time.

A microwave can work for very small amounts, but it is risky. Use very short bursts, whisk between each one, and stop before the sauce gets hot enough to scramble.

If It Gets Cold: Use It Like Béarnaise Butter

Cold béarnaise firms up like flavored butter. It will not have the same glossy texture, but it can still melt beautifully over hot steak, roasted potatoes, asparagus, or fish. Use a small spoonful the way you would use compound butter.

Cold firm béarnaise melting over hot steak and roasted potatoes like flavored butter.
When chilled, leftover béarnaise firms like tarragon butter; melt a small spoonful over hot steak, potatoes, asparagus, or fish.

Substitutions

Béarnaise is flexible up to a point. You can adjust the wine, vinegar, herbs, and butter, but tarragon is the flavor that keeps it recognizable.

Béarnaise Without Fresh Tarragon

Use about 1 teaspoon dried tarragon for every 1 tablespoon fresh tarragon. Dried tarragon is stronger and less bright than fresh, so start small and adjust. Tarragon vinegar can also reinforce the flavor.

Without tarragon at all, you can make a delicious herb butter sauce, but it will lose the flavor that makes béarnaise recognizable. Use parsley, chives, dill, basil, or a mix of soft herbs if that is what you have.

Béarnaise Without Wine

Replace the wine with water, non-alcoholic white wine, or a little extra vinegar diluted with water. The sauce will be slightly less complex, but it will still work.

Salted Butter

Salted butter can work, but reduce the added salt. Taste the sauce at the end before adding more.

Quick Flavor Variations

  • Peppercorn béarnaise: add extra crushed black pepper to the reduction.
  • Chili béarnaise: add a pinch of cayenne or finely minced chili.
  • Lemon béarnaise: add extra lemon juice at the end, especially for fish or seafood.

Keep variations subtle. The sauce should still taste like tarragon, butter, and a sharp wine-vinegar reduction.

Small-Batch Béarnaise and Doubling Tips

For a smaller steak dinner, use 2 large yolks, about 1 tablespoon / 15 ml reduction, and about ½ cup / 115 g clarified butter or ghee. Very tiny batches can be harder in a blender because the blades need enough volume to catch the yolks and butter.

For guests, it is often safer to make two separate batches unless your container is tall and narrow enough for the blender head to stay submerged. Make the reduction ahead, then blend the sauce in one or two batches close to serving.

Real Shortcuts That Still Taste Like Béarnaise

The best shortcuts are the ones that keep the béarnaise identity: tarragon, acidity, egg yolks, and butter.

  • Use ghee: it behaves like clarified butter and keeps the butter step simple.
  • Make the reduction ahead: this is the best make-ahead shortcut for guests or steak night.
  • Use dried tarragon or tarragon vinegar: both help when fresh tarragon is limited.
  • Use a smaller spoonful: for a lighter serving, keep the real sauce but use less of it and brighten with lemon, pepper, and extra tarragon.

Cold Tarragon Mayo Shortcut

For a cold béarnaise-style shortcut, stir mayonnaise with chopped tarragon, lemon juice, Dijon mustard, a little minced shallot, black pepper, and a tiny splash of vinegar. For the base, you can use store-bought mayo or start with this homemade mayonnaise recipe and season it from there.

This is not warm béarnaise, but it works well with steak sandwiches, fries, cold seafood, and leftover roast beef.

When Store-Bought Makes Sense

Store-bought versions, packet mixes, and jars can help on a weeknight. Homemade béarnaise is still the better choice for steak dinners, holidays, guests, and date nights because the tarragon, shallot, vinegar, and butter are brightest when freshly combined.

A packet mix can save dinner, but it will not give you the same fresh tarragon lift as homemade sauce.

FAQs

Still adjusting the sauce or wondering if a swap will work? These quick answers cover the questions that usually come up mid-recipe.

What is béarnaise sauce?

Béarnaise is a warm French butter-and-egg-yolk sauce flavored with tarragon, shallot, vinegar, wine, and pepper. It is especially popular with steak.

What is béarnaise sauce made of?

It is made with egg yolks, clarified butter, white wine, vinegar, shallots, black pepper, and fresh tarragon. Some versions also include chervil, parsley, lemon juice, or cayenne.

Is béarnaise the same as hollandaise?

No. Hollandaise is usually flavored with lemon. Béarnaise uses tarragon, shallot, vinegar, wine, and pepper, which makes it more savory and better suited to steak.

What does béarnaise taste like?

It tastes buttery, tangy, and herbal, with tarragon giving it a lightly sweet, anise-like finish.

Does blender béarnaise work as well as classic?

Yes. Blender béarnaise can be smooth, rich, and steakhouse-worthy. The classic method gives you traditional whisked technique, but the blender method is easier and more reliable for most home cooks.

What can I use instead of fresh tarragon in béarnaise?

Use about 1 teaspoon dried tarragon for every 1 tablespoon fresh tarragon, or use tarragon vinegar to reinforce the flavor. Without tarragon, the sauce will taste more like an herb butter sauce than classic béarnaise.

How do you make béarnaise without wine?

Replace the wine with water, non-alcoholic white wine, or a little extra vinegar diluted with water. The flavor will be slightly less complex, but the sauce will still work.

Why did my béarnaise split?

It usually splits when the butter is added too quickly, the sauce gets too hot, or the emulsion does not form properly. To fix it, start with 1 teaspoon warm water or a fresh egg yolk in a clean jar, then slowly blend the broken sauce back in.

How far ahead can you make béarnaise?

The reduction can be made 1–2 days ahead. Finished béarnaise is best fresh, but it can be held briefly in a thermos or gentle water bath, ideally for less than an hour.

Should béarnaise be served warm or cold?

Béarnaise is best served warm. When cold, it firms like flavored butter. It can still melt nicely over hot steak, potatoes, asparagus, or fish, but it will not have the same glossy texture.

Is it béarnaise, bearnaise, or bernaise?

The classic French spelling is béarnaise. In English, many people type bearnaise without the accent, and some type bernaise. They usually mean the same tarragon butter sauce for steak.

Final Thought

You are not trying to pass a French sauce exam. You are trying to make steak taste richer, fish feel more special, and potatoes or asparagus disappear faster from the plate.

If the béarnaise is warm, glossy, balanced, and full of tarragon, you got there. Serve it before you overthink it.

Made it for steak, salmon, asparagus, or fries? Tell me where the béarnaise landed first — this is one of those sauces people start putting on everything.