Fresh tomato soup should taste bright, smooth, rich, and comforting — not watery, sour, thin, or like hot tomato juice. The goal is simple: take ripe fresh tomatoes, cook them down until they smell sweet and saucy, then blend them into the kind of cozy bowl you actually want to dip grilled cheese into.
This is the soup for the awkward tomato bowl: a few Roma tomatoes, a few garden tomatoes, one soft vine tomato, and cherry tomatoes that need to be used today. It works because you do not force those tomatoes into a fixed amount of liquid. You cook them down first, then loosen the soup after blending.
That makes this recipe useful even when your tomatoes are not identical — Roma, cherry, vine, garden, watery, soft, or mixed. The method keeps the soup from turning thin because the tomatoes get a chance to concentrate before the final broth goes in.
From there, the base recipe is simple; the extra sections are only there to help you adjust the tomatoes you have. Start with the stovetop method for speed, roast the tomatoes for deeper flavor, keep the bowl light, make it creamy, or turn it into tomato basil soup with fresh basil at the end.
Mixed Roma, vine, cherry, or garden tomatoes can still make smooth homemade tomato soup when the pot is reduced first and loosened later.
Cooking now? Start with the recipe card. Still deciding how to handle your tomatoes? Use the soup ratio, success cues, tomato guide, roasted method, or troubleshooting section before you begin.
Quick Answer: How to Make Tomato Soup With Fresh Tomatoes
To make tomato soup with fresh tomatoes, soften onion in olive oil or butter, add garlic and tomato paste, then add chopped ripe tomatoes, salt, pepper, and herbs. Simmer uncovered until the tomatoes collapse into their own juices and the flavor concentrates. Add broth gradually, blend until smooth, stir in fresh basil near the end, and finish with cream only if you want a richer bowl.
You are not rushing fresh tomatoes into soup; you are letting them collapse, sweeten, and turn saucy before you decide how much broth they need.
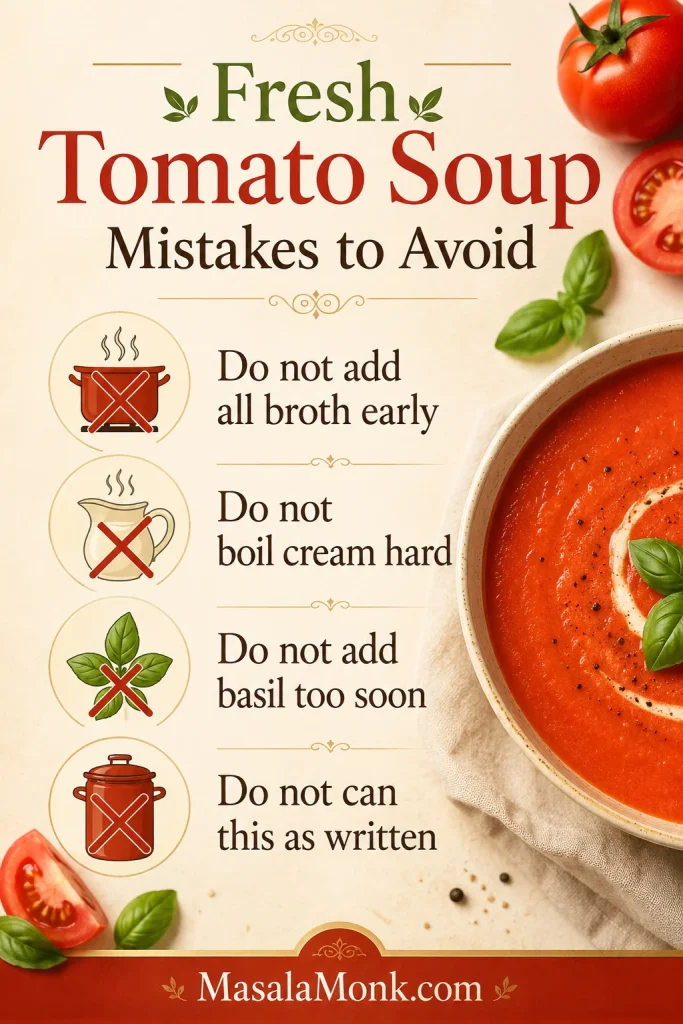
The most important rule is this: do not add all the broth too early. Your tomatoes may release more juice than mine, so hold some liquid back until after blending. That one habit keeps the soup full and spoonable instead of thin.
Next step: Need exact amounts? Jump to the recipe card. Still adjusting your tomatoes? Use the soup ratio first.
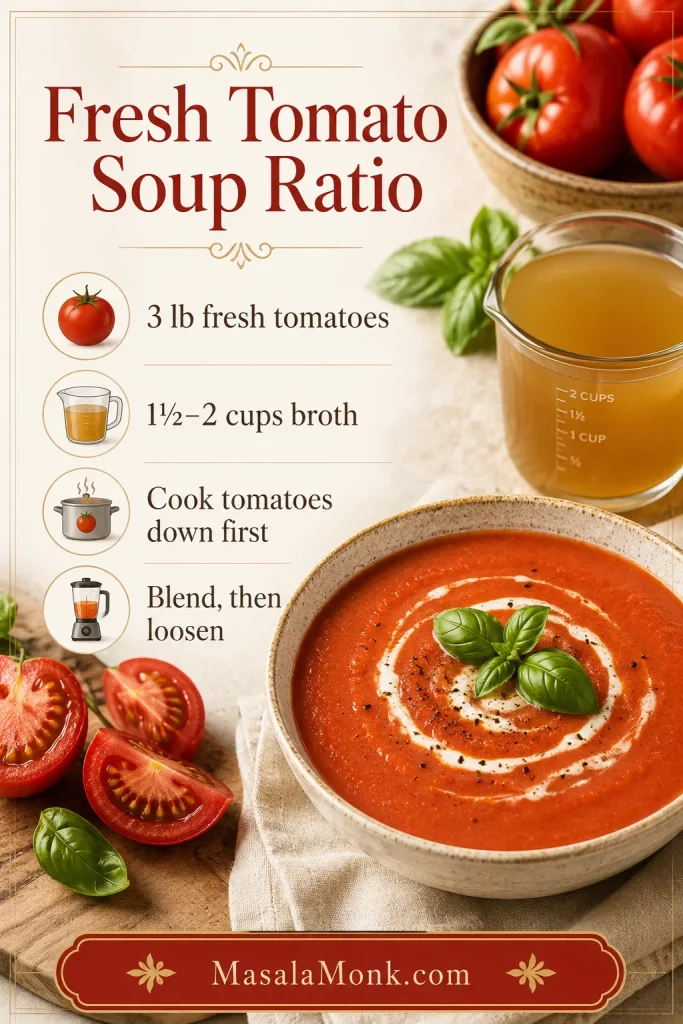
The Fresh Tomato Soup Ratio
For a balanced fresh tomato soup, use about 3 lb / 1.35 kg fresh tomatoes to 1 1/2 to 2 cups / 360 to 480 ml broth. Start with the lower amount, blend, then add more only if the soup needs loosening.
Before adding extra broth, use the ratio below as a starting point, especially when your fresh tomatoes are very juicy or unusually meaty.
Thicker soup
Use Roma or plum tomatoes, begin with 1 1/2 cups broth, and simmer uncovered before blending.
Lighter soup
Add the full 2 cups broth after blending, especially if the tomatoes are meaty and the soup feels too thick.
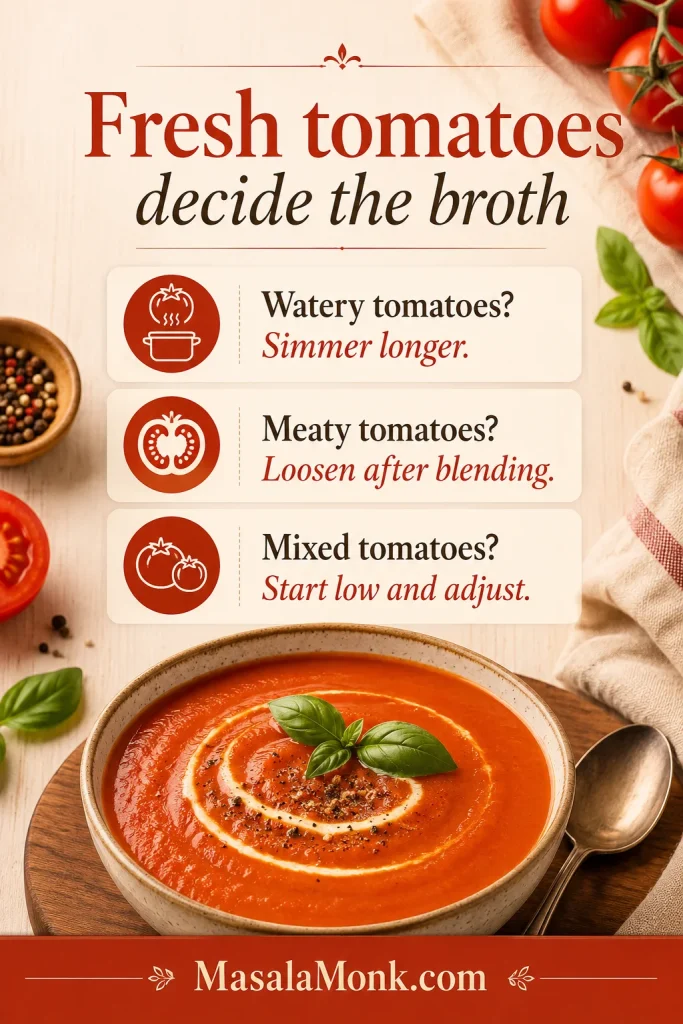
Watery tomatoes
Roast first or simmer longer. Let the tomato juices reduce before you loosen the soup.
Creamy soup
Keep the base slightly thick, then finish with cream or a no-cream thickener after blending.
If you remember only one thing: fresh tomatoes decide the broth, not the other way around.
The main method rule is simple: reduce the tomatoes first, then loosen the soup only after blending.
Still deciding? Compare the best tomatoes for soup, use the roasted method for watery tomatoes, or go straight to troubleshooting.
Recipe Card
Easy Homemade Tomato Soup With Fresh Tomatoes
A smooth, easy homemade tomato soup made with ripe fresh tomatoes, onion, garlic, tomato paste, basil, and optional cream. Use the stovetop method for speed or the roasted method for deeper flavor.
Ingredients
- 3 lb / 1.35 kg ripe fresh tomatoes, roughly chopped
- 2 tablespoons olive oil, or 2 tablespoons / 28g butter
- 1 medium onion, chopped, about 150g
- 4 to 6 garlic cloves, minced
- 2 tablespoons / about 30g tomato paste
- 1 small carrot, chopped, or 1/2 red bell pepper, chopped, optional
- 1 teaspoon fine salt, plus more to taste
- 1/2 teaspoon black pepper
- 1/2 teaspoon dried oregano or dried thyme
- 1 1/2 to 2 cups / 360 to 480 ml vegetable broth or chicken broth
- 1/2 cup loosely packed fresh basil leaves
- 1/4 cup / 60 ml heavy cream, optional
- 1 to 2 teaspoons sugar, honey, or maple syrup, only if the tomatoes taste too sharp; use sugar or maple syrup for vegan soup
- Extra basil, cream, parmesan, croutons, olive oil, or black pepper, for serving
Equipment
- Large pot or Dutch oven
- Sharp knife and cutting board
- Immersion blender, regular blender, or high-speed blender
- Fine-mesh strainer, optional, for extra-smooth soup
- Rimmed baking sheet, only if using the roasted method
Instructions
Cook Down the Tomatoes
- Soften the onion. Warm the olive oil or butter in a large pot or Dutch oven over medium heat. Cook the onion for 5 to 6 minutes, until soft, translucent, and lightly golden.
- Build the tomato base. Stir in the garlic for about 30 seconds. Spoon in the tomato paste and cook for 1 minute, stirring often, until it darkens slightly and smells rich.
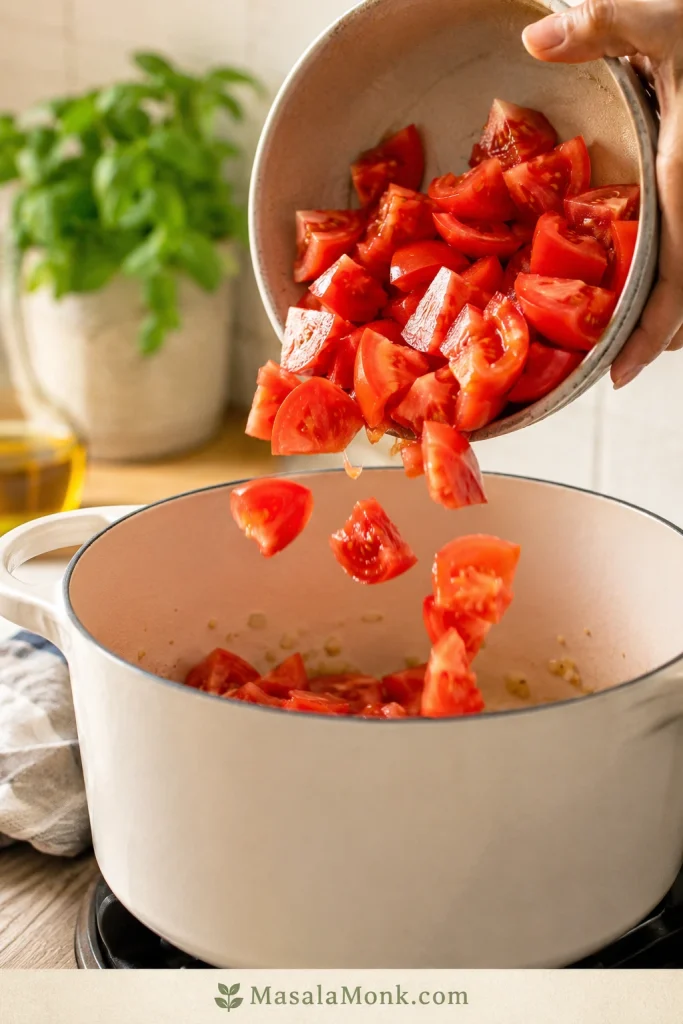
- Tip in the tomatoes. Add the chopped tomatoes, carrot or red bell pepper if using, salt, pepper, and oregano or thyme. Stir well.
- Cook them down. Simmer uncovered for 20 to 25 minutes, stirring occasionally, until the tomatoes collapse and the mixture looks saucy. Splash in a little broth only if the pot starts to dry out.
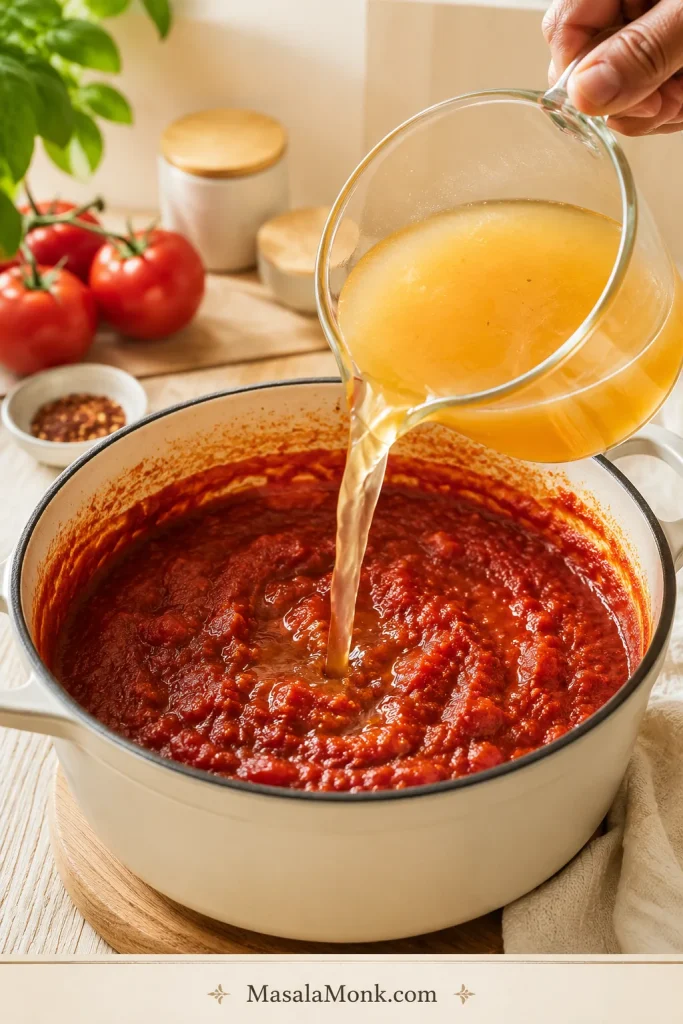
- Pour in the first broth. Stir in 1 1/2 cups / 360 ml broth and simmer for about 5 minutes. Hold back the remaining broth until after blending.
Blend, Finish, and Serve
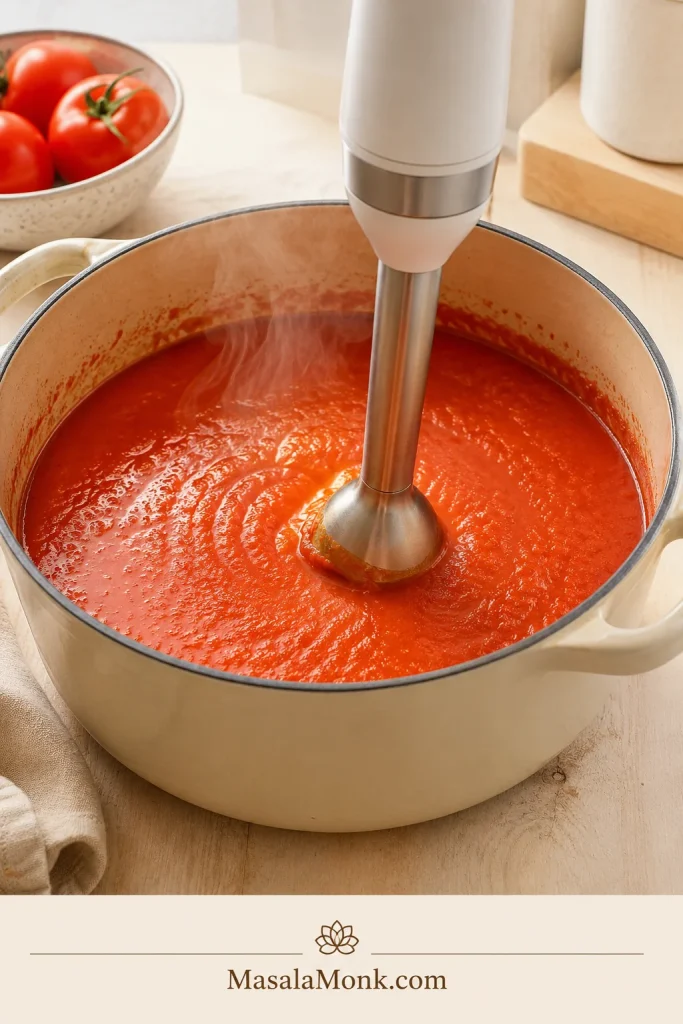
- Puree until smooth. Turn off the heat. Blend with an immersion blender until smooth, or blend carefully in batches in a regular blender. Vent the blender lid so steam can escape.
- Drop in the basil. Add the fresh basil and blend briefly again. For a fresher speckled finish, chop the basil and stir it in after blending instead.
- Finish the texture. Loosen with more broth if the soup is too thick. Simmer uncovered for a few minutes if it is too thin.
- Make it creamy, if desired. Stir in the cream over low heat. If the soup is very hot, mix a spoonful of soup into the cream first, then add it back to the pot. Do not boil hard after adding cream. Taste and adjust salt, pepper, and acidity.
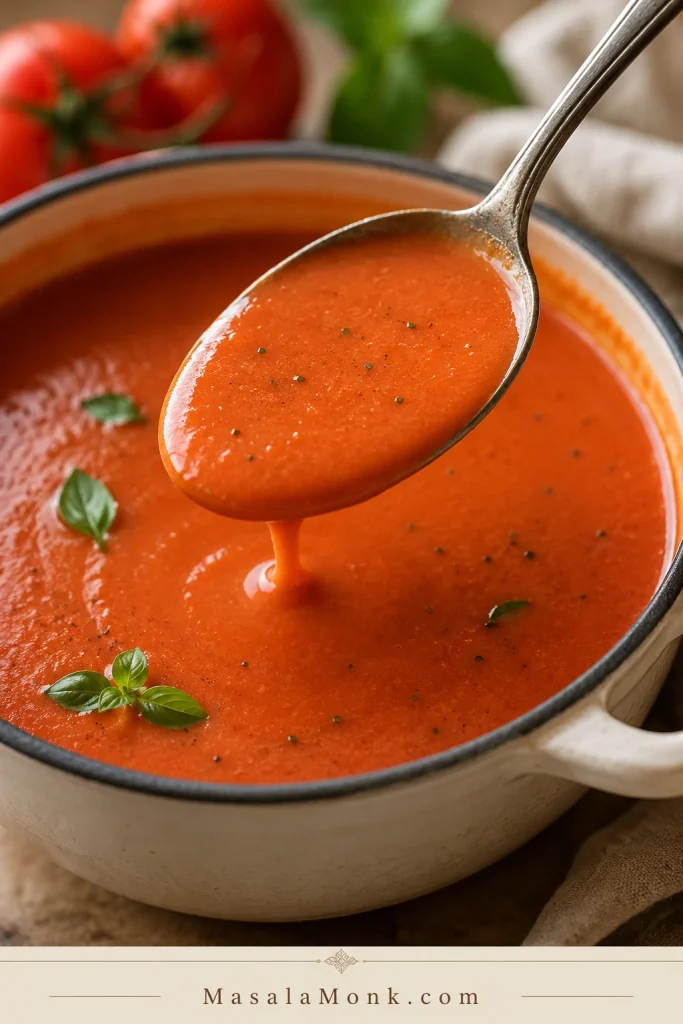
- Serve. Ladle into bowls and finish with basil, black pepper, cream, parmesan, croutons, or olive oil.
Recipe Notes
- Roma and plum tomatoes make the thickest soup. Garden tomatoes give great flavor but may need more simmering.
- The broth range is flexible on purpose because Roma tomatoes, vine tomatoes, cherry tomatoes, and mixed garden-style tomatoes release different amounts of juice.
- Before blending, the tomatoes should look collapsed and saucy, not like chopped tomatoes floating in liquid.
- No peeling is required for everyday soup. Blend well, then strain only if you want an ultra-smooth finish.
- If your broth is salty, start with 3/4 teaspoon salt and adjust after blending.
- The listed cook time is for the stovetop method. Roasted method timing is about 55 to 65 minutes total.
- For a vegan version, use olive oil, vegetable broth, and skip the cream or replace it with cashew cream, coconut milk, white beans, potato, or carrot.
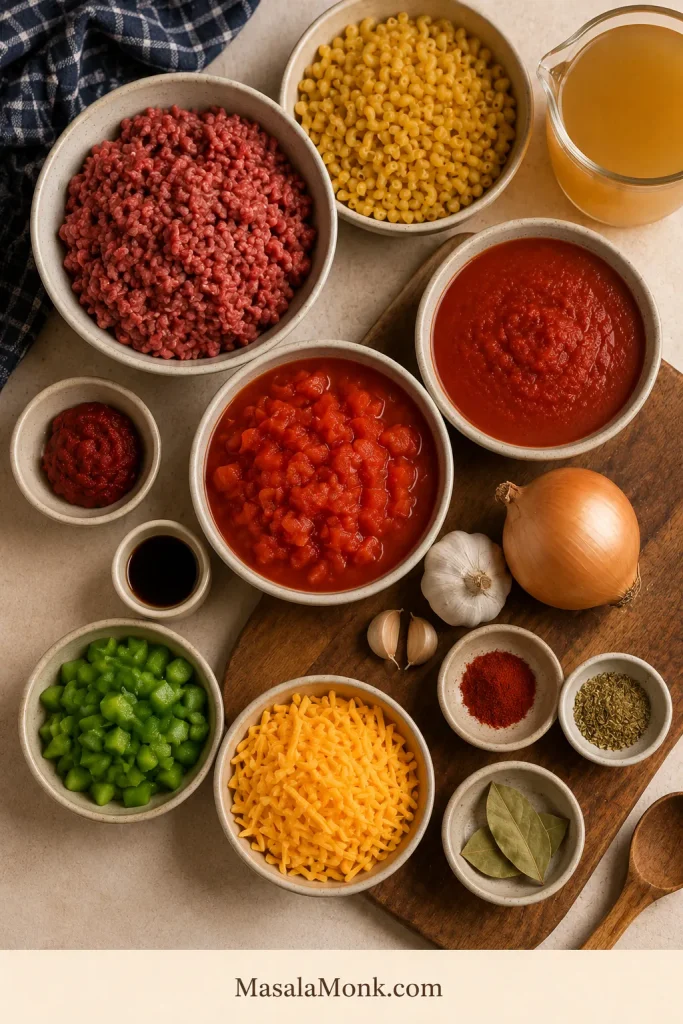
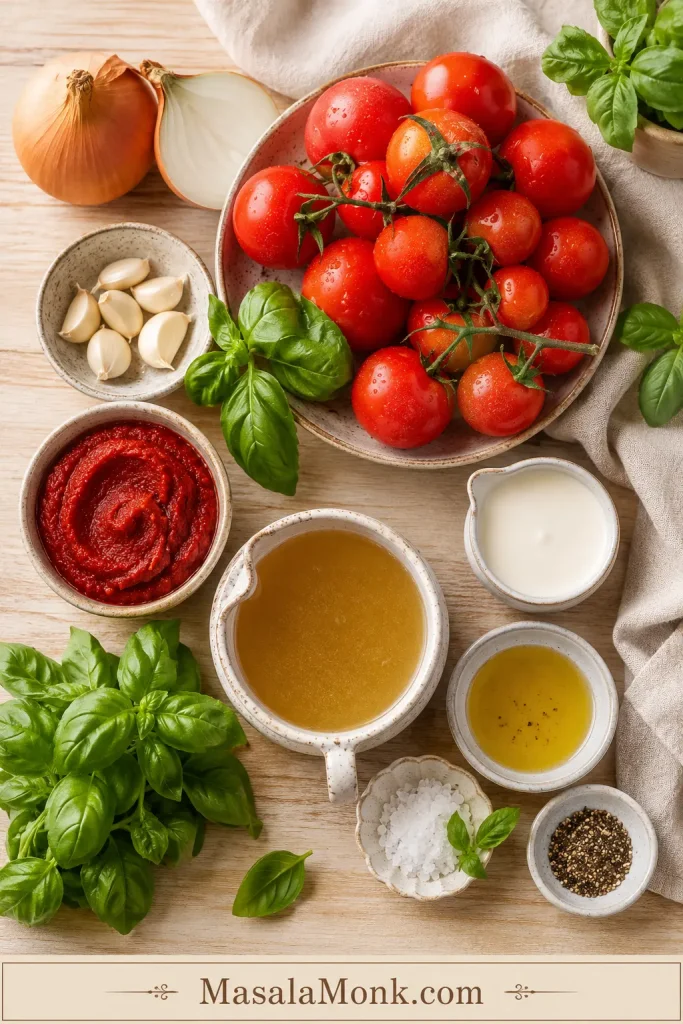
This ingredient view shows why the short list still works: each item builds sweetness, depth, brightness, or body.
Success Cues
Use these cues more than the clock. Fresh tomatoes vary, but the signs of a good pot stay the same.
Tomatoes before blending
The tomatoes should look collapsed and saucy, not like chopped tomatoes floating in broth.
Puree before more broth
The puree should be smooth first. Loosen the soup only after you know how thick the blended base is.
Before serving
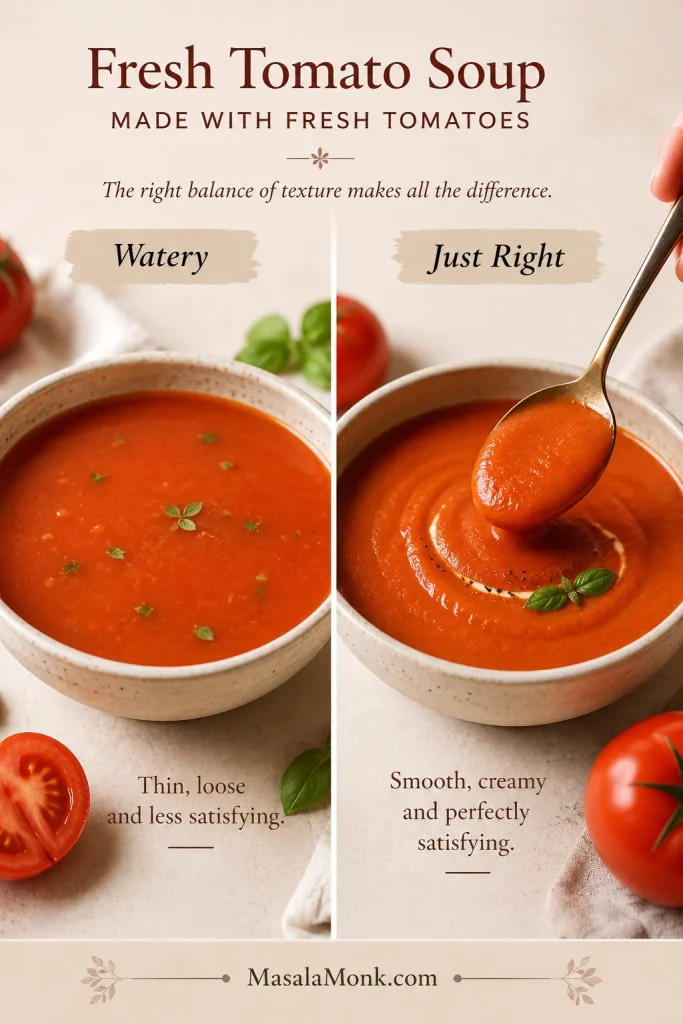
The soup should coat a spoon lightly, pour easily, and taste bright first, then soft and savory.
At the finish
Add basil late, keep cream gentle, and adjust salt after the soup is fully blended.
Look for this cue before blending: the tomatoes should be collapsed and saucy, not floating in loose liquid.
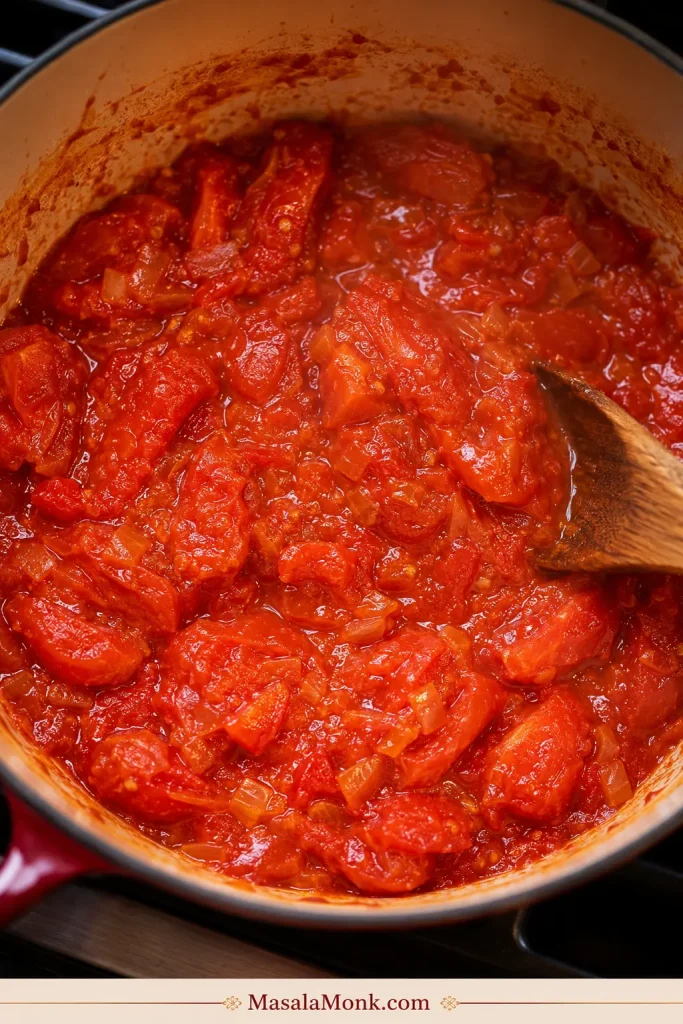
Table of Contents
Need a tomato, texture, roasting, storage, or rescue answer? Jump to the section you need.
Methods & Variations
Fresh Tomato Soup vs Canned Tomato Soup
Fresh tomatoes do not behave like canned tomatoes, and that is exactly why this soup needs a gentler, more flexible method. Canned tomatoes are already cooked, concentrated, and fairly consistent. Fresh tomatoes are brighter and more seasonal, but they also bring their own water, sweetness, acidity, skin, and seeds.
That is why this recipe builds flavor before the pot gets too loose. The same reduction logic matters in this tomato sauce from fresh tomatoes, where the final texture depends on cooking off extra water before adjusting the finished dish.
For a thicker, pasta-ready version of tomato depth, this classic marinara sauce recipe stays in the sauce lane. This soup stays softer, smoother, and more spoonable.
Why This Fresh Tomato Soup Works
Fresh tomatoes give you that bright, just-cut flavor, but they also bring a lot of water with them. The soup gets its body before the blender comes out, while the tomatoes are still bubbling down into something sweeter and fuller.
By the time the blender comes out, the pot should already smell like tomato sauce becoming soup.
- Onion softens the sharp edge of the tomatoes and adds natural sweetness.
- Garlic gives the pot savory warmth without overpowering the fresh tomato flavor.
- Tomato paste boosts color and depth, especially when the tomatoes are juicy or mild.
- Uncovered simmering concentrates the base before the final texture is adjusted.
- Fresh basil goes in late so the soup tastes fragrant, not dull.
- Cream is optional, so the final bowl can be light, creamy, vegan, or dairy-free.
The Best Tomatoes for a Smooth, Flavorful Soup
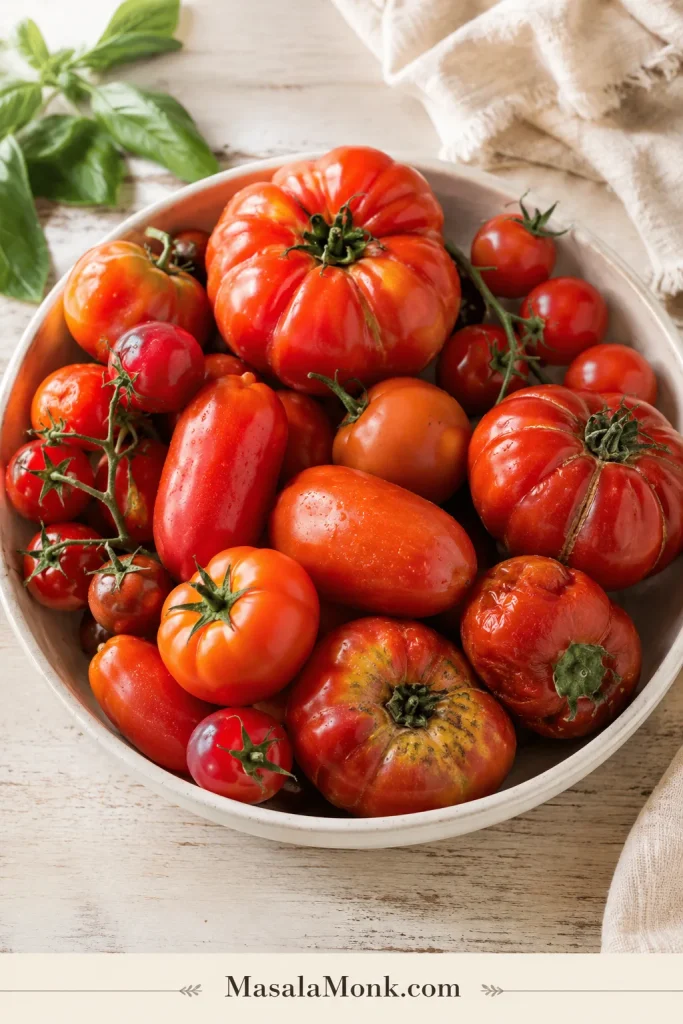
Start with the tomatoes you have, then decide how much help they need. A soft tomato that smells sweet can still make a beautiful soup, even if it is past its salad-perfect moment.
Use the tomato guide below to decide whether your batch needs more simmering, more sweetness, or a roasted start.
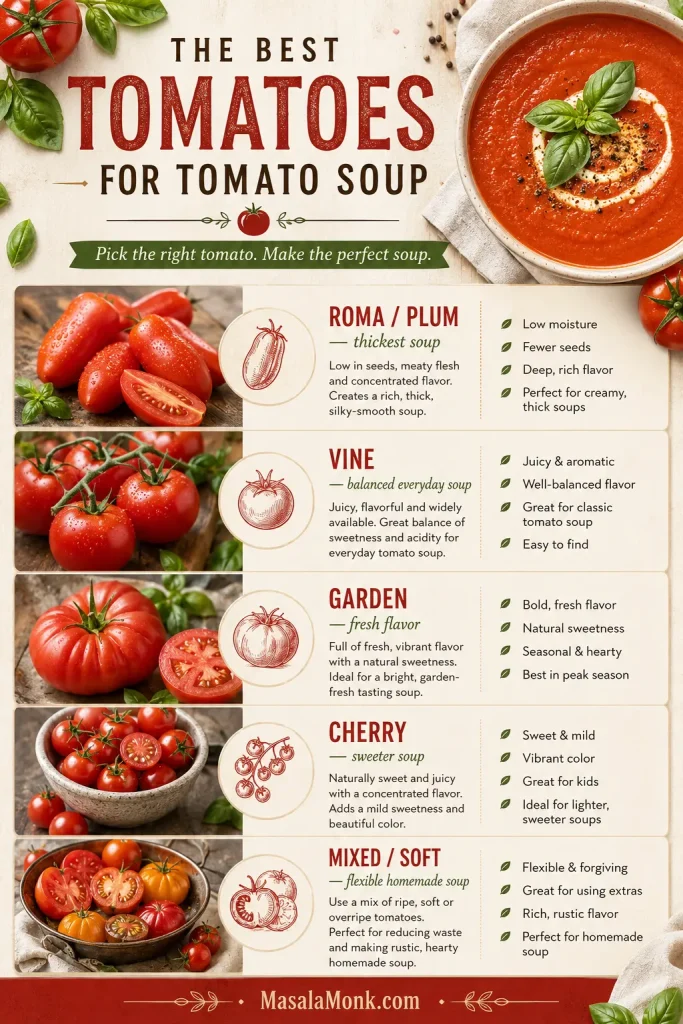
| Tomato Type | Best Use | What to Know |
|---|---|---|
| Roma or plum tomatoes | Thicker fresh tomato soup | Meaty, less watery, and excellent for a smooth soup base. |
| Vine tomatoes | Everyday tomato soup | Good balance of sweetness, juice, and acidity. |
| Garden tomatoes | Fresh summer flavor | Great when ripe, but may need longer cooking if very juicy. |
| Cherry tomatoes | Sweet roasted tomato soup | Sweet and juicy. Roast them or hold back more broth at first. |
| Overripe tomatoes | Rich homemade soup | Excellent if soft and fragrant, but avoid spoiled tomatoes. |
| Watery tomatoes | Roasted or reduced soup | Roast first or simmer uncovered to concentrate them. |
| Underripe tomatoes | Not ideal | They can make the soup sharp, pale, and bland. |
The tomato does not have to be perfect. It just needs to taste ripe enough that you would still want another bite — sweet, juicy, and a little fragrant when you cut into it. If you are mixing tomato types, use that to your advantage: Roma tomatoes can thicken juicy garden tomatoes, while cherry tomatoes can add sweetness to sharper ones.
Tomatoes chosen? Review the soup ratio, then move to the stovetop method.
Ingredients That Make the Soup Taste Full
The ingredient list is short, so each ingredient has to pull its weight. The right balance keeps the soup from tasting watery, flat, or too acidic.
Fresh Tomatoes
Choose ripe tomatoes that feel heavy and smell sweet. Roma, plum, vine, garden, and cherry tomatoes all work, but they behave differently. Juicy tomatoes need more time. Meaty tomatoes make a thicker base more easily.
Onion and Garlic
Onion rounds out the acidity and gives the soup a softer base. Garlic adds that warm, savory smell that makes the pot feel fuller before you even blend it. Cook the onion first, then add the garlic briefly so it stays fragrant instead of bitter.
Tomato Paste
Tomato paste is the backup plan for tomatoes that are juicy, pale, or mild. Cook it for a minute before adding the tomatoes so it darkens slightly and makes the soup taste deeper.
Broth
Vegetable broth keeps the soup light and vegetarian. Chicken broth makes it a little more savory and old-fashioned, especially if you are serving it with grilled cheese. Add it in stages so the tomatoes can show you how much they need.
Fresh Basil
Fresh basil wakes up the bowl at the end. Add it late so the flavor stays green and fragrant. When basil is the flavor you want to push harder, this classic basil pesto guide gives you another way to use the same herb as a swirl, toast spread, or pasta sauce.
Dried basil can work, but it should go in earlier with the dried herbs. Fresh basil is more delicate, so save it for the finish.
Cream, Optional
Heavy cream softens the acidity and makes the soup richer, but it is not required. You can keep the bowl bright and light, or use no-cream options like carrot, potato, cashews, white beans, bread, or coconut milk.
Peeling, Seeding, and the Smooth-Soup Shortcut
You do not need to peel or seed tomatoes for everyday homemade tomato soup. Once the tomatoes are cooked until soft and blended well, most skins disappear into the bowl.
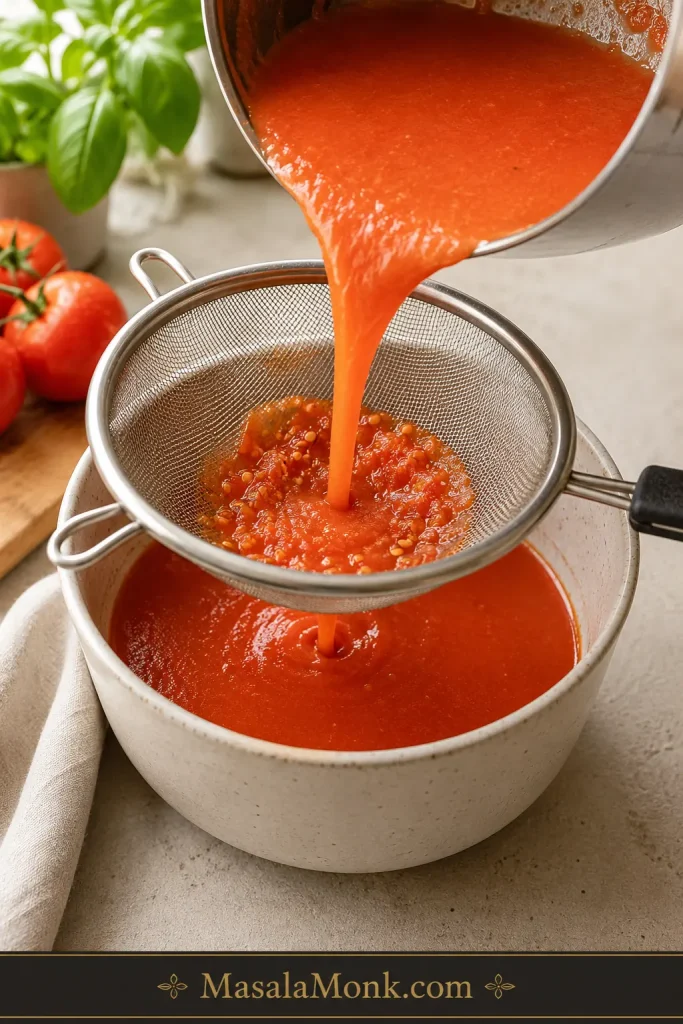
For a very smooth, restaurant-style bowl, blend fully, strain once, and finish with a small splash of cream over low heat. Straining removes seeds, tiny bits of skin, and any grainy texture without making you peel every tomato first.
A silky bowl does not require peeling every tomato; blend first, then strain only if the texture needs it.
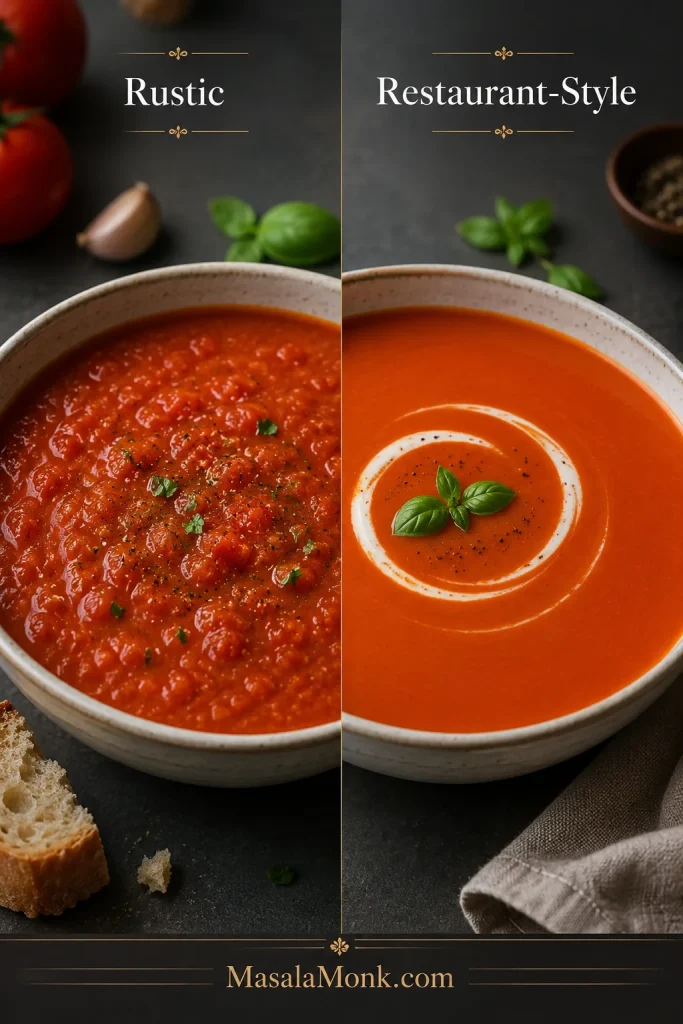
Prefer rustic tomato soup? Blend only half the pot and leave the rest slightly chunky.
Choose the final texture here: leave some body for rustic soup or strain once for a smoother restaurant-style finish.
Once you know whether you want rustic or silky soup, the stovetop method is straightforward.
Texture chosen? Continue to how to make fresh tomato soup, or keep the visual cues nearby while you cook.
How to Make Fresh Tomato Soup
The stovetop method is the easiest place to start. It is fast, flexible, and lets you taste as you go.
1. Soften the Onion Until Sweet
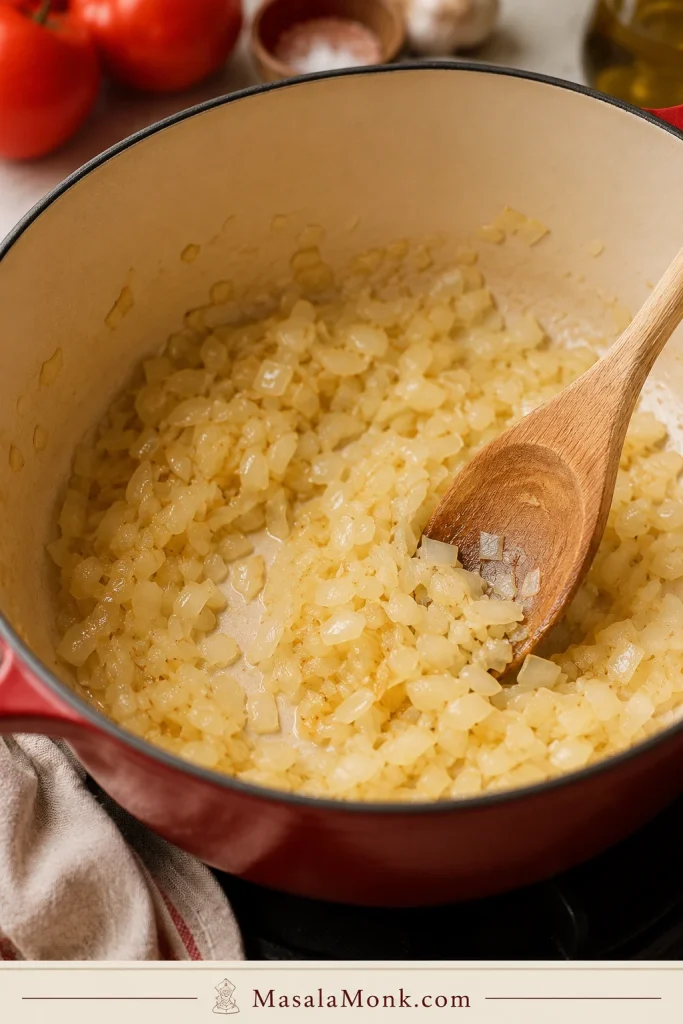
Warm olive oil or butter in a large pot. Cook the onion until soft and lightly golden. Do not rush this part; it creates sweetness before the tomatoes go in.
At this stage, the onion should smell sweet and look translucent before the acidity of the tomatoes enters the pot.
2. Add Garlic and Tomato Paste
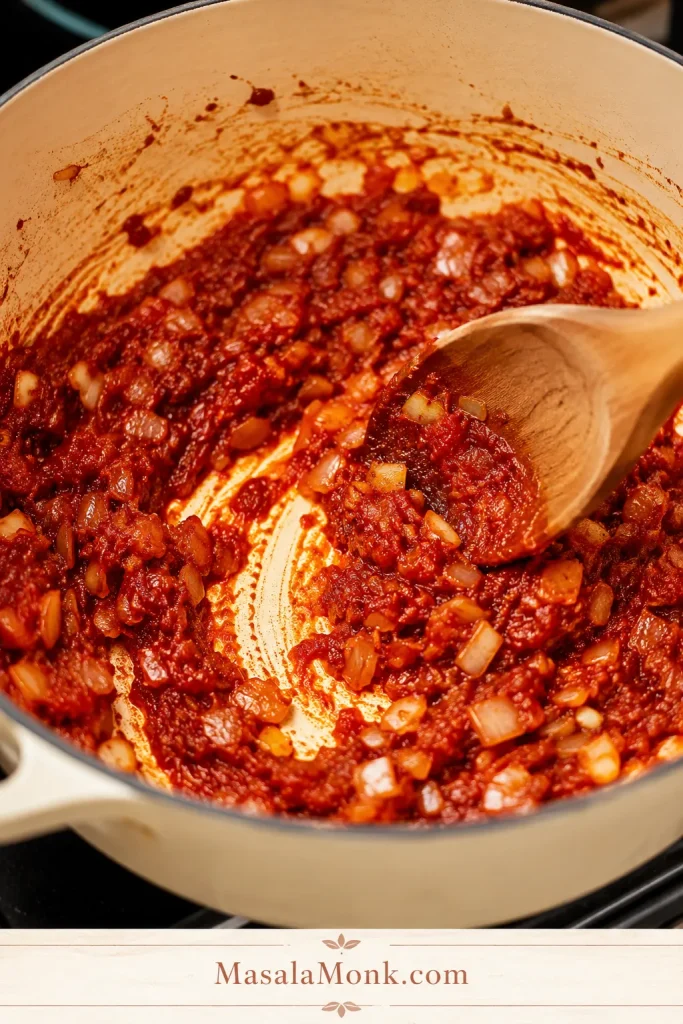
Let the garlic sizzle for about 30 seconds, then stir in the tomato paste. The paste should darken slightly and smell rich, almost like the tomato flavor is already getting deeper.
Cooking tomato paste briefly with the aromatics gives the soup deeper color and a fuller tomato base.
3. Collapse the Tomatoes
Tip in the chopped tomatoes, seasoning, and carrot or bell pepper if using. Simmer uncovered until the tomatoes collapse into their juices and the pot looks saucy.
Once the fresh tomatoes hit the pot, give them time to soften and concentrate before you decide how much broth they need.
4. Blend and Adjust
Pour in part of the broth, puree until smooth, then finish the texture. A good bowl should pour like cream but still taste like tomatoes first.
Add broth gradually after the tomato base has cooked down so the soup stays easier to control.
After you get used to blending first and loosening after, you can use the same habit in other smooth soups too, like this butternut squash soup.
Safety cue: Hot soup expands in a blender. Work in batches, vent the lid, and cover the top with a towel so steam can escape.
When the soup is hot, work carefully and judge the thickness before adding more liquid or cream.
Cooking from the card? Return to the recipe card, or keep going for texture cues and variations.
What to Look For While the Soup Cooks
Tomatoes do not all behave the same, so use the timing as a guide and the texture as the final signal. The pot should smell sweeter before it looks smooth.
| Stage | What You Should See | Why It Matters |
|---|---|---|
| Onion cooked | Soft, translucent, and lightly golden | This adds sweetness before the tomatoes go in. |
| Tomato paste cooked | Darker red and fragrant | This deepens the tomato flavor and color. |
| Tomatoes simmered | Collapsed, saucy, and no longer floating in liquid | This is where the soup starts getting body. |
| After blending | Smooth, spoon-coating, and pourable | You are aiming for soft body, not a thick paste. |
| Final soup | Bright red-orange, balanced, and not grainy | At this point, taste once more, then serve. |
Aim for the texture shown here: smooth, spoon-coating tomato soup that still pours easily.
Roasted Fresh Tomato Soup Method for Deeper Flavor
When to Roast Fresh Tomatoes
Roasting is the method to choose when your tomatoes taste good but not amazing yet. The oven pulls out sweetness, softens acidity, and gives the soup a deeper red, slightly jammy flavor before it ever reaches the blender.
It is especially useful when your tomatoes are watery, very juicy, mild, or garden-grown.
The roasted method takes longer than the stovetop version, but most of that time is hands-off. Plan on about 55 to 65 minutes total if you roast first.
Roasting helps watery or mild tomatoes taste sweeter and more concentrated before they become soup.
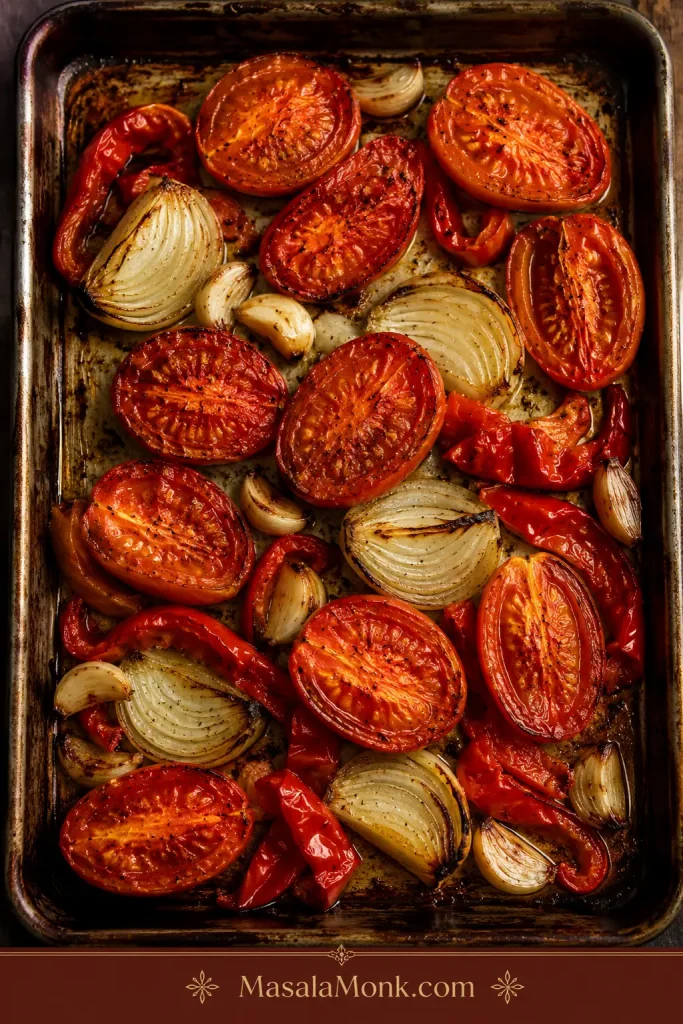
Roasting Setup
Use the same 3 lb / 1.35 kg fresh tomatoes. For roasting, use olive oil on the baking sheet. If you prefer butter, stir it into the pot after roasting instead. Cut medium tomatoes into halves or quarters. Leave the garlic cloves whole for roasting instead of mincing them, then squeeze the softened garlic out of the skins before blending.
How to Finish the Roasted Soup
- Heat the oven to 425°F / 220°C.
- Spread the tomatoes, onion, whole garlic cloves, and optional red bell pepper on a rimmed baking sheet.
- Toss with olive oil, salt, and pepper.
- Roast for 35 to 45 minutes, until the tomatoes are soft, jammy, and lightly browned at the edges.
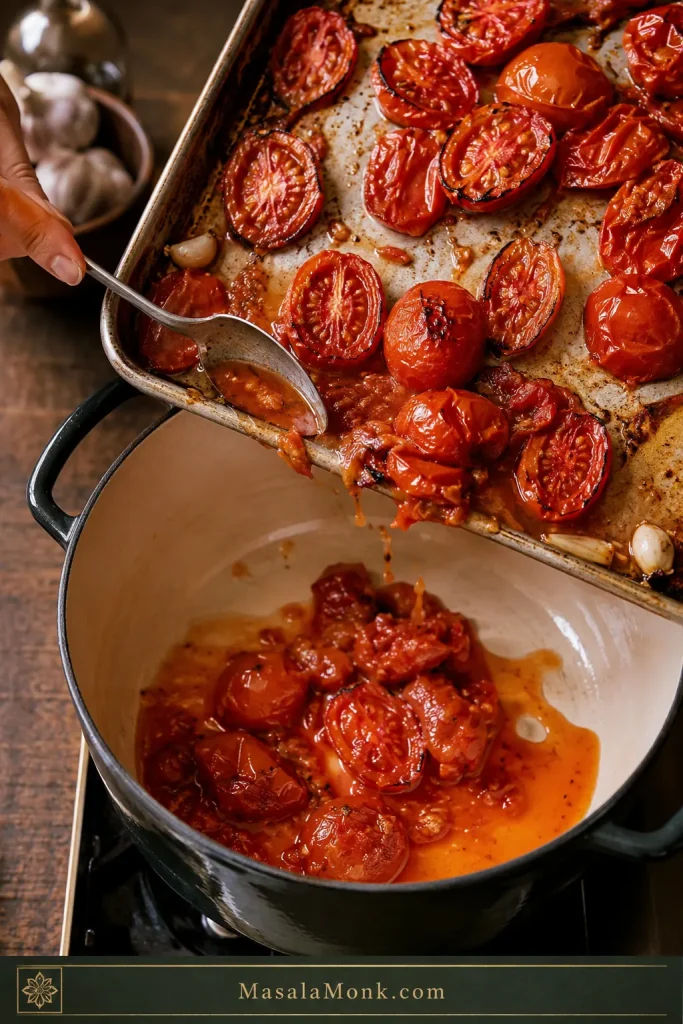
- Transfer the roasted vegetables to a pot. Stir the tomato paste into the roasted juices and cook for 30 to 60 seconds.
- Pour in only 1 cup / 240 ml broth at first, then blend.
- Loosen gradually with more broth until the soup reaches your preferred thickness.
- Simmer for 5 to 10 minutes, blend until smooth, then add basil and blend briefly again. Finish with cream only if you want a richer roasted tomato basil soup.
The roasted tray should smell sweet and garlicky before it ever reaches the pot. If the baking sheet has a lot of tomato liquid, add those juices gradually instead of dumping everything in at once.
When transferring roasted tomatoes, add the tray juices thoughtfully so the roasted flavor stays strong without thinning the pot.
After roasting: Keep the bowl bright, make it creamy or dairy-free, turn it into tomato basil soup, or choose what to serve with it.
Creamy, No-Cream, and Vegan Options
Choose the Creaminess Level
Creaminess is not just about adding cream. It is about deciding how soft, rich, and mellow you want the final bowl to feel. Some bowls want the classic silkiness of dairy; others only need a carrot, a potato, or a handful of cashews to feel round.
Creamy Options and No-Cream Thickeners
| Option | How Much to Use | Best For |
|---|---|---|
| Heavy cream | 1/4 cup / 60 ml for light creaminess; 1/2 cup / 120 ml for richer soup | Classic creamy tomato soup. |
| Half-and-half | 1/4 to 1/2 cup / 60 to 120 ml | Lighter everyday creamy soup. |
| Butter | 1 tablespoon blended in at the end | Silky texture without much cream. |
| Cashews | 1/4 to 1/3 cup soaked cashews | Dairy-free creamy body. |
| White beans | 1/2 cup cooked white beans | Thicker soup with more body. |
| Potato | 1 small peeled potato, simmered with the tomatoes | Thick, mild, no-cream soup. |
| Carrot | 1 small carrot, cooked with the tomatoes | Sweetness, body, and acidity balance. |
| Bread | 1 small slice crusty bread, blended in | Rustic creamy texture without cream. |
| Coconut milk | 2 to 4 tablespoons | Vegan creamy tomato soup. |
Creaminess can come from dairy or from body-building ingredients like cashews, beans, potato, carrot, or bread.
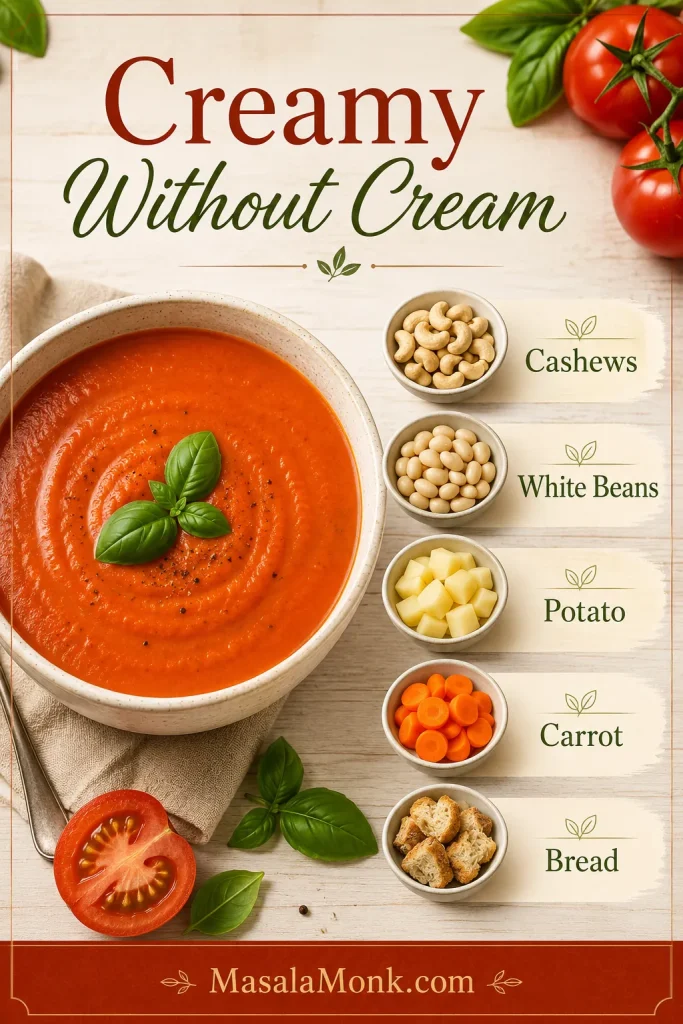
The best creamy version still tastes like fresh tomatoes first. Cream, butter, cashews, beans, potato, or bread should round the edges, not hide them.
The goal is a soup that feels softer on the spoon, not one that forgets it started with fresh tomatoes.
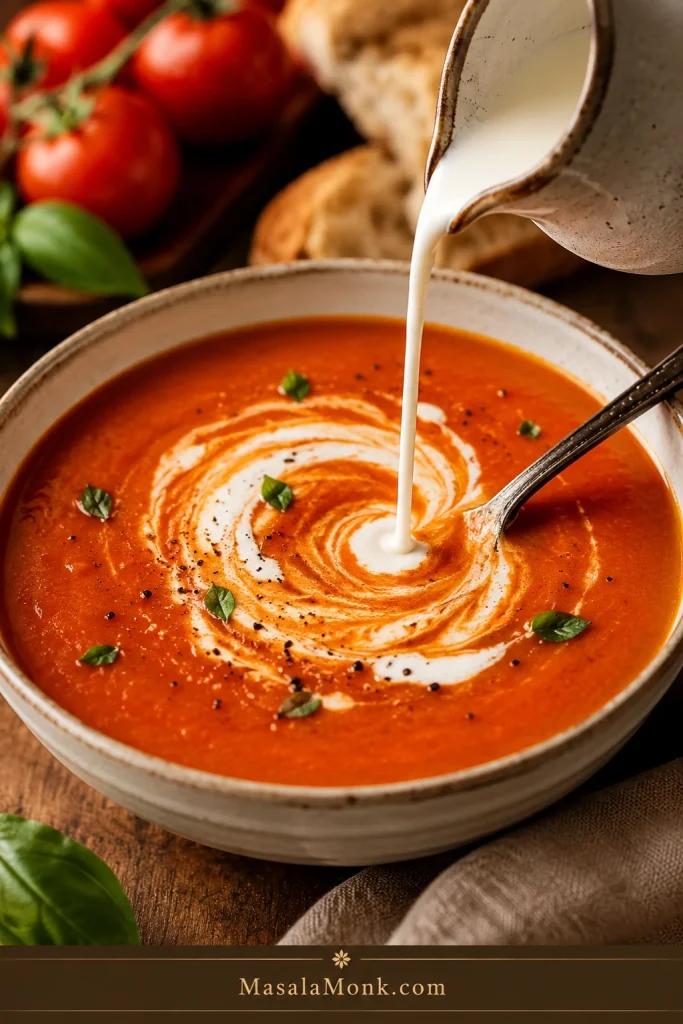
Add Dairy Gently
With dairy, add it after blending and keep the heat low. If the soup is very hot, stir a spoonful of soup into the cream first, then add it back to the pot.
Cream belongs at the end, over low heat, where it softens the tomato flavor without splitting or muting the soup.
Vegan Tomato Soup Adjustments
For vegan tomato soup, use olive oil instead of butter and vegetable broth instead of chicken broth. Skip the cream, or blend in cashews, white beans, potato, carrot, or coconut milk for body. If the soup tastes sharp, use carrot, roasted red pepper, or a tiny amount of maple syrup instead of honey.
Tomato Basil Soup Variation
To make this a fresh tomato basil soup, increase the basil to about 3/4 cup loosely packed fresh basil leaves. Add the basil near the end, then blend briefly. For a brighter finish, save a little chopped basil for the bowls.
Fresh basil should go in late so tomato basil soup keeps its green aroma and bright finish.
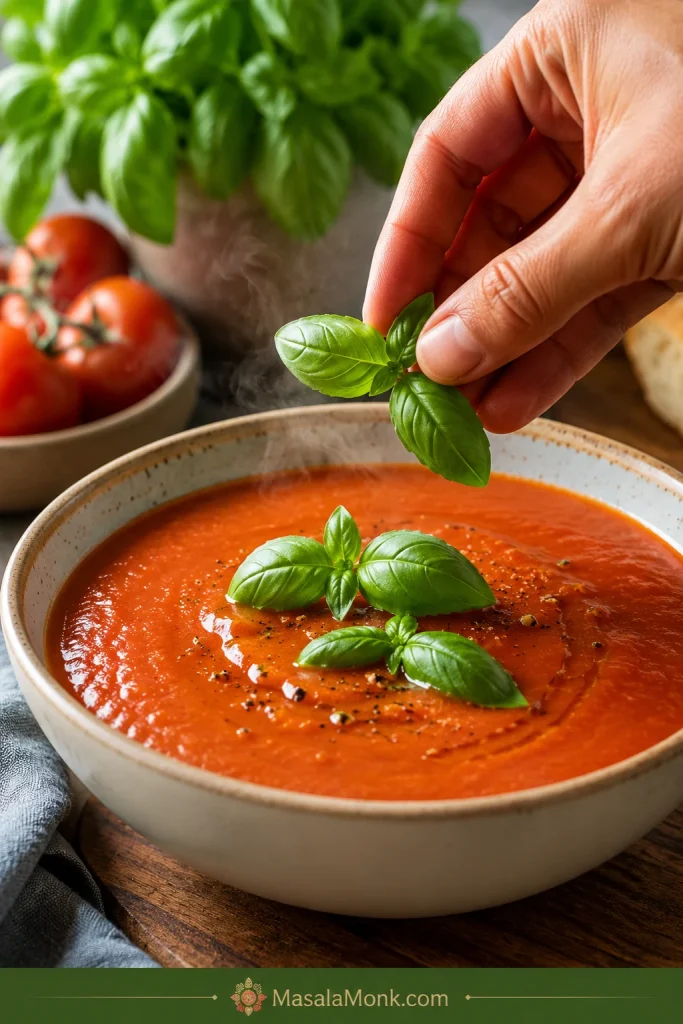
The basil should smell fresh the moment it hits the warm soup. If it cooks too long, that bright green lift disappears.
No fresh basil? Use 1/2 to 1 teaspoon dried basil and add it with the oregano or thyme. The flavor will be less fresh, but the soup will still be good. If basil is what you love most, save this pesto pasta recipe for another night — same fresh-herb comfort, completely different dinner.
Old-Fashioned Fresh Tomato Soup Variation
For an old-fashioned tomato soup texture, use butter instead of olive oil and add a light roux. After the onion softens, stir in 1 to 2 tablespoons flour and cook for 1 minute before adding the tomatoes and broth. Finish with a splash of milk or cream and a tiny pinch of sugar if the tomatoes are sharp.
This version is thicker, softer, and more diner-style, especially good with grilled cheese, buttered toast, or homemade croutons. It is for eating fresh, refrigerating, or freezing — not for canning.
This variation leans softer and creamier, with the kind of diner-style texture that suits toast or grilled cheese.

Once the base method is clear, you can adapt it to the appliance you actually want to use.
Adapt the Method for Instant Pot, Slow Cooker, or Blender
You do not need a separate recipe for every appliance. The same rule still matters: cook the tomatoes into something flavorful before you loosen the soup.
| Method | How to Adapt It |
|---|---|
| Instant Pot | Sauté onion and garlic, deglaze well, then add tomatoes. Keep tomato paste off the bottom to reduce burn risk. Use 1 cup / 240 ml broth for pressure cooking, pressure cook 15 minutes, release naturally 5 to 10 minutes, then blend and loosen. |
| Slow cooker | For best flavor, sauté onion, garlic, and tomato paste first. For the easiest version, add everything directly. Use only part of the broth. Cook on high for 3 to 4 hours or low for 5 to 8 hours, then blend and add basil and cream at the end. |
| High-speed blender | Use it for the smoothest texture, especially if you do not want to peel tomatoes. When blending hot soup, work in batches, vent the lid, and cover the top with a towel. |
These versions are there for convenience, but the best flavor still comes from the same small cues: softened onion, cooked tomato paste, tomatoes that smell sweeter, and final liquid added with care.
When you want the slow-cooker route but a much heartier dinner, this crock pot lasagna soup is the richer tomato-and-pasta version.
Before troubleshooting, check the mistakes most likely to make fresh tomato soup thin, dull, or unsafe to store.
How to Fix Watery, Sour, or Bland Tomato Soup
Start With the Simple Fixes
Do not panic if the first taste is sharp, thin, or a little bland. Fresh tomatoes vary a lot, and most soup problems are easy to fix before the bowls hit the table. Salt wakes the flavor up, cream softens acidity, tomato paste deepens the base, and a few more minutes of simmering can rescue a thin pot.
Use this comparison to see the difference between loose tomato soup and the thicker spoon-coating texture you want.
Common Tomato Soup Problems
| Problem | Why It Happens | How to Fix It |
|---|---|---|
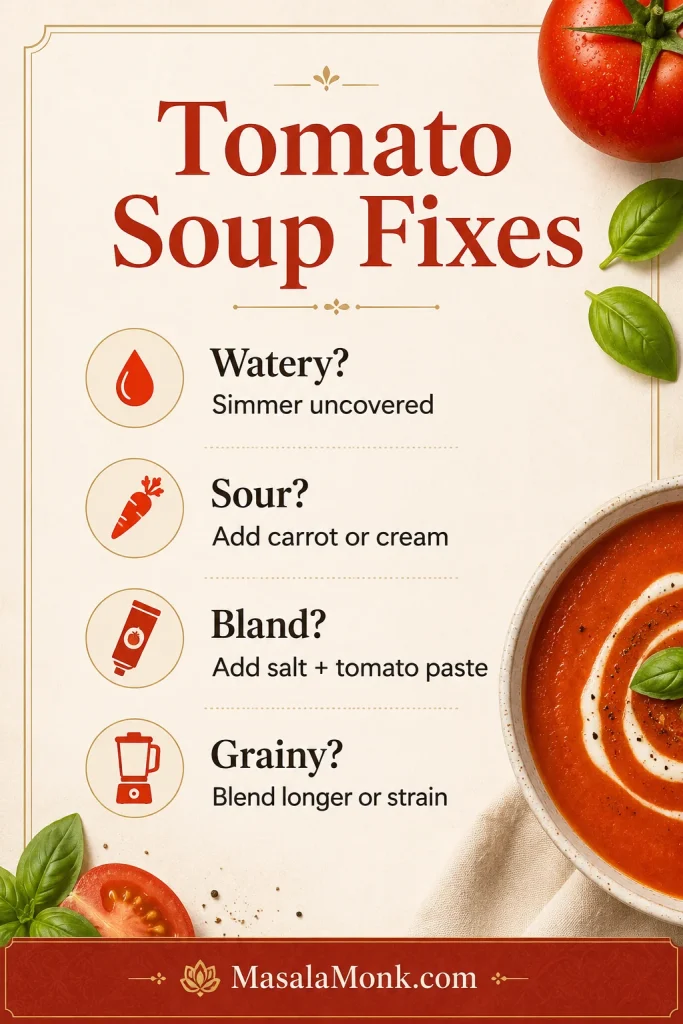
| Watery soup | Tomatoes were very juicy or too much broth was added. | Simmer uncovered, add tomato paste, roast tomatoes next time, or blend in potato, white beans, cashews, or a small piece of bread. |
| Sour soup | Tomatoes were acidic or underripe. | Add carrot, roasted red pepper, cream, butter, or a tiny amount of sugar or maple syrup. |
| Bland soup | Not enough salt, tomato depth, or aromatics. | Add salt gradually, more black pepper, tomato paste, basil, or roasted garlic. |
| Bitter soup | Garlic burned, basil overcooked, or tomatoes were underripe. | Avoid burnt garlic, add basil late, and balance with cream or carrot. |
| Thin soup | Too much liquid or not enough body. | Simmer longer, add potato, white beans, cashews, bread, or cream. |
| Too thick | Soup reduced too much. | Add broth or water slowly until the texture loosens. |
| Seedy soup | Tomato seeds remained after blending. | Strain the soup through a fine-mesh strainer. |
| Skins in soup | Tomato skins did not fully blend. | Blend longer, use a high-speed blender, or strain. |
| Pale soup | Tomatoes were not deeply red or tomato paste was skipped. | Use ripe red tomatoes and add tomato paste. |
| Grainy soup | Soup was not blended enough or solids were fibrous. | Blend longer and strain for a smoother finish. |
After the troubleshooting table, this card gives quick fixes for watery, sour, bland, or grainy soup.
What Not to Overdo
Do not fix everything with sugar. A tiny amount can help sharp tomatoes, but better soup usually comes from ripe tomatoes, enough salt, tomato paste, proper simmering, and a little fat or cream when needed.
For a chunkier tomato-broth soup where beans naturally add body, this minestrone soup is a good next bowl to make.
Soup fixed? Return to the recipe card, choose what to serve with tomato soup, or check storage and freezing.
What to Serve With Tomato Soup
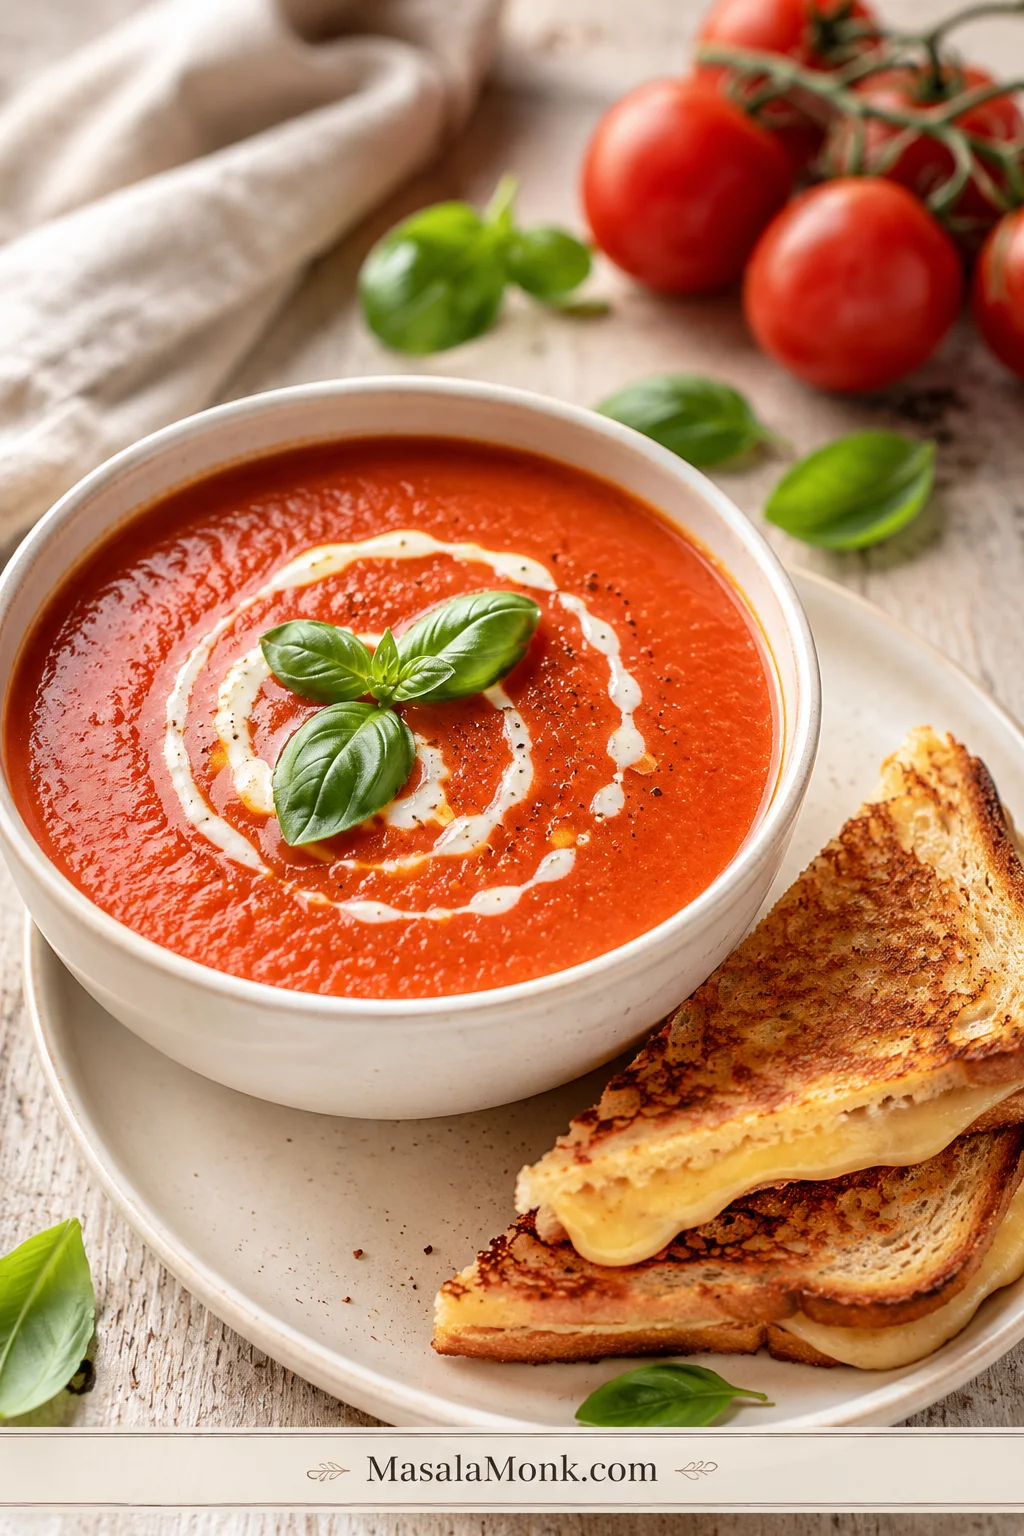
Tomato soup is built for crisp, toasted, cheesy, or herby sides. The best bowl has that red-orange glow, a little basil on top, and something crisp on the side for dipping.
A bowl of tomato soup becomes a fuller meal when you add something crisp, cheesy, herby, or fresh on the side.
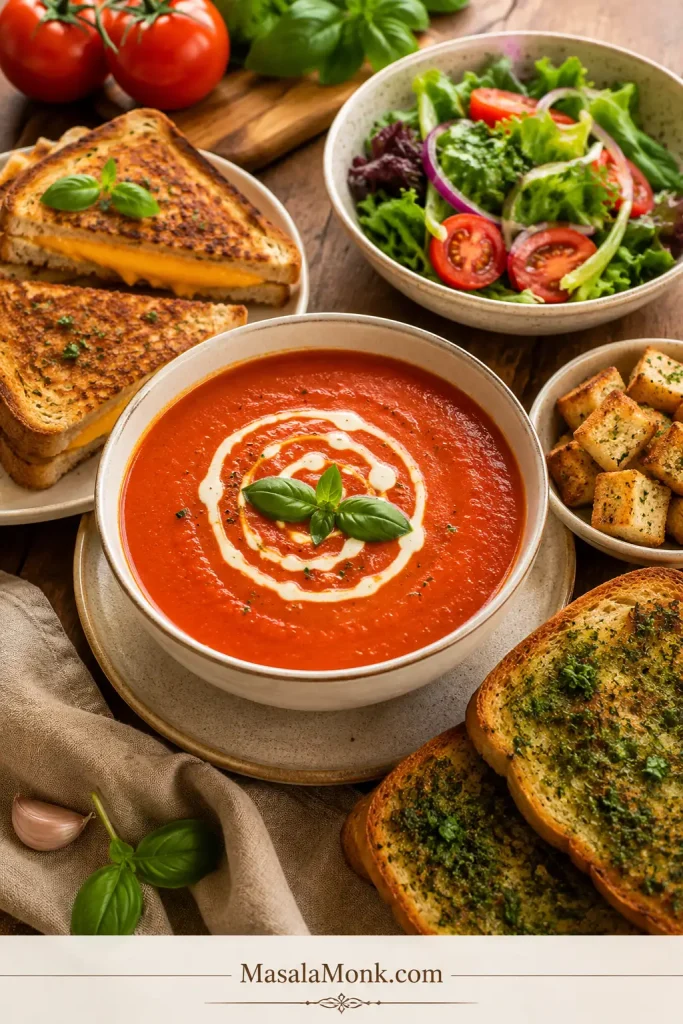
- Grilled cheese sandwich
- Garlic bread
- Cheese toast
- Croutons
- Toasted sourdough
- Basil pesto toast
- Cucumber salad for a crisp, cool side
- Parmesan and black pepper
- Chili flakes or chili oil
- A swirl of cream or olive oil
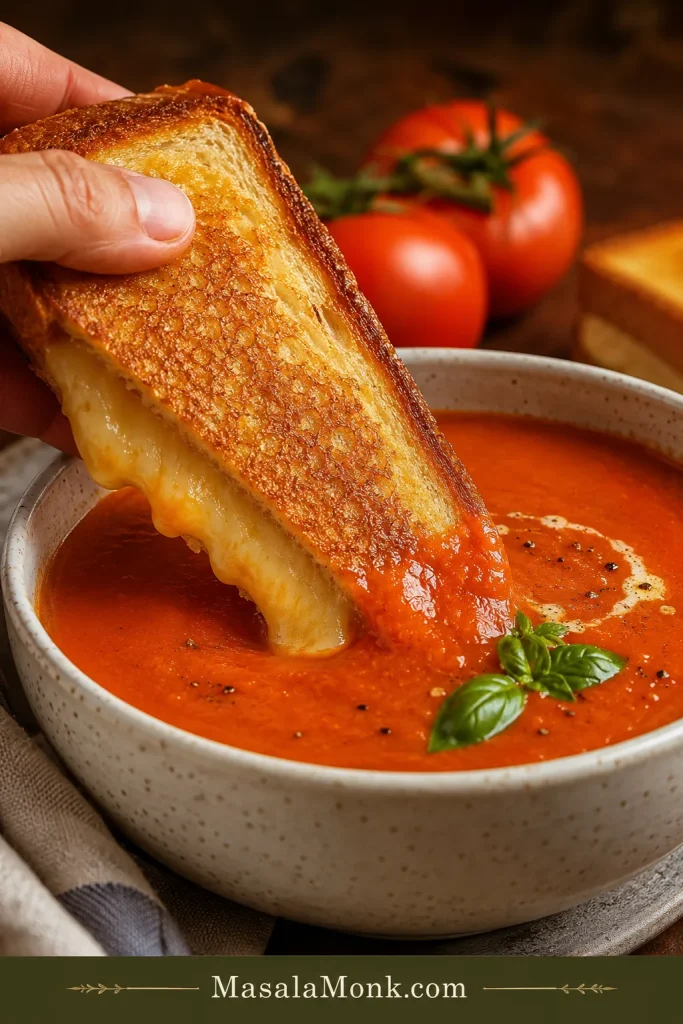
For the classic version, make grilled cheese and dip the crisp edges into the soup. The first dip should leave a little orange-red trail on the bread. To keep the bowl lighter, serve it with salad, toasted bread, and extra basil. For a more filling lunch that still stays fresh, pair it with this chickpea salad instead of making the soup heavier.
The grilled cheese dip is also a texture test: the soup should cling lightly instead of running off like water.
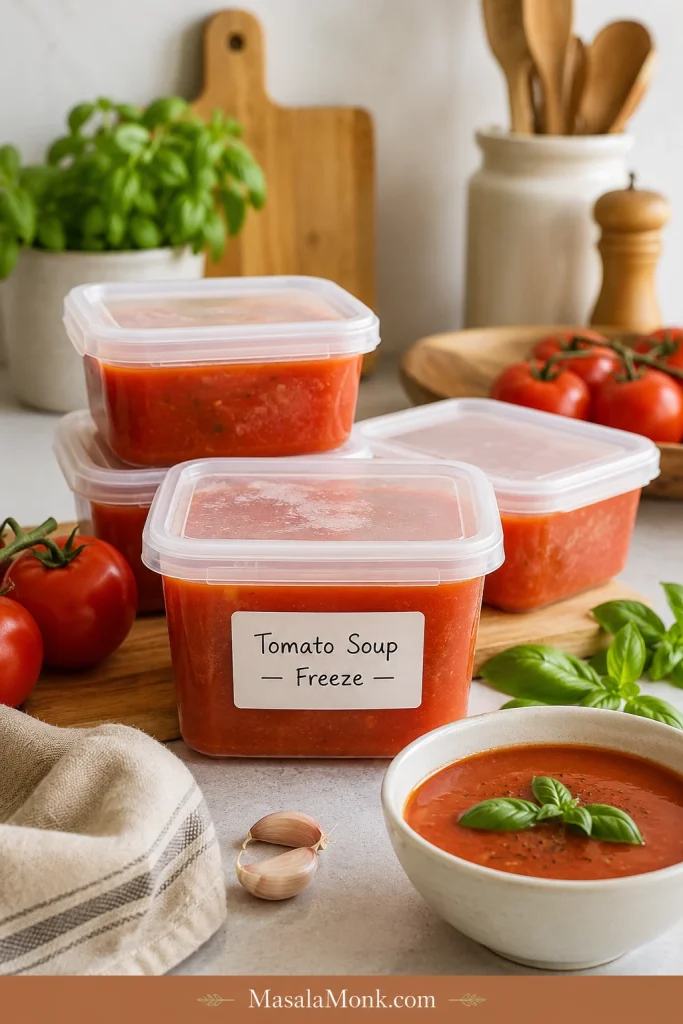
Storage, Freezing, and Reheating
- Refrigerate: Store cooled soup in an airtight container for up to 4 days.
- Freeze: Freeze for up to 3 months for best quality. For best texture, freeze before adding cream.
- Reheat: Warm gently on the stovetop over medium-low heat, stirring often.
- Adjust after reheating: Add a splash of broth or water if the soup thickens in the fridge or freezer.
- Add cream later: If freezing, stir in cream after reheating rather than before freezing.
Freeze the soup in portions for quick lunches. Leave a little space at the top of the container because soup expands as it freezes.
Portion the soup before adding cream, then adjust the texture gently when reheating.
For general leftover timing, FoodSafety.gov’s cold food storage chart lists soups and stews at 3 to 4 days in the refrigerator and 2 to 3 months in the freezer, which is why this recipe keeps the storage guidance conservative.
Cooking again later? Return to the recipe card, or jump back to the top of the post.
Canning Safety Note
This fresh tomato soup recipe is written for eating fresh, refrigerating, or freezing. It is not a tested shelf-stable canning recipe.
Keep the storage advice clear: fresh eating, refrigeration, and freezing are fine, but this is not a canning recipe.
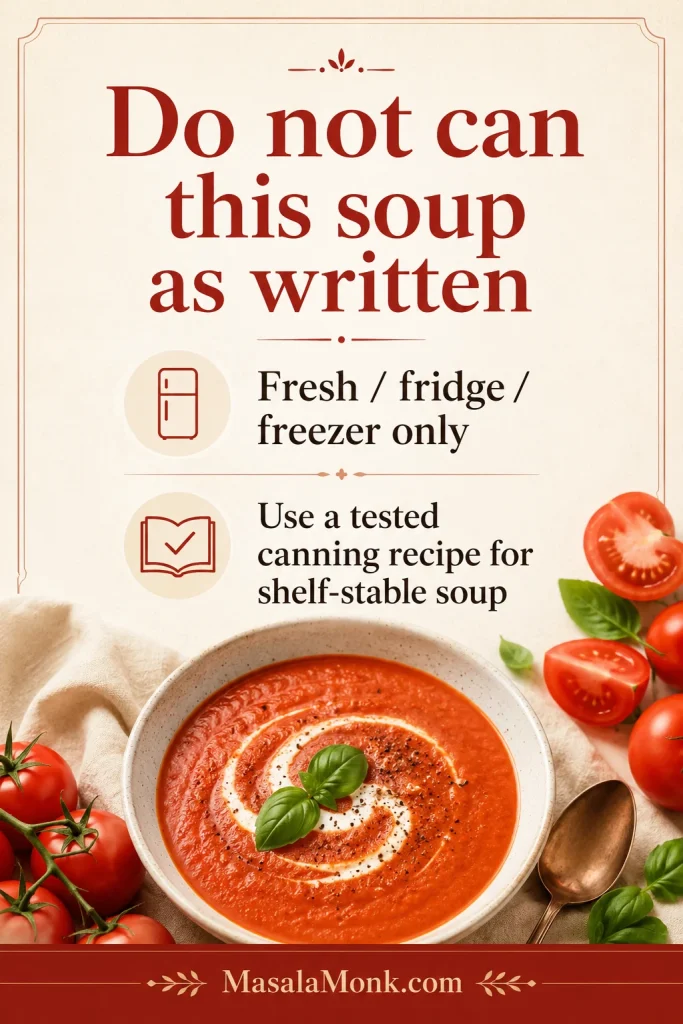
Do not can this soup as written, especially if you add cream, milk, flour, cashews, bread, potato, white beans, pasta, rice, or other thickeners. Those ingredients can change density and heat penetration in home-canned soup. If you want pantry-stable tomato soup, follow a tested pressure-canning recipe from start to finish rather than adapting this one. The National Center for Home Food Preservation is a good place to start.
Fresh Tomato Soup FAQs
Do I need to peel tomatoes for tomato soup?
No. You do not need to peel tomatoes for everyday tomato soup. Blend well, then strain the soup if you want a very smooth finish.
How many fresh tomatoes do I need?
For about 6 bowls of soup, use 3 lb / 1.35 kg fresh tomatoes. This is usually around 8 to 10 medium tomatoes, depending on their size.
Can I use cherry, garden, or mixed tomatoes?
Yes. Cherry tomatoes add sweetness, garden tomatoes add fresh flavor, and mixed tomatoes work well together. If the mix is very juicy, cook it longer before adding more broth.
Why did my soup turn watery?
Tomato soup turns watery when the tomatoes are very juicy, the soup is not simmered long enough, or too much broth is added early. Simmer uncovered, add tomato paste, or roast the tomatoes next time for a thicker bowl.
How do you make fresh tomato soup less acidic?
Use ripe tomatoes, add carrot or roasted red bell pepper, and finish with cream, butter, or a small pinch of sugar if needed. Roasting the tomatoes also helps soften sharp acidity.
What if I do not have tomato paste?
You can still make the soup, but it may taste lighter and look paler. Cook the tomatoes longer, use the roasted method if possible, and add a little extra salt or a small knob of butter at the end for depth.
Should I add cream to fresh tomato soup?
Add cream if you want the soup softer, richer, and closer to classic creamy tomato soup. Skip it if you want the fresh tomato flavor to stay brighter. For no-cream body, use carrot, potato, cashews, white beans, bread, or extra simmering.
How do I make tomato basil soup with fresh tomatoes?
Make the base recipe, then add fresh basil near the end and blend briefly. For stronger basil flavor, use extra basil and garnish each bowl with chopped basil or basil oil.
Can this be made without onion or garlic?
Yes. Use carrot, celery, roasted red bell pepper, bay leaf, basil, black pepper, and olive oil or butter for flavor. For an Indian-style no onion no garlic version, an optional tiny pinch of hing can add savory depth.
How long does homemade tomato soup last?
Homemade tomato soup lasts up to 4 days in the refrigerator when stored in an airtight container.
Can I freeze fresh tomato soup?
Yes. Fresh tomato soup freezes well for up to 3 months for best quality. For the smoothest texture, freeze it before adding cream and stir in cream after reheating.
Can I can this tomato soup?
No. This is not a tested shelf-stable canning recipe. It is written for eating fresh, refrigerating, or freezing. Use a tested pressure-canning recipe if you want pantry-stable soup.
Final Thought
The best fresh tomato soup tastes like you caught the tomatoes at the right moment — ripe, sweet, a little messy, and worth turning into something warm. Cook them down until the pot smells saucy, blend until smooth, then let the tomatoes tell you how much broth they need. The final bowl should taste bright enough for summer, soft enough for comfort, and ready for grilled cheese.