Posted on — Leave a comment

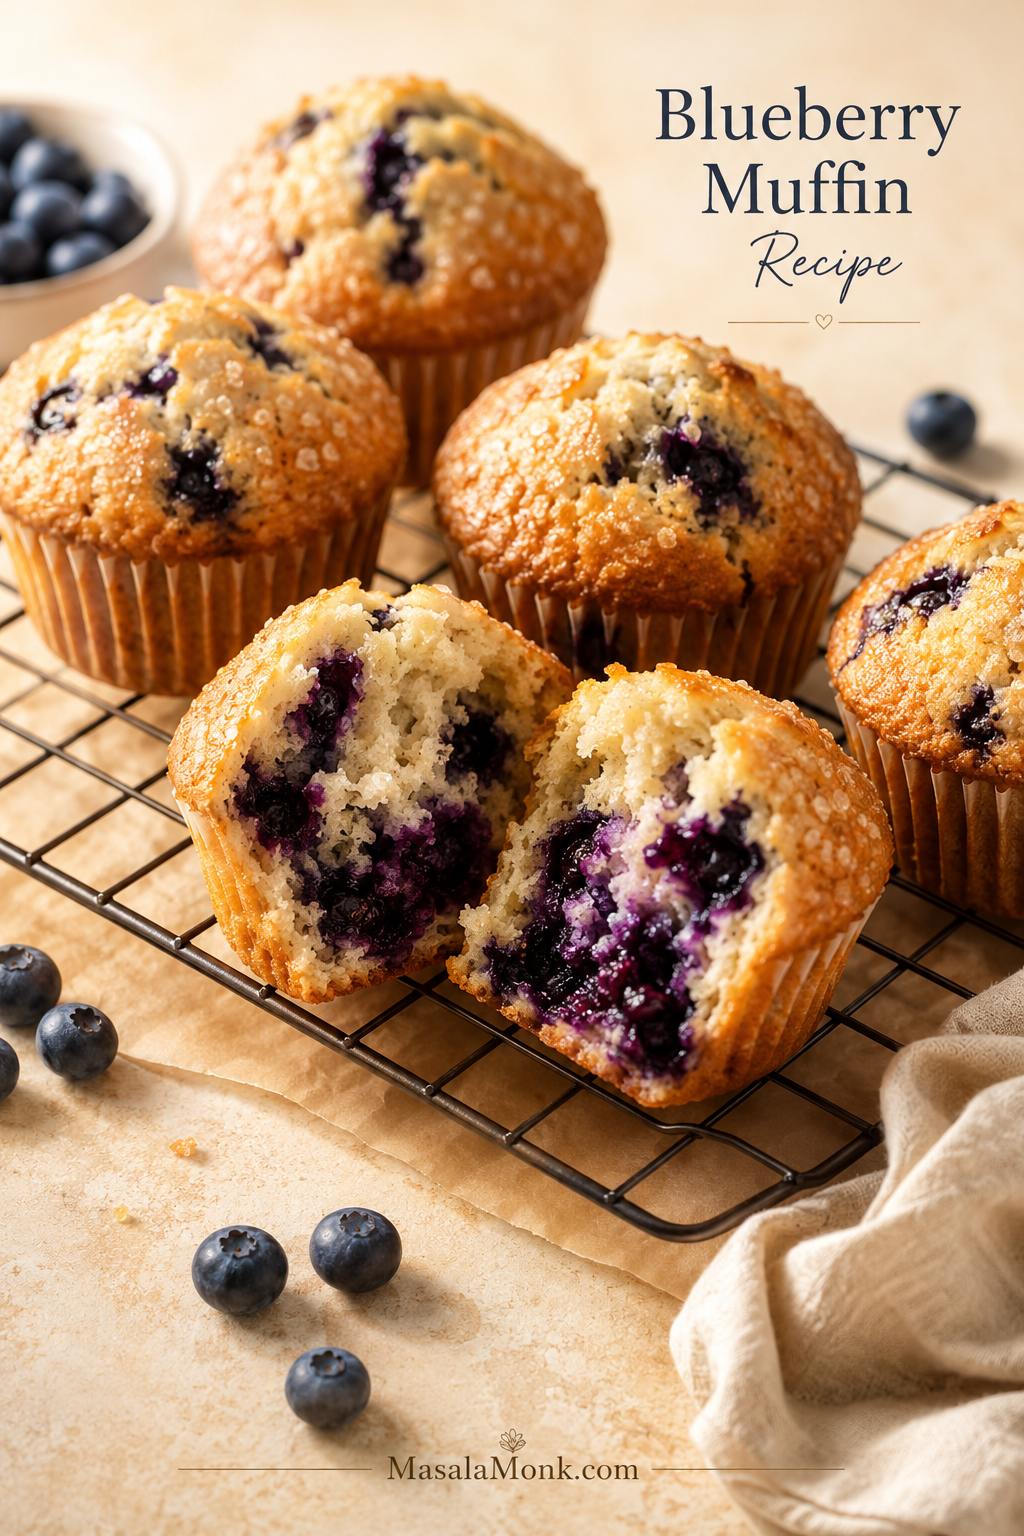
Blueberry Muffin Recipe

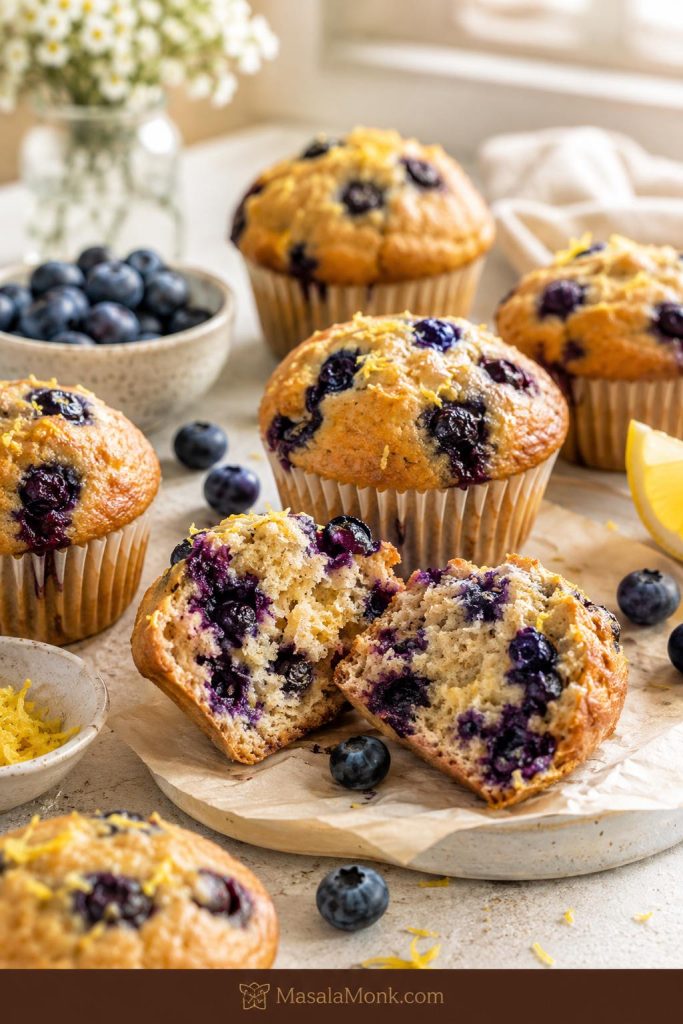
Golden blueberry muffins on a cooling rack with one muffin split open to show a soft blueberry-filled crumb.

A good blueberry muffin recipe should give you that warm bakery moment at home: golden tops, soft centers, juicy blueberries, and a crumb tender enough to pull apart while the muffin is still a little warm. The top should have a light sugar crunch, the center should stay plush, and the berries should burst into little jammy pockets instead of sinking into one wet layer.
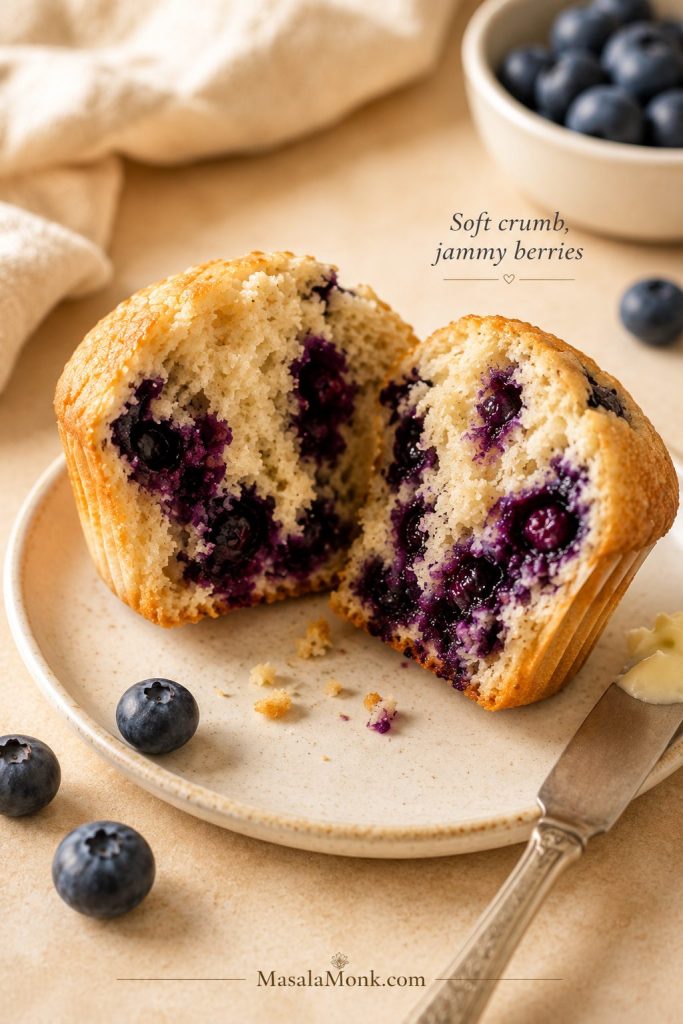
Close-up of a split blueberry muffin with moist crumb and jammy blueberry pockets.
Look for a crumb that pulls apart softly but still holds together. When the berries look jammy instead of watery, the muffins have enough moisture without turning soggy.

Blueberry muffins can look simple and still go wrong in familiar ways: dry, flat, dense, or streaked purple. Usually, the difference comes down to small choices — how much flour you use, how gently you mix, how cold the berries are, and how hot the oven starts.

The method stays easy. First, melted butter brings the flavor; then a small amount of oil keeps the crumb soft, sour cream adds tenderness, and a hot-start oven helps the tops rise tall and golden. Finally, use fresh berries when you have them, frozen berries when you need them, and coarse sugar or streusel depending on the kind of muffin you want today.

Think of this as the comfort of classic blueberry muffins with fewer of the usual disappointments: no dry crumb, no purple batter, no sunken berry layer, and no flat little tops hiding under the liner.
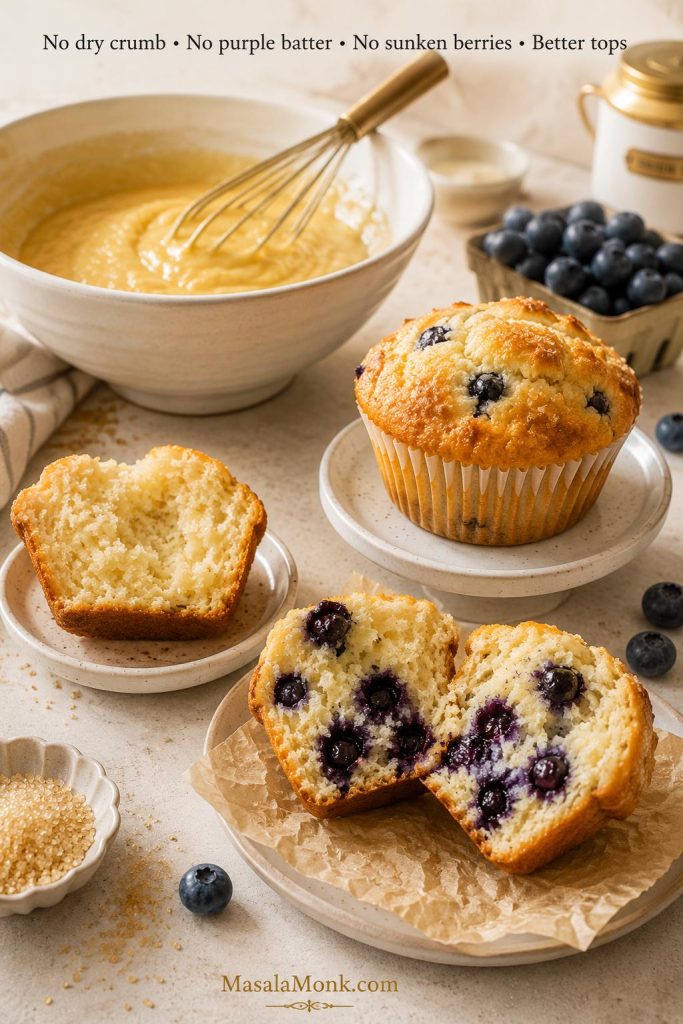
Blueberry muffin proof scene with moist crumb, clean batter, domed tops, and evenly distributed blueberries.
This is the promise of the recipe: fewer dry crumbs, fewer purple streaks, fewer sunken berries, and better tops. The method stays simple, but each step protects the final texture.

Already baking? Go straight to the recipe card. Working with frozen berries? The fresh vs frozen blueberry section will help before you mix.

Quick Answer: How to Make Moist Blueberry Muffins

For moist, fluffy blueberry muffins, this recipe uses a thick, scoopable batter made with melted butter, a little oil, sour cream, milk, and 1½ cups of blueberries. Then, fill the muffin cups almost to the top, bake at 425°F / 220°C for 5 minutes, and reduce the oven to 375°F / 190°C until the tops are golden and the centers are set.

Fresh blueberries give the cleanest-looking crumb, but frozen blueberries work well too. Keep them frozen until the last moment, fold them in gently, and bake right away so the batter stays bright instead of turning streaky purple.

If your last batch turned purple, flat, or soggy, the blueberry muffin troubleshooting table will help you fix the next one quickly.

The result should feel like a real bakery muffin: domed, golden, soft in the middle, and full of berries without turning wet at the bottom.

The key idea: you do not need a mixer or a bakery kitchen to get soft, tall blueberry muffins. A batter with enough body, a hot-start oven, and gentle blueberry folding do most of the work.

Blueberry Muffins at a Glance

Dry, flat, dense, or streaky muffins usually come from a few fixable choices. This quick overview shows what keeps the batch on track before you start mixing.

Yield 12 standard blueberry muffins
Prep time 15 minutes; add 3–5 minutes if making streusel
Optional rest 10–15 minutes for slightly taller tops
Bake time 18–22 minutes
Total time 35–40 minutes without rest; 45–55 minutes with optional rest; add 3–5 minutes if making streusel
Oven method 425°F / 220°C for 5 minutes, then 375°F / 190°C
Blueberries Fresh or frozen
Texture Soft, tender, golden, and blueberry-packed
Topping Coarse sugar by default, optional streusel
Mixer needed? No
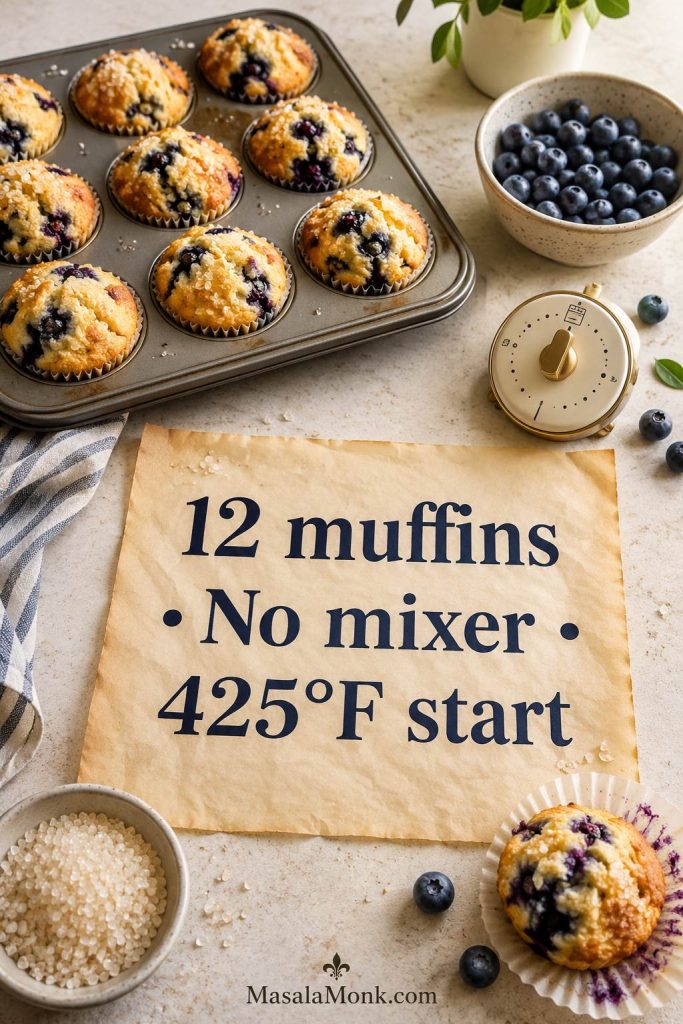
Blueberry muffins at a glance with a recipe card, muffin tin, blueberries, timer, and coarse sugar.
Before mixing, lock in the big decisions: 12 muffins, no mixer, and a hot 425°F start. That simple structure keeps the recipe easy while helping the muffins rise higher.

Why This Blueberry Muffin Recipe Works

Because this muffin recipe balances butter, oil, sour cream, and a hot-start bake, the blueberry muffins come out soft, lifted, and flavorful without needing a mixer.

Butter gives flavor, oil keeps the crumb soft

Butter gives blueberry muffins that rich homemade flavor. A small amount of oil keeps the crumb soft after cooling. The amount is small on purpose: enough for tenderness, not so much that the muffins feel greasy.

Sour cream gives the batter enough body

Sour cream adds richness, tenderness, and light tang. Full-fat sour cream gives the softest crumb, while low-fat sour cream can work if that is what you have. It also gives the batter enough structure to hold the berries instead of letting them slide straight to the bottom. The finished muffin should taste soft and buttery, not wet or oily.

A hot-start bake helps create taller tops

The muffins begin in a hot oven, which gives the batter an early lift. After 5 minutes, the temperature drops so the centers can bake through without drying out. That first burst of heat helps create a taller, more golden top without making the method complicated.

The plain-batter cushion keeps berries from sinking

This is the little step most blueberry muffin recipes skip. Before the blueberries go into the batter, spoon a small amount of plain batter into the bottom of each muffin cup. Then fold the berries into the remaining batter and fill the cups. It takes less than a minute, but it helps prevent that wet, sticky berry layer that can glue itself to the liner.

This idea is also discussed in Serious Eats’ blueberry muffin testing, and it is more useful than relying only on the old “toss the berries in flour” trick.

Ingredients for Homemade Blueberry Muffins

The ingredients are simple, but each one has a job. Together, they create a soft crumb, steady lift, and enough support to keep the blueberries evenly distributed.
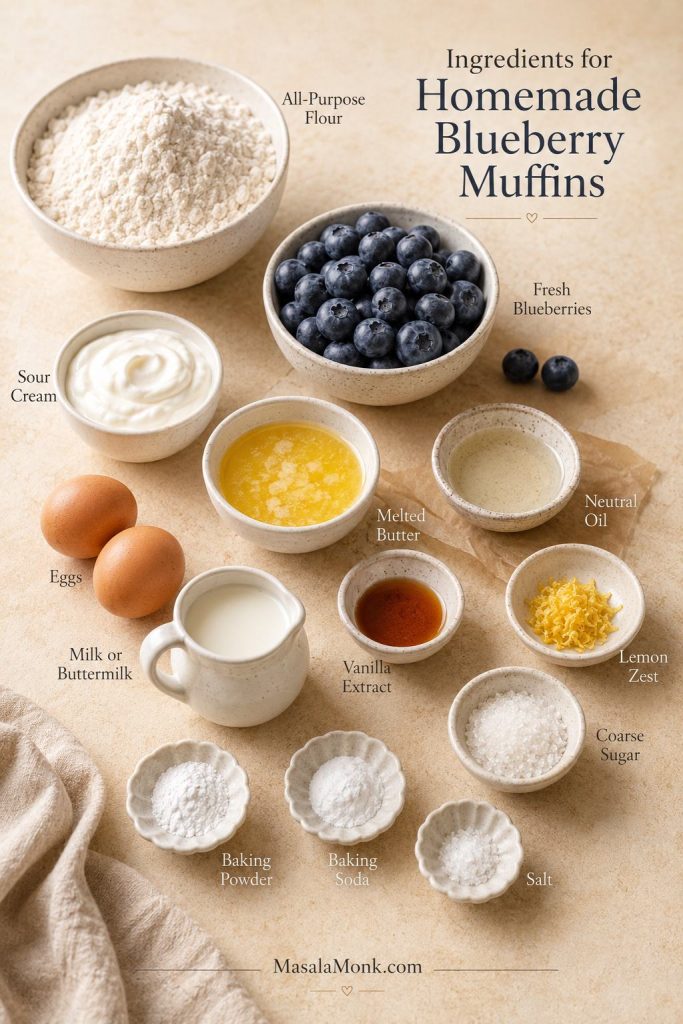
Ingredients for blueberry muffins including blueberries, flour, sour cream, butter, eggs, milk, vanilla, lemon zest, and coarse sugar.
Every ingredient has a job. Butter and vanilla build flavor, sour cream and oil protect softness, and the flour-liquid balance helps the blueberries stay suspended in the batter.

All-purpose flour

Use regular all-purpose flour for a tender, familiar muffin crumb. Weigh the flour if possible, because too much flour is one of the fastest ways to make muffins dry, dense, or heavy. When measuring by cups, spoon the flour into the cup and level it off instead of scooping directly from the bag.

Baking powder and baking soda

Baking powder gives the muffins lift, while baking soda works with the sour cream to help the batter rise and brown. Make sure both are fresh. Old leavening can give you flat muffins even when the mixture looks right.

Sugar

Three-quarters cup of granulated sugar keeps these muffins sweet enough for breakfast or brunch without pushing them into cupcake territory. Coarse sugar on top adds a light crunch and a bakeshop-style finish.

Melted butter and neutral oil

Melted butter keeps the method easy because you do not need a mixer. A small amount of neutral oil adds softness. Use a mild oil such as canola, vegetable, sunflower, or another neutral baking oil.

Eggs

Two large eggs help the muffins rise and hold together. Very cold eggs can be placed in a bowl of warm water for a few minutes while you prepare the dry ingredients.

Sour cream, milk, buttermilk, or Greek yogurt

Sour cream gives the muffins tenderness and moisture. Milk loosens the batter just enough so it folds together without becoming runny. Buttermilk can replace the milk if you want a slightly tangier crumb, and plain Greek yogurt can replace the sour cream if it is thick rather than watery.
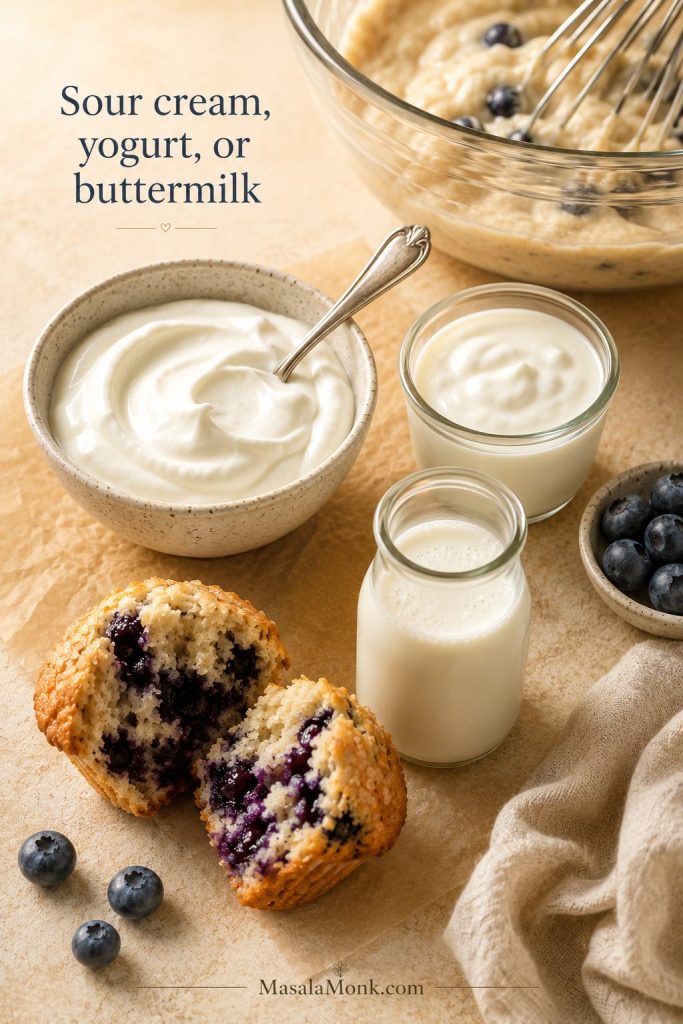
Sour cream, Greek yogurt, and buttermilk beside blueberry muffin batter and a split muffin crumb.
Sour cream gives the richest crumb, while thick Greek yogurt or buttermilk adds a gentle tang. Either way, the batter needs enough body so the muffins bake plush, not loose.

If you are mainly trying to make muffins more filling, keep this classic version as the texture benchmark first. Then use our high protein muffins guide for versions built around Greek yogurt, protein powder, cottage cheese, and freezer-friendly breakfast prep.

Blueberries

Use 1½ cups of blueberries for juicy muffins that still bake evenly. Smaller berries distribute more evenly, while large berries give bigger jammy pockets. Fresh blueberries are easiest, though frozen berries are completely fine when handled gently. For an extra berry-packed batch, you can increase to 1¾ cups, but the muffins will be softer and a little more delicate.

Using frozen berries today? Read the fresh vs frozen blueberry guide before folding them in, because handling matters more than the berries themselves.

If blueberries are the breakfast flavor you keep coming back to, these blueberry pancakes are another easy way to use fresh or frozen berries without turning breakfast into a project.

Coarse sugar or streusel

Coarse sugar is the cleanest default topping because it gives the muffins a light crunch without making them heavy. Use the quick streusel variation in the recipe card when you want a sweeter bakery-style crumb topping.

Fresh vs Frozen Blueberries for Muffins

Both fresh and frozen blueberries work in this muffin recipe. The real difference is how much color and moisture they release into the batter.

Use fresh berries when presentation matters most. Use frozen berries when convenience matters most. If you want the cleanest crumb with frozen berries, use the rinse-and-dry method; otherwise, frozen-from-the-freezer is the fastest reliable route.
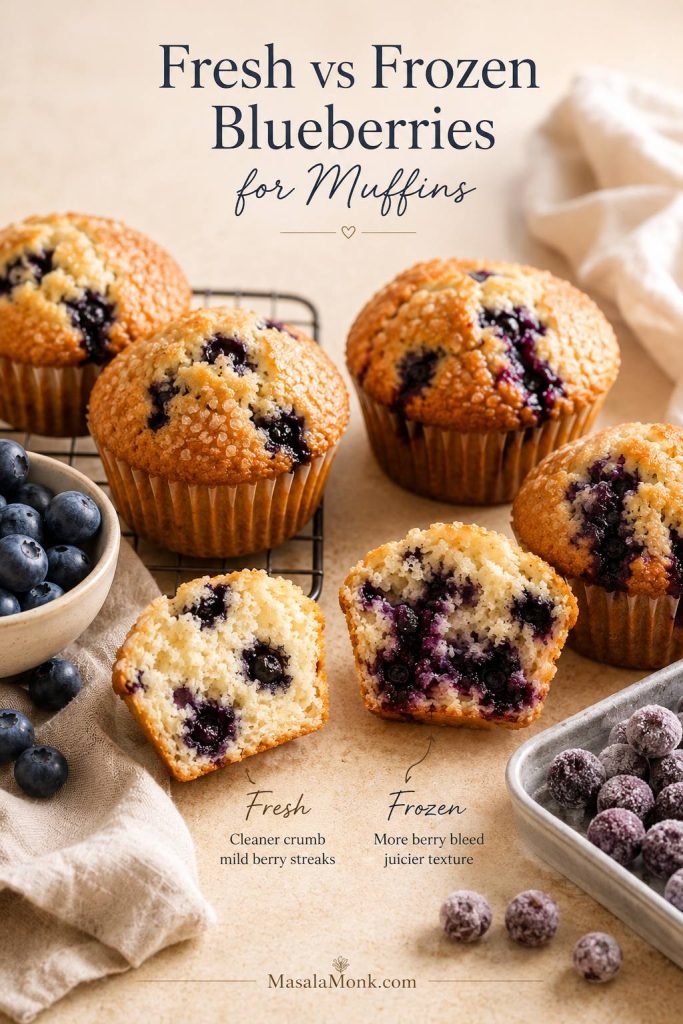
Fresh and frozen blueberries shown with blueberry muffin crumb examples for comparison.
Fresh blueberries usually give the cleanest-looking crumb. Frozen berries are just as useful, but they need colder handling because they release color and juice quickly once they soften.
Blueberry type Best use How to handle it
Fresh blueberries Cleanest batter and easiest folding Rinse, dry well, and fold gently
Frozen blueberries, fast method Convenience and year-round baking Add straight from the freezer
Frozen blueberries, cleanest batter method Less purple streaking Rinse briefly, dry very well, fold gently, and bake right away
Wild blueberries More even berry distribution Use slightly less if they are very small or juicy

For the fastest method, use frozen blueberries straight from the freezer. Once they thaw, they release juice quickly, which can turn the batter purple and make the muffins wetter.

For the cleanest golden batter, you can briefly rinse frozen blueberries in cold water, dry them very well, and fold them in gently. King Arthur Baking’s frozen-blueberry guide explains this method in more detail.
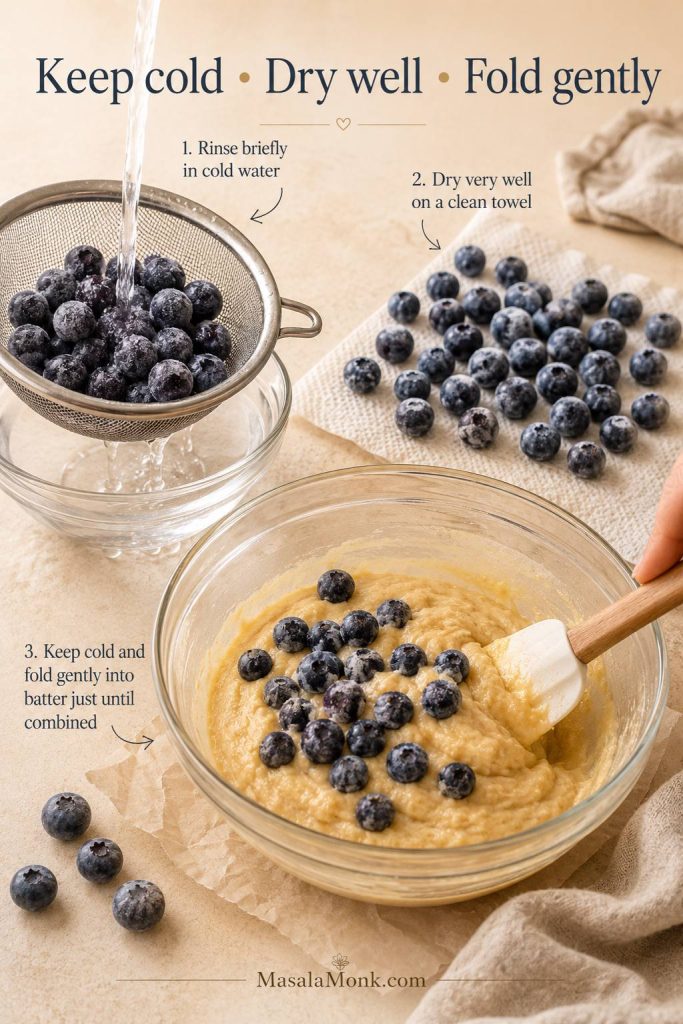
Frozen blueberries being rinsed, dried on a towel, and folded into blueberry muffin batter.
For frozen blueberries, cold and dry is the rule. Add them at the end, fold gently, and bake soon after mixing so the batter stays golden instead of turning purple.
Best practical rule: fresh berries should be dry, and frozen berries should be cold. Wet berries and overmixing are what usually lead to streaky purple batter.

How to Make Blueberry Muffins

Before you start: preheat the oven fully, dry fresh blueberries well, keep frozen blueberries frozen, mix the batter gently, and fill the muffin cups almost to the top. These five steps prevent most dry, dense, flat, purple, or sunken blueberry muffins.

The method is simple, but the order matters. First, mix the dry and wet ingredients separately; then fold them together gently so the muffins stay tender.
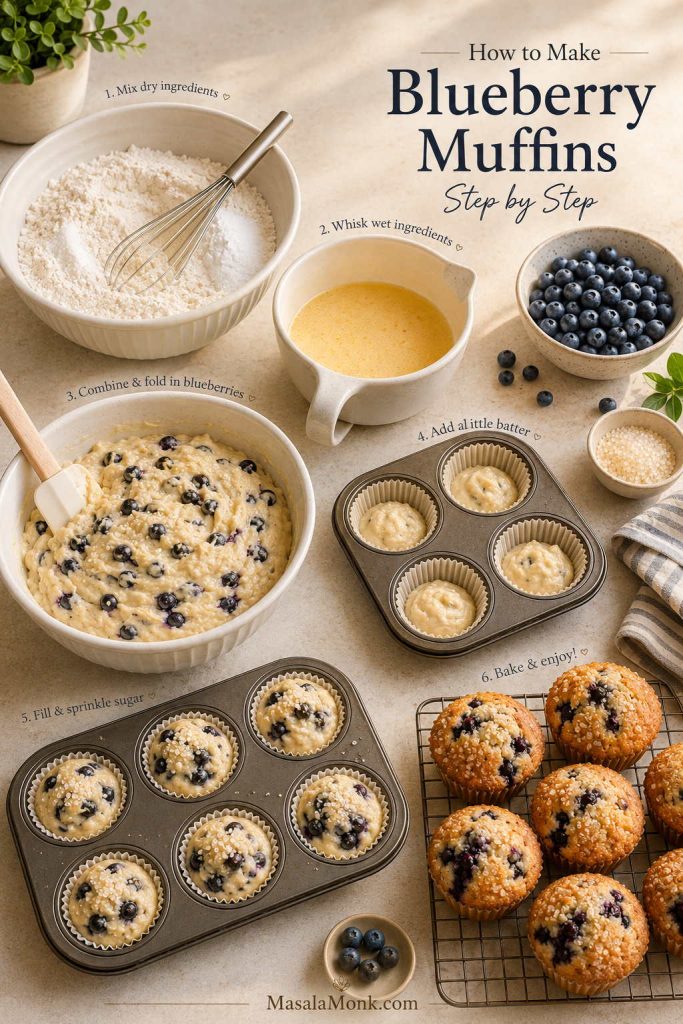
Step-by-step blueberry muffin process with dry ingredients, wet ingredients, plain batter, muffin cups, blueberries, and baked muffins.
The order is what makes this method different. Add the plain-batter cushion before folding in the blueberries, then fill the cups high so the fruit stays better distributed.

1. Prepare the pan and oven

Line a standard 12-cup muffin pan with paper liners. Then, heat the oven to 425°F / 220°C. To protect high muffin tops from sticking, lightly spray the top surface of the pan before filling the cups.

2. Mix the dry ingredients

In a large bowl, whisk together the flour, baking powder, baking soda, and salt. This helps distribute the leavening evenly so the muffins rise consistently.

3. Whisk the wet ingredients

In another bowl or large measuring jug, whisk the sugar, melted butter, oil, eggs, sour cream, milk, vanilla, and lemon zest if using until smooth. Let the butter cool slightly first, so it does not scramble the eggs.

4. Combine into a heavy, spoonable batter

Pour the wet ingredients into the dry ingredients and fold with a spatula until no dry pockets of flour remain. A few small lumps are fine. At this point, the batter should look thick and spoonable, not pourable; when you lift the spatula, it should fall slowly in heavy ribbons.
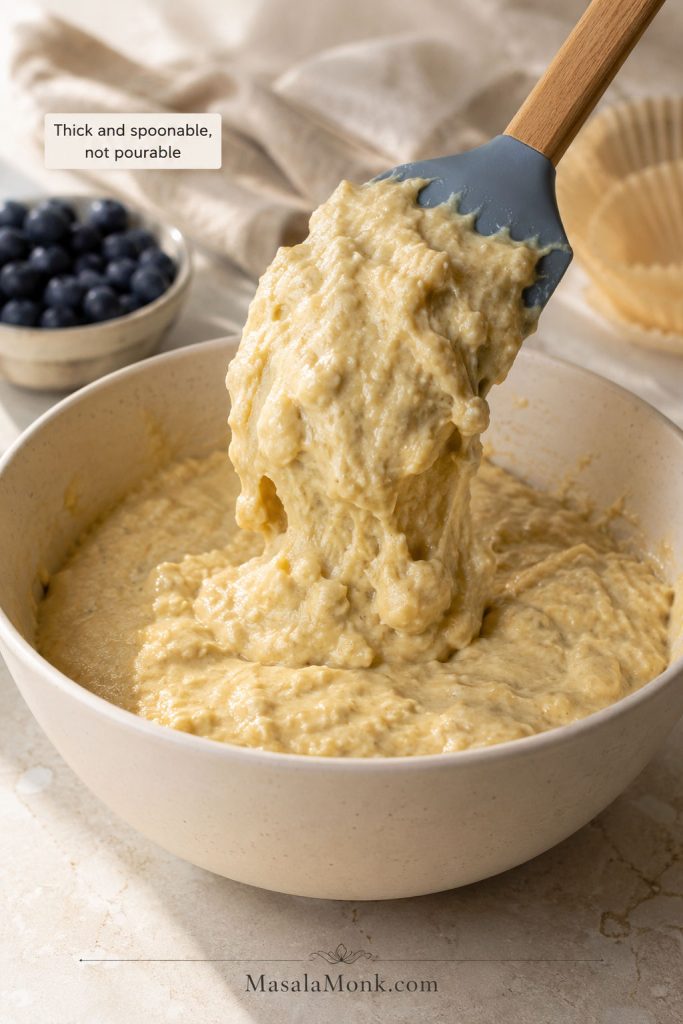
Thick blueberry muffin batter lifted on a spatula with blueberries nearby but not mixed in yet.
The batter should mound on the spatula and fall slowly. That thick, spoonable texture helps create taller muffin tops and keeps the blueberries from sliding straight down.

A 10–15 minute rest can help if you have time. Let the plain batter sit before filling the muffin cups or folding in the blueberries; the short rest lets the flour hydrate and can make the batter bake up a little taller. The muffins still work without it.

5. Add the plain-batter cushion

Before adding blueberries to the bowl, spoon about 1 tablespoon of plain batter into the bottom of each muffin cup. You are not filling the cup yet — just covering the bottom so the first berries do not bake directly against the liner.
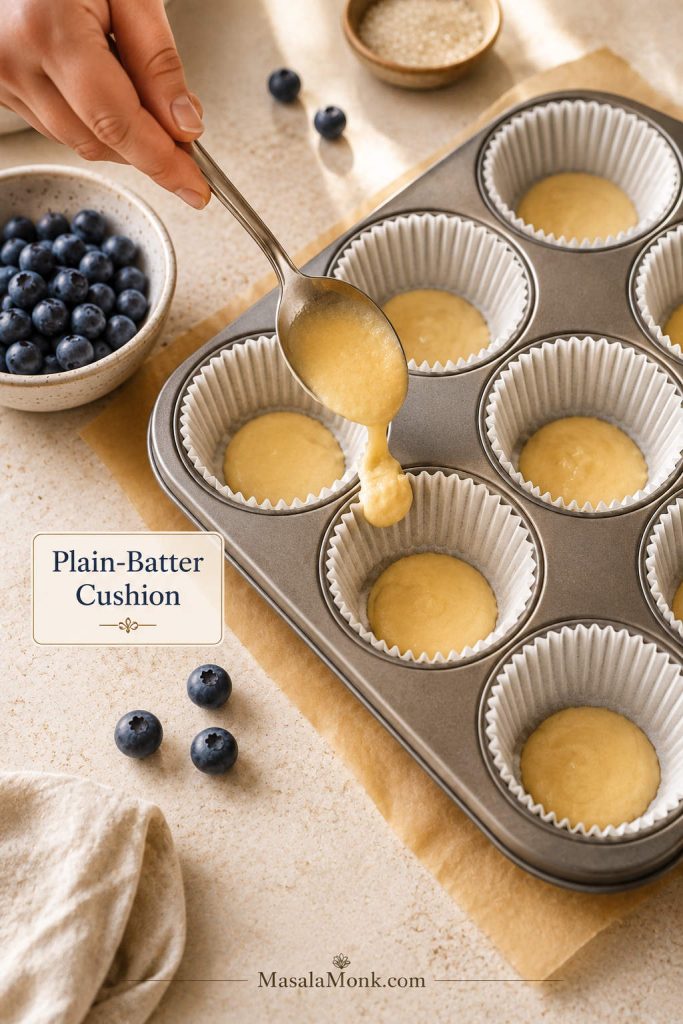
Plain batter being spooned into lined muffin cups before blueberries are added.
This small base layer helps protect the muffin bottoms. Because the first spoonful has no berries, the fruit is less likely to bake into one sticky layer against the liner.

Want to see why this matters? The blueberries sinking section shows how this step keeps the fruit from collecting at the bottom.

6. Fold in the blueberries

Add the blueberries to the remaining batter and fold gently. Use as few strokes as possible, especially with frozen berries. The goal is to distribute the fruit without crushing it or staining the batter.
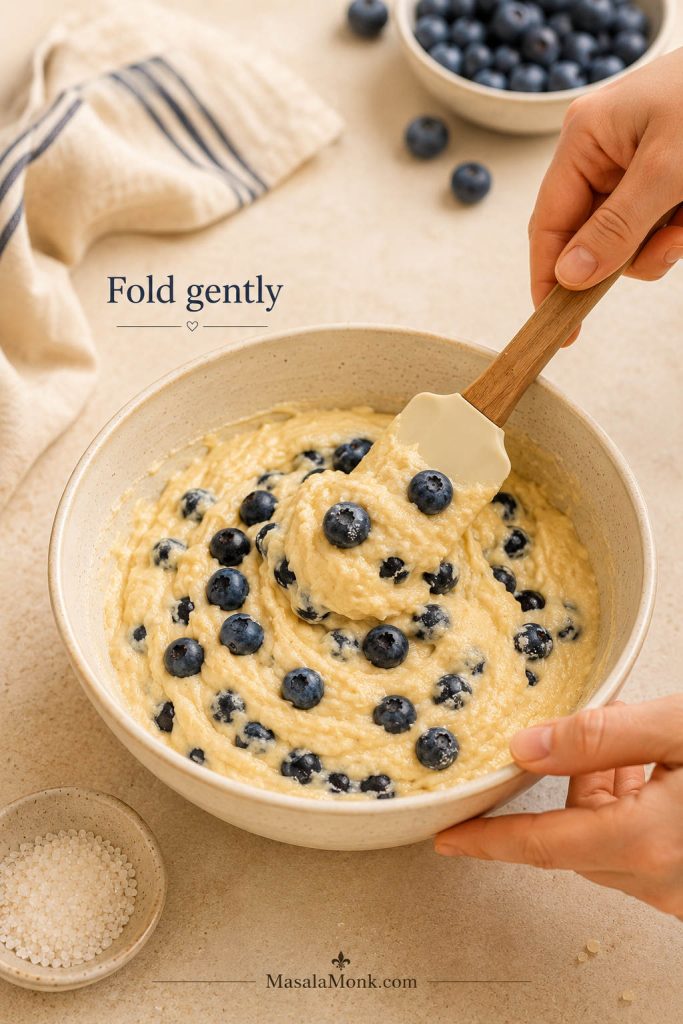
Blueberries being gently folded into golden muffin batter with a spatula.
Fold gently once the blueberries go in. Overmixing can burst the berries, stain the batter purple, and make the finished muffins denser than they need to be.

7. Fill and top

Divide the batter between the muffin cups, filling each one almost to the top. Then, sprinkle with coarse sugar, or add the streusel topping if using.
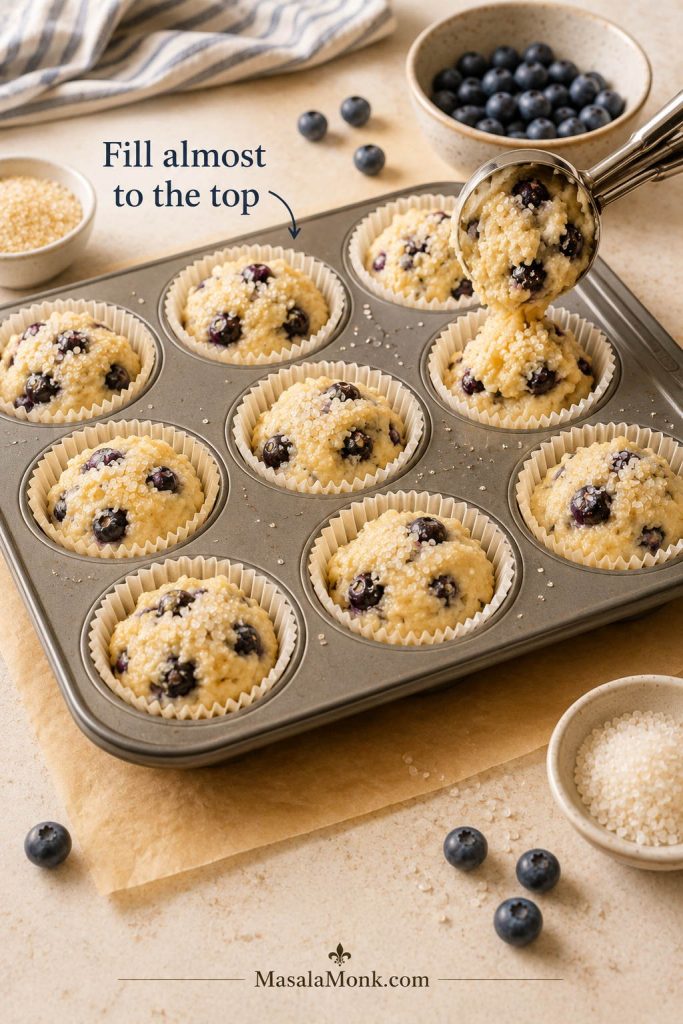
Blueberry muffin batter filled almost to the top of lined muffin cups with coarse sugar sprinkled over it.
Fill level matters more than most people think. For bakery-style blueberry muffin tops, the batter needs to sit close to the top of the liner before it goes into the oven.

For taller domes, see the bakery-style muffin tops section before you bake.

8. Bake hot, then finish lower

Bake at 425°F / 220°C for 5 minutes. Without opening the oven door, reduce the temperature to 375°F / 190°C and bake for another 13–17 minutes, or until the tops are golden and a toothpick inserted into the center comes out clean or with a few moist crumbs. Start checking at the early end of the range if your oven runs hot, and expect the upper end if your berries are frozen or very large.
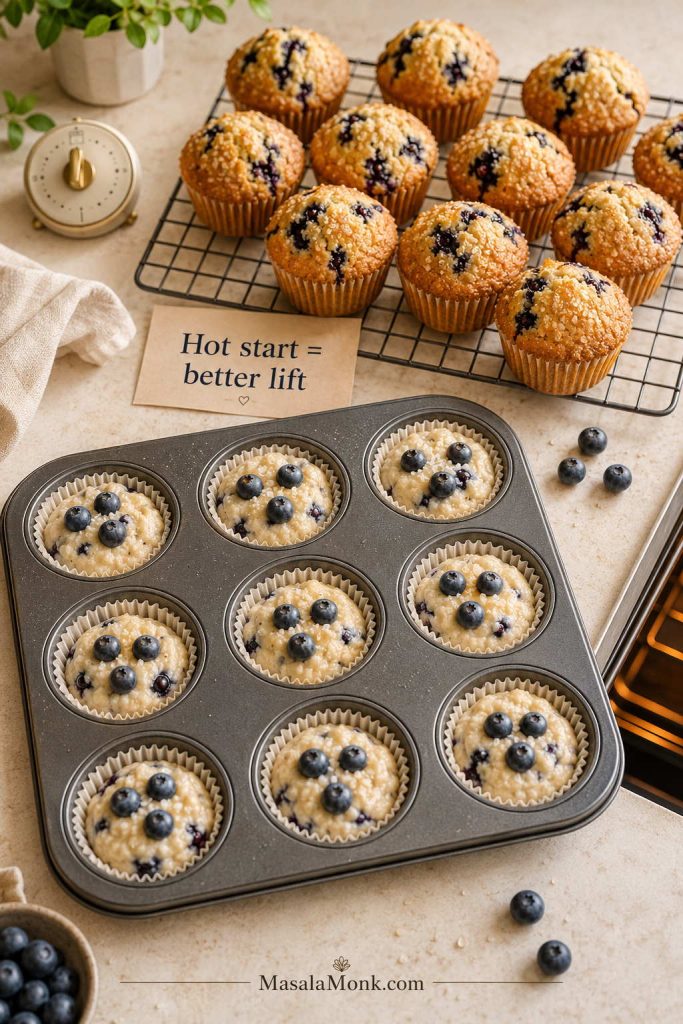
Raw blueberry muffin batter in a muffin tin with finished domed muffins cooling behind it.
The hot-start bake gives the batter its first lift, while the lower temperature finishes the centers more gently. Together, those two stages help prevent flat, dry muffins.

Baking mini or jumbo muffins instead? Use the mini, standard, and jumbo bake-time chart instead of guessing.

How to tell when blueberry muffins are done

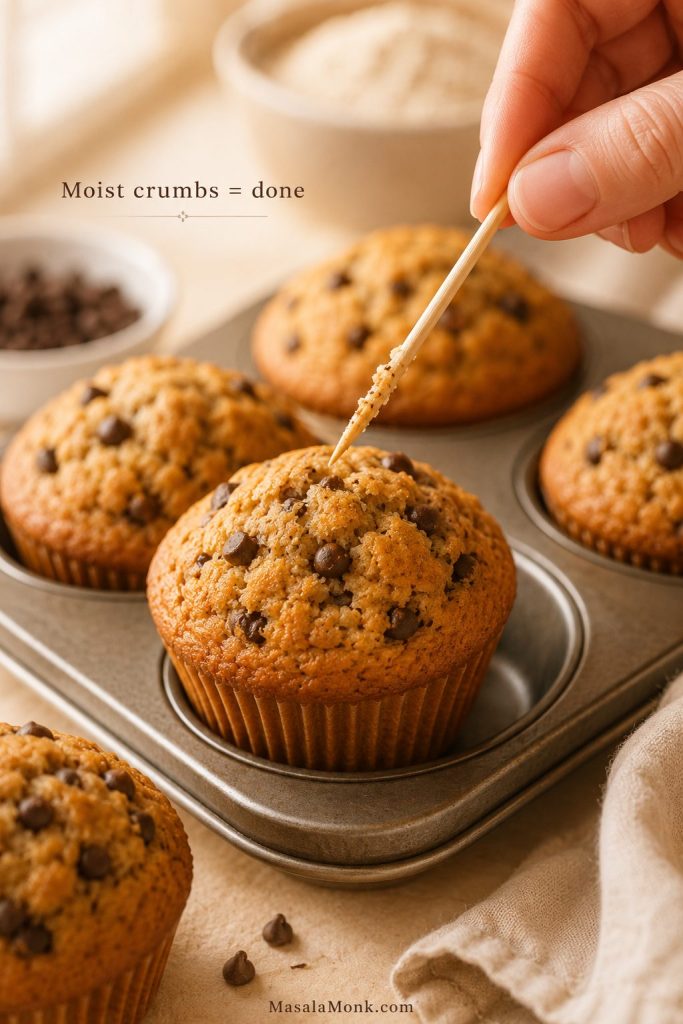
When they are ready, the tops should look set and lightly golden, and the muffins should spring back gently when touched near the center. For extra precision, the center of a fully baked muffin should register about 200–205°F / 93–96°C on an instant-read thermometer.
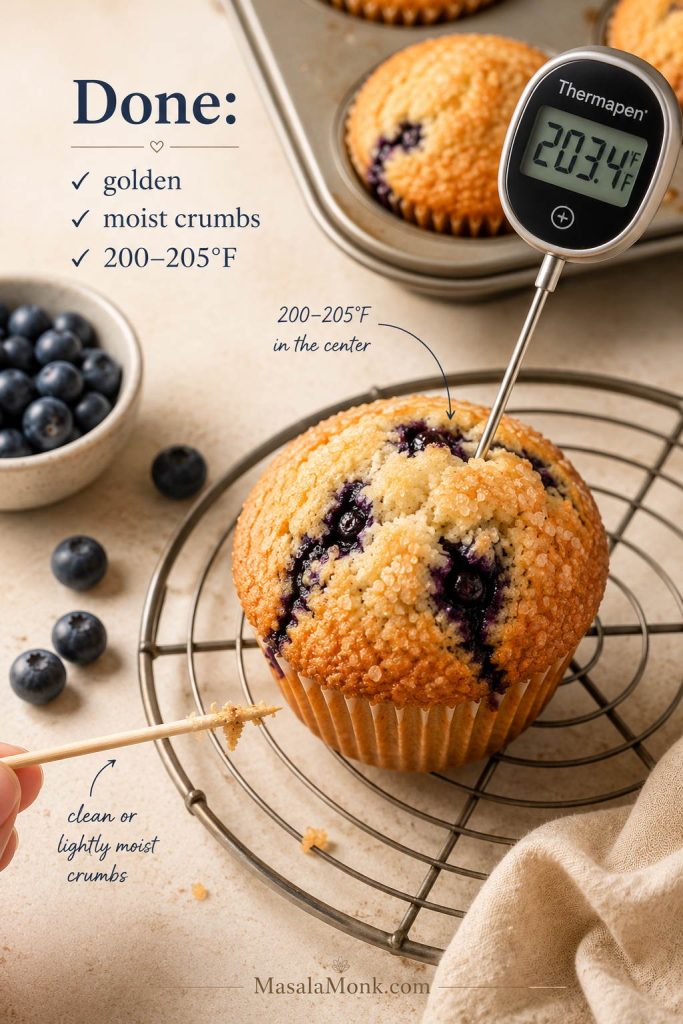
Blueberry muffin doneness guide with a golden muffin, toothpick crumbs, and thermometer reading about 203°F.
Use more than color to check doneness. A finished muffin should spring back lightly, show clean or moist crumbs on a toothpick, and read about 200–205°F in the center.

9. Cool before serving

Let the muffins cool in the pan for 5–10 minutes, then move them to a wire rack. Although they are wonderful warm, the crumb sets better if they get a few minutes to settle before you tear one open.

The first muffin is worth eating while it is still a little warm. Split it open, let the steam escape, and you should see a soft crumb with blueberries tucked through the center instead of pooled at the bottom.

Blueberry Muffin Recipe Card
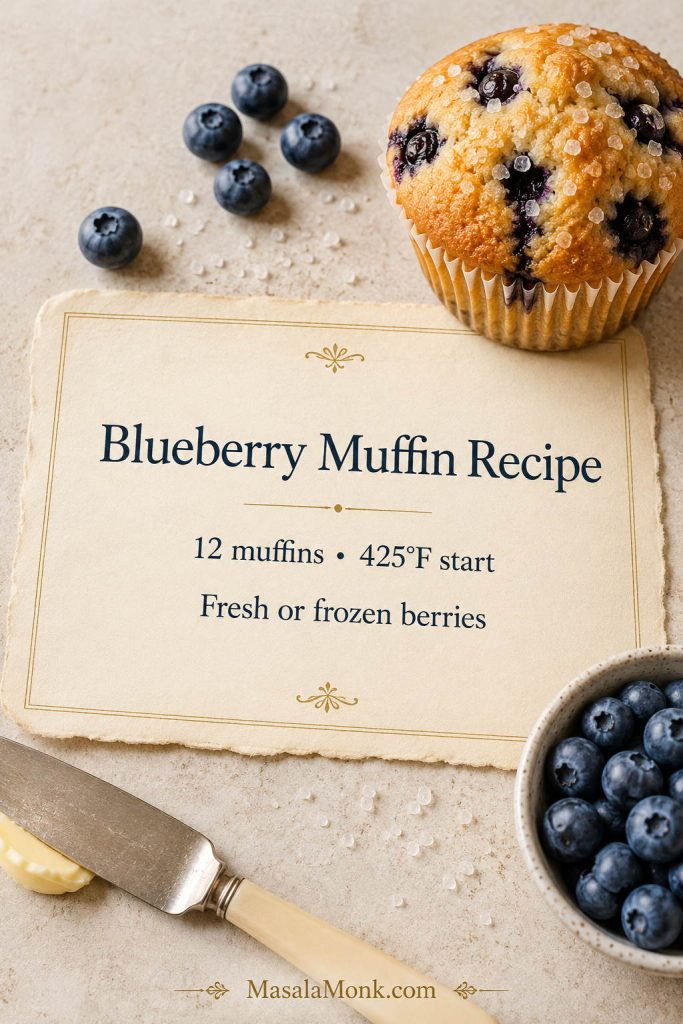
Blueberry muffin recipe card beside a golden muffin, blueberries, coarse sugar, and a butter knife.
Keep the core method simple: 12 muffins, fresh or frozen berries, and a hot oven start. Once those are right, sugar tops, streusel, or lemon zest become easy choices.

Blueberry Muffin Recipe

This blueberry muffin recipe makes soft, fluffy muffins with golden tops, juicy blueberries, and a simple no-mixer batter. Use fresh or frozen blueberries, finish with coarse sugar, or add the optional streusel topping.

Yield12 muffins
Prep15 minutes
Bake18–22 minutes
Total35–40 minutes, or 45–55 minutes with optional rest

Equipment

  • Standard 12-cup muffin pan
  • Paper liners
  • Large mixing bowl
  • Medium bowl or large measuring jug
  • Whisk
  • Silicone spatula
  • Large cookie scoop or ⅓-cup measure, optional
  • Wire cooling rack

Ingredients

  • 2 cups / 250g all-purpose flour
  • 2 teaspoons / about 8g baking powder
  • ½ teaspoon / about 2–3g baking soda
  • ½ teaspoon / about 3g fine salt
  • ¾ cup / 150g granulated sugar
  • ½ cup / 113g unsalted butter, melted and slightly cooled
  • 2 tablespoons / 30ml neutral oil
  • 2 large eggs, about 100g without shells
  • ½ cup / 120g sour cream
  • ¼ cup / 60ml milk or buttermilk
  • 2 teaspoons / 10ml vanilla extract
  • Optional: 1 teaspoon finely grated lemon zest, for a brighter blueberry flavor
  • 1½ cups / 210–225g / about 7½–8 oz blueberries, fresh or frozen
  • 1–2 tablespoons coarse sugar or turbinado sugar, for topping

Optional Streusel Topping

  • ⅓ cup / 42g all-purpose flour
  • ⅓ cup / 65g brown sugar or granulated sugar
  • ½ teaspoon cinnamon
  • 3 tablespoons / 42g melted butter

Instructions

  1. Line a standard 12-cup muffin pan with paper liners. Heat the oven to 425°F / 220°C.
  2. In a large bowl, whisk together the flour, baking powder, baking soda, and salt.
  3. In a separate bowl, whisk the sugar, melted butter, oil, eggs, sour cream, milk, vanilla, and lemon zest if using until smooth.
  4. Pour the wet ingredients into the dry ingredients. Fold gently with a spatula until no dry pockets of flour remain. A few small lumps are fine. The batter should be thick and spoonable, not dry or pourable.
  5. For slightly taller tops, let the plain batter rest for 10–15 minutes before folding in the blueberries. This step helps, but the muffins still work without it.
  6. Spoon about 1 tablespoon of plain batter into the bottom of each muffin cup.
  7. Fold the blueberries into the remaining batter with as few strokes as possible.
  8. Divide the batter among the muffin cups, filling each almost to the top.
  9. Sprinkle with coarse sugar. For streusel, stir the flour, sugar, cinnamon, and melted butter together until crumbly, then sprinkle over the muffins instead.
  10. Bake at 425°F / 220°C for 5 minutes. Without opening the oven, reduce the temperature to 375°F / 190°C and bake for another 13–17 minutes, until the tops are golden and a toothpick inserted in the center comes out clean or with a few moist crumbs. The center should be about 200–205°F / 93–96°C if checked with an instant-read thermometer.
  11. Cool in the pan for 5–10 minutes, then transfer to a wire rack.

Recipe Notes

  • Frozen blueberries: use straight from the freezer for the fastest method.
  • Cleanest batter with frozen berries: rinse briefly, dry very well, fold gently, and bake right away.
  • Plain-batter cushion: spoon a little plain batter into each cup before folding in the blueberries. This helps keep berries from baking directly against the liner.
  • For taller tops: let the plain batter rest for 10–15 minutes before folding in the blueberries.
  • With streusel: add about 3–5 minutes to the prep time.
  • For extra-tall bakery-style muffins: bake only 6 muffins at a time, using every other cup in the pan.
  • For more berries: increase to 1¾ cups / about 245g blueberries, but the muffins will be softer and slightly more delicate.
  • If the batter feels unusually stiff: fold in 1 extra tablespoon of milk. The batter should be thick and spoonable, not dry.

Storage

Store cooled muffins in an airtight container at room temperature for 2–3 days. Add a paper towel to absorb extra moisture and keep the tops from turning sticky. Freeze for up to 2–3 months.

How to Get Tall Bakery-Style Blueberry Muffin Tops

Tall muffin tops come from a few small habits working together: a batter with enough body, full muffin cups, and a hot oven at the beginning. This is the difference between a good homemade muffin and the one people reach for first on the brunch table.
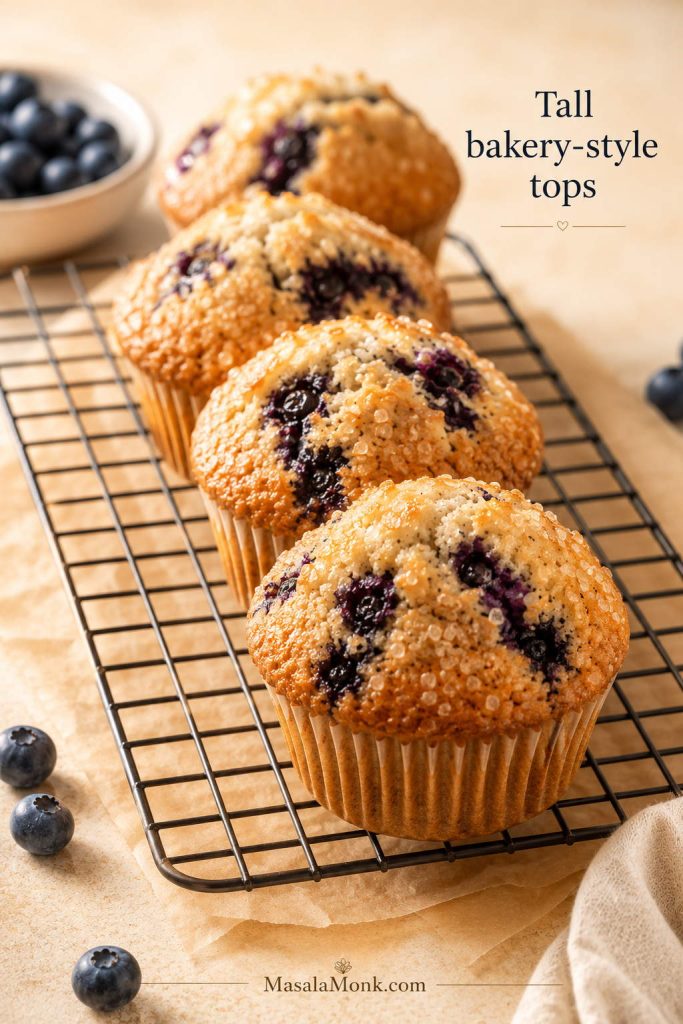
Tall bakery-style blueberry muffins with golden domed tops and coarse sugar on a cooling rack.
Bakery-style blueberry muffin tops come from stacking small advantages: thick batter, high fill, a hot oven start, and enough sugar on top for light crunch.
  • Use a batter that mounds instead of pours. Thin batter spreads before it rises.
  • Fill the cups almost to the top. Underfilled cups make shorter muffins.
  • Start with high heat. The first 5 minutes at 425°F / 220°C help push the tops upward.
  • Keep the oven closed when lowering the temperature. Just reduce the dial and let the muffins keep baking.
  • Use coarse sugar. It helps the tops bake with a light crunch.
  • Rest the plain batter for 10–15 minutes if you have time. This lets the flour hydrate and the batter thicken slightly before the berries go in.

For an extra bakery-style lift, bake only 6 muffins at a time and use every other cup in the muffin pan. This gives each muffin more heat circulation. It is optional, but helpful when you want especially tall domes.

If your muffins still bake up flat, the troubleshooting table will help you check oven heat, fill level, and leavening.

How to Keep Blueberries from Sinking

The most common advice is to toss blueberries in flour, but that is not always enough. Instead, the better approach is to build a batter that can actually support the berries and use the plain-batter cushion before the fruit goes in.
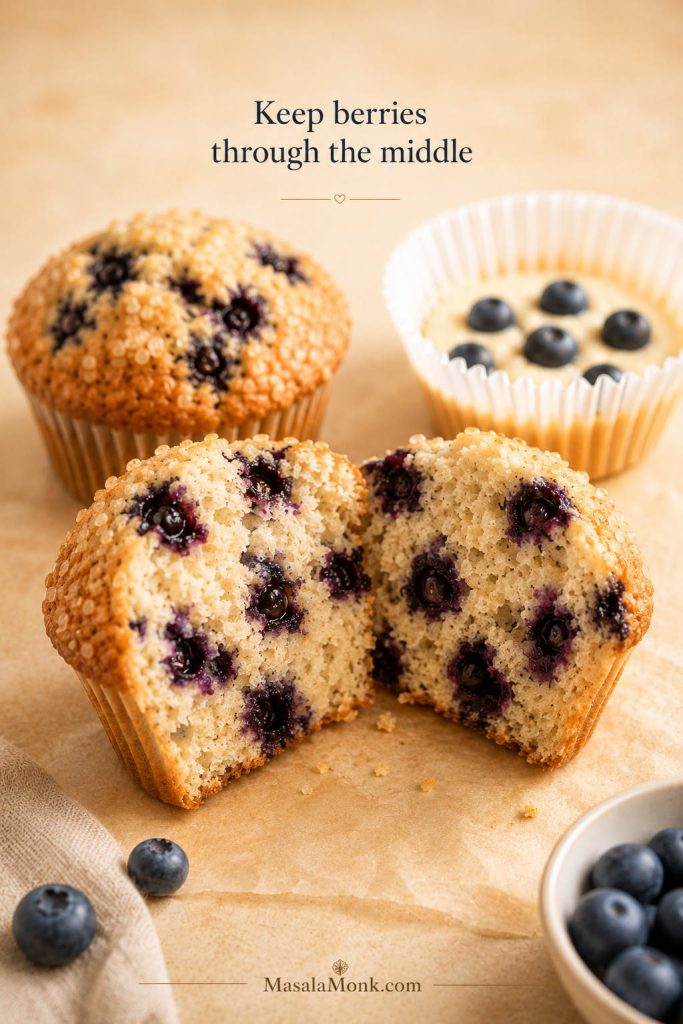
Split blueberry muffin showing blueberries distributed through the middle with a muffin cup of batter in the background.
When blueberries stay through the middle, the batter had enough support. The plain-batter cushion adds one more safeguard by keeping the first berries off the bottom.
  • Use a heavy, spoonable batter. This is the biggest help.
  • Dry fresh berries well. Wet berries slide and bleed more easily.
  • Keep frozen berries frozen. Once they thaw, they release juice quickly.
  • Use a reasonable amount of fruit. More berries are delicious, but too many can make muffins wet or fragile.
  • Add plain batter to the cups first. This keeps berries from sitting directly on the bottom.

A teaspoon of flour can help a little, but the plain-batter cushion does more of the real work.

Sugar Top vs Streusel Topping

Choose the topping based on the kind of muffin you want today: a simple breakfast muffin, a sweeter bakery-style muffin, or a soft everyday snack.

Coarse sugar is the everyday choice. Streusel is the “people will ask where you bought these” choice. Either way, the topping should make the muffin more inviting without hiding the blueberries.
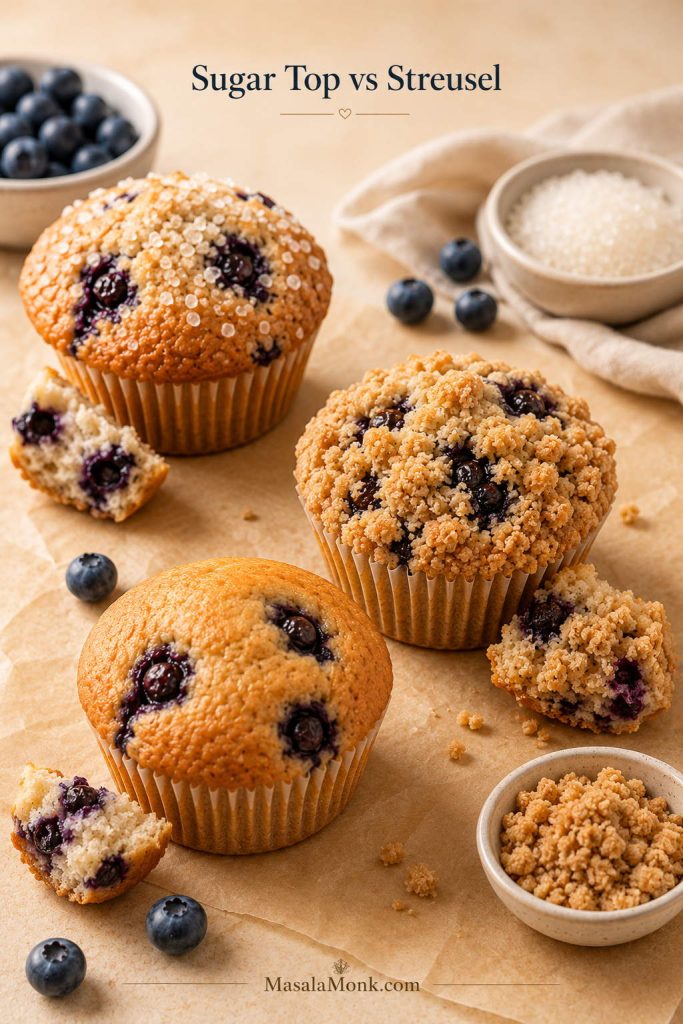
Three blueberry muffins with coarse sugar topping, streusel topping, and plain top shown with crumb pieces.
Coarse sugar keeps muffins crisp, simple, and breakfast-friendly. Streusel makes them sweeter and more bakery-style, so the best topping depends on the mood of the batch.
Topping Best for Texture
Coarse sugar Simple breakfast muffins Light crunch, golden top, not too sweet
Streusel Bakery-style muffins Buttery crumb topping, sweeter finish
No topping Everyday breakfast muffins Softer top, less sweetness

Mini, Standard, and Jumbo Blueberry Muffin Bake Times

The amounts below fit a regular 12-cup muffin pan, but you can use the same mixture for mini or jumbo muffins with a few timing changes.
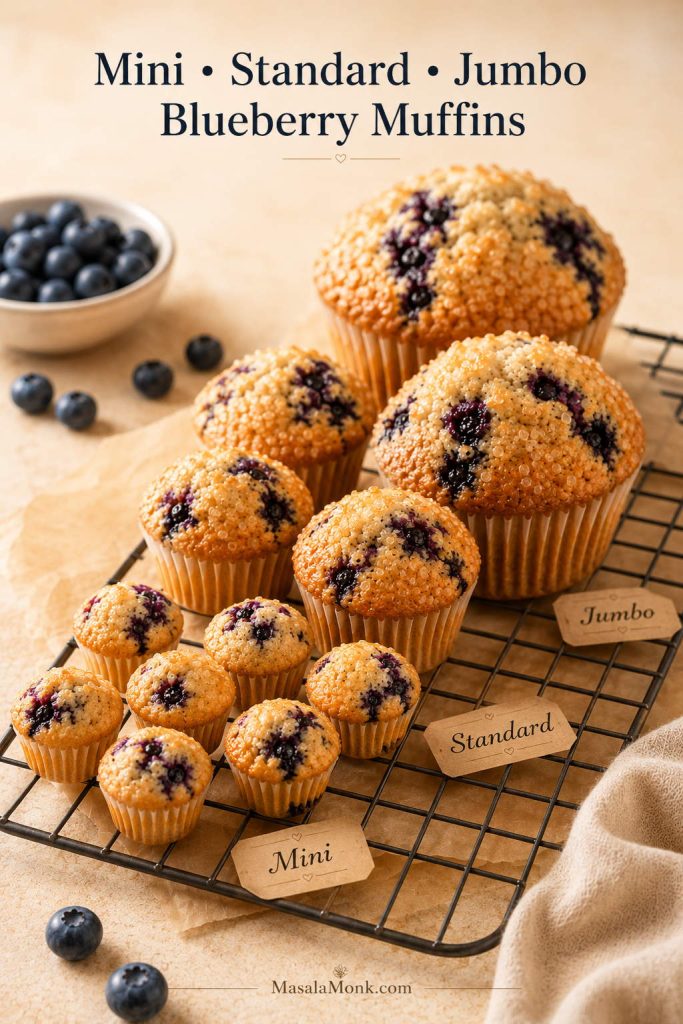
Mini, standard, and jumbo blueberry muffins arranged together on a cooling rack with size labels.
The same batter can work in mini, standard, or jumbo pans. Smaller muffins finish fast, while jumbo muffins need more time for the centers to set properly.
Muffin size Fill level Temperature Bake time
Mini muffins About ¾ full 350°F / 175°C throughout 11–14 minutes
Standard muffins Almost to the top 425°F / 220°C for 5 minutes, then 375°F / 190°C 18–22 minutes total
Jumbo muffins Almost to the top 425°F / 220°C for 5 minutes, then 350°F / 175°C 26–30 minutes total

Always check early the first time you use a new pan. Dark pans, thin pans, and frozen blueberries can all change the bake time slightly.

Blueberry Muffin Troubleshooting

Most blueberry muffin problems are fixable once you know what caused them. So, if a batch from this recipe ever turns out differently than expected, use this table to adjust the next one.

If your last batch was dry and purple, start with flour measurement and frozen-berry handling before changing the whole recipe. If it was flat, look first at fill level, oven heat, and whether your leavening is still fresh.
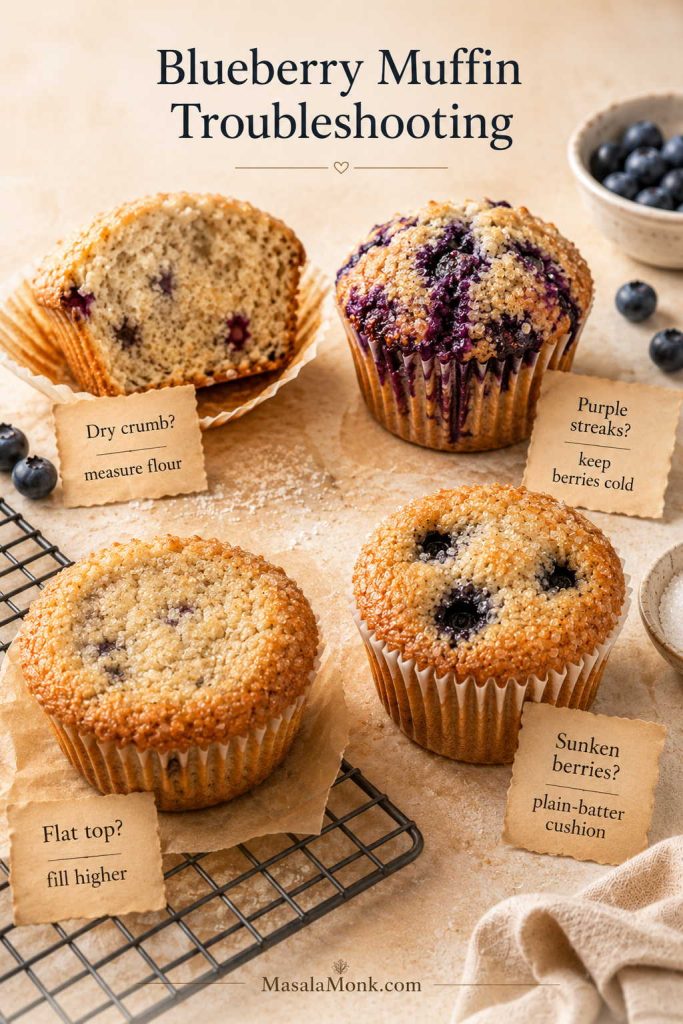
Blueberry muffin troubleshooting scene showing dry crumb, purple streaks, flat top, and sunken berries with small fix notes.
Blueberry muffin troubleshooting usually starts with five things: flour measurement, mixing, berry temperature, fill level, and oven heat. Fix those before changing the full recipe.
Problem Likely cause Fix next time
Dry muffins Too much flour or overbaking Use grams if possible, spoon-and-level flour, and check the muffins early
Dense muffins Overmixed batter Fold gently and stop when no dry pockets of flour remain
Flat tops Oven not hot enough or cups underfilled Preheat fully, fill cups almost to the top, and use the hot-start bake
Purple batter Frozen berries thawed or batter overmixed after berries were added Add frozen berries cold, fold gently, and bake right away
Sunken blueberries Thin batter, wet berries, or berries sitting at the bottom Add a spoonful of plain batter to each cup first and avoid thinning the batter
Soggy bottoms Too many berries or wet berries at the base Dry berries well and use the plain-batter cushion
Pale tops Low oven heat or no topping Use the hot start and sprinkle with coarse sugar
Muffins stuck to the pan Pan not lined or greased enough Use liners or grease the pan well, including the top surface if filling high

How to Store and Freeze Blueberry Muffins

Room temperature

Once the muffins cool completely, store them in an airtight container at room temperature for 2–3 days. When stacking, add a paper towel to the bottom of the container and another between layers. This helps absorb moisture from the blueberries and keeps the tops from turning sticky too quickly.

They are best the day they are baked, but the next morning they should still be soft enough to split and warm with a little butter.
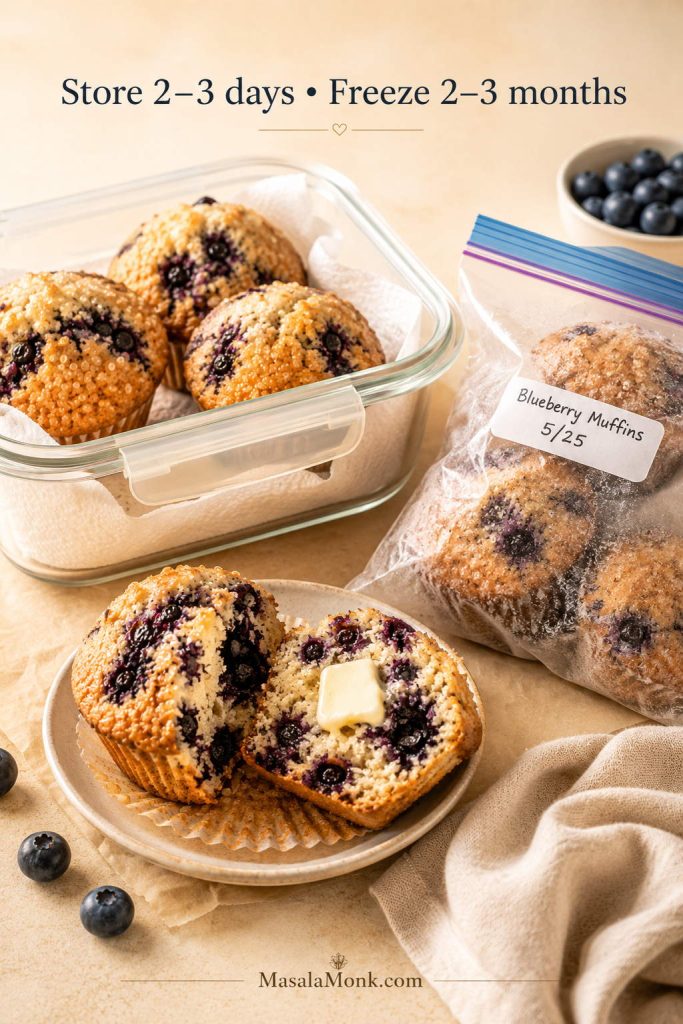
Blueberry muffins stored in an airtight container with paper towel, frozen in a labeled bag, and reheated with butter.
Cool muffins fully before storing, or trapped steam can make the tops sticky. For longer storage, freeze them once cool and reheat gently when you want a quick breakfast.

Refrigerator

The refrigerator is not ideal because it can dry out the crumb. Use it only if your kitchen is very warm or humid.

Freezer

Freeze fully cooled muffins in a freezer-safe bag or container for up to 2–3 months. For the neatest muffins, freeze them in a single layer first, then pack them together once firm.

Reheating

Warm a room-temperature muffin in the microwave for 10–15 seconds. Meanwhile, warm a frozen muffin for 25–40 seconds, or reheat in a low oven until soft and warmed through.

Blueberry Muffin Variations

Once you have the basic method down, you can take blueberry muffins in several directions. Lemon zest and topping changes are easy. Oats, almond flour, eggless, vegan, cottage cheese, and sourdough versions need more adjustment, but the same goal stays the same: a soft crumb, berries through the middle, and a top that rises instead of spreading.
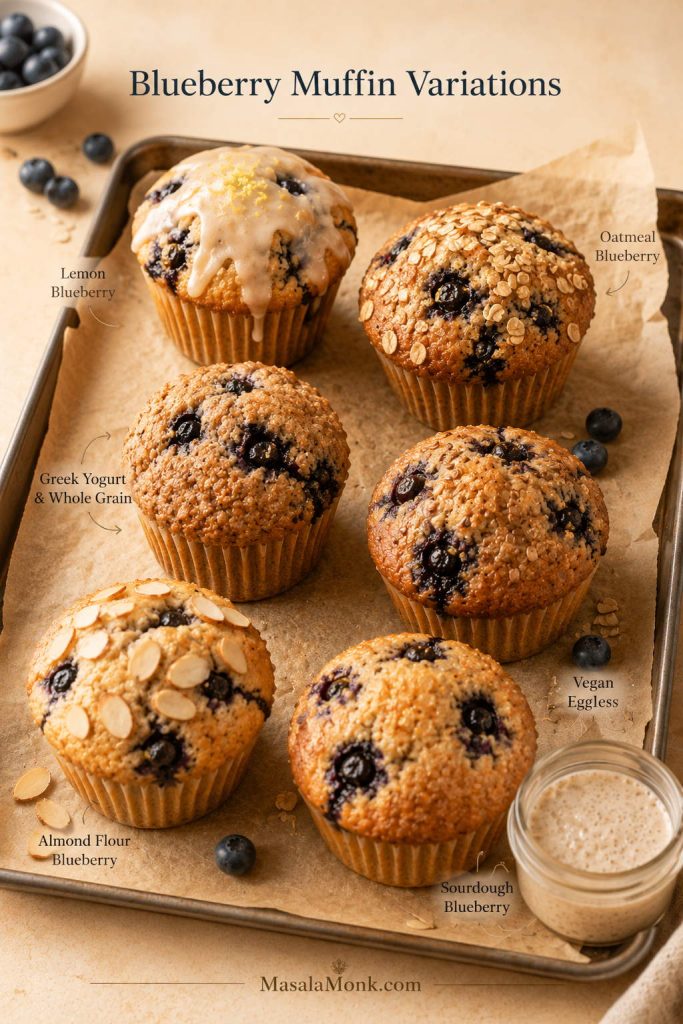
Blueberry muffin variations on a bakery tray including lemon, oatmeal, whole grain yogurt, vegan eggless, almond flour, and sourdough styles.
Lemon zest, oats, yogurt, and streusel are easy ways to change the flavor. Bigger swaps like almond flour, eggless, vegan, or sourdough need a batter balanced for that style.

Lemon Blueberry Muffins

Add 1–2 teaspoons of fresh lemon zest to the batter for a brighter muffin. If you want a sweeter bakery finish, skip the coarse sugar and use a light lemon glaze after the muffins cool. Keep the lemon modest if you want blueberry to stay in front.

Blueberry Oatmeal Muffins

For a light oatmeal direction, replace ¼ cup of the flour with quick oats and add 1–2 tablespoons extra milk if the batter feels too stiff. For a true oat-heavy muffin, use a dedicated formula because oats absorb more moisture than flour. If you are choosing between rolled, quick, or oat-flour-style baking, this guide to oats will help you pick the right type before making an oatmeal version.

Healthy Blueberry Muffins

A lighter blueberry muffin usually leans on whole wheat flour, oats, Greek yogurt, applesauce, maple syrup, or less refined sugar. Do not cut all the fat at once; a little butter or oil is what keeps the crumb from tasting dry. The goal is a muffin that feels soft and satisfying, not worthy-but-disappointing.

Eggless Blueberry Muffins

Eggless blueberry muffins need enough moisture, lift, and structure to replace what eggs do. Yogurt, milk, vinegar, baking soda, and flax can all help, depending on the formula. If you are testing egg-free bakes, start with this flax egg guide so the swap is measured instead of guessed.

Vegan Blueberry Muffins

For vegan blueberry muffins, keep the spirit of this recipe — tender crumb, enough fat, and a batter that can hold berries — but use a formula built around plant milk and oil from the start. A straight swap for the butter, sour cream, milk, and eggs may work in small tweaks, but a fully vegan version needs its own balance.

Almond Flour Blueberry Muffins

Almond flour is not a 1:1 swap for all-purpose flour because it has no gluten and carries more fat. It can make tender low-carb bakes, but the batter needs more structural support. Before adapting this recipe, read this keto flour for baking guide so you understand how almond flour, coconut flour, binders, moisture, and lift work together.

Blueberry Cottage Cheese Muffins

Cottage cheese can add protein and moisture, especially when blended smooth before mixing. It works best when the batter is adjusted around it, because too much cottage cheese can make muffins heavy or damp instead of tender.

Blueberry Sourdough Muffins

Sourdough discard can add light tang and moisture to blueberry muffins, but it changes the flour-liquid balance. Add it only when the rest of the batter has been adjusted for the extra moisture and acidity. If you are still building or maintaining your starter, start with this sourdough starter recipe before using discard in sweet bakes.

What to Serve with Blueberry Muffins

For a cozy breakfast, split one warm and let a little butter melt into the center. For brunch, pile the muffins into a basket with fruit, yogurt, eggs, and coffee so they feel like part of the table rather than a quick side.
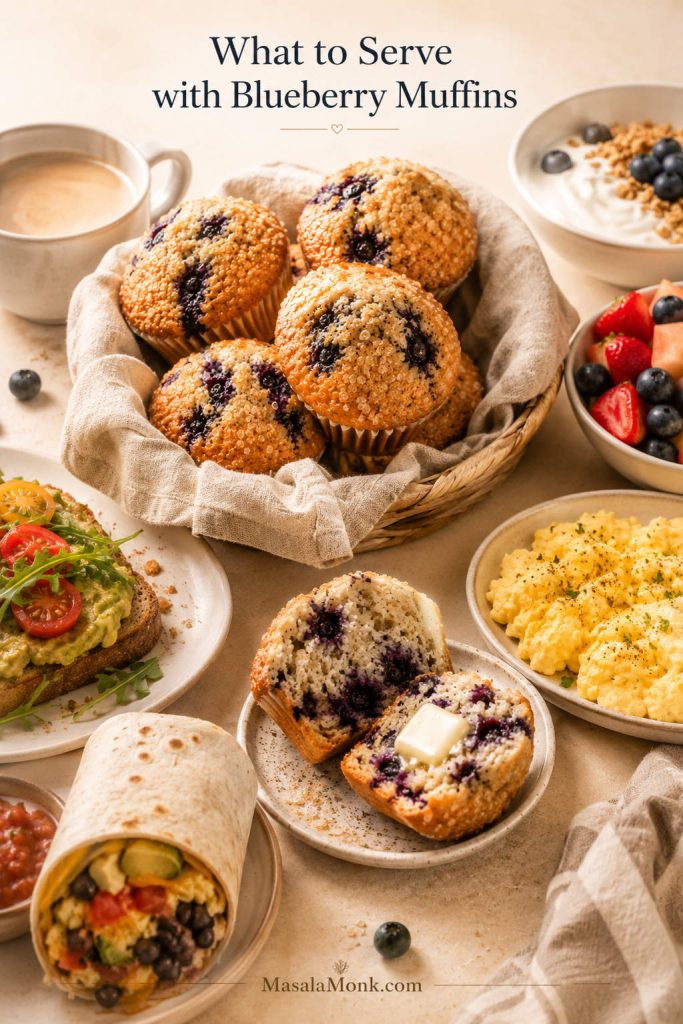
Brunch table with blueberry muffins, a split buttered muffin, coffee, yogurt, fruit, scrambled eggs, avocado toast, and a breakfast burrito.
Blueberry muffins feel more complete when the table has contrast. Pair them with something savory, something creamy, and something fresh so brunch does not lean only sweet.

Blueberry muffins also work well with something savory, especially if you are serving them for brunch or meal prep. Try them with breakfast egg muffins, soft scrambled eggs, a simple yogurt bowl, or freezer-friendly meal prep breakfast burritos so the table has something sweet, something savory, and something fresh.

FAQs About Blueberry Muffins

Fresh or frozen blueberries: which is better for muffins?

Fresh blueberries are easiest because they release less color into the batter. Frozen blueberries are still a good option, especially when berries are out of season. Keep them cold, fold gently, and bake the muffins soon after mixing.

Should frozen blueberries be thawed before baking?

Keep them frozen until the last moment. Once frozen berries soften, they leak into the batter before the oven can set the crumb, which is why thawed berries often create purple streaks and wetter pockets.

Why did my blueberry muffin batter turn purple?

This usually happens when frozen berries thaw, when berries are wet, or when the batter is mixed too much after the fruit is added. Add blueberries last and fold with as few strokes as possible.

What keeps blueberry muffins moist?

These blueberry muffins stay moist because the recipe uses butter for flavor, a little oil for softness, sour cream for tenderness, and careful baking so the centers set without drying out.

Can I make these blueberry muffins with buttermilk?

Yes. Buttermilk can replace the milk in this recipe. It gives the muffins a slightly tangier flavor and works well with the baking soda and sour cream. The batter should still look thick and spoonable, so add only a small splash more milk if it feels unusually stiff.

Can I use Greek yogurt instead of sour cream?

Yes. Plain Greek yogurt can replace the sour cream in this recipe. Use full-fat or 2% yogurt for the softest crumb, and avoid very thin yogurt because it can loosen the batter too much.

How full should muffin cups be?

For tall standard muffins, fill the cups almost to the top. If you fill them only halfway, the muffins will usually bake up shorter and flatter.

Why are my blueberry muffins dense?

Dense muffins usually come from overmixing, too much flour, or old baking powder. Fold the batter gently, use grams if possible, and stop mixing as soon as no dry pockets of flour remain.

How do I make the muffin tops taller?

Fill the cups almost to the top and start the muffins in a hot oven. A short batter rest and baking every other cup can help even more if you want extra-tall tops.

Is streusel necessary?

No. Coarse sugar is enough for a blueberry muffin with a light crunchy top. Streusel is the sweeter bakery-style option when you want a crumb topping.

How do I know when blueberry muffins are done?

The tops should be golden and set, and a toothpick inserted into the center should come out clean or with a few moist crumbs. If you use an instant-read thermometer, aim for about 200–205°F / 93–96°C in the center.

Do blueberry muffins freeze well?

They freeze very well. Cool them completely first, then pack them in a freezer-safe bag or container for up to 2–3 months. Reheat gently in the microwave or a low oven.

Once you understand the batter texture, berry handling, and hot-start bake, blueberry muffins stop feeling unpredictable. The first batch gives you soft centers, golden tops, and berries through the middle; the next one lets you decide whether you are a coarse-sugar person, a streusel person, or a lemon-zest person.
Back to top

Posted on — 2 Comments

High Protein Muffins That Stay Moist and Fluffy

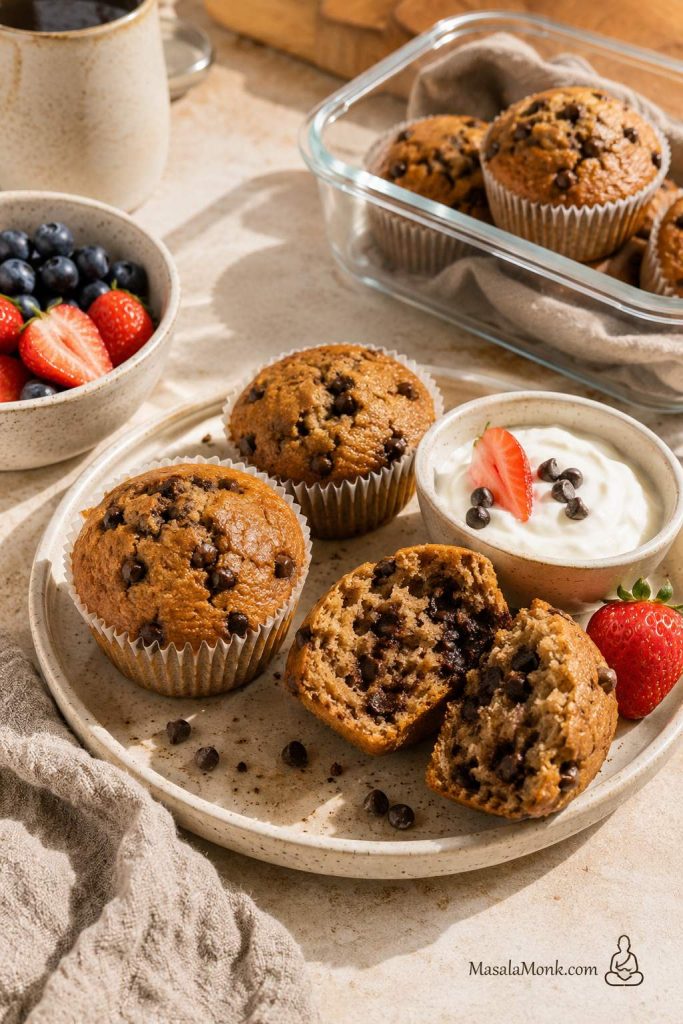
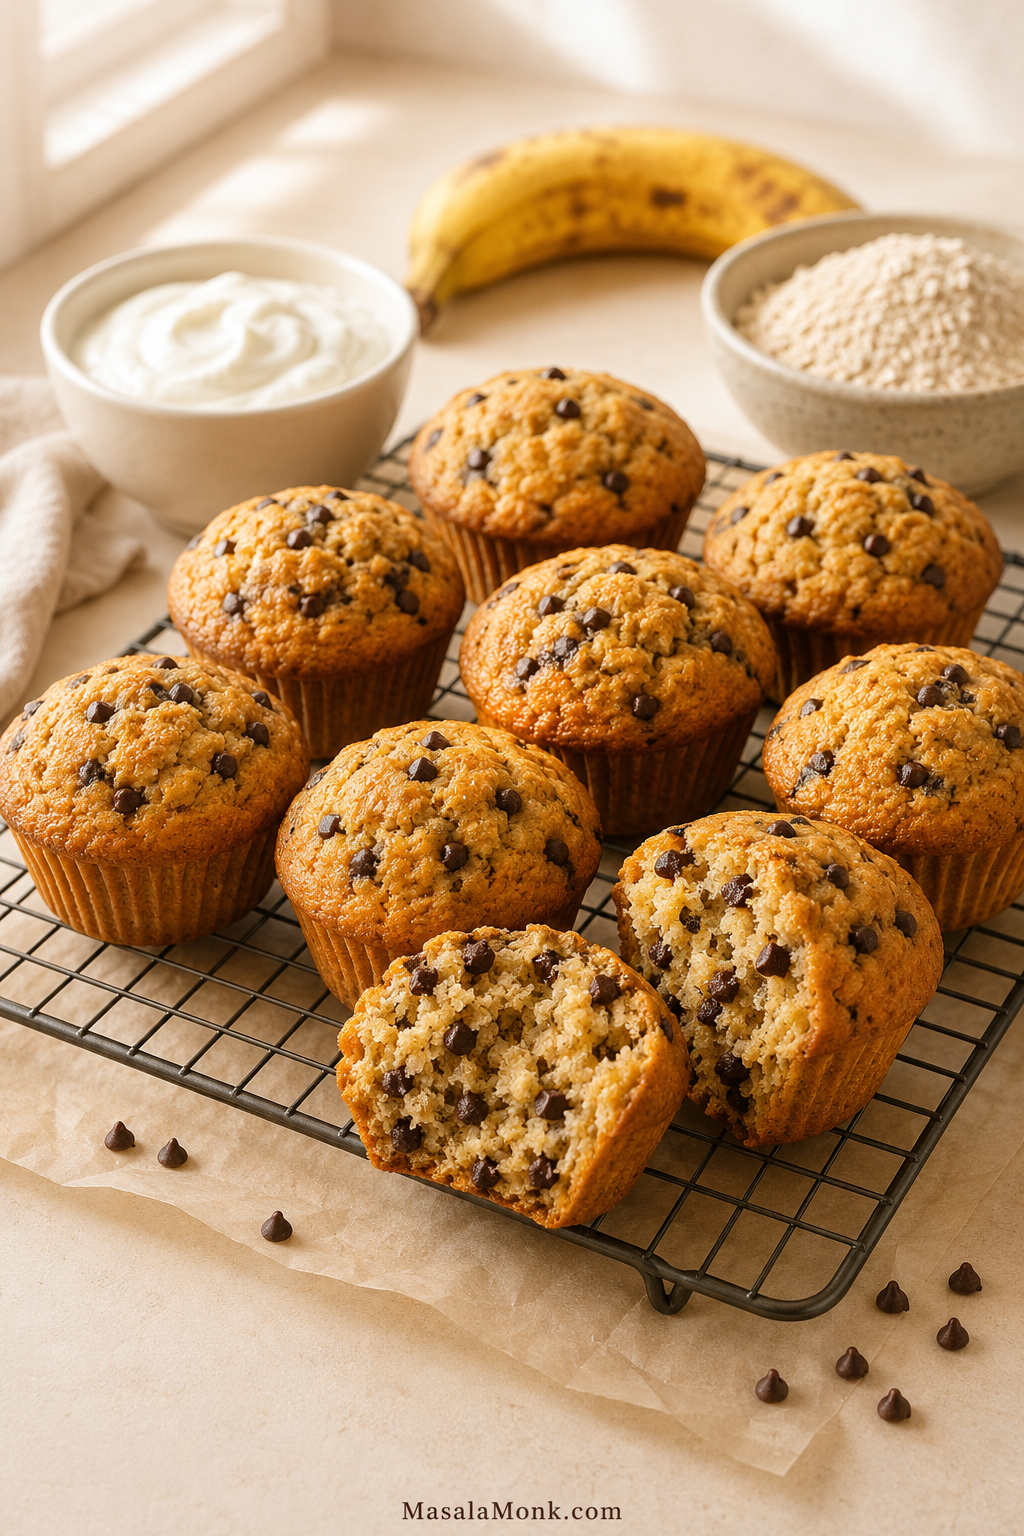
High protein muffins on a cooling rack with one muffin split open to show a soft chocolate chip crumb.

Too many high protein muffins sound better than they taste. They promise easy breakfast meal prep and extra protein, then come out dry, rubbery, chalky, or heavy enough to feel like a compromise. This recipe is built the other way around: soft first, moist first, useful first.

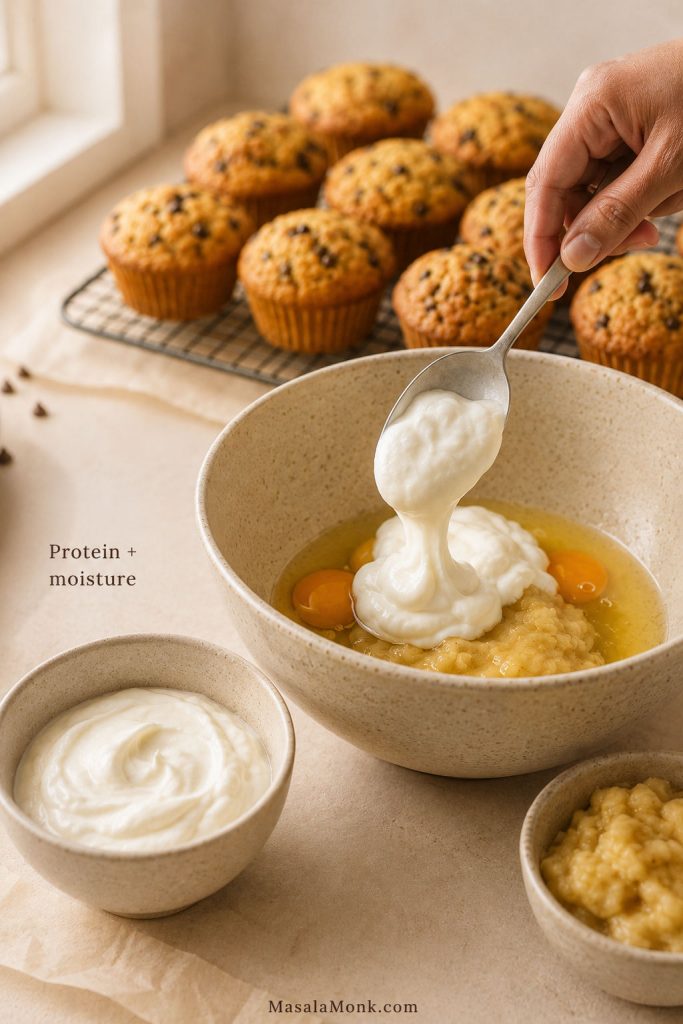
The goal is a muffin you actually want to eat with coffee, not a “healthy” muffin you tolerate because it has protein. Greek yogurt, a reasonable amount of protein powder, oat flour or whole wheat flour, and banana or applesauce all work together to keep the crumb tender.

If you like make-ahead breakfasts in this same lane, you may also like these high protein overnight oats for a no-bake option.
Use the base recipe once, then make it fit your mornings: banana chocolate chip when you want cozy, blueberry lemon when you want fresh, pumpkin when you want softer and spiced, or cottage cheese when you want extra moisture without relying only on protein powder.

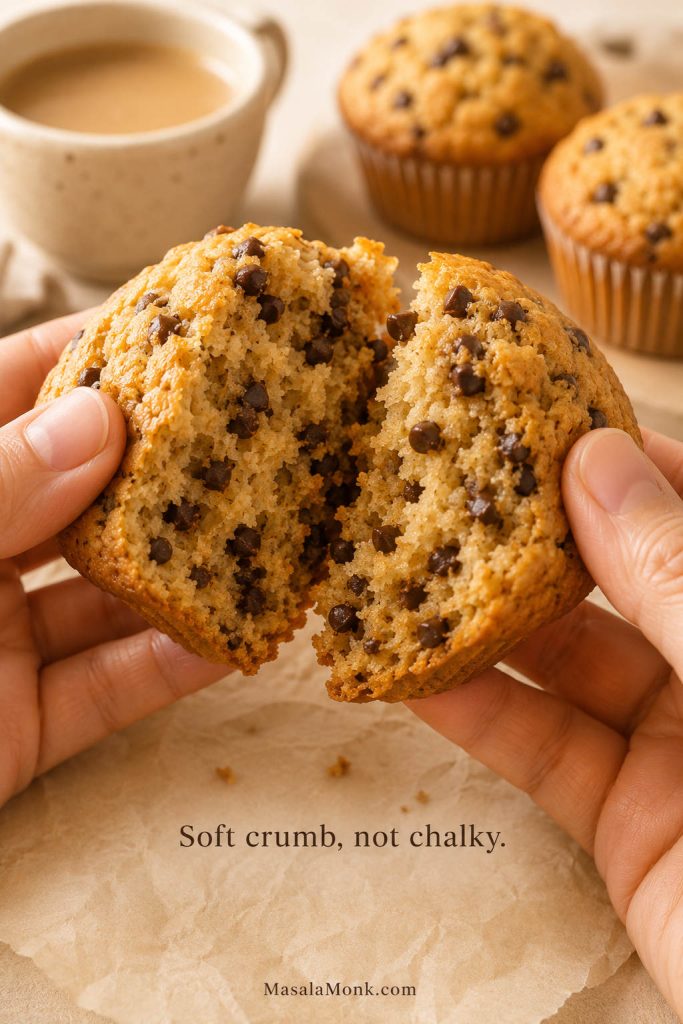
Soft Crumb, Not Chalky

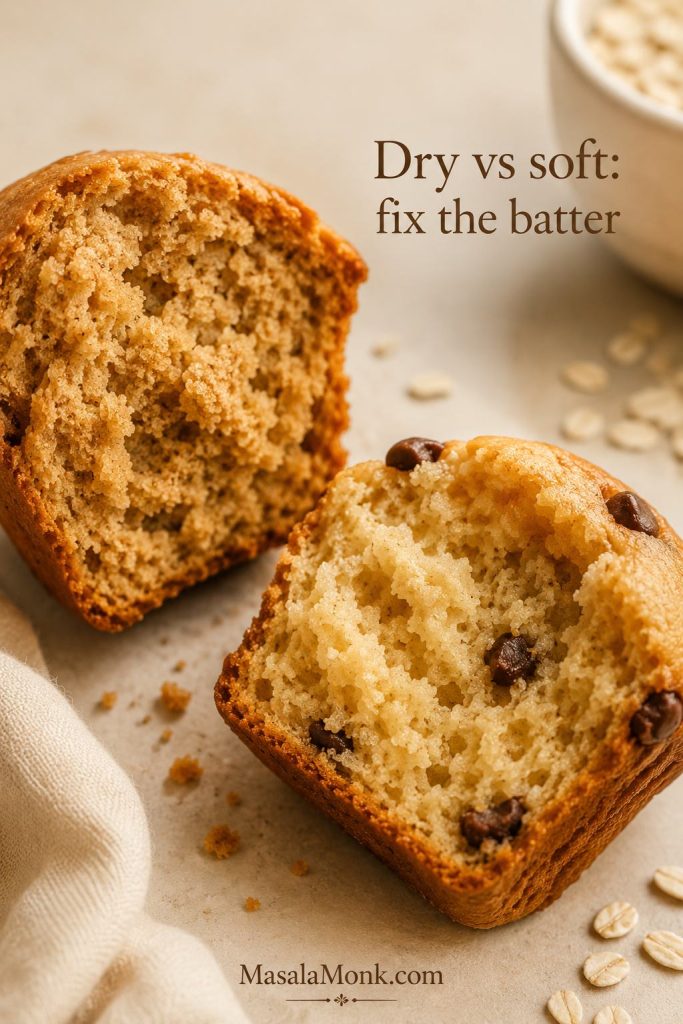
Close-up of a high protein muffin torn open to show a soft moist crumb with chocolate chips.
The crumb tells you whether the recipe worked. Pull the muffins when they are just set, because they continue to firm up as they cool.

Already know you want to bake? Use the jump button to go straight to the recipe card. If you want to avoid dry protein muffins, read the batter and protein powder notes first.

Table of Contents

Use this guide to make soft protein muffins, choose the right protein base, fix texture problems, and store them for easy breakfasts or snacks.

Quick Answer: How Do You Make High Protein Muffins?

To make high protein muffins, combine flour or oat flour, protein powder, Greek yogurt, eggs, banana or applesauce, a little maple syrup or honey, leavening, and enough milk to make a sturdy muffin batter. After that, bake in a lined muffin tin until the tops spring back lightly and a toothpick comes out clean or with a few moist crumbs.

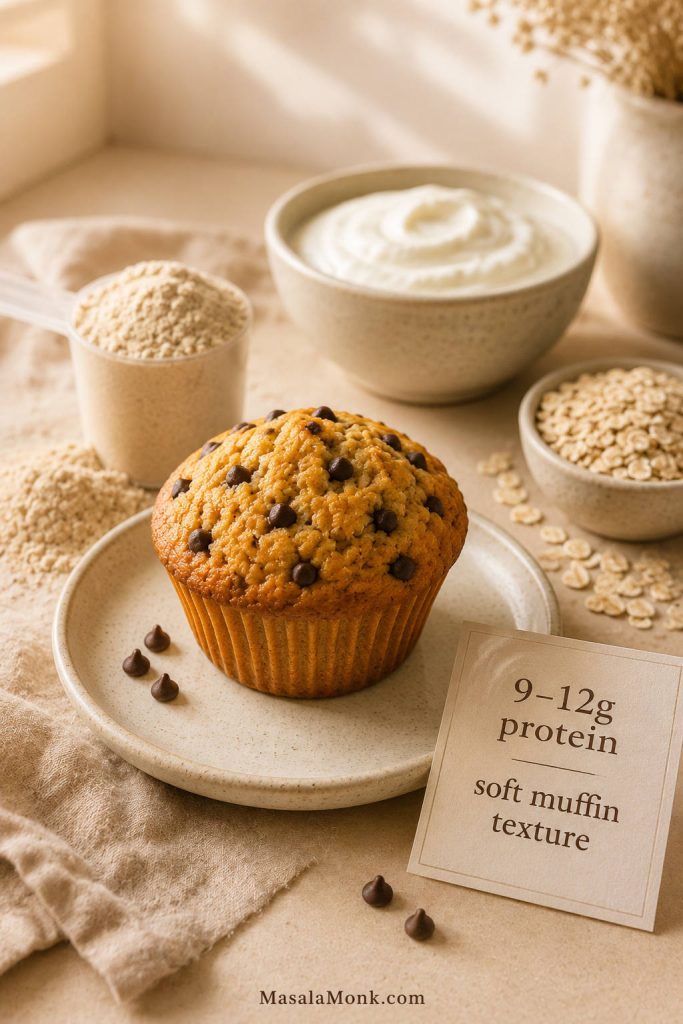
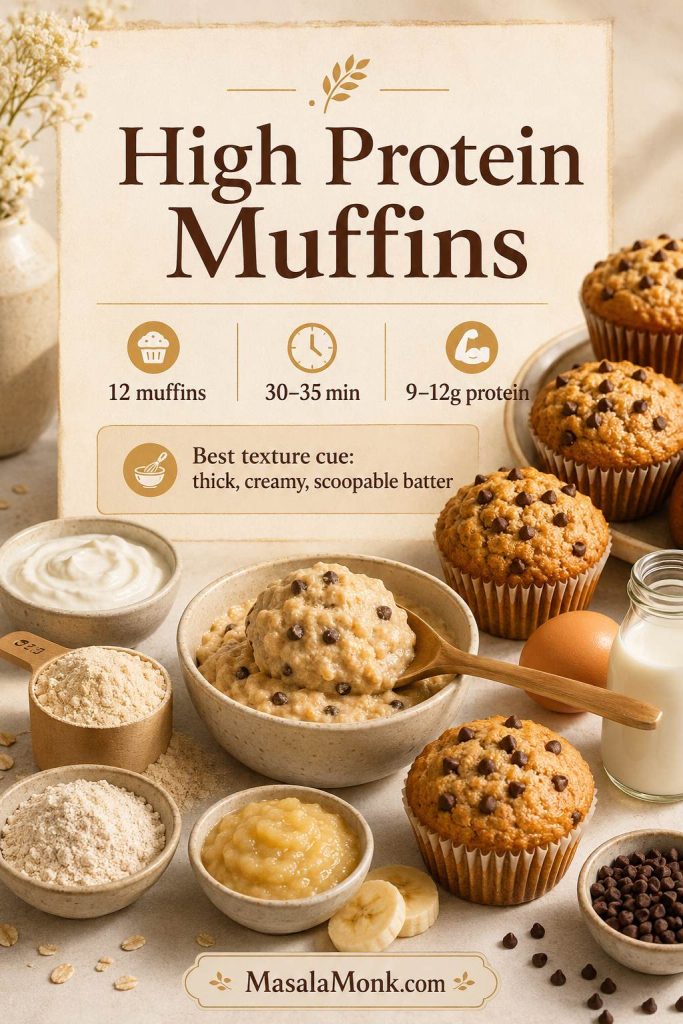
This recipe makes 12 muffins. The exact protein number depends on your protein powder, yogurt, flour, and mix-ins. Most batches land around 9–12 grams of protein per muffin, which makes them more filling without pushing the texture into dry, dense, or chalky territory.

Texture rule: the batter should be thick enough to scoop, but not dry or crumbly. When it looks stiff, loosen it gradually with milk before baking.

If you are ready to bake, jump to the recipe card. If your past protein muffins turned dry or rubbery, read the protein powder tips and troubleshooting guide first.

High Protein Muffins at a Glance

Yield12 muffins
Total timeAbout 30–35 minutes
ProteinAbout 9–12g per muffin, depending on protein powder, yogurt, flour, and mix-ins
TextureTender, lightly hearty, and muffin-like
Best first protein baseGreek yogurt + vanilla protein powder
Best no-powder pathGreek yogurt, cottage cheese, eggs, oats, nut butter, and seeds
Oven375°F / 190°C for 5 minutes, then 350°F / 175°C until done
StorageFridge 4–5 days, freezer up to 3 months
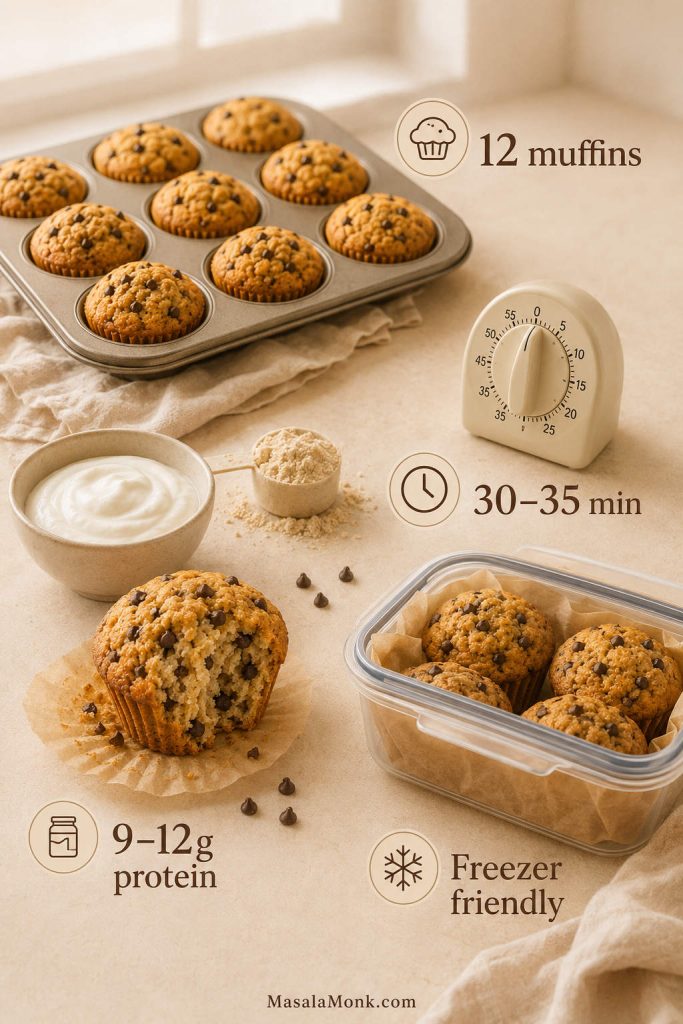
At-a-glance guide for high protein muffins showing yield, time, protein range, and freezer-friendly storage.
This 12-muffin batch is built for real meal prep: a realistic protein range, a soft crumb, and fridge-or-freezer flexibility for busy mornings.

What They Should Taste Like

These are not cupcake-style muffins, and they are not meant to taste like dry protein bars either. Instead, the crumb should be soft and lightly hearty, with enough moisture from Greek yogurt and banana or applesauce to keep each bite tender.

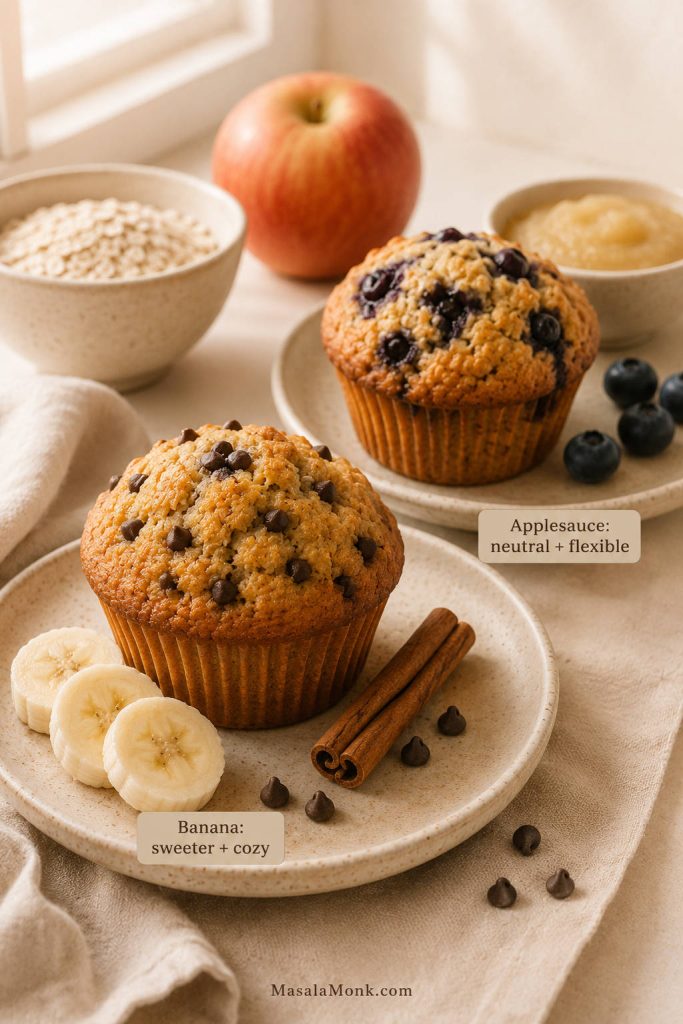
With banana, the muffins lean cozy and breakfast-like. Applesauce gives a more neutral base, which works better with blueberries, chocolate chips, lemon zest, or pumpkin spice. Either way, the muffin should feel satisfying without tasting like a protein powder project.

The best batch should feel like a real breakfast muffin first: warm, tender, lightly sweet, and satisfying enough that you would eat it even without counting the protein. If you add mini chocolate chips, they should give little sweet pockets in the crumb. If you choose blueberries, the muffin should feel fresher and brighter, not wet or gummy.
How Each Version Should Look Inside

Different mix-ins change the color and flavor of the crumb, but they should not change the goal: a tender muffin that still feels soft after cooling.

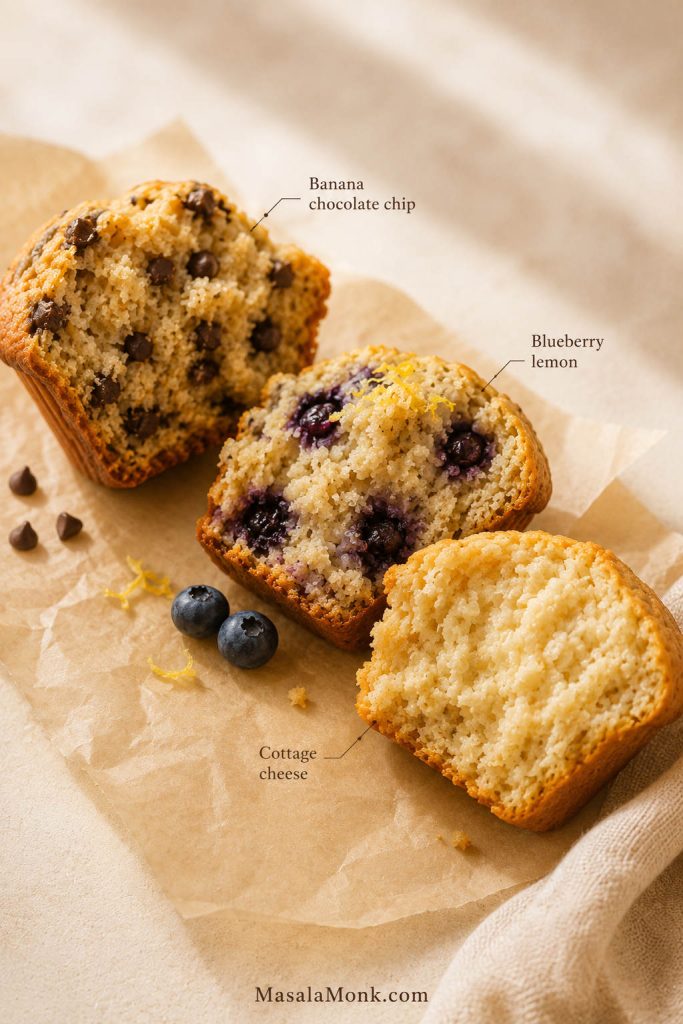
Crumb comparison of banana chocolate chip, blueberry lemon, and cottage cheese high protein muffins.
Banana chocolate chip is cozy, blueberry lemon is bright, and cottage cheese adds extra moisture. Every version should still bake up tender rather than chalky.

Choose Your Muffin Path

There is no single “right” way to make a higher-protein muffin. Some days you may want the extra boost from protein powder. Other times, you may want a more natural muffin built around Greek yogurt, cottage cheese, eggs, and oats. Use this table to choose the version that fits your kitchen and your taste.

PathBest forMain protein sourceTexture note
Protein powder muffinsHigher protein with simple ingredientsVanilla protein powder + Greek yogurtNeeds enough moisture so the crumb stays soft.
No-powder protein muffinsReaders who dislike protein powder tasteGreek yogurt, eggs, oats, hemp hearts, nut butterSofter and more natural, but usually lower in protein per muffin.
Cottage cheese protein muffinsMoist, filling breakfast muffinsBlended cottage cheese + eggsVery moist; needs proper baking and cooling so the centers set.
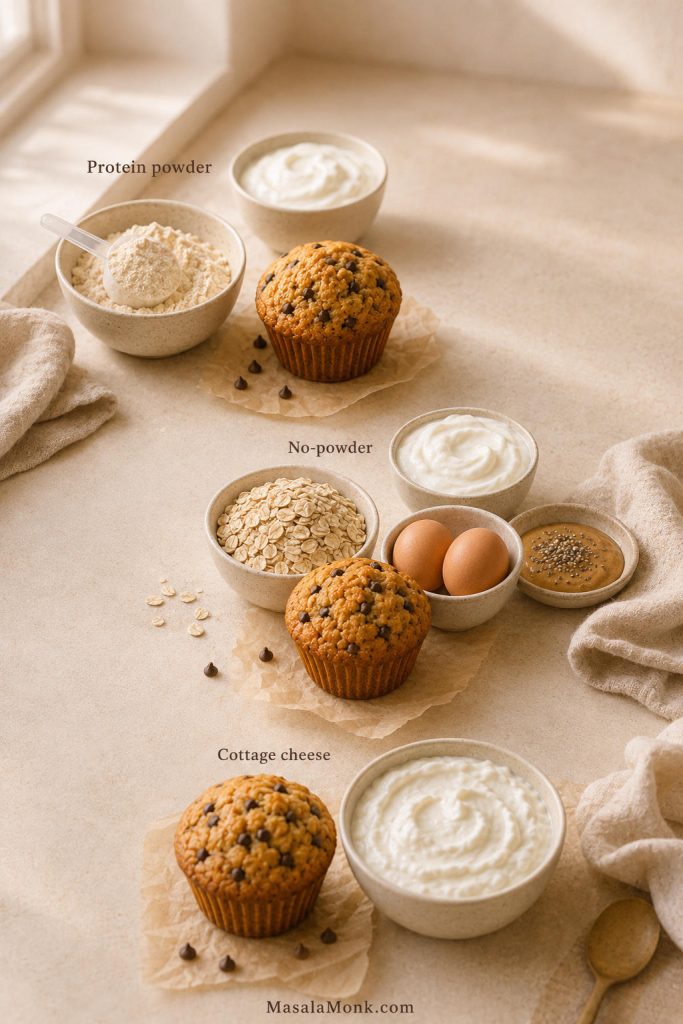
Decision guide showing protein powder, no-powder, and cottage cheese paths for high protein muffins.
Choose by texture and taste, not just protein. Protein powder gives the biggest boost; no-powder and cottage cheese versions lean more real-food and naturally moist.

Once you choose your path, use the protein powder notes for the main version, the no-powder section for real-food protein muffins, or the cottage cheese variation if you want extra moisture.

Why This High Protein Muffin Recipe Works

Greek yogurt keeps the crumb moist

Greek yogurt is one of the most useful ingredients here because it adds protein and moisture at the same time. It also helps balance the drying effect of protein powder, especially if you are using whey or a very absorbent plant-based powder.

Greek yogurt also gives the recipe a real-food protein base instead of making the entire muffin depend on powder. It is naturally protein-rich, and Harvard Health includes Greek yogurt among useful protein sources, which is why it works so well in breakfast recipes that need both moisture and staying power.

Greek yogurt being added to muffin batter ingredients to keep high protein muffins moist.
Greek yogurt helps twice: it adds protein and protects the crumb from drying out, which makes it one of the most useful ingredients in this batter.

Protein powder adds structure, but not too much

The fastest way to ruin protein muffins is to treat protein powder like regular flour. It absorbs liquid, changes the structure of the batter, and can make muffins firm when used too heavily. So this recipe uses enough protein powder to support the high-protein goal without letting it take over the texture.

A hotter oven start helps muffins rise

Start the muffins at a slightly higher oven temperature, then finish them lower. That short hot start encourages lift, while the gentler finish helps the center bake through without drying out the edges.

Banana or applesauce protects the texture

Mashed banana gives the muffins a naturally sweeter breakfast flavor. If you want a more neutral base, use unsweetened applesauce instead. Both add moisture, which is especially helpful in a protein-rich batter.

A little fat makes them taste like real muffins

Low-fat protein muffins often taste dry because too many softening ingredients are removed at once. That is why a modest amount of oil or melted butter helps the crumb stay tender, especially after refrigeration or freezing.

How Much Protein Should a Protein Muffin Have?

A realistic protein muffin can land anywhere from about 7g to 14g protein per muffin depending on the formula. Protein-powder versions can go higher, but the texture often becomes harder to protect. For this base recipe, the goal is about 9–12g protein per muffin with a soft, repeatable texture.

For exact numbers, use the labels on your own protein powder, yogurt, flour, and milk. Treat the nutrition estimate as a helpful range, not a fixed number. You can also look up individual ingredients in USDA FoodData Central if you want a more precise calculation.
That matters because a muffin with 20g protein is not automatically better if it tastes tough, chalky, or too lean. For most home bakers, the better target is a muffin that gives more protein than a regular muffin while still being enjoyable enough to make again.
Useful rule: a slightly lower-protein muffin that tastes good is more valuable than an ultra-high-protein muffin nobody wants to eat.

High protein muffin with a note showing a realistic 9 to 12 gram protein range and soft texture.
A realistic protein target protects texture. In practice, a softer 9–12g muffin is more useful than a dry batch chasing the biggest number.

Ingredients for High Protein Muffins

Best first version to make

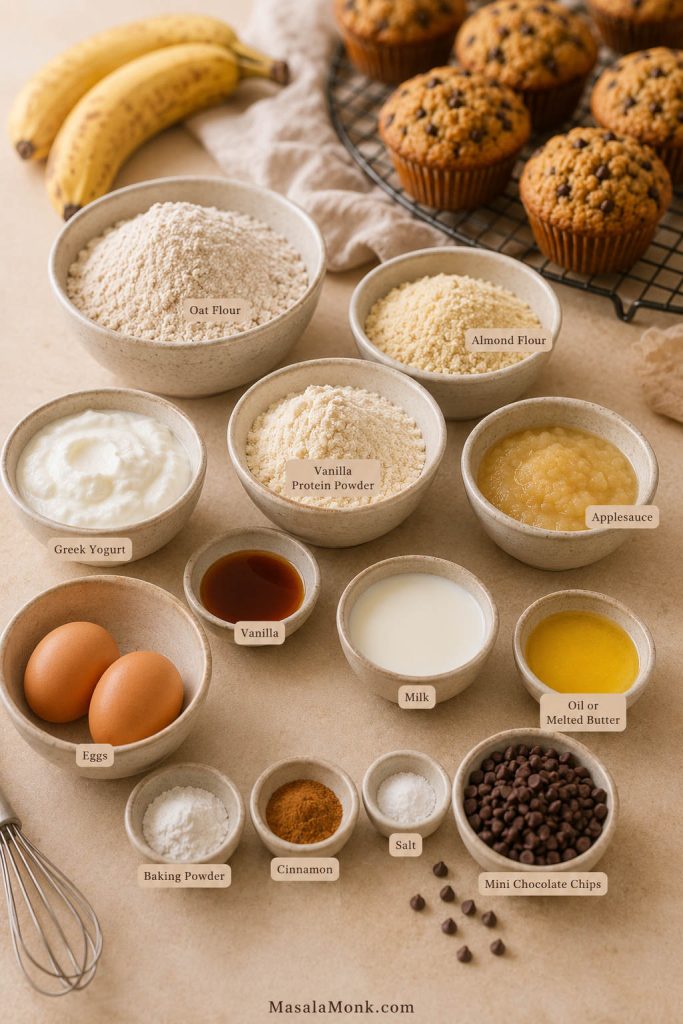
Best first batch: start with oat flour, almond flour, vanilla protein powder, plain Greek yogurt, mashed banana, neutral oil, and mini chocolate chips. That version gives the easiest balance of flavor, moisture, and texture. Once you like the base, try applesauce, blueberries, pumpkin, or cottage cheese.

Ingredients for high protein muffins including oat flour, protein powder, Greek yogurt, banana, eggs, and chocolate chips.
Balance matters more than any one “healthy” add-in: flour gives body, Greek yogurt adds moisture, eggs set the crumb, and protein powder brings the boost.

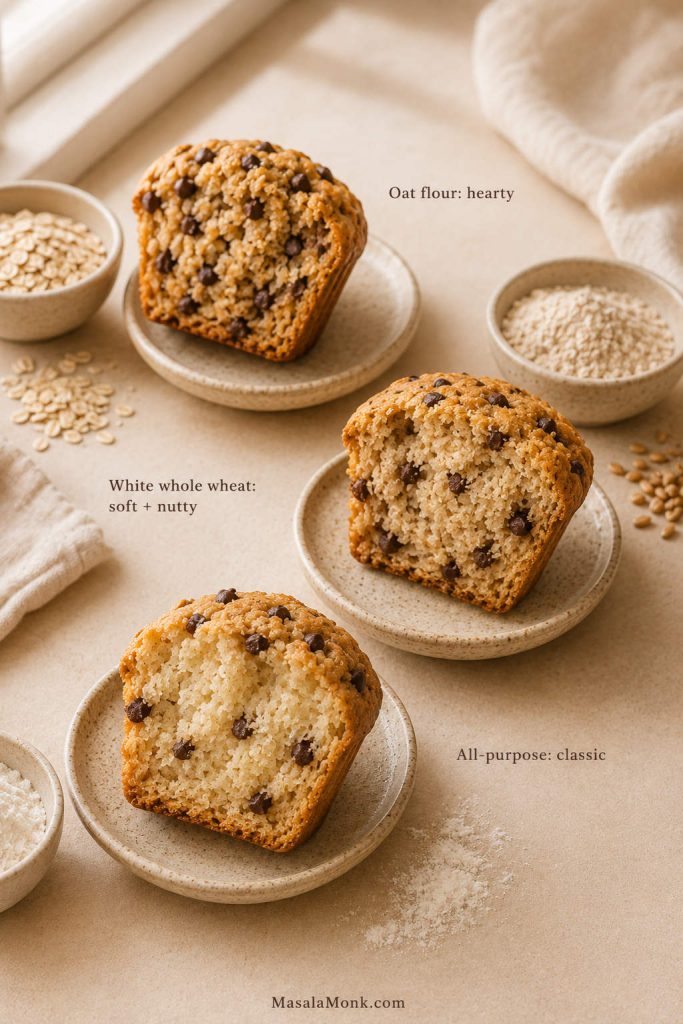
Oat flour, white whole wheat flour, or all-purpose flour

Oat flour gives these muffins a wholesome breakfast feel. White whole wheat flour gives a slightly nutty but still soft muffin. All-purpose flour gives the most classic texture. For the base recipe, use 100g oat flour or 120g all-purpose or white whole wheat flour.

Comparison of oat flour, white whole wheat, and all-purpose flour textures in high protein muffins.
Flour choice changes the crumb: oat flour is heartier, white whole wheat adds soft nuttiness, and all-purpose flour gives the most classic muffin texture.

If oats are your favorite breakfast base, this guide to high protein oatmeal has more ideas for using oats with yogurt, protein powder, cottage cheese, seeds, and nut butter.

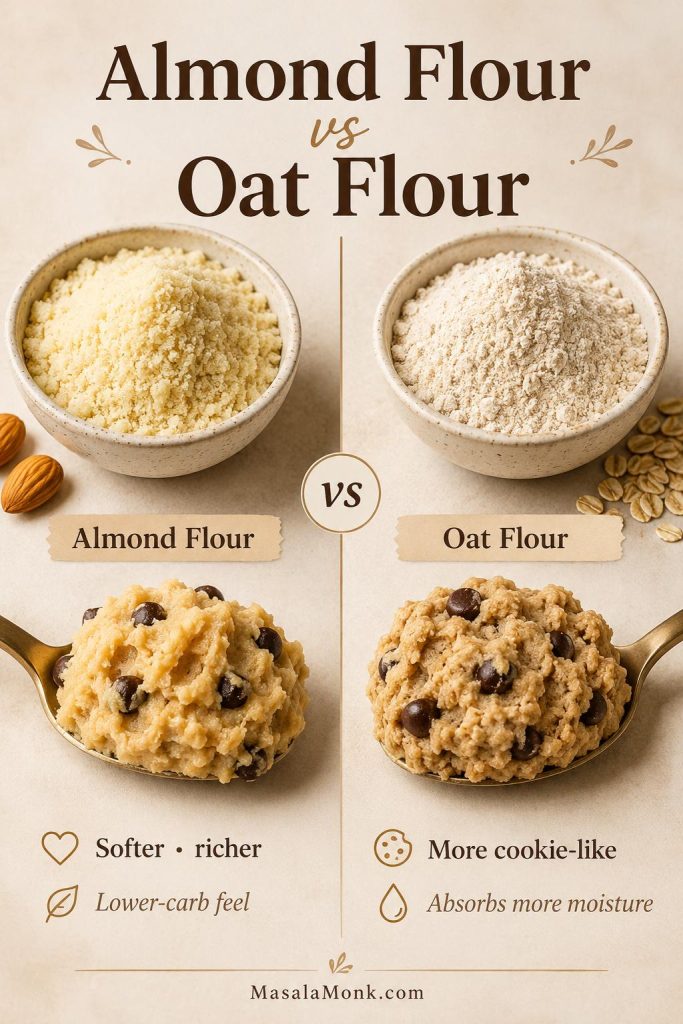
Almond flour or extra oat flour

A small amount of almond flour adds tenderness and helps keep the muffin from tasting too lean. If you do not want to use almond flour, use extra oat flour instead. Avoid replacing all the flour with almond flour unless you are using a recipe designed for that structure.

Protein powder

Vanilla protein powder is the easiest choice because it adds sweetness and flavor. Plain protein powder can work, but the muffins may need more vanilla, cinnamon, sweetener, or mix-ins. For example, chocolate protein powder works best in chocolate chip, double chocolate, or banana chocolate versions.

Greek yogurt

Use plain Greek yogurt. Full-fat or 2% yogurt gives the softest result, but nonfat Greek yogurt also works. If the batter looks too stiff after mixing, add a small splash of milk until it loosens.

Banana or applesauce

Use mashed ripe banana for a banana-forward muffin. If you want a more neutral base, use unsweetened applesauce instead. Banana gives more flavor and sweetness; applesauce keeps the muffin more flexible for blueberry, chocolate chip, or pumpkin variations.

Banana and applesauce high protein muffin comparison showing different moisture and flavor bases.
Banana makes the batch sweeter and more banana-bread-like. Applesauce keeps the base more neutral for blueberry, chocolate chip, or pumpkin variations.

Eggs, milk, and oil

Eggs give structure, milk adjusts the batter, and a little oil or melted butter keeps the crumb tender. Think of the milk as an adjustment, not a fixed amount. Start with less, then add only what the batter needs.

Mix-ins

Mini chocolate chips, blueberries, chopped walnuts, lemon zest, cinnamon, pumpkin spice, and diced strawberries can all work. Keep mix-ins to about ½–¾ cup so the muffins bake evenly.

Flavor and sweetness

Protein powder, oats, and Greek yogurt can mute sweetness once baked. If your protein powder is plain or lightly sweetened, use the full amount of maple syrup or honey and do not skip the vanilla, cinnamon, or salt. For a more treat-like muffin, mini chocolate chips usually help more than extra sweetener because they give little pockets of flavor in every bite.

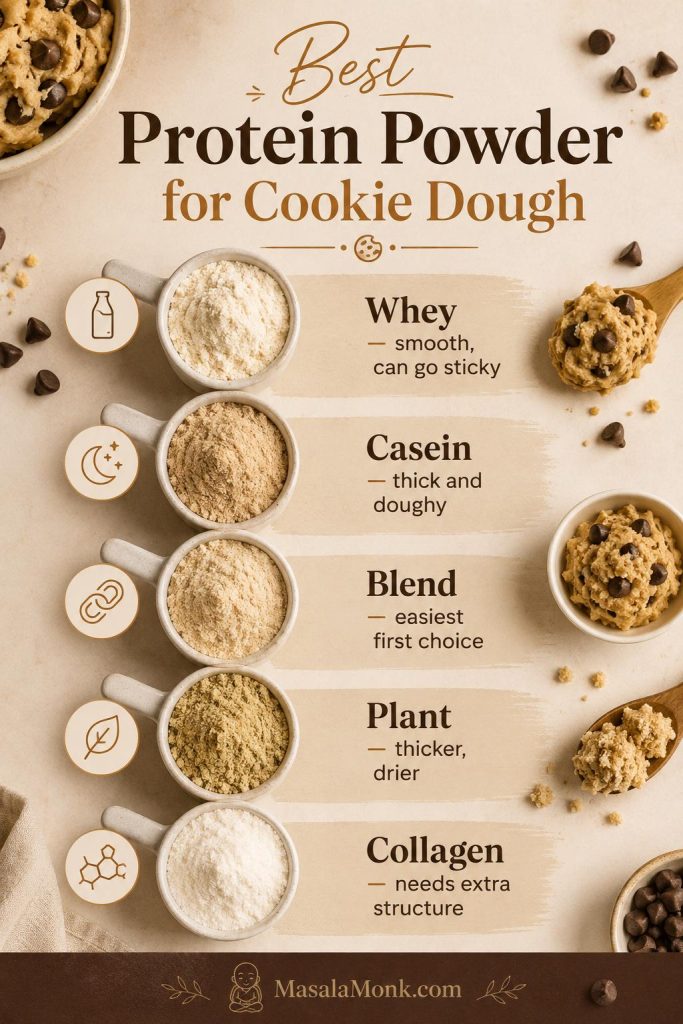
Best Protein Powder for Muffins

Protein powder can make muffins better, but it can also make them dry if the batter is not balanced. Different powders absorb liquid differently, so use the batter texture as your final guide.

This is the part that decides whether your muffins taste like breakfast or like a protein bar in muffin form. The same recipe can turn out soft with one powder and dry with another, so the batter matters more than brand loyalty.

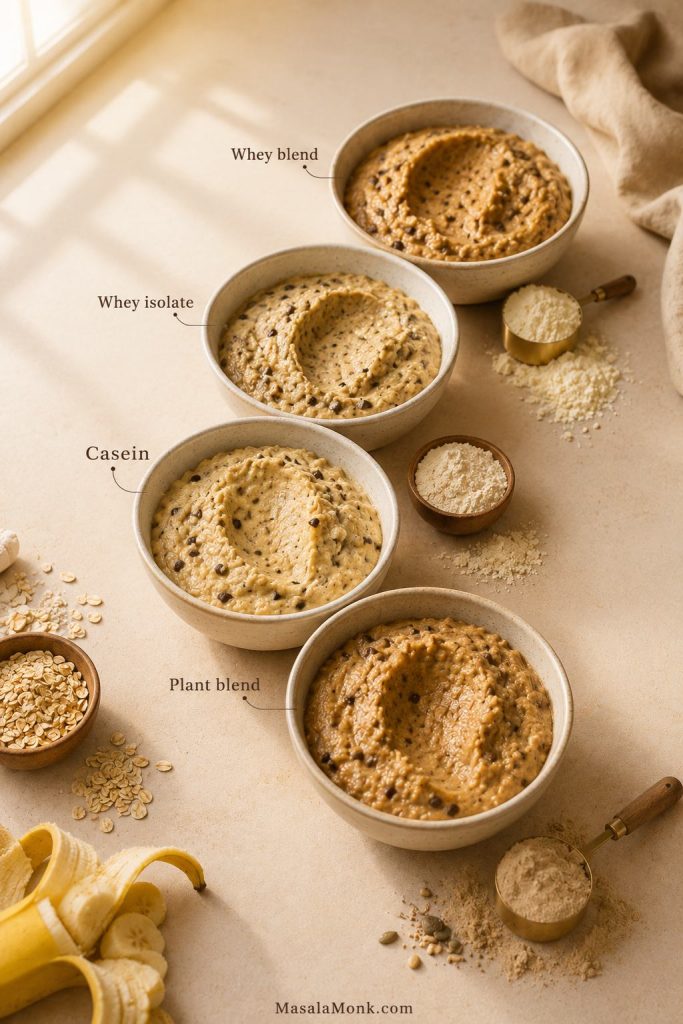
Four muffin batter bowls showing how whey, casein, and plant protein powders create different batter textures.
The same recipe can bake differently with whey, casein, or plant protein. Start with the formula, then adjust the batter before it goes into the pan.
Protein powder typeWhat to expect in muffinsBest adjustment
Whey isolateCan bake firm or dry if overused.Add extra yogurt or milk and check early for doneness.
Whey blendUsually easier than pure isolate and works well in muffin batter.Start with the recipe amount of milk, then adjust if needed.
CaseinAbsorbs a lot of liquid and can make the batter sturdy.Loosen gradually with milk until the batter is easy to scoop.
Pea proteinGood structure, but can become dense or earthy.Use enough flavor, moisture, and gentle mixing.
Plant protein blendOften reliable, but brands vary widely in absorption.Judge by batter texture, not just the printed amount of milk.
CollagenNot ideal as the only protein powder replacement.Use as a partial boost, not a full swap for flour or protein powder.

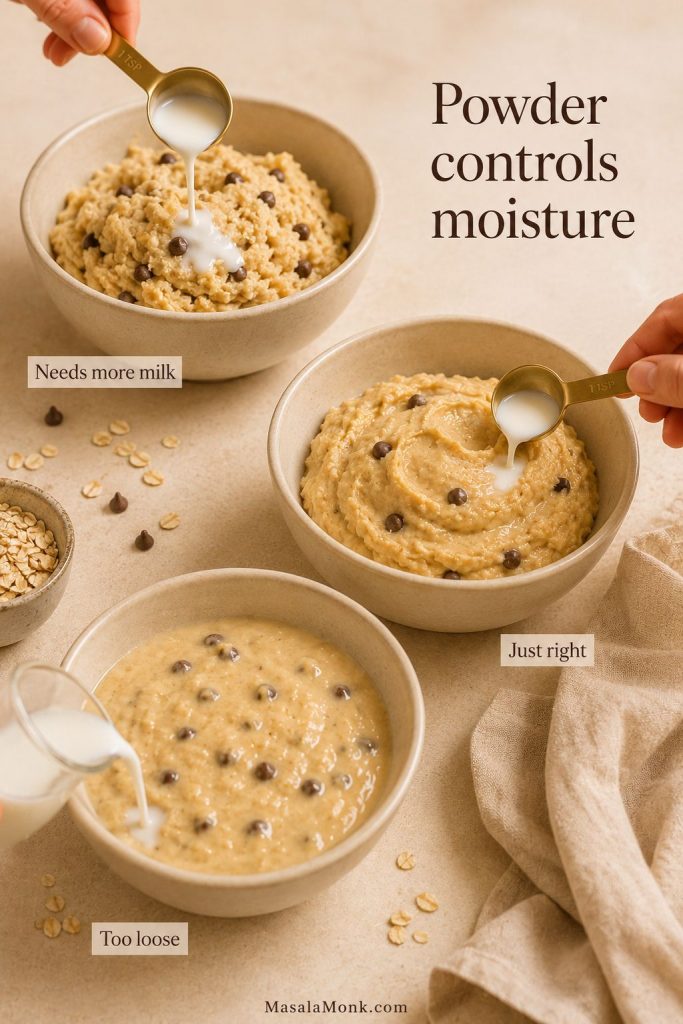
How protein powder changes batter moisture

Protein muffin batter absorption guide showing thick, just-right, and too-loose batter after adding milk.
A stiff batter does not always mean the recipe is wrong. Often, the protein powder simply needs a slower, splash-by-splash milk adjustment.

Protein powder rule: do not keep adding protein powder just to raise the number. Once protein powder becomes too large a share of the dry ingredients, muffins turn tough, dry, or heavy. A better muffin with 9–12g protein is more useful than a 20g muffin nobody wants to eat.

As a practical starting point, avoid replacing more than about one-third of the dry ingredient base with protein powder unless the recipe has been specifically built for that much powder. The more powder you add, the more moisture, fat, flavor, and careful baking you usually need.

Check the batter texture before baking

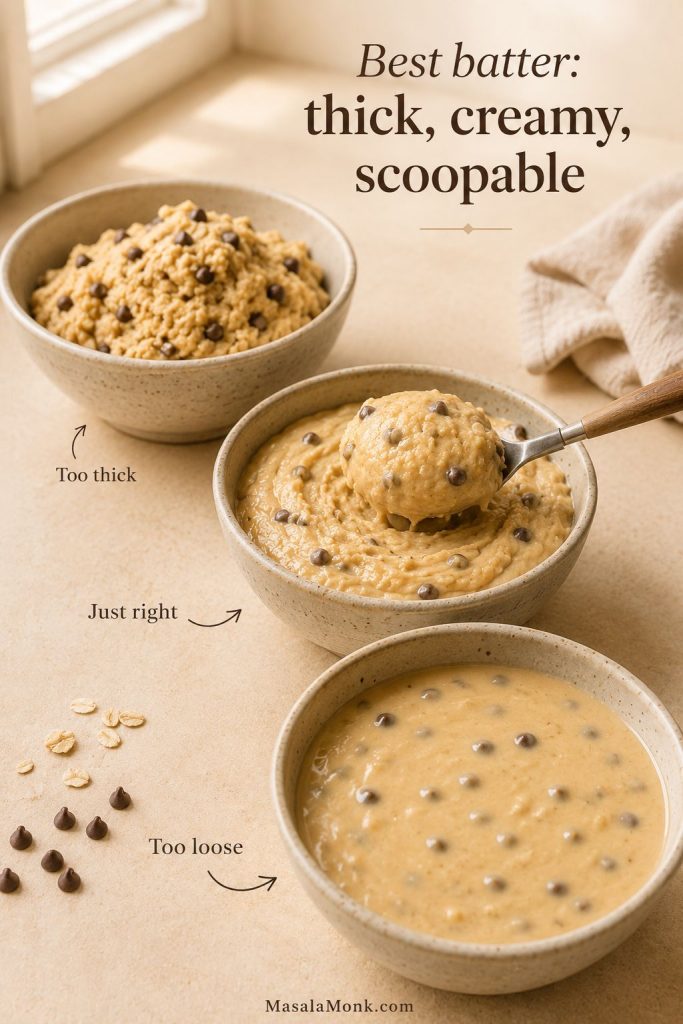
Before you bake: if the batter looks like cookie dough, it needs more milk. If it pours like pancake batter, it needs oat flour and a short rest. The sweet spot is thick, creamy, and scoopable.

Three bowls showing too-thick, just-right, and too-loose batter textures for high protein muffins.
This is the texture check that prevents most dry protein muffins. The batter should hold a scoop without crumbling or pouring.

If your batter already looks too stiff or too loose, fix it here before filling the pan. For finished muffins that came out dry, dense, or rubbery, jump to troubleshooting.

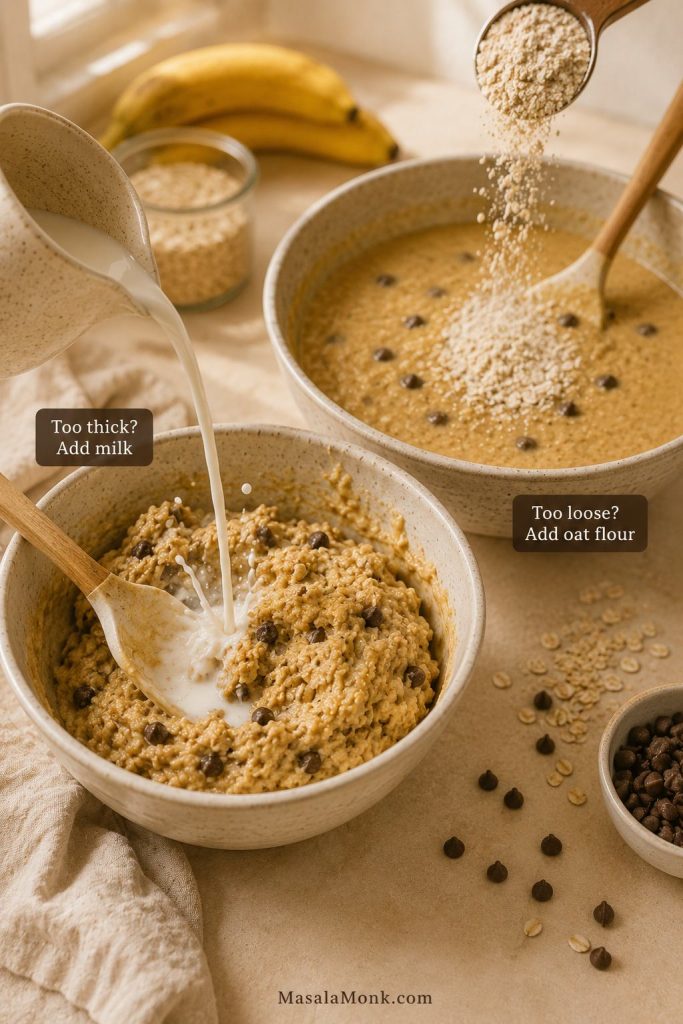
How to fix thick or loose batter

Muffin batter being fixed with milk for thick batter and oat flour for loose batter.
Most batter problems are fixable before baking. Use milk to loosen a stiff mix, or oat flour to tighten a loose one, then let the batter rest briefly.

This is the best moment to fix the batter. If it does not look scoopable, check the batter texture guide before filling the muffin tin.

Step-by-Step Method

1. Mix the dry ingredients

In a large bowl, whisk together the flour or oat flour, almond flour or extra oat flour, protein powder, baking powder, baking soda, salt, and cinnamon. Whisking first helps distribute the protein powder and leavening evenly.

2. Whisk the wet ingredients

In a separate bowl, whisk the Greek yogurt, eggs, mashed banana or applesauce, maple syrup or honey, oil or melted butter, milk, and vanilla. The mixture should look smooth and creamy.

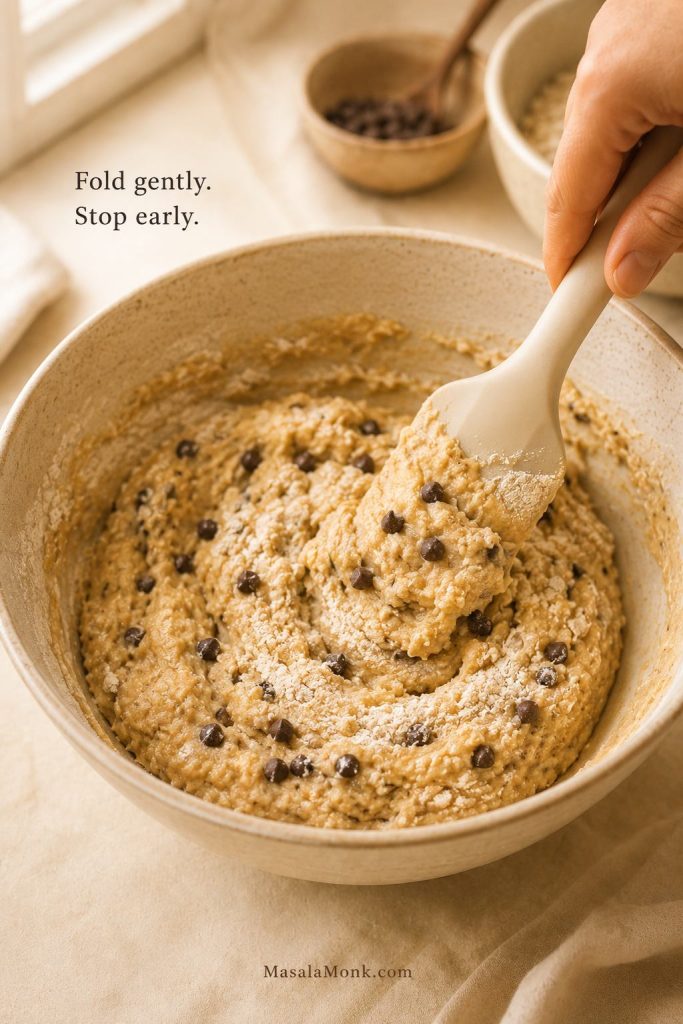
3. Combine gently

Add the wet ingredients to the dry ingredients and fold with a spatula. Stop when no dry streaks remain. Do not worry if the mixture looks a little sturdier than regular muffin batter; that is normal here.

This is the point where the recipe either stays tender or starts getting tough. A few tiny lumps are fine; a perfectly smooth batter is not the goal.

High protein muffin batter being gently folded with a spatula before overmixing.
Stop folding as soon as the batter comes together. A few streaks are better than overmixing, which can make protein muffins dense or rubbery.

4. Check and fix the batter texture

The batter should be creamy, scoopable, and easy to portion. It should mound slightly on a spoon but still spread slowly when scooped into the muffin cup. If it looks dry or crumbly, add a small splash of milk. If it pours like pancake batter, add oat flour 1 tablespoon at a time and let it rest for 5 minutes.

5. Let the batter rest if needed

If using oat flour, casein, pea protein, or a thick plant protein blend, let the batter rest for 5 minutes before scooping. Some powders hydrate slowly, so a short rest can make the final texture more even. If it becomes too stiff after resting, loosen it with 1–2 tablespoons of milk.

6. Fold in mix-ins

Fold in chocolate chips, blueberries, nuts, or other mix-ins gently. Overmixing at this point can make the muffins dense.

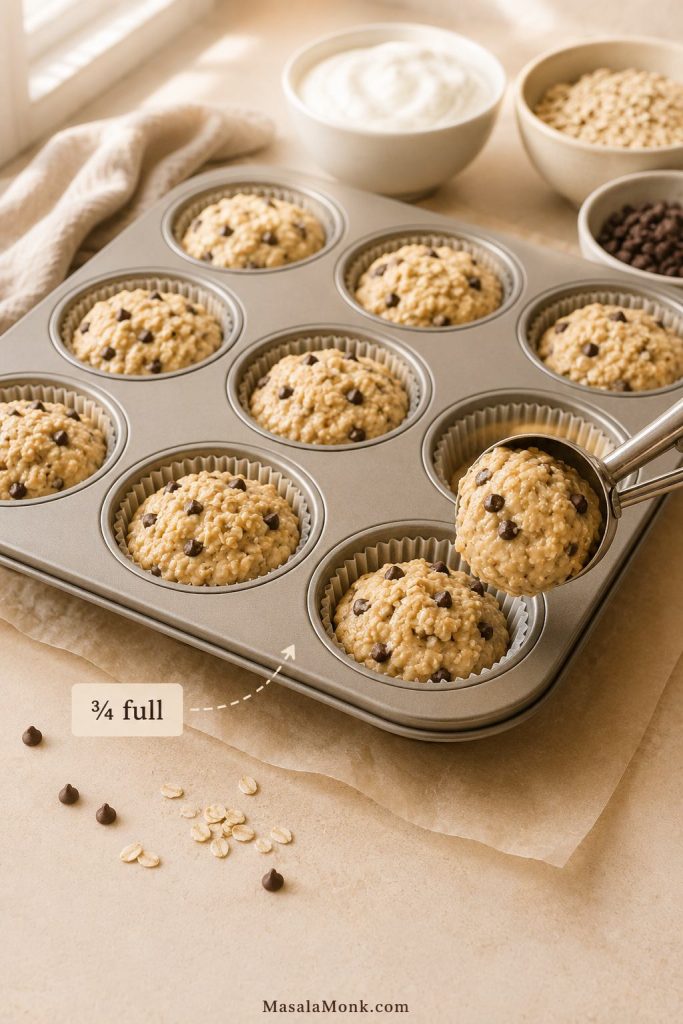
7. Fill the muffin tin

Line a 12-cup muffin tin and lightly spray the liners. Fill each cup about ¾ full for regular muffins, or slightly fuller for taller tops.

High protein muffin batter scooped into a muffin tin with cups filled about three-quarters full.
Fill each muffin cup about three-quarters full. That gives the batter room to rise while still creating a generous, bakery-style top.

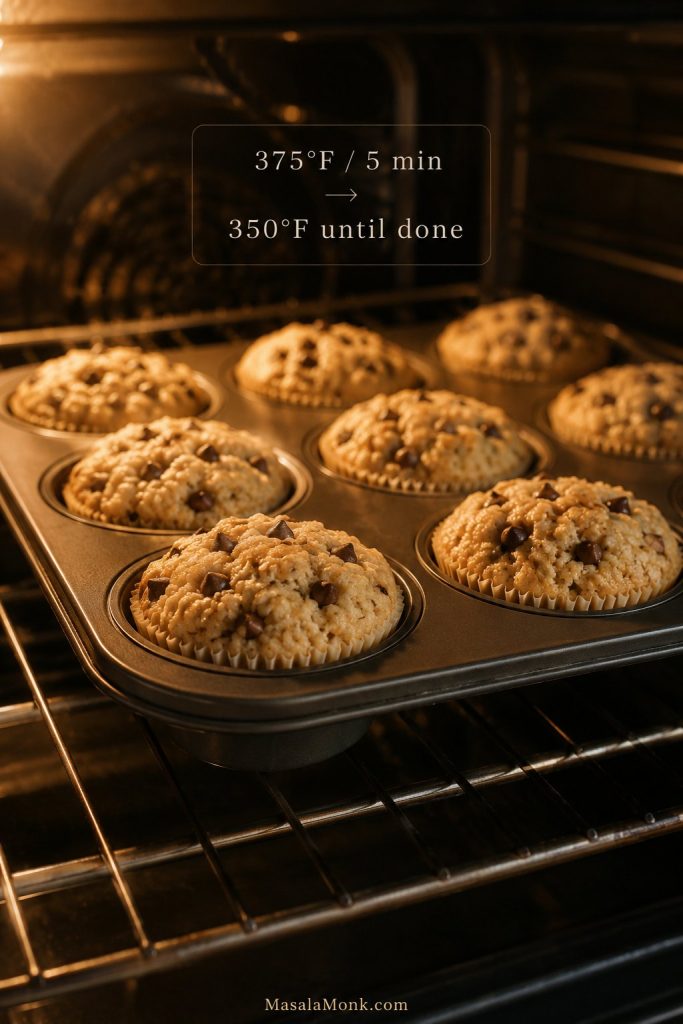
8. Bake and cool

Bake at the higher starting temperature first, then reduce the oven temperature without opening the door. After that, let the muffins cool in the pan for 10 minutes before moving them to a rack. A little patience here pays off because the centers continue to settle as they cool.

Bake Time, Temperature, and Doneness

For the best balance of lift and moisture, start the muffins at 375°F / 190°C for 5 minutes. Then reduce the oven to 350°F / 175°C and bake for another 12–17 minutes, depending on your oven, muffin tin, protein powder, and mix-ins.

High protein muffins baking with a hot-start oven cue of 375 degrees then 350 degrees.
A short hot start helps protein muffins lift before the lower temperature finishes the centers gently. This gives better rise without drying the edges.

How to check doneness

The muffins are done when the tops spring back lightly and a toothpick inserted in the center comes out clean or with a few moist crumbs. Do not wait until the tops feel hard. Instead, pull them when they are just set because they continue to firm up as they cool.

Toothpick test showing moist crumbs on a high protein muffin to indicate doneness.
Do not wait for a perfectly clean toothpick if you want a softer crumb. A few moist crumbs usually mean the muffins are done.

A good batch should rise slightly, feel soft when pressed, and smell warm and lightly sweet. The tops should not feel hard when they leave the oven. If they do, the batch likely baked a few minutes too long.

Cool before storing

Do not skip cooling: these muffins can seem slightly soft in the center when hot. Give them 10 minutes in the pan and more time on a rack before judging the final texture.

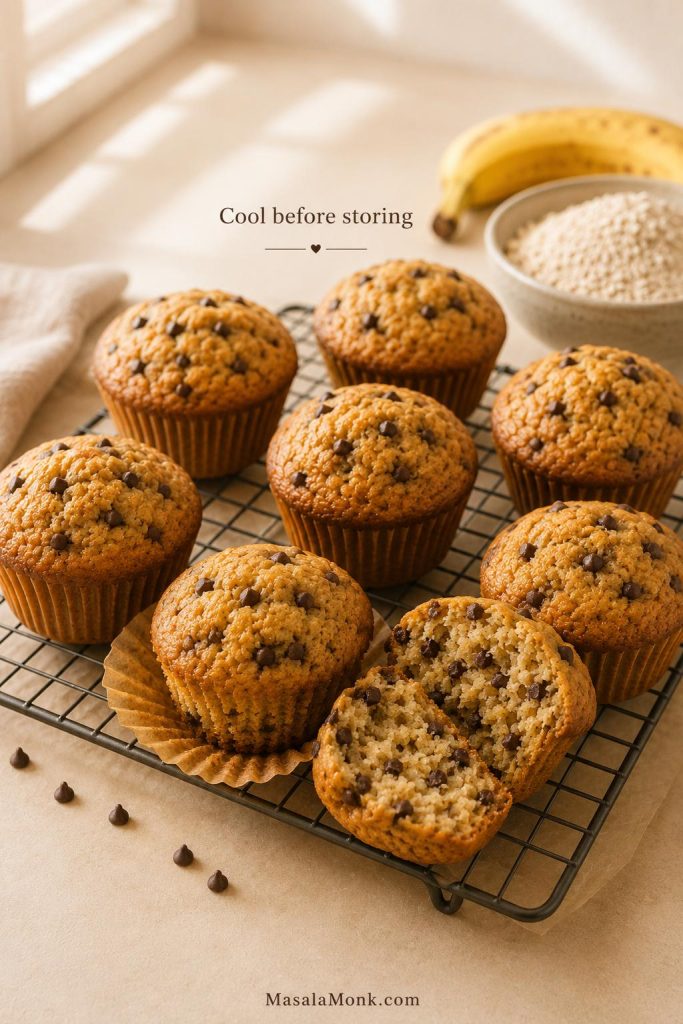
High protein muffins cooling on a wire rack with one muffin split open after cooling.
Cooling is part of the recipe, not an afterthought. Letting the muffins rest helps the centers settle and keeps extra steam out of the storage container.

After baking, let the muffins cool before judging the final crumb. Then use the storage and freezing tips if you are making them for meal prep.

Easy Muffin Variations

Use the base recipe as a flexible formula. The mixture should be sturdy enough to scoop, but still soft enough to settle into the muffin cups. Adjust with milk if your protein powder makes it too stiff.

Choose the version based on what you want the muffin to feel like: banana for cozy breakfast, blueberry for fresh and bright, chocolate chip for snack prep, oatmeal for a heartier morning muffin, and pumpkin for a softer fall batch.

Best first variation: banana chocolate chip is the easiest crowd-pleaser. Blueberry lemon is fresher, pumpkin is softer, and cottage cheese is best when you want extra moisture without relying only on protein powder.

For the easiest first batch, start with banana chocolate chip. For a brighter version, try blueberry lemon; for extra moisture, use the cottage cheese version.

Banana protein muffins

Choose this when you want the coziest version. Mashed ripe banana makes the muffins taste closer to banana bread, especially with cinnamon and mini chocolate chips.

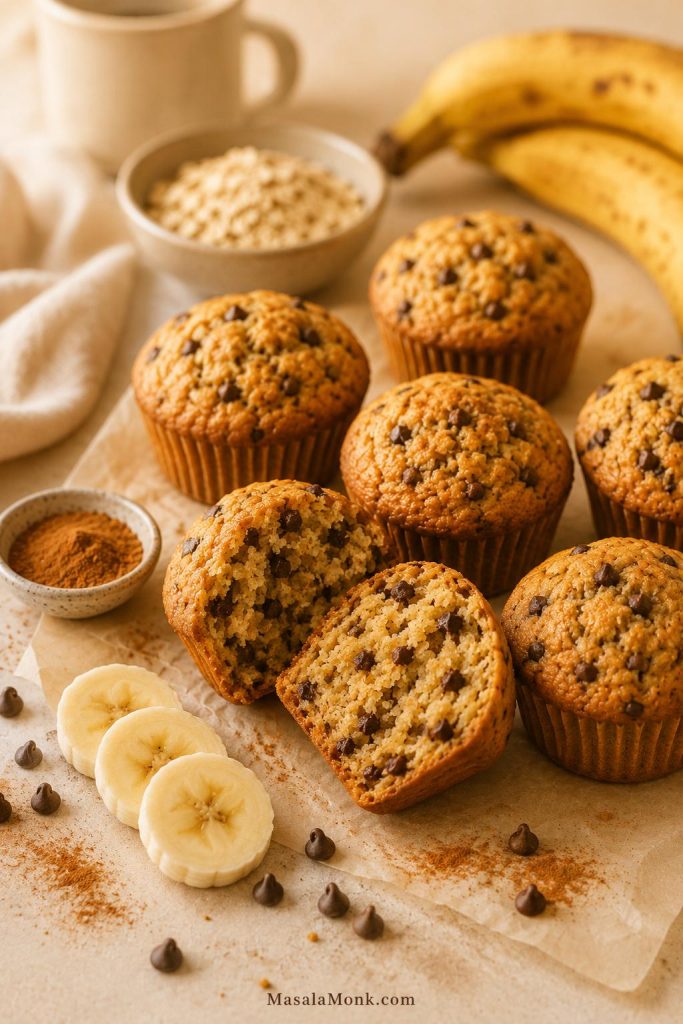
Banana chocolate chip high protein muffins with one muffin split open to show a moist crumb.
Banana chocolate chip is the coziest variation: ripe banana adds sweetness, while mini chips spread little pockets of flavor through the crumb.

Blueberry protein muffins

Choose this when you want something fresher and brighter. Applesauce keeps the base neutral, while blueberries and lemon zest make the muffins feel more like a morning bakery muffin.

Blueberry lemon high protein muffins with one muffin split open to show a soft crumb and blueberry pockets.
Blueberry lemon gives the same protein muffin base a fresher, brighter flavor. Keep the batter thick enough so the berries stay suspended instead of sinking.

Chocolate chip protein muffins

Choose this when you want the batch to feel more like a snack than a strict breakfast. Mini chips spread through the crumb better, so you get chocolate in more bites without overloading the batter.

Chocolate chip high protein muffins served with Greek yogurt and fruit for snack prep.
For snack prep, mini chocolate chips make the muffins feel more satisfying without overloading the batter. Pair one with yogurt and fruit for a fuller bite.

Oatmeal protein muffins

For a heartier breakfast muffin, use oat flour and a small amount of rolled oats. Avoid steel-cut oats here because they will not soften properly in a standard muffin bake.

Pumpkin protein muffins

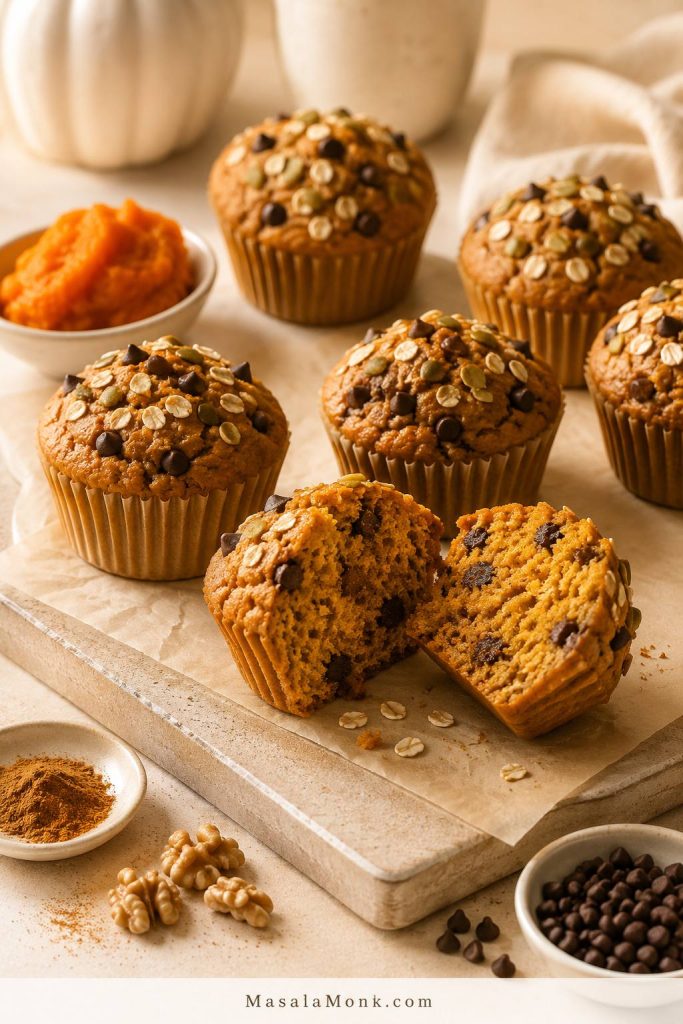
To make a fall-style batch, replace the banana or applesauce with pumpkin puree, add pumpkin pie spice, and use chocolate chips or walnuts. Because pumpkin adds a lot of moisture, these muffins may need the longer end of the bake window.

Pumpkin high protein muffins with a soft orange crumb and warm spice cues.
Pumpkin adds moisture, color, and warm spice, but it also softens the batter. Use the longer end of the bake window if the centers need more time.

Cottage cheese protein muffins

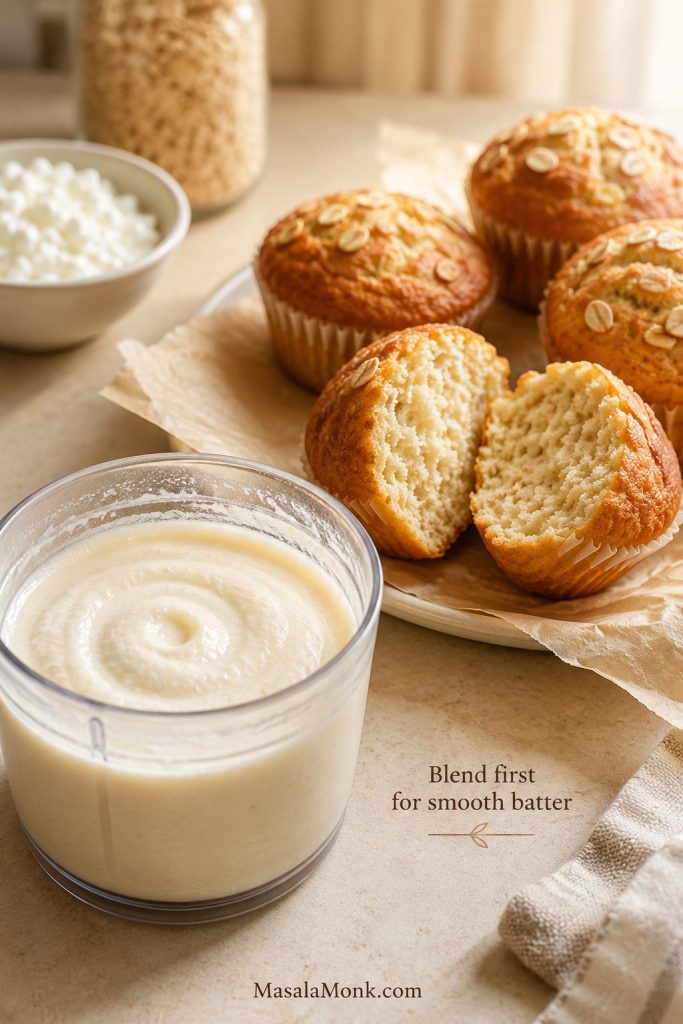
Choose this when you want extra moisture and a softer center. This is the best cottage cheese protein muffin direction if you want more real-food protein without making the batch depend only on powder. Blend the cottage cheese into the wet ingredients first so the batter bakes smooth instead of curdy.

Cottage cheese protein muffins with blended cottage cheese and a split muffin showing a smooth tender crumb.
Cottage cheese works best when blended into the wet ingredients first. That simple step adds moisture without leaving curdy pockets in the crumb.

For more breakfast ideas using the same ingredient, see cottage cheese for breakfast.

How to Make High Protein Muffins Without Protein Powder

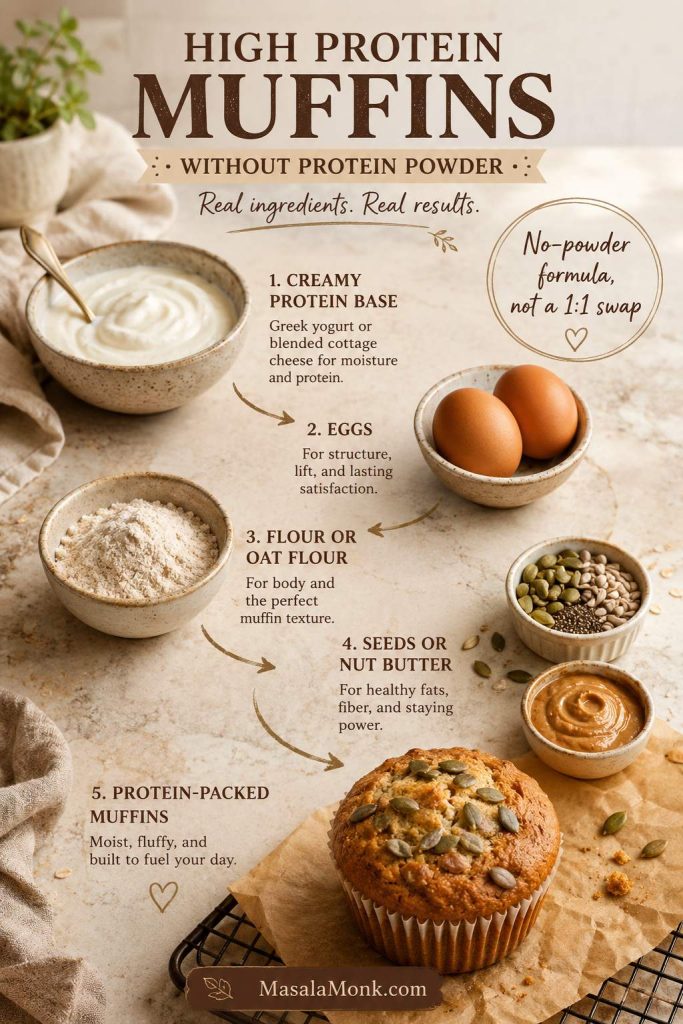
You can make protein-rich muffins without protein powder, but the recipe needs a different strategy. For a no-powder batch, think in parts: a creamy protein base, eggs for structure, flour for body, and a little fat, seeds, or nut butter for staying power.

Important: this is not a direct one-for-one swap. If you simply remove the protein powder from the main recipe, the batter balance changes. Use the no-powder formula below instead.

If you are using protein powder after all, return to the main recipe card. If you want to avoid powder completely, follow the no-powder formula below rather than removing the powder from the main batter.

Best no-powder formula

For muffins without protein powder, start with a structure that balances moisture, lift, body, and staying power:

  • Creamy protein base: ¾–1 cup Greek yogurt or blended cottage cheese
  • Structure: 2 eggs
  • Body: 1 cup oat flour + 1 cup all-purpose or white whole wheat flour
  • Staying power: ¼–½ cup hemp hearts or nut butter
  • Moisture and flavor: banana or applesauce
  • Lift: 2 teaspoons baking powder + ½ teaspoon baking soda
  • Balance: ½ teaspoon salt
No-powder high protein muffin formula with Greek yogurt or cottage cheese, eggs, flour, seeds, nut butter, and a finished muffin.
A no-powder protein muffin needs its own structure. Build around yogurt or cottage cheese, eggs, flour, and seeds or nut butter instead of simply removing protein powder.

This will usually give less protein than a protein-powder muffin. The flavor is often more natural, though, and the texture can be softer.

The same idea works in other breakfast batters too. These oat pancakes use oats, cottage cheese, and high-protein options in a way that feels very similar: simple ingredients, better texture, and no need to rely only on protein powder.

Best real-food protein options

IngredientHow it helpsBest use
Cottage cheeseAdds protein and moisture.Blend with wet ingredients for a smooth muffin.
Greek yogurtAdds protein and keeps the crumb soft.Use in banana, blueberry, and chocolate chip muffins.
EggsAdd structure and protein.Useful in almost every muffin formula.
Oats or oat flourAdd breakfast texture and slow-digesting carbs.Best for oatmeal and banana protein muffins.
Nut butterAdds fat, flavor, and some protein.Best in banana, chocolate, and peanut butter muffins.
Hemp, flax, or chiaAdds protein, fiber, and texture.Use in small amounts so the muffins do not turn heavy.

For the best no-powder result, use cottage cheese or Greek yogurt as part of the wet base rather than treating them like simple add-ins. They help the batter stay moist while adding protein in a more natural way.

Troubleshooting: Why Are My Protein Muffins Dry, Dense, or Rubbery?

Most protein muffin problems are not disasters. They are signals. Dry muffins, sticky centers, flat tops, and chalky flavor usually mean the batter needed a little more moisture, less mixing, or a shorter bake.

If your first batch is not perfect, do not treat it like a failure. Protein muffin batter is more sensitive than regular muffin batter because protein powder, oats, yogurt, and cottage cheese all hold moisture differently. Most problems can be fixed by changing the liquid, mixing less, or pulling the muffins from the oven a little earlier.

The batter usually tells you what it needs. A stiff batter needs a little milk. A loose batter needs oat flour and a short rest. Finally, flat flavor usually needs more vanilla, cinnamon, salt, fruit, or chocolate next time.

Dry vs moist: read the crumb

Dry protein muffin crumb compared with soft moist protein muffin crumb for troubleshooting.
Dry protein muffins usually point back to the batter. More moisture, less overbaking, and a better powder-to-flour balance can change the result.

If the problem started before baking, go back to the batter texture cue. If the muffins looked fine going in but came out dry, check the bake time and doneness notes.

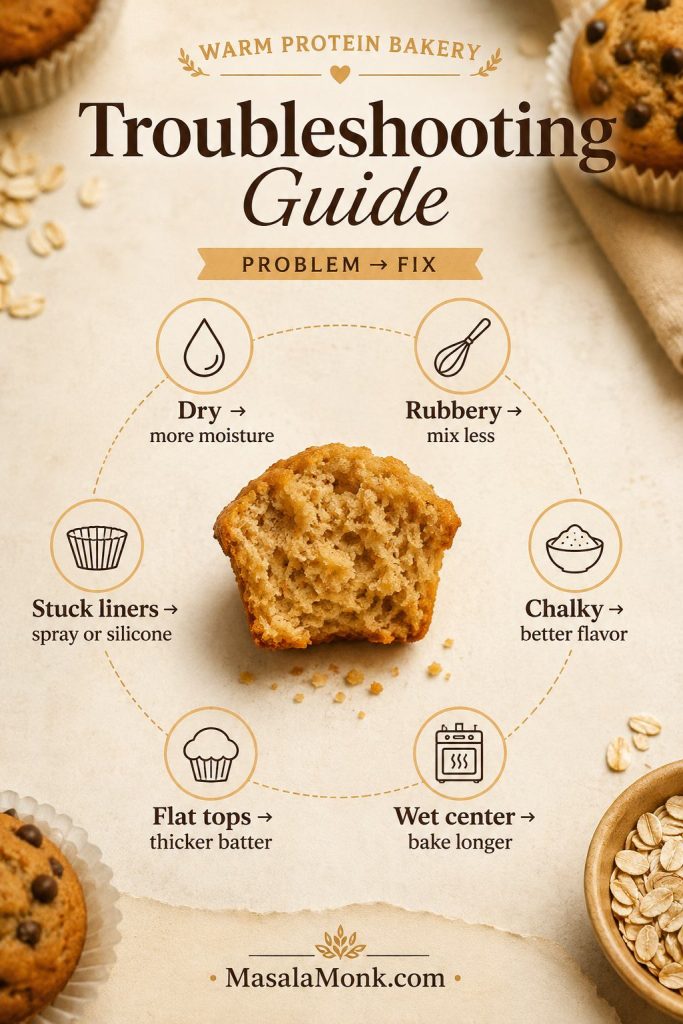
Protein muffin troubleshooting guide

Troubleshooting guide for high protein muffins showing fixes for dry, rubbery, chalky, wet, flat, and stuck muffins.
Most protein muffin problems have a simple cause. Once you know whether it is moisture, mixing, bake time, or liners, the next batch is easier to fix.

Use the tables below like a quick diagnosis: find what happened, then adjust the next batch before changing the whole recipe.

Texture problems

ProblemLikely reasonFix
Dry muffinsToo much protein powder, not enough moisture, or overbaking.Add more yogurt or milk next time and check the muffins earlier.
Rubbery textureThe batter was overmixed after the wet and dry ingredients were combined.Fold gently and stop as soon as the batter comes together.
Chalky tasteThe protein powder flavor is too strong or too much powder was used.Use a better-tasting powder, add cinnamon or vanilla, or reduce the powder slightly.
Wet centerToo much fruit, yogurt, or cottage cheese; muffins may also need more cooling.Bake 2–4 minutes longer and let the muffins cool fully before storing.

Baking and pan problems

ProblemLikely reasonFix
Flat topsThe oven was not hot enough at the start or the batter was too thin.Use the hot-start method and keep the batter thick enough to hold shape.
Muffins stick to linersLow-fat, high-protein batters often cling to paper liners.Spray the liners lightly or use silicone muffin cups.
Blueberries sinkThe berries were too wet, too large, or folded into thin batter.Toss berries with a little flour and keep the batter thick.

Batter and flavor fixes

ProblemLikely reasonFix
Batter too thickThe protein powder absorbed more liquid than expected.Add milk gradually until the batter softens.
Batter too thinToo much yogurt, fruit, or milk was added.Add oat flour 1 tablespoon at a time and let the batter rest for 5 minutes.
Muffins taste “healthy” in a bad wayNot enough flavor against the protein powder.Add cinnamon, vanilla, banana, chocolate chips, lemon zest, or a pinch more salt.

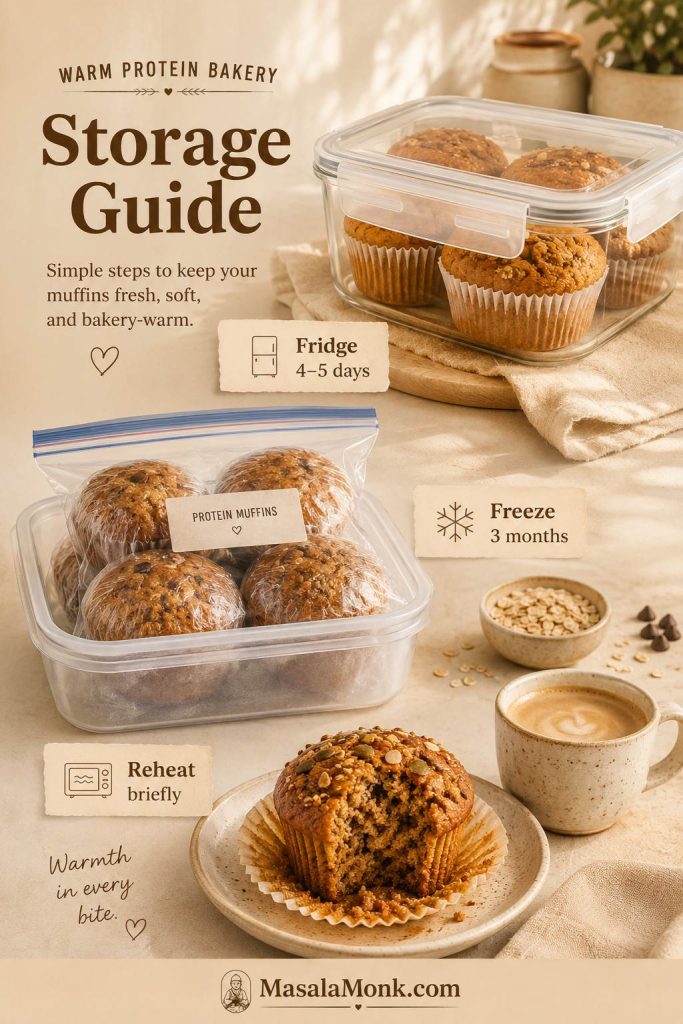
How to Store and Freeze Protein Muffins

These muffins are at their best once fully cooled, which makes them useful for breakfast prep. Bake a batch, cool them completely, then keep a few in the fridge and freeze the rest for mornings when you want something filling without cooking.

For another freezer-friendly breakfast that works well on busy mornings, these freezer-friendly breakfast burritos are a savory option to keep alongside muffins.

Storage guide for high protein muffins showing fridge storage, freezer storage, and reheating.
Store protein muffins only after they cool completely. Then refrigerate the week’s batch and freeze the rest so the texture stays fresher for longer.

Meal prep tip: save the base recipe once, then change only the fruit, mix-ins, and protein powder adjustment. The batter texture should stay the same even when the flavor changes.

Storage times

Storage methodHow longBest tip
Room temperatureSame day, or overnight if your kitchen is coolFor longer storage, refrigerate because these muffins are moist and yogurt-based.
Refrigerator4–5 daysStore in an airtight container with a paper towel to absorb moisture.
FreezerUp to 3 monthsFreeze individually, then move to a freezer bag or airtight container.
Reheating15–45 secondsMicrowave briefly until just warm, not hot and tough.

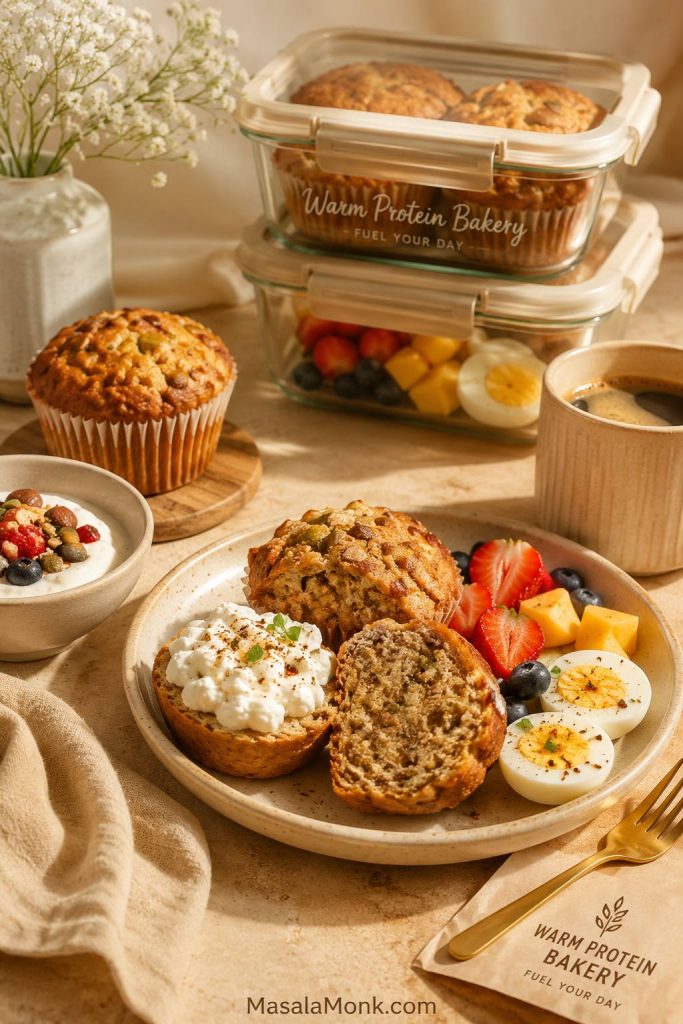
What to Serve with High Protein Muffins

These muffins work well as a quick breakfast, lunchbox item, pre-workout bite, or afternoon snack. For a fuller breakfast, serve one with Greek yogurt, fruit, boiled eggs, cottage cheese, nut butter, or a smoothie.

High protein muffins served with Greek yogurt, fruit, eggs, and coffee for breakfast meal prep.
One muffin can be a quick snack, but it becomes a fuller breakfast with Greek yogurt, fruit, eggs, cottage cheese, or coffee.

When you want a softer, bakery-style breakfast, warm one muffin briefly and split it with a little butter, peanut butter, or almond butter.

For snack prep, pair this recipe with healthy oat protein bars so you have both baked muffins and grab-and-go bars ready for the week.

Once you understand the batter, this becomes an easy recipe to repeat. Keep the base the same, change the fruit or mix-ins, and you have a breakfast muffin that can move from weekday meal prep to a weekend coffee plate without feeling like “diet food.”

For your own next batch, note the protein powder you used and how much milk the batter needed. Once you know that one detail, this recipe becomes easy to repeat with banana, blueberries, chocolate chips, pumpkin, or cottage cheese.

Ready to bake? The full recipe card below gives you the exact amounts, bake time, and adjustment notes. If your protein powder is very absorbent, start with the lower milk amount and add more only after mixing.

High Protein Muffins Recipe Card

A flexible, meal-prep friendly muffin base made with Greek yogurt, protein powder, oat flour or whole wheat flour, and banana or applesauce. Use the notes below to adjust the batter for your protein powder and favorite mix-ins.

Yield12 muffins

Prep Time10 minutes

Bake Time17–22 minutes

Total Time30–35 minutes

High protein muffins recipe card image with yield, time, protein range, and batter texture cue.
Save the texture cue along with the ingredient list: the batter should hold its shape, feel creamy, and scoop easily before it goes into the muffin tin.

Equipment

  • 12-cup muffin tin
  • Muffin liners or silicone muffin cups
  • Mixing bowls
  • Whisk
  • Rubber spatula
  • ¼ cup scoop or spoon
  • Wire cooling rack

Ingredients

Dry ingredients

  • 1 cup oat flour, 100g, for the default breakfast-style version
  • Flour swap: use 1 cup all-purpose or white whole wheat flour, 120g, for a softer classic muffin texture
  • ½ cup almond flour, about 50–55g, for extra tenderness
  • Almond-free swap: use ½ cup extra oat flour instead
  • ½ cup vanilla protein powder, about 50–60g
  • 2 teaspoons baking powder
  • ½ teaspoon baking soda
  • ½ teaspoon fine salt
  • 1 teaspoon cinnamon

Wet ingredients

  • ¾ cup plain Greek yogurt, about 180g
  • ½ cup mashed ripe banana or unsweetened applesauce, about 120g
  • 2 large eggs
  • ⅓ cup maple syrup or honey, about 80ml
  • 3 tablespoons neutral oil or melted butter, about 45ml
  • 3–6 tablespoons milk, about 45–90ml, starting with 3 tablespoons and adding more only if the batter looks too stiff
  • 2 teaspoons vanilla extract

Optional mix-ins

  • ½ cup mini chocolate chips
  • ½–¾ cup blueberries
  • ½ cup chopped walnuts or pecans
  • 1 tablespoon lemon zest for blueberry muffins
  • ½ teaspoon pumpkin pie spice for a warmer flavor

Instructions

  1. Preheat the oven. Preheat to 375°F / 190°C. Line a 12-cup muffin tin and lightly spray the liners.
  2. Mix the dry ingredients. In a large bowl, whisk together the flour, almond flour or extra oat flour, protein powder, baking powder, baking soda, salt, and cinnamon.
  3. Mix the wet ingredients. In a second bowl, whisk Greek yogurt, mashed banana or applesauce, eggs, maple syrup or honey, oil or melted butter, 3 tablespoons milk, and vanilla.
  4. Combine gently. Add the wet ingredients to the dry ingredients. Fold with a spatula until just combined.
  5. Adjust the batter. The batter should be sturdy but not dry. If it looks stiff, add a small splash of milk. If it looks too loose, add oat flour 1 tablespoon at a time and rest for 5 minutes.
  6. Rest if needed. If using oat flour, casein, pea protein, or a very absorbent plant protein powder, let the batter rest for 5 minutes before scooping.
  7. Add mix-ins. Fold in chocolate chips, blueberries, nuts, or other mix-ins. Do not overmix.
  8. Fill the muffin tin. Divide the batter between 12 muffin cups, filling each about ¾ full.
  9. Bake with a hot start. Bake at 375°F / 190°C for 5 minutes. Without opening the oven, reduce the temperature to 350°F / 175°C and bake for 12–17 more minutes.
  10. Check for doneness. The muffins are done when the tops spring back lightly and a toothpick comes out clean or with a few moist crumbs.
  11. Cool properly. Cool in the pan for 10 minutes, then transfer to a wire rack. Let the muffins cool before storing.

Recipe Notes

  • Best texture cue: the batter should mound on a spoon but still spread slowly in the muffin cup.
  • Protein powder varies: if your batter looks dry, add milk gradually before baking.
  • Banana version: use mashed ripe banana instead of applesauce.
  • Neutral base: use applesauce and vanilla protein powder.
  • Softer muffins: avoid overbaking and give the muffins enough cooling time.
  • Sticking prevention: use silicone liners or spray paper liners lightly.
  • Dairy-free batch: use thick dairy-free yogurt and a plant-based protein powder, then adjust the milk as needed.

Approximate Nutrition

Approximate per muffin, based on 12 muffins: 180–230 calories, 9–12g protein, 20–28g carbohydrates, 6–10g fat, and 2–4g fiber. Exact numbers vary by protein powder, yogurt, flour, sweetener, milk, and mix-ins.

Storage

Store fully cooled muffins in an airtight container in the refrigerator for 4–5 days, or freeze for up to 3 months. Reheat briefly in the microwave until just warm.

FAQs About High Protein Muffins

How much protein is in each muffin?

Each muffin has about 9–12 grams of protein depending on the protein powder, yogurt, flour, milk, eggs, and mix-ins you use. For the most accurate number, calculate using the exact brands and amounts in your kitchen.

What if I do not want to use protein powder?

A no-powder version needs a slightly different formula built around cottage cheese, Greek yogurt, eggs, oats, nut butter, or seeds. Simply removing the protein powder from this recipe will change the flour-to-liquid balance.

Which protein powder works best for muffins?

A vanilla whey blend or plant-based blend is the easiest starting point. Whey isolate can bake dry if used heavily, while casein and some plant powders may need extra milk because they absorb more liquid.

Why did my protein muffins turn dry?

Dry muffins usually come from too much protein powder, not enough liquid, overbaking, or using a powder that absorbs heavily. Next time, add more yogurt or milk and check the muffins earlier.

Why is my batter thicker than regular muffin batter?

Protein powder, oat flour, and Greek yogurt all make the batter sturdier than a classic muffin batter. It should still be scoopable, not dry. Let it rest for 5 minutes, then loosen with a small splash of milk if needed.

Does oat flour work in this recipe?

Oat flour works well and gives the muffins a breakfast-style flavor. The texture will be slightly heartier than all-purpose flour. If the batter gets too stiff, add a little more milk.

How should I freeze and reheat them?

Cool the muffins fully, freeze them individually, then move them to a freezer bag or airtight container for up to 3 months. To reheat, microwave briefly from frozen or thaw overnight in the fridge.

How do I make a dairy-free version?

Choose a thick dairy-free yogurt and a plant-based protein powder. Because plant-based powders often absorb more liquid, add milk gradually until the batter looks sturdy but workable.

Blueberries or chocolate chips: which works better?

Both work well, but they give different results. Blueberries make the muffins feel fresher and more breakfast-like, while mini chocolate chips make them feel more snackable. Keep mix-ins around ½–¾ cup so the muffins bake evenly.

How do I know when they are done?

The tops should spring back lightly, and a toothpick should come out clean or with a few moist crumbs. Pull them before they feel firm and dry because they continue to set as they cool.

Are these filling enough for breakfast?

They can be, especially when paired with fruit, Greek yogurt, cottage cheese, eggs, or coffee. On their own, they are more filling than a regular muffin because they include protein-rich ingredients and a more substantial crumb.

If you try these, leave a note with the protein powder you used, whether you chose banana or applesauce, and how much milk your batter needed. Those little details often help the next reader get a softer batch on the first try.

Back to top

Posted on — Leave a comment

Protein Cookie Dough Recipe

Thick protein cookie dough recipe in a bowl with mini chocolate chips, spoon marks, and a scoopable texture.

This protein cookie dough recipe is edible, no-bake, ready in about 5 minutes, and built to taste like cookie dough — not protein paste. It is egg-free, made without raw all-purpose flour, and gives you a scoopable, chocolate-studded dough with about 15–22g protein per serving when divided into 3–4 portions.

No oven, no mixer, no waiting for cookies to cool — just one bowl, a spoon, and a sweet snack that feels more like dessert than a protein shake.

The difference between good protein cookie dough and chalky protein paste is balance. Protein powder adds structure, nut butter gives richness, Greek yogurt softens the dough, and almond flour or oat flour makes it thick enough to scoop. Then vanilla, salt, and mini chocolate chips bring it closer to a real cookie dough bite. If you like this kind of high-protein dessert, this dough gives you the same treat-like feeling without needing a freezer or blender.

It should feel like sneaking a spoonful of cookie dough from the bowl, only with enough protein to make it feel more satisfying than a random bite of dessert.

Spoon lifting edible protein cookie dough with mini chocolate chips and soft ridges showing the scoopable texture
This spoon-lift shows the texture you want: creamy, sturdy, and able to hold its shape without turning stiff.

Quick Answer: The Best Protein Cookie Dough Ratio

Protein cookie dough ratio board with protein powder, flour, nut butter, Greek yogurt, milk, and mini chocolate chips
This quick ratio works because the dry base, creamy ingredients, and milk are balanced before the chocolate chips go in.

Use less milk for a firmer dough and more milk for a softer, scoop-and-eat texture. Divide the batch into 3 portions for a higher-protein snack, or 4 portions for smaller dessert-style servings.

Best first version: Use a vanilla whey-casein blend if you have one, almond flour for a softer rich dough, and mini chocolate chips for the most cookie-dough-like bite.
Do not add all the milk at once. Protein powders absorb moisture differently, and a dough that looks dry at first can loosen quickly after mixing. Add liquid gradually and stop as soon as the dough holds together.

Not sure how your powder will behave? See the protein powder guide before adding all the milk.

Protein Cookie Dough at a Glance

One-bowl five-minute no-bake protein cookie dough with a timer, spoon, and thick chocolate chip dough
Since this is a 5-minute no-bake recipe, the key is adjusting texture in the bowl instead of relying on baking time.
Prep time 5 minutes
Cook time 0 minutes
Chill time Optional 20–30 minutes for firmer dough
Servings 3–4 servings
Protein estimate About 15–22g per serving, depending on powder and serving size
Best texture Scoopable, sturdy, and easy to eat with a spoon
Best flour Almond flour for soft/rich, oat flour for more cookie-like
Main fix Add liquid slowly, then fine-tune the texture in small spoonfuls
Storage 4–5 days in the fridge or 2–3 months frozen in portions

The best part is that the recipe is forgiving. If the first mix looks too dry, too sticky, or too thick, you do not have to start over — you just adjust the bowl in small steps.

Estimated Protein, Calories, and Serving Size

Protein and calorie guide for protein cookie dough showing three-serving and four-serving portion estimates
For macro tracking, portion size matters: three larger servings feel more snack-like, while four smaller servings keep the calories lighter.

As a rough range, the full batch often lands around 900–1,200 calories, depending on the protein powder, nut butter, yogurt, milk, syrup, and chocolate chips used. That works out to about 300–400 calories if divided into 3 larger servings, or about 225–300 calories if divided into 4 smaller servings. Use your own ingredient labels for the most accurate number.

Calories vary most from the nut butter, chocolate chips, protein powder, syrup, and yogurt you use. A richer dessert bowl usually comes from regular nut butter, maple syrup or honey, and the full chocolate chip amount. If you want a lighter version, use powdered peanut butter, nonfat Greek yogurt, almond milk, and fewer mini chocolate chips.

To keep the bowl lighter without making it taste flat, jump to the low-calorie protein cookie dough version and use the swaps there.

Why This Protein Cookie Dough Works

A good high-protein cookie dough has to solve the real problem: it needs enough protein to feel worth making, but it still has to satisfy the part of you that wanted cookie dough in the first place. When the balance is off, the texture changes quickly. Extra protein powder can make the dough dry or chalky, too much liquid can turn it sticky, and not enough fat can make it taste like sweet paste instead of cookie dough.

This version works because each ingredient protects the dough from the usual protein-dessert problems: dry, sticky, chalky, or bland. Protein powder gives the snack its purpose, almond flour or oat flour keeps it from turning loose, nut butter makes it taste richer, and Greek yogurt softens the bite so it feels more like dessert than a scoop of powder. Vanilla, salt, and mini chocolate chips finish the flavor so it tastes more like cookie dough and less like a protein shake in a bowl.

When that balance is right, the dough tastes sweet and familiar instead of “healthy” in the disappointing way.

The finished dough should hold ridges when stirred, scoop cleanly, and firm up slightly after chilling. It should not pour like batter, crumble like dry powder, or cling aggressively to the spoon.

Why readers usually love this: It gives you the cookie-dough feeling without turning into a full baking project. No oven, no mixer, no waiting for cookies to cool — just a thick, sweet, chocolate-studded bowl you can adjust until it tastes right.

Ingredients You Need

Protein cookie dough ingredients arranged by texture role, including protein powder, flour, yogurt, nut butter, and chocolate chips
Each ingredient controls something important: body, creaminess, sweetness, flavor, or chocolate in every bite.

Protein powder

Vanilla protein powder is the easiest choice because it already brings sweetness and dessert flavor. Whey protein can make a smoother dough, but it may become sticky if you add too much liquid. Casein and plant protein usually thicken more aggressively, so they often need extra milk or yogurt. A whey-casein blend is often the easiest option for a classic cookie dough texture.

Almond flour or oat flour

Almond flour versus oat flour comparison for protein cookie dough showing softer rich dough and more cookie-like dough
Almond flour gives a softer, richer dough; meanwhile, oat flour brings a more cookie-like chew and usually needs a little more moisture.

Do not use regular raw all-purpose flour in this no-bake recipe. The safety section below explains why.

For the raw-dough details, read the edible cookie dough safety section before swapping flours.

Nut butter

Peanut butter gives the strongest flavor and the richest dough. Almond butter is milder. Cashew butter gives a softer, almost bakery-style sweetness. Sunflower seed butter works if you need a nut-free option, though it has a more noticeable flavor.

Greek yogurt

Greek yogurt keeps the dough creamy while adding more protein. Thick plain Greek yogurt works best. If your yogurt is thin or watery, start with less milk. If your yogurt is very thick, you may need an extra spoonful of milk to bring the dough together.

Maple syrup or honey

Maple syrup and honey do more than sweeten the dough. They also add moisture and help the texture feel less powdery. Sugar-free syrup can work, but the texture may be thinner or less rich depending on the brand.

Vanilla, salt, and mini chocolate chips

These small ingredients make a big difference. Vanilla gives the dough a dessert-like aroma, salt keeps the flavor from tasting flat, and mini chocolate chips spread more evenly than large chips, especially in a single-serving bowl.

Is Protein Cookie Dough Safe to Eat Raw?

Edible protein cookie dough safety board showing no raw eggs, no raw wheat flour, and almond or oat flour instead
Edible protein cookie dough works best when the no-bake base avoids raw eggs and raw wheat flour from the start.

The FDA explains that most flour is raw and has not been treated to kill germs. The CDC also warns against eating raw dough made with uncooked flour because flour can carry germs that are killed only when the flour is baked or cooked.

For this no-bake dough, use fresh almond flour, oat flour from a trusted package, or a flour product specifically labeled for edible dough. Do not swap in regular raw wheat flour.

If you want the classic version without protein powder, this edible cookie dough recipe follows the same no-bake, spoonable dessert idea with a more traditional cookie-dough flavor.

Important: This recipe avoids raw all-purpose wheat flour. Keep the finished dough chilled, use fresh ingredients, and do not leave yogurt-based cookie dough sitting out for long.

Best Protein Powder for Cookie Dough

Best protein powder for cookie dough guide comparing whey, casein, blended, plant, and collagen protein powders
The best powder depends on texture as much as flavor, because each type thickens the bowl differently.

Texture matters just as much as flavor. Whey, casein, plant protein, collagen, and blends all absorb moisture at a different pace, which is why the recipe gives a range for milk instead of one fixed amount.

This is why two people can use the same recipe and get different results. The recipe may not be the problem — the powder may simply need more or less moisture.

Protein powder texture guide

Protein powder Texture in cookie dough Best fix
Whey protein Smooth, but can become sticky or wet if overhydrated. Add milk slowly. Thicken with almond flour, oat flour, or a little more protein powder.
Casein protein Thick, doughy, and very absorbent. Add milk or Greek yogurt 1 teaspoon at a time until spoonable.
Whey-casein blend Usually the most balanced cookie dough texture. Best first choice for a balanced, cookie-dough-like texture.
Plant protein Thick, sometimes chalky or earthy. Add nut butter, yogurt, vanilla, salt, and enough milk to soften the texture.
Collagen powder Adds protein but does not give much dough structure. Use it with almond flour or oat flour, not as the only dry ingredient.
Powdered peanut butter Lower in fat, peanut-forward, and slightly dry. Pair with Greek yogurt or milk to keep the dough creamy.
Whey, casein, and plant protein cookie dough comparison showing smoother, thicker, and more absorbent dough textures
Whey, casein, and plant protein can all work, but each one changes how much liquid the bowl needs before it becomes scoopable.

For the first batch, use the recipe as written but hold back some of the milk. Once you see how your protein powder thickens, the recipe becomes easy to repeat.

If your dough already turned dry, sticky, or loose, go straight to the texture fixes instead of guessing.

How to Make Protein Cookie Dough

Step-by-step protein cookie dough method showing dry ingredients, creamy ingredients, slow milk addition, chocolate chips, and finished dough
The method stays simple: build the dry base, add richness, loosen carefully, fold in chocolate, then chill only if you want a firmer bite.

Step 1: Mix the dry ingredients

Place the almond flour or oat flour, protein powder, and salt in a medium bowl. Stir them together first so the protein powder is evenly distributed before the wet ingredients go in.

Step 2: Add the creamy ingredients

Stir in the nut butter, Greek yogurt, maple syrup or honey, and vanilla. The dough may start to clump together and look too thick at this point, which is fine.

Pour in milk or almond milk 1 tablespoon / 15ml at a time. Mix well after each addition and stop when the dough is soft but sturdy. You may not need all the milk, especially if your yogurt is loose or your protein powder is whey-based.

Milk being added slowly to thick protein cookie dough in a mixing bowl to control the final texture
Add milk slowly so the dough softens gradually; otherwise, a small bowl can turn loose before the protein powder has time to absorb it.
Close-up of protein cookie dough holding soft spoon ridges to show the ideal thick but scoopable texture
Look for spoon marks that stay visible for a moment; that is the easiest sign your protein cookie dough is thick enough without being dry.

If your dough does not look like this yet, use the texture guide to fix it before folding in the chocolate chips.

Step 4: Fold in mini chocolate chips

Mini chocolate chips being folded into thick protein cookie dough so the chips spread evenly through the bowl
Mini chocolate chips work better than larger chips because they spread through the dough evenly and make each spoonful taste more like dessert.

Step 5: Eat right away or chill

You can eat the dough immediately if you like a softer, freshly mixed texture. For a firmer, more classic cookie dough feel, cover the bowl and chill it for 20–30 minutes.

Protein Cookie Dough Texture Guide

Protein cookie dough texture guide comparing crumbly dry dough, scoopable just-right dough, and loose wet dough
Once you recognize the difference between crumbly, scoopable, and loose, fixing the texture becomes much easier.
Problem Why it happened How to fix it
Too wet Too much milk, loose yogurt, or a whey protein that does not absorb much liquid. Stir in 1 teaspoon almond flour, oat flour, or protein powder at a time.
Too dry Casein or plant protein absorbed the liquid quickly. Loosen it with 1 teaspoon milk or Greek yogurt at a time.
Chalky Too much protein powder, plant protein, or not enough fat/moisture. Work in 1–2 teaspoons nut butter or Greek yogurt, plus vanilla and a pinch of salt.
Too sticky Too much syrup, nut butter, or liquid. Chill 20–30 minutes, or sprinkle in a little almond/oat flour.
Not sweet enough Unsweetened protein powder or not enough syrup. Sweeten with 1 teaspoon maple syrup, honey, or your preferred sweetener.
Too protein-y The protein powder flavor is too strong. Balance it with vanilla, salt, mini chocolate chips, or a better-tasting vanilla protein powder next time.
Best texture rule: Adjust slowly. One teaspoon can change a small batch more than you expect.

Once the texture is right, the bowl stops feeling like a protein workaround and starts feeling like what you actually wanted: cold, sweet cookie dough with little pockets of chocolate in every spoonful.

How to Make It Taste More Like Cookie Dough

Protein cookie dough taste-fix board with vanilla, salt, chocolate chips, syrup, and nut butter for better flavor
If the flavor feels too protein-heavy, vanilla, salt, nut butter, syrup, and mini chips can improve the dough without making it runnier.
  • Add a little more vanilla if the flavor tastes flat.
  • Add a tiny pinch of salt if the dough tastes too sweet, bland, or protein-heavy.
  • Use mini chocolate chips so every spoonful gets chocolate.
  • Add 1 teaspoon maple syrup or honey if your protein powder is not very sweet.
  • Add 1 teaspoon nut butter if the dough tastes chalky or thin.
  • Chill the dough for 20–30 minutes if the flavor feels sharp right after mixing.
Cookie dough versus protein paste comparison showing dull chalky dough beside sweet scoopable chocolate chip dough
The best high-protein cookie dough still needs dessert appeal, so texture and flavor matter just as much as the protein number.

Once the base flavor tastes right, try one of the flavor variations to make the dough more dessert-like.

Protein Cookie Dough Flavor Variations

Protein cookie dough flavor variation board with peanut butter chip, birthday cake, double chocolate, cookies and cream, and cinnamon roll
Once the base dough is balanced, small mix-ins can take it toward peanut butter chip, birthday cake, double chocolate, cookies and cream, or cinnamon roll.
  • Peanut butter chocolate chip: Use peanut butter as the nut butter and keep the mini chocolate chips.
  • Birthday cake: Use vanilla protein powder, cashew butter, and a small spoonful of sprinkles.
  • Double chocolate: Add 1 tablespoon cocoa powder and a little extra milk if the dough gets too thick.
  • Cookies and cream: Fold in crushed chocolate sandwich cookies or a lighter cookie-style mix-in.
  • Cinnamon roll: Add cinnamon, vanilla, and a tiny pinch more salt.

For any dry mix-in like cocoa powder or crushed cookies, add a tiny splash of milk only after the dough is mixed so you do not accidentally make it loose.

Which Protein Cookie Dough Version Should You Make?

Protein cookie dough version chooser showing classic, single-serve, Greek yogurt, cottage cheese, low-calorie, vegan, and bars
Use this guide by need: single-serve for speed, Greek yogurt or cottage cheese for creaminess, low-calorie for lighter macros, vegan for dairy-free, or bars for meal prep.
Version Best for Texture Use this base
Classic protein cookie dough Best overall Thick enough to scoop, soft enough to eat with a spoon Protein powder + flour + nut butter + Greek yogurt
Single serve Quick craving Small-batch dough 30g protein powder + nut butter
Greek yogurt Creamier snack Smoother, tangier, and more spoonable Greek yogurt + protein powder
Cottage cheese Extra creamy, higher-protein variation Smooth and creamy when blended first Blended cottage cheese
Low calorie Macro-friendly snack Lighter and less rich Powdered peanut butter + nonfat Greek yogurt
Vegan Dairy-free version Thick, sometimes chalkier Plant protein + dairy-free milk
Chickpea Plant-based/fiber-rich Thicker and dip-like Chickpeas + protein powder
Bars Meal prep Firm and sliceable Thicker dough + pan chill

Single-Serve Protein Cookie Dough

Single-serve protein cookie dough in a small bowl with mini chocolate chips, spoon, and quick snack portion
The single-serve version is ideal when you want one quick bowl now, especially if you do not want extra dough waiting in the fridge.
Ingredient Amount
Vanilla protein powder 30g
Almond flour or oat flour 2–3 tablespoons
Nut butter 1½ tablespoons
Greek yogurt or milk 1–2 tablespoons
Maple syrup or honey 1–2 teaspoons, optional
Vanilla extract ¼ teaspoon
Salt Pinch
Mini chocolate chips 1–2 tablespoons

Mix the dry ingredients first, stir in the nut butter and yogurt, then adjust with tiny splashes of milk until the dough is scoopable but not loose. This version can be higher in protein than the main recipe because it uses a full scoop of protein powder in one serving.

Greek Yogurt Protein Cookie Dough

Greek yogurt protein cookie dough with thick Greek yogurt being mixed in for a smoother and creamier texture
Greek yogurt gives the dough a softer, tangier bite, which helps balance the dryness some protein powders can bring.

To make the Greek yogurt version, increase the Greek yogurt to ½ cup and reduce the milk. Stir the dough well, then chill it for 20–30 minutes so the flour and protein powder can absorb the moisture. If the yogurt is very thick, add milk 1 teaspoon at a time. If the yogurt is loose, add a little more almond flour or oat flour.

Cottage Cheese Protein Cookie Dough

Cottage cheese protein cookie dough showing blended cottage cheese, finished dough, and the smooth texture after blending
The cottage cheese version depends on one important step: blend the cottage cheese smooth before mixing it into the dry base.

For a cottage cheese version, blend ½ cup cottage cheese with vanilla and 2–3 teaspoons maple syrup until smooth. Then stir it by hand into the protein powder, almond flour or oat flour, nut butter, salt, and chocolate chips. Add the chips after blending, not before.

If your blended cottage cheese is very loose, start with less milk or skip the milk completely until the dough is mixed.

Cottage cheese texture tip: Blend the cottage cheese first, then mix by hand after the dry ingredients go in. Over-blending the full dough can make it runnier.

If you enjoy creamy low-carb desserts, this keto cheesecake recipe is another good one to keep nearby, especially when you want something chilled and richer than a snack bowl.

Low-Calorie Protein Cookie Dough

Low-calorie protein cookie dough with powdered peanut butter, nonfat Greek yogurt, almond milk, and fewer mini chocolate chips
A lighter bowl should still taste satisfying, so use macro-friendly swaps without removing all the creaminess and chocolate.
Swap What it does
Powdered peanut butter Reduces fat and calories while keeping peanut flavor.
Nonfat Greek yogurt Adds creaminess and protein with fewer calories.
Mini chocolate chips Gives more chocolate in every bite with a smaller amount.
Sugar-free syrup, carefully Can reduce sugar, but may make the dough thinner or less rich.
Single-serving batch Helps with portion control and avoids extra leftovers.

For one lighter serving, start with 30g vanilla protein powder, 2 tablespoons powdered peanut butter, ¼ cup nonfat Greek yogurt, 1–2 teaspoons syrup or sweetener, vanilla, salt, and 1 tablespoon mini chocolate chips. Add almond milk 1 teaspoon at a time until the dough becomes scoopable.

For another creamy dessert with a lighter, healthier feel, this avocado chocolate mousse is a good next option when you want chocolate without baking.

Vegan Protein Cookie Dough

Vegan protein cookie dough with plant protein powder, dairy-free milk, nut butter, and dairy-free chocolate chips
The vegan version usually needs a little more moisture and fat because plant protein can thicken quickly as it sits.

For a vegan batch, use ½ cup almond or oat flour, ½ cup plant protein powder, 2–3 tablespoons almond or cashew butter, 2–3 teaspoons maple syrup, vanilla, salt, dairy-free milk as needed, and dairy-free mini chocolate chips. Add the milk slowly because plant protein often thickens fast.

When plant protein tastes earthy, extra vanilla, a tiny pinch of salt, and mini chocolate chips help a lot. A little more nut butter can also soften the chalky edge without making the dough too loose.

Chickpea Protein Cookie Dough

Chickpea protein cookie dough being made in a food processor with chickpeas, protein powder, nut butter, and chocolate chips
The chickpea version works best as a blended variation, since a food processor gives the base a smoother, dip-like texture.

For a chickpea version, start with 1 cup well-rinsed chickpeas, 30g vanilla protein powder, 2 tablespoons nut butter or sunflower seed butter, 1–2 tablespoons maple syrup, vanilla, salt, and 1–2 tablespoons milk as needed. Blend everything except the chocolate chips until smooth, then fold in the chips.

For the smoothest texture, rinse the chickpeas very well and remove the skins if you have time. Chilling the dough for 20–30 minutes also helps the flavor mellow and the texture thicken.

No-bake protein cookie dough bars sliced from a chilled parchment-lined loaf pan with mini chocolate chips visible
Protein cookie dough bars need a firmer base than the spoonable version, so they can chill, hold their shape, and slice cleanly.

After slicing, use the storage guide so the bars stay firm instead of drying out.

A loaf pan works well for a thicker small batch. Use an 8-inch square pan only if you are doubling the recipe, otherwise the bars may be too thin.

For a more dessert-like bar, spread melted chocolate over the chilled dough and chill again until set. For a softer snack bar, skip the chocolate coating and keep the chocolate chips mixed into the dough.

Storage and Freezer Tips

Protein cookie dough storage guide showing an airtight fridge container, rolled snack bites, and freezer portions
For easy snack prep, keep protein cookie dough chilled in a container or freeze small portions that soften after a few minutes.
Storage method How long Best tip
Airtight container in the fridge 4–5 days Stir before serving if it firms up.
Rolled balls in the fridge 4–5 days Use a small cookie scoop for even portions.
Freezer portions 2–3 months Freeze on a tray first, then move to a container.
Cookie dough bars Up to 1 week chilled Keep parchment between layers if stacking.

For bites, chill the dough until it is firm enough to scoop, then roll it into small balls and store them in the fridge or freezer. They are easier to portion than a full bowl and work well for snack prep.

Frozen portions taste best after sitting at room temperature for 5–10 minutes. They should soften slightly but still hold their shape.

What to Eat With Protein Cookie Dough

You can absolutely eat this straight from the bowl. That is the point. But if you make extra, it also turns into an easy topping, dip, or freezer snack.

Think of it as a spoonable snack first, then use leftovers anywhere you would normally want a sweet, cookie-dough-style topping.

  • Scoop it into small snack balls.
  • Serve it with apple slices.
  • Swirl it into Greek yogurt.
  • Crumble it over smoothie bowls.
  • Press it into bars.
  • Freeze it into bite-size portions.
  • Use it as a high-protein dessert dip.

Once you understand the texture, this becomes the kind of recipe you can make by feel: a little more milk for spoonable, a little more flour for scoopable, and a little more vanilla and salt when the protein powder tries to take over.

Different protein powders can change this dough a lot. If you try it with whey, casein, collagen, or plant protein, note how much milk it needed and whether the final texture turned out scoopable, sticky, dry, or firm. That is the kind of detail other readers actually want before they open a new tub of protein powder, so it is worth sharing if your powder behaved differently.

After one batch, you will probably know exactly how your protein powder behaves. From there, this becomes an easy fridge snack you can make by feel — thicker for cookie dough bites, softer for spooning, sweeter when it is dessert, and lighter when you just want a quick protein treat.

Ready to make it now? Jump to the full protein cookie dough recipe card.

FAQs About Protein Cookie Dough

Why is my protein cookie dough dry?

Your protein powder probably absorbed more liquid than expected. Casein and plant-based protein powders are especially thirsty, so add milk or Greek yogurt 1 teaspoon at a time until the dough softens.

Why did my protein cookie dough turn sticky?

Sticky dough usually means too much syrup, nut butter, or milk. First, chill it for 20–30 minutes. After that, add almond flour or oat flour 1 teaspoon at a time if the mixture still feels too loose.

Which protein powder tastes best in cookie dough?

A good vanilla whey-casein blend is usually the easiest choice for a balanced dough texture. Whey can be smooth but sticky, casein can be thick and dry, and plant protein may need more moisture and flavor support.

Best peanut butter substitutes for protein cookie dough

Peanut butter is not required. Almond butter, cashew butter, sunflower seed butter, tahini, or a mix of Greek yogurt and powdered peanut butter can all work. The flavor and texture will change slightly, but the recipe still holds together.

Using powdered peanut butter in protein cookie dough

Powdered peanut butter works best in the low-calorie version because it keeps peanut flavor while reducing fat. Since it can taste drier than regular nut butter, pair it with Greek yogurt and add milk slowly until the dough is scoopable.

No Greek yogurt? Use this texture fix

Greek yogurt helps with creaminess, but the recipe can work without it. Replace it with more nut butter and a little milk, or use dairy-free yogurt for a vegan version. Since yogurt also adds thickness, add the liquid slowly so the dough does not become loose.

Is almond flour safe in no-bake cookie dough?

This recipe avoids raw all-purpose wheat flour, which is the main flour concern in classic raw cookie dough. Use fresh almond flour or oat flour from a reputable source, keep the finished dough chilled, and do not swap in regular raw wheat flour unless it is specifically labeled for edible dough.

Freezing protein cookie dough without ruining the texture

Roll the dough into balls or portion it into small scoops, freeze on a tray, then transfer to an airtight container. Let frozen portions sit for 5–10 minutes before eating so they soften slightly without turning mushy.

Should you bake this dough into cookies?

This recipe is designed as edible no-bake dough. Protein powder behaves differently when baked, so a dedicated protein cookie recipe will give you a better baked texture.

Lower-calorie protein cookie dough swaps that still taste good

Use powdered peanut butter, nonfat Greek yogurt, sugar-free syrup if you like it, and a smaller amount of mini chocolate chips. A single-serving batch is usually the easiest way to keep the calories controlled without making a large bowl of leftovers.

Vegan protein cookie dough: what changes?

Plant-based protein powder usually thickens more and can taste earthier than whey. Use almond or oat flour, nut butter, maple syrup, dairy-free milk, and dairy-free chocolate chips, then add extra milk or nut butter if the dough tastes chalky.

Protein cookie dough recipe card showing the base formula, five-minute prep time, protein estimate, texture target, and storage
Save the base formula as a texture guide: equal parts flour and protein powder, creamy ingredients for richness, then milk only until scoopable.

Protein Cookie Dough Recipe Card

This edible protein cookie dough is no-bake, egg-free, creamy, and ready in about 5 minutes. Chill it for a firmer cookie-dough bite, or eat it right away while it is softer and freshly mixed.

Texture target: The dough should hold ridges when stirred, scoop cleanly, and feel thick but not dry. Pourable dough needs more dry structure, while crumbly dough needs a little more moisture.

Servings 3–4
Prep Time 5 minutes
Chill Time Optional 20–30 minutes
Cook Time 0 minutes

Equipment

  • Medium mixing bowl
  • Spatula or sturdy spoon
  • Measuring cups and spoons
  • Kitchen scale, optional but helpful
  • Airtight container for storage

Ingredients

Ingredient US amount Metric amount
Almond flour or oat flour ½ cup 50–56g
Vanilla protein powder ½ cup 50–60g
Creamy peanut, almond, or cashew butter 3 tablespoons About 48g
Plain thick Greek yogurt ⅓ cup About 80g
Maple syrup or honey 2–3 teaspoons 10–15ml
Milk or almond milk 3–6 tablespoons, added gradually 45–90ml
Vanilla extract ½ teaspoon 2.5ml
Fine salt ¼ teaspoon About 1.5g
Mini chocolate chips 3 tablespoons 30–40g

Instructions

  1. Stir the almond flour or oat flour, protein powder, and salt together in a medium bowl.
  2. Mix in the nut butter, Greek yogurt, maple syrup or honey, and vanilla until a thick dough starts to form.
  3. Add milk or almond milk 1 tablespoon / 15ml at a time, mixing well after each addition, until the dough holds ridges when stirred and scoops cleanly.
  4. Fold in the mini chocolate chips.
  5. Eat immediately for a softer dough, or cover and chill for 20–30 minutes for a firmer cookie-dough bite.

Notes

  • Protein powders absorb liquid differently, so start with less milk and add more gradually.
  • Chilling is optional, but it improves both texture and flavor because the flour and protein powder have time to hydrate.
  • Divide the batch into 3 servings for a higher-protein snack or 4 servings for smaller dessert portions.
  • Use 3 teaspoons maple syrup or honey for a sweeter dessert-style dough, or start with 2 teaspoons for a less sweet snack.
  • When the dough is wet, build it back up with almond flour, oat flour, or protein powder 1 teaspoon at a time.
  • For dry dough, add milk or Greek yogurt 1 teaspoon at a time until it softens.
  • Strong protein-powder flavor usually improves with extra vanilla, a tiny pinch of salt, or 1 teaspoon nut butter before adding more milk.
  • Do not use regular raw all-purpose flour in this no-bake recipe.

Storage

Store protein cookie dough in an airtight container in the fridge for 4–5 days. For longer storage, portion it into balls or scoops and freeze for 2–3 months. Let frozen portions sit for 5–10 minutes before eating.

Estimated Protein and Calories

Protein and calories will vary by powder, yogurt, flour, nut butter, milk, syrup, chocolate chips, and serving size. As a rough guide, this batch usually lands around 15–22g protein per serving when divided into 3–4 portions, with about 225–400 calories per serving depending on portion size and ingredients. Use your own labels for the most accurate numbers.

Posted on — 1 Comment

Cottage Cheese Cheesecake Recipe

Finished cottage cheese cheesecake slice with creamy filling, crumb crust, berries, and lemon on a dessert plate

This cottage cheese cheesecake recipe is built for the two worries people usually have before they try it: grainy curds and a watery filling. The cottage cheese is blended until completely smooth, supported with thick Greek yogurt, eggs, vanilla, lemon, and a little cornstarch, then baked gently and chilled until creamy and sliceable.

It is lighter than a classic cream cheese cheesecake, but it still tastes like dessert. You can bake it with a buttery crumb crust, make it crustless, or add a little cream cheese when you want a richer, more traditional slice — no protein powder needed.

Close-up of a fork cutting into a smooth cottage cheese cheesecake slice with no visible curds
A clean fork cut should reveal a creamy interior — the first sign that the cottage cheese has blended fully into the filling.

Quick Answer: Can You Make Cheesecake with Cottage Cheese?

Yes, you can make cheesecake with cottage cheese. The key is to blend the cottage cheese until smooth before baking it with eggs, Greek yogurt, vanilla, lemon, and a little cornstarch. Once baked and chilled, the filling becomes creamy, lightly tangy, and sliceable.

The best version should not remind you of eating cottage cheese from a tub. Once blended, baked, and chilled, the cottage cheese melts into the filling and gives the cheesecake body, tang, and a lighter feel than a cream cheese-only base.

Cottage cheese cheesecake quick answer visual showing the blend, bake, and chill method
For a reliable result, think in three moves: smooth the dairy first, set the filling gently, then chill before slicing.

Before You Bake: Texture Rules and Timing

At a glance: This is a smooth baked cottage cheese cheesecake with Greek yogurt, vanilla, lemon, and an optional crumb crust. Bake it in an 8-inch springform pan at 325°F / 160°C until the edges are set and the center softly wobbles, then cool slowly and chill at least 4 hours or overnight.
Why you’ll love it:
  • It tastes like cheesecake, not cottage cheese. Blending smooths the curds into the filling.
  • It is lighter but still dessert-like. Greek yogurt adds tang without making the slice feel flat.
  • No protein powder needed. Cottage cheese and Greek yogurt give the filling its protein-rich base without making the cheesecake taste chalky.
  • It works with or without a crust. Make it classic, crustless, or low-carb.
  • It is better the next day. Overnight chilling gives the cleanest, creamiest slices.
The 4 texture rules:
  • Drain cottage cheese when it looks watery.
  • Use thick Greek yogurt, not loose regular yogurt.
  • Blend the dairy completely smooth before adding eggs.
  • Chill the cheesecake overnight before judging the final texture.
Four cottage cheese cheesecake texture rules showing draining, thick yogurt, smooth blending, and overnight chilling
Before baking, these four rules matter most: control moisture, use thick yogurt, blend thoroughly, and give the cheesecake enough chill time.

Need the visual version? Jump to how to make the filling smooth or troubleshooting if your batter looks loose, grainy, or hard to slice.

What Does Cottage Cheese Cheesecake Taste Like?

A good cottage cheese cheesecake tastes creamy, lightly tangy, and familiar — closer to a lighter cheesecake than a cottage cheese dessert. The vanilla gives it warmth, the lemon adds classic cheesecake brightness, and the Greek yogurt rounds out the dairy flavor.

The texture is softer and a little lighter than a dense New York-style cheesecake, especially with the Greek yogurt version. The cream cheese variation makes it richer, denser, and closer to the classic slice many people expect.

The cottage cheese should not stand out. Once it is blended and chilled properly, it should support the cheesecake rather than announce itself.

For Cottage Cheese Skeptics

If the words cottage cheese cheesecake make you imagine curds in dessert, you are not alone. That is exactly what this recipe is designed to avoid. Once the filling is blended, baked, and chilled, the cottage cheese should disappear into the texture.

The goal is not a “healthy dessert” that tastes like a compromise. It should taste like a lighter, tangier cheesecake: cold, creamy, smooth, and familiar enough that nobody is thinking about cottage cheese curds.

Curdy cottage cheese transforming into a smooth cheesecake slice with no visible curds
If cottage cheese flavor worries you, this is the goal: the dairy disappears into the cheesecake instead of standing out.

Why This Cottage Cheese Cheesecake Works

Cottage cheese can make a beautiful cheesecake, but it needs the right support. This recipe is built around the two things that matter most: blending the curds completely smooth and keeping extra moisture under control.

The goal is not to hide cottage cheese under a pile of sugar. It is to make it behave like a cheesecake filling: smooth enough to slice, tangy enough to taste familiar, and rich enough that it still feels like dessert.

Cottage Cheese Adds Protein and Body

Cottage cheese gives the filling body, mild tang, and a naturally higher-protein foundation than a cream cheese-only filling. Full-fat cottage cheese gives the richest result, while 2% cottage cheese works well for a lighter slice that still tastes balanced.

Greek Yogurt Adds Tang and Creaminess

Greek yogurt keeps the filling from tasting flat. It brings the tang people expect from cheesecake, but it needs to be thick; loose yogurt can push the batter toward watery.

Eggs Help the Cheesecake Set

This version uses 4 large eggs for a reliable set. Add them last and blend briefly; too much air in the batter can make the cheesecake puff in the oven and crack as it cools.

Cornstarch Gives Extra Insurance

A small amount of cornstarch helps the filling hold together without making it heavy. It is especially useful when cottage cheese has a little extra liquid. All-purpose flour works too, but cornstarch keeps the texture softer and cleaner.

Low, Gentle Baking Prevents Cracks

This cheesecake bakes at 325°F / 160°C after the crust is pre-baked. The lower heat helps the filling set slowly, which reduces the chance of a cracked top, dry edges, or a firm, rubbery center.

Texture tip: Do not bake this cheesecake until the center looks completely firm. Pull it when the edges are set and the center still has a soft wobble. Warm cheesecake is supposed to look a little underdone; the refrigerator does the final work.

How to Avoid Grainy or Watery Cottage Cheese Cheesecake

This recipe is built around moisture control. Cottage cheese and Greek yogurt both bring liquid to the filling, so the best texture comes from using thick dairy, adding enough egg structure, and including a small amount of cornstarch.

Granulated sugar keeps the batter more predictable than liquid sweeteners. Watery cottage cheese should be drained before measuring. Eggs should go in last so the batter does not become over-aerated. After baking, the cheesecake may look softer than expected, but the texture changes as it cools and chills.

Ingredients for Cottage Cheese Cheesecake

This cottage cheese cheesecake uses familiar cheesecake ingredients, but the balance is slightly different from a classic cream cheese version. The goal is a filling that feels smooth and sliceable without losing the lighter character that makes cottage cheese useful in the first place.

Cottage cheese cheesecake ingredients including cottage cheese, Greek yogurt, eggs, lemon, vanilla, cornstarch, and crumb crust
Each ingredient has a clear job: cottage cheese builds body, Greek yogurt adds tang, eggs set the filling, and cornstarch helps protect the structure.

Cottage Cheese

Use full-fat or 2% cottage cheese for the best balance of richness and structure. Small-curd cottage cheese is easiest to blend, but large-curd cottage cheese also works with a good blender or food processor.

Greek Yogurt

Plain Greek yogurt adds tang and keeps the cheesecake from tasting flat. Whole milk Greek yogurt gives the richest texture, while low-fat or nonfat Greek yogurt makes the cheesecake lighter. Avoid regular yogurt unless it has been strained until thick.

Eggs

Eggs help the filling set. Use room-temperature eggs so they blend evenly into the batter. The cheesecake should not taste eggy when it is baked gently and pulled while the center still has a soft wobble.

Sugar or Sweetener

Regular granulated sugar gives the cleanest cheesecake flavor. A cup-for-cup monk fruit blend or allulose can work for a lower-sugar version. For a fully low-carb cheesecake with a more classic structure, this keto cheesecake recipe goes deeper into almond flour crusts, sugar-free sweeteners, crustless cheesecake, and no-crack baking.

Cornstarch

Cornstarch helps the cottage cheese and yogurt filling bake into clean slices. Use 2 tablespoons of all-purpose flour instead when cornstarch is not available.

Vanilla and Lemon

Vanilla adds warmth. Lemon zest and a little lemon juice give the cheesecake its familiar brightness. The lemon does not need to make the cheesecake taste sharply lemony; it simply makes the dairy taste more like cheesecake.

Graham Cracker or Digestive Biscuit Crust

The crust is optional, but it makes the cheesecake feel more classic. Graham crackers, digestive biscuits, or similar plain sweet biscuits all work. Pre-baking the crust for a few minutes helps it hold together under the filling.

Best Cottage Cheese to Use

The cottage cheese you choose has a direct effect on texture. Since this is a blended cheesecake, you do not need perfect curds, but you do need cottage cheese that is not overly watery.

Cottage cheese comparison showing full-fat, two percent, and watery low-fat cottage cheese for cheesecake
Full-fat or 2% cottage cheese is usually the safest choice because it gives the filling more body and a smoother baked result.
Cottage Cheese Type Result in Cheesecake Best Use
Full-fat / 4% Richest, most forgiving texture Best overall choice
2% Still creamy, slightly lighter Best balance for a lighter cheesecake
Low-fat Can work, but may be thinner or tangier Use only when thick; drain when watery
Fat-free Least rich, more likely to taste tangy or thin Use only for a very lean version
Small-curd Blends easiest Best default
Large-curd Works when blended very well Use a strong blender or food processor

When to Drain Watery Cottage Cheese

When cottage cheese looks loose or has a lot of liquid in the container, drain it through a fine-mesh sieve before measuring. That one small step can prevent a watery cheesecake.

Watery cottage cheese draining in a fine-mesh sieve over a bowl before making cheesecake
Draining loose cottage cheese first removes extra moisture, which means the finished cheesecake is less likely to turn soft or watery.

Once you know which cottage cheese to use, the next important step is blending it smooth before the eggs go in.

For official nutrient data on different cottage cheese varieties, you can check USDA FoodData Central cottage cheese data.

How to Make Cottage Cheese Cheesecake Smooth

Graininess is what can ruin the illusion, so the blender step matters more than anything else. The dairy should look glossy and smooth before the eggs go in.

Use a Blender or Food Processor

A high-speed blender gives the silkiest filling. A food processor also works, especially when you scrape down the sides once or twice. An immersion blender can work in a pinch, but the finished texture may not be quite as polished.

Blend the Dairy Before Adding Eggs

Add the cottage cheese, Greek yogurt, sugar, vanilla, lemon zest, lemon juice, salt, and cornstarch to the blender first. Blend until the mixture looks glossy and even. Add the eggs only after that base is smooth.

Cottage cheese cheesecake filling being blended smooth in a blender before eggs are added
Blend the dairy before the eggs go in; this is the step that turns a curdy base into cheesecake-ready filling.

What the Batter Should Look Like

The batter should look glossy, smooth, and pourable before it goes into the crust. If it still looks grainy, blend again or strain it before baking.

Smooth cottage cheese cheesecake batter lifting from a spatula in a glossy ribbon
The batter should fall in a glossy ribbon, because a smooth pour now usually means a cleaner texture after baking.

Strain the Batter When Needed

When the blender is not very powerful and the batter still looks slightly grainy, pour it through a fine-mesh sieve before baking. It is an optional step, but it can rescue the texture.

After the batter looks glossy and pourable, move to the step-by-step method and then use the doneness cues before chilling.

How to Make Cottage Cheese Cheesecake

The method follows classic cheesecake logic: prepare the pan, pre-bake the crust, blend the filling, bake gently, cool slowly, and chill before slicing. Once the filling is smooth, the oven and refrigerator do most of the work.

Step-by-step cottage cheese cheesecake guide showing pan prep, crust, blended filling, pouring, baking, and chilling
The method stays simple: prepare the pan, pre-bake the crust, blend the filling, bake until just set, and chill for the cleanest slice.

Step 1: Prepare the Pan

Line the bottom of an 8-inch / 20cm springform pan with parchment paper. Lightly grease the sides. For a water bath, wrap the outside of the pan with heavy-duty foil or place the springform pan inside a larger oven-safe bag before setting it in the roasting pan.

Step 2: Make and Bake the Crust

Mix the graham cracker or digestive biscuit crumbs with melted butter, sugar, and a pinch of salt. Press the mixture firmly into the bottom of the pan. Bake at 350°F / 177°C for 8 to 10 minutes, then lower the oven temperature to 325°F / 160°C.

Step 3: Blend the Filling

Blend the cottage cheese, Greek yogurt, sugar, cornstarch, vanilla, lemon zest, lemon juice, and salt until completely smooth. Scrape down the sides, then blend again. Add the eggs and blend briefly, just until the batter is even.

Step 4: Pour the Filling and Bake Low and Slow

Pour the filling over the crust and smooth the top. Bake at 325°F / 160°C for 55 to 70 minutes, or until the edges are set and the center still has a soft wobble. The center should jiggle gently, not slosh.

Smooth cottage cheese cheesecake filling being poured from a blender into a prepared crumb crust
When the filling pours smoothly into the crust, it is a good sign that the blender has done its job.

Step 5: Cool Gradually

Turn off the oven, crack the door open, and let the cheesecake sit inside for 30 to 45 minutes. This gradual cooling helps prevent cracks. Then move it to the counter and let it cool to room temperature.

Step 6: Chill Before Slicing

Refrigerate the cheesecake for at least 4 hours. Overnight is better. Do not panic if it looks soft when it first comes out of the oven. Warm cheesecake is supposed to look a little underdone; the refrigerator does the final work.

Do You Need a Water Bath?

A water bath is optional. Skip it for the easiest version; use it when you want the smoothest texture and the lowest chance of cracks.

To use one, wrap the springform pan well, set it in a roasting pan, and pour hot water around it until the water reaches about 1 inch up the side of the pan. Make sure the pan is protected so water cannot leak into the crust.

Wrapped springform pan sitting in a roasting pan with hot water for an optional cheesecake water bath
A water bath is optional; however, it can help the cheesecake bake more gently and reduce cracking on the surface.

A water bath usually pushes the cheesecake toward the longer end of the bake time. The texture is worth it when you want a cleaner, more classic cheesecake finish.

For more general cheesecake guidance, including room-temperature ingredients, water bath baking, and crack prevention, King Arthur Baking has a helpful guide to cheesecake tips.

Pan Size and Bake Time Guide

Cottage cheese cheesecake recipes often use different pan sizes, which can make bake times confusing. A smaller pan makes a taller cheesecake and usually needs more time. A larger pan makes a thinner cheesecake and may finish sooner.

Pan size guide comparing six-inch, eight-inch, and nine-inch cottage cheese cheesecakes with different heights
Pan size changes both height and bake time, so visual cues matter more than the timer when you move away from the 8-inch pan.
Pan or Format Best For Bake Guidance
6-inch springform Small-batch, taller cheesecake Use about two-thirds of the recipe or expect a deeper filling and longer bake time.
8-inch springform Main recipe Bake 55–70 minutes at 325°F / 160°C.
9-inch springform Thinner full-size cheesecake Start checking around 45–55 minutes.
Muffin tin Mini cheesecakes Bake about 16–22 minutes, depending on filling depth.
Ramekins Single-serve cheesecakes Bake about 20–30 minutes.

Use the visual cues more than the clock. Cheesecake does not care what the timer says when the center is still loose or the edges are already firm. A thin cheesecake in a 9-inch pan may be done before the timer says so, while a deep 6-inch cheesecake may need longer.

Changing pan size also changes doneness timing, so use the set-edge and soft-wobble cues before relying on the clock alone.

How to Know When Cottage Cheese Cheesecake Is Done

Cheesecake keeps setting after it leaves the oven. Baking until the center looks completely firm can leave you with a dry, cracked, or rubbery cheesecake after chilling.

The Edge Test

The outer 2 inches should look set. The edges may be slightly puffed, but they should not be deeply browned or pulling hard away from the pan.

The Center Wobble Test

Gently nudge the pan. The center should wobble softly like set custard. It should not ripple like liquid. A soft wobble is good; a loose slosh means it needs more time.

Baked cottage cheese cheesecake in a springform pan with set edges and a soft center wobble cue
Look for set edges and a soft center wobble, because the cheesecake will continue firming as it cools and chills.

Internal Temperature

For extra precision, check the center with an instant-read thermometer. The center should be around 155–160°F / 68–71°C. Insert the thermometer gently so you do not tear the top.

Why It Still Looks Soft

A warm cheesecake is not supposed to look like a fully chilled cheesecake. The filling firms as it cools and then tightens further in the refrigerator. That is why chill time is part of the recipe, not an optional waiting period.

If you like baked cheesecakes with clean slices and a slow-chilled texture, this salted caramel cheesecake recipe uses similar doneness cues: set edges, a softly wobbly center, and enough chill time before slicing.

Which Cottage Cheese Cheesecake Version Should You Make?

The right version depends on who you are serving and how close you want the slice to feel to classic cheesecake. Use the Greek yogurt base for the lighter, higher-protein style. Add cream cheese for something richer. Skip the crust when you want the easiest version.

If you are serving cottage cheese skeptics, the cream cheese variation is the safest first choice. If you are making it for yourself as a lighter dessert, start with the Greek yogurt version.

Four cottage cheese cheesecake versions showing Greek yogurt, cream cheese, crustless, and low-carb slices
Choose the version by the result you want: Greek yogurt for lighter tang, cream cheese for richness, crustless for ease, or almond crust for low-carb.
Craving or Need Make This Version Why It Works
The lightest higher-protein version Cottage cheese + Greek yogurt Best balance of protein, tang, and creamy texture.
The most classic cheesecake texture Cottage cheese + cream cheese Richer, denser, and closer to New York-style cheesecake.
The easiest version Crustless cottage cheese cheesecake No crumb crust, fewer steps, lighter slice.
The lowest-carb version Almond flour crust or crustless + low-carb sweetener Keeps the cheesecake closer to keto or low-carb needs.
The cleanest slices Crumb crust + overnight chill The crust gives structure and the long chill firms the filling.
The most dessert-like flavor Full-fat cottage cheese + vanilla + lemon + berry topping Richer dairy and bright toppings make it taste more like a classic dessert.

After choosing your version, go straight to the recipe card for the base formula and notes for cream cheese, crustless, and low-carb changes.

Cottage Cheese + Greek Yogurt

This is the main version of the recipe. It is lighter than a cream cheese cheesecake, with a tangy, creamy filling and a higher-protein dairy base. Use thick plain Greek yogurt for the best texture.

Cottage Cheese + Cream Cheese

For a richer cottage cheese cheesecake with a more classic texture, replace 1 cup / 225g of the cottage cheese with 8 oz / 225g softened cream cheese. Blend the cottage cheese first until smooth, then add the cream cheese and blend again before adding the eggs.

Crustless Cottage Cheese Cheesecake

For a crustless version, skip the crumb crust, line the bottom of the pan with parchment, and grease the sides well. Bake the filling directly in the pan and start checking 5 to 10 minutes earlier. Chill fully before releasing the pan, because a warm crustless cheesecake is more delicate than one with a crumb base.

Low-Carb Cottage Cheese Cheesecake

For a low-carb version, use an almond flour crust or skip the crust, then use a cup-for-cup low-carb sweetener in the filling. For more low-carb baking help, especially when an almond flour crust turns crumbly or soft, this keto-friendly flour guide explains how almond flour behaves and how to fix texture problems.

How to Make the Crust

The classic version uses a simple graham cracker or digestive biscuit crust. It gives the cheesecake a buttery base, a little crunch, and the familiar contrast people expect from a chilled cheesecake slice.

Hands pressing a graham cracker crumb crust firmly into a springform pan for cottage cheese cheesecake
A firmly packed crumb crust gives the creamy filling contrast, structure, and a more classic cheesecake feel.

Graham Cracker or Digestive Crust

This is the most classic option. Mix the crumbs with melted butter, a little sugar, and a pinch of salt, then press the mixture firmly into the bottom of the pan.

When to Pre-Bake the Crust

Pre-bake any crumb-style crust for 8 to 10 minutes before adding the filling. It helps the butter bind the crumbs and keeps the base from tasting raw. Let the crust cool slightly before pouring in the cottage cheese filling.

Is Cottage Cheese Cheesecake Healthy or High Protein?

This is still cheesecake, and that is the point. The goal is not to turn dessert into something joyless. It is to use cottage cheese and Greek yogurt in a way that gives you a cold, creamy, satisfying slice with a little more protein and a lighter feel.

You do not need protein powder for the main recipe. The higher-protein advantage comes from using cottage cheese and Greek yogurt as the main dairy base. If you already use vanilla whey and want a more macro-focused version, add one scoop and loosen the batter with 1 to 2 tablespoons of Greek yogurt or milk only if it becomes too thick.

The exact protein, calories, and carbs per slice will depend on your cottage cheese, Greek yogurt, crust, sweetener, and slice size. As a rough estimate, using full-fat or 2% cottage cheese, plain Greek yogurt, 4 eggs, and the crumb crust, a 10-slice cheesecake usually lands around 280–300 calories and 12–13g protein per slice. A crustless version will usually be lighter, while the cream cheese variation will be richer. For the most accurate number, calculate from the labels on your own ingredients.

Higher-protein cottage cheese cheesecake slice with cottage cheese, Greek yogurt, berries, and a protein estimate note
Cottage cheese and Greek yogurt give this cheesecake a higher-protein base without protein powder, though exact macros depend on your dairy, crust, and slice size.

For another higher-protein dessert, you may also like this protein ice cream recipe, which uses Greek yogurt, cottage cheese, and protein powder options without making the texture feel chalky.

The same idea works outside dessert, too: this high-protein oatmeal guide shows how simple add-ins like Greek yogurt and cottage cheese can make everyday recipes more filling.

Baked vs No-Bake Cottage Cheese Cheesecake

This recipe is baked because baking gives cottage cheese cheesecake the cleanest slices and the most reliable set. Eggs and gentle heat help the filling turn into a creamy custard.

A no-bake cottage cheese cheesecake needs a different setting system — usually gelatin, whipped cream, cashews, melted chocolate, or a very thick dairy base. This baked filling is not meant to be poured into a crust and chilled without baking.

Baked cottage cheese cheesecake slice compared with no-bake cheesecake cups in jars
This batter is built for baking because eggs help it set, while a no-bake version needs a different setting method.

For an oven-free cheesecake, start with this no bake cheesecake recipe. The method is different, but the setting logic will help you understand why no-bake cheesecakes need enough fat, air, structure, and chill time.

Best choice: Make this baked version when clean slices matter most. Save no-bake cottage cheese cheesecake for jars, cups, bars, or a separate recipe built with a proper setting method.

Flavor Variations

Once the base recipe works, cottage cheese cheesecake is easy to adapt. Keep the basic structure the same, then adjust flavor carefully so the filling does not become too loose.

Pumpkin Cottage Cheese Cheesecake

Add pumpkin puree, pumpkin pie spice, and a little extra cornstarch to help absorb the added moisture. Start with 3/4 cup pumpkin puree, reduce the Greek yogurt to 1/2 cup, add 1 extra teaspoon cornstarch, and bake until the center has the same soft wobble as the original version.

Chocolate Cottage Cheese Cheesecake

Add unsweetened cocoa powder or melted dark chocolate to the blended filling. Cocoa powder thickens the batter, so you may need a spoonful or two of extra Greek yogurt. Melted chocolate gives a richer texture but makes the cheesecake less light.

Lemon Cottage Cheese Cheesecake

Increase the lemon zest and add a little extra lemon juice. Do not add too much liquid or the filling may need longer to set. Lemon works especially well with a graham cracker crust and fresh berries.

Berry-Topped Cottage Cheese Cheesecake

Keep the filling plain and add berries after chilling. Fresh strawberries, blueberries, raspberries, or a spoonable berry compote all work. Avoid adding too much watery fruit directly to the batter unless you are making a tested swirl version.

Mini Cottage Cheese Cheesecakes

Use a lined muffin tin and bake until the centers are just set. Mini cheesecakes chill faster and are easier for parties, lunchboxes, or portioned desserts.

How to Serve Cottage Cheese Cheesecake

Serve this cheesecake cold, when the filling is fully set and the flavor has had time to settle. A plain slice is creamy and tangy on its own, but toppings make it feel more finished.

  • Fresh berries: Best when you want a lighter, brighter slice.
  • Berry compote: Best when you want it to feel like a classic dessert-table cheesecake.
  • Lemon zest: Best when you want more freshness and lift.
  • Honey drizzle: Best for a simple, soft sweetness.
  • Chocolate drizzle: Best with the cream cheese variation or a crustless slice.

For a dinner-party version, use the crumb crust and berry compote. For an everyday higher-protein dessert, keep it crustless and serve it with berries or a spoonful of Greek yogurt.

After a night in the refrigerator, the filling settles into a cold, creamy slice with a clean fork cut and a soft lemon-vanilla tang. The crumb crust adds contrast, but the filling should still be the point: smooth, cool, lightly tangy, and rich enough to feel like dessert.

Troubleshooting Cottage Cheese Cheesecake

Most cottage cheese cheesecake problems come from four things: watery dairy, not blending enough, overbaking, or cutting before the cheesecake has chilled.

Troubleshooting guide for cottage cheese cheesecake showing grainy, watery, cracked, and hard-to-slice problems
If the cheesecake turns grainy, watery, cracked, or hard to slice, start by checking moisture, blending, bake time, and chill time.
Problem Likely Cause Fix
Grainy texture Cottage cheese was not blended fully. Blend the dairy before adding eggs. Scrape down the sides. Strain the batter when needed.
Watery filling Cottage cheese or yogurt was too loose, or the cheesecake was underbaked. Drain watery cottage cheese, use thick Greek yogurt, bake until the edges are set, and chill overnight.
Cracked top Overbaking, too much air in the batter, or cooling too quickly. Add eggs last, do not over-blend, bake gently, and cool with the oven door cracked.
Rubbery texture Too much high-speed blending after eggs were added, or baking too long. Add eggs last, pulse briefly, and pull the cheesecake while the center still wobbles.
Tastes too much like cottage cheese Very lean cottage cheese, not enough vanilla/lemon/sweetener, or not enough chill time. Use 2% or full-fat cottage cheese, add lemon zest and vanilla, and chill overnight.
Soggy crust Crust was not pre-baked, filling was too wet, or water bath leaked into the pan. Pre-bake the crust and protect the pan well when using a water bath.
Won’t slice cleanly The cheesecake has not chilled long enough. Chill at least 4 hours. Overnight is best for clean slices.

For prevention before the next bake, return to the 4 texture rules or check the doneness cues again.

How to Store and Freeze Cottage Cheese Cheesecake

Cottage cheese cheesecake is a make-ahead dessert. In fact, it tastes better after a full night in the refrigerator because the filling has time to firm up and the flavor settles.

Cottage cheese cheesecake slices stored in a glass container with parchment for refrigeration or freezing
This works well as a make-ahead dessert because the filling firms, the flavor settles, and the slices cut cleaner after chilling.

Refrigerating

Store the cheesecake covered in the refrigerator for 4 to 5 days. Chill it uncovered until fully cold first, then cover it so condensation does not drip onto the surface. Once the cheesecake has cooled to room temperature, move it to the refrigerator rather than leaving it out for hours.

Freezing

You can freeze cottage cheese cheesecake, but the texture may soften slightly after thawing. Freeze individual slices on a tray first, then wrap and store them in an airtight container.

Thawing

Thaw frozen slices overnight in the refrigerator. Avoid thawing at room temperature for long periods, because the dairy filling should stay cold.

Cottage Cheese Cake vs Cottage Cheese Cheesecake

Cottage cheese cake and cottage cheese cheesecake are sometimes used to describe similar desserts, but they are not always the same thing. A cottage cheese cheesecake is usually a blended dairy custard made with cottage cheese, eggs, vanilla, lemon, and sometimes yogurt or cream cheese. It bakes gently, chills, and slices like cheesecake.

Cottage cheese cake can mean something different. Some versions are closer to a flour-based cake or snacking cake, while others are simple cottage-cheese-based cakes that taste cheesecake-like but use fewer ingredients. This version is a true cheesecake: a blended dairy filling that bakes gently, cools slowly, and chills into clean, creamy slices.

Cottage Cheese Cheesecake Recipe

This cottage cheese cheesecake recipe bakes into a creamy, higher-protein cheesecake with Greek yogurt, vanilla, lemon, and an optional graham cracker or digestive biscuit crust. Blend the cottage cheese until silky, bake gently, cool slowly, and chill well before slicing.

Yield10 slices
Prep Time20 minutes
Cook Time55–70 minutes
Chill Time4 hours minimum
Total TimeAbout 7 hours, mostly cooling and chilling
Pan8-inch springform
Oven325°F / 160°C
TextureCreamy, smooth, sliceable

Ingredients

For the crust

  • 1 1/4 cups / 135g graham cracker or digestive biscuit crumbs
  • 5 tbsp / 70g melted butter
  • 1 1/2 tbsp / 18g sugar or sweetener
  • Pinch of fine salt

For the filling

  • 3 cups / 680g / 24 oz full-fat or 2% cottage cheese, drained first when watery
  • 3/4 cup / 180g plain Greek yogurt
  • 4 large eggs, room temperature
  • 2/3 cup / 135g granulated sugar
  • 2 tbsp / 16g cornstarch
  • 2 tsp / 10ml vanilla extract
  • 1–2 tsp lemon zest
  • 1 tbsp / 15ml lemon juice
  • 1/4 tsp fine salt

Instructions

Prepare the Pan, Crust, and Filling

  1. Prepare the pan. Line the bottom of an 8-inch / 20cm springform pan with parchment paper and lightly grease the sides.
  2. Heat the oven. Preheat the oven to 350°F / 177°C for the crust.
  3. Make the crust. Mix the crumbs, melted butter, sugar, and salt until evenly moistened. Press firmly into the bottom of the pan.
  4. Pre-bake the crust. Bake for 8 to 10 minutes. Remove from the oven and reduce the oven temperature to 325°F / 160°C.
  5. Blend the dairy. Add cottage cheese, Greek yogurt, sugar, cornstarch, vanilla, lemon zest, lemon juice, and salt to a blender or food processor. Blend until completely smooth, scraping down the sides once.
  6. Add the eggs. Add the eggs and blend briefly, just until combined. Do not over-blend after the eggs are added.
  7. Check the batter. It should look smooth and pourable, but not watery. If it looks thin because the cottage cheese was loose, let it sit for 5 minutes before pouring so the cornstarch can hydrate slightly.

Bake, Cool, Chill, and Slice

  1. Fill the pan. Pour the filling over the crust and smooth the top.
  2. Optional water bath. For the creamiest texture, place the wrapped springform pan in a roasting pan and pour hot water around it until the water reaches about 1 inch up the side of the pan. Make sure the pan is well protected so water cannot leak into the crust.
  3. Bake. Bake at 325°F / 160°C for 55 to 70 minutes, until the edges are set and the center still has a soft wobble. If using a thermometer, the center should be about 155–160°F / 68–71°C.
  4. Cool slowly. Turn off the oven, crack the door open, and let the cheesecake sit inside for 30 to 45 minutes. Then move it to the counter and cool to room temperature.
  5. Chill. Refrigerate for at least 4 hours, preferably overnight.
  6. Slice and serve. Run a thin knife around the edge before releasing the springform pan. Slice with a clean, warm knife for neat pieces.

Notes

  • For a cream cheese version: Replace 1 cup / 225g cottage cheese with 8 oz / 225g softened cream cheese.
  • For a crustless version: Skip the crust, line the pan well, and start checking 5 to 10 minutes earlier.
  • For a low-carb version: Use an almond flour crust and a cup-for-cup low-carb sweetener.
  • If your cottage cheese is watery: Drain it before measuring.
  • With a water bath: Wrap the pan very well and expect the cheesecake to bake toward the longer end of the time range.
  • Without a water bath: The cheesecake still works, but the top may look a little more rustic.
  • For the smoothest filling: Blend the dairy fully before adding the eggs.

FAQs

Does cottage cheese cheesecake taste like cottage cheese?

Not when it is blended well and flavored properly. The finished cheesecake should taste creamy, tangy, lightly sweet, and cheesecake-like. Vanilla, lemon, sugar, and enough chill time help soften the cottage cheese flavor.

How do you make cottage cheese cheesecake smooth?

Blend the cottage cheese and Greek yogurt until glossy before adding the eggs. A high-speed blender gives the best texture, but a food processor can work if you scrape down the sides.

Why is my cottage cheese cheesecake watery?

Watery cheesecake usually comes from loose cottage cheese, thin yogurt, underbaking, or cutting before the cheesecake has chilled. Drain watery dairy, bake until the edges are set, and chill overnight.

Can I make cottage cheese cheesecake without cream cheese?

Yes. This main recipe uses cottage cheese and Greek yogurt without cream cheese. Add cream cheese only when you want a richer, more traditional cheesecake texture.

How much cream cheese should I add?

Replace 1 cup / 225g cottage cheese with 8 oz / 225g softened cream cheese for a richer version that tastes closer to classic cheesecake.

Can I make it crustless?

Yes. Line the pan with parchment, grease the sides well, skip the crumb crust, and bake the filling directly in the pan. Start checking a little earlier and chill fully before releasing it.

Is cottage cheese cheesecake high protein?

It is usually higher in protein than classic cream-cheese cheesecake because the main dairy base is cottage cheese and Greek yogurt. Exact protein depends on your brands, crust, and slice size.

Can I make it low carb or keto?

Use an almond flour crust or skip the crust, then replace the sugar with a low-carb sweetener such as allulose or a monk fruit blend. The final texture will depend on the sweetener and crust you choose.

How long should cottage cheese cheesecake chill?

Chill it for at least 4 hours. Overnight is best because the filling firms, the flavor settles, and the slices come out cleaner.

Can you freeze cottage cheese cheesecake?

Yes. Freeze it in slices, then thaw overnight in the refrigerator. The texture may be slightly softer after thawing, but it still works well for make-ahead servings.

Baked vs no-bake cottage cheese cheesecake: what changes?

A baked version sets with eggs and oven heat. A no-bake version needs a separate setting system, such as gelatin, whipped cream, cashews, melted chocolate, or a very thick dairy base.

Cottage cheese cake vs cottage cheese cheesecake: what is the difference?

A cottage cheese cheesecake is a blended dairy custard that bakes and chills like cheesecake. By contrast, cottage cheese cake is usually more cake-like, often made with flour, baking powder, and sometimes fruit.

The First Slice Is the Real Test

Final cottage cheese cheesecake slice with berries, lemon, berry sauce, and a forkful removed
The first slice is the real test: smooth texture, clean edges, and a cold creamy bite that tastes like cheesecake, not cottage cheese.

When the cheesecake is cold, creamy, and smooth enough that nobody stops to ask where the cottage cheese went, the recipe has done its job.

Try the Greek yogurt version first for a lighter cheesecake, and try the cream cheese variation when you want something closer to the classic. When you make it, I’d love to know which version won in your kitchen — the lighter Greek yogurt cheesecake, the cream cheese variation, the classic crust, or the crustless slice.

Posted on — 1 Comment

Dutch Apple Pie Recipe

Deep-dish Dutch apple pie with golden crumb topping and a clean slice removed, showing apple filling and bottom crust.

This Dutch apple pie recipe is for the slice everyone wants: a flaky bottom crust, tender cinnamon apples that still hold their shape, and a buttery brown-sugar crumb topping that bakes into golden clusters. It is easier than a lattice apple pie, richer than a plain crumble, and sturdy enough to slice cleanly once it cools.

If you have seen this dessert called apple crumb pie, apple crumble pie, or apple pie with crumb topping, you are in the right place. Although the names overlap, the structure is simple: one bottom crust, a generous apple filling, and a thick layer of cinnamon crumbs on top.

A Sliceable Dutch Apple Pie, Not a Runny Scoop

The method below is built for the problems that usually ruin this kind of pie: a soft bottom crust, apples that shrink under the crumbs, and topping that browns before the center is done. A hot-start bake, lower oven rack, firm apple blend, and full cooling window give the pie its best chance to bake through and slice neatly.

When it works, every forkful gives you the whole point of the pie: flaky crust underneath, soft spiced apples in the middle, and golden buttery crumbs on top.

This is the version to make when you want the comfort of apple crisp, the structure of pie, and a slice that can actually stand up on a plate.

Clean Slice Cue

Clean slice cue: For a slice that stands up on the plate, let the filling settle before cutting. Serve it warm if you like, but not bubbling-hot from the oven.
Clean slice of Dutch apple pie on a plate, showing bottom crust, apple filling, and crumb topping.
Cooling turns the apple layer from loose and glossy into a filling that can hold a clean slice.

Why the Layers Matter

Layer cue: Before baking, check the three jobs: heat for the crust, structure from the apples, and enough butter for clustered crumbs.
Dutch apple pie slice with callouts showing flaky crust, tender apple filling, and golden crumb topping.
Use the layers as a quick check: structure below, tender apples in the middle, and clustered crumbs on top.

Quick Answer

This Dutch apple pie recipe is built around a single-crust apple pie topped with buttery crumbs instead of a second sheet of pastry. For the best homemade version, use about 3 lb / 48 oz / 1.35 kg firm apples sliced 1/4 inch / 6 mm thick. Add them to a chilled single crust in a 9-inch deep-dish pie plate, cover with crumb topping, and bake for 55–65 minutes.

The most reliable oven schedule is 400°F / 200°C for 20 minutes, then 375°F / 190°C for 35–45 minutes more. The pie is done when the topping is golden, the filling bubbles around the edges, and the apples are tender. Let it cool for at least 3 hours before slicing so the filling sets.

Formula cue: Keep the short version in mind before baking: firm apples, even slices, a hot-start oven, and a full cooling window.
Quick answer board showing firm apples, chilled crust, crumb topping, hot-start baking, and cooling time for Dutch apple pie.
When these four cues are in place, the pie has a better chance of baking through without turning loose or runny.

Need more help before baking? Check the best apples, crumb topping, or bake time sections before you start.

Why This Dutch Apple Pie Works

This pie is simple, but a few small details make the difference between a clean slice and a runny scoop. Too much loose apple juice softens the crust, too little butter makes the topping sandy, and soft apples can collapse before the filling sets. The method here keeps those problems in check so you get tender apples, crisp-edged crumbs, and slices that hold together.

Five Details That Protect the Pie

  • A hot-start bake gives the crust a head start. The first 20 minutes at 400°F / 200°C helps the bottom crust set before the apples release too much liquid.
  • Apples with structure keep the filling from collapsing. Granny Smith with Honeycrisp, Braeburn, or Pink Lady gives tartness, sweetness, and shape.
  • Flour thickens the apple juices gently. It gives the filling a classic apple pie texture without turning the center gummy.
  • Melted, slightly cooled butter makes easy crumb clumps. The topping holds together without needing a pastry cutter.
  • A full cooling window gives cleaner slices. The pie tastes wonderful warm, but it slices much better after the filling has had time to settle.

The method works because the protections stack: cold crust, sturdy apples, lower oven rack, hot-start bake, and enough cooling time. Skip one and the pie can still work; skip several and you are much more likely to get a soggy bottom or runny filling.

The Method at a Glance

Method cue: This recipe protects the usual weak spots: a soft bottom crust, collapsed apples, over-browned crumbs, and filling that runs when sliced too soon.
Method board showing cold crust, sturdy apples, lower oven rack, hot-start bake, and cooling time for Dutch apple pie.
Those safeguards work together, so the pie does not depend on one perfect step to bake and slice well.

If you are here because apple pies often turn runny or soft on the bottom, the two most useful sections are how to prevent a soggy bottom and troubleshooting Dutch apple pie.

What Is Dutch Apple Pie?

Dutch apple pie is the crumb-topped cousin of classic apple pie: the same bottom crust and spiced apple filling, but with buttery streusel instead of a second pastry crust. That makes it easier to assemble because you do not have to roll, lattice, vent, or seal a pastry top.

What makes this pie distinct is the topping. It bakes into buttery clumps with crisp edges and a soft cinnamon-brown-sugar center. Meanwhile, the apples underneath soften and release enough juice to make a saucy filling without turning into applesauce.

A chilled bottom crust gives structure, firm apples keep the filling shapely, and the cinnamon crumbs bring the buttery texture that makes this pie so comforting. That is why the top eats a little like apple crisp while the bottom still feels like pie.

Pie vs crisp cue: If the topping reminds you of apple crisp, that is the point. The difference is underneath: Dutch apple pie has a bottom crust, while apple crisp usually does not.
Dutch apple pie slice compared with apple crisp, showing that Dutch apple pie has a bottom crust while apple crisp does not.
Dutch apple pie and apple crisp share a buttery crumb feel, but the bottom crust changes everything. That crust gives the dessert structure, sliceability, and a true pie identity.

Dutch Apple Pie vs Apple Crumble Pie vs Apple Crumb Pie

These names are often used for similar desserts, especially in home baking. The main idea is the same: apples, a bottom crust, and a crumb topping instead of a second pastry crust.

Name Usually Means What to Expect
Dutch apple pie Apple pie with a bottom crust and crumb topping The most common name for this style of pie
Apple crumb pie Apple pie with a crumb topping Same basic dessert, with emphasis on the topping
Apple crumble pie Apple pie with a crumble-style topping Often used when the topping is thicker or more rustic
Apple crisp Baked apples with a crisp or oat-style topping, usually without pie crust More of a baked fruit dessert than a pie

This version is a Dutch apple pie, but it also fits what many bakers mean by apple crumb pie or apple crumble pie: a flaky crust, tender apples, and a generous crumb topping.

Name cue: Searchers use these names differently, but most are looking for the same dessert style: apples in a bottom crust with a crumb, crumble, or streusel-style top.
One crumb-topped apple pie slice labeled Dutch apple pie, apple crumb pie, and apple crumble pie to show overlapping names.
The names often overlap, especially in home baking. Whether someone says Dutch apple pie, apple crumb pie, or apple crumble pie, they usually mean apples, bottom crust, and a crumb-style top.

Ingredients for Dutch Apple Pie

The ingredient list is short, but each part has to pull its weight. The crust needs to stay cold, the apples need enough structure, the filling needs just enough thickener, and the topping needs enough butter to bake into real crumbs instead of loose sugar-flour dust.

Ingredient cue: This recipe does not rely on a long ingredient list. Instead, the results come from handling the basics well: cold dough, firm apples, bright lemon, warm spice, flour, brown sugar, and butter.
Ingredients for Dutch apple pie including apples, pie crust, butter, flour, brown sugar, lemon, vanilla, cinnamon, and nutmeg.
The best results come from simple ingredients handled well: cold dough for structure, firm apples for shape, lemon for brightness, and butter for clustered crumbs.

One Bottom Pie Crust

You need one chilled 9-inch pie crust. Homemade crust gives the best flavor and flake, but a good store-bought crust works if you are focused on the apple filling and crumb topping.

If you want a fully homemade base, use this apple pie crust recipe. For this style, you only need a single bottom crust, not a double crust.

Crust cue: Because there is no top pastry crust, the bottom crust has to carry the slice. Keep it chilled before filling so it has a better chance to set in the oven.
Single unbaked bottom pie crust in a deep-dish pie plate with crimped edges.
Since there is no top pastry crust, the bottom crust has to do the structural work while the crumb layer brings the buttery finish.

Using a shallow pie plate instead of deep-dish? Check the pan-size notes before adding all the apples.

Firm Apples

Use firm baking apples that hold their shape. Granny Smith gives tart structure, while Honeycrisp, Braeburn, Pink Lady, or Golden Delicious can round out the flavor.

The best all-purpose blend is 2 lb Granny Smith plus 1 lb Honeycrisp, Braeburn, or Pink Lady. For a sweeter pie, use half Granny Smith and half Honeycrisp or Golden Delicious.

For a deeper apple-by-apple breakdown, see this guide to the best apples for apple pie.

Peel the Apples for the Smoothest Filling

Peeling gives the smoothest, most classic filling. You can leave the skins on if you like a more rustic pie, but the slices will feel chewier and the skins may separate slightly from the softened apple flesh.

Sugar, Lemon, Flour, and Spices

Granulated sugar sweetens the apples, brown sugar adds warmth, lemon juice brightens the filling, and flour helps thicken the juices as the pie bakes. Cinnamon is essential, while a little nutmeg gives the filling a classic bakery-style aroma.

All-purpose flour works best here because it gives a classic apple pie texture. Cornstarch can work in many fruit fillings, but it can become gummy when overused in a long-baked apple pie.

Buttery Crumb Topping

The crumb layer is made with flour, brown sugar, a little granulated sugar, cinnamon, salt, and melted butter. Once mixed, it should hold together in soft clumps when squeezed. If it looks dusty or powdery, it needs to be worked together a little more.

Best Apples for Dutch Apple Pie

Apple Varieties That Hold Shape

Apple choice cue: A good apple blend needs both flavor and structure. Start with tart Granny Smith, then add one sweet-firm apple so the filling tastes balanced and still holds shape.
Apple selection board for Dutch apple pie with Granny Smith, Honeycrisp, Braeburn, Pink Lady, and Golden Delicious apples.
The best apple blend gives you both flavor and structure. Start with tart Granny Smith, then add a sweet-firm apple such as Honeycrisp, Braeburn, or Pink Lady.

The best apples are firm, flavorful varieties that can survive a long bake without collapsing. Because this pie spends nearly an hour in the oven, avoid soft, mealy, or overripe apples that break down too quickly.

Apple Best Use Flavor / Texture
Granny Smith Best tart backbone Firm, sharp, holds shape well
Honeycrisp Best sweet-tart partner Juicy, crisp, fragrant
Braeburn Best balanced baking apple Sweet-tart, firm, aromatic
Pink Lady Best bright flavor Tart-sweet, firm, lively
Golden Delicious Best softer sweet blend apple Mellow, sweet, less tart

Avoid very soft, mealy, or overripe apples here. They may taste fine raw, but they can collapse during the long bake and leave you with a flatter, wetter filling.

Apple structure cue: Soft apples can taste fine raw but collapse during a long bake. For this pie, firmer slices give you a filling that stays tender instead of turning flat and watery.
Firm apple slices holding shape compared with softer collapsed apple slices after baking.
Apples that taste good raw do not always bake well. For this long-baked apple pie, firm slices are safer because they soften without collapsing into a watery layer.

Slice the apples about 1/4 inch / 6 mm thick. Very thin slices soften faster but can turn compact and jammy. Thick slices can stay firm even when the crust and topping are done.

Slice Thickness for Even Baking

Slice thickness cue: The goal is not paper-thin slices or chunky wedges. Aim for even 1/4-inch slices so the apples soften at the same pace as the crust and crumb topping bake.
Apple slice thickness guide for Dutch apple pie showing too-thin slices, quarter-inch slices, and thick slices.
Even 1/4-inch apple slices bake more predictably. Thin slices can turn jammy, while thick slices may stay too firm after the crust and crumbs are already done.

If your apples are extra juicy or you want neater slices, compare the raw, pre-cooked, and canned filling options before assembling the pie.

Apple Crumb Topping for Dutch Apple Pie

The crumble layer is not just decoration. It is the main reason this pie tastes different from a regular apple pie: buttery, cinnamon-scented, lightly crisp on top, and soft enough underneath to melt into the apples. The goal is chunky crumbs, not loose sugar-flour dust.

Crumb topping cue: The topping should already look like real crumbs before it goes into the oven. If it looks like dry flour and sugar, keep working in the butter until clusters form.
Chunky brown-sugar crumb topping scattered over sliced apples in an unbaked Dutch apple pie.
Once those clumps toast, they become the signature golden top of an apple crumb pie.

For one 9-inch deep-dish pie, use:

  • 1 cup / 4.4 oz / 125 g all-purpose flour
  • 1/2 cup / 3.5 oz / 100 g packed light brown sugar
  • 2 tablespoons / 0.9 oz / 25 g granulated sugar
  • 1 teaspoon ground cinnamon
  • 1/4 teaspoon fine salt
  • 1/2 cup / 4 oz / 113 g unsalted butter, melted and cooled slightly
  • Optional: 1/2 cup / 2 oz / 55–60 g chopped pecans or walnuts

Stir the dry ingredients first, then add the melted butter. Mix until the topping forms damp crumbs. It should not look like loose flour, and it should not become one greasy paste. When squeezed, it should hold together, then break into chunky crumbs.

Melted Butter vs Cold Butter

Melted butter is easiest for this style of topping because it quickly coats the flour and sugar. Let it cool slightly before mixing. Boiling-hot butter can make the crumbs pasty or greasy instead of clumpy.

Butter cue: Melted butter is the easy route here, but it should be slightly cooled. Boiling-hot butter can make the topping pasty instead of crumbly.
Melted butter being poured into a flour, brown sugar, and cinnamon crumb topping mixture.
Slightly cooled butter coats the flour and sugar without turning the mixture greasy.

Oats or No Oats?

Classic Dutch apple pie often uses a flour-based topping without oats. For a more apple-crisp-style texture, replace 1/4 cup / 1 oz / 30 g of the flour with 1/4 cup / 0.9 oz / 25 g old-fashioned oats. Do not use instant oats; they can make the topping feel dusty.

Nuts or No Nuts?

Pecans or walnuts add crunch and a deeper toasted flavor. Leave them out for a smoother, more classic crumb topping, or add them when you want the pie to feel richer and more holiday-ready.

Variation cue: Keep the classic flour crumb for the most traditional Dutch apple pie texture. Add oats for a more apple-crisp feel, or nuts when you want extra toasted crunch.
Classic crumb topping, oat-style crumb topping, and nutty crumb topping variations for Dutch apple pie.
Classic crumbs keep the pie closer to a traditional Dutch apple pie. However, oats make the topping feel more like apple crisp, while nuts add toasted crunch.

Crumb Topping Texture Guide

Texture cue: Use the crumb texture as a quick check before assembly. Sandy topping needs more mixing, while greasy topping needs a brief chill so the crumbs separate again.
Crumb topping texture guide showing dry crumbs, just-right clumpy crumbs, and greasy pasty crumbs.
If the topping looks sandy, keep working in the butter; if it looks greasy, chill it briefly so the crumbs can separate again.
What You See What It Means How to Fix It
Dry and sandy The butter has not been worked in enough Press the mixture with your fingers until clumps form
Wet and pasty The butter was too hot or the topping was overmixed Chill 10 minutes, then break into crumbs
Huge greasy chunks The topping was over-compressed Break apart gently before adding to the pie
Browning too fast The topping is exposed to heat before the apples are done Tent loosely with foil once golden
Soft after storage The pie was covered warm or refrigerated Reheat slices uncovered in the oven
Crumb topping cue: The topping should feel like damp, clumpy sand. Keep mixing and pressing when it will not hold together after a squeeze. A greasy mixture only needs a brief chill before you break it back into crumbs.

For sandy, greasy, or overly dark crumbs, the troubleshooting section gives quick fixes without changing the whole recipe.

The Pan and Tools That Matter Most

You do not need anything fancy. The three tools worth caring about most are a deep-dish pie plate, a rimmed baking sheet, and something to protect the crust edges if they brown early.

  • 9-inch deep-dish pie plate: holds the full 3 lb / 48 oz / 1.35 kg apple filling.
  • Rimmed baking sheet: catches drips and gives the pie a stable surface in the oven.
  • Foil or pie shield: protects the crust edge or crumbs if they brown before the apples are tender.
  • Large mixing bowl: gives the apples room to coat evenly with sugar, flour, lemon, and spices.
  • Small mixing bowl: keeps the topping separate until assembly.
  • Rolling pin: needed if you are using homemade pie crust.
  • Apple peeler, corer, or sharp knife: helps keep the slices even.
  • Instant-read thermometer: optional, but useful if you want a doneness cue beyond color and bubbling.

A metal pie plate browns the bottom crust more quickly, while glass lets you see the crust color but heats more slowly. With glass, the lower rack and full bake time matter even more.

Choosing Metal or Glass

Pan cue: Your pie plate changes how the bottom crust bakes. Metal gives the crust faster heat, while glass lets you check color but often needs the full bake time.
Metal and glass pie plates compared for Dutch apple pie, with crust-browning cues.
Metal gives the bottom crust a faster start, which helps browning. Glass lets you watch the crust color, but it usually needs the full bake time to perform well.

Using a Regular 9-Inch Pie Plate?

The amounts here are sized for a deep-dish 9-inch pie plate. For a shallow or standard-depth plate, use about 2 1/2 lb / 40 oz / 1.1 kg apples instead of the full 3 lb. Do not force every apple slice into the crust; an overfilled shallow pie can overflow, bake unevenly, and soften the bottom crust.

Pan-size cue: The apple amount depends on the depth of your plate. A deep-dish pan can take the full 3 pounds, but a shallow 9-inch plate needs less filling to bake cleanly.
Deep-dish pie plate and regular 9-inch pie plate compared with different apple filling amounts.
A deep-dish pie plate can handle more apples. In a shallow 9-inch plate, reduce the filling so the pie bakes evenly instead of overflowing or softening the bottom crust.

You can also use slightly less crumb topping if the pie is very full. Place the pie on a rimmed baking sheet and start checking for doneness around 50 minutes.

How to Make Dutch Apple Pie

Once the crust is cold, the apples are sliced evenly, and the crumbs hold together when squeezed, the assembly is straightforward. The main thing is to keep the crust chilled and give the pie enough time in the oven for the filling to bubble.

Step 1: Roll and Chill the Crust

Roll one pie crust into a 12-inch circle and fit it into a 9-inch deep-dish pie plate. Trim and crimp the edges, then chill the crust while you prepare the apples and crumb topping.

Chilling gives the bottom crust a better chance to set before the apple juices release fully.

Step 1 cue: Start with the crust cold and shaped before you deal with the filling. That gives the dough structure before the apples release moisture.
Hands crimping an unbaked pie crust in a deep-dish pie plate for Dutch apple pie.
A cold, crimped crust gives the pie a stronger base before the apples release moisture and the crumb topping begins to brown.

Step 2: Peel, Core, and Slice the Apples

Peel and core the apples, then slice them about 1/4 inch / 6 mm thick. Keep the slices as even as possible so they soften at the same rate.

Step 2 cue: Even slicing is more important than perfect-looking slices. When the apple pieces are similar in thickness, they soften together instead of baking unevenly.
Peeled apples being sliced evenly with a knife for Dutch apple pie filling.
Even apple slices soften at the same pace. As a result, the filling bakes more evenly and avoids the mix of mushy pieces and underbaked chunks.

Step 3: Toss the Apple Filling

In a large bowl, toss the sliced apples with granulated sugar, brown sugar, flour, lemon juice, cinnamon, nutmeg, salt, and vanilla. Let the mixture sit for 10 minutes while you make the topping.

Step 3 cue: Coat the slices evenly before they go into the crust. Flour, sugar, lemon, and spice need to reach the apples throughout the bowl, not sit in dry patches.
Apple slices tossed in a bowl with sugar, flour, lemon, cinnamon, nutmeg, salt, and vanilla.
Even coating matters because the flour cannot thicken the apple juices properly if it stays in dry patches at the bottom of the bowl.

That short rest lets the sugar begin drawing moisture from the apples. A little syrup in the bottom of the bowl is normal; if the slices are sitting in a visible puddle, lift the apples into the crust and leave most of that liquid behind.

Liquid control cue: After the apples rest, some syrup is normal. When you see a real puddle, spoon the apples into the crust and leave the extra liquid behind.
Spoon lifting spiced apple slices from a bowl with syrup pooled at the bottom.
This is the moment to protect the crust: spoon in the apples, not the full syrup at the bottom of the bowl.

This liquid-control step is also one of the easiest ways to avoid a soft crust; for the full prevention list, see how to keep Dutch apple pie from getting soggy.

Step 4: Make the Crumb Topping

Stir flour, brown sugar, granulated sugar, cinnamon, and salt in a bowl. Add melted, slightly cooled butter and mix until the topping forms chunky crumbs. When squeezed in your hand, it should hold together, then break apart easily.

Step 4 cue: The squeeze test tells you if the topping is ready. It should hold together in your hand, then break apart into irregular brown-sugar crumbs over the apples.
Hand squeezing Dutch apple pie crumb topping to show clumps that hold together and crumble apart.
Use the squeeze test before topping the pie. The mixture should hold together in your hand, then break into chunky brown-sugar crumbs over the apples.

Now place a rack in the lower third of the oven and heat the oven to 400°F / 200°C. The lower rack gives the bottom crust more direct heat, while the crumbs still brown from above.

Oven rack cue: Use the lower rack for stronger bottom heat, and keep the pie on a rimmed baking sheet to catch bubbling juices.
Dutch apple pie on a rimmed baking sheet being placed on the lower oven rack.
Think of the rimmed sheet as support and insurance: it steadies the pie, catches drips, and lets the bottom crust get stronger heat.

Step 5: Fill the Pie

Spoon the apples into the chilled crust, mounding them slightly in the center. Do not worry if the apples sit a little high before baking; they settle as they soften. Scatter the crumb topping over the apples and press it just lightly enough to stay in place without compacting it.

Assembly cue: A slight apple mound is fine before baking because the slices settle in the oven. Scatter the crumbs gently so the topping stays textured instead of packed flat.
Dutch apple pie crust filled with mounded apple slices while crumb topping is scattered over the top.
Mound the apples gently, then scatter the crumbs without pressing hard; that way, the filling can settle while the topping keeps its texture.

Step 6: Bake Hot, Then Lower the Heat

Place the assembled pie on a rimmed baking sheet and bake at 400°F / 200°C for 20 minutes. Without removing the pie, reduce the oven temperature to 375°F / 190°C and bake for 35–45 minutes more.

If the crumbs or crust edges brown too quickly, usually after the first 30–35 minutes, tent the pie loosely with foil. Do not seal it tightly, or trapped steam can soften the top.

Foil cue: Use foil as a shield, not a lid. A loose tent protects the crumbs and crust edge without sealing in steam.
Dutch apple pie on a baking sheet with foil loosely tented over the browned crumb topping.
The foil should hover over the pie, protecting the top while still letting steam escape.

Not sure whether the pie is fully baked? Use the bake time and doneness cues before pulling it from the oven.

Step 7: Cool Before Slicing

Cool the pie for at least 3 hours before slicing. As the pie cools, the filling keeps thickening. The pie can be warm when served, but not straight-from-the-oven hot if you want clean slices.

Cooling cue: When the pie comes out of the oven, the filling is still setting. Give it the cooling window so the apple layer thickens before you cut into it.
Finished Dutch apple pie cooling on a wire rack with golden crumb topping and an intact crust.
Treat cooling as part of the recipe; this is when the filling becomes sliceable.

How Long to Bake Dutch Apple Pie

A deep-dish pie made with raw sliced apples usually needs 55–65 minutes total bake time.

Two-Temperature Bake Schedule

Bake-time cue: The two-temperature bake has a purpose: strong heat first for the crust, then gentler heat so the apples can finish without scorching the crumb topping.
Dutch apple pie bake time guide showing 400°F for 20 minutes, 375°F for 35 to 45 minutes, and cooling for 3 hours.
The two-temperature bake gives the pie a better balance: strong heat first for the crust, then gentler heat so the apples finish without scorching the crumbs.
Stage Temperature Time What It Does
Hot start 400°F / 200°C 20 minutes Gives the crust a head start and begins browning
Gentle finish 375°F / 190°C 35–45 minutes Softens apples and thickens filling without burning topping
Cooling Room temperature At least 3 hours Lets the filling settle for cleaner slices

Do not pull the pie just because the crumbs look golden. The filling also needs to bubble and the apples need to feel tender; otherwise, the crust and topping may look done while the center still needs time.

Look for golden brown crumbs, bubbling juices around the edges, and apples that feel tender when pierced with a thin knife. An instant-read thermometer is optional, but the center of the filling should be about 190–200°F / 88–93°C.

Doneness Cues Beyond Color

Doneness cue: Golden crumbs are only part of the test. Look for bubbling edges and tender apples before pulling the pie from the oven.
Dutch apple pie doneness guide showing golden crumbs, bubbling edges, tender apples, and a center temperature of 190 to 200°F.
Color is only the first clue; bubbling edges and tender apples confirm the filling has had enough time to thicken.

Should You Par-Bake the Crust for Dutch Apple Pie?

You can usually skip par-baking for this raw-apple Dutch apple pie recipe as long as the crust gets three protections: a cold start, a lower oven rack, and enough total bake time. The apples need nearly an hour in the oven anyway, so the bottom crust has time to cook through.

Par-baking becomes more helpful when the filling is already cooked, canned, or unusually wet. In those cases, the filling may not need as much oven time after assembly, so the crust benefits from a head start.

Par-bake cue: Par-baking is not a blanket rule for this pie. Raw apples need a long bake anyway, while cooked, canned, or very wet fillings may need extra crust protection.
Par-bake decision guide showing raw apples usually do not need par-baking, while pre-cooked, canned, or very juicy fillings may benefit from it.
Par-baking depends on the filling. Raw apples need the long bake, while pre-cooked or canned filling may benefit from giving the crust a head start.
Situation Par-Bake? Why
Raw apple filling, this recipe Usually no The long bake gives the crust enough time to cook
Pre-cooked apple filling Helpful The filling is already soft, so the assembled pie may bake for less time
Canned apple pie filling Helpful Canned filling is soft, sweet, and already thickened
Very juicy apples Optional Par-baking adds extra protection against a soft bottom crust
Glass pie plate More helpful Glass heats more slowly than metal
Metal pie plate Less necessary Metal conducts heat faster and helps the bottom crust brown

How to Keep Dutch Apple Pie from Getting Soggy

A soggy bottom usually comes from one of three places: too much loose apple juice, not enough heat under the crust, or slicing before the filling has settled. This style of pie is especially vulnerable because it has a juicy fruit filling and only one crust.

Three Causes to Control

Soggy-bottom cue: A soft bottom crust usually comes from too much loose apple juice, not enough heat under the pie, or slicing before the filling has set. Control those three points and the pie becomes easier to trust.
Soggy-bottom prevention board showing liquid control, lower oven rack baking, and cooling time for Dutch apple pie.
Use this as a quick pre-bake check: manage liquid first, then rely on lower-rack heat and cooling time.
  • Chill the crust before filling. Cold dough holds its structure better in the oven.
  • Choose apples with structure. Soft apples collapse quickly and release more liquid.
  • Do not pour in all pooled apple juice. Spoon in the apples, but leave excess liquid behind if the bowl is very wet.
  • Use enough thickener. Flour helps bind the juices as the pie bakes.
  • Bake on a lower rack. This gives the bottom crust more direct heat.
  • Use a rimmed baking sheet. It catches drips and keeps the pie stable.
  • Give the filling a full cooling window. Cutting too early makes even a well-baked pie look runny.
  • Do not cover while warm. Trapped steam softens the crumb layer and crust.

Optional Crust Barrier

For an extra barrier against fruit juices, King Arthur Baking suggests using a thin layer of “crust dust” on the bottom crust before adding fruit filling. It is optional, but useful if you often struggle with soggy pie bottoms. You can read their technique here: King Arthur Baking’s crust dust method.

Raw Apples vs Pre-Cooked Apple Filling

All three routes can work, but they give you different pies. Fresh apple slices taste brighter and more classic, pre-cooked filling slices more neatly, and canned filling is the fastest shortcut when you want the crumb-topped version with less prep.

Filling route cue: The filling route changes the final pie. Fresh slices taste brighter, cooked filling can slice more neatly, and canned apple pie filling is the fastest shortcut.
Three bowls comparing raw spiced apple slices, pre-cooked apple filling, and canned apple pie filling.
Choose fresh slices for brighter flavor, pre-cooked filling for neater pieces, or canned apple pie filling when time matters most.
Method Best For Tradeoff
Raw sliced apples Easiest classic pie More shrinkage and more juice management
Pre-cooked apple filling Neater slices, make-ahead baking, less gap under topping Extra step; filling must cool before going into crust
Canned apple pie filling Fastest shortcut Softer, sweeter, less fresh-tasting

I use raw apples here because the full 55–65 minute bake gives them enough time to soften while keeping the flavor fresher and less jammy. Even slices, enough thickener, and visible bubbling are the keys.

Pre-cooked filling is better when you want less shrinkage, fewer hollow gaps under the topping, or cleaner slices for a holiday table. It is also useful if you want to make the filling ahead. Just cool it completely before adding it to the crust; warm filling can melt the butter in the dough and make the bottom crust heavy.

If you want the make-ahead route, use cooled homemade filling from this apple pie filling recipe.

Dutch Apple Pie with Canned Apple Pie Filling

Canned apple pie filling works when you want the shortcut version, but it needs a lighter hand. Because it is already sweetened, softened, and thickened, skip the flour, reduce the sugar, and wake it up with lemon juice, cinnamon, and a small pinch of salt.

Shortcut cue: Canned filling is already soft, sweet, and thickened, so it needs balance more than more sugar. Lemon, cinnamon, and salt make the shortcut taste brighter.
Canned apple pie filling in a bowl with lemon juice, cinnamon, and a pinch of salt added.
Canned apple pie filling works better after a few small fixes. Lemon brightens it, cinnamon warms it, and a pinch of salt balances the sweetness.

If you are using canned filling because you need a faster pie, the par-bake section is worth checking before you assemble it.

How to Adjust Canned Apple Pie Filling

  • Use about 2 cans, 20–21 oz each, for one 9-inch pie.
  • Do not add the flour from the raw-apple filling.
  • Skip most or all of the added sugar in the apple layer.
  • Brighten the flavor with 1 tablespoon / 0.5 fl oz / 15 ml lemon juice.
  • Stir in 1/2 teaspoon cinnamon if the filling tastes flat.
  • Balance the sweetness with a small pinch of salt.
  • Use the same brown-sugar crumb topping listed above.
  • Consider par-baking the crust because canned filling needs less time in the oven.
  • If your pie plate is shallow, do not force in both full cans; leave a little behind rather than overfilling.

Bake Time for the Shortcut Version

A canned-filling version may bake closer to 45–55 minutes, depending on the crust, pan, and whether the filling went in cold or at room temperature. Bake until the crumb topping is golden and the filling bubbles. Cool fully before slicing, because canned filling can look thick while hot but loosen once cut.

For a full shortcut pie, see this apple pie with apple pie filling.

If you have extra filling after baking, it can also go into easy desserts like this apple cinnamon roll bake with apple pie filling.

How to Serve Dutch Apple Pie: Warm, Room Temperature, or Reheated

Dutch apple pie is best after it has cooled long enough to slice cleanly. Serve it at room temperature, gently warmed, or with vanilla ice cream if you want the contrast of warm apples and cold cream. A small drizzle of caramel works too, but the pie is already sweet enough that it does not need much.

For the cleanest slices, cool the pie completely first, then rewarm individual pieces in a 325°F / 160°C oven for 10–15 minutes before serving.

Planning this for Thanksgiving or a holiday table? The make-ahead and reheating section gives the cleanest workflow.

Make Ahead, Storage, Freezing, and Reheating

Dutch apple pie is best the day it is baked, after it has cooled enough to slice cleanly. You can still make several parts ahead, which is helpful for Thanksgiving, fall dinners, and holiday baking days.

Make-ahead cue: For a holiday workflow, do not wrap or freeze the pie while it is hot. Bake it, cool it fully, then freeze or reheat uncovered when needed.
Make-ahead workflow showing pie dough and crumbs prepared ahead, baked pie cooling, frozen pie storage, and reheating uncovered.
For the smoothest holiday workflow, prepare the dough and crumbs early, then bake the pie fully before freezing or reheating.

What to Prep Ahead

Part Make-Ahead / Storage What Matters
Pie dough Refrigerate 2–3 days or freeze up to 3 months Let it soften slightly before rolling
Crumb topping Refrigerate up to 2 days Break into crumbs again before using
Raw apple filling Best made the same day Apples release liquid as they sit
Cooked apple filling Refrigerate 2–3 days Cool completely before filling crust
Baked pie Room temperature up to 2 days; refrigerate leftovers 3–4 days Keep loosely covered once fully cool
Baked pie, frozen Freeze fully cooled pie up to 2–3 months Thaw overnight in the refrigerator, then reheat uncovered at 325°F / 160°C
Reheating 325°F / 160°C for 15–20 minutes Reheat uncovered to help the topping crisp

For a holiday workflow, make the pie dough and crumb topping ahead, then bake the pie the day before you need it. Let it cool fully, keep it loosely covered, and rewarm slices or the whole pie uncovered before serving.

Freezing and Reheating the Baked Pie

For the best texture, freeze the pie after baking and cooling. Wrap it well once completely cool, freeze for up to 2–3 months, thaw overnight in the refrigerator, and reheat uncovered so the buttery crumbs can crisp back up. An unbaked pie can be frozen too, but raw apples release more liquid as they thaw, so the baked-and-cooled route is easier to control.

Can You Make Dutch Apple Pie the Day Before Thanksgiving?

Yes. Bake the pie the day before, cool it completely, and keep it loosely covered. Reheat it uncovered at 325°F / 160°C until warmed through. The crumb topping is crispest the day the pie is baked, but reheating uncovered helps bring back some texture.

Refrigeration is useful after the first couple of days, but it will soften the crumb topping. For the best texture, reheat slices in the oven instead of the microwave.

For food-safety storage guidance, Iowa State University Extension notes that fruit pies made with sugar can be stored at room temperature for up to two days, then refrigerated for additional storage. See their pie storage guidance here: ISU Extension pie storage guide.

Troubleshooting Dutch Apple Pie

Do not judge the pie while it is still hot. Many problems that look serious right out of the oven, especially loose filling, improve as the pie cools and the juices thicken.

Most real issues come down to moisture, timing, or crumb texture. Once you know which one caused the problem, the fix is usually simple.

Troubleshooting cue: Most problems trace back to moisture, timing, or crumb texture. Match the symptom first, then adjust the next bake.
Troubleshooting guide for Dutch apple pie showing fixes for runny filling, soggy bottom, firm apples, sandy crumbs, over-browned topping, and browned crust edges.
Match the symptom first, then adjust moisture, timing, or crumb texture without rebuilding the whole recipe.

Filling and Crust Problems

Problem Likely Cause Fix
Soggy bottom crust Too much apple juice, underbaked crust, or pie cut too soon Use lower rack, hot start, sturdy apples, and a full cooling window
Runny filling Not enough thickener, underbaked apples, or sliced while too hot Bake until bubbling and let the filling fully settle before slicing
Apples stay too firm Slices too thick or bake time too short Slice 1/4 inch / 6 mm thick and bake until the juices bubble
Large gap under the crumbs Raw apples shrank during baking Mound the apples slightly, slice them evenly, or use cooled pre-cooked filling
Filling tastes flat Apples were very sweet or the filling needed more balance Add lemon juice and a pinch of salt next time

Crumb Topping and Baking Problems

Problem Likely Cause Fix
Crumb topping is sandy Butter was not worked into the dry ingredients enough Press the mixture into clumps, then break it into crumbs
Crumb topping is greasy Butter was too hot or the topping was overmixed Chill the topping for 10 minutes, then crumble it again
Topping burns before apples soften Top heat is too strong or the pie needs a longer bake Tent loosely with foil after the crumbs turn golden
Crust edge burns The edge was exposed too long Use foil or a pie shield after the first 20–30 minutes
Pie overflows Pie plate was too shallow or the filling had too much liquid Use a deep-dish plate, leave excess juice behind, and bake on a rimmed sheet

Most of these problems are easy to prevent once you control moisture, heat, and cooling time. With sturdy apples, a cold crust, and a full cooling window, the oven does most of the work; the reward is a pie that smells like cinnamon, cuts cleanly, and still tastes like real apples.

Before you slice: The pie should look settled, not loose and bubbling-hot. The crumbs will be golden, the apple juices will have thickened around the edges, and the filling will hold better after a full cooling window.

Dutch Apple Pie Recipe

This deep-dish Dutch apple pie has tender spiced apples, a flaky bottom crust, and a buttery brown-sugar crumb topping that bakes into golden clusters.

Yield1 deep-dish 9-inch pie
Servings8–10
Prep Time35 minutes
Bake Time55–65 minutes
Cooling Time3 hours
Total TimeAbout 4 hours 30–40 minutes
Oven400°F, then 375°F
Pan9-inch deep-dish pie plate

Ingredients

Crust

  • 1 unbaked 9-inch pie crust, chilled

Apple Filling

  • 3 lb / 48 oz / 1.35 kg firm apples, peeled, cored, and sliced 1/4 inch / 6 mm thick
  • 1/2 cup / 3.5 oz / 100 g granulated sugar
  • 2 tablespoons / 0.9 oz / 25 g packed light brown sugar
  • 3 tablespoons / 0.85 oz / 24 g all-purpose flour
  • 1 tablespoon / 0.5 fl oz / 15 ml fresh lemon juice
  • 1 1/2 teaspoons ground cinnamon
  • 1/4 teaspoon ground nutmeg
  • 1/4 teaspoon fine salt
  • 1 teaspoon / 5 ml vanilla extract
  • Optional: 1 tablespoon / 0.5 oz / 14 g melted unsalted butter

Crumb Topping

  • 1 cup / 4.4 oz / 125 g all-purpose flour
  • 1/2 cup / 3.5 oz / 100 g packed light brown sugar
  • 2 tablespoons / 0.9 oz / 25 g granulated sugar
  • 1 teaspoon ground cinnamon
  • 1/4 teaspoon fine salt
  • 1/2 cup / 4 oz / 113 g unsalted butter, melted and cooled slightly
  • Optional: 1/2 cup / 2 oz / 55–60 g chopped pecans or walnuts

Instructions

  1. Prepare the crust. Roll the pie dough into a 12-inch circle and fit it into a 9-inch deep-dish pie plate. Trim, crimp, and chill while you prepare the filling.
  2. Slice the apples. Peel, core, and slice apples about 1/4 inch / 6 mm thick.
  3. Make the filling. In a large bowl, toss apples with granulated sugar, brown sugar, flour, lemon juice, cinnamon, nutmeg, salt, vanilla, and melted butter if using. Let sit for 10 minutes; leave behind excess pooled liquid if the bowl looks very wet.
  4. Make the crumb topping. In another bowl, mix flour, brown sugar, granulated sugar, cinnamon, and salt. Add melted cooled butter and stir until clumpy crumbs form. Add nuts if using.
  5. Prepare the oven. Place a rack in the lower third of the oven and heat to 400°F / 200°C. Set a rimmed baking sheet nearby for baking the pie.
  6. Fill the crust. Spoon apples into the chilled crust, leaving behind excess pooled liquid if the bowl is very wet. Mound apples slightly in the center.
  7. Add topping. Sprinkle crumb topping evenly over the apples. Press lightly so the crumbs sit in place without compacting them.
  8. Bake. Place the pie on the rimmed baking sheet. Bake at 400°F / 200°C for 20 minutes. Reduce heat to 375°F / 190°C and bake 35–45 minutes more, until the topping is golden and the filling bubbles around the edges.
  9. Protect if needed. If the crumbs or crust edges brown too quickly, usually after the first 30–35 minutes, tent loosely with foil.
  10. Cool. Let the pie cool at least 3 hours before slicing.

Notes

  • Best apple blend: Use 2 lb Granny Smith plus 1 lb Honeycrisp, Braeburn, or Pink Lady.
  • Regular pie plate: For a shallow 9-inch pie plate, use about 2 1/2 lb / 40 oz / 1.1 kg apples.
  • Do not overfill: Extra apples in a shallow plate can cause overflow and a softer bottom crust.
  • Very juicy apples: Use 1 extra tablespoon / about 0.3 oz / 8 g flour and be strict about leaving pooled liquid behind.
  • Optional butter in filling: Add it for a slightly richer apple layer, or leave it out for a cleaner fruit flavor.
  • Salted butter: If using salted butter in the crumb topping, reduce the added salt to a small pinch.
  • Oat crumb variation: Replace 1/4 cup / 1 oz / 30 g flour with 1/4 cup / 0.9 oz / 25 g old-fashioned oats.
  • Canned filling shortcut: Use 2 cans of apple pie filling, skip the flour and most added sugar in the apple layer, and consider par-baking the crust.
  • Cleaner slices: Cool completely, then rewarm individual pieces before serving.

FAQs

What makes Dutch apple pie different from regular apple pie?

Dutch apple pie has a bottom crust and a crumb or streusel topping. Regular apple pie usually has a second pastry crust on top, either solid, vented, or arranged as a lattice.

Is Dutch apple pie the same as apple crumb pie or apple crumble pie?

In many home-baking recipes, yes. Apple crumb pie and apple crumble pie usually emphasize the crumb layer, while Dutch apple pie is the more common name for the full pie style with a bottom crust, apple filling, and streusel-style top.

Should the apples be cooked before baking?

Raw apples work well in this recipe because the pie bakes long enough for them to soften. Pre-cooked apples are useful when you want less shrinkage, fewer gaps under the topping, or a make-ahead filling.

Should the crust for this Dutch apple pie recipe be par-baked?

For the raw-apple version, par-baking is usually not required. A chilled crust, hot-start bake, and lower oven rack are enough for most pies. Par-baking is more useful with canned filling, pre-cooked filling, glass pie plates, or very juicy apples.

Do I have to peel the apples?

Peeling gives the smoothest, most classic filling. Unpeeled apples work if you like a rustic texture, but the skins can feel chewy after baking.

Why is there a gap under my crumb topping?

A gap usually means the raw apples shrank while baking. Mound the apples slightly, slice them evenly, and avoid overly soft apples. For the most compact filling, use cooled pre-cooked apple filling.

Why did my crumb topping turn sandy?

The butter probably was not worked into the flour and sugar enough. Press the mixture between your fingers until it forms clumps before sprinkling it over the apples.

How long should Dutch apple pie cool before slicing?

Give it at least 3 hours. The filling thickens as it cools, so a pie that would run if sliced hot can still cut beautifully later.

Can I bake Dutch apple pie the day before Thanksgiving?

Yes. Bake it the day before, cool it completely, and keep it loosely covered. Reheat uncovered at 325°F / 160°C before serving if you want the pie warm and the crumbs a little crisper.

Can I use canned apple pie filling?

Canned apple pie filling works well for a shortcut version, especially when you brighten it with lemon juice and balance the sweetness with a pinch of salt. Use about two 20–21 oz cans for a 9-inch pie, skip most added sugar, and do not add flour to the filling.

What is the best way to reheat Dutch apple pie?

Reheat slices uncovered in a 325°F / 160°C oven for 15–20 minutes. The oven helps revive the crumb topping better than the microwave.

If you make this pie, I’d love to know which apple blend you used. Did you go classic with Granny Smith and Honeycrisp, or sweeter with Golden Delicious?

Back to top