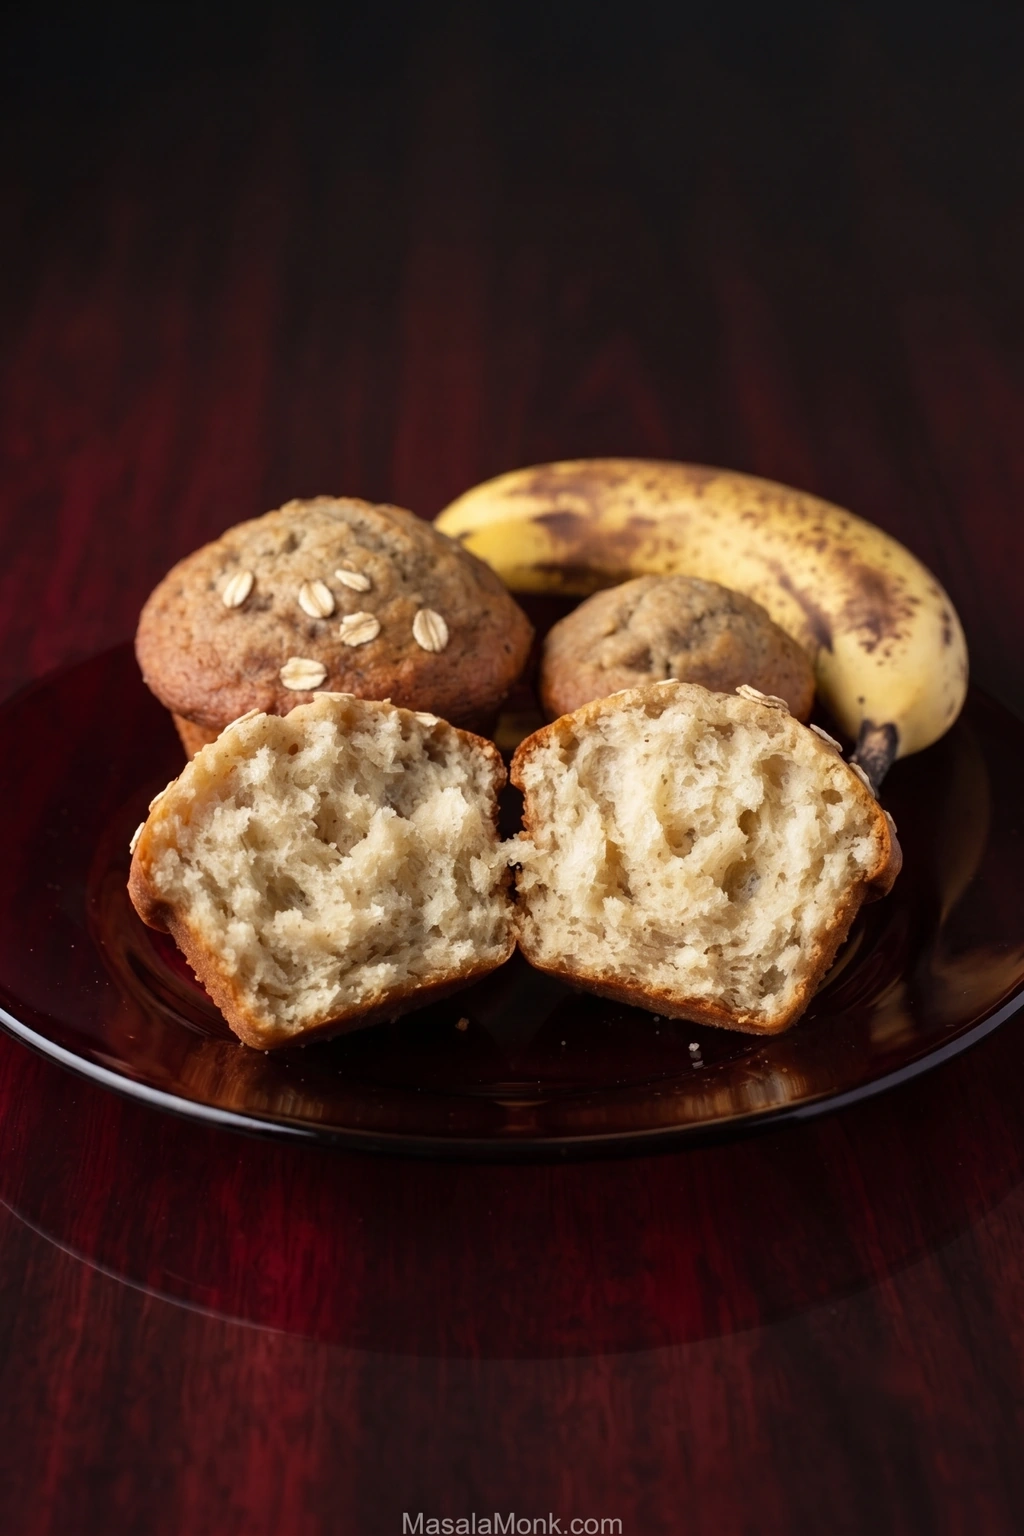
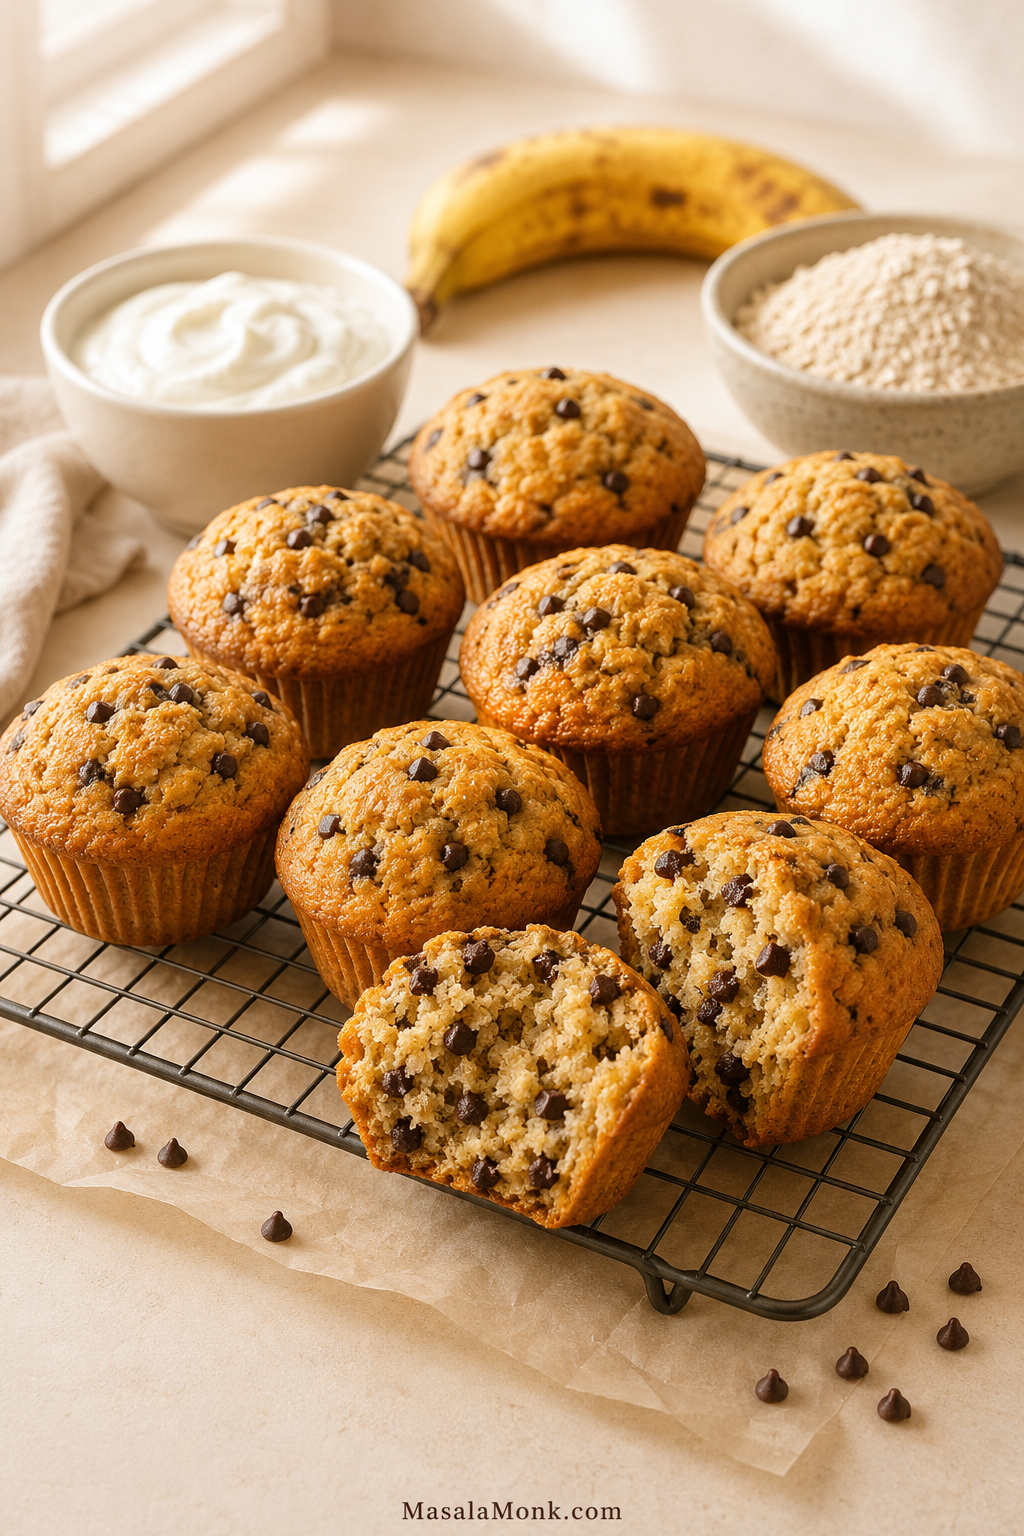
Those spotty bananas on the counter are exactly what you want for a batch of banana oatmeal muffins. These are soft, gently sweet breakfast muffins with a familiar muffin texture and little flakes of rolled oats throughout. Flour gives them structure and lift, while the oats bring a little chew.
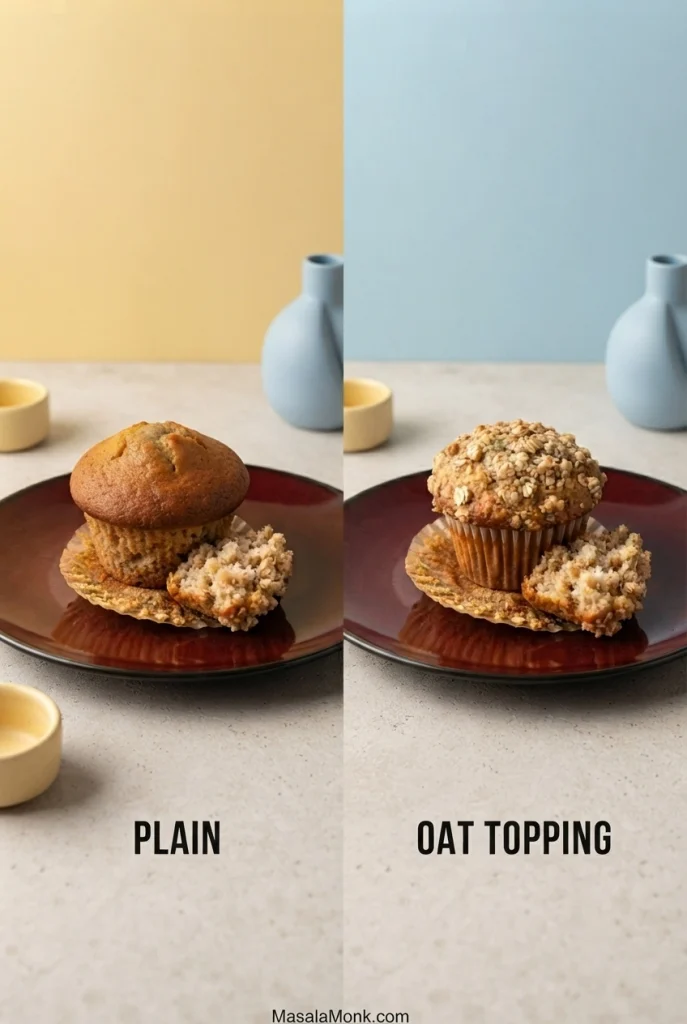
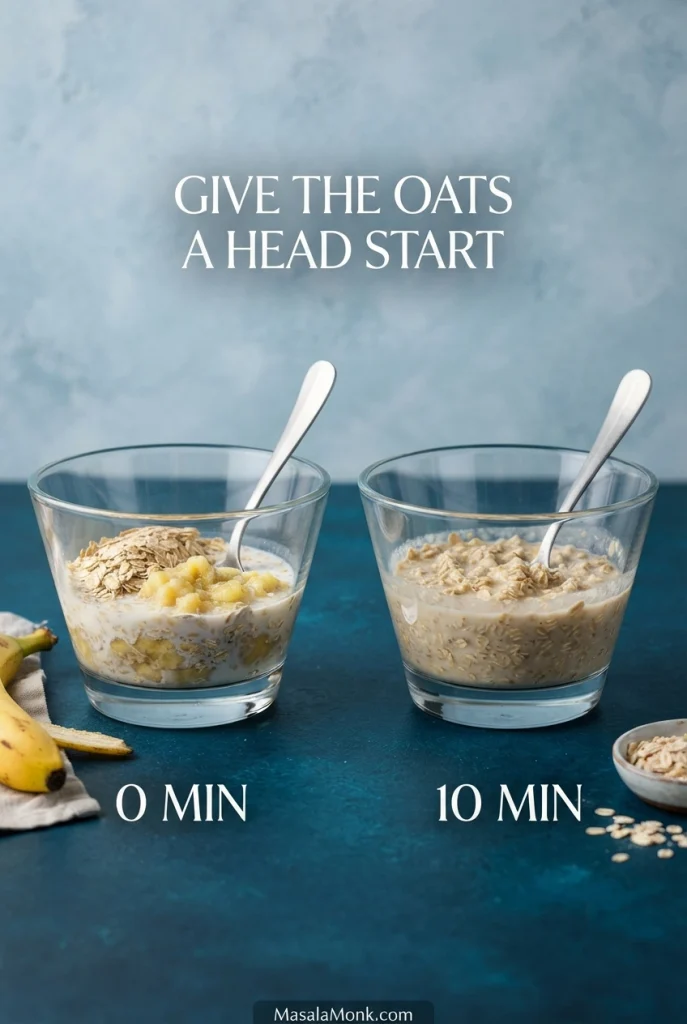
Give the rolled oats 10 minutes to soften in the banana and milk while you prepare everything else. That short rest gives the oats a head start on hydration without making them disappear into the muffin. Leave the tops plain, or add the buttery oat topping for a lightly crisp finish with the warm banana and cinnamon underneath. Chocolate chips, blueberries and nuts all work too.
Use just enough pressure to anchor the oat topping; it should still look loose and craggy rather than pressed flat into the muffin batter.
Before You Mix
Banana: 250 g mashed ripe banana Oats: old-fashioned rolled oats Oat rest: 10 minutes while you prep Oven: 375°F (190°C), conventional oven Yield: 12 standard muffins
The goal is not to soak the rolled oats until creamy. A short 10-minute rest softens them while preserving enough definition to notice in the baked crumb.
Banana Oatmeal Muffins
Soft banana muffins with rolled oats, a touch of cinnamon and an optional buttery oat topping. They’re gently sweet and tender inside, with a little extra crunch on top if you use the topping.
Prep Time 15 minutes
Bake Time 18–22 minutes
Oat Rest 10 minutes, during prep
Total Time About 40–50 minutes, including initial cooling
Yield 12 standard muffins
Equipment
Standard 12-cup muffin pan
Paper liners or nonstick baking spray
Mixing bowls
Whisk and flexible spatula
Kitchen scale or measuring cups and spoons
Ingredients
1½ cups (180 g) all-purpose flour
1½ cups (150 g) old-fashioned rolled oats
½ cup (100 g) packed light brown sugar
1½ teaspoons baking powder
½ teaspoon baking soda
½ teaspoon ground cinnamon
½ teaspoon fine salt
250 g mashed very ripe banana (about 1 generous cup)
2 large eggs
¼ cup (60 ml) neutral oil
½ cup (120 ml) milk
1 teaspoon vanilla extract
Optional Oat Topping — for 12 Muffins
¼ cup (25 g) old-fashioned rolled oats
1 tablespoon (12 g) packed light brown sugar
1 tablespoon (14 g) melted butter
Small pinch of ground cinnamon
Instructions
Heat the oven. Preheat to 375°F (190°C). Line a standard 12-cup muffin pan or grease the cups well.
Soften the oats. Mash the ripe bananas and weigh out 250 g. Stir the banana, rolled oats and milk together and leave for 10 minutes. While they rest, measure the remaining ingredients and prepare the dry mixture.
Mix the dry ingredients. In a large bowl, whisk together the flour, baking powder, baking soda, cinnamon and salt.
Finish the banana mixture. Whisk the brown sugar, eggs, oil and vanilla into the rested banana and oats.
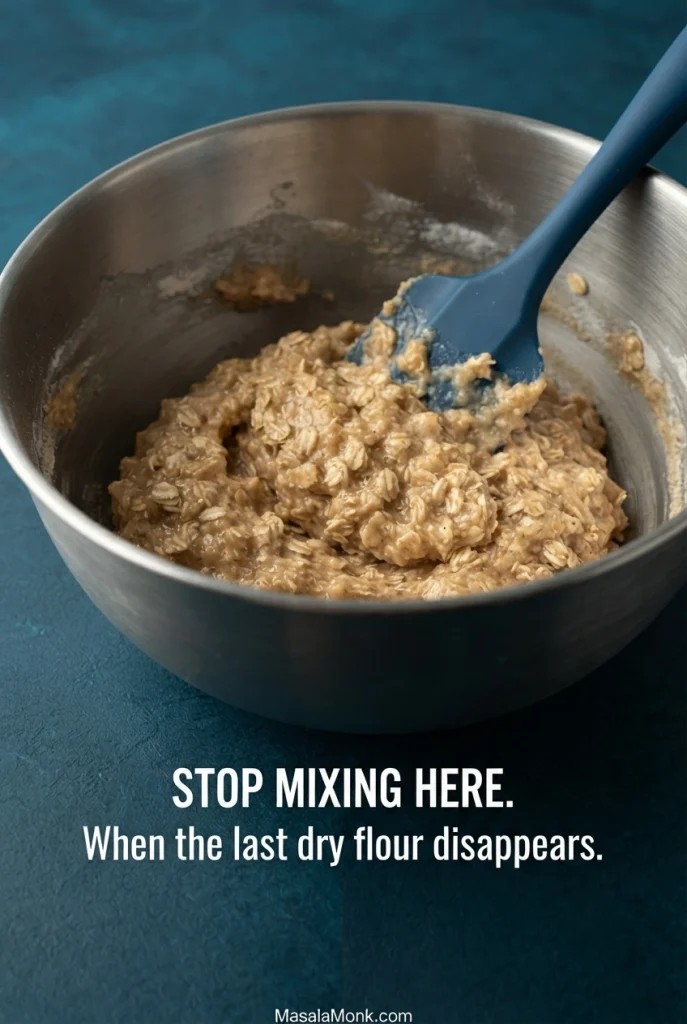
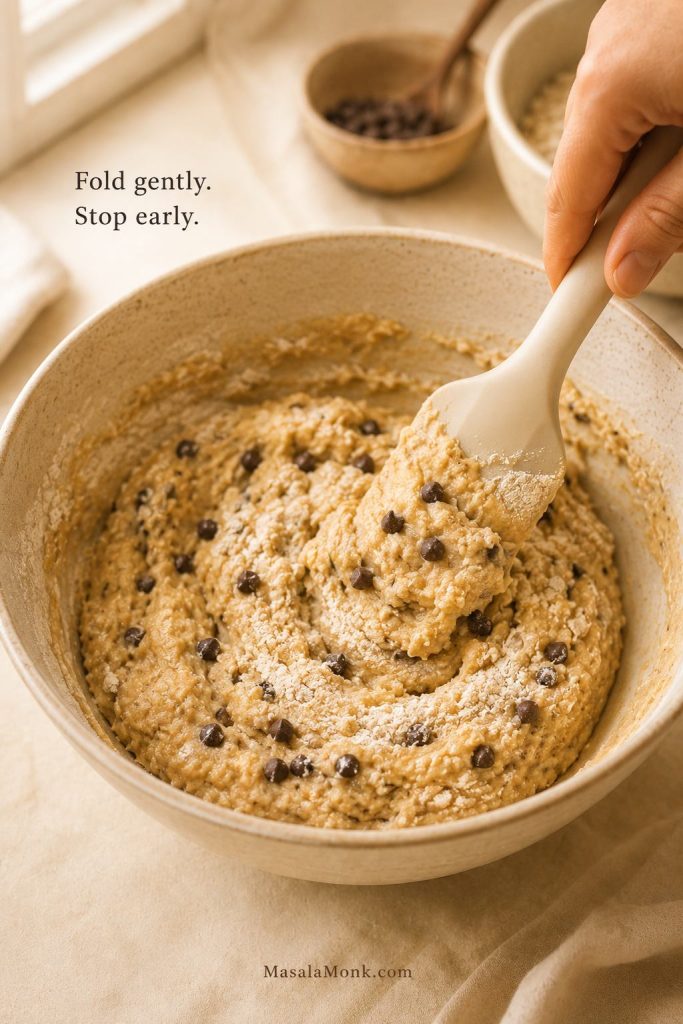
Bring the batter together. Pour the wet mixture into the dry ingredients. Fold gently until no dry flour remains. A few small lumps are fine; don’t keep stirring in search of a perfectly smooth batter.
Prepare the topping, if using. Stir the oats, brown sugar, melted butter and cinnamon together until lightly coated.
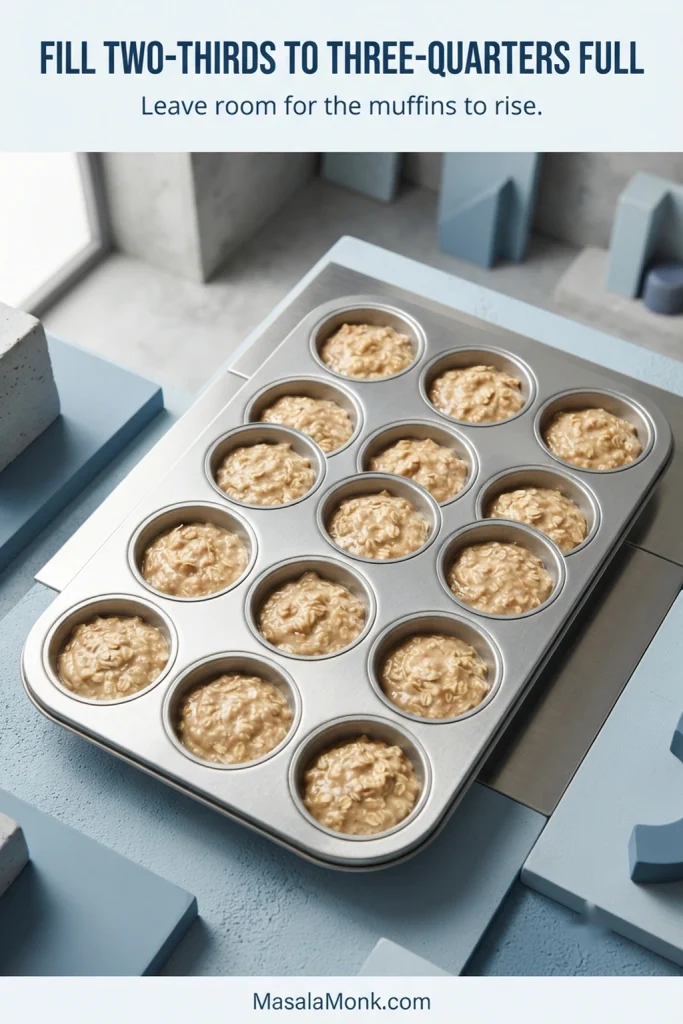
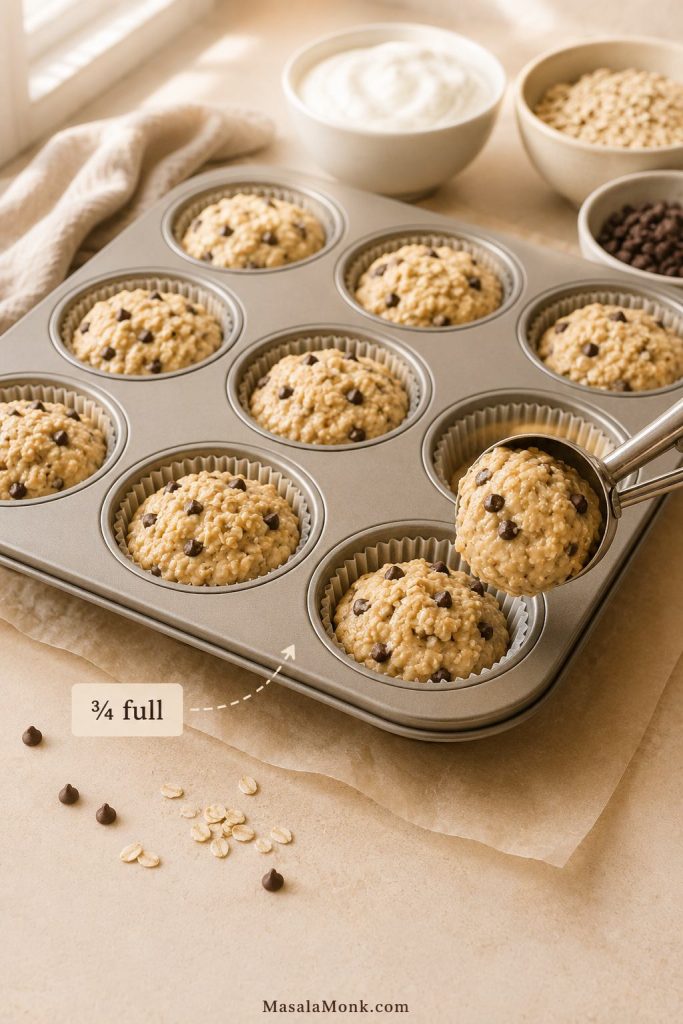
Fill the pan. Divide the batter evenly among all 12 muffin cups. They should be roughly two-thirds to three-quarters full.
Add the topping, if using. Divide it among the muffins and press it lightly onto the batter. Otherwise, leave the tops plain.
Bake. Slide the pan into the oven for 18–22 minutes, beginning to check at 18 minutes.
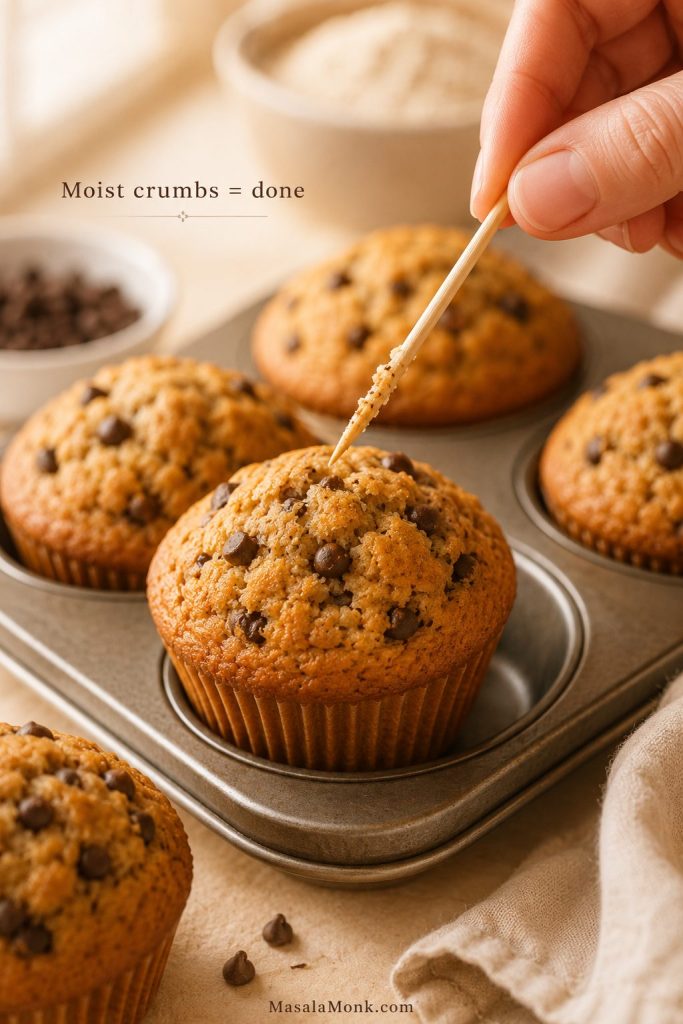
Check the center. The tops should look set, the middle should spring back gently when touched, and a toothpick inserted into the center should come out without wet batter. A few moist crumbs are fine.
Cool. Leave the muffins in the pan for 5–10 minutes, then transfer them to a wire rack. Give them a little more time before peeling away paper liners or judging the texture; banana muffins stay especially soft while they’re hot.
Recipe Notes
Banana: Weigh the mashed fruit if you can. Individual bananas vary enough in size to affect the moisture in the batter.
Oats: Old-fashioned rolled oats give the texture this recipe is designed for.
Flour: If measuring by cups, spoon the flour into the cup and level it without packing.
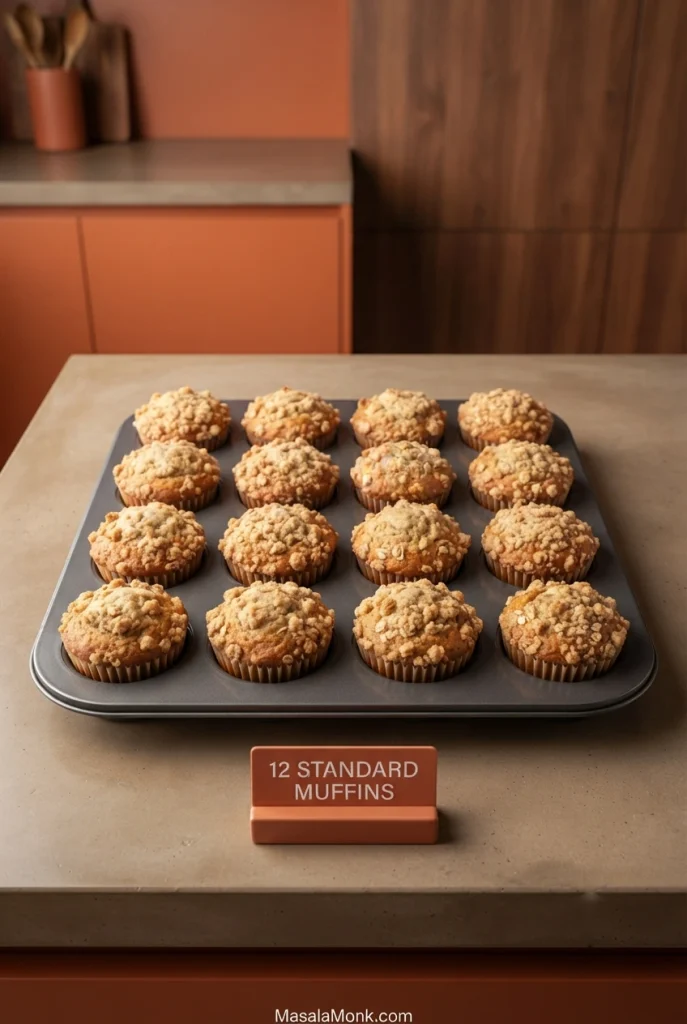
This recipe is sized for a standard 12-cup muffin pan. You should finish with 12 standard muffins rather than a smaller batch of oversized ones.
A full 12-cup pan is the expected yield here, with naturally varied oat-topped crowns rather than twelve perfectly identical muffins.
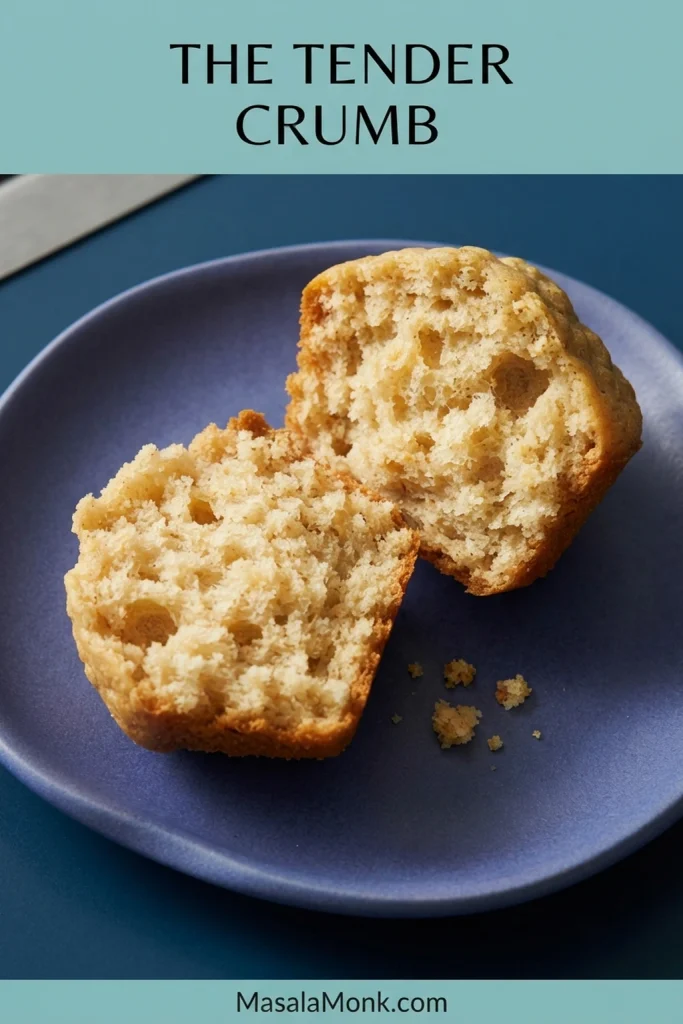
Don’t judge the crumb straight from the oven. Give the muffins a few minutes to cool and let the centers settle before deciding whether the texture is right.
A tender center can feel very soft and still be fully baked. The important clue is that it pulls apart into a recognizable crumb instead of smearing or collapsing.
Need Help With This Batch?
Choosing a different oat, using frozen bananas or troubleshooting a batch? Jump straight to the answer you need.
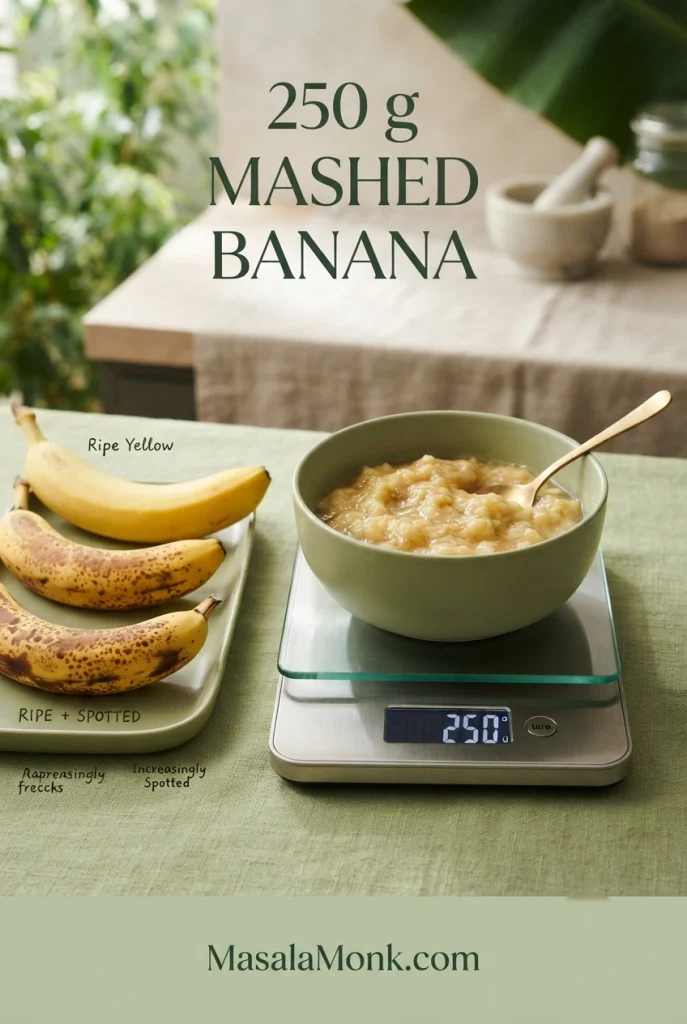
Use 250 g of mashed ripe banana. Counting bananas is less reliable because two pieces of fruit can be surprisingly different in size.
Weighing the mashed fruit keeps the wet-to-dry balance steadier from batch to batch, even when the bananas themselves are very different sizes.
Look for bananas with plenty of brown spots. They’ll mash easily and bring fuller banana flavor and sweetness to the muffins.
Using frozen bananas? Thaw them completely, mash the fruit and include the liquid they release when weighing what you need.
Which Oats Work Best?
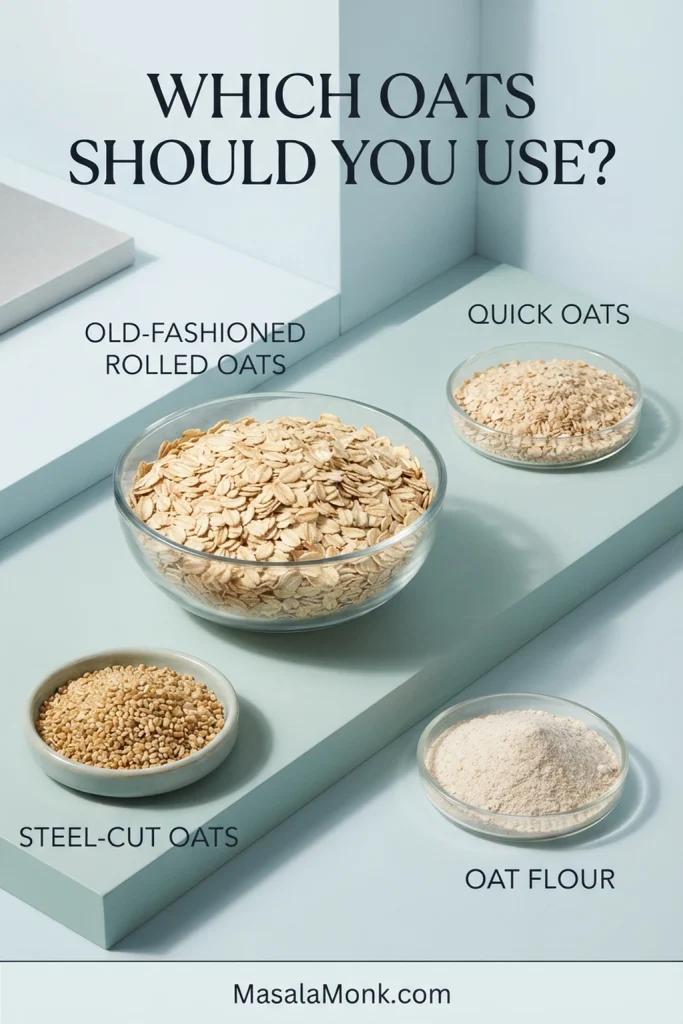
Old-fashioned rolled oats work best here. The short rest softens them while preserving some texture. Quick oats work too, but give you a finer, softer result.
Think of the oat choices as a texture spectrum. Quick oats soften more, rolled oats keep definition, while steel-cut oats stay too firm for this short hydration.
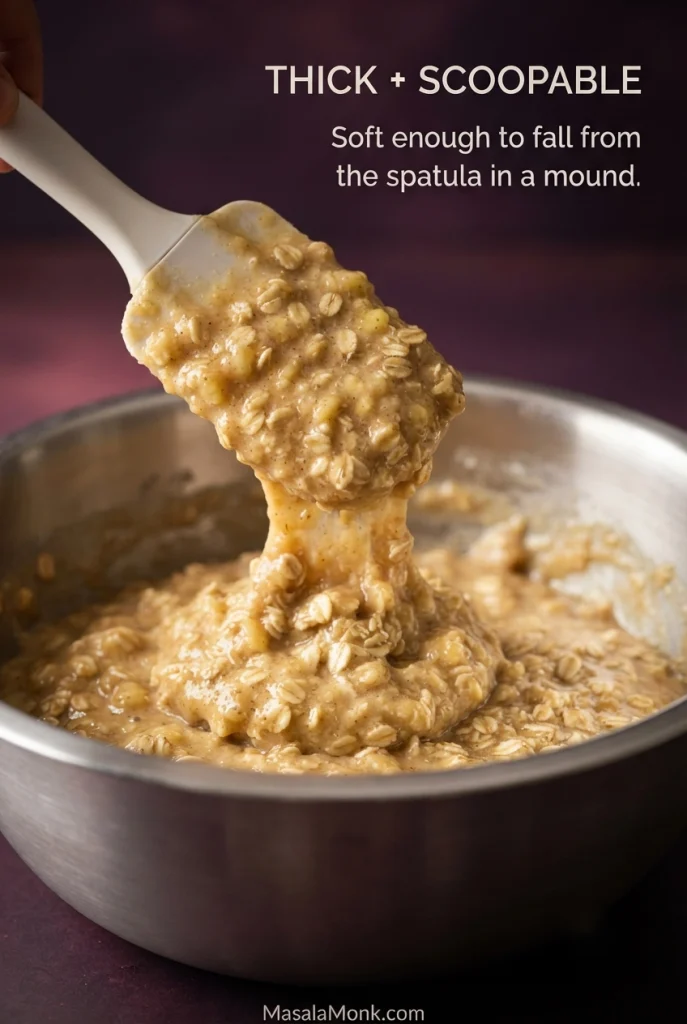
The batter should be thick and scoopable but still soft, with rolled oats visible throughout. It should fall from the spatula in a soft mound rather than run like pancake batter.
Watch how the batter leaves the spatula: it should drop in heavy, soft folds rather than stream from it. That visual cue is more useful than chasing a perfectly smooth mixture.
It won’t look like smooth cake batter, and that’s fine. Small lumps are normal, but there shouldn’t be pockets of dry flour. If yours looks unusually loose or stiff, check the measurements before trying to correct it with extra flour or milk.
A few lumps are a safer stopping point than chasing smoothness. Extra folding is more likely to tighten the crumb than improve the banana oat batter.
Consistency matters as much as the fill line. Cups that are noticeably fuller than their neighbors can still be baking after the smaller muffins are ready.
How to Tell They’re Done
Start checking around 18 minutes. The muffins are done when the tops are set, the centers spring back gently, and a toothpick comes out without wet batter. A few moist crumbs are fine.
Look: the top is set and lightly golden.
Touch: the middle springs back instead of staying indented.
Test: the toothpick has no wet batter clinging to it.
A toothpick with a few damp crumbs is not the same as one streaked with wet batter. Read that cue together with the set top and springy center.
If the center needs more time, bake for another 2–3 minutes and check again. Ovens and pans can shift the timing, so use those cues alongside the clock.
Moist vs. Gummy: What’s the Difference?
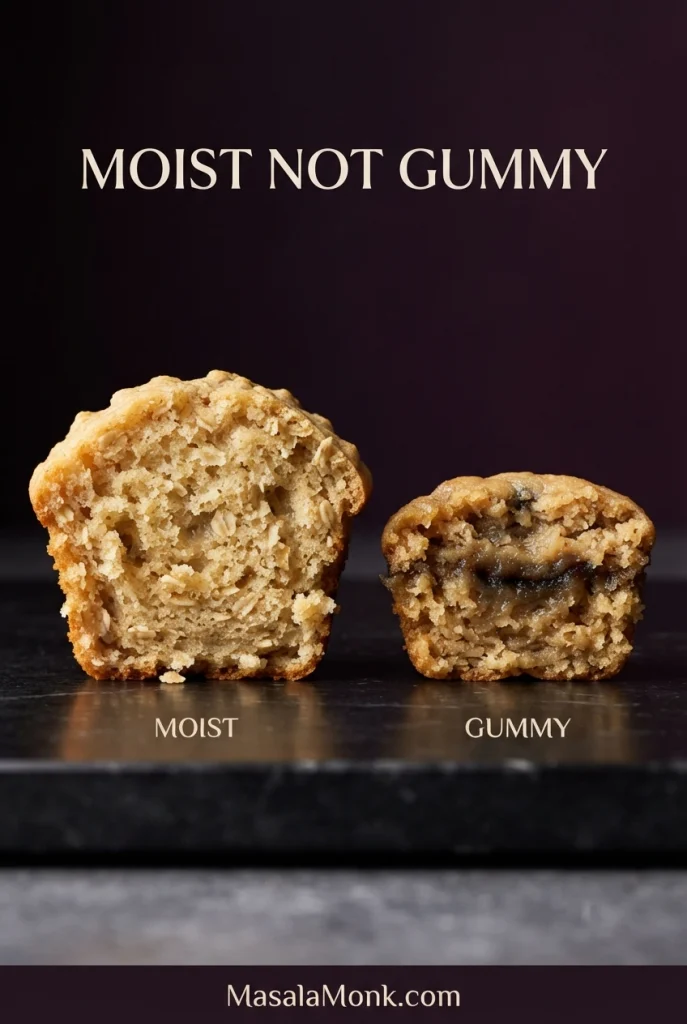
A moist banana oatmeal muffin feels soft and tender but still breaks into a recognizable crumb. By contrast, a gummy muffin feels tacky or paste-like in the middle, sometimes with a damp-looking seam running through it.
A glossy, damp seam that remains after cooling is more concerning than an overall soft crumb. Check measurements and doneness before changing the banana amount.
If the center still feels gummy after that short cooling period, look first at the ingredient measurements, then consider whether the middle had actually finished baking.
If Your Muffins Didn’t Turn Out as Expected
Most problems leave a useful clue. Start with what you can see or feel in the finished batch.
If the crumb is tight but not wet, look first at mixing and leavener freshness. Those two clues are more useful than immediately changing the flour, oats or liquid.
What happened?
What to do
The center is wet
If the muffins are still baking and the tops aren’t getting too dark, give them another 2–3 minutes. For repeated batches that stay wet in the middle, recheck the ingredient amounts and verify that your oven is reaching the set temperature.
The muffins are dry
Warm them briefly for serving. Next time, check for too much flour or oats and start testing sooner; a few extra minutes in the oven can make a noticeable difference.
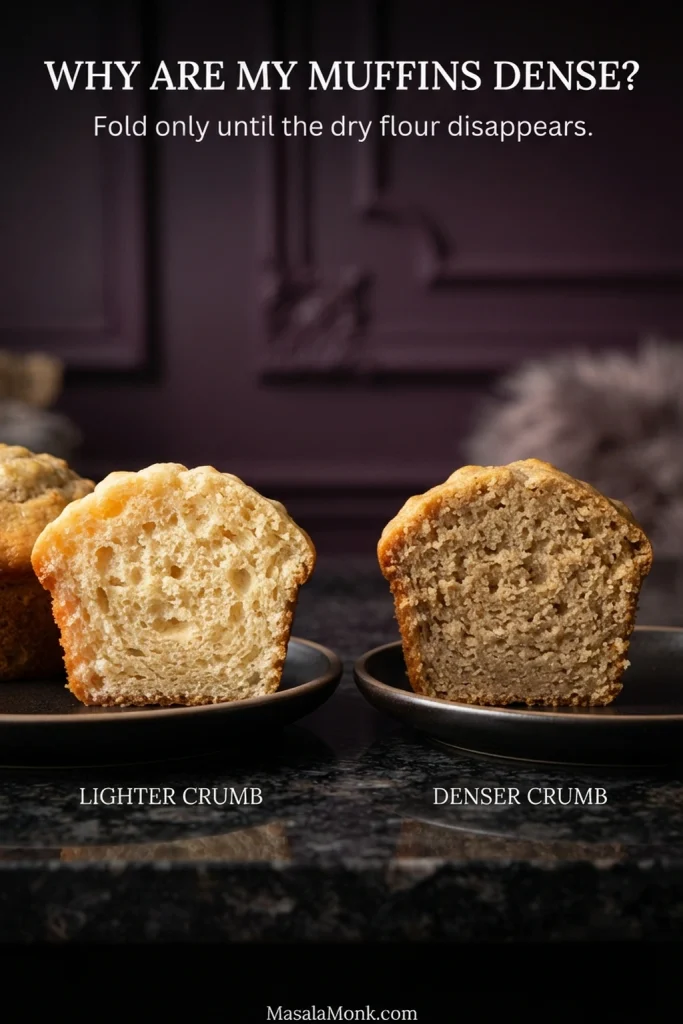
They’re dense or tough
Check that the leaveners are fresh and stop mixing once no dry flour remains.
The liners are sticking
Let the muffins cool longer before peeling. Next time, lightly grease the liners or the pan.
They didn’t rise much
Make sure the oven is fully preheated and the baking powder and baking soda are fresh.
You wanted them sweeter
Nothing necessarily went wrong—you may simply prefer a sweeter muffin. Very ripe bananas help, or add chocolate chips to the next batch.
Yes, you can reduce the sugar if you prefer a less-sweet muffin. Keep the reduction modest because sugar also helps with browning and tenderness. Very ripe bananas bring more sweetness, but they don’t do quite the same job in the batter.
Using Oat Flour
Don’t replace all the wheat flour with oat flour in this recipe. The muffins won’t rise or hold together in quite the same way. For an oat-flour version, use a formula developed for it from the start.
Adding Protein Powder
Protein powder isn’t a simple stir-in here. Powders vary in how much liquid they absorb and can leave muffins dry or rubbery without other adjustments. If extra protein is the goal, our high-protein muffins are a better starting point.
Three Easy Ways to Change the Batch
Chocolate chips and chopped nuts are the easiest add-ins to fold through. Frozen blueberries need gentler handling because they can streak the batter as they thaw.
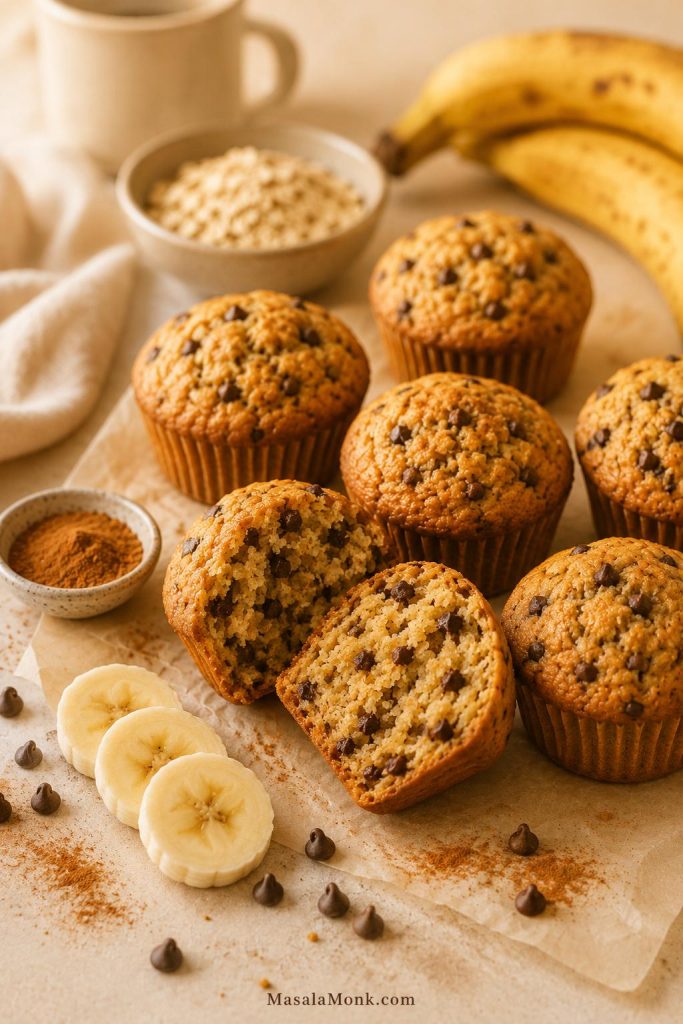
Chocolate Chip Banana Oatmeal Muffins
Fold in up to ½ cup (about 85–90 g) semisweet or dark chocolate chips for little pockets of melted chocolate through the muffins.
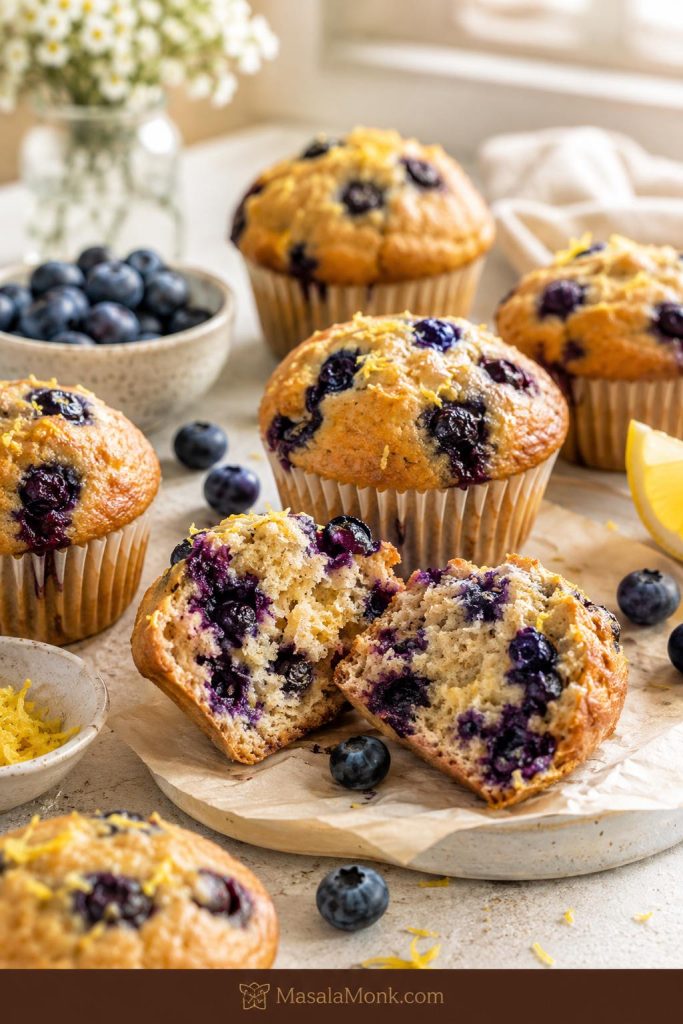
Banana Blueberry Oatmeal Muffins
Use about ¾ cup blueberries. Fresh berries can go straight in. If using frozen, keep them frozen until the last moment, knock away any heavy coating of loose ice, and fold gently to limit streaking. Our blueberry muffin recipe has more guidance on baking with fresh and frozen blueberries.
Banana Walnut or Pecan Muffins
Fold in ½ cup chopped walnuts or pecans. Their crunch works especially well if you leave off the oat topping, though you can use both.
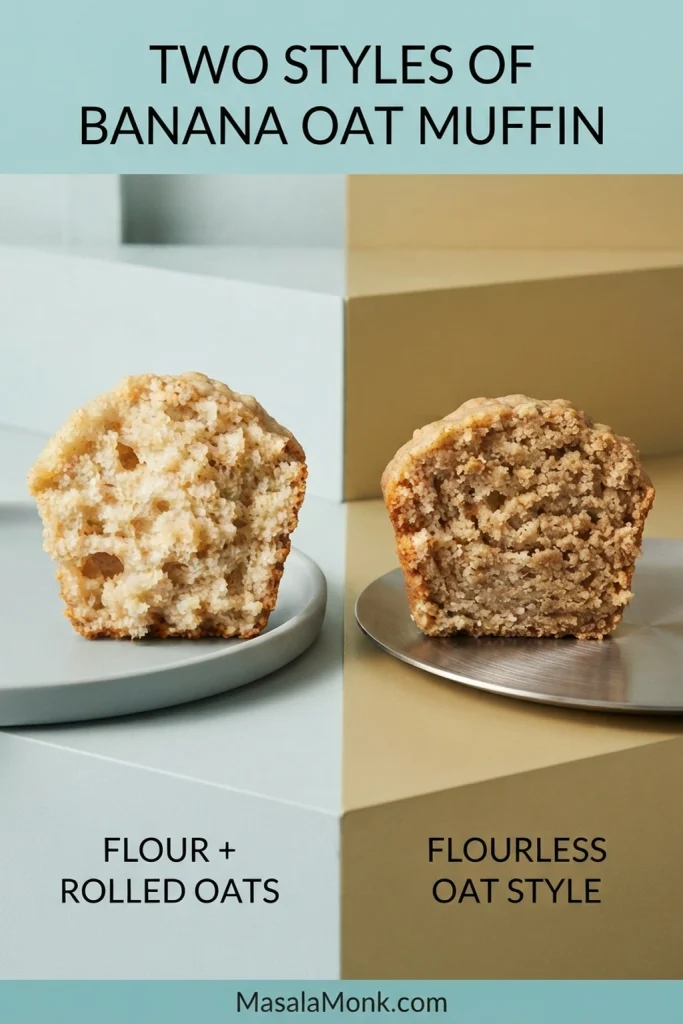
What About Flourless or 3-Ingredient Banana Oat Muffins?
Flourless banana-oat muffins rely on oats for most or all of their structure. That includes many simplified, short-ingredient-list versions. Some use whole oats, some blend them into flour, and many have a softer, denser texture that sits somewhere between a conventional muffin and baked oatmeal.
This recipe uses wheat flour as the framework, with whole rolled oats added for texture. Removing that flour or replacing it with extra oats changes how the muffins rise and hold together, so it isn’t a direct substitution.
Whole oats, oat flour and wheat flour do different structural jobs. Therefore, flourless banana oat muffins need different ratios rather than a one-for-one flour swap.
If you need gluten-free banana oatmeal muffins, use a recipe developed around a gluten-free flour system rather than removing the wheat flour from this one.
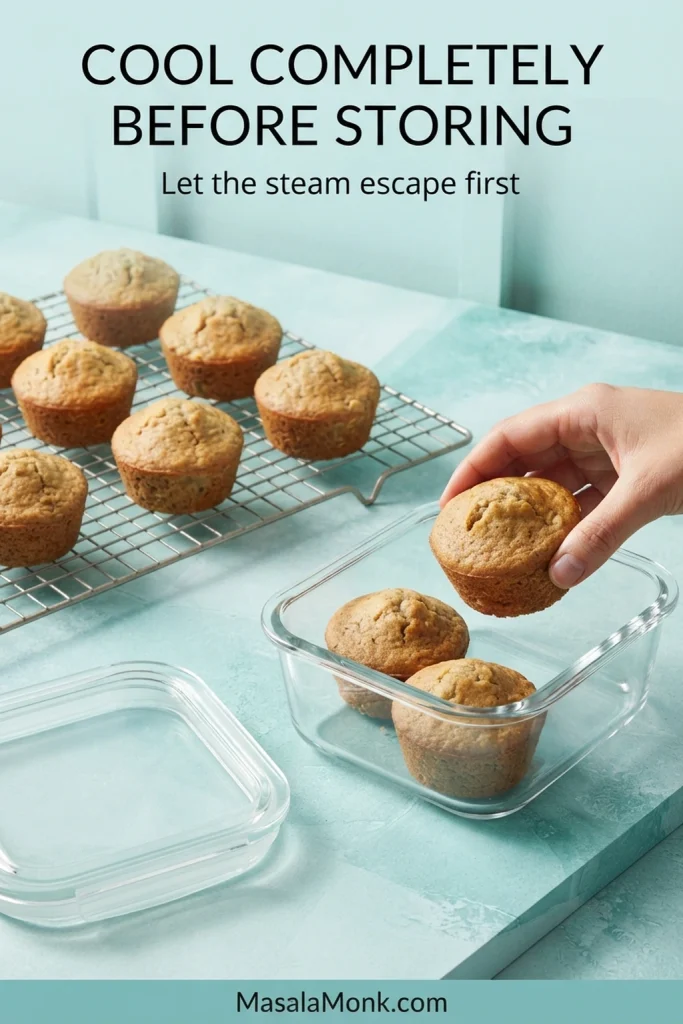
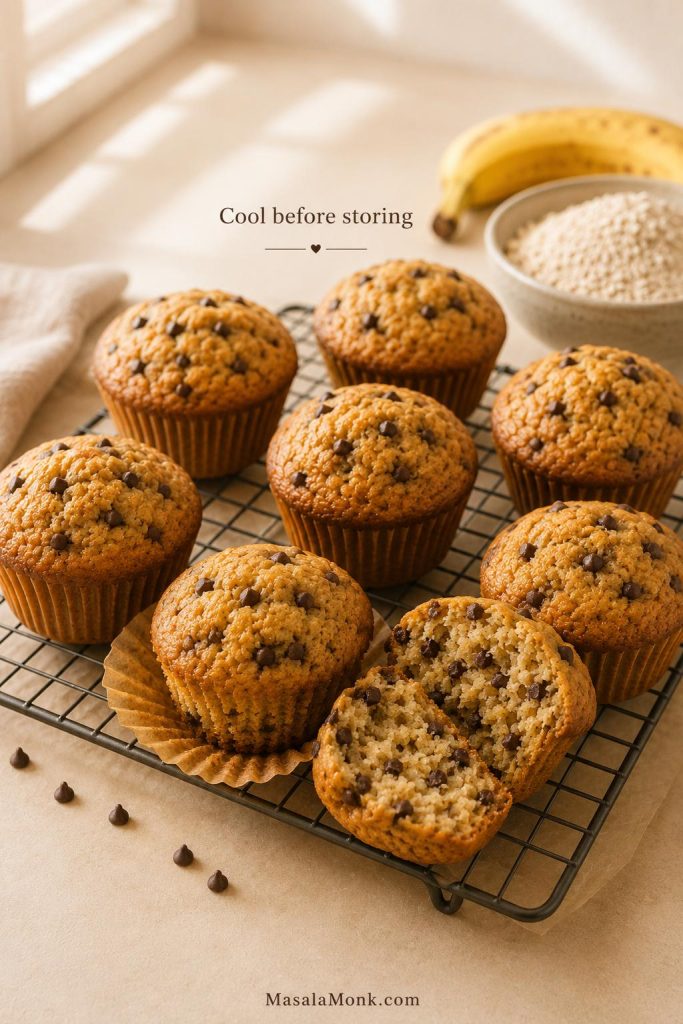
Let the muffins cool completely before storing them. Sealing them while they’re still warm traps steam and can leave the tops damp, particularly if you used the oat topping.
Wait until the muffins are cool all the way through before sealing them. The oat topping is especially quick to lose its lightly crisp texture when trapped with residual steam.
Room Temperature
Keep completely cooled muffins in a well-sealed container in a cool room for about 2–3 days. In a particularly warm or humid kitchen, refrigerate them instead.
Freezer
Freeze cooled muffins in a freezer-safe container or bag. For easy single servings, freeze them separately until firm before packing them together. Aim to use them within about 3 months for best quality.
Thawing and Warming
Let a muffin thaw at room temperature for a few hours or in the refrigerator overnight. Warm it briefly in the microwave, checking in short bursts, or use a low oven if you’d like to perk up the oat topping.
Choose the reheating method by texture: the microwave is quickest for a soft muffin, while a low oven does a better job of reviving the oat topping.
If make-ahead breakfasts are the goal, our overnight oats are another easy option to prepare ahead—without turning on the oven.
The best part of baking a dozen is knowing breakfast is already waiting for tomorrow. Keep a few on the counter, freeze the extras, and warm one when you want it.
If you make these, tell us how your batch turned out—and whether you went with rolled or quick oats, plain tops or the oat topping, blueberries, chocolate or nuts.
Too many high protein muffins sound better than they taste. They promise easy breakfast meal prep and extra protein, then come out dry, rubbery, chalky, or heavy enough to feel like a compromise. This recipe is built the other way around: soft first, moist first, useful first.
The goal is a muffin you actually want to eat with coffee, not a “healthy” muffin you tolerate because it has protein. Greek yogurt, a reasonable amount of protein powder, oat flour or whole wheat flour, and banana or applesauce all work together to keep the crumb tender.
If you like make-ahead breakfasts in this same lane, you may also like these high protein overnight oats for a no-bake option.
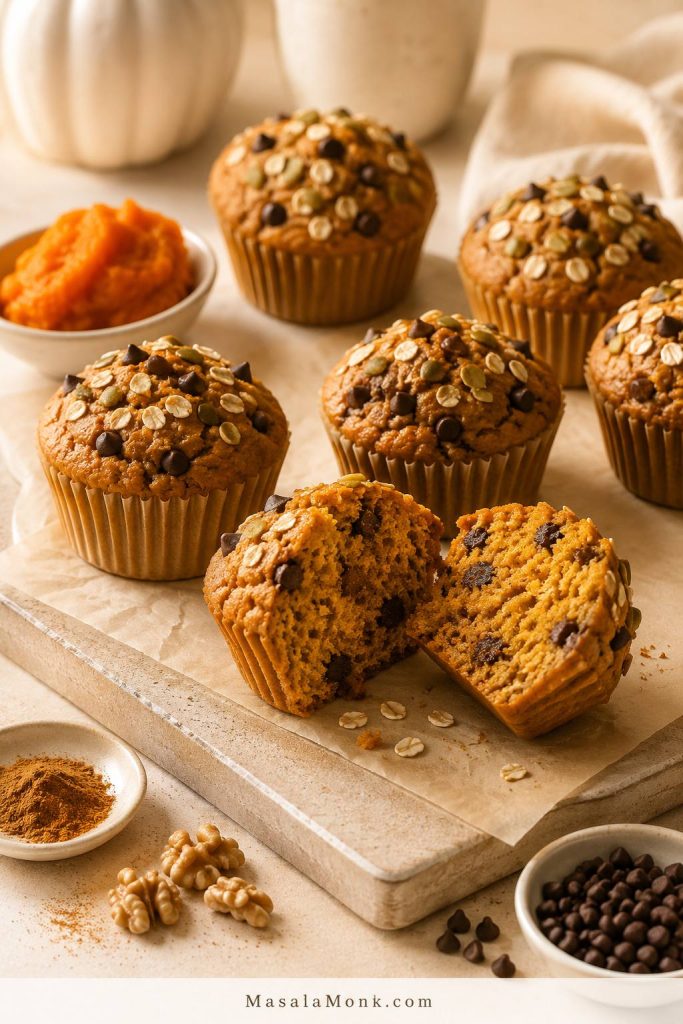
Use the base recipe once, then make it fit your mornings: banana chocolate chip when you want cozy, blueberry lemon when you want fresh, pumpkin when you want softer and spiced, or cottage cheese when you want extra moisture without relying only on protein powder.
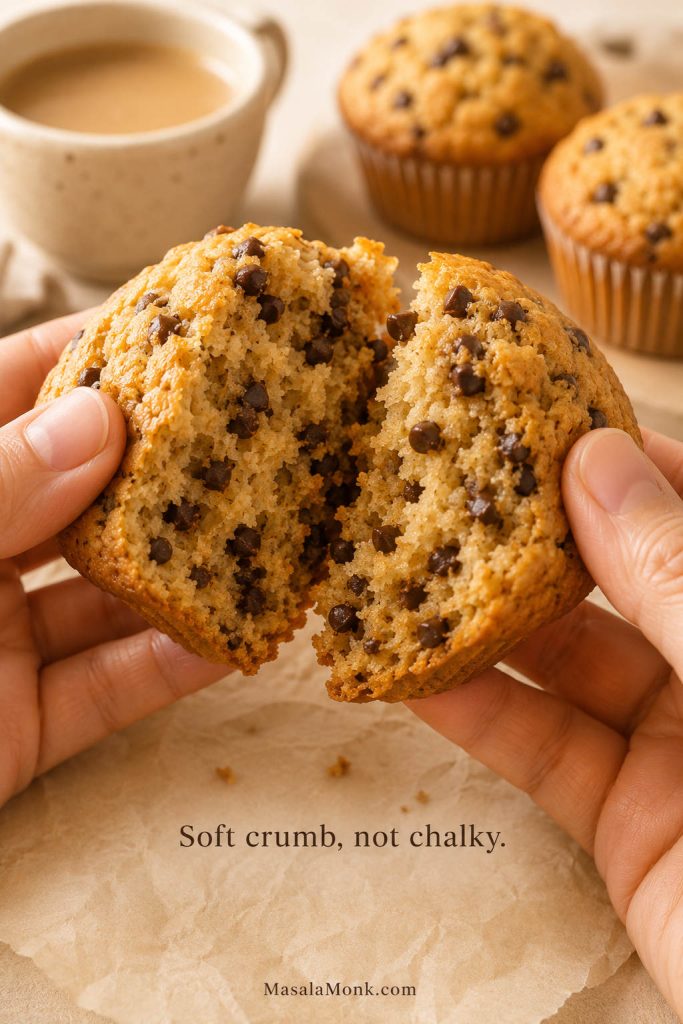
Soft Crumb, Not Chalky
The crumb tells you whether the recipe worked. Pull the muffins when they are just set, because they continue to firm up as they cool.
Already know you want to bake? Use the jump button to go straight to the recipe card. If you want to avoid dry protein muffins, read the batter and protein powder notes first.
Table of Contents
Use this guide to make soft protein muffins, choose the right protein base, fix texture problems, and store them for easy breakfasts or snacks.
Quick Answer: How Do You Make High Protein Muffins?
To make high protein muffins, combine flour or oat flour, protein powder, Greek yogurt, eggs, banana or applesauce, a little maple syrup or honey, leavening, and enough milk to make a sturdy muffin batter. After that, bake in a lined muffin tin until the tops spring back lightly and a toothpick comes out clean or with a few moist crumbs.
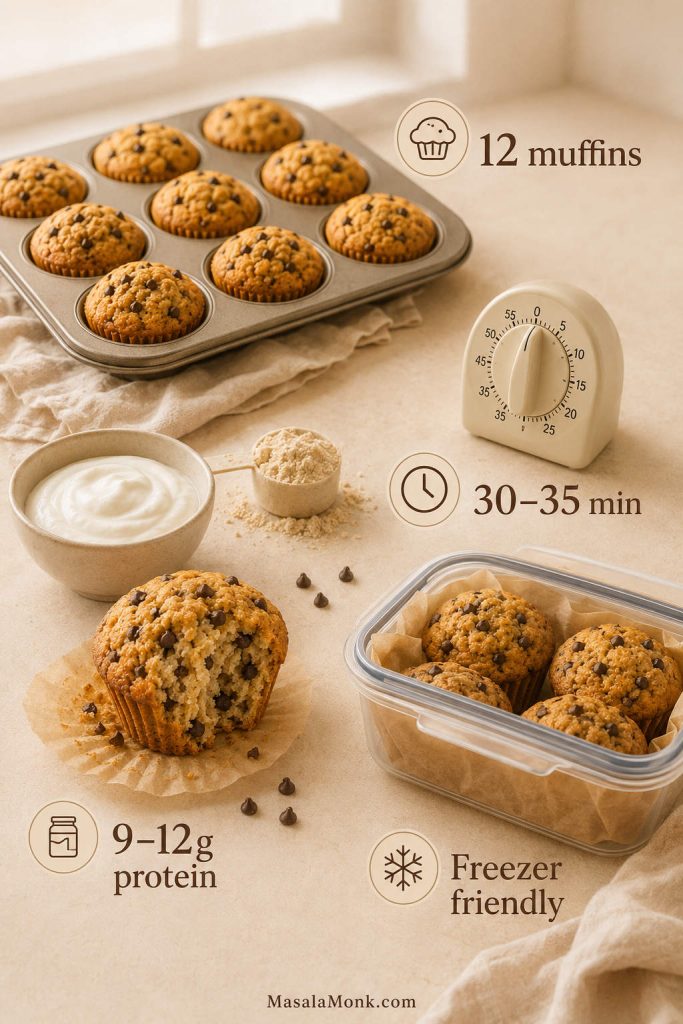
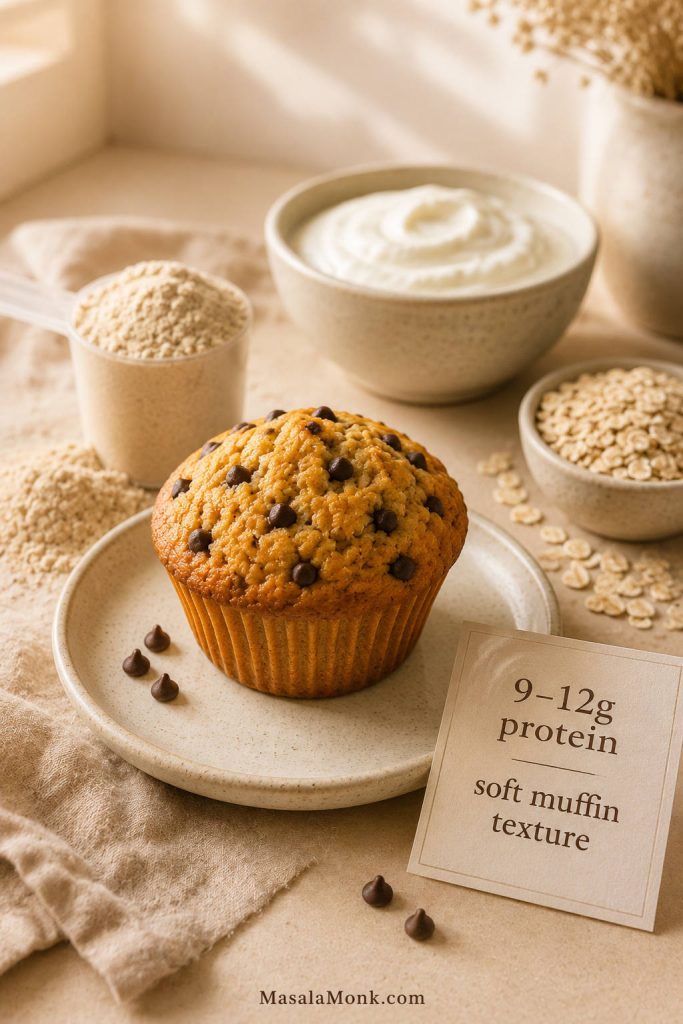
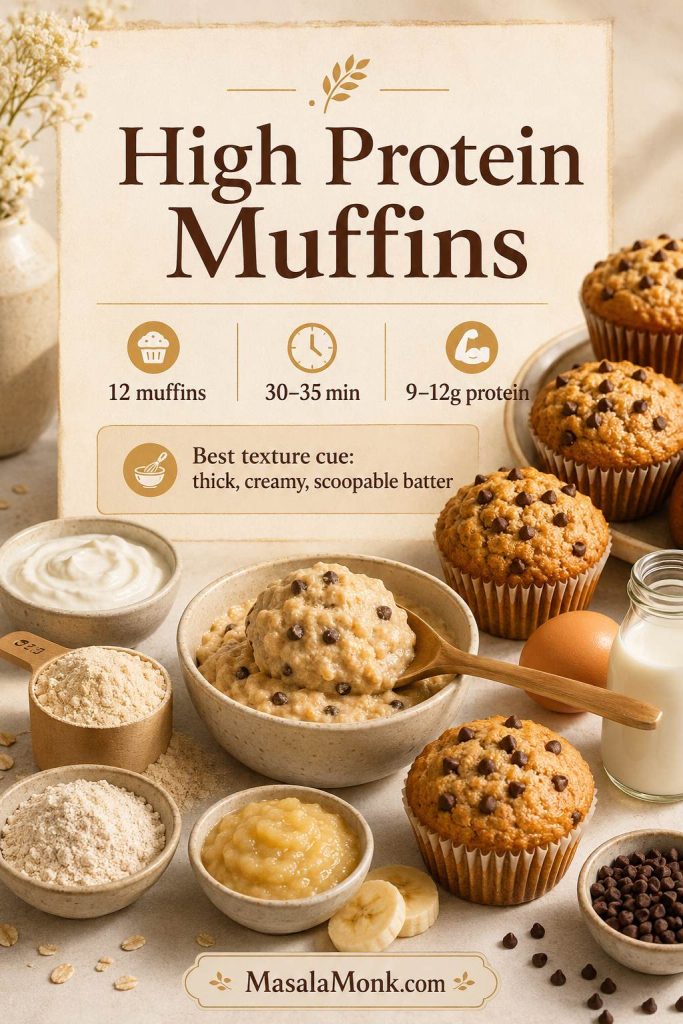
This recipe makes 12 muffins. The exact protein number depends on your protein powder, yogurt, flour, and mix-ins. Most batches land around 9–12 grams of protein per muffin, which makes them more filling without pushing the texture into dry, dense, or chalky territory.
Texture rule: the batter should be thick enough to scoop, but not dry or crumbly. When it looks stiff, loosen it gradually with milk before baking.
About 9–12g per muffin, depending on protein powder, yogurt, flour, and mix-ins
Texture
Tender, lightly hearty, and muffin-like
Best first protein base
Greek yogurt + vanilla protein powder
Best no-powder path
Greek yogurt, cottage cheese, eggs, oats, nut butter, and seeds
Oven
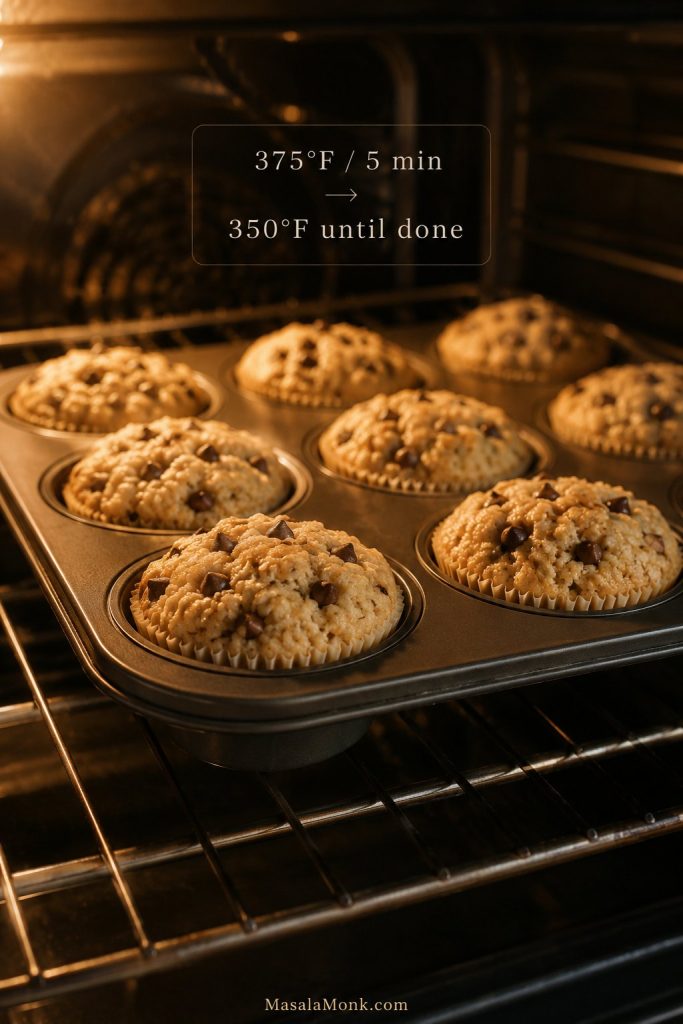
375°F / 190°C for 5 minutes, then 350°F / 175°C until done
Storage
Fridge 4–5 days, freezer up to 3 months
This 12-muffin batch is built for real meal prep: a realistic protein range, a soft crumb, and fridge-or-freezer flexibility for busy mornings.
What They Should Taste Like
These are not cupcake-style muffins, and they are not meant to taste like dry protein bars either. Instead, the crumb should be soft and lightly hearty, with enough moisture from Greek yogurt and banana or applesauce to keep each bite tender.
With banana, the muffins lean cozy and breakfast-like. Applesauce gives a more neutral base, which works better with blueberries, chocolate chips, lemon zest, or pumpkin spice. Either way, the muffin should feel satisfying without tasting like a protein powder project.
The best batch should feel like a real breakfast muffin first: warm, tender, lightly sweet, and satisfying enough that you would eat it even without counting the protein. If you add mini chocolate chips, they should give little sweet pockets in the crumb. If you choose blueberries, the muffin should feel fresher and brighter, not wet or gummy.
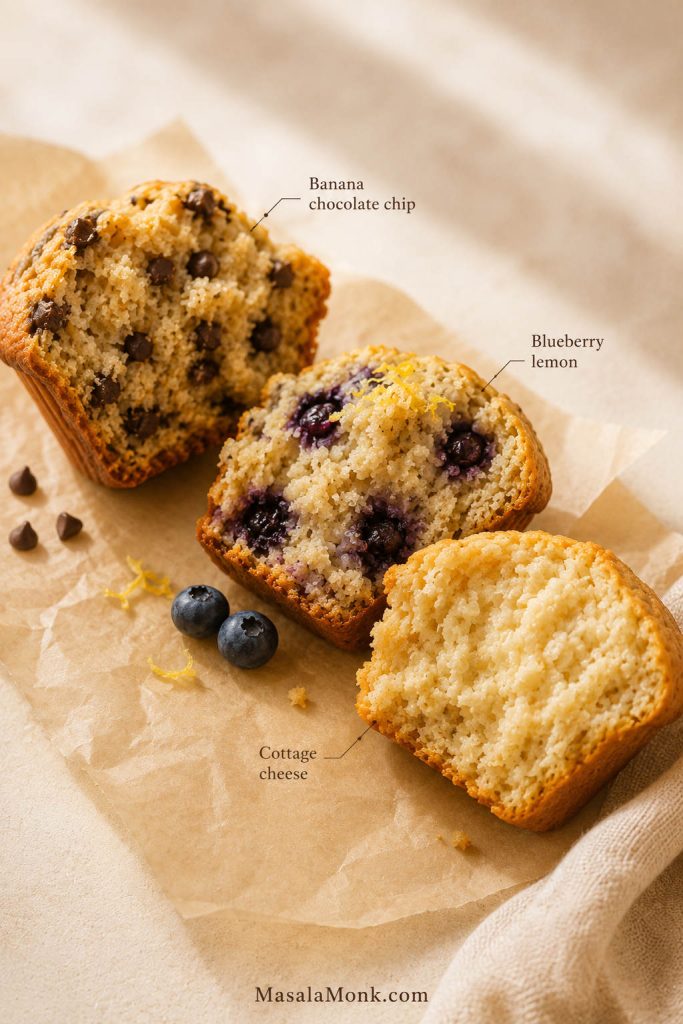
How Each Version Should Look Inside
Different mix-ins change the color and flavor of the crumb, but they should not change the goal: a tender muffin that still feels soft after cooling.
Banana chocolate chip is cozy, blueberry lemon is bright, and cottage cheese adds extra moisture. Every version should still bake up tender rather than chalky.
Choose Your Muffin Path
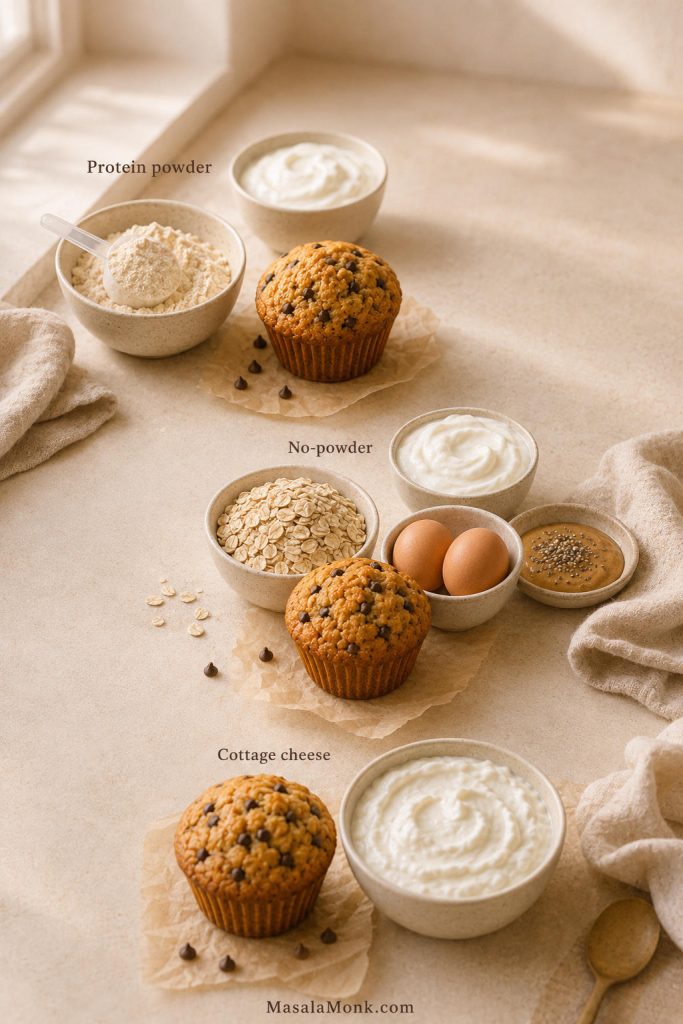
There is no single “right” way to make a higher-protein muffin. Some days you may want the extra boost from protein powder. Other times, you may want a more natural muffin built around Greek yogurt, cottage cheese, eggs, and oats. Use this table to choose the version that fits your kitchen and your taste.
Path
Best for
Main protein source
Texture note
Protein powder muffins
Higher protein with simple ingredients
Vanilla protein powder + Greek yogurt
Needs enough moisture so the crumb stays soft.
No-powder protein muffins
Readers who dislike protein powder taste
Greek yogurt, eggs, oats, hemp hearts, nut butter
Softer and more natural, but usually lower in protein per muffin.
Cottage cheese protein muffins
Moist, filling breakfast muffins
Blended cottage cheese + eggs
Very moist; needs proper baking and cooling so the centers set.
Choose by texture and taste, not just protein. Protein powder gives the biggest boost; no-powder and cottage cheese versions lean more real-food and naturally moist.
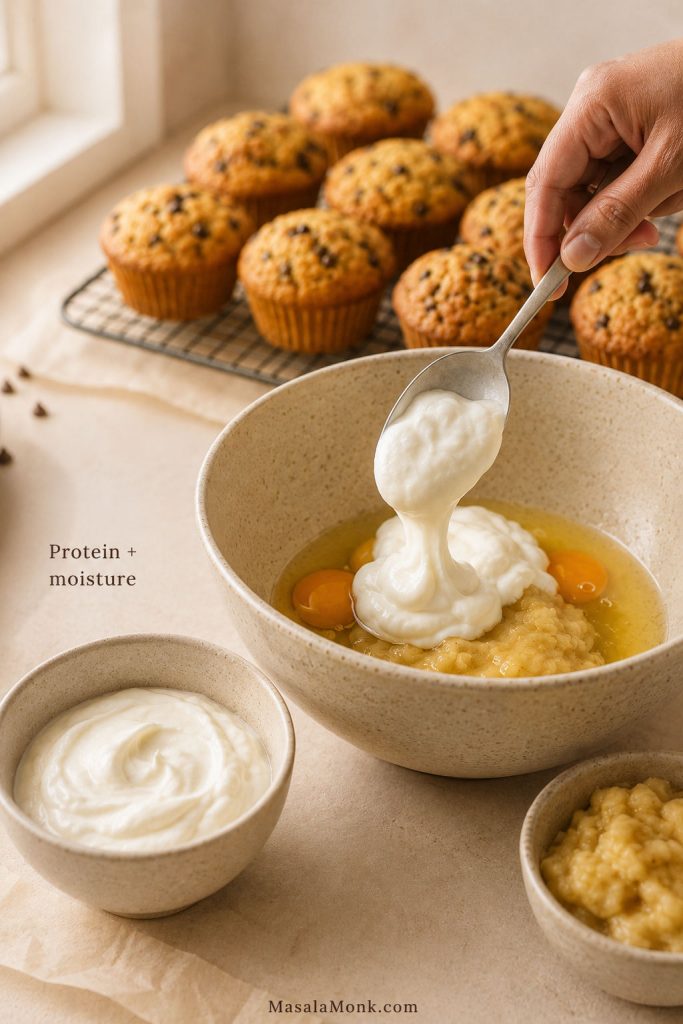
Greek yogurt is one of the most useful ingredients here because it adds protein and moisture at the same time. It also helps balance the drying effect of protein powder, especially if you are using whey or a very absorbent plant-based powder.
Greek yogurt also gives the recipe a real-food protein base instead of making the entire muffin depend on powder. It is naturally protein-rich, and Harvard Health includes Greek yogurt among useful protein sources, which is why it works so well in breakfast recipes that need both moisture and staying power.
Greek yogurt helps twice: it adds protein and protects the crumb from drying out, which makes it one of the most useful ingredients in this batter.
Protein powder adds structure, but not too much
The fastest way to ruin protein muffins is to treat protein powder like regular flour. It absorbs liquid, changes the structure of the batter, and can make muffins firm when used too heavily. So this recipe uses enough protein powder to support the high-protein goal without letting it take over the texture.
A hotter oven start helps muffins rise
Start the muffins at a slightly higher oven temperature, then finish them lower. That short hot start encourages lift, while the gentler finish helps the center bake through without drying out the edges.
Banana or applesauce protects the texture
Mashed banana gives the muffins a naturally sweeter breakfast flavor. If you want a more neutral base, use unsweetened applesauce instead. Both add moisture, which is especially helpful in a protein-rich batter.
A little fat makes them taste like real muffins
Low-fat protein muffins often taste dry because too many softening ingredients are removed at once. That is why a modest amount of oil or melted butter helps the crumb stay tender, especially after refrigeration or freezing.
How Much Protein Should a Protein Muffin Have?
A realistic protein muffin can land anywhere from about 7g to 14g protein per muffin depending on the formula. Protein-powder versions can go higher, but the texture often becomes harder to protect. For this base recipe, the goal is about 9–12g protein per muffin with a soft, repeatable texture.
For exact numbers, use the labels on your own protein powder, yogurt, flour, and milk. Treat the nutrition estimate as a helpful range, not a fixed number. You can also look up individual ingredients in USDA FoodData Central if you want a more precise calculation.
That matters because a muffin with 20g protein is not automatically better if it tastes tough, chalky, or too lean. For most home bakers, the better target is a muffin that gives more protein than a regular muffin while still being enjoyable enough to make again.
Useful rule: a slightly lower-protein muffin that tastes good is more valuable than an ultra-high-protein muffin nobody wants to eat.
A realistic protein target protects texture. In practice, a softer 9–12g muffin is more useful than a dry batch chasing the biggest number.
Ingredients for High Protein Muffins
Best first version to make
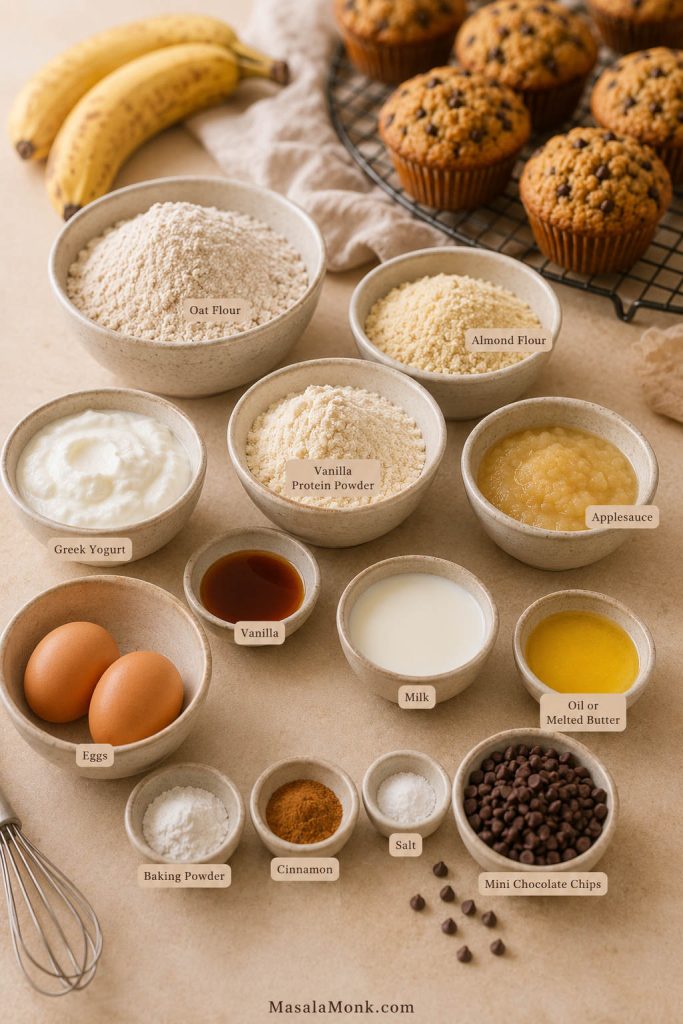
Best first batch: start with oat flour, almond flour, vanilla protein powder, plain Greek yogurt, mashed banana, neutral oil, and mini chocolate chips. That version gives the easiest balance of flavor, moisture, and texture. Once you like the base, try applesauce, blueberries, pumpkin, or cottage cheese.
Balance matters more than any one “healthy” add-in: flour gives body, Greek yogurt adds moisture, eggs set the crumb, and protein powder brings the boost.
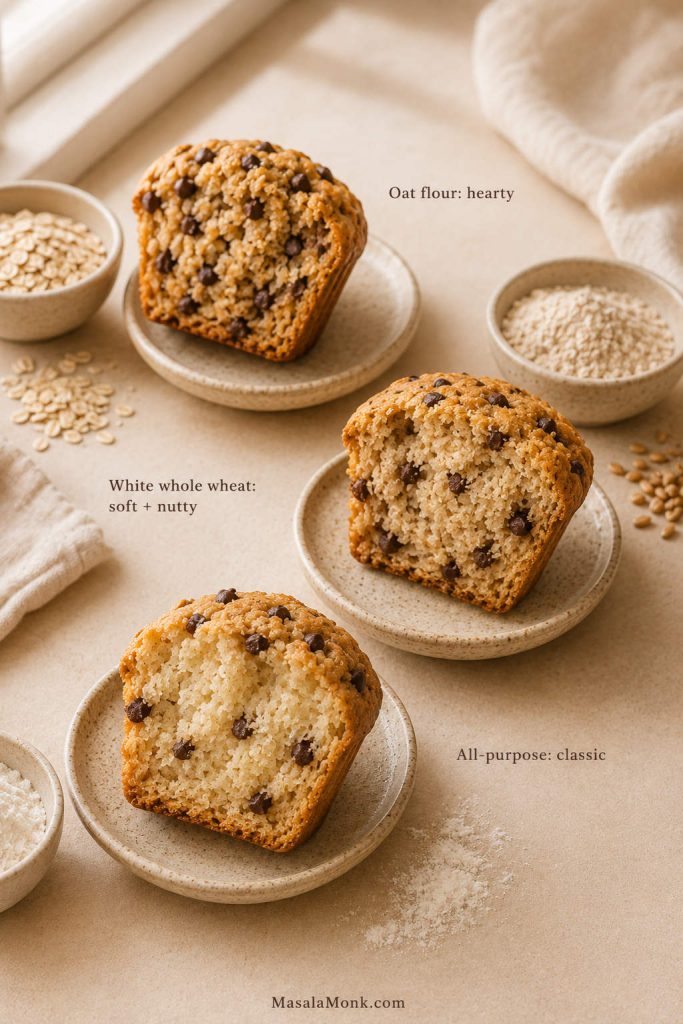
Oat flour, white whole wheat flour, or all-purpose flour
Oat flour gives these muffins a wholesome breakfast feel. White whole wheat flour gives a slightly nutty but still soft muffin. All-purpose flour gives the most classic texture. For the base recipe, use 100g oat flour or 120g all-purpose or white whole wheat flour.
Flour choice changes the crumb: oat flour is heartier, white whole wheat adds soft nuttiness, and all-purpose flour gives the most classic muffin texture.
If oats are your favorite breakfast base, this guide to high protein oatmeal has more ideas for using oats with yogurt, protein powder, cottage cheese, seeds, and nut butter.
Almond flour or extra oat flour
A small amount of almond flour adds tenderness and helps keep the muffin from tasting too lean. If you do not want to use almond flour, use extra oat flour instead. Avoid replacing all the flour with almond flour unless you are using a recipe designed for that structure.
Protein powder
Vanilla protein powder is the easiest choice because it adds sweetness and flavor. Plain protein powder can work, but the muffins may need more vanilla, cinnamon, sweetener, or mix-ins. For example, chocolate protein powder works best in chocolate chip, double chocolate, or banana chocolate versions.
Greek yogurt
Use plain Greek yogurt. Full-fat or 2% yogurt gives the softest result, but nonfat Greek yogurt also works. If the batter looks too stiff after mixing, add a small splash of milk until it loosens.
Banana or applesauce
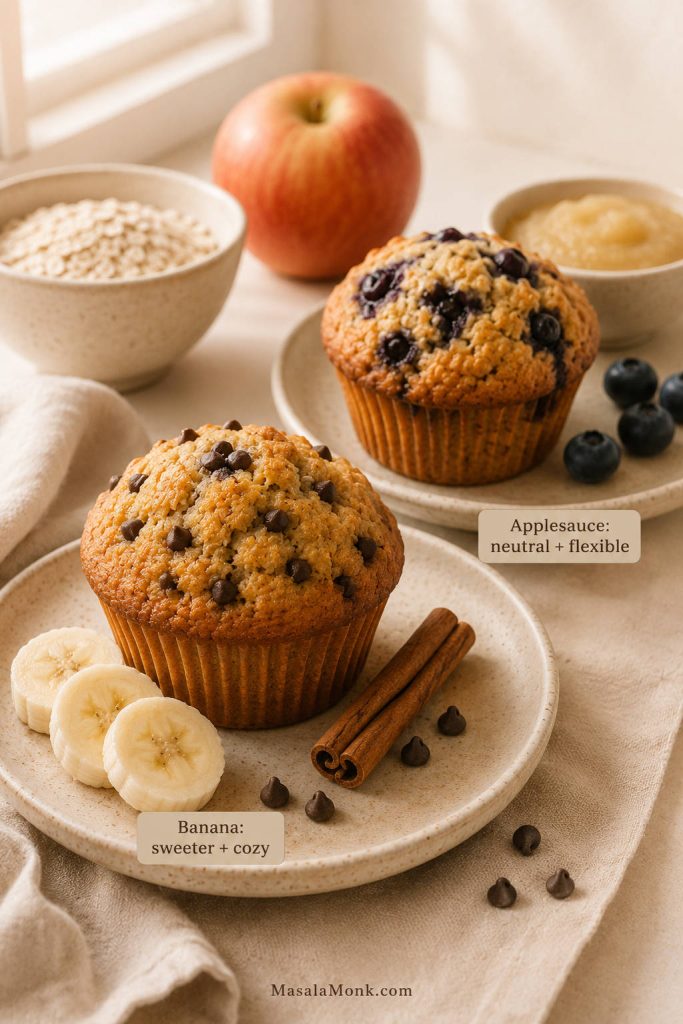
Use mashed ripe banana for a banana-forward muffin. If you want a more neutral base, use unsweetened applesauce instead. Banana gives more flavor and sweetness; applesauce keeps the muffin more flexible for blueberry, chocolate chip, or pumpkin variations.
Banana makes the batch sweeter and more banana-bread-like. Applesauce keeps the base more neutral for blueberry, chocolate chip, or pumpkin variations.
Eggs, milk, and oil
Eggs give structure, milk adjusts the batter, and a little oil or melted butter keeps the crumb tender. Think of the milk as an adjustment, not a fixed amount. Start with less, then add only what the batter needs.
Mix-ins
Mini chocolate chips, blueberries, chopped walnuts, lemon zest, cinnamon, pumpkin spice, and diced strawberries can all work. Keep mix-ins to about ½–¾ cup so the muffins bake evenly.
Flavor and sweetness
Protein powder, oats, and Greek yogurt can mute sweetness once baked. If your protein powder is plain or lightly sweetened, use the full amount of maple syrup or honey and do not skip the vanilla, cinnamon, or salt. For a more treat-like muffin, mini chocolate chips usually help more than extra sweetener because they give little pockets of flavor in every bite.
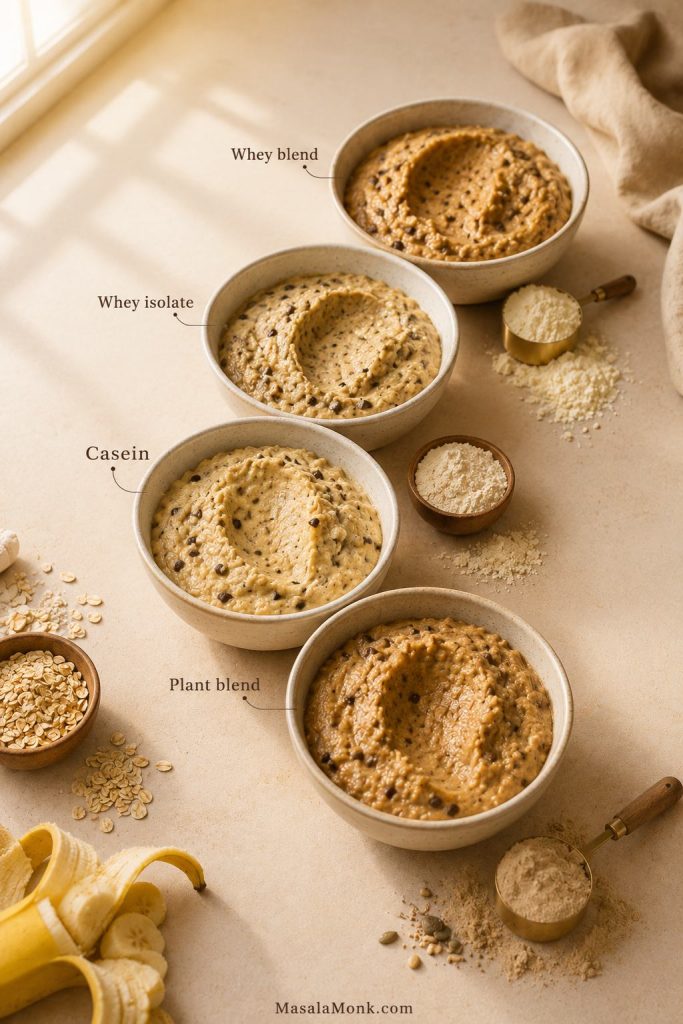
Best Protein Powder for Muffins
Protein powder can make muffins better, but it can also make them dry if the batter is not balanced. Different powders absorb liquid differently, so use the batter texture as your final guide.
This is the part that decides whether your muffins taste like breakfast or like a protein bar in muffin form. The same recipe can turn out soft with one powder and dry with another, so the batter matters more than brand loyalty.
The same recipe can bake differently with whey, casein, or plant protein. Start with the formula, then adjust the batter before it goes into the pan.
Protein powder type
What to expect in muffins
Best adjustment
Whey isolate
Can bake firm or dry if overused.
Add extra yogurt or milk and check early for doneness.
Whey blend
Usually easier than pure isolate and works well in muffin batter.
Start with the recipe amount of milk, then adjust if needed.
Casein
Absorbs a lot of liquid and can make the batter sturdy.
Loosen gradually with milk until the batter is easy to scoop.
Pea protein
Good structure, but can become dense or earthy.
Use enough flavor, moisture, and gentle mixing.
Plant protein blend
Often reliable, but brands vary widely in absorption.
Judge by batter texture, not just the printed amount of milk.
Collagen
Not ideal as the only protein powder replacement.
Use as a partial boost, not a full swap for flour or protein powder.
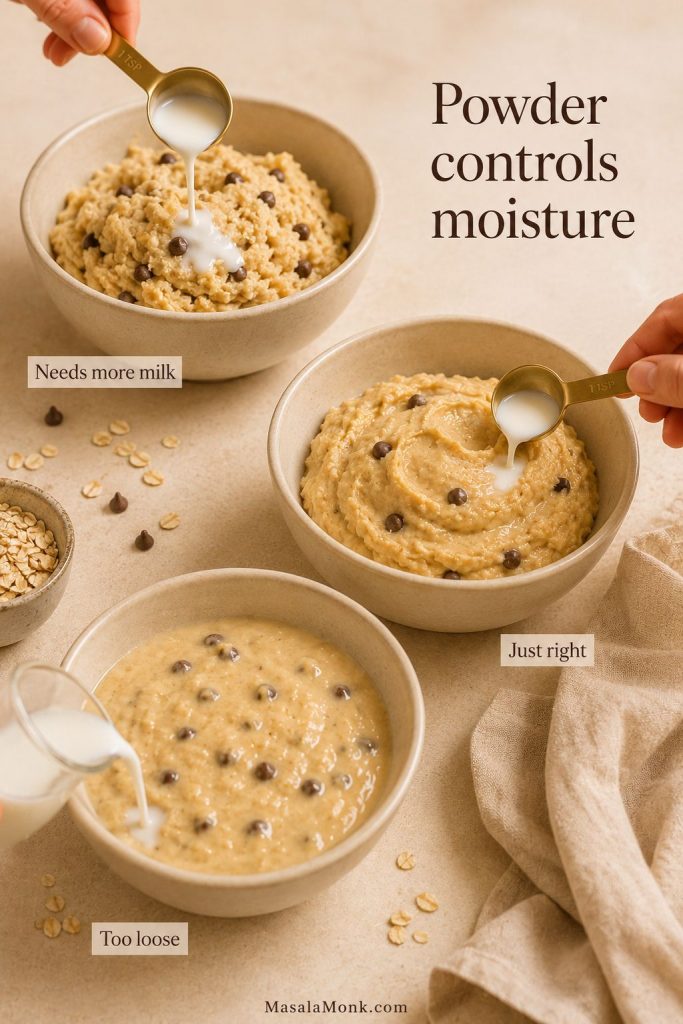
How protein powder changes batter moisture
A stiff batter does not always mean the recipe is wrong. Often, the protein powder simply needs a slower, splash-by-splash milk adjustment.
Protein powder rule: do not keep adding protein powder just to raise the number. Once protein powder becomes too large a share of the dry ingredients, muffins turn tough, dry, or heavy. A better muffin with 9–12g protein is more useful than a 20g muffin nobody wants to eat.
As a practical starting point, avoid replacing more than about one-third of the dry ingredient base with protein powder unless the recipe has been specifically built for that much powder. The more powder you add, the more moisture, fat, flavor, and careful baking you usually need.
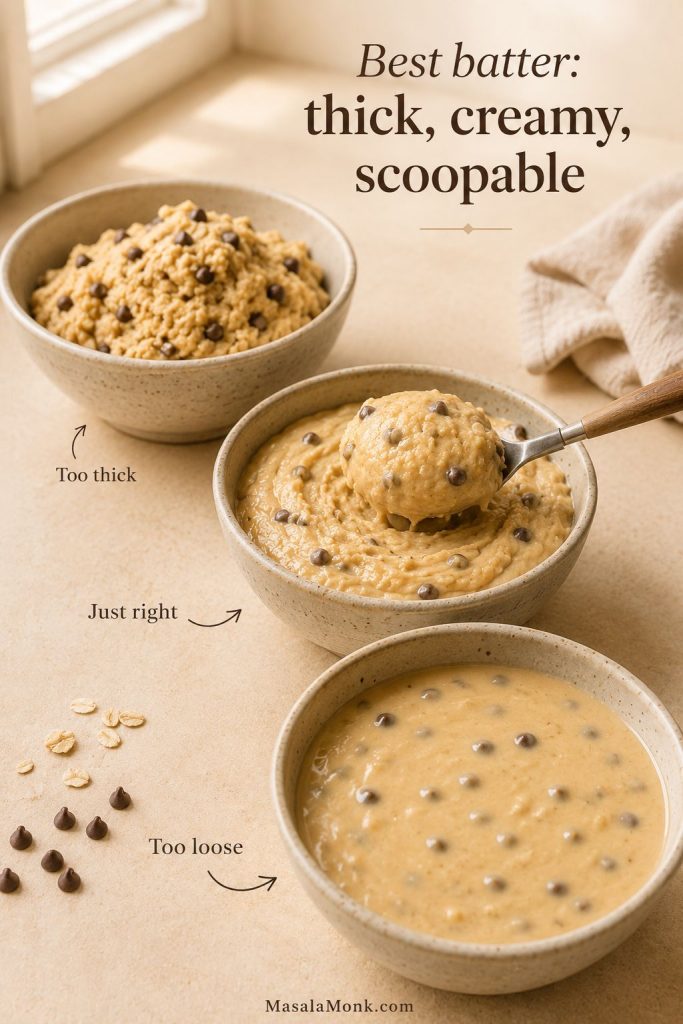
Check the batter texture before baking
Before you bake: if the batter looks like cookie dough, it needs more milk. If it pours like pancake batter, it needs oat flour and a short rest. The sweet spot is thick, creamy, and scoopable.
This is the texture check that prevents most dry protein muffins. The batter should hold a scoop without crumbling or pouring.
If your batter already looks too stiff or too loose, fix it here before filling the pan. For finished muffins that came out dry, dense, or rubbery, jump to troubleshooting.
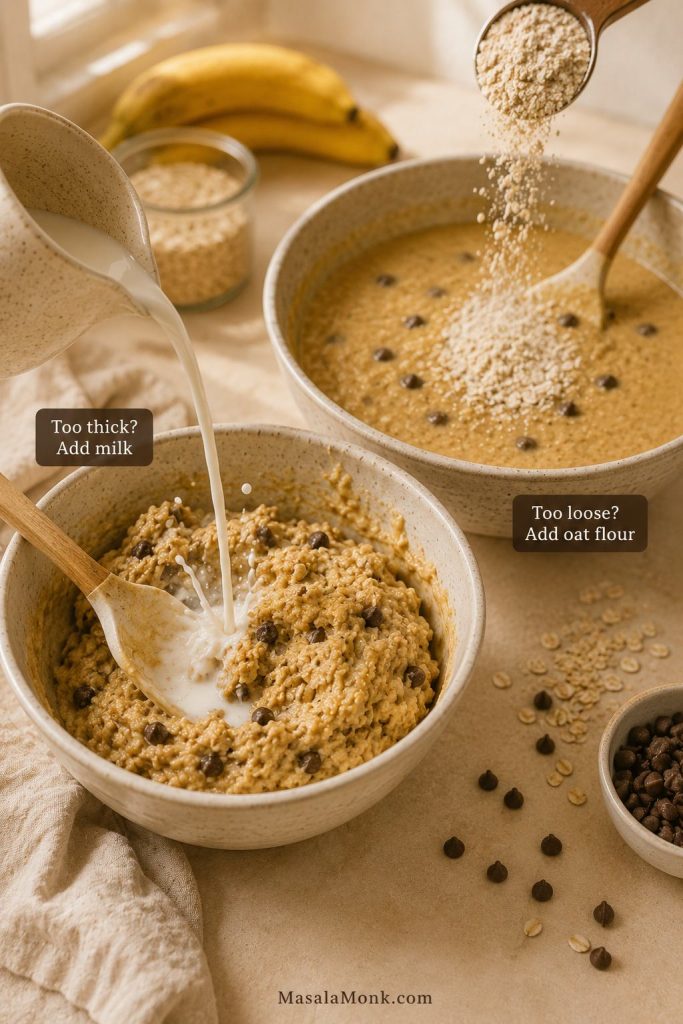
How to fix thick or loose batter
Most batter problems are fixable before baking. Use milk to loosen a stiff mix, or oat flour to tighten a loose one, then let the batter rest briefly.
This is the best moment to fix the batter. If it does not look scoopable, check the batter texture guide before filling the muffin tin.
Step-by-Step Method
1. Mix the dry ingredients
In a large bowl, whisk together the flour or oat flour, almond flour or extra oat flour, protein powder, baking powder, baking soda, salt, and cinnamon. Whisking first helps distribute the protein powder and leavening evenly.
2. Whisk the wet ingredients
In a separate bowl, whisk the Greek yogurt, eggs, mashed banana or applesauce, maple syrup or honey, oil or melted butter, milk, and vanilla. The mixture should look smooth and creamy.
3. Combine gently
Add the wet ingredients to the dry ingredients and fold with a spatula. Stop when no dry streaks remain. Do not worry if the mixture looks a little sturdier than regular muffin batter; that is normal here.
This is the point where the recipe either stays tender or starts getting tough. A few tiny lumps are fine; a perfectly smooth batter is not the goal.
Stop folding as soon as the batter comes together. A few streaks are better than overmixing, which can make protein muffins dense or rubbery.
4. Check and fix the batter texture
The batter should be creamy, scoopable, and easy to portion. It should mound slightly on a spoon but still spread slowly when scooped into the muffin cup. If it looks dry or crumbly, add a small splash of milk. If it pours like pancake batter, add oat flour 1 tablespoon at a time and let it rest for 5 minutes.
5. Let the batter rest if needed
If using oat flour, casein, pea protein, or a thick plant protein blend, let the batter rest for 5 minutes before scooping. Some powders hydrate slowly, so a short rest can make the final texture more even. If it becomes too stiff after resting, loosen it with 1–2 tablespoons of milk.
6. Fold in mix-ins
Fold in chocolate chips, blueberries, nuts, or other mix-ins gently. Overmixing at this point can make the muffins dense.
7. Fill the muffin tin
Line a 12-cup muffin tin and lightly spray the liners. Fill each cup about ¾ full for regular muffins, or slightly fuller for taller tops.
Fill each muffin cup about three-quarters full. That gives the batter room to rise while still creating a generous, bakery-style top.
8. Bake and cool
Bake at the higher starting temperature first, then reduce the oven temperature without opening the door. After that, let the muffins cool in the pan for 10 minutes before moving them to a rack. A little patience here pays off because the centers continue to settle as they cool.
Bake Time, Temperature, and Doneness
For the best balance of lift and moisture, start the muffins at 375°F / 190°C for 5 minutes. Then reduce the oven to 350°F / 175°C and bake for another 12–17 minutes, depending on your oven, muffin tin, protein powder, and mix-ins.
A short hot start helps protein muffins lift before the lower temperature finishes the centers gently. This gives better rise without drying the edges.
How to check doneness
The muffins are done when the tops spring back lightly and a toothpick inserted in the center comes out clean or with a few moist crumbs. Do not wait until the tops feel hard. Instead, pull them when they are just set because they continue to firm up as they cool.
Do not wait for a perfectly clean toothpick if you want a softer crumb. A few moist crumbs usually mean the muffins are done.
A good batch should rise slightly, feel soft when pressed, and smell warm and lightly sweet. The tops should not feel hard when they leave the oven. If they do, the batch likely baked a few minutes too long.
Cool before storing
Do not skip cooling: these muffins can seem slightly soft in the center when hot. Give them 10 minutes in the pan and more time on a rack before judging the final texture.
Cooling is part of the recipe, not an afterthought. Letting the muffins rest helps the centers settle and keeps extra steam out of the storage container.
After baking, let the muffins cool before judging the final crumb. Then use the storage and freezing tips if you are making them for meal prep.
Easy Muffin Variations
Use the base recipe as a flexible formula. The mixture should be sturdy enough to scoop, but still soft enough to settle into the muffin cups. Adjust with milk if your protein powder makes it too stiff.
Choose the version based on what you want the muffin to feel like: banana for cozy breakfast, blueberry for fresh and bright, chocolate chip for snack prep, oatmeal for a heartier morning muffin, and pumpkin for a softer fall batch.
Best first variation: banana chocolate chip is the easiest crowd-pleaser. Blueberry lemon is fresher, pumpkin is softer, and cottage cheese is best when you want extra moisture without relying only on protein powder.
Choose this when you want the coziest version. Mashed ripe banana makes the muffins taste closer to banana bread, especially with cinnamon and mini chocolate chips.
Banana chocolate chip is the coziest variation: ripe banana adds sweetness, while mini chips spread little pockets of flavor through the crumb.
Blueberry protein muffins
Choose this when you want something fresher and brighter. Applesauce keeps the base neutral, while blueberries and lemon zest make the muffins feel more like a morning bakery muffin.
Blueberry lemon gives the same protein muffin base a fresher, brighter flavor. Keep the batter thick enough so the berries stay suspended instead of sinking.
Chocolate chip protein muffins
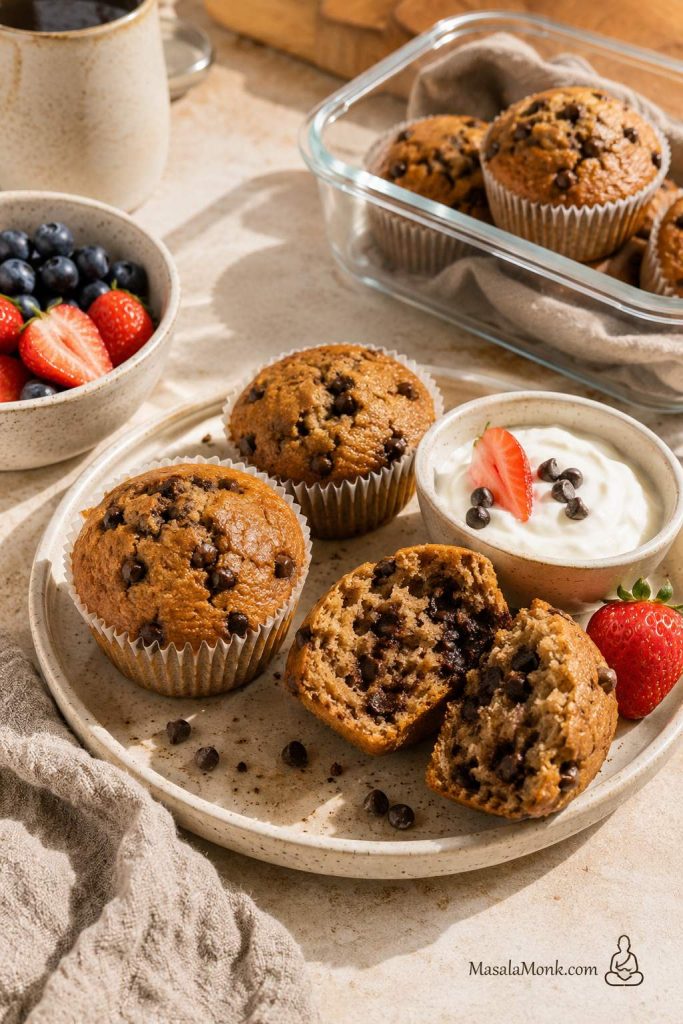
Choose this when you want the batch to feel more like a snack than a strict breakfast. Mini chips spread through the crumb better, so you get chocolate in more bites without overloading the batter.
For snack prep, mini chocolate chips make the muffins feel more satisfying without overloading the batter. Pair one with yogurt and fruit for a fuller bite.
Oatmeal protein muffins
For a heartier breakfast muffin, use oat flour and a small amount of rolled oats. Avoid steel-cut oats here because they will not soften properly in a standard muffin bake.
Pumpkin protein muffins
To make a fall-style batch, replace the banana or applesauce with pumpkin puree, add pumpkin pie spice, and use chocolate chips or walnuts. Because pumpkin adds a lot of moisture, these muffins may need the longer end of the bake window.
Pumpkin adds moisture, color, and warm spice, but it also softens the batter. Use the longer end of the bake window if the centers need more time.
Cottage cheese protein muffins
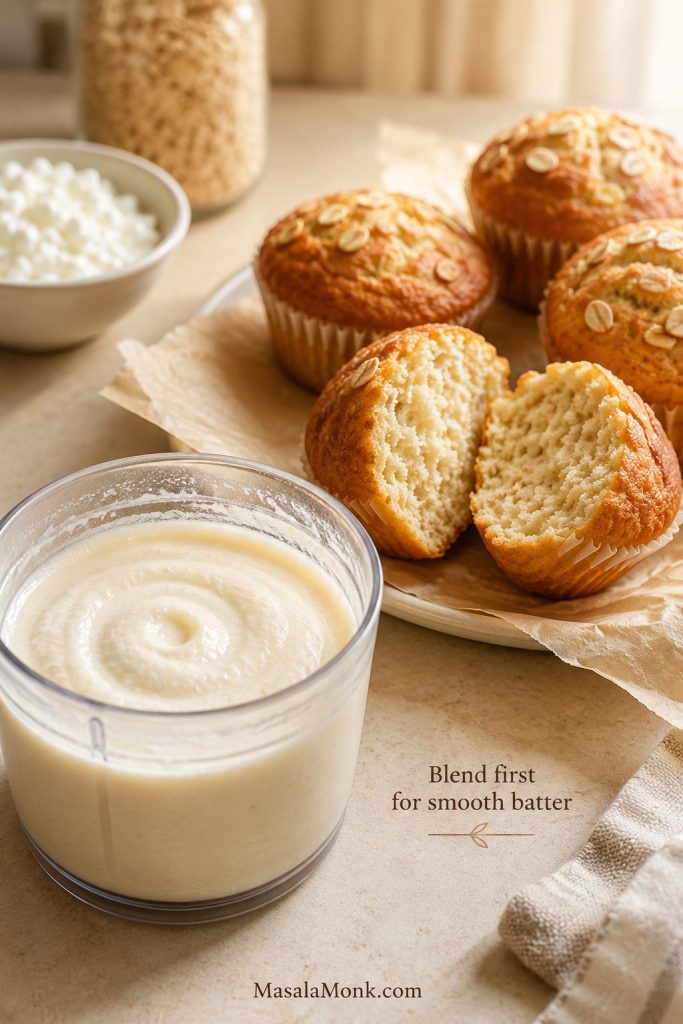
Choose this when you want extra moisture and a softer center. This is the best cottage cheese protein muffin direction if you want more real-food protein without making the batch depend only on powder. Blend the cottage cheese into the wet ingredients first so the batter bakes smooth instead of curdy.
Cottage cheese works best when blended into the wet ingredients first. That simple step adds moisture without leaving curdy pockets in the crumb.
How to Make High Protein Muffins Without Protein Powder
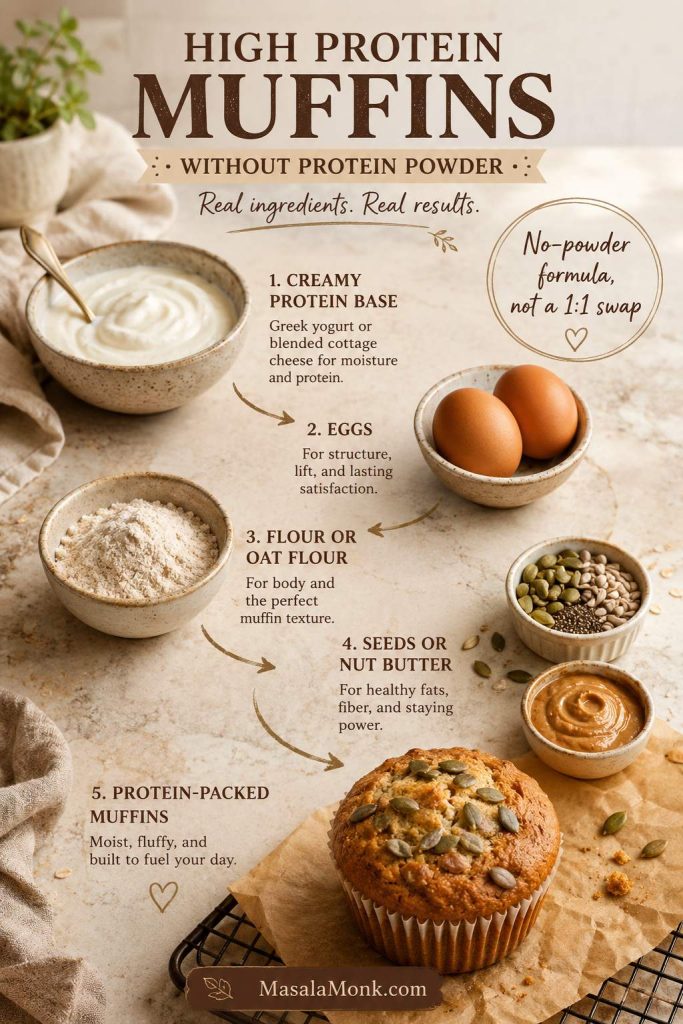
You can make protein-rich muffins without protein powder, but the recipe needs a different strategy. For a no-powder batch, think in parts: a creamy protein base, eggs for structure, flour for body, and a little fat, seeds, or nut butter for staying power.
Important: this is not a direct one-for-one swap. If you simply remove the protein powder from the main recipe, the batter balance changes. Use the no-powder formula below instead.
If you are using protein powder after all, return to the main recipe card. If you want to avoid powder completely, follow the no-powder formula below rather than removing the powder from the main batter.
Best no-powder formula
For muffins without protein powder, start with a structure that balances moisture, lift, body, and staying power:
Creamy protein base: ¾–1 cup Greek yogurt or blended cottage cheese
Structure: 2 eggs
Body: 1 cup oat flour + 1 cup all-purpose or white whole wheat flour
Staying power: ¼–½ cup hemp hearts or nut butter
Moisture and flavor: banana or applesauce
Lift: 2 teaspoons baking powder + ½ teaspoon baking soda
Balance: ½ teaspoon salt
A no-powder protein muffin needs its own structure. Build around yogurt or cottage cheese, eggs, flour, and seeds or nut butter instead of simply removing protein powder.
This will usually give less protein than a protein-powder muffin. The flavor is often more natural, though, and the texture can be softer.
The same idea works in other breakfast batters too. These oat pancakes use oats, cottage cheese, and high-protein options in a way that feels very similar: simple ingredients, better texture, and no need to rely only on protein powder.
Best real-food protein options
Ingredient
How it helps
Best use
Cottage cheese
Adds protein and moisture.
Blend with wet ingredients for a smooth muffin.
Greek yogurt
Adds protein and keeps the crumb soft.
Use in banana, blueberry, and chocolate chip muffins.
Eggs
Add structure and protein.
Useful in almost every muffin formula.
Oats or oat flour
Add breakfast texture and slow-digesting carbs.
Best for oatmeal and banana protein muffins.
Nut butter
Adds fat, flavor, and some protein.
Best in banana, chocolate, and peanut butter muffins.
Hemp, flax, or chia
Adds protein, fiber, and texture.
Use in small amounts so the muffins do not turn heavy.
For the best no-powder result, use cottage cheese or Greek yogurt as part of the wet base rather than treating them like simple add-ins. They help the batter stay moist while adding protein in a more natural way.
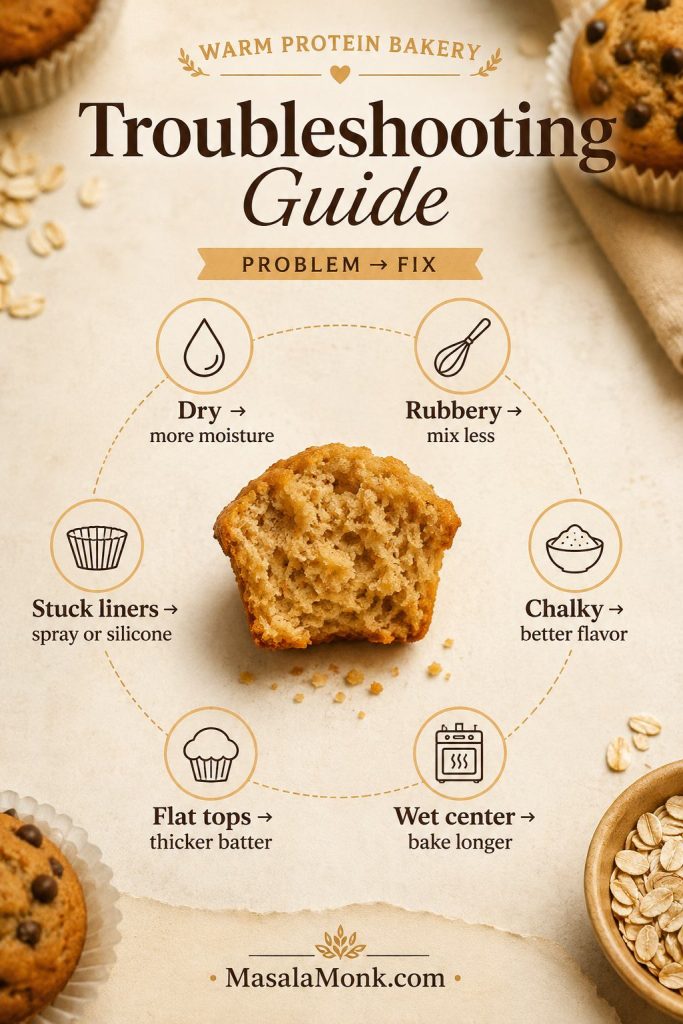
Troubleshooting: Why Are My Protein Muffins Dry, Dense, or Rubbery?
Most protein muffin problems are not disasters. They are signals. Dry muffins, sticky centers, flat tops, and chalky flavor usually mean the batter needed a little more moisture, less mixing, or a shorter bake.
If your first batch is not perfect, do not treat it like a failure. Protein muffin batter is more sensitive than regular muffin batter because protein powder, oats, yogurt, and cottage cheese all hold moisture differently. Most problems can be fixed by changing the liquid, mixing less, or pulling the muffins from the oven a little earlier.
The batter usually tells you what it needs. A stiff batter needs a little milk. A loose batter needs oat flour and a short rest. Finally, flat flavor usually needs more vanilla, cinnamon, salt, fruit, or chocolate next time.
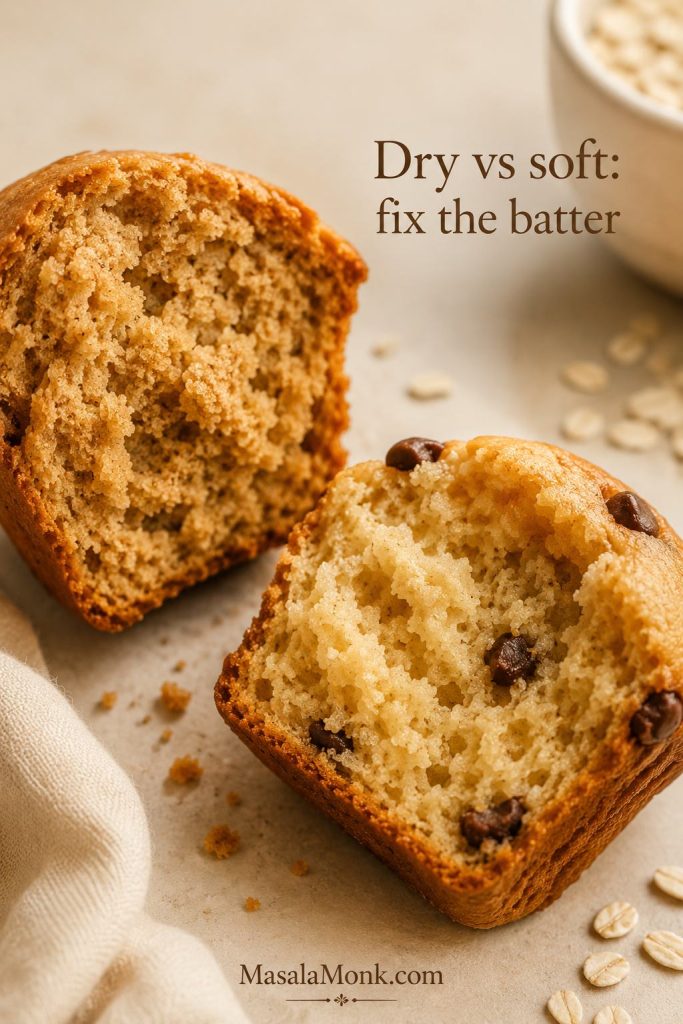
Dry vs moist: read the crumb
Dry protein muffins usually point back to the batter. More moisture, less overbaking, and a better powder-to-flour balance can change the result.
Most protein muffin problems have a simple cause. Once you know whether it is moisture, mixing, bake time, or liners, the next batch is easier to fix.
Use the tables below like a quick diagnosis: find what happened, then adjust the next batch before changing the whole recipe.
Texture problems
Problem
Likely reason
Fix
Dry muffins
Too much protein powder, not enough moisture, or overbaking.
Add more yogurt or milk next time and check the muffins earlier.
Rubbery texture
The batter was overmixed after the wet and dry ingredients were combined.
Fold gently and stop as soon as the batter comes together.
Chalky taste
The protein powder flavor is too strong or too much powder was used.
Use a better-tasting powder, add cinnamon or vanilla, or reduce the powder slightly.
Wet center
Too much fruit, yogurt, or cottage cheese; muffins may also need more cooling.
Bake 2–4 minutes longer and let the muffins cool fully before storing.
Baking and pan problems
Problem
Likely reason
Fix
Flat tops
The oven was not hot enough at the start or the batter was too thin.
Use the hot-start method and keep the batter thick enough to hold shape.
Muffins stick to liners
Low-fat, high-protein batters often cling to paper liners.
Spray the liners lightly or use silicone muffin cups.
Blueberries sink
The berries were too wet, too large, or folded into thin batter.
Toss berries with a little flour and keep the batter thick.
Batter and flavor fixes
Problem
Likely reason
Fix
Batter too thick
The protein powder absorbed more liquid than expected.
Add milk gradually until the batter softens.
Batter too thin
Too much yogurt, fruit, or milk was added.
Add oat flour 1 tablespoon at a time and let the batter rest for 5 minutes.
Muffins taste “healthy” in a bad way
Not enough flavor against the protein powder.
Add cinnamon, vanilla, banana, chocolate chips, lemon zest, or a pinch more salt.
How to Store and Freeze Protein Muffins
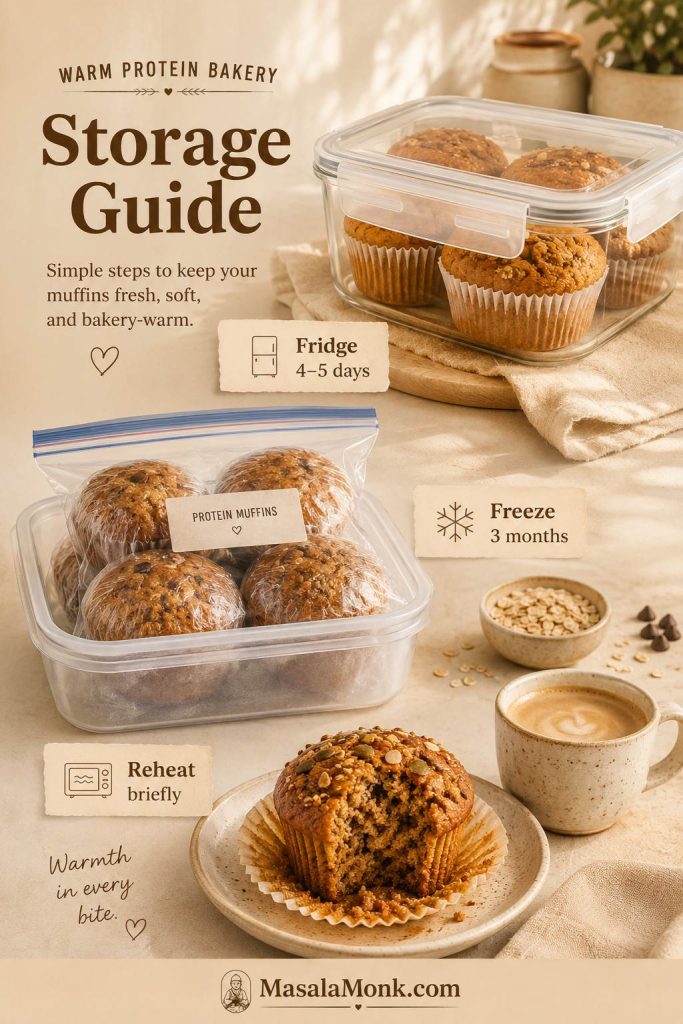
These muffins are at their best once fully cooled, which makes them useful for breakfast prep. Bake a batch, cool them completely, then keep a few in the fridge and freeze the rest for mornings when you want something filling without cooking.
For another freezer-friendly breakfast that works well on busy mornings, these freezer-friendly breakfast burritos are a savory option to keep alongside muffins.
Store protein muffins only after they cool completely. Then refrigerate the week’s batch and freeze the rest so the texture stays fresher for longer.
Meal prep tip: save the base recipe once, then change only the fruit, mix-ins, and protein powder adjustment. The batter texture should stay the same even when the flavor changes.
Storage times
Storage method
How long
Best tip
Room temperature
Same day, or overnight if your kitchen is cool
For longer storage, refrigerate because these muffins are moist and yogurt-based.
Refrigerator
4–5 days
Store in an airtight container with a paper towel to absorb moisture.
Freezer
Up to 3 months
Freeze individually, then move to a freezer bag or airtight container.
Reheating
15–45 seconds
Microwave briefly until just warm, not hot and tough.
What to Serve with High Protein Muffins
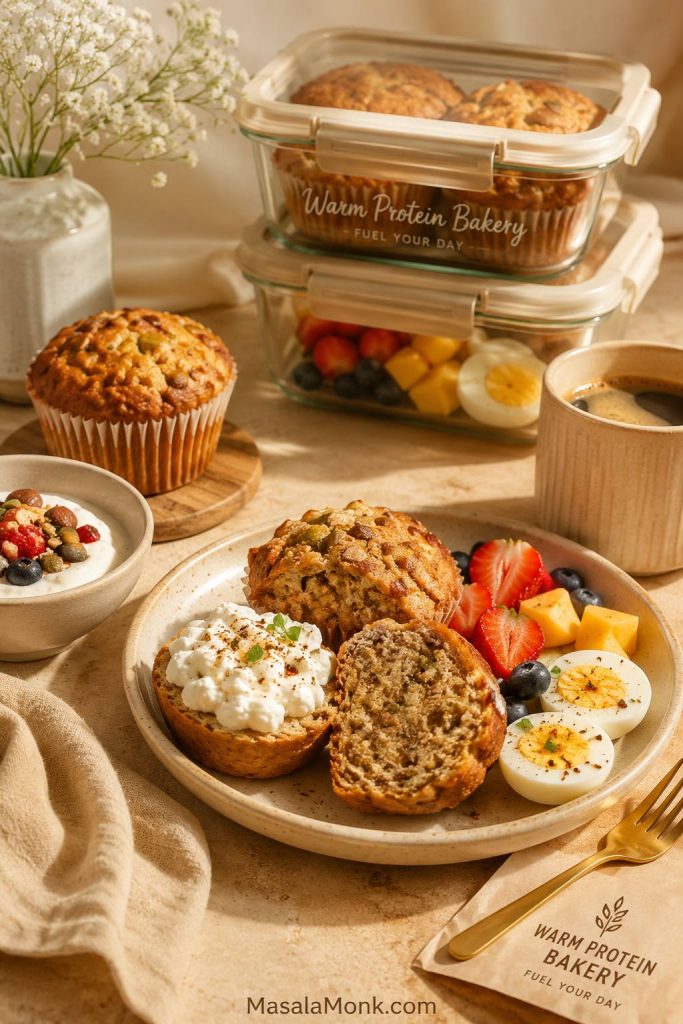
These muffins work well as a quick breakfast, lunchbox item, pre-workout bite, or afternoon snack. For a fuller breakfast, serve one with Greek yogurt, fruit, boiled eggs, cottage cheese, nut butter, or a smoothie.
One muffin can be a quick snack, but it becomes a fuller breakfast with Greek yogurt, fruit, eggs, cottage cheese, or coffee.
When you want a softer, bakery-style breakfast, warm one muffin briefly and split it with a little butter, peanut butter, or almond butter.
For snack prep, pair this recipe with healthy oat protein bars so you have both baked muffins and grab-and-go bars ready for the week.
Once you understand the batter, this becomes an easy recipe to repeat. Keep the base the same, change the fruit or mix-ins, and you have a breakfast muffin that can move from weekday meal prep to a weekend coffee plate without feeling like “diet food.”
For your own next batch, note the protein powder you used and how much milk the batter needed. Once you know that one detail, this recipe becomes easy to repeat with banana, blueberries, chocolate chips, pumpkin, or cottage cheese.
Ready to bake? The full recipe card below gives you the exact amounts, bake time, and adjustment notes. If your protein powder is very absorbent, start with the lower milk amount and add more only after mixing.
High Protein Muffins Recipe Card
A flexible, meal-prep friendly muffin base made with Greek yogurt, protein powder, oat flour or whole wheat flour, and banana or applesauce. Use the notes below to adjust the batter for your protein powder and favorite mix-ins.
Yield12 muffins
Prep Time10 minutes
Bake Time17–22 minutes
Total Time30–35 minutes
Save the texture cue along with the ingredient list: the batter should hold its shape, feel creamy, and scoop easily before it goes into the muffin tin.
Equipment
12-cup muffin tin
Muffin liners or silicone muffin cups
Mixing bowls
Whisk
Rubber spatula
¼ cup scoop or spoon
Wire cooling rack
Ingredients
Dry ingredients
1 cup oat flour, 100g, for the default breakfast-style version
Flour swap: use 1 cup all-purpose or white whole wheat flour, 120g, for a softer classic muffin texture
½ cup almond flour, about 50–55g, for extra tenderness
Almond-free swap: use ½ cup extra oat flour instead
½ cup vanilla protein powder, about 50–60g
2 teaspoons baking powder
½ teaspoon baking soda
½ teaspoon fine salt
1 teaspoon cinnamon
Wet ingredients
¾ cup plain Greek yogurt, about 180g
½ cup mashed ripe banana or unsweetened applesauce, about 120g
2 large eggs
⅓ cup maple syrup or honey, about 80ml
3 tablespoons neutral oil or melted butter, about 45ml
3–6 tablespoons milk, about 45–90ml, starting with 3 tablespoons and adding more only if the batter looks too stiff
2 teaspoons vanilla extract
Optional mix-ins
½ cup mini chocolate chips
½–¾ cup blueberries
½ cup chopped walnuts or pecans
1 tablespoon lemon zest for blueberry muffins
½ teaspoon pumpkin pie spice for a warmer flavor
Instructions
Preheat the oven. Preheat to 375°F / 190°C. Line a 12-cup muffin tin and lightly spray the liners.
Mix the dry ingredients. In a large bowl, whisk together the flour, almond flour or extra oat flour, protein powder, baking powder, baking soda, salt, and cinnamon.
Mix the wet ingredients. In a second bowl, whisk Greek yogurt, mashed banana or applesauce, eggs, maple syrup or honey, oil or melted butter, 3 tablespoons milk, and vanilla.
Combine gently. Add the wet ingredients to the dry ingredients. Fold with a spatula until just combined.
Adjust the batter. The batter should be sturdy but not dry. If it looks stiff, add a small splash of milk. If it looks too loose, add oat flour 1 tablespoon at a time and rest for 5 minutes.
Rest if needed. If using oat flour, casein, pea protein, or a very absorbent plant protein powder, let the batter rest for 5 minutes before scooping.
Add mix-ins. Fold in chocolate chips, blueberries, nuts, or other mix-ins. Do not overmix.
Fill the muffin tin. Divide the batter between 12 muffin cups, filling each about ¾ full.
Bake with a hot start. Bake at 375°F / 190°C for 5 minutes. Without opening the oven, reduce the temperature to 350°F / 175°C and bake for 12–17 more minutes.
Check for doneness. The muffins are done when the tops spring back lightly and a toothpick comes out clean or with a few moist crumbs.
Cool properly. Cool in the pan for 10 minutes, then transfer to a wire rack. Let the muffins cool before storing.
Recipe Notes
Best texture cue: the batter should mound on a spoon but still spread slowly in the muffin cup.
Protein powder varies: if your batter looks dry, add milk gradually before baking.
Banana version: use mashed ripe banana instead of applesauce.
Neutral base: use applesauce and vanilla protein powder.
Softer muffins: avoid overbaking and give the muffins enough cooling time.
Sticking prevention: use silicone liners or spray paper liners lightly.
Dairy-free batch: use thick dairy-free yogurt and a plant-based protein powder, then adjust the milk as needed.
Approximate Nutrition
Approximate per muffin, based on 12 muffins: 180–230 calories, 9–12g protein, 20–28g carbohydrates, 6–10g fat, and 2–4g fiber. Exact numbers vary by protein powder, yogurt, flour, sweetener, milk, and mix-ins.
Storage
Store fully cooled muffins in an airtight container in the refrigerator for 4–5 days, or freeze for up to 3 months. Reheat briefly in the microwave until just warm.
FAQs About High Protein Muffins
How much protein is in each muffin?
Each muffin has about 9–12 grams of protein depending on the protein powder, yogurt, flour, milk, eggs, and mix-ins you use. For the most accurate number, calculate using the exact brands and amounts in your kitchen.
What if I do not want to use protein powder?
A no-powder version needs a slightly different formula built around cottage cheese, Greek yogurt, eggs, oats, nut butter, or seeds. Simply removing the protein powder from this recipe will change the flour-to-liquid balance.
Which protein powder works best for muffins?
A vanilla whey blend or plant-based blend is the easiest starting point. Whey isolate can bake dry if used heavily, while casein and some plant powders may need extra milk because they absorb more liquid.
Why did my protein muffins turn dry?
Dry muffins usually come from too much protein powder, not enough liquid, overbaking, or using a powder that absorbs heavily. Next time, add more yogurt or milk and check the muffins earlier.
Why is my batter thicker than regular muffin batter?
Protein powder, oat flour, and Greek yogurt all make the batter sturdier than a classic muffin batter. It should still be scoopable, not dry. Let it rest for 5 minutes, then loosen with a small splash of milk if needed.
Does oat flour work in this recipe?
Oat flour works well and gives the muffins a breakfast-style flavor. The texture will be slightly heartier than all-purpose flour. If the batter gets too stiff, add a little more milk.
How should I freeze and reheat them?
Cool the muffins fully, freeze them individually, then move them to a freezer bag or airtight container for up to 3 months. To reheat, microwave briefly from frozen or thaw overnight in the fridge.
How do I make a dairy-free version?
Choose a thick dairy-free yogurt and a plant-based protein powder. Because plant-based powders often absorb more liquid, add milk gradually until the batter looks sturdy but workable.
Blueberries or chocolate chips: which works better?
Both work well, but they give different results. Blueberries make the muffins feel fresher and more breakfast-like, while mini chocolate chips make them feel more snackable. Keep mix-ins around ½–¾ cup so the muffins bake evenly.
How do I know when they are done?
The tops should spring back lightly, and a toothpick should come out clean or with a few moist crumbs. Pull them before they feel firm and dry because they continue to set as they cool.
Are these filling enough for breakfast?
They can be, especially when paired with fruit, Greek yogurt, cottage cheese, eggs, or coffee. On their own, they are more filling than a regular muffin because they include protein-rich ingredients and a more substantial crumb.
If you try these, leave a note with the protein powder you used, whether you chose banana or applesauce, and how much milk your batter needed. Those little details often help the next reader get a softer batch on the first try.