Posted on Leave a comment

Peanut Sauce Recipe for Spring Rolls, Satay, Noodles & Chicken

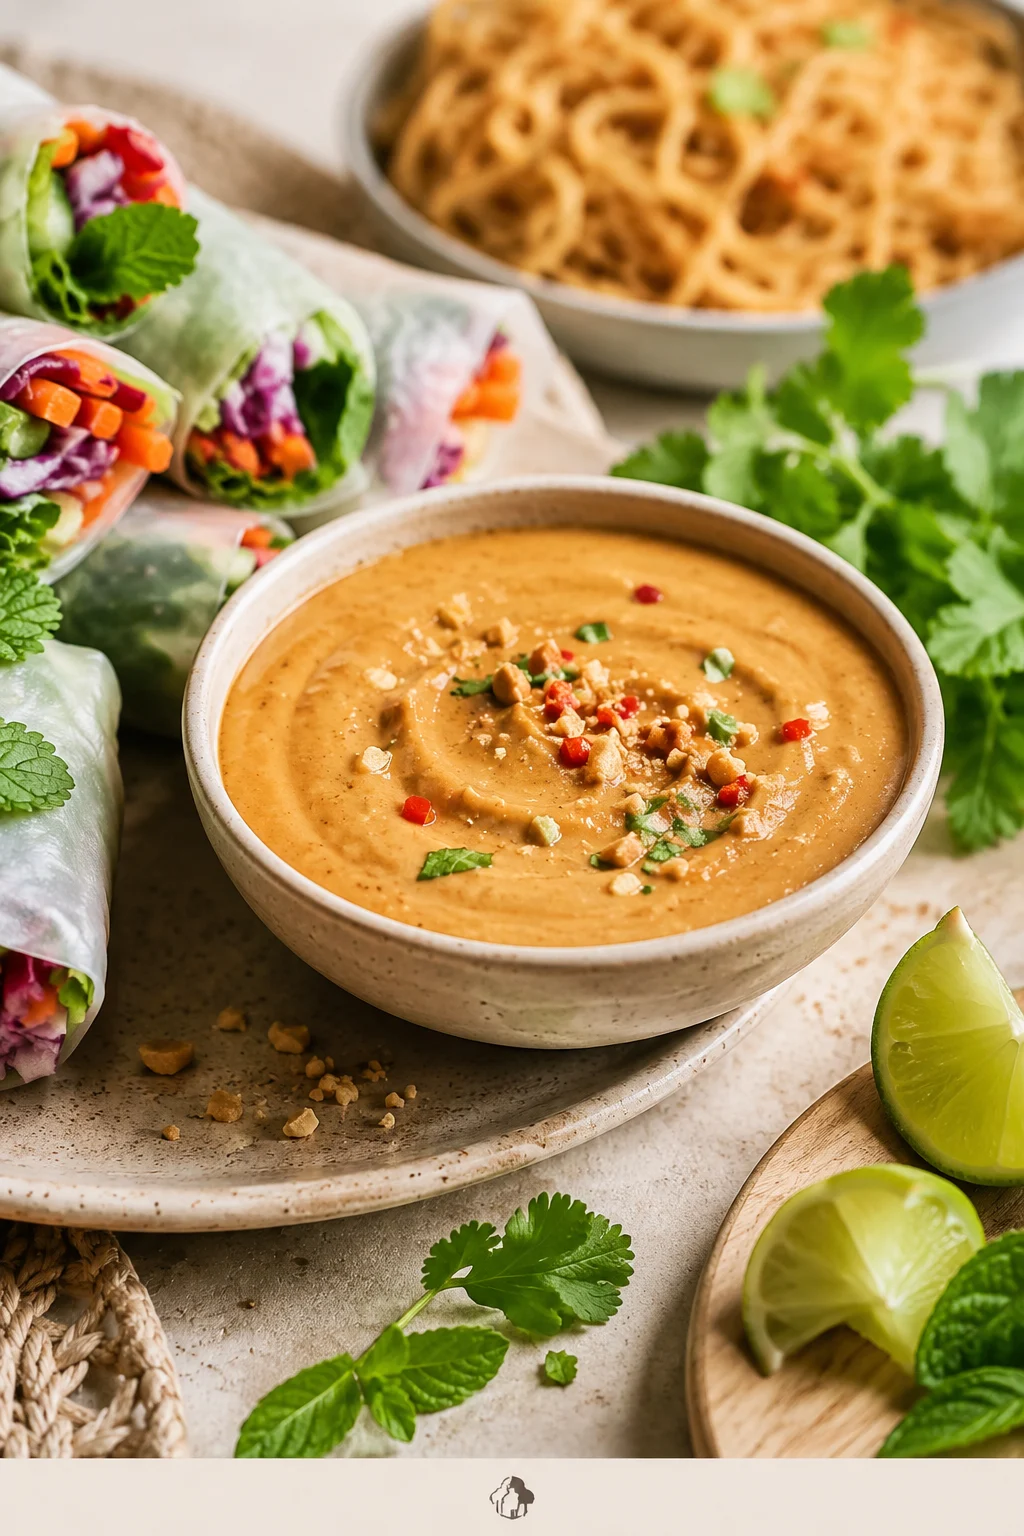
Bowl of creamy peanut sauce with spring rolls, noodles, lime wedges, herbs and crushed peanuts on a dinner table.

This is the peanut sauce you make when dinner is almost there but needs one creamy, salty-sweet thing to pull it together. It is rich from peanut butter, bright with lime and rice vinegar, warm with ginger and garlic, and easy to adjust depending on what is on the plate.

The promise is simple: one 5-minute peanut sauce, adjusted by texture. Make it easy to dip with spring rolls, warmer and richer for satay-style chicken or tofu skewers, looser for noodles, and brighter for salads or slaw.

Once you understand how the sauce should behave, the recipe becomes more than a dip. It becomes the jar that helps fresh rolls, plain noodles, grilled chicken, crispy tofu, rice bowls, vegetables, and leftovers feel like dinner. This is the kind of sauce that makes you feel like you planned dinner, even when you mostly assembled it.

Quick Answer: How to Make Peanut Sauce

To make peanut sauce, whisk the soy sauce or tamari, rice vinegar, lime juice, sweetener, chili sauce, ginger, garlic, and sesame oil first, then whisk in peanut butter and water until the sauce comes together. Start with less liquid, then add more until the sauce matches the food you are serving.

Rule one: fix texture before flavor. A thick peanut sauce can taste saltier, sweeter, and heavier than it really is, so get it close to the right consistency first. Then adjust with lime, soy sauce, sweetener, or chili.

Once the base comes together, the question is not only “is it smooth?” but “will it behave on the food?” If you are unsure, use the texture guide before adding all the liquid.

Jump to

5-Minute Peanut Sauce Recipe

Recipe name: Peanut Sauce Recipe

Prep time: 5 minutes
Cook time: 0 minutes
Total time: 5 minutes
Yield: About 1 to 1¼ cups / 240 to 300 ml, depending on how much water you add
Servings: 8 to 10
Serving size: About 2 tablespoons / 30 ml

Best as a dip: spring rolls, satay, lettuce wraps, dumplings, rice paper rolls
Best as a sauce: noodles, chicken, tofu, salads, rice bowls, roasted vegetables, slaw

Equipment: bowl and whisk or fork. Optional: jar for storage, grater for fresh ginger and garlic, small saucepan for the satay-style variation.

Ingredients

Line up the peanut sauce ingredients before you start so the balance is clear: nutty body, salty depth, tang, heat and just enough sweetness.
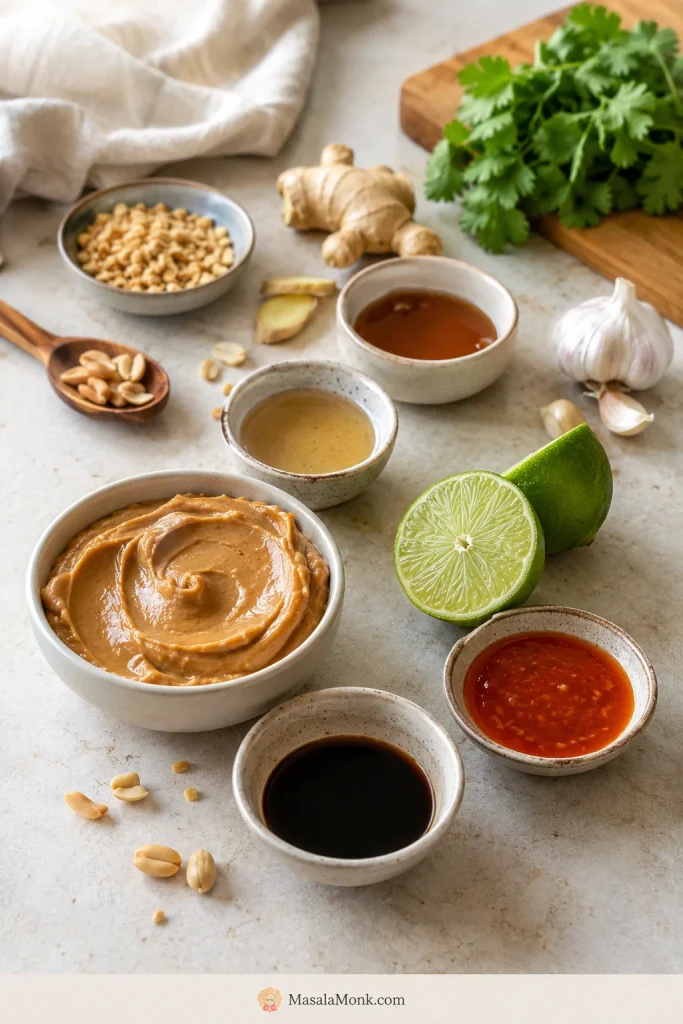
Peanut sauce ingredients including peanut butter, soy sauce, lime, rice vinegar, ginger, garlic, chili sauce, sweetener and sesame oil.
Peanut butter gives the sauce body, while soy sauce, lime, vinegar, ginger, garlic and chili give it balance. Together, they keep the peanut sauce savory enough for dinner instead of sweet and flat.
IngredientAmount
Creamy natural peanut butter½ cup / about 128 g
Low-sodium soy sauce or tamari2 tablespoons / 30 ml
Rice vinegar1 tablespoon / 15 ml
Fresh lime juice1 tablespoon / 15 ml
Maple syrup or honey1 to 2 tablespoons / 15 to 30 ml
Brown sugar, if using instead1 to 2 tablespoons / about 12 to 25 g
Sriracha or chili garlic sauce1 to 2 teaspoons / 5 to 10 ml
Fresh grated ginger1 teaspoon / about 2 g
Garlic1 small clove, finely grated, about 3 g
Toasted sesame oil, optional1 teaspoon / 5 ml
Warm water3 to 6 tablespoons / 45 to 90 ml, plus more as needed

Instructions

Start the peanut sauce by mixing the salty, tangy and spicy ingredients before the peanut butter goes in.
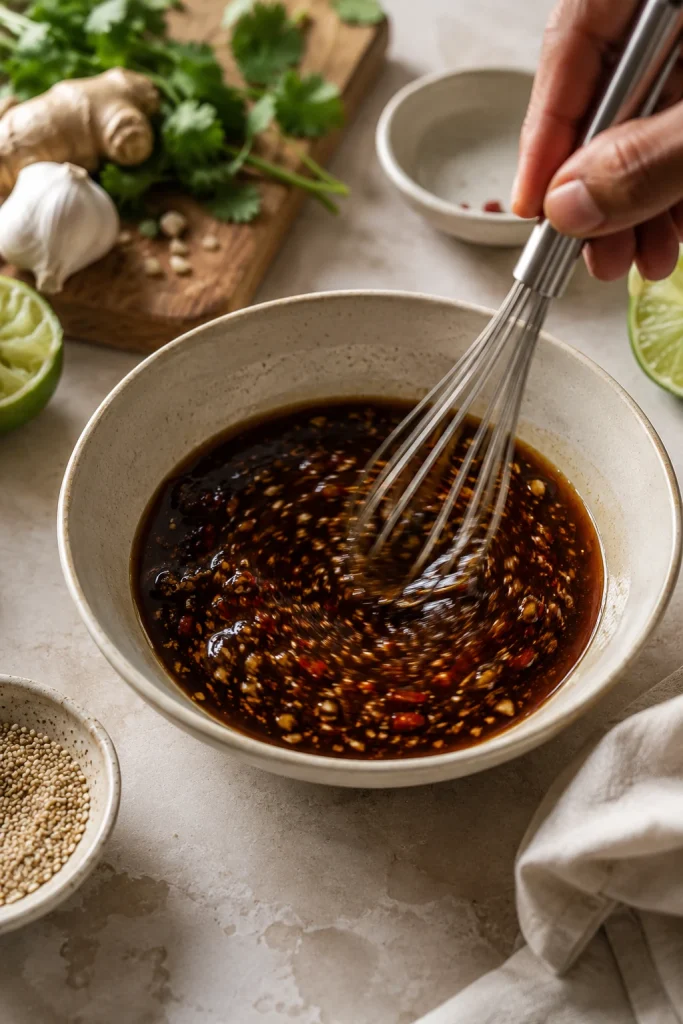
Soy sauce, lime juice, rice vinegar, chili sauce, ginger, garlic and sesame oil being whisked in a bowl before peanut butter is added.
First, whisk the salty, tangy and spicy ingredients together. Then the peanut butter blends into a balanced base instead of forcing you to fix the flavor later.
  1. Add the soy sauce or tamari, rice vinegar, lime juice, sweetener, chili sauce, ginger, garlic, and sesame oil to a medium bowl. Whisk briefly so the salty, tangy, spicy ingredients come together first.
  2. Add the peanut butter and whisk until the mixture looks thick, dark, and mostly combined. It may look stubborn before it turns silky.
  3. Add warm water or another thinning liquid 1 tablespoon at a time, whisking well after each addition.
  4. Stop when the texture matches the food you are serving. Satay can stay thicker, spring roll dip should glide, and noodles or salad dressing need more flow.
  5. Taste and adjust. More lime or vinegar helps if it tastes heavy, soy sauce or tamari helps if it tastes flat, sweetener softens sharpness, and chili adds heat.
  6. Serve right away, or store in an airtight jar in the fridge and re-whisk with a splash of water before using.

Recipe Notes

  • The 3 to 6 tablespoons water gives you a standard dip or drizzle. Noodles and salad dressing usually need more.
  • Warm liquid helps peanut butter loosen faster than cold liquid.
  • Natural peanut butter often needs more patience because it can start thicker, stiffer, or more separated than regular creamy peanut butter.
  • Regular sweetened peanut butter works, but start with less sweetener. The sauce should taste like peanut butter went to dinner, not dessert.
  • The sauce thickens as it sits, especially after refrigeration. If it has already thickened, jump to storage and make-ahead before changing the flavor.
  • For chicken, use this as a dip, drizzle, or finishing sauce. Keep any sauce that touches raw chicken separate from the serving sauce, and cook chicken to 165°F / 74°C.
  • Since this is peanut-based, check for peanut allergies before serving it to guests and read labels on bottled sauces if allergies are a concern.

Texture Guide for Spring Rolls, Satay, Noodles and More

If your sauce looks clumpy, tastes too heavy, or turns noodles sticky, you probably have not ruined anything. Peanut sauce is usually a texture problem before it is a flavor problem.

Clumps usually mean the sauce needs liquid and whisking, not a full restart.
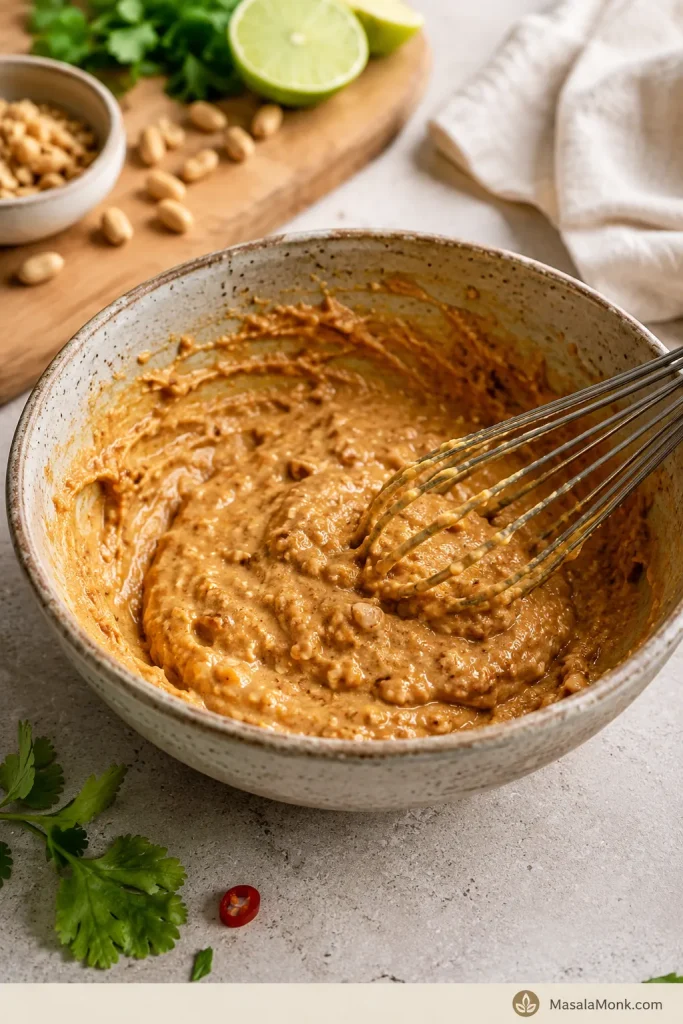
Thick clumpy peanut sauce in a bowl with whisk marks before enough liquid has been added.
At first, peanut sauce can look clumpy and stubborn. Instead of starting over, add liquid slowly and keep whisking until the mixture turns smooth and cohesive.

The mistake most people make is stopping when the sauce looks smooth. Peanut sauce is not done until it behaves right on the food. A spring roll dip should glide, satay sauce should cling, noodle sauce should fall from the spoon in a loose stream, and dressing should pour easily.

How to Read the Sauce Texture

Thin the sauce gradually so you can stop at dip, drizzle, noodle sauce or dressing instead of overshooting the texture.
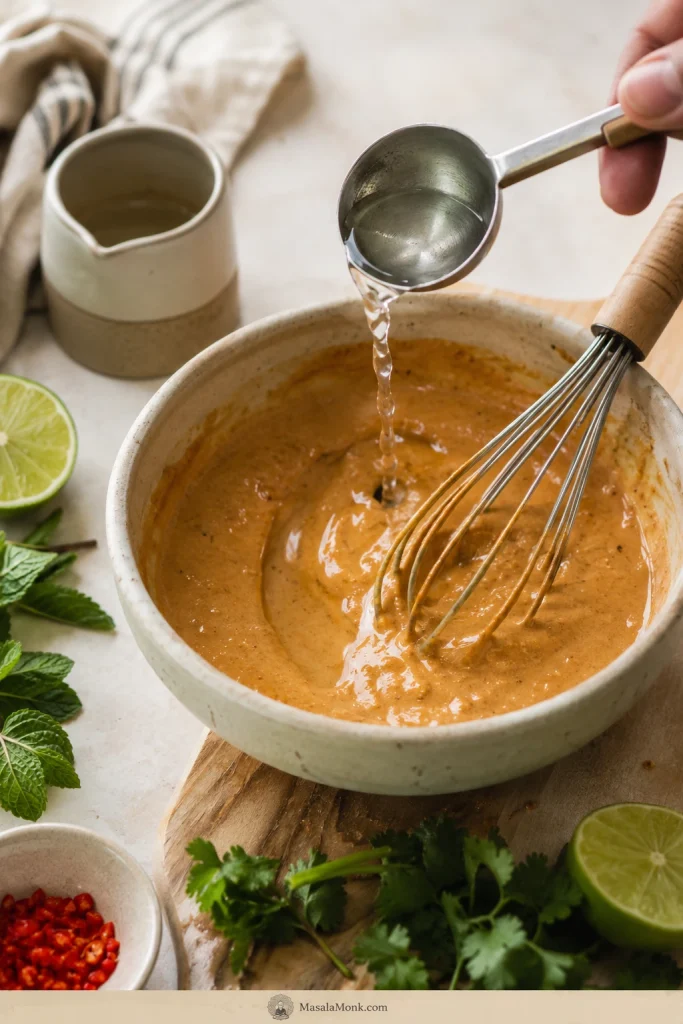
Water being added by spoon to thick peanut sauce while a whisk rests in the bowl.
Add liquid one spoonful at a time and watch how the sauce changes. Stop when it loosens for the job you need: thick dip, noodle sauce or pourable peanut dressing.
UseSauce Should Look LikeAdd This Much LiquidServe It
Spring rollsSoft sheen, easy to dip, clings lightly to rice paperAbout 4 to 6 tablespoons water totalRoom temperature or slightly chilled
SatayThicker, warm, spoonable, not mounded like pasteAbout 2 to 4 tablespoons water, or use the coconut milk variationWarm
NoodlesLoose stream from the spoon, easy to tossAbout 6 to 8 tablespoons hot water or noodle waterWarm or opened up with hot water
Salad dressingPourable, bright, thinner than dipping sauceExtra water plus more lime juice or rice vinegarChilled or room temperature
ChickenMedium-thick dip or drizzleKeep it savory and not too sweetRoom temperature or warm
TofuThicker for coating, thinner for bowlsAdd extra chili and lime for punchRoom temperature or warm
Rice bowlsSlow drizzle, not wateryThin slightly and re-whisk before servingRoom temperature

Use this visual guide when you are deciding whether the sauce should cling, glide, coat or pour.
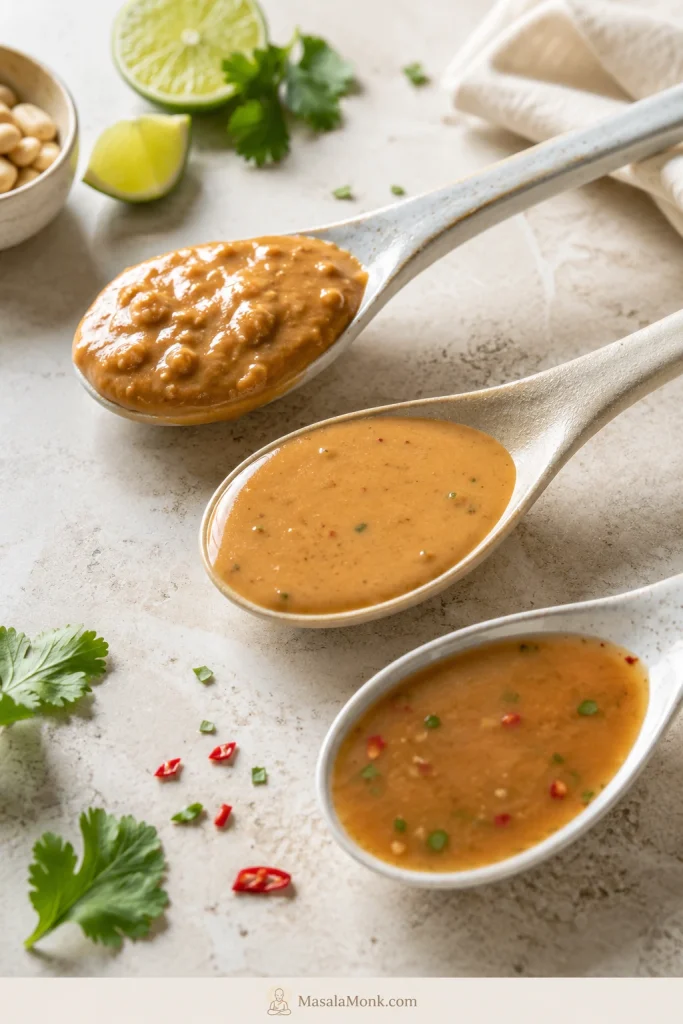
Three spoons holding different peanut sauce textures for satay, spring rolls and noodles.
This is the texture rule worth saving: thicker peanut sauce clings to satay, softer sauce works for spring rolls, and looser sauce coats noodles without grabbing them.

Before you taste, fix the texture: peanut butter can look clumpy or slightly broken before it turns silky. Keep whisking, add liquid slowly, and taste only after the sauce is close to the consistency you want. A sauce that is too thick will taste saltier, sweeter, and heavier than it really is.

When in doubt, keep it a little thicker at first. You can always add a splash more liquid, but it takes extra peanut butter to fix a sauce that has gone too thin.

Why This Peanut Sauce Works

The finished sauce should not taste like sweet peanut butter. It should taste nutty first, then salty, tangy, lightly sweet, and gently spicy at the end.

Peanut butter gives body and nutty richness. Soy sauce or tamari gives dinner-level savoriness. Lime juice and rice vinegar cut the heaviness. Sweetener rounds the sharp edges. Ginger, garlic, and chili keep the sauce lively instead of flat.

Water is not filler here. It is the texture tool. A little gives the sauce enough body for dipping; more turns it into a noodle sauce or dressing. That is why the same bowl can taste right with cool rolls, hot noodles, grilled chicken, tofu, or a pile of vegetables. If the sauce already tastes off, check the troubleshooting table before adding more soy sauce, sugar or lime.

If the sauce tastes like peanut butter first and dinner second, it usually needs salt, acid, or chili before it needs more sweetness.

Ingredients and Smart Swaps

Peanut Butter

Creamy natural peanut butter gives the cleanest peanut flavor. If your jar has separated, stir it well before measuring. Homemade peanut butter also works well if you want more control over roast, salt, and texture.

Regular creamy peanut butter works too, but it is usually sweeter, so start with less sweetener. Crunchy peanut butter is fine if you like texture, especially for satay-style sauce or rice bowls.

Soy Sauce or Tamari

Low-sodium soy sauce keeps the sauce savory without pushing it too salty. Tamari is the best swap for gluten-free peanut sauce, as long as the label says gluten-free. Coconut aminos can work for a soy-free version, but it is sweeter and less salty, so adjust with salt and lime at the end.

Rice Vinegar and Lime Juice

Rice vinegar gives a clean tang; lime makes the sauce taste fresher. Together, they keep peanut butter from feeling heavy. Apple cider vinegar or white vinegar can work in a pinch, especially for a satay-style version.

Sweetener

Maple syrup keeps the sauce vegan and blends easily. Honey gives rounder sweetness. Brown sugar adds deeper flavor, especially in satay-style peanut sauce. When your peanut butter is already sweet, let the lime and soy sauce lead before adding more sugar.

Chili Sauce

Sriracha, chili garlic sauce, sambal, or chili crisp can all work. One teaspoon keeps the heat mild; two or more pushes it into spicy peanut sauce territory. For the satay-style variation, red curry paste adds better depth than sriracha alone.

Garlic and Ginger

Fresh grated garlic and ginger make the sauce taste alive. Grating them finely helps them disappear into the sauce instead of leaving sharp pieces. If raw garlic is too strong for you, use half a clove or a small pinch of garlic powder.

Sesame Oil

Toasted sesame oil is optional, but a small amount gives the sauce a deeper, nuttier flavor. Use it lightly because peanut butter is already rich.

Coconut Milk

Coconut milk is not required for the 5-minute sauce. Water keeps it quick, bright, and flexible.

Coconut milk is what makes the satay-style version feel rounder and warmer. Use it for skewers, grilled chicken, tofu satay, or roasted vegetables. Coconut cream makes the sauce thicker and more luxurious, while regular coconut milk keeps it smoother and more pourable. Making skewers? Jump to the satay-style peanut sauce variation. If you like that coconut-curry direction, the same balance shows up in Chicken Panang Curry, where peanut stays in the background instead of taking over like satay sauce.

Hoisin Sauce

Hoisin is not part of the main sauce, but it is very useful for a Vietnamese-style spring roll dip. It adds sweetness, body, and a deeper savory flavor that works beautifully with rice paper rolls, shrimp rolls, and fresh vegetable rolls.

Peanut Sauce for Spring Rolls

For spring rolls, fresh rolls, summer rolls, and rice paper rolls, the dip should be smooth enough for dipping but thick enough to cling. When it sits on the roll like paste, it needs more liquid. When it runs off immediately, it needs more peanut butter.

Start with the sauce as written and add liquid until it becomes easy to dip. A little extra lime juice or rice vinegar also helps because fresh rolls are usually full of cool vegetables, herbs, shrimp, tofu, or noodles. A good spring roll dip should catch on the rice paper, slide over the herbs and vegetables, and leave a little peanut richness behind.

Use fresh spring rolls as a texture check: the dip should feel light around herbs and vegetables while still leaving a creamy coat.
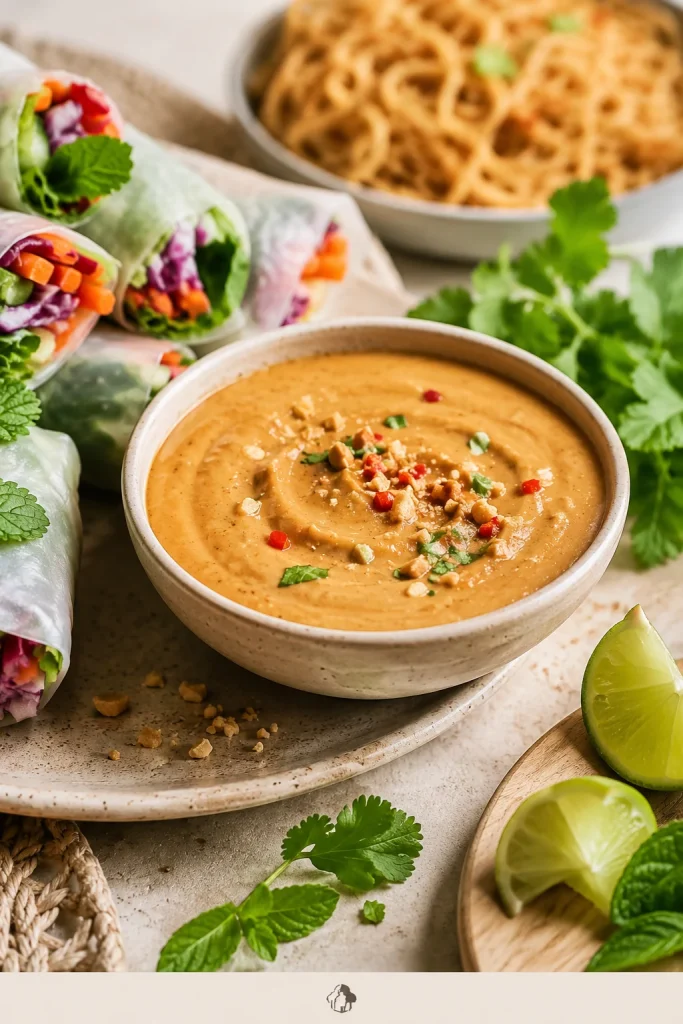
Fresh rice paper spring rolls cut open and served with peanut sauce, herbs and lime.
The dip should coat rice paper lightly, then get out of the way so the herbs, vegetables and filling still taste fresh.

How to Adjust the Sauce for Spring Rolls

  • Vegetable-heavy rolls taste better with a little extra lime juice or rice vinegar.
  • Shrimp rolls can handle a slightly sweeter dip, which is where the hoisin variation works especially well.
  • Tofu rolls benefit from chili crisp, extra ginger, or crushed peanuts for more punch.
  • A dip that drags across rice paper needs a small splash of water until it glides.
  • A dip that slides off the roll needs a small spoon of peanut butter to bring back body.

Before moving to the hoisin variation, check the basic spring roll texture: the dip should coat rice paper without dragging.
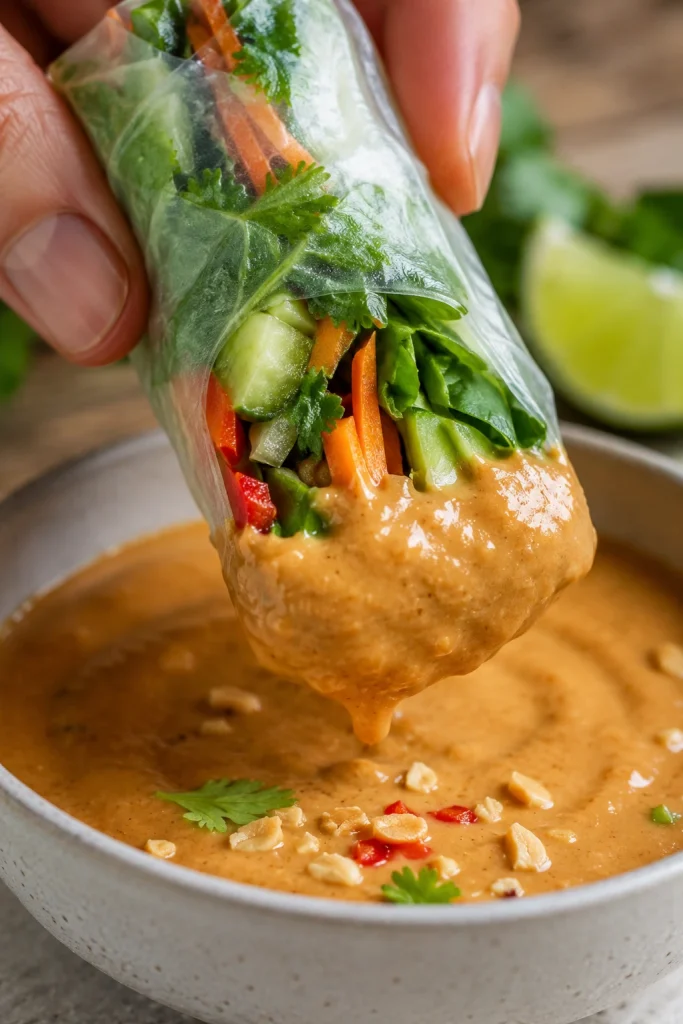
Fresh spring roll dipped into peanut sauce that clings lightly to the rice paper wrapper.
For spring rolls, the dip should leave a light coat on the rice paper. Too much drag means it needs liquid; too much slide means it needs more body.

Vietnamese-Style Hoisin Peanut Sauce for Rice Paper Rolls

Use this version when spring rolls are the main event. Hoisin gives the dip the darker, sweeter body people often expect with rice paper rolls, while peanut butter keeps it creamy and rich.

The hoisin version should look darker and glossier than the everyday peanut sauce, especially for rice paper rolls.
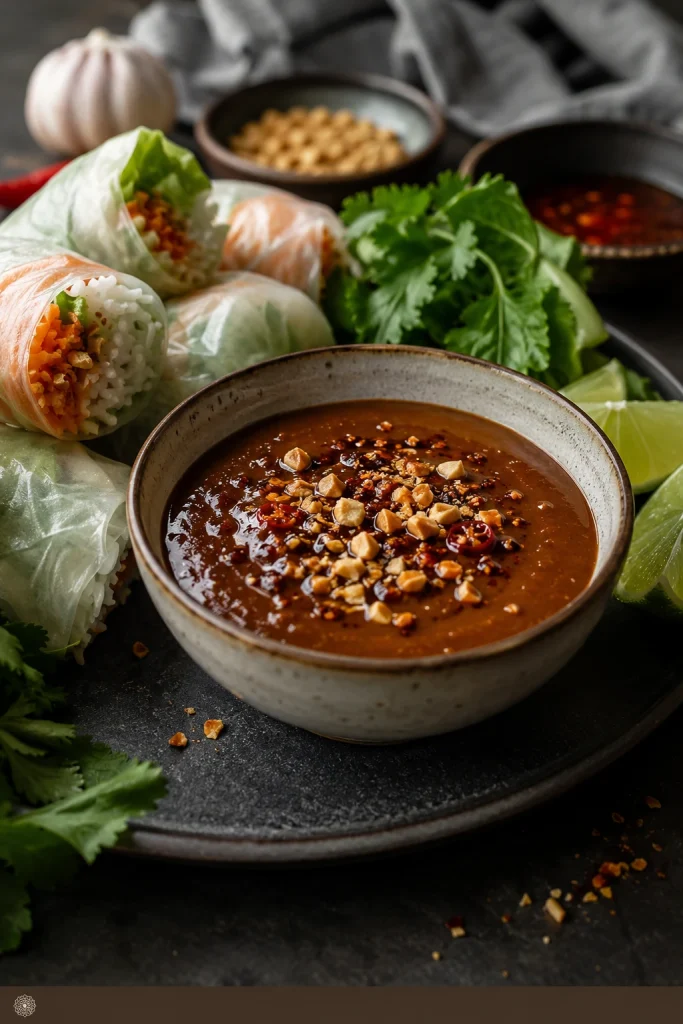
Dark Vietnamese-style hoisin peanut sauce served with rice paper rolls and crushed peanuts.
When rice paper rolls are the main event, hoisin gives peanut sauce a darker, sweeter body. After mixing, add lime or vinegar if the dip starts tasting too sweet.

Use this quick formula:

  • ½ cup peanut sauce
  • 1 tablespoon hoisin for lighter sweetness, or 2 tablespoons for a deeper dip
  • 1 to 3 tablespoons water, milk, or coconut milk, as needed
  • ½ teaspoon chili garlic sauce, optional
  • Crushed peanuts, optional, for finishing

Whisk until the dip has a soft sheen. It should be looser than satay sauce but thicker than salad dressing. Too sweet? Add lime juice or rice vinegar. Too thick? Add liquid a spoonful at a time.

This is the variation to reach for when the meal is built around fresh rolls, shrimp rolls, or rice paper rolls and you want a dip that feels complete on its own.

Satay-Style Peanut Sauce

Satay sauce is usually richer, warmer, and thicker than a quick peanut dipping sauce. Depending on the region and recipe, more traditional versions may use roasted peanuts, coconut milk, curry paste, tamarind, palm sugar, fish sauce, or other aromatics.

Think of this as the weeknight bridge between a quick peanut dip and a fuller satay sauce. Start with the 5-minute base, then add coconut milk and curry paste for depth. Warmth changes everything here: the sauce softens, the curry paste blooms, and the peanut flavor feels rounder before it ever reaches the skewers.

Use this as a satay-style shortcut, not as a claim that all satay sauces are the same. It works well with chicken satay, tofu satay, grilled paneer, roasted vegetables, and rice bowls because it clings well and tastes more complete with grilled food.

Satay-Style Peanut Sauce Variation

Coconut milk and curry paste turn the quick peanut sauce into a warmer satay-style sauce for skewers and grilled food.
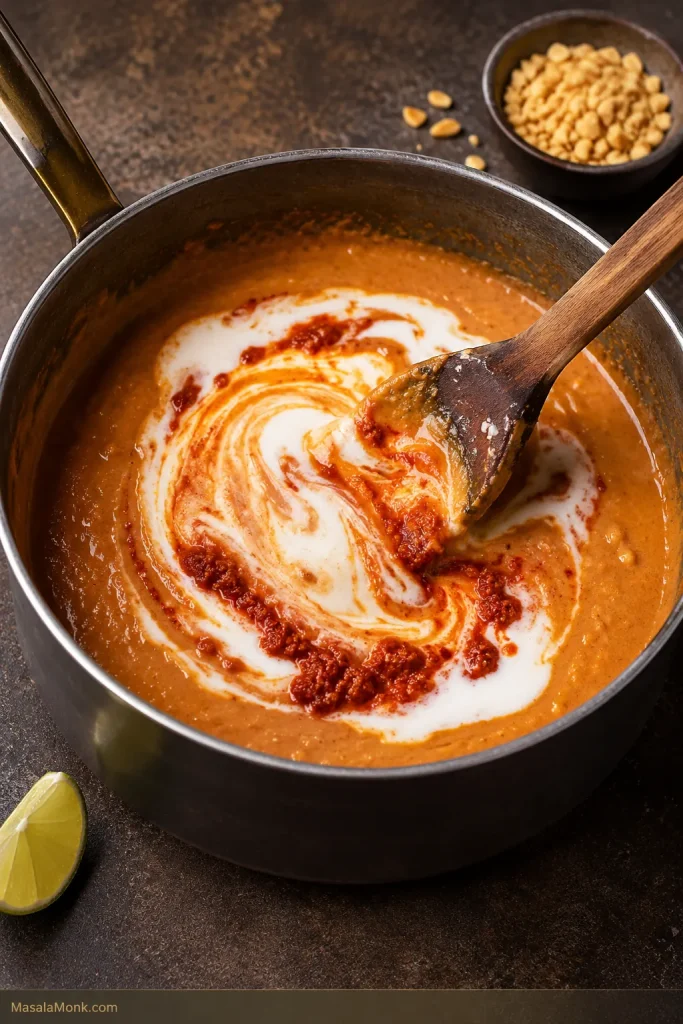
Coconut milk and red curry paste being stirred into peanut sauce in a saucepan.
For satay-style peanut sauce, coconut milk and curry paste add warmth and depth. Warm it gently so the curry paste blooms without reducing the sauce into paste.
  • ½ cup peanut sauce
  • ¼ cup coconut milk or coconut cream
  • 1 to 2 teaspoons red curry paste
  • 1 teaspoon brown sugar, optional
  • ½ teaspoon fish sauce, optional
  • 1 to 2 tablespoons crushed roasted peanuts, optional

Warm everything in a small saucepan over medium-low heat for 3 to 5 minutes, stirring often. Do not hard-boil the sauce. The goal is to warm it, not reduce it into paste. It should be thick, warm, and spoonable, but still loose enough to drizzle over skewers.

If it tightens too much, add water or coconut milk, a spoonful at a time. A squeeze of lime or splash of rice vinegar helps when the sauce tastes too rich.

For chicken satay, the sauce should be warm, spoonable and thick enough to cling to grilled edges.

Grilled chicken satay skewers with peanut sauce, lime wedges, herbs and crushed peanuts.
Chicken satay needs a peanut sauce that clings to grilled edges without stiffening. If the sauce tightens as it warms, loosen it with a spoonful of water or coconut milk.

Because tofu starts mild, give the satay-style sauce more contrast with lime, chili and crunch.
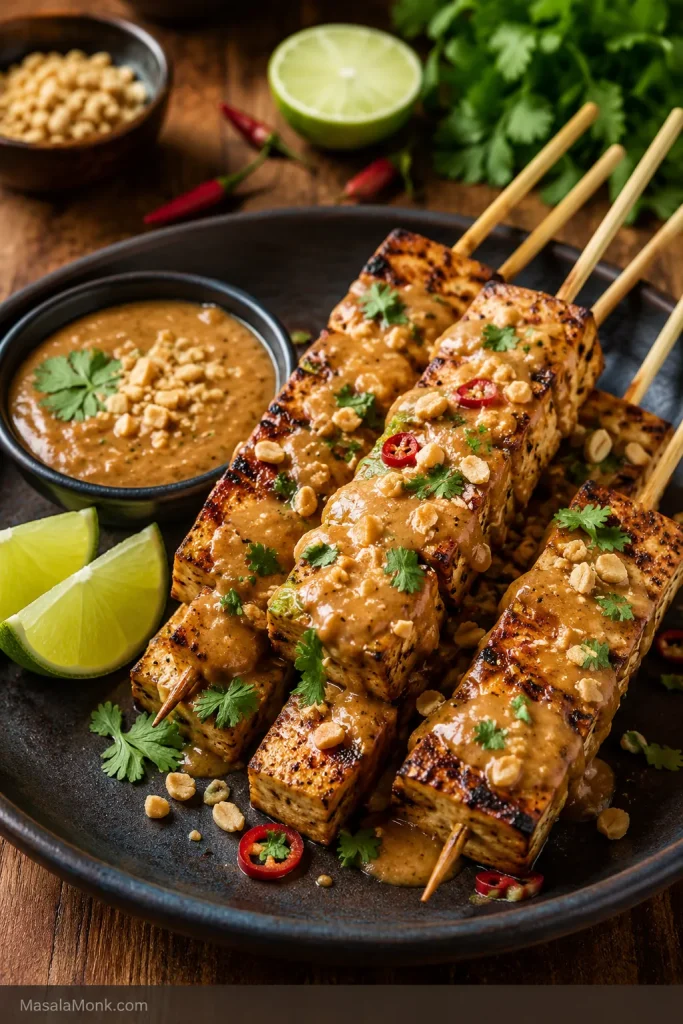
Grilled tofu satay skewers drizzled with peanut sauce, herbs, chili and crushed peanuts.
Keep the sauce thick enough to cling to grilled tofu, then use lime, ginger, chili and crushed peanuts for contrast.

Is Peanut Sauce the Same as Satay Sauce?

Not always. Peanut sauce is a broad term for sauces made with peanuts or peanut butter. Satay sauce usually refers to the peanut-based sauce served with satay skewers, and it is often warmer, richer, and more deeply seasoned.

For everyday cooking, this sauce can move in a satay-style direction with coconut milk, curry paste, and gentle heat. A very specific Thai, Indonesian, Malaysian, or Singaporean satay sauce may need a more traditional recipe built around that cuisine.

Peanut Sauce for Noodles

This is where the sauce becomes dinner, not just a dip. Noodles need a looser peanut sauce than spring rolls or satay. Peanut butter thickens quickly when it hits warm noodles, and a mixture that looks pourable in the bowl can turn sticky once tossed.

For 2 servings, start with about ½ cup peanut sauce and add 2 to 4 tablespoons hot water or noodle cooking water before tossing. For 8 ounces / 225 g noodles, use ½ to ¾ cup sauce, depending on how saucy you like your noodles.

Before sauce meets noodles, it should already move in a loose stream from the spoon.
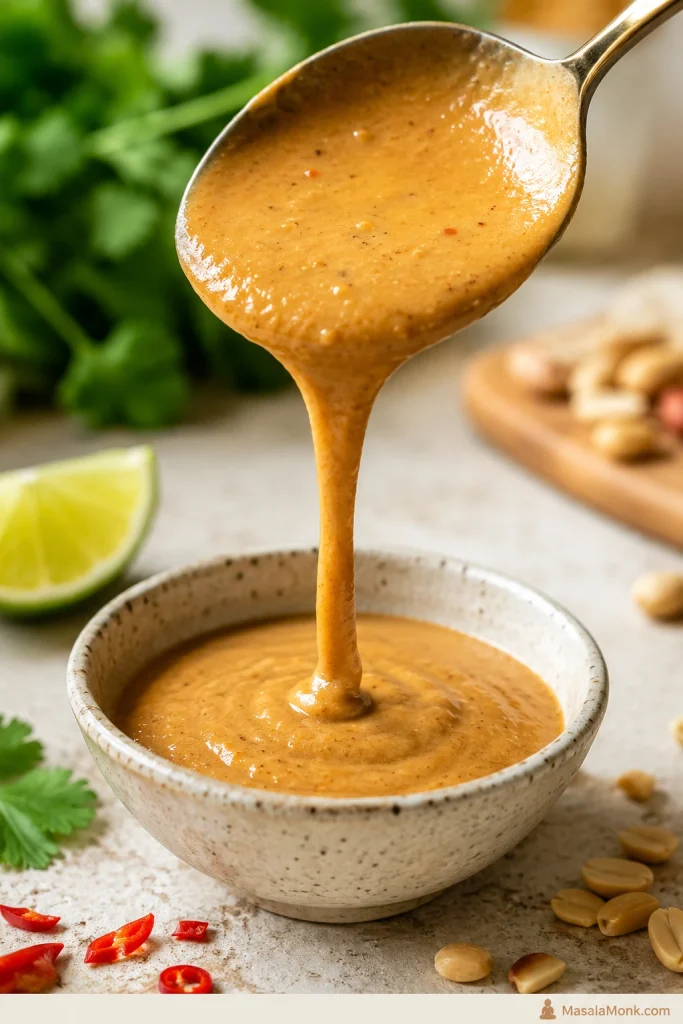
Loose peanut sauce falling from a spoon to show the texture needed for noodles.
For noodles, the sauce should fall from the spoon in a loose stream before tossing. Otherwise, peanut butter can tighten around warm noodles and make the bowl sticky fast.

The idea is similar to glossy pasta sauces: loosen first, then toss. The same idea shows up in pesto pasta, where pasta water keeps the sauce glossy instead of oily or dry.

Pour the peanut sauce over noodles only after it has enough movement to coat the strands evenly.
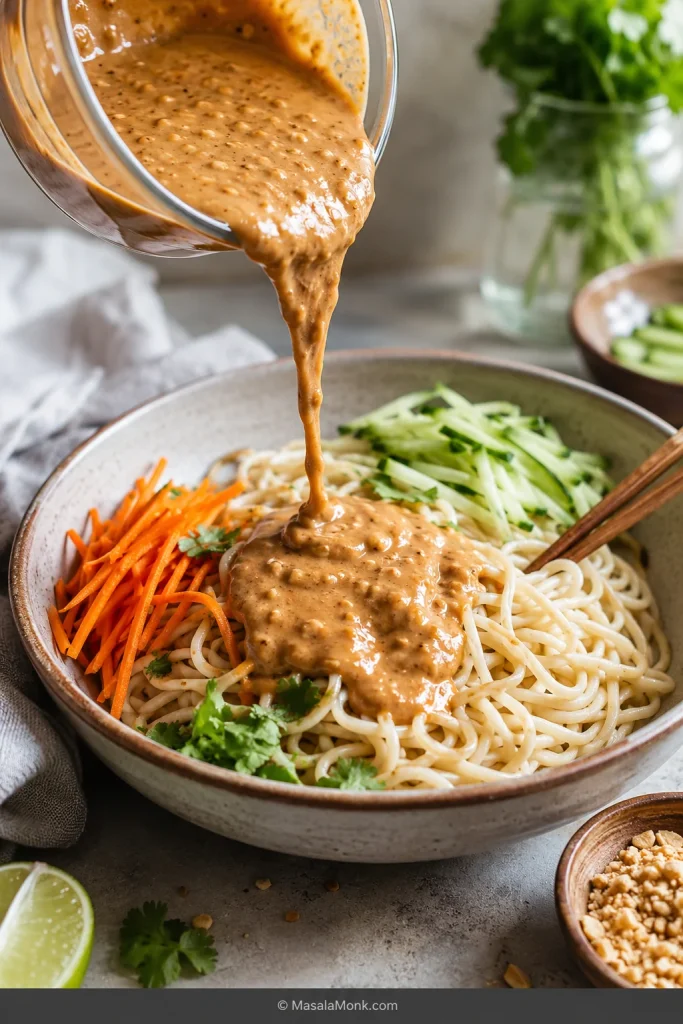
Peanut sauce being poured over noodles before tossing, with vegetables and herbs nearby.
Before tossing noodles, loosen the peanut sauce until it moves easily. As a result, it coats the strands evenly instead of grabbing them into sticky clumps.

Sometimes the bowl looks perfect, then tightens while you are setting the table. Do not panic. Add hot water or noodle water, a spoonful at a time, and toss again until the sauce relaxes around the noodles instead of grabbing them. If it keeps clumping, jump to how to fix peanut sauce.

Tips for Peanut Noodles

  • Hot water or noodle water helps the sauce loosen cleanly; cold water can make it tighten.
  • Make the sauce looser before adding it to the noodles.
  • Toss gradually instead of dumping everything in at once.
  • Lime juice or rice vinegar helps when the noodles taste heavy.
  • Soy sauce or tamari helps when the noodles taste flat.
  • Cold peanut noodles need a looser sauce because it thickens as it chills.

Toss it with rice noodles, spaghetti, ramen, soba, udon, or egg noodles. Add cucumber, carrots, cabbage, scallions, cilantro, mint, edamame, tofu, chicken, shrimp, or a fried egg to turn it into a full meal.

Once the sauce is coating properly, fresh toppings finish the noodle bowl and keep it from tasting heavy.
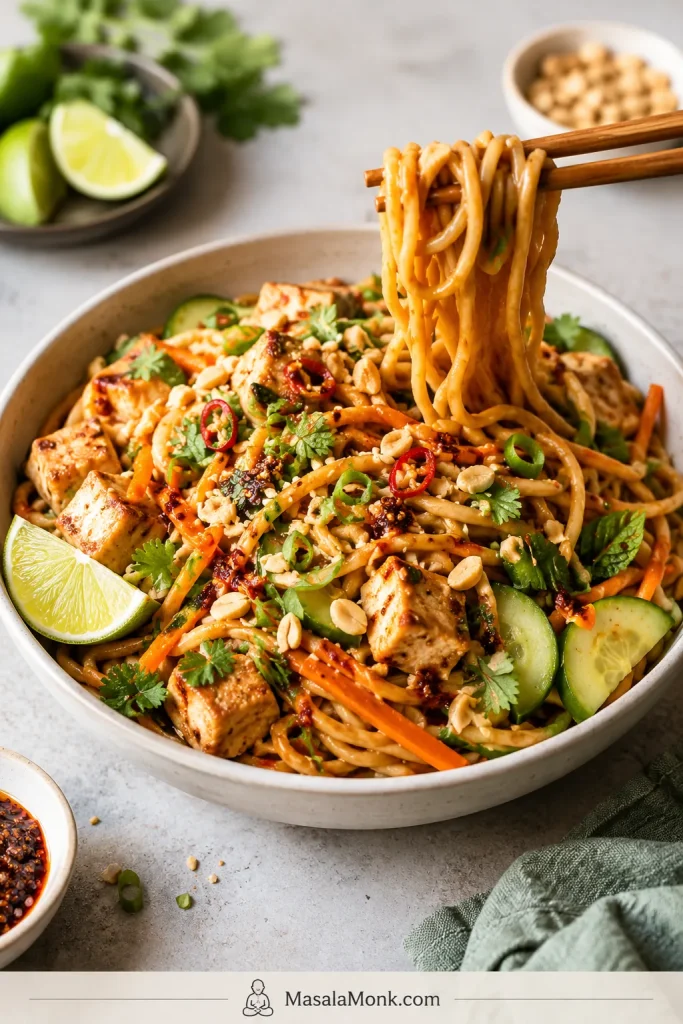
Peanut sauce noodle bowl with vegetables, herbs, lime, chili and crushed peanuts.
Once the noodles are coated, add crunch, herbs, lime and protein to turn peanut sauce noodles into dinner. The finish should taste fresh, not just creamy.

Peanut Sauce for Chicken, Tofu and Bowls

This is where peanut sauce earns its place in the fridge: plain chicken, tofu, rice, and vegetables suddenly taste like a planned meal. The trick is matching the texture to the job, not pouring the same thickness over everything.

UseBest TextureBest Adjustment
Grilled chickenMedium-thick drizzleAdd lime after cooking so the sauce tastes bright, not heavy
Chicken rice bowlsSlow drizzleKeep it savory enough to season the rice
Peanut chicken noodlesLoose, tossable sauceUse hot water or noodle water before tossing
Crispy tofuThicker coating sauceAdd chili crisp, extra ginger, or crushed peanuts
Tofu bowlsDrizzle-able but not wateryAdd lime and tamari so the tofu does not taste flat
Lettuce wrapsEasy dip with bodyAdd lime and herbs for freshness

Chicken

Spoon it over cooked chicken, serve it as a dip for grilled chicken, or use the warm satay-style version with skewers. Plain baked chicken works well here because the sauce brings most of the flavor. Once the chicken is cooked, you can slice it into bowls, tuck it into lettuce wraps, or serve it beside spring rolls and cucumber salad.

Everyday chicken needs a peanut sauce that drizzles cleanly and seasons the plate without turning sweet.
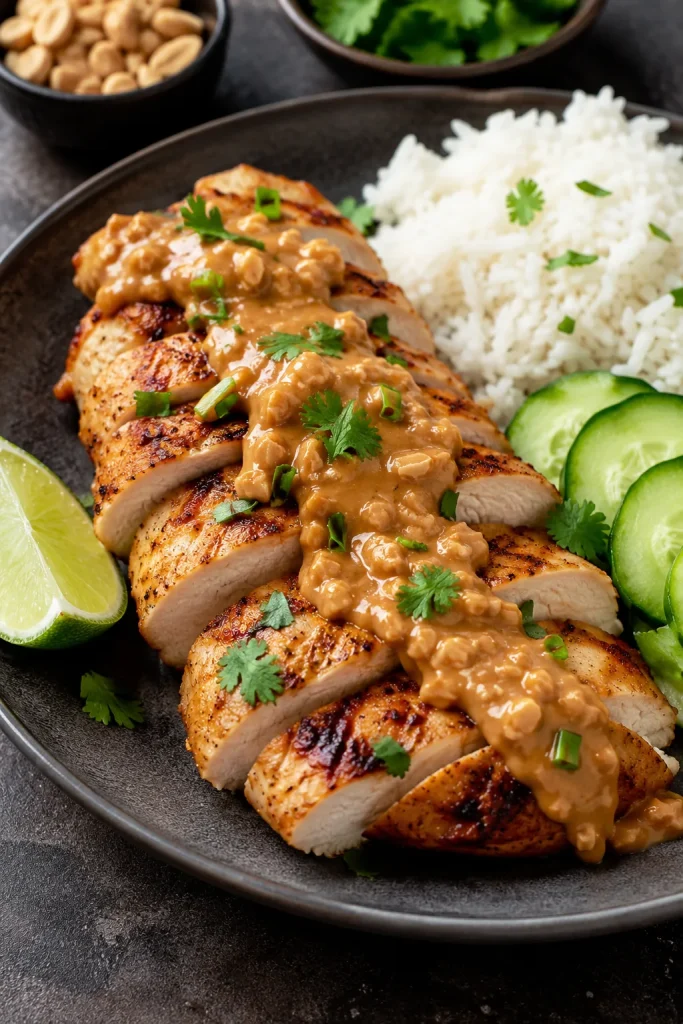
Sliced grilled chicken with peanut sauce, white rice, cucumber, lime and herbs.
For everyday chicken, keep the sauce savory and medium-thick. It should drizzle over the slices, season the rice and stay balanced without tasting dessert-sweet.

Tofu

Tofu can take this sauce in two directions. Keep it thicker if you want to coat crispy tofu, or make it slightly looser if you want to drizzle it over a tofu bowl. Tofu loves a bolder sauce because it gives the peanut, lime, chili, and ginger room to show up.

For crispy tofu, keep the sauce thick enough to coat without covering every crunchy edge.
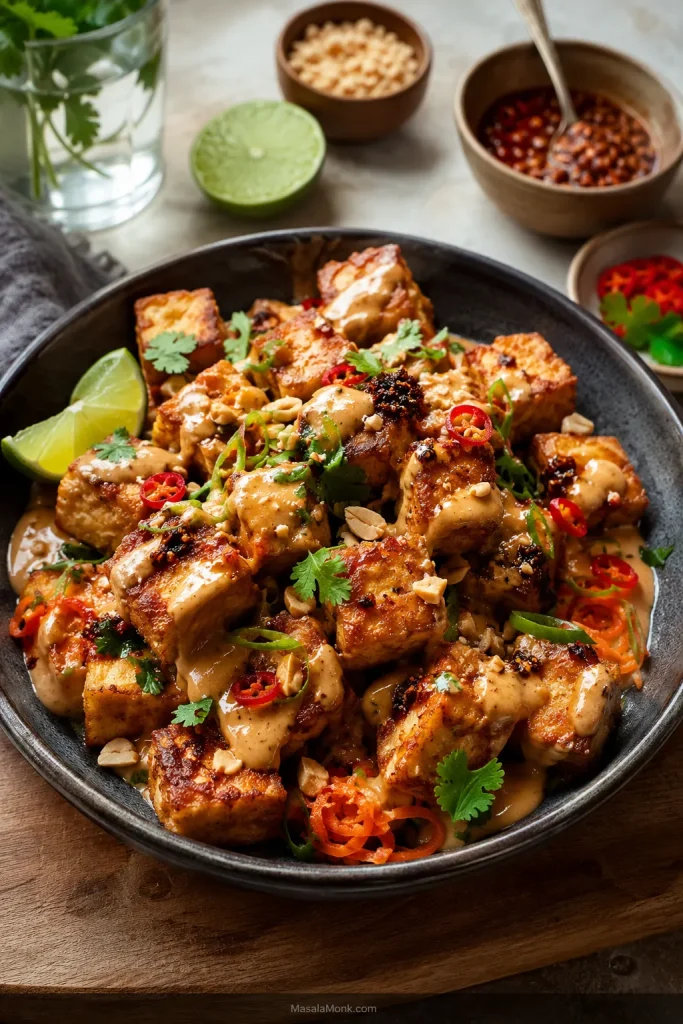
Crispy golden tofu cubes with peanut sauce, chili, herbs, lime and crushed peanuts.
Crispy tofu can take a thicker peanut sauce because the edges stay sturdy. Then chili, lime, ginger and crushed peanuts help the tofu taste bold instead of bland.

For a vegan version, maple syrup or brown sugar keeps the sweetness simple. Gluten-free bowls work best with tamari for the same savory depth. When you need a soy-free version, use coconut aminos and adjust with salt and lime at the end.

Rice Bowls and Meal Prep

In rice bowls, aim for a slow drizzle, not a watery pour. It should settle into the rice, vegetables, and protein without disappearing. Fluffy rice matters because it can hold the sauce without turning gummy.

Rice bowls need a slow drizzle that settles into the grains and makes leftovers feel intentional.
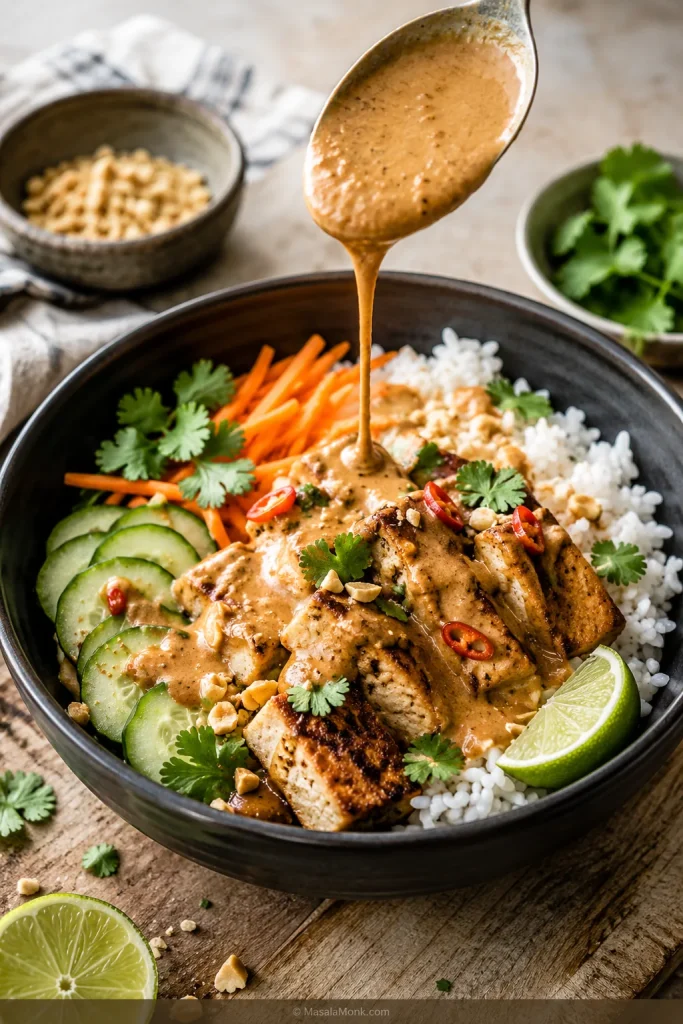
Rice bowl with tofu, vegetables, herbs, lime and peanut sauce being drizzled from a spoon.
In rice bowls, aim for a slow peanut sauce drizzle that settles into the grains without disappearing. This is where leftover rice and vegetables start to feel planned.

When meal prepping, store the sauce separately. It will thicken in the fridge, so re-whisk it with a splash before adding it to bowls, noodles, or salads. A jar of peanut sauce can make leftover rice, roasted vegetables, cooked chicken, tofu, or even plain cucumber feel intentional.

For a full bowl meal, the same creamy-salty idea works beautifully in a Thai-style vegan bowl with peanut butter dressing.

Peanut Dressing for Salads, Slaw and Bowls

To make peanut dressing for salad, slaw, or cold noodle salad, use more liquid than you would for dipping. It should pour easily from a spoon and taste brighter than satay sauce.

Start with ½ cup peanut sauce, then whisk in 2 to 4 tablespoons water. Add 1 to 2 teaspoons extra lime juice or rice vinegar if the dressing tastes heavy. A good peanut dressing should taste a little brighter than you think, because raw vegetables soften its sharpness once everything is tossed.

For salad and slaw, the sauce has to pour easily and taste brighter than it would as a dip.
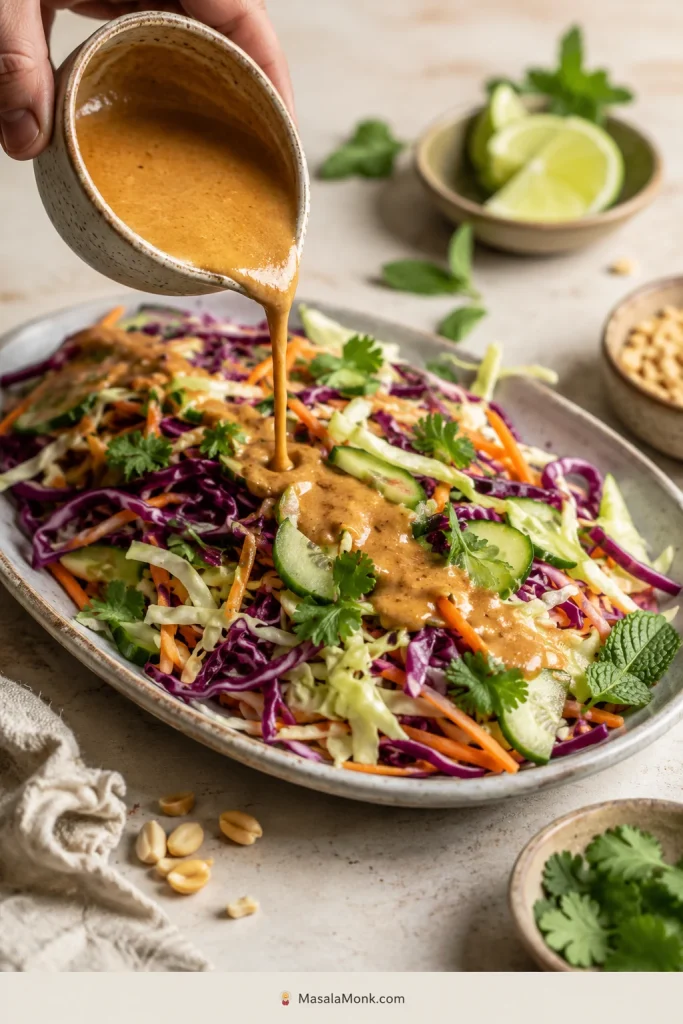
Pourable peanut dressing being drizzled over cabbage, cucumber and carrot slaw.
For slaw and salads, make the peanut dressing brighter and thinner than a dip. Once it hits cabbage, cucumber and carrots, the extra tang keeps everything fresh instead of heavy.

Once it hits cabbage, cucumber, herbs, or shredded carrots, that extra brightness settles into balance. Use it on cabbage slaw, Thai peanut salad, cold noodle salad, lettuce wraps, grilled vegetables, or shredded chicken salad. It also works beautifully beside a crisp cucumber salad, especially when the meal has satay-style chicken, tofu, noodles, or grilled vegetables.

Rich toppings like avocado, fried tofu, or chicken need more lime. Mostly raw vegetables can handle a dressing that is a little sweeter and saltier.

Everyday Peanut Sauce, Vietnamese-Style Hoisin Dip and Satay-Style Sauce

Peanut sauce can mean different things depending on the dish. This recipe is an everyday peanut-butter sauce for home cooking, not a claim that all peanut sauces are the same. Traditional and regional versions may use roasted peanuts, tamarind, palm sugar, fish sauce, coconut milk, hoisin, curry paste, or other aromatics depending on the cuisine and dish.

Use the color and thickness of the sauce to understand which direction it has moved: everyday dip, hoisin dip or satay-style sauce.
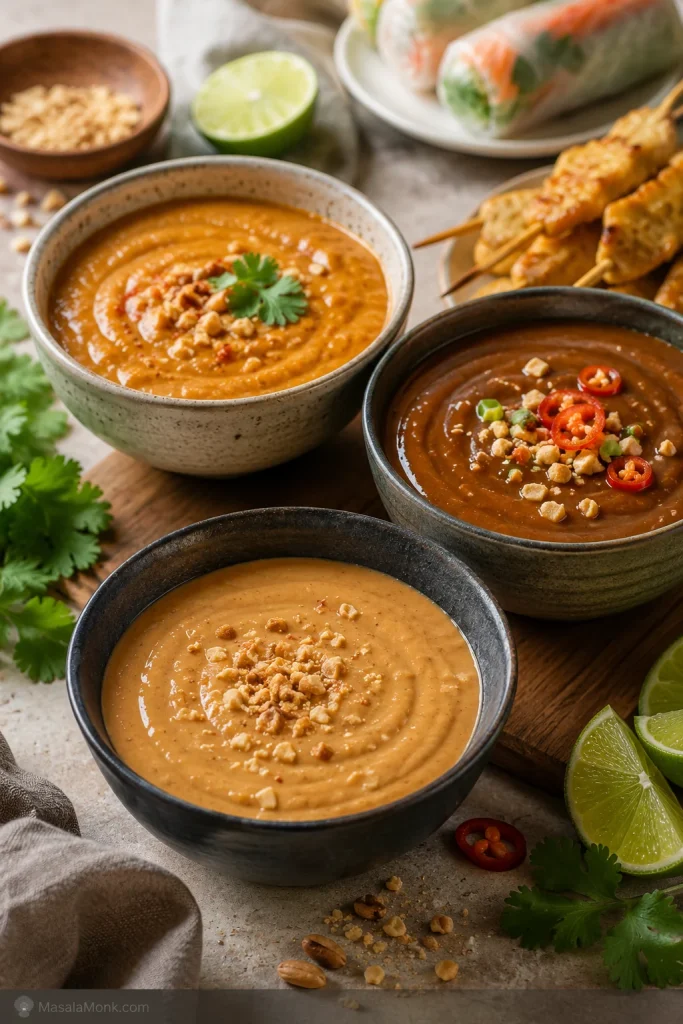
Three bowls showing light peanut sauce, darker hoisin peanut dip and golden satay-style peanut sauce.
One peanut sauce base can move in three directions: everyday dip, Vietnamese-style hoisin peanut sauce or warmer satay-style sauce. The color and thickness show where it belongs.
  • Thai-inspired home-cooking peanut sauce: often a flexible peanut butter sauce with soy or tamari, lime, rice vinegar, chili, ginger, garlic, and water. Use it for dipping, noodles, chicken, tofu, bowls, and salads.
  • Vietnamese-style spring roll sauce: often brings in hoisin with peanut butter, garlic, and water, milk, or coconut milk. Use it for fresh spring rolls, rice paper rolls, shrimp rolls, and summer rolls.
  • Satay-style peanut sauce: usually richer, thicker, and often warm, sometimes with coconut milk, curry paste, fish sauce, or crushed peanuts. Use it for chicken satay, tofu satay, skewers, and grilled vegetables.

The main sauce here is flexible and quick. Add hoisin, and it moves toward a Vietnamese-style spring roll dip. Stir in coconut milk and curry paste, and it becomes warmer, richer and closer to a satay-style sauce.

Substitutions and Variations

This is where peanut sauce is forgiving, but not automatic: every swap changes the balance a little. Use the table as a starting point, then taste again once the texture is right.

NeedUseWatch Out For
Gluten-free peanut sauceTamari or certified gluten-free soy sauceCheck labels on hoisin, chili sauce, and curry paste
Soy-free peanut sauceCoconut aminosAdd salt and lime because coconut aminos are sweeter and less salty
Vegan peanut sauceMaple syrup or brown sugar instead of honeySkip fish sauce in the satay-style variation
Richer satay-style sauceCoconut milk or coconut creamAdd lime or vinegar if it tastes too heavy
Vietnamese-style dipHoisin added to the base sauceAdd lime or vinegar if it tastes too sweet
Spicy peanut sauceSriracha, chili garlic sauce, sambal, chili crisp, or red pepper flakesAdd heat slowly; peanut butter can hide spice at first
Mild peanut sauceSkip chili sauce or use a tiny pinch of chili flakesAdd extra ginger or lime so it does not taste flat
More textureCrushed roasted peanuts or blended roasted peanutsAdd extra liquid if the sauce thickens

Emergency 3-Ingredient Peanut Sauce

If you do not have all the ingredients, you can still make a quick peanut sauce. It will not taste as layered as the full version, but it works for noodles, dipping, wraps, or a fast bowl sauce.

Simple Version

  • 3 tablespoons peanut butter
  • 1 tablespoon soy sauce or tamari
  • 1 to 3 tablespoons warm water

Whisk everything together until smooth. Add lime juice, rice vinegar, chili sauce, garlic, or sweetener if you have them.

Better 3-Ingredient Version

  • 3 tablespoons peanut butter
  • 1 tablespoon soy sauce or tamari
  • 1 tablespoon lime juice or rice vinegar

Whisk with enough liquid until the sauce reaches the texture you need. This version tastes more balanced because the acid cuts through the peanut butter.

How to Fix Peanut Sauce

Most peanut sauce problems are not recipe failures; they are texture problems. Too thick, too salty, too heavy, grainy, separated, or sticky on noodles usually means the sauce needs one small adjustment, not a full restart.

Rule one still applies: fix texture first, then salt, then acid, then sweetness, then heat. If the problem happened after chilling, the storage and make-ahead fix may be all you need.

Fix Texture First, Then Flavor

If the noodles clump, treat it as a sauce-texture problem before you change the flavor.
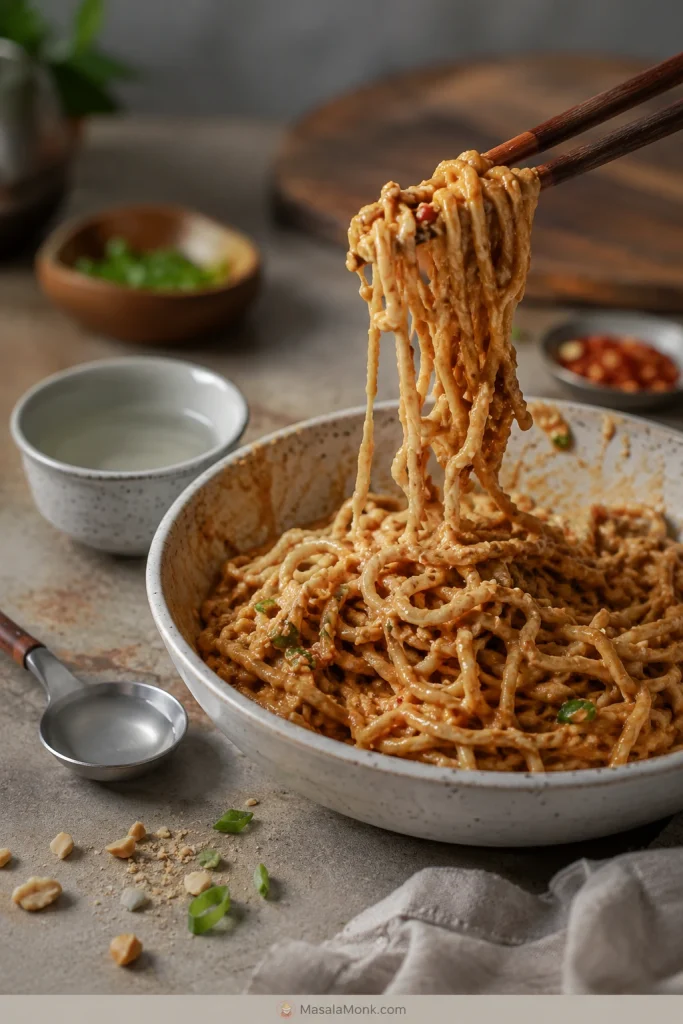
Chopsticks lifting peanut noodles that have clumped because the sauce is too thick.
If peanut noodles turn sticky, the sauce usually needs hot water or noodle water, not a remake. Add a spoonful, toss again and let the sauce relax around the noodles.
ProblemWhy It HappenedFix
Too thickPeanut butter seized, not enough water, or sauce chilledWhisk in warm water 1 tablespoon at a time
Too thinToo much liquid was addedAdd peanut butter 1 tablespoon at a time
Too saltyToo much soy sauce, tamari, or fish sauceAdd peanut butter, lime juice, sweetener, or water
Too sweetToo much sugar, honey, maple syrup, or hoisinAdd lime juice, rice vinegar, chili, or soy sauce
Too spicyToo much chili sauce or curry pasteAdd peanut butter, coconut milk, sweetener, or water
GrainyNatural peanut butter, cold liquid, or poor mixingUse warm water and whisk hard, or blend briefly
Oily or separatedPeanut butter separated, sauce chilled, or sauce overheatedRewarm gently and whisk in warm water
BlandNeeds salt, acid, heat, or aromaticsAdd soy sauce or tamari, lime, vinegar, ginger, garlic, or chili
Too heavyToo much peanut butter or not enough acidAdd lime juice, rice vinegar, water, and fresh herbs
Noodles turned stickyThe sauce thickened after tossingAdd hot water or noodle water and toss again

Noodles need the loosest sauce. Satay can stay thicker and warmer. Spring rolls need a dip that coats the rice paper but still feels easy to bite through.

Storage and Make-Ahead

Store peanut sauce in an airtight jar or container in the fridge for up to 1 week. It will thicken as it chills, so do not judge the texture straight from the fridge.

Straight from the fridge, peanut sauce can look hopeless, but it is not broken; it is just waiting for a splash of water and a firm whisk. Let it sit for a few minutes before adding too much liquid, because the sauce often softens as it warms slightly.

A short rest and a firm whisk are usually enough to bring refrigerated peanut sauce back.
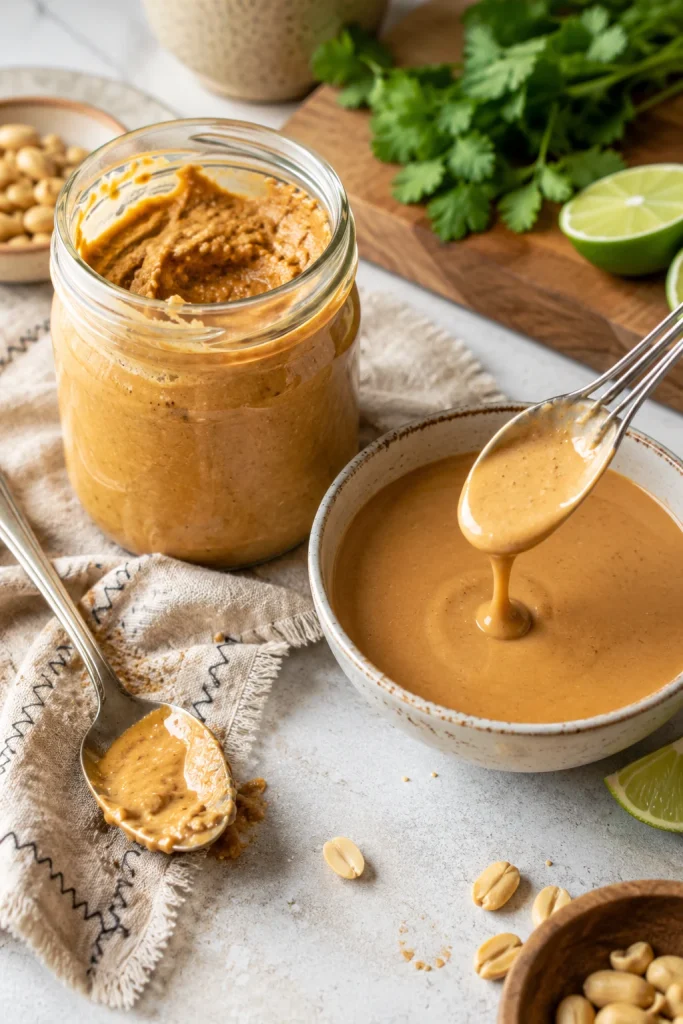
Glass jar of thick refrigerated peanut sauce beside a bowl of re-whisked pourable peanut sauce.
After chilling, peanut sauce often looks thicker than expected. Let it sit briefly, then re-whisk with a splash of water until it flows again.

Noodles usually need more liquid than you expect. Spring roll dip only needs enough water to flow again. Satay-style sauce is best rewarmed gently, then loosened with water or coconut milk.

You can freeze peanut sauce if needed, but the texture may change after thawing. Thaw it in the fridge, then whisk or blend it with a splash of warm water until smooth.

What to Serve with Peanut Sauce

Once the sauce is in the fridge, the question becomes less “what recipe am I making?” and more “what needs help tonight?” Use it where you want something fresh and cool, warm and grilled, dinner-like, or snacky and dippable.

MoodServe It With
Fresh and coolFresh spring rolls, rice paper rolls, summer rolls, shrimp rolls, cabbage slaw, cucumber salad, Vegan Som Tam / Thai raw papaya salad
Warm and grilledChicken satay, tofu satay, grilled chicken, grilled paneer or tofu skewers, roasted shrimp, roasted vegetables
Full dinnerPeanut noodles, rice noodles, cold noodle salad, rice bowls, chicken bowls, tofu bowls, roasted vegetable bowls
Snacky and dippableLettuce wraps, dumplings, potstickers, fresh vegetables, crispy tofu bites

If the sauce is going over something rich, add more lime or vinegar. If it is going over plain rice, noodles, or vegetables, keep it a little saltier and spicier so it can carry the whole bowl. For a thicker Indian peanut condiment rather than a pourable sauce, try peanut chutney.

FAQ

What is peanut sauce made of?

Peanut sauce is usually made with peanut butter or ground peanuts, soy sauce or tamari, vinegar or lime juice, sweetener, chili, garlic, ginger, and water. Some satay-style versions also use coconut milk, curry paste, fish sauce, tamarind, or crushed roasted peanuts.

Is peanut sauce the same as satay sauce?

Not exactly. Peanut sauce is broad; satay sauce usually means the richer peanut-based sauce served with satay skewers.

Do you serve peanut sauce warm or cold?

Serve it room temperature or slightly chilled for spring rolls, warm for satay, and loosened with hot water for noodles. For salad dressing, chilled or room temperature both work.

How do you thin peanut sauce for spring rolls?

Add water 1 tablespoon at a time until the sauce is easy to dip. It should cling lightly to the spring roll without feeling pasty or running off immediately.

Why did my peanut sauce get so thick?

It thickens because peanut butter absorbs liquid and firms up as it sits, especially in the fridge. Whisk in a splash of water at a time until it relaxes again.

What peanut butter works best for peanut sauce?

Creamy natural peanut butter gives the cleanest peanut flavor. Regular creamy peanut butter also works, but it is usually sweeter, so start with less sweetener. Crunchy peanut butter works if you do not mind a textured sauce.

How long does peanut sauce last in the fridge?

It keeps well in an airtight jar in the fridge for up to 1 week. It will thicken as it chills, so whisk in a splash of water before serving.

Is peanut sauce gluten-free?

It can be gluten-free if you use tamari or certified gluten-free soy sauce. Check labels on hoisin, chili sauce, curry paste, and any bottled ingredients because they can vary.

How do you make peanut sauce vegan?

Use maple syrup or brown sugar instead of honey, and skip fish sauce in the satay-style variation. The 5-minute sauce is easy to keep vegan with peanut butter, tamari or soy sauce, lime, vinegar, chili, garlic, ginger, and water.

Can you make peanut sauce without peanut butter?

Yes, but it becomes a different sauce. For a similar creamy dip, use tahini, almond butter, cashew butter, or sunflower seed butter, then adjust salt, acid, sweetness, and liquid to taste. For peanut allergies, do not call it peanut sauce when serving guests; label it clearly.

How much peanut sauce do you need for noodles?

For 2 servings of noodles, start with about ½ cup peanut sauce and thin it with 2 to 4 tablespoons hot water or noodle water before tossing. For 8 ounces / 225 g noodles, use about ½ to ¾ cup sauce depending on how saucy you want them.

Make It Your House Sauce

Make it once, then keep adjusting it by feel. One night, it is a dip for fresh rolls. Another night, it saves plain noodles. Later in the week, it can turn leftover rice, tofu, chicken, or vegetables into a meal you actually meant to make. That is when peanut sauce becomes the jar you are glad to have waiting in the fridge.

If you try it, I would love to know where it landed first: spring rolls, noodles, satay, tofu, or a fridge-cleanout bowl. That is usually the version worth saving and making again.
Posted on Leave a comment

Tartar Sauce Recipe: Easy Homemade Sauce for Fish and Chips

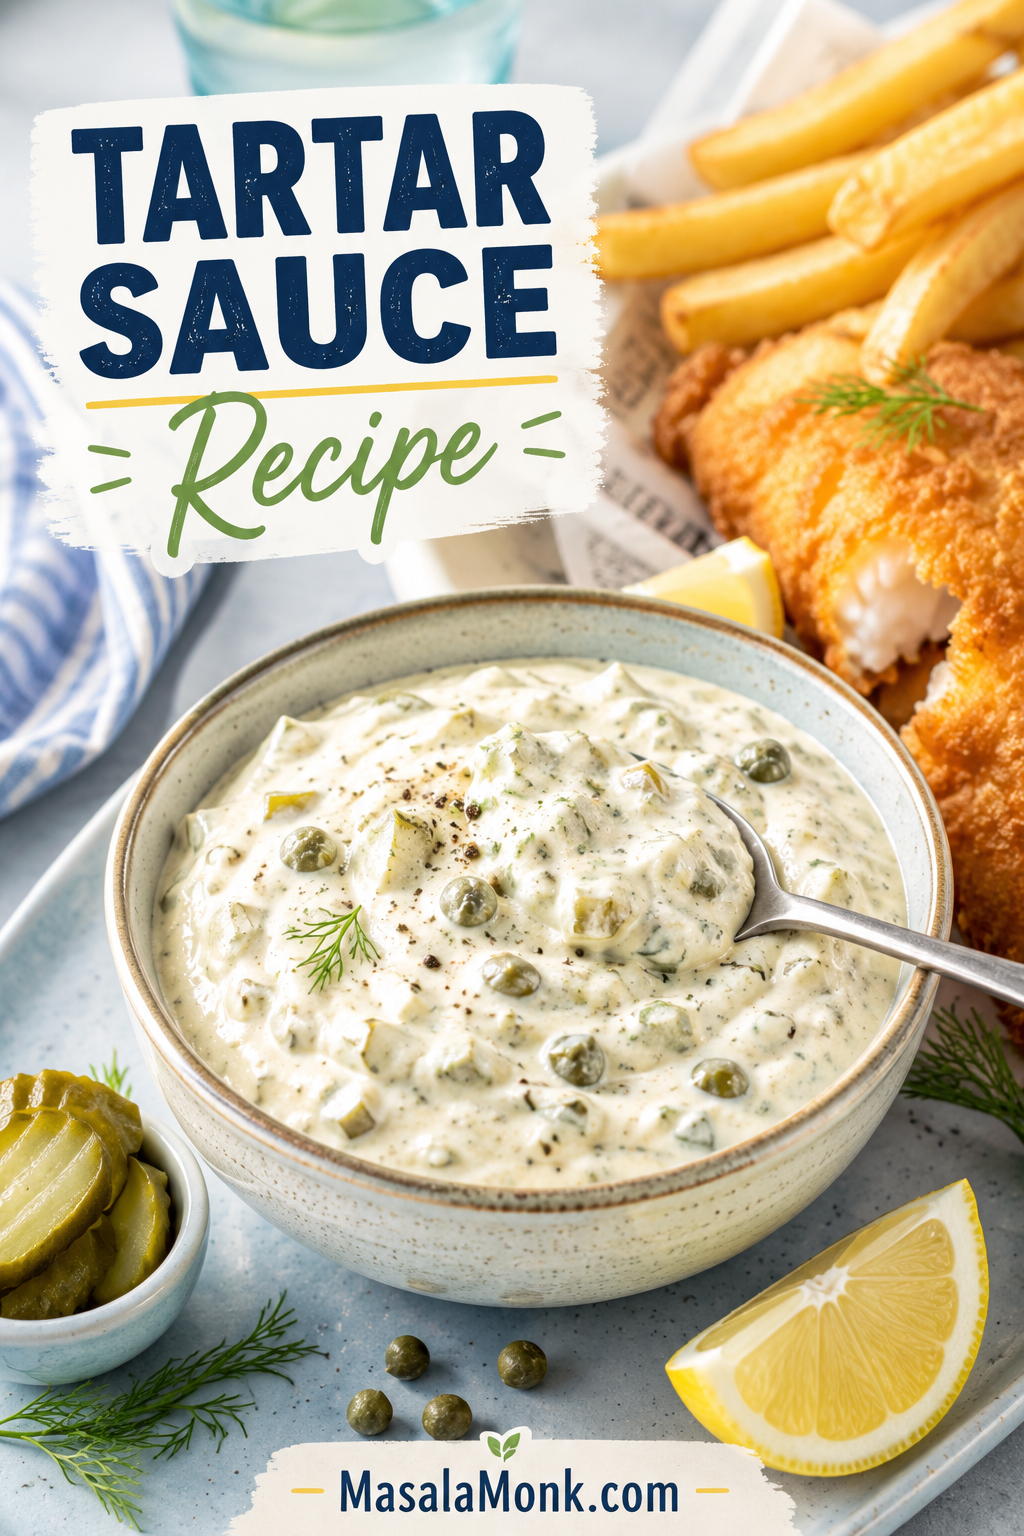
Bowl of thick homemade tartar sauce with pickle and herb flecks served beside crispy fish, chips, lemon, and fresh herbs

The best tartar sauce recipe makes hot fried fish taste better, not heavier. It should be creamy enough to cling, loose enough to spoon, and full of tiny pickle-and-caper bites so every forkful gets a little crunch, lemon, salt, and freshness.

This no-cook homemade tartar sauce is built for fish and chips, fish sticks, crab cakes, salmon cakes, shrimp, fries, and fried fish sandwiches. Start with the classic dill pickle version when you want the best match for fish and chips, use the quick relish version when dinner is moving fast, and use the substitution notes when the fridge is missing relish, pickles, capers, lemon, or mayo.

Quick Answer: How to Make Tartar Sauce

To make tartar sauce, stir mayonnaise with finely chopped dill pickles or relish, lemon juice, capers, Dijon mustard, herbs, and black pepper. Chill it for 15 to 30 minutes if you have time. For fish and chips, start with dill pickles, gherkins, or cornichons; for fish sticks or soft fish sandwiches, sweet relish gives a milder diner-style sauce.

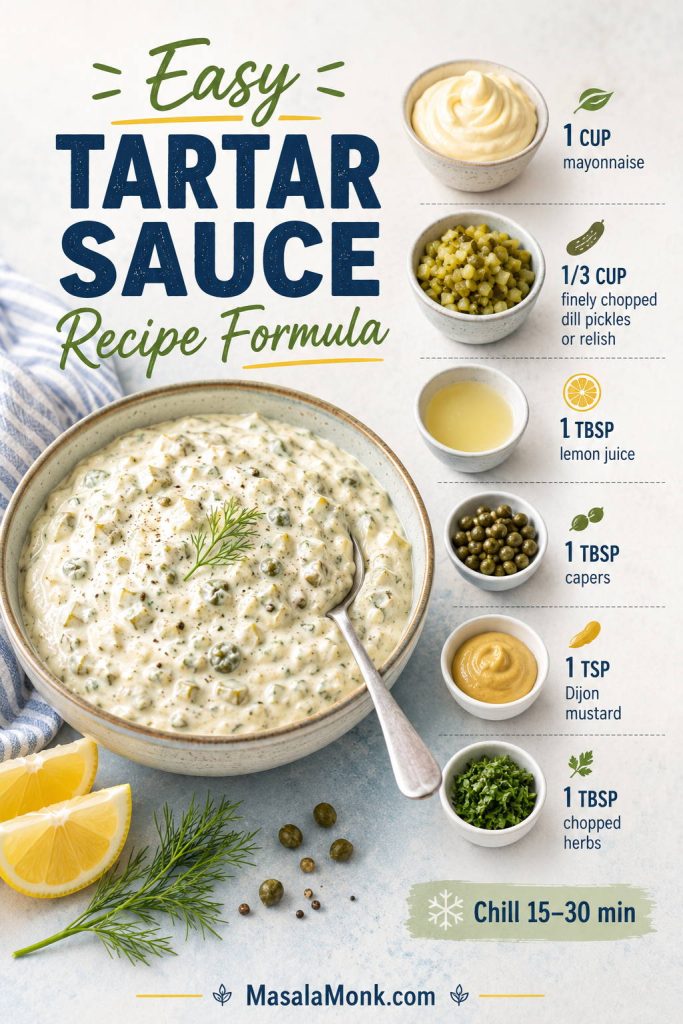
Best default ratio: For every 1 cup of mayo, use about ⅓ cup finely chopped dill pickles or relish, 1 tablespoon lemon juice, 1 tablespoon capers, 1 teaspoon Dijon, and 1 tablespoon chopped herbs. Make it before you start frying, and the sauce will be cold, rested, and ready when the fish hits the plate.

Formula board showing mayonnaise, chopped dill pickles or relish, lemon juice, capers, Dijon mustard, herbs, chill time, and finished tartar sauce
Use this formula as the starting point, then taste after chilling; the pickles, capers, lemon, and herbs settle as they rest.

Not sure which version fits your meal? Use the style guide below before you start mixing.

Homemade Tartar Sauce at a Glance

Prep time10 minutes
Cook time0 minutes
Rest time15–30 minutes recommended; 1 hour if using raw onion or shallot
YieldAbout 1¼ cups / 300 ml
Serving size2 tablespoons / 30 ml
Servings8–10
Best withFish and chips, fried fish, fish sticks, seafood cakes, shrimp, fries, and fish sandwiches
Main textureThick, spoonable, lightly chunky, and easy to dip
StorageMayo-based sauce: best quality within 4–7 days; Greek yogurt sauce: 2–3 days
FreezingNot recommended

Start with this bowl when dinner is moving fast; the notes below are there for texture choices, missing ingredients, lighter bases, and different seafood plates.

Homemade Tartar Sauce Recipe for Fish and Chips

This no-cook sauce is thick enough to sit on hot fish without sliding off, but still loose enough to spoon. The key is fine chopping: the pickles and capers should show up in every bite without turning the sauce into a bowl of relish.

Make the bowl before the fish goes in the oil, and the sauce will taste more settled by the time dinner is ready.

Prep10 minutes
Cook0 minutes
Rest15–30 minutes
Yield1¼ cups / 300 ml

Ingredients

  • 1 cup mayonnaise, about 225 g / 240 ml / 8 fl oz
  • ⅓ cup finely chopped dill pickles, gherkins, or cornichons, about 55–65 g
  • 1 tablespoon capers, drained and chopped, about 9–10 g
  • 1 tablespoon fresh lemon juice, 15 ml
  • 1–2 teaspoons pickle juice, optional, for extra tang or to loosen the sauce
  • 1 teaspoon Dijon mustard, 5 ml
  • 1 tablespoon chopped fresh dill or parsley, about 2–4 g
  • 1 tablespoon finely minced shallot or onion, optional
  • ½ teaspoon Worcestershire sauce, optional
  • ¼ teaspoon black pepper
  • Salt, only if needed

Method

  1. Chop the mix-ins finely. Finely chop the pickles, capers, herbs, and optional shallot or onion. Smaller pieces give the sauce better texture and more even flavor. If one bite tastes like plain mayo and the next tastes like a pickle jar, the pieces are too big.
  2. Mix the base. Add the mayonnaise, lemon juice, Dijon mustard, and black pepper to a bowl. Stir until smooth.
  3. Fold in the flavor. Add the chopped pickles, capers, herbs, optional pickle juice, and optional onion or shallot. Stir until evenly combined.
  4. Taste before salting. Pickles and capers are salty, so add salt only after tasting.
  5. Rest if possible. Cover and refrigerate for 15–30 minutes. The sauce works immediately, but resting lets the chopped ingredients season the mayo.
  6. Adjust and serve cold. Stir once more before serving. Add lemon for lift, pickle juice for tang, mayo for softness, or capers for a saltier seafood edge.

Finished taste cue: The sauce should taste creamy first, then pickle-crunchy and lemony, with a light finish. If it feels heavy, add lemon or pickle juice. If it bites too hard, soften it with another spoonful of mayo.

Recipe Notes

  • Want it sweeter? Swap the chopped dill pickles for sweet pickle relish.
  • Serving fried fish? Use dill pickles, capers, lemon, and herbs.
  • Prefer a smoother sandwich sauce? Mince the pickles and capers very finely or pulse once or twice.
  • Making it vegan? Choose vegan mayo and skip Worcestershire sauce unless you are using a vegan one.
  • Want it lighter? Replace half or all of the mayo with plain Greek yogurt.
  • Keeping it keto? Choose full-fat mayo, dill pickles, capers, lemon, herbs, and no sweet relish or sugar.
  • Yield note: Yield varies slightly depending on how finely the pickles are chopped and whether you add pickle juice.

For more swaps and missing-ingredient fixes, see the substitution guide.

Choose Your Tartar Sauce Style

Use this table when you already know what is on the plate. It keeps the sauce matched to the meal without overthinking the bowl.

You are servingUse this style
Fish and chipsDill pickles or gherkins, capers, lemon, and herbs
Fish sticksSweet relish, mayo, and lemon juice
Fried fish sandwichFinely minced relish or pickles, a little onion, and a smoother texture
Crab cakesLemon, capers, dill, and a little extra pepper or cayenne
Salmon cakesExtra dill, lemon zest, and a thicker mayo base
No picklesCapers, shallot, lemon juice, and Dijon
Lighter sauceHalf mayo and half Greek yogurt
Keto or low-carb mealFull-fat mayo, dill pickles, capers, lemon, and no sweet relish
Guide showing tartar sauce styles for fish and chips, fish sticks, fried fish sandwiches, crab cakes, salmon cakes, lighter sauce, no-pickle sauce, and low-carb meals
The best bowl depends on the meal: sharper for crisp seafood, smoother for sandwiches, and lighter when the plate needs a fresher finish.

Why This Tartar Sauce Recipe Works

This sauce works because it balances fat, acid, salt, crunch, and rest time. Mayo gives the sauce body, while lemon and pickle juice cut through the mayo’s richness. Pickles bring texture, capers add small salty pops, and a short chill lets the chopped ingredients season the mayo instead of sitting in it separately.

That is why finely chopping matters. Large pickle pieces make some bites taste plain and others taste too sharp. Smaller pieces spread flavor through the bowl, so each spoonful lands the same way.

What Is Tartar Sauce Made Of?

Tartar sauce, also called tartare sauce in the UK and some other regions, is a creamy sauce usually made with mayonnaise, pickles or relish, lemon juice, herbs, and salty ingredients such as capers. It is most often served with fried fish, fish and chips, fish sticks, crab cakes, shrimp, and seafood sandwiches.

The creamy base can be as simple as store-bought mayo, but if you want to build the sauce from scratch, MasalaMonk’s mayo recipe walks through classic, eggless, vegan, garlic, spicy, and herb mayo options.

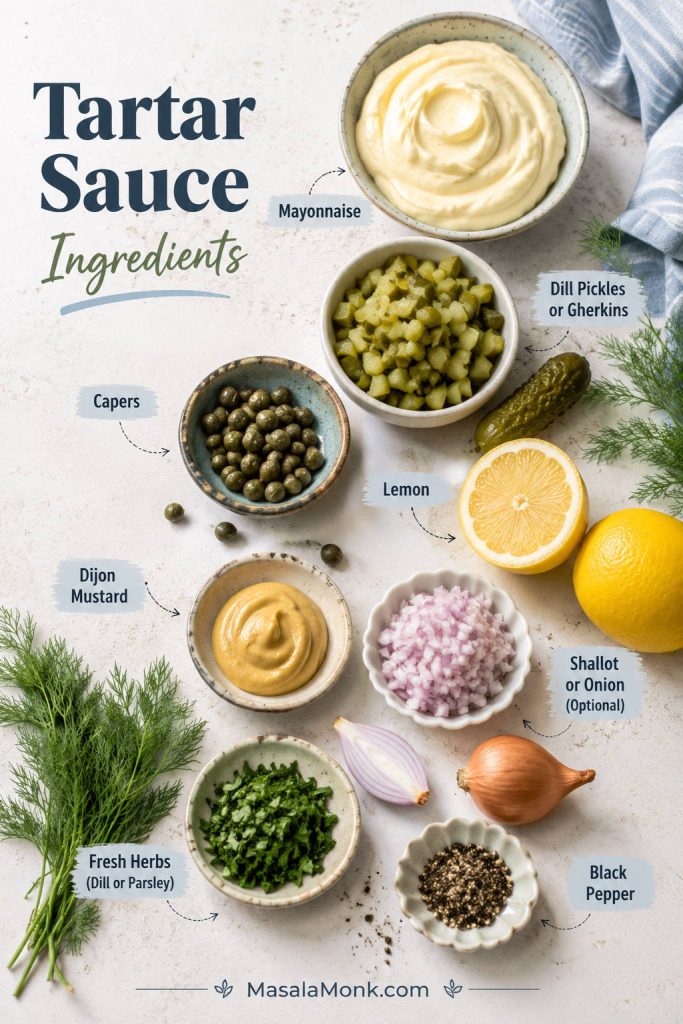
Tartar sauce ingredients on a light surface, including mayonnaise, dill pickles, capers, lemon, Dijon mustard, herbs, black pepper, and shallot
This small ingredient list works because every part has a job: mayo gives body, pickles add crunch, capers bring salt, and lemon keeps the sauce awake.
IngredientWhat it doesCan you skip or swap it?
MayonnaiseCreates the thick, creamy base.Swap in vegan mayo, Greek yogurt, sour cream, or a half-mayo, half-yogurt mix.
Dill pickles, gherkins, or cornichonsAdd crunch, acidity, and pickle flavor.Sweet relish works for a sweeter sauce; capers help if you have no pickles.
CapersAdd small salty pops that suit seafood.Optional, but worth using. Replace with extra pickles or pickle juice.
Lemon juiceLifts the mayo and cuts through fried food.Pickle juice, white vinegar, or apple cider vinegar can stand in.
Dijon mustardAdds gentle sharpness and depth.Yellow mustard, a little vinegar, or no mustard at all will still work.
Dill, parsley, chives, or tarragonAdd freshness and color.Dried dill works in a pinch; otherwise, leave herbs out.
Shallot or onionAdds savory bite.Optional. Onion powder gives a milder pantry-style flavor.
Worcestershire sauceAdds a deeper savory note.Optional. Skip for vegetarian or vegan tartar sauce unless using a vegetarian or vegan Worcestershire.

The Only Equipment Detail That Matters: Chop Size

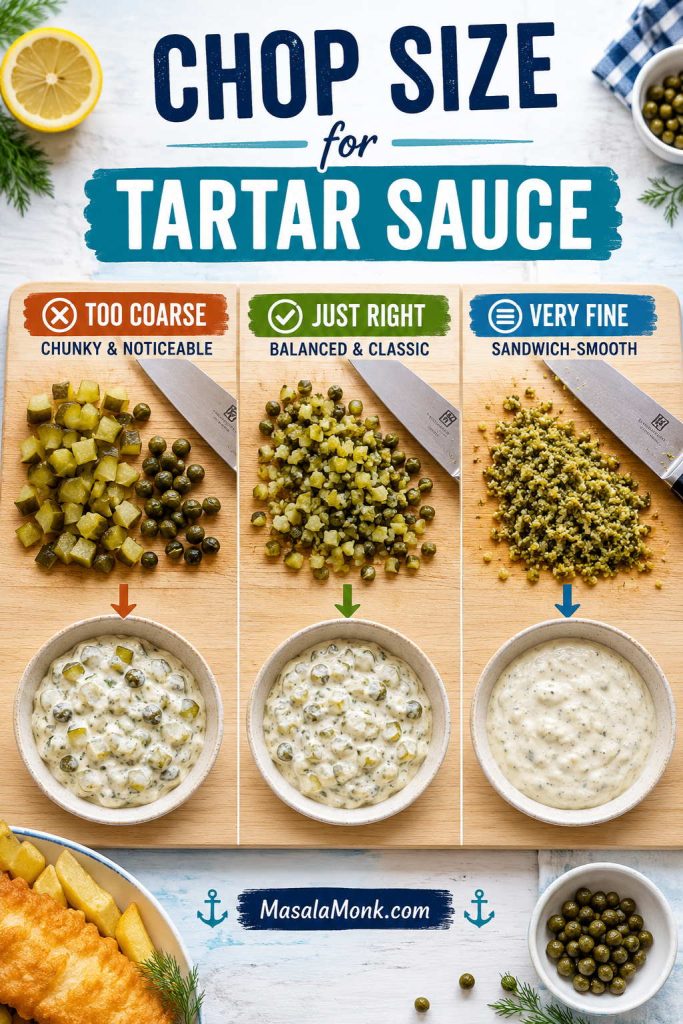
No blender is needed. A bowl, spoon, knife, cutting board, and storage jar are enough. The important part is chop size: pickles and capers should be small enough to spread through the mayo, but not so tiny that the sauce loses texture.

Comparison of coarse, fine, and very fine chopped pickles and capers with tartar sauce texture samples
Chop size is the quiet difference between homemade tartar sauce that tastes balanced and a bowl where one bite is plain while the next is all pickle.

Use a small food processor only when you want a smoother sandwich-style sauce. For dipping fish and chips, a knife gives better control.

After chopping, check the finished texture target so the sauce clings without turning stiff or runny.

How to Make Tartar Sauce Step by Step

1. Chop the Pickles and Capers Finely

The sauce should not feel like chopped pickles held together with mayo. Chop the pickles, capers, herbs, and optional onion finely so every spoonful tastes balanced. If the pieces are too large, some bites taste salty and others taste plain.

2. Mix the Mayo, Lemon, and Mustard First

Add the mayonnaise to a small bowl, then stir in the lemon juice, Dijon mustard, and black pepper. This loosens the mayo slightly and helps the sharper ingredients spread evenly before the chunky ingredients go in.

3. Fold in the Pickles, Capers, and Herbs

Add the chopped pickles, capers, herbs, and optional onion or shallot. Stir until everything is evenly coated. The sauce should look creamy and speckled, with small bits of pickle, caper, and herbs in every spoonful.

4. Taste Before Adding Salt

Pickles, relish, capers, mustard, and Worcestershire sauce can all bring salt. Taste before adding more. If the bowl feels dull, it may need lemon juice, pickle juice, capers, or mustard before it needs salt.

5. Chill, Then Adjust

You can serve it immediately, but 15–30 minutes in the fridge improves the flavor. Stir once more before serving. Add lemon for lift, pickle juice for tang, mayo for softness, or capers for a saltier seafood edge.

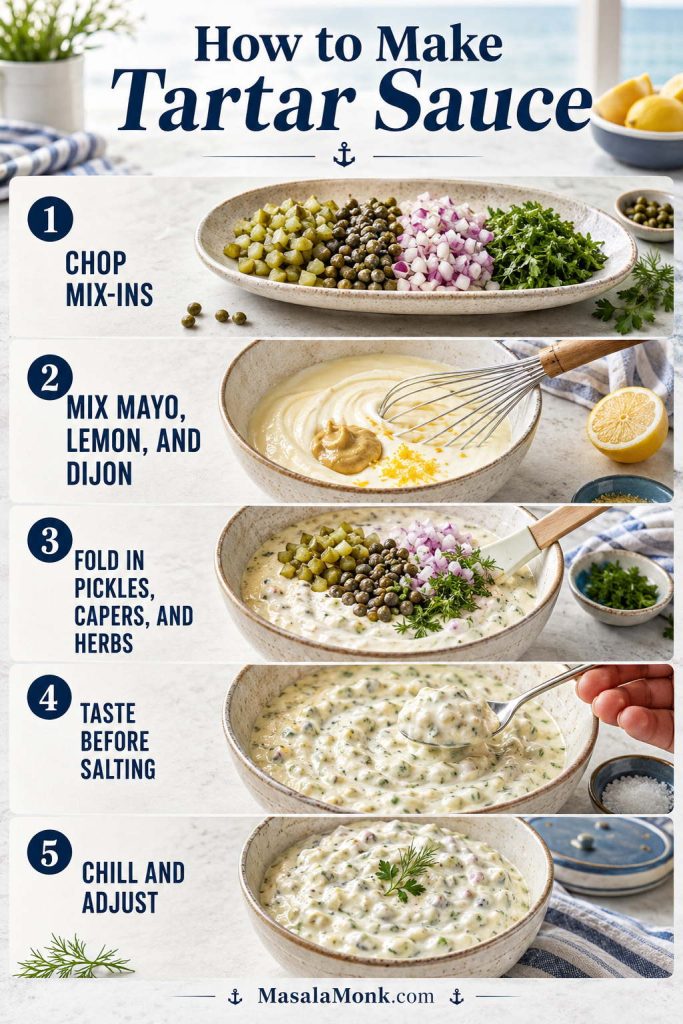
Here is the full stir-and-chill sequence at a glance.

Step-by-step tartar sauce process showing chopped mix-ins, mayonnaise base, pickles, capers, herbs, tasting, chilling, and finished sauce
Even though tartar sauce is no-cook, sequence still matters: chop small, season the base, fold gently, taste late, and chill before serving.

Texture Target: Chunky Dip or Smooth Sandwich Sauce

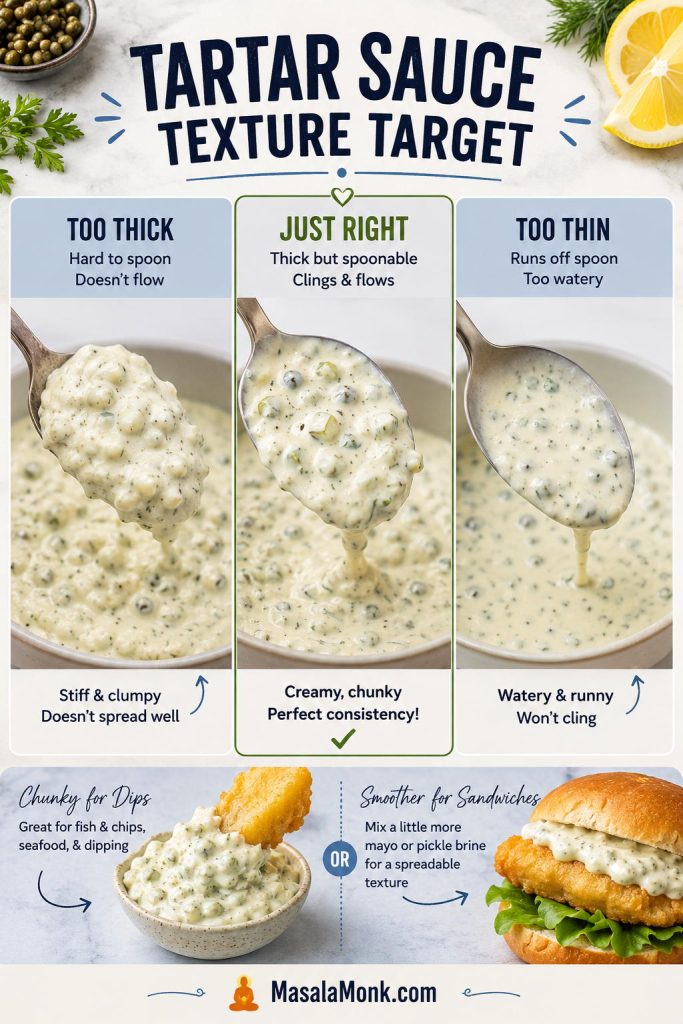
The sauce should be thick enough to sit on a piece of fish without sliding off, but loose enough to spoon easily. For dip texture, keep the pickles and capers finely chopped but visible. For sandwich texture, mince everything smaller or pulse once or twice.

Texture guide showing tartar sauce that is too thick, just right, too thin, chunky for dipping, and smoother for sandwiches
Aim for a sauce that holds on a spoon without feeling stiff. Keep dip versions chunkier and sandwich versions finer.

If the sauce looks stiff, loosen it with pickle juice, lemon juice, or a teaspoon of water. If it looks runny, add a spoonful of mayo and chill it for 15–30 minutes. A good bowl should cling, not puddle.

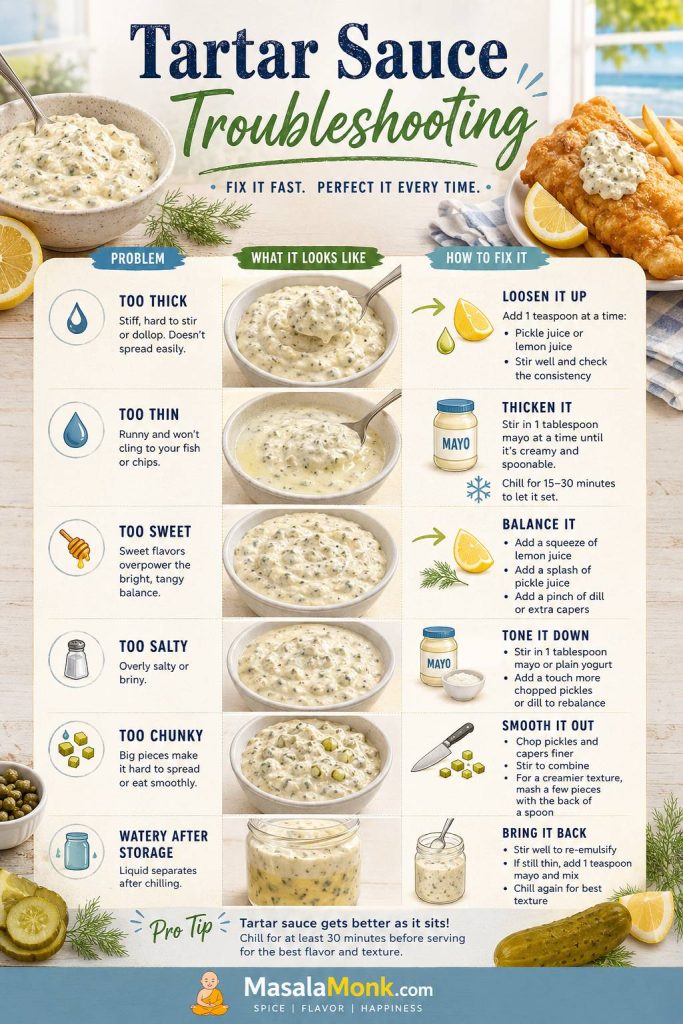
If the sauce has already gone too thick, thin, sweet, or salty, use the troubleshooting guide before making bigger changes.

3-Ingredient Tartar Sauce

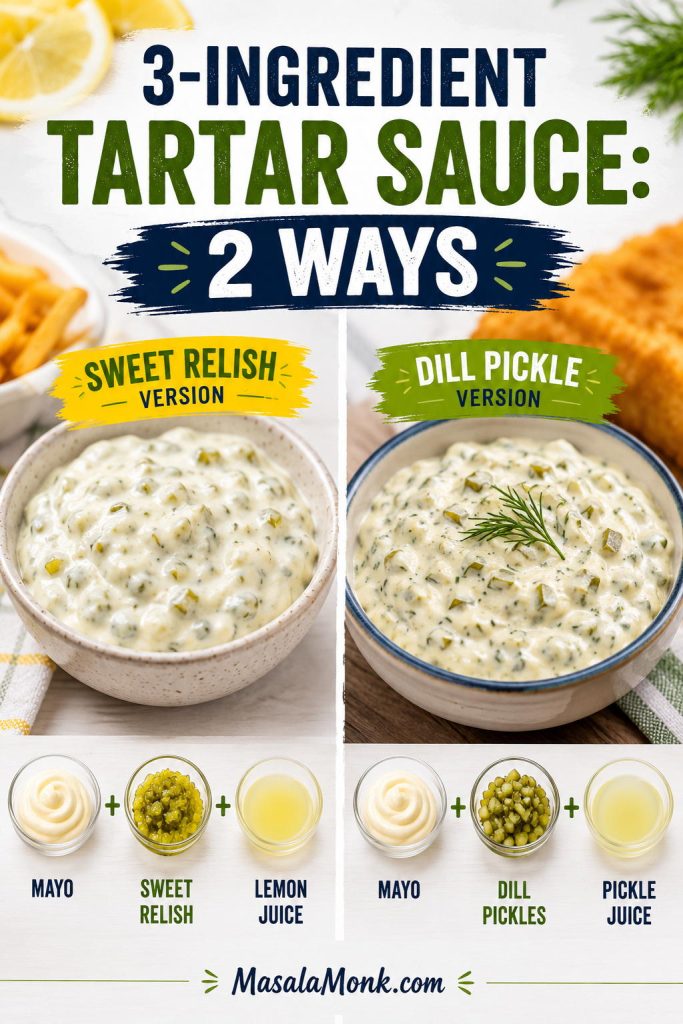
When you need the fastest bowl, you only need mayonnaise, pickles or relish, and lemon juice or pickle juice. This quick pantry sauce is not as layered as the full recipe, but it is exactly right for fish sticks, quick fried fish, frozen seafood, sandwiches, and busy weeknight dinners.

In a hurry, use relish and the sauce is closer to 5 minutes. For the best fish-and-chips texture, finely chopping pickles, capers, and herbs is worth the extra few minutes.

Sweet Relish 3-Ingredient Tartar Sauce

  • 1 cup mayonnaise
  • ⅓ to ½ cup sweet pickle relish
  • 1 teaspoon lemon juice

Dill Pickle 3-Ingredient Tartar Sauce

  • 1 cup mayonnaise
  • ⅓ cup finely chopped dill pickles
  • 1–2 tablespoons pickle juice or lemon juice

Stir, taste, and chill if possible. More pickle juice makes the bowl tangier; another spoonful of mayo softens it.

Two three-ingredient tartar sauces made with mayonnaise, sweet relish or dill pickles, and lemon juice or pickle juice
Three ingredients can still make a useful quick tartar sauce: relish gives a softer finish, while dill pickles give a sharper one.

If one of those ingredients is missing, the substitution section below will help you rebuild the bowl.

Sweet Relish vs Dill Pickles: Which Is Better?

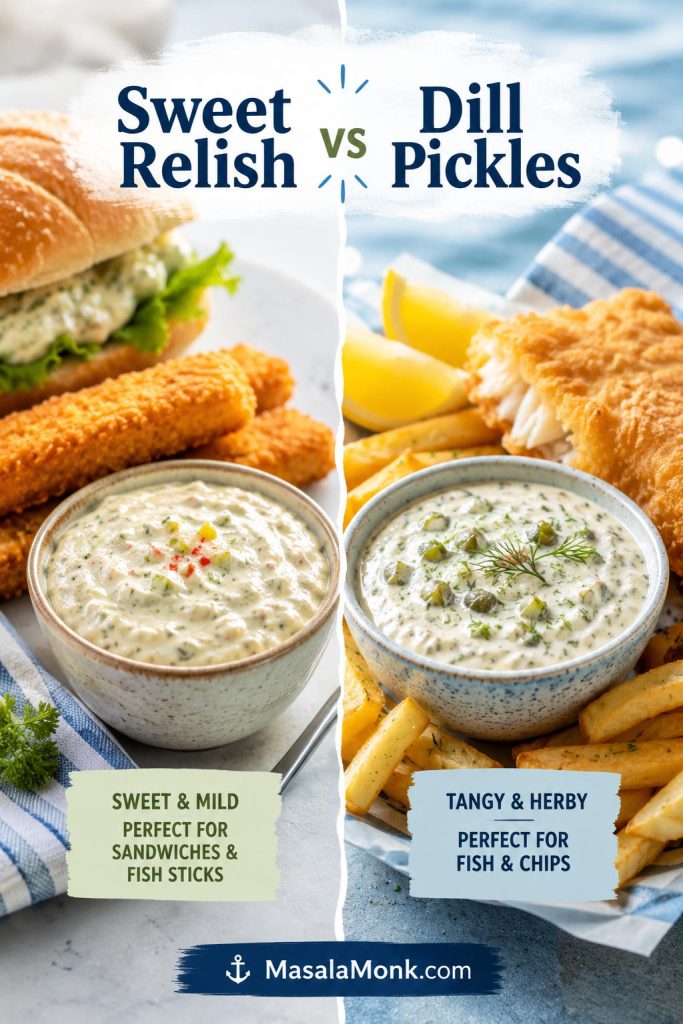
Team dill pickle for fish and chips, team sweet relish for fish sticks — both have a place, but they are not the same sauce. Dill pickles, gherkins, and cornichons give you a more direct pickle bite. Sweet relish gives you a softer, sweeter, more diner-style sauce.

Beside crisp battered fish, dill pickles or gherkins are the better default. If you want both directions in one bowl, use half dill pickle and half sweet relish.

Side-by-side comparison of sweet relish tartar sauce and dill pickle tartar sauce with serving cues for sandwiches and fish and chips
Sweet relish and dill pickles both belong in tartar sauce, but they solve different cravings: soft and familiar versus crisp and pickle-bright.

For the full fried-fish version, jump to the fish-and-chips sauce section.

Best Tartar Sauce for Fish and Chips

The best tartar sauce for fish and chips should be thick, cold, pickle-forward, and lemony enough to wake up the batter. Make it first, then let it chill while the fish cooks and the chips finish.

Crispy battered fish being dipped into thick homemade tartar sauce with chips and lemon nearby
Mix the tartar sauce before frying, because a short chill makes the sauce taste settled by the time the fish is hot and crisp.

If you are making the full meal, pair this sauce with MasalaMonk’s fish and chips recipe. While the sauce rests, you can prep the batter from MasalaMonk’s fish batter recipe so the cold sauce and hot coating are ready at the same time.

The goal is not fancy. It is that second bite where the fish still feels crisp and the sauce makes it easier to keep going.

What to Serve with Tartar Sauce

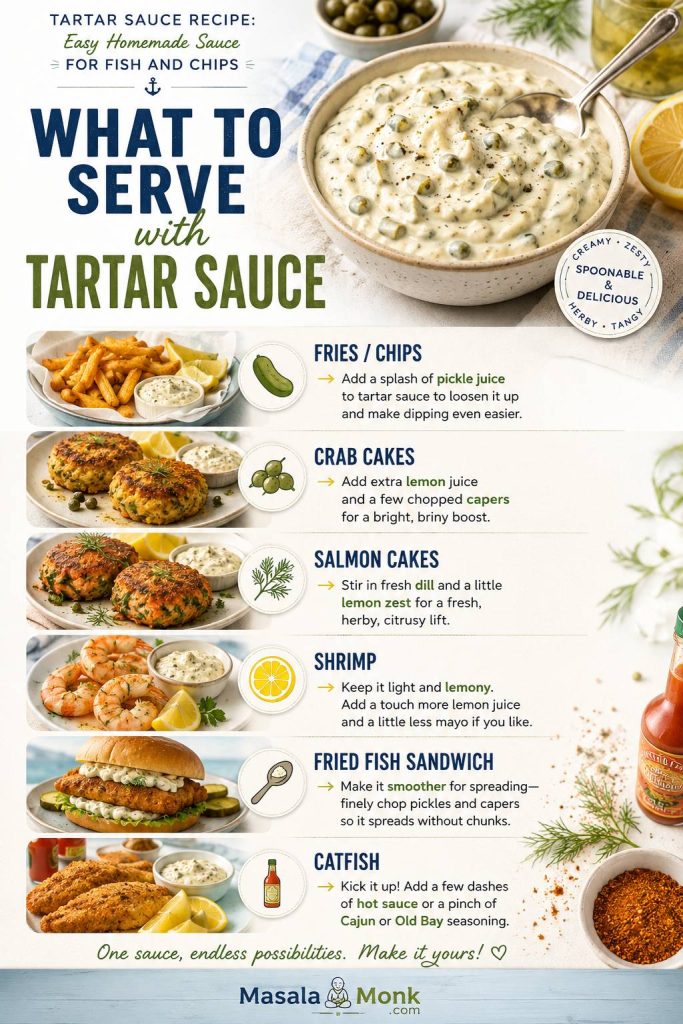
Once the basic sauce is made, adjust the texture or seasoning for the food beside it instead of repeating the whole recipe.

Serve withSmall adjustment
Fries or chipsLoosen slightly with pickle juice so it dips easily.
Crab cakesAdd extra lemon, capers, and a pinch of cayenne.
Salmon cakesAdd more dill and a little lemon zest.
ShrimpKeep it lighter with parsley, lemon, and less onion.
Fried fish sandwichMince everything smaller so the sauce spreads cleanly.
CatfishAdd hot sauce, Cajun seasoning, or Old Bay-style seafood seasoning.
Serving guide showing tartar sauce with fries, crab cakes, salmon cakes, shrimp, a fried fish sandwich, and catfish
After the base is ready, adjust by the plate: loosen it for fries, add lemon for seafood cakes, or mince it finer for a sandwich spread.

That same cold, lemony contrast works beside MasalaMonk’s fish cakes, especially against crisp potato and flaky white fish. It is just as useful with salmon croquettes, where the capers and dill echo the flavors already working in the patties.

For a fry-night plate, MasalaMonk’s battered fries give the sauce exactly what it wants: something hot, crisp, and salty to cut through.

Homemade vs Store-Bought Tartar Sauce

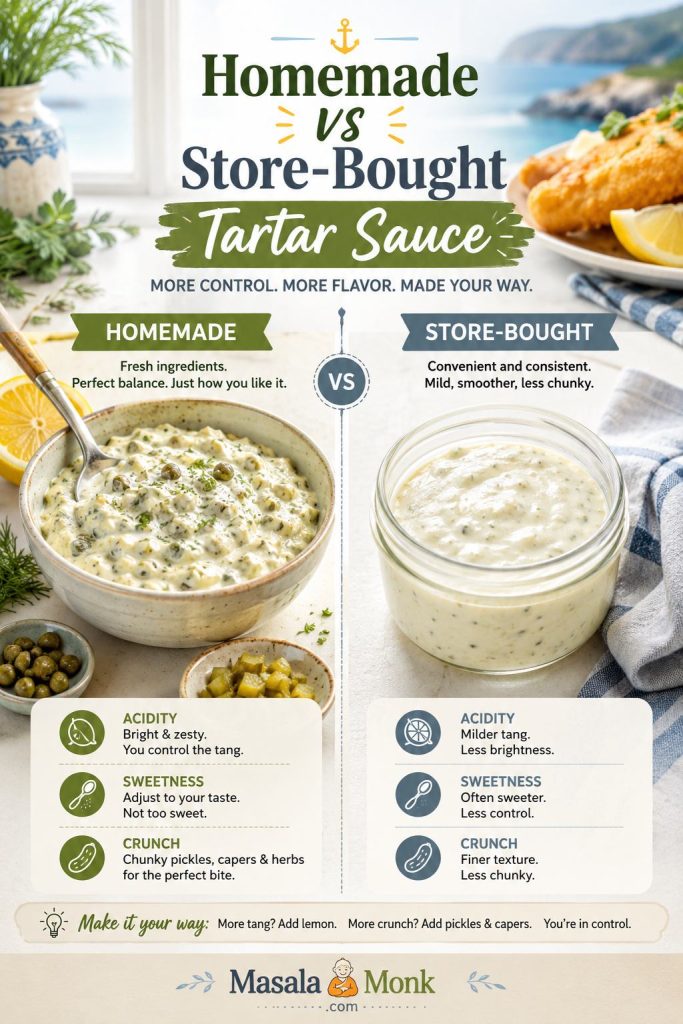
Store-bought tartar sauce is convenient, but homemade gives you control over the three things bottled sauces often get wrong: sweetness, acidity, and crunch. Some jars taste sugary. Others taste flat, heavy, or short on pickle texture.

Homemade tartar sauce with visible chopped pickles and herbs compared with smoother store-bought tartar sauce in an unbranded jar
Bottled sauce is convenient, but homemade tartar sauce lets you decide how sweet, sharp, chunky, or herb-forward the final bowl should be.

Homemade wins when you want a livelier lemon-and-pickle finish and better chop texture. Bottled wins when convenience matters more. That is the whole comparison.

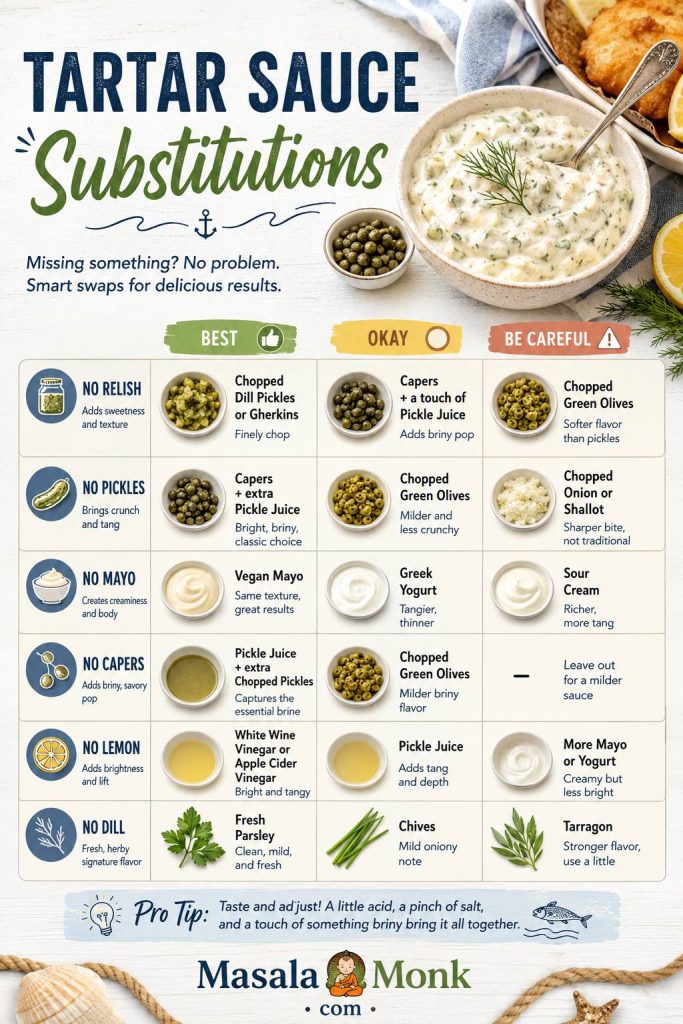
Tartar Sauce Substitutions: No Relish, No Pickles, No Mayo, No Capers, No Lemon

This is the kind of sauce that forgives a half-empty fridge. If you have mayo and something pickled, you are already close. Use the table below to choose the best swap without pushing the sauce too thin, too sweet, or too sour.

MissingBestOkayBe careful with
RelishFinely chopped dill pickles, gherkins, or cornichonsCapers plus a little pickle juiceAdding sugar too early
PicklesCapers, shallot, lemon juice, herbs, and DijonSweet relish if you want a softer saucePlain mayo with no briny ingredient
MayoVegan mayoGreek yogurt, sour cream, or half yogurt and half mayoThin milk-based bases
CapersExtra chopped pickles or cornichonsPickle juiceAdding salt before tasting
LemonPickle juiceWhite vinegar or apple cider vinegarToo much vinegar at once
DillParsley, chives, or tarragonA pinch of dried dillToo much dried herb
Substitution guide for tartar sauce showing swaps for missing relish, pickles, mayonnaise, capers, lemon, and dill
Missing relish, lemon, capers, or mayo does not have to stop dinner; instead, choose swaps that keep the sauce creamy, seasoned, and balanced.

Tartar Sauce Without Relish

You do not need relish. Finely chopped dill pickles, gherkins, or cornichons often give better texture for fish and chips. If you still want sweetness, add a tiny pinch of sugar at the end.

Tartar Sauce Without Pickles

No pickles or relish is not ideal, but the sauce is saveable. Capers bring salt, lemon brings lift, Dijon adds sharpness, and a little minced shallot gives the base something savory to hold onto.

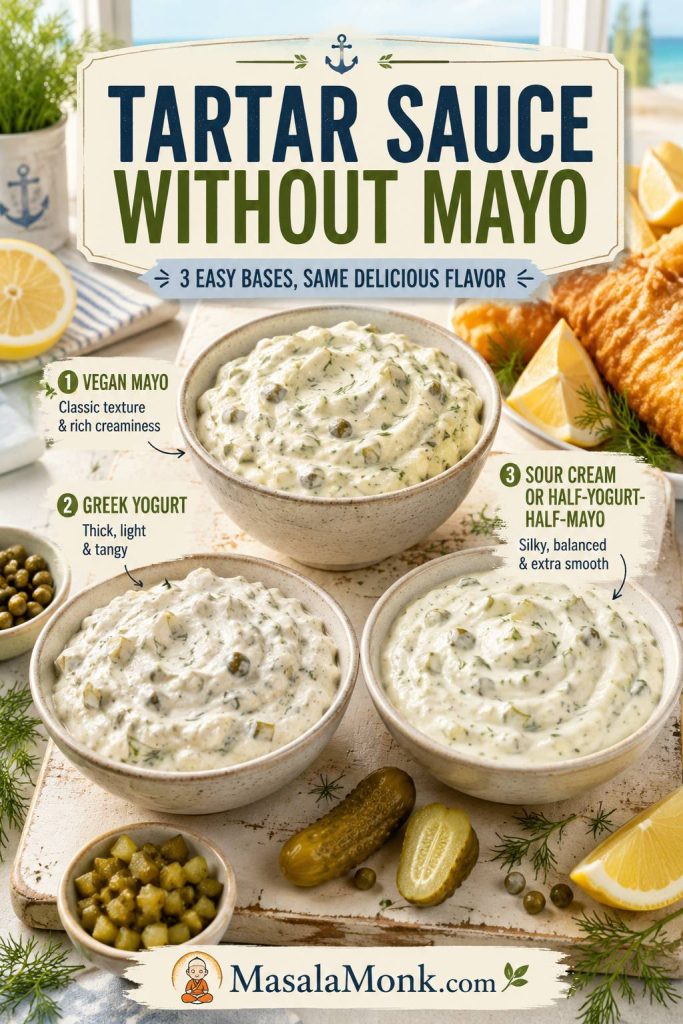
Tartar Sauce Without Mayo

For a no-mayo bowl, choose vegan mayo, Greek yogurt, or sour cream. Vegan mayo gives the closest classic texture. Greek yogurt makes it lighter and tangier, while sour cream makes it softer and richer.

Tartar Sauce Without Capers

Add extra chopped pickles for crunch, a spoonful of relish for sweetness, or a splash of pickle juice if the bowl tastes flat. Taste before adding salt because pickles may already bring enough.

Tartar Sauce Without Lemon Juice

Pickle juice is the easiest lemon swap because it brings tang and seasoning at the same time. Vinegar also works, but add it slowly so the sauce does not turn harsh.

Vegan, Dairy-Free, Low-Calorie, Keto, and Low-Carb Tartar Sauce

Once you know the balance, you can change the base without losing the sauce. The base can be mayo, vegan mayo, Greek yogurt, or sour cream; the rest of the bowl still needs pickle, acid, salt, and texture.

If you are choosing the base carefully, MasalaMonk’s eggless mayonnaise recipe explains the difference between egg-free mayo and fully vegan mayo.

NeedBest adjustment
Vegan or egg-freeChoose vegan mayo, then keep the same pickle, lemon, caper, herb, and Dijon balance.
Dairy-freeMayo-based tartar sauce is usually dairy-free, but not egg-free. Check labels, especially for flavored mayo or Worcestershire sauce.
Low-calorie or no-mayoChoose Greek yogurt, or use half yogurt and half mayo for a lighter sauce that still tastes creamy.
Keto, low-carb, or sugar-freeChoose full-fat mayo and dill pickles. Avoid sweet relish, added sugar, and sweetened sauces.
Low-sodiumUse fewer capers and pickles, then lean on lemon juice, herbs, black pepper, and a small amount of mustard.
Three tartar sauce bowls made with vegan mayonnaise, Greek yogurt, and sour cream as mayonnaise alternatives
A no-mayo tartar sauce still needs body, so vegan mayo gives the closest classic texture while Greek yogurt brings a lighter tang.

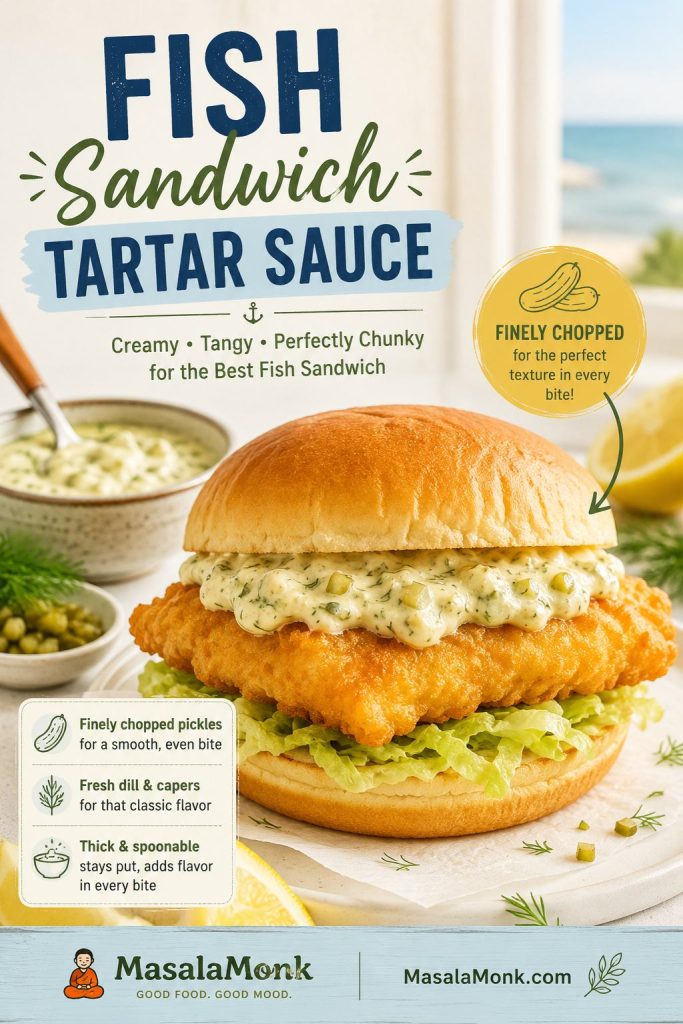
Fish Sandwich / Filet-O-Fish-Style Tartar Sauce

A fish sandwich-style sauce is smoother, sweeter, and more oniony. It makes more sense on a soft fish sandwich than beside a plate of crisp battered fish. Finely minced pickles or relish work better here than chunky pickle pieces, and a short chill helps the onion flavor settle into the mayo.

Fried fish sandwich with smooth tartar sauce spread, a crisp fish fillet, pickle flecks, herbs, and a soft bun
For a fried fish sandwich, finer chopping helps tartar sauce spread evenly instead of slipping out in large pickle-heavy bites.

This is a flavor direction, not an exact restaurant copy. Use dill relish or very finely minced pickles, add 1–2 teaspoons minced onion, add a tiny pinch of sugar if needed, and chill for at least 1 hour.

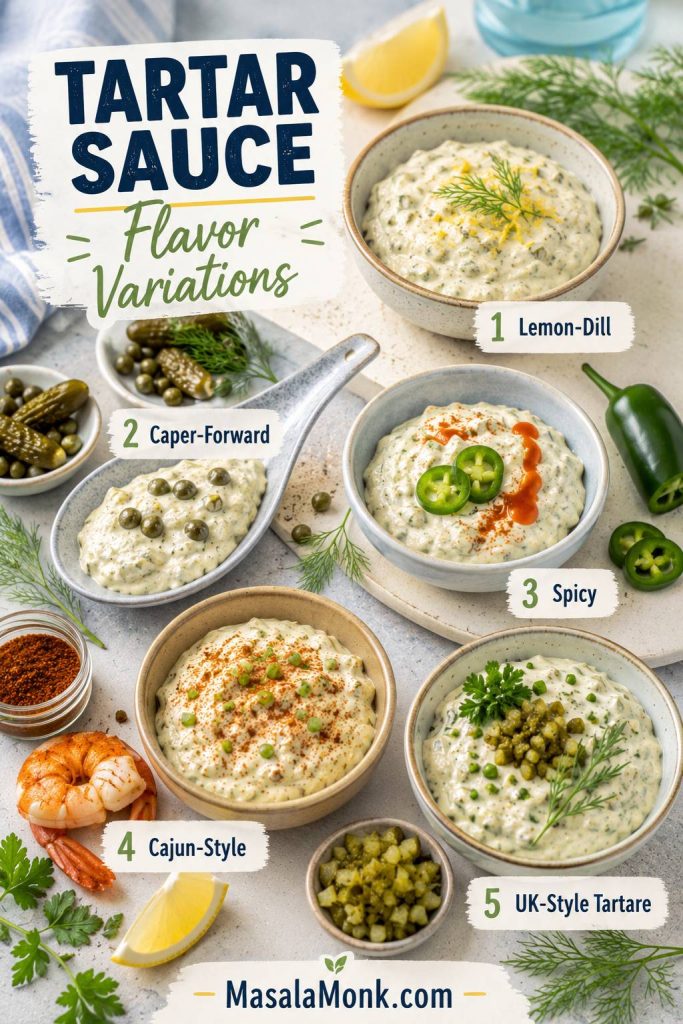
Flavor Variations

Think of the base sauce as the calm version. Lemon makes it livelier, Dijon makes it rounder, cayenne makes it warmer, and herbs make it fresher.

VariationHow to adjust 1 cup mayoBest with
Lemon-dillAdd ½ teaspoon lemon zest, 1 extra teaspoon lemon juice, and another tablespoon chopped dill.Salmon cakes, shrimp, lighter fish
Caper-forwardIncrease capers to 2 tablespoons and use cornichons or gherkins.Crab cakes, fried seafood, richer fish
SpicyAdd ½ teaspoon hot sauce or 1 teaspoon minced jalapeño, then taste after resting.Catfish, fried fish sandwiches, shrimp
Old Bay or CajunAdd ¼ teaspoon seasoning, then taste before adding salt.Seafood platters, shrimp, catfish
UK-style tartareUse gherkins or cornichons, capers, parsley, chives, and optional tarragon.Fried cod, haddock, thick chips
Five tartar sauce flavor variations labeled lemon-dill, caper-forward, spicy, Cajun-style, and UK-style tartare
Once the base sauce tastes balanced, keep flavor changes small: extra dill, more capers, gentle heat, seafood seasoning, or fresh herbs.

For a homemade heat option, MasalaMonk’s pepper sauce guide can help you choose a vinegar-forward hot sauce style.

Troubleshooting Homemade Tartar Sauce

Fix the bowl slowly. A teaspoon of lemon juice, pickle juice, mayo, or capers can change everything, so stir, taste, and adjust again before adding more.

ProblemFix nowPrevent next time
Too thickStir in lemon juice, pickle juice, or 1 teaspoon water at a time.Do not drain the pickles completely dry if you want a looser dip.
Too thinAdd more mayo and chill for 30 minutes.Add pickle juice slowly and drain watery relish before mixing.
Too sweetAdd lemon juice, chopped dill pickles, capers, Dijon, or herbs.Start with ⅓ cup relish, or use half dill pickle and half relish.
Too sourSoften with more mayo or a tiny pinch of sugar.Add vinegar or lemon in teaspoons, not tablespoons.
Too saltyAdd more mayo, Greek yogurt, or sour cream.Taste before salting because capers and pickles already season the sauce.
Too blandAdd capers, pickle juice, Dijon, lemon juice, pepper, or Worcestershire sauce.Use at least one pickled or salty ingredient, not mayo alone.
Too chunkyPulse briefly or chop the mix-ins finer.Use smaller dice for sandwich sauce and slightly larger dice for dip.
Watery after storageStir well and add a spoonful of mayo if needed.Drain relish better and avoid over-loosening before chilling.
Troubleshooting guide for tartar sauce that is too thick, too thin, too sweet, too salty, too chunky, or watery after storage
Fix tartar sauce in teaspoons, not big swings; a little pickle juice, mayo, lemon, or finer chopping can bring the whole bowl back into balance.

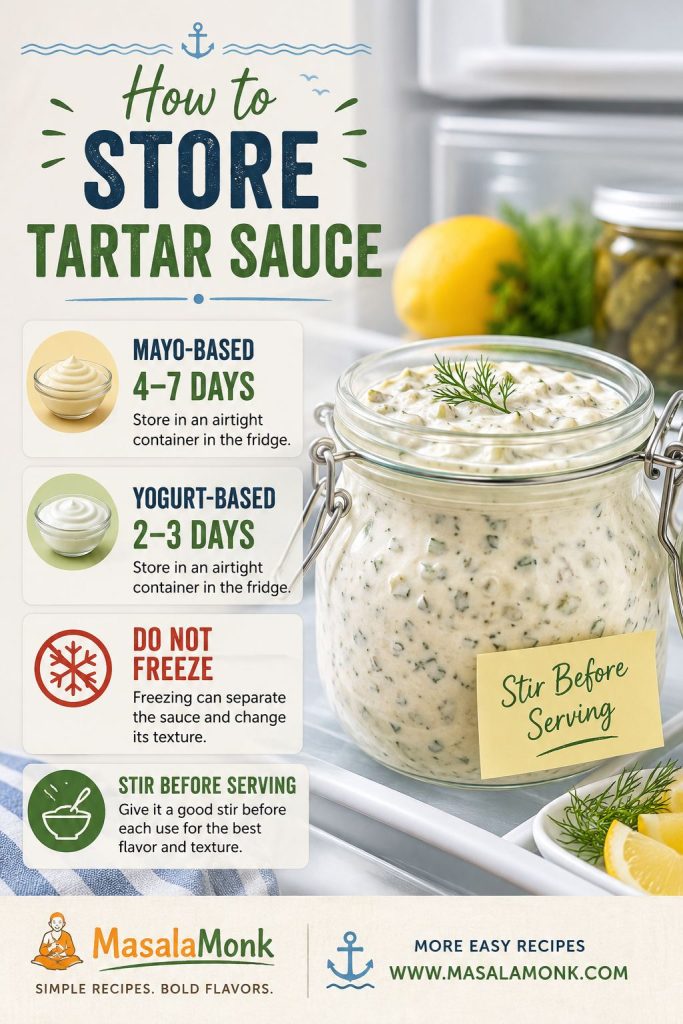
How to Store Tartar Sauce

Store the sauce in an airtight container in the refrigerator. A clean glass jar works well because it keeps the sauce covered and easy to stir before serving.

  • Mayo-based tartar sauce: best quality within 4–7 days when kept cold in a clean, airtight container.
  • Greek yogurt or no-mayo tartar sauce: best within 2–3 days because the texture loosens faster.
  • Homemade mayo, fresh onion, or yogurt sauces: use the shorter storage window.
  • Make-ahead: make it up to 1 day ahead for better flavor.
  • Long meals: return the sauce to the fridge when possible instead of leaving it out for hours.
  • Freezing: not recommended because mayo and yogurt-based sauces can split, turn watery, or lose their creamy texture.
Glass jar of homemade tartar sauce in the refrigerator with storage notes for mayo-based sauce, yogurt sauce, and freezing
Keep tartar sauce cold, stir it before serving, and avoid freezing so the creamy texture stays spoonable for the next fish-and-chips night.

If the sauce turns watery after chilling, use the troubleshooting guide before serving.

For mayo- or yogurt-based sauces, follow the general two-hour rule for perishable foods: do not leave them out through a long meal before returning them to the fridge.

If the sauce smells off, tastes sour in an unpleasant way, or has been left out too long, discard it.

Frequently Asked Questions

Is tartar sauce the same as tartare sauce?

Yes. In most recipe contexts, tartar sauce and tartare sauce mean the same creamy pickle-based sauce for fish and seafood. “Tartare sauce” is more common in the UK and some other regions.

What is the best pickle for tartar sauce?

Dill pickles, gherkins, and cornichons are best for a fish-and-chips sauce. Sweet pickle relish is better for a sweeter diner-style or fast-food-style sauce.

Does tartar sauce need capers?

No. It can be made without capers, but they add small salty pops that work especially well with seafood. If you skip them, add extra chopped pickle, relish, or pickle juice.

How long should tartar sauce chill before serving?

It can be served immediately, but 15–30 minutes in the fridge improves the flavor. If you added raw onion or shallot, 1 hour is better because the bite softens as it rests.

Can tartar sauce be made ahead?

Yes. Make it a few hours ahead or up to 1 day ahead, then stir and taste before serving. Add a little lemon juice or pickle juice if it needs freshening up.

Is tartar sauce dairy-free?

Many mayo-based tartar sauces are dairy-free, but check the mayonnaise and optional sauces you use. Greek yogurt, sour cream, buttermilk, and crème fraîche sauces are not dairy-free. For a dairy-free and egg-free bowl, use vegan mayo.

What makes homemade tartar sauce taste better than bottled?

Fresh lemon juice, chopped pickles, herbs, and adjustable sweetness make it taste fresher than most bottled sauces. You can push it sharper, sweeter, smoother, or lighter depending on the meal.

What is the best tartar sauce for fish and chips?

Use the dill-pickle version in the recipe card: mayo, dill pickles or gherkins, capers, lemon, herbs, Dijon, and black pepper. Keep it chilled until serving.

Can tartar sauce be frozen?

Freezing is not recommended. Mayo and yogurt-based sauces can split after thawing, leaving the sauce watery, grainy, or oily.

What is the difference between tartar sauce and remoulade?

Tartar sauce is usually a simpler mayo, pickle, lemon, caper, and herb sauce for fish and seafood. Remoulade is more seasoned and can include mustard, garlic, paprika, hot sauce, horseradish, spices, or seafood seasoning.

Final Sauce Notes

A good tartar sauce should not steal the plate. It should sit beside the fish, cling when you dip, and make the next hot bite easier to enjoy — which is exactly why a small bowl made before frying can change the whole meal.

Back to top

Posted on Leave a comment

Easy Benedict Sauce Recipe: 5-Minute Blender Hollandaise

Eggs Benedict with glossy hollandaise sauce over a poached egg on a toasted English muffin with ham.

Eggs Benedict looks calm and polished on a brunch plate, but the sauce is usually where the nerves begin. The muffins are toasting, the eggs are poaching, the butter is melting, and suddenly one small bowl of hollandaise can decide whether breakfast feels effortless or chaotic.

This easy Benedict sauce recipe keeps that moment simple. It makes a warm, buttery, lemony blender hollandaise in about 5 minutes, without standing over a double boiler or worrying that the sauce will split before the eggs are ready.

This is not just a fast hollandaise. It is a no-panic Benedict sauce guide with the cues that matter most: hot butter, a slow pour, the right glossy texture, the right amount for brunch, and a rescue plan if the sauce starts to split.

Already dealing with an oily or broken sauce? Jump to the troubleshooting guide and come back to the method once the sauce is stable.

Benedict sauce is hollandaise by its brunch name: warm, buttery, lemony, and built for poached eggs. Once the cues are clear, it stops feeling fragile and starts feeling like something you can actually trust on a busy brunch morning.

Quick Answer: What Is Benedict Sauce?

Benedict sauce is hollandaise sauce, the warm sauce traditionally served over Eggs Benedict and sometimes simply called Eggs Benedict sauce. It is made by emulsifying egg yolks, melted butter, lemon juice, salt, and a little cayenne or white pepper into a smooth, buttery sauce.

So if a restaurant menu, recipe card, or brunch guide says hollandaise, it is talking about the same sauce many home cooks mean when they search for Benedict sauce.

In the classic method, the yolks are whisked gently over heat while butter is slowly added. In this blender version, the machine does the whisking for you. Melted butter is streamed into seasoned yolks, and the mixture turns from loose yellow liquid into a pale, creamy sauce in minutes.

A good batch tastes rich, bright, and lightly tangy. It should fall in a soft ribbon and settle over poached eggs instead of sliding straight off like melted butter.

Benedict Sauce vs Hollandaise Sauce

The name changes with the setting. Restaurants and classic cookbooks usually call it hollandaise; at home, many people call it Benedict sauce because that is the dish they know and love. “Eggs Benedict sauce” is another everyday name for the same butter-and-yolk emulsion.

Either way, the sauce has one job: make poached eggs taste like brunch. A good batch lands between melted butter and mayonnaise: soft, warm, and able to settle over the egg. The texture matters more than the name.

For classic Eggs Benedict, this sauce goes over toasted English muffins, ham or Canadian bacon, and poached eggs. If you like building breakfast around eggs and bread, these breakfast sandwich ideas are useful for English muffin, bagel, croissant, and waffle-style brunch bases.

Benedict Sauce At-a-Glance

DetailWhat to Know
TimeAbout 5 minutes
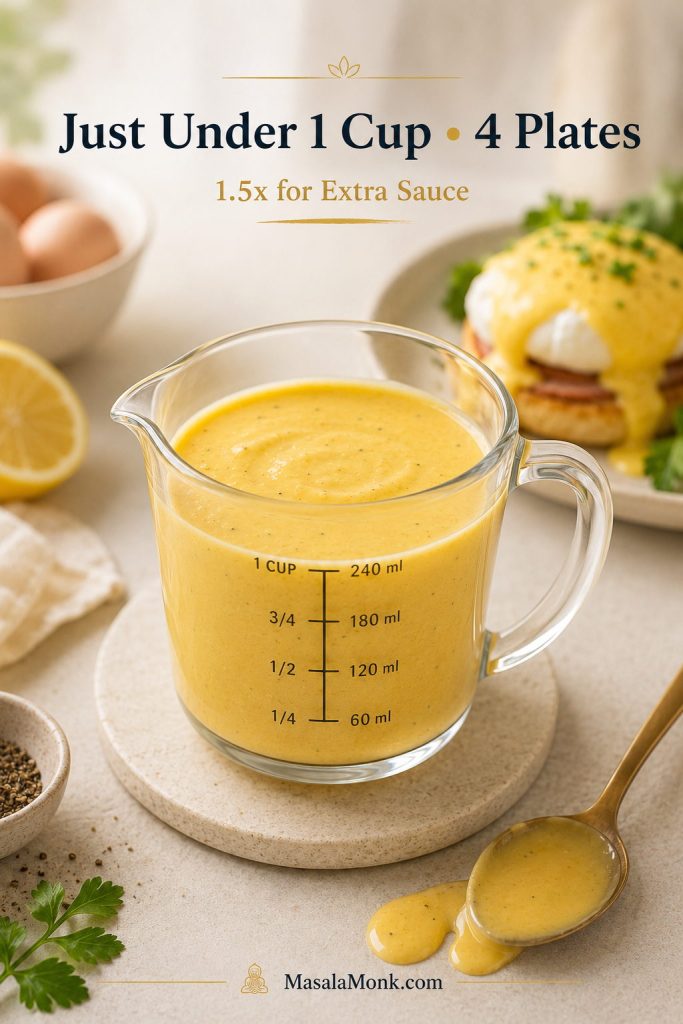
YieldAbout 220–240 ml / just under 1 cup
Serves4 generous Eggs Benedict plates or 6–8 individual Benedict halves
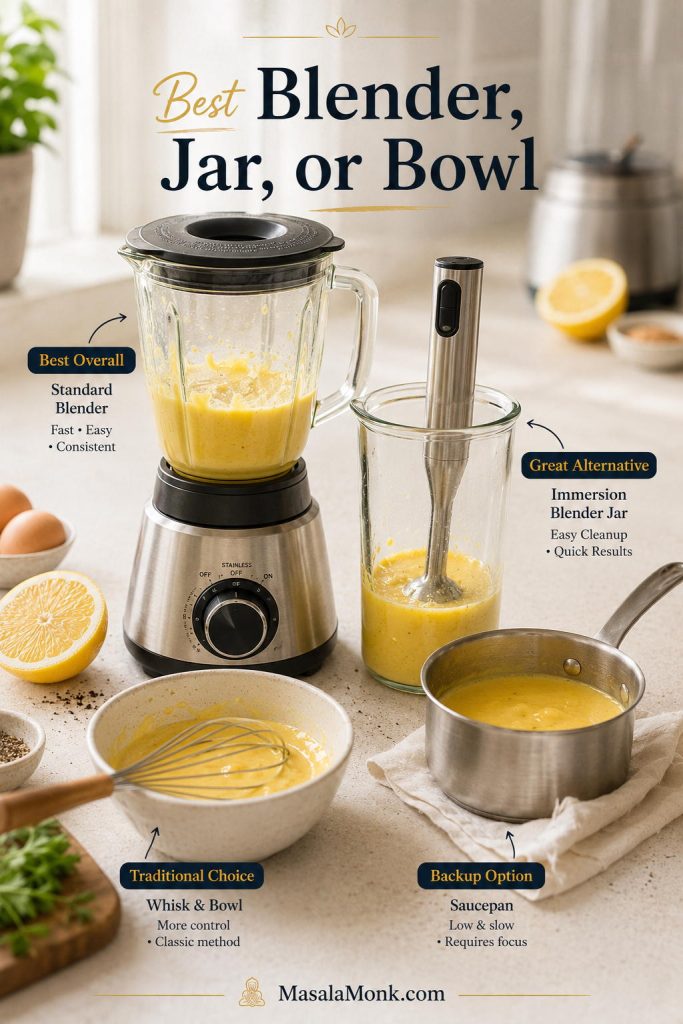
Main methodStandard blender
Most important cuePour hot melted butter slowly over 30–45 seconds
Texture targetSilky, spoon-coating, and pourable
Best timingMake it near the end and serve warm
Best withEggs Benedict, poached eggs, salmon, crab, asparagus, and roasted vegetables
Benedict sauce at-a-glance guide with hollandaise, lemon, poached egg, and time, yield, and slow-pour cues.
Start with the numbers that prevent guesswork: about 5 minutes, just under 1 cup of sauce, and a slow butter pour. Once those cues are clear, the whole brunch feels easier to manage.

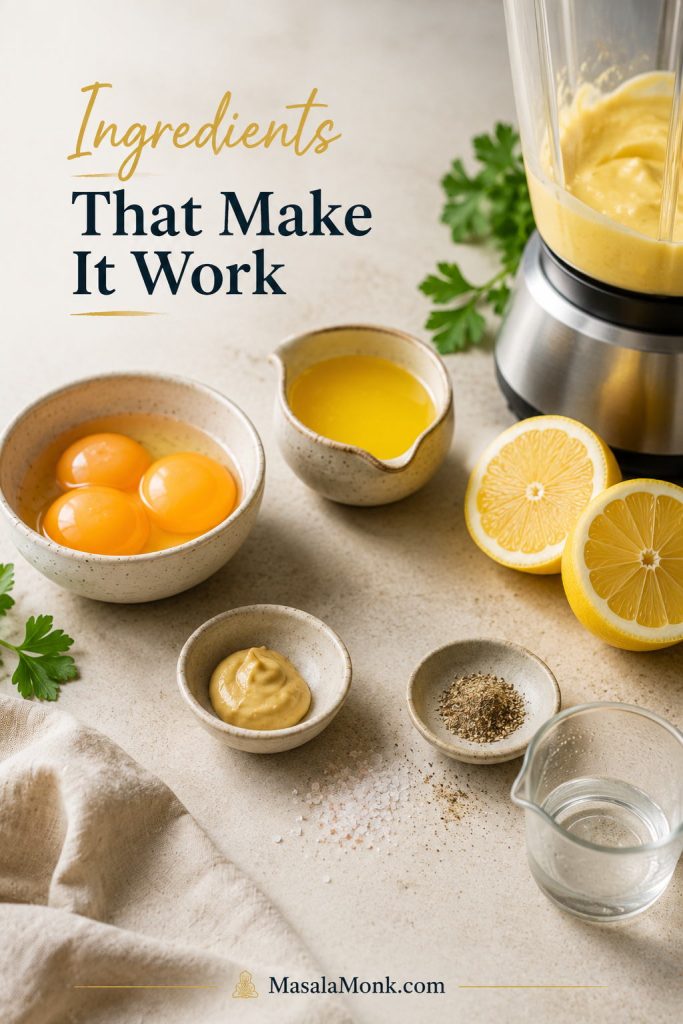
Ingredients That Make It Work

With a sauce this simple, there is nowhere for dull lemon or lukewarm butter to hide. Fresh lemon, hot melted butter, and a slow enough pour do most of the work; the yolks and butter build the body while the seasonings keep the richness balanced.

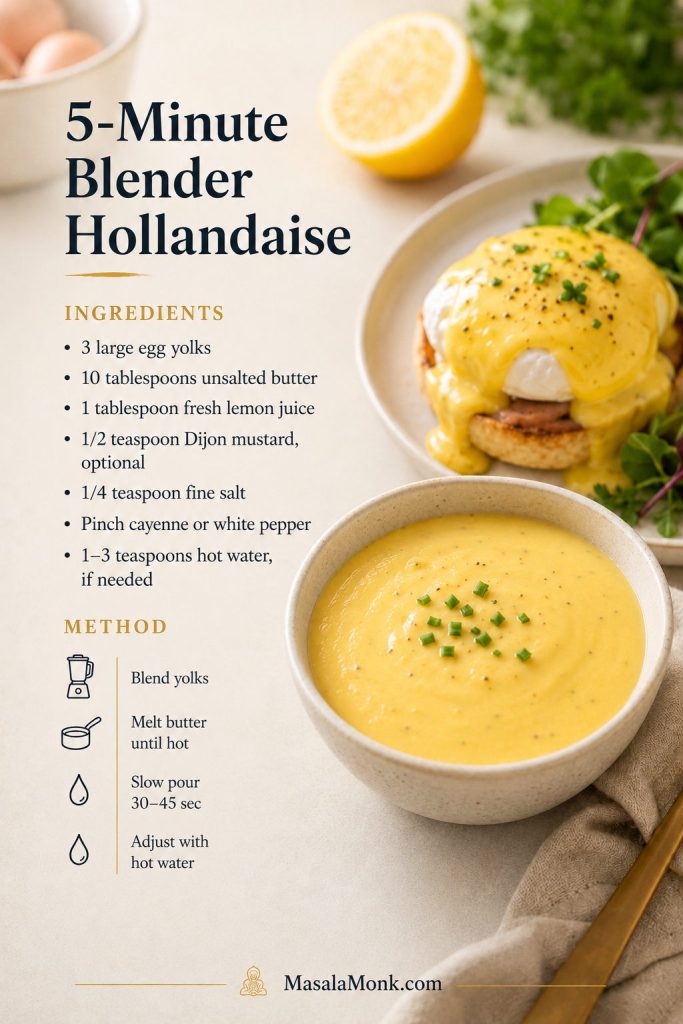
For a reliable batch, use:

  • 3 large egg yolks, about 50–55 g total
  • 10 tablespoons unsalted butter, 142 g / 5 oz
  • 1 tablespoon fresh lemon juice, 15 ml
  • ½ teaspoon Dijon mustard, optional
  • ¼ teaspoon fine salt, plus more to taste
  • Small pinch cayenne pepper or white pepper
  • 1–3 teaspoons hot water, only if needed to thin
Ingredients for Benedict sauce including egg yolks, melted butter, lemon, Dijon mustard, salt, cayenne, and hot water.
Each ingredient has a specific job. Yolks hold the emulsion, hot butter builds body, lemon keeps the sauce bright, and a little hot water lets you fine-tune the final pour.

Egg Yolks

Egg yolks give hollandaise its color, body, and ability to hold the butter. They are the reason the sauce becomes creamy instead of separating into lemon juice and melted fat.

Use large eggs if possible. Very small eggs may make the finished batch looser, while extra-large yolks can make it thicker and richer. Large yolks give the most predictable result.

Unsalted Butter

Use 10 tablespoons unsalted butter, or about 142 g / 5 oz. This gives about 220–240 ml / just under 1 cup of sauce: enough for a small brunch, without leaving you with a large bowl of delicate leftover hollandaise.

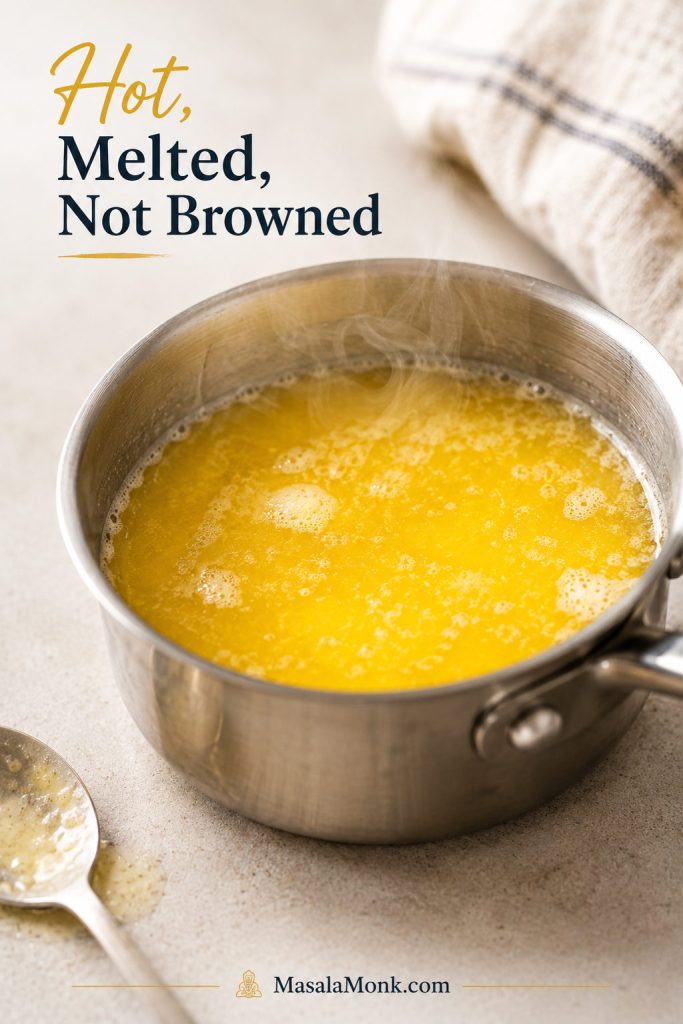
The butter should be fully melted before it goes into the blender. Look for butter that is liquid, lightly steaming, and possibly gently foaming. It should not be browned. If it has melted but no longer feels hot, rewarm it briefly before pouring.

Hot melted butter in a saucepan with light steam and foam for making hollandaise sauce.
Hot butter is one of the biggest success cues in blender hollandaise. It should be fully melted and lightly steaming, because “just melted” butter may not give the yolks enough warmth to thicken properly.

You do not need a thermometer. The practical cue is enough: hotter than “just melted,” but not cooked into browned butter. Salted butter also works, but start with less added salt and adjust after blending.

The pour matters as much as the heat, so check the slow butter pour cue before you start blending.

Lemon, Dijon, Salt, and Pepper

Fresh lemon keeps the sauce from tasting heavy. Dijon is optional, but it gives the flavor a rounder tang without making the finished sauce taste like mustard.

Start with ¼ teaspoon fine salt, then adjust at the end. A small pinch of cayenne or white pepper should lift the butter and lemon, not make the sauce spicy.

Hot Water

Hot water is your texture adjustment. If the hollandaise tightens as it sits, a teaspoon or two brings it back to a softer pour without restarting.

Useful ratio: for about 220–240 ml / just under 1 cup Benedict sauce, use 3 large yolks, 10 tablespoons hot melted butter, 1 tablespoon lemon juice, salt, and a small pinch of cayenne or white pepper. Dijon is optional, but helpful.

Once everything is measured, move to the blender method so the butter can go in while it is still hot.

How to Make This Blender Hollandaise

Once the butter is hot, the recipe moves fast. Measure the ingredients first, melt the butter, then pour slowly while the blender does the hard part. After the butter is melted, the actual blending takes less than a minute.

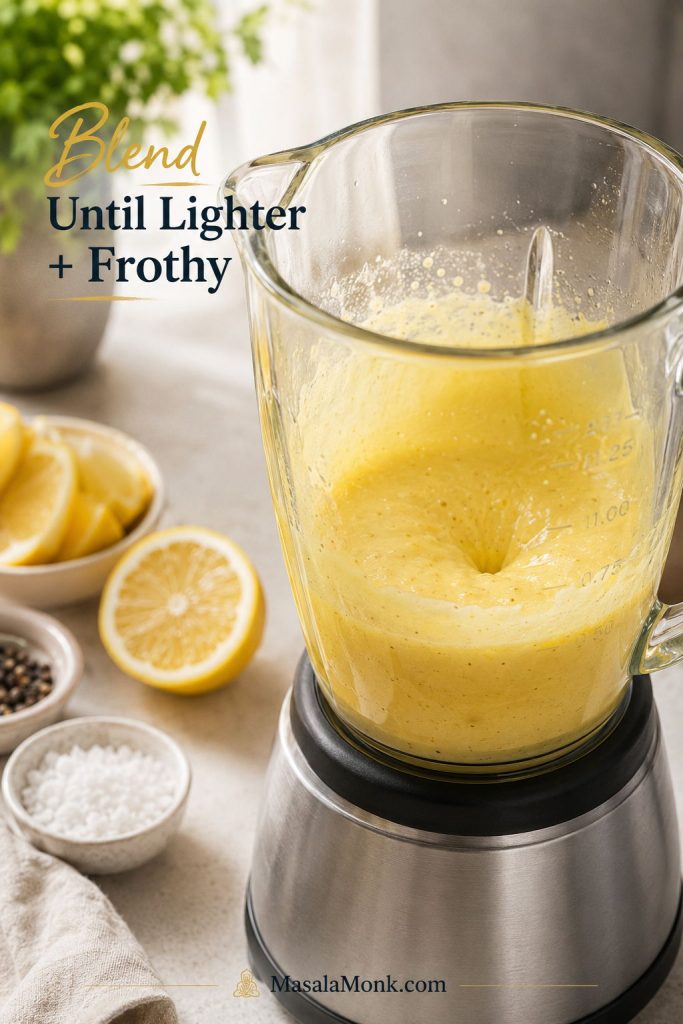
1. Blend the Yolks Until Lighter and Frothy

Add the egg yolks, lemon juice, Dijon mustard if using, salt, and cayenne or white pepper to the blender.

Blend for 15–30 seconds, until the yolks look slightly lighter and a little frothy. This gives the butter a better base to blend into.

Egg yolks and seasonings blended in a blender jar until lighter and slightly frothy.
Blend the yolks before adding butter so the sauce has movement from the start. This quick frothy stage helps the butter blend in smoothly instead of breaking the emulsion.

2. Melt the Butter Until Hot and Lightly Steaming

Melt the butter in a small saucepan over low to medium-low heat, or in the microwave in short bursts. It should be fully liquid and lightly steaming. A little foam is fine; browning is not needed.

If the butter cools while you are setting up the blender, warm it again for a few seconds. Starting with butter that is still hot gives the sauce a better chance of thickening properly.

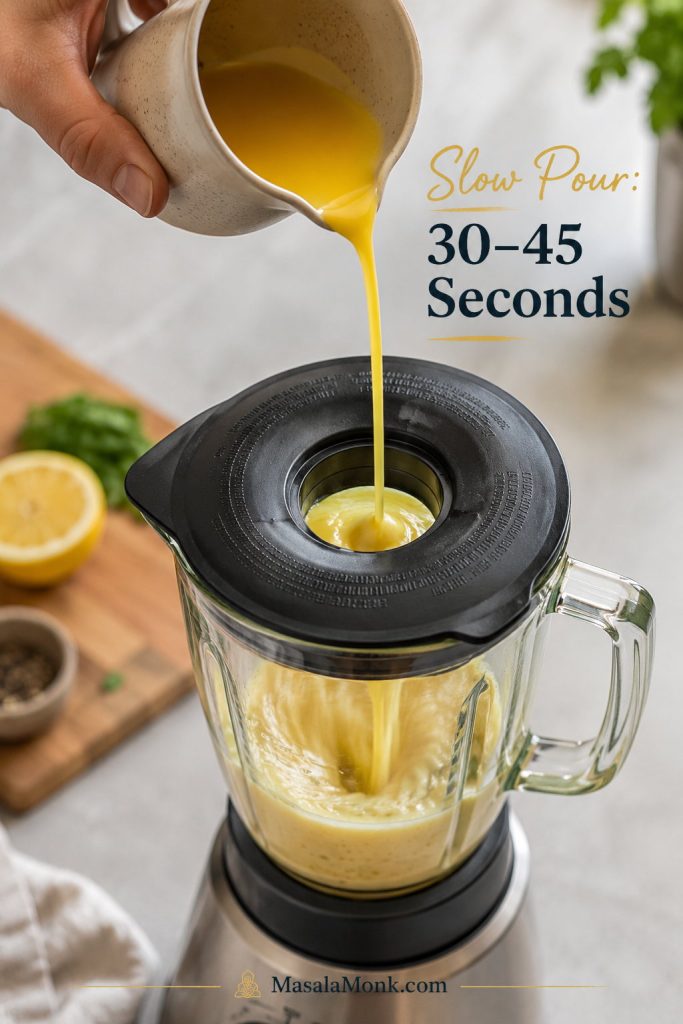
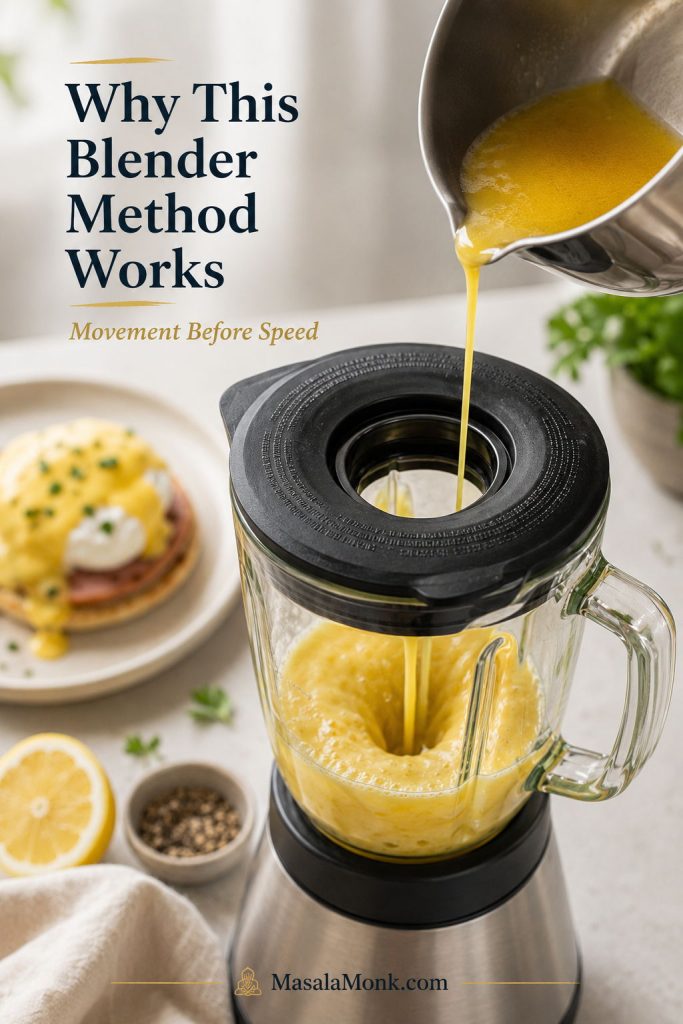
3. Stream the Butter Slowly for 30–45 Seconds

Turn the blender on low to medium-low. Remove the center cap from the lid. With the blender running, pour the butter through the opening in a thin, steady stream.

Think of the butter pour as the whole recipe: slow enough for the yolks to keep up, warm enough to help them thicken, steady enough to stay smooth. If the butter goes in all at once, the emulsion is more likely to break.

Thin stream of hot melted butter being poured into a blender to make hollandaise sauce.
The slow pour is the heart of this easy hollandaise sauce. When the butter goes in over 30–45 seconds, the yolks have time to absorb it and turn creamy instead of greasy.

Avoid jumping straight to high speed once the butter starts going in. Too much splashing can coat the sides of the blender instead of feeding the sauce evenly.

After blending, use the ribbon test to confirm the sauce is thick enough for poached eggs.

4. Adjust Until Glossy and Spoon-Coating

Once all the butter is blended in, stop and check the sauce. It should look paler, thicker, and creamier than when you started, with a buttery-lemon smell rather than an eggy one.

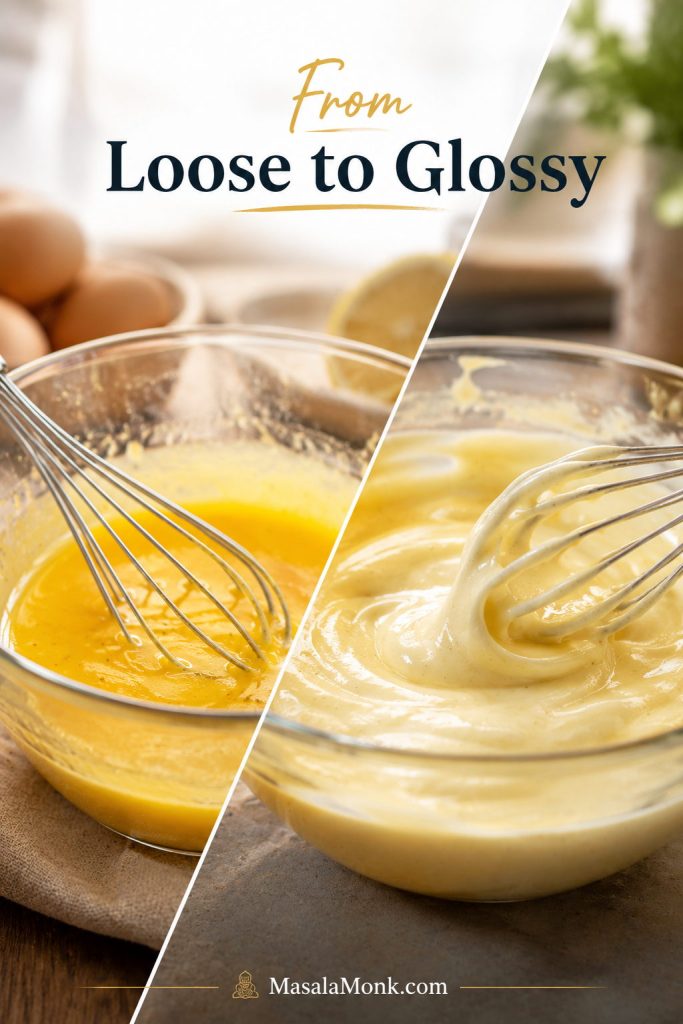
The payoff is immediate: a pale, glossy sauce that smells like butter and lemon and falls from the spoon in a soft yellow ribbon. That is the point where Eggs Benedict stops feeling like a restaurant trick.

Before-and-after comparison of loose yellow mixture and finished glossy hollandaise sauce.
The shift from loose to glossy tells you the emulsion has formed. Once the sauce turns paler, thicker, and smoother, it is ready for tasting, adjusting, and spooning over eggs.
  • Too thick: loosen with hot water, one teaspoon at a time.
  • Flat flavor: add a tiny pinch of salt or a few drops of lemon.
  • Too sharp: blend in a little more warm melted butter.
  • Greasy or split: use the rescue method in the troubleshooting section.

Taste before you fix. Hollandaise often needs one tiny adjustment, not a full rescue.

Perfect Texture Cues

Perfect hollandaise should feel like a warm custard sauce, not melted butter and not mayonnaise. It should cling, move, and pour.

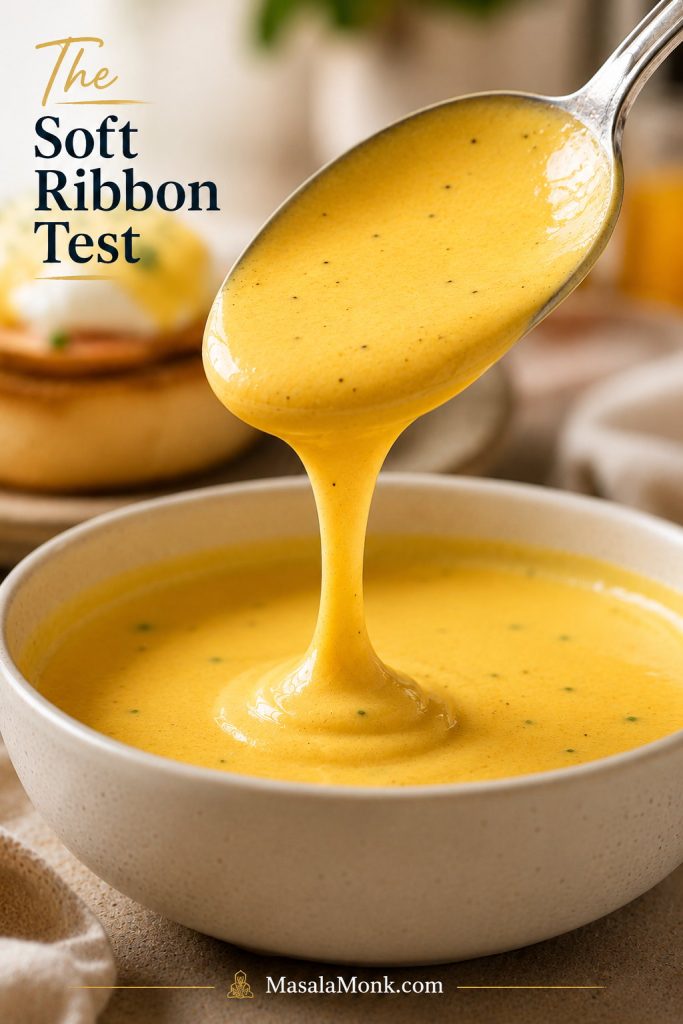
The Soft Ribbon Test

The spoon test is the easiest check. Dip a spoon into the sauce. It should coat the back, then fall in a soft ribbon when lifted. It should not look oily around the edges, grainy, foamy, or separated.

Spoon lifting glossy hollandaise sauce in a soft ribbon above a bowl.
A proper ribbon should fall slowly from the spoon and settle back into the bowl. That tells you the sauce is thick enough for poached eggs while still loose enough to pour.

When it coats, ribbons, and shines, the batch is ready. Oily edges, however, mean the sauce needs fixing before it reaches the eggs.

Oily edges mean it is time to use the boiling-water rescue, not keep pouring the sauce over eggs.

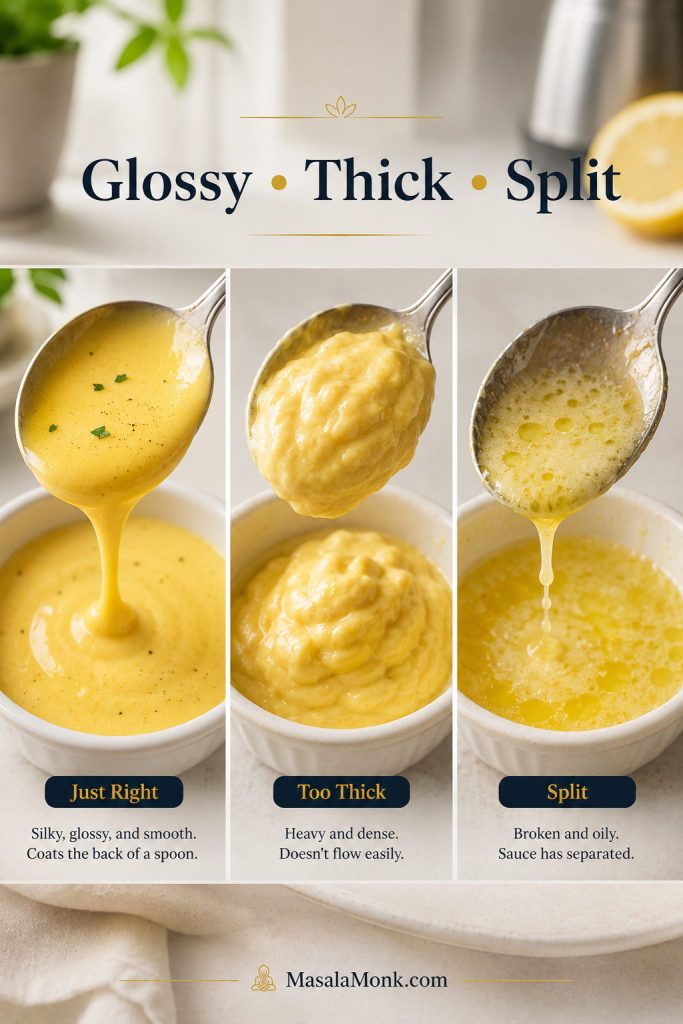
Texture Guide: Glossy, Thick, or Split

Three-part hollandaise texture guide showing glossy sauce, too-thick sauce, and split sauce.
Texture tells you what to do next. Glossy Benedict sauce is ready, thick sauce needs hot water, and split sauce needs a rescue before it ever reaches the eggs.
What You SeeWhat It MeansWhat to Do
Silky, warm, and pourableThe sauce is rightServe soon or hold gently warm
Very thick or mayonnaise-likeThe sauce is too tight or has cooledBlend or whisk in hot water 1 teaspoon at a time
Thin and weakThe emulsion may not have fully formedBlend a little longer; warm very gently if needed
Greasy or separatedThe emulsion brokeUse the boiling-water rescue below
Grainy or scrambledThe yolks overheatedRestart for the smoothest result

A sauce that thickens as it sits is not ruined. Hollandaise naturally tightens as it cools. A teaspoon or two of hot water can bring it back to a softer pouring texture.

At this point, you know the three things that protect the sauce: warmth, movement, and a little patience. The recipe card below keeps those cues in one place.

Easy Benedict Sauce Recipe: 5-Minute Blender Hollandaise

A quick blender Benedict sauce made with egg yolks, hot melted butter, lemon juice, and a pinch of cayenne. It turns glossy, buttery, and spoon-coating in minutes, ready for poached eggs, smoked salmon, asparagus, or crab.

Prep Time
2 minutes
Melt Time
3 minutes
Total Time
5 minutes
Yield
About 220–240 ml / just under 1 cup
Servings
4 plates or 6–8 halves
Method
Standard blender
Best Served
Fresh and warm
Hold Time
15–30 minutes over hot water

Ingredients

  • 3 large egg yolks, about 50–55 g total
  • 10 tablespoons unsalted butter, 142 g / 5 oz
  • 1 tablespoon fresh lemon juice, 15 ml
  • ½ teaspoon Dijon mustard, optional
  • ¼ teaspoon fine salt, plus more to taste
  • Small pinch cayenne pepper or white pepper
  • 1–3 teaspoons hot water, only if needed to thin

Instructions

  1. Add the egg yolks, lemon juice, Dijon mustard if using, salt, and cayenne or white pepper to a blender.
  2. Blend for 15–30 seconds, until the yolks look slightly lighter and a little frothy.
  3. Melt the butter until fully liquid, hot, and lightly steaming. Do not brown it.
  4. With the blender running on low to medium-low, slowly pour the hot butter through the lid opening in a thin stream. Aim to pour over 30–45 seconds.
  5. Blend for a few more seconds, then stop and check the sauce. It should be smooth, warm, and spoon-coating.
  6. Taste and adjust with a few drops of lemon juice, a tiny pinch of salt, or a little cayenne if needed.
  7. If the sauce is too thick, blend in hot water 1 teaspoon at a time until it pours smoothly.
  8. Serve warm over Eggs Benedict, poached eggs, smoked salmon, asparagus, crab cakes, or vegetables.

Recipe Notes

  • Use fully melted butter that is still hot enough to steam lightly.
  • Give the butter 30–45 seconds to stream in. That slow pour is what helps the sauce stay smooth.
  • The finished batch should be warm, silky, and pourable. If it tightens, loosen it with a small splash of hot water.
  • Best served fresh. Hold briefly over hot water if needed, and try the boiling-water rescue if the sauce splits.
Recipe card for 5-minute blender hollandaise with egg yolks, unsalted butter, lemon juice, Dijon, salt, cayenne, and hot water.
Keep the recipe card close for the two cues that matter most: hot butter and a slow pour. With blender hollandaise, those small checks protect the texture before the sauce ever reaches the eggs.

Why This Blender Method Works

Hollandaise works because egg yolks can hold butter and lemon together when they are blended gradually. The blender is not replacing technique completely; it is giving you constant movement while the yolks slowly accept the butter.

The blender helps most at the moment where hollandaise usually fails: the first few seconds of adding butter. The yolks need movement before they need speed. That is why this recipe starts by blending the yolks alone, then adds hot butter slowly instead of dumping everything in at once.

Hot butter being poured into a blender with egg yolks as hollandaise sauce begins to emulsify.
The blender helps most at the fragile beginning, when the yolks first meet the butter. Instead of relying on frantic whisking, you get steady movement while the emulsion forms.

If you enjoy understanding sauces, the same emulsion idea shows up in homemade mayonnaise too: the yolks help hold fat and liquid together so the sauce turns creamy instead of separated.

  • Yolks create the base. They give the butter and lemon a structure to blend into.
  • Hot butter adds body. It warms and loosens the yolks while building richness.
  • A slow pour protects the emulsion. The yolks get time to absorb the butter instead of breaking.
  • Lemon and water keep it balanced. Lemon cuts the richness; water lets you soften the texture if it tightens.

Once you see the emulsion form, the sauce feels much less mysterious. It is not magic; it is just a slow pour, steady movement, and a little heat working together.

Best Blender, Jar, or Bowl to Use

Tiny batches sound convenient, but many full-size blenders struggle when there is not enough yolk mixture for the blades to catch. This batch size is intentional: large enough for most standard blenders to work properly, but not so large that you end up with a bowl of fragile leftover sauce.

  • Use a standard blender for the easiest full small-batch brunch sauce.
  • Use an immersion blender if you have a tall, narrow jar that lets the sauce pull into the blade.
  • Use a double boiler if you want more deliberate yolk heating and do not mind whisking.
  • Use a bowl and whisk if you have no appliance and can work slowly over gentle heat.
  • Use a food processor only in a pinch; wide bowls can make small batches harder to emulsify.
Standard blender, immersion blender jar, whisk bowl, and saucepan arranged as hollandaise equipment options.
A standard blender is the easiest tool for this batch, although a tall jar or whisk bowl can work when needed. Choose the setup that gives the sauce movement without overheating it.

For the blender method, use a blender with a lid that has a removable center cap. That opening lets you pour in the butter while the blender runs. You will also need a small saucepan or microwave-safe cup for melting butter, a measuring cup with a spout, and a spatula.

Once you know your blender can handle the batch, the next question is how much sauce to make.

How Much Sauce to Make for Brunch

How Much Sauce Per Plate?

Plan on 1½–2 tablespoons sauce per Benedict half, or 3–4 tablespoons per plate when each plate has two halves. On most plates, that gives you a generous pour without flooding the muffin.

Eggs Benedict plates showing hollandaise amounts for one Benedict half, one plate, and extra sauce.
A normal Eggs Benedict plate needs enough hollandaise to coat the egg, not drown the muffin. Use 3–4 tablespoons per plate, then make a 1.5x batch if potatoes, asparagus, salmon, or crab are joining the table.
Serving NeedSauce AmountPractical Note
1 Benedict half1½–2 tablespoonsEnough to coat the egg without flooding the muffin
1 plate / 2 halves3–4 tablespoonsA normal restaurant-style pour
2 plates⅓–½ cupA small amount; some blenders may struggle with tiny batches
4 plates¾ cup to just under 1 cupThe ideal home brunch batch
8 Benedict halvesJust under 1 cupA lighter pour for each half
Extra saucy brunch1¼ cups or 1.5x batchUseful if serving asparagus, salmon, or potatoes too

Yield and Batch Size

You will get about 220–240 ml / just under 1 cup, depending on yolk size and how much water you use to adjust the texture. That is enough for 4 generous plates or 6–8 individual Benedict halves, depending on how heavy your pour is.

Measuring cup and bowl of hollandaise showing just under 1 cup of sauce for four plates.
This batch makes just under 1 cup, enough for about four generous plates. That keeps the recipe practical for brunch without leaving too much delicate sauce behind.

This is also the part of brunch where people quietly ask for “just a little more sauce,” so make the 1.5x batch if potatoes, asparagus, or salmon are also on the table.

For the least stressful cooking order, use the brunch timing sequence before you start poaching eggs.

The Easiest Brunch Timing Order

Eggs Benedict is not difficult because of one step. It feels difficult because everything wants to be warm at the same time. The easiest rhythm is simple: toast, warm, poach, blend, assemble.

Brunch timing sequence showing toast, warm, poach, blend, and assemble steps for Eggs Benedict.
Eggs Benedict feels calmer when the order is clear: toast, warm, poach, blend, assemble. The sauce comes last so it lands on the eggs while still warm and glossy.

Feeding a table and want something lower-pressure? A breakfast casserole with hash browns is easier to make ahead than poaching eggs one by one.

Make the Sauce Last

  1. Toast the English muffins first and keep them warm.
  2. Warm the ham, Canadian bacon, smoked salmon plate, spinach, or other base.
  3. Have the poaching water ready and poach the eggs close to serving time.
  4. Make the blender hollandaise last, once the other parts are almost ready.
  5. Assemble immediately and spoon the sauce over the eggs while it is warm.
Blender hollandaise being made beside prepared Eggs Benedict ingredients on a brunch counter.
Make the hollandaise after the muffins, base, and poached eggs are nearly ready. That way, the sauce spends less time waiting and more time coating the plate beautifully.

When the eggs finish before the sauce, hold the poached eggs briefly in warm water. When the sauce finishes first, keep it gently warm over hot water and loosen it before serving if needed.

How to Hold Hollandaise Without Splitting It

This sauce is smoothest right after blending, but short holding is fine. Think warm bath, not stovetop cooking. You are keeping the sauce comfortable, not cooking it again.

Bowl of hollandaise resting over hot water with gentle steam for warm holding.
A warm water bath buys you time without turning holding into cooking. Keep the bowl gently warm, then loosen the hollandaise with hot water if it thickens before serving.
  • Spoon the sauce into a warm bowl.
  • Set the bowl over a pan of hot water, not boiling water.
  • The bowl should feel warm, not aggressively hot.
  • Stir occasionally so the edges do not overheat.
  • Hold for 15–30 minutes if needed.
  • If it thickens, loosen it with a teaspoon or two of hot water.

That gentle hold buys you time without making the sauce feel like another thing to manage. Do not put hollandaise over direct high heat; too much heat can make it grainy or cause the yolks to scramble.

Brunch timing tip: make the sauce last whenever possible. If the rest of the plate is ready, fresh blender hollandaise makes Eggs Benedict feel much easier.

If the sauce thickens or separates while waiting, use the troubleshooting guide before serving.

Troubleshooting: How to Fix Benedict Sauce

If the sauce breaks, thickens, or looks wrong, pause before throwing it away. Most problems are fixable unless the yolks have fully scrambled.

A sauce that looks wrong for a moment is not a failed brunch. It is usually just asking for heat, water, or a slower hand. Look first, fix second.

Save split sauce. Restart scrambled sauce. If the sauce is oily or separated, the emulsion can often come back. If the yolks have turned grainy or scrambled, the smooth texture is usually gone.

Comparison of split oily hollandaise and grainy scrambled hollandaise in two bowls.
Split hollandaise and scrambled hollandaise need different decisions. If it looks oily, try saving it; however, once the yolks turn grainy, restarting is usually the smoother path.

The 3 Mistakes That Usually Break It

  • Adding the butter too fast. The yolks need time to absorb the butter.
  • Using butter that has cooled too much. Lukewarm butter can make the sauce weak or greasy.
  • Heating the finished sauce too aggressively. Direct heat can scramble the yolks or split the sauce.
Troubleshooting guide showing split, too-thick, too-thin, and grainy Benedict sauce fixes.
Most hollandaise problems are easier to fix when you identify the texture first. Thick sauce needs a little hot water, thin sauce needs more blending, and a broken emulsion needs the rescue step.
ProblemLikely CauseFix Now
Split or greasy textureButter went in too fast, butter cooled too much, or the emulsion brokeBlend in 1 tablespoon boiling water slowly. Add a second tablespoon only if needed.
Too thickIt cooled down or the emulsion is too tightWhisk or blend in hot water 1 teaspoon at a time.
Too thinButter was not hot enough, yolks were under-blended, or the sauce needs a little more timeBlend a little longer. If needed, warm very gently while whisking.
Grainy textureYolks overheated or started to scrambleStraining may help slightly, but restarting usually gives the best result.
Too lemonyToo much acid for the amount of butterBlend in a little more warm melted butter.
Flat flavorNot enough salt, lemon, or gentle heatAdd a tiny pinch of salt or a few drops of lemon juice.
Cooled before servingIt sat too long or the bowl was coldWarm gently over hot water and loosen with hot water if needed.

The Boiling-Water Rescue for Split Sauce

If your sauce looks greasy or separated, add 1 tablespoon boiling water to a clean blender or bowl. With the blender running, or while whisking constantly, slowly drizzle the broken sauce into the hot water. The heat and water can help pull the emulsion back together.

Broken hollandaise being slowly drizzled into a bowl with boiling water while whisking.
The boiling-water rescue gives split hollandaise a clean place to rebuild. Add the broken sauce slowly, because the emulsion needs a fresh start, not another rushed pour.

If the sauce improves but still looks slightly broken, add another tablespoon of boiling water only if needed. Do not keep adding water blindly, or the sauce can become too thin.

Once the sauce is smooth again, return to the warm-holding method or go back to the brunch timing order for assembly.

No Blender? Two Backup Methods

No blender does not mean no hollandaise. Use the bowl-and-whisk path when equipment is the issue; use the double-boiler path when you want more deliberate yolk heating.

Bowl-and-whisk hollandaise and double-boiler hollandaise methods shown with whisk, bowl, saucepan, and gentle heat.
No blender does not mean no hollandaise. A bowl and whisk solves the equipment problem, while a double boiler gives you gentler control over yolk heating.

Bowl-and-Whisk Hollandaise

Use the same ingredient amounts. Set a heatproof bowl over barely simmering water, making sure the bottom of the bowl does not touch the water. Whisk the yolks, lemon juice, and 1 tablespoon water until the mixture looks lighter and slightly thickened, then remove the bowl from the heat and slowly whisk in the melted butter.

It works well, although it needs a slower hand and more attention than the blender version. Keep the heat gentle, whisk constantly, and do not let the bowl get too hot.

Double-Boiler Hollandaise

For a more traditional cooked-yolk approach, set a heatproof bowl over a pan of barely simmering water, again making sure the bowl does not touch the water. Whisk the egg yolks, lemon juice, and 1 tablespoon water until the mixture looks slightly lighter, warm, and a little thicker.

Remove the bowl from the heat, then gradually whisk in warm melted butter. If the sauce tightens too much, loosen it with warm water in small splashes.

This method takes longer than the blender version, but it gives you more control over warming the yolks. Keep the heat gentle; hollandaise likes warmth, not aggression.

Food Safety Note for Blender Hollandaise

Blender hollandaise is warmed mostly by the melted butter. Because of that, the yolks may not get as thoroughly heated as they would in a custard or double-boiler sauce. For young children, pregnant people, older adults, or anyone immunocompromised, use pasteurized eggs or choose the double-boiler method above. For general egg-safety guidance, see the FDA egg safety guide.

This is not meant to make the sauce feel intimidating; it simply gives careful households a clear path: use pasteurized eggs, or choose the double-boiler method above.

Homemade vs Packet Hollandaise

There is no shame in packet or jarred hollandaise on a chaotic morning. Convenience has its place, especially for casseroles, breakfast bakes, or low-pressure sides. For classic Eggs Benedict, though, fresh blender sauce tastes brighter, warmer, and more buttery-lemony.

Homemade hollandaise and packet hollandaise compared on Eggs Benedict plates with asparagus and blender sauce.
Packet hollandaise can help on a busy morning, but homemade blender sauce gives you more control: brighter lemon, softer texture, and a warmer, fresher pour.

The homemade version also lets you adjust the plate in real time: more lemon for salmon, a thicker pour for eggs, a looser sauce for asparagus, or a little cayenne for crab. Packet sauce rarely gives you that kind of control.

Flavor Variations

Think of the base sauce as the calm version. Lemon makes it brighter, Dijon makes it rounder, cayenne makes it warmer, and herbs make it feel fresher.

Bowls of hollandaise with lemon, Dijon, cayenne, herbs, and smoked paprika flavor variations.
Once the base sauce is smooth, small flavor changes can match the plate. Lemon sharpens salmon, Dijon rounds out ham, cayenne suits crab, and herbs brighten spring vegetables.
  • Extra lemon: add a few more drops at the end for smoked salmon, asparagus, or crab.
  • Dijon hollandaise: use ½–1 teaspoon Dijon for classic Eggs Benedict, ham, or breakfast potatoes.
  • Cayenne hollandaise: add a slightly larger pinch for crab Benedict, steak and eggs, or rich seafood plates.
  • White pepper hollandaise: use white pepper instead of cayenne for a more traditional brunch flavor.
  • Herb hollandaise: stir in chopped chives, dill, or tarragon after blending for salmon, asparagus, or spring brunch plates.
  • Smoked paprika hollandaise: add a small pinch for potatoes, steak, or roasted vegetables.

For dietary swaps, a good dairy-free butter can make a hollandaise-style sauce closest to the original. Yogurt or mayo-based versions are lighter shortcuts, while cashew or tofu sauces belong more in vegan Benedict territory. They can be useful, but they are alternatives rather than classic hollandaise.

More Ways to Use It

Once the main Benedict plate is handled, this lemony butter sauce can stretch into the rest of brunch: vegetables, seafood, potatoes, and simple egg plates.

Spoon it over asparagus with black pepper, smoked salmon with extra lemon, crab cakes with a little cayenne, or breakfast potatoes when you want the plate to feel more like brunch than leftovers.

Brunch spread with hollandaise on asparagus, smoked salmon, crab cakes, potatoes, and poached egg.
Beyond Eggs Benedict, hollandaise works best where butter, lemon, and warmth already make sense: asparagus, salmon, crab cakes, potatoes, and simple egg plates.
  • Egg dishes: classic Eggs Benedict, Eggs Florentine, poached eggs on toast, steak and eggs, or a slice of frittata when you want a brunch plate that still feels egg-forward.
  • Toast and brunch plates: spoon a little over poached eggs, sautéed greens, or avocado toast when you want something richer than lemon or hot sauce.
  • Seafood: try it with smoked salmon, crab cakes, salmon croquettes, shrimp, scallops, or grilled salmon.
  • Vegetables and potatoes: use it with asparagus, roasted broccoli, broccolini, breakfast potatoes, grain bowls, or vegetable plates topped with eggs.

If the food underneath is rich, use a slightly sharper sauce with a few extra drops of lemon. If the food is lean or vegetable-heavy, the classic version works beautifully.

Storage and Reheating

Hollandaise is at its best right after blending, while it is still warm, glossy, and loose enough to spoon over eggs.

If you have leftovers, refrigerate them in a covered container and use them within 1–2 days for best quality. The sauce will thicken when cold and may separate slightly. That does not always mean it is ruined, but reheating needs to be gentle.

Freezing is not recommended. The emulsion usually suffers when thawed and reheated, so the texture will not be as smooth as a fresh batch.

Covered hollandaise in a refrigerator and hollandaise reheating gently over warm water.
Fresh hollandaise has the smoothest pour, although a short fridge stay is manageable. Reheat slowly over warm water; freezing and harsh heat both work against the emulsion.

How to Reheat It

  • Set the sauce in a heatproof bowl over warm water.
  • Whisk gently as it loosens.
  • Add small splashes of hot water if it is too thick.
  • Use very low heat only; do not boil.
  • If using a microwave, use very short bursts and whisk between each one.

You can hold it briefly and reheat leftovers carefully, but if texture really matters, make the sauce fresh.

For meal-prep mornings, sturdy egg dishes are much easier to store. These egg muffin cups are a better make-ahead option when you want eggs ready for the week instead of a delicate sauce.

The Brunch Payoff

Once you know the slow pour, the soft ribbon, and the gentle warm hold, the final plate feels much less fragile.

Fork cutting into Eggs Benedict with runny yolk mixing into glossy hollandaise sauce.
This is the brunch payoff: warm hollandaise, a runny yolk, and a toasted muffin catching the sauce. Once you know the cues, Benedict sauce feels far less fragile than it looks.

Need a quick answer instead? The Benedict sauce FAQs cover storage, reheating, salted butter, lemon swaps, and sauce amounts.

Benedict Sauce FAQs

Is Benedict sauce the same as hollandaise?

Yes. Benedict sauce is the everyday name many home cooks use for hollandaise when it is served on Eggs Benedict. The recipe is the same basic butter, yolk, lemon, and seasoning emulsion.

What is Eggs Benedict sauce made of?

Eggs Benedict sauce is usually made with egg yolks, melted butter, lemon juice, salt, and cayenne or white pepper. This blender version also includes optional Dijon mustard for a little extra brightness.

Why did my sauce split?

It usually splits when the butter goes in too quickly, cools too much, or the emulsion never fully forms. If it looks oily or separated, try the boiling-water rescue before restarting.

How do I fix sauce that is too thin or too thick?

For a thick sauce, whisk in small splashes of hot water until it loosens. For a thin sauce, blend a little longer; if needed, warm it gently while whisking. Avoid high heat because the yolks can scramble.

How long can hollandaise stay warm?

Hold it for 15–30 minutes over hot water, not direct heat. Stir now and then, and loosen it if it thickens. If the bowl feels hot enough to cook eggs, it is too hot for holding hollandaise.

Can I make or reheat it ahead of time?

It is best made fresh. You can hold it warm for 15–30 minutes, and leftovers can be reheated gently over warm water, but hollandaise thickens and can separate as it cools. Treat reheating as a careful rescue, not a full make-ahead plan.

Does blender hollandaise cook the egg yolks?

The melted butter warms the yolks, but blender hollandaise may not cook them fully like a custard. Use pasteurized eggs or the double-boiler method if that matters for your household.

Can I make it without a blender?

Yes. Use the same ingredients in a heatproof bowl over barely simmering water. It takes more whisking than the blender method, but the cue is the same: gentle heat, slow butter, smooth texture.

Is Dijon mustard required?

Dijon is optional. Use it when you want a rounder, slightly tangier sauce; leave it out when you want a more classic hollandaise flavor.

Can I use salted butter?

Salted butter works, but treat the recipe salt as optional at first. Blend the sauce, taste it, then add only what it needs.

What can I use instead of lemon juice?

Fresh lemon is best because it gives hollandaise a clean brightness. White wine vinegar can work in a pinch, but start with less because it can taste sharper and more pointed than lemon.

How much sauce do I need for four Eggs Benedict plates?

For four plates with two Benedict halves each, plan on ¾ cup to just under 1 cup sauce. This recipe makes enough for a normal pour; make 1.5x if everyone likes extra sauce or if potatoes, asparagus, or salmon are also on the table.

Why is my hollandaise pale instead of bright yellow?

Egg yolk color varies. Some yolks make a deeper yellow sauce, while others make a paler one. If the flavor and texture are right, the color is not a problem.

Back to top

Posted on Leave a comment

Homemade Ketchup Recipe

Thick glossy homemade ketchup in a bowl with a spoon, fresh tomatoes, and tomato paste nearby.

A good homemade ketchup recipe should taste bright, tangy, lightly sweet, deeply tomato-forward, and smooth enough for dipping, spreading, spooning, or squeezing. It should be thicker than tomato sauce, sharper than tomato chutney, and balanced enough for fries, burgers, sandwiches, wraps, pakoras, grilled snacks, and quick dipping sauces. You can also use it as a simple meatloaf glaze or a base for burger sauce.

This homemade tomato ketchup gives you the full fresh tomato method first: ripe tomatoes cooked down with onion, garlic, vinegar, sweetener, salt, mustard, and warm spices until glossy and thick. Then, because real kitchens are not always full of perfect summer tomatoes, you also get a quick tomato paste ketchup recipe, a sugar-free option, texture fixes, storage guidance, and clear canning notes.

In many kitchens, especially in India, this would simply be called a tomato ketchup recipe or homemade tomato sauce. Here, though, the goal is classic ketchup texture: smooth, glossy, thick, tangy-sweet, and easy to dip.

Most importantly, this is a recipe about control. Once you understand the tomato-to-vinegar-to-sweetener balance, you can make ketchup sweeter, tangier, smoother, thicker, spicier, lower in sugar, or closer to bottled ketchup without guessing. That way, the same base can work for fries, burgers, wraps, snacks, and quick sauces without needing a separate recipe every time.

For that reason, the recipe below does not force one version on every kitchen. Instead, it shows you when fresh tomatoes are worth the longer simmer and when tomato paste is the smarter shortcut.

At-a-glance guide summarizing homemade ketchup options, flavor target, texture goal, and storage guidance.
If you want the short version first, this guide shows the key homemade ketchup decisions: which method to choose, how it should taste, and how to store it safely.

Before you start: choose the version based on your tomatoes. If they are ripe and flavorful, use the fresh tomato method. However, if they are watery or bland, use the tomato paste shortcut instead. That way, you get a thick, balanced ketchup without fighting the ingredients.

Quick Answer: The Best Homemade Ketchup Recipe Ratio

Fresh Tomato Ketchup Ratio

To make homemade ketchup with fresh tomatoes, first cook ripe tomatoes with onion and garlic until soft. Next, blend them smooth and strain them for a finer texture. From there, simmer the tomato puree with vinegar, sugar or jaggery, salt, mustard powder, and warm spices until thick and glossy.

Tomato Paste Ketchup Ratio

For a faster version, whisk tomato paste with water, vinegar, sweetener, salt, onion powder, garlic powder, mustard powder, and a tiny pinch of warm spice. Then, simmer it for 5–8 minutes. Compared with the fresh tomato version, tomato paste ketchup is quicker, smoother, and more predictable, although it tastes less seasonal.

As a starting point, use the fresh tomato ratio when flavor matters most and the tomato paste ratio when speed and smoothness matter more.

Version Quick Ratio Best For
Fresh tomato ketchup 1 kg tomatoes + 75–90 ml vinegar + 50–75 g sweetener + 8–10 g salt Ripe summer tomatoes, fresh flavor, and from-scratch ketchup
Tomato paste ketchup 170 g tomato paste + 120–150 ml water + 45 ml vinegar + 20–35 g sweetener Quick ketchup, smooth texture, burgers, fries, and weeknight meals
Ratio guide comparing homemade ketchup made with fresh tomatoes and ketchup made with tomato paste.
Use the fresh tomato ratio when flavor matters most, and the tomato paste ratio when speed, smoothness, and consistency matter more.

That is why this ketchup recipe gives you two practical paths: a fresh tomato version for deeper flavor and a quick tomato paste version for speed.

Because this ketchup recipe is homemade, you can adjust the vinegar, sweetener, salt, and spices near the end instead of being locked into one fixed bottled flavor.

How the Ketchup Should Taste

Flavor target: good ketchup should taste tomato-rich first, then tangy, lightly sweet, salty enough to pop, and only gently spiced. If you can clearly taste cinnamon, clove, or allspice, the warm spice is too strong.

That flexibility is what makes a homemade ketchup recipe useful: the method gives you a starting point, but the final balance comes from tasting and adjusting.

The finished ketchup should taste tomato-rich, tangy-sweet, savory, and gently spiced in the background. When it tastes like plain tomato sauce, it needs more vinegar, sweetener, salt, mustard, or a tiny pinch of warm spice. However, when it tastes like chutney, the warm spices or sweetener are probably too strong.

Which Homemade Ketchup Version Should You Make?

Before you start cooking, decide what problem you are solving. Fresh tomatoes give the best homemade flavor when they are ripe, while tomato paste gives better control when the tomatoes are watery, pale, or out of season.

The easiest way to choose is to look at your tomatoes, your time, and how you plan to store the ketchup. When the tomatoes are ripe and red, fresh tomatoes give the best homemade flavor. On the other hand, when the tomatoes are watery, pale, or out of season, tomato paste gives the fastest, smoothest, most predictable result. If you are reducing sugar, however, the ketchup needs a little more balancing so it still tastes like ketchup instead of plain tomato sauce.

Decision guide showing when to make homemade ketchup with fresh tomatoes and when to use tomato paste.
Fresh tomatoes are best when they are ripe and flavorful, while tomato paste is the smarter shortcut when you want faster, smoother, more predictable ketchup.

In other words, the best homemade version is not always the longest ketchup recipe. It is the version that fits your tomatoes, your time, and the way you want to serve it.

Situation Best Version Why It Works
Ripe summer tomatoes Fresh tomato ketchup This gives the best flavor and the most homemade character.
Watery, pale, or bland tomatoes Tomato paste ketchup The paste gives more predictable color, body, and flavor.
Ketchup needed in about 10 minutes Quick tomato paste ketchup recipe No long reduction is needed.
Lower-sugar ketchup Sugar-free ketchup option This lets you control the sweetener while keeping the sauce balanced.
Pantry-stable jars Tested canning recipe only A flexible fridge ketchup should not be canned casually.

Why This Recipe Works

This recipe works because it treats ketchup as a balance problem, not just a tomato puree. The tomatoes soften first so their flavor turns rounded, the mixture is blended and strained for texture, and the seasoned puree reduces slowly until the vinegar, sweetener, salt, mustard, and spices taste like one glossy sauce.

The fresh tomato version gives deeper homemade flavor, while the tomato paste version gives speed and consistency. Together, they cover both real kitchen situations: good ripe tomatoes and the nights when you need a quick ketchup for fries, burgers, wraps, or snacks. Because both versions use the same sweet-acid-salt logic, you can adjust them in the same way near the end.

Homemade Ketchup Ingredients: Tomatoes, Vinegar, Sugar, Salt and Spices

Ketchup tastes simple, but it depends on balance. Tomatoes give the sauce body, while vinegar adds the sharp tang. Sweetener rounds the acidity, and salt makes the tomato flavor pop. Finally, onion, garlic, mustard, and warm spices turn cooked tomato into ketchup instead of plain tomato sauce.

Because the sauce reduces as it cooks, the balance of vinegar, salt, and sweetener becomes more concentrated near the end. Therefore, it is better to start slightly cautious and adjust after the sauce thickens.

What Is Ketchup Made Of?

Ketchup is usually made from tomatoes or tomato paste, vinegar, sugar or another sweetener, salt, onion, garlic, mustard, and warm spices. The main ingredient is tomato, but the familiar ketchup flavor comes from the balance of tomato, vinegar, sweetness, salt, and spice.

Compared with many bottled ketchup ingredients lists, homemade ketchup gives you more control. You can choose fresh tomatoes or tomato paste, adjust the sugar, use 5% acidity vinegar, control the salt, and keep the spice level gentle.

Ingredients for homemade ketchup including tomatoes, vinegar, sweetener, salt, onion, garlic, mustard powder, and warm spices.
Homemade ketchup gets its classic flavor from balance: tomatoes for body, vinegar for tang, sweetener for roundness, salt for depth, and spices for warmth.

Tomatoes and Vinegar

Tomatoes give the ketchup body, color, and fresh flavor. Meanwhile, vinegar gives the sauce its sharp ketchup tang. For this small-batch fridge version, apple cider vinegar gives a rounder flavor, while white vinegar tastes cleaner and sharper.

Sweetener, Salt and Spices

Sweetener balances tomato acidity, salt sharpens the flavor, and spices make the sauce taste like ketchup instead of plain tomato sauce. In this ketchup recipe, the homemade flavor comes from restraint: mustard powder, cinnamon, and a tiny pinch of clove or allspice are enough. Too much warm spice can push the sauce toward chutney.

Once you understand what each ingredient does, the recipe becomes easier to adjust. The table below shows the fresh tomato amounts first because that version depends most on balance and reduction.

Measurement note: metric weights are more accurate for tomatoes, onion, sweetener, and salt. The US cup and spoon measures are included for convenience, but final yield can vary because tomatoes contain different amounts of water.

Fresh Tomato Ketchup Ingredient Amounts

Ingredient Amount for Fresh Tomato Ketchup Why It Matters
Ripe red tomatoes 1 kg / 2.2 lb Tomatoes form the body, color, and main flavor. Roma, plum, San Marzano-style, or other meaty tomatoes reduce faster and taste richer.
Onion 80–100 g / 3–3.5 oz / 1 small onion Onion builds a savory base and helps the ketchup taste rounded.
Garlic 8–12 g / 2–3 cloves Garlic deepens the flavor. Use less if you want a cleaner bottled-style ketchup.
5% acidity vinegar 75–90 ml / 5–6 tbsp Vinegar gives ketchup its sharp tang. Apple cider vinegar tastes rounder; white vinegar tastes cleaner and sharper.
Sugar, jaggery, or brown sugar 50–75 g / 1.75–2.6 oz / about ¼–⅓ cup packed Sweetener balances tomato acidity and keeps the sauce from tasting like sour tomato puree.
Fine salt 8–10 g / about 1½ tsp Salt sharpens the tomato flavor. Add it carefully because reduction concentrates the sauce.
Mustard powder 1–2 g / ½–1 tsp Mustard powder brings the classic ketchup sharpness without making the sauce taste mustardy.
Cinnamon Pinch to ⅛ tsp A small amount adds warmth. Too much can push the ketchup toward chutney.
Clove or allspice Tiny pinch / 1/16 tsp or less This gives the familiar background spice, but it becomes overpowering quickly.
Cayenne or chili powder Optional, ⅛–¼ tsp Use this for mild heat without turning the ketchup into hot sauce.

How Much Sugar Is in This Homemade Ketchup?

This ketchup recipe uses 50–75 g added sugar, jaggery, or brown sugar for a homemade batch that finishes at about 2–2½ cups. That works out to roughly 1.25–2.3 g added sweetener per tablespoon, depending on your final yield and how much sweetener you use.

For a less sweet ketchup, start with 50 g sweetener and adjust only after the sauce has reduced. Because reduction concentrates flavor, the ketchup may taste sweeter and saltier near the end than it did at the start. Still, do not remove all sweetness unless you want a sharper tomato-sauce-style condiment. Instead, reduce the sweetener gradually and taste again after the ketchup cools.

It is also useful when you want a no-corn-syrup ketchup and prefer to choose the sweetener yourself. For a lighter or more controlled version, homemade ketchup lets you adjust the sugar, salt, and vinegar instead of relying on a fixed bottled formula.

Use 5% acidity vinegar for this recipe, especially when you are also reading the canning section. For regular fridge ketchup, apple cider vinegar, white vinegar, or a mix of the two all work. Apple cider vinegar gives a slightly fruitier ketchup; by contrast, white vinegar gives a cleaner, sharper ketchup.

Important: this flexible recipe is for fridge and freezer storage. If you want shelf-stable canned ketchup, use a tested canning formula and do not casually change vinegar, tomato, onion, vegetable, jar, or processing-time ratios.

Homemade Ketchup Recipe with Fresh Tomatoes

This is the main ketchup-from-scratch version to make when tomatoes are ripe, red, and flavorful. In practice, it starts with 1 kg / 2.2 lb fresh tomatoes and reduces into about 500–600 g / 17.5–21 oz / 2–2½ cups of ketchup, depending on the tomato variety and how thick you cook it.

The method is simple, even though the simmer takes time: soften the tomatoes, blend, strain if needed, season, then reduce until the sauce turns glossy and spoonable.

Step-by-step guide showing how to make homemade ketchup with fresh tomatoes by softening, blending, straining, seasoning, and reducing.
The fresh tomato method is simple: soften the tomatoes, blend them smooth, strain if needed, season, and reduce until the ketchup turns glossy and spoonable.

Best Tomatoes for Homemade Ketchup

The best tomatoes for homemade ketchup are meaty, ripe, and deeply red. For example, Roma, plum, San Marzano-style, and other paste tomatoes are ideal because they have more flesh and less water. Regular round tomatoes also work; however, they usually take longer to reduce. In addition, cherry tomatoes can make a sweet ketchup, although they are often seedier and may need straining.

Homemade ketchup may look slightly darker or softer red than bottled ketchup, especially if you use brown sugar, jaggery, apple cider vinegar, or long cooking. For the brightest color, use ripe red paste tomatoes, white vinegar, white sugar, and gentle heat.

Guide to tomato types for homemade ketchup, including Roma tomatoes, plum tomatoes, San Marzano-style tomatoes, round tomatoes, cherry tomatoes, and pale tomatoes.
Meaty, ripe, deeply red tomatoes make the best homemade ketchup because they reduce faster, taste richer, and give the sauce better color.
Tomato Type How It Works in Ketchup Adjustment
Roma / plum tomatoes Best balance of flesh, flavor, and low water Follow the main formula.
San Marzano-style tomatoes Excellent for smooth, rich ketchup Use the recipe as written.
Regular round tomatoes Good flavor but often watery Give them extra simmering time in a wide pan.
Cherry tomatoes Sweet and bright but more skins/seeds Blend thoroughly, then strain for a smoother finish.
Pale or underripe tomatoes Sharper, less sweet, less red Increase the sweetener slightly or switch to tomato paste.

Step 1: Cook the Tomatoes, Onion, and Garlic

Wash and roughly chop 1 kg / 2.2 lb ripe tomatoes. Then, add them to a wide heavy-bottomed pan with 80–100 g chopped onion and 2–3 garlic cloves. Once everything is in the pan, cover and cook over medium-low heat for 15–20 minutes, until the tomatoes collapse, release their juices, and soften completely.

At this stage, do not add the vinegar, sugar, or salt yet. Starting with just the tomatoes, onion, and garlic lets the vegetables soften evenly before the final reduction.

Step 2: Blend and Strain

After the tomatoes soften, blend the mixture until smooth. An immersion blender is easiest, but a countertop blender gives a finer texture. When using a countertop blender, work in batches and let steam escape safely.

Texture Goal What to Do
Rustic homemade ketchup Blend only, leaving a little skin and seed texture.
Smooth ketchup Pass the blended mixture through a coarse sieve.
Bottled-style ketchup Use a food mill or fine sieve, then blend again after reducing.

For a smoother finish, strain the puree before the final reduction. If you are new to reducing fresh tomatoes, MasalaMonk’s guide to tomato sauce from fresh tomatoes is useful because it explains the food mill method, the no-food-mill path, and why tomato reduction changes texture.

Step 3: Add Vinegar, Sweetener, Salt, and Spices

From there, return the blended and strained tomato puree to the pan. Add:

  • 75–90 ml / 5–6 tbsp 5% acidity vinegar
  • 50–75 g sugar, brown sugar, or jaggery
  • 8–10 g fine salt, or about 1½ tsp
  • ½–1 tsp mustard powder
  • Pinch to ⅛ tsp cinnamon
  • Tiny pinch clove or allspice
  • Optional ⅛–¼ tsp cayenne or chili powder

Start with the lower amount of sugar and vinegar when your tomatoes are already sweet and flavorful. If the tomatoes taste flat, watery, or very acidic, use the higher amount instead. Either way, taste again near the end because the flavor changes as the ketchup reduces.

Step 4: Simmer Until Thick and Glossy

Simmer the ketchup uncovered over low to medium-low heat for 45–70 minutes after blending and seasoning, stirring more often as it thickens. The total cook time is usually 60–90 minutes including the first tomato-softening stage, but watery tomatoes can take longer.

The pan should show small, steady bubbles, not an aggressive boil. Near the end of cooking, the ketchup can catch on the bottom quickly, so use a splatter screen when needed and stir more often as it thickens. Instead of rushing the heat, give the sauce time to reduce slowly; that way, it stays brighter, smoother, and less bitter.

Heat cue: keep the ketchup at a gentle simmer with small, steady bubbles, not a rolling boil. If the sauce spits aggressively, darkens quickly, or sticks to the bottom, lower the heat and stir more often. Gentle reduction gives you brighter flavor, smoother texture, and better color.

Stage Approximate Amount Visual Cue
Fresh chopped tomatoes 1 kg / 2.2 lb Chunky, raw, watery
After softening and blending About 900 ml–1.1 L Loose tomato puree
After straining About 750–950 ml Smoother but still thin
Final ketchup About 500–600 g / 2–2½ cups Glossy, thick, spoonable

Step 5: Test the Thickness

Rather than relying only on time, use the texture as your guide. Because tomatoes vary so much, the exact cook time can shift from batch to batch. Near the end of cooking, check the ketchup with one or more of these doneness tests:

Test What You Should See
Spoon mound test The ketchup should mound slightly on a spoon instead of running off like tomato juice.
Trail test Drag a spatula through the pan; the trail should close slowly, not immediately flood back.
Cold plate test Drop a little ketchup on a chilled plate. After 30 seconds, it should hold shape instead of spreading into a watery puddle.

When in doubt, stop slightly before it looks perfect because ketchup thickens as it cools.

Step 6: Taste and Adjust

Once the ketchup is thick, taste it before you store it. A flat flavor usually needs a little salt first. When the sauce tastes too sweet, add vinegar 1 teaspoon at a time. If the flavor leans too sour, balance it with sweetener in small amounts. When it tastes like plain tomato sauce instead of ketchup, add vinegar, sweetener, salt, mustard, and a very tiny pinch of clove or cinnamon until the flavor tastes rounded.

Do not worry if the ketchup tastes slightly sharp while hot. After cooling, the vinegar softens, the sweetness feels rounder, and the texture becomes thicker.

Step 7: Cool and Store

Before you store it, let the ketchup cool fully. Then, transfer it to a clean glass jar. Refrigerate and use within 2 weeks for best quality, or freeze for longer storage.

For the best flavor, chill the ketchup for at least 2 hours before serving. While it is hot, freshly cooked ketchup can taste sharper than expected. After cooling, the sweetness, acidity, salt, and spices settle into a rounder flavor.

Quick Tomato Paste Ketchup: How to Make Ketchup from Tomato Paste

When fresh tomatoes are weak or you need ketchup quickly, tomato paste is the better starting point. Because it has already been cooked down, this version thickens in minutes, needs less guesswork, and gives you a smoother, more predictable ketchup. It is not as fresh-tasting as the fresh tomato version, but it is much faster.

A standard 6 oz / 170 g can of tomato paste is the easiest starting point for this shortcut. If your paste is very thick or double-concentrated, start with the higher amount of water and adjust after simmering.

Step-by-step guide showing how to make ketchup from tomato paste with water, vinegar, sweetener, salt, onion powder, garlic powder, mustard, and warm spice.
Tomato paste ketchup is the fast route: whisk the ingredients smooth, simmer for a few minutes, cool, and adjust the thickness or tang before serving.
Detail Spec
Yield About 300–350 g / 10.5–12 oz / 1¼–1½ cups
Prep time 3 minutes
Cook time 5–8 minutes
Total time 8–12 minutes
Best for Fries, burgers, sandwiches, dips, and weeknight meals

Tomato Paste Ketchup Ingredients

Ingredient Metric US / Imperial
Tomato paste 170 g 6 oz can
Water 120–150 ml ½–⅔ cup
5% acidity vinegar 45 ml 3 tbsp
Sugar, honey, jaggery, or maple syrup 20–35 g 1½–2½ tbsp
Fine salt 4–5 g About ¾ tsp
Onion powder ½ tsp
Garlic powder ¼–½ tsp
Mustard powder ¼–½ tsp
Cinnamon, clove, or allspice Tiny pinch

How to Make Ketchup from Tomato Paste

  1. Add tomato paste, water, vinegar, sweetener, salt, onion powder, garlic powder, mustard powder, and spices to a small saucepan.
  2. Whisk until the mixture is completely smooth.
  3. Simmer over low heat for 5–8 minutes, stirring often.
  4. If it is too thick, add more water 1 tablespoon at a time.
  5. For more tang, add vinegar 1 teaspoon at a time.
  6. Cool before judging the final thickness.

Best use: tomato paste ketchup is the easiest version for burgers, fries, sandwiches, wraps, and quick mayo-ketchup sauce. It is not as fresh-tasting as the fresh tomato version, but it is smoother and faster.

Sugar-Free, No-Sugar and Keto Homemade Ketchup Option

Classic ketchup needs sweetness to balance tomato acidity. Without any sweetness, the sauce will not taste like familiar bottled ketchup. Instead, it will taste sharper, more acidic, and more like seasoned tomato sauce. However, you still have several good options depending on what “sugar-free” means for you.

This section is for readers looking for ketchup without sugar, no-sugar tomato ketchup, zero-sugar ketchup, or a lower-carb ketchup option. The key point is that ketchup still needs sweetness for balance, so the best sugar-free version uses a low-carb sweetener instead of removing sweetness completely.

Guide comparing no refined sugar, keto low-carb, and no-sweetener options for homemade ketchup.
Ketchup still needs some sweetness for balance, so the best sugar-free version replaces sweetness thoughtfully instead of removing it completely.

Once the basic ketchup tastes balanced, you can lower the sugar more safely. The important thing is to replace sweetness thoughtfully instead of removing it all at once.

Sweetener Options for Sugar-Free Ketchup

Version What to Use Flavor Result
No refined sugar Dates, raisins, apple, jaggery, honey, or maple syrup Still rounded and ketchup-like, but not strictly sugar-free
Keto / low-carb Allulose, monk fruit, or a tiny amount of stevia Closest low-carb option, especially with tomato paste ketchup
No sweetener Skip sweetener Sharper, tangier, more like tomato sauce than ketchup

How to Adjust the Sweetness

In the fresh tomato recipe, replace the 50–75 g sugar with 40–60 g chopped dates or raisins and blend very thoroughly. For keto ketchup, the tomato paste version is easier because it is already thick and consistent. Start with 1–2 tablespoons allulose or monk fruit sweetener, then adjust after simmering.

The best sugar-free ketchup still tastes slightly sweet. If you remove sweetness completely, the sauce becomes tangy tomato sauce, not classic ketchup.

If you are building low-carb burger plates or bowls, this sugar-free ketchup variation fits better than sugary bottled sauces. MasalaMonk’s keto hamburger recipes also explain why ketchup-heavy sauces can become a hidden carb trap.

Fresh Tomato Ketchup vs Tomato Paste Ketchup

Neither version is automatically better. Instead, the right choice depends on your tomatoes and your timing. When tomatoes are ripe and flavorful, fresh tomato ketchup gives the best flavor. By contrast, tomato paste ketchup works better when you want speed, smoothness, and consistency.

In short, the best homemade ketchup recipe for you depends on whether you care more about fresh tomato flavor, speed, smoothness, or consistency.

Need Fresh Tomato Ketchup Tomato Paste Ketchup
Fresh flavor Best when tomatoes are ripe and sweet Good, although less fresh
Speed Slower because it needs reduction Fastest option because paste is already concentrated
Texture Smooth only after careful straining Usually smooth and consistent
Predictability Depends on the tomatoes More predictable because the base is concentrated
Summer tomatoes Ideal choice when tomatoes are in season Useful when fresh tomatoes are weak
Beginner-friendliness Good, although slower Easiest because it skips long reduction
Canning suitability Only with a tested canning recipe Only with a tested canning recipe

How to Make Homemade Ketchup Smooth and Thick

In practice, the two biggest homemade ketchup problems are texture and thickness. Because fresh tomatoes contain a lot of water, ketchup needs reduction. If you stop too early, it tastes like thin tomato sauce. However, if you cook it too hard or too long, it can scorch, darken, or become pasty. Therefore, the goal is slow reduction, not aggressive boiling.

The texture goal is glossy and spoonable, not watery like tomato puree and not stiff like tomato paste.

Texture guide for homemade ketchup showing a spoon mound test, slow-closing trail test, and chilled plate test.
Good homemade ketchup should look glossy, mound slightly on a spoon, leave a slow-closing trail in the pan, and hold shape on a chilled plate.

Use a Wide Pan

A wide pan helps water evaporate faster. By contrast, a tall narrow pot traps steam and makes the ketchup take longer to thicken. For a 1 kg tomato batch, a 26–30 cm / 10–12 inch wide pan is ideal.

Strain for a Smoother Finish

Tomato skins and seeds can make homemade ketchup feel rough. For a smoother finish, blend the softened tomatoes, then pass them through a sieve or food mill before the final reduction.

Reduce Slowly

Keep the ketchup at a gentle simmer. As it thickens, stir more often and scrape the bottom of the pan. The sauce should look glossy, not dry or scorched.

Cool Before Judging Thickness

Hot ketchup looks thinner than cooled ketchup. Therefore, stop when it is slightly looser than your ideal final texture, then let it cool before deciding whether it needs more reduction.

Texture reminder: after cooling, ketchup becomes thicker and smoother. Because of that, stop a little early rather than reducing it until it looks perfect in the hot pan.

How to Fix Homemade Ketchup

Homemade ketchup is easy to adjust when you know what is wrong. First, decide whether the problem is texture, flavor, or color. Then, make small changes and taste again after the ketchup cools slightly on a spoon.

Troubleshooting guide for homemade ketchup showing fixes for ketchup that is too thin, too thick, too sour, too sweet, too salty, bland, spicy, or rough.
Most homemade ketchup problems are easy to fix once you know whether the issue is texture, acidity, sweetness, salt, or spice.

Texture Fixes

Problem Likely Cause Fix
Runny or thin Watery tomatoes or not enough reduction Simmer uncovered in a wide pan until the ketchup thickens and the extra water cooks off.
Stiff or pasty Over-reduced sauce or too much tomato paste Loosen it with water, tomato juice, or vinegar 1 tablespoon at a time.
Rough or seedy Skins or seeds remain Blend longer, then strain through a sieve or food mill for a smoother texture.

Flavor and Color Fixes

Problem Likely Cause Fix
Sharp or sour Too much vinegar or underripe tomatoes Add sugar, jaggery, honey, dates, or raisins in small amounts until the acidity tastes rounded.
Overly sweet Too much sweetener Add vinegar 1 teaspoon at a time. Afterward, add a small pinch of salt or mustard powder if the flavor still feels flat.
Salty or harsh Salt added early or sauce reduced too far Dilute the flavor with unsalted tomato paste, tomato puree, or a little water, then simmer briefly.
Flat or bland Not enough salt, vinegar, or spice Start with salt. Then add vinegar, mustard powder, or warm spice in small amounts.
Too spicy Too much cayenne or chili Round out the heat with tomato paste and a little sweetener.
Brown or dull Overcooking, burning, dark sugar, or dull tomatoes Next time, use ripe red tomatoes, lower the heat, stir more often, and avoid scorching.
Tomato-sauce flavor Missing ketchup’s sweet-acid-spice balance Build ketchup flavor with vinegar, sweetener, salt, mustard powder, and a tiny pinch of clove or cinnamon.

How to Store Homemade Ketchup

After the ketchup tastes right, storage matters as much as flavor. This is especially true for small-batch homemade ketchup because it does not have commercial stabilizers or a tested shelf-stable process.

Store it in a clean glass jar, use a clean spoon, and keep it refrigerated. After serving, return the jar to the fridge rather than leaving it on the counter.

Storage guide for homemade ketchup showing fridge storage, freezer storage, and tested canning safety information.
This small-batch ketchup is best treated as a fridge or freezer condiment unless you follow a tested canning recipe exactly.

Fridge, Freezer and Room Temperature Storage

Storage Method Recommendation
Fridge For best quality, use within 2 weeks.
Freezer For longer storage, freeze for 4–6 months in small portions.
Room temperature Only keep ketchup at room temperature when it has been properly canned with a tested recipe.
After thawing After thawing, stir well; if watery, simmer briefly to bring the texture back.
Jar hygiene Because homemade ketchup has no commercial stabilizers, use clean jars and clean spoons every time.

Can You Can Homemade Ketchup?

Think of this recipe as a fridge ketchup, not a pantry ketchup. You can freeze it safely, but do not treat it like a shelf-stable jarred product unless you follow a tested canning recipe.

For that reason, this flexible MasalaMonk ketchup recipe is not a shelf-stable canning formula.

For canning ketchup, use a tested canning formula from a reliable source such as the National Center for Home Food Preservation tomato ketchup recipe. Do not casually reduce vinegar, increase tomatoes, add extra onion, add extra vegetables, change jar size, change headspace, or shorten processing time.

For context, the NCHFP tomato ketchup formula is a large tested batch using 24 lb ripe tomatoes, 3 cups chopped onions, 3 cups 5% acidity cider vinegar, sugar, salt, and whole spices, with a yield of 6–7 pints. That is a different type of recipe from this flexible small-batch fridge ketchup.

Canning safety note: fridge ketchup is flexible. Canning ketchup is not. For shelf-stable jars, follow a tested recipe exactly, use vinegar with 5% acidity, and process jars according to the tested time for your altitude.

Healthy Canning’s quick ketchup guidance explains the same principle clearly: sweetness, salt, and dry spices are more flexible, but vinegar and low-acid vegetable ratios should not be casually changed in a water-bath canning recipe. If you want a pantry-stable ketchup, use tested canning instructions instead of adapting this small-batch fridge recipe.

Homemade Catsup vs Ketchup: Are They the Same?

Catsup and ketchup usually refer to the same sweet-tangy tomato condiment. “Ketchup” is the dominant modern spelling, but some readers still search for homemade catsup, homemade tomato catsup, or a recipe for tomato catsup.

If you came here looking for catsup, you are in the right place. The spelling changes, but the method is the same: tomatoes are reduced with vinegar, sweetener, salt, mustard, and spices until the sauce becomes thick, glossy, tangy, and balanced.

Close-up of thick glossy homemade ketchup in a bowl with a spoon, with fries in the background.
Homemade ketchup should look smooth, glossy, and spoonable, with enough body to coat fries and burgers without tasting heavy.

Ways to Use Homemade Ketchup

Homemade ketchup is more than a dip for fries. Once you have a jar in the fridge, it becomes a quick base for sauces, glazes, spreads, marinades, and snack plates. For everyday meals, that means one batch can cover burgers, wraps, fries, bowls, and quick dipping sauces.

Guide showing ways to use homemade ketchup with fries, burgers, mayo-ketchup sauce, meatloaf glaze, barbecue sauce, pakoras, wraps, and rice bowls.
A jar of homemade ketchup can do much more than dip fries — it also works in burger sauce, glazes, barbecue-style sauces, and snack platters.
Use How to Use the Ketchup
Fries Pair chilled ketchup with hot crispy homemade French fries.
Burgers Use it on burger buns or fold it into mayo for a creamy burger sauce.
Mayo ketchup sauce Stir 2 parts mayo with 1 part ketchup for a quick fry sauce. MasalaMonk’s homemade mayonnaise guide already covers mayo-ketchup sauce as a useful variation.
Meatloaf glaze Blend ketchup with brown sugar or honey and a splash of vinegar, then brush it over meatloaf.
BBQ sauce base Turn it into a quick barbecue-style sauce with vinegar, brown sugar, smoked paprika, black pepper, and Worcestershire-style seasoning.
Pakoras and snacks Serve it as a tangy-sweet dip when chutney feels too sharp.
Wraps and sandwiches Add a thin layer inside grilled cheese, paneer rolls, tofu wraps, or egg sandwiches.
Rice bowls Spoon it into spicy tomato rice, fried rice-style bowls, or quick sauce bases.

For a fruitier, hotter homemade sauce, try MasalaMonk’s mango habanero sauce. For a sharper fruit-and-mustard dip, try the mango mustard sauce. Both fit naturally into the same homemade sauce and condiment family.

Recipe recap board for homemade ketchup showing fresh tomato and tomato paste versions with a short method summary.
This quick visual recap summarizes both homemade ketchup routes, while the full recipe card below gives the detailed method and ingredient options.

Before you jump to the recipe card: choose the fresh tomato version when tomatoes are ripe and flavorful. However, choose the tomato paste shortcut when you want a faster, smoother, more predictable ketchup. Either way, taste again after cooling because ketchup thickens and mellows in the fridge.

Homemade Ketchup Recipe with Fresh Tomatoes or Tomato Paste

A smooth, tangy homemade ketchup made with ripe fresh tomatoes, vinegar, sweetener, salt, onion, garlic, mustard, and warm spices. This small-batch recipe includes a tomato paste shortcut, sugar-free notes, storage guidance, and texture fixes.

Prep Time15 minutes
Cook Time60–90 minutes
Total Time1 hr 15 min–1 hr 45 min
Yield500–600 g / 2–2½ cups

Equipment

  • Wide heavy-bottomed pan or Dutch oven
  • Immersion blender or countertop blender
  • Sieve or food mill, optional but recommended
  • Spatula
  • Clean glass jar

Ingredients

  • 1 kg / 2.2 lb ripe red tomatoes, roughly chopped
  • 80–100 g / 3–3.5 oz onion, chopped
  • 2–3 garlic cloves, about 8–12 g
  • 75–90 ml / 5–6 tbsp 5% acidity vinegar, apple cider or white vinegar
  • 50–75 g / about ¼–⅓ cup packed brown sugar, jaggery, or sugar
  • 8–10 g fine salt, about 1½ tsp
  • ½–1 tsp mustard powder
  • Pinch to ⅛ tsp ground cinnamon
  • Tiny pinch ground clove or allspice, 1/16 tsp or less
  • Optional: ⅛–¼ tsp cayenne or chili powder
  • Optional: ¼ tsp black pepper

Method

  1. Prep the tomatoes. Wash and roughly chop the tomatoes. Chop the onion and garlic.
  2. Soften. Place the tomatoes, onion, and garlic in a wide pot. Cover and cook over medium-low heat for 15–20 minutes, until the tomatoes collapse and release their juices.
  3. Blend. Blend the mixture until smooth with an immersion blender or countertop blender.
  4. Strain, optional. For smoother ketchup, pass the blended mixture through a sieve or food mill. For rustic ketchup, skip this step.
  5. Season. Return the tomato puree to the pot. Stir in vinegar, sweetener, salt, mustard powder, cinnamon, clove or allspice, and optional cayenne or black pepper.
  6. Reduce. Simmer uncovered over low to medium-low heat for 45–70 minutes. Stir more often as the ketchup thickens so it does not catch on the bottom.
  7. Test. Check that the ketchup mounds slightly on a spoon, leaves a slow-closing trail in the pan, and holds shape on a chilled plate.
  8. Adjust. Taste before storing. Add sweetener if sour, vinegar if sweet, salt if flat, or water if too thick.
  9. Cool and store. Cool the ketchup, transfer it to a clean jar, and refrigerate. Use within 2 weeks for best quality.

Quick Tomato Paste Option

Whisk together 170 g / 6 oz tomato paste, 120–150 ml / ½–⅔ cup water, 45 ml / 3 tbsp vinegar, 20–35 g sweetener, 4–5 g salt, ½ tsp onion powder, ¼–½ tsp garlic powder, ¼–½ tsp mustard powder, and a tiny pinch of cinnamon or clove. Simmer 5–8 minutes, then cool.

Notes

  • For faster thickening and better color, use ripe, meaty tomatoes.
  • A 26–30 cm / 10–12 inch pan works best for a 1 kg tomato batch because it evaporates water faster.
  • Ketchup thickens as it cools, so stop reducing slightly before it looks perfect.
  • For the best flavor, chill the ketchup for at least 2 hours before serving.
  • If you want a smoother bottled-style finish, strain the tomato mixture before the final reduction.
  • If using a countertop blender, blend hot tomatoes in batches and vent the lid so steam can escape safely.
  • Reduction concentrates flavor, so add salt carefully.
  • When doubling the recipe, use a wider pan or expect a longer reduction time. A double batch will not thicken in the same time.
  • For a lower-sugar or sugar-free variation, use allulose, monk fruit, dates, or raisins.
  • This homemade ketchup recipe is flexible for fridge and freezer storage, but it should not be used as a canning formula. For shelf-stable jars, follow a tested canning recipe exactly.

FAQs About Homemade Ketchup

How do I make homemade ketchup from fresh tomatoes?

Fresh tomatoes make excellent homemade ketchup when they are ripe, red, and flavorful. To make it, cook them with onion and garlic, then blend, strain if needed, and reduce with vinegar, sweetener, salt, mustard, and spices until thick.

How do I make ketchup from tomato paste?

Tomato paste ketchup is the fastest version because the tomato base is already concentrated. To make it, whisk tomato paste with water, vinegar, sweetener, salt, onion powder, garlic powder, mustard powder, and a tiny pinch of spice. Then simmer for 5–8 minutes.

Why is my homemade ketchup too thin?

Thin ketchup usually means the tomatoes were watery or the sauce has not reduced enough. To fix it, simmer the ketchup uncovered in a wide pan and stir often as it thickens. The sauce is ready when it mounds slightly on a spoon and holds shape on a chilled plate.

Why does my ketchup taste too sour?

Too much vinegar, underripe tomatoes, or not enough sweetener can make ketchup taste sour. To balance it, gradually add sugar, jaggery, honey, dates, raisins, or a low-carb sweetener until the acidity tastes rounded.

Why does my homemade ketchup taste like tomato sauce?

Your ketchup can taste like tomato sauce when it does not have enough sweet-acid-spice balance. To fix that, add a little vinegar for tang, sweetener for roundness, salt for depth, mustard powder for sharpness, and a tiny pinch of clove, cinnamon, or allspice for classic ketchup flavor. After that, chill it briefly and taste again.
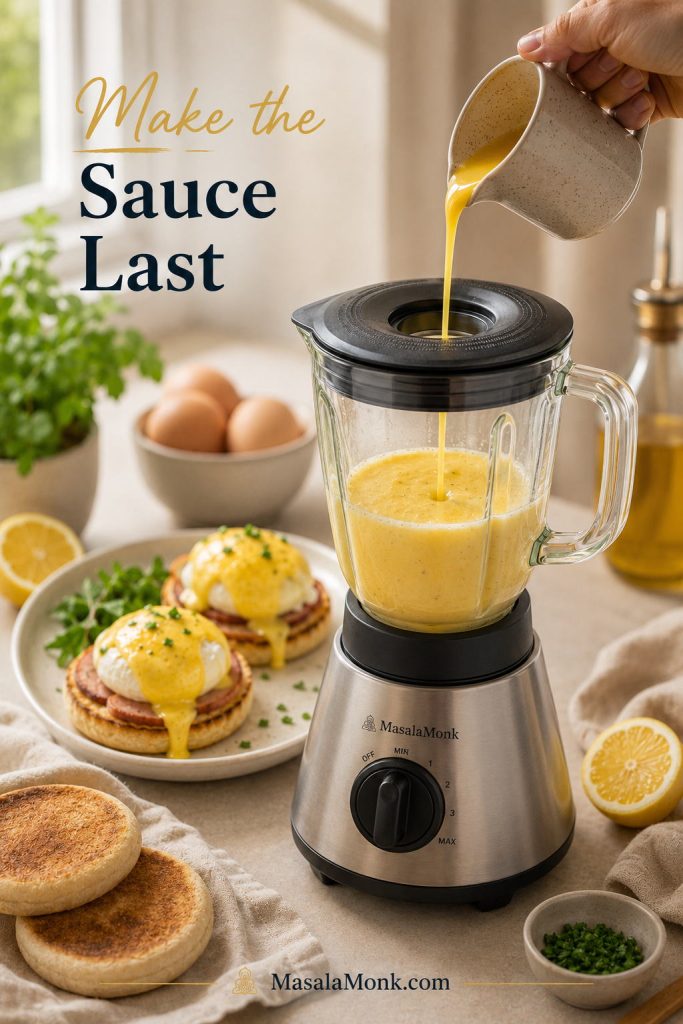
Is homemade ketchup good without sugar?

You can make homemade ketchup without refined sugar, but the flavor changes. For a no-refined-sugar version, use dates, raisins, apple, honey, maple, or jaggery. Meanwhile, keto ketchup works better with allulose, monk fruit, or a very small amount of stevia. Without any sweetener, however, the sauce will taste more like tangy tomato sauce than classic ketchup.

How long does homemade ketchup last?

This small-batch fridge ketchup is best within 2 weeks. For that reason, keep it refrigerated in a clean jar and use a clean spoon. For longer storage, freeze it in small portions for 4–6 months. After thawing, stir before serving.

Does homemade ketchup freeze well?

Freezing works well for homemade ketchup. After cooling, use small containers or ice cube trays. Then, after thawing, stir well. If it separates or turns watery, simmer it briefly to bring the texture back.

Is this homemade ketchup recipe safe for canning?

Do not can this flexible recipe as written. Instead, use it for fridge and freezer storage. For shelf-stable canning, use a tested ketchup canning recipe from a reliable source and follow the vinegar, jar size, headspace, and processing-time instructions exactly.

Is catsup the same as ketchup?

Usually, yes. Catsup and ketchup are alternate names for the same sweet-tangy tomato condiment. Today, ketchup is the more common spelling; however, homemade catsup and homemade tomato catsup usually refer to the same type of recipe.

What makes this a homemade ketchup recipe instead of tomato sauce?

A homemade ketchup recipe uses tomato, vinegar, sweetener, salt, mustard, and warm spices in a tighter balance than tomato sauce. As a result, the finished ketchup tastes tangy-sweet, glossy, concentrated, and dip-friendly.

What is ketchup made of?

Ketchup is usually made from tomatoes, vinegar, sugar or another sweetener, salt, onion or onion powder, garlic or garlic powder, mustard, and warm spices. For homemade ketchup, cinnamon, clove, allspice, or celery seed should stay in the background rather than dominate the sauce. Otherwise, the ketchup can start tasting like chutney instead of a classic dip.

Back to top

Posted on 4 Comments

Mango Mustard Sauce Recipe

Creamy mango mustard sauce in a bowl with fries, fried chicken, pakoras, green mango, mustard seeds, chili and lemon for a quick dipping sauce.

A good mango mustard sauce should taste sweet, tangy, sharp, lightly spicy, and useful enough to go with more than one meal. It should work as a dipping sauce for fries, chicken tenders, wings, pakoras, and nuggets, but also as a spread for burgers, sandwiches, wraps, and rolls.

This mango mustard sauce recipe gives you the most useful version first: a fast blender sauce made with ripe mango, mustard, lemon or vinegar, chili, salt, and a creamy base such as mayonnaise, thick yogurt, coconut cream, or soaked cashews. It takes only a few minutes, yet it tastes brighter and more interesting than plain honey mustard or a regular mayo-based dip.

At the same time, there is a sharper Indian/Bengali direction to know. In Bengali cooking, aam kasundi or mango kasundi usually means a pungent raw mango mustard sauce made with green mango, mustard seeds, mustard oil, green chili, turmeric, and salt. Because the two styles serve different needs, this guide keeps the fast blender sauce as the main recipe, then shows you how to move it toward an aam kasundi-style version when you want a stronger, sharper mustard flavor.

Quick Answer

Mango mustard sauce is a sweet-tangy sauce made with mango and mustard. In its easiest form, it blends ripe mango or unsweetened mango pulp with mustard, lemon juice or vinegar, chili, salt, and a creamy base such as mayonnaise, thick yogurt, coconut cream, or soaked cashews. As a result, it works as a dip, spread, drizzle, dressing, or quick sauce for chicken, fries, wings, burgers, fish, shrimp, pakoras, paneer, and wraps.

For a softer, creamier sauce, use ripe mango and mayo, yogurt, or coconut cream. By contrast, a sharper Indian/Bengali-style version starts with raw mango, mustard seeds, mustard oil, green chili, turmeric, and salt. That second version is closer to aam kasundi or mango kasundi, which is more pungent, sour, and mustard-forward than a creamy mango mustard dip.

  • Best quick version: ripe mango, Dijon or yellow mustard, lemon, chili, salt, and mayo or yogurt.
  • Best no-mayo version: use coconut cream, thick curd, Greek yogurt, or soaked cashews.
  • Best Indian-style version: use kasundi or make the aam kasundi-style raw mango variation below.
  • Best for dipping: keep the sauce thick and creamy.
  • Best for drizzling: thin it with water, lemon juice, vinegar, or a little oil.
  • Best for chicken and wings: keep it tangy, slightly sweet, and medium-spicy.

Which Mango Mustard Sauce Should You Make?

Choose the version based on how you want to serve it. The quick creamy sauce is best for dipping and spreading, the no-mayo version is better for lighter drizzles and bowls, and the aam kasundi-style version is sharper, sourer, and more mustard-forward.

If You Want… Make This Version Best With
A creamy dipping sauce Ripe mango + Dijon or yellow mustard + mayo or yogurt Fries, chicken tenders, wings, nuggets, burgers
A no-mayo sauce Ripe mango + mustard + coconut cream, thick yogurt, or cashews Wraps, bowls, shrimp, fish, roasted vegetables
A sharper Indian-style sauce Ripe mango + kasundi, or raw mango + mustard seeds Pakoras, rolls, paneer, fish, fried snacks
A Bengali-style aam kasundi Raw mango + mustard seeds + mustard oil + green chili Rice, fish, Bengali meals, chops, pakoras
Decision guide comparing creamy mango mustard sauce, no-mayo mango mustard sauce, Indian-style mango mustard sauce, and aam kasundi-style sauce with serving ideas.
Choose the mango mustard sauce that fits your meal: creamy for fries and chicken, no-mayo for lighter bowls and seafood, Indian-style for pakoras and paneer, or aam kasundi-style when you want raw mango and mustard seed sharpness.

Quick Mango Mustard Sauce

This quick mango mustard sauce is creamy, tangy, lightly spicy, and ready in minutes. For the best first batch, use ripe mango, Dijon mustard, lemon juice, chili, salt, and mayonnaise or thick yogurt. After that, adjust it toward a no-mayo, vegan, honey mustard, or aam kasundi-style version.

Prep Time
5 minutes
Cook Time
0 minutes
Rest Time
10 minutes, optional
Total Time
5 to 15 minutes
Yield
About 1 cup

Ingredients

  • 1 cup diced ripe mango or unsweetened mango pulp, about 160–170 g / 6 oz
  • 2 tablespoons Dijon mustard, yellow mustard, or kasundi, about 30 ml
  • 2 to 3 tablespoons mayonnaise, Greek yogurt, thick curd, or coconut cream, about 30–45 g
  • Or, for a cashew version: 2 tablespoons soaked cashews, about 18–22 g, plus 1 to 2 tablespoons water
  • 1 tablespoon fresh lemon juice or apple cider vinegar, about 15 ml
  • 1/4 teaspoon chili flakes or cayenne, or 1 small green chili, finely chopped
  • 1/4 teaspoon fine salt, about 1.5 g, plus more to taste
  • 1 to 2 teaspoons honey or sugar, about 5–10 ml honey or 4–8 g sugar, optional
  • 1 to 2 tablespoons cold water, about 15–30 ml, only if needed to thin

Instructions

  1. Add everything to a blender. Add the mango, mustard, creamy base, lemon juice or vinegar, chili, and salt. Do not add all the honey or sugar yet unless your mango is very tart.
  2. Blend until smooth. Blend until the sauce looks creamy, glossy, and fully combined. Scrape down the sides if needed.
  3. Check the texture. For a dip, the sauce should coat the back of a spoon. For a drizzle, it should fall in a thin ribbon. For a dressing, thin it until pourable but still creamy.
  4. Adjust in small amounts. Add mustard 1 teaspoon at a time for more sharpness, lemon or vinegar 1 teaspoon at a time for brightness, water 1 teaspoon at a time for a thinner sauce, and salt 1 small pinch at a time if the flavor tastes flat.
  5. Rest briefly. Let the sauce sit for 10 minutes if possible. The mustard sharpness settles and the mango flavor becomes rounder.
  6. Serve or chill. Use right away, or refrigerate in a clean airtight jar.

Notes

  • This makes about 1 cup, enough for 4 to 6 servings as a dip or 6 to 8 servings as a drizzle.
  • Use ripe mango for the quick creamy version.
  • Use unsweetened mango pulp when you want the smoothest blender sauce.
  • If using sweetened mango pulp, skip the honey or sugar and add extra lemon, vinegar, or mustard to keep the sauce savory.
  • If using cashews, soak them in hot water for 20 to 30 minutes, then drain before blending.
  • Use kasundi instead of Dijon when you want a sharper Indian-style mango mustard sauce.
  • Use coconut cream or soaked cashews for a vegan no-mayo mango mustard sauce.
  • Honey or sugar is optional. Add it only if the mango is tart or the mustard tastes harsh.

For the first serving, try this mango mustard sauce with fries, chicken tenders, pakoras, grilled paneer, roasted vegetables, fish, shrimp, burgers, wraps, or sandwiches. Ideally, it should taste sweet-tangy first, mustard-sharp second, and spicy only as much as you want it to be.

Why This Mango Mustard Sauce Works

  • Ripe mango gives body and sweetness. It makes the sauce smooth, golden, and fruity without needing much added sugar.
  • Mustard keeps it savory. Dijon, yellow mustard, or kasundi stops the sauce from tasting like plain mango puree.
  • Lemon or vinegar adds lift. The acidity keeps the creamy base from feeling heavy and makes the sauce better with fried, grilled, and roasted foods.
  • The creamy base controls the texture. Mayo makes it rich, yogurt makes it tangier, coconut cream makes it vegan, and soaked cashews make it thick and neutral.
  • The aam kasundi-style option solves the raw mango question. It gives readers a sharper Bengali-style path without making the whole recipe traditional, time-heavy, or confusing.

Once blended, the finished sauce should be smooth, glossy, and spoonable. For dipping, it should cling to fries, pakoras, or chicken tenders. When used as a drizzle, it should fall from a spoon in a thin ribbon. As a spread, it should stay thicker and creamier.

What Is Mango Mustard Sauce?

Mango mustard sauce is a condiment made by combining mango with mustard, acid, salt, and heat. In its easiest form, it is a quick blender sauce made with ripe mango, prepared mustard, lemon or vinegar, chili, and something creamy. Therefore, it tastes like a brighter, fruitier mustard dip and works especially well with fried, grilled, roasted, or snacky foods.

However, mango mustard sauce can also point toward aam kasundi, a Bengali-style mango mustard condiment made with raw mango, mustard seeds, mustard oil, green chili, turmeric, salt, and sometimes garlic or ginger. That version is sharper, more pungent, sourer, and more mustard-heavy than a creamy dipping sauce.

For that reason, this recipe gives you both paths. Make the fast blender version when you need a sauce for fries, chicken, burgers, wraps, wings, fish, or pakoras. Meanwhile, use the aam kasundi-style variation when you need a bolder raw mango mustard flavor for rice, fish, rolls, fried snacks, Bengali-style meals, or kasundi mayo.

For a fresh, chunky mango topping instead of a mustard sauce, try this mango salsa recipe. Mango salsa is brighter, fresher, and diced, while mango mustard sauce is smoother, sharper, and more condiment-like.

For a tangier pickled mango sauce with turmeric, fenugreek, chili, and vinegar, use the amba sauce guide.

Mango Mustard Sauce Ingredients

The ingredient list is simple, but each ingredient has a job. First, mango brings body and sweetness. Then, mustard gives bite. Meanwhile, lemon or vinegar keeps the sauce from tasting heavy. Finally, the creamy base decides whether the sauce feels like a dip, spread, drizzle, or dressing.

Mango mustard sauce ingredients guide showing mango, mustard, lemon or vinegar, creamy base, chili, salt, and optional honey with each ingredient’s role.
Each ingredient has a job in mango mustard sauce: mango gives body and sweetness, mustard adds savory bite, lemon or vinegar brings tang, and the creamy base turns it into a dip, spread, or drizzle.

Ripe mango or mango pulp

Use ripe mango for the fast blender version because it gives the sauce sweetness, color, body, and a smooth fruit flavor. Fresh mango gives the brightest taste, while mango pulp gives the smoothest texture and the most consistent result. Whenever possible, choose unsweetened mango pulp. However, sweetened pulp can still work if you skip the honey or sugar and add extra lemon, vinegar, or mustard to keep the sauce savory.

Mustard

Mustard is what keeps the sauce savory. Dijon mustard gives the cleanest sharpness, while yellow mustard gives a familiar tangy dip flavor. By contrast, kasundi gives a deeper Indian/Bengali-style bite. When you use mustard seeds, the sauce moves closer to aam kasundi.

Lemon juice or vinegar

Acid keeps mango mustard sauce lively. Lemon juice tastes fresh and bright, while apple cider vinegar tastes rounder and slightly fruitier. White vinegar, on the other hand, tastes sharper. Start with a small amount, then adjust after blending.

Creamy base

Mayonnaise gives the richest, smoothest dipping sauce. By comparison, Greek yogurt or thick curd makes the sauce lighter and tangier. Meanwhile, coconut cream makes a vegan no-mayo version that works especially well with shrimp, fish, and snacks. For a neutral vegan base instead, soaked cashews make the sauce creamy without adding a strong coconut flavor.

Chili

Use chili flakes, cayenne, fresh green chili, jalapeño, or a little hot sauce depending on how spicy you want the sauce. For an all-purpose dip, keep the heat moderate. Then, for wings, grilled meats, or a spicy mango habanero mustard variation, increase the chili gradually.

Salt and optional honey

Salt makes the mango and mustard taste complete. Honey or sugar is optional, so use it only if the mango is tart, the mustard tastes harsh, or you prefer a softer honey mustard-style sauce.

Which Mustard Should You Use?

The mustard changes the whole personality of the sauce. For the easiest all-purpose version, start with Dijon. If you want something milder for fries, burgers, or kids, use yellow mustard instead. However, when you want the sauce to taste sharper and more Indian, kasundi is the better choice.

Mustard Best For Flavor
Dijon mustard Everyday mango mustard sauce, chicken, fish, sandwiches, wraps. Sharp, smooth, balanced, not too sweet.
Yellow mustard Fries, burgers, nuggets, chicken tenders, kid-friendly dipping sauce. Mild, tangy, familiar, less pungent.
Kasundi Indian-style dipping sauce, pakoras, rolls, paneer, fish, fried snacks. Sharper, deeper, more pungent, mustard-forward.
Mustard seeds Aam kasundi-style sauce, raw mango mustard sauce. Strongest bite, more traditional, more textured if not blended fully.
Honey mustard Softer variation for chicken, wraps, sandwiches, and fries. Sweeter, rounder, less sharp.
Mustard chooser guide for mango mustard sauce comparing Dijon mustard, yellow mustard, kasundi, mustard seeds, and honey mustard with best uses.
Dijon is the best first choice for balanced mango mustard sauce, yellow mustard makes it milder, kasundi adds Indian-style sharpness, mustard seeds move it toward aam kasundi, and honey mustard makes it sweeter and softer.

If you are unsure, use Dijon for the first batch. It gives the cleanest balance and lets the mango stay clear. After that, you can make the sauce sharper with kasundi or milder with yellow mustard.

Ripe Mango vs Raw Mango

This is the most important decision in the recipe. On one hand, ripe mango gives you a sweet, smooth, creamy dipping sauce. On the other hand, raw mango gives you a sharper, sourer, aam kasundi-style sauce. Both are useful, but they are not the same.

Mango Type Best For Flavor How to Adjust
Ripe mango Quick creamy mango mustard sauce. Sweet, fruity, mellow. Add lemon/vinegar and mustard to keep it savory.
Unsweetened mango pulp Fast blender sauce, smooth dipping sauce. Very smooth, consistent, often sweeter than fresh mango. Skip extra honey unless needed.
Raw mango / green mango Aam kasundi-style mango mustard sauce. Sour, sharp, more traditional. Balance with salt, mustard oil, chili, and a little sugar if needed.
Frozen mango Backup option for quick sauce. Convenient, softer, sometimes watery. Thaw and drain first, then blend.
Comparison guide showing ripe mango, unsweetened mango pulp, raw green mango, and frozen mango for making mango mustard sauce or aam kasundi-style sauce.
Use ripe mango or unsweetened mango pulp for a smooth, sweet-tangy mango mustard sauce. Choose raw green mango when you want a sharper, sourer, mustard-forward aam kasundi-style sauce.

For the everyday blender sauce, use ripe mango or unsweetened mango pulp. For the aam kasundi-style variation, use raw mango or firm green mango. When the two are swapped, the sauce still works, but the flavor moves in a different direction: ripe mango tastes sweeter and smoother, while raw mango tastes sharper and more mustard-forward.

How to Make Mango Mustard Sauce

The quick version is a blender sauce. Even so, the final tasting step matters because mangoes and mustards vary a lot.

Step-by-step guide showing how to make mango mustard sauce in a blender by adding mango and mustard, adding a creamy base, blending, adjusting thickness, and serving.
This quick mango mustard sauce comes together in a blender: start with mango and mustard, add your creamy base, blend until glossy, then adjust the thickness for dipping or drizzling.

1. Add the mango and mustard

Add the ripe mango or mango pulp to a blender with the mustard. For the cleanest flavor, use Dijon. For a milder dip, choose yellow mustard instead. Alternatively, use kasundi for a sharper Indian-style sauce.

2. Add the creamy base

Next, add mayonnaise, Greek yogurt, thick curd, coconut cream, or soaked cashews with a little water. Use more creamy base for a thicker dipping sauce and less for a lighter drizzle.

3. Add acid, chili, and salt

After that, add lemon juice or vinegar, chili, and salt. Because mango usually brings enough sweetness on its own, do not add too much sweetener at the beginning.

4. Blend until smooth

Blend until the sauce is smooth, glossy, and spoonable. After that, scrape down the sides if needed so no mango pieces or mustard streaks remain.
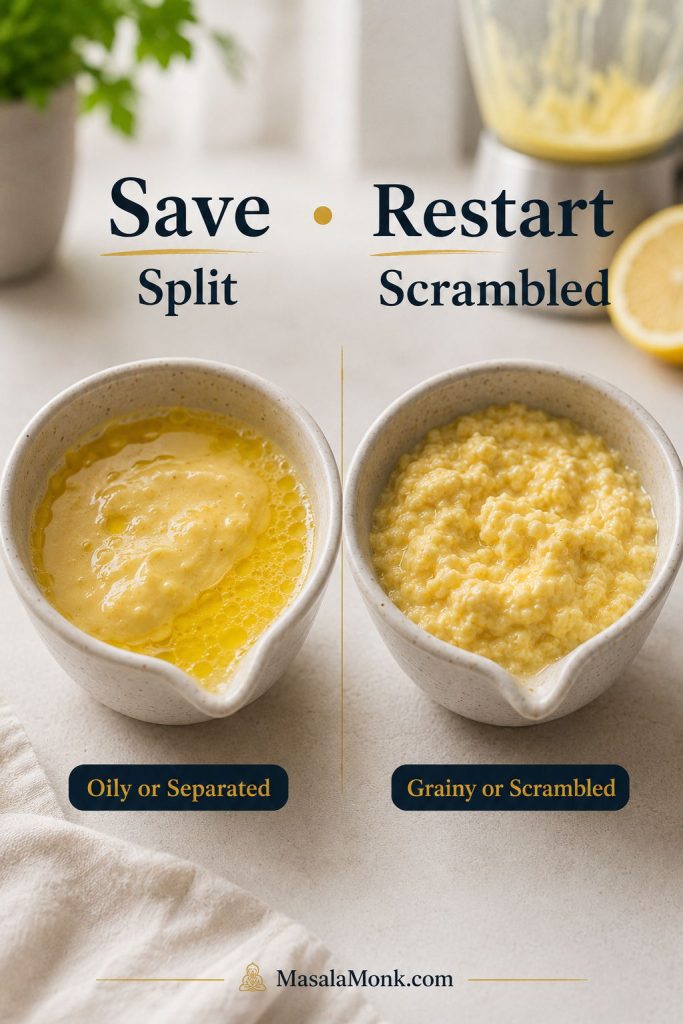
5. Adjust the sauce

After blending, taste the sauce before adding anything else. When it tastes too sweet, add mustard, lemon, vinegar, chili, or salt. If it tastes too sharp, round it out with more mango or creamy base. Finally, when the flavor seems flat, add salt first before reaching for more lemon.

6. Rest before serving

Let the sauce sit for 10 minutes if you can. During that short rest, the mustard sharpness settles, the mango flavor comes forward, and the sauce tastes more complete.

Creamy vs No-Mayo Mango Mustard Sauce

You do not have to use mayonnaise. Instead, the creamy base simply decides how rich, tangy, vegan, or pourable the sauce becomes.

Base Best For What It Does
Mayonnaise Classic dipping sauce, fries, wings, chicken tenders, burgers. Richest, smoothest, most dip-like.
Greek yogurt / thick curd Grilled chicken, wraps, bowls, sandwiches. Lighter, tangier, less rich.
Coconut cream Vegan/no-mayo sauce, shrimp, fish, fried snacks. Creamy with a mild tropical note.
Soaked cashews Vegan creamy sauce without coconut flavor. Thick, neutral, smooth.
Olive oil + lemon or vinegar Dressing-style sauce for salads, bowls, and roasted vegetables. Thinner, brighter, more pourable.
Creamy vs no-mayo mango mustard sauce guide showing mayonnaise, Greek yogurt, coconut cream, soaked cashews, and olive oil with lemon as base options.
The creamy base changes the whole texture of mango mustard sauce: use mayonnaise for the richest dip, yogurt for a lighter tangy sauce, coconut cream or cashews for a vegan version, and olive oil with lemon for a thinner drizzle.

For the most crowd-friendly sauce, use mayonnaise or thick yogurt. Meanwhile, coconut cream or soaked cashews give you a vegan mango mustard sauce without losing body. When you want a dressing instead of a dip, use less creamy base and thin the sauce with lemon juice, vinegar, water, or olive oil.

For a smoother mango-based dressing rather than a mustard sauce, this sweet and spicy mango salad dressing is a better fit for salads, bowls, and lighter drizzles.

Aam Kasundi-Style Mango Mustard Sauce

Aam kasundi, also called mango kasundi or aam kashundi, is a sharper Bengali-style mango mustard condiment. Traditionally, it is usually made with raw mango, mustard seeds, mustard oil, green chili, turmeric, and salt. Compared with the fast blender sauce above, it tastes sourer, hotter, more pungent, and more mustard-forward.

This version is an aam kasundi-style refrigerator sauce. In other words, it gives you the raw mango mustard flavor without treating the sauce as shelf-stable or canned.

Aam kasundi-style ingredient guide showing raw green mango, mustard seeds, mustard oil, green chili, turmeric, salt, and acid for a refrigerator sauce.
Aam kasundi-style mango mustard sauce gets its sharper flavor from raw green mango, mustard seeds, mustard oil, green chili, turmeric, salt, and acid. This version is a refrigerator sauce, not a shelf-stable preserve.

Aam Kasundi-Style Ingredients

  • 1 cup grated raw mango or finely chopped green mango
  • 1 1/2 tablespoons yellow mustard seeds
  • 1 to 2 teaspoons black mustard seeds, optional, for stronger bite
  • 1 to 2 green chilies
  • 1/2 teaspoon turmeric
  • 1 small garlic clove or 1/2 teaspoon grated ginger, optional
  • 1 to 2 tablespoons food-grade mustard oil
  • 1 tablespoon vinegar or lemon juice
  • 1/2 teaspoon salt, plus more to taste
  • 1/2 to 1 teaspoon sugar, optional
  • Water as needed to blend

Use food-grade mustard oil where available. Without mustard oil, replace it with neutral oil and add a little extra prepared mustard or kasundi for sharper flavor.

How to Make the Aam Kasundi-Style Version

  1. Soak the mustard seeds in water for 20 to 30 minutes, then drain.
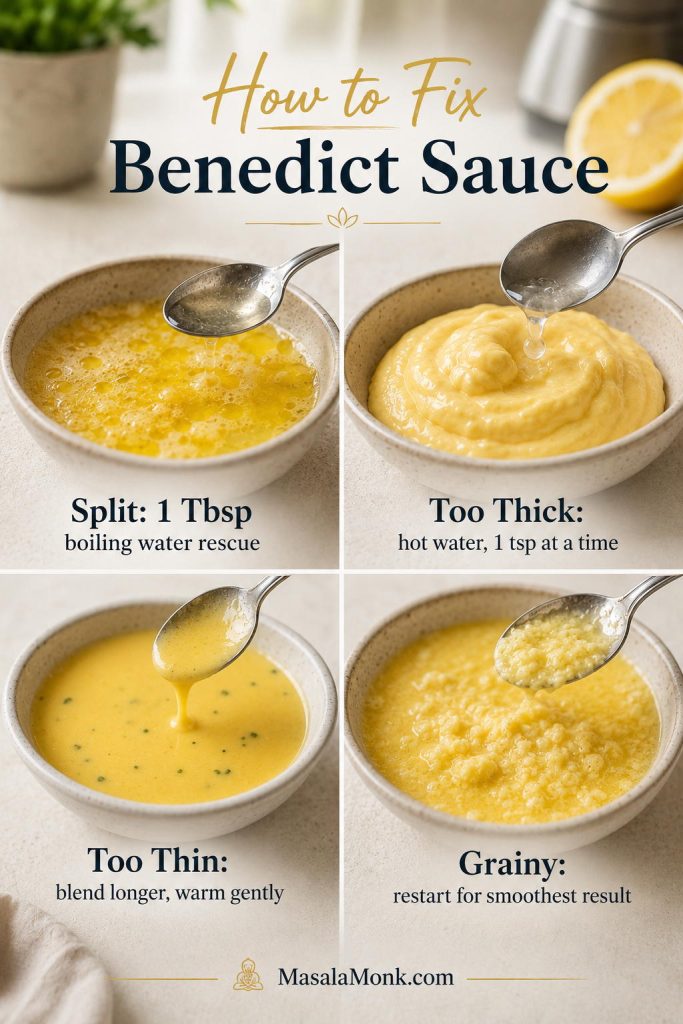
  2. Add the drained mustard seeds, raw mango, green chili, turmeric, salt, vinegar or lemon juice, garlic or ginger if using, and a splash of water to a blender.
  3. Blend to a coarse or smooth paste, depending on the texture you like.
  4. Stir in the mustard oil.
  5. Taste and adjust with more salt, vinegar, chili, or a small amount of sugar.
  6. Transfer to a clean jar and refrigerate.

If you are new to kasundi-style sauces, start with the smaller amount of black mustard seeds. You can always make the next batch sharper, but it is harder to fix a sauce that turns too bitter or pungent.

Important: This aam kasundi-style sauce is a refrigerator condiment, not a shelf-stable preserve. Keep it refrigerated, use a clean spoon, and do not store it at room temperature. For traditionally preserved kasundi or mango pickle, follow a trusted preservation recipe and do not casually change vinegar, water, salt, oil, or food proportions.

Use this sharper version with rice, fish, pakoras, rolls, Bengali-style meals, fried snacks, grilled paneer, or as a base for kasundi mayo. However, when it tastes too strong on its own, mix a spoonful into mayonnaise, yogurt, coconut cream, or mango pulp for a milder dip.

Mango Mustard Sauce vs Aam Kasundi

Mango mustard sauce and aam kasundi overlap, but they are not exactly the same. In general, the fast blender sauce is creamy and made with ripe mango. By contrast, aam kasundi is usually sharper, more pungent, and made with raw mango and mustard seeds.

Side-by-side comparison of creamy mango mustard sauce made with ripe mango and prepared mustard versus aam kasundi made with raw mango, mustard seeds, and mustard oil.
Mango mustard sauce is usually a smooth, creamy ripe-mango dip for fries, chicken, wings, and burgers. Aam kasundi is sharper, more pungent, and built around raw mango, mustard seeds, mustard oil, and green chili.
Sauce Mango Mustard Texture Flavor Best Use
Quick mango mustard sauce Ripe mango or mango pulp Dijon, yellow mustard, or kasundi Creamy and smooth Sweet-tangy, mild to sharp Fries, chicken, wings, burgers, wraps
No-mayo mango mustard sauce Ripe mango or mango pulp Prepared mustard or kasundi Creamy or pourable Lighter, tangy, less rich Snacks, salads, bowls, shrimp, fish
Aam kasundi / mango kasundi Raw mango / green mango Mustard seeds + mustard oil Pungent, thicker, sometimes coarse Sharp, sour, spicy, mustard-heavy Rice, fish, pakoras, rolls, Bengali meals
Mango honey mustard Ripe mango Mustard + honey Smooth Sweeter, softer, rounder Chicken tenders, sandwiches, wraps
Mango habanero mustard Ripe mango Mustard + habanero Smooth or slightly seedy Hot, fruity, sharp Wings, grilled meats, burgers

How to Use Mango Mustard Sauce

Mango mustard sauce is useful because it can be thick, creamy, pourable, or sharp depending on how you adjust it. Keep it thicker for dipping and spreading. When you need a drizzle or dressing, thin it slightly with water, lemon juice, vinegar, or oil.

As a simple rule, use the creamy ripe-mango version with fries, chicken, burgers, sandwiches, and wraps. Use the thinner no-mayo version with bowls, salads, grilled fish, shrimp, and roasted vegetables. Use the aam kasundi-style version when you want a sharper, mustard-heavy sauce for rice, fish, pakoras, rolls, or Bengali-style meals.

Guide showing how to use mango mustard sauce as a dip, spread, drizzle, glaze, or sharper sauce with fries, chicken, burgers, fish, shrimp, paneer, rice, and pakoras.
Mango mustard sauce works beyond dipping: keep it thick for fries, wings, burgers, and wraps, thin it for fish, shrimp, bowls, and vegetables, or use the sharper aam kasundi-style version with rice, fish, pakoras, and Bengali-style meals.

Best foods for dipping

Use thick mango mustard sauce with chicken tenders, fries, potato wedges, wings, pakoras, nuggets, onion rings, chips, crackers, and vegetable sticks. For this use, keep the sauce creamy enough to cling instead of running off the food.

Mango Mustard Sauce for Chicken

For chicken tenders, nuggets, fried chicken sandwiches, grilled chicken, or wings, keep the sauce tangy and medium-thick. Use Dijon for a sharper sauce, yellow mustard for a softer family-style dip, or kasundi for a stronger Indian-style chicken sauce. When using it as a glaze, brush it on near the end of cooking so the mango and creamy base do not scorch.

Best places to spread it

Spread mango mustard sauce on burgers, sandwiches, wraps, rolls, grilled cheese, paneer wraps, tofu wraps, and fried chicken sandwiches. For spreading, keep it thicker than a dressing so it stays in place.

Best meals for drizzling

Thin mango mustard sauce slightly and drizzle it over grilled chicken, fish, shrimp, roasted vegetables, grain bowls, salads, grilled paneer, tofu bowls, and rice bowls. For a lighter drizzle, use yogurt, coconut cream, cashews, or olive oil instead of a heavy mayo base.

Glaze, marinade, or finishing sauce

For chicken, fish, shrimp, paneer, or tofu, use mango mustard sauce as a finishing glaze, table sauce, or short marinade. A 20 to 30 minute marinade is usually enough because the sauce is acidic and strongly flavored. When the sauce contains yogurt, mayo, or coconut cream, avoid brushing it too early over high heat because it can split or scorch. Instead, add it near the end of cooking, or spoon it over the finished dish at the table.

If the sauce has touched raw chicken, fish, shrimp, paneer, or tofu, do not reuse it as a table sauce unless it has been cooked properly. For serving, keep a clean portion separate before marinating.

For Bengali-style meals

The aam kasundi-style version is stronger and sharper. Therefore, it works especially well with rice, fish, pakoras, rolls, chops, fried snacks, or mustard-forward dishes. For a milder snack dip, mix a small spoonful into mayo, yogurt, or thick curd.

Mango Mustard Sauce Variations

Once the base sauce tastes balanced, you can move it sweeter, hotter, creamier, tangier, or more Indian-style depending on what you are serving. In other words, the same base can become a dip, glaze, dressing, or sharper kasundi-style sauce with only a few changes.

Mango mustard sauce variations guide showing mango honey mustard, mango habanero mustard, yogurt mango mustard, coconut mango mustard, kasundi mayo, and mango chili mustard.
Start with the basic mango mustard sauce, then adjust it into a sweeter honey mustard, hotter habanero sauce, lighter yogurt version, vegan coconut sauce, sharper kasundi mayo, or bright mango chili mustard.

Mango Honey Mustard

Add 1 to 2 teaspoons honey and use Dijon or yellow mustard. As a result, this version becomes softer, sweeter, and especially good with chicken tenders, sandwiches, wraps, and fries.

Mango Habanero Mustard

Add a very small amount of minced habanero or habanero hot sauce. Since habanero heat builds quickly, start with less than you think you need. This variation is best with wings, grilled meats, burgers, and spicy sandwiches.

Coconut Mango Mustard Sauce

Use coconut cream instead of mayo or yogurt. This version is vegan, creamy, slightly tropical, and especially good with shrimp, fish, roasted vegetables, and fried snacks.

Yogurt Mango Mustard Sauce

Use Greek yogurt or thick curd for a lighter, tangier sauce. Because it has more acidity and less richness than mayo, it works well with grilled chicken, wraps, bowls, paneer, and roasted vegetables.

Kasundi Mayo

Mix 1 tablespoon kasundi with 2 tablespoons mayo or yogurt and 1 to 2 tablespoons mango pulp. This gives you a fast, sharp, creamy dip for fries, pakoras, rolls, sandwiches, and snacks.

Mango Chili Mustard Sauce

Add chili flakes, fresh green chili, cayenne, or a small amount of chili sauce. However, keep the mango and mustard balanced so the sauce tastes fruity and sharp, not just hot.

How to Fix Mango Mustard Sauce

Mangoes, mustards, and creamy bases all vary. Therefore, after blending, taste the sauce and adjust it before serving.

Troubleshooting guide for mango mustard sauce showing how to fix sauce that is too sweet, too sharp, too bitter, too thick, too thin, too hot, too flat, or too heavy.
Taste mango mustard sauce after blending and adjust it before serving: sharpen sweetness with mustard and lemon, soften harshness with mango and creamy base, add salt when it tastes flat, or thin it slowly for drizzling.
Problem What Happened How to Fix It
Too sweet The mango or mango pulp is very sweet. Add lemon juice, vinegar, mustard, chili, or a pinch of salt.
Too sharp There is too much mustard or acid. Add more mango, mayo, yogurt, coconut cream, or a tiny bit of honey.
Too bitter The mustard seeds or mustard are too strong. Add mango and creamy base. Next time, use less mustard seed or a milder mustard.
Too thick There is too much mango pulp, cashew, mayo, or coconut cream. Thin with water, lemon juice, vinegar, or a little oil.
Too thin There is too much liquid or the mango is watery. Add mayo, yogurt, cashew paste, coconut cream, or more mango pulp.
Too hot The chili is stronger than expected. Add more mango and creamy base.
Too flat The sauce is under-salted or lacks acid. Add salt first, then lemon or vinegar if it still needs brightness.
Too heavy There is too much mayo or cream. Add lemon juice, vinegar, chili, mango, or mustard to lift it.

Store-Bought vs Homemade Mango Mustard Sauce

Store-bought aam kasundi, mango kasundi, or mango mustard sauce can be convenient, but the flavor varies a lot. Some versions are sharp, salty, oily, and pungent. Others, however, are sweeter, creamier, or closer to a mild mustard dip.

Store-bought vs homemade mango mustard sauce guide showing a jarred sauce, adjustment spoons with mango, lemon, chili, salt, mustard, and vinegar, and a fresh homemade sauce bowl.
Store-bought mango mustard sauce or mango kasundi can be convenient, but homemade sauce gives you more control. Use mango and a creamy base to soften sharpness, lemon, chili, and salt to brighten mild sauce, or mustard and vinegar to balance extra sweetness.

Homemade mango mustard sauce gives you more control. Instead of accepting one fixed flavor, you can make it creamy or no-mayo, sweet or sharp, mild or spicy, thick for dipping, or thin for drizzling. However, if you already have store-bought kasundi, you can still turn it into a fast sauce by whisking a spoonful with mango pulp and mayo, yogurt, coconut cream, or soaked cashews.

When store-bought kasundi tastes too sharp, soften it with mango pulp and a creamy base. If it tastes too mild, brighten it with lemon, chili, or a pinch of salt. When it leans too sweet, bring back the mustard bite with extra mustard, vinegar, or lemon juice.

Storage

Storage depends on the version you make. Because the fast blender sauce contains fresh mango and often mayo, yogurt, coconut cream, or cashews, treat it as a fresh refrigerator sauce.

Quick creamy mango mustard sauce

  • Store in a clean airtight jar or container in the refrigerator.
  • Use within 3 to 4 days.
  • Stir before serving because the sauce may thicken slightly as it sits.
  • Use a clean spoon every time.
  • Do not leave the sauce at room temperature for more than 2 hours, or more than 1 hour in very hot weather.

Aam kasundi-style refrigerator sauce

  • Store in a clean jar in the refrigerator.
  • For best flavor and freshness, use within 5 to 7 days.
  • Use a clean spoon to avoid introducing moisture or crumbs.
  • Treat it as a refrigerator condiment, not a shelf-stable preserve.
  • Discard if it smells off, grows mold, or changes texture in an unpleasant way.
Important: For shelf-stable mustard, kasundi, or mango pickle, use a tested preservation recipe. Do not casually adjust vinegar, water, salt, oil, or food proportions in preserved condiments.

For general safe pickling principles, see the National Center for Home Food Preservation’s pickling guidance.

Mango Mustard Sauce FAQs

What is mango mustard sauce made of?

Mango mustard sauce is usually made with mango, mustard, lemon juice or vinegar, chili, salt, and a creamy base such as mayonnaise, yogurt, coconut cream, or soaked cashews. A sharper aam kasundi-style version, however, uses raw mango, mustard seeds, mustard oil, green chili, turmeric, and salt.

Is mango mustard sauce the same as aam kasundi?

Not exactly. Quick mango mustard sauce is usually creamy and made with ripe mango and prepared mustard. By contrast, aam kasundi is a sharper Bengali-style mango mustard condiment made with raw mango, mustard seeds, mustard oil, and green chili.

What is mango kasundi?

Mango kasundi, also called aam kasundi or aam kashundi, is a Bengali-style raw mango mustard sauce. Because it uses raw mango and mustard seeds, it is usually sharper, sourer, and more pungent than a creamy mango mustard dipping sauce.

Can I make mango mustard sauce without mayo?

Yes. Instead of mayonnaise, use Greek yogurt, thick curd, coconut cream, or soaked cashews. For a vegan no-mayo version, coconut cream and cashews are the best options.

Can I use mango pulp?

Yes. Mango pulp works well for a smooth blender sauce. Unsweetened mango pulp is best; however, if the pulp is very sweet, skip the honey or sugar and add extra lemon juice or mustard if needed.

Which mustard is best?

Dijon mustard is the best first choice because it is sharp, smooth, and balanced. Yellow mustard makes a milder dipping sauce. Meanwhile, kasundi gives the sauce a stronger Indian/Bengali-style flavor, and mustard seeds are best for the aam kasundi-style version.
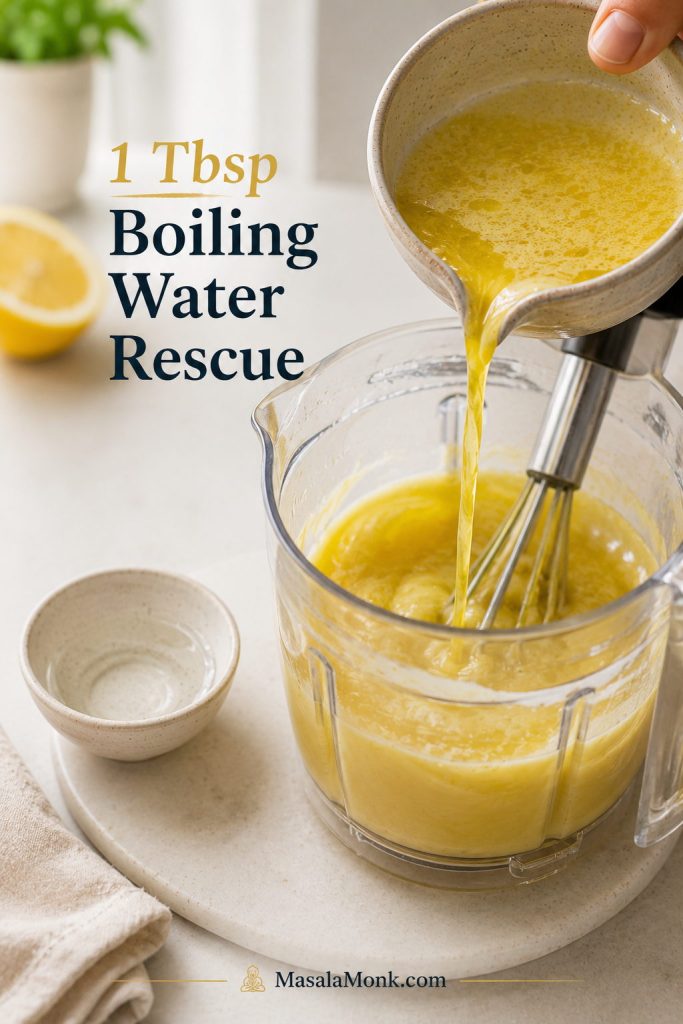
Is mango mustard sauce good with chicken?

Yes. Mango mustard sauce works well with grilled chicken, chicken tenders, chicken wings, chicken sandwiches, wraps, and rice bowls. Depending on the meal, use it as a dip, spread, drizzle, or finishing glaze.
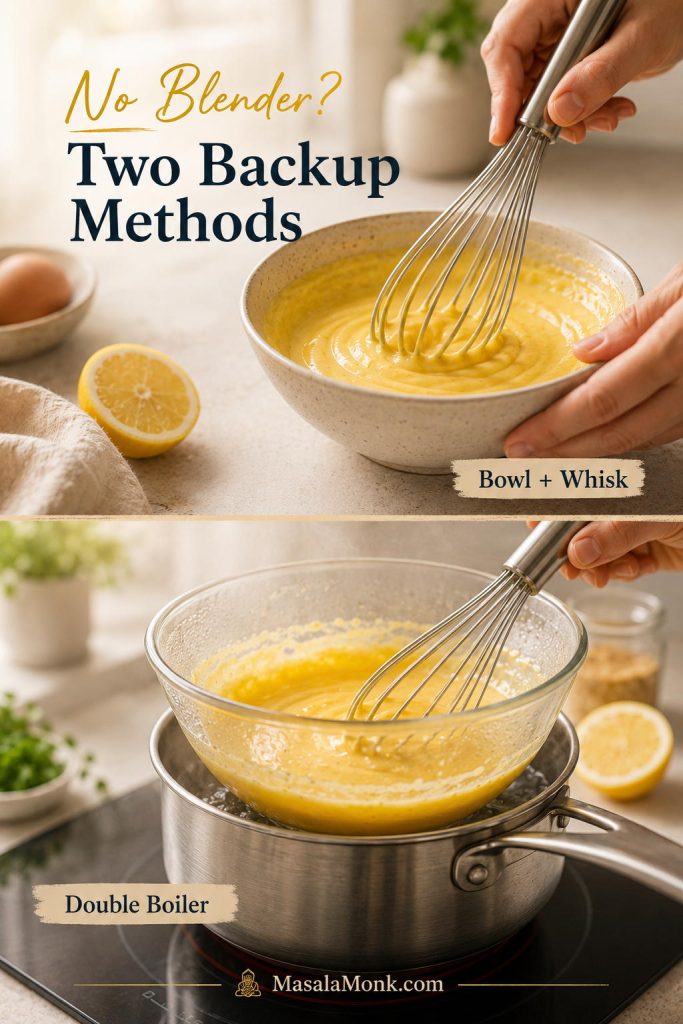
Can I use mango mustard sauce as a marinade?

Yes, but it works best as a short marinade or finishing glaze. For a marinade, 20 to 30 minutes is usually enough. Since the sauce may contain mayo, yogurt, or coconut cream, avoid cooking it over very high heat for too long because it can split or scorch. For grilling, brush it on near the end or serve it on the side.

What do you eat with mango mustard sauce?

Serve mango mustard sauce with fries, chicken tenders, wings, pakoras, nuggets, onion rings, burgers, sandwiches, wraps, grilled chicken, fish, shrimp, paneer, tofu, roasted vegetables, grain bowls, or salads.

How long does mango mustard sauce last?

The quick creamy version usually keeps for 3 to 4 days in the refrigerator in a clean airtight container. Meanwhile, the aam kasundi-style version should also be refrigerated and used within 5 to 7 days for best flavor and freshness.

Can I make mango habanero mustard?

Yes. Add a very small amount of minced habanero or habanero hot sauce to the quick mango mustard sauce. Since habanero heat builds quickly, start with less than you think you need.

Is mango mustard sauce sweet or spicy?

It can be both, but the best version is balanced. Ripe mango gives sweetness, mustard gives sharpness, lemon or vinegar gives tang, and chili adds heat. Therefore, you can make it mild, medium, or hot depending on how much chili you use.

Final Tips for the Best Mango Mustard Sauce

Before you make your first batch, keep these final points in mind.

  • Use ripe mango for the quick creamy sauce and raw mango for the aam kasundi-style version.
  • Start with Dijon if you want the cleanest all-purpose mango mustard sauce.
  • Use kasundi when you want a sharper Indian-style flavor.
  • Keep the sauce thick for dipping and thinner for drizzling.
  • Add salt before adding more lemon or vinegar if the sauce tastes flat.
  • Use coconut cream or soaked cashews for a vegan no-mayo version.
  • Let the sauce rest for 10 minutes before final judging.
  • Keep homemade mango mustard sauce refrigerated.

↑ Back to top