Posted on Leave a comment

Peanut Sauce Recipe for Spring Rolls, Satay, Noodles & Chicken

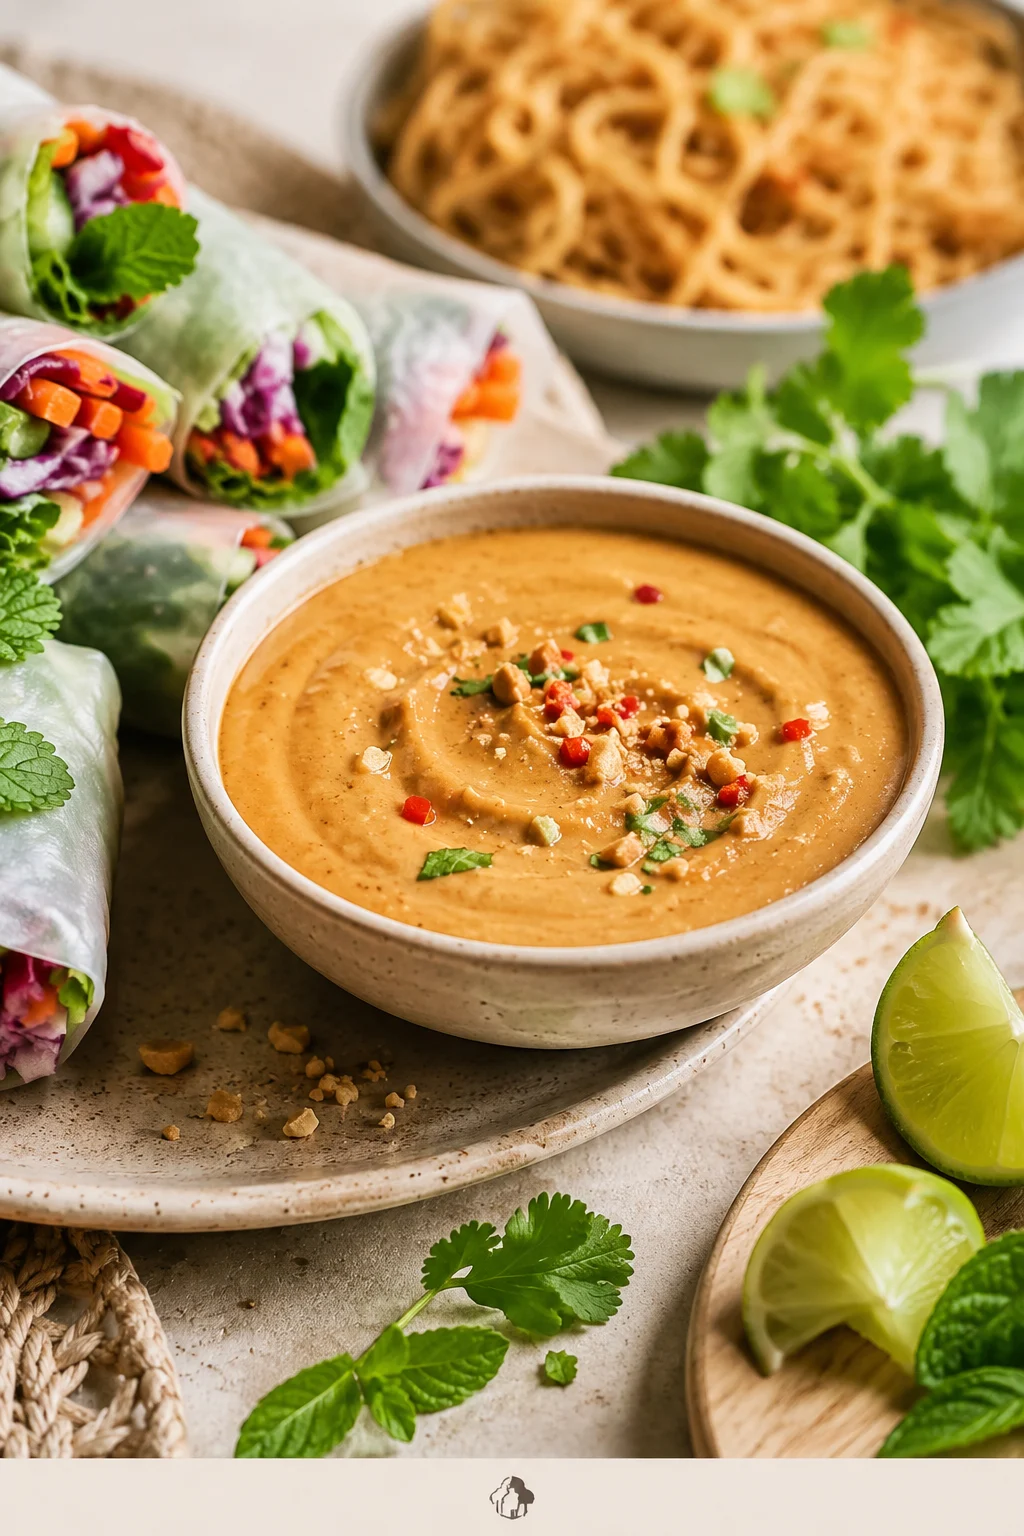
Bowl of creamy peanut sauce with spring rolls, noodles, lime wedges, herbs and crushed peanuts on a dinner table.

This is the peanut sauce you make when dinner is almost there but needs one creamy, salty-sweet thing to pull it together. It is rich from peanut butter, bright with lime and rice vinegar, warm with ginger and garlic, and easy to adjust depending on what is on the plate.

The promise is simple: one 5-minute peanut sauce, adjusted by texture. Make it easy to dip with spring rolls, warmer and richer for satay-style chicken or tofu skewers, looser for noodles, and brighter for salads or slaw.

Once you understand how the sauce should behave, the recipe becomes more than a dip. It becomes the jar that helps fresh rolls, plain noodles, grilled chicken, crispy tofu, rice bowls, vegetables, and leftovers feel like dinner. This is the kind of sauce that makes you feel like you planned dinner, even when you mostly assembled it.

Quick Answer: How to Make Peanut Sauce

To make peanut sauce, whisk the soy sauce or tamari, rice vinegar, lime juice, sweetener, chili sauce, ginger, garlic, and sesame oil first, then whisk in peanut butter and water until the sauce comes together. Start with less liquid, then add more until the sauce matches the food you are serving.

Rule one: fix texture before flavor. A thick peanut sauce can taste saltier, sweeter, and heavier than it really is, so get it close to the right consistency first. Then adjust with lime, soy sauce, sweetener, or chili.

Once the base comes together, the question is not only “is it smooth?” but “will it behave on the food?” If you are unsure, use the texture guide before adding all the liquid.

Jump to

5-Minute Peanut Sauce Recipe

Recipe name: Peanut Sauce Recipe

Prep time: 5 minutes
Cook time: 0 minutes
Total time: 5 minutes
Yield: About 1 to 1¼ cups / 240 to 300 ml, depending on how much water you add
Servings: 8 to 10
Serving size: About 2 tablespoons / 30 ml

Best as a dip: spring rolls, satay, lettuce wraps, dumplings, rice paper rolls
Best as a sauce: noodles, chicken, tofu, salads, rice bowls, roasted vegetables, slaw

Equipment: bowl and whisk or fork. Optional: jar for storage, grater for fresh ginger and garlic, small saucepan for the satay-style variation.

Ingredients

Line up the peanut sauce ingredients before you start so the balance is clear: nutty body, salty depth, tang, heat and just enough sweetness.
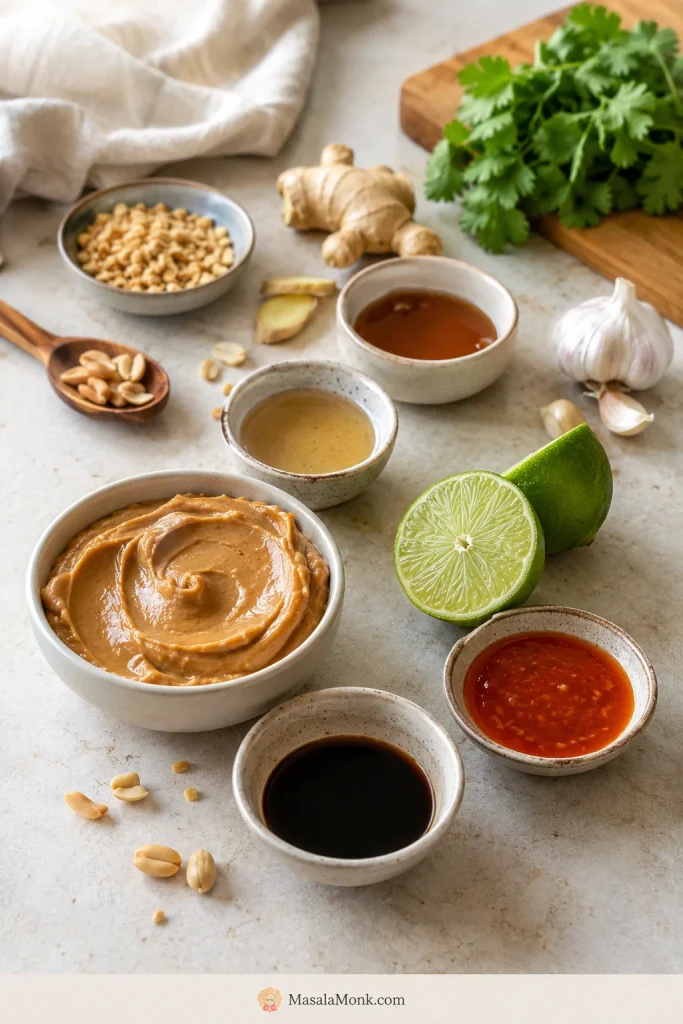
Peanut sauce ingredients including peanut butter, soy sauce, lime, rice vinegar, ginger, garlic, chili sauce, sweetener and sesame oil.
Peanut butter gives the sauce body, while soy sauce, lime, vinegar, ginger, garlic and chili give it balance. Together, they keep the peanut sauce savory enough for dinner instead of sweet and flat.
IngredientAmount
Creamy natural peanut butter½ cup / about 128 g
Low-sodium soy sauce or tamari2 tablespoons / 30 ml
Rice vinegar1 tablespoon / 15 ml
Fresh lime juice1 tablespoon / 15 ml
Maple syrup or honey1 to 2 tablespoons / 15 to 30 ml
Brown sugar, if using instead1 to 2 tablespoons / about 12 to 25 g
Sriracha or chili garlic sauce1 to 2 teaspoons / 5 to 10 ml
Fresh grated ginger1 teaspoon / about 2 g
Garlic1 small clove, finely grated, about 3 g
Toasted sesame oil, optional1 teaspoon / 5 ml
Warm water3 to 6 tablespoons / 45 to 90 ml, plus more as needed

Instructions

Start the peanut sauce by mixing the salty, tangy and spicy ingredients before the peanut butter goes in.
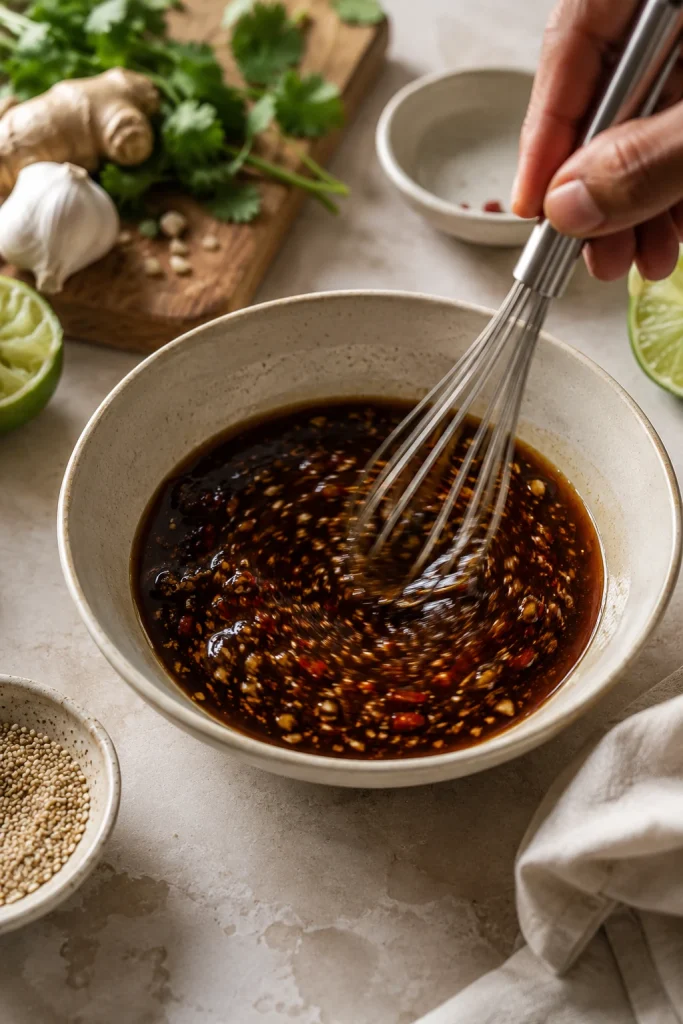
Soy sauce, lime juice, rice vinegar, chili sauce, ginger, garlic and sesame oil being whisked in a bowl before peanut butter is added.
First, whisk the salty, tangy and spicy ingredients together. Then the peanut butter blends into a balanced base instead of forcing you to fix the flavor later.
  1. Add the soy sauce or tamari, rice vinegar, lime juice, sweetener, chili sauce, ginger, garlic, and sesame oil to a medium bowl. Whisk briefly so the salty, tangy, spicy ingredients come together first.
  2. Add the peanut butter and whisk until the mixture looks thick, dark, and mostly combined. It may look stubborn before it turns silky.
  3. Add warm water or another thinning liquid 1 tablespoon at a time, whisking well after each addition.
  4. Stop when the texture matches the food you are serving. Satay can stay thicker, spring roll dip should glide, and noodles or salad dressing need more flow.
  5. Taste and adjust. More lime or vinegar helps if it tastes heavy, soy sauce or tamari helps if it tastes flat, sweetener softens sharpness, and chili adds heat.
  6. Serve right away, or store in an airtight jar in the fridge and re-whisk with a splash of water before using.

Recipe Notes

  • The 3 to 6 tablespoons water gives you a standard dip or drizzle. Noodles and salad dressing usually need more.
  • Warm liquid helps peanut butter loosen faster than cold liquid.
  • Natural peanut butter often needs more patience because it can start thicker, stiffer, or more separated than regular creamy peanut butter.
  • Regular sweetened peanut butter works, but start with less sweetener. The sauce should taste like peanut butter went to dinner, not dessert.
  • The sauce thickens as it sits, especially after refrigeration. If it has already thickened, jump to storage and make-ahead before changing the flavor.
  • For chicken, use this as a dip, drizzle, or finishing sauce. Keep any sauce that touches raw chicken separate from the serving sauce, and cook chicken to 165°F / 74°C.
  • Since this is peanut-based, check for peanut allergies before serving it to guests and read labels on bottled sauces if allergies are a concern.

Texture Guide for Spring Rolls, Satay, Noodles and More

If your sauce looks clumpy, tastes too heavy, or turns noodles sticky, you probably have not ruined anything. Peanut sauce is usually a texture problem before it is a flavor problem.

Clumps usually mean the sauce needs liquid and whisking, not a full restart.
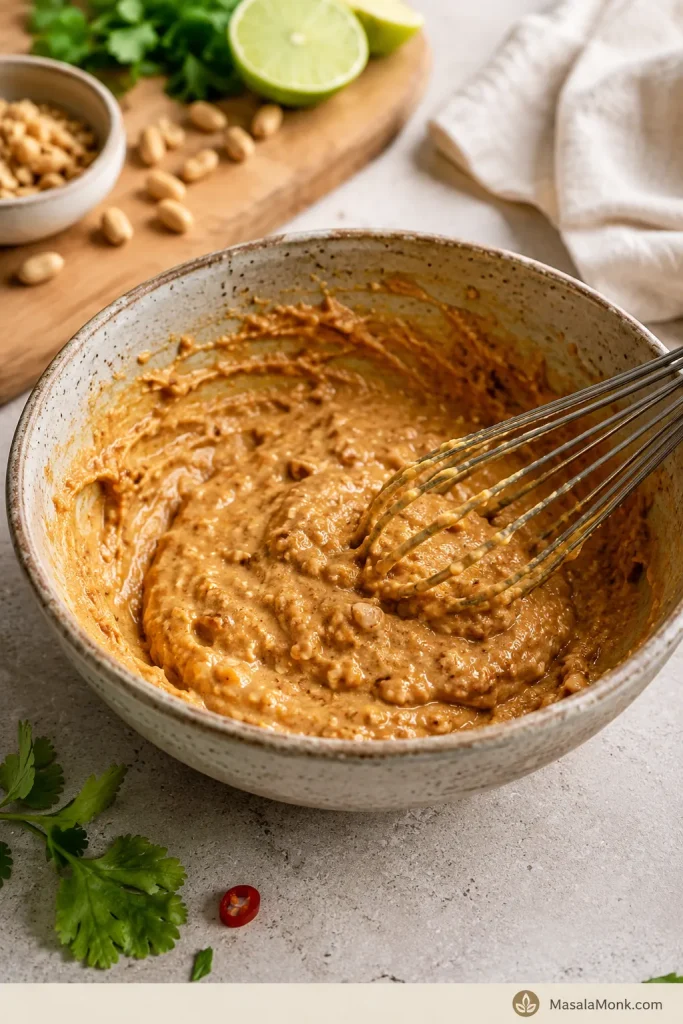
Thick clumpy peanut sauce in a bowl with whisk marks before enough liquid has been added.
At first, peanut sauce can look clumpy and stubborn. Instead of starting over, add liquid slowly and keep whisking until the mixture turns smooth and cohesive.

The mistake most people make is stopping when the sauce looks smooth. Peanut sauce is not done until it behaves right on the food. A spring roll dip should glide, satay sauce should cling, noodle sauce should fall from the spoon in a loose stream, and dressing should pour easily.

How to Read the Sauce Texture

Thin the sauce gradually so you can stop at dip, drizzle, noodle sauce or dressing instead of overshooting the texture.
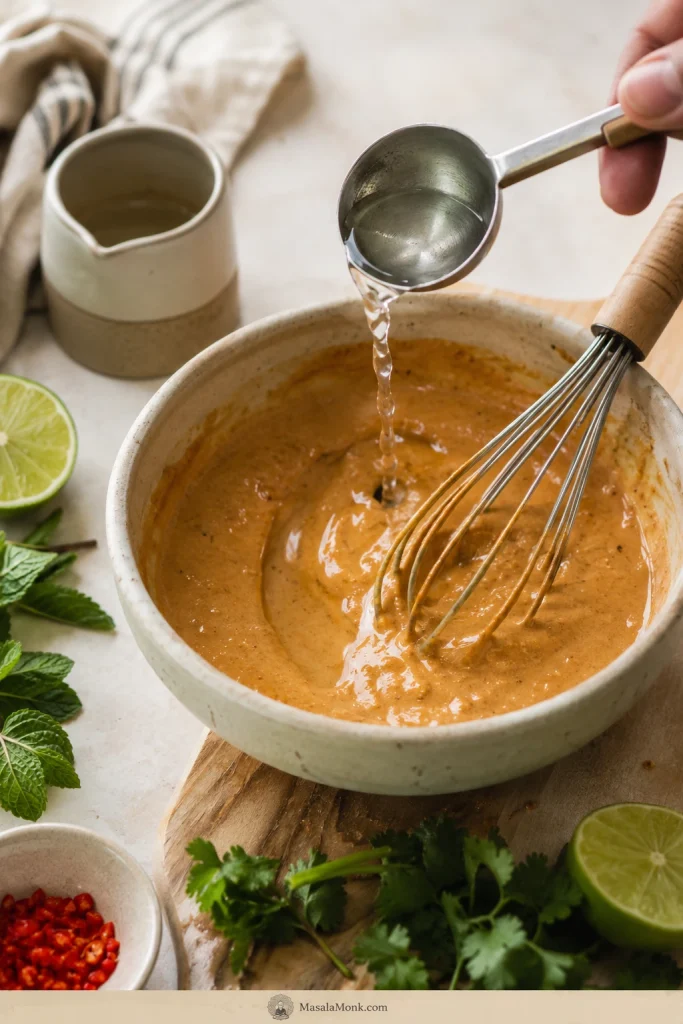
Water being added by spoon to thick peanut sauce while a whisk rests in the bowl.
Add liquid one spoonful at a time and watch how the sauce changes. Stop when it loosens for the job you need: thick dip, noodle sauce or pourable peanut dressing.
UseSauce Should Look LikeAdd This Much LiquidServe It
Spring rollsSoft sheen, easy to dip, clings lightly to rice paperAbout 4 to 6 tablespoons water totalRoom temperature or slightly chilled
SatayThicker, warm, spoonable, not mounded like pasteAbout 2 to 4 tablespoons water, or use the coconut milk variationWarm
NoodlesLoose stream from the spoon, easy to tossAbout 6 to 8 tablespoons hot water or noodle waterWarm or opened up with hot water
Salad dressingPourable, bright, thinner than dipping sauceExtra water plus more lime juice or rice vinegarChilled or room temperature
ChickenMedium-thick dip or drizzleKeep it savory and not too sweetRoom temperature or warm
TofuThicker for coating, thinner for bowlsAdd extra chili and lime for punchRoom temperature or warm
Rice bowlsSlow drizzle, not wateryThin slightly and re-whisk before servingRoom temperature

Use this visual guide when you are deciding whether the sauce should cling, glide, coat or pour.
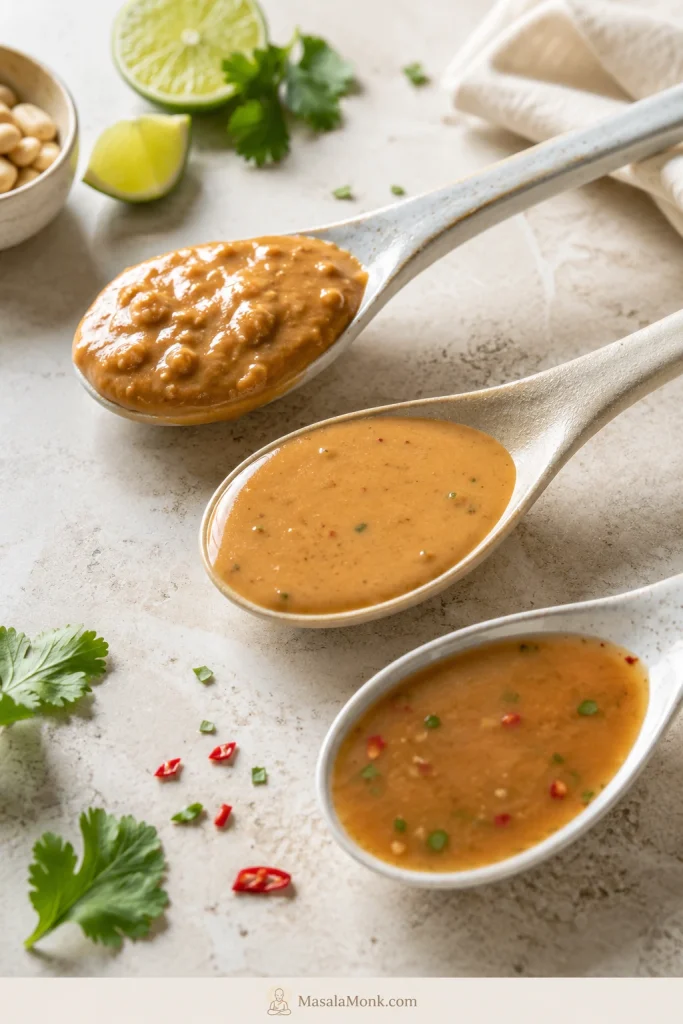
Three spoons holding different peanut sauce textures for satay, spring rolls and noodles.
This is the texture rule worth saving: thicker peanut sauce clings to satay, softer sauce works for spring rolls, and looser sauce coats noodles without grabbing them.

Before you taste, fix the texture: peanut butter can look clumpy or slightly broken before it turns silky. Keep whisking, add liquid slowly, and taste only after the sauce is close to the consistency you want. A sauce that is too thick will taste saltier, sweeter, and heavier than it really is.

When in doubt, keep it a little thicker at first. You can always add a splash more liquid, but it takes extra peanut butter to fix a sauce that has gone too thin.

Why This Peanut Sauce Works

The finished sauce should not taste like sweet peanut butter. It should taste nutty first, then salty, tangy, lightly sweet, and gently spicy at the end.

Peanut butter gives body and nutty richness. Soy sauce or tamari gives dinner-level savoriness. Lime juice and rice vinegar cut the heaviness. Sweetener rounds the sharp edges. Ginger, garlic, and chili keep the sauce lively instead of flat.

Water is not filler here. It is the texture tool. A little gives the sauce enough body for dipping; more turns it into a noodle sauce or dressing. That is why the same bowl can taste right with cool rolls, hot noodles, grilled chicken, tofu, or a pile of vegetables. If the sauce already tastes off, check the troubleshooting table before adding more soy sauce, sugar or lime.

If the sauce tastes like peanut butter first and dinner second, it usually needs salt, acid, or chili before it needs more sweetness.

Ingredients and Smart Swaps

Peanut Butter

Creamy natural peanut butter gives the cleanest peanut flavor. If your jar has separated, stir it well before measuring. Homemade peanut butter also works well if you want more control over roast, salt, and texture.

Regular creamy peanut butter works too, but it is usually sweeter, so start with less sweetener. Crunchy peanut butter is fine if you like texture, especially for satay-style sauce or rice bowls.

Soy Sauce or Tamari

Low-sodium soy sauce keeps the sauce savory without pushing it too salty. Tamari is the best swap for gluten-free peanut sauce, as long as the label says gluten-free. Coconut aminos can work for a soy-free version, but it is sweeter and less salty, so adjust with salt and lime at the end.

Rice Vinegar and Lime Juice

Rice vinegar gives a clean tang; lime makes the sauce taste fresher. Together, they keep peanut butter from feeling heavy. Apple cider vinegar or white vinegar can work in a pinch, especially for a satay-style version.

Sweetener

Maple syrup keeps the sauce vegan and blends easily. Honey gives rounder sweetness. Brown sugar adds deeper flavor, especially in satay-style peanut sauce. When your peanut butter is already sweet, let the lime and soy sauce lead before adding more sugar.

Chili Sauce

Sriracha, chili garlic sauce, sambal, or chili crisp can all work. One teaspoon keeps the heat mild; two or more pushes it into spicy peanut sauce territory. For the satay-style variation, red curry paste adds better depth than sriracha alone.

Garlic and Ginger

Fresh grated garlic and ginger make the sauce taste alive. Grating them finely helps them disappear into the sauce instead of leaving sharp pieces. If raw garlic is too strong for you, use half a clove or a small pinch of garlic powder.

Sesame Oil

Toasted sesame oil is optional, but a small amount gives the sauce a deeper, nuttier flavor. Use it lightly because peanut butter is already rich.

Coconut Milk

Coconut milk is not required for the 5-minute sauce. Water keeps it quick, bright, and flexible.

Coconut milk is what makes the satay-style version feel rounder and warmer. Use it for skewers, grilled chicken, tofu satay, or roasted vegetables. Coconut cream makes the sauce thicker and more luxurious, while regular coconut milk keeps it smoother and more pourable. Making skewers? Jump to the satay-style peanut sauce variation. If you like that coconut-curry direction, the same balance shows up in Chicken Panang Curry, where peanut stays in the background instead of taking over like satay sauce.

Hoisin Sauce

Hoisin is not part of the main sauce, but it is very useful for a Vietnamese-style spring roll dip. It adds sweetness, body, and a deeper savory flavor that works beautifully with rice paper rolls, shrimp rolls, and fresh vegetable rolls.

Peanut Sauce for Spring Rolls

For spring rolls, fresh rolls, summer rolls, and rice paper rolls, the dip should be smooth enough for dipping but thick enough to cling. When it sits on the roll like paste, it needs more liquid. When it runs off immediately, it needs more peanut butter.

Start with the sauce as written and add liquid until it becomes easy to dip. A little extra lime juice or rice vinegar also helps because fresh rolls are usually full of cool vegetables, herbs, shrimp, tofu, or noodles. A good spring roll dip should catch on the rice paper, slide over the herbs and vegetables, and leave a little peanut richness behind.

Use fresh spring rolls as a texture check: the dip should feel light around herbs and vegetables while still leaving a creamy coat.
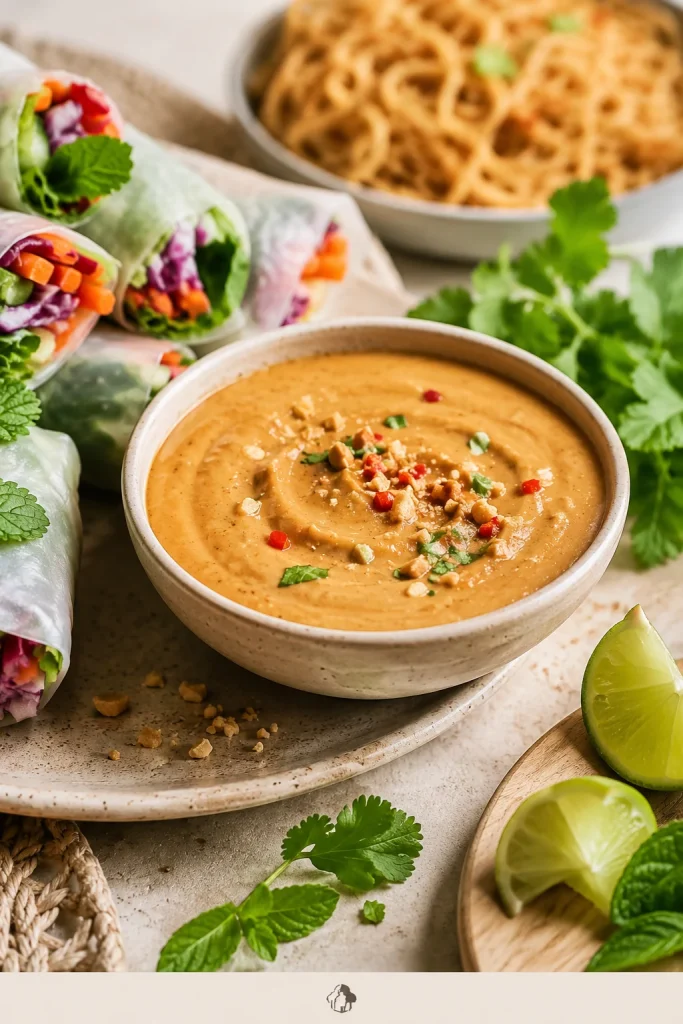
Fresh rice paper spring rolls cut open and served with peanut sauce, herbs and lime.
The dip should coat rice paper lightly, then get out of the way so the herbs, vegetables and filling still taste fresh.

How to Adjust the Sauce for Spring Rolls

  • Vegetable-heavy rolls taste better with a little extra lime juice or rice vinegar.
  • Shrimp rolls can handle a slightly sweeter dip, which is where the hoisin variation works especially well.
  • Tofu rolls benefit from chili crisp, extra ginger, or crushed peanuts for more punch.
  • A dip that drags across rice paper needs a small splash of water until it glides.
  • A dip that slides off the roll needs a small spoon of peanut butter to bring back body.

Before moving to the hoisin variation, check the basic spring roll texture: the dip should coat rice paper without dragging.
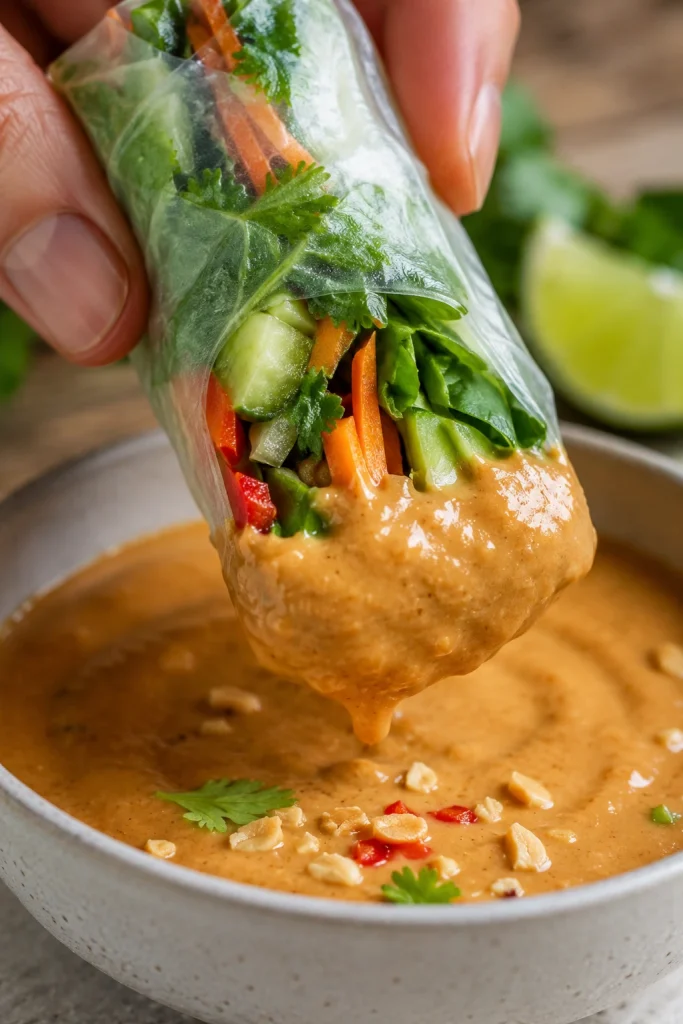
Fresh spring roll dipped into peanut sauce that clings lightly to the rice paper wrapper.
For spring rolls, the dip should leave a light coat on the rice paper. Too much drag means it needs liquid; too much slide means it needs more body.

Vietnamese-Style Hoisin Peanut Sauce for Rice Paper Rolls

Use this version when spring rolls are the main event. Hoisin gives the dip the darker, sweeter body people often expect with rice paper rolls, while peanut butter keeps it creamy and rich.

The hoisin version should look darker and glossier than the everyday peanut sauce, especially for rice paper rolls.
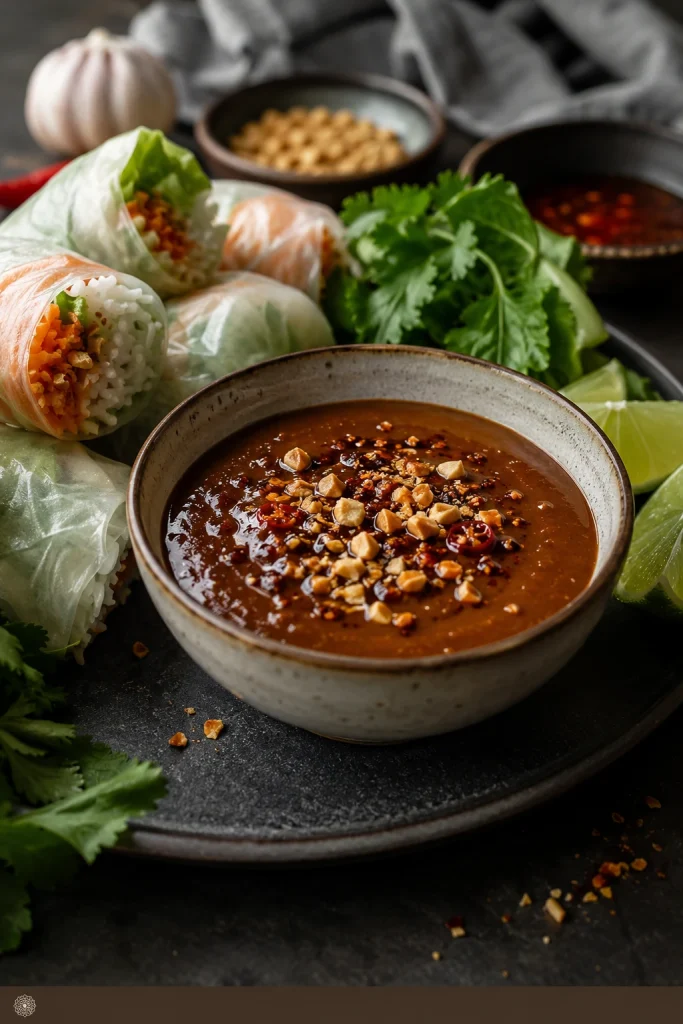
Dark Vietnamese-style hoisin peanut sauce served with rice paper rolls and crushed peanuts.
When rice paper rolls are the main event, hoisin gives peanut sauce a darker, sweeter body. After mixing, add lime or vinegar if the dip starts tasting too sweet.

Use this quick formula:

  • ½ cup peanut sauce
  • 1 tablespoon hoisin for lighter sweetness, or 2 tablespoons for a deeper dip
  • 1 to 3 tablespoons water, milk, or coconut milk, as needed
  • ½ teaspoon chili garlic sauce, optional
  • Crushed peanuts, optional, for finishing

Whisk until the dip has a soft sheen. It should be looser than satay sauce but thicker than salad dressing. Too sweet? Add lime juice or rice vinegar. Too thick? Add liquid a spoonful at a time.

This is the variation to reach for when the meal is built around fresh rolls, shrimp rolls, or rice paper rolls and you want a dip that feels complete on its own.

Satay-Style Peanut Sauce

Satay sauce is usually richer, warmer, and thicker than a quick peanut dipping sauce. Depending on the region and recipe, more traditional versions may use roasted peanuts, coconut milk, curry paste, tamarind, palm sugar, fish sauce, or other aromatics.

Think of this as the weeknight bridge between a quick peanut dip and a fuller satay sauce. Start with the 5-minute base, then add coconut milk and curry paste for depth. Warmth changes everything here: the sauce softens, the curry paste blooms, and the peanut flavor feels rounder before it ever reaches the skewers.

Use this as a satay-style shortcut, not as a claim that all satay sauces are the same. It works well with chicken satay, tofu satay, grilled paneer, roasted vegetables, and rice bowls because it clings well and tastes more complete with grilled food.

Satay-Style Peanut Sauce Variation

Coconut milk and curry paste turn the quick peanut sauce into a warmer satay-style sauce for skewers and grilled food.
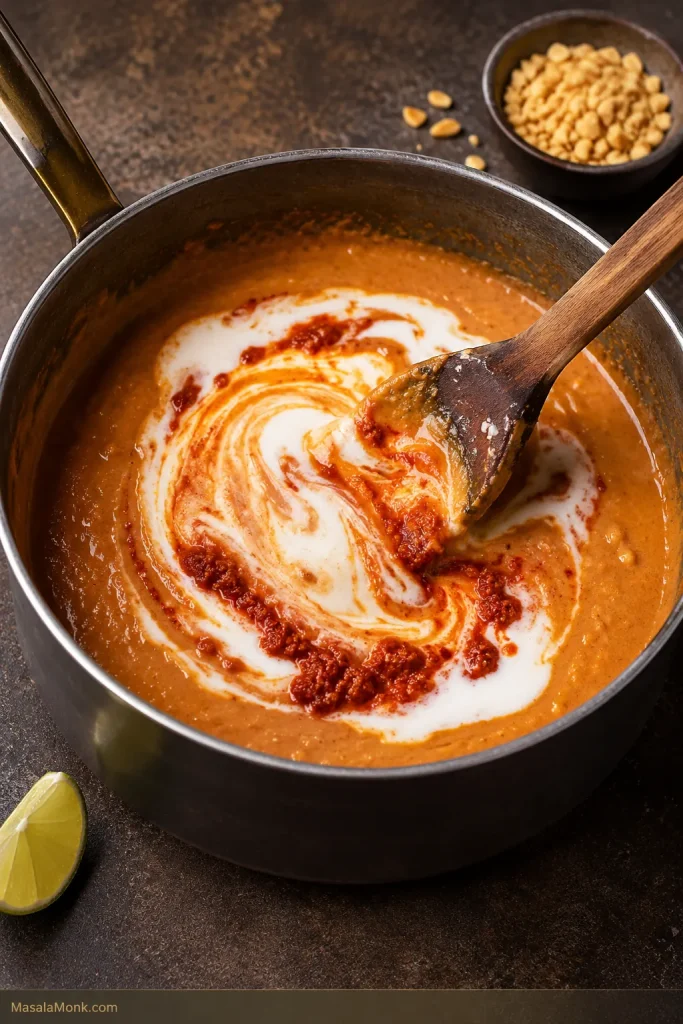
Coconut milk and red curry paste being stirred into peanut sauce in a saucepan.
For satay-style peanut sauce, coconut milk and curry paste add warmth and depth. Warm it gently so the curry paste blooms without reducing the sauce into paste.
  • ½ cup peanut sauce
  • ¼ cup coconut milk or coconut cream
  • 1 to 2 teaspoons red curry paste
  • 1 teaspoon brown sugar, optional
  • ½ teaspoon fish sauce, optional
  • 1 to 2 tablespoons crushed roasted peanuts, optional

Warm everything in a small saucepan over medium-low heat for 3 to 5 minutes, stirring often. Do not hard-boil the sauce. The goal is to warm it, not reduce it into paste. It should be thick, warm, and spoonable, but still loose enough to drizzle over skewers.

If it tightens too much, add water or coconut milk, a spoonful at a time. A squeeze of lime or splash of rice vinegar helps when the sauce tastes too rich.

For chicken satay, the sauce should be warm, spoonable and thick enough to cling to grilled edges.
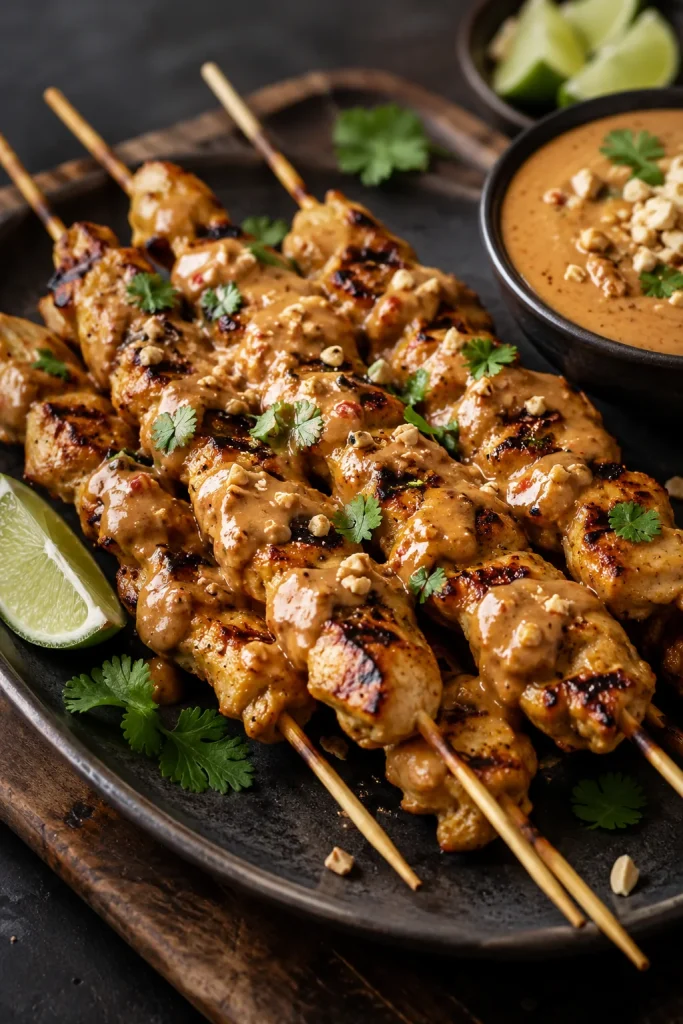
Grilled chicken satay skewers with peanut sauce, lime wedges, herbs and crushed peanuts.
Chicken satay needs a peanut sauce that clings to grilled edges without stiffening. If the sauce tightens as it warms, loosen it with a spoonful of water or coconut milk.

Because tofu starts mild, give the satay-style sauce more contrast with lime, chili and crunch.
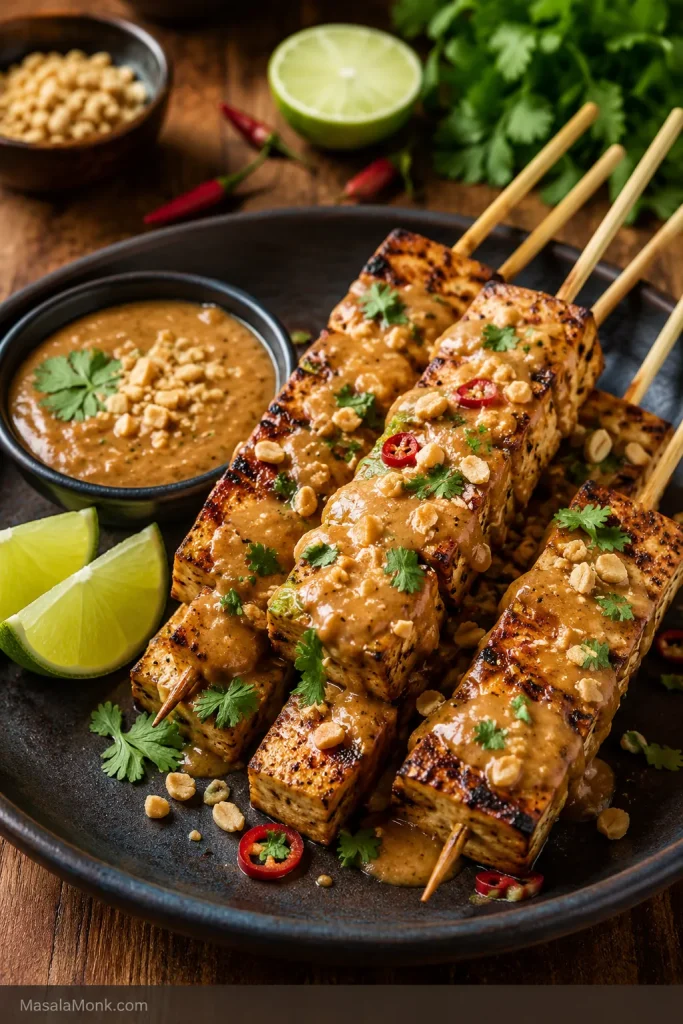
Grilled tofu satay skewers drizzled with peanut sauce, herbs, chili and crushed peanuts.
Keep the sauce thick enough to cling to grilled tofu, then use lime, ginger, chili and crushed peanuts for contrast.

Is Peanut Sauce the Same as Satay Sauce?

Not always. Peanut sauce is a broad term for sauces made with peanuts or peanut butter. Satay sauce usually refers to the peanut-based sauce served with satay skewers, and it is often warmer, richer, and more deeply seasoned.

For everyday cooking, this sauce can move in a satay-style direction with coconut milk, curry paste, and gentle heat. A very specific Thai, Indonesian, Malaysian, or Singaporean satay sauce may need a more traditional recipe built around that cuisine.

Peanut Sauce for Noodles

This is where the sauce becomes dinner, not just a dip. Noodles need a looser peanut sauce than spring rolls or satay. Peanut butter thickens quickly when it hits warm noodles, and a mixture that looks pourable in the bowl can turn sticky once tossed.

For 2 servings, start with about ½ cup peanut sauce and add 2 to 4 tablespoons hot water or noodle cooking water before tossing. For 8 ounces / 225 g noodles, use ½ to ¾ cup sauce, depending on how saucy you like your noodles.

Before sauce meets noodles, it should already move in a loose stream from the spoon.
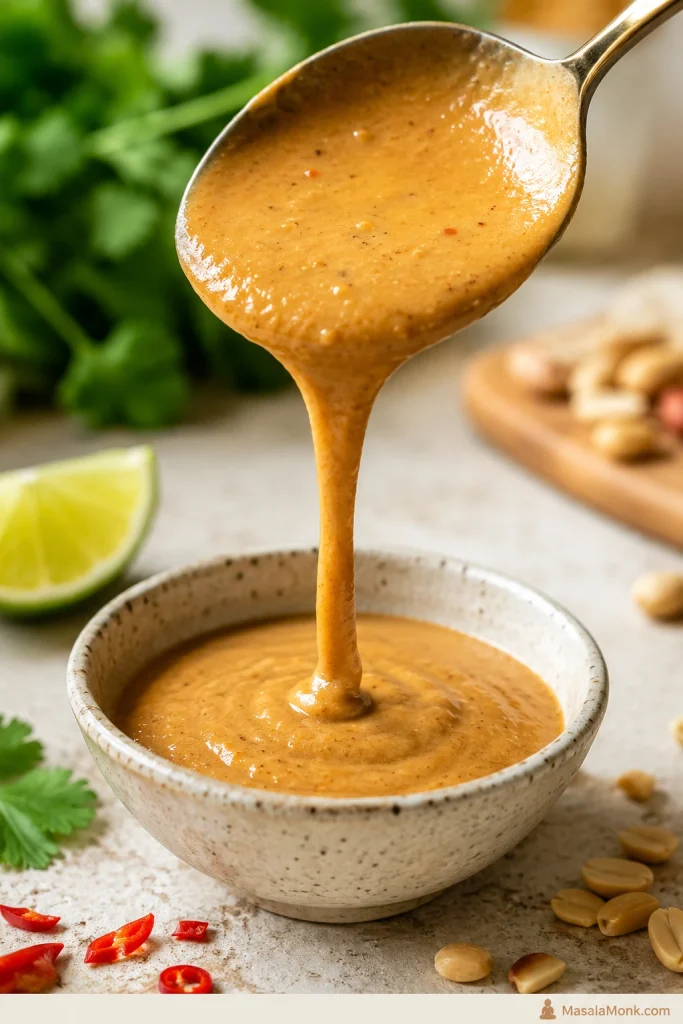
Loose peanut sauce falling from a spoon to show the texture needed for noodles.
For noodles, the sauce should fall from the spoon in a loose stream before tossing. Otherwise, peanut butter can tighten around warm noodles and make the bowl sticky fast.

The idea is similar to glossy pasta sauces: loosen first, then toss. The same idea shows up in pesto pasta, where pasta water keeps the sauce glossy instead of oily or dry.

Pour the peanut sauce over noodles only after it has enough movement to coat the strands evenly.
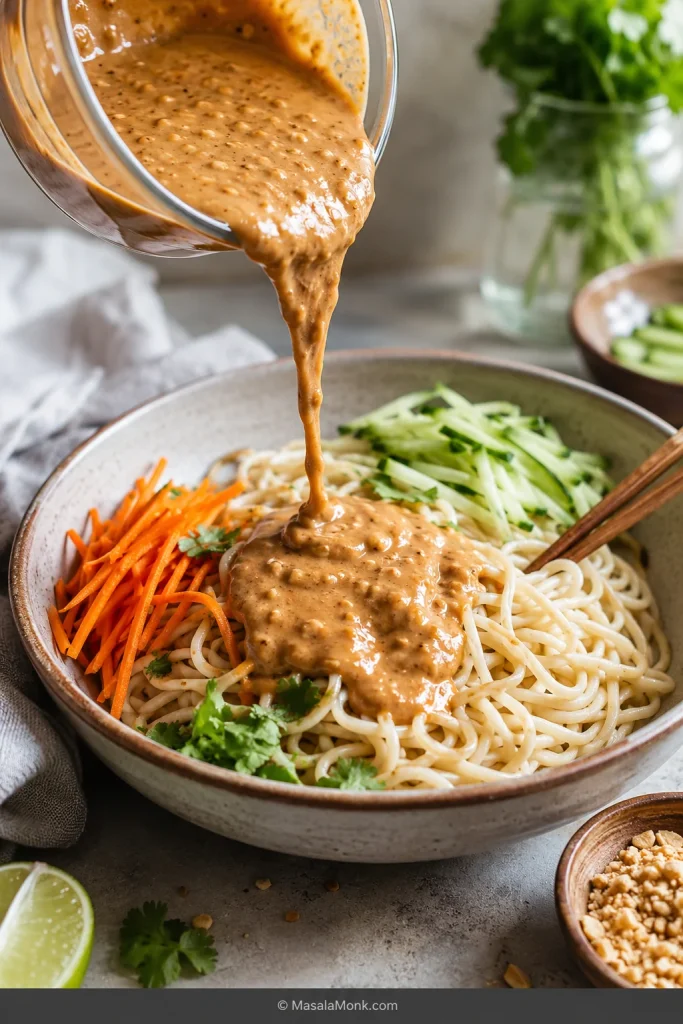
Peanut sauce being poured over noodles before tossing, with vegetables and herbs nearby.
Before tossing noodles, loosen the peanut sauce until it moves easily. As a result, it coats the strands evenly instead of grabbing them into sticky clumps.

Sometimes the bowl looks perfect, then tightens while you are setting the table. Do not panic. Add hot water or noodle water, a spoonful at a time, and toss again until the sauce relaxes around the noodles instead of grabbing them. If it keeps clumping, jump to how to fix peanut sauce.

Tips for Peanut Noodles

  • Hot water or noodle water helps the sauce loosen cleanly; cold water can make it tighten.
  • Make the sauce looser before adding it to the noodles.
  • Toss gradually instead of dumping everything in at once.
  • Lime juice or rice vinegar helps when the noodles taste heavy.
  • Soy sauce or tamari helps when the noodles taste flat.
  • Cold peanut noodles need a looser sauce because it thickens as it chills.

Toss it with rice noodles, spaghetti, ramen, soba, udon, or egg noodles. Add cucumber, carrots, cabbage, scallions, cilantro, mint, edamame, tofu, chicken, shrimp, or a fried egg to turn it into a full meal.

Once the sauce is coating properly, fresh toppings finish the noodle bowl and keep it from tasting heavy.
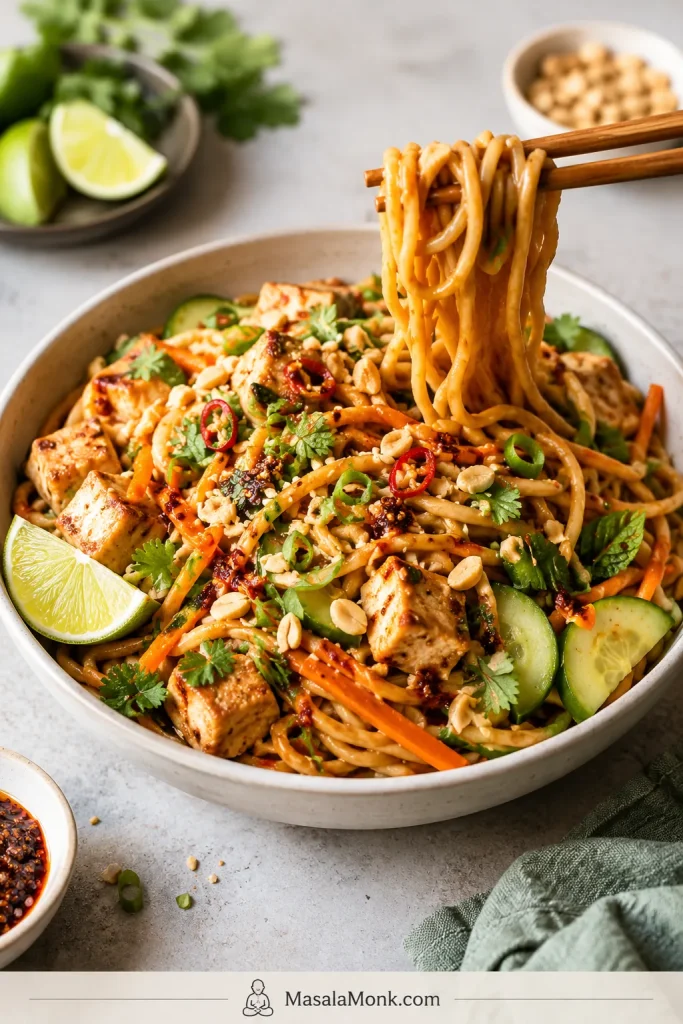
Peanut sauce noodle bowl with vegetables, herbs, lime, chili and crushed peanuts.
Once the noodles are coated, add crunch, herbs, lime and protein to turn peanut sauce noodles into dinner. The finish should taste fresh, not just creamy.

Peanut Sauce for Chicken, Tofu and Bowls

This is where peanut sauce earns its place in the fridge: plain chicken, tofu, rice, and vegetables suddenly taste like a planned meal. The trick is matching the texture to the job, not pouring the same thickness over everything.

UseBest TextureBest Adjustment
Grilled chickenMedium-thick drizzleAdd lime after cooking so the sauce tastes bright, not heavy
Chicken rice bowlsSlow drizzleKeep it savory enough to season the rice
Peanut chicken noodlesLoose, tossable sauceUse hot water or noodle water before tossing
Crispy tofuThicker coating sauceAdd chili crisp, extra ginger, or crushed peanuts
Tofu bowlsDrizzle-able but not wateryAdd lime and tamari so the tofu does not taste flat
Lettuce wrapsEasy dip with bodyAdd lime and herbs for freshness

Chicken

Spoon it over cooked chicken, serve it as a dip for grilled chicken, or use the warm satay-style version with skewers. Plain baked chicken works well here because the sauce brings most of the flavor. Once the chicken is cooked, you can slice it into bowls, tuck it into lettuce wraps, or serve it beside spring rolls and cucumber salad.

Everyday chicken needs a peanut sauce that drizzles cleanly and seasons the plate without turning sweet.
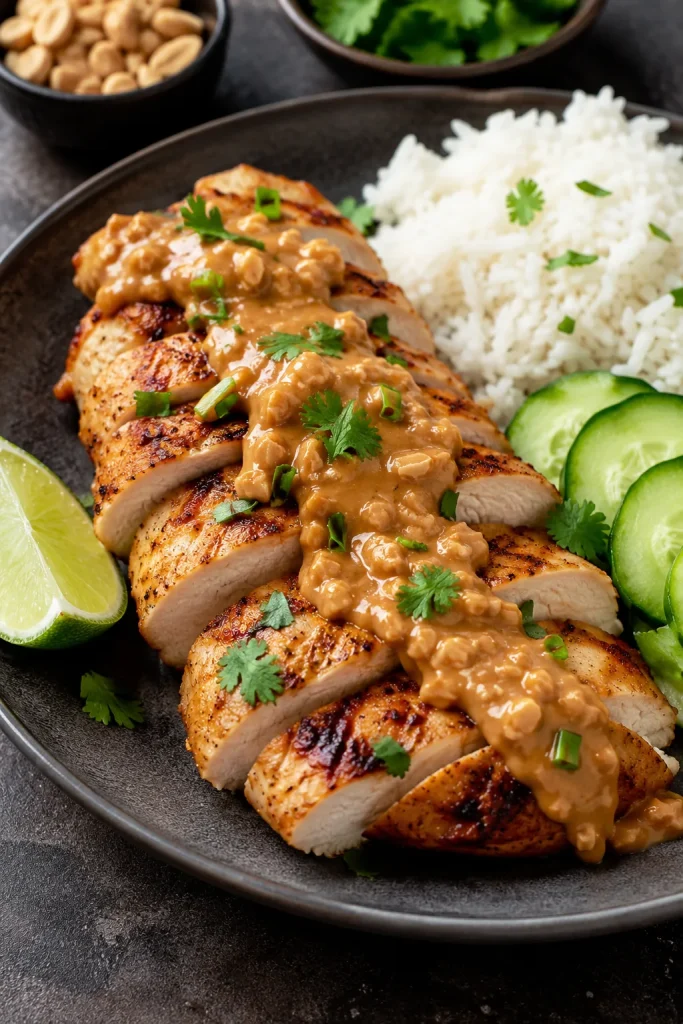
Sliced grilled chicken with peanut sauce, white rice, cucumber, lime and herbs.
For everyday chicken, keep the sauce savory and medium-thick. It should drizzle over the slices, season the rice and stay balanced without tasting dessert-sweet.

Tofu

Tofu can take this sauce in two directions. Keep it thicker if you want to coat crispy tofu, or make it slightly looser if you want to drizzle it over a tofu bowl. Tofu loves a bolder sauce because it gives the peanut, lime, chili, and ginger room to show up.

For crispy tofu, keep the sauce thick enough to coat without covering every crunchy edge.
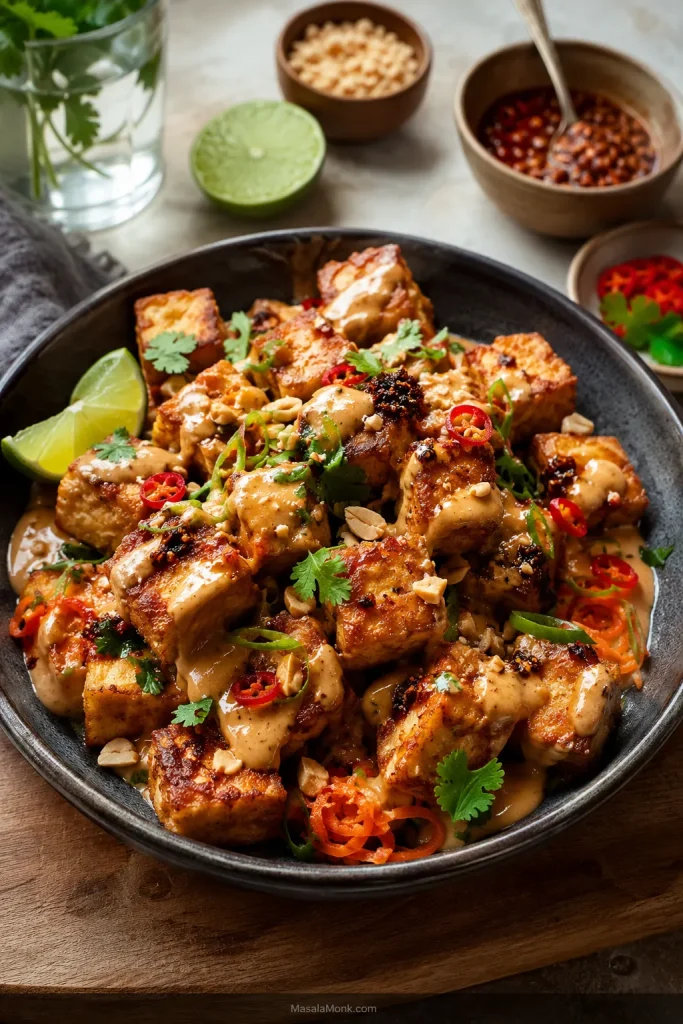
Crispy golden tofu cubes with peanut sauce, chili, herbs, lime and crushed peanuts.
Crispy tofu can take a thicker peanut sauce because the edges stay sturdy. Then chili, lime, ginger and crushed peanuts help the tofu taste bold instead of bland.

For a vegan version, maple syrup or brown sugar keeps the sweetness simple. Gluten-free bowls work best with tamari for the same savory depth. When you need a soy-free version, use coconut aminos and adjust with salt and lime at the end.

Rice Bowls and Meal Prep

In rice bowls, aim for a slow drizzle, not a watery pour. It should settle into the rice, vegetables, and protein without disappearing. Fluffy rice matters because it can hold the sauce without turning gummy.

Rice bowls need a slow drizzle that settles into the grains and makes leftovers feel intentional.
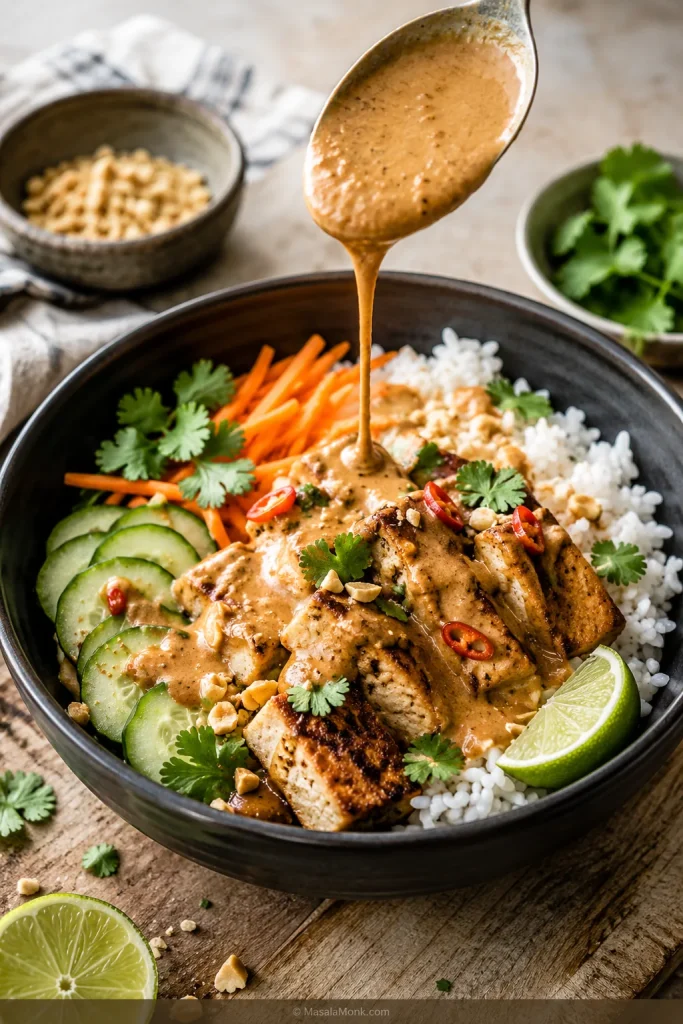
Rice bowl with tofu, vegetables, herbs, lime and peanut sauce being drizzled from a spoon.
In rice bowls, aim for a slow peanut sauce drizzle that settles into the grains without disappearing. This is where leftover rice and vegetables start to feel planned.

When meal prepping, store the sauce separately. It will thicken in the fridge, so re-whisk it with a splash before adding it to bowls, noodles, or salads. A jar of peanut sauce can make leftover rice, roasted vegetables, cooked chicken, tofu, or even plain cucumber feel intentional.

For a full bowl meal, the same creamy-salty idea works beautifully in a Thai-style vegan bowl with peanut butter dressing.

Peanut Dressing for Salads, Slaw and Bowls

To make peanut dressing for salad, slaw, or cold noodle salad, use more liquid than you would for dipping. It should pour easily from a spoon and taste brighter than satay sauce.

Start with ½ cup peanut sauce, then whisk in 2 to 4 tablespoons water. Add 1 to 2 teaspoons extra lime juice or rice vinegar if the dressing tastes heavy. A good peanut dressing should taste a little brighter than you think, because raw vegetables soften its sharpness once everything is tossed.

For salad and slaw, the sauce has to pour easily and taste brighter than it would as a dip.
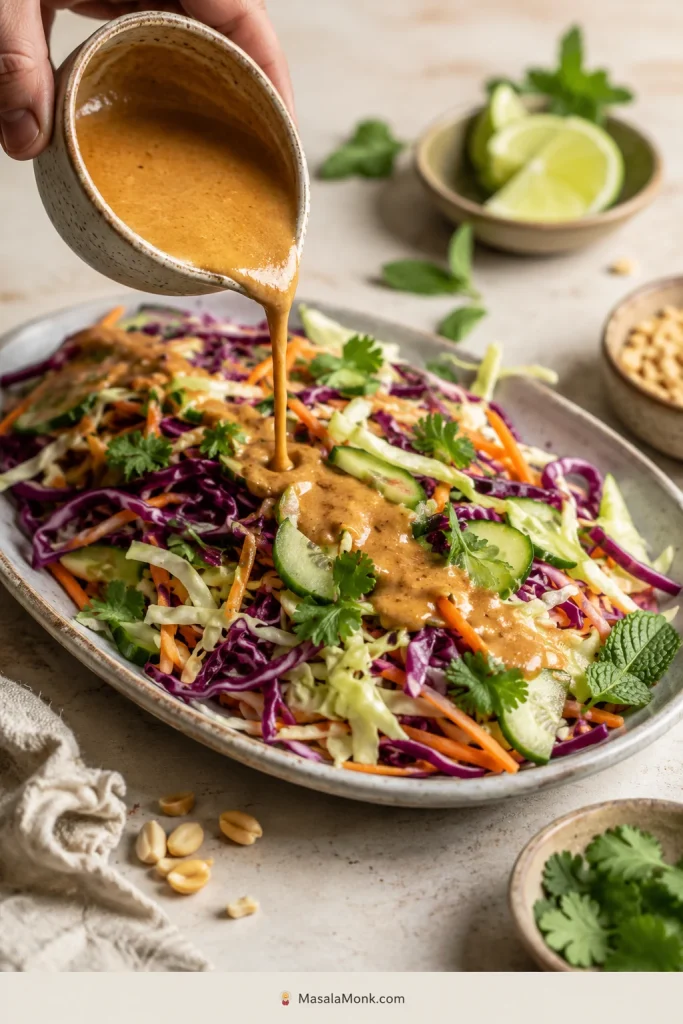
Pourable peanut dressing being drizzled over cabbage, cucumber and carrot slaw.
For slaw and salads, make the peanut dressing brighter and thinner than a dip. Once it hits cabbage, cucumber and carrots, the extra tang keeps everything fresh instead of heavy.

Once it hits cabbage, cucumber, herbs, or shredded carrots, that extra brightness settles into balance. Use it on cabbage slaw, Thai peanut salad, cold noodle salad, lettuce wraps, grilled vegetables, or shredded chicken salad. It also works beautifully beside a crisp cucumber salad, especially when the meal has satay-style chicken, tofu, noodles, or grilled vegetables.

Rich toppings like avocado, fried tofu, or chicken need more lime. Mostly raw vegetables can handle a dressing that is a little sweeter and saltier.

Everyday Peanut Sauce, Vietnamese-Style Hoisin Dip and Satay-Style Sauce

Peanut sauce can mean different things depending on the dish. This recipe is an everyday peanut-butter sauce for home cooking, not a claim that all peanut sauces are the same. Traditional and regional versions may use roasted peanuts, tamarind, palm sugar, fish sauce, coconut milk, hoisin, curry paste, or other aromatics depending on the cuisine and dish.

Use the color and thickness of the sauce to understand which direction it has moved: everyday dip, hoisin dip or satay-style sauce.
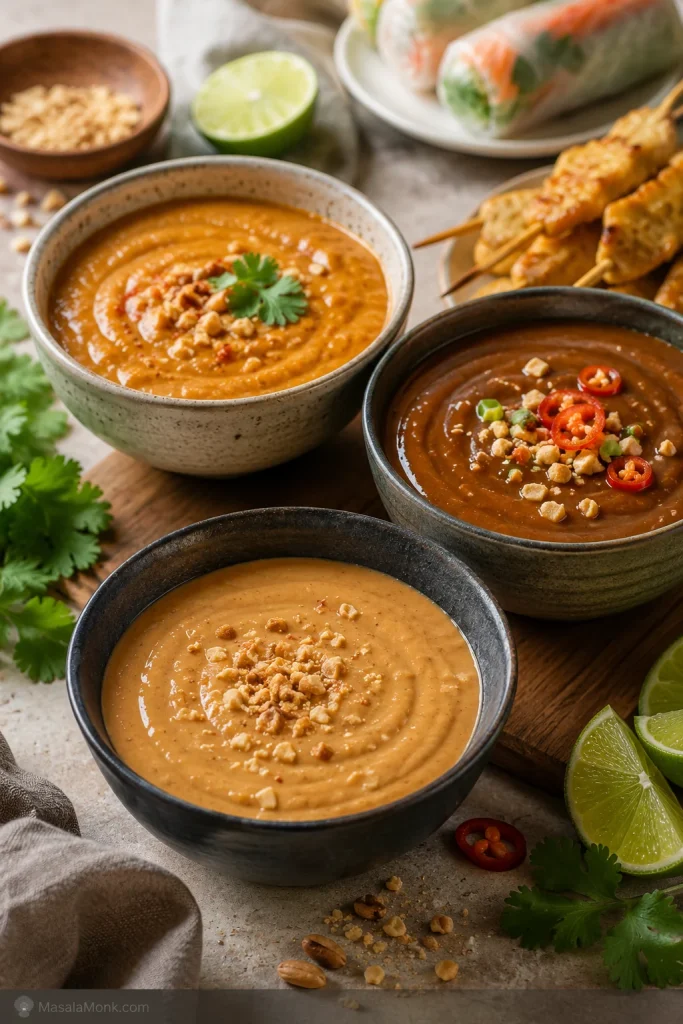
Three bowls showing light peanut sauce, darker hoisin peanut dip and golden satay-style peanut sauce.
One peanut sauce base can move in three directions: everyday dip, Vietnamese-style hoisin peanut sauce or warmer satay-style sauce. The color and thickness show where it belongs.
  • Thai-inspired home-cooking peanut sauce: often a flexible peanut butter sauce with soy or tamari, lime, rice vinegar, chili, ginger, garlic, and water. Use it for dipping, noodles, chicken, tofu, bowls, and salads.
  • Vietnamese-style spring roll sauce: often brings in hoisin with peanut butter, garlic, and water, milk, or coconut milk. Use it for fresh spring rolls, rice paper rolls, shrimp rolls, and summer rolls.
  • Satay-style peanut sauce: usually richer, thicker, and often warm, sometimes with coconut milk, curry paste, fish sauce, or crushed peanuts. Use it for chicken satay, tofu satay, skewers, and grilled vegetables.

The main sauce here is flexible and quick. Add hoisin, and it moves toward a Vietnamese-style spring roll dip. Stir in coconut milk and curry paste, and it becomes warmer, richer and closer to a satay-style sauce.

Substitutions and Variations

This is where peanut sauce is forgiving, but not automatic: every swap changes the balance a little. Use the table as a starting point, then taste again once the texture is right.

NeedUseWatch Out For
Gluten-free peanut sauceTamari or certified gluten-free soy sauceCheck labels on hoisin, chili sauce, and curry paste
Soy-free peanut sauceCoconut aminosAdd salt and lime because coconut aminos are sweeter and less salty
Vegan peanut sauceMaple syrup or brown sugar instead of honeySkip fish sauce in the satay-style variation
Richer satay-style sauceCoconut milk or coconut creamAdd lime or vinegar if it tastes too heavy
Vietnamese-style dipHoisin added to the base sauceAdd lime or vinegar if it tastes too sweet
Spicy peanut sauceSriracha, chili garlic sauce, sambal, chili crisp, or red pepper flakesAdd heat slowly; peanut butter can hide spice at first
Mild peanut sauceSkip chili sauce or use a tiny pinch of chili flakesAdd extra ginger or lime so it does not taste flat
More textureCrushed roasted peanuts or blended roasted peanutsAdd extra liquid if the sauce thickens

Emergency 3-Ingredient Peanut Sauce

If you do not have all the ingredients, you can still make a quick peanut sauce. It will not taste as layered as the full version, but it works for noodles, dipping, wraps, or a fast bowl sauce.

Simple Version

  • 3 tablespoons peanut butter
  • 1 tablespoon soy sauce or tamari
  • 1 to 3 tablespoons warm water

Whisk everything together until smooth. Add lime juice, rice vinegar, chili sauce, garlic, or sweetener if you have them.

Better 3-Ingredient Version

  • 3 tablespoons peanut butter
  • 1 tablespoon soy sauce or tamari
  • 1 tablespoon lime juice or rice vinegar

Whisk with enough liquid until the sauce reaches the texture you need. This version tastes more balanced because the acid cuts through the peanut butter.

How to Fix Peanut Sauce

Most peanut sauce problems are not recipe failures; they are texture problems. Too thick, too salty, too heavy, grainy, separated, or sticky on noodles usually means the sauce needs one small adjustment, not a full restart.

Rule one still applies: fix texture first, then salt, then acid, then sweetness, then heat. If the problem happened after chilling, the storage and make-ahead fix may be all you need.

Fix Texture First, Then Flavor

If the noodles clump, treat it as a sauce-texture problem before you change the flavor.
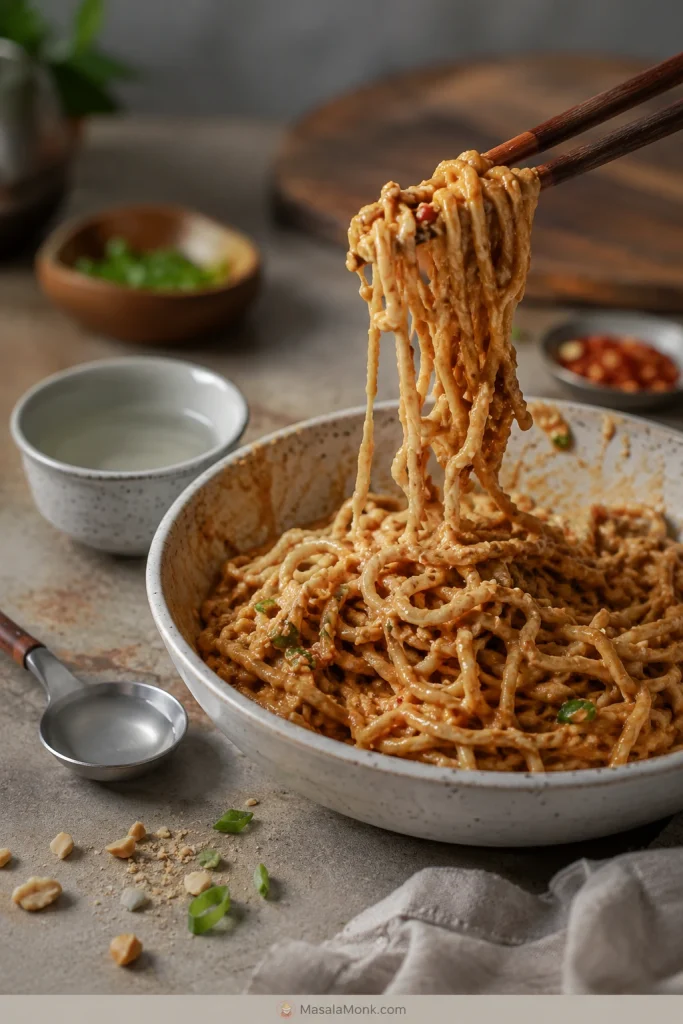
Chopsticks lifting peanut noodles that have clumped because the sauce is too thick.
If peanut noodles turn sticky, the sauce usually needs hot water or noodle water, not a remake. Add a spoonful, toss again and let the sauce relax around the noodles.
ProblemWhy It HappenedFix
Too thickPeanut butter seized, not enough water, or sauce chilledWhisk in warm water 1 tablespoon at a time
Too thinToo much liquid was addedAdd peanut butter 1 tablespoon at a time
Too saltyToo much soy sauce, tamari, or fish sauceAdd peanut butter, lime juice, sweetener, or water
Too sweetToo much sugar, honey, maple syrup, or hoisinAdd lime juice, rice vinegar, chili, or soy sauce
Too spicyToo much chili sauce or curry pasteAdd peanut butter, coconut milk, sweetener, or water
GrainyNatural peanut butter, cold liquid, or poor mixingUse warm water and whisk hard, or blend briefly
Oily or separatedPeanut butter separated, sauce chilled, or sauce overheatedRewarm gently and whisk in warm water
BlandNeeds salt, acid, heat, or aromaticsAdd soy sauce or tamari, lime, vinegar, ginger, garlic, or chili
Too heavyToo much peanut butter or not enough acidAdd lime juice, rice vinegar, water, and fresh herbs
Noodles turned stickyThe sauce thickened after tossingAdd hot water or noodle water and toss again

Noodles need the loosest sauce. Satay can stay thicker and warmer. Spring rolls need a dip that coats the rice paper but still feels easy to bite through.

Storage and Make-Ahead

Store peanut sauce in an airtight jar or container in the fridge for up to 1 week. It will thicken as it chills, so do not judge the texture straight from the fridge.

Straight from the fridge, peanut sauce can look hopeless, but it is not broken; it is just waiting for a splash of water and a firm whisk. Let it sit for a few minutes before adding too much liquid, because the sauce often softens as it warms slightly.

A short rest and a firm whisk are usually enough to bring refrigerated peanut sauce back.
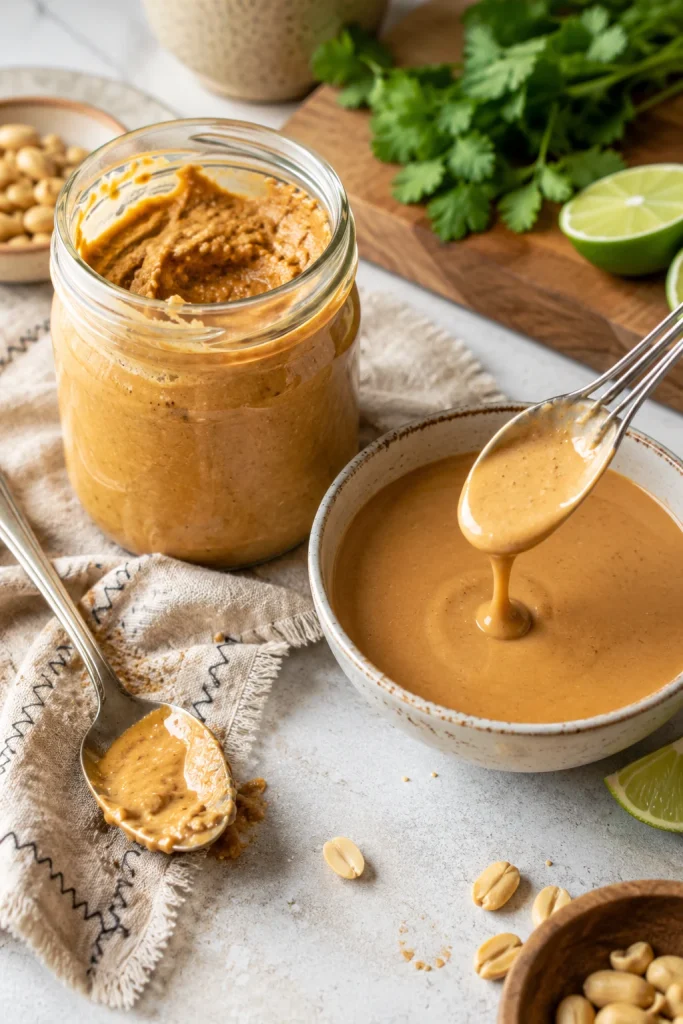
Glass jar of thick refrigerated peanut sauce beside a bowl of re-whisked pourable peanut sauce.
After chilling, peanut sauce often looks thicker than expected. Let it sit briefly, then re-whisk with a splash of water until it flows again.

Noodles usually need more liquid than you expect. Spring roll dip only needs enough water to flow again. Satay-style sauce is best rewarmed gently, then loosened with water or coconut milk.

You can freeze peanut sauce if needed, but the texture may change after thawing. Thaw it in the fridge, then whisk or blend it with a splash of warm water until smooth.

What to Serve with Peanut Sauce

Once the sauce is in the fridge, the question becomes less “what recipe am I making?” and more “what needs help tonight?” Use it where you want something fresh and cool, warm and grilled, dinner-like, or snacky and dippable.

MoodServe It With
Fresh and coolFresh spring rolls, rice paper rolls, summer rolls, shrimp rolls, cabbage slaw, cucumber salad, Vegan Som Tam / Thai raw papaya salad
Warm and grilledChicken satay, tofu satay, grilled chicken, grilled paneer or tofu skewers, roasted shrimp, roasted vegetables
Full dinnerPeanut noodles, rice noodles, cold noodle salad, rice bowls, chicken bowls, tofu bowls, roasted vegetable bowls
Snacky and dippableLettuce wraps, dumplings, potstickers, fresh vegetables, crispy tofu bites

If the sauce is going over something rich, add more lime or vinegar. If it is going over plain rice, noodles, or vegetables, keep it a little saltier and spicier so it can carry the whole bowl. For a thicker Indian peanut condiment rather than a pourable sauce, try peanut chutney.

FAQ

What is peanut sauce made of?

Peanut sauce is usually made with peanut butter or ground peanuts, soy sauce or tamari, vinegar or lime juice, sweetener, chili, garlic, ginger, and water. Some satay-style versions also use coconut milk, curry paste, fish sauce, tamarind, or crushed roasted peanuts.

Is peanut sauce the same as satay sauce?

Not exactly. Peanut sauce is broad; satay sauce usually means the richer peanut-based sauce served with satay skewers.

Do you serve peanut sauce warm or cold?

Serve it room temperature or slightly chilled for spring rolls, warm for satay, and loosened with hot water for noodles. For salad dressing, chilled or room temperature both work.

How do you thin peanut sauce for spring rolls?

Add water 1 tablespoon at a time until the sauce is easy to dip. It should cling lightly to the spring roll without feeling pasty or running off immediately.

Why did my peanut sauce get so thick?

It thickens because peanut butter absorbs liquid and firms up as it sits, especially in the fridge. Whisk in a splash of water at a time until it relaxes again.

What peanut butter works best for peanut sauce?

Creamy natural peanut butter gives the cleanest peanut flavor. Regular creamy peanut butter also works, but it is usually sweeter, so start with less sweetener. Crunchy peanut butter works if you do not mind a textured sauce.

How long does peanut sauce last in the fridge?

It keeps well in an airtight jar in the fridge for up to 1 week. It will thicken as it chills, so whisk in a splash of water before serving.

Is peanut sauce gluten-free?

It can be gluten-free if you use tamari or certified gluten-free soy sauce. Check labels on hoisin, chili sauce, curry paste, and any bottled ingredients because they can vary.

How do you make peanut sauce vegan?

Use maple syrup or brown sugar instead of honey, and skip fish sauce in the satay-style variation. The 5-minute sauce is easy to keep vegan with peanut butter, tamari or soy sauce, lime, vinegar, chili, garlic, ginger, and water.

Can you make peanut sauce without peanut butter?

Yes, but it becomes a different sauce. For a similar creamy dip, use tahini, almond butter, cashew butter, or sunflower seed butter, then adjust salt, acid, sweetness, and liquid to taste. For peanut allergies, do not call it peanut sauce when serving guests; label it clearly.

How much peanut sauce do you need for noodles?

For 2 servings of noodles, start with about ½ cup peanut sauce and thin it with 2 to 4 tablespoons hot water or noodle water before tossing. For 8 ounces / 225 g noodles, use about ½ to ¾ cup sauce depending on how saucy you want them.

Make It Your House Sauce

Make it once, then keep adjusting it by feel. One night, it is a dip for fresh rolls. Another night, it saves plain noodles. Later in the week, it can turn leftover rice, tofu, chicken, or vegetables into a meal you actually meant to make. That is when peanut sauce becomes the jar you are glad to have waiting in the fridge.

If you try it, I would love to know where it landed first: spring rolls, noodles, satay, tofu, or a fridge-cleanout bowl. That is usually the version worth saving and making again.
Posted on 4 Comments

Homemade Teriyaki Sauce Recipe : Classic, Thick, Sticky, Healthy & More

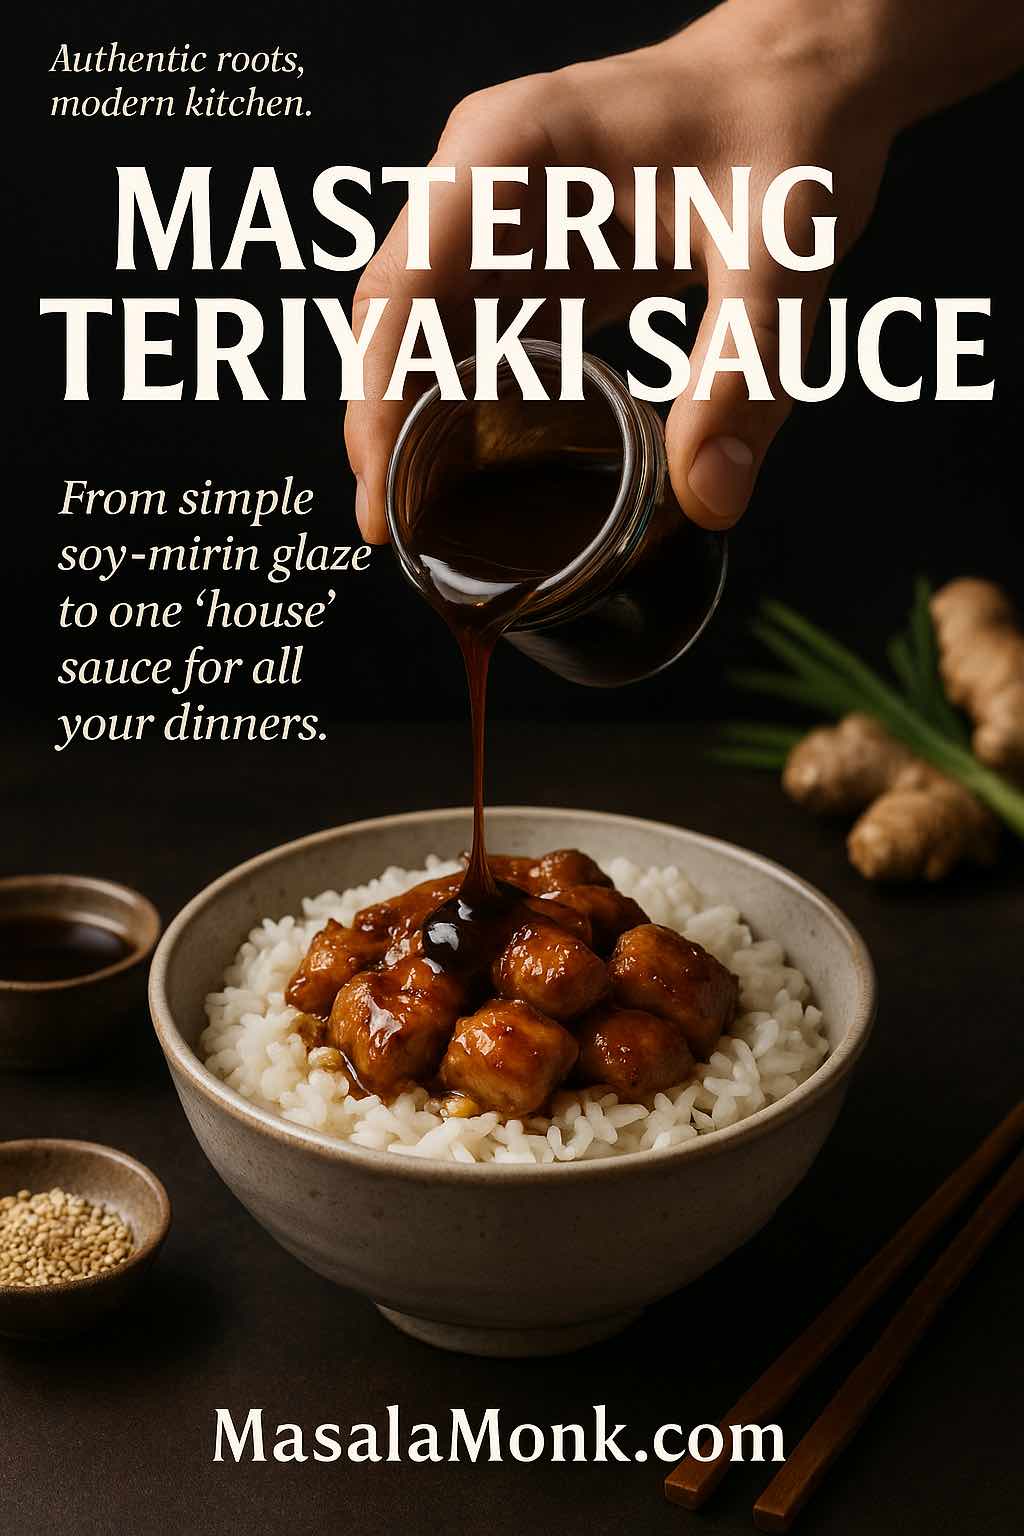
Hand pouring glossy teriyaki sauce over a bowl, with the headline ‘Mastering Teriyaki Sauce’ on a premium magazine-style cover for MasalaMonk.

Teriyaki is one of those flavours that makes plain food feel like an actual meal. A bowl of rice and vegetables is nothing special; spoon a glossy, sweet–savory teriyaki sauce over the top and suddenly it looks like something from a Japanese grill. The same happens to chicken thighs, salmon fillets, tofu cubes, even roasted potatoes. A teriyaki sauce recipe is simple at its core, but endlessly flexible in practice.

The confusion starts when you realise “teriyaki sauce” means very different things to different people. In Japan, it began as a simple glaze made with soy sauce, mirin and sugar, brushed repeatedly onto grilled fish or chicken. Outside Japan, it grew thicker, sweeter and more garlicky, eventually showing up in bottles, takeout shops and fusion recipes ranging from teriyaki pizza to teriyaki burgers. Then the health-conscious crowd arrived and the questions multiplied: low sugar teriyaki, low sodium teriyaki, keto teriyaki, vegan teriyaki, soy-free teriyaki… are those even still “teriyaki”?

This post is meant to be your one-stop answer. We’ll walk through what teriyaki actually is, how to make a reliable homemade teriyaki sauce, how to cook a more traditional Japanese-style version, and how to spin that base into marinades, stir-fry sauces, glazes, dips and dressings. After that, we’ll look at the most useful flavour variations and finish with ways to make teriyaki lighter and friendlier for everyday eating, without turning it into a completely different sauce.

Throughout, think of teriyaki as joining the same “core sauce” family as pesto, béchamel and tzatziki—sauces that MasalaMonk has already taken deep dives into in posts like the basil-packed pesto variations, classic béchamel for lasagna and refreshing Greek tzatziki recipes. Once you know the base, you can bend it in all sorts of directions.


What “Teriyaki” Really Means

The word comes from two Japanese elements: teri, which refers to shine or luster, and yaki, meaning grilling or broiling. If you look at the description on Wikipedia’s teriyaki page, you’ll see that originally it wasn’t a bottled sauce at all, but a method of cooking: fish or meat was grilled while being brushed with a mixture of soy sauce, mirin and sugar, sometimes sake as well. The sugar and mirin helped the glaze caramelise and created that characteristic glossy coat.

In that setting:

  • the focus was on the technique of basting and grilling
  • the glaze was a simple blend of soy, mirin, sugar and maybe sake
  • the sauce itself stayed fairly thin and syrupy, not thick like gravy

Classic examples include teriyaki yellowtail, teriyaki mackerel and teriyaki chicken. The glaze was cooked directly onto the surface of the food. It wasn’t something served in a ramekin on the side.

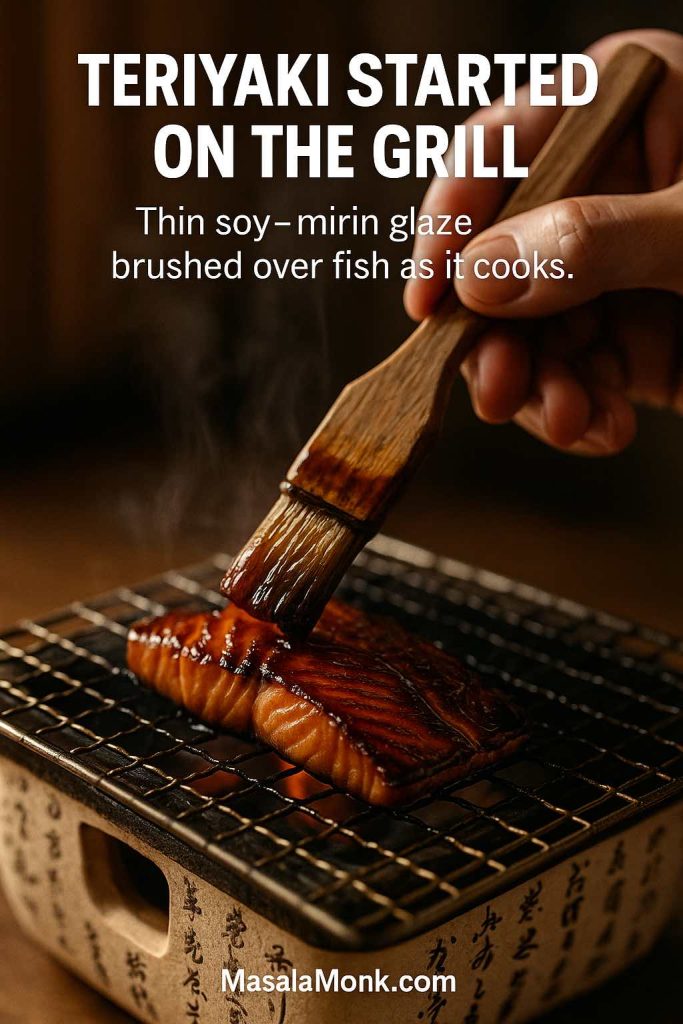
Traditional Japanese teriyaki salmon being brushed with a thin soy–mirin glaze on a tabletop grill, showing the shiny caramelised surface and steam rising.
In classic Japanese cooking, teriyaki isn’t a bottled sauce but a technique: fish or chicken is grilled while being brushed over and over with a light soy–mirin glaze until it turns glossy and caramelised.

As Japanese cooks migrated and Japanese flavours spread, teriyaki began to adapt. In Hawaii, cooks folded in brown sugar and pineapple juice. In the US, garlic and ginger started appearing in the mix. Bottled teriyaki sauces appeared on shelves, often thickened with starch and stabilisers so they’d hold up over time. Restaurant dishes like chicken teriyaki bowls, beef teriyaki skewers and salmon teriyaki became staples.

So when someone says “teriyaki sauce” today, they might be thinking of:

  • a light, traditional soy–mirin glaze
  • a thick, sweet, garlicky bottled sauce
  • or a homemade version that tries to be healthier, spicier or fruitier

Instead of treating those as completely separate things, it’s more helpful to see them as points on a spectrum, all built from the same core ingredients.

Also Read: Bolognese Sauce Recipe: Real Ragù & Easy Spag Bol


The Essential Building Blocks of Teriyaki

Every teriyaki sauce—whether it calls itself authentic, homemade, healthy, or “just like your favourite restaurant”—is some combination of a few key elements. Once you understand what each one does, creating your own version becomes much easier.

Soy Sauce: The Savoury Backbone of Any Teriyaki Sauce Recipe

The foundation of teriyaki is soy sauce. It brings salt, umami (that deep savoury dimension), and the dark, rich colour most people associate with the sauce.

The Wikipedia entry for soy sauce gives a good overview of how it’s traditionally brewed from soybeans, grain, water and salt. For our purposes, what matters is:

  • regular soy sauce is intensely salty and savoury
  • you can use low-sodium soy to make more forgiving sauces
  • tamari, made mostly from soy without wheat, is a good choice when you need a gluten-free teriyaki base

Because soy sauce is so salty, it’s very easy for teriyaki to become sodium-heavy—especially when you reduce it into a sticky glaze. That’s why a lot of people look for lower sodium approaches, which we’ll come back to later.

Mirin and Sake: Shine and Sweetness

If soy sauce is the backbone, mirin is the soul of a traditional teriyaki. Mirin is a sweet rice wine used in Japanese cooking, described in more depth on pages like this mirin overview. It brings:

  • natural sweetness
  • a mild, wine-like aroma
  • a helping hand with that glossy “teri” shine when it reduces with soy and sugar

Sake, another rice wine, sometimes joins the party, adding aroma and dimension. Put together, soy, mirin, sake and sugar form the base of the classic Japanese teriyaki glaze. No cornstarch, no garlic, no ginger—just those four building blocks simmered until they slightly thicken.

If you don’t have mirin, you can approximate it by combining a splash of sake or white wine with sugar, or by using sugar and rice vinegar together for a similar sweet-acid balance. It won’t be exact, but the overall character of the sauce will still lean toward teriyaki.

Sweeteners: Balance and Caramelisation in a Teriyaki Sauce Recipe

Teriyaki has a sweet side. That sweetness balances the saltiness of soy sauce and encourages the surface of the sauce to caramelise under high heat.

You can use:

  • white sugar, for neutral sweetness
  • brown sugar, for a deeper, caramel-like note
  • honey, for a rounder, floral sweetness

Other sweeteners—maple syrup, coconut sugar, jaggery, date syrup—can slide in comfortably as well, depending on what you have and what kind of flavour you’re chasing.

The main thing is to remember that sugar is acting as a seasoning. It’s there to keep the sauce from tasting harsh and salty and to give it that repeat-able, “lick the spoon” quality. Take it too far and you end up with something that feels like dessert on your chicken; dial it in well and you get that classic sweet–savory balance.

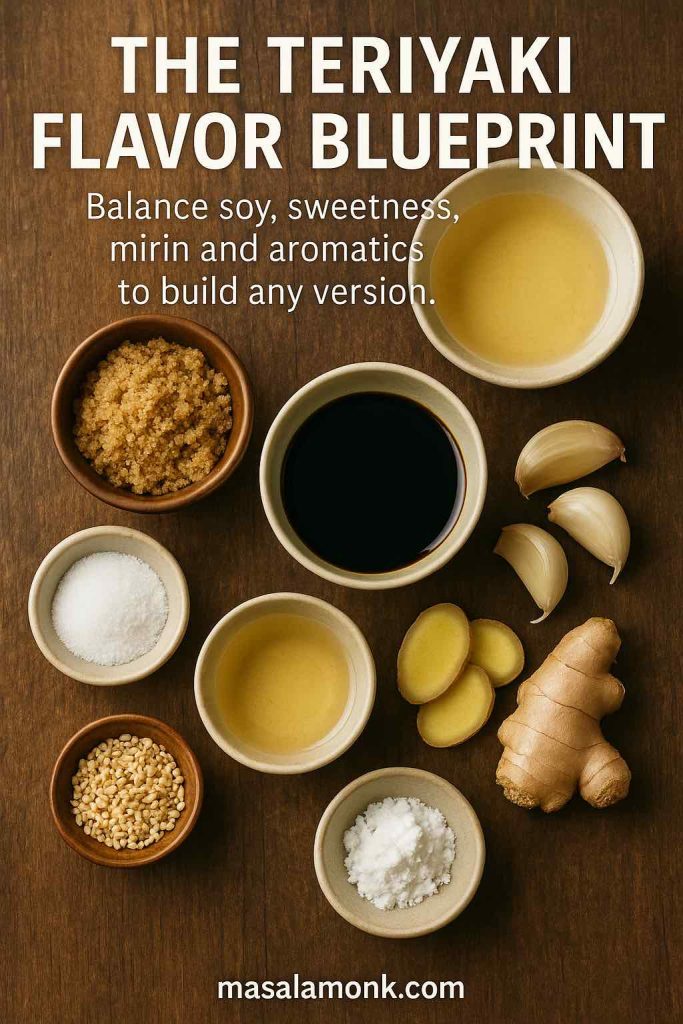
Overhead view of small bowls holding soy sauce, mirin, sugar, garlic, ginger and other seasonings on a wooden table, showing the main ingredients needed to make homemade teriyaki sauce.
Every teriyaki recipe is built from the same core pieces: soy for salt and colour, mirin or sake for shine, sugar or honey for sweetness, plus garlic and ginger for aroma. Once you understand this “flavour blueprint”, tweaking the sauce for chicken, salmon, noodles or low-sugar versions becomes simple.

Garlic and Ginger: Aromatic Extras

In strictly traditional teriyaki, you can absolutely skip garlic and ginger. Many traditional Japanese teriyaki sauce recipes don’t include them. But they’ve become so common in global teriyaki that a lot of people instinctively expect that flavour.

Garlic adds a warm, pungent note; ginger brings a slightly spicy freshness. Together, they make the sauce:

  • punchier and more aromatic
  • better suited to stir-fries and noodle dishes
  • closer to what most “teriyaki chicken” takeout tastes like

If you love ginger, you can double down and let the sauce lean into a ginger-forward profile. If you want something mellow, you can keep both garlic and ginger fairly subtle.

Thickening: Reduction, Starch or Syrup

Finally, there’s the question of texture. A teriyaki sauce recipe can be:

  • thin and brushable
  • thick and clingy
  • or sticky and syrupy

There are three easy ways to get the texture you want.

Reduction
If you simmer a soy–mirin–sugar mixture gently, water evaporates and the sauce naturally thickens. This is how traditional teriyaki glaze is usually made: no extra thickener, just time and evaporation.

Starch slurry
Mix a spoonful of cornstarch with an equal or slightly larger amount of cold water until smooth, then stir that into a gently simmering sauce. As it heats, the starch thickens the liquid, giving you a glossy, reliable coating. This is what a lot of quick “homemade teriyaki sauce” recipes use.

Thicker sweeteners
Honey and syrupy sweeteners naturally give body. If your sauce includes them and you reduce it a bit, they help you get that sticky, almost lacquered consistency without needing much starch.

Once you’re familiar with these three levers, adjusting a sauce from “light glaze” to “thick stir-fry sauce” to “sticky wing glaze” becomes a simple question of preference.

Also Read: Authentic Chimichurri Recipe (Argentine Steak Sauce)


The Everyday Homemade Teriyaki Sauce Recipe

With the fundamentals in place, let’s actually make a sauce you can use on weeknights. This version keeps the ingredient list small, uses garlic and ginger, and relies on a cornstarch slurry so you get a consistent result even if you’re new to this.

It’s exactly the kind of thing you can batch once and then keep in the fridge, the way you might keep a jar of pesto or a homemade salad dressing.

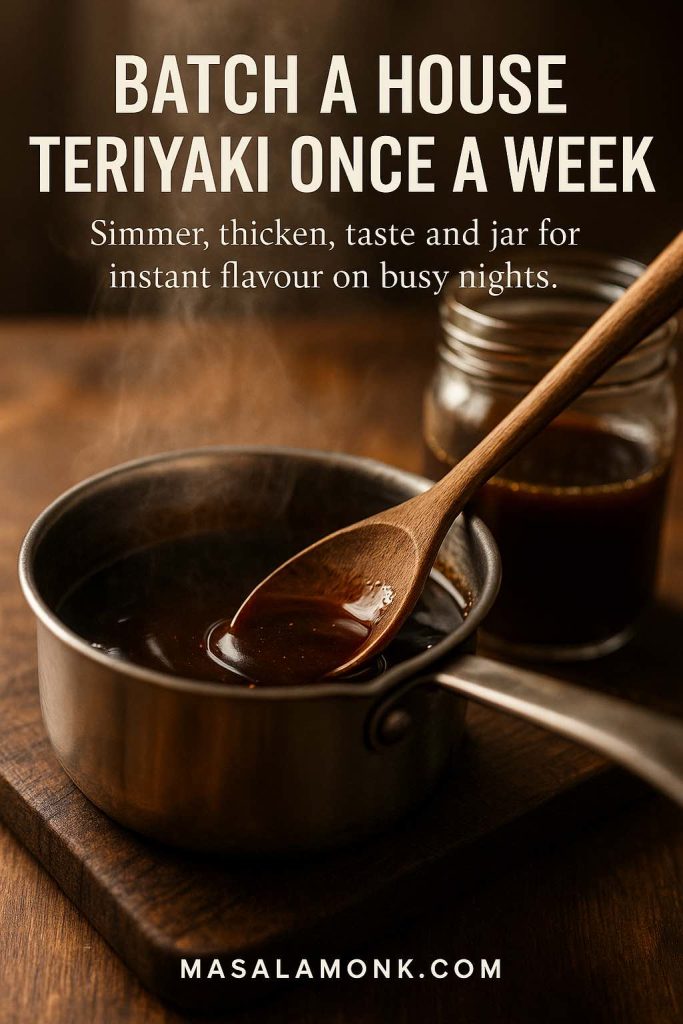
Close-up of glossy homemade teriyaki sauce being stirred with a wooden spoon in a small saucepan, with a glass jar of sauce in the background, illustrating batch cooking for easy weeknight teriyaki recipes.
Cooking one small pan of teriyaki and jarring it for the fridge turns the sauce into a “house staple” you can grab for quick dinners—brush it over chicken, drizzle on salmon, toss with vegetables or turn it into a stir-fry sauce without starting from scratch each time.

Ingredients for Teriyaki Sauce Recipe

  • ½ cup soy sauce (regular or low-sodium)
  • ½ cup water
  • ¼ cup mirin (or 2 tablespoons mirin + 2 tablespoons sake if that’s what you have)
  • ¼ cup brown sugar (you can replace part with honey for extra stickiness)
  • 1–2 cloves garlic, very finely minced
  • 1–2 teaspoons fresh ginger, grated
  • 1 tablespoon rice vinegar (optional, for brightness)
  • 1 tablespoon cornstarch
  • 2 tablespoons cold water (for the slurry)

Step-by-Step Teriyaki Sauce Recipe

Step 1: Combine the base ingredients

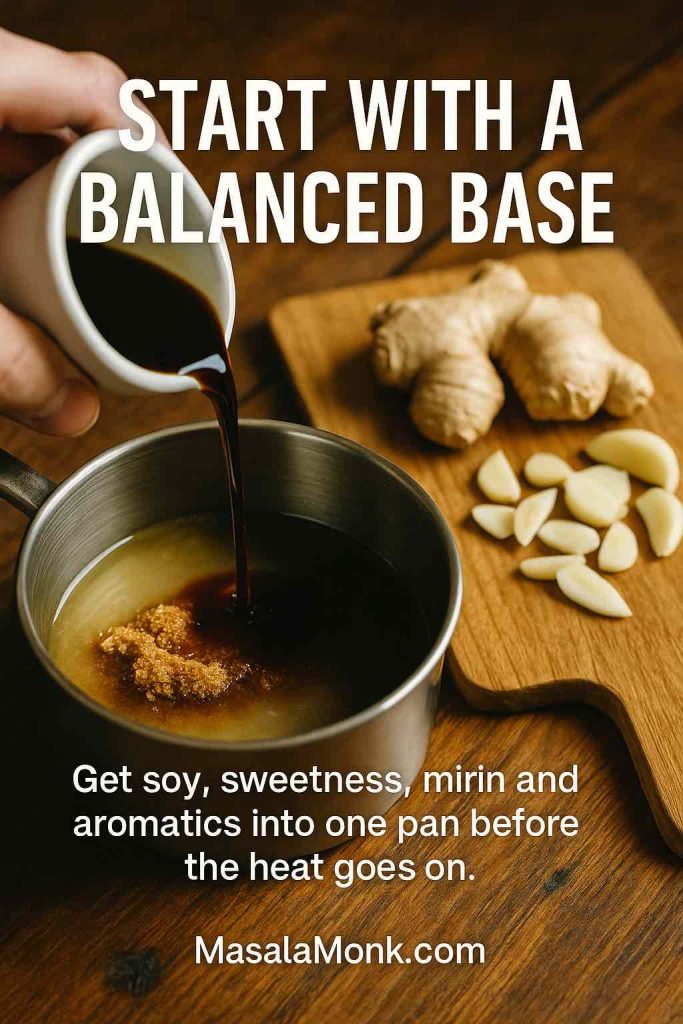
Pour the soy sauce, water, mirin, brown sugar, garlic, ginger and rice vinegar into a small saucepan. Stir everything together so the sugar starts to dissolve and the garlic and ginger are evenly dispersed.

Hand pouring soy sauce into a saucepan filled with liquid and brown sugar, with sliced garlic and fresh ginger on a cutting board, showing the base ingredients for homemade teriyaki sauce.
Layering soy, mirin, sugar, garlic and ginger in a cold pan lets the flavours blend before the heat hits, so your teriyaki sauce reduces evenly instead of tasting sharply salty in some spoonfuls and flat in others.

Step 2: Bring to a gentle simmer

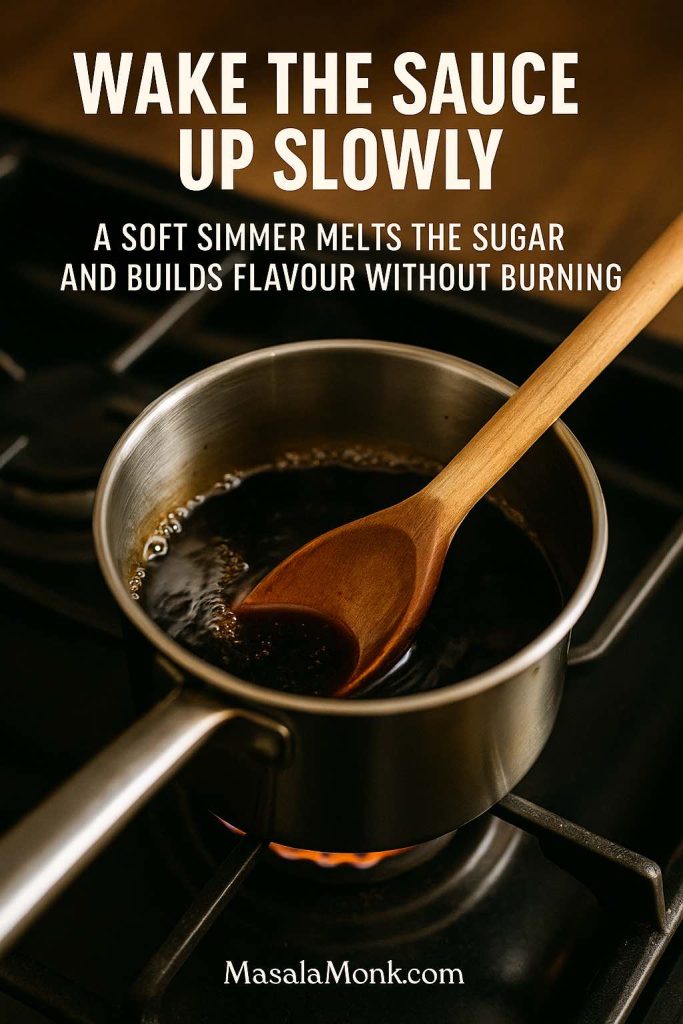
Set the saucepan over medium heat. As it warms up, keep an eye on it and give it an occasional stir. Aim for a gentle simmer, not a furious boil. After a few minutes, the sugar will be fully dissolved and the kitchen will start to smell like teriyaki night.

Teriyaki sauce gently simmering in a small saucepan with tiny bubbles at the edges and a wooden spoon stirring, showing how to melt the sugar and infuse flavour without boiling hard.
If the surface is jumping like a vigorous boil, turn the heat down. A quiet simmer gives you gloss and depth; too much heat can make the sauce taste harsh or slightly burnt before it ever reaches the right thickness.

Step 3: Make the cornstarch slurry

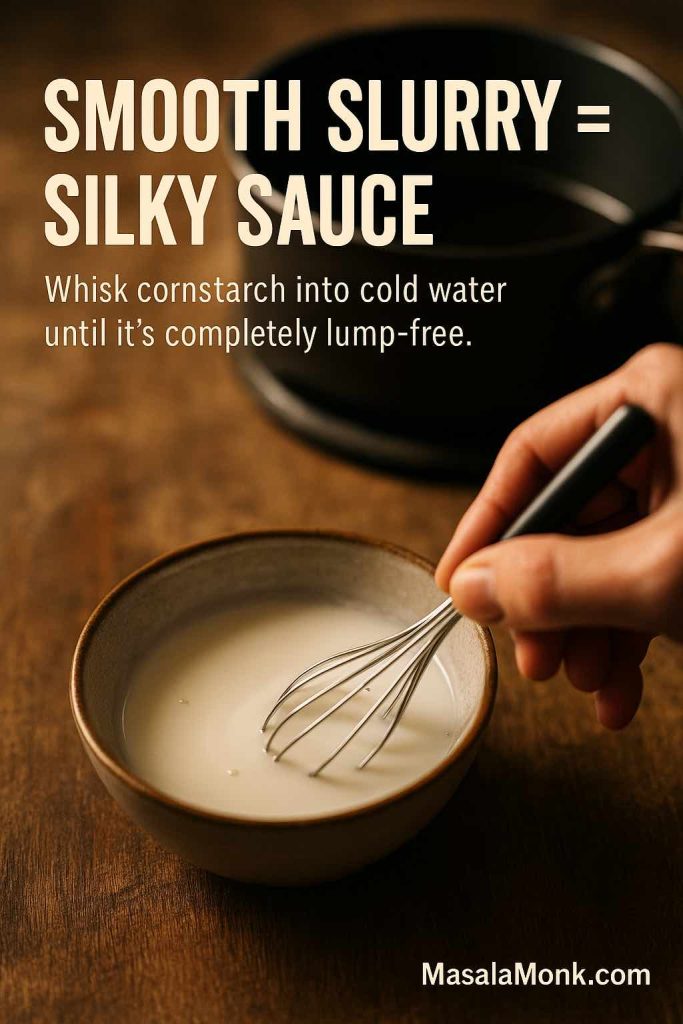
While the sauce is heating, mix the cornstarch and cold water in a small bowl until completely smooth. Any lumps now will turn into lumps in the sauce later, so it’s worth taking ten extra seconds to get this right.

Hand whisking cornstarch and cold water into a smooth slurry in a small ceramic bowl on a wooden counter, with a saucepan blurred in the background, showing how to prepare a lump-free thickener for teriyaki sauce.
If the slurry looks chalky or grainy, keep whisking until it turns glossy and perfectly smooth. A well-made slurry disappears into the teriyaki and thickens it gently; a rushed one leaves tiny gummy blobs you’ll never quite strain out.

Step 4: Thicken the sauce

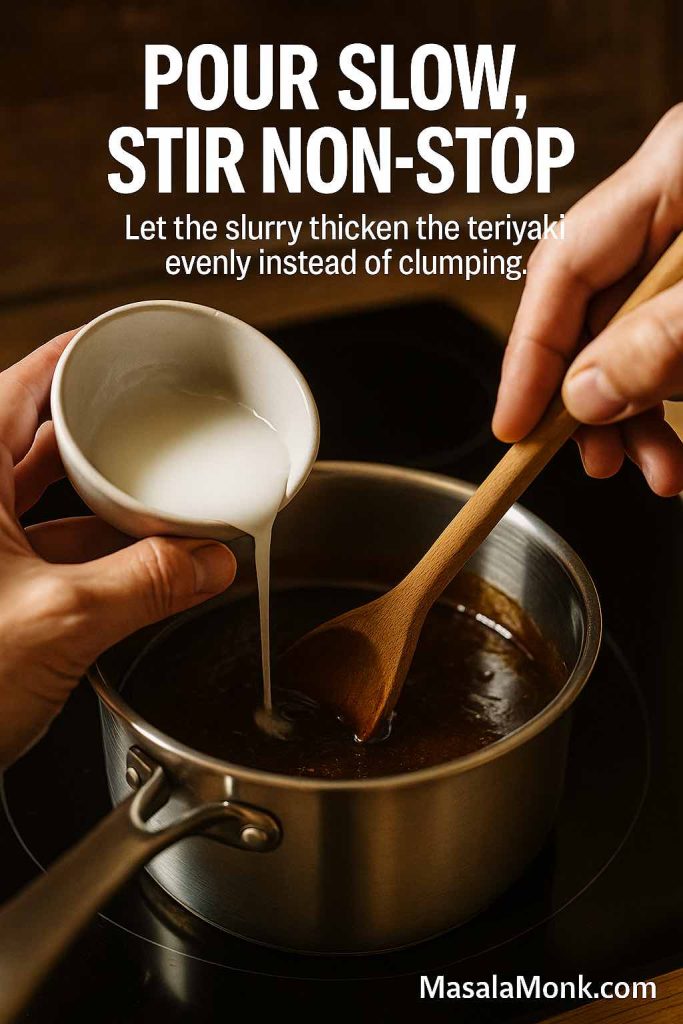
Once the sauce is gently simmering, turn the heat down just a notch and slowly pour in the cornstarch slurry while stirring continuously. The liquid will look cloudy at first, then begin to clear and thicken. After a minute or two, it should coat the back of a spoon and fall in a slow, steady ribbon.

Cornstarch slurry being poured in a thin stream into a simmering saucepan of teriyaki sauce while a wooden spoon stirs constantly, showing how to thicken the sauce evenly.
Add the slurry gradually and give the sauce a minute or two to come back to a gentle simmer. It should go from thin and shiny to a glaze that coats the back of a spoon and falls in a slow ribbon—ideal for brushing, tossing and drizzling.

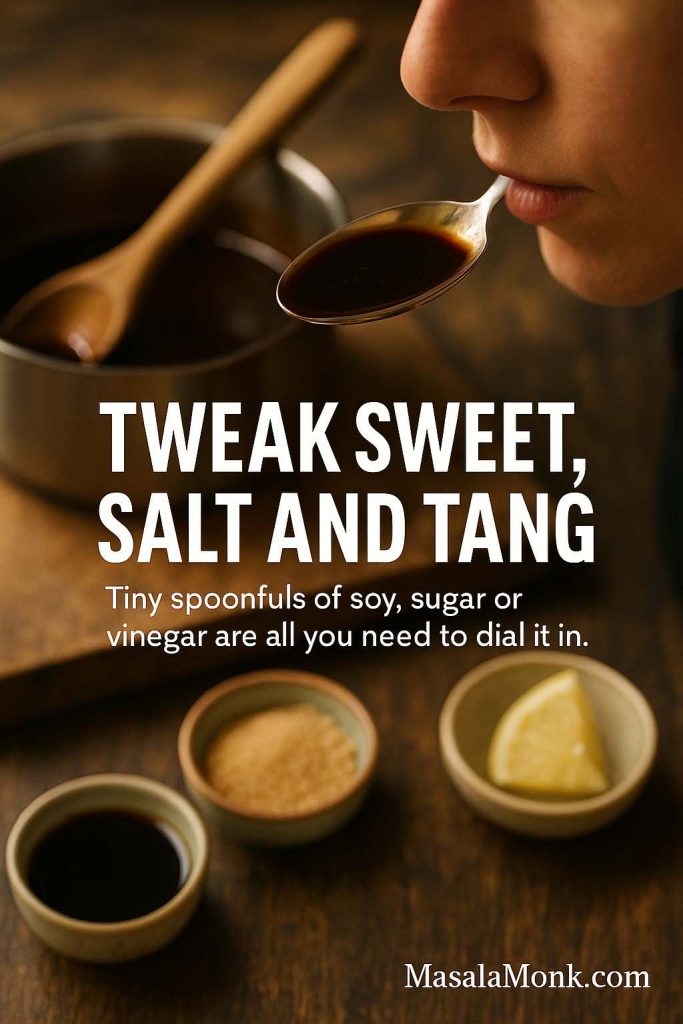
Step 5: Taste and adjust

Now taste the sauce.
If the sauce feels too salty, add a splash of water or a teaspoon more sugar.
If it tastes too sweet, add a dash more soy sauce or a little extra rice vinegar.
And if it seems a bit flat, another pinch of ginger often wakes everything up.

Person tasting a spoonful of glossy homemade teriyaki sauce over a saucepan, with small bowls of soy sauce, brown sugar and a lemon wedge on the counter, showing how to adjust the balance of flavours.
Always adjust the sauce while it’s warm, when the flavours are most open and easy to correct. A sauce that tastes slightly too intense in the spoon will usually be perfect once it’s spread over rice, noodles or grilled meat, so keep your tweaks small and deliberate.

Step 6: Cool and store

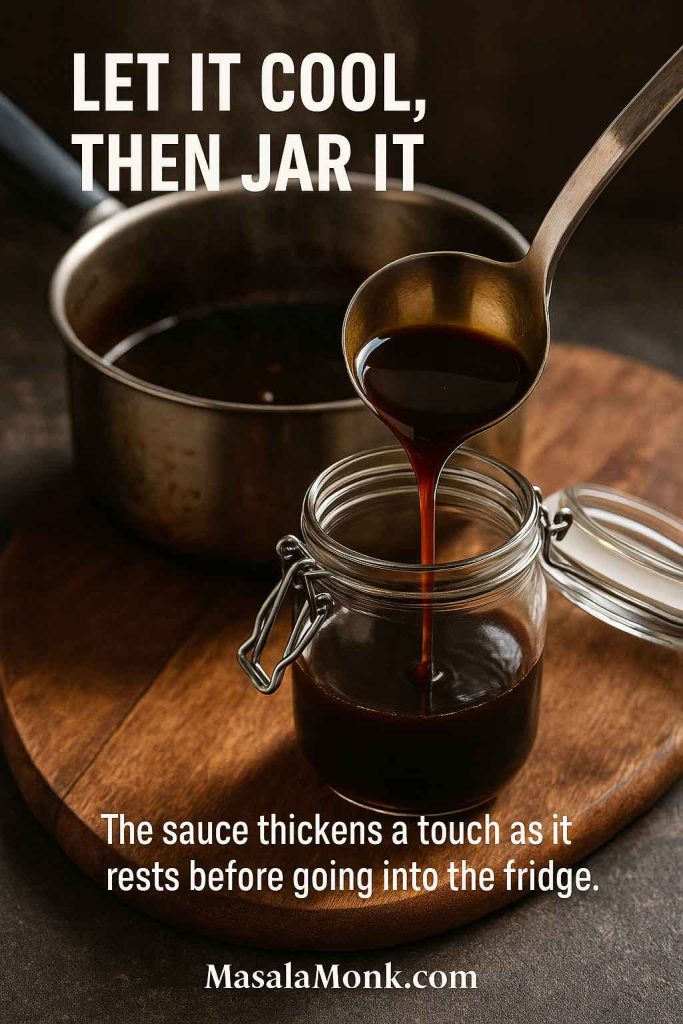
When you’re happy with the flavour and texture, take the pan off the heat and let the sauce cool for a few minutes. It will thicken slightly as it stands. Pour it into a clean glass jar, let it come completely to room temperature, and then move it to the fridge.

Warm homemade teriyaki sauce being ladled from a saucepan into a glass jar on a wooden board, with steam still rising, showing how to cool and store the sauce before refrigerating.
Leaving the teriyaki uncovered for a few minutes before sealing the jar lets excess steam escape so condensation doesn’t water the sauce down. Once it’s at room temperature, close the lid and you’ve got a ready-to-use teriyaki glaze for the next several meals.

Step 7: Use your house teriyaki sauce

Your house teriyaki sauce is ready. Brush it on grilled chicken, spoon it over salmon before baking, toss it with stir-fried vegetables and noodles, or reduce it a little further into a sticky glaze for wings or meatballs.

Also Read: Upma Recipe: 10+ Easy Variations (Rava, Millet, Oats, Semiya & More)

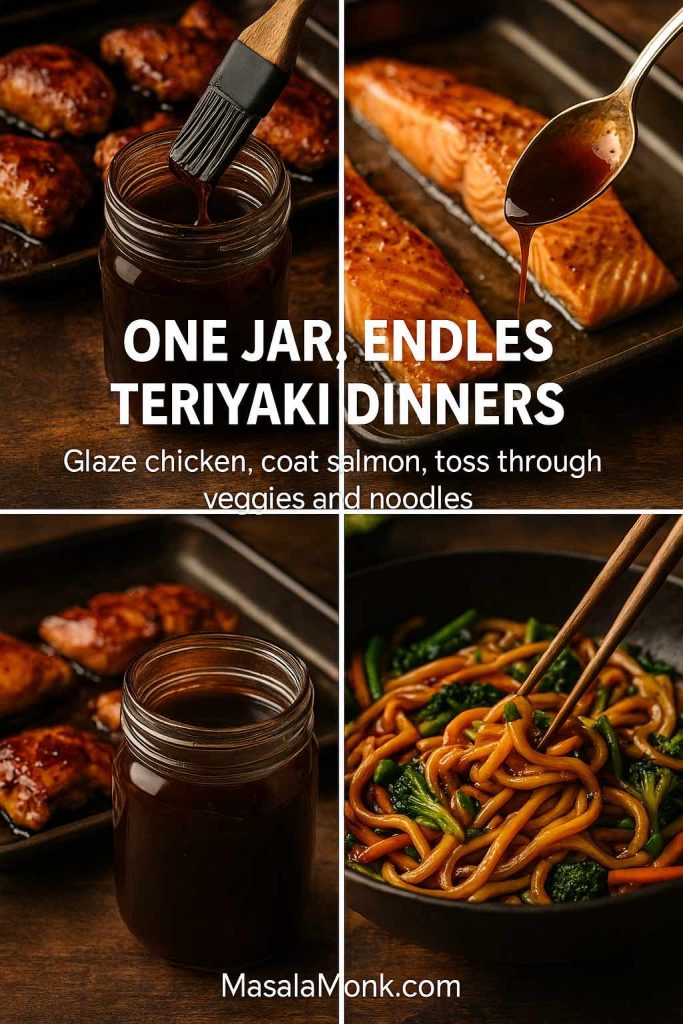
Collage showing a jar of homemade teriyaki sauce in the centre, with glazed chicken pieces, salmon fillets being coated with sauce and a bowl of teriyaki stir-fry noodles and vegetables, illustrating different ways to use one batch of sauce.
The same jar of teriyaki can do weeknight meal prep and entertaining: whisk it into a quick marinade for chicken thighs, brush it over salmon before baking, toss it through veggie noodles, or reduce it further for ultra-sticky wings, meatballs and party skewers.

A More Traditional Japanese-Style Teriyaki Glaze Recipe

If you’re in the mood for something closer to what you might find in Japan—lighter, simpler, and without that cornstarch gloss—there’s an even more minimal version.

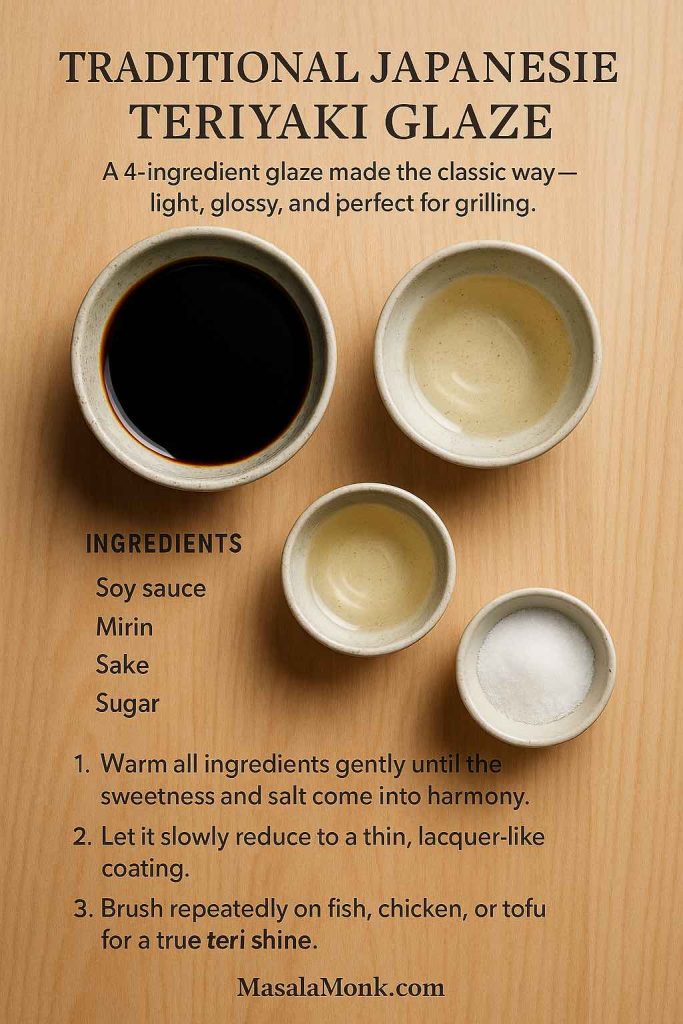
Here we go back to the roots: soy sauce, mirin, sake and sugar, simmered until glossy.

Ingredients

  • ½ cup soy sauce
  • ½ cup mirin
  • ¼ cup sake
  • 3–4 tablespoons sugar

Combine these in a small saucepan and stir until the sugar starts dissolving. Set the pan over medium heat and bring the mixture to a gentle simmer.

Keep it on that soft simmer for around 8–10 minutes, stirring occasionally, until the liquid has reduced by about a third. You don’t need to be exact here; what you’re looking for is a sauce that coats the back of a spoon in a thin, shiny layer, rather than running off like plain soy sauce.

This minimalist glaze is the “old-school” version of teriyaki—just soy, mirin, sake and sugar gently reduced until it can be brushed in thin layers over grilled fish, chicken skewers or tofu for a clean, restaurant-style shine.

Take the pan off the heat and let it cool slightly. This is now your traditional-leaning teriyaki glaze.

Use it to brush repeatedly over pieces of chicken, fish or tofu while they grill or broil. The sugar and mirin will take on a deeper colour and the surface will go from matte to glossy. Each pass builds another layer of flavour.

This version is especially good on salmon and on chicken skewers, where you want the glaze to complement the grilled flavour rather than smother it.

Also Read: Double Chocolate Chip Cookies – Easy Recipe with 7 Variations


How One Sauce Becomes Many: Marinade, Stir-Fry, Glaze, Dip, Dressing

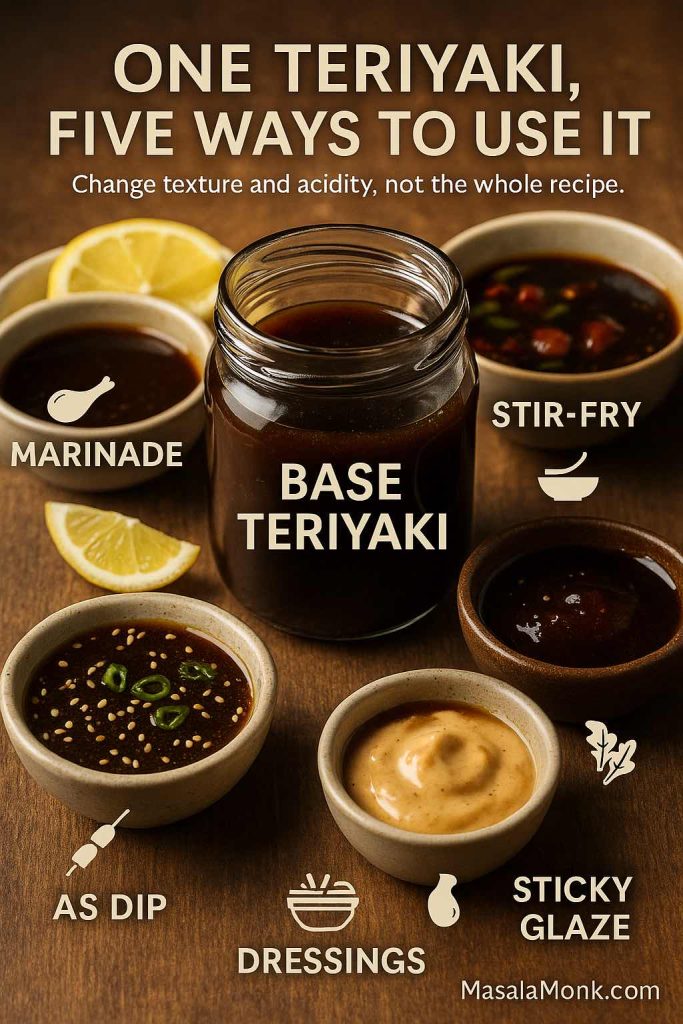
You don’t need completely different recipes for “teriyaki marinade”, “teriyaki glaze” and “teriyaki stir-fry sauce”. You just change the texture, strength and acidity in the original teriyaki sauce recipe.

Jar of base teriyaki sauce on a wooden table surrounded by five small bowls labelled marinade, stir-fry, sticky glaze, dip and dressings, illustrating different ways to use one homemade teriyaki sauce.
Once you have a basic teriyaki in a jar, you don’t need five different recipes—just thin it for marinades, loosen it slightly for stir-fries, reduce it to a sticky glaze, brighten it into a dipping sauce, or whisk it with oil or mayo for dressings and burger sauces.

Turning It Into a Marinade

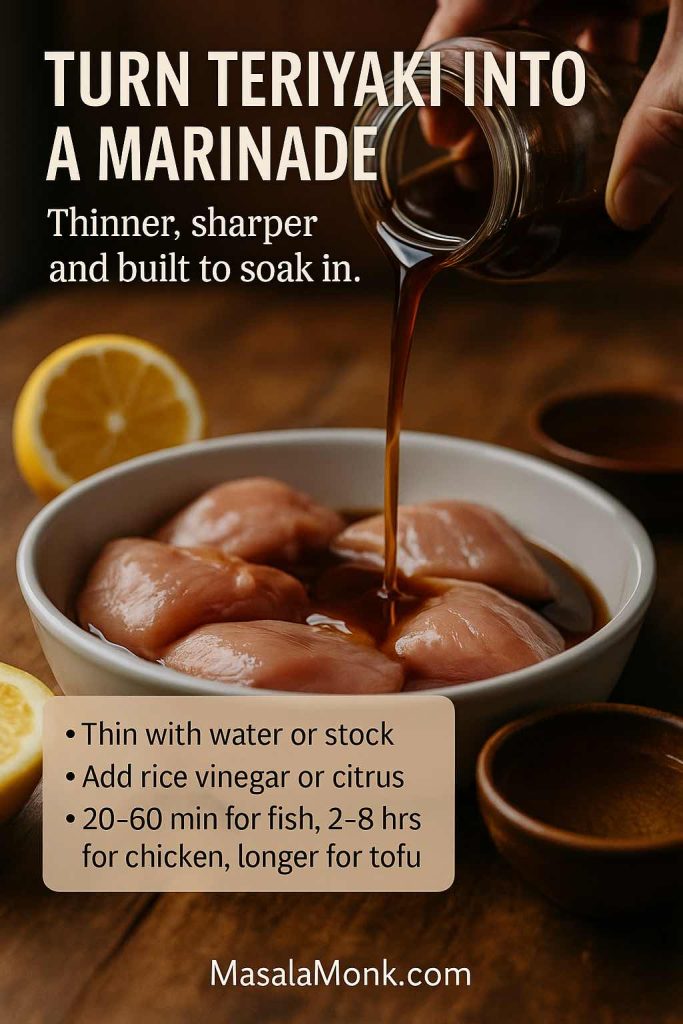
For marinating, you want the sauce thinner and usually a bit sharper. That way it coats the food easily and adds flavour without forming a heavy layer.

Take the everyday teriyaki (before thickening, or thinned slightly with water if it’s already thick) and add:

  • a little extra rice vinegar, or
  • a squeeze of lemon or lime
Close-up of teriyaki sauce being poured from a jar over raw chicken pieces in a white dish, with lemon halves and a small bowl of rice vinegar nearby and text explaining how to turn teriyaki into a marinade.
A good teriyaki marinade should feel looser and a bit brighter than your table sauce. Thinning it with water or stock helps it coat evenly, while extra vinegar or citrus keeps richer meats like chicken thighs or pork tasting fresh even after a long soak.

Pour this over chicken pieces, pork, tofu or sturdy vegetables and marinate in the fridge. Chicken thighs and drumsticks are happy with anywhere from half an hour to overnight. Fish does better with a shorter bath—twenty minutes to an hour—so it doesn’t go mushy. Tofu can handle long soaks, and often gets better with time.

If you want, you can boil the leftover marinade after you’ve removed the raw meat or fish and use it as a finishing sauce; just make sure it gets a good hard boil so it’s safe.

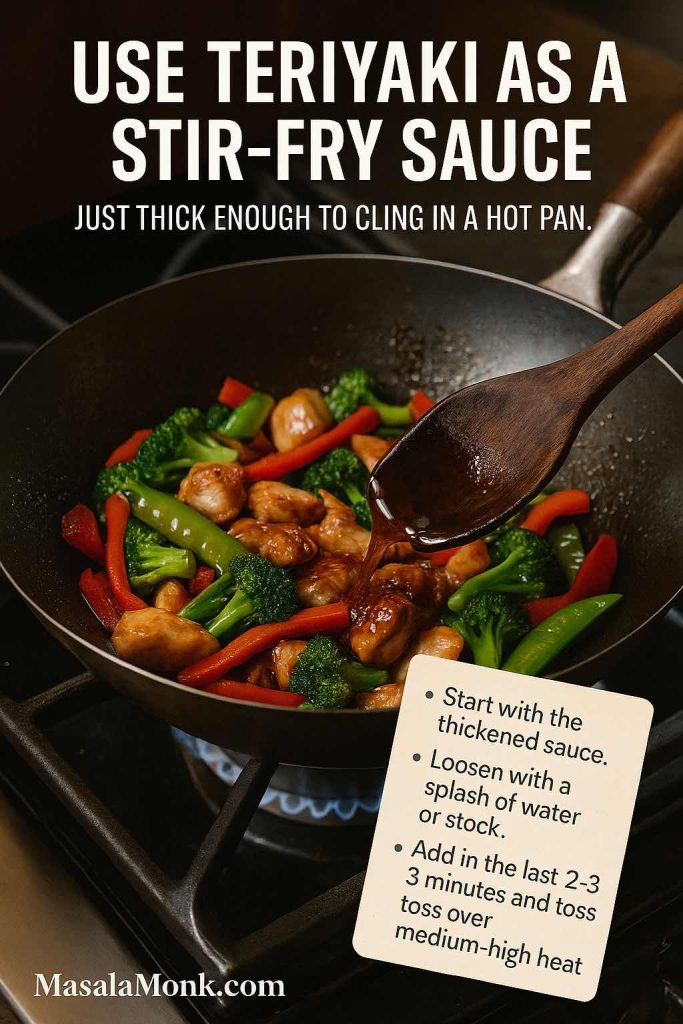
Using It as a Stir-Fry Sauce

In a stir-fry, you want the sauce to cling but still move. The cornstarch-thickened everyday teriyaki is perfect once you adjust its thickness.

If it’s too thick to pour smoothly, add a splash of water or unsalted stock. Then:

  1. Stir-fry your vegetables and protein over high heat.
  2. When everything is nearly done, reduce the heat slightly.
  3. Pour the teriyaki into the pan and toss quickly so it coats everything.
Wok on a gas stove with chicken, broccoli, red pepper and snap peas being coated in a glossy teriyaki stir-fry sauce, with on-image tips explaining how to loosen and add the sauce at the end of cooking.
The best teriyaki stir-fries start dry and finish wet: sear your protein and vegetables first, then pour in a slightly loosened sauce in the last few minutes so it thickens just enough to cling without burning on the bottom of the pan.

In a minute or two, the sauce will cling and glisten around the ingredients. Spoon this over hot rice, noodles or even quinoa. Set it next to other sharable sides—potato salads, dips, grilled vegetables—and it suddenly looks like a generous spread rather than “just a stir-fry”.

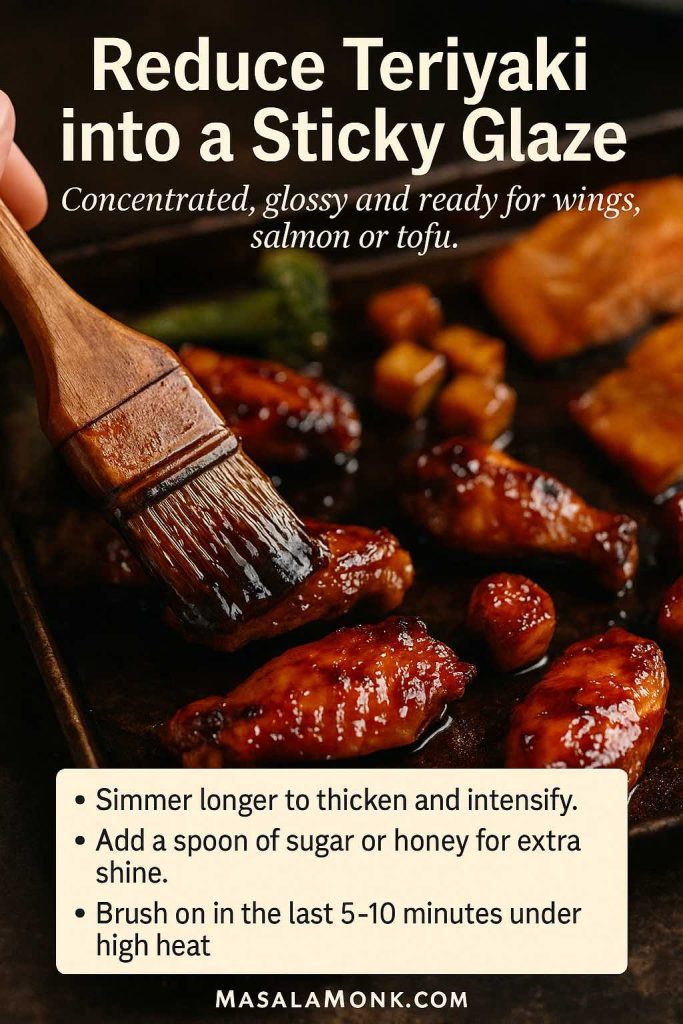
Reducing It to a Sticky Glaze

For wings, ribs, thick salmon fillets and roasted tofu cubes, you want a sauce that’s more like a glaze: sticky, intense and slightly caramelised.

You can either start with the everyday teriyaki and simmer it longer (with an extra spoonful of sugar or honey for extra sheen), or you can use the traditional soy–mirin–sake glaze and reduce it further.

Close-up of a brush coating teriyaki-glazed chicken wings on a dark baking tray, with text overlay explaining how to reduce teriyaki into a thick, sticky glaze for wings, salmon or tofu.
For that restaurant-style lacquer, let your teriyaki bubble gently until it looks almost syrupy, then brush it on near the end of cooking. The sugars caramelise in the heat, giving wings, salmon or tofu a shiny crust without burning or drying them out.

Brush thickened sauce onto food in the last stretch of cooking and let the oven or grill finish the job. If you want extra charring, give it a last-minute blast under a very hot broiler or grill, watching it closely so the sugar doesn’t burn.

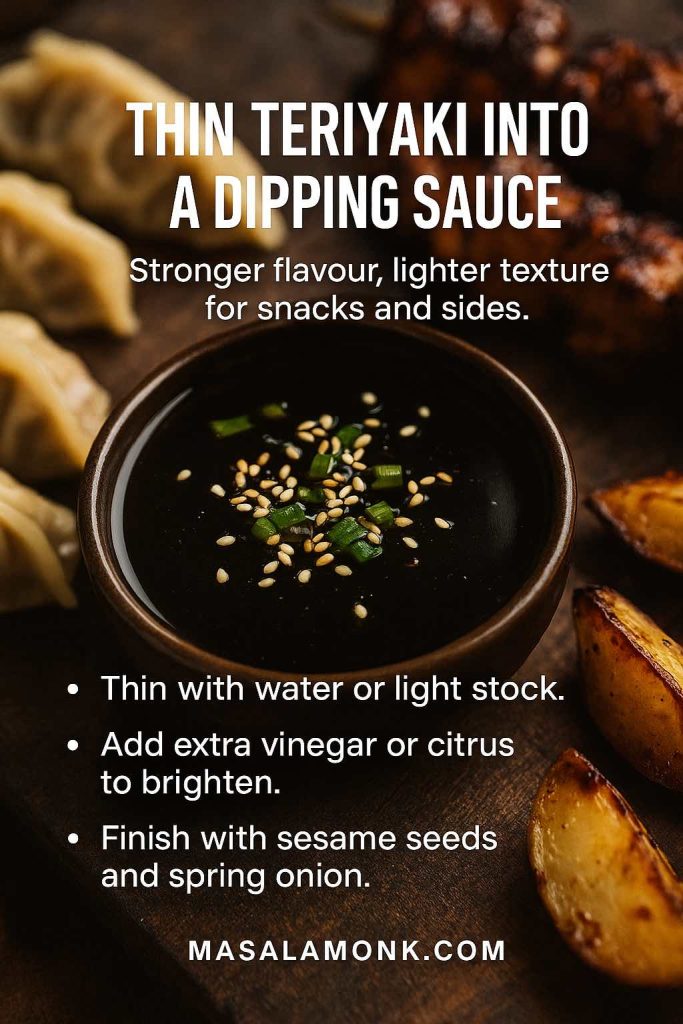
Turning It Into a Dipping Sauce

Sometimes it’s nicer to dip than to coat. If you want teriyaki as a dip for dumplings, skewers, crispy tofu, roasted vegetables or even fries, you want a sauce that’s strong in flavour but thin enough to flow easily.

Take a portion of your homemade teriyaki and thin it with a little water or light stock. Add a bit more vinegar or citrus juice to brighten things and cut the sweetness. Pour into a small bowl and top with sesame seeds and chopped spring onion.

Bowl of teriyaki dipping sauce topped with sesame seeds and chopped spring onion, surrounded by dumplings, skewers and roasted potato wedges, with text explaining how to thin and brighten teriyaki for use as a dip.
Turning teriyaki into a dip is all about contrast: a looser texture and brighter acidity so it cuts through fried dumplings, grilled skewers and roasted vegetables instead of weighing them down. A splash of stock and vinegar goes a long way.

Put that on a table alongside other dips—spinach-based ones, creamy spreads, spicy options—and suddenly teriyaki is playing in the same space as buffalo sauce and ranch, not just “stir-fry sauce”.

Using It as a Dressing or Mayo

Teriyaki also works beautifully off the heat.

For a simple dressing, whisk equal parts teriyaki sauce and neutral oil together, then add a spoon of rice vinegar or lemon juice. You get a punchy salad dressing that loves green salads, grain bowls and noodle salads. Shake it in a jar until lightly emulsified, then toss or drizzle as you like.

Jar of teriyaki salad dressing next to a green salad and a small bowl of teriyaki mayo beside a crispy chicken burger, with on-image text explaining how to make teriyaki dressings and mayo for salads, bowls and sandwiches.
A spoonful of teriyaki goes a long way off the heat: whisk it with neutral oil and a splash of vinegar for a punchy salad or grain-bowl dressing, or fold it into mayo to turn simple chicken sandwiches and burgers into full-blown “teriyaki” meals.

For a sandwich or burger sauce, stir a spoonful or two of teriyaki into mayonnaise and taste as you go. That simple mix is surprisingly good on chicken sandwiches, burgers, sliders and teriyaki-style rice bowls. If you like building stacked sandwiches with layers of texture and flavour, you can borrow structure ideas from MasalaMonk’s own chicken sandwich recipe collection and simply swap their sauce element for your teriyaki mayo.

Also Read: One-Pot Chicken Bacon Ranch Pasta (Easy & Creamy Recipe)


Playing with Flavours: Honey, Citrus, Pineapple, Miso, Spice

Once the base is second nature, you can adjust it to suit your mood or the rest of the menu. Most “special” teriyaki sauce recipes are just small nudges away from that everyday sauce.

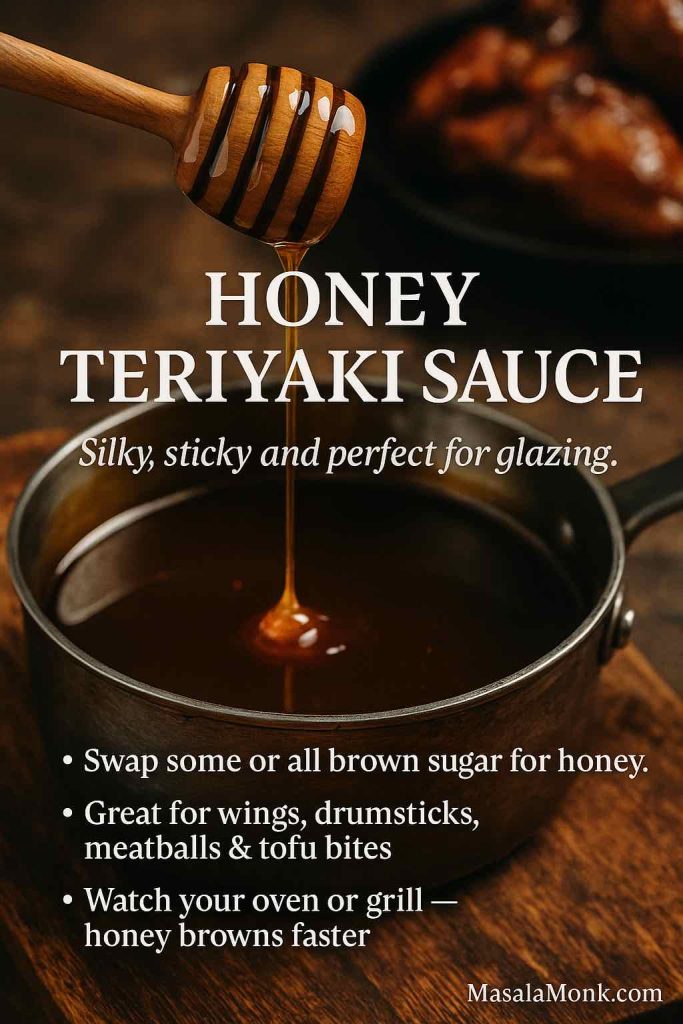
Honey Teriyaki Sauce Recipe

Replacing some or all of the brown sugar with honey gives you a honey-teriyaki hybrid. Honey makes the sauce silkier and helps it cling to food in a particularly satisfying way.

Vertical recipe card showing honey teriyaki sauce in a saucepan with honey dripping from a wooden dipper above it, plus text explaining how to swap sugar for honey and use the sauce for wings, drumsticks, meatballs and tofu bites.
Honey doesn’t just sweeten teriyaki, it changes the texture—giving you a thicker, more elastic glaze that clings beautifully to wings, drumsticks, tofu and meatballs. Just keep the heat moderate, because honey-based sauces can go from caramelised to burnt much faster than sugar-only versions.

This version is perfect for:

  • chicken wings and drumsticks
  • sticky meatballs
  • glossy tofu bites

Just remember that honey browns faster than regular sugar, so keep an eye on oven and grill temperatures to avoid scorching.

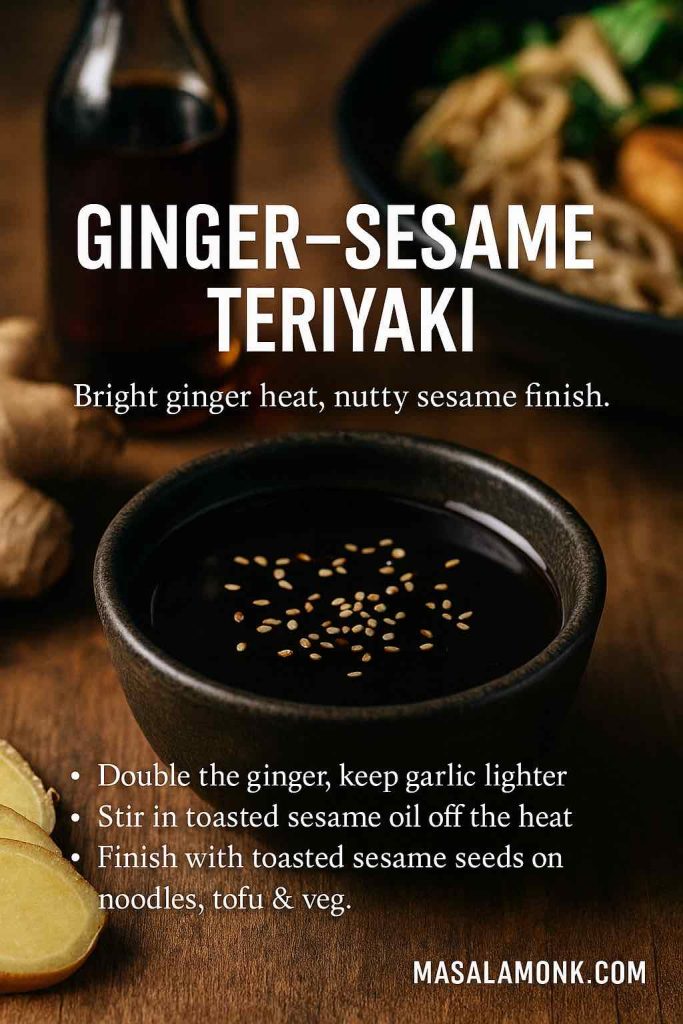
Recipe for Ginger-Sesame Teriyaki Sauce

If ginger is your favourite part, double the amount you add and keep the garlic modest in the original teriyaki sauce recipe. When the cooking is done, stir in a teaspoon of toasted sesame oil and a spoonful of toasted sesame seeds.

Recipe card showing a rustic bowl of glossy ginger–sesame teriyaki sauce topped with toasted sesame seeds, with fresh ginger, sesame oil and a noodle bowl in the background, plus text explaining how to double the ginger and finish with sesame oil and seeds.
Turning your base teriyaki into a ginger–sesame version is one of the easiest ways to make noodle bowls and tofu stir-fries taste “restaurant-level” – all you do is lean harder on fresh ginger, stir in toasted sesame oil off the heat and shower everything with sesame seeds right before serving.

What you get is a sesame–ginger teriyaki that’s ideal for:

  • tofu and vegetable stir-fries
  • soba and udon noodle bowls
  • roasted or steamed greens

It’s also a great way to make cold noodle salads feel complete without loading them up with mayonnaise.

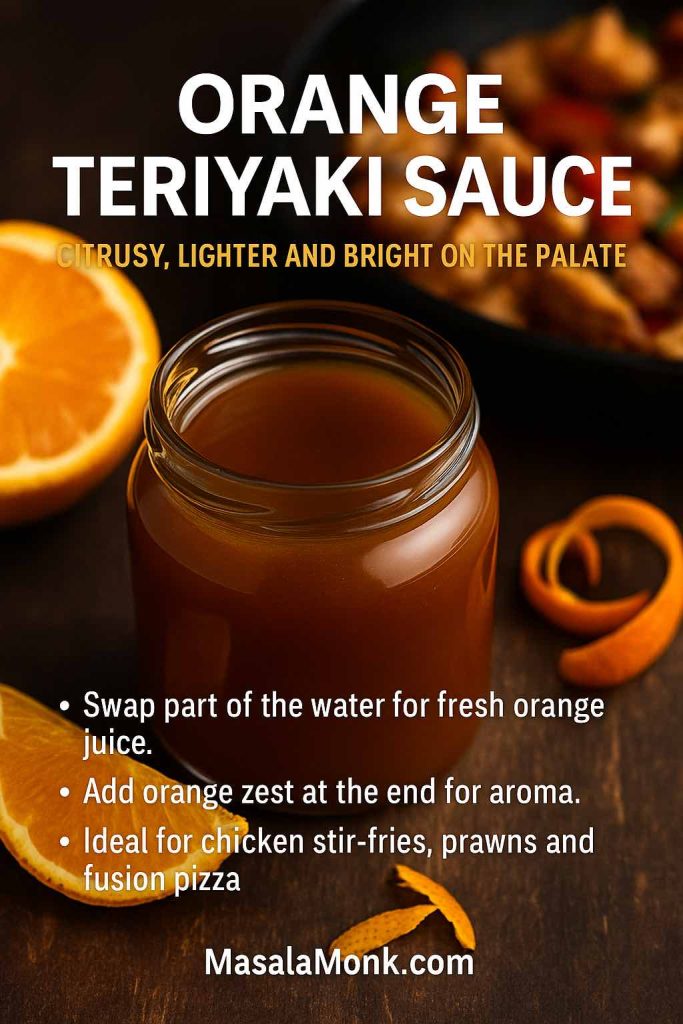
Orange Teriyaki Sauce Recipe

To bring citrus into the picture, swap part of the water in the base recipe for fresh orange juice and add grated orange zest at the end. Taste the result and adjust with extra soy or vinegar if it leans too sweet.

Vertical recipe card showing a jar of orange teriyaki sauce on a wooden table with fresh orange halves and zest beside a chicken stir-fry pan, plus text explaining how to add orange juice and zest and where to use the citrus teriyaki sauce.
Swapping part of the water for fresh orange juice gives teriyaki a lighter, brighter profile that’s perfect when you want something fresher than a straight soy glaze. It’s especially good on chicken-and-bell-pepper stir-fries, prawn skewers and fun fusion ideas like teriyaki chicken pizza.

Orange teriyaki sits beautifully on:

  • chicken stir-fries with bell peppers
  • shrimp or prawn skewers
  • fusion dishes like teriyaki chicken pizza

It’s especially useful when you want something that feels lighter and fresher than a straight soy-based glaze.

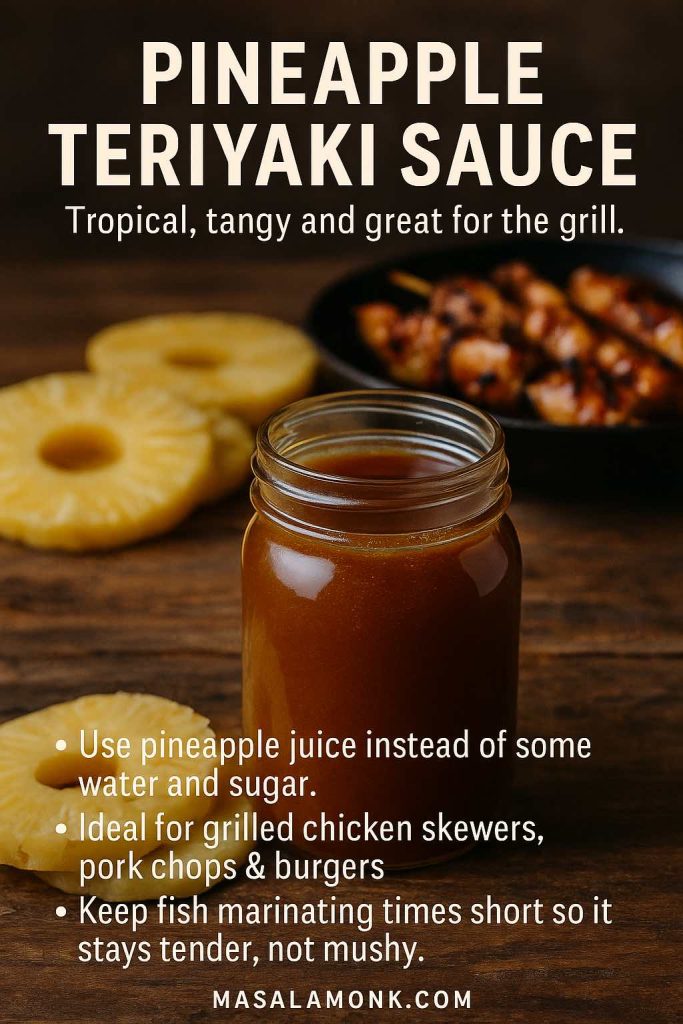
Recipe of Pineapple Teriyaki Sauce

For a more tropical character, use pineapple juice in place of some of the water and sugar. Pineapple’s natural enzymes can help tenderise meat, which is why pineapple-based marinades are so common in grill cultures.

Vertical recipe card showing a jar of pineapple teriyaki sauce on a wooden table with fresh pineapple rings and grilled chicken skewers in the background, plus text explaining how to use pineapple juice for a tropical teriyaki glaze and marinade.
Pineapple teriyaki pulls double duty as both flavour and tenderiser, which is why it shines on grilled chicken skewers, pork chops and burgers. Because the enzymes are so active, it’s best to keep marinating times short for delicate fish and seafood so they stay juicy, not mushy.

Use homemade pineapple teriyaki sauce on:

  • grilled chicken skewers
  • pork chops and pork tenderloin
  • burgers topped with grilled pineapple rings

Just go easy with marinating delicate fish in pineapple heavy mixtures for long periods; shorter times work better to preserve texture.

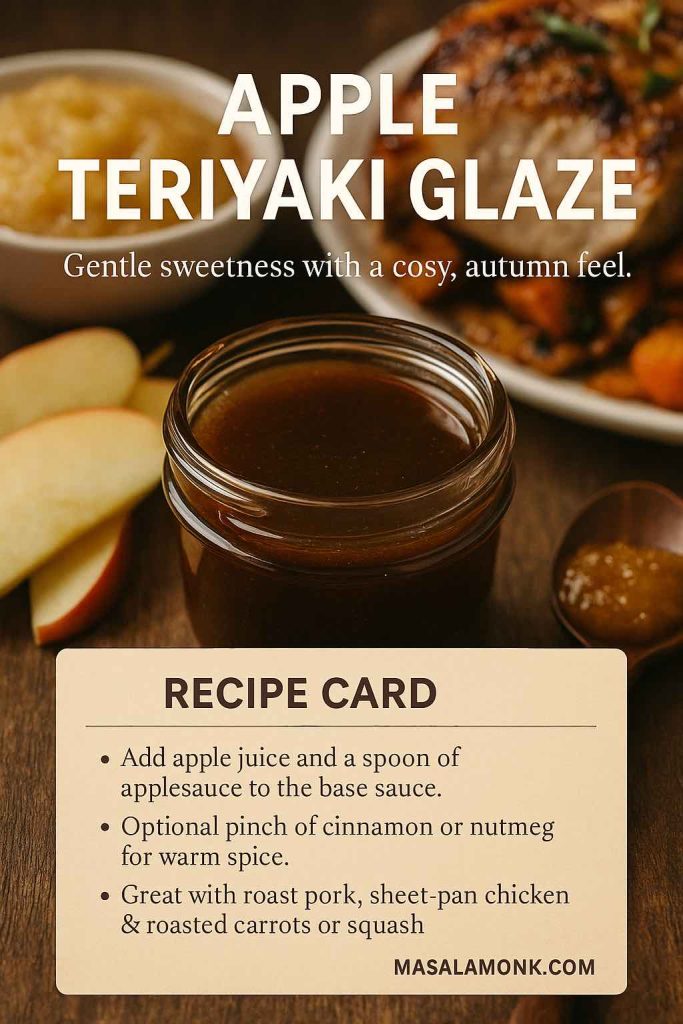
Apple-Lifted Teriyaki Sauce Recipe

Apple juice and a spoon of applesauce can soften teriyaki’s edges and give it a mild, autumnal feel. A pinch of cinnamon or nutmeg can tilt it gently toward “warm spice” without turning it into dessert.

Vertical recipe card showing a jar of apple teriyaki glaze on a wooden table with apple slices, applesauce and roasted meat in the background, plus text explaining how to add apple juice and warm spices to teriyaki sauce.
Apple teriyaki is a smart way to make salty soy-based glazes feel rounder and more comforting. A little apple juice and applesauce softens the edges, while a pinch of warm spice lets the sauce sit naturally alongside roast pork, tray-bake chicken and caramelised root vegetables.

This style of sauce suits roast pork, sheet-pan chicken dinners with onions and apples, and roasted carrots or squash.

Miso Teriyaki Sauce & Its Recipe

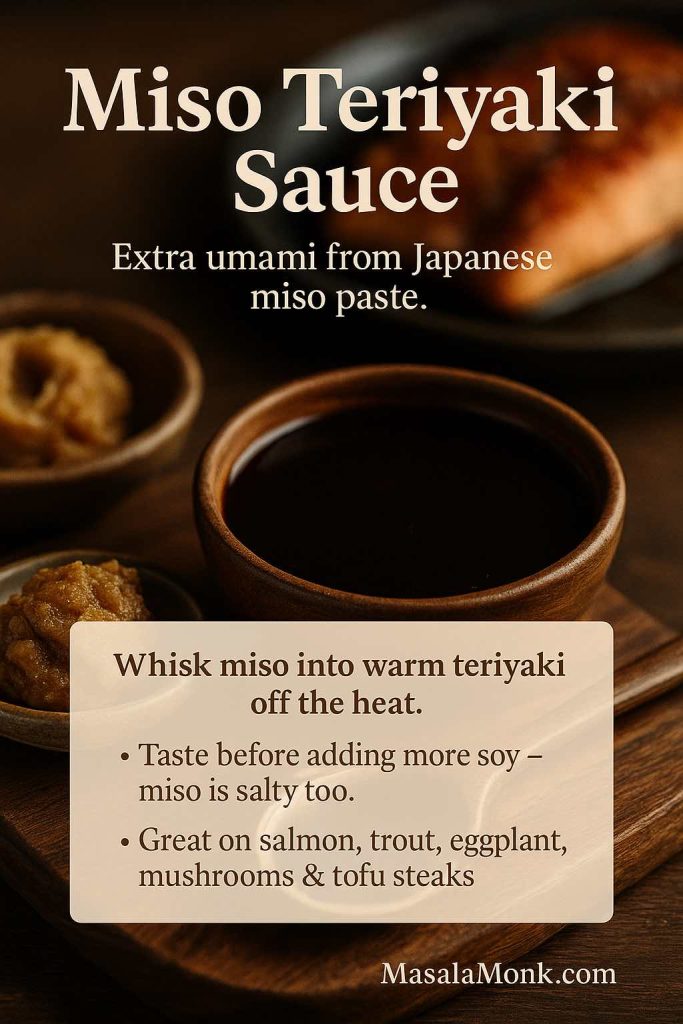
Miso is another fermentation star in Japanese cooking, and adding a spoon of miso paste to warm teriyaki sauce deepens its savoury side.

Take the pan off the heat, whisk in a spoon of white or red miso, and taste. You might not need more soy after that; miso is salty as well.

Vertical recipe card showing a wooden bowl of dark miso teriyaki sauce with small dishes of miso paste and grilled salmon in the background, plus text explaining how to whisk miso into warm teriyaki and use it on salmon, trout, eggplant, mushrooms and tofu steaks.
White miso gives a gentler, slightly sweeter teriyaki, while red miso makes the sauce deeper and more intense. Either way, add the paste off the heat and taste before you reach for extra soy—miso itself brings plenty of salt and umami.

Miso teriyaki is particularly good on:

  • salmon or trout
  • eggplant, mushrooms and other umami-friendly vegetables
  • tofu steaks and skewers

It feels simple but layered, which is exactly what you want when the sauce is doing most of the work.

Spicy Teriyaki Sauce Recipe

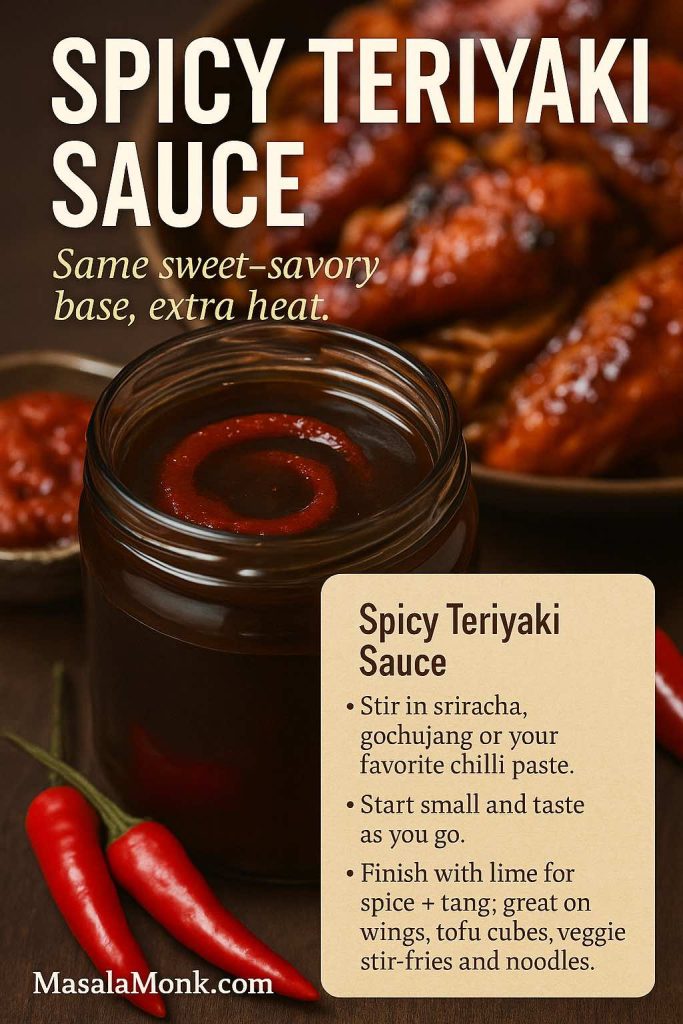
For those nights when you want a little heat, add sriracha, gochujang or your favourite chilli paste to the simmering sauce. Start with a teaspoon or two, taste, and adjust. You can also finish with a squeeze of lime juice if you like spice plus tang.

Vertical recipe card showing a jar of spicy teriyaki sauce with a swirl of red chilli paste on top, fresh red chillies and teriyaki wings in the background, plus text explaining how to add sriracha or gochujang and use the sauce on wings, tofu, veggie stir-fries and noodles.
Spicy teriyaki is ideal when you want the comfort of sweet–savory sauce with proper heat. Stir in chilli paste gradually, then finish with lime to keep the flavour bright—perfect for party wings, sticky tofu cubes, veg-packed stir-fries and big noodle bowls.

Spicy teriyaki is ideal for:

  • hot wings
  • sticky tofu cubes
  • vegetable stir-fries
  • noodle dishes with a bit of a kick

It sits comfortably on a table with buffalo wings, creamy dips and crisp salads, especially if you like building mixed, “everyone grabs what they like” spreads.

Also Read: Authentic Louisiana Red Beans and Rice Recipe (Best Ever)


Making Teriyaki Friendlier: Less Sugar, Less Salt, Keto, Vegan, Soy-Free

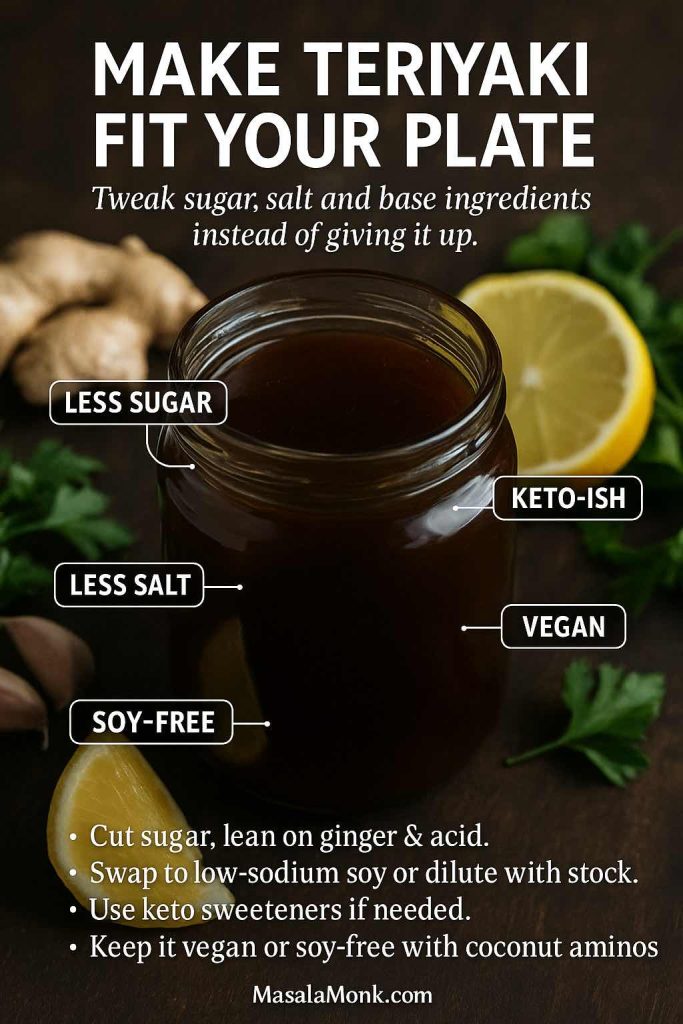
Because teriyaki is built on soy sauce and sugar, it doesn’t automatically fit every eating style. But once you’re making it at home instead of relying solely on bottled versions, you have a lot more control.

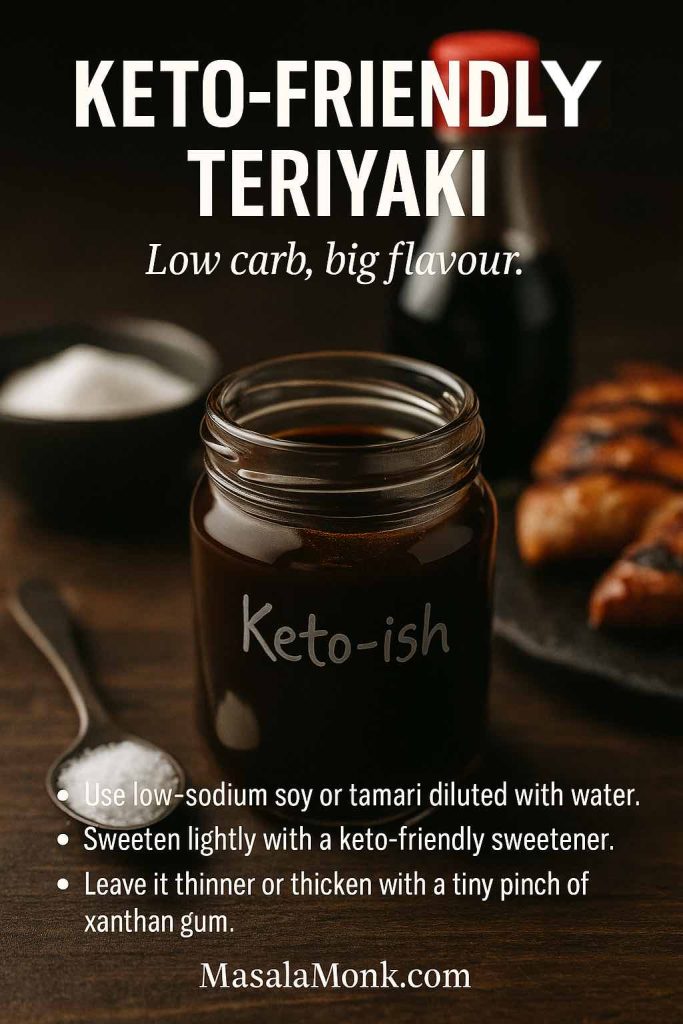
Vertical guide image showing a jar of teriyaki sauce surrounded by ginger, lemon and herbs, with overlay text highlighting options such as less sugar, less salt, keto-ish, vegan and soy-free, and tips for adapting teriyaki sauce to different diets.
Instead of treating teriyaki as something you have to give up, think of it as a base you can tune: cut the sugar, dilute the soy, switch to keto sweeteners or coconut aminos and lean harder on ginger, garlic and citrus to keep the flavour big while the numbers stay friendly.

Cutting Back on Sugar in the Recipe for Teriyaki Sauce

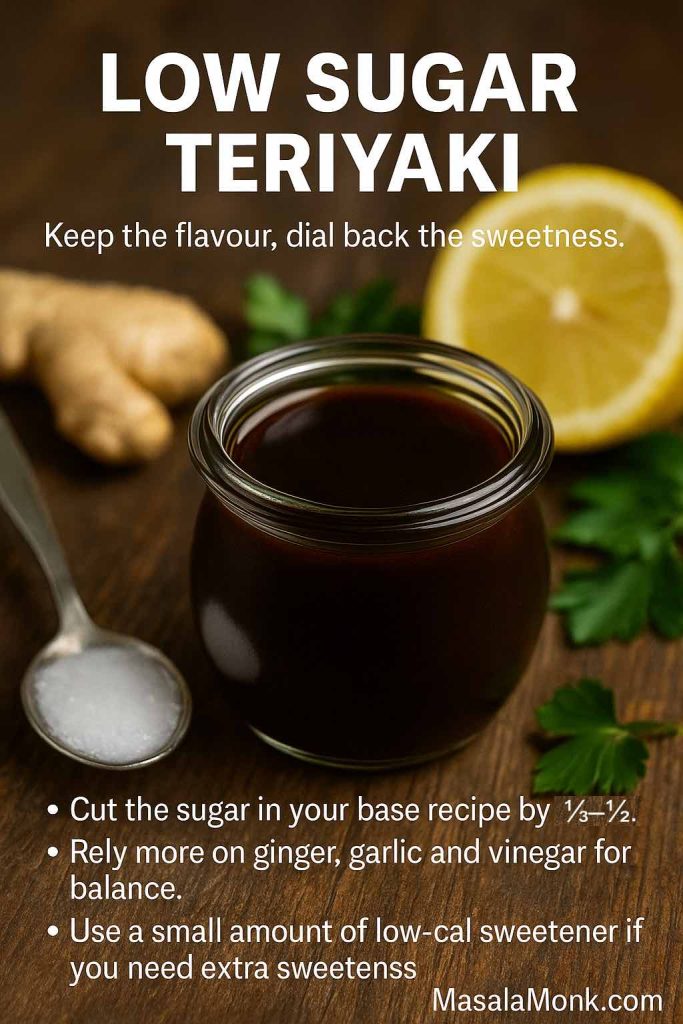
You can usually cut the sugar in a teriyaki recipe by a third or even half without destroying the balance, especially if you:

  • keep mirin in the mix
  • lean more on ginger and garlic
  • let a bit more acidity (vinegar or citrus) balance the salt
Guide image showing a jar of low sugar teriyaki sauce with a half-filled spoon of sugar, fresh ginger and lemon on a wooden table, with text explaining how to reduce sugar and boost aromatics and acidity in teriyaki sauce.
Most teriyaki recipes can lose a third to half their added sugar without breaking; the trick is to let ginger, garlic and a bit of acid do more of the balancing work, and only bring in low-cal sweeteners if you still miss a touch of sweetness.

For more aggressive sugar reduction, you can substitute part of the sugar with low-calorie sweeteners. Just be careful with reductions: without sugar to round things out, very reduced sauces can taste sharply salty.

Making It More Keto-Friendly

For a keto-leaning teriyaki sauce recipe, you want lower net carbs:

  • use low-sodium soy or tamari, diluted with water
  • sweeten with a keto-compatible sweetener
  • thicken with a tiny pinch of xanthan gum if you need a glaze, or leave it thinner
A vertical keto teriyaki guide card showing a jar labeled “Keto-ish” with soy sauce, keto sweetener and grilled chicken in the background, along with text explaining how to make a low-carb teriyaki using tamari, keto sweeteners and xanthan gum.
Keto-style teriyaki keeps things bold without the sugar spike—tamari, ginger and garlic build the savoury base, a touch of keto sweetener rounds the edges, and a tiny pinch of xanthan gum creates that classic glossy cling without carbs.

In practice, you’ll probably use less sauce per serving and let the grilled meat, fish or tofu do more of the talking.

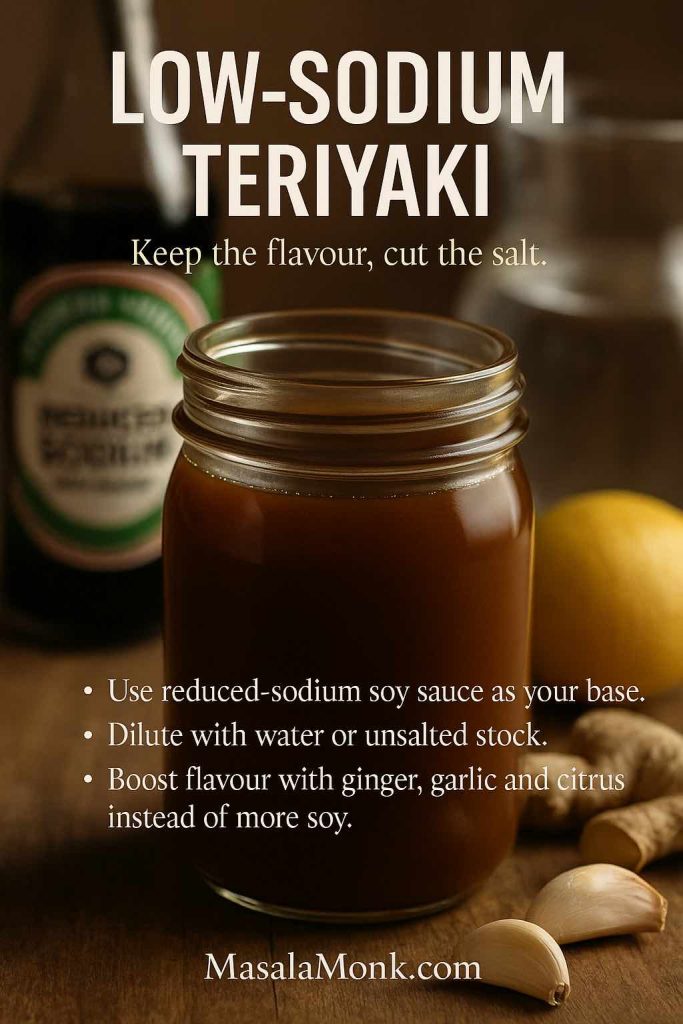
Lowering the Sodium Load in Teriyaki Sauce Recipe

Salt is the other big issue. It doesn’t take much teriyaki sauce to push your sodium intake up for the day, and most health guidelines suggest keeping sodium on the conservative side for heart and kidney health.

Vertical low-sodium teriyaki guide card showing a jar of teriyaki sauce on a wooden surface with a low-sodium soy bottle, lemon, ginger and garlic in the background, plus text explaining how to dilute soy sauce and boost flavour with aromatics instead of salt.
A simple way to make teriyaki easier on your daily sodium is to treat soy like a concentrate: start with reduced-sodium soy, cut it with water or stock and let ginger, garlic and citrus rebuild the flavour instead of just pouring in more soy sauce.

Instead of just accepting that, you can:

  • base your sauce on reduced-sodium soy sauce
  • dilute soy with water or unsalted stock
  • build flavour with ginger, garlic, chilli and acid instead of extra soy

You’ll still get plenty of teriyaki character, but with a much softer impact on your daily salt tally.

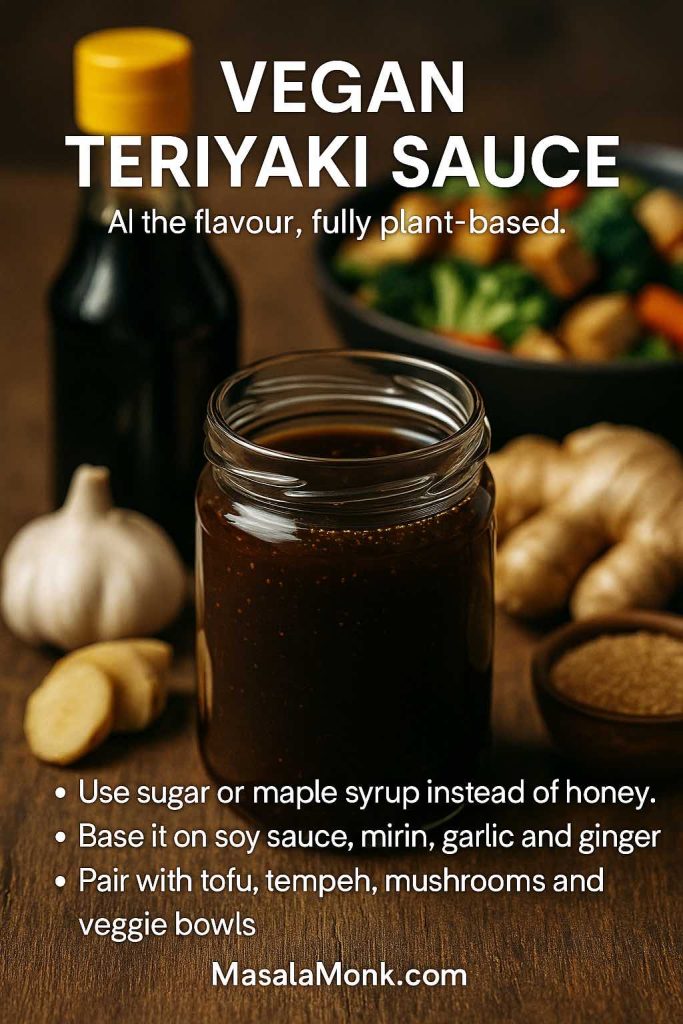
Keeping Your Teriyaki Sauce Recipe Vegan

Most homemade teriyaki sauces are almost vegan by default. As long as you skip honey and stick to sugar or maple syrup, the standard soy–mirin–garlic–ginger mixture is plant-based.

Vertical vegan teriyaki guide card showing a jar of glossy teriyaki sauce on a wooden table with soy sauce, garlic, ginger and a bowl of vegetables in the background, plus text explaining how to make a fully plant-based teriyaki using sugar or maple syrup instead of honey.
Most classic teriyaki formulas are just one swap away from being vegan—use sugar or maple syrup instead of honey, then pair the sauce with tofu, tempeh, mushrooms and veggie bowls for the same sweet–savory comfort in a fully plant-based meal.

Combine that with tofu, tempeh, mushrooms, seitan or beans and you have endless vegan teriyaki bowls and plates. You can structure them the way you’d structure high-protein salads or spreads—like the ones in MasalaMonk’s healthy tuna salad ideas—but swap the tuna for chickpeas or lentils and the mayo for teriyaki.

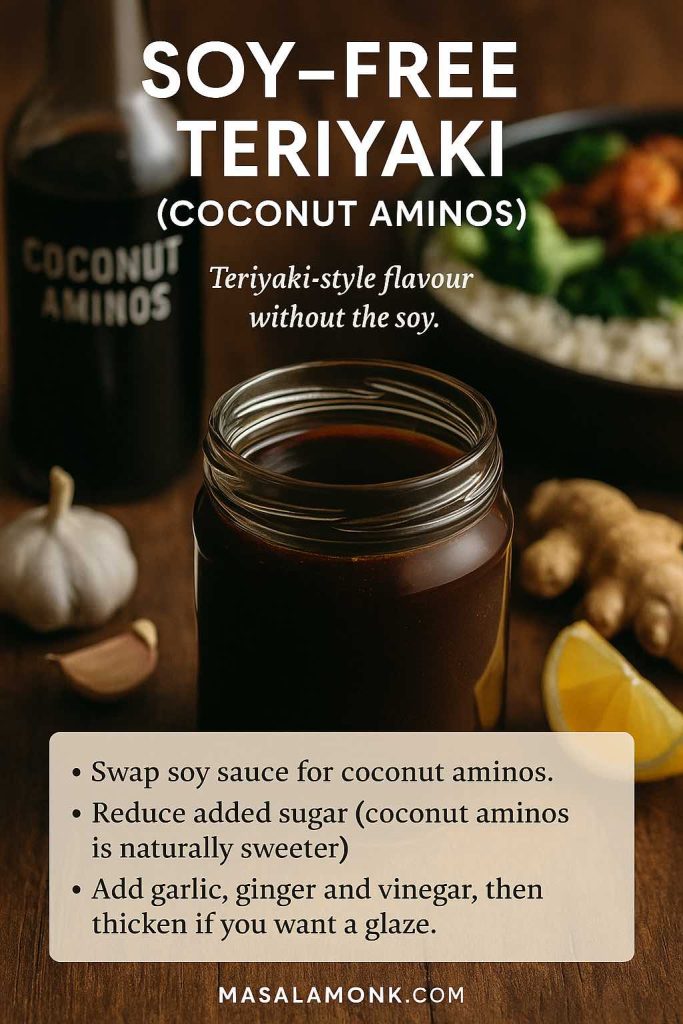
Going Soy-Free with Coconut Aminos

If you need to avoid soy, coconut aminos is your friend. It’s made from fermented coconut sap and salt, and while it tastes different from soy sauce, it still brings a dark, savoury note. It’s also generally lower in sodium and naturally gluten- and soy-free.

Vertical soy-free teriyaki guide card showing a jar of dark coconut aminos teriyaki sauce on a wooden table with a coconut aminos bottle, garlic, ginger and lemon in the background, plus text explaining how to swap soy sauce for coconut aminos and adjust sugar and acidity.
Coconut aminos already bring sweetness and savoury depth, so a good soy-free teriyaki is more about restraint than addition—use less extra sugar, lean on garlic, ginger and vinegar for balance, and reduce gently until it behaves just like your usual glaze.

To modify the recipe and make a soy-free teriyaki-style sauce:

  • use coconut aminos instead of soy sauce
  • reduce or omit extra sugar (coconut aminos is sweeter than soy)
  • add garlic, ginger and vinegar
  • reduce or lightly thicken with starch if you want a glaze

It won’t taste exactly like traditional teriyaki, but it’s recognisably in the same family and plays the same role on the plate.

Also Read: Sheet Pan Chicken Fajitas Recipe (Easy One-Pan Oven Fajitas)


Bottled Teriyaki vs Homemade: Which Has the Edge?

Bottled teriyaki has one unbeatable strength: convenience. You finish work, you’re tired, you don’t feel like measuring anything, and that bottle is right there. Pour some over chicken or vegetables, and you’re halfway to dinner.

The tradeoffs are just as clear:

  • you don’t control how salty or sweet it is
  • you’re stuck with the brand’s idea of texture and flavour balance
  • you often get stabilisers and preservatives you probably don’t need in a fresh sauce
Vertical infographic comparing a bottle of store-bought teriyaki sauce on one side and a jar of homemade teriyaki with fresh ingredients on the other, with text outlining the pros and cons of bottled versus homemade teriyaki.
Store-bought teriyaki wins on speed and predictability, but a homemade batch gives you full control over salt, sugar and thickness—and you can still use bottled sauce as a shortcut base, then upgrade it with fresh garlic, ginger, citrus, honey or miso.

A homemade teriyaki sauce recipe asks for a little more effort once, then repays you many times. There’s no single “best teriyaki sauce recipe” for everyone, but when you make it yourself you can dial in your own best version. You:

  • decide how salty, sweet and thick it should be
  • can tune it to your household’s tastes (more ginger, less garlic, citrusy, smoky, etc.)
  • can adapt it to different needs (lighter one night, sticky the next)

That does not mean you don’t have to throw away bottled sauce forever. You can also treat it as a base ingredient. Sauté garlic and ginger, add bottled teriyaki and cook it for a few minutes; thin or reduce as needed; finish with citrus, honey, chilli or miso. That’s the same philosophy MasalaMonk uses in things like their homemade coffee creamer flavour guide: start with something simple, then bend it to your will.

But if you take one thing away from this post, let it be this: the jump from “I buy teriyaki” to “I make teriyaki” is smaller than it looks.

Also Read: Cheesy Chicken Broccoli Rice – 4 Ways Recipe (One Pot, Casserole, Crockpot & Instant Pot)


Quick Teriyaki Chicken Recipe (Using This Sauce)

If you only make one dish with this teriyaki sauce recipe, let it be simple chicken teriyaki – the kind of easy teriyaki chicken recipe (stovetop, air fryer or oven) you can throw together on a weeknight. It’s the kind of weeknight meal that tastes like takeout, uses just one pan, and works with chicken thighs or breast.

Ingredients

  • 500–700 g chicken thighs or breast, cut into bite-sized pieces
  • 2 tablespoons neutral oil
  • Salt and pepper (just a pinch; the sauce is salty)
  • ½ to ¾ cup homemade teriyaki sauce (from the everyday teriyaki sauce recipe above)
  • Cooked white rice or brown rice, to serve
  • Steamed or stir-fried vegetables (broccoli, carrots, peppers, beans), to serve
High-resolution recipe card showing a bowl of quick teriyaki chicken with glossy glazed pieces, rice and green vegetables, with overlay text listing ingredients and three simple steps for a one-pan teriyaki chicken dinner.
This is the “entry level” way to use your house teriyaki: one hot pan, a handful of chicken, a scoop of sauce and you’ve got a takeout-style bowl in under half an hour—perfect for testing new flavour tweaks like honey, orange or spicy teriyaki without changing the method.

How to Cook Teriyaki Chicken

  1. Prep the chicken. Pat the chicken dry and season very lightly with salt and pepper.
  2. Sear. Heat the oil in a wide pan over medium-high heat. Add the chicken in a single layer and cook until lightly browned on both sides and just cooked through.
  3. Add the teriyaki sauce. Reduce the heat to medium, pour in the teriyaki sauce and toss so every piece is coated.
  4. Glaze. Let the sauce bubble gently for a few minutes, stirring, until it thickens into a shiny glaze and clings to the chicken. If it gets too thick, add a splash of water; if it’s too thin, simmer for another minute.
  5. Serve. Spoon the chicken teriyaki over hot rice with plenty of vegetables on the side. Drizzle over any extra sauce from the pan.

This basic chicken teriyaki recipe is easy to spin into variations. Toss cooked noodles through the pan for chicken teriyaki noodle stir fry, or pile the glazed pieces into a bun with crunchy salad for teriyaki chicken burgers.

Also Read: Whiskey Sour Recipe: Classic Cocktail, Best Whiskey & Easy Twists


Easy Teriyaki Salmon Recipe

For salmon teriyaki, the oven does most of the work. This is a simple teriyaki salmon recipe that uses the same everyday sauce.

  1. Heat the oven to 200°C. Line a baking tray with parchment.
  2. Place 4 salmon fillets on the tray, skin-side down. Pat dry and season very lightly with salt and pepper.
  3. Spoon a generous layer of teriyaki sauce over each fillet.
  4. Bake for 10–12 minutes, depending on thickness, until the salmon is just cooked through.
  5. For a more caramelised finish, brush with a little more sauce and give the fillets 1–2 minutes under a hot grill or broiler.
Vertical recipe card showing a plate of oven-baked teriyaki salmon with white rice and broccolini, plus text with simple steps for making easy teriyaki salmon using homemade teriyaki sauce.
Baking the salmon with teriyaki already on top does two jobs at once—the fish gently steams underneath while the sauce reduces on the surface, so you get juicy flesh, a shiny glaze and tray juices you can spoon straight over rice or noodles.

Serve the baked teriyaki salmon with rice and vegetables, or flake it over warm noodle bowls. The same method works for other firm fish fillets if you’re in the mood for fish teriyaki beyond salmon.

Also Read: Easy Lemon Pepper Chicken Wings (Air Fryer, Oven & Fried Recipe)


Simple Beef Teriyaki Stir-Fry (with rice or noodles)

Beef teriyaki is another fast, high-heat favourite. Thin slices of beef cook in minutes and soak up the teriyaki stir-fry sauce beautifully.

  • 300–400 g beef steak, sliced thinly against the grain
  • 2 cups mixed vegetables (broccoli, carrots, peppers, snap peas)
  • 2 tablespoons neutral oil
  • ½ cup teriyaki sauce, thinned with a splash of water if very thick
  • Cooked rice or noodles, to serve
Vertical recipe card showing a bowl of simple beef teriyaki stir-fry with glossy beef strips, broccoli, carrots and green beans over rice, with a wok full of stir-fry in the background and text explaining the quick three-step method.
Because the beef is sliced thin and cooked hot and fast, this stir-fry is the perfect place to test how thick you like your teriyaki—keep it slightly looser if you’re serving over rice, or reduce it a little more if you want the sauce to cling tightly to noodles.
  1. Stir-fry the beef. Heat 1 tablespoon oil in a hot pan or wok. Add the beef and stir-fry just until browned; remove to a plate.
  2. Cook the vegetables. Add the remaining oil and the vegetables. Stir-fry over high heat until crisp-tender.
  3. Combine with sauce. Return the beef to the pan, pour in the teriyaki sauce and toss everything together. Cook for 1–2 minutes until the sauce bubbles and coats the beef and vegetables.
  4. Serve. Spoon your beef teriyaki stir-fry over rice, or toss with cooked noodles for beef teriyaki noodles.

This one pan teriyaki beef and rice or noodle dinner is an easy way to turn the same teriyaki sauce recipe into a new meal.

Also Read: Crispy Homemade French Fries From Fresh Potatoes (Recipe Plus Variations)


Bringing It All Together in Real Meals

Theory is nice, but you’re going to remember teriyaki by what you put on the table.

You might start by whisking up that everyday teriyaki sauce, then:

  • marinate chicken thighs in a thinner, more acidic version and roast them on a tray with onions and peppers, brushing with a thicker glaze in the last ten minutes
  • spoon the traditional soy–mirin–sake glaze over salmon fillets as they grill, letting it build up into a shiny layer, then serve them with rice and a crisp side from the potato salad recipes you’ve bookmarked
  • throw together a fridge-cleanout stir-fry with vegetables, tofu and a ladle of teriyaki, knowing you can adjust sweetness and salt right there in the pan
  • build warm or cold noodle bowls with soba, plenty of vegetables and a ginger-sesame teriyaki dressing
  • glaze pork chops or pork tenderloin with pineapple teriyaki and serve with a simple salad and grilled pineapple slices
  • spread pineapple-lifted teriyaki over a pizza base, add leftover chicken teriyaki and bake for an easy teriyaki chicken pizza night.
Four friends sitting around a wooden table sharing a variety of teriyaki dishes—including chicken bowls, teriyaki salmon, noodles and vegetables—with a jar of sauce in the centre and the text “One Teriyaki, A Whole Table of Meals” overlaid.
One base teriyaki sauce can turn into a whole table of food—bowls, salmon, stir-fries, wings and veggie plates—so once you’ve dialled in your “house” version, you’re only a few tweaks away from an easy teriyaki night with friends.

If you’re hosting, you can lean harder into variety. Make a platter of wings: some in honey teriyaki, some in spicy teriyaki. Put out bowls of dips—spinach dip, buffalo chicken dip, hummus—along with raw vegetables, bread and crackers. Pour drinks, maybe even something fun and fizzy from a set of mimosa ideas, and suddenly your weeknight sauce has turned into a party.

Also Read: Katsu Curry Rice (Japanese Recipe, with Chicken Cutlet)

Conclusion

Over time, you’ll find your own sweet spot: maybe a slightly less sweet, more gingery version for everyday cooking; a fruit-heavy pineapple or orange teriyaki for grilling; a miso-enriched glaze for salmon; and a low-sugar, low-sodium version when you want to keep things light but flavourful.

And at that point, “teriyaki sauce” isn’t a mysterious thing in a bottle anymore. It’s just one of your house sauces—like pesto, like chimichurri, like tzatziki—waiting in the fridge or on the stove, ready to make simple food feel like something worth sitting down for.

FAQs on Teriyaki Sauce and its Recipe

1. What is teriyaki sauce, exactly?

Teriyaki sauce is a sweet–savory Japanese-style sauce built on soy sauce, a sweetener (usually sugar or honey), and mirin or another mild cooking wine. Traditionally, it began as a glaze brushed over grilled fish or chicken, giving the surface a shiny, caramelised coating. Over time, it has evolved into a multi-use sauce for marinating, stir-frying, glazing, dipping, and even dressing salads and noodle bowls.


2. How do you make a simple homemade teriyaki sauce from scratch?

To begin with, you only need a few pantry staples. Combine soy sauce, water, mirin (or a mix of mild wine and sugar), brown sugar, minced garlic, grated ginger, and a splash of rice vinegar in a saucepan. Simmer gently until the sugar dissolves and the flavours mingle. Then, if you want it thicker, stir in a cornstarch-and-water slurry and cook for a minute or two until glossy. Taste, adjust sweetness and salt, cool it, and your homemade teriyaki sauce is ready to use or store for quick teriyaki chicken, salmon, beef or veggie stir-fries.


3. What’s the difference between authentic Japanese teriyaki and the thicker takeout-style sauce?

In authentic Japanese teriyaki, the sauce is usually just soy sauce, mirin, sake, and sugar simmered until slightly syrupy, with no garlic, no ginger, and no cornstarch. It stays light and clean, meant mainly for brushing over grilled fish or chicken. By contrast, many takeout-style or bottled teriyaki sauces are thicker, sweeter, and heavily scented with garlic and ginger, often relying on starch for that shiny, clingy texture. Both are delicious, but they serve slightly different purposes in cooking.


4. What ingredients do I really need for teriyaki sauce if my pantry is basic?

Even with a minimal pantry, you can still make a good teriyaki-style sauce. At the very least, you need soy sauce for salt and umami, sugar (or honey) for sweetness, and water to keep it from being overpowering. Whenever possible, adding something mirin-like (or a mild wine plus sugar), along with a little garlic and ginger, makes the flavour much more rounded. From there, extras like rice vinegar, sesame oil, or chilli are optional upgrades, not requirements.


5. How can I make my teriyaki sauce thicker and stickier?

If your teriyaki sauce feels too thin, there are several ways to change that. The most straightforward method is to simmer it for longer so water evaporates and the sauce naturally reduces and thickens. Alternatively, you can whisk a small amount of cornstarch into cold water, then stir this slurry into gently simmering sauce until it becomes glossy and coats the back of a spoon. For an even stickier glaze, increasing honey or another syrupy sweetener and cooking for a little longer works beautifully on wings, drumsticks, salmon and tofu.


6. Can I make teriyaki sauce without mirin or sake?

Yes, you absolutely can. When mirin or sake isn’t available, you can still get very close to that classic taste. One approach is to use a mild white wine with a little extra sugar. Another option is to mix sugar with a bit of rice vinegar and water to mimic some of mirin’s sweet–tangy balance. It won’t be perfectly traditional, yet the resulting sauce will still taste recognisably like teriyaki and work well in marinades, stir-fries and glazes.


7. Is teriyaki sauce healthy, and how can I make it lighter?

On its own, teriyaki sauce tends to be high in sodium and contains added sugar, so it’s more of a “use thoughtfully” ingredient than a neutral one. However, it can absolutely fit into a balanced way of eating. To make it lighter, you can switch to low-sodium soy sauce, dilute the soy with water, and reduce the sugar by a third to half. In addition, leaning more on ginger, garlic and a touch of vinegar keeps the flavour big while toning down the salt and sweetness. Using less sauce per serving and pairing it with plenty of vegetables also helps.


8. How do I turn teriyaki sauce into a marinade, stir-fry sauce, or dipping sauce?

Interestingly, you don’t need separate recipes for each use. For a teriyaki marinade, simply keep the sauce thinner and slightly more acidic by adding a bit more water and vinegar or citrus. Then for a stir-fry sauce, aim for medium thickness so it coats ingredients without turning gloopy—your cornstarch-thickened version is ideal here. And for a dipping sauce, thin a small amount with water or light stock, then brighten it with extra vinegar or lime so it’s punchy, pourable and perfect alongside dumplings, skewers, tofu or roasted vegetables.


9. How long does homemade teriyaki sauce last in the fridge?

Generally, homemade teriyaki sauce keeps well in a sealed jar in the refrigerator for about one week, sometimes a bit longer if it’s cooked, cooled and stored cleanly. Because it contains soy and sugar, it has some built-in preservative qualities, but it still counts as a fresh sauce. Before using leftovers, give it a sniff, a quick look and a small taste. If anything seems off—odd smell, separation that doesn’t mix back, or mould—discard it and make a fresh batch.


10. Can I freeze teriyaki sauce for later?

Absolutely. Moreover, freezing is a smart way to batch-prep. Once your teriyaki sauce has cooled completely, pour it into freezer-safe containers or small portions in ice cube trays. When frozen, you can pop the cubes into a bag for easy storage. On busy days, just thaw a few cubes in a saucepan or microwave and use them as a glaze, marinade base or stir-fry sauce. This trick also lets you make different versions—honey, ginger-heavy, spicy—and keep them ready to go.


11. How do I make a low sugar or keto-friendly teriyaki sauce?

For a lower sugar teriyaki, start by cutting the sugar in your favourite recipe in half and letting mirin, ginger, garlic and vinegar do more of the flavour work. If you’d like to go further and keep the sauce very low in carbohydrates, you can use a sugar substitute that behaves well in cooking, then taste and adjust carefully to avoid an artificial aftertaste. In addition, keeping the sauce slightly thinner and using less per serving is often enough to get that teriyaki flavour without loading up on sugar.


12. Is it possible to make vegan or soy-free teriyaki sauce?

Yes, both are quite achievable. To keep your teriyaki sauce recipe vegan, avoid honey and use plant-based sweeteners such as sugar or maple syrup, along with soy sauce, mirin, garlic and ginger. For a soy-free teriyaki-style sauce, you can swap soy sauce for coconut aminos or a similar savoury seasoning, then adjust the sweetness down a bit because those alternatives are often naturally sweeter. Finally, add garlic, ginger and a touch of vinegar, then reduce or lightly thicken the mixture until it has the shine and consistency you want.


13. Can I use bottled teriyaki sauce in these recipes?

Yes. If you already have a bottle of teriyaki sauce at home, you can absolutely use it in place of the homemade teriyaki sauce recipe here. For a quick teriyaki chicken recipe using bottled sauce, brown the chicken in a pan, pour in enough sauce to coat, and let it simmer until the chicken is cooked through and the sauce thickens slightly. If the bottled sauce is very strong or salty, thin it with a little water or stock and add fresh garlic, ginger or a squeeze of citrus to brighten it. The same approach works for slow cooker teriyaki chicken with bottled sauce or a very quick teriyaki chicken with bottled sauce on the stovetop: add the chicken and sauce, cook until tender, then thicken the juices at the end if you want a stickier finish.


14. How do I make teriyaki chicken in the air fryer?

Air fryer teriyaki chicken is basically your quick-pan recipe adapted to hot circulating air. Pat chicken thighs or breast pieces dry, toss them in a thin layer of teriyaki sauce (or marinate briefly), then arrange them in a single layer in the basket. Air fry at around 190–200°C for 10–15 minutes, turning once, until cooked through. In the last 2–3 minutes, brush with a little more teriyaki to create a sticky glaze. Serve over rice or tuck into wraps and bowls with vegetables for an easy, lower-oil version of classic teriyaki chicken.


15. What’s an easy slow cooker or crockpot teriyaki chicken recipe?

For slow cooker teriyaki chicken, the main trick is to keep the sauce thin at the start and thicken it at the end. Place boneless chicken thighs or breasts in the crockpot, pour over enough teriyaki sauce (homemade or bottled) to mostly cover, and cook on LOW for 4–6 hours or HIGH for 2–3 hours until tender. Remove the chicken and shred or slice it. Then simmer the cooking liquid in a saucepan with a cornstarch slurry until it turns into a glossy teriyaki glaze. Toss the chicken back in the thickened sauce and serve over rice, noodles or in lettuce wraps.


16. How can I use teriyaki sauce for baked chicken or salmon?

Baked teriyaki chicken and baked teriyaki salmon are both “hands-off” ways to use the same sauce. For chicken, arrange thighs or drumsticks on a lined tray, brush with teriyaki sauce and bake at 190–200°C until cooked through, brushing once or twice more during baking for extra gloss. For salmon, spoon teriyaki over fillets and bake for 10–12 minutes, then finish with a quick blast under the grill to caramelise the top. In both cases, you can reduce extra sauce on the stovetop into a thicker glaze for drizzling when you serve.


17. What are some easy teriyaki noodle and fried rice ideas?

Teriyaki sauce turns simple noodles and leftover rice into full meals. For teriyaki noodles, stir-fry vegetables and a protein of your choice, add cooked noodles (soba, udon, ramen or regular stir-fry noodles), then pour in enough teriyaki to coat everything. Toss over high heat until glossy. For teriyaki fried rice, stir-fry cold cooked rice with vegetables, scrambled egg and any leftover meat or tofu, then add a thinner teriyaki sauce and let it sizzle into the rice. Both are great ways to use up fridge odds and ends while still delivering that sweet–savory teriyaki flavour.


18. How do I make a good teriyaki chicken and broccoli or veggie bowl?

For chicken teriyaki with broccoli and other vegetables, think in three parts: base, veg and protein. Start with rice or noodles in the bowl. Stir-fry or steam broccoli, carrots, peppers and snap peas until just tender, then toss them with a little teriyaki sauce so they’re lightly coated. Cook chicken pieces in a pan until browned, add more teriyaki and let it reduce to a shiny glaze. Pile the glazed chicken and vegetables over the base, drizzle over any remaining sauce, and sprinkle with sesame seeds. It’s an easy template for healthy chicken teriyaki bowls you can repeat all week.


19. Can I use teriyaki sauce for cod, shrimp or other seafood?

Definitely. Teriyaki cod and teriyaki shrimp are both fast, flavourful options. For cod or other white fish, keep the sauce a bit lighter and don’t marinate for too long; brush or spoon teriyaki over fillets just before baking or grilling. For shrimp, a 10–15 minute marinade is usually enough before a quick stir-fry or grill, then you can finish with extra sauce in the pan. Because seafood cooks quickly, teriyaki works best as a glaze and finishing sauce rather than a long marinade that might break down the texture.



20. What are some fun, non-traditional ways to use teriyaki sauce?

Once you have a reliable teriyaki sauce recipe, you can take it far beyond the usual rice bowls. Use it as the base for teriyaki chicken pizza (spread a thicker glaze on the crust, add cooked chicken, onions and peppers, then bake with cheese), or brush burgers and meatballs with teriyaki as they grill for a sweet–savory crust. Toss roasted potatoes or sweet potatoes in a reduced teriyaki glaze for a sticky side dish, or drizzle a thinner sesame–ginger version over grain bowls and chopped salads. The same core sauce can anchor everything from party snacks to weeknight comfort food.