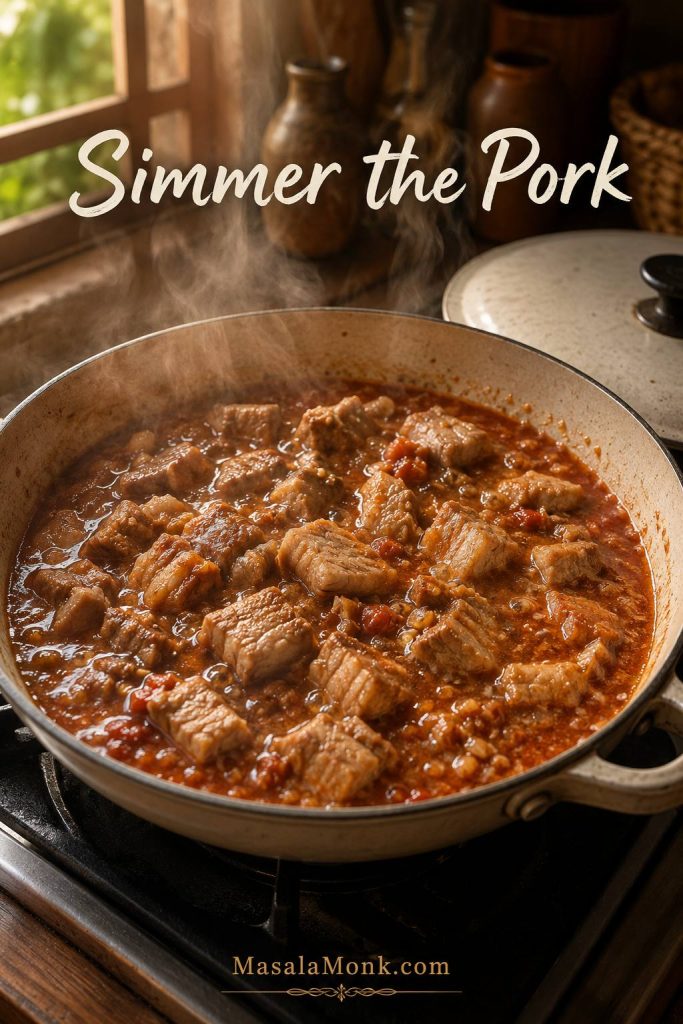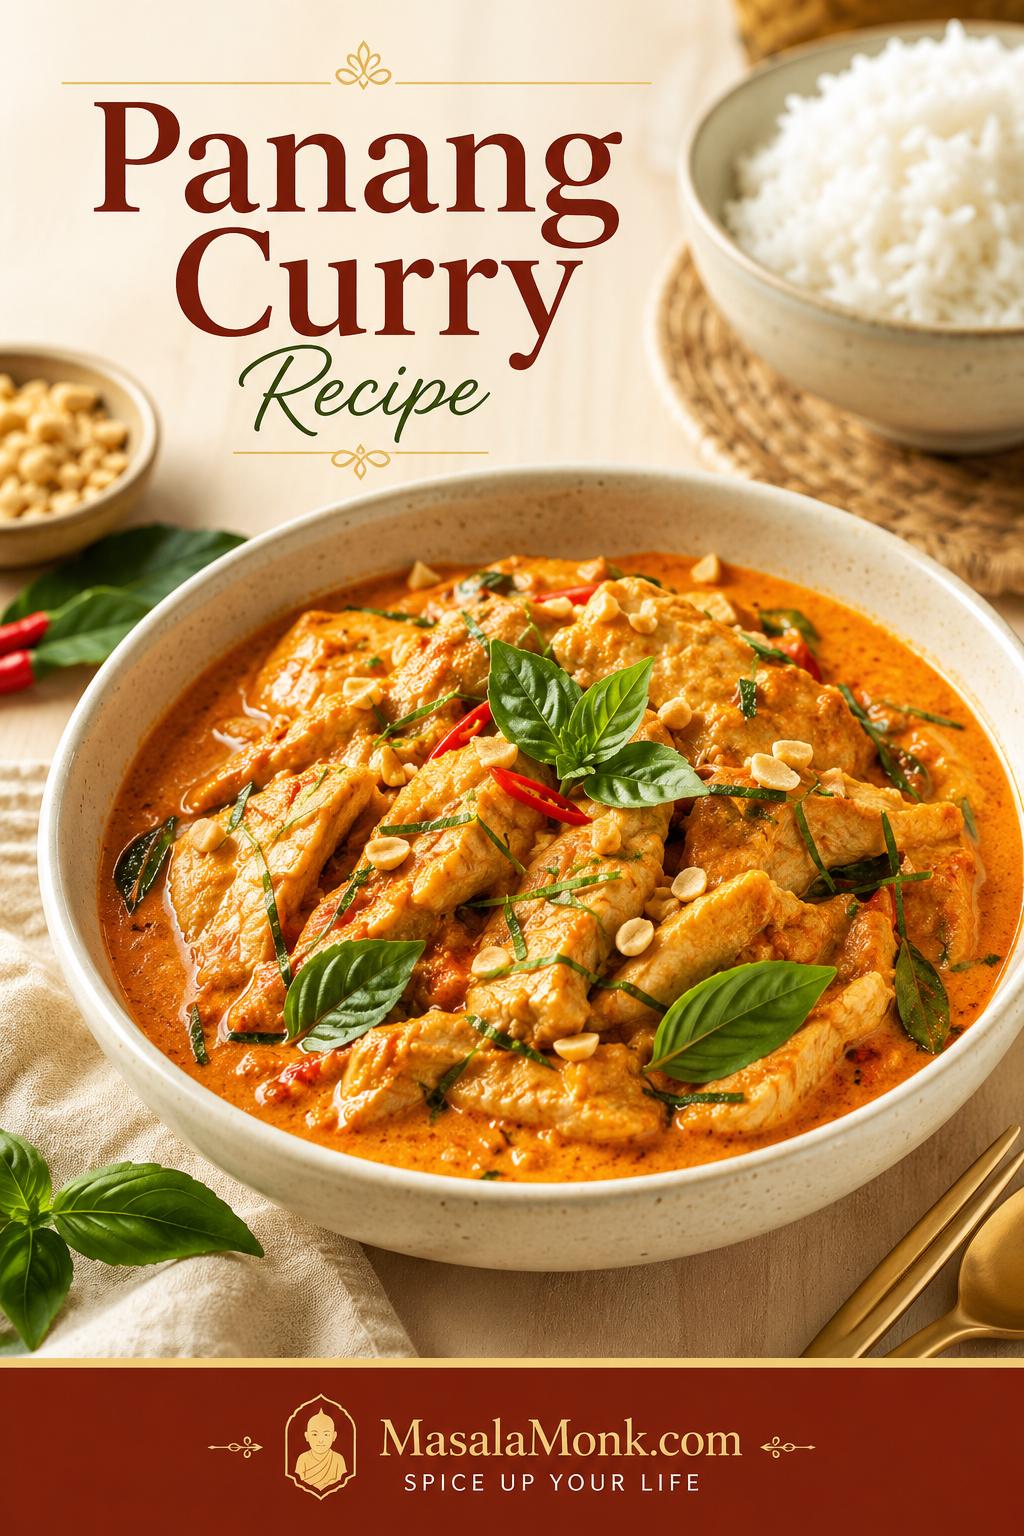
A good Panang curry starts changing the moment the paste hits hot fat: the raw edge softens, the chile smell deepens, and the pan begins to smell warmer almost immediately. When the coconut goes in, it turns orange-red around the paste. By the time the chicken is done, the curry should look glossy and generous, not thin or tired.
This Panang curry recipe is built for the home-cook problem most recipes do not talk about enough: store-bought paste can taste flat, watery, harsh, or too much like ordinary red curry when it is rushed. The fix is not a longer shopping list. It is better paste frying, full-fat coconut, and a few clear texture cues.
The result is a 40-minute curry that still feels special: tender chicken, glossy coconut sauce, fresh basil, jasmine rice, and enough depth that the store-bought paste never feels like a compromise. The base version is chicken Panang curry, also called Panang gai, but the same method works for beef, tofu, shrimp, or vegetables once you understand the texture.
It is generous weeknight food: fragrant, creamy, a little sweet, a little spicy, and made to spoon over rice. If you like fast Thai basil-heavy dinners, this Pad Kra Pao recipe is another bold option to keep nearby.
Table of Contents
Use this guide to make Panang curry that tastes creamy, balanced, aromatic, and clearly different from ordinary red curry.
Panang Curry Recipe: Quick Answer
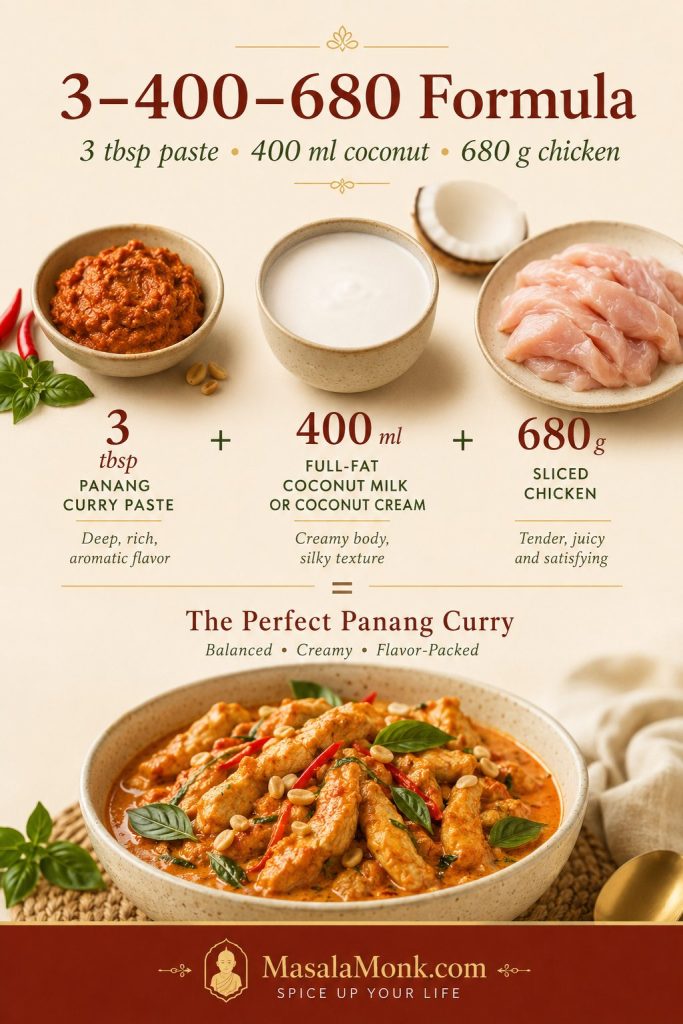
Remember it as 3–400–680: 3 tablespoons / about 45g Panang curry paste, 13.5–14 oz / 400ml full-fat coconut milk or coconut cream, and 1½ lb / 680g thinly sliced chicken for a generous 4-serving curry.
Fry the paste first in oil or thick coconut cream until it smells deeper and less raw. Stir in the coconut gradually, then add fish sauce, palm sugar or brown sugar, torn makrut lime leaves, and peanuts or peanut butter. Simmer gently until the chicken is cooked through, finish with Thai basil, and serve with jasmine rice.
Think of this as your safe starting bowl: enough paste to taste full, enough coconut to feel creamy, and enough body for the curry to settle over rice instead of running through it. Add 1–1½ cups vegetables if you want a fuller chicken curry; keep the amount modest so the flavor stays focused.
Most important cue: the spoon tells you more than the timer. The curry should coat the back of a spoon in a glossy layer while still being loose enough to serve over rice. Need the exact visual cue? Jump to the spoon-coating test. Ready to cook? Go straight to the recipe card.
The Easy Panang Curry Formula
The 3–400–680 formula is not a test; it is a starting point. From there, you can adjust for paste strength, vegetable volume, protein choice, and how rich you want the final curry. More vegetables usually need a little more paste and a little more time in the pan. Saltier paste needs less fish sauce. Sweeter coconut needs less sugar.
| For 4 Servings | Amount | Why It Matters |
|---|---|---|
| Panang curry paste | 3 tbsp / about 45g | The flavor base. Start lower if your paste is very spicy or salty. |
| Coconut milk or coconut cream | 13.5–14 oz / 400ml | The body of the curry. Coconut cream gives the lushest result. |
| Chicken or other protein | 1½ lb / 680g chicken, or equivalent | Enough protein for a full dinner without overcrowding the pan. |
| Fish sauce | 1–1½ tbsp / 15–22ml | Adds salt and savory depth. Use less at first if your paste is salty. |
| Palm sugar or brown sugar | 2 tsp–1 tbsp / 8–15g | Rounds heat and salt. Start low if your paste or coconut tastes sweet. |
| Makrut lime leaves | 4–6 leaves | Torn leaves perfume the simmering sauce; finely sliced tender leaves can finish the curry. |
| Peanuts or peanut butter | 2 tbsp / about 15g crushed peanuts, or 1 tbsp / about 16g peanut butter | Brings Panang’s quiet nutty note without turning the sauce into satay. |
Taste after the curry has simmered for a few minutes, not when the paste first hits the pan. Early tasting can trick you because the coconut is still loose, the paste has not settled, and the salt has not concentrated yet. If your paste tastes too mild or too harsh, use the store-bought paste guide before changing the whole recipe.
Why This Recipe Works
The difference between a forgettable Panang curry and a good one is usually not the ingredient list. It is the order. Curry paste needs fat and heat before the coconut goes in. The pan sauce needs enough time to come together. Basil needs to go in at the end, when its aroma will stay bright instead of disappearing into a long simmer.
If your first few homemade Thai curries have tasted thinner than takeout, this is usually where things change. You are not adding fancy ingredients; you are simply giving the paste and coconut enough time to become a sauce.
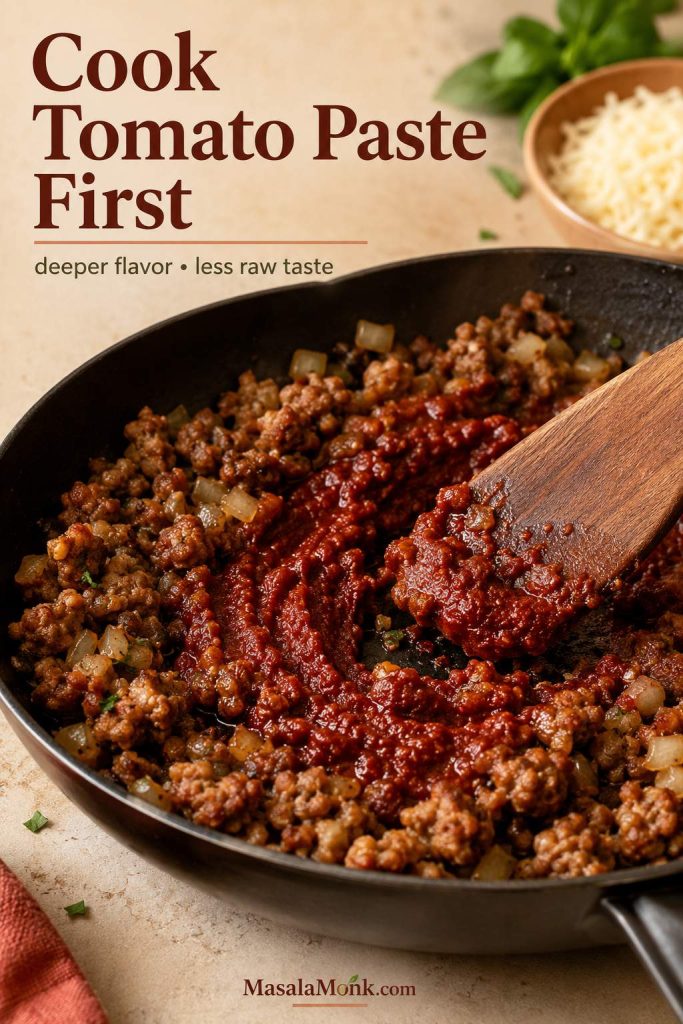
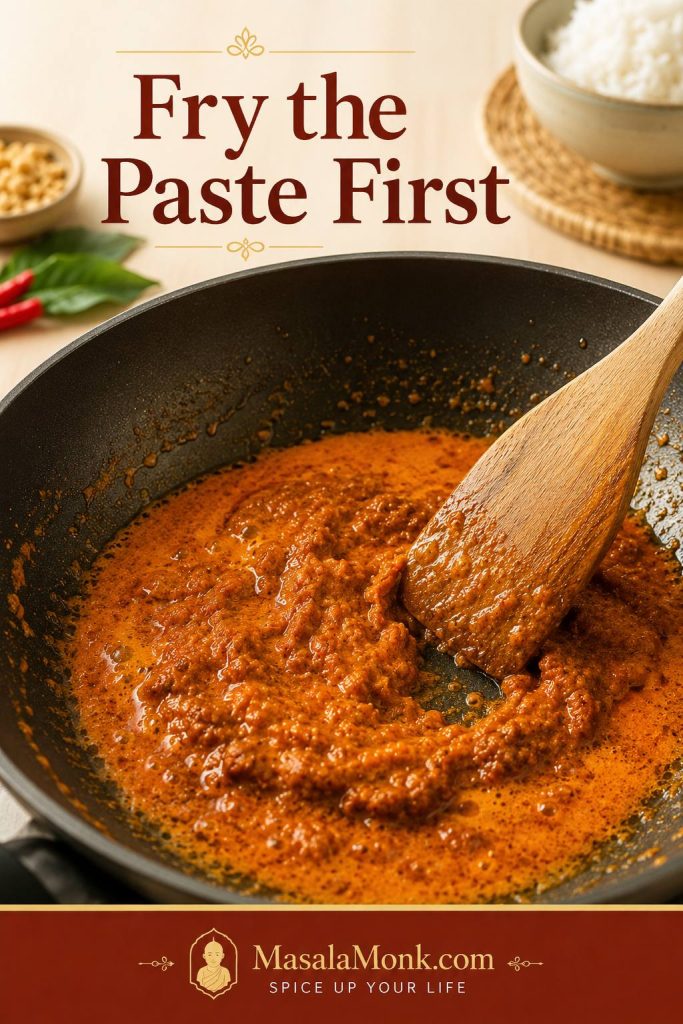
Frying the paste prevents flat flavor
Let it sizzle in fat first, and the smell changes from sharp to warm, deep, and curry-like.
Full-fat coconut gives the curry body
Light coconut milk makes the flavor feel spread out. Coconut cream gives the richest result.
The final balance happens at the end
Fish sauce, sugar, lime leaves, peanuts, and basil let you tune salt, sweetness, aroma, and nuttiness before serving.
The finished curry lands rich without feeling greasy, spicy without tasting harsh, and gently sweet without becoming sugary. It tastes like Panang curry, not red curry with peanut butter stirred in.
What Is Panang Curry?
Panang curry, also written as Phanaeng, Phanang, or Panaeng, is a Thai coconut curry with a richer, more concentrated character than a loose red curry. The easiest way to recognize a good Panang is this: if red curry pours, Panang clings.
In the bowl, Panang feels creamy, rounded, aromatic, and concentrated enough to coat the protein. Coconut gives body, curry paste gives heat and depth, makrut lime leaves give a citrusy lift, basil adds freshness, and peanuts add a quiet roasted note in the background.
Peanut belongs in the background here; it rounds the curry without turning it into satay. Chicken Panang curry is often called Panang gai or gaeng Panang gai. “Gai” means chicken, so Panang gai simply means the chicken version.
Panang Curry vs Red Curry
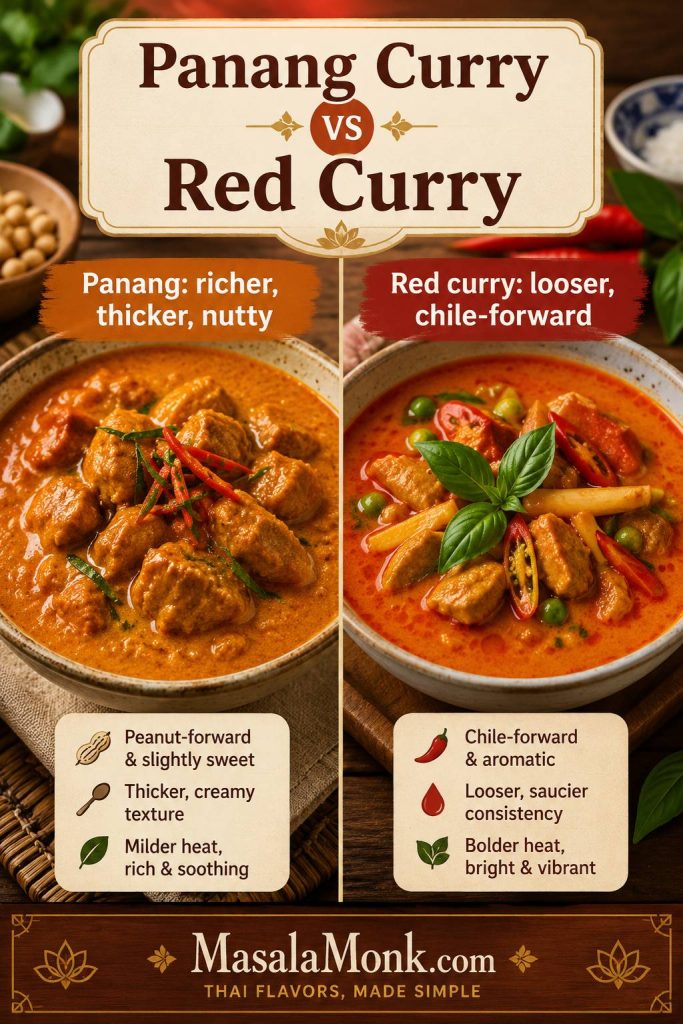
Panang curry and Thai red curry are related, but they should not taste identical. Red curry is usually looser and more chile-forward. Panang is creamier, richer, lightly sweet, and gently nutty. When homemade Panang tastes too much like red curry, the first fix is usually texture, then peanut and aromatic finish.
| Feature | Panang Curry | Thai Red Curry |
|---|---|---|
| Texture | Thicker, creamier, more clingy | Looser, saucier, more broth-like |
| Flavor | Rich, lightly sweet, savory, nutty | Brighter, chile-forward, more flexible |
| Paste profile | Red-curry-style base with peanut and spice depth | Red chile and aromatic base |
| Best cue | Coats the protein clearly | Pours more freely around the ingredients |
Quick fix: bring the curry back toward Panang by simmering the coconut base until it looks glossy, then finishing with peanut richness, Thai basil, and finely sliced tender makrut lime leaves if you have them.
If you are using red curry paste as a shortcut, add peanuts and a tiny pinch of warm spice so the sauce does not taste like ordinary red curry with coconut milk.
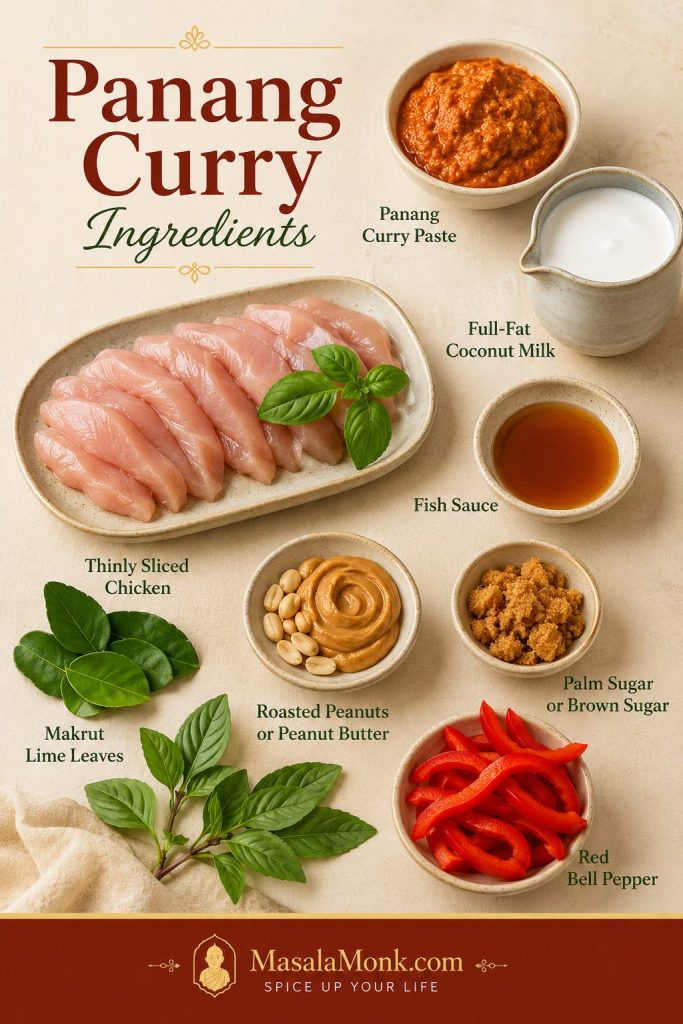
Panang Curry Ingredients
These ingredients are not equal. The paste, coconut, fish sauce, and lime leaves decide whether the curry tastes complete. Peanuts and basil finish the personality. Sugar is there to round the edges, not make the curry sweet.
The most important thing is timing. Paste goes first, coconut goes in gradually, protein cooks once the base has formed, and basil waits until the heat is low or off.
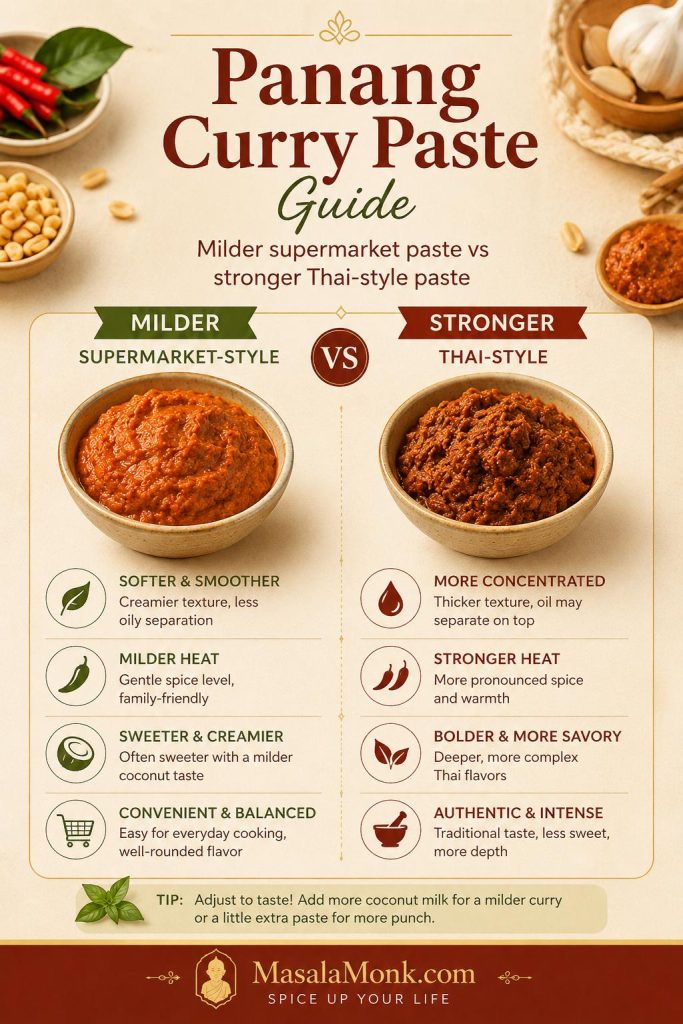
Panang curry paste
Use Thai Panang curry paste if you can find it. Some brands are stronger, saltier, and spicier than others, so start with a balanced amount and adjust. Thai Kitchen-style supermarket pastes are often milder, while Mae Ploy and Maesri-style Thai pastes are usually stronger, saltier, and more concentrated. Start lower if the brand is new to you.
If your paste is very salty, begin with 1 tablespoon fish sauce, simmer, then add the remaining ½ tablespoon only if the curry needs it. When homemade Panang tastes flat, the paste often needed a better start: fat, heat, and enough time to smell cooked before the coconut went in. For the deeper technique, see how to bloom the paste in fat first.
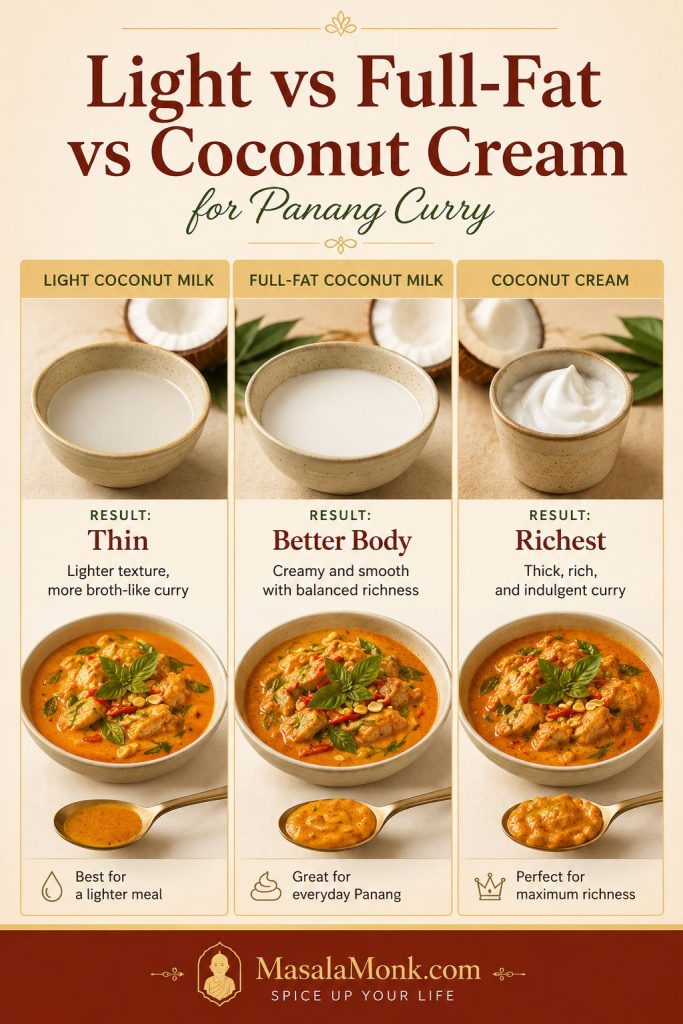
Coconut milk or coconut cream
Coconut cream gives the lushest result. Full-fat coconut milk also works well; it just needs a few extra minutes in the pan. Light coconut milk makes the curry harder to concentrate and easier to dilute.
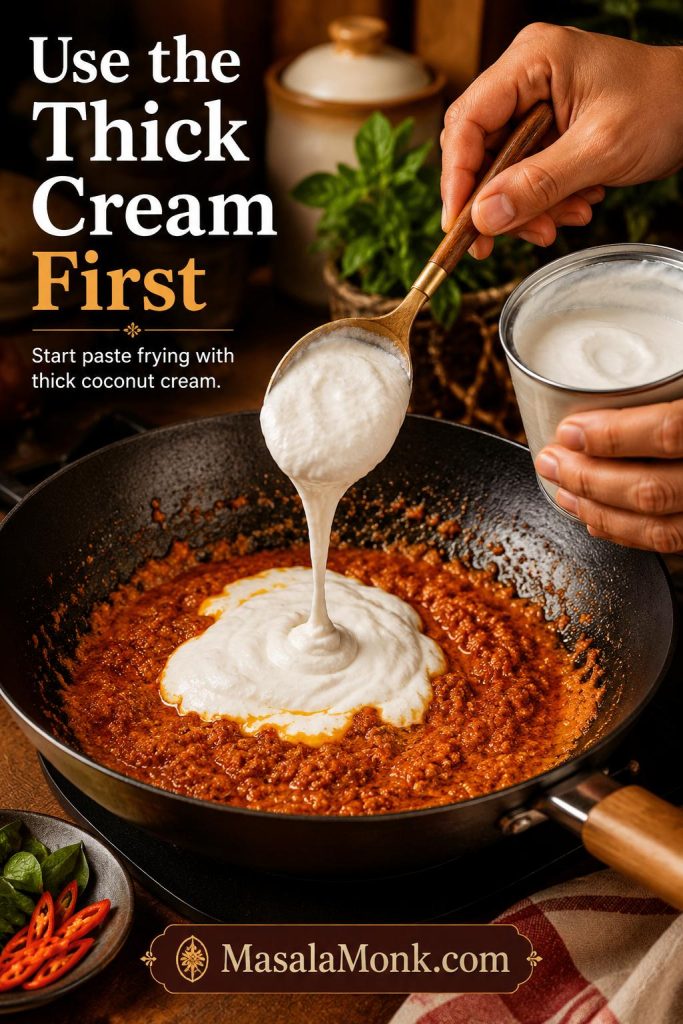
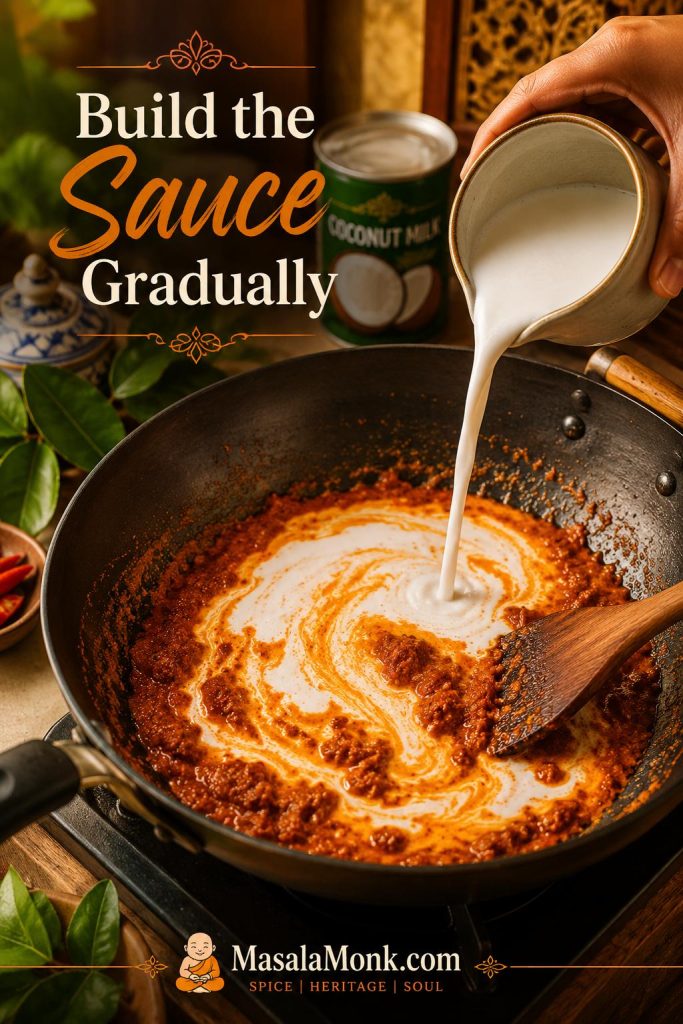
How to use thick coconut cream first
If the can has a thick layer of coconut cream at the top, scoop that into the pan first and use it to fry the curry paste. Then add the thinner coconut milk gradually. This gives the pan a richer start and helps the paste bloom in fat.
Fish sauce
Fish sauce keeps the coconut from tasting flat. You should not notice it as “fishy”; you should notice that the curry tastes deeper, saltier, and more complete. Add it gradually because the paste may already be salty.
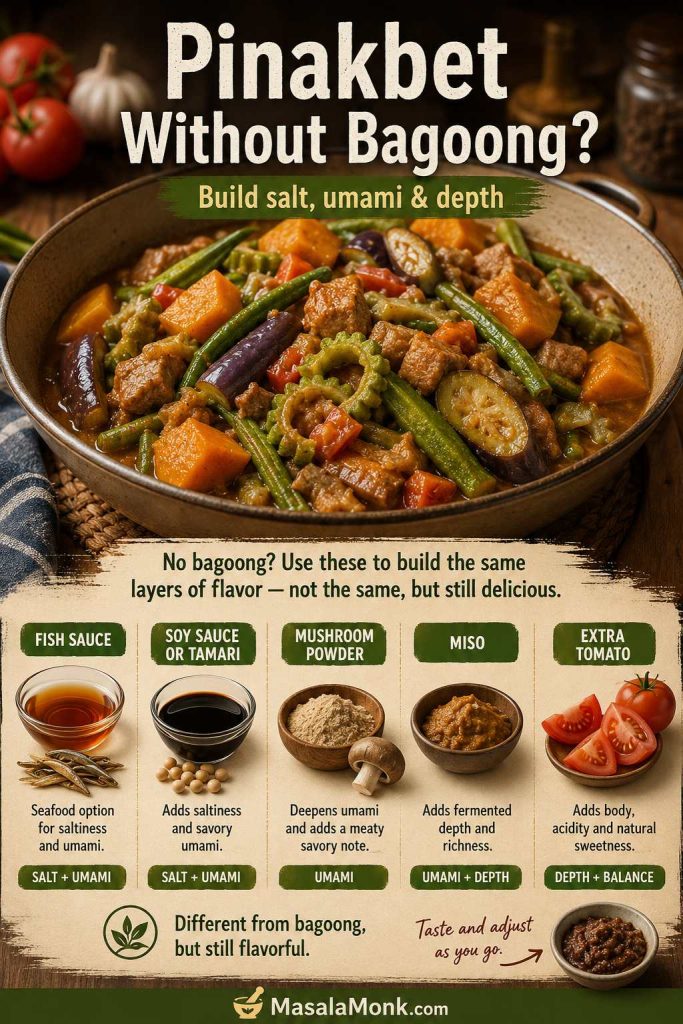
For a vegan version, use soy sauce, tamari, or a vegetarian fish-sauce alternative. The flavor will be different, but the curry still needs savory depth.
Palm sugar or brown sugar
The sweetness should round the chile and salt; it should not announce itself first. Palm sugar gives a softer sweetness, while brown sugar works well in a home kitchen. Start with 2 teaspoons if your paste or coconut milk already tastes sweet.
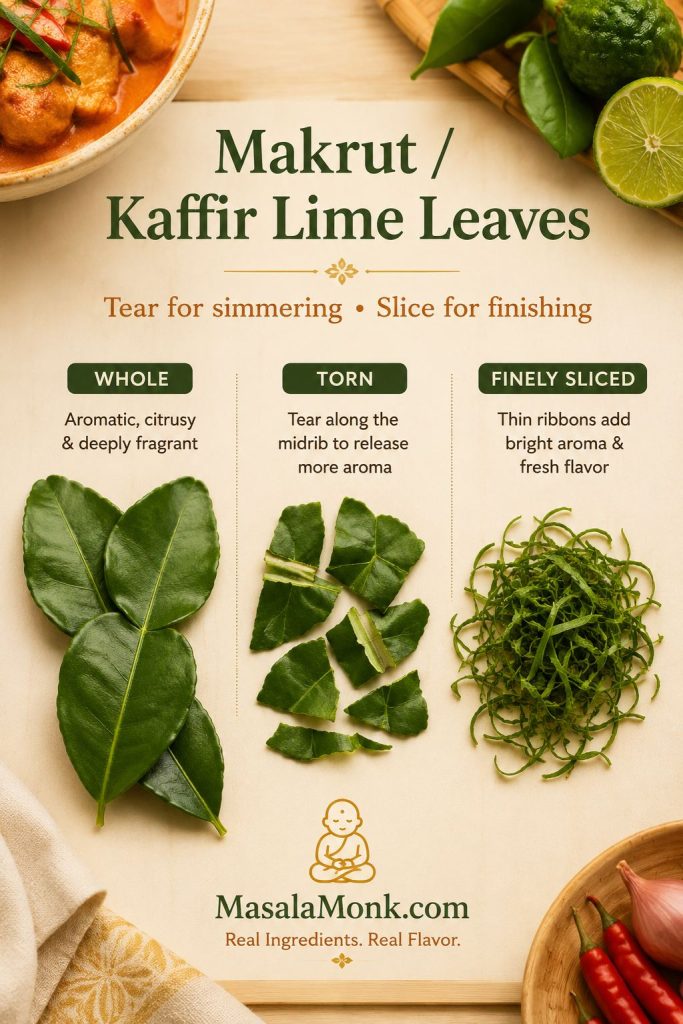
Makrut lime leaves
Makrut lime leaves, often sold as kaffir lime leaves, are the ingredient that makes the curry smell alive. Tear whole leaves before adding them to the simmering coconut sauce so their oils release into the pan. If you have tender leaves, slice a small amount very finely and use it at the end for a sharper aromatic finish.
Fresh or frozen leaves are best. Torn whole leaves can be left in the curry for aroma and picked out while eating. Lime juice is not a true replacement; if you need a backup, a little lime zest is closer than bottled lime juice, but use it gently. The goal is aroma, not sourness.
Peanuts or peanut butter
Crushed roasted peanuts give texture and a more traditional feel. Peanut butter is a practical shortcut that blends smoothly into the sauce. Either works, but keep the amount modest. The peanut note should sit in the background, not make the curry taste like peanut sauce.

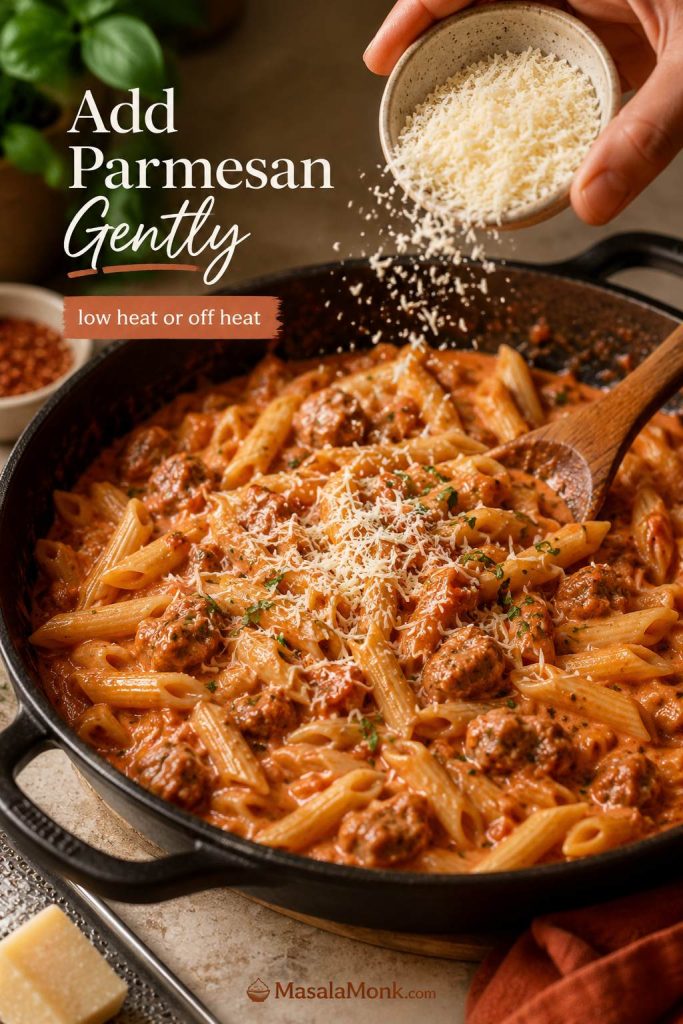
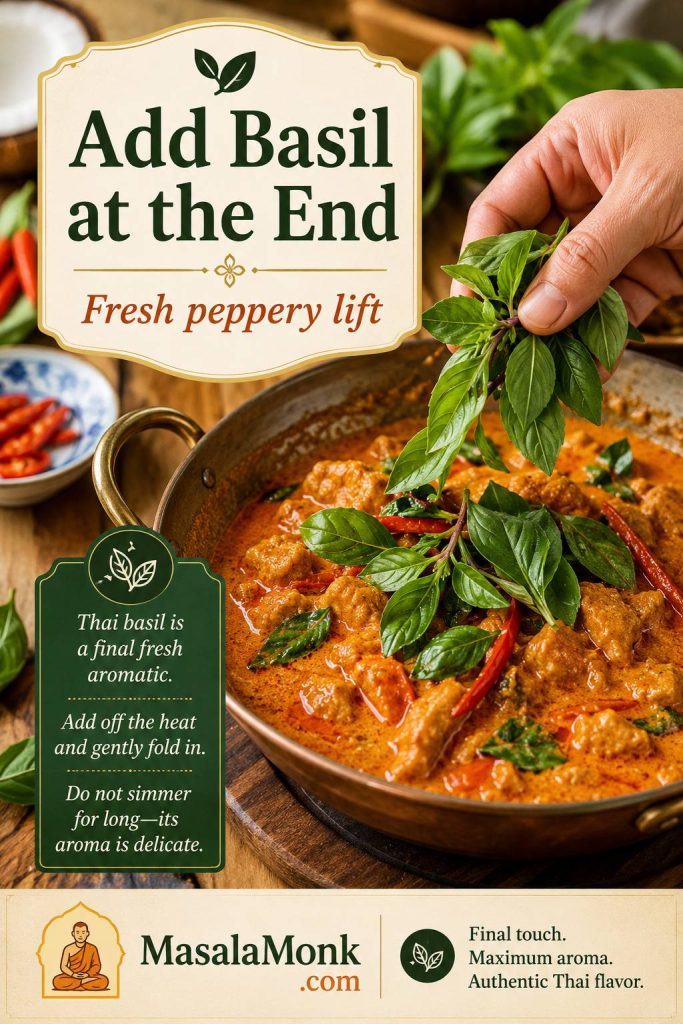
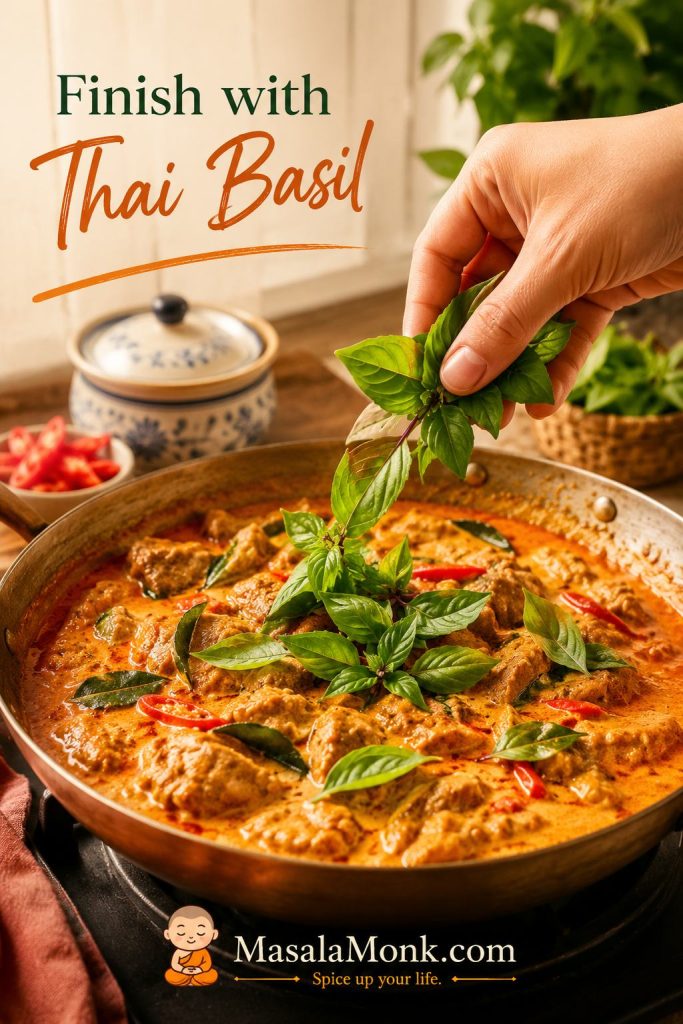
Thai basil
Thai basil gives the finished dish a fresh, peppery lift. Add it after the sauce thickens and the heat is low or off. If it simmers for several minutes, that fragrance fades quickly.
How to Make Store-Bought Panang Curry Paste Taste Better
This is a home-kitchen Panang curry built around store-bought paste, but the technique is the point: fry the paste properly, use full-fat coconut, simmer until glossy, and finish with basil and lime leaf.
Fry it first
Cook the paste in oil or coconut cream until it smells warmer, deeper, and less raw.
Use full-fat coconut
Thin coconut milk makes the curry taste weaker. Full-fat coconut milk or cream gives body.
Finish the flavor
Fish sauce, sugar, lime leaves, peanuts, and basil make the sauce taste complete.
Bloom the paste in fat first
Traditional Panang methods often fry the paste in coconut cream until the oil separates. At home, canned coconut milk does not always separate well, so oil or the thick cream from the top of the can is more reliable.
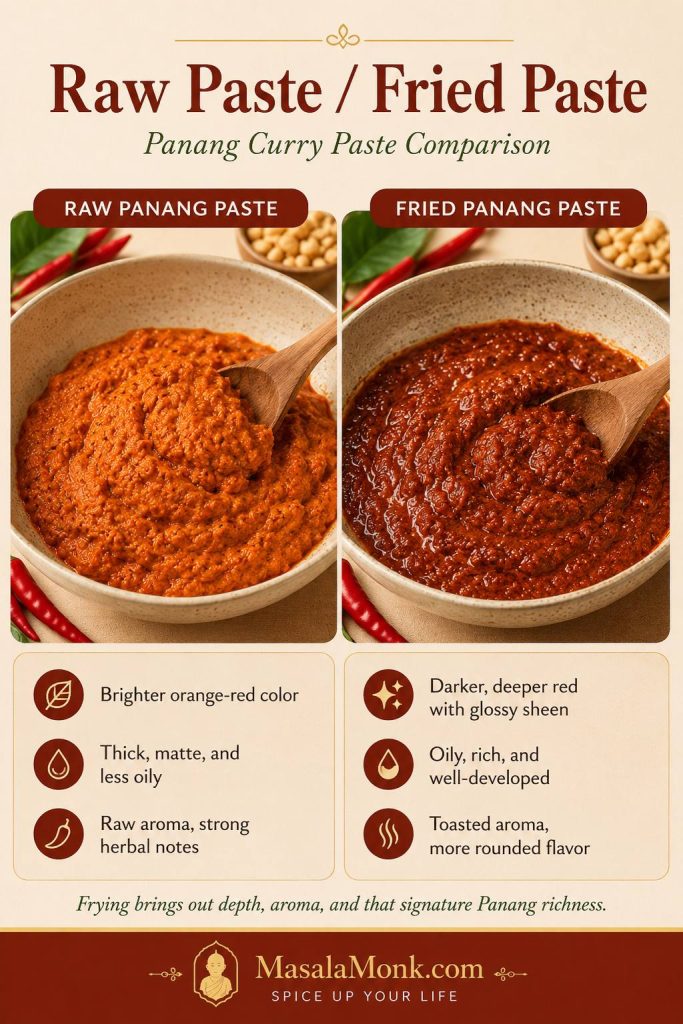
What fried Panang curry paste should look like
The color change is subtle but useful: the paste turns a little darker, smells rounder, and loses the raw edge before the coconut is stirred in.
Choose the right paste amount
For one 13.5–14 oz / 400ml can of coconut milk or cream, use this as your starting point:
| Style | Paste Amount | Best For |
|---|---|---|
| Mild | 2 tbsp / about 30g | Kids, spice-sensitive eaters, or very strong paste brands |
| Balanced | 3 tbsp / about 45g | Most homemade Panang curry |
| Stronger | 4 tbsp / about 60g | Restaurant-style intensity or a pan with more protein and vegetables |
Adjust after simmering
If the curry tastes weak after simmering, check the texture first. A thin coconut base can make even a strong paste taste dull because the flavor is spread across too much liquid. Let the pan settle into a glossy consistency, then decide if you need more paste.
When you do add more paste, avoid stirring it in raw. Fry another teaspoon or two in a small pan with a spoon of coconut cream, then stir that back into the curry. This keeps the added flavor cooked and rounded. For a deeper look at the paste itself, Serious Eats has a helpful Panang curry paste guide that explains the peanut and warm-spice notes that separate it from a basic red curry paste.
Using red curry paste instead? For every 2–3 tablespoons red curry paste, add 1 tablespoon crushed roasted peanuts or peanut butter, a tiny pinch of nutmeg, and a small pinch of ground coriander or cumin if the sauce tastes plain. Add torn makrut lime leaves if you have them. This shortcut is best for a weeknight curry, not for a strict traditional version.
Check labels for vegan or vegetarian versions
If you are cooking for vegan or vegetarian eaters, check the paste label carefully. Many Thai curry pastes contain shrimp paste, fish sauce, or other seafood ingredients. Use a vegan Panang curry paste, or use vegan red curry paste and adjust it with peanuts and warm spices.
How to Make Panang Curry
Once the paste and coconut are ready, the cooking moves quickly. A wide skillet, wok, or 12-inch saucepan gives the paste room to fry and helps the coconut base come together faster. Have the chicken sliced, vegetables cut, herbs ready, and rice started before the paste hits the pan.
Visual overview: how to make Panang curry
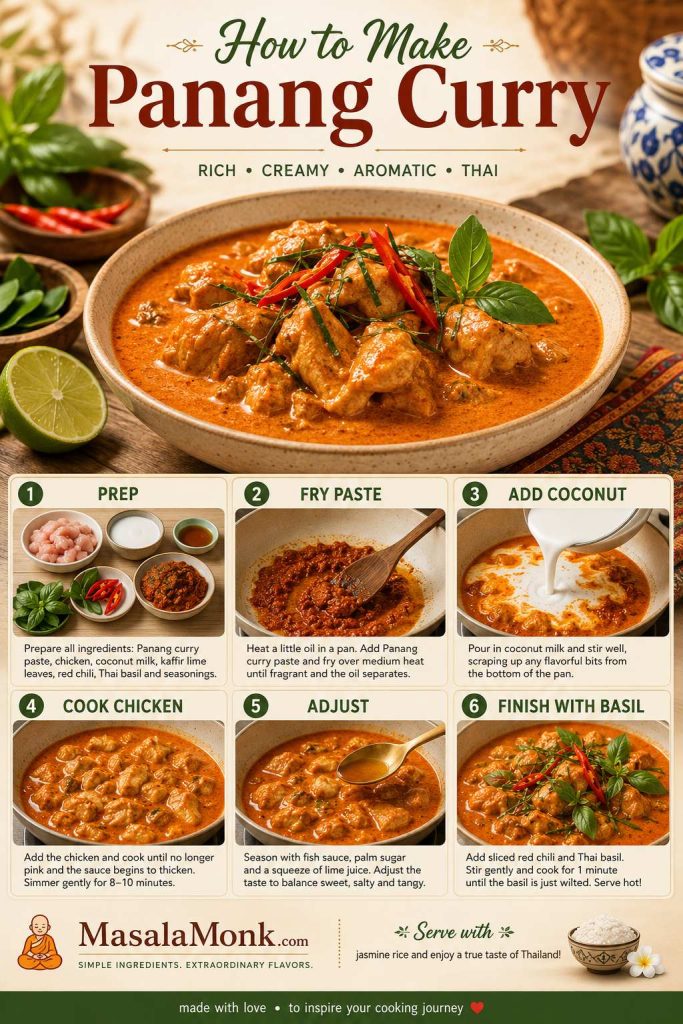
1. Slice the protein thinly
Thin slices cook quickly and pick up the curry better. Cut chicken across the grain into bite-size strips. Slice beef very thinly against the grain. For tofu, cut into cubes or slabs and pat dry before cooking.
Avoid large chunks of chicken here. Thick pieces take longer to cook, which can push the pan past its best texture before the center is done.

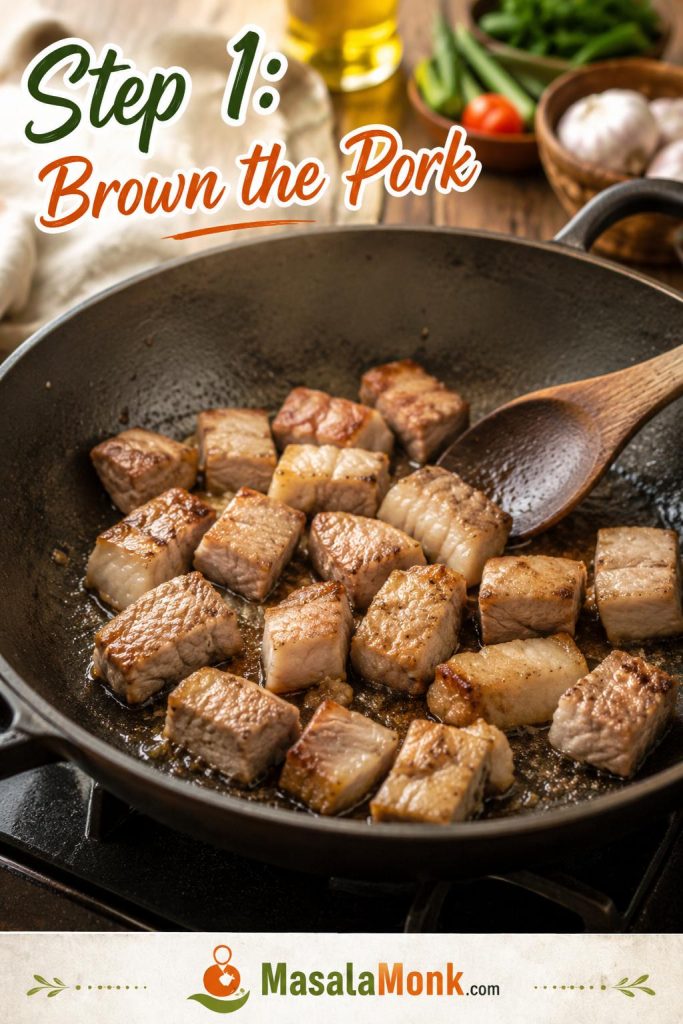
2. Fry the curry paste
Heat neutral oil, or the thick cream from the top of the coconut milk can, in a wide skillet, wok, or 12-inch saucepan over medium heat. Add the paste and fry for 1–2 minutes for softer supermarket paste, or 3–5 minutes for a thicker Thai paste, stirring often, until it smells deeper and turns slightly darker.
When the paste starts sticking, lower the heat and loosen it with a spoonful of coconut cream or coconut milk. Water cools the pan, so use it only when you have no other choice.
This is the moment the curry starts smelling less like paste from a tub and more like dinner: chile, coconut fat, warm spice, and lime leaf waiting to open up.
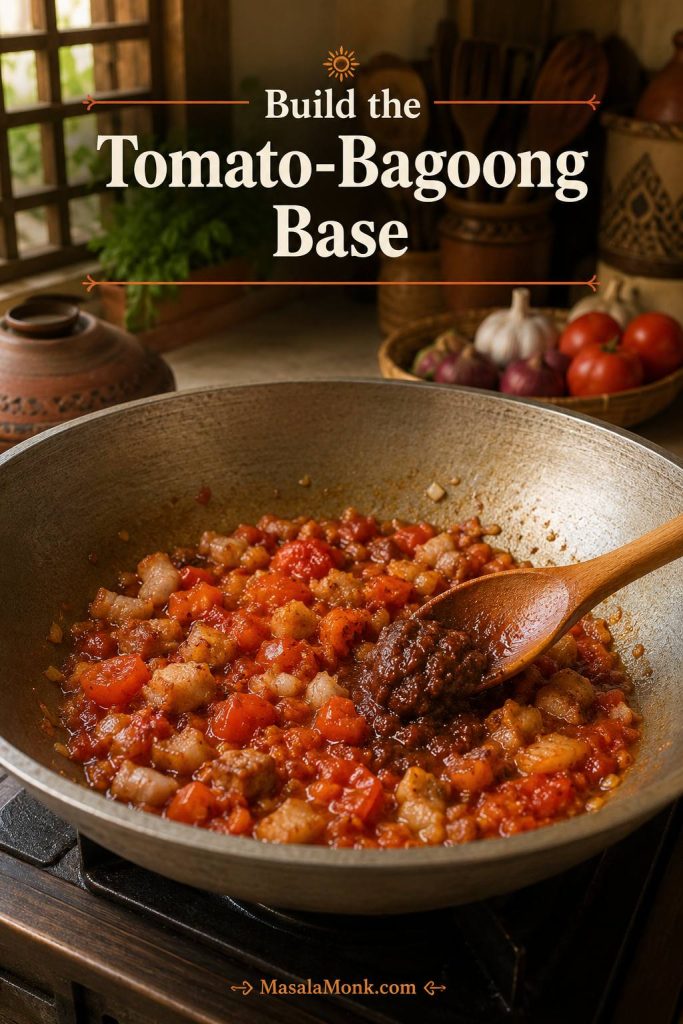
3. Build the coconut sauce
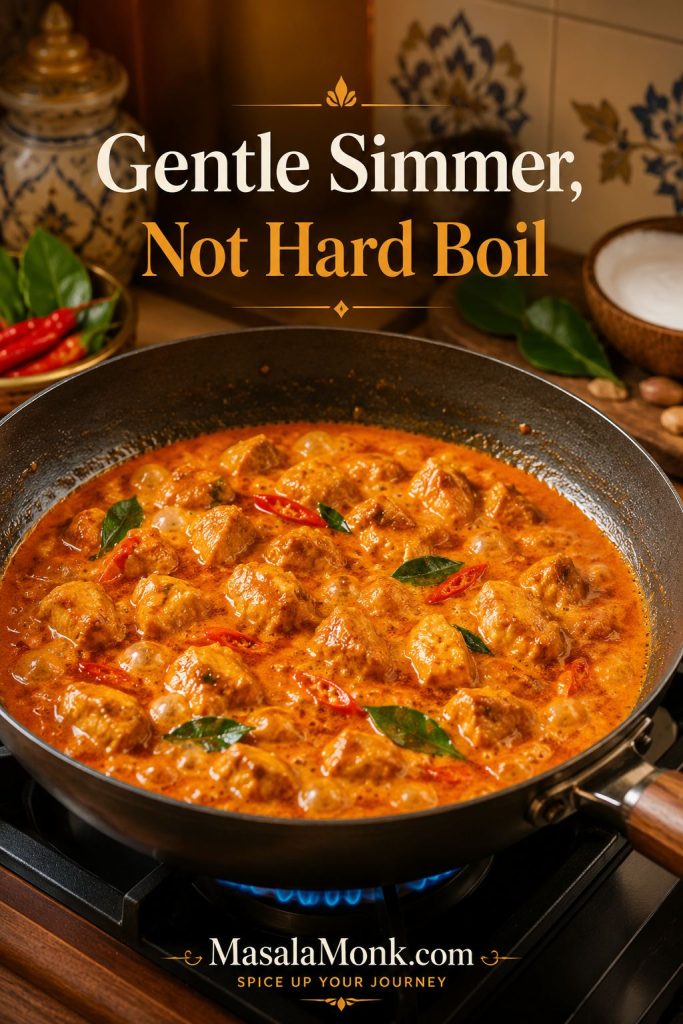
Stir in the coconut milk or coconut cream gradually until the paste dissolves into a smooth sauce. Add fish sauce, palm sugar or brown sugar, torn makrut lime leaves, and peanuts or peanut butter. Keep the curry at a gentle bubble, not a hard boil.
At this point, the pan should look creamy and red-orange. Let it bubble for a few minutes before adding delicate vegetables or herbs. A good Panang base looks slightly more intense than you think it needs to be; rice will soften everything later. When you are unsure, use the spoon-coating test before serving.
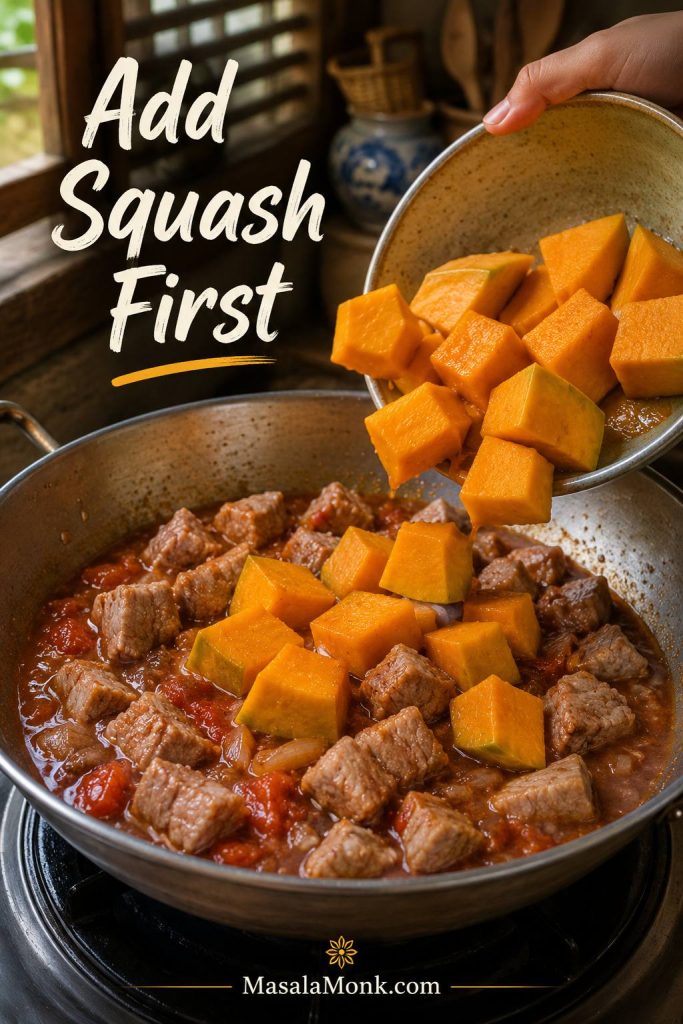
4. Cook the protein and vegetables
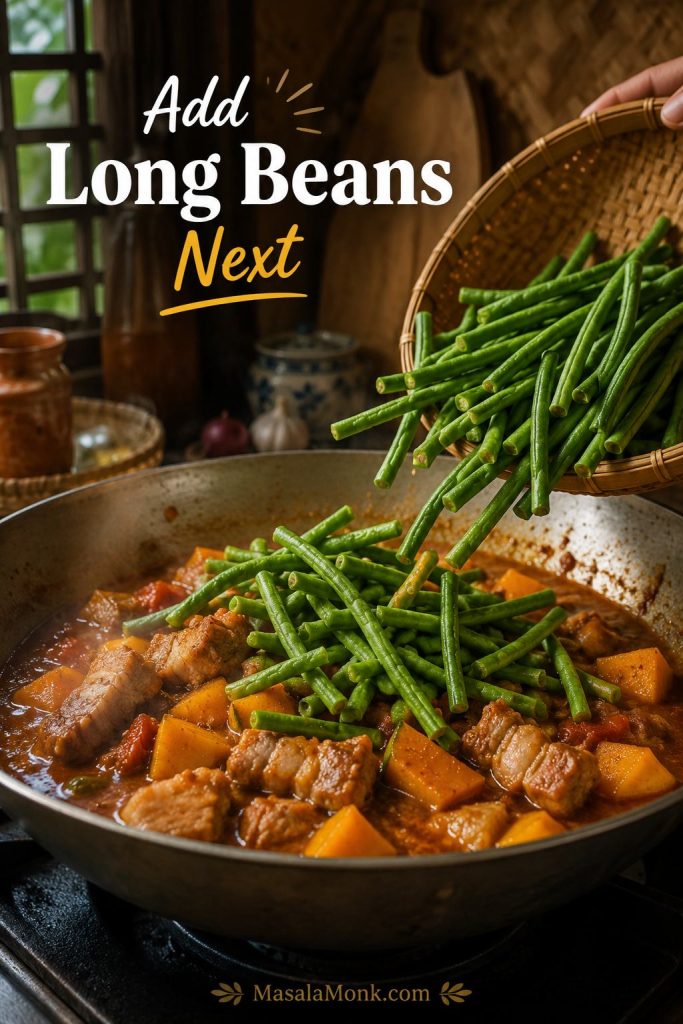
Add chicken and firm vegetables such as carrots, green beans, baby corn, or broccoli stems first. Simmer gently until the chicken is cooked through; the thickest piece should reach 165°F / 74°C.
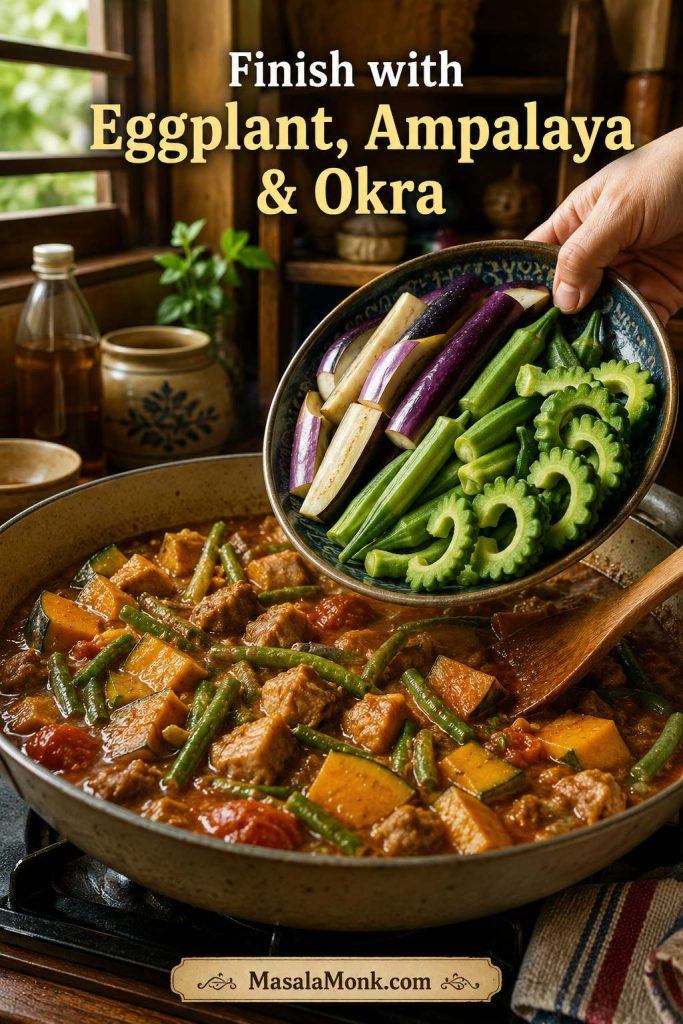
Add bell pepper, snap peas or snow peas, zucchini, or spinach later so they stay brighter and release less water. Save finely sliced makrut lime leaves for the end if you are using them as garnish.
Beef and shrimp go in later. Browned tofu can go in near the end so it keeps its shape.
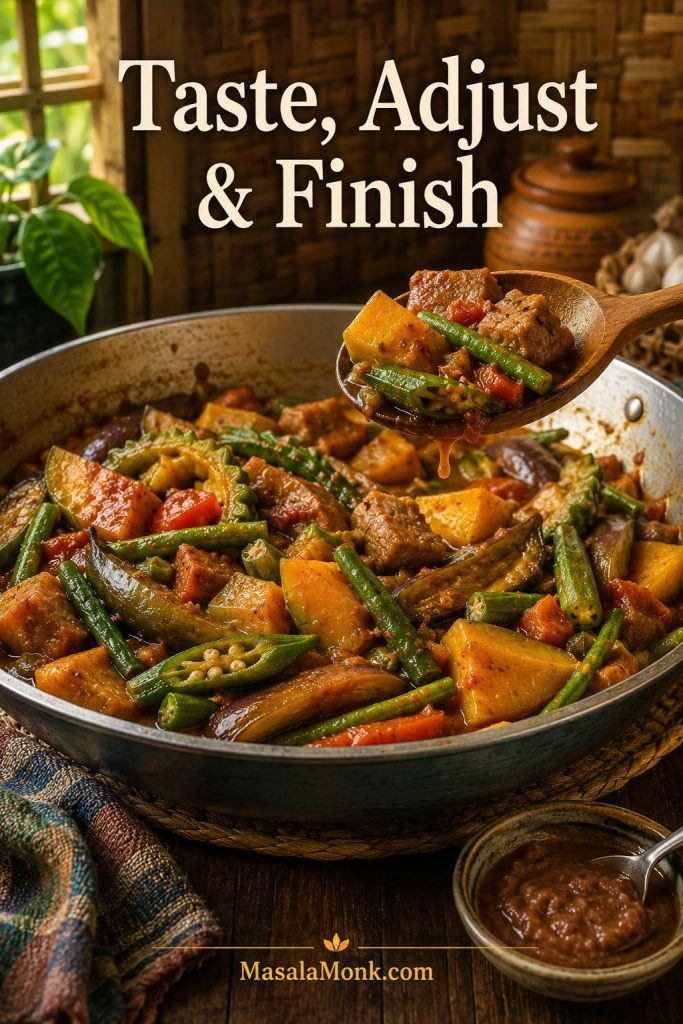
5. Taste and finish
Give the curry a few uncovered minutes before final tasting. The flavor changes as the coconut settles: salt becomes clearer, sweetness rounds out, and the paste tastes less scattered.
Turn off the heat and stir in Thai basil right before serving. Add extra finely sliced makrut lime leaves, crushed peanuts, or sliced red chile for a stronger finish. The basil should smell fresh as soon as it hits the hot curry.
Chicken safety note: chicken should reach 165°F / 74°C in the thickest piece. FoodSafety.gov lists this as the safe minimum internal temperature for poultry in its safe minimum internal temperatures chart.
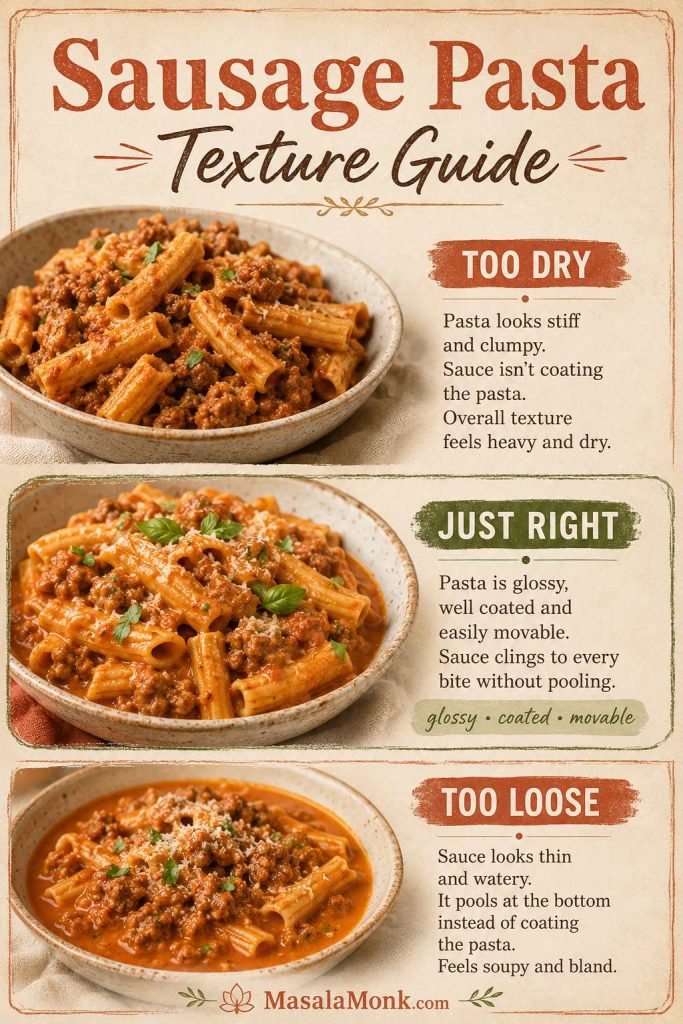
The Spoon-Coating Test for Panang Curry Sauce
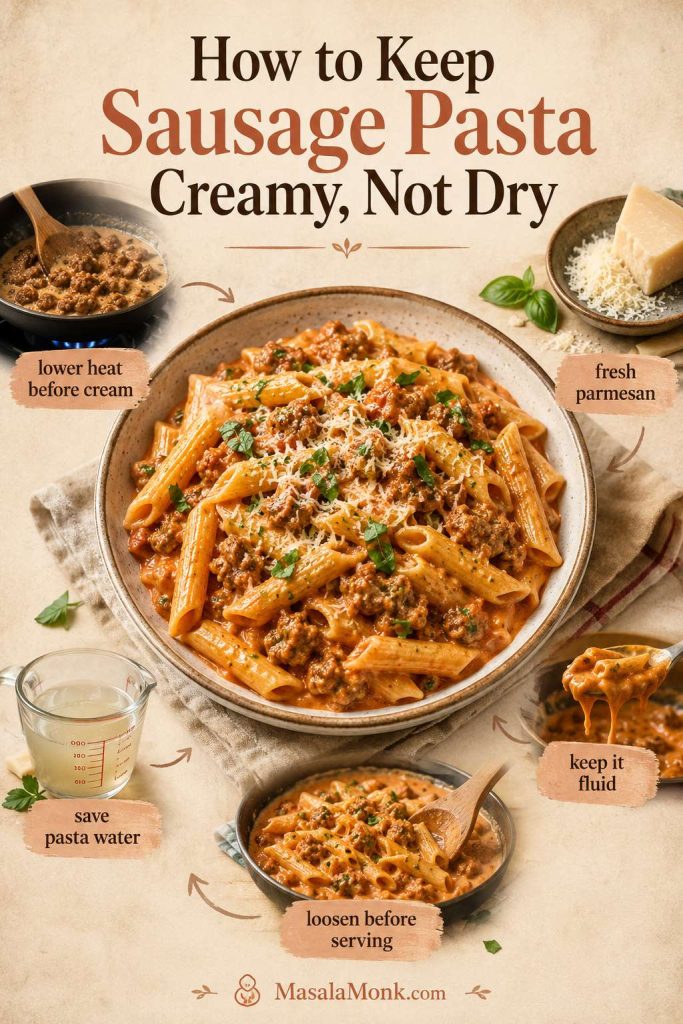
When you are not sure whether the curry is ready, trust the spoon more than the clock. Dip a spoon into the pan and lift it out. The sauce should coat the back in a visible layer instead of sliding off immediately.
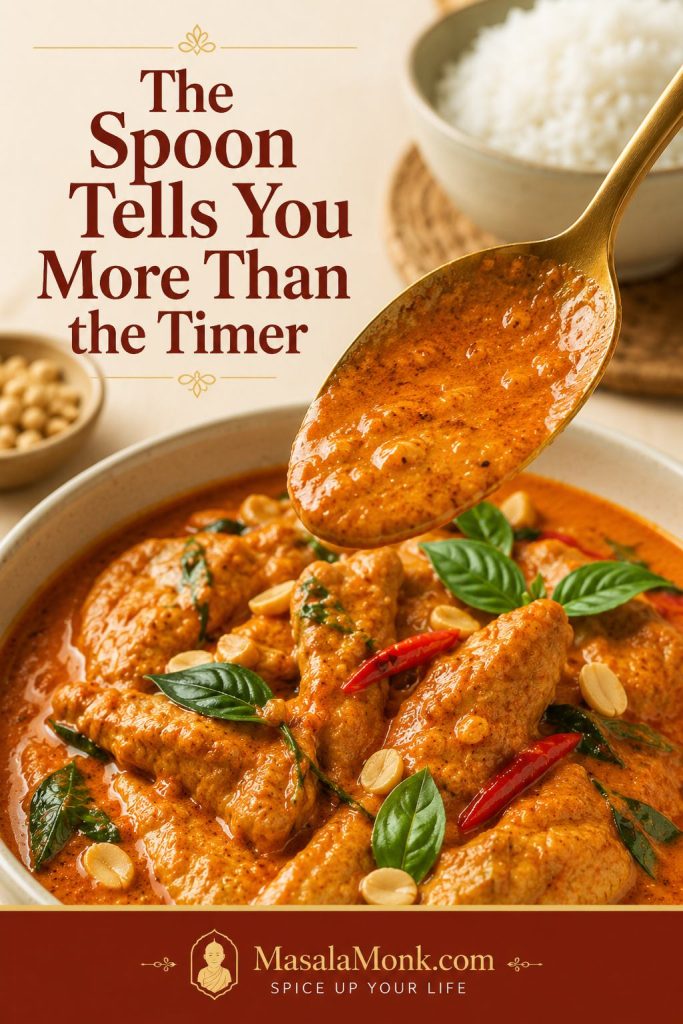
When it is right, the sauce leaves a glossy trail on the spoon and settles over rice instead of disappearing into it. If it becomes too heavy, loosen it with a spoonful of coconut milk, water, or stock. Cornstarch can rescue a rushed sauce, but it should not be the first fix. If the texture is already off, go to the sauce fixes before serving.
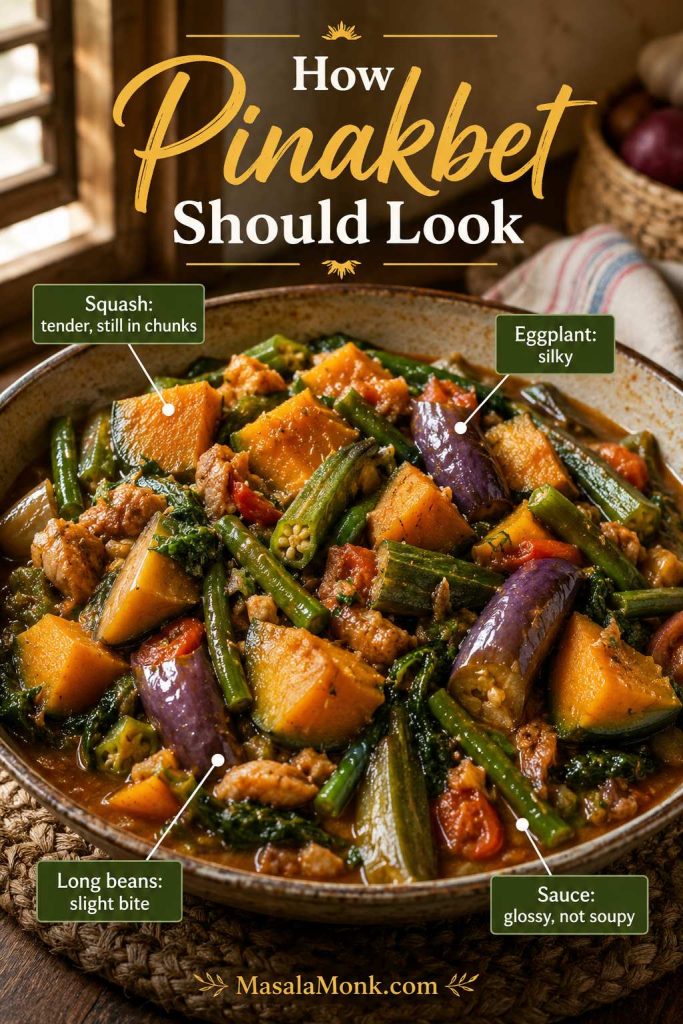
How thick should Panang curry sauce be?
The best texture sits between runny and pasty: it coats the spoon, moves slowly in the pan, and still spoons easily over rice.
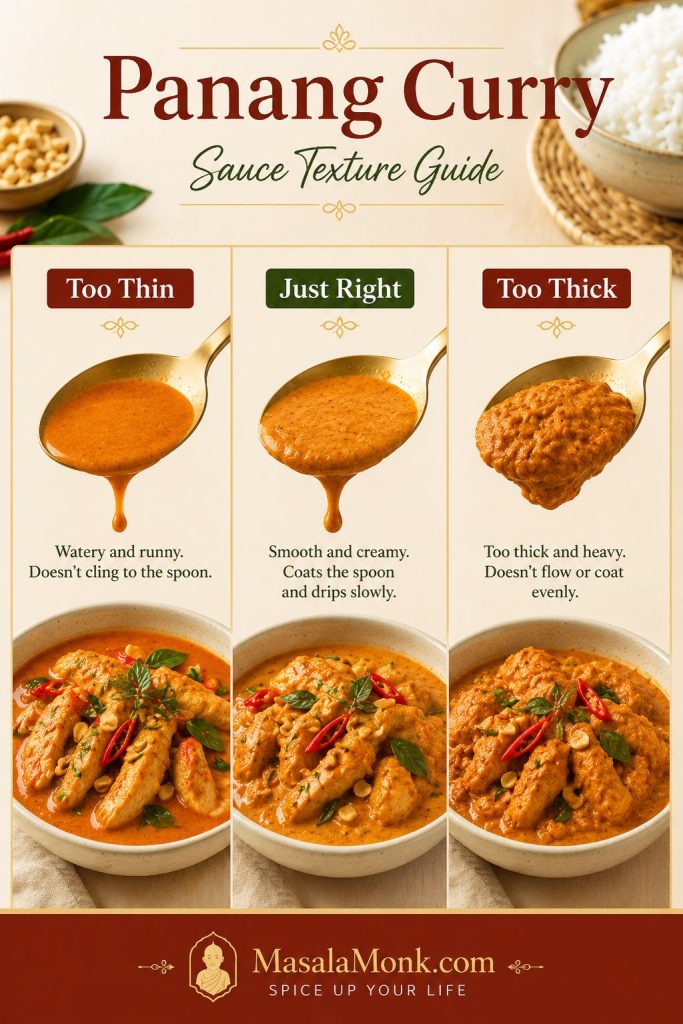
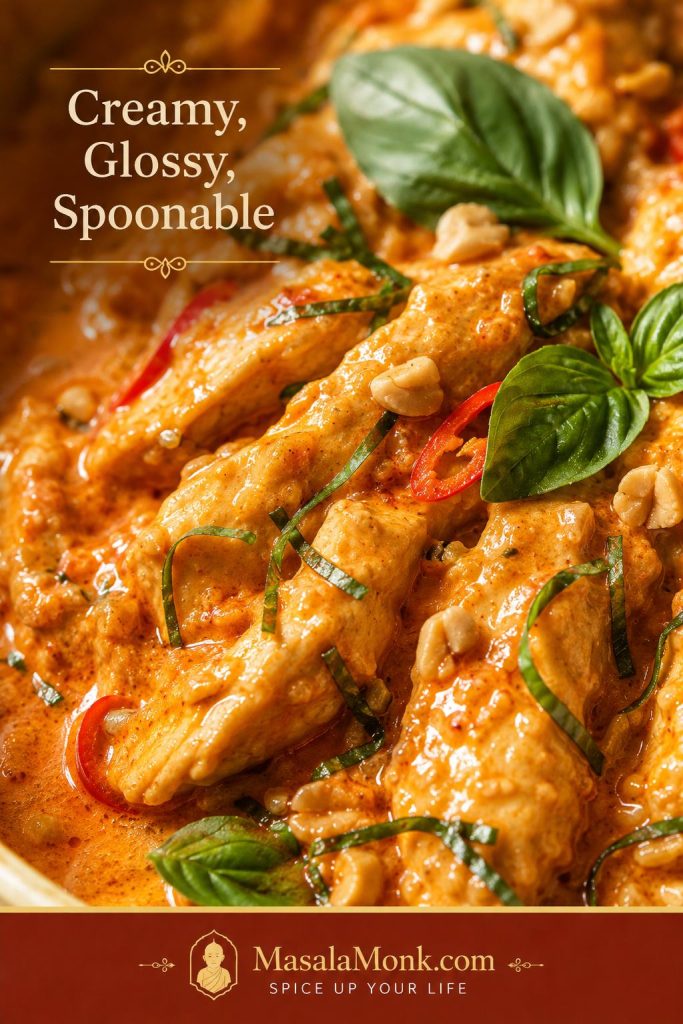
Texture goal: glossy and spoonable, rich enough to coat the protein, but still loose enough for rice.
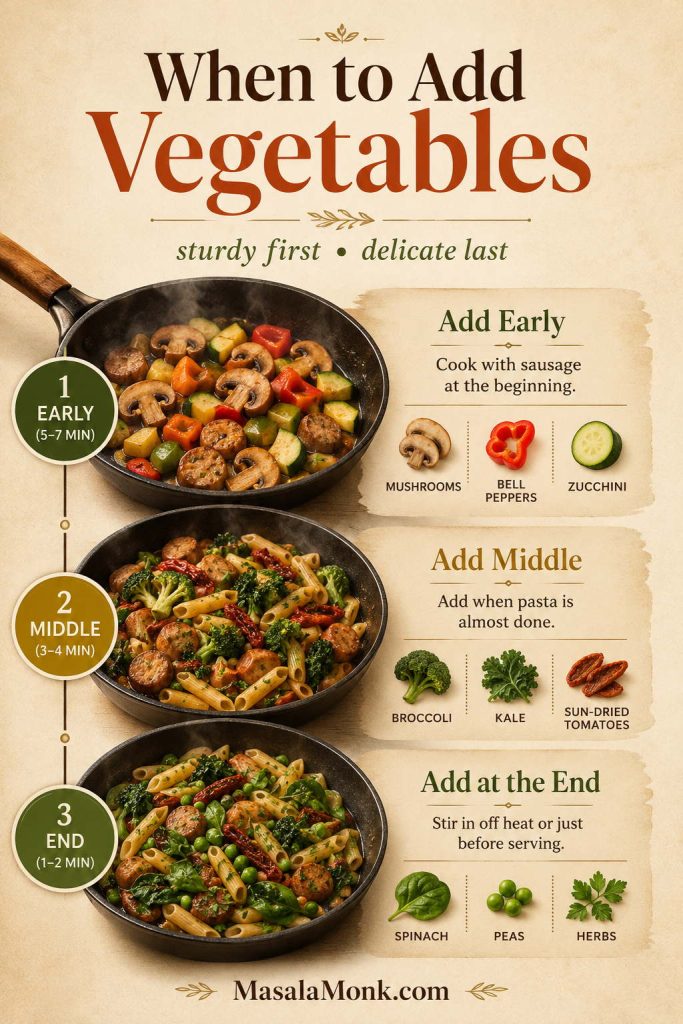
Best Vegetables for Panang Curry
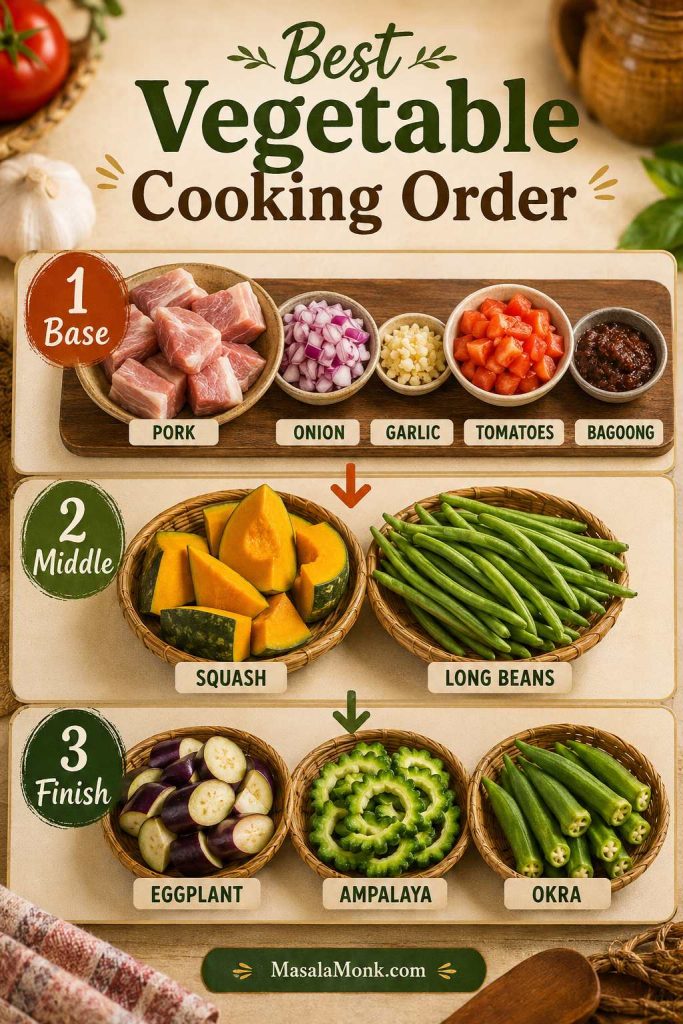
Vegetables can make Panang curry feel fuller and fresher, but they need good timing. Add firm vegetables first, tender vegetables later, and basil at the very end.
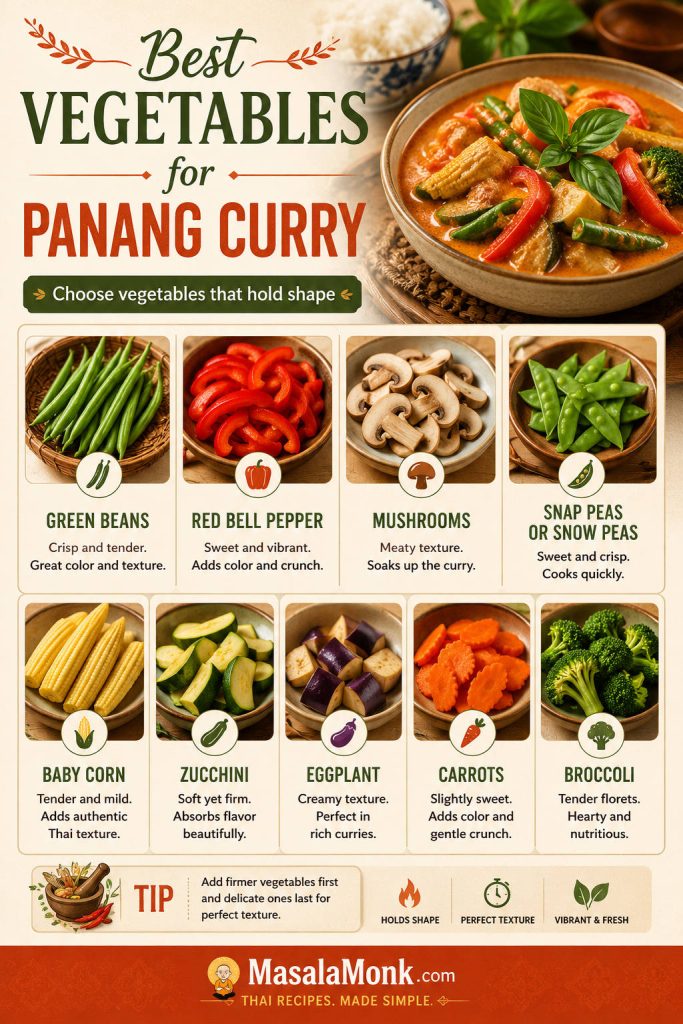
Keep watery vegetables modest, especially mushrooms, zucchini, and spinach. They are delicious here, but a crowded pan can turn a glossy Panang into a thinner curry.
When to add vegetables to Panang curry
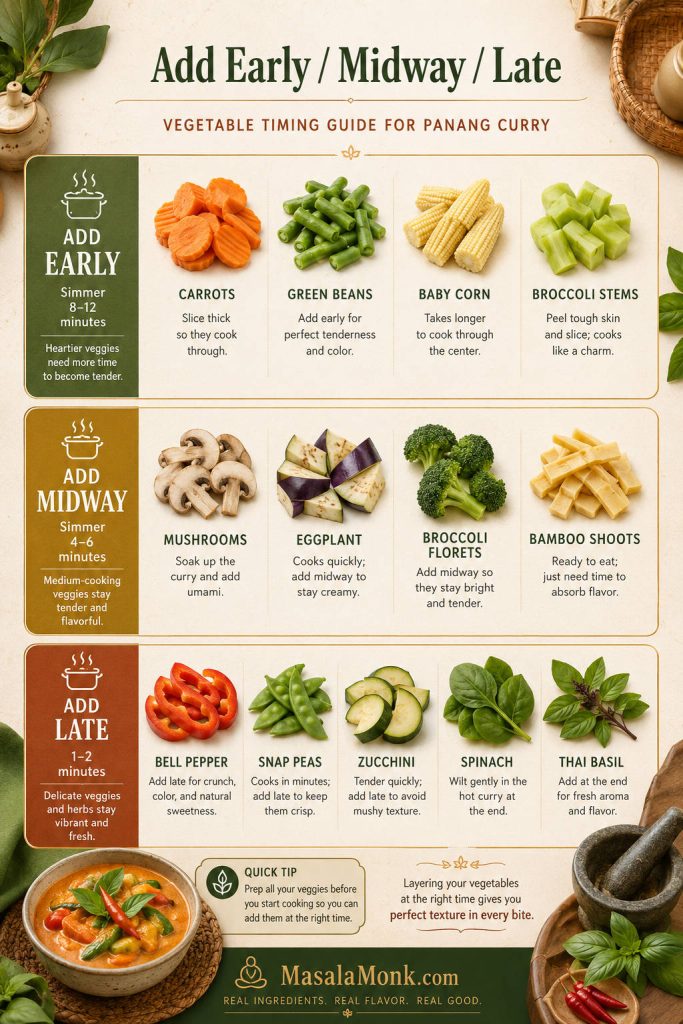
| Add Early | Add Midway | Add Late |
|---|---|---|
| Carrots | Mushrooms | Bell pepper |
| Green beans | Small eggplant pieces | Snap peas or snow peas |
| Small cauliflower florets | Broccoli florets | Zucchini |
| Broccoli stems | Bamboo shoots | Spinach |
| Baby corn | Thai basil |
For a vegetable-heavy curry, use a little more paste and give the coconut base extra time to settle into the right texture. If you are skipping meat completely, jump to the vegetable Panang curry variation.
Chicken, Beef, Tofu, Shrimp and Vegetable Panang Curry
The curry base stays mostly the same, but each version has one thing to protect: juicy chicken, tender beef, intact tofu, just-cooked shrimp, or vegetables that do not water down the pan.
| Version | How Much to Use | Best Method |
|---|---|---|
| Chicken Panang curry | 1½ lb / 680g chicken thighs or breast | Slice thin and simmer until just cooked through. Thighs are juicier; breast cooks faster. |
| Beef Panang curry | 1–1¼ lb / 450–570g tender beef | Slice thinly against the grain and add near the end so it stays tender. |
| Tofu Panang curry | 14–16 oz / 400–450g firm tofu | Press if watery, brown if desired, then add after the sauce has reduced. |
| Shrimp Panang curry | 1 lb / 450g peeled shrimp | Add during the final few minutes and cook only until opaque. |
| Vegetable Panang curry | 3–4 cups mixed vegetables | Add firm vegetables first and quick-cooking vegetables later. |
Chicken Panang Curry
Chicken is the best first version because it is easy to cook and lets the curry shine. Thighs are the most forgiving choice because they stay juicy. Breast also works, but it needs thin slicing and close timing.
For the most reliable chicken version, use 1½ lb / 680g chicken, 3 tablespoons curry paste, one 400ml can of coconut milk or coconut cream, and 1–1½ cups vegetables. Red bell pepper, green beans, baby corn, mushrooms, and snap peas or snow peas all work well.
Beef Panang Curry
Use sirloin, ribeye, flank steak, flat iron, or another tender cut. Slice it thinly against the grain, then add it after the sauce is mostly finished. Simmer just until cooked through.
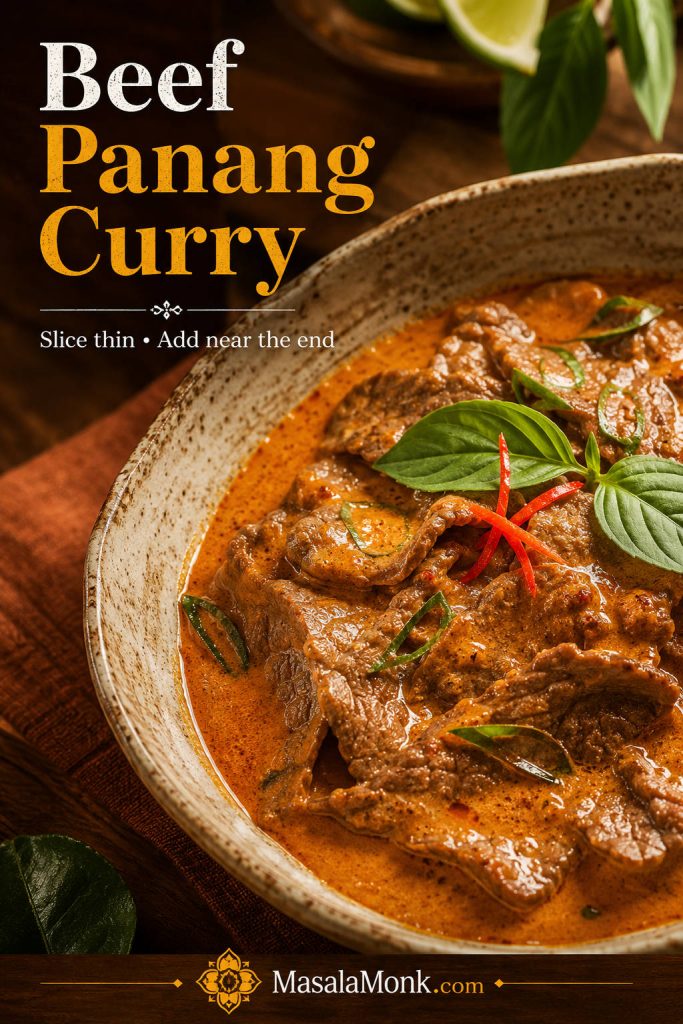
Do not simmer thin steak-style beef for 15 minutes the way you might simmer chicken. It can turn chewy, especially if it is very lean. For a slow-cooked beef Panang, use a tougher cut such as chuck or short rib and treat it as a separate slow-braised version.
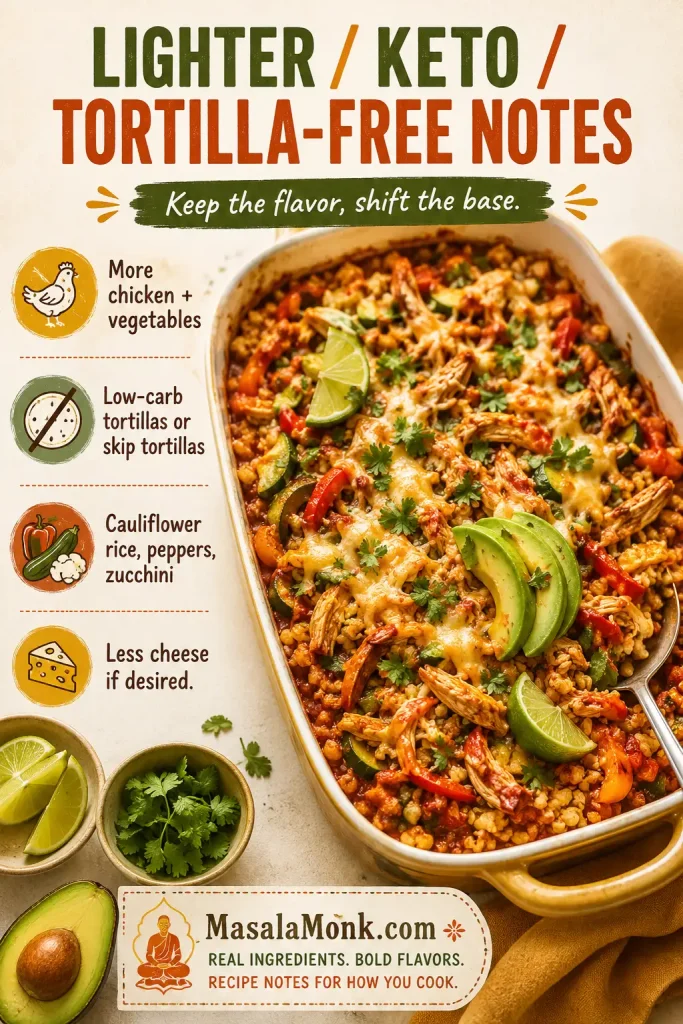
Tofu or Vegan Panang Curry
Tofu Panang curry can be excellent, but the tofu needs texture and the curry paste needs a label check if you are cooking vegan. Use firm or extra-firm tofu. Press it for 15–20 minutes if it is watery, then cut it into cubes or slabs. For better texture, brown the tofu before adding it to the sauce.
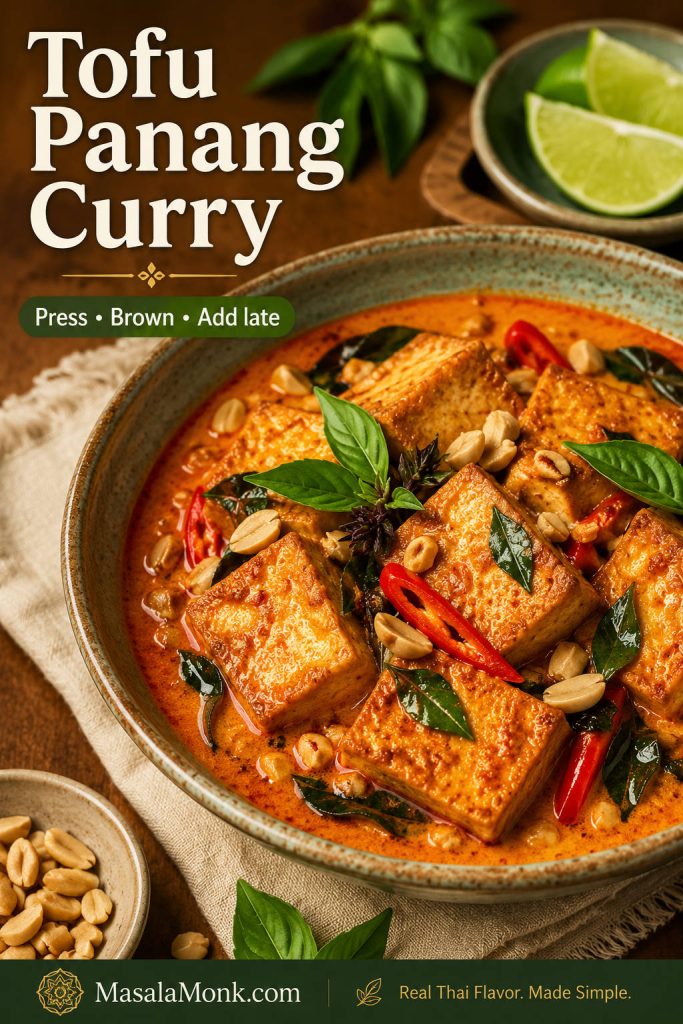
Vegan paste warning: many Thai curry pastes contain shrimp paste, fish sauce, or other seafood ingredients. Use a vegan Panang curry paste, or use vegan red curry paste and adjust it with peanuts, a tiny pinch of nutmeg, and a little coriander or cumin.
Replace fish sauce with soy sauce or tamari. Add tofu after the sauce has reduced so it does not break apart while the curry thickens. Finish with basil and crushed peanuts.
Shrimp Panang Curry
Shrimp Panang is the fastest version, but it asks for restraint. The sauce should be ready before the shrimp goes in, because shrimp only needs a few minutes to turn sweet, opaque, and tender.
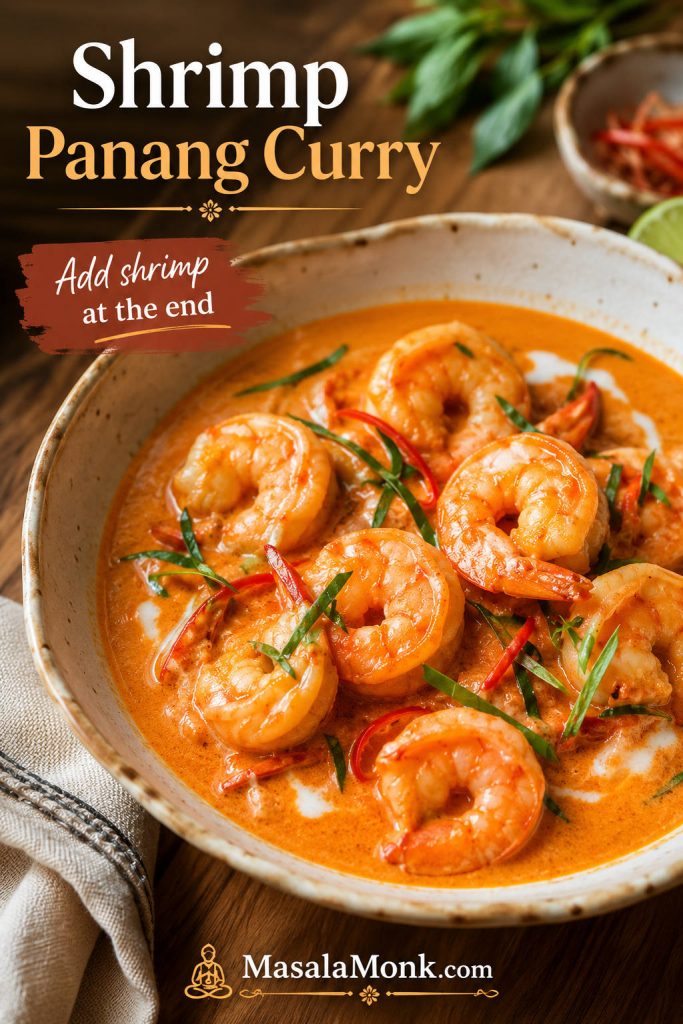
Once the shrimp is in the pan, simmer only until it curls gently and loses its translucency. Serve right away.
Vegetable Panang Curry
Vegetable Panang curry works best when you choose vegetables that hold their shape. Green beans, bell peppers, mushrooms, broccoli, snap peas or snow peas, baby corn, carrots, zucchini, and eggplant can all work, but they should not all go in at once.
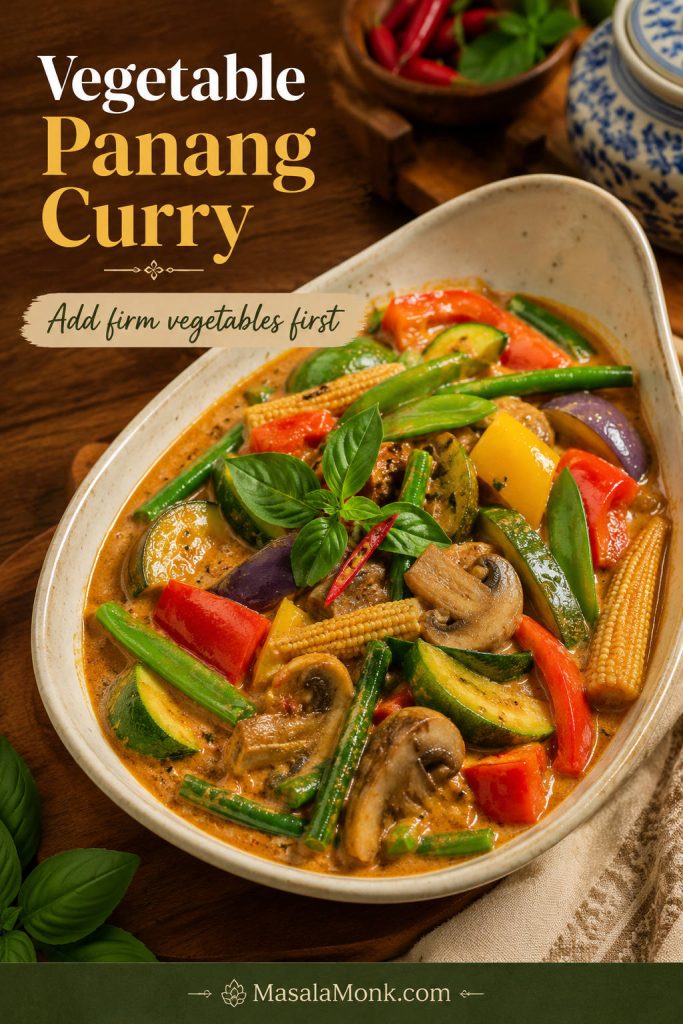
Add firm vegetables first, quick-cooking vegetables later, and basil at the very end. For a vegetable-heavy curry, start with 1 extra teaspoon of paste. A very full pan may need up to 1 extra tablespoon. Once you have chosen the version, return to the recipe card for the base method.
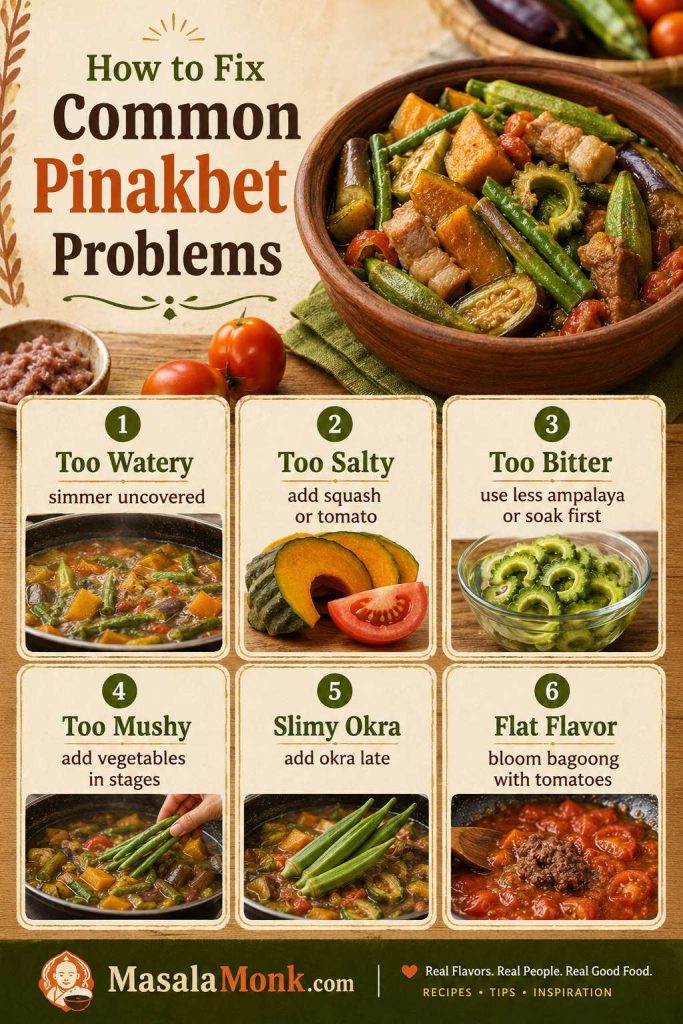
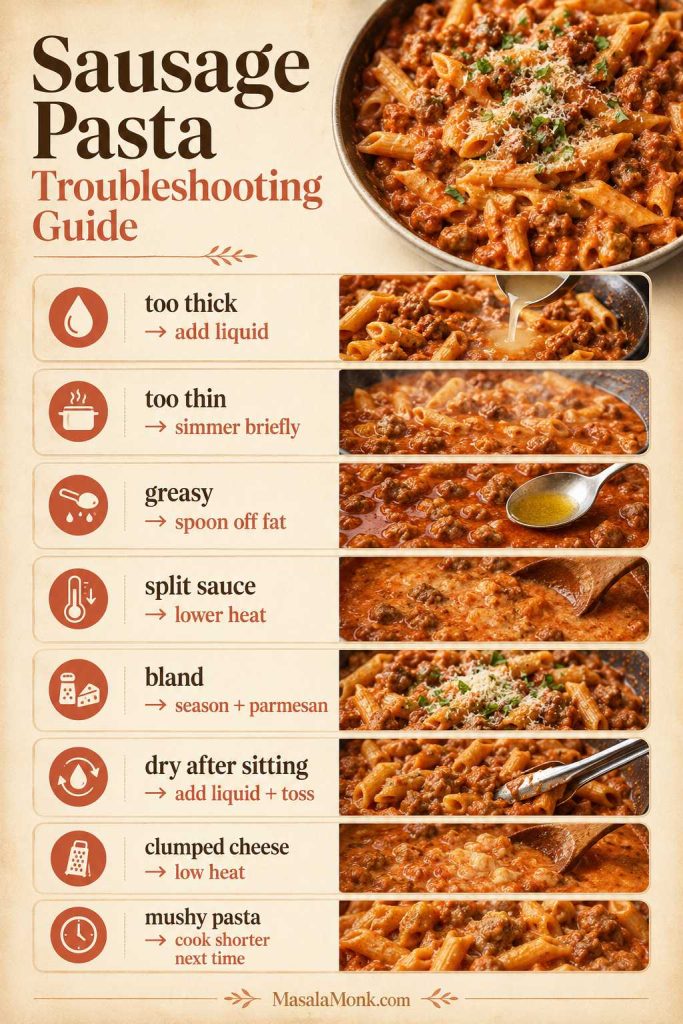
How to Fix Panang Curry Sauce
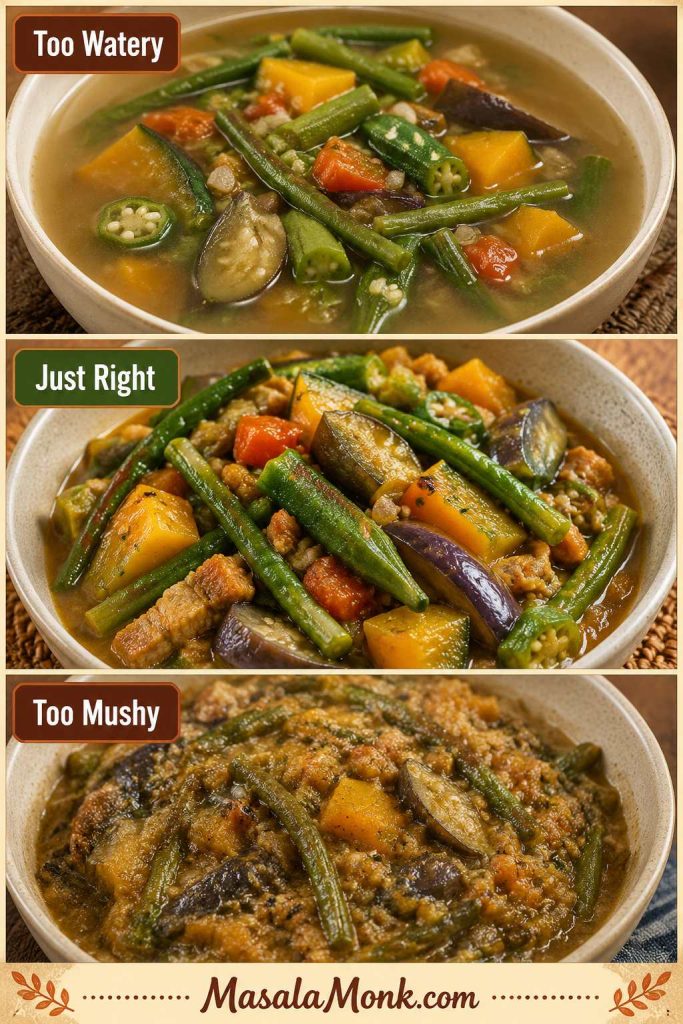
This is the section to use when the curry looks wrong five minutes before dinner. Most Panang problems are not disasters; they are small balance problems. A watery vegetable, a salty paste, thinner coconut milk, or too much heat can throw the pan off, but most of it is fixable.
You are looking for sauce that visibly coats the protein, but still has enough movement to spoon over rice. When the protein is already cooked, remove it with a slotted spoon and fix the sauce on its own.
Quick fixes for Panang curry sauce
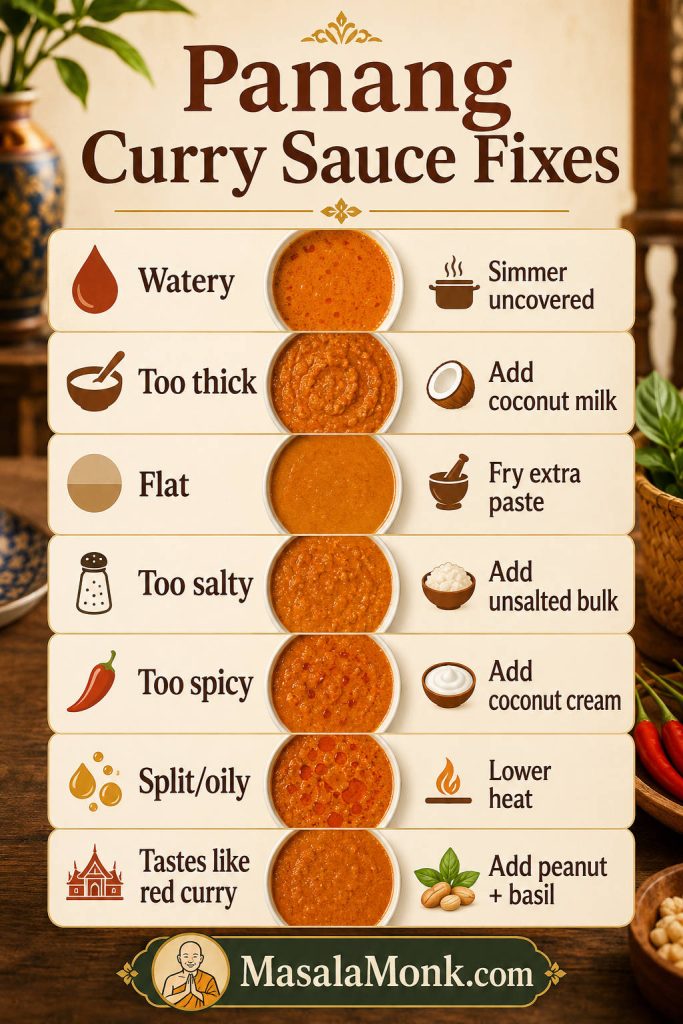
| Sauce Problem | What It Feels Like | How to Fix It |
|---|---|---|
| Too watery | The chicken looks like it is floating instead of coated. | Simmer uncovered. If the protein is cooked, remove it and reduce the sauce alone. Use coconut cream next time. |
| Too thick | The curry looks heavy, pasty, or dry instead of glossy. | Add coconut milk, water, or stock one spoonful at a time, then stop as soon as it turns spoonable. |
| Tastes flat | The curry smells fine but tastes dull or unfinished. | Fry extra paste separately and stir it in. Add fish sauce, sugar, lime leaves, or basil. |
| Too salty | The salt hits first and the coconut sweetness disappears. | Add unsalted bulk such as coconut milk, vegetables, tofu, or chicken. Balance with a tiny amount of sugar. |
| Too spicy | The heat overwhelms the coconut and aromatics. | Add coconut cream or coconut milk and serve with extra rice. |
| Oily or split | The curry looks greasy around the edges. | Lower the heat, stir gently, and add a splash of coconut milk. |
| Tastes like red curry | The curry is loose, chile-forward, and missing the rounded Panang note. | Add peanuts or peanut butter, simmer briefly, and finish with Thai basil and finely sliced tender makrut lime leaves. |
Panang Curry Recipe Card
A creamy chicken Panang curry with store-bought paste, full-fat coconut, makrut lime leaves, peanuts, and Thai basil. Rich, spoonable, and easy to adapt for beef, tofu, shrimp, or vegetables.
Ingredients
- 1½ lb / 680g boneless chicken thighs or chicken breast, thinly sliced
- 3 tbsp / about 45g Panang curry paste
- 1 tbsp / 15ml neutral oil, or thick coconut cream from the top of the can
- 13.5–14 oz / 400ml full-fat coconut milk or coconut cream
- 1–1½ tbsp / 15–22ml fish sauce, plus more to taste, depending on paste saltiness
- 2 tsp–1 tbsp / 8–15g palm sugar or brown sugar
- 4–6 makrut lime leaves, torn, plus optional finely sliced tender leaves for finishing
- 2 tbsp / about 15g crushed roasted peanuts, or 1 tbsp / about 16g peanut butter
- 1 red bell pepper, thinly sliced, or 1–1½ cups mixed vegetables for the chicken version
- ½ cup loosely packed Thai basil leaves
- Optional garnish: sliced red chile, extra basil, crushed peanuts, finely sliced makrut lime leaves
- Steamed jasmine rice, for serving
Instructions
- Prep. Slice the chicken thinly and prepare the vegetables, herbs, and garnishes before cooking.
- Fry the paste. Heat oil or thick coconut cream in a wide skillet, wok, or 12-inch saucepan over medium heat. Add the Panang curry paste and cook, stirring often, until fragrant and slightly darker — about 1–2 minutes for softer paste or 3–5 minutes for thicker Thai paste.
- Build the sauce. Stir in coconut milk or coconut cream gradually until smooth. Add fish sauce, sugar, torn makrut lime leaves, and peanuts or peanut butter.
- Simmer. Add chicken and firm vegetables such as carrots, green beans, or baby corn. Simmer gently until the chicken is cooked through: about 6–8 minutes for thin chicken breast or 8–12 minutes for thin chicken thighs. The thickest piece should reach 165°F / 74°C. Add bell pepper, snap peas or snow peas, zucchini, or spinach near the end.
- Adjust. If the sauce looks loose, simmer uncovered until glossy and spoonable. Taste after thickening, then adjust with fish sauce, sugar, coconut milk, or extra fried paste if needed.
- Finish. Turn off the heat and stir in Thai basil. Garnish with extra basil, crushed peanuts, sliced chile, or finely sliced makrut lime leaves.
- Serve. Serve hot with steamed jasmine rice.
Recipe Notes
- Beef: use 1–1¼ lb / 450–570g thinly sliced sirloin, ribeye, flank steak, or another tender cut. Add near the end and simmer briefly.
- Tofu: use firm or extra-firm tofu. Press if watery, brown first if desired, and add after the sauce has reduced.
- Vegan Panang: use vegan curry paste and replace fish sauce with soy sauce or tamari.
- Shrimp: build and thicken the sauce first, then add shrimp near the end and cook only until opaque.
- Vegetable Panang: use 3–4 cups mixed vegetables and add 1 teaspoon to 1 tablespoon extra paste depending on volume.
- Richer sauce: use coconut cream. For a milder curry, start with 2 tbsp paste and add more after tasting.
Once the paste smells cooked, the coconut turns glossy, and the basil hits the pan, the curry feels much easier to trust. Spoon it beside jasmine rice, add the final herbs, and you have the kind of weeknight Panang that tastes deliberate instead of rushed.
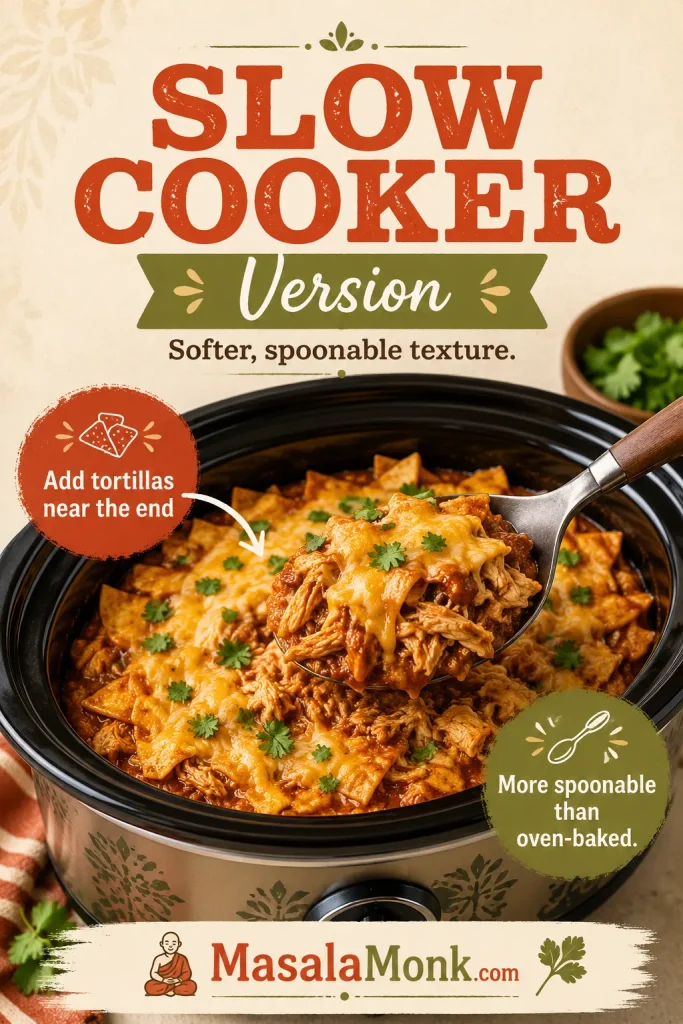
Instant Pot or Slow Cooker Panang Curry
Panang rewards stovetop control, so treat Instant Pot and slow cooker versions as backup methods. They are useful for convenience, but both need a final look at the sauce before serving.
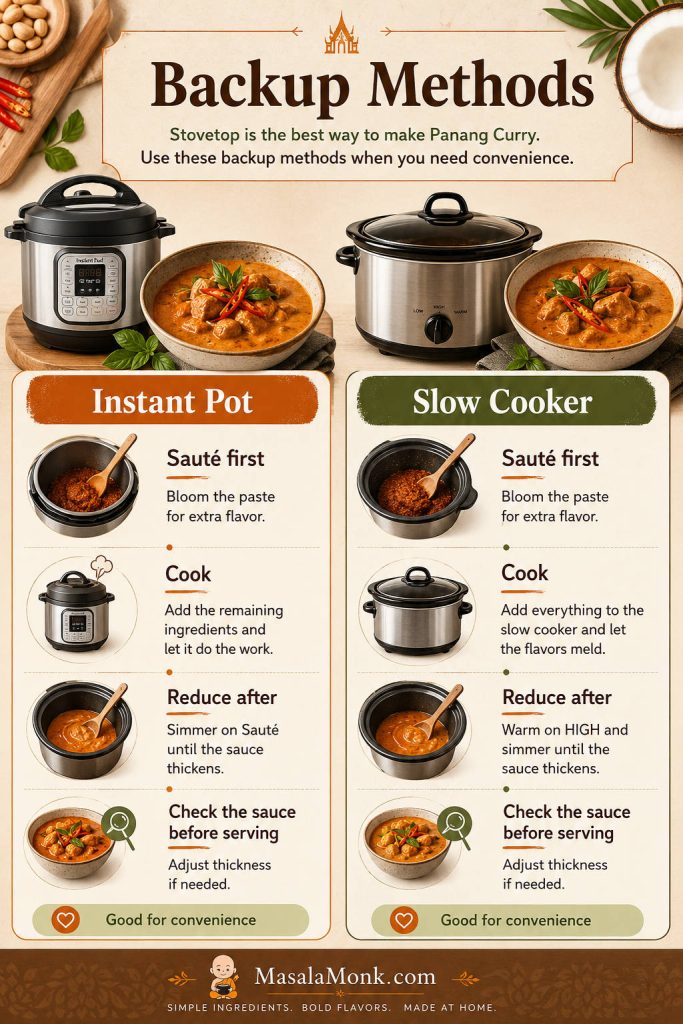
Instant Pot Panang curry
Use sauté first. Fry the paste in oil or thick coconut cream for 1–2 minutes, then stir in coconut milk or cream, fish sauce, sugar, torn lime leaves, and thin chicken pieces. Pressure cook on high for 3–4 minutes, then quick release. Use sauté again to bring the sauce back to a spoonable texture, then finish with basil.
Slow cooker Panang curry
Slow cooker Panang works best with chicken thighs or beef, not thin chicken breast. Fry the paste separately first, then add it to the slow cooker with coconut milk, seasoning, and protein. Cook on low until the meat is tender, usually about 2–3 hours for boneless chicken thighs. If the sauce is thin at the end, reduce it uncovered in a saucepan before adding basil.
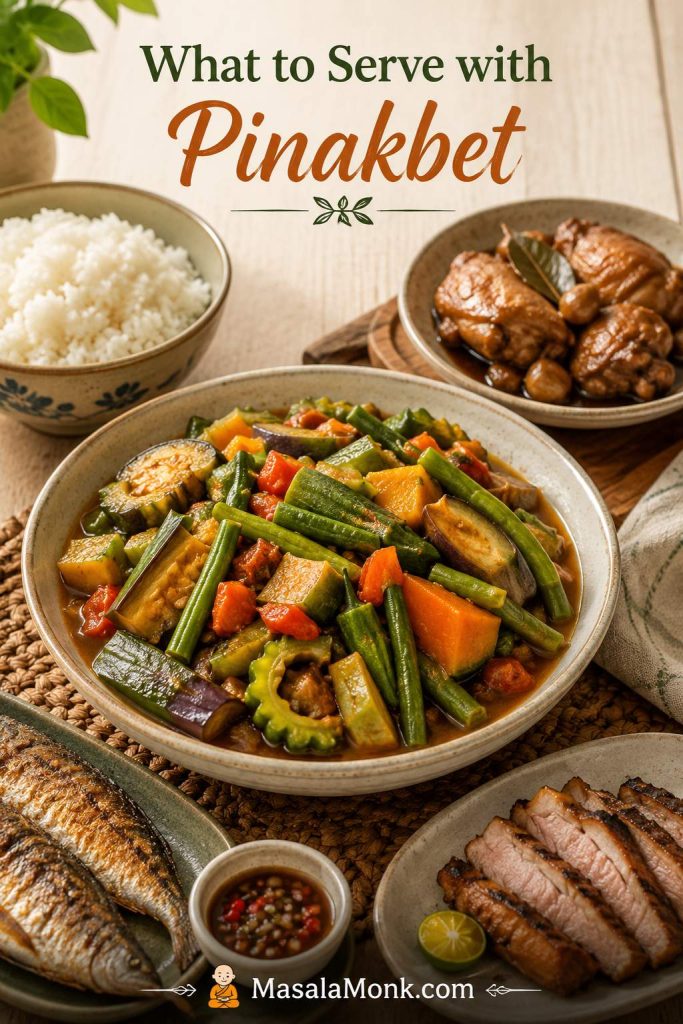
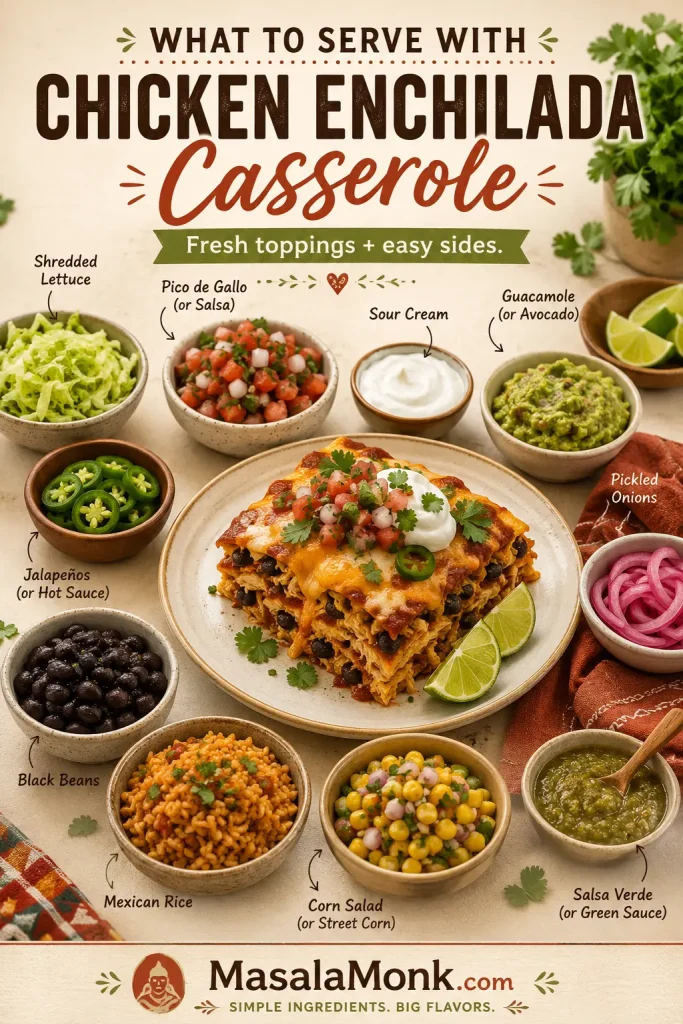
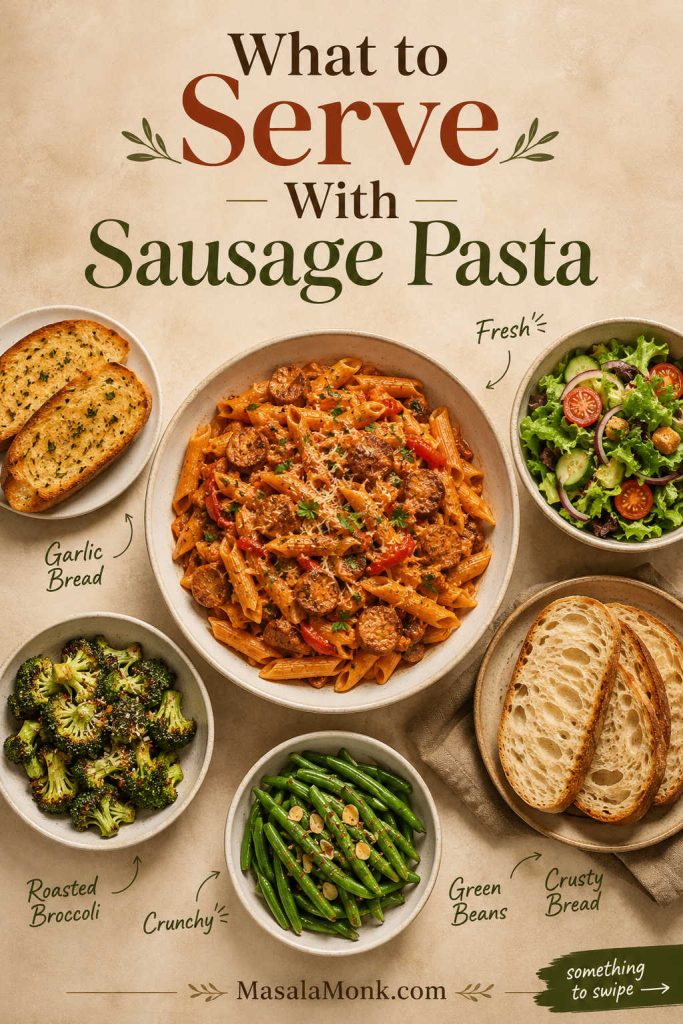
What to Serve with Panang Curry
Panang is rich, so the best sides either catch the sauce or cut through it. Jasmine rice catches the glossy curry; cucumber, herbs, lime, green beans, or Som Tam keep the bowl from feeling heavy. Planning leftovers too? Jump to storage and reheating.
What goes well with Panang curry?
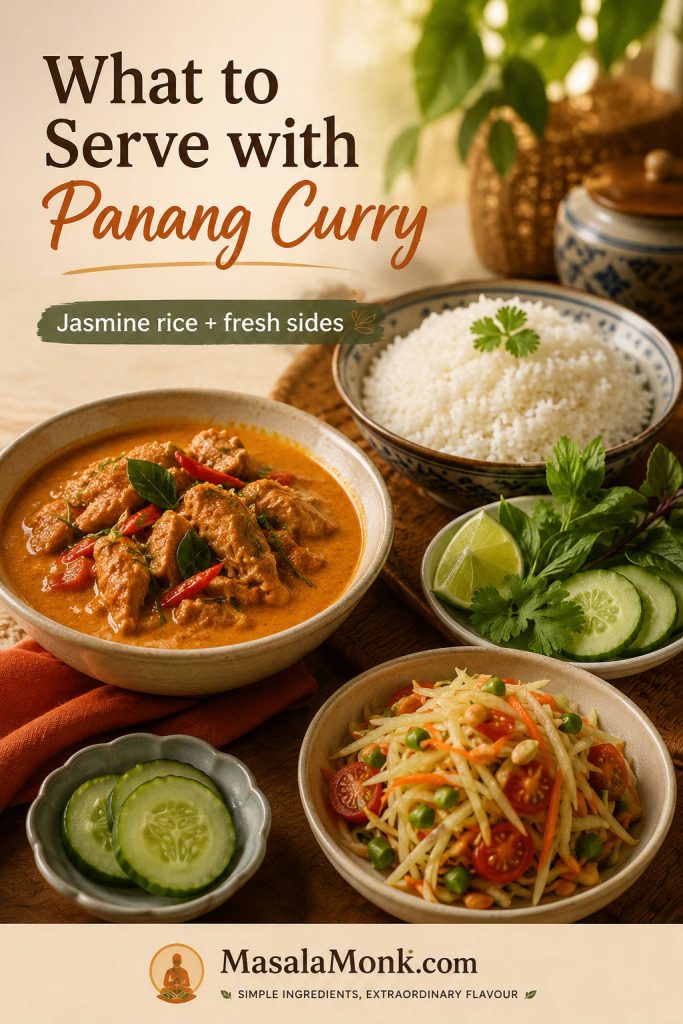
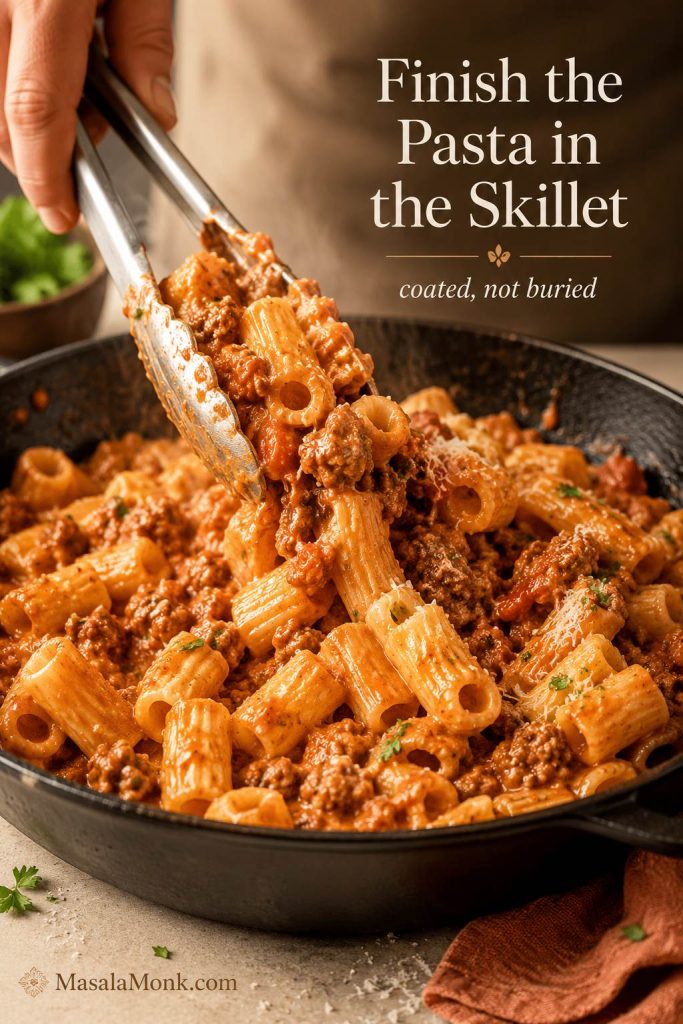
Spoon the curry beside the rice rather than burying it. That way the first few bites stay glossy and concentrated, and the rice catches the sauce slowly instead of muting it all at once. If rice is the part that usually goes wrong, this guide to cooking perfect rice can help.
| Serve With | Why It Works |
|---|---|
| Steamed jasmine rice | Best default; it absorbs the sauce without competing with the curry. |
| Cucumber salad, herbs, lime, or lightly steamed green beans | Fresh sides balance the coconut richness. |
| Roti, flatbread, rice noodles, or coconut rice | Comfort options for a fuller, more restaurant-style meal. |
For a crisp Thai-style side, this Vegan Som Tam Salad gives the fresh, sharp contrast that works well beside a creamy coconut curry.
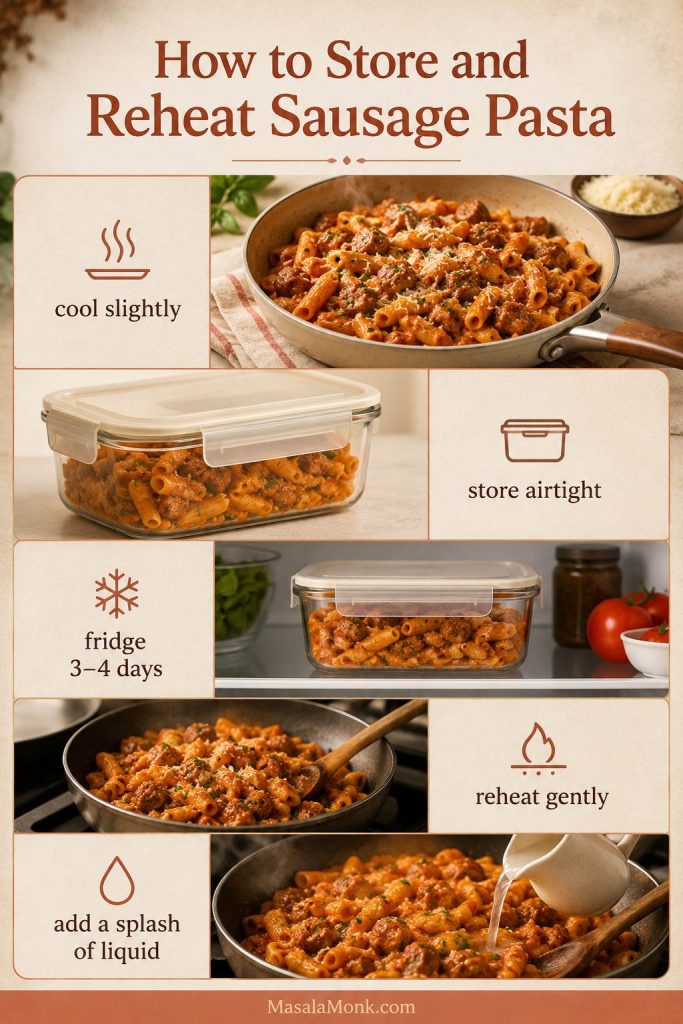
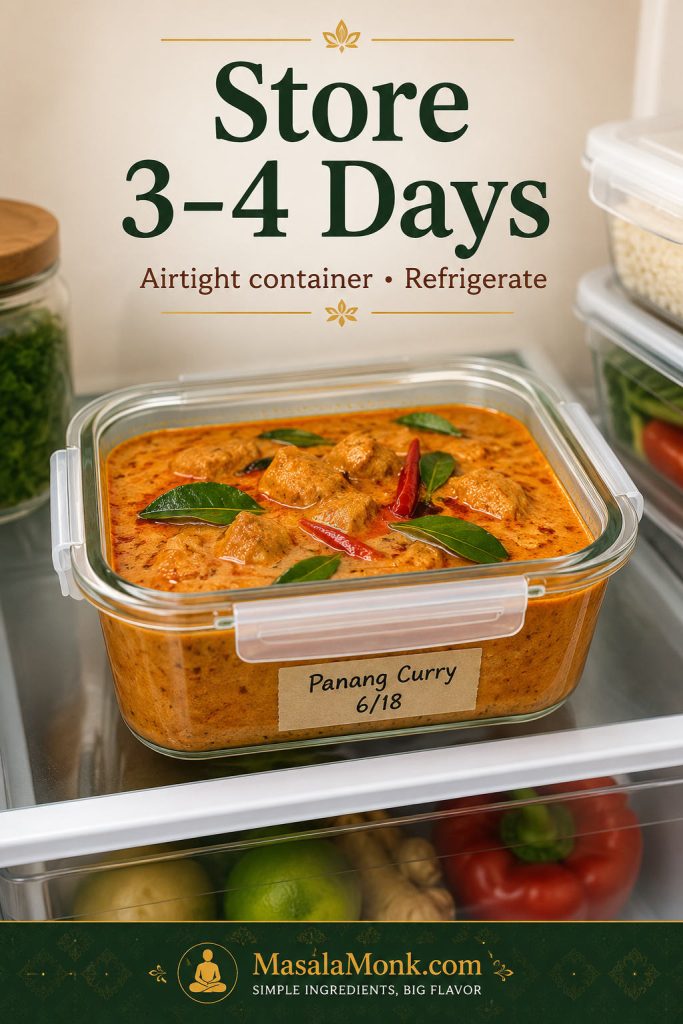
Storage, Freezing and Reheating
How to store Panang curry leftovers
Store leftover Panang curry in an airtight container in the refrigerator for 3–4 days. The sauce will thicken as it chills, so add a splash of coconut milk, water, or stock when reheating.
How to reheat Panang curry
Reheat gently on the stovetop over low to medium-low heat. Avoid hard boiling because coconut-based sauces can split. If the curry looks oily after reheating, lower the heat and stir in a small splash of coconut milk.
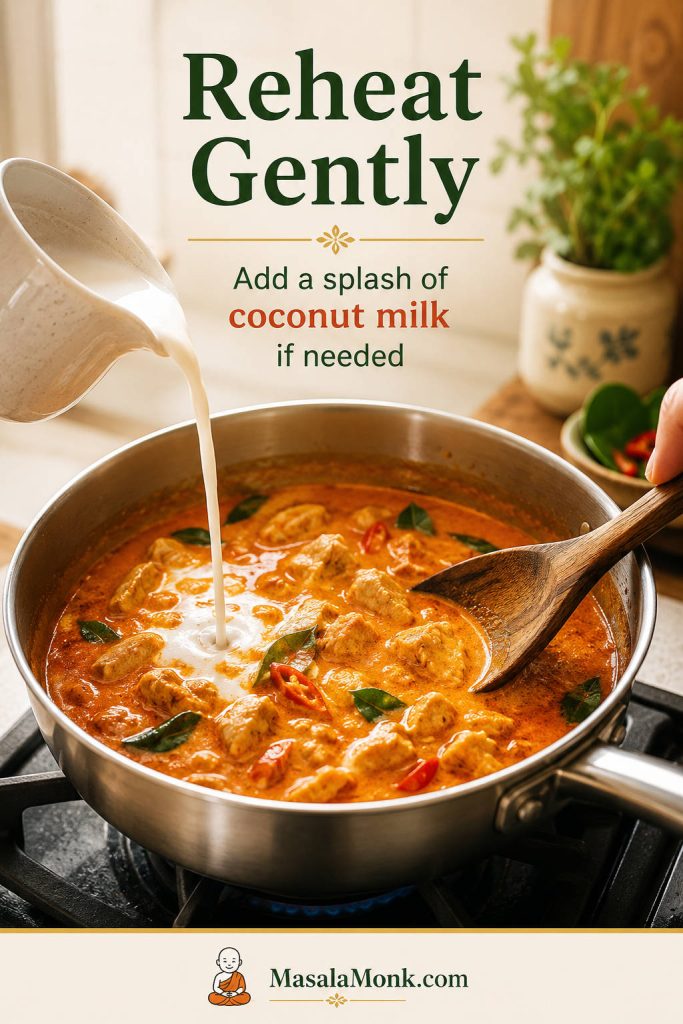
The curry reheats well, but fresh basil does not. For make-ahead cooking, stop before adding the basil if you can, then add it after reheating so the curry tastes fresh again.
You can freeze Panang curry for up to 2 months, but the sauce may look slightly separated or grainy after thawing. Reheat gently and stir in a little coconut milk to smooth it out. Shrimp Panang curry is less ideal for freezing because shrimp can become rubbery after thawing and reheating. Tofu may soften slightly after storage, but it still tastes good.
Panang Curry FAQs
Is Panang curry supposed to be thick?
Panang curry is usually thicker and more concentrated than Thai red curry. It should coat the chicken, tofu, shrimp, beef, or vegetables instead of running like soup.
Is Panang curry very spicy?
Most bowls land in the medium-spicy range, but the paste controls the heat. Start with 2 tablespoons for a gentler curry and add more after tasting.
What does Panang curry taste like?
It tastes creamy, savory, lightly sweet, and aromatic, with a quiet peanut note. Peanut belongs in the background; it rounds the curry without turning it into satay sauce.
Why does my Panang curry taste like red curry?
The curry may be too loose or missing the rounded peanut and lime-leaf finish. Simmer the coconut base until glossy, then add peanut richness, basil, and finely sliced tender makrut lime leaves if you have them.
Can I use red curry paste instead of Panang curry paste?
Yes, as a shortcut. Add peanuts or peanut butter, a tiny pinch of nutmeg, and a little coriander or cumin to move it closer to Panang flavor.
What is the best coconut milk for Panang curry?
Full-fat coconut milk works well, while coconut cream gives the richest result. Light coconut milk makes the curry thinner and less satisfying.
Is Panang curry the same as Panang gai?
Panang gai means chicken Panang curry. “Gai” means chicken, so the method is the same here: thin chicken, coconut sauce, and a fresh basil finish.
Can I make Panang curry without fish sauce?
Use soy sauce, tamari, or a vegetarian fish-sauce alternative. Taste after simmering because substitutes vary in saltiness and depth.
Why is my Panang curry watery?
The coconut may need more time, the milk may be too thin, or the vegetables may have released water. Simmer uncovered before reaching for cornstarch.
Can I make Panang curry ahead?
Chicken, beef, tofu, and vegetable versions reheat well. For the freshest flavor, hold back the basil and add it after reheating.
What vegetables go well in Panang curry?
Green beans, bell peppers, mushrooms, broccoli, snap peas, baby corn, carrots, zucchini, and eggplant all work. Add watery vegetables late.
Can I make this with shrimp?
Build and thicken the sauce first, then add shrimp near the end and cook just until opaque. Do not reduce the curry after shrimp goes in.