Posted on Leave a comment

Easy Spam Fried Rice Recipe

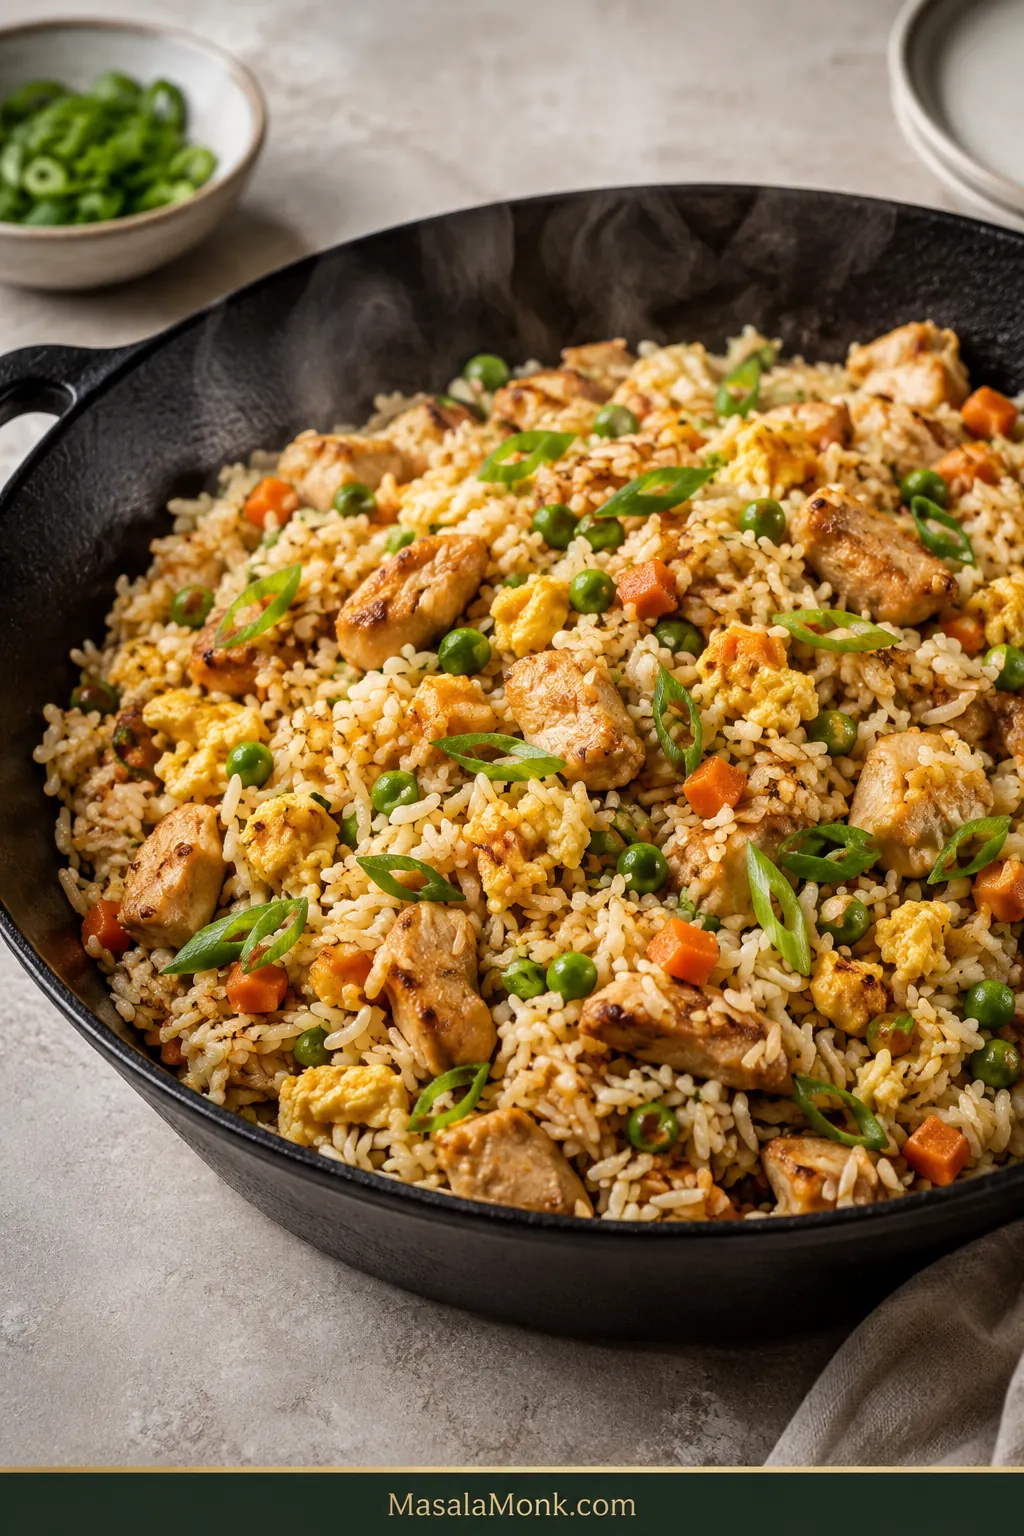
A skillet of fried rice with browned Spam cubes, soft scrambled egg, peas, carrots, scallions, and glossy separated rice being lifted with a spoon.

This Spam fried rice recipe is for the night you have cold rice in the fridge, a can of Spam in the pantry, and no patience for a complicated dinner. The pan does the heavy lifting: crisp salty cubes, soft egg, garlic, scallions, vegetables, and loose grains tossed with just enough soy-oyster-sesame seasoning to make everything savory and glossy.

The trick is not adding everything at once. Brown the Spam until the edges crisp, cook the egg gently, let the rice loosen in a hot pan, and season near the end so the grains stay separate instead of turning soft and salty. Once everything is prepped, the cooking part takes about 12–15 minutes.

After that base makes sense, you can take the same method toward kimchi Spam fried rice, Hawaiian pineapple Spam fried rice, garlic-heavy Filipino-style rice, or a spicy chili-crisp version without losing the texture that makes the dish work.
Spam Fried Rice Guide

Start with the quick method, then use the rice, sauce, egg, variation, serving, and troubleshooting sections to adjust the pan you are actually cooking.

Quick Answer: How to Make Spam Fried Rice

Dice the Spam and brown it in a hot wok or large skillet until the edges look crisp and toasted. Scramble the eggs and set them aside. Stir-fry garlic, scallion whites, vegetables, and cold cooked rice, then add a simple sauce of soy sauce, oyster sauce, sesame oil, and pepper. Fold the crispy Spam and soft egg back through the rice and finish with scallion greens.

A quick visual guide showing browned Spam, soft scrambled egg, cold rice, sauce, and the finished fried rice pan.
The order matters here: brown the Spam, cook the egg gently, fry the cold rice, and add sauce near the end, because that sequence gives the rice its best texture.

Spam Fried Rice at a Glance

  • Main ratio: 1 can Spam + 4 cups cold cooked rice + 3 eggs
  • Base sauce: 2 tbsp soy sauce + 1 tbsp oyster sauce + 2 tsp toasted sesame oil
  • Rice to start with: cold day-old jasmine, long-grain, or medium-grain rice
  • Spam cut: ½-inch cubes for crisp edges and visible bites
  • Pan choice: wok, carbon-steel skillet, cast iron, or large nonstick skillet
  • Heat level: medium-high to high
  • Cook time: 12–15 minutes once everything is prepped

The rice does most of the texture work here. Because chilled rice has less surface moisture, it separates and fries instead of clumping into soft, steamy pockets. If your rice is freshly cooked, there is a quick fix in the rice section below.

Why This Version Works

This dish works best when every ingredient gets a quick moment in the pan before everything comes together. The Spam needs time against the hot surface, the rice needs enough heat to loosen, and the sauce should season the grains without drowning them.

  • Browned Spam comes first. Crisp edges give the finished rice salty-crisp bites instead of soft, barely warmed pieces.
  • Chilled rice keeps the texture loose. Drier grains separate more easily and give you a fluffier pan.
  • Soft egg goes back in near the end. Scrambling it first keeps it tender instead of dry or rubbery.
  • A measured sauce keeps the salt in check. Spam already brings salt, so the soy sauce and oyster sauce need a lighter hand.
  • Vegetables bring contrast. Peas, carrots, scallions, corn, cabbage, or bell pepper help lighten the richness.

Flavor balance: Spam brings salt and richness, rice softens everything, egg adds body, vegetables add relief, and scallions wake the pan up at the end. If the dish tastes heavy, do not add more sauce first. Add freshness, heat, acid, or crunch.

Texture cue: The rice should look glossy and separate, not wet. The Spam should stay visible in browned cubes, and the egg should be soft pieces folded through the rice rather than tiny dry crumbs.

Ingredients You Need

The ingredient list is short, but each piece matters. For the first batch, keep the base simple. After that, use the variation section to move toward kimchi, pineapple, garlic-heavy, spicy, or teriyaki-style fried rice.

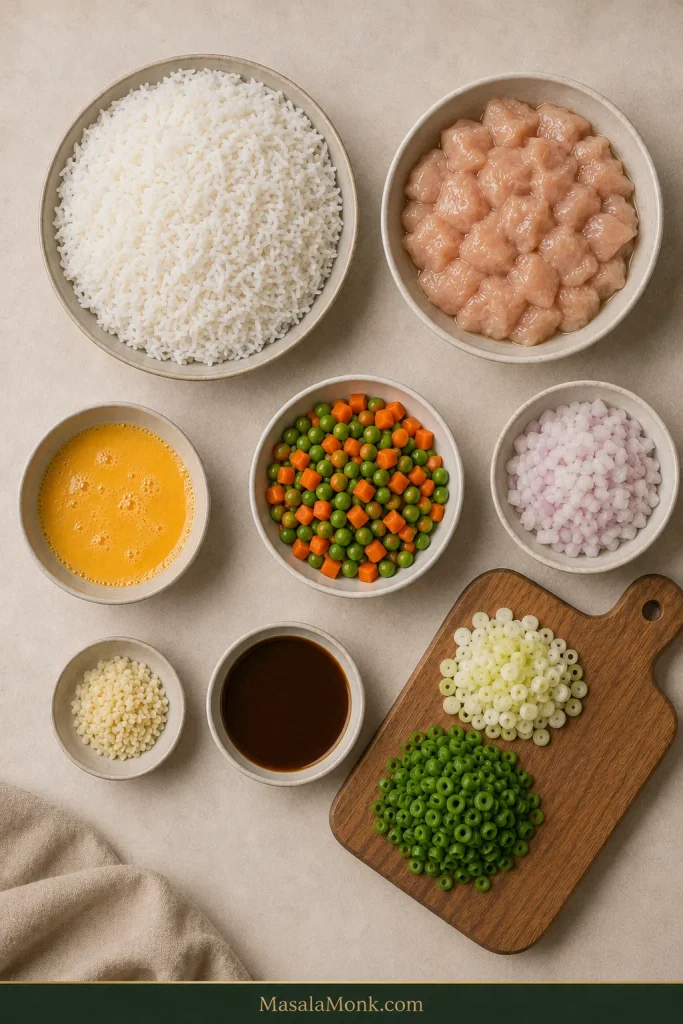
Ingredients for Spam fried rice arranged on a dark surface, including Spam, cold cooked rice, eggs, peas, carrots, scallions, garlic, soy sauce, oyster sauce, and sesame oil.
The base is simple, yet the balance matters: Spam brings salt, rice softens it, egg adds body, and the sauce should pull everything together without taking over.

Spam

Use one 12 oz / 340 g can of Spam. SPAM 25% Less Sodium is helpful if you have it, especially because the sauce also includes soy sauce and oyster sauce. Cut the Spam into ½-inch cubes so the pieces brown quickly while still staying chunky enough to notice in the rice.

For extra texture, dice most of the Spam and roughly mash or crumble a small portion. The cubes give you crisp bites, while the rough pieces spread more savory flavor through the rice.

Comparison of Spam cut styles for fried rice, showing browned half-inch cubes, rough crumbles, and rectangular slices.
Half-inch cubes are the easiest first cut because they brown well and stay visible in the rice, while crumbles spread flavor more widely and slices suit simpler rice bowls.

Cold Cooked Rice

Use 4 cups cold cooked rice, about 680–730 g depending on the rice type and how tightly it is packed. Jasmine rice, long-grain white rice, and medium-grain rice all work well once chilled.

Eggs

Three large eggs are the most balanced amount for 4 cups of rice. Use 2 eggs for a lighter pan or 4 eggs if you want a more breakfast-style Spam egg rice.

Vegetables

Frozen peas and carrots are the easiest classic choice. Before adding them, rinse them briefly under warm water and drain them well. Corn, cabbage, bell pepper, onion, edamame, and extra scallions also work, but avoid adding too many watery vegetables at once.

Aromatics

Garlic and scallions are enough for the base recipe. Add garlic after the Spam has browned so it does not burn before the meat gets crisp. Use the scallion whites while cooking and save the green tops for the finish.

Sauce

The base sauce uses soy sauce, oyster sauce, toasted sesame oil, a little sugar, and white pepper. Soy sauce seasons the rice, oyster sauce adds depth, sesame oil brings aroma, sugar rounds the edges, and white pepper gives the rice a gentle fried-rice finish without making it hot.

The Rice That Gives You Separate Grains

The easiest rice to work with is cold, cooked, and slightly dry on the surface. It should not be hard or stale, but it should not be hot and steamy when it hits the pan.

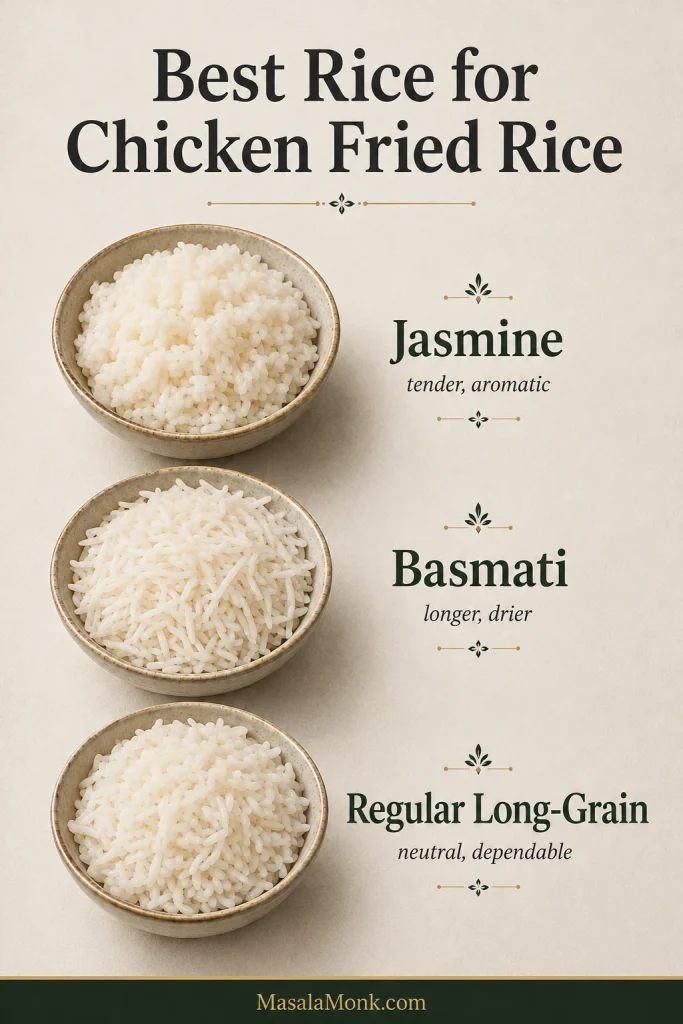
Three bowls of rice labeled day-old jasmine, long-grain white, and chilled medium-grain rice for making fried rice.
Good fried rice starts before the pan gets hot. If the grains are cool, lightly dry, and easy to separate, they are much more likely to fry instead of clump.

If you are starting from uncooked rice, this guide on how to cook rice perfectly is useful for getting the base right before you chill it for fried rice.

Cold Day-Old Rice

Day-old rice is the most forgiving option at home. After a night in the refrigerator, the grains lose some surface moisture and separate more easily in a hot pan.

Jasmine Rice

Jasmine rice is the easiest everyday choice because it separates well once chilled but still tastes soft and fragrant.

Long-Grain White Rice

Long-grain white rice gives you a fluffier, more separate pan, especially if you want the grains to stay distinct.

Medium-Grain Rice

Medium-grain rice works well when it is fully chilled. It gives the dish a slightly chewier, more cohesive texture. Before cooking, break up the clumps so the rice does not go into the pan in large blocks.

Fresh Rice Emergency Fix

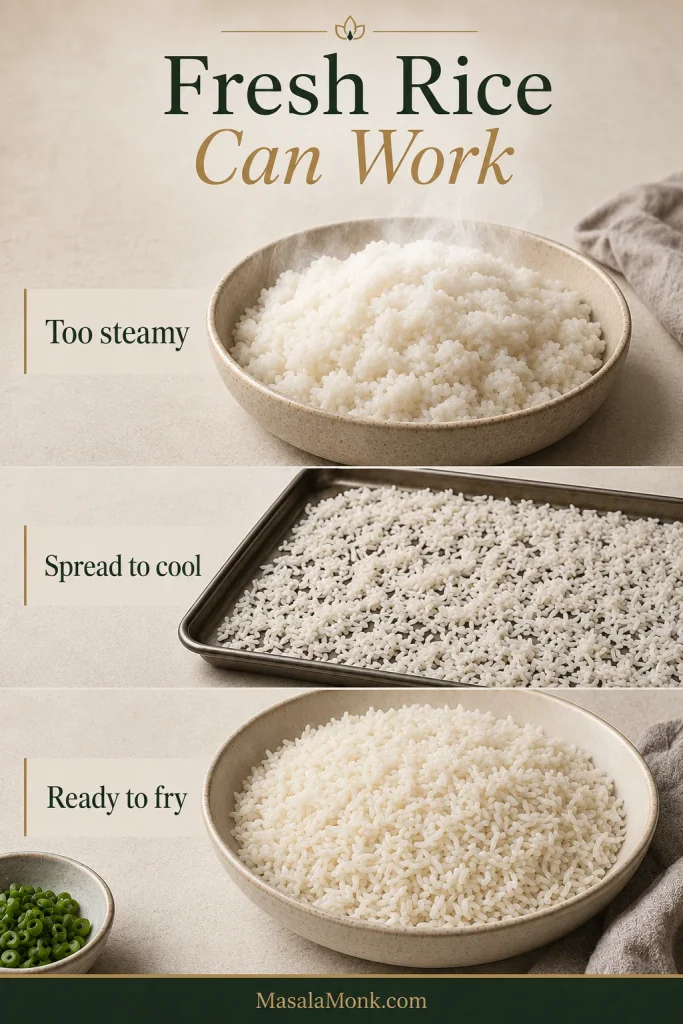
No day-old rice? You can still make this work. Spread freshly cooked rice in a thin layer on a tray or large plate, let the steam escape, and chill it uncovered until the surface feels cooler and drier. Even 20–30 minutes of cooling is better than adding hot rice straight from the cooker.
Freshly cooked rice spread thinly across a tray to cool before being used for fried rice.
Fresh rice is not a dealbreaker; however, the steam needs to escape first, so spreading it out gives the grains a better chance of frying well.

If the rice still feels damp, use a slightly wider pan, give it more time before adding the sauce, and avoid stirring nonstop. The pan should sound active, not steamy. Also, if you have more cooked rice than you need, save the rest for something sweet like rice pudding with cooked rice.

Avoid this: Very wet rice, overcooked rice, and hot rice straight from the pot. Those are the main reasons fried rice goes soft.

How to Make It

The basic rhythm is simple: crisp the Spam, scramble the egg, fry the rice, season lightly, and fold everything together.

Once the pan is hot, everything moves quickly, so dice the Spam, break up the rice, beat the eggs, drain the vegetables, and mix the sauce before you turn on the stove.

A step-by-step visual guide showing sauce mixing, egg scrambling, Spam browning, rice frying, sauce adding, and the finished fried rice.
Once the pan is hot, everything moves quickly, so having the Spam, rice, eggs, vegetables, and sauce ready makes the method easier and more reliable.

1. Mix the Sauce

In a small bowl, stir together soy sauce, oyster sauce, toasted sesame oil, sugar, white pepper, and optional water, broth, or Shaoxing wine. This gives you one seasoning mix to add later, instead of measuring bottles over a hot pan.

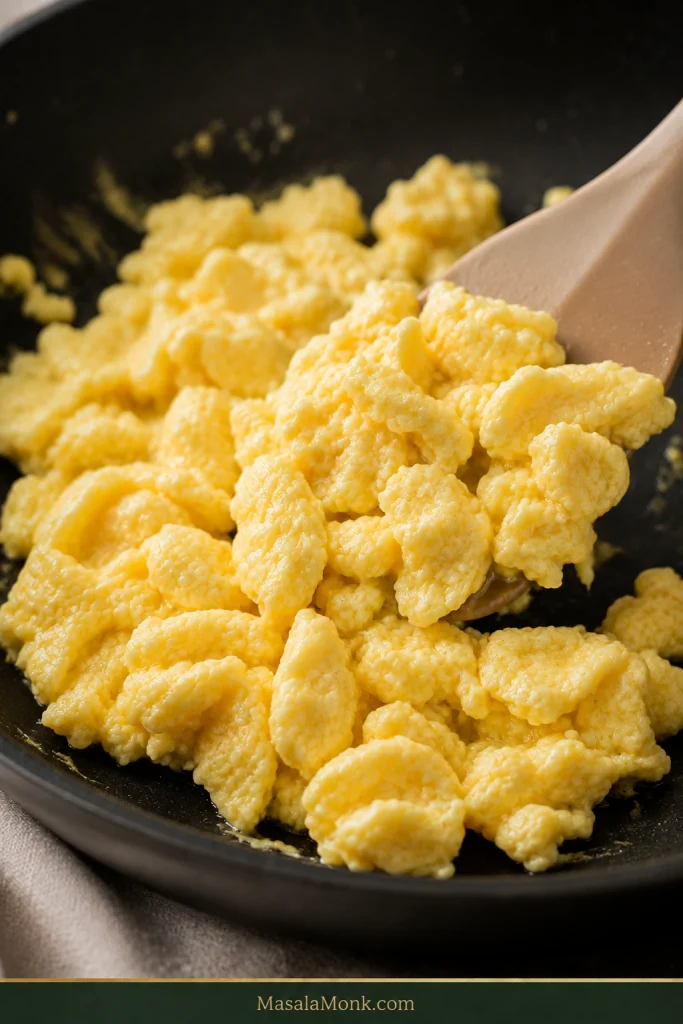
2. Scramble the Eggs

Heat 1 teaspoon of the neutral oil in a wok or large skillet over medium-high heat. Add the beaten eggs and scramble just until softly set. They should still look tender when you move them to a plate, because they will warm through again at the end.

Soft scrambled eggs in a skillet being moved with a spatula while still glossy and tender.
Pull the eggs while they still look soft and glossy. Later, they will finish gently in the hot rice instead of turning dry.

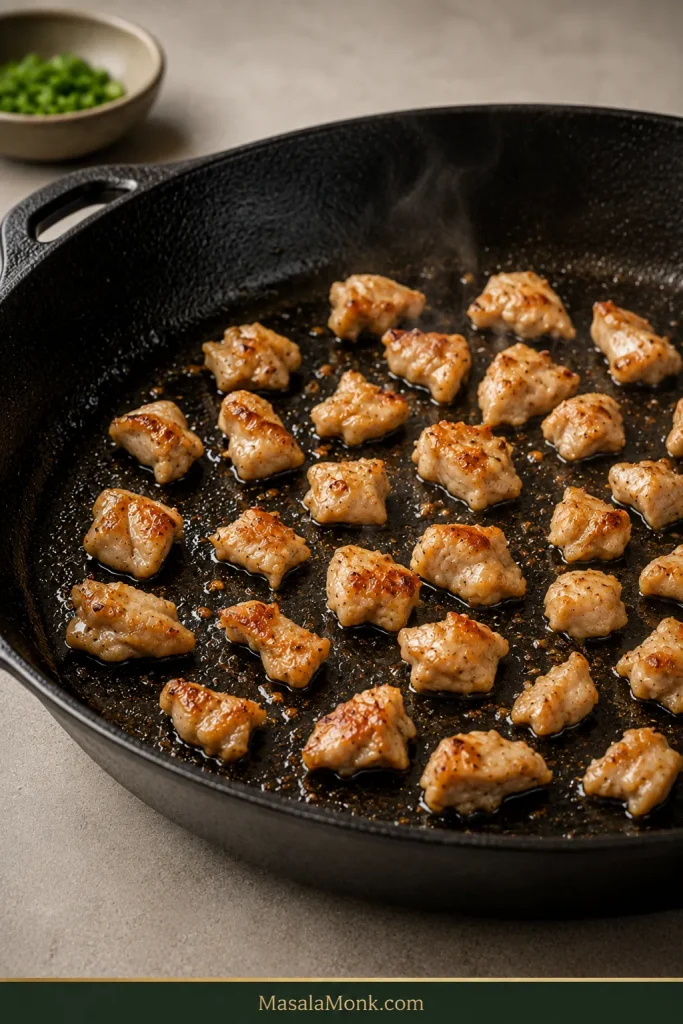
3. Brown the Spam

Add another teaspoon or two of oil only if the pan looks dry, then add the diced Spam. Spread it into a single layer and let it sit long enough to brown before stirring. The pieces should look darker at the edges and smell toasted, not just warmed through.

Cubes of Spam browning in a skillet until the edges look crisp and caramelized.
Give the Spam enough contact with the pan before stirring, because those browned edges bring much of the dish’s salty, savory character.

This step gives the finished rice its best salty-crisp bites. If your pan is crowded, transfer the browned Spam to a plate and add it back with the eggs near the end. In a wide wok, you can leave it in the pan or push it to one side.

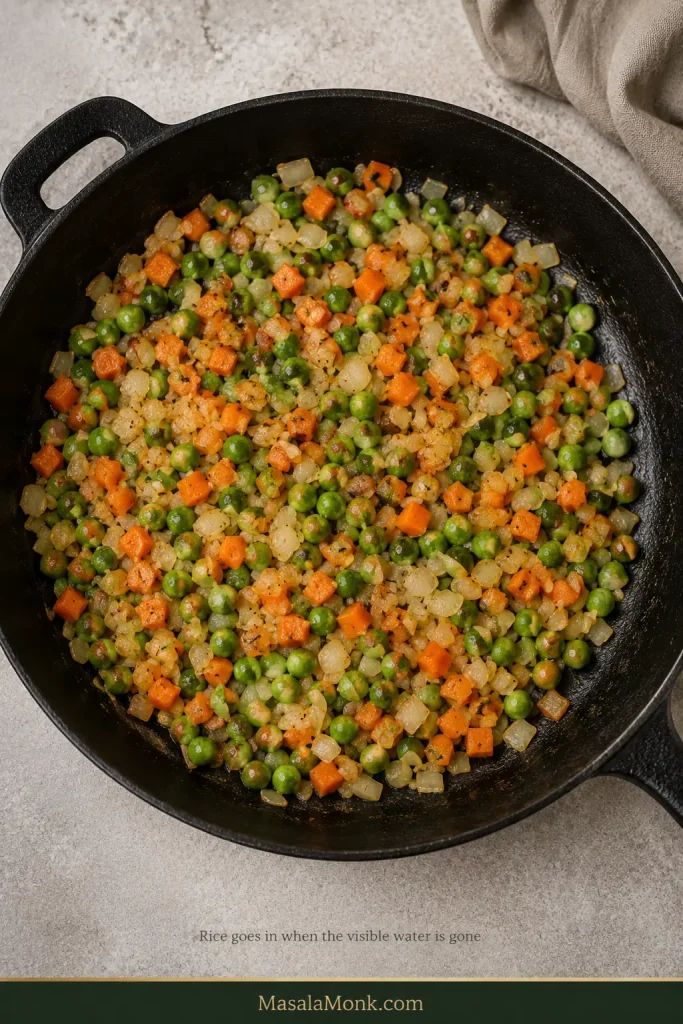
4. Add Garlic, Scallion Whites, and Vegetables

Scatter in the garlic and scallion whites and stir for about 20–30 seconds, just until fragrant. Add the peas and carrots and cook until they are hot and dry. If the vegetables release water, pause and let that moisture cook off before adding the rice.

5. Add the Rice

Add the cold rice and press gently on any clumps with the spatula. At first, the grains may feel firm from the fridge. Keep tossing and pressing until they loosen, turn hot, and start to separate. If the pan sounds steamy instead of sizzling, give the rice another minute before adding the sauce.

Cold rice in a skillet being pressed from clumps into loose grains with a spatula.
Cold rice often goes in stiff and clumped, but gentle pressure and steady heat help the grains loosen and fry instead of steaming.

For a few crisp bits, spread the rice across the pan and let it sit undisturbed for 30–60 seconds before tossing again.

6. Add the Sauce Around the Pan Edge

In a wok, stainless skillet, or cast-iron pan, pour the sauce around the hot edge so it sizzles briefly before you toss it through the rice. If you are using nonstick, drizzle the sauce evenly over the rice and toss right away. Either way, stop and taste before adding more soy sauce; the Spam will keep seasoning the dish as you eat.

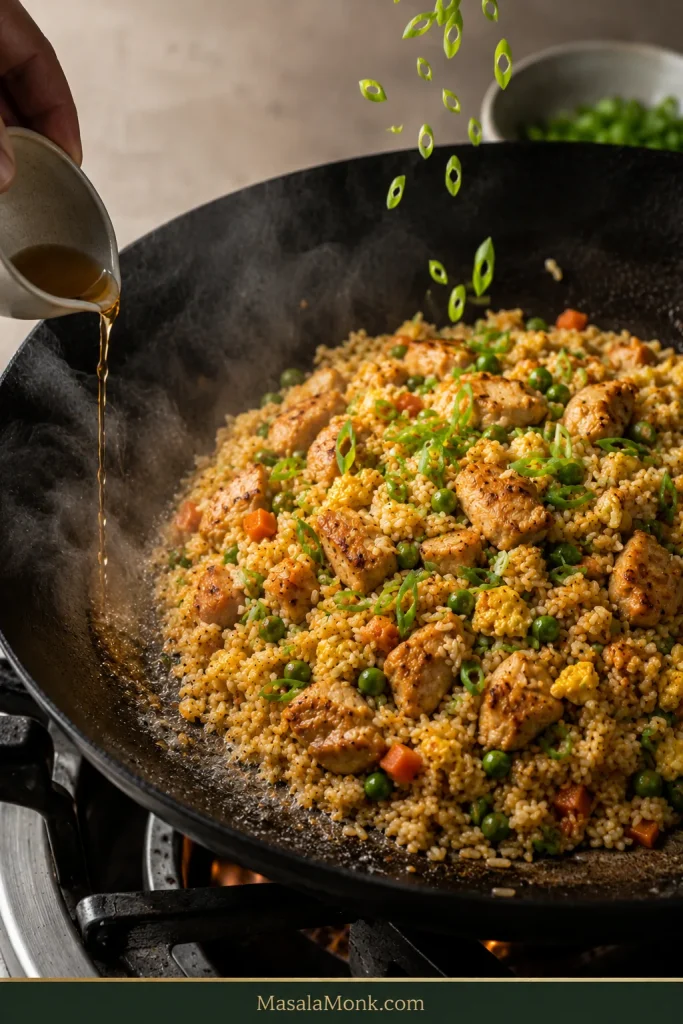
Sauce being poured around the exposed hot edge of a wok while fried rice cooks in the center.
When sauce hits the hot pan edge first, it wakes up quickly before coating the rice, which gives the whole pan a cleaner, more even savory finish.

7. Fold the Egg Back In

Add the soft scrambled eggs back to the pan and fold them through the rice with the crispy Spam. The finished pan should taste salty-savory, a little rich, and balanced by scallions or vegetables. Finish with scallion greens, extra white pepper, sesame seeds, chili crisp, or a tiny drizzle of sesame oil.

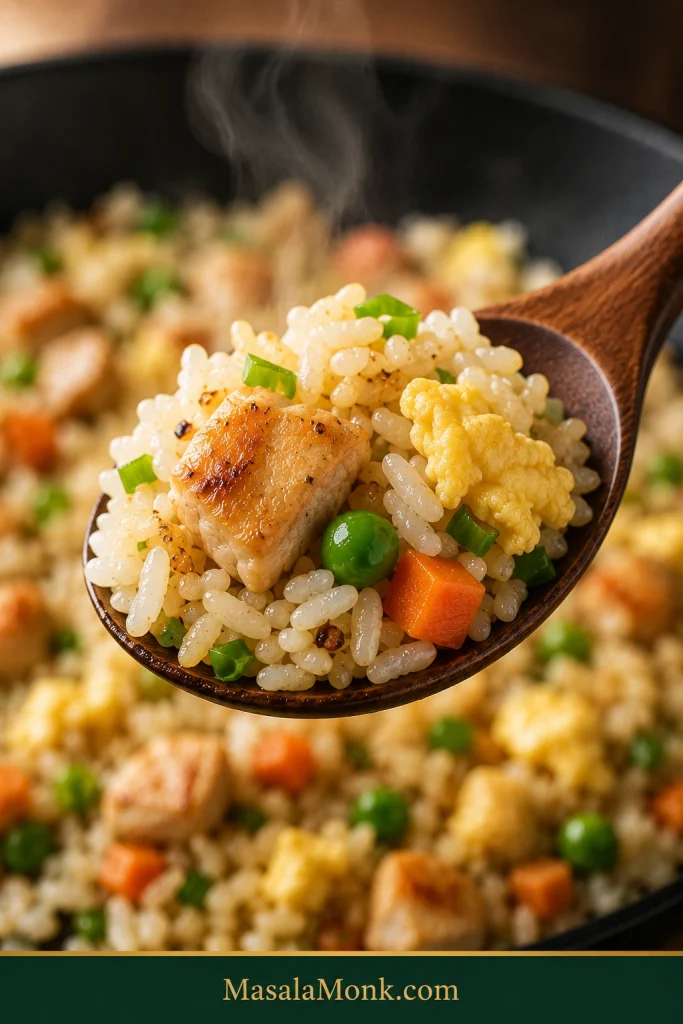
A close-up spoonful of finished fried rice with separate grains, browned Spam cubes, egg, scallions, peas, and carrots.
The finished texture should look glossy and loose rather than wet, with crisp Spam and tender egg balancing the richness of the rice.

Spam Fried Rice with Egg

Egg belongs in the base version because it balances the salty Spam and makes the rice more filling. It also gives the dish that familiar Spam-and-eggs comfort without turning the whole pan into a breakfast scramble.

A bowl of fried rice with visible scrambled egg, browned Spam cubes, scallions, peas, and carrots.
Egg does more than add protein. It also softens the salty edge of the Spam and makes the whole pan feel rounder and more complete.

For 4 cups of cooked rice, 3 large eggs give you visible pieces of egg without overwhelming the grains. Use 2 eggs if you want a lighter pan, or 4 eggs if you want the dish more protein-heavy.

The easiest method is to scramble the eggs first, remove them while still soft, and fold them back in at the end. You can also push the rice aside and scramble the eggs in an open space in the pan, but that works best in a wide wok or large skillet.

If you often have eggs to use up, these easy egg dishes are useful for quick meals beyond fried rice.

Best egg texture: Take the eggs off the heat when they are just set. If they cook all the way through at the start, they can turn dry by the time the rice is finished.

Spam and Rice vs Spam Fried Rice

People use “Spam and rice” to mean a few different meals, from a simple bowl to a full fried rice pan. The difference matters because the cooking method changes the texture.

  • Spam and rice is usually browned Spam served over plain white rice.
  • Spam egg rice is often a simple bowl or plate with Spam, egg, and rice.
  • Spam fried rice means the rice itself is stir-fried with Spam, egg, sauce, aromatics, and vegetables.
  • Spamsilog is a Filipino-style plate with Spam, garlic rice, and egg, usually served as separate components.
Three dishes labeled Spam and rice bowl, fried rice, and spamsilog-style, showing different ways to serve Spam with rice.
Spam and rice can be a simple bowl, a full fried rice pan, or a spamsilog-style plate; therefore, the cooking method changes the texture, flavor, and feel of the meal.

In this version, the rice actually fries with the Spam, egg, sauce, and aromatics, so every grain picks up flavor. If you want a simpler bowl instead, brown Spam slices, fry an egg, and serve both over hot white rice with scallions and chili crisp.

Sauce Guide

The sauce should make the rice savory, not salty for the sake of being salty. Start with the measured amount, toss well, then taste. It is much easier to add a splash more soy sauce at the end than to fix a pan that has gone too far.

A sauce guide showing small bowls labeled classic, less salty, oyster-forward, teriyaki-style, and spicy beside a spoonful of fried rice.
Start with less sauce than you think you need. Since Spam keeps seasoning the rice as you eat, a lighter hand usually gives the pan a better finish.
Sauce Style Formula Best For
Balanced classic 2 tbsp soy sauce + 1 tbsp oyster sauce + 2 tsp toasted sesame oil The main recipe and most everyday versions.
Less salty 1½ tbsp low-sodium soy sauce + 1 tbsp oyster sauce + 1 tbsp water or broth Regular Spam, salty rice, or anyone sensitive to salt.
Oyster-forward 1 tbsp soy sauce + 1½ tbsp oyster sauce + white pepper A deeper, rounder, more savory fried rice.
Teriyaki-style 2 tbsp soy sauce + 1 tbsp mirin + 1 tsp sugar A slightly sweeter Spam fried rice variation.
Garlic-butter Base sauce + 1 tbsp butter at the end + extra garlic Richer comfort-food style fried rice.
Spicy Base sauce + chili crisp, sriracha, gochujang, gochugaru, or sliced chilies Heat lovers and kimchi-style variations.

No Oyster Sauce?

You can make this without oyster sauce. Use 2 tablespoons low-sodium soy sauce, 1 teaspoon sugar, and a small splash of water or broth. For more depth, add a few drops of fish sauce, a small spoon of hoisin, or a little chili crisp. Start light, because Spam already brings plenty of salt.

A substitution guide showing soy sauce, sugar, broth, chili crisp, fish sauce, hoisin, and a spoonful of fried rice as alternatives when oyster sauce is missing.
No oyster sauce is not a dead end. Soy sauce, a little sugar, and a splash of broth still build a savory base, while chili crisp, fish sauce, or hoisin can deepen the flavor.

Start with the less-salty formula when your Spam is regular or the rice already tastes seasoned. When the rice tastes flat, go with the balanced classic. For a deeper, takeout-style flavor, lean slightly more oyster-forward.

Use a neutral oil for stir-frying and save toasted sesame oil for the sauce or final drizzle. Otherwise, the sesame oil can taste flat before the rice is finished. Added near the end, it keeps its aroma fresher.

Variations: Kimchi, Pineapple, Garlic, and Spicy

Choose the variation based on what you want from the bowl. Kimchi makes it tangy and bold, while pineapple pushes it sweet-salty. Extra garlic makes it more comforting, chili crisp makes it louder, and teriyaki-style sauce gives you a slightly sweeter weeknight version.

Kimchi Spam Fried Rice

Kimchi is the boldest direction here. Use ripe kimchi with good sourness, chop it into small pieces, and drain or squeeze it lightly if it is very wet. Fry the kimchi after browning the Spam and before adding the rice so the flavor deepens and extra moisture cooks off.

Kimchi fried rice in a bowl with red-orange rice, crispy Spam cubes, kimchi pieces, scallions, sesame seeds, and a fried egg.
Kimchi takes the rice in a tangier, bolder direction, adding acid, heat, and depth without needing many extra ingredients.

If you want stronger kimchi flavor without soggy rice, squeeze the chopped kimchi over a small bowl, fry the kimchi until it smells deeper and less raw, then add a spoonful of the reserved juice only after the rice is hot and separate.

Chopped kimchi being squeezed over a bowl to remove excess liquid, with fried kimchi cooking in a pan nearby.
For kimchi fried rice, control the liquid before it reaches the pan. Squeezing first lets you add tang later without making the grains soggy.

Use less soy sauce than the base recipe because both Spam and kimchi bring salt. Add a spoonful of kimchi juice only if the rice is dry enough to handle it. For more heat, add gochujang, gochugaru, chili crisp, or sliced chilies. A fried egg on top works especially well.

Hawaiian Spam Fried Rice with Pineapple

For a Hawaiian-style pan, add ½ to 1 cup diced pineapple. Fresh pineapple gives the cleanest texture, but canned pineapple works if it is drained very well. Add pineapple near the end for juicy pieces, or brown it briefly with the Spam if you want caramelized edges.

Hawaiian-style fried rice with pineapple, browned Spam cubes, egg, scallions, and vegetables in a bowl.
Pineapple gives the rice a sweet-salty contrast, but it works best when the fruit is well drained and added near the end so the grains stay loose.

A lighter hand with sauce works better here. Too much soy sauce plus pineapple juice can make the rice wet. Bell pepper, scallions, peas, carrots, and a little ginger all fit nicely with the sweet-salty flavor.

Drained pineapple in a strainer and lightly browned pineapple pieces in a pan beside fried rice ingredients.
To keep pineapple fried rice from turning watery, drain canned fruit well or brown fresh pineapple briefly before it reaches the rice.

Filipino Garlic Spam Fried Rice

For a Filipino-inspired garlic version, use extra garlic and keep the seasoning simple. Brown the Spam, fry plenty of minced garlic until fragrant, then add cold rice and season lightly with soy sauce or a small splash of fish sauce. Finish with scallions and serve with a fried egg if you want a spamsilog-style plate.

Garlic fried rice with crispy Spam, fried egg, scallions, and golden garlic pieces served on a plate.
A garlic-heavy version needs less sauce because the garlic, Spam, rice, and egg already create a deep comfort-food flavor on their own.

The difference is mostly in the format. Garlic Spam fried rice mixes diced Spam into the rice, while spamsilog usually serves fried Spam slices, garlic rice, and egg as separate parts on the same plate.

Spicy Spam Fried Rice

For heat, add chili crisp, sriracha, gochujang, gochugaru, sambal, sliced fresh chilies, or extra black pepper. Chili crisp is the easiest option because it brings heat, oil, crunch, and savoriness at the same time. Start small if your Spam and sauce are already salty.

Spicy fried rice with chili crisp being spooned over rice, Spam cubes, egg, and scallions.
Chili crisp is one of the easiest spicy finishes, since it adds heat, crunch, oil, and extra savoriness in one spoonful.

Spam Fried Rice with Peas and Carrots

Peas and carrots are the classic low-effort vegetable mix. Use ¾ to 1 cup for 4 cups of rice. Before adding them, rinse frozen vegetables briefly under warm water, drain them well, and add them before the rice so excess moisture can cook off.

Fried rice in a skillet with peas, carrots, browned Spam cubes, egg, and scallions being lifted with a spatula.
Peas and carrots are the easiest vegetable mix for this recipe, especially when they are drained well and heated long enough for extra moisture to cook off.

If you like the same leftover-rice logic with a different protein, MasalaMonk’s ground pork recipes include budget-friendly weeknight ideas that fit the same quick-dinner mood.

Teriyaki Spam Fried Rice

For a teriyaki-style version, replace the oyster sauce with a simple mix of soy sauce, mirin, and a little sugar. Ginger works nicely here. Keep the sweetness controlled so the rice still tastes savory, not sticky or glazed like a teriyaki bowl.

Teriyaki-style fried rice with glossy rice, browned Spam cubes, scallions, and sesame seeds.
A teriyaki-style version can be slightly sweeter and darker, but the sauce should glaze the rice lightly rather than make it sticky or heavy.

How to Fix Spam Fried Rice

If the pan is not perfect the first time, it is usually easy to understand what happened. Most problems come from moisture, heat, salt, or crowding. First, check the texture. Then, adjust the seasoning only after the rice has had enough time in the pan.

A troubleshooting image showing fixes for mushy fried rice, overly salty rice, and Spam that is not crispy enough.
Most fried rice problems come from moisture, salt, heat, or crowding, so the right fix depends on whether the pan looks steamy, tastes too salty, or never browned properly.

Texture Problems

Mushy fried rice being spread across a skillet with a spatula so excess moisture can cook off.
If the rice turns soft or clumpy, spread it out and pause before stirring again, because more pan contact helps moisture cook away.
Problem What Happened How to Fix It
Rice is mushy The rice was too warm, wet, or freshly cooked. Spread it out in the pan and let moisture cook off without stirring constantly. Next time, use cold day-old rice or chill fresh rice on a tray first.
Rice is dry The rice was very old or cooked too long after adding sauce. Add 1–2 tablespoons water or broth and toss quickly over heat.
Rice is clumping The rice was not broken up before cooking, or the pan was too small. Break up cold rice before adding it. Also, use a wide pan and enough heat to fry the grains.

Seasoning Problems

A pan of fried rice with plain rice, egg, vegetables, scallions, cucumber, and a bright finishing ingredient shown as ways to balance too much salt.
When the pan tastes too salty, add plain rice, egg, vegetables, or a fresh finish such as scallions or cucumber; more soy sauce will only push it further out of balance.
Problem What Happened How to Fix It
Fried rice is too salty The Spam, soy sauce, and oyster sauce added up quickly. Add more plain rice, egg, or vegetables. Then finish with scallions or a tiny splash of rice vinegar instead of more soy sauce.
Rice tastes bland The sauce did not spread evenly, or the rice needed a little more seasoning. Add a small splash of soy sauce around the hot pan edge, toss, and taste again before adding more.
Fried rice is greasy Too much oil was added before the Spam rendered. Use less oil next time and let the Spam release some fat before adding more oil.

Spam, Egg, and Add-In Problems

Problem What Happened How to Fix It
Spam is not crispy The pan was crowded or the Spam was stirred too often. Brown the Spam before adding rice. Let it sit in contact with the pan so the edges can crisp.
Egg is rubbery The eggs cooked too long at the beginning. Scramble eggs separately and remove them while still soft. Then fold them back in at the end.
Pineapple made it wet The pineapple was too juicy or added too early. Drain pineapple well and add it near the end. Alternatively, brown it briefly with the Spam before the rice goes in.
Kimchi made it soggy The kimchi carried too much liquid into the pan. Squeeze or drain very wet kimchi. Then fry it before adding rice so the extra moisture cooks off.

What to Serve with Spam Fried Rice

This fried rice can be dinner on its own, especially with egg and vegetables, but a fresh or tangy side makes the plate feel brighter.

Choose the side based on what the pan needs. For a rich-tasting pan, add cucumber salad, kimchi, or pickled vegetables. To make dinner fuller, add garlicky greens, bok choy, broccoli, or a fried egg. When the bowl needs more energy, finish with chili crisp, sesame seeds, scallions, or a squeeze of lime.

A serving spread with fried rice, cucumber salad, kimchi, greens, fried egg, chili crisp, scallions, and lime.
Choose sides based on what the rice needs: fresh or tangy dishes brighten a rich pan, while greens or a fried egg turn it into a fuller meal.

For another pantry-friendly dinner built around a canned protein, these salmon croquettes with canned salmon are a good next recipe to keep in rotation.

  • Cucumber salad, kimchi, or quick pickled vegetables
  • A fried egg on top
  • Chili crisp, hot sauce, sesame seeds, or extra scallions
  • Steamed bok choy, broccoli, or garlicky greens
  • Sliced avocado with lime or sesame seeds
  • A simple broth, miso soup, or clear vegetable soup

Storage and Reheating

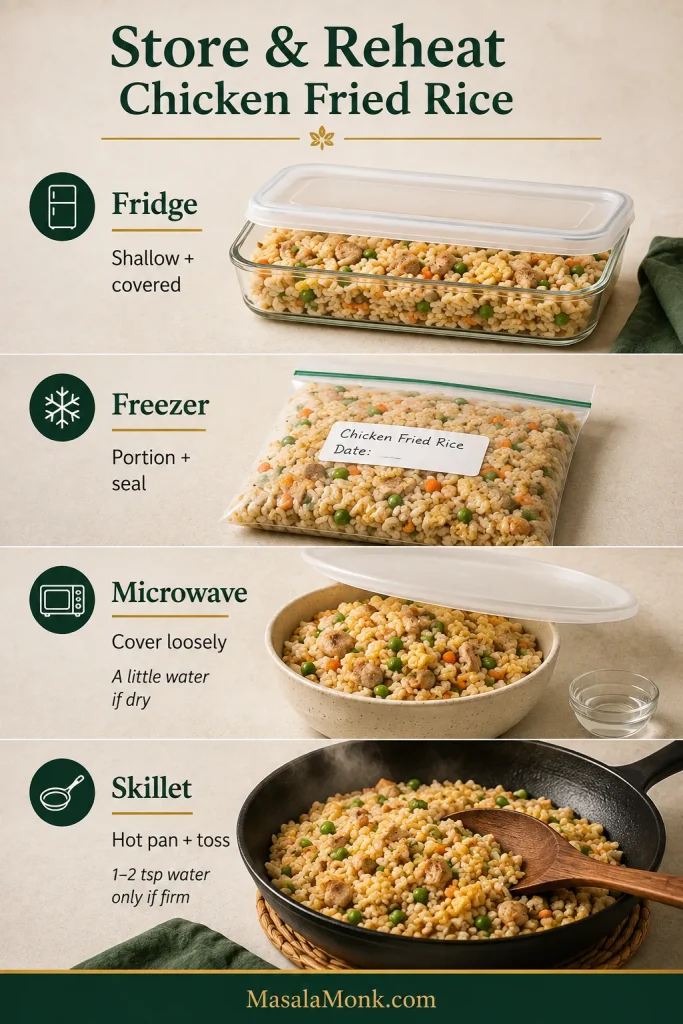
Store leftover Spam fried rice in an airtight container in the refrigerator and use it within 3–4 days. That matches the USDA leftover guidance for cooked leftovers. You can also freeze portions, though the texture is best when the rice is freshly made or reheated from the fridge.

Fried rice stored in a clear airtight container and reheated in a skillet with a small splash of water.
A skillet gives leftovers a better second life than the microwave alone. Meanwhile, a small splash of water helps reheat the rice without making it dry or brittle.

For the best texture, reheat fried rice in a skillet over medium heat with a small splash of water or broth. Stir until hot, then let it sit briefly in the pan if you want the rice to regain a few crisp edges.

For a faster option, microwave the rice in a covered bowl with a damp paper towel. Stir halfway through so it heats evenly. After reheating, add scallions, sesame oil, or chili crisp to freshen it up.

The finished fried rice should not feel heavy or wet. You want separate grains, crisp-edged Spam, soft pieces of egg, and enough scallion or vegetable freshness to balance the salty richness. Once you know that texture, the recipe becomes easy to adjust with whatever is already in your fridge.

Spam Fried Rice Recipe

Crispy browned Spam, cold leftover rice, soft scrambled egg, vegetables, and a quick soy-oyster-sesame sauce come together in this easy one-pan fried rice.

Prep Time10 minutes
Cook Time12–15 minutes
Total Time22–25 minutes
Yield4 servings
CourseMain dish, quick dinner
StyleSpam fried rice with egg

Equipment

  • Wok, carbon-steel wok, cast-iron skillet, or large 12-inch nonstick skillet
  • Wide spatula
  • Small bowl for sauce
  • Plate or bowl for holding cooked egg and Spam if needed

Ingredients

  • 1 can Spam, 12 oz / 340 g, preferably low sodium, cut into ½-inch cubes
  • 4 cups cold cooked rice, about 680–730 g
  • 3 large eggs, beaten
  • 2 tablespoons / 30 ml neutral oil, divided, plus a little more only if the pan looks dry
  • 2 cloves garlic, minced
  • 2 green onions, whites and greens separated
  • ¾ to 1 cup frozen peas and carrots, thawed or rinsed and drained
  • Optional: ½ cup corn, diced bell pepper, cabbage, or edamame

Sauce

  • 2 tablespoons / 30 ml soy sauce, preferably low sodium
  • 1 tablespoon / 15 ml oyster sauce
  • 2 teaspoons / 10 ml toasted sesame oil
  • 1 teaspoon sugar, optional
  • ¼ teaspoon white pepper or black pepper
  • Optional: 1 tablespoon / 15 ml water, broth, or Shaoxing wine

Instructions

  1. Mix the sauce. In a small bowl, stir together soy sauce, oyster sauce, sesame oil, sugar, pepper, and optional water, broth, or Shaoxing wine.
  2. Scramble the eggs. Heat 1 teaspoon neutral oil in a wok or large skillet over medium-high heat. Add the beaten eggs and scramble until softly set. Then transfer to a plate.
  3. Brown the Spam. Add another teaspoon or two of oil only if the pan looks dry, then add the diced Spam. Cook until browned and crisp at the edges, about 4–6 minutes. If the pan is crowded, transfer the Spam to a plate and add it back near the end.
  4. Add aromatics and vegetables. Stir in garlic and scallion whites for 20–30 seconds, then add peas and carrots and cook until hot and dry.
  5. Add the rice. Add cold cooked rice and break up clumps with a spatula. Stir-fry until the rice is hot and the grains separate.
  6. Add the sauce. In a wok, stainless skillet, or cast-iron pan, pour the sauce around the hot edge and let it sizzle briefly. If using nonstick, drizzle it evenly over the rice and toss right away.
  7. Finish. Fold the scrambled egg and browned Spam back through the rice. Add scallion greens, taste, and adjust only if needed.
  8. Serve hot. Top with sesame seeds, chili crisp, extra scallions, or a fried egg if desired.

Notes

  • Cold day-old rice gives the best texture.
  • Use low-sodium Spam or low-sodium soy sauce if you are worried about saltiness.
  • Taste before adding extra soy sauce at the end.
  • If you skip oyster sauce, use the no-oyster-sauce option in the sauce section above.
  • For kimchi Spam fried rice, use ripe chopped kimchi and reduce the soy sauce.
  • For pineapple Spam fried rice, drain pineapple well and add it near the end.

Storage

Refrigerate leftovers in an airtight container and use within 3–4 days. Reheat in a skillet with a splash of water or broth for the best texture.

A saveable recipe card showing the base ratio of one can of Spam, four cups of rice, three eggs, and a 25-minute cooking time.
Remember the ratio first: one can of Spam, four cups of cold rice, and three eggs. Once that works, the sauce and vegetables are easy to adjust.

Before the FAQs, use the final serving cue as a quick check: the bowl should look loose, glossy, crisp-edged, and balanced by something fresh or spicy.

A plated serving of fried rice with browned Spam cubes, egg, scallions, chili crisp, cucumber, and kimchi side dishes.
A good final bowl has separate grains, crisp Spam, soft egg, and a fresh side or spicy finish to keep the dish lively from the first bite to the last.

For saving or sharing, this version is the simplest promise of the recipe: cold rice, crisp Spam, soft egg, vegetables, and a fast savory sauce.

A close-up image of easy Spam fried rice with crispy Spam cubes, egg, vegetables, scallions, and a bold title overlay.
Save this easy Spam fried rice idea for nights when there is cold rice in the fridge and dinner needs to be fast, savory, and still intentional.

FAQs

What rice is best for Spam fried rice?

Cold day-old jasmine rice is the easiest everyday choice because it separates well and stays fragrant. Long-grain white rice gives a fluffier texture, while medium-grain rice works if it is fully chilled and broken up before cooking.

Can I make Spam fried rice with fresh rice?

Yes, but do not add hot rice straight from the cooker. Instead, spread fresh rice on a tray, let the steam escape, and chill it uncovered until the surface feels cooler and drier. Fresh rice needs more help because it can steam in the pan instead of frying.

Is egg necessary in Spam fried rice?

Egg is not mandatory, but it makes the pan feel more complete. It softens the salty edges of the Spam, adds protein, and gives the rice those tender golden pieces people expect in fried rice.

Can I make Spam fried rice without oyster sauce?

Yes. Use low-sodium soy sauce, a little sugar, and a small splash of water or broth. For more depth, add a few drops of fish sauce, a small spoon of hoisin, or chili crisp. Start lightly because Spam is already salty.

Why is my Spam fried rice mushy?

Mushy fried rice usually starts before the sauce ever goes in. Hot, wet, or overcooked rice steams in the pan instead of frying, so the grains collapse together. Cold rice, a hot pan, and a light hand with sauce fix most of the problem.

How do I make Spam fried rice less salty?

Use low-sodium Spam or low-sodium soy sauce, start with less sauce, and add more rice, egg, or vegetables if the pan already tastes too salty. After that, scallions, cucumber, or a tiny splash of rice vinegar can help balance the flavor.

What vegetables go well with Spam fried rice?

Peas, carrots, corn, cabbage, bell pepper, onion, scallions, and edamame all work well. Keep vegetables cut small and avoid adding too many watery ingredients at once.

How do I make kimchi fried rice with Spam?

Brown the Spam first, then fry chopped ripe kimchi before adding the rice. Since kimchi and Spam are both salty, use less soy sauce than the base recipe. Finish with sesame oil, scallions, and egg.

How do I make Hawaiian Spam fried rice?

Add ½ to 1 cup diced pineapple, keep the sauce slightly lighter, and drain the pineapple well. Then add it near the end for juicy pieces, or brown it briefly with the Spam for caramelized edges.

If you make it, choose your direction: classic egg, kimchi, pineapple, garlic-heavy, or chili crisp. Leave a comment with the version you tried and whether you like your Spam cubed, sliced, or extra crispy.

Posted on Leave a comment

Air Fryer Burgers Recipe: Juicy Hamburgers, Time & Temp

Juicy air fryer cheeseburger with melted cheddar, lettuce, tomato, red onion, pickles, and toasted bun on a dark surface, with an air fryer basket in the background.

A good air fryer burger recipe should give you juicy patties, clear timing, and a reliable way to know when the burgers are done. This guide to air fryer hamburgers starts with fresh ground beef patties, then covers thicker burgers, frozen patties, cheeseburgers, toasted buns, smoke prevention, toppings, storage, and a full recipe card with US and metric details.

The best default is simple: cook fresh ¼-lb / 113 g hamburger patties at 375°F / 190°C for 8–10 minutes, flipping halfway, until the center reaches 160°F / 71°C. From there, adjust by thickness, starting temperature, and air fryer model instead of relying on one fixed minute for every burger.

For a bunless version, the same patties can become lettuce-wrap burgers, burger bowls, or low-carb cheeseburger plates. For more ideas in that direction, see these keto hamburger recipes.

How Long to Cook Hamburgers in the Air Fryer

Best default: Use 1 lb / 454 g ground beef for 4 patties. Shape each patty about 4 oz / 113 g and ½ inch / 1.25 cm thick. Air fry at 375°F / 190°C for 8–10 minutes, flipping halfway, until the center reaches 160°F / 71°C. Add cheese only at the end.

Air fryer burger timing guide showing 375°F or 190°C, 8 to 10 minutes, flipping halfway, and a 160°F center temperature for fresh quarter-pound patties.
For most fresh ¼-lb patties, 375°F for 8–10 minutes is the best starting point; the center temperature is what confirms the burger is done.

Start checking early the first time

If you are making these for the first time, start checking at 8 minutes rather than waiting for the full range to pass. That way, you learn how your air fryer handles your patties without overcooking the first batch.

Put simply, the 8–10 minute range works best for patties that are about 4 oz / 113 g each and about ½ inch / 1.25 cm thick. Thinner patties may finish closer to 6–8 minutes, while thicker patties may need 10–12 minutes. Because air fryer baskets, patty thickness, and beef fat percentage all vary, the time range is only the starting point.

Use temperature, not color, to check doneness

For that reason, the thermometer matters more than the clock. Ground beef can look brown before it is safe, or stay slightly pink after it reaches temperature, so do not judge doneness by color alone.

For the most accurate reading, insert the thermometer through the side of the patty so the tip reaches the center instead of stopping near the surface. That way, you are checking the part of the burger that takes the longest to cook.

Food safety note: Ground beef burgers should reach 160°F / 71°C in the center. FoodSafety.gov lists 160°F as the safe minimum internal temperature for ground meat, so a thermometer is the clearest way to avoid guessing. See the safe minimum internal temperature chart.

Why this air fryer method works

In practice, the air fryer is good at burgers because it cooks fast, drains extra fat, and keeps the process cleaner than a skillet. The tradeoff is that patties can dry out if they are too lean, too thin, or cooked too long. That is why thickness, beef choice, spacing, and internal temperature matter more than chasing one exact minute.

Air Fryer Burger Time and Temperature Chart

Best default temperature

For most fresh patties, 375°F / 190°C is the best first setting. It is hot enough to cook the burgers quickly and help the outside brown. However, it is not so aggressive that the edges dry out before the center is done.

If this is your first time making burgers in the air fryer, use the quarter-pounder row as your starting point. After that, adjust by thickness instead of changing everything at once.

Fresh burger time chart

Because patty size changes the answer, start with the row that matches your burger instead of forcing every patty into the same time. Once you know how your air fryer handles one batch, adjust the next batch by 1–2 minutes rather than changing the temperature immediately.

Fresh air fryer burger timing chart comparing sliders, thin patties, quarter-pound patties, thicker three-quarter-inch patties, and half-pound patties with their cook times.
Fresh burger timing changes most with patty size and thickness, so match your patty to the closest size instead of using one fixed cook time for every batch.
Fresh burger type Air fryer temp Approx. time Flip? Internal temp
Fresh quarter-pounder / ¼-lb / 113 g patties, about ½ inch / 1.25 cm thick 375°F / 190°C 8–10 minutes Yes, halfway 160°F / 71°C
Fresh thicker patties, about ¾ inch / 2 cm thick 375°F / 190°C 10–12 minutes Yes 160°F / 71°C
Fresh ½-lb / 225 g thick patties 360–370°F / 182–188°C 14–18 minutes Yes 160°F / 71°C
Thin fresh patties 375°F / 190°C 6–8 minutes Yes 160°F / 71°C
Mini burgers or sliders 375°F / 190°C 5–7 minutes Yes 160°F / 71°C

Frozen Burger, 400°F, and Cheeseburger Timing

However, frozen burgers need a wider range because the center has to thaw before it can safely finish cooking. Before adding cheese to any burger, check the center first. Otherwise, the cheese may melt while the patty still needs more time.

Frozen air fryer burger guide showing timing for quarter-pound and third-pound patties, flipping halfway, checking for 160°F, and adding cheese at the end.
Frozen burgers need a wider timing range because the center has to thaw first; check the temperature before adding cheese.
Burger type Air fryer temp Approx. time Flip? Internal temp
Frozen ¼-lb / 113 g patties 360–375°F / 182–190°C 10–14 minutes Yes 160°F / 71°C
Frozen ⅓-lb / 150 g patties 360–375°F / 182–190°C 12–16 minutes Yes 160°F / 71°C
Thin fresh patties at 400°F / 200°C 400°F / 200°C 6–8 minutes Yes 160°F / 71°C
Frozen burgers at 400°F / 200°C 400°F / 200°C 11–15 minutes Yes 160°F / 71°C; check early because the outside may brown first
Cheeseburgers Same as burger Add cheese last 30–60 seconds 160°F / 71°C before cheese

Should you air fry burgers at 375°F or 400°F?

For most homemade patties, 375°F is the better first choice because it gives the center time to cook before the edges dry out. However, 400°F can work for thinner patties or for people who like a firmer browned outside. In that case, start checking early and use a thermometer, because the outside can look done before the center reaches 160°F.

Comparison chart for air fryer burgers showing 375°F as the best default for control and 400°F as an option for thinner patties with earlier checking.
Use 375°F as the most reliable starting point for homemade burgers, and treat 400°F as an option for thinner patties or stronger browning with an early temperature check.

In short, 375°F is the better beginner setting, while 400°F is an alternate for thinner patties or cooks who already know their air fryer runs evenly. That said, once you know how your air fryer behaves, you can fine-tune the temperature without guessing.

How to adjust the time

If your air fryer runs hot, start checking a minute early. On the other hand, if your patties are thick, cold, or crowded, they may need longer. In either case, do not press the burgers while they cook; pressing squeezes out the juices you are trying to keep.

If you are not sure which row fits your burger, choose the lower end of the time range first. Then check the center and add 1–2 minutes only if the patty has not reached 160°F / 71°C.

Back to table of contents ↑

Hamburger Patties in the Air Fryer

For your first batch, keep the patties simple: 1 lb / 454 g ground beef divided into 4 loose patties, about 4 oz / 113 g each. Shape each patty about 4–4½ inches / 10–11.5 cm wide and about ½ inch / 1.25 cm thick. That size cooks evenly, fits most air fryer baskets, and gives you a better chance of hitting 160°F without drying out the edges.

Raw air fryer burger patties showing 4-ounce portions, 4 to 4 and a half inch width, half-inch thickness, a shallow center dimple, and a bun size comparison.
Even patty size is what makes the timing chart work: aim for 4 oz patties that are about ½ inch thick, slightly wider than the bun, and gently dimpled in the center.

Because burgers shrink as they cook, shape each patty slightly wider than the bun. Then press a shallow dimple in the center so the patty stays flatter instead of puffing up into a dome.

When the patties are the same size, they finish at about the same time. Otherwise, the smaller patties can dry out while the thicker ones are still catching up.

If one patty is noticeably larger, place it where your air fryer runs hottest, or give it an extra minute after removing the smaller patties. That way, the thinner burgers do not dry out while the thickest one finishes.

This same method works for fresh beef patties, homemade burger patties, and plain hamburger patties from the butcher counter. However, the main adjustment is thickness: thin patties cook faster, while thick patties need more time to reach 160°F in the center.

For best texture, avoid mixing the beef too much. Once ground beef is overworked, the cooked patty can turn dense and springy instead of tender and juicy.

Can you cook raw ground beef patties in the air fryer?

Yes. Raw ground beef patties can go straight into the air fryer as long as they are shaped evenly, cooked in a single layer, and checked for 160°F in the center. However, loose ground beef mixtures and very wet patties can cook unevenly, so formed patties work best.

Ingredients for Air Fryer Hamburgers

You only need a few ingredients for classic burgers. Since the cooking method is simple, the beef, seasoning, patty shape, and cheese timing matter more than a long ingredient list. In other words, better patties matter more than more ingredients.

Since the ingredient list is short, each choice matters. The beef controls juiciness, the salt controls flavor, and the patty shape controls how evenly the burger cooks.

Air fryer burger ingredients including ground beef, salt, black pepper, garlic powder, onion powder, Worcestershire sauce, cheese slices, burger buns, lettuce, tomato, onion, and pickles.
The ingredient list stays simple because the success of air fryer burgers comes from good beef, even patties, enough seasoning, and adding cheese only at the end.

Ground beef

Use 1 lb / 454 g ground beef for 4 regular burgers. For the juiciest result, choose 80/20 ground beef. For a slightly leaner patty with less smoke, 85/15 is a good middle ground.

Seasoning

A simple mix of salt, black pepper, garlic powder, and onion powder is enough. If the beef is good and the patties are shaped well, the seasoning should support the burger rather than cover it up. Since kosher salt brands vary, start with a little less if you are using fine table salt. Worcestershire sauce or steak sauce is optional, but a small amount adds savory depth without turning the burger into meatloaf.

Cheese

American cheese melts the easiest. Cheddar, pepper jack, Swiss, provolone, and mozzarella also work, but thicker slices may need the full final minute to soften. Because the air fryer fan is strong, add cheese only at the end so it does not slide off, burn, or blow around inside the basket.

Buns and toppings

Use burger buns, brioche buns, potato buns, lettuce wraps, or bowls. Classic toppings include lettuce, tomato, onion, pickles, mustard, ketchup, and a creamy burger sauce. For a homemade creamy base, use this homemade mayonnaise recipe and turn it into burger sauce with ketchup, mustard, pickle juice, and a little seasoning.

Do you need oil, parchment, or foil?

Fresh 80/20 or 85/15 patties usually do not need oil because the beef has enough fat. However, if you are using very lean fresh patties or dry-surfaced frozen patties, a light oil spray can help browning.

If you use parchment, choose perforated parchment made for air fryers and never block airflow under the patties. Likewise, use foil only if your air fryer manual allows it. Otherwise, trapped grease and blocked airflow can slow cooking, create smoke, and make the burgers cook unevenly.

In short, airflow matters more than lining the basket. If a liner blocks the holes or traps grease under the patties, skip it.

Best Ground Beef for Air Fryer Burgers

If juiciness matters most, start with 80/20. If your air fryer smokes easily or you prefer a slightly lighter burger, 85/15 is the safer everyday choice. Very lean beef can work, but it needs more care because it dries out faster.

Best ground beef guide for air fryer burgers comparing 80/20 beef for juicy burgers, 85/15 beef for balanced burgers, and 90/10 or leaner beef that can dry out faster.
For the juiciest air fryer burgers, 80/20 is the most forgiving, while 85/15 is a good everyday choice when you want less smoke without losing too much moisture.
Ground beef Best for What to know
80/20 Juiciest classic burgers Rich, flavorful, and forgiving, but it can drip more fat and create more smoke in some air fryers.
85/15 Balanced everyday burgers Still juicy, usually less smoky, and a good choice for indoor air fryer cooking.
90/10 or leaner Leaner burgers Can dry out faster. Add moisture and check the temperature early.

As a result, 80/20 or 85/15 is the most reliable choice for a first batch. Shape the patties gently, keep them even in thickness, and add a center dimple so they do not puff into domes as they cook.

If you are using very lean beef, add a little moisture with Worcestershire sauce, grated onion, mustard, or a small amount of oil. Then start checking early, because lean patties can move from done to dry quickly.

For a thinner burger with a harder griddled crust instead of a thicker air fryer patty, try this classic smash burger method.

How to Make Air Fryer Hamburgers

This method is for fresh ground beef patties. Once the patties are shaped, the rest is mostly about spacing, flipping, and checking the center. After that, assembly is quick because the burgers only need a short rest.

Step-by-step air fryer burger guide showing preheating, shaping patties, making a dimple, seasoning, cooking in one layer, flipping halfway, checking the center, and resting before assembly.
The method is simple once the order is clear: shape the patties evenly, cook them in one layer, flip halfway, check the center, then rest and assemble.

1. Preheat the air fryer

Preheat the air fryer to 375°F / 190°C for about 3 minutes. Although some models heat quickly, preheating helps the patties start cooking evenly.

If you skip preheating, add 1–2 minutes and start checking at the low end of the range. Once you know your air fryer, the timing becomes easier to repeat.

2. Shape the patties gently

Divide 1 lb / 454 g ground beef into 4 loose portions, about 4 oz / 113 g each. Then shape each portion into a patty about 4–4½ inches / 10–11.5 cm wide and ½ inch / 1.25 cm thick. Because the patties shrink as they cook, starting a little wider helps them fit the bun better later.

3. Make a center dimple

Press a shallow dimple into the center of each patty with your thumb or the back of a spoon. This small step helps the burgers stay flatter instead of puffing up in the middle.

4. Season both sides

Season the outside of the patties with salt, pepper, garlic powder, and onion powder. If using Worcestershire sauce, mix it in lightly before shaping, or brush a tiny amount over the patties before seasoning.

5. Air fry in a single layer

Place the patties in the basket in a single layer. Then leave space between them so hot air can move around each burger. Do not stack patties, and do not crowd the basket.

If all 4 patties do not fit with space between them, cook in batches. Otherwise, the burgers may steam instead of brown. Later batches may cook slightly faster because the air fryer is already fully hot.

6. Flip halfway

Air fry for 8–10 minutes total, flipping halfway through. Even if your model usually cooks without flipping, turning the patties makes the result more reliable across different basket styles.

7. Check the center

Check the thickest part of each patty. The burgers are done when the center reaches 160°F / 71°C. For the cleanest reading, insert the thermometer from the side so the tip lands in the center of the patty.

Digital thermometer inserted from the side into an air fryer burger patty showing 160°F and 71°C as the internal temperature for ground beef burgers.
Color is not a reliable doneness check for ground beef, so insert the thermometer from the side and make sure the center of the patty reaches 160°F.

If one patty is thicker than the others, it may need an extra minute or two. In that case, remove the finished patties and let the thicker one continue cooking until it reaches temperature.

8. Rest and assemble

Let the patties rest for about 2 minutes before assembling. Meanwhile, toast the buns, slice the toppings, or stir together a quick sauce.

Can you toast burger buns in the air fryer?

Yes. After the patties come out, place the buns cut-side up in the basket and air fry at 350–375°F / 175–190°C for 1–2 minutes. Watch closely because buns go from toasted to dry quickly.

How to Make Air Fryer Cheeseburgers

To make cheeseburgers, cook the patties first, then add cheese at the very end. The easiest method is to place a slice of cheese on each cooked patty during the final 30–60 seconds of cooking.

Air fryer cheeseburger guide showing cheese added at the end of cooking, melted cheese on the patty, and a reminder not to add cheese halfway.
Add cheese only after the burger is almost done; the final 30–60 seconds or residual basket heat is usually enough to melt it without making a mess.

Instead of running the fan longer just to melt cheese, you can also use the heat that is already trapped in the basket. Turn the air fryer off, place cheese on the hot patties, close the basket, and let the residual heat melt the cheese for about 1 minute.

If your cheese slides, folds, or blows off, do not fight the fan. Instead, melt the cheese with leftover heat after cooking. That way, the cheese softens over the patty instead of ending up on the basket.

Do not add cheese halfway through cooking. It can melt off the burger, stick to the basket, burn at the edges, or blow around inside the air fryer.

Frozen Burgers in the Air Fryer

Frozen patties are perfect for nights when nothing was thawed. They can go straight from freezer to basket; however, they need a little more patience because the center has to thaw before it can safely finish cooking.

That is why frozen burgers usually need a lower-to-moderate temperature and a wider time range than fresh patties. In practice, smaller ¼-lb / 113 g patties finish sooner, while thicker ⅓-lb / 150 g patties need the longer end of the range.

Fresh versus frozen air fryer burger guide comparing fresh patties cooked at 375°F with frozen patties cooked from frozen, including cook times, flipping, and 160°F internal temperature.
Fresh patties give you the most control, while frozen patties need extra time because the center must thaw before the burger can safely finish cooking.

How to air fry frozen burger patties

  1. Preheat the air fryer to 360–375°F / 182–190°C.
  2. Place frozen patties in a single layer.
  3. Air fry for 10–16 minutes, depending on patty size and thickness.
  4. Flip halfway through.
  5. Season after the surface warms slightly if seasoning will not stick at the beginning.
  6. Cook until the center reaches 160°F / 71°C.
  7. Add cheese during the final 30–60 seconds if making cheeseburgers.

For exact ranges by patty size, use the frozen burger timing chart above. Before adding cheese to frozen burgers, check the center first. Otherwise, the cheese may look melted while the patty still needs more time inside.

What about Bubba-style frozen burgers?

Bubba-style frozen burgers can go straight from freezer to air fryer. However, they are often thick and fatty, so they may need the longer end of the timing range. Start at 360–375°F, flip halfway, and check for 160°F in the center.

If you cook frozen burgers at 400°F / 200°C, start checking early. The outside can brown before the center is fully done, especially with thicker frozen patties. In that case, a thermometer prevents the most common mistake: serving a burger that looks done outside but is not finished inside.

Back to table of contents ↑

Ninja Foodi, Air Fryer Oven and Basket Air Fryer Notes

The basic method is the same in most basket-style air fryers: cook fresh ¼-lb / 113 g patties at 375°F / 190°C, flip halfway, and check for 160°F / 71°C in the center. However, stronger models, smaller baskets, dual-zone air fryers, and air fryer ovens can change the timing by a minute or two.

Likewise, air fryer ovens may need slightly longer because the cooking space is larger than a compact basket. That means the best approach is to use the chart first, then adjust the next batch based on your specific model.

Air fryer model notes for burgers comparing basket air fryers, Ninja Foodi style models, and air fryer ovens with timing adjustments and 160°F internal temperature guidance.
Use the timing chart as your starting point, then adjust by model: stronger basket air fryers may finish sooner, while air fryer ovens can need a minute or two longer.
Air fryer type What to adjust Best starting point
Ninja air fryer or Ninja Foodi air crisp These can cook efficiently, so check early. 375°F / 190°C, 8 minutes, then check the center.
Ninja Foodi Grill Air crisp and grill mode behave differently. Use air crisp for this method; follow grill-plate timing if using grill mode.
Cosori, Instant Vortex, Gourmia, PowerXL, and similar basket air fryers Basket size and airflow vary. Use the chart first, then adjust by 1–2 minutes after your first batch.
Air fryer oven or toaster oven air fryer The larger cavity may cook slightly slower. Use the middle rack, flip halfway, and check the center early.

Back to table of contents ↑

How to Keep Air Fryer Burgers Juicy

These burgers stay juicy when the beef has enough fat, the patties are handled gently, and the cooking time does not run too long. As a result, a few small details make the difference between a tender burger and a dry one.

  • Use 80/20 or 85/15 beef. A little fat keeps the burger tender.
  • Do not overmix. Handle the meat gently and stop once the patties hold together.
  • Make even patties. Uneven patties cook unevenly.
  • Add a center dimple. This helps prevent puffing.
  • Do not press the burgers. Pressing forces juices out.
  • Flip once. It improves even cooking without overhandling.
  • Check temperature early. Start checking at the low end of the timing range.
  • Rest briefly. Two minutes is enough for most burgers.

In other words, juicy burgers come from control, not extra steps. Once the patties are shaped well and cooked to temperature, the air fryer does most of the work.
Finished air fryer cheeseburger with melted cheese, toasted bun, lettuce, tomato, onion, and pickles, shown with an air fryer basket in the background.
A juicy air fryer burger comes from control, not extra steps: shape the patty evenly, avoid overcooking, and stop once the center reaches temperature.

When using lean beef, add a little moisture with Worcestershire sauce, grated onion, mustard, or a small amount of oil. Also, check the temperature earlier because lean patties move from done to dry quickly.

The goal is a patty with browned edges, melted cheese, and a tender center — not a dry puck that only tastes like seasoning. So, once the burger reaches temperature, stop cooking and let it rest.

Troubleshooting Air Fryer Hamburgers

If the burgers turn out dry, smoky, uneven, or messy, do not change everything at once. In most cases, one small adjustment fixes the next batch: use slightly fattier beef, make the patties thinner, clean the basket, or add cheese later.

What not to do when air frying burgers

Before changing the recipe, check the most common mistakes first. These are the small things that usually cause dry burgers, uneven cooking, smoking, or messy cheese.

Air fryer burger mistakes to avoid, including stacking patties, pressing burgers, adding cheese too early, blocking airflow, judging doneness by color, and using one timing for every patty.
Most air fryer burger problems come from blocked airflow, uneven patties, early cheese, or guessing doneness by color instead of checking the center.
  • Do not stack patties in the basket.
  • Avoid pressing the burgers while they cook.
  • Add cheese only at the end, not halfway through cooking.
  • Never block the basket holes with solid parchment or foil.
  • Do not judge doneness by color alone.
  • Avoid using the same timing for thin fresh patties and thick frozen patties.

Air fryer burger troubleshooting chart

Once you know what went wrong, use the chart below to fix the next batch. Instead of changing the beef, temperature, timing, and basket setup all at once, adjust one thing first.

Problem Likely cause Fix
Dry burgers Lean beef or overcooking Use 80/20 or 85/15 beef, and check the temperature earlier.
Smoking air fryer Fat dripping onto a hot base, old grease, or very fatty beef Clean the basket, avoid overcrowding, and try 85/15 beef if smoke is frequent.
Burger puffed up No center dimple Press a shallow dimple in each patty before cooking.
Undercooked center Patty too thick or too cold Cook longer at 375°F and check for 160°F in the center.
Cheese blew off Cheese added too early or fan too strong Add cheese during the final 30–60 seconds, or melt it with residual heat after cooking.
Uneven cooking Basket overcrowded Cook in a single layer and leave space between patties.
Air fryer burger troubleshooting guide showing fixes for dry burgers, smoking, outside browning before the center finishes, puffing in the middle, and checking for 160°F internal temperature.
The best fix depends on the problem: dry burgers need more moisture control, smoking needs cleaner airflow, and underdone centers need a thermometer check instead of more browning.

How to fix the next batch

If you are not sure what went wrong, start with the simplest fix first. Next time, change only one thing at a time. If the burgers were dry, check earlier or use fattier beef; if they smoked, clean the basket or use a slightly leaner blend.

If smoke happens, do not panic. Usually, it means fat is hitting a very hot surface or old grease is still in the basket. Before cooking the next batch, clean the basket, avoid overcrowding, and use the lower end of the temperature range if your air fryer runs hot.

The next batch becomes easier to control because you are matching the fix to the actual problem instead of guessing.

If this happens often with air fryer recipes, it is worth checking these common air fryer mistakes. Overcrowding, blocked airflow, old grease, and wrong timing can affect burgers, fries, wings, and almost everything else you cook in the basket.

Jump to recipe card → | Back to table of contents ↑

Best Sauces and Toppings for Air Fryer Hamburgers

A good burger only needs a few toppings, but the sauce can change the whole direction of the meal. For that reason, keep the patty simple and use the sauce to make it classic, spicy, Indian-style, or bowl-friendly.

Air fryer burger sauce and topping guide showing classic burger sauce, mango habanero sauce, mango mustard sauce, green chutney, pickles, onion, tomato, and lettuce.
Keep the burger patty simple and use the sauce to change the direction: classic, spicy-sweet, tangy, or fresh and herby.

Classic burger sauce is the easiest place to start: mix mayonnaise, ketchup, mustard, finely chopped pickles or pickle juice, garlic powder, onion powder, and a little black pepper. If you want a fresh base, use this homemade mayonnaise; if you need an egg-free spread, use eggless mayonnaise.

When you want heat, brush the cooked patty lightly with mango habanero sauce or serve it on the side for fries. Meanwhile, mango mustard sauce gives the burger a tangy, fruity change from plain mustard.

An Indian-style burger works especially well with green chutney, onion, tomato, mayo, and a pinch of chaat masala. Because the chutney is bright and herb-heavy, it cuts through the richness of the patty.

Air Fryer Burger Variations

Once the basic method is set, you can change the toppings and sauces without changing the cooking technique. That way, one reliable patty method can turn into several different dinners.

Air fryer burger variations guide showing a classic cheeseburger, spicy mango habanero burger, mango mustard burger, green chutney burger, and a low-carb lettuce-wrap option.
Once the basic air fryer patty is reliable, the easiest way to change the burger is through the sauce: classic, spicy-sweet, tangy, herby, or low-carb.
  • Classic cheeseburger: American cheese, pickles, onion, lettuce, tomato, and burger sauce.
  • Spicy mango habanero burger: Cheddar, onions, pickles, and mango habanero sauce.
  • Mango mustard burger: Lettuce, pickles, onion, and mango mustard sauce.
  • Green chutney burger: Green chutney, mayo, onion, tomato, and chaat masala.
  • Low-carb burger bowl: Lettuce, pickles, cheese, onions, tomato, and sauce without the bun.
  • Pesto cheeseburger: Pesto mayo, tomato, mozzarella or provolone, and roasted peppers.

For a lower-carb plate, keep the same patty method and build the meal around lettuce, pickles, cheese, onions, tomato, and sauce instead of a bun.

What to Serve With Air Fryer Hamburgers

For an easy burger-night plate, pick one sauce, one crispy side, and something fresh to cut through the richness. That way, the meal feels complete without turning dinner into a project.

For the classic burger-and-fries plate, serve the patties with homemade fries, wedges, or potato snacks. If a make-ahead side is easier, potato salad is one of the best choices. For a party-style spread, add one or two ideas from these potato appetizers.

If the air fryer is already out, keep the sides easy. Air fryer mozzarella sticks make the meal feel like a game-day plate, while air fryer croquettes are a good option when you want something crispy that is not fries.

For something fresh, add a cabbage slaw, cucumber salad, onion-tomato salad, or raw papaya salad. A crisp fresh side helps balance the richness of the burgers and cheese.

Storage and Reheating

Make-ahead tip: You can shape the raw patties up to 24 hours ahead and refrigerate them in a covered container with parchment between layers. Keep them cold until cooking, then air fry straight from the fridge and check the center for 160°F / 71°C.

Air fryer burger storage guide showing raw patties made ahead with parchment, cooked patties stored separately from buns and toppings, and patties reheated in the air fryer.
Store patties, buns, and toppings separately so leftovers reheat cleanly; warm the patty first, then assemble the burger fresh.

Cooked hamburger patties store better than fully assembled burgers. If you know you will have leftovers, store the patties, buns, cheese, sauces, and toppings separately. Otherwise, the bun can turn soggy while the lettuce and tomato lose their texture.

Once the patties are cooked, refrigerate leftovers within 2 hours. If the room is very hot, refrigerate them within 1 hour. After that, reheat only the patties and assemble the burgers fresh so the buns and toppings stay in better shape.

  • Refrigerate: Cool cooked patties, then store in an airtight container for 3–4 days.
  • Freeze: Wrap cooked patties individually and freeze for up to 2 months.
  • Reheat in the air fryer: Reheat patties at 350°F / 175°C until warmed through.
  • Add cheese after reheating: Cheese melts better when added at the end instead of reheated from cold.
  • Avoid reheating assembled burgers: The bun can dry out while lettuce, tomato, and sauce turn soggy.

For more air fryer recipes with ground beef, this burger method is the easiest starting point because the patties cook quickly, portion neatly, and can be served on buns, in bowls, or over salad.

Air Fryer Burgers Recipe Card

Air Fryer Burgers

These air fryer burgers are built for a quick, juicy first batch: fresh ground beef, simple seasoning, 375°F heat, one flip, and cheese added only at the end.

Yield 4 burgers
Prep Time 10 minutes
Cook Time 8–10 minutes
Total Time 18–20 minutes

Ingredients

  • 1 lb / 454 g ground beef, preferably 80/20 or 85/15
  • ¾ tsp kosher salt, or to taste
  • ½ tsp black pepper
  • ½ tsp garlic powder
  • ½ tsp onion powder
  • 1 tsp / 5 ml Worcestershire sauce or steak sauce, optional
  • 4 cheese slices, about 3 oz / 85 g total, optional
  • 4 burger buns
  • Lettuce, tomato, onion, pickles, sauce, or toppings of choice

Instructions

  1. First, preheat the air fryer to 375°F / 190°C.
  2. Next, divide the beef into 4 loose portions, about 4 oz / 113 g each.
  3. Then shape each portion into a patty about 4–4½ inches / 10–11.5 cm wide and ½ inch / 1.25 cm thick.
  4. After that, press a shallow dimple into the center of each patty so the burgers stay flatter as they cook.
  5. Once the patties are shaped, season both sides with salt, pepper, garlic powder, and onion powder. If using Worcestershire sauce, mix it in gently before shaping or brush a tiny amount over the patties before seasoning.
  6. Then place the patties in the air fryer basket in a single layer, leaving space between them.
  7. As the burgers cook, flip them halfway through the 8–10 minute cooking time.
  8. Once the time is close, check the center of each patty. For the most accurate reading, insert the thermometer through the side of the patty so the tip reaches the center. The burgers are done when they reach 160°F / 71°C.
  9. If making cheeseburgers, add cheese during the final 30–60 seconds, or place cheese on the hot cooked patties and close the warm basket briefly until melted.
  10. Finally, rest the patties for 2 minutes, then assemble with buns, sauce, and toppings.

Notes

  • Best beef: Use 80/20 for the juiciest burgers or 85/15 for a slightly leaner burger with less smoke.
  • Salt: Kosher salt brands vary. If using fine table salt, start with less and adjust to taste next time.
  • Preheating: If you skip preheating, add 1–2 minutes and start checking early.
  • Batch cooking: If the patties do not fit in a single layer with space between them, cook in batches. Later batches may cook slightly faster.
  • Oil: Fresh 80/20 or 85/15 patties usually do not need oil. Use a light spray only for very lean or dry-surfaced patties.
  • Frozen patties: Cook frozen ¼-lb / 113 g patties at 360–375°F for 10–14 minutes and frozen ⅓-lb / 150 g patties for 12–16 minutes, flipping halfway.
  • Bubba-style burgers: Start at 360–375°F and use the longer end of the timing range for thick frozen patties.
  • Cheese: Add cheese at the end only. Adding it too early can make it slide off or blow around.
  • Doneness: Ground beef burgers should reach 160°F / 71°C in the center.
  • Parchment or foil: Use only if your air fryer manual allows it, and never block airflow or trap grease under the patties.
  • Storage: Refrigerate cooked patties within 2 hours, or within 1 hour if the room is very hot. Store patties separately from buns and toppings for the best leftovers.

If you are cooking a different patty size, use the recipe card as the base and the timing chart above as the adjustment guide. That way, the method stays simple while the timing changes to match the burger.

One rule matters most: timing can change, but doneness should be checked with a thermometer. Use the chart for timing, then use the center temperature to decide when the burgers are done.

Air fryer burgers time and temperature guide showing 375°F or 190°C, 8 to 10 minutes for fresh patties, flip halfway, cook to 160°F or 71°C, and adjust timing for frozen burgers.
Use this as the quick visual summary: fresh patties, frozen patties, cheeseburgers, and the center-temperature check that keeps air fryer burgers reliable.

Back to table of contents ↑

FAQs About Air Fryer Burgers and Hamburgers

Can you cook hamburgers in an air fryer?

Yes. When cooked in a single layer, hamburgers cook well in an air fryer because the hot circulating air reaches the top, bottom, and sides of each patty. For the best result, leave space between the patties and flip halfway.

What temperature do you cook hamburgers in the air fryer?

For most fresh hamburger patties, use 375°F / 190°C. This temperature gives the center enough time to cook while still helping the outside brown.

How long do hamburgers take in the air fryer?

In most cases, fresh ¼-lb / 113 g hamburger patties take 8–10 minutes at 375°F / 190°C. However, thinner patties may finish in 6–8 minutes, while thicker patties may need 10–12 minutes.

How long do you cook ½-pound burgers in the air fryer?

Fresh ½-lb / 225 g burgers usually need about 14–18 minutes at 360–370°F / 182–188°C, depending on thickness and air fryer strength. Flip halfway and check that the center reaches 160°F / 71°C.

Do you flip burgers in the air fryer?

Yes. Although some air fryers cook fairly evenly without flipping, flipping halfway gives more reliable results across different basket styles and patty thicknesses.

What internal temperature should air fryer hamburgers reach?

Ground beef burgers should reach 160°F / 71°C in the center. Since color can be misleading, use a food thermometer rather than judging by appearance alone. For the best reading, insert the thermometer from the side so the tip reaches the center of the patty.

How long do frozen burgers take in the air fryer?

Usually, frozen burger patties take 10–16 minutes. A ¼-lb / 113 g frozen patty often takes 10–14 minutes, while a thicker ⅓-lb / 150 g frozen patty may take 12–16 minutes.

Can I cook frozen burgers at 400°F in the air fryer?

Yes, but check early. At 400°F, the outside can brown before the center is fully done, especially with thick frozen patties. For more control, use 360–375°F and cook until the center reaches 160°F.

When should you add cheese to air fryer burgers?

Once the burger is almost done, add cheese during the final 30–60 seconds. If the fan blows the cheese around, turn the air fryer off and let the residual heat melt the cheese instead.

Why did my air fryer burger smoke?

Usually, smoke comes from fat dripping onto a hot base, old grease in the basket, overcrowding, or very fatty beef. To prevent it next time, clean the basket before cooking, avoid crowding, and use 85/15 beef if smoke is a recurring problem.

Can I make these burgers in a Ninja, Cosori, Instant Vortex, Gourmia, or PowerXL air fryer?

Yes. The method is the same: cook fresh ¼-lb patties at 375°F, flip halfway, and check for 160°F in the center. However, smaller or stronger air fryers may finish a minute or two faster, while crowded baskets or thicker patties may need longer. For Ninja Foodi Grill-style models, use the air-fry function unless you are intentionally using the grill plate.

Can you cook burgers in an air fryer oven?

Yes. Use the air fry setting, place the patties on a rack or tray with space between them, flip halfway, and start with the same time and temperature chart. Air fryer ovens may need 1–2 extra minutes because the cooking space is larger.

Can I cook more than four burgers at once?

Only if they fit in a single layer with space between them. Otherwise, cook in batches. Crowding the basket slows cooking, blocks airflow, and can make the burgers steam instead of brown.

Do I need to spray the air fryer basket for burgers?

Usually, no. If you are using 80/20 or 85/15 beef, the patties release enough fat as they cook. However, if your patties are very lean or your basket tends to stick, use a light spray instead of adding extra oil to the burgers.

Can I make turkey burgers this way?

Yes, but turkey burgers are leaner and need different doneness guidance. Since ground poultry should reach 165°F / 74°C, do not use the 160°F ground beef temperature for turkey burgers.

Can I use foil or parchment under air fryer burgers?

Use foil or parchment only if your air fryer manual allows it. Also, never block airflow under the patties, because blocked airflow can slow cooking, trap grease, create smoke, and make the burgers cook unevenly.

Back to table of contents ↑ | Back to top ↑

Posted on 7 Comments

Air Fryer Hard-Boiled Eggs (No Water, Easy Peel Recipe)

Top view of a person holding toast topped with a halved air fryer hard boiled egg, next to an open air fryer basket filled with eggs, a bowl of eggs in ice water, and text reading "Air Fryer Hard Boiled Eggs – Time & temp guide inside".

If there’s one tiny kitchen trick that quietly changes your weekly routine, it might be this: making air fryer hard boiled eggs instead of dragging out a pot of water every time you want a few eggs. You lay them gently in the basket, set the time, walk away, and come back to perfectly cooked eggs that slide out of their shells with almost no effort.

No hovering over the stove. No pan to scrub. Just reliable, easy-peel eggs you can eat on toast, turn into deviled eggs, throw into salads, or stash in the fridge for busy days.


What Are Air Fryer Hard Boiled Eggs, Really?

The phrase “hard boiled eggs” is a bit of a lie here, because there’s no actual boiling. Instead of simmering in water, the eggs sit in the dry, circulating heat of the air fryer. The shells protect the whites and yolks, and the hot air cooks them kind of like a tiny oven.

The result is surprisingly close to classic boiled eggs:

  • Whites set and firm
  • Yolks as soft, jammy, or firm as you like, depending on time
  • Shells that usually peel very cleanly after a cold plunge

Curious about how other recipe developers handle it too? It’s interesting later to compare this method with recipes like Feel Good Foodie’s air fryer hard boiled eggs, but first it’s helpful to get your own timing dialed in.


Why Bother With Air Fryer Hard Boiled Eggs?

You might already have a foolproof stovetop method. So why move to the air fryer?

Less watching, more living

On the stove, you need to:

  • Bring water to a boil
  • Lower in the eggs gently
  • Track the timing
  • Adjust the heat to maintain a gentle simmer

With an air fryer, you:

  1. Preheat
  2. Put the eggs in
  3. Set the time
  4. Walk away

That makes it incredibly convenient if you’re also juggling toast, coffee, kids, or work messages in the morning.

Easily scale up or down

Some days you just need one egg for a snack. Other days you want a whole batch for meal prep. Either way, air fryer hard boiled eggs handle it effortlessly:

  • One egg cooks just as easily as eight
  • The method stays the same; you may only tweak the time by a minute if you pack the basket

It’s especially handy if you’re prepping a full week’s worth of eggs for breakfast boxes or high-protein snacks. If you’re tracking macros or protein intake, it’s useful to know exactly how much protein two boiled eggs give you, so a weekly batch practically becomes a pre-portioned protein stash in the fridge.

Great for meal prep and snacking

Because hard cooked eggs store well, they’re perfect for:

  • Lunchboxes
  • Salad toppers
  • Quick snacks with just a pinch of salt and spice
  • Deviled eggs for parties

The USDA notes that once eggs are hard-cooked and refrigerated, they can be safely stored for up to one week. That guideline, explained in their note on how long you can keep hard cooked eggs, makes a weekly egg-prep session genuinely worthwhile.


Ingredients and Equipment

You might already have everything you need.

Ingredients

  • Eggs – any number that fits in a single layer in your air fryer basket
  • Ice and cold water – for an ice bath to stop cooking and help with peeling

That’s all. No oil, no vinegar, no baking soda tricks required.

Equipment

  • Air fryer – basket or drawer style
  • Tongs or a spoon – to lift hot eggs safely
  • Large bowl – to hold the ice water bath

If you’re new to air fryers in general, it’s worth giving a quick read to 12 common air fryer mistakes and how to fix them. Simple things like overcrowding, skipping preheating, or using the wrong temperature can make a big difference with eggs too.


Step-by-Step Recipe: Air Fryer Hard Boiled Eggs

Let’s walk through the whole process from cold eggs to easy-peel perfection.

Step 1: Preheat the air fryer for Hard Boiled Eggs

Begin by preheating your air fryer to 270°F (about 130–135°C) for 3–5 minutes.

Step 1 for making air fryer hard boiled eggs – hand pressing the start button on a black air fryer preheated to 270°F (130–135°C).
Step 1: For perfectly cooked air fryer hard boiled eggs, preheat the air fryer to 270°F (130–135°C) for 3–5 minutes so the eggs go into evenly hot air, not a cold basket.

This short preheat helps ensure the eggs start cooking in a stable, even environment. If you’ve ever had eggs with slightly undercooked whites or overcooked yolks, a proper preheat alone can fix a lot of that inconsistency.

Step 2: Arrange the eggs in the basket

Once the air fryer is hot, carefully place the eggs in the basket:

  • Lay them in a single layer
  • Leave a little space between each egg so hot air can circulate
  • Avoid stacking or using multiple racks for this method
Step 2 for air fryer hard boiled eggs – eight brown eggs arranged in a single layer inside a black air fryer basket with space between each egg.
Step 2: Arrange the eggs in a single layer in the air fryer basket with a little space between them. This helps every egg cook evenly and reduces the chance of shells cracking while they “boil” in the air fryer.

Packing too many eggs too tightly can cause uneven cooking, especially at the edges of the basket. A little breathing room gives you more consistent results.

Step 3: Set the time and temperature

Now comes the key part: the timing.

At 270°F (about 132°C), these ranges work well:

  • Soft “boiled” eggs with runny yolks:
    About 11–12 minutes
  • Jammy eggs with custardy yolks:
    Around 13–14 minutes
  • Fully hard boiled eggs with firm yolks:
    Roughly 15–17 minutes
Step 3 for making air fryer hard boiled eggs – close-up of an air fryer set to 270°F and 15 minutes, with sliced eggs in the background showing soft, jammy, and hard yolks.
Step 3: Set the timer based on how you like your air fryer hard boiled eggs – about 11–12 minutes for soft eggs, 13–14 minutes for jammy centers, and 15–17 minutes for fully hard yolks, then adjust by a minute to match your own air fryer.

As a starting point, many people enjoy hard boiled eggs at about 15 minutes, then adjust slightly up or down on the next batch. Air fryers vary a bit in intensity, so once you test your machine, you’ll know your own perfect “house timing”.

If you’re curious how other cooks adapt the same idea, recipes like Skinnytaste’s air fryer hard boiled eggs or Cook At Home Mom’s air fryer eggs use similar combinations of temperature and timing, which can reassure you that you’re in a safe, sensible range.

Step 4: Shock the eggs in an ice bath

As soon as the timer beeps, move quickly:

  1. Carefully lift the eggs from the basket with tongs or a spoon.
  2. Transfer them straight into a bowl filled with ice and cold water.
  3. Let them rest there for at least 5–10 minutes.
Step 4 for air fryer hard boiled eggs – hand lowering a cooked egg into a glass bowl filled with ice water to cool the eggs quickly.
Step 4: Transfer the cooked eggs straight into an ice bath and let them cool for 5–10 minutes. Rapid chilling stops the cooking and makes air fryer hard boiled eggs much easier to peel.

This “shock” does two important things:

  • It stops the cooking instantly, so your yolks don’t overcook and turn chalky.
  • It helps the membrane pull away from the shell, making the eggs significantly easier to peel.

The FDA’s egg safety guidance on what you need to know about egg safety also emphasizes proper chilling and refrigeration to minimize foodborne risk, which is another good reason not to skip the ice bath.

Step 5: Peel or store Air Fryer Hard Boiled Eggs

After the eggs have cooled down:

  • Crack each egg gently on the counter, then roll it to create a network of cracks.
  • Start peeling from the wider end; there’s often a little air pocket there that makes it easier to get under the shell.
  • If the shell clings in spots, peel under a gentle stream of running water to loosen it.
Step 5 for air fryer hard boiled eggs – hands peeling a hard boiled egg on a countertop with eggshells scattered and a bowl of whole eggs in the background.
Step 5: Gently crack and roll each egg, then peel from the wider end where the air pocket sits. This helps the shell slip off cleanly so your air fryer hard boiled eggs look smooth and photo-ready.

You can now:

  • Eat the eggs right away
  • Store them whole and unpeeled in the fridge
  • Peel them all at once and keep them in an airtight container for quick snacks

For food safety, the USDA’s note on how long to keep hard cooked eggs clearly states they can be refrigerated for up to one week. That applies whether the eggs are peeled or still in their shells, as long as they’ve been chilled promptly.

Also Read: Negroni Recipe: Classic Cocktail & Its Variation Drinks


Air Fryer Hard Boiled Eggs: Soft, Jammy, and Hard

The beauty of this method is how easy it is to fine-tune the yolks.

How to make Soft air fryer eggs

If you love a runny yolk for dipping toast, try:

  • 11–12 minutes at 270°F, followed by the same ice bath
Soft air fryer egg sliced in half to show a runny yolk, with text indicating 11–12 minutes at 270°F and serving ideas over toast, ramen, and roasted veggies.
Soft air fryer eggs: Cook for 11–12 minutes at 270°F for a set white and runny yolk that’s perfect for dipping toast, topping hot ramen, or serving with roasted veggies on the side.

The white should be set while the center stays liquid or very soft. These are gorgeous served:

  • Over toast with butter and black pepper
  • On top of hot ramen or noodle soup
  • Alongside roasted veggies and bread

Also Read: How to Cook Perfect Rice Every Time (Recipe)

How to make Jammy air fryer eggs

Jammy eggs fall right in the middle: the yolk is thick and creamy rather than runny or crumbly.

  • Aim for 13–14 minutes at 270°F, then chill in ice water
Jammy air fryer egg sliced in half with a thick, creamy yolk, with text showing 13–14 minutes at 270°F and serving ideas for grain salads, rice bowls, and snack plates with hummus.
Jammy air fryer eggs: Cook for 13–14 minutes at 270°F to get a thick, custardy yolk that’s perfect for grain salads, rice or quinoa bowls, and snack plates with hummus and veggies.

This texture shines in:

  • Salads (especially grain-based ones)
  • Rice and quinoa bowls
  • Snack plates with vegetables, hummus, and a few olives

How to make Classic Air Fryer Hard Boiled Eggs

For air fryer hard boiled eggs that slice cleanly and mash well:

  • Go with 15–17 minutes at 270°F, depending on how firm you prefer the yolk
Hard air fryer egg sliced in half with a fully set yolk, with text showing 15–17 minutes at 270°F and serving ideas like egg salad, deviled eggs, and sandwiches.
Hard air fryer eggs: Cook for 15–17 minutes at 270°F for firm yolks that hold their shape. These hard boiled air fryer eggs are perfect for egg salad, deviled eggs, and slices on sandwiches or buttery toast.

These are ideal for:

  • Egg salad
  • Deviled eggs
  • Sliced eggs on sandwiches or toast
  • Protein-packed lunch boxes

Once you’ve tested your air fryer, you can even jot down separate timings for “soft,” “jammy,” and “hard” on a sticky note and keep it near the machine.

Also Read: Whiskey Sour Recipe: Classic Cocktail, Best Whiskey & Easy Twists


Ways to Use Air Fryer Hard Boiled Eggs

Having a container of air fryer hard boiled eggs in the fridge is like having a little protein toolkit ready whenever hunger hits.

Deviled eggs and party platters

Perhaps the most classic way to dress up hard boiled eggs is to turn them into deviled eggs. After you cook and chill your eggs in the air fryer, you can follow the fillings and flavor variations from this deviled eggs recipe with eight delicious twists.

Because air fryer hard boiled eggs usually have:

  • Evenly cooked yolks
  • Shells that peel cleanly

they’re perfect for deviled eggs that look neat enough to take to potlucks, brunches, or holiday tables.

Everyday breakfasts (and special brunches)

It’s very easy to build breakfast around a couple of eggs:

  • Slice them over buttered toast with a sprinkle of chilli flakes.
  • Pair them with a small fruit bowl and coffee.
  • Serve them alongside sautéed greens or leftover veggies.

On weekends or special mornings, you can go further and pair your air fryer hard boiled eggs with something sweet from the same appliance, such as french toast sticks that work in both the oven and the air fryer.

If you’re cooking for someone who avoids eggs but still loves brunch, you could switch them to vegan french toast with air fryer options or eggless french toast that’s crispy and fluffy while you enjoy your eggs on the side.

High-protein snacks

Hard boiled eggs are basically ready-made high-protein snacks. Two eggs alone make a surprisingly satisfying mini-meal. For more detailed macro info, you can peek at this breakdown of protein in three scrambled eggs, then adapt the numbers for your boiled eggs.

For a snack plate, try combining:

  • A couple of egg halves
  • Some cut vegetables
  • A handful of nuts or seeds
  • A little hummus or yogurt dip

When you’d rather keep things plant-based, it’s nice to still lean on the air fryer. For example, high-protein vegan meal prep ideas using an air fryer offer plenty of tofu and legume-based options to enjoy alongside, or instead of, eggs.

Salads, bowls, and sandwiches

Because they slice and chop so neatly, hard boiled eggs slot beautifully into:

  • Green salads
  • Pasta salads
  • Grain bowls with roasted vegetables
  • Sandwiches and wraps

For a slightly more global twist, you might draw inspiration from a list of popular Mediterranean breakfasts, adding olives, cucumbers, tomatoes, olive oil, and fresh herbs around your eggs.


Simple Seasoning Ideas (and a Deep Dive if You Want One)

Plain boiled eggs with just a pinch of salt are comforting. Still, once you start sprinkling on spices and toppings, they get much more exciting.

If you want a full playground of ideas, there’s a dedicated guide to seasoning options that make eggs come alive, but here are a few easy combinations you can try immediately:

  • Classic: Sea salt, black pepper, a drizzle of olive oil
  • Desi-inspired: Chaat masala, red chilli powder, a squeeze of lime
  • Smoky: Smoked paprika, garlic powder, a tiny bit of butter
  • Crunchy: Toasted sesame seeds, soy sauce, chopped spring onions
  • Herby: Fresh coriander or parsley, lemon zest, cracked pepper

You can also slice eggs onto toasted buns or pav and spoon over a light hollandaise or yoghurt-based sauce if you’d like to riff on some of the ideas from a desi twist on Eggs Benedict.


Nutrition and Health: Are Air Fryer Hard Boiled Eggs Good for You?

Eggs are one of those foods that look simple but come with a lot of nutrition and a lot of opinions.

What’s inside an egg?

Each egg contains:

  • High-quality protein
  • Fat (mostly in the yolk)
  • A mix of vitamins and minerals, including B vitamins, choline, and some fat-soluble vitamins

For a closer look at what each part gives you, you can check:

Together, those explain why egg whites are popular in weight loss diets, while yolks carry their own valuable nutrients.

How many eggs are okay per day?

That question comes up constantly. The answer depends on your health profile, cholesterol levels, and the rest of your diet. However, modern research tends to be kinder to eggs than older headlines suggested.

If you’d like a nuanced, readable explanation, this article on eggs and daily consumption walks through what studies actually say instead of relying on myths. It’s a great companion if you’re eating eggs regularly and want to understand where they fit in.

For people following low-carb or keto-style eating, eggs are almost a foundation food. There’s even a separate deep dive on why eggs are such a keto staple, which is useful if you’re combining this air fryer method with keto meal prep.

Are air fryers themselves healthy?

The air fryer is often marketed as a “healthy” appliance because it lets you cook crispy foods with much less oil than deep frying. That’s mostly true, but there are a couple of details worth knowing:

  • For starchy foods like fries, research has shown air frying can sometimes lead to higher acrylamide levels than boiling or steaming. Acrylamide is a compound formed in browned, carbohydrate-rich foods. A research summary on air frying and acrylamide in foods goes into detail on this.
  • However, eggs are not starchy, and they don’t contain the sugars and amino acids in the same way that potatoes or bread do, so acrylamide isn’t really a concern when you’re making air fryer hard boiled eggs.

For a balanced look at the broader question, you can read a practical overview in “Do Air Fryers Cause Cancer?” on Poison.org, which essentially concludes that moderation, variety, and proper cooking habits matter far more than any single appliance.

Also Read: 10 High Calorie Protein Shakes & Smoothie Recipes for Healthy Weight Gain


Storage, Safety, and Freshness

It’s easy to get excited about convenience and forget the boring-but-important part: food safety.

How long do hard boiled eggs last?

As mentioned earlier, the USDA has a clear answer: hard cooked eggs, once cooled and refrigerated, are safe to eat for up to one week. Their short note on how long you can keep hard cooked eggs is worth reading if you’re prepping a big batch.

In addition:

  • Don’t leave cooked eggs at room temperature for more than two hours. The FDA’s egg safety page on what you need to know about egg safety emphasizes that time window to reduce the risk of bacteria growing.
  • Store eggs in the refrigerator, not on the counter, once they’re cooked.

Storing raw eggs before cooking

It also helps to start with fresh eggs. For raw eggs, USDA guidance on how long eggs can be stored in the fridge explains that whole eggs in their shells typically keep for several weeks when refrigerated promptly.

If you’re curious about egg quality, cost, and labels, it can be useful to read whether expensive eggs are truly worth your money. That guide walks through cage-free, organic, and other terms so you can decide whether the premium is worthwhile for you.


Troubleshooting: Common Air Fryer Hard Boiled Eggs Issues

Even though the method is simple, questions do pop up. Fortunately, most problems have easy fixes.

My shells have brown spots

Sometimes, you’ll see little brown or tan spots on the shells after cooking in the air fryer. This usually happens where the hot air or heating element browned the shell. The inside is almost always fine.

If it bothers you aesthetically, you can:

  • Lower the temperature slightly and cook a bit longer, or
  • Experiment with moving the basket further from the top element if your machine allows

Once peeled, the egg usually looks completely normal.

I’m getting a greenish ring around the yolk

That green or grey ring around the yolk is a classic sign of overcooking. It’s safe to eat, but the texture can be a bit chalky.

To prevent it:

  • Shorten the cooking time by 1–2 minutes next time
  • Make sure you’re using a prompt, cold ice bath to stop the cooking

If it happens occasionally, don’t worry; you’re still very close to the right timing, and a tiny adjustment usually fixes it.

Some eggs cracked in the air fryer

Small hairline cracks can happen when:

  • Eggs are packed too tightly
  • There are tiny existing cracks you didn’t notice
  • The temperature in your air fryer is very intense in one spot

To reduce cracking:

  • Space the eggs out
  • Avoid dropping them into the basket
  • Try starting with room-temperature eggs if you consistently see cracks coming from fridge-cold eggs

Minor cracks are mostly cosmetic; as long as you chill and store the eggs properly, they’re usually fine to eat.

Also Read: High Protein Overnight Oats | 5 Recipes (Low Calorie, Vegan, Bulking & More)


Variations and Related Air Fryer Recipes

Once you’re comfortable knocking out air fryer hard boiled eggs, it’s only natural to cast around for more things to cook in there—especially for breakfasts, snacks, and meal prep.

Chicken wings and party snacks

For game nights or casual gatherings, a tray of eggs alone feels a bit bare. Adding something crispy and shareable works beautifully. That’s where super crispy air fryer chicken wings with no baking powder come in. They’re crunchy, flavorful, and much easier than dragging out a deep fryer.

On the side, you can offer more nibbles like:

Those snacky ideas turn a simple batch of eggs into part of a full spread.

Plant-based air fryer inspiration

Just as eggs are a powerhouse for omnivores, the air fryer is also a great ally for plant-based meal prep. On days when you want to rely less on animal protein, you can reach for:

Those resources make it easy to keep your air fryer busy even when you’re giving eggs a rest.

Beyond breakfast: falafel, potatoes, and more

As your confidence with the air fryer grows, it’s fun to explore more adventurous recipes, such as:

Add a few air fryer hard boiled eggs on the side, and you suddenly have mezze-style spreads, brunch boards, and snack platters that feel far more impressive than the effort required.


Bringing It All Together

In the end, air fryer hard boiled eggs are one of those quiet, unflashy techniques that earn their spot in your regular routine simply because they work so well:

  • The method is straightforward and hands-off.
  • The results are consistent once you know your air fryer’s timing.
  • The eggs themselves are endlessly versatile—breakfasts, snacks, salads, deviled trays, and everything in between.

As you start making them week after week, you’ll probably find your own little twists: a preferred level of doneness, a favorite seasoning, or a go-to way to serve them. And once the air fryer is already hot and humming, you might find yourself adding a few wings, potatoes, or plant-based bites to the basket as well.

All from the simple idea of “boiling” eggs without ever boiling water.

Also Read: Tres Leches – Mexican 3 Milk Cake Recipe

FAQs for Air Fryer Hard Boiled Eggs

1. What are air fryer hard boiled eggs, exactly?

Air fryer hard boiled eggs are whole eggs cooked in their shells using the hot, circulating air of an air fryer instead of boiling water on the stove. The heat gently cooks the whites and yolks until they reach your preferred level of doneness—soft, jammy, or fully hard—so you get the same result as traditional boiled eggs, just with a much simpler, hands-off method. In short, it’s a no-water way to make “boiled” eggs in an air fryer.


2. How long does it take to make air fryer hard boiled eggs?

To begin with, timing depends on how you like your yolks. For most air fryer hard boiled eggs, a good range is 15–17 minutes at a moderate temperature like 270°F (about 130–135°C). If you prefer softer centers, you can drop that to around 11–12 minutes for soft “boiled” eggs or 13–14 minutes for jammy yolks. After cooking, an ice bath finishes the job and helps them peel easily.


3. What is the best temperature for hard boiled eggs in the air fryer?

For reliable results, a medium temperature usually works best. Rather than cranking the heat all the way up, aim for about 270°F (around 132°C) when making air fryer hard boiled eggs. This gentler heat cooks the eggs evenly from shell to center and reduces the risk of rubbery whites or overcooked yolks. You can adjust a little up or down based on how powerful your specific air fryer feels.


4. Do I need water to make boiled eggs in the air fryer?

Interestingly, no water is needed at all for air fryer boiled eggs. The eggs sit directly in the basket in their shells, and the hot air does the cooking. Water baths, simmering, and boiling are replaced by a simple timer plus an ice bath afterward. The only water you really want is in the bowl for cooling the eggs quickly once they’re done.


5. Can I cook soft, jammy, and hard eggs in the air fryer using the same method?

Yes, you can use the same basic method and simply change the time. Soft air fryer eggs with runny yolks usually need around 11–12 minutes. Jammy eggs with a creamy, custardy center often do well at about 13–14 minutes. Finally, truly hard boiled air fryer eggs typically sit in the basket for 15–17 minutes. Everything else about the process—preheating, arranging the eggs, and chilling them—stays the same.


6. How many eggs can I cook in an air fryer at once?

Generally, you can cook as many eggs as fit in a single layer in your air fryer basket. They should sit comfortably without stacking or crowding so that the hot air can move around them. If your basket is big, you might easily handle a dozen eggs; if it’s smaller, you might cook six or eight. When the basket is very full, you might add a minute or so to your usual time for fully hard boiled eggs in the air fryer.


7. Why do my eggs crack or “explode” in the air fryer?

Every so often, eggs in an air fryer can crack, and occasionally a little egg white leaks out. Frequently, this happens when the eggs are packed too tightly, dropped into the basket, or have tiny hairline cracks already. In addition, a very high temperature can make pressure build up quickly inside the shell. To reduce cracking, space the eggs out, handle them gently, and stick to a moderate temperature instead of blasting them on maximum.


8. How do I make air fryer hard boiled eggs easier to peel?

Peeling is all about two key steps. First, don’t overcook the eggs; overdone eggs tend to cling to their shells. Second, transfer the eggs straight into an ice bath as soon as they come out of the air fryer. The sudden chill helps the egg pull away from the membrane inside the shell, which makes air fryer hard boiled eggs peel with far less frustration. Rolling the egg on the counter to crack the shell all over before peeling also helps.


9. Can I cook eggs in an air fryer without the shell?

Absolutely, you can cook eggs in an air fryer without the shell by using ramekins or silicone cups. For example, you can crack an egg into a greased ramekin for a baked or “boiled” style result, whisk eggs with milk and cheese for scrambled eggs in the air fryer, or pour a seasoned mixture into silicone molds for egg cups or egg bites. In each case, the air fryer becomes a tiny oven for your eggs, rather than just a replacement for boiling.


10. Is it safe to cook eggs in an air fryer?

Yes, cooking eggs in an air fryer is safe as long as you treat it like any other cooking method and follow basic food safety. Eggs should be cooked until the whites are fully set and yolks reach your chosen level of doneness, and any mixed egg dishes like egg bites or air fryer omelettes should be cooked until firm and steaming hot. Once they’re done, they need to be cooled and refrigerated promptly if you’re not eating them right away.


11. How long do air fryer boiled eggs last in the fridge?

Once you’ve cooled them down, air fryer boiled eggs keep well in the refrigerator. Typically, they can be stored for up to one week in a covered container. You can keep them in their shells or peel them in advance; either way, the key is to chill them promptly after cooking and then keep them cold. If they’ve been sitting at room temperature for more than a couple of hours, it’s safer to discard them.


12. Can I make scrambled eggs in the air fryer?

Yes, scrambled eggs in the air fryer are very doable. Instead of putting eggs straight in the basket, you whisk them in a bowl with a splash of milk, seasonings, and perhaps cheese, then pour the mixture into a greased, oven-safe dish or ramekin. After that, you cook the eggs at a moderate temperature, stirring once or twice if you like smaller curds, until they’re just set. The result is a gentle, baked-style scramble that pairs nicely with toast or vegetables.


13. Can I cook poached-style eggs in an air fryer?

You can’t poach eggs in the traditional sense inside an air fryer basket, but you can get a very similar result in cups. To create an air fryer poached egg effect, you grease a small ramekin or silicone cup, add a spoonful of water, and gently crack in an egg. Then, you cook it at a moderate heat until the whites are set and the yolk is still soft. The texture won’t be identical to a water-poached egg, yet it comes pleasantly close and works well for toast or brunch dishes.


14. How do I make air fryer egg bites or egg cups?

For air fryer egg bites, you whisk eggs with a little milk or cream, then stir in extras like cheese, chopped vegetables, herbs, or cooked meats. Next, you pour this mixture into greased silicone molds, muffin cups, or small ramekins, filling them about three-quarters full. After that, you cook them in the air fryer at a gentle temperature until they’re puffed and set in the center. These egg cups are easy to refrigerate and reheat, which makes them perfect for quick breakfasts.


15. Can I make an omelette or frittata in an air fryer?

Yes, an air fryer omelette or frittata is a great way to use the same appliance for a heartier dish. You simply whisk eggs with milk or cream, season well, and fold in fillings like vegetables, cheese, or leftover meats. Then, you pour everything into a greased, oven-safe pan that fits in the basket. Once it’s in, you cook the mixture until the center is set and the top is lightly golden. Thinner mixtures resemble an omelette, while thicker ones turn into a frittata-style bake.


16. Are air fryer hard boiled eggs healthier than regular boiled eggs?

Nutritionally, air fryer hard boiled eggs and classic stovetop boiled eggs are very similar. In both cases, you’re cooking the egg in its shell without added fat, and the protein, vitamins, and minerals remain largely the same. The main advantage of the air fryer method is convenience and ease rather than a big shift in nutrition. As always, how healthy your meal is overall depends more on what else is on the plate alongside those eggs.


17. Why do my air fryer boiled eggs sometimes have a green ring around the yolk?

When you see a green or grey ring around the yolk, it’s usually a sign that the eggs have been slightly overcooked. In an air fryer, this often means the temperature was a bit high or the time a little long. To fix it next time, you can reduce the cooking time by a minute or two and make sure the eggs go straight into an ice bath at the end. Even with the ring, the eggs are still safe to eat; the change is mainly cosmetic and affects texture more than anything else.


18. Can I use air fryer hard boiled eggs for deviled eggs?

Definitely, air fryer hard boiled eggs are excellent for deviled eggs. In fact, once you dial in the timing, the whites tend to be evenly cooked and the yolks nicely centered, which makes them ideal for neat deviled halves. After cooking and cooling, you simply peel the eggs, slice them, and mash the yolks with your chosen ingredients to make the filling. From there, you can keep things classic or experiment with spices, herbs, and toppings to create a tray of deviled eggs that really stands out.

Posted on 17 Comments

Béchamel Sauce for Lasagna: Classic, Vegan & Ricotta Sauce Recipe

Hand pouring silky béchamel onto a golden lasagna slice; copper saucepan and pasta sheets behind — Béchamel Sauce for Lasagna.

Some lasagne land on the plate as tidy, satiny squares, their layers distinct yet tender; others slouch apart, rich but oddly heavy. The difference, more often than not, is a confident Béchamel Sauce for Lasagna. This classic white sauce—built from a butter-and-flour roux whisked with milk—glues the pasta, ragù, and cheese together without weighing everything down. It’s one of the five “mother sauces” of French cuisine, a family of preparations that underpin countless dishes; if you’re curious about that lineage, the overview from the Auguste Escoffier School of Culinary Arts is a neat primer on why béchamel matters and how cooks riff on it across traditions (including the Mornay variation, which adds cheese) (learn more).

As we go, we’ll explore the classic method, a luscious ricotta–béchamel hybrid, and a plant-based version that behaves exactly like the dairy original. We’ll also walk through consistency cues, layering logic, and common mistakes—with calm, practical fixes—so your Béchamel Sauce for Lasagna performs beautifully every time.

Also Read: Crock Pot Lasagna Soup (Easy Base + Cozy Slow-Cooker Recipes)


What Béchamel Is—and What It Isn’t

At its heart, béchamel is simply milk thickened with a roux. You make a roux by cooking equal parts butter and flour until the paste foams and smells nutty. Keep it blond (not browned) for lasagna; a pale roux thickens more efficiently, giving you a sleeker sauce with less cooking. Season gently with salt, a pinch of white pepper, and just a whisper of fresh nutmeg. That’s it: no cheese yet, no garlic, no stock—just a neutral, creamy backbone ready to support the rest of the dish.

Add cheese to béchamel and you’ve made Mornay, which is wonderful in mac and cheese or as a gratin glue but a bit richer than you need for traditional lasagne. If you’d like to see how gently folding cheese into a hot white sauce creates that glossy, elastic finish (without turning grainy), our Macaroni & Cheese recipe offers a practical demonstration of melting off the heat and letting the sauce stabilize before serving.

Historically, Italian lasagne—especially the Bolognese style from Emilia-Romagna—embraces béchamel as a structural element rather than a dramatic flavor spike. It complements ragù; it doesn’t compete with it. La Cucina Italiana’s concise recipe for besciamella mirrors what generations of home cooks do: modest fat and flour, whisked with milk to a soft, spoon-coating body (classic Italian method).

Also Read: Cottage Cheese Lasagna Recipe | Chicken, Spinach, & Ricotta


Classic Béchamel Sauce for Lasagna: The Master Ratio and Why It Works

While plenty of cooks eyeball their béchamel by feel, a ratio keeps things reproducible—especially when you’re scaling up for guests. A widely used proportion is equal parts butter and flour by weight, then roughly ten parts warm milk by weight. For everyday home cooking, Italy’s common kitchen ratio—40 g butter + 40 g flour + 500 ml milk—is a friendly benchmark. It yields a softly thick sauce that clings to the back of a spoon (the classic nappe texture) without turning pasty.
Why blond matters. A pale roux maintains more thickening power than a darker one because less starch has broken down during toasting. That’s exactly what we want here: a silken texture at a gentle simmer, not a roasty, nutty profile that’d be more appropriate for gumbo or étouffée. If you want a deeper dive into roux behavior and the trade-off between flavor and thickening power, the science-forward guides at Serious Eats are terrific for grasping what’s happening in the pot and how to correct course if you overshoot the color (roux 101), (béchamel basics).

Texture, not time, is your compass. Rather than obsessing over minutes, watch how the sauce moves. When you lift the spoon, it should slide off in a continuous sheet, not in watery rivulets. Draw a finger along the spoon’s back; the line should stay clean. If the sauce feels sluggish, whisk in a spoon or two of warm milk. If it’s thin, simmer delicately for another minute and reassess. With that steady, patient approach, your Béchamel Sauce for Lasagna will end up glossy and cooperative, ready to layer.
Classic Béchamel Sauce for Lasagna being whisked in a copper pan; ratio 40 g butter, 40 g flour, 500 ml warm milk; melt, whisk to blond roux, add milk and simmer to nappe; yields about 4 cups.
Classic Béchamel Sauce for Lasagna—use the 40 g butter + 40 g flour + 500 ml milk ratio, whisk to a blond roux, then simmer to nappe for a silky base (≈4 cups, perfect for a standard 9×13).

Also Read: How to Make Churros (Authentic + Easy Recipe)


The Method, Step by Step – How to Make Béchamel Sauce for Lasagna

Although the technique is short, each move earns its keep. Let’s walk through it explicitly, so nothing feels rushed.

  1. Warm your milk first. Heat the milk separately until it’s steaming, not boiling. Warm liquid integrates into the roux more willingly, minimizing lumps and shaving time off the final simmer.
  2. Cook a blond roux. In a heavy-bottomed saucepan, melt butter over medium-low. Scatter in an equal weight of flour and whisk constantly for 2–3 minutes. You’re aiming for a gentle foam and a pale straw color.
  3. Off heat, add milk gradually. Take the pot off the burner. Whisk in a small splash of warm milk; when it’s smooth, add a little more, and a little more. As the mixture loosens and turns glossy, you can add the remaining milk in a steady stream.
  4. Return to low heat and simmer. Put the pot back over low heat and whisk until the sauce gently bubbles. Keep it just below a boil; vigorous bubbling can scorch milk solids or create a grainy mouthfeel.
  5. Season and adjust. Salt, a pinch of white pepper, and a tiny grating of nutmeg bring it into focus. Check texture; it should coat a spoon and flow slowly off the whisk.

That’s the base. From here, you can drive in several directions—straight into a lasagna pan, gently into ricotta for a smooth hybrid, or toward a vegan variant that behaves like this one but uses plant milk and olive oil.

Also Read: How to Cook Bacon in the Oven (Crispy, No-Mess, Crowd-Ready Recipe)


How Much Béchamel Sauce for Lasagna You Actually Need

Because pan depth and noodle thickness vary, it’s easier to think in ranges. For a standard 9×13-inch lasagna, 4 to 5 cups of béchamel usually lands you in the sweet spot. Spread a thin smear on the bottom to prevent sticking; then build in repeating layers: béchamel → noodles → ragù → béchamel → grated cheese. Keep the béchamel layers thin yet continuous—enough to gloss the pasta and moisten the ragù so everything fuses.

Traditional Lasagne alla Bolognese from Emilia-Romagna follows precisely this logic—pasta, ragù, béchamel, Parmigiano, and repeat—resulting in slices that hold shape without drying out. For a lovely regional perspective on that structure, browse the official travel resources from Emilia-Romagna or articles documenting the classic recipe; they consistently place béchamel as the quiet, essential binder rather than a showy flavor bomb (regional context).

If you enjoy ricotta’s milky sweetness, you can absolutely keep it in play; we’ll fold it into béchamel in a moment. Meanwhile, if you’re looking to cross-reference other layering styles (including a cottage-cheese-forward path that meal-preps well), peek at Cottage Cheese Lasagna: Chicken, Spinach & Ricotta and adapt the assembly by swapping your béchamel for part of the cheese mix.


Ricotta–Béchamel Recipe: The Ultra-Smooth Cheese Layer

Some cooks love ricotta’s flavor but don’t always love its grainy, slightly crumbly texture in baked layers. Béchamel Sauce for Lasagna solves that beautifully when you blend the two.

Top-down flatlay showing Ricotta–Béchamel Cheese Sauce for Lasagna: glass bowl of creamy sauce, small bowl of ricotta, wedge of Parmigiano, and lasagna sheets on a wooden board.
Ricotta–Béchamel Cheese Sauce—fold ricotta and finely grated Parmigiano into hot béchamel off heat for a glossy, non-grainy layer; makes about 5 cups, ideal for a standard 9×13 lasagna.

How to make it:

  • Start with 4 cups hot béchamel at nappe consistency.
  • Whisk in 1 cup finely grated Parmigiano Reggiano off the heat until melted and glossy.
  • Fold in ½–1 cup ricotta, choosing a smooth variety; if it’s dense, whisk it briefly to loosen before blending.
  • Taste for salt and, if needed, add an extra tablespoon of grated Parmesan to sharpen the finish.

This hybrid behaves like a mellow Mornay—silky, cohesive, and easy to spread—while preserving ricotta’s clean dairy notes. If you’re curious which cheese finishes the top layer best (for bronzing without greasy puddles), our primer on the difference between Parmesan and Parmigiano Reggiano explains why the real thing seasons with a savory snap and melts more cleanly than many pre-grated blends.


Vegan Béchamel Sauce for Lasagna: Same Feel, Plant-Based Recipe

The plant-based route is gratifyingly simple because the physics don’t change—only the fat and the milk do.

  • Fat: Use olive oil or a neutral vegan butter.
  • Flour: Stick to all-purpose. Chickpea or whole-grain flours can add flavor; if you enjoy that, use them sparingly at first.
  • Milk: Opt for unsweetened soy or oat milk. Unsweetened soy melts into the background; oat brings a subtle, round sweetness. Almond milk can work but is thinner and may need a minute more simmering.
  • Seasoning: Salt, white pepper, nutmeg, plus an optional teaspoon of onion powder for savory backbone. If you want a slightly “cheesy” direction without adding actual cheese, whisk in a tablespoon or two of nutritional yeast.
Vegan Béchamel Sauce for Lasagna whisked in a black pan—60 g olive oil, 60 g flour, 700 g unsweetened soy/oat milk—melt oil, whisk blond roux, add warm plant milk, simmer to nappe; yields about 4 cups.
Vegan Béchamel Sauce for Lasagna—use an olive-oil roux and warm unsweetened soy/oat milk, then simmer gently to nappe for a silky, slice-clean layer (≈4 cups in 12–15 minutes).

Technique-wise, everything mirrors the dairy version: warm the plant milk, cook a blond roux in oil, whisk off the heat, then return to a gentle simmer. If you’d like more ideas for building a fully vegan pasta night—high protein, big flavor—dip into our plant-based pasta collection for cashew-based sauces and other creamy profiles that pair beautifully with vegetables.


Seasoning and Aroma: Subtlety Wins

Because Béchamel Sauce for Lasagna plays a supporting role, restraint pays off. A scant pinch of nutmeg accentuates the sauce’s dairy sweetness without shouting; more than that can tilt perfumey. White pepper keeps flecks invisible and holds onto heat gently; black pepper works too, but the specks distract in a pale sauce. If your ragù is already intense, let béchamel stay quiet. Conversely, if your filling leans delicate—say, spinach and mushrooms—consider a whisper of fresh lemon zest to brighten the edges.

Crucially, avoid garlic in the béchamel itself; if you want a garlic presence, let it live in the ragù or a separate spinach layer, where it can sauté properly and won’t risk turning harsh in milk.

Also Read: 10 Best Espresso Martini Recipe Variations (Bar-Tested)


Layering Strategy: Structure Meets Tenderness

Successful layering is less about strict rules and more about a few guiding ideas:

  • Moisture distribution. Thin béchamel layers moisten the pasta while the ragù provides body. Too much béchamel in one spot can slip and puddle; too little leaves dry corners. Spread to the edges.
  • Cheese placement. Finely grate Parmigiano between layers rather than piling most of it on top. This encourages even melt and better slice integrity. Save a small handful for the surface to bronze.
  • Top management. Finish with a modest veil of béchamel and cheese, not a thick cap. That balance prevents rubbery tops and helps steam escape.
Layering Béchamel Sauce for Lasagna in a 9×13 pan—use about 4–5 cups; sequence: base smear, pasta, ragù, béchamel, Parmesan; repeat and finish with a thin béchamel cap; rest 10–15 minutes.
Layering Béchamel Sauce for Lasagna—plan ≈4–5 cups for a 9×13. Start with a base smear, then build pasta → ragù → béchamel → Parmesan; repeat, top lightly, and rest before slicing.

If you’re ever tempted to swap béchamel for a heavy cheese sauce on every layer, consider contrast. Let béchamel do the quiet binding and reserve richer, cheesier notes for a single inner layer or the finish. For a clear comparison of white sauces versus cream-based Alfredo styles (and when each shines), our Alfredo deep-dive lays out the differences so you can choose the right tool for the flavor you want.


Troubleshooting: Calm Fixes for Common Problems

Even experienced cooks run into little snags; the key is responding gracefully.

Lumps
If lumps form, kill the heat immediately. Whisk hard for 20–30 seconds; most will dissolve as the starch hydrates fully. Still not smooth? Pour the sauce through a fine sieve into a warm pot and carry on. Next time, remember to whisk off the heat when adding milk and add it gradually.

Too Thick or Too Thin
If your Béchamel Sauce for Lasagna feels gluey, whisk in warm milk a tablespoon at a time until it flows again. If it’s thin, give it a gentle simmer and the occasional whisk for another minute. Because a pale roux retains strong thickening power, tiny tweaks go a long way.

Nappe test for Béchamel Sauce for Lasagna—spoon coated with sauce showing a clean finger line, indicating pourable, spoon-coating consistency.
Nappe = the right thickness for béchamel: it coats the spoon, holds a clean finger line, and still pours smoothly—ideal for neat, sliceable lasagna layers.

Grainy After Adding Cheese
This usually means the cheese overheated or the sauce boiled after the cheese went in. Melt cheeses off heat and stop stirring once they dissolve. You can always rewarm gently if needed. For technique cues that keep melted cheese smooth, the process notes in our Macaroni & Cheese guide are directly transferable.

Scorching
Scorched milk is stubborn. If you catch the smell early, pour the unscorched top portion into a new pot, leaving any browned film behind. Keep heat low and whisk more frequently.

Breaking in the Oven
If a lasagna looks greasy on top, it’s often because the cheese was too fatty or piled too thickly. Use a firm grana like Parmigiano for most of the top and keep any mozzarella to a light sprinkle; you’ll get bronze without pools. Our Parmesan vs. Parmigiano Reggiano piece clarifies why the real stuff behaves better under heat.

Also Read: 10 Best Chicken Sandwich Recipes (BBQ, Parm, Buffalo & More)


Make-Ahead, Cooling, and Reheating

Béchamel is an ideal make-ahead component because it reheats predictably. After cooking, cool it quickly: transfer to a shallow container, press parchment or plastic directly onto the surface to prevent a skin, and refrigerate promptly. For general food-safety timing, U.S. guidelines recommend using refrigerated leftovers within 3–4 days, and, if you need a longer hold, freezing works well; thaw overnight and whisk while reheating, loosening with a splash of milk as needed (USDA/FSIS guidance), (FoodSafety.gov storage chart).

When reheating béchamel, keep the heat low and whisk patiently; it will return to its glossy self. If you’re turning it into a ricotta–béchamel blend, bring it to just-warm before whisking in cheese so everything integrates without curdling.

Also Read: French Toast Sticks (Air Fryer + Oven Recipe) — Crispy Outside, Custardy Inside

Side-by-side pans showing white roux and blond roux—the ideal stage for béchamel.
For Béchamel Sauce for Lasagna, cook the roux to blond: more thickening power and a silkier sauce.

Béchamel Sauce for Lasagna—Scaled Recipes You Can Memorize

Classic Béchamel (about 4 cups)

  • 60 g butter
  • 60 g all-purpose flour
  • 600 g whole milk, warmed
  • 1 tsp fine salt, pinch white pepper, tiny grating nutmeg

Directions: Make a blond roux (2–3 minutes). Off heat, whisk in warm milk gradually until smooth, then simmer gently for 6–8 minutes. Season and adjust to nappe.

Ricotta–Béchamel (for one 9×13-inch lasagna)

  • 4 cups hot béchamel
  • 1 cup finely grated Parmigiano Reggiano
  • ½–1 cup smooth ricotta

Directions: Off heat, whisk Parmesan into béchamel until glossy; fold in ricotta. Taste and season. Spread thinly between layers.

Vegan Béchamel (about 4 cups)

  • 60 g olive oil (or vegan butter)
  • 60 g all-purpose flour
  • 700 g unsweetened soy or oat milk, warmed (plant milks vary in body; start here)
  • 1–1½ tsp fine salt, pinch white pepper, tiny pinch nutmeg
  • Optional: 1 tsp onion powder; 1–2 tbsp nutritional yeast

Directions: Make a blond roux with oil; whisk in warm plant milk off heat; return to low simmer until nappe. Season and adjust with milk as needed.

Also Read: Lemon Drop Martini Recipe (Classic, 3-Ingredient, & More)


Beyond Lasagna: Using Béchamel Elsewhere (With Restraint)

Because béchamel is neutral and stabilizing, it shines in unexpected places:

  • Mac and Cheese. Fold in cheeses off heat to create a classic Mornay; the method used in our stovetop and baked mac & cheese keeps the sauce silky instead of clumpy.
  • Vegetable gratins. A modest layer underneath roasted cauliflower or leeks amplifies tenderness without drowning flavor.
  • Croque monsieur. Thin béchamel brushed onto the bread provides moisture insurance and browning potential.
  • Moussaka. A thicker béchamel (sometimes enriched with egg yolks) forms the custardy top; for a Greek-leaning lasagna night, it’s a lovely twist that still uses the same roux logic.

If you want to compare white-sauce approaches with cream-based pasta styles for variety in your weekly rotation, our Alfredo overview maps where béchamel-based sauces fit, and when to pivot to cream reductions instead.


Putting It All Together: A Calm, Confident Lasagna Flow

To bring the pieces together, work in an unhurried rhythm:

  1. Cook béchamel first. It holds well and gives you time to tweak texture.
  2. Taste your ragù. Salt it to where you want it, since béchamel will not compensate for underseasoning later.
  3. Par-cook or soak noodles as needed. No-boil sheets drink up moisture; béchamel helps, but be generous with sauce coverage so the edges don’t crisp prematurely.
  4. Layer lightly but completely. Each béchamel layer should be thin yet continuous, reaching every corner.
  5. Finish modestly. A veil of béchamel and Parmigiano on top will bronze and stay supple.
  6. Rest before slicing. Ten to fifteen minutes lets the starches set, giving you clean squares rather than slumps.

On nights when you want a lighter profile, choose the classic Béchamel Sauce for Lasagna and keep cheese modest. On nights when you crave dreamy richness, fold in ricotta for the hybrid. When cooking for plant-based friends, the vegan version slips into the stack quietly and delivers the same structure. Because the method is compact and forgiving, you’ll adjust by feel in no time.

Also Read: Pumpkin Spice, Your Way: Master Blend, Variations & Real-World Recipes


A Final Word on Confidence and Craft

Great béchamel is about attention, not fussiness. Warm the milk, whisk off heat, simmer gently, season with care, and trust your eyes more than the clock. Every pan, every burner, every batch of flour behaves a little differently; nonetheless, the cues never change. When the sauce coats a spoon and glides, when the layers spread thin and even, when the bake exhales a faint butter-and-nutmeg scent as it rests—you’ll know you’re there.

If you’d like more perspective on béchamel’s role in the wider culinary family, the Escoffier piece on mother sauces helps set the stage (read here). For nitty-gritty technique and starch science, Serious Eats offers clear, test-driven guidance on roux and white sauces (roux guide), (béchamel guide). And for your own kitchen reference, keeping an eye on safe cooling and storage windows will let you make sauce ahead without worry (USDA/FSIS), (FoodSafety.gov).

Meanwhile, for variations and related dishes in our repertoire, browse these companion reads on MasalaMonk:

Make your Béchamel Sauce for Lasagna once this way—patient, glossy, and balanced—and it will quietly upgrade every batch that follows.

FAQs

1) What is Béchamel Sauce for Lasagna, exactly?

Béchamel Sauce for Lasagna is a silky white sauce made from a blond roux (butter + flour) whisked with warm milk, lightly seasoned with salt, white pepper, and a hint of nutmeg. It binds layers, prevents dryness, and gives clean, sliceable structure.

2) What’s the ideal ratio for Béchamel Sauce for Lasagna?

Use equal parts butter and flour by weight, then about 10 parts milk by weight. For home cooking, 40 g butter + 40 g flour + 500 ml milk yields a classic, spoon-coating consistency.

3) How much béchamel do I need for a 9×13-inch pan?

Plan on 4–5 cups. Start with a thin smear in the pan, then use modest, even layers between noodles and ragù so everything fuses without becoming soupy.

4) Should I use béchamel, ricotta, or both?

Either works, yet combining them is lovely. Blend warm béchamel with ricotta and a little grated hard cheese for a smooth, cohesive “cheese sauce” that spreads evenly and bakes beautifully.

5) How thick should Béchamel Sauce for Lasagna be?

Aim for nappe: it should coat the back of a spoon and leave a clean line when you swipe a finger. If it’s too thick, add a splash of warm milk; if thin, simmer briefly to tighten.

6) Can I make Béchamel Sauce for Lasagna ahead of time?

Absolutely. Cool quickly, press parchment or plastic directly on the surface, and refrigerate. Reheat gently and whisk in a bit of milk to restore gloss.

7) Can I freeze béchamel?

Yes. Freeze in flat portions. Thaw overnight, reheat slowly, and whisk to smooth; add a spoon of milk if needed.

8) What’s the best milk to use?

Whole milk delivers classic body and flavor. For a lighter take, use 2% and simmer a minute longer. If you prefer richness, blend in up to 25% cream—but keep the texture pourable.

9) How do I fix lumpy béchamel?

Remove from heat and whisk vigorously; most lumps dissolve as starch hydrates. If needed, strain through a fine sieve into a warm pot and continue.

10) Why did my sauce turn grainy after adding cheese?

Cheese overheated. Next time, add cheese off heat and stir just until melted. For this recipe, keep béchamel plain between layers and use grated cheese sparingly for balance.

11) Can I make a vegan Béchamel Sauce for Lasagna?

Certainly. Swap butter for olive oil or vegan butter, use unsweetened soy or oat milk, and season as usual. Simmer a touch longer to remove any raw flour taste.

12) Is béchamel the same as white sauce?

Yes. “White sauce” is the common name for béchamel—milk thickened with a roux and gently seasoned. Add cheese and you’ve created a daughter sauce (often called Mornay).

13) Do I need nutmeg?

A small pinch accentuates dairy sweetness without dominating. Use a light hand so the sauce stays supportive rather than showy.

14) How do no-boil noodles change the amount of sauce?

No-boil sheets drink more liquid while baking. Consequently, keep your béchamel layers continuous (edge-to-edge) and lean toward the higher end of the 4–5 cup range.

15) Can I make gluten-free Béchamel Sauce for Lasagna?

Yes. Use a 1:1 gluten-free all-purpose blend for the roux. Cook the roux gently to remove raw flavors before whisking in warm milk.

16) How should I season béchamel for lasagna layers?

Season lightly—salt, white pepper, a whisper of nutmeg. Let the ragù and finishing cheeses carry most of the bold flavors, while béchamel provides balance and moisture.

17) Will béchamel make my lasagna watery?

Not if it’s cooked to nappe and spread thinly. Watery results usually come from under-reduced ragù, overpacked fillings, or uncooked vegetables releasing liquid.

18) What’s the best way to layer with Béchamel Sauce for Lasagna?

Begin with a thin béchamel smear in the pan, then alternate: noodles → ragù → béchamel → a light sprinkle of grated hard cheese. Finish with a modest veil of béchamel and cheese on top.

19) How long should lasagna rest after baking?

Give it 10–15 minutes. Resting allows starches and fats to settle, helping slices hold their shape.

20) Can I flavor béchamel with aromatics?

For lasagna, keep it quiet. If desired, infuse the milk with a bay leaf or onion, then strain. Avoid sautéed garlic in the béchamel itself; keep stronger flavors in the ragù or vegetable layers.

21) Why use Béchamel Sauce for Lasagna instead of heavy cream?

Béchamel delivers body without greasiness, sets cleanly, and prevents separation. Heavy cream alone can feel rich yet loose; béchamel provides dependable structure.

22) Does béchamel change the bake time?

Not meaningfully. Bake until bubbling around the edges and the top is lightly bronzed. If browning too fast, tent loosely with foil.

23) How much salt should I add?

Season béchamel modestly and taste the ragù separately. Since cheeses add salt, under-seasoning the béchamel a touch keeps the final dish balanced.

24) Can I add herbs to Béchamel Sauce for Lasagna?

If you like, whisk in finely chopped parsley or chives at the end, although restraint is key. The sauce should support, not overshadow, the other layers.

25) What’s the simplest way to scale béchamel?

Multiply the base ratio. For double, use 80 g butter + 80 g flour + 1 liter milk. Watch texture cues and adjust with a splash of milk if it thickens too much.

Posted on 19 Comments

How to Cook Bacon in the Oven (Crispy, No-Mess, Crowd-Ready Recipe)

Hand holding a parchment-lined tray of crispy oven-baked bacon with warm, moody styling; headline ‘How to Cook Bacon in the Oven’ and timing 400°F 12–18 min (thick 18–25); jalapeño poppers and thermometer props.

There’s a reason so many pros and savvy home cooks quietly migrate from the skillet to the sheet pan: once you learn how to cook bacon in the oven, you get even browning, less fuss, almost no splatter, and—most importantly—perfectly crisp slices that finish at the same time. Instead of babysitting over popping fat, you slide a tray into a preheated oven, rotate once, and pour yourself coffee while the heat does the work. Independent tests routinely rank oven on parchment among the most reliable approaches for consistent texture and easy cleanup, and large-batch cooking becomes trivial. If you’re planning brunch, feeding a crowd, or just prefer your kitchen to smell like breakfast (and not like a grease fire), this is the method you’ll return to again and again. See the side-by-side from The Kitchn that named parchment-lined baking the winner in a multi-method showdown: baking on parchment paper is best and, for further mechanics, Serious Eats’ explanation of why bacon “fries in its own fat” on a flat, lined sheet helps lock in uniform browning: the best way to cook bacon.
Before we light the oven, let’s set the payoff: oven bacon frees your hands for everything else. With one tray working, you can mash yolks for a platter of classic deviled eggs or toss together a spread of potato appetizers—both pairings that vanish quickly when crisp bacon hits the table.

Parchment-lined sheet pan with evenly browned bacon strips—step 1 oven method for cooking bacon at 400°F
Even browning, minimal mess: line a rimmed sheet with parchment, bake on the middle rack, rotate once, then rest to crisp.

The Straightforward Way: How to Bake Bacon in the Oven

To master how to cook bacon in the oven, start simple. Preheat to 400°F (205°C). Line a rimmed sheet with parchment; fold the paper’s edges up slightly so they catch the drips. Arrange the strips in one layer with a sliver of space between each piece. Slide the tray onto the middle rack and bake until the edges are deeply rendered and the centers no longer look shiny: for regular slices, 12–18 minutes; for thick cut, 18–25 minutes. Rotate the pan once halfway to even out hot-spot differences. If you crave a touch more mahogany, finish under the broiler for 60–90 seconds, watching constantly. Transfer the bacon to a wire rack (or paper towels) and rest 1–2 minutes; it crisps further as it cools.

Although foil works, parchment typically releases better and wipes up faster—exactly what The Kitchn’s 8-method test concluded when it crowned the parchment-lined oven method the overall winner. If you enjoy method-nerd deep dives, bookmark that side-by-side here: We tried 8 methods; baking on parchment won.

And because brunch is a whole mood, tuck a few supporting bites alongside: creamy deviled eggs and a tray of crisp-tender potato bites build out the board with minimal extra effort.

Also Read: 10 Best Chicken Sandwich Recipes (BBQ, Parm, Buffalo & More)


Why Oven Bacon Beats the Skillet When It Matters

First, capacity. A full sheet pan fits far more slices than a skillet; everything finishes together instead of in waves. Second, predictability. With a steady 400°F and a lined pan, you aren’t fighting hot spots or flare-ups, and you can place the bacon exactly where you want it. Third, tranquility. No hovering with tongs, no fat popping onto your forearms, and no chaos near the stovetop when you’re scrambling eggs.

Moreover, this isn’t just opinion. Food & Wine tested seven methods and landed where many of us do: the oven delivers the most consistent, low-effort crisp while still accommodating big batches. Have a look at their summary here: We tested 7 ways; oven won. Serious Eats also lays out why convection and even heat promote browning more evenly than a crowded skillet can manage: how to cook bacon.

Meanwhile, if you’re outfitting your kitchen for long-term wins, give this a skim before you impulse-buy more heavy cookware: Buying a Cast Iron Skillet? 5 Warnings Before You Invest. Cast iron is brilliant for searing and oven finishes, but caring for it properly protects your sanity (and your bacon).

Also Read: 10 Best Espresso Martini Recipe Variations (Bar-Tested)


How to Make Bacon Extra Crispy in the Oven—Every Time

Now that you know how to cook bacon in the oven, let’s push for that shattery edge without overcooking.

Space matters. Overlap creates steam, and steam softens. Leave small gaps so fat can render cleanly and the edges can dry.

Airflow wins. For the crispiest possible texture, elevate the slices on a wire rack set over the sheet pan. Air moving under the bacon tightens the texture and flattens the wave. Add 1–3 minutes to the timing when using a rack.
Finish fast. The broiler is a torch, not a strategy. Use it briefly—no more than 60–90 seconds—to burnish color at the end, not as the primary heat source.
Rest to set. Two minutes on a rack is the difference between “hot and floppy” and “cooled and crisp.”

Four tips overlay on bacon on a cooling rack: space slices, elevate on rack, brief broil, rest to set
Space the strips, lift on a rack, finish with a brief broil, then rest 1–2 minutes—hello shattery edges.

Curious why a flat, lined surface equals uniform browning? Because bacon essentially fries in its own fat on the sheet; parchment lets it baste, release, and crisp without sticking, which is exactly what Serious Eats describes in its method comparison: the best way to cook bacon. If you need ultra-flat slices for BLTs or breakfast sandwiches, try the pro trick of gently pressing the bacon beneath a second pan (with parchment between) as it bakes; Kenji López-Alt uses this in his “bacon for a crowd” method: baked bacon for a crowd.

Also Read: Macaroni & Cheese Recipe: Creamy Stovetop, Baked & Southern


Thickness, Temperatures, and Timelines

Because readers arrive with different ovens and cuts, it helps to position the timing windows clearly.

Oven bacon time and temperature chart for 350°F, 375°F, 400°F, and 425°F with doneness photos
Use this quick chart to hit your desired texture with bacon—400°F is the sweet spot for speed and crisp, while 350–375°F adds forgiveness.

How to Cook Bacon in the Oven at 400°F (the Sweet Spot)

Most kitchens get the best balance of speed and crisp at 400°F (205°C). Expect 12–18 minutes for standard slices and 18–25 for thick-cut, rotating the tray once. The Kitchn’s step-by-step lays out the same range with a straightforward setup: how to cook bacon in the oven at 400°F.

How to Cook Bacon in the Oven at 375°F (Even Browning)

Prefer a slightly gentler march toward crisp? At 375°F (190°C), you often see 16–22 minutes as the window. This is a sweet setting for big brunch trays where you’d rather have a touch more forgiveness.

How to Cook Bacon in the Oven at 350°F (Calmer, Fewer Pops)

At 350°F (175°C), you trade time for calm: 20–25 minutes for standard slices. If you’re new to your oven or worried about splatter, this conservative setting keeps things tidy.

How to Cook Bacon in the Oven at 425°F (Fast—Eyes on It)

When you’re sprinting, 425°F (220°C) can land 10–15 minutes, but it demands vigilance. The last three minutes determine whether you nail glossy, crisp mahogany or overshoot into brittle. Rotate, then watch like a hawk.

Also Read: French Toast Sticks (Air Fryer + Oven) — Crispy Outside, Custardy Inside


Thick-Cut Bacon: How to Cook Bacon in the Oven for Big Slices

Thick-cut strips reward patience. They hold more fat and need a breath more time to render. Set 400°F, lift the slices on a rack if you have one, and start checking at 18 minutes. Most batches pull somewhere between 20–25 minutes. If the centers are right but the color wants another shade, broil briefly—truly, a minute can be plenty.

Thick-cut bacon baked on parchment with timing note to check at 18 minutes and finish by 25
Thick-cut needs patience—start checking at 18 minutes at 400°F; pull when centers lose shine and edges are deeply rendered.

If you like food gear insights while we’re here, this piece offers real-world cautions before you add more iron to your cabinet: cast-iron skillet warnings. Cast iron excels for many tasks, but it’s fine to keep oven bacon on parchment; you don’t need a heavy pan to nail it.

Also Read: Lemon Drop Martini Recipe (Classic, 3-Ingredient, & More)


Parchment vs Foil vs Rack: Choosing the Best Setup

It’s tempting to chase hacks, yet the basics outperform gimmicks.

Side-by-side comparison of bacon baked on parchment, foil, and wire rack showing release and crispness differences
Parchment = easiest cleanup, Rack = crispiest (with more scrubbing), Foil = workable but can stick with sugary cures.

Parchment on a rimmed sheet is the dependable default: it releases cleanly, encourages even browning, and makes cleanup nearly effortless. The Kitchn’s comparison crowned this exact configuration: parchment-lined baking wins.

A rack over the sheet yields the crispiest texture with flatter slices and more airflow. Add a minute or two to timing and budget a moment to scrub the rack; the result is worth it for “glass-snappy” edges.

Foil-lined sheets also work and are easy to toss, though certain sugar-cured bacons can adhere slightly more to foil than to parchment. If you go foil, fold the edges up into a shallow tray to corral drips for mess-free disposal (Food & Wine even shows a DIY “ridge” rack with folded foil here: oven bacon trick).

For completeness, a few outlets promote cold-start tricks or twist techniques. If you enjoy experimenting, go for it. The fundamentals above, though, remain the most repeatable for week-to-week cooking.

Also Read: Classic vs. Authentic Alfredo: 5 Essential Recipes


Convection, Toaster Oven, and a Word on Microwaves

Because ovens vary, it’s smart to adapt. Convection fans accelerate browning by moving hot air constantly over the surface. As a rule, reduce by 25°F (≈15°C) and start checking 3–4 minutes earlier.

Bacon on a rack in a toaster oven with guidance to reduce temperature by ~25°F and check earlier
Convection speeds browning—drop temp by ~25°F and begin peeking 3–4 minutes early to avoid overshooting.

Toaster ovens are mini-ovens. The same guidance applies; just use a smaller tray and peek 2–3 minutes earlier because the elements sit closer to the food.

As for microwaves, they excel for 1–4 slices when you’re racing out the door: layer bacon between paper towels on a microwave-safe plate, cook about 1 minute per slice to start, then add 15–20 second bursts to finish. However, controlled tests still favor baked bacon for texture and consistency—especially with thick-cut. Food & Wine’s multi-method comparison places microwave near the bottom for taste and mouthfeel: 7 ways to make bacon—oven wins.

Also Read: Air Fryer Chicken Wings (Super Crispy, No Baking Powder)


How to Cook Bacon in the Oven—Without a Mess

If you’ve ever cleaned splatter from a stovetop, the oven already feels calmer; nevertheless, a few habits make it virtually mess-free.

  • Use a rimmed sheet so fat can’t cascade into the oven floor.
  • Middle rack positioning keeps hot coils above and below at safe distances.
  • Do not broil the entire time. Broiling drives popping; instead, broil only to finish for color.
  • Don’t crowd. Overlapping strips steam each other and spatter more.
  • Line with parchment and fold the edges up; this turns the paper into a drip tray you can lift and discard.
  • Start with a clean oven. Residual grease on the floor smokes before bacon does. A quick wipe pays dividends.

If you enjoy flavor-building extras across the rest of your brunch plan, take a peek at MasalaMonk’s seasoning ideas for eggs, which dovetail nicely with a bacon tray: egg-cellent seasoning options.


Turkey Bacon: How to Cook Bacon in the Oven When It Isn’t Pork

Turkey bacon behaves differently: less fat, quicker edges. Bake at 400°F (205°C) for 10–15 minutes. Flip at 8–10 minutes if the edges curl; pull once the surface looks uniformly crisp, because a minute too long dries it out.

Turkey bacon on a rack with steps: bake at 400°F 10–15 min, flip at 8–10 if edges curl, pull when surface looks crisp
Leaner strips cook faster—trust visual cues; flip if curling, then pull as soon as the surface crisps to prevent drying.

Because brand moisture and slice thickness vary, one must trust visual cues as much as the clock. If there’s ever a product advisory (they do happen), always check the official guidance—USDA FSIS maintains an updated recall hub and safety pages. For example, here’s the FSIS bacon safety backgrounder: Bacon and Food Safety.


Bacon Grease: Strain, Save, and Store

Once your tray cools a bit, pour the drippings through a fine sieve or a coffee filter into a clean jar. That liquid gold perfumes roasted potatoes, fried eggs, cornbread, even sautéed greens.

Jar of strained bacon grease with tips to refrigerate for about 3 months or freeze longer
Strain through a fine sieve or coffee filter; refrigerate up to ~3 months or freeze for longer—perfect for potatoes, eggs, and cornbread.

For storage, the simplest, most practical guidance is: refrigerate up to ~3 months and freeze for longer (6+ months), always discarding if the fat smells off or looks milky after warming. For broader food-safety context, tap FSIS’ comprehensive basics and temperature resources: Food safety basics and the safe internal temperature chart.


From Oven to Plate: What to Serve With Bacon (and How to Keep It Hot)

Because oven bacon scales so well, you can build the rest of the menu without anxiety. As mentioned earlier, classic pairings make you look like a catering pro with almost no extra labor: silky deviled eggs and crispy-creamy potato appetizers round out the plate. Or, pivot toward a slightly different vibe with sweet-potato starters—the salty-sweet play loves bacon.

Bacon slices on a wire rack with text: hold and reheat at 200°F (95°C) for 30–40 minutes
Keep bacon crisp for service: rest cooked strips on a rack in a 200°F oven for 30–40 minutes—airflow prevents soggy edges.

To hold bacon for the table, set your oven to 200°F (95°C) and rest the strips on a rack set over a sheet; this keeps them crisp for 30–40 minutes. Avoid covering tightly with foil, which traps steam and softens the edges you worked to get.

Also Read: Punch with Pineapple Juice: Guide & 9 Party-Perfect Recipes


A Note on Food Safety (Because You’re the Grown-Up in the Room)

While bacon itself is fully cooked when crisp to your liking, many brunch menus combine it with proteins that do require strict temperature targets—bacon-wrapped chicken breasts for instance.

Bacon on cooling rack with food safety notes: poultry 165°F, pork 145°F plus rest, refrigerate grease, check FSIS recalls
Pair bacon with safe temps: poultry to 165°F, pork to 145°F + rest. Strain and refrigerate grease, and scan FSIS recalls for advisories.

Whenever you include cross-links to recipes with poultry or seafood, keep your stance clear and cite the USDA’s numbers: poultry to 165°F / 74°C, pork whole cuts to 145°F / 63°C plus a short rest. For a one-page refresher, the FSIS chart is here: safe temperature chart. And as for bacon storage and handling, FSIS’ backgrounder is again the anchor: Bacon and Food Safety.


Variations Worth Knowing (Without Straying From the Core)

Once you’re have learned enough from above about how to cook bacon in the oven, you can go through a few optional flourishes.

Maple-pepper glazed bacon. In the final 5 minutes, brush a whisper of maple syrup on top and dust with black pepper. Return to the oven just long enough to set the glaze. Watch closely—sugar accelerates browning.

“Pressed” bacon for sandwiches. As mentioned earlier, slide a second tray gently over a parchment-covered layer of bacon so it bakes flat; Kenji showcases this for ultra-uniform slices: baked bacon for a crowd.

Convection for snappier edges. If your oven offers it, cut the temperature by 25°F (≈15°C) and begin checking 3–4 minutes early.

Toaster-oven micro-batches. For two people, a quarter sheet pan in a toaster oven works beautifully at the same temperatures, with a slightly earlier check. Food & Wine’s tip for a DIY foil “ridge” can keep slices out of pooled fat if you don’t own a rack: make bacon on foil ridges.

Also Read: What to Mix with Jim Beam: Best Mixers & Easy Cocktails


Troubleshooting Without Tears

Troubleshooting overlay on baked bacon: bake longer or brief broil, rotate pan halfway, use parchment and let rest
Chewy? Add 2–3 minutes or a quick broil. Uneven color? Rotate the pan. Sticking? Switch to parchment and lift after a brief rest.

Even with a method this forgiving, a few hiccups are common. Fortunately, each has a simple fix:

Chewy, not crisp. Either the oven ran a little cool or the slices were crowded. Add 2–3 minutes, or finish with a 1-minute broil to nudge color without overcooking the lean.

Uneven browning. Ovens have hot spots. Rotate the pan halfway, and consider a rack for better airflow if your bacon warps.

Stuck slices. Switch to parchment and let the bacon rest on the tray 30–60 seconds before lifting; rendered fat re-absorbs slightly and helps release.

Smoky oven. The usual culprit is old oil on the floor or walls, not the bacon itself. A quick wipe before you bake prevents most smoke. Keep the tray centered; upper racks sit closer to hot elements.

Also Read: 10 Creative Chia Pudding Recipes for Every Taste


The Case for Oven Bacon, Restated—For Anyone Still on the Fence

To recap with crisp clarity: how to cook bacon in the oven boils down to a preheated 400°F oven, a parchment-lined rimmed sheet, and a single layer of strips baked 12–18 minutes (or 18–25 for thick-cut), rotated once. The method scales to crowds, leaves your stovetop spotless, and delivers evenly rendered slices that finish together. It’s also the approach most publications reach for when they test multiple methods head-to-head: We tested 7 ways; oven was the clear winner, and The Kitchn’s parchment method remains a go-to reference for a reason.

Also Read: Coconut Water Cocktails: 10 Easy, Refreshing Drinks


FAQs

1) How long do I bake bacon at 400°F?

At 400°F (205°C), most regular slices turn perfectly crisp in about 12–18 minutes, while thick-cut usually needs 18–25. Moreover, rotate the pan once to even out hot spots, then let the strips rest briefly so they firm up.

2) How to cook bacon in the oven at 375°F?

Set the oven to 375°F (190°C) and plan for roughly 16–22 minutes. Additionally, this gentler temperature delivers very even browning, which helps when you’re baking multiple trays at once.

3) How to cook bacon in the oven at 350°F?

At 350°F (175°C), expect a calmer bake that typically takes 20–25 minutes for standard-cut slices. Consequently, if your oven runs hot or you prefer fewer pops, this setting keeps things tidy while still producing crisp edges.

4) How to cook bacon in the oven at 425°F?

With the dial at 425°F (220°C), bacon cooks fast—about 10–15 minutes—so watch closely near the end. Subsequently, pull the tray as soon as the color deepens; residual heat will finish the job.

5) What’s the best temperature to cook bacon in the oven?

Generally, 400°F strikes the ideal balance of speed and crispness. Likewise, it’s the sweet spot most readers land on once they learn how to cook bacon in the oven consistently.

6) Do I need to flip bacon while baking?

Not necessarily. Nevertheless, turning the pan once midway promotes uniform rendering without the mess of flipping each slice.

7) How do I make bacon extra crispy in the oven?

Space the slices so steam can escape, then consider a wire rack over the sheet for airflow. Finally, if you want deeper color, finish with a very brief broil—think 60 to 90 seconds—while watching constantly.

8) Should I use parchment, foil, or a rack?

Parchment is the easiest for release and cleanup, whereas foil is fine if that’s what you have. Alternatively, a rack yields the crispiest texture, though you may need an extra minute or two and a touch more cleanup.

9) How to cook thick-cut bacon in the oven without chewy centers?

Bake at 400°F and start checking around 18 minutes; most thick-cut slices finish between 20 and 25. Importantly, a rack helps render the middle while keeping the edges snappy.

10) Can I use convection for oven bacon?

Yes—reduce the temperature by about 25°F (≈15°C) and begin checking 3–4 minutes earlier. Subsequently, the moving air speeds browning, so rely on visual cues as much as the clock.

11) How do I keep the kitchen clean when baking bacon?

Use a rimmed sheet lined with parchment, place it on the middle rack, and avoid broiling for the entire cook. Moreover, a quick wipe of old grease from the oven floor before you start prevents smoky surprises.

12) What’s the timing for turkey bacon in the oven?

Turkey bacon generally finishes faster: estimate 10–15 minutes at 400°F. Ultimately, pull it when the surface looks crisp, because an extra minute can push it from perfect to dry.

13) How long will bacon grease last once saved?

After straining through a fine sieve or coffee filter, refrigerate for up to a few months or freeze for longer. Specifically, discard it if the aroma turns off or the texture looks milky after warming.

14) Is microwave bacon worth it if I’m in a rush?

For one to four slices, the microwave is speedy—about a minute per slice to start with brief bursts to finish. Still, if you’re chasing the best texture or serving a crowd, learning how to cook bacon in the oven remains the more consistent approach.

15) How do I reheat baked bacon so it stays crisp?

Warm it on a rack at 350°F for 3–5 minutes, just until the fat re-liquefies and edges revive. Likewise, avoid covering tightly, since trapped steam softens the crunch you worked for.