
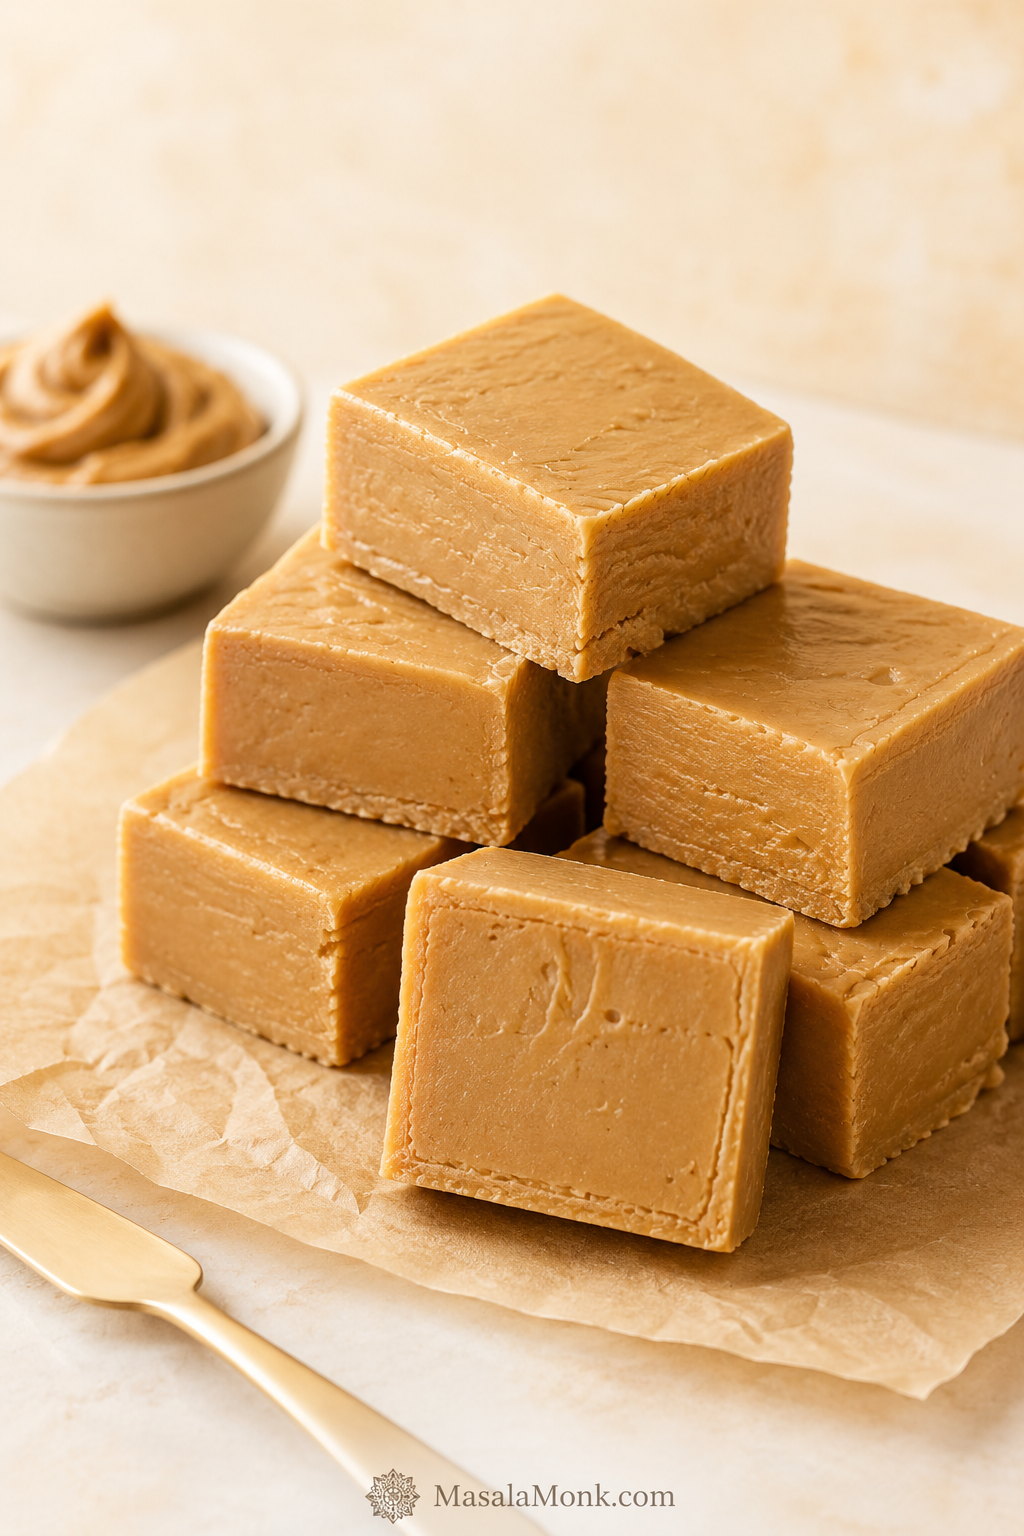
This easy peanut butter fudge recipe is built for creamy, sliceable squares without a candy thermometer, bubbling sugar syrup, or a long ingredient list. The goal is simple: rich peanut butter flavor, a smooth bite, and a slab that sets firmly without turning dry, greasy, or crumbly.
The result is deeply peanut-buttery, buttery, and sweet in that old-school homemade candy way, but still sturdy enough to cut into neat little pieces. You melt, stir, press, chill, and slice — no guessing at candy stages and no hovering over a bubbling pot.
The mixture thickens into a soft peanut butter dough before it goes into the pan, so you can see when it is ready instead of hoping it sets later.
It is the kind of fudge that works for holiday tins, bake-sale boxes, office trays, or the small after-dinner square that somehow disappears from the fridge. Cut it small, and it feels rich instead of heavy.
Start here if you want the simple version first. When you are ready to compare condensed milk, marshmallow fluff, old-fashioned, frosting, or keto versions, MasalaMonk’s full peanut butter fudge methods guide walks through those separately.
Table of Contents
Quick Answer: Easy Peanut Butter Fudge
For easy peanut butter fudge, melt 1 cup creamy peanut butter with 1 cup butter, stir in 3 cups powdered sugar, press the thick mixture into a lined 8×8-inch pan, and refrigerate for 2–3 hours, until firm enough to cut. Vanilla and salt are optional, but they make the flavor rounder and less one-note.
Because this is a no-bake peanut butter fudge, the only heat you need is enough to melt the peanut butter and butter together. Powdered sugar gives the mixture body, butter keeps the bite smooth, and peanut butter brings the salty-sweet richness.
The best pieces should taste like the peanut butter center of a peanut butter cup: salty-sweet, dense, smooth, and rich enough that one small square feels satisfying.
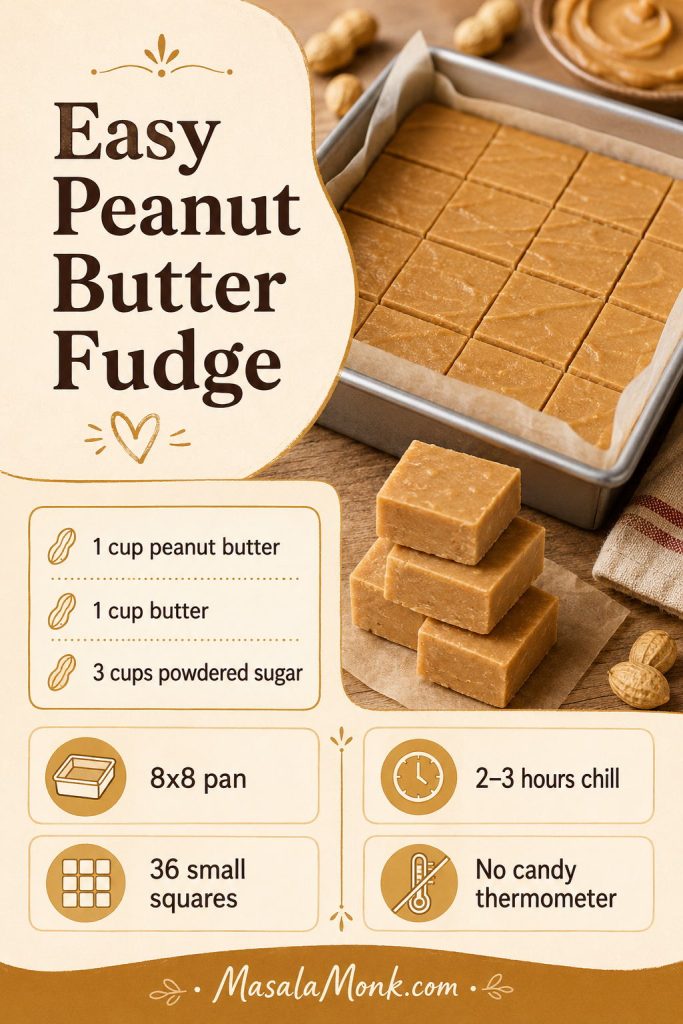
Ready to make it? Jump to the full recipe card for the exact measurements, method, notes, and storage details.
At a Glance
| Detail | Best Answer |
|---|---|
| Main ingredients | Peanut butter, butter, powdered sugar |
| Optional flavor helpers | Vanilla extract and fine salt |
| Best pan | 8×8-inch / 20 cm square pan |
| Backup pan | 9×9-inch / 23 cm works, but the pieces will be thinner |
| Texture | Creamy, firm, smooth, and sliceable |
| Chill time | 2–3 hours in the refrigerator |
| Candy thermometer | Not needed |
| Yield | About 36 small squares |
A 9×9-inch pan also works, but the pieces will be thinner and may firm up a little faster. For thicker, gift-style squares, use an 8×8-inch pan.
For party trays, 36 small squares is usually better than 16 large pieces. Peanut butter fudge is dense, so smaller pieces look neater and eat better.
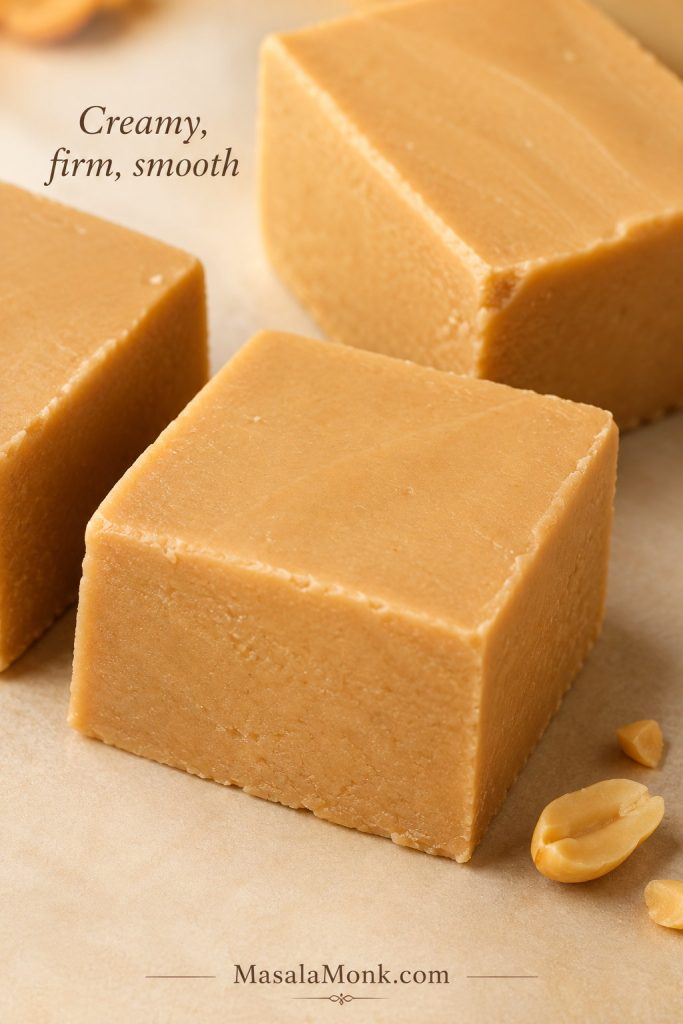
What Good Peanut Butter Fudge Texture Looks Like
Use this texture cue before you start: the finished fudge should look smooth and dense inside, with clean edges that hold their shape once chilled.
Why This Peanut Butter Fudge Works
This fudge sets because powdered sugar thickens the warm peanut butter-butter mixture while the refrigerator firms the slab enough to slice. You get a creamy bite without boiling sugar or trying to catch a candy stage at the exact right moment.
Powdered sugar helps the fudge hold together. It blends more smoothly than granulated sugar, especially when you add it while the mixture is still warm.
Butter gives the fudge richness and a softer bite. It makes the peanut butter base glossy and smooth before the powdered sugar goes in.
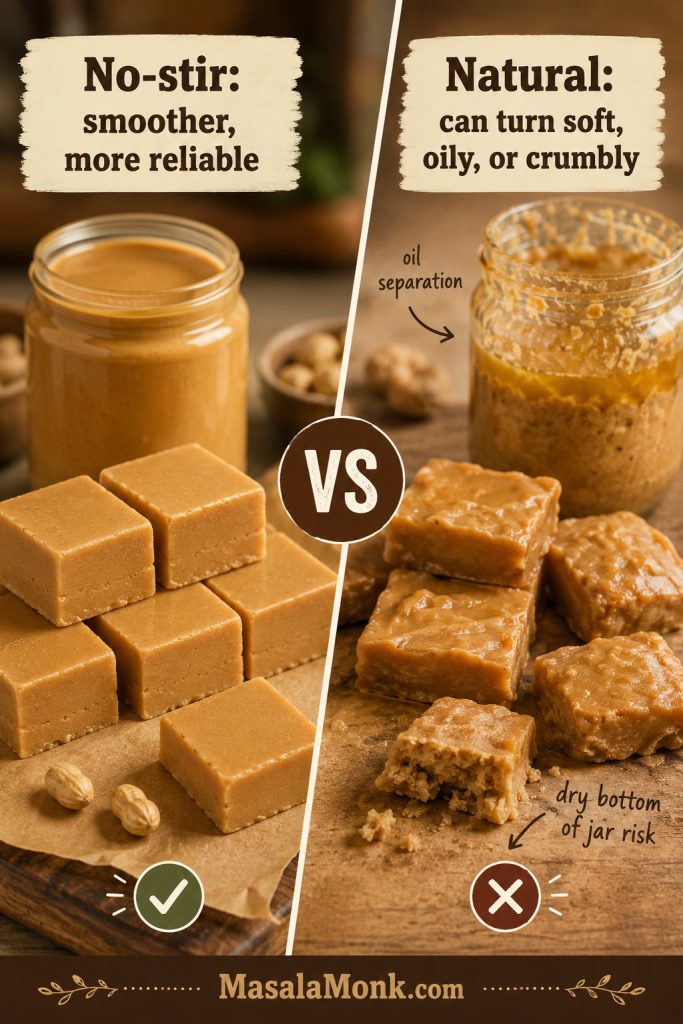
Creamy no-stir peanut butter gives the most predictable result. Natural peanut butter can work if it is thick and very well stirred, but it can change the set because some jars are oily, loose, or dry at the bottom.
The balance matters. Too little powdered sugar gives a soft slab, but too much pushes the texture toward dry candy instead of creamy fudge. This recipe gives a base amount first, then a small adjustment range if your mixture needs it.
Chilling finishes the texture. The mixture may look thick as soon as you press it into the pan, but it needs time in the refrigerator to hold its shape for tidy pieces.
Ingredients You Need
This recipe has a short ingredient list, so the details matter. The image below shows the base ingredients and the two optional flavor helpers that make the fudge taste more balanced.
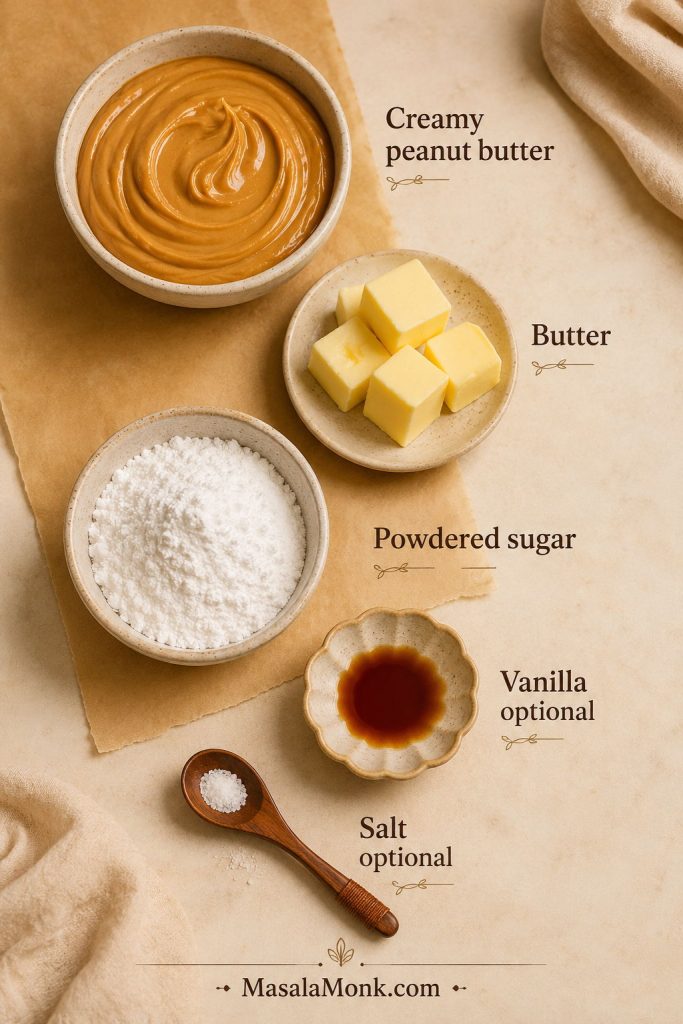
Creamy Peanut Butter
Use creamy peanut butter for the smoothest fudge. A regular no-stir peanut butter gives the most reliable texture because it is already stable and well blended. If you like making pantry staples from scratch, MasalaMonk’s homemade peanut butter guide is useful, but for this recipe, make sure any homemade or natural peanut butter is thick, smooth, and extremely well stirred before measuring.
Butter
Unsalted butter gives you the most control. Salted butter also works; just skip or reduce the added salt. Cut the butter into pieces so it melts evenly with the peanut butter.
Why This Peanut Butter Fudge Uses Powdered Sugar
Powdered sugar is what turns the warm peanut butter mixture into fudge. If it is clumpy, sift it first so you do not get dry spots or grainy pockets in the finished candy.
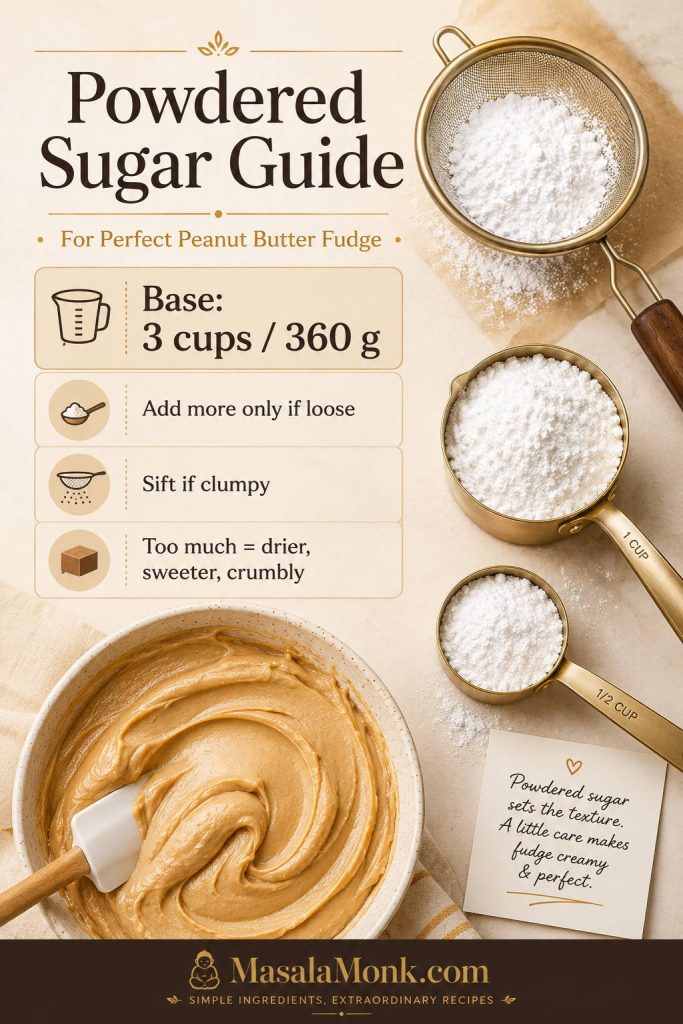
This version uses 3 cups / 360 g powdered sugar as the base because it keeps the fudge creamy while still giving the slab enough body to set. If the mixture still looks loose after resting for 2 minutes, increase the powdered sugar by 2 tablespoons at a time, up to 3 1/4 cups / about 390 g.
If you measure by cups, spoon the powdered sugar into the cup and level it instead of packing it down. This style is sweet by design because powdered sugar is part of the structure, not just the flavor; salt, vanilla, and smaller pieces make it taste more balanced without weakening the set.
If your fudge turns soft, crumbly, oily, or grainy, the troubleshooting section walks through the most common causes and fixes.
Vanilla and Salt
Vanilla and salt are optional, but they make the candy taste more complete. The vanilla rounds out the sweetness, while a small pinch of salt sharpens the peanut butter flavor. For a true 3 ingredient peanut butter fudge, leave both out; for the best-tasting version, use them.
Best Peanut Butter to Use for Fudge
The peanut butter you choose changes the bite more than almost anything else in this recipe. For a first batch, choose regular creamy no-stir peanut butter. It gives the best balance of smoothness, body, and neat cutting.
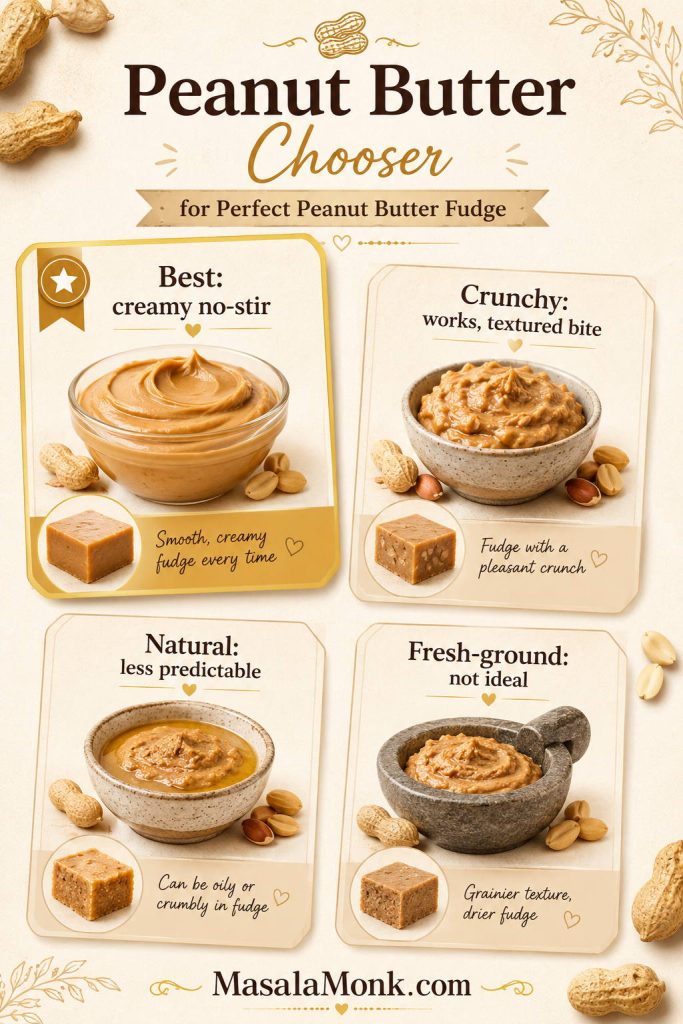
Natural peanut butter is not impossible, but it often explains those “same recipe, different result” batches. One jar may be thick and stable, while another may be oily, loose, or dry at the bottom.
| Peanut Butter Type | Use It? | What to Expect |
|---|---|---|
| Regular creamy no-stir peanut butter | Best choice | Smooth, stable, creamy, and reliable for tidy squares. |
| Crunchy peanut butter | Yes | Works well, but the pieces will have a textured bite instead of a smooth finish. |
| Natural stir peanut butter | Use carefully | Can work if thick and fully stirred, but may turn oily, softer, or crumbly. |
| Fresh-ground peanut butter | Not ideal | Often too coarse or oily for the neatest fudge texture. |
| Salted peanut butter | Yes | Use it, but reduce or skip the added salt. |
No-Stir vs Natural Peanut Butter for Fudge
Natural peanut butter can work, but the jar-to-jar variation is exactly why some batches turn soft, oily, or crumbly.
Once your peanut butter is chosen, use the success cues to check whether the mixture looks ready before chilling.
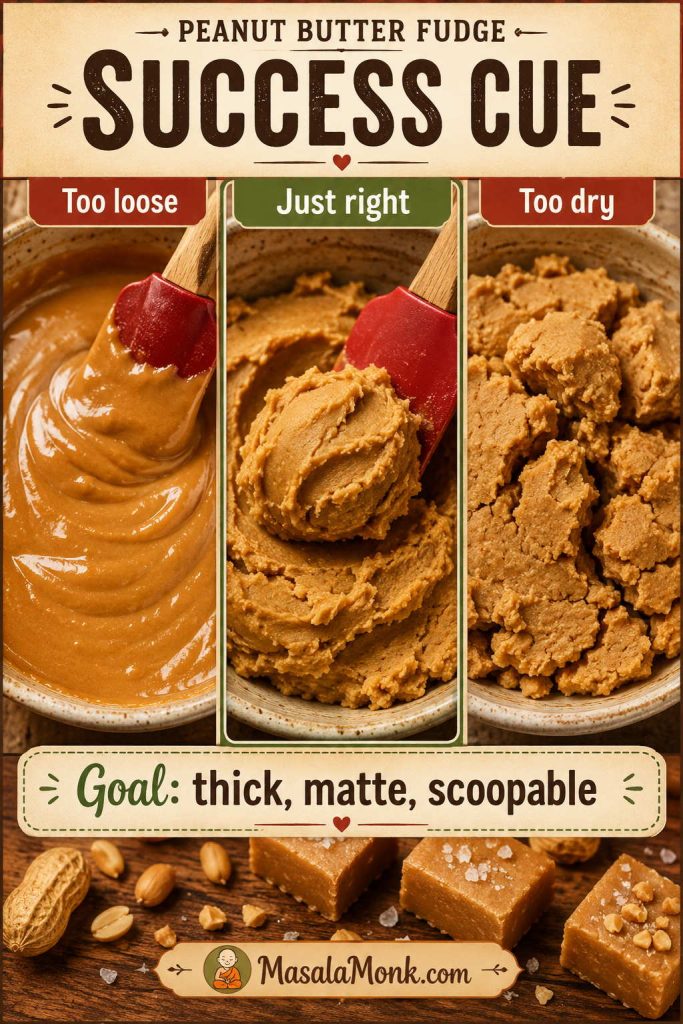
Success Cues: What Peanut Butter Fudge Should Look Like Before It Sets
Before chilling, the mixture should look thick, matte, and scoopable, almost like a soft peanut butter dough. It should not pour like sauce. After chilling, the slab should lift from the pan in one piece and cut without smearing through the center.
How to Make Easy Peanut Butter Fudge
The method is simple, and the order is what keeps it easy. Measure the powdered sugar before you start so you can stir it in while the peanut butter mixture is still warm.
Using the microwave instead? Go straight to the microwave peanut butter fudge method.
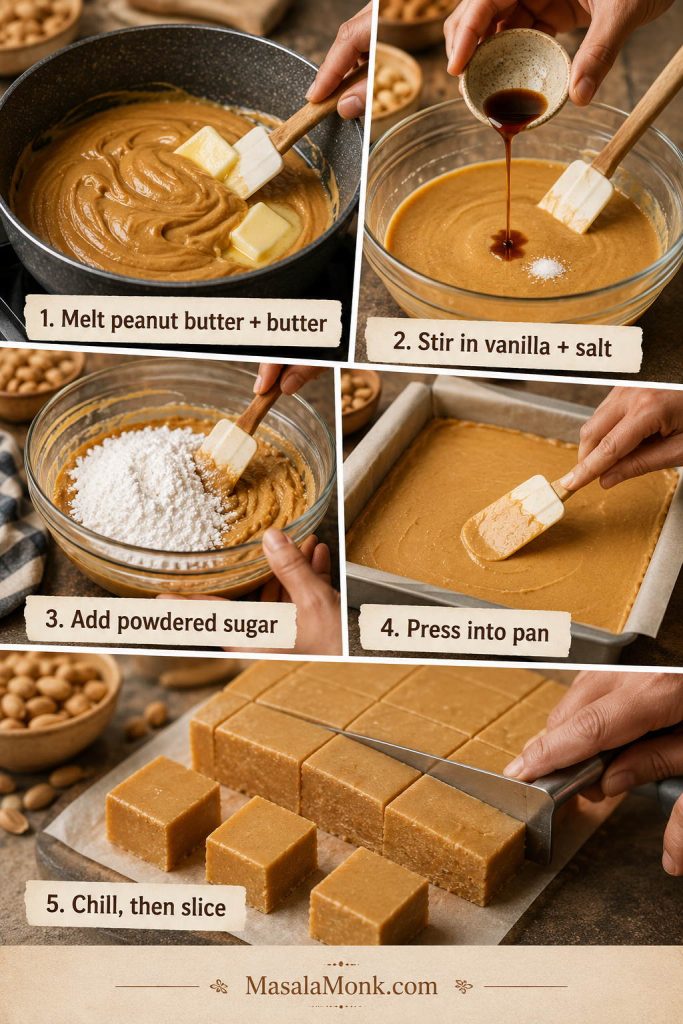
Step 1: Line the Pan
Line an 8×8-inch square pan with parchment paper, leaving overhang on two sides. This gives you a sling so you can lift the whole slab out later for cleaner cutting.
Step 2: Melt the Peanut Butter and Butter
Add the peanut butter and butter to a medium saucepan over low heat. Stir often until the butter melts and the mixture looks smooth and glossy. Do not boil it. You only want to melt and combine.
Step 3: Add Vanilla and Salt
Remove the pan from the heat. Stir in the vanilla and salt if using. The mixture should still be warm and fluid.
Step 4: Mix in the Powdered Sugar
Add the powdered sugar in batches, stirring after each addition. The mixture will thicken quickly. Keep stirring until no dry streaks remain. It should look like a thick, soft dough.
At this point, the mixture should no longer pour like a sauce. It should gather into a thick, matte, scoopable mass that can be pressed into the pan. If it still looks glossy and loose after all the sugar is mixed in, let it sit for 2 minutes and stir again before adding more sugar.
Step 5: Press Into the Pan
Transfer the fudge mixture to the lined pan. Press it firmly into the corners and smooth the top with a spatula. If it sticks, place a small piece of parchment over the top and press gently with your hands.
Do not worry if the top is not perfectly smooth yet. Once the slab chills, small spatula marks are much less noticeable, and you can always trim the edges before serving or gifting.
Step 6: Chill Until Firm
Refrigerate for 2–3 hours, or until the slab is sturdy enough to lift and slice. For faster setting, you can use the freezer for 45–60 minutes, but the refrigerator gives a more even texture.
Step 7: Slice
Lift the fudge out using the parchment overhang. Use a sharp knife to cut it into 36 small squares. For extra-neat edges, warm the knife under hot water, wipe it dry, cut, then wipe between cuts.
Microwave Peanut Butter Fudge Method
You can also make this peanut butter fudge in the microwave when you want the quickest no-stove version. Use a large microwave-safe bowl and short bursts instead of one long microwave time, because microwave strength varies and overheating can make the mixture oily.
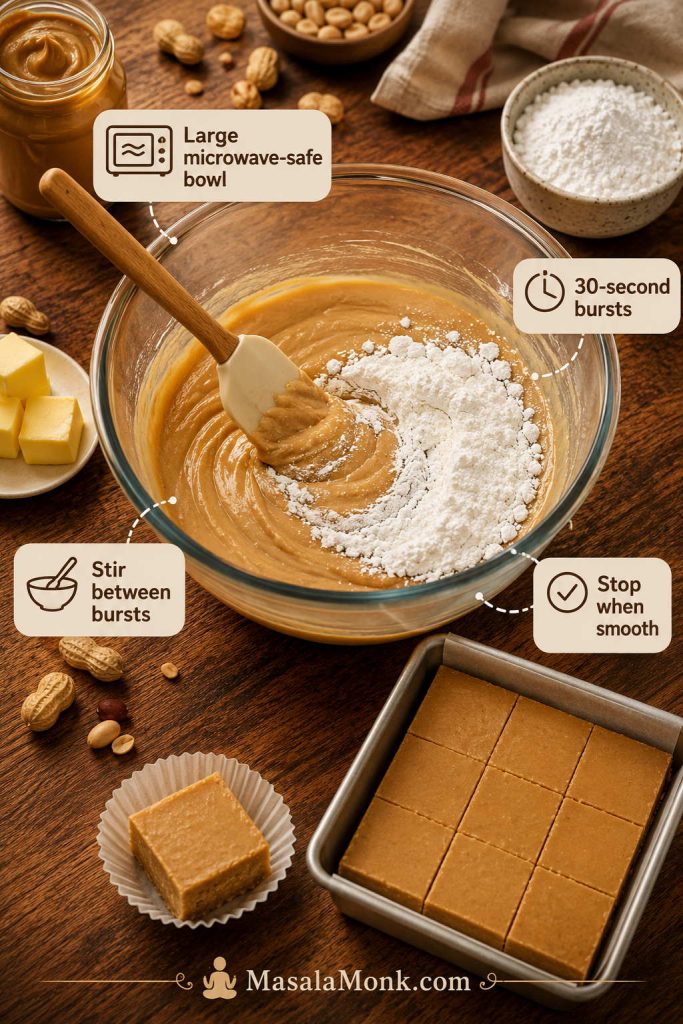
- Add peanut butter and butter to a large microwave-safe bowl.
- Microwave for 30 seconds, then stir.
- Repeat in 30-second bursts until the butter is melted and the mixture is smooth.
- Stir in vanilla and salt if using.
- Add the powdered sugar in batches and mix until thick.
- If the mixture looks loose, let it rest briefly and stir again before adding more powdered sugar.
- Press into the lined pan and chill until firm.
3 Ingredient Peanut Butter Fudge
To make this as a true 3 ingredient peanut butter fudge, use only:
- 1 cup creamy peanut butter
- 1 cup butter
- 3 cups powdered sugar
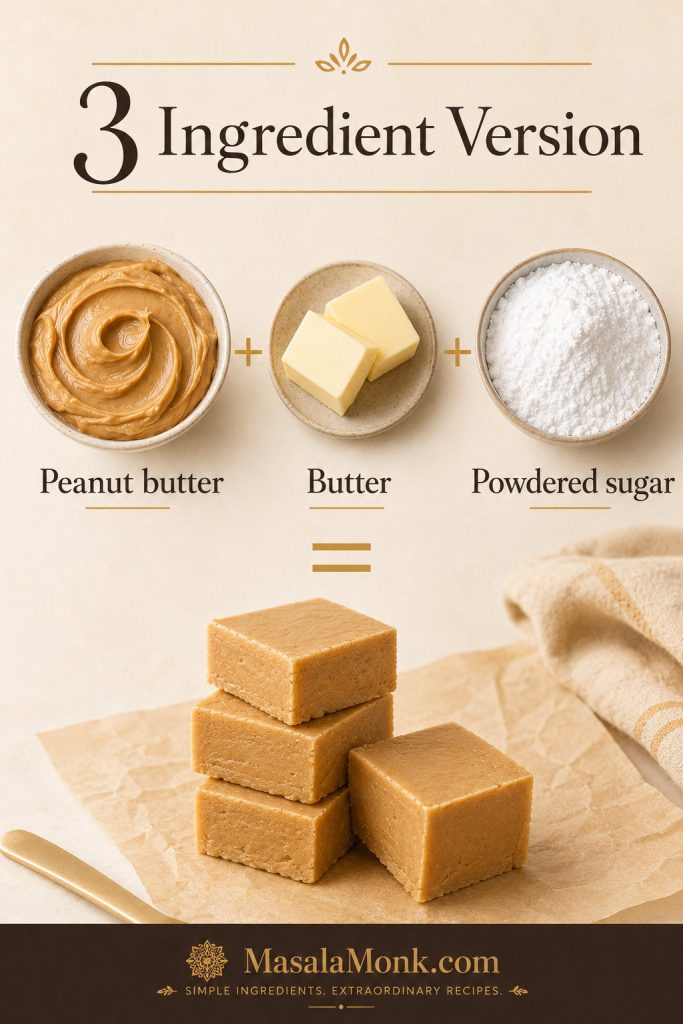
Peanut butter brings the flavor, butter softens the bite, and powdered sugar helps the mixture hold together once it chills.
If you are not strictly trying to keep the ingredient count at three, add vanilla and salt. They do not change the method, but they make the fudge taste more balanced. Without them, the candy is still good, just simpler and sweeter.
If you like short ingredient-list peanut butter desserts, MasalaMonk’s peanut butter cookies are another easy option, with classic, 3-ingredient, chocolate chip, and oatmeal variations.
4 Ingredient Peanut Butter Fudge
For most readers, the best version is technically a 4 ingredient peanut butter fudge: peanut butter, butter, powdered sugar, and vanilla. Vanilla does not help the fudge set, but it makes the sweetness taste warmer and less flat.
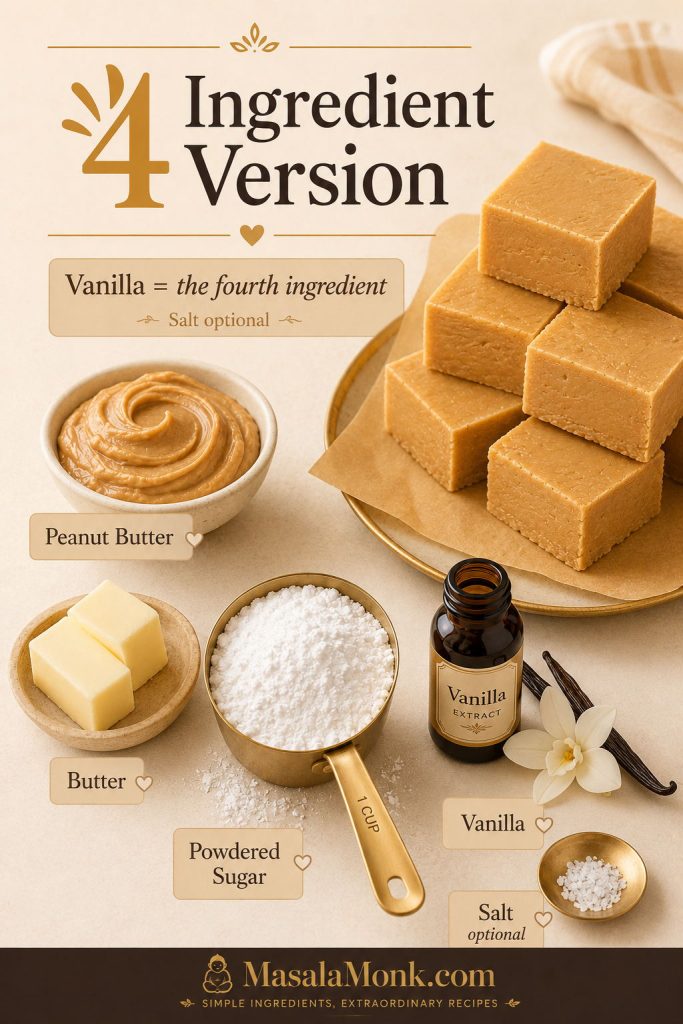
If you count salt as a fifth ingredient, use it as a flavor adjuster rather than a structural ingredient. Vanilla makes the fudge taste warmer; salt makes it taste more peanut-buttery. Neither one helps the fudge set, so the base ratio stays the same.
How Long Does Peanut Butter Fudge Take to Set?
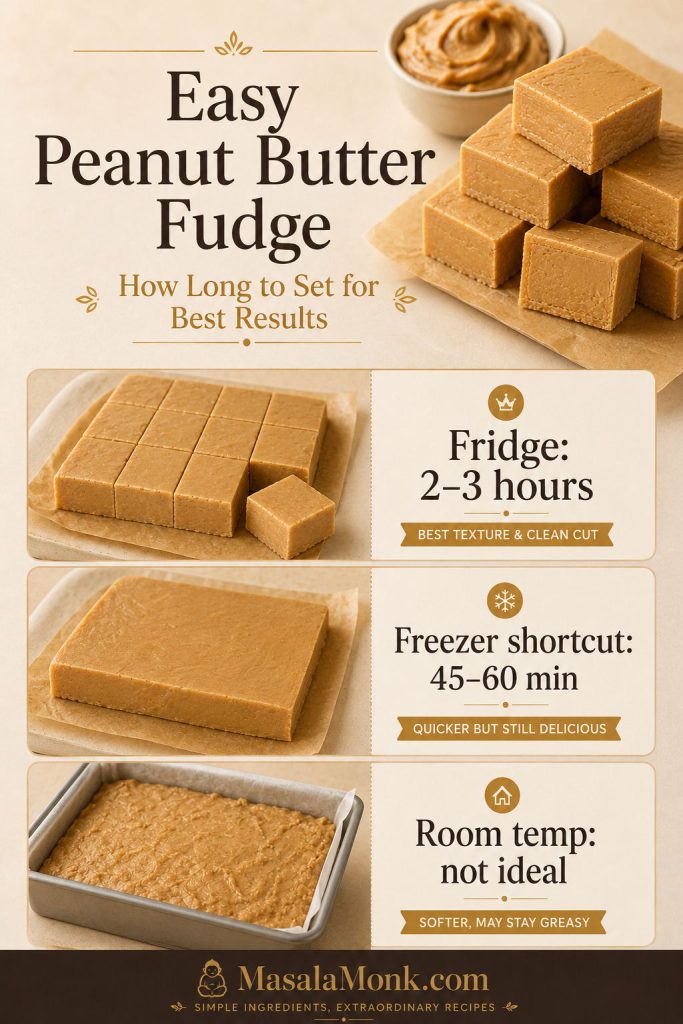
The slab usually needs 2–3 hours in the refrigerator before it is ready to cut. It may look finished sooner, but slicing too early can make the edges smear and the center slump.
| Setting Method | Approximate Time | Best Use |
|---|---|---|
| Refrigerator | 2–3 hours | Best texture and neatest slices. |
| Freezer shortcut | 45–60 minutes | Useful when you are in a hurry, but do not forget it there. |
| Room temperature | Several hours | Not ideal for a quick, firm set. |
For the best pieces, chill the fudge until firm, slice it, then let the squares sit at room temperature for a few minutes before serving. That gives you sharp edges and a softer bite.
Best Serving Temperature for Peanut Butter Fudge
Cut the fudge while it is cold, then give the squares a few minutes at room temperature if you want the creamiest bite.
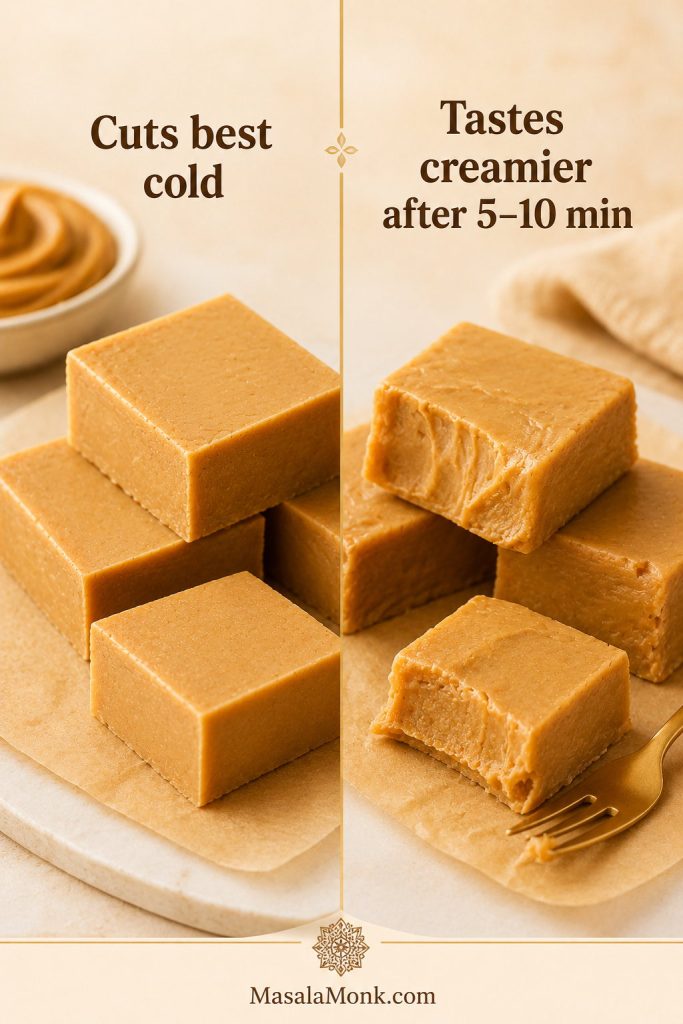
Once the slab is fully chilled, the clean-cutting tips will help you get neater squares for trays and gifts.
Why Didn’t My Peanut Butter Fudge Set?
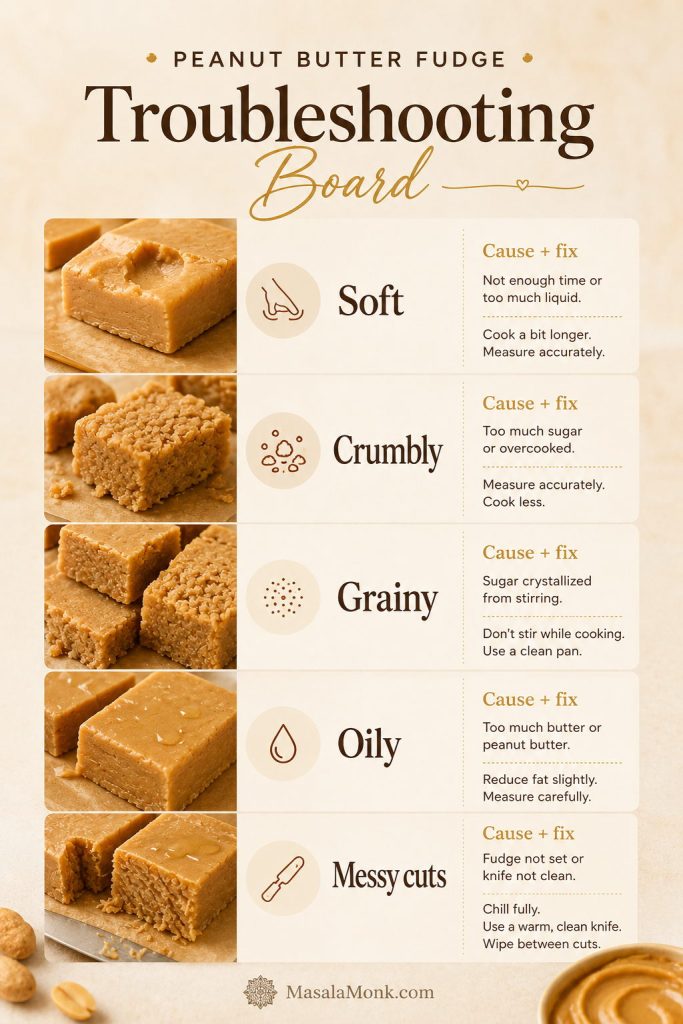
If your peanut butter fudge is too soft, crumbly, grainy, or oily, the issue is usually one of four things: peanut butter type, powdered sugar amount, mixing temperature, or chill time.
Most problems are easier to fix than they look. If the fudge tastes good but feels too soft, start with more chill time before changing the recipe.
How to Fix Soft Peanut Butter Fudge
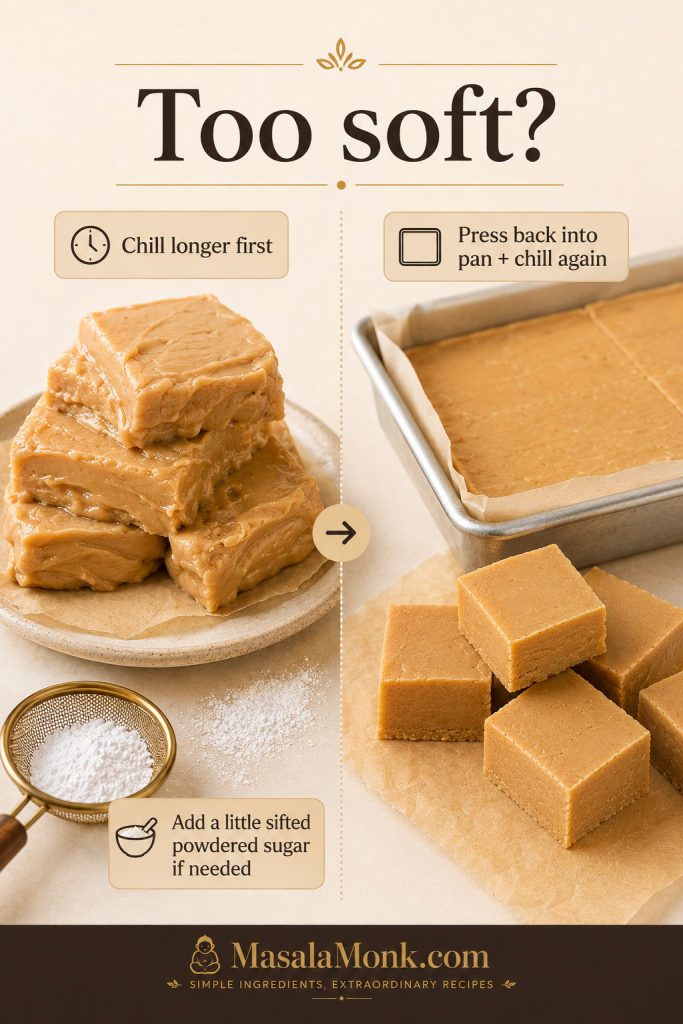
Start with the least disruptive fix first. Many soft batches only need more time in the refrigerator before you change the ratio.
| Problem | Likely Cause | How to Fix It |
|---|---|---|
| Fudge is too soft | Not enough powdered sugar, oily peanut butter, or not enough chill time. | Chill longer first. If it is still too soft after several hours, let it soften at room temperature, scrape it back into a bowl, and work in a little more sifted powdered sugar. Press it back into the pan and chill again. |
| Fudge is crumbly | Too much powdered sugar, dry peanut butter, or over-chilling. | Let it sit at room temperature for 10 minutes before cutting. Next time, reduce the powdered sugar slightly or use creamier peanut butter. |
| Fudge is grainy | Clumpy powdered sugar or sugar added after the mixture cooled too much. | Sift powdered sugar and add it while the peanut butter mixture is still warm. |
| Fudge looks oily | Natural peanut butter separated, or the mixture was overheated. | Use no-stir peanut butter for the most reliable batch. Melt gently and avoid boiling. |
| Fudge will not cut cleanly | Not chilled enough, or the knife is dragging through the fudge. | Chill longer. Use a warm, dry knife and wipe between cuts. |
Peanut Butter Fudge Troubleshooting Guide
Use the visual guide below to match the texture problem to the most likely cause before making a bigger adjustment.
If you are starting a fresh batch, the recipe card keeps the base ratio and method in one place.
How to Cut Clean Peanut Butter Fudge Squares
Neat squares make homemade fudge look more polished, especially if you are gifting it. The trick is to chill the slab fully, lift it from the pan, and cut with a warm, dry knife instead of dragging a dull blade through the fudge.
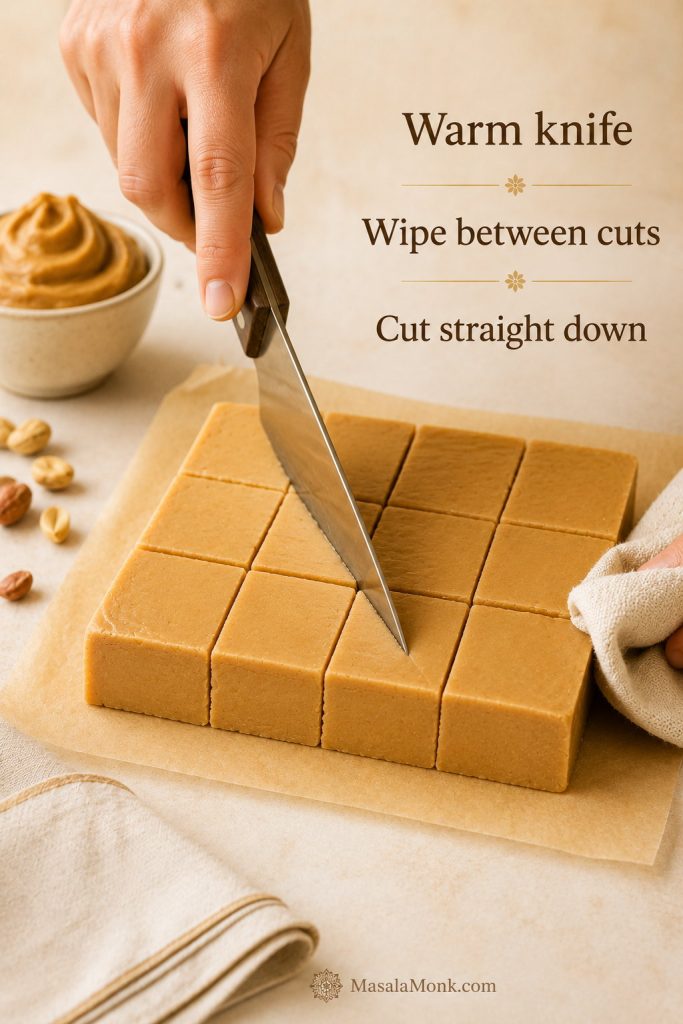
- Chill the fudge until fully firm.
- Lift the slab out of the pan using the parchment overhang.
- Place it on a cutting board.
- Use a long, sharp knife.
- Warm the knife under hot water and wipe it dry.
- Cut straight down instead of sawing back and forth.
- Wipe the knife between cuts.
If the slab feels rock-hard straight from the refrigerator, let it sit for 5–10 minutes before cutting. Very cold fudge can crack at the edges, while slightly softened fudge cuts more neatly.
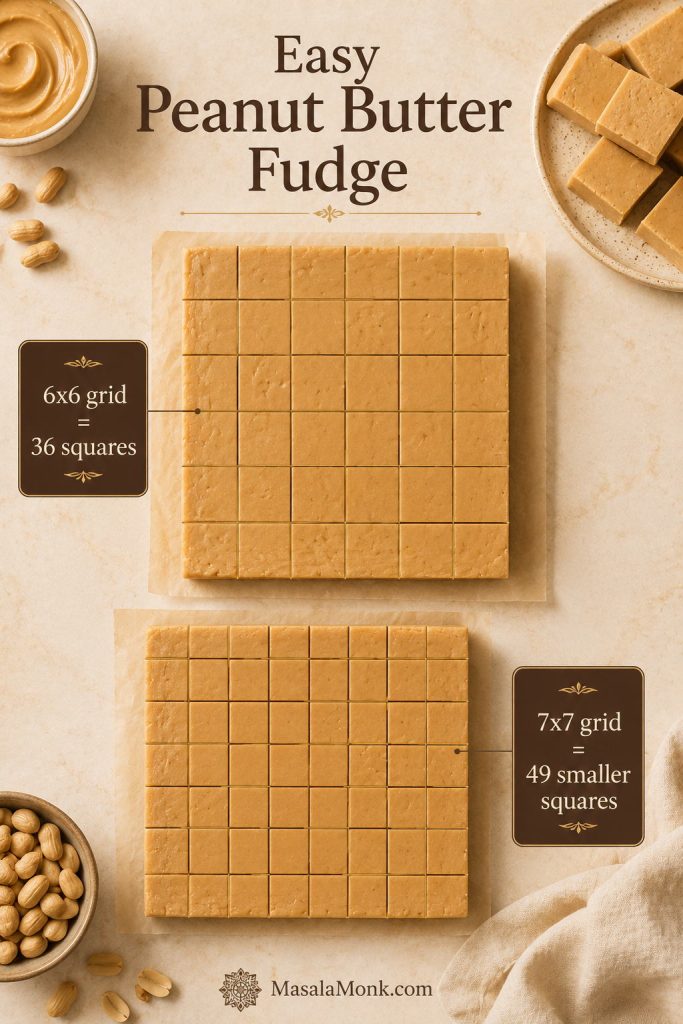
For 36 pieces, cut the slab into a 6×6 grid. For smaller holiday-box pieces, cut it into a 7×7 grid for 49 smaller squares.
Best Cutting Grid for Peanut Butter Fudge
Use the cutting grid based on how you plan to serve the fudge: slightly larger pieces for dessert plates, smaller pieces for tins, trays, and gifts.
Easy Peanut Butter Fudge Recipe
A creamy, no-thermometer peanut butter fudge made with peanut butter, butter, and powdered sugar. Use regular creamy no-stir peanut butter for the smoothest, most reliable texture.
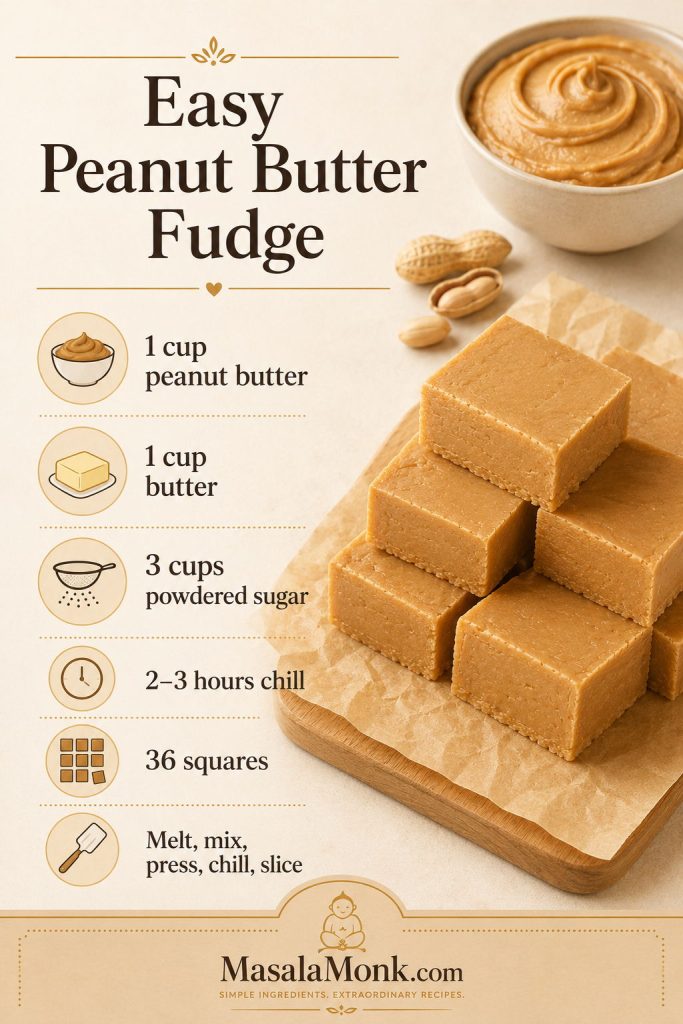
Total Time: About 2 hours 15 minutes, including chill time.
Texture: Creamy, firm, smooth, and sliceable without smearing.
Equipment
- 8×8-inch / 20 cm square pan
- Parchment paper
- Medium saucepan or microwave-safe bowl
- Heatproof spatula or wooden spoon
- Fine-mesh sieve, optional but useful for clumpy powdered sugar
- Sharp knife
Ingredients
- 1 cup creamy no-stir peanut butter, 250 g
- 1 cup unsalted butter, 226 g / 2 sticks
- 3 cups powdered sugar, sifted if clumpy, 360 g
- 1–2 teaspoons vanilla extract, optional, 5–10 ml
- 1/4 teaspoon fine salt, optional
Instructions
- Line an 8×8-inch square pan with parchment paper, leaving overhang on two sides.
- Add peanut butter and butter to a medium saucepan over low heat.
- Stir until the butter is melted and the mixture is smooth. Do not boil.
- Remove from the heat. Stir in vanilla and salt if using.
- Add powdered sugar in batches, stirring until no dry streaks remain. The mixture will become thick.
- If the mixture still looks loose, rest 2 minutes, stir again, then add 1–2 tablespoons more powdered sugar only if needed.
- Transfer to the lined pan and press firmly into an even layer.
- Refrigerate for 2–3 hours, or until sturdy enough to slice.
- Lift from the pan, cut into 36 squares, and serve chilled or slightly softened at room temperature.
Microwave Method
Add peanut butter and butter to a large microwave-safe bowl. Microwave in 30-second bursts, stirring after each burst, until smooth. Stir in vanilla and salt, then mix in powdered sugar. Press into the lined pan and chill until firm.
Notes
- Serving size is 1 small square when cut into 36 pieces.
- A 9×9-inch / 23 cm pan works, but the pieces will be thinner and may chill faster.
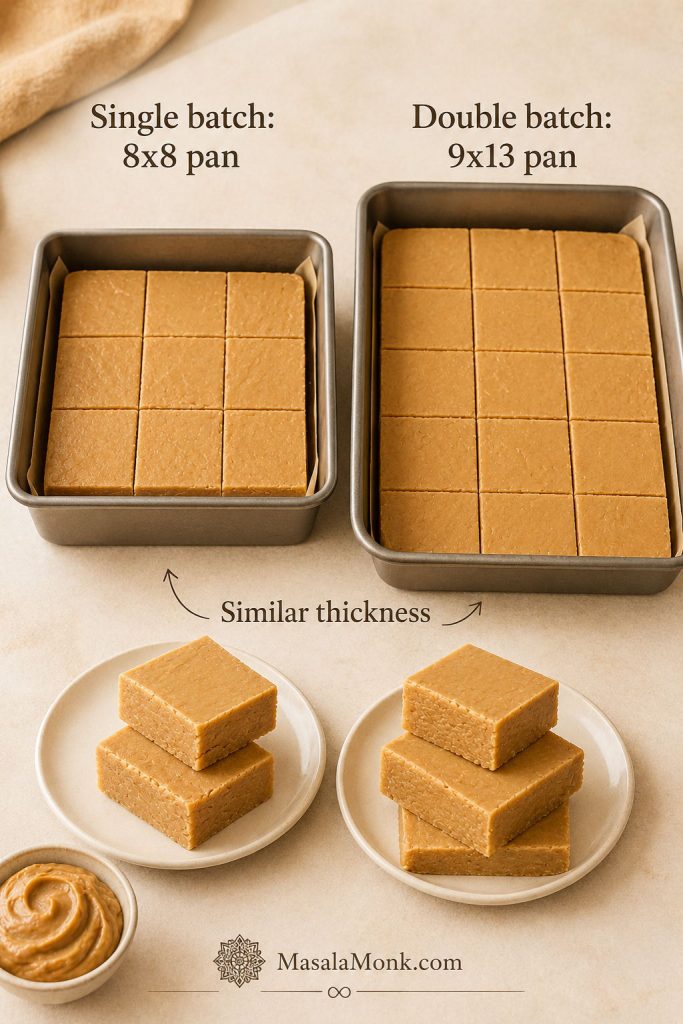
- To double the recipe, use a 9×13-inch pan. The pieces will be close to the same thickness as the 8×8-inch batch.
- For true 3 ingredient peanut butter fudge, skip vanilla and salt.
- For firmer gift-box squares, add powdered sugar 2 tablespoons at a time, up to 3 1/4 cups / about 390 g total.
- If the fudge is too soft, chill it longer before adding more sugar.
- For neat cuts, use a warm knife and wipe between slices.
Storage
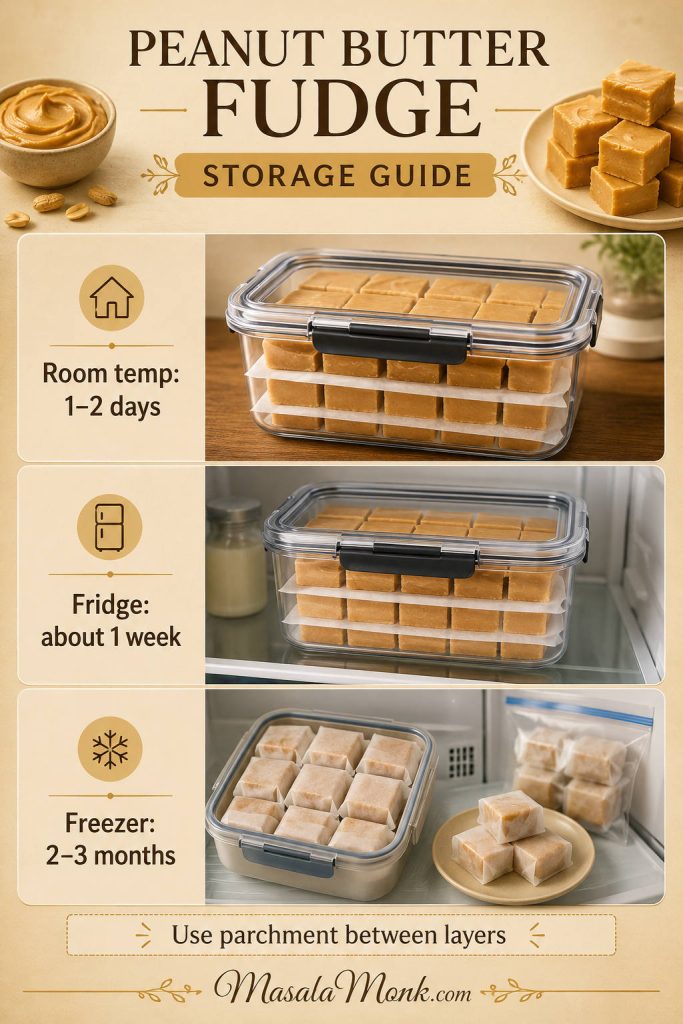
Store in an airtight container in the refrigerator for about 1 week, or freeze well-wrapped pieces for 2–3 months. Place parchment between layers if stacking.
How to Store Peanut Butter Fudge
Store peanut butter fudge in an airtight container. Place parchment between layers if stacking. The refrigerator is the best everyday storage choice because it keeps the squares firm and tidy.
| Storage Method | How Long | Notes |
|---|---|---|
| Room temperature | 1–2 days in a cool room | Best only if your kitchen is not warm. |
| Refrigerator | About 1 week | Best everyday storage for a firmer texture. |
| Freezer | 2–3 months | Wrap well, then thaw in the fridge before serving. |
How to Gift Peanut Butter Fudge
This is one of the easiest homemade candies to gift because the pieces look polished without frosting, sprinkles, or extra decoration. Chill the slab well, cut it small, and it feels instantly giftable.
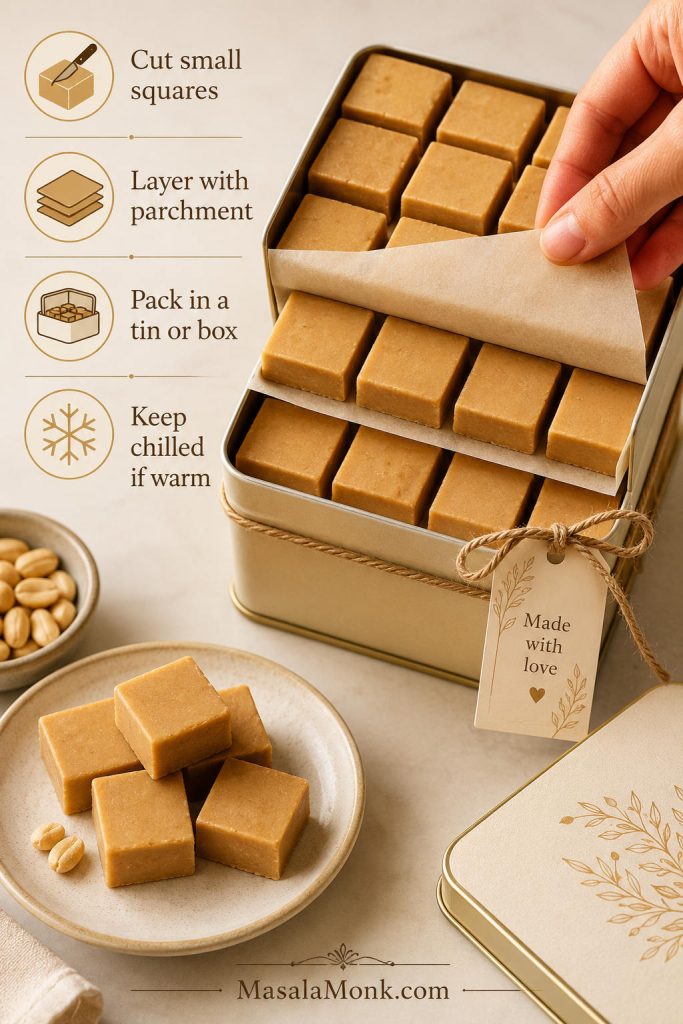
It is also the kind of treat that looks more impressive than the work it takes. Small, tidy pieces tucked between layers of parchment feel like a proper homemade gift without making the process fussy.
A small tin of peanut butter fudge feels personal without being fragile, which is why it works so well for neighbors, teachers, office trays, or a last-minute holiday sweet.
For a second make-ahead peanut butter sweet on the same dessert tray, these peanut butter rice crispy treats bring a softer, chewy contrast to the richer fudge squares.
- Cut into small squares rather than large blocks.
- Let the pieces firm fully before packing.
- Use parchment between layers.
- Pack in a tin, box, or airtight container.
- Keep chilled if the weather is warm.
If you are packing the fudge ahead, check the storage guide first so the pieces stay firm and tidy.
For a cleaner gift box, trim the edges of the slab first and save the trimmings for snacking. The center pieces will look the neatest.
Which Peanut Butter Fudge Method Should You Choose?
Use this powdered sugar method when you want the easiest sliceable fudge without boiling sugar. Choose another method only if you want a different texture, a different sweetener, or a shortcut built around condensed milk, frosting, or marshmallow creme.
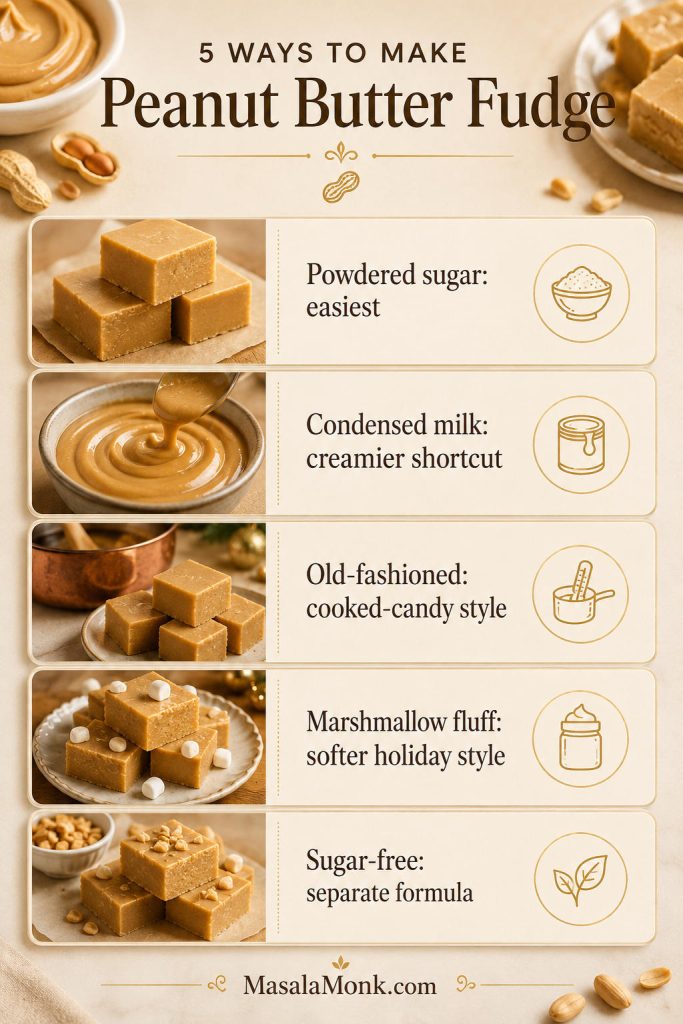
| Method | Best For | Tradeoff |
|---|---|---|
| Powdered sugar peanut butter fudge | Easy, sliceable, no-thermometer fudge | Sweet and rich, so small pieces are best. |
| 2 ingredient peanut butter fudge | The fastest shortcut version | Usually uses frosting or condensed milk, so the flavor is sweeter and less classic. |
| Condensed milk peanut butter fudge | Creamier shortcut fudge | Usually needs chocolate, white chocolate, peanut butter chips, or another setting partner. See MasalaMonk’s sweetened condensed milk fudge recipes. |
| Old-fashioned peanut butter fudge | Nostalgic cooked-candy texture | More temperature-sensitive because it depends on cooked sugar concentration and crystallization. |
| Marshmallow fluff peanut butter fudge | Softer, plush holiday-style fudge | Sweeter and made by a different method. |
| Chocolate peanut butter fudge | Peanut-butter-cup flavor | Best as a swirl or chocolate layer unless you are following a dedicated chocolate fudge formula. |
| Sugar-free peanut butter fudge | Low-carb or keto needs | Requires a recipe built for sugar-free sweeteners; do not swap powdered sugar 1:1. |
For keto, frosting, marshmallow creme, corn syrup, peanut-free, and other peanut butter fudge variations, MasalaMonk’s full peanut butter fudge methods guide is the better next step.
If you want to understand the cooked-candy difference behind old-fashioned fudge, the Exploratorium’s candy-making stages guide explains the soft-ball stage used for traditional fudge.
FAQs
Do you need a candy thermometer for peanut butter fudge?
No. This recipe does not use boiled sugar syrup, so there is no candy stage to measure. Powdered sugar helps the peanut butter mixture thicken and hold its shape once chilled.
What are the 3 ingredients in peanut butter fudge?
The three core ingredients are creamy peanut butter, butter, and powdered sugar. Vanilla and salt are optional flavor helpers.
Does natural peanut butter work in fudge?
It can, but it is less predictable. Natural peanut butter must be very well stirred before measuring. If it is oily, runny, coarse, or dry, the fudge may turn soft, oily, grainy, or crumbly.
Why is my peanut butter fudge soft?
It may need more chill time, or the mixture may not have enough powdered sugar. Oily peanut butter can also make fudge softer. Chill it longer first; if it still does not firm up, mix in a little more sifted powdered sugar.
Why did my peanut butter fudge turn crumbly?
Crumbly fudge usually has too much powdered sugar or peanut butter that is too dry. Let it sit at room temperature for 10 minutes before cutting. Next time, reduce the powdered sugar slightly or use creamier peanut butter.
Microwave or stovetop: which method is easier?
The microwave method is fastest, but the stovetop gives you more control. Either works as long as you heat gently, stop once the mixture is smooth, and avoid overheating.
Is condensed milk a direct swap for powdered sugar?
No. Condensed milk peanut butter fudge is a different method and usually needs chocolate, white chocolate, or peanut butter chips to help it set.
How do you double peanut butter fudge?
Double all ingredients and press the mixture into a 9×13-inch pan. The slab will be close to the same thickness as the 8×8-inch version, which makes it useful for holiday trays, parties, or gifting.
Freezing peanut butter fudge: what works best?
Wrap the pieces well, place them in an airtight container, and freeze for 2–3 months. Thaw in the refrigerator before serving.
How do you make peanut butter fudge less sweet?
Use the optional salt, choose unsalted butter, and avoid frosting-based shortcut versions. This style will always be sweet because powdered sugar helps it hold together, but salt, vanilla, and smaller pieces make the richness feel more balanced.








