Posted on — Leave a comment

Frozen Shrimp in Air Fryer: No-Thaw Time & Temp Guide

Cooked shrimp on a white plate with lemon wedges, garlic butter, parsley, and a blurred air fryer in the background.

This is the kind of recipe for the night when dinner was not really planned, the shrimp are still frozen, and you need the air fryer to save the meal. A bag of frozen shrimp can turn into shrimp tacos, rice bowls, pasta, salads, wraps, or garlic-butter shrimp in minutes — but only if you use the right timing for the shrimp you actually have.

Do not start with the timer. Start with the bag: raw or precooked, small or jumbo, peeled or shell-on, plain or breaded/coated. The rule is simple: cook raw shrimp, reheat precooked shrimp, and crisp coated shrimp. No thawing bowl, no guessing, no rubbery shrimp if you start with that bag check.

Quick Answer

Most plain frozen raw shrimp takes 8 to 10 minutes at 400°F / 205°C in the air fryer, with a shake or flip halfway. Frozen cooked or precooked shrimp takes 4 to 6 minutes at 375°F to 400°F / 190°C to 205°C because it only needs reheating.

Icy, glazed, or stuck-together pieces need a short head start. Air fry them plain for 2 to 3 minutes first, then separate them, drain off extra moisture if needed, add oil and seasoning, and finish cooking. Some frozen shrimp has a thin ice glaze, and that is normal. The short head start helps the flavor stick to the seafood, not the ice.

That tiny pause is the difference between seasoning the shrimp and seasoning the basket.
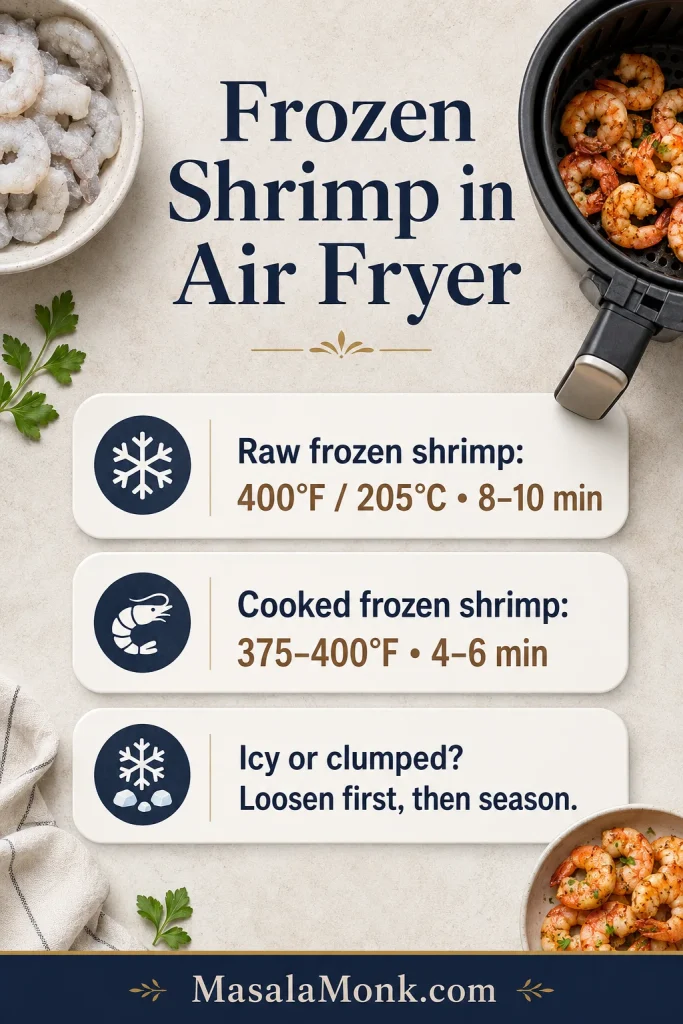
Timing graphic showing raw frozen shrimp at 400°F for 8 to 10 minutes, cooked frozen shrimp for 4 to 6 minutes, and icy shrimp loosened before seasoning.
Start with the timing split: raw frozen shrimp needs full cooking time, while precooked shrimp only needs a quick reheat.

Jump to What You Need

Bag Check: What Do You Have?

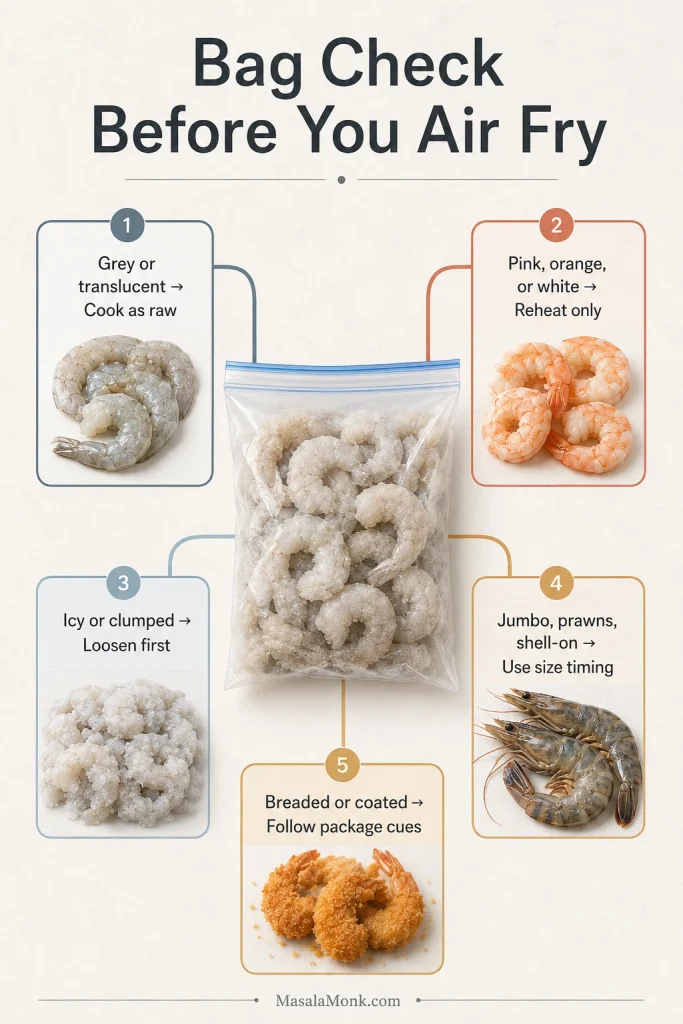
Use this quick check before you set the timer. It is the fastest way to avoid rubbery precooked shrimp, bland icy shrimp, or coated shrimp that browns outside before it heats through.

What the bag says or looks likeWhat to do
Grey or translucent shrimpCook as raw shrimp
Pink, orange, or white shrimpReheat only; do not use raw-shrimp timing
Icy, glazed, or clumped piecesAir fry briefly, separate, then season
Jumbo shrimp, prawns, or shell-on shrimpUse size-based timing and check doneness
Breaded, popcorn, coconut, or scampi shrimpFollow package timing and crisping cues
Bag check guide showing raw, cooked, icy, jumbo, shell-on, prawn, breaded, and coated frozen shrimp categories for air fryer timing.
Before the shrimp goes into the air fryer, check the bag. Raw, cooked, icy, jumbo, shell-on, and coated shrimp need different timing.

Air Fryer Frozen Shrimp Recipe

The recipe below is the simple cook-now path for plain frozen raw shrimp — the bag most people grab when dinner needs to happen fast. If yours is cooked, jumbo, shell-on, thawed, prawn-style, or coated, use the chart right after the card to adjust.

Recipe at a Glance

Cooking methodAir fryer
Shrimp typePlain frozen raw shrimp
ThawingNo thawing needed
Prep time3 minutes
Cook time8 to 10 minutes
Total time11 to 13 minutes
Serves3 to 4
Temperature400°F / 205°C
Using precooked shrimp?Reduce time to 4 to 6 minutes

Ingredients

  • 1 lb / 454 g frozen raw shrimp, peeled and deveined
  • 1 tbsp / 15 ml olive oil or avocado oil
  • ½ tsp garlic powder
  • ½ to 1 tsp paprika, Cajun seasoning, or Old Bay-style seafood seasoning
  • Salt: ¼ to ½ tsp, depending on how salty your seasoning blend is
  • ¼ tsp black pepper
  • Lemon wedges, to serve
  • Optional: 1 tbsp / 14 g melted butter, for finishing
  • Fresh herbs, optional: 1 to 2 tbsp chopped parsley or cilantro

For a smaller 8 oz / 225 g batch, use half the shrimp and roughly half the seasoning. Smaller batches are especially useful in 3 to 4 quart air fryers.

Frozen shrimp, oil, garlic powder, paprika, salt, pepper, lemon, melted butter, herbs, and an unbranded freezer bag arranged on a light counter.
Keep the base simple: oil helps seasoning cling, dry spices add quick flavor, and lemon or butter finishes the shrimp cleanly.

Method

  1. Preheat the air fryer to 400°F / 205°C for 3 to 5 minutes.
  2. Add the frozen shrimp in a mostly single layer.
  3. If the pieces are icy, glazed, or clumped, air fry them plain for 2 to 3 minutes first.
  4. Shake, separate, and drain excess liquid if needed.
  5. Toss with oil, garlic powder, seasoning, salt, and pepper.
  6. Air fry for 8 to 10 minutes total, shaking or flipping halfway, until opaque and tender.
  7. Finish with lemon, melted butter, herbs, or your favorite sauce. For a full garlic-butter pasta route, use the shrimp in a shrimp scampi-style dinner.

The batch is ready when the center is opaque, not grey or glassy. For jumbo, precooked, shell-on, thawed, or prawn-style bags, use the timing chart below.

Frozen Shrimp Air Fryer Time and Temperature Chart

Use this chart when your bag is not plain frozen raw shrimp. Size, raw or cooked status, surface ice, and crowding can all change the timing.

ShrimpTempTimeCue
Frozen raw small or medium400°F / 205°C6 to 8 minOpaque, gently curled
Frozen raw large400°F / 205°C8 to 10 minOpaque through center
Frozen raw jumbo400°F / 205°C9 to 12 minCheck thickest piece
Frozen cooked or precooked shrimp375°F to 400°F / 190°C to 205°C4 to 6 minHot through, not tight
Thawed raw shrimp350°F to 375°F / 175°C to 190°C5 to 7 minPat dry first
Thawed cooked shrimp350°F / 175°C2 to 4 minWarm gently
Shell-on frozen shrimp400°F / 205°C8 to 12 minShells pink, flesh opaque
Frozen prawns400°F / 205°C8 to 12 minTime by size

Treat the chart as a starting point, then let doneness get the final vote. In most baskets, large raw shrimp land in the 8 to 10 minute range, but crowding or a heavy glaze can push the batch toward the longer end. If the basket looks watery, it usually means surface ice is melting, so drain if needed instead of cooking the shrimp longer.

Got your timing? Go to the step-by-step method.

How to Air Fry Frozen Shrimp

The method below gives you tender shrimp without thawing first. That small head start for icy pieces is worth it because it keeps the seasoning from washing away. Frozen shrimp is fast, but it asks for one favor: stop early and check.

1. Preheat the air fryer

Preheat to 400°F / 205°C for raw frozen shrimp. A hot basket helps the pieces start cooking quickly instead of slowly thawing and releasing too much liquid.

2. Add the shrimp in one layer

Place the frozen shrimp in the basket in a mostly single layer. A little overlap is fine, but avoid a thick pile. You are not trying to fill the basket; you are trying to give the hot air room to work.
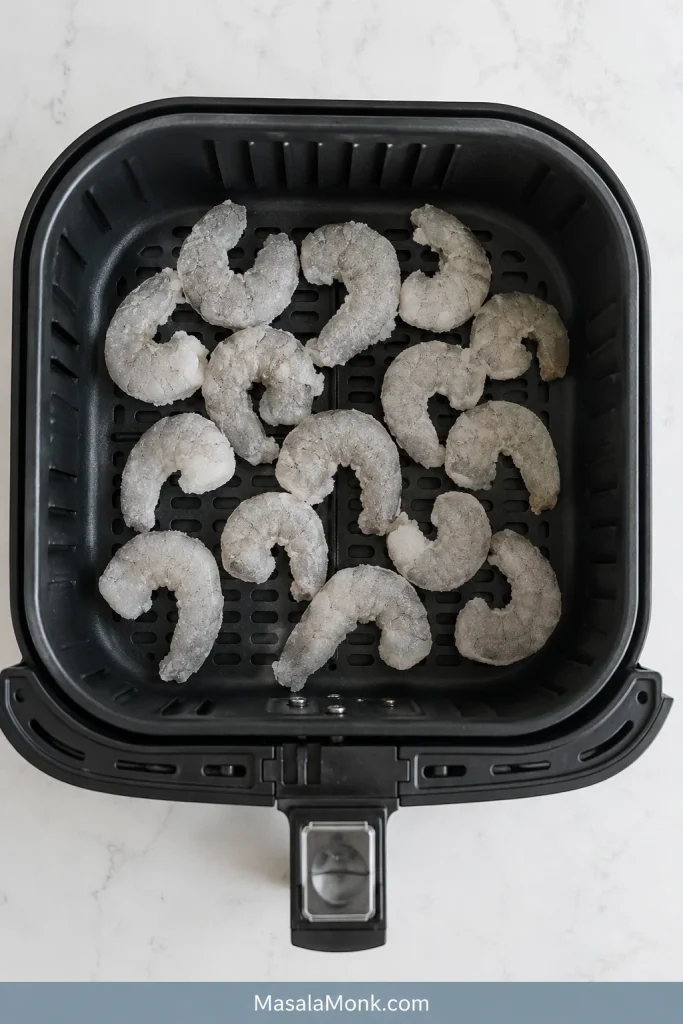
Grey frozen raw shrimp with visible frost spread in a mostly single layer inside a black air fryer basket.
A mostly single layer gives frozen raw shrimp space to cook evenly instead of trapping steam in a crowded basket.

3. Loosen icy or clumped shrimp first

When the pieces are stuck together or covered in a thin ice glaze, air fry them plain for 2 to 3 minutes. Then shake the basket and separate them with tongs. After that short head start, the icy glaze should look wet instead of frosty, and the pieces should separate easily. That is the moment to season.

Side-by-side comparison of icy clumped frozen shrimp before cooking and loosened shrimp after a short air fryer head start.
When shrimp is clumped or heavily glazed, loosen it first; then seasoning sticks to the shrimp instead of melting away.

4. Add oil and seasoning

Move the shrimp to a bowl if needed, then toss with oil, garlic powder, seasoning, salt, and pepper. Drain any liquid in the basket before adding the shrimp back.

Shrimp being tossed in a bowl with oil, garlic powder, paprika, salt, and pepper after the frost has loosened.
Season once the surface frost softens. At that point, oil and spices can coat the shrimp instead of pooling below.

5. Finish cooking

Air fry until the pieces are opaque and tender, shaking or flipping halfway. Use the timing chart for small, jumbo, precooked, shell-on, thawed, or prawn-style bags.
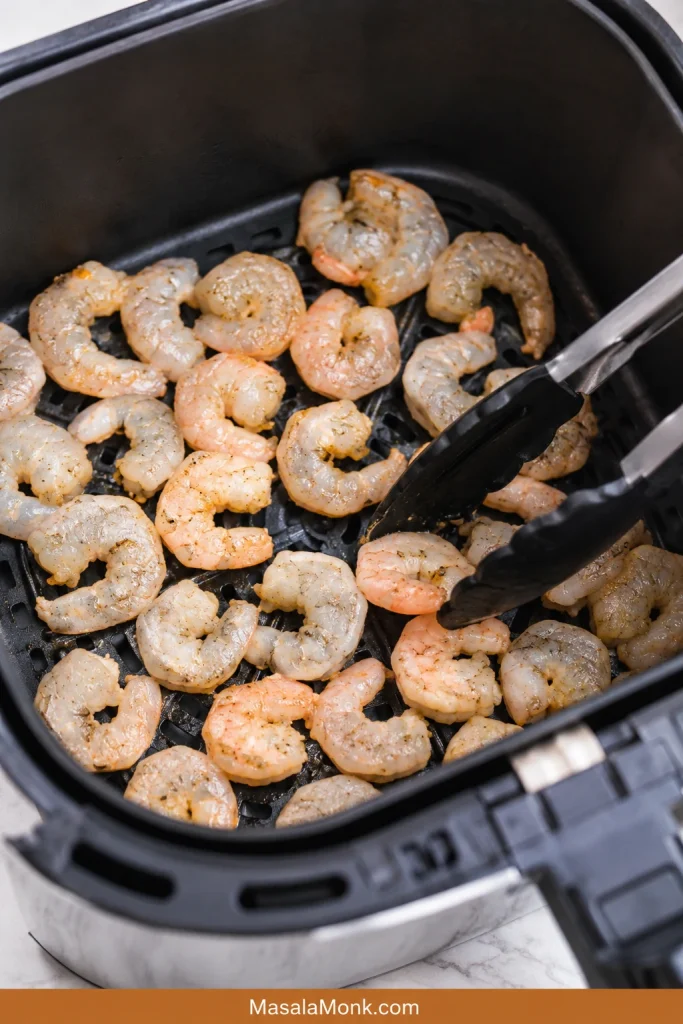
Partly cooked shrimp in an air fryer basket with tongs turning the pieces halfway through cooking.
Halfway through cooking, shake or flip the shrimp so pale centers, pink edges, and released moisture even out.

6. Finish with lemon or butter

Squeeze lemon over the hot shrimp. For a richer finish, toss with melted butter, chopped herbs, garlic butter, or a quick sauce after cooking. When it works, the shrimp tastes bright and clean, with lemon, butter, and seasoning clinging to the surface instead of sliding into the basket.

Close-up of finished air fryer shrimp with lemon butter, herbs, and light seasoning on the surface.
Finished shrimp should look moist, pearly, and lightly curled, with the seasoning clinging to the surface instead of the basket.

How Shrimp Type Changes the Timing

This is where the label on the bag matters most. The same air fryer can give you tender shrimp or rubbery shrimp depending on whether the pieces started raw, cooked, icy, jumbo, or shell-on.

Raw vs cooked frozen shrimp

Raw shrimp usually looks grey or translucent and needs to cook through. Cooked or precooked shrimp usually already looks pink, orange, or white and only needs to get hot. For precooked shrimp, look for heat, not a deeper curl.
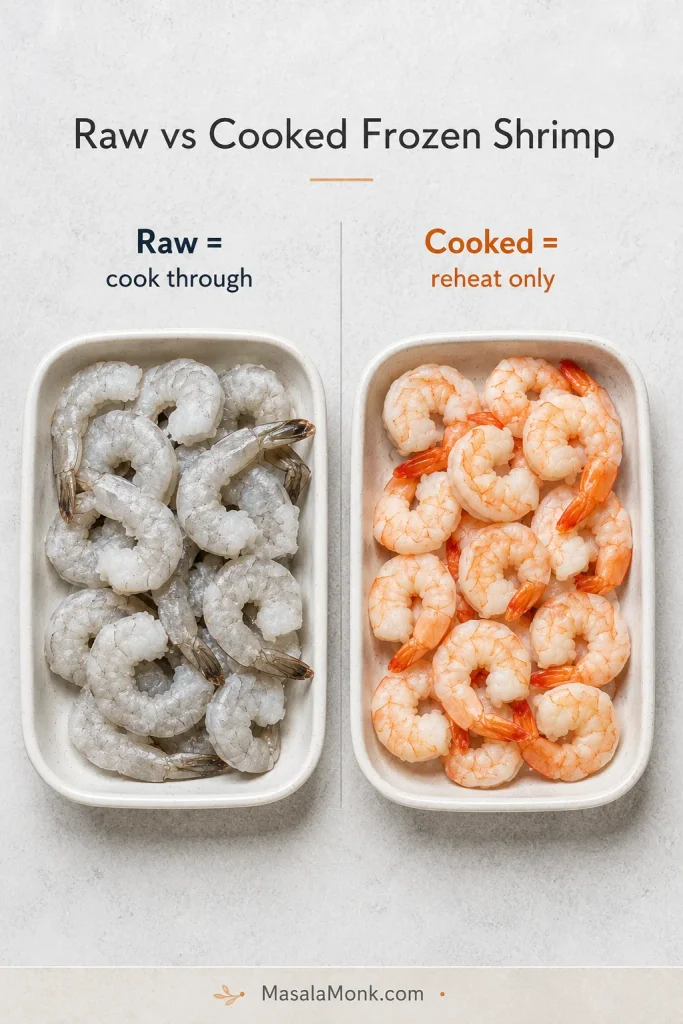
Split comparison showing grey frozen raw shrimp on one side and pink cooked frozen shrimp on the other side.
This is the biggest timing mistake to avoid: grey raw shrimp must cook through, while pink cooked shrimp only needs heat.

Shrimp size guide: what 16/20, 21/25, and 31/40 mean

Many frozen shrimp bags use a count-per-pound number instead of words like medium or jumbo. A lower number means larger shrimp because there are fewer pieces in a pound. Higher numbers mean smaller shrimp, which cook faster.
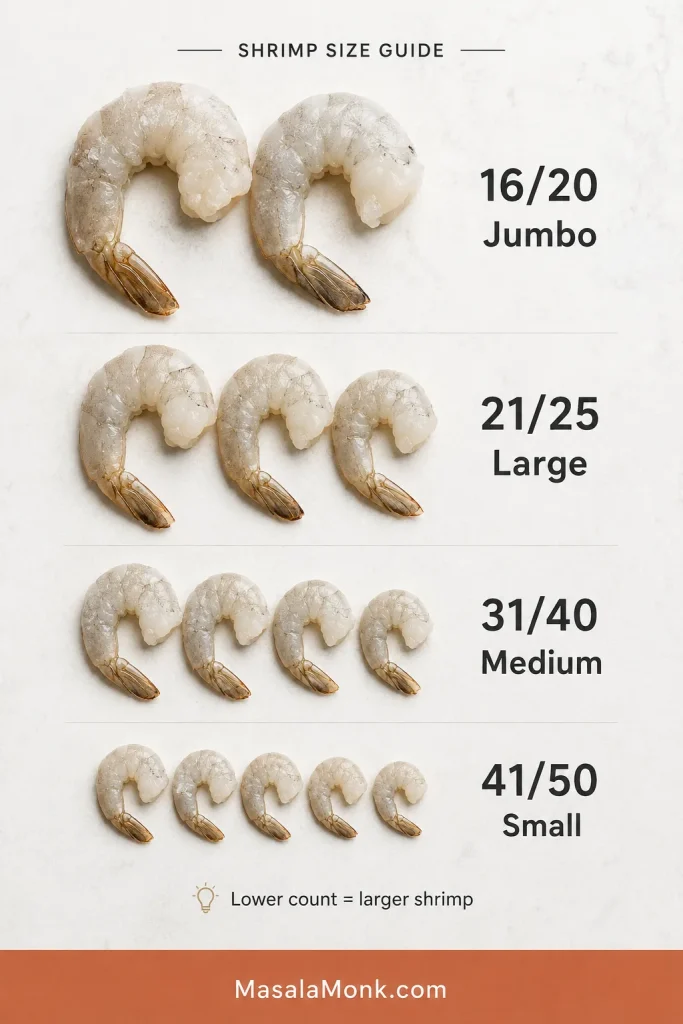
Shrimp size guide showing 16/20 jumbo, 21/25 large, 31/40 medium, and 41/50 small shrimp arranged from largest to smallest.
Shrimp count tells you size. Lower numbers mean larger pieces, so jumbo shrimp usually needs more air fryer time than small shrimp.
Package countCommon sizeAir fryer note
16/20JumboUse the longer range, often 9 to 12 minutes from frozen
21/25Extra large or largeMain 8 to 10 minute timing usually works
26/30LargeMain 8 to 10 minute timing usually works
31/40MediumStart checking around 6 to 8 minutes
41/50 and smallerSmallCheck early; small shrimp can overcook fast

Once you know the count, the timing starts making much more sense. When the bag gives both a size word and a count, trust the count more. “Large” can vary by brand, but 16/20 will almost always need more time than 31/40.

Thin ice glaze or freezer burn?

A thin ice glaze is normal on many frozen shrimp bags. Heavy frost, dry white patches, freezer-burned edges, or a stale smell are different. If the seafood smells off after opening, do not use it.
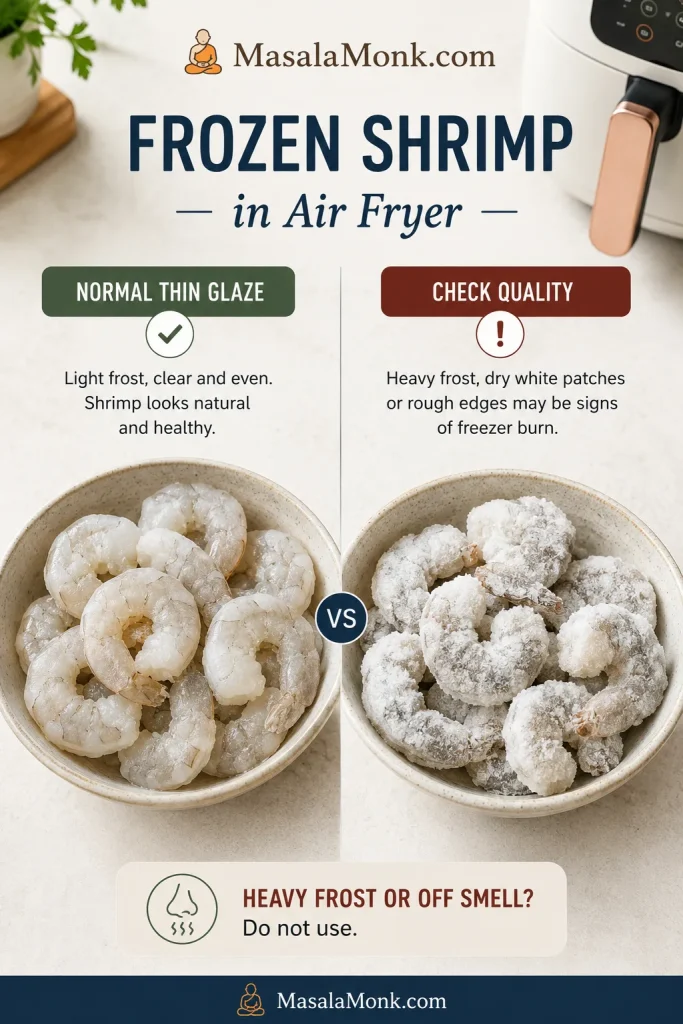
Comparison of frozen shrimp with a normal thin ice glaze beside shrimp with heavy frost, dry white patches, and freezer burn signs.
A light ice glaze is normal. However, heavy frost, dry patches, rough edges, or an off smell are signs to pause and check quality.

Shell-on shrimp, prawns, and thawed shrimp

These need small adjustments, not a new recipe. Shell-on frozen shrimp usually needs 8 to 12 minutes at 400°F / 205°C, depending on size. Frozen prawns cook like shrimp; let size decide. Thawed raw shrimp cooks faster, usually about 5 to 7 minutes at 350°F to 375°F / 175°C to 190°C.
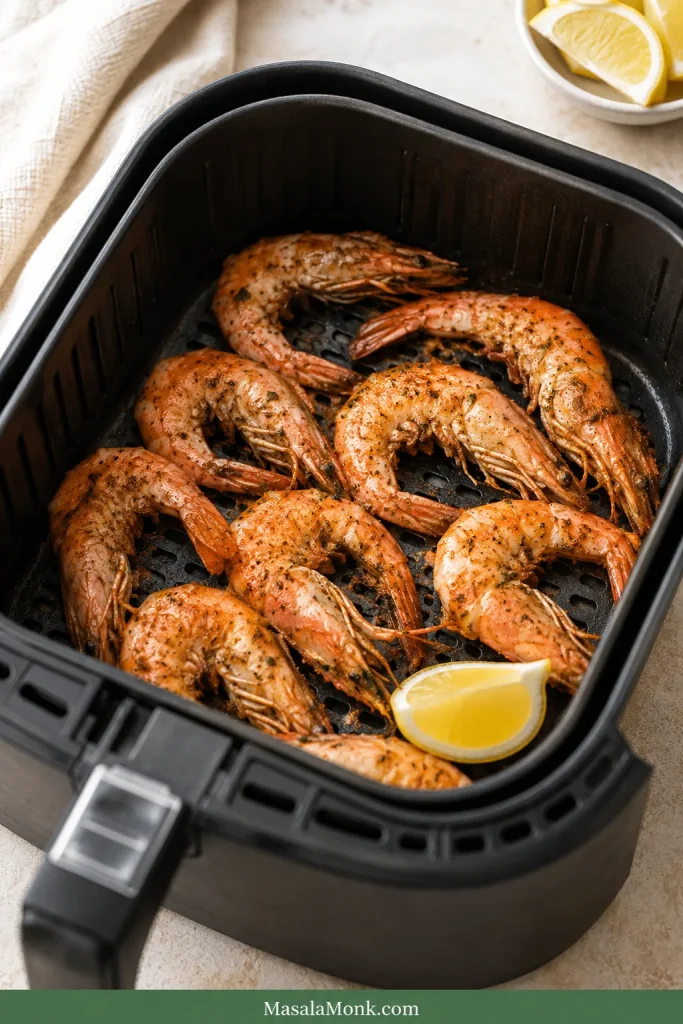
Shell-on shrimp or prawns cooked in a black air fryer basket with pink-orange shells and a lemon wedge.
Shell-on shrimp and prawns can air fry from frozen, but larger pieces need a center check instead of timer-only cooking.

Tail-on and tail-off shrimp cook almost the same way. Leaving the tail on looks a little more dramatic for serving, while tail-off is easier for bowls, tacos, fried rice, and pasta.

Ready to cook now? Return to the recipe card or follow the full method.

Why This Method Works

Frozen shrimp needs quick heat, enough space, and a moment for surface ice to loosen. Once the frost turns wet and the pieces separate, the seasoning can land on the shrimp instead of sliding into the basket. That is why the short head start matters more than adding extra seasoning at the beginning.

Ingredient Notes

Oil helps the spices cling. Garlic powder adds quick flavor without burning. Paprika, Cajun seasoning, or Old Bay-style seafood seasoning adds color and depth. If your bag is already seasoned, marinated, or salty, start with less salt and adjust after cooking.

Equipment and Batch Size

You do not need special equipment beyond an air fryer, but basket size matters. A hot basket helps. Crowding does not. In a smaller air fryer, a smaller batch works better than a longer struggle.

  • For a 3 to 4 quart air fryer, cook smaller 8 oz / 225 g batches.
  • A 5 to 6 quart air fryer can handle 12 to 16 oz / 340 to 454 g if the shrimp are mostly in one layer.
  • Keep tongs nearby to separate clumped pieces and a slotted spoon or quick drain ready if liquid collects.
  • Pat thawed shrimp dry with a paper towel before cooking.
  • Ninja Foodi, Cosori, Instant Vortex, basket-style, and oven-style air fryers can all work, but timing may vary slightly.

If your air fryer is small, cook less shrimp rather than forcing the whole bag in. That one choice fixes more problems than extra minutes ever will.

Season Before or After Air Frying?

Separate, lightly frosty shrimp can be seasoned before air frying. Icy, glazed, or clumped pieces do better with a short head start in the basket first, then seasoning.

  • Lightly frosty shrimp: toss with oil and seasoning before cooking.
  • Icy or clumped shrimp: loosen first, then season.
  • Thawed shrimp: pat dry, then season before air frying.
  • Precooked frozen shrimp: season lightly and reheat briefly.
  • Coated shrimp: skip wet seasoning before air frying; use dips or sauces after cooking.

For slightly crisp edges on plain shrimp, add 1 teaspoon cornstarch or cornflour after the surface frost has loosened. This is optional. Do not use this trick for shrimp that are already breaded, battered, popcorn-style, or coconut-coated.

Once the seasoning actually lands on the shrimp, even a simple garlic-lemon finish tastes cleaner and brighter.

How to Know Shrimp Is Done

The goal is not hard browning. You want tender shrimp with no grey center. For plain shrimp, the flesh should be pearly, opaque, and no longer grey or glassy in the middle. The pieces should feel springy, not tight.

Check the center

For a thermometer check, seafood is generally cooked to 145°F / 63°C. Visually, shrimp should be firm, pearly, and opaque. When you cut into the thickest piece, the center should look opaque and moist, not grey, glassy, or dry. For more detail, see the FDA seafood safety guide.
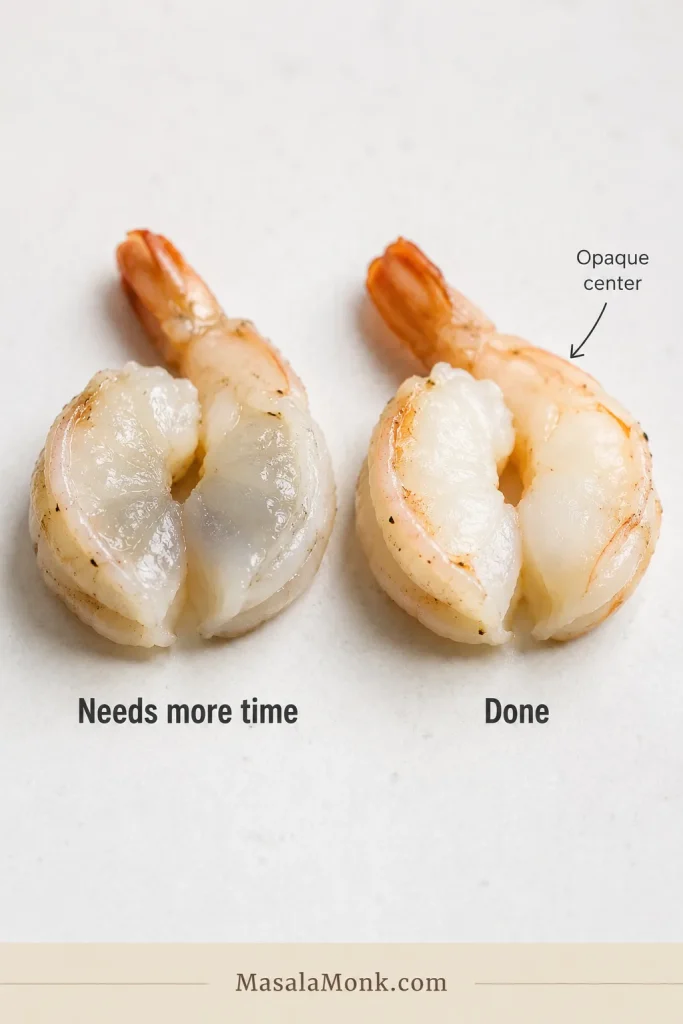
Cut shrimp comparison showing a grey glassy center labelled needs more time and an opaque white center labelled done.
When you are unsure, cut the thickest shrimp. The center should be opaque and moist, not grey, glassy, or translucent.

Use the curl as a texture clue

Shrimp moves from perfect to rubbery quickly, so checking early is not fussy. It is the shortcut.

  • Undercooked shrimp: grey, glassy, or translucent in the center
  • Done shrimp: opaque, pearly, springy, and loosely curled
  • Overcooked shrimp: tight, dry, rubbery, or curled into a very tight O
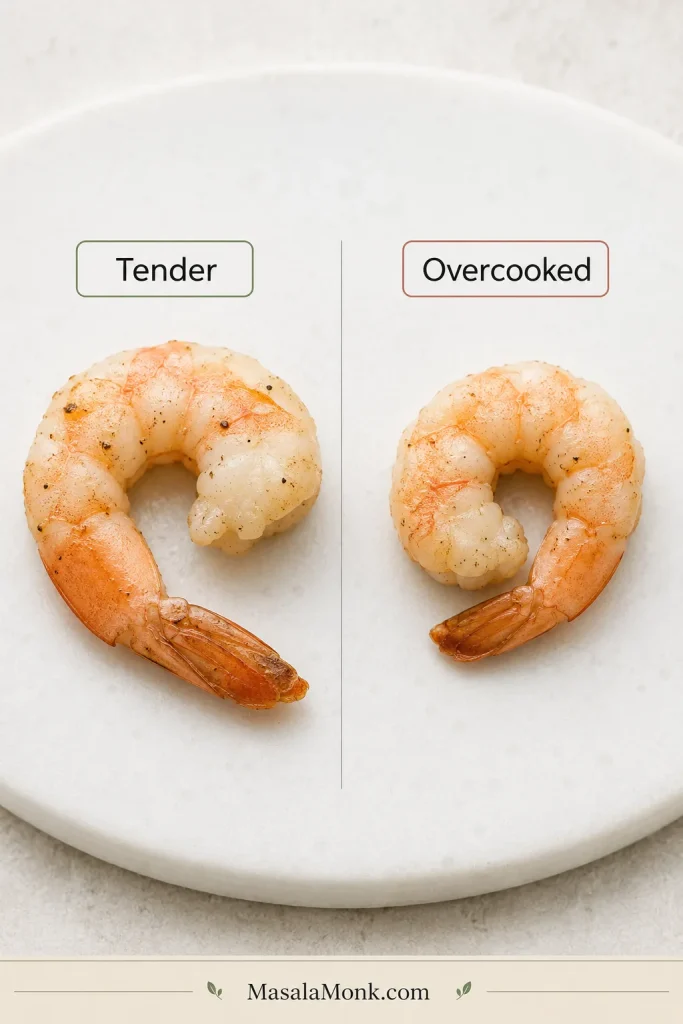
Cooked shrimp comparison showing a loose C-shaped tender shrimp and a tightly curled overcooked shrimp.
Shrimp shape gives a fast texture clue: a loose curl usually means tender, while a tight O-shape often means overcooked.

For coated or sauced frozen shrimp, follow the package directions because the outside can brown before the inside is fully heated.

Avoid These Mistakes

Most mistakes come from treating every frozen shrimp bag the same. A few small changes make the difference between tender shrimp and a tough batch.

  • Precooked shrimp should not cook like raw shrimp. It only needs reheating.
  • Do not season a block of icy shrimp. Loosen it first so the flavor can stick.
  • Give the pieces room instead of piling them high. Shrimp cook faster and more evenly with space.
  • If the basket gets watery, drain it instead of trying to cook the water away.
  • Do not use plain-shrimp timing for coated frozen shrimp. Breaded, popcorn, and coconut shrimp need package and crisping cues.

Already dealing with a watery, bland, or rubbery batch? Jump to troubleshooting or rescue it for dinner.

Troubleshooting Air Fryer Frozen Shrimp

A first batch that goes sideways is usually easy to fix. Watery baskets, bland seasoning, or a slightly rubbery bite do not mean the recipe failed. Usually, the shrimp just needed a different timing path.

If your first batch looks watery, do not panic. That is usually ice, not failure. The next batch is easier once you know what happened.

Why did my shrimp turn rubbery?

Rubbery shrimp usually means overcooking. This is common with frozen cooked or precooked shrimp because it only needs reheating. Use the shorter timing range, and check even earlier if the pieces are already thawed.

A batch that is already a little rubbery should not keep air frying. Toss it with garlic butter, lemon, sauce, pasta, fried rice, or a rice bowl where moisture can help soften the bite.

Why is there water in the air fryer basket?

That water in the basket is usually just surface ice melting. The goal is not to panic-cook the water away; drain it, season the shrimp itself, and finish gently.
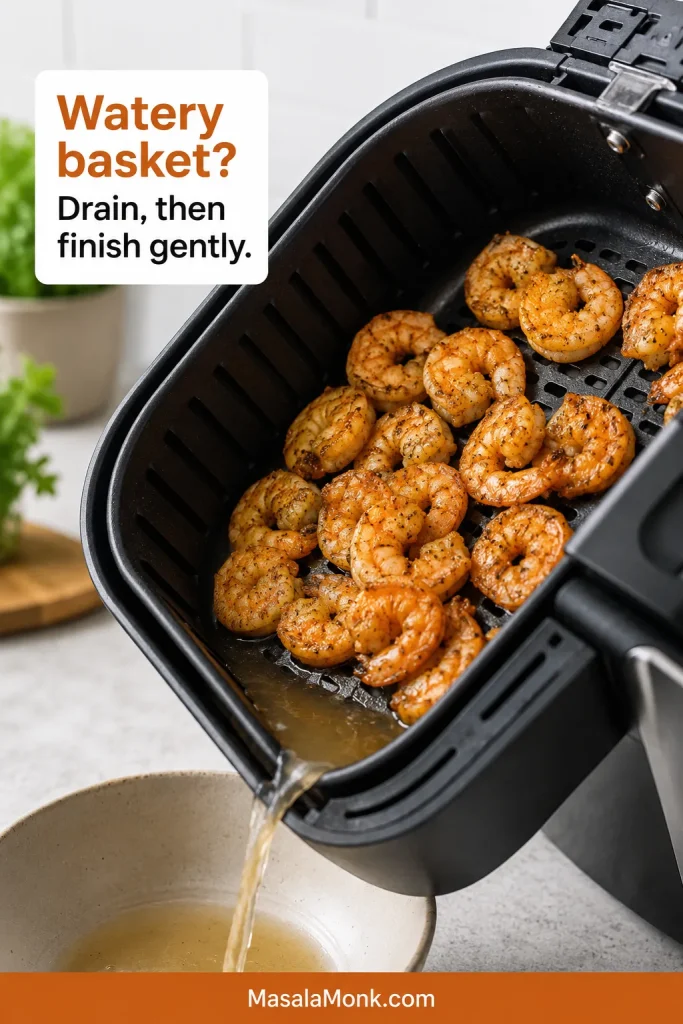
Air fryer basket tilted over a bowl while liquid drains from cooked shrimp inside the basket.
If the basket turns watery, drain the moisture instead of adding more minutes. Extra time can make shrimp tough.
  • Loosen icy pieces before seasoning.
  • Shake halfway through cooking.
  • Separate clumped pieces as soon as they loosen.
  • Drain excess liquid instead of cooking it away.

Why is the shrimp bland?

Seasoning ice is frustrating because the flavor ends up in the basket. Let frosty pieces loosen first, then add oil and seasoning so the flavor sticks.

To rescue a bland batch, toss it immediately with melted butter, lemon juice, garlic powder, black pepper, and a pinch of seasoning while it is still hot. For rice bowls or noodles, a spoonful of stir-fry sauce can turn plain shrimp into dinner quickly.

Why did some pieces cook faster than others?

The pieces were probably clumped, crowded, or mixed in size. Separate stuck pieces early and shake the basket halfway. A mixed bag of small and jumbo shrimp will not finish all at once; the small ones will cook first.

ProblemLikely causeFix nowNext time
Rubbery shrimpPrecooked shrimp got too much timeStop cooking; toss with sauce, butter, pasta, or riceReheat only 4 to 6 minutes
Dry shrimpToo much heat or too much timeFinish with lemon, butter, or sauceCheck earlier and stop at opaque
Bland shrimpSeasoning slid off iceToss hot shrimp with butter, lemon, and seasoningSeason after frost loosens
Watery basketSurface ice meltedDrain the basket and finish gentlyUse one layer and shake halfway
Uneven cookingClumped, crowded, or mixed-size shrimpSeparate pieces and add 1 minute if neededSpread into a mostly single layer
Slightly underdoneJumbo pieces or cold centerAdd 1 minute and check the thickest pieceUse the longer range for jumbo shrimp

Best Uses for an Imperfect Batch

Not every batch has to become a perfect shrimp plate. If the texture or seasoning is not exactly where you wanted it, turn the shrimp into the kind of meal that helps it shine anyway.
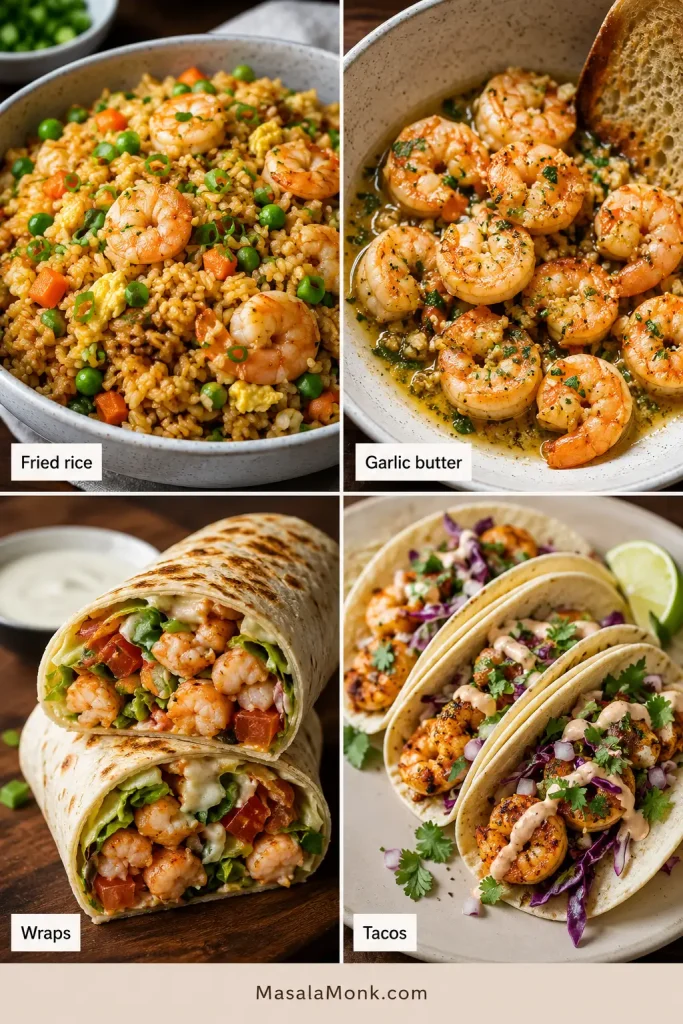
Four-panel collage showing air fryer shrimp used in fried rice, garlic butter shrimp, wraps, and tacos.
An imperfect batch still has uses: watery shrimp suits fried rice, bland shrimp likes garlic butter, and firm shrimp works better chopped.
If the shrimp turned out…Use it for…
Tender and juicyTacos, bowls, salads, pasta, or peel-and-eat plates
A little wateryFried rice, noodles, saucy bowls, or garlic butter pasta
Slightly rubberyChopped wraps, rice bowls, pasta, or saucy stir-fries
Mild or blandStir-fry sauce, peanut sauce, Cajun butter, lemon butter, or chutney
Shell-onPeel-and-eat plates, seafood bowls, or simple lemon-and-salt platters

This is one of those freezer shortcuts that gets easier every time you make it. The first batch teaches you the bag; the next one feels simple.

Batch fixed? Turn it into tacos, rice bowls, pasta, or fried rice.

Flavor Variations

This is where the plain batch becomes dinner. Once you know the timing, keep the base method the same and change the seasoning or finish.

  • Garlic butter shrimp: finish with melted butter, garlic, lemon, and parsley so the hot shrimp turns glossy and bright. Best with pasta, rice bowls, bread, or vegetables.
  • Old Bay-style shrimp: use seafood seasoning, lemon, and black pepper for a simple peel-and-eat feel. Good for salads, tacos, and quick plates.
  • Cajun shrimp: use Cajun seasoning, paprika, and a little cayenne for smoky heat. Serve in tacos, wraps, or grain bowls.
  • Lemon pepper shrimp: use lemon zest, black pepper, and garlic powder for a bright, sharp finish. Good for salads, pasta, and quick lunches.
  • Taco shrimp: use chili powder, cumin, and lime. Serve in tacos, burrito bowls, lettuce cups, or with mango habanero sauce.
  • Light masala shrimp: use garlic, chili, black pepper, and a tiny pinch of turmeric or garam masala. Finish with green chutney.

Add fresh garlic or butter near the end or after cooking. Garlic can burn if it sits in the hot basket too long, and butter can brown quickly if it drips under the shrimp.

What to Serve With Air Fryer Frozen Shrimp

Think of this as a fast protein you can drop into whatever meal is already halfway planned. The shrimp cook quickly, so they work especially well with rice, pasta, noodles, salads, and wraps.
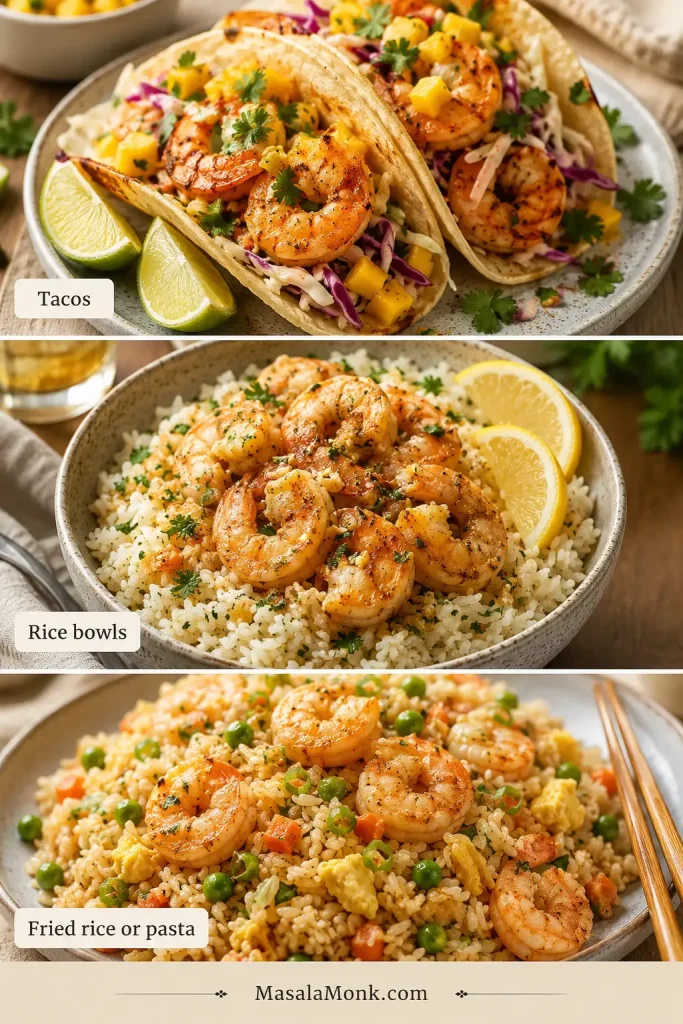
Three-panel collage showing cooked shrimp served as tacos, a garlic butter rice bowl, and shrimp fried rice.
Use cooked shrimp as a flexible protein: pile it into tacos, spoon it over rice, or fold it into fried rice when dinner needs to move fast.
  • Shrimp tacos with slaw, lime, and mango salsa
  • Rice bowls with vegetables, garlic butter, lemon, and herbs
  • Pasta with lemon butter, garlic, tomato sauce, or a quick scampi-style finish
  • Salads with avocado, cucumber, corn, herbs, or greens
  • Wraps with lettuce, onion, spicy mayo, and a squeeze of lime
  • Noodle bowls with chili oil, peanut sauce, or soy-lime dressing
  • Quick shrimp fried rice
  • Shrimp cocktail-style plates with lemon and dipping sauce

For pasta, fried rice, or saucy dishes, stop cooking as soon as the shrimp are just done. They will keep warming when tossed with the rest of the meal.

Storage and Reheating

Air fryer shrimp is best right after cooking, but leftovers can still be useful. Cool the shrimp, store it in an airtight container, and refrigerate for up to 3 days. Reheat gently at 300°F to 350°F / 150°C to 175°C for 1 to 3 minutes, just until warm.

Shrimp is not very patient the second time around, so reheat gently and avoid warming it again and again. Cold leftover shrimp is often kinder than reheated shrimp, especially in salads, wraps, shrimp cocktail-style plates, or quick lunch bowls.

Breaded, Popcorn, Coconut, or Scampi Shrimp

These are not plain uncoated shrimp, so let the bag’s directions lead. Coated shrimp plays by slightly different rules: the outside needs to crisp while the inside heats through.

  • Frozen breaded shrimp: use a single layer, shake or flip, and follow package timing so the coating crisps.
  • Popcorn shrimp: shake often because the pieces are small and can brown quickly.
  • Frozen coconut shrimp: watch the coating closely because coconut can brown faster than the inside heats.
  • Scampi-style frozen shrimp: use scampi-specific package directions because butter, sauce, and coating can change the method.

As a loose starting point, many frozen breaded, popcorn, and coconut shrimp products cook around 390°F to 400°F / 200°C to 205°C for 7 to 12 minutes, but the package should lead. Product size, coating, brand, and raw or precooked status can change the timing quickly.

Plain shrimp is about tenderness; coated shrimp is about crispness.

FAQs

Do you need to thaw shrimp before air frying?

No. Plain frozen shrimp can go straight into the air fryer. If the pieces are icy or clumped, loosen them briefly first, then season and finish cooking.

How long does frozen shrimp take in the air fryer?

Most frozen raw shrimp takes 8 to 10 minutes at 400°F / 205°C. Small shrimp can finish closer to 6 minutes, while jumbo shrimp may need 9 to 12.

What temperature works best for frozen shrimp?

For raw frozen shrimp, 400°F / 205°C is the best starting point. With precooked shrimp, use 375°F to 400°F / 190°C to 205°C and stop once hot.

Raw or cooked frozen shrimp: what changes?

Raw shrimp needs to cook through. Precooked shrimp only needs to get hot. That one difference changes the timing completely.

How do you air fry precooked frozen shrimp?

Air fry precooked frozen shrimp at 375°F to 400°F / 190°C to 205°C for 4 to 6 minutes, shaking halfway. Stop once the pieces are hot.

Can you air fry frozen shrimp with vegetables?

Yes, but vegetables often need more time and frozen vegetables can release water. Start firmer vegetables first, then add shrimp near the end.

Can you air fry frozen shrimp without oil?

Yes, but a little oil helps seasoning stick and improves texture. For oil-free shrimp, cook in one layer and finish with lemon or sauce.

What do shrimp size numbers like 16/20 or 31/40 mean?

The number tells you roughly how many shrimp are in one pound. Lower numbers mean larger shrimp, so 16/20 needs more time than 31/40 or 41/50.

Are frozen prawns cooked the same way as shrimp?

Yes. Frozen prawns can be air fried like frozen shrimp. Let size guide the timing.

Should shell-on frozen shrimp be peeled before cooking?

No. You can air fry shell-on frozen shrimp, then peel after cooking. Cook until the shells turn pink and the flesh is opaque.

Why did my air fryer shrimp turn rubbery?

Rubbery shrimp almost always means it went too long, especially if it was precooked. Use a shorter time and stop once hot.

Why is there water in the air fryer basket?

Frozen shrimp releases moisture as surface ice melts. Use one layer, shake halfway, separate clumps early, and drain excess liquid if needed.

What about frozen breaded shrimp or popcorn shrimp?

Treat breaded, popcorn, and coconut shrimp as coated products. Start with package directions, then watch for a crisp outside and a fully heated center.

Back to Quick Answer · Back to Recipe Card

Final Tender Shrimp Check

Before you serve, the shrimp should be opaque through the center, loosely curled, and hot without feeling tight or dry. Raw shrimp should have no grey or glassy center. Precooked shrimp should be hot, not curled tighter and tighter.

Once you learn to read the bag, frozen shrimp becomes one of the easiest freezer proteins to trust. Loosen icy pieces if needed, season the shrimp instead of the frost, and stop as soon as the center is opaque. That is how a forgotten bag of shrimp turns into dinner instead of a guessing game.
Posted on — Leave a comment

Shrimp Fried Rice Recipe: Easy, Fluffy & Better Than Takeout

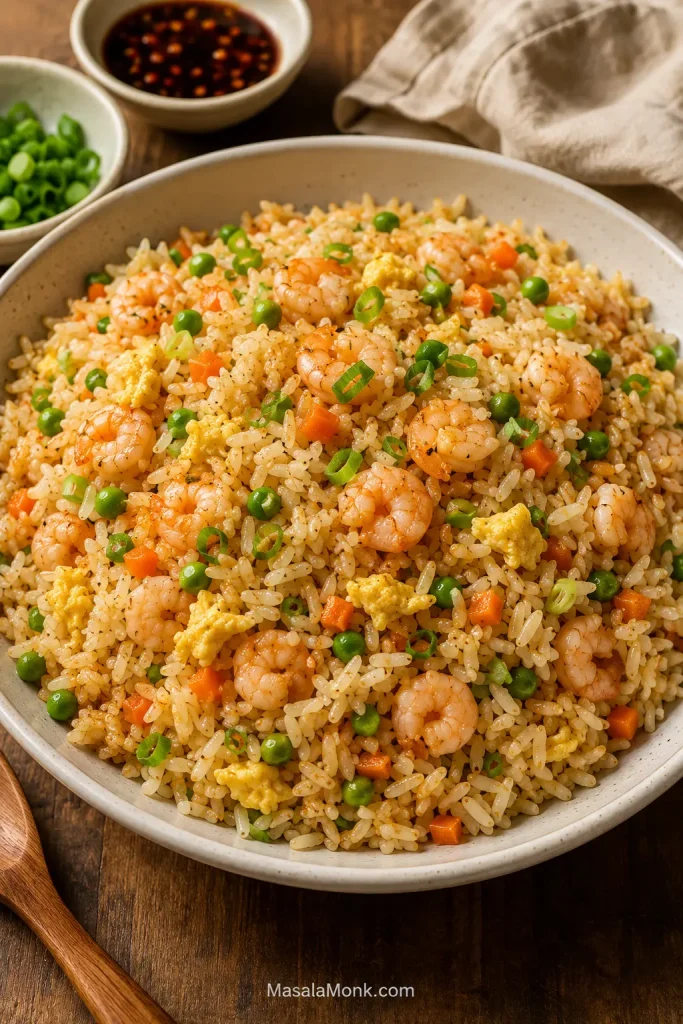
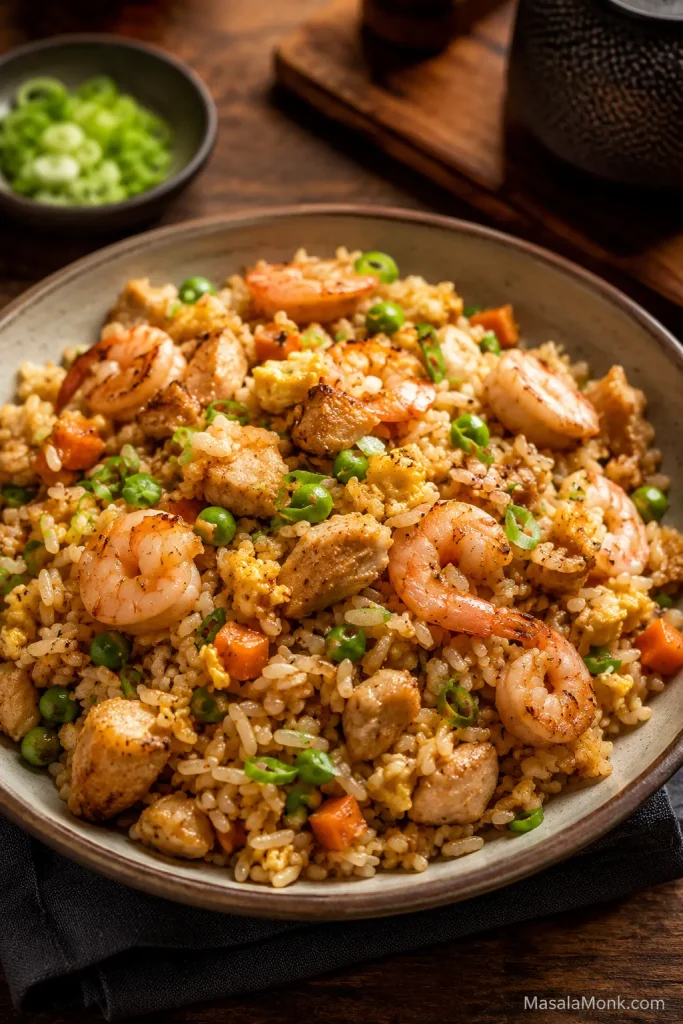
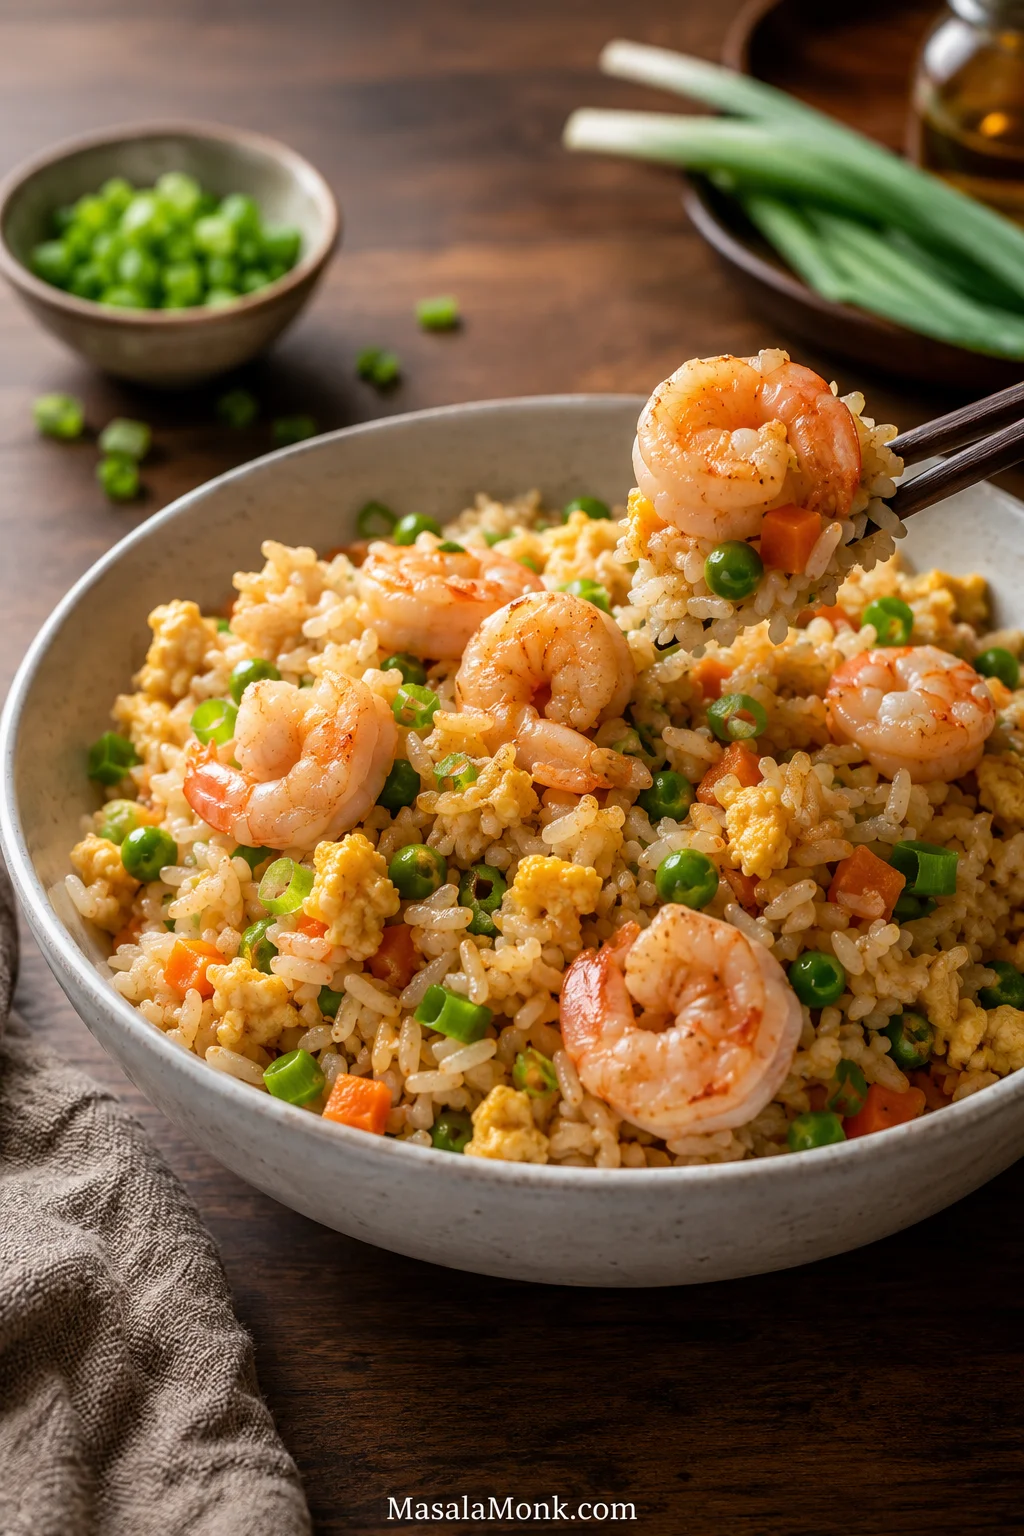
Bowl of shrimp fried rice with plump shrimp, scrambled egg, peas, carrots, scallions, and chopsticks lifting a bite of rice.

This shrimp fried rice recipe is for the night you open the fridge, see cooked rice, and realize dinner is almost already halfway done. A hot skillet turns yesterday’s rice into glossy, savory grains with juicy shrimp, soft egg, garlic, scallions, and vegetables — faster than takeout and fresher from the pan.

The goal is fluffy rice, tender shrimp, and a dinner that tastes planned, even when it started with leftovers. No restaurant burner needed. Just remember the four things that matter most: cold rice, dry shrimp, hot pan, light sauce.

What makes it better than takeout is control: more shrimp, less grease, tender egg, bright scallions, and rice that tastes soy-sesame savory without turning heavy.

Quick Answer: How to Make Shrimp Fried Rice

To make shrimp fried rice, start with cold cooked rice and break up the clumps. Pat raw shrimp dry, season lightly, then cook it quickly in a hot wok or large skillet until just opaque. Remove the shrimp, scramble the eggs, and cook the vegetables until the skillet looks dry again.

Stir-fry garlic, scallions, and rice, then add a small amount of soy-sesame sauce. Fold the shrimp and egg back in and serve while the rice is hot, loose, and glossy.

What is shrimp fried rice? It is a quick stir-fried rice dish made with cooked rice, shrimp, egg, vegetables, aromatics, and a savory soy-sesame sauce. In the best versions, cold rice and a hot pan keep the grains separate instead of soft or sticky.

Order matters because each ingredient behaves differently. Shrimp cooks fast, frozen vegetables can release water, and rice needs direct contact with heat before it gets sauced. When those pieces happen in the right order, the dish tastes fresh instead of heavy.

Already have cold rice and thawed shrimp? Jump straight to the recipe card. Need rice help first? See the best rice guide.

The 4 Rules for Fluffy Shrimp Fried Rice

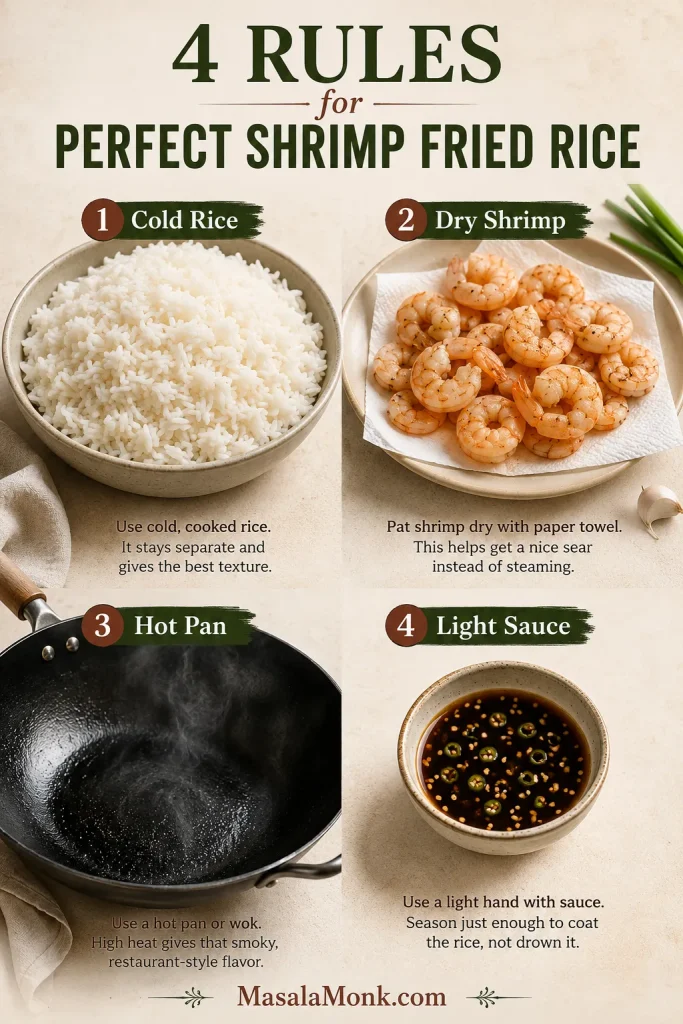
Use this quick visual guide as the recipe’s safety net before you start cooking. Each rule protects the final texture in a different way.

Four-part guide showing cold rice, dry shrimp, a hot wok, and light sauce as the key rules for shrimp fried rice.
Use this four-rule system as your fried rice safety net: cold rice protects texture, dry shrimp sears cleanly, high heat adds flavor, and light sauce keeps the grains separate.

Shrimp Fried Rice Recipe

This version is built for real weeknights: cooked rice from yesterday, shrimp from the fridge or freezer, a few vegetables, and a hot pan that makes it all feel deliberate. Leftover rice makes it easiest, but the fresh-rice workaround below gives you a path when you are starting from scratch.

Prep Time10 minutes
Cook Time15 minutes
Total Time25 minutes
Yield4 servings
CourseMain dish, quick dinner
StyleTakeout-style shrimp fried rice

Timing note: The 25-minute total assumes you already have cooked and chilled rice. Cooking rice from scratch adds cooling time before frying. Starting with fresh rice today? Use the fresh-rice workaround before heating the pan.

Before you turn on the stove: Have the rice loosened, shrimp dried, eggs beaten, vegetables ready, and sauce mixed. Fried rice is easy, but it does not wait once the pan is hot.

Equipment

  • Wok or large 12-inch non-stick/heavy skillet
  • Wide spatula
  • Mixing bowl for shrimp
  • Small bowl for sauce
  • Sheet pan or wide plate if cooling fresh rice

Ingredients

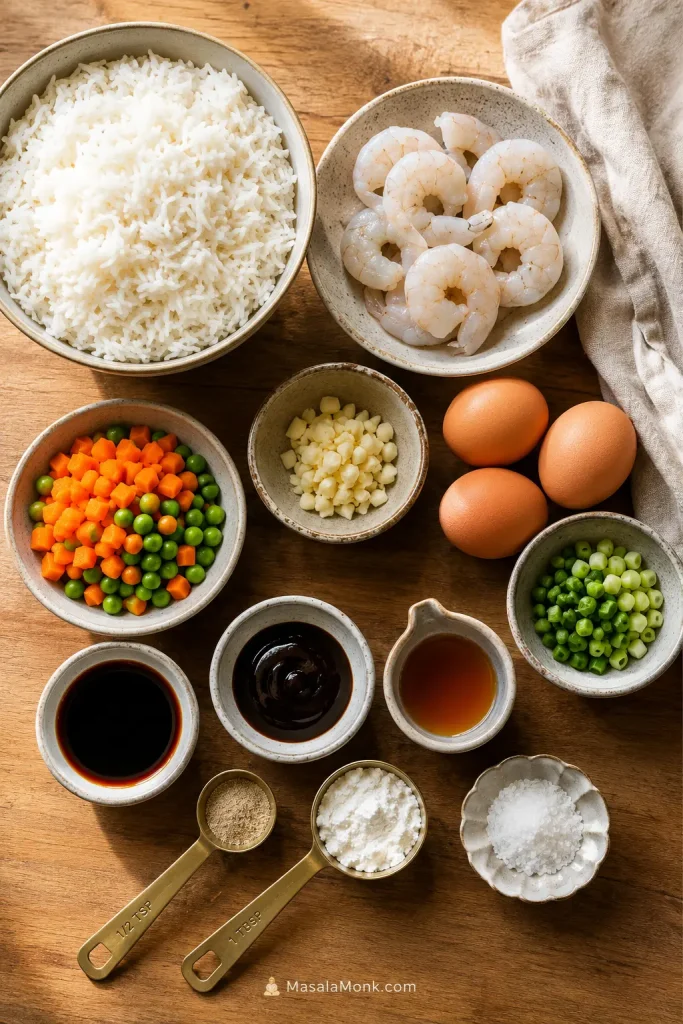
Overhead view of cooked rice, raw shrimp, three eggs, peas, carrots, garlic, scallions, soy sauce, oyster sauce, sesame oil, cornstarch, white pepper, and salt.
Fried rice moves quickly once the pan gets hot, so prep the shrimp, eggs, vegetables, aromatics, rice, and sauce before you start cooking.
IngredientUS MeasureMetric
Cold cooked rice4 cupsabout 600–650 g
Raw peeled and deveined shrimp1 lb450 g
Large eggs, beaten33
Frozen peas and carrots1 to 1 1/2 cups140–200 g
Garlic, minced3 cloves10–12 g
Scallions / green onions, sliced3–425–35 g
Neutral oil2 tbsp30 ml
Light soy sauce2 tbsp30 ml
Oyster sauce, optional1 tbsp15 ml
Toasted sesame oil1 tsp5 ml
White pepper1/4 tspabout 0.5 g
Sugar1/4 tspabout 1 g
Cornstarch1 tspabout 3 g
Salt1/4 tsp for shrimp, then only more after tastingabout 1.5 g, then only more after tasting

Ingredient note: This main method is written for raw shrimp. If you are using cooked shrimp, skip the searing step and add it at the very end just to warm through.

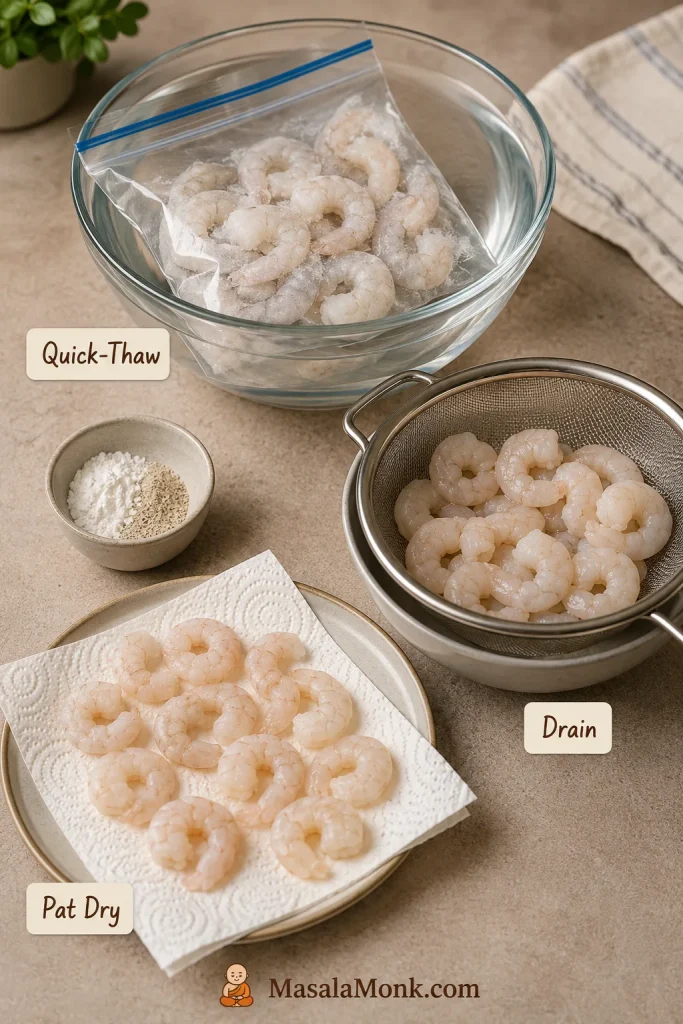
Frozen shrimp note: Frozen shrimp works well once fully thawed and patted dry. To quick-thaw, keep the shrimp sealed in a bag and place it in cold water until thawed, then drain and pat very dry before cooking. The skillet should sear the shrimp, not hiss with extra water. If you are unsure when to pull it from the pan, use the shrimp doneness cues.

Instructions

Prep the Rice and Sauce

  1. Break up the rice. Use your fingers or a fork to loosen cold cooked rice before it goes into the skillet. Clumps are easier to fix now than once the heat is on.
  2. Mix the sauce. In a small bowl, stir together soy sauce, oyster sauce if using, sesame oil, white pepper, and sugar. Keep it beside the stove so you are not measuring while the rice is cooking.

Season the Shrimp and Heat the Pan

  1. Season the shrimp. Pat shrimp very dry. Toss with salt, cornstarch, and a small pinch of white pepper. A dry surface helps the shrimp cook quickly instead of steaming.
  2. Heat the pan. Place a wok or large skillet over medium-high to high heat. Add 1 tablespoon oil and let the pan get properly hot.

Cook Shrimp Separately So It Stays Tender

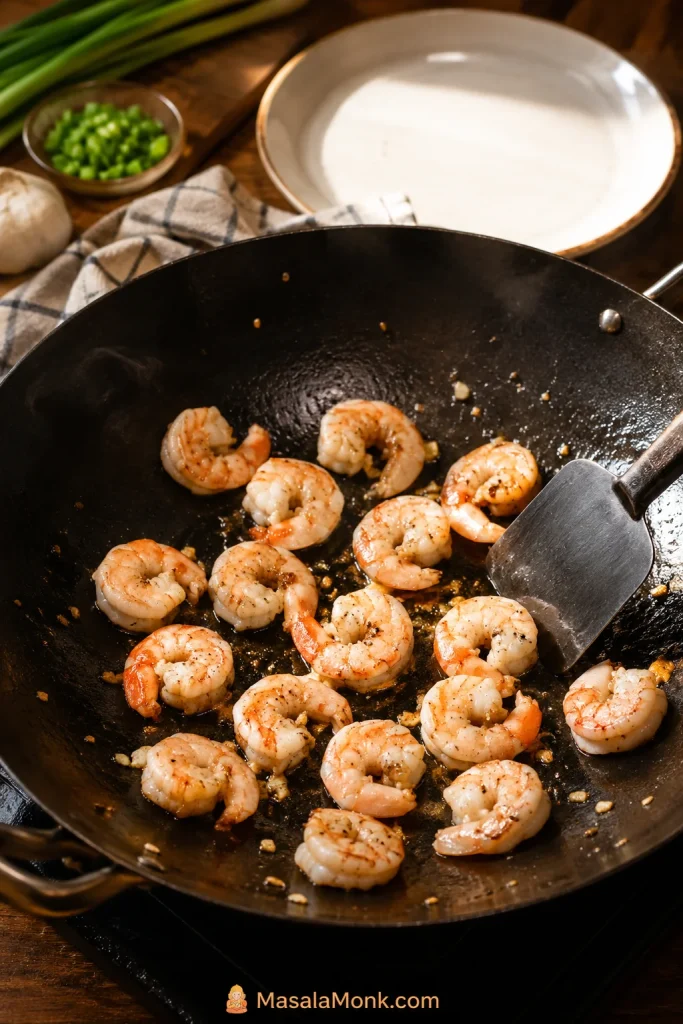
  1. Cook the shrimp. Add shrimp in a single layer. Cook for about 60–90 seconds per side, just until pearly, opaque, and lightly curled. Move it to a plate before it turns tight and firm.
  2. Scramble the eggs. Add 1 teaspoon oil if the pan is dry. Pour in the beaten eggs and scramble until just set. Move them to the plate with the shrimp; they will finish warming when they return to the rice.
Shrimp searing in a black wok with a spatula and an empty plate nearby for removing the shrimp.
Shrimp needs less time than rice, so cook it separately. Pull it while it is still plump, then return it near the end for tender shrimp in every bite.

Cook the Vegetables Until the Pan Looks Dry

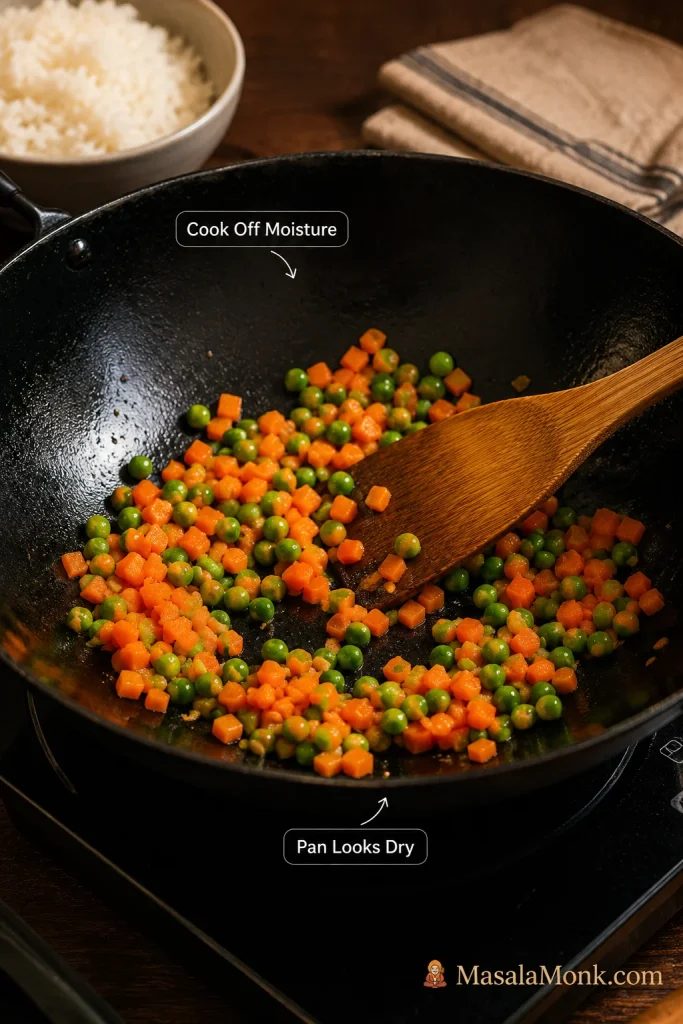
  1. Cook the vegetables. If needed, add the remaining oil, then stir in the peas and carrots. Cook until the skillet looks dry again so their sweetness and color stay bright without softening the rice.
Peas and diced carrots cooking in a black wok with a wooden spatula while a bowl of cooked rice waits nearby.
Once peas and carrots stop releasing moisture, the pan should look dry again. That is when the rice can fry instead of steam.

Garlic and Scallions Build the First Flavor Layer

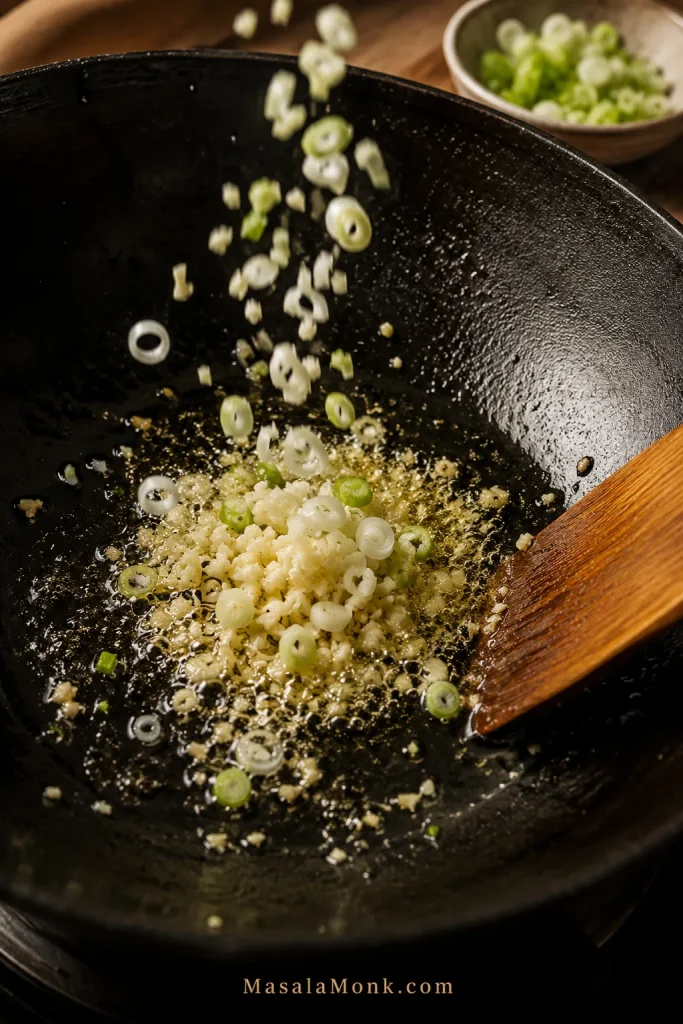
  1. Add aromatics. Stir in garlic and the white/light parts of the scallions. Cook for 15–30 seconds, just until the pan smells garlicky and sharp. You want the garlic lively, not browned.
Minced garlic and sliced scallions sizzling in oil inside a black wok with a wooden spatula.
Garlic and scallion whites flavor the oil almost instantly. Stir just until fragrant, because browned garlic can make the whole pan taste bitter.

Fry the Rice Before Adding Sauce

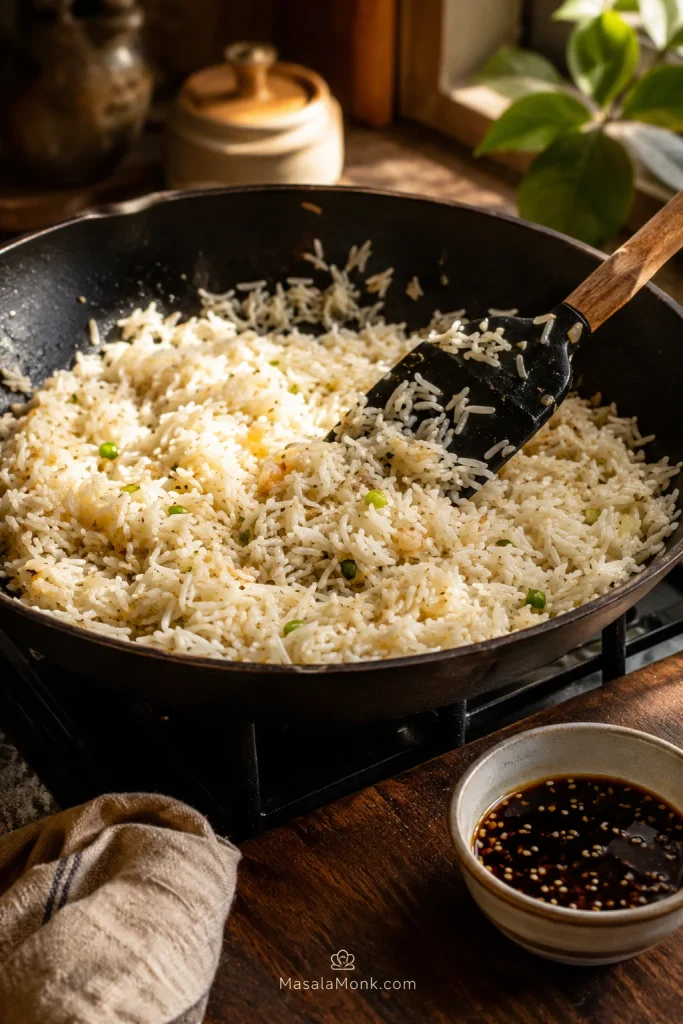
  1. Fry the rice. Add the cold rice, spread it out, and let it sizzle before stirring. The rice should look separate before it looks glossy; sauce comes after the grains are hot, not before.
Cooked rice frying in a wok with a spatula while a small bowl of dark sauce waits beside the pan.
Let the rice spend a little time in the pan before the sauce joins in. That early contact with heat keeps the grains loose instead of heavy.

Add Sauce, Return Shrimp and Egg, Then Finish

  1. Add the sauce. Drizzle in the sauce and toss quickly. The rice should look glossy, separate, and evenly seasoned. Puddles mean keep tossing over heat until the grains absorb the seasoning.
  2. Return shrimp and egg. Add the seared shrimp and scrambled egg back to the pan. Toss for 30–60 seconds, just until everything is hot, the shrimp stays springy, and the egg is tucked through the rice.
  3. Finish and serve. Add the green parts of the scallions so the final pan tastes fresh, sharp, and a little sweet. Taste before adding more soy sauce. If it needs lift, try white pepper, scallion greens, or a tiny pinch of salt before adding more liquid.

Cook’s cue: The pan should sound lively. Quiet, steamy rice usually means the skillet is crowded or something brought in too much moisture. If the rice steamed, clumped, or turned salty, jump to troubleshooting before trying again.

This is the kind of dinner that feels bigger than the effort it asks from you: one hot pan, a bowl of leftover rice, a handful of shrimp, and a few minutes where garlic, scallions, soy, and sesame make the kitchen smell like you planned ahead.

Shrimp Fried Rice Success Formula

Once you know the basic order, the recipe becomes easy to adapt. This quick table helps you adjust for the rice, shrimp, vegetables, or pan you actually have, while still landing in the same place: loose rice, tender shrimp, soft egg, bright scallions, and sauce that clings instead of pools.

If you have…Do this
Day-old riceBreak it up and fry it cold.
Fresh riceSpread, cool, and chill it until the surface feels dry.
Frozen shrimpThaw fully, pat dry, and cook briefly.
Cooked shrimpAdd it at the end just to warm through.
Frozen vegetablesCook them until the skillet looks dry before adding rice.
A small skilletCook in batches instead of crowding the pan.
Flat flavorAdd white pepper, scallions, heat, or a tiny pinch of salt before adding more soy sauce.

Why This Recipe Works

This recipe treats leftovers like an advantage. Cold rice is already drier and firmer, so the hot pan only has to wake it up.

The rest is order: shrimp cooks briefly and comes out, vegetables lose moisture before rice goes in, rice fries before sauce, and egg returns at the end for softness. That is how you get fried rice that tastes fresh instead of heavy.

If you like this leftover-rice style of cooking, MasalaMonk’s Spam fried rice recipe uses the same cold-rice logic with crispy Spam, egg, vegetables, and a quick savory sauce.

Ingredient Notes That Matter

The ingredient list is simple, which is part of the charm. A few ordinary things — cold rice, shrimp, egg, vegetables, garlic, scallions, and soy sauce — turn into a full dinner when the pan is hot and the moisture is under control.

Eggs

Egg makes the rice feel fuller and softer. Scramble it separately for the easiest method. Once you are comfortable, you can drizzle beaten egg over hot rice and stir quickly for a more golden restaurant-style effect. Try that only when the rice is already hot and loose; otherwise the egg can disappear into wet rice.

Soft egg gives the rice richness without needing extra sauce, which helps the whole pan stay savory instead of wet.

Vegetables

Frozen peas and carrots are classic because they are easy, colorful, and already cut small. Loose frozen vegetables can go straight into the hot skillet; just cook them until the pan looks dry again before adding rice. If they are icy or clumped together, thaw briefly and pat dry first.

No peas and carrots? Use corn, cabbage, bell pepper, mushrooms, green beans, or skip vegetables and add extra egg or shrimp. Small, quick-cooking add-ins give you color and texture without stealing heat from the rice.

Aromatics

Garlic and scallions are enough for a clean takeout-style flavor. For a deeper base, add 1/4 cup finely diced onion or 1 teaspoon minced ginger with the garlic. Keep the pieces small so they cook quickly and do not weigh down the rice.

Sauce and Seasoning

Light soy sauce gives salt and color. Oyster sauce adds a deeper takeout-style flavor, but it is optional. Low-sodium soy sauce gives you more control when your oyster sauce is already salty. Toasted sesame oil is strong, so use it sparingly. White pepper gives the rice a familiar restaurant-style warmth.

The goal is not dark, salty rice. Instead, aim for grains that taste seasoned all the way through — soy at the edges, sesame in the background, white pepper for warmth, and scallions keeping each bite fresh.

Want a warmer restaurant-style color? A tiny pinch of turmeric can add a light golden tint without needing food coloring. Use very little so it supports the rice instead of making it taste like turmeric.

For a broader sauce base you can use across vegetables, noodles, chicken, shrimp, tofu, and rice bowls, see this stir fry sauce recipe.

Best Rice for Shrimp Fried Rice

The rice matters, but the texture matters more. Choose a grain that can cool, separate, and move cleanly through a hot pan.

How Cold Rice Should Look Before Frying

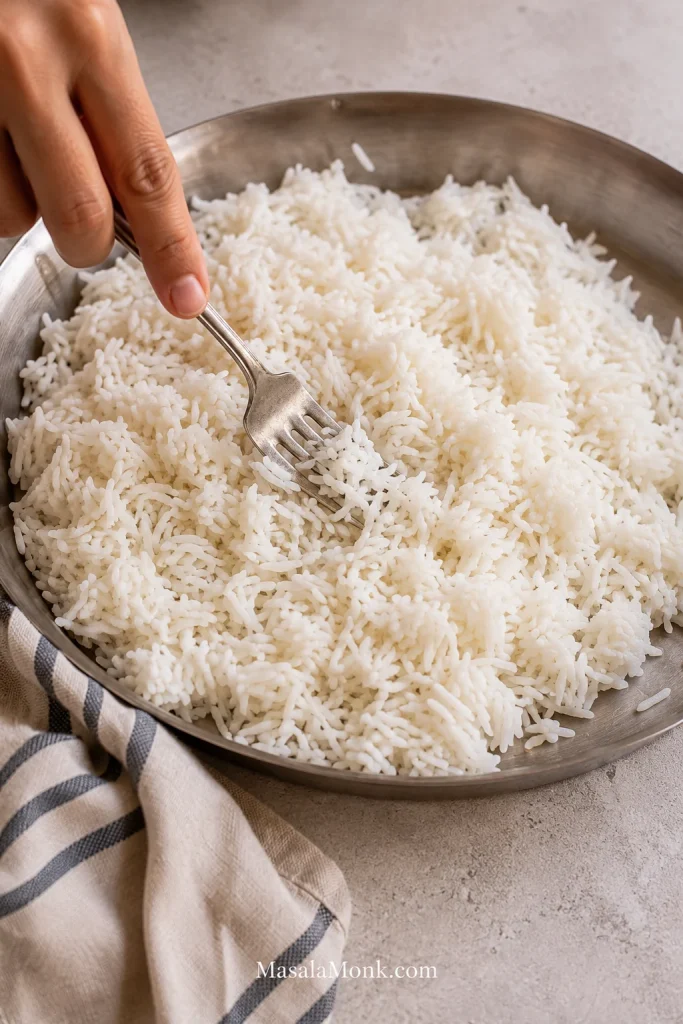
Cold rice should feel firm enough to break apart easily. If the grains loosen before cooking, they have a better chance of frying evenly in the pan.

Hand using a fork to break up cold cooked rice in a metal bowl before adding it to the pan.
Break up chilled rice before cooking, not inside a crowded pan, so every grain can touch the heat instead of clumping together.

For the easiest fluffy texture, start with cold cooked rice that separates easily. Freshly cooked rice is usually too soft and steamy for direct frying, while chilled rice has enough structure to move cleanly through the skillet.

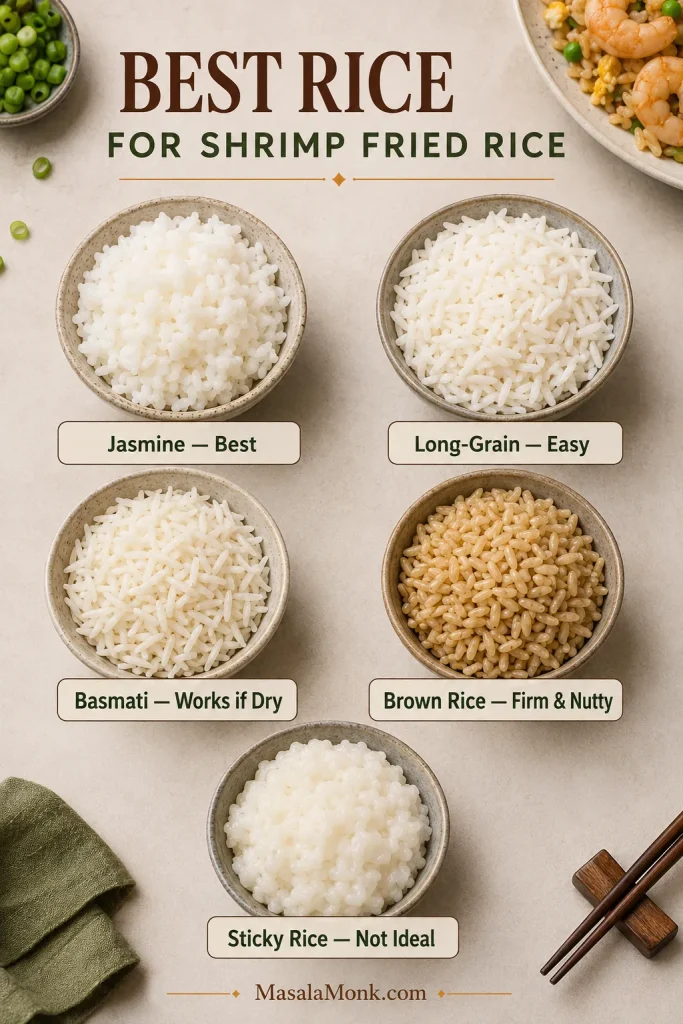
Choose jasmine rice for a takeout-style aroma, long-grain white rice for reliability, basmati rice if that is what you already cook, and brown rice if you want a firmer, nuttier version.

Not every rice behaves the same once it hits high heat, so use this as a quick guide.

Best Rice Types for Shrimp Fried Rice

Rice TypeGood for Shrimp Fried Rice?Notes
Jasmine riceYesAromatic and excellent for takeout-style fried rice.
Long-grain white riceYesReliable, fluffy, and easy to separate.
Basmati riceYes, if dryWorks well when cooked firm, cooled fully, and broken up before frying.
Brown riceYesFirmer and nuttier; taste and adjust seasoning carefully.
Short-grain or sticky riceNot idealCan clump and turn heavy unless you are making a different style intentionally.
Comparison board with bowls labeled jasmine rice, long-grain rice, basmati rice, brown rice, and sticky rice for fried rice.
Jasmine and long-grain rice are the easiest choices for fluffy shrimp fried rice, while basmati and brown rice can also work when cooked firm and cooled well.

Best make-ahead move: Cook the rice the day before, spread it out so steam escapes, then refrigerate it once cool. The next day, break up the grains before frying. This gives you the easiest fluffy texture.

Do not rinse cooked rice before frying. If the grains are clumped, loosen them with your fingers or a fork; adding water brings back the moisture you are trying to avoid.

No Day-Old Rice? Fresh Rice Workaround

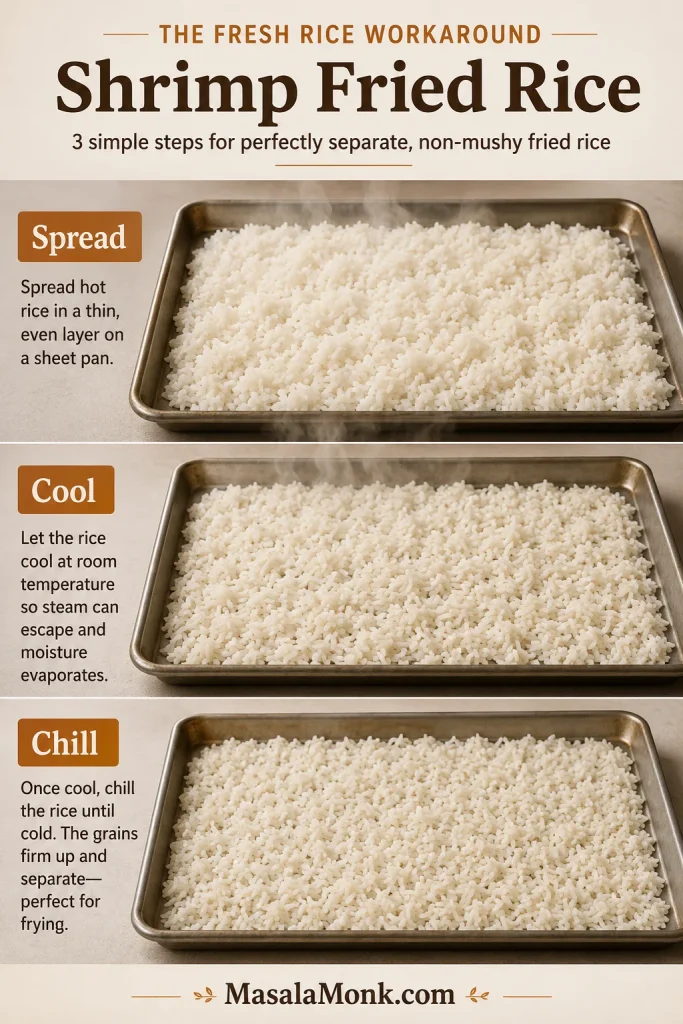
You can make shrimp fried rice with fresh rice, but not while it is hot and steamy. Cook it slightly firm, spread it on a sheet pan so steam escapes, then chill it until the surface feels cool and dry. Once the grains separate easily, it can fry like day-old rice.

  1. Cook the rice with slightly less water than usual so it finishes a little firmer.
  2. Spread the hot rice on a sheet pan or large plate.
  3. Let the steam escape for 10 minutes.
  4. Refrigerate the rice for 30–60 minutes, or freeze it for about 15 minutes if you are rushing.
  5. Break up the cooled rice before frying.
Three-step guide showing fresh rice spread on a sheet pan, cooled, and chilled before being used for fried rice.
No day-old rice? Spread fresh rice thinly, let the steam escape, and chill it until the surface dries so it behaves more like leftover rice.

Fresh rice will not be quite as effortless as day-old rice, but it can still make good fried rice when you cool it properly. You are just trying to give it the same dry surface that leftovers already have.

Shrimp, Prawns, Frozen Shrimp, and Cooked Shrimp

Whether your market sells them as shrimp or prawns, cook them the same way here. Start with seafood that is dry on the surface, cook it briefly, and bring it back only after the rice has had time in the pan.

Size changes the way the fried rice eats, not just how it looks. Choose 26–30 count shrimp for a juicy home-style pan. For smaller restaurant-style pieces through every bite, use 51–60 count shrimp. Very large shrimp are best chopped into bite-size pieces so the rice eats evenly.

Shrimp SizeBest Use
51–60 count / small shrimpBest for restaurant-style fried rice because shrimp pieces mix through every bite.
26–30 count / medium shrimpBest balance for home cooks; juicy but still easy to mix into rice.
16–20 count / large shrimpLooks generous, but may need chopping so the rice eats evenly.
Cooked shrimpUse only in a pinch. Add at the end just to warm through.

How to Thaw and Dry Frozen Shrimp

Frozen shrimp can work as well as fresh shrimp when it is thawed safely and dried thoroughly. The goal is to remove surface moisture before the shrimp hits the hot pan.

Frozen shrimp sealed in a bag thawing in cold water, with drained shrimp and paper towel-dried shrimp beside it.
After a cold-water thaw, dry shrimp well before it hits the pan. A dry surface sears better and keeps the rice from steaming later.

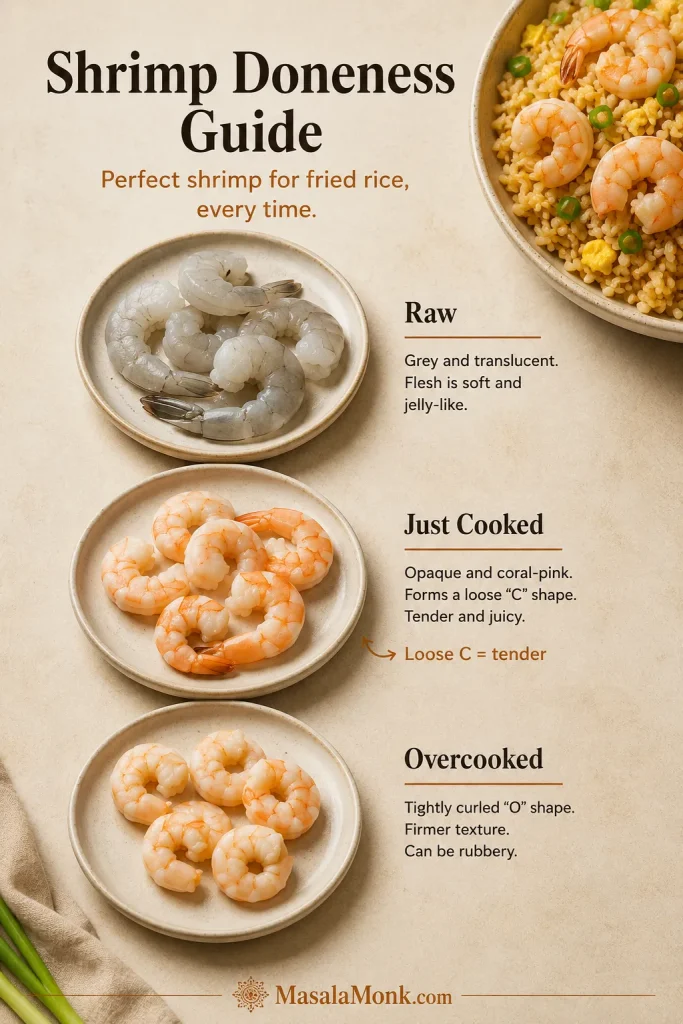
Shrimp Doneness: Loose C, Not Tight Curl

The best doneness cue is visual: shrimp should turn opaque and curl gently. When it tightens into a firm ring, it has usually cooked too long.

Shrimp doneness guide showing raw grey shrimp, just-cooked coral shrimp in a loose C shape, and overcooked tightly curled shrimp.
Watch the shape, not only the color. A loose C-shape usually means tender shrimp, while a tight curl means it has stayed on the heat too long.

If you are using pre-cooked shrimp, do not sear it again. Add it near the end and toss only until warm. For shrimp that starts raw, a loose C-shape is usually a good cue; tight, firm curls usually mean it stayed on the heat too long.

When the shrimp is right, it should feel juicy and springy against the rice, not tight or chewy. That contrast is what makes the bowl feel generous.

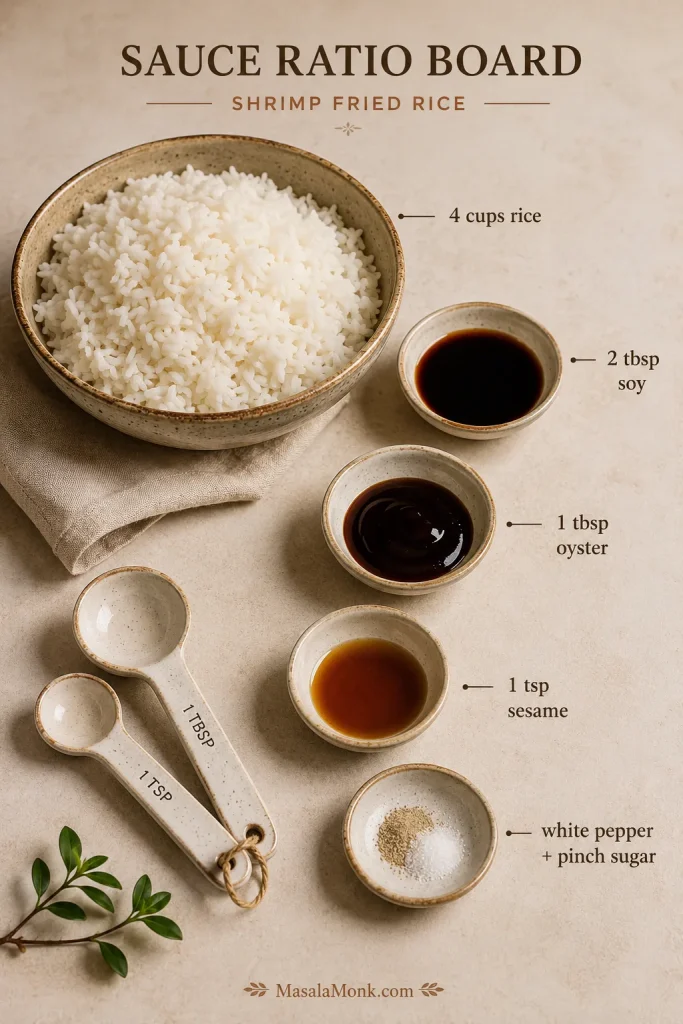
The Sauce Ratio That Keeps Fried Rice Glossy, Not Wet

If your fried rice tastes salty but still flat, more soy sauce is usually not the answer. Try aroma, pepper, scallions, chili, or a tiny bit of sweetness before adding more liquid.

A balanced pan should taste savory all the way through, not sit in a puddle of sauce. For 4 cups cooked rice, this is enough to coat the grains without making them heavy:

  • 2 tbsp / 30 ml light soy sauce
  • 1 tbsp / 15 ml oyster sauce, optional
  • 1 tsp / 5 ml toasted sesame oil
  • 1/4 tsp white pepper
  • 1/4 tsp sugar
Sauce ratio board showing four cups of rice with soy sauce, oyster sauce, sesame oil, white pepper, and sugar.
A good sauce ratio should season the rice, not drown it. Measure first, then add just enough soy, oyster sauce, sesame oil, and white pepper for balance.

Mix the sauce before you start cooking. Fried rice moves quickly, and stopping to measure sauces while the pan is hot can lead to overcooked shrimp or wet rice.

A small splash of dark soy sauce can add color, while light soy sauce stays the main seasoning. Too much dark soy can make the rice look heavy and taste overly salty.

Sauce Ratio by Rice Amount

Sauce is where fried rice can go from balanced to salty fast. Start with these amounts, then taste at the end.

Cooked RiceSoy SauceOyster SauceSesame Oil
2 cups1 tbsp / 15 ml1 1/2 tsp / 7 ml1/2 tsp / 2.5 ml
3 cups1 1/2 tbsp / 22 ml2 tsp / 10 ml3/4 tsp / 4 ml
4 cups2 tbsp / 30 ml1 tbsp / 15 ml1 tsp / 5 ml

If you skip oyster sauce, keep the soy sauce measured and build flavor with white pepper, scallions, heat, or a tiny pinch of sugar after tasting. If the rice tastes flat or salty, check the pan cues before adding more soy sauce.

Sauce Swaps

  • No oyster sauce: Skip it, then taste for white pepper, scallions, heat, or a tiny pinch of sugar.
  • Gluten-free: Use tamari instead of soy sauce and check the oyster sauce label.
  • No soy sauce: Use coconut aminos, or season lightly with salt and a tiny splash of broth.
  • No sesame oil: Skip it and finish with extra scallions for freshness.
  • Spicy: Add chili crisp, sriracha, sambal, chopped green chili, or red pepper flakes.

Wok vs Skillet: Best Pan for Home Stoves

If you have ever made fried rice in a small pan and wondered why it steamed instead of fried, the pan size is probably the reason — not your cooking skill.

A wok is excellent for fried rice because it gives you room to toss and move ingredients quickly. But a large skillet is often better for home cooks than a small wok on a weak burner.

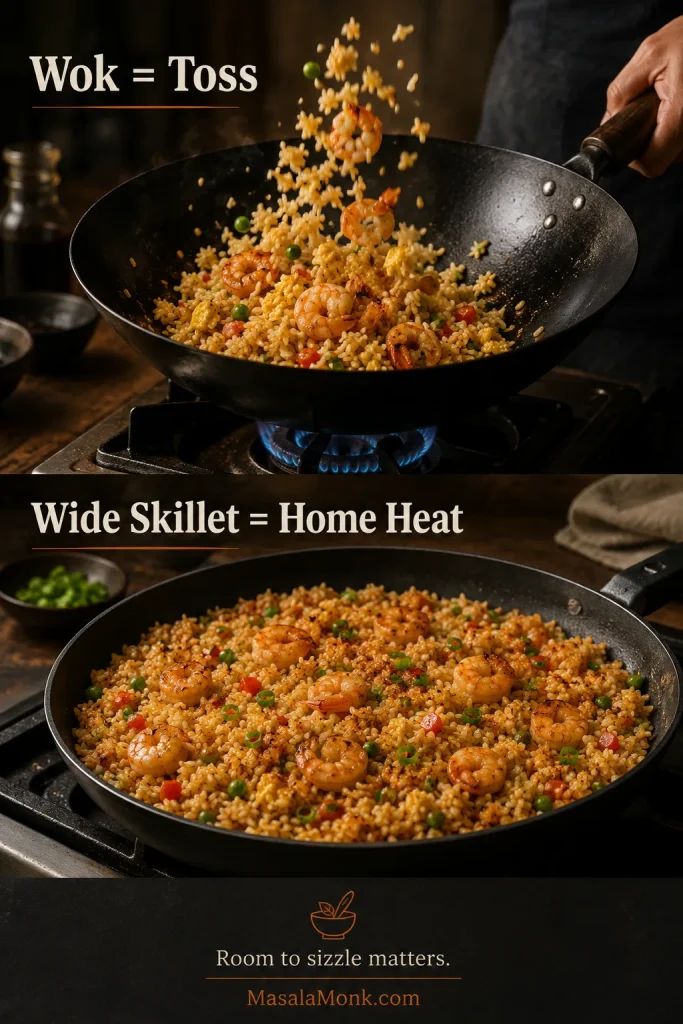
You do not need restaurant heat; you need restaurant order. A wide hot skillet, dry rice, and a little patience between stirs will get you much closer than a crowded wok on weak heat.

Comparison image showing shrimp fried rice being tossed in a wok and spread across a wide skillet.
On a home stove, a wide skillet often beats a small wok. More surface area lets more rice touch direct heat at once.

With less crowding, the rice has room to sizzle, which is where the better texture comes from. When the pan is too full, the vegetables leak water, the rice steams, and the sauce sits underneath instead of clinging to the grains.

  • Use a wok if your stove gives strong heat and you can toss quickly.
  • Choose a large non-stick skillet for the easiest beginner-friendly option.
  • Try a heavy stainless or cast-iron skillet if it holds heat well and you are comfortable managing sticking.
  • Cook in batches if your pan is small. A small pan can still make good fried rice — it just needs batches.

The Pan Cues That Matter Most

Use this while the rice is still in the pan. The troubleshooting table later is for fixing or understanding what went wrong; this section helps you catch problems before they become permanent.

Good fried rice gives you clear signs while it cooks. The pan tells you when to move forward and when to pause: steam, puddles, tight shrimp, or rice that sits in clumps instead of moving freely.

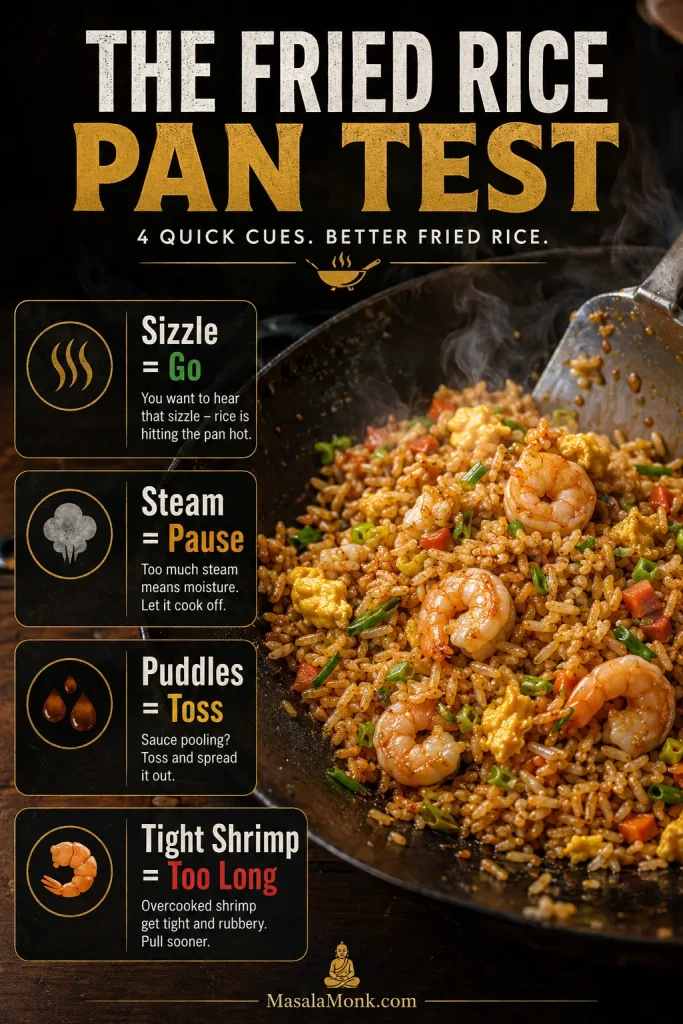
Think of it as the fried rice pan test: sizzle means go, steam means pause, puddles mean keep tossing, and tight shrimp means it cooked too long.

Fried rice pan test infographic showing four cues: sizzle means go, steam means pause, puddles mean toss, and tight shrimp means too long.
Let the pan guide you: sizzle means keep frying, steam means slow down, puddles need tossing, and tight shrimp should come off sooner.
CueWhat It MeansWhat to Do
Rice sizzlesThe pan is hot enough and the grains are frying.Let the rice get contact with the pan before adding sauce.
Rice steams heavilyThe pan is crowded or there is too much moisture.Spread the rice out or cook in batches.
Sauce pools underneathToo much liquid was added or the rice was not hot enough.Keep tossing over heat until the sauce clings to the grains.
Shrimp is tight and firmIt stayed on the heat too long.Cook shrimp briefly next time and return it only at the end.
Flavor tastes flatThe rice may need lift, not more liquid.Add white pepper, scallions, chili, or a tiny pinch of salt before more soy sauce.

When it is ready, you should see loose grains, springy shrimp, soft egg, fresh scallions, and no sauce puddles.

Shrimp Fried Rice Variations

Once the base method works, you can take the same pan in a few different directions: brighter with pineapple and lime, hotter with chili crisp, fuller with chicken, lighter with cauliflower rice, or simpler without egg. Keep the rice dry and the sauce measured, and the texture stays in your control.

Looking for a specific version? Jump to restaurant-style, pineapple, or chicken and shrimp fried rice.

Prawn Fried Rice

Use prawns exactly the same way as shrimp. Medium prawns stay juicy and still mix well with the rice. Very large prawns are easier to eat when cut into bite-size pieces before cooking or after searing.

Restaurant-Style Shrimp Fried Rice

Use jasmine rice, white pepper, scallions, a little oyster sauce, and small shrimp pieces that mix through the rice. Drizzle the sauce around the edge of the hot skillet so it sizzles before coating the grains. Keep the sauce light so the rice tastes restaurant-style without turning dark, salty, or heavy.

Restaurant-style shrimp fried rice in a bowl with small shrimp, egg, peas, carrots, scallions, and lightly glossy rice.
Restaurant-style shrimp fried rice should taste savory, not heavy. Keep the sauce light, finish with scallions and white pepper, and let the rice stay golden.

Pineapple Shrimp Fried Rice

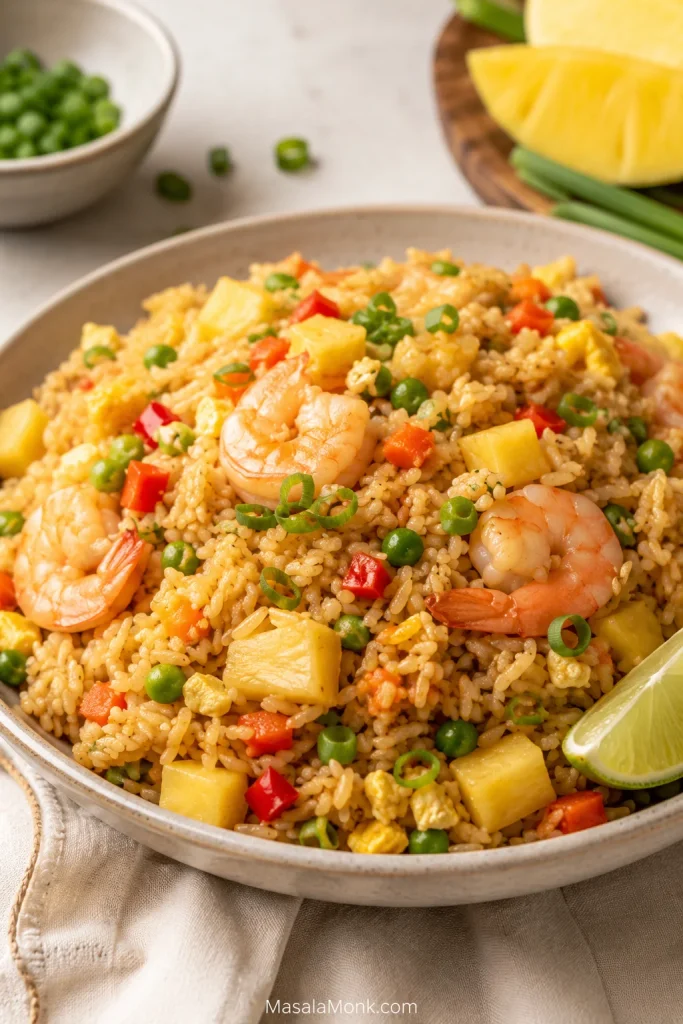
Add 1/2 to 3/4 cup pineapple chunks, diced bell pepper, and a squeeze of lime at the end. Use less sugar in the sauce because pineapple brings sweetness. For a Thai-style direction, add a small splash of fish sauce, chopped chili, and extra scallions. Drain the pineapple well so the rice stays glossy instead of wet.

Pineapple shrimp fried rice with shrimp, pineapple chunks, egg, peas, carrots, red pepper, scallions, and a lime wedge.
Pineapple shrimp fried rice works best when the fruit is bright but not juicy. Drain it well and add it near the end so the rice stays fluffy.

Chicken and Shrimp Fried Rice

Use small pieces of boneless chicken along with the shrimp. Cook the chicken first until done, remove it, then cook the shrimp briefly. Return both proteins near the end so neither overcooks.

Chicken and shrimp fried rice with plump shrimp, browned chicken pieces, egg, peas, carrots, scallions, and glossy rice.
Chicken and shrimp need different timing. Cook the chicken first for browning, then add shrimp briefly so both proteins stay juicy.

Shrimp Fried Rice Without Egg

Skip the eggs and add more vegetables, tofu, or extra shrimp. Since egg adds richness, finish with scallions, white pepper, and a small amount of sesame oil to keep the rice flavorful.

Shrimp Fried Rice Without Soy Sauce

Use coconut aminos for a sweeter soy-free version, or season with salt, white pepper, sesame oil, and a tiny splash of broth. Add less liquid than you think you need, then taste after tossing.

Spicy Shrimp Fried Rice

Add chili crisp, sambal, sriracha, chopped green chili, or red pepper flakes. For the best texture, add chili oil or chili crisp near the end instead of flooding the rice early.

Cauliflower Shrimp Fried Rice

Use cauliflower rice instead of cooked rice for a lighter version. Frozen cauliflower rice should be thawed and squeezed dry first. Fry it in a wide skillet and leave it uncovered so it does not turn watery.

Why Fried Rice Turns Mushy — and How to Fix It

A difficult pan of fried rice is usually not a disaster. It is feedback: too much moisture, not enough heat, too much sauce, or shrimp that stayed in the pan too long.

Most fried rice problems are easy to diagnose once you know what to look for. Steam means moisture, puddles mean liquid, clumps mean the rice needed breaking up earlier, and tight shrimp means it stayed in the heat too long.

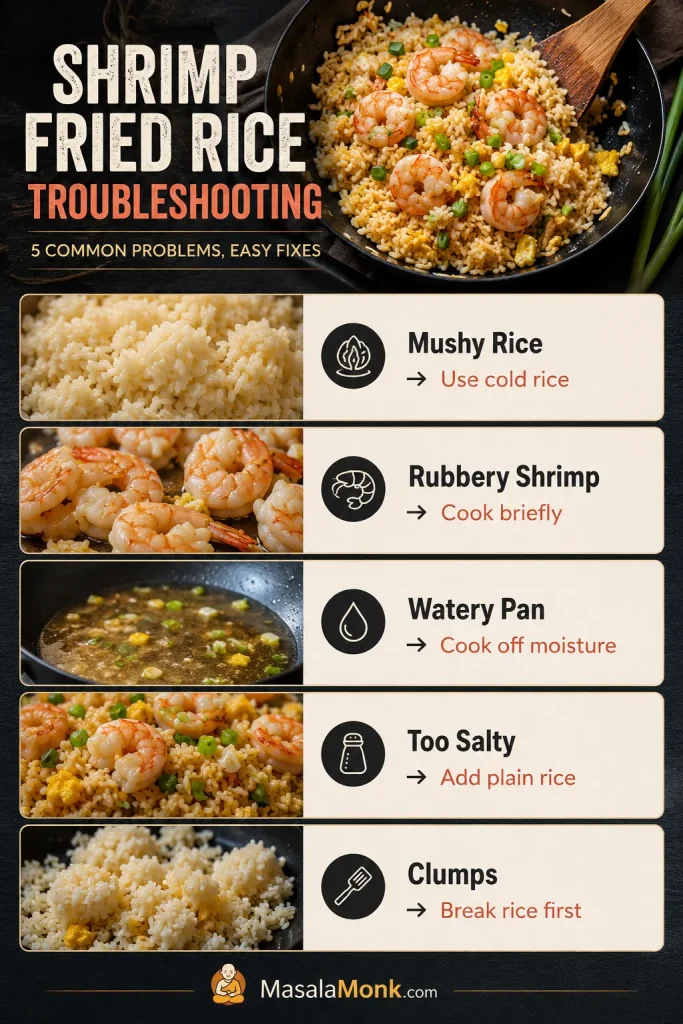
Troubleshooting board with fixes for mushy rice, rubbery shrimp, watery pan, salty rice, and rice clumps.
Mushy shrimp fried rice usually starts with excess moisture. Dry rice, dry add-ins, measured sauce, and enough pan space fix most texture issues.
ProblemWhy It HappenedFix
Rice is mushyRice was warm or wet, sauce was too heavy, or the pan was crowded.Use cold rice, reduce sauce, use a wider pan, and cook in batches.
Shrimp is rubberyShrimp cooked too long or stayed in the pan while the rice finished.Cook shrimp briefly, remove it, and return it at the end.
Rice tastes blandSauce was uneven or the rice was not seasoned enough.Mix sauce before cooking and taste for salt, white pepper, scallions, and heat before adding more sauce.
Rice is too saltyToo much soy sauce, oyster sauce, or dark soy sauce was added.Add plain rice, egg, or extra vegetables to balance it.
Rice is clumpyCold rice was added in large chunks.Break rice apart before it goes into the pan.
Fried rice is wateryFrozen shrimp, frozen vegetables, or pineapple added too much moisture.Dry shrimp well, cook off vegetable moisture, and drain pineapple before adding.
Egg disappeared into the riceEgg was mixed into wet rice or over-stirred.Scramble egg separately, then return it near the end.

What to Serve with Shrimp Fried Rice

This can be dinner on its own, especially with egg and vegetables. Because the rice is savory and glossy, the best sides bring crunch, acidity, freshness, or heat.

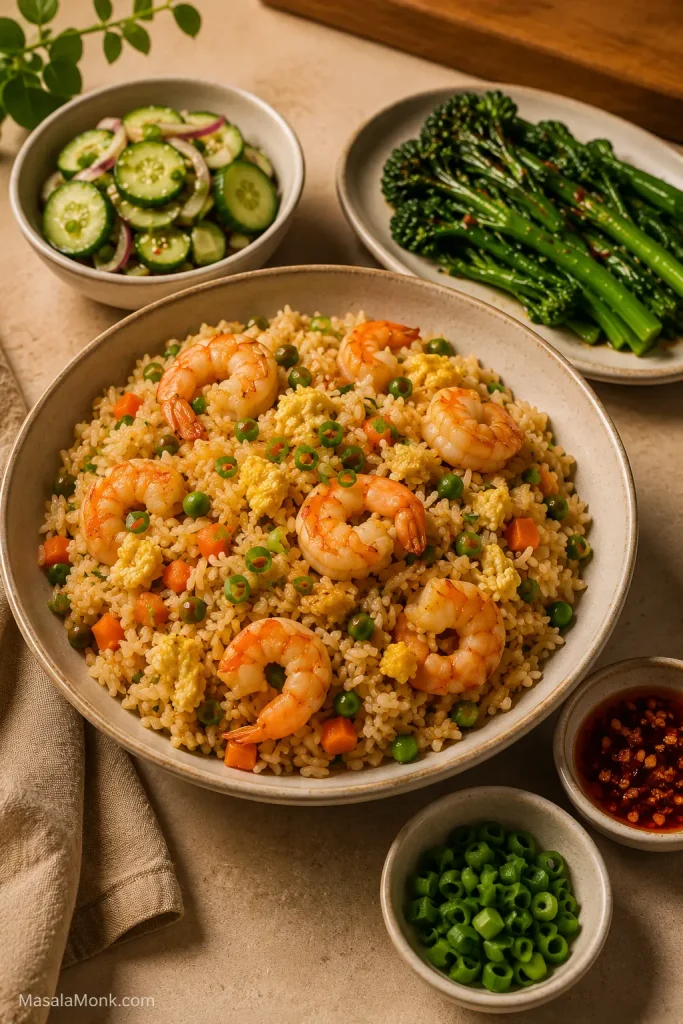
Shrimp fried rice served with cucumber salad, broccolini, chili crisp, scallions, and small side dishes.
Because shrimp fried rice is savory and rich, pair it with something crisp, green, acidic, or spicy. That contrast makes the meal feel fresher.
  • Cucumber salad or quick pickled cucumbers
  • Steamed or stir-fried greens
  • Spring rolls or lettuce wraps
  • Clear soup or hot and sour soup
  • Chili oil, chili crisp, or extra scallions on top

For a cold, crisp contrast, MasalaMonk’s cucumber salad recipe works especially well beside salty, glossy rice. For another quick shrimp dinner in a different direction, the shrimp scampi recipe gives you garlic butter, lemon, and tender shrimp instead of soy-sesame rice.

Storage and Reheating

This dish tastes best fresh from the pan, but leftovers can still be good when they are cooled, stored, and reheated properly.

  • Refrigerate: Store cooled shrimp fried rice in an airtight container for up to 3 days.
  • Reheat in a skillet: Warm over medium heat with a few drops of oil or water. Stir gently until hot.
  • Microwave carefully: Use short bursts and stop as soon as the rice is hot. Shrimp can get rubbery if overheated.
  • Freezing: Freezing is possible, but the shrimp and egg texture may not be as good after reheating.

Leftover rice note: Because this recipe often starts with leftover rice, cooling and reheating matter. If you cook rice ahead for fried rice, cool it quickly in a shallow container and refrigerate it within 2 hours. Do not leave cooked rice sitting out for hours before chilling. Reheat shrimp fried rice until hot all the way through, and reheat only the portion you plan to eat. For more detail, see the USDA leftover food safety guidance.

FAQs About Shrimp Fried Rice

What is the best rice for shrimp fried rice?

Cold cooked jasmine or long-grain white rice is the easiest choice because the grains stay separate in a hot skillet. Dry basmati can also work well when it has been cooked firm and cooled fully.

Do you need cold rice for shrimp fried rice?

Cold rice is easiest because the grains are firmer and drier on the surface. Fresh rice can work too, but it needs cooling time first so it stops steaming.

Can you use freshly cooked rice for shrimp fried rice?

Yes, but not straight from the cooker. Cook it slightly firm, spread it out so steam escapes, then chill it until the surface feels dry. Break up the grains before adding them to the pan.

How do you make shrimp fried rice not mushy?

Use cold rice, a hot wide pan, and a measured amount of sauce. Pat shrimp dry, cook off moisture from frozen vegetables, and avoid crowding the pan.

What shrimp works best for fried rice?

Raw peeled and deveined medium shrimp is the easiest choice. Smaller shrimp give a more restaurant-style bite, while very large shrimp are better chopped.

Should shrimp be cooked before adding rice?

Yes. Cook shrimp briefly first, remove it from the pan, then return it after the rice is fried. This keeps the shrimp tender while the rice gets enough time on the heat.

How much sauce should you add to shrimp fried rice?

For 4 cups cooked rice, start with 2 tablespoons soy sauce, 1 tablespoon oyster sauce, 1 teaspoon sesame oil, white pepper, and a small pinch of sugar. Add more only after tasting.

Is oyster sauce necessary?

No. Oyster sauce gives a deeper takeout-style flavor, but the rice still works without it. Keep the soy sauce measured, then use white pepper and scallions for extra flavor.

How do you make shrimp fried rice with frozen shrimp?

Thaw frozen shrimp fully and pat it dry. Season it, cook it briefly in a hot pan, then remove it before frying the rice so it stays juicy and the skillet stays dry.

Do prawns work instead of shrimp?

Yes. Prawns work the same way in this recipe. Use raw peeled and deveined prawns, dry them well, cook them briefly, and return them at the end.

How do you make shrimp fried rice without egg?

Skip the egg and add more shrimp, vegetables, or tofu. Since egg adds richness, finish with scallions, white pepper, and a small amount of sesame oil.

How long does shrimp fried rice keep?

Shrimp fried rice keeps for up to 3 days in the refrigerator when stored in an airtight container. Cool it before storing and reheat only the portion you plan to eat.

What is the best way to reheat shrimp fried rice?

A skillet over medium heat gives the best texture. Add a few drops of oil or water and stir gently until hot. Use short microwave bursts if reheating quickly.

Back to recipe card · Back to quick answer

The Takeaway

Good shrimp fried rice is not about a long ingredient list. It is about giving the rice enough heat, keeping the shrimp tender, and using just enough sauce to season every grain.

Once you hear the rice sizzling instead of steaming, you are on the right track. Keep the shrimp brief, the sauce measured, and the pan wide, and this becomes the kind of fried rice you can repeat with whatever is already in the fridge.

The best version does not taste like leftovers. It tastes like a hot pan gave yesterday’s rice a second life.

Posted on — Leave a comment

Ham and Cheese Quiche Recipe: Creamy, Easy, Crustless Option

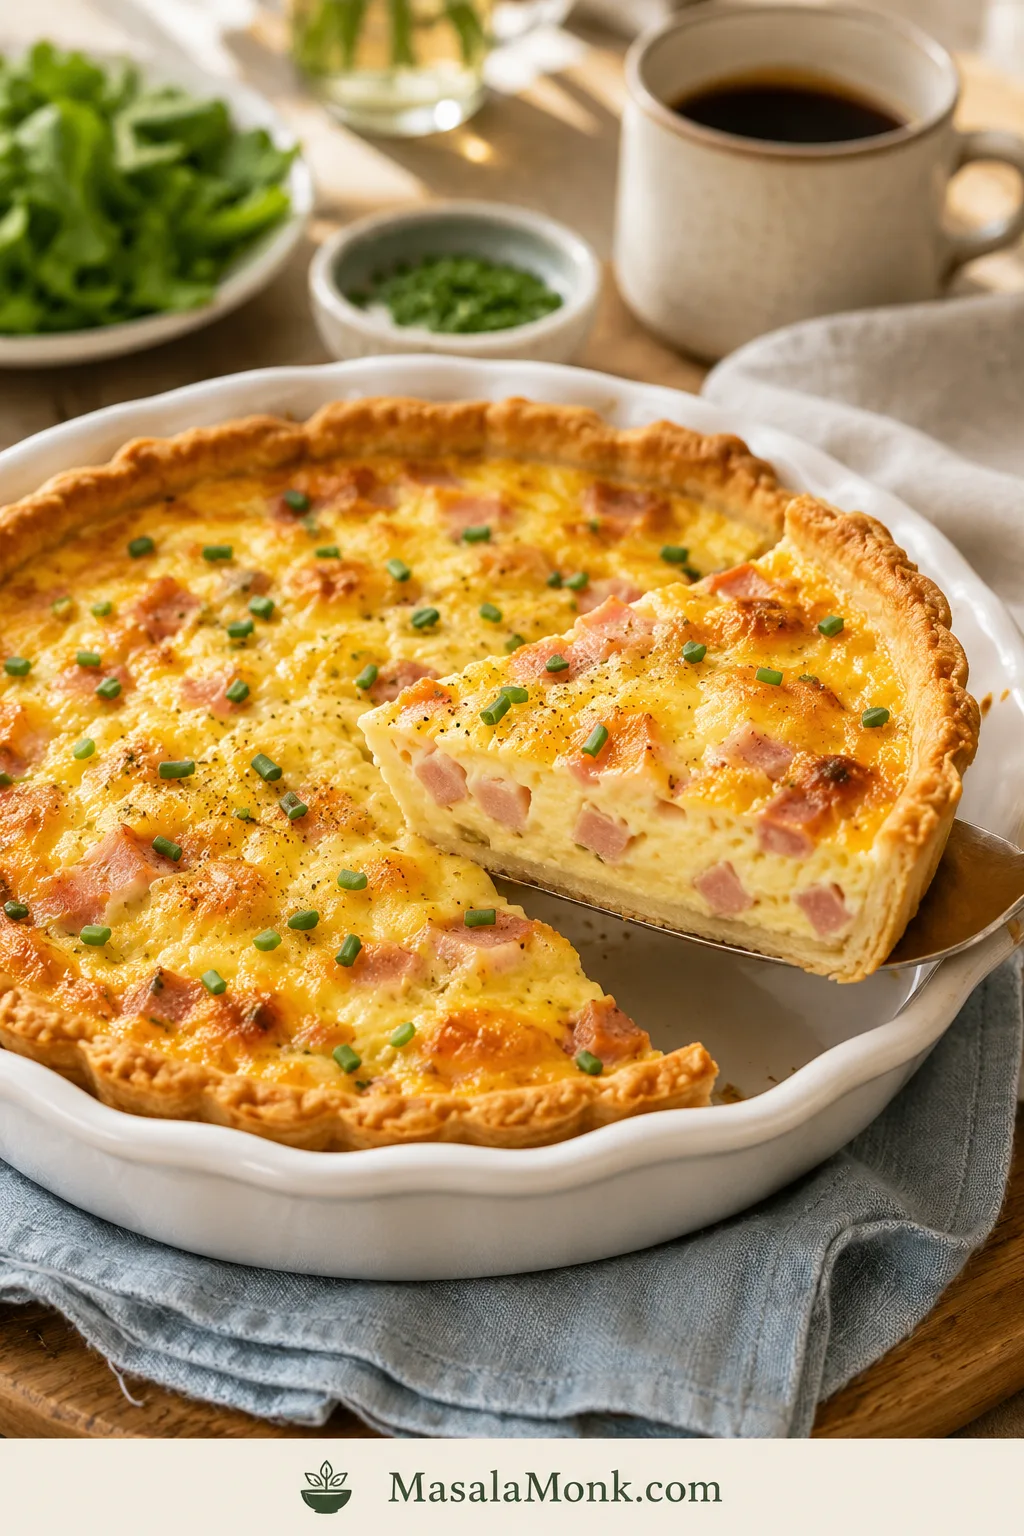
Whole ham and cheese quiche in a white ceramic pie dish with one slice lifted, showing golden crust, creamy custard, diced ham, melted cheese, and chives.

Ham and cheese quiche is what you make when brunch needs to feel special but you do not want to stand at the stove. It uses cooked ham, a simple egg custard, plenty of cheese, and a crust that can be homemade, refrigerated, frozen, or skipped completely.

The most satisfying bites have smoky ham, melted cheese, and soft custard against the flaky edge of the crust. This version is creamy without being loose, savory without being too salty, and practical enough for a holiday brunch, a quiet lunch, or a weeknight dinner with salad.

Close-up of a ham and cheese quiche slice on a white plate, with a fork cutting into the creamy custard and flaky crust.
A good slice should hold together but still look soft inside; that creamy custard is what keeps this from feeling like a firm egg bake.

This ham and cheese quiche is built for real kitchens: the kind with leftover holiday ham, a frozen crust in the freezer, or a bit of cheese that needs using. As long as the ham is cooked, diced small, and not wet, the recipe is flexible.

The base is simple: 5 large eggs, 1 cup dairy, 1½ cups diced ham, and 1½ cups cheese for one 9-inch / 23 cm quiche. That ratio keeps the center creamy but sliceable, so you do not end up with a stiff egg pie or a watery middle.

Start with the quick answer and recipe if you are ready to bake. The extra notes are there for frozen crusts, crustless baking, make-ahead timing, variations, and troubleshooting.

Quick Answer

For one 9-inch / 23 cm ham and cheese quiche, use 5 large eggs, 1 cup dairy, 1½ cups cooked diced ham, and 1½ cups shredded cheese. Par-bake the crust, fill it, bake at 375°F / 190°C until the edges are set and the center is soft-set, then rest for 10 minutes before slicing.

Quiche ElementUse This
Eggs5 large eggs
Dairy1 cup / 240 ml / 8 fl oz half-and-half, or cream + milk
Ham1½ cups / 200–225 g / 7–8 oz cooked diced ham, loosely measured
Cheese1½ cups / 150–170 g / 5–6 oz shredded cheese, loosely measured
Oven375°F / 190°C for a crusted quiche
Done whenEdges are set and the center is soft-set, not liquid

For a first bake, keep it simple: deep-dish frozen or refrigerated pie crust, half-and-half, 1 cup sharp cheddar, ½ cup Swiss, and diced cooked ham. Once you see how the center should wobble, the variations become much easier.

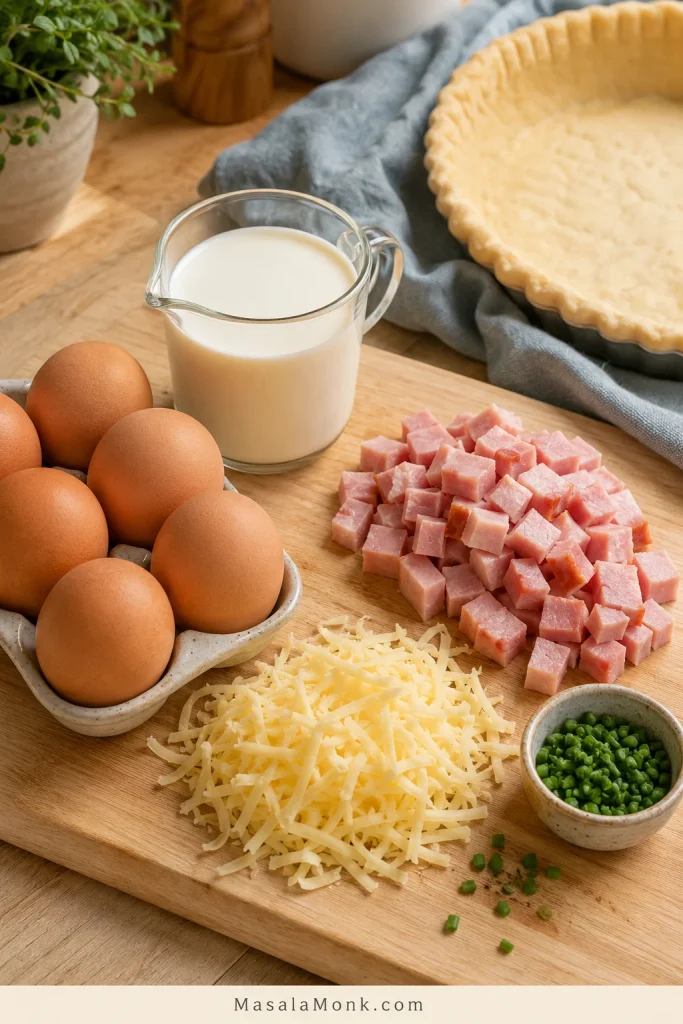
Eggs, dairy, diced cooked ham, shredded cheese, chopped chives, and a pie crust arranged on a kitchen prep surface.
Use the base as a balance check: eggs help the custard set, dairy keeps it tender, and ham and cheese make the filling generous without weighing it down.

Choose Your Ham and Cheese Quiche Path

Start with the same creamy base, then choose the version that fits your day: frozen crust for ease, crustless for meal prep, or extra vegetables when the fridge needs clearing.

If This Is Your SituationBest Path
You want the easiest brunchUse a deep-dish frozen crust, half-and-half, sharp cheddar, Swiss, and cooked diced ham.
You have leftover holiday hamDice it small, pat it dry if needed, reduce the salt, and balance sweet glaze with Dijon and black pepper.
You want no crustGrease the pie dish well and bake the same egg mixture at 350°F / 175°C until just set.
You want the creamiest textureUse half-and-half, or equal parts heavy cream and whole milk.
You are adding vegetablesCook, drain, and cool them before they touch the egg mixture.
You are meal-preppingBake the quiche first, cool it, slice it, then refrigerate or freeze the slices.

Ham and Cheese Quiche Recipe

Description

This easy quiche has a creamy egg custard, diced cooked ham, plenty of cheese, and a crisp-tender pie crust. Use a frozen deep-dish crust for the easiest version, or make it with homemade or refrigerated crust. Serve it for brunch, lunch, holidays, meal prep, or an easy dinner with salad.

Crustless note: For a no-crust version, use the same filling in a well-greased 9-inch / 23 cm pie dish and bake at 350°F / 175°C for 30–40 minutes. See the crustless ham and cheese quiche section for the full method.

  • Prep Time: 15 minutes
  • Par-Bake Time: 10–12 minutes
  • Final Bake Time: 35–45 minutes
  • Resting Time: 10 minutes
  • Total Time: About 1 hour 10 minutes to 1 hour 20 minutes
  • Servings: 6–8 slices

Equipment

  • 9-inch / 23 cm pie dish or 9-inch deep-dish frozen pie shell
  • Rimmed baking sheet
  • Mixing bowl
  • Whisk
  • Measuring cups and spoons
  • Fork
  • Foil or pie shield
  • Wire rack
  • Instant-read thermometer, optional

Ingredients

  • 1 9-inch / 23 cm deep-dish pie crust, homemade, refrigerated, or frozen
  • 5 large eggs
  • 1 cup / 240 ml / 8 fl oz half-and-half, or ½ cup / 120 ml heavy cream plus ½ cup / 120 ml whole milk
  • 1½ cups / 200–225 g / 7–8 oz cooked diced ham, measured loosely, not packed
  • 1½ cups / 150–170 g / 5–6 oz shredded cheese, measured loosely, not packed
  • 2–3 tablespoons chopped green onions or chives
  • 1 teaspoon Dijon mustard
  • ¼ teaspoon black pepper
  • ¼–½ teaspoon salt
  • Small pinch of nutmeg, optional
  • 1 tablespoon butter or oil, optional, if sautéing onion, mushrooms, spinach, or other vegetables

Use ¼ teaspoon salt if your ham or cheese is salty. Use ½ teaspoon only if your ham is mild and your cheese is not very salty.

Instructions

1. Preheat and Set Up

Heat the oven to 375°F / 190°C and set a rack in the middle or lower-middle position. Place the pie crust on a rimmed baking sheet so it is easier to move and any overflow is caught.

2. Par-Bake the Crust

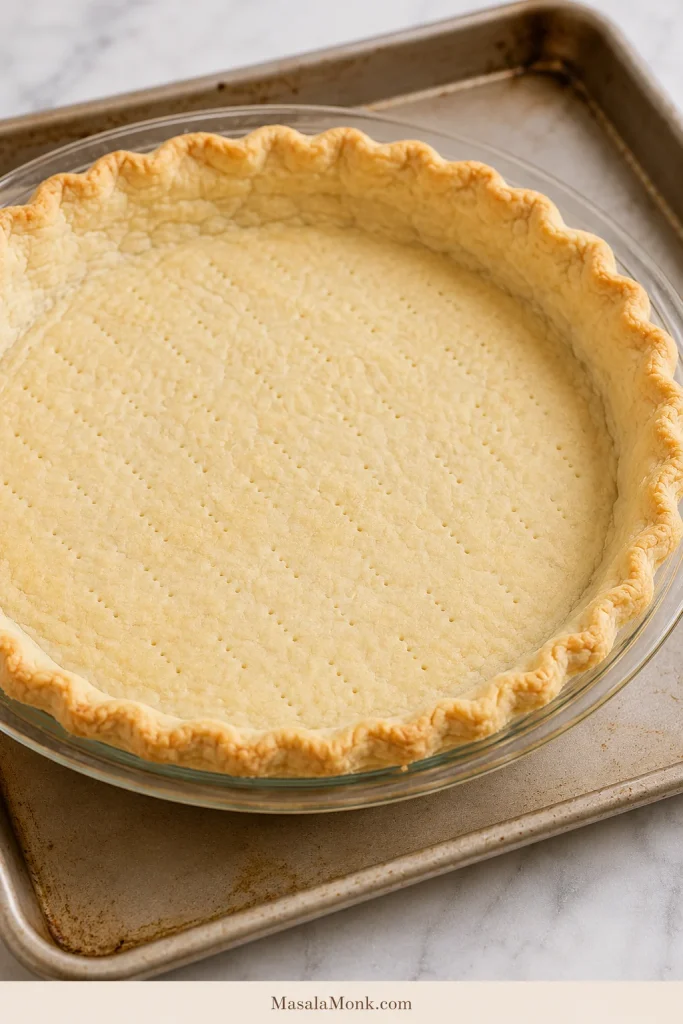
Give the crust a short head start for 10–12 minutes, or follow the package timing if using a frozen shell. The surface should look dry and lightly set, even if it is still pale. Gently press down any puffed spots with a spoon.

Lightly par-baked pie crust with fork holes in a pie dish on a rimmed baking sheet.
Par-bake the crust until the surface looks dry and lightly set; it should not be deeply browned yet because it bakes again with the custard.

3. Whisk the Custard

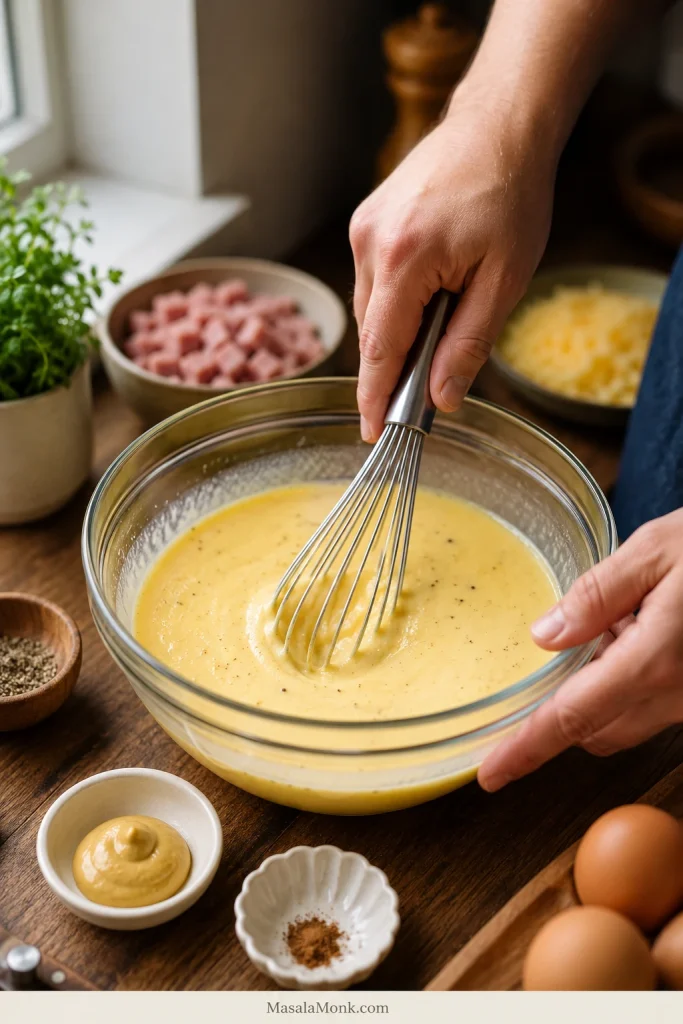
Combine the eggs, half-and-half, Dijon mustard, black pepper, salt, and nutmeg in a mixing bowl until the mixture looks smooth and evenly yellow. Stop once it is blended; the custard should not be bubbly or foamy.

Hands whisking a pale egg custard mixture in a glass bowl with dairy, Dijon mustard, pepper, and seasonings nearby.
Whisk the eggs and dairy just until smooth; a calm, even custard bakes more neatly than one whipped full of foam.

4. Layer the Ham, Cheese, and Chives

Scatter the diced ham evenly over the warm par-baked crust. Add the shredded cheese and green onions or chives so the filling is spread across the base before the custard goes in.

Diced ham, shredded cheese, and chopped chives spread evenly inside a par-baked pie crust.
Layer the ham, cheese, and chives before the custard goes in so every slice gets flavor throughout instead of one heavy layer at the bottom.

5. Pour Without Overfilling

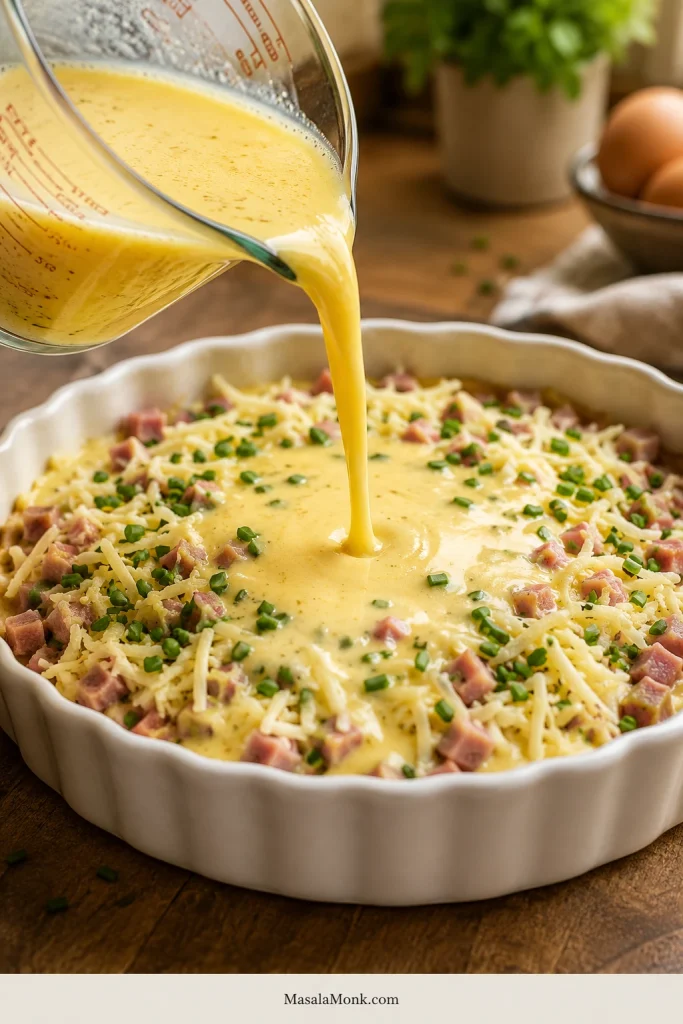
Add the egg mixture slowly over the ham and cheese so it can settle into the gaps. Stop before it touches the rim, especially if the crust is shallow. A clean oven is worth more than one extra spoonful.

Egg custard being poured from a glass measuring cup into a pie crust filled with ham, cheese, and chives.
Pour slowly so the custard settles between the ham and cheese; this helps the quiche bake evenly from the crust edge to the center.

A shallow crust may not hold every drop of custard. When the filling looks close to the top, save the extra for a greased ramekin instead of risking overflow.

Unbaked quiche filling sitting below the visible rim of a deep pie crust in a white ceramic dish.
Stop before the filling reaches the rim; leaving visible crust above the custard is one of the easiest ways to prevent overflow in a deep-dish quiche.

6. Bake Until Soft-Set

Slide the quiche into the oven for 35–45 minutes, until the edges are set and the center moves like soft-set pudding when you gently nudge the pan. Cover the crust edge with foil or a pie shield if it browns too quickly, and tent the whole quiche loosely if the top colors before the center is ready.

Whole baked ham and cheese quiche in a white ceramic pie dish resting on a wire cooling rack.
A softly puffed top, golden cheese spots, and a browned crust edge are better doneness clues than waiting for the center to look firm.

7. Rest Before Slicing

Set the quiche on a wire rack for 10 minutes before cutting. The center settles as it cools, which helps the slices lift cleanly instead of slumping.

8. Serve Warm or Room Temperature

Bring slices to the table warm or at room temperature for the creamiest texture. Chilled leftovers are fine for quick lunches, but the custard tastes better once the chill comes off.

A good slice should look softly set in the center, with ham and cheese suspended through the custard instead of sunk into one dense layer.

Slice of ham and cheese quiche lifted on a pie server, showing creamy custard, diced ham, melted cheese, and an intact bottom crust.
A clean cross-section shows the target texture: ham suspended through the custard, a tender middle, and a crust strong enough to lift.

Recipe Notes

  • This recipe card is for the crusted version. For crustless baking, use the crustless note above or jump to the crustless quiche section.
  • If using frozen crust, make it deep-dish. Regular frozen shells can work, but they often cannot hold all the filling; the frozen crust notes explain why.
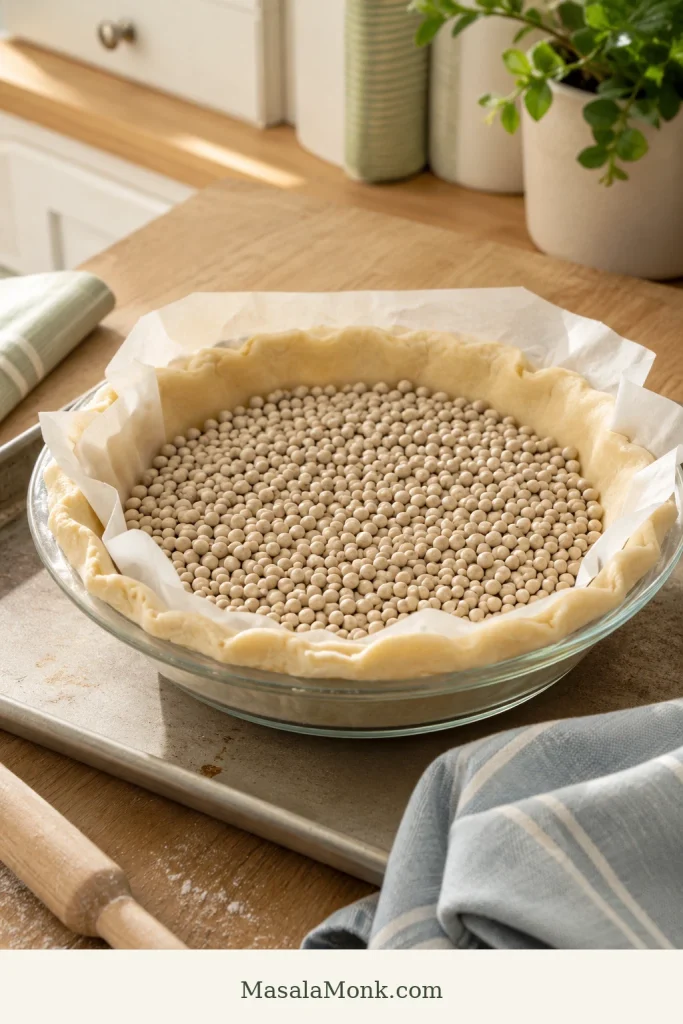
  • If using homemade or refrigerated pie dough, chill it in the dish, line it with parchment, add pie weights, dried beans, or uncooked rice, and par-bake until the edges begin to set. Frozen crusts can usually follow package directions.
  • Cook, drain, and cool vegetables before adding them so they do not throw off the texture.
  • Do not overfill a shallow crust. Extra egg mixture can be baked in a small greased ramekin.

Why This Recipe Works

That ratio does most of the work here: 5 large eggs + 1 cup dairy + 1½ cups ham + 1½ cups cheese. Five eggs give the slice structure, one cup of dairy keeps the center soft instead of omelet-like, and the ham and cheese stay generous without weighing down the custard.

The goal is a slice that lifts cleanly but still tastes soft and creamy, with little pockets of ham and melted cheese all the way through.

A short head start in the oven also protects the crust. It keeps the bottom from turning pale and soft once the wet custard goes in, and it helps you avoid the usual quiche problems: too much liquid, wet add-ins, a soft bottom crust, and eggs baked until rubbery.

Ingredients and Key Tips

Quiche is forgiving, but it is not random. Once you control moisture, salt, and bake time, the rest becomes flexible.

Ham

Almost any cooked ham works here: leftover holiday ham, ham steak, smoked ham, or thick-cut deli ham. Dice it small so it spreads evenly through the custard.

This is especially useful after a holiday meal, Sunday dinner, or any time you have cooked ham in the fridge. The ham is already seasoned and ready to help; you are not building brunch from nothing, just giving leftovers a better second life.

For deli ham, choose thicker slices and dice them small. Watery packages need a quick blot before the ham goes into the crust because extra moisture can affect the custard just like wet vegetables can.

Salty ham needs less salt in the egg mixture. You can always add a little salt at the table, but you cannot remove it once it is baked into the dish.

With sweet glazed ham, trim away any thick sticky edges before dicing. A little sweetness is fine, but too much glaze can make the quiche taste sweeter and more casserole-like than classic ham quiche. Dijon mustard, black pepper, cheddar, Swiss, or Gruyère will help balance it.

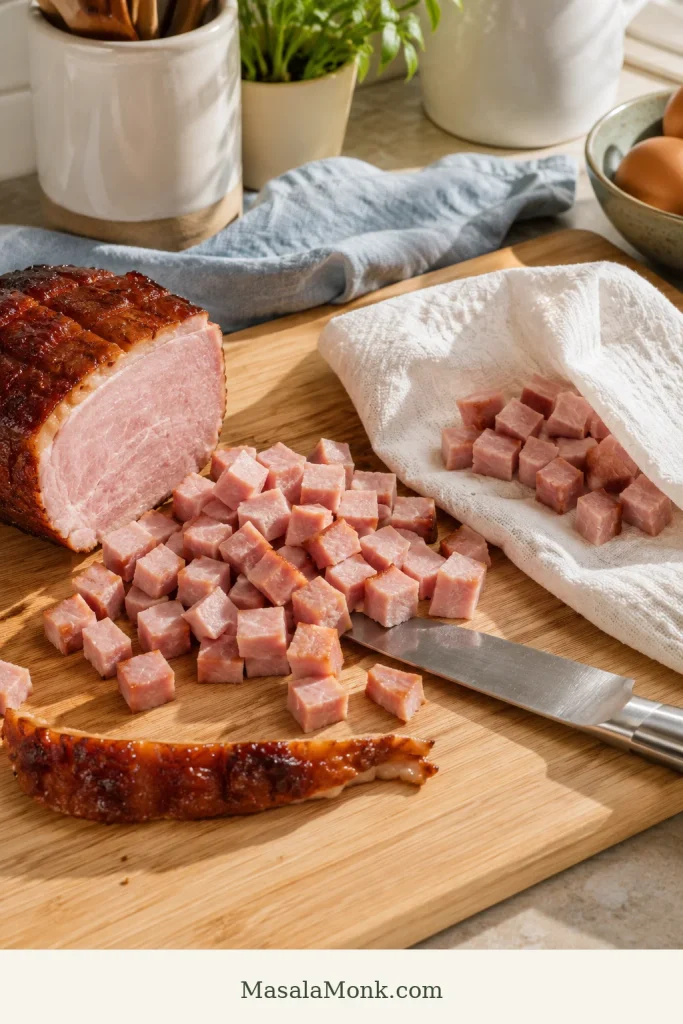
Diced cooked ham on a wooden cutting board with a towel blotting some pieces and a glazed ham edge being trimmed.
Blot wet ham before adding it; this small step helps prevent watery quiche, especially with deli ham or glazed leftovers.

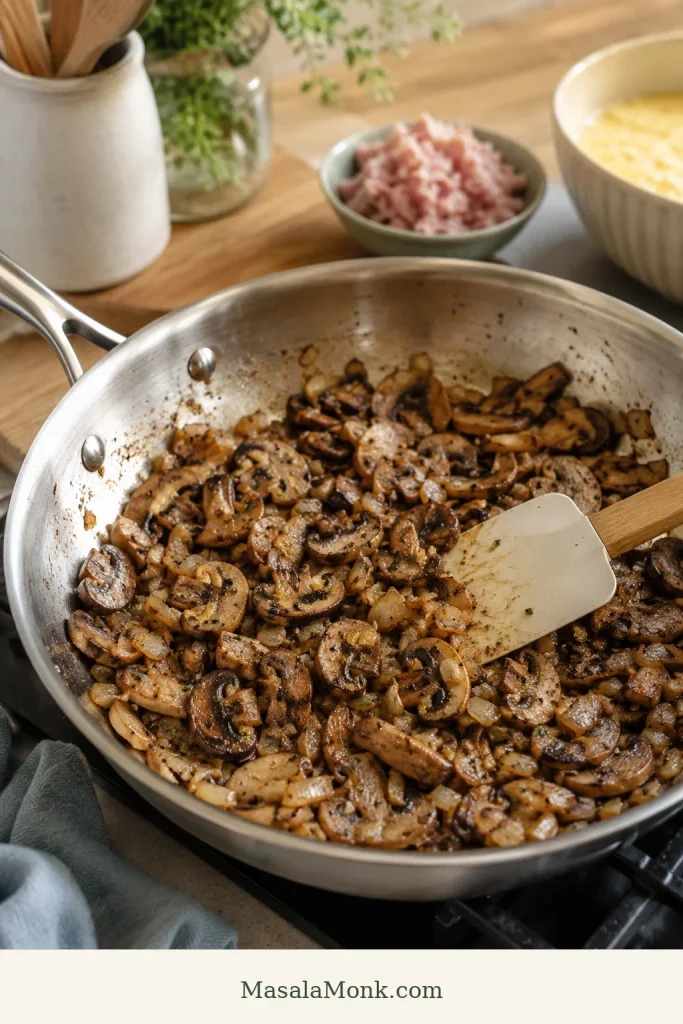
Brown the ham if it is pale, wet, or mild. Skip this step if the ham is already smoky, dry, or strongly flavored. A quick 2–3 minutes in a dry skillet or a little butter gives the edges more savory flavor.

Eggs

Five eggs is the sweet spot for this size: enough structure to slice, but not so many that the center turns firm and omelet-like.

Dairy

For the creamiest everyday texture, half-and-half gives you the easiest balance. If half-and-half is not available where you live, use equal parts heavy cream and whole milk.

Whole milk also works for a lighter quiche. The center will be less rich, but it will still set if you keep the egg-to-dairy ratio steady.

Cheese

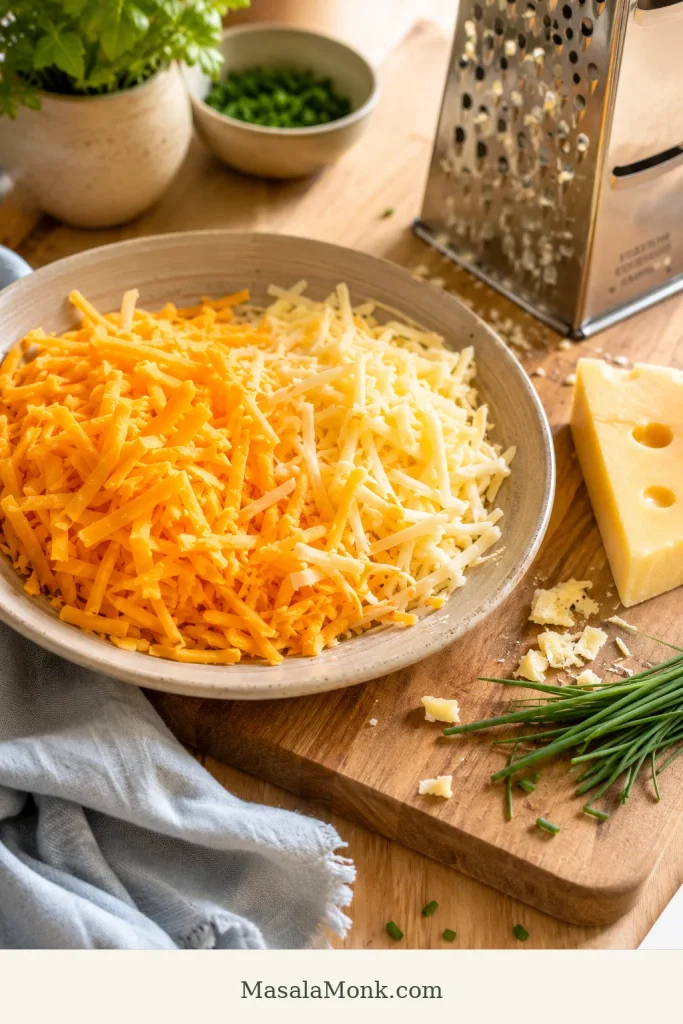
For cheese, stay with something that actually has flavor. Sharp cheddar gives the quiche that familiar melted ham-and-cheese pull, Swiss is mild and classic, and Gruyère makes the dish feel more brunch-table polished.

Measure shredded cheese loosely, not packed tightly into the cup. Too much cheese can make the quiche greasy, salty, or heavy. Freshly shredded cheese melts most smoothly, but pre-shredded cheese is fine when convenience matters.

Avoid fresh mozzarella unless it is very well drained. It can release water into the custard. Low-moisture mozzarella is safer, but it is mild, so it works better as part of a blend than as the main cheese.

Green Onions, Chives, Onion, or Garlic

Green onions and chives are the easiest because they can go straight into the egg mixture. If using yellow onion, shallot, or garlic, sauté them first so the flavor softens before baking.

Dijon, Pepper, and Nutmeg

Dijon mustard adds gentle sharpness without making the quiche taste mustardy. Black pepper keeps the custard from tasting flat. A tiny pinch of nutmeg is optional, but it works beautifully with eggs, cream, cheese, and ham.

Before You Bake, Check These 5 Things

If you remember only three things, par-bake the crust, control wet add-ins, and pull the quiche before the center turns firm. If the center still makes you nervous, the doneness cues below explain the wobble, resting time, and thermometer range.

  • The crust is par-baked and lightly set.
  • The ham is diced small and patted dry if it feels wet.
  • Any vegetables are cooked, drained, and cooled slightly.
  • The cheese and ham are measured loosely, not packed down.
  • The egg mixture sits below the rim of the crust.

Best Crust, Dairy, and Cheese Choices

This is where you can make the recipe fit your kitchen. Frozen crust, homemade crust, cream, milk, cheddar, Swiss, or Gruyère can all work — the goal is to keep the custard balanced and the crust from going soft.

Using a Frozen Pie Crust

If you are using a frozen crust, you are not cheating; you are making brunch easier. Choose a 9-inch deep-dish frozen crust if you can. Regular frozen shells can work, but they often cannot hold all the filling.

Keep the crust in its tin if it comes that way, place it on a rimmed baking sheet, prick the base lightly, and par-bake for 10–12 minutes before filling. Do not worry if it is not deeply browned after the first bake. It will go back into the oven with the custard.

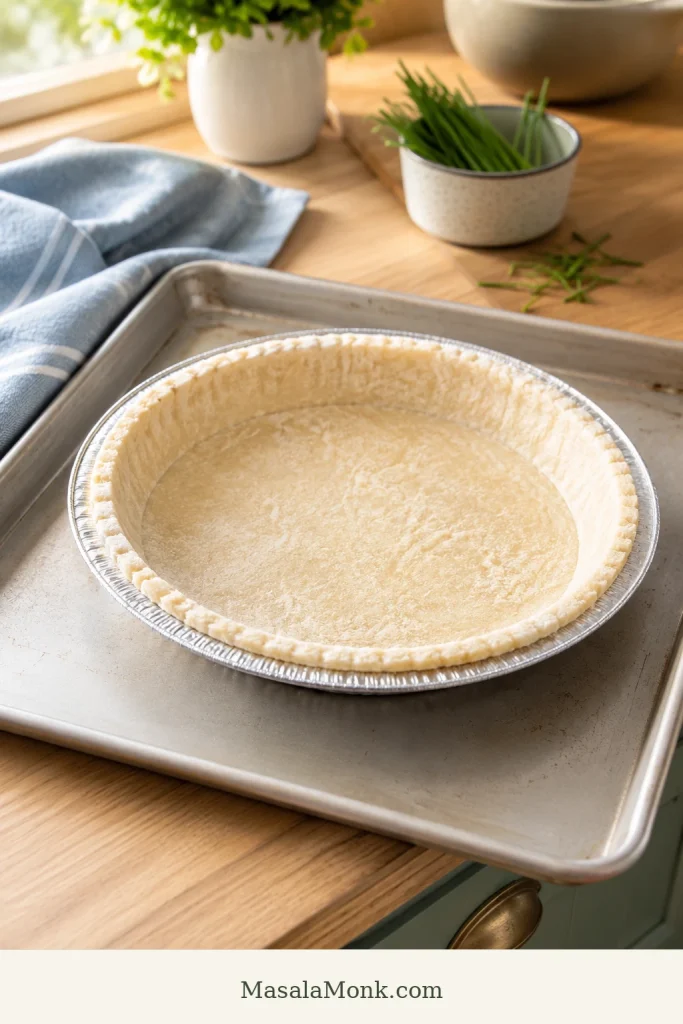
Deep-dish frozen pie crust in a foil tin set on a rimmed baking sheet on a kitchen counter.
A deep-dish frozen pie crust makes frozen crust quiche easier because it gives the egg custard enough room and helps reduce spillover.

Homemade or Regular Pie Crust

Not every 9-inch crust holds the same amount of custard. A regular 9-inch crust can still work, but you may not need every drop of the egg mixture.

If using homemade pie dough, chill it in the dish before blind baking. Line it with parchment, fill with pie weights, dried beans, or uncooked rice, and bake until the edges begin to set before removing the weights.

Pie crust lined with parchment paper and filled with pie weights in a glass pie dish.
With homemade or refrigerated dough, blind-baking with parchment and pie weights helps the crust hold its shape before the wet filling goes in.

Do not fill the crust all the way to the rim. Quiche can puff as it bakes. If you have extra egg mixture, bake it in a small greased ramekin instead of forcing it into the crust.

What Dairy Makes the Creamiest Texture?

The dairy is where you can quietly change the whole personality of the quiche. Cream makes it rich, milk makes it lighter, and half-and-half sits comfortably in the middle.

DairyTexture and FlavorGood Use
Heavy creamRichest, softest, most custardySpecial brunch or holiday quiche
Half-and-halfCreamy but not too heavyEveryday choice
Whole milkLighter and less richLighter quiche that still sets
Low-fat milkLess creamy and slightly less forgivingUse only if you accept a lighter texture
½ cream + ½ whole milkRich and balancedEasy substitute for half-and-half

If you do not have half-and-half, use ½ cup / 120 ml heavy cream + ½ cup / 120 ml whole milk. To make the quiche without heavy cream, use 1 cup / 240 ml whole milk.

Cheddar, Swiss, or Gruyère?

Ham needs cheese with enough flavor to stand up to it. Sharp cheddar gives bold, familiar flavor. Swiss gives a mild, nutty, classic brunch taste. Gruyère makes the custard richer and deeper.

For an everyday version, use 1 cup sharp cheddar + ½ cup Swiss. For a richer brunch version, use 1 cup Gruyère + ½ cup cheddar or Swiss. A little Parmesan can also be added for salty, nutty depth, but use it lightly.

Shredded cheddar and pale Swiss or Gruyère cheese on a board with a grater and chopped chives nearby.
Sharp cheddar with Swiss or Gruyère gives ham quiche familiar melt plus a more brunch-ready finish.

Bake Time, Doneness, and Visual Cues

For a crusted quiche, use 375°F / 190°C for 35–45 minutes. A shallow quiche may finish closer to 35 minutes, while a deep-dish or vegetable-heavy one may need closer to 45–50 minutes.

Use 350°F / 175°C for the crustless version or a very deep filling. Save 400°F / 200°C mainly for par-baking crust or quick browning, not for the full custard bake.

Visual Doneness Cues

  • After par-baking: the crust should look dry and lightly set, not deeply browned.
  • After whisking: the egg mixture should look smooth and lightly yellow, not frothy.
  • Before baking: the egg mixture should sit below the rim, with a little breathing room.
  • Near the end: the top may puff slightly and turn golden in spots.
  • When done: the center should move like soft-set pudding, not ripple like raw liquid.
  • After resting: the center should look calmer, and the slice should hold when lifted.

If the crust browns too quickly, cover the edges with foil or a pie shield and keep baking until the center is set. If the top browns before the center is ready, tent the whole quiche loosely with foil.

The first time you bake quiche, the wobble can feel wrong. It is not. The quiche is done when the edges are puffed and set, the center is soft-set but not liquid, and the top is lightly golden in places.

Thermometer and Resting Cues

If using a thermometer, the center should reach at least 160°F / 71°C for egg safety. For a tender, sliceable quiche, start checking around 165°F / 74°C and avoid pushing far past 185°F / 85°C. Carryover heat and resting time will help the center finish setting.

Instant-read thermometer inserted into the center of a baked ham and cheese quiche in a white ceramic pie dish.
A thermometer gives extra confidence with quiche doneness: the center should be safe and set without baking until the eggs turn rubbery.

If you are unsure, give the quiche a few more minutes of rest before cutting rather than putting it back into the oven too quickly. Resting often fixes a soft-looking center; overbaking does not.

Whole baked ham and cheese quiche resting on a wire rack with a knife and pie server nearby.
Let the quiche rest before slicing; this pause helps the center settle so the slices lift cleaner and taste creamier.

Crustless Ham and Cheese Quiche and Easy Variations

Once the base is steady, this quiche is easy to bend toward the day: crusted for brunch, crustless for meal prep, mini for parties or lunchboxes.

If You Want…Do This
Classic ham and cheese quicheUse cheddar + Swiss in a par-baked crust
Richer brunch quicheUse Gruyère and a cream + milk mixture
Lighter quicheUse whole milk instead of cream or half-and-half
Crustless quicheGrease the dish well and bake at 350°F / 175°C
Vegetable quicheCook and cool vegetables before adding them
Mini quichesUse muffin tins and fill each cup about ¾ full
Leftover ham quicheDice ham small and reduce added salt if needed

Crustless Ham and Cheese Quiche

The crustless version is not just the fallback. It is the faster, lighter version for meal prep or for anyone skipping pastry.

To make it crustless, skip the pie crust and bake the egg mixture in a well-greased 9-inch / 23 cm pie dish. Use the same base: 5 eggs, 1 cup / 240 ml dairy, 1½ cups ham, 1½ cups cheese, Dijon, pepper, and herbs.

Bake at 350°F / 175°C for 30–40 minutes, or until the center is just set. The crustless version is softer than the crusted version, so let it rest for at least 10 minutes before slicing.

Crustless ham and cheese quiche in a white baking dish with one wedge removed, showing set custard, ham, cheese, and chives.
The lighter crustless ham and cheese quiche uses the same creamy filling but bakes directly in a greased dish.

For another no-crust egg bake, the frittata recipe is the skillet-style route; for muffin-tin meal prep, use the egg muffins recipe.

Ham and Swiss Quiche

Ham and Swiss quiche has a mild, nutty, classic brunch flavor. Use Swiss for all or part of the cheese. A good blend is 1 cup Swiss + ½ cup sharp cheddar. Dijon mustard and chives work especially well with this version.

Ham and Spinach Quiche

For ham and spinach quiche, use either 1 cup cooked fresh spinach or ½ cup frozen spinach that has been thawed and squeezed very dry. Spinach pairs well with Swiss, Gruyère, cheddar, feta, or goat cheese.

Wet spinach is not a small issue. It can make the center watery, even if the egg ratio is right.

Ham and spinach quiche with a wedge cut out, showing spinach ribbons, diced ham, creamy custard, and golden crust.
Cook or squeeze spinach dry before making ham and spinach quiche; the greens should add color and flavor, not extra water.

Broccoli Ham and Cheese Quiche

For broccoli ham quiche, use 1 cup small broccoli florets. Steam, blanch, microwave, or sauté them first, then drain well and chop small. Sharp cheddar is the easiest pairing, but Swiss or Gruyère also work.

Slice of broccoli ham and cheese quiche on a plate with visible broccoli florets, diced ham, creamy custard, and crust.
Small cooked broccoli florets keep broccoli ham and cheese quiche tender, balanced, and easy to cut.

Mushroom, Onion, Asparagus, and Other Add-Ins

Add-ins are where a good quiche can go watery, so treat them before they reach the crust. A few minutes in a skillet can save the whole dish.

Add-InAmountPrep
Mushrooms¾–1 cup slicedSauté until the moisture evaporates
Onion or shallot¼–½ cup choppedSauté until softened
Asparagus¾–1 cup choppedBlanch or sauté if thick
Bell pepper½ cup dicedSauté for better texture
TomatoSmall amountRemove seeds and excess moisture

Let cooked vegetables cool for a few minutes before adding them. Hot add-ins can start setting the eggs unevenly before the dish even reaches the oven.

Sautéed mushrooms and onions in a skillet with a spatula, browned and cooked down with no pooled liquid.
Sauté mushrooms and onions until their moisture cooks off; this is a simple fix for watery quiche.

Mini Ham and Cheese Quiche

Mini ham and cheese quiches are best when you want party bites, brunch trays, lunchboxes, or freezer-friendly portions. Use the same egg mixture, but cut the ham and add-ins smaller so each bite gets ham, cheese, and custard. For leftovers, use the make-ahead, storage, and reheating cues below.

The full filling usually makes about 10–12 regular muffin-size mini quiches or 24–30 mini muffin-size bites, depending on how much crust and add-ins you use.

  • Regular muffin tin: bake at 350°F / 175°C for 18–25 minutes.
  • Mini muffin tin: bake at 350°F / 175°C for 14–20 minutes.
  • With crust: press small pie crust or puff pastry rounds into greased cups before filling.
  • Without crust: grease the tin very well or use silicone liners.
  • Filling level: fill each cup about ¾ full so the egg mixture has room to puff.

Let mini quiches cool for 5 minutes before loosening them with a small knife. They freeze well after baking; reheat from chilled or thawed in a 325°F / 160°C oven until warmed through.

Mini ham and cheese quiches with small golden pastry crusts baked in a muffin tin, with a few placed on a nearby plate.
Party-size mini ham and cheese quiches work best with small pastry crusts, visible ham, and room for the custard to puff.

Other Shortcut Variations

Puff pastry works well for mini quiches and party bites. Crescent dough gives a softer, breadier crust. A Bisquick-style ham and cheese bake is closer to an impossible pie than a classic quiche, so it is better treated as a separate recipe rather than a small swap.

For an old-fashioned ham and cheese quiche, keep it simple: pie crust, cooked ham, cheddar and Swiss, half-and-half, green onions or chives, and black pepper.

Make Ahead, Storage, and Reheating

Quiche is one of the rare egg dishes that actually likes being made ahead. It can rest, settle, reheat, and still taste good when everyone finally reaches the table.

This is also why quiche works so well for hosting: it gives you something generous to serve without asking you to cook every egg to order. When the timing is sorted, jump to what to serve with it for plate ideas.

For a crisper crust, do not pour the raw egg mixture into the shell many hours before baking. The crust can absorb moisture and soften before it ever reaches the oven. If you want to prep ahead, par-bake the crust, dice the ham, shred the cheese, cook any vegetables, and keep the egg mixture separate until baking.

For safety, cooked egg dishes should not sit at room temperature for more than 2 hours; the FDA gives the same basic egg-safety guidance.

Fridge

Let the quiche cool completely, then cover it and refrigerate for 3–4 days, whole or in slices. That timing lines up with USDA leftover food safety guidance.

Freezer

Quiche freezes more cleanly after baking. Cool it completely, wrap it tightly, and freeze it whole or sliced for up to 2 months for the creamiest texture.

The crust may soften slightly after freezing, but reheating in the oven helps bring it back. If freezing slices, wrap them individually or place parchment between them so they do not stick together.

For a freezer breakfast that reheats faster than quiche, MasalaMonk’s breakfast burrito recipe is the better handheld option.

Reheating

For a better texture, reheat slices in a 325°F / 160°C oven until warmed through. Reheat loosely covered with foil, then uncover for the last few minutes if the crust needs crisping.

The microwave works for individual slices when speed matters, but it will soften the crust. If reheating from frozen, thaw overnight in the refrigerator first.

Slices of ham and cheese quiche stored in clear containers with one slice on a parchment-lined reheating tray.
Make-ahead ham and cheese quiche slices store well once cooled; reheat them in the oven or toaster oven when you want the crust to stay crisp.

What to Serve with Ham and Cheese Quiche

The quiche already brings richness, salt, and comfort. The best sides simply make the plate feel fresher. A crisp salad or fresh fruit keeps each creamy, salty bite from feeling heavy.

Plated slice of ham and cheese quiche served with greens, cucumber slices, tomatoes, fruit, and coffee on a brunch table.
Serve the rich quiche with fruit, greens, cucumber, or coffee so the creamy, salty slices feel balanced.

How to Avoid Watery, Soggy, or Rubbery Quiche

When quiche goes wrong, it usually gives you clues. A watery middle, soggy bottom, rubbery texture, or salty bite can almost always be traced back to moisture, timing, salt, or overfilling — not to quiche being difficult.

Once you know what the center should look like, quiche stops feeling mysterious.

ProblemMost Likely CauseFix Next Time
Watery centerWet vegetables, watery ham, too much dairy, or underbakingCook and drain add-ins, keep the ratio steady, and rest before slicing
Soggy crustCrust not par-baked or custard sat in crust too longPar-bake first and assemble close to baking
Rubbery textureOverbakingPull while the center is still soft-set
Too saltySalty ham and cheese plus full added saltUse ¼ teaspoon salt or less with salty ham
OverflowShallow crust or filling too close to rimUse deep-dish crust and stop below the rim

The 3 Biggest Quiche Mistakes

  • Skipping the par-bake: this is the fastest path to a soft bottom crust.
  • Adding wet ingredients: watery ham, spinach, mushrooms, and tomatoes can loosen the custard.
  • Baking until fully firm: pull it while the center is still soft-set, then let it rest.

Why is my quiche watery?

Watery quiche is almost always a moisture or timing problem. The usual culprits are wet spinach, raw mushrooms, watery ham, too much dairy, underbaking, or slicing before the center has had time to settle.

  • Cook and drain vegetables before adding them.
  • Squeeze spinach very dry.
  • Pat wet ham dry.
  • Use the 5 eggs to 1 cup dairy ratio.
  • Bake until the center is just set.
  • Rest for 10 minutes before slicing.

Why is my crust soggy?

A soggy crust usually means the crust was not par-baked, the egg mixture sat in the crust too long before baking, or wet ingredients released moisture into the bottom. Par-bake the crust, cook and drain vegetables, and avoid assembling the raw custard in the crust too far ahead.

Lifted slice of ham and cheese quiche showing a clean, firm bottom crust, creamy custard, diced ham, melted cheese, and golden edge.
The best no-soggy-bottom proof is underneath: the crust should look firm enough to lift, not pale, wet, or collapsed.

Why is my quiche rubbery?

Rubbery quiche is usually overbaked. Eggs become firm and tough when they cook too long. Remove the quiche when the center still has a gentle wobble. It will finish setting as it rests.

Why did the center not set?

The center may not set if the quiche is very deep, the oven temperature is too low, the mixture has too much liquid, or it simply needs more time. Cover the crust edges with foil if needed and continue baking until the center no longer looks liquid.

Why is it too salty?

Ham and cheese both bring salt. If your ham is salty, use less salt in the egg mixture. Dijon, black pepper, green onions, chives, and a small amount of cream can help balance the flavor without adding more salt.
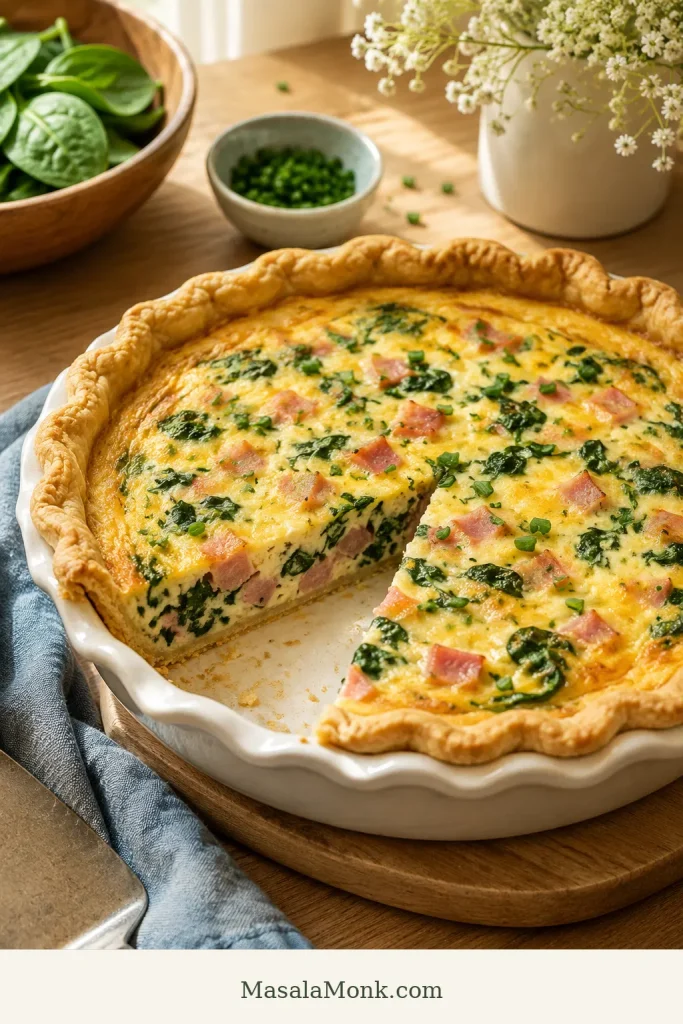

Why did it overflow?

The crust may have been too shallow or filled too close to the top. Use a deep-dish crust when possible, stop before the egg mixture reaches the rim, and always bake the quiche on a rimmed baking sheet.

FAQs

Does ham and cheese quiche work without crust?

Yes. Grease a 9-inch / 23 cm pie dish, add the filling, and bake at 350°F / 175°C for 30–40 minutes. Rest before slicing so the center can settle.

Milk instead of cream: will the quiche still set?

Yes. Whole milk works. Keep it to 1 cup / 240 ml so the center still slices cleanly. It will taste lighter than a cream version, but it will still be a proper, sliceable quiche.

Best substitute for half-and-half

Use ½ cup / 120 ml heavy cream plus ½ cup / 120 ml whole milk. You can also use 1 cup / 240 ml whole milk for a lighter version.

Best cheese for ham quiche

Sharp cheddar gives bold flavor, Swiss gives a classic ham quiche taste, and Gruyère makes it richer. A cheddar-Swiss blend is the easiest everyday choice.

Frozen pie crust: deep-dish or regular?

Deep-dish is better because regular frozen shells may not hold all the filling. Par-bake the crust first, place it on a rimmed baking sheet, and avoid overfilling it.

Spinach in quiche: fresh, frozen, cooked, or raw?

Fresh spinach should be wilted first, and frozen spinach should be thawed and squeezed very dry. Raw or wet spinach can make the quiche watery.

Make-ahead quiche: bake first or assemble later?

Bake it first for the easiest make-ahead plan. To prep parts ahead, keep the par-baked crust, cooked add-ins, cheese, ham, and egg mixture separate until baking.

Freezing ham and cheese quiche: whole or sliced?

Both work. Bake it first, cool it completely, then freeze it whole or in slices. Slices are easier for quick meals. Thaw overnight in the refrigerator and reheat in the oven for the best texture.

Doneness cues for creamy, sliceable quiche

The edges should be set, and the center should look soft-set, not liquid. A gentle wobble is okay. If using a thermometer, the center should reach at least 160°F / 71°C.

Watery quiche: what went wrong?

Quiche usually turns watery because of wet vegetables, watery ham, too much dairy, underbaking, or slicing too soon. Cook and drain add-ins, use the right egg-to-dairy ratio, and rest it before slicing.

Is ham and cheese quiche the same as quiche Lorraine?

Not exactly. Quiche Lorraine is traditionally made with bacon or lardons and a savory custard. Ham and cheese quiche has a similar creamy egg base, but uses cooked ham and usually includes cheese like cheddar, Swiss, or Gruyère.

Final Thoughts

Once the ratio makes sense, this stops feeling like a recipe you have to follow tightly and starts feeling like a brunch formula you can use. Cooked ham after a holiday, spinach from the fridge, cheddar one week, Swiss the next, crusted for brunch, crustless for meal prep — it all works as long as the base stays steady.

That is the kind of recipe worth keeping: calm, flexible, and good enough for both leftover ham and a proper brunch table. Slice it warm, serve it with something crisp or fresh, and let the ham, cheese, custard, and flaky crust do the quiet work.

If you make it, start with the cheddar-Swiss version once, then tell me where you took it: crustless, extra herbs, leftover holiday ham, spinach, broccoli, or a different cheese blend.

Posted on — Leave a comment

Stir Fry Sauce Recipe: One Sauce for Chicken, Beef, Tofu, Vegetables & Noodles

Finished chicken stir-fry with broccoli, bell peppers, carrots, mushrooms, rice, and a small jar of brown stir fry sauce in the background.

A stir-fry can look perfect in the pan and still taste disappointing if the sauce is off. Use too little, and dinner feels dry. Pour too much, and the vegetables turn watery. Go too salty, and you lose the freshness. Let it get too sweet, and everything starts tasting bottled.

The short version: mix one jar, add it near the end, and use about 1 cup for a family-size stir-fry so dinner turns glossy, not watery.

This homemade stir fry sauce is built around a simple MasalaMonk rule: salt, loosen, brighten, round, aroma, cling. Soy sauce gives the savory base, water or broth keeps it balanced, vinegar brightens it, honey or brown sugar rounds it, garlic-ginger-sesame bring aroma, and cornstarch helps it cling to the food instead of pooling at the bottom of the pan.

It takes about five minutes to mix and works with chicken, beef, tofu, shrimp, vegetables, noodles, rice bowls, and those tired weeknight dinners where the fridge has a few vegetables, a protein, and no clear plan.

This is the sauce to keep in your back pocket: flexible enough for whatever is in the pan, reliable enough to make a random skillet taste like a real dinner, and easy enough to adjust lighter, deeper, sweeter, spicier, lower-sodium, vegan, keto-friendly, gluten-free, or soy-free.

Quick Answer: What Is Stir Fry Sauce Made Of?

A basic stir fry sauce is made with soy sauce, water or broth, rice vinegar, honey or brown sugar, toasted sesame oil, garlic, ginger, and cornstarch. Whisk everything together, add it near the end of cooking, and let it bubble for 30 to 60 seconds until it turns glossy and coats the food.

For most stir-fries, use about ¾ to 1 cup sauce for 1 lb / 450 g protein plus vegetables. Use less for fried rice, more for noodles, and slightly less if your vegetables release a lot of water.

If you have ever poured sauce into a stir-fry and watched it turn thin, salty, or soupy, the problem was probably not you. It was usually timing, pan moisture, or too much sauce for the amount of food in the pan.

Need a specific fix? Jump to how much sauce to use, when to add it, or how to fix watery stir-fry sauce.

What the sauce texture should look like

Before the sauce ever hits the pan, check the texture. It should be thin enough to pour, but balanced enough to turn shiny and cling once heated.

Close-up of glossy brown stir fry sauce coating a spoon, with visible bits of garlic, chili, sesame, and scallion.
Use the spoon as a quick texture check: the sauce should pour easily, but still leave a shiny coating behind. That is the texture that helps it cling in the pan.

Recipe at a Glance

Prep time:
5 minutes
Cook time:
No cooking until added to the pan
Yield:
About 1 cup / 250 ml
Servings:
1 family-size stir-fry / about 4 portions
Best for:
Chicken, beef, tofu, vegetables, noodles, rice bowls
Flavor:
Savory, lightly sweet, garlicky, gingery
Make-ahead:
5–7 days in the fridge
Main cue:
Add near the end; stop when shiny and coating

Easy Homemade Stir-Fry Sauce

This is the all-purpose version to start with. It is balanced enough for chicken, beef, tofu, vegetables, noodles, and rice bowls, but simple enough to mix before the pan is even hot.

All-Purpose Stir Fry Sauce

Prep: 5 minutes
Cook: no-cook sauce; 1–3 minutes in pan
Yield: about 1 cup / 250 ml
Serves: 1 family-size stir-fry / about 4 portions

Equipment

No special equipment is needed. A small bowl or jar, a whisk or fork, measuring spoons, and a hot wok or large skillet are enough.

Best For

Chicken, beef, tofu, shrimp, vegetables, noodles, rice bowls, and quick weeknight stir-fries.

Not Best For

It is not meant for deep-frying or as a thick dip straight from the jar. This sauce shines when it hits hot food in the pan and has a minute to thicken.

Ingredients

  • ½ cup / 120 ml water or low-sodium broth
  • ⅓ cup / 80 ml low-sodium soy sauce
  • 1 tablespoon / 15 ml rice vinegar
  • 1 tablespoon honey or brown sugar, about 20 g honey or 12–13 g sugar
  • 2 teaspoons / 10 ml toasted sesame oil
  • 2 garlic cloves, grated or very finely minced
  • 2 teaspoons fresh ginger, grated
  • 1 tablespoon cornstarch / cornflour (the white thickening starch), about 8 g
  • ¼ to ½ teaspoon red pepper flakes, chili garlic sauce, or sriracha, optional

Instructions

  1. Add the water or broth, soy sauce, rice vinegar, honey or brown sugar, sesame oil, garlic, ginger, cornstarch, and chili if using to a bowl or jar.
  2. Whisk well, or close the jar and shake until the cornstarch is fully dissolved.
  3. Use immediately, or refrigerate in an airtight jar.
  4. Shake or whisk again before using because the cornstarch settles as the sauce sits.
  5. Add near the end of stir-frying, after the protein and vegetables are mostly cooked.
  6. Let it bubble for 30 to 60 seconds, tossing until it turns shiny and coats the food.

Recipe Notes

  • Use low-sodium soy sauce for the best balance. Regular soy sauce can become too salty once reduced.
  • Use broth instead of water when you want a deeper sauce for chicken or beef.
  • For a brighter sauce, add 1 extra teaspoon rice vinegar at the end.
  • For a saucier rice bowl, add 2 to 4 tablespoons extra water or broth when the sauce hits the pan.
  • Do not pour it into a pan full of watery vegetables. Cook off extra moisture first.
  • If using this as a marinade, leave out the cornstarch. Cornstarch is for thickening in the hot pan; in a marinade, it can settle, clump, or make the surface pasty.
  • Yes, you can double the recipe. Double all ingredients, store in a larger jar, and shake well before each use.
  • It is also a good meal-prep sauce. Keep a jar in the fridge, and you are halfway to a stir-fry before the pan is even hot.

Why a jar of sauce makes stir-fry easier

A mixed sauce jar turns stir-fry into assembly cooking. With the flavor base ready, you can focus on heat, sequence, and not overcrowding the pan.

Clear glass jar of brown homemade stir fry sauce on a counter with garlic, ginger, scallions, soy sauce, and sesame oil nearby.
Because the sauce is mixed before cooking, weeknight stir-fries move faster. Keep it in a jar, then shake before using so the cornstarch blends back into the sauce.

Stir fry sauce ingredients before you mix

Keep the ingredients measured before cooking starts. Stir-fries move quickly, so the sauce should be ready before the wok or skillet gets hot.

Overhead flat-lay of stir fry sauce ingredients including soy sauce, broth, rice vinegar, honey, sesame oil, garlic, ginger, cornstarch, chili, and scallions.
The ingredient list is short, but each part matters: soy sauce brings salt, vinegar brightens, sweetener rounds, aromatics wake it up, and cornstarch helps it finish properly.

Mix the sauce before the pan gets hot

Whisk or shake until the cornstarch disappears into the liquid. That prevents last-minute measuring and gives the thickener time to disperse evenly.

Hand whisking brown homemade stir fry sauce in a ceramic bowl, with a wok of vegetables in the background and garlic, ginger, chili, scallions, and sesame nearby.
Mix the sauce before the pan gets hot. Then, once the protein and vegetables are ready, you can add it quickly instead of overcooking dinner while you measure.

Before you pour it into the pan: check how much sauce to use and when to add it so the stir-fry turns glossy instead of soupy.

The first time this sauce really clicks is when you stop treating it like a separate recipe and start treating it like a dinner shortcut. A jar in the fridge means chicken, tofu, broccoli, mushrooms, noodles, or leftover rice can turn into something that feels planned — as long as you use the right amount.

Timing cue: Mix the sauce before the pan gets hot. The protein should be cooked, the vegetables should be crisp-tender, and the pan should be hot but not swimming in liquid before the sauce goes in.

The MasalaMonk Stir-Fry Sauce Rule

A good stir-fry sauce is not just soy sauce plus thickener. It needs balance. Once you understand what each part is doing, you can adjust the sauce without guessing.

The six-part sauce rule

Use this as the control panel for the recipe. If dinner tastes off, fix the missing role instead of adding random ingredients.

Educational graphic showing a bowl of stir fry sauce and the MasalaMonk stir-fry sauce rule: salt, loosen, brighten, round, aroma, and cling, with ingredient examples around the bowl.
This is the control system for the whole recipe: salt, loosen, brighten, round, aroma, and cling. Once you understand those six jobs, you can fix the sauce without guessing.
Balance Part Ingredient Job in the Sauce
Salt Soy sauce, tamari, coconut aminos Creates the savory base.
Loosen Water or broth Keeps the sauce from becoming too salty or heavy.
Brighten Rice vinegar, lime juice Cuts through richness and keeps the flavor awake.
Round Honey, brown sugar, maple syrup Softens salt, acid, and heat.
Aroma Garlic, ginger, toasted sesame oil Makes the sauce smell fresh instead of flat.
Cling Cornstarch, arrowroot, xanthan gum Helps the sauce coat the food instead of pooling.

That is the real trick. The recipe gives you the base, but this rule tells you how to fix it. Too salty? Loosen. Too flat? Brighten. Too sharp? Round. Too thin? Help it cling. Too bottled? Add aroma.

Using the rule to fix dinner? If the sauce tastes too salty, too flat, too thin, or too sweet, jump to the troubleshooting table.

How Much Stir Fry Sauce to Use

This is the part most recipes skip, and it is also the part that saves dinner. The same sauce can taste perfect or overwhelming depending on how much food is in the pan.

If your stir-fries usually taste either dry or soupy, use the table first, then check the image cue that matches what you are cooking.

What You Are Cooking How Much Sauce to Use What to Watch
1 lb / 450 g chicken + vegetables ¾ to 1 cup Use the full cup if serving over rice and you want extra sauce.
1 lb / 450 g beef + vegetables ⅔ to 1 cup Beef can handle a deeper, slightly stronger sauce.
14 oz / 400 g tofu + vegetables About ⅔ cup Use a slightly thicker sauce so it clings to crisp tofu.
4 cups vegetables only About ½ cup Use less if the vegetables release water.
6 cups vegetables + 1 lb protein About 1 cup This is the classic family-size stir-fry amount.
200 g fresh noodles or 100 g dried noodles + add-ins ⅔ to 1 cup Noodles absorb sauce quickly; add water or broth if needed.
Fried rice-style stir fry 3 to 5 tablespoons Too much sauce makes rice wet and soft.
Very saucy takeout-style stir fry 1 cup plus 2 to 4 tablespoons water or broth Best when serving over plain rice.

How much sauce to use for chicken stir-fry

For chicken and vegetables, start with ¾ cup if the pan is modest and go up to 1 cup when you want extra sauce for plain rice.

Cooked chicken pieces, mixed vegetables, and a measuring cup of brown stir fry sauce with text reading “Chicken + vegetables” and “Use ¾–1 cup sauce.”
Chicken and vegetables usually need ¾ to 1 cup sauce for a family-size pan. Use the higher end when serving over plain rice, where a little extra sauce is useful.

How much sauce to use for tofu stir-fry

Tofu works better with restraint. Too much sauce softens the crisp edges before they can hold flavor.

Crisp golden tofu cubes with broccoli, peppers, snap peas, carrots, and a measuring cup of sauce, with text reading “Tofu + vegetables” and “Use about ⅔ cup sauce.”
Tofu needs enough sauce to cling to its crisp edges, but not so much that the pan floods. About ⅔ cup is a good starting point for tofu and vegetables.

How much sauce to use for vegetables

Vegetables release moisture as they cook, so a smaller amount of sauce often looks light at first but finishes better after bubbling.

Colorful vegetable stir-fry with broccoli, peppers, carrots, mushrooms, snap peas, zucchini, and a measuring cup of sauce, with text reading “Vegetables only” and “Use about ½ cup sauce.”
Vegetable-only stir-fries need restraint because the vegetables release water as they cook. Start with about ½ cup, then add more only after the sauce thickens.

How much sauce to use for noodles

Noodles absorb sauce quickly. Keep water or broth nearby so you can loosen the pan without adding more salt or sweetness.

Glossy noodle stir-fry being lifted with tongs, with chicken, broccoli, peppers, and a measuring cup of sauce labeled “Noodles” and “Use ⅔–1 cup sauce.”
Noodles absorb sauce as they sit, so keep the finish flexible. Start with ⅔ to 1 cup sauce, then loosen with a splash of water if the noodles tighten up.

How much sauce to use for fried rice

Fried rice needs seasoning, not a full stir-fry sauce pour. Start with a few tablespoons, toss, taste, and stop before the grains clump.

Pan of fried rice with vegetables, egg, scallions, and a tablespoon of sauce, with text reading “Fried rice,” “Use only 3–5 tbsp,” and “Seasoned, not wet.”
Fried rice is seasoned, not sauced. Use only 3 to 5 tablespoons so the grains stay separate instead of turning wet and clumpy.

Amount rule: Start lower if your pan is crowded, your vegetables are watery, or your noodles are already soft. You can always add more sauce after it thickens; you cannot easily remove extra once the pan turns soupy.

When to Add the Sauce

Add it near the end of cooking, not at the beginning. The sauce is there to coat and finish the food, not to boil the vegetables or stew the protein.

The stir-fry order before sauce goes in

The pan should be hot, the protein mostly cooked, and excess vegetable moisture reduced before the sauce goes in.

  1. Heat the wok or large skillet first. A hot pan helps food sear instead of steam.
  2. Cook the protein. Chicken, beef, shrimp, pork, or tofu need direct heat before sauce.
  3. Remove the protein if needed. This prevents overcooking while vegetables finish.
  4. Cook firm vegetables first. Broccoli and carrots need more time than bok choy leaves or peppers.
  5. Cook off extra moisture. A watery pan dilutes the sauce.
  6. Return the protein and shake the sauce. Cornstarch settles, so mix it again.
  7. Add the sauce and toss for 30 to 60 seconds. Stop when it thickens and finishes the pan.
Brown stir fry sauce being poured from a jar into a wok of mostly cooked chicken, broccoli, carrots, peppers, snap peas, and scallions.
Add the sauce near the end, not at the beginning. The food should already be mostly cooked, so the sauce only needs a short bubble to thicken and coat.

Cloudy to glossy: what the sauce should do in the pan

In the pan, the sauce often starts cloudy because the cornstarch is just beginning to hydrate. Once it bubbles around the edges, it should turn clearer, darker, and shinier.

Wok of chicken and vegetables with cloudy brown sauce bubbling around the food and text reading “Cloudy at first is normal.”
At first, cornstarch sauce can look cloudy in the pan. Give it 30 to 60 seconds of bubbling, and it should turn clearer, shinier, and more clingy.

Stop when the sauce turns glossy

The stop point is short and visual: the sauce tightens, the food looks coated, and the vegetables still look bright. Keep cooking after that and the flavor can turn too salty.

Close-up of glossy chicken stir-fry with broccoli, carrots, red peppers, mushrooms, scallions, and sauce clinging to the food, with small text reading “Stop when glossy.”
This is the stop point: the sauce has tightened, the food looks coated, and the vegetables still look bright. Keep cooking much longer and the sauce can turn too salty.

Glossy, not soupy: the final texture cue

The goal is glossy, not soupy — coated, not drowned. If sauce sits under the food instead of clinging to it, the pan probably has too much liquid.

Comparison image with one side showing a stir-fry in too much liquid and the other side showing a coated stir-fry, with text reading “Glossy, not soupy,” “Coated, not drowned,” “Too much liquid,” and “Just enough sauce.”
The difference is liquid control. Too much stir-fry sauce drowns the pan; just enough coats the food and keeps the vegetables crisp-looking.

Good stir-frying is mostly prep, heat, and sequence. Serious Eats explains those stir-frying basics in depth, but for this sauce the main thing is simple: mix it first and add it near the end.

If you need rice underneath your stir-fry, MasalaMonk’s how to cook rice guide is useful when you want fluffy rice that can hold sauce without turning mushy.

Why This Recipe Works

Why each ingredient has a job

This recipe works because each ingredient solves a specific sauce problem. Use the roles below when you need to adjust taste, thickness, or balance.

Ingredient-role graphic with labeled bowls showing soy sauce as savory base, water or broth as balance, vinegar as brightness, honey as roundness, garlic and ginger as aroma, and cornstarch as cling.
When a sauce tastes off, fix the role that is missing. Add broth to loosen, vinegar to brighten, honey or sugar to round, garlic and ginger for aroma, or cornstarch for cling.

This sauce is simple, but it is not random. Soy sauce brings salt and savory depth, while water or broth keeps it from becoming too intense. Rice vinegar adds brightness, and honey or brown sugar rounds the sharp edges so the sauce tastes balanced instead of harsh.

Garlic and ginger give the sauce its classic stir-fry aroma. Toasted sesame oil adds a warm nutty finish. Cornstarch is what changes the sauce from thin liquid into a shiny coating in the hot pan.

The goal is not a heavy glaze. The goal is a thin mixture that thickens in the hot pan, grabs onto the food, and leaves everything tasting seasoned but still fresh.

When it is right, you should smell the garlic and ginger first, see the sauce turn from cloudy to shiny, and still taste the freshness of the vegetables underneath. The sauce should make the food feel finished, not hidden.

Ingredients and Substitutions

Think of this section as permission to adjust. The sauce does not fall apart if you swap broth for water, honey for maple syrup, or tamari for soy sauce. You just need to keep the balance: salt, loosen, brighten, round, aroma, and cling.

Cooking for a specific need? Jump to gluten-free, soy-free, vegan, lower-sodium, and keto variations.

Soy Sauce

Low-sodium soy sauce is the best default. Regular soy sauce can work, but it becomes stronger as it reduces. If you only have regular soy sauce, use ¼ cup instead of ⅓ cup, then add 1 to 2 extra tablespoons water or broth.

For gluten-free sauce, use certified gluten-free tamari, certified gluten-free soy sauce, or coconut aminos. For a soy-free style version, coconut aminos are usually the easiest starting point, but they are sweeter and less salty than soy sauce, so reduce the sweetener and taste at the end.

Water or Broth

Water keeps the flavor clean and light. Broth gives more depth. Chicken broth works well with chicken, beef broth gives beef stir-fries a deeper base, and vegetable broth keeps tofu or vegetable stir-fries flexible. Low-sodium broth is best because the soy sauce already brings salt.

Honey or Brown Sugar

A little sweetness balances the saltiness of soy sauce and the sharpness of vinegar. Honey gives a smooth feel. Brown sugar gives deeper flavor. Maple syrup works well for a vegan version.

For the base sauce, keep the sweetener modest. This is a balanced weeknight sauce, not a sticky glaze. If you want something sweeter, use the honey soy variation below.

Rice Vinegar

Rice vinegar keeps the sauce bright. Apple cider vinegar can work in a pinch. Lime juice also works, especially for a Thai-inspired version, but it changes the flavor and makes the sauce sharper.

Garlic and Ginger

Fresh garlic and ginger make the sauce taste more alive. Grating them helps them disappear into the mixture and spread evenly through the pan.

Close-up of fresh ginger being grated beside minced garlic on a wooden cutting board, with garlic cloves and a small bowl in the background.
Fresh garlic and ginger do more than add flavor; they make the sauce smell freshly cooked instead of bottled. Grating them helps that aroma spread quickly through the stir-fry.

If you need to use powders, replace 2 garlic cloves with about ½ teaspoon garlic powder, and replace 2 teaspoons fresh ginger with about ½ to ¾ teaspoon ground ginger. The sauce will still work, but fresh gives better aroma.

Toasted Sesame Oil

Use toasted sesame oil for flavor, not as the main cooking oil. Two teaspoons are enough to make the sauce taste warm and nutty without overpowering the garlic and ginger.

Cornstarch / Cornflour

Cornstarch thickens the sauce and gives it that takeout-style finish. It must be mixed into cold or room-temperature liquid before heating. If dry cornstarch hits hot liquid directly, it can clump.

Bowl of brown stir fry sauce being whisked with visible text reading “Whisk cornstarch cold first” and “No clumps in the pan.”
Cornstarch works best when it is whisked into cool liquid first. That small step prevents clumps and helps the sauce turn smooth when it bubbles.

It also settles when the sauce sits, so always shake or whisk before adding it to the pan.

Can you make it without cornstarch? Yes, but it will be thinner. You can simmer it slightly longer, use arrowroot for some gluten-free or grain-free versions, or use a tiny amount of xanthan gum for keto sauce. Cornstarch is still the easiest everyday thickener.

How to Use This Sauce for Different Stir-Fries

Once the base is mixed, the rest is about matching the sauce to the food. Chicken wants balance. Beef can take depth. Tofu needs cling. Vegetables need restraint. Noodles need room to move.

For Chicken

Chicken is mild, so the sauce should stay balanced rather than too salty or too sweet. The base recipe works as written, especially if you use broth instead of water.

For 1 lb / 450 g chicken plus vegetables, ¾ to 1 cup is usually right. Go closer to the full cup if you are serving it over rice and want a little extra sauce to catch underneath.

The main danger with chicken is not the sauce; it is overcooking the chicken while waiting for the sauce to thicken. Keep the final simmer short.

Good vegetables for chicken include broccoli, bell peppers, carrots, snap peas, green beans, mushrooms, cabbage, bok choy, zucchini, and onions.

Chicken stir-fry being served from a wok onto rice, with broccoli, carrots, peppers, mushrooms, peas, and glossy brown sauce.
This is the chicken use-case: tender pieces, crisp vegetables, and enough sauce to catch on the rice without turning the bowl soupy.

For Beef

Beef likes a darker, more savory sauce. Start by swapping water for broth. Oyster sauce gives the quickest savory boost, Shaoxing wine or dry sherry adds restaurant-style depth, white pepper brings quiet warmth, and a small splash of dark soy sauce gives color if you have it.

You do not need every add-in at once. Even one or two — broth, oyster sauce, or white pepper — can make the sauce taste deeper.

For 1 lb / 450 g beef plus vegetables, ⅔ to 1 cup works well. Beef can carry a stronger sauce, especially with broccoli, mushrooms, green beans, or rice underneath.

Slice beef thinly across the grain and cook it quickly over high heat. Add the sauce only after the beef and vegetables are mostly cooked, then toss just long enough for everything to thicken and coat.

Beef stir-fry with thin beef slices, broccoli, mushrooms, red peppers, green beans, scallions, sesame seeds, and glossy dark brown sauce.
For beef, lean deeper and more savory. A darker brown sauce works well with mushrooms, broccoli, peppers, and thin slices of tender beef.

For Tofu

Tofu needs the sauce to cling, not slide off. If the tofu is not browned first, it can taste bland even when the sauce itself tastes good.

A 14 oz / 400 g block of tofu plus vegetables usually needs about ⅔ cup. More than that can flood the pan before the tofu has a chance to hold the flavor.

Press firm or extra-firm tofu, cut it into cubes or slabs, and pat it dry before it hits the pan. A dry surface browns better, and browned tofu holds sauce better.

Golden tofu cubes in a wok with broccoli, bell peppers, snap peas, mushrooms, scallions, sesame seeds, and glossy brown sauce.
Brown the tofu first so the sauce has something to hold onto. Crisp edges make tofu taste more seasoned and keep the sauce from sliding off.

For a lower-carb tofu dinner idea, MasalaMonk’s tofu and broccoli stir-fry with cauliflower rice is a natural fit, especially when you want a high-protein meal without noodles or regular rice.

For a vegan tofu stir-fry, use vegetable broth and maple syrup or sugar instead of honey. If you want deeper savory flavor, add mushroom powder or a little dried-shiitake soaking liquid.

For Vegetables

Vegetables are sneaky. They look dry when they first hit the pan, then suddenly release enough water to thin the whole sauce. That is why vegetable stir-fries need less sauce and a hotter pan.

Four cups of vegetables usually need only about ½ cup sauce. That may look modest, but vegetables release their own moisture as they cook.

Mushrooms and zucchini are the biggest water releasers here. Give them space, use higher heat, and wait until their moisture cooks off before adding the sauce.

Cook firm vegetables first: broccoli, carrots, cauliflower, green beans, cabbage stems. Add softer vegetables later: bell peppers, mushrooms, zucchini, bok choy leaves, snap peas, and scallions.

Colorful vegetable-only stir-fry with broccoli, red and yellow peppers, carrots, mushrooms, snap peas, zucchini, scallions, and a light glossy sauce.
A vegetable stir-fry should still look fresh after saucing. Keep the coating light so the broccoli, peppers, carrots, mushrooms, and snap peas stay colorful.

For Noodles and Rice

Noodles drink sauce quickly, so they need a looser finish. For noodles, use ⅔ to 1 cup sauce for about 200 g fresh noodles or 100 g dried noodles, plus your protein and vegetables. Start lower if the noodles are already soft or oily; add a splash of water or broth if they drink up the sauce too quickly.

If cooked noodles are clumped before they go into the pan, loosen them first with a splash of water or oil. Sauce cannot coat noodles evenly if they enter the pan as one sticky block.

Chopsticks lifting glossy stir-fried noodles from a wok with vegetables, tofu or chicken pieces, scallions, and brown sauce.
Noodle stir-fry is ready when the strands separate and shine instead of clumping together. If the pan feels tight, add a splash of water and toss briefly.

For fried rice-style cooking, use much less. Start with 3 to 5 tablespoons. Too much liquid makes rice wet and heavy. Cold cooked rice works better than freshly cooked hot rice because it is drier and separates more easily in the pan.

If you like saucy rice-bowl dinners, use the full cup in the stir-fry and serve it over plain rice. For fried rice, season gradually.

For a takeout-style egg dish with a glossy sauce, MasalaMonk’s egg foo young recipe is a useful companion because it also leans on a savory sauce that thickens and coats.

Back to top ↑

Easy Sauce Variations

You do not need every variation today. Make the base sauce first. Come back to this section when you want it sweeter, spicier, darker, lower-sodium, vegan, gluten-free, keto-friendly, or soy-free.

Choose the sauce direction that fits dinner

Use the base recipe as your starting point, then nudge it sweeter, hotter, darker, or looser depending on what is in the pan.

Three labeled bowls of stir fry sauce showing Honey Soy, Spicy, and Dark Takeout-Style variations with honey, chilies, mushrooms, ginger, and scallions nearby.
Once the base sauce works, choose the direction that fits dinner: honey soy for shine, spicy for heat, or dark takeout-style for a deeper brown sauce.
If You Want Change This Best For
Balanced everyday sauce Use the base recipe as written. Chicken, tofu, vegetables, rice bowls
Sweeter honey soy Increase honey to 2 tablespoons. Chicken, shrimp, tofu, noodles
Darker takeout-style sauce Use broth, oyster sauce, Shaoxing wine, and white pepper. Beef, broccoli, mushrooms, cabbage
Spicy sauce Add chili garlic sauce, sriracha, chili crisp, or fresh chilies. Chicken, shrimp, tofu, noodles
Noodle-friendly sauce Keep it looser with extra water or broth. Fresh noodles, dried noodles, rice noodles
Soy-free style Use coconut aminos and reduce the sweetener. Tofu, vegetables, chicken, rice bowls

Pick the version closest to tonight’s dinner, then adjust from there. Chicken and noodles may want sweeter or looser; beef may want darker; vegetables usually want restraint.

If you find a version that works especially well — extra ginger, chili crisp, coconut aminos, mushroom broth, less sweetener, or something completely your own — leave it in the comments so another reader can borrow the idea.

3 Ingredient Stir Fry Sauce

A 3 ingredient version is useful when you need something fast and do not have the full list of ingredients. Mix soy sauce, honey or brown sugar, and a cornstarch slurry. It works in a pinch, but the full sauce tastes more balanced because it includes acid, aromatics, sesame oil, and a proper loosened base.

Chinese Takeout-Style Brown Sauce Variation

For a deeper, darker, more takeout-style sauce, start by swapping water for broth. Oyster sauce brings the quickest savory boost, Shaoxing wine or dry sherry adds restaurant-style depth, white pepper brings quiet warmth, and a small splash of dark soy sauce gives color if you have it. Reduce the honey or brown sugar slightly so the sauce stays savory.

Vegetarian cooks can use mushroom sauce instead of oyster sauce. For a vegan version, skip oyster sauce and use mushroom powder, shiitake soaking liquid, or a vegan mushroom stir-fry sauce.

Honey Soy Stir Fry Sauce

The honey soy version is sweeter and shinier: increase the honey to 2 tablespoons. It works especially well with chicken, shrimp, salmon, tofu, broccoli, carrots, bell peppers, and noodles. If it tastes too sweet, balance it with rice vinegar, lime juice, chili flakes, or a little more soy sauce.

Spicy Stir Fry Sauce

To make it spicy, add red pepper flakes, chili garlic sauce, sriracha, gochujang, chili crisp, or fresh chopped chilies to the base recipe. Start small. Spicy sauce tastes better when it still has balance: salt, sweetness, acid, garlic, ginger, and heat.

Thai-Inspired Quick Stir-Fry Sauce

This is not a replacement for a specific Thai dish sauce. It is a quick direction for weeknight stir-fries when you want the flavor to lean brighter, sharper, and more chili-forward. Replace some rice vinegar with lime juice, add a little fish sauce if you are not vegetarian, reduce the soy sauce slightly, and keep the garlic and chili strong.

If you want a full Thai basil stir-fry, MasalaMonk’s Pad Kra Pao recipe goes deeper into that sharper, basil-heavy sauce style.

Teriyaki-Style Stir Fry Sauce

For a teriyaki-style version, make the sauce sweeter and shinier. Increase the sweetener, use a little more ginger, and let it reduce until it looks lightly glazed. Use this when you want a sweeter rice-bowl style dinner rather than a lighter vegetable stir-fry. For a dedicated sweeter glaze, see MasalaMonk’s teriyaki sauce recipe.

Diet and Substitution Variations

These versions are not here to make the sauce feel restricted. They are here so the same jar can still work when someone at the table needs less sodium, no gluten, no soy, no animal products, or no sugar.

Use this section like a shortcut: lower-sodium if salt is the problem, gluten-free if wheat is the problem, soy-free if soy itself is the problem, and keto if sugar or starch is the problem.

Easy stir fry sauce swaps that are not interchangeable

The labels matter here. Gluten-free, soy-free, vegan, and lower-sodium changes solve different problems, so choose the swap that matches the actual need.

Ingredient-swap guide for stir fry sauce with visible labels for gluten-free tamari or coconut aminos, soy-free coconut aminos, vegan maple syrup and vegetable broth, and lower-sodium dilute and taste.
Substitution labels matter. Tamari can help with gluten-free stir fry sauce, but it is usually soy-based; coconut aminos are the better soy-free starting point.

Lower-Sodium Version

A lower-sodium version needs more than just low-sodium soy sauce. Low-sodium soy sauce still contains sodium, and the sauce can become saltier as it reduces. Reduce the soy sauce first, increase water or unsalted broth, and build flavor with garlic, ginger, vinegar, chili, scallions, mushrooms, and sesame aroma.

Do not add salt until the stir-fry is finished and tasted. If you are cooking for a strict sodium limit, use label numbers rather than taste alone.

Keto / Sugar-Free Version

For a keto or sugar-free version, skip the honey or brown sugar and use a keto-friendly sweetener only if needed. Cornstarch is not ideal for strict keto. Use up to ⅛ teaspoon xanthan gum for 1 cup sauce, starting with a smaller pinch if your brand thickens aggressively.

Xanthan gum does not behave like cornstarch: cornstarch thickens as it cooks, while xanthan gum thickens as it hydrates. Whisk well, wait a minute, and add more only if you really need it. A sauce can go from glossy to gummy quickly.

Vegan Version

To make it vegan, use vegetable broth and maple syrup or sugar instead of honey. Avoid oyster sauce, fish sauce, chicken broth, chicken bouillon, and non-vegan bottled sauces. For deeper savory flavor, add mushroom powder, finely minced mushrooms, or a little dried-shiitake soaking liquid.

If you are building more plant-forward meals around tofu, tempeh, edamame, lentils, or beans, MasalaMonk’s plant-based protein sources guide can help you choose what to pair with the sauce.

Gluten-Free Version

Regular soy sauce often contains wheat, so it is not always gluten-free. Use certified gluten-free tamari, certified gluten-free soy sauce, or coconut aminos. Also check the labels on broth, oyster sauce, hoisin sauce, chili garlic sauce, and bottled sauces because gluten can appear in places you may not expect.

No Soy Sauce vs Soy-Free vs Gluten-Free

These terms sound similar, but they are not interchangeable. That matters when you are cooking for allergies, gluten-free needs, or someone who is avoiding soy completely. For a broader look at tamari, coconut aminos, and liquid aminos, EatingWell’s guide to soy sauce substitutes is a helpful reference.

Phrase What It Actually Means What to Watch
Without soy sauce The recipe does not use soy sauce. It may still contain soy from hoisin, oyster-style sauces, or other condiments.
Soy-free No soy ingredients at all. Check every label carefully.
Gluten-free No wheat/gluten ingredients. Tamari may be gluten-free but still contains soy.
Coconut aminos A common soy-free and gluten-free substitute for soy sauce. Usually sweeter and less salty, so reduce sweetener.
Liquid aminos A savory soy-sauce-like seasoning. Many versions are soy-based and can still be high in sodium; check the label.

Without Soy Sauce

A sauce without soy sauce is not always the same as a soy-free sauce. Some recipes skip soy sauce but use hoisin sauce, oyster sauce, or other bottled condiments that may still contain soy. That may be fine if you only want to avoid soy sauce specifically, but it is not appropriate for someone who needs a truly soy-free version.

Coconut aminos are the easiest starting point for a soy-sauce-style substitute. From there, garlic, ginger, vinegar, chili, and a little mushroom depth help bring back the savory edge that soy sauce usually provides.

Truly Soy-Free Version

For a truly soy-free version, check every ingredient label carefully. Do not use soy sauce, tamari, hoisin sauce, or oyster-style sauces unless they are clearly labeled soy-free. Use coconut aminos as the main savory base, then add garlic, ginger, rice vinegar, sesame oil if tolerated, chili, and mushroom flavor for depth.

Back to top ↑

Homemade vs Store-Bought Stir Fry Sauce

Store-bought sauce is convenient, but it often leans too sweet, too salty, or too thick. Homemade sauce lets you adjust the balance in the moment: more vinegar for brightness, more broth for looseness, more garlic or ginger for freshness, and a little sweetener only when the sauce tastes harsh.

If you are using bottled sauce, start with ⅓ to ½ cup for a small two-serving stir-fry, or ½ to ¾ cup for a larger pan. Bottled sauces are often saltier and sweeter than homemade, so add less first and stretch with water or broth if needed.

  • Too salty? Dilute with water or broth and add more vegetables.
  • Too sweet? Add rice vinegar, lime juice, chili, or a little soy sauce.
  • Too thick? Loosen with water or broth.
  • Too flat? Add fresh garlic, ginger, scallions, chili, or toasted sesame oil.
  • Tastes bottled? Add fresh aromatics and a splash of acid.

Use bottled sauce near the end of cooking, just like homemade. If it is already thick and sweet, do not simmer it for too long or it can become sticky and overpowering.

How to Fix Sauce Problems

A stir-fry can go sideways fast, but most sauce problems are fixable while the pan is still hot. Usually the pan needs one small correction, not a restart.

Most sauce problems start earlier: check the amount guide and the timing cue if your stir-fries often turn watery, salty, or too thick.

Quick fixes for common stir-fry sauce problems

Problem Why It Happened Fix
Sauce is too salty Too much regular soy sauce, salty broth, or bottled sauce. Add water or broth, vinegar or lime, more vegetables, or a little sweetener.
Sauce is too thin Not enough cornstarch, not simmered long enough, or pan is watery. Simmer 30–60 seconds more or add a small slurry.
Sauce is too thick Too much cornstarch or sauce reduced too much. Add water or broth 1 tablespoon at a time.

Sauce tastes flat Not enough acid, garlic, ginger, or heat. Add vinegar, lime, garlic, ginger, chili, or sesame oil.
Sauce is too sweet Too much honey, sugar, or bottled sauce. Add vinegar, chili, soy sauce, or broth.

Sauce clumps Cornstarch was added directly to hot liquid. Mix cornstarch with cold liquid first.
Stir-fry turns watery Vegetables released moisture into the pan. Cook off liquid before adding sauce.
Sauce burns Sugary sauce cooked too long over high heat. Add sauce at the end, lower the heat slightly if needed, and stop once glossy.
Noodles absorb everything Noodles are thirsty or sauce is too thick. Add water or broth and toss briefly.
Tofu tastes bland Tofu was not crisped or sauce was too thin. Crisp tofu first and use a slightly thicker sauce.
Sauce tastes bottled It is sweet, salty, and thick but missing freshness. Add fresh garlic, ginger, vinegar or lime, scallions, chili, or sesame oil.

Why your stir-fry turns watery

The most common mistake is adding sauce to a crowded, watery pan. Cook the vegetables until extra moisture reduces, then add the sauce and let it bubble briefly.

Wok of chicken and vegetables sitting in thin watery sauce with text reading “Watery pan? Cook off moisture first.”
If the pan turns watery, pause before adding more sauce. Cook off vegetable moisture first, especially with mushrooms, zucchini, or a crowded skillet.

Small fixes before you restart dinner

Small save: If the pan tastes almost right but not quite, add a splash of water if it is too strong, a little vinegar if it feels flat, or a pinch of sugar if it tastes harsh. Tiny changes fix most stir-fry sauce problems.

How to Store It

Store the sauce in an airtight jar in the refrigerator for 5 to 7 days. Shake or whisk before using because the cornstarch settles at the bottom.

You can also freeze it for up to 3 months. Thaw in the refrigerator, then whisk or shake well before adding it to the pan. If freezing, use a freezer-safe container and leave a little room for expansion.

Do not worry if it looks cloudy or separated when cold. Cornstarch can settle and make the sauce look uneven. Once heated and stirred, it should smooth out again.

If the sauce has already been cooked into a stir-fry, store leftovers in an airtight container. For best texture, store noodles or rice separately from saucy stir-fry when possible.

What to Serve With It

It fits easy dinners like chicken and broccoli, beef and green beans, tofu and bok choy, shrimp and vegetables, cabbage and mushrooms, or zucchini and peppers.

Serve those over steamed jasmine rice, brown rice, cauliflower rice, stir-fried noodles, lettuce wraps, or fried rice. For choosing between rice, quinoa, cauliflower rice, or lighter base options, MasalaMonk’s quinoa vs rice guide is helpful, especially if you are balancing fullness, carbs, and texture.

If you want a cool, crisp side beside a salty-sweet stir-fry, MasalaMonk’s cucumber salad is a simple contrast: fresh, tangy, and fast enough to make while the sauce is resting in the jar.

If you want a rice-based takeout-style meal with a different flavor direction, MasalaMonk’s Spam fried rice recipe shows how little sauce fried rice actually needs compared with a saucy stir-fry.

At its best, the sauce leaves you with crisp vegetables, tender protein, and just enough savory-sweet shine for the rice or noodles to catch.

Frequently Asked Questions

What is stir fry sauce made of?

It is usually made with soy sauce, water or broth, rice vinegar, a little sweetener, garlic, ginger, sesame oil, and cornstarch. Together, they make a sauce that is savory, lightly sweet, aromatic, and able to thicken in the pan.

How much sauce should I use for a stir-fry?

Use about ¾ to 1 cup for 1 lb / 450 g protein plus vegetables. Use about ½ cup for vegetables only, ⅔ to 1 cup for noodles, and only 3 to 5 tablespoons for fried rice.

When should I add sauce to a stir-fry?

Add it near the end of cooking, after the protein and vegetables are mostly cooked. Let it bubble for 30 to 60 seconds until it turns glossy and coats the food.

Can I make this without soy sauce?

Yes. Coconut aminos are the easiest soy-sauce-style substitute. They are usually sweeter and less salty than soy sauce, so reduce the sweetener and adjust the flavor at the end. Be careful with hoisin, oyster sauce, and bottled sauces because they may still contain soy even if they are not soy sauce.

Is this sauce gluten-free?

Only if you use the right soy sauce substitute. Regular soy sauce often contains wheat, so choose certified gluten-free tamari, certified gluten-free soy sauce, or coconut aminos, and check all bottled add-ins.

How do I make a lower-sodium version?

Use low-sodium soy sauce or a lower-sodium alternative, water or unsalted broth, and extra garlic, ginger, vinegar, chili, scallions, or mushroom flavor. Avoid high-sodium bottled sauces unless the label works for your needs.

How do I make a keto version?

Skip honey or sugar and use a keto sweetener only if needed. Replace cornstarch with up to ⅛ teaspoon xanthan gum for 1 cup sauce, starting with a small pinch. Soy sauce, tamari, or coconut aminos can all work depending on your carb and sodium needs.

Can I use this for noodles?

Yes. Use ⅔ to 1 cup for a noodle stir-fry, and keep a little water or broth nearby. Noodles absorb sauce quickly, so you may need a splash to loosen everything in the pan.

Can I use this as a marinade?

Yes, but leave out the cornstarch if using it as a marinade. Cornstarch is for thickening in the pan, not for soaking raw protein. Add the cornstarch later when you are ready to cook.

Why is my sauce too salty?

The most common reason is regular soy sauce, salty broth, or too much bottled sauce. Dilute with water or broth, add more vegetables, brighten with vinegar or lime, or balance with a small amount of sweetener.

Why did it not thicken?

It may not have simmered long enough, the pan may have too much vegetable liquid, or there may not be enough cornstarch. Let it bubble briefly, or add a small slurry made from cornstarch and cold water.

How long does homemade stir fry sauce last?

It lasts 5 to 7 days in an airtight jar in the refrigerator. Shake or whisk before using because the cornstarch settles.

Final Notes

Do not let the length of the guide make the sauce feel complicated. The base recipe is simple; the extra notes are just here to help you adjust it without guessing.

Once you know the rule — salt, loosen, brighten, round, aroma, cling — stir-fry sauce stops feeling like a fixed recipe and starts feeling like something you can control.

Keep a jar ready, and a random mix of protein, vegetables, and rice or noodles starts to feel like dinner instead of leftovers. If you make it your own — sweeter, spicier, soy-free, or extra garlicky — share what worked so others can borrow the idea too.

Back to top ↑

Posted on — Leave a comment

Burger Patty Recipe

Cheeseburger on a toasted bun with melted cheese, lettuce, tomato, onion, pickles, and a browned beef patty that reaches the edge of the bun.

You opened the fridge, saw a pound of ground beef, and decided burgers were dinner. Good call. Now the goal is simple: patties that stay juicy, hold together, brown well, and do not turn into dry little beef discs.

This is a no-drama burger patty recipe for a regular weeknight. No egg, no breadcrumbs, no overthinking. Just cold beef, simple seasoning, gentle shaping, and a hot pan or grill.

It is built for the problems home cooks actually run into: patties that crack, shrink, puff, dry out, or fall apart before they ever make it to the bun.

The result still feels easy on a weeknight, but you get the good parts: browned edges, a juicy center, melted cheese if you want it, and a patty that actually fits the bun.

If your burgers have fallen apart before, it usually does not mean you needed egg. It usually means the beef was too warm, too wet, too lean, packed too tightly, salted too early, or flipped before the first side had a chance to brown.

Need dinner fast? Jump to the recipe. Trying to fix burgers that fell apart last time? Start with the mistake map.

Quick Answer: How to Make Burger Patties

Use 1 lb / 450 g 80/20 ground beef for 4 patties. Shape each one about 4 oz / 115 g, 4 to 4 1/2 inches / 10 to 11.5 cm wide, and about 3/4 inch / 2 cm thick. Make each patty slightly wider than the bun, press a shallow dimple in the center, salt the outside just before cooking, and cook on a hot skillet or grill without pressing.

No egg. No breadcrumbs. If you came here looking for a hamburger patty recipe without egg or breadcrumbs, this is that version. For simple beef patties, 80/20 beef, cold meat, gentle shaping, and proper cooking are enough.

Binder-Free Patty Cue

This is the quick visual for the no egg, no breadcrumbs method: simple beef, dry seasoning, and a patty that holds through browning.

Raw ground beef with salt, pepper, garlic powder, onion powder, a small dark sauce dish, and a note that says no egg and no breadcrumbs.
No egg or breadcrumbs needed: cold beef, dry seasoning, gentle handling, and browning do the binding work.

Simple formula: 1 lb / 450 g beef = 4 patties. Keep them cold, shape them loose, salt them late, and let the first side brown before flipping.

Portion the Beef Before Shaping

Even portions are the quiet shortcut to even cooking. Divide the beef first, then shape each patty gently.

Four loose portions of raw ground beef on parchment paper with a kitchen scale nearby.
Portioning first keeps homemade burger patties even without packing the meat into dense rounds.

Burger Patty Mistake Map: Why They Fall Apart, Shrink, Puff, or Dry Out

Most burger problems are easier to fix once you know the cause. Egg is not usually the answer. Colder beef, less moisture, gentler shaping, better heat, or a later flip usually solve more.

Find the problem that sounds most like your last burger. That is the fix to focus on first.

Problem Patterns to Check First

Quick Diagnosis: Read the Patty Shape

A failed patty often explains itself before you change the whole recipe.

Parchment-lined tray with four burger patties labeled cracked, puffed, shrunk, and good.
Read the shape before changing the recipe: cracks, puffing, shrinking, and crumbling each point to a different fix.
  • Falling apart before cooking: the beef is warm, wet, too lean, or shaped too loosely.
  • Falling apart while cooking: the patty was flipped too early or the pan/grill was not hot enough.
  • Shrinking too much: the raw patties started too small or were packed too tightly.
  • Puffing in the middle: the dimple was missing, too shallow, or uneven.
  • Dry burgers: the beef was too lean, overworked, pressed while cooking, or overcooked.
  • Tight, springy texture: salt may have been mixed into the meat too early.

Pick the issue that matches what happened last time, then fix that first. Once you know the likely cause, the troubleshooting table gives the exact fix.

What success looks like: a good burger patty should be browned on the outside, slightly craggy around the edges, juicy in the middle, and wide enough to still fill the bun after cooking. It should hold together when flipped, but it should not feel dense, rubbery, or packed like sausage.

What a Good Burger Patty Looks Like

This is the texture target after cooking: browned outside, juicy inside, and sturdy without feeling packed.

Close-up of a cooked beef burger patty with browned craggy edges and a juicy center visible from a cut side.
A good beef patty looks craggy and browned outside, not smooth, tight, or sausage-like.

Shallow Dimples Before Cooking

These patties show the dimple as a small guide, not a deep hole through the middle.

Four raw burger patties on parchment paper with shallow center dimples, a spatula, seasoning bowl, and thermometer nearby.
A shallow dimple helps the patty cook flatter while the middle stays thick enough to stay juicy.

Burger Patty Recipe

Juicy homemade hamburger patties made from ground beef with simple seasoning. These work in a skillet, on the grill, or as the base for cheeseburgers.

Servings4 patties
Prep Time10 minutes
Cook Time6 to 10 minutes
Total TimeAbout 20 minutes

Equipment

  • Mixing bowl or tray
  • Kitchen scale, optional but helpful
  • Cast iron skillet, grill, griddle, or air fryer
  • Spatula
  • Instant-read thermometer
  • Parchment paper, if freezing patties

Ingredients

  • Ground beef: 1 lb / 450 g, preferably 80/20 ground chuck
  • Kosher salt: 1 tsp, or about 3/4 tsp fine/table salt
  • Black pepper: 1/2 tsp
  • Garlic powder: 1/2 tsp
  • Onion powder: 1/2 tsp
  • Worcestershire sauce: 1 tsp, optional; skip if the beef already feels soft or loose
  • Neutral oil: 1 to 2 tsp, or just enough to lightly film the pan if needed

For Serving, Optional

  • 4 burger buns
  • Cheese slices
  • Lettuce, tomato, onion, pickles, and burger sauce

Instructions

  1. Keep the beef cold. Remove it from the fridge only when you are ready to shape.
  2. Add Worcestershire, if using. Drizzle lightly and toss once or twice. Skip it if the beef feels soft.
  3. Divide the beef. Split the meat into 4 equal portions, about 4 oz / 115 g each.
  4. Shape gently. Form each portion into a patty about 4 to 4 1/2 inches / 10 to 11.5 cm wide and 3/4 inch / 2 cm thick.
  5. Make them wider than the buns. Shape each patty about 1/2 inch / 1 cm wider than the bun.
  6. Add a shallow center dimple. Press a small depression into the middle. Keep it shallow so the center stays thick.
  7. Season just before cooking. Sprinkle the salt, pepper, garlic powder, and onion powder over both sides right before the patties go into the pan or onto the grill.
  8. Cook in a skillet. Heat a cast iron skillet over medium-high heat. Add oil if needed. Cook standard patties for 3 to 4 minutes on the first side, then 2 to 3 minutes on the second.
  9. Or cook on the grill. Grill over medium-high direct heat for about 3 to 4 minutes per side.
  10. Add cheese if using. Add it during the last 30 to 60 seconds.
  11. Check the temperature. Ground beef patties should reach 160°F / 71°C.
  12. Rest briefly. Let the patties rest for 2 minutes before serving.

Notes

  • Use 80/20 ground beef for the juiciest patties.
  • For the cleanest texture, skip Worcestershire the first time and add sauces to the finished burger instead.
  • If using fine/table salt instead of kosher salt, use a little less.
  • Salt the outside just before cooking for the best texture.
  • Use a thermometer instead of relying only on color.
  • Freeze raw patties flat first, then stack with parchment between them.

Once the basic method is clear, the rest is just solving the small problems: lean beef, soft patties, sticky grill grates, frozen meat, or burgers that fell apart last time.

When it works, it feels almost boring in the best way: the patty sizzles, releases cleanly, melts the cheese if you want it, and lands on the bun without drama.

Why These Burger Patties Hold Together

This method works because each step protects either shape, juiciness, or browning. Cold beef keeps the fat firm so the patty holds together. Gentle shaping keeps the texture loose instead of rubbery. Late salting seasons the outside without making the meat tight. A hot surface builds crust, and that crust helps the patty release before you flip.

The best homemade burgers do not need restaurant tricks. Work with the meat: keep it cold, shape it lightly, and let the hot surface do the browning.

  • 80/20 beef gives flavor and moisture. Fat helps the finished burger taste like a burger.
  • Cold meat holds shape better. Warm beef gets sticky before it reaches the pan.
  • A hot surface builds browning. Browning does more for flavor than extra mix-ins.

Ingredients for Homemade Burger Patties

Because the ingredient list is short, the beef does most of the work. Start with enough fat, keep extra moisture out of the patty, and save the saucy, crunchy, cheesy parts for the finished burger.

The beef and salt matter most. The pepper, garlic powder, and onion powder support the beef instead of hiding it. Worcestershire is optional; use it only if the meat feels firm enough to handle a little liquid.

Ground Beef

Use 1 lb / 450 g ground beef for 4 standard patties. The best choice is 80/20 ground beef, often sold as ground chuck. When the package says hamburger meat instead of ground beef, check the fat ratio if possible.

Fresh beef should smell clean, feel cold, and show visible fat flecks. If it looks watery or feels mushy, pat away excess moisture and keep it cold before shaping.

Look for 80/20 Ground Beef Texture

The fat flecks are not a flaw. They help the patty stay juicy and forgiving as it cooks.

Close-up of raw 80/20 ground beef on parchment paper with visible white fat flecks.
Visible fat flecks are your friend; 80/20 ground beef gives burger patties flavor and moisture.

Best Beef Choices

  • 80/20 ground chuck: the best everyday choice; juicy, flavorful, and forgiving.
  • Choose 85/15 ground beef when you want a slightly leaner patty and can watch the cooking closely.
  • Use 90/10 ground beef carefully because it dries out faster and gives beginners less room for error.
  • Ground sirloin tastes beefy but needs careful cooking because it is usually leaner.
  • Loaded mixtures work better for family-style patties where a binder may be useful.

Lean beef is not wrong; it just gives you less room for error. If you only have lean beef, make slightly smaller patties, handle them less, avoid pressing, and watch the thermometer closely.

Salt

Use about 1 teaspoon kosher salt for 1 lb / 450 g ground beef. If you are using fine salt or table salt, use about 3/4 teaspoon because it packs more tightly into the spoon and tastes saltier by volume.

If your burger seasoning blend already contains salt, reduce or skip the extra salt.

Black Pepper

Black pepper gives the beef a little bite without making the burger taste heavily spiced. Freshly cracked pepper is best, but regular ground black pepper also works.

Garlic Powder and Onion Powder

Garlic powder and onion powder bring flavor without adding moisture. Fresh onion and garlic can taste good, but too much fresh onion, sauce, or grated vegetables can loosen the mixture and make it harder to shape.

Worcestershire Sauce

Worcestershire sauce is optional. A teaspoon adds savory depth, but extra liquid can make the meat softer. If the mixture already feels loose, skip it. You can always add sauce to the finished burger instead.

Oil

Oil is only there to help the first side release and brown. Use just enough to lightly film the pan. With 80/20 beef and a well-seasoned cast iron skillet, you may barely need any.

Do Burger Patties Need Egg or Breadcrumbs?

No. Simple beef burger patties do not need egg or breadcrumbs. With 80/20 beef, the binder is not egg — it is cold fat, gentle shaping, and a crust that forms before you flip.

Egg and breadcrumbs only make sense when you are intentionally making a softer, meatloaf-style patty or when the mixture is very lean, wet, or loaded with add-ins.

No Binder vs Binder-Style Patties

This comparison helps you choose between a beef-first burger and a softer meatloaf-style patty.

Two raw burger patty preparations labeled beef-first and binder-style, with egg and breadcrumbs near the binder-style patty.
Choose no-binder for a beef-first burger; use egg and breadcrumbs only for wet, meatloaf-style patties.

Simple rule: no binder for a beef-first burger; binder only for wet, lean, or meatloaf-style patties.

Skip Egg for Beef-First Patties

  • You are using 80/20 ground beef.
  • The goal is regular hamburger patties.
  • You are making smash burgers.
  • The meat mixture is simple and not wet.
  • You want a tender, beefy burger texture.

Use Egg Only for Softer Loaded Patties

  • The beef is very lean.
  • You are adding lots of fresh onion, grated vegetables, sauces, or herbs.
  • The goal is a softer family-style patty.
  • A loose mixture will not hold together.

Breadcrumbs Are for Absorbing Extra Moisture

Breadcrumbs absorb extra moisture. That can be useful if you add wet ingredients, but it makes the patty softer and more bound, closer to meatloaf than a regular burger.

Add These to the Burger, Not the Patty

If you want a beefy burger texture, keep wet add-ins out of the meat. Sauce, onions, pickles, and extra cheese usually belong on the burger, not inside the patty.

Think of the patty as the beef layer, not the whole burger. Let the meat bring crust and juiciness; let the toppings bring sauce, crunch, sharpness, and freshness.

Keep Toppings Out of the Meat

This visual separates structure from flavor: let the patty brown cleanly, then build the burger on top.

Raw burger patties on parchment paper with lettuce, tomato, onion, pickles, cheese slices, and sauce set aside.
Keep sauce, onion, pickles, and cheese on top so the beef patty browns and holds together.

If what you really want is a creamy burger-style dinner rather than a simple patty, homemade cheeseburger macaroni is a better place for extra sauce, cheese, ketchup, mustard, and Worcestershire.

Keep these out of the meat when you want a beef-first burger:

  • Lots of chopped onion: use it as a topping or cook it separately.
  • Ketchup or barbecue sauce: brush near the end so it glazes instead of soaking the meat.
  • Too much Worcestershire: use 1 teaspoon at most, or skip it if the beef feels soft.
  • Milk, egg, and breadcrumbs: save them for meatloaf-style patties.
  • Cheese mixed into the beef: melt cheese on top near the end instead.

Back to top ↑

Burger Patty Size Chart

Patty size is where a lot of homemade burgers quietly go wrong. Too thin and they dry out quickly. Too thick and the outside can brown before the center is done.

If your burgers always end up smaller than the bun, the raw patties probably started too small. Bun size matters more than perfect inches, but do not start bun-sized unless you want a smaller finished burger.

Visual cue: if the raw patty looks slightly too wide for the bun, it is probably the right size.

Use the Bun as Your Size Guide

The raw patty should look a little too wide now, because it will shrink as it cooks.

Raw burger patty shown wider than a burger bun on parchment paper with a ruler nearby.
Make the raw patty slightly wider than the bun so it still fits after shrinking.
Burger StyleRaw WeightApprox. Width / ThicknessBest Use
Thin burger3 oz / 85 gAbout 4 inches / 10 cm wide, 1/2 inch / 1 cm thickQuick diner-style burger
Standard burger4 oz / 115 gAbout 4 to 4 1/2 inches / 10 to 11.5 cm wide, 3/4 inch / 2 cm thickBest everyday patty
Thick burger5 to 6 oz / 140 to 170 gAbout 4 1/2 to 5 inches / 11.5 to 13 cm wide, 1 inch / 2.5 cm thickJuicier pub-style burger
Smash burger2 to 3 oz / 55 to 85 gSmashed thinCrispy griddle burger
Big 1/3-lb burger1/3 lb / 150 gAbout 1 inch / 2.5 cm thickHearty grill burger

Check the Patty Thickness

Thickness controls the balance between browning outside and cooking through in the center.

Side view of a raw burger patty on parchment paper with a ruler and a 2 cm thickness mark.
Aim for enough thickness to stay juicy, but not so much that the center lags behind.

For this recipe: 1 lb / 450 g ground beef makes 4 patties of about 4 oz / 115 g each. Shape each one about 1/2 inch / 1 cm wider than the bun so the finished burger still fills the bread.

How to Shape Burger Patties

Shaping is where a lot of burgers quietly get ruined before they ever touch the pan. You do not need a burger press or special tool. Your hands are enough for regular patties.

The 5-Second Patty Check

Before cooking, lift one patty with both hands. It should hold together without sagging, feel cold, and look slightly rough around the edges. If it feels wet, floppy, greasy, or pasty, chill it for 10 to 20 minutes. If it feels dense and bouncy, it was probably packed too tightly.

The 5-Second Patty Lift

A ready patty should feel cold and hold together when lifted without sagging.

Two hands lifting a raw burger patty above parchment paper with other raw patties nearby.
Lift one patty gently; cold, cohesive patties are ready, while floppy patties need chilling.
  • Good patty: cold, slightly rough, and able to hold together when lifted.
  • Overworked patty: smooth, dense, bouncy, and tight around the edges.
  • Too-soft patty: floppy, greasy, wet, or hard to move without breaking.

Good vs Overworked vs Too Soft

This comparison shows the three textures to recognize before the patties ever hit heat.

Three raw burger patties on a parchment-lined tray labeled good, overworked, and too soft.
Texture gives the warning: loose and rough is good, smooth is overworked, spreading is too soft.

1. Keep the Beef Cold

Cold beef shapes cleanly. Warm beef smears, sticks, and starts falling apart before it reaches the pan.

If the beef feels greasy and soft in your hands, pause. A few minutes in the fridge fixes more than breadcrumbs ever will. That is not a failure; it is an easy fix.

2. Divide Before Shaping

Divide the beef into equal portions first. For 1 lb / 450 g beef, make 4 portions of about 4 oz / 115 g each.

3. Shape Gently

Form each portion into a loose ball, then flatten it into a patty. Handle it just enough to bring it together. The surface can still look a little craggy. That loose, uneven texture is part of what keeps the burger tender.

Slight roughness around the edges is fine. A burger should look like beef, not dough. If the edges crack badly, gently press them back together without packing the center tight.

4. Make the Patties Wider Than the Buns

When the raw patty fits the bun perfectly, it will usually look too small after cooking. Shape each one about 1/2 inch / 1 cm wider than the bun so the finished burger still fits properly.

5. Add a Shallow Center Dimple

Press a shallow dimple into the center with your thumb or the back of a spoon. Keep it shallow. It should be a small dip, not a crater. The middle should not become thin or cracked.

Shallow Dimple Close-Up

Light pressure is enough; the center only needs to sit slightly lower than the edges.

Fingertip gently pressing a shallow dimple into the center of a raw beef burger patty on parchment paper.
Stop once the center sits just slightly below the edges; deeper pressure can weaken the patty.

6. Chill If the Patties Feel Soft

If the shaped rounds feel soft and floppy, chill them for 10 to 20 minutes. They will be much easier to handle.

How to Season Burger Patties

Season the outside, not the inside, when you want a tender beef-first burger. Salt mixed into ground beef too early can make the texture tighter and springier. Garlic powder, onion powder, pepper, and paprika are more forgiving, but the cleanest method is to shape first and season both sides right before cooking.

If you already mixed salt into the beef, do not throw it out. Shape gently, cook soon, and avoid packing the meat tighter. The texture may be a little firmer, but the burgers can still be good.

Simple Burger Patty Seasoning for 1 lb / 450 g Beef

  • Kosher salt: 1 tsp, or about 3/4 tsp fine salt
  • Black pepper: 1/2 tsp
  • Garlic powder: 1/2 tsp
  • Onion powder: 1/2 tsp
  • Smoked paprika: 1/4 tsp, optional

Sprinkle the seasoning evenly over both sides right before cooking.

Add Seasoning Right Before Cooking

After shaping, sprinkle salt and pepper on the surface so the beef stays loose until it hits the heat.

Hand sprinkling salt and pepper over shaped raw burger patties on parchment paper.
A last-minute sprinkle flavors the surface while keeping the burger patty tender inside.

Easy Seasoning Variations

Use these as small changes, not as a reason to mix wet ingredients into the beef.

  • Classic: salt, pepper, garlic powder, and onion powder.
  • Smoky: add a little smoked paprika.
  • Spicy: add cayenne, chili flakes, or pepper jack cheese.
  • BBQ-style: brush barbecue sauce near the end so it glazes instead of burns.
  • Salt-free prep: use garlic powder, onion powder, paprika, and pepper, then salt the outside right before cooking.

Back to top ↑

How to Cook Burger Patties

Best crust: cast iron or griddle.

For smoky flavor: use the grill.

Easiest hands-off method: air fryer.

For crispy thin edges: make smash burgers on a griddle.

With thick frozen patties: thaw first when possible.

Once the meat is shaped and seasoned, cooking is mostly about heat control. The pan or grill should be hot enough that the meat sizzles clearly when it touches the surface. If it lands quietly, wait a little longer before adding the rest.

Cook times are always approximate. The table is a starting point, not a promise. A thick cold patty and a thin room-temperature patty will not cook the same way.

Burger Patty Cooking Time by Size

Patty SizeSkillet TimeGrill TimeWhen to Start Checking
3 oz / 85 g thin pattyAbout 2 to 3 minutes per sideAbout 2 to 3 minutes per sideAround 5 minutes total
4 oz / 115 g standard patty3 to 4 minutes first side, 2 to 3 minutes second sideAbout 3 to 4 minutes per sideAround 6 minutes total
5 to 6 oz / 140 to 170 g thick patty4 to 5 minutes first side, 3 to 4 minutes second sideAbout 4 to 5 minutes per sideAround 8 minutes total
2 to 3 oz / 55 to 85 g smash pattyUsually under 3 minutes total on a very hot surfaceBetter on a griddle than grill gratesVery quickly; these cook fast

Time tells you when to start checking; internal temperature tells you when the burger is actually done.

Stovetop Burger Patties

If you are cooking indoors, cast iron is your friend. It gives the meat a browned crust and works even when grilling is not practical.

Listen for the Sizzle

The sound tells you whether the skillet is browning the patties or just steaming them.

Four burger patties sizzling in a cast iron skillet with browned edges and bubbling fat.
A steady sizzle means the pan is hot enough to brown, not steam, the patties.
  1. Heat a cast iron skillet or heavy pan over medium-high heat.
  2. Add a thin film of oil if the pan needs it.
  3. Place the patties in the pan, leaving space between them.
  4. Cook 4 oz / 115 g patties for about 3 to 4 minutes on the first side.
  5. Flip once, after the first side has browned.
  6. Cook for another 2 to 3 minutes, or until cooked through.
  7. Add cheese during the last 30 to 60 seconds if making cheeseburgers.
  8. Rest briefly before serving.

Let the patties cook undisturbed. Pressing feels satisfying, but it squeezes out the juiciness you worked for. Before flipping, look for browned edges, a firmer underside, and easier release. If the spatula has to fight the patty, wait another 30 to 60 seconds.

Look for a Clean Flip

When the crust forms, the spatula slides under more easily and the patty stays intact.

Metal spatula lifting a browned burger patty from a cast iron skillet while another patty cooks behind it.
Flip when the crust releases cleanly; the spatula should not have to fight the patty.

That first clean flip is the moment you know the patty is working: browned underneath, still juicy inside, and sturdy enough to finish without falling apart.

Grilled Burger Patties

On the grill, the payoff is smoke, char, and enough space to cook several burgers at once.

  1. Preheat the grill to medium-high heat.
  2. Clean and oil the grates if needed.
  3. Place the patties over direct heat.
  4. Grill standard patties for about 3 to 4 minutes per side.
  5. Flip once, after the first side has browned and releases cleanly.
  6. If a patty sticks, wait. Meat usually releases more easily once the first side has browned.
  7. Add cheese during the last minute if using.
  8. Check the internal temperature with a thermometer.

Air Fryer Burger Patties

Air fryer burgers are easiest, not crustiest. Use the air fryer when convenience matters more than the deepest browning.

Fresh patties usually take about 8 to 10 minutes at 375°F / 190°C, depending on thickness. Flip halfway through if your air fryer cooks unevenly. If they look pale, toast the bun and add cheese or sauce so the finished burger feels more complete. For more detail, see the full Air Fryer Burgers guide.

Cooking Frozen Burger Patties

Frozen patties are where timing charts start lying to you, because thickness changes everything. A thin frozen patty cooks very differently from a thick 1/3-lb patty.

Best result: thaw overnight in the fridge. Fastest result: cook from frozen over moderate heat, then finish hotter if needed for browning. Worst result: blasting a thick frozen patty on high heat from the start.

For frozen patties, start over medium heat until the center begins to thaw and the patty softens slightly. Then raise the heat near the end if you need more browning. Check the center with a thermometer before serving.

This works for homemade frozen patties and most plain store-bought frozen beef patties. If the package gives specific cooking instructions, use those as the starting point and still check the center temperature.

  • Thin frozen patties can cook from frozen over moderate heat, but watch them closely because they dry out quickly.
  • Standard frozen patties need more time than fresh patties, and the center should be checked with a thermometer.
  • Thick frozen patties are best thawed overnight when possible.
  • The counter is tempting, but the fridge gives you the safer, more even thaw.
  • Separate patties with parchment before freezing so they do not stick.

Burger Patty Internal Temperature

This recipe follows standard food-safety guidance for ground beef, so the target is 160°F / 71°C in the center. Check with an instant-read thermometer, using the FoodSafety.gov safe minimum internal temperature chart as the safety reference.

Color can fool you with burgers. The USDA FSIS explains why cooked ground beef color is not a reliable doneness test: burgers can brown before they are safe, and some can stay a little pink even after proper cooking. Use the thermometer instead of guessing.

To check a thin patty, insert the thermometer from the side into the center of the burger.

Check Temperature from the Side

A side-entry thermometer check reaches the center cleanly without tearing the patty open.

Cooked burger patty with an instant-read thermometer inserted from the side showing 160°F.
Check from the side so the thermometer reaches the center without tearing the patty open.

Why Burger Patties Fall Apart

Use this section after something has already gone wrong. Before cooking, fix the mixture. During cooking, fix the heat and flip timing. After cooking, look at fat level and final temperature.

A soft patty is not a failed patty. Before cooking, most problems can be fixed with chilling or reshaping. During cooking, most problems are fixed by waiting longer before flipping.

Common Burger Patty Problems and Fixes

ProblemWhy It HappensFix
Beef is too leanLean meat has less fat to help the patty stay juicy and cohesive.Use 80/20 or 85/15 ground beef.
Meat is too warmSoft fat makes the mixture loose and sticky.Chill the beef or shaped patties before cooking.
Too many wet mix-insOnion, sauces, or vegetables can loosen the meat.Use less liquid first. If you still want a wet, loaded mixture, switch to the binder-style variation.
Flipped too earlyNo crust has formed yet.Let the first side brown before flipping.
Pan or grill is not hot enoughThe patties steam instead of sear.Preheat properly before cooking.
Edges are crackedThe edges were left loose or the meat was handled too roughly.Gently press the edges together without compacting the whole patty.
Meat is overworkedThe texture becomes dense and can crack.Next time, bring the beef together gently and stop while the surface still looks a little craggy.
Frozen or thawed beef is wateryExtra moisture weakens the patty.Pat lightly, shape carefully, and chill before cooking.

The most reliable fix: use 80/20 beef, keep it cold, shape gently, chill soft patties before cooking, and wait for a crust before flipping. When in doubt, come back to temperature, texture, and timing.

Good news: burger mistakes are easy to read. Once you know whether the problem was warmth, moisture, shaping, heat, or timing, the next batch gets better fast.

Why Burger Patties Puff Up in the Middle

Patties puff up because the meat tightens as it cooks. The edges cook and shrink first, pushing the center upward.

The fix is a shallow dimple. Before cooking, press your thumb into the center of each raw patty. Make a small depression, not a hole. As the burger cooks, the center rises slightly and the patty ends up flatter.

This is especially useful for thick patties. Smash burgers do not need a dimple because they are pressed thin on the hot surface.

Back to top ↑

Make-Ahead, Storage, and Freezing

These patties freeze well for nights when dinner has to move fast. Shape them properly now and one pound of beef can become an easy future meal, not just tonight’s burgers.

Keep them cold, separate them properly, and avoid salting them too early. If making patties ahead, shape them plain and salt later. This keeps the texture looser and avoids drawing moisture out too early.

Make Ahead

You can shape raw patties up to 1 day ahead. Place them on a plate or tray, cover tightly, and refrigerate. Salt them right before cooking for the best texture.

Freezing Raw Patties

  1. Shape the patties.
  2. Place them on a parchment-lined tray.
  3. Freeze until firm.
  4. Stack with parchment between each patty.
  5. Transfer to a freezer bag or airtight container.
  6. Freeze for up to 3 months for best quality.

Parchment keeps the patties from freezing into one solid block.

Thawing

Thawing on the counter is tempting, but the fridge is the safer, better path. Overnight fridge thawing gives the best texture and most even cooking.

Storing Cooked Patties

Store cooked patties in an airtight container in the fridge for 3 to 4 days if they were cooled and refrigerated properly. Reheat gently in a skillet, air fryer, or microwave until hot. Avoid overheating, or the burgers can dry out.

Burger Patty Variations

Once the structure is right, flavor is easy. Change the seasoning, topping, or cooking style, but keep the same cold-beef, gentle-shaping method until the basic patty works for you.

Cheeseburger Patties

For classic burger night, cook the patties as written, then add cheese once the second side is nearly done. Cover the pan briefly or close the grill lid to help the cheese melt.

Smash Burger Patties

Choose this style when you want crispy edges, not thick juiciness. Use 2 to 3 oz / 55 to 85 g portions, shape them into loose balls, skip the dimple, and smash them thin on a very hot griddle or skillet.

BBQ Burger Patties

Brush the sauce late instead of mixing it into the meat. Add smoked paprika to the seasoning and brush barbecue sauce near the end so it glazes instead of burns.

Spicy Burger Patties

Add cayenne pepper, chili flakes, chopped jalapeño, or pepper jack cheese. Keep wet spicy sauces for topping rather than mixing too much into the meat.

Lean Burger Patties

Lean patties work for lighter meals, but they are less forgiving. Use 85/15 or 90/10 beef, keep the patties smaller, avoid pressing, and check early with a thermometer.

If you are building a lower-carb plate around the patties, the keto hamburger recipes guide has bunless cheeseburgers, burger bowls, lettuce wraps, and skillet-style ideas.

Binder-Style Family Patties

Use this style for wet add-ins or softer family-style patties. Add 1 egg and 1/4 cup breadcrumbs to 1 lb / 450 g beef. This changes the recipe, but it can help if you are using very lean meat or adding a lot of onion, herbs, sauces, or vegetables.

What to Serve with Burger Patties

These can become classic burgers, bunless plates, rice bowls, salads, or quick comfort-food dinners.

At the table, the win is simple: a patty that still fills the bun, a little crust at the edges, warm juices in the middle, and toppings that stay on top instead of trying to hold the meat together.

Burger-Night Payoff

This is the final proof: patties that stay juicy, fit the bun, and hold together at the table.

Burger night table with assembled cheeseburgers, an open burger, fries, coleslaw, toppings, and a hand reaching for a bun.
The payoff is a burger that stays juicy, fits the bun, and holds together at the table.
  • Classic burger night: toasted buns, cheese, lettuce, tomato, onion, pickles, ketchup, mustard, or a quick sauce made from homemade mayo
  • Lighter plate: lettuce wraps, salad, grilled vegetables, sliced avocado, or crisp coleslaw
  • Comfort plate: fries, potato wedges, roasted potatoes, macaroni salad, or a cool potato salad
  • No-bun dinner: patties over rice, mashed potatoes, salad bowls, or sautéed vegetables
  • Leftovers: chopped cooked patty in rice bowls, wraps, omelets, or quick pasta

If you are already baking bread, use a soft roll or sandwich-style bun here. A crusty loaf can overpower the patty.

Back to top ↑

Frequently Asked Questions

Can I make burger patties without egg and breadcrumbs?

Yes. For simple beef patties, 80/20 beef, cold meat, gentle shaping, and late salting are enough. Egg and breadcrumbs are only useful for very wet or meatloaf-style patties.

What is the best meat for burger patties?

80/20 ground beef or ground chuck is the best all-purpose choice because it stays juicy, browns well, and holds together without binders.

Do hamburger patties need egg?

For simple 80/20 beef patties, cold fat, gentle shaping, and proper browning are enough.

Do burger patties need breadcrumbs?

No, not for a regular beef-first burger. Breadcrumbs are only useful for wet, soft, meatloaf-style patties.

How much seasoning do I use for 1 lb of ground beef?

Use about 1 tsp kosher salt, 1/2 tsp black pepper, 1/2 tsp garlic powder, and 1/2 tsp onion powder. If using fine salt, use about 3/4 tsp instead.

Should I season burger meat before or after shaping?

Shape first, then season both sides just before cooking. Salt mixed in early can make the texture tighter.

How do I stop burger patties from falling apart?

Keep the beef cold, avoid wet mix-ins, shape gently, and wait for the first side to brown before flipping.

Why do my burgers puff up in the middle?

The meat contracts as it cooks and pushes the center upward. Press a shallow dimple into the center before cooking to help the patty stay flatter.

How thick should burger patties be?

For standard patties, aim for about 3/4 inch / 2 cm thick. Shape them slightly wider than the buns because they shrink as they cook.

Can I make burger patties ahead of time?

Yes. Shape the patties up to 1 day ahead and keep them covered in the fridge. Salt them right before cooking.

Can I freeze raw burger patties?

Freeze them flat until firm, then stack with parchment between each patty. Store for up to 3 months for best quality.

Can I cook burger patties from frozen?

You can, but thawed patties brown better and cook more evenly. If cooking from frozen, use moderate heat first and check the center with a thermometer.

How long do burger patties take in a skillet?

Standard 4 oz / 115 g patties usually take about 3 to 4 minutes on the first side and 2 to 3 minutes on the second side over medium-high heat.

How long do burger patties take on the grill?

Standard patties usually take about 3 to 4 minutes per side over medium-high direct heat. Timing depends on thickness and grill heat.

What temperature should burger patties reach?

Ground beef patties should reach 160°F / 71°C in the center. For thin patties, insert the thermometer from the side.

If one thing keeps going wrong with your burgers — falling apart, shrinking, puffing, or drying out — note the pattern and use the mistake map above next time. Once you know the pattern, the fix becomes much easier.

Final Tip

The whole method comes down to this: cold beef, loose hands, late salt, hot surface, no pressing. Get those five things right and the burger does most of the work for you.

Once you make them this way a couple of times, a pound of ground beef stops feeling like a gamble. It starts feeling like four reliable burgers waiting to sizzle, brown, melt a slice of cheese, and land on the bun without falling apart.

Back to top ↑