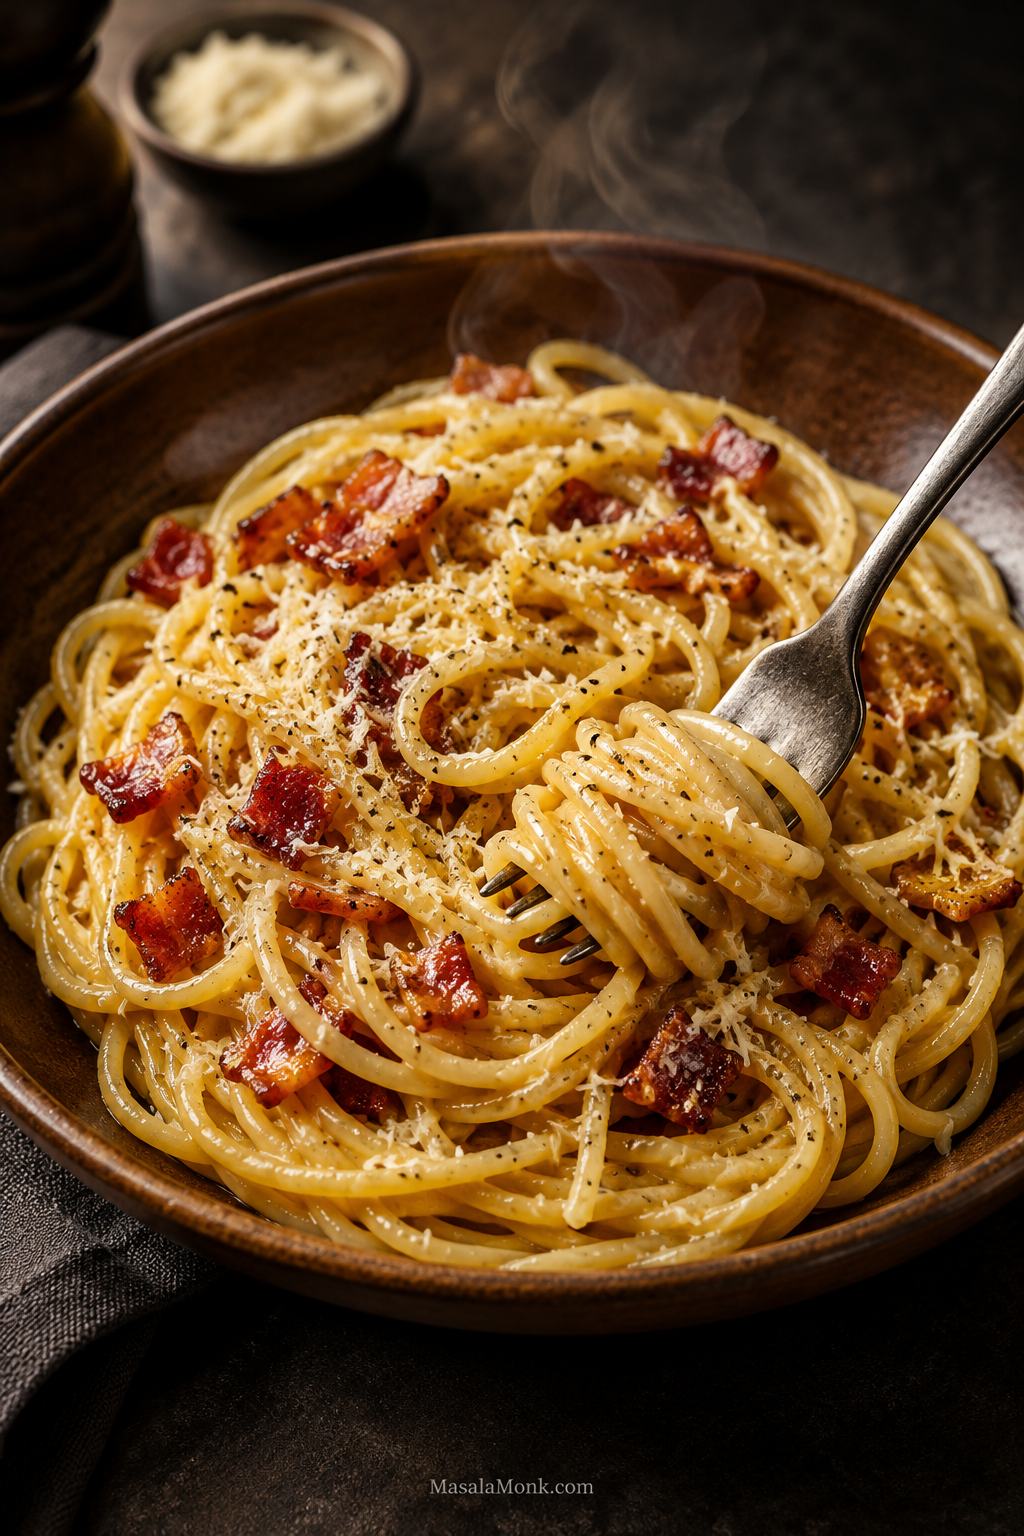
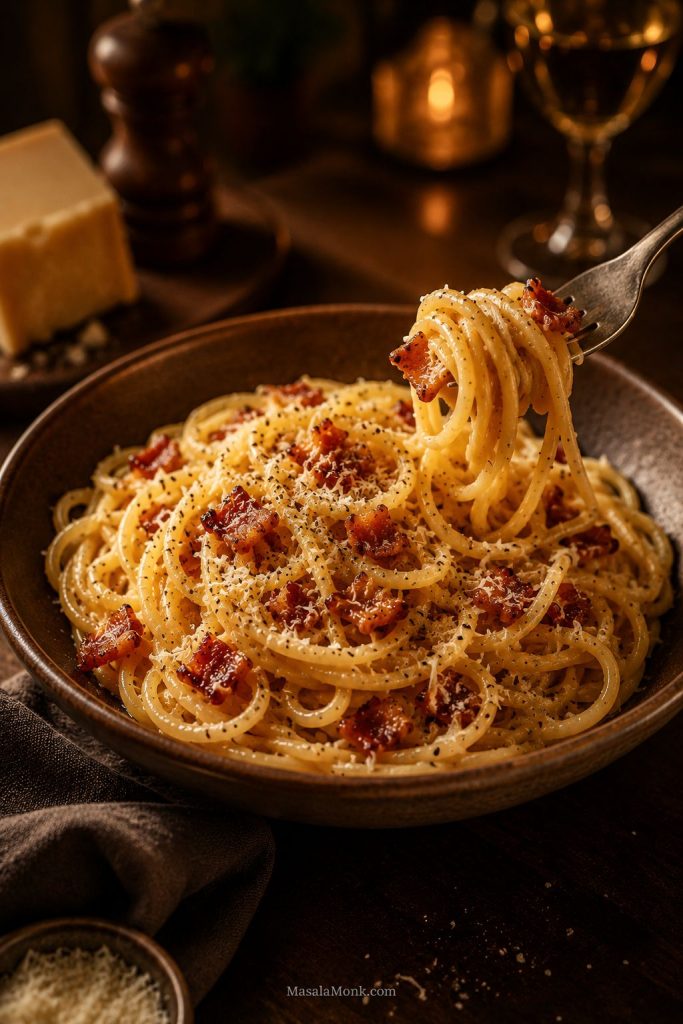
This bacon carbonara recipe is for the night you want glossy, peppery spaghetti with crisp bacon and a sauce that feels creamy without becoming heavy. It is also for the moment when carbonara sounds intimidating because of the eggs. Once you know the rhythm — crisp bacon, hot pasta, eggs and cheese away from harsh heat, then a splash of starchy cooking water — the whole dish becomes much calmer.
Traditional Roman carbonara is usually made with guanciale, Pecorino Romano, eggs, pasta, and black pepper. Here, bacon makes the recipe easier for a regular home kitchen while still keeping the sauce egg-and-cheese based. Thick-cut bacon works especially well because it is easy to find, smoky, crisp, and gives you enough rendered fat to help the sauce wrap around the spaghetti.
The main version below is creamy without cream. You get that texture from eggs, egg yolks, finely grated cheese, bacon fat, and cloudy pasta water. If you prefer a softer comfort-food finish, there is also a small cream option later in the post.
In This Bacon Carbonara Recipe
Make the Recipe
Cream, Variations & Fixes
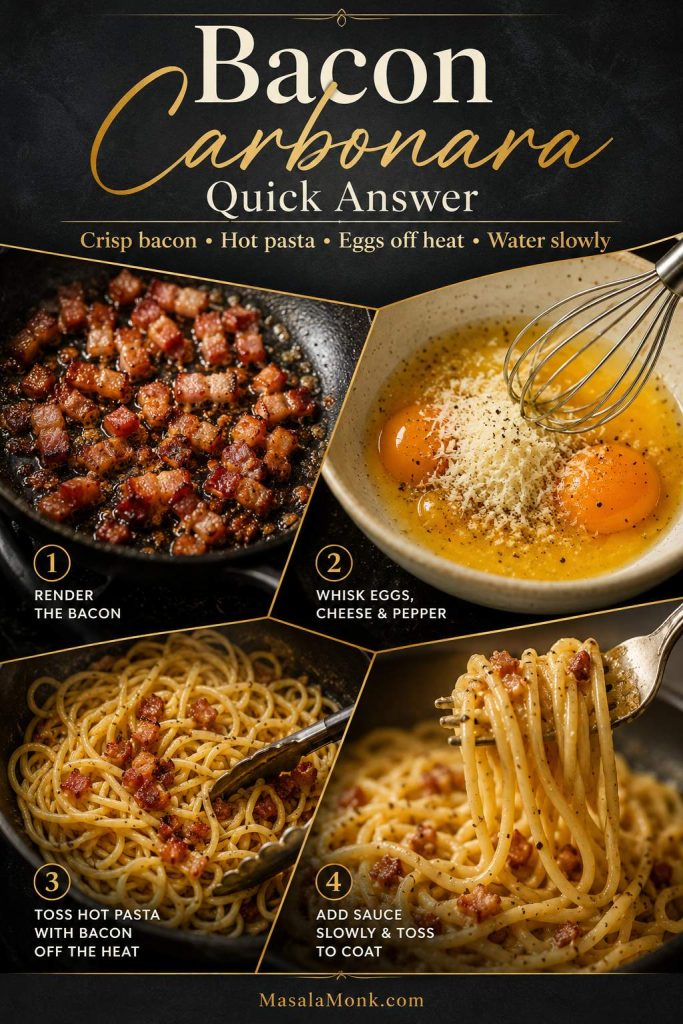
Quick Answer: How to Make Bacon Carbonara
To make bacon carbonara, cook spaghetti until al dente, crisp diced bacon in a skillet, and whisk eggs, egg yolks, finely grated Parmesan or Pecorino, and black pepper in a large bowl. Add the hot pasta to the bacon with the burner off, pour in the cheese-and-egg base, and toss quickly while adding reserved cooking water a little at a time. In a minute or two, the rough mixture turns into a silky sauce that coats the spaghetti instead of sitting in the pan.
The main thing to avoid is pouring the eggs into a scorching pan. Take the skillet off the burner, let the harsh heat settle, and use the heat of the pasta to finish the sauce gently. If that is the part that makes you nervous, read the scrambling prevention tips before you start cooking.
Already comfortable with the method? Jump straight to the recipe card.
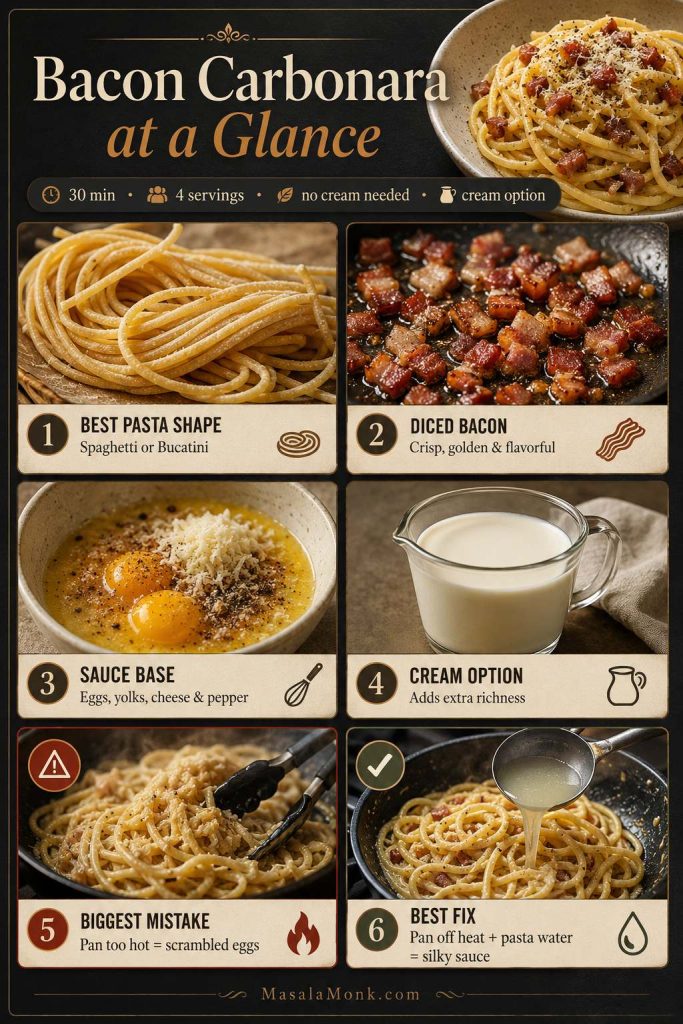
Bacon Carbonara at a Glance
| Question | Best answer |
|---|---|
| Best pasta | Spaghetti first; bucatini, linguine, fettuccine, or rigatoni also work. |
| Best bacon | Thick-cut bacon, diced small and cooked until crisp at the edges. |
| Sauce base | Whole eggs, extra yolks, finely grated cheese, black pepper, bacon fat, and reserved cooking water. |
| Cream | Not needed for the main method; 2–4 tbsp heavy cream is optional for a softer sauce. |
| Biggest mistake | Adding the egg mixture to a pan that is still too hot. |
| Best fix | Move the pan off the heat, toss constantly, and loosen gradually with the hot water saved from the pot. |
Why This Recipe Works
This recipe works because the sauce is built like a quick emulsion, not a cream sauce. Bacon fat gives richness, finely grated cheese gives body, eggs thicken gently, and the water saved before draining keeps everything loose enough to coat the spaghetti. That is how you get a creamy carbonara texture without pouring in heavy cream.
Bacon changes the flavor, not the basic method. It brings smoke, crisp browned edges, and grocery-store convenience, while the sauce still stays rooted in eggs, cheese, black pepper, and pasta water. Think of this as a carbonara recipe adapted for bacon rather than a completely different cream pasta.
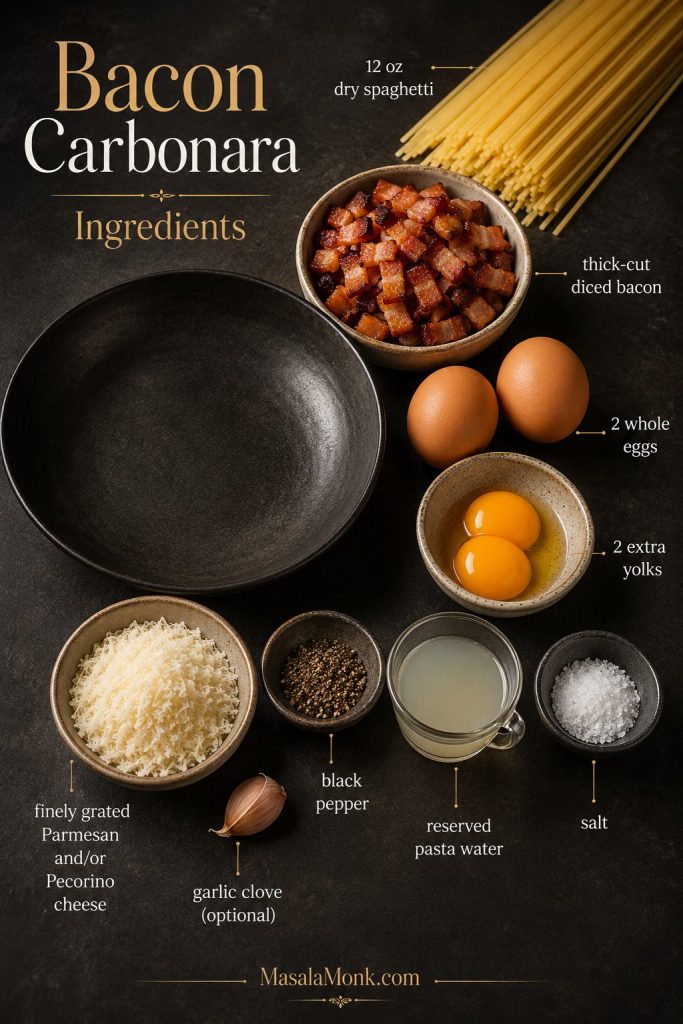
Bacon Carbonara Ingredients
This is one of those recipes where a short ingredient list is a good thing. There is nowhere for the flavors to hide, so the bacon should be crisp, the cheese should be finely grated, the pepper should be generous, and the starchy cooking water should be saved before you even think about draining the spaghetti.
For the full measured version, use the recipe card below.
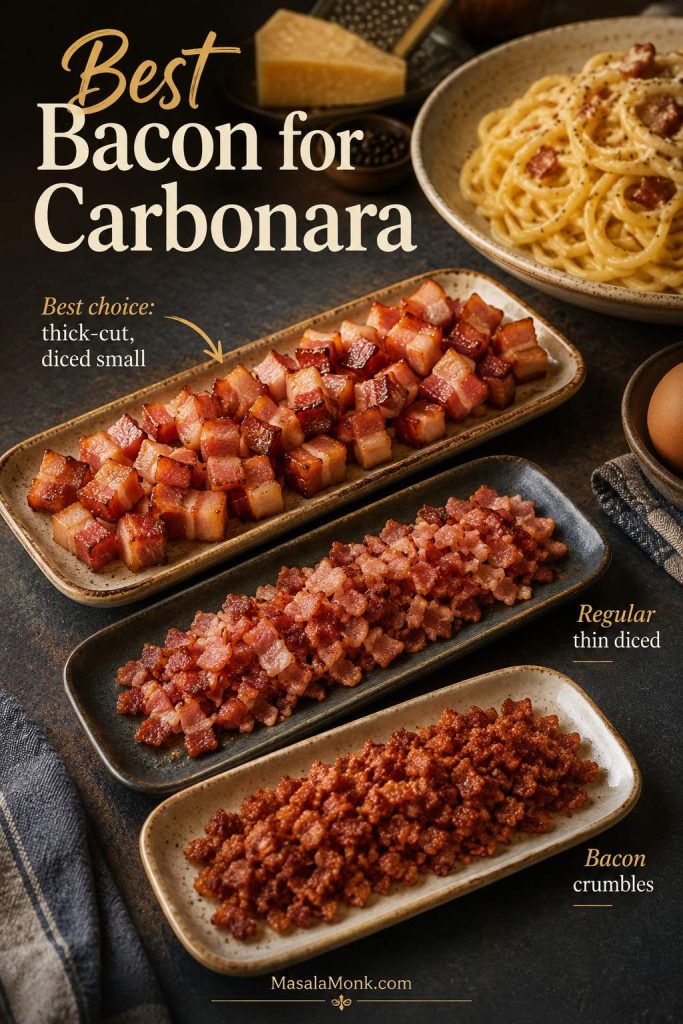
Best Bacon to Use
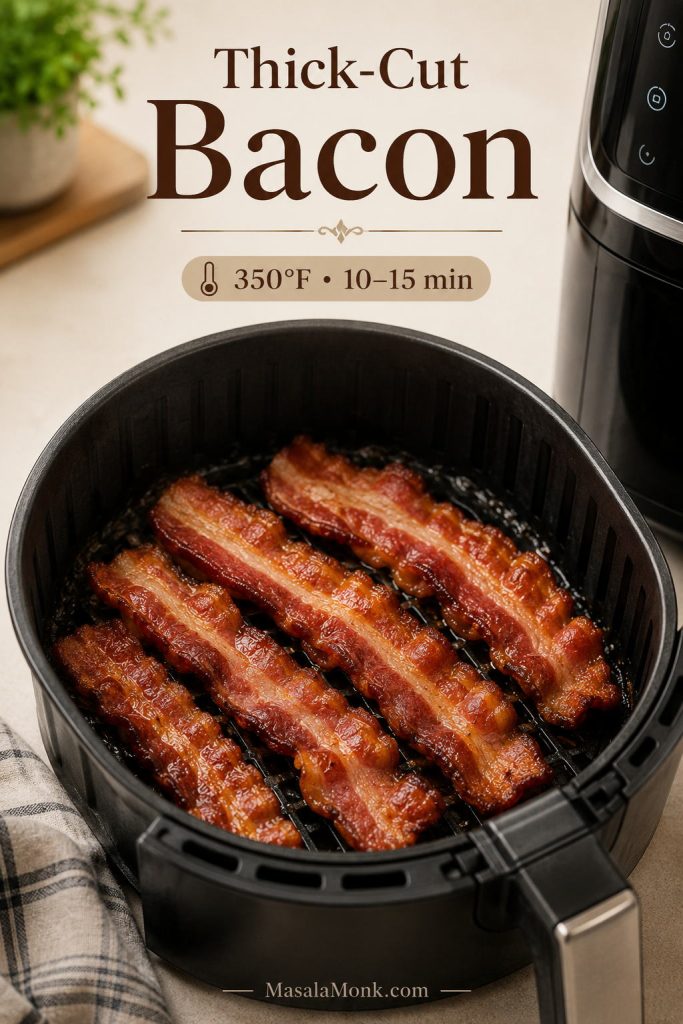
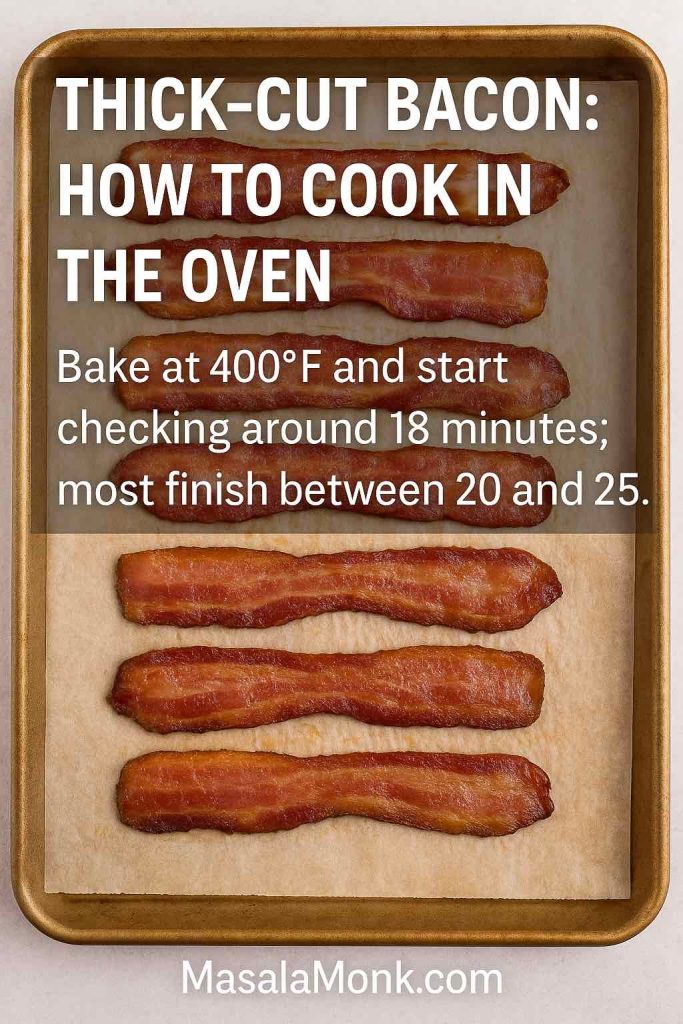
Thick-cut bacon is the easiest win here. It gives you crisp browned edges, a smoky chew, and enough rendered fat to help the sauce wrap around the spaghetti instead of tasting thin.
For the cooking cue, see how to render the bacon until the edges are crisp.
Regular bacon also works, but watch it closely because thin slices can go from crisp to brittle quickly. Dice the bacon before cooking so every forkful gets small pieces. For a more dramatic finish, cook one or two strips separately, crumble them over the bowl, and keep the diced bacon in the sauce for flavor.
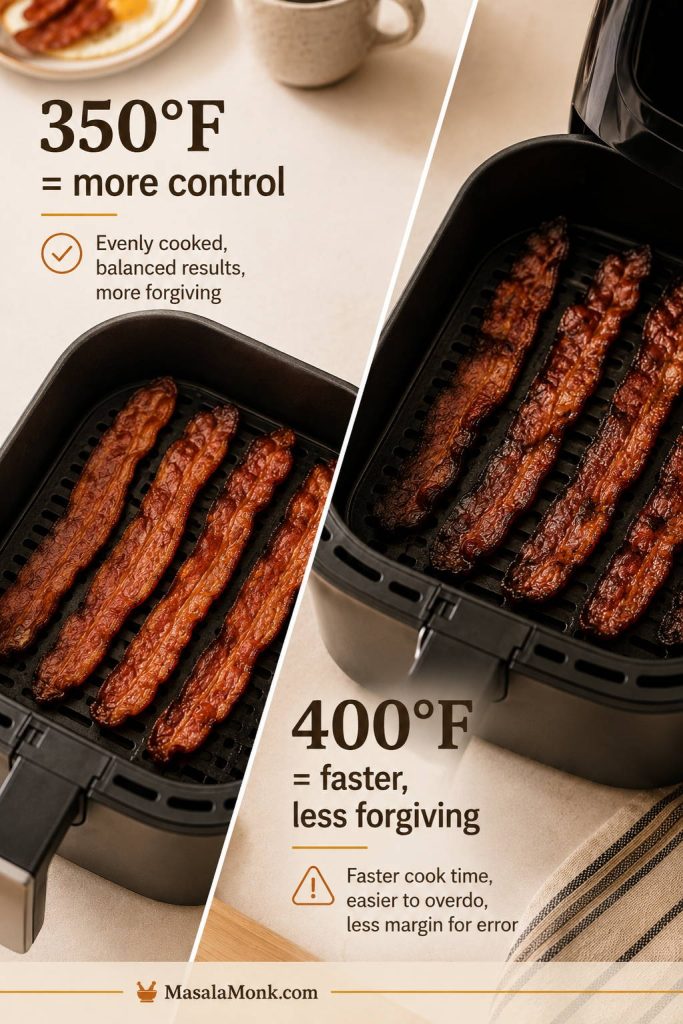
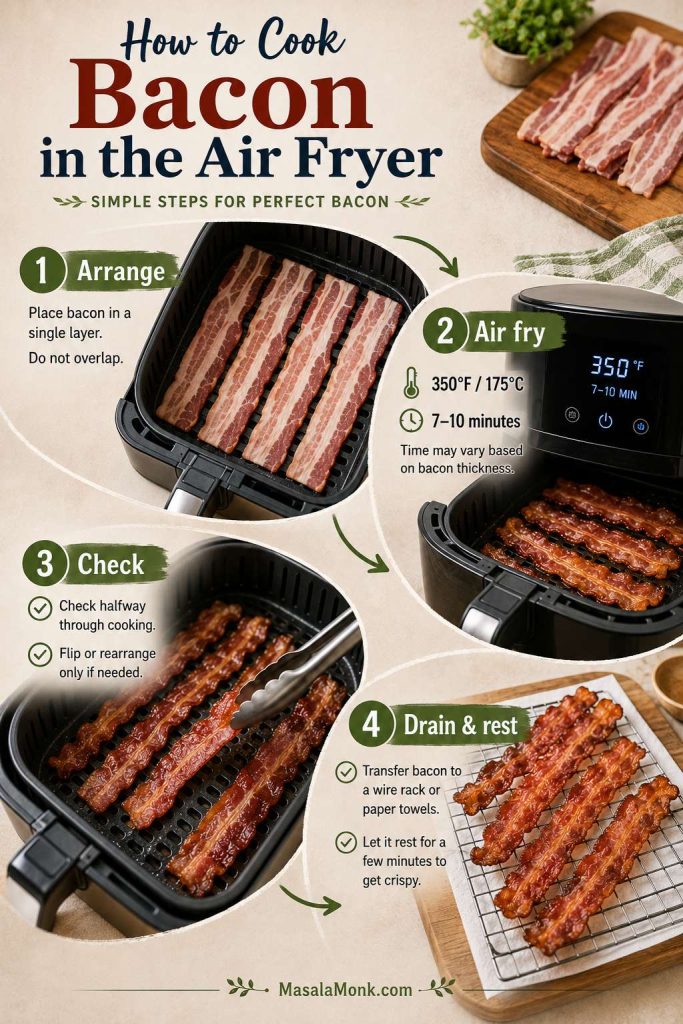
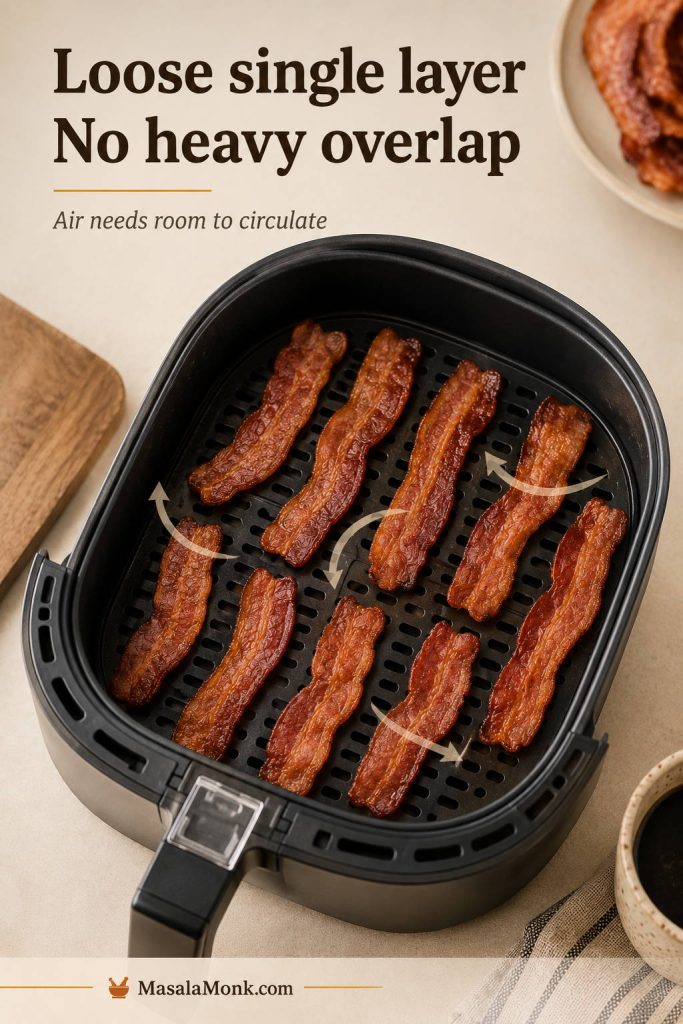
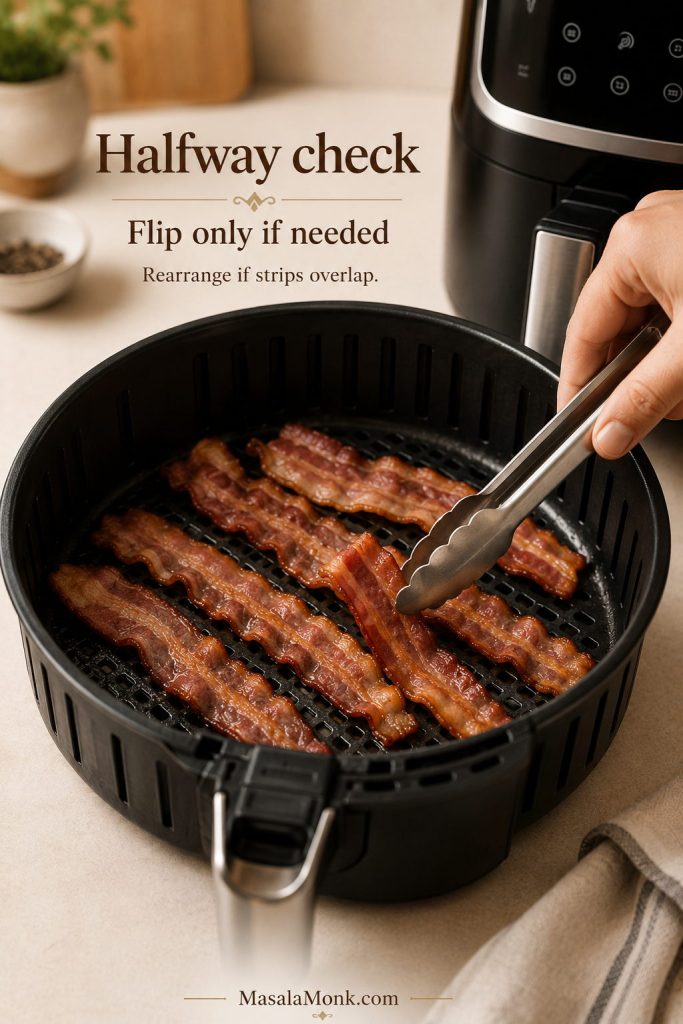
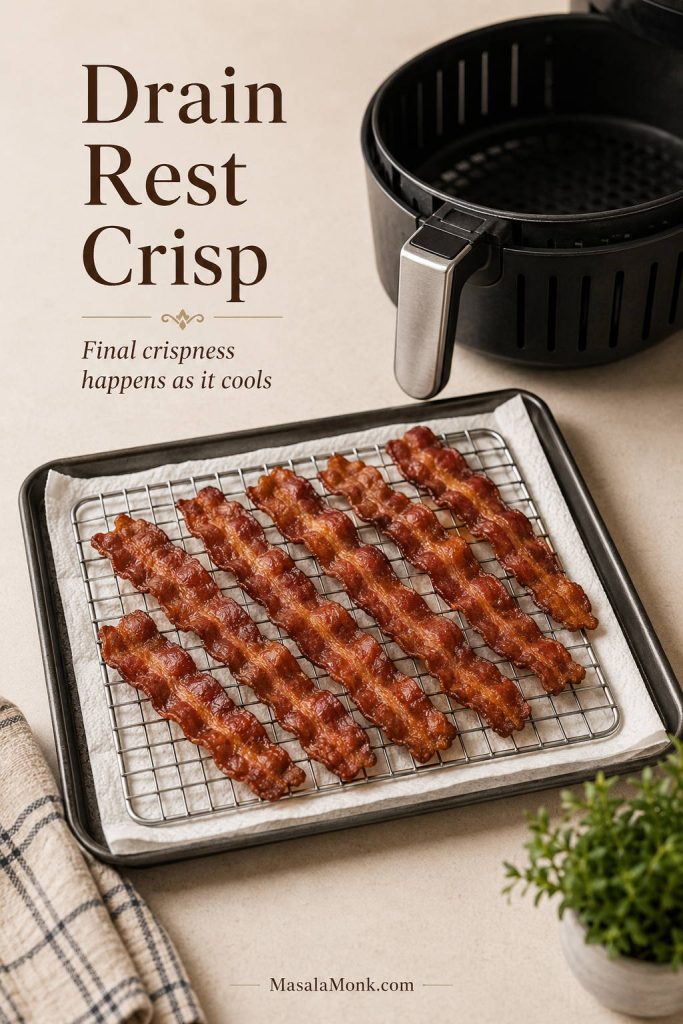
If you already have cooked bacon from another method, such as crispy air fryer bacon, you can use it. The sauce will taste better if you still add a spoonful of bacon fat or olive oil to help the cheese-and-egg base coat the pasta.
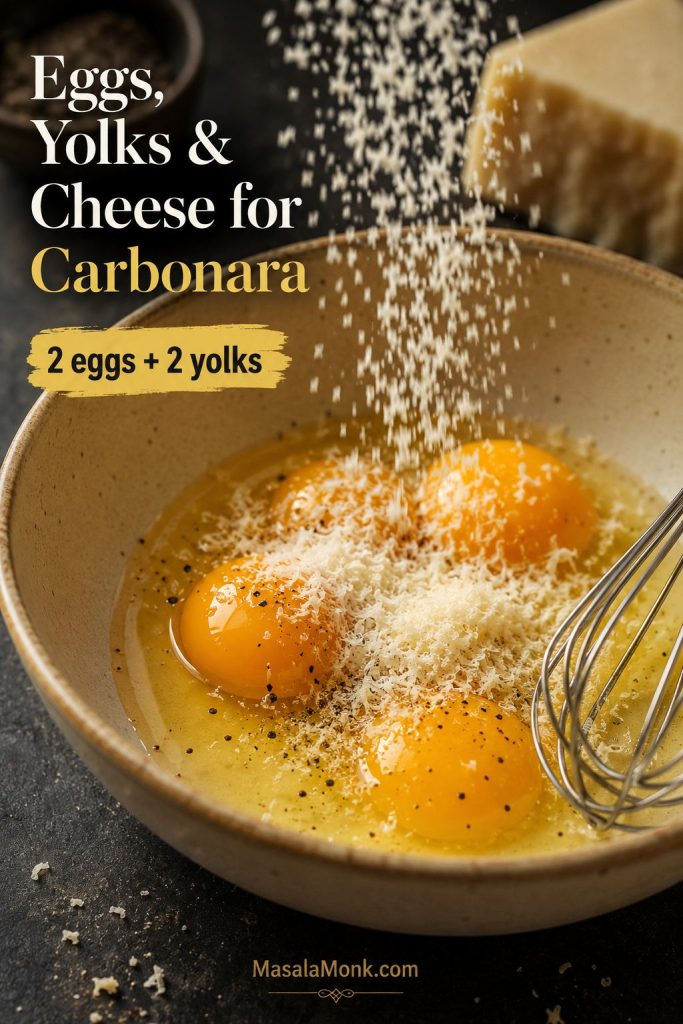
Eggs, Yolks, and Cheese
This recipe uses 2 whole eggs plus 2 egg yolks. Whole eggs help the sauce loosen and coat the spaghetti, while yolks make it richer and silkier. Only whole eggs can taste a little thinner; only yolks can feel too rich and sticky for a casual weeknight bowl.
Because the eggs are gently cooked by the heat of the pasta rather than simmered in a sauce, use fresh eggs. For extra caution, use pasteurized eggs and follow general egg safety guidance.
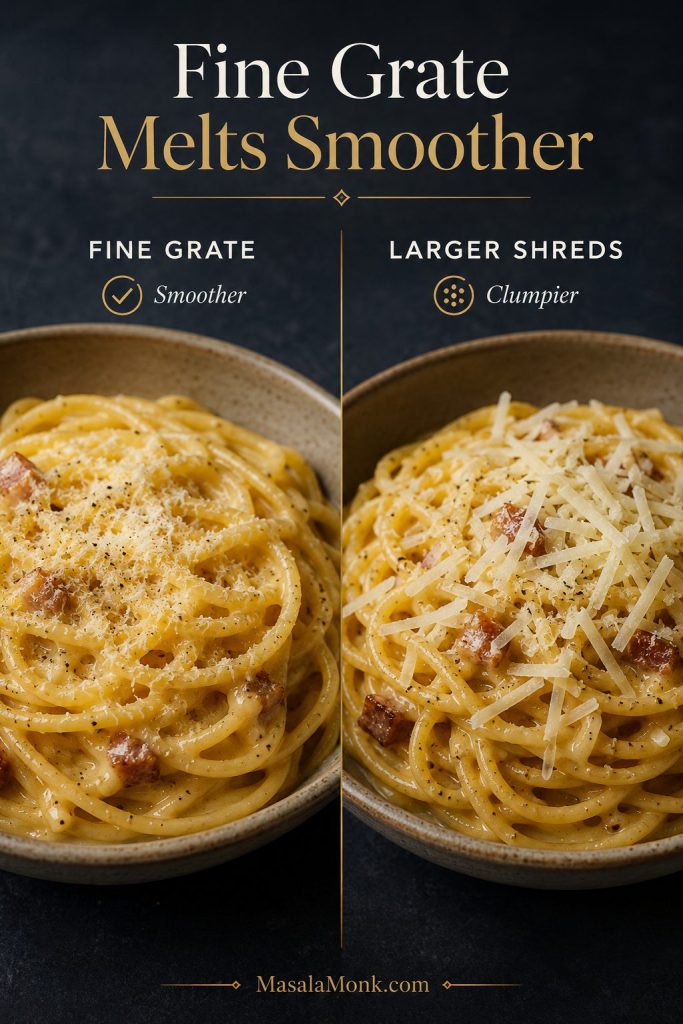
Finely grated cheese matters more than people think. Pre-shredded cheese does not melt as smoothly because it is usually coated to prevent clumping. For the smoothest sauce, see the fine-grated cheese cue before you cook.
Parmesan vs Pecorino Romano
Pecorino Romano is sharper, saltier, and more traditional for Roman-style carbonara. Parmesan is milder, nuttier, and easier to find in many kitchens. A half-and-half mix is the most balanced option here because the bacon already brings salt and smoke.
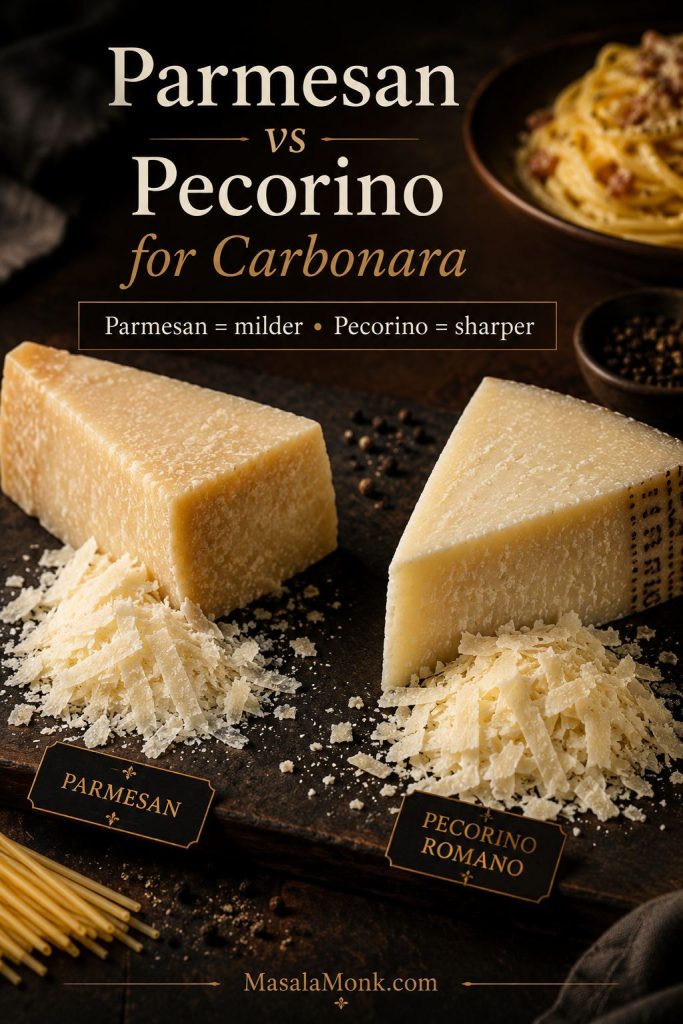
Very salty bacon? Start with more Parmesan than Pecorino. Mild bacon and a sharper sauce? Use more Pecorino. For a deeper cheese comparison, MasalaMonk’s Parmesan vs Parmigiano Reggiano guide is a useful supporting read.
Why Pasta Water Matters
That cloudy water from the pasta pot is what saves the sauce when it starts looking thick. The starch helps the egg, cheese, and bacon fat come together instead of separating into clumps. Plain hot water can rescue a dry pasta in a pinch, but the water from the pasta pot gives carbonara its shiny, clinging finish.

Before draining the spaghetti, scoop out at least 1 cup / 240 ml of the cooking water. You may not need all of it, but having extra gives you control. Add it slowly, 1–2 tablespoons at a time near the end, until the sauce looks silky instead of thick or clumpy.
Do not rinse the pasta after draining. The starch on the surface helps the sauce grip the spaghetti, and rinsing it away makes the finished carbonara harder to emulsify. You will see this in action in the sauce-coating step, where the liquid goes in gradually instead of all at once.
Bacon vs Pancetta vs Guanciale
Classic carbonara is closely associated with guanciale, a cured pork jowl with deep savory flavor and plenty of fat. Pancetta is cured pork belly and is easier to find in many places. Bacon is smoked pork belly, which makes it less traditional but very practical for a home carbonara recipe.
| Pork | Flavor | Best for | Notes |
|---|---|---|---|
| Bacon | Smoky, salty, crisp | Easiest home version | Salt the pasta water lightly because bacon already brings salt. |
| Pancetta | Porky, cured, less smoky | A closer Italian-style substitute | Dice it small and render gently until the edges brown. |
| Guanciale | Rich, fatty, deeply savory | Most traditional flavor | Render slowly so the fat melts before the outside browns too much. |
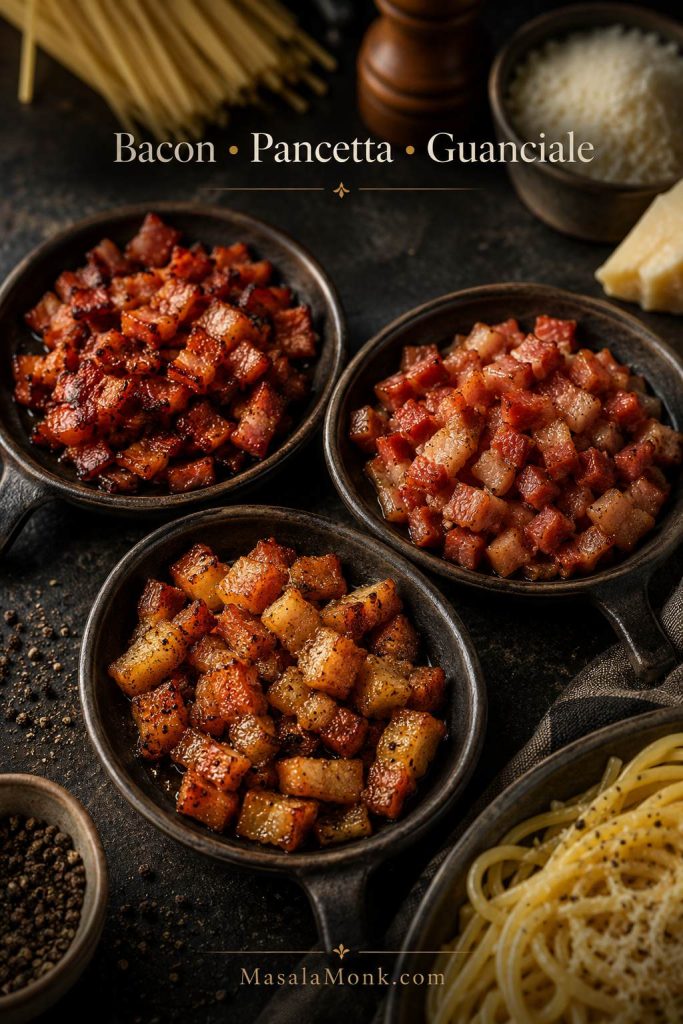
So, can you use bacon in carbonara? Yes — just know what it changes. Bacon brings smoke, crisp edges, and easy grocery-store convenience. It is not the same as guanciale, but it can still make a beautiful bowl of carbonara-style pasta when you balance the salt and keep the sauce egg-and-cheese based.
If you want the stricter Italian-style version, read MasalaMonk’s classic carbonara guide. For this page, the goal is different: a creamy, reliable, bacon-led method that works with grocery-store ingredients.
For a traditional reference point, La Cucina Italiana’s classic carbonara recipe shows the guanciale, egg yolk, cheese, pasta water, and black pepper foundation. The recipe below keeps that creamy egg-and-cheese sauce idea, then adapts it for bacon you can find easily.
Once you are comfortable with the bacon swap, you can go straight to the recipe card for the exact amounts.
How to Make Bacon Carbonara
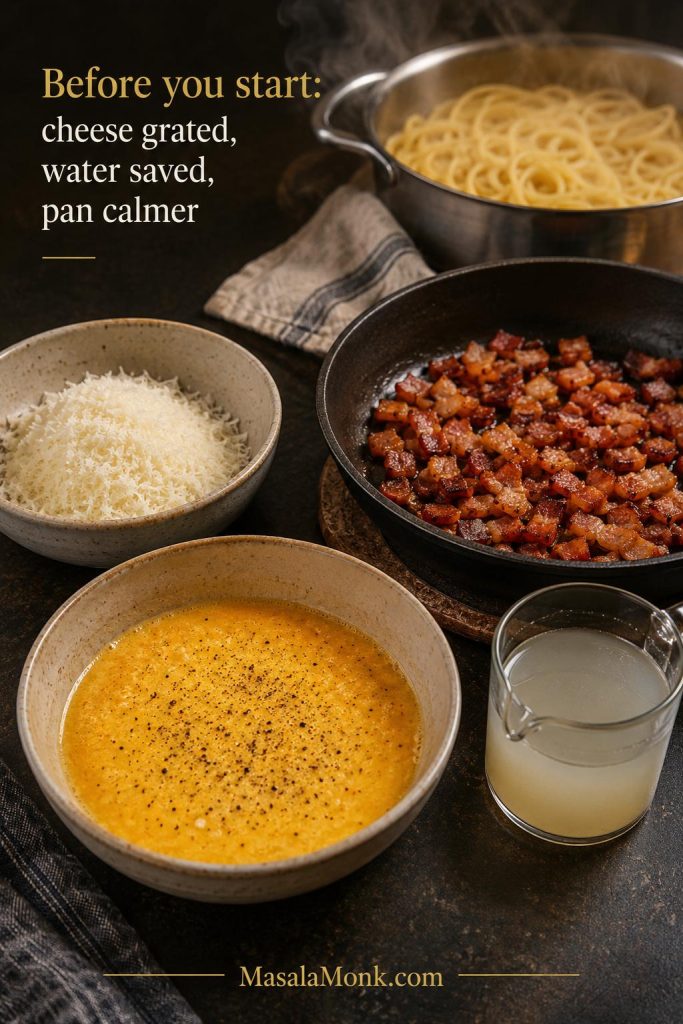
The cooking moves quickly, so set yourself up before the spaghetti is done. Once the bacon is crisp, the cheese is grated, the egg mixture is ready, and the reserved water is saved, the final sauce comes together in a minute or two.
Try to have the bacon ready a few minutes before the pasta is done, not twenty minutes earlier. Warm bacon fat helps the sauce turn smooth; a scorching pan scrambles the eggs, but a completely cold pan makes the pasta harder to coat.
For exact measurements in one place, use the recipe card; for technique, follow the steps below slowly the first time.
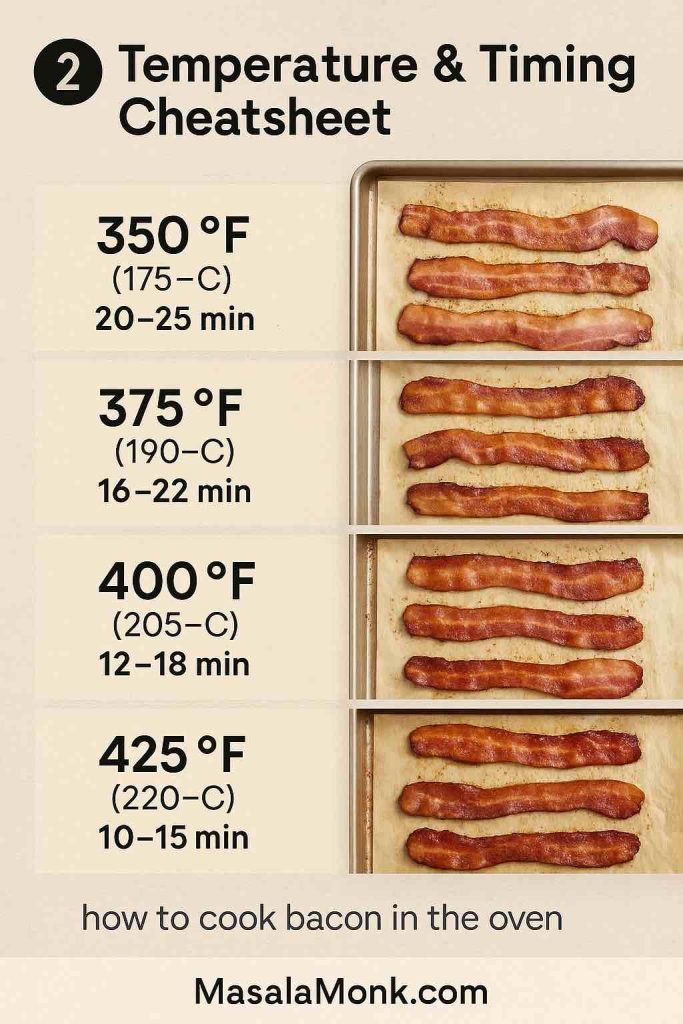
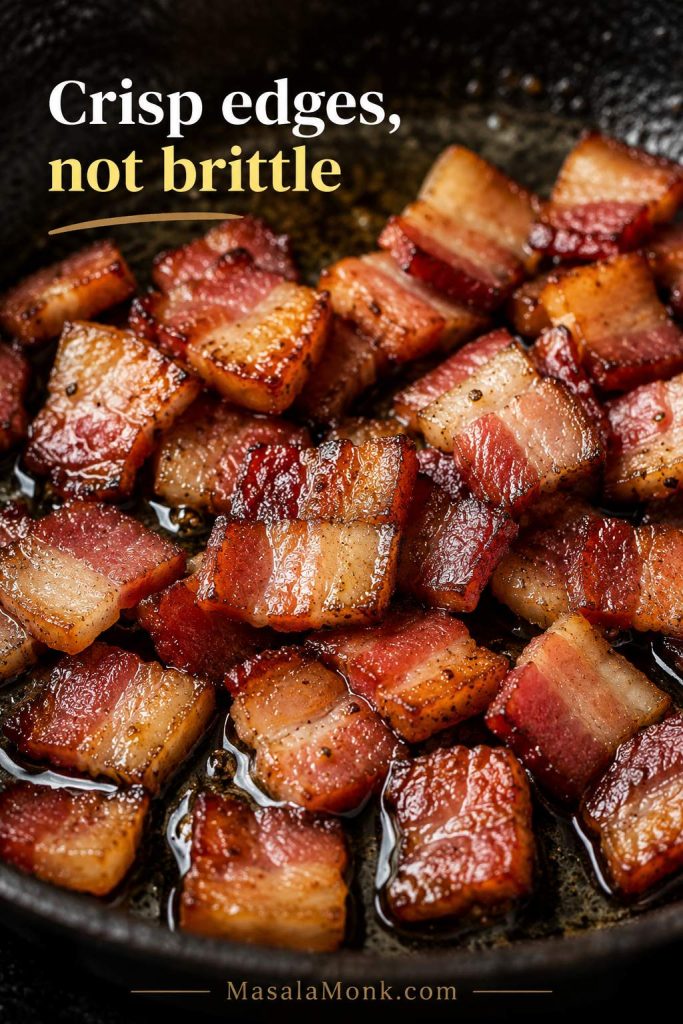
1. Cook the Bacon Until Crisp
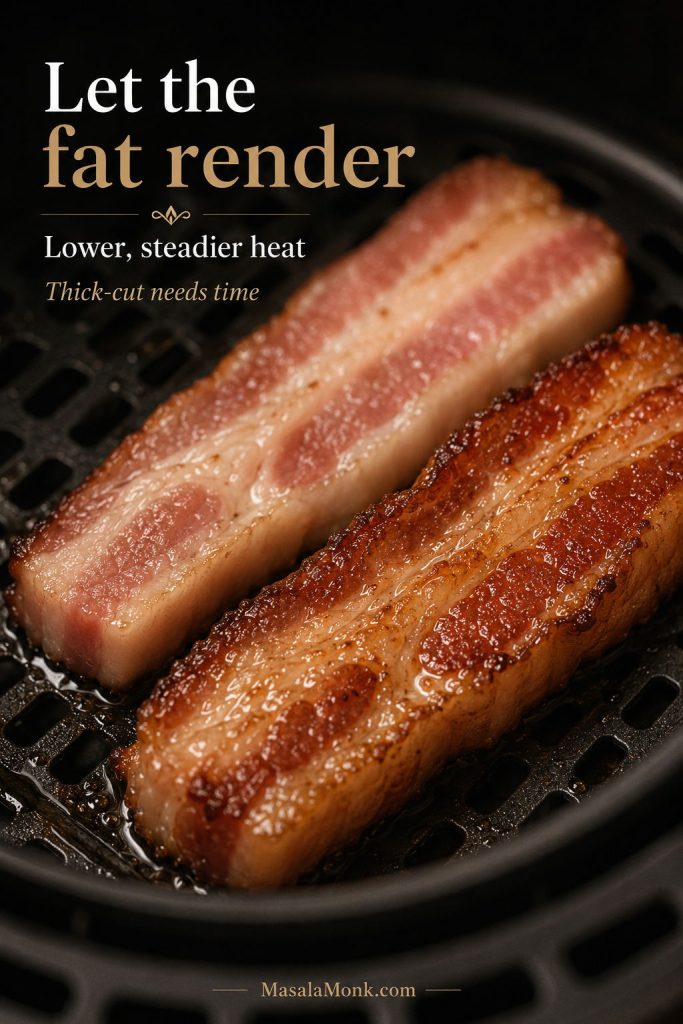
Start the diced bacon in a large skillet over medium heat and let it render until the edges brown, the fat collects in the pan, and the pieces turn crisp but not brittle. Stir occasionally so one side does not burn while the other stays soft.
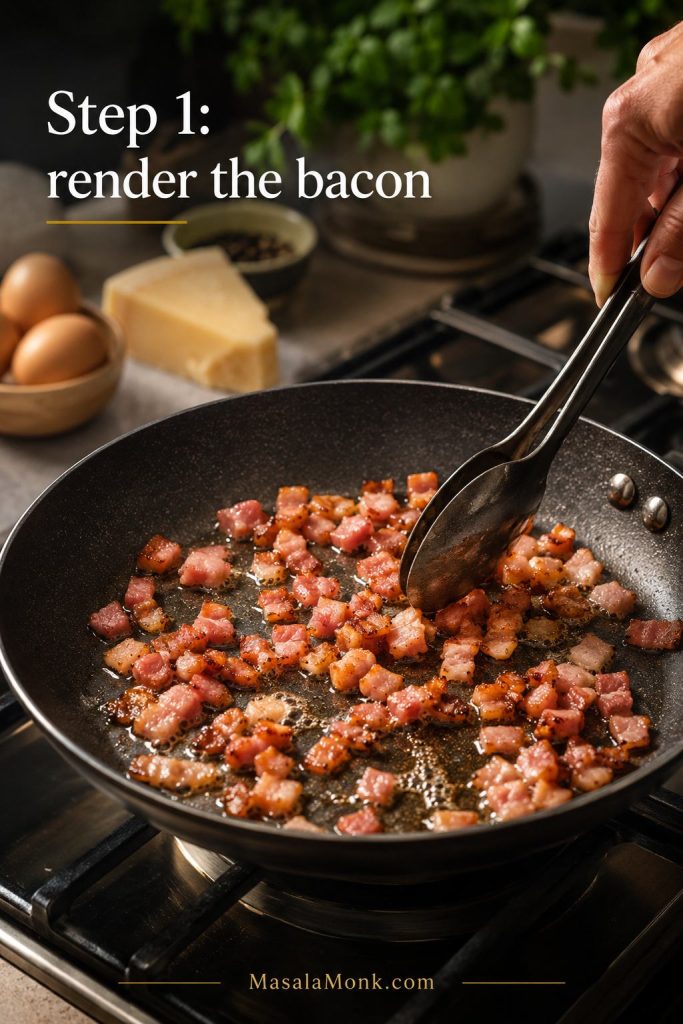
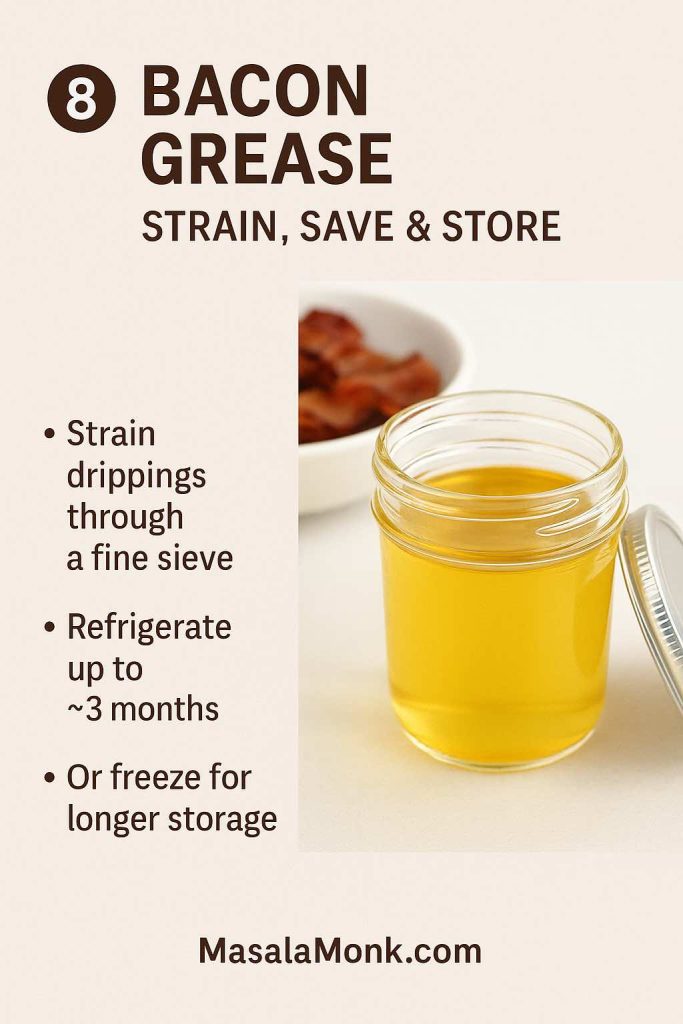
You want about 1–2 tablespoons of rendered bacon fat left in the skillet. If there is much more than that, spoon off the excess. If the pan looks dry because the bacon was lean, add a small drizzle of olive oil before tossing the pasta.
Once the bacon is crisp, turn the heat off while the pasta finishes. A pan that keeps heating after the bacon is done is more likely to scramble the sauce later.
For a gentle garlic background, add one lightly smashed garlic clove to the bacon fat for 30–60 seconds, then remove it. Avoid minced garlic in the egg mixture unless you want the dish to move away from carbonara and toward garlic bacon pasta.
2. Boil the Pasta and Save the Cooking Water
Cook the spaghetti in a large pot of boiling salted water until al dente. Because bacon and cheese are salty, season the water enough to flavor the pasta, but do not go as salty as you might for a simpler tomato or olive oil pasta.
Before draining, reserve at least 1 cup / 240 ml of hot cloudy water from the pot. That cloudiness is starch, and starch is what helps the sauce coat the strands.
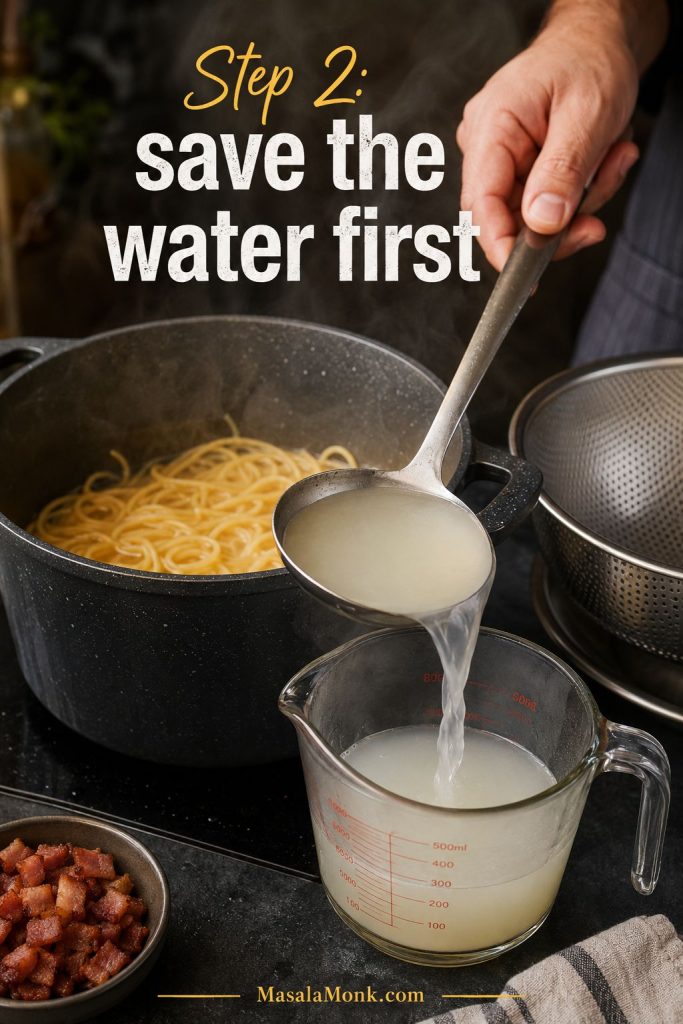
Drain the pasta, but do not rinse it. The hot, starchy surface is exactly what helps the sauce grab onto the spaghetti.
3. Whisk Eggs, Yolks, Cheese, and Pepper
In a large heatproof bowl, whisk together the eggs, egg yolks, finely grated cheese, and black pepper. The sauce base will look thick and grainy at first. That is normal; it smooths out when the hot pasta and a little water from the pot hit it.
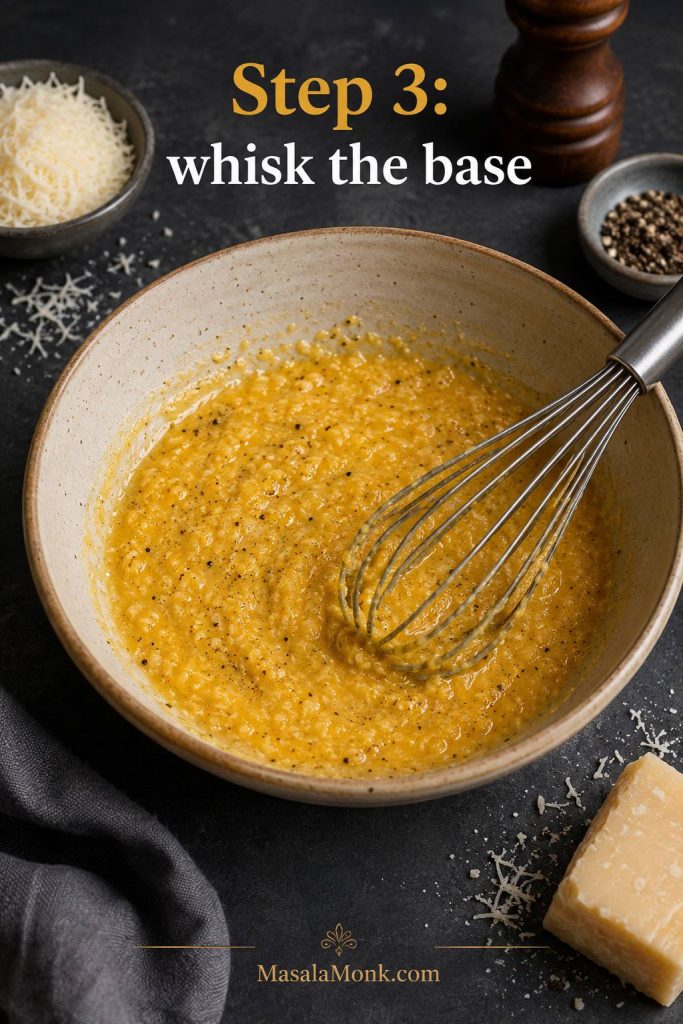
A larger bowl gives the sauce room to become fluid. If the bowl is tiny, the mixture sits in one place, the pasta cools unevenly, and the eggs are more likely to clump.
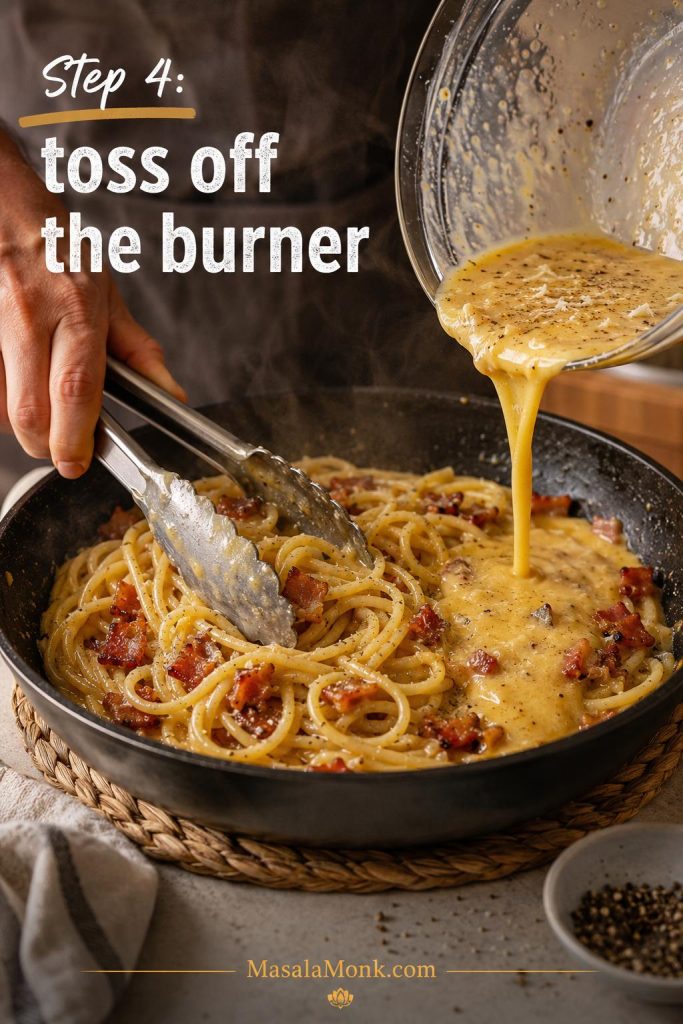
4. Toss Away from Direct Heat
With the burner off, add the drained hot spaghetti to the bacon and fat, then toss so the pasta is lightly coated. Wait 30 seconds if the skillet feels extremely hot. You want warmth, not fierce direct heat.
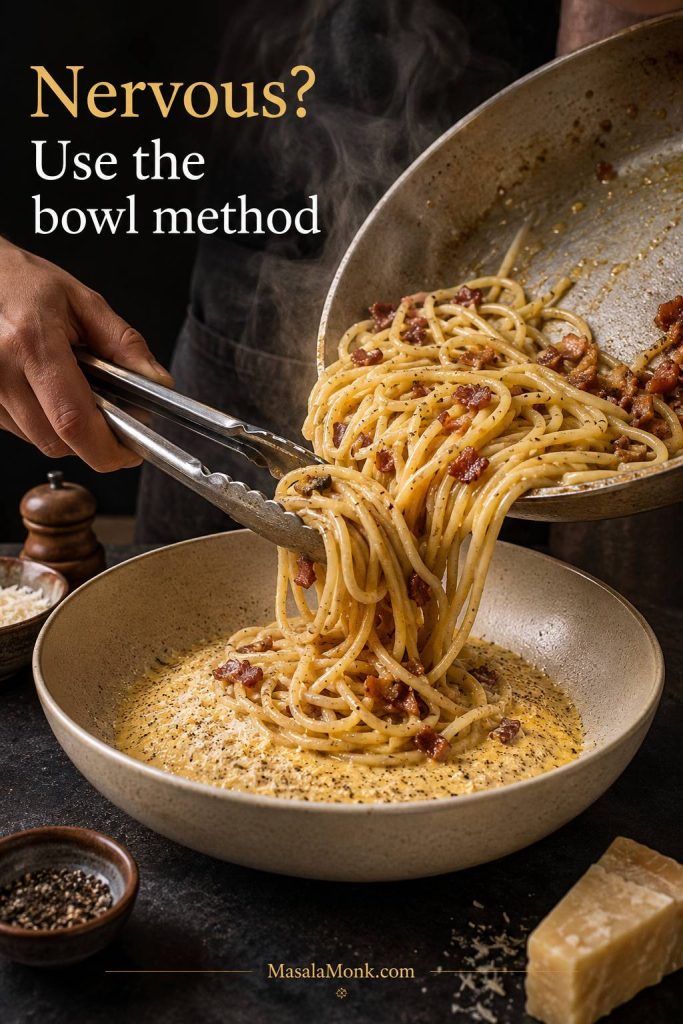
Now add the cheese-and-egg base and toss quickly. You can do this in the skillet away from the burner or in the large bowl with the egg mixture. The bowl method is the safest option if you are nervous about scrambling because it gives you more distance from the hot pan.
5. Loosen Until the Sauce Coats the Spaghetti
Add hot starchy water a little at a time, tossing constantly. Start with ¼ cup, then continue with 1–2 tablespoons at a time until the sauce loosens and coats the spaghetti. Stop when the strands look shiny and pepper-speckled, with the sauce moving with the pasta instead of pooling at the bottom of the pan.
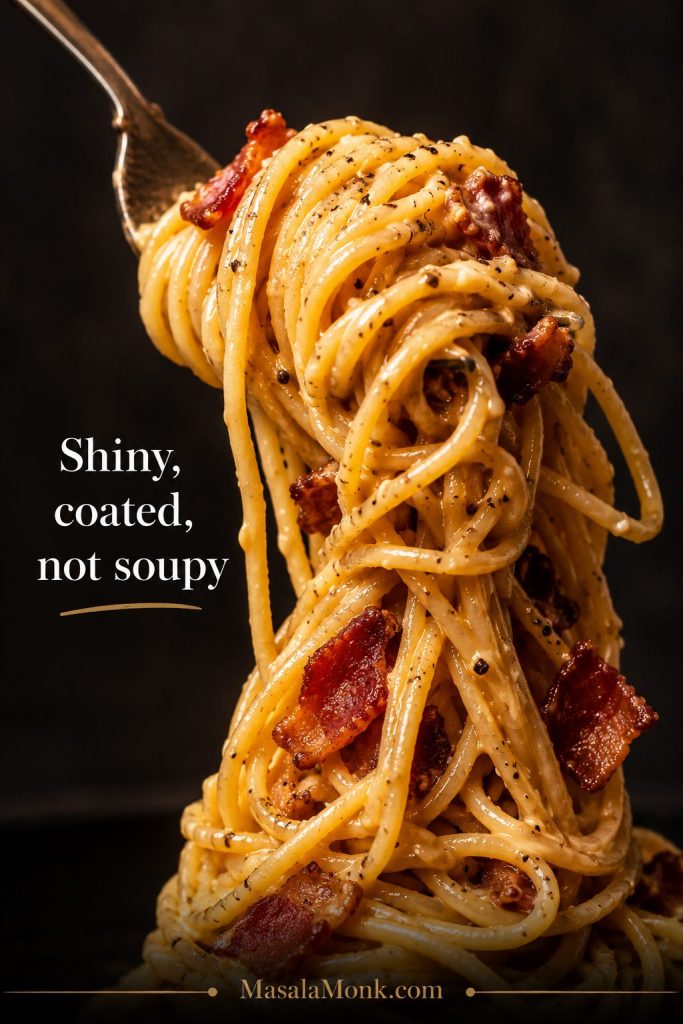
Serve immediately with more black pepper and a little extra cheese. Carbonara is at its best right away, while the sauce is warm, fluid, and clinging to the pasta.
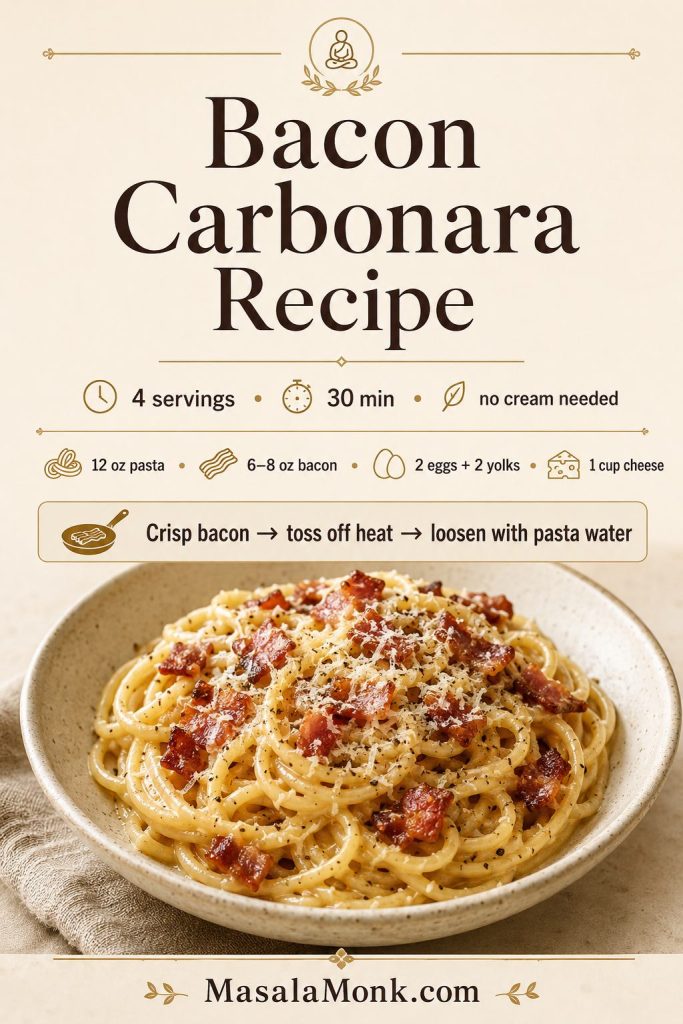
Bacon Carbonara Recipe
This carbonara recipe uses hot spaghetti, crisp bacon, eggs, cheese, black pepper, and reserved pasta water to make a silky sauce without heavy cream. Keep it no-cream and carbonara-style, or add a small splash of cream for a softer, richer version.
Ingredients
- 12 oz / 340 g spaghetti, bucatini, linguine, fettuccine, or rigatoni
- 6–8 oz / 170–225 g thick-cut bacon, diced
- 2 large eggs
- 2 large egg yolks
- 1 cup / 85–100 g finely grated Parmesan, Pecorino Romano, or a mix
- ¾–1 tsp freshly ground black pepper, plus more to serve
- ¾–1 cup reserved hot pasta water, added gradually
- Salt for pasta water
- Optional: 1 small garlic clove, lightly smashed and removed after flavoring the bacon fat
- Optional cream version: 2–4 tbsp / 30–60 ml heavy cream
Method
- Bring a large pot of water to a boil. Salt it moderately, remembering that bacon and cheese will add salt later.
- Add diced bacon to a large skillet and cook over medium heat until crisp around the edges. Leave 1–2 tablespoons rendered fat in the pan and spoon off excess if needed.
- Turn off the heat under the skillet while the pasta finishes. If using garlic, add the smashed clove to the warm bacon fat for 30–60 seconds, then remove and discard it.
- Cook spaghetti until al dente. Before draining, reserve at least 1 cup / 240 ml hot pasta water. Drain the pasta, but do not rinse it.
- In a large heatproof bowl, whisk eggs, egg yolks, finely grated cheese, black pepper, and 2 tablespoons of the reserved hot pasta water. If making the cream version, whisk in 2–4 tablespoons heavy cream now.
- Add drained hot pasta to the bacon skillet with the burner off and toss so the spaghetti is lightly coated in bacon fat.
- Add the egg-and-cheese mixture with the skillet off the burner, tossing quickly and constantly. If the skillet feels extremely hot, wait 30 seconds first. Alternatively, transfer the hot bacon-coated pasta into the bowl with the egg mixture and toss there for extra control.
- Add more reserved pasta water gradually, starting with about ¼ cup, then adding 1–2 tablespoons at a time until the sauce looks smooth and coats the pasta.
- Taste and adjust with more black pepper, cheese, or a small splash of pasta water. Serve immediately.
Notes
- This makes 4 moderate servings or 3 very generous bowls.
- Keep the pan off the burner when adding the egg mixture.
- Use finely grated cheese, not large shreds, for the smoothest texture.
- If the sauce gets thick, add hot reserved pasta water gradually and toss; for more fixes, see troubleshooting.
- If using Pecorino Romano, salt the pasta water lightly because Pecorino and bacon are both salty.
- Carbonara is best served right away. Reheat leftovers gently with a splash of water or milk.
How to Keep the Sauce from Scrambling
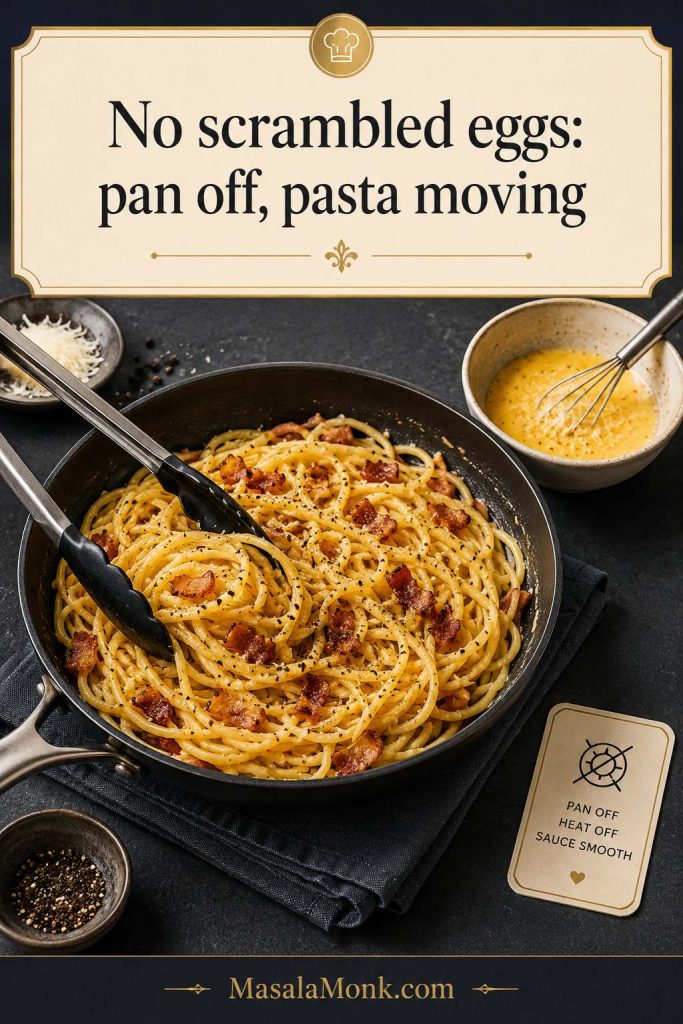
If carbonara makes people nervous, this is usually why. Eggs scramble when they meet too much heat too quickly. The fix is simple: move the pan away from direct heat, keep the pasta moving, and add the cloudy water slowly.
- Take the pan off the burner. Do not cook the egg mixture over active heat.
- Let the bacon pan calm down. If the fat is smoking or aggressively sizzling, wait 30–60 seconds.
- Use hot pasta, not direct flame. The pasta has enough heat to thicken the eggs gently.
- Add the water gradually. It loosens the sauce and helps distribute heat evenly.
- Toss constantly. Still eggs scramble; moving eggs turn into sauce.
- Use finely grated cheese. Big shreds melt slowly and can make the sauce clumpy.
New to this method? Use the bowl method: put the egg mixture in a large bowl, add the hot bacon-coated pasta into the bowl, and toss there. It gives you more control over the final texture.
Without Cream: How the Sauce Still Gets Creamy
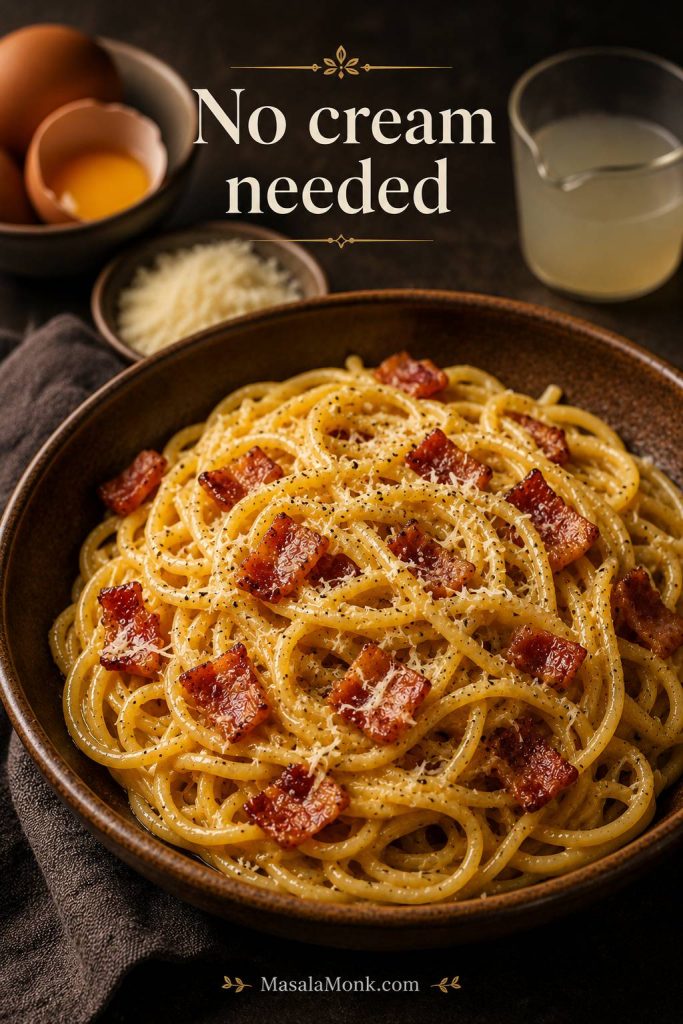
The main recipe is made without cream. It still tastes creamy because the sauce is not just egg. It is eggs, extra yolks, cheese, bacon fat, black pepper, and starchy water working together.
Think of the saved water as the bridge. The bacon fat adds richness, the cheese adds body, and the eggs thicken everything. Without that liquid, the sauce can feel tight and sticky. With it, the sauce turns spoonable and smooth.
This is the method to make first. It is lighter than a cream sauce, more carbonara-like, and better at letting the bacon, pepper, and cheese come through.
Prefer a softer comfort-food finish? See the small cream option.
With Cream: When to Add a Small Splash
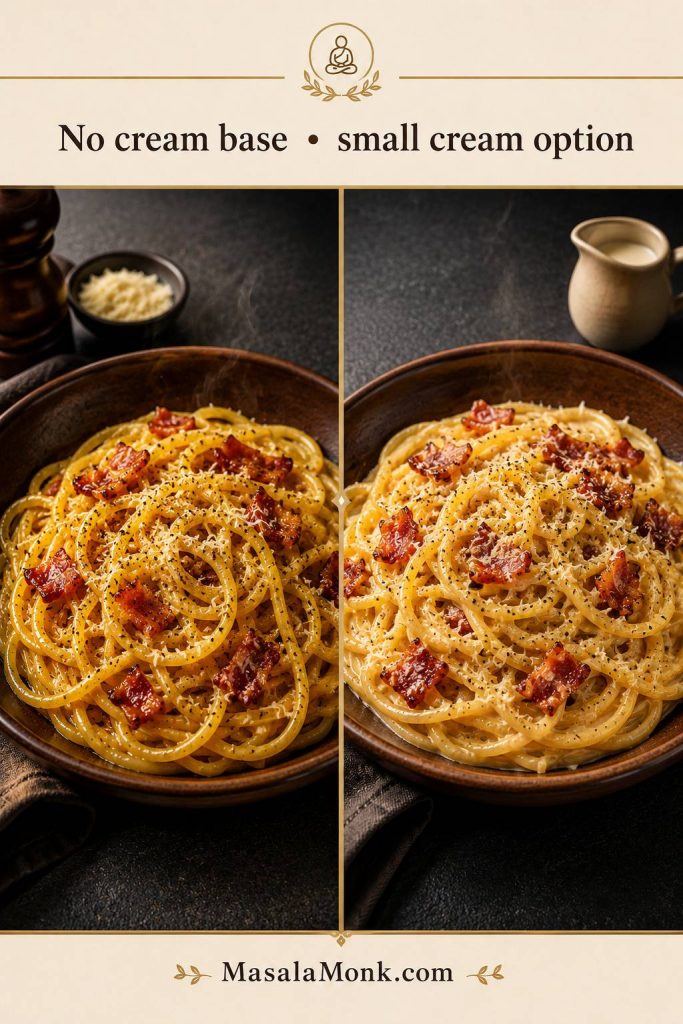
The no-cream version is still the best first batch, but this small cream option is helpful if you prefer a softer, richer sauce. This is not the traditional route; it is a home-cook option for a more forgiving, comfort-food finish.
Add 2–4 tablespoons / 30–60 ml heavy cream to the egg mixture before tossing. Keep the amount small. The goal is to soften the sauce, not turn the recipe into Alfredo.
Because cream softens sharper flavors, taste at the end and wake the pasta back up with more black pepper or a little extra cheese if needed.
| Version | Texture | Best choice when… |
|---|---|---|
| No cream | Glossy, peppery, carbonara-style | You want the bacon, cheese, pepper, and starchy water to do the work. |
| 2 tbsp cream | Softer and slightly richer | You want a little more forgiveness without turning it into a cream sauce. |
| 4 tbsp cream | Richer and more comfort-food creamy | You prefer a restaurant-style creamy pasta, but still want the carbonara base. |
Bacon Mushroom Carbonara
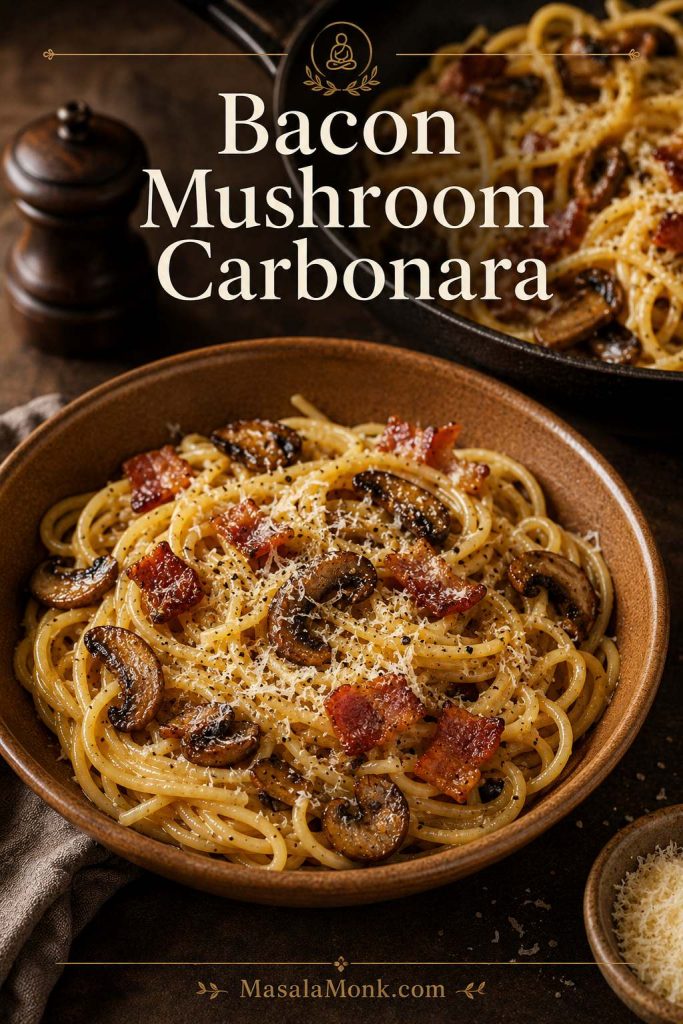
Mushrooms are an easy upgrade here because they soak up bacon fat beautifully. Use 8 oz / 225 g sliced mushrooms. After the bacon is crisp, remove it with a slotted spoon, leave 1–2 tablespoons fat in the pan, and cook the mushrooms until they release their moisture and brown.
Do not rush this part. Pale, watery mushrooms will thin the sauce. Browned mushrooms add depth, make the pasta feel heartier, and keep the final bowl from tasting diluted.
If the pan looks dry after the mushrooms brown, add a small splash of reserved cooking water before tossing in the spaghetti so the sauce has enough moisture to come together.
Chicken Bacon Carbonara
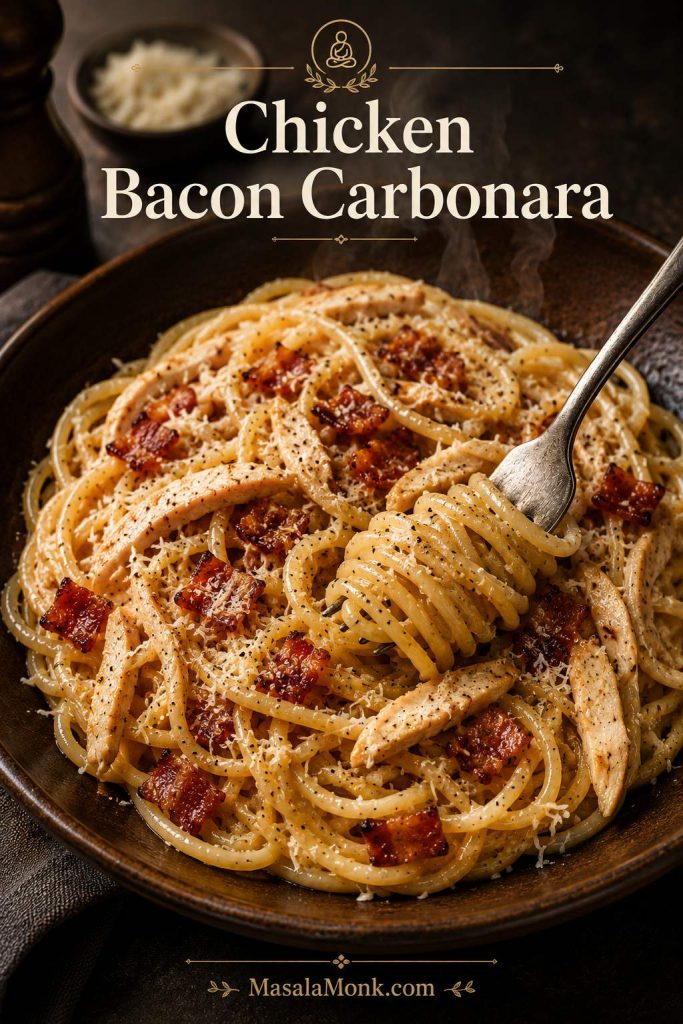
For a chicken version, add 1½–2 cups cooked sliced chicken. Chicken breast, thighs, or leftover roast chicken all work, but keep the pieces thin so they warm quickly without stealing heat from the sauce.
If cooking chicken from scratch, season it lightly and sear it before cooking the bacon, or cook it in a little bacon fat after the bacon is done. Slice it thinly, then add it back with the hot pasta before the cheese-and-egg base goes in.
If what you really want is a creamier ranch-style chicken and bacon pasta, MasalaMonk’s one-pot chicken bacon ranch pasta is a better fit. This variation stays egg-and-cheese based.
Carbonara with Peas
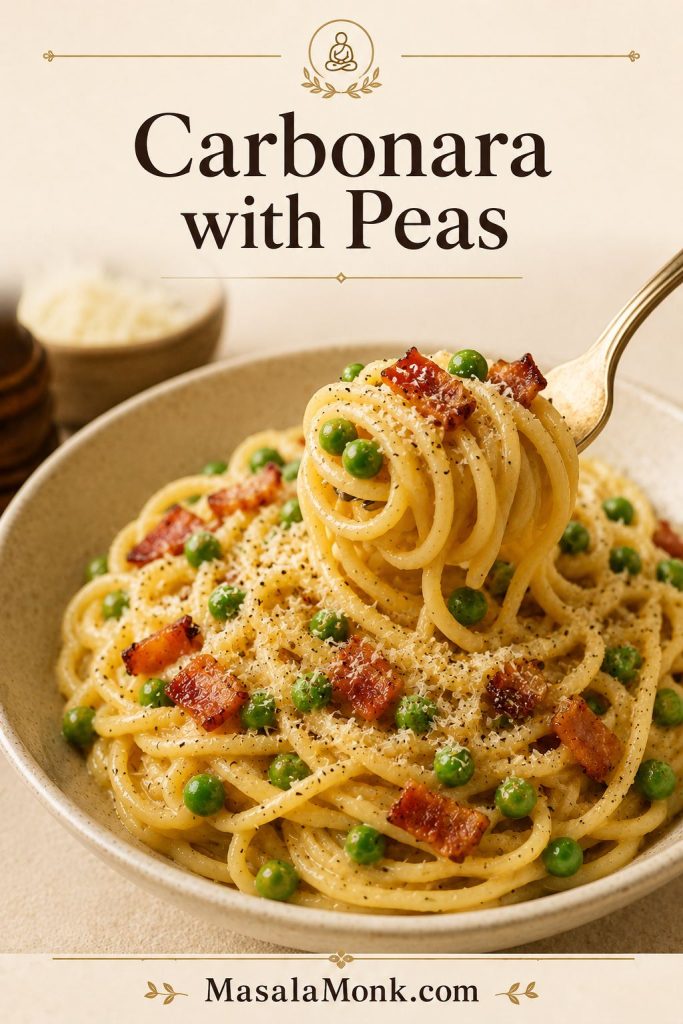
Peas add sweetness and color to this rich pasta. Add ¾ cup frozen peas to the pot during the last 60–90 seconds of cooking, then drain them with the spaghetti. They warm through quickly without turning dull or mushy.
They are not necessary, but they are helpful when you want the bowl to feel a little brighter. And then they also balance the salty bacon and cheese well.
Once you choose your version, see what to serve with bacon carbonara for lighter sides that balance the pasta.
What to Serve with Bacon Carbonara
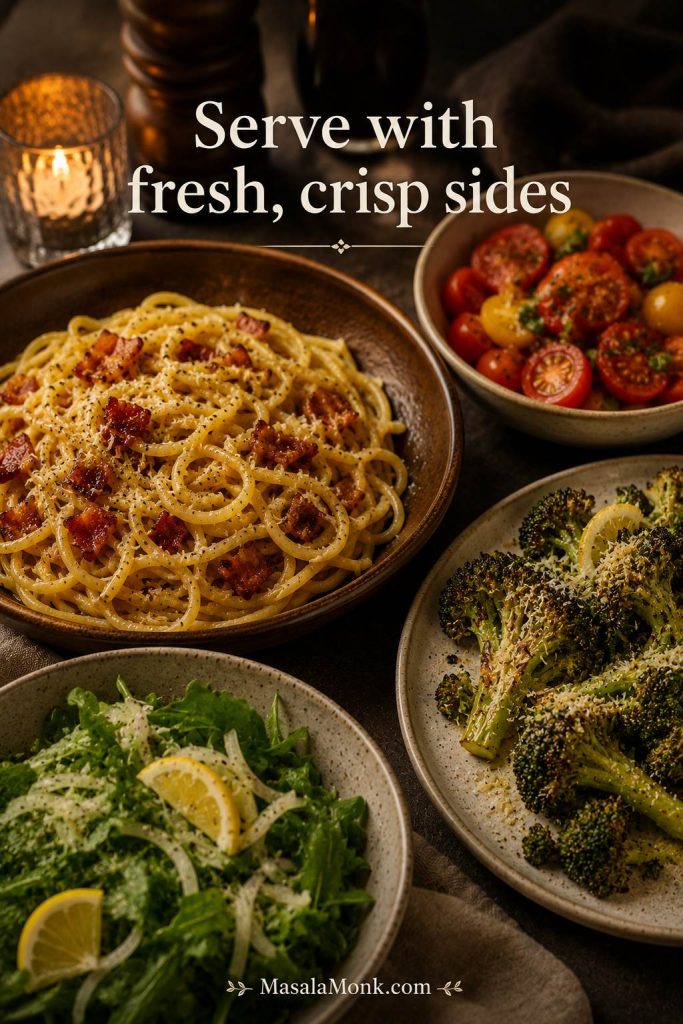
This pasta is rich, salty, and creamy, so the best sides are fresh, bitter, acidic, or crisp. You do not need another heavy dish beside it.
- Lemony green salad: arugula, romaine, or mixed greens with lemon vinaigrette.
- Roasted broccoli: crisp edges help balance the creamy pasta.
- Asparagus: roasted, grilled, or quickly sautéed.
- Tomato salad: especially good with ripe tomatoes, olive oil, and black pepper.
- Garlic bread: delicious, but keep the portion modest because the pasta is already rich.
- Sautéed greens: spinach, kale, or Swiss chard with lemon.
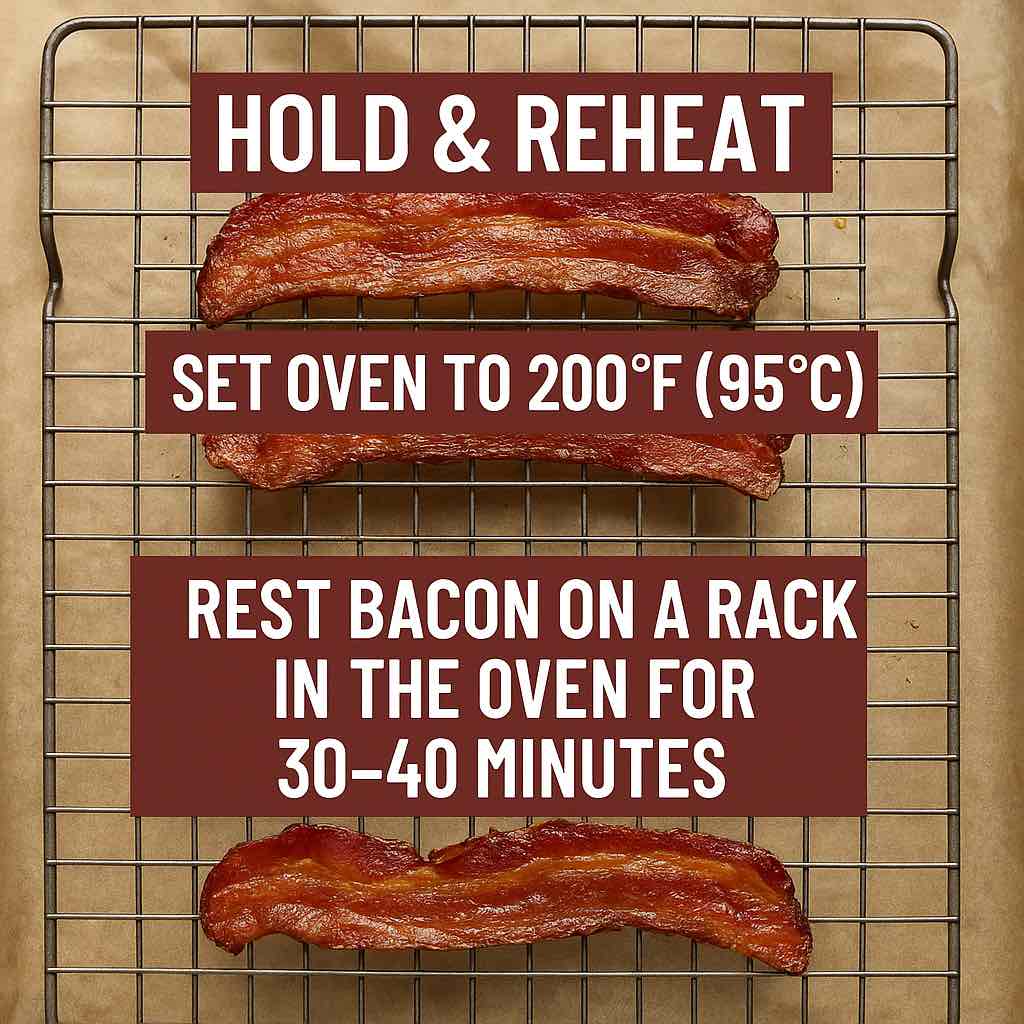
Storage and Reheating
Carbonara is best right after tossing, when the sauce is warm, fluid, and coating the strands. Leftovers can still be good, but they need gentle reheating because eggs and cheese do not like harsh heat.
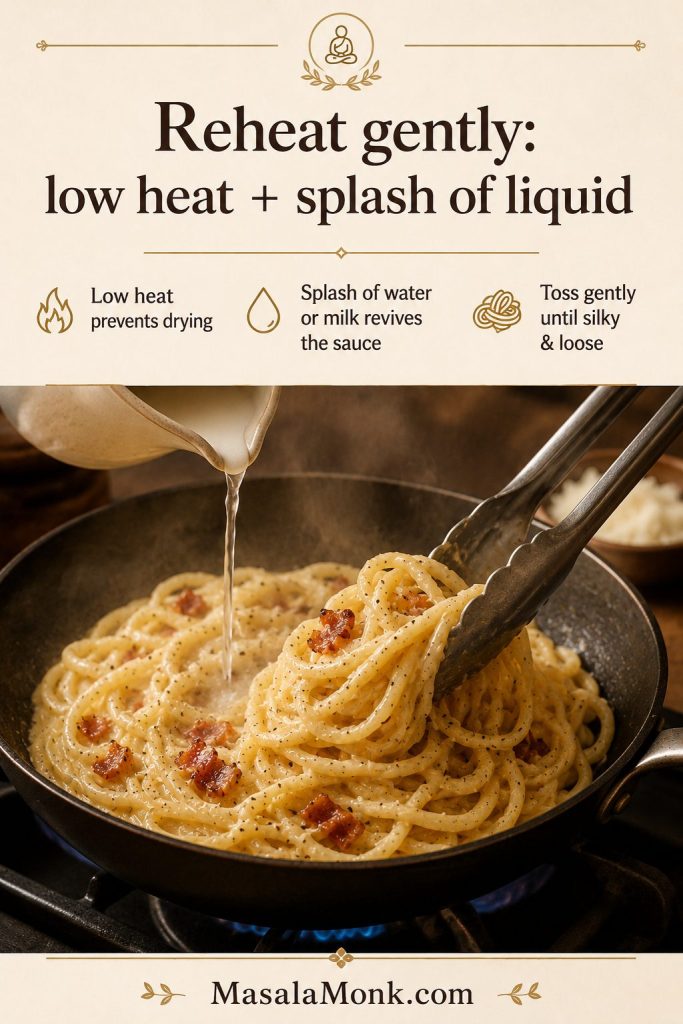
- Refrigerate: store leftovers in an airtight container for up to 3 days.
- Reheat in a skillet: add a splash of water or milk and warm over low heat, tossing often.
- Microwave carefully: use short bursts at lower power and stir between bursts.
- Do not boil the sauce: high heat can make it grainy, oily, or scrambled.
- Refresh before serving: add black pepper and a little grated cheese after reheating.
If you like understanding why creamy sauces split or turn grainy, MasalaMonk’s easy cheese sauce guide explains the same gentle-heat principle from a different angle. Carbonara is more delicate because it uses eggs, but the lesson is similar: harsh heat is the enemy of a smooth sauce.
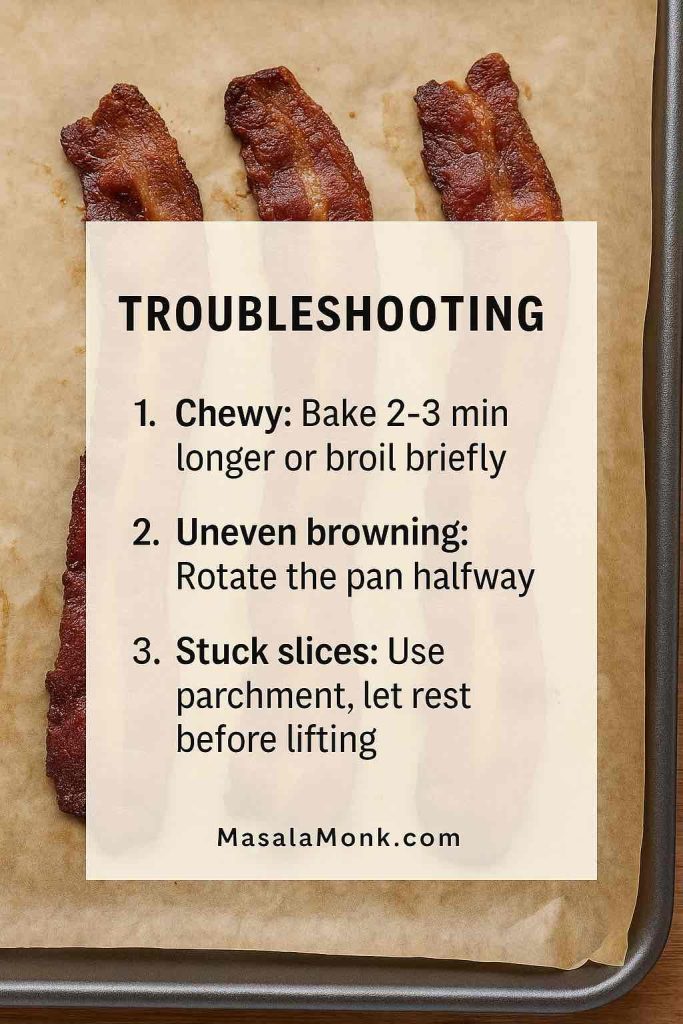
Troubleshooting: Fix Scrambled, Thick, or Salty Carbonara
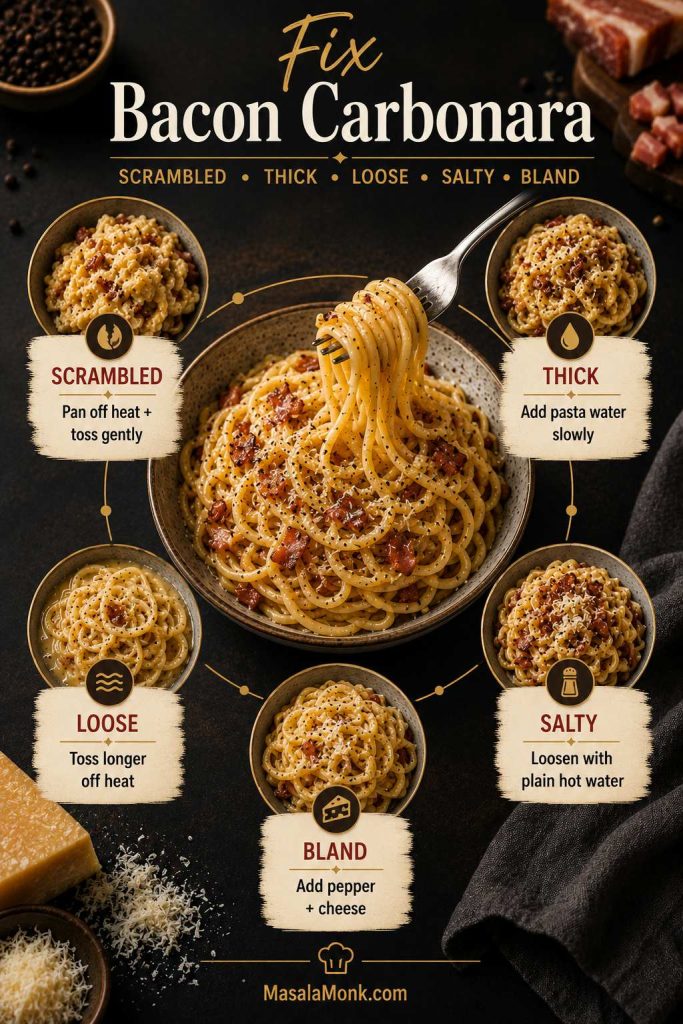
If your first batch is not perfect, it is usually still fixable. Most problems come from heat, timing, or sauce thickness, not from the recipe being difficult. Use the table below to bring the pasta back toward smooth, creamy, and balanced.
| Problem | Likely Cause | Fast Fix |
|---|---|---|
| Scrambled sauce | The pan was too hot | Remove from heat, loosen with hot water, and toss gently. |
| Sauce is thick or sticky | Not enough reserved cooking liquid | Add hot reserved water 1–2 tbsp at a time and toss until smooth. |
| Sauce looks loose | The liquid went in too quickly | Toss longer away from heat, then add a little more finely grated cheese if needed. |
| Finished pasta tastes salty | Bacon, cheese, and cooking water all brought salt | Add extra unsalted pasta if possible, or loosen carefully with a small splash of plain hot water. |
| Bland | Not enough pepper, cheese, or bacon fat | Add black pepper first, then cheese, then a tiny drizzle of fat if needed. |
The Sauce Scrambled
The pan was too hot or the eggs sat still too long. Next time, toss away from direct heat, let the pan cool briefly, and add the reserved water gradually. For the current batch, remove any obvious large egg clumps if you can, then loosen the pasta with a small splash of hot water or unsalted pasta water if you have it. Add a little extra cheese and keep going. It will not be perfect carbonara, but do not throw it out; it can still taste good.
The Sauce Is Thick or Sticky
Add hot reserved water 1–2 tablespoons at a time and toss until the sauce relaxes. A thick sauce usually means the cheese and eggs tightened before enough starchy water was added.
The Sauce Looks Loose
Toss longer away from heat. The sauce often thickens as it coats the pasta. If it still looks loose, add a little more finely grated cheese and keep tossing. Avoid putting it back over high heat, because that can scramble the eggs.
The Finished Pasta Tastes Salty
Bacon, Pecorino, Parmesan, and the cooking water all bring salt. If the finished pasta is too salty, add extra unsalted cooked pasta if you have it, or loosen with a small splash of plain hot water. Next time, salt the pot more lightly and use more Parmesan than Pecorino.
The Bacon Is Not Crisp
Start bacon in a cooler pan and give it time to render. If the heat is too high, the outside browns before the fat has time to melt. For carbonara, the best bacon pieces are crisp at the edges but not burnt or dry.
The Pasta Tastes Bland
Add more black pepper first. Carbonara needs pepper. Then add a little more cheese. If it still tastes flat, you may have drained away too much bacon fat or diluted the sauce. A tiny drizzle of bacon fat or olive oil can bring it back together.
FAQs
Is bacon a good substitute for pancetta in carbonara?
Bacon works well in a practical home carbonara, though it is smokier than pancetta and less traditional than guanciale. Salt the pasta water lightly, then taste before adding extra cheese at the end.
What if I have pancetta or guanciale instead?
Use the same amount by weight. Guanciale will taste richer and more traditional, while pancetta will be less smoky than bacon. Because both can be salty, taste before adding extra cheese at the end.
Does the sauce need cream?
No. The sauce can be creamy without cream when eggs, cheese, bacon fat, and starchy pasta water are tossed together properly. For the full comparison, see the without cream and with cream sections above.
How does carbonara get creamy without cream?
Egg yolks, finely grated cheese, bacon fat, and reserved hot cooking water work together to make the sauce creamy. Toss everything away from direct heat so the eggs thicken gently, then add the water slowly until the sauce turns smooth and shiny.
Why did the eggs scramble?
The pan was probably too hot when the egg mixture went in. Remove the pan from the burner, let the bacon fat calm down briefly, and toss constantly while adding reserved cooking water. The full scrambling prevention section walks through the safest method.
Which pasta shape works best?
Spaghetti is the classic and easiest choice. Bucatini, linguine, fettuccine, rigatoni, and mezze rigatoni also work. Long pasta gives the sauce a twirlable finish, while short tubes catch bacon pieces well.
Is milk a good replacement for cream?
Milk is not ideal because it thins the sauce without adding much richness. Use the no-cream method with eggs, cheese, and pasta water, or add a small amount of heavy cream if you want a softer sauce.
Should I use whole eggs, yolks, or both?
A mix of whole eggs and yolks gives the best balance. Whole eggs loosen the sauce, while extra yolks make it richer and silkier. For 12 oz / 340 g pasta, 2 whole eggs plus 2 yolks is a reliable starting point.
How much pasta water should I add?
Reserve at least 1 cup / 240 ml, but do not add it all at once. Start with about ¼ cup, then add 1–2 tablespoons at a time until the sauce coats the pasta smoothly.
Why is my carbonara sauce grainy?
Grainy carbonara usually means the eggs or cheese got too hot, the cheese was too coarse, or the sauce did not get enough reserved pasta water. Keep the skillet off the burner, use finely grated cheese, and loosen the sauce gradually while tossing.
How should leftovers be reheated?
Reheat gently in a skillet over low heat with a splash of water or milk, tossing often. Avoid high heat because the egg and cheese sauce can turn grainy or scramble.
Final Tip
Great bacon carbonara is about rhythm, not extra ingredients: crisp bacon, hot pasta, eggs away from harsh heat, and just enough saved cooking water for the sauce to turn loose, shiny, and pepper-speckled. Once that timing clicks, the dish feels less intimidating — and much easier to repeat.