Posted on — Leave a comment

Hibachi Ginger Sauce Recipe — Japanese Steakhouse Brown Sauce

A small ceramic bowl of brown hibachi ginger sauce with visible ginger and onion flecks, served with shrimp, steak bites, fried rice, zucchini, mushrooms, and onion.

If you have ever dipped hibachi shrimp, steak, or fried rice into that sharp brown ginger sauce and wished you had a jar at home, this is the one to make.

This hibachi ginger sauce is pourable, tangy, salty, lightly sweet, and full of fresh ginger-onion bite. It is the brown dipping sauce from the little Japanese steakhouse cup — not creamy yum yum sauce and not the orange ginger dressing from the salad.

The first spoonful should taste like the dip you remember: salty at the start, bright in the middle from lemon and rice vinegar, and warm with ginger at the end. Blend it in 5 minutes, chill it if you can, and serve it with shrimp, steak, chicken, fried rice, noodles, vegetables, dumplings, tofu, or rice bowls.

Before You Blend

  • Use fresh ginger if possible. Ginger paste works in a pinch, but fresh ginger gives the cleanest bite.
  • Choose low-sodium soy sauce. Regular soy sauce can make this dip too salty after it rests.
  • Pulse, don’t fully puree. Tiny ginger and onion flecks are part of the steakhouse-style texture.
  • Let it chill when you can. One hour in the fridge softens the raw onion and makes the sauce taste more rounded.

Quick Answer: What Is Hibachi Ginger Sauce?

Hibachi ginger sauce is a Japanese steakhouse-style dipping sauce made with fresh ginger, onion, soy sauce, rice vinegar, lemon juice, and a little sugar. It is usually served with grilled meats, seafood, vegetables, noodles, and fried rice.

When people ask for the brown sauce from hibachi restaurants, they usually mean this ginger-soy dipping sauce. Yum yum sauce is the creamy pink-orange one. On salad, the orange or tan sauce is usually Japanese ginger dressing.

It is especially good with shrimp fried rice, steak bites, grilled chicken, sautéed mushrooms, zucchini, dumplings, spring rolls, tofu, salmon, and rice bowls.

Hibachi Ginger Sauce Recipe

A 5-minute no-cook Japanese steakhouse-style ginger sauce made with fresh ginger, onion, soy sauce, rice vinegar, and lemon juice. The flavor is salty-tangy first, then bright and gingery, with a little onion bite that mellows after chilling.

Prep Time5 minutes
Cook Time0 minutes
Optional Chill Time1 hour
Total Time5 minutes, or 1 hour 5 minutes with chilling
YieldAbout 1 cup / 240 ml
Servings8
Serving Size2 tablespoons / 30 ml
TexturePourable, lightly textured

Ingredients

  • 2 tablespoons fresh ginger, peeled and grated or finely chopped, about 15 g
  • ½ cup chopped yellow onion, about 70–80 g
  • ⅓ cup low-sodium soy sauce or tamari, 80 ml
  • 3 tablespoons rice vinegar, 45 ml
  • 2 tablespoons fresh lemon juice, 30 ml
  • 1 teaspoon sugar or brown sugar, 4 g
  • ½ teaspoon lemon zest, optional
  • 1 small garlic clove, optional

Equipment

  • Blender, food processor, or mini chopper
  • Microplane, grater, or sharp knife
  • Cutting board
  • Measuring cups and spoons
  • Small jar or airtight container

No blender? Grate the ginger, mince the onion as finely as possible, then shake everything hard in a jar. The dip will be chunkier and more intense, but it still works for dipping.

Instructions

  1. Peel the ginger and grate it, or chop it finely so it blends easily.
  2. Chop the onion into small pieces. Smaller pieces help the mixture blend faster without turning foamy.
  3. Add the ginger, onion, soy sauce, rice vinegar, lemon juice, sugar, and optional lemon zest or garlic to a blender or food processor.
  4. Pulse until the sauce is loose and spoonable. Stop while tiny pieces of ginger and onion are still visible.
  5. Taste before you change anything. Add more lemon juice if it tastes flat, a tiny pinch of sugar if it tastes too strong, or 1–2 tablespoons water if it tastes too salty.
  6. Serve right away, or cover and chill for 1 hour so the flavor tastes smoother and more rounded.

Recipe Notes

  • Do not judge the sauce in the first minute after blending. Raw onion and ginger taste loud at first; chilling is part of the recipe if you want a smoother restaurant-style flavor.
  • Start with 2 tablespoons fresh ginger. Very mild ginger can take another ½ tablespoon after blending. Older, woody, or very hot ginger should rest in the sauce before you add more.
  • Low-sodium soy sauce keeps the sauce from becoming too salty.
  • Use a food processor for a slightly textured sauce and a blender for a smoother one.
  • The dip may separate in the fridge. Stir or shake before serving.
  • Yield may vary slightly depending on how finely the onion is chopped and blended.
  • Store in an airtight jar in the refrigerator and use within 5 days.

Choose Your Version

The main recipe is balanced for home cooking: bold enough for hibachi-style plates, but not so salty that it overwhelms rice, vegetables, or dumplings. Use this quick guide before you add more soy sauce, sugar, or lemon.

A tabletop guide showing hibachi ginger sauce served with steak bites, dumplings, fried rice, a rice bowl, and a jar method.
Start with the base sauce, then adjust it for the meal in front of you. Keep it loose for fried rice, make it bolder for steakhouse plates, or add garlic and sesame oil when serving it with dumplings.
Want This Result?Do This
Closest steakhouse biteAdd extra soy sauce, rice vinegar, lemon, and ginger from the stronger restaurant-style adjustment below.
Less salty everyday sauceStay with the main recipe and use low-sodium soy sauce.
Best for dumplingsAdd the optional garlic and a few drops of toasted sesame oil.
Best for fried riceKeep it loose and bright. Do not thicken it.
Best texturePulse until tiny ginger and onion flecks remain.
No blender versionGrate the ginger, mince the onion finely, and shake everything in a jar.

Already made the sauce? Jump to adjustments after blending or troubleshooting. Still deciding how you want it to taste? Start with why the balance works.

Why This Ginger Sauce Recipe Works

Some restaurant-style ginger sauces lean hard on soy sauce and vinegar. They taste bold with grilled steak or shrimp, but they can become too salty for home dinners. This version keeps the familiar ginger-onion base and balances it with lemon, rice vinegar, and a small amount of sugar.

The finished sauce should hit salty first, then tangy, then gingery. It should not taste creamy, oily, syrupy, or thick. If the onion tastes raw right away, chill the sauce before changing the recipe.

Quick Taste Check

The dip should taste balanced, not sweet or heavy. Flat sauce needs lemon, a too-strong batch needs chill time, and salty sauce needs water 1 tablespoon at a time. When one bite of rice makes you want another, the balance is right.

Chopsticks holding white rice dipped in brown hibachi ginger sauce above a small bowl of sauce, with grilled vegetables and fresh ginger nearby.
Plain rice is the quickest way to test the flavor because it does not hide the sauce. When the bite tastes lightly salty, bright, and gingery, the hibachi ginger sauce is ready.

That balance is why the dip works with a whole plate, not just one bite. It cuts through butter, soy, and seared edges without covering up the shrimp, steak, rice, or vegetables. Use it as a dip, a spoon-over sauce for fried rice, or a brighter alternative when a thicker stir fry sauce would feel too heavy.

What Is Hibachi Ginger Sauce?

The easiest way to understand hibachi ginger sauce is by where it sits on the plate: beside grilled food, not on salad. It cuts through richness, wakes up rice, and adds a fresh ginger bite to shrimp, steak, chicken, vegetables, and noodles.

You may see it called Japanese steakhouse ginger sauce, Benihana-style ginger sauce, hibachi brown sauce, or simply ginger sauce. Most of those names point to the same ginger-soy dipping cup sauce.

Ingredients You’ll Need

The goal is not to make the strongest sauce possible. Aim for that familiar first dip: bright, salty, gingery, and balanced enough that you keep going back for one more bite of rice.

Fresh ginger root, grated ginger, chopped yellow onion, soy sauce, rice vinegar, lemon halves, sugar, and garlic arranged on a wooden board.
Fresh ginger and onion create the bite, while soy sauce, rice vinegar, lemon, and a small amount of sugar bring balance. Together, they keep the sauce savory and bright instead of flat, sour, or overly salty.

Fresh Ginger

Fresh ginger is the main flavor. It gives the sauce its clean bite, gentle heat, and bright fragrance. Peel it first, then grate or finely chop it so it blends evenly.

Two tablespoons gives the sauce a clear ginger flavor without overwhelming everything else. Use 1½ tablespoons for a milder dip or 2½ tablespoons for a stronger one.

Yellow Onion

Onion is what keeps the dip from tasting like soy sauce with ginger stirred in. Yellow onion gives the best balance; white onion tastes sharper, and red onion changes the color and flavor too much for this style.

Soy Sauce or Tamari

Soy sauce brings salt, color, and savory depth. Low-sodium soy sauce is the safest choice because this is a dipping sauce, and salt builds quickly.

Tamari works well for a deeper flavor or a gluten-free version. Coconut aminos can work for a soy-free version, but it is sweeter and less salty, so reduce or skip the sugar and brighten the sauce with extra vinegar or lemon if needed.

For a sweeter cooked soy-ginger glaze instead of a fresh dipping sauce, this teriyaki sauce recipe is the better direction.

Rice Vinegar

Rice vinegar gives the sauce a clean tang without making it harsh. Unseasoned rice vinegar gives you the most control. If using seasoned rice vinegar, blend first, then add sugar only if the sauce still needs rounding.

Lemon Juice

Fresh lemon juice lifts the ginger, keeps the soy sauce from tasting heavy, and gives the dip a clean finish. Lemon zest is optional; use only a little because too much can make the sauce bitter.

Sugar

The sugar is not there to make the sauce sweet. It just rounds off the raw onion, vinegar, lemon, and ginger so the dip tastes balanced instead of harsh. Brown sugar tastes rounder; white sugar keeps the flavor cleaner.

Garlic, Optional

Garlic pushes the dip away from the clean steakhouse flavor and toward a stronger dumpling or noodle sauce. Add one small clove for that version, or leave it out for a cleaner ginger-onion base.

Fresh Ginger vs Ginger Paste vs Ground Ginger

Fresh ginger is best here because the sauce is supposed to taste lively. Dried ginger cannot give the same clean bite.

Ginger OptionDoes It Work?How to Use It
Fresh gingerBest choiceUse 2 tablespoons / about 15 g for the main recipe.
Ginger pasteWorks in a pinchStart with 1½ tablespoons, blend, then add more after tasting.
Ground gingerEmergency onlyStart with ¼ teaspoon. The flavor will be warmer and duller.

Check the label on ginger paste. Some brands include salt, vinegar, oil, or preservatives, and those can change the balance.

How to Make Ginger Sauce

No cooking needed here — just chop, blend, taste, and rest. A blender or food processor gives the cleanest texture, but a hand-chopped jar version still works when you want the sauce quickly.

1. Prep the ginger and onion

Peel the ginger and grate it, or chop it finely. Cut the onion into small pieces so it breaks down quickly.

Fresh ginger being grated on a metal grater beside chopped yellow onion on a wooden cutting board.
Grating the ginger before blending helps its flavor spread evenly through the sauce. Likewise, chopping the onion small gives body without leaving big raw pieces in the finished dip.

2. Add the sauce ingredients

Add the ginger, onion, soy sauce, rice vinegar, lemon juice, sugar, and optional lemon zest or garlic to a blender or food processor.

Chopped onion, fresh ginger, soy sauce, rice vinegar, lemon juice, and sugar inside a food processor before blending.
This no-cook ginger sauce comes together in the food processor. Add the aromatics and liquids together, then pulse in short bursts so the sauce stays loose and lightly textured.

3. Pulse until spoonable

Pulse until the sauce is loose and easy to pour. Stop before it becomes a creamy puree. Tiny visible bits of ginger and onion are a good sign.

Pulsed brown hibachi ginger sauce inside a food processor with small visible pieces of ginger and onion.
Stop pulsing while tiny ginger and onion flecks are still visible. That light texture is what gives Japanese steakhouse ginger sauce its fresh bite instead of a dull, over-blended finish.

4. Taste and adjust

Taste before you change anything, and do not panic if it feels loud at first. This sauce can swing from perfect to too salty quickly, so small adjustments are better than big ones. Add lemon if it tastes flat, a tiny pinch of sugar if it tastes too strong, or 1–2 tablespoons water if it tastes too salty.

5. Chill for smoother flavor

You can serve the sauce right away, but it tastes better after resting. After about an hour in the fridge, the onion relaxes, the ginger settles, and the sauce starts tasting more like the restaurant cup.

Blender vs Food Processor: What Texture Should Ginger Sauce Have?

Both tools work, but they give slightly different results.

Two bowls of brown ginger sauce on a tray, one labeled blender with a smoother texture and one labeled food processor with more visible flecks.
Use a blender for a smoother ginger sauce and a food processor for a more flecked steakhouse-style dip. Either works, but the tool changes the final texture.
ToolBest ForTexture
BlenderSmoother sauceMore even, less textured, easy to pour.
Food processorSteakhouse-style textureLightly textured, with tiny ginger and onion flecks.
Mini chopperSmall batchesWorks well, but scrape the sides once or twice.
No blenderQuick hand-chopped versionChunkier and stronger, but still useful for dipping.

The ideal texture is pourable and lightly flecked. It should not look like mayonnaise, salad dressing, or a thick glaze.

If the sauce turns pale or foamy after blending, let it sit for a few minutes and stir. Air can lighten the color temporarily; after resting, the sauce usually settles into a deeper brown.

Taste and Texture Target

You’ll know the sauce is right when it smells gingery, pours easily from a spoon, tastes bright but not biting, and leaves tiny flecks behind in the cup. It should be brighter than salad dressing and lighter than teriyaki sauce.
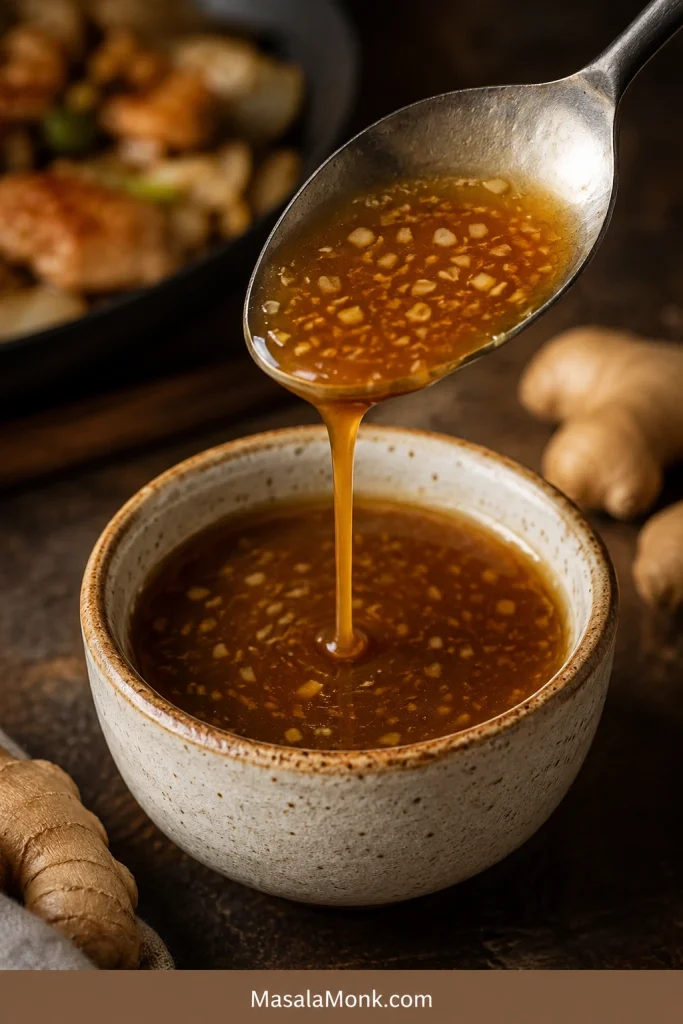
A spoon pouring brown hibachi ginger sauce with small flecks back into a ceramic bowl.
The finished sauce should fall easily from a spoon. That pourable texture lets it brighten rice, shrimp, steak, chicken, and vegetables without feeling heavy like a glaze.

How to Adjust the Sauce After Blending

Once the dip is blended, change it slowly. A spoonful of water, lemon, sugar, or soy sauce can move the whole batch.

GoalWhat to Do
More restaurant-styleAdd 1–2 tablespoons soy sauce, 1 tablespoon rice vinegar, and a little extra grated ginger.
Less saltyAdd 1–2 tablespoons water after blending, or use a little less soy sauce next time.
Less intenseChill for 1 hour and add ½ teaspoon sugar if needed.
More gingeryAdd ½ tablespoon more fresh grated ginger.
More texturedUse a food processor and stop while tiny pieces are visible.
SmootherUse a blender and blend a little longer, but stop before it turns foamy.
Gluten-freeUse tamari or certified gluten-free soy sauce.
Soy-freeUse coconut aminos, reduce or skip the sugar, and add extra vinegar or lemon to balance the sweetness.
Better for dumplingsAdd the optional garlic and a few drops of toasted sesame oil.

Benihana-Style Notes

Think of this as Benihana-style, not a claim that it is the restaurant’s exact formula. Benihana’s own ginger sauce notes emphasize fresh ginger, onion, rice vinegar, lemon juice, and low-sodium soy sauce, which lines up with the flavor profile people expect from the brown dipping sauce.

This version keeps that profile but adjusts the balance for a home kitchen. Use the stronger adjustment below when the sauce in your memory was sharper, saltier, and more intense. For a dip you can spoon over rice and use all week, stay with the main recipe.

A small bowl of dark brown Benihana-style ginger sauce with visible flecks, served near shrimp, steak bites, fresh ginger, lemon, and chopsticks.
For a stronger Benihana-style direction, add soy sauce, rice vinegar, lemon, and extra ginger a little at a time. Small changes matter because this dipping sauce can turn too salty quickly.

For a Stronger Restaurant-Style Sauce

After blending the main recipe, make it sharper and more soy-forward by adding:

  • 1–2 extra tablespoons soy sauce
  • 1 extra tablespoon rice vinegar
  • ½ tablespoon extra lemon juice
  • ½ tablespoon extra grated ginger

Add these slowly and taste as you go. It is easier to make the sauce stronger than to rescue a sauce that has become too salty or too sour.

Ginger Sauce vs Ginger Dressing vs Yum Yum Sauce

These sauces often get mixed up because they all show up around hibachi and Japanese steakhouse meals. The easiest way to tell them apart is to look at where they show up on the table: ginger sauce is for the dipping cup, ginger dressing is for salad, and yum yum sauce is the creamy one people spoon over shrimp and fried rice.

Three small cups labeled ginger sauce, yum yum sauce, and ginger dressing, showing a brown sauce, a creamy pink-orange sauce, and an orange-tan dressing.
This side-by-side view clears up the common hibachi sauce mix-up. Brown ginger sauce is for dipping, yum yum sauce is creamy, and Japanese ginger dressing usually belongs on salad.
SauceTextureMain FlavorBest Use
Hibachi ginger sauceBrown, pourable, lightly texturedGinger, onion, soy, vinegar, lemonShrimp, steak, chicken, vegetables, fried rice
Japanese ginger dressingOrange or tan, dressing-likeCarrot, onion, ginger, oil, vinegarGreen salad
Yum yum sauceCreamy, pale pink or orangeMayo, tomato or ketchup, sugar, spicesShrimp, chicken, fried rice, vegetables
Hibachi mustard sauceSmooth, mustard-forwardMustard, soy, sesame, or cream depending styleSteak and chicken
Ginger scallion sauceOil-based and spoonableGinger, scallions, hot oilRice, noodles, poached chicken, tofu

For salad, ginger dressing is usually the better match. Beside hibachi shrimp, steak, chicken, vegetables, or fried rice, this brown ginger sauce is the right one.

What to Eat With Ginger Sauce

Use this sauce beside something rich: buttery mushrooms, seared shrimp, fried rice, grilled steak, or chicken thighs. It makes rice taste brighter, shrimp taste sweeter, and steak feel less heavy after a few bites.

Hibachi-style favorites

  • Hibachi shrimp
  • Steak bites or grilled steak
  • Chicken thighs or chicken breast
  • Salmon or tuna
  • Grilled zucchini, onion, mushrooms, and broccoli
  • Fried rice
  • Hibachi noodles

Takeout-style snacks

  • Dumplings
  • Potstickers
  • Egg rolls
  • Spring rolls
  • Lettuce wraps

For a creamier dip beside spring rolls or noodles, keep this ginger sauce as the bright option and add a bowl of peanut sauce for contrast.

A wooden appetizer board with dumplings, spring rolls, lettuce wraps, brown ginger sauce, and a separate creamy dipping sauce.
This brown ginger dipping sauce also works beyond hibachi dinners. Try it with dumplings, potstickers, spring rolls, and lettuce wraps when you want a bright soy-ginger dip instead of a creamy sauce.

Everyday bowls and meals

  • Rice bowls
  • Noodle bowls
  • Tofu
  • Roasted vegetables
  • Leftover grilled chicken
  • A flexible salmon bowl when you want the sauce with fish

Complete Your Hibachi Night

For a full hibachi-style plate, serve this ginger sauce with fried rice or steamed rice, sautéed zucchini and mushrooms, shrimp or chicken, and one creamy sauce on the side. The ginger sauce brings the bright tang; the creamy sauce brings richness.

A hibachi-style dinner plate with fried rice, shrimp, steak, chicken, zucchini, mushrooms, onion, and a small bowl of brown ginger sauce.
Serve this ginger sauce beside rich hibachi foods. Its ginger, lemon, vinegar, and soy cut through fried rice, seared shrimp, steak, chicken, mushrooms, and buttery vegetables.

Cold leftover rice works especially well because the sauce cuts through the salty, savory flavor. For a fresh base, use this how to cook rice guide before adding shrimp, steak, chicken, tofu, or vegetables.

Optional Warm Drizzle for Bowls and Noodles

Classic hibachi ginger sauce is served cold or at room temperature. But if you want a warmer drizzle for noodles, bowls, or stir-fried vegetables, you can thicken a small portion.

Quick thickened version

  1. Mix ½ teaspoon cornstarch with 1 tablespoon water.
  2. Add ½ cup ginger sauce to a small pan.
  3. Warm over medium-low heat.
  4. Stir in the cornstarch slurry.
  5. Cook for 1–2 minutes, stirring, until lightly thickened.

Heating changes the personality of the sauce. It becomes more of a warm bowl drizzle, and the fresh ginger-onion bite softens. Thicken only what you plan to use right away and keep the rest cold for dipping.

Troubleshooting Ginger Sauce

Fresh ginger and onion can taste strong before they rest. Most problems are easy to fix with a small adjustment.

A troubleshooting board for hibachi ginger sauce with a bowl of brown sauce, lemon wedges, sugar, soy sauce, water, onion, and text explaining flavor fixes.
Fix the sauce in small steps after blending: lemon wakes up a flat batch, chilling softens onion bite, water reduces saltiness, and sugar rounds out too much acid.
ProblemWhy It HappenedHow to Fix It
Too onionyToo much raw onion or not enough resting timeChill for 1 hour. Add a small splash of soy sauce or lemon juice. Use less onion next time.
Overly saltyRegular soy sauce or too much soy sauceAdd 1–2 tablespoons water, a little more onion, or a squeeze of lemon.
Sharp or sourToo much vinegar or lemon juiceAdd ½–1 teaspoon sugar and a small splash of soy sauce.
Flavor feels intenseGinger, onion, vinegar, and lemon are all strongChill the sauce. Add a tiny bit more sugar. Dilute with 1 tablespoon water if needed.
BitterToo much lemon zest or old gingerSkip zest next time. Add a little sugar to round out the bitterness.
Runny textureClassic ginger sauce is naturally looseServe as-is, or use the warm drizzle variation for bowls and noodles.
Chunky textureNot blended enoughPulse 10–20 seconds more, or strain only if you prefer a cleaner pour.
Smooth or foamyOver-blendedLet it settle and stir. Next time, pulse instead of blending continuously.
Separated in the fridgeNormal for a fresh blended sauceShake or stir before serving.

Storage and Make-Ahead

Store the sauce in an airtight jar in the refrigerator and use it within 5 days for the freshest flavor.

Homemade hibachi ginger sauce stored in a glass jar labeled Hibachi Ginger Sauce, with a spoonful of sauce, fresh ginger, garlic, and kitchen ingredients nearby.
Store homemade hibachi ginger sauce in an airtight jar and shake before serving. As it rests, the fresh ginger, onion, and soy-vinegar base can naturally settle.

The flavor is loudest right after blending. After 1 hour in the fridge, the onion and ginger settle down and the soy, vinegar, and lemon taste more balanced. By the next day, the sauce feels rounder, and it is the kind of small jar you end up spooning over leftover rice, cold chicken, or roasted vegetables without planning to.

Shake or stir before serving because the sauce can separate as it sits.

Can you freeze ginger sauce?

You can freeze it in small portions, but the texture will not be as fresh after thawing. The onion and ginger can become slightly watery. For the best dipping texture, make it fresh and refrigerate it instead.

Can you use ginger sauce as a marinade?

Yes, but it is best as a dipping sauce first and a quick marinade second. Use it for shrimp, chicken, tofu, or vegetables when you want a fast ginger-soy flavor.

Because it contains vinegar and lemon juice, do not marinate delicate seafood for too long. Shrimp or fish only needs 10–15 minutes; chicken or tofu can sit for 15–30 minutes.

FAQ

What is the brown sauce at hibachi restaurants?

It is usually ginger sauce: a soy-based dipping sauce made with fresh ginger, onion, vinegar, and lemon. Restaurants commonly serve it with shrimp, steak, chicken, vegetables, noodles, and fried rice.

Is this the same as Benihana ginger sauce?

It is Benihana-style, not the restaurant’s exact formula. The recipe keeps the fresh ginger, onion, soy, vinegar, and lemon profile while using a balanced home-kitchen ratio. Benihana says its signature ginger sauce is prepared fresh and is not sold in stores or bottles. Read Benihana’s note here.

Is ginger sauce the same as yum yum sauce?

No. Ginger sauce is brown, tangy, and soy-based. Yum yum sauce is creamy, usually mayo-based, and pale pink or orange.

Is hibachi ginger sauce the same as ginger salad dressing?

No. Hibachi ginger sauce is a dipping sauce for grilled food and rice. Japanese ginger dressing is usually smoother, often made with carrot, onion, ginger, oil, vinegar, and soy sauce, and served on salad.

Do you serve ginger sauce hot or cold?

Serve it cold, chilled, or at room temperature. It can sit beside hot steak, shrimp, chicken, vegetables, or fried rice, but the sauce itself does not need to be heated.

How long does homemade ginger sauce last?

Use it within 5 days for the freshest flavor. Keep it in an airtight jar in the refrigerator and stir or shake before serving.

Fresh ginger, paste, or powder — which is best?

Fresh ginger is best. Ginger paste can work as a shortcut, but it may contain salt or vinegar. Ground ginger is not recommended because it does not give the same lively flavor.

Can I make ginger sauce without a blender?

Yes. Grate the ginger, mince the onion very finely, add the remaining ingredients to a jar, and shake hard. The sauce will be chunkier and stronger, but it still works for dipping.

Why does my ginger sauce taste too oniony?

Raw onion can taste strong right after blending. Chill the sauce for 1 hour before judging it. If it still tastes too oniony, add a little soy sauce, lemon juice, or sugar to balance it. Next time, use slightly less onion.

What can I serve with ginger sauce?

Serve it with hibachi shrimp, steak, chicken, fried rice, noodles, grilled vegetables, dumplings, spring rolls, tofu, salmon, rice bowls, or roasted vegetables.

Final Tip

The sauce should taste like the first bright bite at the hibachi table: salty, tangy, gingery, and fresh enough to make you want another spoonful of rice or another piece of shrimp. Blend it, chill it if you can, and keep the texture lightly flecked. That little bit of ginger and onion is the whole point.

Posted on — Leave a comment

Rotel Dip Recipe: Easy Velveeta Cheese Dip with Sausage, Beef & Crock Pot Tips

A tortilla chip lifting warm Rotel dip with melted Velveeta, sausage crumbles, diced tomatoes, and green chilies from a dark serving bowl.

This Rotel dip recipe is for the moment when the chips are open, people are hovering, and the cheese needs to stay creamy long after the first scoop. It is not fancy food. Think warm, glossy, salty, tomato-chile cheese dip that does exactly what party food should do: disappear from the table.

The best bowl should be soft enough to drag through with a chip, thick enough to cling, but not so stiff that the chip snaps. That texture comes from a few simple choices: use the Rotel undrained, melt the cheese gently, drain the meat well, and keep the finished dip warm instead of hot.

Keep it classic with Velveeta and Rotel when you need something fast. Add ground beef when you want it hearty and mild. Choose sausage when you want a bolder game-day bowl. Stir in cream cheese when you want it thicker and richer. Use the slow cooker when people are going to keep coming back for one more scoop.

Quick Answer: How to Make Rotel Dip

To make classic Rotel dip, combine 16 oz Velveeta with one 10 oz can of Rotel, undrained. Melt gently on the stovetop, in the microwave, or in a slow cooker until smooth. For a heartier dip, add 1 lb cooked and drained sausage or ground beef.

For the best all-around party dip, use sausage. A milder, family-friendly bowl works better with ground beef. Need the fastest version? Skip the meat. Want the thickest scoop? Add cream cheese.

There is no fancy sauce technique here. The Rotel liquid loosens the cheese, Velveeta keeps it steady, and cooked meat makes it hearty. Once everything is melted, your only job is to keep it soft and stir it now and then.

  • Classic ratio: 16 oz Velveeta + one 10 oz can Rotel, undrained
  • Cream cheese version: add 4 to 8 oz cream cheese for a thicker scoop
  • Crock pot version: cook on low for 2 to 3 hours, then switch to warm
  • Main rule: melt gently; do not boil the cheese mixture

The Easy Rotel Dip Ratio

This simple ratio gives the dip enough cheese to stay creamy, enough Rotel to loosen it, and enough meat to feel like a real party bowl.

Velveeta, an open can of Rotel, cooked ground meat, and tortilla chips arranged on a dark wooden table.
For the easiest Rotel dip ratio, use 16 oz Velveeta, one 10 oz can of Rotel, and 1 lb cooked meat for a heartier batch.

Rotel Dip Recipe Card

Rotel Dip Recipe

A creamy, scoopable cheese dip made with Velveeta, Rotel tomatoes with green chilies, and optional ground beef or sausage. Make it on the stovetop for a quick appetizer, or move it to a crock pot to keep it warm for a crowd.

  • Prep time: 5 minutes
  • Cook time: 10 to 15 minutes
  • Total time: 15 to 20 minutes
  • Servings: 10 to 12 appetizer servings
  • Best for: game day, potlucks, parties, movie nights, nachos, and snack boards

Ingredients

  • 1 lb ground beef or breakfast sausage / 454 g, optional but recommended for a heartier dip
  • 16 oz Velveeta, cubed / 454 g
  • 1 can Rotel diced tomatoes and green chilies, undrained / 10 oz / about 283 g
  • 1/2 tsp chili powder or 1 to 2 tbsp taco seasoning, optional
  • 1 to 3 tbsp milk / 15 to 45 ml, optional, only if the cheese needs thinning
  • 4 to 8 oz cream cheese / 113 to 227 g, optional, for a thicker and richer dip
Cubed Velveeta, an open can of Rotel, cooked meat, cream cheese, milk, seasoning, and a spoon arranged on a wooden board.
Before cooking, set up each ingredient by job: Velveeta melts smoothly, Rotel adds tomato-chile flavor, meat adds body, and cream cheese makes the dip richer.

Instructions

  1. Brown the ground beef or sausage in a large skillet over medium-high heat, breaking it into small crumbles as it cooks.
  2. Drain the meat very well. Keep the crumbles, not the grease.
  3. Reduce the heat to medium-low.
  4. Add the cubed Velveeta, undrained Rotel, and chili powder or taco seasoning if using.
  5. If using cream cheese, add it now in small cubes so it melts evenly.
  6. Stir until the cheese melts and the mixture looks smooth, glossy, and creamy.
  7. If it is too thick, add milk 1 tablespoon at a time until it is easy to scoop.
  8. Taste before serving. Add a pinch of chili powder, taco seasoning, or hot sauce only if it needs more flavor.
  9. Serve warm with tortilla chips, or transfer to a slow cooker on warm for parties.

Recipe Notes

  • For 2-ingredient Rotel dip, skip the meat and use only Velveeta and Rotel.
  • Mild breakfast sausage keeps the batch crowd-friendly, while hot sausage adds more heat.
  • Lean ground beef works well because it keeps the bowl hearty without adding too much grease.
  • Use 4 oz cream cheese for a slightly richer dip or 8 oz for a thick sausage-style batch.
  • If using sausage or taco seasoning, taste before adding extra salt.
  • Cook ground beef or sausage fully before adding the cheese. Ground meat and sausage should reach 160°F / 71°C; FoodSafety.gov has a safe minimum temperature chart if you want a reference.
  • Do not boil the cheese after it melts. Low, steady heat keeps the texture smoother.

What the Dip Should Look Like

Finished Rotel dip should look glossy, melted through, and thick enough to coat a chip. You should see small tomato and green chile pieces suspended in the cheese, not watery liquid around the edges.

When the dip falls from a spoon in slow ribbons, it is ready. A stiff clump needs gentle heat and a little milk. Grease pooling on top usually means the meat needed more draining. The final test is simple: a sturdy chip should scoop through without snapping.

Look for Slow Ribbons

The spoon tells you more than the clock. Smooth ribbons mean the cheese has melted evenly and the dip is ready to serve.

A spoon lifting glossy Rotel dip with diced tomatoes and green chilies so the dip falls back into the bowl in thick ribbons.
Once the cheese falls from the spoon in slow ribbons, the texture is right: melted through, easy to dip, and still strong enough for chips.

Which Version Should You Make?

Keep this ratio handy: 16 oz Velveeta, one 10 oz can Rotel, and 1 lb meat if you want the bowl hearty. From there, choose the version that fits the table.

SituationMake This
Need dip in 10 minutes2-ingredient Velveeta + Rotel
Want the best all-around party bowlSausage + Velveeta + Rotel
Serving kids or spice-sensitive guestsGround beef + mild Rotel
Want thicker scoopsAdd 4 to 8 oz cream cheese
Want the richest versionSausage + cream cheese + Velveeta + Rotel
Keeping it warm for a partyUse the crock pot on warm after melting
Dip got too thickRewarm gently and add milk slowly
Making a bigger party batch32 oz Velveeta + two cans Rotel + 1 to 2 lb meat

Match the Version to the Table

Use the version guide when you are choosing between fast, mild, bold, thick, or slow-cooker friendly.

Four bowls of Rotel dip on a dark table labeled meatless, ground beef, sausage, and cream cheese, with tortilla chips nearby.
Next, match the version to the table: meatless for speed, ground beef for mild flavor, sausage for game day, and cream cheese for thicker scoops.

For most parties, sausage with original Rotel is the safest bold version. A milder family bowl is easier to love with ground beef and mild Rotel.

Need more detail before choosing? Compare the ground beef version, sausage version, cream cheese version, or crock pot method.

Why This Cheese Dip Works

This dip works because every ingredient has a job, and none of them ask much from you.

  • Velveeta melts smoothly. It gives the bowl that classic creamy texture without needing a roux or careful cheese sauce technique.
  • Rotel adds flavor and moisture. The tomatoes and green chilies bring tang, gentle heat, and enough liquid to loosen the cheese.
  • Well-drained meat keeps it clean. Ground beef or sausage makes the bowl more filling, but extra grease can float on top if the meat is not drained.
  • Low heat protects the texture. Cheese dip does not need to boil. It needs to melt gently until loose, glossy, and dippable.
  • A slow cooker solves the party problem. Once melted, the warm setting keeps the cheese soft enough for chips without constant reheating.

If you like understanding why cheese turns smooth instead of grainy, this easy cheese sauce recipe goes deeper into gentle heat and creamy texture.

What Is Rotel Dip?

Rotel dip is the quick American-style cheese dip people make when they want melted cheese, tomato-chile flavor, and almost no prep. The classic version uses Velveeta because it melts smoothly and stays creamy, while Rotel adds tomatoes, green chilies, and just enough liquid to loosen the cheese.

The familiar 10 oz can plus 16 oz cheese ratio is also the brand-style queso formula. Ro-Tel’s Famous Queso Dip uses a 10 oz can of Ro-Tel, undrained, with a 16 oz package of Velveeta.

Searchers may call this Rotel cheese dip, Velveeta Rotel dip, Rotel queso dip, sausage Rotel dip, or hamburger cheese dip, but the idea is usually the same: melted cheese, Rotel, and sometimes meat.

Once you know the basic idea, the ingredient choices are simple: cheese controls the texture, Rotel brings the tomato-chile flavor, and meat decides how filling the bowl feels.

Ingredients You’ll Need

Velveeta

Velveeta gives this recipe its familiar party texture: creamy, steady, and almost impossible to mess up if you keep the heat low. A 16 oz block gives one standard batch the texture people expect from Velveeta Rotel dip.

Regular Velveeta gives the classic flavor. Queso blanco Velveeta also works for a lighter-colored dip. Shredded cheddar alone can turn grainy, so it works better with cream cheese in the no-Velveeta option.

Rotel Tomatoes and Green Chilies

One 10 oz can is the right amount for one 16 oz block of Velveeta. Pour in the tomatoes, chilies, and liquid together; that liquid keeps the cheese from turning stiff. The tomato and green chile pieces also keep the bowl from tasting flat.

Original Rotel is the default for that familiar tomato-chile bite. Mild Rotel is better for a gentle, crowd-friendly bowl. Hot Rotel works when you want more heat.

Ground Beef or Sausage

Meat is optional, but it makes the cheese dip more filling. Ground beef brings a milder, heartier flavor. Sausage makes it bolder, saltier, and more game-day friendly.

For one standard batch, cook 1 lb of ground beef, breakfast sausage, pork sausage, or hot sausage. Break it into small crumbles, spoon off excess fat, and then add the cheese and Rotel.

Cream Cheese

A little cream cheese gives the dip more body; a full 8 oz block turns it into a thicker, richer party scoop. It works especially well with sausage and in no-Velveeta versions.

Cut it into small cubes before adding it so it melts evenly. Use 4 oz when you still want classic queso energy; go up to 8 oz when you want the chip to come up loaded.

Seasoning and Heat

You do not need much seasoning because Velveeta, Rotel, and sausage already bring flavor. For more depth, add a little chili powder, taco seasoning, garlic powder, hot sauce, or chopped jalapeños. Start light, especially with sausage or taco seasoning.

How to Make Rotel Dip

The method is simple: cook the meat if you are using it, turn the heat down, melt the cheese with Rotel, and thin only if the dip needs it.

Stovetop Method

  1. Brown the ground beef or sausage in a large skillet over medium-high heat.
  2. Drain the meat well and return it to the pan.
  3. Lower the heat to medium-low.
  4. Add cubed Velveeta and undrained Rotel.
  5. Add cream cheese now if using it.
  6. Stir until the cheese melts into a smooth dip.
  7. Add a splash of milk only if the dip is too thick.

Drain the Meat Well

Draining the meat is the small step that keeps the finished dip rich instead of oily.

Cooked sausage crumbles in a skillet with a spoon removing excess grease before the meat is added to cheese dip.
After browning sausage or ground beef, drain it well so the cheese dip stays savory and rich without a greasy layer on top.

Once the meat is drained, add the Rotel with its liquid. That can liquid is part of the sauce, helping the cheese loosen while carrying tomato-chile flavor through the whole pan.

Use the Rotel Liquid

Pour in the tomatoes, green chilies, and liquid together before the cheese fully melts, so the mixture has enough moisture from the start.

Undrained Rotel tomatoes, green chilies, and liquid being poured from a can over cubed Velveeta in a dark pan.
When adding Rotel, pour in the tomatoes, green chilies, and liquid together; that juice loosens the Velveeta and keeps the dip scoopable.

Stop when the cheese looks glossy and the dip moves slowly from the spoon, not when it starts bubbling. High heat can make the edges oily, the texture heavy, or real cheese grainy.

Melt the Velveeta Gently

Low heat gives the cheese time to melt into the Rotel liquid, so the dip stays glossy and smooth.

Cubed Velveeta melting with Rotel tomatoes and green chilies in a skillet while a spoon stirs the mixture.
As the Velveeta melts, keep the heat gentle. The goal is glossy, dippable cheese, not a bubbling pot that turns heavy or oily.

Making this ahead for a crowd? Use the crock pot method. If the texture changes while it sits, the troubleshooting guide will help you bring it back.

Microwave Method

The microwave is best when you are making the fast meatless version and just need cheese dip on the table now. Add cubed Velveeta and undrained Rotel to a microwave-safe bowl. Microwave on high for 2 to 3 minutes, stir well, then continue in 30 to 60 second bursts until the cheese is melted through.

If adding ground beef or sausage, cook and drain the meat separately first, then stir it into the melted cheese mixture.

Slow Cooker Method

For parties, the slow cooker is the easiest method. Brown and drain the meat first, then add the meat, cubed Velveeta, and undrained Rotel to the slow cooker. Cook on low for 2 to 3 hours or high for 1 to 2 hours, stirring occasionally. Once smooth, switch to warm for serving.

2-Ingredient / Meatless Rotel Dip

When speed matters more than making it hearty, skip the meat and keep the bowl simple: Velveeta and Rotel. This is the fastest version and the easiest one to make at the last minute.

  • 16 oz Velveeta, cubed / 454 g
  • 1 can Rotel, undrained / 10 oz / about 283 g

Melt them together on the stovetop or in the microwave, stirring until smooth. It is lighter than the ground beef or sausage batch, but it still gives you that classic warm cheese-and-chile flavor. Corn or beans can make it more filling, but they move the recipe into a different style.

Ground Beef Version

Start here when you want the dip to feel like food, not just a snack, but still keep the flavor mild enough for everyone. Ground beef makes the bowl feel more like a filling snack than plain melted cheese, while still letting the tomato-chile flavor come through.

For one batch, use 1 lb ground beef, 16 oz Velveeta, and one 10 oz can Rotel. Brown the beef, break it into small crumbles, and drain it well before adding the cheese and Rotel. You may know this as hamburger Rotel dip, hamburger cheese dip, or Velveeta cheese dip with hamburger meat.

A dark bowl of Rotel dip with fine ground beef crumbles, melted Velveeta, diced tomatoes, green chilies, and tortilla chips.
For a milder bowl, ground beef gives this dip taco-night flavor that works with chips, nachos, baked potatoes, or a mixed crowd.

Sausage Version

Sausage is the game-day version: bolder, saltier, and a little more “people keep coming back” than ground beef. The sausage version smells richer and more savory as it melts, which is why it feels especially right for game day.

A standard sausage batch needs 1 lb breakfast sausage, 16 oz Velveeta, and one 10 oz can Rotel. Mild sausage keeps the dip crowd-friendly. Hot sausage makes it spicier and pairs well with original or hot Rotel. Cook the sausage fully, drain it well, and leave the grease behind before the cheese goes in.

Close-up of sausage Rotel dip with melted cheese, browned sausage crumbles, diced tomatoes, and green chili pieces.
For a bolder party dip, sausage brings deeper savory flavor, more texture, and a stronger game-day feel than ground beef.

This is also the option that works especially well with cream cheese. Add 4 to 8 oz when you want a thicker, richer scoop.

Cream Cheese Version

Cream cheese is for the thick-scoop people. It turns the dip into a heavier, richer scoop — the kind that sits on a sturdy chip instead of sliding right off.

Add 4 oz cream cheese for extra creaminess or 8 oz cream cheese for a thick sausage-style dip. Cut it into small cubes and let it soften slightly so it melts evenly.

A hand holding a tortilla chip topped with thick cream cheese Rotel dip, diced tomatoes, green chilies, and small meat pieces.
Add cream cheese when you want a heavier scoop; it makes the cheese dip richer, sturdier, and easier to load onto thick chips.

Because cream cheese makes the dip thicker, it pairs especially well with the chip test and the sturdy serving ideas below.

Slow Cooker / Crock Pot Rotel Dip

The slow cooker is the best choice when the cheese needs to stay soft for a party. It melts everything gently and keeps the finished bowl ready for repeat scoops.

BatchUse ThisSlow Cooker Size
Standard batch1 lb cooked meat + 16 oz Velveeta + 1 can Rotel3 to 5 quart
Small meatless batch16 oz Velveeta + 1 can Rotel2 to 3 quart
Big party batch1 to 2 lb cooked meat + 32 oz Velveeta + 2 cans Rotel4 to 6 quart
A slow cooker filled with Rotel dip on a party table with tortilla chips, diced tomatoes, jalapeños, green onions, and serving utensils.
For parties, the crock pot is about holding as much as cooking. Once melted, the warm setting keeps each scoop soft and ready.

Cook on low for 2 to 3 hours or high for 1 to 2 hours. Once the cheese is smooth, switch to warm. A large slow cooker batch may need up to 1/4 to 1/2 cup milk as it sits, but add it slowly so the cheese does not become thin.

Do not add raw ground beef or sausage directly into the cheese dip. Cook and drain the meat first. If using 2 lb sausage, taste before adding seasoning because sausage can make the dip salty.

Serving this for a longer party? Keep the dip on warm, then use the troubleshooting section if it thickens, turns oily, or needs loosening later.

For another slow-cooker bite that can stay warm for a crowd, grape jelly meatballs fit the same potluck and game-day table.

Do You Drain the Rotel?

No, do not drain Rotel for regular cheese dip. The liquid in the can helps the cheese melt into a smooth, creamy, dippable texture. The Rotel pour visual above shows how the tomatoes, green chilies, and liquid go in together.

Drain part of the liquid only for a very thick bowl, a doubled recipe that needs more control, or a different recipe where extra moisture causes problems. For the classic dip, use the whole can.

No-Velveeta Version

Real cheese can work, but it will not behave exactly like Velveeta. The no-Velveeta version tastes more like homemade queso, with stronger cheese flavor but less foolproof texture. Keep the heat low and give it help from cream cheese so it stays smoother.

  • 8 oz cream cheese / 227 g
  • 1 to 1 1/2 cups freshly shredded cheddar or pepper jack
  • 1 can Rotel, partly drained if you want a thicker dip
  • A splash of milk if the cheese needs loosening

Freshly shredded cheese melts better than pre-shredded cheese because bagged shredded cheese often has anti-caking ingredients. Add shredded cheese off the heat or over very low heat, and stir gently.

How to Make It Spicier

The easiest way to add heat is to use hot Rotel instead of original. For a stronger kick, add spicy sausage, chopped jalapeños, cayenne, hot sauce, pepper jack, or a little extra chili powder.

Add heat slowly. Cheese dip can become too spicy faster than expected, especially if you use hot sausage and hot Rotel together. For a brighter bowl beside all that cheese, salsa verde adds a tangy green contrast for chips, tacos, bowls, and nachos.

How to Keep It Creamy and Warm

Rotel dip is best when it stays soft enough to scoop. As it cools, the cheese naturally tightens; that is normal, and it is easy to fix.

  • Serve it from a slow cooker on warm.
  • Stir every 20 to 30 minutes during a party.
  • Keep the lid on when people are not serving.
  • Add milk slowly if it gets too thick.
  • Keep the heat low after the cheese melts.
  • Drain meat well so grease does not collect on top.

If the bowl has been sitting for a while, stir it before adding more liquid. Sometimes the top looks thick, but the inside is still creamy once stirred. The same rule applies to other dairy-heavy dips, like spinach artichoke dip: once it is hot and melted, warm is safer than high.

Troubleshooting

When the cheese changes while it sits, do not panic. Warm dips thicken, cool, and sometimes look oily before a quick stir brings them back. Most problems are easy to fix if you control heat, thickness, and grease.

ProblemWhy It HappensHow to Fix It
Too thickThe cheese cooled, or too much liquid evaporatedWarm gently and add milk 1 tablespoon at a time
Too thinToo much liquid or not enough cheeseAdd more cubed Velveeta, or warm uncovered on low for a few minutes while stirring often
GreasyThe meat was not drained wellSpoon off excess grease or blot the surface lightly
Oily edgesThe heat is too high, or the meat was greasyLower the heat, stir gently, and spoon off excess oil
GrainyHeat was too high, or real cheese did not melt smoothlyLower the heat and use Velveeta or cream cheese for a smoother base
Skin on topIt sat uncovered or unstirred for too longKeep covered and stir every 20 to 30 minutes
Too spicyHot Rotel, spicy sausage, or too much hot sauceAdd more Velveeta or cream cheese to mellow it
BlandMild meat and mild Rotel need more seasoningAdd taco seasoning, chili powder, garlic powder, or hot sauce
Too saltySausage, Velveeta, or seasoning added more salt than expectedAdd cream cheese, a splash of milk, or more unsalted meat if you have it

Quick Fix Guide

Most dip problems come down to heat, liquid, or grease. Fix one at a time and the bowl usually comes back quickly.

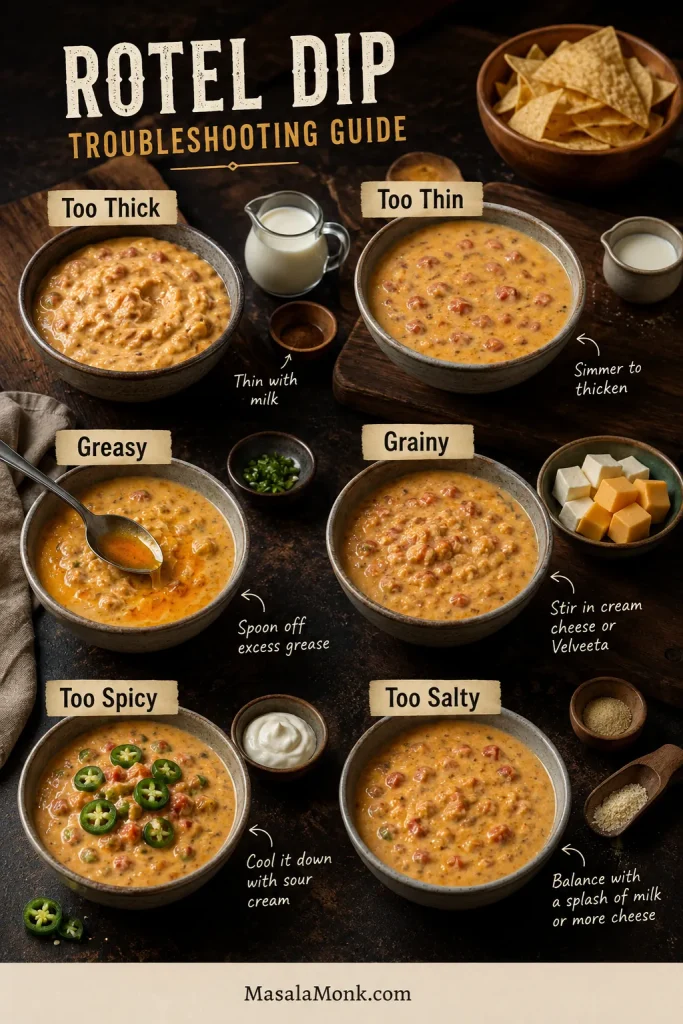
A Rotel dip troubleshooting board with bowls labeled too thick, too thin, greasy, grainy, too spicy, and too salty, plus small fix ingredients.
If the dip gets too thick, thin, greasy, grainy, spicy, or salty, small fixes like milk, gentle heat, cream cheese, or extra cheese can bring it back.

What to Serve with Rotel Dip

Once the cheese is warm and glossy, the only real question is what gets dipped first. Set out the sturdy chips first. The thin ones can wait for salsa.

Use the Chip Test Before Serving

A sturdy tortilla chip should scoop through the dip without snapping. That tells you the dip is thick enough to cling but still soft enough to serve.

A hand pushing a sturdy tortilla chip into Rotel dip with melted cheese, meat crumbles, diced tomatoes, and green chilies.
Before serving, try the chip test: a sturdy tortilla chip should scoop through cleanly and bring up cheese, meat, tomato, and chile.
  • Best dippers: thick tortilla chips, scoop-style corn chips, Fritos Scoops, pretzels, or sturdy crackers.
  • Fresh contrast: celery sticks, bell pepper strips, cucumber rounds, jalapeño slices, green onion, cilantro, pico de gallo, or a little sour cream drizzle.
  • Load it onto: nachos, fries, tater tots, baked potatoes, tacos, rice bowls, burgers, or hot dogs.
  • Game-day spread: pair it with something crisp and savory like air fryer chicken wings.

The best scoop should bring up cheese, tomato, chile, and little bits of meat in one bite. That is why thick chips matter, especially with sausage or cream cheese versions.

Make Ahead, Storage, Reheating, and Freezing

Yes, you can make Rotel dip ahead. Let it cool, store it in the fridge, and reheat it gently on the stovetop, in the microwave, or in a slow cooker. Add a splash of milk if it has thickened.

Store leftovers in an airtight container in the fridge for 3 to 4 days. Refrigerate leftovers within 2 hours; during serving, keep the dip warm rather than letting it sit at room temperature for long stretches.

Reheating is easy; the only trick is not rushing it. Use low heat on the stovetop or short microwave intervals, stirring often so the edges do not overheat before the center is warm.

Freezing is not ideal. Cheese dips can separate, turn grainy, or lose their smooth texture after thawing. For the best texture, refrigerate leftovers and reheat them within a few days instead.

Make It a Snack Table

A good snack table needs contrast. Keep this cheese dip warm, add a cold 7 layer dip, set out something crunchy, and bring in one savory bite like wings, meatballs, or sliders. That way the Rotel dip stays the warm centerpiece without having to carry the whole table.

Build the Serving Board

Put sturdy chips closest to the warm dip, then use vegetables, jalapeños, green onion, pico, and toppings to add freshness around the rich cheese.

A serving board with Rotel dip, tortilla chips, scoop chips, celery sticks, red bell pepper strips, jalapeños, green onion, diced tomatoes, shredded cheese, and cilantro.
Finally, serve the dip with sturdy chips first, then add scoop chips, vegetables, jalapeños, green onion, pico, and toppings for contrast.

For a second warm dip, buffalo chicken dip brings a spicy, creamy option beside this cheesy one. If you are turning the snack table into dinner, slow cooker pulled pork works for sliders, nachos, rice bowls, and loaded baked potatoes.

FAQ

What is Rotel dip made of?

The classic version is Velveeta plus Rotel diced tomatoes with green chilies. Many versions also add ground beef, sausage, cream cheese, taco seasoning, or chili powder.

Do you drain Rotel before adding it?

No. Use Rotel undrained for regular cheese dip. The liquid helps the cheese melt smoothly and keeps the texture scoopable.

How much Velveeta do I need for one can of Rotel?

Use 16 oz Velveeta for one 10 oz can of Rotel. That is the classic ratio for smooth, scoopable Rotel dip.

Is Rotel dip better with sausage or ground beef?

Sausage gives the dip a bolder, saltier, more party-style flavor. Ground beef is milder and better for a crowd that does not want much spice.

How do you make Rotel dip in a crock pot?

Cook and drain the meat first, then add it to the slow cooker with cubed Velveeta and undrained Rotel. Heat on low for 2 to 3 hours or high for 1 to 2 hours, then switch to warm.

What does cream cheese do in Rotel dip?

Cream cheese makes the dip thicker, richer, tangier, and sturdier on chips. Use 4 oz for a small creamy boost or 8 oz for a thick sausage-style batch.

How do I thin Rotel dip without making it watery?

Warm it gently and add milk 1 tablespoon at a time. Stir before adding more because the center may be creamier than the top looks.

What can I use instead of Velveeta?

Use cream cheese with freshly shredded cheddar or pepper jack. It will taste more like homemade queso, but it will not be as foolproof as classic Velveeta dip.

How long does Rotel dip last in the fridge?

Leftover Rotel dip keeps well in an airtight container in the fridge for 3 to 4 days. Reheat gently and stir in a little milk if it has thickened.

Does Rotel dip freeze well?

Freezing is not the best choice because the cheese can separate or turn grainy after thawing. Refrigerate leftovers and reheat them within a few days for the best texture.

Rotel dip should make the table easier, not more complicated. Start with Velveeta and Rotel, add sausage or ground beef if the bowl needs to feel hearty, stir in cream cheese for a thicker scoop, and let the slow cooker do the quiet work while people come back for more.

Made it with sausage, ground beef, cream cheese, or just Velveeta and Rotel? Tell us which version disappeared first.

Posted on — Leave a comment

Yum Yum Sauce Recipe

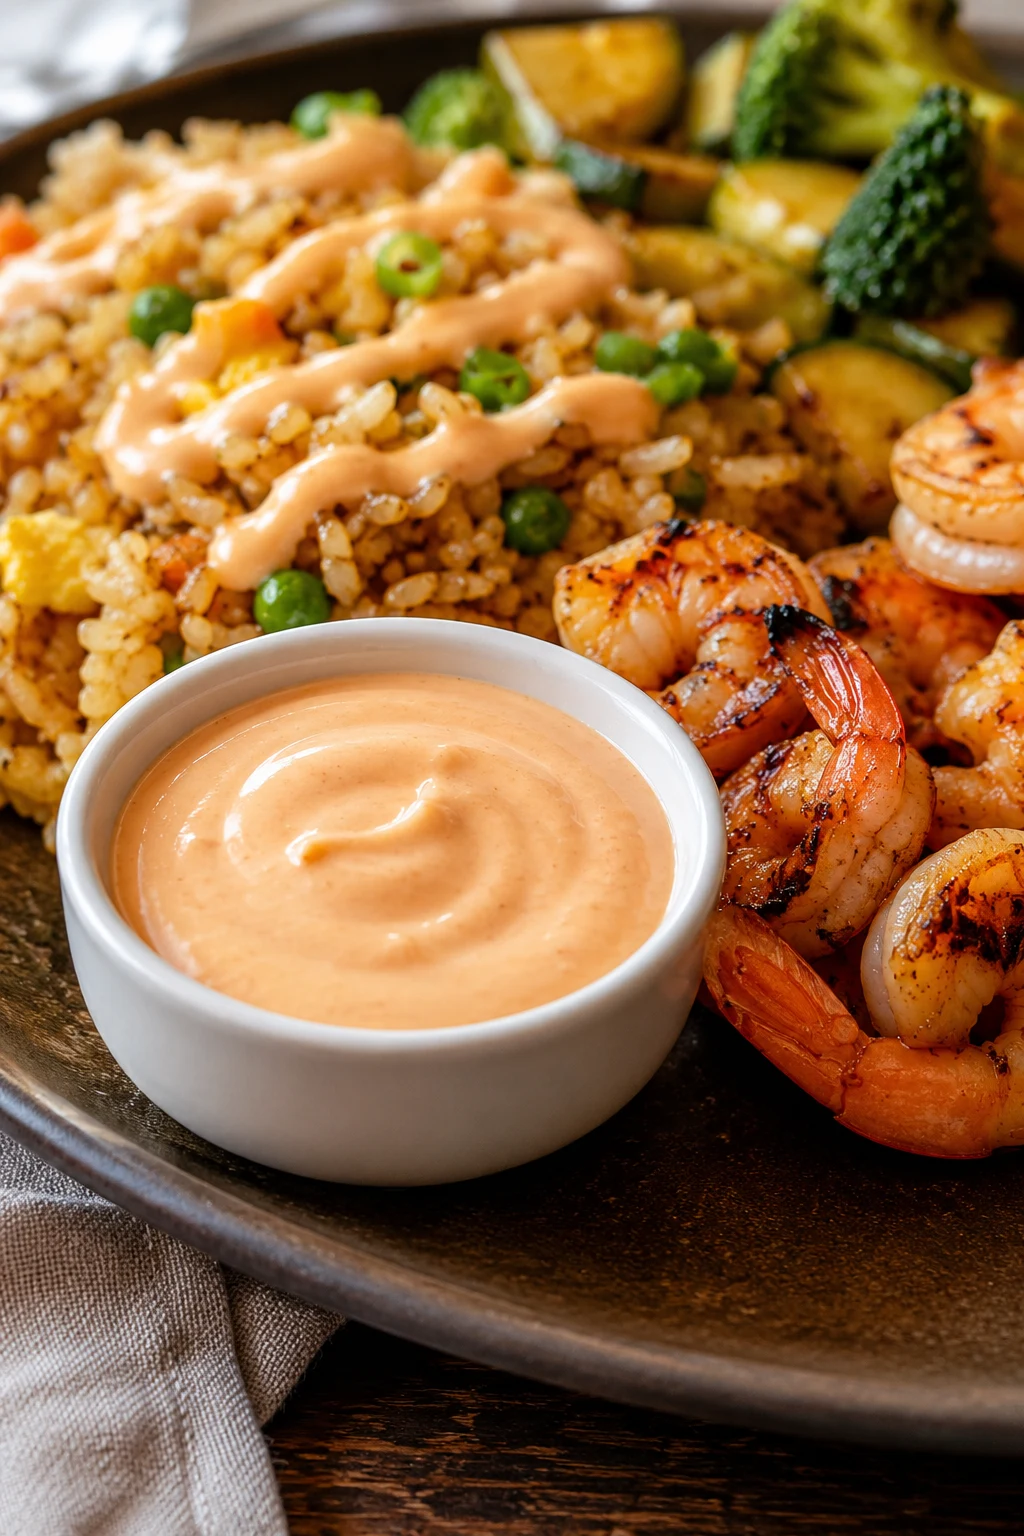
A small white cup of pale pink-orange yum yum sauce served with shrimp fried rice, grilled shrimp, broccoli, zucchini, and hibachi-style vegetables.

This yum yum sauce is the cool, creamy, pale pink-orange sauce people remember from the hibachi plate before anything else. It is a little sweet, a little tangy, rich enough for dipping, and somehow good on almost everything at the table.

Yum yum sauce is a mayo-based hibachi-style sauce made with ketchup or tomato paste, rice vinegar, sugar, garlic powder, onion powder, paprika, and water. It takes about 5 minutes to whisk together, then the fridge does the final work.

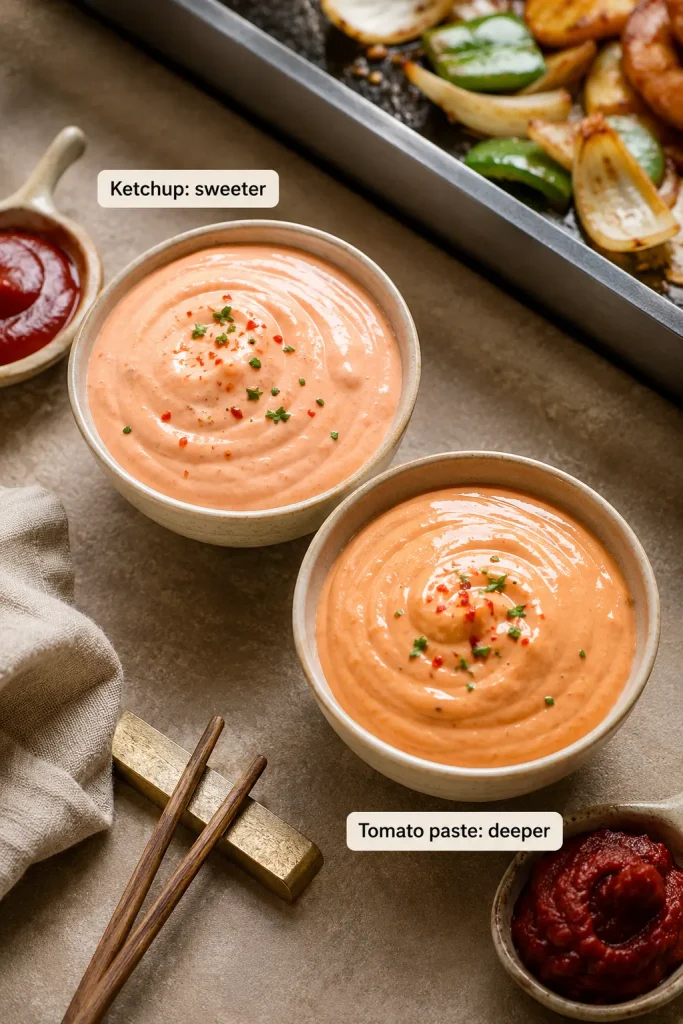
Make the simple ketchup version first. Once it chills, you can tune it sweeter, tangier, richer, thinner, or spicier without guessing. Ketchup gives you the friendly first batch; tomato paste gives you the deeper, less sweet version you try once you know what you like.

The goal is not just copying one restaurant bottle. It is to give you the sauce people keep reaching for: creamy but not heavy, sweet but not sugary, thin enough to drizzle, and bold enough to make rice, shrimp, chicken, and vegetables taste finished.

Keep it nearby when dinner is moving toward shrimp, vegetables, or a quick shrimp fried rice plate.

Quick Answer: How to Make Yum Yum Sauce

To make yum yum sauce, whisk mayonnaise with ketchup, rice vinegar, sugar, garlic powder, onion powder, paprika, a pinch of salt, and enough water to make it smooth. Ketchup gives the easiest sweet, pale pink-orange version. Tomato paste can replace ketchup when you want a deeper, less sweet sauce.

You can use it immediately if dinner is ready, but it tastes more like steakhouse-style yum yum sauce after chilling. Thirty minutes helps, 2 hours is better, and overnight gives the smoothest flavor. Stir before serving and thin with a little water if you want it pourable enough for fried rice, shrimp, chicken, vegetables, or bowls.

This sauce is often called hibachi white sauce, Japanese white sauce, shrimp sauce, pink sauce, or Japanese steakhouse sauce. It is best understood as an American hibachi-style restaurant sauce, not a traditional Japanese condiment.

Already cooking? Go straight to the recipe card, or use the texture guide if you need dip, drizzle, or dressing consistency.

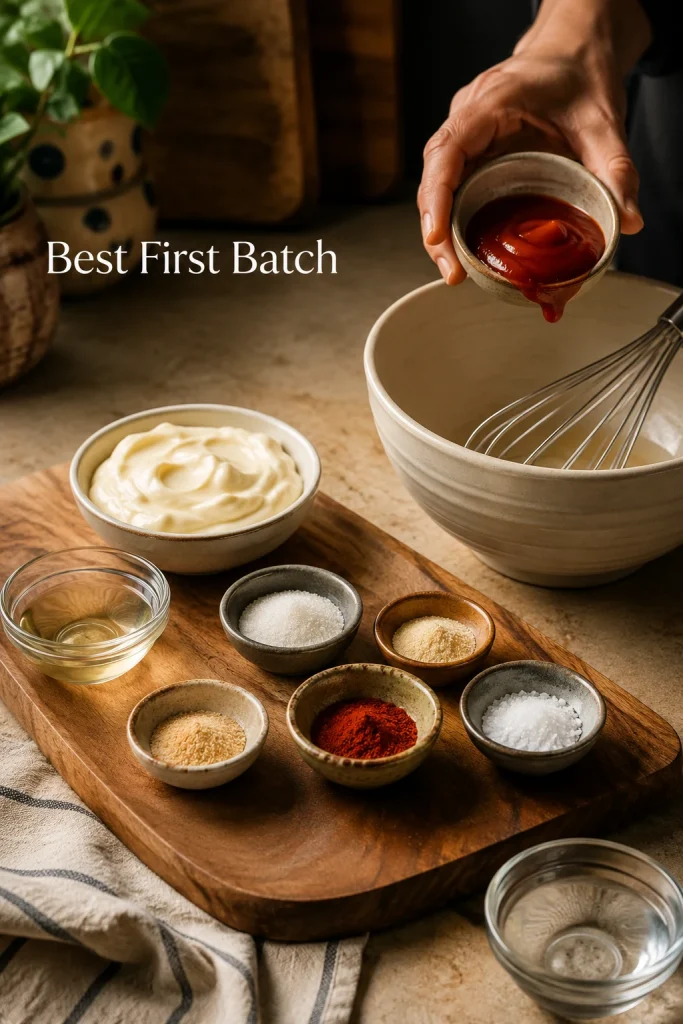
Best first batch: Use 1 cup mayo, 2 tablespoons ketchup, 2 teaspoons rice vinegar, 1 teaspoon sugar, 1 teaspoon garlic powder, ½ teaspoon onion powder, ½ teaspoon paprika, a pinch of salt, and 1 to 2 tablespoons water. Chill for 30 minutes. This gives you the classic sweet, creamy hibachi-style version before you start adjusting.

Ingredients for yum yum sauce arranged on a kitchen counter, including mayonnaise, ketchup, rice vinegar, sugar, garlic powder, onion powder, paprika, salt, water, a whisk, and a mixing bowl.
Start with the ketchup version when making your first batch because it gives the easiest sweet baseline before you adjust tang, heat, or richness.

Yum Yum Sauce at a Glance

Best default versionRegular mayo, ketchup, rice vinegar, sugar, garlic powder, onion powder, paprika, salt, and water
Active time5 minutes
Minimum total time35 minutes, including a 30-minute chill
Best flavorAfter 2 hours or overnight
YieldAbout 1¼ to 1½ cups / 300 to 360 ml, depending on thinning
Texture goalThick enough to dip, smooth enough to drizzle after thinning
Best withShrimp, fried rice, chicken, steak bites, vegetables, fries, spring rolls, rice bowls, wraps, and burgers
StorageUp to 1 week in an airtight container in the refrigerator

Yum Yum Sauce Recipe

This easy yum yum sauce starts thick and creamy, then thins into the pale pink-orange drizzle people love with fried rice, shrimp, chicken, vegetables, steak bites, fries, spring rolls, and hibachi-style bowls. The main recipe uses ketchup for the easiest first batch. Tomato paste, Kewpie mayo, butter, and heat are included as optional upgrades when you want a richer steakhouse-style sauce.

Active Time5 minutes
Cook Time0 minutes
Chill Time30 minutes minimum, 2 hours recommended
Minimum Total Time35 minutes
Best FlavorAfter 2 hours or overnight
YieldAbout 1¼ to 1½ cups / 300 to 360 ml
Serving Size2 tablespoons / 30 ml
Servings10 to 12
EquipmentMixing bowl, whisk, measuring spoons, airtight jar, optional squeeze bottle

Ingredients

  • 1 cup mayonnaise / about 230 g
  • 2 tablespoons ketchup / about 30 g
  • 2 teaspoons rice vinegar / 10 ml
  • 1 teaspoon sugar / 4 g
  • 1 teaspoon garlic powder / about 3 g
  • ½ teaspoon onion powder / about 1 g
  • ½ teaspoon paprika or smoked paprika / about 1 g
  • 1 to 2 tablespoons water / 15 to 30 ml, plus more as needed
  • Pinch of salt, to taste

Optional Restaurant-Style Add-Ins

  • Use 1 tablespoon tomato paste / 15 to 16 g instead of ketchup for a deeper, less sweet sauce.
  • Add 1 tablespoon melted cooled butter / 14 g for a silkier, richer finish.
  • Use Kewpie mayo instead of regular mayo for a fuller, more savory base.
  • Add a pinch of cayenne or ½ teaspoon sriracha for gentle heat.
  • If using tomato paste instead of ketchup, increase sugar to 2 teaspoons / 8 g.

Instructions

  1. Add the mayonnaise, ketchup, rice vinegar, sugar, garlic powder, onion powder, paprika, and a pinch of salt to a mixing bowl.
  2. Whisk until the sauce is smooth and evenly colored, with no streaks of tomato or spice.
  3. Add water 1 tablespoon at a time until the sauce reaches your preferred thickness.
  4. If using butter, let the melted butter cool slightly, then whisk it into the sauce. Do not add hot butter directly to the mayo.
  5. Taste lightly, but do not over-adjust yet. The flavor becomes smoother after chilling.
  6. Cover and refrigerate for at least 30 minutes. For better flavor, chill for 2 hours or overnight.
  7. Stir again before serving. Thin with another teaspoon or two of water if needed.

Recipe Notes

  • The ketchup version is sweeter, easier, and the best place to start.
  • The tomato paste version is deeper, less sweet, and better when you want the richer steakhouse-style finish.
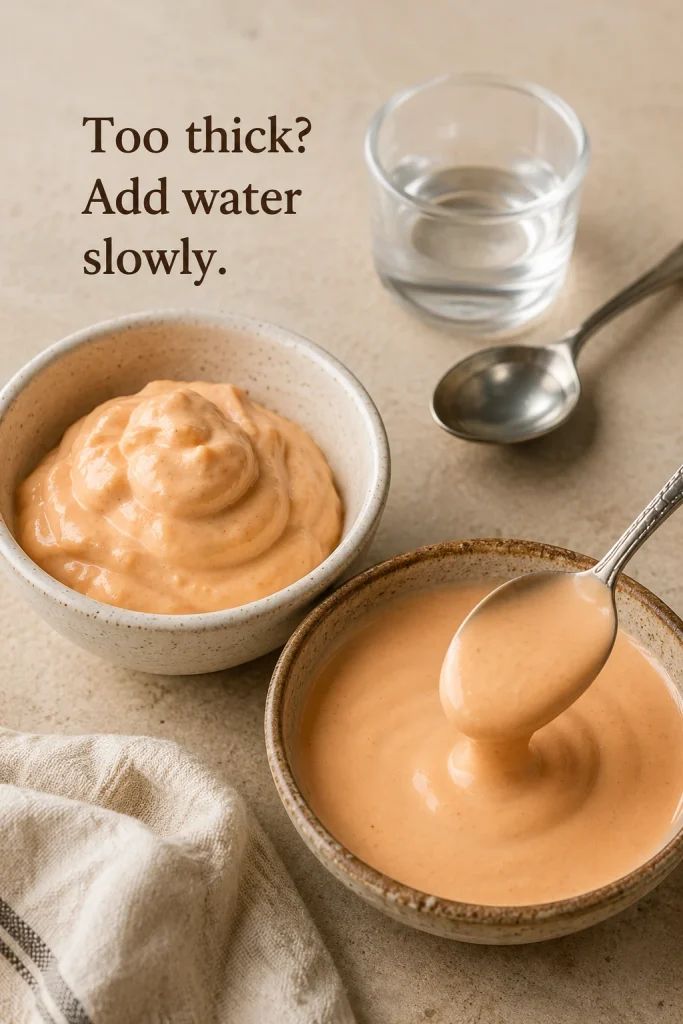
  • Thick dip texture needs about 1 tablespoon water. Drizzle texture usually needs 2 to 3 tablespoons water. A looser dressing-style sauce can take up to 4 tablespoons.
  • To double the recipe, double everything except the water. Add water slowly at the end until the texture looks right.
  • Store in an airtight jar in the refrigerator for up to 1 week.
  • Freezing is not recommended because mayo-based sauces can separate after thawing.

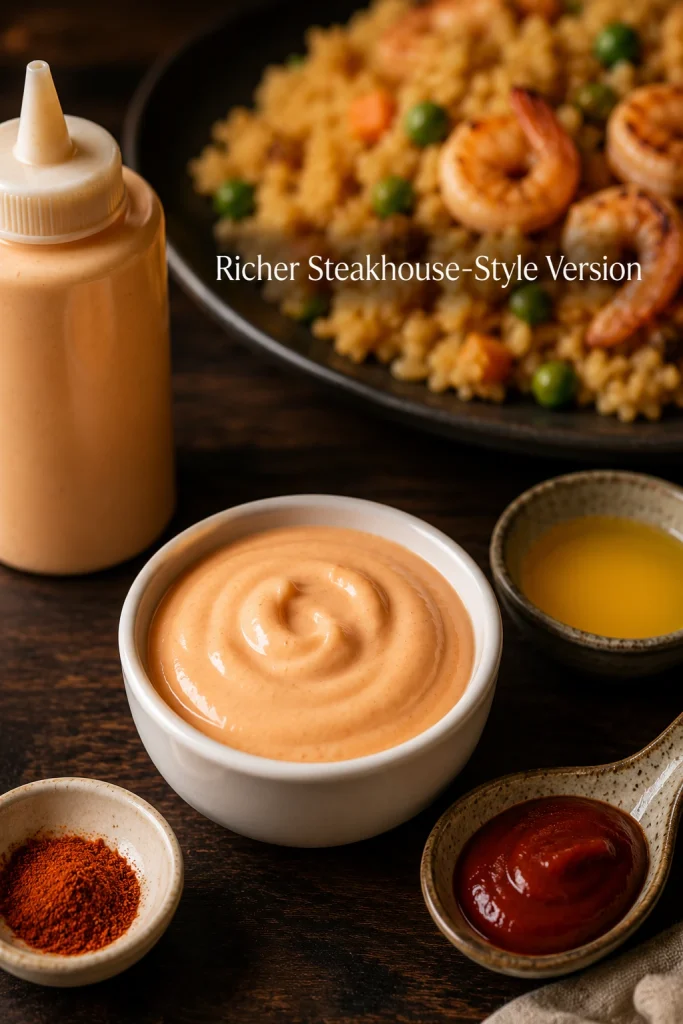
Closest restaurant-style version: Use Kewpie mayo, 1 tablespoon tomato paste instead of ketchup, 2 teaspoons sugar, 1 tablespoon cooled melted butter, 2 tablespoons water, and a tiny pinch of cayenne. Chill for at least 2 hours before serving.

Rich pale pink-orange yum yum sauce with a squeeze bottle, tomato paste, melted butter, cayenne, and fried rice with shrimp in the background.
For a richer steakhouse-style sauce, tomato paste, cooled melted butter, and a tiny pinch of heat make the flavor rounder.

Before You Start

Start with the ketchup version if this is your first batch. It tastes familiar right away: sweet, creamy, lightly tangy, and close to the sauce-cup flavor people remember from hibachi dinners. Try tomato paste next time if you want deeper color, stronger tomato flavor, and less sweetness.

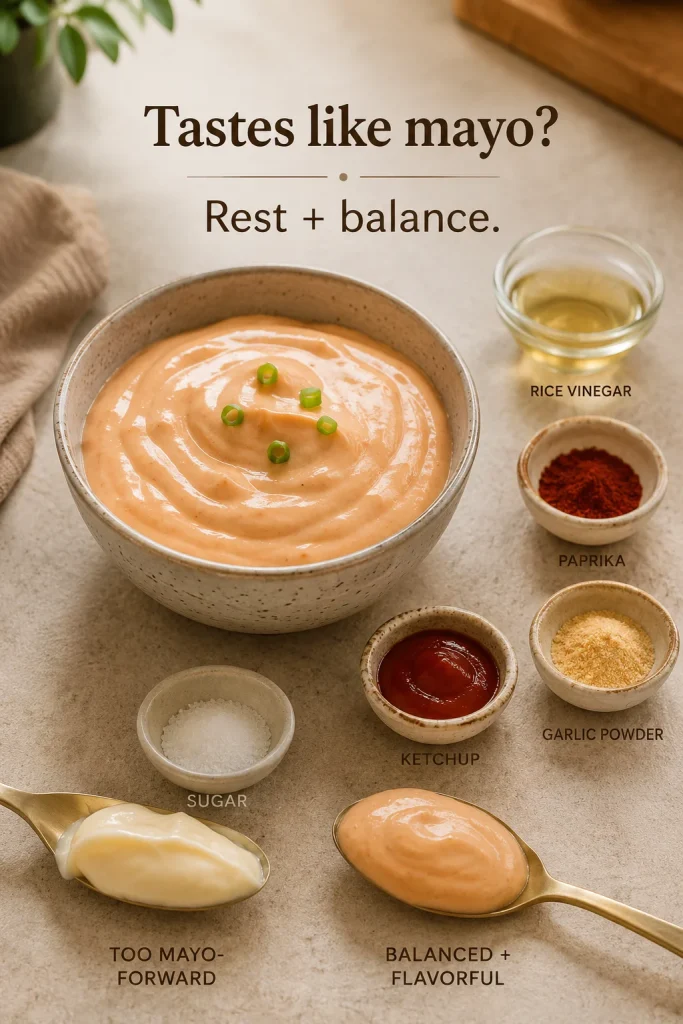
If it tastes like plain mayo after the first whisk, do not panic. That is normal before the sauce rests. A freshly mixed batch can taste sharper than expected, so give it 30 minutes before you start fixing things that may not be broken.

Yum yum sauce is a finishing sauce, not a pan sauce. Add it after cooking, not while the food is simmering or frying. For a sauce that cooks with the food, use this stir fry sauce recipe instead.

Choose Your Version: Classic, Richer, Spicy, or Lighter

The best version depends on what you want from the sauce tonight. Ketchup gives you the familiar sweet hibachi-night flavor. Tomato paste makes it deeper and less sweet. Kewpie and butter push it richer. Yogurt makes it lighter for bowls, even though it moves away from the classic copycat feel.

VersionUse ThisWhat It Tastes Like
Classic easy sauceMayo + ketchup + rice vinegar + sugar + garlic powder + paprikaFamiliar, gently sweet, family-friendly
Deeper sauceMayo + tomato paste + a little extra sugarLess sweet, deeper in color, more concentrated
Richer steakhouse-style sauceKewpie mayo + tomato paste + cooled melted butterSmoother, fuller, more savory
Spicy versionAdd cayenne, sriracha, sambal, or chili garlic sauceCreamy with gentle to medium heat
Keto or lower-sugar sauceTomato paste instead of ketchup + keto sweetenerTangier, less sweet, still creamy
Lighter bowl sauceHalf mayo + half Greek yogurtBrighter, lighter, better for bowls than copycat flavor

For a completely different quick dip in the same weeknight-sauce family, this peanut sauce recipe is better when you want something nutty, salty-sweet, and built for noodles or spring rolls.

Ketchup vs Tomato Paste

Stuck between ketchup and tomato paste? Use this as the simple rule: use ketchup for the easy sweet version and tomato paste for the deeper, less-sweet version.

Two bowls of yum yum sauce comparing a lighter ketchup version with a deeper tomato paste version, with ketchup and tomato paste nearby.
Choose ketchup for a sweeter yum yum sauce, or tomato paste for a deeper, less-sweet restaurant-style flavor.
Use Ketchup WhenUse Tomato Paste When
You want the easiest versionYou want a deeper flavor
You prefer a sweeter sauceYou want less sweetness
You want a brighter pale pink-orange colorYou want a more concentrated tomato taste
You are making it for kids or family mealsYou are making a keto or lower-sugar version
You want a softer, familiar flavorYou want a richer steakhouse-style base

Ketchup usually needs less sugar. Tomato paste usually needs a little more. Taste after chilling.

Ingredients You Need

The core yum yum sauce ingredients are mayonnaise, ketchup or tomato paste, rice vinegar, sugar, garlic powder, onion powder, paprika, water, and salt. Butter and heat are optional.

Mayonnaise

Mayonnaise is the body of the sauce. Use one you already like, because its flavor comes through. Regular mayo works well. Kewpie tastes richer and slightly more savory. Light mayo or avocado oil mayo can work if you like the flavor, but the sauce may taste sharper or thinner. If using Miracle Whip, reduce the sugar and vinegar because it is already sweeter and tangier.

Ketchup or Tomato Paste

Ketchup gives the sauce that familiar hibachi-night sweetness. Tomato paste is the version you try when you want it to taste a little less sweet and a little more grown-up.

Rice Vinegar

Rice vinegar cuts through the richness of the mayo and keeps the sauce from tasting flat. It is mild enough to brighten the sauce without making it harsh.

Sugar

A little sugar gives the sauce its familiar sweet finish. Ketchup already contains sweetness, so the ketchup version needs less. Tomato paste is less sweet, so it usually needs a little more.

Garlic Powder, Onion Powder, and Paprika

Garlic powder and onion powder give savory depth without raw garlic bite. Paprika gives the sauce its warm color and keeps the flavor from feeling plain. Smoked paprika adds a deeper note that works well with grilled chicken, fried rice, shrimp, or steak bites.

Butter and Water

Butter is optional. Add it when you want the sauce to feel fuller and more like the little cup from a steakhouse; skip it when you want a brighter drizzle for rice or vegetables. Water decides whether the sauce behaves like a dip, drizzle, or dressing. Add it slowly because a small amount changes the consistency quickly.

Why This Recipe Works

This sauce works because every small ingredient fixes one common problem. Vinegar keeps the mayo from tasting heavy. Tomato gives color and tang. Sugar rounds the edges. Garlic powder, onion powder, and paprika make it taste like more than seasoned mayo. Water turns it from a thick dip into the soft ribbon people want over fried rice, shrimp, chicken, and vegetables.

The rest time matters too. After chilling, the garlic powder softens, the paprika settles into the mayo, and the vinegar stops tasting sharp. After 30 minutes it tastes more blended; after 2 hours it tastes closer to the steakhouse-style sauce people remember.

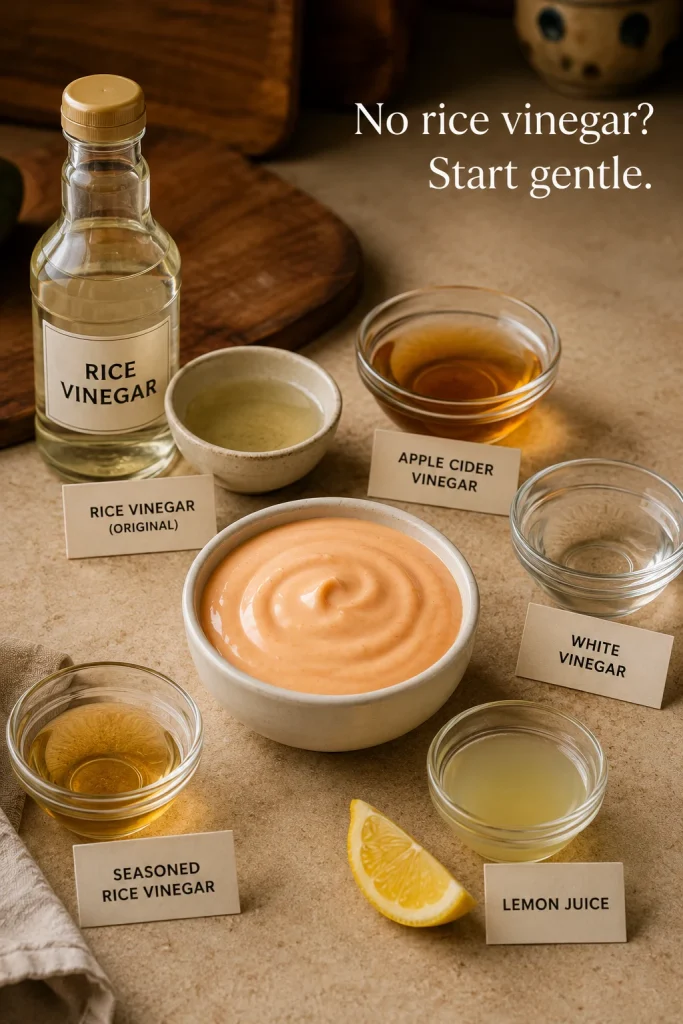
No Rice Vinegar? Use These Instead

Rice vinegar is mild and slightly sweet, which is why it works well here. Rice vinegar is usually milder than sharp white vinegar; for example, Kikkoman lists its rice vinegar at 4.2% acidity. If you need a swap, use another gentle acid and adjust slowly.

A bowl of yum yum sauce surrounded by rice vinegar, apple cider vinegar, white vinegar, lemon juice, seasoned rice vinegar, lemon wedges, and small labeled cards.
When replacing rice vinegar, start small; apple cider vinegar, white vinegar, lemon juice, and seasoned rice vinegar all sharpen the sauce differently.
SubstituteHow to Use It
Apple cider vinegarUse the same amount. It is slightly fruitier and a little sharper.
White vinegarUse a little less at first because it can taste sharper.
Lemon juiceUse the same amount for a fresher, brighter sauce.
Seasoned rice vinegarUse the same amount, but reduce the sugar slightly because it may already be sweetened.
MirinUse a small splash for sweetness and depth, but do not rely on it as the only acid.

Avoid strong vinegars like balsamic or malt vinegar. They can overpower the mayo and tomato. Whichever swap you use, start small, let the sauce rest, and adjust after the flavor settles.

Butter or No Butter?

No, yum yum sauce does not need butter. A good sauce can be made with mayo, ketchup or tomato paste, vinegar, sugar, seasonings, and water. Butter is optional; it makes the sauce richer and silkier, but the sauce still works without it.

Add butter if you want a fuller, sauce-cup style finish. Skip it if you want a brighter sauce for fried rice, spring rolls, or vegetables. If you use butter, melt it gently and let it cool until warm, not hot, before whisking it into the mayo.

How to Make Yum Yum Sauce

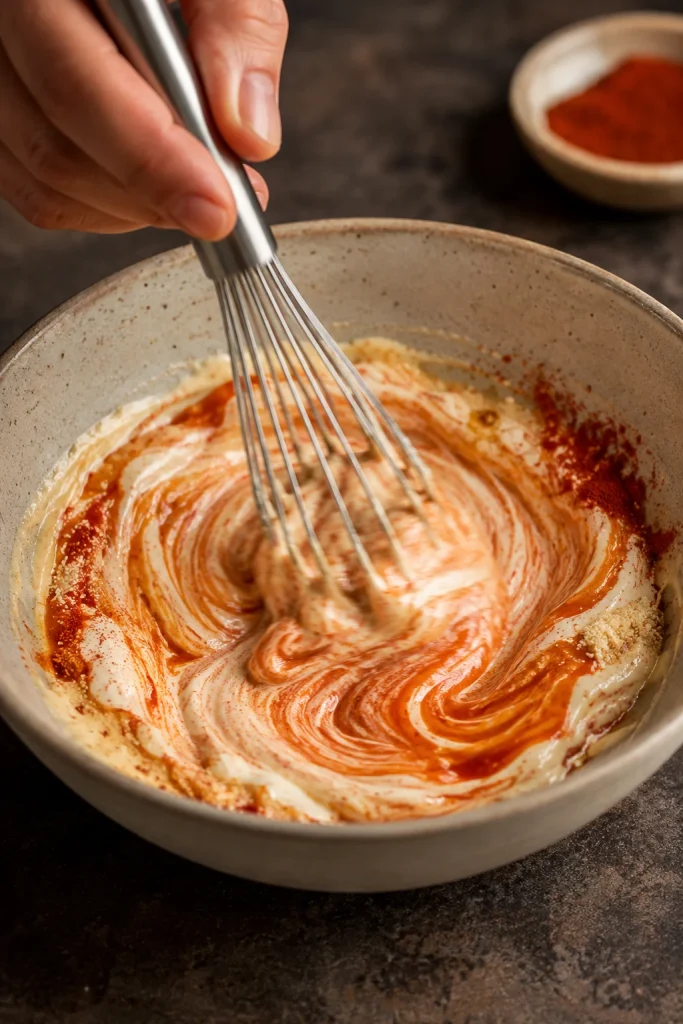
Add the mayo, ketchup, vinegar, sugar, garlic powder, onion powder, paprika, and salt to a bowl. Whisk until the sauce is completely smooth and there are no streaks of tomato or spice left in the mayo.

A hand whisking mayonnaise, ketchup, vinegar, sugar, garlic powder, onion powder, paprika, and salt in a ceramic bowl to make yum yum sauce.
Once the mayo, ketchup, vinegar, sugar, and spices turn evenly colored, the sauce is ready to chill and settle.

Thin the sauce with water. Start with 1 tablespoon for a thick dip. Add more water 1 teaspoon to 1 tablespoon at a time until it reaches the texture you want. If you are adding butter, make sure it is warm, not hot, before whisking it in.

Finished Sauce Texture

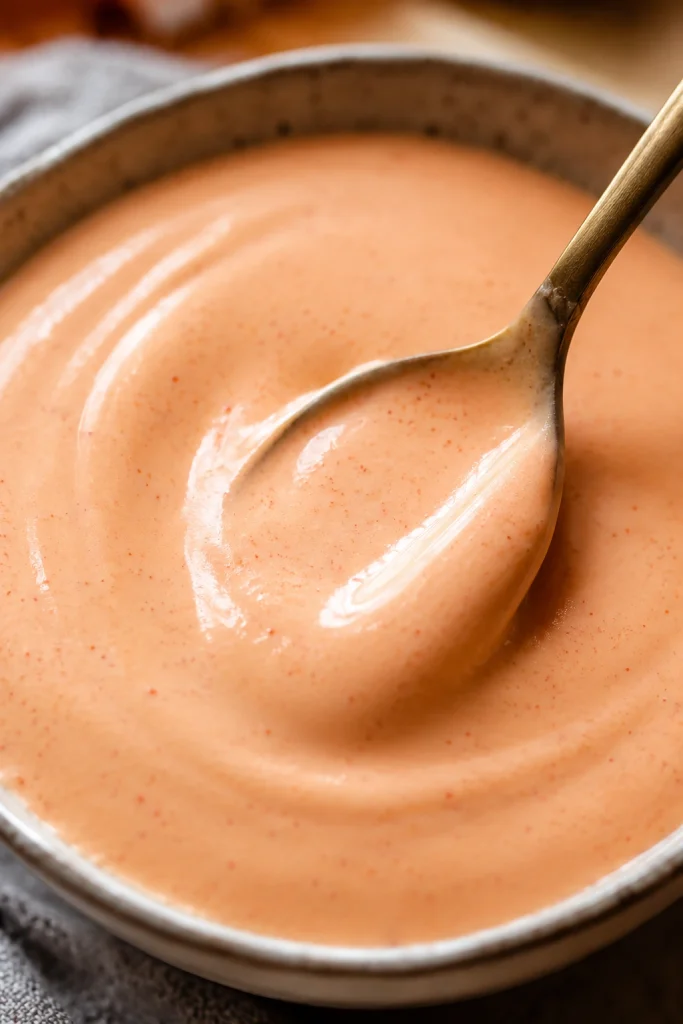
Once the sauce is fully whisked, check the spoon trail before you start changing the flavor. The texture should look glossy and smooth, not stiff or grainy.

A close-up of smooth pale pink-orange yum yum sauce in a bowl, with a spoon dragging through the glossy surface.
A good finished sauce should leave a glossy spoon trail; if it looks stiff or heavy, loosen it slowly with water.

Taste the sauce, but do not make aggressive adjustments right away. Freshly mixed sauce often tastes more mayo-forward than the finished version. Cover and refrigerate it for at least 30 minutes, then stir and taste again.

A Few Things Not to Rush

  • Do not add all the water at once. The sauce can go from thick dip to thin dressing quickly.
  • Do not add hot butter directly to mayo. Let it cool first so the sauce stays smooth.
  • Do not cook the finished sauce in fried rice or stir-fry. Add it after cooking.
  • Do not use strong vinegars like balsamic or malt vinegar. They take the sauce in a completely different direction.

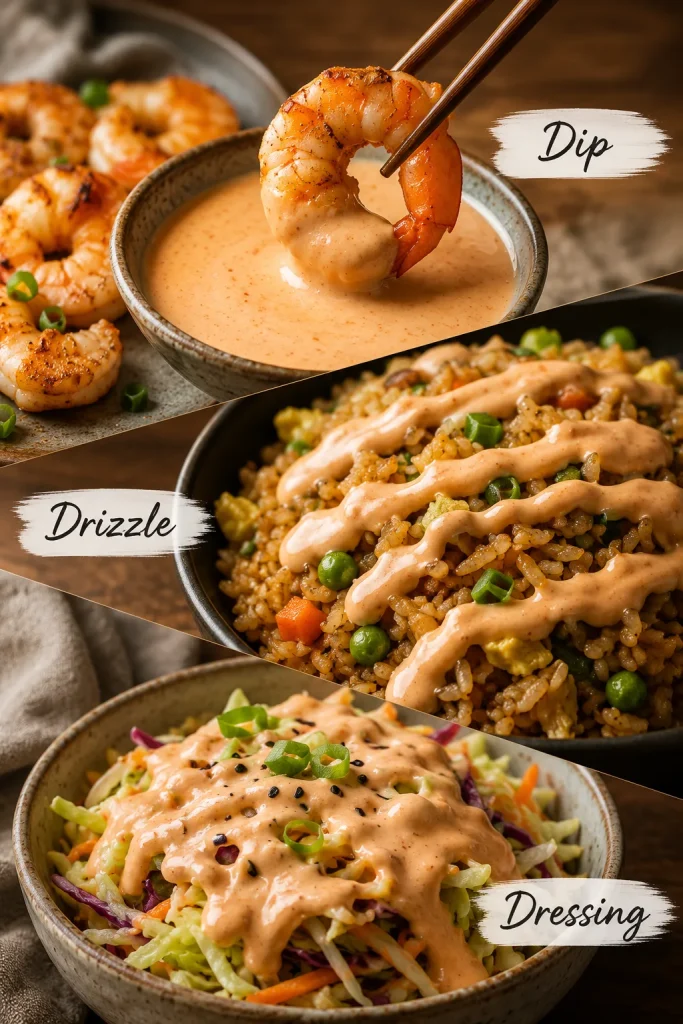
Best Texture: Dip, Drizzle, or Dressing

The right texture depends on the plate. Fries need a thick dip. Fried rice needs a loose ribbon. Shrimp can go either way.

A three-part texture guide showing yum yum sauce as a thick dip with shrimp, a drizzle over fried rice, and a dressing over a slaw-style bowl.
Instead of using one texture for everything, keep it thick for dipping, looser for rice, and lightest for bowls or slaw.
TextureWater AmountBest For
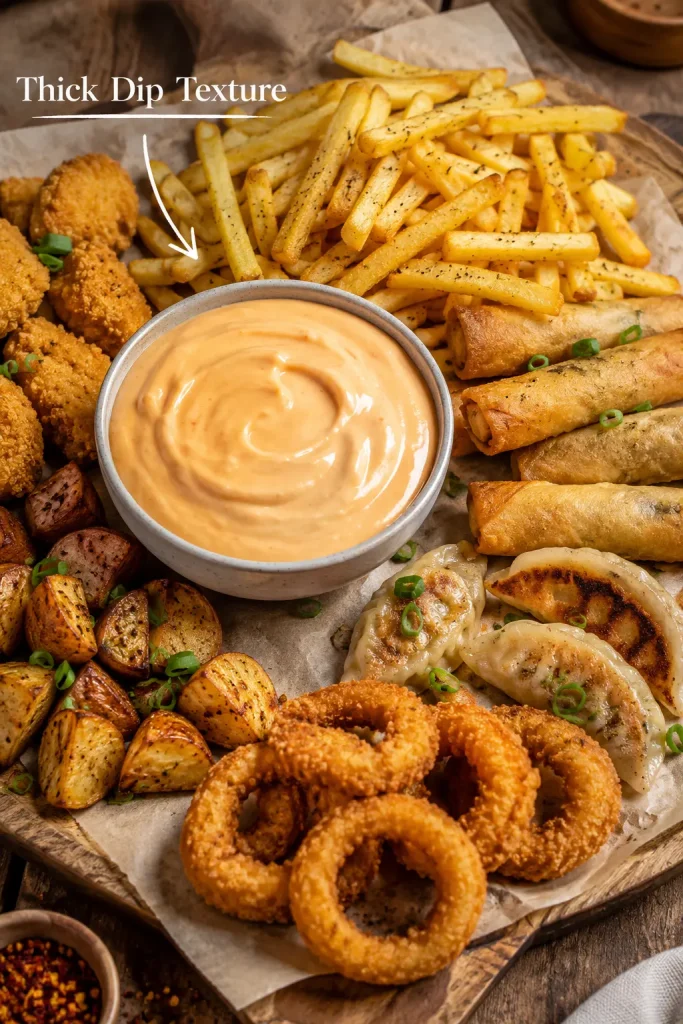
Thick dip1 tablespoon / 15 mlShrimp, fries, nuggets, spring rolls, dumplings, roasted potatoes
Drizzle sauce2 to 3 tablespoons / 30 to 45 mlFried rice, chicken bowls, hibachi shrimp, steak bites, vegetables
Dressing-style sauce3 to 4 tablespoons / 45 to 60 ml, plus a little extra vinegarSalads, slaws, grain bowls, cold noodle bowls

The sauce should fall softly from a spoon for rice, but cling after one dip for shrimp, fries, and spring rolls. If you are serving it with hot fried rice, make it slightly thinner than you think; the rice will make a thick sauce feel heavier. If the sauce is for fries or spring rolls, stop thinning early so it clings to crispy edges.

Serving ideas: jump to fried rice, shrimp, bowls, or crispy snacks.

Why Yum Yum Sauce Tastes Better After Chilling

You can use the sauce immediately, but it tastes better after chilling. Right after mixing, the mayo, vinegar, tomato, sugar, and spices can taste separate. The sauce may also taste more mayo-forward than expected.

After 30 minutes in the fridge, the garlic powder and onion powder soften into the sauce. The paprika and tomato blend into the fat. The vinegar becomes less sharp, and the sweetness tastes less raw. After 2 hours, the flavor usually lands much closer to the hibachi-style sauce people remember from restaurants.

If you have time, make it the night before. Overnight chilling gives the smoothest flavor. If the sauce has been in the fridge overnight, let it sit for 5 to 10 minutes and stir before serving. It should be cool, not icy-thick.

Jump to recipe · Texture guide · Back to top

Hibachi White Sauce, Japanese White Sauce, and Shrimp Sauce

If you have ever searched for “that white sauce from hibachi,” this is probably the sauce you meant. In many American hibachi and Japanese steakhouse-style restaurants, this creamy sauce is called yum yum sauce, hibachi white sauce, Japanese white sauce, shrimp sauce, pink sauce, or Japanese steakhouse sauce.

The names come from how people use it. Some remember it with shrimp, some with fried rice, and some from the little sauce cups at a steakhouse. Even though it is often called white sauce, most homemade versions are pale peach or pink-orange because of ketchup, tomato paste, and paprika.

There is no single official formula. The goal is the familiar balance: cool mayo base, gentle sweetness, mild tang, pale tomato color, and enough water to make it dip-friendly or drizzle-friendly.

Homemade vs Store-Bought Yum Yum Sauce

Store-bought yum yum sauce is useful when you just want a squeeze bottle in the fridge. The problem is that bottled versions can swing too sweet, too salty, too thin, or too much like a generic mayo dressing.

Homemade is better when you want the sauce to match the plate: thicker for fries, looser for fried rice, sweeter for kids, tangier for shrimp, richer for steakhouse-style bowls. You can also make gluten-free, vegan, keto, or lighter versions more easily when you control the ingredients.

What to Eat with Yum Yum Sauce

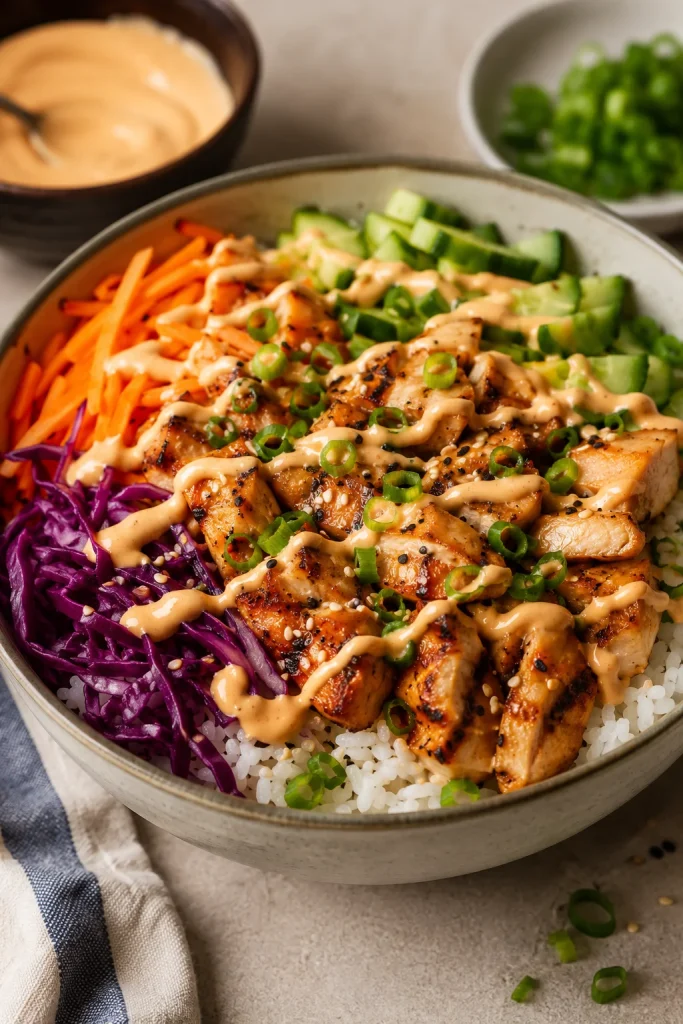
Think of this as a cool finishing sauce. It works anywhere you want something creamy enough to soften heat, bright enough to wake up rice, and rich enough to cling to crispy snacks. This is the drizzle that makes plain rice, shrimp, and vegetables feel like hibachi night at home.

UseBest Texture
Fried riceLoose drizzle
ShrimpThick dip or light drizzle
Chicken bowlsDrizzle
Fries and nuggetsThick dip
Spring rolls and dumplingsThick dip
Burgers, wraps, and tacosSpread texture
Salads and slawsDressing-style

Fried Rice and Hibachi Plates

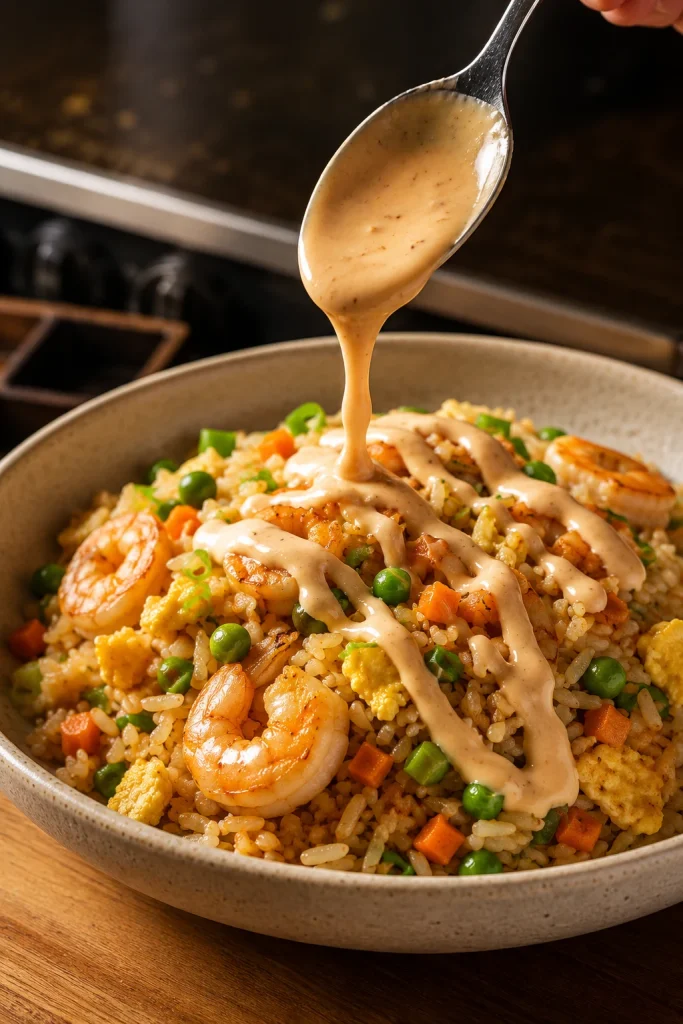
On fried rice and hibachi-style plates, keep it loose enough to fall from a spoon. You want pale, creamy streaks across hot rice, not a heavy scoop sitting on top. Add the sauce after cooking so the rice stays fluffy and the sauce stays smooth.

Yum yum sauce being spooned in ribbons over shrimp fried rice with egg, peas, carrots, scallions, and visible rice grains.
Drizzle the sauce after cooking fried rice so the grains stay fluffy and the cool sauce does not turn oily.

Shrimp, Seafood, and Chicken

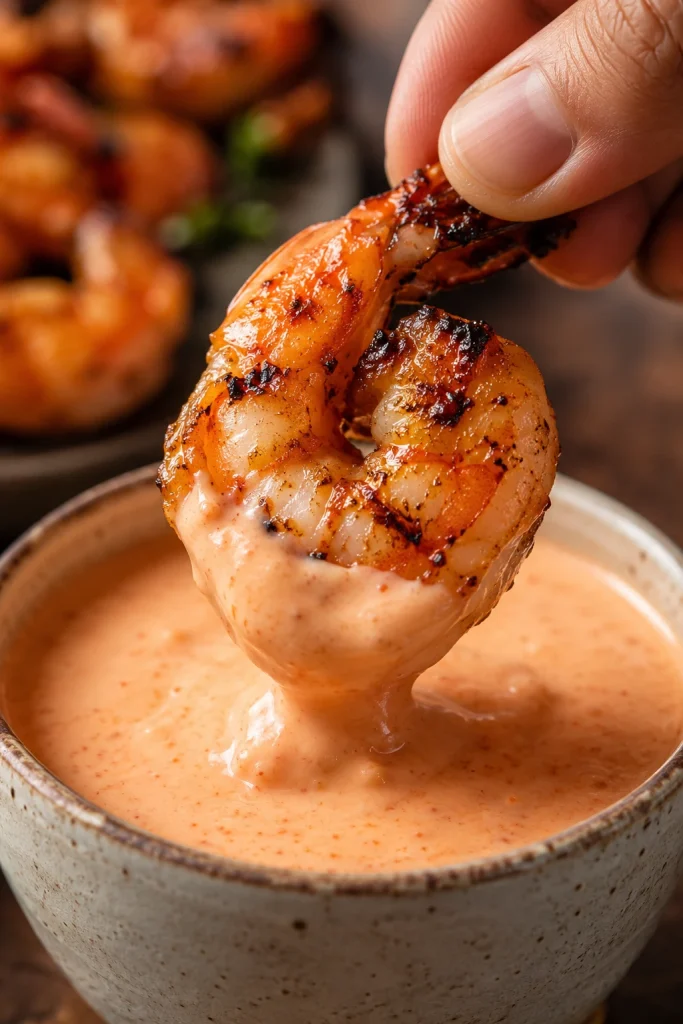
Shrimp can go either way: thick as a dip or slightly loosened as a drizzle. For shrimp, the sauce should be thick enough to cling after one dip. If the protein is already rich or fried, add a little extra vinegar to the sauce for balance.

A grilled shrimp held by fingers and dipped into thick pale pink-orange yum yum sauce in a ceramic bowl.
Hibachi shrimp sauce works best as a thicker dip that clings after one swipe instead of sliding off the shrimp.

For another quick shrimp dinner with a brighter lemon-garlic direction, keep this shrimp scampi recipe nearby. If the meal is more fried fish than hibachi shrimp, this homemade tartar sauce is the better match.

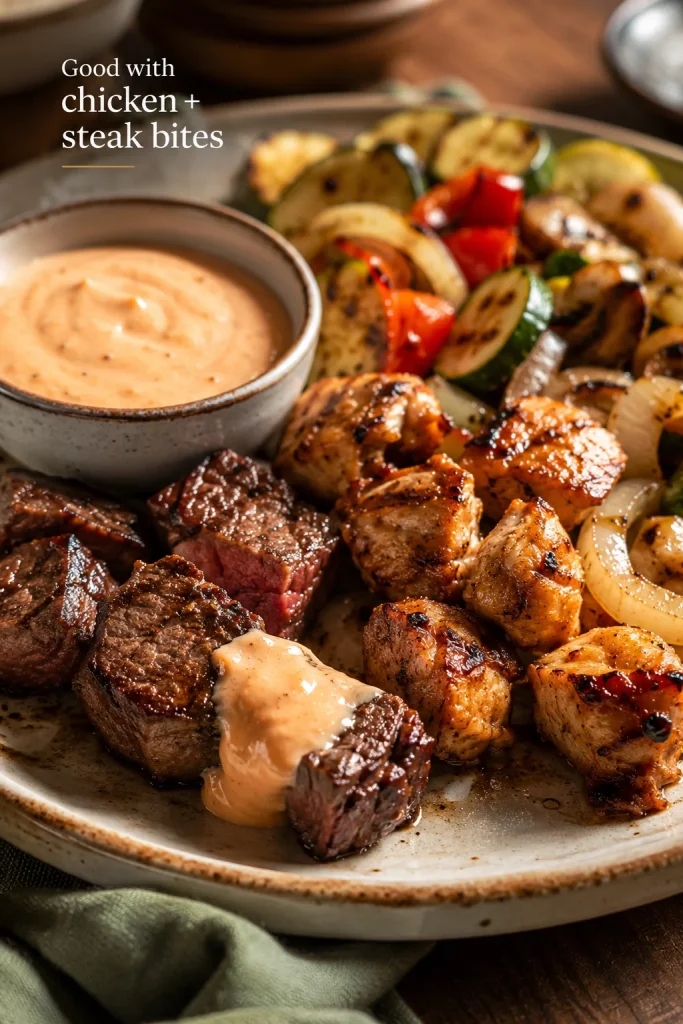
Chicken, Steak Bites, and Hibachi Vegetables

Chicken and steak bites are best with a cool, smooth sauce that softens charred edges without hiding the grilled flavor.

A plate of grilled chicken pieces, steak bites, hibachi-style vegetables, and a bowl of pale pink-orange yum yum sauce, with sauce on one piece of steak.
Beyond shrimp, a cool hibachi-style sauce helps balance grilled chicken, steak bites, onions, zucchini, and peppers.

Bowls, Wraps, and Rice Meals

Bowls need a smoother drizzle. A spoonful can make a simple bowl feel finished, especially when there is warm rice, crunchy cucumber, cabbage, lettuce, carrots, grilled chicken, shrimp, beef, tofu, or crispy vegetables.

A rice bowl with grilled chicken, white rice, cucumber, purple cabbage, carrots, scallions, sesame seeds, and yum yum sauce drizzled across the top.
In rice bowls, a light drizzle adds flavor without covering the crunch of cucumber, cabbage, and carrots.

A seafood rice bowl can borrow the build from this salmon bowl recipe. With beef and rice, use it as a cool creamy contrast beside a saucy Korean beef bowl.

Fries, Spring Rolls, Dumplings, and Snacks

Crispy snacks are where the thicker version wins. Start with only 1 tablespoon water so the sauce clings to fries, nuggets, spring rolls, dumplings, potstickers, onion rings, roasted potatoes, and other crunchy bites instead of sliding back into the bowl.

A snack board with a bowl of thick yum yum sauce surrounded by fries, spring rolls, dumplings, nuggets, roasted potatoes, and onion rings.
Crispy snacks need a thicker sauce, so fries, spring rolls, dumplings, nuggets, and onion rings can catch it on their edges.

With spring rolls and fries, keep it spoonable and thick so every crispy edge catches some sauce. A crisp snack plate works well beside crispy veg spring rolls, fries, dumplings, or roasted potatoes.

Sandwiches, Burgers, and Tacos

As a burger, taco, or sandwich spread, keep it thicker than drizzle texture so it stays where you put it. It pairs especially well with crunchy lettuce, cucumber, cabbage, grilled chicken, shrimp, or crispy tofu.

Yum Yum Sauce Variations

Make the main version first if you can. Once you know the baseline, these variations help you make it spicier, richer, lighter, vegan, gluten-free, or lower in sugar.

Spicy Yum Yum Sauce

Add cayenne, sriracha, sambal, chili garlic sauce, or your favorite hot sauce. A pinch of cayenne gives gentle heat. About ½ to 1 teaspoon sriracha makes the sauce noticeably spicy. If it becomes too hot, add more mayo and a small pinch of sugar.

For a hotter fruit-and-chili direction that goes further than yum yum sauce, save this mango habanero sauce recipe for tacos, wings, shrimp, grilled chicken, paneer, tofu, or vegetables.

Kewpie Mayo Version

Kewpie mayo makes the sauce richer, smoother, and slightly more savory. It is a good choice if you want a fuller steakhouse-style flavor. Regular mayo still works well, especially when balanced with vinegar, tomato, garlic powder, paprika, and rest time.

Gluten-Free Version

This sauce can be made gluten-free if every packaged ingredient you use is labeled gluten-free. Check the mayo, ketchup, tomato paste, vinegar, hot sauce, and spice blends. If you add soy sauce, chili garlic sauce, or another condiment, choose a gluten-free version.

Vegan Version

Use vegan mayo in place of regular mayo. Skip the butter or use vegan butter. Sugar, maple syrup, or another sweetener can round out the flavor. Vegan mayo gives a more classic result than yogurt-style bases because it keeps the sauce creamy and rich.

Keto or Lower-Sugar Version

Tomato paste is usually the cleaner low-sugar base because ketchup brings sweetness before you even add a sweetener. Replace the sugar with a keto-friendly sweetener, then taste after chilling because some sweeteners can feel sharper before the sauce rests.

Low-Calorie or Greek Yogurt Version

The half-mayo, half-yogurt version is the sweet spot. It still tastes like a creamy sauce, while a full-yogurt version tastes more like a tangy bowl dressing. Use it for bowls, salads, slaws, or lighter chicken-and-rice plates rather than a strict hibachi copycat.

No-Mayo Version

You can make a no-mayo version with Greek yogurt, sour cream, vegan sour cream, or blended cashew cream, but it becomes a different sauce. To keep it balanced, add tomato, vinegar, sweetener, and seasoning in small amounts, then let it rest before adjusting again.

Troubleshooting Yum Yum Sauce

Most “failed” yum yum sauce is not actually failed. It usually just needs a short rest, a tiny splash of acid, or a spoonful of mayo to bring it back. If the flavor still feels off after chilling, the fix is usually small.

Yum yum sauce texture comparison showing a too-thick mound-like sauce beside a smoother drizzle texture, with water and a spoon nearby.
If the sauce is too thick, add water one teaspoon at a time until it changes from a mound to a smooth drizzle.
ProblemHow to Fix It
It tastes too much like mayoChill first. Then add a little more vinegar, paprika, garlic powder, ketchup or tomato paste, and a small pinch of sugar.
Too sweetAdd rice vinegar, lemon juice, or a pinch of salt.
Sharp or tangyAdd more mayo and a tiny pinch of sugar.
Thick and heavyAdd water 1 teaspoon at a time until it loosens.
Thin or runnyAdd mayo 1 tablespoon at a time until it thickens.
Looks too paleAdd a little more tomato paste, ketchup, or paprika.
Looks too orangeAdd more mayo.
Not steakhouse-style enoughUse Kewpie mayo, add the optional cooled butter, and chill the sauce longer.
Too spicyAdd mayo and a small pinch of sugar.
Tastes flatAdd salt, onion powder, garlic powder, or a tiny splash of rice vinegar.

When It Tastes Too Much Like Mayo

A mayo-heavy sauce usually needs rest and small balancing moves, not a full restart.

A bowl of yum yum sauce with rice vinegar, paprika, garlic powder, ketchup, sugar, and two spoons comparing a mayo-forward sauce with a more balanced sauce.
When the sauce tastes mayo-heavy, rest it first; then balance it with rice vinegar, ketchup or tomato paste, paprika, garlic, and sweetness.

Storage and Make-Ahead

Store yum yum sauce in an airtight jar or covered container in the refrigerator for up to 1 week. Stir it before serving because the sauce may thicken slightly as it chills.

A glass jar and squeeze bottle filled with pale pink-orange yum yum sauce on a kitchen counter beside an open refrigerator, with date labels.
Refrigerate homemade yum yum sauce in a jar or squeeze bottle, then stir before serving because it thickens as it chills.

This is a good make-ahead sauce. The flavor is better after at least 30 minutes and usually best after 2 hours or overnight. If you are serving it for a hibachi-style dinner, make the sauce first and let it chill while you prepare the rice, shrimp, chicken, or vegetables.

A squeeze bottle is helpful when you want the restaurant-style drizzle over rice and shrimp. For storage, a jar is easier to clean.

Keep the sauce refrigerated and do not leave it sitting out for long periods. This is not a shelf-stable sauce and it is not meant for canning. For general food safety, FoodSafety.gov recommends refrigerating perishable foods within 2 hours and keeping the refrigerator at 40°F / 4°C or below.

If you use Greek yogurt, vegan mayo, homemade mayo, or any ingredient with a shorter use-by date, follow the shortest storage time. Freezing is not recommended because mayo-based sauces can separate and turn grainy after thawing.

Make-ahead tip: Make the sauce first when you start dinner. By the time the rice, shrimp, chicken, or vegetables are ready, the flavor will already be smoother. It is one of those small prep steps that makes tomorrow’s rice bowl easier before tomorrow even starts.

Jump to recipe · Troubleshooting · Back to top

FAQs

What is yum yum sauce made of?

Yum yum sauce is usually made with mayonnaise, ketchup or tomato paste, vinegar, sugar, garlic powder, paprika, and water. Some versions also include butter, onion powder, cayenne, sriracha, mirin, or hot sauce.

Is yum yum sauce actually Japanese?

Not traditionally. It is best known as an American hibachi-style sauce served at many Japanese steakhouse-style restaurants.

Is yum yum sauce the same as hibachi white sauce?

Usually, yes. Many restaurants and home cooks use those names for the same creamy mayo-based sauce.

Is yum yum sauce the same as spicy mayo?

No. Spicy mayo is usually mayo mixed with sriracha or another hot sauce. Yum yum sauce has more rounded flavor from tomato, vinegar, sugar, garlic powder, paprika, and water.

Can I make yum yum sauce without tomato paste?

Yes. Use ketchup instead. For this recipe, 2 tablespoons ketchup gives the easiest sweet, pale pink-orange sauce. Because ketchup is already sweet, start with only 1 teaspoon sugar and adjust after chilling.

Is this Benihana-style yum yum sauce?

It is a homemade hibachi-style sauce in the same creamy, sweet-tangy family, but restaurant formulas vary. For the closest restaurant-style version, use Kewpie mayo, tomato paste, cooled melted butter, a tiny pinch of heat, and a 2-hour chill.

What can I use instead of rice vinegar?

Use apple cider vinegar, white vinegar, lemon juice, or seasoned rice vinegar. White vinegar is sharper, so start with a little less. Seasoned rice vinegar may already contain sugar, so reduce the sugar slightly.

Does yum yum sauce need butter?

No. Butter is optional. It adds richness and a silkier texture, but the sauce still works without it. If using butter, cool it before whisking it into the mayo.

Why does my yum yum sauce taste like mayo?

Freshly mixed sauce often tastes mayo-forward before it rests. Chill it for at least 30 minutes, then add a little more vinegar, paprika, garlic powder, tomato, and sugar if needed.

Is yum yum sauce good on fried rice?

Yes. Thin it to drizzle texture and add it after cooking, not in the pan. It gives hot fried rice a creamy, tangy finish without making the rice soggy.

What does yum yum sauce go with?

It goes well with shrimp, fried rice, chicken, steak, vegetables, rice bowls, fries, spring rolls, dumplings, nuggets, burgers, wraps, and roasted potatoes.

Is yum yum sauce gluten-free?

It can be gluten-free if every packaged ingredient you use is labeled gluten-free. Check mayo, ketchup, vinegar, hot sauce, spice blends, and any add-ins.

How long does homemade yum yum sauce last?

It keeps for up to 1 week in an airtight container in the refrigerator. Stir before serving and discard it if it smells off, changes texture, or has been left out too long.

Can you freeze yum yum sauce?

Freezing is not recommended. Mayo-based sauces can separate, turn watery, or become grainy after thawing. Make a fresh batch and store it in the refrigerator instead.

How do I make yum yum sauce spicy?

Add cayenne, sriracha, sambal, chili garlic sauce, or hot sauce. Start small, chill the sauce, and taste again before adding more.

Jump to recipe · Storage · Back to top

Posted on — Leave a comment

Air Fryer Boneless Pork Chops: Juicy Time & Temp Guide

Sliced air fryer boneless pork chops served with mashed potatoes and green beans on a white plate.

Boneless pork chops look like the easy dinner choice until you remember how quickly lean pork can turn dry. This air fryer method is built around the moment that usually ruins them: the last few minutes, when the outside looks done but the center can go from juicy to tight if you wait too long.

For juicy air fryer boneless pork chops, cook 1-inch chops at 380°F / 193°C for 10–12 minutes, flipping halfway, until the thickest center reaches 145°F / 63°C. Rest them for 3–5 minutes before slicing. The pork should come out lightly browned at the edges, with a savory rub that clings and a center that stays moist instead of chalky.

This is the no-dry method by thickness: start with the 1-inch timing, then adjust for the chop in front of you. Thin chops need an early check at the center, thick chops need steadier heat, frozen chops need a few minutes before seasoning will stick, and breaded chops usually need a little more heat for crisping.

Quick Answer: How Long to Cook Boneless Pork Chops in the Air Fryer

Best temperature380°F / 193°C for juicy unbreaded boneless pork chops
Default cook time10–12 minutes for 1-inch chops
Flip?Yes, flip halfway through cooking
Safe internal temperature145°F / 63°C in the thickest part
Rest time3–5 minutes before slicing
Most useful toolAn instant-read thermometer

For most 1-inch chops, that answer is enough to get dinner moving. If your pork is thinner, thicker, frozen, or breaded, use the shortcut below first, then fine-tune with the detailed chart after the recipe.

Start Here: Time by Pork Chop Type

If your chops are already on the counter, match them to the closest situation here. The goal is to know when to use the thermometer, not to guess from color alone.

SituationStarting point
Standard 1-inch chops380°F / 193°C for 10–12 minutes
Thin chopsStart around 4 minutes
Thick chops380°F / 193°C; start around 12 minutes
Breaded chops390°F–400°F / 199°C–204°C with a light oil spray
Frozen chopsCook 5 minutes first, then oil, season, and finish

Need the special version? Jump to thin boneless pork chops, thick boneless pork chops, breaded and Shake-and-Bake pork chops, or frozen boneless pork chops.

The easy rule: 1-inch chops usually need 10–12 minutes at 380°F. Thin chops need an early check at the center, thick chops need steadier heat, and every chop should come out when the center reaches 145°F / 63°C.

Why Thickness Matters Before You Start

Use thickness as the first decision point. It tells you when to start checking the center and keeps the air fryer timer from turning into guesswork.
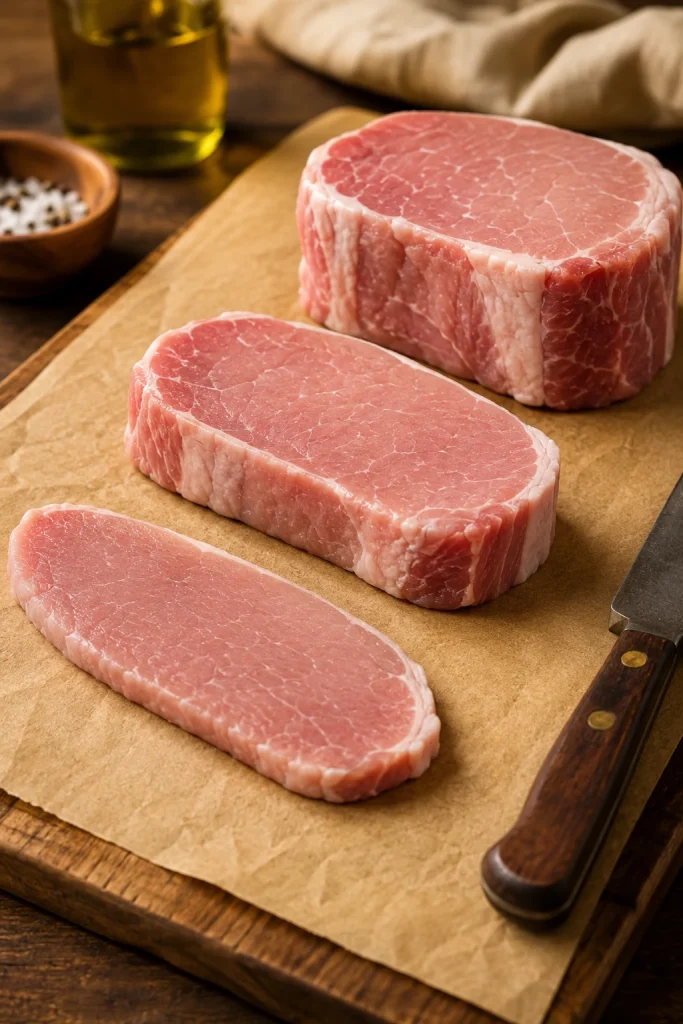
Three raw boneless pork chops of different thicknesses arranged on butcher paper.
Thickness changes the cook time more than the package name. Thin, 1-inch, and thick boneless pork chops need different air fryer timing.

Ready to cook the standard 1-inch version? Start with the recipe below. If one chop is smaller than the others, it is not cheating to pull it first; it is how you keep every piece from drying out while the thicker ones finish.

Air Fryer Boneless Pork Chops Recipe

The most reliable version starts with 4 boneless pork chops about 1 inch thick — thick enough to stay juicy, but still quick enough for a weeknight dinner. This recipe makes 4 pork chops and takes about 20 minutes total, including rest time.

Using a different thickness? Check the air fryer pork chops time chart before you start, then come back to the recipe steps.

Ingredients

IngredientAmount
Boneless pork chops4 chops, about 1 inch thick, 5–6 oz / 140–170 g each
Olive oil or avocado oil1½ tbsp / 22 ml
Brown sugar, optional1 tbsp / 12 g
Smoked or sweet paprika2 tsp / about 4–5 g
Garlic powder1 tsp / about 3 g
Onion powder½ tsp / about 1–1.5 g
Fine salt¾–1 tsp / about 4–6 g
Black pepper½ tsp / about 1 g
Dried thyme or sage, optional½ tsp

What You Need Before Cooking

Raw boneless pork chops with oil, paprika, garlic powder, onion powder, salt, pepper, brown sugar, and herbs.
Before the chops go in the basket, oil and pantry spices build color, flavor, and a better browned surface in the air fryer.

Brown sugar is optional, but it helps the pork brown and balances the savory seasoning. Without it, the chops may brown a little less but still cook well. Smoked paprika gives deeper color and a subtle smoky edge; sweet paprika keeps the flavor milder.

If using kosher salt, the volume can vary by brand. Use the lower amount for smaller chops, salty seasoning blends, or if you are unsure. You can always add a pinch more at the table, but you cannot take salt back once it is cooked in.

Instructions

Prep and Season the Pork Chops

These first steps set up the crust and flavor. Dry the surface, oil lightly, and press the rub in so the pork browns instead of steaming.

  1. Pat the pork chops dry. Use paper towels to remove surface moisture. Dry pork browns better and holds seasoning more evenly.
  2. Oil both sides. Rub the chops with olive oil or avocado oil. You want a light coating, not a greasy layer.
  3. Mix the seasoning. In a small bowl, combine the brown sugar, paprika, garlic powder, onion powder, salt, black pepper, and thyme or sage if using.
  4. Season generously. Sprinkle the seasoning over both sides and press it in gently so it clings.

Pat the Pork Chops Dry Before Seasoning

A hand patting raw boneless pork chops dry with a paper towel on a cutting board.
A dry surface helps the spice rub cling and gives the pork a better chance to brown instead of steam.

Season the Pork Evenly

Raw boneless pork chops coated with paprika seasoning on a wooden cutting board.
The seasoning should look evenly pressed onto the pork, so every bite tastes finished even without breading.

Air Fry, Check, and Rest

The cooking stage is about control: space the chops, flip once, measure the thickest center, and rest before slicing.

  1. Preheat if needed. If your air fryer recommends preheating, preheat to 380°F / 193°C for 3–5 minutes. If the chops are straight from the fridge, they may need an extra minute. Do not leave raw pork sitting out for long; just season while the air fryer preheats.
  2. Arrange in one layer. Place the chops in the basket with a little space between them. Do not stack or overlap. If one piece is thinner than the others, plan to take its temperature first and remove it early if needed.
  3. Cook and flip. Air fry at 380°F / 193°C for 5–6 minutes, flip, then cook 4–6 minutes more depending on thickness.
  4. Take the temperature. Around the 9-minute mark, slide an instant-read thermometer into the thickest center of the chop, not the edge. The pork is done at 145°F / 63°C.
  5. Rest before slicing. Transfer the chops to a plate and rest uncovered for 3–5 minutes. If they are very thick, you can tent them loosely. That short pause helps the juices stay in the meat instead of running out onto the cutting board.

Give the Chops Space in the Basket

Air fryer heat works best when it can move around the food. If the chops overlap, the covered spots steam and cook unevenly.

Four seasoned boneless pork chops spaced apart in an air fryer basket.
Visible space around each chop helps air fryer boneless pork chops brown at the edges instead of steaming in the basket.

Flip Halfway Through Cooking

Metal tongs flipping a boneless pork chop in an air fryer basket.
Halfway through cooking, flipping gives both sides direct heat and helps powerful basket-style air fryers brown more evenly.

Check the Thickest Center

The edge can read hotter than the middle. Aim the thermometer into the thickest center so you pull the pork at the right moment.
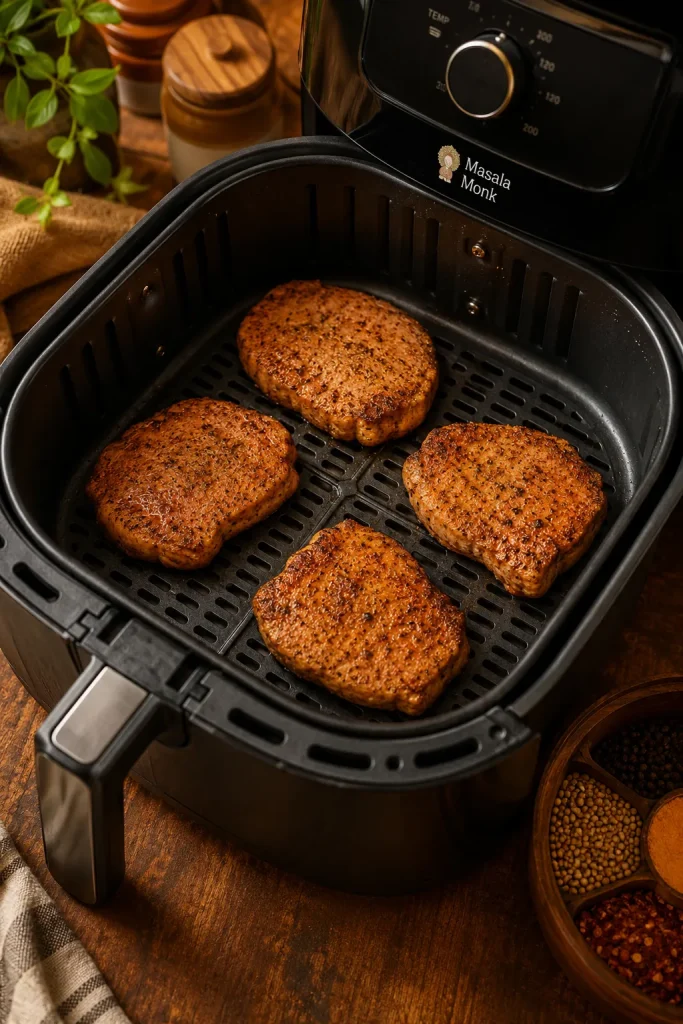
Instant-read thermometer inserted into the center of a cooked boneless pork chop.
The thermometer belongs in the thickest center, not the edge. That is the safest way to stop at 145°F / 63°C without drying the pork.

Rest Before Slicing

Cooked air fryer boneless pork chops resting on a plate before slicing.
A short rest makes the first cut cleaner and keeps more juice in the meat instead of on the plate.

Look for a Moist Sliced Center

The slice should look moist and gently firm, not hard or chalky. Color can vary, so use this cue with the thermometer instead of replacing it.
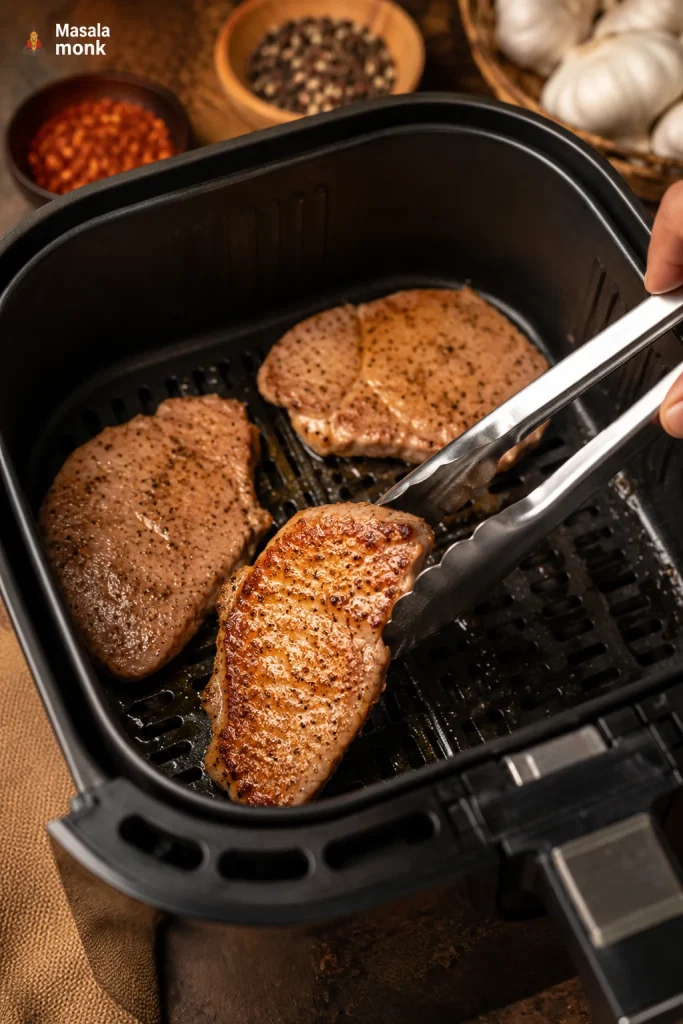
Cooked boneless pork chop sliced into pieces with a moist pale center.
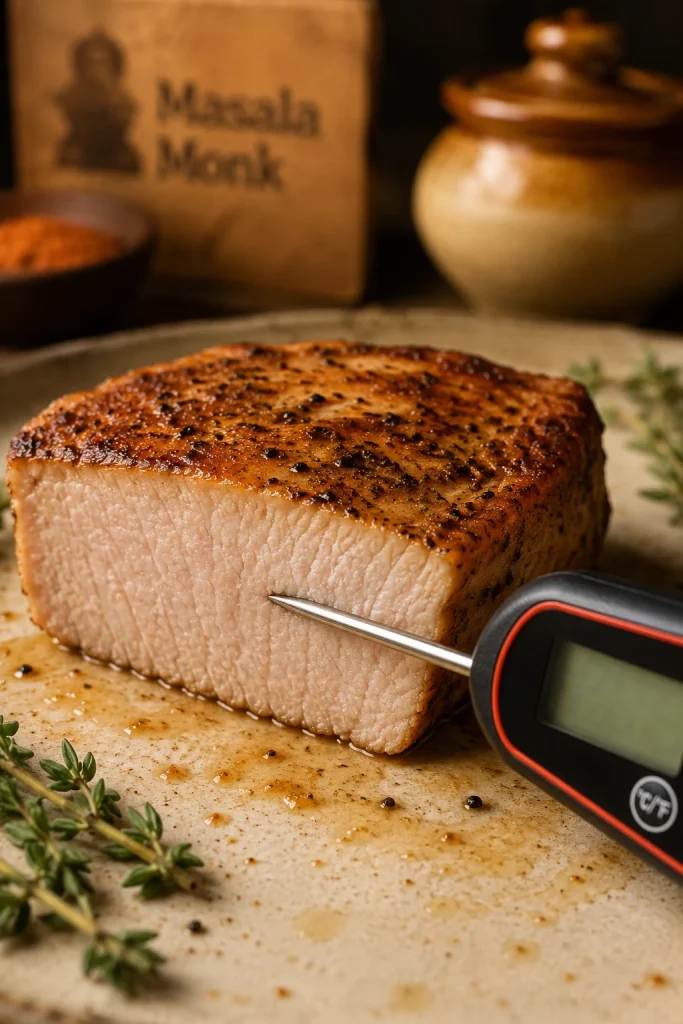
The sliced center should look moist and clean, not fibrous. Dry-looking edges usually mean the pork cooked a little too long.

When the chops are close to 145°F but not quite there, give them another 1–2 minutes and take another reading. At 145°F / 63°C, take them out right away. The best batch should have browned, seasoned edges, a juicy center, and enough flavor from the rub that you do not need to hide it under sauce.

When they are done, the outside should look browned and seasoned, not wet or pale. The rub should taste savory and a little smoky-sweet, with enough browned edge to make the pork feel finished even without breading. The center should feel firm but not hard when pressed, and it may still have a slight blush if it has reached temperature. Trust the thermometer more than color alone.

For more help with doneness, use the time and temperature chart, the thin chop notes, or the thick chop notes below.

More Air Fryer Pork Chop Help

Air Fryer Boneless Pork Chops Time and Temperature Chart

For most 1-inch chops, the recipe timing above is enough. Use this chart when the pork is thinner, thicker, frozen, or breaded so you know when to start and when to pull it from the air fryer.

These ranges are starting points, not promises, because air fryers and pork chop thickness vary. A thin ½-inch chop and a thick 1½-inch chop need different treatment, even if both packages say “boneless pork chops.”

Boneless pork chop typeAir fryer tempFirst readingLikely total timeInternal targetRest
Thin ½-inch / 1.25 cm chops375°F–380°F / 190°C–193°C4 min5–8 min145°F / 63°C3 min
¾-inch chops380°F–390°F / 193°C–199°C8 min9–11 min145°F / 63°C3–5 min
1-inch chops380°F / 193°C9 min10–12 min145°F / 63°C3–5 min
Thick 1¼–1½ inch chops380°F / 193°C12 min13–16 min145°F / 63°C5 min
Very thick 2-inch chops375°F–380°F / 190°C–193°C16 min18–22 min145°F / 63°C5–8 min
Breaded 1-inch chops390°F–400°F / 199°C–204°C9 min10–12 min145°F / 63°C3–5 min
Frozen boneless chops360°F–380°F / 182°C–193°CAfter first 5 min15–23 min total145°F / 63°C5 min

Breaded, frozen, or unusually thin pork chops can move quickly. Use the breaded pork chop section, the frozen pork chop method, or the thin chop guide for the closest match.

Visual Time Chart by Thickness

The visual chart works as a quick reminder; the full table above gives exact ranges for thin, thick, breaded, or frozen pork chops.

Air fryer boneless pork chops time and temperature chart organized by thickness.
The visual time chart is a quick thickness reminder. Confirm the pork with a thermometer before serving.

Once you know where your chop fits, the rest is simple: give it space, use the thermometer well, and pull it before the center tightens. Go with 375°F for very lean thin chops if you are worried about overcooking. Use 400°F / 204°C for thin chops only if you are watching them closely. Choose 390°F–400°F when breading needs help crisping.

If one chop is smaller than the others, pull it when it reaches 145°F / 63°C and let the thicker pieces keep cooking. For the clearest home-cook rule, cook the thickest part to 145°F / 63°C, then rest before slicing.

Why This Method Works

Boneless pork chops are lean, so they cook quickly and tighten quickly once they pass the right temperature. The air fryer gives you fast browning, but the method needs enough control to keep the center juicy.

That is why 380°F / 193°C works well for lean, unbreaded chops. The outside still browns, but the center has a little breathing room. Breaded chops or thicker pieces can handle more heat when they need extra browning.

Oil helps the seasoning cling, flipping evens out the browning, and resting keeps the first slice from losing all its juice. Spacing matters too: when food is crowded, the air fryer cannot move hot air around the surface properly. If your air fryer meals often turn out uneven, this guide to common air fryer mistakes is a helpful companion.

For food safety, pork chops should reach 145°F / 63°C with a 3-minute rest. You can confirm the current safety guidance through the FoodSafety.gov safe minimum internal temperatures chart. At this temperature, pork can still have a slight blush in the center; the thermometer matters more than color alone.

Thin Boneless Pork Chops in the Air Fryer

Thin chops are not hard, but they are unforgiving. The good news is that they cook fast, so one early check at the center is usually all it takes. This is the version where you do not want to set the timer and walk away.

If your chops are about ½ inch / 1.25 cm thick, start around 4 minutes and expect them to finish around 5–8 minutes in many air fryers. For very thin, lean pieces, 375°F / 190°C gives you more control. If you use 390°F–400°F / 199°C–204°C, stay close during the final stretch.

Thin chops are often done before they look deeply browned, so do not wait for a dramatic crust before measuring the center. A lighter crust is better than a dry center, especially with thin pork. If the chops are breaded, be even more careful because the coating can brown before the meat is perfectly cooked.

Thin Chop Doneness Cue

Thin air fryer pork chop sliced on a white plate with a light golden crust.
Thin boneless pork chops can finish before they look deeply browned. Stop at the right center temperature instead of chasing a darker crust.

Thick Boneless Pork Chops in the Air Fryer

Thicker chops need patience more than extra heat. A 1-inch chop is the easiest size for this recipe. Once you get into 1¼-inch, 1½-inch, or 2-inch chops, the outside can brown while the center is still catching up.

For thick chops, use 375°F–380°F / 190°C–193°C and let the heat work more steadily. Take your first thermometer reading around 12 minutes for 1¼–1½ inch chops and around 16 minutes for very thick 2-inch chops. Slide the probe into the middle of the meat, not near the edge, because the edge can read hotter than the center.

If the outside is getting dark before the center reaches temperature, lower the heat slightly next time rather than blasting the pork hotter. A thick chop should feel springy when pressed, not stiff, and the first slice should look moist rather than fibrous.

Thick Chop Sliced Center

Thick air fryer boneless pork chop sliced on a cutting board with broccoli in the background.
Thick boneless pork chops need steadier heat so the center can catch up. Look for a moist interior, not a stiff or fibrous slice.

Thicker pieces also benefit from a slightly longer rest. Five minutes is usually enough for 1¼–1½ inch chops. Very thick ones can rest closer to 8 minutes without losing their warmth, especially if you tent them loosely.

Best Boneless Pork Chops to Buy for the Air Fryer

For the easiest air fryer pork chops, buy center-cut boneless chops that are ¾ inch to 1 inch thick. That size cooks quickly but still gives you enough room to keep the center juicy.

If your package just says “boneless pork chops,” measure thickness first. That matters more than the exact label. When two packs look similar, choose the one with even thickness over the one with the prettiest label.

Choose Even-Thickness Chops

Even thickness helps every piece finish at about the same time. It also keeps you from sacrificing a thin chop while waiting for a thicker one.

Even-thickness raw center-cut boneless pork chops arranged on butcher paper.
At the store, even thickness matters more than the prettiest package. Similar-size chops cook more predictably and stay juicier.
  • Boneless pork loin chops: Lean and common; avoid pushing them past temperature.
  • Center-cut boneless pork chops: Best default for this recipe.
  • Boneless ribeye pork chops: Often more forgiving because they can have more marbling.
  • Butterfly pork chops: Often thinner once opened; use thin-chop timing if needed.
  • Pork cutlets: Very thin; take the first reading sooner than standard chops.
  • Boneless sirloin chops: Can be uneven or a little tougher; the thermometer matters.

Very thin pieces cook fast but dry out quickly. Very thick ones can be juicy, but they need more careful temperature checks. If you are comparing lean pork cuts beyond chops, this pork tenderloin in oven guide follows the same basic idea: cook gently, check the center, and rest before slicing.

No Breading, Breaded, and Shake-and-Bake Pork Chops

Once thickness is sorted, the next question is usually coating: plain seasoning, breadcrumbs, or Shake-and-Bake. The main recipe uses oil and a dry seasoning rub, but breaded chops and Shake-and-Bake style chops also work well in the air fryer.

VersionBest tempLikely timeKey move
Unbreaded 1-inch chops380°F / 193°C10–12 minOil first, then season well.
Thin unbreaded chops375°F–380°F / 190°C–193°C5–8 minTake an early reading.
Breaded 1-inch chops390°F–400°F / 199°C–204°C10–12 minSpray the coating lightly with oil.
Thin breaded cutlets390°F / 199°C6–10 minWatch closely; coating browns fast.
Shake-and-Bake chops390°F–400°F / 199°C–204°C6–12 minOil first, coat well, and spray dry patches.

Oil Spray for Breaded Pork Chops

Breaded chops need a little surface fat to crisp in the air fryer. Spray lightly, especially on dry patches, instead of soaking the coating.

Breaded boneless pork chops being sprayed with oil in an air fryer basket.
A light oil spray helps breaded air fryer pork chops turn crisp and golden instead of staying pale or powdery.

For thin unbreaded chops, a hotter setting can work only if you are watching closely. If the pork is very lean or very thin, the lower temperature gives you more room to catch it before it dries out.

No-Breading Air Fryer Boneless Pork Chops

Choose the dry-rub version when you want a quick weeknight dinner without flour, egg, or crumbs. Oil the pork first, then season both sides generously. The oil helps the spice rub cling and keeps the surface from tasting dry.

Because there is no coating, these chops can cook a little faster than breaded ones, especially when they are thin. A 1-inch chop works best at 380°F / 193°C. Smaller pieces should stay near the lower end of the time range.

Breaded Boneless Pork Chops

For breaded boneless pork chops, use a simple flour, egg, and panko or breadcrumb coating. Air fry at 390°F–400°F / 199°C–204°C until the coating is crisp and the pork reaches 145°F / 63°C in the center.

Crispy Breaded Pork Chop Doneness Cue

A golden crust is only part of the signal. The pork inside still needs to reach 145°F / 63°C before it rests.

Crispy breaded air fryer pork chop sliced on a plate with slaw and green beans.
Breaded boneless pork chops should be crisp outside but still moist inside. The crust can brown before the center is done, so check the pork itself.

The small but important detail is oil spray. Spray the breaded surface lightly before cooking, then look for dry patches after flipping. Dry crumbs stay pale and powdery in the air fryer; a little oil helps them crisp and brown. The goal is a coating that tastes crisp, not dusty. Use a refillable oil sprayer, brush, or the type of oil spray your air fryer manufacturer recommends.

Shake-and-Bake Pork Chops in the Air Fryer

Shake-and-Bake style pork chops work well in the air fryer if the coating has enough moisture to stick. Oil the pork first, coat it well, shake off the excess, and place the chops in a single layer.

Boneless pork chop being coated in seasoned crumbs with tongs in a bowl.
Oil the pork first for Shake-and-Bake style chops so the coating sticks, then shake off extra crumbs before air frying.

Cook at 390°F–400°F / 199°C–204°C and use a thermometer in the center instead of judging only by the crust. If the coating still looks dusty after flipping, spray those spots lightly with oil and continue cooking. Give the chops space in the basket so the coating can crisp instead of steaming.

Frozen Boneless Pork Chops in the Air Fryer

Frozen chops are not ideal, but they are absolutely workable when dinner needs to happen. You are not trying to make them perfect from frozen; you are trying to make them seasoned, safe, and still pleasant to eat.

Give Frozen Chops a Short Head Start

Start frozen pork chops plain for a few minutes. That softens the surface so seasoning can cling instead of falling off ice.

Frozen boneless pork chops arranged in one layer in an air fryer basket.
Frozen boneless pork chops need a short head start in the air fryer. Once the icy surface softens, oil and seasoning can actually stick.

Thawed chops usually cook more evenly and hold seasoning better, but frozen pieces can still come out well if you season them after the surface softens. The same staged approach works for other frozen air fryer foods too, including these frozen chicken wings in the air fryer.

  1. Place the frozen pork chops in the air fryer basket.
  2. Air fry at 380°F / 193°C for 5 minutes to soften the surface.
  3. If the chops are stuck together, separate them carefully.
  4. Brush or rub with oil, then season both sides.
  5. Return to the basket in a single layer.
  6. Cook 10–18 minutes more, depending on thickness, flipping halfway.
  7. Use a thermometer in the center and cook until the pork reaches 145°F / 63°C.
  8. Rest for 5 minutes before slicing.

Season Frozen Chops After Softening

After the first few minutes, the surface is ready for oil and spices. This is the point where seasoning starts doing real work.

Frozen pork chops being brushed with oil and seasoning in an air fryer basket.
Once the frozen chops soften, add oil and seasoning before finishing the cook. This gives the pork better flavor than seasoning an icy surface.

A thin frozen chop may finish quickly after the first softening step, while a thick frozen chop may need the full range or a little more. Very thick frozen chops can take longer than the chart, so the thermometer matters more than the timer. Seasoning sticks much better after those first few minutes, so do not waste your best rub on an icy surface.

Air Fryer Model Notes: Ninja Foodi, Cosori, Instant Vortex, PowerXL

Most basket-style air fryers can use this timing. The brand matters less than basket size, airflow, and how aggressively your model browns. That includes Ninja Foodi, Cosori, Instant Vortex, PowerXL, and similar air fryers.

  • 5–6 quart basket: Best size for 4 average chops.
  • 3–4 quart basket: Cook in batches if the chops crowd or overlap.
  • Large basket air fryer: May brown faster, so take a reading sooner.
  • Oven-style air fryer: Can cook less evenly, so rotate or flip carefully.
  • Ninja Foodi or multicooker style: Use the air crisp or air fry setting and learn how quickly your model runs.
  • Very powerful model: Reduce the time slightly or use the lower end of the range.

Your first batch is the calibration batch. After that, you will know whether your air fryer runs fast, slow, or a little aggressive around the edges. When the pork reaches temperature early, reduce the time next round. Slow browning usually needs another minute or two while you watch the internal temperature.

Troubleshooting Air Fryer Boneless Pork Chops

A dry, pale, or uneven batch usually comes back to thickness, crowding, heat, or a few minutes too long. Start with the table below, then check the timing chart again before the next batch.

Avoid Overcrowding the Basket

Crowding is one of the easiest problems to fix. Leave space around each piece so the air fryer can brown the pork instead of steaming it.

Boneless pork chops crowded and overlapping in an air fryer basket.
A crowded basket traps moisture and makes pork chops brown unevenly. Instead, cook in batches when the pieces overlap.
ProblemLikely reasonFix next time
Pork chops are dryOvercooked, very thin, sliced too soon, or reheated too longShorten the cook, check the center earlier, and rest before slicing.
Outside browned but inside underdoneHeat too high for the thicknessUse 375°F–380°F and cook more steadily.
Seasoning tastes flatNot enough salt or seasoning did not stickOil first, season both sides, and press the rub in gently.
Chops steamed instead of brownedBasket overcrowdedCook in one layer or use batches.
Breaded coating has dry patchesNot enough oil spraySpray lightly before cooking and again after flipping if needed.
Frozen chops taste blandSeasoning was added while the surface was icyCook frozen chops 5 minutes first, then oil and season.
Chops cooked unevenlyUneven thickness or oven-style air fryer airflowFlip, rotate if needed, and check the thickest part.

What to Serve With Air Fryer Boneless Pork Chops

Because the pork is lean and savory, it loves something creamy, crisp, or sweet-tangy on the plate. The best plate is simple: juicy pork, a side that balances it, and something that catches the seasoned juices.

Comfort Plate

A classic comfort plate can start with garlic mashed potatoes, gravy, roasted potatoes, or buttered rice. If you want a classic vegetable side, green bean casserole works especially well with juicy pork chops.

Air fryer boneless pork chops served with mashed potatoes and green beans.
Mashed potatoes and green beans turn air fryer pork chops into a comfort dinner while catching the seasoned juices on the plate.

Next time you want a saucier pork chop dinner, MasalaMonk’s smothered pork chops with onion gravy takes the same comfort-food mood even further.

Lighter Plate

A crisp, fresh plate can start with a wedge salad with blue cheese and bacon, cucumber salad, coleslaw, cabbage slaw, steamed broccoli, green beans, or asparagus.

Air fryer boneless pork chops served with slaw, greens, and tomatoes.
Crisp slaw or salad brings freshness to air fryer boneless pork chops and balances the savory browned edges.

Cookout or Leftover Plate

Cookouts, leftovers, or a colder plate pair well with this potato salad guide, which gives you creamy, tangy, warm, chilled, and lighter directions. Leftover sliced pork chops also work well in sandwiches, rice bowls, salads, wraps, or quick breakfast plates with eggs.

Planning for leftovers? Jump to storage and reheating so the pork stays useful without drying out the next day.

Sauces That Work Well

  • Honey mustard or mango mustard sauce
  • Garlic butter
  • BBQ sauce
  • Apple chutney or applesauce
  • Quick pan-style gravy

Storage and Reheating

These chops taste best fresh from the air fryer, when the edges are still warm and the center has just rested. Leftovers can still be useful, but the key is to warm them gently instead of cooking them all over again.

  • Refrigerate: Store cooled pork chops in an airtight container for 3–4 days.
  • Freeze: Freeze cooked pork chops if needed, though the texture is best when fresh.
  • Reheat in the air fryer: Warm at 350°F / 177°C for 3–5 minutes, just until hot.
  • Avoid repeated reheating: Cooked pork dries out quickly when warmed again and again.

Reheat Gently in the Air Fryer

Cooked pork chops reheating in an air fryer basket with tongs on a plate nearby.
Gentle reheating is the goal for leftover pork chops: warm them through in the air fryer without cooking them all over again.

If you know you are saving some for later, pull the chops from the air fryer as soon as they reach temperature and avoid slicing until you are ready to eat or pack them.

Flavor Variations

Once the time and temperature feel easy, the seasoning can change with dinner. Keep the oil, salt, spacing, and thermometer habit the same, then adjust the flavor around the sides or sauce you want.

  • Garlic herb: Use garlic powder, onion powder, thyme, black pepper, and a little lemon zest after cooking. Best with mashed potatoes, green beans, or a simple salad.
  • Smoky paprika: Use smoked paprika, garlic powder, onion powder, black pepper, and a pinch of brown sugar. Good with roasted potatoes, corn, or slaw.
  • BBQ-style: Season with paprika, garlic, onion, and pepper, then brush lightly with BBQ sauce near the end. Serve with potato salad, coleslaw, or buttered rice.
  • Ranch-style: Use ranch seasoning lightly, then reduce added salt if the mix is salty. Pair with fries, salad, or roasted vegetables.
  • Spicy: Add cayenne, chili powder, or Cajun seasoning to the dry rub. Good in rice bowls, wraps, or with a cooling creamy side.
  • Garlic parmesan: Add grated parmesan after cooking or use it in a breaded coating. Serve with pasta, salad, or roasted broccoli.
  • Marinated: Marinate briefly, then pat the chops dry before air frying so the surface browns instead of steaming.

For a creamy pork chop direction, these cream of mushroom pork chops are a cozy pantry-style option.

Once you know the thickness and trust the thermometer, the guesswork drops quickly. Give the chops space, pull them when the center reaches 145°F / 63°C, and let them rest before slicing. The next batch will feel less like guessing and more like dinner on purpose.

FAQ

How long do boneless pork chops take in the air fryer?

Most 1-inch boneless pork chops take 10–12 minutes at 380°F / 193°C. Thin chops may finish in 5–8 minutes, while thick chops can need 13–16 minutes or more. Cook to 145°F / 63°C in the thickest center.

What temperature is best for air fryer boneless pork chops?

For juicy unbreaded chops, 380°F / 193°C is a strong default. Breaded chops usually crisp better at 390°F–400°F, while very thick chops can benefit from 375°F–380°F.

How do you keep boneless pork chops juicy in the air fryer?

Choose chops that are not too thin, oil and season the surface, cook in one layer, take the temperature before they overcook, and rest before slicing.

Do thin boneless pork chops cook faster?

Yes. Thin ½-inch / 1.25 cm chops can cook in about 5–8 minutes. Start around 4 minutes because thin pieces dry out quickly once they pass the right temperature.

What about thick boneless pork chops?

Thick chops need steadier heat and more time. Cook 1¼–1½ inch chops at 380°F / 193°C for about 13–16 minutes. Very thick 2-inch chops may need 18–22 minutes at 375°F–380°F.

Should boneless pork chops be flipped in the air fryer?

Yes. It is a small step, but it helps both sides cook and brown more evenly, especially in powerful basket-style air fryers.

Is 145°F safe for pork chops?

Yes. Pork chops are considered safe when they reach 145°F / 63°C in the thickest part and rest for at least 3 minutes. The center may still have a slight blush. The National Pork Board’s pork cooking temperature guide also uses 145°F followed by a 3-minute rest for fresh pork cuts.

Why did my air fryer pork chops turn out dry?

They were probably overcooked, very thin, cooked too hot for their thickness, sliced too soon, or reheated too long. Check the center earlier next time and rest before cutting.

Can you cook frozen boneless pork chops in the air fryer?

Yes. Cook frozen chops for 5 minutes first to soften the surface, then oil and season them. Most frozen chops take about 15–23 minutes total depending on thickness, and the center should reach 145°F / 63°C.

Do breaded boneless pork chops need more time?

Not always, but they usually need a hotter setting for better crisping. Use 390°F–400°F, spray the coating lightly with oil, and use a thermometer instead of relying only on crust color.

Can Shake-and-Bake pork chops go in the air fryer?

Yes. Oil the pork first, coat it well, place the chops in a single layer, and air fry at 390°F–400°F. Spray dry patches lightly with oil so the coating crisps instead of staying powdery.

Are boneless pork loin chops the same as boneless pork chops?

Boneless pork loin chops are one common type of boneless pork chop. They work well here, but they are lean, so avoid overcooking them.

Does this timing work for bone-in pork chops?

Use it as a starting point, but bone-in pork chops usually need a little more time than boneless chops of the same thickness. Use a thermometer in the center.

Will this work in a Ninja Foodi or Cosori air fryer?

Yes. It works in Ninja Foodi, Cosori, Instant Vortex, PowerXL, and most similar air fryers. Since models vary, start a little earlier the first time.

Posted on — Leave a comment

Ham and Cheese Quiche Recipe: Creamy, Easy, Crustless Option

Whole ham and cheese quiche in a white ceramic pie dish with one slice lifted, showing golden crust, creamy custard, diced ham, melted cheese, and chives.

Ham and cheese quiche is what you make when brunch needs to feel special but you do not want to stand at the stove. It uses cooked ham, a simple egg custard, plenty of cheese, and a crust that can be homemade, refrigerated, frozen, or skipped completely.

The most satisfying bites have smoky ham, melted cheese, and soft custard against the flaky edge of the crust. This version is creamy without being loose, savory without being too salty, and practical enough for a holiday brunch, a quiet lunch, or a weeknight dinner with salad.

Close-up of a ham and cheese quiche slice on a white plate, with a fork cutting into the creamy custard and flaky crust.
A good slice should hold together but still look soft inside; that creamy custard is what keeps this from feeling like a firm egg bake.

This ham and cheese quiche is built for real kitchens: the kind with leftover holiday ham, a frozen crust in the freezer, or a bit of cheese that needs using. As long as the ham is cooked, diced small, and not wet, the recipe is flexible.

The base is simple: 5 large eggs, 1 cup dairy, 1½ cups diced ham, and 1½ cups cheese for one 9-inch / 23 cm quiche. That ratio keeps the center creamy but sliceable, so you do not end up with a stiff egg pie or a watery middle.

Start with the quick answer and recipe if you are ready to bake. The extra notes are there for frozen crusts, crustless baking, make-ahead timing, variations, and troubleshooting.

Quick Answer

For one 9-inch / 23 cm ham and cheese quiche, use 5 large eggs, 1 cup dairy, 1½ cups cooked diced ham, and 1½ cups shredded cheese. Par-bake the crust, fill it, bake at 375°F / 190°C until the edges are set and the center is soft-set, then rest for 10 minutes before slicing.

Quiche ElementUse This
Eggs5 large eggs
Dairy1 cup / 240 ml / 8 fl oz half-and-half, or cream + milk
Ham1½ cups / 200–225 g / 7–8 oz cooked diced ham, loosely measured
Cheese1½ cups / 150–170 g / 5–6 oz shredded cheese, loosely measured
Oven375°F / 190°C for a crusted quiche
Done whenEdges are set and the center is soft-set, not liquid

For a first bake, keep it simple: deep-dish frozen or refrigerated pie crust, half-and-half, 1 cup sharp cheddar, ½ cup Swiss, and diced cooked ham. Once you see how the center should wobble, the variations become much easier.

Eggs, dairy, diced cooked ham, shredded cheese, chopped chives, and a pie crust arranged on a kitchen prep surface.
Use the base as a balance check: eggs help the custard set, dairy keeps it tender, and ham and cheese make the filling generous without weighing it down.

Choose Your Ham and Cheese Quiche Path

Start with the same creamy base, then choose the version that fits your day: frozen crust for ease, crustless for meal prep, or extra vegetables when the fridge needs clearing.

If This Is Your SituationBest Path
You want the easiest brunchUse a deep-dish frozen crust, half-and-half, sharp cheddar, Swiss, and cooked diced ham.
You have leftover holiday hamDice it small, pat it dry if needed, reduce the salt, and balance sweet glaze with Dijon and black pepper.
You want no crustGrease the pie dish well and bake the same egg mixture at 350°F / 175°C until just set.
You want the creamiest textureUse half-and-half, or equal parts heavy cream and whole milk.
You are adding vegetablesCook, drain, and cool them before they touch the egg mixture.
You are meal-preppingBake the quiche first, cool it, slice it, then refrigerate or freeze the slices.

Ham and Cheese Quiche Recipe

Description

This easy quiche has a creamy egg custard, diced cooked ham, plenty of cheese, and a crisp-tender pie crust. Use a frozen deep-dish crust for the easiest version, or make it with homemade or refrigerated crust. Serve it for brunch, lunch, holidays, meal prep, or an easy dinner with salad.

Crustless note: For a no-crust version, use the same filling in a well-greased 9-inch / 23 cm pie dish and bake at 350°F / 175°C for 30–40 minutes. See the crustless ham and cheese quiche section for the full method.

  • Prep Time: 15 minutes
  • Par-Bake Time: 10–12 minutes
  • Final Bake Time: 35–45 minutes
  • Resting Time: 10 minutes
  • Total Time: About 1 hour 10 minutes to 1 hour 20 minutes
  • Servings: 6–8 slices

Equipment

  • 9-inch / 23 cm pie dish or 9-inch deep-dish frozen pie shell
  • Rimmed baking sheet
  • Mixing bowl
  • Whisk
  • Measuring cups and spoons
  • Fork
  • Foil or pie shield
  • Wire rack
  • Instant-read thermometer, optional

Ingredients

  • 1 9-inch / 23 cm deep-dish pie crust, homemade, refrigerated, or frozen
  • 5 large eggs
  • 1 cup / 240 ml / 8 fl oz half-and-half, or ½ cup / 120 ml heavy cream plus ½ cup / 120 ml whole milk
  • 1½ cups / 200–225 g / 7–8 oz cooked diced ham, measured loosely, not packed
  • 1½ cups / 150–170 g / 5–6 oz shredded cheese, measured loosely, not packed
  • 2–3 tablespoons chopped green onions or chives
  • 1 teaspoon Dijon mustard
  • ¼ teaspoon black pepper
  • ¼–½ teaspoon salt
  • Small pinch of nutmeg, optional
  • 1 tablespoon butter or oil, optional, if sautéing onion, mushrooms, spinach, or other vegetables

Use ¼ teaspoon salt if your ham or cheese is salty. Use ½ teaspoon only if your ham is mild and your cheese is not very salty.

Instructions

1. Preheat and Set Up

Heat the oven to 375°F / 190°C and set a rack in the middle or lower-middle position. Place the pie crust on a rimmed baking sheet so it is easier to move and any overflow is caught.

2. Par-Bake the Crust

Give the crust a short head start for 10–12 minutes, or follow the package timing if using a frozen shell. The surface should look dry and lightly set, even if it is still pale. Gently press down any puffed spots with a spoon.

Lightly par-baked pie crust with fork holes in a pie dish on a rimmed baking sheet.
Par-bake the crust until the surface looks dry and lightly set; it should not be deeply browned yet because it bakes again with the custard.

3. Whisk the Custard

Combine the eggs, half-and-half, Dijon mustard, black pepper, salt, and nutmeg in a mixing bowl until the mixture looks smooth and evenly yellow. Stop once it is blended; the custard should not be bubbly or foamy.

Hands whisking a pale egg custard mixture in a glass bowl with dairy, Dijon mustard, pepper, and seasonings nearby.
Whisk the eggs and dairy just until smooth; a calm, even custard bakes more neatly than one whipped full of foam.

4. Layer the Ham, Cheese, and Chives

Scatter the diced ham evenly over the warm par-baked crust. Add the shredded cheese and green onions or chives so the filling is spread across the base before the custard goes in.

Diced ham, shredded cheese, and chopped chives spread evenly inside a par-baked pie crust.
Layer the ham, cheese, and chives before the custard goes in so every slice gets flavor throughout instead of one heavy layer at the bottom.

5. Pour Without Overfilling

Add the egg mixture slowly over the ham and cheese so it can settle into the gaps. Stop before it touches the rim, especially if the crust is shallow. A clean oven is worth more than one extra spoonful.

Egg custard being poured from a glass measuring cup into a pie crust filled with ham, cheese, and chives.
Pour slowly so the custard settles between the ham and cheese; this helps the quiche bake evenly from the crust edge to the center.

A shallow crust may not hold every drop of custard. When the filling looks close to the top, save the extra for a greased ramekin instead of risking overflow.

Unbaked quiche filling sitting below the visible rim of a deep pie crust in a white ceramic dish.
Stop before the filling reaches the rim; leaving visible crust above the custard is one of the easiest ways to prevent overflow in a deep-dish quiche.

6. Bake Until Soft-Set

Slide the quiche into the oven for 35–45 minutes, until the edges are set and the center moves like soft-set pudding when you gently nudge the pan. Cover the crust edge with foil or a pie shield if it browns too quickly, and tent the whole quiche loosely if the top colors before the center is ready.

Whole baked ham and cheese quiche in a white ceramic pie dish resting on a wire cooling rack.
A softly puffed top, golden cheese spots, and a browned crust edge are better doneness clues than waiting for the center to look firm.

7. Rest Before Slicing

Set the quiche on a wire rack for 10 minutes before cutting. The center settles as it cools, which helps the slices lift cleanly instead of slumping.

8. Serve Warm or Room Temperature

Bring slices to the table warm or at room temperature for the creamiest texture. Chilled leftovers are fine for quick lunches, but the custard tastes better once the chill comes off.

A good slice should look softly set in the center, with ham and cheese suspended through the custard instead of sunk into one dense layer.

Slice of ham and cheese quiche lifted on a pie server, showing creamy custard, diced ham, melted cheese, and an intact bottom crust.
A clean cross-section shows the target texture: ham suspended through the custard, a tender middle, and a crust strong enough to lift.

Recipe Notes

  • This recipe card is for the crusted version. For crustless baking, use the crustless note above or jump to the crustless quiche section.
  • If using frozen crust, make it deep-dish. Regular frozen shells can work, but they often cannot hold all the filling; the frozen crust notes explain why.
  • If using homemade or refrigerated pie dough, chill it in the dish, line it with parchment, add pie weights, dried beans, or uncooked rice, and par-bake until the edges begin to set. Frozen crusts can usually follow package directions.
  • Cook, drain, and cool vegetables before adding them so they do not throw off the texture.
  • Do not overfill a shallow crust. Extra egg mixture can be baked in a small greased ramekin.

Why This Recipe Works

That ratio does most of the work here: 5 large eggs + 1 cup dairy + 1½ cups ham + 1½ cups cheese. Five eggs give the slice structure, one cup of dairy keeps the center soft instead of omelet-like, and the ham and cheese stay generous without weighing down the custard.

The goal is a slice that lifts cleanly but still tastes soft and creamy, with little pockets of ham and melted cheese all the way through.

A short head start in the oven also protects the crust. It keeps the bottom from turning pale and soft once the wet custard goes in, and it helps you avoid the usual quiche problems: too much liquid, wet add-ins, a soft bottom crust, and eggs baked until rubbery.

Ingredients and Key Tips

Quiche is forgiving, but it is not random. Once you control moisture, salt, and bake time, the rest becomes flexible.

Ham

Almost any cooked ham works here: leftover holiday ham, ham steak, smoked ham, or thick-cut deli ham. Dice it small so it spreads evenly through the custard.

This is especially useful after a holiday meal, Sunday dinner, or any time you have cooked ham in the fridge. The ham is already seasoned and ready to help; you are not building brunch from nothing, just giving leftovers a better second life.

For deli ham, choose thicker slices and dice them small. Watery packages need a quick blot before the ham goes into the crust because extra moisture can affect the custard just like wet vegetables can.

Salty ham needs less salt in the egg mixture. You can always add a little salt at the table, but you cannot remove it once it is baked into the dish.

With sweet glazed ham, trim away any thick sticky edges before dicing. A little sweetness is fine, but too much glaze can make the quiche taste sweeter and more casserole-like than classic ham quiche. Dijon mustard, black pepper, cheddar, Swiss, or Gruyère will help balance it.

Diced cooked ham on a wooden cutting board with a towel blotting some pieces and a glazed ham edge being trimmed.
Blot wet ham before adding it; this small step helps prevent watery quiche, especially with deli ham or glazed leftovers.

Brown the ham if it is pale, wet, or mild. Skip this step if the ham is already smoky, dry, or strongly flavored. A quick 2–3 minutes in a dry skillet or a little butter gives the edges more savory flavor.

Eggs

Five eggs is the sweet spot for this size: enough structure to slice, but not so many that the center turns firm and omelet-like.

Dairy

For the creamiest everyday texture, half-and-half gives you the easiest balance. If half-and-half is not available where you live, use equal parts heavy cream and whole milk.

Whole milk also works for a lighter quiche. The center will be less rich, but it will still set if you keep the egg-to-dairy ratio steady.

Cheese

For cheese, stay with something that actually has flavor. Sharp cheddar gives the quiche that familiar melted ham-and-cheese pull, Swiss is mild and classic, and Gruyère makes the dish feel more brunch-table polished.

Measure shredded cheese loosely, not packed tightly into the cup. Too much cheese can make the quiche greasy, salty, or heavy. Freshly shredded cheese melts most smoothly, but pre-shredded cheese is fine when convenience matters.

Avoid fresh mozzarella unless it is very well drained. It can release water into the custard. Low-moisture mozzarella is safer, but it is mild, so it works better as part of a blend than as the main cheese.

Green Onions, Chives, Onion, or Garlic

Green onions and chives are the easiest because they can go straight into the egg mixture. If using yellow onion, shallot, or garlic, sauté them first so the flavor softens before baking.

Dijon, Pepper, and Nutmeg

Dijon mustard adds gentle sharpness without making the quiche taste mustardy. Black pepper keeps the custard from tasting flat. A tiny pinch of nutmeg is optional, but it works beautifully with eggs, cream, cheese, and ham.

Before You Bake, Check These 5 Things

If you remember only three things, par-bake the crust, control wet add-ins, and pull the quiche before the center turns firm. If the center still makes you nervous, the doneness cues below explain the wobble, resting time, and thermometer range.

  • The crust is par-baked and lightly set.
  • The ham is diced small and patted dry if it feels wet.
  • Any vegetables are cooked, drained, and cooled slightly.
  • The cheese and ham are measured loosely, not packed down.
  • The egg mixture sits below the rim of the crust.

Best Crust, Dairy, and Cheese Choices

This is where you can make the recipe fit your kitchen. Frozen crust, homemade crust, cream, milk, cheddar, Swiss, or Gruyère can all work — the goal is to keep the custard balanced and the crust from going soft.

Using a Frozen Pie Crust

If you are using a frozen crust, you are not cheating; you are making brunch easier. Choose a 9-inch deep-dish frozen crust if you can. Regular frozen shells can work, but they often cannot hold all the filling.

Keep the crust in its tin if it comes that way, place it on a rimmed baking sheet, prick the base lightly, and par-bake for 10–12 minutes before filling. Do not worry if it is not deeply browned after the first bake. It will go back into the oven with the custard.

Deep-dish frozen pie crust in a foil tin set on a rimmed baking sheet on a kitchen counter.
A deep-dish frozen pie crust makes frozen crust quiche easier because it gives the egg custard enough room and helps reduce spillover.

Homemade or Regular Pie Crust

Not every 9-inch crust holds the same amount of custard. A regular 9-inch crust can still work, but you may not need every drop of the egg mixture.

If using homemade pie dough, chill it in the dish before blind baking. Line it with parchment, fill with pie weights, dried beans, or uncooked rice, and bake until the edges begin to set before removing the weights.

Pie crust lined with parchment paper and filled with pie weights in a glass pie dish.
With homemade or refrigerated dough, blind-baking with parchment and pie weights helps the crust hold its shape before the wet filling goes in.

Do not fill the crust all the way to the rim. Quiche can puff as it bakes. If you have extra egg mixture, bake it in a small greased ramekin instead of forcing it into the crust.

What Dairy Makes the Creamiest Texture?

The dairy is where you can quietly change the whole personality of the quiche. Cream makes it rich, milk makes it lighter, and half-and-half sits comfortably in the middle.

DairyTexture and FlavorGood Use
Heavy creamRichest, softest, most custardySpecial brunch or holiday quiche
Half-and-halfCreamy but not too heavyEveryday choice
Whole milkLighter and less richLighter quiche that still sets
Low-fat milkLess creamy and slightly less forgivingUse only if you accept a lighter texture
½ cream + ½ whole milkRich and balancedEasy substitute for half-and-half

If you do not have half-and-half, use ½ cup / 120 ml heavy cream + ½ cup / 120 ml whole milk. To make the quiche without heavy cream, use 1 cup / 240 ml whole milk.

Cheddar, Swiss, or Gruyère?

Ham needs cheese with enough flavor to stand up to it. Sharp cheddar gives bold, familiar flavor. Swiss gives a mild, nutty, classic brunch taste. Gruyère makes the custard richer and deeper.

For an everyday version, use 1 cup sharp cheddar + ½ cup Swiss. For a richer brunch version, use 1 cup Gruyère + ½ cup cheddar or Swiss. A little Parmesan can also be added for salty, nutty depth, but use it lightly.

Shredded cheddar and pale Swiss or Gruyère cheese on a board with a grater and chopped chives nearby.
Sharp cheddar with Swiss or Gruyère gives ham quiche familiar melt plus a more brunch-ready finish.

Bake Time, Doneness, and Visual Cues

For a crusted quiche, use 375°F / 190°C for 35–45 minutes. A shallow quiche may finish closer to 35 minutes, while a deep-dish or vegetable-heavy one may need closer to 45–50 minutes.

Use 350°F / 175°C for the crustless version or a very deep filling. Save 400°F / 200°C mainly for par-baking crust or quick browning, not for the full custard bake.

Visual Doneness Cues

  • After par-baking: the crust should look dry and lightly set, not deeply browned.
  • After whisking: the egg mixture should look smooth and lightly yellow, not frothy.
  • Before baking: the egg mixture should sit below the rim, with a little breathing room.
  • Near the end: the top may puff slightly and turn golden in spots.
  • When done: the center should move like soft-set pudding, not ripple like raw liquid.
  • After resting: the center should look calmer, and the slice should hold when lifted.

If the crust browns too quickly, cover the edges with foil or a pie shield and keep baking until the center is set. If the top browns before the center is ready, tent the whole quiche loosely with foil.

The first time you bake quiche, the wobble can feel wrong. It is not. The quiche is done when the edges are puffed and set, the center is soft-set but not liquid, and the top is lightly golden in places.

Thermometer and Resting Cues

If using a thermometer, the center should reach at least 160°F / 71°C for egg safety. For a tender, sliceable quiche, start checking around 165°F / 74°C and avoid pushing far past 185°F / 85°C. Carryover heat and resting time will help the center finish setting.

Instant-read thermometer inserted into the center of a baked ham and cheese quiche in a white ceramic pie dish.
A thermometer gives extra confidence with quiche doneness: the center should be safe and set without baking until the eggs turn rubbery.

If you are unsure, give the quiche a few more minutes of rest before cutting rather than putting it back into the oven too quickly. Resting often fixes a soft-looking center; overbaking does not.

Whole baked ham and cheese quiche resting on a wire rack with a knife and pie server nearby.
Let the quiche rest before slicing; this pause helps the center settle so the slices lift cleaner and taste creamier.

Crustless Ham and Cheese Quiche and Easy Variations

Once the base is steady, this quiche is easy to bend toward the day: crusted for brunch, crustless for meal prep, mini for parties or lunchboxes.

If You Want…Do This
Classic ham and cheese quicheUse cheddar + Swiss in a par-baked crust
Richer brunch quicheUse Gruyère and a cream + milk mixture
Lighter quicheUse whole milk instead of cream or half-and-half
Crustless quicheGrease the dish well and bake at 350°F / 175°C
Vegetable quicheCook and cool vegetables before adding them
Mini quichesUse muffin tins and fill each cup about ¾ full
Leftover ham quicheDice ham small and reduce added salt if needed

Crustless Ham and Cheese Quiche

The crustless version is not just the fallback. It is the faster, lighter version for meal prep or for anyone skipping pastry.

To make it crustless, skip the pie crust and bake the egg mixture in a well-greased 9-inch / 23 cm pie dish. Use the same base: 5 eggs, 1 cup / 240 ml dairy, 1½ cups ham, 1½ cups cheese, Dijon, pepper, and herbs.

Bake at 350°F / 175°C for 30–40 minutes, or until the center is just set. The crustless version is softer than the crusted version, so let it rest for at least 10 minutes before slicing.

Crustless ham and cheese quiche in a white baking dish with one wedge removed, showing set custard, ham, cheese, and chives.
The lighter crustless ham and cheese quiche uses the same creamy filling but bakes directly in a greased dish.

For another no-crust egg bake, the frittata recipe is the skillet-style route; for muffin-tin meal prep, use the egg muffins recipe.

Ham and Swiss Quiche

Ham and Swiss quiche has a mild, nutty, classic brunch flavor. Use Swiss for all or part of the cheese. A good blend is 1 cup Swiss + ½ cup sharp cheddar. Dijon mustard and chives work especially well with this version.

Ham and Spinach Quiche

For ham and spinach quiche, use either 1 cup cooked fresh spinach or ½ cup frozen spinach that has been thawed and squeezed very dry. Spinach pairs well with Swiss, Gruyère, cheddar, feta, or goat cheese.

Wet spinach is not a small issue. It can make the center watery, even if the egg ratio is right.

Ham and spinach quiche with a wedge cut out, showing spinach ribbons, diced ham, creamy custard, and golden crust.
Cook or squeeze spinach dry before making ham and spinach quiche; the greens should add color and flavor, not extra water.

Broccoli Ham and Cheese Quiche

For broccoli ham quiche, use 1 cup small broccoli florets. Steam, blanch, microwave, or sauté them first, then drain well and chop small. Sharp cheddar is the easiest pairing, but Swiss or Gruyère also work.

Slice of broccoli ham and cheese quiche on a plate with visible broccoli florets, diced ham, creamy custard, and crust.
Small cooked broccoli florets keep broccoli ham and cheese quiche tender, balanced, and easy to cut.

Mushroom, Onion, Asparagus, and Other Add-Ins

Add-ins are where a good quiche can go watery, so treat them before they reach the crust. A few minutes in a skillet can save the whole dish.

Add-InAmountPrep
Mushrooms¾–1 cup slicedSauté until the moisture evaporates
Onion or shallot¼–½ cup choppedSauté until softened
Asparagus¾–1 cup choppedBlanch or sauté if thick
Bell pepper½ cup dicedSauté for better texture
TomatoSmall amountRemove seeds and excess moisture

Let cooked vegetables cool for a few minutes before adding them. Hot add-ins can start setting the eggs unevenly before the dish even reaches the oven.

Sautéed mushrooms and onions in a skillet with a spatula, browned and cooked down with no pooled liquid.
Sauté mushrooms and onions until their moisture cooks off; this is a simple fix for watery quiche.

Mini Ham and Cheese Quiche

Mini ham and cheese quiches are best when you want party bites, brunch trays, lunchboxes, or freezer-friendly portions. Use the same egg mixture, but cut the ham and add-ins smaller so each bite gets ham, cheese, and custard. For leftovers, use the make-ahead, storage, and reheating cues below.

The full filling usually makes about 10–12 regular muffin-size mini quiches or 24–30 mini muffin-size bites, depending on how much crust and add-ins you use.

  • Regular muffin tin: bake at 350°F / 175°C for 18–25 minutes.
  • Mini muffin tin: bake at 350°F / 175°C for 14–20 minutes.
  • With crust: press small pie crust or puff pastry rounds into greased cups before filling.
  • Without crust: grease the tin very well or use silicone liners.
  • Filling level: fill each cup about ¾ full so the egg mixture has room to puff.

Let mini quiches cool for 5 minutes before loosening them with a small knife. They freeze well after baking; reheat from chilled or thawed in a 325°F / 160°C oven until warmed through.

Mini ham and cheese quiches with small golden pastry crusts baked in a muffin tin, with a few placed on a nearby plate.
Party-size mini ham and cheese quiches work best with small pastry crusts, visible ham, and room for the custard to puff.

Other Shortcut Variations

Puff pastry works well for mini quiches and party bites. Crescent dough gives a softer, breadier crust. A Bisquick-style ham and cheese bake is closer to an impossible pie than a classic quiche, so it is better treated as a separate recipe rather than a small swap.

For an old-fashioned ham and cheese quiche, keep it simple: pie crust, cooked ham, cheddar and Swiss, half-and-half, green onions or chives, and black pepper.

Make Ahead, Storage, and Reheating

Quiche is one of the rare egg dishes that actually likes being made ahead. It can rest, settle, reheat, and still taste good when everyone finally reaches the table.

This is also why quiche works so well for hosting: it gives you something generous to serve without asking you to cook every egg to order. When the timing is sorted, jump to what to serve with it for plate ideas.

For a crisper crust, do not pour the raw egg mixture into the shell many hours before baking. The crust can absorb moisture and soften before it ever reaches the oven. If you want to prep ahead, par-bake the crust, dice the ham, shred the cheese, cook any vegetables, and keep the egg mixture separate until baking.

For safety, cooked egg dishes should not sit at room temperature for more than 2 hours; the FDA gives the same basic egg-safety guidance.

Fridge

Let the quiche cool completely, then cover it and refrigerate for 3–4 days, whole or in slices. That timing lines up with USDA leftover food safety guidance.

Freezer

Quiche freezes more cleanly after baking. Cool it completely, wrap it tightly, and freeze it whole or sliced for up to 2 months for the creamiest texture.

The crust may soften slightly after freezing, but reheating in the oven helps bring it back. If freezing slices, wrap them individually or place parchment between them so they do not stick together.

For a freezer breakfast that reheats faster than quiche, MasalaMonk’s breakfast burrito recipe is the better handheld option.

Reheating

For a better texture, reheat slices in a 325°F / 160°C oven until warmed through. Reheat loosely covered with foil, then uncover for the last few minutes if the crust needs crisping.

The microwave works for individual slices when speed matters, but it will soften the crust. If reheating from frozen, thaw overnight in the refrigerator first.

Slices of ham and cheese quiche stored in clear containers with one slice on a parchment-lined reheating tray.
Make-ahead ham and cheese quiche slices store well once cooled; reheat them in the oven or toaster oven when you want the crust to stay crisp.

What to Serve with Ham and Cheese Quiche

The quiche already brings richness, salt, and comfort. The best sides simply make the plate feel fresher. A crisp salad or fresh fruit keeps each creamy, salty bite from feeling heavy.

Plated slice of ham and cheese quiche served with greens, cucumber slices, tomatoes, fruit, and coffee on a brunch table.
Serve the rich quiche with fruit, greens, cucumber, or coffee so the creamy, salty slices feel balanced.

How to Avoid Watery, Soggy, or Rubbery Quiche

When quiche goes wrong, it usually gives you clues. A watery middle, soggy bottom, rubbery texture, or salty bite can almost always be traced back to moisture, timing, salt, or overfilling — not to quiche being difficult.

Once you know what the center should look like, quiche stops feeling mysterious.

ProblemMost Likely CauseFix Next Time
Watery centerWet vegetables, watery ham, too much dairy, or underbakingCook and drain add-ins, keep the ratio steady, and rest before slicing
Soggy crustCrust not par-baked or custard sat in crust too longPar-bake first and assemble close to baking
Rubbery textureOverbakingPull while the center is still soft-set
Too saltySalty ham and cheese plus full added saltUse ¼ teaspoon salt or less with salty ham
OverflowShallow crust or filling too close to rimUse deep-dish crust and stop below the rim

The 3 Biggest Quiche Mistakes

  • Skipping the par-bake: this is the fastest path to a soft bottom crust.
  • Adding wet ingredients: watery ham, spinach, mushrooms, and tomatoes can loosen the custard.
  • Baking until fully firm: pull it while the center is still soft-set, then let it rest.

Why is my quiche watery?

Watery quiche is almost always a moisture or timing problem. The usual culprits are wet spinach, raw mushrooms, watery ham, too much dairy, underbaking, or slicing before the center has had time to settle.

  • Cook and drain vegetables before adding them.
  • Squeeze spinach very dry.
  • Pat wet ham dry.
  • Use the 5 eggs to 1 cup dairy ratio.
  • Bake until the center is just set.
  • Rest for 10 minutes before slicing.

Why is my crust soggy?

A soggy crust usually means the crust was not par-baked, the egg mixture sat in the crust too long before baking, or wet ingredients released moisture into the bottom. Par-bake the crust, cook and drain vegetables, and avoid assembling the raw custard in the crust too far ahead.

Lifted slice of ham and cheese quiche showing a clean, firm bottom crust, creamy custard, diced ham, melted cheese, and golden edge.
The best no-soggy-bottom proof is underneath: the crust should look firm enough to lift, not pale, wet, or collapsed.

Why is my quiche rubbery?

Rubbery quiche is usually overbaked. Eggs become firm and tough when they cook too long. Remove the quiche when the center still has a gentle wobble. It will finish setting as it rests.

Why did the center not set?

The center may not set if the quiche is very deep, the oven temperature is too low, the mixture has too much liquid, or it simply needs more time. Cover the crust edges with foil if needed and continue baking until the center no longer looks liquid.

Why is it too salty?

Ham and cheese both bring salt. If your ham is salty, use less salt in the egg mixture. Dijon, black pepper, green onions, chives, and a small amount of cream can help balance the flavor without adding more salt.

Why did it overflow?

The crust may have been too shallow or filled too close to the top. Use a deep-dish crust when possible, stop before the egg mixture reaches the rim, and always bake the quiche on a rimmed baking sheet.

FAQs

Does ham and cheese quiche work without crust?

Yes. Grease a 9-inch / 23 cm pie dish, add the filling, and bake at 350°F / 175°C for 30–40 minutes. Rest before slicing so the center can settle.

Milk instead of cream: will the quiche still set?

Yes. Whole milk works. Keep it to 1 cup / 240 ml so the center still slices cleanly. It will taste lighter than a cream version, but it will still be a proper, sliceable quiche.

Best substitute for half-and-half

Use ½ cup / 120 ml heavy cream plus ½ cup / 120 ml whole milk. You can also use 1 cup / 240 ml whole milk for a lighter version.

Best cheese for ham quiche

Sharp cheddar gives bold flavor, Swiss gives a classic ham quiche taste, and Gruyère makes it richer. A cheddar-Swiss blend is the easiest everyday choice.

Frozen pie crust: deep-dish or regular?

Deep-dish is better because regular frozen shells may not hold all the filling. Par-bake the crust first, place it on a rimmed baking sheet, and avoid overfilling it.

Spinach in quiche: fresh, frozen, cooked, or raw?

Fresh spinach should be wilted first, and frozen spinach should be thawed and squeezed very dry. Raw or wet spinach can make the quiche watery.

Make-ahead quiche: bake first or assemble later?

Bake it first for the easiest make-ahead plan. To prep parts ahead, keep the par-baked crust, cooked add-ins, cheese, ham, and egg mixture separate until baking.

Freezing ham and cheese quiche: whole or sliced?

Both work. Bake it first, cool it completely, then freeze it whole or in slices. Slices are easier for quick meals. Thaw overnight in the refrigerator and reheat in the oven for the best texture.

Doneness cues for creamy, sliceable quiche

The edges should be set, and the center should look soft-set, not liquid. A gentle wobble is okay. If using a thermometer, the center should reach at least 160°F / 71°C.

Watery quiche: what went wrong?

Quiche usually turns watery because of wet vegetables, watery ham, too much dairy, underbaking, or slicing too soon. Cook and drain add-ins, use the right egg-to-dairy ratio, and rest it before slicing.

Is ham and cheese quiche the same as quiche Lorraine?

Not exactly. Quiche Lorraine is traditionally made with bacon or lardons and a savory custard. Ham and cheese quiche has a similar creamy egg base, but uses cooked ham and usually includes cheese like cheddar, Swiss, or Gruyère.

Final Thoughts

Once the ratio makes sense, this stops feeling like a recipe you have to follow tightly and starts feeling like a brunch formula you can use. Cooked ham after a holiday, spinach from the fridge, cheddar one week, Swiss the next, crusted for brunch, crustless for meal prep — it all works as long as the base stays steady.

That is the kind of recipe worth keeping: calm, flexible, and good enough for both leftover ham and a proper brunch table. Slice it warm, serve it with something crisp or fresh, and let the ham, cheese, custard, and flaky crust do the quiet work.

If you make it, start with the cheddar-Swiss version once, then tell me where you took it: crustless, extra herbs, leftover holiday ham, spinach, broccoli, or a different cheese blend.