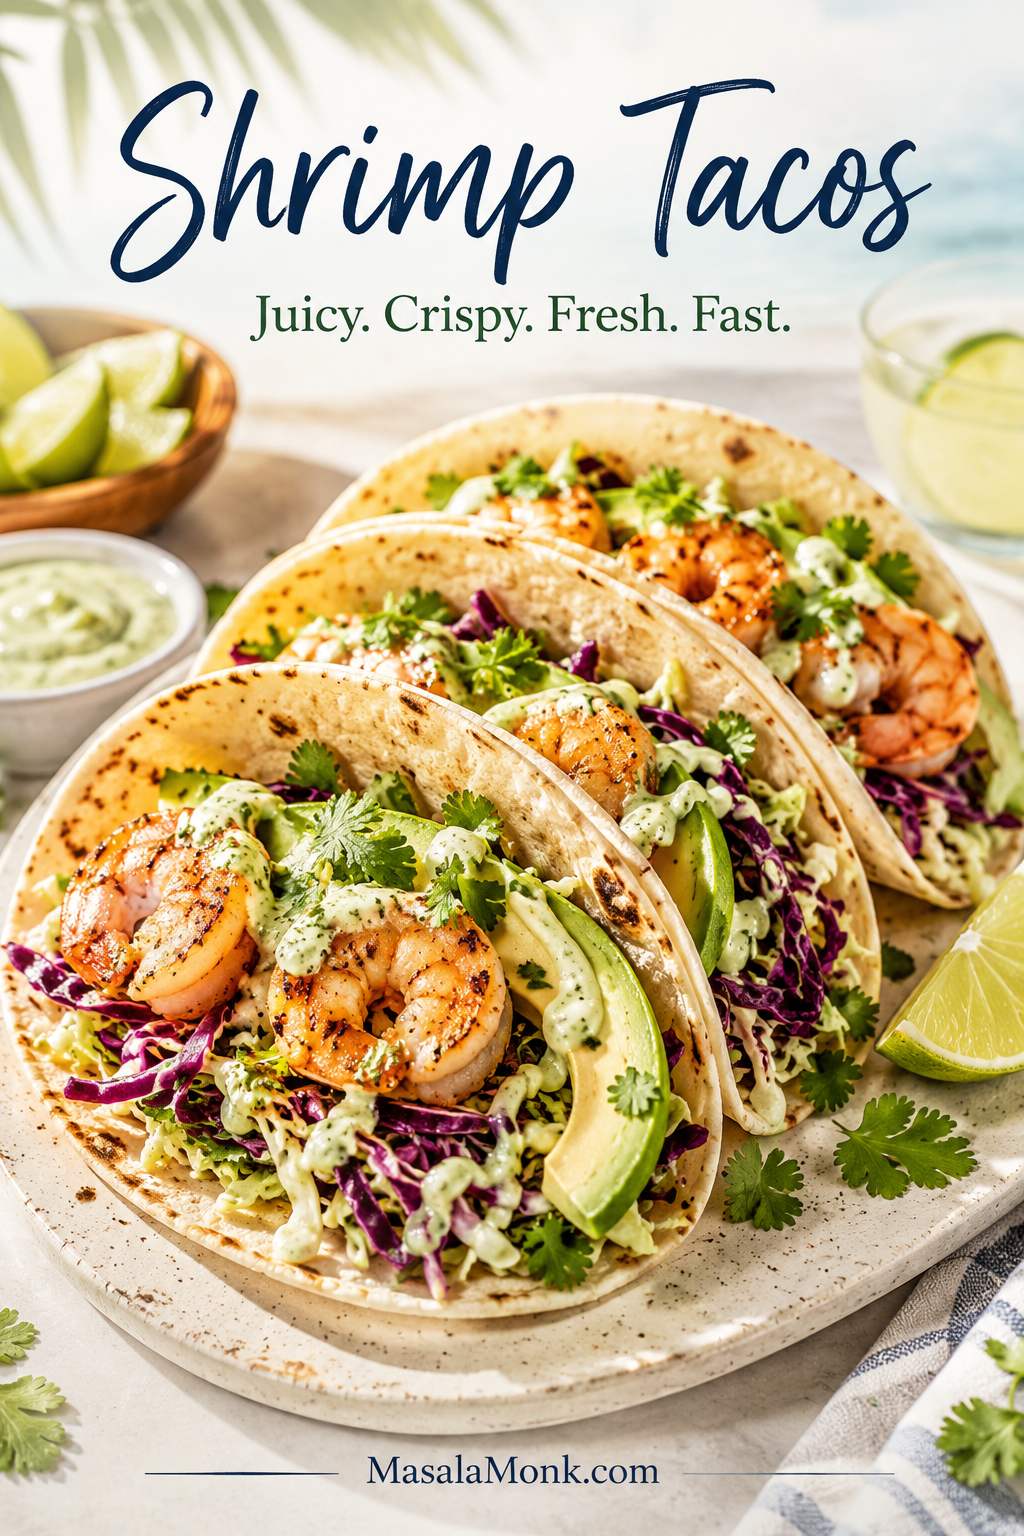
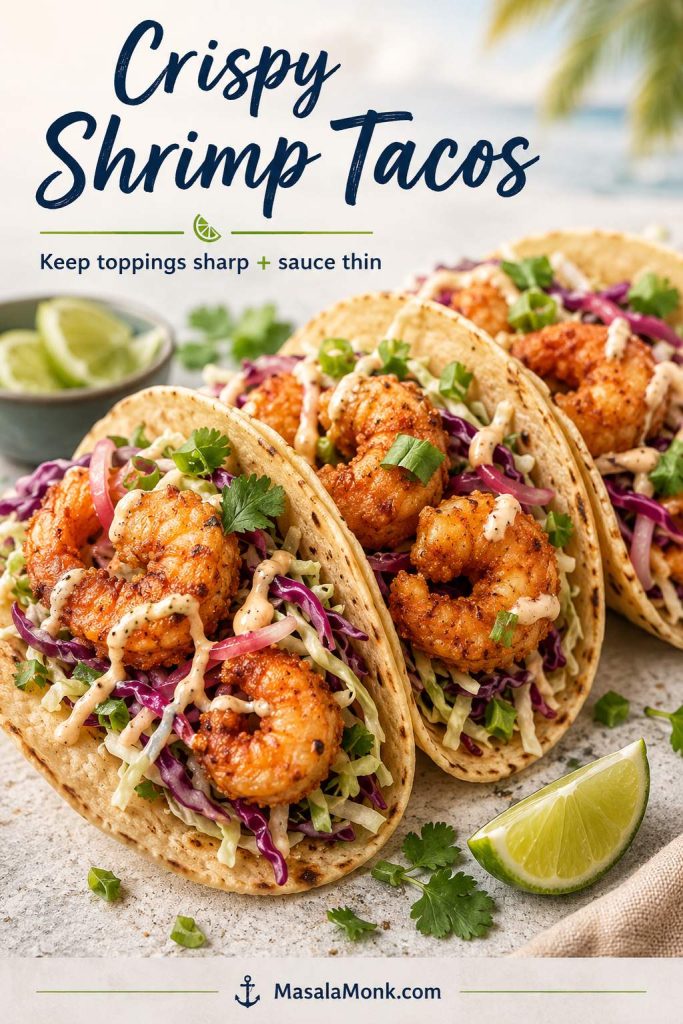
This shrimp tacos recipe is what you make when dinner needs to be quick, but you still want it to feel like taco night instead of just another weeknight meal. The shrimp hit the hot skillet with smoky seasoning, the cabbage stays cold and crunchy, the creamy cilantro-lime sauce gets drizzled over everything, and that last squeeze of lime makes the whole taco taste awake.
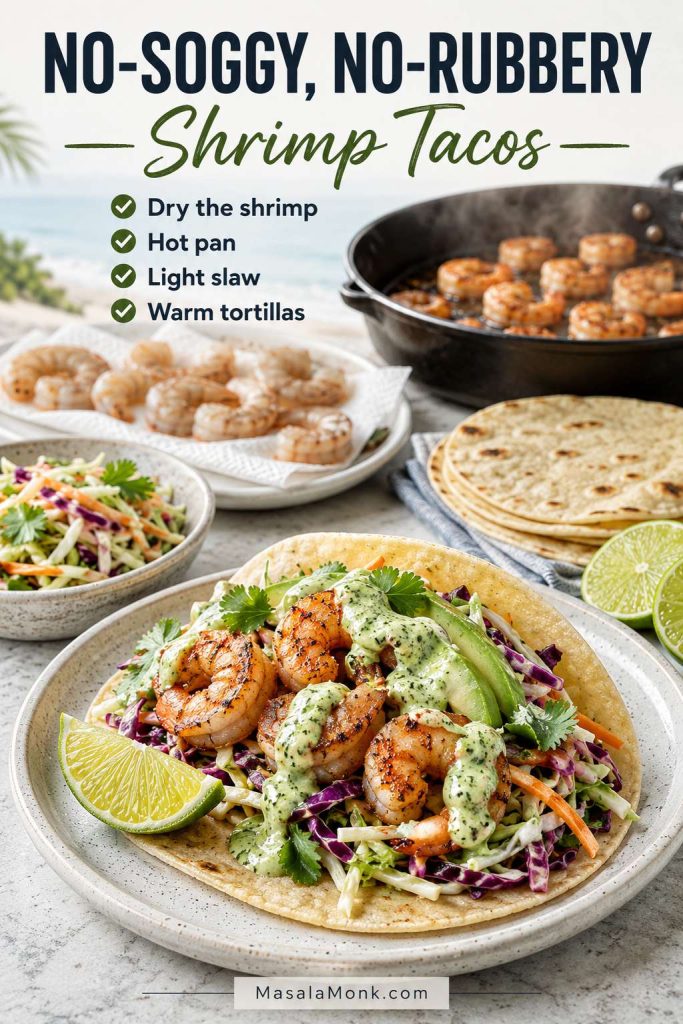
Think of this as the no-soggy, no-rubbery shrimp tacos recipe: smoky skillet shrimp, cold lime slaw, drizzleable sauce, and tortillas warm enough to fold around everything. Shrimp tacos go wrong quickly because every part is delicate, so this version keeps the shrimp dry, the pan hot, the slaw crisp, and the lime at the end where it belongs.
The whole thing comes together in about 25 minutes, but it does not taste rushed. You get juicy skillet shrimp, crisp cabbage slaw, warm tortillas, avocado, cilantro, and a sauce that can work as both a drizzle and a quick creamy slaw binder. Use fresh or frozen shrimp, corn or flour tortillas, and keep the heat mild or spicy depending on your table.
What You’ll Find in This Shrimp Tacos Guide
Make the Tacos
Make Them Better
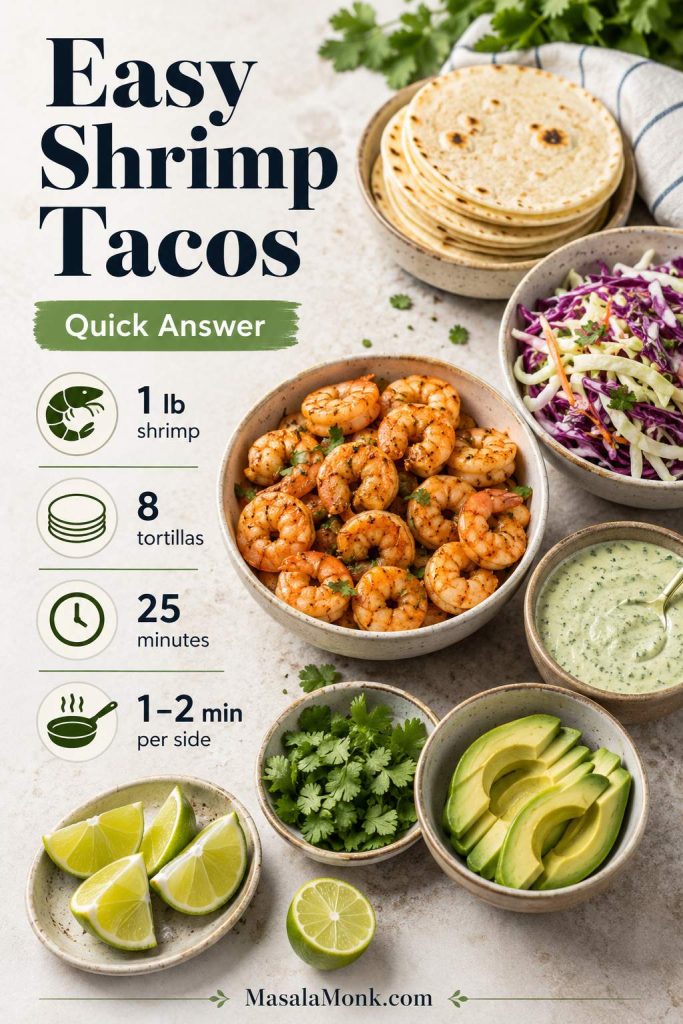
Quick Answer: How to Make Shrimp Tacos at Home
For this easy shrimp tacos recipe, use 1 lb / 454 g peeled and deveined shrimp, pat the shrimp very dry, season with chili powder, cumin, smoked paprika, garlic, onion powder, salt, and pepper, then cook in a hot skillet for 1–2 minutes per side. Serve the shrimp in warm tortillas with cabbage slaw, creamy cilantro-lime sauce, avocado, cilantro, and fresh lime.
The most important details are simple: avoid excess moisture, do not crowd the pan, and stop cooking once the shrimp are opaque and curled into a loose C shape. When shrimp tighten into a firm O shape, they are usually overcooked.
If shrimp tacos have ever turned out watery, bland, or a little rubbery, this version fixes the usual problems before they happen. The shrimp are dried before they hit the pan, the lime goes in after cooking, the sauce is thinned until it drizzles, and the slaw is kept crisp instead of drowned.
If you already make tacos often, this recipe will feel familiar. However, shrimp move fast in the pan, so small details matter. A hot skillet, a light slaw, a sauce that actually drizzles, and tortillas that bend without cracking can make the whole meal feel livelier and more complete.
If your biggest worry is overcooking, jump to the shrimp doneness cue. If your tacos usually turn watery, the watery vs seared shrimp guide will show what to fix.
Shrimp Tacos at a Glance
Before you start, keep the plan simple: one pound of shrimp, eight small tortillas, a quick slaw, a creamy lime sauce, and a hot pan. Once the sauce and slaw are ready, the shrimp cook fast.
| Shrimp | Medium or large peeled, deveined shrimp, tails removed |
| Amount | 1 lb / 454 g shrimp for 8 small tacos |
| Servings | 4 servings, usually 2 tacos per person |
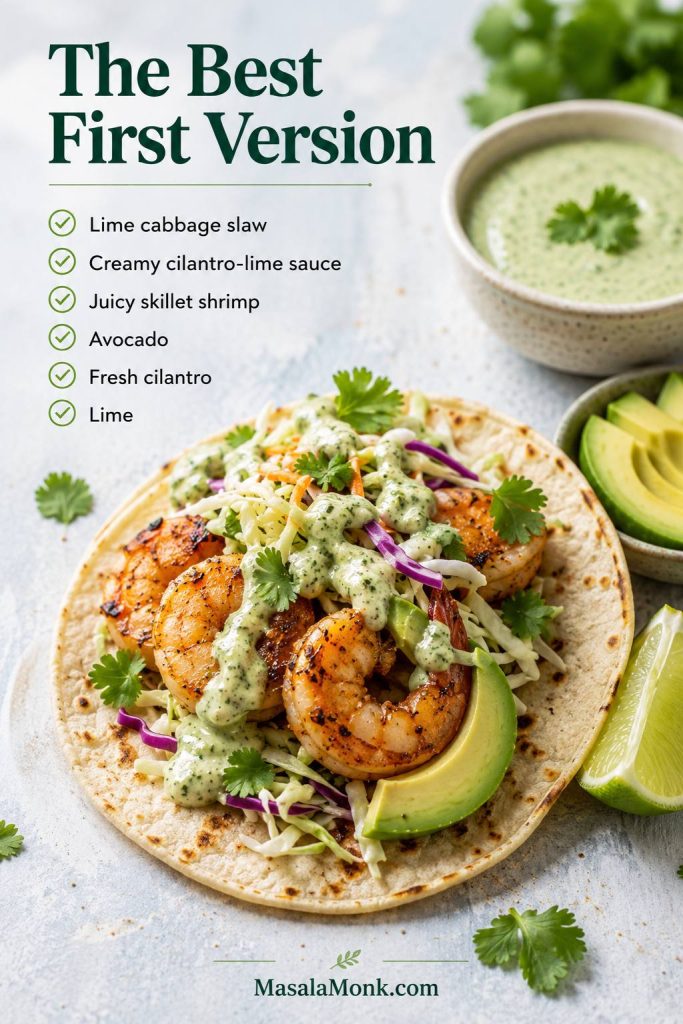
| Best first version | Skillet shrimp, lime cabbage slaw, creamy cilantro-lime sauce, avocado, cilantro, warm tortillas, and fresh lime |
| Method | Hot skillet, 1–2 minutes per side |
| Sauce | Creamy cilantro-lime sauce, with chipotle and avocado options |
| Slaw | Cabbage lime slaw, lightly dressed |
| Total time | About 25 minutes |
| Biggest mistakes | Watery shrimp, cold tortillas, overcooked shrimp, or too much sauce too early |
Why This Shrimp Tacos Recipe Works
This recipe works because it protects the two things shrimp tacos lose fastest: texture and brightness. The shrimp stay dry before cooking, the pan stays hot, the cabbage stays lightly dressed, and the lime goes in at the end instead of sitting on the shrimp too long.
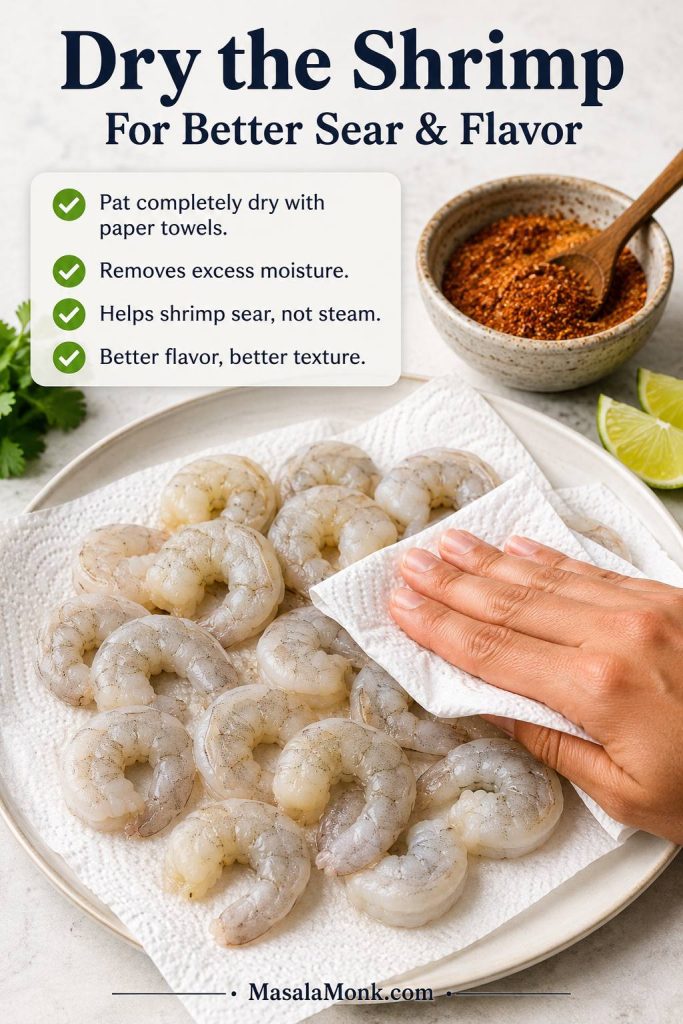
- Moisture control matters: shrimp brown and taste more seasoned when excess surface water is removed first.
- Lime goes in at the end: finishing with lime keeps the shrimp zesty without turning the texture mushy.
- Sauce does double duty: use it as a drizzle and as a creamy slaw binder.
- Slaw protects the taco: putting slaw under the shrimp catches juices and keeps the tortilla from softening too quickly.
- Let the shrimp lead: the toppings should support the smoky shrimp, not hide it under a heavy pile of sauce, cheese, and salsa.
Simple rule: Cook the shrimp last, dress the slaw lightly, and finish with lime after the heat. Those three choices prevent most shrimp taco problems.
The best bite is a little messy in the right way: warm tortilla, smoky shrimp, cold cabbage, sauce running into the slaw, and lime cutting through before the next bite.
The goal is not to load every tortilla with everything in the kitchen. Instead, the shrimp should still be the reason you want the next taco; the slaw, sauce, avocado, and lime simply make the bite cooler, sharper, and more satisfying.
Ingredients for Shrimp Tacos
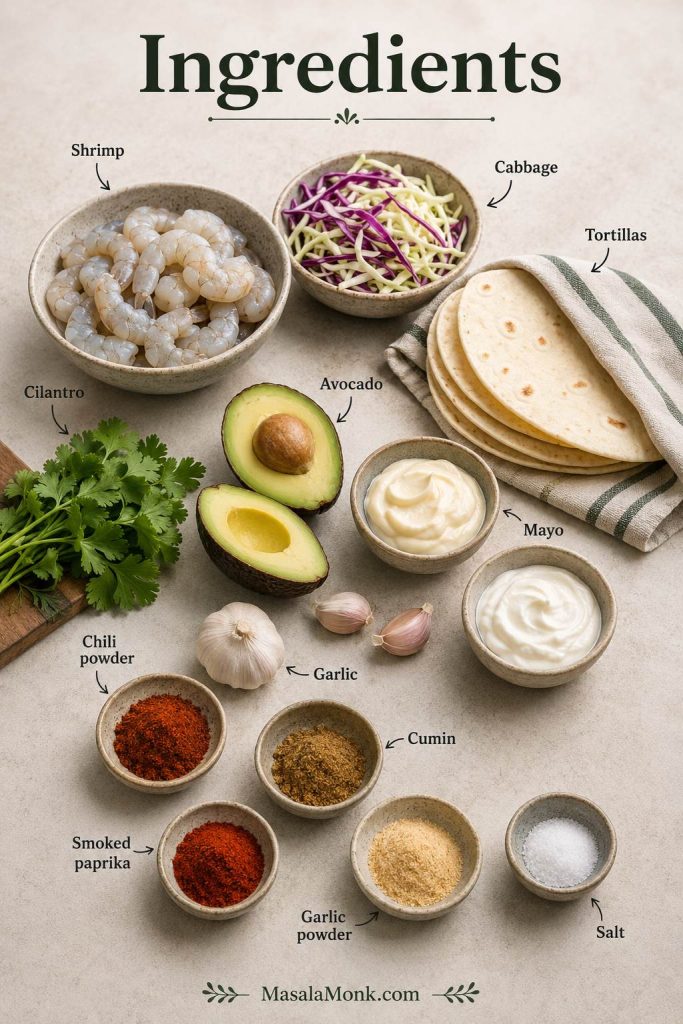
The ingredient list for this shrimp tacos recipe is simple: raw shrimp, quick seasoning, cabbage slaw, creamy cilantro-lime sauce, warm tortillas, and a few fresh toppings. The details below show where each ingredient matters most.
Ingredient Amounts at a Glance
| Part | Amount | What it does |
|---|---|---|
| Shrimp | 1 lb / 454 g | Makes 8 small tacos / 4 servings |
| Shredded cabbage | 3 cups / about 210 g | Adds crunch and freshness |
| Yogurt or sour cream | ½ cup / 120 g | Creates the creamy sauce base |
| Mayonnaise | 2 tbsp / 30 g | Rounds out the sauce |
| Lime juice | About 3½ tbsp / 52 ml total, plus lime wedges for serving | Brightens the shrimp, sauce, and slaw |
| Tortillas | 8 small tortillas | Use corn for flavor or flour for softness |
If you are still choosing shrimp, the shrimp size guide will help you decide between medium, large, and jumbo shrimp before you start cooking.
Shrimp
Use raw shrimp, not pre-cooked shrimp, for the juiciest result. Peeled and deveined shrimp save time, and tails-off shrimp are much easier to eat in tacos. Frozen shrimp work well too, as long as they are thawed and dried before seasoning.
- Shrimp: 1 lb / 454 g raw shrimp, peeled, deveined, tails removed.
- Oil: olive oil or avocado oil helps the spices coat the shrimp and prevents sticking.
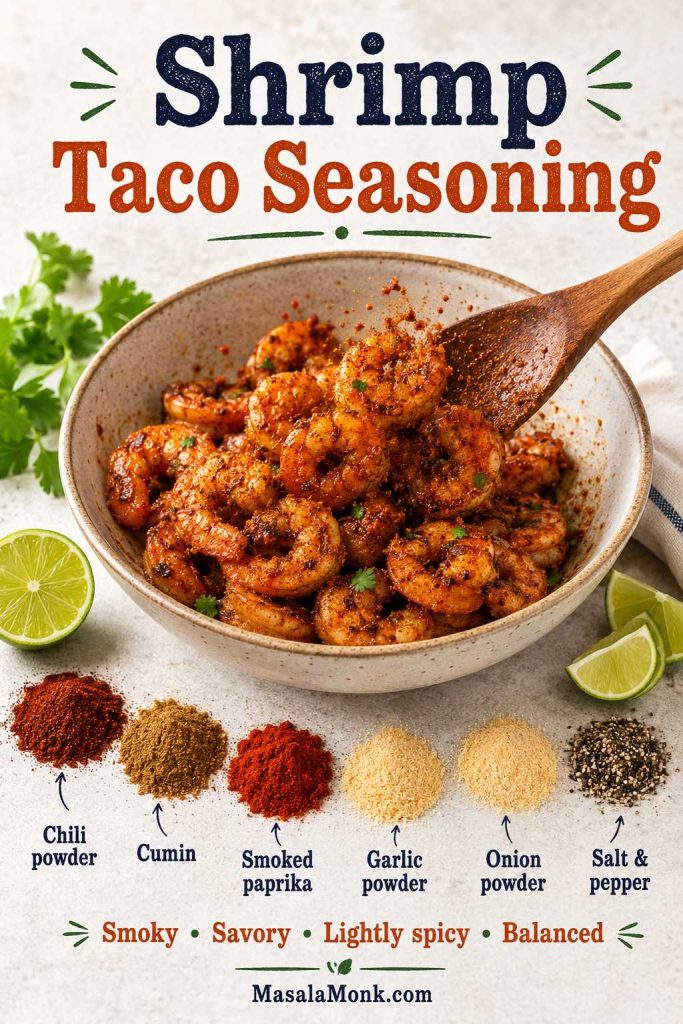
- Seasoning: chili powder, cumin, smoked paprika, garlic powder, onion powder, salt, pepper, and optional cayenne or chipotle.
- Lime: fresh lime juice goes on after cooking for brightness without softening the shrimp too much.
Creamy Cilantro-Lime Sauce
The sauce should be tangy, creamy, herby, and thin enough to drizzle. Greek yogurt or sour cream gives it brightness, mayonnaise rounds out the sharpness, lime lifts it up, and cilantro makes it taste fresh. Use 2 tablespoons cilantro for a mild, creamy lime sauce, or 4 tablespoons if you want the cilantro-lime flavor to lead. Add hot sauce, chipotle, or sriracha if you want a spicier shrimp taco sauce.
If cilantro is not your thing, make it a creamy lime sauce instead. Use scallions, parsley, extra lime zest, or a little chipotle for flavor without the cilantro.
Cabbage Slaw
Cabbage slaw keeps the tacos from feeling soft and one-note. Use green cabbage, red cabbage, or a bagged slaw mix. Lime, cilantro, onion, and salt are enough for a crisp version, but a few spoonfuls of the sauce can turn it creamy.
Tortillas and Toppings
Use small corn or flour tortillas, then finish the tacos with avocado, radishes, pickled onions, cilantro, cotija or queso fresco, and lime wedges. Keep the toppings light enough that the shrimp still feels like the main event.
Equipment You’ll Need
You do not need special equipment for these tacos, although a few simple tools make the process easier and cleaner.
- Large skillet: stainless steel, cast iron, or nonstick all work.
- Mixing bowls: one for the shrimp, one for the slaw, and one for the sauce.
- Paper towels: useful for drying thawed shrimp before seasoning.
- Tongs or spatula: helpful for turning shrimp quickly.
- Small whisk or spoon: for making the sauce smooth.
- Knife and cutting board: for cabbage, cilantro, onion, avocado, and lime.
- Optional blender or food processor: use this if you want a smoother cilantro-lime sauce.
How to Make Shrimp Tacos
The recipe moves quickly once the shrimp hit the pan, so make the sauce, toss the slaw, slice the avocado, cut the lime wedges, and warm the tortillas first. Cook the shrimp last, then assemble while they are still hot.

1. Thaw and Dry the Shrimp
If your shrimp are frozen, thaw them fully before cooking. Drain off any liquid, then pat the shrimp dry with paper towels. This small step helps the seasoning cling and keeps the shrimp from releasing too much water in the skillet.
2. Make the Sauce
Stir together the yogurt or sour cream, mayonnaise, lime juice, lime zest, garlic, cilantro, cumin, salt, and optional hot sauce. Add water 1 teaspoon at a time until the sauce is creamy but easy to drizzle.
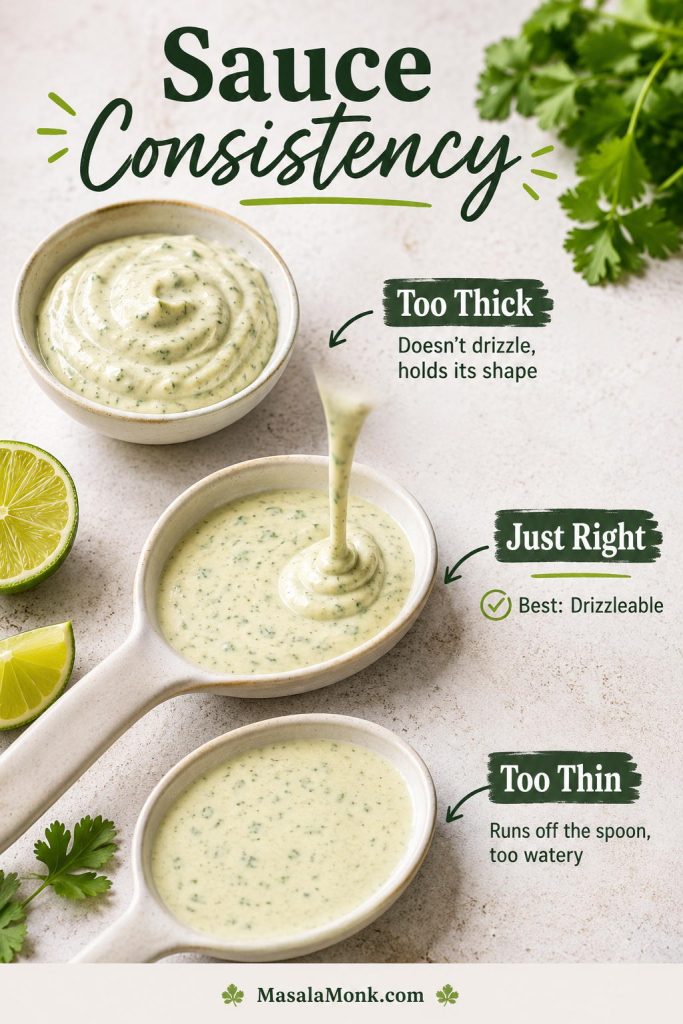
If your sauce feels too thick or too runny, use the sauce consistency guide before drizzling it over the tacos.
Before you drizzle the sauce, taste it like a dip. If it tastes flat, add salt first. When it feels heavy, add lime. For a sauce that tastes too sharp, add a spoon of mayo or yogurt. When it tastes creamy but quiet, add hot sauce, chipotle, or more cilantro. A good shrimp taco sauce should taste bright enough to cut through the shrimp, not just creamy. Ideally, it should make you want one more spoonful.
3. Toss the Slaw
In a bowl, toss the cabbage with lime juice, cilantro, onion or scallions, jalapeño if using, salt, and a tiny bit of honey or sugar if you want to soften the sharpness. Add a few spoonfuls of sauce if you want creamy slaw, but keep it light.
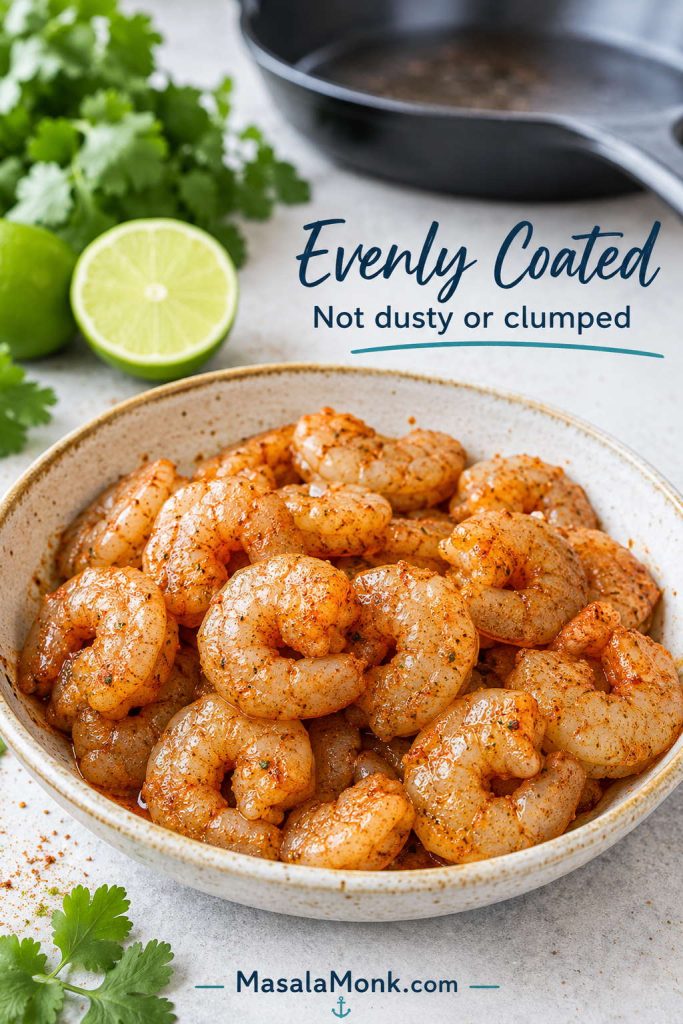
4. Season the Shrimp
Toss the shrimp with oil, chili powder, smoked paprika, cumin, garlic powder, onion powder, salt, pepper, and optional cayenne or chipotle. The shrimp should look evenly coated, not dusty or clumped with spice.
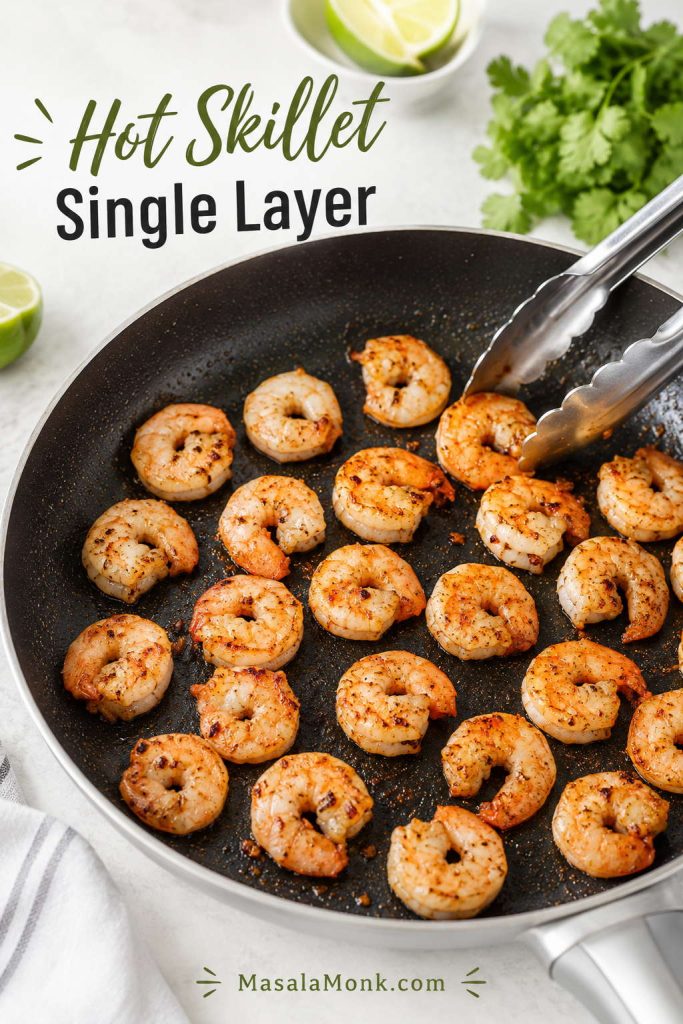
5. Cook the Shrimp
Heat a large skillet over medium-high heat. The pan is ready when the shrimp sizzle as soon as they touch it. Add the shrimp in a single layer and cook for 1–2 minutes per side, depending on size. Work in batches if needed. The shrimp are ready when they are pink, opaque, and curled into a loose C shape. Squeeze lime juice over the hot shrimp after cooking.
If the shrimp release a lot of liquid right away, the pan may be too cool or the shrimp may still be too wet. Let the pan heat properly and avoid crowding the next batch.
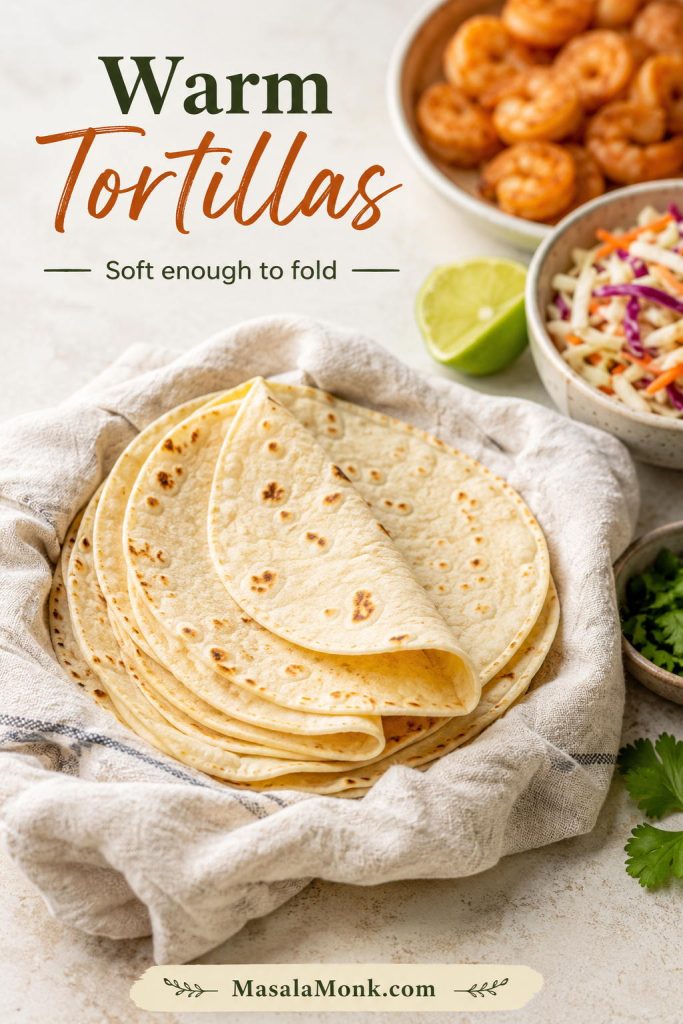
6. Warm the Tortillas
Warm tortillas in a dry skillet, over a gas flame, in foil in a low oven, or wrapped in a damp towel in the microwave. Keep them covered so they stay soft and flexible. If your corn tortillas are fragile, double-stack them or warm them a little longer before filling.
If you are deciding between tortilla styles, jump to corn vs flour tortillas before assembling the batch.
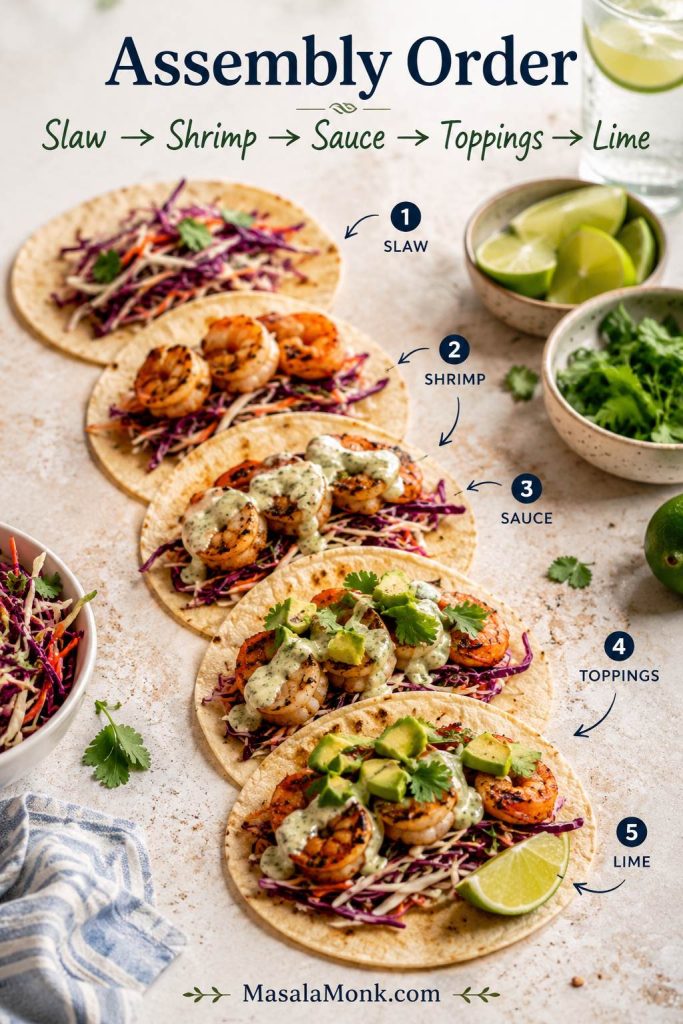
7. Assemble the Tacos
For clean, balanced tacos, layer slaw first, shrimp second, sauce third, toppings fourth, and lime at the end. Slaw underneath the shrimp helps catch the juices and keeps the tortilla from getting too wet too quickly.
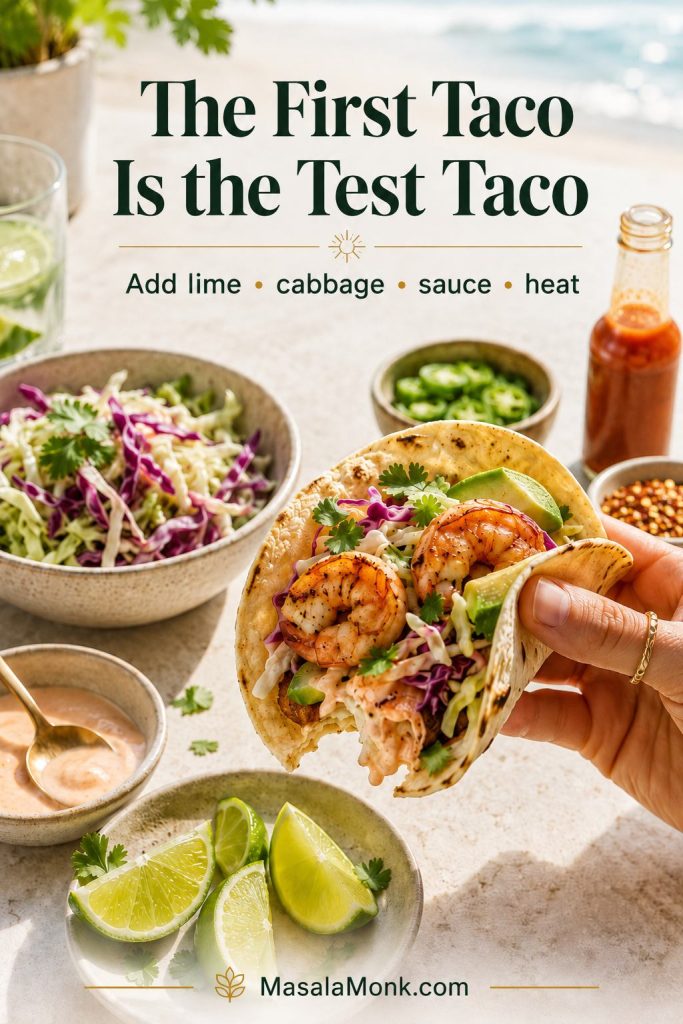
Before serving the full batch, taste one taco or one bite of shrimp with slaw and sauce. If it tastes dull, add lime and salt. When it feels heavy, bring in more cabbage. For a bite that tastes too sharp, add avocado or a little more sauce.
The first taco is the test taco. Take one bite before you build the whole batch, then adjust like you would at the table: more lime if it tastes flat, more cabbage if it feels heavy, more sauce if the shrimp need softness, or more heat if the taco tastes too polite.
How Long to Cook Shrimp for Tacos
Shrimp tacos are forgiving in flavor, but not in timing. Because shrimp cook fast, a minute too long in the pan can take them from juicy to rubbery. In a hot skillet, most medium or large shrimp need only 1–2 minutes per side.
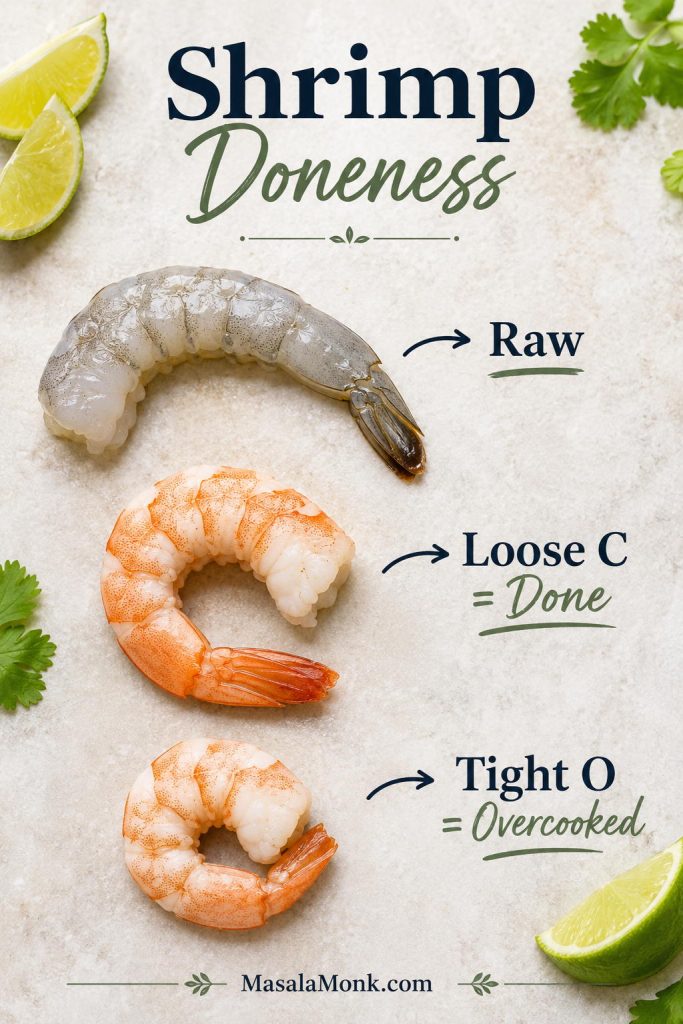
Use the Loose C Doneness Cue
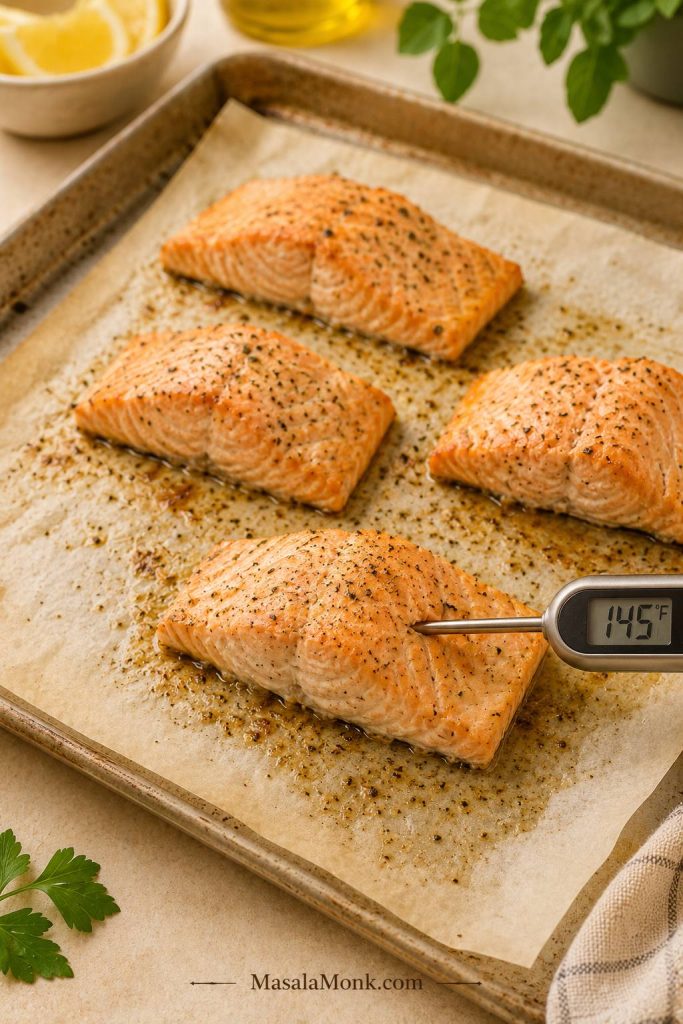
The shrimp are done when they turn pink, opaque, and curl into a loose C shape. If they curl into a tight O shape and feel firm or rubbery, they are probably overcooked. Official seafood guidance uses 145°F / 63°C as the food-safety benchmark, but shrimp are often easier to judge visually because they are small and fast-cooking. The FDA’s seafood guidance describes cooked shrimp as firm, pearly, and opaque.
| Shrimp look | What it means |
|---|---|
| Gray and translucent | Raw |
| Pink, pearly, opaque, loose C shape | Done |
| Tight O shape, firm, rubbery | Overcooked |
If you are nervous about timing, pull the shrimp from the pan as soon as the thickest part turns opaque. The residual heat will finish the last few seconds of cooking while you warm or assemble the tortillas.
Optional extra-juicy shrimp trick: For a slightly snappier, more restaurant-style texture, toss 1 lb shrimp with ½ tsp kosher salt and 1/16 tsp baking soda for 15 minutes before seasoning. If you do this, reduce the salt in the main seasoning so the tacos do not taste too salty.
Skillet, Air Fryer, or Grill?
The skillet gives you the most control, which is why it is the default method here. However, the same seasoned shrimp can also go into an air fryer or onto the grill.
| Method | When to use it | Timing |
|---|---|---|
| Skillet | Everyday tacos with the most control | 1–2 minutes per side over medium-high heat |
| Air fryer | Hands-off cooking and easy cleanup | About 5–6 minutes at 360°F / 182°C, shaking halfway |
| Grill | Smokier summer shrimp tacos | About 1–2 minutes per side over medium-high heat |
For the air fryer or grill, keep the shrimp in a single layer and check early. Shrimp size varies, so the visual cue matters more than the clock.
Sauce and Slaw for Shrimp Tacos
In this shrimp tacos recipe, sauce and slaw are what make the tacos feel finished. The sauce should not sit on top like plain sour cream; it should loosen enough to run into the cabbage and season the whole bite.
Creamy Cilantro-Lime Shrimp Taco Sauce
For the easiest sauce, stir together Greek yogurt or sour cream, a little mayonnaise, lime juice, garlic, cilantro, cumin, salt, and a splash of hot sauce if you want heat. The yogurt or sour cream keeps it tangy, while the mayonnaise rounds it out so the sauce tastes creamy instead of sharp.
If you like a smoother sauce, blend it. If you like a more casual taco-night sauce, stir it by hand and let the chopped cilantro stay visible. Either way, thin it until it drizzles easily from a spoon.
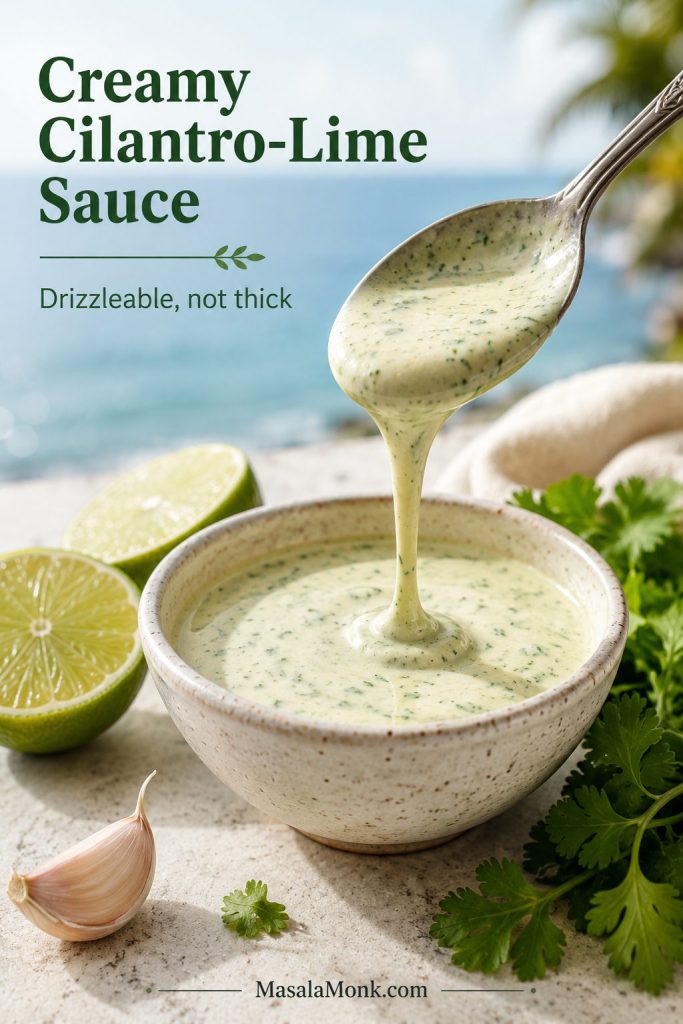
Check the Sauce Consistency Before You Drizzle
The sauce should be loose enough to drizzle into the cabbage and shrimp, not sit on top like a heavy dollop. If it holds its shape, thin it slowly with lime juice or water.
Shrimp Taco Sauce Options
| Sauce | Use it when you want | How to make it |
|---|---|---|
| Creamy cilantro-lime sauce | A zesty, balanced taco | Yogurt or sour cream, mayo, lime, garlic, cilantro, cumin, salt |
| Extra-herby cilantro lime sauce | A fresher, greener finish | Add extra cilantro and blend until mostly smooth |
| Chipotle sauce | Smoky heat | Add chipotle in adobo or chipotle powder |
| Avocado crema | A richer, softer taco | Blend avocado with lime, yogurt or sour cream, salt, and water |
| Spicy mayo | Crispy or bang bang-style tacos | Mix mayo with lime and hot sauce or sriracha |
For a fruitier heat, a small drizzle of mango habanero sauce works especially well with grilled shrimp tacos, mango shrimp tacos, or any version where you want sweetness and heat in the same bite.
Cabbage Slaw for Shrimp Tacos
Use shredded cabbage, lime juice, cilantro, salt, and thinly sliced onion or scallions. Keep the slaw lightly dressed so it stays crisp. For creamy slaw, toss in 2–3 tablespoons of the sauce right before serving.
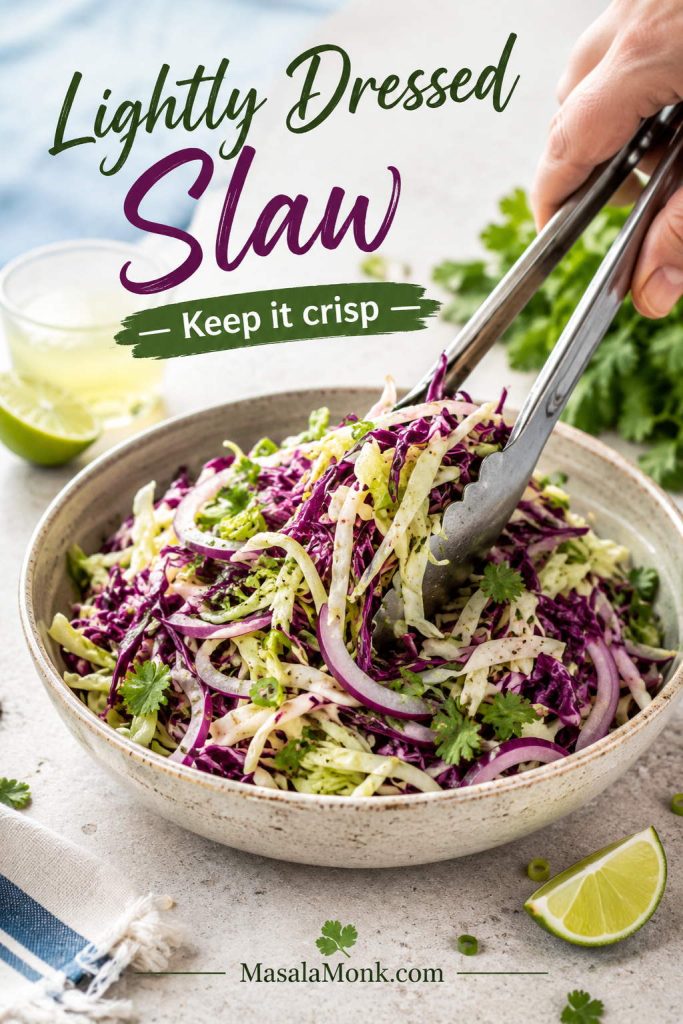
Do not drown the slaw early. Cabbage releases water as it sits, and too much dressing can make the tacos soggy. If you want to prep ahead, shred the cabbage and mix the sauce in advance, but combine them closer to serving.
Slaw Options for Shrimp Tacos
| Slaw | Use it when you want | Tip |
|---|---|---|
| Lime cabbage slaw | A fresh, all-purpose taco | Use cabbage, lime, cilantro, onion, and salt |
| Creamy slaw | A richer, restaurant-style taco | Toss cabbage with 2–3 tbsp creamy sauce right before serving |
| Red cabbage slaw | More color and crunch | Slice thinly so it does not feel tough |
| Bagged slaw shortcut | A faster weeknight dinner | Skip heavy bottled dressing and use lime plus a little sauce |
| Mango slaw | A sweet-spicy version | Add diced mango and jalapeño close to serving |
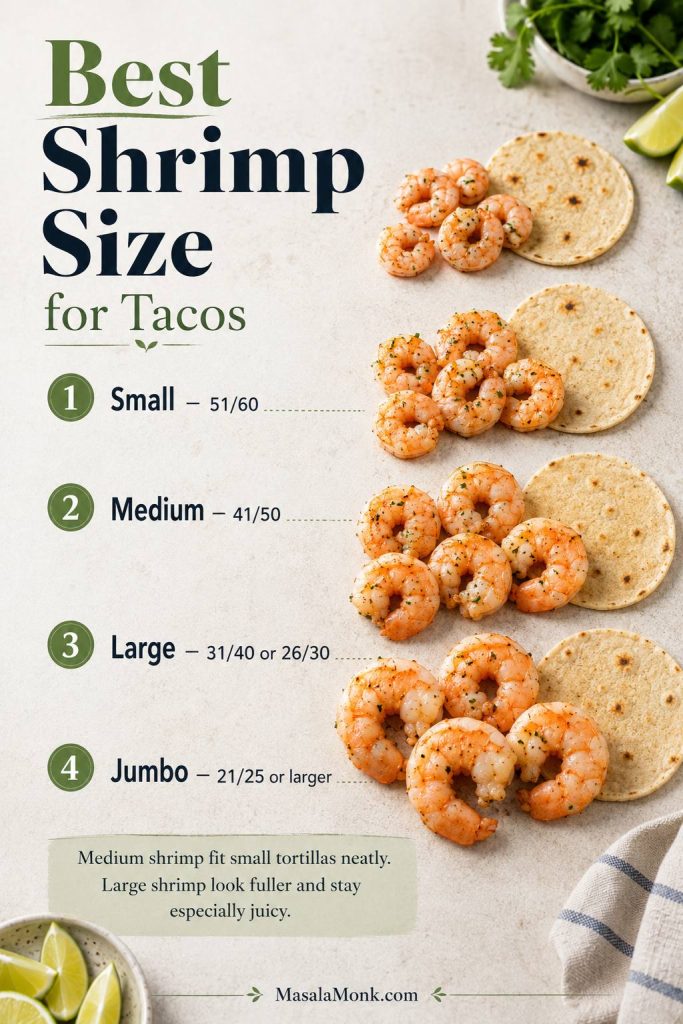
Choosing Shrimp for Tacos
Medium shrimp are easiest for neat tacos, while large shrimp look fuller and stay especially juicy. Avoid very small shrimp if you are nervous about overcooking, and chop jumbo shrimp after cooking if they feel too large for the tortilla.
| Shrimp size | Typical count | How it works in tacos |
|---|---|---|
| Small | 51/60 | Budget-friendly, but easy to overcook |
| Medium | 41/50 | Great fit for small tortillas |
| Large | 31/40 or 26/30 | Juicier, fuller-looking tacos |
| Jumbo | 21/25 or larger | Use 2–3 per taco or chop after cooking |
If you are using frozen shrimp, thaw them in the refrigerator overnight or place the sealed bag in cold water until thawed. After thawing, drain well and press the shrimp dry with paper towels.
Shrimp Taco Seasoning
A good shrimp taco seasoning should be smoky, savory, lightly spicy, and salty enough to stand up to the slaw and sauce. Chili powder gives the base, cumin adds warmth, smoked paprika adds depth, and garlic and onion powder make the shrimp taste fuller.
- Mild tacos: skip the cayenne and use sweet paprika instead of extra chili.
- Smokier tacos: add chipotle powder or extra smoked paprika.
- More heat: add cayenne, hot sauce, or sliced jalapeño at assembly.
- Extra zest: finish the cooked shrimp with lime juice instead of marinating them too long.
Shrimp are delicate, so avoid soaking them in lime-heavy marinades for a long time. A short 10–15 minute rest with oil and dry spices is fine, but the cleanest texture comes from seasoning the shrimp first and squeezing lime over them after cooking. Also, do not skip the salt; under-seasoned shrimp are one of the fastest ways to make tacos taste flat.
Shrimp Taco Toppings That Balance Each Bite
Shrimp are soft and juicy, so the toppings should bring crunch, acidity, creaminess, heat, and freshness rather than simply piling on more ingredients.
| Topping job | Good choices |
|---|---|
| Crunch | Cabbage slaw, radishes, pickled onions |
| Creaminess | Avocado, crema, sour cream, the cilantro-lime sauce |
| Freshness | Cilantro, lime, scallions, pico de gallo |
| Sweetness | Mango salsa, pineapple salsa, corn salsa |
| Saltiness | Cotija, queso fresco, feta |
| Heat | Jalapeño, chipotle sauce, hot sauce, chili crisp |
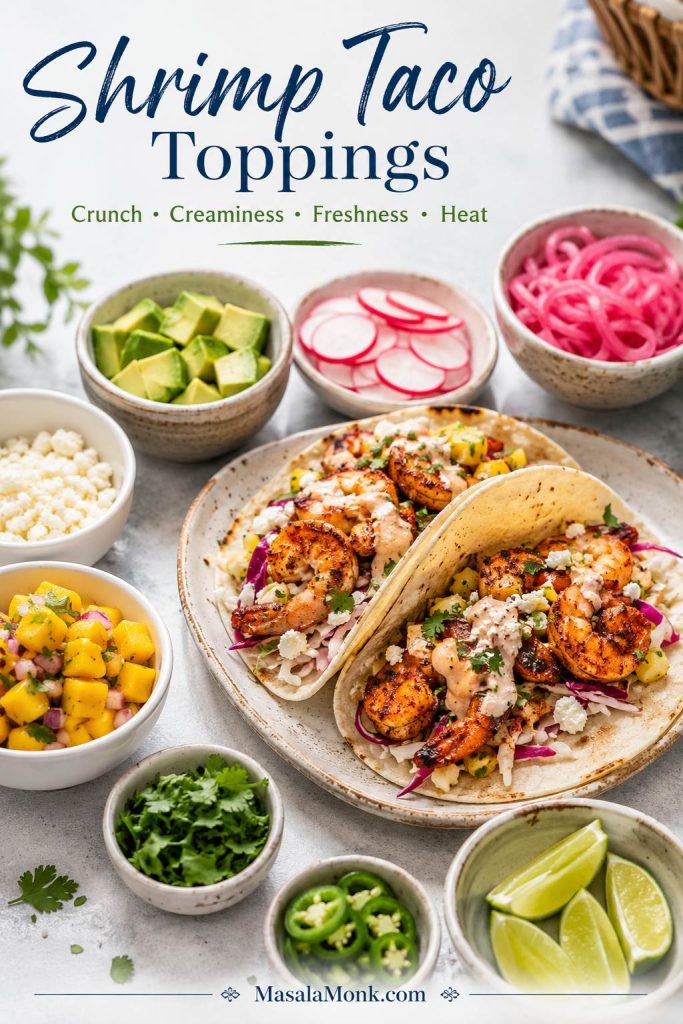
For a clean first version, use cabbage slaw, the creamy sauce, avocado, cilantro, and lime. If you want a richer taco, add avocado or a spoonful of guacamole. To make the taco sharper, use pickled onions and radishes. Meanwhile, for a warmer-weather version, save the mango salsa idea for the variation below.
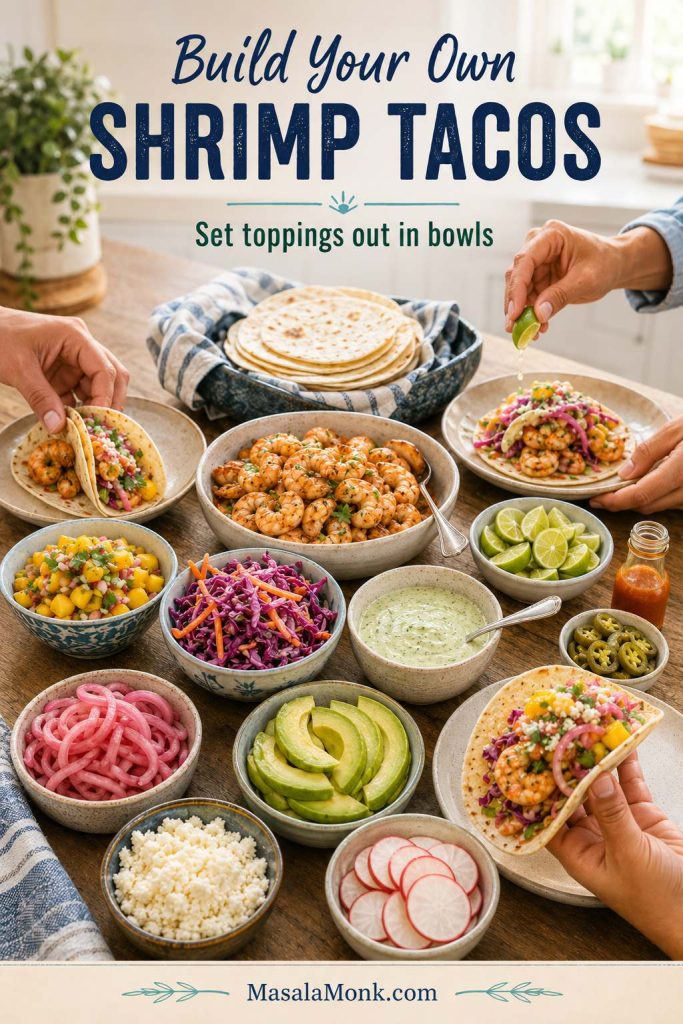
This is where shrimp tacos become personal: some tables want mango and avocado, some want chipotle and jalapeño, and some want nothing but extra cabbage, cotija, and lime. If you are serving a group, set out the toppings in small bowls and let people build their own version instead of trying to make every taco identical.
Corn or Flour Tortillas for Shrimp Tacos?
Corn tortillas give shrimp tacos a more classic taco flavor, while flour tortillas are softer and easier to fold. If your corn tortillas crack, warm them first in a dry skillet or wrap them in a damp towel and microwave briefly.
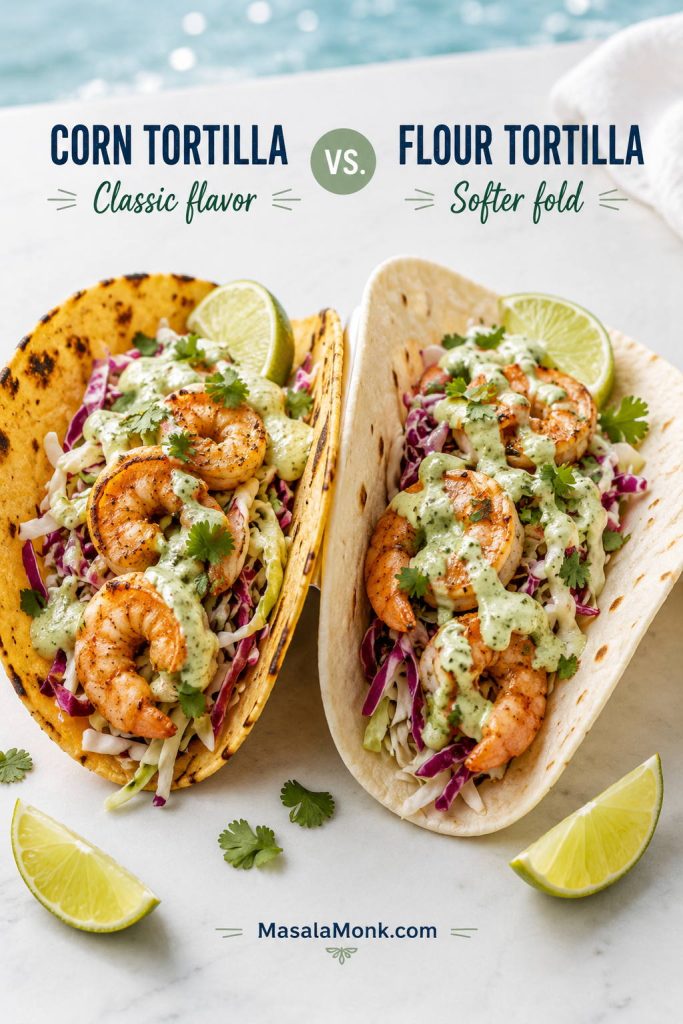
If you are serving a group, warm the tortillas in batches and keep them wrapped in a clean towel. For small street-taco-style tortillas, plan on 2 tacos per person. For larger tortillas with more filling, one very full taco may be enough for lighter eaters, but 2 per person is still the safer dinner estimate.
Substitutions and Shortcuts
These tacos are flexible, so use what makes dinner easier. Just protect the important parts: dry shrimp, warm tortillas, fresh crunch, and enough lime or sauce to keep the filling lively.
- No Greek yogurt? Use sour cream.
- No mayonnaise? Use more yogurt or sour cream, but add a small drizzle of olive oil for roundness.
- No cilantro? Use scallions, parsley, extra lime zest, or a little chipotle.
- No cotija? Use queso fresco, feta, or skip the cheese.
- Need it faster? Use peeled and deveined shrimp, bagged slaw mix, and store-bought tortillas.
- Want it dairy-free? Use dairy-free yogurt, all-mayo sauce, or avocado crema.
- Want it less spicy? Skip cayenne and hot sauce, then serve hot sauce on the side.
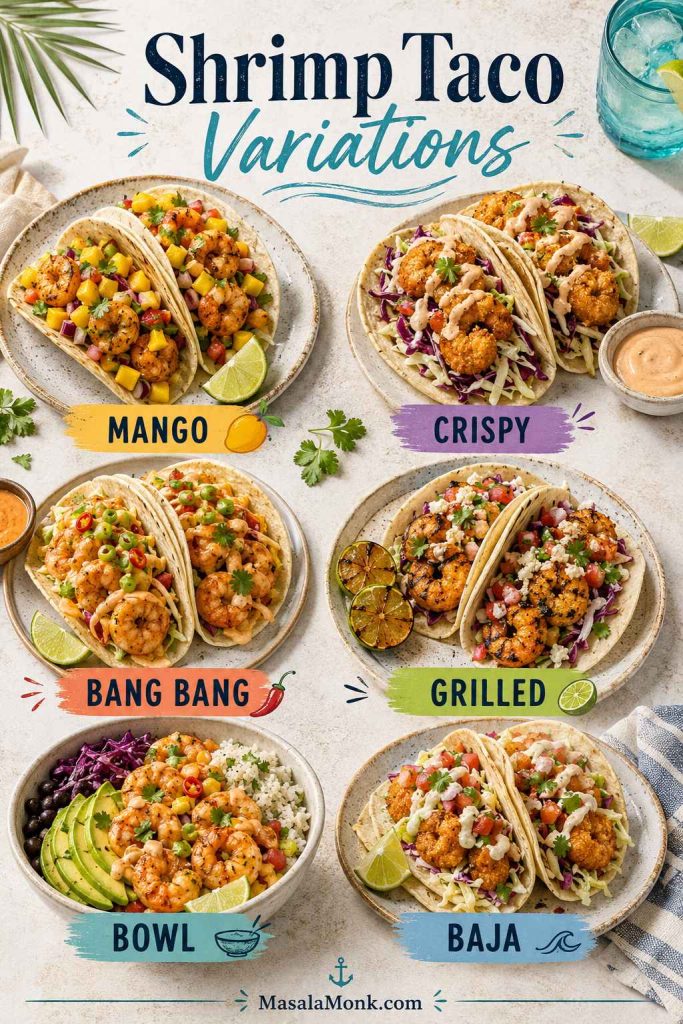
Shrimp Taco Variations
Once the base version works, the recipe becomes a taco-night template. Keep the shrimp quick-cooked and the slaw fresh, then change the mood: sweet with mango, smoky with chipotle, crisp with fried shrimp, or summery on the grill.
If your table is split, make the base shrimp once and set out two sauces: cilantro-lime for the mild side and chipotle or spicy mayo for the heat lovers.
If you want a crunchier version, start with crispy shrimp tacos. If you want the base recipe first, use the recipe card and change the toppings later.
Mango Shrimp Tacos
Add mango salsa, avocado, cilantro, and extra lime. The sweetness of mango works especially well with smoky shrimp seasoning and creamy sauce. This is one of the easiest warm-weather versions of the recipe.
Crispy Shrimp Tacos
For crispy shrimp tacos, toss dry shrimp with a light coating of cornstarch, flour, or panko depending on how crisp you want them, then pan-fry or air-fry until just cooked. Keep the toppings sharp and fresh: cabbage, lime, pickled onions, and a thinner sauce work better than heavy toppings.
Bang Bang Shrimp Tacos
For bang bang shrimp tacos, use crispy shrimp and a creamy sweet-spicy sauce made with mayonnaise, sweet chili sauce, sriracha or hot sauce, and lime. Add cabbage underneath so the taco does not turn too rich, then finish with scallions, cilantro, and extra lime.
Grilled Shrimp Tacos
For grilled shrimp tacos, thread shrimp onto skewers or use a grill basket so they do not fall through the grates. Keep the seasoning smoky, grill quickly, and serve with lime slaw, avocado, and chipotle sauce.
Shrimp Taco Bowls
Turn the same components into bowls by serving the shrimp, slaw, sauce, avocado, and toppings over rice, greens, or beans. If rice is your base, this guide to cooking perfect rice can help keep the bowl fluffy instead of heavy. This is also the easiest way to use leftover shrimp without trying to store assembled tacos.
Baja-Style Shrimp Tacos
For a Baja-inspired version, use crispy shrimp, cabbage, creamy chipotle or lime sauce, pico de gallo, and warm corn tortillas. Keep the slaw crunchy and the sauce bold.
What to Serve with Shrimp Tacos
Shrimp tacos are already full of flavor, so the best sides are fresh, lively, and easy. For a simple table, serve them with chips and salsa, cucumber salad, or extra slaw. For a fuller dinner, add black beans, Mexican rice, or grilled corn.
If you are building a bigger taco-night spread, pair these shrimp tacos with fish tacos so guests can choose between two seafood styles. Set out mango salsa, extra sauce, lime wedges, and sliced avocado so each person can build the taco they want without doubling the prep.
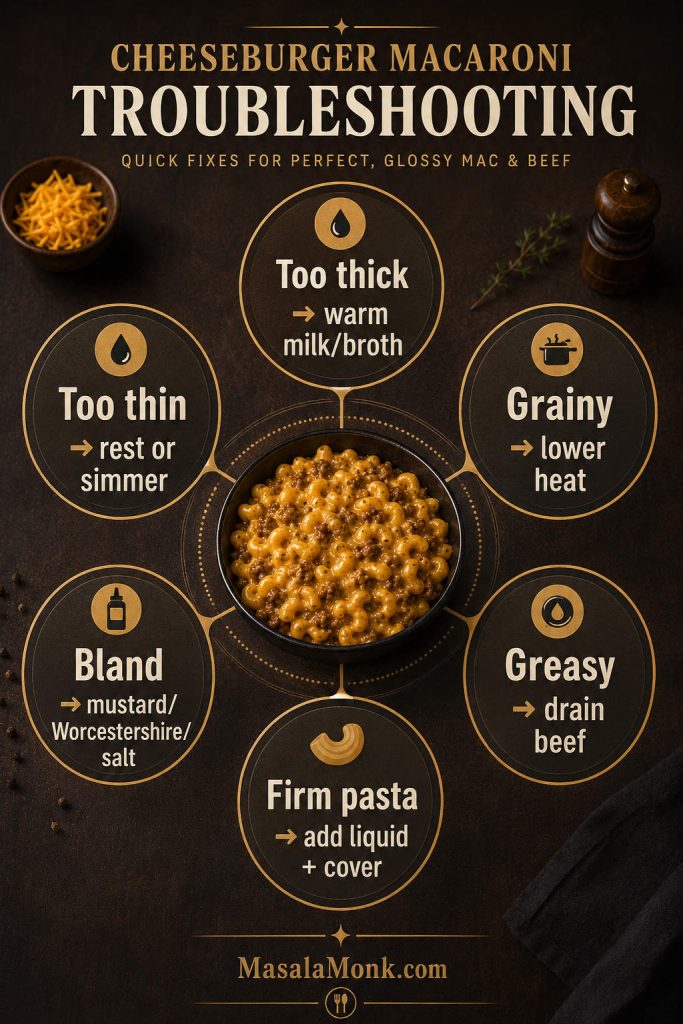
Troubleshooting Shrimp Tacos
If the tacos taste fine but not exciting, do not add five more toppings. Fix the missing piece. Flat shrimp need salt. Heavy tacos need lime. Soft tacos need cabbage or radishes. A sauce that tastes dull needs heat, garlic, or more citrus.
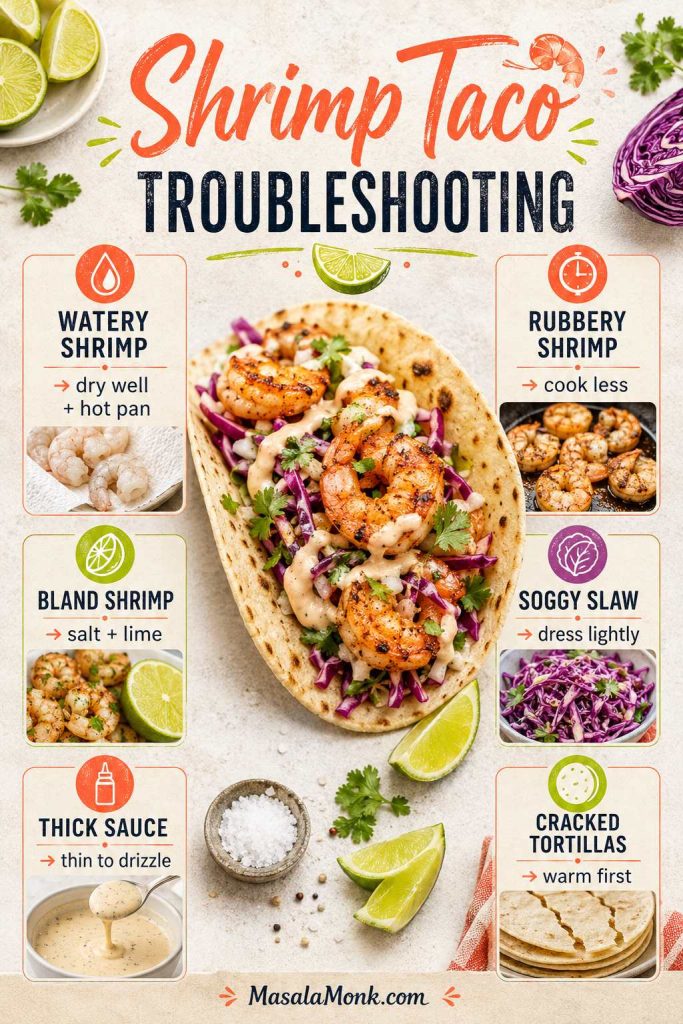
| Problem | What to do |
|---|---|
| Shrimp taste bland | Add salt, lime, and a little extra seasoning after cooking. |
| Shrimp are rubbery | Cook less next time and remove them as soon as they turn opaque. |
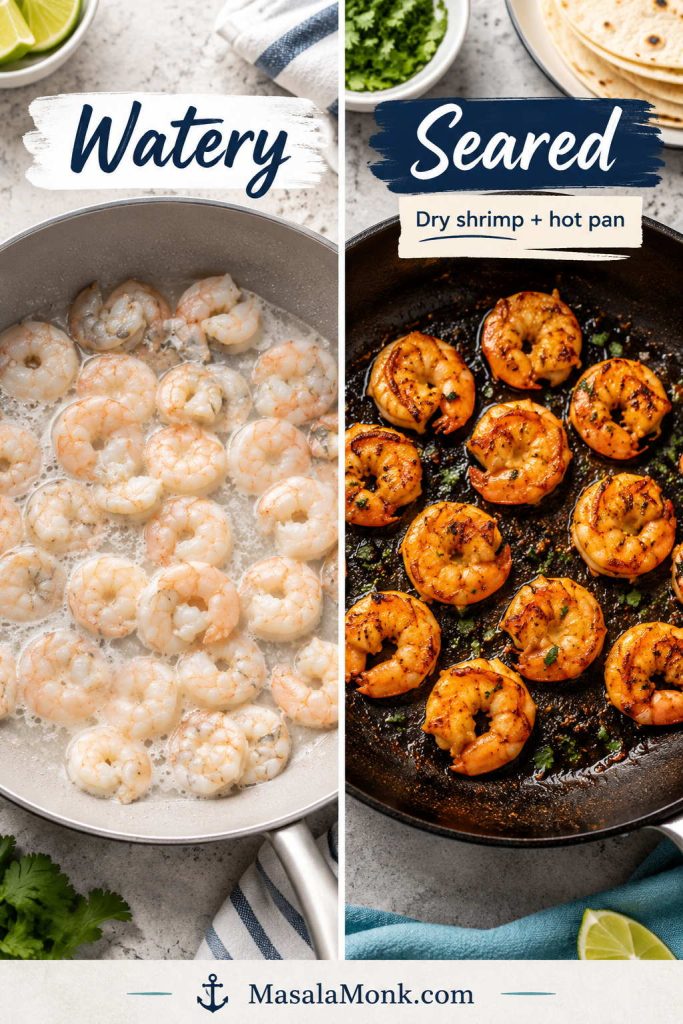
| Shrimp are watery | Dry them well and use a hotter pan. |
| Spices burn in the pan | Lower the heat slightly and make sure the shrimp are coated with oil. |
| Slaw is soggy | Dress it lightly and close to serving. |
| Sauce is too thick | Thin it with lime juice or water, 1 teaspoon at a time. |
| Sauce is too sharp | Add a spoon of mayo, yogurt, or sour cream. |
| Tortillas crack | Warm them before filling. If needed, double-stack small corn tortillas. |
| Tacos feel heavy | Use more slaw, less sauce, and extra lime. |
Make-Ahead, Storage, and Reheating
Shrimp tacos are a little like salad: the parts can be prepped ahead, but the final assembly is best fresh. Store the shrimp, sauce, slaw, tortillas, and toppings separately so the tortillas do not soften before serving.
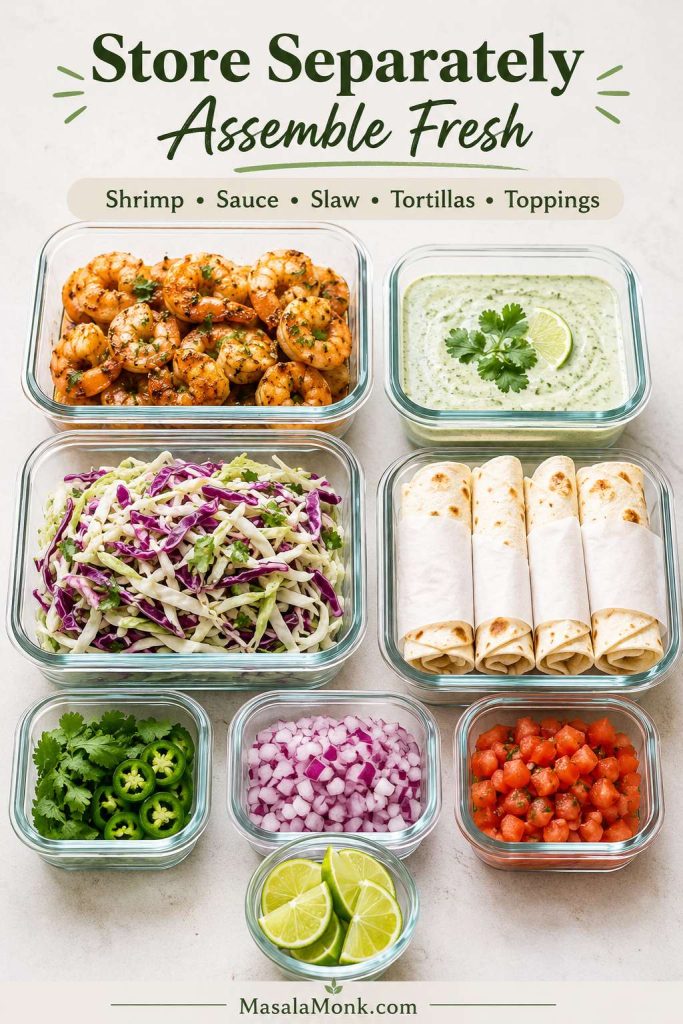
| Component | Make-ahead/storage advice |
|---|---|
| Sauce | Make 2–3 days ahead and refrigerate in an airtight container. |
| Slaw vegetables | Shred 1 day ahead, but dress close to serving. |
| Dressed slaw | Best the same day; it softens as it sits. |
| Cooked shrimp | Refrigerate for 2–3 days and reheat gently. |
| Tortillas | Warm right before serving. |
| Assembled tacos | Not ideal for storage because the slaw and sauce soften the tortillas. |
To reheat shrimp, use low to medium-low heat with a tiny splash of water or oil. Warm only until heated through. Avoid blasting leftover shrimp over high heat, because they can turn rubbery fast.
For leftovers, treat the shrimp gently and rebuild the taco with fresh cold toppings. Reheated shrimp can still be good, but leftover assembled tacos almost always lose the texture that makes this recipe work.
Shrimp Tacos Recipe Card
Shrimp Tacos with Slaw and Creamy Cilantro-Lime Sauce
Juicy skillet shrimp tacos with cabbage slaw, creamy cilantro-lime sauce, avocado, cilantro, and fresh lime. This easy shrimp tacos recipe is ready in about 25 minutes and built to avoid watery, rubbery, or bland shrimp.
Best result: Cook the shrimp last, warm the tortillas before filling, and toss creamy slaw only right before serving.
Quick notes: Plan on about 2 tacos per person. Medium or large peeled shrimp work well, and small 6-inch corn or flour tortillas are easiest to fill. The heat level is mild-medium as written; however, the sauce can be made hotter, smokier, or more herby. The sauce can be made ahead, but assembled tacos are best fresh.
Ingredients
For the Shrimp
- Raw shrimp: 1 lb / 454 g, peeled, deveined, tails removed
- Olive oil or avocado oil: 1 tbsp / 15 ml
- Chili powder: 1 tsp
- Smoked paprika: 1 tsp
- Ground cumin: ¾ tsp
- Garlic powder: ½ tsp
- Onion powder: ½ tsp
- Kosher salt: ¾ tsp, or ½ tsp fine sea salt
- Black pepper: ¼ tsp
- Cayenne or chipotle powder: ⅛–¼ tsp, optional
- Fresh lime juice: 1 tbsp / 15 ml, added after cooking
For the Creamy Cilantro-Lime Sauce
- Greek yogurt or sour cream: ½ cup / 120 g
- Mayonnaise: 2 tbsp / 30 g
- Fresh lime juice: 1 tbsp / 15 ml
- Lime zest: 1 tsp, optional
- Garlic: 1 small clove, grated, or ¼ tsp garlic powder
- Chopped cilantro: 2–4 tbsp, depending on how herby you want the sauce
- Ground cumin: ½ tsp
- Kosher salt: ¼ tsp
- Hot sauce, chipotle in adobo, or sriracha: 1–2 tsp, optional
- Water: 1–2 tsp to thin, if needed
For the Slaw
- Shredded cabbage: 3 cups / about 210 g, green, red, or mixed
- Red onion or scallions: ¼ cup / 25 g, thinly sliced
- Chopped cilantro: ¼ cup
- Jalapeño: 1 small, thinly sliced, optional
- Fresh lime juice: 1½ tbsp / 22 ml
- Kosher salt: ½ tsp
- Honey or sugar: 1 tsp, optional
- Creamy cilantro-lime sauce: 2–3 tbsp, optional for creamy slaw
For Assembly
- Corn or flour tortillas: 8 small tortillas
- Avocado: 1, sliced or diced
- Cheese: cotija, queso fresco, feta, or no cheese
- Crunchy toppings: radishes or pickled onions
- Fresh herbs: extra cilantro
- Lime wedges: for serving
Instructions
- Dry the shrimp: If using frozen shrimp, thaw completely. Drain well and pat dry with paper towels.
- Make the sauce: Stir together yogurt or sour cream, mayonnaise, lime juice, lime zest, garlic, cilantro, cumin, salt, and optional hot sauce. Thin with water 1 teaspoon at a time until drizzleable. Taste and adjust with more salt, lime, cilantro, or heat as needed.
- Make the slaw: Toss cabbage, onion or scallions, cilantro, jalapeño if using, lime juice, salt, and optional honey or sugar. For creamy slaw, add 2–3 tablespoons of the sauce just before serving.
- Season the shrimp: Toss shrimp with oil, chili powder, smoked paprika, cumin, garlic powder, onion powder, salt, pepper, and optional cayenne or chipotle.
- Cook the shrimp: Heat a large skillet over medium-high heat. Add shrimp in a single layer and cook for 1–2 minutes per side, until pink, opaque, and curled into a loose C shape. Cook in batches if needed.
- Finish with lime: Remove the shrimp from the heat and squeeze fresh lime juice over the top.
- Warm the tortillas: Warm tortillas in a dry skillet, over a gas flame, in a low oven, or in the microwave wrapped in a damp towel.
- Assemble: Fill each tortilla with slaw, shrimp, creamy cilantro-lime sauce, avocado, cheese if using, extra cilantro, and lime.
Notes
Texture tip: cook the shrimp in a hot skillet in a single layer. Wet or crowded shrimp steam instead of searing.
Mild version: skip the cayenne or chipotle and use a mild hot sauce on the side.
Want more heat? Add chipotle powder to the shrimp seasoning and hot sauce or chipotle in adobo to the sauce.
Creamy slaw note: toss the cabbage with a few spoonfuls of sauce right before serving, not far in advance.
Storage: store shrimp, sauce, slaw, tortillas, and toppings separately. Cooked shrimp keep for 2–3 days in the refrigerator.
FAQs About Shrimp Tacos
What shrimp is best for shrimp tacos?
Medium or large peeled, deveined shrimp are the easiest choice. Medium shrimp fit small tortillas neatly, while large shrimp stay juicy and look generous. Tails-off shrimp are easiest to eat.
Is frozen shrimp okay for shrimp tacos?
Frozen shrimp are completely fine here. The important step is drying them well after thawing so they sear instead of steaming.
Can I use cooked shrimp for shrimp tacos?
You can use cooked shrimp, but raw shrimp gives better texture and flavor because it cooks with the seasoning. If using cooked shrimp, warm it gently with a little oil and seasoning just until hot, then stop before it turns rubbery.
How many shrimp do I need per taco?
For small tortillas, plan on about 3–5 shrimp per taco, depending on shrimp size. Jumbo shrimp may need only 2–3 per taco, while medium shrimp usually need a few more.
How do you keep shrimp from getting rubbery?
Cook shrimp quickly over medium-high heat and remove them as soon as they turn opaque and curl into a loose C shape. A tight O shape usually means the shrimp stayed in the pan too long.
Which sauce works best with shrimp tacos?
For most taco nights, creamy cilantro-lime sauce is the easiest choice because it cools the seasoning and gives the slaw something to cling to. Chipotle sauce, avocado crema, and spicy mayo also work well.
Which slaw should I use?
Cabbage lime slaw is the easiest default because it is crunchy, fresh, and sturdy. For a richer taco, toss the cabbage with a few spoonfuls of creamy sauce right before serving.
Are corn or flour tortillas better for shrimp tacos?
Corn tortillas give a more classic taco flavor, while flour tortillas are softer and easier to fold. Both work. The main thing is to warm them before filling.
What toppings go with shrimp tacos?
Good shrimp taco toppings include cabbage slaw, avocado, cilantro, lime, radishes, pickled onions, cotija, queso fresco, jalapeño, mango salsa, and creamy cilantro-lime sauce.
Can I make shrimp tacos ahead of time?
You can make the sauce ahead and prep the slaw vegetables ahead, but shrimp tacos are best assembled fresh. Keep each component separate until serving.
How should I reheat shrimp for tacos?
Reheat shrimp gently in a skillet over low to medium-low heat with a tiny splash of water or oil. Stop as soon as they are warm. High heat can overcook leftover shrimp quickly.
Start with the base version once, then let the second batch become your house version: chipotle sauce for heat, mango salsa for sweetness, crispy shrimp for crunch, or grilled shrimp for a smokier taco-night feel. Once you know whether your table wants extra lime, extra sauce, or extra heat, this recipe gets easier every time.
What makes a shrimp taco perfect for you: extra crunch, lots of sauce, more lime, mango salsa, avocado, crispy shrimp, or serious heat? I’d love to know which version your table would choose first — and whether you’re team corn tortilla or team flour tortilla.