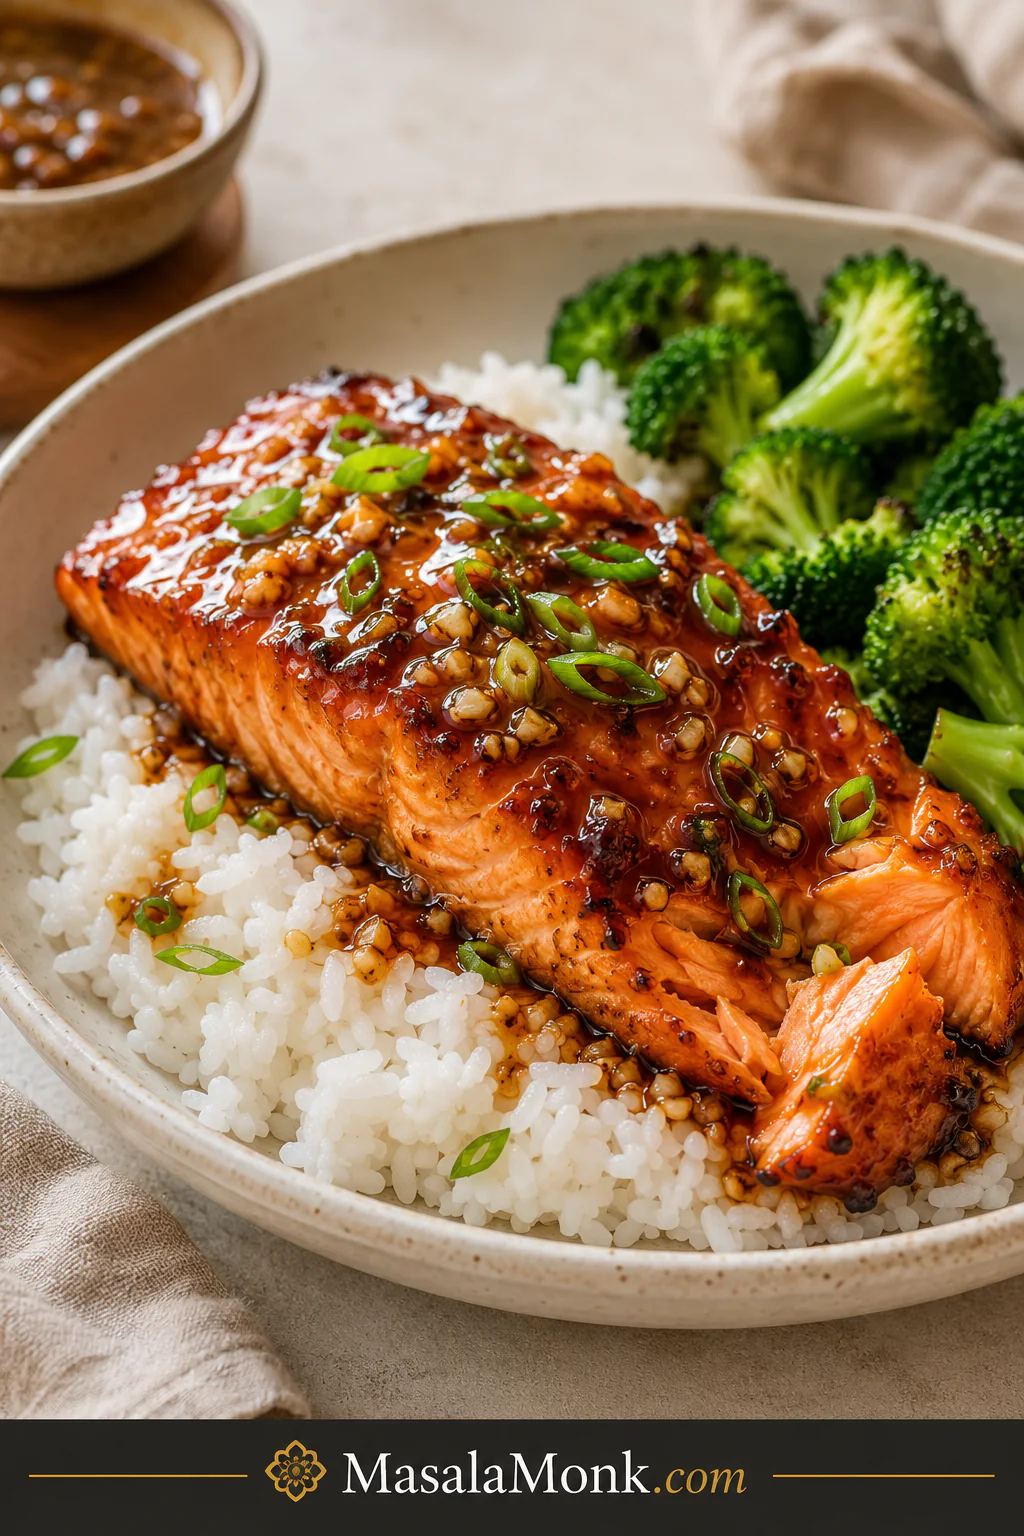
This honey garlic salmon is the kind of dinner that makes plain rice feel exciting. The salmon stays tender and flaky, the sauce turns shiny and spoonable, and every bite has that sweet-savory mix of honey, garlic, soy sauce, and a little brightness from lemon or rice vinegar.
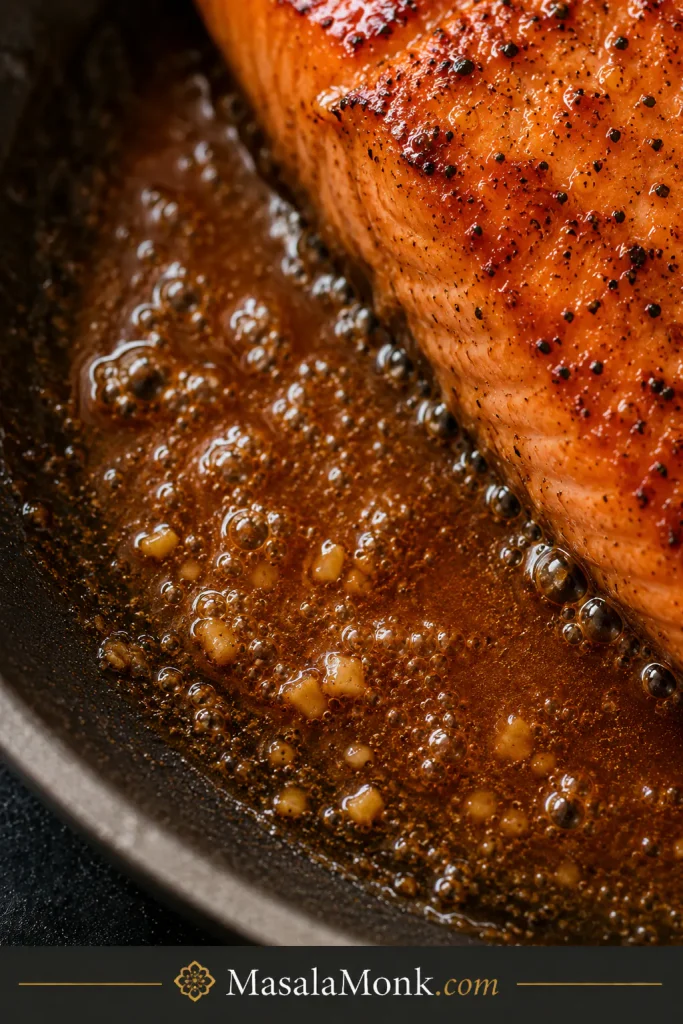
Here is the main rule: sear first, sauce later. Salmon needs enough heat to brown; honey needs gentler heat so it can thicken without burning. Once you understand that, this recipe becomes much easier to trust.
That matters because salmon cooks quickly, and nobody wants to lose a good piece of fish to burnt honey or a dry center. This method gives you control: brown the fish first, then let the honey garlic mixture finish gently around it.
The skillet method gives you the stickiest, glossiest result, but the same honey garlic sauce also works for baked salmon, foil packets, air fryer salmon, and salmon bites. Start with the main recipe when you want the best skillet glaze, then use the oven or air fryer notes when dinner needs to be more hands-off.
Quick Answer: The Best Way to Make Honey Garlic Salmon
For the stickiest glaze, use a skillet. Pat the salmon dry, sear it first, then add a honey garlic sauce made with honey, low-sodium soy sauce, garlic, and lemon juice or rice vinegar. Once the sauce enters the pan, lower the heat and baste for 2–4 minutes, just until the bubbles slow and the sauce lightly coats the fish.
- Total time: about 20 minutes.
- Best salmon size: 4 fillets, about 6 oz / 170 g each.
- Preferred method: skillet for the most controlled glaze.
- Oven option: bake at 400°F / 200°C for 12–15 minutes.
- Foil option: bake at 400°F / 200°C for 12–15 minutes.
- Air fryer option: air fry at 390°F / 199°C for 7–8 minutes.
- Biggest mistake: adding honey sauce too early over high heat.
Honey Garlic Salmon Recipe Card
Prep time: 8 minutes
Cook time: 12 minutes
Total time: 20 minutes
Servings: 4
Yield: 4 salmon fillets
Main method: Skillet
Other methods included below: Baked, foil, air fryer, and salmon bites
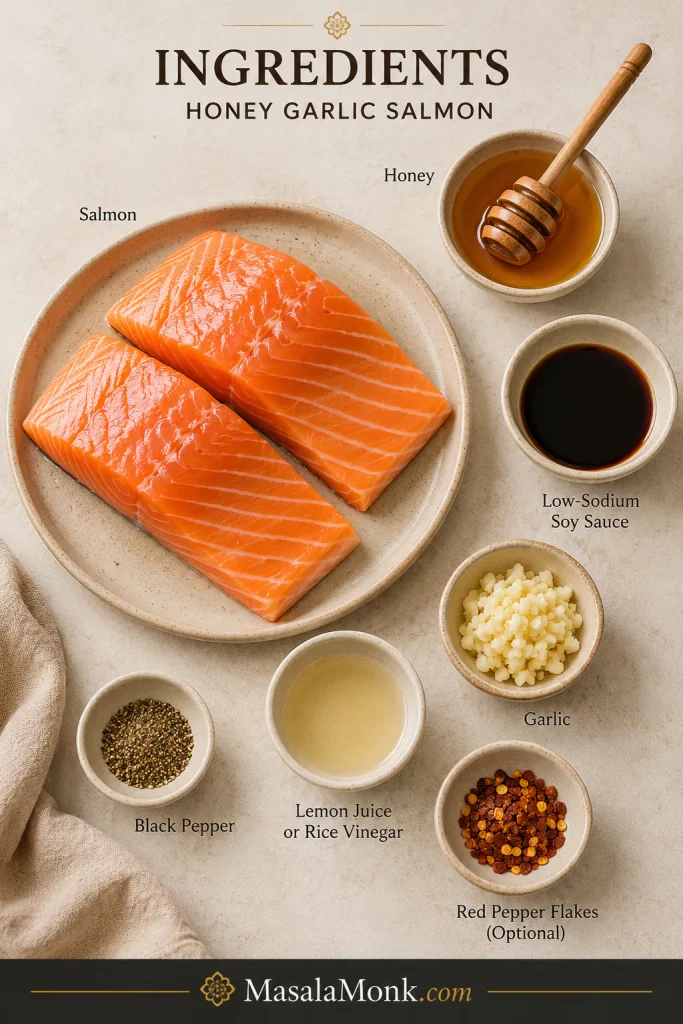
Ingredients
| Ingredient | US amount | Metric amount |
|---|---|---|
| Salmon fillets | 4 fillets, about 6 oz each | About 680 g total |
| Honey | 1/3 cup | About 113 g |
| Low-sodium soy sauce | 1/4 cup | 60 ml |
| Lemon juice or rice vinegar | 2 tbsp | 30 ml |
| Garlic, minced | 4 cloves | About 12–16 g |
| Olive oil or butter | 1 tbsp | 15 ml oil or 14 g butter |
| Black pepper | 1/2 tsp | To taste |
| Red pepper flakes, sriracha, or hot honey | Optional | To taste |
| Salt | Small pinch, optional | Use lightly |
Instructions
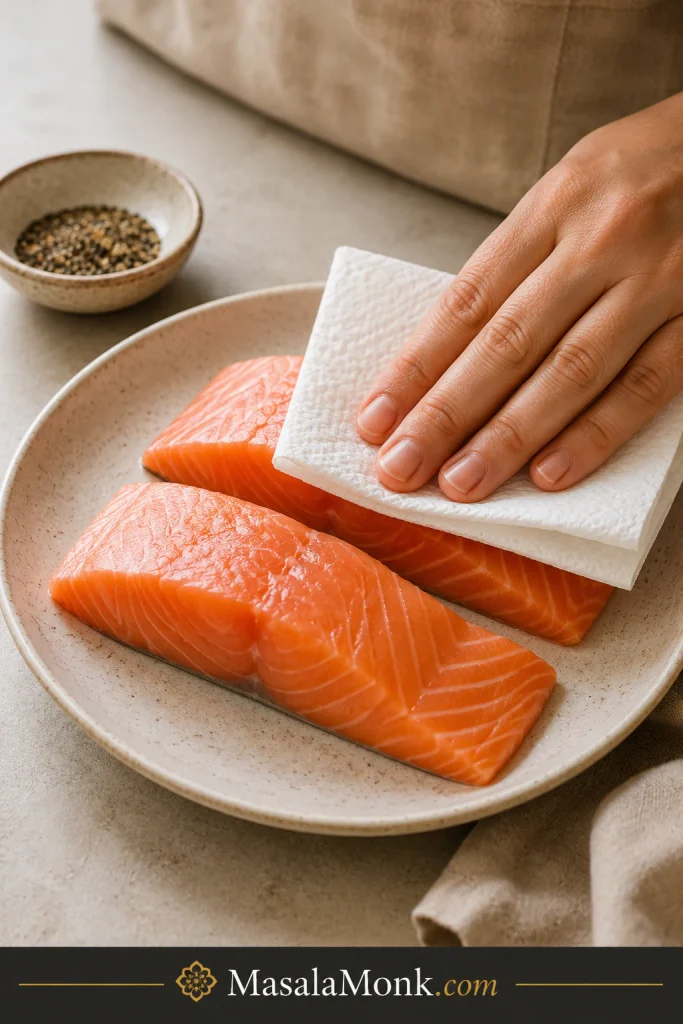
- Pat the salmon fillets very dry with paper towels. Season lightly with black pepper and a small pinch of salt only if needed.
- In a small bowl, whisk together the honey, low-sodium soy sauce, lemon juice or rice vinegar, minced garlic, and optional red pepper flakes, sriracha, or hot honey.
- Heat olive oil or butter in a large nonstick or cast-iron skillet over medium to medium-high heat.
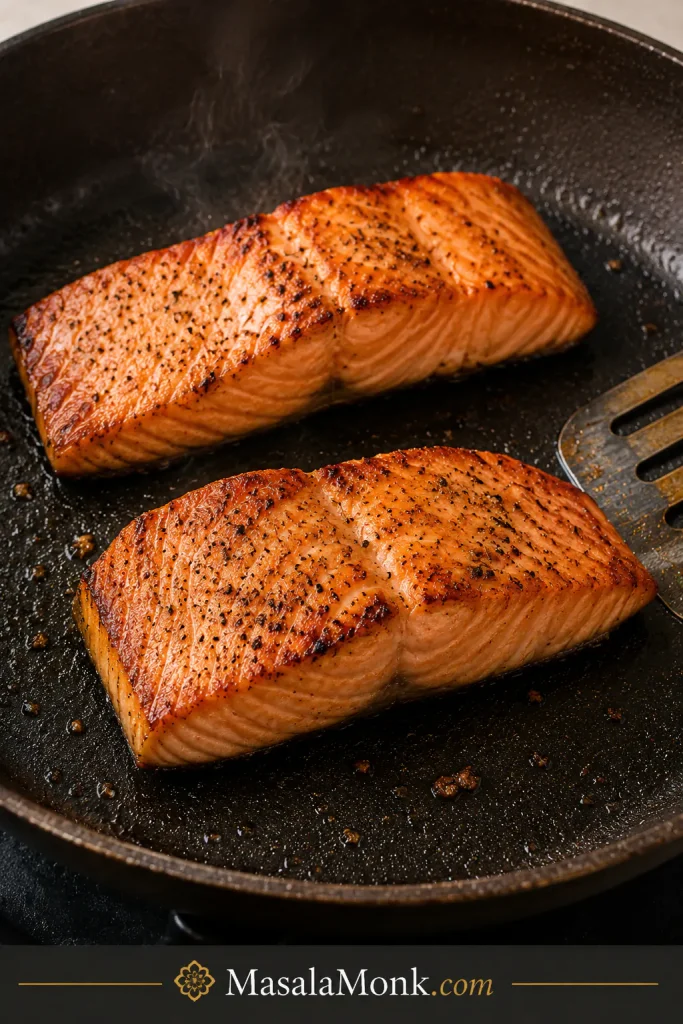
- Add the salmon best-looking side down first. Sear for 3–5 minutes, depending on thickness, until the surface is lightly golden.
- Flip carefully and cook the second side for about 2 minutes.
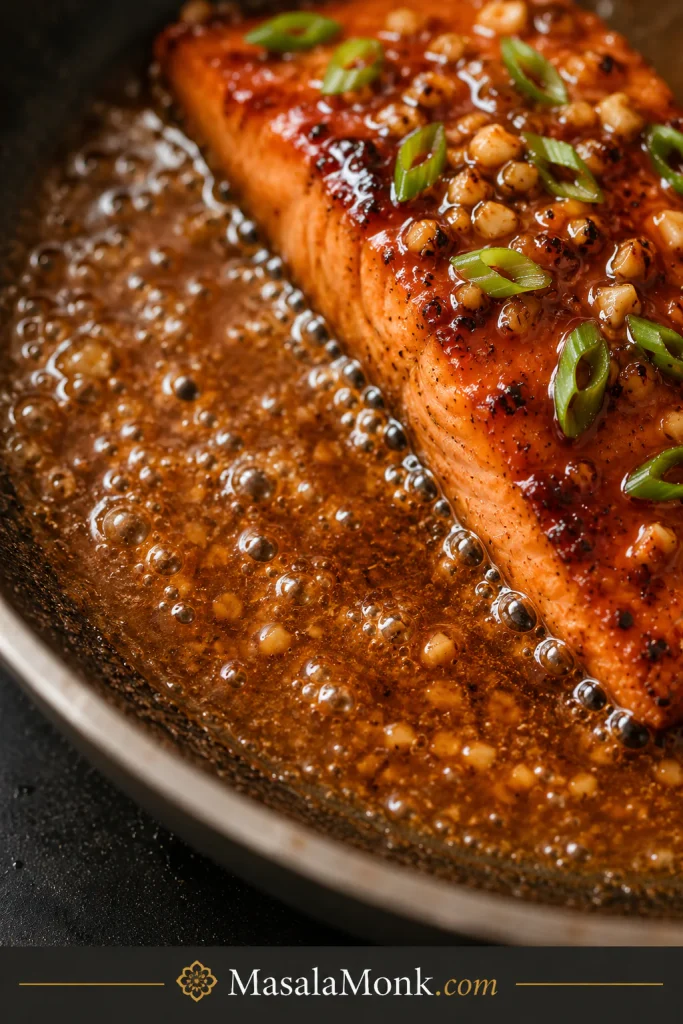
- Lower the heat to medium. Pour the honey garlic sauce into the pan around the salmon.
- Let the sauce bubble gently for 2–4 minutes. As the bubbles get smaller and slower, spoon the basting liquid over the salmon until it leaves a light coating on the fish.
- If the sauce tightens too quickly, add 1–2 tbsp water. When the salmon is cooked but the sauce is thin, remove the fish and simmer the sauce for another minute.
- Serve hot with extra pan glaze spooned over the salmon.
Recipe note: Sear first, sauce later. Honey darkens quickly over high heat, so get the salmon mostly cooked first, then lower the heat and let the sauce turn glossy instead of burnt.
Start with the skillet recipe for the best glaze. The baked, foil, and air fryer methods are there for the nights when dinner needs to be softer, easier, or faster.
Honey Garlic Salmon at a Glance
| Best for | Fast weeknight dinner, rice bowls, meal-prep lunches, and a sweet-savory salmon glaze |
|---|---|
| Main flavor | Honey, savory soy sauce, fresh garlic, light acidity, optional heat |
| Best method | Skillet, because you can watch the sauce reduce and control the heat |
| Salmon amount | 4 fillets, about 6 oz / 170 g each |
| Main sauce ratio | 1/3 cup honey, 1/4 cup low-sodium soy sauce, 2 tbsp lemon juice or rice vinegar, 4 garlic cloves |
| Skillet timing | 3–5 minutes first side, 2 minutes second side, 2–4 minutes with sauce |
| Baked timing | 400°F / 200°C for 12–15 minutes |
| Foil timing | 400°F / 200°C for 12–15 minutes |
| Air fryer timing | 390°F / 199°C for 7–8 minutes |
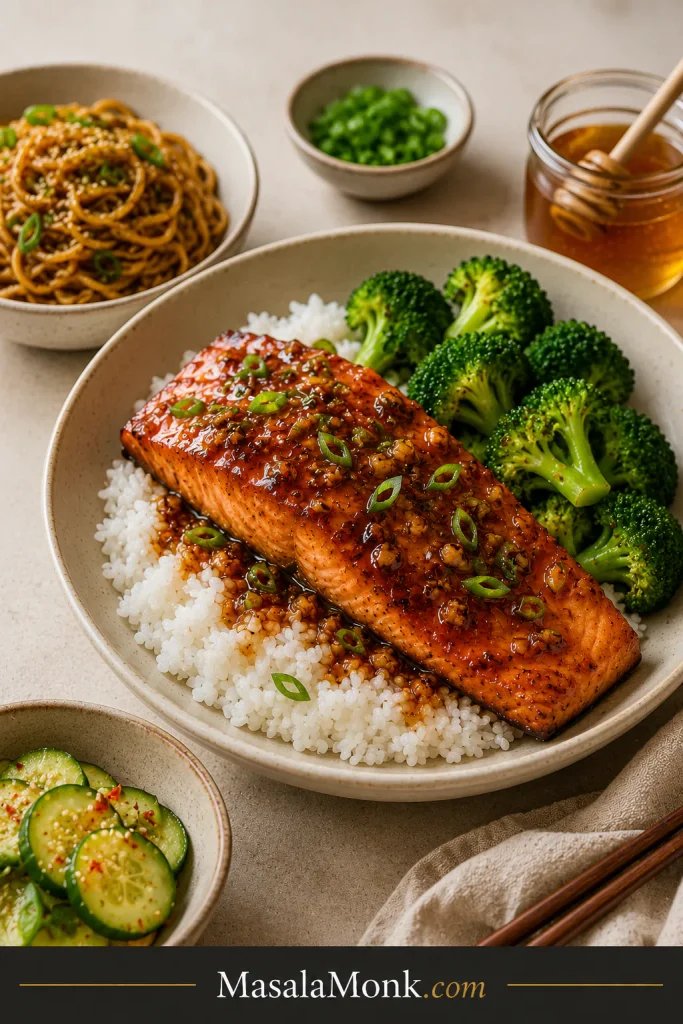
| Best serving idea | Rice, broccoli, cucumber salad, noodles, or a salmon bowl with extra pan sauce |
The sauce does most of the work: it gives rice something to soak up, makes the salmon look finished, and turns a simple vegetable on the side into part of the meal.
Why This Recipe Works
This recipe works because the fish and the sauce are treated differently. Salmon wants quick, confident heat. Honey wants gentler heat. If the sauce goes in too early, the honey can scorch before the salmon is cooked. When you sear first and sauce later, the fish gets color and the glaze only needs a few minutes to thicken.
The same late-sauce logic is useful in quick dinners like a stir fry sauce: let the main ingredient cook first, then add the sauce just long enough to coat everything.
- Dry salmon sears better. Patting the fillets dry helps the surface brown instead of steam.
- Low-sodium soy sauce keeps the sauce balanced. As it reduces, regular soy sauce can become too salty.
- Lemon juice or rice vinegar cuts the sweetness. Honey alone tastes flat; acid makes the final bite brighter.
- Garlic gives the sauce its savory backbone. It should cook gently, not burn in an empty pan.
- Basting builds the glaze. Spoon the sauce over the salmon as it thickens so every bite gets coated.
The rule to remember: sear first, sauce later. Once honey enters the pan, lower the heat and let it bubble gently.
Skillet cue: sear before the sauce goes in: The salmon should get color first, because honey garlic sauce needs gentler heat once it enters the pan.
If you are here because there is salmon in the fridge and no plan for dinner, start with the skillet version. It is fast, glossy, and forgiving as long as you add the sauce after the first sear.
In This Recipe
Start Here
Make the Salmon
Helpful Equipment
You can make this with a skillet, a bowl, and a spoon, but a few tools make the process calmer — especially if salmon usually makes you nervous.
- Large nonstick skillet or cast-iron skillet
- Small mixing bowl
- Whisk or fork
- Fish spatula
- Instant-read thermometer
- Baking sheet or baking dish for the oven method
- Small saucepan if you want to reduce extra sauce separately
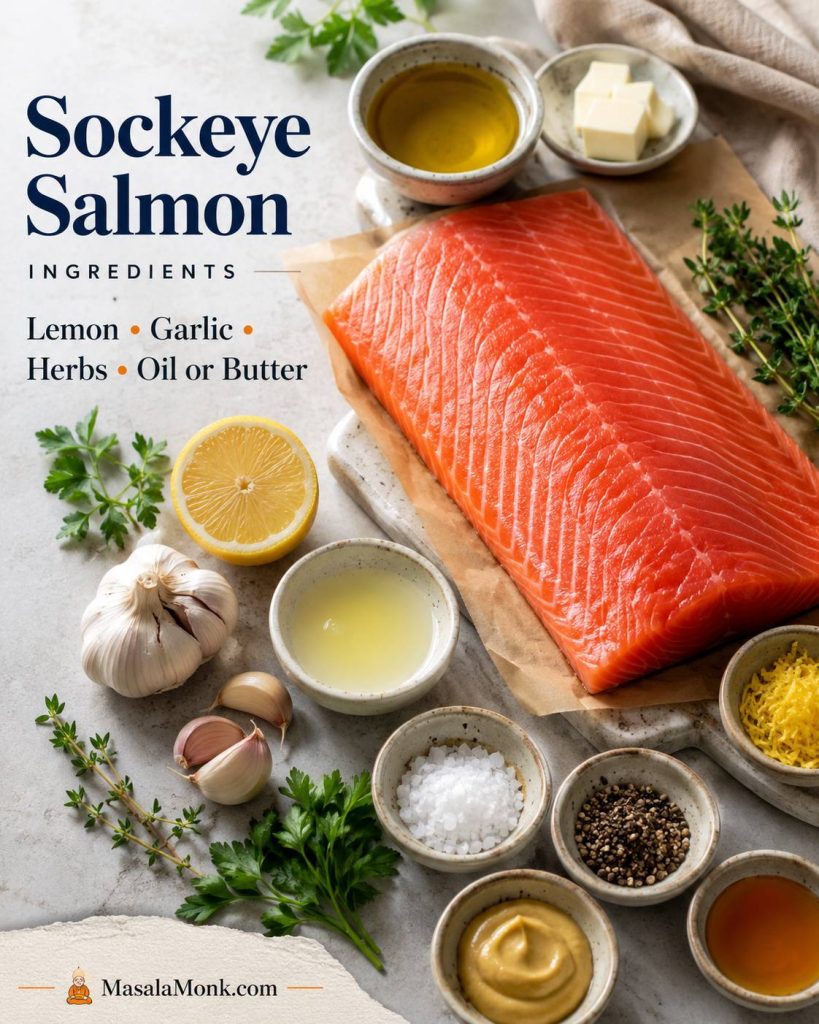
Ingredients You Need
The ingredient list is short, so each item matters. The sauce should taste sweet, salty, garlicky, and slightly sharp before it goes into the pan. Salmon and rice will soften those flavors, so do not be afraid if the sauce tastes a little bold in the bowl.
Ingredient visual: what goes into the sauce: Use this visual to check the short ingredient list before the sauce hits the pan.
Salmon
Use 4 salmon fillets that are about 6 oz / 170 g each. This size cooks quickly but is still thick enough to stay moist. If one fillet is much thinner than the others, pull it from the pan early and let the thicker pieces finish.
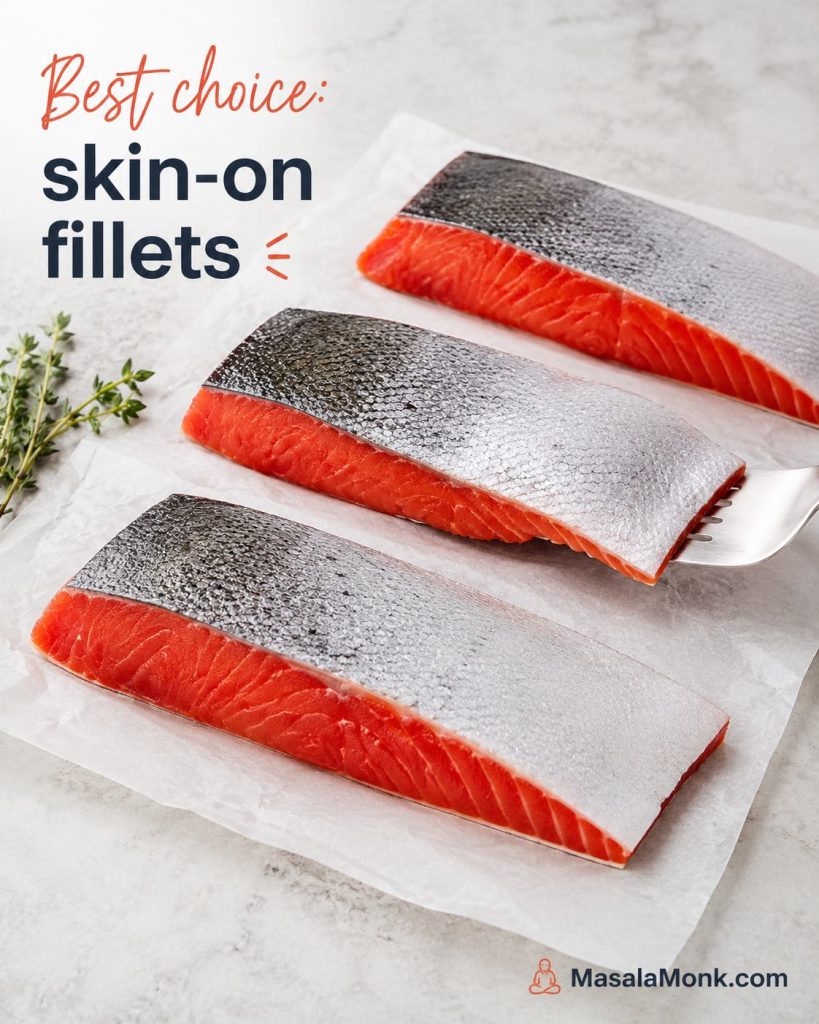
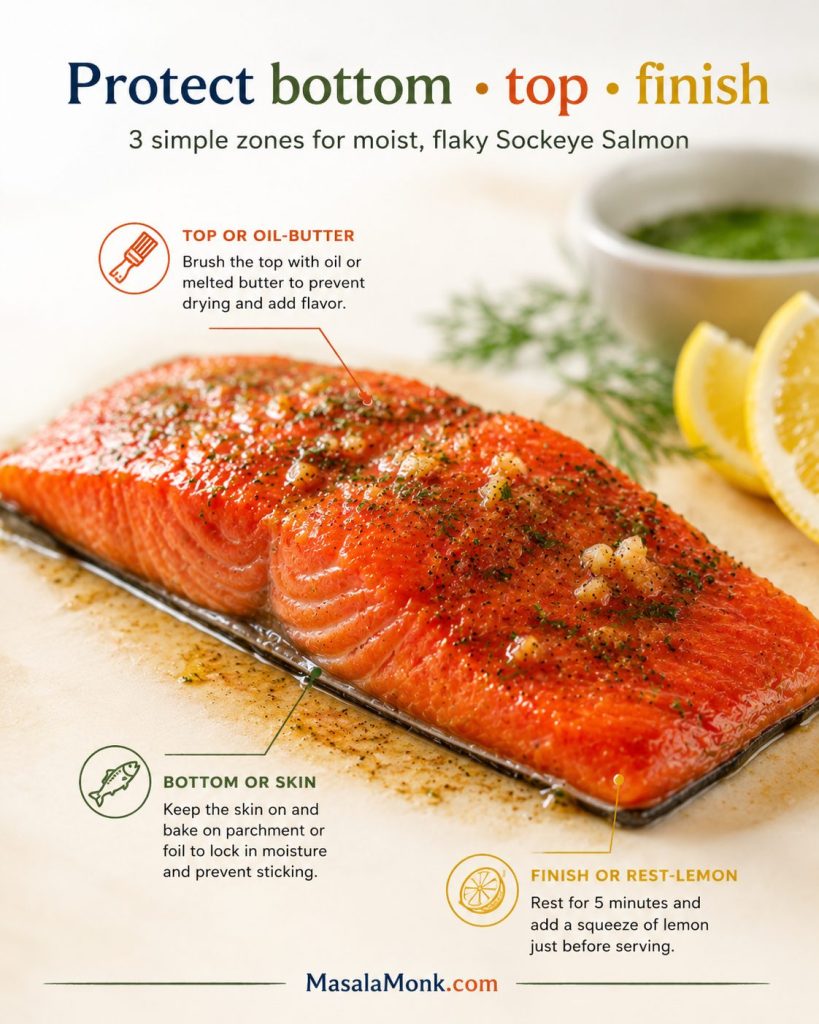
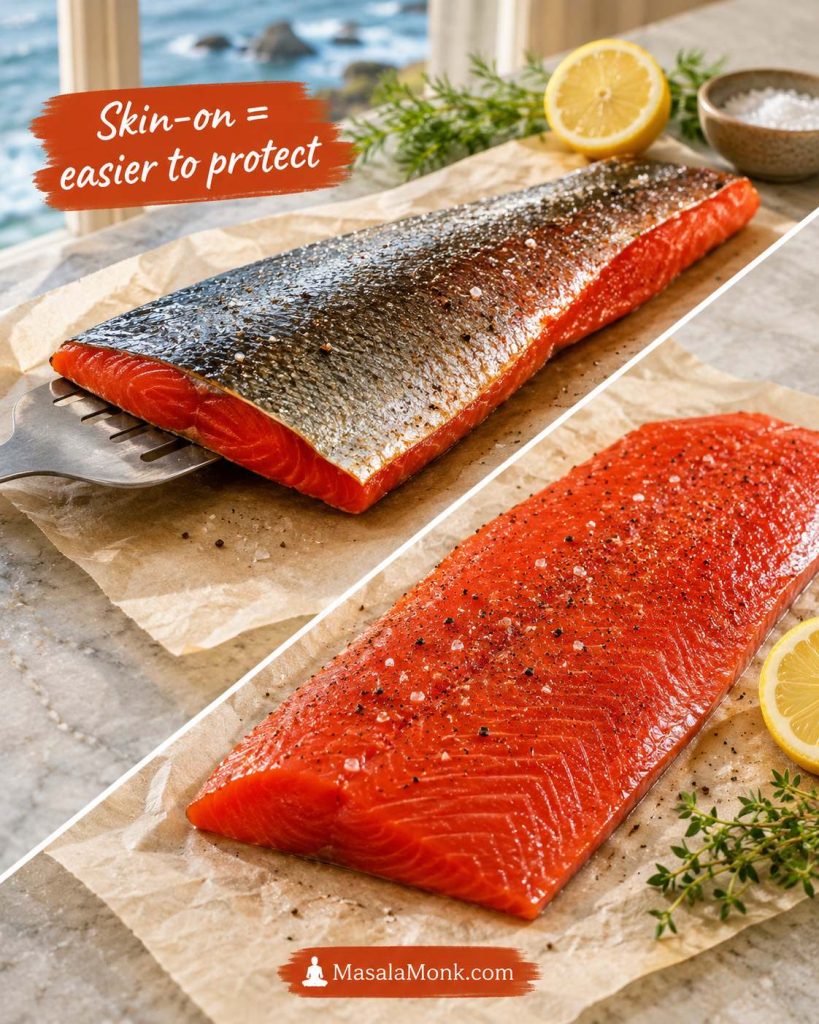
Skin-on fillets are a little more forgiving in a skillet because the skin protects the bottom of the fish. Skinless fillets are easier to coat on all sides and work well for baked salmon, air fryer salmon, and salmon bites.
Honey
Honey gives the sauce its shine, sweetness, and body. It also browns quickly, which is why the sauce is added after the fish has already started cooking.
Maple syrup can work in a pinch, but the finish will be thinner and less sticky. Brown sugar also works if you dissolve it fully into the sauce before it goes into the pan.
Low-Sodium Soy Sauce
Low-sodium soy sauce is the safest choice because the sauce reduces in the pan. It gives salt, umami, and color without overpowering the honey and garlic.
For a gluten-free version, use gluten-free tamari. To make it soy-free, coconut aminos are the easiest swap. The flavor will be a little sweeter and lighter, but it still works well with garlic and lemon.
Garlic
Fresh minced garlic gives the best flavor. Mince it finely so it spreads through the sauce and cooks quickly. If your pan runs hot, mix the garlic into the sauce instead of frying it alone; burnt garlic can turn bitter.
In a pinch, use 1/2 tsp garlic powder instead of fresh garlic. Mix it into the sauce rather than adding it directly to the hot pan.
Lemon Juice or Rice Vinegar
A little acid keeps the sauce from tasting too sweet. Fresh lemon juice gives a brighter finish. Rice vinegar makes the sauce taste softer and slightly more takeout-style. Either one works well.
Butter or Oil
Use olive oil for a cleaner, dairy-free version. Use butter if you want a richer honey garlic butter salmon. Butter adds a deeper, restaurant-style flavor, but it can brown quickly, so keep the heat controlled.
Optional Heat
Red pepper flakes, sriracha, chili crisp, or hot honey can make the sauce spicy. Start small. You can always add more heat at the end, but it is harder to fix a sauce that has become too sharp or fiery.
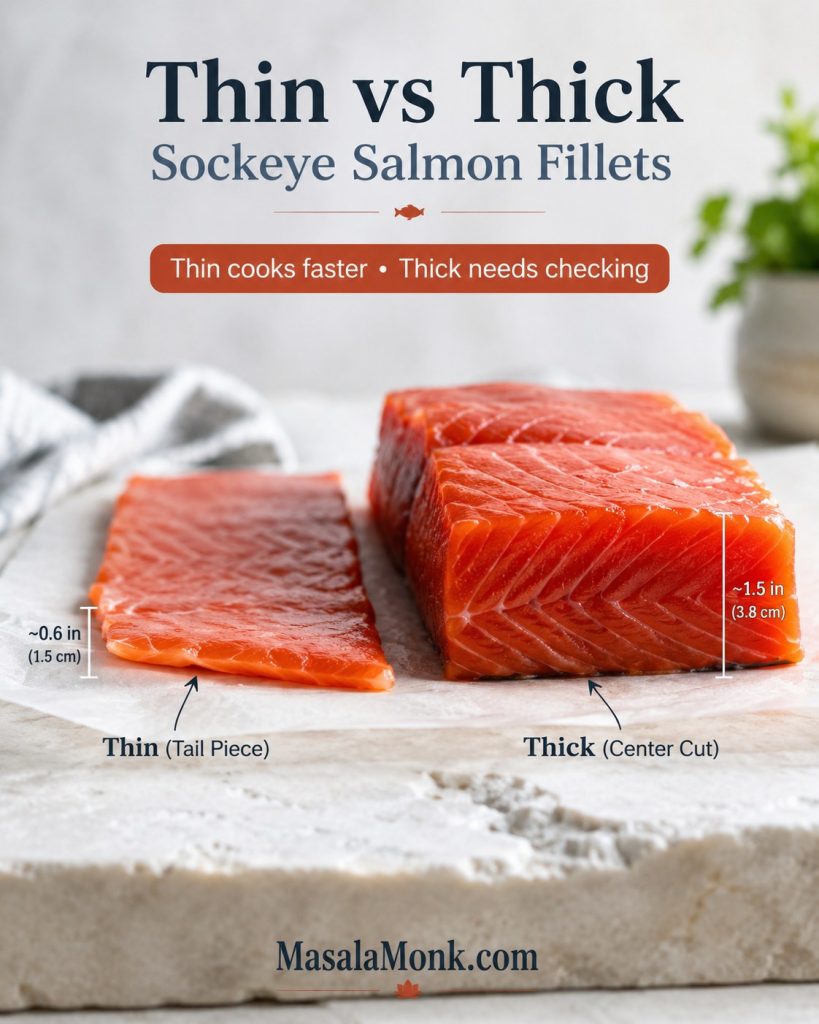
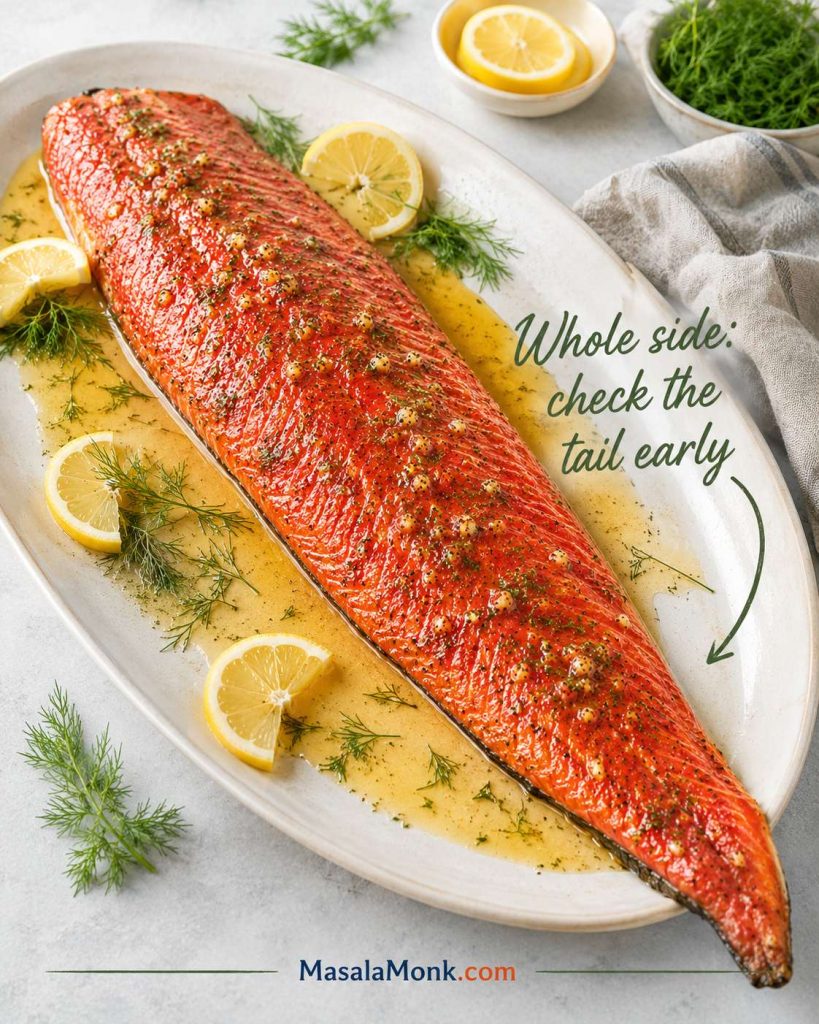
The sauce is forgiving, but the shape of the salmon matters. A thick center-cut fillet gives you more room to sear and baste; a thin tail piece needs a shorter ride in the pan.
Best Salmon to Use
Choose salmon that is thick enough to stay juicy while the sauce reduces. Center-cut fillets are easiest because they cook more evenly from end to end. Thin tail pieces still work, but they cook faster and need a gentler hand.
| Salmon type | How it behaves | Best tip |
|---|---|---|
| Atlantic salmon | Usually fattier and more forgiving | Good for skillet and air fryer methods |
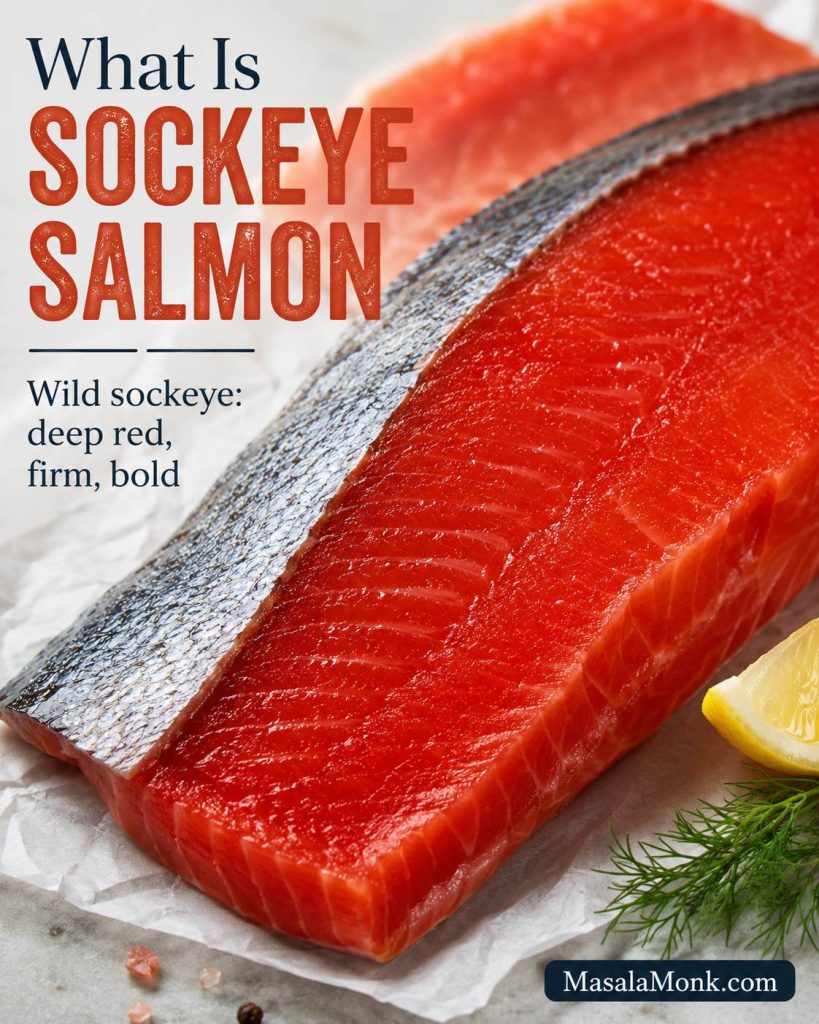
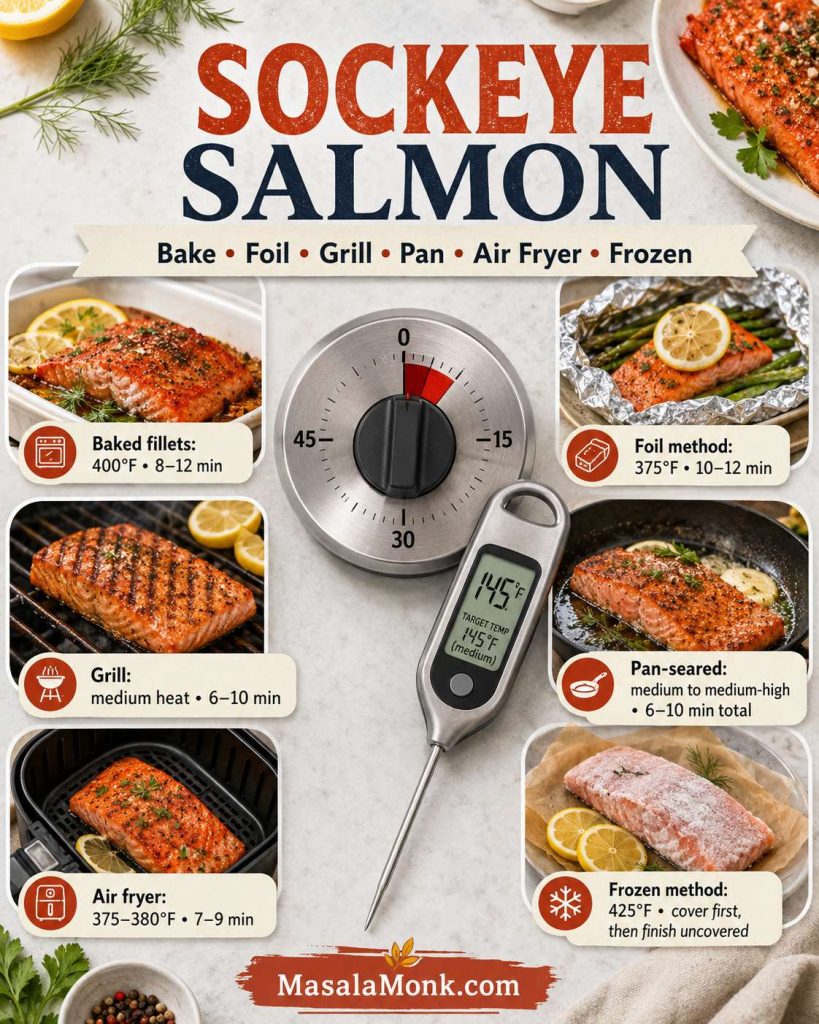
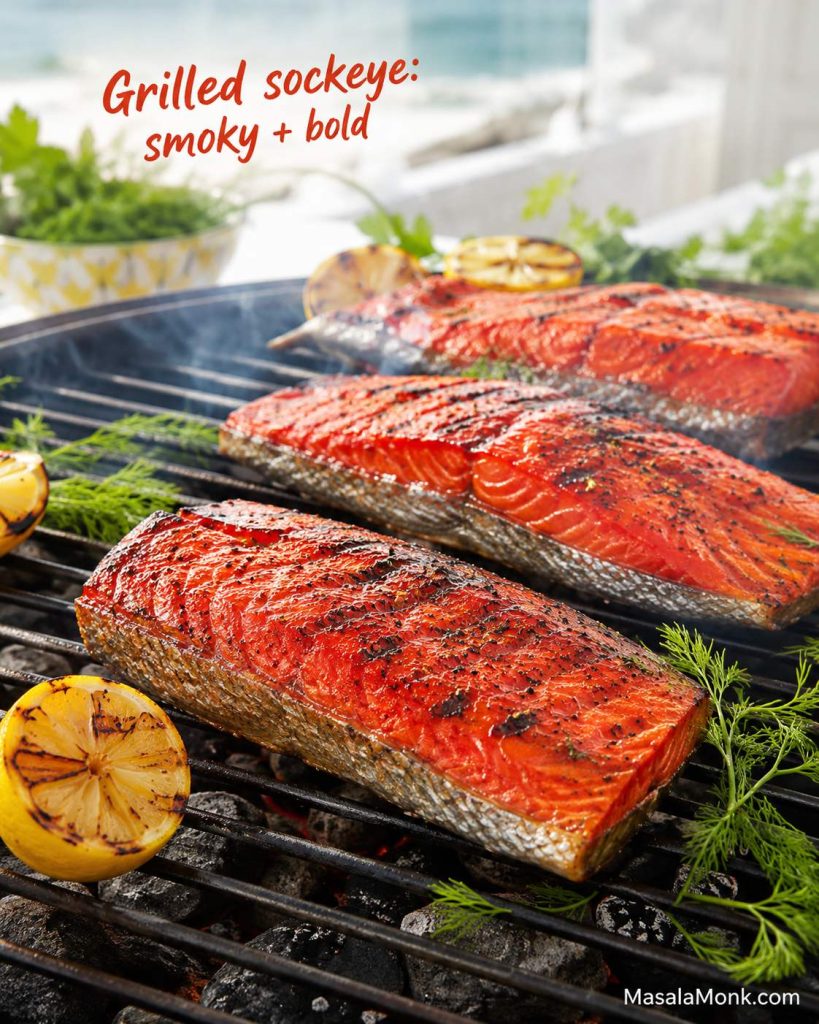
| Sockeye salmon | Leaner, deeper in color, and quicker to dry out | Cook gently and pull it earlier |
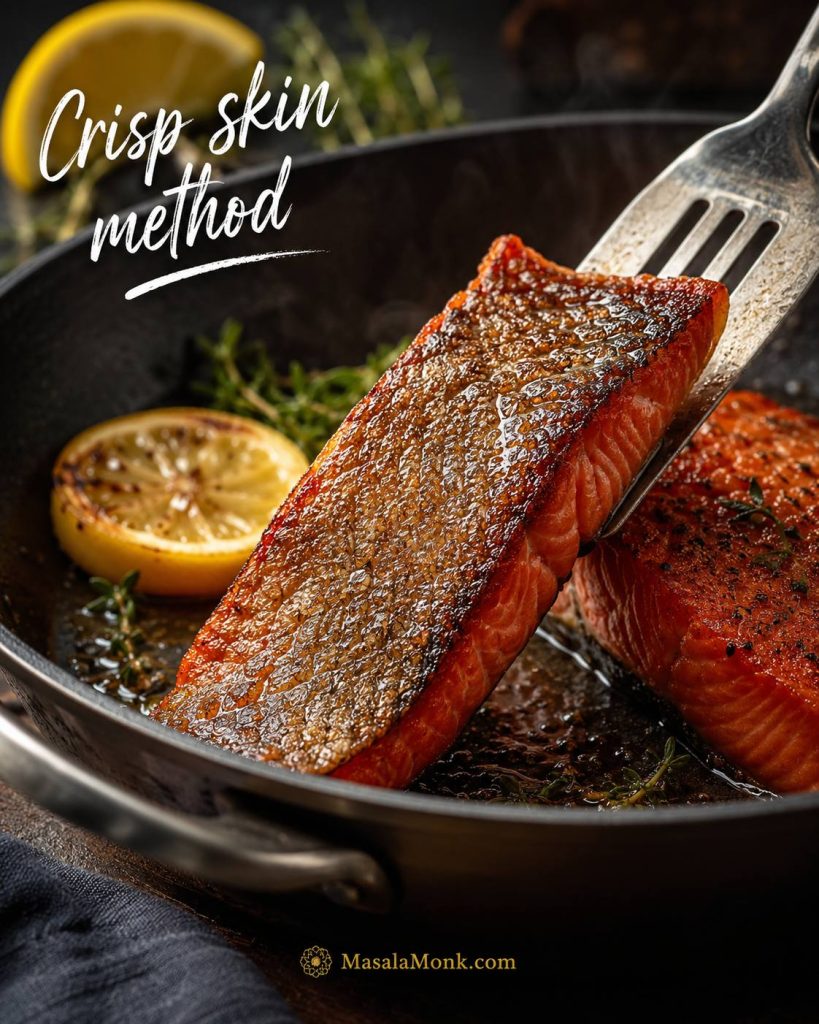
| Skin-on fillets | More protection in the pan | Good for skillet cooking |
| Skinless fillets | Easier to coat all over | Good for baked, air fryer, and bites |
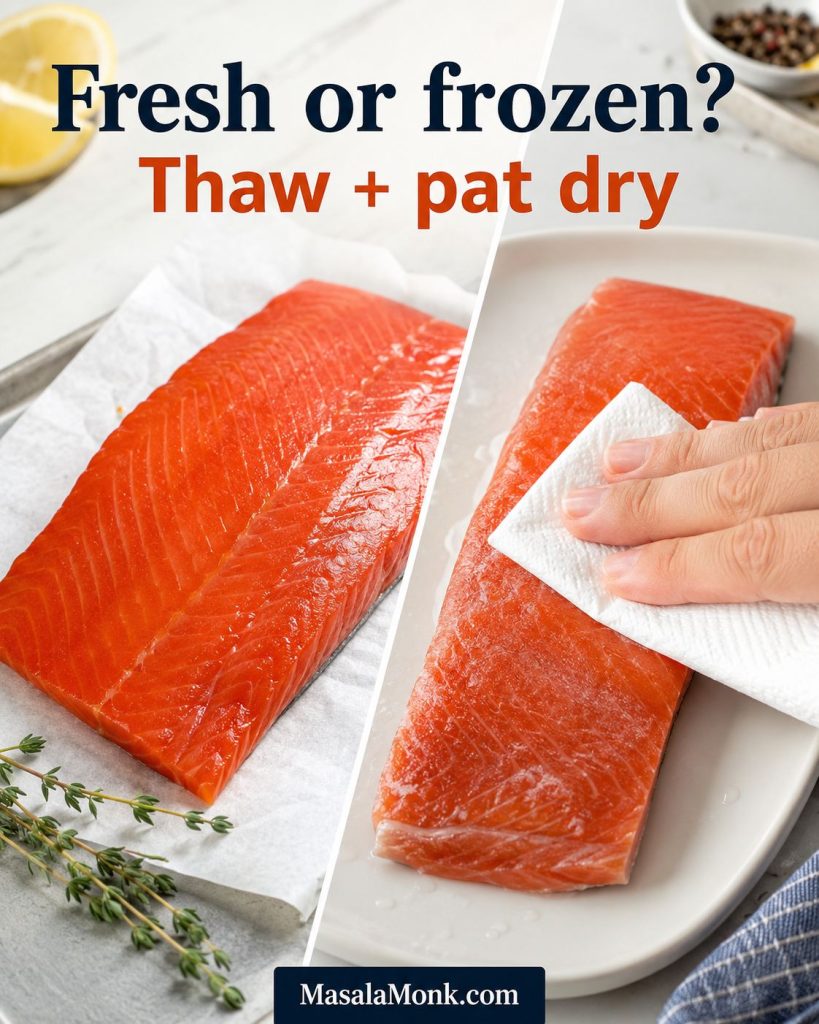
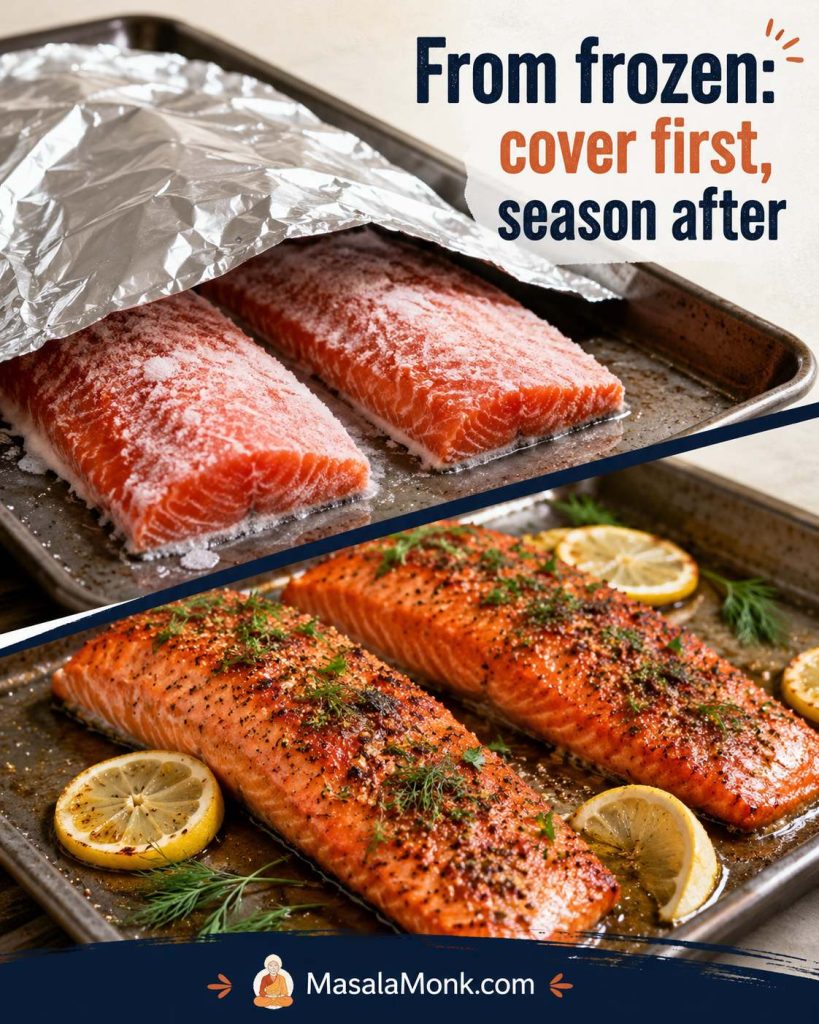
| Frozen salmon | Works well if fully thawed | Drain and pat very dry before cooking |
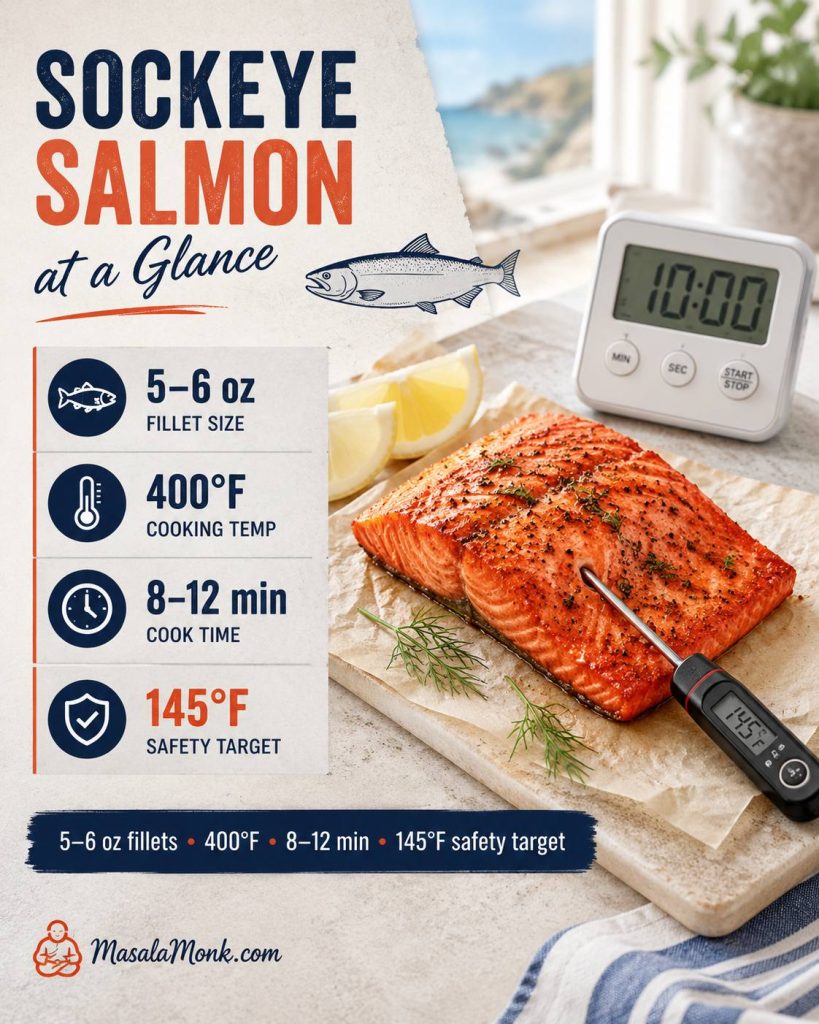
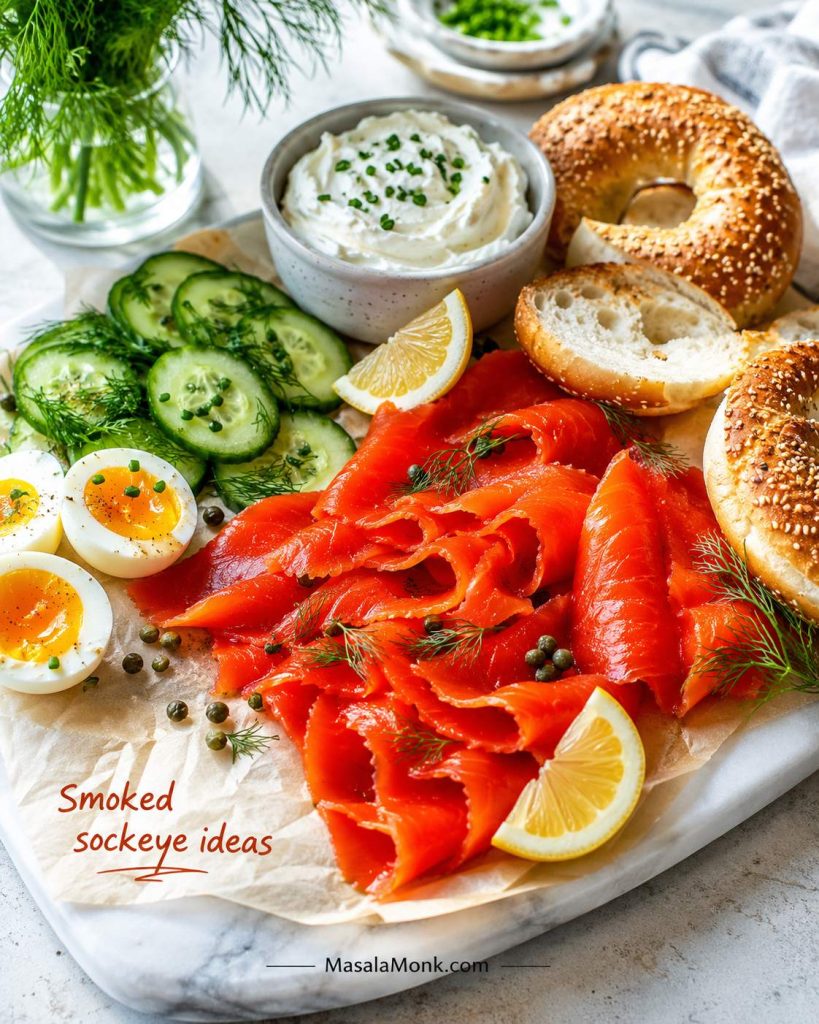
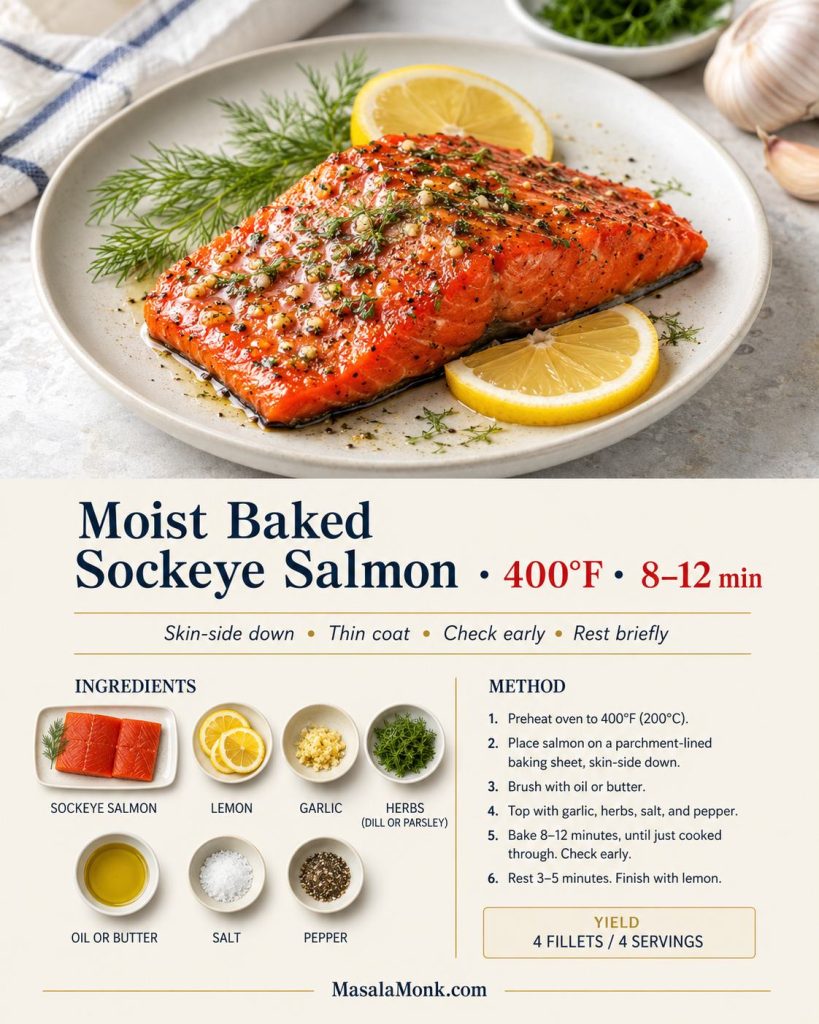
If you are using sockeye, keep a closer eye on the timing because it is leaner than many Atlantic salmon fillets. For more detail on that style of fish, see this sockeye salmon recipe, which focuses on keeping lean salmon moist.
When using frozen salmon, thaw it fully first, drain off extra liquid, and pat it very dry. Wet fish steams instead of searing, and that makes the pan sauce feel thinner.
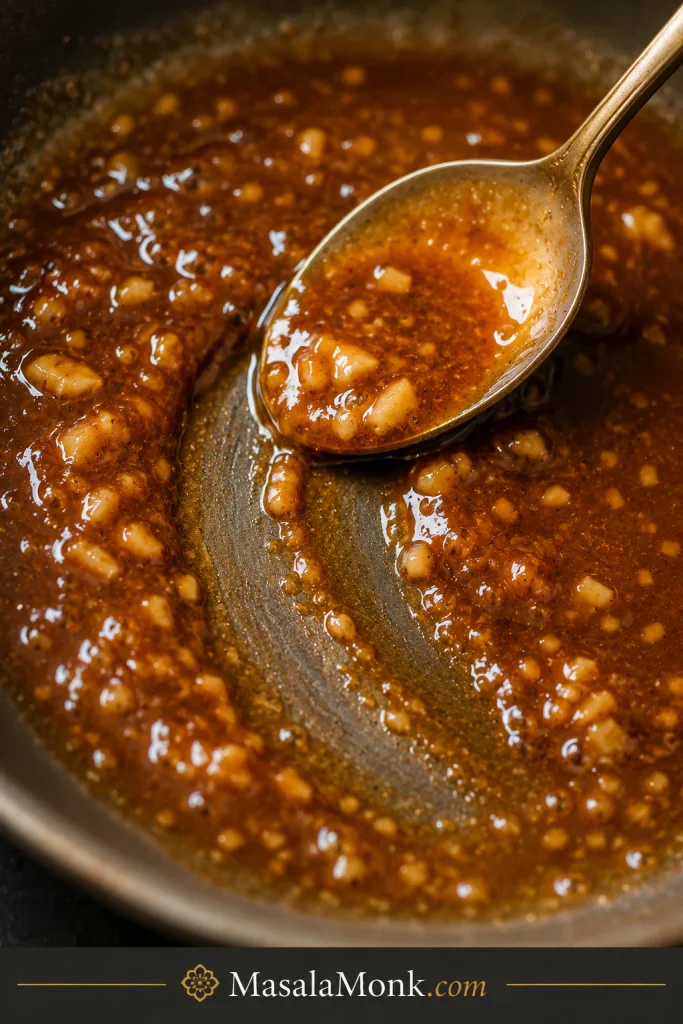
Honey Garlic Salmon Sauce Ratio
A good honey garlic sauce is not just sweet. It needs salt, acid, and garlic to stay balanced. This main ratio gives you enough sauce to coat 4 fillets and still spoon a little extra over rice.
Think of the sauce as a balance, not a pour: honey brings shine, soy sauce brings depth, acid keeps it awake, and garlic makes it taste like dinner.
If you are serving this with rice, err on the side of a little extra sauce. The rice is not just a side here; it is where the glaze lands.
Sauce visual: balance the honey garlic glaze: Use this sauce cue to see how the sweet, salty, garlicky, and bright ingredients come together before they reduce in the pan.
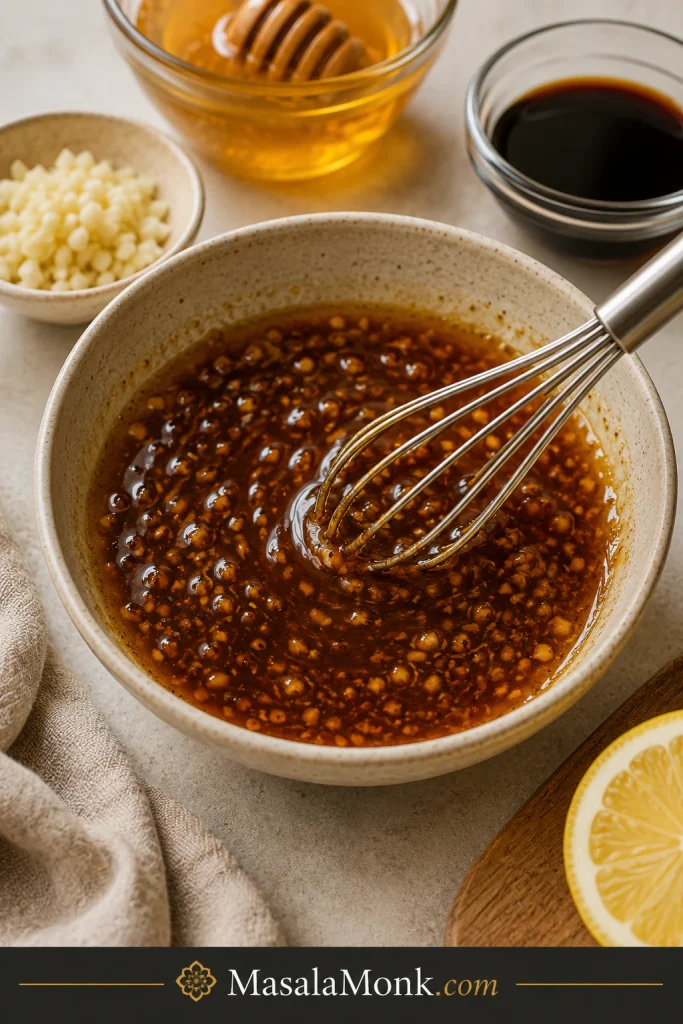
Main Sauce Ratio
| Ingredient | US amount | Metric amount | Role |
|---|---|---|---|
| Honey | 1/3 cup | About 113 g | Sweetness, shine, body |
| Low-sodium soy sauce | 1/4 cup | 60 ml | Salt, umami, color |
| Lemon juice or rice vinegar | 2 tbsp | 30 ml | Balance and brightness |
| Garlic, minced | 4 cloves | About 12–16 g | Savory flavor |
| Butter or olive oil | 1 tbsp | 14–15 g/ml | Richness and pan coating |
How to Adjust the Sauce
From there, adjust the sauce to match the plate: sweeter for kids, saltier for noodles, spicier for bowls, or thicker when rice is waiting underneath.
| Sauce style | What to change | Best for |
|---|---|---|
| Balanced sauce | Use the main ratio | Everyday honey garlic salmon |
| Sweeter sauce | Use 1/3 cup honey and reduce soy to 3 tbsp | Milder family dinners |
| Saltier soy sauce | Use equal honey and soy sauce | Rice bowls and noodles |
| Thicker glaze | Reduce the sauce 1–2 minutes longer | Spooning over rice |
| Gluten-free version | Use gluten-free tamari | Gluten-free cooking, not soy-free cooking |
| Soy-free version | Use coconut aminos instead of soy sauce | Soy-free cooking |
| Spicy version | Add sriracha, chili flakes, chili crisp, or hot honey | Hot honey garlic salmon |
If this sweet-salty sauce is the part you love most, a homemade teriyaki sauce is a good next sauce to try.
Best practical tip: Rice deserves extra sauce. For a saucier plate, make 1.5 times the recipe: 1/2 cup honey, 1/4 cup plus 2 tbsp low-sodium soy sauce, 3 tbsp lemon juice or rice vinegar, and 6 garlic cloves. Reduce the extra sauce separately so the salmon does not overcook.
Coconut aminos are the best soy-free choice. In a pinch, water, a small pinch of salt, extra lemon juice, and a little more garlic will work, but the flavor will be lighter and less savory.
Use this sauce in the skillet method · See what to serve with it
Skillet vs Baked vs Foil vs Air Fryer
Choose the method by the kind of dinner you want: skillet for control, oven for ease, foil for tenderness, and air fryer for speed.
Method visual: choose the right cooking style: This guide helps readers choose skillet, baked, foil, air fryer, or salmon bites based on the result they want.

| Method | Time and temp | Texture | Best for |
|---|---|---|---|
| Skillet | About 10–12 minutes total cooking | Glossy pan glaze | Most control |
| Baked | 400°F / 200°C for 12–15 minutes | Tender, easy, less hands-on | Weeknight tray dinner |
| Foil | 400°F / 200°C for 12–15 minutes | Soft and juicy, less browned | Easy cleanup |
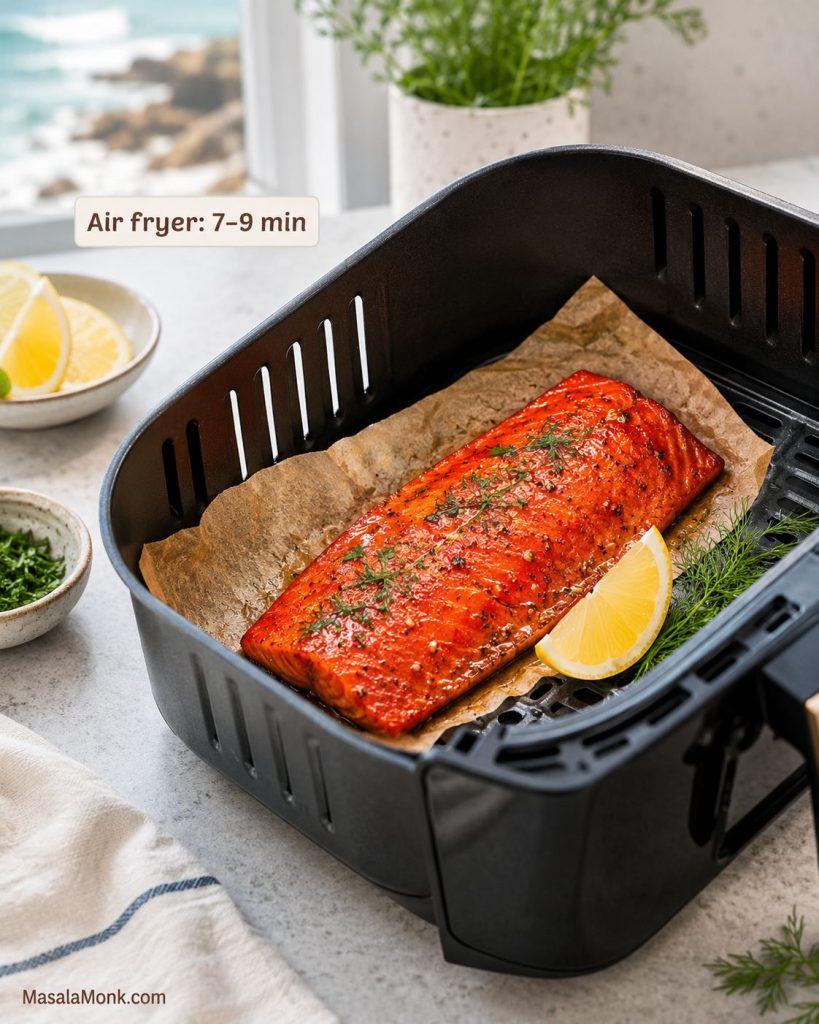
| Air fryer | 390°F / 199°C for 7–8 minutes | Fast, lightly caramelized | One or two fillets |
| Salmon bites | 390°F / 199°C for 6–8 minutes | Sticky edges, bowl-friendly | Rice bowls and meal prep |
Your first skillet batch also teaches you the visual cues: loose at first, bubbling in the middle, then slower and clingier as the glaze tightens.
Skillet method · Baked method · Foil method · Air fryer method · Salmon bites
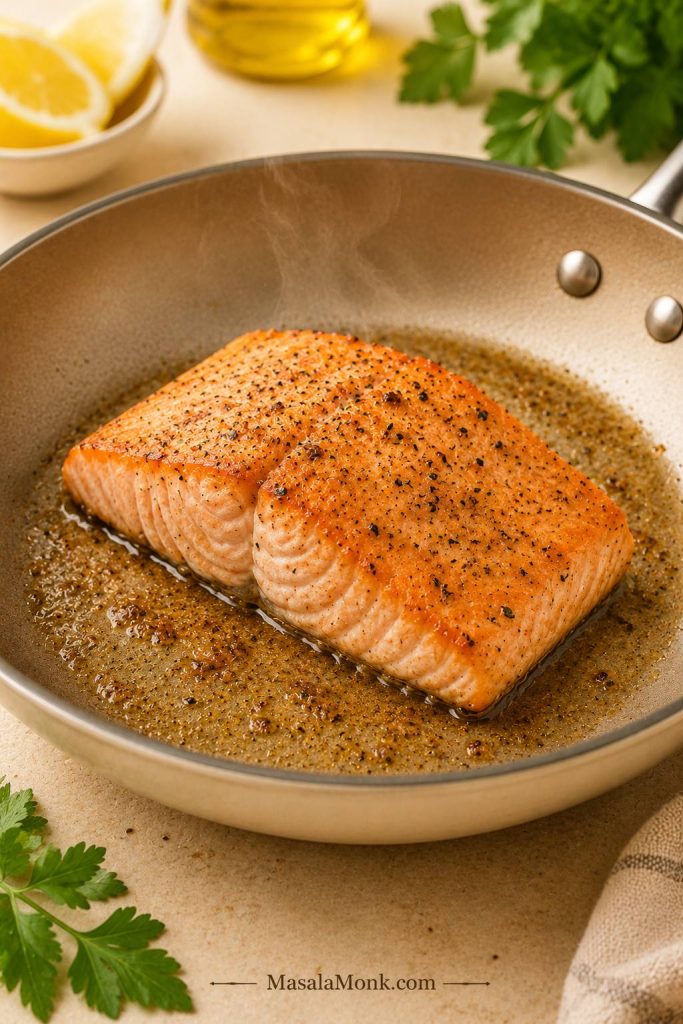
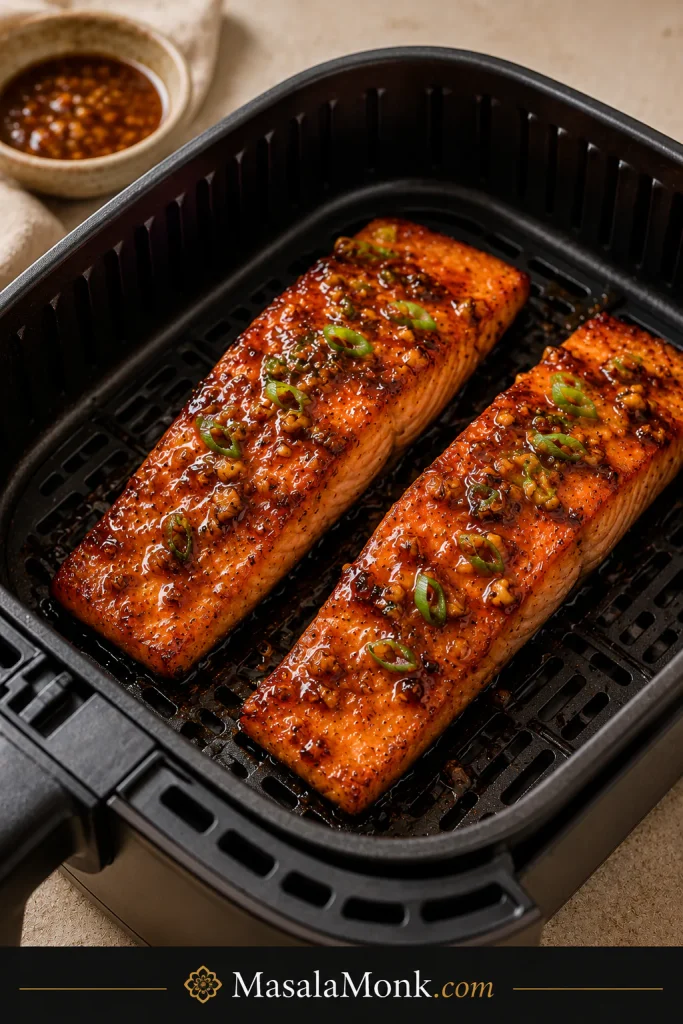
How to Make Honey Garlic Salmon in a Skillet
Use a skillet when you want the most control. You can see the sauce loosen, bubble, darken slightly, and finally leave a light coating on the salmon instead of guessing what is happening inside the oven.
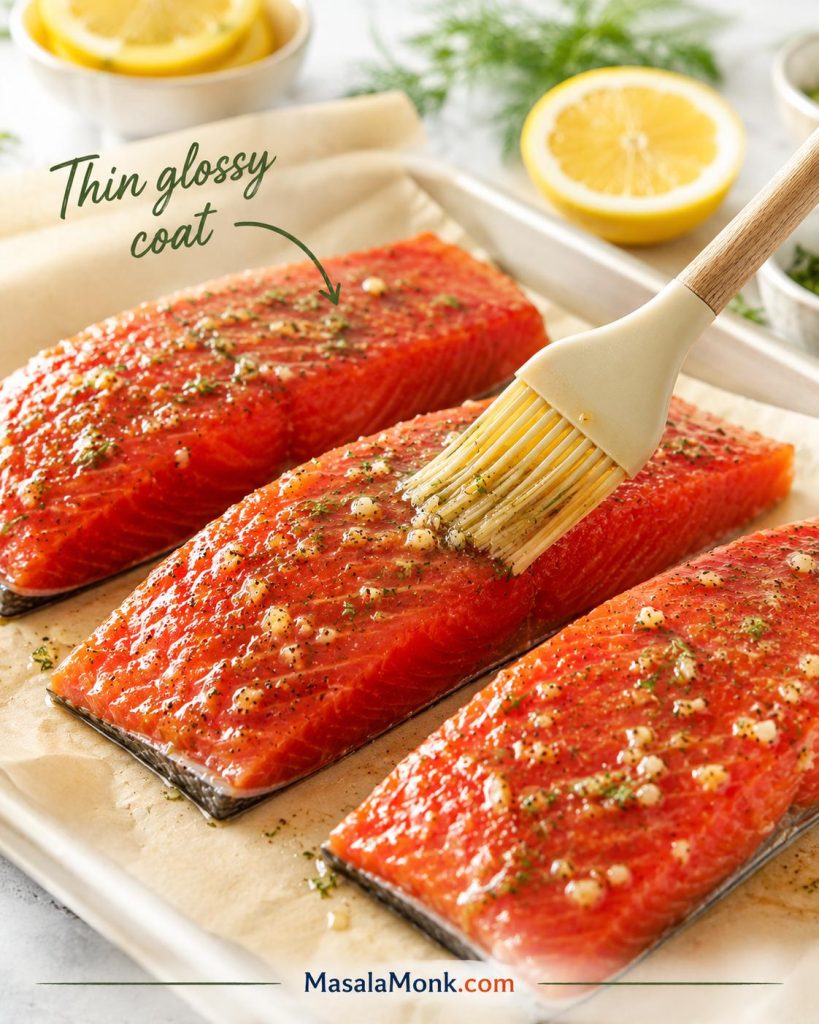
Visual cue: dry the salmon before searing: This step matters because surface moisture makes salmon steam, while a dry fillet browns faster in the skillet.
Skillet Step-by-Step
- Pat the salmon dry. Use paper towels and dry the top, sides, and bottom. This helps the salmon sear instead of steam.
- Season lightly. Add black pepper and only a small pinch of salt if needed. The soy sauce already brings salt to the glaze.
- Mix the sauce first. Whisk honey, low-sodium soy sauce, lemon juice or rice vinegar, garlic, and optional chili in a small bowl.
- Sear the salmon. Heat oil or butter in a large skillet over medium to medium-high heat. Add the salmon best-looking side down first and cook for 3–5 minutes, depending on thickness.
- Flip gently. Cook the second side for about 2 minutes. A fish spatula helps keep the fillets intact.
- Lower the heat and add the sauce. Pour the honey garlic sauce around the salmon, not directly over one spot.
- Baste as the bubbles slow. Let the sauce bubble gently for 2–4 minutes. When the bubbles get smaller and slower, spoon it over the fish until the surface is lightly coated.
- Finish smart. If the salmon is done before the sauce is thick, move the fish to a plate and reduce the sauce by itself for another minute.
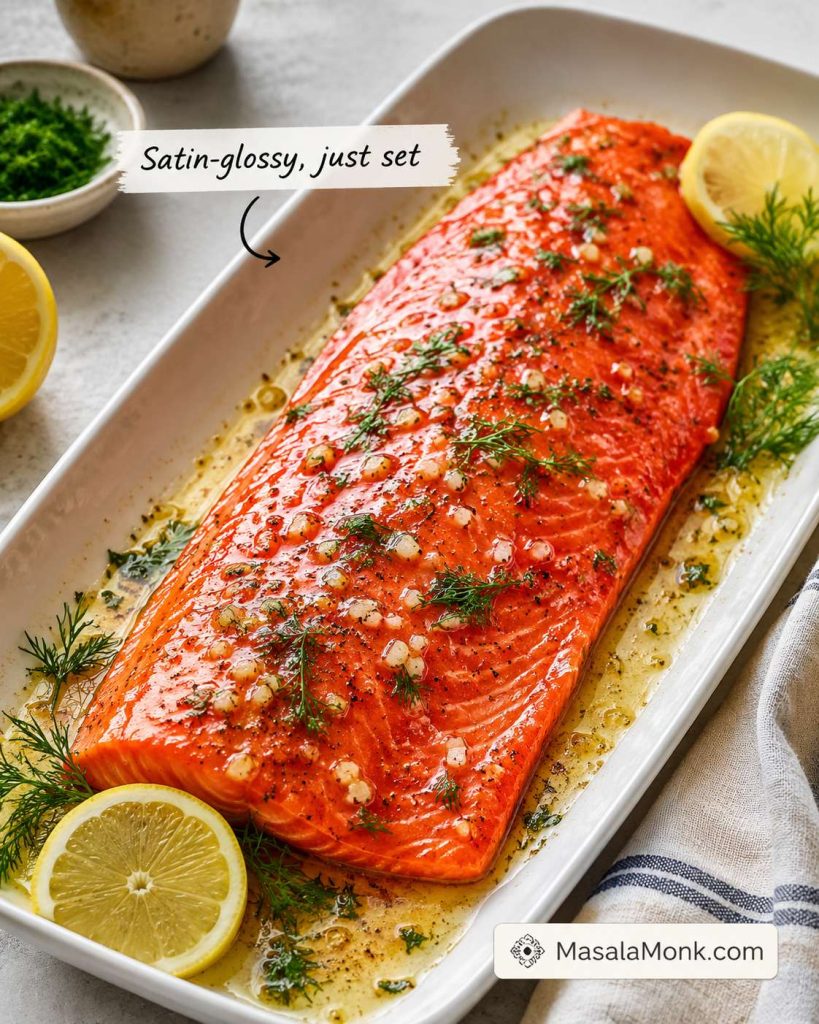
How the Glaze Should Look
The sauce is ready when it coats the back of a spoon and does not run straight off the salmon. It should look glossy, not dry or grainy. If it tightens too much, add 1–2 tbsp water and swirl the pan.
Skillet cue: add sauce around the salmon: Pouring the sauce around the fillets helps it bubble evenly and keeps one spot from getting too dark too fast.
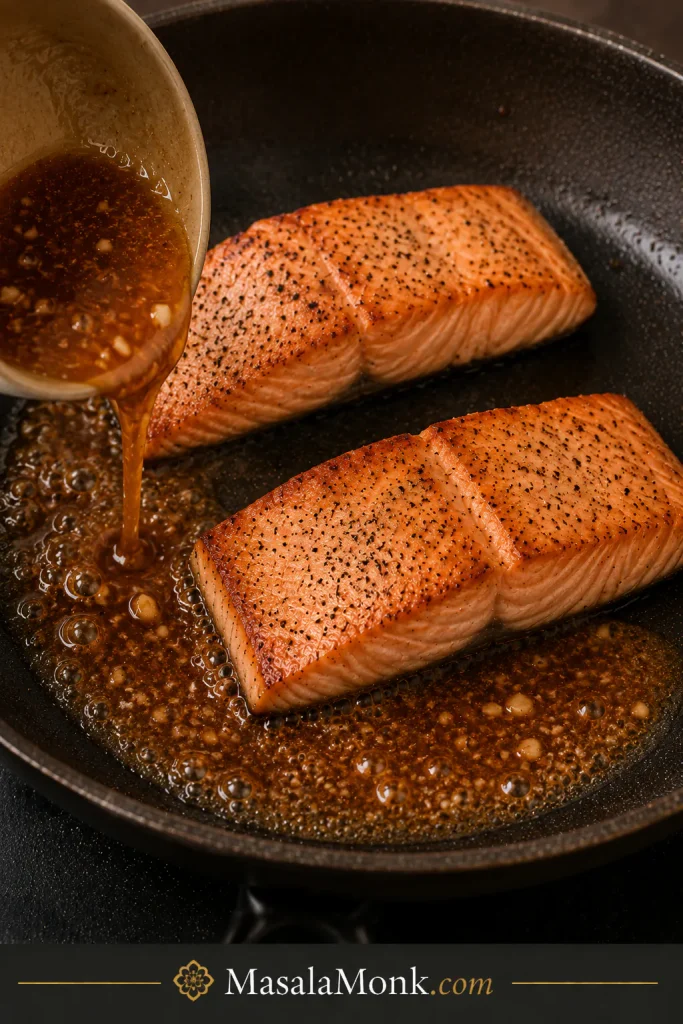
Glaze cue: watch the bubbles slow down: Smaller, slower bubbles tell you the honey garlic sauce is thickening into a glaze instead of staying thin.
If the garlic or honey starts darkening too quickly, lift the pan off the heat for a few seconds, then return it once the bubbling calms down. That small pause can save the sauce without stopping dinner.
Skillet cue: baste for the glossy finish: Basting pulls the warm glaze over the top of the salmon while the center stays moist.
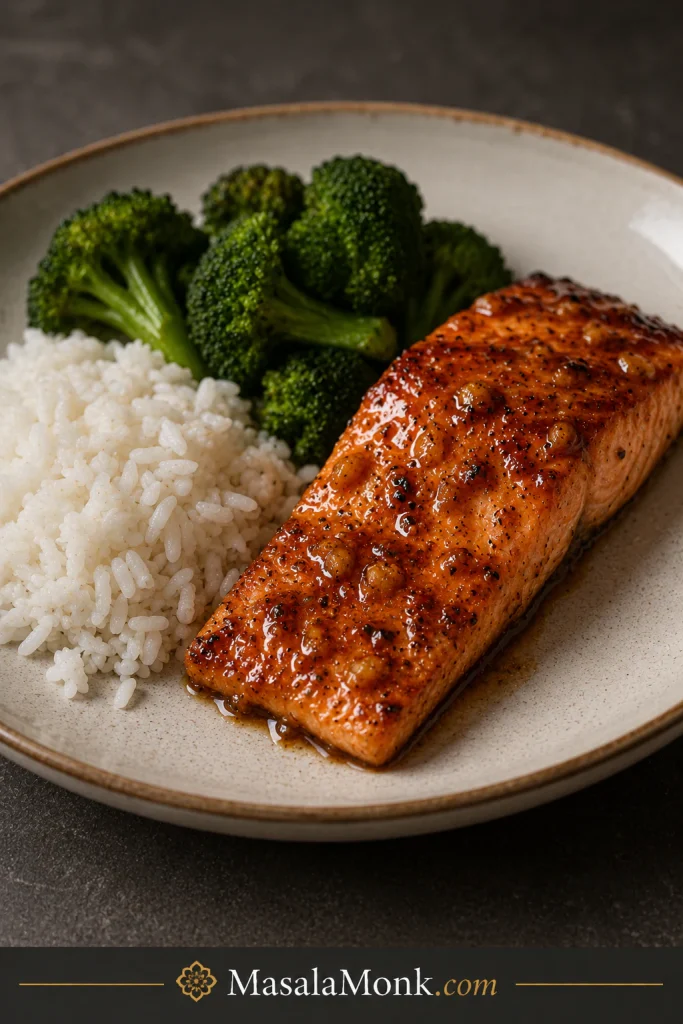
Finished skillet cue: glossy, reduced, and spoonable: At the end, the salmon should look coated and shiny, with enough pan glaze left to spoon over rice.

Back to recipe card · Fix the glaze · Check doneness
When you do not want to stand at the stove, the oven gives you a softer, easier path.
Baked Honey Garlic Salmon
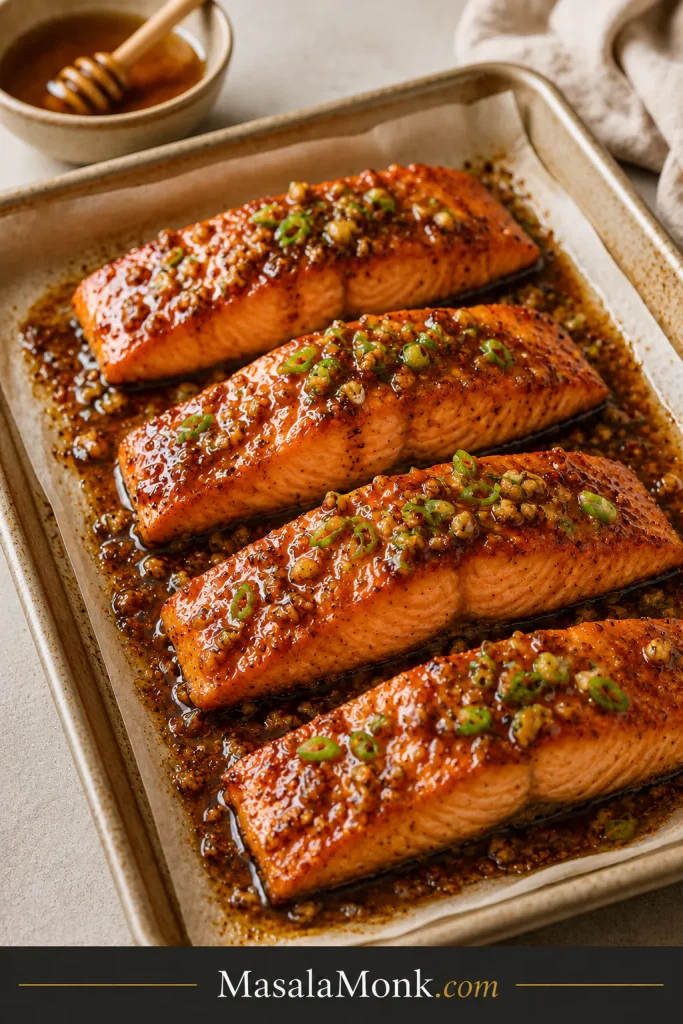
Bake it when you want dinner to feel easier. Line the tray, brush on the honey garlic mixture, bake, and finish with a little extra reduced sauce while the rice or vegetables come together.
Oven visual: easy tray salmon: Use this tray version when you want a hands-off honey garlic salmon dinner.
| Oven style | Temperature | Time | Best for |
|---|---|---|---|
| Everyday baked salmon | 400°F / 200°C | 12–15 minutes | Most weeknight fillets |
| Gentler baked salmon | 375°F / 190°C | 15–20 minutes | Thicker fillets or softer texture |
| Caramelized top | Broil after baking | 1–2 minutes | More color, only if watched closely |
| Separate sauce finish | Small saucepan | 2–4 minutes | Shiny sauce without burnt honey on the tray |
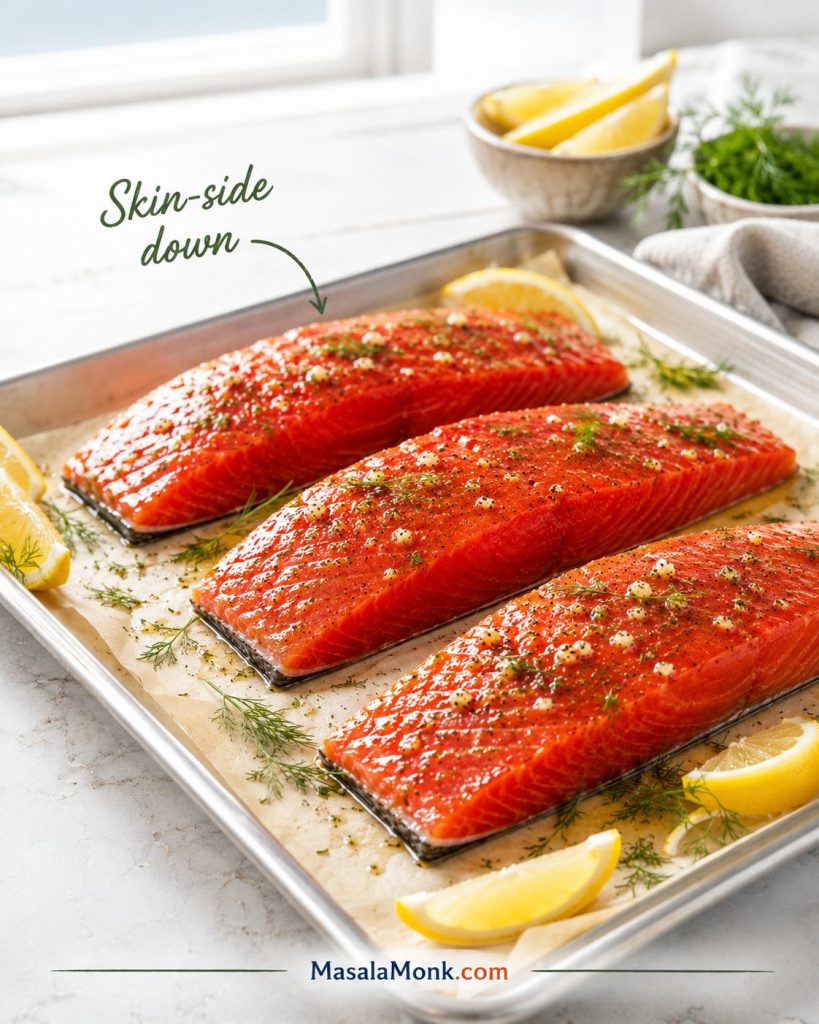
- Preheat the oven to 400°F / 200°C.
- Line a baking sheet or baking dish with parchment or foil.
- Place the salmon on the tray and brush with part of the honey garlic sauce.
- Bake for 12–15 minutes, depending on thickness.
- For better color, broil for 1–2 minutes at the end, watching closely.
- Spoon extra reduced sauce over the salmon before serving.
Oven sauce tip: For the shiniest baked salmon, reduce some sauce in a small saucepan for 2–4 minutes and spoon it over the salmon after baking. This gives you better shine without risking burnt honey on the tray.
Try the foil method · Try the air fryer method · Back to recipe card
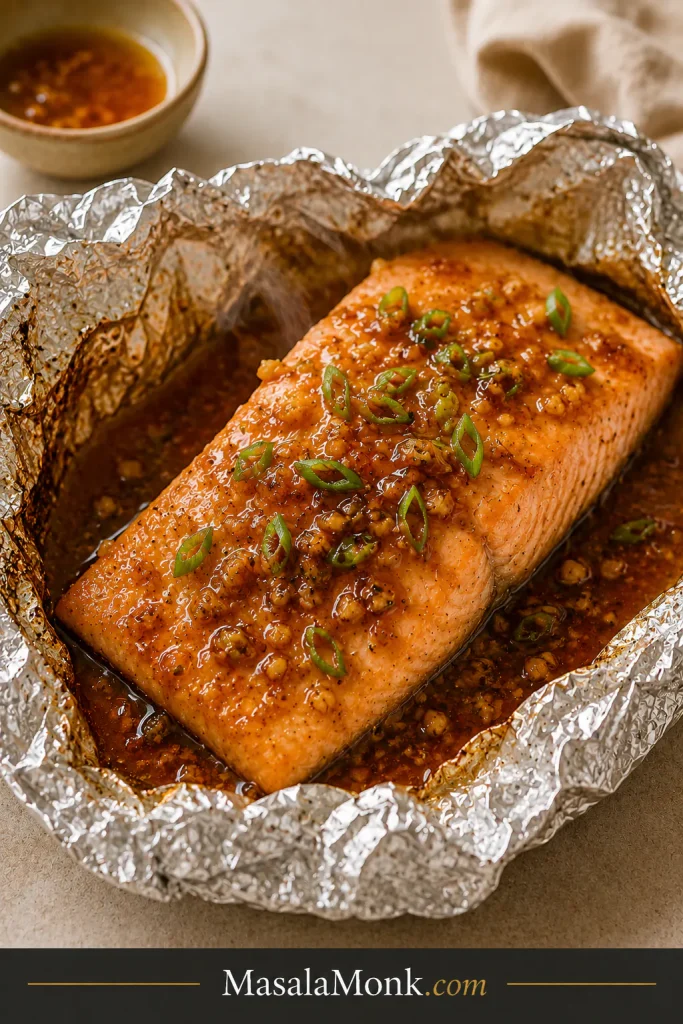
Honey Garlic Salmon in Foil
Use foil when you want tender salmon and almost no cleanup. It is the gentlest method here: less browning, more steam, and a softer piece of fish that still tastes good with a little extra pan glaze at the end.
Foil method visual: tender salmon with easy cleanup: Foil keeps sauce and steam close to the fish, which gives a softer result and a simpler cleanup.
- Preheat the oven to 400°F / 200°C.
- Place the salmon on a large sheet of foil.
- Spoon honey garlic sauce over the salmon.
- Seal the foil loosely so there is a little space above the fish.
- Bake for 12–15 minutes, depending on thickness.
- Open the foil and broil for 1–2 minutes if you want a more caramelized finish.
For the best foil result, keep some sauce separate and spoon it over the fish after baking. That gives you the easy cleanup of foil with the sweet-savory glaze people expect from honey garlic salmon.
Air Fryer Honey Garlic Salmon
Use the air fryer when you want one or two fillets fast without heating the oven. Brush the salmon lightly before cooking, then add warm reduced sauce at the end. That gives you caramelized edges without burning honey in the basket.
Air fryer method visual: fast caramelized edges: A lighter glaze before cooking helps the salmon caramelize without making the air fryer basket too messy.
- Preheat the air fryer to 390°F / 199°C.
- Pat the salmon dry and brush lightly with honey garlic sauce.
- Place the fillets in the basket with space between them.
- Air fry for 7–8 minutes, adding 1–2 minutes for thicker pieces.
- Brush or spoon extra warm sauce over the salmon before serving.
Air fryer sauce tip: Do not pour a lot of honey sauce into the basket. Brush lightly before cooking, then spoon warm reduced sauce over the salmon after cooking for the stickiest finish.
Honey Garlic Salmon Bites
For salmon bites, cut the salmon into 1-inch / 2.5 cm cubes. Air fry at 390°F / 199°C for 6–8 minutes, or use 370°F / 188°C if your air fryer runs hot. Toss the cooked bites with warm sauce after cooking so they stay sticky without burning.
Salmon bites visual: better for bowls: Smaller pieces cook quickly and give the honey garlic glaze more surface area to cling to.
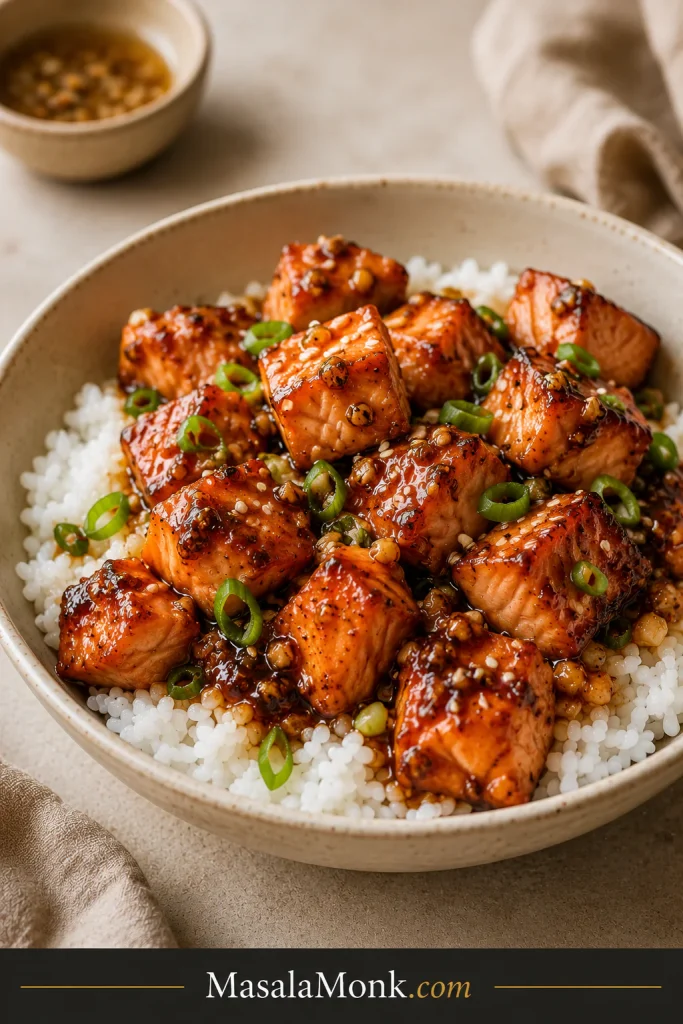
Salmon bites are especially good over rice bowls with cucumber, avocado, edamame, scallions, sesame seeds, or a drizzle of spicy mayo. If bowl-style dinners are your thing, this salmon bowl recipe has more ideas for rice, toppings, sauces, and fresh crunchy add-ons.
Back to recipe card · Build a salmon bowl · Store leftovers
The method can change, but the honey rule does not: keep the heat gentle once the sauce is involved.
How to Make the Glaze Sticky Without Burning
The biggest mistake is treating honey like oil. Oil can take high heat. Honey cannot. It is supposed to bubble and thicken, but it can go from shiny to burnt quickly if the pan is too hot.
- Pat the salmon dry. A dry surface sears faster, so the fish spends less time in the pan.
- Sear first, sauce later. Let the salmon get color before the honey enters the pan.
- Lower the heat before adding sauce. Medium heat is usually enough once honey is involved.
- Baste instead of boiling hard. Spoon the sauce over the fish while it thickens.
- Add water if the sauce tightens too fast. One or two tablespoons can loosen it and save dinner.
- Remove the salmon if the sauce needs more time. Reduce the sauce by itself instead of overcooking the fish.
Do not worry if the sauce looks loose at first. It thickens fast once the bubbles get smaller and slower. You are not chasing a hard candy coating; you want a soft glaze that leaves a trail on the spoon and lightly hugs the fish.
Glaze cue: look for a spoon trail: A clear spoon trail shows that the sauce is thick enough to coat the salmon instead of running straight off.
If the sauce starts darkening, it is not always a disaster. Move the fish to a plate, loosen the pan with a splash of water, and bring it back gently once the bubbling calms down.
Check salmon doneness · Fix sauce problems · Back to recipe card
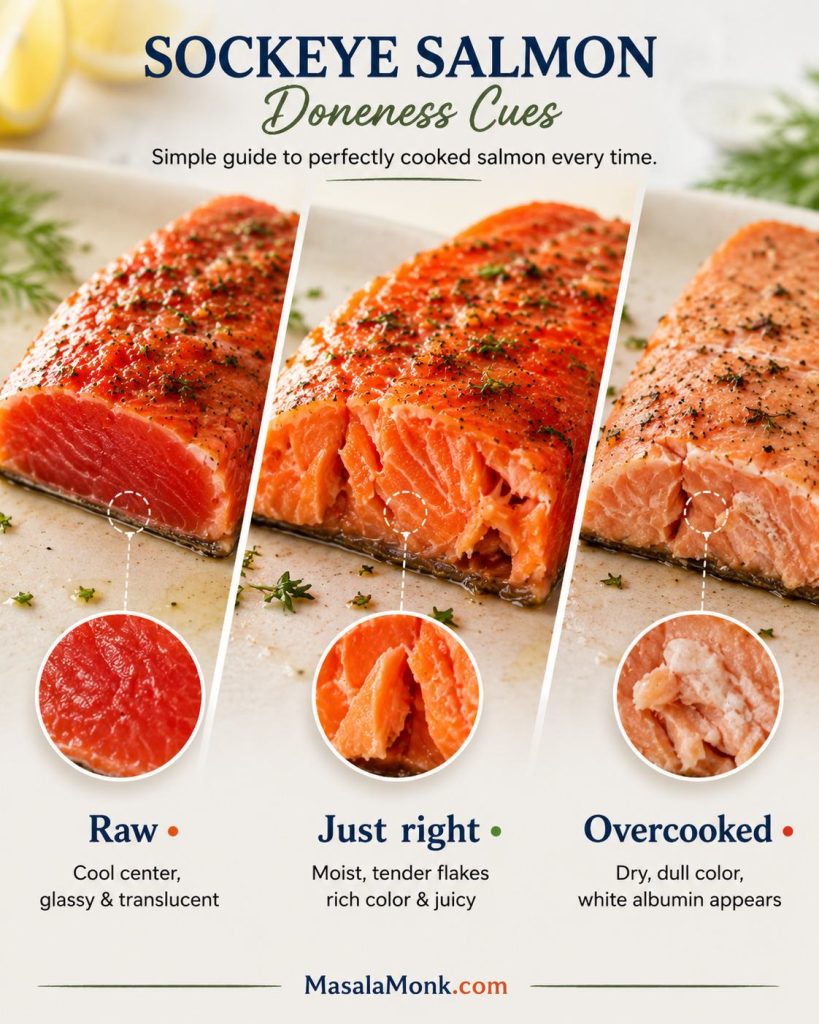
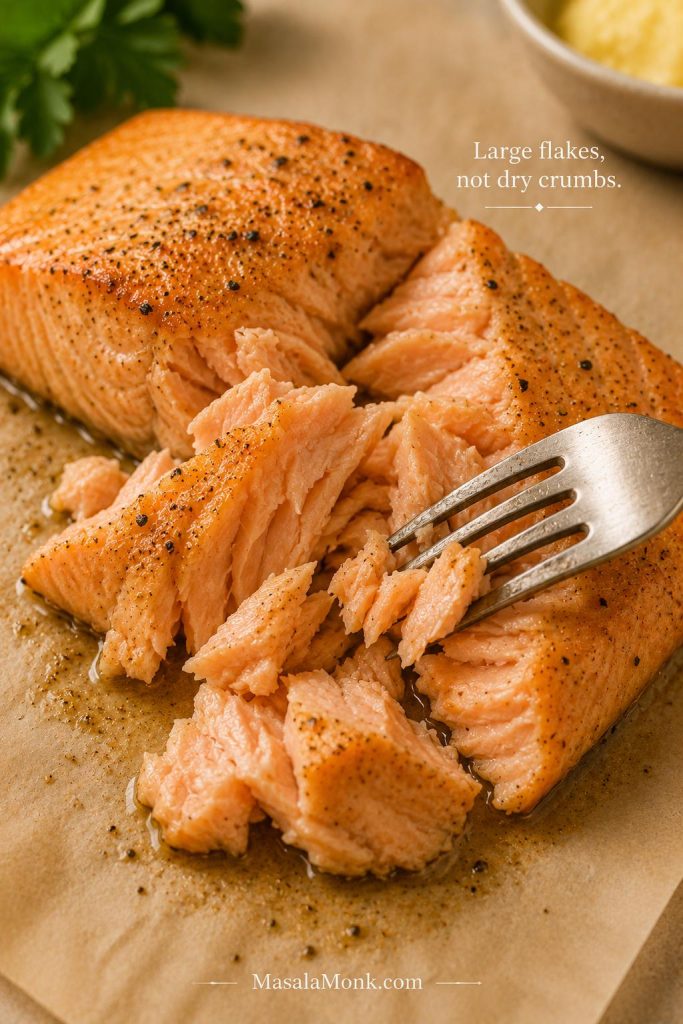
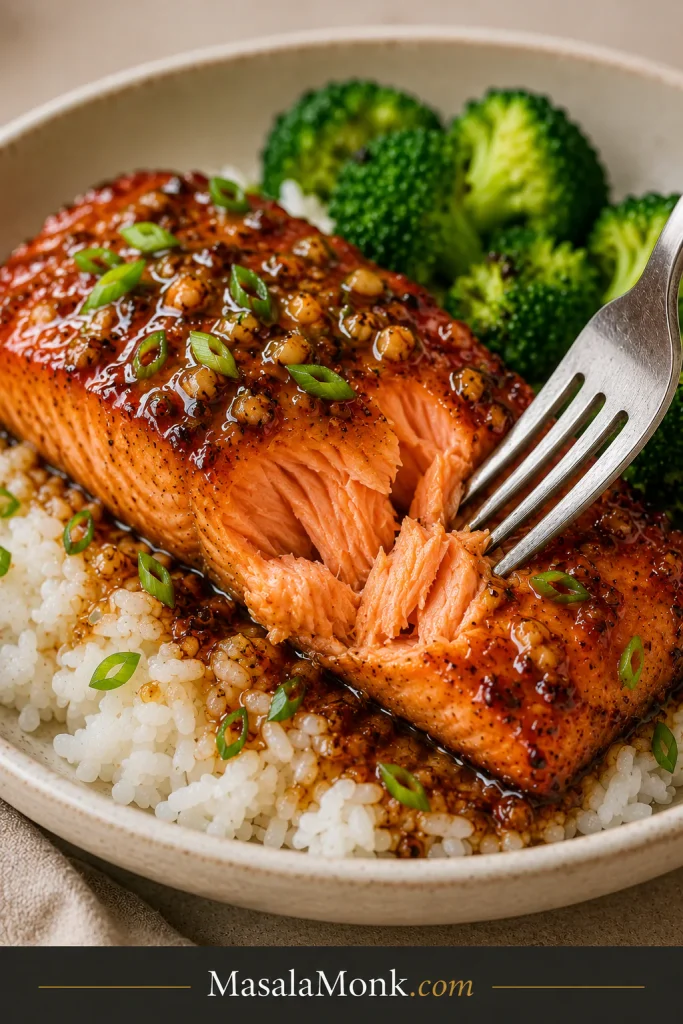
How to Tell When Salmon Is Done
The sauce gets the attention, but doneness is what makes the salmon worth eating. The fish should flake easily and still look moist in the center. If it becomes firm all the way through, it is usually overcooked.
Pulling salmon at the right moment matters more than forcing a perfect glaze. You can always reduce sauce for another minute, but you cannot undo dry fish.
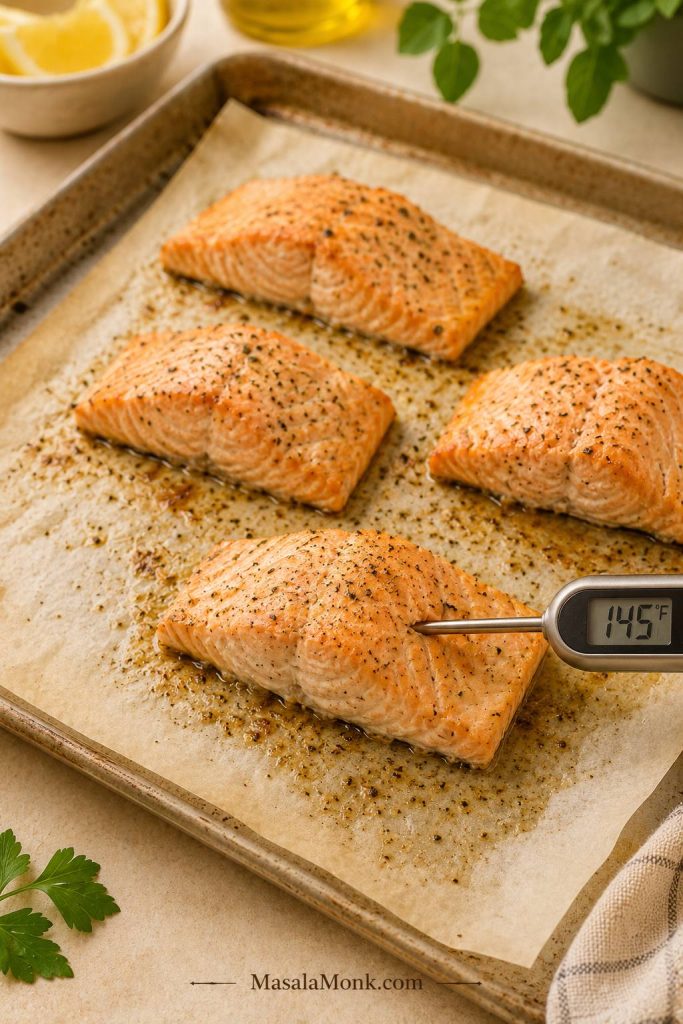
Doneness visual: flake the thickest part: This cue helps readers check that the salmon separates easily while still looking moist inside.
| Doneness | Internal temperature | Texture |
|---|---|---|
| Moist / medium-rare | 120–130°F / 49–54°C | Soft, tender, slightly translucent center |
| Medium | 130–135°F / 54–57°C | Flaky but still juicy |
| More done | 135–145°F / 57–63°C | Fully opaque and firmer |
For fully cooked salmon, 145°F / 63°C is the standard safety endpoint. The FDA also notes that fish should look opaque and separate easily with a fork when a thermometer is not available. You can read its seafood safety guidance here: FDA seafood safety guidance.
Many people prefer to pull salmon earlier for a softer, restaurant-style texture, then let carryover heat finish the center. Choose the doneness level you are comfortable with, especially if cooking for children, older adults, or anyone who prefers fully cooked fish.
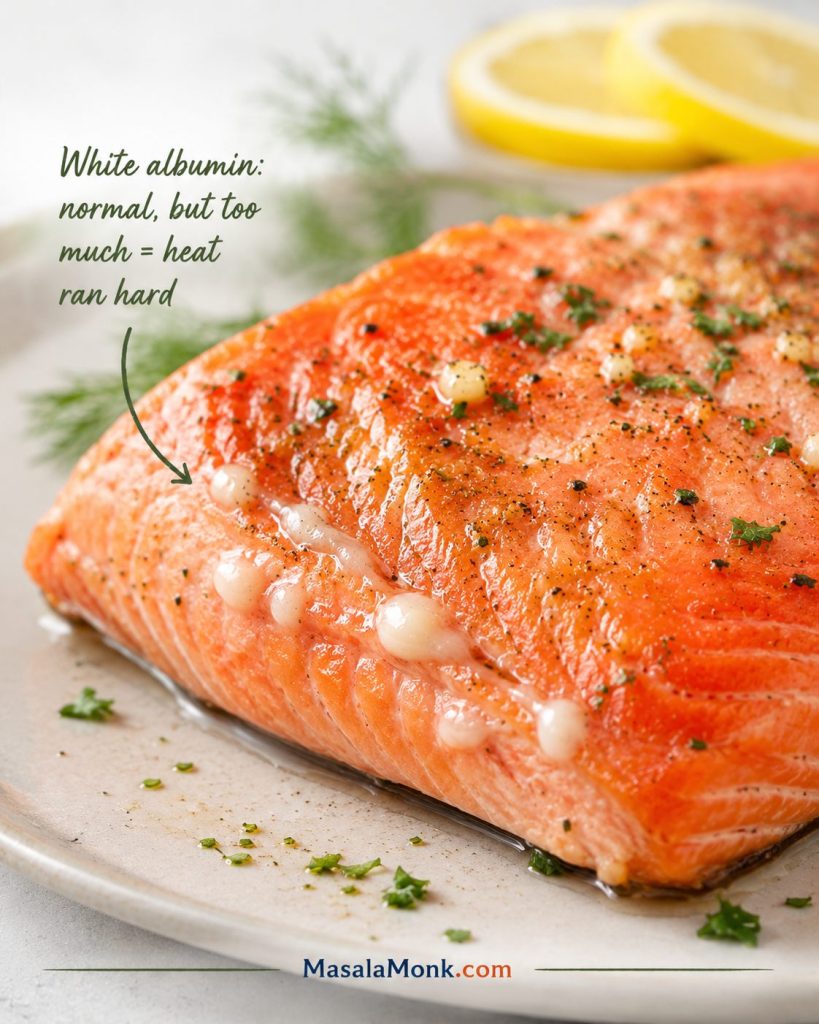
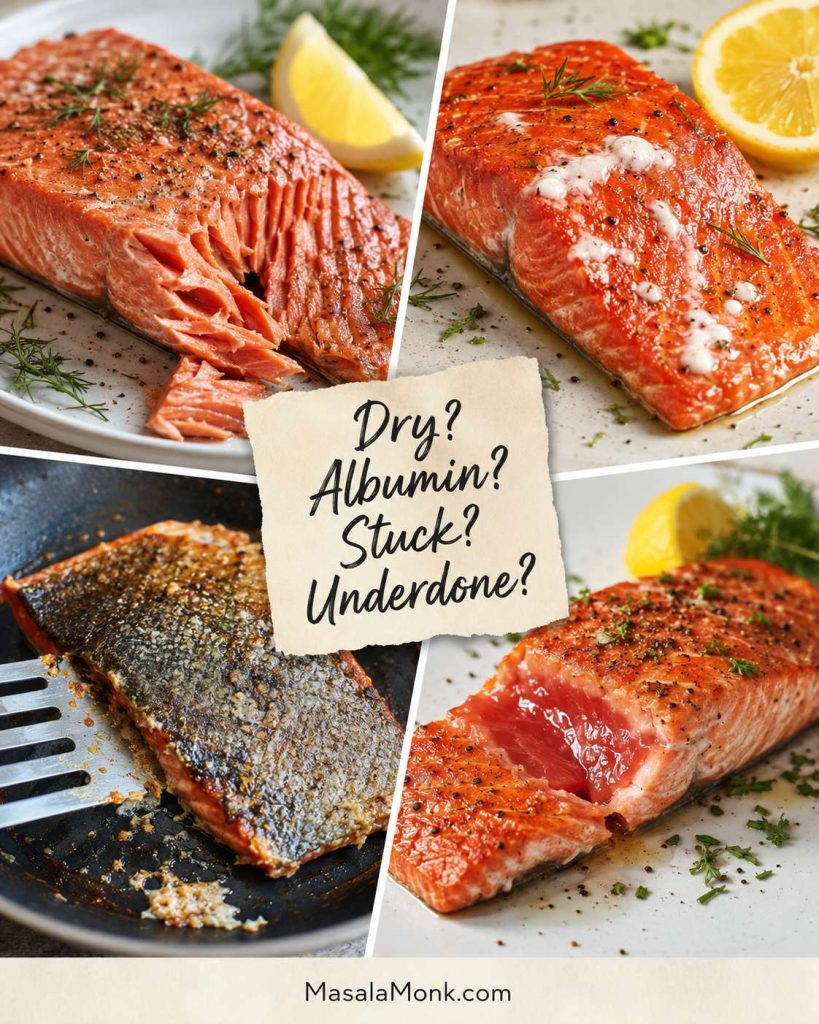
If you do not have a thermometer, press the thickest part gently with a fork. The salmon should separate into flakes but still look glossy inside. A little white albumin on the surface is normal, but a lot of it usually means the fish is cooking too hot or too long.
See serving ideas · Store leftovers · Back to recipe card
Sauce vs Glaze vs Marinade
Honey garlic sauce, glaze, and marinade use similar ingredients, but they are not exactly the same thing. Knowing the difference helps you avoid watery sauce, over-marinated salmon, and unsafe reuse of marinade.
| Term | What it means | How to use it here |
|---|---|---|
| Sauce | Loose and spoonable | Mix before cooking and pour into the pan |
| Glaze | Reduced until sticky and shiny | Baste over the salmon as it thickens |
| Marinade | Used before cooking to flavor the fish | Use briefly, then cook fresh or reserved sauce for serving |
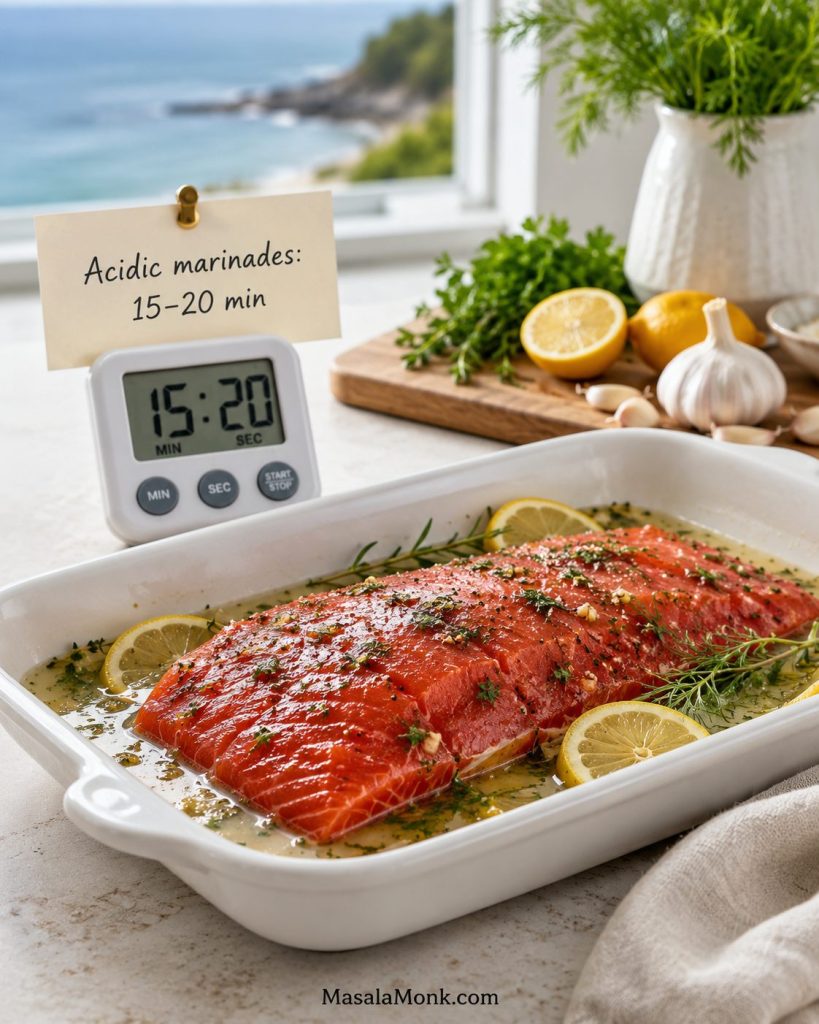
You can use honey garlic sauce as a marinade, but keep it short. Salmon only needs 15–30 minutes. If the sauce contains lemon juice or vinegar, avoid marinating for hours because acid can soften the texture of the fish.
Marinate salmon in the refrigerator, not on the counter. The cleanest method is to divide the sauce before it touches raw salmon: use one part as a short marinade and keep the rest clean for glazing. If a marinade has touched raw fish, boil it thoroughly before using it as a sauce.
Honey Garlic Salmon Variations
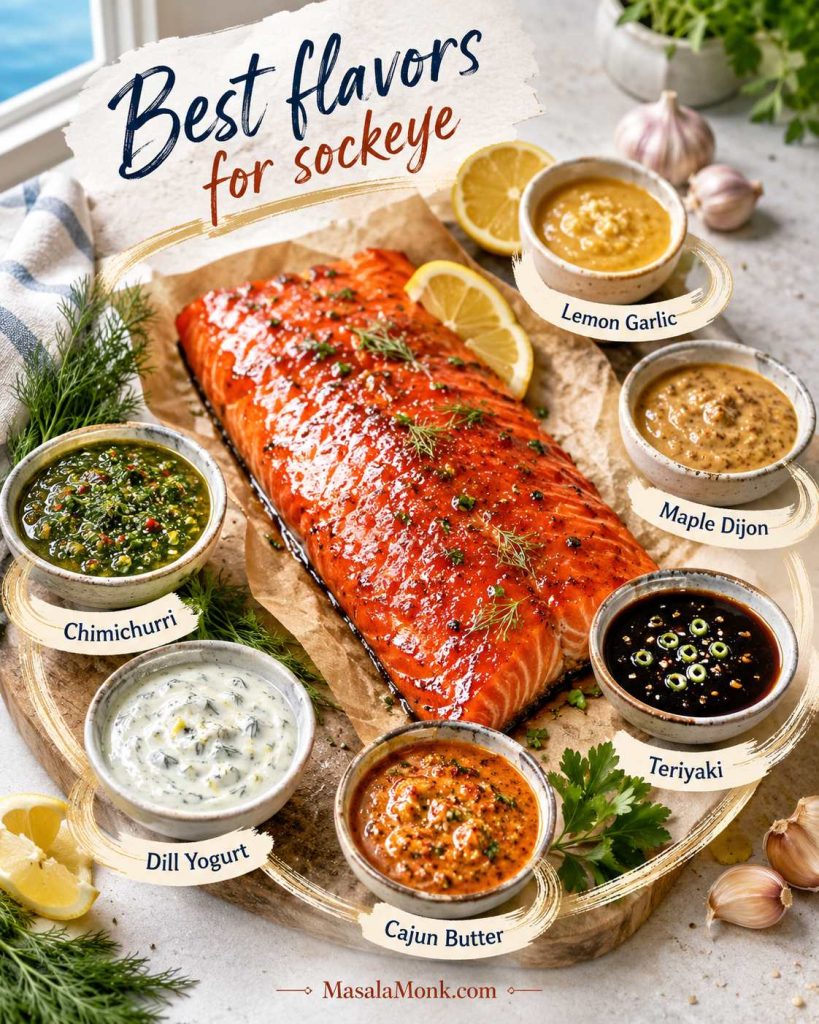
Once the base sauce works, the variations are low-risk. Keep the same honey-soy-garlic backbone, then change the mood with butter, ginger, chili, lemon, or Dijon.
Choose the butter version when you want it richer, the ginger version when you want it brighter, and the hot honey version when the plate needs a little spark.
| Version | What to change | Best method |
|---|---|---|
| Classic honey garlic salmon | Use the main sauce exactly as written | Skillet |
| Honey garlic butter salmon | Use butter instead of oil, or add 2 tbsp / 28 g butter to the pan | Skillet |
| Honey soy ginger salmon | Add 1 tsp grated ginger and 1 tsp sesame oil | Skillet or air fryer |
| Hot honey garlic salmon | Add sriracha, chili flakes, chili crisp, or hot honey | Skillet or baked |
| Lemon honey garlic salmon | Use extra lemon juice and slightly less soy sauce | Baked |
| Gluten-free honey garlic salmon | Use gluten-free tamari | Skillet or baked |
| Soy-free honey garlic salmon | Use coconut aminos instead of soy sauce | Skillet |
| Honey mustard garlic salmon | Add Dijon mustard to the sauce | Baked or foil |
For the most restaurant-style version, make honey garlic butter salmon. Sear the fish, add butter and garlic, then pour in the honey-soy-lemon mixture and baste until glossy. For a sharper version, add Dijon mustard. Add sriracha or chili flakes and finish with lime when you want heat.
Keep the plate simple. This glaze already brings sweetness, salt, garlic, and brightness, so the sides only need to catch it and balance it.
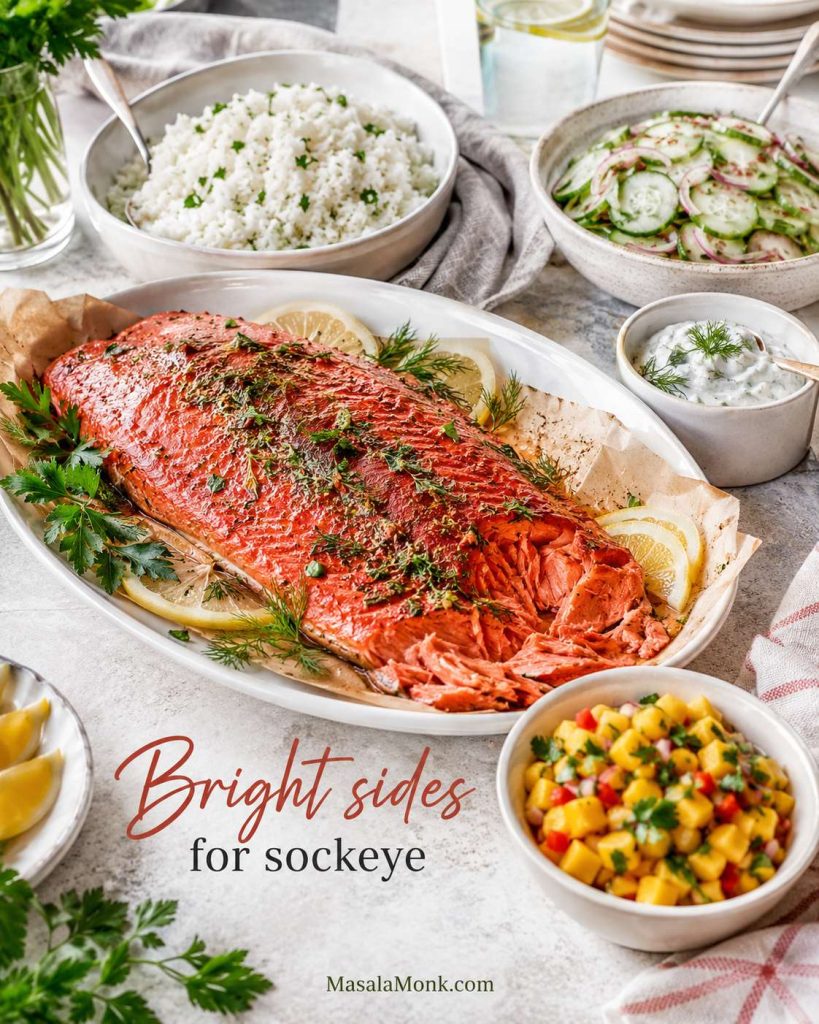
What to Serve With Honey Garlic Salmon
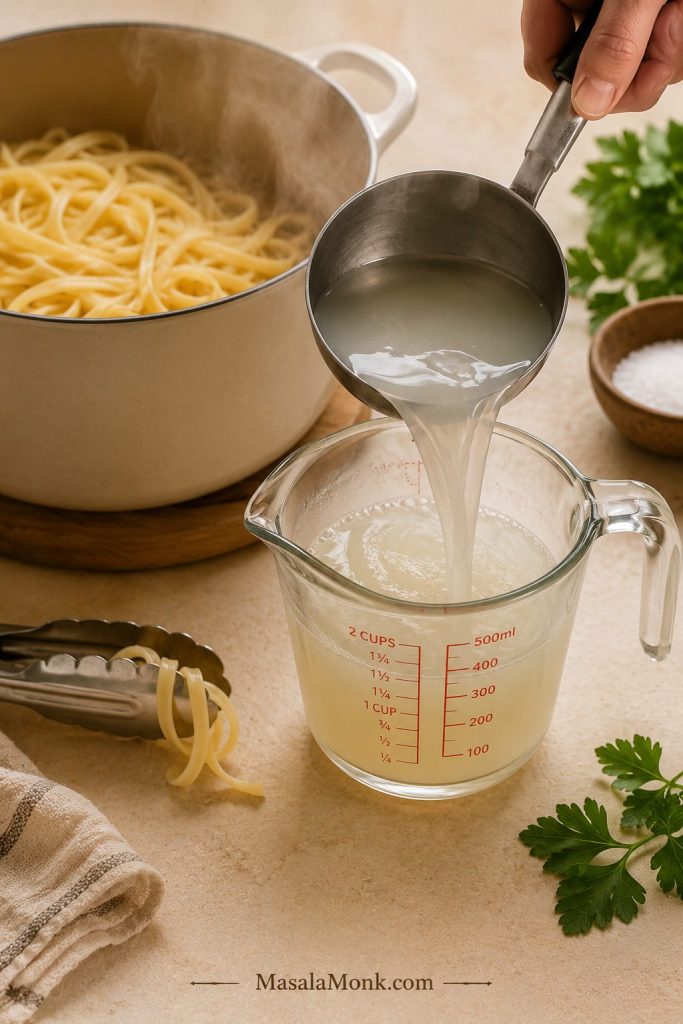
The easiest plate is rice, salmon, and something green. The rice catches the sauce, the vegetable keeps the sweetness in check, and the salmon stays the star without needing much else. If you want the rice to come out fluffy instead of sticky or wet, this guide on how to cook rice covers stovetop, rice cooker, and Instant Pot timing.
Think of the plate in three parts: something to catch the sauce, something green or crisp, and something fresh to keep the sweetness balanced.
Serving visual: build a balanced plate: Rice, greens, cucumber salad, noodles, and bowl toppings all balance the sweet-savory glaze.
Best Sides for the Glaze
- Simple rice: jasmine rice, basmati rice, brown rice, coconut rice, or fried rice.
- Noodles: sesame noodles, garlic noodles, stir-fried noodles, or these creamy peanut noodles when you want the meal to feel fuller.
- Vegetables: broccoli, asparagus, green beans, bok choy, snap peas, or roasted carrots.
- Fresh sides: avocado, shredded cabbage, scallions, pickled onions, or a crisp cucumber salad to cut through the sweet-savory sauce.
- Bowls: rice, salmon, cucumber, edamame, avocado, sesame seeds, and extra sauce.
For a brighter plate, add something fresh and fruity on the side. A spoonful of mango salsa works especially well with glazed fish because it brings acidity, freshness, and juicy contrast.
Lowest-Effort Plate
On the lowest-effort nights, rice and frozen broccoli are enough because the glaze carries the plate. The extra sauce is part of the meal, not just decoration, so let it run into the rice, noodles, or vegetables.
Weeknight plate visual: rice and broccoli are enough: This simple plate shows that the glaze can carry dinner even when the sides stay minimal.
Back to recipe card · Storage and reheating · Read FAQs
Storage and Reheating
Serve the first round hot if you can. That is when the sauce looks best and the fish flakes most softly. They will not have quite the same shine, but leftovers still have plenty of good uses.
Leftovers taste best when you treat them like a new meal instead of trying to recreate the first plate. Flake the salmon into rice bowls, noodles, wraps, or a quick lunch salad.
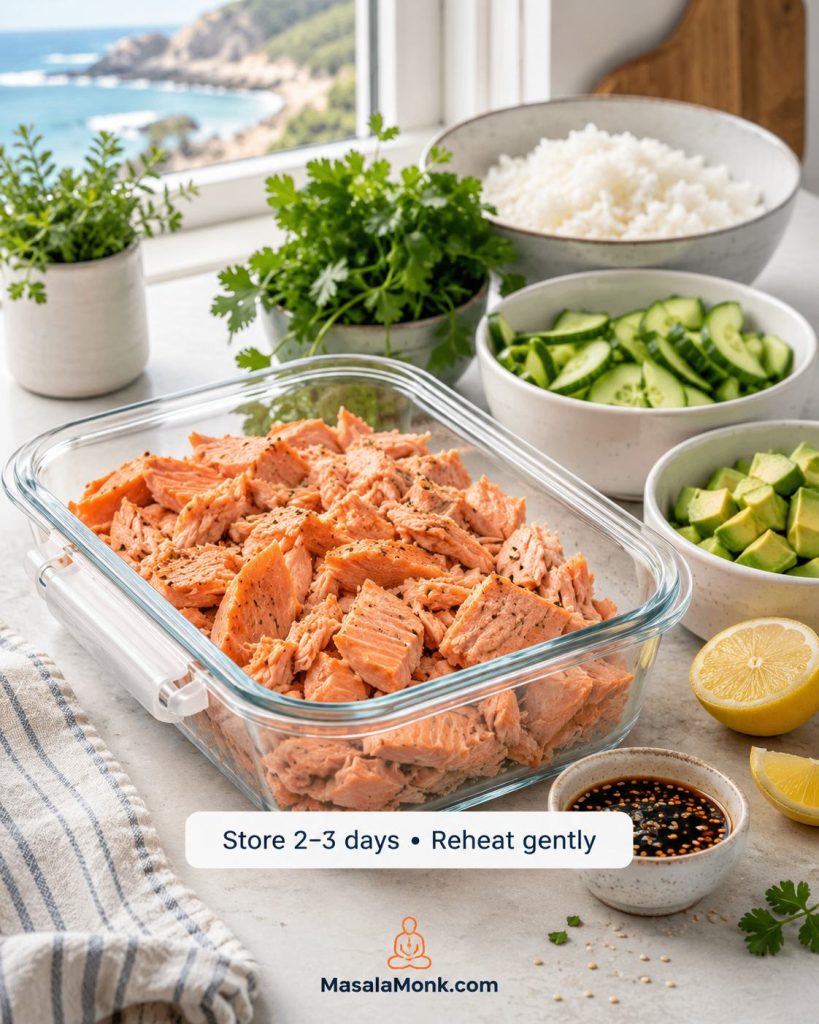
- Fridge: Store cooled salmon in an airtight container for up to 3 days.
- Freezer: You can freeze cooked salmon, but the texture is better fresh. Freeze only if needed.
- Skillet reheating: Reheat gently in a covered skillet with a splash of water.
- Oven reheating: Warm at a low temperature until just heated through.
- Microwave reheating: Use short bursts and avoid overheating, or the salmon can turn dry.
For general leftover safety, USDA guidance recommends using refrigerated leftovers within 3 to 4 days: USDA leftovers and food safety.
If the sauce thickens in the fridge, add a teaspoon or two of water when reheating. That loosens it and helps it coat the salmon again. Leftover flakes are especially good tucked into a rice bowl with cucumber, scallions, sesame seeds, and a little extra sauce.
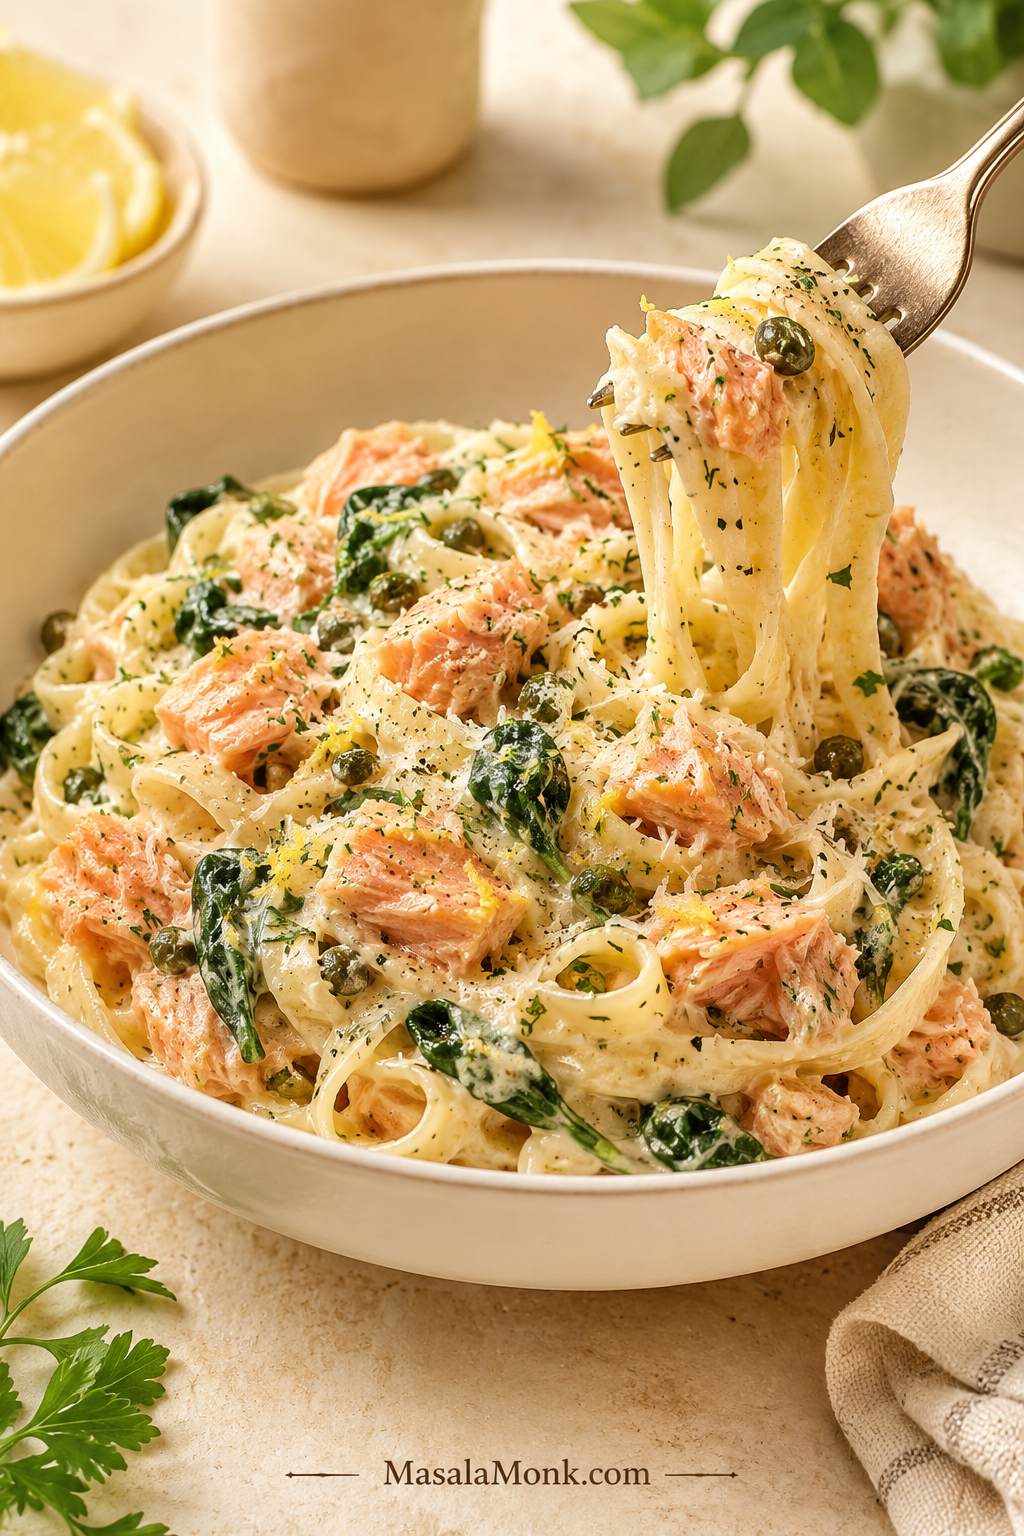
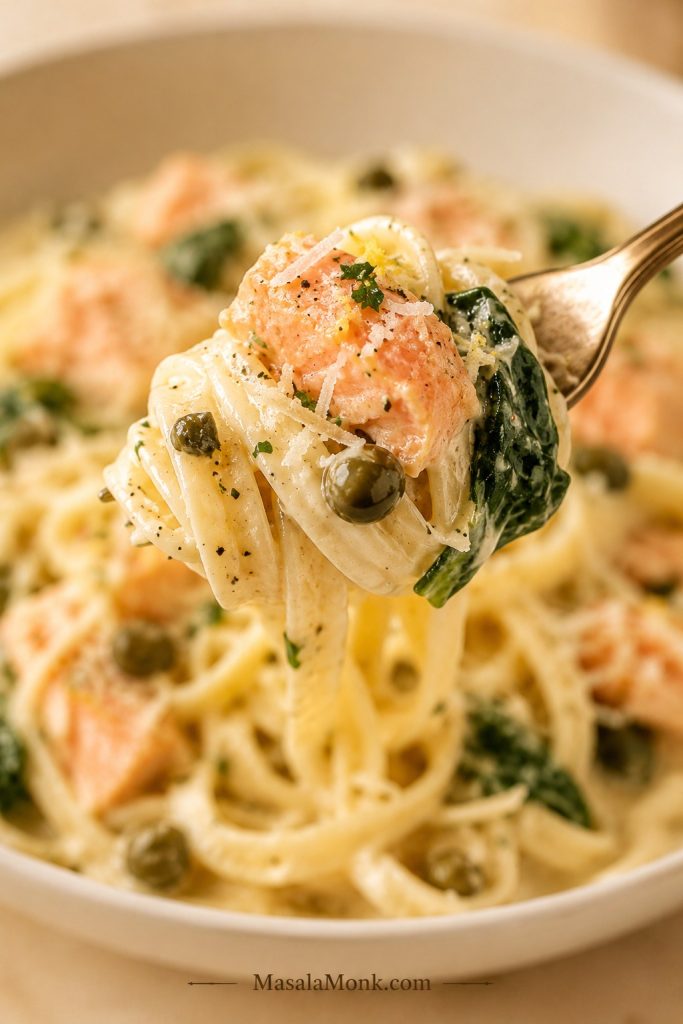
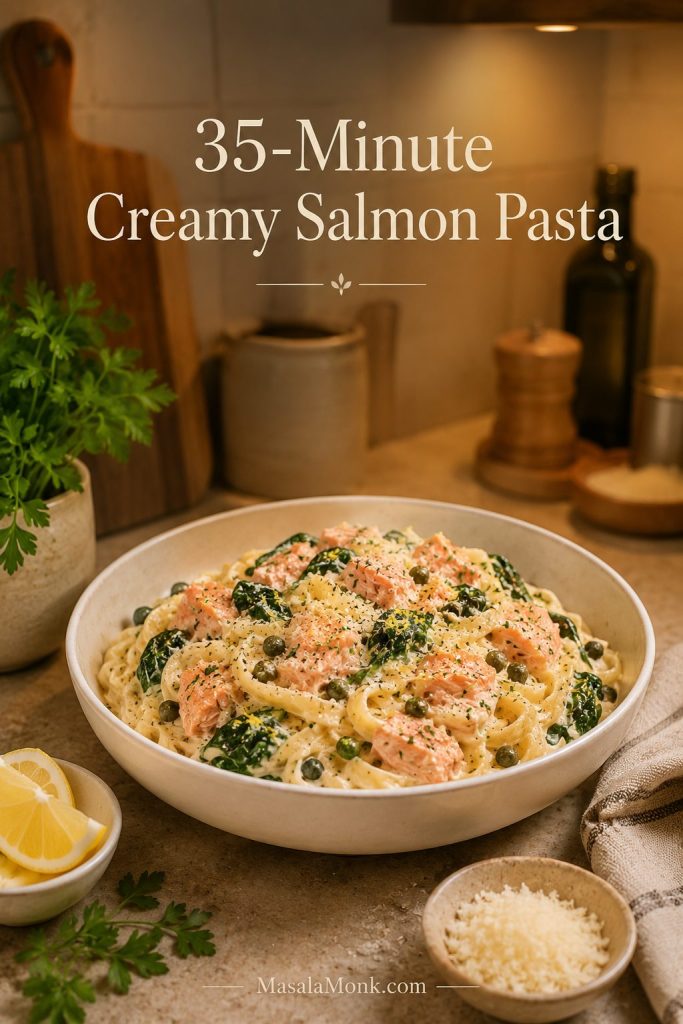
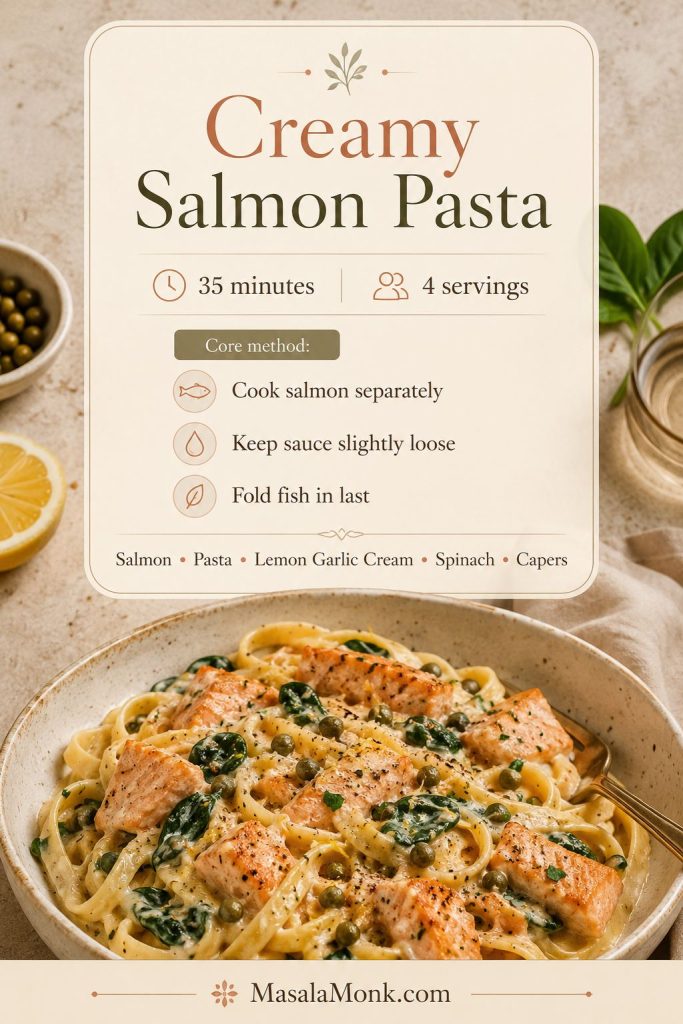
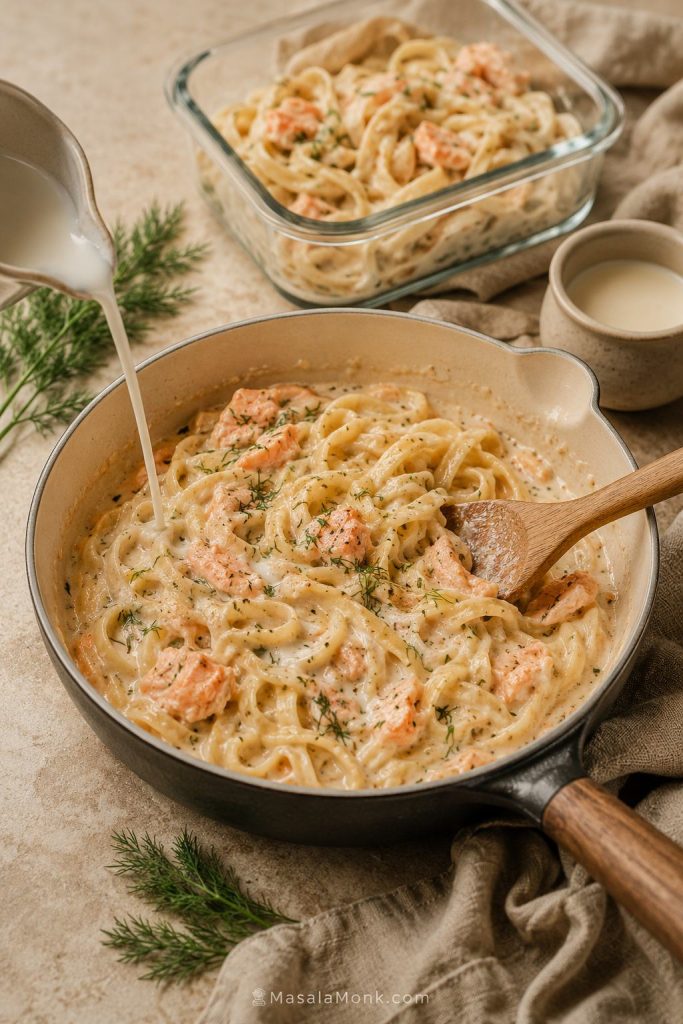
With a larger piece of leftover salmon, flake it gently and use it in a softer dinner the next day. This creamy salmon pasta is the right direction when you want lemon, garlic, pasta, and a richer sauce instead of another sticky glaze.
Troubleshooting Honey Garlic Salmon
When something goes wrong, it is usually not the recipe falling apart. Most honey garlic salmon problems look dramatic in the pan, but they usually come down to heat, moisture, or timing.
A watery sauce needs more reduction. Burnt glaze usually needed lower heat. Dry salmon simply stayed in the pan too long. Most mistakes are fixable if you catch them early, and slightly overcooked salmon can still be saved with extra sauce over rice.
Troubleshooting visual: too hot vs gentle heat: This comparison helps readers see why honey garlic glaze needs controlled heat to stay amber and spoonable.
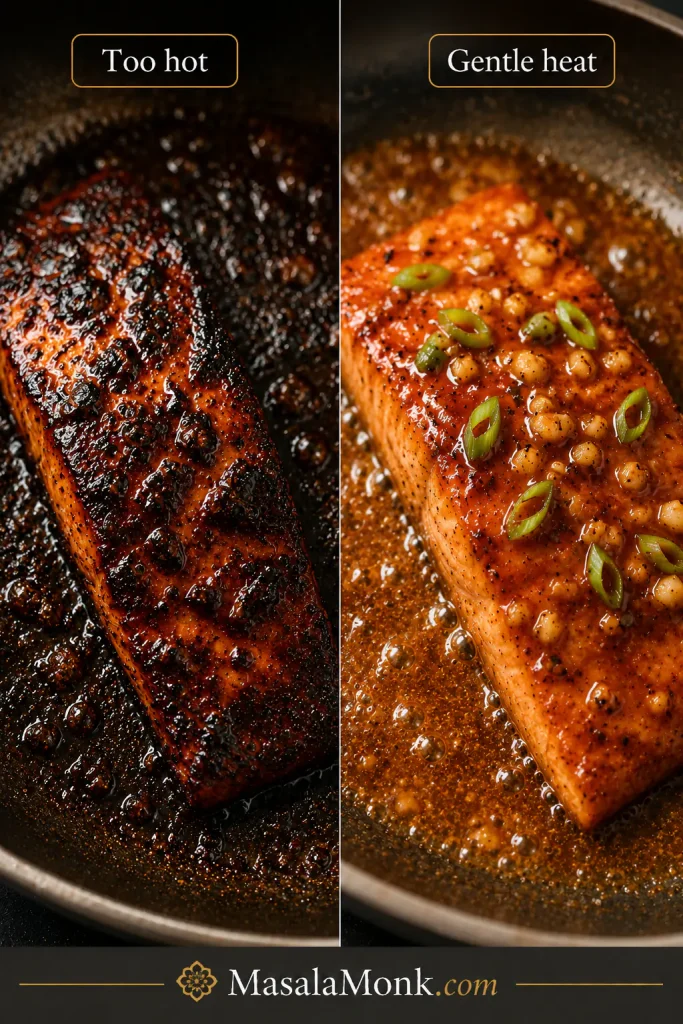
Why did my honey garlic glaze burn?
The heat was probably too high, or the sauce went into the pan too early. Sear the salmon first, lower the heat, then add the honey garlic sauce and let it bubble gently.
Why is my sauce watery?
Moisture from the fish may have loosened the sauce, or the sauce may not have reduced long enough. Remove the fillets from the pan and simmer the sauce by itself for a minute or two.
Why is my salmon dry?
It cooked too long or the heat was too high. Pull salmon from the pan while it still looks moist inside. Carryover heat will continue cooking it for a short time.
Why does my garlic taste bitter?
The garlic burned before the sauce had a chance to cool the pan down. Add garlic briefly, or mix it into the sauce and cook it gently with the glaze.
Can I use frozen salmon?
Yes. Thaw it fully, drain off extra liquid, and pat it very dry before cooking. Frozen salmon that is still wet will steam instead of sear.
Can I make this without soy sauce?
Yes. Coconut aminos are the easiest soy-free version. Choose gluten-free tamari only if you need a gluten-free option and soy is still okay for you.
Glaze tips · Doneness guide · Back to recipe card
Those are the big pan problems. Here are the quick questions people usually ask before they start.
FAQs
Is honey garlic salmon better baked or pan-seared?
Pan-seared is best if you want the stickiest glaze and the most control over the sauce. Baked salmon is easier and more hands-off, especially when cooking several fillets at once. Both work well.
What temperature keeps salmon moist?
For fully cooked salmon, use 145°F / 63°C. Many cooks pull salmon around 125–135°F / 52–57°C for a softer texture, then let carryover heat finish the center. Choose the doneness level you are comfortable with, especially if cooking for children, older adults, or anyone who prefers fully cooked fish.
How long does honey garlic salmon take in the air fryer?
Air fry at 390°F / 199°C for 7–8 minutes for standard fillets. Keep the first layer of sauce light, because honey can darken quickly in the air fryer, then spoon on more warm sauce after cooking.
Should I marinate salmon in honey garlic sauce?
You can, but keep the marinating time short. Salmon only needs 15–30 minutes. If the sauce has lemon juice or vinegar, do not marinate too long or the texture can become soft. Always marinate in the refrigerator.
Why is my honey garlic sauce not thickening?
It may need another minute or two of simmering, or the salmon may have released moisture into the pan. If the fish is already cooked, remove it and reduce the sauce by itself so the salmon does not overcook.
Should I use skin-on or skinless salmon?
Both work. Skin-on salmon is a little more forgiving in a skillet because the skin protects the bottom of the fish. Skinless salmon is easier to coat on all sides and works well for baked or air fryer versions.
What can I use instead of soy sauce?
Use coconut aminos for the easiest soy-free swap. If you only need the recipe to be gluten-free, use gluten-free tamari. Tamari is usually soy-based, so it is not the same as soy-free.
What is the white stuff on cooked salmon?
The white stuff is albumin, a protein that comes to the surface as salmon cooks. A little is normal. Heavy albumin usually means the fish cooked too hot or too long.
Can I use maple syrup instead of honey?
Yes, but the sauce will be thinner and less sticky. Honey gives a thicker glaze. Maple syrup still tastes good, especially with soy sauce, garlic, and a little lemon, but it will not cling quite the same way.
What sides go best with honey garlic salmon?
Rice is the easiest choice because it catches the sauce. Add a green vegetable for balance, cucumber salad for crunch, or noodles if you want a fuller meal. Keep the sides simple so the sweet-savory sauce stays the main flavor.
Final Thought
Honey garlic salmon feels fancy because the glaze does the showing off. Dry the fish, sear it well, lower the heat, and let the honey, garlic, soy sauce, and lemon do the rest. Add rice and something green, spoon the pan sauce over the plate, and dinner feels finished without asking much from you.