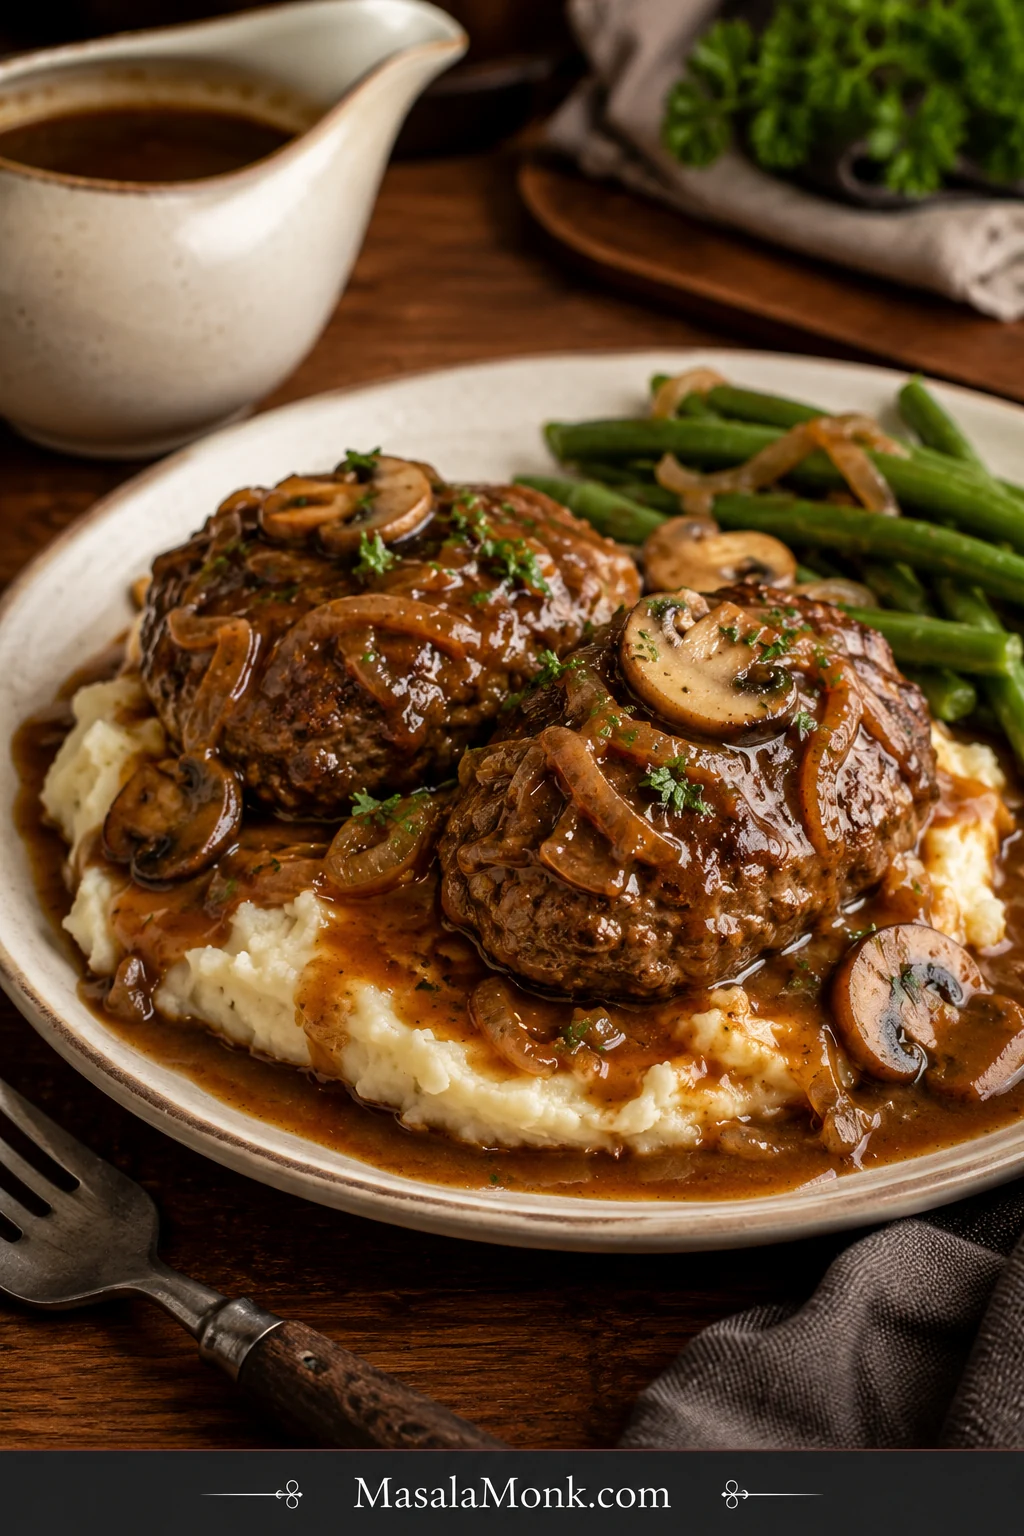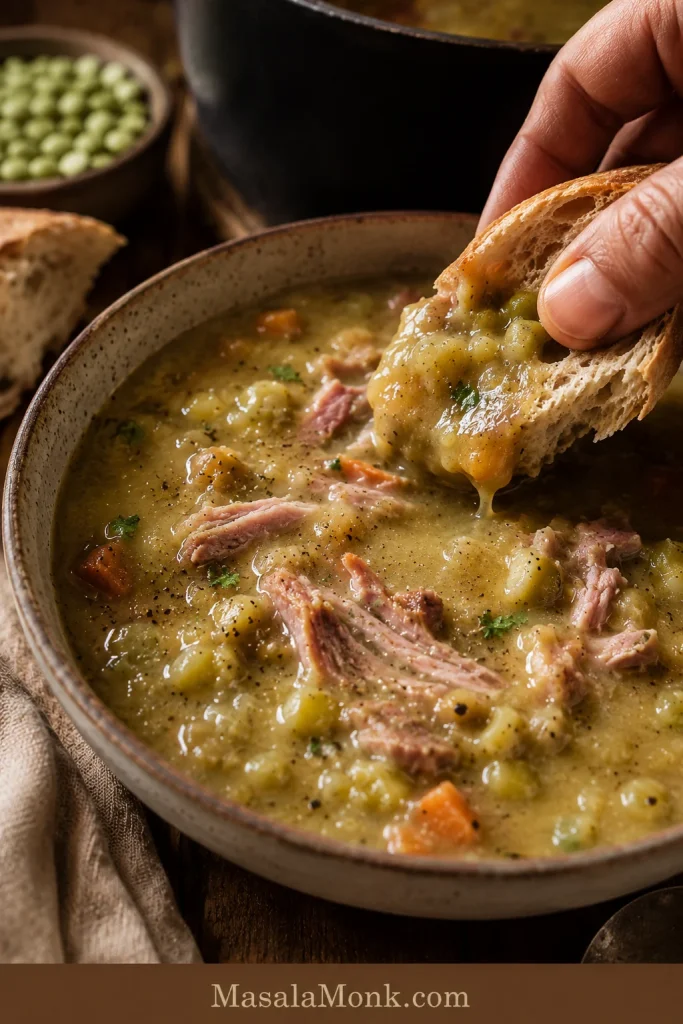
A good smoked haddock chowder should feel like a full meal in a bowl: soft potatoes, tender flakes of fish, and a creamy broth that carries the smoke without turning salty or heavy. This version is smoke-kissed enough to feel special, rounded enough to be comforting, and sturdy enough to serve with nothing more than bread on the side.
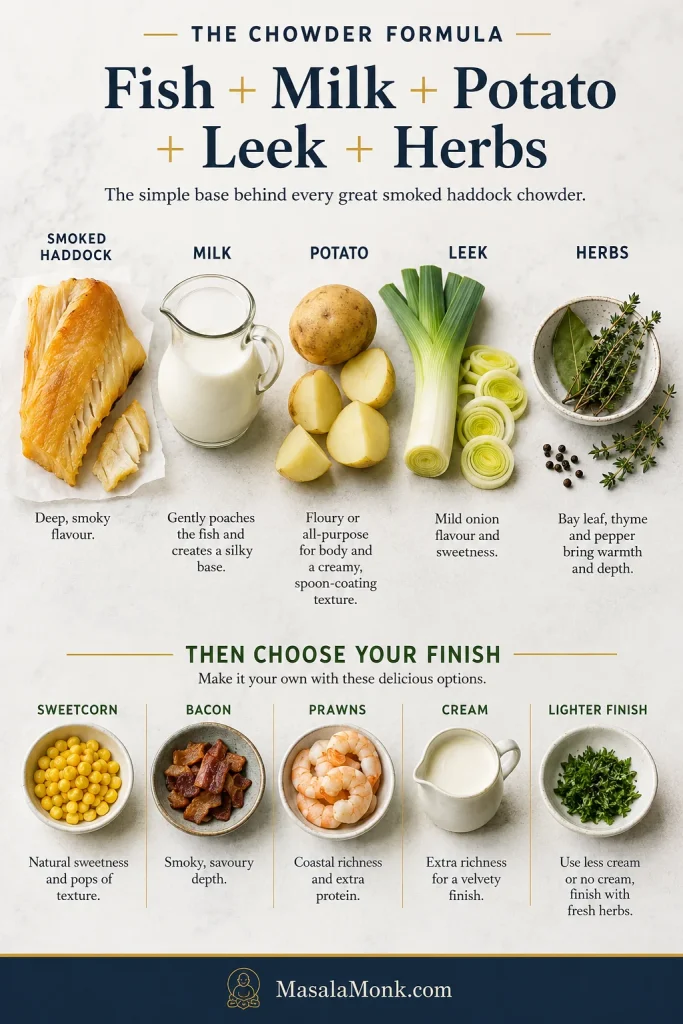
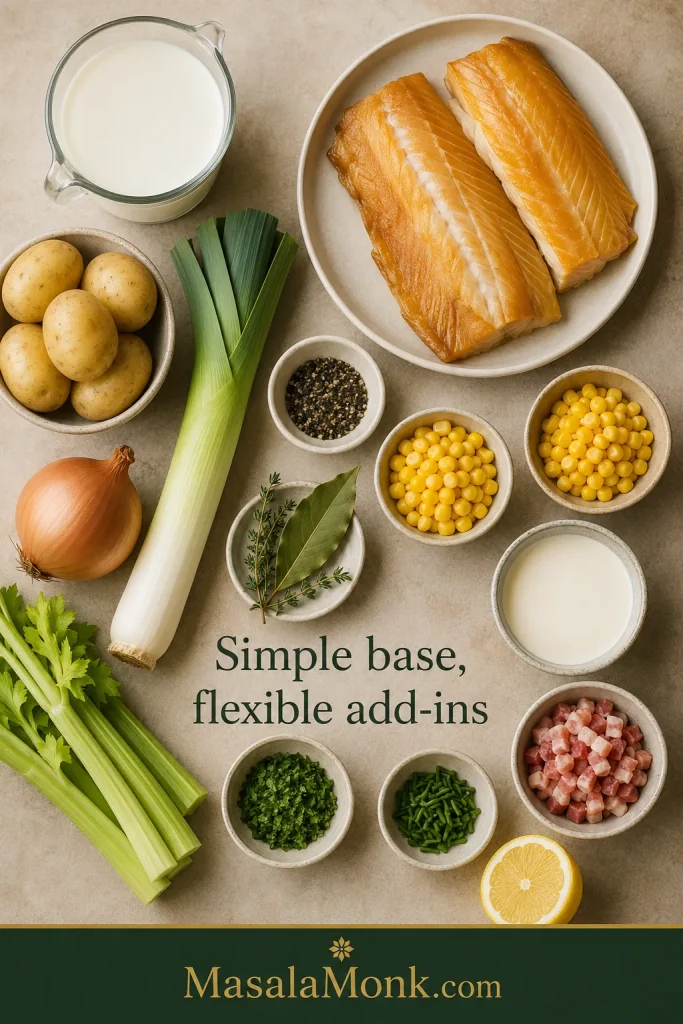
This version keeps the base simple: smoked haddock, milk, potatoes, leek, onion, celery, and herbs. From there, you can make the bowl sweeter with sweetcorn, richer with cream, deeper with bacon, or more seafood-forward with prawns. The heart of the recipe stays the same: gently poached smoked fish, smoky milk, and potatoes mashed just enough to thicken the soup naturally.
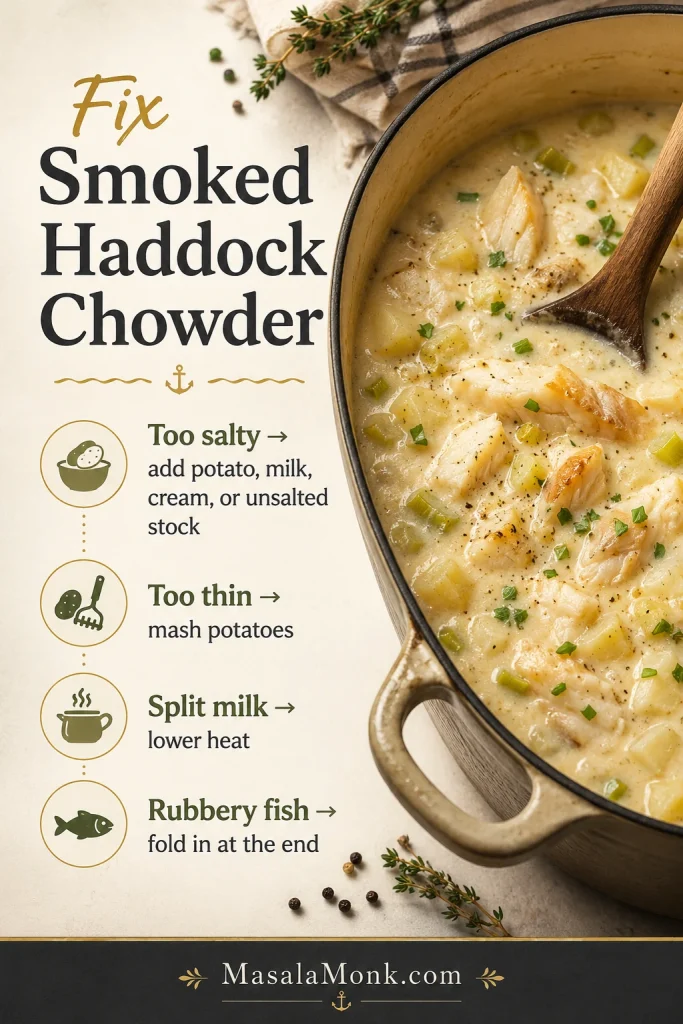
The method is built to avoid the usual smoked haddock chowder problems: over-salted broth, split milk, rubbery flakes, and a thin base. It feels like weekend comfort, but the cooking is simple enough for a weeknight.
Those small details matter most at the end, when the milk, seasoning, and flaked haddock come together. For another cozy fish-and-potato bowl, this creamy salmon soup follows the same comforting, gentle-cooked idea.
Quick Answer: What Is Smoked Haddock Chowder?
Smoked haddock chowder is a creamy fish soup made with smoked haddock, potatoes, leek or onion, and milk. The best method is to poach the haddock gently in milk first, use that smoky milk in the soup base, mash some potatoes for body, then fold the fish back in at the end so it stays tender.
It is closely related to Cullen skink, the traditional Scottish smoked haddock soup, but chowder is broader and more flexible. Cullen skink usually stays close to smoked haddock, potatoes, onion or leek, milk, and sometimes cream. Chowder can include sweetcorn, bacon, celery, prawns, stock, herbs, or a richer creamy finish.
The key: Treat the haddock gently. Once it has been poached, the chowder is mostly about building a soft potato base and folding the fish back in without breaking it up.
Jump to the recipe card · See the 3 rules first
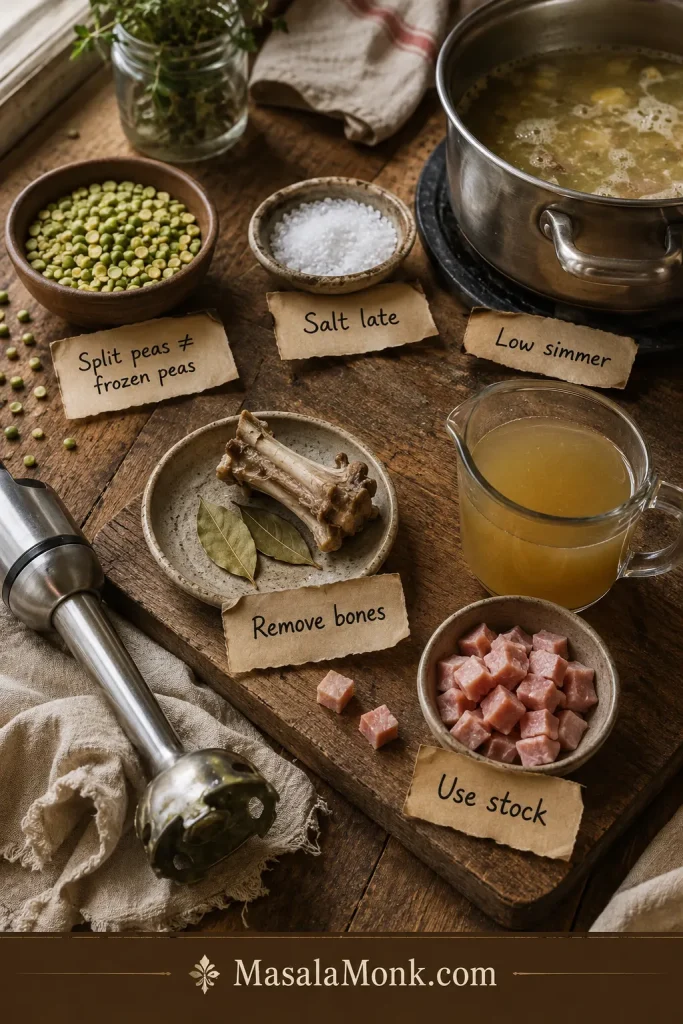
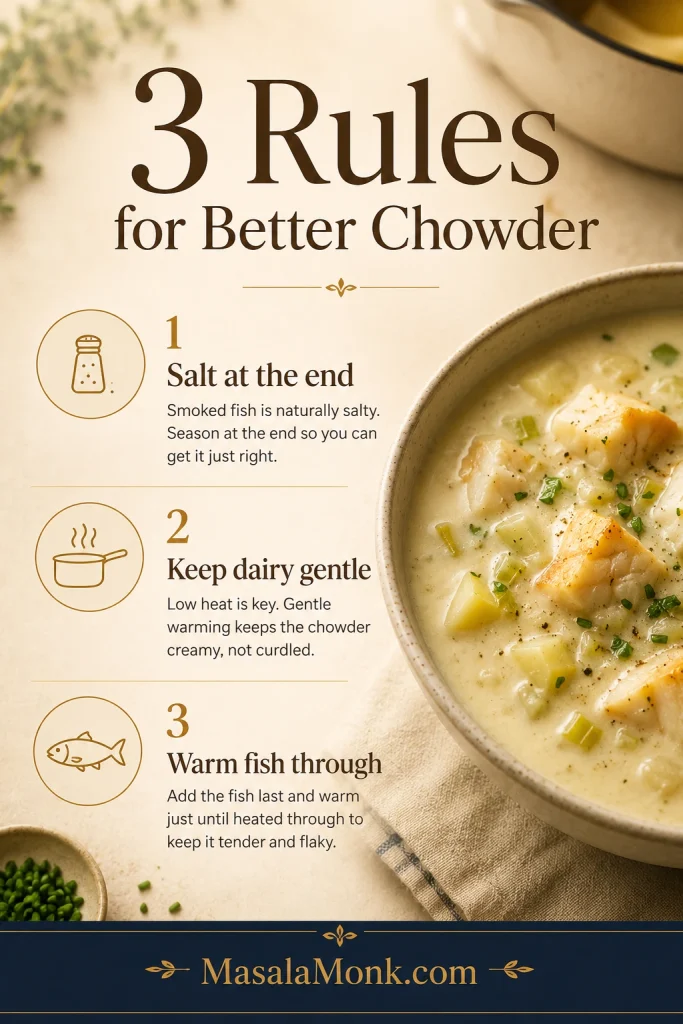
Before You Cook: 3 Things That Make the Chowder Better
Smoked haddock is easy to cook, but it has a strong personality. A little care with heat and seasoning keeps the chowder mellow, creamy, and balanced.
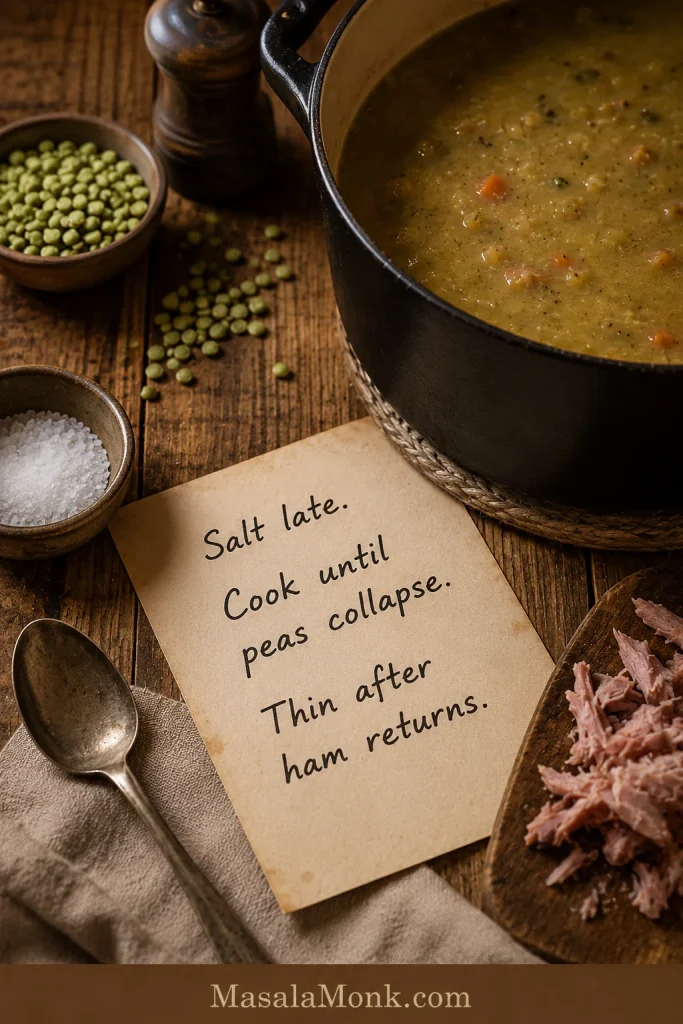
- Save salt for the end. Smoked haddock, bacon, pancetta, and stock can all bring salt. Taste the finished chowder before seasoning.
- Keep the dairy gentle. Milk and cream stay smoother when they are warmed quietly instead of pushed into a rolling boil.
- Warm the fish through instead of re-cooking it. Once the haddock is poached and flaked, it only needs a few minutes in the finished chowder.
Best for: smoky comfort without an over-salted soup, a creamy chowder without a heavy roux, and one base recipe you can turn sweeter with sweetcorn, deeper with bacon, or more seafood-forward with prawns.
Smoked Haddock Chowder Recipe
Easy Creamy Smoked Haddock Chowder
This is a cozy stovetop chowder with milk-poached smoked haddock, soft potatoes, leek, onion, celery, and herbs. Sweetcorn is optional but lovely for a sweeter family-style bowl; cream and bacon are optional richer finishes. The potatoes thicken the base naturally, the poaching milk carries the smoked-fish flavour, and the haddock goes back in at the end so the flakes stay tender.
| Prep time | 15 minutes |
| Cook time | 35 to 40 minutes |
| Total time | 50 to 55 minutes |
| Servings | 4 generous bowls |
| Method | Stovetop |
| Difficulty | Easy |
| Texture | Creamy, chunky, smoky, spoon-coating |
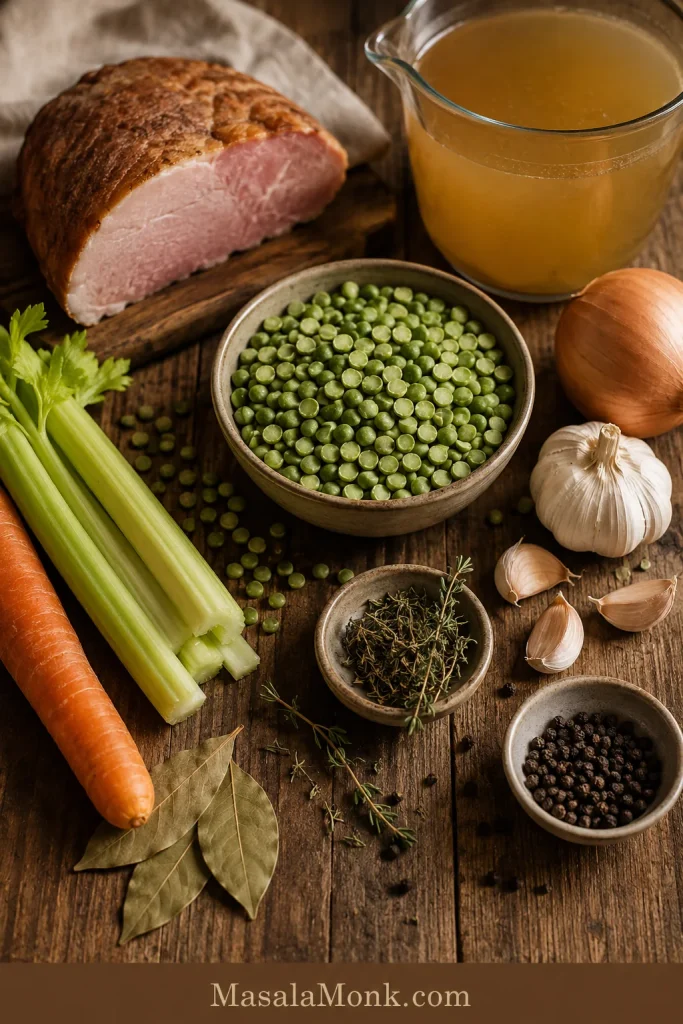
Ingredients
- 400 to 450 g / 14 to 16 oz smoked haddock fillets
- 600 ml / 2½ cups whole milk
- 250 to 300 ml / 1 to 1¼ cups unsalted fish stock, unsalted vegetable stock, or water
- 500 to 600 g / 1 lb 2 oz to 1 lb 5 oz potatoes, peeled and diced into 1 to 1.5 cm pieces
- 1 large leek, cleaned and sliced
- 1 small onion, finely chopped
- 1 celery stick, finely sliced
- 30 to 40 g / 2 to 3 tablespoons unsalted butter
- 1 bay leaf
- 1 teaspoon thyme leaves, or 2 thyme sprigs
- 100 to 150 g / about ⅔ to 1 cup sweetcorn, optional, recommended for a sweeter family-style bowl
- 75 to 100 ml / ⅓ cup to scant ½ cup cream, optional
- 75 to 100 g / about 2½ to 3½ oz bacon or pancetta, optional
- Black pepper, to taste
- Chopped parsley or chives, to finish
- Lemon wedges, optional
Salt note: Taste after the smoked haddock is back in the pot, then add salt only if the chowder needs it.
Instructions
Poach the fish and start the base
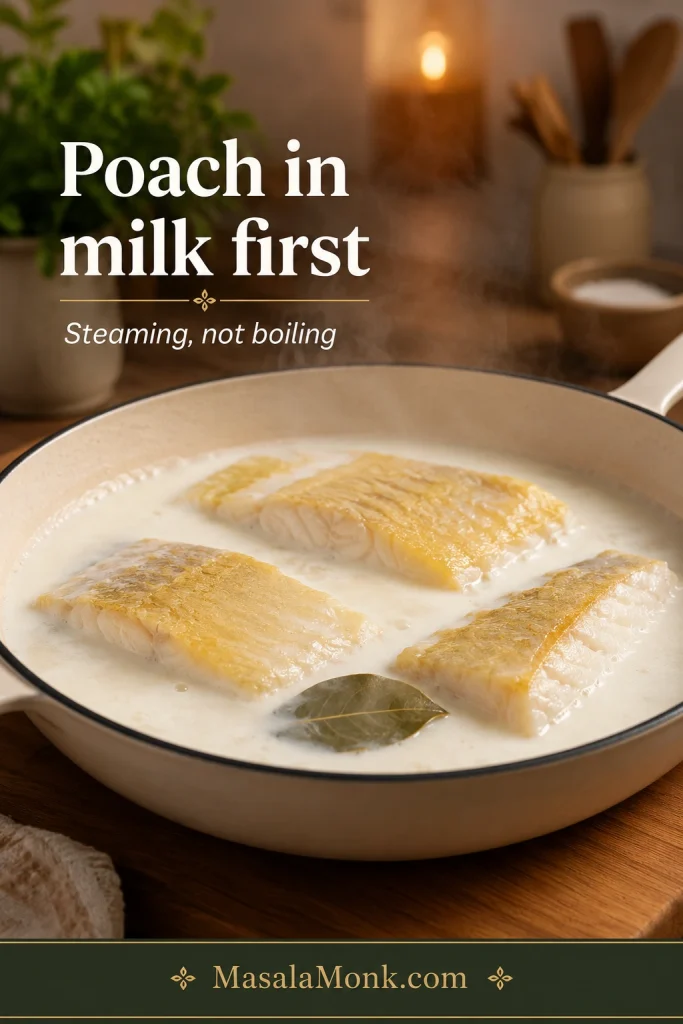
- Poach the smoked haddock. Place the smoked haddock in a wide pan. Add the milk and bay leaf. Warm over low to medium-low heat until the milk is steaming and barely simmering.
- Cook the fish gently. Poach for 5 to 7 minutes, depending on thickness, until the fish is opaque and flakes easily.
- Reserve the smoky milk. Lift the fish out with a slotted spoon. Strain and reserve the poaching milk. Remove skin or bones if needed, then flake the haddock into large pieces.
- Start the base. Melt the butter in a large soup pot over medium-low heat. If using bacon or pancetta, cook it first until golden, then remove some crispy pieces for topping if you like.
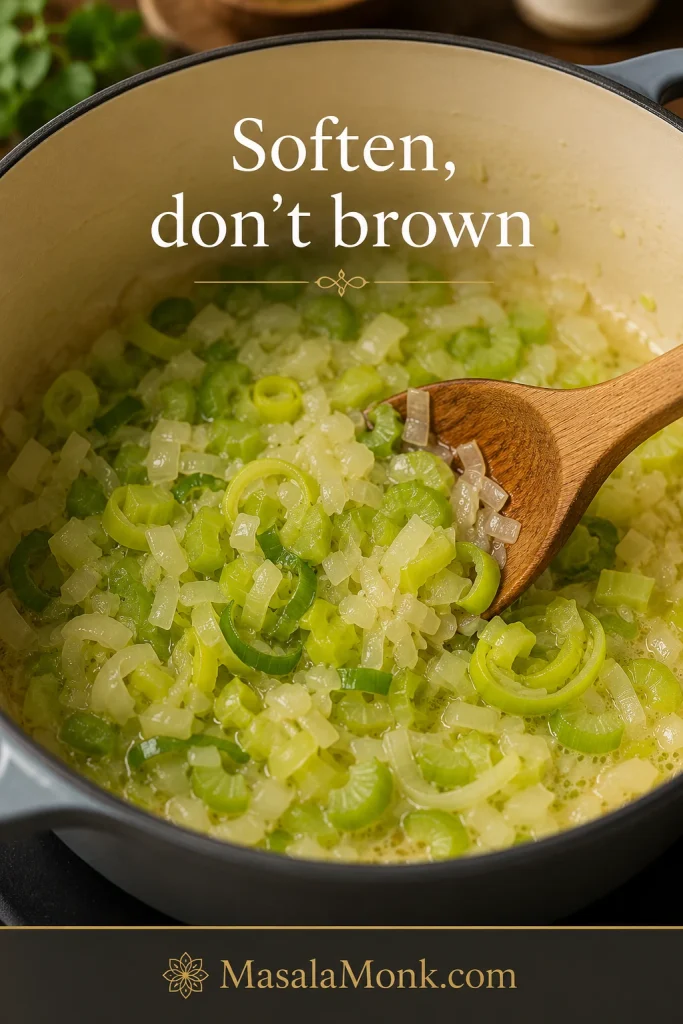
- Soften the vegetables. Add the leek, onion, and celery. Cook for 8 to 10 minutes, stirring often, until soft and glossy but not browned. The leeks should smell sweet before the potatoes go in.
Thicken, finish, and serve
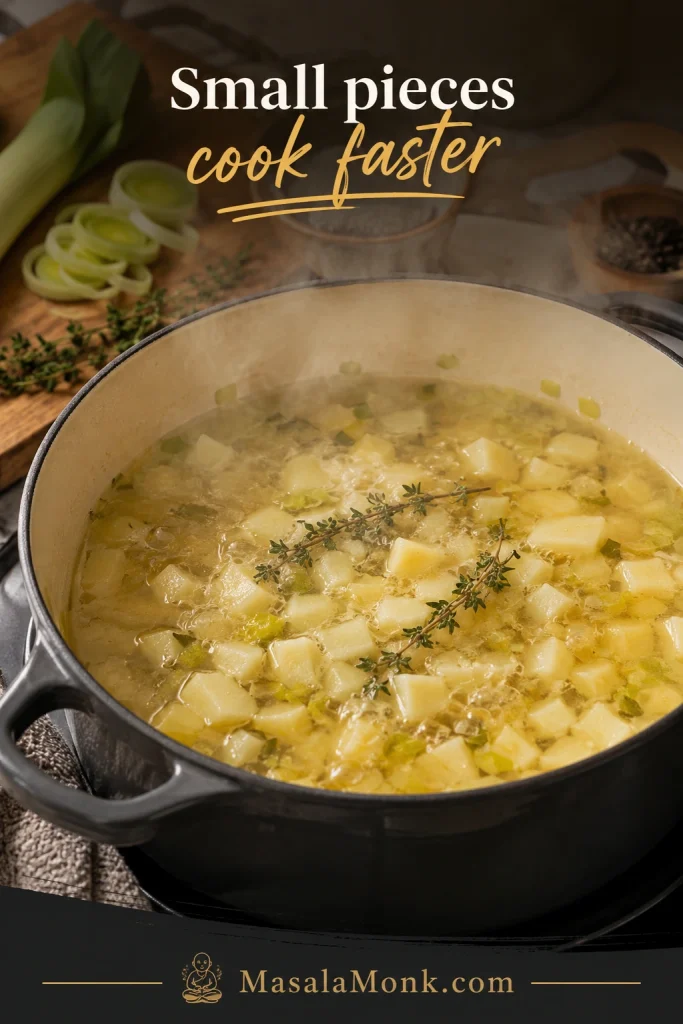
- Simmer the potatoes. Add the diced potatoes, thyme, and unsalted stock or water. Simmer for 10 to 15 minutes, or until the potatoes are tender.
- Thicken naturally. Mash some of the potatoes directly in the pot. Leave some chunks whole so the bowl stays hearty.
- Add the milk and sweetcorn. Pour in the reserved poaching milk. Add the sweetcorn, if using. Warm gently for 3 to 5 minutes.
- Finish with cream and fish. Stir in the cream, if using, then add the flaked smoked haddock. Keep the heat low and warm through for 2 to 3 minutes. The pot should be hot, not bubbling hard.
- Rest, taste, and serve. Let the chowder sit off the heat for 5 minutes if you have time; the potatoes settle and the smoky flavour rounds out. Finish with black pepper, herbs, lemon, and a little salt only if needed. Serve hot with crusty bread, toast, oatcakes, crackers, or a simple green salad.
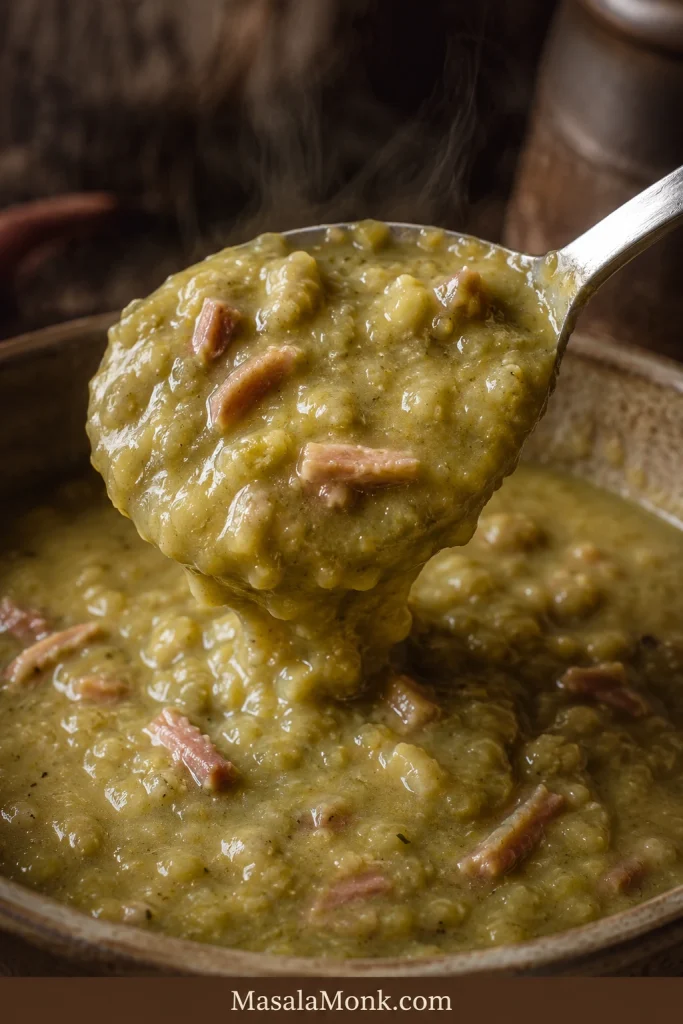
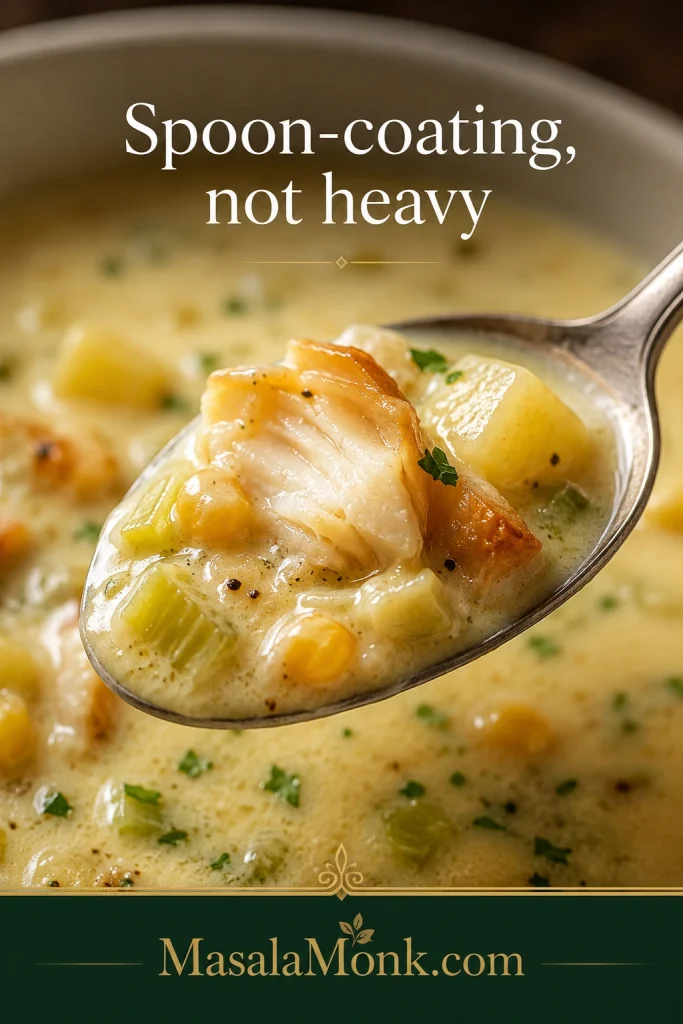
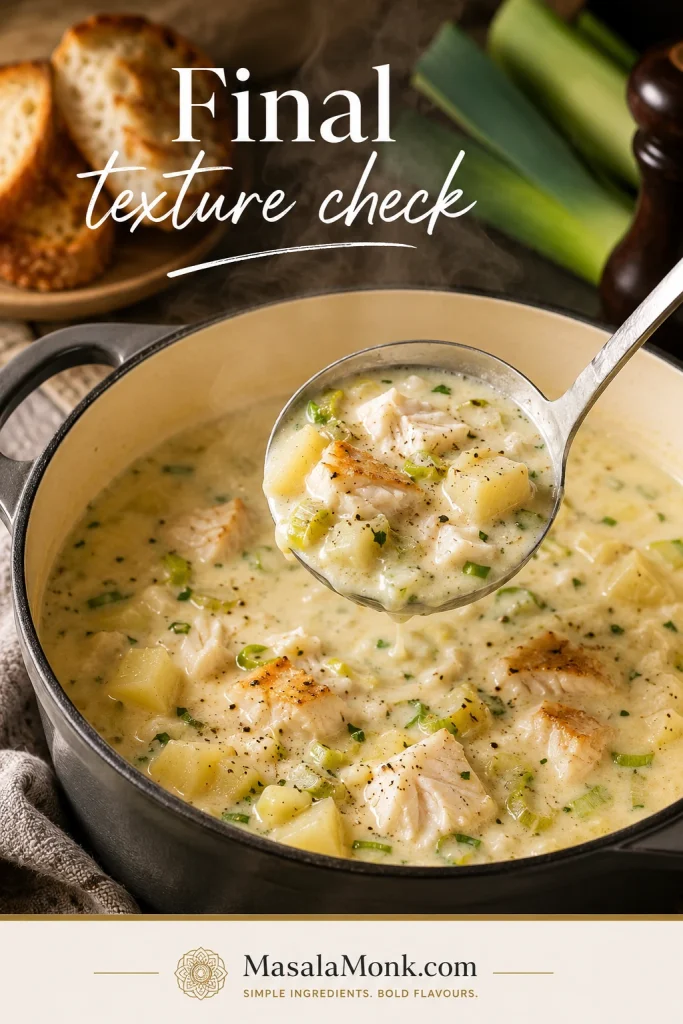
Best texture cue: The chowder should be spoon-coating, with tender potato pieces and large flakes of fish. It should feel generous, creamy, and smoky without becoming heavy.
Once you understand the base, this chowder becomes easy to bend. Keep the fish tender, keep the seasoning balanced, then choose the version that fits the meal you want.
See the variations · Need a fix?
Smoked Haddock Chowder Variations: Sweetcorn, Bacon, Prawn, Creamy, or Lighter
Choose the bowl you want, but keep the spine of the recipe steady: smoked fish, milk, potatoes, leek or onion, and gentle heat. The variations below let you make the same pot lighter, richer, sweeter, or more generous without relearning the recipe.

| If you want… | Do this | Result |
|---|---|---|
| Classic cozy bowl | Use milk, potatoes, leek, onion, celery, thyme, and a little cream. | Rounded, creamy, balanced |
| Lighter weeknight bowl | Skip bacon and cream, mash extra potatoes, and finish with herbs and lemon. | Creamy without feeling heavy |
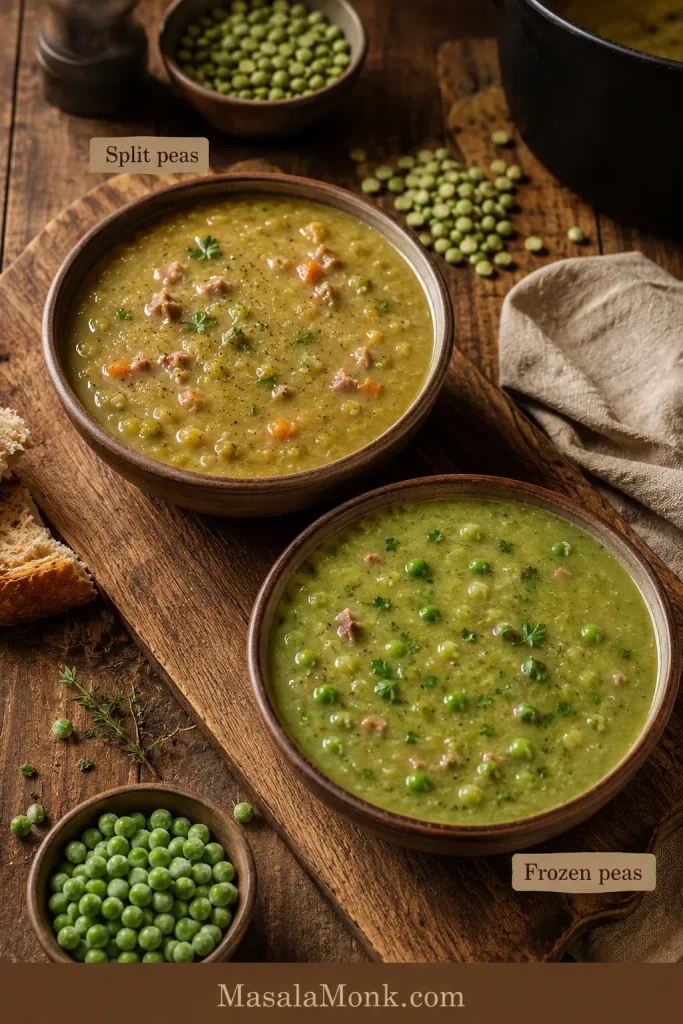
| Sweetcorn chowder | Add 100 to 150 g / about ⅔ to 1 cup sweetcorn near the end. | Softer smoke, little sweet pops |
| Bacon chowder | Cook bacon or pancetta first, then soften the vegetables in the fat. | Deeper, savoury, bacon-smoky |
| Prawn or shrimp chowder | Add raw prawns or large shrimp near the end and cook just until pink. | More seafood-forward and generous |
| Cullen skink-style bowl | Skip sweetcorn, bacon, celery, and prawns. Keep smoked haddock, potatoes, onion or leek, milk, and herbs. | Simpler, cleaner, more traditional |
| Dairy-free coconut bowl | Use light coconut milk and water instead of dairy milk and cream. | Smoke-kissed, lighter, less traditional |
More in This Guide
Recipe Basics
Cook It Right
Why This Recipe Works
Milk-poaching makes the biggest difference. The fish cooks quietly, the milk takes on a gentle smoke, and the kitchen starts to smell smoky and savoury before the soup base is even built.
Potatoes give the soup body without needing a heavy flour base. Once they are tender, mash some directly into the pot. The starch thickens the broth naturally, leaves the flavour cleaner than a roux, and still gives you enough potato chunks to make the bowl feel hearty.
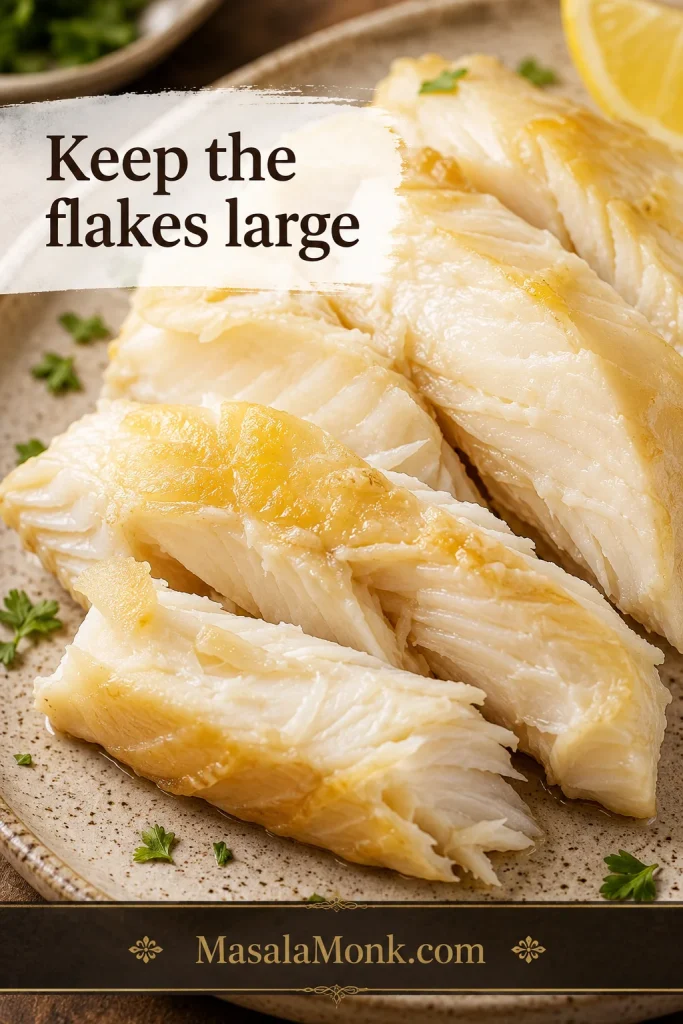
Adding the fish back at the end keeps the flakes large and tender instead of dry, rubbery, or broken into tiny pieces. The same gentle-finish idea also matters in creamy fish dishes like this creamy salmon pasta.
Late seasoning keeps the bowl balanced. Smoked haddock varies from mild to very salty, and richer add-ins like bacon or pancetta can change the salt level quickly. Waiting until the end gives you control.
The Texture We’re Going For
The finished chowder should sit in the comfortable middle: thicker than a thin fish soup, lighter than a heavy seafood stew, and creamy without becoming heavy or stodgy. The broth should coat a spoon lightly, the potatoes should be soft, and the fish should stay tender instead of breaking down into the base.
The finished bowl should feel settled and comforting: soft potatoes, mellow smoke, and clear pieces of haddock, not tiny fragments lost in the soup. If the pot looks a little loose before the haddock goes back in, give the potatoes a gentle mash and a few minutes to settle. If it looks too thick, a splash of warm milk or unsalted stock will bring it back.
The Chowder Formula
Once the fish is handled gently, the rest of the chowder is built from simple, comforting things: potatoes for body, leek for sweetness, milk for softness, and herbs for a fresh finish.
| Fish | Smoked haddock, ideally undyed if available |
| Base | Whole milk for poaching, plus unsalted stock or water for the potatoes |
| Body | Diced potatoes, partly mashed into the soup |
| Sweetness | Leek, onion, and optional sweetcorn |
| Richness | Cream or bacon, both optional |
| Freshness | Parsley, chives, black pepper, and lemon at the end |
| Main cue | Quiet heat after the dairy and fish go in |
Ingredients and Smart Swaps
The ingredient list is simple, but each choice shapes the bowl: smoke from the fish, sweetness from the leek, body from the potatoes, softness from the milk, and freshness from herbs and lemon.
Smoked Haddock
Choosing the Fish
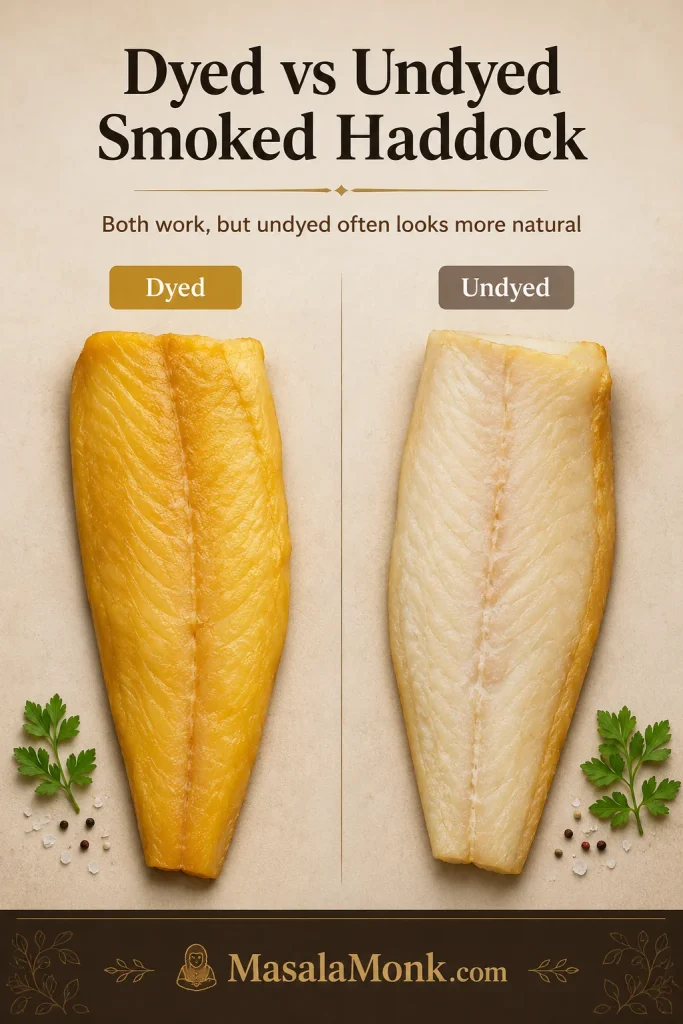
Use 400 to 450 g / 14 to 16 oz smoked haddock for four generous bowls. Undyed smoked haddock is ideal if you can find it because the colour is natural and the flavour is usually cleaner. Dyed smoked haddock also works, but it will give the soup a stronger yellow colour.
When the fish has skin, poach it with the skin on, then remove the skin before flaking. Pull out any bones as you break the fish into large pieces.
Frozen Fish, Substitutes, and Salt Balance
Frozen smoked haddock works well when it is thawed overnight in the fridge before poaching. Pat it dry, then cook gently as usual. When poaching from frozen, use lower heat and allow extra time, though thawed fish gives better texture and more even cooking.
When smoked haddock is unavailable, use smoked cod, smoked pollock, smoked whiting, or another smoked white fish. For very strong smoked fish, use part smoked fish and part plain white fish.
Very strong or salty haddock can overpower the pot, so use a little less of the poaching milk and balance the chowder with fresh milk, unsalted stock, or extra potato. You still get the smoked-fish flavour without letting it take over the bowl.
Extra cooked smoked haddock is worth keeping in large flakes for potato-based leftovers. This crispy fish cakes recipe is a useful next idea when you have fish and potato to use up.
Milk
Whole milk gives the best texture and flavour because it does two jobs at once: it poaches the fish and becomes part of the base. Semi-skimmed or 2% milk can work too, but it needs lower heat because leaner milk is less forgiving.
Potatoes
Floury potatoes make the thickest, creamiest chowder because they break down slightly. Maris Piper, King Edward, Russet, or Yukon Gold are all good choices. Waxy potatoes hold their shape and give a chunkier bowl, which is also fine if that is what you like.
Dice the potatoes into roughly 1 to 1.5 cm pieces so they cook in 10 to 15 minutes. Mash some of the cooked potatoes into the soup before adding the fish back, and leave the rest whole for texture. The best bowls have both: a rounded base from the mashed edges and a few soft pieces left for the spoon.
You can replace 150 to 200 g of the potato with sweet potato for a slightly sweeter chowder, especially if you are using prawns, sweetcorn, or a lighter no-cream version.
Leek, Onion, and Celery
Leek gives a soft sweetness that suits smoked fish. Slice it, then rinse well in a bowl or colander to remove grit between the layers. Onion adds depth, and celery gives the pot a classic savoury base.
If you only have onion, use one large onion and skip the leek. If you love leeks, use two leeks and skip the onion. For a more leek-forward smoked haddock and leek chowder, use two leeks and skip the celery.
Sweetcorn
Sweetcorn is optional, but it works beautifully here. It gives little pops of sweetness against the creamy potato base and softens the salty-smoky edge of the fish. Frozen sweetcorn can go straight into the hot chowder. Canned sweetcorn should be drained first. Fresh corn can be cut from the cob and simmered for a few minutes until tender.
Stock or Water
Unsalted fish stock, unsalted vegetable stock, or water gives you the most control. If your stock is already salted, start with less and adjust the finished bowl instead of seasoning early.
Bacon or Pancetta
Bacon or pancetta makes the bowl deeper, richer, and more pub-style. Cook it first, then soften the leek and onion in the rendered fat. If the bacon releases plenty of fat, use less butter before adding the vegetables. Taste the finished chowder before seasoning because bacon can push the salt up quickly.
Cream
Cream is a finishing touch, not the thing that holds the chowder together. Single cream, heavy cream, or cooking cream all work. If using double cream, use the smaller amount because it is richer. Add cream near the end over low heat.
For another rich finish, stir in a small handful of mature cheddar off the heat. Keep it modest and taste before adding salt, because smoked haddock and cheese can make the bowl salty quickly.
Herbs, Pepper, Mustard, and Lemon
Parsley and chives bring freshness to the finished bowl. Black pepper works better than early salt. Lemon is optional, but a small squeeze at the end can wake up a rich chowder, especially if you used cream or bacon.
A small teaspoon of Dijon or English mustard can also sharpen the soup without making it taste obviously mustardy. It is especially useful if the base tastes creamy but a little flat.
Jump to the step-by-step method · Back to recipe card
Useful Equipment
You only need a wide pan for poaching, a soup pot for the base, a sieve for the smoky milk, and a potato masher or sturdy spoon for thickening. An immersion blender is optional, but blend only part of the potato mixture so the chowder keeps some texture.
How to Poach Smoked Haddock in Milk
Milk-poaching is the step that makes the chowder taste rounded instead of sharp. The fish cooks quietly, the milk absorbs the smoke, and you get a base that already tastes like smoked haddock before the soup is built.
Milk-Poaching Steps
- Place the smoked haddock in a wide pan in a single layer.
- Add the milk and bay leaf. The fish does not need to be submerged perfectly, but it should be mostly covered.
- Warm slowly over low to medium-low heat until the milk is steaming and just beginning to tremble at the edges.
- Poach for 5 to 7 minutes, depending on the thickness of the fillets.
- Lift the fish out as soon as it turns opaque and flakes easily. If checking with a thermometer, look for 63°C / 145°F.
- Strain the milk and keep it for the chowder. The reserved milk should smell gently smoky, not harsh; that is the flavour that will carry through the whole pot.
- Remove skin and bones if needed, then flake the haddock into large pieces.
Visual cue: Keep the cooked haddock in large flakes before it goes back into the chowder.
Give this step gentle heat and a few calm minutes. The fish may not look dramatic at this stage, and that is fine. You are only cooking it until it flakes, not trying to brown or crisp it.
Continue to the step-by-step method · Back to recipe card
How to Make Smoked Haddock Chowder
Once the haddock is poached and the smoky milk is reserved, the chowder comes together like a simple potato soup. Build flavour before the dairy goes back in, then finish with low, patient heat.
1. Soften the Leek, Onion, and Celery
Melt the butter in a large soup pot over medium-low heat. Add the leek, onion, and celery, then cook for 8 to 10 minutes until soft and glossy. The vegetables should smell sweet and savoury, not browned.
2. Simmer the Potatoes
Add the diced potatoes, thyme, and unsalted stock or water. Simmer until the potatoes are tender, usually 10 to 15 minutes. Smaller potato pieces cook faster and make the chowder easier to thicken.
3. Mash Some Potatoes for Body
Mash some of the potatoes directly in the pot. This is the easiest way to thicken the soup without making it heavy. Leave enough potato chunks whole so each bowl still has texture.

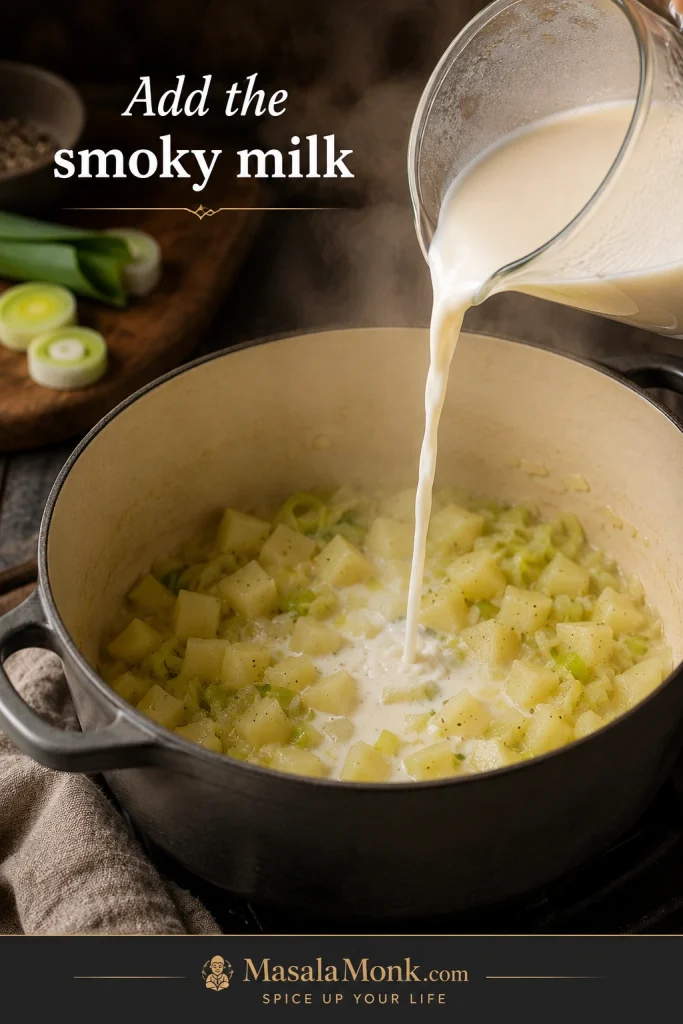
4. Add the Reserved Smoky Milk
Pour in the strained poaching milk and stir gently. The pot should start to smell smoky and mellow, not sharp or fishy. This is the moment it starts to taste like chowder instead of potato soup. If the chowder looks a little loose, mash a few more potatoes and let the base settle for a minute.
5. Finish With Fish, Sweetcorn, and Cream
Stir in the sweetcorn and warm it through. Add the cream if using, then fold in the flaked smoked haddock. A few broken flakes are fine; just avoid stirring so hard that the fish disappears into the soup.

6. Taste at the End
Finish with black pepper, parsley or chives, and a squeeze of lemon if the chowder needs brightness. Add mustard if the base tastes creamy but flat. The final herbs and lemon lift the bowl and make it feel rich without becoming heavy.
Check final texture cues · Troubleshoot the chowder
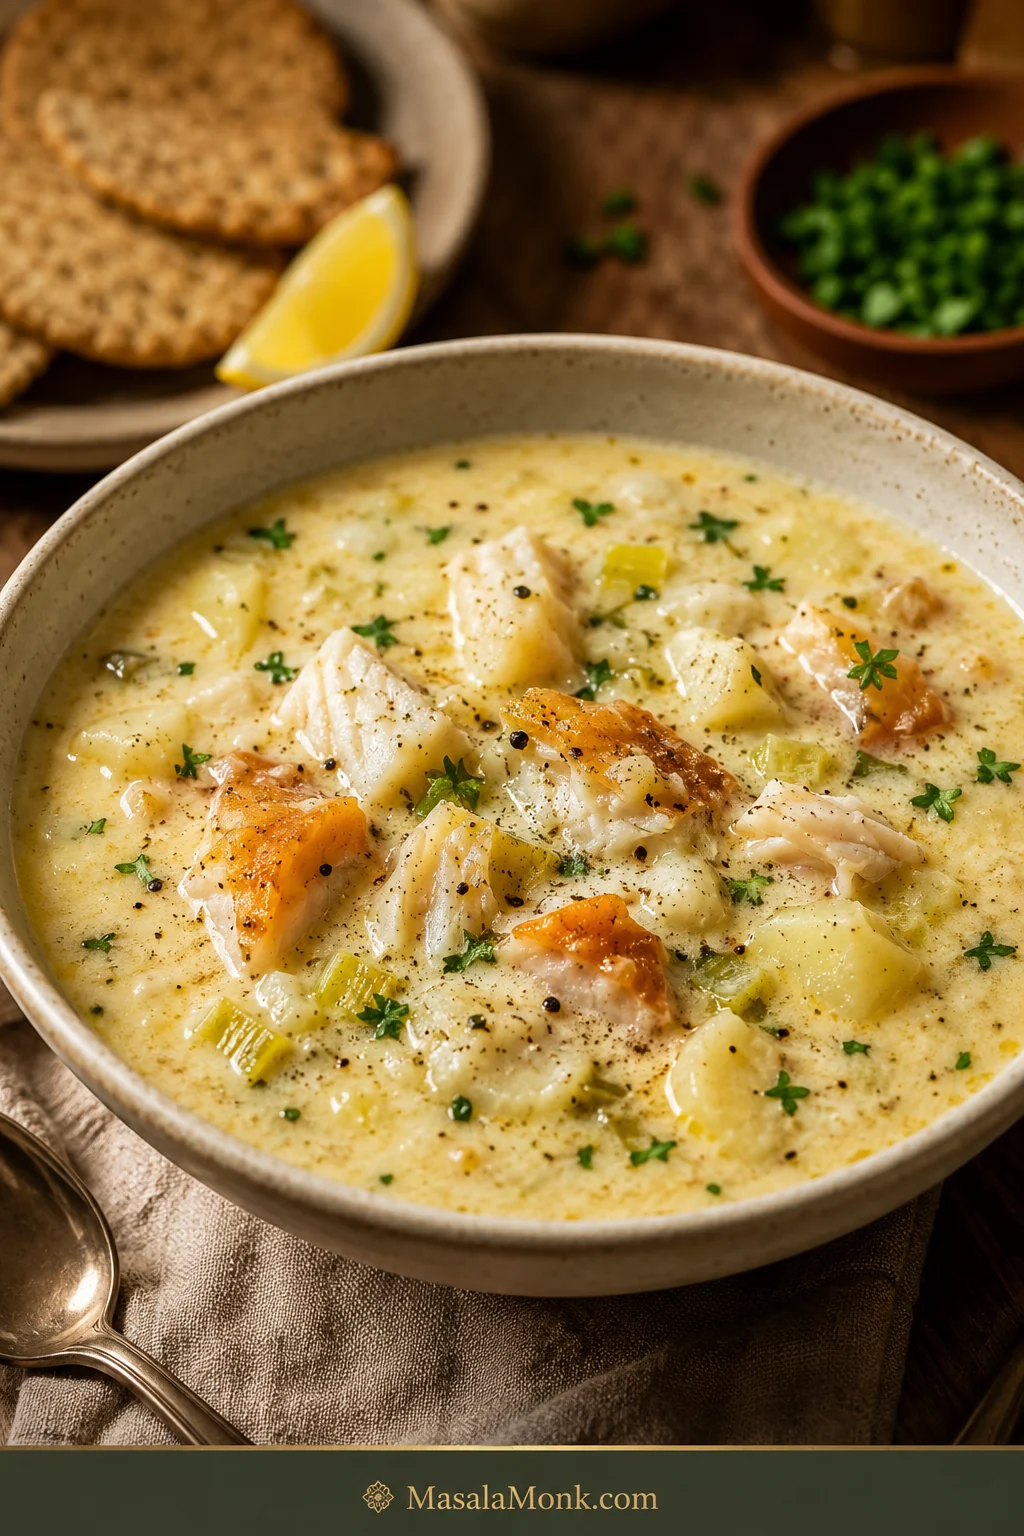
Final Texture and Taste Cues
A good smoked haddock chowder should look smooth and spoon-coating, not gluey. The broth should coat a spoon lightly, the potatoes should be tender, and the haddock should sit in large flakes rather than tiny broken pieces. The bowl should feel generous, not heavy.
- Fish: opaque, tender, and easy to flake.
- Potatoes: soft enough to mash at the edges, with some chunks left whole.
- Liquid: smooth and rounded, not separated or grainy.
- Seasoning: smoke first, gentle sweetness from leek and corn, and only enough salt to feel balanced.
If the chowder tastes flat, it usually needs pepper, herbs, lemon, mustard, or a little extra smoked-fish flavour. If it tastes too salty, the fix is usually more potato, milk, cream, or unsalted stock.
More Ways to Adjust the Chowder
The base recipe gives you a classic spoon-coating chowder. These notes help you steer the same pot lighter, richer, sweeter, or more seafood-heavy without changing the method.
Creamy Version
A splash of cream makes the bowl fuller and softer. Stir in 75 to 100 ml / ⅓ cup to scant ½ cup near the end so it rounds out the broth without drowning the smoked fish.
Lighter or No-Cream Version
Skip the bacon and cream, use milk as the main liquid, mash extra potatoes for body, and finish with herbs and lemon instead of extra fat. The bowl still feels rich and rounded, but the body comes from potatoes rather than cream.
Smoked Haddock and Sweetcorn Chowder
Sweetcorn is the easiest way to soften the smoke. Add 100 to 150 g / about ⅔ to 1 cup near the end for little sweet pops against the salty fish and creamy potato base. Frozen, canned, or fresh corn all work.

Smoked Haddock and Bacon Chowder
Bacon pushes this into pub-style territory. Cook 75 to 100 g / about 2½ to 3½ oz chopped bacon or pancetta first, then let the leek and onion soften in the rendered fat. Taste the finished chowder before seasoning.

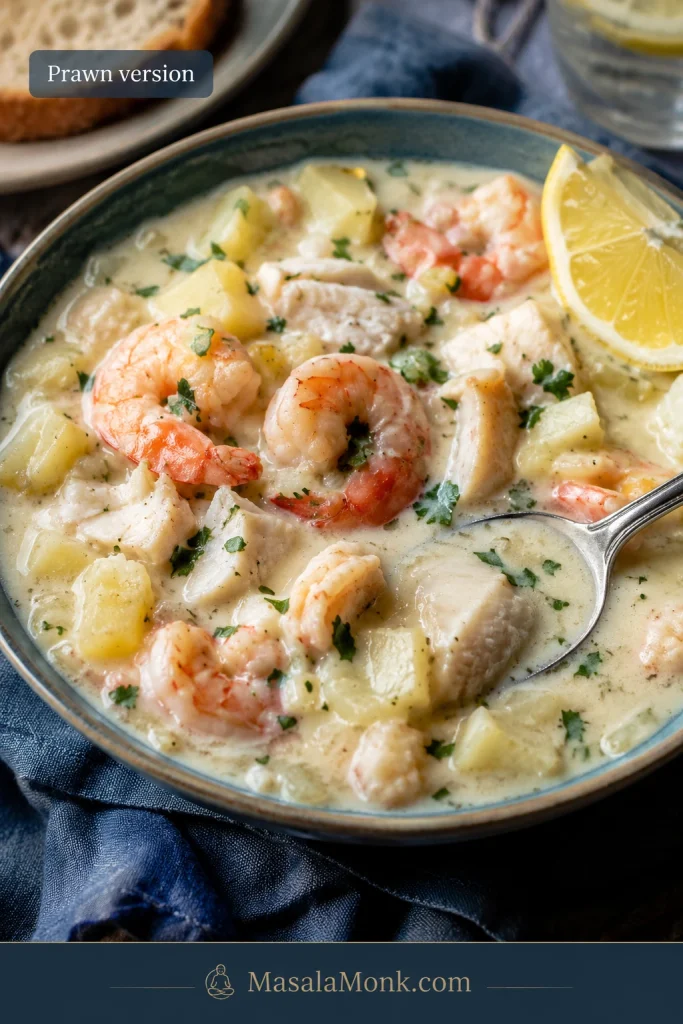
Smoked Haddock and Prawn Chowder
Prawns make the bowl feel more generous and seafood-forward. Add raw prawns, or large shrimp, near the end and cook gently for 2 to 3 minutes, just until pink and opaque. If using cooked prawns, add them only long enough to warm through. For a separate quick seafood dinner where prawns are the main event, try this shrimp scampi recipe.
Dairy-Free Coconut Version
This will not taste like a classic British chowder, but it can still be lovely: smoky, light, and gently spiced. Use light coconut milk and water instead of dairy milk and cream, then add ginger, turmeric, chilli, or smoked paprika if you want more warmth.
Small Batch for 2 People
For two bowls, use about 200 to 225 g / 7 to 8 oz smoked haddock, 300 ml / 1¼ cups milk, 250 to 300 g potatoes, and one small leek or half an onion. A smaller pan helps keep the fish mostly covered while it poaches.
Budget-Friendly Version
To stretch the pot, use 250 to 300 g smoked haddock instead of the full amount, then add more potato, sweetcorn, and leek. The flavour will be milder, but the smoky poaching milk still carries through the soup.
Smoked Haddock Chowder vs Cullen Skink
Cullen skink is the more traditional Scottish smoked haddock soup; smoked haddock chowder is the broader, more flexible version. Cullen skink usually stays close to smoked haddock, potatoes, onion or leek, milk, and sometimes cream, while chowder may include celery, sweetcorn, bacon, prawns, stock, herbs, or extra cream.
Make the Cullen skink-style version when you want something simpler and more traditional. Make this chowder when you want a flexible bowl with sweetcorn, bacon, prawns, or a richer finish.

For a more traditional direction, this Cullen skink recipe keeps the focus on smoked fish, potatoes, onion, and a simple milk-rich base.
For a stricter Cullen skink-style bowl, skip the sweetcorn, bacon, celery, prawns, and heavy add-ins. Use smoked haddock, potatoes, leek or onion, milk, a little cream if you like, black pepper, and herbs.
| Dish | Usually includes | Best for |
|---|---|---|
| Smoked haddock chowder | Smoked haddock, potatoes, milk, leek or onion, celery, sweetcorn, bacon, cream, herbs, or seafood add-ins | A flexible creamy fish soup |
| Cullen skink | Smoked haddock, potatoes, onion or leek, milk, cream, herbs | A more traditional Scottish smoked haddock soup |
Troubleshooting
Most chowder problems happen near the end, when the milk gets too hot, the fish is stirred too hard, or the smoked haddock brings more salt than expected. The fixes below will usually save the pot.
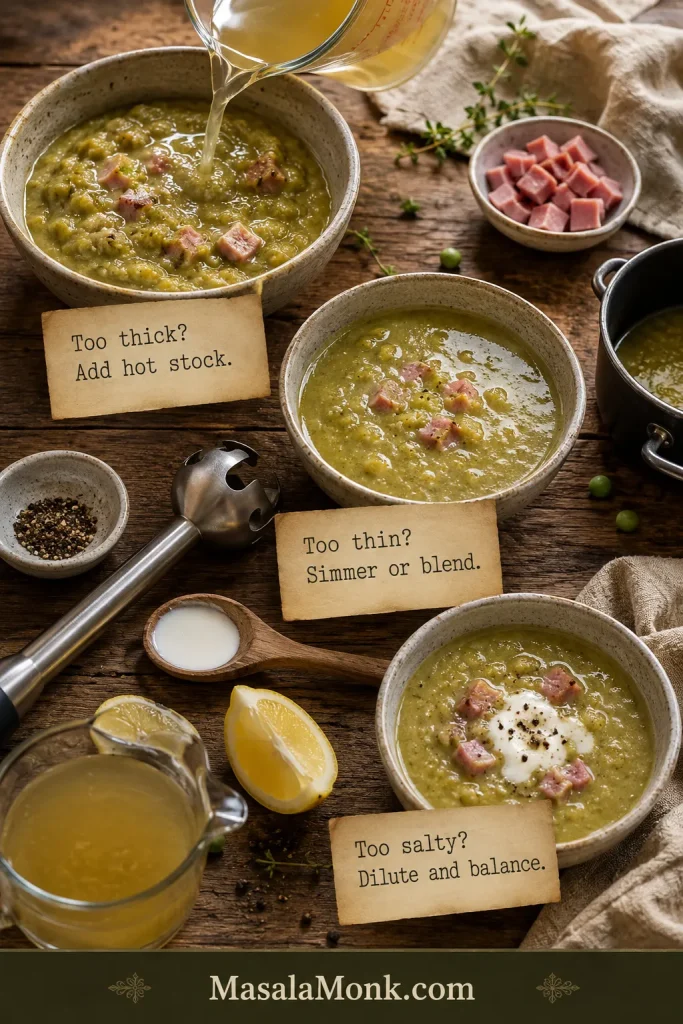
Texture and heat fixes
| Problem | What happened | How to fix it |
|---|---|---|
| Chowder is too thin | The potatoes did not break down enough. | Mash some potatoes into the soup or simmer the base uncovered briefly before adding the fish. |
| Chowder is too thick | The potatoes thickened the base more than expected. | Loosen with warm milk, stock, or water until the texture feels right. |
| Milk split or turned grainy | The heat was too high after the milk or cream went in. | Lower the heat and avoid a hard boil. A split chowder is usually edible, but the texture may look grainy. |
| Fish is rubbery | The haddock was boiled or cooked too long. | Poach gently and add the flaked fish back near the end only to warm through. |
| Fish broke into tiny pieces | The haddock was stirred too much after flaking. | Fold the fish in gently at the end and avoid aggressive stirring. |
Flavour and seasoning fixes
| Problem | What happened | How to fix it |
|---|---|---|
| Chowder is too salty | The smoked haddock, bacon, pancetta, or stock added more salt than expected. | Add potato, milk, cream, or unsalted stock to soften the salt. Next time, season at the end. |
| Chowder tastes too smoky | The smoked haddock was very strongly smoked. | Add potato, sweetcorn, milk, or cream to soften the smoke. Next time, use part smoked fish and part plain white fish. |
| Chowder tastes bland | The base needs more lift or seasoning. | Add pepper, herbs, lemon, mustard, or a little extra smoked-fish flavour. |
| Chowder is too rich | Too much cream, bacon, or butter made it heavy. | Loosen with milk or stock and finish with lemon and herbs. Next time, skip cream and thicken with potato. |
| Chowder tastes fishy | The fish may not be fresh enough, may have been overcooked, or may be too strong for your taste. | Use fresh-smelling smoked haddock, avoid boiling, and finish with lemon and herbs. |
Back to recipe card · Storage and reheating
Storage, Freezing, and Reheating
This chowder is best freshly made, but leftovers can still be lovely if you warm them slowly. Fish and dairy prefer patience, not high heat.

To Refrigerate
Let the chowder cool briefly, then store it in an airtight container in the fridge for up to 2 to 3 days. Because it contains fish and dairy, get it into the fridge promptly.
To Reheat
Reheat on low heat, stirring gently, until hot all the way through. Add a splash of milk or stock if the chowder has thickened in the fridge.
To Freeze
You can freeze it, but the texture may change because milk, cream, and potatoes can become slightly grainy after freezing. For the best make-ahead result, freeze the potato and milk base before adding cream and fish, then add freshly poached smoked haddock when reheating.
Best Make-Ahead Method
Make the leek, potato, and milk base ahead of time, then add the flaked smoked haddock when you reheat the chowder. This keeps the fish from breaking apart or turning tough.
What to serve with it · Back to recipe card
What to Serve With Smoked Haddock Chowder
The chowder is filling enough to be a meal on its own, especially when it has potatoes and sweetcorn in the bowl. A simple side makes it feel complete.
Anything toasted, crunchy, or slightly sharp works well here because the chowder itself is soft, smoky, and spoon-coating. Toast, oatcakes, crackers, or crusty bread give you contrast against the creamy bowl.

- Crusty bread
- Buttered toast
- Soda bread
- Oatcakes or crackers
- Simple green salad
- Roasted carrots or other roasted vegetables
- Lemon wedges
- Extra chives, parsley, or black pepper
For something homemade to dip into the bowl, this homemade garlic bread loaf is a strong fit.
For a fresher plate, pair the chowder with a crisp salad. This cucumber salad recipe gives you the cool, sharp contrast that creamy soups often need.
FAQ
Should I poach smoked haddock in milk first?
Yes. It keeps the fish tender and gives you smoky milk for the base.
What should I do with the poaching milk?
Strain it and use it in the chowder. It carries smoked-fish flavour into the whole soup.
Does frozen smoked haddock work for chowder?
Yes. Thaw it overnight in the fridge for the best texture, then poach it in milk. Cooking from frozen works, but it takes longer and cooks less evenly.
Can I use dyed smoked haddock?
Yes. Dyed smoked haddock works, but it gives the soup a stronger yellow colour. Undyed smoked haddock usually looks more natural and often tastes cleaner.
How do I make it without cream?
Skip the cream and mash more potatoes into the soup. Whole milk and potatoes are enough to make the bowl feel full-bodied.
How do I make a lighter version?
Skip bacon and cream, use a little more stock if you want a looser base, and finish with lemon, herbs, and black pepper.
Is sweetcorn good in smoked haddock chowder?
Yes. Sweetcorn softens the salty-smoky edge of the fish and adds little pops of sweetness. Frozen, canned, or fresh corn all work.
Should I add bacon?
Add bacon for a richer, pub-style bowl. Cook it first, then soften the leek and onion in the fat. Taste before adding salt.
How is this different from Cullen skink?
Cullen skink is usually simpler: smoked haddock, potatoes, onion or leek, milk, and sometimes cream. This chowder is broader and can include sweetcorn, bacon, celery, prawns, herbs, or extra cream.
Why did my chowder turn out too salty?
Smoked haddock, bacon, pancetta, and stock can all add salt. Add more potato, milk, cream, or unsalted stock to soften the saltiness.
Does smoked haddock chowder freeze well?
It can be frozen, but dairy and potatoes may turn slightly grainy. For the best result, freeze the potato and milk base, then add freshly poached haddock when reheating.
What can I use instead of smoked haddock?
Use smoked cod, smoked pollock, smoked whiting, or another smoked white fish. If the flavour is too strong, use part smoked fish and part plain white fish.
How do I make the chowder thicker?
Mash more cooked potatoes into the soup. If it still feels loose, simmer the potato base briefly before adding the milk, cream, and fish.
What is the best make-ahead method?
Make the potato and milk base ahead, then add the smoked haddock when reheating. This keeps the fish tender and prevents it from breaking apart.
Final Tips for the Best Smoked Haddock Chowder
The best smoked haddock chowder is gentle from start to finish. Warm the milk slowly, let the leeks soften properly, use the potatoes for body, and add the fish back only when the base is ready. That is how you get smoke, creaminess, and tender haddock in the same spoonful.
If the first spoonful tastes smoky, mellow, and a little sweet from the leek or corn, you have done it right. Make it richer with cream, lighter with extra mashed potato, sweeter with sweetcorn, or deeper with bacon. Serve it hot, keep the bread close, and do not be surprised if the last bit in the bowl gets wiped clean.