Posted on Leave a comment

Stuffed Shells Recipe: Easy Baked Ricotta Pasta Shells

Baked ricotta stuffed shells with marinara sauce and melted mozzarella in a cream baking dish.

Stuffed shells are the kind of baked pasta that makes the table feel full before anyone even sits down: tender jumbo shells, creamy ricotta filling, tomato sauce bubbling around the edges, and mozzarella melted over the top. They give you lasagna-level comfort without all the layering, and the recipe is much more forgiving than it looks.

This version is built to avoid the usual stuffed shell problems: loose ricotta filling, dry pasta edges, shells that turn mushy after baking, and a tray that looks good on top but tastes flat in the middle. Think of it as the no-dry-shell method: thick filling, enough sauce, a covered bake first, and tender shells all the way through.

It fits one classic 9×13-inch baking dish: about 20–24 filled jumbo shells, a seasoned ricotta-mozzarella filling, marinara under and over the pasta, and mozzarella melted on top. A few shells may tear while boiling. The first few you fill may look messy. That is normal. Once everything is tucked into sauce and baked until bubbling, nobody at the table can tell which ones were imperfect.

Stuffed Shells at a Glance

No long planning needed. Here is the quick version before you start.

  • Start with a 12 oz / 340g box of jumbo pasta shells, or enough to cook 28–30 shells.
  • Aim to fill about 24 shells. If your shells are very large, you may fit closer to 20–22 in the baking dish.
  • Mix 15–16 oz / 425–454g ricotta with mozzarella, parmesan, egg, garlic, herbs, salt, and pepper.
  • Use about 3 cups / 720ml marinara sauce, with sauce under and over the shells.
  • Bake at 375°F / 190°C for 25 minutes covered, then 8–10 minutes uncovered.
  • Rest for 5–10 minutes before serving so the filling settles and the shells lift more cleanly.

Boil, fill, sauce, cover, bake, rest — that is the whole recipe. This is also a good one to save because the base method stays the same even when the filling changes.

Quick answers: Yes, you boil the shells first for this version. Use about 3 cups sauce for one 9×13-inch baking dish. Egg helps the filling set, but you can skip it if you prefer a softer filling. Stuffed shells freeze best before baking.

Jumbo pasta shells, ricotta, marinara sauce, mozzarella, parmesan, egg, garlic, herbs, and a baking dish on a kitchen counter.
Start with the essentials: jumbo shells, thick ricotta filling, marinara, mozzarella, parmesan, egg, garlic, and herbs.

Why This Stuffed Shells Recipe Works

This method is built around four small choices that make the biggest difference: undercook the shells slightly, keep the ricotta filling thick, use sauce under and over the pasta, and bake covered before browning the cheese.

  • Shells stay tender. Boiling them just shy of al dente keeps them flexible enough to fill, but firm enough to finish in the oven.
  • Filling stays creamy, not runny. Ricotta gives body, mozzarella gives melt, parmesan adds savory depth, and egg helps everything set.
  • Sauce protects the pasta. Marinara on the bottom keeps the shells from sticking, while sauce over and around the shells prevents dry edges.
  • A covered bake does the work. Foil traps heat and steam so the pasta finishes cooking gently before the cheese browns.
  • Flexibility is built in. Keep it classic, add spinach, stir meat into the sauce, swap in cottage cheese, or freeze a batch for later.

Best of all, the edge of the baking dish tells you dinner is almost ready: sauce bubbling up around the shells, little golden patches of mozzarella, and the smell of garlic, tomato, and browned cheese.

Filled jumbo shells sitting in marinara sauce with foil partly covering the baking dish before baking.
The no-dry-shell method is simple: sauce underneath, sauce around the edges, and foil on top for the first bake.

Ingredients You Need

Stuffed shells do not need complicated ingredients, but they do need the right balance: sturdy shells, thick ricotta filling, enough sauce, and mozzarella that melts without making the pasta watery.

Jumbo Pasta Shells

Choose a 12 oz / 340g box of jumbo pasta shells. These are the large shells made for stuffing, not small shell pasta or macaroni-style shells. Cook 28–30 jumbo shells for one baking dish, or cook the whole box if you like having extra backups.

Some shells will split or fold while boiling, so cook a few extras and move on. The sauce and cheese hide almost everything.

Ricotta Cheese

Use 15–16 oz / 425–454g ricotta cheese. Whole milk ricotta gives the creamiest filling. Loose or watery ricotta should be drained for 10–15 minutes in a fine-mesh strainer or on a few layers of paper towel before mixing. For the right texture, the ricotta filling section shows what the mixture should look like before stuffing.

Ricotta draining in a fine-mesh strainer with thick cheese filling nearby.
Loose ricotta should be drained first; thick filling is what prevents watery stuffed shells after baking.

Mozzarella

You need 3 cups shredded low-moisture mozzarella, about 12 oz / 340g, divided between the filling and topping. Low-moisture mozzarella melts into the filling and gives the top a bubbly finish without watering down the pasta. Fresh mozzarella can be used on top in small amounts, but it is softer and wetter.

Parmesan or Pecorino

Use ½ cup / 45–55g grated parmesan or pecorino. Ricotta gives you the creamy center, but parmesan or pecorino is what makes the filling taste seasoned and savory instead of just milky.

Egg

One large egg helps bind the ricotta filling so it holds together after baking. You can skip it, but the filling will be softer. If you leave out the egg, add a little extra parmesan or mozzarella to help the filling hold.

Marinara Sauce

About 3 cups / 720ml marinara sauce gives one baking dish enough sauce for the bottom, top, and edges. A 24 oz / 680g jar is the practical shortcut and usually gives enough sauce for one batch. A good jarred marinara is not a shortcut to apologize for here; stuffed shells are mostly about enough sauce and a well-seasoned filling. If you want to make your own, this homemade marinara sauce gives you a classic base plus spicy, dipping, low-sodium, and sugar-free variations.

Very thick marinara benefits from 2–4 tablespoons of water before baking. If your jar is slightly short or extra thick, loosen it with a splash of water and save a little warm sauce for serving.

Garlic, Herbs, Salt, and Pepper

Ricotta needs seasoning. Garlic, Italian seasoning or fresh herbs, salt, pepper, and optional red pepper flakes make the filling taste like dinner instead of plain cheese. Use ½ teaspoon salt if your parmesan and sauce are already salty. Use closer to ¾ teaspoon if your ricotta is mild and your sauce is lower in salt.

Dried Italian seasoning is the easiest pantry option. Fresh parsley adds brightness, basil gives a sweeter flavor, and oregano gives the filling a stronger Italian-American note. Save fresh basil partly for the top after baking.

Optional Spinach

Either fresh or frozen spinach works; the real rule is to squeeze out as much moisture as possible. Wet spinach can turn a creamy filling loose and watery. For the full version, jump to spinach ricotta stuffed shells.

Optional Meat

The main recipe below is a classic cheese stuffed shells recipe, but cooked ground beef or Italian sausage can make the meal heartier. Brown the meat fully before adding it to the sauce or filling, then drain off excess fat so the pasta does not turn greasy. For the heartier version, see meat stuffed shells.

Tools That Help

You do not need special tools. A large pot, colander, mixing bowl, 9×13-inch / 23×33 cm baking dish, foil, and a spoon or zip-top bag are enough. A zip-top bag with one corner snipped off can make filling the shells faster and neater, but a spoon works perfectly well.

The first few shells are usually the messiest; by the fifth or sixth one, you will know exactly how much filling your shells can hold.

What Pasta Shells Should You Use?

Jumbo pasta shells are the shape you want here. They are large enough to hold ricotta filling and sturdy enough to bake in sauce. Small shells, medium shells, macaroni shells, and regular conchiglie are better for tossing with sauce, not stuffing.

Boil the shells 2–3 minutes shy of al dente. They should be flexible enough to open and fill, but not fully soft. Spread them on a tray to cool; rinse only if they are sticking badly or too hot to handle.

Depending on shell size and your baking dish, you may fit 20–24 filled shells. Aim for 24, but do not force them in. A slightly looser baking dish bakes better than crushed shells.

Cooked jumbo pasta shells spread on a tray with one torn shell visible.
Cook jumbo shells just shy of al dente and boil a few extras, because a torn shell or two is normal when stuffing pasta.

The Best Ricotta Filling for Stuffed Shells

The filling should look thick and scoopable, more like a cheese spread than a sauce. It should mound on a spoon without running off. If it spreads like sauce, it is too wet; if it feels dry or crumbly, a spoonful of ricotta or sauce will loosen it.

A good stuffed shells filling uses ricotta for creaminess, mozzarella for melt, parmesan or pecorino for savory depth, egg for structure, and garlic, herbs, salt, and pepper for flavor. To check the seasoning safely, mix the cheeses, garlic, herbs, salt, and pepper first, taste, then add the egg last.

Thick ricotta cheese filling with herbs mounding on a spoon above a bowl.
A good ricotta filling should mound on a spoon, not drip, so it stays creamy inside each pasta shell.

Save This Stuffed Shells Filling Ratio

For one 9×13-inch baking dish, use:

  • 15–16 oz / 425–454g ricotta
  • 2 cups / about 225g mozzarella inside the filling
  • ½ cup / 45–55g parmesan or pecorino
  • 1 large egg
  • 1–2 garlic cloves
  • Herbs, salt, and pepper
  • 1 cup / about 115g mozzarella for the top

Once the filling looks thick and scoopable, you are in good shape.

How Much Sauce Do Stuffed Shells Need?

Use about 3 cups / 720ml marinara for one 9×13-inch baking dish. The shells should sit in sauce and have sauce spooned over and around them, but they do not need to be buried.

  • 1 cup / 240ml goes on the bottom of the baking dish
  • 1½–2 cups / 360–480ml goes over and around the filled shells
  • Extra warm sauce can be served on the side if you like a saucier plate

Before baking, you should still see the shape of each shell, but the edges should be surrounded by sauce.

Filled stuffed shells in a baking dish with marinara sauce spooned around and between them.
The shells should stay visible, but the edges need enough marinara to finish tender instead of drying out.

How to Make Stuffed Shells

With the shells, filling, and sauce sorted, assembly is simple: sauce, filled shells, more sauce, cheese, foil, and oven. While the shells boil, mix the filling and spread sauce in the baking dish. By the time the shells are cool enough to handle, the filling and baking dish are ready.

1. Boil the shells

Bring a large pot of salted water to a boil. Add the jumbo shells and cook them 2–3 minutes less than the package says for al dente. Drain and let them cool until they are easy to handle.

2. Make the ricotta filling

In a large bowl, mix ricotta, 2 cups mozzarella, parmesan, egg, garlic, herbs, salt, pepper, and optional red pepper flakes. The filling should be creamy but thick enough to hold its shape on a spoon.

3. Add sauce to the baking dish

Spread about 1 cup of marinara sauce across the bottom of a 9×13-inch / 23×33 cm baking dish. This layer keeps the shells from sticking and protects the bottom of the pasta.

4. Fill the shells

Fill each shell with about 1½–2 tablespoons / about 30g of ricotta filling, depending on shell size. Use a spoon, piping bag, or zip-top bag. Fill generously, but not so much that the shells split. Do not worry if a little filling shows or the shells sit at slightly different angles.

A hand filling a jumbo pasta shell with ricotta mixture using a spoon.
Fill each shell generously, then stop before the pasta stretches or splits around the ricotta filling.

5. Arrange and sauce

Place the filled shells in the baking dish, filling-side up. Spoon the remaining sauce over and around the shells. You want the pasta to look full and well-coated, not dry or sparse.

Ricotta-filled jumbo shells arranged in marinara sauce in a baking dish before baking.
Once the filled shells sit in sauce, cover the dish so the pasta can finish baking gently and evenly.

6. Bake covered, then uncovered

Cover the baking dish with foil without pressing it into the shells. If the foil may touch the sauce or cheese, place a sheet of parchment under the foil or tent the foil slightly. Bake at 375°F / 190°C for 25 minutes.

Stuffed shells in a baking dish loosely covered with foil before baking.
Foil traps steam during the first bake, which helps stuffed pasta shells stay soft and tender.

Remove the foil, sprinkle the remaining mozzarella over the top, and bake for another 8–10 minutes, until the cheese is melted and the sauce is bubbling. The uncovered bake is where the top gets those golden spots.

Shredded mozzarella being sprinkled over sauced stuffed shells in a baking dish.
Add mozzarella after the covered bake, then uncover the dish so the cheese melts and lightly browns.

7. Rest before serving

Let the stuffed shells rest for 5–10 minutes before serving. This is the hardest part because it smells ready, but the short rest makes serving much cleaner. After resting, the shells should lift from the baking dish without spilling all their filling.

Rested stuffed shells being lifted from a baking dish with sauce and melted cheese.
Rest baked stuffed shells before serving so the filling settles and each shell lifts cleanly from the sauce.

How to Know When Stuffed Shells Are Done

The stuffed shells are done when the sauce is bubbling around the edges, the cheese is melted and lightly browned in spots, and the filling is hot in the center. The best bite is fork-tender pasta, thick ricotta filling, tangy tomato sauce, and a little golden mozzarella from the top.

Close-up of baked stuffed shells with bubbling marinara sauce and browned mozzarella at the edge of the baking dish.
Check the edge of the baking dish: bubbling sauce and melted cheese mean the shells are hot through the center.

If the top cheese browns before the center is hot, cover the pasta loosely with foil again and keep baking until the filling is hot through the middle.

Stuffed Shells Recipe

This is the full classic version: jumbo shells filled with seasoned ricotta, tucked into marinara, covered until tender, then finished uncovered so the mozzarella melts into golden spots.

  • Yield:
    6 servings
  • Prep time:
    30 minutes
  • Cook time:
    35 minutes
  • Total time:
    1 hour 5 minutes
  • Oven temperature:
    375°F / 190°C
  • Baking dish:
    9×13-inch / 23×33 cm

Ingredients

  • 12 oz / 340g jumbo pasta shells, or enough to cook 28–30 shells
  • 3 cups / about 720ml marinara sauce, or one 24 oz / 680g jar, divided
  • 15–16 oz / 425–454g ricotta cheese
  • 3 cups shredded low-moisture mozzarella, about 12 oz / 340g, divided
  • ½ cup / 45–55g grated parmesan or pecorino
  • 1 large egg
  • 1–2 garlic cloves, minced or grated
  • 1 tsp dried Italian seasoning, or 2–3 tbsp chopped fresh parsley or basil
  • ½–¾ tsp salt, plus more for pasta water
  • ¼–½ tsp black pepper
  • Pinch of red pepper flakes, optional
  • A few drops of olive oil, only if needed to keep cooked shells from sticking

Instructions

  1. Heat the oven. Preheat the oven to 375°F / 190°C.
  2. Cook the shells. Bring a large pot of salted water to a boil. Add 28–30 jumbo shells and cook 2–3 minutes less than the package directions for al dente. Drain and let cool until easy to handle. If the shells start sticking, spread them on a tray or toss with only a few drops of olive oil.
  3. Make the filling. In a large bowl, combine ricotta, 2 cups mozzarella, parmesan, garlic, Italian seasoning or herbs, salt, pepper, and red pepper flakes if using. Taste the cheese mixture before adding the egg, then mix in the egg last.
  4. Prepare the baking dish. Spread about 1 cup of marinara sauce over the bottom of a 9×13-inch / 23×33 cm baking dish.
  5. Fill the shells. Spoon about 1½–2 tablespoons / about 30g filling into each shell. Arrange the filled shells in the dish, filling-side up. Aim for 24 filled shells; if your shells are very large, 20–22 may fit better.
  6. Add sauce. Spoon the remaining marinara sauce over and around the shells. Cover the baking dish tightly with foil, tenting it slightly so it does not press into the cheese or filling.
  7. Bake covered. Bake for 25 minutes, until the shells are hot and the sauce is bubbling around the edges.
  8. Finish uncovered. Remove the foil, sprinkle the remaining 1 cup mozzarella over the top, and bake uncovered for 8–10 minutes, until the cheese is melted and lightly browned in spots.
  9. Rest and serve. Let the stuffed shells rest for 5–10 minutes before serving. Serve with extra warm marinara if you like a saucier plate.

Recipe Notes

  • Softer top cheese: Add all the mozzarella before covering and baking if you want a fully melted top.
  • Stretchier browned top: Save the final cup of mozzarella and add it after the covered bake.
  • Spinach shells: Add 5 oz / 140g cooked fresh spinach or 8 oz / 225–250g thawed frozen spinach, squeezed very dry.
  • Meat sauce version: Add ½–1 lb / 225–450g cooked ground beef or Italian sausage to the sauce, and increase sauce by ½–1 cup if the pasta looks dry.
  • Cottage cheese swap: Blend cottage cheese briefly for a smoother filling and drain it first if it looks watery.

Small Details That Make Better Stuffed Shells

  • Cook 28–30 shells. You need backups for the ones that tear.
  • Drain watery ricotta. Loose ricotta makes the filling run instead of mound.
  • Taste before adding egg. It is easier to fix bland filling before the egg goes in.
  • Loosen very thick marinara. A few tablespoons of water help the sauce move around the shells.
  • Cover first. The pasta finishes cooking in the sauce before the cheese browns.
  • Rest before serving. The filling firms slightly as it sits.

Make-Ahead, Freezer, and Reheating Instructions

Stuffed shells are one of the best baked pasta dinners to prepare ahead. The shells, filling, sauce, and cheese all hold up well, and a freezer batch feels like a future dinner already handled. This is also a good place to make two baking dishes: bake one tonight and freeze the second before baking.

Best Make-Ahead Option

Assemble the stuffed shells up to 24 hours ahead. Fill the shells, arrange them in sauce, cover tightly, and refrigerate. Let them sit at room temperature only while the oven preheats, about 20–30 minutes. If baking straight from the fridge, add 5–10 minutes to the covered baking time.

Unbaked stuffed shells in a baking dish partly covered with foil, with sauce nearby.
Stuffed shells are ideal for make-ahead dinners because you can refrigerate or freeze them before baking.

Best Freezer Option

Freeze stuffed shells before baking. Assemble the shells in a freezer-safe baking dish, cover tightly with plastic wrap and foil or a freezer-safe lid, and freeze for up to 2–3 months for best quality.

If you froze the shells in a glass or ceramic baking dish, thaw them overnight unless the dish is labeled freezer-to-oven safe. That helps prevent sudden temperature shock. You can also freeze the filled shells separately and transfer them to an oven-safe dish with sauce before baking.

Best Small-Batch Freezer Option

Freeze filled shells on a tray until firm, then transfer them to a freezer-safe bag or container. Later, place only the number of shells you need into a baking dish with sauce and cheese. This is useful when you want 2–4 servings instead of a full batch.

Ricotta-filled jumbo pasta shells spaced apart on a parchment-lined tray before freezing.
Freeze stuffed shells in a single layer first so they do not stick together; once firm, you can transfer them for easy small-batch freezer meals later.

Best Texture After Freezing

For the best texture, thaw frozen stuffed shells overnight in the refrigerator before baking. Before baking, remove any plastic wrap and cover the baking dish again with foil. Bake as directed, adding 5–10 extra minutes if the pasta is still cold.

How to Bake Frozen Stuffed Shells

To bake from frozen, cover the baking dish with foil and bake at 350°F / 175°C for about 60–75 minutes, or until the center is steaming hot. Uncover, add cheese if needed, and bake 10–15 minutes more until bubbling and melted.

How to Store Leftovers

Store leftover stuffed shells in an airtight container in the refrigerator for 3–4 days. A 3–4 day refrigerator window is also the general USDA guidance for cooked leftovers, so it is a good limit to use here.

How to Reheat Stuffed Shells

Reheat covered in the oven at 350°F / 175°C until hot, or microwave individual portions. Add a spoonful of extra sauce or a small splash of water before reheating so the pasta does not dry out.

Leftover Ideas

Leftover stuffed shells are best reheated with extra sauce, but you can also chop them into smaller pieces and reheat them like baked pasta. Add fresh herbs, parmesan, or a little extra marinara to wake the flavor back up. This is the sort of dinner that makes leftovers feel like a reward.

Stuffed Shells Variations

Think of the recipe card as the house version. The variations are how you adjust the pasta for the people eating it — greener for spinach lovers, meatier for Sunday dinner, lighter with cottage cheese, or richer with Alfredo.

Which Stuffed Shells Variation Should You Make?

Spinach Ricotta Stuffed Shells

Add spinach to the ricotta filling for a classic spinach stuffed shells variation. Fresh spinach and frozen spinach both work, but the spinach needs to be cooked, chopped, and squeezed very dry before it goes into the filling. Use about 5 oz / 140g fresh spinach or 8 oz / 225–250g frozen spinach.

Spinach ricotta stuffed shells arranged in marinara sauce in a cream baking dish.
For spinach ricotta stuffed shells, squeeze the spinach dry so the filling stays creamy instead of watery.

Beef Stuffed Shells

For the cleanest shells, keep the ricotta filling mostly cheese-based and put the browned meat in the sauce. That gives every bite a hearty meat sauce without making the shells heavy or hard to close. Brown ½–1 lb / 225–450g ground beef with a little salt, pepper, garlic, and Italian seasoning, then drain excess fat before adding it to the marinara.

Sausage Stuffed Shells

Italian sausage brings more seasoning than ground beef, so it is the easiest way to make the sauce taste deeper. Remove it from the casing if needed, brown it well, and drain any excess fat. Sausage brings more salt and spice than plain ground beef, so taste before adding extra seasoning.

Ricotta stuffed shells with chunky beef or sausage marinara sauce spooned around them.
For meat stuffed shells, keep the cheese inside the pasta and stir browned beef or sausage into the marinara.

Cottage Cheese Stuffed Shells

Cottage cheese is the easiest ricotta swap and a good option if you want a lighter, higher-protein filling. Replace ricotta 1:1 by weight, drain it if watery, and blend it briefly for a smoother texture. The flavor is a little tangier and less classic than ricotta, but it bakes up creamy when mixed with mozzarella, parmesan, egg, garlic, and herbs.

Stuffed Shells Without Ricotta

If you do not have ricotta, use cottage cheese, a mix of cream cheese and mozzarella, a meat filling, roasted vegetables, or tofu ricotta for a dairy-free version. This helps if you dislike ricotta or simply do not have it. The recipe can still work well as long as the filling is thick and not watery.

A jumbo pasta shell being filled with smooth blended cottage cheese mixture.
For stuffed shells without ricotta, blend cottage cheese until smooth so the filling holds its shape inside the pasta.

Alfredo Stuffed Shells

For a creamy white-sauce version, use Alfredo sauce instead of marinara. Because Alfredo is rich, spinach or chicken works especially well here. For more creamy pasta dinner ideas, see this chicken Alfredo pasta guide.

Alfredo stuffed shells with creamy white sauce, spinach, and melted mozzarella in a baking dish.
Alfredo stuffed shells are the creamy white-sauce variation to choose when you want spinach, chicken, or a richer pasta bake.

No-Boil Stuffed Shells

No-boil stuffed shells can work, but they need a different sauce ratio and a longer covered bake. This recipe is written for boiled shells because it gives the most predictable texture: shells that are flexible enough to fill, tender after baking, and less likely to stay firm in the center. If you want a true no-boil version, increase the sauce or liquid and keep the dish tightly covered until the pasta is fully tender.

Serving and Scaling

How Many Stuffed Shells Per Person?

Plan on 3–4 stuffed shells per adult if serving with salad, bread, or vegetables. Plan on 4–5 shells per person for a heartier main dish with fewer sides. A 9×13-inch baking dish with about 20–24 stuffed shells serves 6 people generously.

A plate of ricotta stuffed shells with marinara sauce, parmesan, herbs, and a fork.
For dinner portions, plan on three to four ricotta stuffed shells per adult with salad, garlic bread, or vegetables.

Can You Double This Recipe?

Yes. To double the recipe, use two 9×13-inch baking dishes instead of crowding everything into one deep dish. If baking both at the same time, rotate them halfway through if your oven has hot spots. If the pans are cold from the fridge, they may need a few extra minutes of covered baking time. You can also bake one now and freeze one for later.

What to Serve with Stuffed Shells

Stuffed shells are rich, cheesy, and well-sauced, so they pair best with something crisp, green, garlicky, or simple. On a weeknight, salad is enough. When serving company, add garlic bread and something fresh on the side.

Classic Comfort Sides

Light and Fresh Sides

  • Simple green salad with vinaigrette
  • Cucumber salad with vinegar, dill, and onion
  • Arugula salad with lemon

Extra Vegetable Sides

  • Roasted broccoli
  • Sautéed spinach or greens
  • Roasted zucchini or eggplant
  • Steamed green beans

Bigger Dinner Add-Ons

A fresh side can still feel filling: this chickpea salad brings lemon, herbs, cucumber, and crunch beside the cheesy shells.

Troubleshooting Stuffed Shells

Problem Cause Fix
Shells tear Overcooked or handled too hot Undercook slightly, cool, and boil extras
Shells stick Cooled in a pile Spread on a tray or use a few drops of oil
Filling is watery Wet ricotta or spinach Drain ricotta and squeeze spinach dry
Filling leaks Too much filling or loose filling Use about 30g filling per shell and keep filling thick
Shells are dry Too little sauce or uncovered too long Use sauce under and over; bake covered first
Edges dry out Not enough sauce near edges Spoon extra sauce around edges
Filling tastes bland Ricotta under-seasoned Add salt, parmesan, garlic, herbs, and pepper
Pasta is mushy Shells fully cooked before baking Boil 2–3 minutes shy of al dente
Top browns too fast Uncovered too long Cover loosely and keep baking
Frozen center is cold Covered bake too short Keep baking covered until center is hot
Cheese turns rubbery Overbaked or poor melting cheese Bake just until melted and use low-moisture mozzarella
Pasta looks watery Wet filling or vegetables Drain ingredients and rest before serving

If the shells or edges look dry after baking, spoon warm marinara around the pasta before serving. Sauce brings moisture back better than adding more cheese.

Extra marinara sauce being spooned around the edge of baked stuffed shells.
When the edges look dry, spoon warm marinara around the shells before serving to soften them again.

Frequently Asked Questions

A few common questions come up once you start adjusting the recipe. These quick answers should help you choose the right shells, filling, sauce, and make-ahead method.
What pasta shells do I use for stuffed shells?

Use jumbo pasta shells. Small shells, medium shells, and macaroni-style shells are not large enough for stuffing.

Do you have to boil shells before stuffing them?

For this version, yes. Boiling first gives you shells that are soft enough to fill but firm enough to finish in the oven. No-boil shells need more liquid and a longer covered bake.

What is the best cheese filling for stuffed shells?

The best classic filling uses ricotta, mozzarella, parmesan or pecorino, egg, garlic, herbs, salt, and pepper. Ricotta makes it creamy, mozzarella adds melt, parmesan adds depth, and egg helps it hold together.

Do I need egg in stuffed shells?

Egg helps the filling set so the shells lift more cleanly. You can skip it, but the filling will be softer. If skipping egg, add a little extra parmesan or mozzarella.

Can I use cottage cheese instead of ricotta?

You can replace ricotta 1:1 by weight, drain cottage cheese if watery, and blend it first if you want a smoother filling. The no-ricotta section gives more options.

Can I make stuffed shells without ricotta?

Yes — use cottage cheese, cream cheese mixed with mozzarella, a meat filling, roasted vegetables, or tofu ricotta. Keep the filling thick so it does not run out of the shells.

How much sauce do stuffed shells need?

For one 9×13-inch baking dish, use about 3 cups / 720ml sauce. Spread about 1 cup on the bottom and spoon the rest over and around the filled shells.

Do you bake stuffed shells covered or uncovered?

Bake them covered for most of the time so the pasta stays moist and the filling heats through. Uncover at the end to melt and lightly brown the cheese.

How do you keep stuffed shells from drying out?

Use sauce under and over the shells, cover the baking dish for the first bake, and reheat leftovers with extra sauce or a small splash of water. That is the same no-dry-shell method used in the main recipe.

Can I make stuffed shells ahead of time?

Yes. Assemble stuffed shells up to 24 hours ahead, cover, and refrigerate. The make-ahead section explains the timing and freezer options.

Can stuffed shells be frozen?

Freeze them before baking for the best texture, either as a full baking dish or as individual filled shells. Use within 2–3 months for best quality.

Can I bake stuffed shells from frozen?

You can bake them covered at 350°F / 175°C for 60–75 minutes, or until the center is hot. Then uncover and bake until the sauce bubbles and the cheese melts.

Can I add meat to stuffed shells?

Meat works best in the sauce, where it makes the dish heartier without weighing down the ricotta filling. Brown and drain the meat before adding it.

How many stuffed shells per person?

Plan on 3–4 stuffed shells per adult with sides, or 4–5 shells per person for a heartier main dish.

How long do leftover stuffed shells last?

Leftovers keep for 3–4 days and reheat best with extra sauce. Store them in an airtight container in the refrigerator and reheat until hot.

Make It Your Own

A good batch of stuffed shells should feel generous: pasta tucked into sauce, cheese bubbling around the edges, and enough filling in every shell that nobody feels shortchanged. The whole recipe comes back to the same simple method: thick filling, enough sauce, covered bake, tender shells.

This is the kind of tray that looks a little messy in the best way: sauce at the edges, cheese pulling from the spoon, and enough shells for someone to quietly go back for one more.

A family-style baking dish of stuffed shells served with garlic bread, salad, plates, and a fork.
Serve stuffed shells family-style with garlic bread and salad; this is the pasta bake people come back to for one more shell.

You can keep the recipe classic, add spinach, make it meaty with beef or sausage, swap in cottage cheese, use Alfredo sauce, or freeze a batch for another night. For another cozy pasta dinner after this one, save this broccoli pasta too.

If you make these stuffed shells, tell us which version landed on your table: classic ricotta, spinach, meat sauce, cottage cheese, Alfredo, or extra saucy. I especially want to know if you froze a batch for later — that is where this recipe really earns its keep.

Back to top ↑

Posted on Leave a comment

Slow Cooker Beef Stew Recipe

A bowl of beef stew with beef chunks, potatoes, carrots, peas, thick brown gravy, bread, and a spoon.

Tender beef, soft potatoes, sweet carrots, and a Crock Pot gravy that stays rich instead of turning thin.

If you have ever waited all day for beef stew and opened the slow cooker to thin broth instead of rich gravy, this version is built to avoid that disappointment.

The goal is the moment you lift the lid and see glossy, deep brown gravy settled around tender beef instead of a pot that needs rescuing.

Lid-lift cue: The finished pot should look glossy and settled, with steam rising from gravy rather than beef and vegetables floating in broth.

A hand lifting the lid of a slow cooker to reveal steaming beef stew with beef, potatoes, carrots, peas, and glossy gravy.
When you lift the lid, look for gravy settled around the beef and vegetables. If the pot looks glossy instead of flooded, the liquid stayed under control.

This is the kind of slow cooker beef stew you want waiting at the end of the day: beef soft enough to break with a spoon, carrots that turn sweet in the gravy, potatoes that still hold their shape, and deep brown gravy thick enough to drag bread through.

Finished cue: This is the texture we are aiming for: chunky beef, visible vegetables, and gravy thick enough to feel like stew instead of soup.

A bowl of beef stew with beef chunks, potatoes, carrots, peas, thick brown gravy, bread, and a spoon.
Start with the finished goal in mind: chunky beef stew with glossy brown gravy, visible vegetables, and enough body to scoop with bread instead of chasing thin broth.

Why This Slow Cooker Beef Stew Stays Thick

This method works with the slow cooker instead of fighting it. It uses controlled liquid, the right cut of beef, vegetables cut large enough for a long cook, and a simple thickening step once the meat is tender. You still get classic beef stew with potatoes and carrots, but the pot is set up to finish glossy enough to coat a spoon instead of thin and brothy.

You can make it with chuck roast or packaged beef stew meat. Brown the beef for the deepest flavor, or use the dump-and-go version when dinner just needs to get started. Either way, the fork test matters more than the timer, and the slow cooker gives you the kind of dinner that feels finished before you even sit down.

Quick Answer: How to Make Slow Cooker Beef Stew That Is Not Watery

For thick, tender slow cooker beef stew, use beef chuck or stew meat cut into 1¼- to 1½-inch chunks. Coat the beef lightly with flour, brown it if you have time, then slow cook it with potatoes, carrots, onion, tomato paste, Worcestershire sauce, herbs, and controlled beef broth.

Cook on low until the beef gives easily with a fork, then stir in a cornstarch slurry during the final 20 to 30 minutes if the gravy needs more body. Start with enough broth to moisten the pot, not enough to fully cover every piece of beef and potato.

  1. Use chuck roast or stew meat cut into even chunks.
  2. Add only enough broth to moisten the pot.
  3. Cook on low until the beef is truly tender.
  4. Finish with slurry during the final 20 to 30 minutes.
  5. Rest before serving so the gravy settles.

Ready to cook? Start with the recipe card. If thin gravy is your main worry, jump to how much liquid to use before loading the pot; if you already bought packaged cubes, read the beef stew meat notes first.

Recipe Card

Slow Cooker Beef Stew Recipe

Description: A classic slow cooker beef stew made with chuck roast or beef stew meat, potatoes, carrots, onion, herbs, and a rich gravy-style broth. Includes browned-beef and no-browning methods.

Prep Time25–30 minutes with browning
12–15 minutes dump-and-go
Slow Cook Time8 hours on low
4–5 hours on high
Thickening + Rest30–45 minutes
Total TimeAbout 8 hours 45 minutes to 9 hours
Servings6 generous servings
Equipment6-quart / 5.7 L slow cooker

Ingredients

For the beef stew

  • 2½ lb / 1.1 kg beef chuck roast or beef stew meat, cut into 1¼- to 1½-inch chunks
  • 1 teaspoon salt, plus up to ½ teaspoon more after thickening if needed
  • 1 teaspoon black pepper
  • 3 tablespoons / 24 g all-purpose flour or plain flour
  • 2 tablespoons / 30 ml neutral oil, for browning
  • 1 large onion, diced, about 150 g
  • 4 garlic cloves, minced
  • 3 tablespoons / 45 g tomato paste
  • 2½ cups / 600 ml beef broth or beef stock
  • ½ cup / 120 ml red wine, or use extra beef broth
  • 2 tablespoons / 30 ml Worcestershire sauce
  • 1 tablespoon / 15 ml balsamic vinegar, optional but helpful for depth
  • 1 beef bouillon cube or 1 teaspoon beef base, optional
  • 4 medium carrots, cut into thick pieces, about 300–350 g
  • 1½ lb / 680 g Yukon gold or red potatoes, cut into large chunks
  • 2 celery ribs, sliced, about 100–120 g
  • 2 bay leaves
  • 1 teaspoon dried thyme
  • 1 rosemary sprig, or ½ teaspoon dried rosemary
  • 1 cup / 130–140 g frozen peas

For thickening near the end

  • 2 tablespoons / 16 g cornstarch
  • ¼ cup / 60 ml cold water

Instructions

  1. Cut and season the beef. Pat the beef dry. Cut into 1¼- to 1½-inch chunks if needed. Season with 1 teaspoon salt and the black pepper.
  2. Coat lightly with flour. Sprinkle flour over the beef and toss until lightly coated. The flour should cling to the beef, not form a thick paste.
  3. Brown the beef for best flavor. Heat oil in a large skillet over medium-high heat. Brown beef in batches for 2 to 3 minutes per side, just until the outside is deeply browned. Transfer to the slow cooker.
  4. Build the flavor base. In the same skillet, cook onion for 2 to 3 minutes. Add garlic and tomato paste and cook for about 1 minute. Pour in wine or a splash of broth and scrape the pan. Transfer everything to the slow cooker.
  5. Load the slow cooker. Add potatoes and carrots toward the bottom and sides, then add the beef, onion mixture, broth, Worcestershire sauce, balsamic if using, bouillon if using, celery, bay leaves, thyme, and rosemary. Stir gently. The liquid does not need to cover everything.
  6. Cook low and slow. Cover and cook on low for 8 hours, or until the beef is fork-tender. High works in 4 to 5 hours, but low gives better tenderness. Keep the lid on as much as possible.
  7. Add peas and thicken. Mix cornstarch with cold water until smooth. Stir slurry into the stew, then add frozen peas. Cover and cook on high for 20 to 30 minutes.
  8. Rest and serve. Turn off the slow cooker and let the stew rest for 10 to 15 minutes. Remove bay leaves and rosemary stem. Taste and adjust salt and pepper.

Notes

  • For a no-browning version, toss beef with flour and seasoning, then add everything directly to the slow cooker except peas and slurry.
  • If skipping wine, use 3 cups / 720 ml total beef broth.
  • Add the extra ½ teaspoon salt only if using low-sodium broth and no salty shortcuts like bouillon, onion soup mix, gravy mix, or a seasoning packet.
  • Start with the listed broth amount and adjust the final consistency after the beef is tender.
  • If the beef is tough, cook it longer. Tough stew meat usually needs more time, not more heat.
  • Thaw beef before adding it to the slow cooker. Frozen peas are fine near the end.

Recipe cue: Use the recipe card for the exact amounts, then use the visual sections below to judge texture, liquid level, and doneness.

A bowl of Crock Pot beef stew with beef, potatoes, carrots, peas, and brown gravy on a neutral surface.
A good Crock Pot beef stew should serve as one complete spoonful: tender beef, chunky vegetables, and gravy that carries everything together.

The Start Low, Finish Thick Method

The secret to this stew is simple: start with less liquid than you would use for stovetop stew, let the beef and vegetables release their own moisture, then adjust the gravy only after the meat is tender.

The pot may look a little under-liquid at first. That is not a mistake; that is the plan. A stew that looks thin before the final step has not failed; it simply is not finished yet.

The anti-watery stew system: use less broth at the start, cut the vegetables large, cook on low until the beef gives, then thicken only after the slow cooker has created its own liquid.

Method cue: The anti-watery setup starts before cooking, with large chunks and restrained broth instead of a fully submerged pot.

Hands arranging beef and large vegetables in a slow cooker while a small amount of broth is poured around them.
This is the anti-watery setup: large chunks, restrained broth, and room for the slow cooker to create its own liquid as it cooks.

Before You Start: Three Things That Matter Most

  1. Do not fully cover the stew with liquid. The beef and vegetables should be moistened, not swimming.
  2. Let tenderness decide the timing. The beef should give when pressed with a fork, not just be “cooked through.”
  3. Wait to judge the gravy. The final texture should be judged after the beef is tender, the slurry has cooked, and the stew has rested.

Visual Cues for Success

  • Before cooking: the ingredients look moistened, not submerged.
  • Once cooked: the beef gives easily with a fork.
  • When thickened: the gravy looks glossy and lightly coats a spoon.
  • After resting: the potatoes hold their shape and the gravy settles around the beef.

This is not a fussy stew. It is a patient one. Set it up well, let it cook gently, and make the final call on texture only when the beef is ready.

Back to top ↑

You’ll Like This Version If You Want

  • A classic potatoes-and-carrots beef stew made in the slow cooker
  • Rich, spoon-coating gravy instead of a thin beef broth
  • A recipe that works with chuck roast or packaged beef stew meat
  • A choice between browning the beef and a no-browning shortcut
  • Potatoes that stay in soft, generous chunks
  • Clear fixes for thin gravy, tough beef, bland flavor, or mushy vegetables

Prefer a brothy bowl? Add extra warm broth at the end, after the beef is tender and the gravy has been adjusted. This recipe is written as a thick, gravy-style stew.

If you want the same thick, cozy feeling without beef, this bean stew recipe is a hearty meatless option with a similar spoonable texture.

Why This Recipe Works

The best slow cooker stews feel effortless at the table, but they are usually won before the lid goes on. This version uses a simple four-part system: less broth at the start, large vegetable pieces, low heat until the beef gives, and slurry only after the pot has shown you how much liquid it created.

Flour gives the beef a little body, tomato paste and Worcestershire build depth, and slow heat gives tougher cuts time to soften. The peas go in late so they stay sweet and green instead of dull.

Wait until the long cook is done before judging the gravy. By then, the beef and vegetables have released their liquid, and you can thicken what is actually in the pot instead of guessing at the start.

Kitchen confidence cue: do not judge the stew too early. A pot that looks a little loose at hour six can still finish beautifully after the slurry and a short rest.

What This Beef Stew Tastes Like

The gravy should taste rounded and savory, with the tomato paste melted into the background instead of tasting sharp or tomato-heavy. Worcestershire sauce and optional balsamic add just enough lift to keep the bowl rich without making it heavy.

The beef should be soft enough to press apart with a spoon, the potatoes should be creamy at the edges, and the carrots should taste sweet from the long cook. Browned beef gives the stew a deeper, roastier finish; the dump-and-go version is gentler, but still cozy and satisfying.

This is the kind of stew that wants bread, rice, mashed potatoes, or noodles nearby — something simple to catch the last spoonfuls of gravy at the bottom of the bowl.

That same cozy beef-and-potato comfort shows up in this slow cooker cottage pie, especially if you like rich gravy-style dinners.

Ingredients You’ll Need

Nothing here is fancy, but each ingredient has a job. The stew tastes best when the basics are doing their work: beef for depth, potatoes for body, carrots for sweetness, and a little acidity to wake up the gravy.

Ingredient cue: Each ingredient has a job, so keep the lineup simple and let beef, vegetables, broth, tomato paste, and herbs do the work.

Beef chuck, potatoes, carrots, onion, garlic, broth, herbs, flour, and tomato paste arranged on a kitchen counter.
Before cooking begins, build the stew in layers: beef for depth, potatoes for body, carrots for sweetness, and tomato paste for a darker gravy base.

Beef

Chuck roast is the first choice here because it gives the best mix of tenderness and flavor. Packaged beef stew meat is also fine and is often the most convenient option; see the stew meat section if that is what you have.

Cut the beef into even 1¼- to 1½-inch chunks. Pieces that are too small can dry out, while very large chunks may need extra time before they soften.

Flour

Flour helps the beef brown and gives the gravy body. Use a light coating. Too much flour can make the stew feel heavy or pasty.

For a gluten-free version, skip the flour or use a gluten-free all-purpose flour blend. Then finish the stew with cornstarch or arrowroot slurry.

Potatoes

Yukon gold potatoes or red potatoes are best because they hold their shape. The goal is soft edges, not potato collapse.

Russet potatoes can be used, but they soften more and may cloud the gravy. If you use russets, cut them into larger chunks and expect a softer texture.

Serving the stew over potatoes instead of cooking potatoes inside it? These garlic mashed potatoes are built to stay creamy instead of gluey under gravy.

Carrots, Celery, and Onion

Carrots bring sweetness, celery adds a classic stew flavor, and onion gives the gravy a savory base. Cut carrots into thick pieces so they hold up during the long cook.

Tomato Paste, Worcestershire, and Broth

Cooked briefly or whisked well into the broth, tomato paste gives the gravy depth without making the stew taste like tomatoes. Worcestershire sauce adds savory depth. Beef broth or beef stock is the main liquid, but the amount is controlled so the pot finishes hearty instead of soupy.

Low-sodium broth gives you more control when bouillon, beef base, onion soup mix, or a seasoning packet is involved. Taste after thickening, not before; salt feels different once the gravy tightens.

Red Wine or No-Wine Option

Red wine adds depth and a richer stew flavor. For a no-wine version, use 3 cups / 720 ml total beef broth and keep the Worcestershire sauce. The optional balsamic becomes more useful without wine because it gives the gravy a small lift.

Herbs and Peas

Bay leaves, thyme, and rosemary are classic with beef stew. Frozen peas go in late because they only need enough time to heat through. Adding peas at the beginning can make them dull and mushy.

Best Beef to Use

The best beef for stew is not the fanciest beef. It is the cut that has enough time to soften. The slow cooker is not the place for very lean quick-cooking steak cuts; stew is where tougher, flavorful cuts become tender.

Beef cue: Choose a cut that benefits from slow cooking; chuck roast is better here than lean quick-cooking steak.

A whole beef chuck roast with visible marbling on a wooden cutting board beside a chef’s knife.
Chuck roast works because slow cooking gives its connective tissue time to soften. That is why it becomes tender instead of dry in beef stew.
Beef Cut Use It? Notes
Chuck roast Best choice Cut it yourself into even chunks for the best texture and flavor.
Beef stew meat Yes Convenient and useful when you want less prep.
Stewing beef, braising steak, casserole beef Yes Good global equivalents for long-cooked beef dishes.
Very lean steak cuts Not ideal Can become dry or chewy during long cooking.

Using Beef Stew Meat in the Slow Cooker

This is the section for the pack of stew meat already sitting in your fridge. You do not need perfect butcher-counter cubes to make a good pot of stew.

Stew meat cue: Spread packaged stew meat out before cooking so you can trim hard fat and even out the largest pieces.

Raw beef stew meat pieces on a wooden cutting board being sorted and trimmed with a knife.
If using packaged beef stew meat, sort it first. Trim hard fat and cut oversized pieces so the beef cooks evenly in the slow cooker.

Spread the pieces out on a board before cooking. Cut very large pieces down, trim large hard fat, and aim for pieces around 1¼ to 1½ inches. Even pieces cook more evenly and give you a better chance of tender beef throughout the pot.

Size cue: Cut beef into even 1¼- to 1½-inch chunks so the stew meat stays juicy while it becomes fork-tender.

Raw beef pieces cut into even chunks on a wooden cutting board with a knife nearby for scale.
Next, keep the beef pieces large enough to stay juicy. Chunks around 1¼ to 1½ inches are ideal for fork-tender stew meat.

A light flour coating helps stew meat in two ways: it gives the gravy body and helps the beef brown if you are searing it first. Browning is useful, but not required. For the no-browning method, lean on the tomato paste, Worcestershire sauce, optional balsamic, and beef base for depth; the dump-and-go section shows the shortcut.

If stew meat is chewy after 8 hours, do not assume it is ruined. In most cases, it needs more time on low. Keep cooking until a piece gives easily when pressed with a fork.

Choose Your Method: Browned Beef or Dump-and-Go

There is no single right way to start this stew. Browning gives the deepest flavor, but the dump-and-go method is useful on busy days. The best choice is the one that gets dinner into the slow cooker without making the recipe feel like a project.

Method How to Do It Best For Tradeoff
Best flavor Flour and brown the beef, sauté onion/garlic/tomato paste, then deglaze the pan. Richest gravy, deeper color, weekend-style comfort Adds 10–15 minutes
Dump-and-go Add floured beef, vegetables, broth, tomato paste, Worcestershire, and herbs directly to the slow cooker. Busy mornings, low effort, basic weeknight stew Slightly lighter flavor and color
Middle path Skip browning but whisk tomato paste, Worcestershire, balsamic, and beef base into the broth first. Good flavor without the skillet step Not quite as roasted as browned beef

On busy days, the dump-and-go version still gets a real dinner going. Browning is better, but the stew can still be worth making without it.

How Much Liquid to Use So the Stew Is Not Watery

This is the moment where slow cooker stew asks you to trust the process a little. It is tempting to add more broth at the start, but restraint is what gives you rich gravy instead of soup.

On the stove, steam escapes and the sauce reduces. In a slow cooker, the lid traps that steam while the beef and vegetables release their own moisture. Too much broth at the beginning can leave you with a loose bowl by the end.

The Pot Should Look a Little Low on Liquid

When you first load the slow cooker, the ingredients should look moistened and surrounded by broth, not fully submerged like soup. Potatoes and carrots should still be visible. The beef should sit among the vegetables, not float in a deep pool of liquid. If the pot is already loose, use the thickening guide near the end instead of adding more starch too early.

Liquid cue: Before the lid goes on, the broth should sit around the beef and vegetables, not cover them like soup.

A slow cooker filled with raw beef, potatoes, carrots, onion, herbs, and broth that sits below the top of the ingredients.
Before cooking, the ingredients should be moistened, not submerged. This one visual cue does more to prevent watery slow cooker beef stew than almost anything else.

This can feel strange if you are used to stovetop stew, but it is intentional. The liquid level will rise as the beef and vegetables cook. Resist adding extra broth early unless the pot truly looks dry.

Warning cue: If the ingredients are floating before cooking, the slow cooker may finish with thin broth instead of rich gravy.

Beef, potatoes, and carrots floating in too much broth inside a slow cooker before cooking.
By contrast, if the beef and vegetables are floating at the start, the finished stew can turn thin. Add more broth only after cooking if needed.

Texture cue: the liquid should come partway around the beef and vegetables. It should not fully cover everything. A slightly low-looking pot at the start usually becomes a better stew at the end.

If you like oniony gravy-style slow-cooker dinners, this slow cooker French onion chicken uses the same idea of controlled liquid and a cozy sauce.

How Full Should the Slow Cooker Be?

For even cooking, aim for the slow cooker to be about half to three-quarters full. Packed to the very top, the stew may cook unevenly or bubble over. Too empty, and the edges may cook faster while the liquid behaves differently.

A 6-quart / 5.7 L slow cooker is the best size for this full recipe. Use the small-batch version below for a 3-quart cooker.

How to Make It Step by Step

Step 1: Cut the Beef and Vegetables Properly

Cut the beef into 1¼- to 1½-inch pieces. This size is large enough to stay juicy and small enough to tenderize well.

Cut potatoes into large chunks, about 1½ inches. Cut carrots into thick pieces. Small vegetable pieces can become mushy after 8 hours.

Vegetable cue: Cut potatoes and carrots larger than you would for soup because they need to survive the full slow-cooker time.

Large potato chunks and thick carrot pieces on a wooden cutting board with a knife and whole vegetables nearby.
Cut the vegetables for the long cook, not for a quick soup. Larger potato and carrot pieces hold their shape while the beef finishes tenderizing.

Step 2: Season and Flour the Beef

Season the beef with salt and pepper, then toss with flour. The coating should be light and even. Shake off any heavy clumps.

That light coating helps the beef brown in the skillet and gives the stew more body later.

Flour cue: The coating should look light and dusty, not thick or clumpy, so the gravy gains body without turning pasty.

Raw beef chunks lightly coated with flour in a shallow bowl on a kitchen counter.
A thin flour coating helps the beef brown and gives the gravy a head start. Keep it light so the final stew does not taste pasty.

Step 3: Brown the Beef, If You Have Time

Heat oil in a large skillet. Brown the beef in batches, leaving space between pieces. Crowding the pan makes the beef steam instead of brown.

You only need to brown the outside. The beef will finish cooking in the slow cooker.

Browning cue: Give the beef room in the skillet so the outside browns deeply before it goes into the slow cooker.

Beef cubes browning in a skillet with seared edges and space between the pieces.
Browning is optional, but it adds roasted depth. Leave space between the beef pieces so they sear instead of steaming in the pan.

Step 4: Build the Flavor Base

After browning the beef, use the same skillet for onion, garlic, and tomato paste. Then add wine or broth to loosen the browned bits from the pan. Those browned bits bring depth into the stew.

Flavor-base cue: Cook the tomato paste briefly with onion and garlic so the gravy tastes deeper, not raw or sharp.

Tomato paste, onions, and garlic cooking in a skillet with a wooden spoon.
Then cook the tomato paste with the onions and garlic. This deepens the flavor and keeps the gravy from tasting sharp or raw.

Deglazing cue: Scrape up the browned bits before they are lost; they are concentrated flavor for the slow-cooker gravy.

Liquid being poured into a skillet while a wooden spoon scrapes browned bits from the pan.
After browning, deglaze the skillet before adding everything to the slow cooker. Those browned bits turn into extra flavor in the gravy.

For the no-browning version, whisk the tomato paste, Worcestershire sauce, balsamic if using, and broth together before pouring them over the beef and vegetables. This helps the tomato paste blend in instead of sitting in clumps.

Step 5: Load the Slow Cooker

Add potatoes and carrots toward the bottom and sides because they can handle the long cook. Add the beef over and among the vegetables, then add the onion mixture, broth, Worcestershire sauce, balsamic if using, celery, herbs, and bouillon or beef base if using.

Stir gently so everything is distributed, but do not worry if the ingredients are not fully submerged. Save the peas and cornstarch slurry for the finish.

Step 6: Cook Until the Beef Gives Easily

Cook on low for about 8 hours. Low is the best setting for tender beef because it gives the meat time to soften gradually.

On high, start checking around 4 hours, then continue until the beef is tender. Chewy beef usually needs more time, not more heat.

Keep the lid on as much as possible. Opening it repeatedly releases heat and makes the timing less predictable.

Doneness cue: Trust the fork more than the timer; the beef should give easily before you call the stew done.

A fork pressing into a cooked brown beef chunk in stew with gravy, potatoes, carrots, and peas nearby.
The timer is not the final test. The beef is ready when it gives under a fork and starts to separate into soft fibers.

Potato cue: The potato pieces should be tender but still visible, which is why large chunks matter from the beginning.

A spoon lifting a cooked potato chunk from beef stew while the potato holds its shape and gravy clings to it.
Meanwhile, the potatoes should stay intact. Soft edges are good; falling-apart potatoes usually mean the pieces were cut too small.

Step 7: Add Peas and Finish the Gravy

Mix cornstarch with cold water in a small bowl. Stir until smooth, then pour it into the stew. Add frozen peas. Cover and cook on high for 20 to 30 minutes.

Before-thickening cue: Judge the gravy after the long cook, not before, because the beef and vegetables release liquid as they soften.

Cooked beef stew in a slow cooker with beef, potatoes, carrots, peas, steam, and loose gravy before thickening.
After the long cook, the stew may look slightly loose. Do not panic yet; this is the right time to judge the real liquid level.

Slurry cue: Mix starch with cold water first so it disappears smoothly into the hot stew instead of clumping.

A small bowl of smooth cornstarch slurry being stirred with a spoon on a kitchen counter.
Mix cornstarch with cold water before it touches the stew. A smooth slurry thickens the gravy evenly and prevents dry clumps.

Thickening cue: Add slurry near the end, once you can see exactly how much liquid is in the pot.

A hand pouring white cornstarch slurry into hot beef stew in a slow cooker with beef, potatoes, and carrots visible.
Now thicken only what the slow cooker actually made. Adding slurry near the end gives you control over the final gravy texture.

Pea cue: Frozen peas only need a short finish, so add them late instead of letting them cook all day.

Bright green peas being poured from a small bowl into hot beef stew in a slow cooker.
Add peas late so they stay bright and sweet. If they cook all day, they lose color before the beef has time to become tender.

The gravy should turn glossier and begin to coat a spoon. A good stew often looks slightly under-liquid before cooking and glossy after this final step.

Texture cue: The gravy is finished when it looks glossy and clings to a spoon instead of running off like broth.

A spoon lifted above a slow cooker with thick brown gravy and a beef chunk coating the spoon.
Finally, check the spoon. The gravy should cling lightly and look glossy; if it runs like broth, give it more thickening time.

Step 8: Rest Before Serving

Let the stew rest for 10 to 15 minutes before serving. This gives the gravy time to settle and makes the stew easier to serve without breaking up the potatoes.

Resting cue: A short rest helps the finished gravy settle around the beef and vegetables before you ladle the stew.

Finished beef stew in a dark slow cooker with a ladle, steam, beef chunks, potatoes, carrots, peas, and brown gravy.
Once the gravy has thickened, let the stew rest briefly. This helps the sauce settle around the beef and vegetables before serving.

How Long to Cook It

Beef stew is done when the beef is soft enough to spoon apart, not just when the timer ends.

Setting Time Best Use
Low 8 to 9 hours Best tenderness and flavor
High 4 to 5 hours Faster option, but slightly less forgiving
Finish on high 20 to 30 minutes Thickening after slurry

Low is the better default for beef stew. High is fine when dinner needs to move faster, but low gives chuck roast and stew meat more time to soften. A perfect gravy around chewy beef is still not done, so let the meat lead the timing.

Slow cookers vary. If yours runs hot, check the stew a little earlier and keep the potato chunks large. If yours runs cool, the beef may need extra time on low.

How to Thicken the Gravy

Do not worry about perfect thickness at the start. Once the beef is tender and the vegetables have released their moisture, the slow cooker will show you what the gravy actually needs.

Body builds in two stages: a light flour coating at the start and a slurry at the finish. Think of the slurry as the final polish, not a rescue for bad stew.

Thickening Method Best For When to Add How to Use It
Flour on beef Body from the start Before cooking Toss beef lightly with flour before browning or slow cooking.
Cornstarch slurry Quick glossy finish Last 20–30 minutes Mix cornstarch with cold water, then stir into hot stew.
Arrowroot slurry Gluten-free or paleo-style thickening Last 10–20 minutes Add near the end and stop once the gravy thickens.
Mashed potatoes Natural thickening After potatoes are soft Mash a few potato pieces into the gravy.
Saucepan reduction Very loose stew At the end Reduce some liquid on the stove, then stir it back in.

Flour at the Beginning

The flour coating on the beef gives the stew some body as it cooks. If you brown the beef, the flour also helps create a richer surface and better color.

Use only enough flour to coat the beef lightly. Too much flour can make the gravy heavy or pasty.

Why the Slurry Waits Until the End

A cornstarch slurry is the easiest way to control the final texture. Always mix cornstarch with cold water before adding it to the hot stew. Dry cornstarch can clump if it goes straight into the slow cooker.

Do not add the slurry at the beginning. It can thin out or lose thickening power during the long cook. Add it after the long simmer, when you can see how much liquid is actually in the pot.

Use 2 tablespoons cornstarch mixed with ¼ cup cold water for the standard finish. For an extra-thick gravy, increase the cornstarch to 3 tablespoons while keeping the water at ¼ cup.

Emergency Fix for Very Thin Gravy

For very thin gravy, ladle some of the liquid into a saucepan and simmer it on the stove until reduced. Stir the reduced liquid back into the slow cooker. This is the fastest way to rescue a stew that started with too much broth.

Do not dump dry flour or cornstarch directly into the slow cooker. Do not add a large amount of flour at the end, or the stew can taste raw and pasty. Wait to fix the thickness until the beef is tender.

Back to top ↑

Crock Pot Beef Stew: Is It the Same Recipe?

Yes. Crock Pot is a type of slow cooker, so the same method works either way.

For the full recipe, a 6-quart / 5.7 L slow cooker is ideal. A 5-quart cooker can work if it is not overfilled, while a 7-quart cooker may leave the stew sitting a little shallower depending on the model.

Using a 3-quart cooker? Follow the small-batch version below.

Easy Dump-and-Go Method

This is the basic version for days when you want the stew started fast. Using a packet too? Check the seasoning packet notes so the stew does not become too salty.

Toss the beef with flour, salt, and pepper. Add it to the slow cooker with the potatoes, carrots, celery, and onion. Whisk the broth, tomato paste, Worcestershire sauce, balsamic if using, and beef base if using, then pour it over the top. Add the herbs, cover, and cook on low until the beef is tender.

During the final 20 to 30 minutes, stir in the cornstarch slurry and frozen peas. Browning gives better flavor, but this version still gives you a warm, hearty stew with very little effort.

Dump-and-go cue: Whisk the broth mixture before pouring it in so the tomato paste and seasonings reach the whole pot.

Raw beef, potatoes, carrots, onion, celery, herbs, and broth mixture being added to a dark slow cooker.
For the dump-and-go method, mix the broth, tomato paste, and seasonings well first. That gives the no-browning version a stronger base.

Can I Use Onion Soup Mix or a Beef Stew Seasoning Packet?

Yes, you can use onion soup mix or a beef stew seasoning packet. Shortcuts are not the problem. Stacking salty shortcuts is the problem.

Packets, bouillon, beef base, gravy mix, and store-bought broth can all be salty. Low-sodium broth gives you more room to adjust later.

A packet can add seasoning, but it does not automatically fix a loose gravy. You still need to control the amount of liquid and finish the texture once the stew has cooked. Taste after thickening, because salt can seem stronger once the gravy tightens.

Shortcut How to Use It What to Reduce
Onion soup mix Add 1 packet with the broth for a savory onion-style stew. Reduce salt and skip bouillon or beef base at first.
Beef stew seasoning packet Use as the main seasoning base for an easy family-style version. Use low-sodium broth and taste before adding more salt.
Brown gravy mix Use only if you want a packet-style thick gravy. Reduce cornstarch slurry so the stew does not become gummy.
Bouillon or beef base Use a small amount for deeper beef flavor. Reduce added salt and avoid stacking too many salty shortcuts.

Shortcut rule: if using a seasoning packet, skip the bouillon or beef base in the main recipe first. You can always add more flavor later, but it is harder to fix an over-salty stew.

Variations

Once the liquid and timing are right, you can change the flavor without throwing off the stew. Keep the liquid ratio steady when adding mushrooms, beer, or extra vegetables, then adjust the texture at the end.

Red Wine Slow Cooker Beef Stew

Use ½ cup red wine along with the beef broth. If browning the beef, use the wine to deglaze the pan before adding everything to the slow cooker. The wine gives the stew a deeper, rounder flavor.

Slow Cooker Beef Stew Without Wine

Replace the wine with extra beef broth, using 3 cups / 720 ml total broth. Keep the Worcestershire sauce and optional balsamic for depth. You can also add a little extra tomato paste or beef base if you want a richer flavor.

Guinness or Beer Beef Stew

Replace the red wine with stout or another dark beer. This gives the stew a darker, slightly malty flavor without changing the basic slow-cooker method.

Mushroom Beef Stew

Add 8 oz / 225 g sliced mushrooms. For best texture, sauté them briefly after browning the beef, then add them to the slow cooker. Mushrooms release liquid, so do not increase the broth.

Gluten-Free Slow Cooker Beef Stew

Use gluten-free flour to coat the beef, or skip the flour and rely on cornstarch or arrowroot slurry at the end. Make sure your Worcestershire sauce, broth, bouillon, and seasoning packets are gluten-free if needed.

Low-Carb or Keto-Style Beef Stew

For a lower-carb version, replace potatoes with turnips, radishes, mushrooms, or extra celery and carrots. Because potatoes and flour do a lot of the thickening here, keep the low-carb version simple and adjust the gravy at the end with a small amount of slurry if needed.

Beef Stew Over Rice

Serve leftovers over rice to stretch the meal. This works especially well if the stew has plenty of gravy. Cooking for two instead of making the full pot? Use the small-batch amounts. For fluffy grains that soak up sauce without turning mushy, use this guide on how to cook perfect rice.

Rice cue: Serve leftovers over rice when you want the gravy to stretch further and make a smaller amount feed more bowls.

Beef stew with beef, potatoes, carrots, and glossy brown gravy served over white rice in a bowl.
For leftovers, rice stretches the stew and catches extra gravy. It is especially useful when you want one pot to feed more bowls.

Small-Batch Version for Two

For one or two people, a 3-quart slow cooker is the better fit. The method stays the same, but the liquid needs to stay restrained.

Ingredient or Detail Small-Batch Amount
Beef ¾ to 1 lb / 340–450 g
Potatoes ½ lb / 225 g
Carrots 2 medium
Onion ½ medium
Beef broth and wine combined 1 to 1½ cups / 240–360 ml
Flour 1 to 1½ tablespoons / 8–12 g
Cornstarch 1 tablespoon / 8 g
Cold water for slurry 2 tablespoons / 30 ml
Slow cooker size 3-quart
Cook time 7 to 8 hours on low

A small slow cooker does not need much broth. The ingredients should not be swimming at the start. If your 3-quart cooker runs hot, start with the lower end of the liquid range and adjust near the end only if needed.

Small-batch cue: Match the recipe to the cooker size so a smaller amount of stew does not spread too thin.

A compact slow cooker with a modest amount of beef stew and two small bowls nearby, one filled and one empty.
For a small-batch beef stew, scale the pot as well as the ingredients. A compact cooker helps the stew stay rich instead of spreading too shallow.

Troubleshooting: Thin Gravy, Tough Beef, Mushy Potatoes

Stew is more forgiving than it looks. A thin pot, chewy beef, or bland broth does not mean dinner is lost; most fixes happen in the final stretch, once the beef is tender and you can see what the gravy actually needs.

Quick Fixes by Problem

Problem Likely Reason Fix
Stew is watery Too much broth, trapped steam, or vegetables releasing moisture Add slurry, cook uncovered on high, or reduce some liquid in a saucepan.
Beef is tough It has not cooked long enough, or the pieces are uneven Keep cooking on low until the beef is fork-tender.
Potatoes are mushy Pieces were too small or potatoes were too soft Use Yukon gold or red potatoes and cut them into larger chunks next time.
Carrots or potatoes are still firm Pieces were very large or the slow cooker runs cool Keep cooking on high for 20 to 40 minutes. If the beef is already perfect, remove the firm vegetables, simmer or microwave them with a splash of broth until tender, then return them to the stew.
Gravy tastes bland Needs more salt, umami, browning, or acidity Add Worcestershire, beef base, tomato paste, salt, or a tiny splash of vinegar.
Stew is too salty Packet, broth, or bouillon added too much salt Add unsalted broth if there is room, or serve over rice, potatoes, or noodles.
Stew is too thick Slurry thickened more than expected or stew rested/chilled Stir in warm broth a splash at a time until the gravy loosens.
Gravy is lumpy Dry starch was added directly Always mix cornstarch with cold water before adding it.
Stew is greasy Fatty beef or surface fat was not skimmed Skim the top before thickening.
Peas are dull and mushy They were added too early Add frozen peas during the last 10 to 20 minutes.

Back to top ↑

Storage, Freezing, and Reheating

Leftovers are one of the quiet rewards of beef stew. The gravy settles, the flavors round out, and the next bowl often tastes even deeper. For pairing ideas, jump to what to serve with beef stew.

Let the stew cool, then store leftovers in airtight containers. The gravy thickens as it chills, so do not be surprised if it looks firmer the next day.

Storage cue: Expect the gravy to thicken in the fridge, then loosen leftovers gently only if they need it.

Beef stew in a glass storage container with a reheated bowl of stew nearby on a kitchen counter.
The next day, the gravy will usually be thicker. Reheat gently and loosen it with a small splash of broth only if needed.
Storage Method Time Reheating Note
Refrigerator Up to 4 days Add a splash of broth or water if the gravy is too thick.
Freezer Up to 3 months Potatoes may soften slightly after thawing, but the flavor stays good.
Reheating Until steaming hot throughout Reheat gently on the stove or in the microwave, stirring occasionally.

One safety note: do not put frozen beef directly into the slow cooker. Thaw it first so it heats evenly and safely. The USDA slow cooker safety guide recommends thawing meat or poultry before slow cooking.

Frozen peas or frozen mixed vegetables are fine near the end because they are small and heat quickly.

Can I Prep It the Night Before?

Yes. You can cut the vegetables, trim the beef, and measure the seasonings the night before. Store everything covered in the refrigerator. If you brown the beef ahead, cool it quickly and refrigerate it separately or with the vegetables.

Do not leave the filled slow cooker insert sitting at room temperature for hours before cooking. Add the chilled ingredients to the slow cooker when you are ready to start the recipe, then begin cooking right away.

What to Serve With Beef Stew

A bowl of this can stand on its own, but the gravy almost demands something to catch it.

Serving cue: A good ladleful should bring beef, vegetables, and gravy together, not leave the chunks behind.

A ladle pouring beef stew with beef, potatoes, carrots, peas, and gravy into a light stoneware bowl.
When ladling, each serving should carry both chunks and gravy. That balance is what makes the bowl feel hearty instead of brothy.

For Soaking Up the Gravy

Bread cue: If the gravy clings to bread, the liquid balance and thickening step did their job.

A hand dragging crusty bread through thick beef stew gravy at the edge of a bowl.
This is the payoff for controlling the liquid: gravy thick enough to cling to bread, not just soak it with thin broth.

For Stretching Leftovers

  • Mashed potatoes
  • Rice
  • Buttered noodles
  • Toast
  • Pot pie crust

Leftover cue: Thick stew over mashed potatoes turns the same pot into a second dinner without making the bowl watery.

Beef stew with beef, carrots, potatoes, and brown gravy served over creamy mashed potatoes.
For a second serving idea, spoon the stew over mashed potatoes. Thick gravy should pool into the potatoes without making them watery.

For Something Fresh on the Side

  • Green salad
  • Cabbage slaw
  • Roasted green beans
  • Steamed peas
  • Chickpea salad

Frequently Asked Questions

These are the questions that usually come up once the stew is actually in the pot.

Should beef stew be covered with liquid in the slow cooker?

Not fully. The beef and vegetables should be moistened and surrounded by broth, but they do not need to be completely covered like soup. The ingredients release liquid as they cook, and too much broth at the start can make the stew watery.

Why is my slow cooker beef stew watery?

The usual reason is too much added broth. Vegetables also release moisture, and the covered slow cooker traps steam. Use less liquid at the start and thicken near the end with a cornstarch slurry.

How do I thicken slow cooker beef stew?

Use a slurry made from cornstarch and cold water, then stir it in during the final 20 to 30 minutes. For extra body, mash a few soft potato pieces into the gravy or reduce some liquid in a saucepan and stir it back in.

Why is my beef stew meat chewy after 8 hours?

It usually needs more time. Large pieces, cooler slow cookers, and collagen-rich cuts can take longer to soften. Keep cooking on low until the beef gives easily with a fork.

Can I use beef stew meat?

Yes. Beef stew meat is convenient and fits this recipe well. Check the pieces before cooking, cut very large chunks down, and keep cooking until the beef is tender all the way through.

What is the best beef for slow cooker beef stew?

Chuck roast is the first choice because it becomes tender and flavorful during long cooking. Beef stew meat also works well. Avoid very lean steak cuts because they can become dry or chewy in the slow cooker.

Can I put raw beef in slow cooker beef stew?

Yes. Browning adds flavor, but raw beef can go into the slow cooker. Toss it with seasoning and flour first.

Do I have to brown beef before adding it to the slow cooker?

No. Browning gives deeper color and flavor, but the no-browning version still works if you build flavor with tomato paste, Worcestershire sauce, optional balsamic, and beef base.

Is it better to cook beef stew on low or high?

Low is better for tenderness. High is fine when dinner needs to move faster, but low gives chuck roast and stew meat more time to soften.

How long does beef stew take in a slow cooker?

Most slow cooker beef stew takes about 8 hours on low or 4 to 5 hours on high. The exact time depends on your slow cooker and the size of the beef pieces. The stew is ready when the beef gives easily with a fork.

Can I add potatoes at the beginning?

Yes. Add potatoes at the beginning if they are cut into large chunks and you are using Yukon gold or red potatoes. Small pieces or softer russet potatoes can break down more during the long cook.

What potatoes are best for beef stew?

Yukon gold and red potatoes are best because they hold their shape. Russet potatoes work, but they soften more and can make the gravy cloudier.

Can I make slow cooker beef stew without wine?

Yes. Replace the wine with extra beef broth, using 3 cups / 720 ml total broth. Add Worcestershire sauce, optional balsamic vinegar, tomato paste, or beef base for extra depth.

Can I use onion soup mix?

Yes. Use low-sodium broth and reduce added salt because onion soup mix is salty. Skip bouillon at first.

Can I use gravy mix instead of cornstarch?

Yes, but add it carefully. Gravy mix already contains salt and thickener, so use less slurry and taste before adding more seasoning.

When should I add peas?

Add frozen peas during the last 10 to 20 minutes of cooking. They only need to heat through. Adding them at the beginning can make them mushy and dull.

Can I freeze slow cooker beef stew?

Yes. Freeze cooled stew in airtight containers for up to 3 months. The potatoes may become softer after thawing, but the flavor is still good.

Can I make this in a 3-quart slow cooker?

Yes. Use the small-batch version: ¾ to 1 lb / 340–450 g beef and 1 to 1½ cups / 240–360 ml total liquid. Keep the pot from looking flooded at the start.

Can I start with frozen beef?

No. Thaw the beef first before adding it to the slow cooker. Frozen peas or frozen vegetables are fine near the end because they heat quickly.

Can I prep this the night before?

Yes. Cut the vegetables, trim the beef, and measure seasonings ahead. Keep everything covered in the refrigerator. Start the slow cooker when you are ready to cook, not hours later on a delayed timer.

The Bottom Line: Tender Beef, Rich Gravy, Dinner Done

The best slow cooker beef stew is not complicated, but it does need the right balance. Use beef that benefits from long cooking, keep the liquid controlled, finish the gravy after the meat is tender, and let the stew rest before serving.

Once you know the liquid level your slow cooker likes, this becomes one of those dependable cold-weather dinners you can start early and trust. Keep the beef tender, the vegetables chunky, and the gravy finished at the end, and the whole pot feels calmer.

A good stew should feel generous, not complicated. Brown the beef when you want the deepest flavor. Skip browning when life is busy. Either way, the slow cooker gives you tender beef, soft vegetables, and a rich gravy that makes the kitchen smell like dinner has been taking care of itself all day.

Back to top ↑

Posted on Leave a comment

Mashed Potatoes Recipe

Creamy mashed potatoes in a cream ceramic bowl with melted butter, chives, black pepper, and a blurred gravy boat behind.

This is the mashed potato bowl people reach for first: soft, buttery, creamy enough to feel rich, and fluffy enough to hold a spoonful of gravy. It works for holidays, roast dinners, weeknights, and those “everything else is ready but the potatoes need help” moments.

The ingredients are simple, but the finish matters. Yukon Gold potatoes make the mash naturally creamy, russets make it lighter, warm milk blends in smoothly, and a gentle hand keeps the texture soft instead of sticky.

This recipe is built for real mashed potato moments: the holiday batch, the weeknight side, the dry mash that needs saving, the no-milk emergency, and the serving dish that has to stay warm while dinner catches up.

Quick Answer: How to Make Mashed Potatoes

To make mashed potatoes, simmer peeled potato chunks in cold salted water until very tender, drain well, dry them briefly in the hot pot, then mash with butter and warm milk or cream. Season to taste and add more warm liquid only until the potatoes are soft, creamy, and spoonable.

The finish is where the bowl is won. Dry the potatoes well, add warm liquid gradually, and stop as soon as the mash looks soft and spoonable.

Recipe at a Glance

Best potatoes Yukon Gold, russet, or a 50/50 mix
Texture Creamy, fluffy, buttery, and soft enough for gravy
Prep time 15 minutes
Cook time 20 minutes
Total time 35 minutes
Servings 4 generous or 5 smaller side servings
Best tool Masher for cozy homemade texture; ricer or food mill for a smoother, lighter finish
Main mistake to avoid Overmixing, especially with a blender or food processor
Why this method is worth saving: It gives you one reliable base recipe, then shows you how to steer it creamy, fluffy, richer, dairy-free, make-ahead, or rescue-ready without starting over.

Creamy Mashed Potatoes Recipe

Description: Creamy, fluffy mashed potatoes made with Yukon Gold or russet potatoes, warm milk, butter, and a gentle method that keeps the mash soft, gravy-ready, and easy to rescue if dinner gets ahead of you.

Success cue: Soft, steamy, spoonable potatoes that hold gentle ridges when dragged with a spoon and fall slowly instead of pouring or clumping.

Prep Time15 minutes
Cook Time20 minutes
Total Time35 minutes
Servings4 generous or 5 smaller side servings

Base Ingredients

  • 1 kg / 2.2 lb Yukon Gold potatoes, russet potatoes, or a mix
  • 75–100 g / about 5–7 tbsp unsalted butter
  • 180–240 ml / 3/4–1 cup whole milk, half-and-half, or milk and cream, warmed
  • 2 tsp to 1 tbsp kosher salt for the cooking water, depending on pot size and water volume
  • Fine salt, added gradually after mashing, to taste
  • 1/4–1/2 tsp black pepper

Optional Add-Ins

  • 60 ml / 1/4 cup sour cream
  • 60–100 g / 2–3.5 oz cream cheese
  • Chopped chives, parsley, extra melted butter, or gravy for serving

Instructions

  1. Peel the potatoes for a smooth bowl, or scrub them well if making a rustic version with some skin. Cut into even 1 1/2–2 inch / 4–5 cm chunks.
  2. Place the potatoes in a large pot and cover with cold water by about 1 inch / 2.5 cm. Add kosher salt to the water.
  3. Bring to a boil, then reduce to a steady simmer. Cook for 15–20 minutes, or until a fork slides through easily with almost no resistance.
  4. Drain well. Return the potatoes to the hot empty pot for 30–60 seconds so extra steam escapes and the surface looks dry. Do not rinse them.
  5. Mash gently with a potato masher. For a smoother finish, use a ricer or food mill.
  6. Add the butter and about 180 ml / 3/4 cup warm milk or cream. Mash or fold gently until creamy.
  7. Add more warm milk or cream only as needed. Start with less; you can always loosen the mash once the texture tells you what it needs.
  8. Season with fine salt and pepper. Taste and adjust. Add sour cream or cream cheese if using. Serve hot with extra butter, herbs, or gravy.

Recipe Notes

  • For the best all-purpose bowl, use a 50/50 mix of Yukon Gold and russet potatoes.
  • The potatoes are ready to mash when a fork slides through with almost no resistance. If they fight back at all, cook them longer.
  • Do not rinse after draining. Let steam escape in the hot pot instead.
  • A masher, ricer, or food mill keeps you in control. Save the blender for soups.
  • If using sour cream or cream cheese, add less milk at first. You can loosen the potatoes later, but you cannot easily remove excess liquid.
  • For make-ahead prep, make the mash slightly looser than usual and reheat gently with extra warm milk or butter.
Cook’s note: This method is built around the places mashed potatoes usually fail: undercooked centers, watery potatoes, cold dairy, too much mixing, and last-minute reheating.

Choose Your Mashed Potato Texture

Before you start, decide what kind of mash you want on the table. A fluffy classic mash and a rich holiday batch use the same base method, but they need slightly different choices.

Once you choose the texture first, the rest of the recipe becomes easier: the potato, tool, dairy, and add-ins all have a job.

Three small servings of mashed potatoes showing smooth, fluffy, and rustic skin-on textures.
First choose the texture, then choose the tool. Smooth, fluffy, and rustic mashed potatoes all start similarly but finish differently.
You want Use Do this
Creamy everyday mash Yukon Gold potatoes Use warm milk and butter; mash gently.
Fluffy classic mash Russet potatoes Use a ricer or light masher; avoid heavy mixing.
Best balanced mash 50/50 Yukon Gold and russet Use moderate milk, enough butter, and stop when spoonable.
Rich holiday mash Yukon/russet mix + sour cream or cream cheese Make slightly looser before chilling or holding.
No-milk mash Reserved potato water, broth, butter, or olive oil Add slowly so the mash loosens without turning soupy.

Once the style is clear, the potato choice becomes easier. Yukon Golds lean creamy, russets lean fluffy, and a mix gives the safest balance.

The Mashed Potato Texture Rule

The rule that protects the bowl: Dry the potatoes first, add warm liquid slowly, and stop when the mash looks soft and spoonable. If it feels dry, loosen it gently. If it looks wet or sticky, pause before adding or mixing more.

Most mashed potato problems happen in the last few minutes, not at the ingredient stage. The right mash should look relaxed, not wet; soft, not slumped; ridged, not rubbery. Once you know that cue, the recipe becomes much easier to trust.

Why This Recipe Works

Great mashed potatoes do not come from adding every rich ingredient at once. They come from tender potatoes, enough salt, good draining, warm dairy, and a light hand at the end.

In practice, great mashed potatoes come down to moisture control and starch control. Cook the potatoes until fully tender, let surface steam escape after draining, then fold in fat and dairy without beating the mash into paste. That is what keeps the bowl creamy and light instead of watery or gluey.

Yukon Gold potatoes bring a naturally buttery texture. Russets are drier and fluffier. Using both gives you a reliable middle ground: rich enough for holidays, but not so dense that the serving dish feels heavy.

The drying step matters because boiled potatoes carry surface moisture. Letting steam escape in the hot pot keeps the mash from turning watery before the butter and milk go in.

Work the starch as little as possible after cooking. The more you beat the potatoes, the more the texture moves toward sticky and pasty.

Best Potatoes for Mashed Potatoes

Potato choice decides whether the mash leans creamy, fluffy, rustic, or dense. If you are standing in the store and do not want to think about it, buy Yukon Golds. Choose russets for the fluffiest result, or use both if you want the best balance.

Yukon Gold potatoes and russet potatoes with whole potatoes and cut halves on a wooden board.
Yukon Golds bring buttery creaminess, while russets bring lift. Together, they give mashed potatoes a balanced texture that feels smooth without turning heavy.
Potato Texture Best for
Yukon Gold Creamy, buttery, naturally rich Smooth everyday mashed potatoes
Russet / Idaho Fluffy, light, slightly drier Classic fluffy mashed potatoes
Yukon Gold + Russet mix Creamy and fluffy Best all-purpose mashed potatoes
Red potatoes Waxy, rustic, holds shape Skin-on mashed potatoes
New potatoes / fingerlings Firm and waxy Not ideal for classic mash

Peel the potatoes for a smooth finish. For a rustic mash, leave some or all of the skin on, especially with Yukon Gold or red potatoes. Russet skins are thicker, so they are usually better peeled unless you want a very rustic texture.

Red potatoes are delicious, but they do not give the same classic fluffy texture as russets or the same smooth richness as Yukon Golds. Waxy new potatoes and fingerlings hold their shape well, but they do not mash into the same soft finish.

The Best Ratio

This ratio keeps the recipe flexible without turning it into a guessing game. You can scale it for two people, eight people, or a full holiday table without losing the texture.

For every 1 kg / 2.2 lb potatoes, use 75–100 g butter and 180–240 ml warm milk, half-and-half, or cream. Start with the lower amount of liquid, then add more only if the potatoes need it.

For salt, season the cooking water generously but carefully. For 1 kg / 2.2 lb potatoes, start with about 2 teaspoons kosher salt in a medium pot, or up to 1 tablespoon for a large pot of water. The water should taste seasoned, not harshly salty. After mashing, add fine salt in small pinches or 1/4 teaspoon increments until the flavor tastes full and balanced.

Kosher salt brands vary in weight, so use the cooking-water amount as a starting point and trust the final tasting step more than the spoon measurement.

Ingredient Everyday creamy mash Richer holiday mash
Potatoes 1 kg / 2.2 lb 1 kg / 2.2 lb
Butter 75 g / about 5 tbsp 100 g / about 7 tbsp
Milk or half-and-half 180 ml / 3/4 cup 240 ml / 1 cup
Optional sour cream Skip or use 2 tbsp 60 ml / 1/4 cup
Optional cream cheese Skip 60–100 g / 2–3.5 oz

This is the ratio that keeps you from guessing when the guest count changes.

Useful rule: Start with the everyday column. If you add sour cream, cream cheese, or extra butter, reduce the milk at first because rich add-ins loosen the mash too.

Ingredients

With mashed potatoes, a short ingredient list does not mean the details do not matter. The potato decides the texture, the butter softens the edges, the dairy loosens the mash, and the salt makes the whole dish taste complete.

The amounts are in the recipe card and ratio table above. Here is what each one does once it hits the potatoes.

Raw potatoes, butter, milk, salt, and pepper arranged on a wooden board.
Before technique matters, the base stays simple: potatoes, butter, milk or cream, salt, and pepper. The magic comes from how gently those basics are handled.

Potatoes

Yukon Gold potatoes make the mash naturally creamy and buttery. Russets make it lighter and fluffier. A mix gives the most reliable everyday result.

Peel them for a smooth bowl, or scrub them well and leave some skin on for a rustic version.

Butter

Butter gives richness, but it also helps the texture feel soft instead of dry. Unsalted butter gives you more control; salted butter works if you season carefully at the end.

Milk, half-and-half, or cream

Whole milk gives a classic creamy texture. Half-and-half or cream makes the mash richer. Warm the dairy before adding it so it blends smoothly instead of cooling the potatoes down and making the texture tighten.

Salt

Salt the boiling water and season again after mashing. With so few ingredients, blandness has nowhere to hide. If the potatoes taste dull, they usually need a little more salt, butter, or both.

Black pepper

Black pepper gives a gentle warmth. Use white pepper if you want the potatoes to look very smooth without black specks.

Sour cream or cream cheese

Sour cream adds tang and balances the richness of butter. Cream cheese makes the mash thicker and richer, which is especially useful for make-ahead prep. Add less milk at first when using either one.

Herbs and toppings

Chives, parsley, thyme, roasted garlic, melted butter, parmesan, or crispy bacon can all be added depending on the meal. When using salty add-ins like parmesan, bacon, salted butter, broth, or gravy, season lightly at first and adjust at the end.

Equipment

You are not trying to purée potatoes into smoothness. You are breaking them down gently, then folding in enough butter and dairy to make them soft. That is why a masher, ricer, or food mill is safer than anything that spins fast.

  • Potato masher: best for a classic homemade bowl with a little texture.
  • Ricer: best for a very smooth, light finish.
  • Food mill: useful for larger batches or silky mash.
  • Hand mixer: okay on low speed, but stop as soon as the potatoes are smooth.
  • Blender or food processor: save these for soups; they can make mashed potatoes gluey.
Potato ricer pressing cooked potatoes into fluffy strands over a bowl.
A potato ricer creates fine strands before mixing begins. That means smoother, fluffier mashed potatoes with less handling and less risk of gumminess.

Tool choice matters most when the potatoes are already tender. Before mixing too far, see How to Avoid Gluey Mashed Potatoes.

How to Make Mashed Potatoes Step by Step

Start with the recipe card if dinner is already moving. The step-by-step notes below are for getting the texture exactly right — not just edible, but soft, warm, and worth passing around again.

1. Peel and cut the potatoes

Peel the potatoes if you want a smooth bowl. If you prefer a rustic finish, scrub them well and leave some or all of the skin on.

Cut into even 1 1/2–2 inch / 4–5 cm chunks. The pieces do not need to be tiny, but they should be similar in size so they cook evenly.

Hands cutting peeled potatoes into even chunks on a wooden cutting board.
Even potato chunks are small insurance against lumps. Because they cook at the same pace, you need less force when it is time to mash.

If you cut them ahead, keep them covered in cold water in the refrigerator for a few hours. Drain before cooking and start with fresh cold water so the flavor stays clean.

2. Start in cold salted water

Place the potato chunks in a large pot and cover with cold water by about 1 inch / 2.5 cm. Add kosher salt to the water; use about 2 teaspoons for a medium pot or up to 1 tablespoon for a larger pot.

Starting in cold water helps the pieces cook evenly. Salted water seasons them from the inside instead of leaving all the seasoning for the end.

Potato chunks in a pot of cold water with salt being added before boiling.
Seasoning starts in the pot, not at the end. Cold salted water helps the potatoes cook through evenly and taste good before butter goes in.

3. Boil until very tender

Bring the water to a boil, then reduce to a steady simmer. Cook for 15–20 minutes, depending on the size of the pieces.

Use the clock only as a guide; the fork test tells you the truth. When a fork slides through with almost no resistance, the potatoes are ready to mash. Around the edges, they may look slightly softened, but the centers should be fully tender, not chalky.

Fork sliding into a tender boiled potato chunk with steam rising from the pot.
Look for tenderness, not just time. Once the fork slides through cleanly, the potatoes are ready to mash without stubborn centers.

Slightly over-tender potatoes mash better than undercooked ones. Do not leave cooked potatoes sitting in the hot water after they are tender, or they can absorb more water and make the final mash too thin.

4. Drain and dry

Drain very well in a colander. Then return the potatoes to the hot empty pot for 30–60 seconds. Shake the pot gently once or twice so steam escapes.

Skip the rinse after draining. The hot pot does the work here: it lets steam escape without washing away flavor. The potatoes should steam instead of shine.

Drained boiled potatoes steaming in a hot empty pot before mashing.
Steam is useful here. After draining, a brief rest in the hot pot lets surface moisture escape so the mash stays creamy instead of loose.

5. Mash gently

Use a potato masher for a classic texture. For a smoother bowl, pass the potatoes through a ricer or food mill.

Hand using a potato masher to mash cooked potatoes in a pot.
Stop before the potatoes fight back. Gentle mashing gives you control, while heavy beating can push the starch toward sticky and dense.

If you use a hand mixer, keep it on low speed and stop as soon as the potatoes are smooth.

6. Add butter and warm milk gradually

Warm the milk, half-and-half, or cream before adding it. It should be warm to the touch or lightly steaming, not boiling. Add the butter and about 3/4 cup / 180 ml warm liquid first, then mash or fold gently.

Warm milk being poured into mashed potatoes while butter melts into the mixture.
Add richness slowly. Warm milk or cream loosens the potatoes in stages, while butter folds in more smoothly when the mash is still hot.

Start with less liquid; you can always loosen the mash once the texture tells you what it needs. Stop when it mounds softly on a spoon — that is the sweet spot before it turns too thin.

Final texture cue: soft, spoonable mashed potatoes

The final texture should be easy to see before you taste it. The mash should mound softly on a spoon, hold gentle ridges for a moment, and fall back without stretching, pouring, or clumping.

Spoon lifting creamy mashed potatoes with soft ridges, steam, and a light butter sheen.
This spoon lift is the final cue: the mash should mound softly, hold ridges for a moment, and fall back without stretching.

7. Season and finish

Taste before serving. Add fine salt in small pinches or 1/4 teaspoon increments, then add pepper, more butter, or a splash of warm milk if needed.

If dinner is moving fast, this is the moment to slow down for one minute. The potatoes are cooked; this last minute is what keeps them soft, warm, and worth serving.

If the texture is not where you want it yet, do not keep mixing blindly. Use the troubleshooting guide to fix dry, watery, lumpy, bland, or gluey mashed potatoes.

Creamy vs Fluffy Mashed Potatoes

Not every batch should be the same. Some dinners need rich, creamy potatoes. Others need a lighter mash that can hold gravy without feeling heavy. Neither version is better; the best texture is the one that fits the meal.

Two servings of mashed potatoes showing one smoother creamy texture and one lighter fluffy texture.
Creamy mashed potatoes sit smoother and richer, while fluffy ones hold lighter peaks. The better choice depends on the sauce, timing, and plate.

For a fluffy bowl

Use mostly russets, moderate liquid, and a light hand. Stop mixing as soon as the potatoes look soft.

For a creamy bowl

Use more Yukon Golds, warm half-and-half or cream, and a little more butter.

For a rich holiday batch

Add sour cream or cream cheese, but reduce the milk at first. You can always loosen the mash later.

For a rustic finish

Leave some skin on and use a potato masher. The uneven texture works beautifully beside gravy and roast meats.

If you think of these as whipped potatoes, use a ricer first, then fold in the butter and milk until smooth. Avoid aggressive whipping; the texture can move from smooth to gluey quickly.

For this creamy, classic version, skip rinsing after boiling and let the potatoes dry in the hot pot instead. If you are chasing an ultra-fluffy russet-only style, some methods rinse away extra starch, but this version keeps the process simpler and the flavor fuller.

How to Avoid Gluey Mashed Potatoes

Gluey mashed potatoes are frustrating because they usually happen at the very end, after everything looked fine. The good news is that the problem is predictable: sticky texture usually comes from overworked starch.

Fluffy mashed potatoes compared with a denser, glossier spoonful of gluey mashed potatoes.
The visual difference is easy to spot: fluffy mash looks soft and ridged, while gluey mashed potatoes look dense, glossy, and overworked.
Do this Avoid this
Use a masher, ricer, or food mill Blender or food processor
Cook until fully tender Mashing undercooked centers
Fold gently after mashing Beating hard after smooth
Add liquid gradually Pouring everything in at once
Stop when spoonable Trying to fix texture by mixing more

If the potatoes are already gluey, do not keep beating them. Truly gluey mash will not fully return to fluffy, but you can soften the mouthfeel with warm butter or cream. If it is very dense, use the leftovers for potato cakes, croquettes, soup, or a casserole topping.

How to Fix Mashed Potatoes That Went Wrong

A batch of imperfect mashed potatoes is usually not a disaster. Before you add more liquid or start mixing harder, pause and match the problem to the right fix.

The goal is not perfection at every step. The goal is knowing when to stop, when to loosen, and when to turn imperfect potatoes into something else delicious.

Texture problems

Problem Why it happened How to fix it
Gluey texture Overmixed starch, blender, food processor, or too much beating Stop mixing. Gently fold in warm butter or cream. If the mash is truly gluey, repurpose dense leftovers instead of trying to whip them back.
Watery texture Potatoes were not drained or dried well, or too much liquid was added Warm gently over low heat to release moisture. Fold carefully. Add potato flakes only as a last resort.
Lumps Potatoes were undercooked or cut unevenly Cook potatoes until completely tender. Use a ricer next time for smoother results.
Dry texture Not enough liquid or fat, or reheated without moisture Add warm milk, cream, broth, or butter a little at a time.
Too thin Too much milk or cream Warm gently to evaporate moisture. Add a few potato flakes only if needed.
Too stiff Not enough warm liquid Loosen a little at a time, folding only until the texture comes back.
Sticky after using a hand mixer The potatoes were beaten too long Stop mixing immediately. Fold in warm butter or cream. Use leftovers for cakes or casserole topping if needed.
Grainy after reheating The mash was too lean or reheated too aggressively Warm slowly and fold in butter, cream, or sour cream until smoother.

Flavor and serving problems

Problem Why it happened How to fix it
Bland flavor Cooking water was not salted, or not enough final seasoning was added Add salt gradually, then finish with butter, pepper, herbs, garlic, sour cream, or cheese.
Flat flavor even after salting They may need fat, tang, herbs, or deeper seasoning Add butter, black pepper, chives, roasted garlic, sour cream, parmesan, or a little gravy.
Got cold before serving They sat too long or the serving dish was cold Reheat gently with warm milk or butter. Next time, warm the serving dish and keep them covered.
Too much garlic or pepper The seasoning is overpowering the potatoes Fold in more plain mash if available, or soften the flavor with cream, butter, or sour cream.

Most fixes are small. The important thing is not to panic-mix the potatoes into a worse texture. Serve them warm if they still taste good, or save them for cakes, croquettes, soup, or a casserole topping where the texture can work in your favor.

Variations

Once the base mash is right, variations should support the meal, not bury the potatoes. Keep the flavor simple for rich mains, or add garlic, cheese, herbs, or tang when the potatoes need to carry more of the plate.

Garlic Mashed Potatoes

Use roasted garlic when you want mellow sweetness, sautéed garlic when you want a sharper savory edge, and garlic butter when you want the flavor to spread through the whole mash. For a deeper version with the garlic balance already worked out, use this garlic mashed potatoes recipe.

Cream Cheese Mashed Potatoes

Use cream cheese when you want a thicker, richer mash that reheats well. Let it soften first so it melts in easily, and add less milk at the beginning.

Sour Cream Mashed Potatoes

Use sour cream when you want tang that cuts through butter, gravy, steak, pork chops, or roast chicken. It makes the mash taste richer without feeling too heavy.

Loaded Mashed Potatoes

Fold in shredded cheddar, crispy bacon, chopped chives, and a spoonful of sour cream. Loaded mashed potatoes work well as a side dish or as the base for a comfort-food plate.

Parmesan Herb

Fold in grated parmesan, chopped parsley, chives, thyme, or a little roasted garlic. Parmesan adds saltiness and depth, so taste before adding more salt.

Buttermilk

Use warm buttermilk for a tangy Southern-style version. Keep the heat gentle and do not boil the buttermilk.

Extra Buttery

For holiday-style potatoes, increase the butter to 100–125 g / about 7–9 tbsp per 1 kg / 2.2 lb potatoes and use half-and-half or a mix of milk and cream.

Mashed Potatoes Without Milk

If this is an emergency “I already boiled the potatoes and there is no milk” moment, start with reserved potato water and butter. It is the safest fix because the water is already starchy and neutral.

No milk does not mean no comfort. It just means choosing the right liquid for the job. Potato water keeps the flavor clean, broth makes it more savory, and olive oil or vegan butter can add richness without dairy.

Mashed potatoes with cups of broth, potato cooking water, olive oil, and a butter-like block nearby.
No milk does not end the recipe. Potato water keeps things clean, broth adds savory depth, and olive oil or dairy-free butter brings richness.

Plant milk can work, but choose an unsweetened neutral version. Potato water is usually safer because it tastes like potato, not oat, almond, or coconut.

Situation Best substitute Notes
No milk at home Reserved potato water + butter Neutral, easy, and already starchy enough to loosen the mash.
No milk, but dairy is okay Cream cheese, sour cream, or thick plain yogurt Add gently so the flavor does not become too tangy or thin.
More savory flavor Warm chicken or vegetable broth Good with gravy, meatloaf, chicken, pork chops, and roast dinners.
Dairy-free version Olive oil + reserved potato water Gives richness without dairy. Add slowly.
Vegan version Vegetable broth + vegan butter or olive oil Use neutral plant milk only if you like the flavor.

If the no-milk mash still feels dry, stiff, or too thin, use the troubleshooting table. For leftovers or dairy-free make-ahead prep, see how to reheat mashed potatoes gently.

Make-Ahead Mashed Potatoes

Mashed potatoes are usually not finished in a quiet kitchen. They happen while gravy is thickening, mains are resting, and someone is asking when dinner is ready.

Make-ahead mashed potatoes are not about being fancy. They are about giving yourself one less thing to panic over when the oven is full, the gravy is waiting, and dinner is moving fast.

Hands covering a shallow dish of mashed potatoes with butter and a small milk jug nearby.
Make-ahead mashed potatoes should go into storage a little softer than serving texture. Later, that extra moisture helps them reheat without drying out.

For the best texture, make them up to 1–2 days ahead, keep them covered in the refrigerator, and reheat gently with extra warm milk, cream, butter, sour cream, or cream cheese.

The most important trick is to make them slightly softer than usual before chilling, because the fridge will firm them up. A little extra moisture and fat gives you room to reheat without drying them out.

For holiday serving, warm the serving dish, cover the potatoes tightly, and keep extra warm milk or butter nearby for a quick loosen before they go to the table.

Make-Ahead Method

  1. Prepare the base recipe as usual.
  2. Make the mash slightly looser than you want it at serving time.
  3. Add a little extra butter, milk, cream, sour cream, or cream cheese so it stays soft.
  4. Cool and store in a covered shallow dish or airtight container in the refrigerator.
  5. Reheat gently with extra warm milk or butter.
  6. Stir only as much as needed to bring the texture back.

Once the potatoes are made ahead, the real success comes from reheating them well. Jump to How to Reheat Mashed Potatoes before serving.

How to Reheat Mashed Potatoes

Cold mashed potatoes rarely look promising at first. They firm up in the fridge, but they usually come back with low heat, patience, and a little extra moisture.

Mashed potatoes being reheated with melting butter, warm milk, steam, and a spoon folding through them.
Reheating is a recovery step, not a second mash. Low heat, steam, butter, and warm milk bring back creaminess without rough stirring.

Reheating is less about stirring hard and more about giving the potatoes back moisture slowly. Warm them gently for texture, but make sure leftovers are hot all the way through. If you are checking with a thermometer, aim for 165°F / 74°C.

Method How to do it Best for
Stovetop Place in a pot over low heat. Add warm milk, cream, or butter and stir gently until hot. Small to medium batches
Oven Place in a covered baking dish and reheat at 350°F / 175°C for 25–40 minutes. Add butter on top if the potatoes look dry. Holiday meals and larger batches
Microwave Reheat at medium power in short intervals, stirring every 1–2 minutes. Add a splash of milk or cream. Leftovers and single servings
Slow cooker Reheat first, then keep warm in the slow cooker. Add butter or milk if the surface starts drying out. Holding for a crowd
Slow cooker note: A slow cooker is good for holding hot mashed potatoes warm, but it is not the best way to slowly heat cold mashed potatoes from the fridge. Reheat them first, then transfer to the slow cooker on warm.

How Much to Make Per Person

A good side-dish estimate is 225–250 g / 1/2 lb raw potatoes per person. For a holiday meal with many sides, you can go slightly lower. For a mashed-potato-heavy dinner with gravy, meatballs, steak, or chicken, plan a little more.

If mashed potatoes are the side everyone reaches for first, round up. Leftovers are easier to use than an empty serving dish is to explain.

People Raw potatoes Approx. butter Approx. milk/cream
2 500 g / 1.1 lb 40–50 g 90–120 ml
4 1 kg / 2.2 lb 75–100 g 180–240 ml
8 2 kg / 4.4 lb 150–200 g 360–480 ml
10 2.25 kg / 5 lb 170–225 g 420–540 ml
20 4.5 kg / 10 lb 340–450 g 850 ml–1.1 L

For a lighter meal with many sides, use the lower end. For gravy-heavy dinners, holiday plates, or mashed-potato lovers, use the higher end.

What to Serve with Mashed Potatoes

Mashed potatoes are often the quiet thing holding the whole plate together. When they are soft, warm, and well-seasoned, even a simple dinner feels more complete.

The easiest rule is simple: if the main dish has gravy, pan juices, cream sauce, onion sauce, or mushrooms, mashed potatoes probably belong beside it.

Dinner plate with mashed potatoes, gravy, sliced roast chicken, green beans, and a gravy boat in the background.
Mashed potatoes earn their place beside saucy mains because they catch gravy and pan juices. That is what turns a simple plate into comfort food.

Best mashed potato pairings

Think of mashed potatoes as the soft landing for the plate: one saucy main, one green vegetable, and one simple extra like rolls, salad, or roasted carrots is usually enough.

Keep the potatoes plain and buttery when the main dish is strongly flavored. Add garlic, cheese, sour cream, or herbs when the main dish is simple.

Meal type Best pairings Why it works
Gravy-heavy comfort dinners Meatloaf, meatballs, smothered pork chops, creamy mushroom mains The potatoes soak up sauce and make the plate feel complete.
Beef dinners Steak, pot roast, roast beef, beef stew, cottage pie Beef and mashed potatoes are classic because the richness balances well with butter and salt.
Chicken dinners Roast chicken, chicken gravy, creamy mushroom chicken, slow cooker French onion chicken Mashed potatoes turn chicken into a fuller comfort meal.
Pork dinners cream of mushroom pork chops, pork loin, sausages, ham Pork works well with creamy mash, mustardy sauces, onion gravy, or pan juices.
Seafood Salmon, white fish, fish cakes, shrimp in garlic butter Keep the potatoes simple so they do not overpower the fish.
Vegetarian meals Mushroom gravy, lentils, roasted mushrooms, green beans, peas, carrots Earthy vegetables and legumes pair well with buttery potatoes.
Holiday plates Turkey, ham, stuffing, gravy, sweet potato casserole, hashbrown casserole Mashed potatoes are the soft, savory anchor for a full holiday spread.

If the main dish does not have much sauce, add a simple brown gravy, mushroom gravy, chicken gravy, or onion gravy. Mashed potatoes taste best when there is something warm and savory to spoon over the top.

What to Do with Leftover Mashed Potatoes

Leftovers are not a problem here. Cold mash is one of those rare leftovers that can become better at holding its shape the next day. Leftover mash is already halfway to something crispy.

Use it for potato cakes, breakfast patties, croquettes, or fish cakes when you want something crisp outside and soft inside.

  • Mashed potato pancakes
  • Potato cakes
  • Croquettes
  • Fish cakes
  • Shepherd’s pie or cottage pie topping
  • Potato soup
  • Loaded mashed potato casserole
  • Breakfast patties
  • Waffles
  • Stuffed rolls
  • Crispy fried mashed potato balls

For quick mashed potato cakes, start with 2 cups cold mashed potatoes, 1 egg, 2–4 tablespoons flour or breadcrumbs, and a little cheese or herbs. Shape into patties and cook in a lightly oiled skillet until golden on both sides.

If you would rather turn leftovers into a full casserole-style dinner, use the mash as a topping for cottage pie, or move into another cozy potato bake like tater tot casserole. It keeps the same comfort-food mood while changing the texture completely.

If the leftover mashed potatoes are very soft, add flour, breadcrumbs, or grated cheese a little at a time before shaping them into cakes or patties. Cold mash holds together better than warm mash.

How to Store Mashed Potatoes

Store leftovers in an airtight container in the refrigerator for 3–4 days. When reheating, make sure they are hot all the way through; if you are checking with a thermometer, aim for 165°F / 74°C. For detailed safety guidance, the USDA leftovers guide is useful.

As they warm, add a splash of milk, cream, broth, or a little butter so the texture turns creamy again instead of dry or stiff.

Can You Freeze Mashed Potatoes?

Yes, they can be frozen, but the texture depends on how much fat and dairy they contain. A batch made with butter, cream, sour cream, or cream cheese freezes better than a lean version made with only potatoes and water.

To freeze, cool the mash completely and pack it into freezer-safe containers. The texture is usually best within the first month. It can be kept frozen longer, but it may become more watery or grainy over time.

Thaw overnight in the refrigerator and reheat gently with extra milk, cream, or butter. If the texture looks a little separated after thawing, warm the potatoes slowly and fold in extra butter or cream.

FAQs

These are the questions that usually come up once the potatoes are already peeled, boiling, or waiting on the stove.

1. What are the best potatoes for mashed potatoes?

Yukon Golds and russets are the safest choices. Yukon Golds make the mash creamy and buttery; russets make it lighter and fluffier. A mix gives the best balance.

2. Should I peel potatoes for mashed potatoes?

Peel them for a smooth mash. Leave some or all of the skin on for a rustic texture, especially with Yukon Gold or red potatoes.

3. Do you start mashed potatoes in cold or boiling water?

Start potatoes in cold water so the pieces cook evenly from outside to center. Boiling water can soften the edges before the middle is cooked.

4. How long should potatoes boil for mashed potatoes?

Potato chunks usually take 15–20 minutes. They are ready when a fork slides through easily with almost no resistance.

5. Why are my mashed potatoes gluey?

They turn gluey when the starch is overworked. This often happens from using a blender, food processor, or beating the potatoes too much.

6. Can I fix gluey mashed potatoes?

You can improve them, but you usually cannot make truly gluey potatoes fluffy again. Stop mixing, fold in warm butter or cream, and use dense leftovers for cakes, croquettes, soup, or casserole topping.

7. How do I make mashed potatoes without milk?

Use reserved potato cooking water, warm broth, olive oil, vegan butter, or unsweetened plant milk. Add gradually and taste as you go.

8. Can I use cream instead of milk?

Yes. Cream makes the potatoes richer and thicker. Use all cream for a holiday-style mash, or part milk and part cream for balance.

9. Can I use a hand mixer for mashed potatoes?

Yes, but use low speed and stop as soon as the potatoes are smooth. Overmixing can make the texture gluey.

10. Can I make mashed potatoes ahead of time?

Yes. Make them slightly softer than usual, refrigerate for 1–2 days, then reheat gently with extra warm milk, cream, or butter. Sour cream or cream cheese helps them reheat smoothly.

11. How do I reheat mashed potatoes without drying them out?

Reheat gently over low heat or in a covered dish. Add warm milk, cream, broth, or butter a little at a time until creamy again.

12. Can you freeze mashed potatoes?

Yes, but they freeze best with enough butter, cream, sour cream, or cream cheese. Thaw overnight and reheat slowly with extra dairy or fat.

13. How much mashed potato do I need per person?

Plan on about 225–250 g / 1/2 lb raw potatoes per person. For 4 people, use about 1 kg / 2.2 lb; for 8 people, use about 2 kg / 4.4 lb.

14. What can I add to mashed potatoes for more flavor?

Add roasted garlic, sour cream, cream cheese, parmesan, chives, parsley, black pepper, browned butter, cheddar, bacon, or gravy.

15. What is the secret to creamy mashed potatoes?

Use Yukon Gold potatoes, drain them well, add warm dairy gradually, and stop before the mash is overworked. Butter and warm half-and-half make the creamiest everyday version.

Final Thoughts

Once the method is in your hands, you can take the same potatoes creamy, fluffy, garlicky, cheesy, dairy-free, make-ahead, or gravy-ready without learning a new recipe each time.

That is why this method is worth saving: it gives you a good bowl when everything goes right, and a way back when the potatoes need help.

Posted on Leave a comment

Bean Stew Recipe with Canned or Cooked Beans: Thick, Hearty & Flexible

A bowl of thick tomato-based bean stew with mixed beans, carrots, greens, herbs, a spoon, and crusty bread beside it. The image includes the text “Bean Stew Recipe” and “Thick, hearty, flexible.”

This bean stew turns three cans of beans into a thick, hearty one-pot dinner in about 50 minutes. Onion, carrot, celery, garlic, tomato paste, tomatoes, broth, and a small mash of beans cook down into a glossy tomato-bean sauce that is scoopable instead of thin.

It is especially useful on the nights when the pantry is not empty, just awkward: a few cans of beans, one onion, the last carrot in the drawer, and enough broth to pull everything together. Because the beans carry most of the meal, rice, bread, potatoes, or polenta can stretch the pot into more servings without making it feel like less dinner.

Ingredients for bean stew arranged on a kitchen counter, including beans, onion, carrot, celery, garlic, tomato paste, crushed tomatoes, broth, herbs, and bay leaf.
The base is simple: beans, aromatics, tomato paste, tomatoes, broth, herbs, and a bay leaf.

The main recipe is tomato-based, gently smoky, full of soft-edged beans and sweet vegetables, and finished with lemon juice or vinegar so the final bowl tastes lively instead of heavy.

Most bean stew recipes ask you to choose one bean or one flavor direction first. This one gives you one base method for almost any cooked beans: cannellini beans, butter beans, black beans, pinto beans, chickpeas, kidney beans, or mixed pantry beans.

Quick Answer: What Is Bean Stew?

Bean stew is a hearty one-pot meal made with cooked beans, aromatics, tomatoes or broth, herbs, vegetables, and optional meat. It has less liquid than bean soup, so it sits on rice, clings to bread, and feels more like a full dinner. It is also less narrowly seasoned than chili, which usually has a stronger chili powder, pepper, and spice profile.

For the easiest version, use three cans of beans, a savory tomato base, and 1½–2 cups of broth. Simmer until the sauce reduces, mash a small portion of the beans into the pot, stir in greens if you like, and finish with lemon juice, vinegar, herbs, or olive oil. The bowl should be spoonable, glossy, and filling without cream.

A guide-style image for hearty bean stew showing a bowl of stew with callouts for 50 minutes, 3 cans beans, one pot, thick not soupy, vegetarian base, and freezer-friendly.
This visual summary shows the promise of the recipe: one pot, three cans of beans, a thick spoonable texture, and leftovers that still feel useful the next day.

The exact measurements are in the recipe card, and the thickening cues below show when to reduce, mash, or loosen the pot.

Recipe Snapshot

Main methodStovetop, one pot
Prep time15 minutes
Cook time35–40 minutes
Total time50–55 minutes
Servings6 bowls, or 8 smaller servings with rice/bread
Stretch-it sideRice, bread, potatoes, polenta, or another sauce-catching base
Best beansCannellini, butter beans, black beans, pinto beans, kidney beans, chickpeas, navy beans, Great Northern beans, or mixed beans
Easiest optionCanned beans
Budget optionDried beans, cooked separately first
Finished textureGlossy tomato-bean sauce that clings to the spoon
DietVegetarian base; vegan-friendly; meat-flexible
Freezer-friendlyYes

Before You Start: Beans and Ratio

This stew works best with cooked, starchy beans that can simmer, soften at the edges, and help thicken the sauce. Sweet baked beans, refried beans, and green beans behave differently, so they are better treated as separate recipes or add-ins. Green beans can be added as a vegetable, but they will not make this kind of cooked-bean stew on their own.

The Simple Ratio Behind a Good Pot

Once you know this ratio, you can make a good bean stew without needing the same cans twice. It is the kind of formula that saves dinner when the pantry looks random but not empty.

  • 3 cans cooked beans, 14–15 oz / 400–425 g each, or about 4½ cups cooked beans
  • 1 large onion plus carrot, celery, and garlic
  • 2–3 tbsp / 30–45 g tomato paste
  • 1 can crushed tomatoes, 28 oz / 800 g, or 14 oz / 400 g for a lighter tomato version
  • 1½–2 cups / 360–480 ml broth, added gradually
  • 10–15 minutes uncovered simmering to reduce the liquid
  • ½–1 cup mashed beans to thicken naturally
  • 1 tbsp / 15 ml lemon juice or vinegar to finish
A bean stew ratio guide with bowls of beans, chopped vegetables, tomato paste, tomatoes, broth, mashed beans, and lemon wedges, each labeled with the recipe ratio.
This bean stew ratio is the saveable formula: beans for body, vegetables for sweetness, tomato paste for depth, broth for looseness, and mashed beans for a thicker finish.

The stew may look thick before it has simmered, but wait 10–15 minutes before adding more broth. Beans release starch, tomatoes loosen, and vegetables soften as they cook. It is easier to loosen a thick pot than to rescue one that started too watery.

Why This Works with Almost Any Beans

The base recipe works because it does not ask every bean to behave the same way. Creamy beans help the sauce; firmer beans stay visible; mixed beans give you contrast. Start with cooked beans, keep the broth controlled, use tomato paste for depth, and mash a small portion of beans for body.

Choose Your Path

Start with the row that matches your pantry today; the main recipe is complete as written.

  • Canned or cooked beans: Follow the main recipe. Drain canned beans first, then simmer until the sauce tightens around the beans.

  • Dried beans: Cook them until tender first, then use about 4½ cups cooked beans.
  • Different bean styles: Use rosemary and lemon for white beans, lime and cumin for black beans, and herbs or vinegar for mixed beans.
  • Meat or slow cooker version: Brown meat first if using it. For slow cooker stew, use cooked/canned beans and less broth.

Cooking dried beans instead of opening cans? Check the canned vs dried bean notes before the pot starts so the beans are already tender when they meet the tomato base.

Ingredients, Swaps, and What Each One Does

The ingredients are simple, but the base matters. Let the onion, carrot, celery, garlic, and tomato paste smell sweet, savory, and cooked before the beans go in; that is what makes canned beans taste like a real stew instead of beans stirred into tomato sauce.

Main Ingredients

  • Olive oil: Softens the vegetables and gives the stew a rounder finish. Use less if adding sausage or chorizo.
  • Onion, carrot, and celery: The flavor base. Cook them until sweet-smelling and softened.
  • Garlic: Adds savory depth. Add it after the vegetables soften so it does not burn.
  • Tomato paste: Makes the stew taste deeper and more slow-cooked.
  • Smoked paprika, oregano or thyme, bay leaf, and pepper: A flexible seasoning base that works with many beans.
  • Crushed tomatoes: Create the main sauce. The full 28 oz / 800 g gives a tomato-rich pot. Use 14 oz / 400 g if you want the beans and broth to lead.
  • Broth: Low-sodium vegetable broth keeps the base vegetarian and easier to season.
  • Beans: Use three cans drained and rinsed, or about 4½ cups cooked beans.
  • Greens: Spinach, kale, chard, or collards add color. Use closer to 60 g for spinach and closer to 100 g for chopped kale, chard, or sturdier greens.
  • Lemon juice, vinegar, or balsamic: Adds a fresh lift after simmering.

Pantry Swaps

The recipe can still work if you are missing celery, using a smaller can of tomatoes, or trying to stretch two cans of beans into dinner.

If you are missingUse instead
CeleryExtra carrot, bell pepper, leek, fennel, or skip it.
CarrotSweet potato, squash, bell pepper, or extra onion.
Tomato pasteSimmer the tomatoes longer, or add a very small splash of soy sauce for depth if it fits your version.
Crushed tomatoesPassata, diced tomatoes, tomato sauce, or 14 oz / 400 g tomatoes plus more broth for a lighter stew.
BrothWater plus bouillon, or water with extra herbs, pepper, and olive oil.
Fresh herbsDried herbs in the base, then lemon or vinegar at the end.
GreensFrozen spinach, chopped cabbage, kale, chard, collards, or skip them.
Third can of beansAdd diced potato, cooked lentils, rice, extra vegetables, or use the small-batch notes below.

Salt tip: Start with ¾ tsp fine salt if using regular broth, salted canned beans, sausage, chorizo, parmesan, bouillon, or salty toppings. Use up to 1½ tsp only when your broth and beans are low-sodium or unsalted. Taste again after the stew reduces.

How to Cook It

The recipe is simple, but the pot tells you a few things as it cooks: the tomato paste should smell deeper, the sauce should slow down, and the spoon should come up with beans, not broth.

1. Soften the Vegetables

Heat olive oil in a large Dutch oven or heavy-bottomed pot over medium heat. Add onion, carrot, celery, and a pinch of salt. Cook for 7–10 minutes, stirring occasionally, until the onion looks translucent, the carrot has started to soften, and the pot smells sweet rather than raw.

Onion, carrot, and celery softening in olive oil inside an enameled Dutch oven with a wooden spoon.
First, soften the onion, carrot, and celery until glossy and sweet-smelling so the stew starts with a real cooked base, not just beans in tomato sauce.

2. Cook the Garlic, Tomato Paste, and Spices

Add garlic, tomato paste, smoked paprika, oregano or thyme, cumin if using, chili flakes if using, and black pepper. Stir for 1–2 minutes. The tomato paste should darken slightly and coat the vegetables. This is the step that makes the stew taste slow-cooked even when the beans came from cans.

Softened onion, carrot, and celery coated with cooked tomato paste, garlic, herbs, and spices inside a Dutch oven, with a wooden spoon in the pot.
Next, let the tomato paste darken slightly with the garlic, herbs, and spices; that small step gives canned or cooked beans a deeper stew flavor.

3. Add Tomatoes, Broth, Beans, and Bay Leaf

Add crushed tomatoes, 1½ cups / 360 ml broth, drained beans, and bay leaf. Stir well and scrape the bottom of the pot. If the mixture is too thick to bubble gently, add another ½ cup / 120 ml broth. Hold back extra liquid until the stew has simmered for at least 10 minutes.

Beans, crushed tomatoes, broth, and a bay leaf combined in a Dutch oven at the early simmer stage of bean stew.
After the beans, tomatoes, broth, and bay leaf go in, the pot should look a little loose; simmering uncovered is what turns it into stew.

At this stage, a loose-looking pot is normal; the thickening cues below explain when to wait, reduce, mash, or add more liquid.

4. Simmer Covered

Bring the pot to a gentle boil, then reduce the heat and cover. Simmer for 15–20 minutes. The beans should absorb the garlic-tomato flavor, and the vegetables should become fully tender.

5. Simmer Uncovered

Remove the lid and simmer for 10–15 minutes more. Stir occasionally so the bottom does not catch. The bubbles should slow down, the sauce should look glossier, and a spoon should leave a brief trail through the stew before the sauce flows back. If you plan to serve it over rice, keep it slightly saucier.

6. Mash a Small Portion of the Beans

Mash ½–1 cup of beans against the side of the pot with a spoon, ladle, or potato masher. Do not puree the stew. You want enough broken beans to make the sauce creamy while most beans stay whole. Chickpeas will stay firmer than white beans, so mash a little more if using mostly chickpeas.

A potato masher pressing some beans into thick tomato bean stew inside a Dutch oven, with many whole beans still visible.
Instead of adding cream or flour, mash a small portion of the beans into the sauce while leaving plenty of whole beans for texture.

When the stew stays thinner than you want after mashing, use the troubleshooting table before adding extra ingredients.

7. Add Greens and Finish

Stir in spinach, kale, chard, or other greens. Spinach needs 2–3 minutes; kale and chard may need 4–5 minutes. Turn off the heat, remove the bay leaf, then stir in lemon juice, vinegar, or balsamic. If the stew tastes dull even after salt, it probably needs acid, not more spices.

A hand adding fresh spinach and kale to a pot of thick tomato bean stew while a wooden spoon rests in the pot.
Toward the end, fold in spinach, kale, or chard so the greens soften into the hot stew while still adding freshness and color.

8. Rest Before Serving

Let the stew rest for 10 minutes before serving. The beans settle, the sauce tightens, and the bowl becomes more balanced. If it gets too thick, loosen it with broth or water ¼ cup / 60 ml at a time.

Finished bean stew in a Dutch oven with white beans, carrots, tomatoes, greens, herbs, and a thick red sauce, with bread and a wooden spoon nearby.
After resting, the stew should look settled and glossy in the pot before it ever reaches the bowl.

How to Keep It Thick, Not Soupy

If the stew looks too loose at first, give it a few minutes uncovered before adding fixes.

  • Start with less broth. For three cans of beans, begin with 1½ cups / 360 ml broth and add more only if needed.
  • Wait before adding liquid. Tomatoes loosen and beans release starch as they simmer.
  • Simmer uncovered near the end. This reduces extra liquid and concentrates flavor.
  • Mash some beans. Breaking down ½–1 cup beans thickens the sauce naturally.
  • Use tomato paste. Cooked tomato paste adds body and depth.
  • Choose creamy beans. Cannellini, butter beans, pinto beans, and white beans make a thicker pot.
  • Blend a small amount. You can blend 1 cup of stew and stir it back in, but do not blend the whole pot unless you want a bean puree.
  • Rest before serving. The stew thickens slightly as it cools.

Texture cue: after the uncovered simmer, a spoon should leave a short trail through the stew before the sauce slowly flows back. The stew should sit on rice instead of flooding it, and bread should be able to drag through the sauce.

Close-up of thick tomato bean stew with a wooden spoon creating a visible trail through the sauce. The image includes the text “Thick, Not Soupy” and “Look for a spoon trail.”
The best texture cue is the spoon trail: when the sauce clings to the beans and slowly settles back, the stew is thick enough without becoming dry.

Recipe Card

Thick and Hearty Bean Stew

This thick bean stew turns canned or cooked beans into a hearty tomato-based dinner with garlic, herbs, soft vegetables, greens, and a bright lemon or vinegar finish. Mash a small amount of beans into the pot so the sauce turns glossy and spoonable without cream.

Prep Time
15 minutes
Cook Time
35–40 minutes
Total Time
50–55 minutes
Servings
6 bowls

Equipment

  • Large Dutch oven or heavy-bottomed pot, 5–6 quart / 5–6 liter
  • Wooden spoon
  • Measuring cups and spoons
  • Can opener
  • Potato masher or ladle, optional

Ingredients

  • 2 tbsp / 30 ml olive oil
  • 1 large onion, diced, about 150–180 g
  • 2 medium carrots, diced, about 160–200 g
  • 2 celery ribs, diced, about 100 g
  • 4 garlic cloves, minced, about 12–16 g
  • 2–3 tbsp / 30–45 g tomato paste
  • Smoked paprika, 1 tsp
  • Dried oregano or thyme, 1 tsp
  • ½ tsp ground cumin, optional
  • ¼–½ tsp chili flakes, optional
  • Bay leaf, 1
  • Crushed tomatoes, 1 can, 28 oz / 800 g
  • Low-sodium vegetable broth, 1½–2 cups / 360–480 ml, plus more as needed
  • 3 cans beans, 14–15 oz / 400–425 g each, drained and rinsed; about 4½ cups cooked beans
  • 2 cups / 60–100 g spinach, kale, chard, or other greens
  • 1 tbsp / 15 ml lemon juice, red wine vinegar, or balsamic vinegar
  • 2–3 tbsp chopped fresh parsley or basil
  • ¾ tsp fine salt to start, plus more to taste; use up to 1½ tsp if using low-sodium broth and unsalted beans
  • ½ tsp black pepper
  • Extra olive oil for serving, optional

Instructions

  1. Soften the vegetables. Heat olive oil in a large Dutch oven or heavy pot over medium heat. Add onion, carrot, celery, and a pinch of salt. Cook for 7–10 minutes, stirring occasionally, until softened and sweet-smelling.
  2. Add garlic and tomato paste. Stir in garlic, tomato paste, smoked paprika, oregano or thyme, cumin if using, chili flakes if using, and black pepper. Cook for 1–2 minutes, stirring often, until the tomato paste darkens slightly.
  3. Add tomatoes, broth, beans, and bay leaf. Add crushed tomatoes, 1½ cups / 360 ml broth, the drained beans, and bay leaf. Stir well. If the stew looks too thick to simmer, add another ½ cup / 120 ml broth.
  4. Simmer covered. Bring to a gentle boil, reduce heat, cover, and simmer for 15–20 minutes.
  5. Simmer uncovered. Remove the lid and simmer for 10–15 minutes, stirring occasionally, until the liquid reduces and clings to the beans.
  6. Mash some beans. Mash ½–1 cup of beans into the sauce with a spoon, ladle, or potato masher. Keep most beans whole.
  7. Add greens. Stir in spinach, kale, or chard. Cook for 2–5 minutes, depending on the green, until tender.
  8. Finish the stew. Remove the bay leaf. Stir in lemon juice, vinegar, or balsamic, plus fresh herbs. Taste and adjust salt, pepper, and balance.
  9. Rest and serve. Let the stew rest for 10 minutes before serving. Add broth or water ¼ cup / 60 ml at a time if it becomes too thick.

Notes

  • Taste after simmering before adding more salt; broth reduces and canned beans vary.
  • For a thicker stew, start with 1½ cups / 360 ml broth and mash more beans near the end.
  • Prefer a looser stew? Use the full 2 cups / 480 ml broth and add more as needed.
  • For a lighter, less tomato-heavy version, use 14 oz / 400 g crushed tomatoes and add broth only as needed.
  • If using cooked dried beans, some good-tasting bean cooking liquid can replace part of the broth.
  • If using kidney beans, use canned kidney beans or dried kidney beans that have already been properly cooked.
  • For sausage, brown 12–16 oz / 340–450 g sausage first and reduce the olive oil.
  • For a vegan version, use vegetable broth and finish with olive oil, lemon, and herbs.

Best Beans for Stew

The bean mix changes the whole bowl: creamy beans soften the sauce, firmer beans stay visible, and mixed beans make the stew feel more like a pantry dinner than a planned recipe.

Several bowls of different beans for stew, including white beans, butter beans, black beans, pinto beans, kidney beans, chickpeas, and mixed beans.
Different beans bring different texture: creamy white beans, butter beans, chickpeas, kidney beans, black beans, pinto beans, or a mixed-bean blend can all work here.
BeanBest forTextureNotes
Cannellini beansWhite bean stew, Tuscan-style stewCreamy but holds shapeBest all-purpose choice for the main version.
Butter beansThick, soft, comforting stewLarge, tender, butteryExcellent with tomatoes, smoked paprika, rosemary, mushrooms, or chorizo.
Great Northern or navy beansWhite bean stewSmall to medium, creamyBest when you want the stew creamy and gentle.
Black beansSmoky or Latin-style stewEarthy and creamy-firmUse cumin, smoked paprika, chili, lime, cilantro, and rice.
Pinto beansMexican-style or pantry stewSoft and creamyThey break down nicely and help thicken the sauce.
Kidney beansMixed bean stew, beef bean stewFirmUse canned or properly cooked kidney beans.
Chickpeas / garbanzo beansMediterranean, Spanish, or Moroccan-style stewNutty and firmGood with tomato, cumin, coriander, paprika, greens, and lemon.
Mixed beansBudget stew, pantry cleanout stewVariedMash some creamy beans into the sauce to bring the textures together.

Once you know which beans you are using, the variation table below shows how to season white beans, black beans, chickpeas, butter beans, and mixed pantry beans.

If you were looking for a green bean side dish instead of a cooked-bean stew, MasalaMonk’s green bean casserole recipe is the better place to start.

Canned vs Dried Beans

For speed, canned beans get dinner on the table faster; dried beans give you more control, economy, and often excellent texture. Once they simmer with the garlic-tomato base, canned beans still taste like they belong.

Two bowls of beans on a kitchen counter, one with smooth drained canned beans and one with cooked dried beans, with a small bowl of bean cooking liquid and an unlabeled can nearby.
Use the comparison as a measuring cue: 3 cans of beans usually give about 4½ cups cooked / about 720 g drained beans, while about 1½ cups dried beans can replace them after cooking.

For this recipe, 3 cans of beans, 14–15 oz / 400–425 g each, gives about 4½ cups cooked beans once drained, or roughly 720 g drained beans. To replace them with dried beans, start with about 1½ cups dried beans, cook them until tender, then measure about 4½ cups cooked beans for the stew. The exact yield varies by bean type, size, and age.

If your cooked dried-bean liquid tastes good and is not overly salty, use some of it in place of broth. It adds body and keeps the stew even more budget-friendly.

Very old dried beans may take much longer to soften or stay firm even after extended cooking. When cooking dried beans, keep tomatoes, lemon juice, and vinegar out until the beans are tender. Acidic ingredients can slow softening.

Planning to use the slow cooker? Read the slow cooker notes before using dried beans, especially kidney beans.

Kidney bean note: Canned kidney beans are the easiest choice here. If starting with dried kidney beans, cook them properly before adding them to stew, especially before slow cooking. For food-safety details, see the FDA’s guidance on kidney bean toxins and Utah State University Extension’s guide to storing and cooking dry beans.

Variations

Think of these as directions for the next pot, not decisions you need to make before the first one. The main recipe is complete as written; choose only the path that matches what you have today.

For a hands-off version, use the slow cooker and Instant Pot notes after the flavor ideas.

Vegetarian or Vegan Bean Stew, Plus Meat Add-Ins

Vegetarian or vegan bean stew: The main recipe is vegetarian with vegetable broth. For a fully vegan pot, skip parmesan, yogurt, sour cream, and other dairy toppings; olive oil, mushrooms, smoked paprika, nutritional yeast, lemon, and herbs can still make the finish rich and lively.

Sausage: Brown 12–16 oz / 340–450 g sausage in the pot for 5–7 minutes before adding the vegetables. Spoon off excess fat, reduce the olive oil to 1 tablespoon / 15 ml, and build the stew in the same pot. White beans, butter beans, and pinto beans work especially well. For a more sausage-forward slow-cooker dinner, MasalaMonk’s slow cooker sausage casserole recipe follows that comfort-food direction more fully.

Chorizo: Use 4–6 oz / 115–170 g chorizo. Cured Spanish-style chorizo should be sliced or diced and gently rendered. Fresh Mexican-style chorizo should be cooked until browned and crumbly. Reduce the added oil and taste before adding more salt.

Chicken: Cooked shredded chicken is the simplest route. Stir in 2 cups / 280–320 g during the last 10 minutes of simmering. For raw chicken, use boneless thighs or breasts cut into large pieces, simmer until cooked through, then shred and return to the pot.

Beef: Beef turns this into a longer-cooked stew, not a 50-minute variation. Brown 1 lb / 450 g stew beef first, then simmer it with tomatoes and broth until mostly tender before adding canned beans. Depending on the cut, this may take 1½–2 hours.

Best Bean Mixes and Flavor Versions

This is where the recipe becomes useful for real pantry cooking: two half-used cans can make a better stew than one perfect bean. Keep the same method, then change the herbs, spices, finish, and side.

Version or mixChange these ingredientsFinish withServe with
Cannellini + butter beansUse mostly white beans with rosemary, thyme, and greens.Lemon, olive oil, parsleyBread or sautéed greens
Black beans + pinto beansUse cumin, chili, smoked paprika, and less Italian herb.Lime, cilantro, avocadoRice
Chickpeas + cannelliniUse cumin, coriander, paprika, tomato, and greens.Lemon, parsley, yogurt if desiredFlatbread or couscous
Butter beans + mushrooms or chorizoUse smoked paprika, rosemary, mushrooms, or rendered chorizo.Vinegar, parsley, black pepperPotatoes or bread
Mixed pantry cansUse any cooked beans and mash the creamier ones into the sauce.Vinegar, herbs, olive oilRice or bread

If you want chickpeas in a fresher, no-cook direction instead, MasalaMonk’s chickpea salad recipe turns canned chickpeas into a bright lemony lunch or side.

Fresh Tomato, No-Tomato, and Small-Batch Notes

Fresh tomato version: Fresh tomatoes work, but they need more time to cook down than canned tomatoes. Use them when they are ripe and flavorful, simmer longer, and expect a slightly looser, brighter sauce. MasalaMonk’s guide to tomato sauce from fresh tomatoes shows how reduction changes both texture and flavor.

Lighter no-tomato version: Skip the crushed tomatoes and tomato paste. Use 2½–3 cups / 600–720 ml broth, white beans, rosemary or thyme, garlic, greens, and lemon. Mash about 1 cup of beans into the pot so the broth becomes creamy.

Small batch with 2 cans of beans: Use 1 tbsp / 15 ml olive oil, 1 small onion, 1 carrot, 1 celery rib, 2 garlic cloves, 1½ tbsp / about 22 g tomato paste, 14 oz / 400 g tomatoes, ¾–1 cup / 180–240 ml broth, and 2 cans of beans. This makes about 3–4 bowls.

Adding Beans to Another Stew

Already have a pot of stew going? Use cooked or canned beans. Raw dried beans should not be added to an existing stew unless the recipe was designed for that timing.

  • Canned or cooked beans: Add during the final 15–20 minutes.
  • Delicate white beans or butter beans: Add later if you want them to stay whole.
  • Kidney, black, or pinto beans: Add a little earlier if you want them to absorb more flavor.
  • To thicken another stew: Mash some beans into the liquid.

Slow Cooker and Instant Pot Notes

The stovetop gives the best control over thickness. Choose the slow cooker for convenience, not the glossiest texture, and use the Instant Pot when speed matters more than deep reduction.

Slow Cooker

The slow cooker version will usually be softer and less glossy than the stovetop version, but it is excellent for a hands-off, make-ahead dinner. Use canned beans or beans that have already been safely cooked, and sauté the onion, carrot, celery, garlic, tomato paste, and spices first if you can.

  1. Sauté the vegetables, garlic, tomato paste, and spices in a skillet or in the slow cooker insert if it has a sauté function.
  2. Add tomatoes, cooked/canned beans, bay leaf, herbs, and 1¼–1½ cups / 300–360 ml broth.
  3. Cook on high for 3–4 hours or low for 5–6 hours. Timing depends on bean type and how soft you want the stew.
  4. Add greens near the end.
  5. Mash some beans after cooking. If the stew is still thin, transfer to a pot and simmer uncovered for a few minutes.

Slow cooker kidney bean warning: Do not cook raw dried kidney beans from scratch in the slow cooker. Use canned kidney beans or dried kidney beans that have already been boiled and cooked properly.

Instant Pot with Canned Beans

The Instant Pot is best when you want speed, not deep reduction. The sauté step and final simmer are what keep it from tasting flat. This version works best with cooked or canned beans unless you are following a bean-specific dried-bean pressure-cooking method.

  1. Use the sauté function to soften the onion, carrot, celery, garlic, tomato paste, and spices.
  2. Deglaze thoroughly with a splash of broth, scraping until the bottom feels smooth before adding beans and tomatoes.
  3. Add drained beans, 1 cup / 240 ml broth, bay leaf, and crushed tomatoes on top.
  4. Pressure cook for 5 minutes.
  5. Let the pressure release naturally for 10 minutes, then release the remaining pressure.
  6. Mash some beans after cooking. If the stew is thin, use sauté mode for a few minutes to reduce it.
  7. Add greens, lemon or vinegar, and herbs after pressure cooking.

What to Serve with Bean Stew

The best sides are the ones that catch the sauce: rice, bread, potatoes, polenta, or anything sturdy enough for a thick spoonful. Serve it thick enough for bread, or just saucy enough to settle into rice. A final drizzle of olive oil and a squeeze of lemon can make the bowl feel richer, brighter, and more intentional than the ingredient list suggests.

A hand dipping a piece of crusty bread into a bowl of thick tomato bean stew with white beans, carrots, herbs, and a warm linen beside it.
Serve the stew with crusty bread when you want the sauce to be part of the meal; one scoop should catch beans, herbs, and tomato base together.

To Make It More Filling

  • Crusty bread or garlic bread
  • Steamed rice
  • Polenta
  • Cornbread
  • Baked potatoes
  • Quinoa, bulgur, or couscous
  • Buttered toast

A pot of plain rice is one of the easiest ways to stretch the stew. MasalaMonk’s guide on how to cook rice covers stovetop, rice cooker, and Instant Pot methods so the base comes out right before you spoon the stew over it.

A bowl of white rice topped with tomato bean stew, carrots, herbs, and a lemon wedge, with a spoon resting in the bowl.
For a bigger dinner, spoon the bean stew over rice; the rice catches the tomato sauce and stretches the pot without making the meal feel thin.

The storage section explains why extra stew is worth planning for: it thickens overnight and loosens easily when reheated gently.

To Add Freshness

Because the stew is rich and hearty, the best toppings either brighten it, cool it, or add contrast.

  • Lemon or lime wedges
  • Fresh parsley, basil, cilantro, or dill
  • Pickled onions
  • Green salad
  • Sautéed greens
  • Avocado for black bean versions
  • Yogurt or sour cream, if not vegan

For another bean-and-rice dinner with a Louisiana-style flavor base, MasalaMonk’s red beans and rice recipe is a heartier, smokier route.

Make-Ahead, Storage, Freezing, and Reheating

Bean stew thickens and deepens as it rests, which means tomorrow’s bowl may taste even better than tonight’s. The leftovers are part of the reward here; the beans keep soaking up flavor as they sit. If you are making it ahead, keep it slightly looser than you want. It will thicken as it cools and again in the fridge.

A glass storage container filled with leftover tomato bean stew beside a reheated bowl of the same stew, with bread, herbs, and a spoon on a kitchen counter.
Leftover bean stew usually thickens as it rests; store it in glass if you can, then loosen it with a splash of broth or water when reheating.
  • Make ahead: Make the stew 1–2 days ahead if you want the flavor to settle.
  • Refrigerator: Store in an airtight container for 4–5 days.
  • Freezer: Freeze for up to 3 months.
  • Greens: If freezing, consider adding fresh greens after reheating rather than before freezing.
  • Reheating: Warm on the stovetop over low-medium heat with a splash of broth or water.
  • Brighten after reheating: Add lemon juice, herbs, or olive oil at the end.

The troubleshooting table below covers reheated stew that turns too thick, too loose, or flat-tasting.

Mistakes That Make It Watery or Bland

Most disappointing bean stews fail in the same few ways: too much liquid, not enough base flavor, or no fresh finish. Fix those, and the pot usually comes back.

  • Adding too much broth at the start. Begin with less, simmer, then adjust.
  • Skipping the vegetables. Beans need onion, garlic, herbs, and seasoning to taste like dinner.
  • Not cooking the tomato paste. Raw tomato paste can taste sharp and flat.
  • Adding tomatoes or vinegar before dried beans are tender. Acidic ingredients can slow softening.
  • Forgetting the fresh finish. A small splash of vinegar or lemon at the end keeps the stew from tasting heavy.
  • Ignoring salt from broth, canned beans, sausage, or chorizo. Taste before adding the full amount of salt.

Troubleshooting

Most bean stew problems are fixable because beans are forgiving. When the pot is watery, give it time uncovered. Flat flavor usually needs salt first, then a small splash of vinegar or lemon juice. A too-thick pot should be loosened slowly and tasted again.

ProblemFix nowFix next time
Too waterySimmer uncovered and mash ½–1 cup beans into the sauce.Start with less broth and add more only after simmering.
Too thickAdd broth or water ¼ cup / 60 ml at a time.Reduce for less time or use the full 2 cups / 480 ml broth.
Bland beansAdd salt first, then a small splash of vinegar or lemon juice, herbs, olive oil, or chili.Season the vegetables and cook the tomato paste properly.
Flat flavorAdd a small splash of vinegar or lemon juice, fresh herbs, black pepper, or olive oil.Do not skip the final balance.
Too acidicAdd more beans, a splash of broth, olive oil, or a small pinch of sugar.Use fewer tomatoes or cook tomato paste longer.
Bitter tomato pasteAdd tomatoes, broth, and beans to soften the flavor.Cook tomato paste until darkened, but do not let it burn.
Firm beansSimmer longer with extra broth until tender.Use canned beans or cook dried beans fully before adding.
Too saltyAdd unsalted beans, potato, tomatoes, or low-sodium broth.Use low-sodium broth and season gradually.
Thin slow cooker versionMash beans at the end or transfer to a pot and simmer uncovered.Use less broth in the slow cooker.

FAQs

What beans are best for bean stew?

Cannellini beans and butter beans are the easiest all-purpose choices for bean stew because they turn creamy without disappearing. Black beans make it smoky, chickpeas keep it firmer, pinto beans help thicken the sauce, and mixed beans are best when you want to use what is already open.

Is bean stew the same as bean soup?

No. Bean stew is thicker than bean soup. Soup has more broth and a looser texture, while this stew is reduced, spoonable, and sturdy enough to serve with bread, rice, polenta, or potatoes as a full meal.

How is bean stew different from chili?

Bean stew is usually less chili-spice focused than chili. This version leans on aromatics, tomatoes, herbs, beans, and a flexible finish rather than a heavy chili-powder base.

Can I use canned beans for bean stew?

Yes, canned beans work very well for bean stew. Drain and rinse three 14–15 oz cans, then simmer them in the tomato base until the sauce clings to the beans.

Should I drain canned beans?

Usually, yes. Draining and rinsing gives you more control over salt and texture. If the can liquid tastes clean and you want extra body, add a small splash, but do not use it as the main liquid.

Can I use dried beans?

Yes, dried beans work well if they are cooked until tender first. Use about 4½ cups cooked beans to replace three cans; the stew should be where they absorb flavor, not where they struggle to soften.

How do I thicken bean stew?

To thicken bean stew, simmer uncovered and mash ½–1 cup of beans into the sauce. Starting with less broth and cooking the tomato paste properly also helps the finished bowl become glossy and scoopable.

Can I make bean stew without tomatoes?

Yes, bean stew can be made without tomatoes. Use broth as the base, add extra aromatics and herbs, mash more beans for body, and finish with olive oil and a little acidity so it still tastes complete.

Can this bean stew be vegan?

Yes, this bean stew can be vegan. Use vegetable broth, skip dairy toppings, and finish with olive oil, herbs, mushrooms, or nutritional yeast for extra richness.

Can I make bean stew in a slow cooker?

Yes, bean stew can be made in a slow cooker with canned beans or beans that have already been cooked. Use less broth than the stovetop version, and expect a softer, less glossy stew that is still excellent for a hands-off dinner.

Does bean stew freeze well?

Yes, bean stew freezes well for up to 3 months. It usually looks thicker after thawing, so reheat it gently with a splash of broth or water, then brighten it at the end so it tastes fresh again.

What should I serve with bean stew?

Serve bean stew with crusty bread, rice, polenta, cornbread, baked potatoes, quinoa, couscous, or a green salad. Bread is best when the stew is extra thick; rice is best when you want to stretch the pot into more servings.

Final Thoughts

A good bean stew is not fancy food. It is the kind of recipe that makes three cans of beans, one onion, and the last carrot in the drawer feel like dinner for tonight and lunch tomorrow.

Once the method clicks, you stop needing one exact bean. Try white beans and rosemary when you want something soft and cozy. Go with black beans, cumin, and lime when you want a smoky bowl over rice. Choose chickpeas with paprika and lemon, butter beans with chorizo, or mixed beans when the pantry needs clearing out.

If you make this with a different bean mix, leave a comment with the exact cans or cooked beans you used and what you served it with — especially if you tried black beans, butter beans, chickpeas, or a mixed pantry batch. It helps the next person staring at the same random cans.

Back to top

Posted on Leave a comment

Creamy Mushroom Sauce Recipe for Steak, Chicken, Pasta & More

A good creamy mushroom sauce should make the plate feel complete: rich enough for steak, loose enough for pasta, and spoonable enough for potatoes or rice.

This is the sauce to make when dinner is almost there but needs one thing to pull it together. Steak feels restaurant-style. Chicken tastes richer. Pasta turns silky. Even potatoes, rice, toast, or roasted vegetables feel like a proper meal once a glossy mushroom sauce lands on top.

It is not quite a side dish and not quite a gravy; it is the thing that makes the plate feel finished.

The secret is simple: brown the mushrooms first, then choose the finish. Let them release their moisture, shrink, darken, and catch at the edges before the cream goes in. Once that happens, garlic, broth, cream, parmesan, thyme, black pepper, and a little lemon turn those browned bits into a sauce you can use half a dozen ways.

This creamy mushroom sauce recipe takes about 20 to 25 minutes and makes roughly 3 cups / 700 to 720 ml. Keep it thick for steak, loosen it for pasta, soften it for chicken, or push it slightly toward gravy for potatoes and rice. Start with the creamy version below; the no-cream, no-wine, dairy-free, and gravy-style notes are adaptations, not separate recipes.

Creamy Mushroom Sauce at a Glance

A good mushroom sauce starts with well-browned mushrooms, then turns into a shiny skillet sauce that tastes savory first and creamy second.

  • Time: about 20 to 25 minutes in a wide skillet
  • Yield: about 3 cups / 700 to 720 ml
  • Mushrooms: 400–450g / 14–16 oz, roughly two 8 oz packs
  • Best mushrooms: cremini, baby bella, button, portobello, or mixed mushrooms
  • Best uses: steak, chicken, pork chops, pasta, mashed potatoes, rice, vegetables, toast, and omelettes
  • Texture: smooth and spoonable, not watery, gluey, greasy, or split

This is a skillet mushroom sauce, not a condensed soup shortcut or a mushroom ragu. Brown the mushrooms first, then finish with cream and parmesan so the sauce tastes deep before it tastes creamy.

Choose the Finish Before You Start

One skillet, one base, many possible dinners. Before you reduce it too far, decide where it is going: over steak, through pasta, across chicken, or closer to gravy.

Sauce map guide showing mushroom sauce served with steak, chicken, pasta, and potatoes or rice, with different finish notes for each.
Use the Sauce Map before the final simmer so one mushroom sauce can move toward steak, chicken, pasta, or potatoes without starting over.
Serve it withTextureLiquidFinish
SteakThick, shiny, spoonableBeef broth, pan drippings, or red wineBlack pepper, Dijon, Worcestershire, thyme
ChickenMedium creamyChicken brothLemon, parsley, parmesan
PastaLooser and silkyPasta water, cream, brothParmesan, black pepper, parsley
Pork chopsCreamy and smotheredChicken broth or pork pan juicesGarlic, thyme, optional slurry
Potatoes or riceThicker, gravy-likeStock or brothFlour or cornstarch option
Vegetables or toastMushroom-heavy, not too looseCream, milk, or brothHerbs, lemon, black pepper

Once you know the direction, jump to the notes for steak, chicken, pasta, pork chops, or potatoes and rice.

Before you start: Use a wide skillet. Wait until the mushroom liquid cooks off. Add parmesan over low heat. Those three choices prevent most watery, bland, split, or clumpy mushroom sauce problems.

Pick the direction first, then cook the base recipe below. In the final 2 minutes, the same skillet can stay thick for steak, loosen for pasta, or move closer to gravy.

Creamy Mushroom Sauce Recipe for Steak, Chicken, Pasta & More

A flexible skillet mushroom sauce built on deeply browned mushrooms, garlic, broth, cream, parmesan, thyme, and black pepper. Keep it spoonable for steak, looser for pasta, or thicken it slightly for a gravy-style finish.

Prep Time8 minutes
Cook Time15 minutes
Total Time23 minutes
YieldAbout 3 cups / 700–720 ml

Serves: 4 to 5 over steak, chicken, or pork chops; 3 to 4 with pasta

Equipment: 10- to 12-inch skillet, wooden spoon or spatula, whisk, measuring cup, fine grater or microplane

Ingredients

  • 400–450g / 14–16 oz mushrooms, sliced about 1/4 inch / 6 mm thick
  • 2 tbsp / 28g butter
  • 1 tbsp / 15 ml olive oil
  • 1 small shallot, finely minced, or 1/4 cup minced onion
  • 3 garlic cloves, minced
  • 2 tsp fresh thyme leaves, or 1/2 tsp dried thyme
  • 1/4 cup / 60 ml dry white wine, optional
  • 1/2 cup / 120 ml chicken, beef, or vegetable broth
  • 1 cup / 240 ml heavy cream or double cream
  • 1/3 cup / about 30g finely grated parmesan
  • 1–2 tsp lemon juice, to taste
  • 1/4 tsp salt to start, plus more to taste after parmesan
  • Freshly ground black pepper, to taste
  • 1–2 tbsp chopped parsley, optional, for finishing

Optional thickener for a gravy-style sauce: 1 tsp cornstarch mixed with 1 tbsp cold water.

Instructions

  1. Brown the mushrooms. Heat the butter and olive oil in a wide skillet over medium-high heat. Add the mushrooms and cook for 6 to 8 minutes, stirring occasionally, until they release moisture, the moisture evaporates, the pan looks mostly dry, and the edges begin to brown. If the pan is crowded, cook them in two batches.
  2. Add aromatics. Season the browned mushrooms with 1/4 tsp salt and black pepper. Add the shallot or onion and cook for 1 to 2 minutes. Add the garlic and thyme and cook for 30 to 45 seconds, just until fragrant.
  3. Deglaze the pan. Pour in the wine, or use extra broth if skipping wine. Scrape the browned bits from the bottom of the skillet. Simmer until the wine smells less sharp and reduces by about half, about 1 minute.
  4. Add broth and cream. Lower the heat to medium. Add the broth and cream. Simmer gently for 4 to 6 minutes, stirring occasionally, until the cream turns beige, the sauce begins to thicken, and it leaves light trails when you stir.
  5. Finish with parmesan. Reduce the heat to low. Stir in the parmesan gradually until melted and smooth. Taste before adding more salt.
  6. Balance the sauce. Add black pepper and 1 teaspoon lemon juice. Taste again. If it tastes flat, add salt. If it tastes heavy, add lemon. If it tastes creamy but not savory, add parmesan, Worcestershire, or more pepper.
  7. Adjust thickness. For steak or pork chops, simmer a little longer until spoonable. For pasta, stop slightly loose and loosen with reserved pasta water as needed. For a thicker gravy-style sauce, stir in the cornstarch slurry and simmer for 30 to 60 seconds.
  8. Serve warm. Spoon over steak, chicken, pork chops, pasta, mashed potatoes, rice, roasted vegetables, meatballs, toast, or omelettes.

Best Finishes

  • Steak: beef broth, Dijon, Worcestershire, and extra black pepper.
  • Chicken: chicken broth, lemon, parsley, and a medium-thick texture.
  • Pasta: stop the sauce slightly loose and loosen with pasta water.
  • No wine or gravy-style: use broth instead of wine; add the optional slurry for a thicker finish.

Storage: Refrigerate leftovers and reheat gently with a splash of liquid.

This is the quick turn from browned mushrooms to sauce: liquid lifts the browned bits, and cream pulls everything together.

Cream and liquid being poured into a skillet of browned mushrooms while a spoon stirs the sauce.
After browning, deglazing pulls flavor from the skillet into the sauce. Then cream ties the mushrooms, garlic, thyme, and pan juices together.

What Browning Should Look and Smell Like

This is the part where patience pays you back. Mushrooms do not become rich the second they hit the pan. First they steam, then they shrink, then the pan goes quieter and drier, and only after that do the edges begin to brown.

Do not judge the sauce in the first few minutes; mushrooms get messy before they get good. They may look wet, crowded, and pale at first, but keep going. The pan should smell deeper and nuttier before the cream goes in, not just buttery.

Two stages of mushrooms cooking in a pan: wet pale mushrooms labeled Wet First — Keep Cooking and browned mushrooms labeled Ready for Cream.
First comes moisture, then color. When the pan quiets down and the mushrooms turn golden at the edges, the sauce will taste much more savory.
  • Too wet: keep cooking until the pan looks mostly dry.
  • Too crowded: cook the mushrooms in two batches.
  • Too pale: give them another minute or two before adding garlic.
  • Ready for cream: the mushrooms are smaller, darker, and golden at the edges.

If the sauce still turns watery, bland, or thin after browning, use the troubleshooting guide before adding more cream.

Once the cream goes in, keep the heat gentle. The cream should turn beige as it picks up the browned mushroom juices. If it tastes creamy but not mushroomy, the problem is usually browning, not the amount of cream.

Tested texture note: A 12-inch skillet browns 400–450g mushrooms much better than a small saucepan. If the mushrooms pile up deeply, cook them in two batches. The sauce also thickens after parmesan and again as it cools, so stop slightly looser than you want it on the plate if it will sit for more than 5 minutes or if you are tossing it with pasta.

Ingredient Notes

The sauce is simple enough that the small choices show. Mushrooms bring savoriness, broth balances the pan, cream gives body, parmesan adds depth, and lemon keeps the finish lifted.

Ingredients for mushroom sauce arranged on a table, including mushrooms, cream, broth, parmesan, garlic, thyme, butter, lemon, salt, and black pepper.
Before the pan gets hot, line up the sauce builders: dry mushrooms for searing, broth for the pan, cream for body, parmesan for depth, and lemon for balance.

Cremini or baby bella mushrooms give the best everyday flavor, but button, portobello, or mixed mushrooms also work. Slice them about 1/4 inch / 6 mm thick.

Fresh, dry-looking mushrooms sear better than damp ones. If the mushrooms are dirty, a quick rinse is fine, but dry them well before cooking. For a quick visual reference, the Mushroom Council’s mushroom cleaning tips show the same brush, wipe, or brief-rinse approach.

Butter adds roundness, olive oil helps with heat, and pan drippings make the sauce deeper if you cooked steak, chicken, or pork first. Use chicken broth for chicken and pasta, beef broth for steak, and vegetable broth for a vegetarian version.

Heavy cream gives the smoothest finish, and finely grated parmesan melts into the pan instead of sitting in clumps. MasalaMonk’s Parmesan vs Parmigiano Reggiano guide is helpful when choosing between hard cheeses.

Dry white wine helps lift the browned bits from the pan, but broth works well too. If you skip wine, finish with lemon juice so the sauce still tastes bright.

Cooking without cream, wine, or dairy? Use the no-cream substitutions and dairy-free notes before you start.

Getting the Texture Right

The sauce should coat the back of a spoon and fall in a slow ribbon for steak, chicken, and pork chops. For pasta, it should flow more loosely because it tightens as you toss. For potatoes, rice, or meatballs, it can sit closer to gravy.

Spoon test: Dip a spoon into the sauce and run your finger through the coating on the back. A line that holds for a moment means it is thick enough for steak or chicken. When the coating closes immediately, simmer longer. Loosen the sauce gently if it barely moves.

Close-up of creamy mushroom sauce with mushroom slices coating a spoon and dripping back into the pan.
Use the spoon test before serving. If the sauce coats and drips slowly, it is ready; if it runs, reduce it; if it drags, loosen it gently.

Then check the final texture.

Guide showing three mushroom sauce thicknesses: loose for pasta, spoonable for steak and chicken, and thicker for potatoes or rice.
Thickness is the final choice. Keep it loose for pasta, medium-spoonable for steak and chicken, and heavier when you want a mushroom gravy finish.

Use that texture guide before serving: thicker for steak, looser for pasta, or gravy-style for potatoes and rice.

If pasta tightens in the bowl, that is normal. A splash of hot pasta water brings it back.

How Much Sauce to Use — and Where It Works Best

Use enough sauce to feel generous, not so much that steak, pasta, or potatoes disappear under it.

Serve it withHow much to use
Steak1/3 to 1/2 cup per steak
Chicken breast or thigh1/3 cup per piece
Pork chop1/3 to 1/2 cup per chop
PastaFull batch for 250g / 8 oz long pasta or 300g / 10 oz short pasta
Mashed potatoes, rice, or vegetables1/4 to 1/3 cup per serving
Toast or omelette2 to 4 tbsp per serving

Mushroom Sauce for Steak

For steak: use pan drippings if you have them, and reduce until the sauce sits on the meat instead of running across the plate.

Seared steak on a dark plate topped with mushroom sauce, sliced mushrooms, thyme, and black pepper.
Mushroom sauce for steak should cling to the meat while the seared crust stays visible. Pepper, thyme, Dijon, or Worcestershire can deepen the finish.

Mushroom Sauce for Chicken

For chicken: keep the sauce medium-thick and bright with lemon or parsley. If the chicken is already cooked, warm it gently in the sauce. If it is not fully cooked, finish it gently until the thickest part reaches 165°F / 74°C. For a complete chicken dinner using this flavor family, see MasalaMonk’s Cream of Mushroom Chicken Recipe.
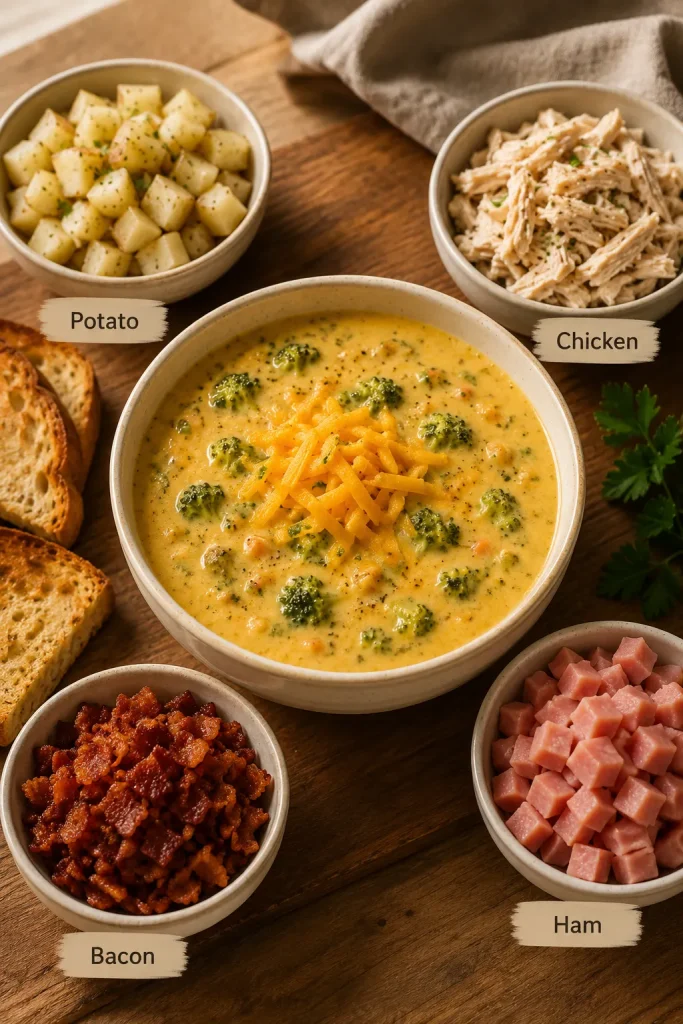
Chicken pieces on a cream-colored plate covered with mushroom sauce, sliced mushrooms, parsley, and a lemon wedge.

Mushroom sauce for chicken works best when it is rich but still bright. Parsley and lemon keep the cream from feeling too heavy.
Mushroom Sauce for Pasta

For pasta: keep the sauce loose enough to coat, not clump. Reserve 1 cup pasta water before draining, then toss over low heat and add pasta water 2 to 4 tablespoons at a time until glossy.

Pasta lifted with a fork from a bowl of mushroom sauce with sliced mushrooms, parmesan, parsley, and black pepper.
Keep mushroom pasta sauce loose and glossy so it slides through the noodles instead of settling in clumps.

Mushroom Sauce for Pork Chops

Pork chops: use chicken broth or pork pan juices and reduce until the sauce coats the chops well. A full pork version is waiting in MasalaMonk’s Cream of Mushroom Pork Chops.

Seared pork chops topped with mushroom sauce, sliced mushrooms, black pepper, thyme, green beans, and roasted potatoes.
Mushroom sauce for pork chops should be generous but controlled, coating the chop while leaving the seared edges visible.

Mushroom Sauce for Potatoes and Rice

Potatoes, rice, vegetables, toast, or omelettes: use a slightly thicker finish and let the mushrooms stay the focus. This sauce is especially good over garlic mashed potatoes. With rice, keep it looser so it soaks in instead of sitting heavily on top; MasalaMonk’s guide on how to cook rice is a simple place to start.

Thick mushroom sauce with visible mushroom slices spooned over mashed potatoes on a cream-colored plate.
Potatoes or rice work best when the sauce moves toward mushroom gravy: thicker, spoonable, and full of visible mushroom pieces.

No Cream, No Wine & Dairy-Free Options

Once the base works, substitutions become less risky because you know what each ingredient is replacing. Remove cream and you need body. Skip wine and you need brightness. Go dairy-free and you need body plus savoriness.

Without Cream

The no-cream versions will not all taste identical, but they can still be rich, savory, and useful. Choose milk + flour for creamy, broth + cornstarch for gravy-like, and cashew cream for dairy-free richness.

VersionHow to replace 1 cup / 240 ml creamBest for
Milk + flourCook 1 tbsp flour in the fat for 1 minute, then whisk in 1 cup / 240 ml whole milk gradually.Chicken, pasta, toast
Broth + cornstarchUse 1 cup / 240 ml extra broth, then thicken with 1–2 tsp cornstarch mixed with cold water.Steak, potatoes, rice, gravy-style sauce
Broth + milkUse 3/4 cup / 180 ml broth plus 1/4 cup / 60 ml whole milk, then thicken lightly if needed.Lighter creamy sauce
Cashew creamUse 1 cup / 240 ml cashew cream in place of heavy cream.Dairy-free pasta or vegetables
Guide for mushroom sauce without cream showing milk and flour, broth and cornstarch, broth and milk, and cashew cream options.
Mushroom sauce without cream still needs body. Flour, cornstarch, broth, milk, or cashew cream can thicken the sauce depending on what you have.

If you are also skipping wine or dairy, use the no-wine and dairy-free guide before finishing the sauce.

If using milk instead of cream, keep the heat gentle. Milk-based sauces are more likely to curdle or separate if boiled hard.

Without Wine

Wine helps, but it is not the soul of the sauce. Browned mushrooms, broth, parmesan, and lemon do most of the real work. Replace the wine with the same amount of broth, then add 1 to 2 teaspoons lemon juice before serving.

Dairy-Free

Use olive oil or vegan butter instead of butter, vegetable broth instead of chicken or beef broth, and cashew cream for the most neutral creamy body. For a lighter sauce, use vegetable broth and cornstarch slurry, then add a small splash of soy sauce or tamari for savory depth. Use unsweetened dairy-free milk only. Avoid sweetened plant milks; coconut milk works but changes the flavor.

These two swaps solve different problems: broth and lemon replace wine’s brightness, while olive oil, vegetable broth, and cashew cream replace dairy’s body.

Guide for no-wine and dairy-free mushroom sauce showing broth, lemon, olive oil, vegetable broth, cashew cream, cashews, mushrooms, garlic, and thyme.
Without wine, add brightness with broth and lemon. A dairy-free mushroom sauce gets body from olive oil, vegetable broth, and cashew cream.

Small Flavor Adjustments

To make it more garlicky, increase the garlic to 4 or 5 cloves and add it only after the mushrooms brown. A deeper steak version can use red wine, beef broth, Dijon, Worcestershire, thyme, and extra black pepper. Brighten the pan with lemon, parsley, or a splash of white wine. For more savoriness, add a few drops of Worcestershire or soy sauce, more parmesan, or a little extra broth.

Mushroom Sauce vs Mushroom Gravy

The line between sauce and gravy is blurry in real kitchens. If it is going over steak or pasta, keep it silkier. If it is going over potatoes, rice, meatballs, or roasts, you can push it thicker and more stock-forward.

FeatureMushroom sauceMushroom gravy
BaseCream + brothStock + roux or slurry
ColorCreamy, pale, golden, or beigeBrown and savory
TextureSilky, rich, spoonablePourable, thicker, gravy-like
Best forSteak, chicken, pork chops, pastaMashed potatoes, meatloaf, roasts, rice
FreezingNot ideal if cream-basedBetter if made without cream
ThickenerReduction, parmesan, optional slurryFlour, roux, or cornstarch

This recipe is a creamy sauce first. To take it closer to gravy, use more broth, less cream, and the optional cornstarch slurry.

Can This Replace Canned Cream of Mushroom Soup?

Yes, this homemade sauce can replace canned cream of mushroom soup as a spoonable topping for chicken, pork chops, rice, pasta, potatoes, or vegetables. It tastes fresher and more mushroom-forward than canned soup.

As a pourable dinner sauce, keep the full 3-cup batch as written. To make a condensed-soup-style replacement, reduce and thicken it to about 2 cups. A gravy-style topping can stay closer to 2 1/2 to 3 cups, then thicken with slurry or roux.

Casseroles need a thicker sauce than a pourable skillet topping because the sauce has to hold vegetables, noodles, protein, and topping together. To turn the same sauce idea into a full casserole, MasalaMonk’s green bean casserole is a useful next step.

Watery, Split or Bland? Fix It Fast

If your sauce looks wrong, do not panic. Most mushroom sauce problems are fixable. Usually, the issue comes from mushrooms that steamed instead of browned, cream that boiled too hard, cheese added over high heat, or a sauce that was made too thick before pasta or reheating.

Quick Visual Fixes

Troubleshooting guide for mushroom sauce showing fixes for watery, split, bland, and plain cream-tasting sauce.
Use the fix-it guide at the first sign of trouble: reduce watery sauce, warm split sauce gently, brighten bland sauce, and build more mushroom depth.

Detailed Fix Table

ProblemFix nowNext time
Watery sauceSimmer uncovered for 2 to 5 minutes, or stir in 1 tsp cornstarch mixed with 1 tbsp cold water.Give the mushrooms enough time for the pan to dry before adding cream.
Too thickAdd warm broth, milk, cream, or pasta water 1 tbsp at a time.Stop simmering while the sauce is slightly looser than you want it on the plate.
Split or greasyLower heat and whisk in a splash of warm broth or cream. Avoid adding cold liquid directly.Keep the cream at a gentle simmer.
Tastes like plain creamAdd parmesan, salt, pepper, thyme, lemon, Worcestershire, or a splash of broth.Brown mushrooms longer and deglaze the pan before adding cream.
BlandAdd salt if flat, lemon if heavy, parmesan or Worcestershire if it lacks depth.Taste after parmesan before final seasoning.
Rubbery mushroomsKeep cooking until moisture evaporates and edges brown.Use a wide pan and avoid crowding.
Floury tasteSimmer 2 to 3 minutes longer after adding liquid.Cook flour in the fat for about 1 minute before adding liquid.
Parmesan clumpedTake the pan off the heat and whisk gently. Add a splash of warm liquid if needed.Use finely grated parmesan and avoid high heat.
Pasta absorbed the sauceAdd pasta water 2 to 4 tbsp at a time and toss over low heat.Keep the sauce looser before adding pasta.

Most fixes come back to two things: give the mushrooms more time in the pan, then keep the creamy finish gentle. For watery or bland sauce problems, recheck the wet-to-browned mushroom cue and the spoon test.

Storage, Reheating, and Make-Ahead Tips

Cream sauces are not difficult to reheat; they just do not like being rushed. Store leftovers in an airtight container in the refrigerator for 3 to 4 days. For general leftover safety, the USDA recommends using refrigerated leftovers within 3 to 4 days.

  • To refrigerate: cool the sauce, then store in an airtight container.
  • To reheat on the stove: warm over low or medium-low heat, stirring often.
  • To loosen: add a splash of broth, milk, cream, or pasta water.
  • To microwave: use short bursts and stir between each one.
  • To freeze: cream-based sauce is not ideal because it can split. A no-cream, gravy-style version freezes better.

If the sauce looks separated after chilling, warm it slowly and whisk in a little liquid. Do not bring it to a hard boil. For more general leftover storage guidance, see the USDA’s Leftovers and Food Safety guide.

FAQs About Mushroom Sauce

Can I use canned mushrooms?

Yes, canned mushrooms work in a pinch, but fresh mushrooms give better browning and flavor. Drain canned mushrooms well, pat them dry, and brown them before adding liquid.

How do I make mushroom sauce thicker?

Simmer mushroom sauce uncovered first; that gives the best flavor. For a faster fix, add a slurry made from 1 teaspoon cornstarch and 1 tablespoon cold water.

Why is my mushroom sauce watery?

Mushroom sauce is usually watery when the pan is still too wet before the cream goes in. Simmer uncovered, or use a small cornstarch slurry if dinner is waiting.

Why does it taste like plain cream?

If mushroom sauce tastes like plain cream, the mushrooms probably needed more browning, or the sauce needs salt, parmesan, pepper, lemon, or Worcestershire. It should taste savory before it tastes creamy.

Is this the same as mushroom gravy?

No. Mushroom sauce is usually creamier and better for steak, chicken, pasta, and pork chops. Mushroom gravy is usually more stock-based, brown, and thickened with flour or cornstarch.

What can I use instead of cream?

Use milk with flour for a lighter creamy sauce, broth with cornstarch for a gravy-style sauce, or cashew cream for dairy-free richness. Milk and broth are thinner than cream, so they usually need a thickener.

Can I make mushroom sauce ahead of time?

Yes. Make it 2 to 3 days ahead, refrigerate, and reheat gently with a splash of liquid. Leftovers keep for 3 to 4 days in an airtight container.

Why did the sauce split?

Cream sauces usually split when boiled too hard or reheated too aggressively. Lower the heat and whisk in a splash of warm broth or cream.

Final Spoonful

Once you understand the texture, this becomes the sauce you can pull out for half-finished dinners: steak that needs polish, chicken that needs richness, pasta that needs gloss, or potatoes that need comfort.

Tried it over steak, chicken, pasta, potatoes, or something else? Tell me what you spooned it over and how you finished it — Dijon, Worcestershire, extra pepper, pasta water, or your own trick.

Back to top