Posted on Leave a comment

Black Bean Burger Recipe: Easy Patties That Don’t Fall Apart

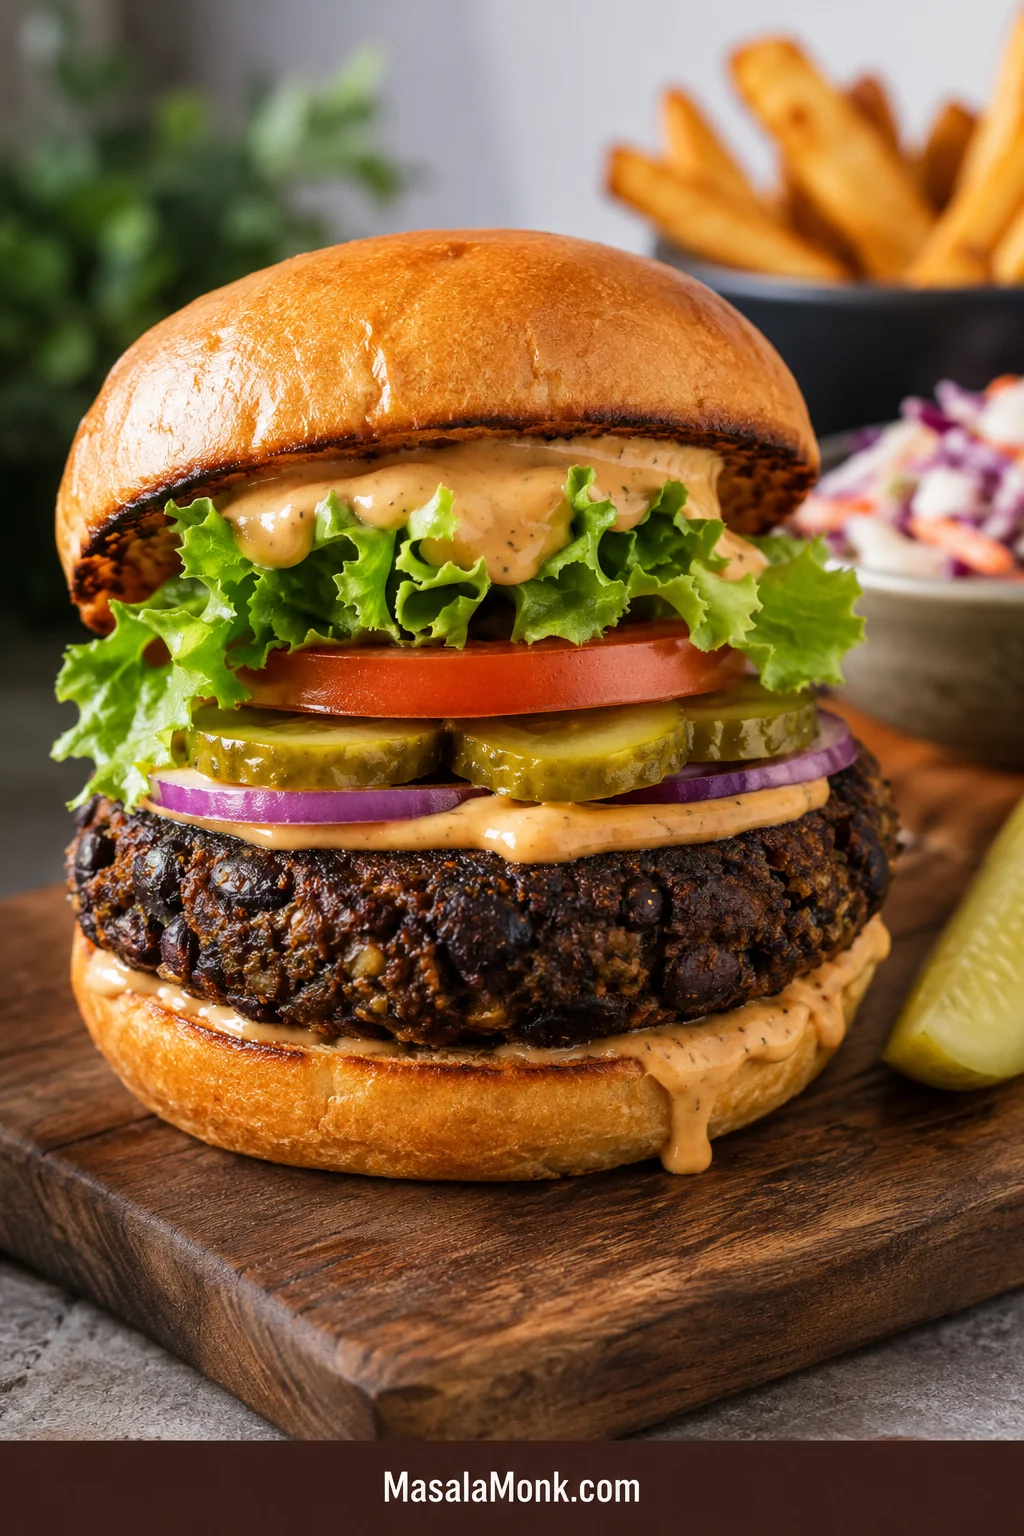
Tall black bean burger on a toasted bun with lettuce, tomato, pickles, creamy sauce, and a dark crisp-edged patty on a wooden board.

Black bean burgers are easy to love and surprisingly easy to mess up. The mixture can turn wet, the patties can crack in the pan, or the center can taste more like mashed beans than a real burger. What you want is a patty that lands on a bun without crumbling, browns at the edges, and feels hearty when you bite into it — not something you have to rescue with extra sauce.

This black bean burger recipe is built for that kind of confidence: crisp edges, smoky flavor, a tender middle, and patties that hold together without first-flip panic. It is the recipe for people tired of mushy, fragile bean burgers and ready for one that actually feels like dinner.

The main version uses canned black beans, egg, panko or oats, onion, garlic, and smoky spices. You will also find vegan, gluten-free, no-breadcrumb, oven, grill, and air fryer options, so the recipe works whether you want a classic veggie burger, a no-egg patty, or a meal-prep-friendly batch for the freezer.

Quick Answer: How to Make Black Bean Burgers That Don’t Fall Apart

To make black bean burgers that do not fall apart, dry the beans first, mash only part of them, use a real binder, and cook the first side until a crust forms before flipping. Wet beans, raw watery vegetables, too little binder, and early flipping are the main reasons homemade black bean burgers turn mushy or break.

The simple rule is: dry, bind, rest, crust. That means drying the beans, binding the mixture, resting delicate patties, and letting the crust form before flipping.

  • Dry the beans: bake drained beans briefly so the center does not turn pasty.
  • Use a binder: egg plus panko, breadcrumbs, or oats is the easiest vegetarian option.
  • Go egg-free with oats: flax egg plus oats or oat flour works well for vegan patties.
  • Leave texture: mash enough to bind, but keep some visible bean pieces.
  • Rest soft patties: a short chill makes delicate patties easier to move.
  • Wait for the crust: if a patty feels stuck, it probably needs another minute before flipping.

Even if this is your first homemade veggie burger, the cues below will help you fix the bean base before it ever touches the skillet. If it looks like bean dip, it is not ready to be a burger. A pressed handful that holds its shape means you are much closer to a clean flip.
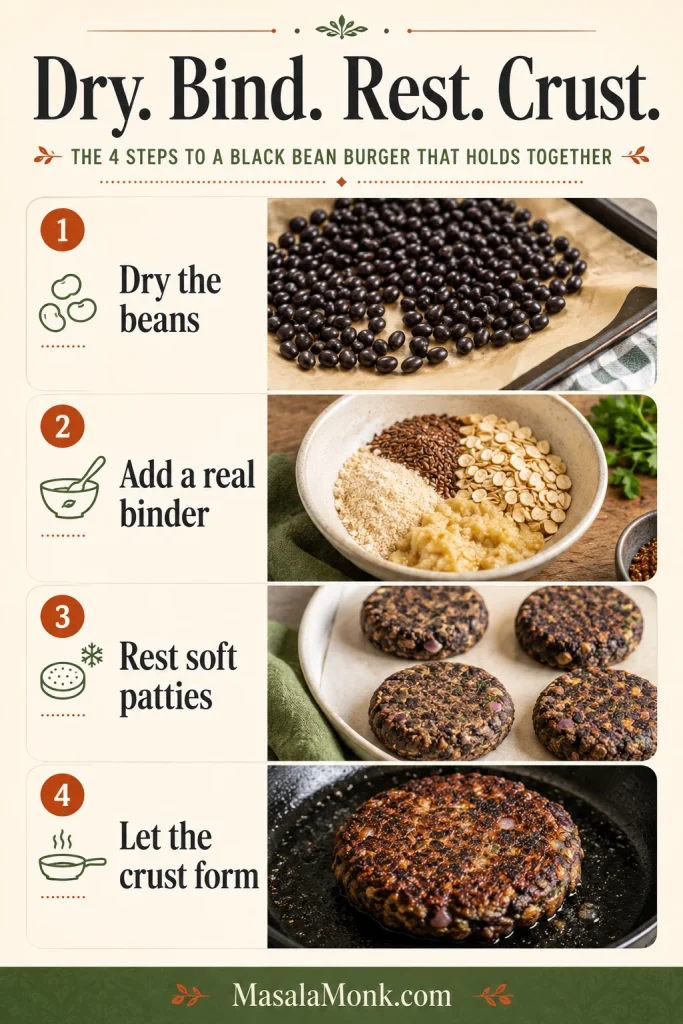
Vertical guide showing four steps for black bean burgers: dried beans, binder ingredients, resting patties, and a browned patty in a skillet.
Before cooking, follow the structure sequence: dry the beans, bind the mixture, rest soft patties, then let the crust set.

Black Bean Burgers at a Glance

Yield6 medium patties
Beans2 cans / about 3 cups drained black beans
Main texture stepDry the beans first
Default binderEgg + panko, breadcrumbs, or oats
Vegan binderFlax egg + oats or oat flour
Main methodSkillet, for crisp edges and control
Texture cueMoist and moldable, not loose like dip

Black Bean Burger Recipe Card

Smoky Black Bean Burgers That Hold Together

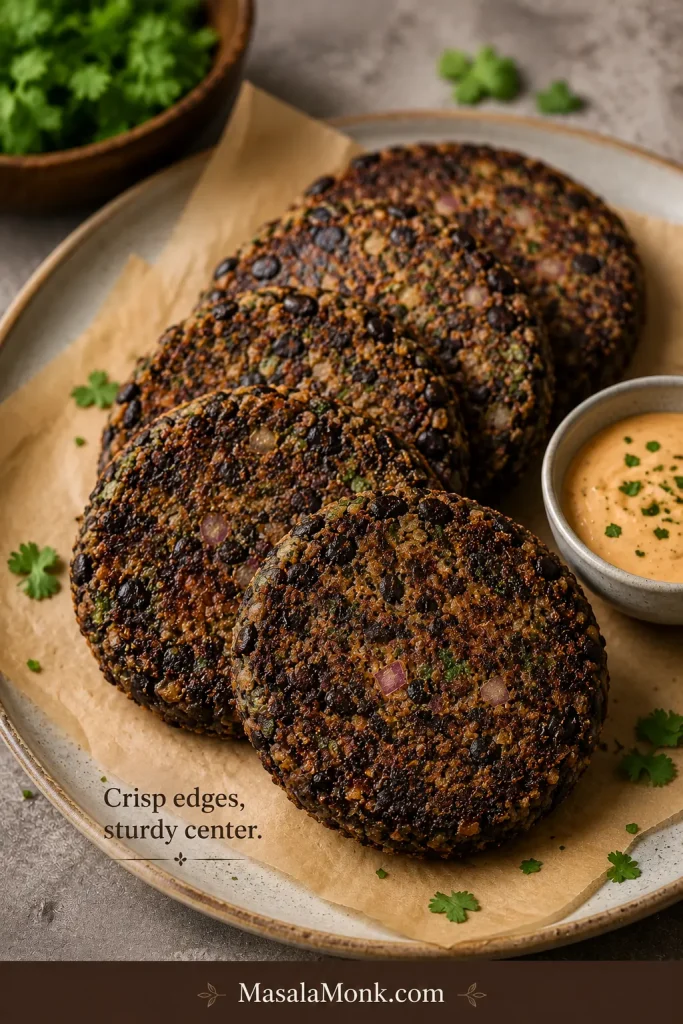
These black bean burgers are smoky, hearty, crisp-edged, and firm enough to flip. They are sturdy enough for a bun but still tender in the middle, with enough texture to feel satisfying instead of pasty.

The finished patty should have browned edges, a smoky garlic-cumin aroma, and a middle that feels hearty rather than mashed. Add a toasted bun, creamy sauce, something crunchy, and a little acidity, and it eats like a real burger.

Prep Time15 minutes
Bean-Drying Time12–15 minutes
Patty Cook Time10 minutes for skillet
Total TimeAbout 40–45 minutes
Yield6 patties
Main MethodSkillet
Other MethodsOven, grill, air fryer

If you chill the patties before cooking, add 20–30 minutes of resting time. The wait is useful when the mixture feels soft, especially for vegan, oat-based, or grill-ready patties.

Fast path: For a quicker version, towel-dry the beans very well instead of baking them. The patties will be a little softer than the oven-dried version, but still workable if you use enough binder and let the first side brown before flipping.

Make-ahead path: Shape the patties up to 24 hours ahead and refrigerate them covered. This gives the binder time to settle and makes the patties easier to cook later.

Equipment

  • Rimmed baking sheet
  • Parchment paper
  • Large mixing bowl
  • Fork, potato masher, or food processor
  • Cast-iron or nonstick skillet
  • Thin spatula
  • Optional: grill mat, foil, or air fryer basket

You do not need a food processor. A fork or potato masher gives you more control and makes it easier to leave some texture in the beans.

Ingredients

  • 2 cans black beans, 15 oz / 425 g each, drained and rinsed, about 3 cups / 500–520 g drained beans
  • 1 teaspoon oil, for cooking the onion
  • ½ cup / 75 g finely chopped onion
  • 2–3 garlic cloves, minced
  • 1 large egg
  • ¾ cup panko or breadcrumbs, about 45–55 g, or ¾ cup rolled oats, about 60 g
  • 1 tablespoon tomato paste, ketchup, or barbecue sauce
  • 1 tablespoon tamari, soy sauce, or vegan Worcestershire-style sauce for deeper burger-style flavor
  • 1 teaspoon ground cumin
  • 1 teaspoon smoked paprika
  • ½ teaspoon chili powder
  • ½ teaspoon fine salt, plus more to taste
  • ¼ teaspoon black pepper
  • 1–2 tablespoons chopped cilantro or parsley, optional
  • 1 tablespoon chopped chipotle in adobo, optional for smoky heat
  • 1–2 tablespoons oil, for cooking the patties

Using soy sauce or vegan Worcestershire-style sauce? Taste before adding extra salt because both can make the mixture saltier than expected.

With oat flour: Start with ½ cup / about 50 g oat flour instead of ¾ cup whole oats. Oat flour absorbs more quickly, so add more only when the mixture still feels loose.

Vegan Swap

Replace the egg with 1 flax egg. Mix 1 tablespoon ground flaxseed with 3 tablespoons water and let it thicken for 5–10 minutes. Use rolled oats or oat flour as the dry binder, and chill the shaped patties before cooking.

Instructions

  1. Dry the beans. Heat the oven to 350°F / 175°C. Spread the drained and rinsed black beans on a parchment-lined baking sheet. Bake for 12–15 minutes, until the beans look matte and slightly wrinkled. Cool briefly.
  2. Cook the onion and garlic. Warm 1 teaspoon oil in a skillet. Soften the onion for 3–4 minutes, stir in the garlic for 30 seconds, then cool slightly.
  3. Mash the beans. Transfer the beans to a large bowl. Mash with a fork or potato masher until partly mashed with some visible bean pieces.
  4. Add binder and seasoning. Stir in the cooked onion and garlic, egg, panko, breadcrumbs, or oats, tomato paste, tamari or soy sauce, spices, herbs, and chipotle if using.
  5. Mix until moldable. Stir and press until the mix holds when squeezed.
  6. Adjust if needed. If the bowl feels wet, add oats or breadcrumbs 1 tablespoon at a time. If it feels dry, work in a teaspoon of sauce, water, or oil.
  7. Shape the patties. Divide the bean base into 6 patties, about ½ cup each. Shape them ½–¾ inch thick and press the edges smooth.
  8. Chill soft patties. Refrigerate for 20–30 minutes when the shaped burgers feel delicate. This helps vegan or grill-ready patties.
  9. Cook in a skillet. Heat 1 tablespoon oil over medium heat. Cook 4–5 minutes per side, flipping only after the first side browns and releases. Work in batches so each patty has room to brown.
  10. Serve. Build on toasted buns with lettuce, tomato, onion, avocado, pickles, chipotle mayo, garlic aioli, or salsa.

Choose Your Version

Use this quick table if you already know what kind of black bean burger you want. The base method stays the same, but the binder and resting time change depending on your goal.

Choose This VersionUse ThisWhat to Expect
Firmest classic pattyEgg + panko or breadcrumbsClean flipping, crisp edges, sturdy bun-ready texture
Vegan pattyFlax egg + oatsSofter before cooking, firmer after resting and browning
Gluten-free pattyCertified gluten-free oats or oat flourGood structure without panko or breadcrumbs
No-breadcrumb pattyRolled oats, quick oats, or oat flourHearty texture with a little resting time
Fastest versionVery well towel-dried beansSlightly softer, but still workable
Best textureOven-dried beansFirmest patties and least mushy center
Grill versionFirm binder + chilled pattiesBetter handling on hot grates

Next, use the visual cues below to check how the bean base should look and feel before it reaches the pan.
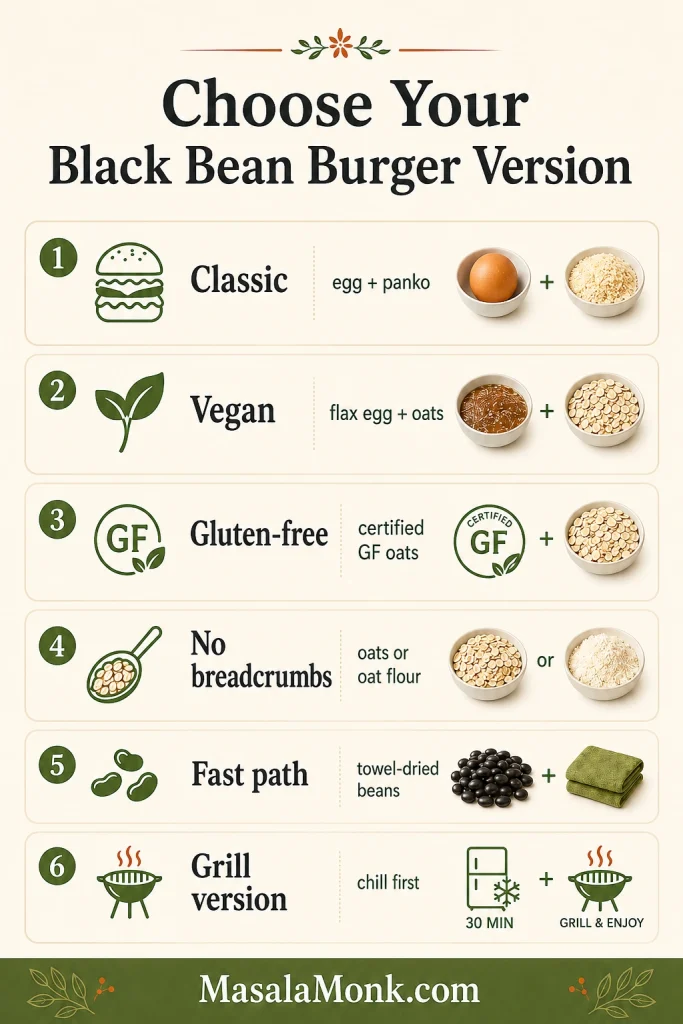
Vertical decision guide comparing classic, vegan, gluten-free, no-breadcrumb, fast, and grill versions of black bean burgers.
First choose the binder: egg and panko for firmness, flax and oats for vegan patties, and certified gluten-free oats when needed.

What Good Black Bean Burgers Should Look Like

Good bean burgers are not perfectly smooth. They should look rustic, with some bean pieces still visible, a firm edge, and enough structure to lift with a spatula. A good black bean burger should be sturdy enough for a bun and tender enough to enjoy.

  • After drying: the beans should look matte and slightly wrinkled, and a few may split open.
  • After mashing: the bowl should have both mashed beans and visible bean pieces.
  • Before shaping: a squeezed handful should hold together without oozing through your fingers.
  • After shaping: each patty should hold its edge instead of slumping on the plate.
  • In the pan: the first side should brown and release more easily once the crust sets.
  • After cooking: the outside should be crisp-edged and the middle should be tender, not wet or gummy.
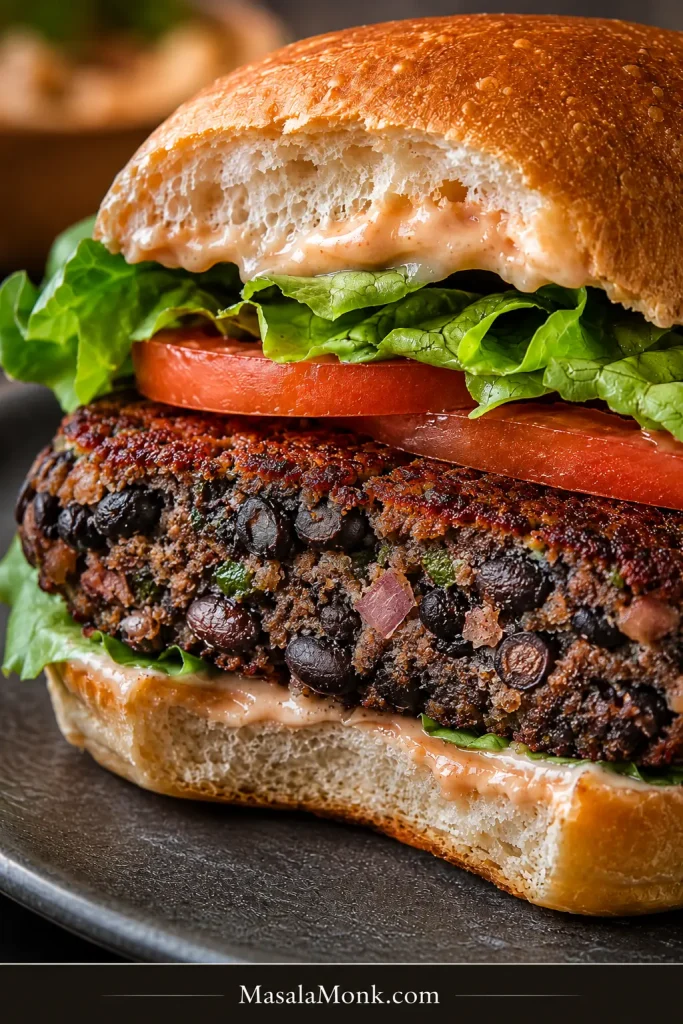
Close-up of a cut black bean burger showing a dark bean-filled interior, crisp browned edge, bun, lettuce, tomato, and sauce.
The best texture is tender inside but not pasty, with visible bean pieces and a browned exterior that gives each bite structure.

When the mixture looks like bean dip, it needs more dry binder and resting time. If it looks dusty or cracks at the edges, mash a little more or add a tiny splash of moisture. The same basic patty logic applies whether you are shaping beans or meat: control moisture, shape gently, and let the surface set. For a deeper look at patty structure, see this burger patty recipe.

Why This Black Bean Burger Recipe Works

Most black bean burgers fail because they treat beans like ground meat. Beans bring moisture, starch, and softness, so the method has to build structure before the patty ever hits the pan. This version does that with dried beans, cooked aromatics, partial mashing, and a binder that matches your diet.

Control PointWhat It Fixes
Drying the beansPrevents pasty, wet centers
Cooking the onionRemoves raw sharpness and extra water
Partial mashingCreates natural bean paste without losing bite
BinderAbsorbs moisture and helps the patty set
Chilling when neededMakes delicate patties easier to move
Surface browningCreates the crust needed for a clean flip

Do not make the beans smoother. Make the structure smarter. A fully smooth mixture can cook up dense and gummy, while a barely mashed one can crumble. The sweet spot is enough mashed beans to bind, with enough whole pieces to make the burger satisfying.

Ingredients You’ll Need

This ingredient list is short, but a few choices matter more than others: dry beans, controlled onion, a real binder, and bold seasoning. A black bean burger should taste like dinner, not a compromise.
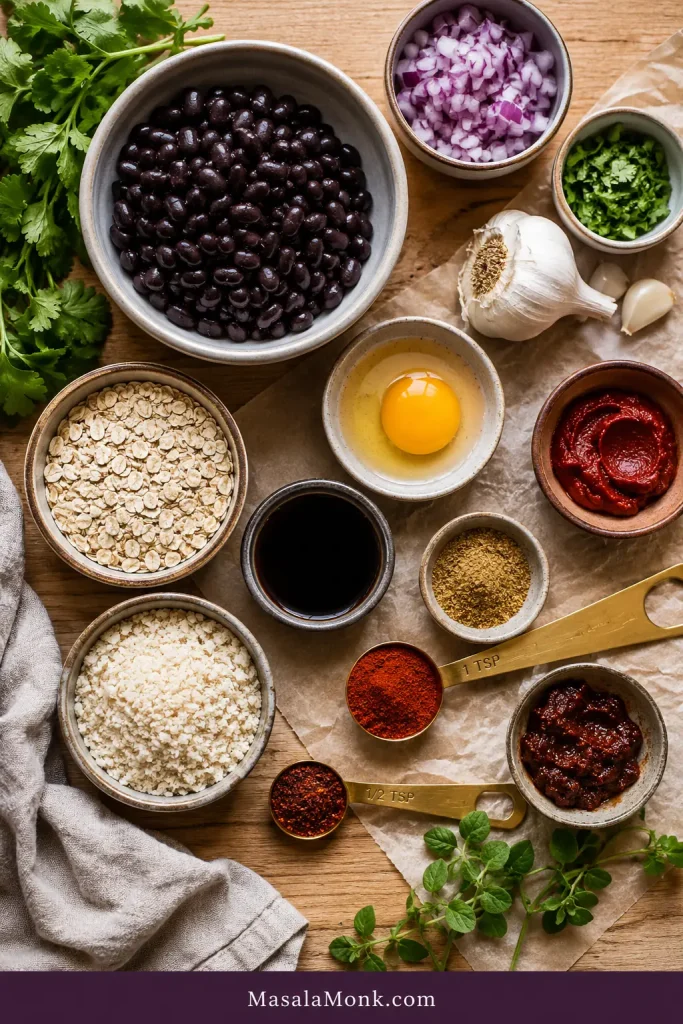
Ingredient board with black beans, onion, garlic, egg, oats, panko, tomato paste, tamari or soy sauce, spices, and herbs in small bowls.
Before shaping, build flavor into the bean base with onion, garlic, smoky spices, tomato paste, herbs, and tamari.

Black Beans

Canned black beans are the easiest choice. Drain, rinse, and dry them well before mixing. Home-cooked black beans also work, but they should be tender, well-drained, and not soupy.

Extra cooked beans do not have to sit around either; they can become a cozy bean stew later in the week.

Onion and Garlic

Onion and garlic give the patties a savory base. Cooking the onion first is worth the extra few minutes because raw onion can release water into the bean base and make the patties softer.

Egg or Flax Egg

Egg is the easiest binder for a vegetarian version because it helps the patty set as it cooks. For an egg-free version, use a flax egg or chia egg with oats.

Panko, Breadcrumbs, Oats, or Oat Flour

Panko and breadcrumbs give a lighter, firmer bite. Rolled oats are great for no-breadcrumb and gluten-free versions. Oat flour binds quickly when the patty mix feels soft, but too much can make the center dense.

Smoky Spices and Flavor Boosters

Cumin, smoked paprika, and chili powder make the burgers warm, smoky, and savory. Tomato paste, ketchup, barbecue sauce, tamari, soy sauce, or vegan Worcestershire-style sauce adds depth, so the burger does not taste like a plain bean patty.

Optional Texture Add-Ins

Chopped walnuts, cashews, sunflower seeds, corn, cooked quinoa, or cooked mushrooms can add bite. Keep add-ins modest because too many extras make the patties harder to bind.

Which Binder Should You Use?

There is no single correct binder. The right choice depends on whether you want the firmest vegetarian patty, a vegan version, or a gluten-free one. Your test is simple: press a handful together. It should hold its shape without oozing, slumping, or crumbling apart.
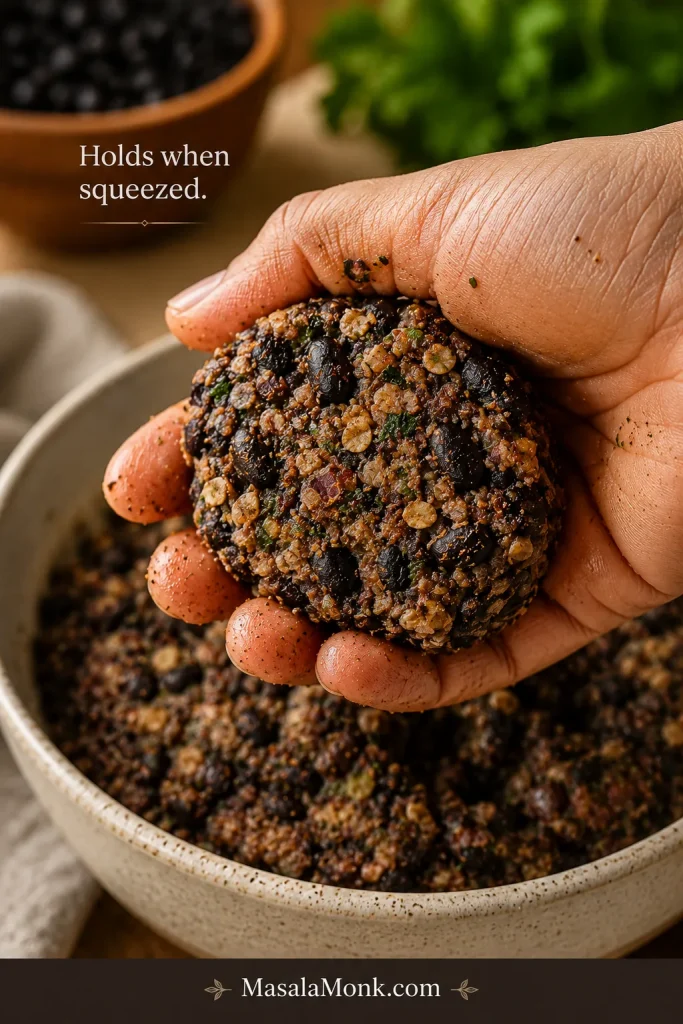
Hand squeezing black bean burger mixture into a firm clump with visible beans, oats, herbs, and spices.
Before shaping, squeeze a small handful. If it holds together without oozing or crumbling, the mixture is ready.
NeedBinderHow to Use It
Firmest vegetarian pattyEgg + panko or breadcrumbsEasiest option for clean flipping
Vegan black bean burgerFlax egg or chia egg + oatsRest and chill so the oats can settle into the mixture
Gluten-freeCertified gluten-free oats or oat flourUse oat flour when a firmer texture is needed
No breadcrumbsRolled oats, quick oats, or oat flourLet the mixture rest before shaping
Grillable pattiesStrong binder + chillingChill 30 minutes or freeze 15–20 minutes before grilling
Softer, richer pattiesAvocado, mashed sweet potato, or a little mayoAdd extra oats or crumbs to balance moisture
More biteChopped nuts, seeds, quinoa, or cornUse as add-ins, not the main binder

In the main recipe, egg plus panko, breadcrumbs, or oats is the most reliable path. For vegan patties, use a flax egg and oats. To keep the burgers gluten-free, use certified gluten-free oats or oat flour and check the sauces you add.

No Breadcrumbs? Use Oats This Way

Breadcrumbs are not required. If oats are what you have, they can do the job well — they just need a few minutes to absorb moisture. They are also useful for vegan and gluten-free versions when certified gluten-free oats are used.

Rolled oats give the most rustic texture. Quick oats blend in faster and make a softer patty. Oat flour binds the fastest and gives a firmer gluten-free patty, but too much can make the center dense.

Start with ¾ cup rolled oats or ½ cup oat flour for 2 cans of black beans. After mixing, let the patty mix rest for 5–10 minutes. Oats firm up as they absorb moisture, so a base that feels slightly soft at first may become easier to shape after resting.
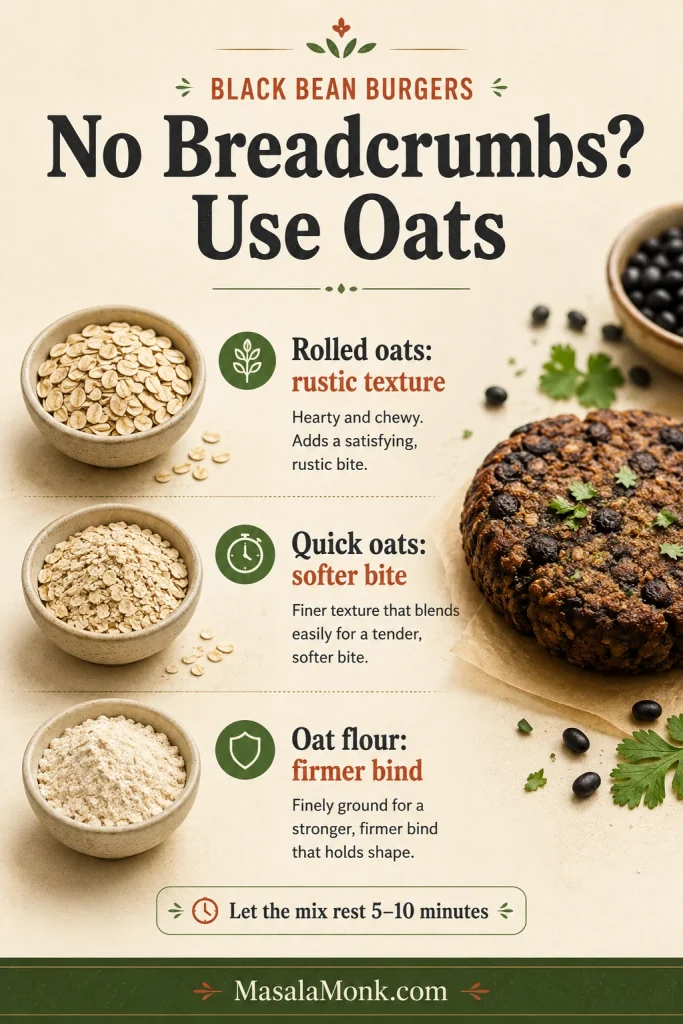
Vertical guide comparing rolled oats, quick oats, and oat flour as no-breadcrumb binders for black bean burgers.
No breadcrumbs? Use oats strategically: rolled oats add chew, quick oats blend in softly, and oat flour binds fastest.

Step-by-Step Method

The steps are simple, but the order matters. Dry the beans first, soften the aromatics, mash for texture, then add the binder and seasonings.

1. Dry the Black Beans

Heat the oven to 350°F / 175°C. Spread drained and rinsed black beans on a parchment-lined baking sheet. Bake for 12–15 minutes, until they look drier and slightly wrinkled. This one step makes the biggest difference in preventing a mushy center.

No oven available? Pat the beans very dry with a clean towel and let them sit uncovered while you prepare the rest of the ingredients. The oven method is stronger, but even towel-drying helps.
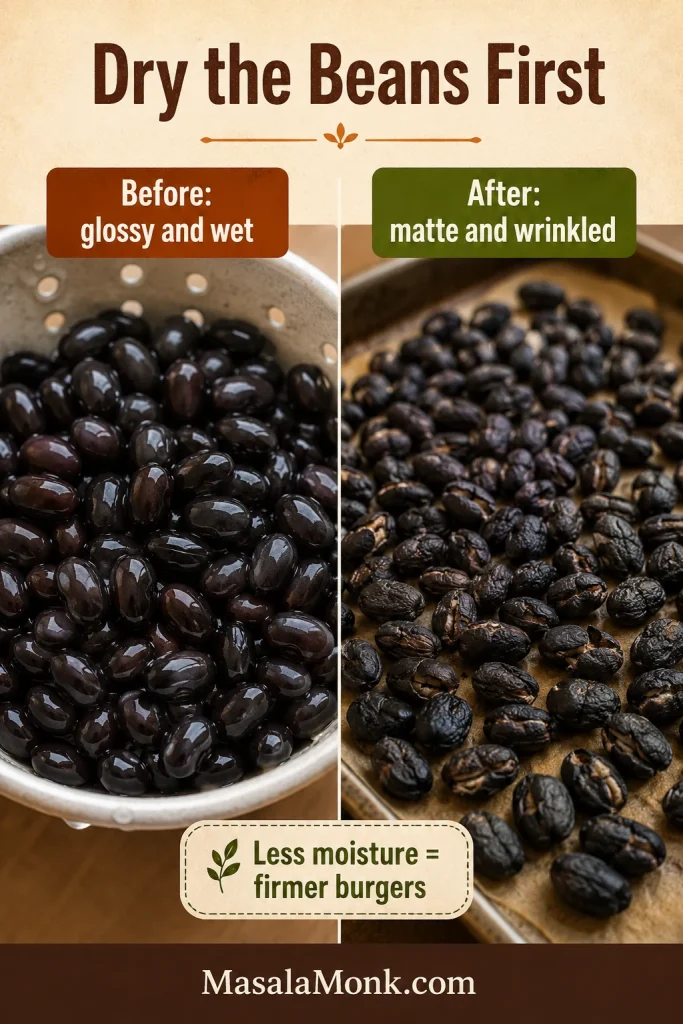
Split comparison showing glossy wet black beans before drying and matte wrinkled black beans after drying on parchment.
After drying, the beans look less glossy and hold less moisture. That small step helps the patties firm up in the pan.

2. Cook the Onion and Garlic

Cook the chopped onion in a little oil for 3–4 minutes, then add garlic for 30 seconds. This softens the sharp flavor and cooks off extra moisture. Raw onion can make the bean base wetter than expected.

3. Mash the Beans

Mash the dried beans with a fork or potato masher. Stop when the bowl is partly mashed with some whole or half beans still visible. A food processor can be used, but pulse gently and avoid turning everything into a smooth paste.
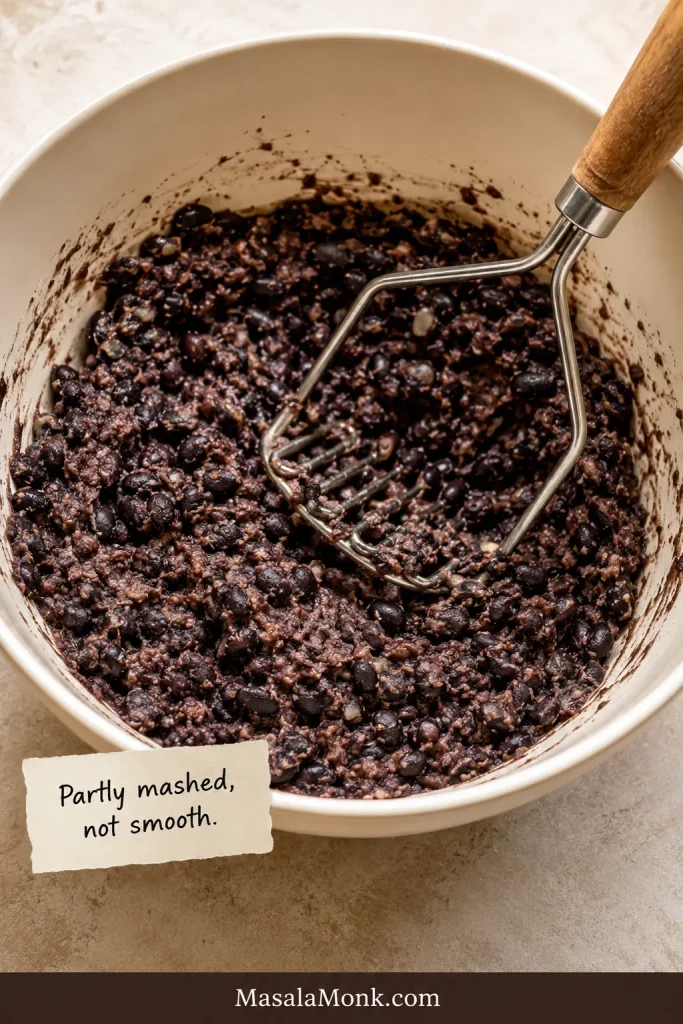
Bowl of partly mashed black beans with a fork or masher, showing some mashed beans and some whole bean pieces.
Stop mashing while some beans are still whole. The mix needs both paste for binding and pieces for texture.

4. Add the Binder and Seasonings

Add the egg, panko, breadcrumbs, or oats, cooked onion and garlic, tomato paste or ketchup, tamari or soy sauce, cumin, smoked paprika, chili powder, salt, pepper, and herbs. Stir until the mixture holds together when pressed.
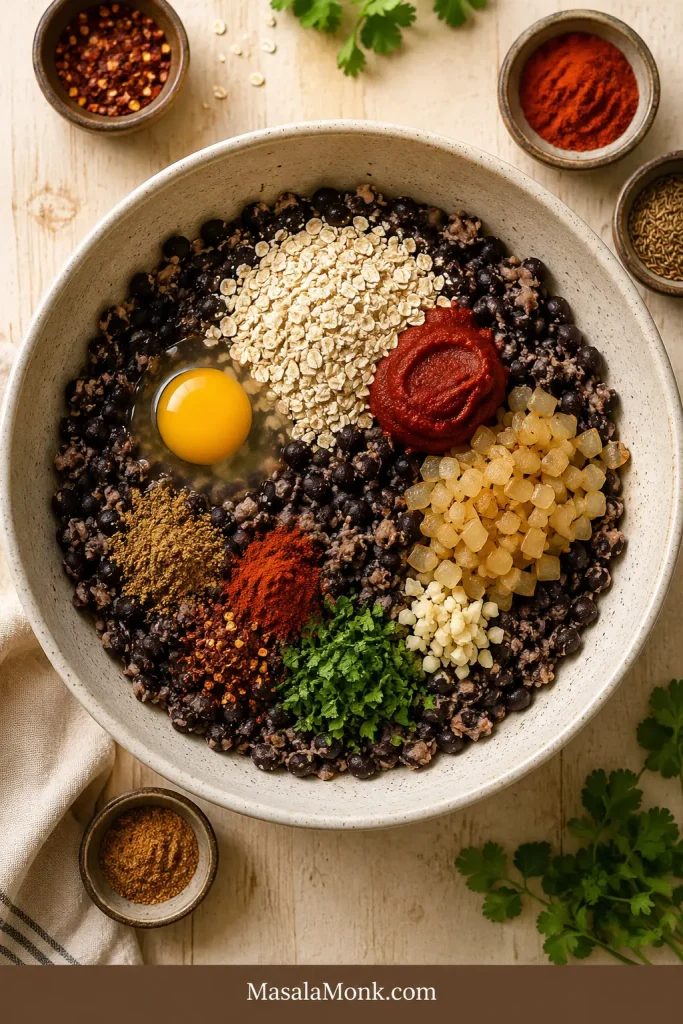
Bowl of mashed black beans topped with egg, oats or breadcrumbs, tomato paste, cooked onion, garlic, spices, and herbs before mixing.
Once the beans are partly mashed, the binder absorbs moisture and helps the patties hold together without becoming heavy.

5. Adjust the Texture

Aim for moist and moldable — closer to soft dough than bean dip. Add oats or breadcrumbs 1 tablespoon at a time when the bowl feels wet. Use a teaspoon of sauce, water, or oil when the base feels dry and cracks at the edges.
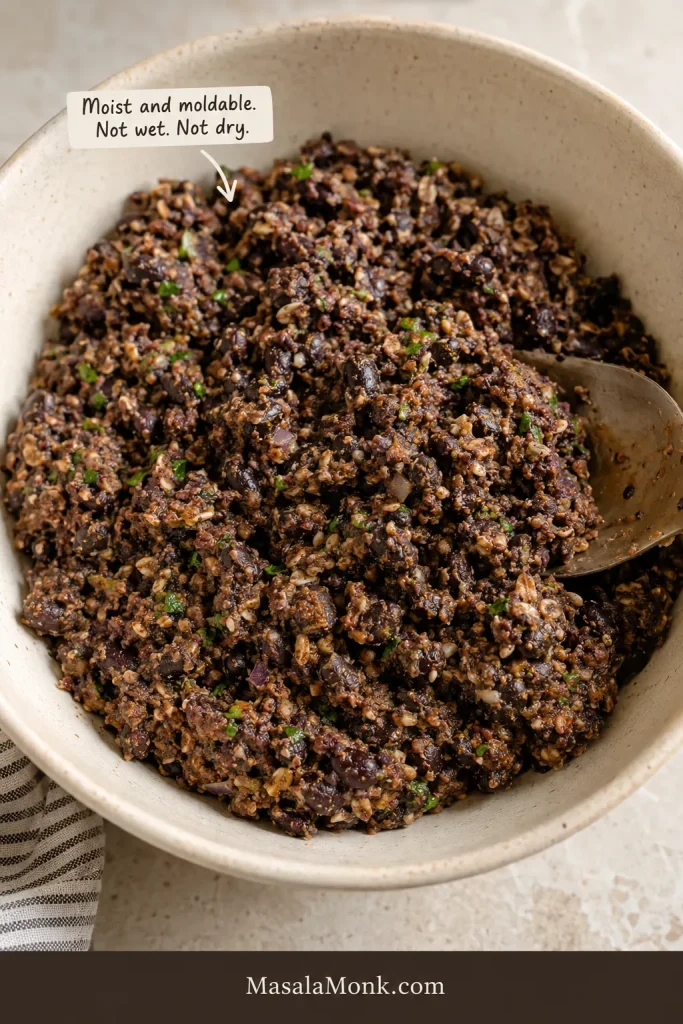
Bowl of chunky black bean burger mixture with visible black beans, oats, herbs, onion, and a spoon, labeled moist and moldable.
The ideal mix should be moist and moldable. It should scoop and press easily, not spread like dip or crumble like dry stuffing.

6. Shape the Patties

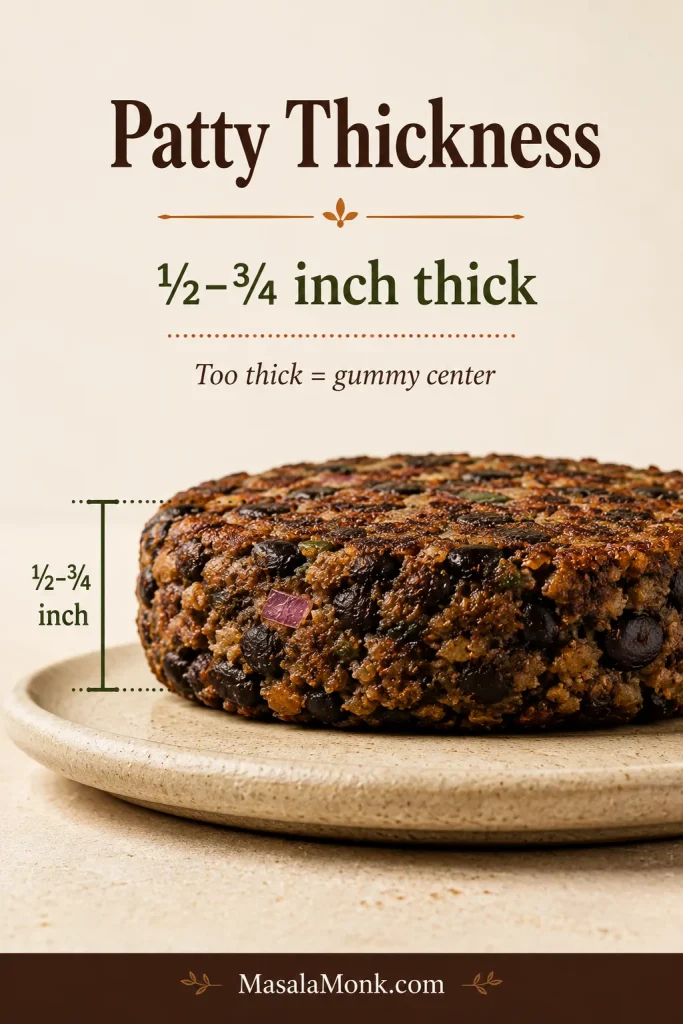
Divide the mixture into 6 patties. Aim for about ½ cup mixture per patty and keep them ½–¾ inch thick. Press the edges smooth so the shaped burgers do not crumble in the pan.
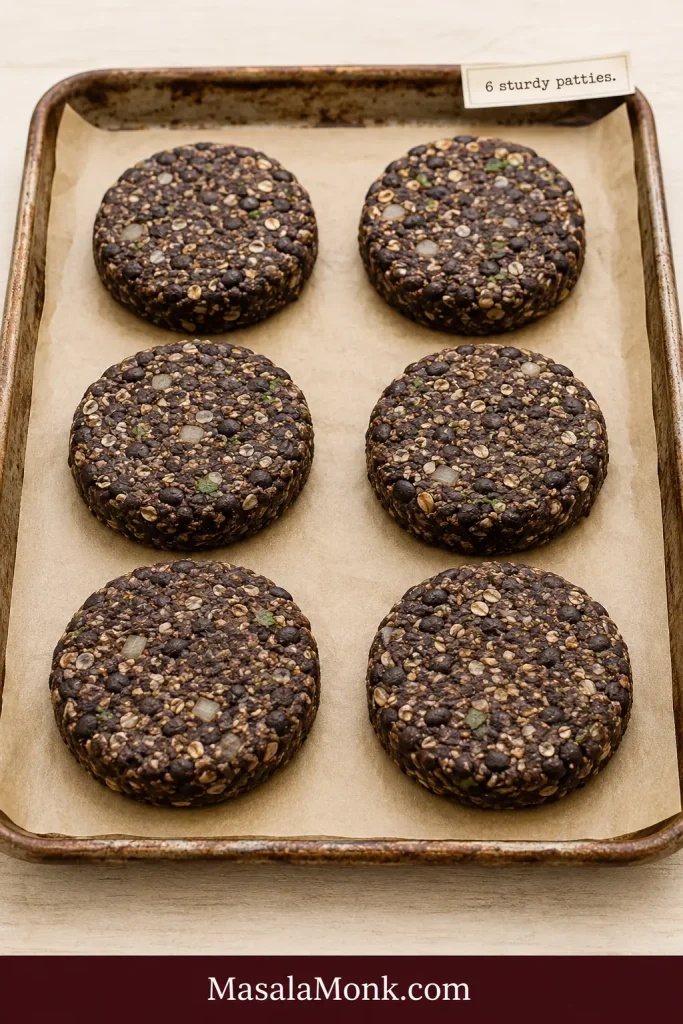
Six uncooked black bean burger patties on parchment paper on a baking tray, with visible beans, oats, herbs, and onion pieces.
After shaping, smooth the edges and keep the patties even. Clean edges help them cook and flip more reliably.
Side-view guide showing the thickness of a shaped black bean burger patty with a label for ½ to ¾ inch thickness.
Keep patties about ½ to ¾ inch thick. That size browns well without leaving the center gummy.

7. Chill When Needed

If the patties feel delicate, do not panic. Chill them for 20–30 minutes before cooking. Vegan, oat-based, and grill-ready patties benefit the most from this short rest.
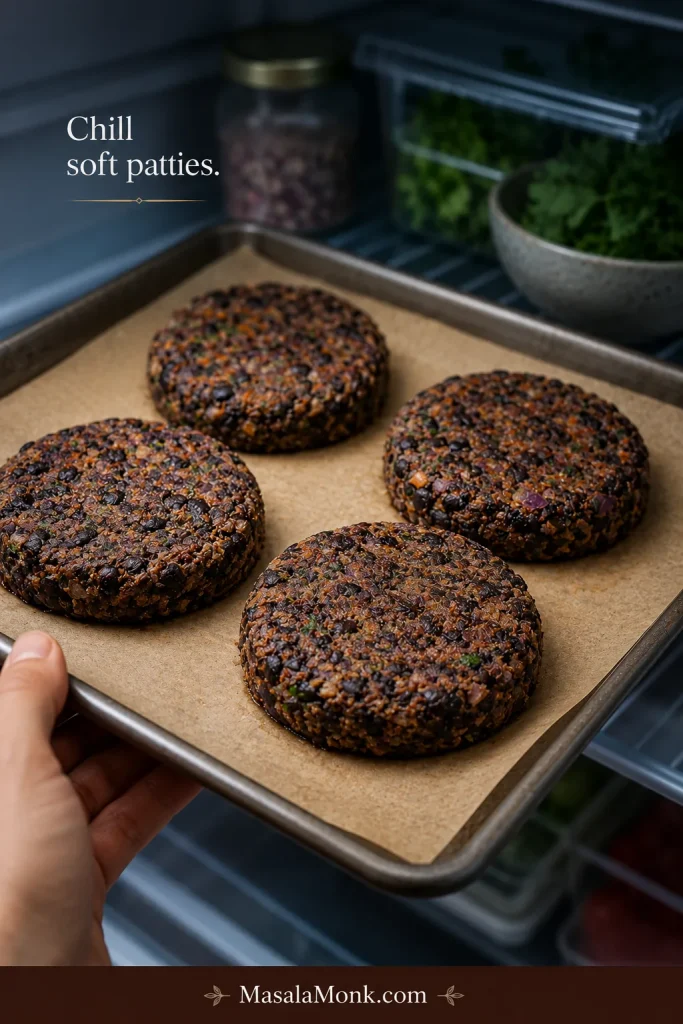
Parchment-lined tray of shaped black bean burger patties being chilled or removed from a refrigerator.
Chilling delicate patties before cooking gives the binder time to firm the mixture.

8. Cook Until the Edges Are Crisp

Cook the patties in a lightly oiled skillet over medium heat for 4–5 minutes per side. If a patty feels stuck, do not force it. That usually means the crust has not finished forming. Give it another minute, then slide the spatula under slowly. The patties are done when both sides are browned, the center is hot, and the patty feels set when gently pressed.

Once the crust sets, the burger stops feeling delicate. It lifts cleanly, lands on the bun in one piece, and gives you that crisp-edge, smoky-middle bite that makes a bean burger feel like dinner instead of a backup plan.
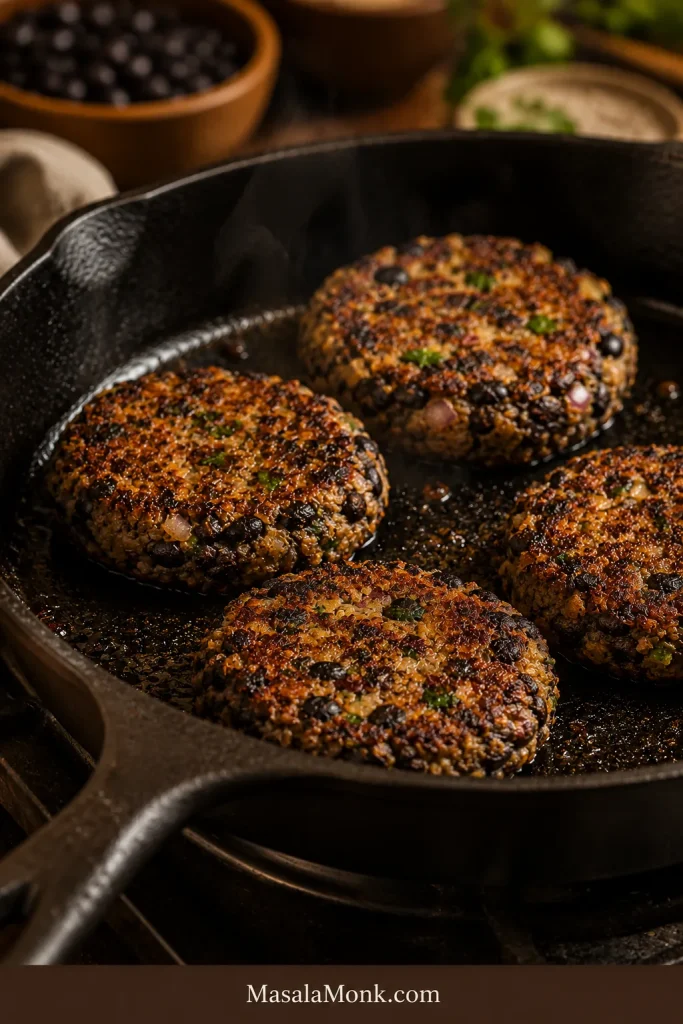
Several black bean burger patties browning in a cast iron skillet with crisp edges and an oil sheen.
For the deepest crust, cook in a skillet with space between patties. Crowding makes them steam instead of brown.
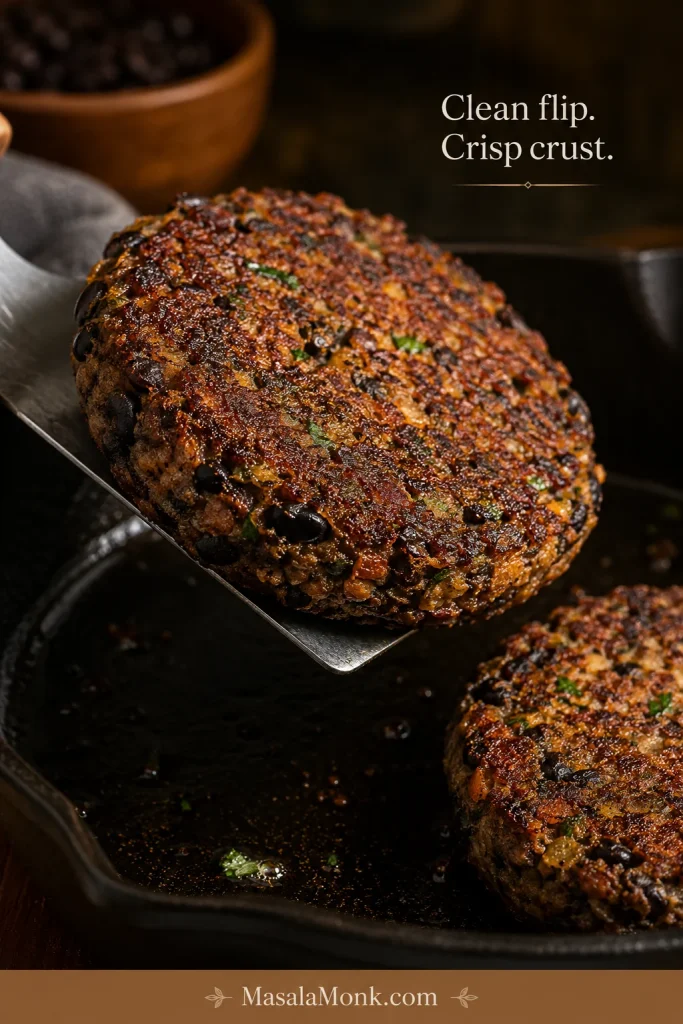
Black bean burger patty being lifted cleanly from a cast iron skillet with a metal spatula, showing a browned intact underside.
Once the first side browns, the patty releases more easily. Wait for that crust before flipping so the burger stays intact.
Stack or row of cooked black bean burger patties with browned edges, visible beans, herbs, and a small sauce bowl nearby.
Cooked patties should hold their shape for buns, bowls, wraps, or meal prep without turning soft again.

Fix the Mixture Before You Cook

Most black bean burger problems can be fixed before the patties hit the pan. A soft mixture is not a failed mixture. It usually just needs a little more binder, a little more resting time, or a gentler hand when shaping.
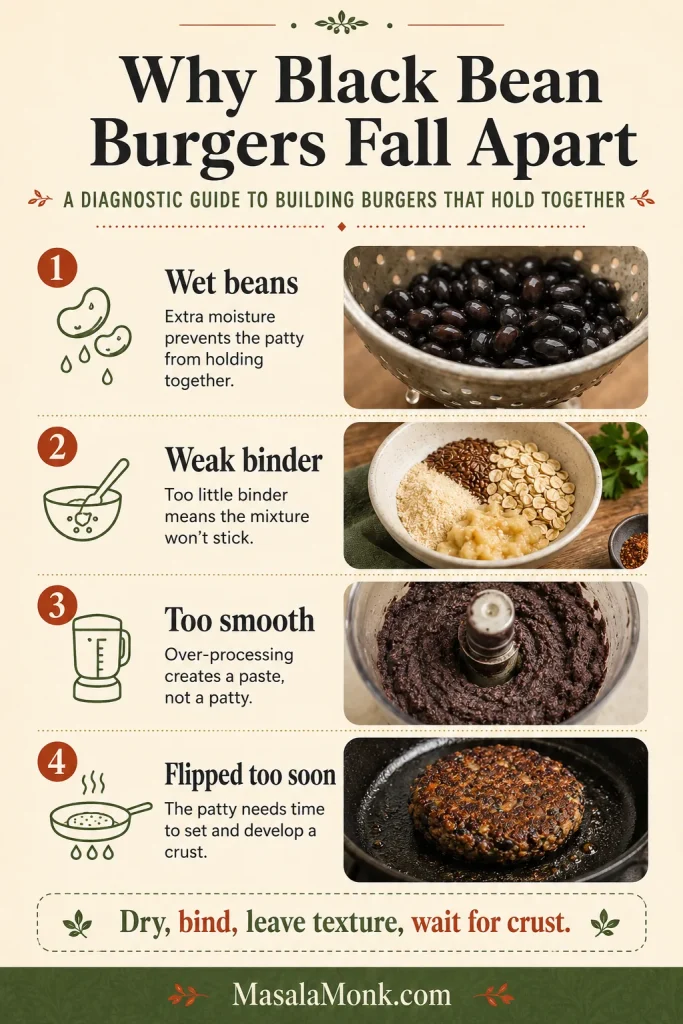
Vertical diagnostic guide listing four reasons black bean burgers fall apart: wet beans, weak binder, too smooth, and flipped too soon.
When patties break, check the cause first: wet beans, weak binder, over-smooth mash, or flipping before the crust sets.

Quick Texture Fixes

ProblemLikely ReasonFix
Mixture looks like bean dipToo much moisture or over-processingAdd oats or breadcrumbs 1 tablespoon at a time and chill
Patties fall apartNot enough binder or not enough mashingMash more beans, add binder, and rest the mixture
Patties slump on the plateMixture is too softAdd oats or crumbs, then chill 20–30 minutes
Patties crack at the edgesMixture is too dryMash more beans or add 1 teaspoon sauce, water, or oil
Patties stick to your handsMixture is moist but workableLightly wet or oil your hands while shaping
Too soft for the grillPatties need more firmnessChill 30 minutes or freeze 15–20 minutes and use foil or a grill mat
Patties stick to the panFlipped too early or surface too dryUse a lightly oiled pan and wait for a crust before flipping
Center is gummyPatties are too thick or mixture is too smoothShape thinner patties and leave more bean texture next time
Burgers taste blandBeans need stronger seasoningAdd chipotle, smoked paprika, cumin, tamari, lime, hot sauce, or more salt

Final Squeeze Test

The final test is simple: press a patty between your palms. When it holds its shape, keeps its edge, and does not feel loose, it is ready to cook.
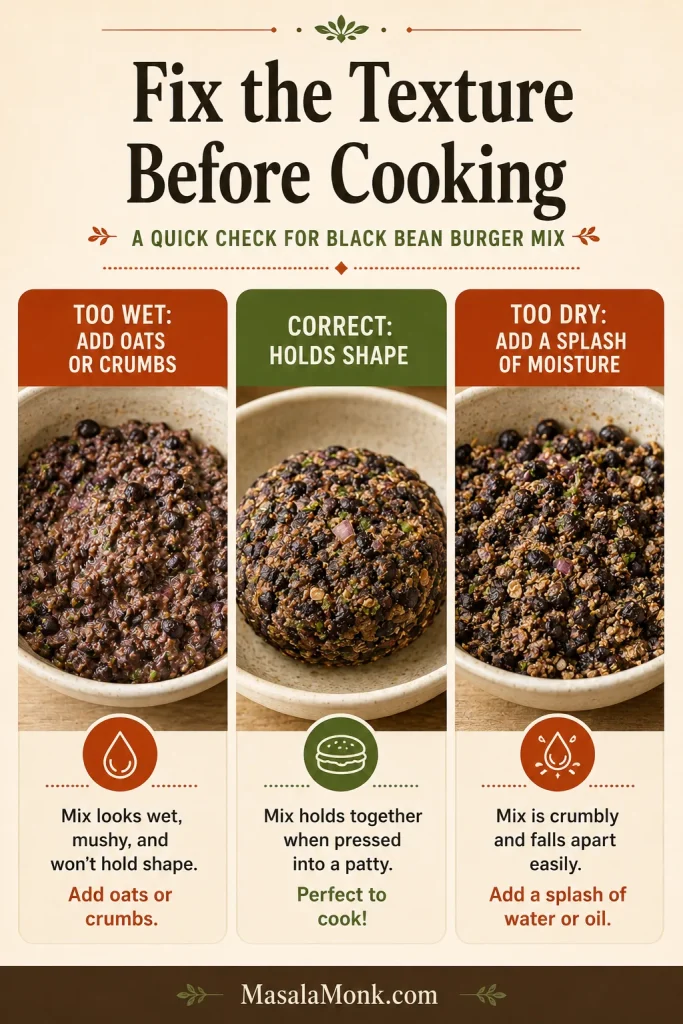
Three-panel guide showing black bean burger mixture that is too wet, correct, and too dry, with short fixing tips.
Fix texture before heat hits the pan: add oats if wet, add moisture if cracked, and shape only when it holds.

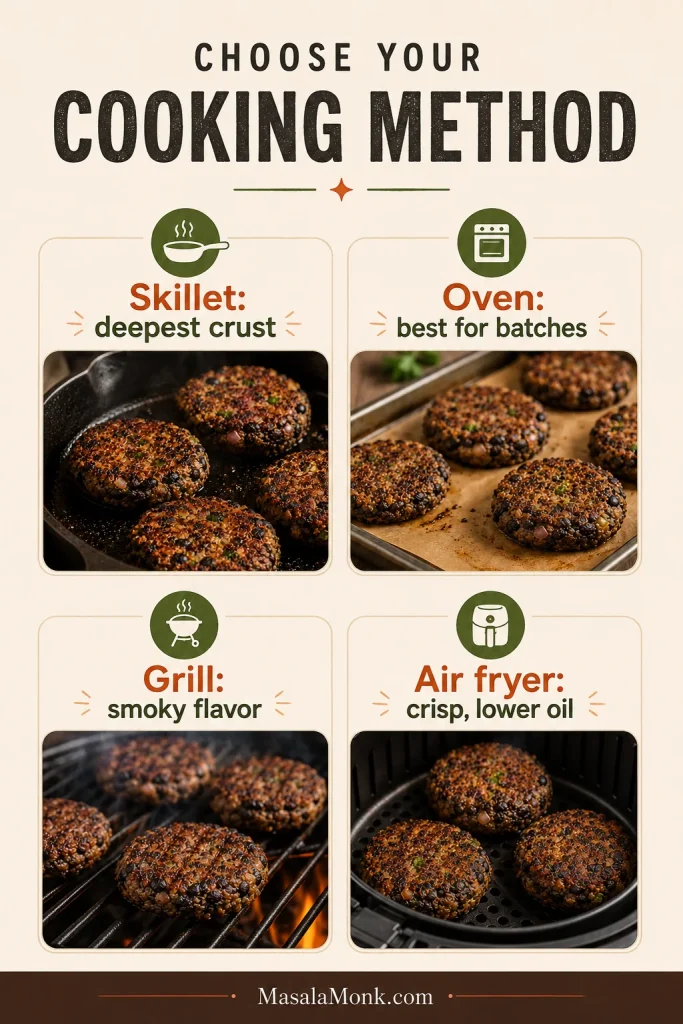
Choose Your Cooking Method: Skillet, Oven, Grill, or Air Fryer

Skillet cooking gives the deepest crust, but these patties can also be baked, grilled, or air fried. A firm patty gives you more freedom: once the mixture holds together, every cooking method becomes easier.

MethodTemperatureTimeGood ForKey Tip
SkilletMedium heat4–5 minutes per sideDeepest crust and flavorLet the first side brown before turning
Oven375°F / 190°C10 minutes per sideBatch cookingRaise the oven after drying the beans
GrillMedium to medium-high5–7 minutes per sideSmoky flavorChill patties and oil the grates well
Air fryer380°F / 193°C10–12 minutes totalCrisp, lower-oil cookingFlip halfway and keep patties about ½ inch thick
Vertical cooking method guide comparing skillet, oven, grill, and air fryer methods for black bean burgers.
Choose the method by goal: skillet for crust, oven for batches, grill for smoke, and air fryer for crisp lower-oil cooking.

Skillet Black Bean Burgers

Heat a thin layer of oil in a cast-iron or nonstick skillet over medium heat. Cook for 4–5 minutes per side. This is the easiest method for crisp edges and a tender center.

Baked Black Bean Burgers

After drying the beans at 350°F / 175°C, raise the oven to 375°F / 190°C. Place shaped patties on a parchment-lined baking sheet and brush or spray lightly with oil. Bake for 10 minutes, flip carefully, then bake another 10 minutes. Baked patties are convenient for batches, though the crust is gentler than skillet-cooked ones.
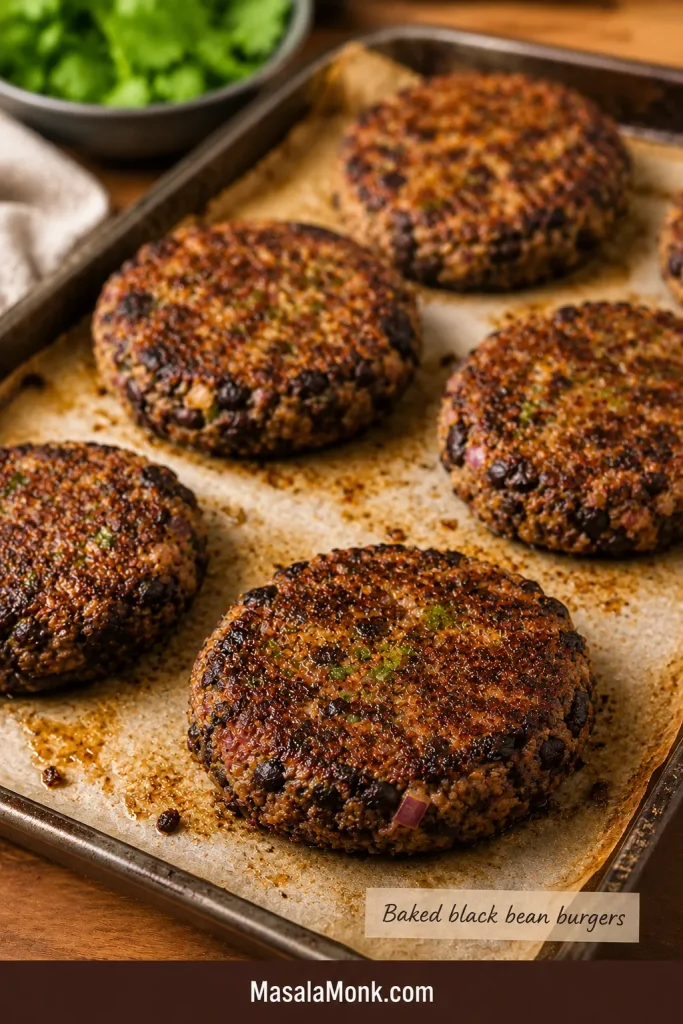
Black bean burger patties on a parchment-lined baking sheet with browned tops and a small label for baked black bean burgers.
For batch cooking, bake on parchment and brush lightly with oil so the tops brown without drying out.

Grilled Black Bean Burgers

Treat grilling as the firm-patty method. Chill the patties for at least 30 minutes, oil the grates well, and cook over medium to medium-high heat for 5–7 minutes per side. Do not grill loose or freshly mixed patties. If they feel delicate in your hand, they will feel even more delicate on hot grates.

For the safest grill version, chill the patties until firm, brush both sides with oil, and use a grill mat or foil for the first try. Once you know how your mixture behaves, you can move them directly onto well-oiled grates.
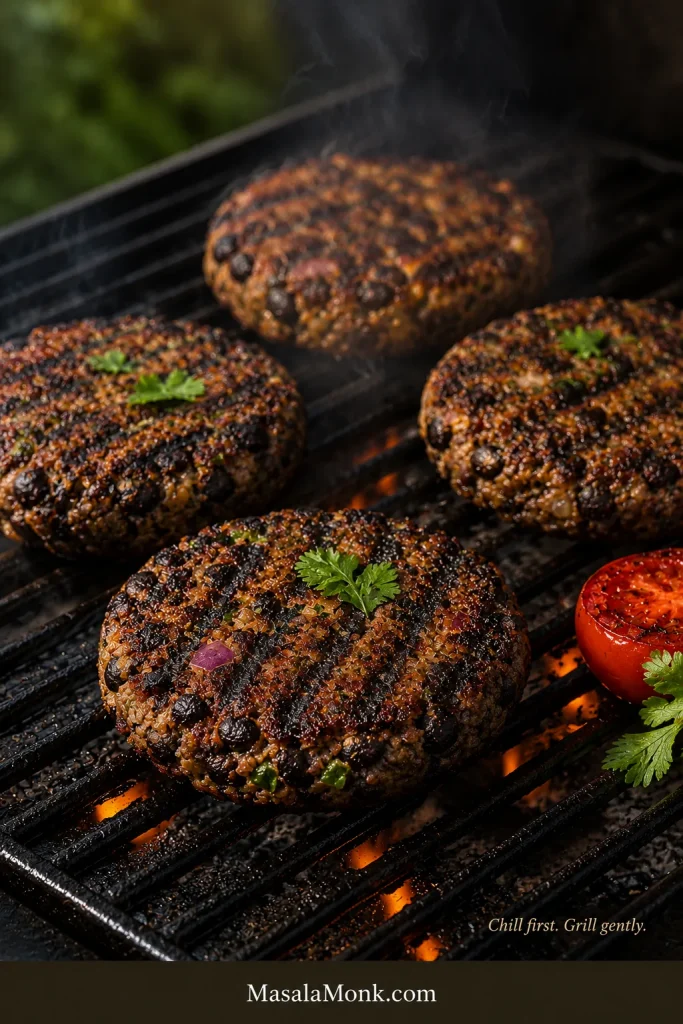
Black bean burger patties with light char marks cooking on a grill with smoke, herbs, and a grilled tomato nearby.
Grill only firm, chilled patties. Oiled grates, gentle heat, and patience help them stay intact over the fire.

Air Fryer Black Bean Burgers

Preheat the air fryer to 380°F / 193°C. Lightly spray the patties and basket with oil. Cook for 10–12 minutes total, flipping halfway. Air fryer patties should be about ½ inch thick so the center heats through before the outside dries. The same thickness-and-flip logic applies to meat burgers too; this air fryer burgers guide is useful if you use your air fryer for burger nights often.
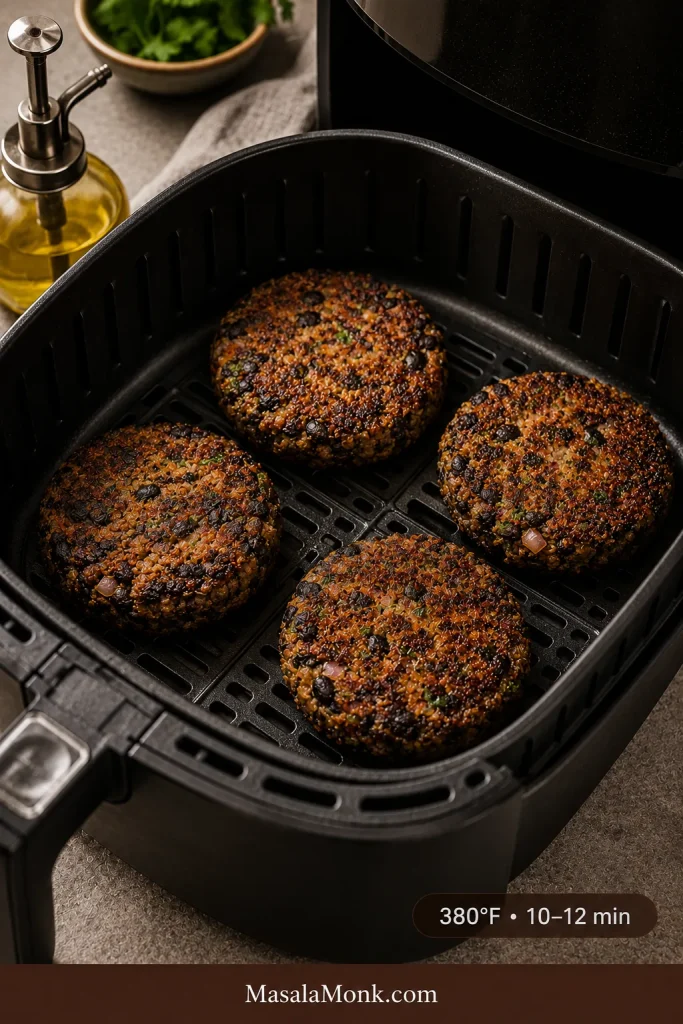
Four black bean burger patties in an air fryer basket with browned tops, an oil bottle nearby, and a 380°F 10 to 12 minute label.
In the air fryer, leave space around each patty so the edges crisp before the centers lose moisture.

Making Them Vegan

For vegan black bean burgers, replace the egg with a flax egg or chia egg and use oats or oat flour as the dry binder. They may feel softer than egg-bound patties at first, but that does not mean they will fail. A short rest and a good crust make them much easier to handle.
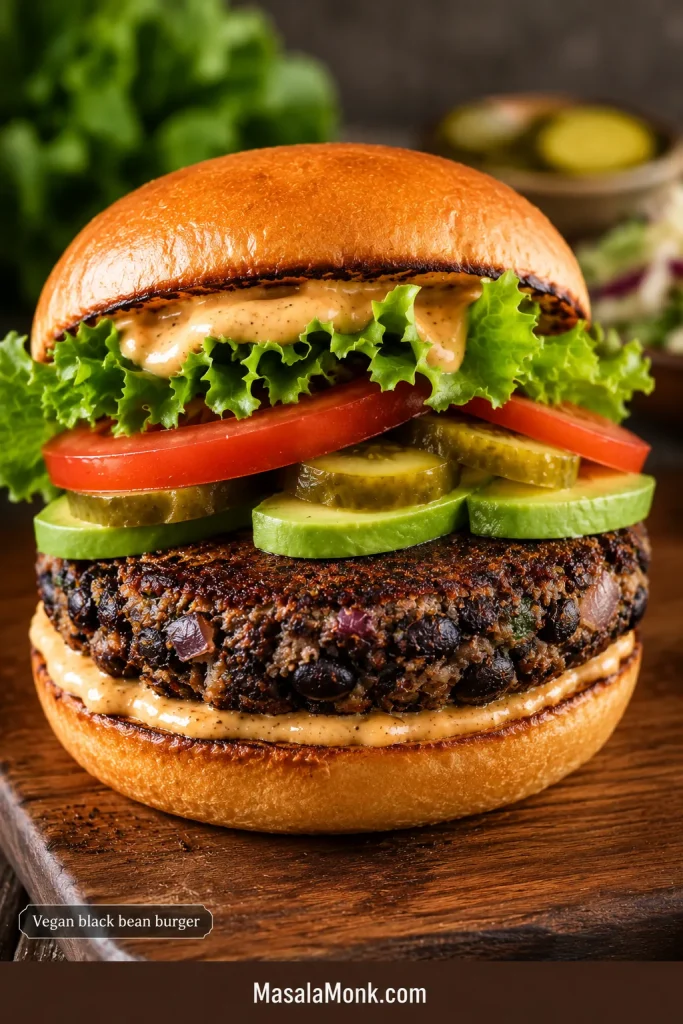
Vegan black bean burger on a bun with avocado, lettuce, tomato, pickles, sauce, and a dark black bean patty.
The vegan version should still feel hearty. Avocado, pickles, tomato, lettuce, and egg-free sauce add richness and freshness.

How to Make a Flax Egg

  • Mix 1 tablespoon ground flaxseed with 3 tablespoons water.
  • Let it sit for 5–10 minutes until slightly thickened.
  • Add it to the burger mixture in place of 1 egg.
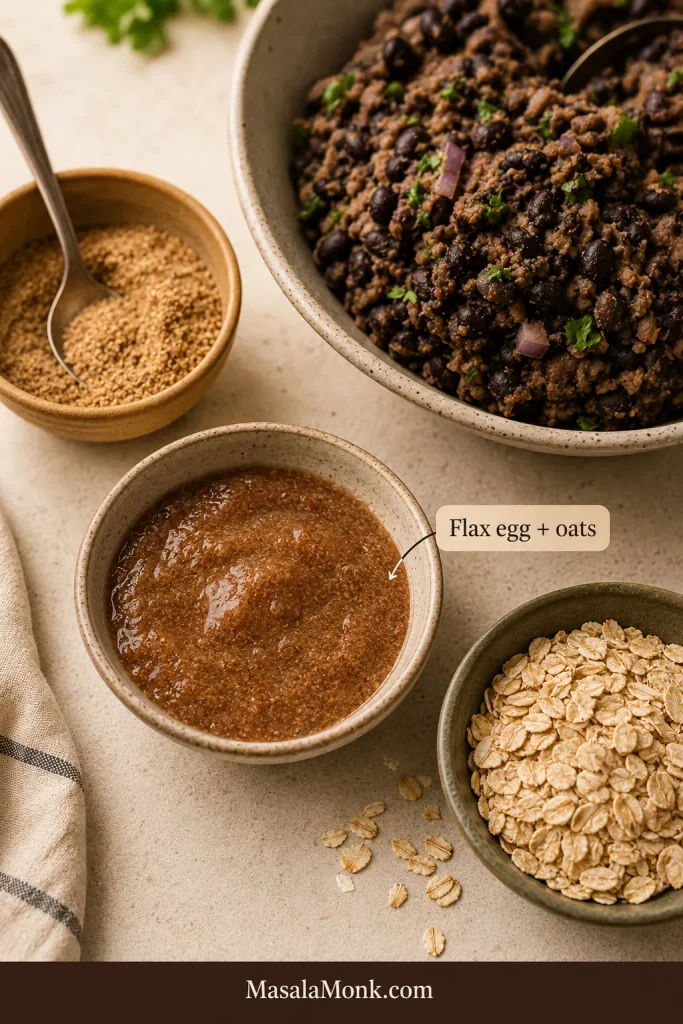
Small bowl of thickened flax egg beside rolled oats and a bowl of black bean burger mixture on a cream countertop.
For vegan patties, let the flax egg thicken first. Then it can help the oats and beans bind cleanly.

Use tamari, soy sauce, or vegan Worcestershire-style sauce when keeping the recipe fully vegan. For a creamy egg-free topping, this eggless mayonnaise recipe is a useful sauce base.

Making Them Gluten-Free

Making the burgers gluten-free is mostly about the binder and sauces. Use certified gluten-free oats or oat flour instead of panko or breadcrumbs. Check labels on soy sauce, Worcestershire-style sauce, and barbecue sauce. Tamari is a useful gluten-free swap for soy sauce.

Gluten-free patties benefit from a short rest before cooking because oats and oat flour need a few minutes to absorb moisture.
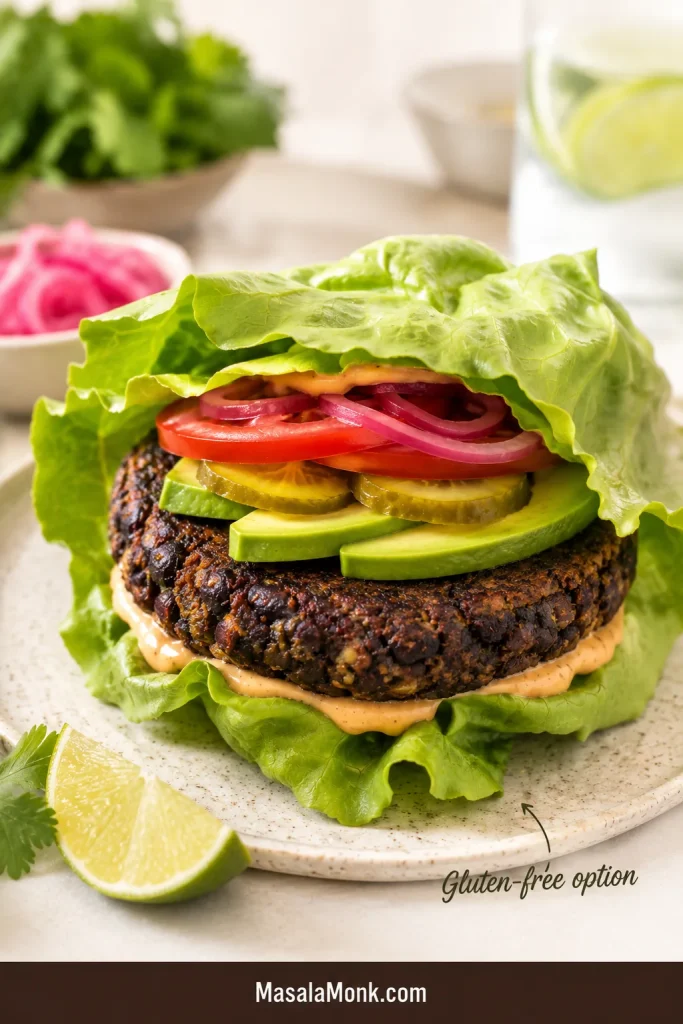
Black bean burger served in a large lettuce wrap with avocado, tomato, pickled onion, pickles, sauce, and lime on a plate.
For a gluten-free option, use a lettuce wrap to keep the bite fresh while the sturdy patty stays the focus.

Flavor Variations

Once the base mixture holds together, black bean burgers are easy to customize. Keep the same structure: beans, binder, seasoning, and a controlled amount of add-ins.

Spicy Black Bean Burger

Add chopped chipotle in adobo, jalapeño, extra chili powder, cayenne, or hot sauce for more heat. Serve with chipotle mayo, avocado, pickled onions, and lettuce. A little mango salsa adds sweet-bright contrast on top or on the side.

Sweet Potato Black Bean Burger

Mix in mashed roasted sweet potato for a softer, sweeter version. Because sweet potato brings extra moisture, balance it with a little more oats or breadcrumbs until the mixture feels sturdy again. This version pairs especially well with smoked paprika, cumin, lime, avocado, and cilantro.

Black Bean Quinoa Burger

Cooked and cooled quinoa adds chew without making the patty heavy. Keep the amount moderate; too much quinoa makes the mixture harder to hold together. It works especially well with garlic, cumin, smoked paprika, and a little lime.

Mushroom Black Bean Burger

Cook chopped mushrooms before adding them. Mushrooms add savory depth, but raw mushrooms release water and can make the patties soft. Sauté until their moisture cooks off, then cool before mixing.

Corn and Southwest Black Bean Burger

A small handful of corn, chopped cilantro, lime zest, cumin, smoked paprika, and chili powder gives the patties a Southwest-style feel. Keep the corn modest so the mixture still binds cleanly.

MasalaMonk-Style Black Bean Burger

Start with the smoky patty, then build the burger with green chutney, pickled onion, sliced tomato, lettuce, and a little yogurt-style sauce or egg-free mayo. The cumin, chili, herbs, and sharp onion make the burger brighter without turning it into a completely different recipe.
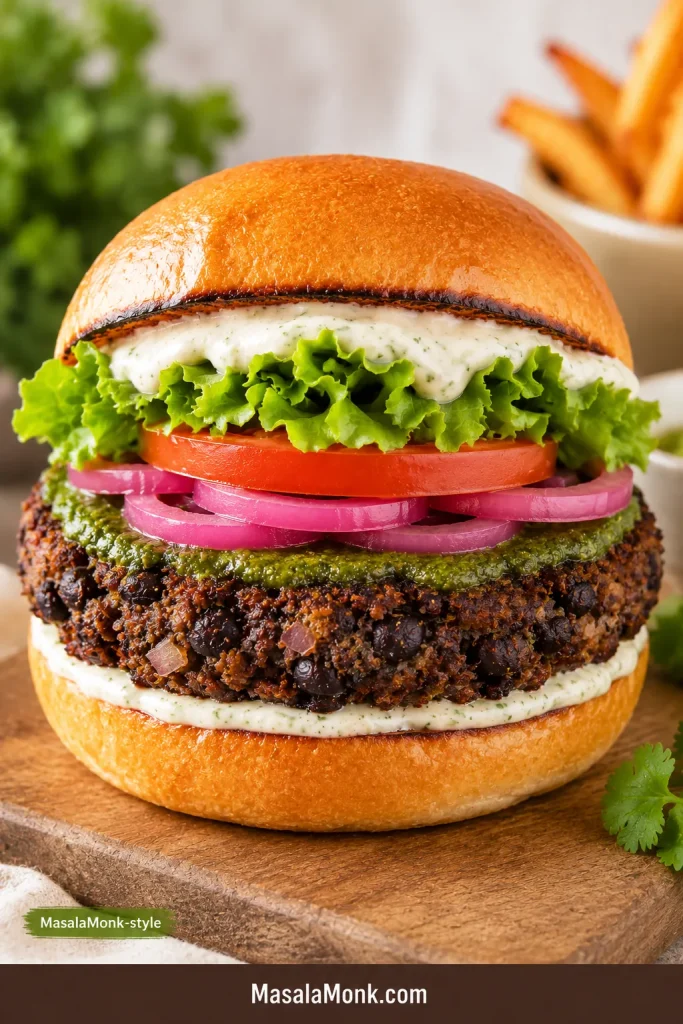
Black bean burger on a toasted bun with green chutney, pickled onions, tomato, lettuce, and creamy sauce on a wooden board.
For a brighter MasalaMonk-style burger, pair the smoky patty with green chutney, pickled onion, tomato, lettuce, and creamy sauce.

Mini Patties or Sliders

Shape smaller patties for sliders and reduce the cooking time by 1–2 minutes per side. Because mini patties dry faster, pull them once the edges are browned and the centers are hot.

Cheesy Black Bean Burger

For a vegetarian version, add a small amount of shredded cheese, feta, pepper jack, or cotija. Cheese adds salt, richness, and a little extra structure.

Toppings, Sauces, and Buns That Work Well

Because the patty is smoky and hearty, the toppings should bring contrast: creaminess, crunch, acidity, and freshness. The best bite has a warm smoky patty, cool lettuce, juicy tomato, creamy sauce, and a little sharpness from pickles, salsa, chutney, or onion.
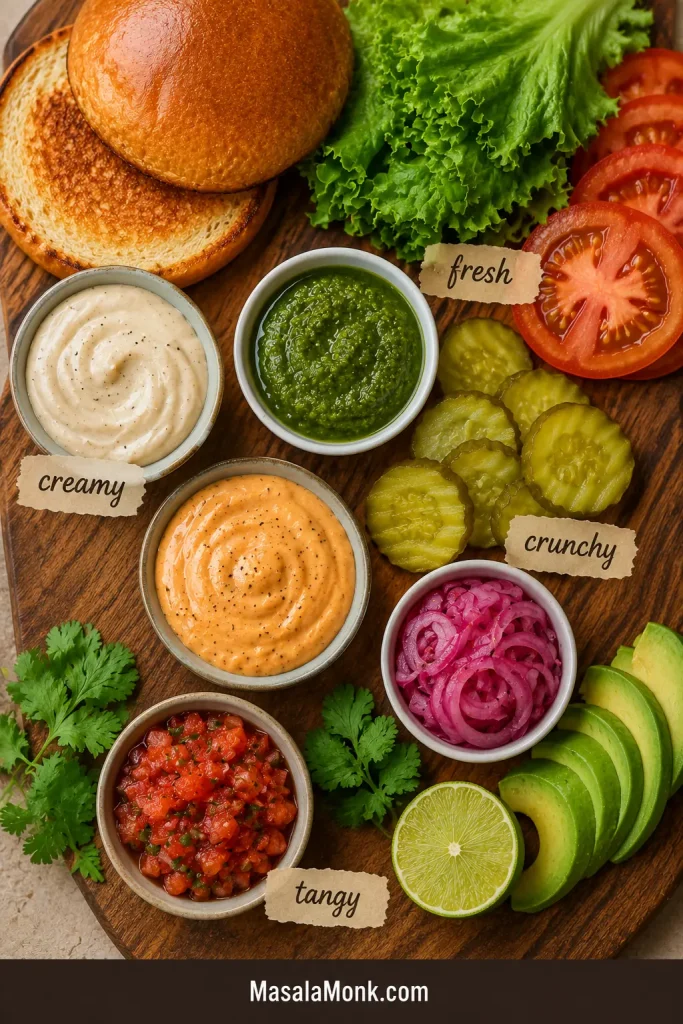
Toppings board with toasted buns, lettuce, tomato slices, pickles, pickled onions, avocado, salsa, green chutney, aioli, chipotle sauce, cilantro, and lime.
Build contrast with toppings: creamy sauce, crunchy pickles, fresh lettuce, tangy salsa, avocado, green chutney, and a toasted bun.
  • Chipotle mayo
  • Garlic aioli
  • Avocado or guacamole
  • Salsa or pico de gallo
  • Pickled onions
  • Lettuce
  • Tomato
  • Red onion
  • Jalapeños
  • Cabbage slaw
  • Lime crema
  • Barbecue sauce
  • Vegan mayo

For sauce, go creamy or sharp. Garlic aioli adds creaminess without covering up the smoky bean flavor. For a brighter MasalaMonk-style twist, use green chutney with sliced onion, tomato, lettuce, and a little mayo or yogurt-style sauce.

Use toasted burger buns, brioche-style buns, whole wheat buns, or lettuce wraps. Toasting helps protect the bun from sauce and keeps the burger from feeling soft-on-soft.

What to Serve With Black Bean Burgers

Serve black bean burgers anywhere a regular burger would feel right. They work with classic sides, fresh salads, roasted vegetables, and bowl-style meals.

  • French fries or sweet potato fries
  • Simple green salad
  • Cabbage slaw
  • Corn salad
  • Roasted vegetables
  • Rice or quinoa bowls
  • Lettuce wraps
  • Pickles and chips
  • Grilled vegetables

Pair the patties with crispy homemade French fries for a classic burger plate. If you want a colder side that cuts through the smoky burger, use this creamy coleslaw.

Roasted vegetables work better than another heavy starch for a lighter dinner plate. These roasted carrots bring sweetness, color, and browned edges without competing with the burger.

To add more protein, use cheese, a Greek-yogurt-style sauce, or serve the patty over a quinoa bowl. On a vegan plate, pair it with hummus, tofu slaw, extra beans, or a hearty salad.

Storage, Freezing, and Reheating

These patties are excellent for meal prep. They store well, freeze well, and reheat best when the crust gets a chance to crisp again.

Fridge

Cooked patties keep for 3–4 days in an airtight container in the refrigerator. Let them cool before storing so trapped steam does not soften the crust too much.

Freezer

Freeze shaped or cooked patties for up to 3 months. Place parchment between patties so they do not stick together, then store in a freezer-safe bag or container.
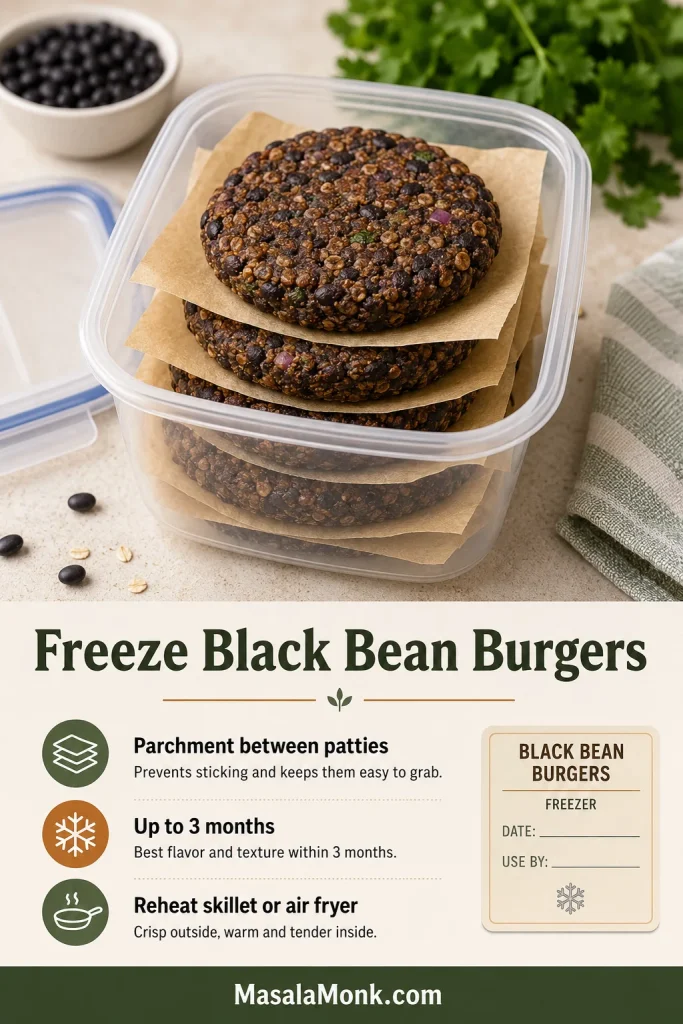
Black bean burger patties stacked in a freezer-safe container with parchment between each patty and a guide for freezing and reheating.
When freezing, place parchment between patties so they separate easily, then reheat in a skillet or air fryer to bring back the crust.

For general leftover safety, the USDA recommends using refrigerated leftovers within 3–4 days and freezing leftovers for longer storage. Their leftovers and food safety guide is helpful if you want broader storage guidance.

Reheating

Reheat the burgers in a skillet or air fryer for the best texture. A microwave works for speed, but it softens the crust. For frozen patties, start over medium-low heat so the center warms before the outside over-browns, then increase the heat briefly to crisp the edges.

Make-Ahead Patties

Shape the patties up to 24 hours ahead and refrigerate them covered. This helps the binder absorb moisture and makes the patties easier to cook.

Once you learn the feel of the mixture, black bean burgers stop being risky. You know when the beans are dry enough, when the patty is firm enough, and when the crust is ready to flip. That is the real win here: a smoky, satisfying veggie burger you can put on a bun without holding your breath.

Frequently Asked Questions

Why are my black bean burgers mushy?

Usually because the beans, onion, or add-ins brought too much moisture, or because the beans were processed too smoothly. Dry the beans, cook watery vegetables first, leave some bean texture, and add oats or breadcrumbs if the mixture feels loose.

What keeps black bean burgers from falling apart?

A good binder, enough mashing, and proper browning keep the patties from falling apart. Egg and breadcrumbs work well for vegetarian patties, while flax egg and oats work well for vegan patties.

Do black bean burgers need egg?

No. Egg helps, but you can still make a sturdy patty without it. Use a flax egg or chia egg with oats or oat flour, then give the mixture a short rest before cooking.

What can replace breadcrumbs in black bean burgers?

Rolled oats, quick oats, oat flour, crushed crackers, or potato flakes can replace breadcrumbs. Cooked quinoa can add texture, but it works best with another binder because it does not absorb moisture as strongly as oats.

Can I make black bean burgers without a food processor?

A fork or potato masher works very well and gives you more control over the texture. Mash enough beans to bind the mixture, but leave some pieces for a heartier bite.

Are canned black beans okay for black bean burgers?

Canned beans work very well because they are already cooked and consistent. Drain and rinse them well, then dry them in the oven or with a towel before mixing.

Can I use dried black beans?

Dried beans are fine once they are fully cooked, tender, drained, and cooled. They should be soft enough to mash but not watery when they go into the burger mixture.

Are black bean burgers vegan?

Some are vegan, but many recipes use egg, cheese, mayonnaise, or Worcestershire sauce. This recipe can be made vegan with flax egg, oats, and vegan-friendly sauces.

Are black bean burgers gluten-free?

They can be gluten-free; the main things to watch are the binder and sauces. Use certified gluten-free oats or oat flour instead of breadcrumbs or panko, and check sauce labels when gluten is a concern.

Can black bean burgers be grilled?

Yes, but treat grilling as the firm-patty method. Chill the patties before grilling, oil the grates well, and flip carefully. Use foil, a grill mat, or a cast-iron griddle for delicate patties.

How do you make black bean burgers taste better?

Lean on bold seasoning and a little umami. Cumin, smoked paprika, chili powder, chipotle, tamari, tomato paste, lime, garlic, and onion all help the patties taste deeper and more satisfying.

How long do black bean burgers last in the fridge?

Cooked patties last 3–4 days in an airtight container in the refrigerator. Reheat them in a skillet or air fryer for the best texture.

Can black bean burgers be frozen?

Yes. Freeze shaped or cooked patties for up to 3 months. Place parchment between patties so they do not stick together, then thaw overnight or cook with a few extra minutes from frozen.

Are black bean burgers healthy?

These burgers can be a nourishing, filling option because black beans bring plant-based protein, fiber, complex carbohydrates, vitamins, and minerals. Harvard’s Nutrition Source has a helpful overview of legumes and pulses if you want more background. The overall nutrition still depends on the binder, oil, bun, cheese, sauce, and toppings you use.
Posted on Leave a comment

Air Fryer Pork Tenderloin Recipe: Juicy, Easy, No-Dry Timing Guide

Sliced air fryer pork tenderloin with browned edges, tender center, roasted potatoes, green beans, and juices on a serving board.

Air fryer pork tenderloin is the kind of dinner that feels almost too easy when it goes right. The outside turns browned and savory, the inside stays juicy, and you can slice it onto plates in about half an hour without heating the oven.

You are not trying to make fancy pork here. The goal is smoky browned edges, tender slices, and just enough pan-style flavor to make dinner feel like more than a shortcut. Everything comes down to three things: cook it hot, check it early, and rest before slicing.

Because pork tenderloin is lean, a few extra minutes can turn glossy slices into dry pork, especially if your piece is small, your air fryer runs hot, or the package in front of you is actually pork loin instead of tenderloin.

This guide is built for the real-life versions too: small tenderloins, hot air fryers, pre-marinated packs, pork fillet labels, frozen pork, and the moment you realize your potatoes need longer than the pork.

Quick Answer

Cook pork tenderloin in the air fryer at 400°F / 200°C, or 205°C if your air fryer uses exact 5-degree settings, until the middle of the pork reads 145°F / 63°C. Most 1–1½ lb / 450–680g tenderloins take about 18–24 minutes, but small or slim pieces can finish sooner. Start checking early, rest for 5 minutes, then slice across the grain.

The clock gets you close. A temperature check saves the pork.
What success looks like

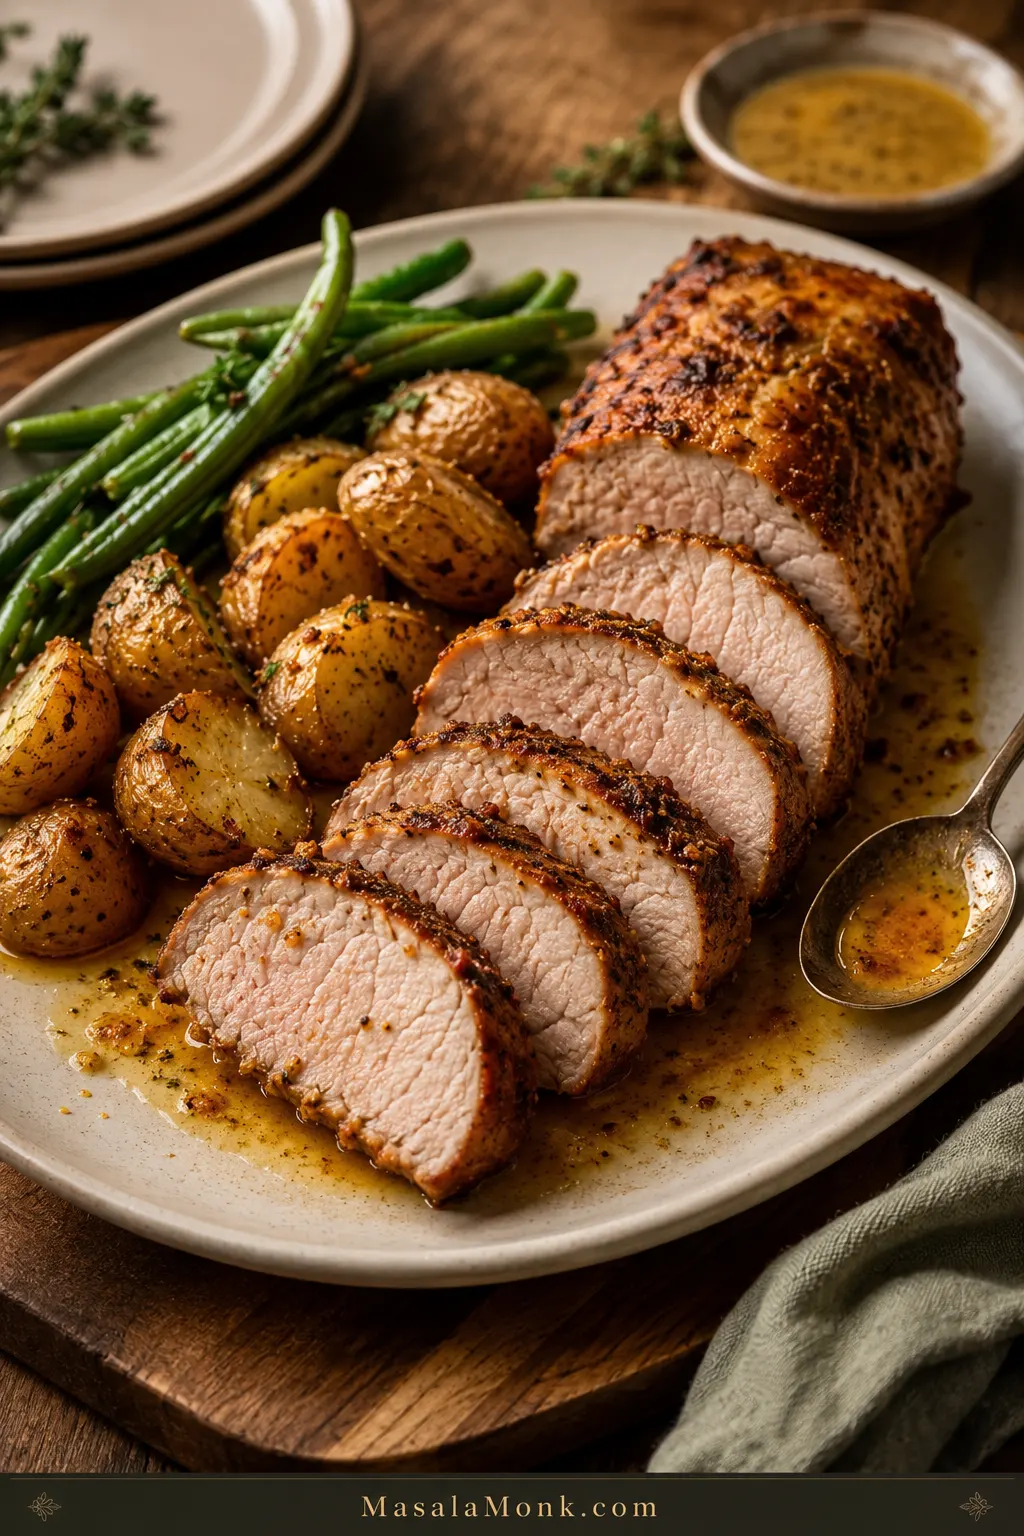
The pork should have browned, smoky-garlic edges, a moist center, and slices that look glossy instead of chalky. Spoon any board juices back over the sliced pork before serving. That little step makes the whole plate feel more finished.

Texture check: Before serving, look for a moist center and glossy slices rather than a chalky cut surface.
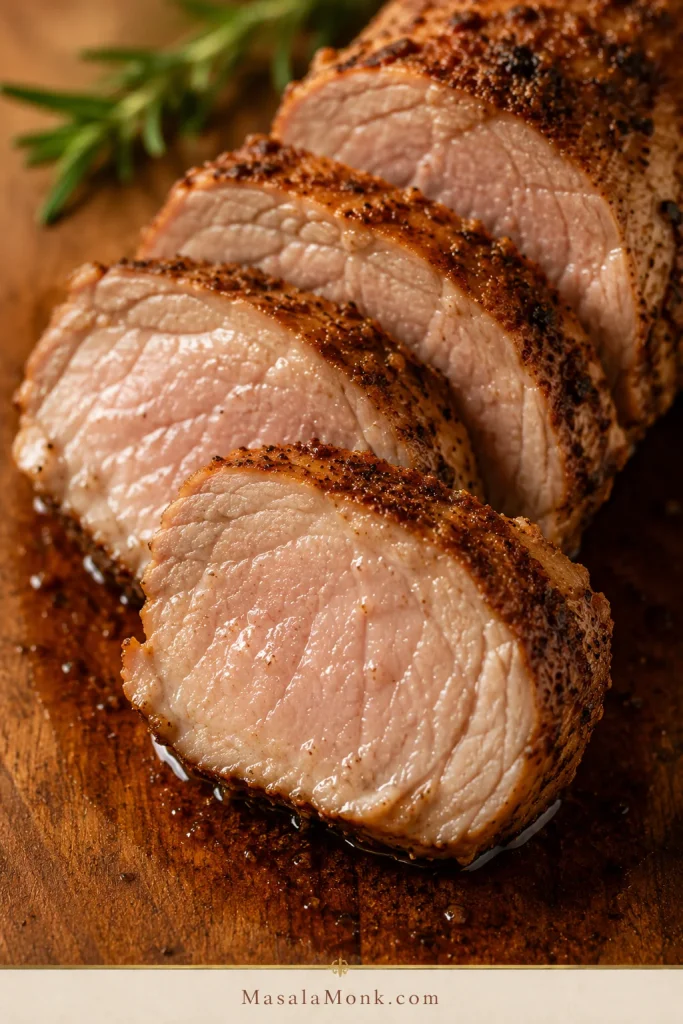
Close-up of sliced air fryer pork tenderloin with browned crust, moist center, and juices on a wooden cutting board.
Look for slices that stay glossy in the center after resting; that shine is the visual clue that the pork was not cooked too long.

Ready to cook? Jump to the recipe cardNeed timing? See the chart

Make this when

  • You want pork that slices juicy, not dry and gray.
  • You need dinner fast, but still want it to feel complete.
  • You bought pork tenderloin or pork fillet and need clear air fryer timing.
  • You are using a Ninja Foodi, basket air fryer, oven-style air fryer, or pre-marinated pack.
  • You want potatoes, carrots, green beans, rice, salad, or a simple sauce on the side.

Air Fryer Pork Tenderloin Recipe Card

This is the fast version: season the pork with a smoky garlic-Dijon rub, air fry it hot, check once before it overcooks, and rest it so the slices stay juicy.

Recipe at a Glance

RecipeAir Fryer Pork Tenderloin
Best cutPork tenderloin or pork fillet, 1–1½ lb / 450–680g
Prep time5–10 minutes
Cook time18–24 minutes for most tenderloins
Start checking13–14 minutes for small/slim pieces; 16–18 minutes for standard pieces
Rest time5 minutes
Total timeAbout 28–35 minutes
Servings4
Air fryer temperature400°F / 200°C, or 205°C if available
Internal temperature145°F / 63°C in the center, then rest

Ingredients

  • 1 pork tenderloin, 1–1½ lb / 450–680g
  • 1 tablespoon / 15 ml olive oil or avocado oil
  • 1 teaspoon / 5 ml Dijon mustard
  • 1–2 teaspoons brown sugar or honey
  • 1 teaspoon smoked paprika
  • 1 teaspoon garlic powder
  • ½ teaspoon onion powder
  • ¾–1 teaspoon kosher salt, depending on size and seasoning
  • ½ teaspoon black pepper
  • Pinch of cayenne, chili powder, or red pepper flakes, optional

Method

  1. Preheat the air fryer to 400°F / 200°C, or 205°C if your air fryer allows that setting. Give it 3–5 minutes if your model recommends preheating.
  2. Pat the pork dry. Remove any tough silver skin if present.
  3. Mix the oil, Dijon mustard, brown sugar or honey, smoked paprika, garlic powder, onion powder, salt, pepper, and optional chili in a small bowl.
  4. Rub the seasoning mixture all over the tenderloin.
  5. Place it in the air fryer basket with space around it. Cut it in half crosswise if needed so it fits without curling tightly.
  6. Air fry for 10–12 minutes, then flip.
  7. Continue cooking until the middle reaches 145°F / 63°C, checking early for small or slim tenderloins.
  8. Rest loosely tented for 5 minutes, then slice across the grain into thick, juicy pieces.

Do not cook by time alone. A slim 1 lb tenderloin and a thick 1½ lb tenderloin should not be treated like the same piece of meat.

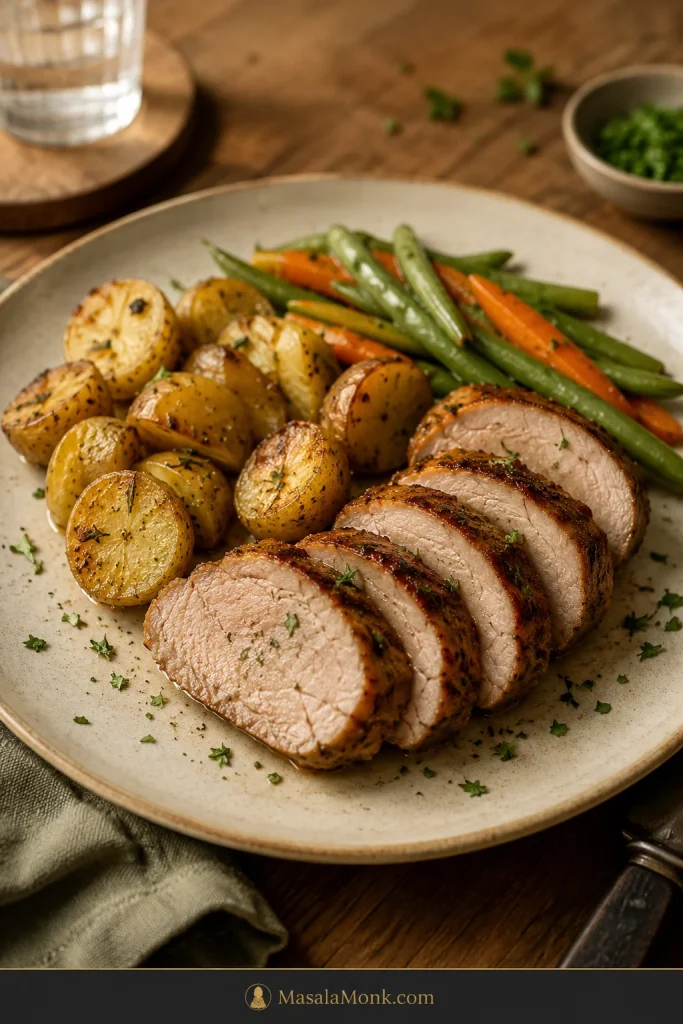
A simple plate of potatoes and green vegetables turns the tenderloin into a full weeknight dinner after the main method is done.

Plate of sliced pork tenderloin served with roasted potatoes, green beans, carrots, and herbs.
For a fast weeknight plate, pair pork tenderloin slices with potatoes and green vegetables so the air fryer recipe feels like a full meal, not just the main protein.

From here, the things that change the result are the cut, the thickness, the air fryer style, and when you stop cooking. That is what the rest of the guide helps you control.

Table of Contents

Choose your path

With a plain tenderloin, start with the recipe card and cooking chart. For a package labeled pork loin filet, check the cut section before you season anything. Adding potatoes or carrots? Read the sides section first so the pork does not wait around while the vegetables finish.

Why This Works

The air fryer works beautifully for pork tenderloin because the cut is small enough to cook through before the outside has time to dry out. You get browned edges without babysitting a skillet, as long as you stop at temperature.

The flavor is simple but satisfying: smoky, garlicky, lightly tangy, and just sweet enough to help the edges brown. Oil helps the rub toast instead of sitting dry on the surface. Dijon adds a quiet tang without making the pork taste mustardy. Brown sugar or honey helps the outside color. The short rest keeps the slices glossy when you cut in.

When it comes out right, the edges are smoky and browned, the slices look moist, and the mustard-garlic rub tastes like it took more effort than it did.

That is also why this tenderloin cooks hotter than some air fryer pork chops. Pork chops are flatter and can tighten quickly, so if the package in front of you is actually chops, switch to this air fryer boneless pork chops guide instead.

The no-dry rules

  • Use pork tenderloin, not pork loin. The cuts are different and need different timing.
  • Cook hot, but check early. 400°F / 200°C browns well, but small pieces finish quickly.
  • Test the middle, not the tapered end. The thin tail is not the doneness judge.
  • Rest before slicing. Five quiet minutes gives you glossier, juicier slices.
  • Do not chase “no pink.” A slight blush can be normal when the pork is cooked to temperature.

Before any of those rules can help, though, the cut has to be right.

Pork Tenderloin vs Pork Loin vs Pork Fillet

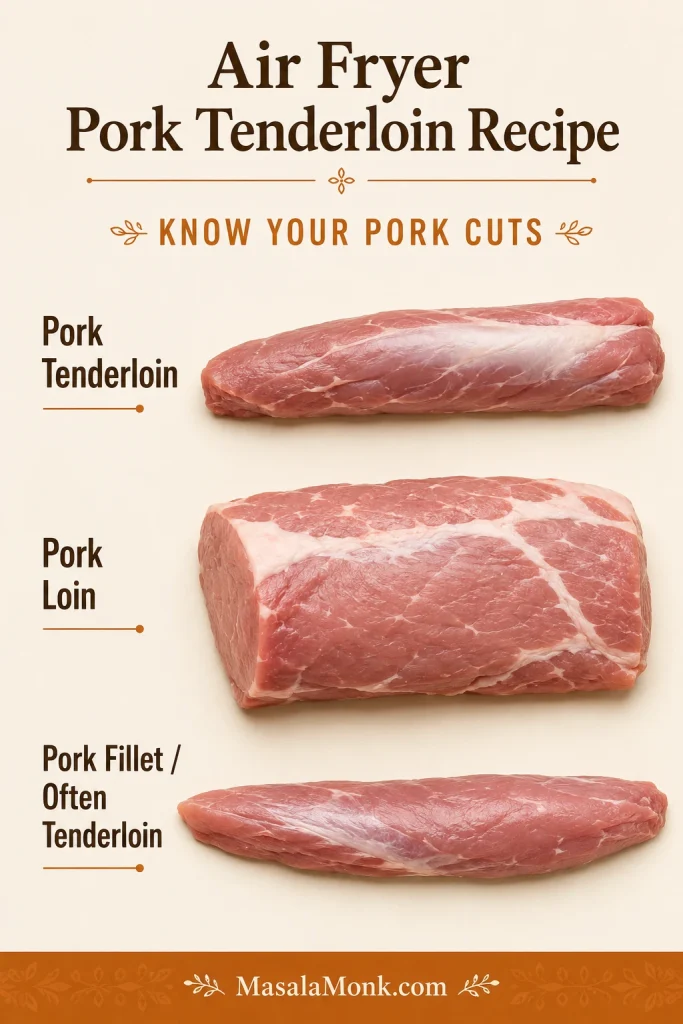
This is worth checking before you cook, because the wrong cut is the easiest way to follow the recipe perfectly and still end up disappointed. Pork tenderloin, pork loin, pork loin filet, pork fillet, and pork roast sound similar, but they do not cook the same way.

How to Identify the Right Cut

Cut check: Shape matters here; this visual helps you confirm tenderloin or pork fillet before using the air fryer timing.

Comparison image showing pork tenderloin, pork loin, and pork fillet with different shapes and sizes.
A quick shape check here can save the whole recipe: tenderloin and pork fillet are usually long and narrow, while pork loin is wider and cooks on a different timeline.
Package saysWhat it likely isUse this recipe?
Pork tenderloinLong, narrow, lean cut, usually 1–1½ lbYes
Pork filletOften the same cut as pork tenderloin in UK, Australia, and some grocery labelingYes, if long, narrow, and about 450–680g / 1–1½ lb
Pork loinWider, larger roast-style cutNo, it needs different timing
Pork loin filetCan be a branded or pre-marinated loin-style cut; check shape and weight carefullyMaybe, only if it looks like tenderloin
Pork roastUsually larger and wider than tenderloinNo

When to Switch Recipes

If it is wide like a roast, stop. This method is for a long, narrow pork tenderloin or pork fillet. A pork loin roast needs a different timing plan.

If your package turns out to be a bigger pork loin, you are not stuck — just switch methods. MasalaMonk already has a dedicated slow cooker pork loin recipe and a smoked pork loin recipe for that larger cut.

If you have pork tenderloin but want another cooking method, see the pork tenderloin in oven guide or this softer, hands-off slow cooker pork tenderloin recipe.

Cut confirmed? Back to the recipe cardGo to the cooking time chart

Ingredients for Juicy Pork Tenderloin

The ingredient list is short on purpose. Pork tenderloin does not need to be buried under sauce. It needs enough fat for browning, enough salt for flavor, and a rub that gives the air fryer something to toast.

The result is a smoky garlic crust with a little mustardy brightness and just enough sweetness to make the edges taste dinner-worthy, not sugary.

What Each Ingredient Does

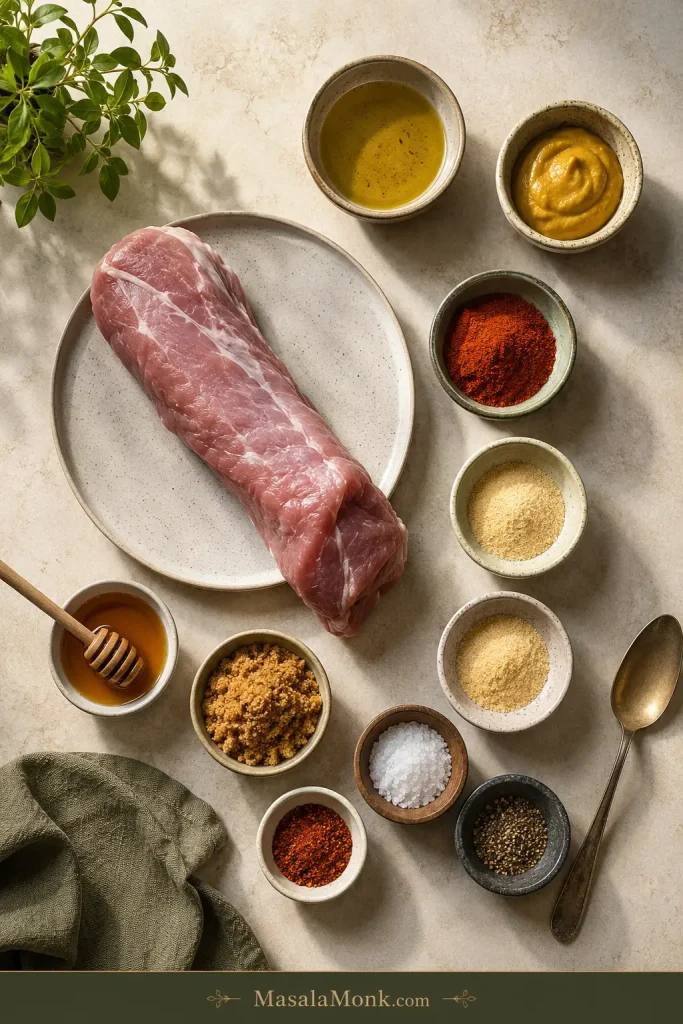
Gather the rub ingredients before preheating so the pork can go from seasoning to basket without losing momentum.

Overhead view of pork tenderloin ingredients including raw pork, oil, Dijon mustard, smoked paprika, garlic powder, onion powder, salt, pepper, honey, and brown sugar.
This short ingredient list works because each part has a job: oil helps the rub cling, Dijon adds brightness, and paprika plus garlic build the crust.
IngredientUS amountMetric amountWhy it helps
Pork tenderloin1–1½ lb450–680gThe ideal size for this method
Olive oil or avocado oil1 tbsp15 mlHelps browning and seasoning coverage
Dijon mustard1 tsp5 mlAdds tang and helps the rub cling
Brown sugar or honey1–2 tsp5–10 mlBalances lean pork and helps browning
Smoked paprika1 tsp2–3gAdds color and smoky depth
Garlic powder1 tsp3gMain savory note
Onion powder½ tsp1–2gRounds out the rub
Kosher salt¾–1 tsp4–6gPrevents bland pork
Black pepper½ tsp1gAdds gentle heat
Cayenne or chili powderPinchPinchOptional heat

Salt and Seasoning Notes

For smaller or pre-marinated tenderloins, stay near the lower salt amount. Use the higher amount for a plain, larger one. When the pork is already seasoned, injected, or packed in a salty marinade, reduce the salt in the rub.

With fine salt or table salt instead of kosher salt, start with about ½ teaspoon for a 1 lb / 450g tenderloin and adjust next time. Fine salt packs more tightly, so the same spoonful tastes saltier.

Easy Substitutions

  • No Dijon? Use yellow mustard, whole-grain mustard, or skip it and add a small splash of lemon juice or vinegar for brightness.
  • No smoked paprika? Use regular paprika with a pinch of chili powder, cayenne, or cumin.
  • No brown sugar? Use honey or maple syrup. Skip the sweetener if your marinade is already sweet.
  • No avocado oil? Olive oil works well. Use a light coating so the rub clings and browns.
  • Using a salty seasoning blend? Reduce or skip the added salt until you know how salty the blend is.

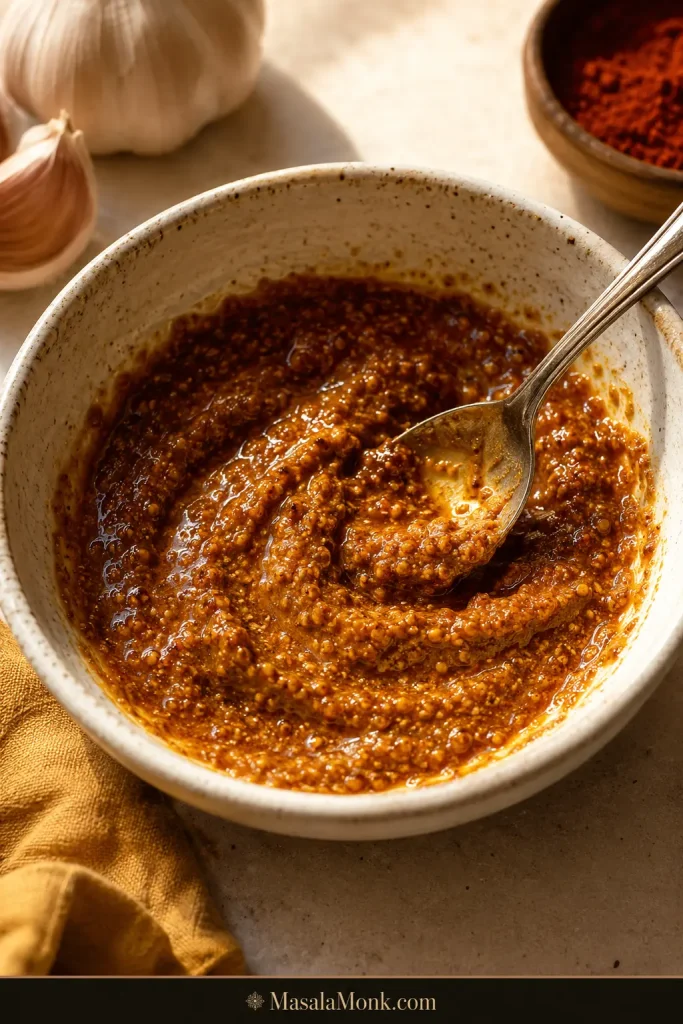
Rub texture: Aim for a loose paste that coats the pork evenly instead of dropping into the basket.

Bowl of smoky garlic Dijon rub with a spoon, made with mustard, paprika, oil, garlic, and seasonings.
The rub should look like a loose paste so it clings to the pork instead of dropping off as dry seasoning in the basket.

Can I use a marinade instead?

Yes. For a simple marinade-style version, mix 1 tablespoon oil, 2 teaspoons soy sauce, 1 teaspoon Dijon mustard, 1 tablespoon honey or brown sugar, 1 teaspoon garlic powder, and 1–2 teaspoons lemon juice or vinegar. Marinate for 20–30 minutes if you have time, then air fry the same way and check the internal temperature.

Equipment You Need

You can make this with basic kitchen tools, but the thermometer is the one that matters. Pork tenderloin is too lean and too quick-cooking for blind timing.

  • Air fryer
  • Instant-read thermometer
  • Tongs
  • Small bowl for the seasoning paste
  • Measuring spoons
  • Paper towels
  • Cutting board
  • Sharp knife for trimming silver skin and slicing

Basket Air Fryer, Oven-Style Air Fryer, and Ninja Foodi Notes

Air fryer style changes how quickly the outside browns, so use this as a first-check guide before trusting one fixed time.

Air fryer typeWhat to expectFirst check
Basket air fryerBrowns fastest with strong direct airflow13–16 minutes
Oven-style air fryerMay need a few extra minutes16–18 minutes
Ninja Foodi or Foodi GrillCan brown aggressively from the top13–15 minutes
Small air fryerCut the tenderloin in half; do not coil it tightlyBased on thickness
Air fryer with linerBrowning can slow if airflow is blockedCheck color and temperature early

How to Prepare the Pork

A good result starts before the basket: dry the surface, season all sides, and remove any tough silver skin so the finished slices are tender from edge to edge.

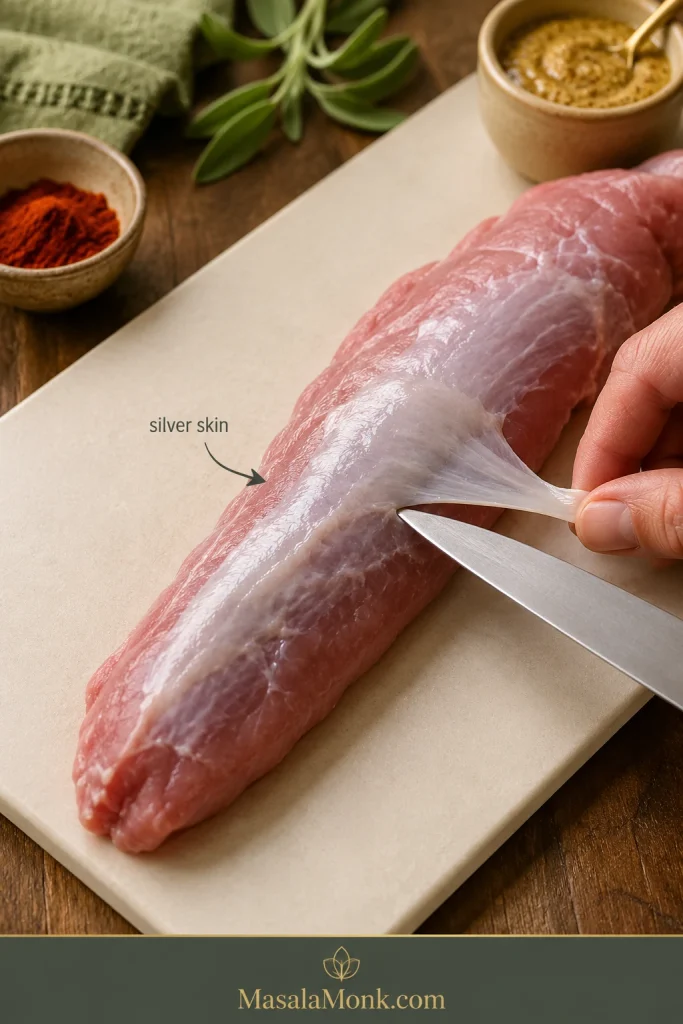
Prep Steps Before Air Frying

Look for the shiny strip before seasoning; trimming it now prevents chewy bites later.

Raw pork tenderloin on a cutting board with silver skin being lifted and trimmed with a knife.
Trim the silver skin before cooking, otherwise that shiny strip stays tough even when the pork itself is perfectly done.
  1. Pat it dry. Surface moisture slows browning.
  2. Remove silver skin. This is the shiny, tough membrane that does not soften well during cooking. Slide a thin knife under it and trim it away.
  3. Trim lightly. Pork tenderloin is already lean. Remove loose fat or ragged edges, but do not over-trim.
  4. Protect the thin tail. If the tapered end is very thin, tuck it slightly under so it does not overcook too far ahead of the center.
  5. Season all over. Coat the top, bottom, sides, and tapered end.
  6. Let it sit briefly. Even 5–10 minutes while the air fryer preheats helps the seasoning settle.

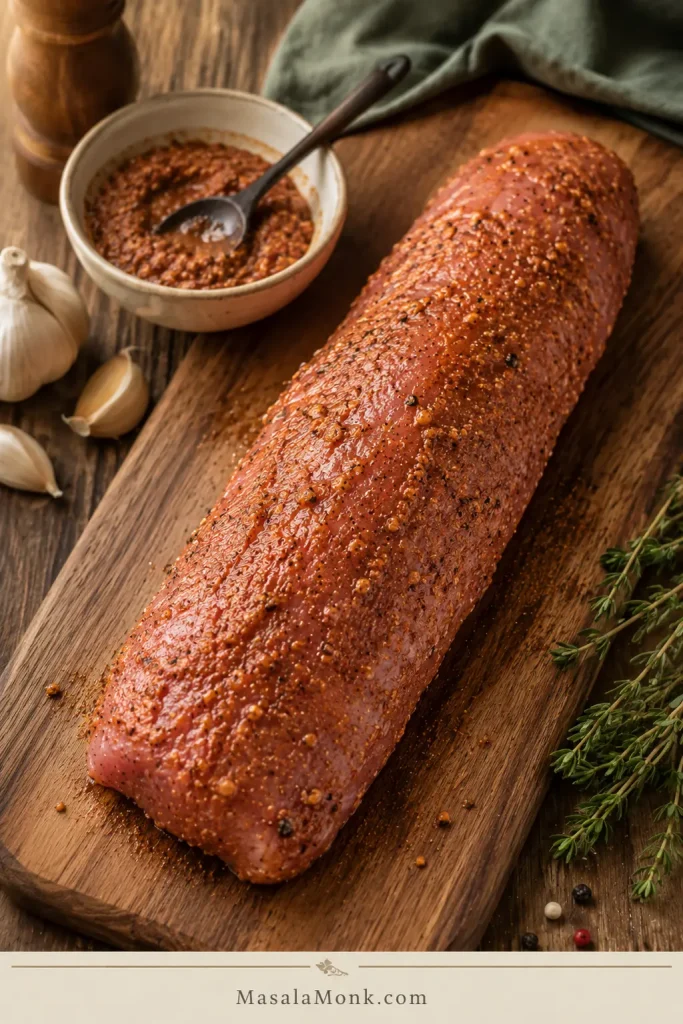
Seasoning Check Before Air Frying

The tenderloin should look evenly coated before cooking, with no bare patches on the sides or tapered end.

Raw pork tenderloin coated evenly with reddish garlic Dijon seasoning paste on a wooden board.
Once the tenderloin is evenly coated, the paprika-Dijon rub can toast into a savory crust while the center stays protected from drying out.

How to Cook It in the Air Fryer

This is where the pork starts becoming dinner, not just a timing problem. Once it is seasoned, the cooking is simple. The only trick is not walking away for too long the first time you make it in your air fryer.

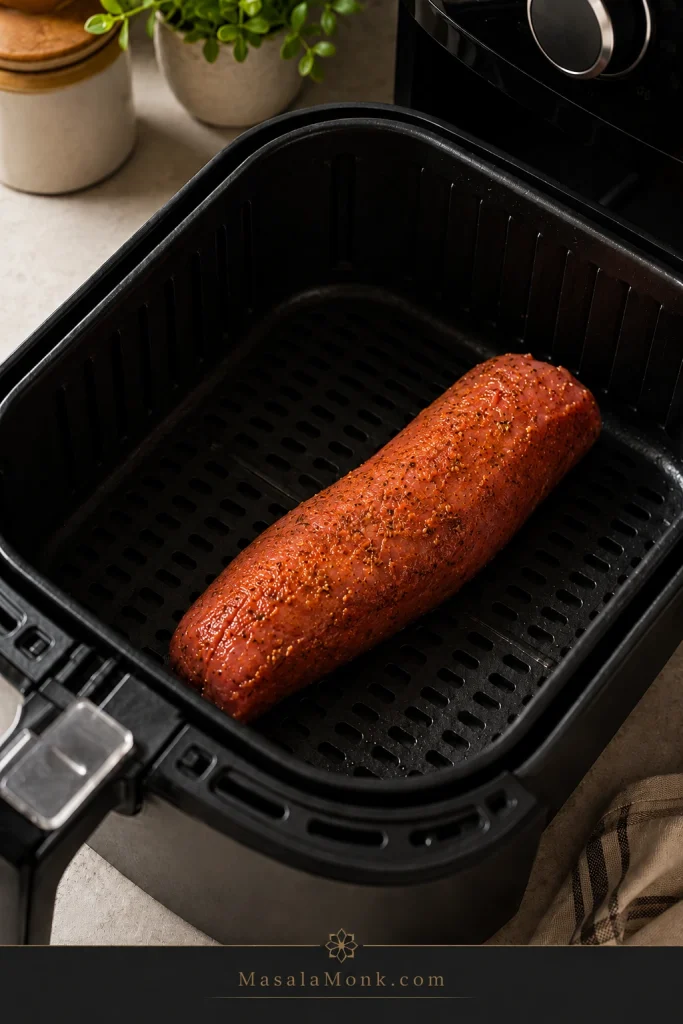
Basket spacing: Leave visible room around the pork so hot air can reach the sides and brown the surface.

Seasoned raw pork tenderloin placed inside an air fryer basket with clear space around it.
Leave open space around the pork tenderloin in the air fryer basket; that airflow helps the surface brown instead of steaming.

Step-by-Step Air Fryer Method

  1. Preheat the air fryer. Set it to 400°F / 200°C, or 205°C if available. Preheat for 3–5 minutes if your air fryer recommends it.
  2. Season the pork. Rub the oil, mustard, and spice mixture over the whole tenderloin.
  3. Place it in the basket. Leave space around the meat so hot air can circulate. Cut it in half crosswise if it is too long.
  4. Cook the first side. Air fry for 10–12 minutes. The outside should be starting to color, but it does not need to look deeply browned yet.
  5. Flip. Turn the tenderloin with tongs. Some juices in the basket are normal.
  6. Watch the surface. By the time it is close, the rub should smell toasted and savory, and the outside should look browned in patches rather than wet.
  7. Finish cooking. Continue air frying until the middle reaches 145°F / 63°C.
  8. Rest. Transfer to a board and rest loosely tented for 5 minutes.
  9. Slice. Cut across the grain into thick slices. The center should look moist, not chalky.

After the Flip

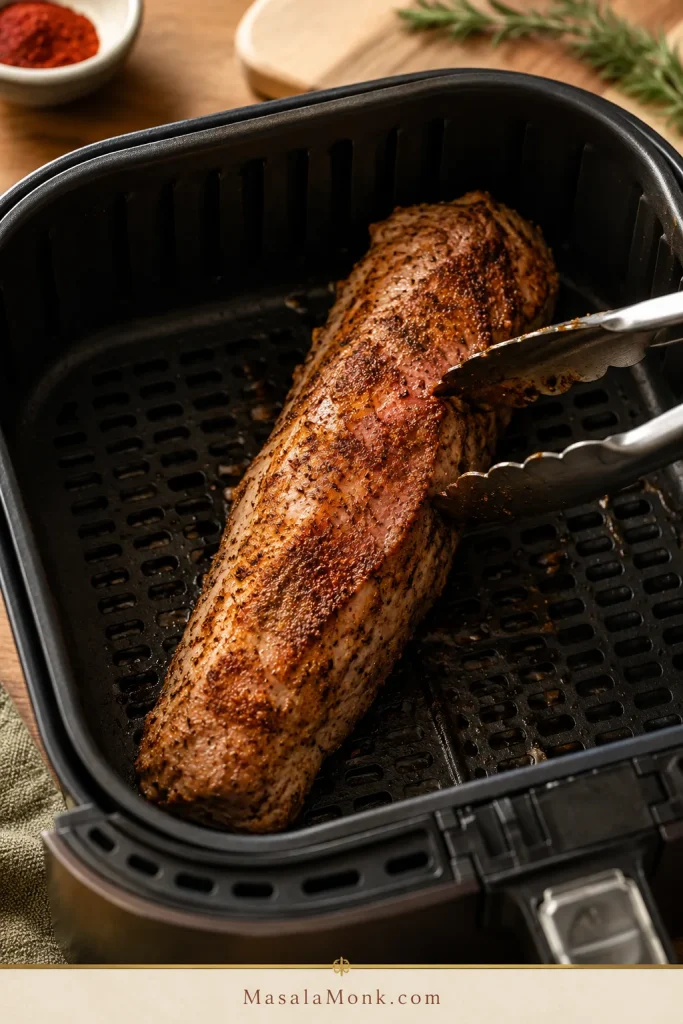
After the flip, browned patches are enough; from this point, temperature matters more than chasing a darker crust.

Pork tenderloin halfway cooked in an air fryer basket with browned seasoning patches after being flipped.
After flipping, the surface should start browning in patches; from here, rely on the thermometer rather than waiting for the outside to get darker.

When the Outside Browns Fast

Dark edges before a done center usually mean the heat is too aggressive. Lower the air fryer to 375–390°F / 190–200°C for the remaining minutes. If the pork is cooked through but pale, brush it with a little oil, honey mustard, or pan juices and air fry for 1–2 more minutes only if it is not already above temperature.

Rest and Slice Before Serving

Resting is not just waiting. It helps the juices settle before you slice. Spoon those juices back over the meat, and the pork tastes more finished.

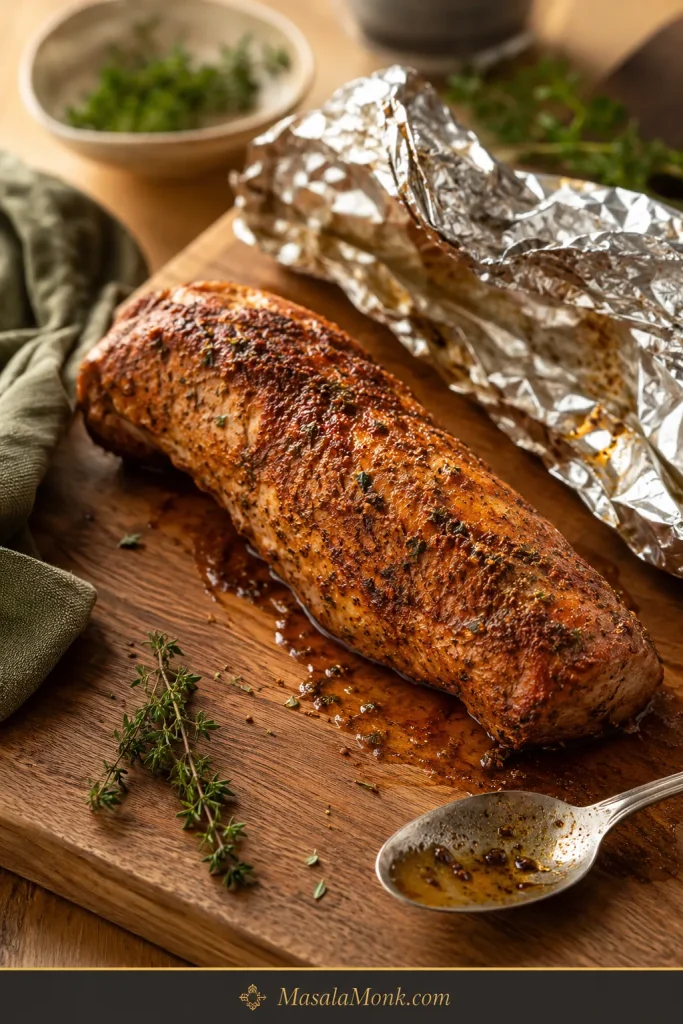
Rest the pork here before slicing so the juices settle and the board juices can be spooned back over the meat.

Whole cooked pork tenderloin resting on a wooden board with foil nearby, herbs, a spoon, and visible board juices.
Give the pork a few quiet minutes here; that short rest keeps more juices in the slices and leaves enough on the board to spoon back over the top.

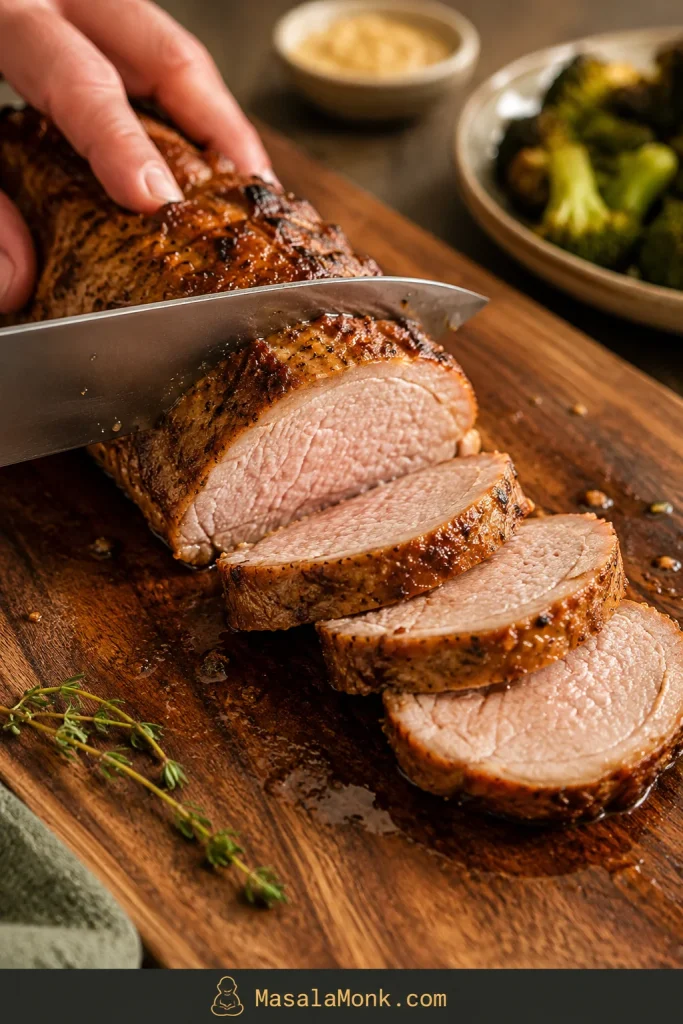
When the tenderloin has rested, use a steady cross-grain cut to make thick slices that stay moist on the plate.

Cooked pork tenderloin being sliced with a knife into thick pieces on a wooden cutting board.
Then slice across the grain into thick pieces; thinner slices dry out faster, while thicker slices hold moisture better on the plate.

Need exact timing? See the chartCheck the temperature guide

Cooking Time Chart by Weight

The chart is here to keep you from guessing, not to make the recipe complicated. Use the earliest check time when cooking a new brand, a new air fryer, or a pre-marinated pack.

First time with this air fryer? Watch closely once. After that, your own air fryer timing becomes the shortcut.

Use the timer to know when to start checking, then let the thermometer decide when the pork is done.

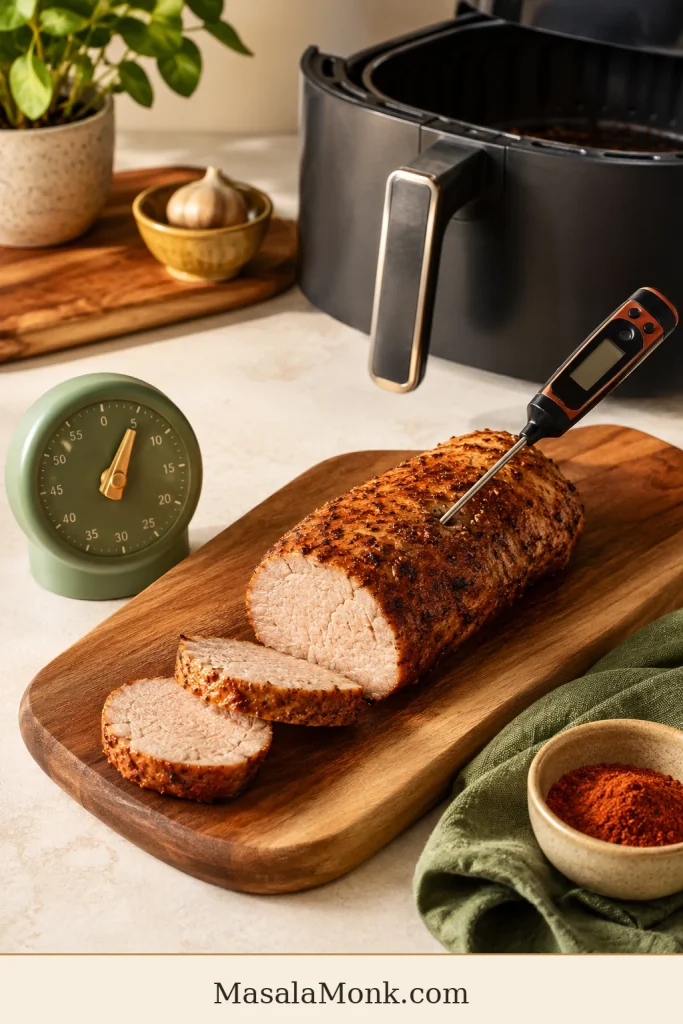
Cooked pork tenderloin on a cutting board with an instant-read thermometer, kitchen timer, air fryer, spice bowl, and green towel.
Your timer helps you know when to start checking, while the thermometer tells you when to stop; together, they make air fryer pork tenderloin repeatable.
Pork tenderloin sizeMetricAir fryer tempStart checkingLikely total time
Small or slim tenderloin450g / 1 lb400°F / 200°C13–14 min14–18 min
Standard tenderloin565g / 1¼ lb400°F / 200°C16 min18–22 min
Larger tenderloin680g / 1½ lb400°F / 200°C18–20 min20–26 min
Very thick tenderloin700g+ / 1½ lb+390–400°F / 200–205°C20 min24–28 min
Cut in half to fitSame total weight400°F / 200°C13–16 minDepends on thickness, not length

How to Use the Chart

Cutting a tenderloin in half does not automatically cook it in half the time. Thickness matters more than length. Pieces that stay thick in the center still need time, while slim pieces finish faster.

Save your first successful timing. Once you know how your air fryer handles a 1 lb or 1½ lb tenderloin, this recipe becomes much easier the next time.

If your “very thick tenderloin” is actually wide like a roast, pause and check the package. It may be pork loin, not tenderloin, and it needs a different cooking plan.

Internal Temperature and Pink Pork

Pork tenderloin is done when the middle of the thickest part reaches 145°F / 63°C, followed by a short rest. Check the largest section, not the thin tail end.

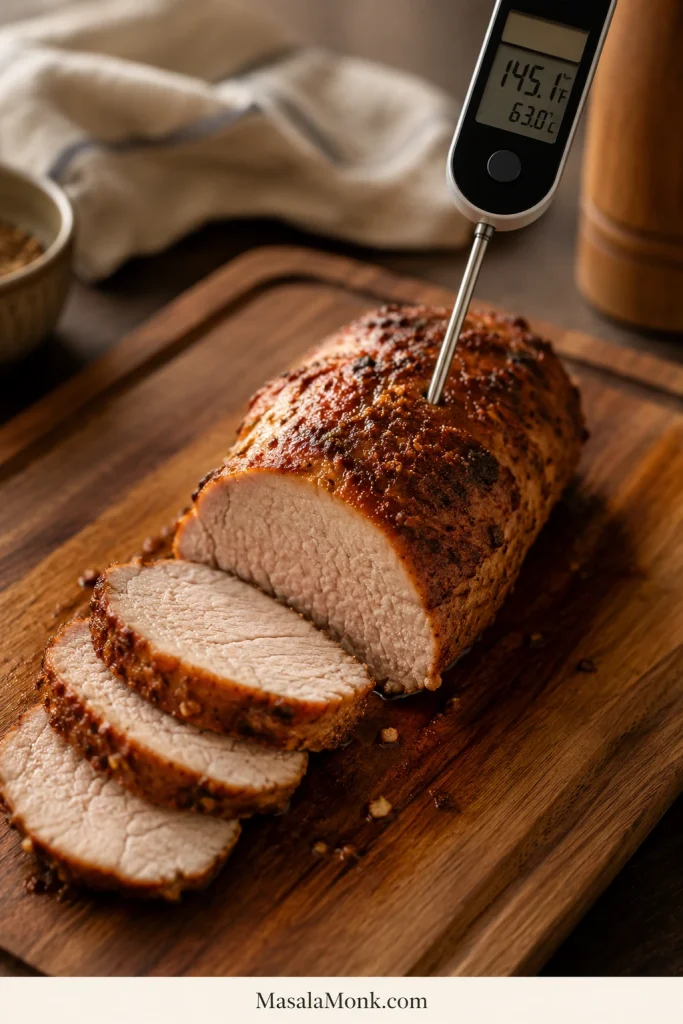
Temperature check: Measure the thickest center, not the thin end, when checking for 145°F / 63°C.

Instant-read thermometer inserted into the thickest center of cooked pork tenderloin on a wooden cutting board.
The thermometer should go into the thickest center, not the thin end; pull the pork at 145°F / 63°C so the slices stay tender after resting.

For food safety, FoodSafety.gov lists pork steaks, roasts, and chops at 145°F / 63°C with a 3-minute rest.

The National Pork Board pork cooking temperature guide gives the same practical guidance: 145°F, a short rest, and a digital thermometer.

What Pink Pork Means

That is why a slight blush of pink can be normal. Pink does not automatically mean raw; temperature tells you more than color.

For beginners, keep the target simple: cook to 145°F / 63°C, then rest for 5 minutes. Experienced cooks may start watching closely around 140–143°F because carryover can raise the final temperature during rest, but the clearest serving target for this recipe is still 145°F / 63°C.

Once you trust the thermometer, pork tenderloin stops being stressful. Instead of guessing by color or cutting into it five times, cook to the number, let it rest, and slice when the juices have settled.

Doneness guide

  • 140–143°F / 60–62°C: Watch closely here only if you understand carryover cooking and will rest the pork immediately.
  • 145°F / 63°C: Clearest finished target for most home cooks.
  • 150°F / 66°C: Still usable, but getting firmer.
  • 160°F / 71°C and above: Much drier, especially in lean tenderloin.

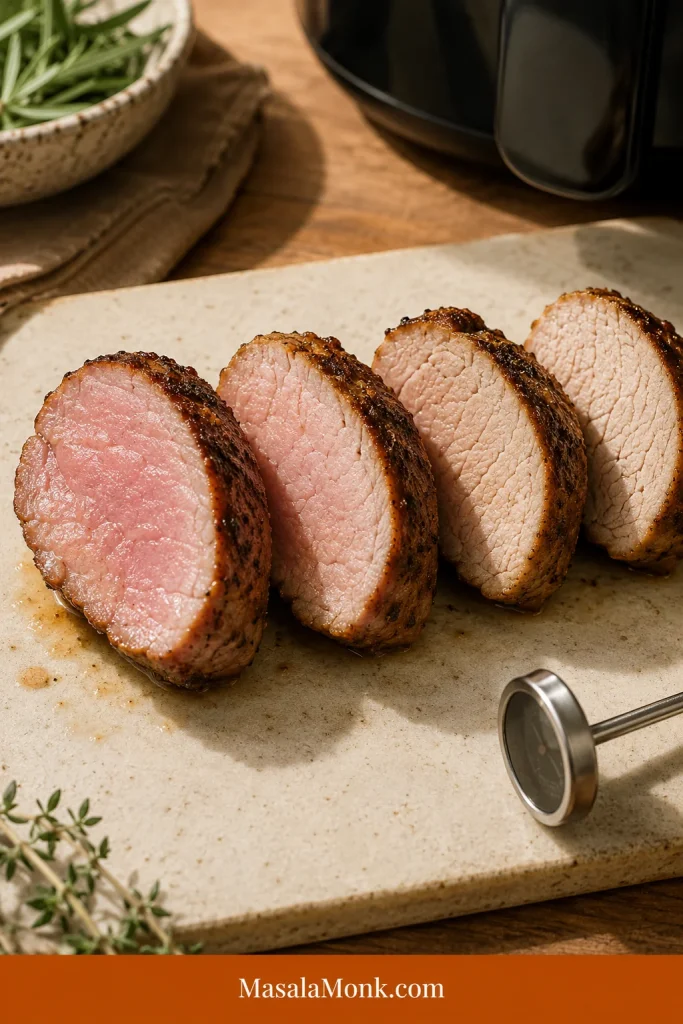
This visual pairs with the doneness guide: as pork cooks longer, the slices turn paler, firmer, and less glossy.

Four pork tenderloin slices arranged from pink and moist to pale and firmer, with a meat thermometer nearby.
As pork cooks longer, the slices turn paler and firmer; a slight blush with the right internal temperature can still mean tender, safe pork.

Nervous about dryness? Troubleshoot itBack to the recipe card

Why It Turns Dry — and How to Prevent It

This is the section to read if you are nervous, using a new air fryer, or already worried you left the pork in a minute too long. Dryness usually comes down to timing, cut, or resting. The good news is that all three are fixable.

ProblemWhat happensFix
Cooking by time onlyThe pork can overcook before you noticeUse the time chart, then do the doneness check
Using pork loin instead of tenderloinThe cut is larger and needs different timingCheck the package and shape before cooking
Very small tenderloinIt cooks faster than the recipe rangeStart checking at 13–14 minutes
No restJuices run out when slicedRest 5 minutes before cutting
Sugary marinade burns earlyThe outside darkens before the middle is doneCheck early or reduce the temperature slightly
Aggressive reheatingLeftovers become dry and firmReheat gently with sauce, broth, or butter

Match Your Result

Still not sure what happened? Match the result:

  • Outside dark, inside not ready: The heat was too aggressive, the rub was sugary, or the pork sat too close to the heating element. Lower the temperature for the remaining minutes.
  • Pale outside, dry inside: The pork likely cooked too long without enough surface oil or browning. Next time, dry it well, coat lightly with oil, and start checking earlier.
  • Only the thin end was dry: The tenderloin was tapered. Tuck the thin tail slightly under or expect the end pieces to cook faster than the center slices.

Dry pork is not ideal, but it is rarely beyond saving. Slice it thicker and serve it with something moist: pan juices, honey mustard, mushroom sauce, gravy, melted butter, broth, apple chutney, or a spoon of barbecue sauce.

If the slices need extra help, a spoon of creamy mushroom sauce turns slightly over-rested or lean pork into a much softer dinner plate.

Adding Potatoes, Carrots, or Green Beans

After the pork is under control, the real trick is keeping the sides from making it wait. You can cook it with potatoes, carrots, green beans, or sweet potatoes in the air fryer, but dense vegetables often take longer than the pork.

The pork is the part you protect. Vegetables are the part you can let keep cooking.

Best No-Dry Method

  1. Cook the tenderloin first.
  2. Rest it for 5–10 minutes.
  3. While it rests, cook or finish the potatoes, carrots, or green beans in the air fryer.
  4. Slice the pork right before serving.

This keeps the pork from waiting around while the potatoes catch up.

If you would rather keep the air fryer focused on the meat, make the potatoes separately. These ranch roasted potatoes give you crisp, salty-herby edges without forcing the tenderloin to wait in the basket.

One-Basket Dinner Example

For a simple one-basket version, use 1 lb / 450g pork tenderloin, 8 oz / 225g baby potatoes, and 1 large carrot. Halve the baby potatoes, slice the carrot thinly, toss the vegetables with oil and seasoning, and air fry them for 8–10 minutes at 390–400°F / 200–205°C. Add the seasoned pork, then cook until it reaches 145°F / 63°C. If the meat finishes before the vegetables are tender, remove and rest it while the vegetables cook a few minutes longer.

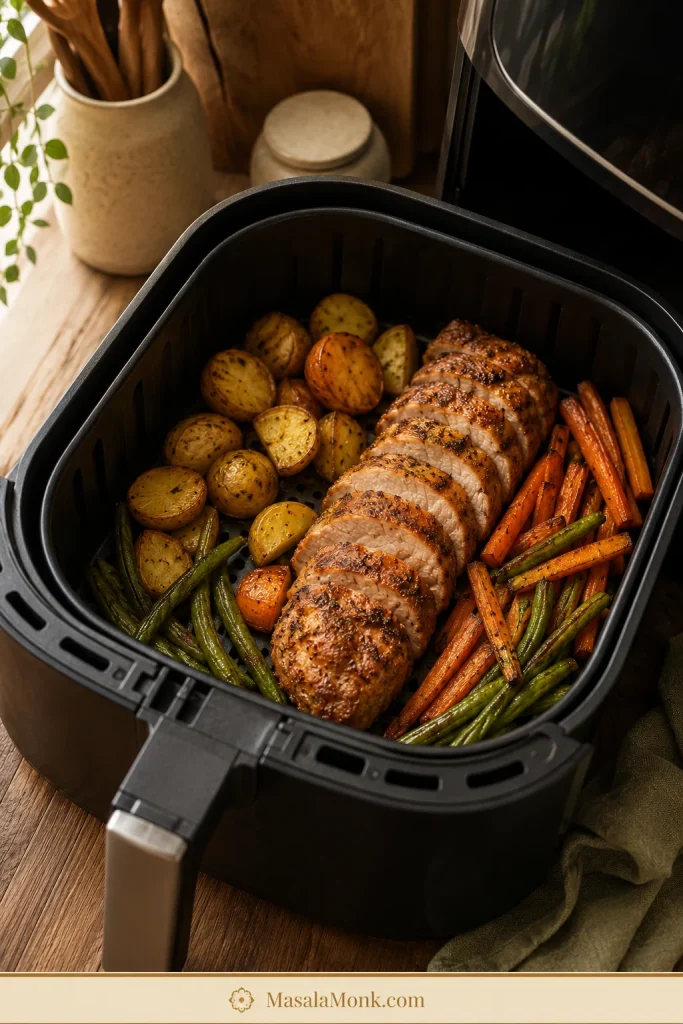
One-basket note: Keep the pork visible and let dense vegetables finish separately if they need more time.

Air fryer basket with sliced pork tenderloin, roasted baby potatoes, carrots, and green beans.
When making a one-basket dinner, keep the pork visible and give potatoes or carrots extra time so the vegetables finish without overcooking the meat.

Vegetable Timing Tips

SideBest way to handle it
Baby potatoesHalve them and give them a head start.
Regular potatoesCut into ½-inch cubes so they cook faster.
CarrotsSlice thinly or cut small; thick carrots need extra time.
Green beansAdd later or cook while pork rests.
Sweet potatoesCut small and expect them to need more time than green vegetables.

For a sweeter vegetable side, roasted carrots with honey, maple, or garlic work especially well with the smoky paprika and mustard in this pork rub.

Can You Cook It From Frozen?

Thawed is the recipe. Frozen is the emergency version.

A thawed tenderloin seasons better, browns better, cooks more evenly, and usually has a better texture. If you are staring at a frozen one and need a fallback, drop the heat and give it more time.

  • Use a lower temperature: about 330°F / 165°C.
  • Start checking around 30 minutes and expect roughly 33–38 minutes for many pieces, depending on thickness.
  • Start from frozen, then season once the surface softens enough for the rub to stick.
  • Flip halfway.
  • Check the middle, not just the browned outside.
  • Rest before slicing.

Do not cook a frozen double pack as one solid block. Separate the tenderloins first if they are frozen together. Do not use this fallback method for stuffed, rolled, or bacon-wrapped frozen tenderloin. Frozen breaded pork tenderloin is also a different product from raw whole tenderloin, so follow the package guidance and confirm doneness.

Smithfield, Hormel, and Pre-Marinated Packs

Pre-marinated packs are where label confusion shows up again. They are convenient, but some are pork tenderloin, some are pork loin filet, and some are wider, sweeter, or saltier than this recipe assumes.

These packs can still make an easy dinner; they just need a quick label check before they go into the basket.

Before cooking a pre-marinated pack, check the shape, salt level, sweetness, and final temperature instead of trusting the label alone.

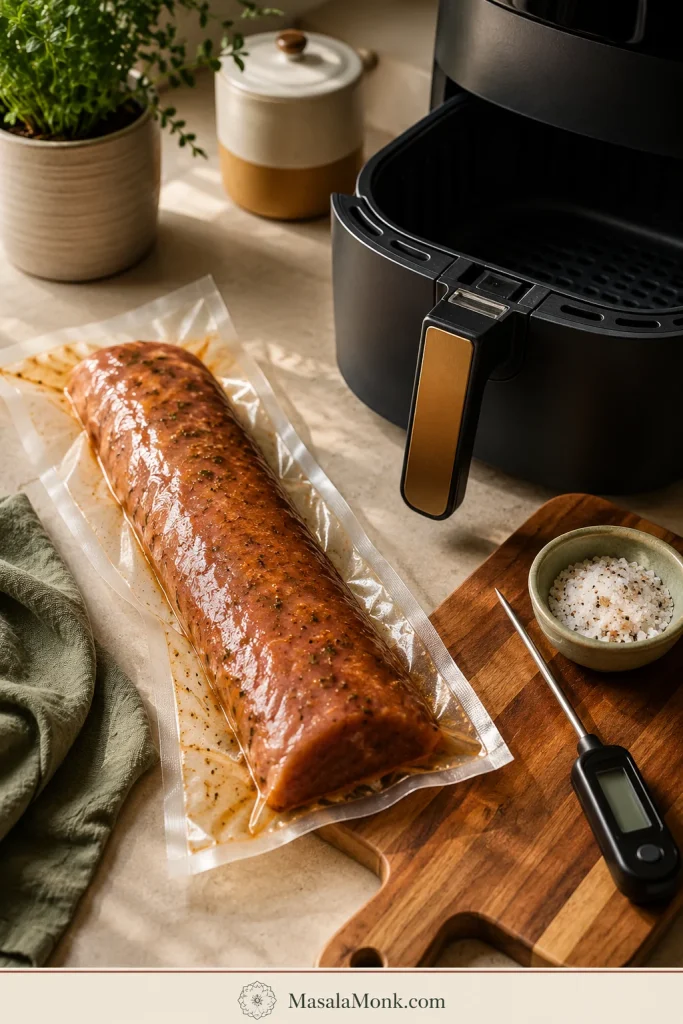
Unbranded pre-marinated pork tenderloin package beside an air fryer basket, thermometer, salt bowl, wooden board, and green towel.
Pre-marinated pork tenderloin can be convenient, but check the shape, salt level, sweetness, and final temperature instead of trusting package timing alone.

Pre-Marinated Package Checklist

  • Check the package name, weight, and shape before cooking.
  • Long, narrow packs around 1–1½ lb / 450–680g usually work with this method.
  • A pork loin filet label deserves a closer look. It may look long in the package but still be wider and denser than pork tenderloin.
  • Wider pork loin filet or roast-style packs need different timing.
  • Pat off excess wet marinade if it is very drippy.
  • Start checking around 15 minutes because sugar-heavy marinades can brown faster.
  • Dark edges early are a sign to check temperature before assuming the pork is done.
  • Use less added salt because many pre-marinated packs are already seasoned.

Package timing is a starting point, not a promise. Use the package for flavor guidance and your thermometer for doneness.

Air Fryer Pork Tenderloin Medallions

If you sliced the pork already, switch timing systems. Medallions cook much faster than a whole tenderloin, which makes them useful for rice bowls, salads, wraps, or a faster dinner plate.

  1. Slice the tenderloin into even medallions, about 1–1½ inches thick.
  2. Season both sides.
  3. Air fry at 350°F / 175°C for about 9–12 minutes, flipping once.
  4. Start checking around 7–8 minutes if the pieces are closer to 1 inch thick.
  5. Check the largest medallion for 145°F / 63°C, then rest briefly before serving.

Even thickness matters. Tiny end pieces cook faster than center-cut medallions, so pull them early if needed.

Flavor Variations

After you know when to stop cooking, the flavor can go almost anywhere. The timing usually stays close unless the tenderloin is thicker, smaller, wrapped, frozen, or heavily coated.

  • Honey mustard: Add extra Dijon and honey, then finish sliced pork with a small spoon of sauce.
  • BBQ rub: Use smoked paprika, brown sugar, garlic powder, onion powder, salt, pepper, and chili powder.
  • Garlic herb: Use garlic powder, thyme, rosemary, parsley, black pepper, and olive oil.
  • Cajun: Use Cajun seasoning, smoked paprika, garlic, and oil. Watch the salt if your blend is salty.
  • Soy-Dijon marinade: Use soy sauce, Dijon mustard, honey, garlic powder, and a little vinegar or lemon juice.
  • Spicy chili-garlic: Add chili flakes, cayenne, or chili paste to the oil and mustard mixture.
  • Bacon-wrapped: Cook more carefully because bacon needs time to render. Start checking early so the pork does not overcook while the bacon browns.

Choose honey mustard for a softer family-style dinner, Cajun for heat, garlic herb for mashed potatoes, and BBQ rub if you want leftovers for sandwiches.

After slicing, this honey mustard dressing can double as a bright pork drizzle, especially with the honey mustard or garlic herb versions.

With BBQ-style pork tenderloin, creamy coleslaw is a natural fresh side because it brings crunch, tang, and a little sweetness.

What to Serve with It

This pork tenderloin is flexible enough for a quick weeknight dinner, a meal-prep bowl, or a slightly nicer weekend plate. A few slices over mashed potatoes feels cozy; the same pork over rice with sauce becomes lunch tomorrow.

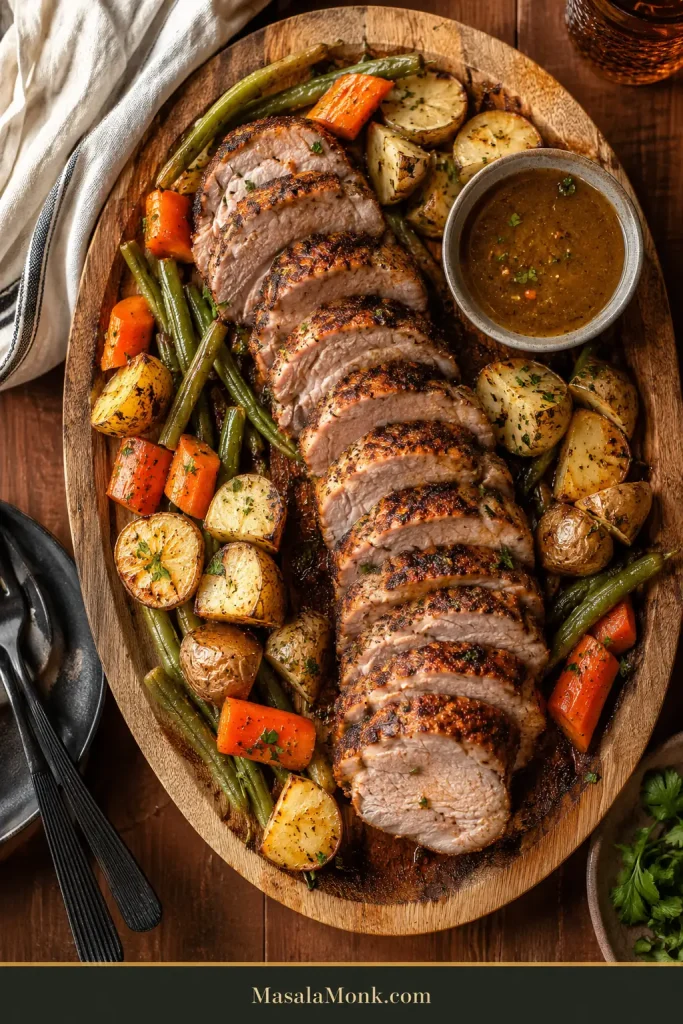
Once the pork is sliced, a platter with vegetables, potatoes, sauce, and board juices makes serving easier.

Family-style wooden platter with sliced pork tenderloin, roasted potatoes, carrots, green beans, herbs, and a bowl of sauce.
For serving, arrange sliced pork tenderloin with vegetables, potatoes, and sauce so each portion gets crust, tender center, and a little pan-style flavor.

Comfort sides

A classic comfort plate starts with sliced pork over creamy mashed potatoes, so the juices, mustard sauce, or mushroom gravy have somewhere to land.

Garlic mashed potatoes are the richer version, especially if you are skipping a sauce. For a cozy family-style dinner, creamy macaroni and cheese also works well with something green or crisp on the side.

Fresh sides

Something crisp beside the warm pork helps balance the plate. A wedge salad gives you cold crunch, creamy dressing, and steakhouse-style balance. Green beans, simple salad, apple sauce, apple chutney, and roasted carrots also fit the plate.

Bowls, wraps, and easy leftovers

Sliced pork works well over rice, in wraps, on salads, or tucked into quick bowls with vegetables and sauce. If you are turning leftovers into rice bowls, this how to cook rice guide helps with stovetop, rice cooker, and Instant Pot timing.

Make-Ahead Tips

You can season the pork up to 12 hours ahead and refrigerate it covered. Let it sit at room temperature for 15–20 minutes while the air fryer preheats, then cook as directed.

If the rub contains a lot of salt or soy sauce, avoid over-marinating a very small tenderloin. The smaller the piece, the faster salty marinades can make the texture feel firm.

Storage and Reheating

Leftover pork is best when you treat it gently. The meat is lean, so reheating should warm it through without blasting away the moisture you protected during cooking.

NeedBest method
Fridge storageStore in an airtight container for 3–4 days.
Freezer storageFreeze sliced or portioned pork, wrapped well, for easier reheating.
Air fryer reheatingReheat slices at 350°F / 175°C for 3–4 minutes.
Microwave reheatingAdd a splash of broth, water, butter, or sauce and heat gently.
What to avoidDo not blast a whole cooked tenderloin in the air fryer again. It can dry out before the center warms.

Leftover slices are best used gently: tucked into rice bowls with sauce, folded into wraps, chopped into breakfast hash, or added cold to salads instead of aggressively reheated.

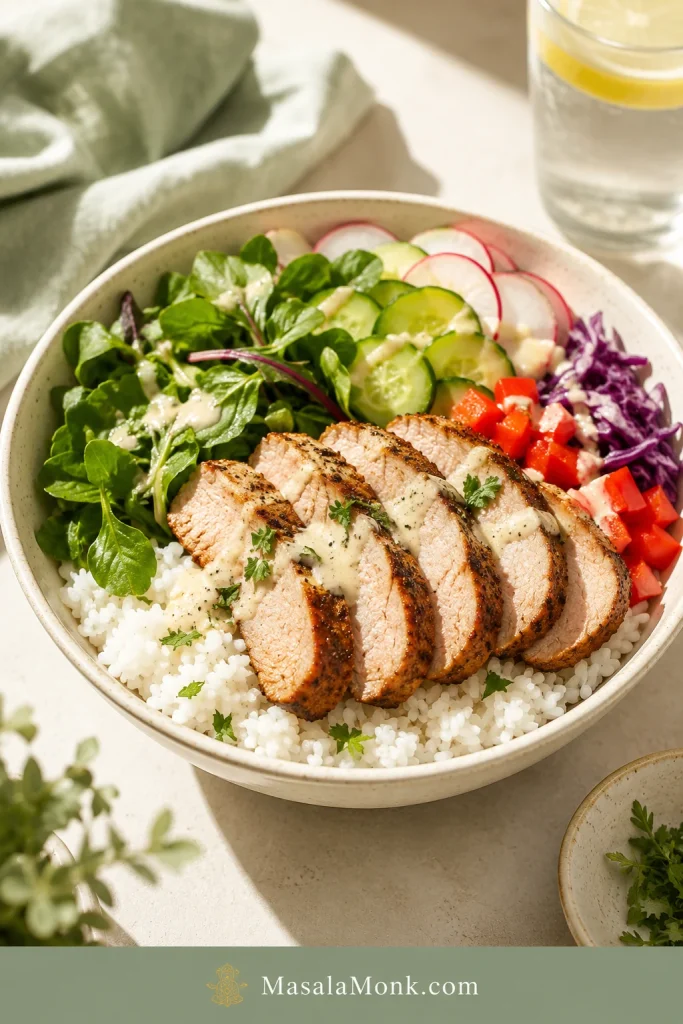
Extra slices can become an easy lunch with rice, crisp vegetables, greens, and a sauce that brings moisture back.

Rice bowl with sliced pork tenderloin, white rice, leafy greens, cucumber, radish, red pepper, purple cabbage, herbs, and sauce.
Finally, leftover air fryer pork tenderloin works beautifully in rice bowls because the sauce, greens, and crisp vegetables bring moisture back to the slices.

Go to FAQBack to the recipe cardBack to top

FAQ

How long do you cook pork tenderloin in the air fryer?

Most 1–1½ lb / 450–680g pork tenderloins take 18–24 minutes at 400°F / 200°C. Slim 1 lb pieces may finish closer to 14–18 minutes, while thick pieces may need 24–28 minutes. Use the chart, then confirm 145°F / 63°C in the center.

What temperature should I air fry pork tenderloin?

Set the air fryer to 400°F / 200°C, or 205°C if your model allows that setting. This gives good browning without a long cook time. If your air fryer runs very hot, reduce slightly to 375–390°F / 190–200°C and cook to temperature.

How do I keep it from drying out?

Use the right cut, check early, and rest before slicing. The mistake is usually not the seasoning — it is leaving lean pork in the air fryer a few minutes too long.

What if I do not have a meat thermometer?

A thermometer is strongly recommended because pork tenderloin is lean and cooks quickly. Without one, use the timing chart, slice into the thickest part, and check that the pork is hot all the way through with no raw-looking center. This is less reliable than a temperature check, so a small instant-read thermometer is worth it.

Is pork tenderloin the same as pork loin?

No. Pork tenderloin is long, narrow, and usually 1–1½ lb. Loin is wider, larger, and more roast-like. They need different cooking times, so checking the package before cooking matters.

Is pork fillet the same as pork tenderloin?

Often, yes. In many places, pork tenderloin is sold as pork fillet. If your pork fillet is long, narrow, and around 450–680g / 1–1½ lb, this air fryer method applies.

Can pork tenderloin be pink inside?

Yes. A slight blush can be normal when the pork is cooked to temperature. Do not keep cooking just to erase every hint of pink, or the tenderloin can turn dry.

Do I need to flip it?

Yes. Flipping helps the pork brown more evenly, especially in basket-style air fryers where the top often gets more direct heat than the bottom. Turn it after the first 10–12 minutes, then finish cooking.

Can I cook frozen pork tenderloin in the air fryer?

You can, but thawed is better for browning and texture. For frozen pork tenderloin, use about 330°F / 165°C, begin testing around 30 minutes, season once the surface softens, flip halfway, and confirm doneness before serving.

Can I cook pork tenderloin and potatoes together?

Yes, but potatoes need a head start because they usually take longer. Cook the pork first and finish the vegetables while it rests, or start small-cut potatoes 8–10 minutes before adding the pork.

How do I cook pre-marinated pork tenderloin?

Check that the package is actually pork tenderloin and not pork loin filet. Pat off excess wet marinade if needed, begin testing around 15 minutes, and cook until the pork reaches 145°F / 63°C. If the outside darkens early, check the temperature before assuming the middle is done.

Can I season pork tenderloin ahead of time?

Yes. You can season it up to 12 hours ahead and refrigerate it covered. Let it sit out for 15–20 minutes while the air fryer preheats so it is not going into the basket ice-cold.

How do I reheat leftovers?

Reheat slices at 350°F / 175°C for 3–4 minutes in the air fryer, or microwave gently with a splash of broth, water, butter, or sauce. Sliced pork reheats better than a whole tenderloin because it warms faster and needs less time.

Can I make pork tenderloin medallions in the air fryer?

Yes. Slice the tenderloin into even 1–1½ inch medallions, season both sides, and air fry at 350°F / 175°C for about 9–12 minutes, flipping once. Start checking early if the pieces are closer to 1 inch thick.

Final Tip

Once you know the cut, the temperature, and when to stop cooking, air fryer pork tenderloin becomes a very easy win: browned outside, juicy inside, and flexible enough for potatoes, salads, bowls, or leftovers the next day. The first cook teaches you your air fryer; after that, this becomes one of those dinners you can repeat without hovering over the basket.

If your air fryer runs especially hot or slow, drop your timing in the comments — model, weight, and total cook time are especially helpful. Someone else with the same style of air fryer may be comparing notes before dinner.

Back to recipe cardBack to cooking chartBack to top

Posted on Leave a comment

Ranch Roasted Potatoes Recipe

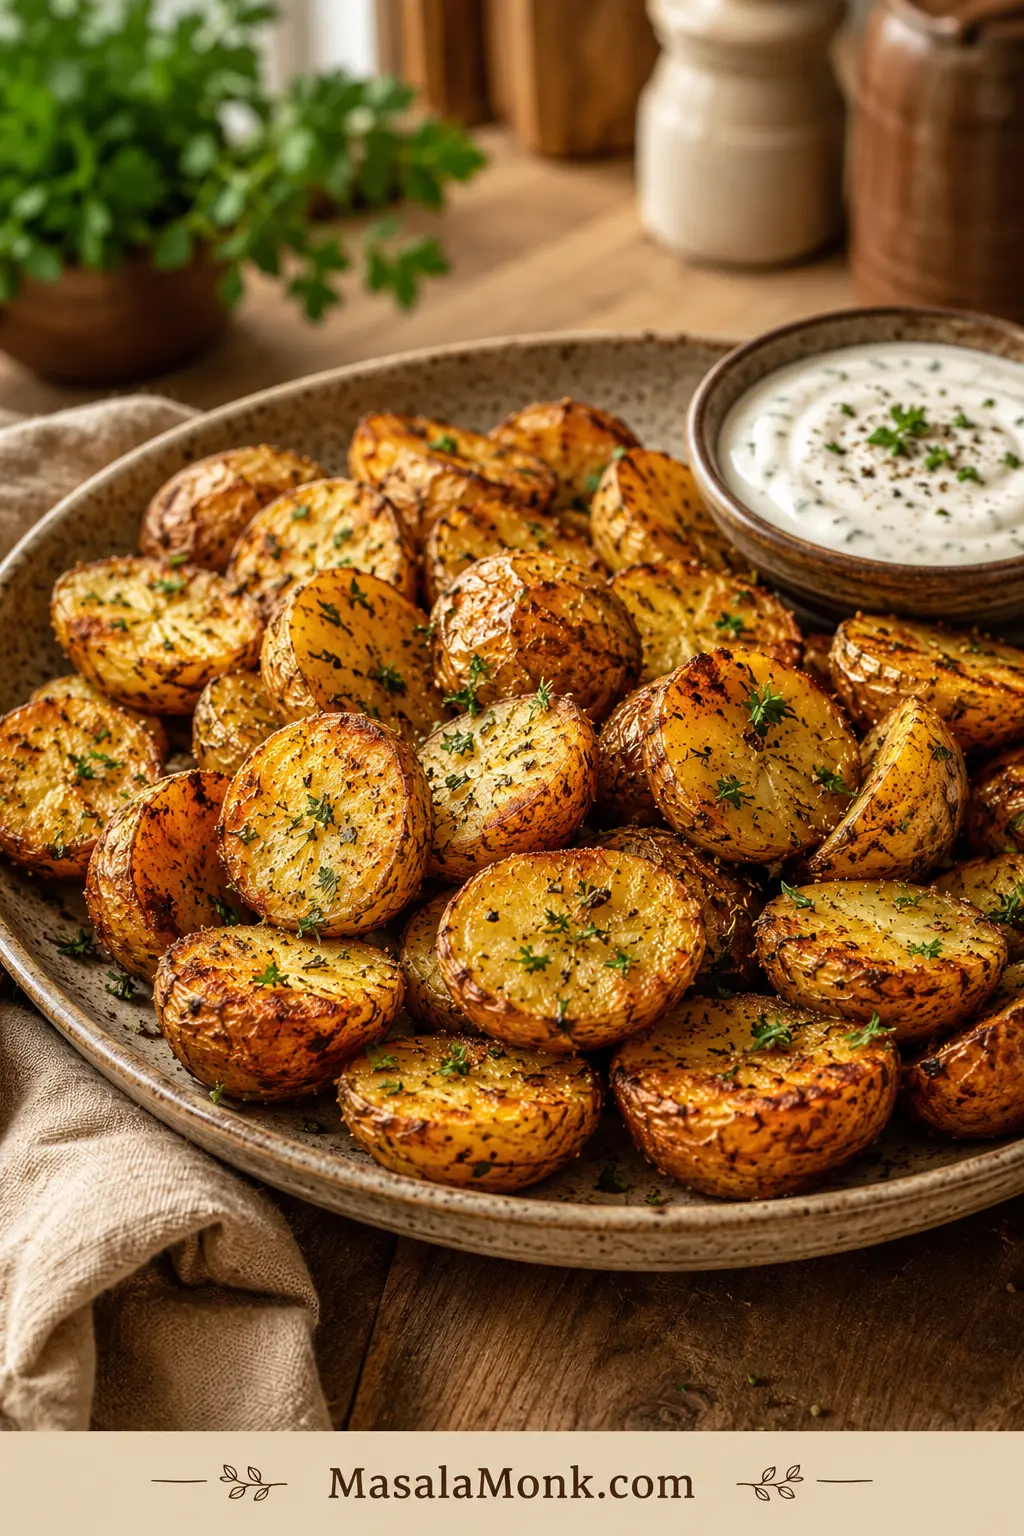
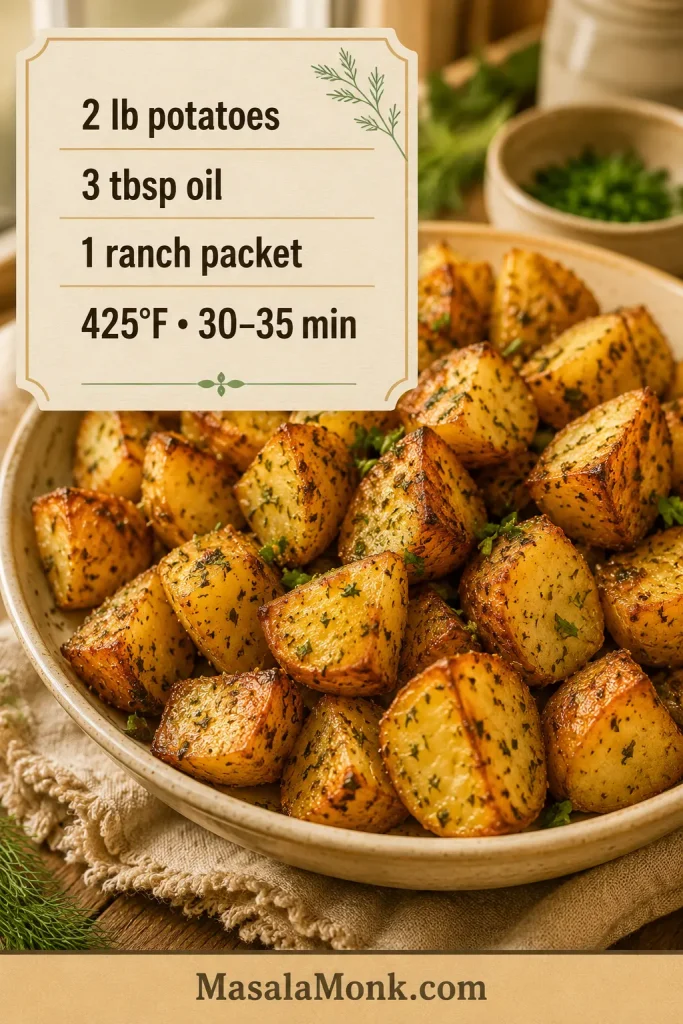
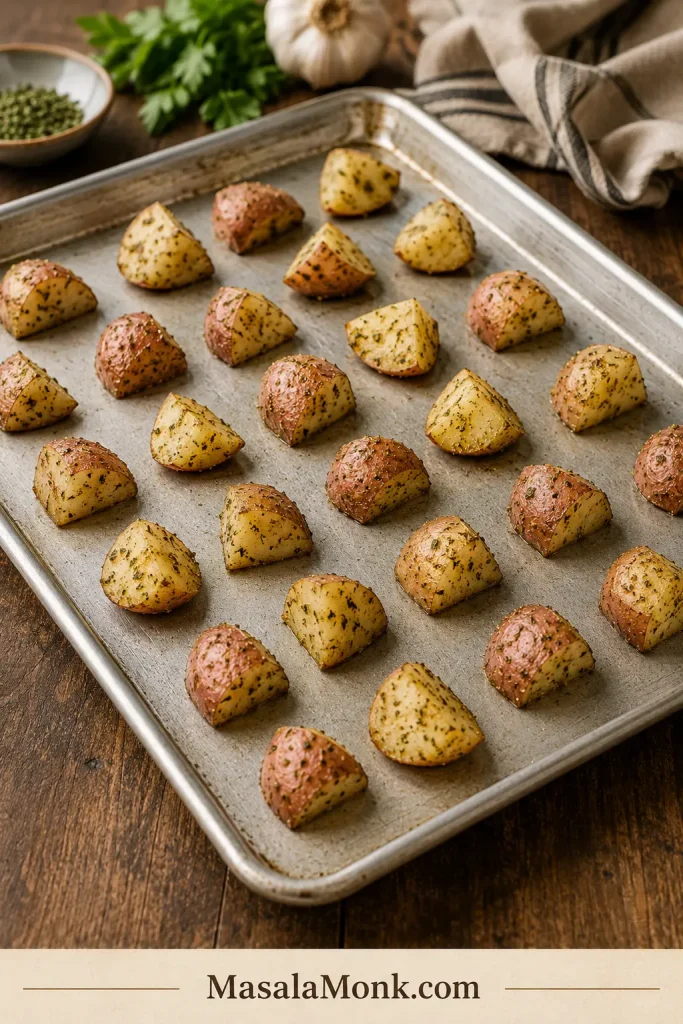
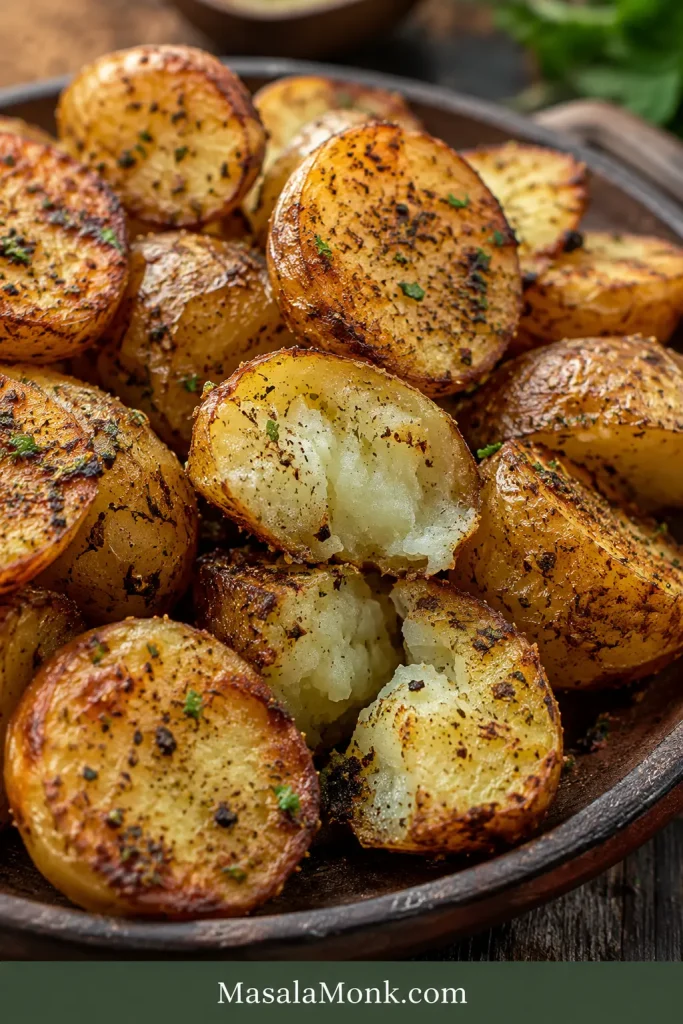
Crispy ranch roasted potatoes on a rustic platter with browned cut sides, chopped herbs, black pepper, and a small bowl of ranch dip.

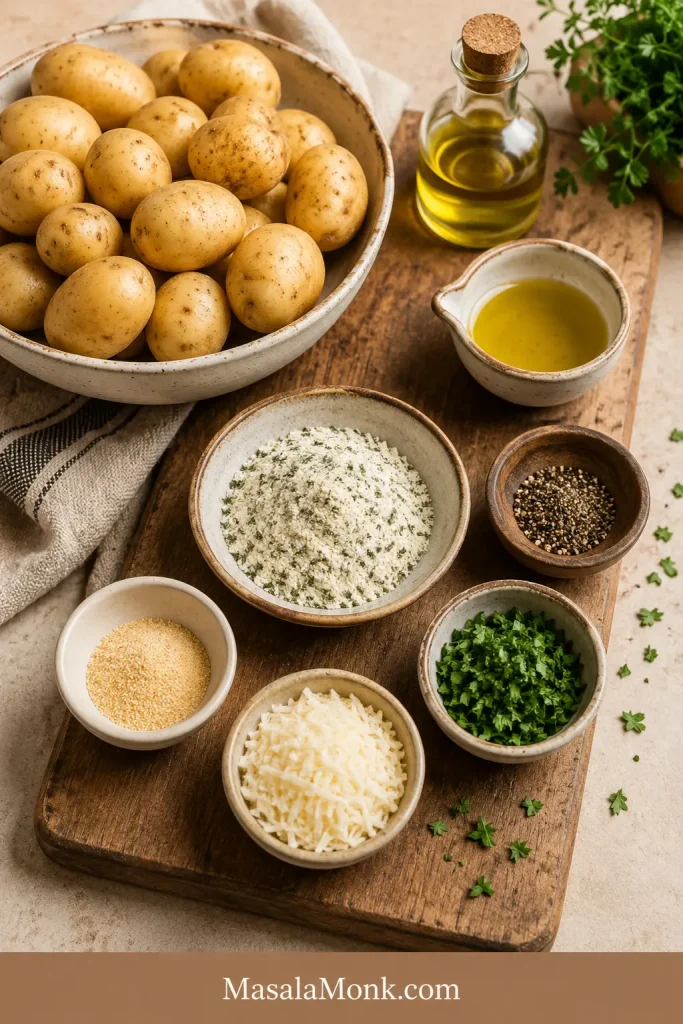
Ranch roasted potatoes are the easy sheet-pan side you make when dinner needs something crispy, salty, herby, and almost no fuss. Cut the potatoes, toss them with oil and dry ranch seasoning, spread them out, and let a hot oven do the work.

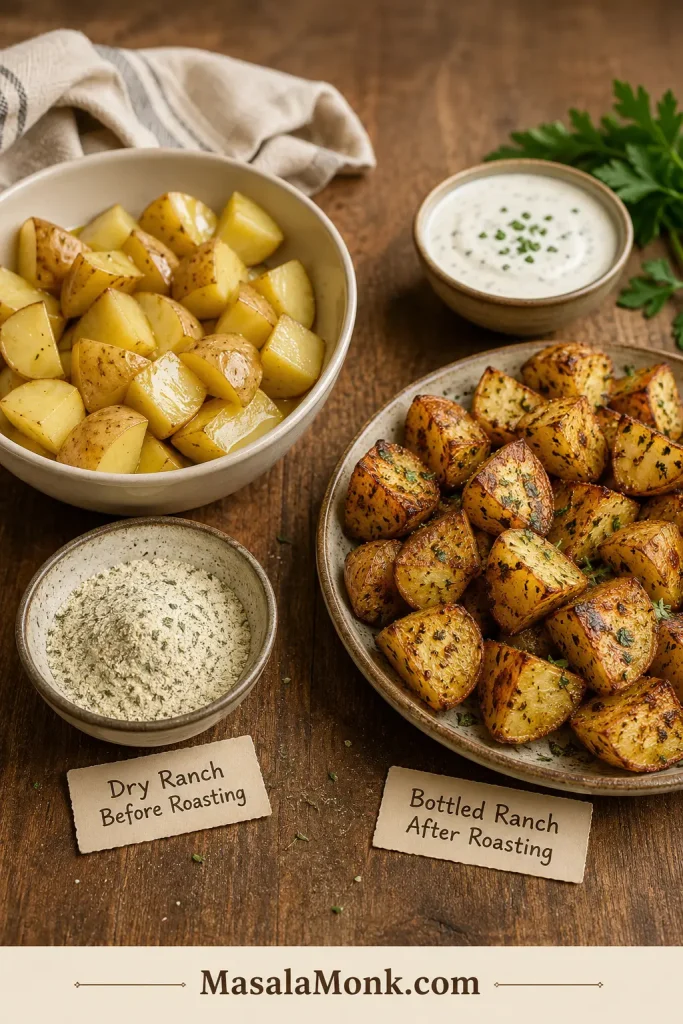
The key is using dry ranch seasoning, not bottled ranch dressing, before roasting. Dry mix gives you crisp edges and bold flavor; bottled ranch is better as a dip or drizzle after the potatoes are browned.

Remember the simple rhythm: dry potatoes, oil first, ranch second, plenty of space. That is what turns a basic ranch packet into golden potatoes people start stealing from the tray before dinner is even served.

Quick Answer: How to Make Ranch Roasted Potatoes

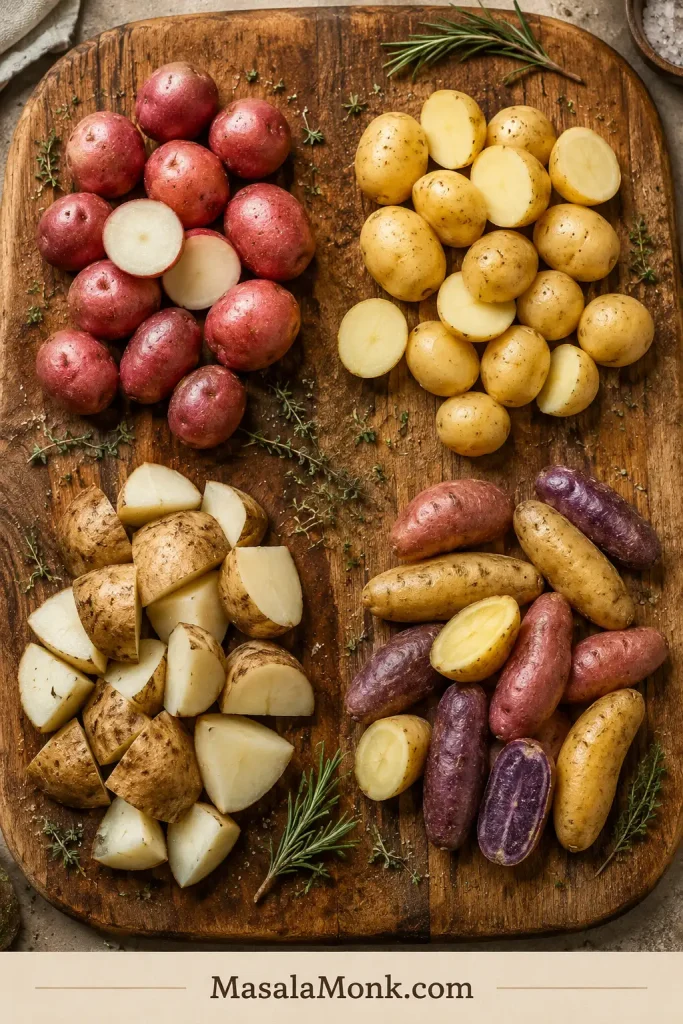
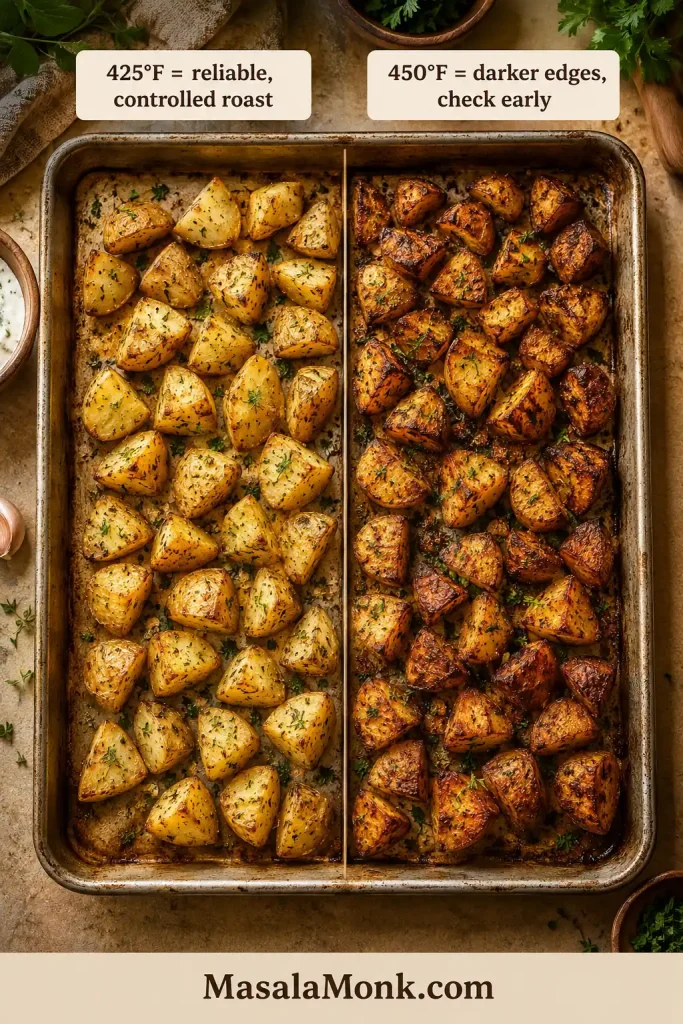
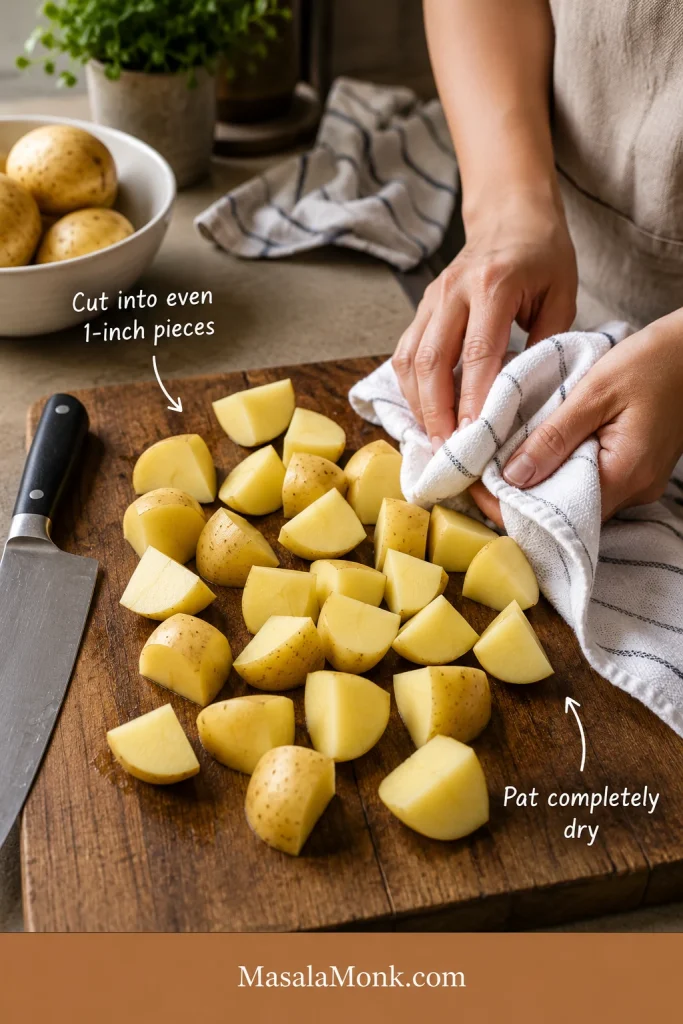
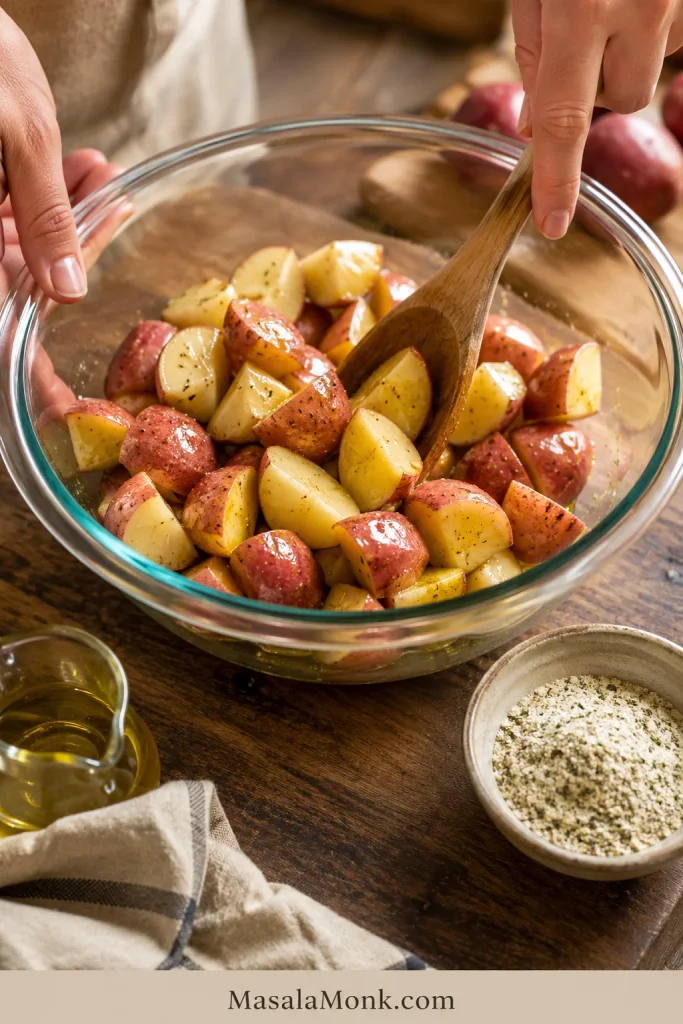
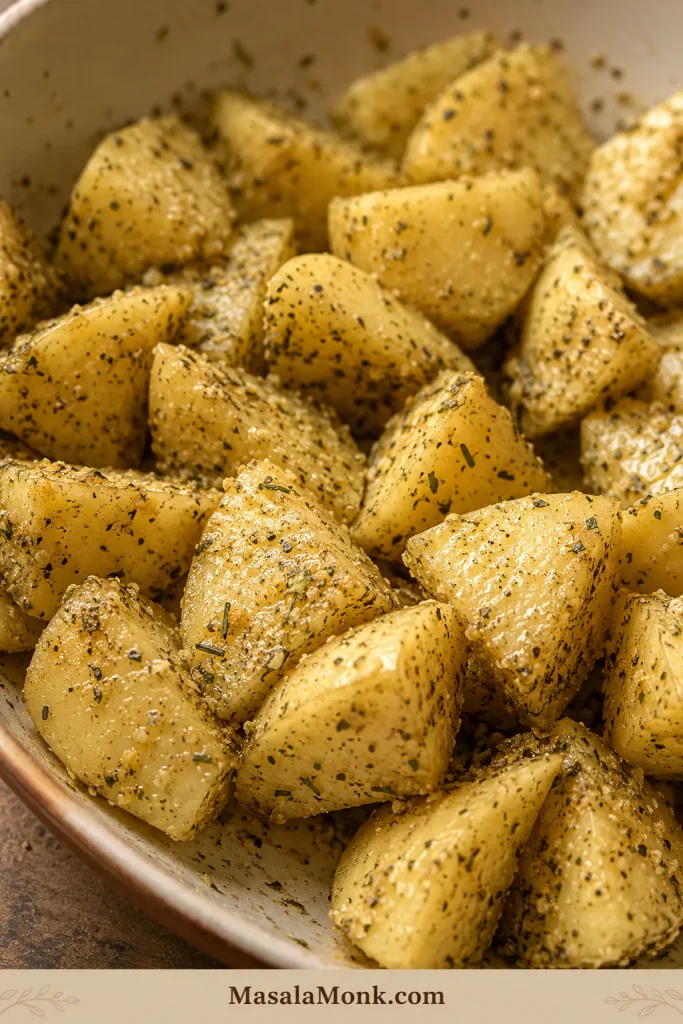
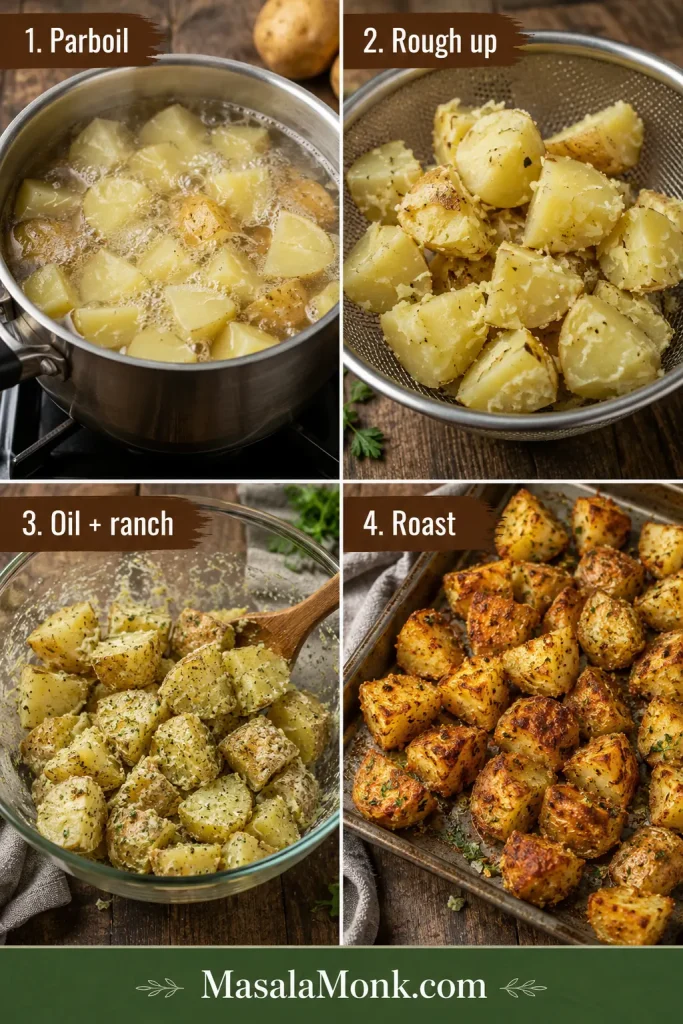
For crispy ranch roasted potatoes, cut 2 lb / 900 g potatoes into 1-inch / 2.5 cm pieces. Toss with 3 tablespoons / 45 ml oil, then add 1 standard 1 oz / 28 g packet dry ranch seasoning, or about 3 tablespoons dry ranch seasoning from a jar. Spread on a large rimmed sheet pan and roast at 425°F / 218°C for 30 to 35 minutes, flipping once halfway through.

For darker, faster browning, roast at 450°F / 232°C and start checking around 25 minutes. The potatoes are done when the flat sides are golden, the edges look roasted, and a fork slides through the centers easily.

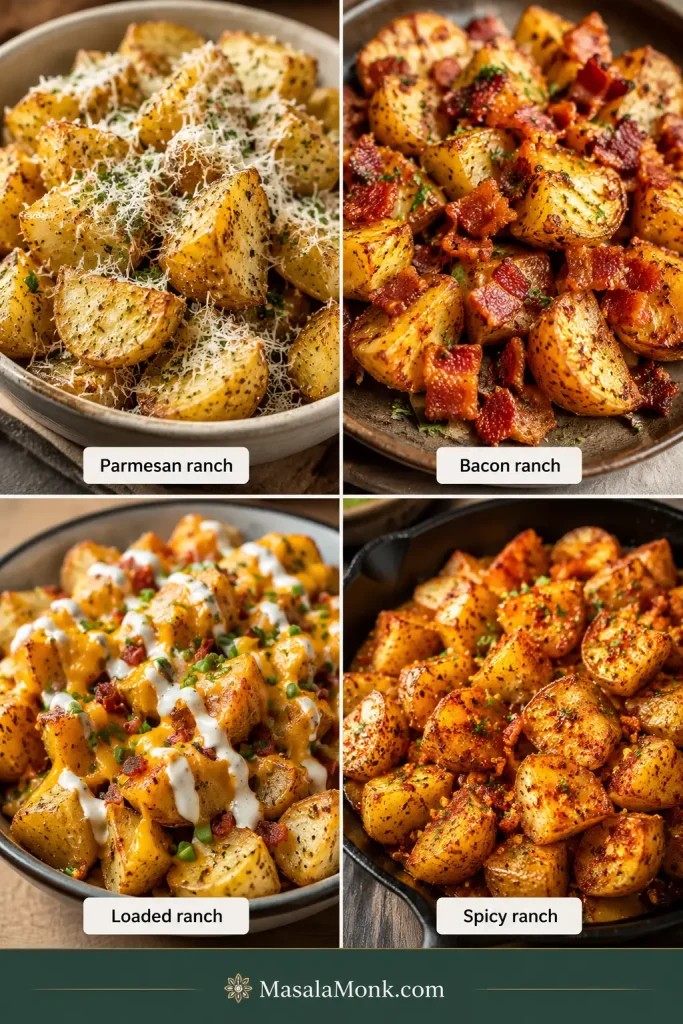
The simple ranch potato ratio

This visual keeps the ranch potato ratio easy to check before you move into the full recipe card.

Recipe ratio card for ranch roasted potatoes showing 2 lb potatoes, 3 tbsp oil, 1 ranch packet, and 425°F for 30 to 35 minutes.
Start with the base ratio: 2 lb potatoes, 3 tablespoons oil, 1 ranch packet, and 425°F for a reliable sheet-pan batch.

Ranch Roasted Potatoes Recipe Card

Crispy Ranch Roasted Potatoes

Description: Crispy ranch roasted potatoes made with dry ranch seasoning, oil, and a hot sheet pan. The edges turn golden and salty-herby while the centers stay soft and creamy.

What to look for: The potatoes should be browned on the flat sides, tender when pierced with a fork, and seasoned all the way around — not dusty in one bite and plain in the next.

Prep Time10 minutes
Cook Time30 to 35 minutes
Total Time40 to 45 minutes
Servings4 to 6
MethodOven roasted
Best PanLarge rimmed sheet pan

Ingredients

  • 2 lb / 900 g potatoes, such as baby red potatoes, baby Yukon gold potatoes, Yukon gold potatoes, russets, or creamer potatoes
  • 3 tablespoons / 45 ml olive oil or neutral oil
  • 1 standard 1 oz / 28 g packet dry ranch seasoning, or about 3 tablespoons dry ranch seasoning from a jar
  • ½ teaspoon black pepper
  • ½ teaspoon garlic powder, optional
  • ¼ cup / 20 to 25 g finely grated parmesan, optional
  • 1 to 2 tablespoons chopped parsley, chives, or dill, optional, for finishing

Instructions

  1. Heat the oven to 425°F / 218°C. For faster, darker browning, use 450°F / 232°C and start checking the potatoes earlier.
  2. Wash the potatoes and dry them well. Cut them into 1-inch / 2.5 cm pieces. Halve very small baby potatoes and quarter larger ones.
  3. Add the potatoes to a large bowl. Pour in the oil and toss until every piece looks lightly glossy.
  4. Add the dry ranch seasoning, black pepper, and garlic powder if using. Toss again until the seasoning is evenly distributed.
  5. Spread the potatoes on a large rimmed sheet pan in one layer. Place as many cut sides down as possible for better browning.
  6. Roast for 30 to 35 minutes, flipping once around the 18 to 20 minute mark, until the potatoes are browned outside and tender inside.
  7. Finish with parmesan, herbs, cooked bacon, shredded cheese, or a small drizzle of ranch dressing after roasting. Serve hot.

Recipe note: Use up to 4 tablespoons jarred ranch seasoning only if your mix is mild or salt-free. If your ranch mix tastes salty on its own, start with less and add more after roasting if needed.

Tested Notes for Best Results

  • Best potatoes: baby red and baby Yukon gold potatoes are the easiest because they hold their shape and brown well.
  • Russets work: they give fluffy centers and rougher edges, but toss them gently because they break more easily.
  • Seasoning order: dry the potatoes, coat them with oil, then add the ranch seasoning.
  • Pan choice: a bare metal sheet pan browns better; parchment makes cleanup easier.
  • Texture tip: spread the potatoes in one layer and place some cut sides down.
  • Browning rule: pan space matters more than the exact ranch seasoning brand.

Choose your version: Want the easiest tray? Use the recipe card. Want the crispiest tray? Use the parboil option. Want the fastest small batch? Use the air fryer method.

Once that basic rhythm is clear, the rest is just choosing the right potato, the right heat, and the right finish. Here is how to make the tray crisp, not soggy.

Why This Works

Ranch potatoes are simple, but they are not random. The crisp version depends on three things: dry seasoning, steady heat, and enough space on the pan. Dry ranch seasoning gives concentrated flavor without adding the moisture that comes from bottled dressing. Oil helps that seasoning cling and gives the cut sides enough surface fat to brown.

One-inch pieces are small enough to cook through before the seasoning gets too dark, but large enough to stay creamy inside. A large sheet pan lets them roast instead of steam. When a few cut sides sit directly against the pan, they pick up the golden crust that makes roasted potatoes feel like more than boiled potatoes with seasoning.

The best pieces should have a toasted flat side, a soft middle, and that salty ranch flavor baked into the surface. Those are usually the bites people pick at first.

Ingredients and Ranch Seasoning Amount

What you need before roasting

Keep the base simple, then use optional add-ins only when you want a sharper, cheesier, or fresher finish.

Ingredients for ranch roasted potatoes on a wooden board, including potatoes, dry ranch seasoning, oil, black pepper, garlic powder, parmesan, and chopped herbs.
Potatoes, oil, and dry ranch seasoning build the base flavor; then pepper, garlic powder, parmesan, and herbs can add a sharper, fresher finish.

Potatoes

Most potatoes will work here, but they do not all give you the same bite. Baby red potatoes stay creamy and neat. Yukon gold potatoes taste buttery and tender. Russets give you fluffier centers and rougher browned edges, but they can break if you toss them too hard.

If you are unsure, choose baby red potatoes or baby Yukon gold potatoes. They are the least fussy and look good even when cut quickly. If you often choose between Yukon golds and russets, the same creamy-versus-fluffy split matters in mashed potatoes too.

Oil

No fancy oil needed. Olive oil, avocado oil, canola oil, vegetable oil, or another neutral roasting oil will work. For 2 pounds of potatoes, 3 tablespoons should make the pieces lightly glossy, not greasy.

Dry Ranch Seasoning

Dry ranch seasoning is the main flavor. It usually brings herbs, garlic, onion, salt, and tangy dairy-style flavor in one packet. A standard ranch packet is usually about 1 oz / 28 g, which is a good amount for 2 lb / 900 g potatoes.

If your seasoning comes from a jar, start with about 3 tablespoons. Go up to 4 tablespoons only if the mix is mild or salt-free. If you also use ranch packets for snacks, the same dry-mix logic shows up in these ranch oyster crackers: fat helps the seasoning cling, while too much moisture softens the crunch.

Ranch Seasoning Ratio

Use this ratio when you are making a smaller tray, doubling for a crowd, or trying to avoid a too-salty batch.

PotatoesOilDry Ranch SeasoningBest Pan Setup
1 lb / 450 g1½ tbsp / 22 ml½ packet or about 1½ tbspSmall to medium sheet pan
2 lb / 900 g3 tbsp / 45 ml1 packet / 28 g or about 3 tbsp1 large sheet pan
4 lb / 1.8 kg6 tbsp / 90 ml1½ to 2 packets, depending on saltiness2 large sheet pans

If you are adding bacon, cheese, parmesan, or a ranch drizzle, start on the lighter side with the seasoning. Those toppings bring salt too.

Using a Hidden Valley-style packet? You do not need a separate method. Use the same base recipe: 2 lb / 900 g potatoes, 3 tablespoons / 45 ml oil, and 1 standard 1 oz / 28 g dry ranch packet. Roast at 425°F / 218°C for control or 450°F / 232°C for deeper browning. If the packet tastes salty or you are adding bacon or cheese, use a little less and finish with more only if needed.

Pepper, Garlic Powder, Parmesan, and Herbs

Black pepper gives the potatoes a sharper finish. Garlic powder is optional because ranch seasoning already contains garlic, but a small amount makes the flavor fuller. Parmesan, chives, parsley, or dill are best as finishing touches. They make the tray taste fresher without changing the base recipe.

Dry Ranch Seasoning vs Bottled Ranch Dressing

This is the ranch-potato choice that changes texture most. Dry ranch seasoning and bottled ranch dressing do not behave the same way in the oven.

Dry mix before roasting, bottled ranch after

Keep the powdered mix in the oven step and the creamy dressing at the table.

Dry ranch seasoning beside oiled potato chunks with finished roasted potatoes and a bowl of ranch dressing for dipping.
Use dry ranch mix before roasting for crisp edges; then save bottled ranch for dipping or drizzling once the potatoes are browned.
Ranch ProductBest UseWhat Happens
Dry ranch seasoning packetCrispy roasted potatoesStrong flavor, less moisture, better browning
Dry ranch dressing mix from a jarCrispy roasted potatoesWorks like a packet when measured carefully
Homemade ranch seasoningMore control over salt and ingredientsGood flavor, but you may need to adjust salt
Bottled ranch dressingDipping, drizzling, or creamy potato bakesAdds moisture and softens the roasted finish
Bottled ranch before roastingSofter, saucier baked potatoesLess browning, more casserole-style texture

Bottled ranch makes more sense in a softer, saucier potato bake. In this sheet-pan version, let the dry mix bake into the edges, then bring in bottled ranch later as a dip or drizzle.

Ready to cook? Jump back to the recipe card. Want crispier results? See the crispy potato tips.

Best Potatoes to Use

Choose based on what you already have and the kind of bite you want.

Best potatoes for ranch roasting

Red and Yukon-style potatoes are the most forgiving, while russets give a fluffier bite when handled gently.

Red potatoes, yellow baby potatoes, russet chunks, and fingerling potatoes arranged in separate groups on a wooden board.
Baby red and baby Yukon gold potatoes are the easiest choices because they roast evenly and hold their shape; meanwhile, russets give fluffier centers but break more easily.
PotatoBest ForResultPeel or Not?
Baby red potatoesBest no-peel optionClassic ranch potato texture, creamy centers, thin skinsNo need to peel
Baby Yukon gold potatoesBest overallButtery, tender, reliable browningNo need to peel
Yukon gold potatoesBest creamy biteSoft centers and good flavorPeeling optional
Russet potatoesBest fluffy centerFluffy inside, browned edges, more fragilePeeling optional
Fingerling potatoesBest presentationPretty side dish, good roasted flavorNo need to peel

Red potatoes are especially easy here because the skins are thin and the pieces hold together well. Scrub, dry, cut, season, and roast. No peeling needed.

425°F vs 450°F

For the easiest tray, 425°F / 218°C is the safest default. The potatoes have time to soften before the ranch seasoning gets too dark. Use 450°F / 232°C when you want deeper color and are willing to check the pan a little earlier.

Choose the oven temperature

The hotter tray browns faster, but the lower temperature gives you more control if your oven runs strong.

Oven temperature comparison showing ranch roasted potatoes at 425°F with lighter golden edges and 450°F with darker browned edges.
The 425°F tray gives you more control, while 450°F creates deeper color if you are willing to check early.
Oven TemperatureBest ForWatch Out For
425°F / 218°CBest default and most reliable roastSlightly slower browning, but better control
450°F / 232°CDarker edges and faster browningRanch seasoning can darken faster, so check early
400°F / 200°CCheesy or saucier baked potato versionsLess crisp for plain roasted potatoes

When your oven runs hot, stay with 425°F the first time. Once you know your oven is steady and you like darker edges, 450°F gives a more roasted finish.

How to Roast Them in the Oven

1. Heat the oven

Heat the oven to 425°F / 218°C. For a faster, darker tray, use 450°F / 232°C, but check earlier so the seasoning does not over-darken.

2. Cut and dry the potatoes

Cut the potatoes into 1-inch / 2.5 cm pieces. Small baby potatoes can be halved, larger baby potatoes can be quartered, and bigger potatoes should be cut into even chunks. Pat the pieces dry before seasoning so the oil and ranch mix cling properly.

Visual cue: cut and dry before seasoning

Cut size and surface moisture decide whether this step browns or steams.

Hands drying cut potato pieces with a towel on a wooden cutting board beside a chef’s knife and whole potatoes.
Even 1-inch pieces give the oven a fair shot; drying the surface helps the seasoning roast cleanly instead of steaming.

3. Toss with oil, then ranch seasoning

Add the potatoes to a large bowl and coat them with oil first. Then add the dry ranch seasoning, black pepper, and garlic powder if using. This keeps the dry mix from clumping in dusty patches. The pieces should look lightly glossy, not oily or wet.

Visual cue: oil first, ranch second

Do this in two tosses: oil first, ranch second.

Potato chunks being tossed with oil in a glass mixing bowl, with a small bowl of dry ranch seasoning nearby.
A light oil coating gives the dry ranch mix something to grab, so the flavor lands evenly instead of clumping.

Visual cue: even ranch coating

Before roasting, every piece should look lightly speckled, not buried in mix.

Close-up of raw potato chunks evenly coated with dry ranch seasoning, herbs, pepper, and oil in a mixing bowl.
A thin, even ranch coating means every bite seasons the same; if you see dusty spots, toss a little longer.

4. Spread on a sheet pan

Spread the potatoes in one layer on a large rimmed sheet pan. Leave a little space between the pieces and turn some cut sides down against the pan. Those flat sides usually become the best bites.

Visual cue: give the potatoes room to brown

A little space around the pieces helps hot air move across the pan and gives cut sides better contact.

Ranch seasoned potato pieces spread apart on a rimmed metal sheet pan with several cut sides facing down.
Space is what turns seasoned potatoes into roasted potatoes; the cut sides need room and pan contact to brown.

5. Roast, flip, and finish

Roast for 30 to 35 minutes, flipping once around the 18 to 20 minute mark. The potatoes are ready when the flat sides are golden, the edges look roasted, and a fork slides easily into the centers. Finish with herbs, parmesan, bacon, cheese, or a small ranch drizzle after roasting.

Visual cue: what done potatoes should look like

The timer helps, but color, crisp edges, and a tender center are the better doneness signs.

Close-up of roasted ranch potatoes with browned flat sides, crisp edges, herb flecks, and a broken piece showing a soft center.
Look for browned flat sides, crisp edges, and tender centers; these visual cues are more reliable than the timer alone.

Want to push the texture further? Read the crisping rules or try the extra-crispy parboil method.

Tips for Crispy Potatoes

If you remember only a few things, make them these crisping rules.

  • Dry the potatoes. Wet potatoes steam before they brown.
  • Oil before ranch. The oil helps the dry mix cling evenly.
  • Use a sheet pan, not a deep dish. A deep casserole dish traps moisture.
  • Give every piece breathing room. Use two pans if needed.
  • Put cut sides down. The flat side browns better against the pan.

A zip-top bag works if you like the classic packet-recipe shake method. Parchment makes cleanup easier, but direct contact with the pan gives stronger browning. Add cheese near the end so it melts without burning.

The goal is not just “done.” The best pieces have golden flat sides, soft centers, and ranch flavor baked onto the edges. Space is what turns ranch potatoes from seasoned and soft into browned and snacky.

Biggest mistake to avoid: do not crowd the pan. If the potatoes touch too much, they steam before they brown. Use two pans for a double batch.

For Extra Crispy Potatoes

The main recipe keeps things simple. For a more pub-style crispy bite, add a quick parboil before roasting. It roughs up the potato edges so they brown more aggressively in the oven.

Parboil for extra crisp edges

This optional method creates rougher potato surfaces, which means more places for the oil and ranch seasoning to brown.

Four-step guide showing potatoes being parboiled, roughened after draining, tossed with oil and ranch seasoning, and roasted until crispy.
For extra crispy ranch potatoes, parboil briefly, rough up the edges, coat with oil and ranch seasoning, and then roast until deeply browned.
  1. Cut the potatoes into 1-inch / 2.5 cm pieces.
  2. Boil in lightly salted water for 6 to 8 minutes, just until the edges begin to soften. If your ranch mix is already very salty, use unsalted water.
  3. Drain very well.
  4. Shake the potatoes gently in the pot for a few seconds to rough up the edges.
  5. Let them steam-dry for 2 to 3 minutes.
  6. Toss with oil first, then dry ranch seasoning.
  7. Roast on a hot sheet pan at 425°F / 218°C or 450°F / 232°C until deeply browned and tender.

This method takes a few extra minutes, but it gives you more craggy edges for the seasoning to cling to. If you like crisp-edge potato sides, you may also like these homemade French fries, which go deeper into potato choice, soaking, drying, oven fries, air fryer fries, and loaded variations.

Keeping it simple instead? Go back to the main recipe. Making a smaller batch? Use the air fryer method.

Homemade Ranch Seasoning Option

No packet? You can still make ranch-style potatoes with a quick homemade mix. It will not taste exactly like a packet, but it gives you a fresher, less salty coating.

IngredientAmount
Dried parsley1 tablespoon
Dried dill1 teaspoon
Dried chives, optional1 teaspoon
Garlic powder1 teaspoon
Onion powder1 teaspoon
Black pepper½ teaspoon
Fine salt½ to ¾ teaspoon, to taste
Buttermilk powder, optional1 tablespoon

Without buttermilk powder, use the whole homemade mix for 2 lb / 900 g potatoes. With buttermilk powder, start with about 3 tablespoons, then add the rest after roasting only if the potatoes need more ranch flavor.

Air Fryer Method

Air fryer ranch potatoes are great for a faster, smaller batch, but the basket still needs space. A crowded air fryer basket will cook the potatoes, but it will not crisp them well.

Air fryer spacing matters too

The same anti-crowding rule applies in the basket, especially when you want browned edges instead of soft potatoes.

Ranch seasoned potato chunks with browned edges arranged in a single layer inside an air fryer basket.
Air fryer ranch potatoes still need breathing room, so arrange them in a single layer or cook in batches for better browning.

Keep the seasoning amount the same, but reduce the oil. For 2 lb / 900 g potatoes, 1½ to 2 tablespoons oil is usually enough because the air fryer circulates heat closely around the pieces.

Potato SizeAir Fryer TimeTemperature
Small baby potato halves12 to 15 minutes400°F / 200°C
1-inch / 2.5 cm chunks15 to 20 minutes400°F / 200°C
Larger chunks20 to 22 minutes400°F / 200°C
  1. Cut the potatoes into even pieces.
  2. Toss with oil and dry ranch seasoning.
  3. Air fry at 400°F / 200°C.
  4. Shake the basket halfway through, or every 5 to 7 minutes for more even browning.
  5. Cook in batches if your air fryer basket is small.

Start checking early if your pieces are small or your air fryer runs hot. Air fryers vary more than ovens, so use the timing as a guide and look for browned edges with tender centers. If you use the air fryer for potato sides often, this air fryer hash browns guide is also useful for timing, shaking, thin layers, and fixing soft potato batches.

Once the potatoes are browned, choose a variation or fix common ranch potato problems.

Easy Variations

Think of the base recipe as the reliable weeknight tray. The variations are for nights when you want the potatoes to feel more like a snack, a party side, or something loaded enough to steal attention from the main dish.

Four ways to finish the tray

These ideas keep the base method the same while changing the final flavor and serving style.

Four ranch potato variations showing parmesan ranch potatoes, bacon ranch potatoes, loaded ranch potatoes with cheese and drizzle, and spicy ranch potatoes.
Once the base tray is roasted, you can make parmesan ranch, bacon ranch, loaded ranch, or spicy ranch potatoes without changing the main method.

More ranch potato variation ideas

VariationHow to Make It
Parmesan ranch potatoesAdd ¼ cup / 20 to 25 g finely grated parmesan during the last 8 to 10 minutes of roasting, or sprinkle it over the potatoes right after they come out of the oven.
Garlic ranch potatoesAdd ½ teaspoon garlic powder with the ranch seasoning. If using fresh garlic, add it during the last 10 minutes so it does not burn.
Bacon ranch potatoesRoast the potatoes as usual, then toss with cooked crumbled bacon before serving. Use a little less ranch seasoning if the bacon is salty.
Cheesy ranch potatoesRoast until almost done, sprinkle with shredded cheddar, Monterey Jack, mozzarella, or a cheese blend, then return to the oven for 3 to 5 minutes.
Loaded ranch potatoesFinish with melted cheese, bacon, chives, and a small drizzle of ranch dressing or sour cream.
Spicy ranch potatoesAdd smoked paprika, cayenne, chili flakes, or a little hot sauce after roasting. Start small because ranch seasoning is already bold.
Ranch potatoes with onionsAdd thick onion wedges to the pan with the potatoes so they soften and brown without burning before the potatoes are done.

Creamy ranch potato bake note: A cheesy ranch potato bake made with bottled ranch dressing is softer and more casserole-like than these sheet-pan potatoes. Here, the cheesy version simply means roasted potatoes finished with melted cheese. If you are in the mood for a full potato casserole instead of a crisp side, this tater tot casserole is a better fit for a creamy, cheesy casserole-style dinner.

Serving these tonight? See what goes with ranch potatoes. Making them ahead? Check storage and reheating tips.

What to Serve with Ranch Potatoes

Serve ranch potatoes with burgers, steak, pork chops, BBQ mains, baked chicken tenders, or this baked chicken breast when you want a simple oven dinner. They also work with eggs for brunch or as a game-day potato tray with cheese, bacon, and chives.

For dipping, use ranch dressing, sour cream, spicy mayo, a yogurt-herb sauce, or this easy garlic aioli. If the potatoes taste salty from the ranch seasoning, choose a cooler dip instead of another salty one.

To balance the plate, add something crisp or fresh, like a chickpea salad or simple green salad. The loaded version can turn them from a side dish into the thing people hover around.

Make-Ahead, Storage, and Reheating

  • Cut ahead: Cut potatoes can sit covered in cold water in the refrigerator for up to a day. Drain and dry them very well before roasting.
  • Season ahead: Season right before roasting. Salt in the ranch mix can pull moisture from the potatoes if they sit too long.
  • Double batch: For 4 lb / 1.8 kg potatoes, double the oil and use two large sheet pans. Start with about 1½ packets if adding bacon, cheese, or parmesan.
  • Rotate pans: If using two pans, rotate them halfway through roasting if your oven has hot spots.
  • Refrigerate: Store leftovers in an airtight container for 3 to 4 days.
  • Reheat: Use the oven, air fryer, or a lightly oiled skillet for the best texture. The microwave is fine for speed, but the potatoes will soften.
  • Freeze: You can freeze them, but the texture is not ideal. Roasted potatoes often turn softer and slightly grainy after freezing and thawing.

For broader leftover timing and cold-storage guidance, the FoodSafety.gov cold food storage chart is a helpful reference.

If the potatoes seem dry after chilling, toss them with a tiny drizzle of oil before reheating. The oven or air fryer is what brings the edges back.

Troubleshooting

If your first batch is softer than you wanted, it is usually not a recipe failure. Ranch potatoes go soggy for predictable reasons, and most of them are easy to fix next time.

Quick fixes for common ranch potato problems

The same few causes show up again and again, which makes the fixes easy to remember.

Troubleshooting guide for ranch potatoes with tips for soggy, powdery, salty, burnt, and hard-centered potatoes beside small roasted potato photos.
When a tray goes wrong, check moisture, crowding, seasoning amount, oven heat, and potato size first.
ProblemLikely CauseHow to Fix It
Soggy potatoesWet potatoes, crowded pan, deep dish, low heat, or bottled ranch before roastingDry well, use a sheet pan, spread in one layer, and use dry ranch seasoning
Burnt seasoningOven too hot too long, pieces too small, seasoning clumped, or not enough oilOil first, cut 1-inch pieces, toss evenly, and check early at 450°F / 232°C
Too saltySalty ranch packet plus bacon, cheese, or parmesanUse less ranch seasoning next time; serve with sour cream, yogurt dip, herbs, or lemon
Potatoes taste powderyToo much dry ranch mix or seasoning added unevenlyToss with oil first, use less mix next time, and finish with herbs or a small ranch drizzle
Browned outside, hard insidePotato pieces too large or oven too hot for their sizeCut smaller next time; lower the oven slightly and continue roasting
Sticking to the panNot enough oil or potatoes moved before crust formedUse enough oil, let the cut sides brown, then flip with a thin spatula
Uneven flavorSeasoning added before oil or not tossed well enoughToss with oil first, then add ranch seasoning and toss again

Problem solved? Return to the recipe card or back to top.

FAQ

Is ranch seasoning the same as ranch dressing mix?

In many recipes, yes. Dry ranch seasoning and dry ranch dressing mix usually mean the powdered mix used to make ranch dressing or season foods.

How much ranch seasoning do I use for 2 pounds of potatoes?

For 2 pounds of potatoes, use 1 standard 1 oz / 28 g packet, or about 3 tablespoons dry ranch seasoning from a jar. Go up to 4 tablespoons only if the mix is mild or salt-free.

Should I use dry ranch mix or bottled ranch dressing?

Dry ranch mix is best before roasting. Bottled ranch works better after roasting as a dip or drizzle, or in softer cheesy potato bakes.

What temperature is best?

425°F / 218°C is the best default. Use 450°F / 232°C when you want darker edges and are comfortable checking the pan earlier.

How long do ranch potatoes take in the oven?

Most 1-inch potato pieces take 30 to 35 minutes at 425°F / 218°C. They are done when the flat sides are golden and a fork slides through the centers easily.

Do red potatoes need to be peeled?

No. Red potato skins are thin and help the pieces hold together. Scrub, dry, cut, and roast.

Will russet potatoes work?

Yes. Russets give you fluffy centers and browned edges, but they are more fragile than red or Yukon gold potatoes, so toss them gently.

How do I make ranch potatoes crispier?

Dry the potatoes well, oil before seasoning, spread them in one layer, and place cut sides down. For extra crispiness, parboil for 6 to 8 minutes, rough up the edges, then roast.

Air fryer version: what changes?

Keep the seasoning amount the same, but reduce the oil to about 1½ to 2 tablespoons for 2 lb / 900 g potatoes. Air fry 1-inch pieces at 400°F / 200°C for 15 to 20 minutes, shaking halfway through.

Can I add cheese and bacon?

Yes. Add cooked bacon after roasting, and add shredded cheese during the last few minutes so it melts without burning. Use less ranch seasoning if your bacon or cheese is salty.

A Good Pan of Ranch Potatoes

Good ranch potatoes should taste bold and comforting without turning heavy. The outside should be seasoned and browned, the inside should be soft, and the ranch flavor should feel baked onto the potatoes instead of sitting on top as a wet dressing.

Once you learn the dry-potatoes, oil-first, ranch-second rhythm, this becomes the tray you can make without looking at the recipe.

Back to top ↑

Posted on Leave a comment

Honey Mustard Chicken Tenders Recipe

Golden panko-coated honey mustard chicken tenders on a plate with dip, pickles, crumbs, and a cut-open cooked tender.

These honey mustard chicken tenders are for the night you want crispy chicken strips, a creamy sweet-tangy dip, and zero deep-frying drama. The chicken stays juicy, the panko turns golden, and every piece is made for dragging through honey mustard sauce.

They are the kind of tenders people pick from the tray before dinner is even on the table: crisp edges, juicy centers, and just enough honey mustard to keep everyone reaching for one more.

Here, the goal is simple: no pale panko, no soggy bottoms, no dry chicken, and no wasted dipping sauce because it touched raw chicken. Everything runs on one simple system: creamy honey mustard as the binder, panko as the crunch, clean dip reserved first, then an oven or air fryer finish.

Remember the signature rule: mix once, divide first — one clean bowl for dipping, one bowl for coating raw chicken. For the best all-around tray, use chicken strips about 3/4 inch thick, press them into panko, and bake at 425°F / 220°C until golden and cooked through. It is the kind of dinner that feels fun without asking you to set up a frying station or babysit a pan of oil.

Quick Answer: How to Make Honey Mustard Chicken Tenders

To make crispy honey mustard chicken tenders, pat chicken tenderloins or chicken breast strips dry, coat them in a creamy mustard-honey mixture, reserve clean sauce before raw chicken touches the rest, press the coated chicken into panko breadcrumbs, then bake at 425°F / 220°C for 16–20 minutes or air fry at 390°F / 200°C for 10–12 minutes.

The chicken is done when the thickest piece reaches 165°F / 74°C. For the best texture, keep the strips evenly sized, spray the crumb layer lightly with oil, leave space between pieces, and dip at the table instead of pouring sauce over the crust too early.

Jump to recipe card · Oven method · Air fryer method · Fix a problem

Honey Mustard Chicken Tenders Recipe Card

Recipe: Crispy Honey Mustard Chicken Tenders

Main method: Oven baked
Alternate method: Air fryer
Servings: 4
Yield: About 10–12 chicken tenders

Prep Time15 minutes
Optional Rest15–30 minutes
Cook Time16–20 minutes oven / 10–12 minutes air fryer
Total Time35–45 minutes, plus optional 15–30 minute rest
Chicken Doneness165°F / 74°C internal temperature

Ingredients

For the Chicken and Coating

  • 1 1/2 lb / 680 g / 24 oz chicken tenderloins, or boneless chicken breast sliced into strips about 3/4 inch thick
  • 1 1/2 cups / 75–90 g panko breadcrumbs
  • Fine salt, 1 teaspoon / 5–6 g, divided
  • Black pepper, 1/2 teaspoon
  • Garlic powder, 1 teaspoon
  • Onion powder, 1/2 teaspoon
  • Smoked paprika or sweet paprika, 1 teaspoon
  • Oil spray, or 1 tablespoon / 15 ml olive oil for drizzling

For the Honey Mustard Coating and Dipping Sauce

  • 1/4 cup / 60 ml / about 60 g Dijon mustard, yellow mustard, or a mix of both
  • 3 tablespoons honey / 45 ml / about 60 g
  • 3 tablespoons mayonnaise or Greek yogurt / 45 ml / about 45 g
  • 1 tablespoon / 15 ml lemon juice or apple cider vinegar
  • 1/4 teaspoon garlic powder
  • Pinch of salt and black pepper, to taste

Sauce note: This amount gives enough sauce to coat the chicken and reserve a small dipping bowl. For sauce-heavy serving, make a second half-batch of honey mustard or reserve more before raw chicken touches it.

Instructions

Prepare the Sauce

  1. In a bowl, mix the mustard, honey, mayonnaise or Greek yogurt, lemon juice or vinegar, garlic powder, salt and pepper.
  2. Taste and adjust. Make it sweeter with more honey, sharper with extra Dijon, or brighter with a little more lemon juice.
  3. Mix once, divide first: reserve about one-third to one-half of the sauce in a clean bowl for dipping. Keep this portion away from raw chicken.

Coat the Chicken

  1. Pat the chicken tenders dry with paper towels. The surface should look dry, not shiny-wet.
  2. Season the chicken lightly with some of the salt, pepper, garlic powder, onion powder and paprika.
  3. Add the chicken to the remaining honey mustard mixture and turn until each piece is coated.
  4. Let the chicken sit for 15–30 minutes if you have time. Avoid a long acidic marinade for very thin strips because the surface can soften and the coating may not grip as well.
  5. Place the panko breadcrumbs in a shallow bowl. Season with the remaining salt and spices.
  6. Press each honey mustard-coated chicken tender firmly into the panko, turning to coat all sides.

Bake the Chicken Tenders

  1. Preheat the oven to 425°F / 220°C. Line a baking sheet with parchment paper. For crispier bottoms, place a wire rack over the baking sheet.
  2. Arrange the coated tenders in a single layer with space between them.
  3. Spray the tops lightly with oil, or drizzle with a small amount of olive oil.
  4. Bake for 16–20 minutes, flipping once if needed, until the edges are golden and the chicken is cooked through.
  5. Check the thickest tender for doneness.
  6. Rest for 3–5 minutes on a rack or plate, then serve with the reserved clean honey mustard dipping sauce.

Air Fryer Method

  1. Preheat the air fryer to 390°F / 200°C.
  2. Arrange the chicken tenders in a single layer. Do not overcrowd the basket.
  3. Spray lightly with oil.
  4. Air fry for 10–12 minutes, flipping halfway, until crisp and cooked through. Check around 9–10 minutes the first time because air fryers brown at different speeds.
  5. Cook in batches if needed. Two lighter batches will beat one crowded batch every time.

Recipe Notes

  • No egg is needed here because the honey mustard mixture acts as the binder.
  • Very thin strips cook quickly, so start checking early.
  • Thicker tenders may need the full 20 minutes, or a gentler 400°F / 200°C bake for a few extra minutes.
  • For the crunchiest crust, use a wire rack and oil spray.
  • To get a familiar fast-food-style honey mustard, use more yellow mustard and mayonnaise.
  • Prefer a sharper Dijon-style sauce? Use more Dijon and a little extra lemon juice.

Choose Your Version

Already know what kind of tray you want? Use this table to steer the recipe. The base method stays the same; the small changes below make the tenders crunchier, faster, milder, sharper, party-style, or gluten-free.

Six-panel board comparing honey mustard chicken tender versions: oven, air fryer, kid-friendly, Dijon, pretzel crunch, and no-breading.
Choose the version that fits your night: oven-baked for maximum crunch, air fryer for speed, Dijon for a sharper bite, pretzel crumbs for texture, or no-breading for a lighter option.
Want This Result?Do This
Crispiest oven tendersUse panko, toast it first if you can, spray with oil, and bake on a wire rack.
Fastest versionUse the air fryer at 390°F / 200°C in a single layer.
Kid-friendly flavorUse yellow mustard, mayonnaise, and a little extra honey.
Sharper Dijon versionUse more Dijon, Greek yogurt, and extra lemon juice.
Party-style crunchReplace panko with crushed pretzels and reduce added salt.
Gluten-free versionUse gluten-free panko or crushed gluten-free rice cereal.
No-breading versionSkip the panko and bake lightly coated honey mustard tenderloins.

Time and Temperature Guide

Chicken tenders cook quickly, so timing matters. Use the table below as a guide, then check the thickest piece before serving.

MethodTemperatureTimeBest For
Oven, standard tenders425°F / 220°C16–20 minutesFull batch, golden crumb crust
Oven, thick tenders400°F / 200°C20–25 minutesLarger chicken strips
Air fryer390°F / 200°C10–12 minutesFast crisping, smaller batches
Reheat375–390°F / 190–200°C5–8 minutes, or until hot and crispLeftovers

Chicken should reach 165°F / 74°C in the thickest part. The tenders should also look golden at the edges and feel firm when lifted with tongs, but the thermometer is the safest check.

Once the timing is clear, the next thing is texture. These tenders work because the coating is built to cling, brown, and stay crisp long enough to dip.

Why This Recipe Works

The best honey mustard chicken tenders are not just sweet chicken in breadcrumbs. They need a coating that stays put, a crust that browns before the chicken dries out, and a dipping sauce that does not soften the crunch too early.

The magic is not complicated, but it does depend on a few small choices that keep baked tenders from tasting like soft breaded chicken.

  • Dry chicken helps the coating grip. You want the mustard-honey layer to cling, not slide around.
  • Honey mustard replaces egg. It gives the crumbs something to hold onto and adds flavor at the same time.
  • Panko gives the oven-fried bite. It is lighter and flakier than regular breadcrumbs.
  • Oil spray brings the color. Dry crumbs stay pale; a little oil helps them turn golden.
  • Space and a rack fight steam. Give the tenders a little breathing room so they brown instead of softening together.
  • Reserved sauce stays clean. Moving the dip to a separate bowl before coating the chicken keeps serving simple and safe.

When those pieces work together, you get the comfort of chicken fingers, the brightness of honey mustard, and a crisp bite that still tastes juicy underneath.

The best part is the contrast: the craggy panko shell, the tender strip of chicken inside, and that cool-sweet honey mustard dip catching in all the little crispy edges.

Crispy Outside, Juicy Inside

This is the texture target to keep in mind before you start coating: crisp crumbs on the outside, tender chicken in the middle, and sauce served on the side so the crust stays lively.

Close-up of a cut-open crispy chicken tender with golden panko coating, white cooked chicken inside, and honey mustard dip nearby.
Aim for contrast in every bite: a crunchy panko shell outside and moist white chicken inside. Pull the tenders once they are cooked through so the center stays juicy.

Ingredients You Need

Most of the flavor comes from the ingredients. Simple tools and small technique choices handle the texture.

Overhead layout of ingredients for honey mustard chicken tenders, including raw chicken, panko, mustard, honey, yogurt or mayo, spices, and oil.
Set out the chicken, panko, sauce ingredients, seasonings, and oil spray before you start. It keeps the coating step smooth and makes it easier to reserve a clean dipping bowl.

Chicken Tenderloins or Chicken Breast

Chicken tenderloins are easiest because they are already shaped like strips. Boneless chicken breast works too; just slice it lengthwise into even pieces about 3/4 inch thick at the widest part. Very thin strips cook before the crumbs brown, while very thick strips need more time and can darken the honey before the center is done.

Raw chicken tenderloins and sliced chicken breast strips arranged side by side on a cutting board with a 3/4 inch thickness label.
Even thickness matters more than perfect shape. Keep chicken tenderloins or breast strips close to 3/4 inch thick so the coating can brown before the center dries out.

If you are starting with full chicken breasts and want more detail on keeping them juicy, this baked chicken breast recipe goes deeper into timing, thickness, and avoiding dry chicken.

Mustard

Dijon brings bite; yellow mustard brings nostalgia. Use Dijon for a sharper sauce, yellow mustard for a milder dipping-sauce flavor, or a mix of both for the best middle ground.

Honey

Honey gives the sauce its classic sweetness, but this is not a sticky glaze recipe. The honey mustard flavors the chicken while the panko does the crisping, so the tenders stay crunchy instead of turning syrupy.

Mayonnaise or Greek Yogurt

Mayonnaise makes the sauce creamy and familiar. Greek yogurt gives you a lighter, tangier version. Both help the mustard-honey coating cling to the chicken and hold the crumbs in place.

If you like making creamy sauces from scratch, this homemade mayonnaise guide gives you a richer base for dips.

Panko Breadcrumbs

Panko is what keeps baked tenders from feeling like soft breaded chicken. The flakes are light and uneven, so they create a craggy shell that feels much closer to fried chicken fingers.

This recipe skips the classic flour-and-egg dredge to keep the coating simple. The mustard-honey layer works as the glue. For a firmer, more restaurant-style crust, lightly dust the chicken with flour before dipping it into the sauce, then press it into the panko.

Seasonings

Garlic powder, onion powder, paprika, salt and pepper are enough. They make the coating savory without hiding the honey mustard flavor.

Equipment That Helps

You can make these with a baking sheet and a bowl, but a few simple tools make the difference between “good enough” tenders and crisp, golden ones.

  • Rimmed baking sheet: Keeps crumbs and oil contained.
  • Parchment paper: Helps prevent sticking and makes cleanup easier.
  • Wire rack: Gives the bottoms a better chance to crisp.
  • Shallow bowl: Makes pressing the panko onto the chicken easier.
  • Oil spray: Helps the crumbs turn golden without deep frying.
  • Air fryer: Optional, but excellent for smaller batches.
  • Instant-read thermometer: Helpful for avoiding dry or undercooked chicken.

Honey Mustard Sauce: Dip, Binder or Marinade?

Honey mustard does three jobs here: it helps the crumbs stick, flavors the chicken, and gives you that creamy dipping bowl at the end. The only rule is that the dip must be reserved before raw chicken touches the rest.

Sauce safety rule: mix once, divide first. Make one batch of honey mustard, then immediately move the dipping portion to a clean bowl before raw chicken touches the rest.

Mix Once, Divide First

This visible split is what keeps dinner simple: one bowl becomes the clean dip, while the rest of the sauce seasons and coats the raw chicken before breading.

Four-panel guide showing honey mustard sauce mixed, clean dip reserved, raw chicken coated, and chicken pressed into panko crumbs.
Mix once, then divide before raw chicken touches the sauce. This keeps one bowl safe and clean for dipping while the remaining honey mustard becomes the flavorful coating binder.

The sauce has three jobs. First, it helps the crumb layer stick. At the table, it gives the cooked tenders that creamy sweet-tangy finish. If the chicken rests for 15–30 minutes before breading, the same sauce also works as a short flavor boost.

Honey Mustard Sauce Spoon Test

Before the chicken goes in, lift a spoon through the sauce and check the texture. It should coat the spoon in a creamy layer, not run off immediately.

Thick creamy honey mustard sauce clinging to the back of a spoon above a bowl with visible mustard specks.
Look for a spoon-coating texture: thick enough to cling, creamy enough to dip. If the honey mustard looks runny, thicken it slightly before coating the chicken.

For a loose sauce, whisk in another spoonful of mayo or Greek yogurt before breading. A thicker sauce grips the chicken better and protects the panko from turning wet.

Very thin strips do not need an overnight marinade, especially if your sauce is tangy with lemon juice or vinegar. Too much time in an acidic sauce can soften the surface and make the coating less secure.

Simple Honey Mustard Dipping Sauce Ratio

  • 1/4 cup / 60 ml mayonnaise or Greek yogurt
  • 2 tablespoons / 30 ml Dijon or yellow mustard
  • 2 tablespoons honey / 30 ml / about 40 g
  • 1–2 teaspoons lemon juice or apple cider vinegar
  • Pinch of garlic powder
  • Salt and pepper to taste

Make it sweeter with more honey, sharper with extra Dijon, or more familiar and restaurant-style with yellow mustard and mayo. Greek yogurt plus a little extra lemon juice gives you the lighter, tangier version.

If you enjoy this sweet-tangy lane, mango mustard sauce is a fun next dip for fries, wraps and sandwiches.

Next: press into panko · Bake the tenders · Air fry the tenders · Back to recipe card

How to Make Honey Mustard Chicken Tenders

Once the recipe card is open, these are the small visual cues that make the tray come out right: dry surface, spoon-coating sauce, firmly pressed crumbs, enough space, and golden edges.

1. Dry and Season the Chicken

The chicken should look dry before the sauce goes on. You want the mustard-honey coating to cling, not slide around.

2. Mix, Taste and Divide the Sauce

The sauce should taste sweet first, tangy next, and creamy enough to dip. Once it tastes right, reserve the clean dipping portion before you coat the raw chicken.

3. Coat Lightly, Not Heavily

You want a thin layer of honey mustard clinging to the chicken, not a heavy blanket of sauce. Too much sauce can make the crumbs wet and slow down browning.

4. Press the Panko

Press the crumbs onto the chicken instead of sprinkling them over the top. The coating should look attached before it goes into the oven or air fryer.

Hands pressing a honey-mustard-coated chicken tender into coarse panko breadcrumbs in a shallow bowl.
After coating the chicken, press it firmly into the panko instead of sprinkling crumbs over the top. This helps the breadcrumb crust grip better during baking or air frying.

5. Space, Spray and Cook

Leave gaps between the tenders and give the crumb layer a light spray of oil. This is the step that makes the tray look like dinner instead of pale baked chicken: the crumbs need both heat and a little fat to turn golden.

Oven Method

Use the oven when you want the whole tray ready together, with enough tenders for dinner plates and a few “just one more” pieces.

  • Temperature: 425°F / 220°C
  • Time: 16–20 minutes
  • Best setup: parchment-lined baking sheet or a wire rack over a baking sheet
  • Texture goal: golden crumbs, juicy chicken, crisp edges
Oven method guide for panko honey mustard chicken tenders showing baking temperature, time, wire rack use, and safe doneness.
For the oven method, high heat and rack spacing do most of the work. The rack helps the panko crisp underneath while the quick bake keeps the chicken tender.

Why Use a Wire Rack?

A wire rack helps hot air reach the bottom of the tenders, which keeps them from steaming against the pan. When baking directly on parchment, flip the tenders once for better bottom color. With a rack, flipping is optional.

Breaded chicken tenders spaced apart on a wire rack over a rimmed baking sheet before baking.
A wire rack gives baked chicken tenders an instant crispness boost. Because heat can move underneath the pieces, the bottoms stay drier and the panko browns more evenly.

Thick tenders can bake at 400°F / 200°C for about 20–25 minutes. Thin strips may be ready closer to 14–16 minutes, so start checking early.

Compare the air fryer method · Make them extra crispy · See serving ideas · Back to recipe card

Air Fryer Method

Use the air fryer when speed matters more than cooking the whole batch at once. It crisps the crumb layer quickly, but only if the basket has enough space.

Air Fryer Single Layer Setup

Before starting the timer, check the basket. The pieces should sit in one layer with visible gaps, even if that means cooking two smaller batches.

Breaded chicken tenders arranged in a single layer inside a black air fryer basket with space between each piece.
In the air fryer, crowding turns crisping into steaming. Therefore, leave small gaps between the tenders so the hot air can brown the panko coating properly.
  • Temperature: 390°F / 200°C
  • Time: 10–12 minutes
  • Flip: halfway through
  • Oil: light spray on both sides
  • Best rule: cook in batches if the basket is small

Air Fryer Time and Temperature Guide

Use this quick visual check when you want the air fryer version: moderate-high heat, a halfway flip, and enough space for the crumbs to crisp.

Air fryer method guide with breaded chicken tenders in a basket and text for temperature, time, flipping, single-layer spacing, and doneness.
Give every tender room in the air fryer basket. Meanwhile, flipping halfway helps both sides get direct heat so the coating crisps instead of softening.

Different air fryers brown at different speeds, so check around 9–10 minutes the first time. Keep the first batch warm on a rack in a low oven while the rest cook, and avoid stacking hot tenders in a bowl because steam will soften the crust.

The same air-flow rule shows up in crispy recipes like air fryer chicken wings: dry surfaces, space between pieces, and late saucing protect the crunch.

Make them extra crispy · Try another coating · See serving ideas · Back to recipe card

Extra Crispy Upgrades

Once the basic method is in place, these upgrades take baked chicken tenders from good to properly crisp. They are especially helpful if your baked tenders usually come out pale or soft.

  • Toast the panko first. This is the best color upgrade. Toasting gives baked tenders a golden head start before the chicken has a chance to overcook.
  • Use a wire rack. It lets heat move around the tenders instead of trapping steam underneath.
  • Spray both sides lightly. A little oil helps the crumbs brown and gives the crust a more oven-fried texture.
  • Rest cooked tenders on a rack. If you have a rack, use it even after baking. It keeps the bottoms from softening while everyone is getting plates ready.
  • Avoid stacking. Hot tenders piled together will soften quickly.
  • Dip, do not drown. Let the crust stay in charge until the moment you eat.

Best Coatings for Honey Mustard Chicken Tenders

Panko is the easiest default, but honey mustard chicken tenders are flexible. Use this quick guide to choose the coating that fits the meal.

Coating comparison board showing panko, pretzel, cornflake, and gluten-free crumbs with chicken tender samples.
Each coating changes the crunch. Panko stays light and flaky, pretzel crumbs add salty depth, cornflakes create a bigger golden crust, and gluten-free crumbs keep the recipe flexible.
CoatingBest ForNotes
Panko breadcrumbsClassic crispy baked tendersBest default choice
Crushed pretzelsSalty, crunchy party-style tendersUse less added salt
Crushed cornflakesExtra crisp kid-friendly tendersCrush finely but not into powder
Regular breadcrumbsSofter chicken stripsWorks, but less crisp than panko
Gluten-free pankoGluten-free versionCheck labels on mustard and seasonings too
Crushed rice cerealEmergency gluten-free crunchBest with a little extra seasoning

If you use pretzels or cornflakes, crush them into small uneven crumbs. A little texture is good, but a fine powder will not give the same crunch.

Variations

Once the basic tray works, this recipe is easy to bend toward the people eating it — sweeter for kids, sharper for Dijon lovers, spicier for game day, crunchier with pretzels, or lighter without mayo.

Spicy Hot Honey Mustard Chicken Tenders

This is the game-day version: still sweet and creamy, but with enough heat to keep people dipping. Add a pinch of cayenne, chili powder or hot sauce to the honey mustard mixture. You can also finish the cooked tenders with a tiny drizzle of hot honey, but add it at the table so the coating stays crisp.

For a fruitier heat, borrow the sweet-spicy direction from this mango habanero sauce and add only a small amount to the honey mustard dip.

Pretzel-Crusted Honey Mustard Tenders

Replace the panko with crushed pretzels for a salty snack-style crust that feels made for a party tray. Reduce the salt in the crumb mixture because pretzels are already salty.

Buttermilk Honey Mustard Chicken Tenders

For a more tender, classic chicken-finger texture, soak the chicken in buttermilk for 30 minutes before coating. Pat off the excess before adding the honey mustard mixture so the panko does not slide off.

No-Mayo Honey Mustard Sauce

Use Greek yogurt when you want the dip tangier and lighter without losing the creamy coating. Add a little extra honey if you want it sweeter. For an egg-free creamy base, eggless mayonnaise also works well.

Kid-Friendly Yellow Mustard Version

Use yellow mustard instead of Dijon, skip the cayenne or spicy seasonings, and keep the sauce a little sweeter. This version tastes closer to familiar fast-food honey mustard.

Gluten-Free Honey Mustard Chicken Tenders

Use gluten-free panko or crushed gluten-free rice cereal. Also check the mustard, mayonnaise and seasonings to make sure they fit your needs.

No-Breading Honey Mustard Tenderloins

This version is not trying to be crispy. It is for the night you want juicy honey mustard tenderloins over rice, salad, or roasted vegetables. Skip the panko, coat the chicken lightly in honey mustard, and bake on parchment until cooked through, starting to check around 14–16 minutes depending on thickness.

Green Chutney Mayo Dip

For an Indian-style dipping sauce, stir a spoonful of green chutney into mayo or Greek yogurt. It gives the tenders a fresh coriander-mint bite without changing the main recipe.

Shallow-fried note: If you want a more classic chicken-finger texture, shallow fry the coated tenders in a thin layer of neutral oil until golden and cooked through. Keep the heat moderate so the honey in the coating does not brown too fast.

What to Serve with Honey Mustard Chicken Tenders

Once the tray is done, the only real question is whether this is a cozy dinner, a game-day snack, or a wrap-and-leftovers situation. Keep the dip close and build the meal around something crisp, creamy, tangy or fresh.

Three serving ideas for honey mustard chicken tenders: dinner plate with fries and slaw, chicken wrap, and lunchbox salad.
These tenders can move from snack to full meal with the right sides. Try them with fries and slaw, tuck them into wraps, or slice them over salad with extra honey mustard.
  • Weeknight dinner: roasted broccoli, green beans, mashed potatoes, or macaroni and cheese.
  • Diner-style plate: crispy homemade French fries, creamy coleslaw, pickles, and extra honey mustard.
  • Game-day tray: buffalo chicken dip, potato wedges, celery sticks, and a pile of napkins.
  • Lunchbox or salad bowl: cucumber salad, green salad, crunchy vegetables, and sliced cold tenders.
  • Wrap or sandwich night: lettuce, pickles, soft buns or tortillas, and enough sauce to swipe through every bite.

Leftover tenders are great sliced over salad, tucked into wraps, or layered into sandwiches with lettuce, pickles and extra honey mustard. For more lunch ideas, these chicken sandwich recipes are a useful next stop.

Storage, Freezing and Reheating

The main rule for leftovers is simple: keep the sauce separate and bring the crunch back with dry heat.

Storing Leftovers

Store cooked chicken tenders in an airtight container in the fridge for 3–4 days. Keep the honey mustard sauce in a separate container so the coating does not soften. That 3–4 day window matches the FoodSafety.gov cold storage chart for cooked meat and poultry leftovers.

Reheating

For the best texture, reheat the tenders in an oven or air fryer at 375–390°F / 190–200°C for about 5–8 minutes, or until hot and crisp. The microwave works if you are in a hurry, but it will soften the coating.

Freezing

For easiest freezing, freeze cooked tenders. Raw breaded tenders can also be frozen if the chicken was handled cold and clean, but cooked leftovers are simpler and safer for most home kitchens. Freeze in a single layer first, then move to a freezer-safe bag or container.

Do not freeze the dipping sauce with the chicken. Make fresh sauce or store it separately in the fridge.

Troubleshooting

Most honey mustard chicken tender problems come down to moisture, crowding, or too much sauce. If baked tenders have ever come out pale, soft, or half-naked on the pan, this is the section that saves the next batch.

Troubleshooting board showing fixes for soggy chicken tenders, coating falling off, pale crumbs, and dry chicken with temperature guidance.
For soggy coating, fix the airflow first with a rack, spacing, and oil spray. When crumbs fall off, start earlier by patting the chicken dry and pressing the panko firmly.

Why Are My Chicken Tenders Soggy?

Likely causes: crowding, too much sauce, not enough oil on the crumbs, or stacking hot tenders after cooking.

Fix: leave space between pieces, use a rack if possible, spray lightly with oil, rest cooked tenders without stacking, and dip at the table instead of saucing early.

Why Did My Coating Fall Off?

Likely causes: wet chicken, thin sauce, loose crumbs, or not enough pressing.

Fix: pat the chicken dry, use a creamy coating that clings, and press each tender into the panko until the crumbs look attached.

Why Is My Panko Pale?

Likely causes: dry breadcrumbs, low browning, or not enough time for color before the chicken is done.

Fix: spray or drizzle the panko lightly with oil. For deeper color, toast the panko before coating the chicken.

Why Did the Honey Burn?

Likely causes: a sauce layer that is too heavy, very small chicken pieces, or cooking too long.

Fix: use a thin coating, rely on panko for crunch, and start checking thin strips early.

Why Is the Chicken Dry?

Likely causes: thin strips, uneven sizes, or cooking past the safe internal temperature.

Fix: cut even pieces, start checking early, and use a thermometer in the thickest tender.

Why Is the Sauce Too Sweet or Too Sharp?

Likely causes: too much honey for your taste, too much Dijon, or not enough creamy base.

Fix: add mustard or lemon juice if it is too sweet. Add honey, mayo, or Greek yogurt if it is too sharp. Honey mustard should taste sweet first, tangy next, and creamy enough to dip.

Back to recipe card · Review oven method · Review air fryer method · Back to top

FAQs

Are Chicken Tenders and Chicken Strips the Same Thing?

They are often used the same way in recipes. Tenderloins are the small natural strips attached to the chicken breast. Strips are usually sliced from boneless chicken breast. Both work as long as the pieces are similar in size.

Can I Use Chicken Breast Instead of Tenderloins?

Yes. Slice boneless chicken breast into even strips about 3/4 inch thick at the widest part. Try not to make them too thin, because thin strips can dry out before the coating gets crisp.

Do I Need Flour or Egg for These Chicken Tenders?

No. The honey mustard mixture works as the binder in this recipe. For a firmer restaurant-style crust, lightly dust the chicken with flour before adding the sauce and panko.

Can I Make Honey Mustard Chicken Tenders in the Air Fryer?

Yes. Air fry at 390°F / 200°C for 10–12 minutes, flipping halfway, until the chicken is crisp and cooked through. Cook in batches so the basket is not crowded.

How Do I Keep Baked Chicken Tenders Crispy?

Use panko breadcrumbs, spray or drizzle the coating lightly with oil, leave space between the tenders, and bake at high heat. A wire rack helps too. Keep the sauce on the side until serving.

Can I Make These Gluten-Free?

Yes. Use gluten-free panko or crushed gluten-free rice cereal. Check your mustard, mayonnaise, and seasonings as well if gluten-free cooking is important for your household.

Can I Make the Sauce Without Mayo?

Yes. Use Greek yogurt for a tangier, lighter sauce. Add a little extra honey if you want it sweeter, or use eggless mayonnaise if you want a mayo-style sauce without egg.

Can I Use the Same Honey Mustard as Marinade and Dip?

Only if you divide it first. Reserve the dipping portion in a clean bowl before raw chicken touches the rest. The sauce used on raw chicken should not be served as a dip unless it is cooked safely.

How Do I Reheat or Freeze Honey Mustard Chicken Tenders?

Reheat cooked tenders in an oven or air fryer at 375–390°F / 190–200°C for 5–8 minutes, or until hot and crisp. For freezing, cooked tenders are the easiest option. Freeze in a single layer first, then store in a freezer-safe bag or container.

Final Bite

The win here is simple: no frying pot, no soggy tray, no dry chicken, and no wasted dipping sauce because it touched raw chicken.

Just golden panko, juicy strips, and a clean bowl of sweet-tangy honey mustard that somehow disappears faster than expected. Keep the sauce creamy, the crumbs well-pressed, and the dip on the side until the moment everyone starts reaching.

Posted on Leave a comment

Air Fryer Chicken Thighs Recipe: Crispy Skin, Juicy Meat & Time Chart

Crispy air fryer chicken thighs served on a plate with lemon wedges, rice, salad, and a creamy dipping sauce.

The air fryer is especially good for chicken thighs because the heat moves fast around the skin while the dark meat stays forgiving and juicy. When the timing is right, you get golden crisp edges, tender meat near the bone, and a dinner that feels much more satisfying than the effort it takes.

The easiest mistake is treating every chicken thigh the same. Bone-in, skin-on thighs need time for the skin to render. Boneless skinless thighs cook much faster. Frozen thighs need a slower start. BBQ sauce and sweet marinades need to go in late so they turn sticky instead of burnt.

Start with the best all-purpose version: bone-in, skin-on thighs with crisp skin and juicy meat. Bought boneless, frozen, sauced, skinless, tiny, or extra-large thighs? You are still covered. Use the recipe card for the classic crispy-skin version, then jump to the section that matches the chicken you actually have.

The goal is simple: no rubbery skin, no dry boneless pieces, and no guessing whether the thickest part is done. You should be able to open the basket and know what you are looking at: crisp skin where there is skin, juicy meat in the center, and no awkward cutting into every piece to check.

Jump to: Recipe Card · Time Chart · Boneless Skinless · Crispy Skin · Frozen Thighs · BBQ & Marinated · Troubleshooting · FAQs

Quick Answer: How Long to Cook Air Fryer Chicken Thighs

For bone-in, skin-on chicken thighs, air fry at 400°F / 200°C for 20 to 24 minutes, flipping once, until the center of the largest thigh reaches at least 165°F / 74°C. Many people prefer dark meat closer to 175°F / 79°C for a softer texture, while still using 165°F as the food-safety minimum.

Boneless skinless thighs need a shorter window. Thin pieces may take 11–13 minutes, average pieces usually take 14–17 minutes, and thick or folded pieces may need 18–20 minutes.

Skin-side up or down? Start skin-side down, then finish skin-side up. Starting skin-side down gives the fat under the skin time to render; finishing skin-side up gives the skin direct heat so it turns golden instead of rubbery.

Air fryers vary. A compact basket model may finish faster than a large oven-style model, so use the time range as a starting point and let the thermometer decide the final few minutes.

Choose Your Thighs

The cut decides the clock: bone-in needs time, boneless needs attention, frozen needs patience, and sauced chicken needs a late glaze. Match your pack of chicken to the right path before you cook.

Think of air fryer chicken thighs in four decisions: cut, size, surface, and finish. Cut gives you the basic timing, size tells you when to start checking, surface decides whether you get crisp skin, a browned coating, or a sticky glaze, and the thermometer confirms when dinner is actually done.

What you haveBest forWatch out forWhere to go
Bone-in, skin-on thighsCrisp skin and juicy dinner platesNeeds enough time for the skin to renderRecipe Card
Boneless skinless thighsBowls, wraps, salads, tacos, noodles, meal prepCooks fast and can dry if ignoredBoneless Skinless
Skinless bone-in thighsJuicy meat without skinLess browning, no crispy skinTime Chart
Frozen thighsRescue dinners when you forgot to thawLess predictable; must check temperatureFrozen Thighs
BBQ or sauced thighsSticky, glossy finishSugar can burn if added too earlyBBQ & Marinated
Marinated thighsDeeper flavorToo much wet marinade prevents browningBBQ & Marinated
Very small or very large thighsStill usable with adjusted timingSmall pieces finish early; large pieces need more timeTime Chart
Guide to choosing air fryer chicken thigh timing for bone-in skin-on, boneless skinless, frozen, and BBQ sauced thighs.
Before you choose a time, choose your chicken. Bone-in, boneless, frozen, and sauced thighs all need a slightly different air fryer game plan.

Next step: Making the classic bone-in version? Jump to the recipe card. Need exact timing? Use the time chart. Bought a different pack? Go to boneless skinless, frozen thighs, or BBQ and marinated thighs.

Before You Start: The 3 Rules That Change the Result

1. Dry skin browns; wet skin steams

Pat the chicken dry before seasoning, especially on the skin side. If the skin still looks shiny-wet, it will steam before it crisps.

2. Airflow is what makes the edges crisp

The thighs can touch lightly at the edges, but they should not overlap or cover each other. If air cannot move around the chicken, the skin softens and the pieces cook unevenly. The same airflow issue is behind many common air fryer mistakes.

Four seasoned chicken thighs arranged in a single layer with space between them inside a black air fryer basket.
A little space does real work here. When the thighs sit in one layer, hot air can reach more surface area and brown the chicken more evenly.

3. The biggest thigh decides when the batch is done

Chicken thighs vary in size, shape, and thickness. Use the time range to start, then check the center of the largest piece with a thermometer. That is the difference between guessing and knowing.

Avoid These 5 Mistakes

  • Keep the thighs in one layer instead of stacking them.
  • Brush BBQ sauce on near the end, not at the beginning.
  • Use browned skin as a clue, not the final doneness test.
  • Insert the thermometer into the meat without touching the bone.
  • Give boneless thighs their own shorter timing instead of using the bone-in timing.
Infographic listing common air fryer chicken thigh mistakes including crowding, wet skin, early sauce, wrong thermometer placement, and overcooked boneless thighs.
When air fryer chicken thighs disappoint, the fix is usually simple: more space, drier skin, later sauce, better thermometer placement, or less time for boneless pieces.

Ready to cook? Follow the recipe card for the classic version, or check the time chart first if your thighs are boneless, frozen, sauced, skinless, unusually small, or unusually large.

Air Fryer Chicken Thighs Recipe Card

This is the everyday version: bone-in, skin-on thighs rubbed with smoked paprika, garlic, herbs, and a little oil, then air fried until the skin is golden and the dark meat stays juicy. The skin should smell like paprika and garlic as it browns, and the first cut should stay juicy instead of spilling everything onto the plate.

This is the kind of chicken that works on a tired weeknight: crisp enough to feel special, simple enough that you are not babysitting a pan.

Serve it straight from the basket with lemon wedges, rice, salad, or a cool dip, and it feels like a proper dinner without much planning.

Prep time5 minutes
Cook time20–24 minutes
Rest time5 minutes
Total time30–34 minutes
Servings4
Main cut4 medium bone-in, skin-on chicken thighs
Temperature400°F / 200°C
Basket setupSingle layer, no overlapping

Equipment

  • 5–6 quart air fryer
  • Instant-read thermometer
  • Tongs
  • Paper towels
  • Small bowl for the seasoning

Ingredients

  • 4 medium bone-in, skin-on chicken thighs, about 2–2.5 lb / 900–1130 g total
  • 1 tablespoon / 15 ml olive oil or avocado oil
  • 1 teaspoon smoked paprika
  • 1 teaspoon garlic powder
  • 1/2 teaspoon onion powder
  • 1/2 teaspoon dried oregano or thyme
  • 3/4 teaspoon fine salt, or about 1 teaspoon coarse kosher salt, plus more to taste
  • 1/4 teaspoon black pepper
  • Optional for extra-crisp skin: 1/4 teaspoon aluminum-free baking powder
  • Lemon wedges, for serving

Instructions

  1. Dry the chicken well. Pat the thighs very dry with paper towels, especially on the skin side.
  2. Trim loose pieces. Remove large hanging pieces of skin or fat, but leave the skin attached. If the skin folds under itself, gently spread it back over the top.
  3. Mix the seasoning. In a small bowl, combine smoked paprika, garlic powder, onion powder, oregano or thyme, salt, and pepper. For extra-crisp skin, add the baking powder.
  4. Season the thighs. Rub the chicken with oil, then coat both sides with the seasoning. Season the edges too.
  5. Preheat the air fryer. Set it to 400°F / 200°C for 3–5 minutes if your model recommends preheating.
  6. Start skin-side down. Place the thighs in a single layer, skin-side down. Air fry for 10–12 minutes.
  7. Flip and finish skin-side up. Turn the thighs over and air fry for another 8–12 minutes, until the skin is golden and the chicken is cooked through.
  8. Check the temperature. Insert an instant-read thermometer into the center of the largest thigh without touching the bone. The safe minimum is 165°F / 74°C; for softer dark meat, cook closer to 175°F / 79°C.
  9. Rest before serving. Let the thighs rest for 5 minutes so the juices settle instead of running out as soon as you cut into the meat.

Recipe Notes

  • The baking powder is optional, but it helps skin-on thighs crisp more deeply. Use only a tiny amount.
  • With table salt, start slightly lighter. Coarse kosher salt may need a little more by volume.
  • Small thighs may finish closer to 18–20 minutes. Large thighs may need 2–5 extra minutes.
  • If the chicken is cooked but the skin is not crisp, air fry skin-side up for 2–4 more minutes.
  • For boneless skinless thighs, use the boneless timing section instead of the main bone-in timing.

Using a different kind of thigh? See boneless skinless thighs, frozen thighs, or BBQ and marinated thighs before you cook.

Ingredients You Need

The recipe card gives you the amounts. These notes help you choose the right cut, seasoning, and crisping option before you cook.

Raw chicken thighs with paprika, garlic powder, herbs, salt, pepper, oil, and lemon arranged on a prep board.
The seasoning stays flexible on purpose. Paprika brings color, garlic and herbs bring depth, and oil helps the air fryer build better browning.

Chicken thighs

Bone-in, skin-on thighs are best for the main recipe because they give you crisp skin and juicy meat. Boneless skinless thighs cook faster and are better for bowls, wraps, salads, tacos, noodles, and meal prep.

Oil

One tablespoon / 15 ml of oil is enough for 4 thighs. It helps the seasoning cling and encourages browning. Too much oil can make the basket smoky and the skin heavy.

Smoked paprika

Smoked paprika gives the chicken a warm color and a lightly smoky flavor, which helps the thighs taste roasted even though they cook quickly.

Garlic powder and onion powder

Powdered garlic and onion coat the chicken evenly and are less likely to burn than fresh garlic in the air fryer.

Dried herbs

Oregano or thyme adds a simple savory note. Crush dried herbs between your fingers before adding them to wake up the aroma. You can also use Italian seasoning, Cajun seasoning, ranch seasoning, lemon pepper, or a pinch of garam masala.

Salt

Fine salt seasons quickly and evenly. Table salt is stronger by volume, so start a little lighter. Coarse kosher salt may need a little more.

How to Make It

Here is what each stage should look and feel like, so you can adjust confidently even if your thighs are bigger, smaller, or shaped differently from mine.

1. Dry the chicken until the skin is no longer shiny

Blot both sides, then give the skin side a second pass. If the surface still looks wet, it will steam first and brown later.

Hands patting raw chicken thighs dry with a white paper towel before seasoning.
Remove surface moisture before seasoning. Dry skin has a much better chance of crisping instead of steaming in the basket.

2. Trim loose fat, but keep the skin attached

Trim large hanging pieces of skin or fat, but do not remove the skin completely. Spread folded skin back over the top instead of leaving it tucked underneath.

3. Coat the edges, not just the top

Rub the thighs with oil, then season both sides and around the edges. If the skin is loose, you can season lightly underneath it without pulling it off.

Raw chicken thighs being coated with a paprika garlic seasoning rub in a shallow bowl.
Season the edges as well as the top. As the thighs cook and tighten, those seasoned edges become some of the most flavorful bites.

4. Start hot so the surface begins browning quickly

Preheating helps the chicken start cooking as soon as it hits the basket. If your air fryer does not require preheating, you can still run it empty for 3 minutes while you finish seasoning the chicken.

5. Give the skin time to render before the flip

Arrange the thighs in a single layer, skin-side down. Cook for 10–12 minutes. The pieces can touch lightly at the edges, but they should not overlap.

Seasoned chicken thighs placed skin-side down in an air fryer basket with metal tongs.
Starting skin-side down gives the fat under the skin time to warm and render. That quiet first step helps set up the crispier finish.

6. Finish skin-side up for color and texture

Turn the thighs over and finish cooking skin-side up for another 8–12 minutes. This final stage is where the skin gets its best color. If one thigh is much smaller than the others, check it early and pull it out if it is already done.

Chicken thighs flipped skin-side up in an air fryer basket with metal tongs.
The final direct heat is what turns the skin crisp. During this stage, the color deepens and the surface changes from soft to browned.

7. Check the thickest thigh, not the prettiest one

Insert the thermometer into the deepest part of the meat without touching the bone. The safe minimum for poultry is 165°F / 74°C; FoodSafety.gov lists that same minimum for chicken thighs and other poultry cuts.

Instant-read thermometer inserted into the thickest part of a cooked chicken thigh.
A thermometer removes the guesswork. Check the thickest thigh first because the largest piece decides when the whole batch is ready.

Think of 165°F / 74°C as the safety line. Going closer to 175°F / 79°C is a texture choice, not a safety rule; many people like dark meat better there because it turns softer instead of dry.

8. Rest before cutting so the juices stay in the meat

Rest the chicken for 5 minutes before serving. Resting keeps the first cut from sending all those juices onto the plate.

How to Tell When Chicken Thighs Are Done

Look for golden skin, browned seasoning around the edges, and juices that do not look pink when the thigh rests. Boneless thighs should feel springy but not tight. Bone-in thighs can still look slightly pink near the bone, so color alone is not enough.

Temperature is still the real check: 165°F / 74°C in the thickest part for safety, or closer to 175°F / 79°C if you prefer softer dark meat.

Cut-open air fryer chicken thigh showing crisp browned skin and fully cooked juicy meat inside.
Aim for contrast: browned skin outside, moist cooked meat inside. Resting briefly helps keep those juices in the chicken.

A compact, thick thigh usually needs more time than a flatter thigh of the same weight. Large pieces can look browned outside before the center is ready, so check the largest thigh in the basket before serving.

Why This Method Works

This method works because it gives the skin time to render before the final crisping stage. Starting skin-side down warms the fat under the skin; finishing skin-side up gives the surface direct heat. The thermometer check keeps the timing flexible, because a small boneless thigh and a large bone-in thigh can look similar outside but cook very differently inside.

Time and Temperature Chart

If you remember one thing, remember this: the cut decides the clock. Use the chart to get close, then use the thermometer to land the chicken exactly where you want it: safe, juicy, and not overcooked.

Chicken thigh typeTemperatureApprox. timeFlip?Doneness cue
Bone-in, skin-on400°F / 200°C20–24 minYesSkin crisp, 165°F minimum inside
Small bone-in, skin-on400°F / 200°C18–20 minYesCheck early so they do not dry
Large bone-in, skin-on390–400°F / 199–200°C24–28 minYesContinue in 3-minute bursts if needed
Boneless skinless, thin375–400°F / 190–200°C11–13 minOptionalEdges browned, center 165°F
Boneless skinless, average380–390°F / 193–199°C14–17 minYesJuicy center, browned surface
Boneless skinless, thick380–390°F / 193–199°C18–20 minYesCheck the thickest folded part
Bone-in, skinless390–400°F / 199–200°C18–22 minYesJuicy but less browned
Frozen bone-in360°F then 380°F / 180°C then 190°C25–40 minYesSeparate once softened, check near bone
BBQ thighs380–400°F / 193–200°CNormal time + 3–5 min glazeYesSauce sticky, not burned
Marinated thighs380–400°F / 193–200°CDepends on cutYesPat dry if you want browning
Air fryer chicken thighs time and temperature chart for bone-in, boneless, frozen, and BBQ sauced thighs.
Treat the air fryer chicken thighs time chart as your starting point, then let size and thickness guide the final few minutes. Smaller thighs often finish faster than the chart suggests.

Need the full method? Return to the recipe card. For special cases, jump to boneless skinless thighs, frozen thighs, or BBQ and marinated thighs.

Boneless Skinless Air Fryer Chicken Thighs

Boneless skinless chicken thighs in the air fryer are the fast version: less dramatic than crisp skin, maybe, but incredibly useful for rice bowls, wraps, salads, tacos, noodles, and lunch boxes.

Sliced boneless skinless air fryer chicken thighs served with rice, salad, cucumbers, herbs, and lemon wedges.
This sliced version is built for bowls, wraps, salads, noodles, and meal prep. Start checking early so the pieces stay juicy.

The texture is different from skin-on thighs. Boneless pieces can get browned edges and a roasted surface, but they will not have crispy chicken skin. For a better surface, pat them dry, use a little oil, and toss the seasoned thighs with 1 tablespoon / about 8 g cornstarch if you want a light crisp coating.

This is the version to make when you want cooked chicken you can actually use all week: slice it hot for dinner, then tuck leftovers into wraps, bowls, salads, noodles, or a filling chickpea salad with lemon, herbs, or a spoonful of yogurt dip.

Best method for boneless skinless thighs

  1. Pat the thighs dry.
  2. Open any folded pieces so the thickness is more even.
  3. Rub with oil and seasoning.
  4. Use cornstarch if you want a light browned coating.
  5. Air fry average pieces at 380–390°F / 193–199°C.
  6. Flip halfway for better browning.
  7. Check the center for 165°F / 74°C.

Thin boneless thighs may be ready in 11–13 minutes. Average pieces usually need 14–17 minutes. Thick pieces, folded pieces, or a crowded basket may need closer to 18–20 minutes. Start checking at the low end of the range if your air fryer runs hot.

How to Get Crispy Skin

Crisp skin is not luck. It is mostly dryness, space, and the final few minutes.

  • Blot the skin very dry. Keep blotting until it no longer looks shiny.
  • Give the thighs space. Light edge-touching is fine; overlapping traps steam.
  • Start skin-side down, finish skin-side up. The first stage helps render fat; the second gives the skin direct heat.
  • Use very little oil. Too much oil makes the surface heavy instead of crisp.
  • Add wet or sweet things late. BBQ sauce, honey, and sugary marinades brown fast and can burn before the chicken is done.
Infographic showing five rules for crispy air fryer chicken thigh skin, including drying, spacing, flipping, and saucing late.
Crispy skin works best as a sequence: dry surface, good airflow, a purposeful flip, and sauce only at the end.

For the crispiest version, season the thighs and refrigerate them uncovered for 1–8 hours before cooking. This dries the surface even more, but it is optional for a regular weeknight batch.

If the chicken is cooked through but the skin is still soft, air fry skin-side up for another 2–4 minutes. Watch closely near the end because spices can darken quickly. For another crisp chicken guide, see these air fryer chicken wings.

Frozen Chicken Thighs in the Air Fryer

You can cook frozen thighs in the air fryer, but treat them like a rescue dinner, not the crispiest version of the recipe. Begin gently, separate the pieces as soon as they loosen, and let the thermometer make the final call.

For frozen bone-in thighs, start at 360°F / 180°C for 20–30 minutes, flipping halfway, then finish hotter only after the pieces have separated and the centers are mostly cooked. When pieces are frozen into a solid block, do not force them apart with a knife; warm them until they loosen.

Frozen-together thighs cook unevenly because the center of the stack lags behind the outside pieces. Separate them as soon as they loosen, season any exposed surfaces, then continue cooking in a single layer.

Frozen chicken thighs in an air fryer basket shown before and after separating into a single layer.
When cooking frozen chicken thighs, separation is the turning point. After the pieces loosen, spread them out so the middle cooks as evenly as the edges.

Once the chicken is mostly cooked through, increase to 380°F / 190°C for 3–5 minutes to improve browning and crisp the skin. Medium frozen thighs may take about 25–35 minutes total. Large frozen thighs can take 30–40 minutes. Check near the bone before serving.

The same staged approach works for other frozen chicken pieces too, including frozen chicken wings in the air fryer. Fresh or fully thawed thighs usually brown better and cook more predictably, but frozen thighs are useful when dinner needs to happen without a thawing plan.

Thawed thighs? Return to the classic recipe card or compare cuts in the time chart.

BBQ, Sauced, and Marinated Chicken Thighs

BBQ sauce and marinades can make the chicken taste deeper and more flavorful, but they also change how the surface cooks. Think dry rub early, sweet sauce late. That is the simple rule.

The best sauced thighs should look glossy and sticky at the edges, not blackened before the center is done.

BBQ sauce brushed onto cooked chicken thighs inside an air fryer basket.
Timing matters more than extra sauce here. Brush near the end so the BBQ glaze turns sticky and glossy instead of burnt.

For BBQ thighs

Air fry the thighs mostly plain or with a dry rub first. Sauce belongs near the end: brush it on during the final 3–5 minutes, then cook until it looks glossy at the edges, not blackened. Add a second light brush after cooking if you want a saucier finish. For very sugary sauces, use a thin layer first and add more after cooking.

Marinated thighs

Lift the chicken out of the marinade and wipe off excess liquid before air frying. Let the flavor stay, but leave the liquid behind. This is especially useful for soy-based marinades, honey garlic marinades, yogurt marinades, and tandoori-style marinades.

With sweet marinades, cook closer to 380°F / 193°C and watch the last few minutes carefully. Honey, sugar, and bottled sauces can darken quickly. For a glossy sweet-savory finish, brush on homemade teriyaki sauce near the end rather than at the start.

Flavor Variations

Once the cooking method is clear, flavor becomes the easy part. Keep the timing steady and adjust the seasoning around it.

  • Lemon pepper: Use lemon pepper seasoning and finish with fresh lemon juice after cooking. For a saucier version, see this lemon pepper chicken.
  • Garlic herb: Use garlic powder, onion powder, thyme, oregano, and black pepper.
  • Cajun: Use Cajun seasoning and reduce added salt if the blend is already salty.
  • Ranch: Use dry ranch seasoning lightly, then taste before adding extra salt.
  • Teriyaki: Cook with a dry base seasoning, then glaze near the end.
  • Honey garlic: Add honey garlic glaze during the final few minutes so it does not burn.
  • Tandoori-style: Use a thick yogurt-spice marinade, wipe off excess, then air fry until cooked through.
  • Garam masala: Add a small pinch of garam masala to the paprika-garlic rub for a warmer spice note.
  • Green chutney: Serve with green chutney, or stir the chutney into yogurt for a quick herby dip.
  • Spicy: Add cayenne, chili powder, crushed red pepper, or hot sauce after cooking. Serve sweet-hot versions with mango habanero sauce.

Bright, spicy serving idea

For a brighter plate, keep the thighs dry-rubbed and crisp, then serve them with sliced onions, lemon wedges, green chutney, and a quick yogurt-garlic dip. You get the crisp skin from the air fryer and the fresh, spicy contrast on the side.

Air Fryer Size, Basket Space, and Equipment

A 5–6 quart basket-style air fryer is ideal for 4 medium bone-in thighs. Smaller air fryers may only fit 2 or 3 at a time. Light edge-touching is fine; overlapping or stacking means you should cook in batches.

Basket-style air fryers often brown faster than oven-style air fryers. Larger oven-style models may need a few extra minutes because the food sits farther from the heating element. Ninja Foodi, Cosori, Instant, Philips, and similar models can all work, but basket shape and heating strength change the final few minutes more than the brand name does.

The most useful tool is an instant-read thermometer. It removes the guesswork, especially when the thighs are different sizes or when you are cooking frozen pieces.

Troubleshooting

Most air fryer chicken thigh problems are not recipe failures. They are usually surface problems, spacing problems, timing problems, or sauce problems. Once you know which one happened, the fix is usually simple.

Quick fixes by problem

ProblemLikely reasonFix
Skin is rubberyThe skin was wet, the basket was crowded, or the thighs did not finish skin-side up long enoughPat dry, cook in a single layer, and add 2–4 minutes skin-side up
Chicken is dryThe thighs were small or cooked too longStart checking earlier and rest for 5 minutes before serving
Outside is browned but inside is undercookedThe thighs are large, very cold, frozen, or crowdedLower the temperature slightly and continue cooking in 3-minute bursts
Seasoning burnedToo much sugar, fresh garlic, or sauce went in too earlyUse dry spices first and add sweet sauces near the end
Air fryer smokedToo much oil, excess fat, old grease, or a dirty basketTrim loose fat, use less oil, and check the drawer for old grease before starting
Chicken tastes blandThe surface was under-seasonedSeason both sides, including edges, and add a squeeze of lemon after cooking if the chicken tastes flat
Thighs cooked unevenlyPieces were different sizes or folded under themselvesUse similar-sized thighs and open folded boneless pieces before cooking
Skin stuck to the basketThe basket was not clean, the skin was too wet, or the chicken was moved too earlyClean the basket, dry the skin well, and let the first side cook before flipping
Frozen thighs cooked unevenlyThe pieces were stuck together or too thickSeparate once softened and check near the bone before serving

When the skin is still soft

When the chicken is already cooked but the skin is disappointing, do not start over. Put it back skin-side up for a few minutes, then serve with lemon, chutney, sauce, or a cool dip.

Storage and Reheating

Store leftover chicken thighs in an airtight container in the refrigerator for 3–4 days. That matches USDA guidance for cooked leftovers, which gives a 3–4 day refrigerator window.

To reheat, air fry at 350°F / 175°C until hot in the center. The exact time depends on whether the thigh is bone-in or boneless. Reheating in the air fryer keeps the surface much better than microwaving.

For the best leftover texture, reheat only what you plan to eat and keep the rest chilled until needed.

The microwave works when speed matters, but the skin will soften. If you want the skin crisp again, microwave briefly to warm the center, then air fry for a few minutes to revive the outside.

Cooked thighs can also be frozen, though the skin will not be as crisp after thawing. For best results, remove the meat from the bone and use it later in rice bowls, wraps, soups, noodles, or salads.

What to Serve with Them

These thighs are flexible enough for a simple dinner, a meal prep box, or a more flavorful weekend plate. The best plate is usually hot chicken, something cool, something bright, and something that catches the juices.

Crispy air fryer chicken thighs served with green chutney, yogurt dip, sliced onions, lemon wedges, and naan.
To serve, build contrast around the crispy chicken. Lemon brightens it, onions add bite, chutney brings heat, and yogurt dip cools everything down.
  • Plain rice, jeera rice, fried rice, or a bowl with sliced thighs and crunchy vegetables
  • Mashed potatoes, roasted potatoes, or air fryer hash browns
  • Steamed vegetables, roasted broccoli, green beans, carrots, or corn
  • A cold cucumber salad for smoky, spicy, or BBQ-style thighs
  • Garlic bread, dinner rolls, or naan
  • Noodles with garlic, chili, or teriyaki-style sauce
  • Cool yogurt-garlic dip, green chutney, ranch, aioli, hot sauce, or lemon wedges for squeezing over the hot skin

Creamy garlic mayo works well here, or you can build one from this homemade mayonnaise guide. For a tandoori-style version, serve the chicken with naan, rice, sliced onions, lemon wedges, and a cooling yogurt dip.

A lighter meal works well with sliced boneless thighs over salad. Tuck extras into wraps with crunchy vegetables.

FAQs

How long do chicken thighs take in the air fryer?

Bone-in, skin-on thighs usually take 20–24 minutes at 400°F / 200°C. Boneless skinless thighs cook faster, usually 11–20 minutes depending on thickness. Start checking at the low end of the range if your thighs are small or your air fryer runs hot.

What temperature works best?

For bone-in, skin-on thighs, 400°F / 200°C gives the best balance of golden skin and juicy meat. Boneless skinless thighs do better around 380–390°F / 193–199°C because the center can cook before the edges dry.

Do you need to preheat the air fryer?

Preheating helps the chicken start browning quickly, especially for skin-on thighs. If your air fryer does not require preheating, you can still run it empty for 3 minutes while you finish seasoning the chicken.

Should chicken thighs start skin-side up or down?

Start skin-side down, then flip skin-side up to finish. The first stage helps the fat begin to render, and the final stage gives the skin direct heat so it can crisp.

Are boneless skinless thighs faster?

Yes. Boneless skinless thighs cook much faster than bone-in thighs, especially when they are thin or opened flat. Start checking early so they stay juicy instead of tightening up.

How do you make the skin crispy?

Use skin-on thighs, blot the skin dry, preheat the air fryer, avoid overcrowding, and finish cooking skin-side up. A tiny amount of baking powder can also help the skin crisp more deeply.

Why is the skin not crispy?

The skin may have been too damp, the basket may have been crowded, or the chicken may have needed a few extra minutes skin-side up. Wet marinades and too much oil can also soften the surface.

Is 165°F enough for chicken thighs?

Yes. Chicken thighs are safe to eat once they reach 165°F / 74°C in the deepest part of the meat. Check the thickest thigh and keep the thermometer in the meat, not against the bone.

Why cook thighs closer to 175°F?

They do not have to reach 175°F for safety, but many people prefer dark meat around that temperature because it can taste softer and more tender. Thighs are more forgiving than chicken breast, so they can handle a slightly higher finish.

Can frozen thighs go straight in?

Yes, but give them a slower start and check the center carefully. Begin around 360°F / 180°C to cook through, then finish hotter around 380°F / 190°C to brown and crisp the outside. Separate pieces as soon as they loosen so the centers cook evenly.

How many thighs fit in an air fryer?

A 5–6 quart basket usually fits 4 medium bone-in thighs in a single layer. Smaller air fryers may fit only 2 or 3. The thighs can touch lightly, but they should not overlap.

Can you use BBQ sauce?

Yes. Brush BBQ sauce on during the final 3–5 minutes so it turns sticky without burning. If the sauce is very sugary, use a thin layer first and add more after cooking.

Can you air fry marinated thighs?

Yes, just do not move them straight from a dripping marinade into the basket. Let the flavor stay, but wipe away excess liquid so the surface can brown.

Need the short version again? Return to the Quick Answer or the Recipe Card.

Final Tip

Once you know what kind of thigh is in the basket, the recipe becomes simple. Give skin-on thighs time to render, check boneless pieces early, be patient with frozen pieces, and finish with something bright: lemon, chutney, yogurt dip, or a sticky glaze. The result is a low-effort dinner that still feels like you meant to make something good.