Posted on Leave a comment

Zucchini Bread Recipe: Easy, Moist and Never Soggy

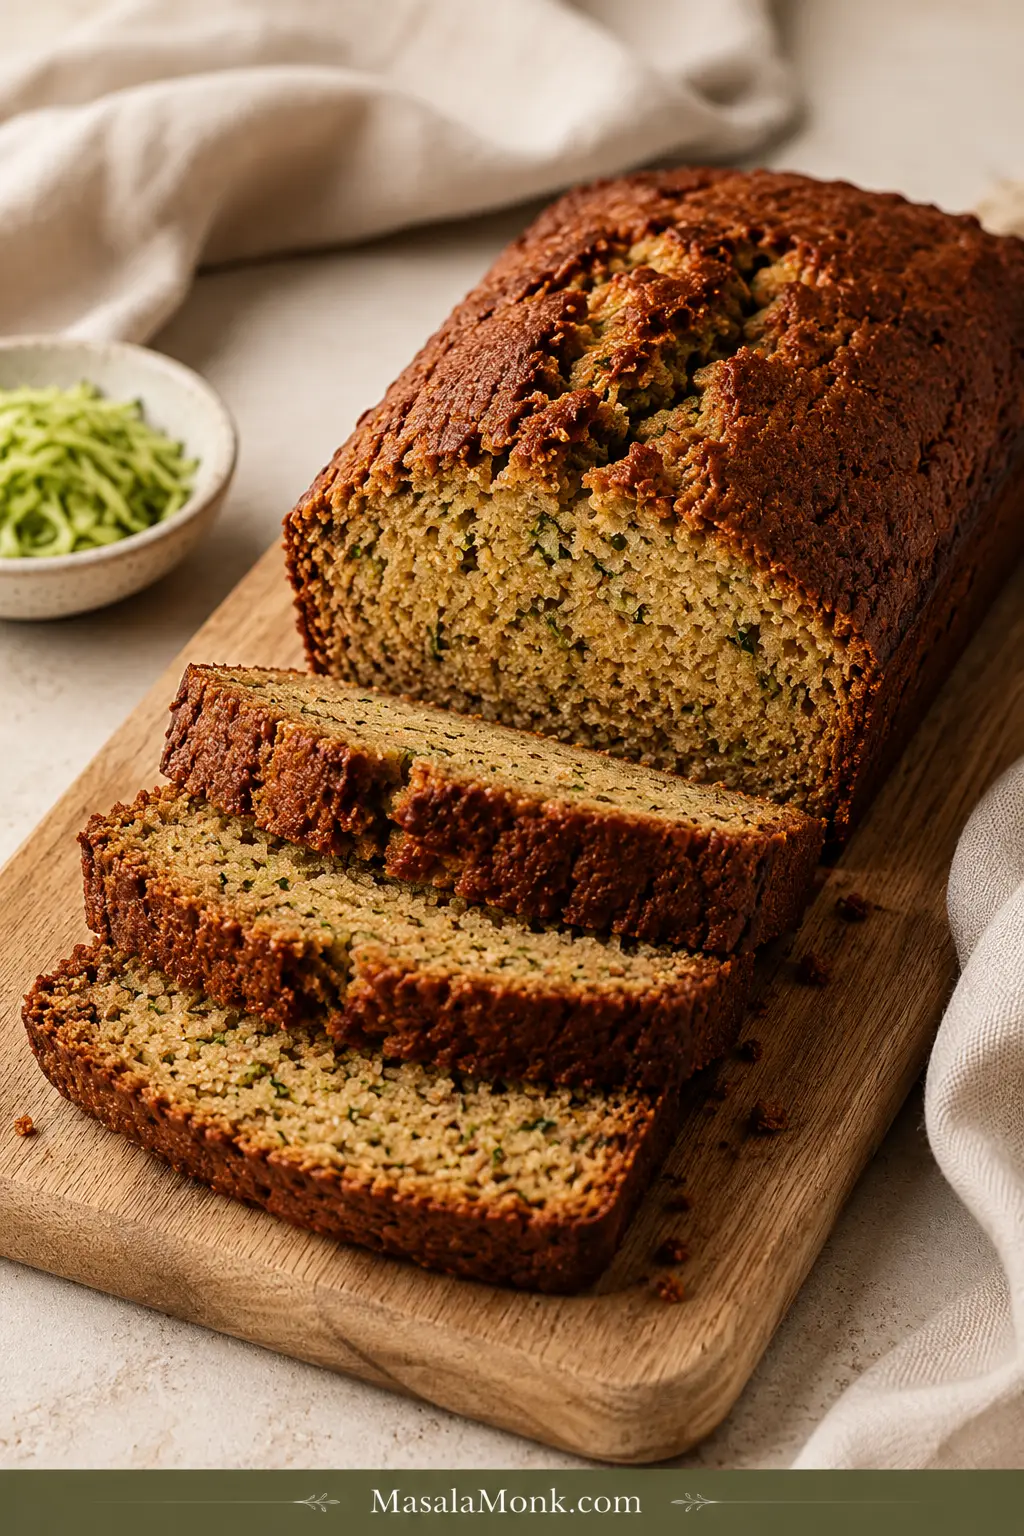
Sliced homemade zucchini bread with a deeply golden cracked top, tender cinnamon-colored crumb and small green zucchini flecks.

A good zucchini bread has a deeply golden top with a natural split down the middle, warm cinnamon in the first bite, and a tender crumb dotted with little green flecks. A slice should bend gently without falling apart, with enough moisture to stay lovely today and still be worth reaching for tomorrow.

Zucchini creates that tenderness, but it can also make the middle deceptive. The crust may look beautifully baked while the batter underneath still needs a few more minutes.

This version keeps the process easy: one bowl, no mixer, no peeling small or medium zucchini, and no wringing fresh shreds dry. You grate, stir, fold and bake.

Keep the moisture in the shreds, leave the puddle behind, and bake until the middle is set.

Quick Answer: How Do You Make Moist Zucchini Bread Without a Wet Middle?

Do not squeeze fresh zucchini dry for this recipe. Grate it on the large holes of a box grater and use 370g / 13 oz, about 2 firmly packed cups. Weigh the shreds themselves; if liquid has collected separately beneath them, leave that puddle behind.

Bake the thick batter in a 9 × 5-inch / 23 × 13 cm loaf pan at 350°F / 175°C. The crack across the top should reveal baked crumb, and a thin skewer or knife pushed into the loaf should show no raw batter.

You can make good zucchini bread without a thermometer. If you have one, it gives you the most objective final check when the crack or tester leaves any doubt. Around 200–205°F / 93–96°C indicates the loaf is baked through.
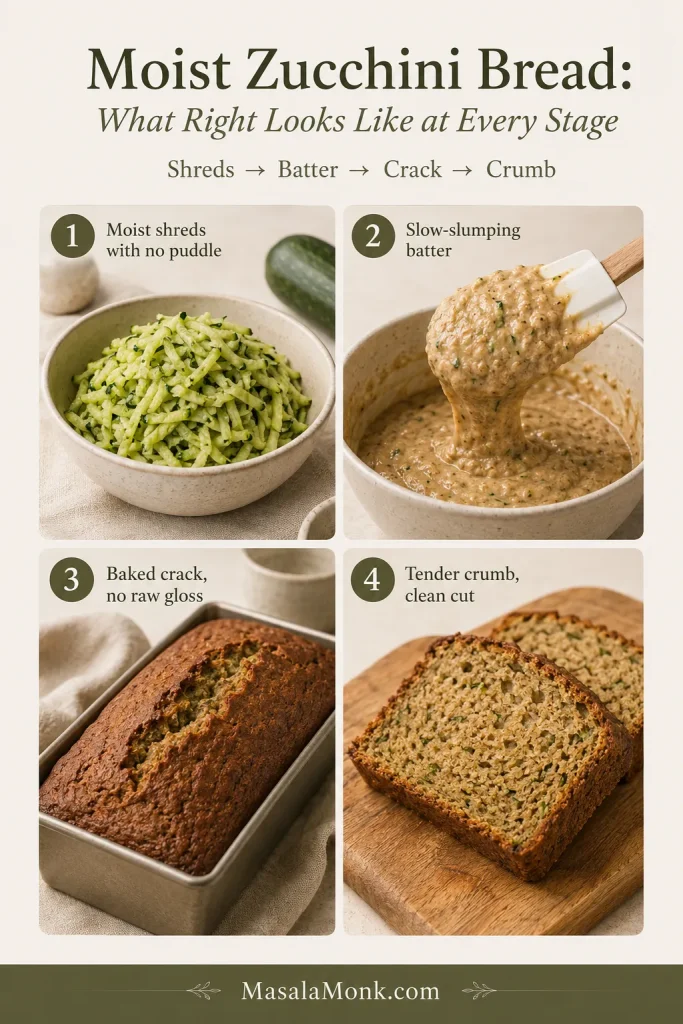
Four-stage zucchini bread guide showing moist grated zucchini, thick batter, a baked center crack and a clean-cut finished crumb.
Use the sequence as checkpoints: moist shreds → thick batter → baked crack → settled crumb. Problems are easier to correct before the loaf reaches the oven.

Zucchini Bread Recipe

This is a cinnamon-forward, oil-based loaf with plenty of zucchini, a golden split top and a crumb that stays tender without feeling wet. Make it plain, or fold in nuts or chocolate when that sounds better.

Recipe at a Glance

Yield1 loaf, about 8–10 generous slices
Pan9 × 5-inch / 23 × 13 cm loaf pan; light-colored metal preferred. Using glass or dark metal? See the pan notes.
Oven350°F / 175°C
PrepAbout 15 minutes
BakeAbout 55–60 minutes; check the loaf itself for doneness
Zucchini370g / 13 oz freshly grated zucchini, not wrung dry
Cooling15 minutes in the pan, then completely on a rack

You will need: one large mixing bowl, a box grater, fork or whisk, flexible spatula, 9 × 5-inch loaf pan, parchment paper and a cooling rack. A digital scale is particularly helpful; an instant-read thermometer is optional.

Ingredients
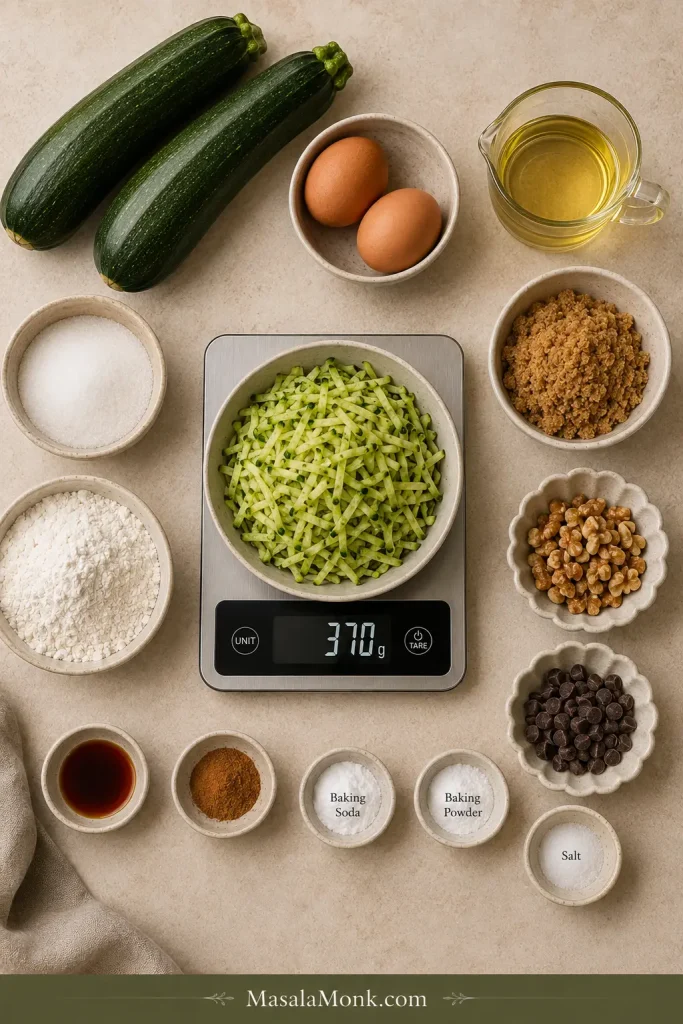
Zucchini bread ingredients arranged around a digital scale holding grated zucchini at 370 grams, with two eggs, flour, sugars, oil and spices.
Weigh 370g of the grated flesh you will actually use, especially if an oversized zucchini needs trimming first.
  • 370g / 13 oz freshly grated zucchini, about 2 firmly packed cups, not wrung dry
  • 2 large eggs
  • 160ml / ⅔ cup neutral oil, such as sunflower, canola or vegetable oil
  • 95g / 3.4 oz (½ cup packed) brown sugar, light or dark
  • 100g / 3.5 oz (½ cup) granulated sugar
  • 1 teaspoon vanilla extract
  • 1 teaspoon fine salt
  • ¾ teaspoon baking soda
  • ½ teaspoon baking powder
  • 1¼ teaspoons ground cinnamon
  • ⅛ teaspoon ground nutmeg, optional
  • 260g / 9.2 oz (2 cups) all-purpose flour, spooned and leveled if using cups
  • Up to 85g / 3 oz chopped walnuts, pecans or chocolate chips, optional

Instructions
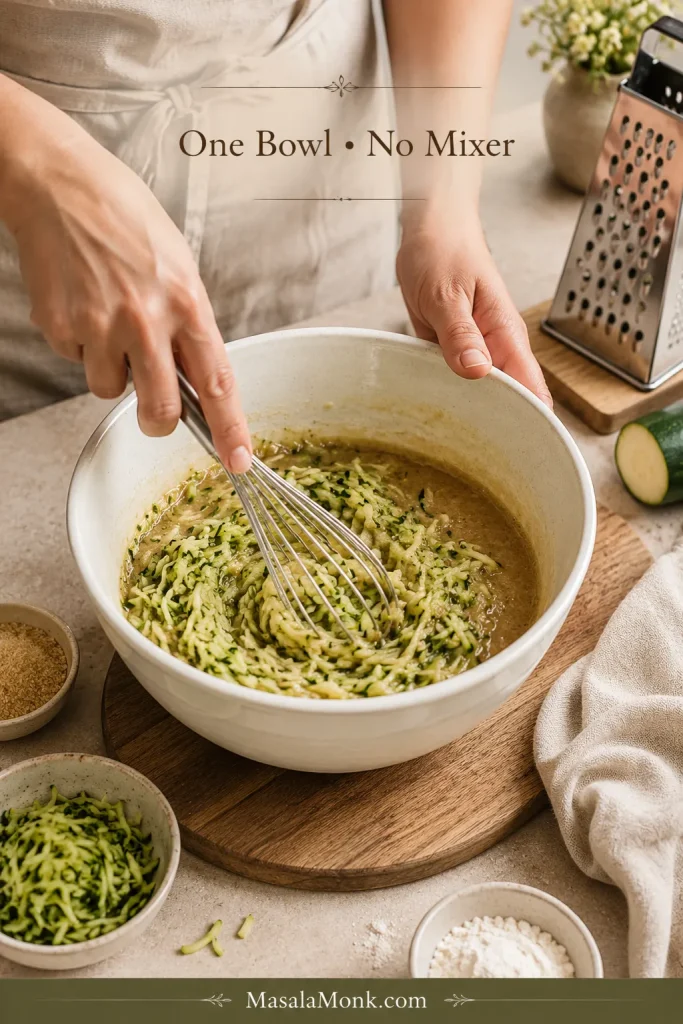
Hands mixing grated zucchini and wet ingredients in a large cream bowl beside a box grater, with no electric mixer present.
Hand mixing makes it easier to stop as soon as the batter comes together.

Prep and Mix the Batter

  1. Heat the oven. Set a rack in the center and preheat to 350°F / 175°C. Lightly grease a 9 × 5-inch / 23 × 13 cm loaf pan and line the long sides with a parchment sling.
  2. Grate the zucchini. Leave small and medium zucchini unpeeled and grate them on the large holes of a box grater. Measure 370g / 13 oz. Keep the moisture in the shreds, but leave behind any liquid that has pooled separately. Using oversized or frozen zucchini? See the prep notes first.
  3. Mix the wet ingredients. Put the grated zucchini in a large bowl. Add the eggs, oil, brown sugar, granulated sugar, vanilla and salt. Stir until evenly combined.
  4. Add the spices and leaveners. Sprinkle the cinnamon, nutmeg, baking soda and baking powder evenly across the surface. Stir thoroughly, scraping around the bowl, so everything is well distributed before the flour goes in.
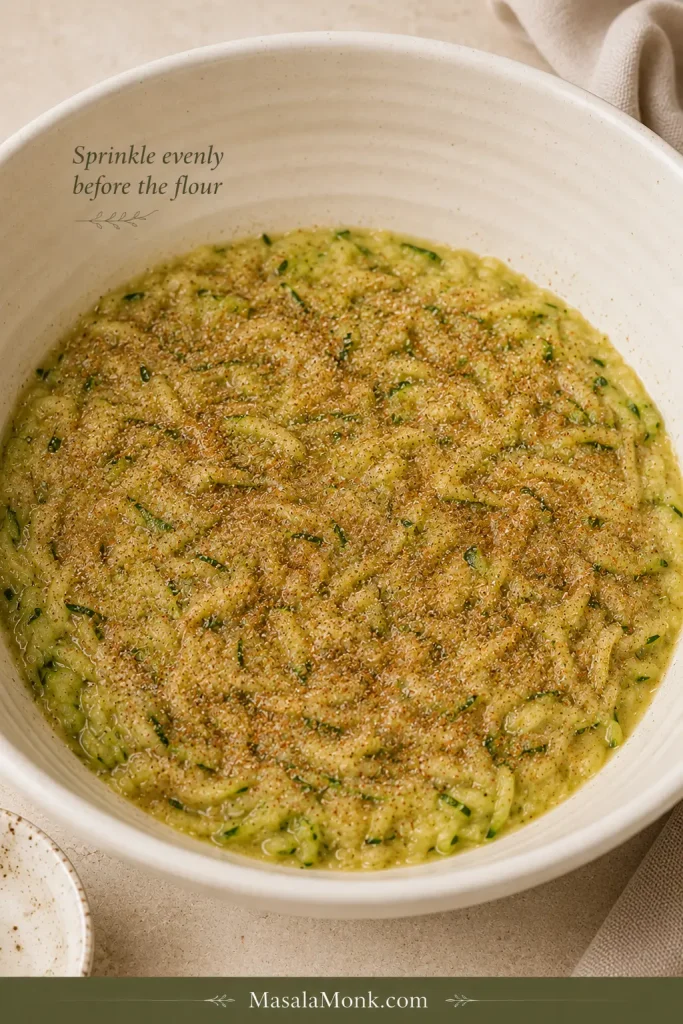
Cinnamon and small amounts of baking soda and baking powder evenly scattered over a wet zucchini mixture before flour is added.
Scatter the leaveners broadly before the flour goes in so they distribute evenly through the loaf.
  1. Fold in the flour. Add the flour and fold just until the last dry streak disappears. Fold in nuts or chocolate chips now, if using. The batter should spread easily with a spatula and slump slowly when lifted.
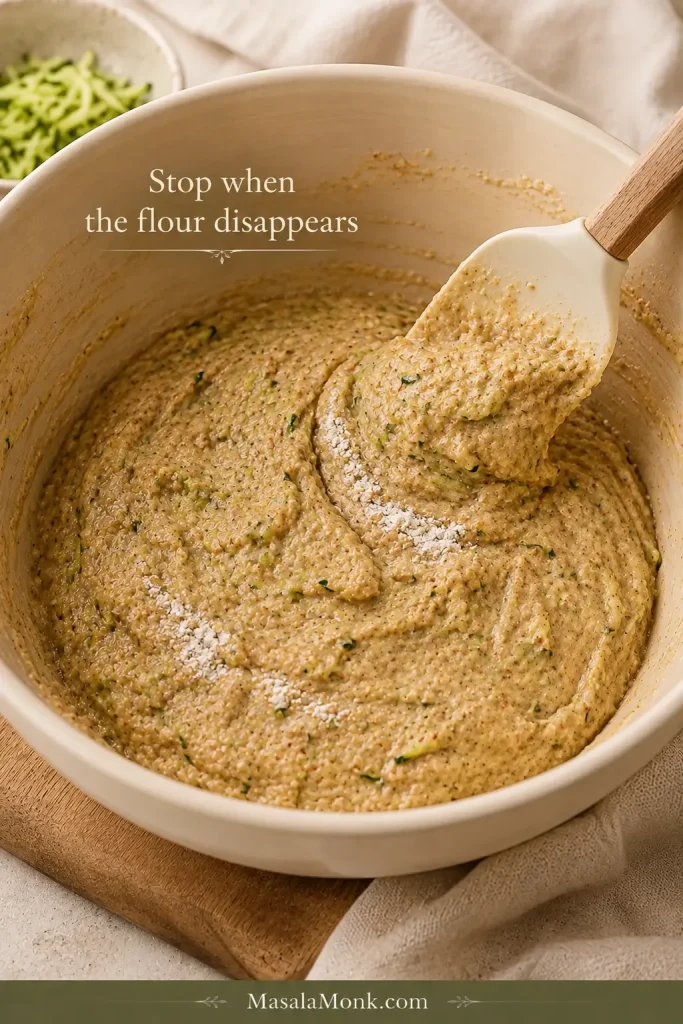
Zucchini bread batter being gently folded with a spatula while a few final streaks of dry flour remain visible.
Stop when the last dry flour streak disappears; extra folding only works the batter harder.

Fill, Bake and Cool

  1. Fill the pan. Scrape the entire batch into the prepared pan and smooth the top lightly.
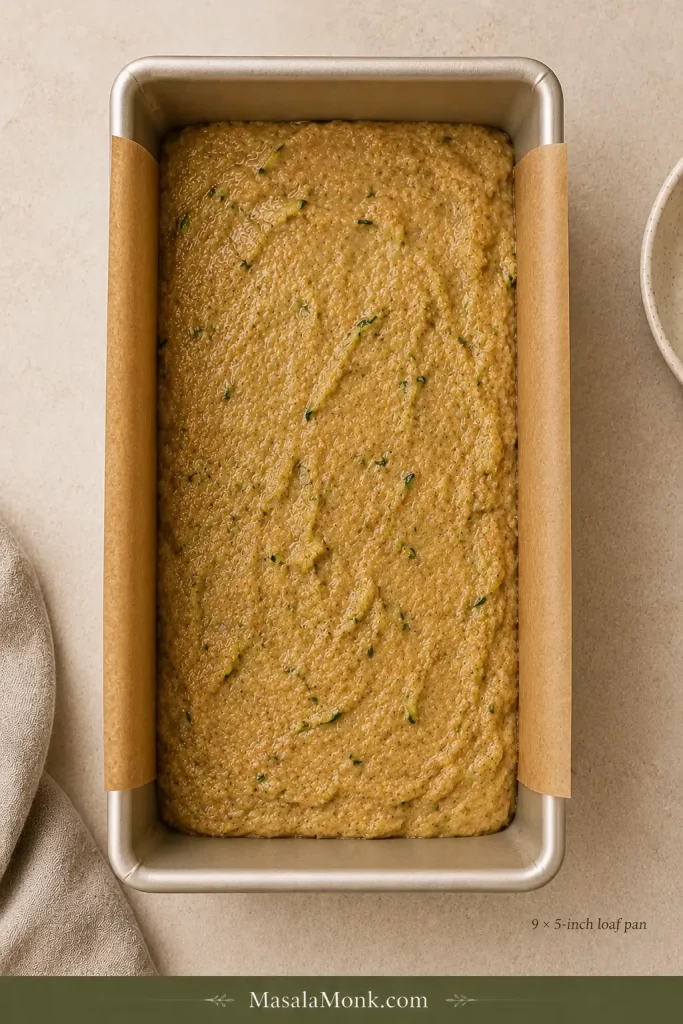
Thick zucchini bread batter spread in a parchment-lined light metal 9 by 5 inch loaf pan with space remaining above the batter.
Use the full batch in the intended 9×5-inch pan so the center bakes at the expected depth.
  1. Bake. Bake for about 55–60 minutes. Near the end of that window, the top will usually be deeply golden with a natural crack running across it.
  2. Check before removing it. Look into the crack and test the loaf with a thin skewer or knife. A few tender crumbs are fine; shiny raw batter needs more time. Loosely tent the top with foil if it already has enough color.
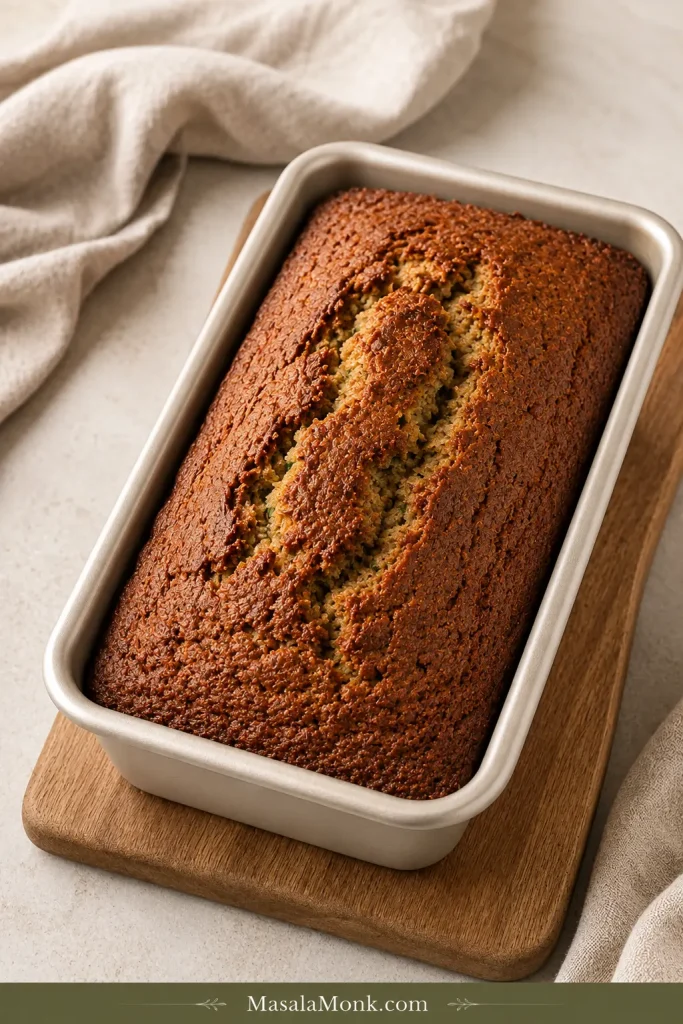
Golden-brown zucchini bread with a natural central crack still inside a light-colored metal loaf pan after baking.
Once the top is golden and split, the center—not surface color—decides whether the loaf is done.
  1. Cool. Leave the bread in its pan for about 15 minutes, then lift it onto a rack. Cool completely for clean slices and a fully settled crumb.

Recipe source: Adapted from Smitten Kitchen’s Ultimate Zucchini Bread, with additional guidance here on zucchini moisture, doneness and common texture problems.

Table of Contents

Which Zucchini Are You Using?

Freshly grated zucchini is the reference point for this loaf. Small supermarket zucchini are the simplest route, but the oversized one hiding beneath the garden leaves can work too.
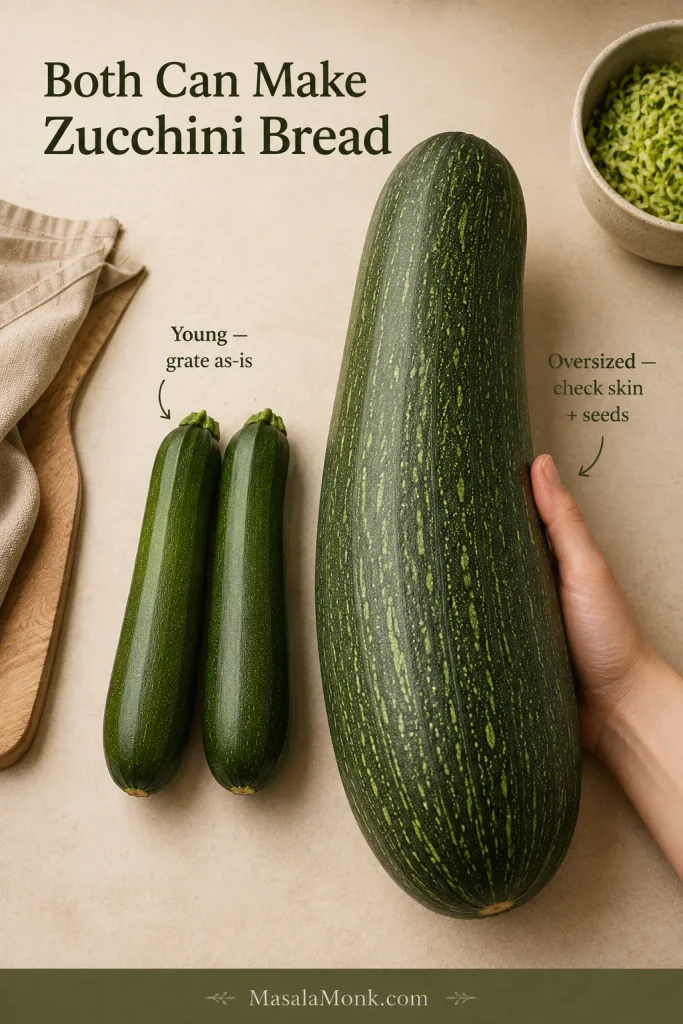
Several small young zucchini beside one very large garden zucchini, comparing the sizes that can be used for zucchini bread.
Prep changes with zucchini size; the target stays 370g of usable grated flesh.
You haveWhat to do
Small or medium fresh zucchiniLeave the skin and seeds in place. Grate and measure 370g.
Large garden zucchiniCut it open first. Remove tough skin or a pale, spongy cavity full of hard seeds if necessary, then grate and measure 370g of the usable flesh.
Frozen shredded zucchiniIt can work, but it will not behave exactly like fresh zucchini after thawing. See the note below.

How to Prepare Zucchini for Bread

Peel, Seeds and Grating

Do you need to peel it? No. Thin zucchini skin softens during baking and leaves the familiar green flecks through each slice. Peel only an oversized mature zucchini whose skin has become leathery.

What about the seeds? Leave young seeds alone. With a huge garden zucchini, scoop out the middle only when it has become pale, spongy and filled with hard mature seeds.
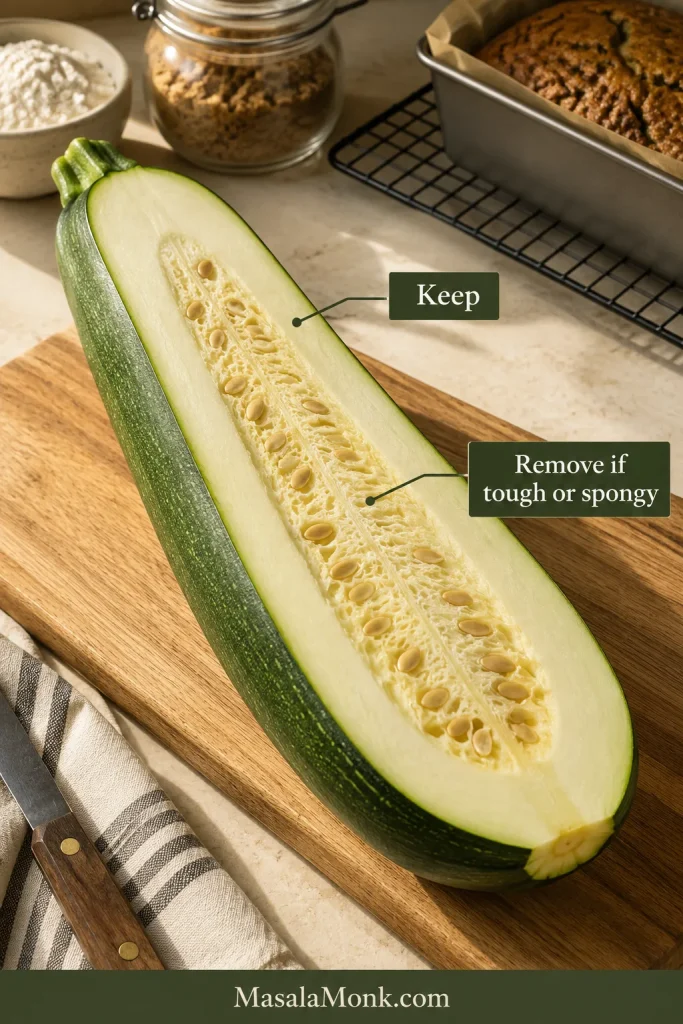
Large mature zucchini cut lengthwise to show firm usable outer flesh and a pale, seeded central cavity that may need removing.
Remove a hard-seeded, spongy center before weighing so the 370g reflects usable flesh.

Which grater? Use the large holes of a box grater. They produce strands that disappear comfortably into the baked crumb without turning the raw zucchini into pulp.
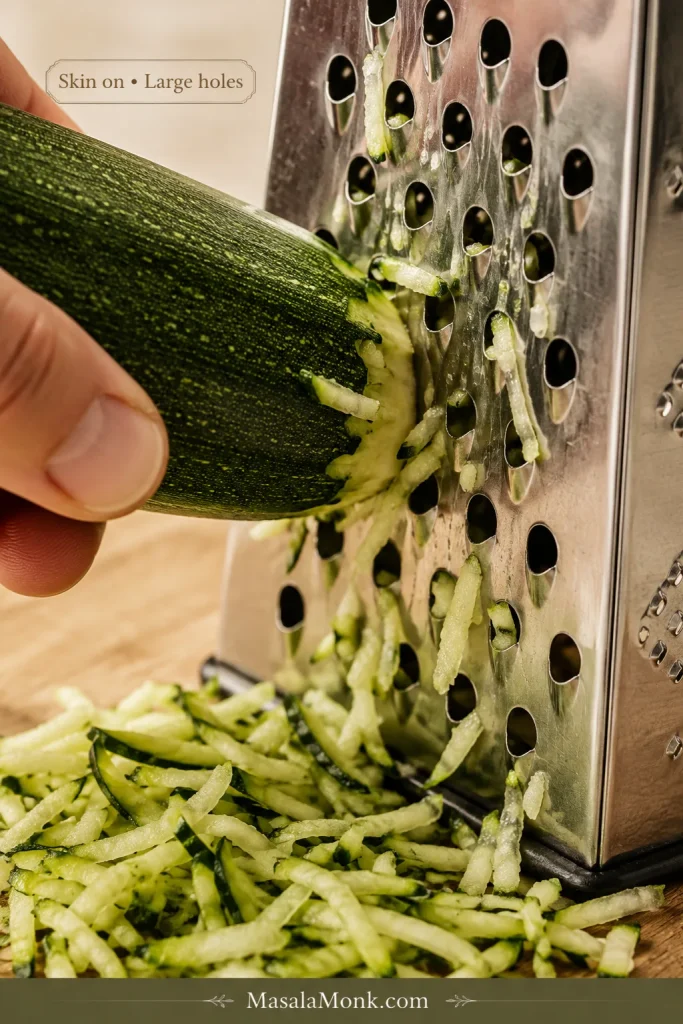
Unpeeled green zucchini being grated on the large holes of a stainless steel box grater, with green-edged shreds collecting below.
Grate over a plate or shallow bowl so separately pooled liquid is easy to leave behind.

Should You Squeeze Zucchini for Zucchini Bread?

No—fresh zucchini should not be squeezed dry for this loaf. Its moisture is part of what keeps the crumb tender.

A bowl of freshly grated zucchini can look surprisingly wet. That alone does not mean anything has gone wrong.

Moisture held inside and on the shreds belongs in the recipe. Water that has collected separately as a puddle does not. Leave that free liquid behind, but do not twist or wring the zucchini into a dry, fibrous mass.

Keep the moisture in the shreds; leave the puddle behind.
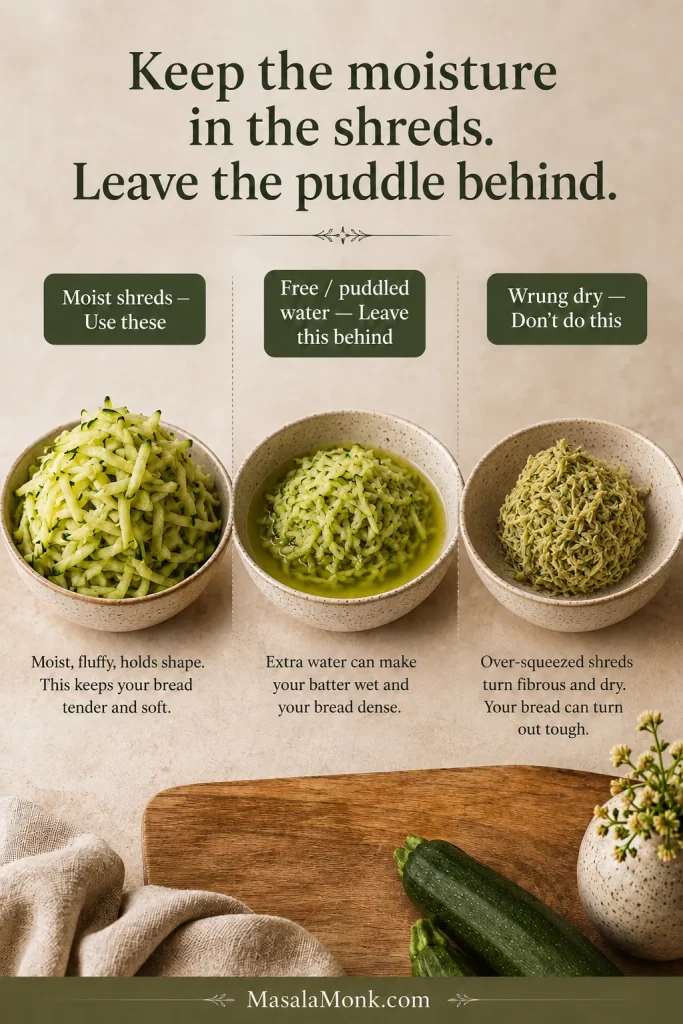
Three grated zucchini states showing moist fluffy shreds, zucchini sitting in separately pooled liquid and tightly squeezed dry zucchini.
Judge separated liquid, not simple dampness: keep moist shreds, leave the puddle, and don’t wring them dry.

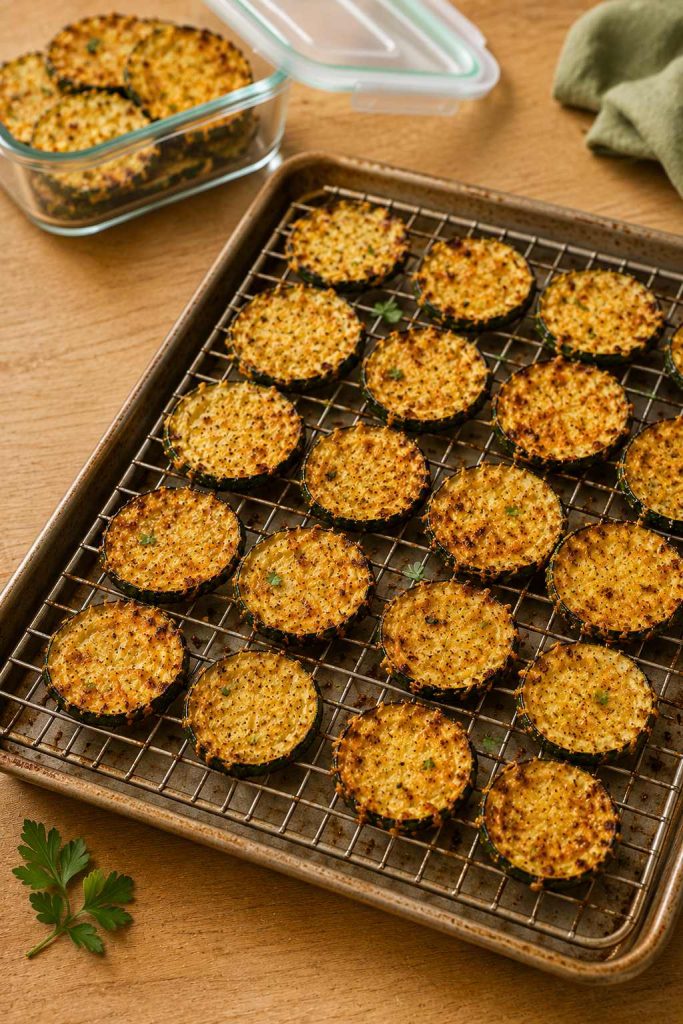
Grated too much? Keep the extra out of the batter so the ratio stays intact. These crispy zucchini chips turn the surplus into something thin, salty and crunchy instead.

Can You Use Frozen Zucchini for Zucchini Bread?

Yes, but fresh zucchini gives the most predictable result here. Freezing breaks down the shreds and makes them release considerably more water as they thaw.

Thaw frozen zucchini completely and let any liquid that has separated freely drain away. Do not wring the remaining shreds dry. Drained frozen zucchini is not a gram-for-gram equivalent to the fresh amount in the recipe, so some variation is unavoidable.

The batter checkpoint matters more when you use frozen zucchini. It should still spread easily, slump slowly from the spatula and have no distinct layer of liquid collecting around it. A bag of summer zucchini saved for later can still make a good loaf; it simply asks you to pay closer attention to the bowl.
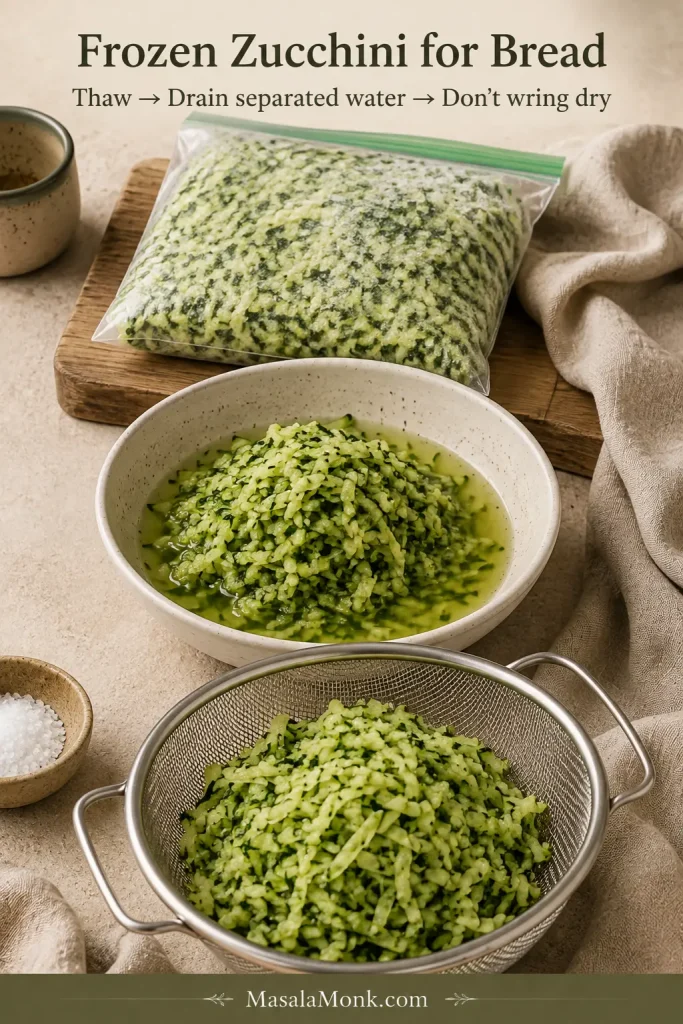
Frozen grated zucchini, thawed zucchini releasing liquid and drained zucchini shreds that remain visibly moist.
After thawing, drain freely separated liquid without wringing the shreds; then use batter consistency as the better checkpoint.

What Should Zucchini Bread Batter Look Like?

The batter should be thick enough to spread into the pan and loose enough to slump slowly from the spatula. Green strands of zucchini will still be visible through the cinnamon-speckled mixture.

A little visible moisture from the grated zucchini is normal. A distinct layer of liquid separating around the batter is different; check whether free zucchini water went into the bowl and recheck the measurements before baking.
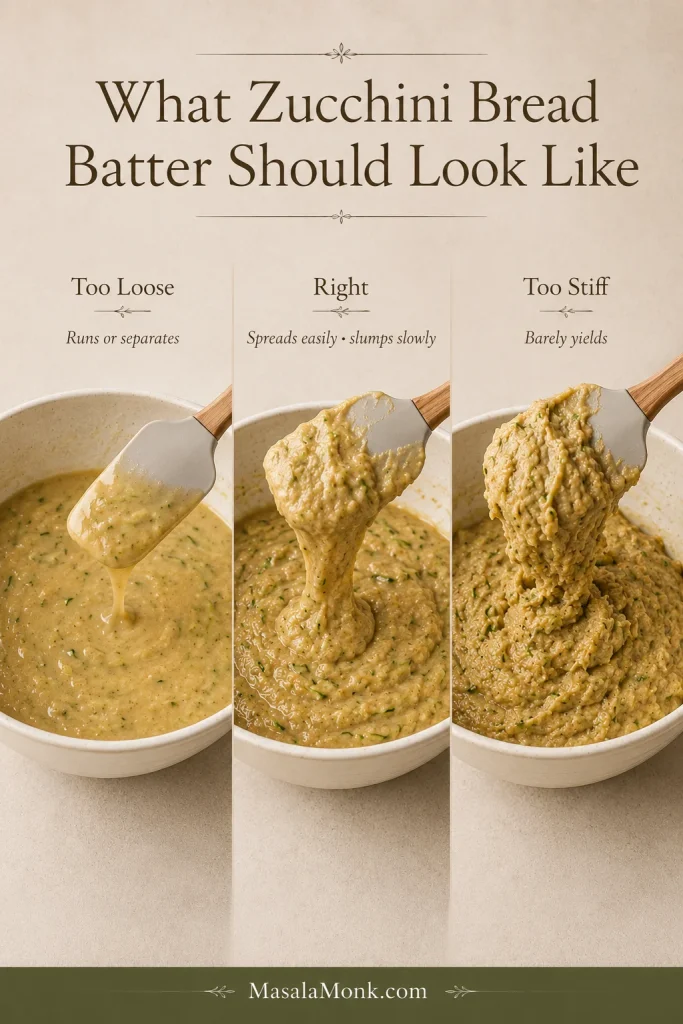
Three zucchini bread batters comparing a thin runny mixture, thick slow-slumping correct batter and an overly stiff batter.
If the batter is too loose or stiff, recheck zucchini water and flour before adding anything.

A mixture that barely yields to the spatula can point to too much flour.

How to Know Zucchini Bread Is Done

Zucchini bread is done when the crack through the top reveals baked crumb and a tester pushed into the loaf carries no raw batter. The clock tells you when to begin looking; these cues tell you when to stop baking.

Check the Crack, Then Use a Tester

A deeply golden top is persuasive, especially once the kitchen smells like the loaf must be done. Check the crack anyway.

Shiny batter down inside that opening needs more oven time. Baked crumb has lost the raw gloss.
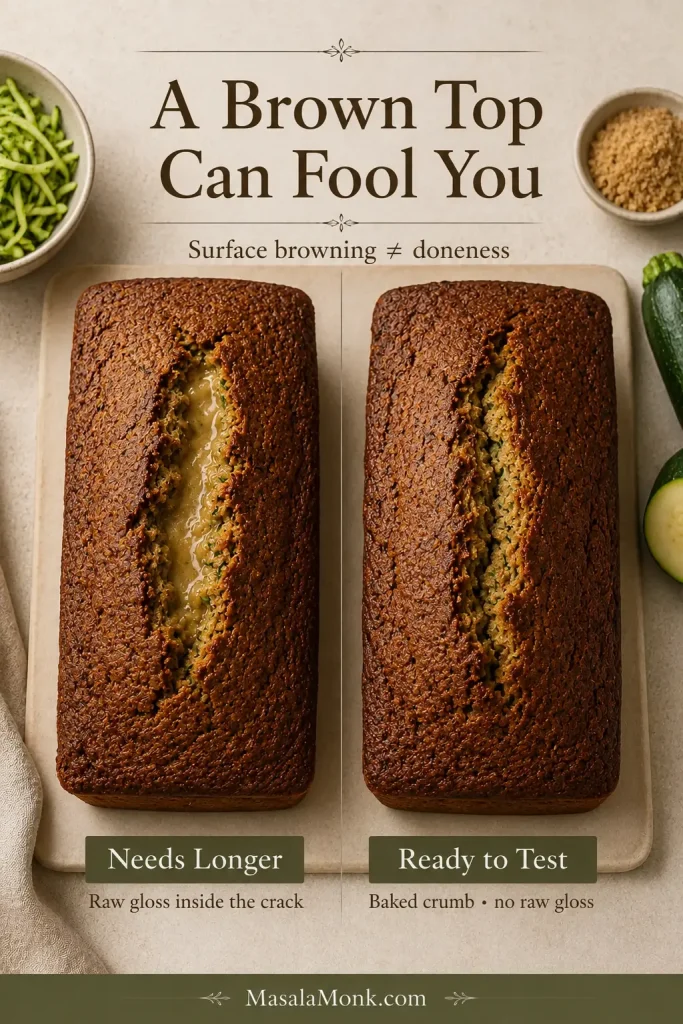
Two similarly browned zucchini loaves comparing a crack with glossy raw batter and a crack showing opaque baked crumb.
Once the crust is brown enough, judge the center—not the surface color or the clock.

Next, push a thin skewer or knife into the thickest part. A clean tester or a few tender crumbs are both fine. A streak of uncooked batter is not.
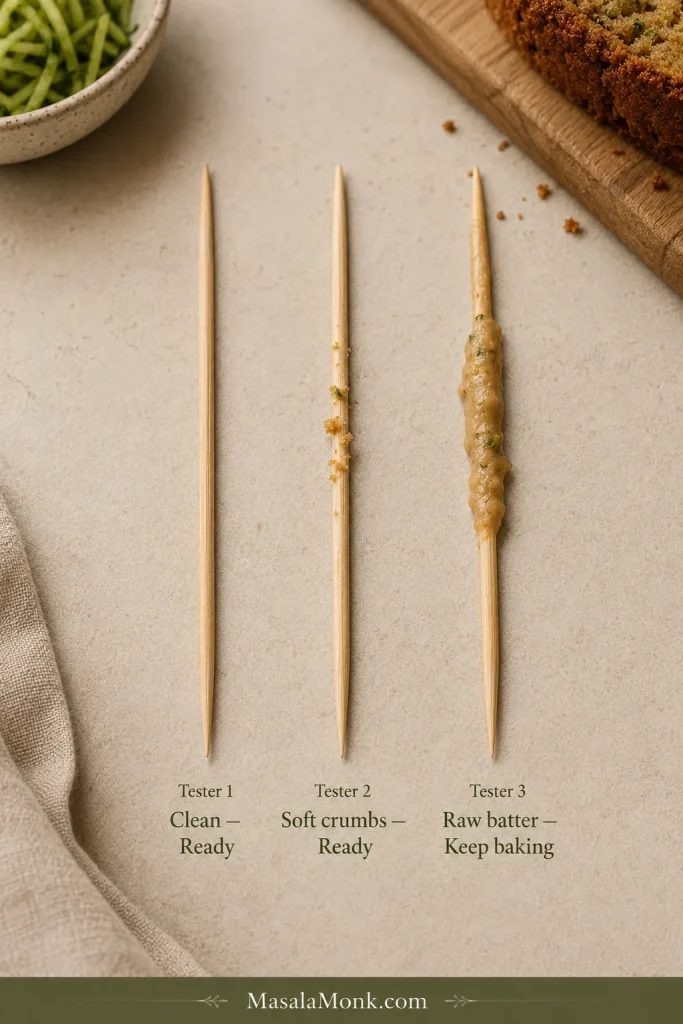
Three wooden testers showing a clean tester, a few soft baked crumbs and a thick smear of raw zucchini bread batter.
Test the thickest center; an edge can look done while the deepest batter still needs time.

Chocolate chips can imitate wet batter, so test another spot before deciding.
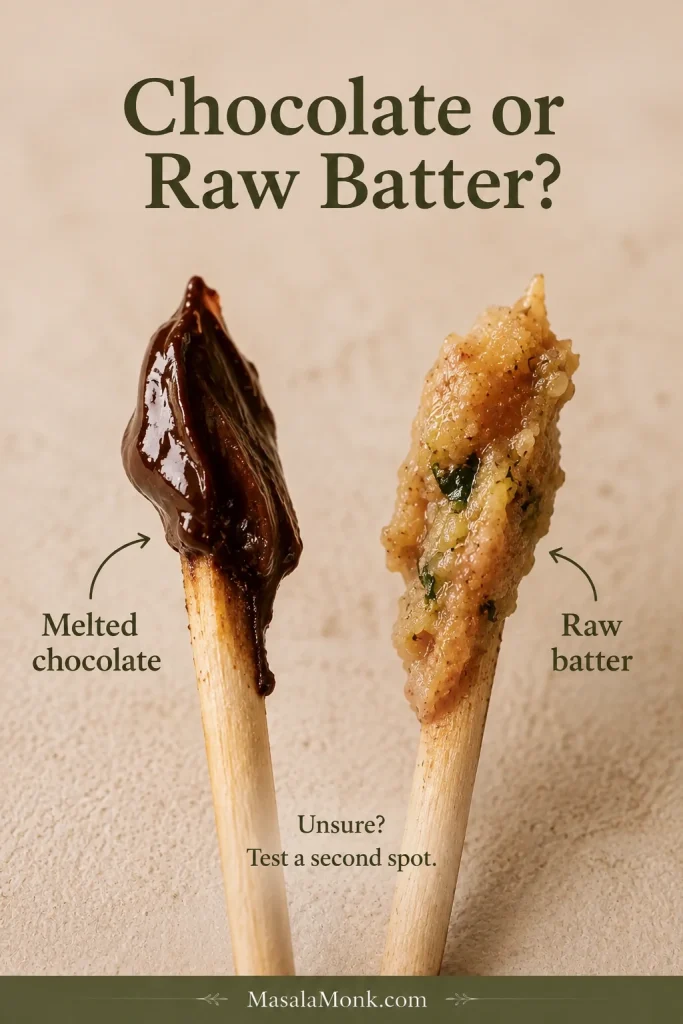
Two close-up baking testers comparing dark melted chocolate residue with a pale, wet smear of raw zucchini bread batter.
If a tester hits melted chocolate, test a nearby spot before extending the bake.

A Thermometer Gives You One More Check

You can make good zucchini bread without a thermometer. If you have one, it gives you the most objective final check when the crack or tester leaves any doubt.

Move an instant-read probe slowly through the loaf and note the lowest reading. Around 200–205°F / 93–96°C indicates that the bread is baked through.
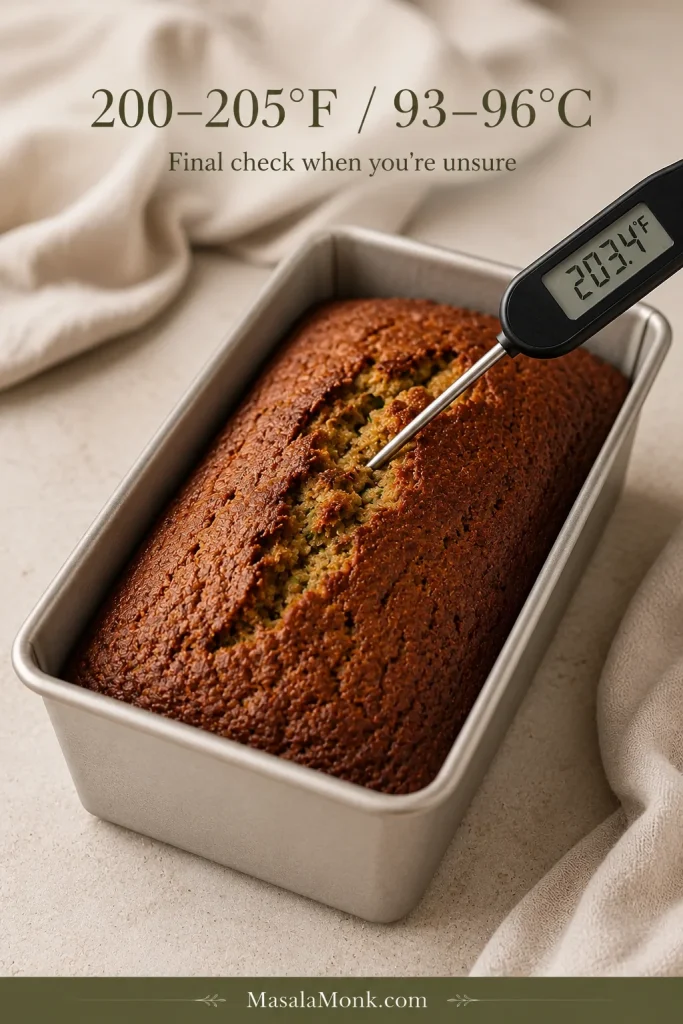
Instant-read thermometer inserted into the thick center of zucchini bread in a light metal pan, displaying about 203 degrees Fahrenheit.
Keep the probe off the pan and read the thickest part of the loaf.

King Arthur Baking’s quick-bread doneness guide explains the thermometer method in more detail.

Already baked it and found a wet or raw center? Go straight to troubleshooting →

The Hard Part: Let It Cool

This is the instruction nobody wants when the kitchen smells like cinnamon and the loaf is sitting three feet away.
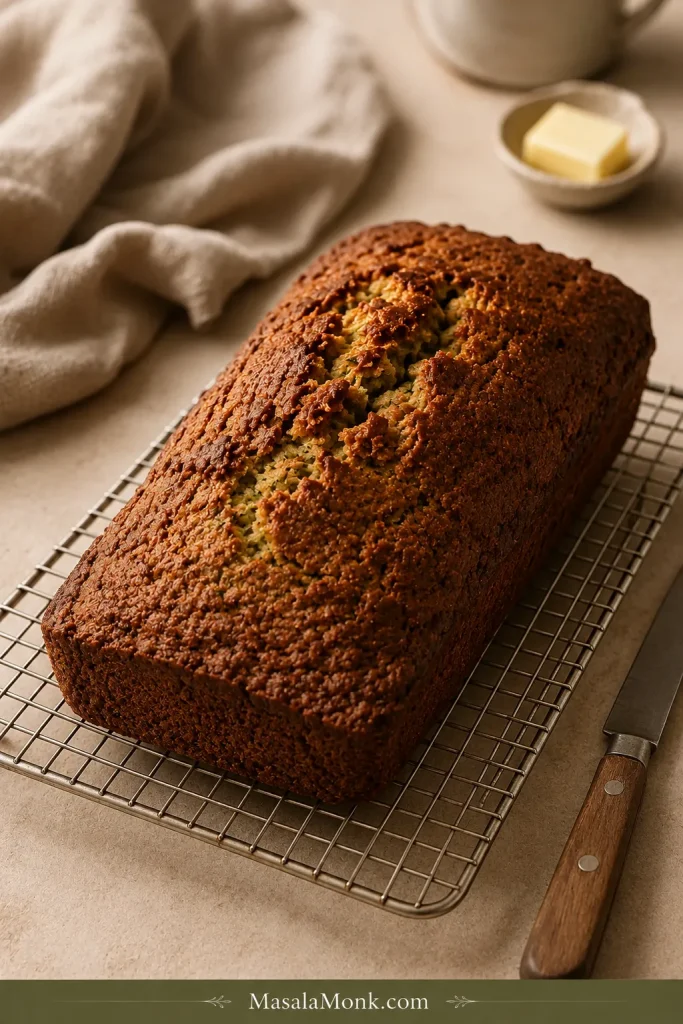
Whole golden zucchini bread cooling on a wire rack beside a knife, butter and neutral linen in warm natural light.

Give it about 15 minutes in the pan, then move it to a rack. Steam continues to escape while the crumb settles, so a just-baked slice naturally feels tackier than one cut later.

You can steal a warm slice. Just wait until the loaf has cooled before deciding that its tender middle is actually gummy.
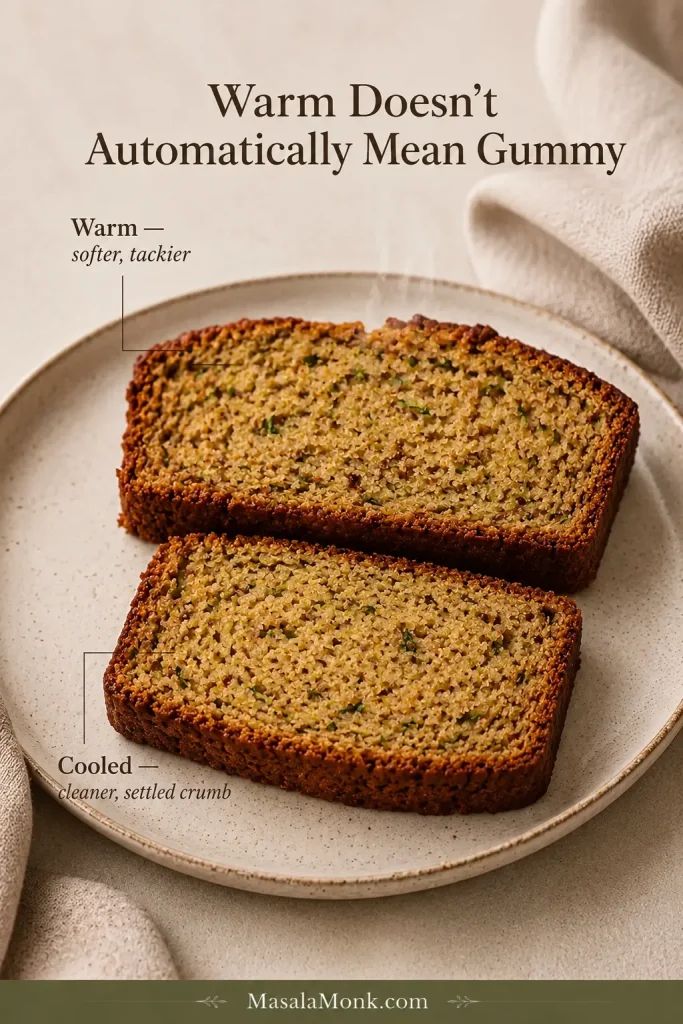
Two fully baked zucchini bread slices comparing a softer warm crumb with a cleaner, more settled cooled crumb.
Judge gumminess on a cooled slice; warmth and trapped steam can temporarily make a fully baked crumb feel tackier.

Moist, Wet or Gummy?

Moist: The cooled crumb is tender, holds together and cuts cleanly. That’s the texture you’re after.

Wet: Raw-looking or paste-like batter remains through the loaf and smears onto the knife. It needed more baking.

Gummy: The bread holds together but feels tacky, compressed or rubbery. Underbaking can cause it, but excess free water, heavy mixing or cutting while very hot can contribute too.

A slightly tacky patch directly beneath the top crust is different from a stripe of raw batter running through the loaf.
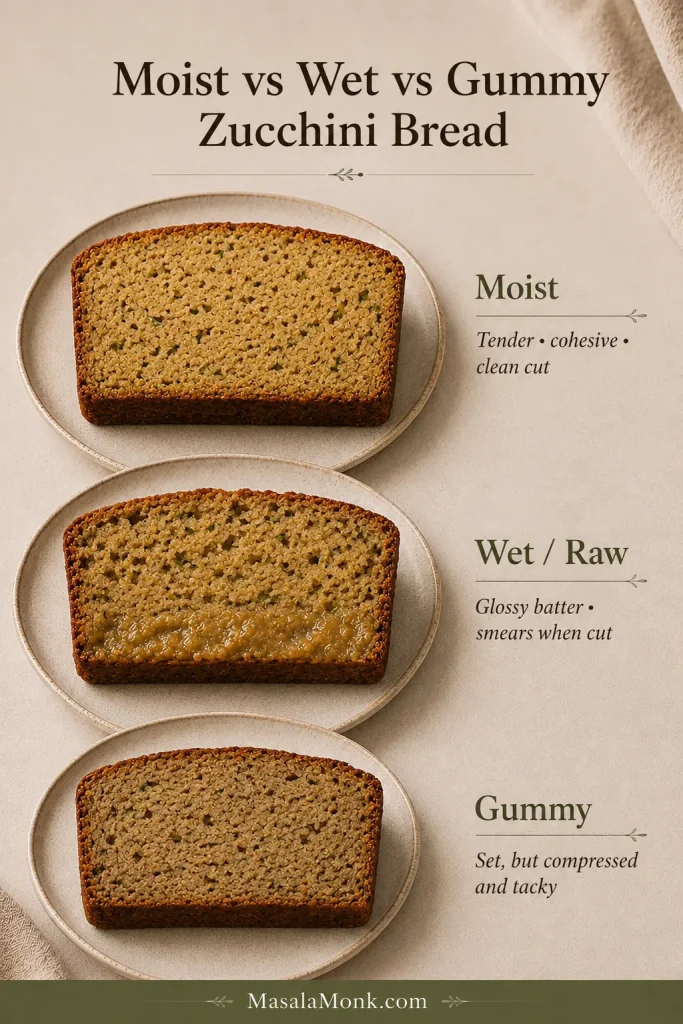
Three zucchini bread slices comparing a tender baked crumb, a glossy raw band and an opaque but compressed gummy crumb.
Wet or raw points back to doneness; a fully set but gummy crumb points to moisture, mixing or cooling.

Zucchini Bread Troubleshooting

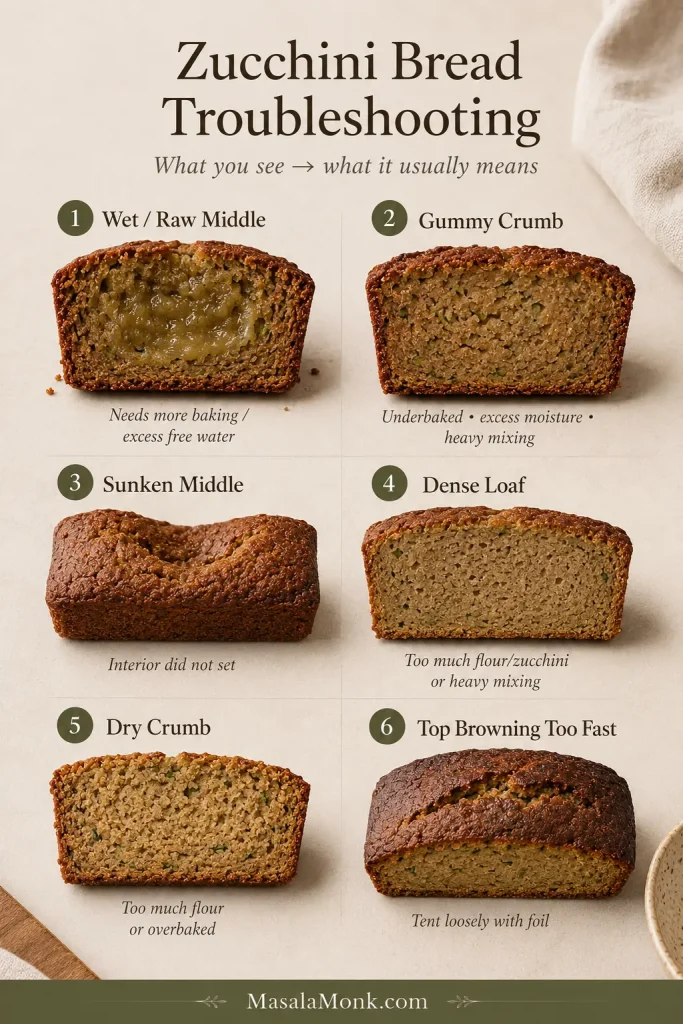
Troubleshooting guide showing zucchini bread with a raw center, gummy crumb, sunken middle, dense crumb, dry crumb and an overly browned top.
Start with the symptom you can see and change one variable at a time.
ProblemLikely causeNext move
Wet or raw middleMore baking time needed; excess free water; oven running coolKeep a whole, hot loaf baking until the raw batter is gone
Gummy crumbUnderbaking, excess moisture, heavy mixing or cutting very hotMix only until combined, bake fully and cool before judging
Sunken middleInterior had not set; inaccurate leavener; pan too small or overfilledCheck measurements, pan size and doneness
Dense loafToo much flour, too much zucchini or heavy mixingWeigh the key ingredients and stop folding once combined
Dry crumbToo much flour, zucchini wrung dry or loaf overbakedKeep the zucchini’s natural moisture and remove the loaf once baked through
Top browning too quicklyDark pan or strong top heatLoosely tent with foil while the loaf finishes

If the top is already dark enough while the center still needs time, loosely tent the loaf with foil and continue baking. The foil is a shield for the crust, not a signal that the middle is finished.
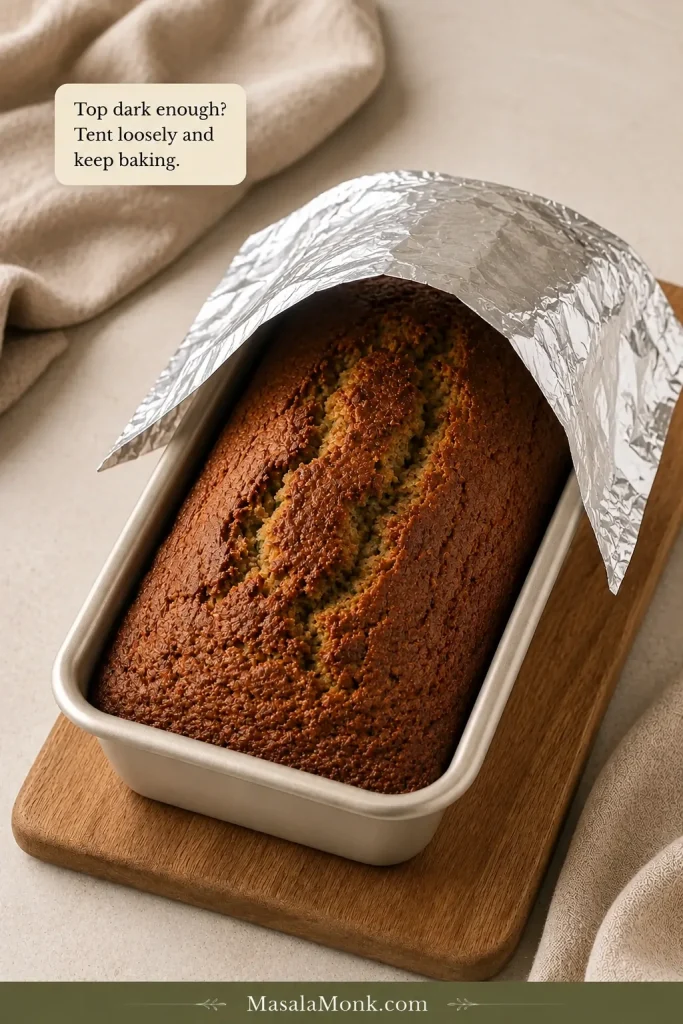
Deeply browned zucchini bread in a light metal loaf pan with aluminum foil loosely arched above the top to prevent further browning.
Keep the foil loose with an air gap; shield the browned crust without wrapping the loaf.

Why Is My Zucchini Bread Raw in the Middle?

Usually because the loaf needed more time, excess free water entered the batter, or the oven was running cooler than expected.

A loaf that is still whole and hot can go back into the oven. Cover the top loosely with foil when it already has enough color and continue until the raw batter is gone.

If you’ve already cut into it and found a genuinely raw middle, the options are unfortunately narrower. Save the fully baked portions. Continuing to bake the whole cut loaf tends to dry the parts that were already done before the exposed batter cooks evenly.
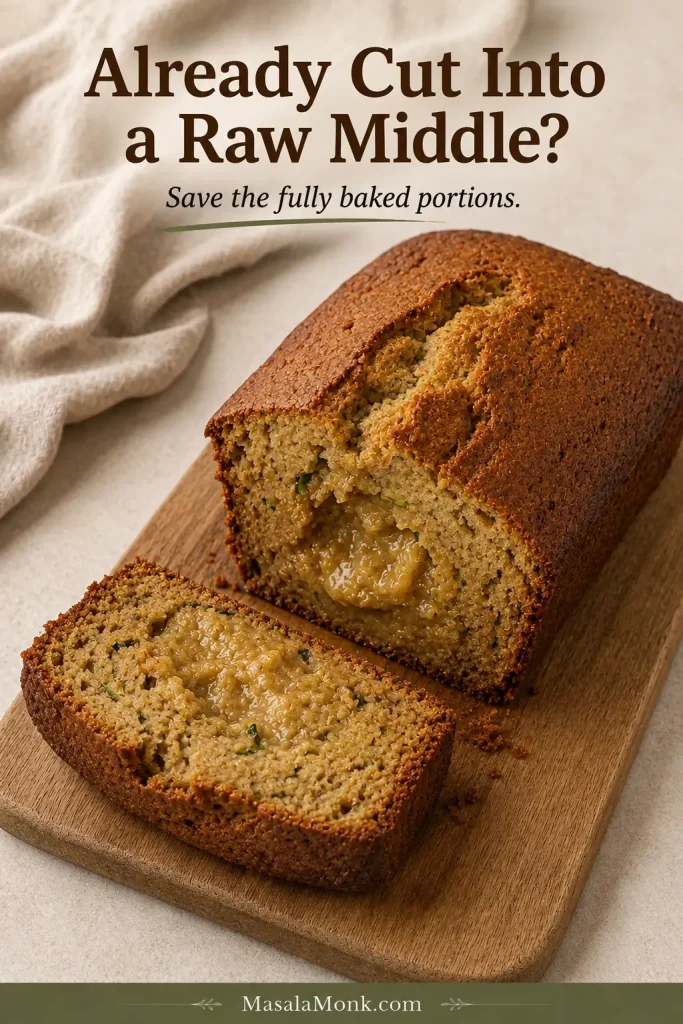
Cut zucchini bread showing fully baked outer crumb surrounding a glossy raw section in the middle of the loaf.
Once the loaf is cut open, protect the baked portions rather than trying to finish it like an intact loaf.

↑ Back to the recipe · Recheck doneness

Easy Add-Ins

Walnuts or pecans: Fold in up to 85g / 3 oz. Walnuts give the loaf the more familiar old-fashioned crunch; pecans are slightly sweeter.

Chocolate chips: Use up to 85g / 3 oz semi-sweet or dark chocolate. In a slightly warm slice, the chips soften into little melted pockets against the cinnamon crumb.

Raisins: About 75g / 2.6 oz, roughly ½ cup, gives the loaf a more old-fashioned recipe-box feel. Raisins and walnuts work especially well together.
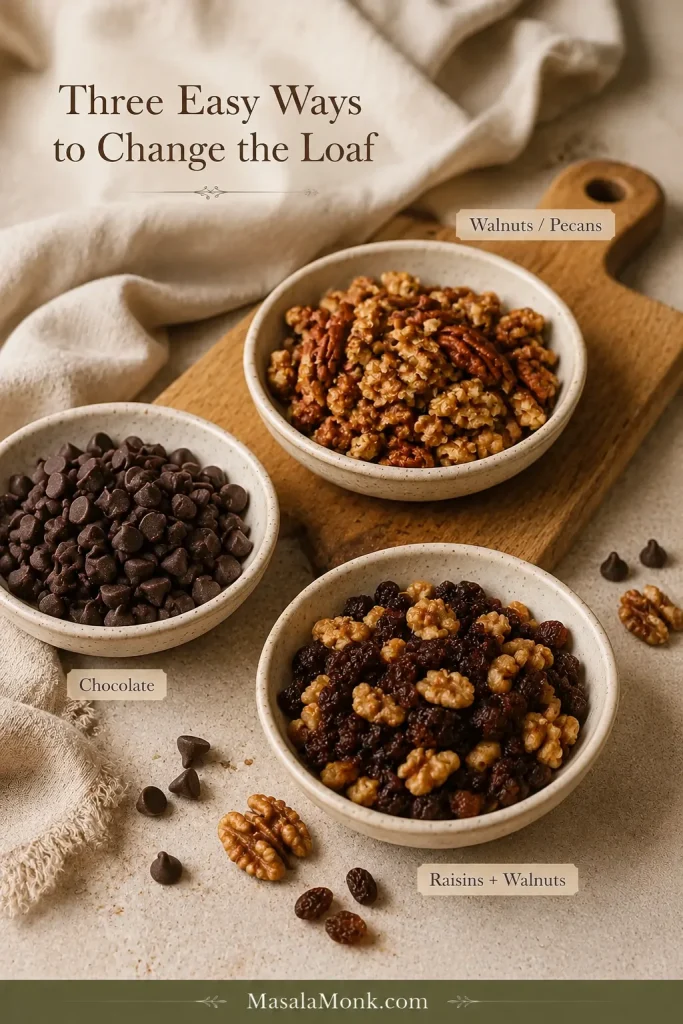
Walnuts and pecans, chocolate chips, and raisins with walnuts arranged in bowls as optional zucchini bread add-ins.
Distribute add-ins evenly so every slice gets some without heavy clusters weakening the crumb.

If that combination of grated vegetables, cinnamon and nuts is the part you love most, it takes a richer turn in this carrot cake with cream cheese frosting.

Before You Start Swapping Ingredients

Zucchini bread is forgiving, but flour, eggs, sugar, oil and zucchini moisture all help determine the final crumb. Change several at once and you’re effectively making a different recipe.

For the first loaf, keep the eggs and oil as written. Butter and applesauce both work in zucchini breads designed around them, but they do not perform exactly the same job as neutral oil here.

If applesauce is the change you are considering, this banana bread made with applesauce shows how a quick bread can be built around fruit puree from the start.

Eggless, vegan, gluten-free, keto and almond-flour versions change the structure enough that they are better treated as their own recipes instead of casual swaps inside this one.

Ready to bake? Return to the zucchini bread recipe →

The Pan Matters More Than It Seems

The full batch fits a 9 × 5-inch / 23 × 13 cm loaf pan. A light-colored metal pan gives you more control over browning during the long bake.

Dark metal usually browns the crust faster. When the top has enough color before the loaf is finished, cover it loosely with foil and keep baking.

Glass behaves differently from metal and holds heat longer. If glass is what you have, King Arthur Baking recommends reducing the oven temperature by 25°F; for this loaf, that means 325°F / about 165°C. Expect the timing to change and use the same doneness cues instead of relying on the original clock time.
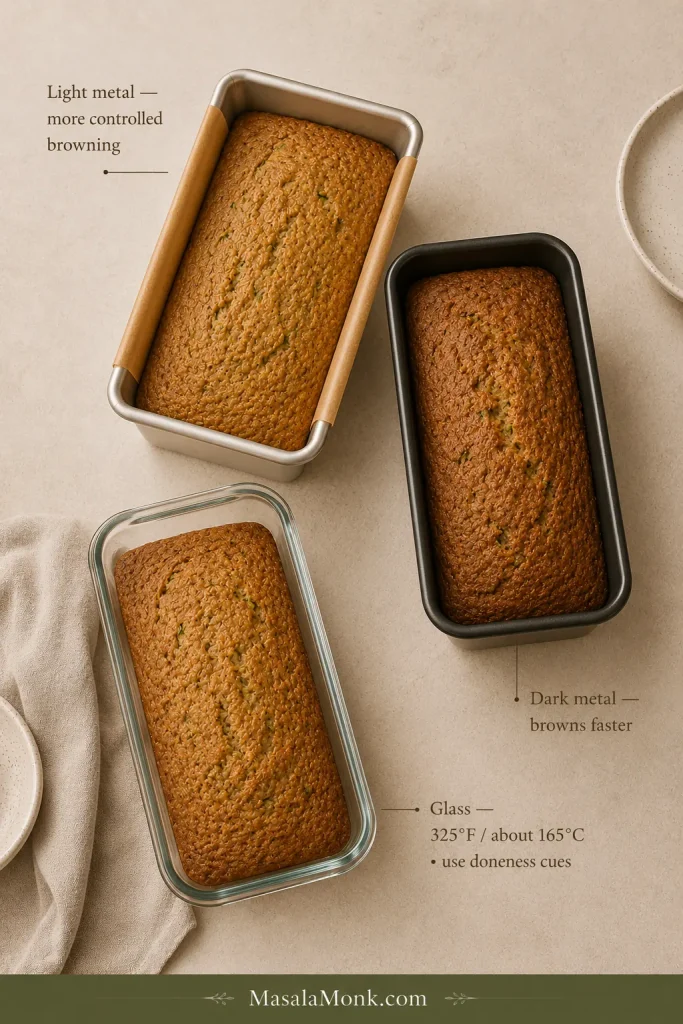
Three zucchini loaves baked in similarly sized light metal, dark metal and clear glass pans to compare pan materials and browning.
Keep the 9×5 size constant when comparing pan materials so batter depth does not become a second variable.

A noticeably smaller loaf pan makes the batter deeper and changes the bake. Use the specified 9 × 5-inch pan when possible instead of forcing the full batch into something smaller. Muffins and mini loaves need their own baking times, so the full-loaf timing should not be used for either.

Storing and Freezing Zucchini Bread

Room temperature: Cool the loaf completely before covering it. Keep it well wrapped or in an airtight container for about 3 days. Wrapping while warm traps steam against the crust.

Refrigerator: A very hot or humid kitchen is the main reason to refrigerate it. Chilled quick bread firms up, so let a slice lose its chill or warm it gently before eating.

Freezer: Wrap the completely cooled loaf or individual slices tightly and place them in a freezer-safe bag or container. For best quality, use them within about 3 months. Individual slices are especially handy: pull one out, let it thaw on the counter, and breakfast is mostly handled.
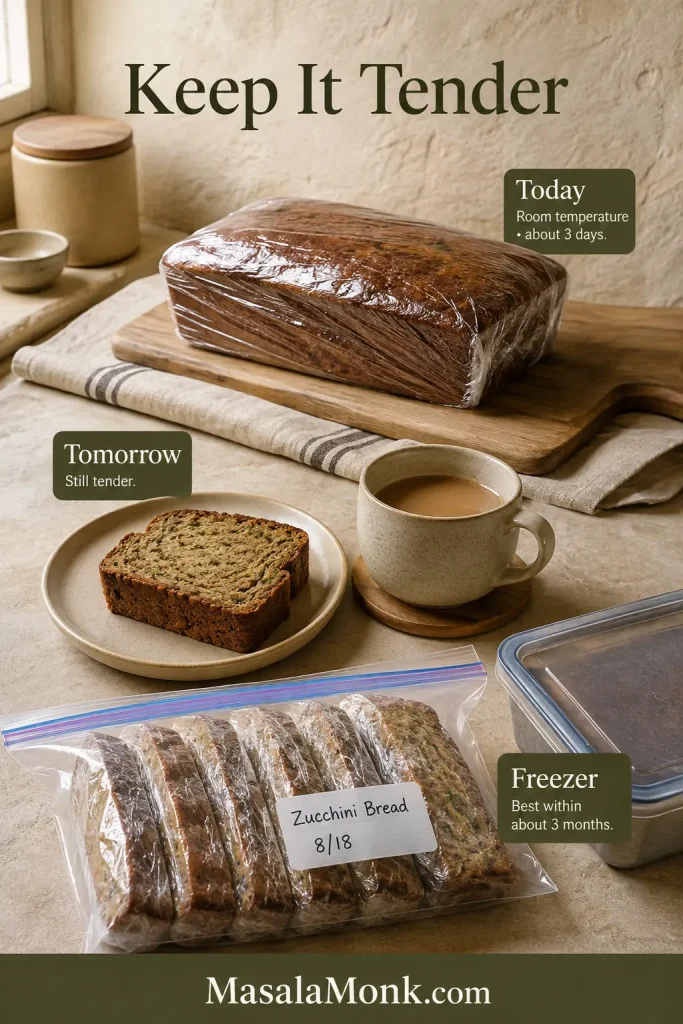
Wrapped whole zucchini bread for room-temperature storage, a slice served with coffee and individually wrapped slices packed for freezing.
Freeze the cooled loaf in portions so you can thaw one slice without repeatedly exposing the rest.

For another simple cinnamon bake that keeps well for the next day, try this fresh apple cake.

Frequently Asked Questions

Can You Taste the Zucchini in Zucchini Bread?

Not strongly. Cinnamon, vanilla and brown sugar reach you first. The zucchini mostly contributes moisture, tenderness and little green flecks instead of an obvious vegetable flavor.

Can You Use Yellow Summer Squash Instead?

A young, firm yellow summer squash can work much like zucchini. Grate it the same way. An oversized mature squash may need tough skin or a coarse seed cavity removed first.

Can You Double the Recipe?

Yes. Divide a double batch between two 9 × 5-inch pans. One extra-deep loaf would bake very differently; the pan section explains why depth and material matter.

The Slice You’re Looking For

Once the loaf has cooled, the knife should pass through without dragging a wet streak behind it. The slice bends gently, the crumb holds together, and cinnamon reaches you before zucchini ever does.

That’s the balance this bread is after: the zucchini keeps the crumb tender, while enough oven time turns the middle from batter into bread.

Add butter if you like. It does not need much else.
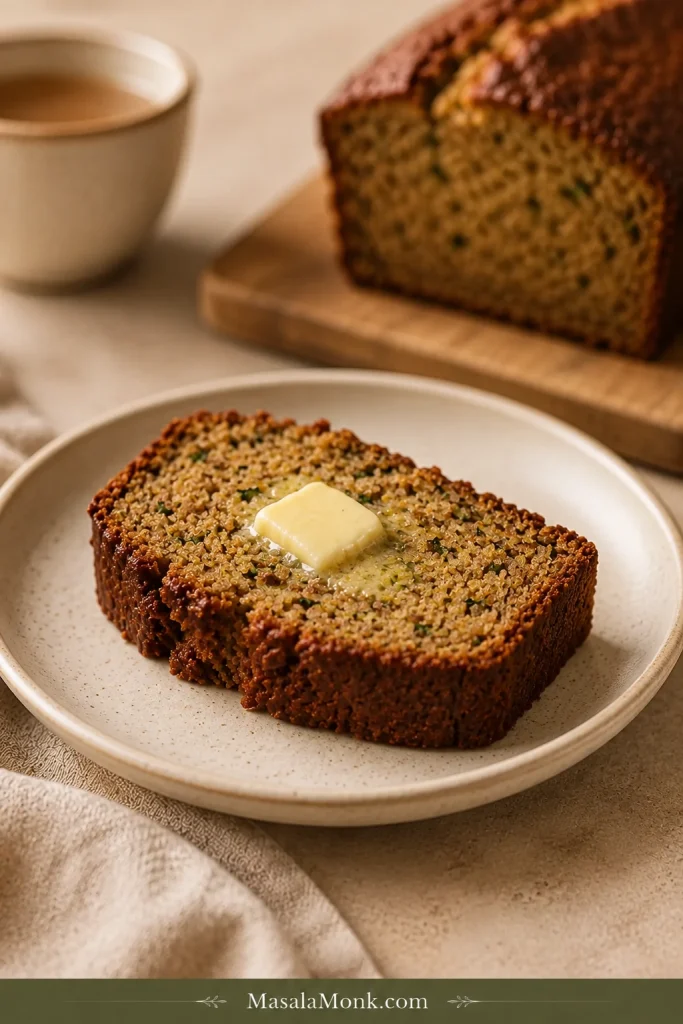
Thick slice of golden zucchini bread with tender green-flecked crumb and a small pat of melting butter, with the remaining loaf softly blurred behind.

What did you make yours with: small fresh zucchini, one of those enormous garden zucchini, or zucchini from the freezer?
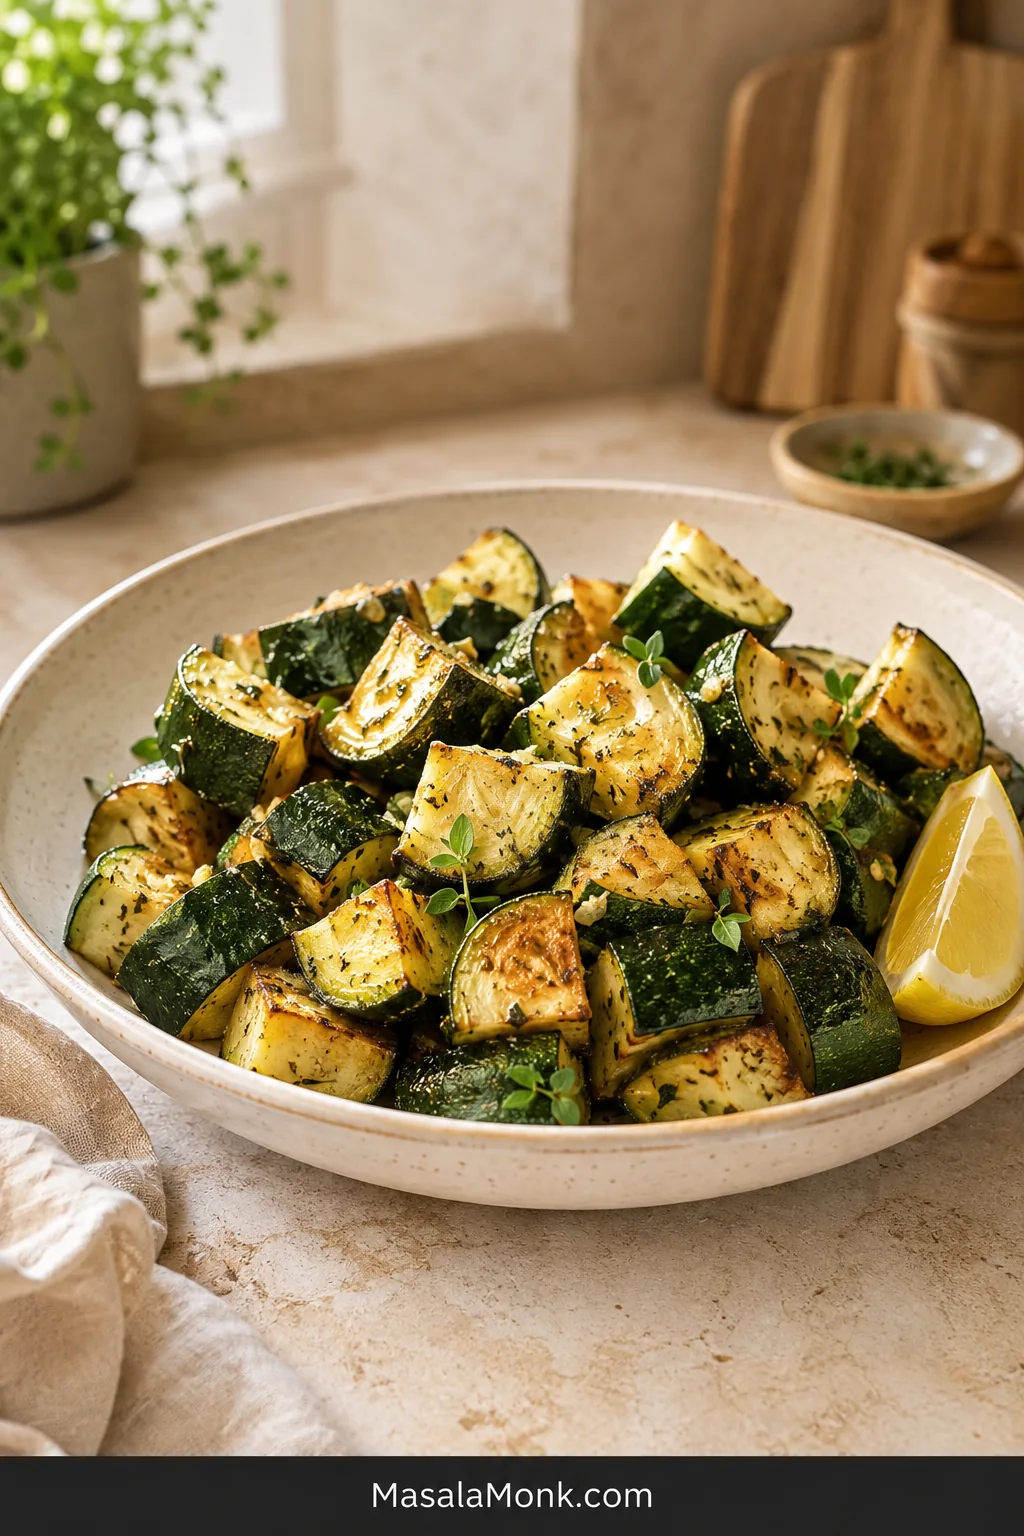
↑ Back to the recipe · ↑ Back to top

Posted on Leave a comment

Air Fryer Zucchini Recipe: Tender, Browned and Not Mushy

Ivory bowl filled with browned zucchini chunks with intact green skin, scattered herbs and a lemon wedge on a pale stone surface.

Good air fryer zucchini has a small, easy-to-spot window. The cut faces have started to bronze, the edges look roasted instead of wet, and the center is tender without folding when lifted with a fork.

Some nights dinner needs one last thing—something green, hot and bright that does not ask for another pan or a bowl of breading. Zucchini, called courgette in the UK, fills that gap when it gets enough heat and breathing room.

This is air fryer zucchini without breading, flour or egg. The goal is not to dry the vegetable until it crunches like a chip; it is to brown the outside while the middle still tastes fresh and juicy. For thin Parmesan rounds or panko-coated pieces, use the separate crispy zucchini chips recipe.

Quick Answer

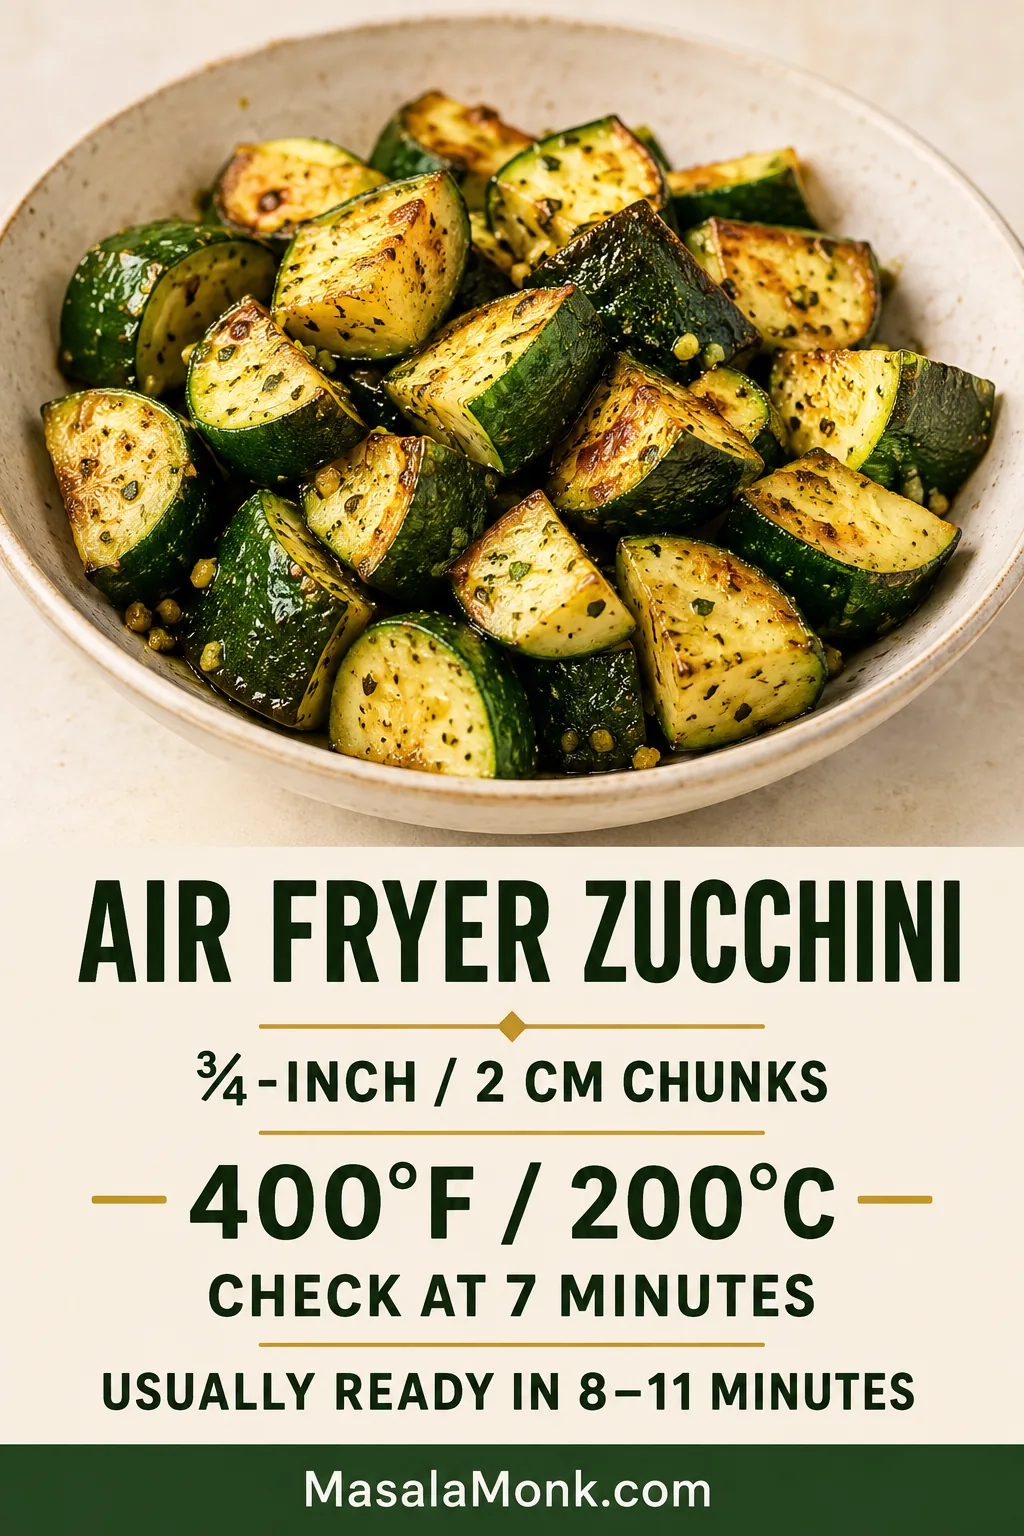
Cut 1 lb / 454 g small or medium zucchini into ¾-inch / 2 cm chunks. Coat with 2 teaspoons / 10 ml oil, add the dry seasonings and spread the pieces loosely in a preheated 400°F / 200°C air fryer.

Cook undisturbed for 5 minutes, shake well and begin checking at 7 minutes. Many basket-style air fryers finish this cut in about 8–11 minutes. Remove the zucchini when several faces are golden, the surfaces no longer look watery and a fork enters with a little resistance.

Cut thick. Cook hot. Check early.

Vertical timing guide showing ¾-inch zucchini pieces, a temperature of 400°F, a first check at 7 minutes and an expected cooking range of 8–11 minutes.
How long to air fry zucchini depends on basket shape, load and fan strength. Use the stated range for your first batch, then remember where your own machine landed.

Air Fryer Zucchini Recipe

Thick zucchini chunks with browned corners and tender centers that still hold their shape. The base version is lightly garlicky and gently herbal, with fresh zucchini sweetness and an optional squeeze of lemon.

Active prep: About 8–10 minutes · Cook time: 8–11 minutes per batch

Total time: About 20 minutes for one batch; preheating overlaps with prep · Temperature: 400°F / 200°C

Yield: Serves 4 alongside a main course, or 2 as a generous vegetable portion

Small basket: Allow another 9–12 minutes if the zucchini needs two batches.

Dietary note: The base recipe is vegan and dairy-free, with no flour or breadcrumbs. Check packaged seasoning labels when strict gluten avoidance matters.

Equipment

  • Basket-style or oven-style air fryer
  • Sharp knife and cutting board
  • Mixing bowl
  • Measuring spoons or a digital kitchen scale
  • Silicone-tipped tongs or a small flexible spatula

Ingredients

  • 1 lb / 454 g small or medium zucchini, usually 2 to 3 depending on size
  • 2 teaspoons / 10 ml olive oil or avocado oil
  • 1 teaspoon Italian seasoning, or ½ teaspoon dried oregano
  • ½ teaspoon garlic powder
  • ¼ teaspoon ground black pepper
  • 3 g salt, or about ½ teaspoon fine salt when not weighing
  • 1 teaspoon / 5 ml lemon juice, optional, added after cooking
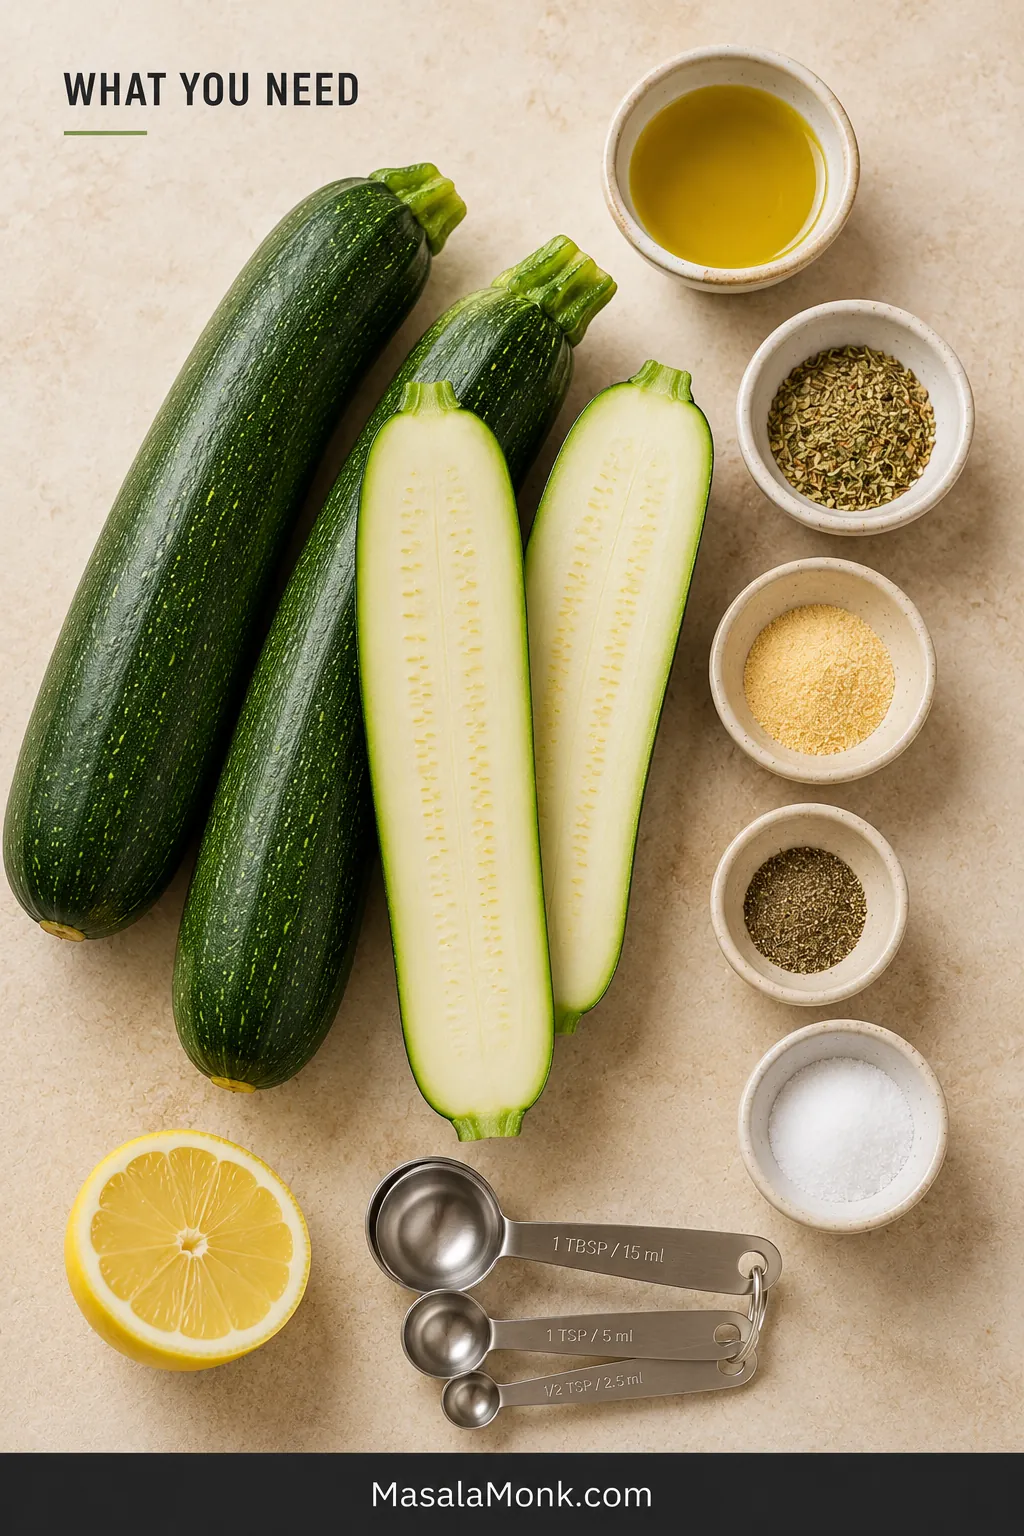
Overhead arrangement of zucchini, oil, Italian seasoning, garlic powder, black pepper, salt, lemon and measuring spoons on a warm cream surface.
For air fryer zucchini without breading, two teaspoons of oil are enough to help the seasonings cling. Extra oil cannot compensate for wet zucchini or restricted airflow.

Method

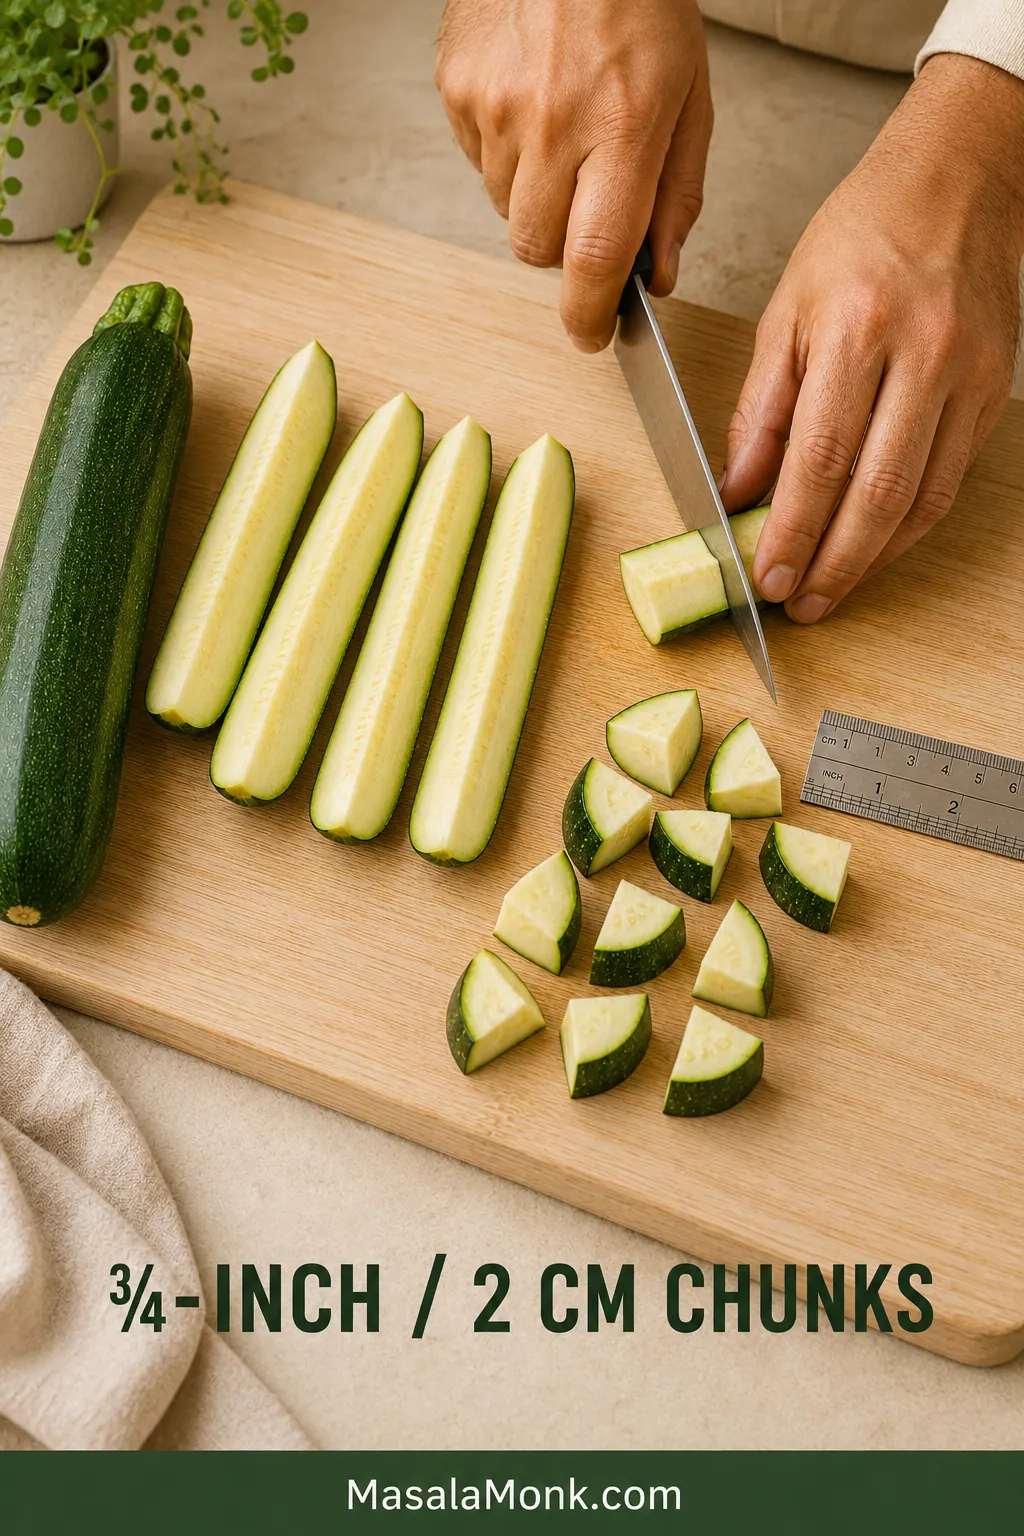
  1. Dry and cut the zucchini. Wash it, dry the skin well and trim the ends. Quarter each zucchini lengthwise, then cut the long quarters crosswise into ¾-inch / 2 cm chunks. Blot any visibly wet sides.
  2. Preheat the air fryer. Heat it to 400°F / 200°C for 3 to 5 minutes, unless the machine preheats automatically or its instructions recommend starting from cold.
  3. Oil the zucchini. While the air fryer heats, toss the chunks with the oil until they carry a thin, even sheen.
  4. Season just before cooking. Add the Italian seasoning, garlic powder, pepper and salt. Toss again and move the zucchini straight into the hot basket. If you salted an oversized zucchini earlier, omit the salt here and adjust only after cooking.
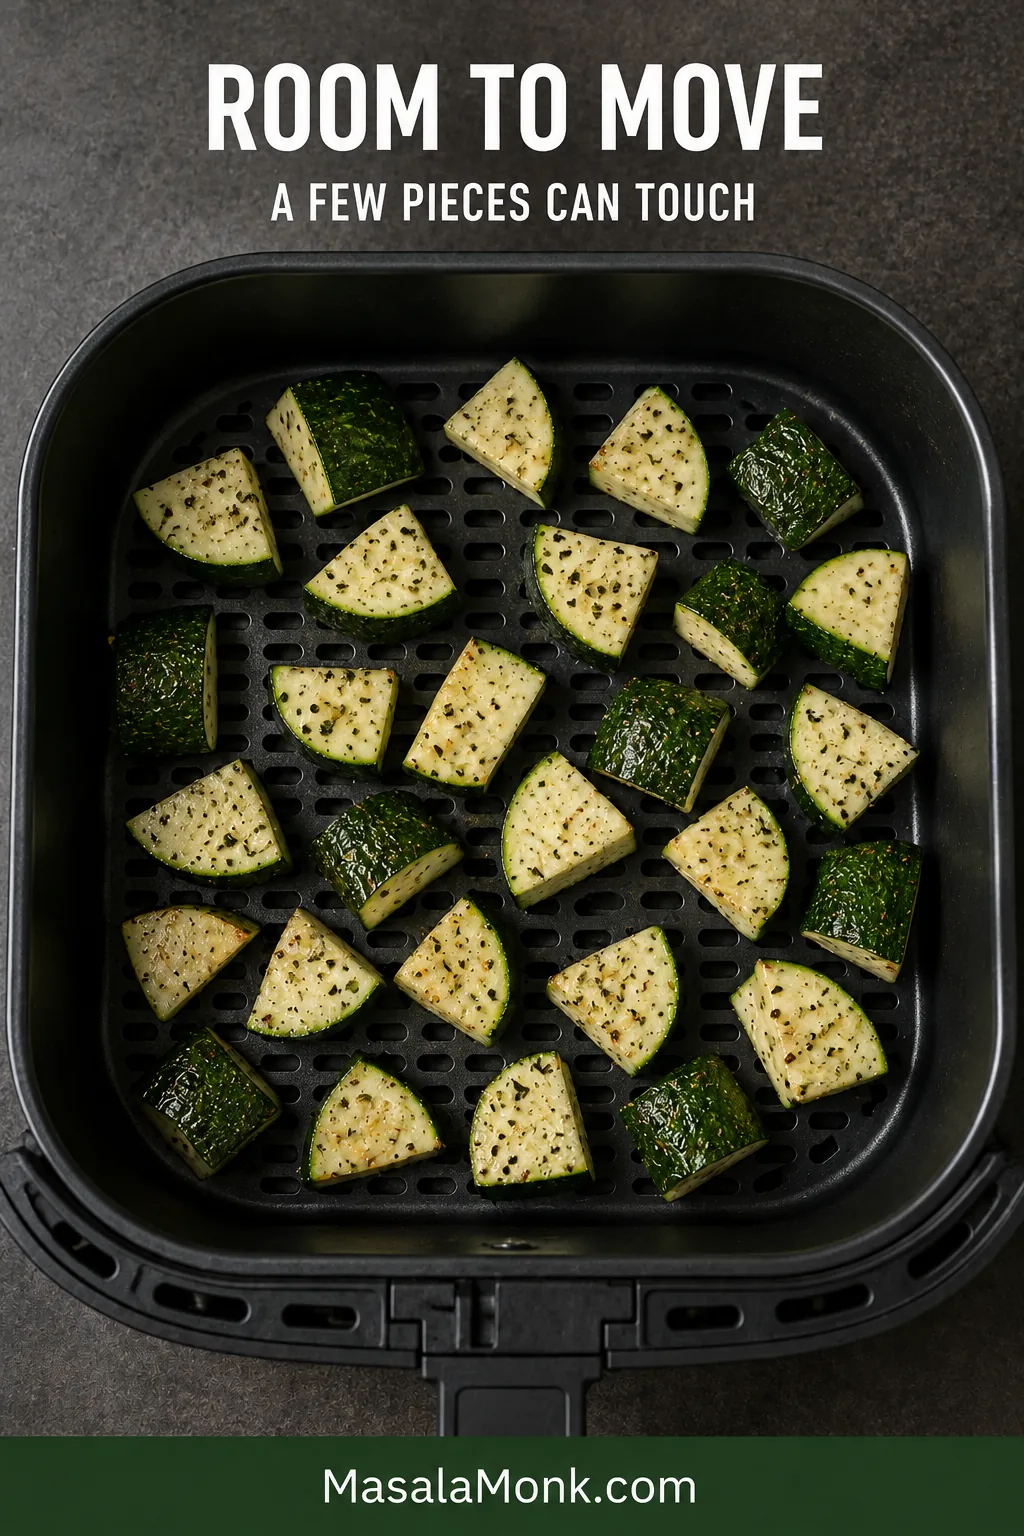
  5. Spread the pieces loosely. A little touching is fine, but the chunks should shift when the basket is shaken. Divide them into two batches when needed.
  6. Cook undisturbed for 5 minutes. This gives the surfaces touching the basket time to begin browning.
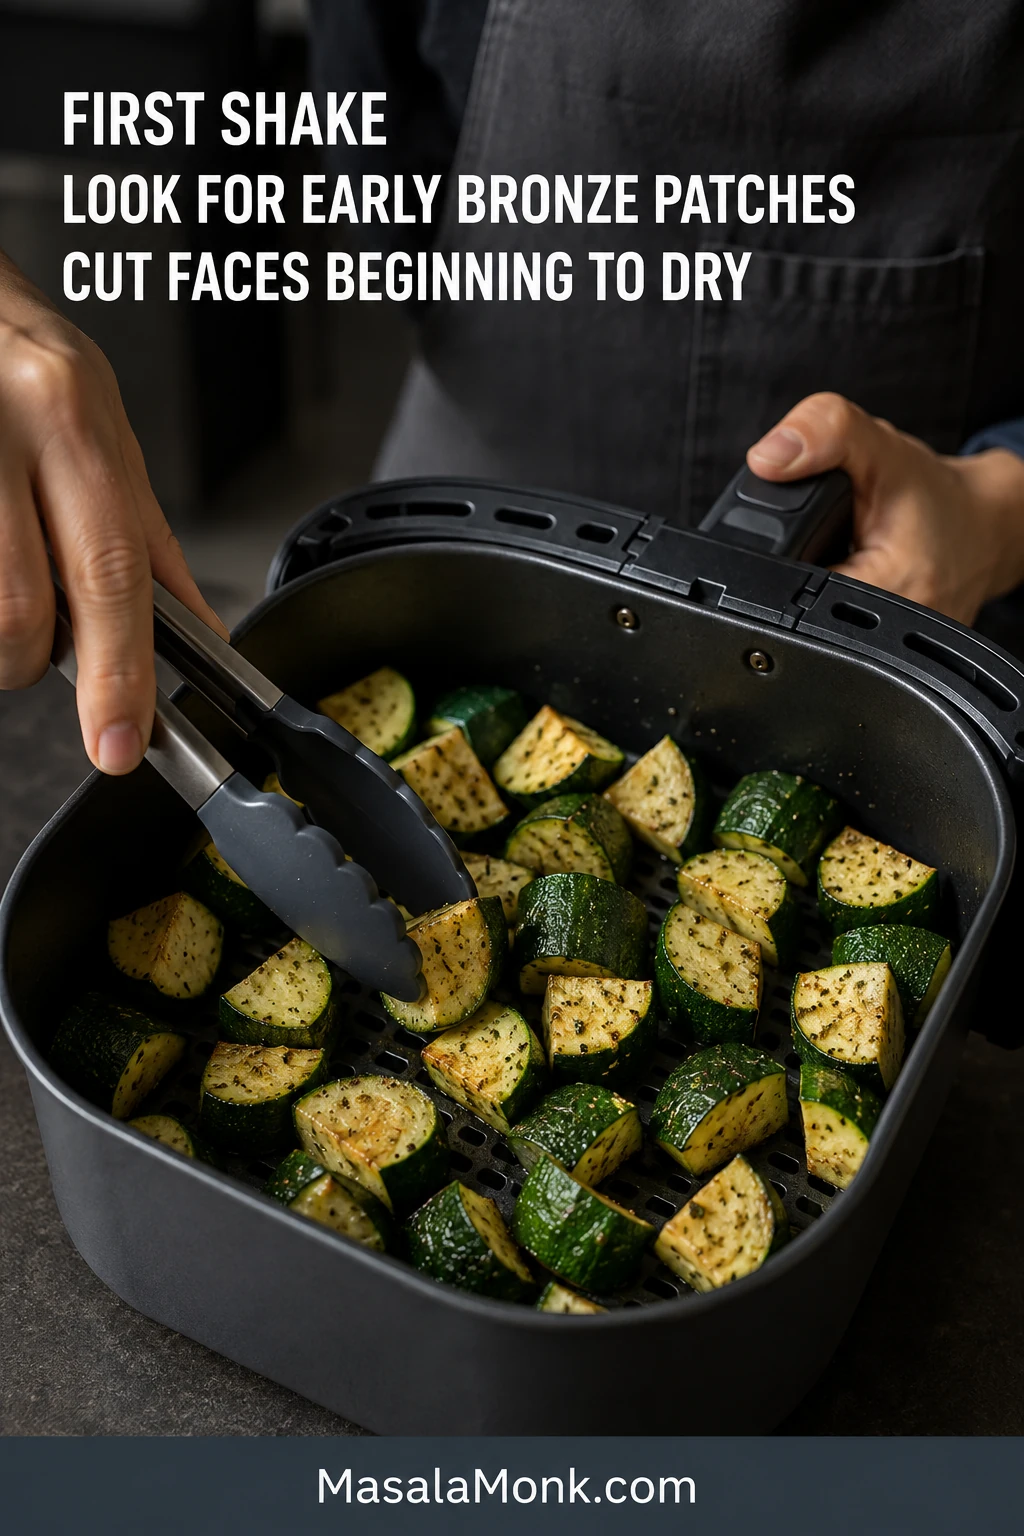
  7. Shake well. The zucchini will not look finished yet. Look for the first bronze patches and cut faces beginning to dry—the signs that the basket is roasting rather than steaming. Turn any pieces still resting on one pale face.
  8. Begin checking at 7 minutes. Give the zucchini another minute or two as needed. Remove it when several corners are golden, the cut sides no longer look wet and a fork enters with light resistance. For side-by-side cues, see how to tell when air fryer zucchini is done.
  9. Finish and serve. Transfer the zucchini to a broad, uncovered plate. Add lemon juice or fresh herbs while it is hot.

Success Cues and Second-Batch Timing

Cook turning partially cooked zucchini in an open air fryer basket, with early brown patches visible on several pieces.
One deliberate shake is usually more useful than repeatedly opening the machine. Turn the pale faces, redistribute any clustered pieces and give the heat time to recover.

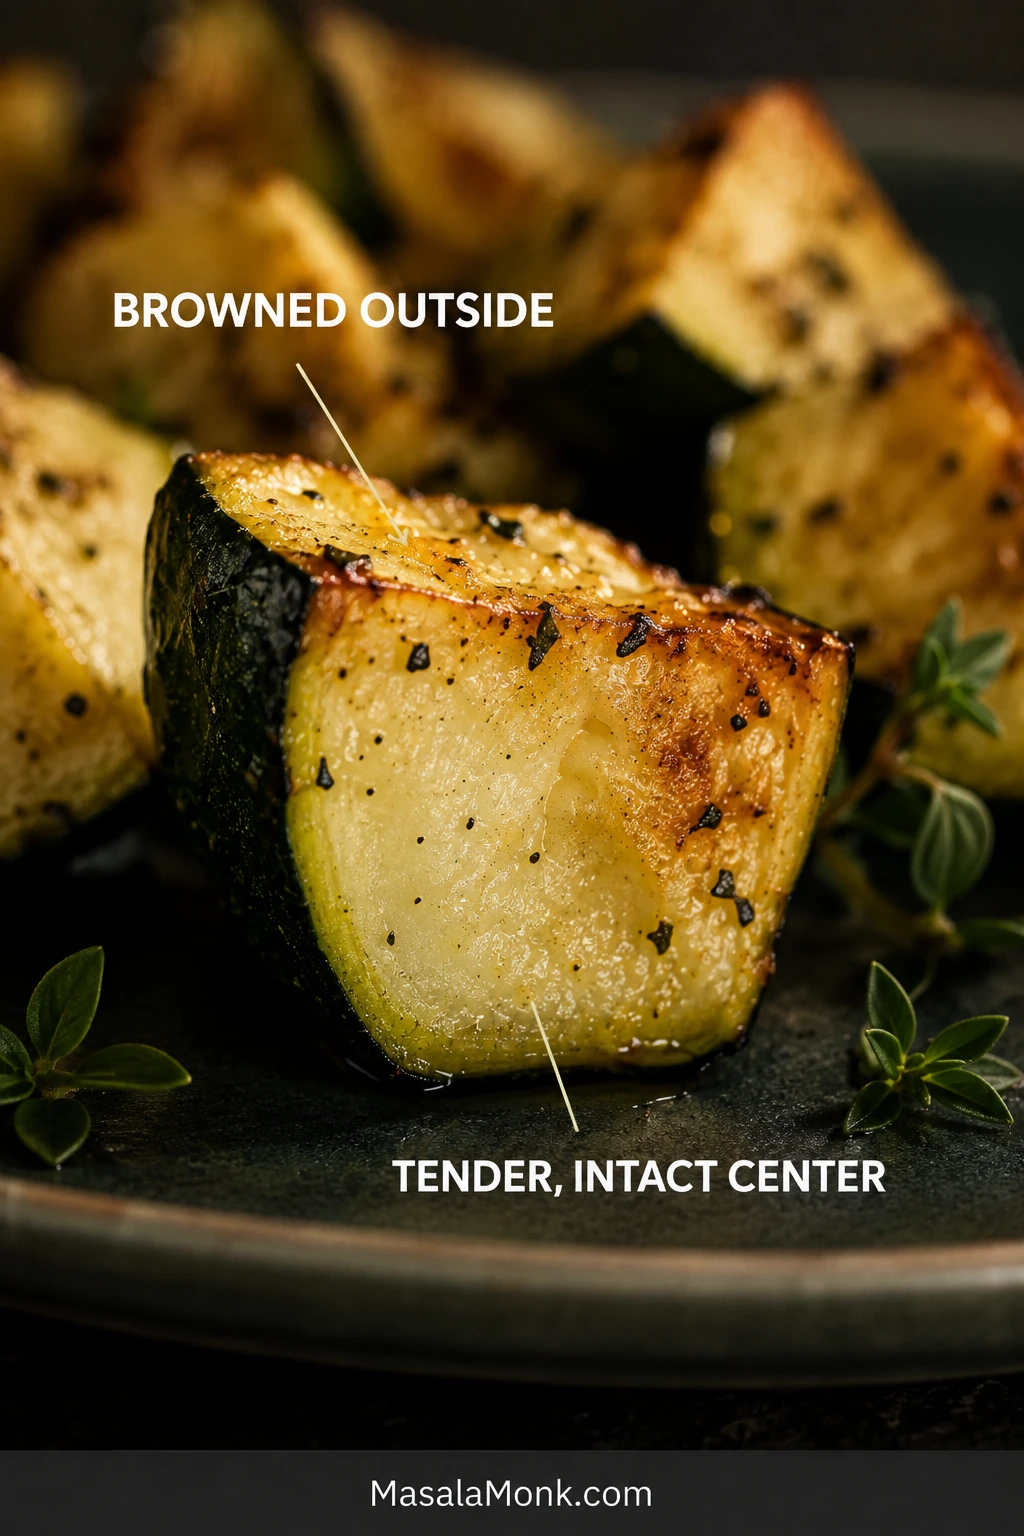
What success smells and feels like: The basket should smell garlicky and lightly roasted. Lift one piece: it should hold its shape while the fork meets only slight resistance in the center.

A little moisture in the center is the point. A puddle underneath is not.

Close-up of a browned zucchini chunk cut open to show dark green skin and a pale, moist, intact center.
Still uncertain? Cut open one of the largest chunks. A moist center that holds together is desirable; waterlogged flesh that slumps or releases liquid has moved beyond the ideal window.

Cooking two batches: Keep the first batch uncovered. When the second is nearly ready, return the first batch to the air fryer for 30–60 seconds only if it has cooled noticeably.

If your zucchini tends to come out pale, watery or softer than expected, four variables usually explain it.

Four Things to Control Before Cooking

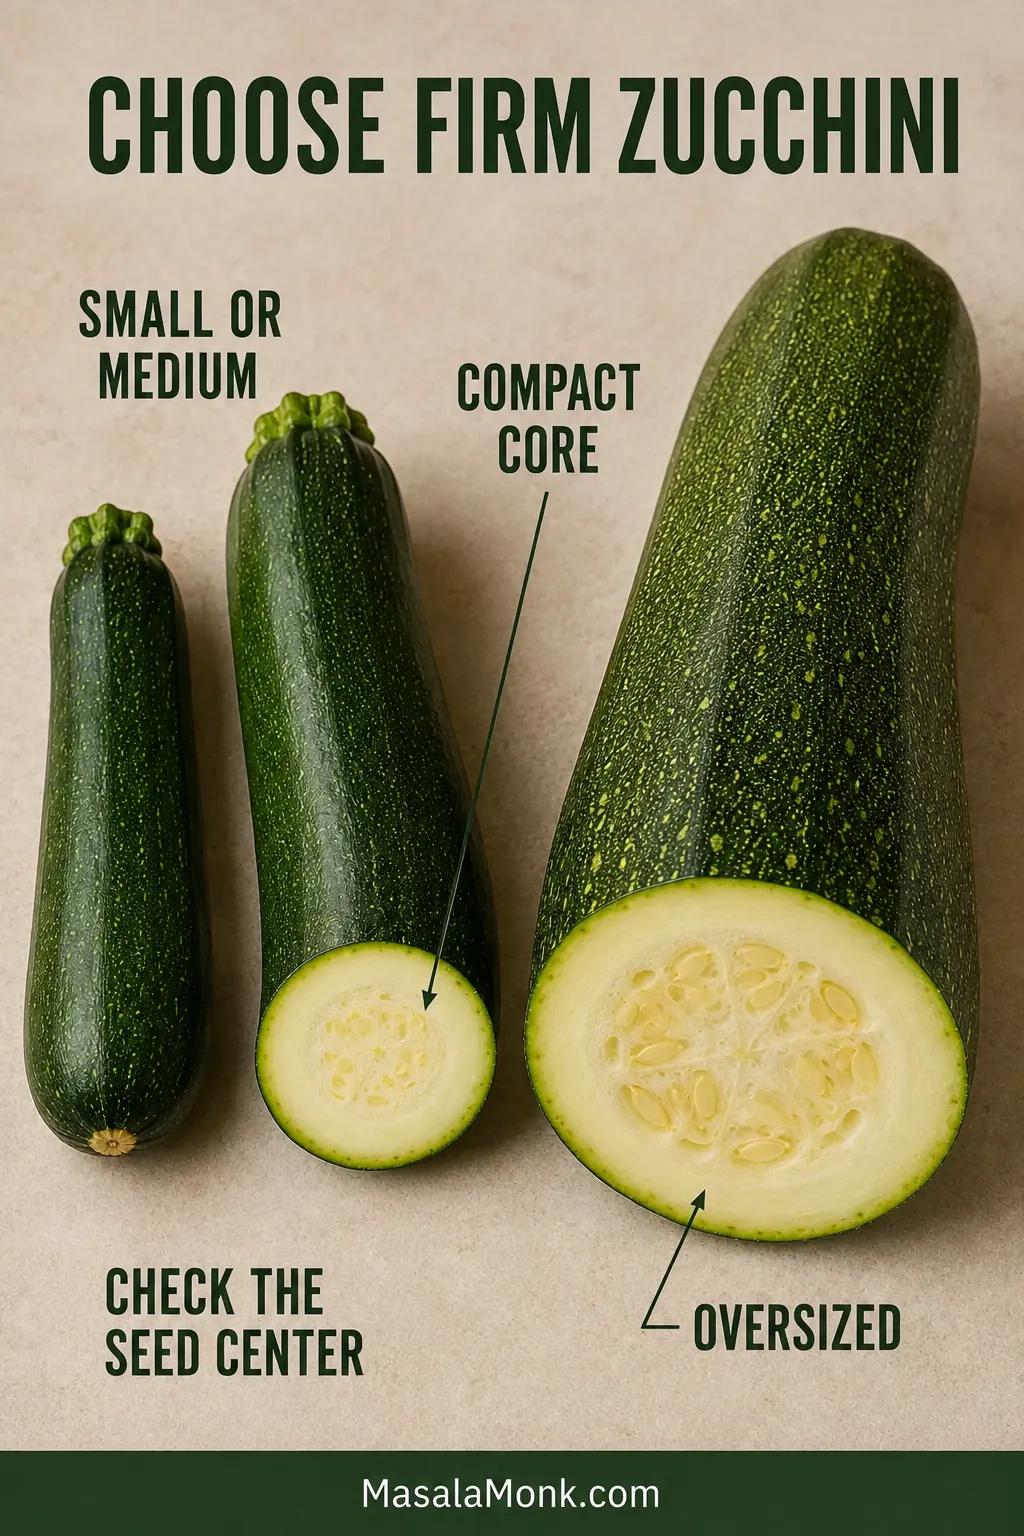
1. Start with firm zucchini

Small and medium zucchini are usually easiest to air fry because their flesh is firm and their seed cores are compact. Choose vegetables that feel heavy for their size, with smooth skin and no broad soft patches.

With an oversized garden zucchini, scoop away broad seeds surrounded by loose, spongy flesh. If the remaining pieces still look unusually wet, sprinkle them with about half the measured salt, rest for 10 minutes and blot thoroughly. Add more salt only after cooking and tasting.

Small, medium and oversized zucchini displayed side by side, with compact seed cores in the smaller vegetables and a broad, loose center in the largest.
An oversized zucchini is still useful. Air fry the firm outer flesh, then save a loose or heavily seeded center for soup, curry or a blended vegetable sauce.

2. Cut thick, even chunks

Quarter the zucchini lengthwise, then cut across those long quarters. This shape gives the hot air several edges to brown without leaving the middle so thin that it folds.

Hands cutting a lengthwise zucchini quarter into ¾-inch chunks on a wooden board, with whole zucchini, cut quarters and a ruler nearby.
Match thickness more closely than shape. Pieces with similar thickness soften at a similar rate even when their outlines are not perfectly identical.

The tapered ends naturally make smaller pieces. Check those first and take them out when ready. The larger chunks can continue for another minute.

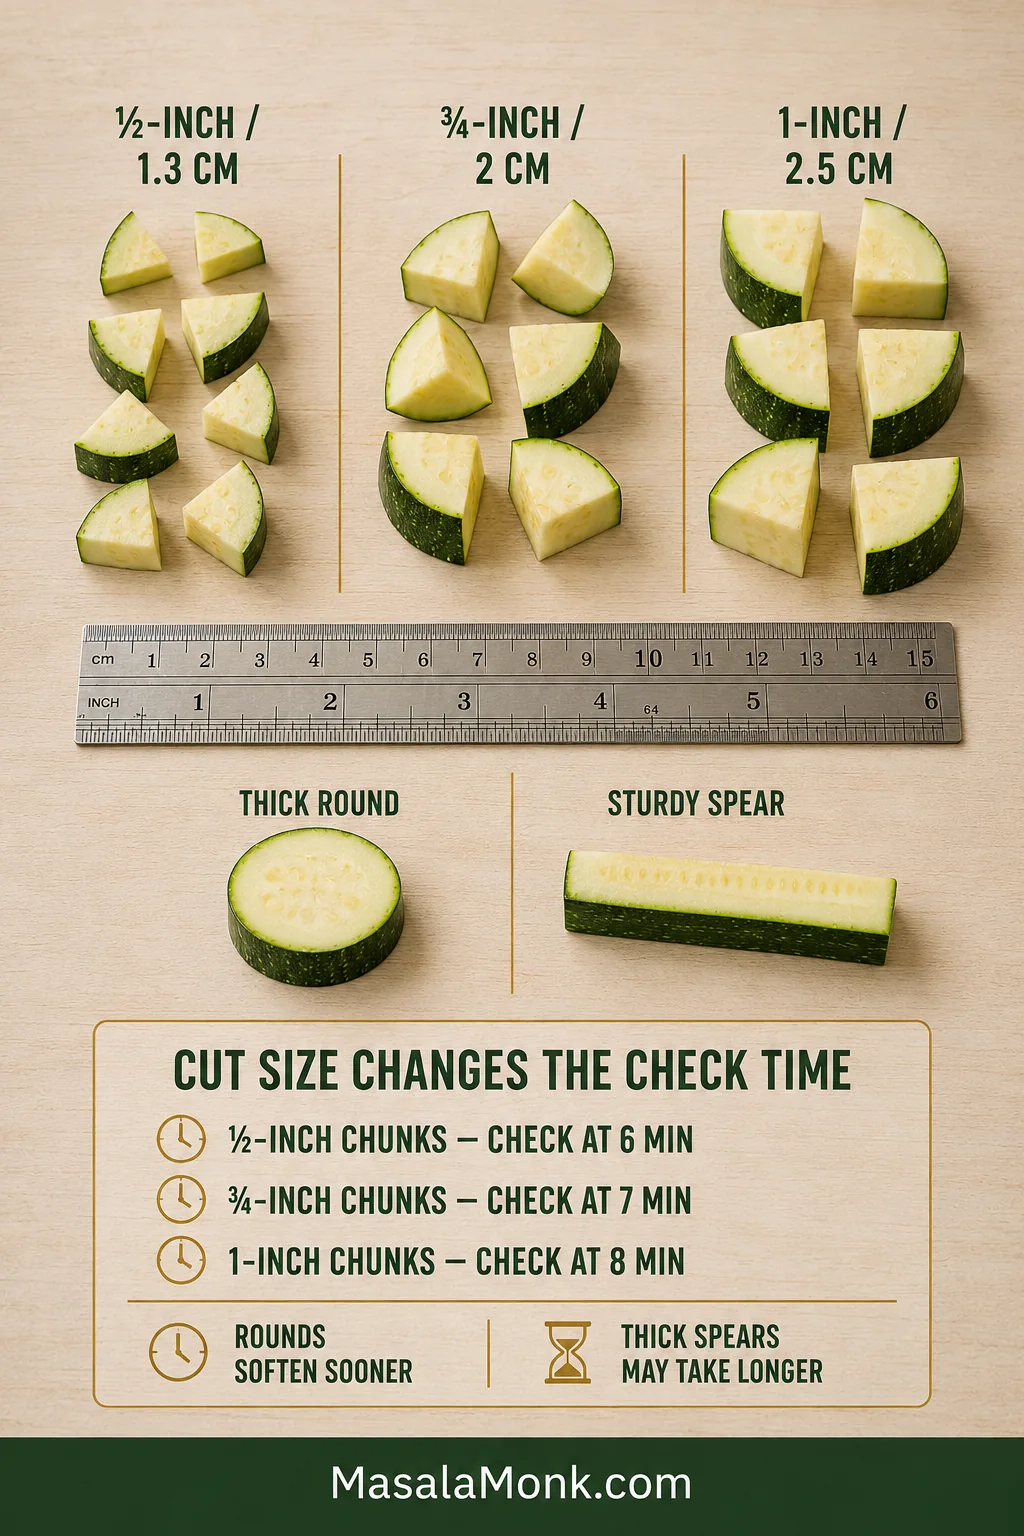
CutFirst checkWhat to expect
½-inch / 1.3 cm chunks6 minutesFast cooking; remove smaller pieces promptly
¾-inch / 2 cm chunks7 minutesThe balanced everyday cut used in this recipe
1-inch / 2.5 cm chunks8 minutesA firmer, juicier middle; continue as needed

Thick rounds or spears can also work. Rounds expose broader cut faces and usually soften sooner, while sturdy spears may need slightly longer depending on their width.

Guide comparing ½-inch, ¾-inch and 1-inch zucchini pieces beside a ruler, along with a thick round and a sturdy spear.
Choose the cut for the meal: chunks make the most forgiving side, sturdy spears suit dipping, and thick rounds cook quickly but lose structure sooner.

To prepare ahead, refrigerate the cut zucchini in a dry, covered container. Blot it before cooking and wait to add the seasonings.

3. Dry the surface and season late

Blot any cut faces that look glossy with water. A thin coat of oil helps the seasonings cling and encourages the exposed edges to brown instead of drying into leathery patches.

Two raw zucchini pieces shown side by side, one glossy with surface moisture and one matte after blotting with a paper towel.
Blot after cutting, not only after washing. Newly exposed zucchini flesh can develop a fresh sheen of moisture even when the outer skin was dried thoroughly.

Season when the air fryer is already hot. Moving the salted pieces directly into the basket gives them less time to release water before cooking begins.

Flavor note: Garlic powder and dried herbs can cook with the zucchini. Add lemon, lime and fresh herbs afterward so their flavor stays bright.

Hands tossing lightly oiled zucchini chunks in a metal bowl while dry seasoning falls across their surfaces.
The mixing bowl should look nearly dry after tossing. Oil pooling beneath the zucchini signals more than the batch needs.

4. Leave room for the hot air

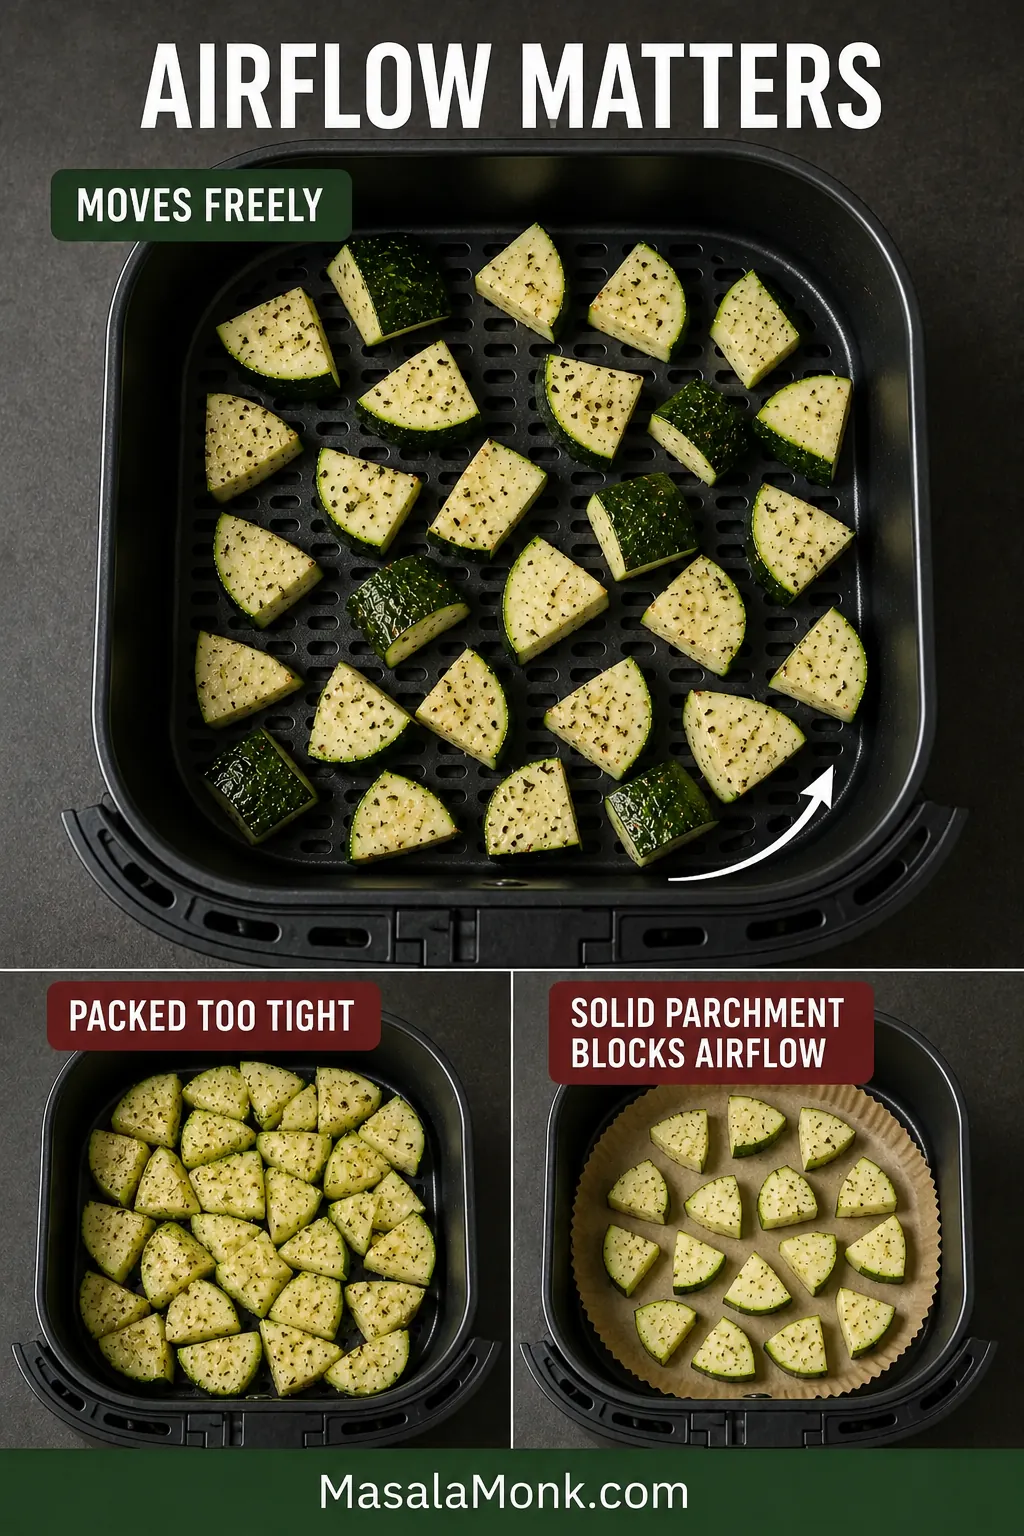
What matters is the flat cooking area, not the capacity printed on the box. A few pieces can touch, but the load should redistribute when the uncooked basket is gently shaken. If it moves as one packed mass, divide it into two batches.

Seasoned raw zucchini chunks arranged loosely in one layer inside a perforated air fryer basket, with visible gaps and basket holes between them.
One smaller, freely moving batch often browns faster than an overloaded basket that must first evaporate trapped moisture. Capacity matters less than usable flat space.

If several foods come out pale or uneven in your machine—not only zucchini—these common air fryer mistakes and fixes cover crowding, preheating, oil and halfway turning in more detail.

Solid parchment can block airflow beneath the zucchini. Cook directly in a clean basket, or use only a properly secured perforated liner approved for your machine.

Guide comparing loosely arranged zucchini, an overcrowded air fryer basket and solid parchment covering the basket perforations.
Some basket holes should remain visible, but movement matters most. If the zucchini shifts as one packed mass instead of redistributing, divide the batch.

Once these four details are in place, zucchini stops feeling unpredictable. It becomes the kind of side you can start while the rest of dinner finishes.

Time, Temperature and Doneness

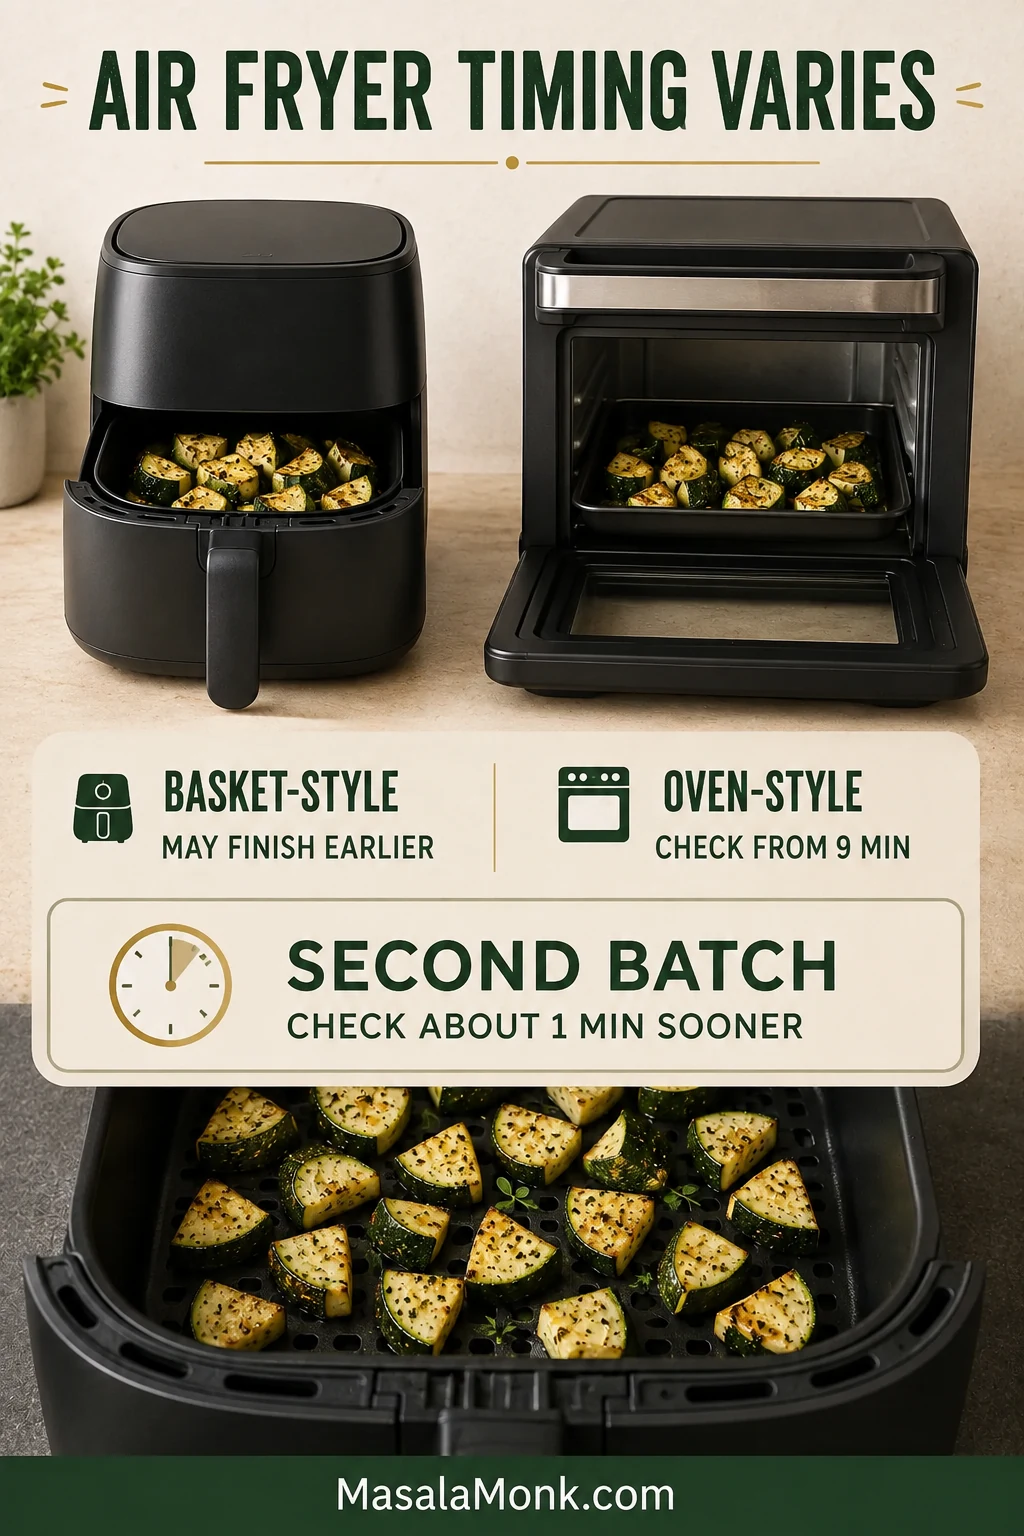
Treat the recipe’s 8–11-minute cooking time as a checking range, not a guaranteed finish. Basket shape, load size and fan strength determine where your zucchini falls within it.

Compact basket machines may finish early. Oven-style air fryers often need several extra minutes, so inspect them from around 9 minutes and turn pieces whose undersides remain pale. A later batch may cook faster because the chamber is already thoroughly hot.

Timing guide comparing a basket-style air fryer, an oven-style air fryer and a second batch cooked in an already heated basket.
Write down the finish time of the first successful batch in your machine. That personal benchmark will be more dependable next time than any universal minute count.

How to Tell When Air Fryer Zucchini Is Done

If your zucchini needs ten minutes while another recipe promises seven, nothing has gone wrong. The timer should tell you when to check. The zucchini should tell you when to stop.

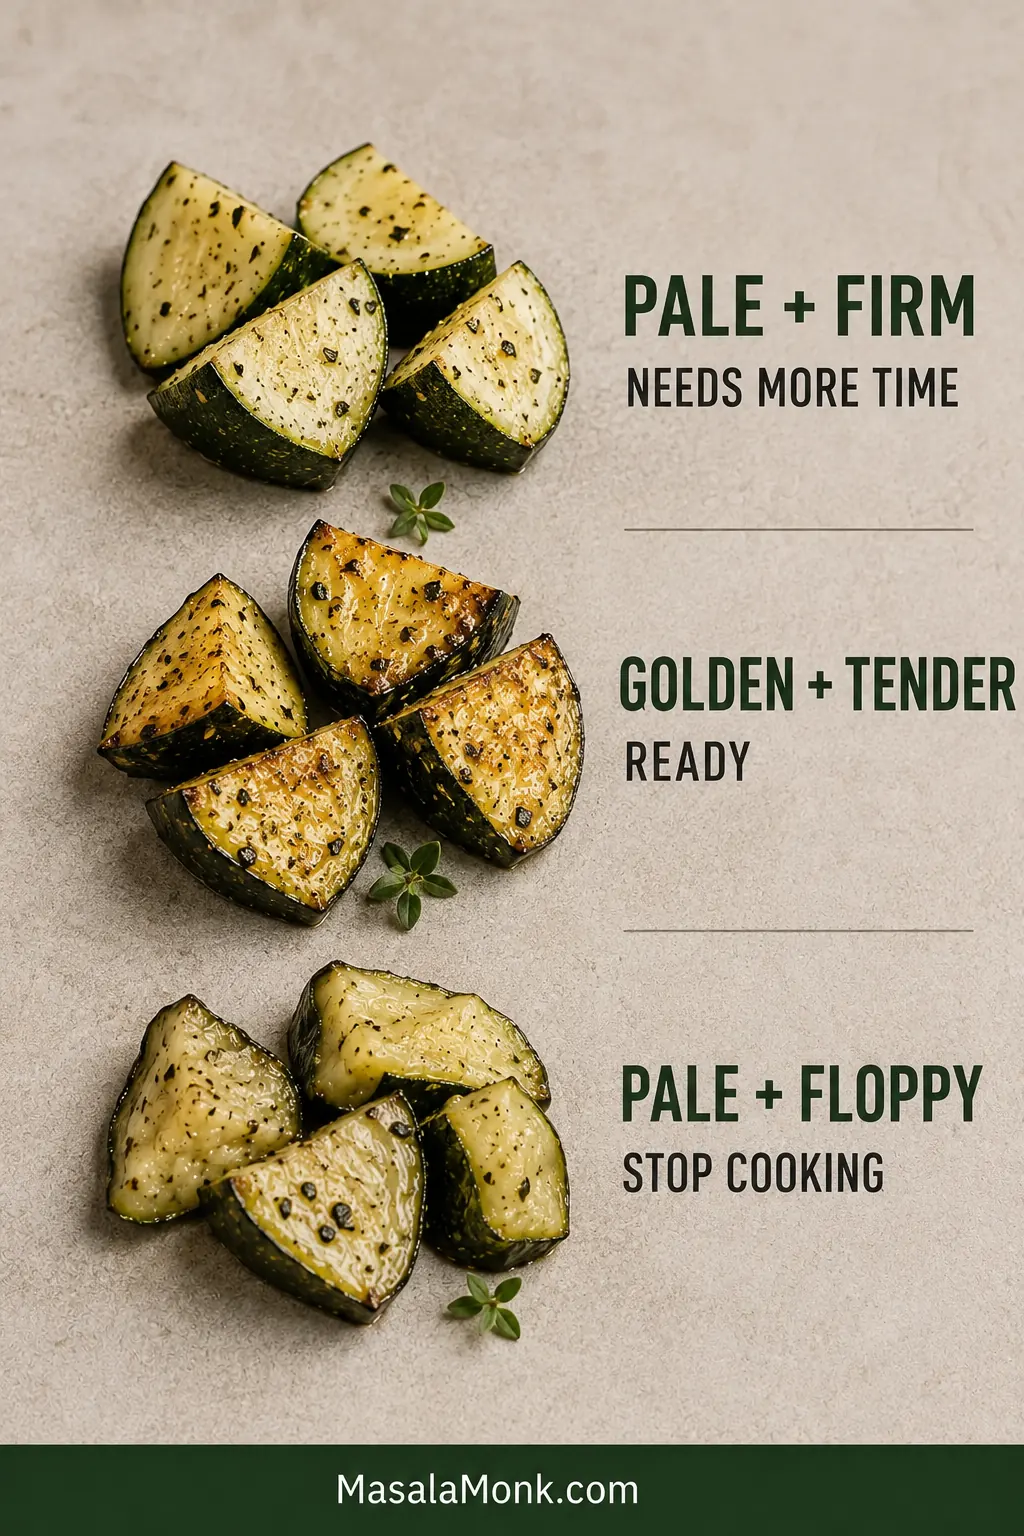
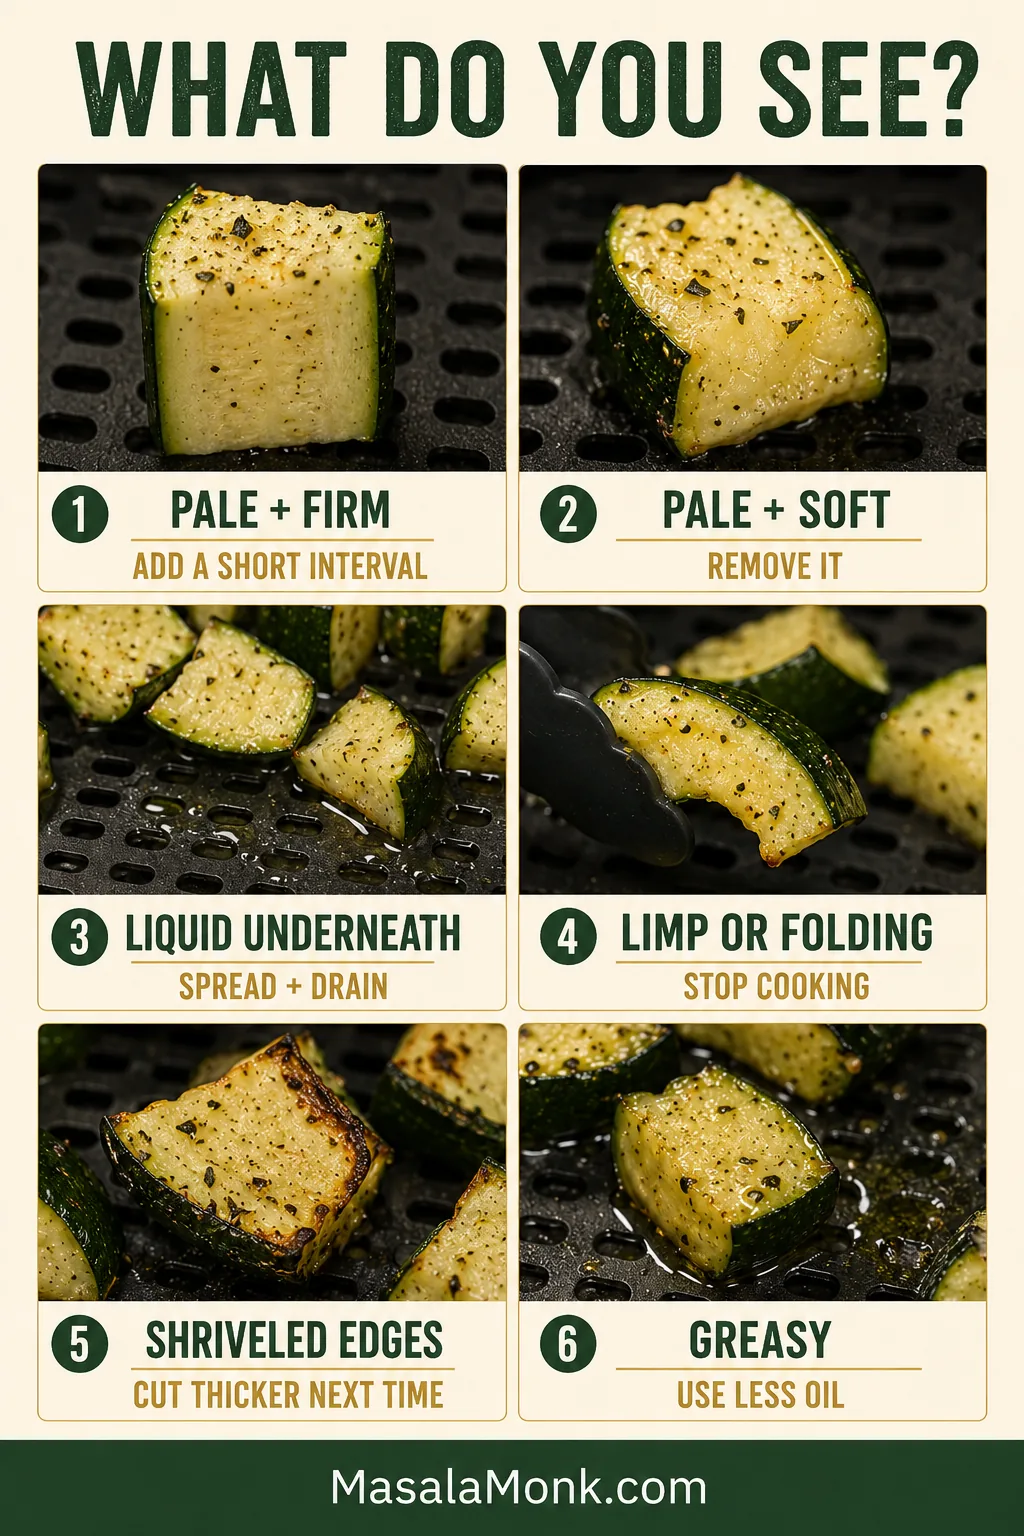
Before adding another minute, check one piece: Pale and firm means it needs more time. Golden and tender means it is ready. Pale and floppy usually means extra cooking will not improve the texture.

Three zucchini doneness states showing pale firm pieces, golden tender pieces and pale floppy pieces with a recommended action for each.
Air fryer zucchini doneness will not always be uniform. Remove the early winners and let only the firmer, paler pieces continue for another brief interval.

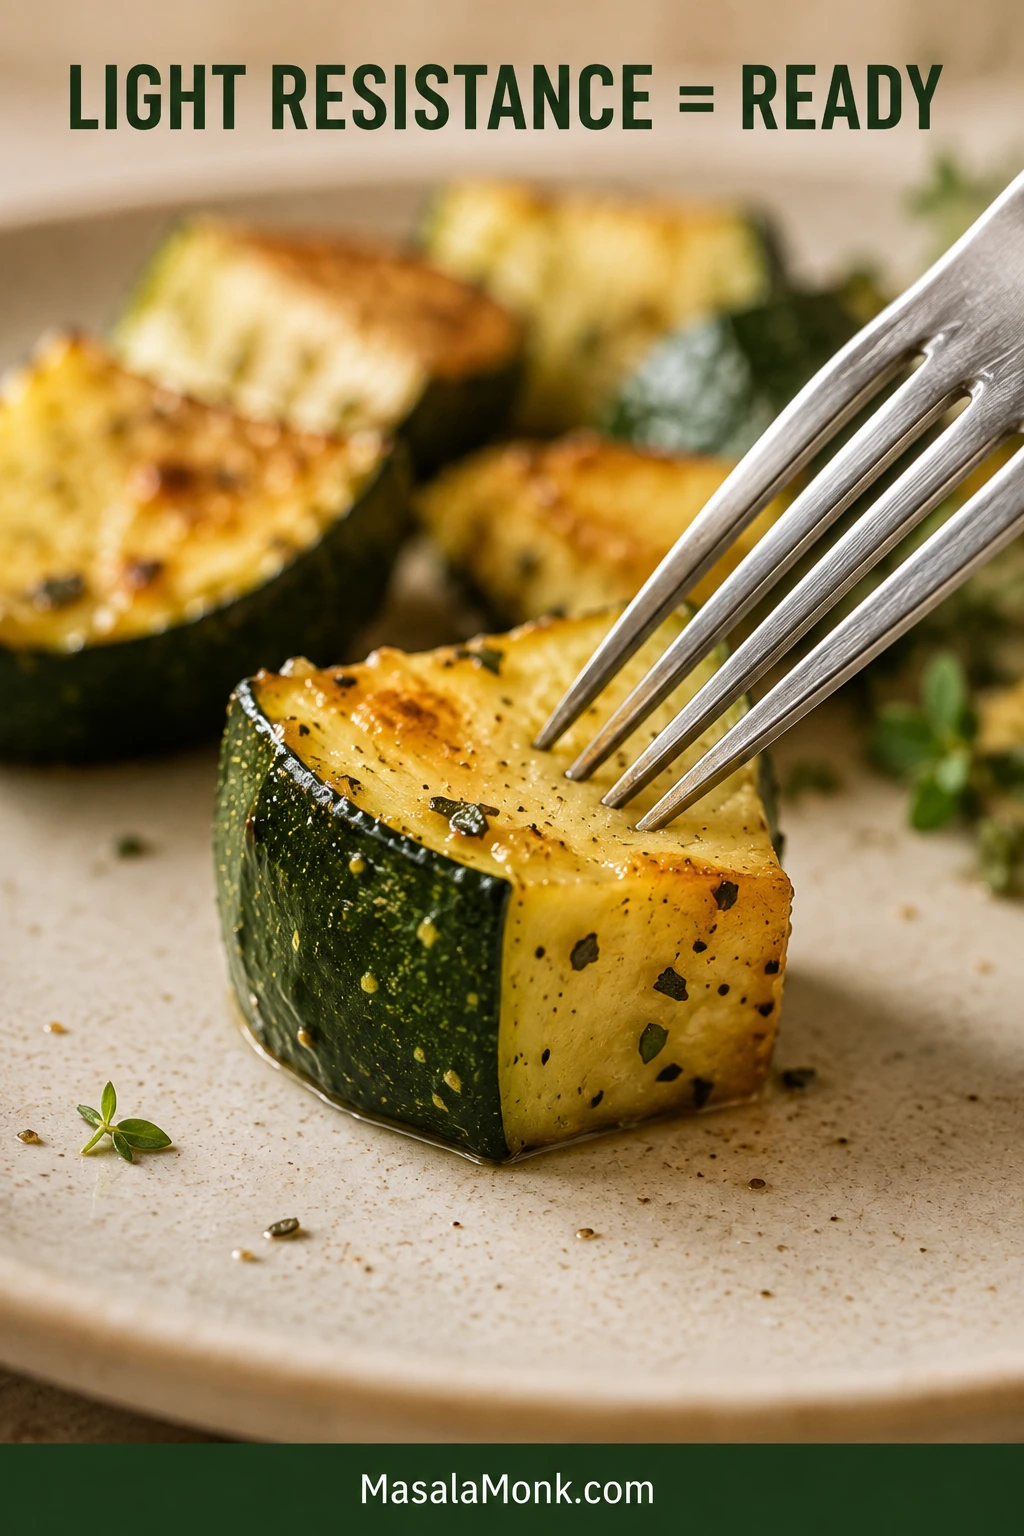
Look for several golden faces rather than identical color on every side. The cut surfaces should no longer look wet, and a fork should enter easily while still meeting a little resistance in the middle.

Dinner fork pressing gently into a browned zucchini chunk that remains upright on a neutral plate.
Test one of the thickest pieces rather than the darkest one. If its center gives gently without collapsing, the smaller pieces are already ready to leave the basket.

Already soft, wet or uneven? Use the troubleshooting guide before adding more time.

Fixing Soft, Wet or Uneven Zucchini

Even a softer batch is usually still usable. Stop cooking before it collapses further, then serve it promptly or fold it into pasta, rice or a sauced dish.

Six-part troubleshooting guide comparing pale, soft, watery, limp, shriveled and greasy air fryer zucchini.
When diagnosing soggy air fryer zucchini, judge texture before color. Firm pieces may need more heat; already-soft pieces need to come out, whatever shade they are.

Pale but already soft

This usually means the zucchini became tender before it received enough heat or airflow to brown. Likely causes: an overloaded basket, a cold start, weak oven-style airflow or excess surface moisture. Do now: remove it once tender; more time may only make it softer. Next time: reduce the load, dry the pieces carefully and preheat where appropriate.

Wet or sitting in liquid

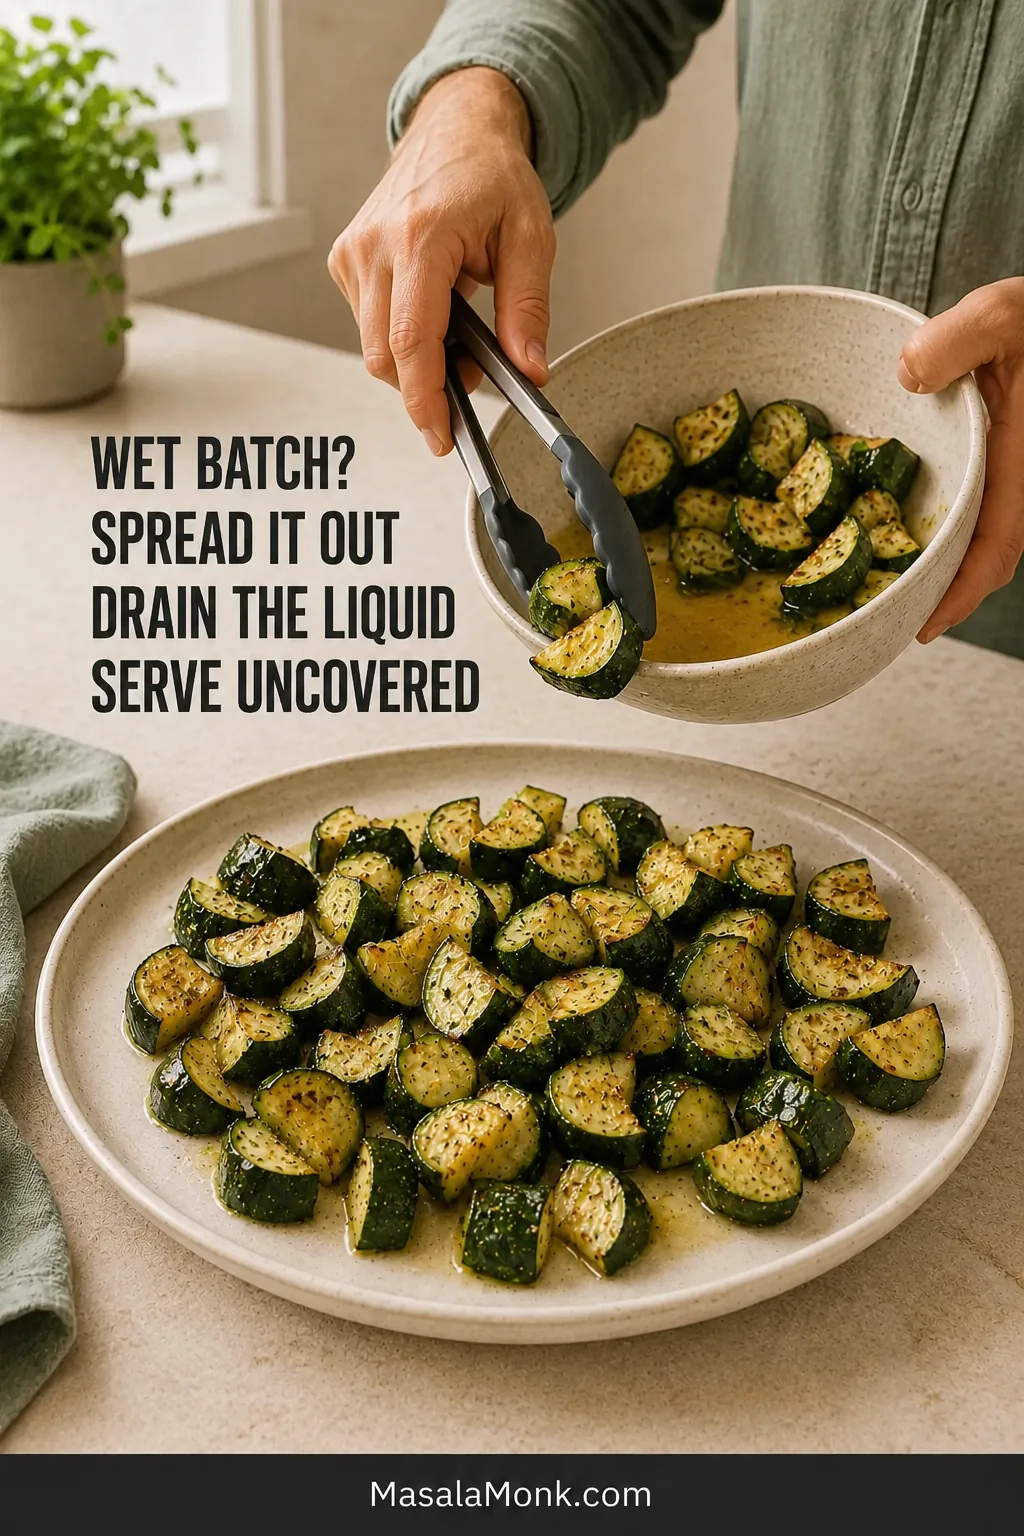
Water was released faster than the basket could evaporate it. Move the zucchini to a wide, uncovered plate and drain any liquid that has collected. Common causes include wet cut sides, early salting, a packed basket or transferring the hot pieces into a narrow or covered bowl.

Cook transferring wet zucchini from a narrow bowl with pooled liquid onto a broad uncovered platter using silicone-tipped tongs.
Spreading the batch prevents further steaming, but it cannot rebuild lost structure. Do not return floppy zucchini to the air fryer merely to chase darker color.

If the zucchini was oversized and seedy, scoop out the loose center next time. Otherwise, reduce the load, blot the pieces and season only when the air fryer is ready.

Limp or folding in half

The zucchini’s structure has already started to break down. Thin pieces, cooking past tenderness, leaving the finished batch in the hot basket or giving a second batch the same timing in an already-hot chamber can all cause it.

Remove it immediately and serve it now instead of chasing more color. Next time, cut thicker and watch the second batch a minute sooner.

Other common problems

  • Shriveled edges: Use thicker pieces, a measured coat of oil and an earlier check.
  • Burned seasoning: Use a lighter coating of spices and add Parmesan or delicate finishes near the end.
  • Taking much longer: A cold start, dense load, larger cut or oven-style appliance may be slowing the batch. Keep checking in short intervals.
  • Seasoning fell off: Dry the zucchini, add oil before the dry ingredients and avoid repeated shaking.
  • Greasy zucchini: Measure the oil and reduce it when cooking less than one pound.
  • Softened on the plate: Use a broad uncovered dish and add wet sauces at the table.

Once the texture is under control, changing the flavor is the easy part.

Air Fryer Zucchini Variations

Choose your finish: Keep the garlic-and-herb version simple, add Parmesan for nutty browned edges, or finish the zucchini with chaat masala and lime.

FinishBest when you wantKey adjustment
Everyday unbreadedGolden edges and a tender middleUse the base recipe
ParmesanSavory, nutty browned cornersReduce the salt and add cheese near the end
Chaat masala and limeTangy, bright flavorSkip the Italian herbs; add chaat masala, lime and cilantro after cooking
Very low oilMinimal added fatExpect lighter browning and slightly drier edges
Thin chips or breaded friesA crisp coatingUse the separate chips method

Using little or no oil: The zucchini will brown less evenly and may develop drier edges. Dry it carefully, keep the basket loose and check it sooner than the standard version. A fine oil spray offers a useful middle ground.

Side-by-side bowls comparing evenly browned zucchini cooked with the standard amount of oil and paler zucchini with drier edges cooked with little or no oil.
Air fryer zucchini without oil needs closer attention at the small tapered pieces. Their exposed edges may dry before the larger chunks develop much color.

Parmesan Zucchini

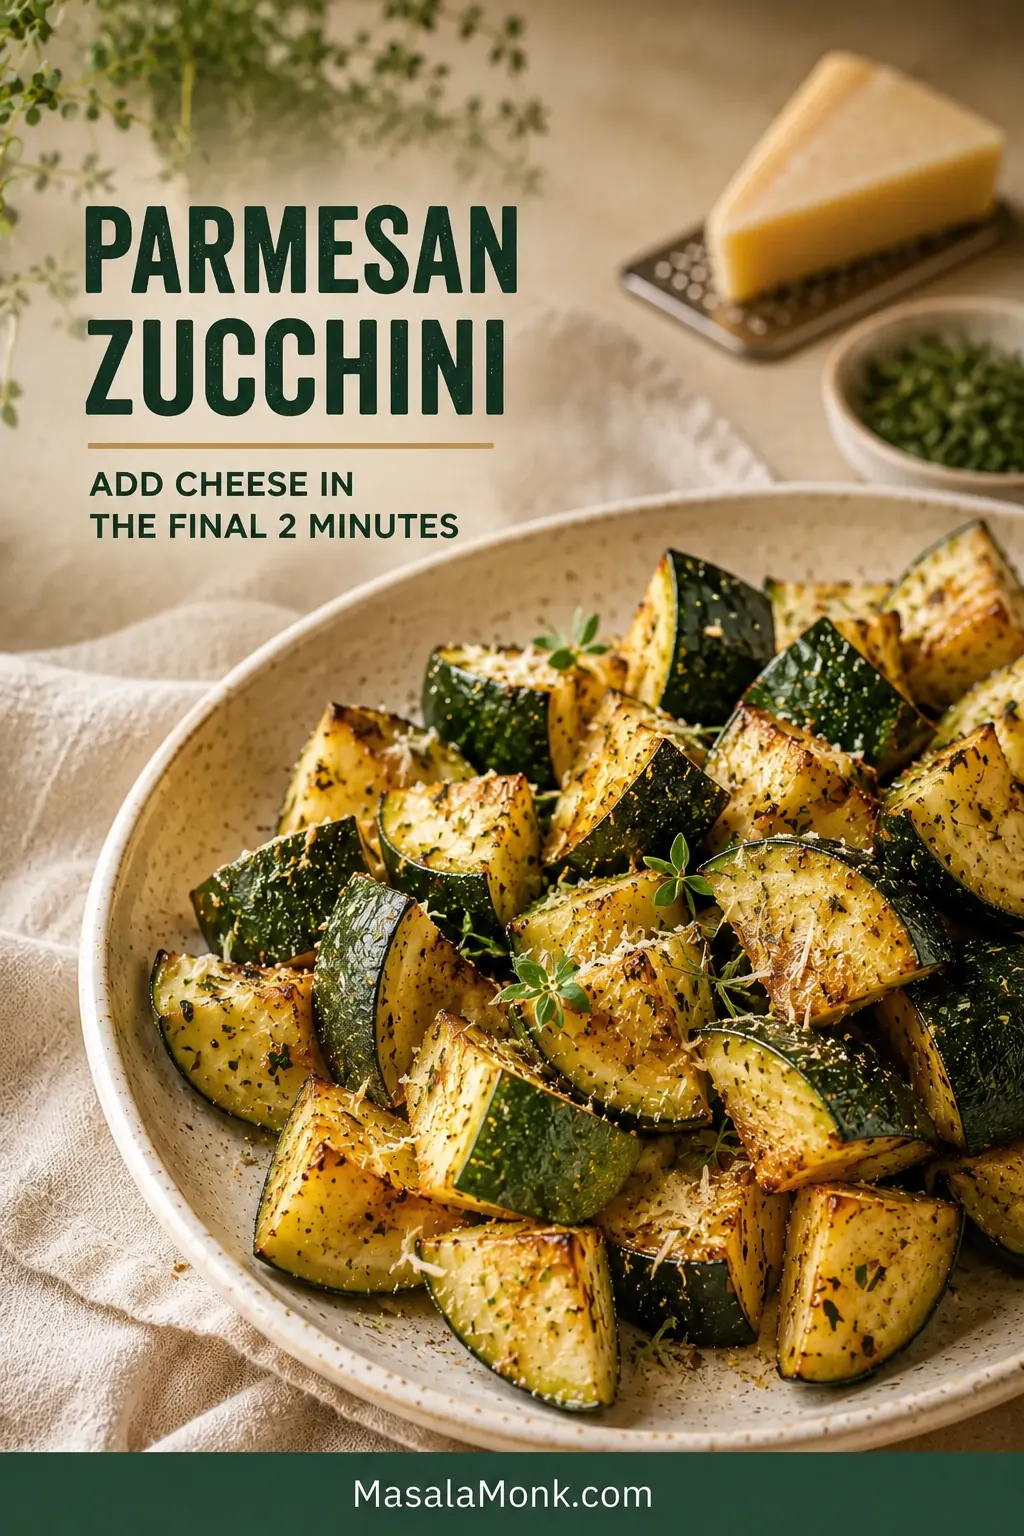
Use half the salt in the base recipe. During the final 2 minutes, add 2 tablespoons / about 10 g finely grated Parmesan. Sprinkle it over the zucchini, return the basket and avoid shaking again.

The cheese should catch on the corners and smell nutty as it browns. For an easier finish, sprinkle Parmesan over the zucchini on the serving plate instead.

Browned zucchini chunks lightly coated with finely grated Parmesan, with a cheese wedge and metal grater in the background.
For Parmesan air fryer zucchini, use finely grated cheese rather than coarse shreds. The smaller particles cling to the corners and melt before they have time to scorch.

Beside garlic Parmesan broccoli pasta, keep the zucchini lightly seasoned and add only a light dusting of cheese at the table.

Chaat Masala and Lime Zucchini

Omit the Italian seasoning, but keep the garlic powder and black pepper. Reduce the fine salt to ¼ teaspoon.

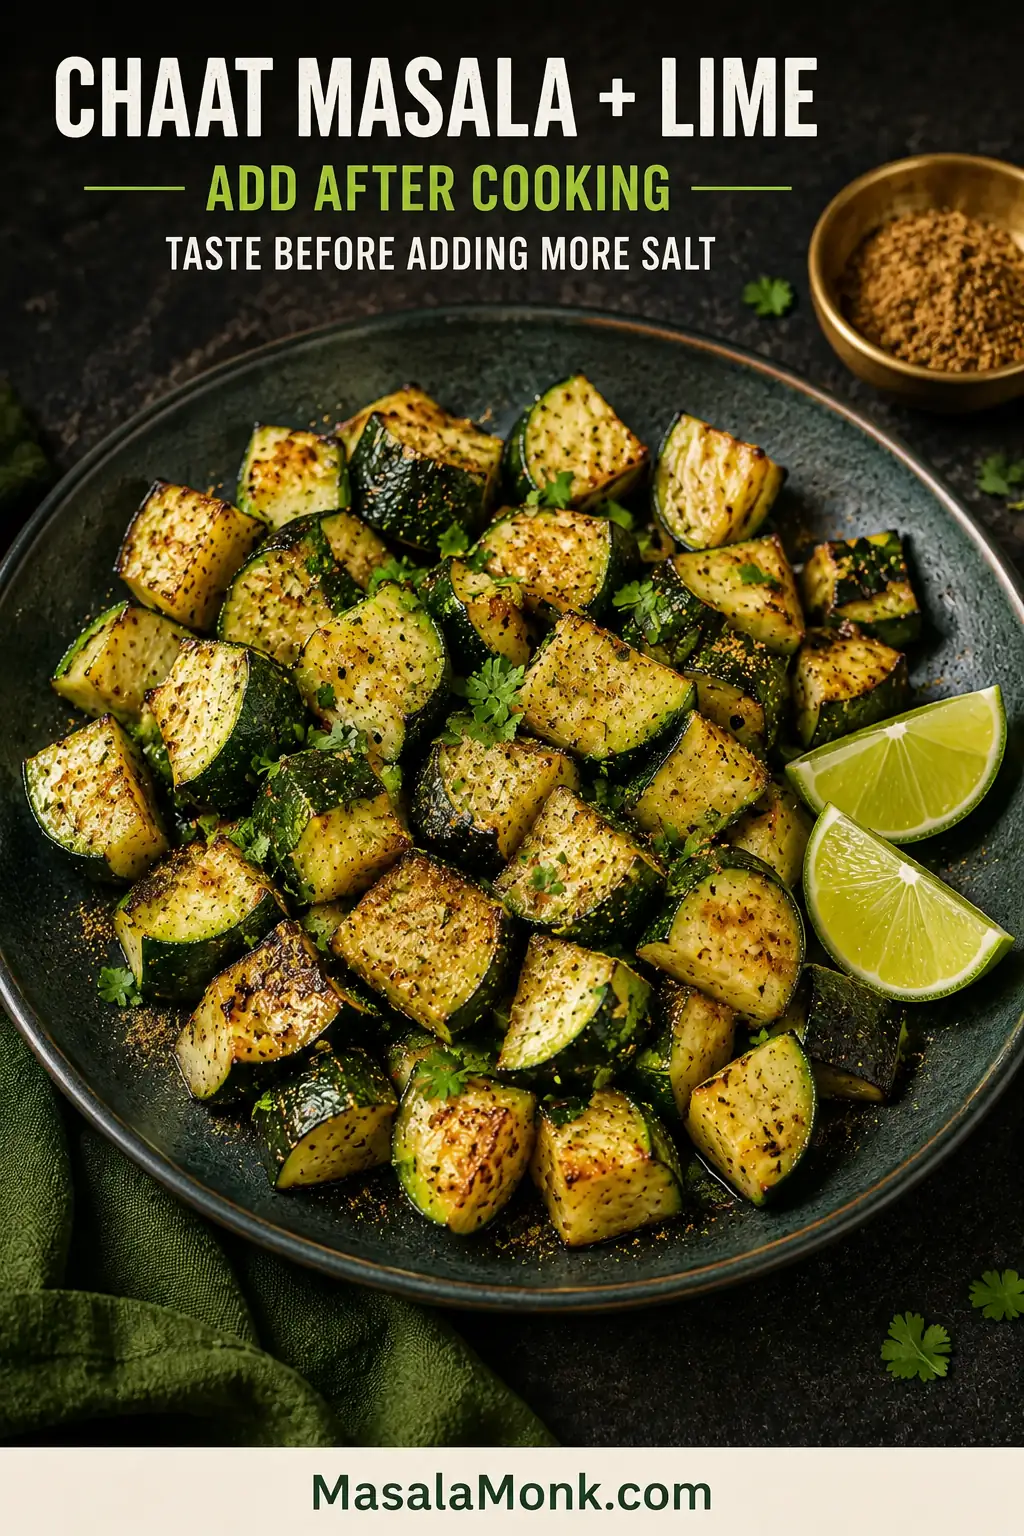
After cooking, sprinkle the hot zucchini with ½ teaspoon chaat masala, add 1 teaspoon / 5 ml lime juice and finish with a small handful of chopped cilantro. Taste before adding more because chaat masala blends vary in salt and intensity.

Dark plate of browned zucchini finished with chaat masala, lime wedges and chopped cilantro beside a small bowl of spice.
Chaat masala, lime and cilantro belong after cooking, when their flavor stays vivid. Taste before adding more salt because seasoning blends vary widely.

The tangy spice and bright lime work especially well beside dal and rice, chickpeas or cubes of soft homemade paneer.

Zucchini and Yellow Squash

Yellow summer squash can cook in the same basket when the pieces are similar in size. Softer or seedier chunks may finish first, so take them out and let the firmer pieces continue.

Can You Air Fry Frozen Zucchini?

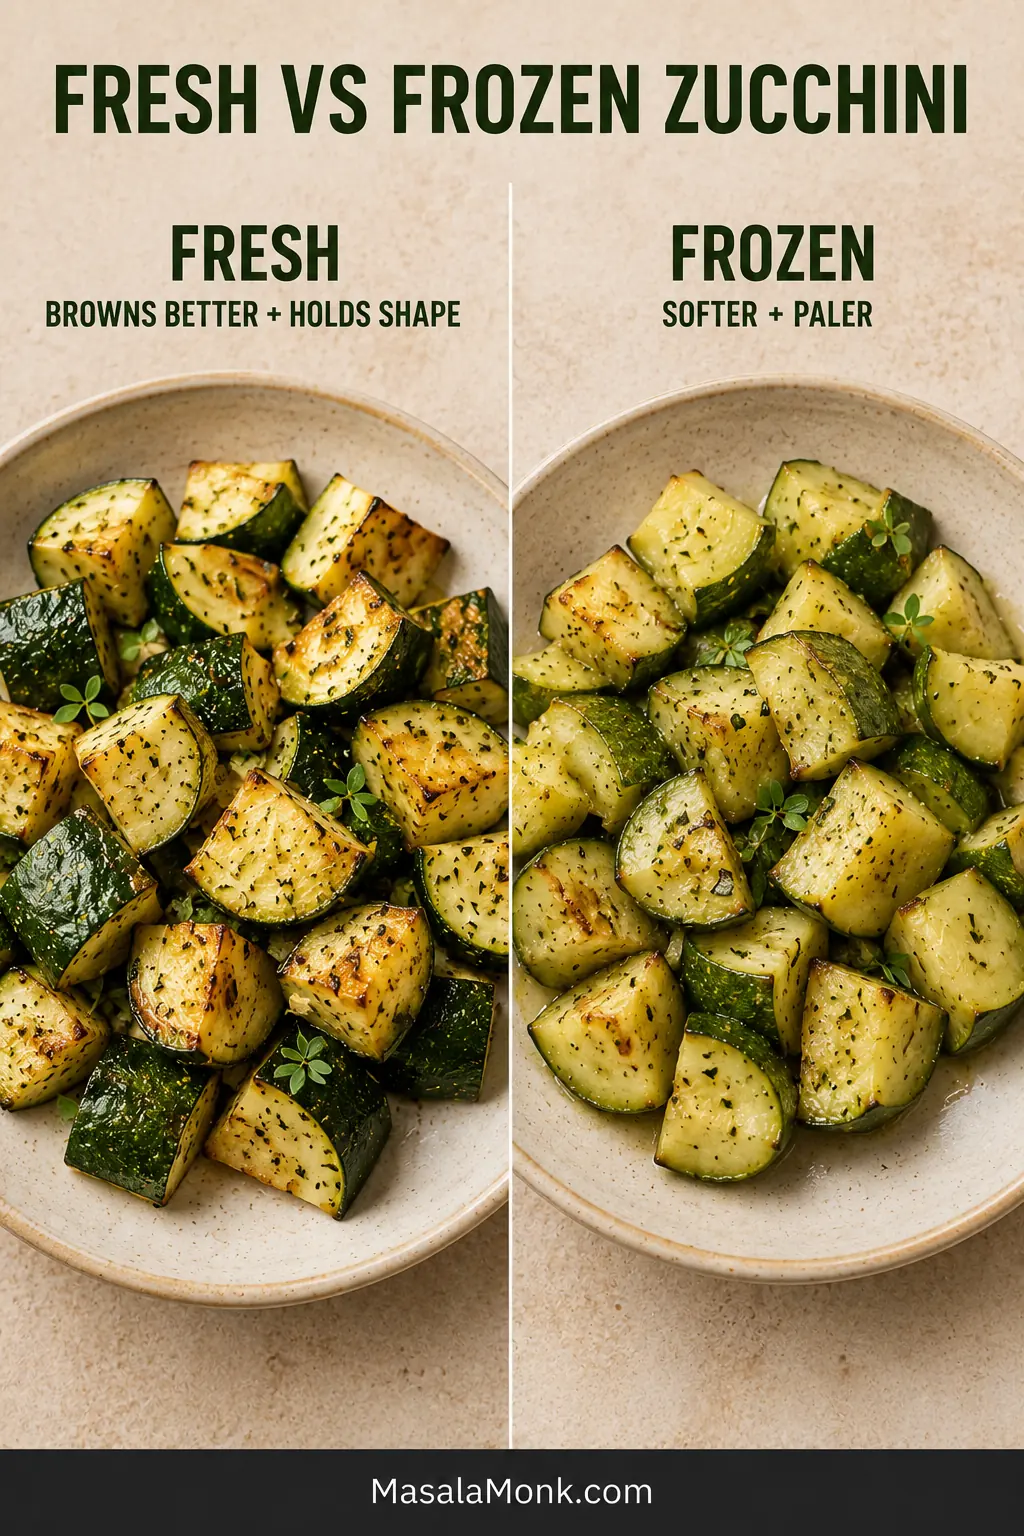
Yes, but it will be softer, paler and less distinctly roasted than fresh zucchini. Frozen pieces release more water and lose structure quickly.

Use fresh zucchini when you want browned chunks that hold their shape. Save frozen zucchini for soup, curry, pasta sauce, casseroles or blended vegetable sauces where softness belongs.

Side-by-side bowls showing browned, firm fresh zucchini and paler, softer zucchini cooked from frozen.
Treat frozen zucchini in the air fryer as an ingredient rather than a roasted side. Its softer texture becomes far less noticeable once folded into a curry, soup or sauce.

Freezing fresh zucchini at home? The National Center for Home Food Preservation’s summer-squash guidance explains how to blanch, cool and pack it safely.

What to Serve With Air Fryer Zucchini

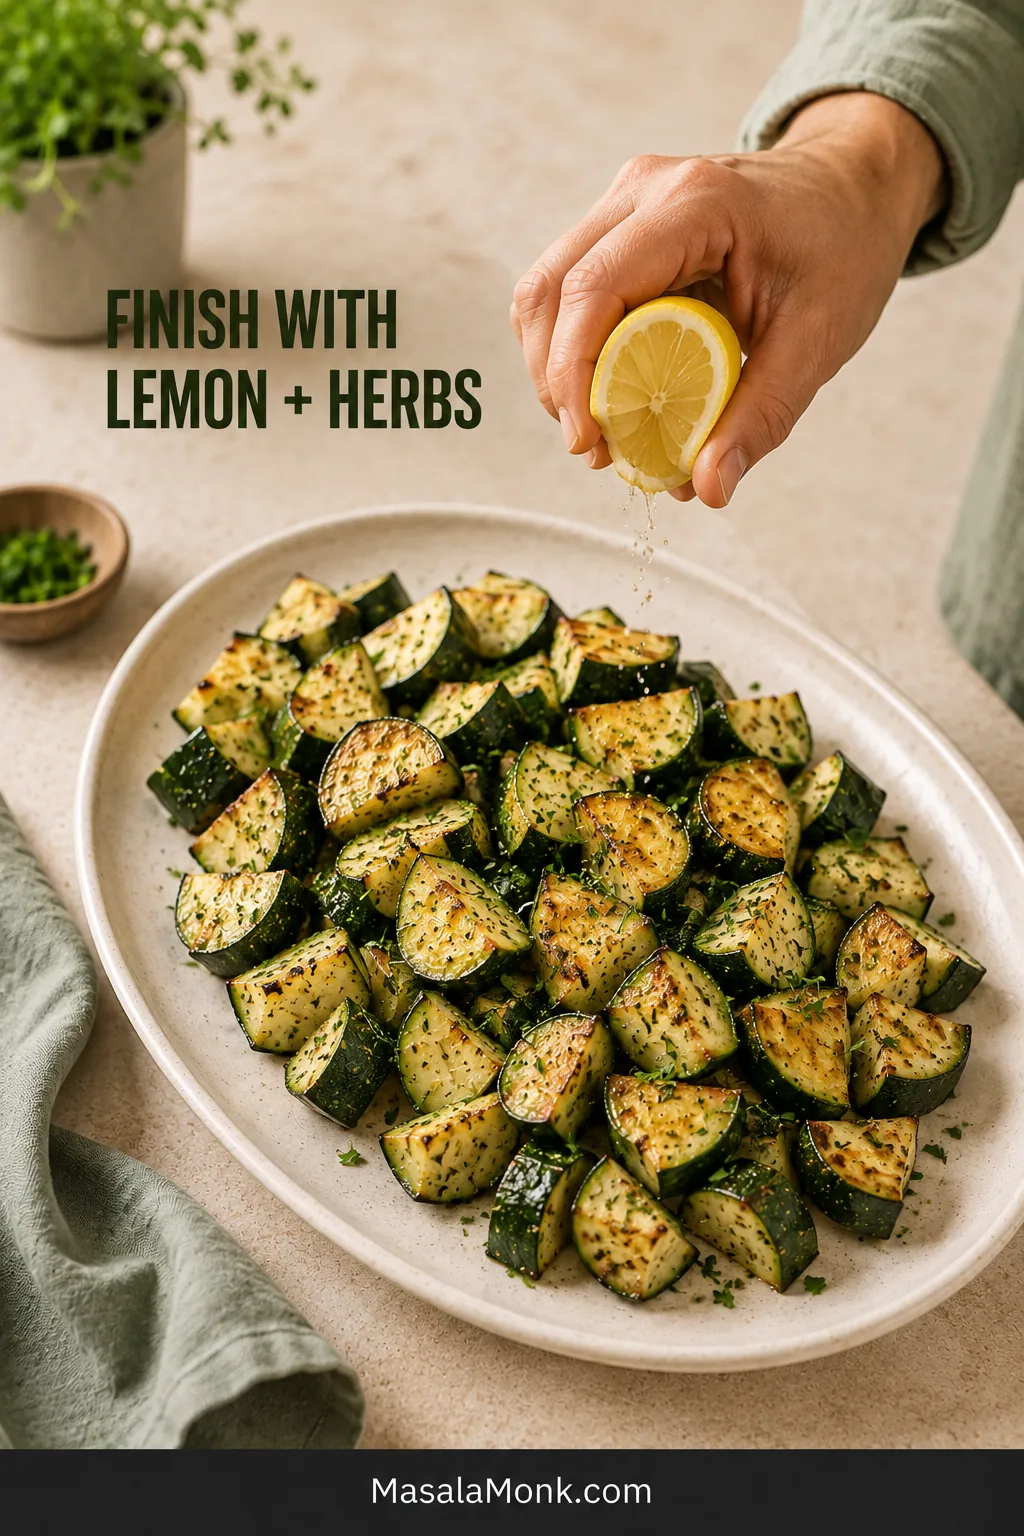
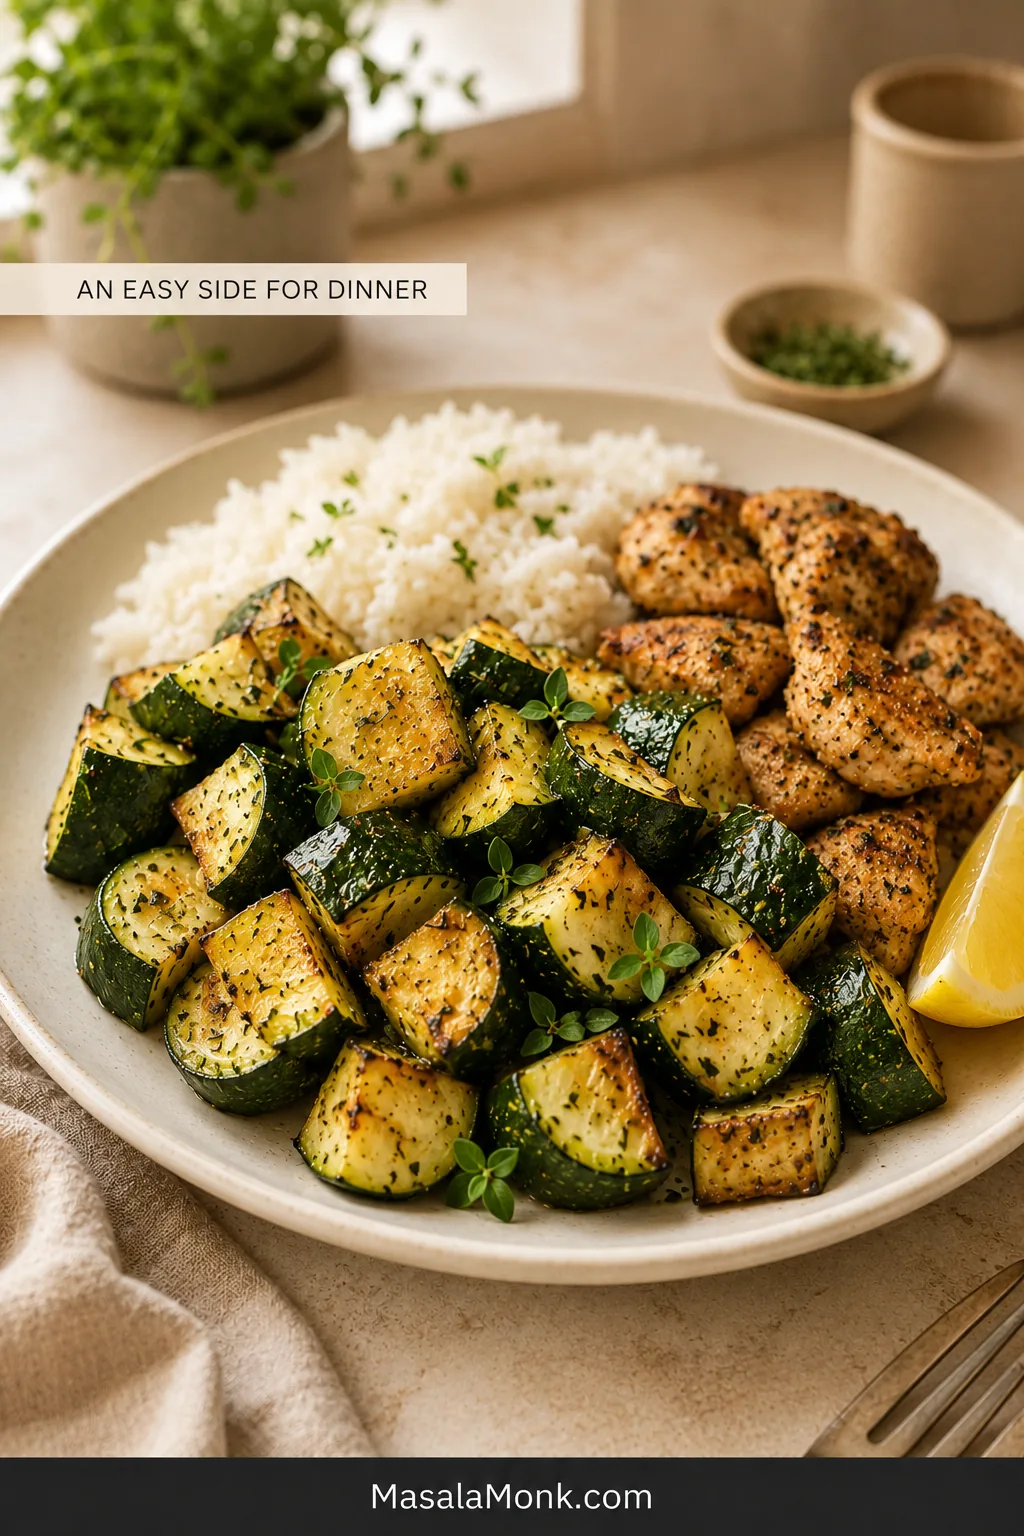
Once the texture is right, this is the kind of side that quietly fits around almost anything already planned for dinner. Spoon the zucchini beside rice or potatoes and juicy air fryer chicken breast, salmon, paneer or tofu. Squeeze lemon over the whole plate and add a little salt at the table.

Hand squeezing lemon over browned zucchini spread across a broad white platter and finished with fresh herbs.
Add lemon and fresh herbs after cooking so their flavor stays bright. A broad platter lets steam escape instead of softening the browned surfaces.

With a richer main such as honey garlic salmon, keep the zucchini lemony and herb-led. For a vegetarian bowl, layer it with warm grains, chickpeas or paneer, plenty of herbs and a cool yogurt or tahini sauce.

Weeknight dinner plate with a generous serving of browned zucchini, white rice and seasoned chicken pieces on a warm neutral table.
Wondering what to serve with air fryer zucchini? Plate it last and keep gravy, dressing or wetter sauces alongside it so the browned surfaces remain distinct longer.

Once chilled, fold leftovers into a chickpea salad, wrap or pasta bowl. Add them close to serving so they do not sit in dressing and soften further.

When the air fryer is already occupied—or a softer vegetable side suits dinner better—the skillet mushroom and zucchini stir-fry is a useful stovetop alternative.

How to Store and Reheat Air Fryer Zucchini

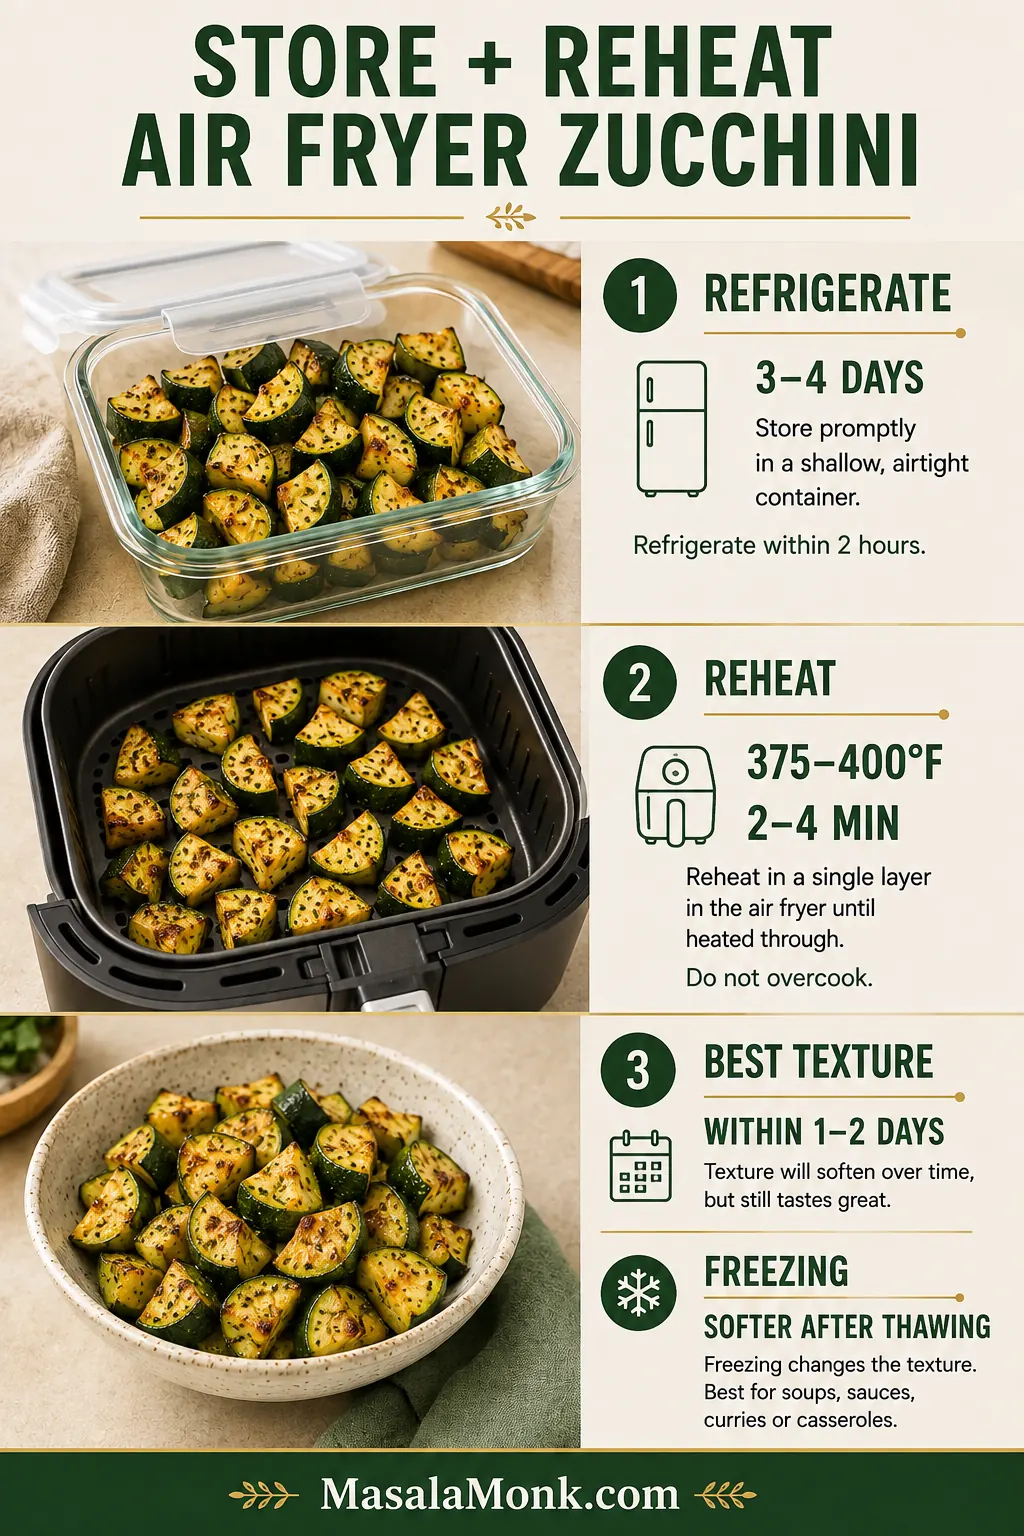
Transfer leftovers promptly to a shallow covered container and refrigerate them within two hours. The zucchini does not need to cool completely before going into the refrigerator.

Use it within 3 to 4 days, following the USDA’s leftovers and food-safety guidance. For the best texture, eat it during the first day or two.

Vertical storage guide showing zucchini in a shallow lidded container, a single layer reheating in an air fryer and notes about refrigeration and freezing.
For the best way to reheat air fryer zucchini, warm only the portion you need in one layer. Add reserved lemon, herbs or cheese after reheating—not before storage.

Reheating

Arrange the zucchini in one layer and reheat at 375–400°F / 190–200°C for approximately 2 to 4 minutes. Check early; the goal is to reheat it, not cook the center a second time.

The microwave is convenient, although the zucchini will be softer. Heat it in short intervals. Freezing cooked zucchini will not preserve its roasted texture; use thawed leftovers in soup, sauce, curry or a casserole.

Food-safety note: Reheat leftovers until hot throughout. If you check with a thermometer, USDA recommends reheating leftovers to 165°F / 74°C.

Frequently Asked Questions

Do you need to peel zucchini before air frying?

No. The skin is edible, adds color and helps the chunks stay intact. Leave it on unless it is unusually tough or damaged.

Do you need to preheat the air fryer?
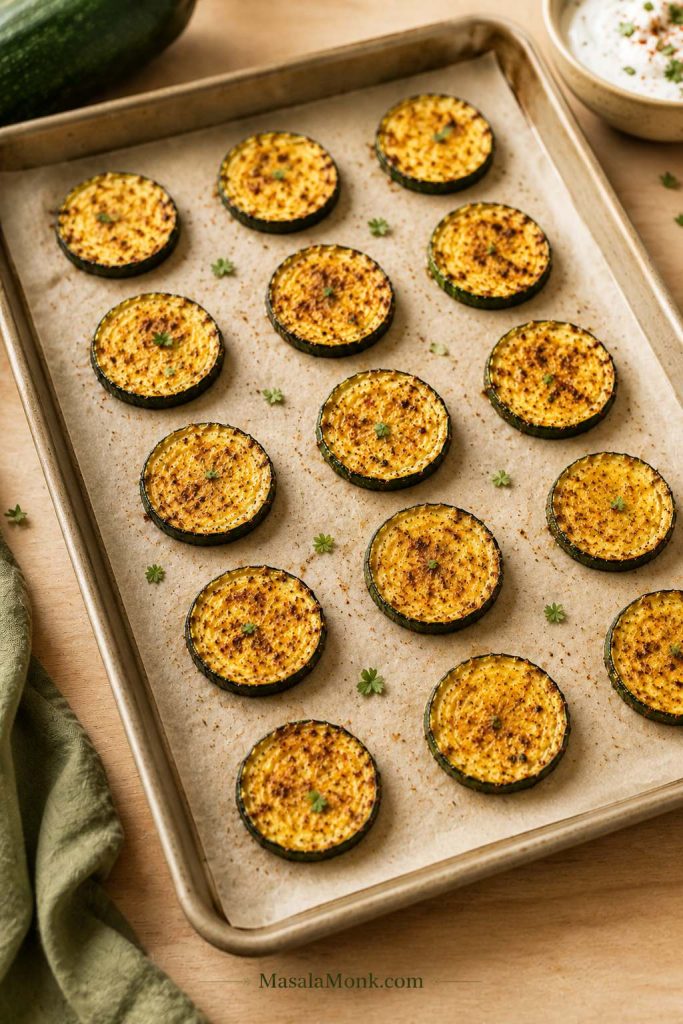
Preheating gives the zucchini a hot start and makes the checking range more predictable. Skip it only when your machine preheats automatically or its manufacturer recommends starting from cold.

Should zucchini be salted before air frying?

Salt small or medium zucchini immediately before air frying, not well in advance. Only oversized, visibly watery zucchini benefits from a 10-minute salted rest followed by thorough blotting.

Why did my air fryer zucchini turn soggy?

Common causes include thin pieces, a crowded basket, wet surfaces, a cold start, salting too early, overcooking or trapping steam after cooking. Use the full troubleshooting guide to match the visible symptom with the right correction.

How long does zucchini take at 400°F?

Begin checking thick chunks at 7 minutes. Many preheated basket-style machines will finish them between 8 and 11 minutes. See the time and temperature guide for oven-style machines, second batches and visual stopping cues.

Can you air fry zucchini rounds or spears?

Yes. Keep rounds and spears fairly thick and inspect them early. Rounds usually soften faster because they expose broad cut faces, while sturdy spears may take closer to the chunk timing. See the cut-size and shape guide for the visual comparison. Use the separate zucchini chips method for very thin or breaded pieces.

When the zucchini looks ready before the timer does, trust your fork. Take it out and let dinner continue.

Posted on Leave a comment

Crispy Zucchini Chips Recipe: Air Fryer, Oven, Panko, Keto & Dehydrator Methods

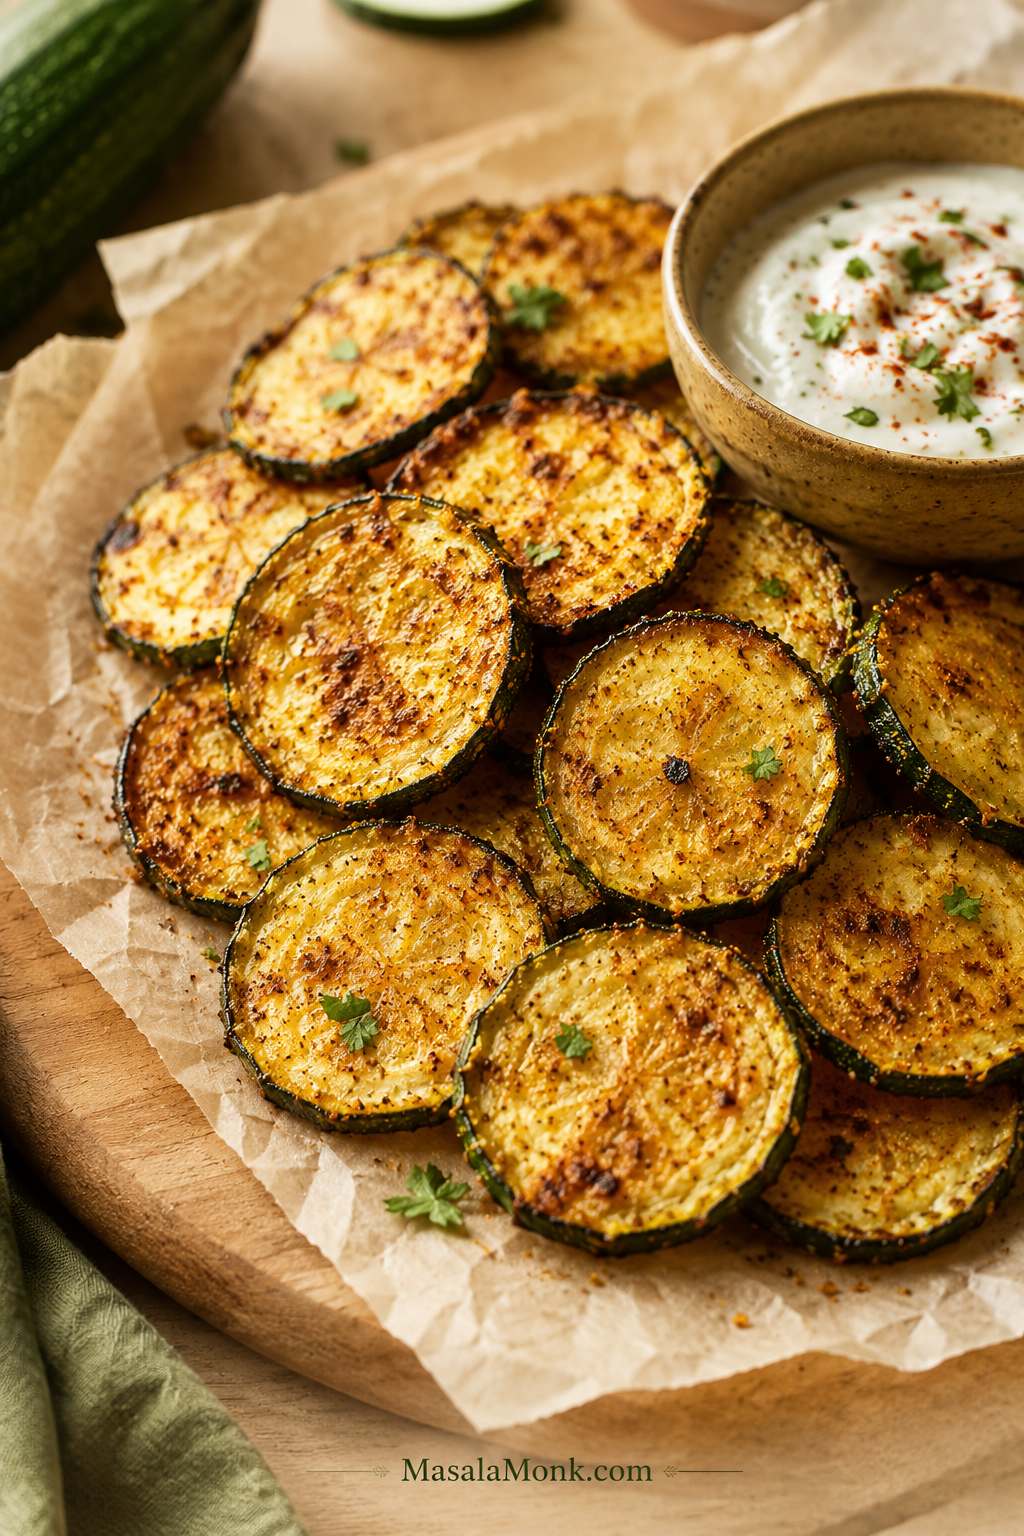
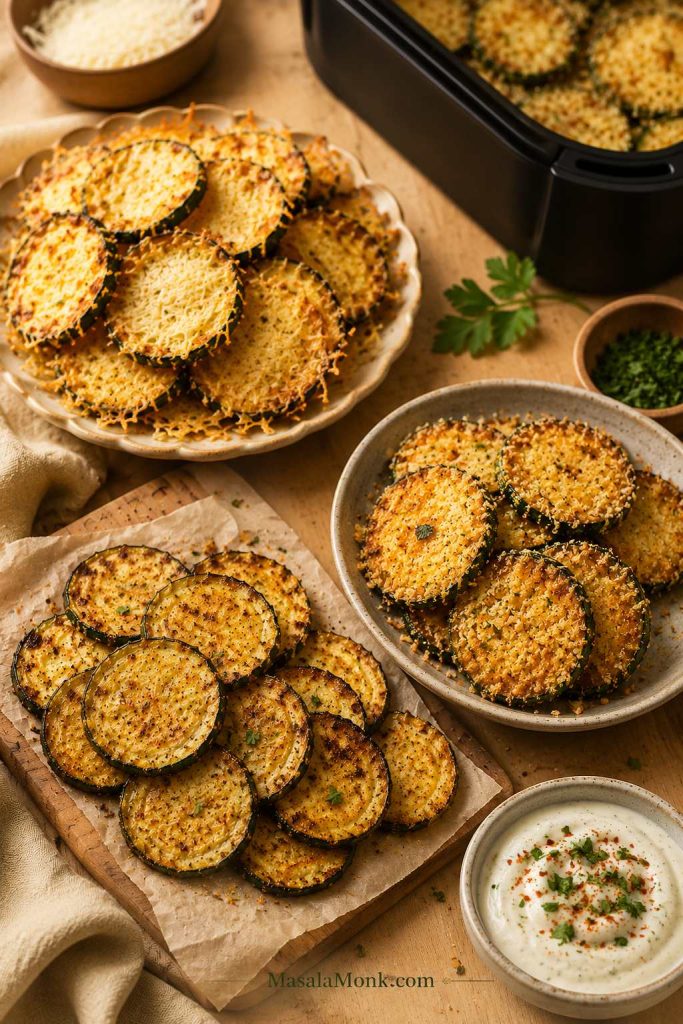
These crispy zucchini chips are golden at the edges, tender in the center, and best dipped while the parmesan still has its crunch.

Zucchini chips sound easy until you pull them from the oven or air fryer and find the same annoying problem: browned edges, soft centers, and slices that look like chips but bend like roasted zucchini.

If that has happened to you, the problem was probably not just the cooking time. Zucchini is naturally tender and water-rich, so it needs a little help before it can become crisp. Even slicing, a short salting step, proper drying, light oil, enough space, and the right heat make the difference between limp slices and a snack you actually want to keep reaching for.

Most zucchini chips recipes are not actually disagreeing with each other. They are making different snacks. This guide starts with the easiest crisp-edged air fryer parmesan version, then shows when to use the oven, panko, keto/no-breadcrumb, or dehydrator method for the texture you actually want. If you already know the texture you want, compare the styles first.

These will not behave exactly like packaged potato chips, and that is okay. The win is a crisp-edged, salty bite that lets zucchini be zucchini without turning limp.

Quick Answer: How to Make Crispy Zucchini Chips

To make crispy zucchini chips, slice the zucchini evenly, salt the slices briefly, pat them very dry, season lightly, and cook in a single layer. Start with air fryer parmesan zucchini chips at 370°F / 188°C for 10–12 minutes, then cool them spread out for a few minutes so the cheese can firm. Need amounts and steps? Jump to the recipe card.

Seasoning helps, but the real win happens before the zucchini hits the heat. If the slices go in wet, they soften before the edges can firm up. Use only a little oil or oil spray, avoid crowding, and do not judge the final texture until the chips have cooled for a few minutes.

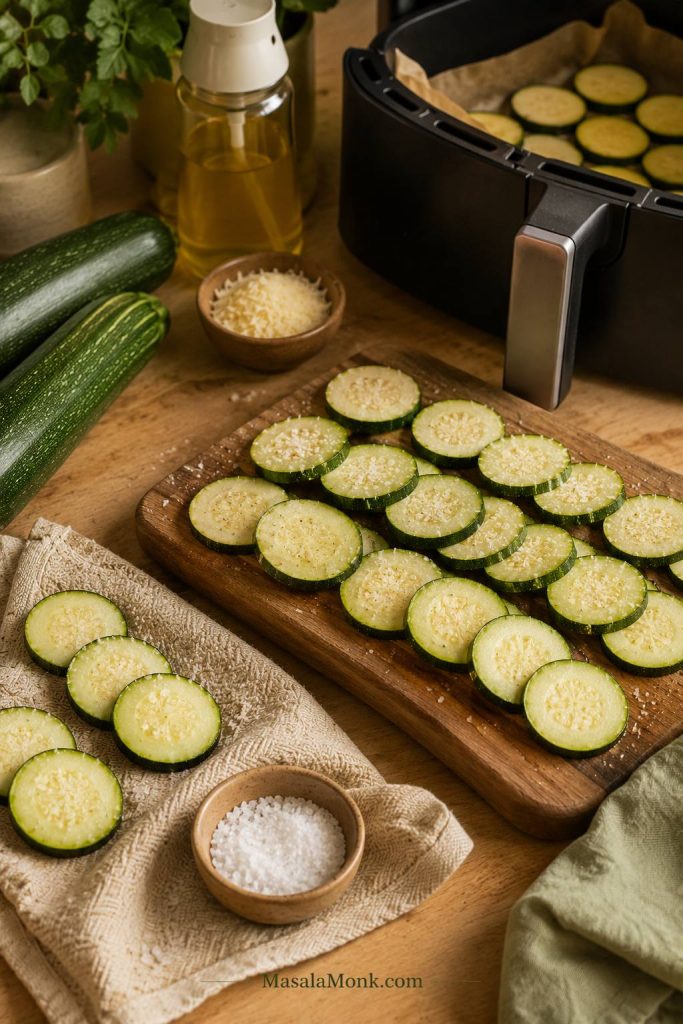
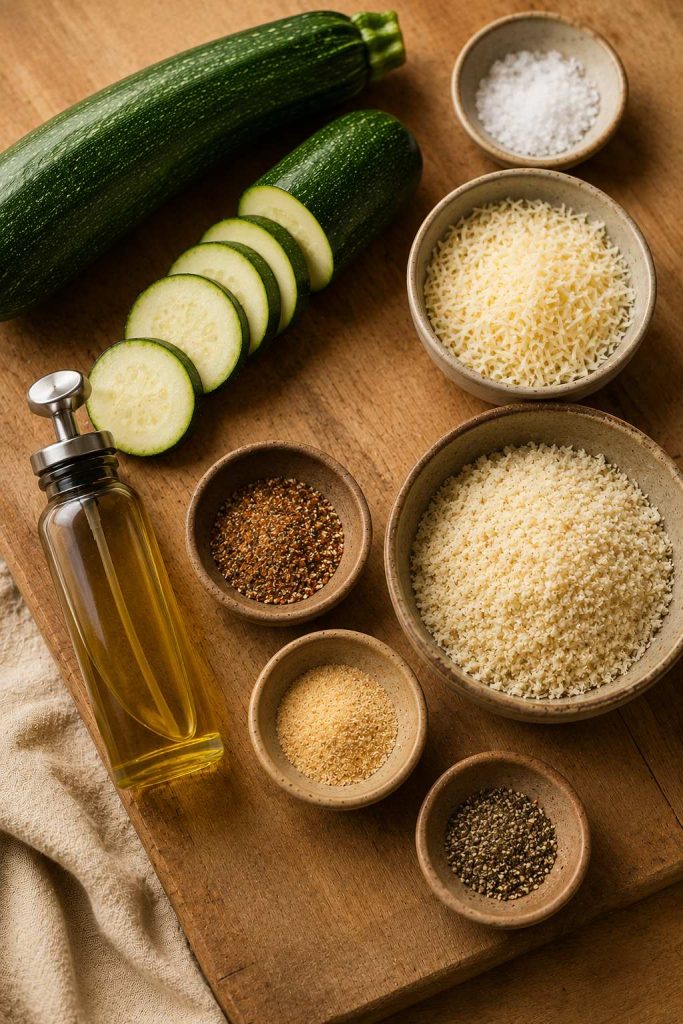
Sliced zucchini, salt, parmesan, oil spray, towel, and air fryer basket arranged on a wooden surface.
Before the air fryer or oven does any work, set the zucchini up for success with even slices, salt, towels, light oil, and parmesan.

Best first batch: air fryer parmesan zucchini chips.

The crispness rule: slice evenly, salt briefly, pat very dry, cook in one layer, and cool spread out.

Crispy Air Fryer Parmesan Zucchini Chips Recipe

This is the first batch to make because parmesan gives zucchini a shortcut to crisp edges. The slices still need salting and drying, but the cheese browns quickly, firms as it cools, and turns a soft vegetable into something snackable without breadcrumbs or a long oven bake.

Texture: crisp parmesan edges, tender centers, and a salty snack bite. Not packaged potato-chip snap, but much better than limp zucchini rounds.

Yield4 servings

Prep Time20 minutes

Cook Time10–12 minutes

Total Time30–35 minutes

Ingredients

  • 2 medium zucchini, about 400 g / 14 oz total
  • ½ tsp fine salt, about 3 g, for salting the zucchini
  • 1 tbsp olive oil or avocado oil, 15 ml, or use oil spray
  • ½ tsp garlic powder, about 1.5 g
  • ½ tsp paprika or smoked paprika, about 1 g
  • ¼ tsp black pepper, about 0.5 g
  • ⅓ cup finely grated parmesan, about 30 g
  • Extra salt only if needed, after cooking

Instructions

  1. Slice the zucchini. Slice into even rounds, about ⅛ inch / 3 mm for thinner chips or slightly thicker if your air fryer tends to blow thin slices around.
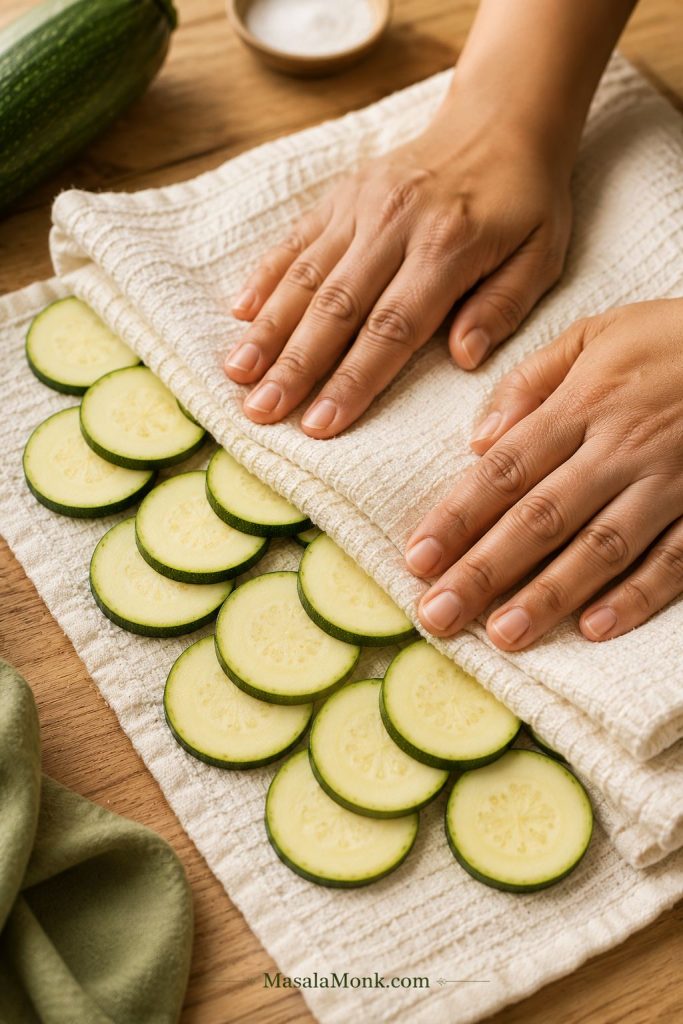
  2. Salt the slices. Arrange the zucchini on a towel or in a colander. Sprinkle with the salt and let rest for 15–20 minutes.
  3. Dry very well. Pat the slices dry with a clean kitchen towel or paper towels. The surface should look matte, not shiny-wet.
  4. Season lightly. Toss the zucchini with oil, garlic powder, paprika, black pepper, and finely grated parmesan. The slices should look lightly glossy, with seasoning clinging to the surface instead of sliding around.
  5. Arrange in the air fryer. Place slices in a single layer in the basket. Cook in batches if needed; it is better to cook two quick batches than one crowded soft batch.
  6. Air fry. Cook at 370°F / 188°C for 10–12 minutes, flipping or shaking gently halfway, until the parmesan smells toasted, the edges look dry, and the slices feel lighter. Start checking around 8 minutes.
  7. Remove finished chips early. If some slices are golden before others, remove them and keep cooking the softer pieces.
  8. Cool before serving. Spread the chips out for a few minutes. The parmesan firms up and the edges crisp more as they cool.
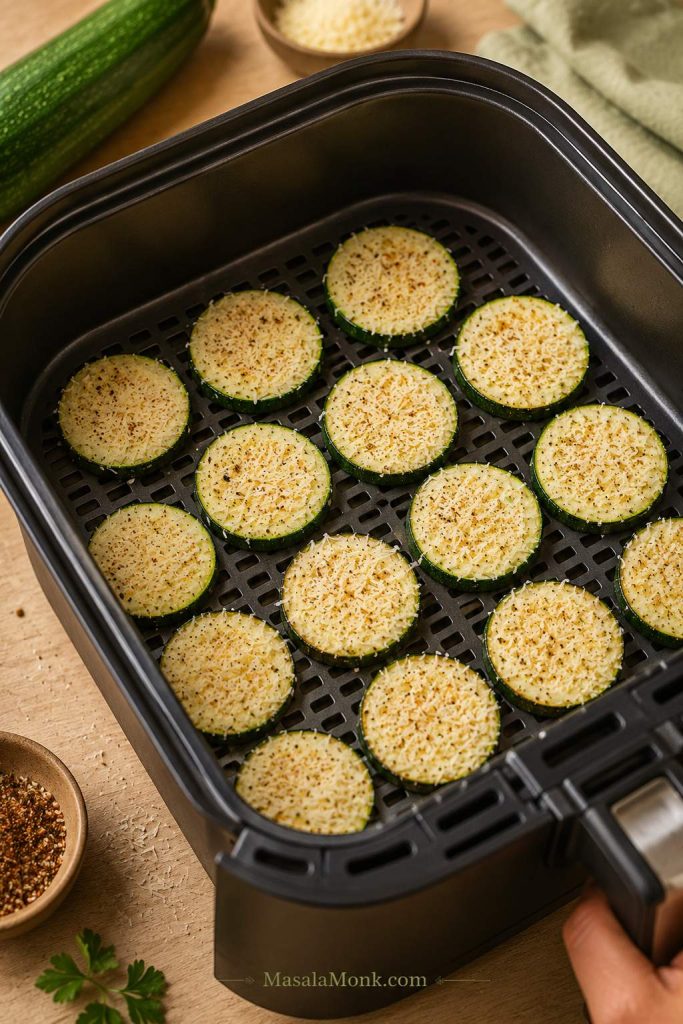
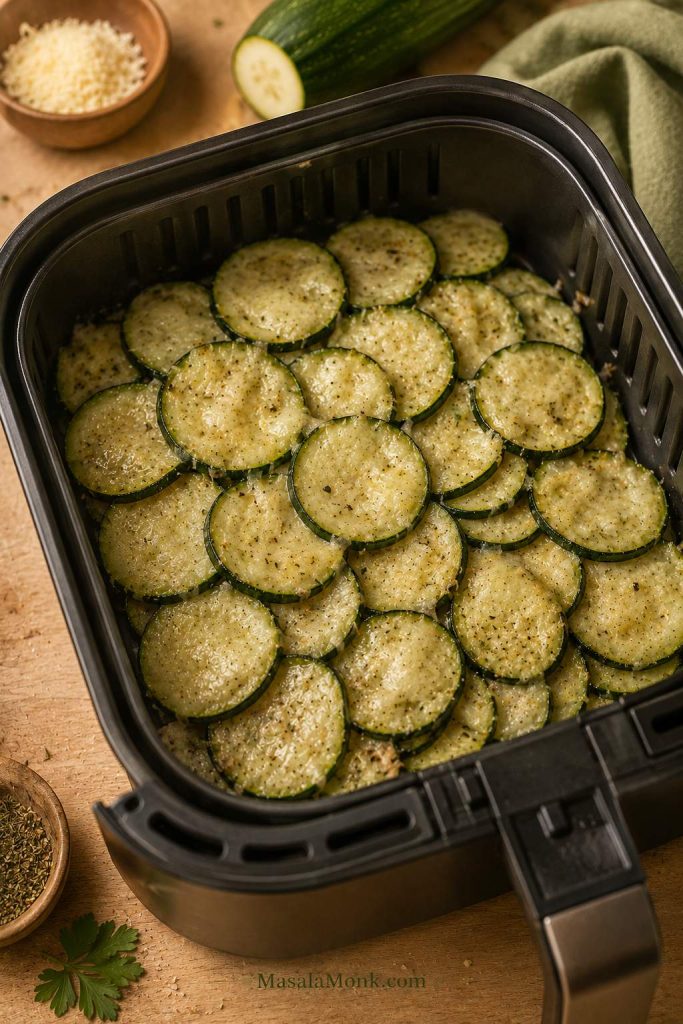
Parmesan-coated zucchini rounds arranged in one layer inside an air fryer basket.
For air fryer zucchini chips, keep the rounds in one layer. Hot air needs open gaps to dry the edges instead of steaming the centers.

Recipe Notes

  • Use finely grated parmesan for the most reliable crisping.
  • Smaller or thinner slices may finish first; pull them out early.
  • Do not add extra salt until after cooking, especially if using parmesan.
  • No air fryer? Use the hot oven parmesan method.
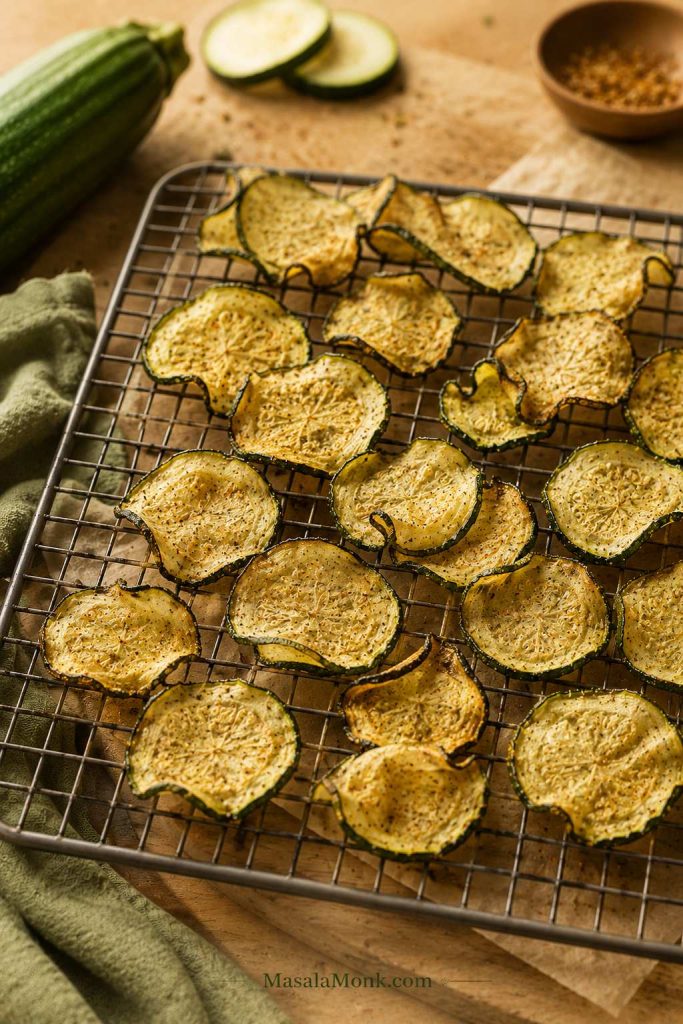
  • Serve soon after cooling, while the parmesan edges are still crisp.
  • Re-crisp leftovers in the air fryer or oven, not the microwave.

Why this works: salting gives the slices a better start, parmesan browns quickly, and cooling lets the cheese firm up. That is why the chips often feel crisper after a few minutes on the plate than they do straight from the air fryer. If they still come out soft, use the soggy-chip fixes.

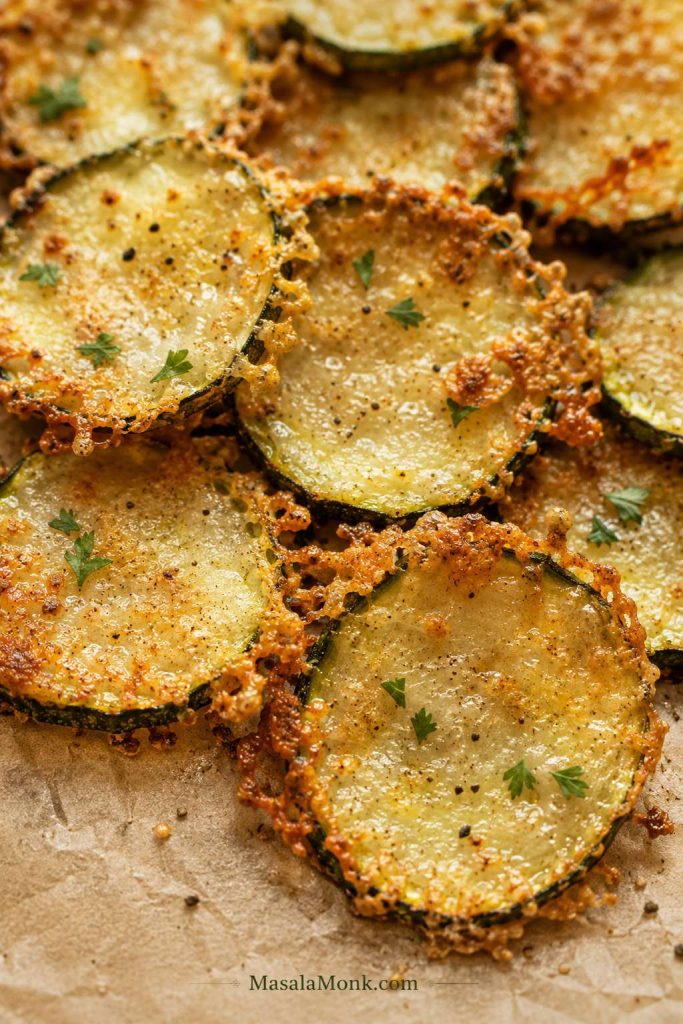
Close-up of parmesan zucchini chips with golden lacy cheese edges on parchment.
With parmesan zucchini chips, the best sign is a lacy golden edge. Let them cool briefly so the cheese can firm and crisp.

The first successful batch feels obvious in hindsight: the slices look lighter, the parmesan smells toasted, and the edges firm up while you are getting the dip. A few softer pieces are normal. At their best, they taste salty and cheesy, with crisp edges and tender centers.

The first crisp one is the cook’s tax. Eat it while the edges are still at their best.

Want a Different Texture? Choose Your Zucchini Chip Style
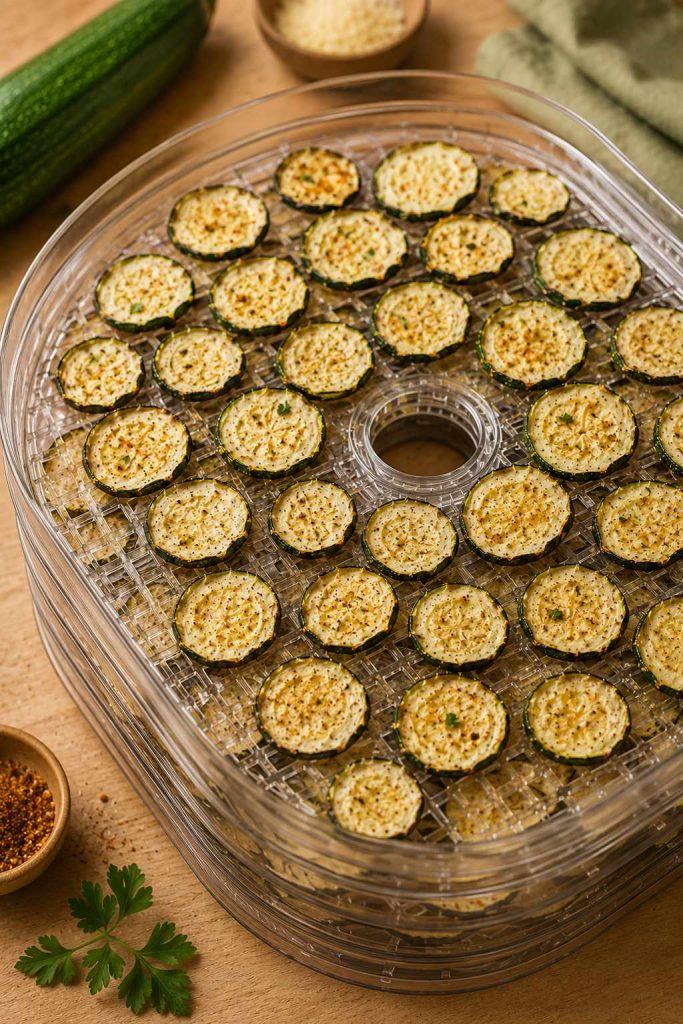
From here, the same idea can shift into oven trays, panko coating, keto chips, or make-ahead dehydrated chips. You do not need to master every version today. Choose the one that matches what you want to eat: the air fryer method for speed, the panko method for crunch, or the dehydrator method for make-ahead chips.

Thin chips dry. Parmesan rounds crisp. Panko rounds crunch. Once you know which style you are making, the times stop looking random.

Three zucchini chip styles shown together: thin plain chips, parmesan rounds, and panko-coated rounds.
Not every zucchini chip should look the same: thin chips dry, parmesan rounds crisp at the edges, and panko rounds bring the loudest crunch.
If You Want…Make ThisWhy It Works
The easiest first tryFast cheesy: air fryer parmesanParmesan helps the edges crisp quickly and adds salty, snacky flavor.
The crunchiest appetizerCrunchy appetizer: panko roundsPanko creates a crisp coating while the zucchini stays tender inside.
Keto or no-breadcrumb snackLow-carb: plain or parmesanParmesan gives better low-carb crispness than almond flour alone.
Larger sheet-pan batchSheet-pan: oven-bakedA baking sheet gives the slices more room than most air fryer baskets.
The most chip-like thin slicesThin veggie chips: low oven or dehydratorSlower heat gives thin slices time to turn light and crisp.
A sturdy dipperSturdy dippers: panko or thick parmesanThin plain chips are delicate; coated rounds hold up better.

Best choice guide: air fryer parmesan for the first batch, low oven or dehydrator for the most chip-like thin texture, panko for party crunch, parmesan for keto, and dehydrator or low-and-slow oven for better storage.

This is the kind of tray that disappears by the edges first: the lacy parmesan pieces, the extra-golden rounds, the ones everyone says they are “just testing.”

Why Zucchini Chips Turn Soggy

Most failed batches come down to one problem: the slices steam before they crisp. Already dealing with a limp tray? Skip to the troubleshooting table.

Zucchini carries a lot of moisture. When the slices are too thick, too crowded, or too wet, that moisture gets trapped. Instead of crisping at the edges, the zucchini softens. That is how you get chips that look browned but still bend in the middle.

If your last batch came out limp, you are not alone. This vegetable can make even a good recipe feel unpredictable until you give the slices a better start.

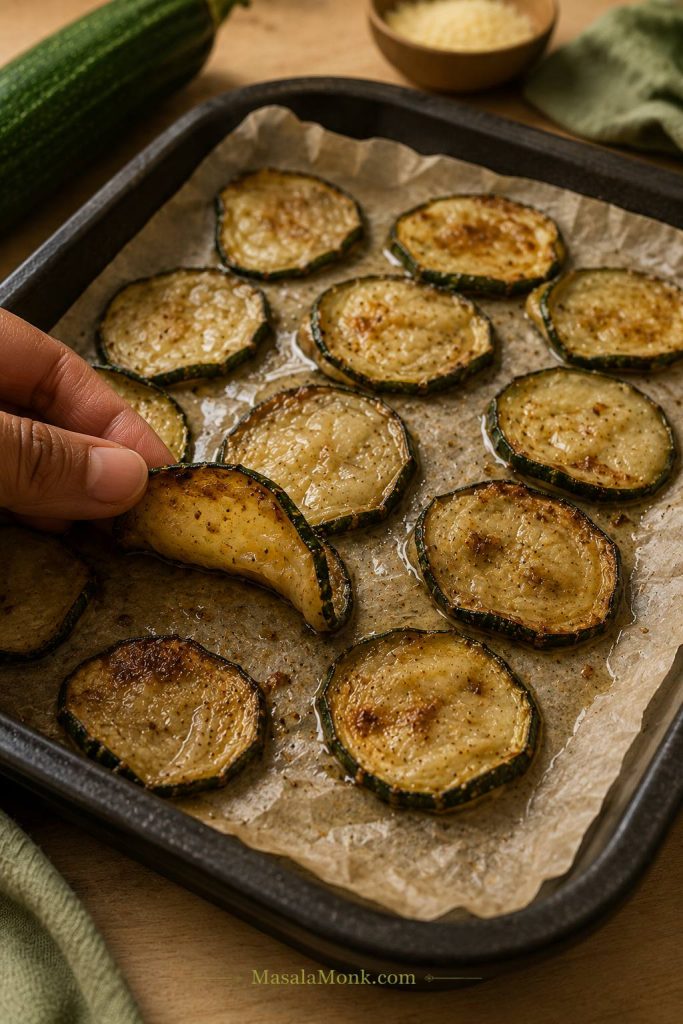
Soft browned zucchini chip being bent above a tray of limp zucchini slices.
If zucchini chips brown but still bend, they probably steamed before they crisped. Next time, go thinner, drier, or less crowded.

The rule that saves most batches: slice evenly, salt briefly, pat very dry, cook with space, and cool the chips spread out. That matters more than adding extra oil.

Once you solve that, the reward is simple: golden edges, better seasoning, and chips that feel like a snack instead of a side dish.

The Mistakes That Keep Zucchini Chips Soft

If a batch stays limp, the fix usually points back to one of these habits. This is not about being fussy; it is about giving zucchini a fair chance to crisp.

  • You salted but did not dry. Salting brings moisture to the surface; drying removes it. If the slices still look shiny, press them between towels before cooking.
  • You used too much oil. Glossy is good. Wet or slick is not. Too much oil coats the surface and keeps the chip soft.
  • You crowded the basket or pan. Overlapping slices steam each other. Cook in batches if needed.
  • You sliced unevenly. Thin pieces brown first while thick pieces stay soft. Pull the crisp ones early instead of waiting for the whole tray to match.
  • You used wet flavors too early. Lemon juice, hot sauce, fresh garlic paste, and watery marinades belong after cooking.
  • You piled them hot. Stacked chips lose their edge quickly. Spread them out for a few minutes first.
  • You expected every method to crunch the same way. Thin chips dry, parmesan rounds crisp, and panko rounds crunch. Choose the texture first.

Why These Ingredients Help Zucchini Chips Crisp

The ingredient list is short, but every item has a job. Medium zucchini gives you neat slices, salt draws moisture to the surface so you can pat it away, oil helps browning, parmesan firms into crisp edges, and panko gives the loudest crunch.

Zucchini, salt, grated parmesan, panko, oil spray, and spices arranged on a wooden board.
Keep the ingredient list simple, but choose each one for a job: salt manages moisture, parmesan builds crisp edges, and panko adds crunch.
  • Best zucchini: medium, firm zucchini with fewer watery seeds. Oversized zucchini can stay soft in the center.
  • Best crisping helper: finely grated parmesan. It clings better than large shreds and sets as it cools.
  • Best crunch coating: panko. Use it for appetizer-style rounds, not thin delicate chips that need to stay light.
  • Best oil approach: a light toss or spray. Glossy is enough; greasy slices soften.
  • Best seasoning type: dry spices and dried herbs. Save lemon juice, hot sauce, and fresh garlic paste for after cooking.

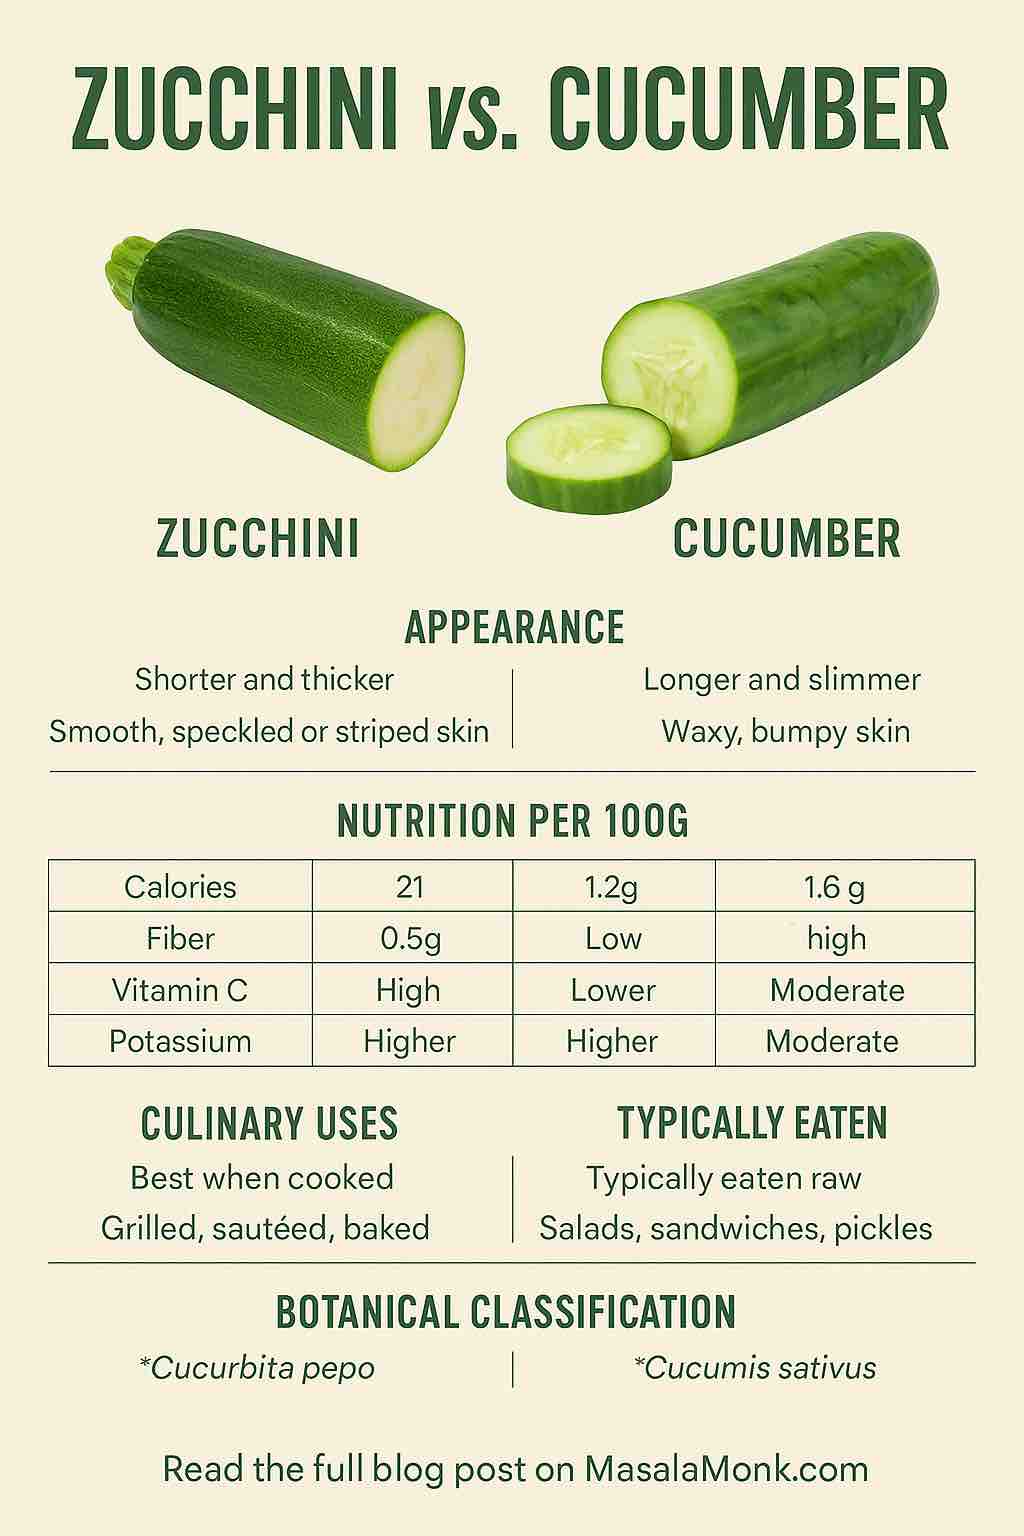
If you only have a very large zucchini, cut it lengthwise and scoop out the soft, seedy center if it looks watery. Use the firmer outer flesh for chips. And if you are comparing it with cucumber, remember that zucchini and cucumber are different vegetables, even though they can look similar at first glance.

Equipment That Actually Helps

You do not need a perfect kitchen setup here. A sharp knife, a clean towel, and enough space on the tray will get you most of the way there.

  • Mandoline or sharp knife: for even thickness.
  • Kitchen towels or paper towels: for drying after salting.
  • Parchment or wire rack: for oven batches and cooling.
  • Oil spray: for a light coating without greasiness.
  • Tongs: for pulling finished chips early.
  • Dehydrator: optional, but helpful for dry, make-ahead veggie chips.

Dry towels, even slices, and a little patience will do more for crispness than another spoonful of seasoning.

How Thin Should You Slice Zucchini for Chips?

Thickness decides whether you get a delicate chip, a cheesy round, or a sturdy dipper.

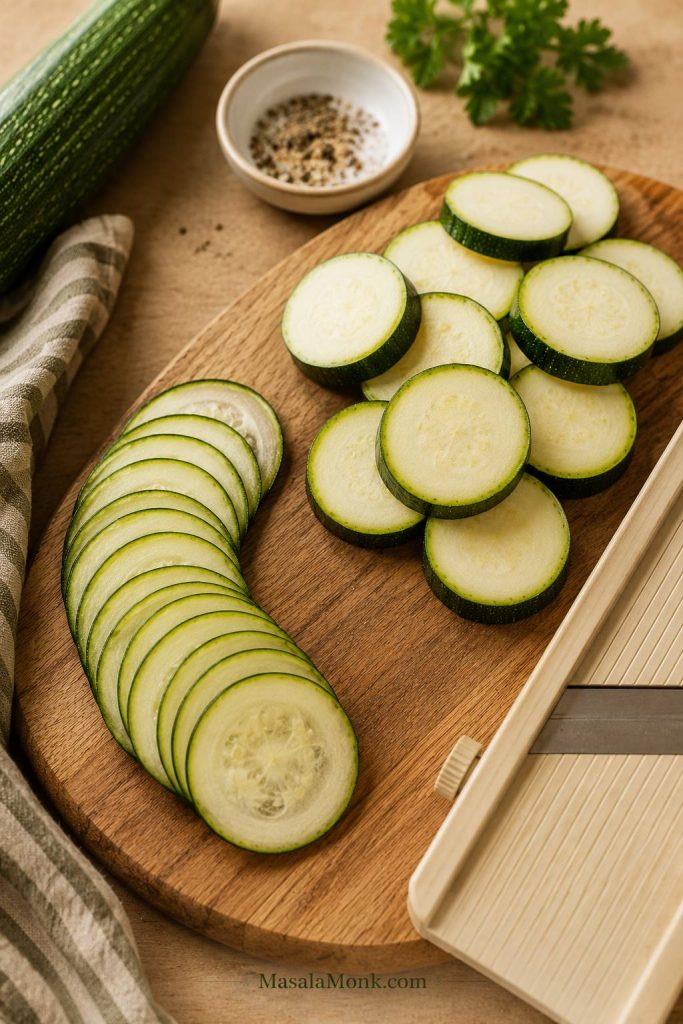
Thin zucchini slices and thicker zucchini rounds shown on a cutting board with a slicing tool.
Slice thickness decides the snack: thin rounds make delicate chips, while thicker rounds hold parmesan or panko coatings better.

For thin plain chips, aim for about ⅛ inch / 3 mm. These slices dry better, but they can burn quickly or fly around in some air fryer baskets.

For breaded or panko chips, slice closer to ¼ inch / 6 mm. Thicker rounds hold the coating better and are less fragile. They will be crunchy outside and tender inside, not dry all the way through; see the panko method if that is the texture you want.

For parmesan chips, either thickness can work. Choose thinner slices for a more chip-like result, or slightly thicker slices for a snacky zucchini round with crisp cheese edges.

A good batch will not all finish at the same second. Pull the crisp ones early. That is not fussiness; that is how zucchini behaves.

Should You Salt Zucchini First?

Yes. It is the small step that makes the biggest difference, especially if your zucchini is juicy or your last batch came out soft.

Salt draws moisture to the surface so you can pat it away before the zucchini hits the air fryer, oven, or dehydrator. It also helps breaded coatings stick because the slices are not slippery.

Here is the simple way to do it:

  1. Slice the zucchini evenly.
  2. Spread the slices on a clean towel or place them in a colander.
  3. Sprinkle with salt.
  4. Let them rest for 15–30 minutes.
  5. Pat very dry with a clean kitchen towel or paper towels.

You should see moisture on the surface after the rest. That is good. It means the water is on the towel instead of trapped in the chip.

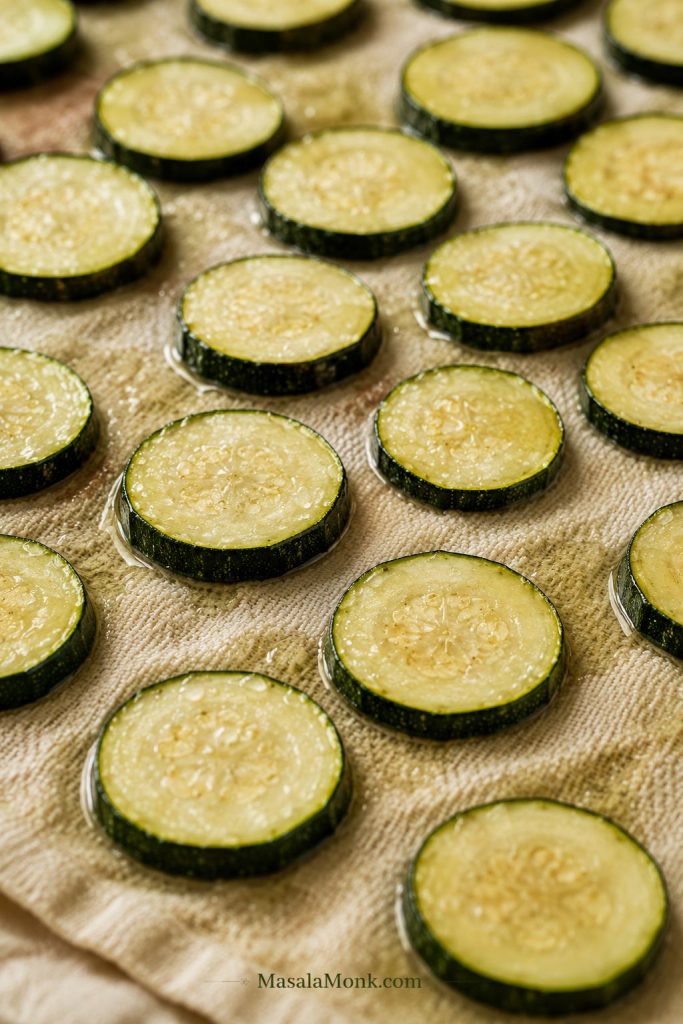
Salted zucchini rounds resting on a towel with moisture beads visible on the surface.
After salting, moisture should bead on the zucchini surface. That is the water you want on the towel, not trapped inside the chip.

You do not need to rinse if you used a light amount of salt. If you salted heavily, rinse quickly and dry extremely well. For thin low-and-slow chips, you can rest the zucchini longer, even up to 45–60 minutes, but for most batches, 20–30 minutes is enough.

Do not skip the drying after salting. Pat away the surface moisture before cooking, or the slices will steam. Next, see how spacing changes the result in the air fryer and oven methods.

Hands patting zucchini rounds dry between clean towels before cooking.
Once the slices release moisture, press them until they look matte. Shiny zucchini usually means softer chips later.

Air Fryer Zucchini Chips: What Matters Most

The air fryer moves hot air, not magic. If the slices overlap, steam wins.

Overlapping zucchini rounds crowded inside an air fryer basket.
A crowded air fryer basket traps steam fast. Even well-seasoned zucchini chips stay soft when the slices overlap this much.

This is the weeknight version: quick heat, toasted parmesan, and a snack that is ready before anyone gets impatient. Good air fryer chips have browned parmesan around the edges, a garlic-paprika aroma, and enough firmness to dip gently after they cool for a few minutes.

Air Fryer StyleTemperatureTimeWhat to Look For
Plain thin chips370°F / 188°C12–18 minutesEdges dry and lightly browned
Parmesan chips370°F / 188°C10–12 minutesCheese is golden and edges are crisp
Panko chips400°F / 204°C10–12 minutesPanko is golden and crunchy

Very thin slices may finish early; thicker slices may need a few more minutes. Pull the early winners. Waiting for the whole basket to match is how the best chips become bitter.

The second batch is usually better because you already know how fast your air fryer runs.

If very thin chips fly around: slice them slightly thicker next time or use an air fryer rack or mesh insert if your model allows it. Overcrowding the basket will hold them down, but it will also trap steam.

Oven Zucchini Chips: Hot and Fast vs Low and Slow

The oven only looks confusing because thin chips and coated rounds need completely different treatment. Use a hot oven, around 425°F / 218°C, for parmesan or panko-coated rounds that need quick browning. For thin plain slices, a low oven around 225–235°F / 107–113°C gives the zucchini time to dry out.

Hot oven batches should smell toasted and look golden at the edges. Low oven batches should look drier, lighter, and slightly curled.

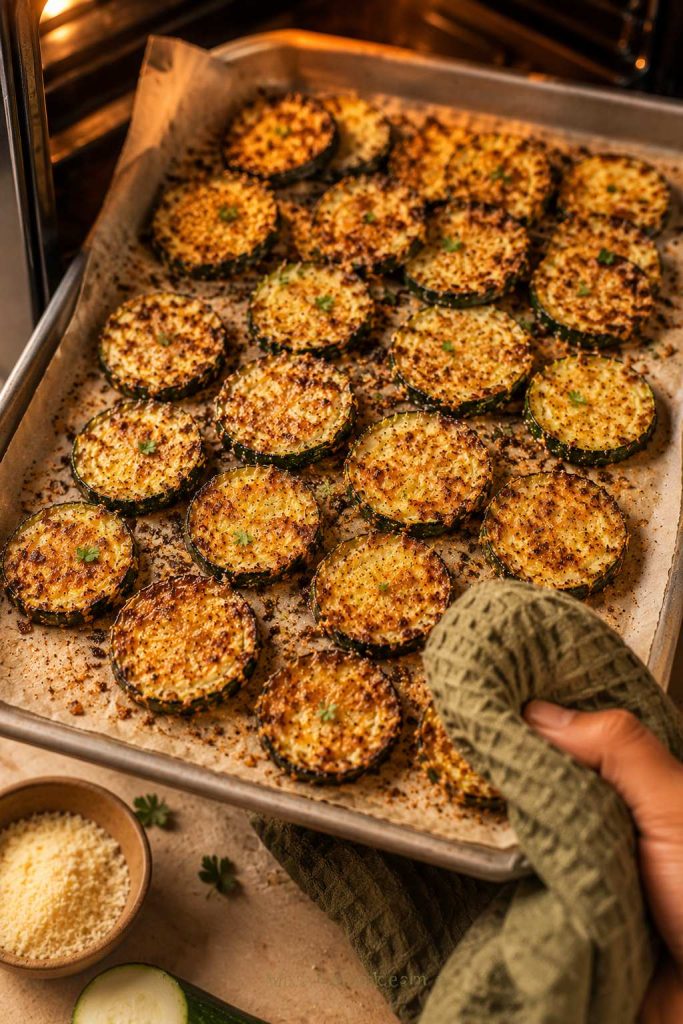
Golden baked zucchini chips on a parchment-lined sheet pan being pulled from the oven.
Baked zucchini chips need steady heat and enough tray room. Look for golden tops, drier centers, and edges that lift slightly.

Hot Oven Parmesan or Panko Chips

  1. Preheat the oven to 425°F / 218°C.
  2. Slice zucchini into ¼-inch / 6 mm rounds for panko chips, or slightly thinner for parmesan chips.
  3. Salt, rest, and dry the slices.
  4. Coat with parmesan or panko mixture.
  5. Arrange in a single layer on a parchment-lined baking sheet.
  6. Spray lightly with oil.
  7. Bake for 25–30 minutes, flipping halfway, until golden and crisp at the edges.

The chips should look lighter, slightly curled at the edges, and golden where the cheese or coating touches the heat. If they only look browned but still bend like roasted zucchini, give them more time.

Zucchini rounds arranged with space between them on a parchment-lined sheet pan.
On a sheet pan, visible gaps are not wasted space. They let heat move around each zucchini slice so the edges can firm.

Low-and-Slow Thin Zucchini Chips

  1. Preheat the oven to 225–235°F / 107–113°C.
  2. Slice zucchini thinly, about ⅛ inch / 3 mm.
  3. Salt for 20–30 minutes, then pat very dry.
  4. Use very little oil, or just a light spray, then add dry seasoning.
  5. Spread in a single layer on parchment or a wire rack set over a baking sheet.
  6. Bake for 70–120 minutes, rotating trays halfway.
  7. Start checking around 70 minutes, then remove dry pieces every 10–15 minutes as needed.
  8. Cool completely before serving.

They are done when the centers stop looking wet, the edges curl slightly, and the slices feel light. If they still bend like roasted zucchini, they need more time.

Thin lightly curled zucchini chips cooling on a wire rack.
Low-and-slow zucchini chips should look light, thin, and slightly curled. Cooling them on a rack keeps the undersides from softening.

Dehydrator Zucchini Chips

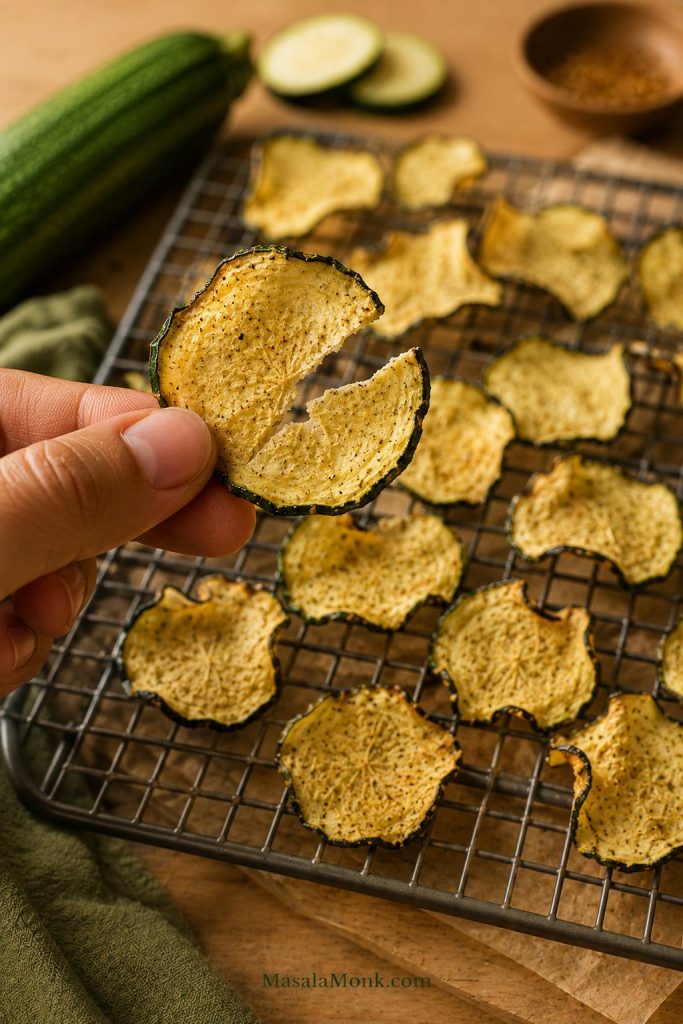
The dehydrator is not the fastest route, but it is the one to choose if you want chips that stay crisp after the first hour. This is the quiet, patient version: less hot-snack energy, more crisp pantry-snack payoff.

  1. Slice zucchini very thin and even.
  2. Salt lightly for 20–30 minutes, then pat dry very well.
  3. Use very little oil or skip oil completely.
  4. Season lightly with garlic powder, paprika, pepper, or dried herbs.
  5. Arrange in a single layer on dehydrator trays.
  6. Dehydrate at 135–150°F / 57–66°C for 4–8 hours.
  7. Rotate trays if your dehydrator heats unevenly.
  8. Cool completely before storing.
Thin zucchini slices arranged in a single layer on a dehydrator tray.
For dehydrator zucchini chips, single-layer spacing is the method. Thin slices dry more evenly and store better after they cool.

Use salt lightly here; dehydrated chips taste saltier as they dry. Humid kitchens, thicker slices, and crowded trays will push the timing toward the longer end.

Home-drying guidance supports the same idea used here: a single layer and steady dehydrator temperature help the slices dry evenly.

Cool one chip, then test it. Warm zucchini can lie to you. Fully dried chips should snap or feel crisp after cooling, not leathery. For keeping that texture, use the storage and re-crisping guide.

Hand holding a thin dried zucchini chip above a rack of dehydrated zucchini chips.
Cool one chip before testing. A dehydrated zucchini chip should feel dry and crisp, not warm, leathery, or bendy.

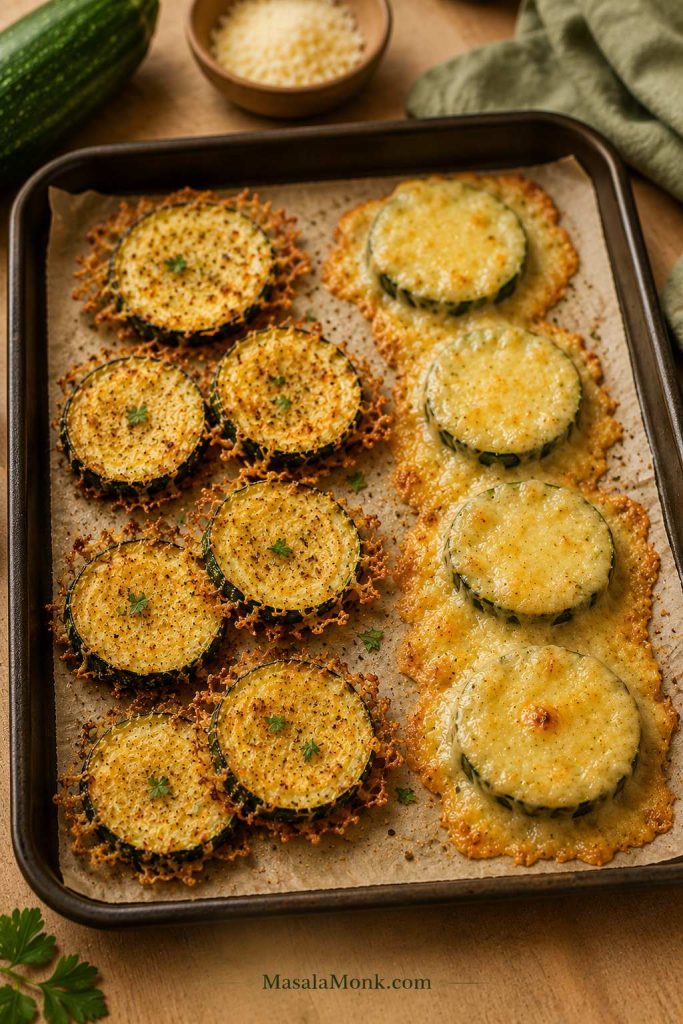
Parmesan Zucchini Chips: How to Get Lacy, Crisp Edges

Parmesan chips are done when the cheese looks golden and lacy at the edges, not pale and melted. If the parmesan smells sharp, bitter, or turns dark brown before the zucchini looks lighter, the heat is too high or the slices need more drying before cooking.

Finely grated parmesan works best because it clings in a thin layer and firms as it cools. Big shreds melt into patches. Too much cheese can also form a heavy blanket instead of a crisp edge, so use enough to coat lightly, not bury the zucchini.

Zucchini rounds on a tray showing light lacy parmesan coating beside heavy melted cheese coating.
Parmesan helps, but too much can act like a blanket. A lighter coating gives zucchini chips better lacy edges and cleaner crisping.
  • Use finely grated parmesan, not big shreds.
  • Look for golden, lacy edges instead of dark brown spots.
  • Pull the tray or basket if the cheese smells bitter.
  • Let the chips cool spread out so the cheese can firm.
  • Add extra salt only after tasting; parmesan already brings salt.

Parmesan chips are especially good with something tomatoey on the side. A small bowl of marinara sauce makes them feel closer to a crispy zucchini appetizer than a plain vegetable snack.

Breaded or Panko Zucchini Chips

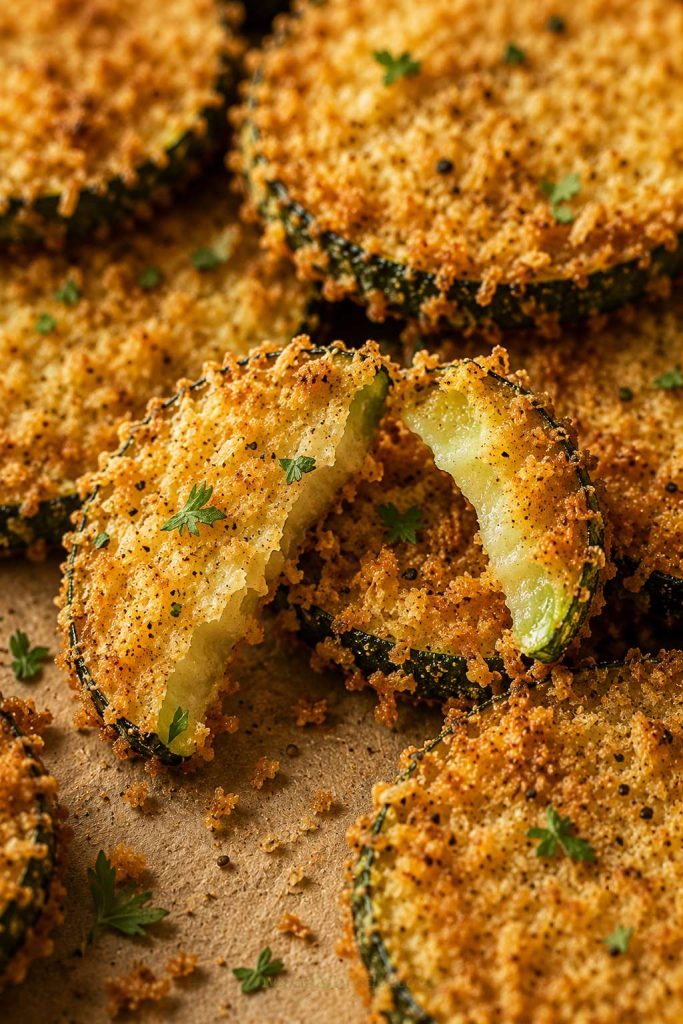
When you want the kind of crunch people hear across the table, use panko. Treat this version as crispy zucchini rounds, not thin vegetable chips. They are golden outside, tender inside, and strong enough for thick dips.

Panko crisps better than regular breadcrumbs because the flakes are larger and airier. Finished panko rounds should sound crisp when tapped with tongs, even though the zucchini inside stays tender.

This is the party version: golden crumbs outside, soft zucchini inside, and enough crunch to scoop a thick dip without collapsing.

Broken panko-coated zucchini chip showing a crunchy golden coating and tender zucchini center.
With panko zucchini chips, the coating turns golden and crisp while the zucchini inside stays tender.

Panko Ingredients

  • 2 medium zucchini, sliced into ¼-inch / 6 mm rounds
  • ½ cup all-purpose flour, about 60 g
  • 2 large eggs, beaten
  • 1 cup panko breadcrumbs, about 55–60 g
  • ½ cup finely grated parmesan, about 45 g
  • 1 tsp Italian seasoning or dried oregano
  • ½ tsp garlic powder
  • Oil spray

Panko Method

  1. Salt the zucchini rounds briefly and pat them dry.
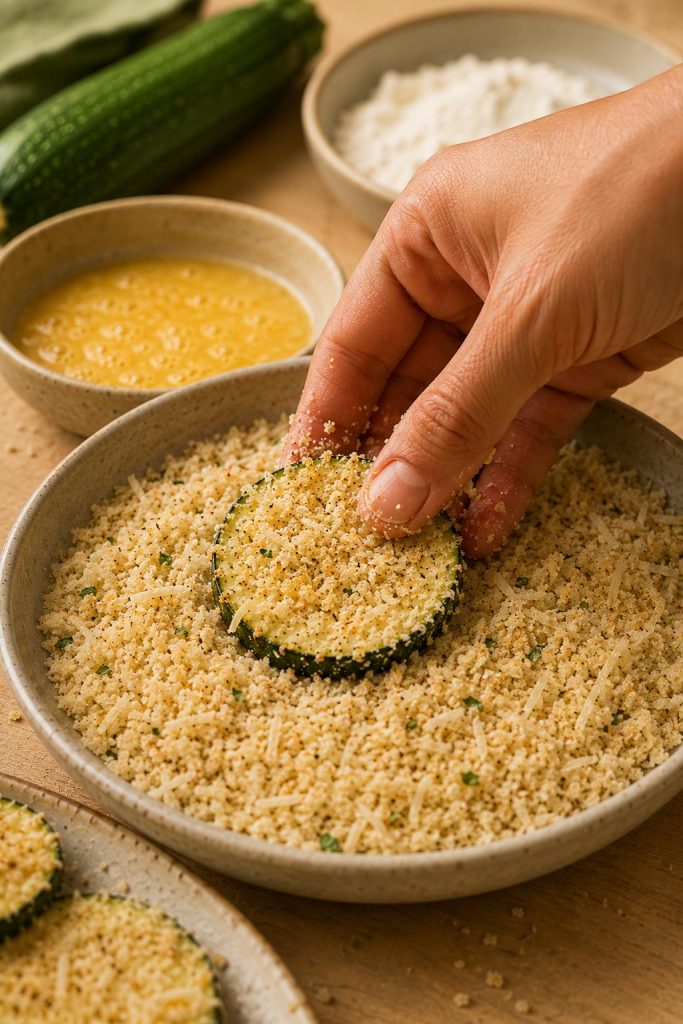
  2. Set up three bowls: flour, beaten eggs, and panko mixed with parmesan and seasoning.
  3. Coat each slice in flour, then egg, then panko mixture.
  4. Press gently so the coating sticks.
  5. Arrange in a single layer and spray lightly with oil.
  6. Bake at 425°F / 218°C for 25–30 minutes, or air fry at 400°F / 204°C for 10–12 minutes, checking early because panko can brown quickly.
Hand pressing a zucchini round into panko crumbs during breading.
For panko zucchini chips, press the crumbs onto dry slices gently. That contact helps the coating cling and brown into a crunchy shell.

If the coating falls off, the zucchini was probably too wet before breading. Salt, drain, and dry the slices well before coating. For more soft-chip fixes, check the troubleshooting table.

The panko version is especially good with buffalo chicken dip or spinach artichoke dip. If you want something simpler, a warm cheese sauce works too.

Keto and No-Breadcrumb Zucchini Chips

If breadcrumbs are off the table, parmesan is the easiest way to get real edge crispness. Plain zucchini can dry nicely, but parmesan gives the snack more structure and a salty bite.

Almond flour can work, but it does not behave like panko. It tends to feel heavier and less crisp, so use it lightly or pair it with parmesan instead of expecting a breadcrumb-style crunch.

If you are building a bigger low-carb snack plate, these parmesan chips can sit alongside other keto chips, cucumber sticks, olives, cheese, and a creamy ranch or garlic yogurt dip.

Dry Seasonings That Work Best

Keep the wet flavors for later. Before cooking, dry spices are your friend.

  • Garlic parmesan: garlic powder, black pepper, and finely grated parmesan.
  • Ranch-style: garlic powder, onion powder, dried dill, parsley, and black pepper.
  • Chili lime: chili powder, garlic powder, lime zest, and a squeeze of lime after cooking.
  • Smoky paprika: smoked paprika, garlic powder, black pepper, and a little parmesan.
  • Italian herb: dried oregano, basil, garlic powder, black pepper, and parmesan.
  • Spicy parmesan: garlic powder, paprika, cayenne, black pepper, and finely grated parmesan.

Taste before adding more salt at the end, especially with parmesan. If you like heat, keep hot sauce or other wet sauces for after cooking; they work better as a finishing touch than as a pre-cook coating.

What to Serve with Zucchini Chips

The dip depends on the style of chip. Thin plain chips are delicate, so they work better with lighter dips like ranch, garlic yogurt, or tzatziki. Parmesan chips are great with marinara or salsa verde. If you want something sweeter and brighter, mango salsa also works.

For a snack board, pair warm zucchini chips with one creamy dip, one bright dip, and a few crunchy extras like cucumber sticks, carrot sticks, crackers, or olives. The contrast is what makes the board work: warm chips, cool dip, crisp edge, creamy finish.

How to Store and Re-Crisp Zucchini Chips

Fresh is best, but leftovers are not hopeless. You just have to bring the dry heat back.

They are best while the cheese has just firmed, the edges still crackle lightly, and the centers are still warm. As they sit, zucchini continues to soften, so even a crisp batch can lose some texture.

Do not seal in the steam you just worked so hard to remove. Spread hot chips out for a few minutes before piling them into a bowl or container.

Same-Day Storage

If you are serving them within a few hours, cool them completely first. Keep them loosely covered rather than sealing them while warm.

Overnight Storage

Refrigerate parmesan or panko chips in an airtight container once fully cool. They will lose some crispness, but you can revive them in the oven or air fryer.

Make-Ahead Chips

Choose low-and-slow oven chips or dehydrator chips if you need something that stores better. They hold up longer because they are dried more thoroughly.

How to Re-Crisp Them

Leftover zucchini chips spread on a rack with an open storage container nearby for re-crisping.
To re-crisp zucchini chips, spread them out and bring back dry heat. The air fryer or oven works better than a microwave.
  • Air fryer: re-crisp at 350–370°F / 175–188°C for 3–5 minutes, checking often.
  • Oven: bake at 350°F / 175°C for 8–10 minutes, uncovered, until the edges crisp again.

Re-crisped chips will not be exactly like fresh, but dry heat can still bring back that salty edge. The microwave is the one option to skip; it softens zucchini instead of reviving it.

Troubleshooting: Soggy, Burnt, Oily, or Uneven Chips

A soft tray is not a failed recipe. It is usually one adjustment away: drier slices, less oil, more space, or a few more minutes.

Quick Fixes for Soft or Uneven Zucchini Chips

ProblemRight NowNext Batch
Chips are soggyRe-crisp uncovered in the air fryer or oven.Salt longer, pat very dry, use less oil, and avoid crowding.
Chips are soft in the middleCook a few minutes longer at moderate heat.Slice thinner or use a lower, slower oven method.
Edges burned but centers stayed softRemove the burnt pieces and lower the heat slightly.Slice more evenly and check earlier.
Chips stayed softSpread them out and cook a few minutes more.Use a single layer and cook in batches.
Chips feel oilyDrain briefly on a towel and re-crisp with dry heat.Use oil spray or toss with less oil.

Fixes for Coating, Salt, and Air Fryer Problems

ProblemRight NowNext Batch
Parmesan burnedPull the basket or tray before the cheese turns bitter.Use finely grated parmesan, less cheese, or slightly lower heat.
Parmesan stuck to the trayLet it cool briefly before lifting.Use parchment for oven chips or a light oil spray for air fryer chips.
Panko coating fell offServe the loose crumbs as a crunchy topping.Dry zucchini well before breading and press the coating gently.
Panko browned but zucchini stayed wateryReturn the soft pieces to the oven or air fryer for a few minutes.Use ¼-inch / 6 mm slices and dry them better before coating.
Chips taste too saltyServe with an unsalted dip or yogurt sauce.Use less salt before cooking, especially with parmesan.
Chips taste bitterRemove dark pieces and serve the lighter ones.Lower heat slightly and add delicate seasonings after cooking.
Air fryer chips flew aroundPause and settle the chips if needed.Slice slightly thicker or use a rack/mesh insert.
Chips softened after coolingRe-crisp in the air fryer or oven.Cool spread out before storing or serving.

If the first tray bends, do not panic. Moisture usually won the first round, and the next batch often only needs one or two adjustments.

Frequently Asked Questions

Why are my zucchini chips soggy?

Zucchini chips turn soggy when moisture gets trapped. Slice evenly, salt briefly, pat very dry, use little oil, and cook in a single layer.

Why are my air fryer zucchini chips not crispy?

The slices may be wet, thick, crowded, or coated with too much oil. Cook in batches and pull finished pieces early instead of waiting for every slice to match.

Do you have to salt zucchini first?

You do not absolutely have to, but it helps a lot. Even a 15–20 minute rest gives the slices a better start before they hit the heat.

Do they get crispier as they cool?

Yes, especially parmesan chips. The cheese firms as it cools, so give the chips a few minutes before judging the texture.

Air fryer or oven: which is better?

Choose the air fryer for speed and small batches. Use the oven for larger trays, panko-coated chips, and low-and-slow thin chips.

Can I bake zucchini chips without breadcrumbs?

Yes. Use thin slices, salt and dry them well, then bake low and slow at 225–235°F / 107–113°C. Add finely grated parmesan if you want crisp edges without breadcrumbs.

What is the best no-breadcrumb coating?

Finely grated parmesan is the easiest no-breadcrumb coating because it browns, firms as it cools, and adds salty flavor.

How thin should I slice the zucchini?

Slice about ⅛ inch / 3 mm for thin plain chips and about ¼ inch / 6 mm for breaded or panko rounds.

Are zucchini chips keto?

Plain and parmesan versions can be keto-friendly. Panko or regular breadcrumb-coated chips are not keto unless you use a low-carb coating.

Can I use yellow squash or courgette?

Yes. Courgette is another name for zucchini, and yellow summer squash can also work. If you actually have cucumber, use it fresh in a cucumber salad instead of baking it into chips.

Should I peel the zucchini?

No. The skin adds color, helps the slices hold together, and gives better texture.

Can I use frozen zucchini?

Frozen zucchini is not ideal for chips because it releases too much liquid after thawing. Use fresh zucchini for this recipe.

Are these the same as zucchini fries?

No. Chips are usually sliced into rounds, while zucchini fries are cut into thicker sticks and often breaded.

Can I use a dehydrator for zucchini chips?

Yes. Slice very thin, salt and dry the slices, season lightly, and dehydrate at 135–150°F / 57–66°C for 4–8 hours.

How do I store zucchini chips?

Cool them completely first. Store fully dried chips airtight, refrigerate parmesan or panko leftovers, and re-crisp in the air fryer or oven.

Final Thoughts

Zucchini chips stop feeling random once you stop treating every version like the same snack. Thin chips need drying time, parmesan rounds need a light coating and a cool-down, and panko rounds need enough thickness to hold their crunch.

Your first batch teaches you what your zucchini and air fryer are doing. Usually, the next one is the keeper.

When the edges finally crisp, the whole thing clicks: not a packaged potato chip, not a limp roasted round, but a golden, salty zucchini snack that actually earns its dip.

Back to top

Posted on Leave a comment

Zucchini vs Cucumber 🥒

ZUCCHINI VS. CUCUMBER

At first glance, zucchinis and cucumbers may seem like twins separated at birth—long, green, and often occupying neighboring bins at the grocery store. But are they really the same? Can they be used interchangeably in recipes? And what about their nutrition—who wins the health crown?

If you’ve ever wondered “Is zucchini a cucumber?” or searched for “difference between zucchini and cucumber,” you’re not alone. Thousands of people every month look up variations of this question. This comprehensive guide will walk you through every major difference—from appearance and taste to nutritional value and culinary use. Let’s settle the zucchini vs. cucumber debate once and for all.


🧬 Are Zucchini and Cucumber the Same?

Short answer: No, they’re not the same.

While both belong to the Cucurbitaceae family (commonly known as the gourd family), cucumbers and zucchinis are different species, with unique textures, flavors, and culinary applications.

  • Cucumber (Cucumis sativus) is a fruit (yes, botanically!) often eaten raw.
  • Zucchini (Cucurbita pepo) is also a fruit, but one that’s commonly cooked and referred to as a vegetable.

🌿 Visual & Botanical Differences

FeatureCucumberZucchini
SpeciesCucumis sativusCucurbita pepo
OriginSouth AsiaItaly (as a summer squash)
Growth HabitClimbs on vinesGrows in bushy plants
Skin TextureSmooth to bumpy, waxySmooth, sometimes speckled
ColorUniform deep green or stripedDark green, light green, or yellow
SeedsMore visible, largerFiner, softer, less noticeable

While they both look similar at a glance, cucumbers tend to be longer and thinner with a glossy, sometimes waxy coating. Zucchinis, on the other hand, are more matte and have a slightly thicker, firmer appearance.


🧊 Texture, Taste & When to Use Each

🥒 Cucumber: Crisp, Cool, and Refreshing

  • Taste: Mild, watery, slightly sweet
  • Texture: Crunchy and refreshing
  • Best Used For: Raw dishes like salads, sandwiches, and pickles
  • Common Types: English (seedless), Persian (mini), Slicing (common grocery-store type)

🥗 Zucchini: Mild, Tender, and Versatile

  • Taste: Mild, earthy, slightly sweet when cooked
  • Texture: Softens when cooked, slightly spongy raw
  • Best Used For: Grilling, sautéing, roasting, baking, spiralizing
  • Common Types: Green zucchini, golden zucchini, costata romanesco

Pro Tip: Never use cucumber in a stir-fry—its high water content and delicate texture make it unsuitable for heat. Zucchini, however, thrives in the pan or oven.


🍽️ Zucchini vs. Cucumber in the Kitchen

Use CaseCucumberZucchini
Raw Salads✔️ Crisp and refreshing⚠️ Slightly chewy raw
Grilled Dishes❌ Too watery✔️ Excellent when grilled
Pickling✔️ Classic use⚠️ Not commonly pickled
Baking (e.g., bread)❌ Doesn’t bake well✔️ Moist and perfect for baking
Spiralized “noodles”❌ Breaks easily✔️ Ideal zoodle material

🥗 Nutritional Comparison: Zucchini vs. Cucumber

Both are low-calorie, hydrating options, but zucchinis have a slight edge in terms of nutrient density.

Nutrient (per 100g)CucumberZucchini
Calories15 kcal21 kcal
Water Content95%92%
Fiber0.5 g1.2 g
Vitamin CLowHigher
Vitamin KHighLower
Potassium147 mg261 mg
Carbs3.6 g3.9 g
Protein0.65 g1 g
  • Zucchini: Higher in potassium, fiber, and vitamins like C and B6. Better choice if you’re aiming for more nutrients.
  • Cucumber: Great for hydration and weight loss diets due to ultra-high water content.

❄️ Storage & Shelf Life

  • Cucumbers: Best stored wrapped in plastic or in a produce bag in the crisper drawer. Avoid high humidity to prevent soft spots.
  • Zucchinis: Store unwashed in a paper bag in the refrigerator’s crisper drawer. Avoid airtight containers—they trap moisture and lead to rot.

🇬🇧 Courgette vs. Zucchini: Are They Different?

Nope! They’re exactly the same. “Courgette” is simply the British English term for what Americans call “zucchini.”

So if you see “courgette vs cucumber” or “difference between courgette and cucumber,” you’re really just revisiting the zucchini vs. cucumber discussion with UK spelling.


🔄 Can You Substitute One for the Other?

In some raw dishes—like salads—you can swap cucumber and zucchini, especially if the zucchini is very young and tender. But for most recipes, they serve different purposes.

  • Acceptable Swaps:
    • Raw spiralized zucchini in a cucumber salad
    • Raw zucchini slices in sandwiches
  • Bad Swaps:
    • Grilled cucumber (becomes mushy)
    • Pickled zucchini (not a classic flavor or texture)
    • Baked cucumber bread (won’t work!)

🧾 Final Thoughts: Which One Should You Use?

Choose cucumber if you’re making:

  • Crisp, cold dishes
  • Summer salads or sandwiches
  • Pickles or infused water

Choose zucchini if you’re making:

  • Stir-fries or roasted vegetables
  • Low-carb pasta alternatives
  • Savory baked goods like muffins or bread

📌 Bottom Line

Zucchini and cucumber might be cousins in the plant kingdom, but they live in totally different culinary worlds. Knowing which to use—and when—will not only elevate your recipes but also prevent soggy stir-fries or dry sandwiches.

Next time you’re at the grocery store and caught in the zucchini vs. cucumber conundrum, remember: one’s made for the skillet, the other for the salad bowl.

FAQs: Zucchini vs. Cucumber


1. Are zucchini and cucumber the same?
No. While they may look similar, zucchini and cucumber are different species with distinct textures, flavors, and culinary uses. Zucchini is typically cooked, while cucumber is eaten raw.


2. Can I substitute cucumber with zucchini in recipes?
Only in some cases. You can use raw zucchini in salads or sandwiches in place of cucumber, but cucumber doesn’t hold up well to cooking, so it can’t replace zucchini in hot dishes.


3. What is the nutritional difference between zucchini and cucumber?
Zucchini is higher in fiber, potassium, and vitamin C, making it more nutrient-dense. Cucumber has a higher water content and fewer calories, ideal for hydration and weight loss.


4. Which is better for weight loss: zucchini or cucumber?
Both are excellent low-calorie options. However, cucumber has slightly fewer calories and more water, making it especially effective for hydration and appetite control.


5. Is it safe to eat raw zucchini like cucumber?
Yes, raw zucchini is safe to eat and often used in salads or as spiralized “zoodles.” Just note that its texture is firmer and flavor more neutral than cucumber.


6. Why do cucumbers taste different from zucchinis?
Cucumbers are crisp and watery with a subtle sweetness. Zucchinis are denser and more neutral or earthy in taste, especially when cooked.


7. Is courgette the same as zucchini or cucumber?
“Courgette” is simply the British English term for zucchini. It is not another name for cucumber.


8. Can you pickle zucchini like cucumber?
Technically yes, but the texture and flavor are not the same. Zucchini doesn’t have the same crunch or acidity balance that cucumbers offer when pickled.


9. How can you tell zucchini and cucumber apart visually?
Cucumbers usually have a waxy, bumpy skin and a cooler touch due to high water content. Zucchinis have smoother, sometimes speckled skin and are more matte in appearance.


10. Which plant grows better in home gardens—zucchini or cucumber?
Both grow well, but cucumbers need support (they vine), while zucchini grows as a bush. Zucchini is often easier for beginners due to fewer pest issues and simpler harvesting.