Posted on Leave a comment

Air Fryer Zucchini Recipe: Tender, Browned and Not Mushy

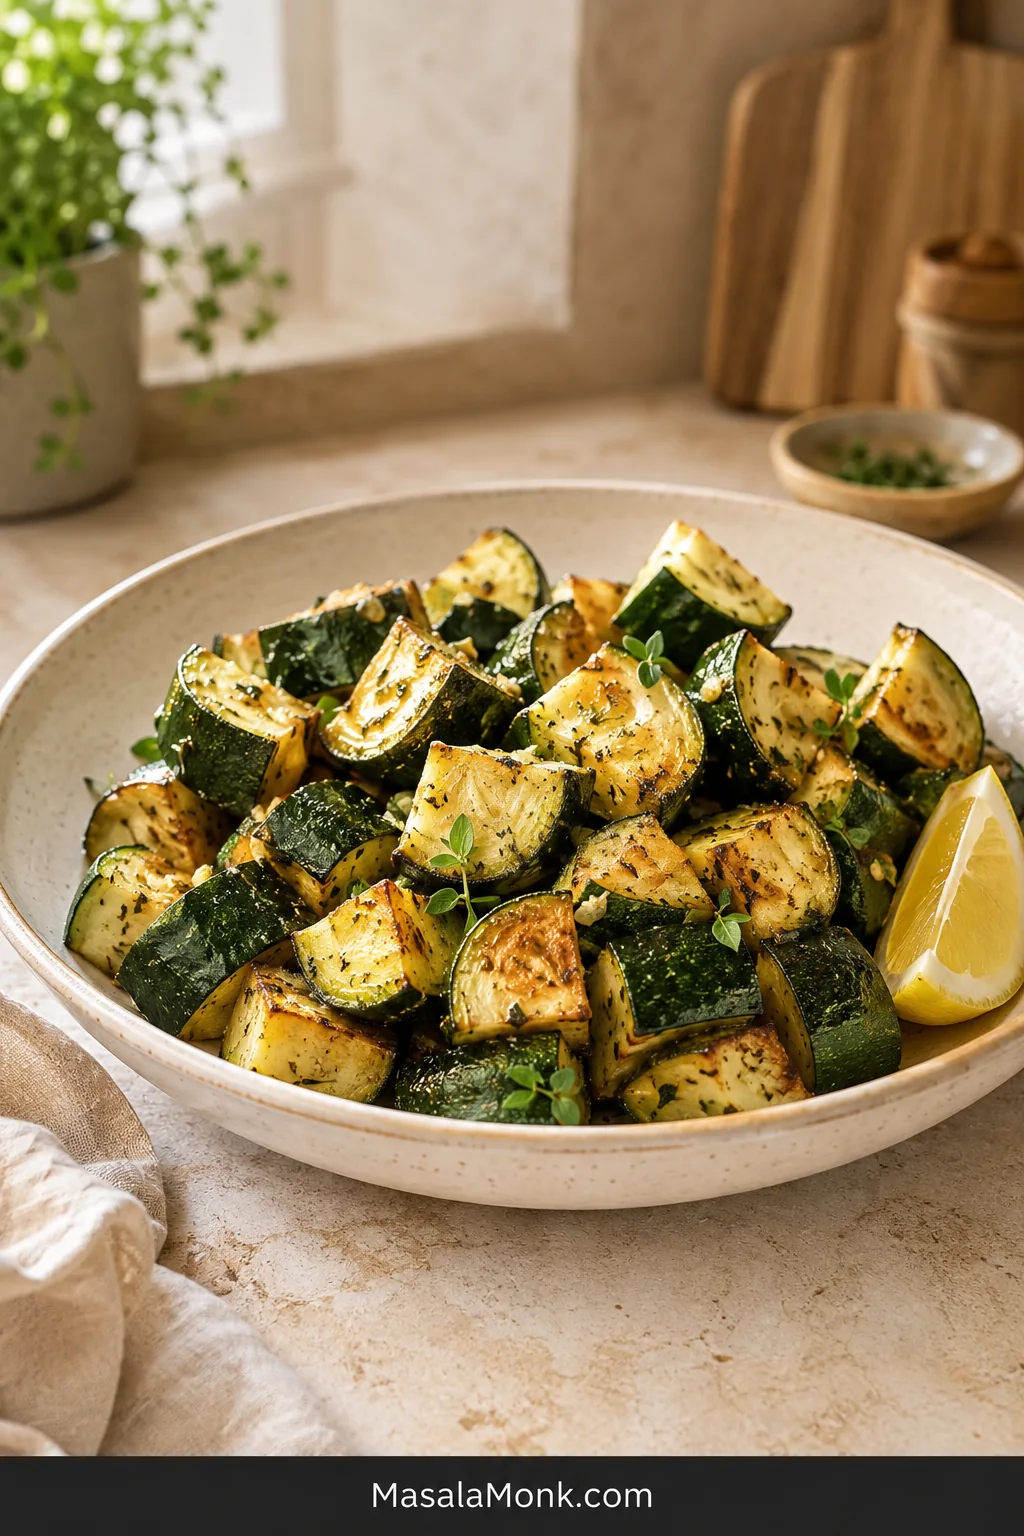
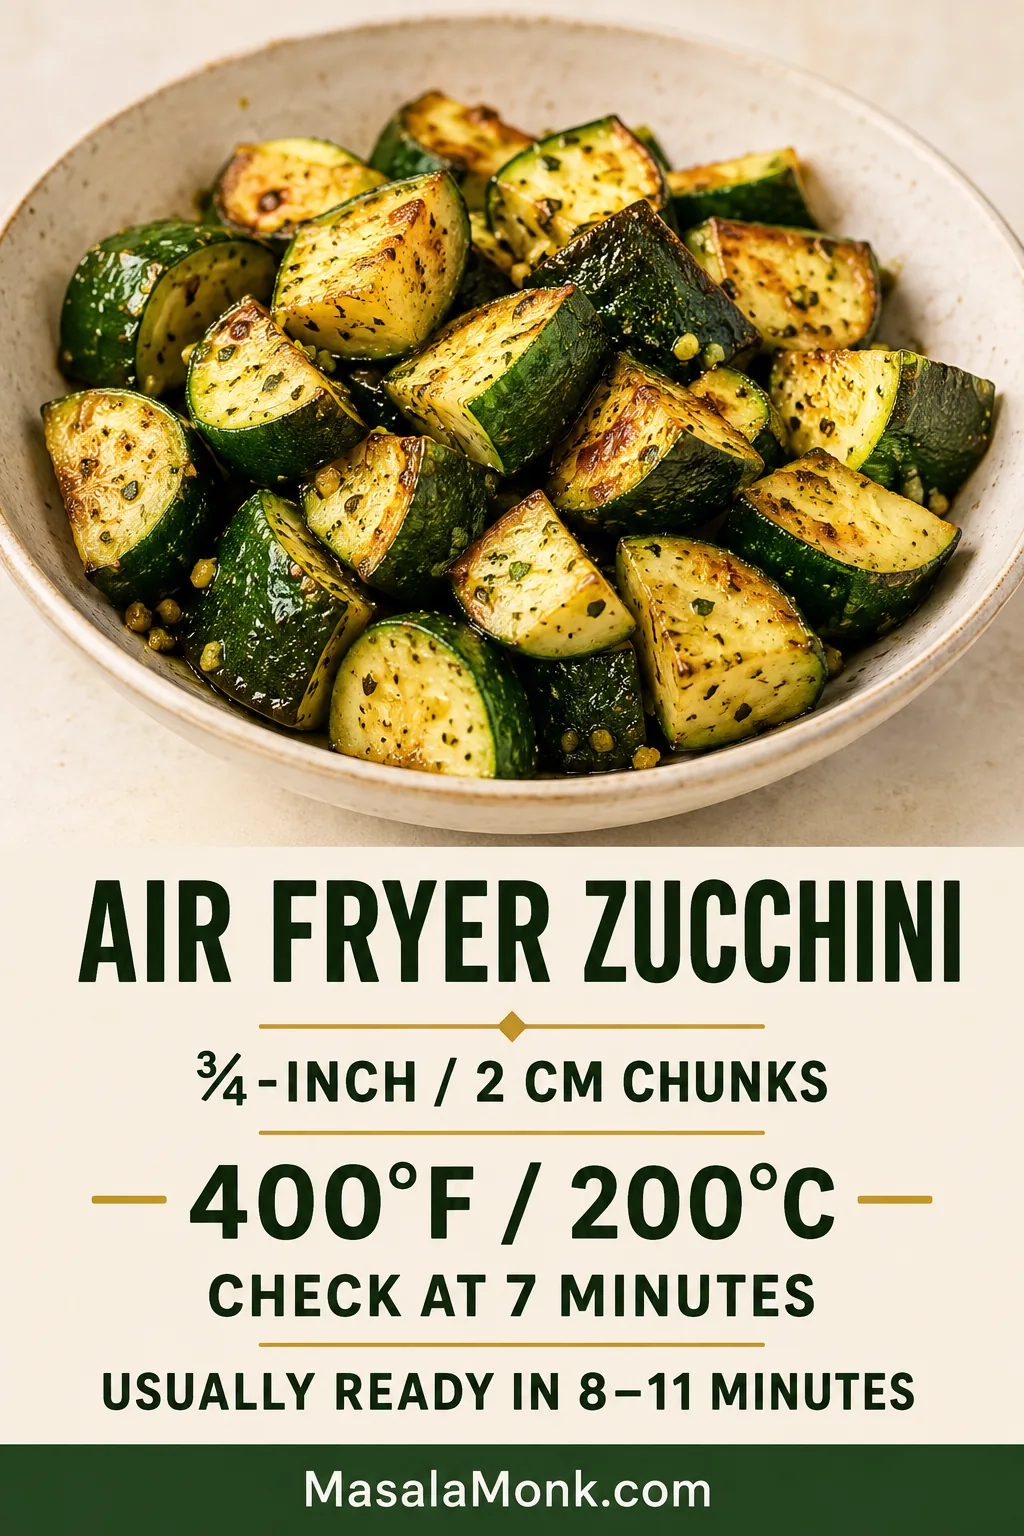
Ivory bowl filled with browned zucchini chunks with intact green skin, scattered herbs and a lemon wedge on a pale stone surface.

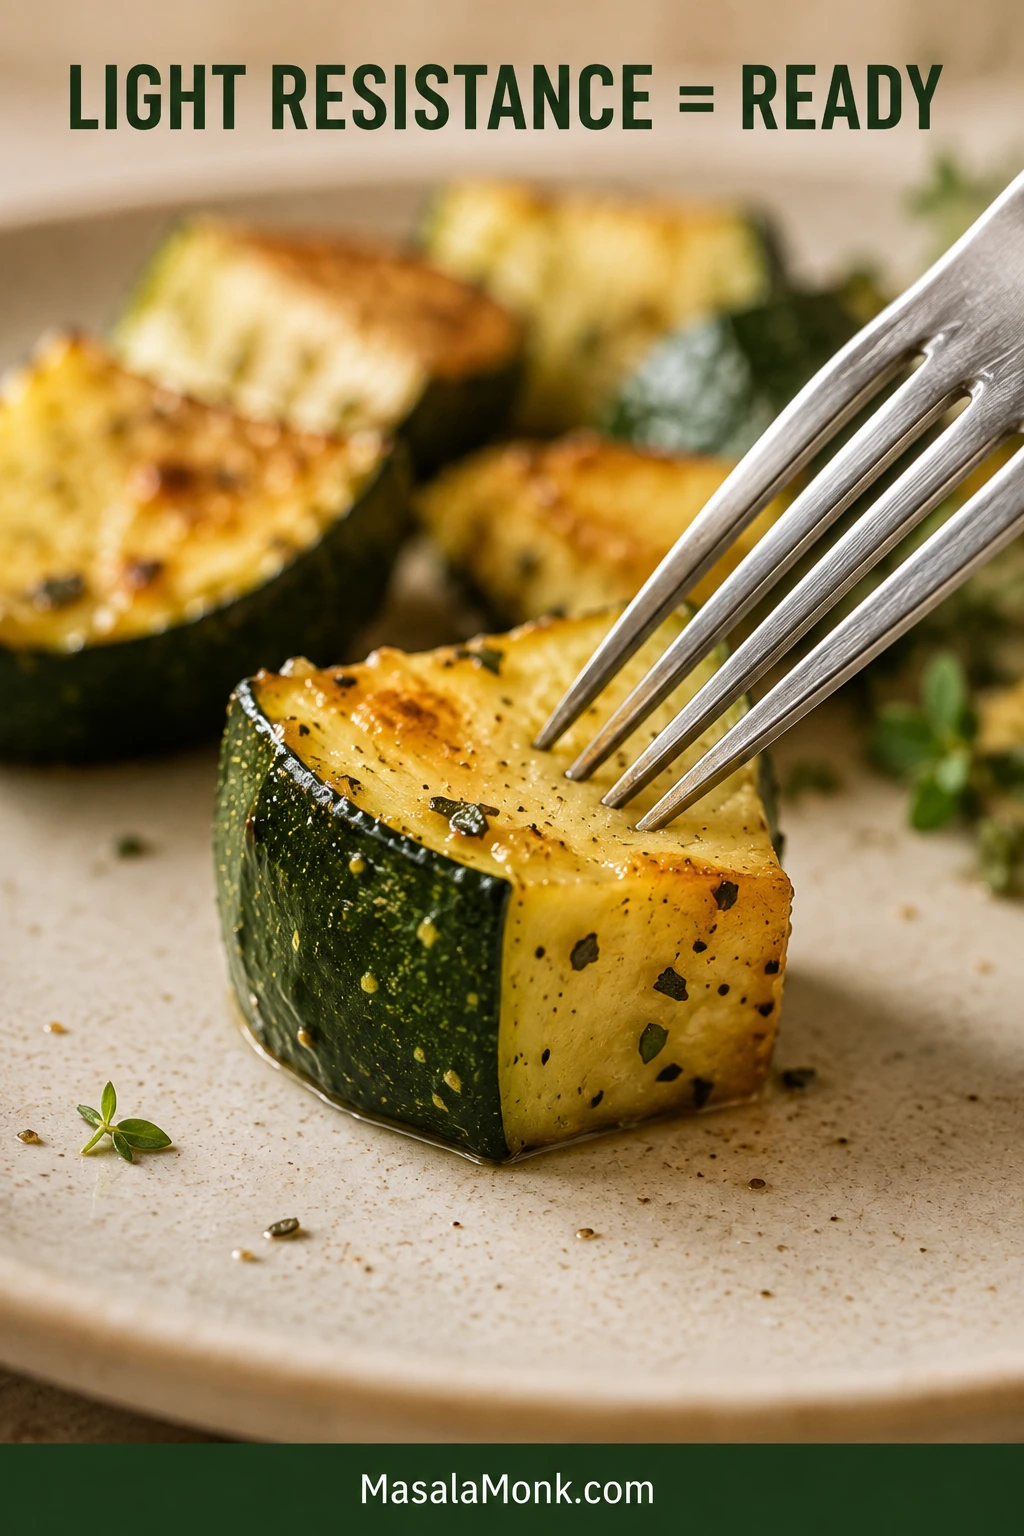
Good air fryer zucchini has a small, easy-to-spot window. The cut faces have started to bronze, the edges look roasted instead of wet, and the center is tender without folding when lifted with a fork.

Some nights dinner needs one last thing—something green, hot and bright that does not ask for another pan or a bowl of breading. Zucchini, called courgette in the UK, fills that gap when it gets enough heat and breathing room.

This is air fryer zucchini without breading, flour or egg. The goal is not to dry the vegetable until it crunches like a chip; it is to brown the outside while the middle still tastes fresh and juicy. For thin Parmesan rounds or panko-coated pieces, use the separate crispy zucchini chips recipe.

Quick Answer

Cut 1 lb / 454 g small or medium zucchini into ¾-inch / 2 cm chunks. Coat with 2 teaspoons / 10 ml oil, add the dry seasonings and spread the pieces loosely in a preheated 400°F / 200°C air fryer.

Cook undisturbed for 5 minutes, shake well and begin checking at 7 minutes. Many basket-style air fryers finish this cut in about 8–11 minutes. Remove the zucchini when several faces are golden, the surfaces no longer look watery and a fork enters with a little resistance.

Cut thick. Cook hot. Check early.

Vertical timing guide showing ¾-inch zucchini pieces, a temperature of 400°F, a first check at 7 minutes and an expected cooking range of 8–11 minutes.
How long to air fry zucchini depends on basket shape, load and fan strength. Use the stated range for your first batch, then remember where your own machine landed.

Air Fryer Zucchini Recipe

Thick zucchini chunks with browned corners and tender centers that still hold their shape. The base version is lightly garlicky and gently herbal, with fresh zucchini sweetness and an optional squeeze of lemon.

Active prep: About 8–10 minutes · Cook time: 8–11 minutes per batch

Total time: About 20 minutes for one batch; preheating overlaps with prep · Temperature: 400°F / 200°C

Yield: Serves 4 alongside a main course, or 2 as a generous vegetable portion

Small basket: Allow another 9–12 minutes if the zucchini needs two batches.

Dietary note: The base recipe is vegan and dairy-free, with no flour or breadcrumbs. Check packaged seasoning labels when strict gluten avoidance matters.

Equipment

  • Basket-style or oven-style air fryer
  • Sharp knife and cutting board
  • Mixing bowl
  • Measuring spoons or a digital kitchen scale
  • Silicone-tipped tongs or a small flexible spatula

Ingredients

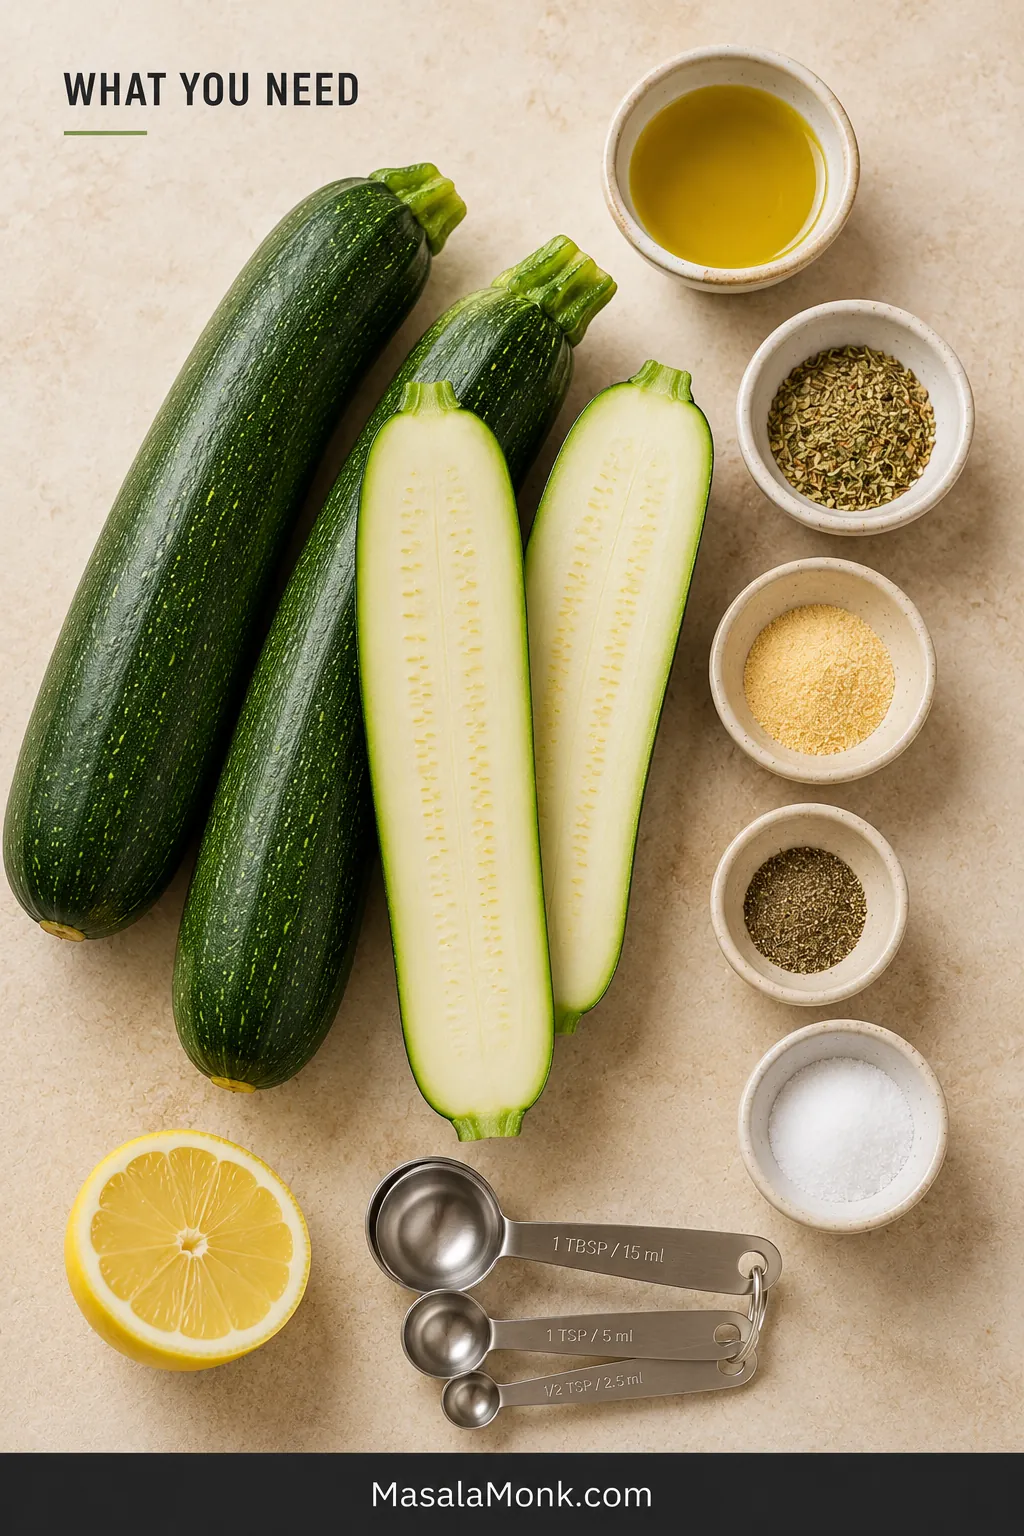
  • 1 lb / 454 g small or medium zucchini, usually 2 to 3 depending on size
  • 2 teaspoons / 10 ml olive oil or avocado oil
  • 1 teaspoon Italian seasoning, or ½ teaspoon dried oregano
  • ½ teaspoon garlic powder
  • ¼ teaspoon ground black pepper
  • 3 g salt, or about ½ teaspoon fine salt when not weighing
  • 1 teaspoon / 5 ml lemon juice, optional, added after cooking
Overhead arrangement of zucchini, oil, Italian seasoning, garlic powder, black pepper, salt, lemon and measuring spoons on a warm cream surface.
For air fryer zucchini without breading, two teaspoons of oil are enough to help the seasonings cling. Extra oil cannot compensate for wet zucchini or restricted airflow.

Method

  1. Dry and cut the zucchini. Wash it, dry the skin well and trim the ends. Quarter each zucchini lengthwise, then cut the long quarters crosswise into ¾-inch / 2 cm chunks. Blot any visibly wet sides.
  2. Preheat the air fryer. Heat it to 400°F / 200°C for 3 to 5 minutes, unless the machine preheats automatically or its instructions recommend starting from cold.
  3. Oil the zucchini. While the air fryer heats, toss the chunks with the oil until they carry a thin, even sheen.
  4. Season just before cooking. Add the Italian seasoning, garlic powder, pepper and salt. Toss again and move the zucchini straight into the hot basket. If you salted an oversized zucchini earlier, omit the salt here and adjust only after cooking.
  5. Spread the pieces loosely. A little touching is fine, but the chunks should shift when the basket is shaken. Divide them into two batches when needed.
  6. Cook undisturbed for 5 minutes. This gives the surfaces touching the basket time to begin browning.
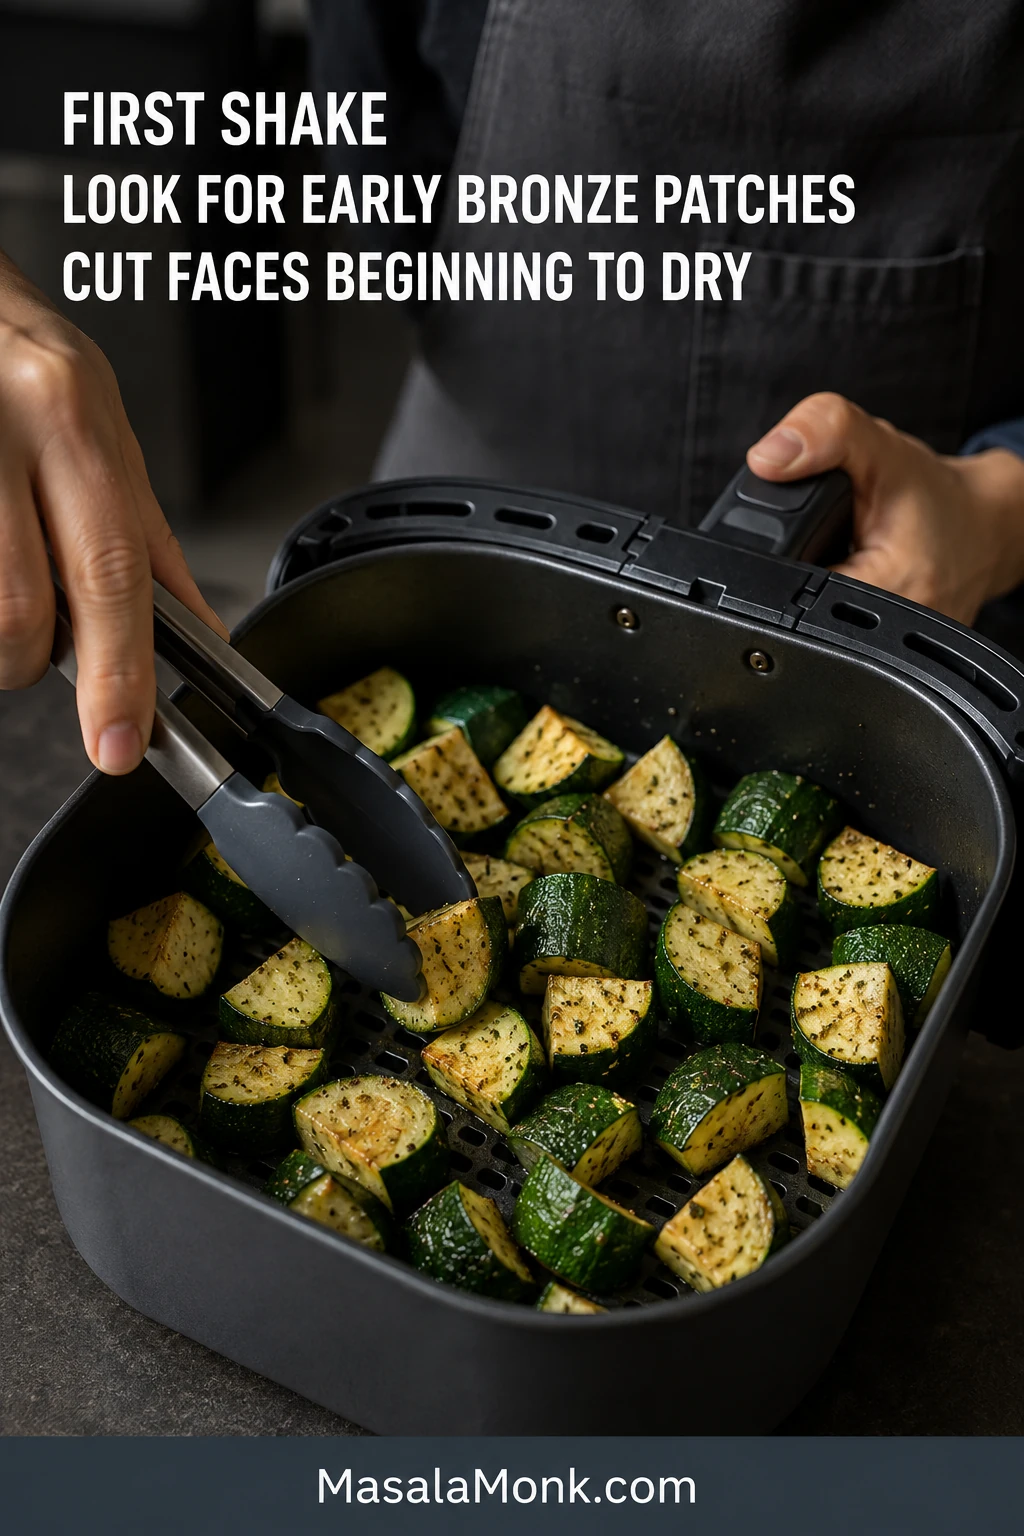
  7. Shake well. The zucchini will not look finished yet. Look for the first bronze patches and cut faces beginning to dry—the signs that the basket is roasting rather than steaming. Turn any pieces still resting on one pale face.
  8. Begin checking at 7 minutes. Give the zucchini another minute or two as needed. Remove it when several corners are golden, the cut sides no longer look wet and a fork enters with light resistance. For side-by-side cues, see how to tell when air fryer zucchini is done.
  9. Finish and serve. Transfer the zucchini to a broad, uncovered plate. Add lemon juice or fresh herbs while it is hot.

Success Cues and Second-Batch Timing

Cook turning partially cooked zucchini in an open air fryer basket, with early brown patches visible on several pieces.
One deliberate shake is usually more useful than repeatedly opening the machine. Turn the pale faces, redistribute any clustered pieces and give the heat time to recover.

What success smells and feels like: The basket should smell garlicky and lightly roasted. Lift one piece: it should hold its shape while the fork meets only slight resistance in the center.

A little moisture in the center is the point. A puddle underneath is not.

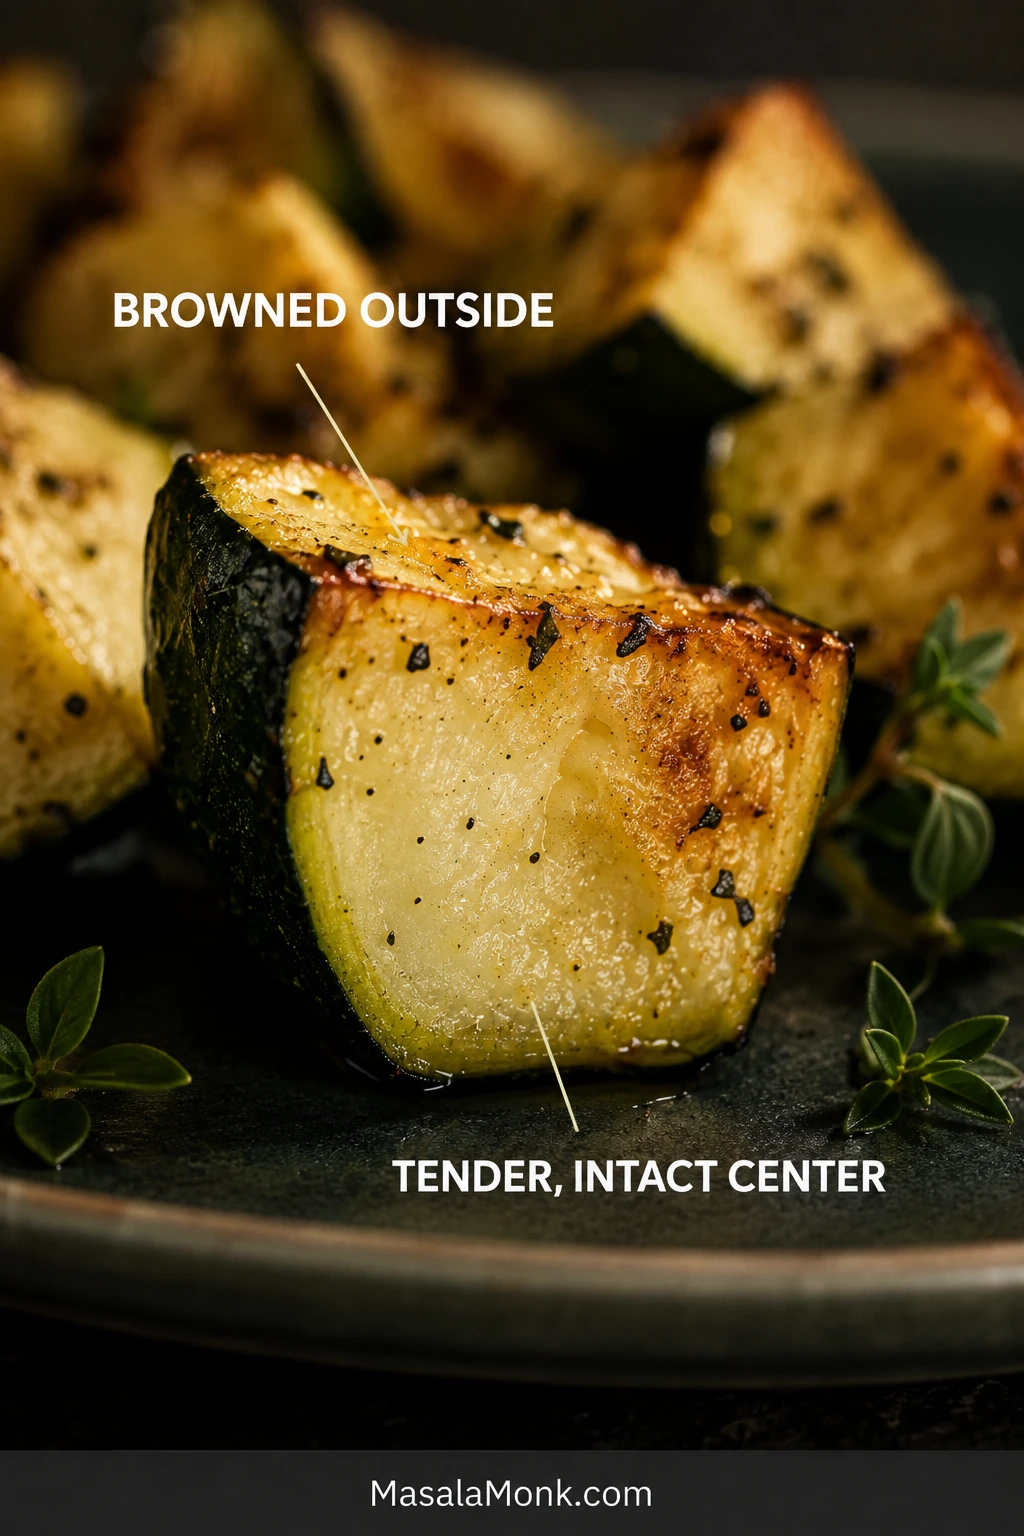
Close-up of a browned zucchini chunk cut open to show dark green skin and a pale, moist, intact center.
Still uncertain? Cut open one of the largest chunks. A moist center that holds together is desirable; waterlogged flesh that slumps or releases liquid has moved beyond the ideal window.

Cooking two batches: Keep the first batch uncovered. When the second is nearly ready, return the first batch to the air fryer for 30–60 seconds only if it has cooled noticeably.

If your zucchini tends to come out pale, watery or softer than expected, four variables usually explain it.

Four Things to Control Before Cooking

1. Start with firm zucchini

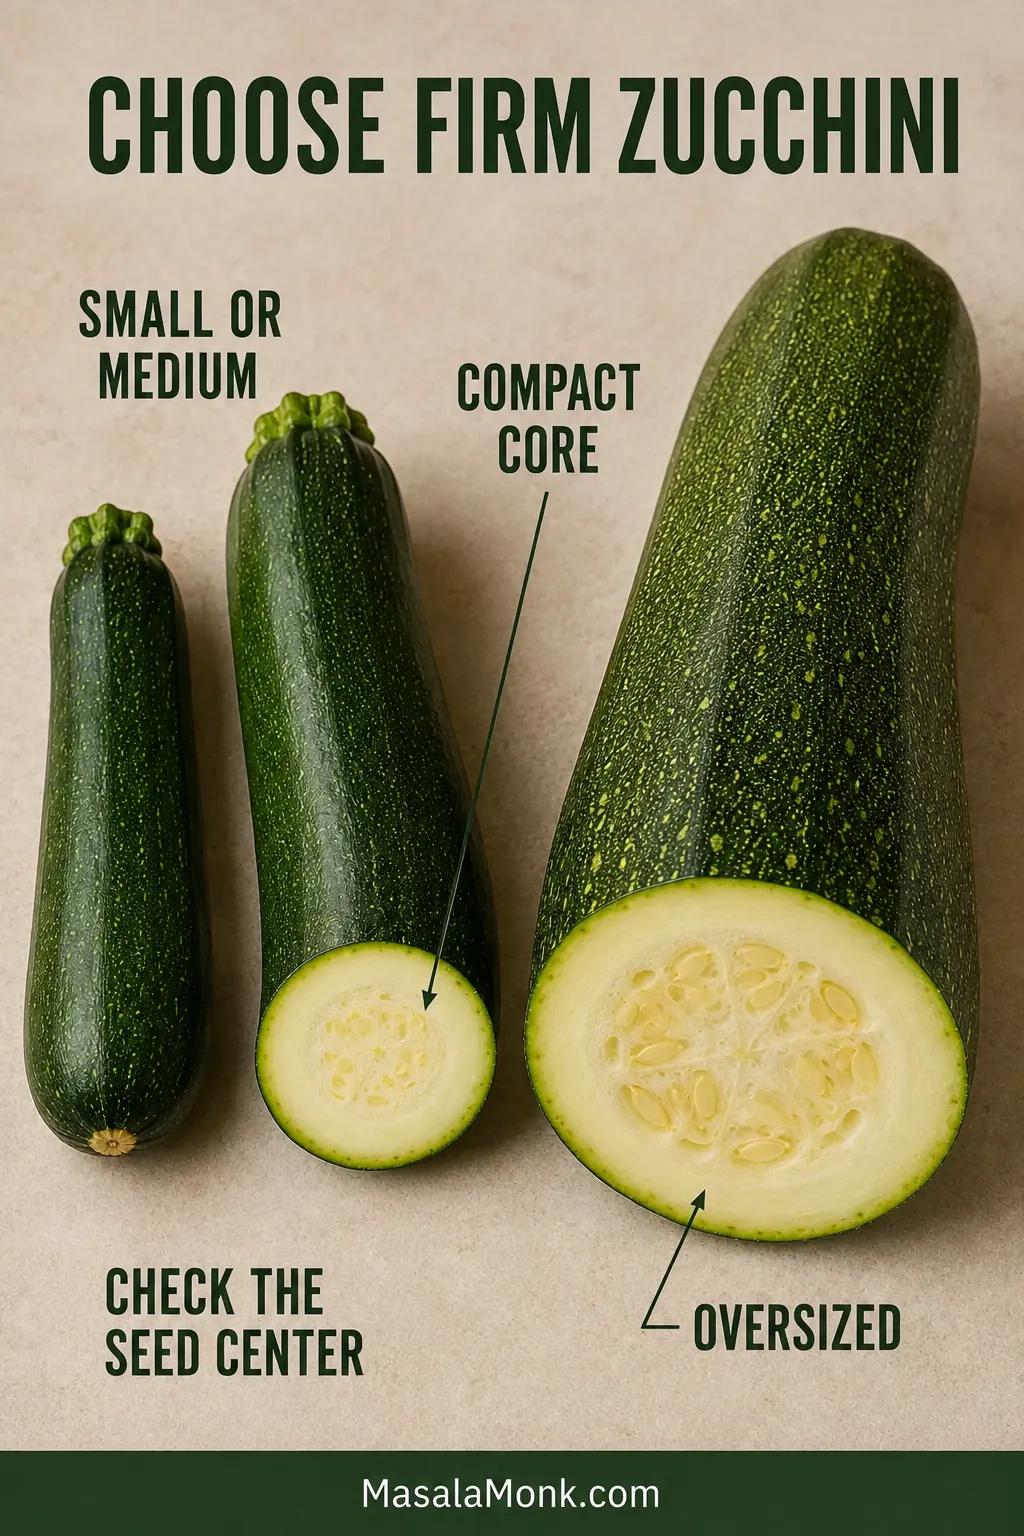
Small and medium zucchini are usually easiest to air fry because their flesh is firm and their seed cores are compact. Choose vegetables that feel heavy for their size, with smooth skin and no broad soft patches.

With an oversized garden zucchini, scoop away broad seeds surrounded by loose, spongy flesh. If the remaining pieces still look unusually wet, sprinkle them with about half the measured salt, rest for 10 minutes and blot thoroughly. Add more salt only after cooking and tasting.

Small, medium and oversized zucchini displayed side by side, with compact seed cores in the smaller vegetables and a broad, loose center in the largest.
An oversized zucchini is still useful. Air fry the firm outer flesh, then save a loose or heavily seeded center for soup, curry or a blended vegetable sauce.

2. Cut thick, even chunks

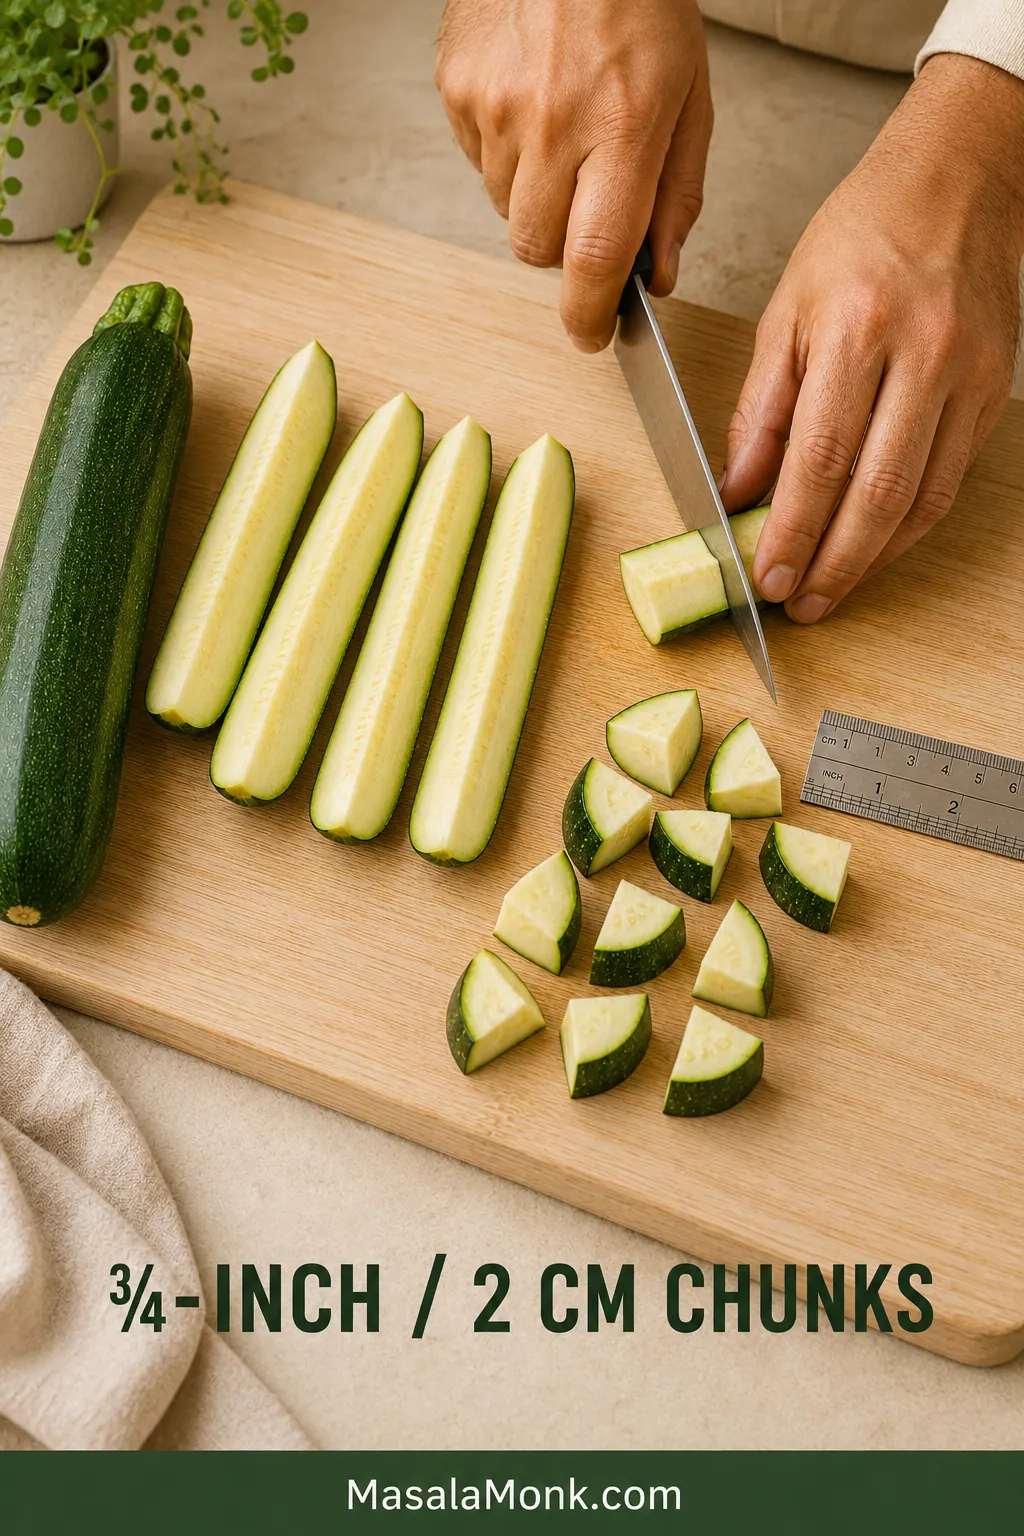
Quarter the zucchini lengthwise, then cut across those long quarters. This shape gives the hot air several edges to brown without leaving the middle so thin that it folds.

Hands cutting a lengthwise zucchini quarter into ¾-inch chunks on a wooden board, with whole zucchini, cut quarters and a ruler nearby.
Match thickness more closely than shape. Pieces with similar thickness soften at a similar rate even when their outlines are not perfectly identical.

The tapered ends naturally make smaller pieces. Check those first and take them out when ready. The larger chunks can continue for another minute.

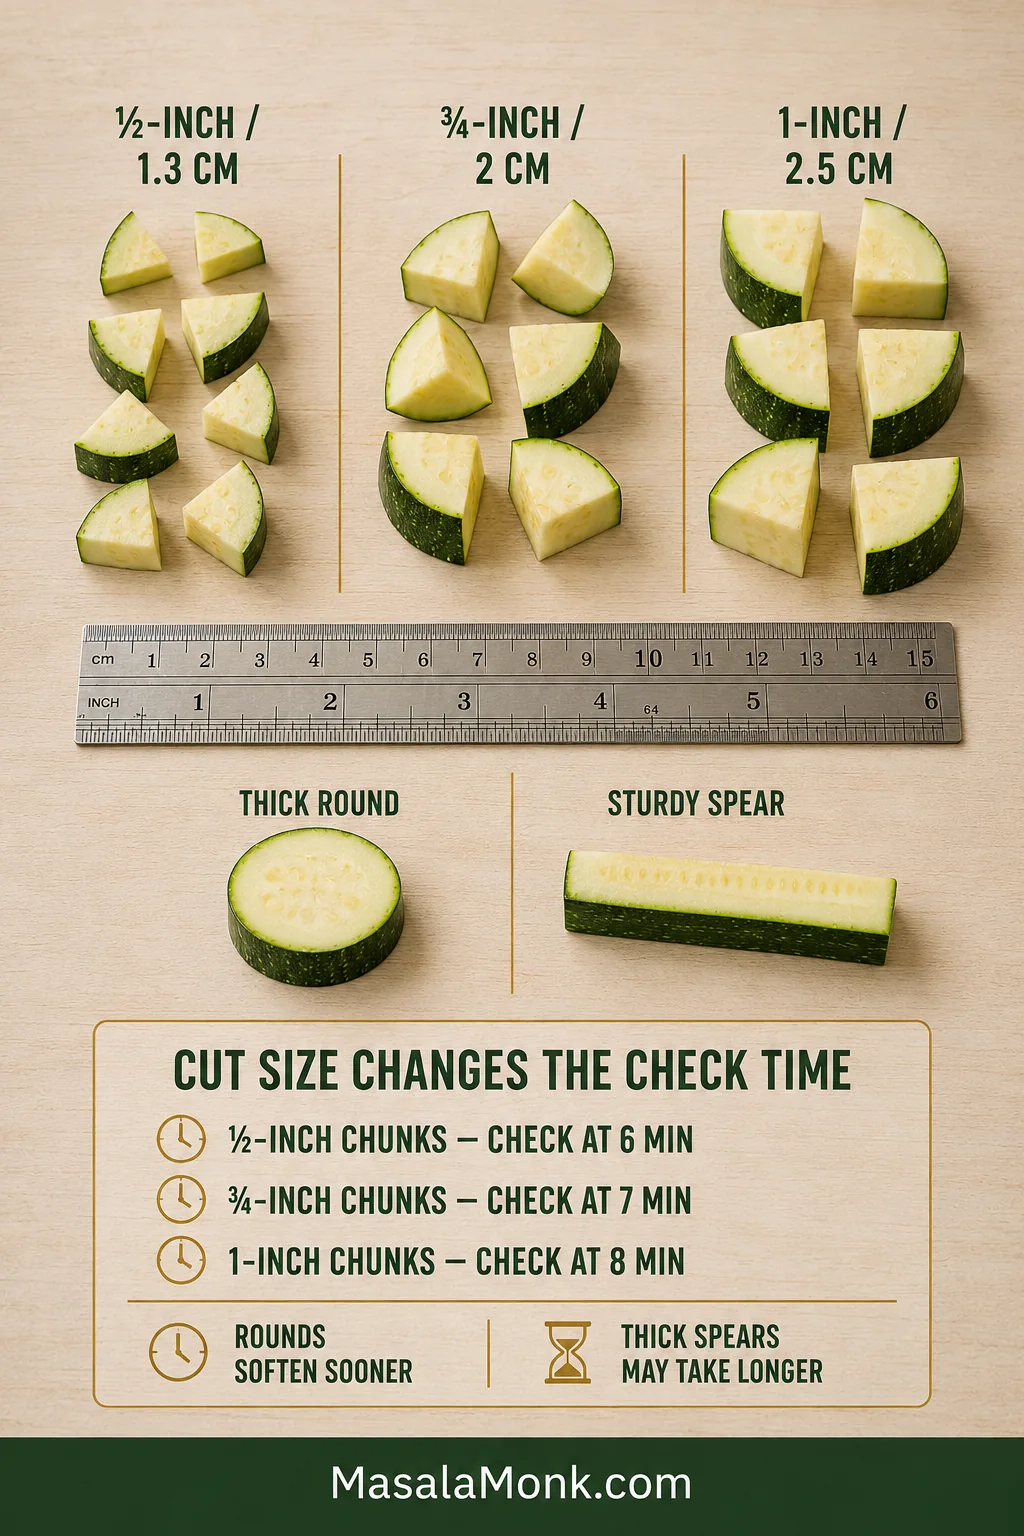
CutFirst checkWhat to expect
½-inch / 1.3 cm chunks6 minutesFast cooking; remove smaller pieces promptly
¾-inch / 2 cm chunks7 minutesThe balanced everyday cut used in this recipe
1-inch / 2.5 cm chunks8 minutesA firmer, juicier middle; continue as needed

Thick rounds or spears can also work. Rounds expose broader cut faces and usually soften sooner, while sturdy spears may need slightly longer depending on their width.

Guide comparing ½-inch, ¾-inch and 1-inch zucchini pieces beside a ruler, along with a thick round and a sturdy spear.
Choose the cut for the meal: chunks make the most forgiving side, sturdy spears suit dipping, and thick rounds cook quickly but lose structure sooner.

To prepare ahead, refrigerate the cut zucchini in a dry, covered container. Blot it before cooking and wait to add the seasonings.

3. Dry the surface and season late

Blot any cut faces that look glossy with water. A thin coat of oil helps the seasonings cling and encourages the exposed edges to brown instead of drying into leathery patches.

Two raw zucchini pieces shown side by side, one glossy with surface moisture and one matte after blotting with a paper towel.
Blot after cutting, not only after washing. Newly exposed zucchini flesh can develop a fresh sheen of moisture even when the outer skin was dried thoroughly.

Season when the air fryer is already hot. Moving the salted pieces directly into the basket gives them less time to release water before cooking begins.

Flavor note: Garlic powder and dried herbs can cook with the zucchini. Add lemon, lime and fresh herbs afterward so their flavor stays bright.

Hands tossing lightly oiled zucchini chunks in a metal bowl while dry seasoning falls across their surfaces.
The mixing bowl should look nearly dry after tossing. Oil pooling beneath the zucchini signals more than the batch needs.

4. Leave room for the hot air

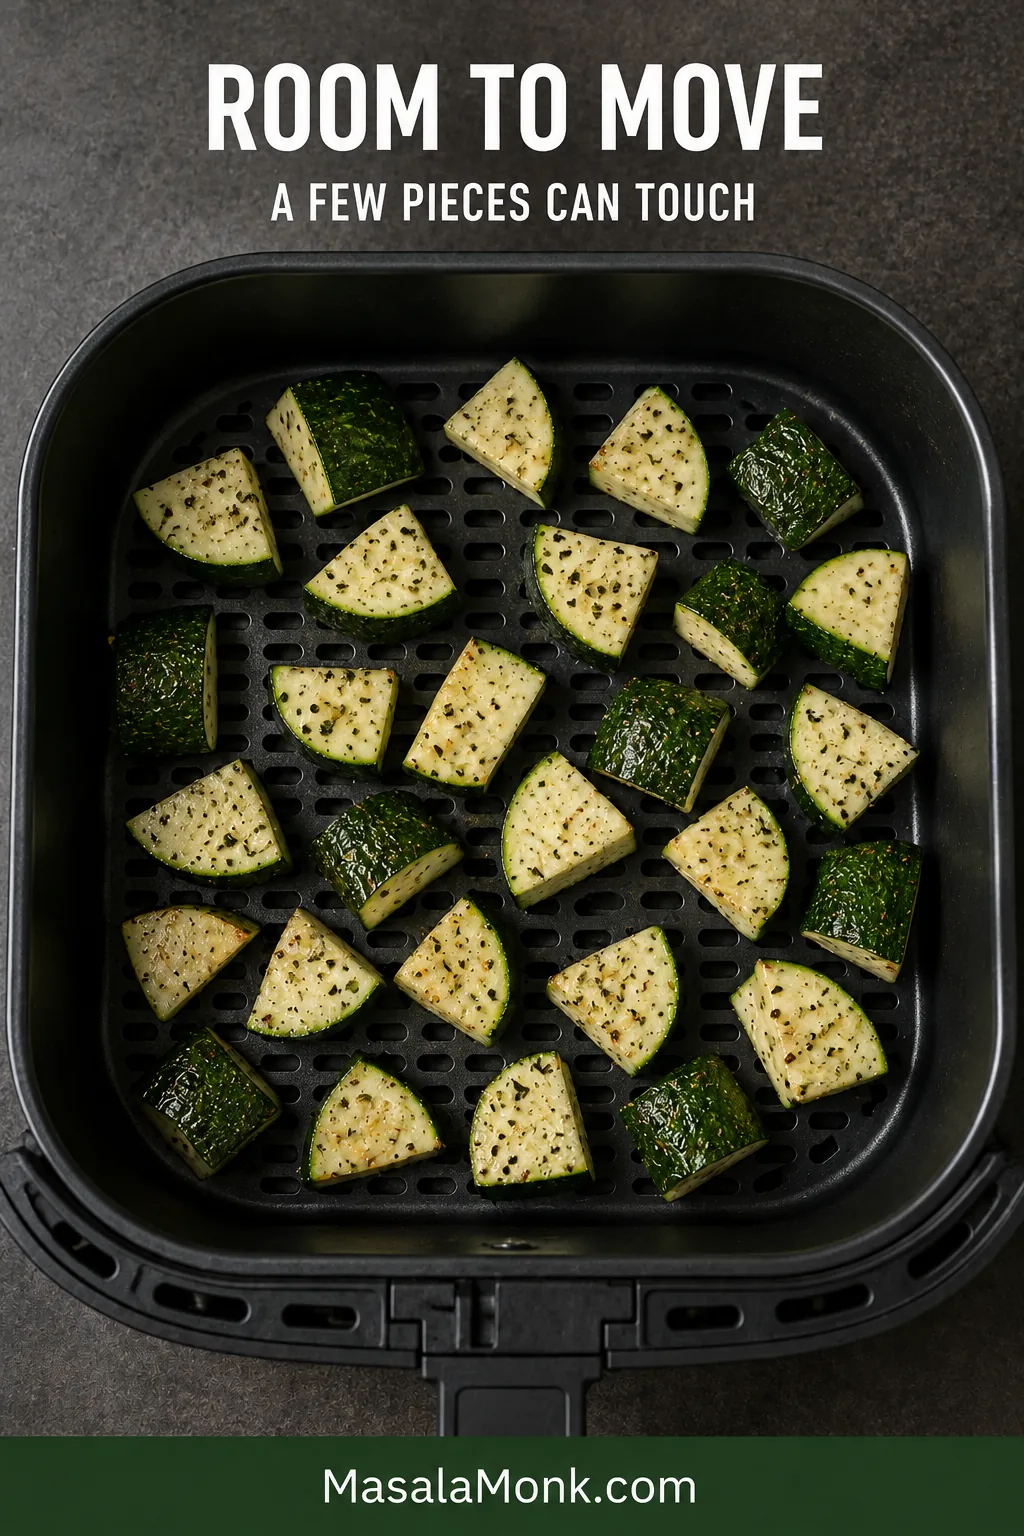
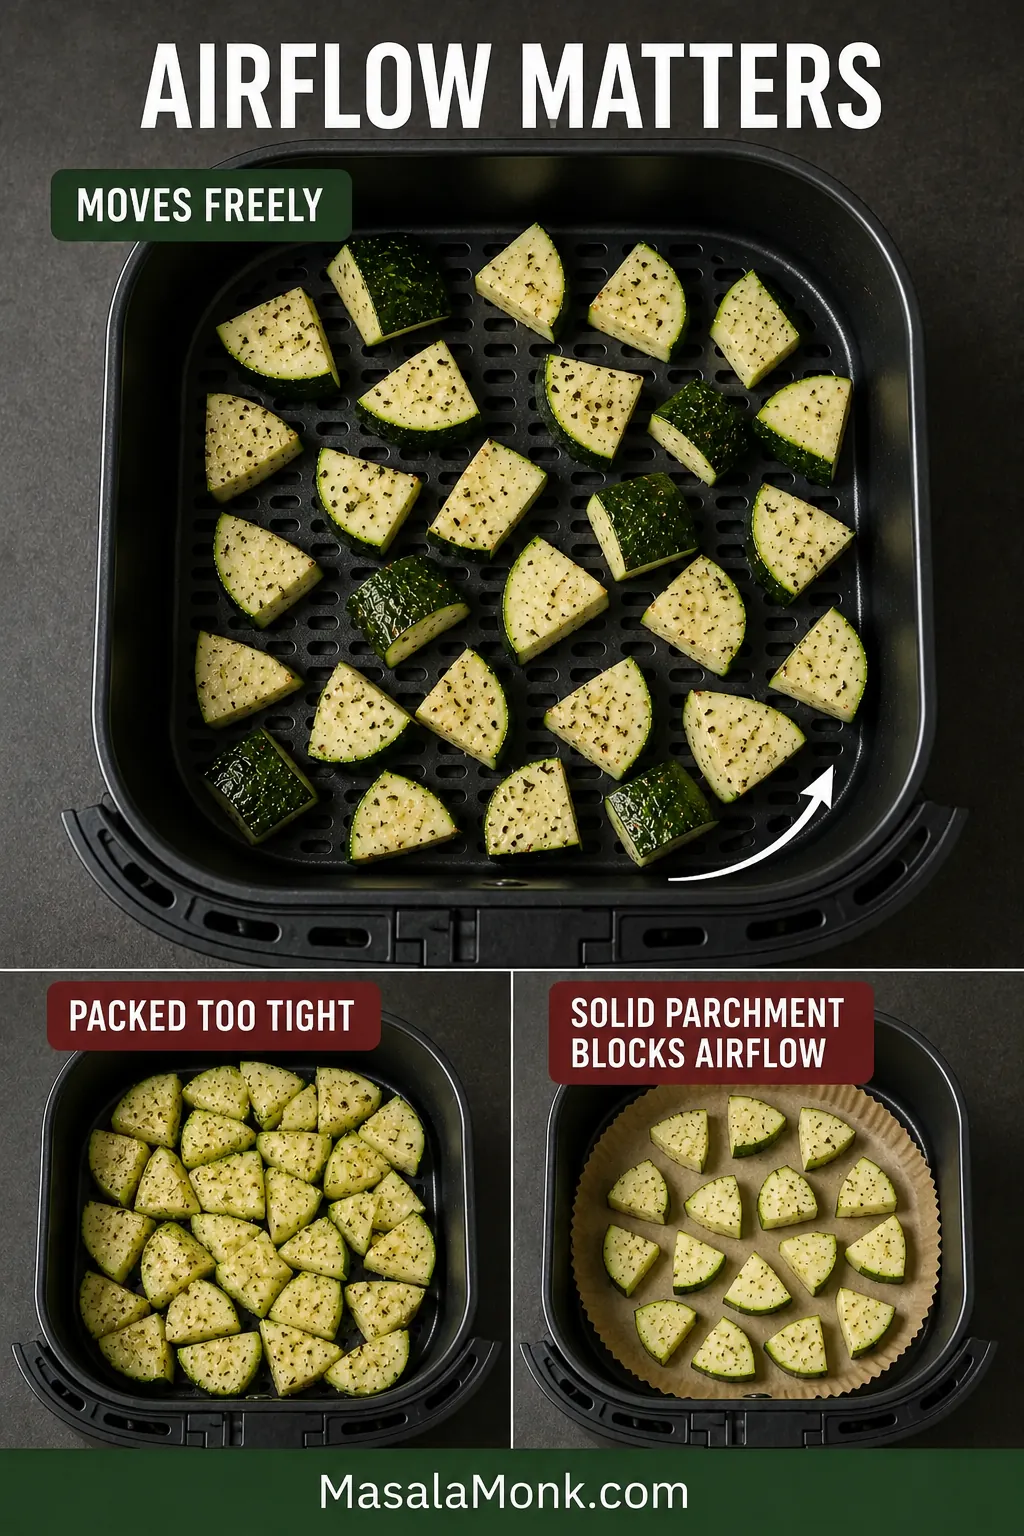
What matters is the flat cooking area, not the capacity printed on the box. A few pieces can touch, but the load should redistribute when the uncooked basket is gently shaken. If it moves as one packed mass, divide it into two batches.

Seasoned raw zucchini chunks arranged loosely in one layer inside a perforated air fryer basket, with visible gaps and basket holes between them.
One smaller, freely moving batch often browns faster than an overloaded basket that must first evaporate trapped moisture. Capacity matters less than usable flat space.

If several foods come out pale or uneven in your machine—not only zucchini—these common air fryer mistakes and fixes cover crowding, preheating, oil and halfway turning in more detail.

Solid parchment can block airflow beneath the zucchini. Cook directly in a clean basket, or use only a properly secured perforated liner approved for your machine.

Guide comparing loosely arranged zucchini, an overcrowded air fryer basket and solid parchment covering the basket perforations.
Some basket holes should remain visible, but movement matters most. If the zucchini shifts as one packed mass instead of redistributing, divide the batch.

Once these four details are in place, zucchini stops feeling unpredictable. It becomes the kind of side you can start while the rest of dinner finishes.

Time, Temperature and Doneness

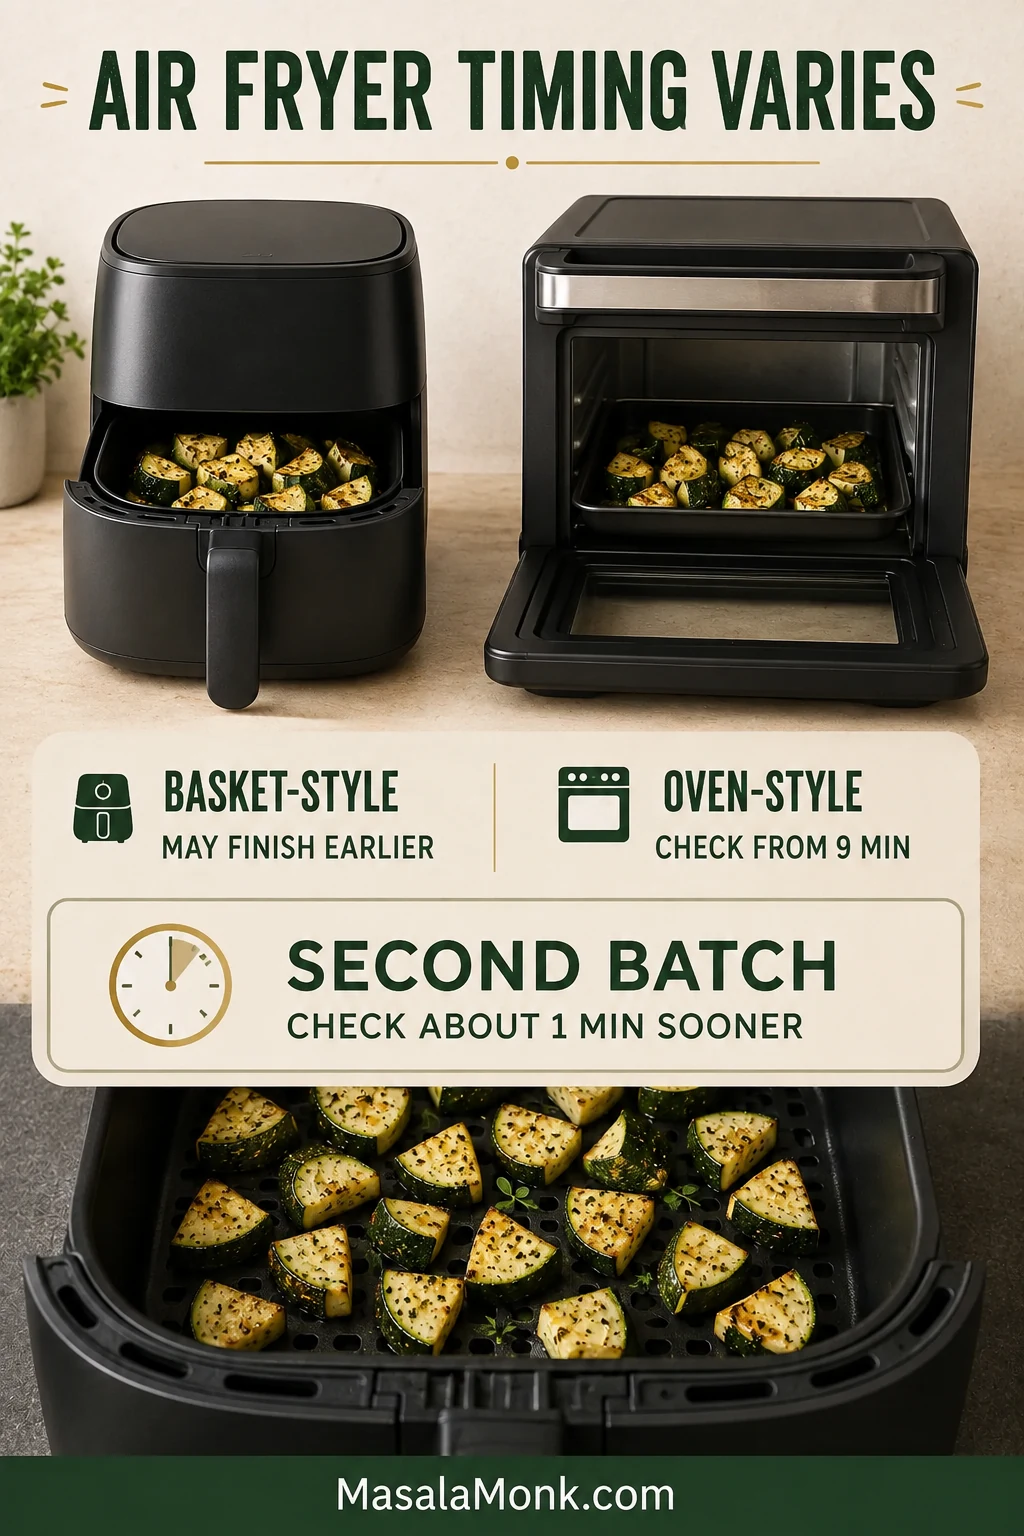
Treat the recipe’s 8–11-minute cooking time as a checking range, not a guaranteed finish. Basket shape, load size and fan strength determine where your zucchini falls within it.

Compact basket machines may finish early. Oven-style air fryers often need several extra minutes, so inspect them from around 9 minutes and turn pieces whose undersides remain pale. A later batch may cook faster because the chamber is already thoroughly hot.

Timing guide comparing a basket-style air fryer, an oven-style air fryer and a second batch cooked in an already heated basket.
Write down the finish time of the first successful batch in your machine. That personal benchmark will be more dependable next time than any universal minute count.

How to Tell When Air Fryer Zucchini Is Done

If your zucchini needs ten minutes while another recipe promises seven, nothing has gone wrong. The timer should tell you when to check. The zucchini should tell you when to stop.

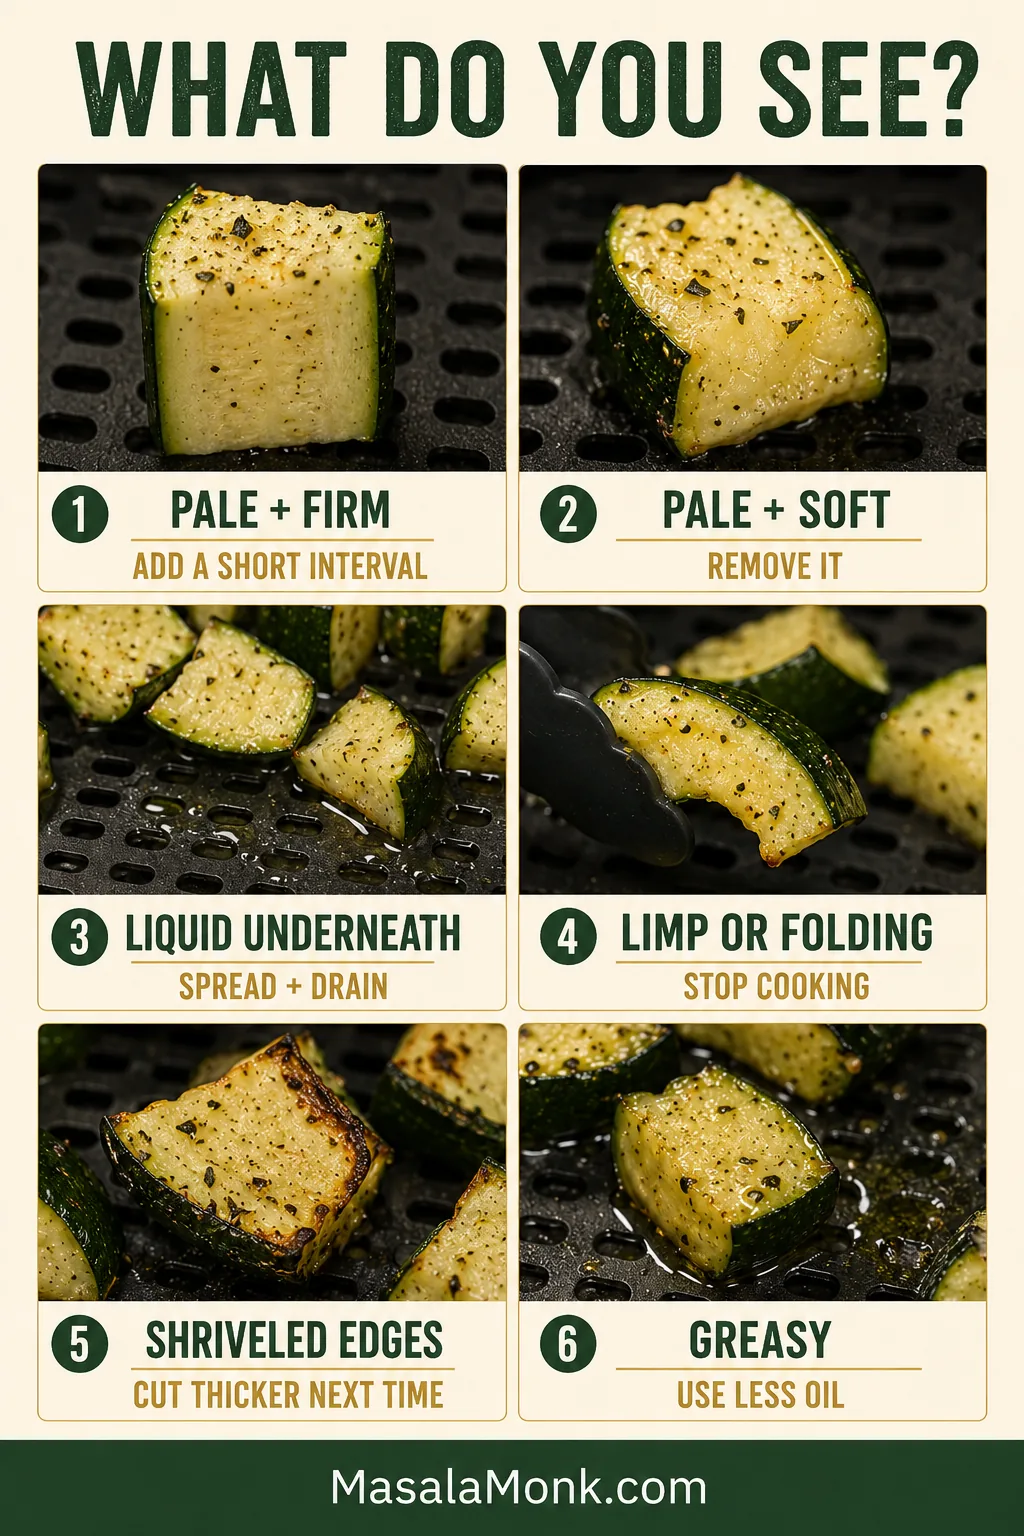
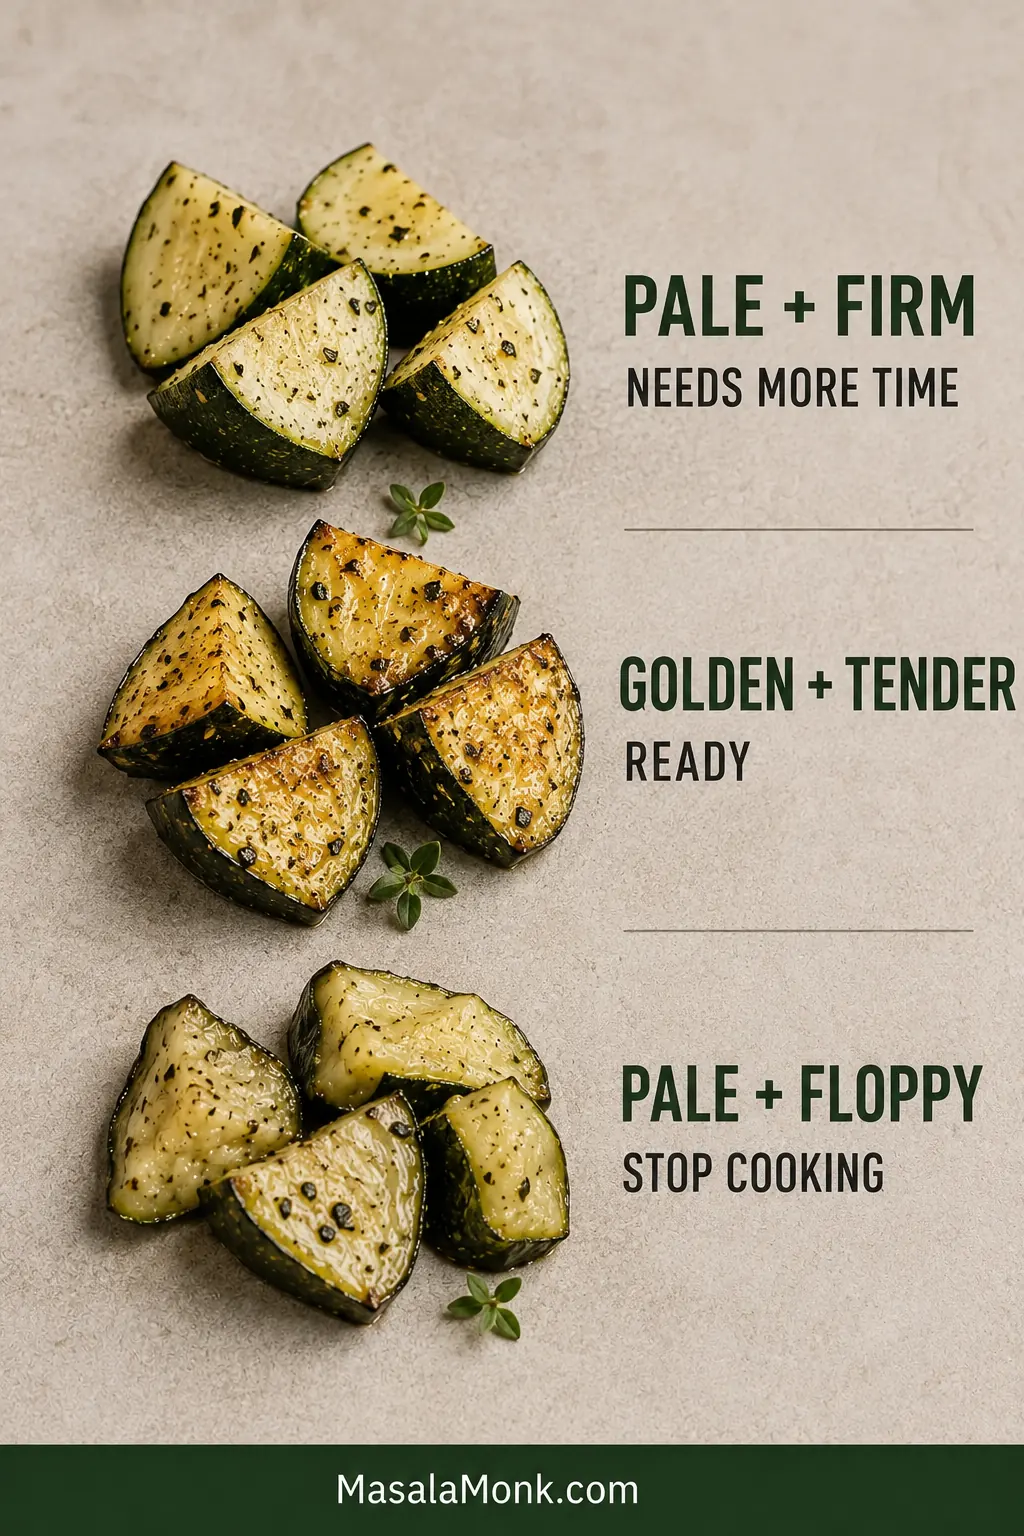
Before adding another minute, check one piece: Pale and firm means it needs more time. Golden and tender means it is ready. Pale and floppy usually means extra cooking will not improve the texture.

Three zucchini doneness states showing pale firm pieces, golden tender pieces and pale floppy pieces with a recommended action for each.
Air fryer zucchini doneness will not always be uniform. Remove the early winners and let only the firmer, paler pieces continue for another brief interval.

Look for several golden faces rather than identical color on every side. The cut surfaces should no longer look wet, and a fork should enter easily while still meeting a little resistance in the middle.

Dinner fork pressing gently into a browned zucchini chunk that remains upright on a neutral plate.
Test one of the thickest pieces rather than the darkest one. If its center gives gently without collapsing, the smaller pieces are already ready to leave the basket.

Already soft, wet or uneven? Use the troubleshooting guide before adding more time.

Fixing Soft, Wet or Uneven Zucchini

Even a softer batch is usually still usable. Stop cooking before it collapses further, then serve it promptly or fold it into pasta, rice or a sauced dish.

Six-part troubleshooting guide comparing pale, soft, watery, limp, shriveled and greasy air fryer zucchini.
When diagnosing soggy air fryer zucchini, judge texture before color. Firm pieces may need more heat; already-soft pieces need to come out, whatever shade they are.
Pale but already soft

This usually means the zucchini became tender before it received enough heat or airflow to brown. Likely causes: an overloaded basket, a cold start, weak oven-style airflow or excess surface moisture. Do now: remove it once tender; more time may only make it softer. Next time: reduce the load, dry the pieces carefully and preheat where appropriate.
Wet or sitting in liquid

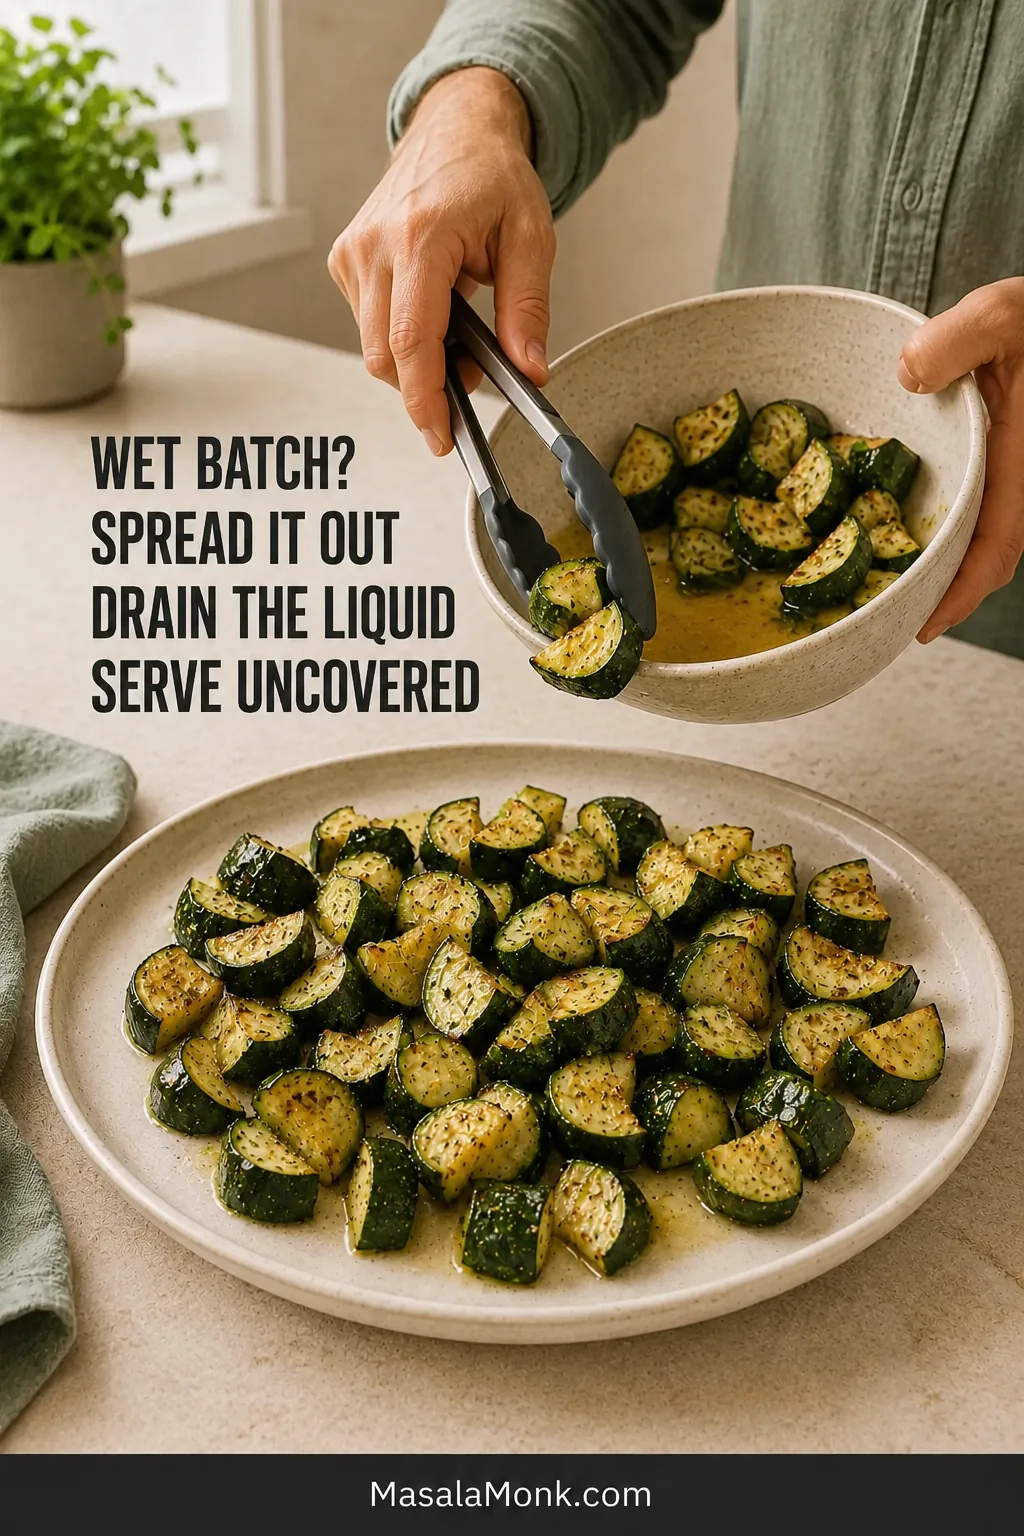
Water was released faster than the basket could evaporate it. Move the zucchini to a wide, uncovered plate and drain any liquid that has collected. Common causes include wet cut sides, early salting, a packed basket or transferring the hot pieces into a narrow or covered bowl.

Cook transferring wet zucchini from a narrow bowl with pooled liquid onto a broad uncovered platter using silicone-tipped tongs.
Spreading the batch prevents further steaming, but it cannot rebuild lost structure. Do not return floppy zucchini to the air fryer merely to chase darker color.

If the zucchini was oversized and seedy, scoop out the loose center next time. Otherwise, reduce the load, blot the pieces and season only when the air fryer is ready.

Limp or folding in half

The zucchini’s structure has already started to break down. Thin pieces, cooking past tenderness, leaving the finished batch in the hot basket or giving a second batch the same timing in an already-hot chamber can all cause it.

Remove it immediately and serve it now instead of chasing more color. Next time, cut thicker and watch the second batch a minute sooner.

Other common problems

  • Shriveled edges: Use thicker pieces, a measured coat of oil and an earlier check.
  • Burned seasoning: Use a lighter coating of spices and add Parmesan or delicate finishes near the end.
  • Taking much longer: A cold start, dense load, larger cut or oven-style appliance may be slowing the batch. Keep checking in short intervals.
  • Seasoning fell off: Dry the zucchini, add oil before the dry ingredients and avoid repeated shaking.
  • Greasy zucchini: Measure the oil and reduce it when cooking less than one pound.
  • Softened on the plate: Use a broad uncovered dish and add wet sauces at the table.

Once the texture is under control, changing the flavor is the easy part.

Air Fryer Zucchini Variations

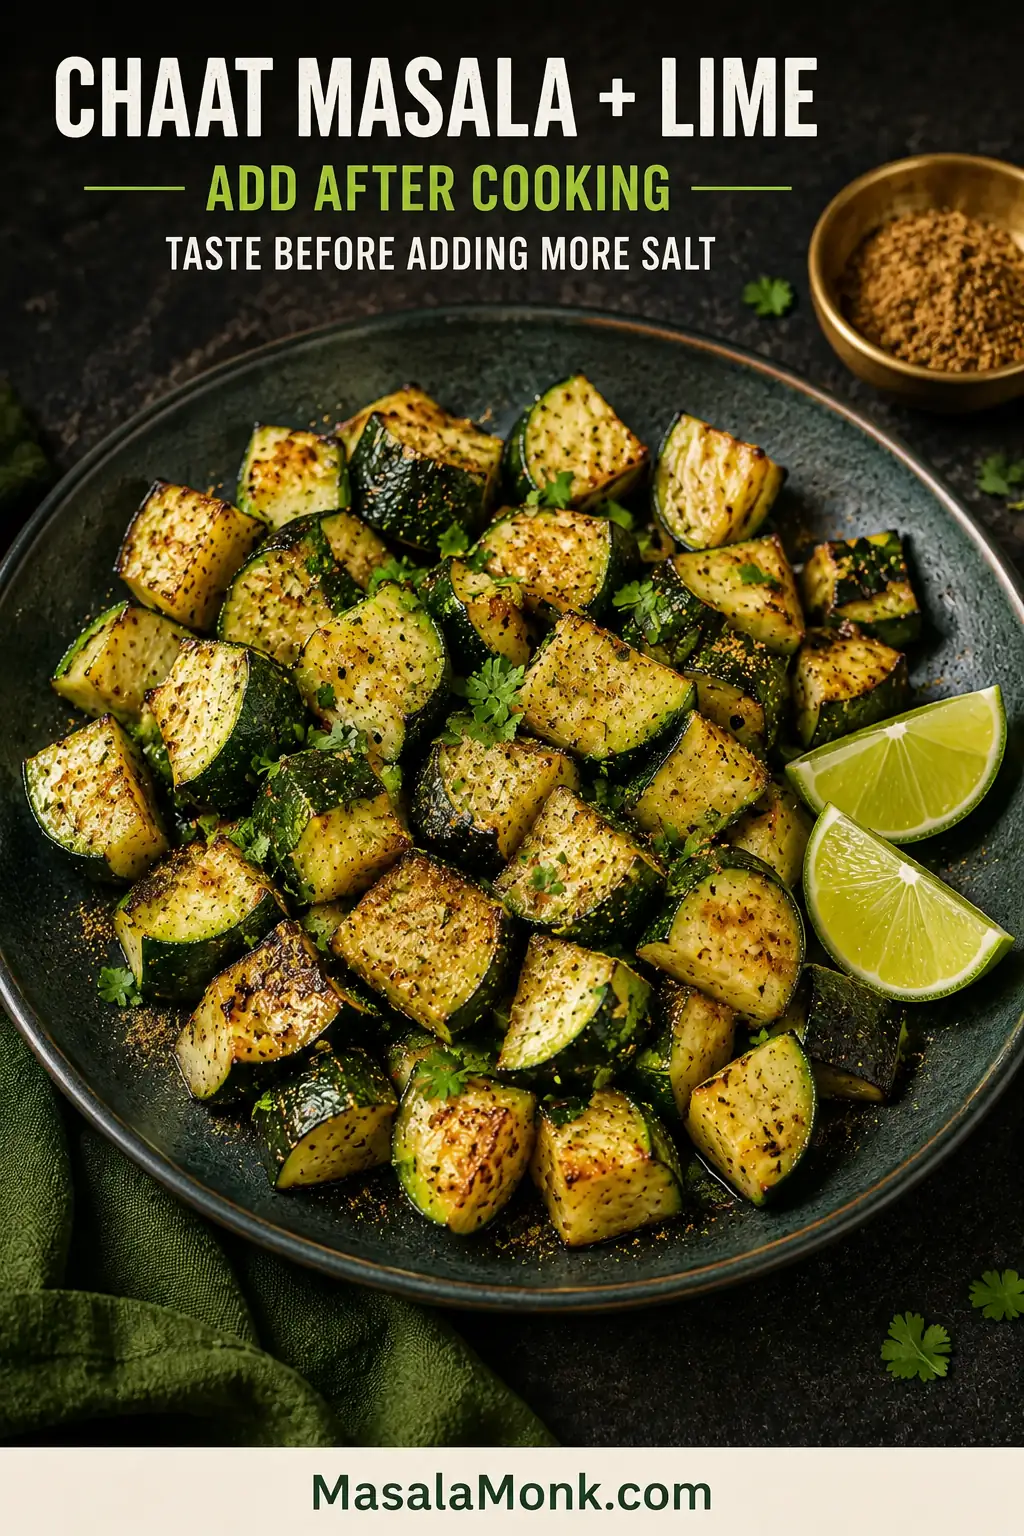
Choose your finish: Keep the garlic-and-herb version simple, add Parmesan for nutty browned edges, or finish the zucchini with chaat masala and lime.

FinishBest when you wantKey adjustment
Everyday unbreadedGolden edges and a tender middleUse the base recipe
ParmesanSavory, nutty browned cornersReduce the salt and add cheese near the end
Chaat masala and limeTangy, bright flavorSkip the Italian herbs; add chaat masala, lime and cilantro after cooking
Very low oilMinimal added fatExpect lighter browning and slightly drier edges
Thin chips or breaded friesA crisp coatingUse the separate chips method

Using little or no oil: The zucchini will brown less evenly and may develop drier edges. Dry it carefully, keep the basket loose and check it sooner than the standard version. A fine oil spray offers a useful middle ground.

Side-by-side bowls comparing evenly browned zucchini cooked with the standard amount of oil and paler zucchini with drier edges cooked with little or no oil.
Air fryer zucchini without oil needs closer attention at the small tapered pieces. Their exposed edges may dry before the larger chunks develop much color.

Parmesan Zucchini

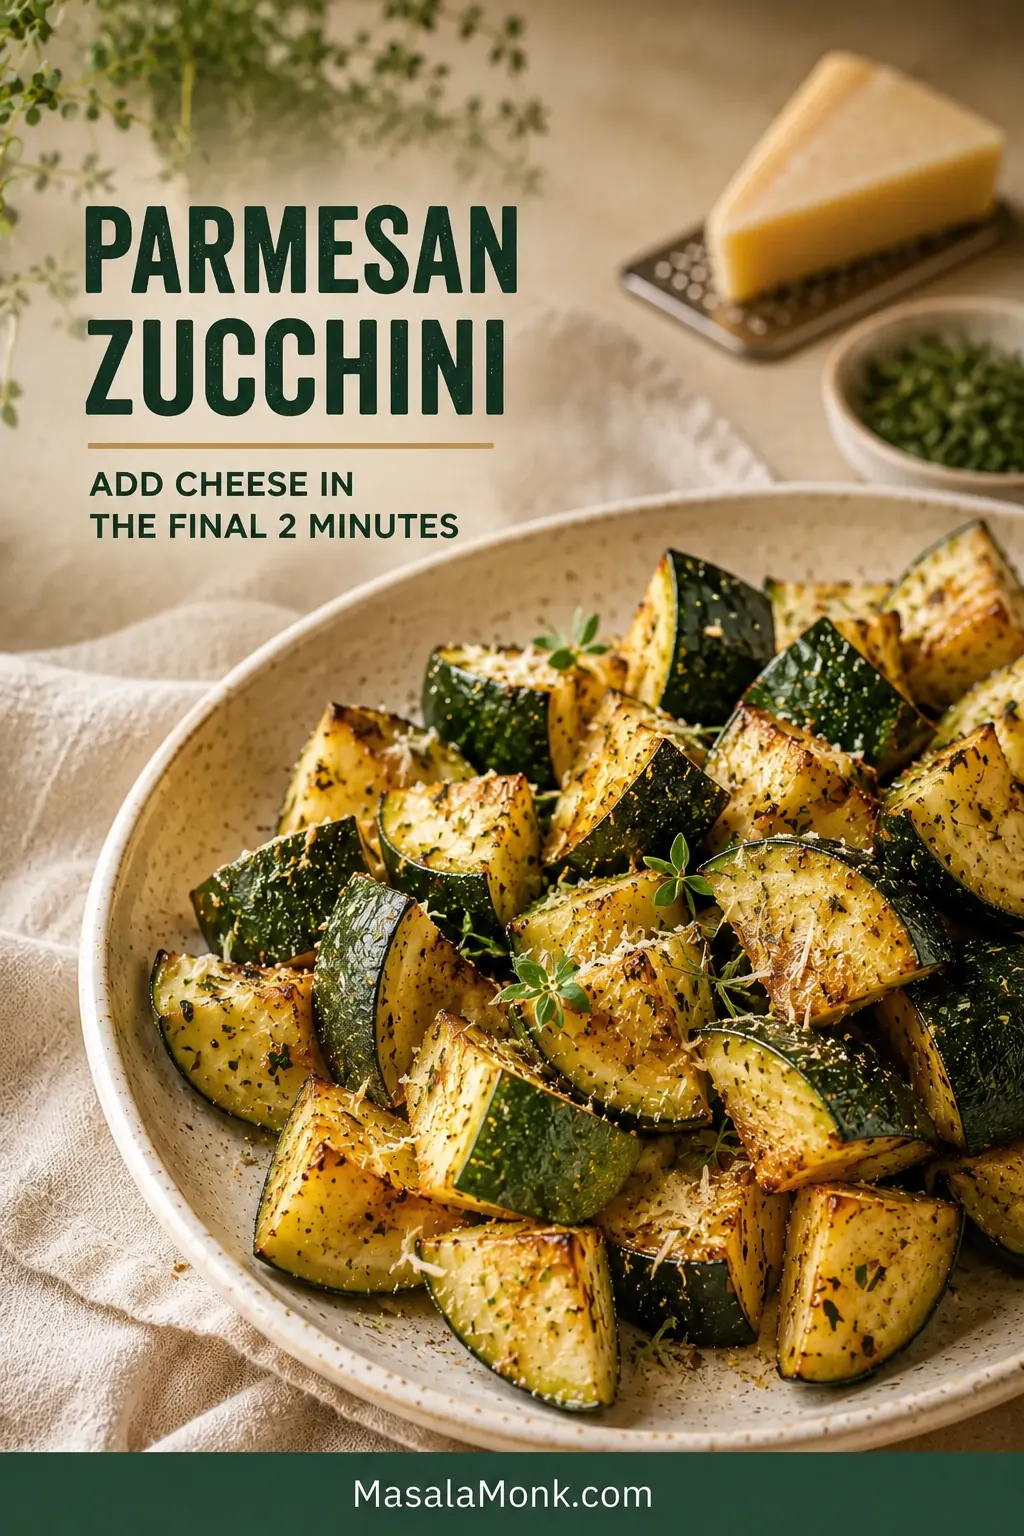
Use half the salt in the base recipe. During the final 2 minutes, add 2 tablespoons / about 10 g finely grated Parmesan. Sprinkle it over the zucchini, return the basket and avoid shaking again.

The cheese should catch on the corners and smell nutty as it browns. For an easier finish, sprinkle Parmesan over the zucchini on the serving plate instead.

Browned zucchini chunks lightly coated with finely grated Parmesan, with a cheese wedge and metal grater in the background.
For Parmesan air fryer zucchini, use finely grated cheese rather than coarse shreds. The smaller particles cling to the corners and melt before they have time to scorch.

Beside garlic Parmesan broccoli pasta, keep the zucchini lightly seasoned and add only a light dusting of cheese at the table.

Chaat Masala and Lime Zucchini

Omit the Italian seasoning, but keep the garlic powder and black pepper. Reduce the fine salt to ¼ teaspoon.

After cooking, sprinkle the hot zucchini with ½ teaspoon chaat masala, add 1 teaspoon / 5 ml lime juice and finish with a small handful of chopped cilantro. Taste before adding more because chaat masala blends vary in salt and intensity.

Dark plate of browned zucchini finished with chaat masala, lime wedges and chopped cilantro beside a small bowl of spice.
Chaat masala, lime and cilantro belong after cooking, when their flavor stays vivid. Taste before adding more salt because seasoning blends vary widely.

The tangy spice and bright lime work especially well beside dal and rice, chickpeas or cubes of soft homemade paneer.

Zucchini and Yellow Squash

Yellow summer squash can cook in the same basket when the pieces are similar in size. Softer or seedier chunks may finish first, so take them out and let the firmer pieces continue.

Can You Air Fry Frozen Zucchini?

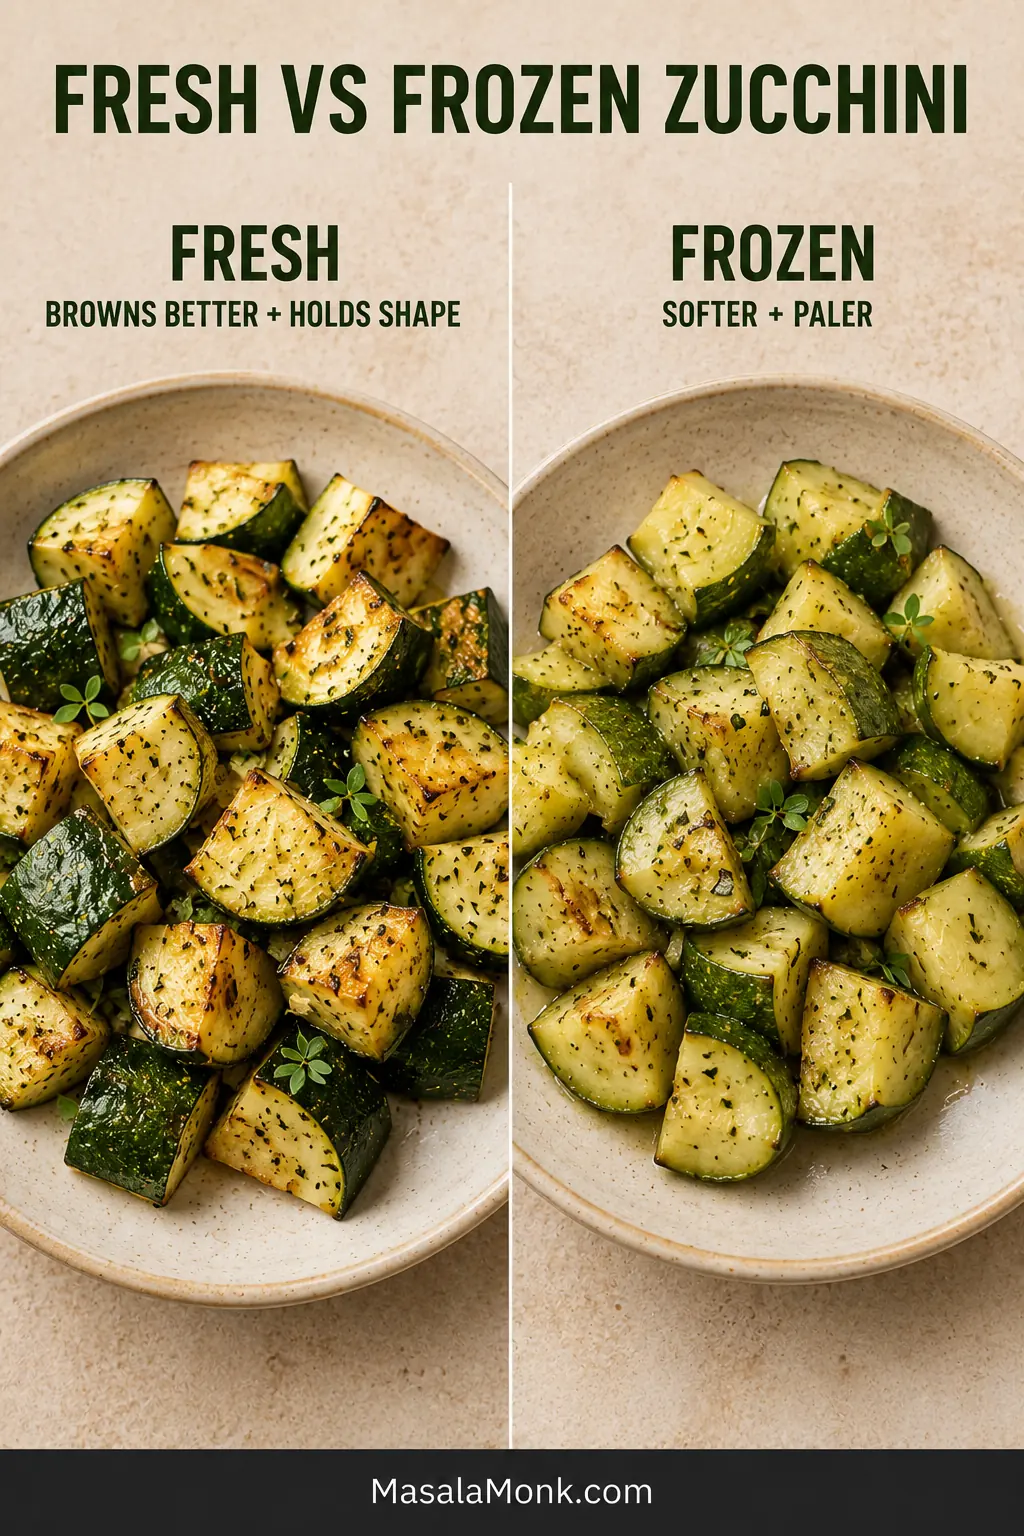
Yes, but it will be softer, paler and less distinctly roasted than fresh zucchini. Frozen pieces release more water and lose structure quickly.

Use fresh zucchini when you want browned chunks that hold their shape. Save frozen zucchini for soup, curry, pasta sauce, casseroles or blended vegetable sauces where softness belongs.

Side-by-side bowls showing browned, firm fresh zucchini and paler, softer zucchini cooked from frozen.
Treat frozen zucchini in the air fryer as an ingredient rather than a roasted side. Its softer texture becomes far less noticeable once folded into a curry, soup or sauce.

Freezing fresh zucchini at home? The National Center for Home Food Preservation’s summer-squash guidance explains how to blanch, cool and pack it safely.

What to Serve With Air Fryer Zucchini

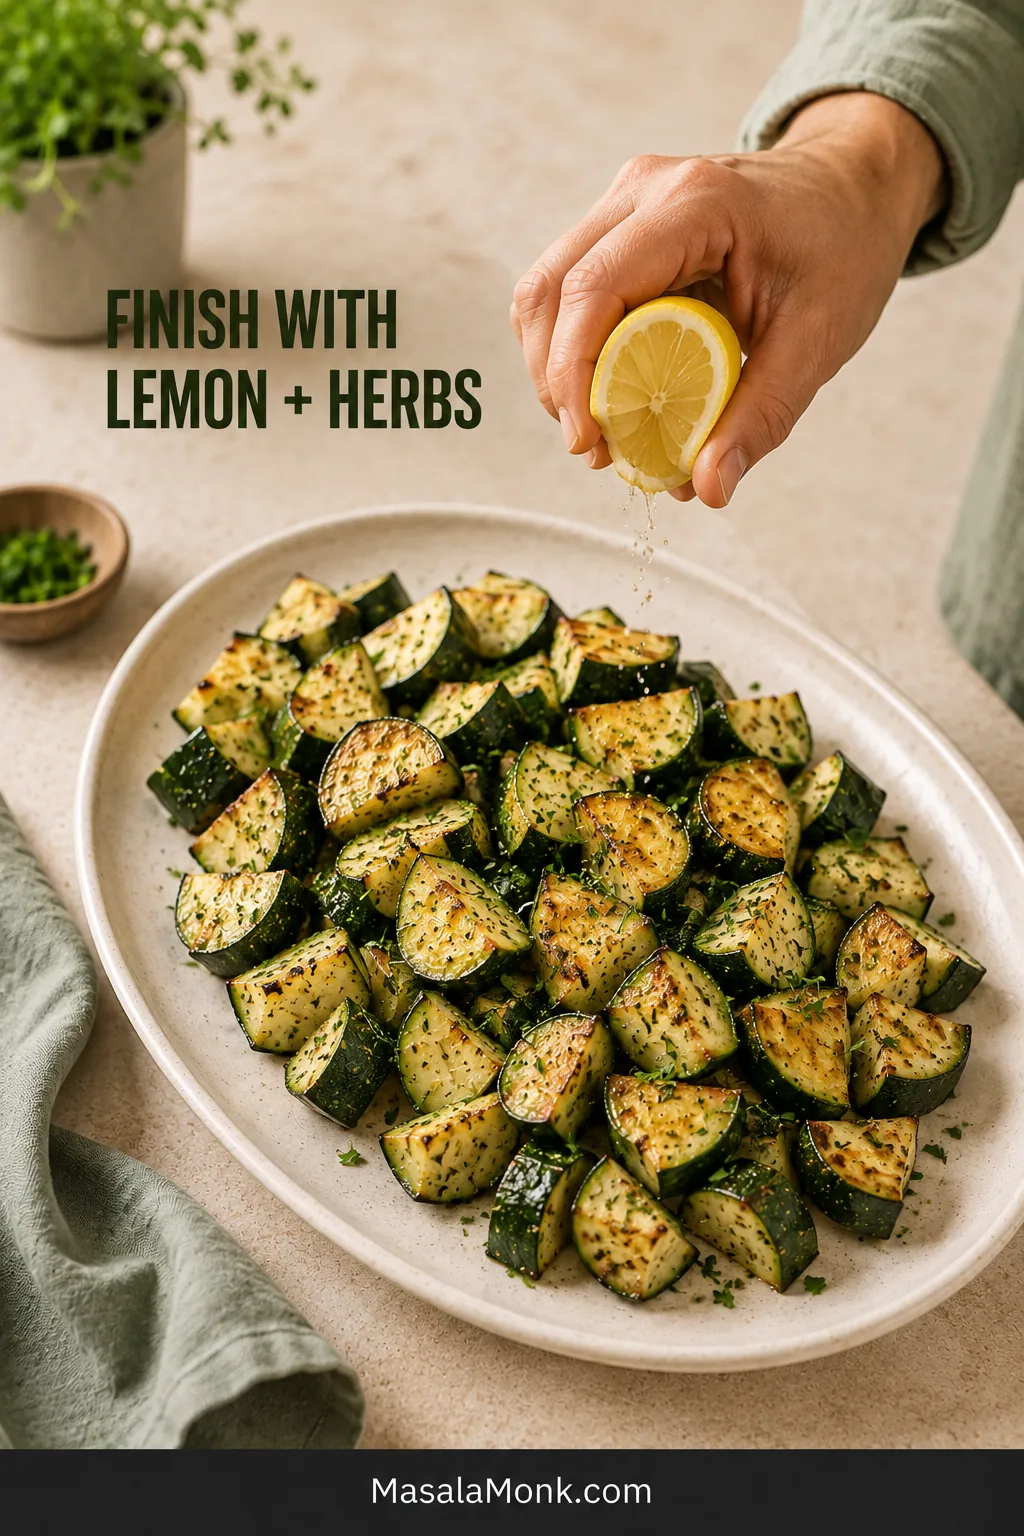
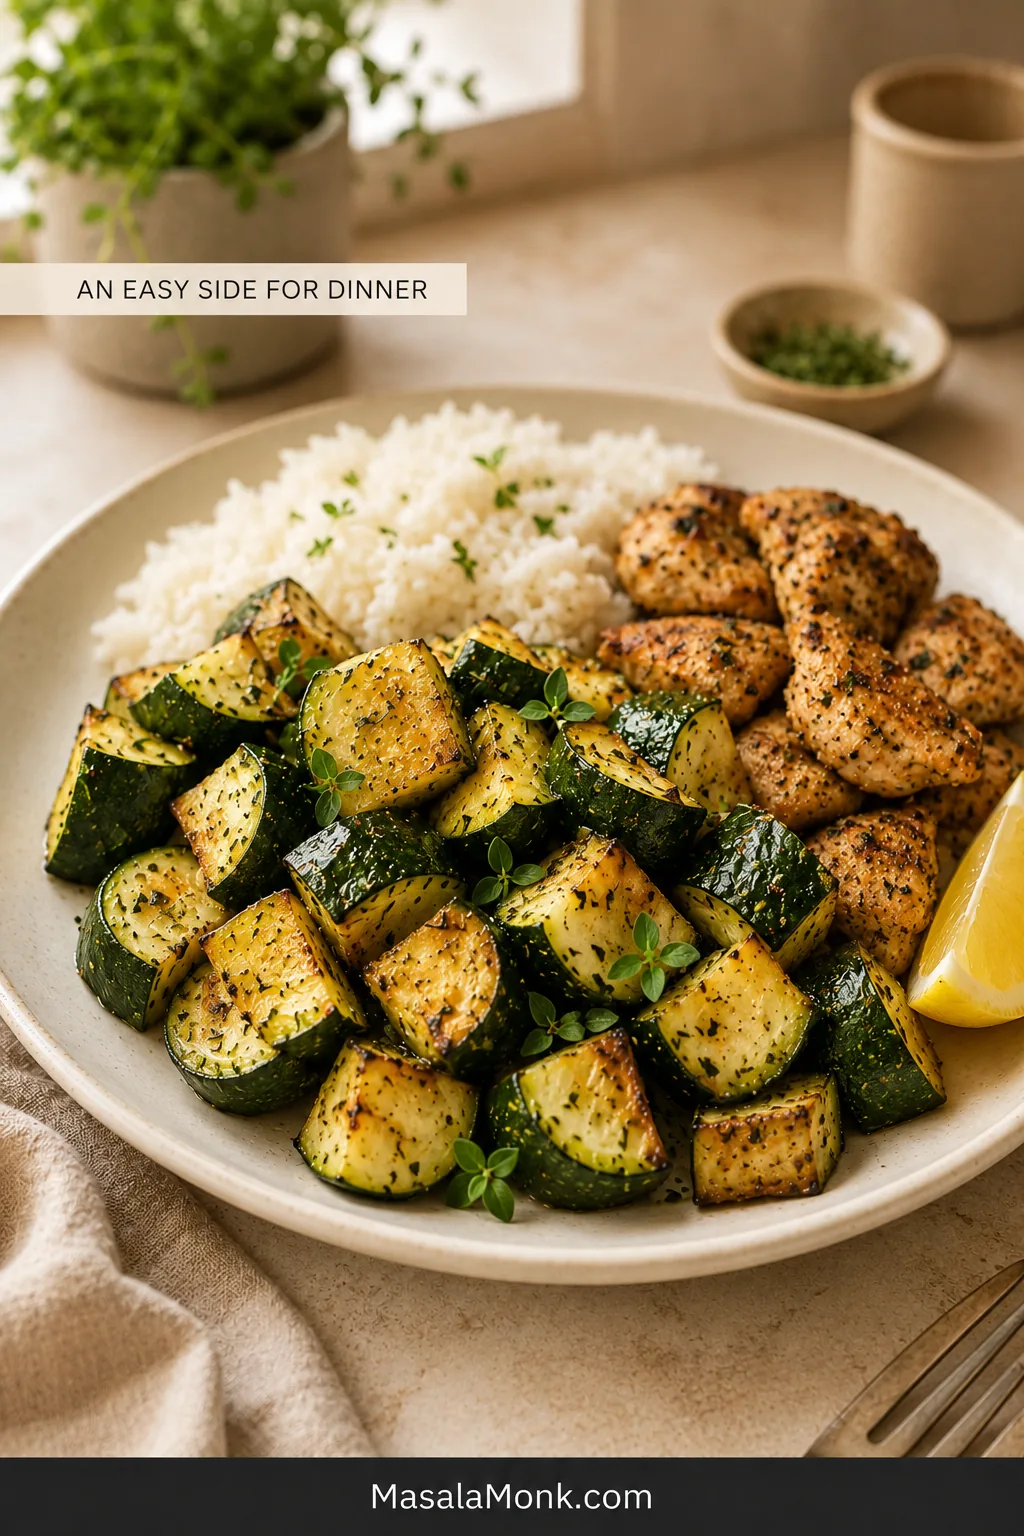
Once the texture is right, this is the kind of side that quietly fits around almost anything already planned for dinner. Spoon the zucchini beside rice or potatoes and juicy air fryer chicken breast, salmon, paneer or tofu. Squeeze lemon over the whole plate and add a little salt at the table.

Hand squeezing lemon over browned zucchini spread across a broad white platter and finished with fresh herbs.
Add lemon and fresh herbs after cooking so their flavor stays bright. A broad platter lets steam escape instead of softening the browned surfaces.

With a richer main such as honey garlic salmon, keep the zucchini lemony and herb-led. For a vegetarian bowl, layer it with warm grains, chickpeas or paneer, plenty of herbs and a cool yogurt or tahini sauce.

Weeknight dinner plate with a generous serving of browned zucchini, white rice and seasoned chicken pieces on a warm neutral table.
Wondering what to serve with air fryer zucchini? Plate it last and keep gravy, dressing or wetter sauces alongside it so the browned surfaces remain distinct longer.

Once chilled, fold leftovers into a chickpea salad, wrap or pasta bowl. Add them close to serving so they do not sit in dressing and soften further.

When the air fryer is already occupied—or a softer vegetable side suits dinner better—the skillet mushroom and zucchini stir-fry is a useful stovetop alternative.

How to Store and Reheat Air Fryer Zucchini

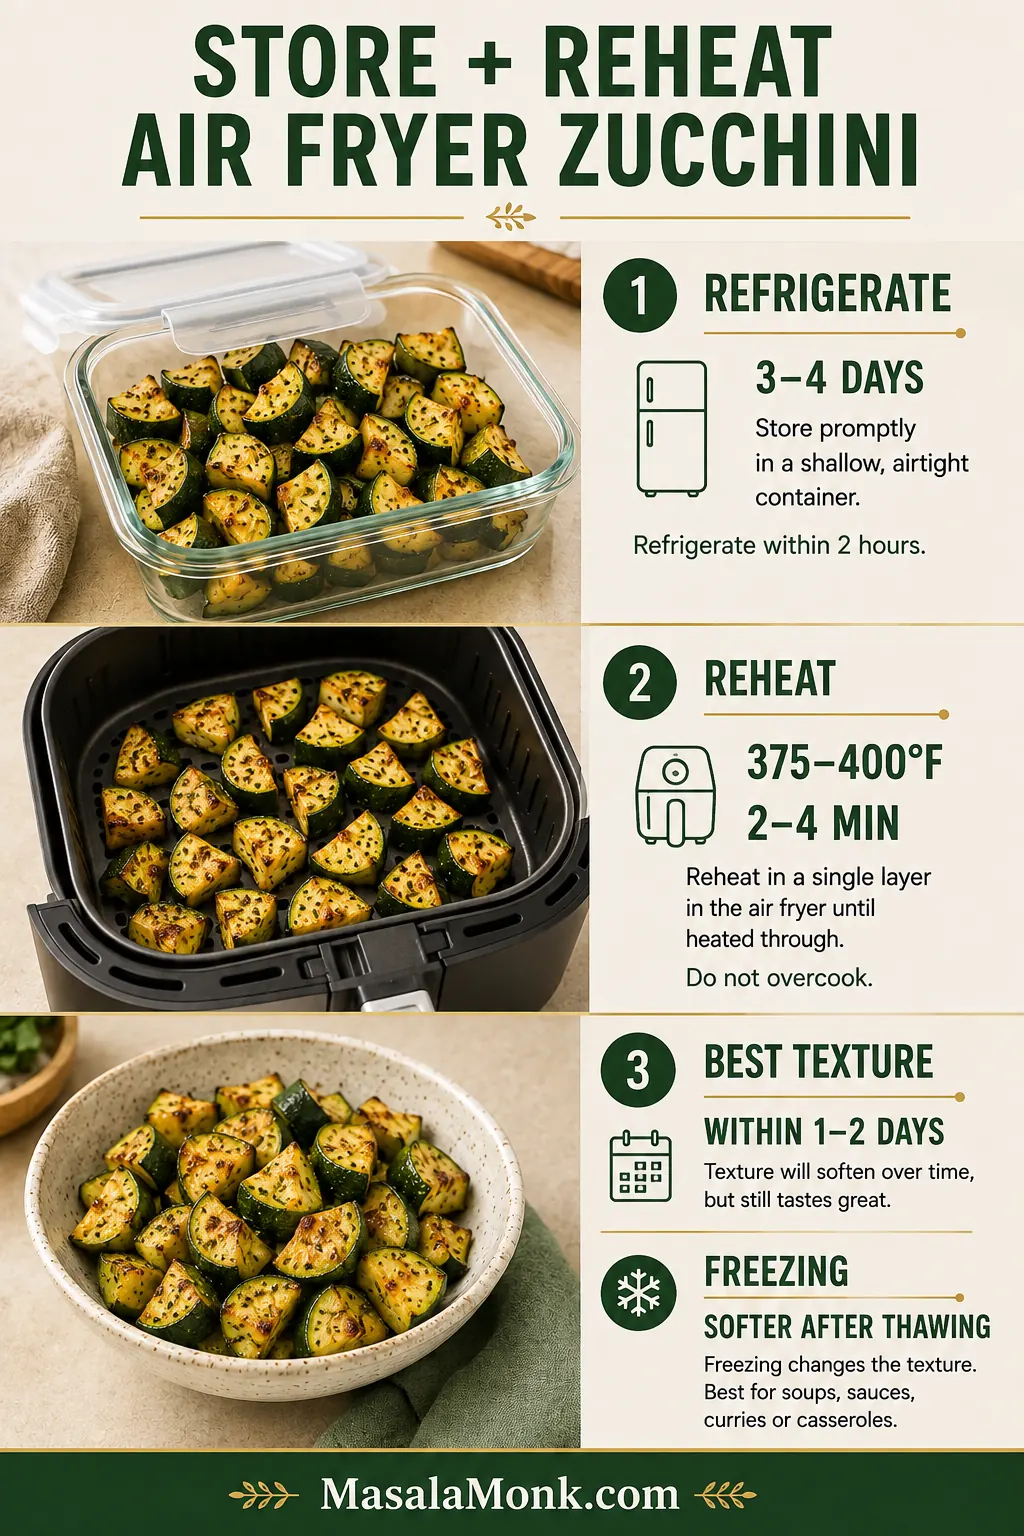
Transfer leftovers promptly to a shallow covered container and refrigerate them within two hours. The zucchini does not need to cool completely before going into the refrigerator.

Use it within 3 to 4 days, following the USDA’s leftovers and food-safety guidance. For the best texture, eat it during the first day or two.

Vertical storage guide showing zucchini in a shallow lidded container, a single layer reheating in an air fryer and notes about refrigeration and freezing.
For the best way to reheat air fryer zucchini, warm only the portion you need in one layer. Add reserved lemon, herbs or cheese after reheating—not before storage.

Reheating

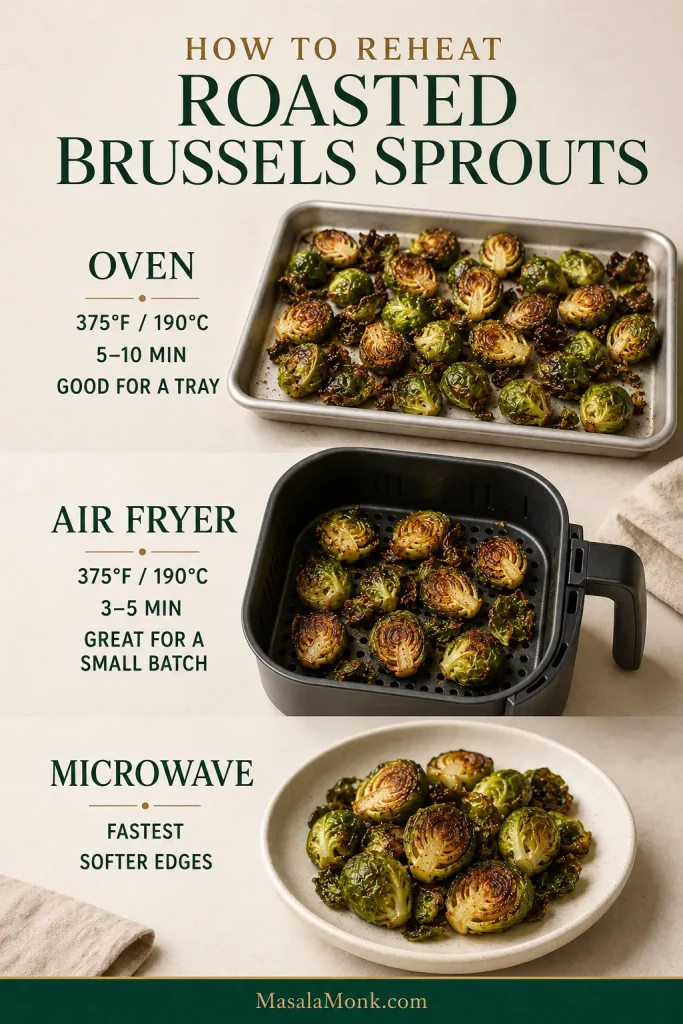
Arrange the zucchini in one layer and reheat at 375–400°F / 190–200°C for approximately 2 to 4 minutes. Check early; the goal is to reheat it, not cook the center a second time.

The microwave is convenient, although the zucchini will be softer. Heat it in short intervals. Freezing cooked zucchini will not preserve its roasted texture; use thawed leftovers in soup, sauce, curry or a casserole.

Food-safety note: Reheat leftovers until hot throughout. If you check with a thermometer, USDA recommends reheating leftovers to 165°F / 74°C.

Frequently Asked Questions

Do you need to peel zucchini before air frying?

No. The skin is edible, adds color and helps the chunks stay intact. Leave it on unless it is unusually tough or damaged.

Do you need to preheat the air fryer?

Preheating gives the zucchini a hot start and makes the checking range more predictable. Skip it only when your machine preheats automatically or its manufacturer recommends starting from cold.

Should zucchini be salted before air frying?

Salt small or medium zucchini immediately before air frying, not well in advance. Only oversized, visibly watery zucchini benefits from a 10-minute salted rest followed by thorough blotting.

Why did my air fryer zucchini turn soggy?

Common causes include thin pieces, a crowded basket, wet surfaces, a cold start, salting too early, overcooking or trapping steam after cooking. Use the full troubleshooting guide to match the visible symptom with the right correction.

How long does zucchini take at 400°F?

Begin checking thick chunks at 7 minutes. Many preheated basket-style machines will finish them between 8 and 11 minutes. See the time and temperature guide for oven-style machines, second batches and visual stopping cues.

Can you air fry zucchini rounds or spears?

Yes. Keep rounds and spears fairly thick and inspect them early. Rounds usually soften faster because they expose broad cut faces, while sturdy spears may take closer to the chunk timing. See the cut-size and shape guide for the visual comparison. Use the separate zucchini chips method for very thin or breaded pieces.

When the zucchini looks ready before the timer does, trust your fork. Take it out and let dinner continue.

Posted on Leave a comment

Roasted Carrots Recipe: Easy Oven Roasted Carrots With Honey, Maple & Garlic

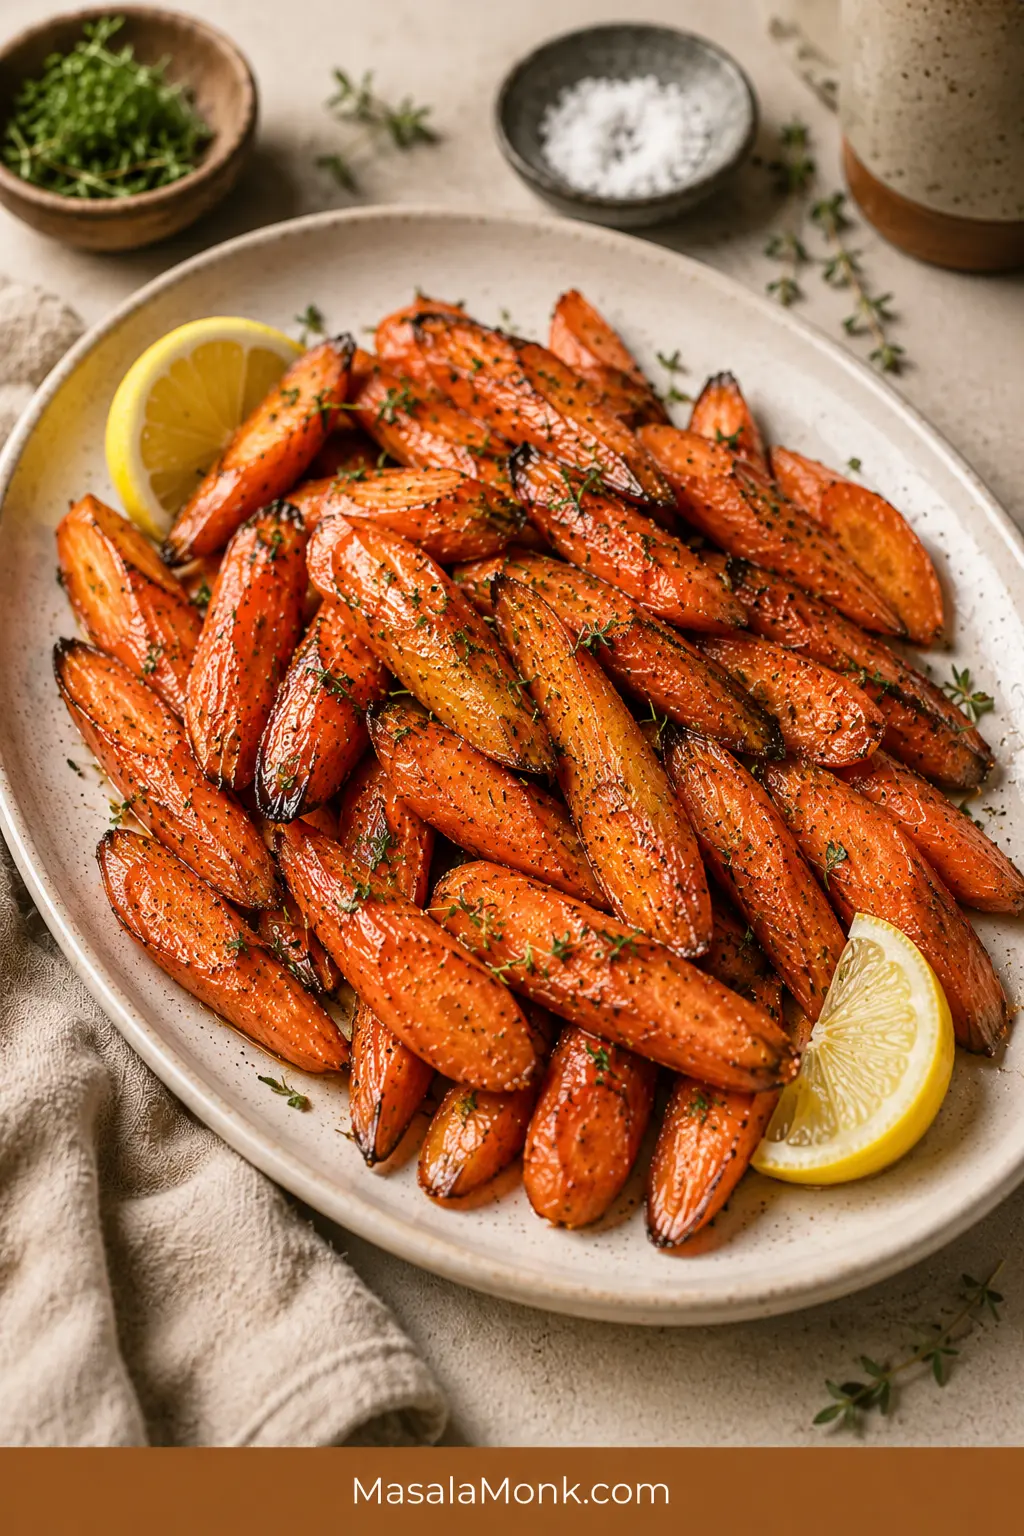
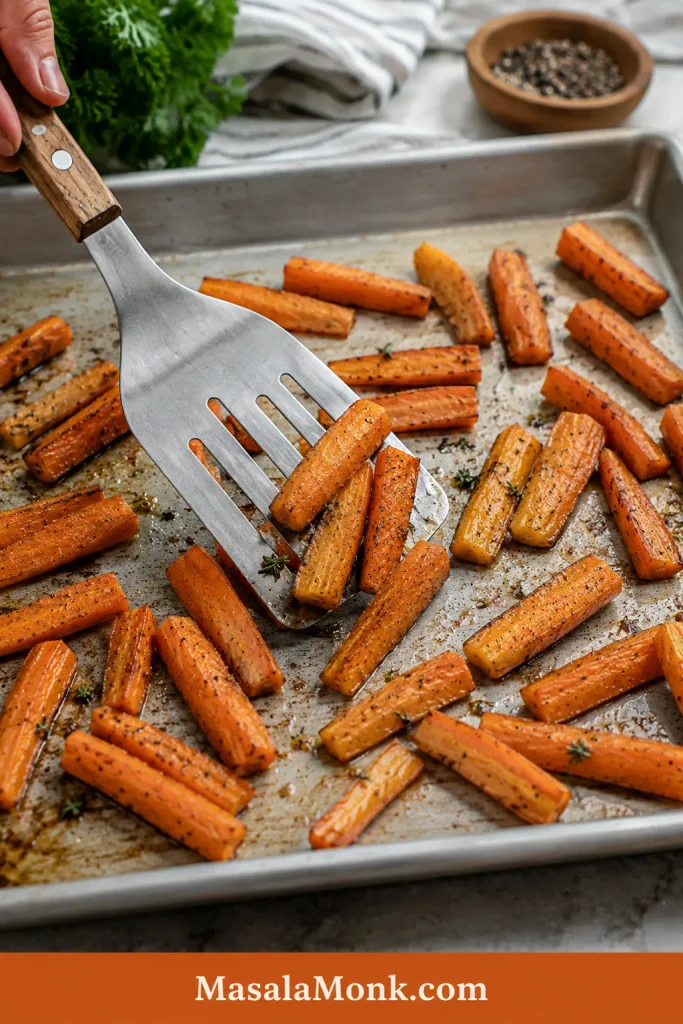
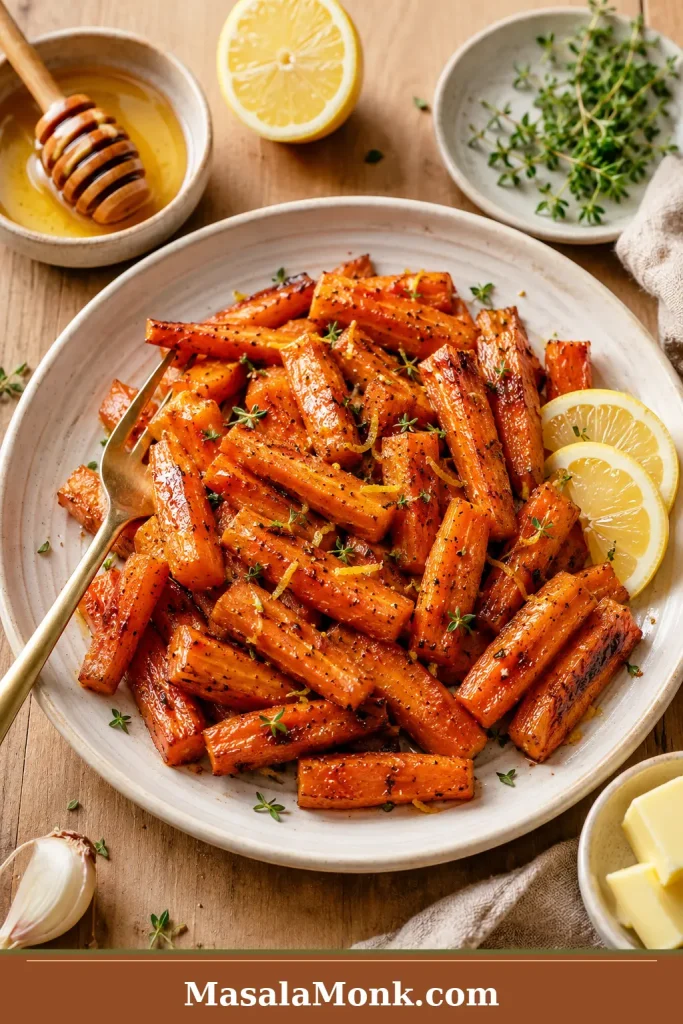
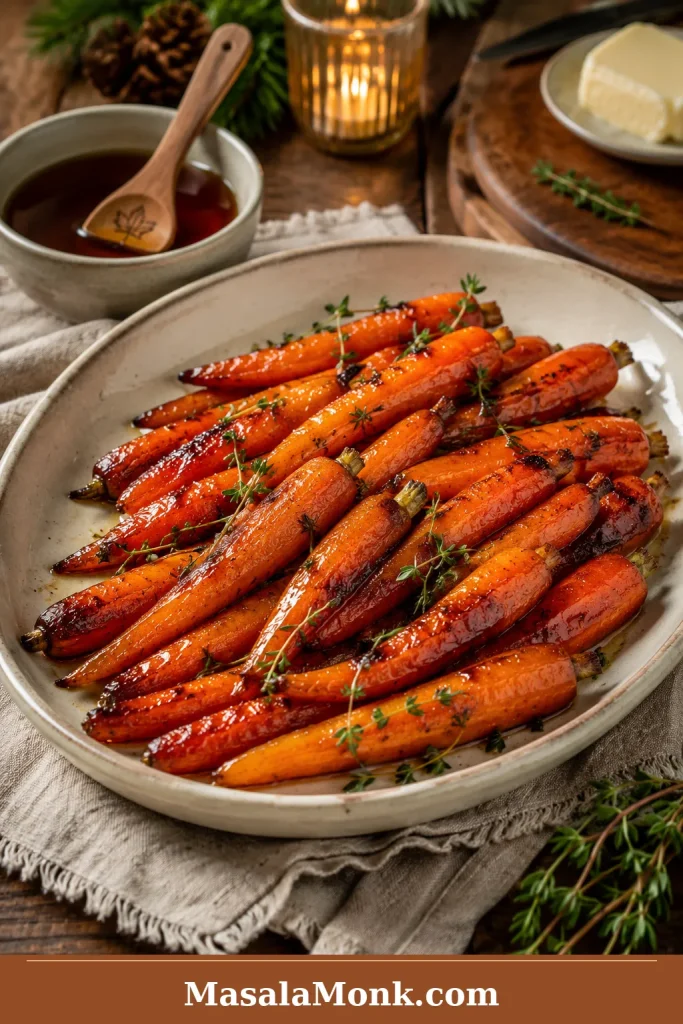
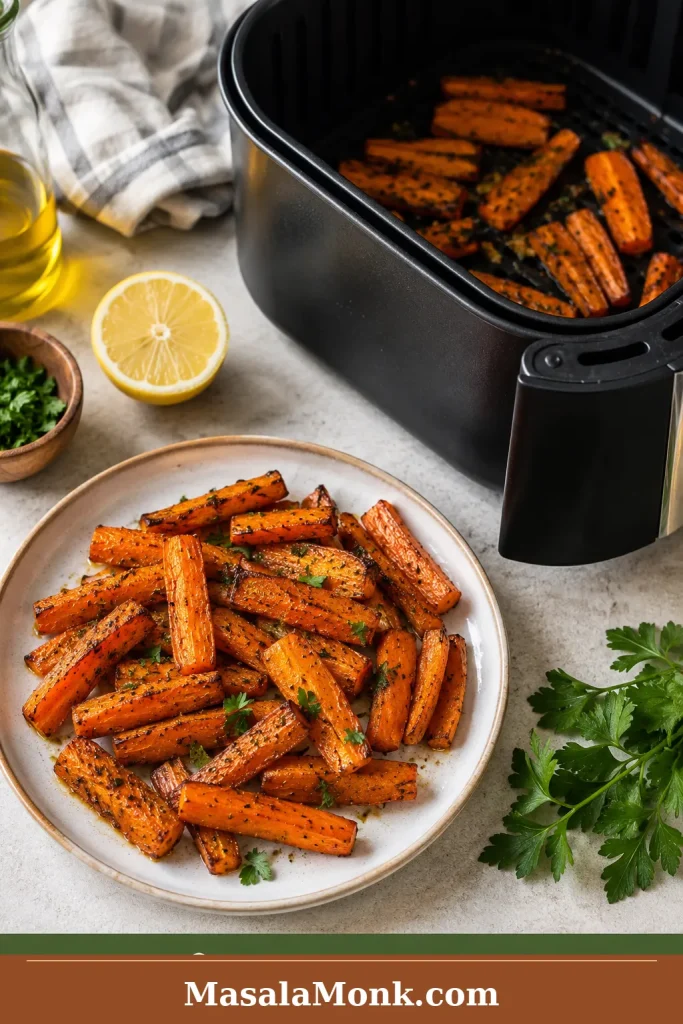
Roasted carrot pieces on a cream platter with browned edges, fresh herbs, lemon wedges, and a light glossy finish.

Roasted carrots should be easy: browned at the edges, tender through the center, and sweet enough to make everyone reach for more. The trouble is that carrots can also turn pale, dry, wrinkled, mushy, or sticky-burnt when the pieces are uneven, the pan is crowded, or the glaze goes in too early.

This roasted carrots recipe keeps the main method simple first: carrots, olive oil, salt, pepper, a hot oven, and a roomy sheet pan. Once that tray works, every other version is just a finish — honey roasted carrots, maple glazed carrots, garlic butter carrots, brown sugar carrots, baby carrots, whole carrots, rainbow carrots, or a prettier holiday platter.

The promise is dependable roasted carrots without babysitting the pan. Make the plain olive-oil tray once, then use the same method whenever you want a glossy honey finish, a buttery maple holiday version, a savory garlic butter side, or warm spiced carrots with cumin, chili, and lemon.

Quick Answer: How to Roast Carrots

Roast carrots at 425°F / 220°C for 20 to 30 minutes, depending on thickness. Cut them into even 2 to 3 inch diagonal pieces, toss with olive oil, salt, and pepper, then spread them in one layer on a rimmed sheet pan. They are done when the centers are fork-tender and the edges are browned.

For most cut carrots, 425°F / 220°C gives the best mix of browned edges and tender centers. Move down to 400°F / 200°C for large whole carrots, very thin pieces in a strong fan oven, or heavier maple and brown sugar glazes.

Honey and maple are least likely to scorch when added during the final 5 to 10 minutes or tossed with the carrots after roasting. Fresh garlic is best added halfway, warmed in butter first, or used as a finish. Garlic powder can go in from the start.

The rule that saves the tray: make the pieces similar in thickness, give them space, and add sweet glazes late. That is the difference between roasted carrots and steamed, dry, or burnt carrots.

Ready to cook? Jump to the recipe card. Still choosing a finish? Compare the roasted carrot versions.

Roasted Carrots Recipe Card

Easy Oven Roasted Carrots With Honey, Maple & Garlic Options

A reliable tray of oven roasted carrots for 2 to 3 inch carrot pieces, with browned edges, tender centers, and optional honey, maple, brown sugar, garlic butter, baby carrot, and rainbow carrot finishes.

Yield: 4 to 6 servings
Prep time: 10 minutes
Cook time: 22 to 30 minutes for 2 to 3 inch pieces
Total time: About 35 to 40 minutes
Method: Oven roasted
Oven temperature: 425°F / 220°C
Texture target: Fork-tender centers, browned edges
Diet: Vegetarian; vegan if using olive oil and maple syrup instead of butter or honey

Ingredients

  • 2 lb / 900 g carrots, peeled or scrubbed
  • 2 tablespoons / 30 ml olive oil
  • ½ to ¾ teaspoon fine sea salt, plus more to taste
  • ¼ teaspoon black pepper, or to taste
  • ½ teaspoon garlic powder, optional
  • 1 tablespoon / 15 ml honey or maple syrup, optional, for a light glaze
  • 1 to 2 tablespoons chopped parsley, thyme, dill, or chives
  • 1 to 2 teaspoons lemon juice, optional

Optional light glaze: use 1 tablespoon honey or maple syrup for a gentle shine, or up to 2 tablespoons for a sweeter finish. Add near the end of roasting or toss with the carrots after roasting. For a simple savory tray, skip the glaze and finish with herbs, lemon, and salt.

Instructions

  1. Heat the oven to 425°F / 220°C. Place a rack in the center of the oven.
  2. Wash and dry the carrots. Peel rough-skinned carrots, or scrub fresh thin-skinned carrots well.
  3. Cut the carrots diagonally into 2 to 3 inch pieces. Halve or quarter thick pieces lengthwise so the carrots are similar in thickness.
  4. Toss the carrots with olive oil, salt, pepper, and garlic powder if using. The pieces should look lightly shiny, not drenched.
  5. Spread the carrots in one layer on a large rimmed sheet pan. Give them space now, because a crowded pan can smell good and still give you pale carrots.
  6. Roast for 22 to 30 minutes, tossing halfway, until the edges are browned and the centers are fork-tender.
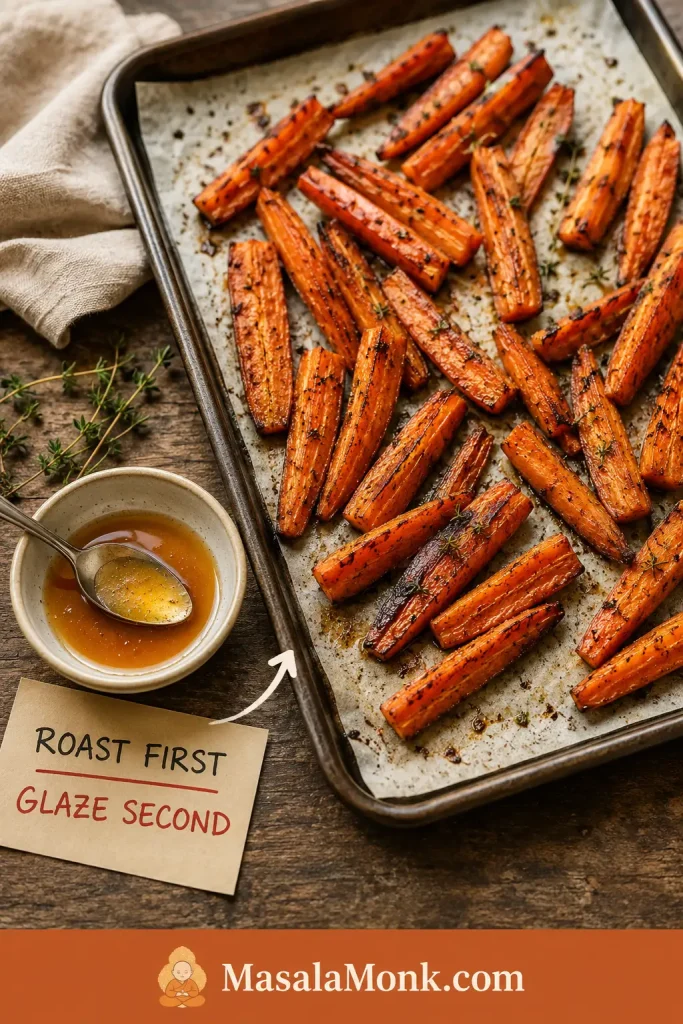
  7. For honey or maple roasted carrots, drizzle with honey or maple syrup during the final 5 to 10 minutes, or toss with the glaze just after roasting. The carrots should look roasted before they look glazed.
  8. Finish with herbs, lemon juice, and a little extra salt if needed. Serve warm.

Success Notes

  • Do not crowd the pan: use two pans if the carrots overlap.
  • Deeper browning: use a bare metal sheet pan.
  • Easy cleanup: use parchment rated for 425°F / 220°C for the basic recipe, or foil for sticky maple and brown sugar glazes.
  • Fresh garlic: add it halfway, warm it in butter first, or toss it with the carrots after roasting.
  • Baby carrots: pat them very dry before roasting so they do not steam.
  • Large or dry carrots: parboil until just crisp-tender, dry well, then roast for softer centers and less shriveling.
  • Fan or convection ovens: start checking 3 to 5 minutes earlier, especially with thin or glazed carrots.
  • Scaling: for every extra 1 lb / 450 g carrots, add about 1 tablespoon / 15 ml oil and ¼ teaspoon salt.
  • Doubling the recipe: use two sheet pans and rotate them halfway. Do not pile 4 lb / 1.8 kg carrots onto one pan.

Want the method explained with visuals? See the step-by-step guide. If your carrots usually turn pale, dry, or burnt, jump to troubleshooting.

The 5-Point Roasted Carrot Check

The tray usually fails before it ever goes into the oven. Run this quick check first and roasted carrots become almost boringly reliable.

  • Similar thickness: thick tops are halved or quartered so they cook with the thinner ends.
  • Roomy pan: carrots sit in one layer instead of steaming in a pile.
  • Dry surface: especially important for bagged baby carrots and mini carrots.
  • Protected garlic: garlic powder can start early; fresh garlic needs gentler timing.
  • Late sweet glaze: honey, maple, and brown sugar should shine, not burn before the centers soften.

The biggest visual fixes are usually pan spacing, even cut size, and late glaze timing.

Pan note: for better browning, use a roomy bare metal sheet pan. Parchment makes cleanup easier but gives slightly lighter edges. Honey and maple taste cleanest when the carrots already look roasted before the glaze goes on.

Which Roasted Carrot Version Should You Make?

Make the simple olive-oil tray first if you are unsure. The first tray teaches you more than any variation. Every version below uses the same roasting method; only the finish changes.

SituationBest VersionWhy It Works
First time making thisSimple olive oil roasted carrotsTeaches the timing without glaze risk
Kids or family dinnerHoney roasted carrotsGlossy, sweet, familiar
Thanksgiving, Christmas or EasterMaple butter carrots with thymeWarm, shiny, holiday-friendly
Roast chicken, beef or porkGarlic butter lemon carrotsSavory enough for rich mains
Less sweet versionCumin, chili, lemon and herbsWarm and bright without being sugary
Pretty platterRainbow carrots with feta, herbs or pomegranateColorful and finished-looking

Choose Your Roasted Carrot Finish

Once the base tray works, the finish decides the mood: plain and savory for a weeknight, honey-glossed for family dinner, maple-buttery for holidays, garlic butter for roast dinners, or cumin-chili-lemon when you want something warmer and less sweet.

After choosing a version, use this table to keep the finish balanced and timed correctly.

VersionFlavorWhat to AddTiming
Simple oven roasted carrotsSavory, sweet, cleanOlive oil, salt, pepper, garlic powderSeason before roasting
Honey roasted carrotsGlossy, sweet-savoryHoney, lemon, herbs, black pepperAdd honey near the end or after roasting
Maple glazed carrotsWarm, buttery, festiveMaple syrup, butter, thyme, chili flakesAdd maple near the end; use 400°F for heavy glaze
Brown sugar carrotsCaramel-like, richBrown sugar, butter or oil, flaky saltUse lightly and watch closely
Garlic butter carrotsRich, savory, butteryButter, fresh garlic, parsley, lemonToss with finished carrots
Baby or mini carrotsSweet, simple, quickOil, salt, pepper, optional honeyPat dry first; check around 18 minutes
Whole or rainbow carrotsElegant, colorful, naturally sweetMaple, herbs, lemon, feta, nuts, pomegranateCut evenly and finish after roasting
Sweet spiced roasted carrotsWarm, bright, lightly spicedCumin, coriander, chili, honey, lemonSpices before roasting; honey and lemon after

If you are cooking now, the recipe card above is enough. The sections below explain how to adjust the same tray for different carrot cuts, glazes, ovens, holiday servings, and the little problems that can make carrots turn pale, dry, or sticky-burnt.

Why This Roasted Carrots Recipe Works

A hot oven gives the tray its roasted flavor. At 425°F / 220°C, the edges can brown while the centers become tender instead of collapsing.

What Browned Roasted Carrot Edges Should Look Like

Use the browned edges as your visual cue. The centers should look tender, while the outside has enough color to taste sweet, savory, and roasted.

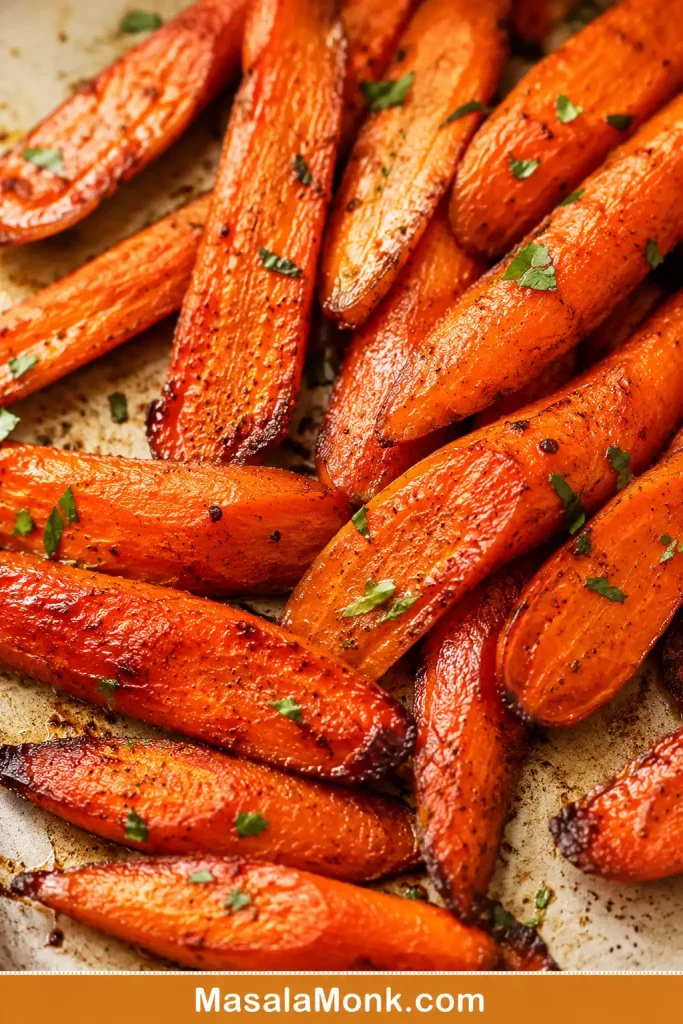
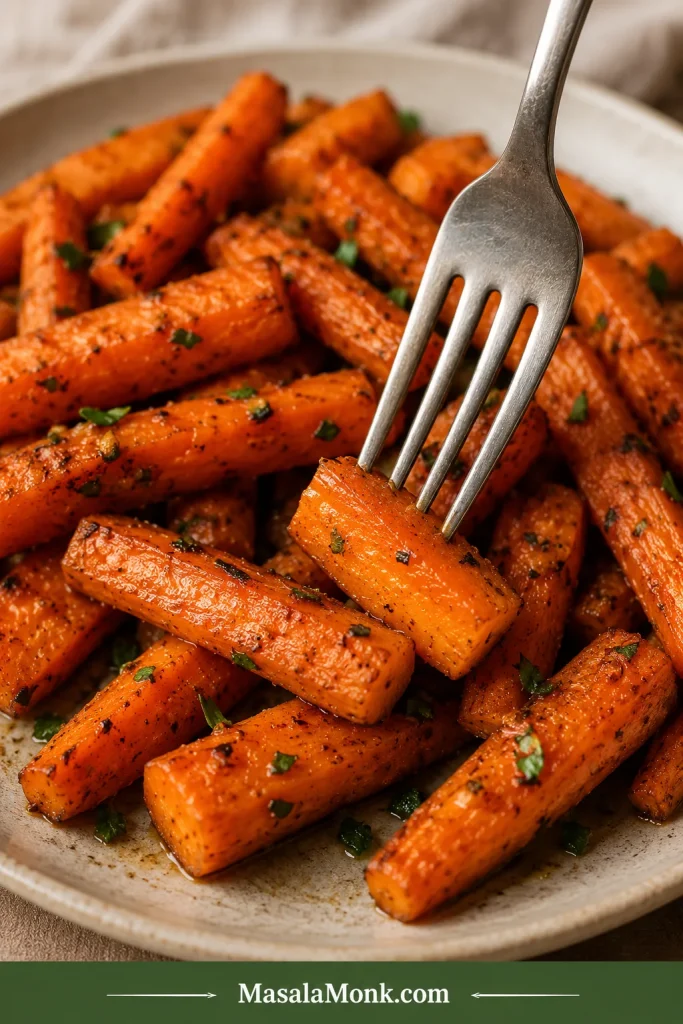
Close-up of roasted carrots with caramelized browned edges, black pepper, green herbs, and tender orange centers.
The browned edges are the flavor signal. Once the carrots look caramelized outside and tender inside, they only need a light finish to taste complete.

Even thickness makes the timing predictable. Carrots taper, so thick tops need to be split lengthwise. A single layer lets steam escape, which is why roomy pans brown better than crowded pans.

The glaze is controlled instead of dumped on early. A light glaze should cling to the carrots, not sit in puddles on the pan. Add it late and the carrots turn glossy instead of bitter.

If roasted carrots have disappointed you before, it was probably a cut-size, pan, or glaze-timing problem — not a carrot problem.

Roasted Carrots Ingredients and Smart Swaps

The ingredient list stays short because the oven does most of the work. What matters is starting with dry carrots, coating them lightly but evenly, salting them enough, and keeping sweet glazes controlled.

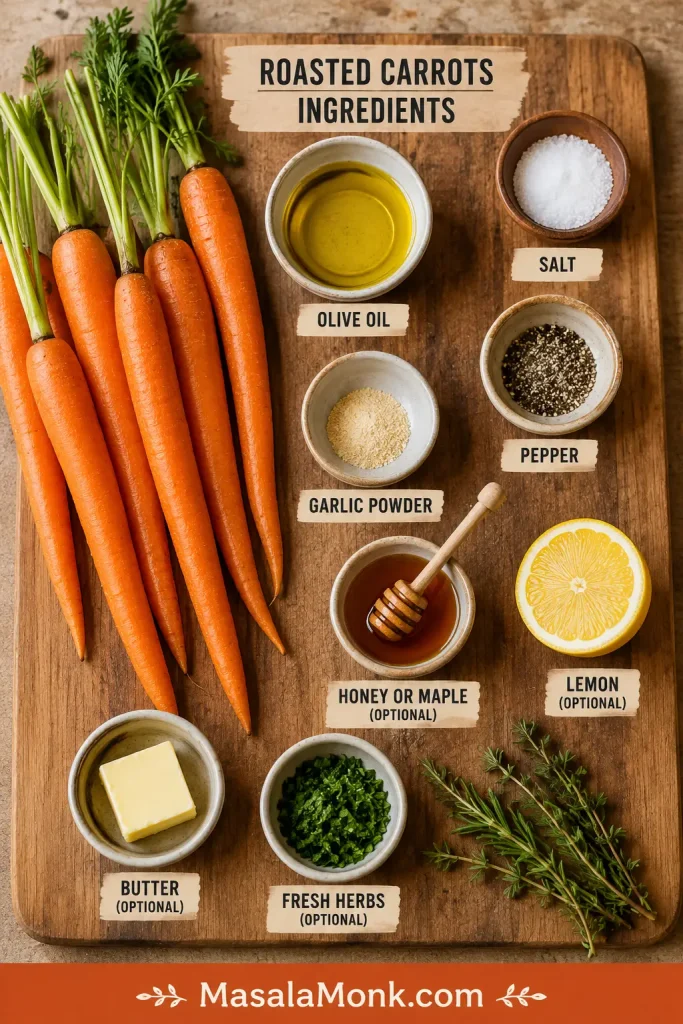
Carrots, olive oil, salt, pepper, honey, maple syrup, lemon, herbs, and butter arranged for making roasted carrots.
The base tray stays simple with carrots, oil, salt, and pepper. Then honey, maple, butter, lemon, garlic, or herbs can change the flavor without changing the method.
  • Carrots: medium carrots are easiest. Baby-cut carrots, mini carrots, whole slim carrots, and rainbow carrots all work, but very wet carrots need extra drying.
  • Olive oil: use about 1 tablespoon per pound / 450 g carrots. The pieces should look lightly shiny, not slick.
  • Salt and pepper: salt makes carrots taste sweeter and fuller; pepper balances the natural sweetness.
  • Garlic powder: the most reliable garlic option from the start because it does not burn as easily.
  • Fresh garlic: best warmed in butter, added halfway, or tossed with finished carrots.
  • Honey, maple or brown sugar: use lightly and add near the end or after roasting for a glossy finish.
  • Lemon, vinegar, herbs or chili: small bright finishes keep sweet carrots from tasting flat.
  • Butter: best as a finish or glaze; olive oil is easier for the main high-heat roast.

Best Pan for Roasted Carrots

The pan is where most roasted carrots are won or lost. Seasoning matters, but space matters more. A large rimmed sheet pan gives moisture room to escape, which helps the carrots brown instead of steam.

Crowded Pan vs Spaced Carrots

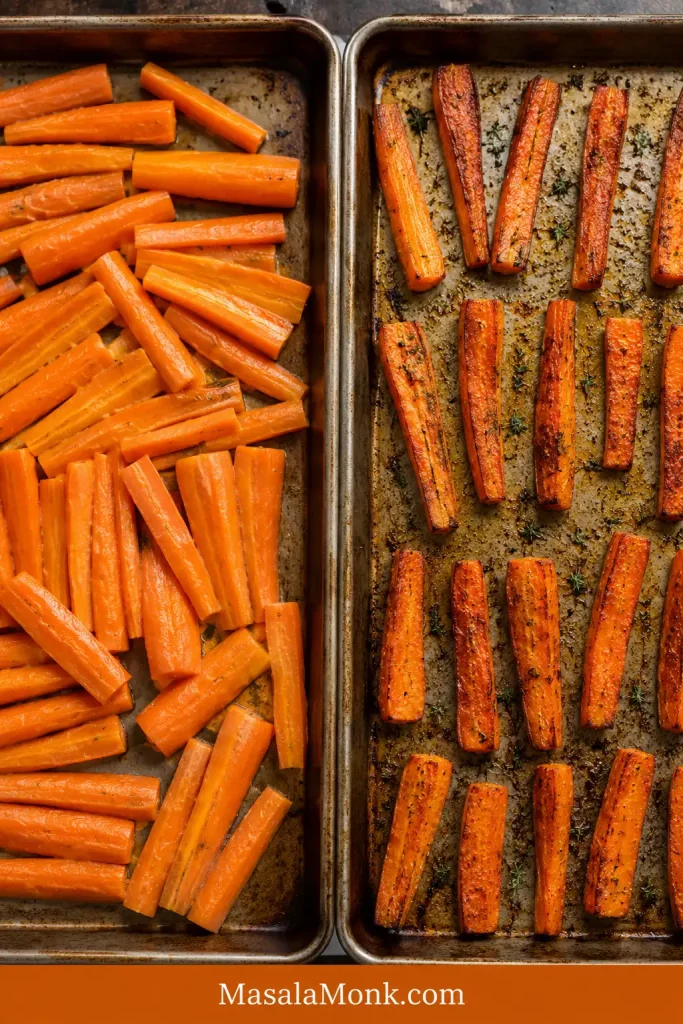
The same carrot cut can come out pale or caramelized depending on pan space. If the pieces overlap, spread them onto a second sheet pan before roasting.

Side-by-side comparison of crowded pale carrots and properly spaced browned carrots on sheet pans.
Crowding changes the result fast. A second sheet pan is often the difference between soft steamed carrots and caramelized roasted edges.
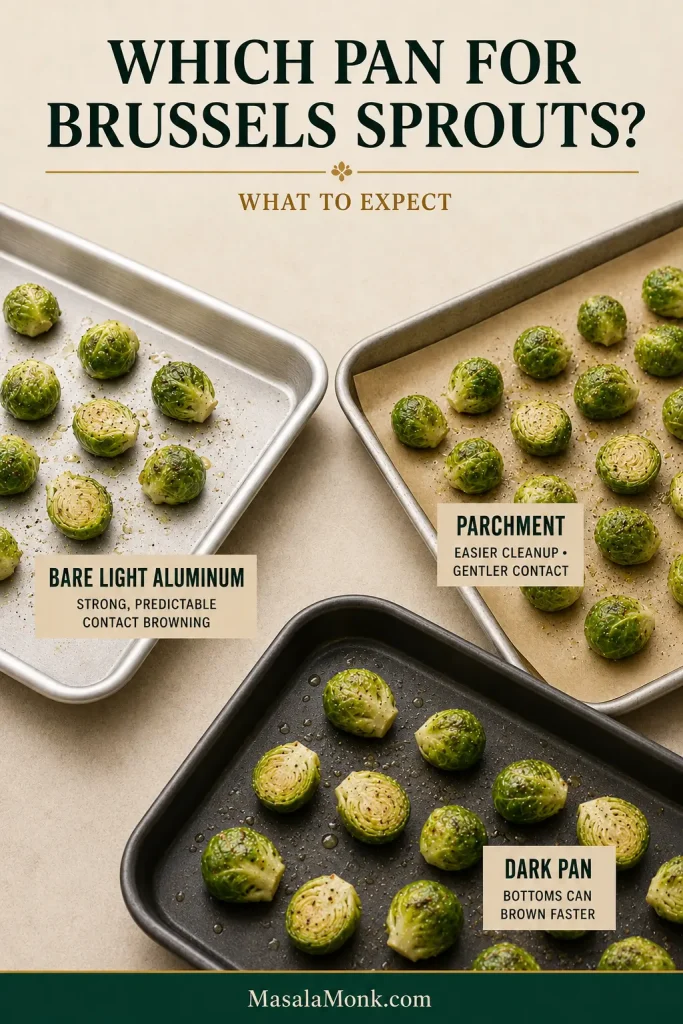
  • Bare metal: best for deeper browning.
  • Parchment: easier cleanup if rated for 425°F / 220°C, with slightly lighter browning.
  • Foil: useful for sticky maple, honey, or brown sugar glazes.
  • Preheated sheet pan: helpful for wet baby carrots, but use carefully and skip it for your first heavy sugar-glaze batch.

How to Roast Carrots Step by Step

1. Heat the oven

Preheat the oven to 425°F / 220°C. A properly hot oven helps the carrots brown instead of slowly drying out.

2. Wash, dry and peel

Scrub the carrots well, then dry them. Peeling is optional for fresh, thin-skinned carrots. Older carrots with rough skins usually look and taste better peeled.

3. Cut even pieces

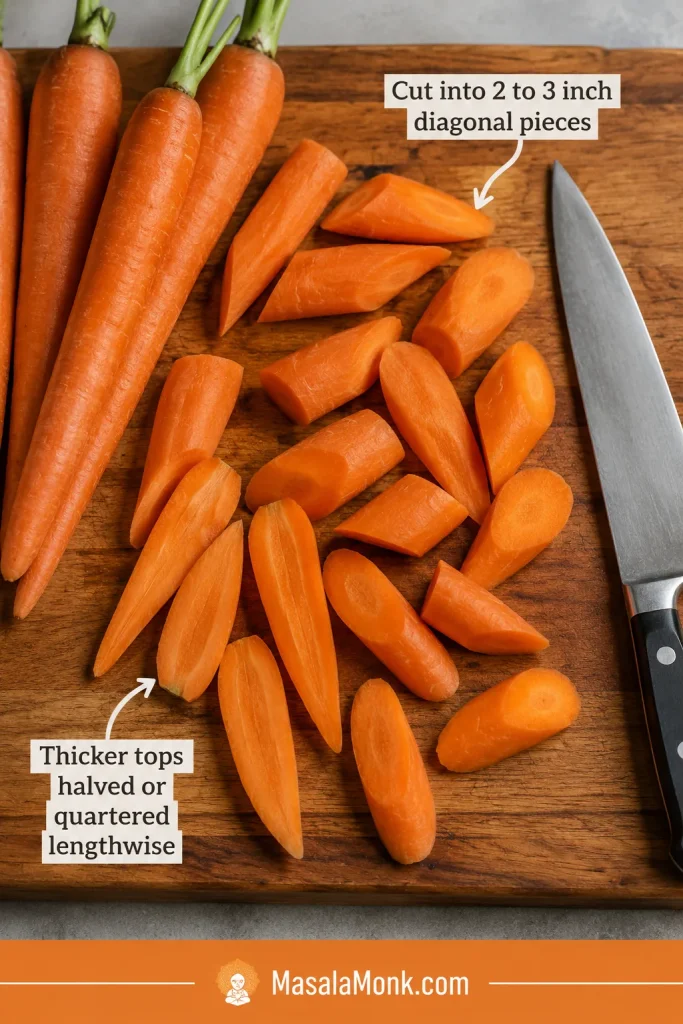
Cut the carrots diagonally into 2 to 3 inch pieces. Split thick tops lengthwise so the pieces are close in thickness, even if they are not identical in shape.

Carrots cut into 2 to 3 inch diagonal pieces on a wooden board, with thicker carrot tops split lengthwise.
Even thickness matters more than perfect shape. Therefore, split thick carrot tops lengthwise so the centers soften before the narrow edges dry out.

4. Toss with oil and seasoning

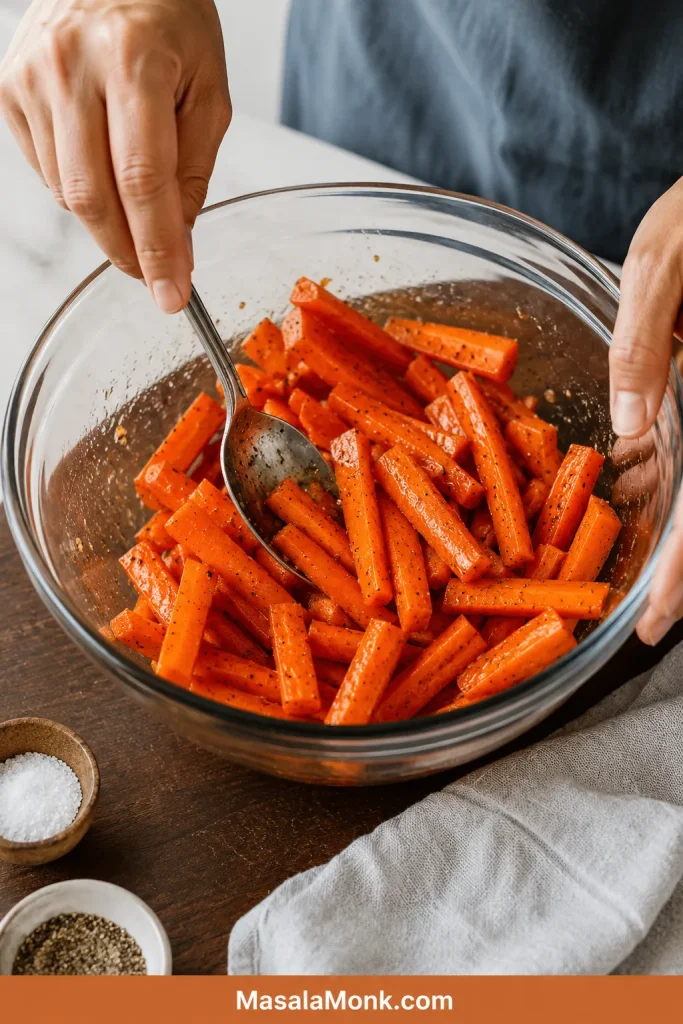
Toss with olive oil, salt, pepper, and garlic powder if using. The oil should coat the carrots lightly and evenly.

Carrot pieces tossed in a bowl with olive oil, salt, pepper, and seasoning before roasting.
Aim for a light, even coating before the carrots hit the pan. Too little oil can make them dry, while too much can make them greasy instead of roasted.

5. Spread with space

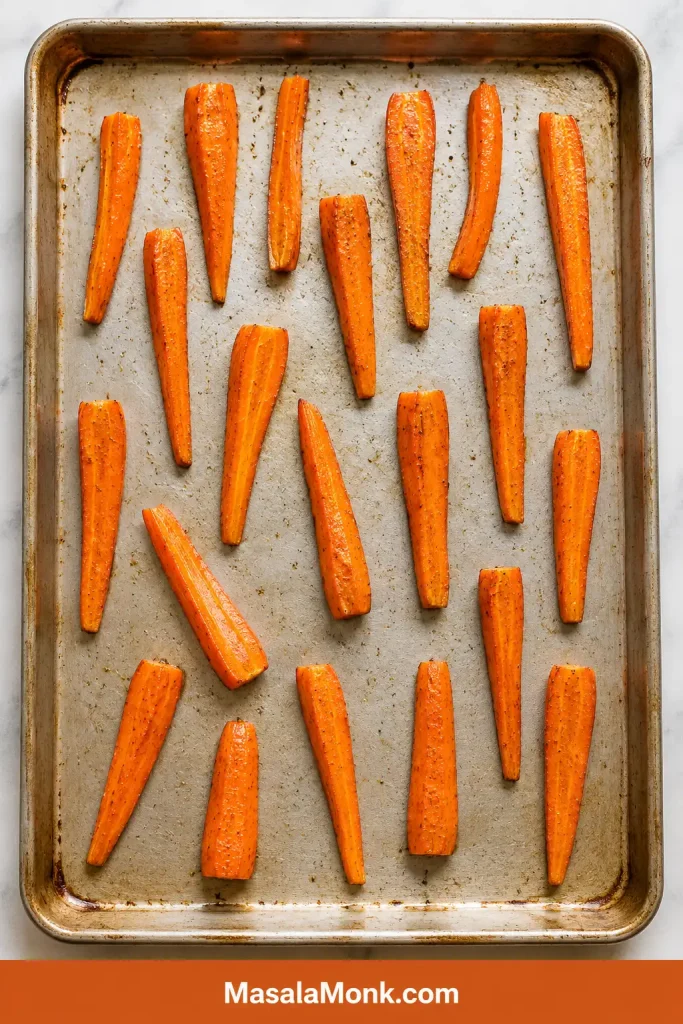
Give the carrots room on the pan. If they look crowded before roasting, they will taste crowded after roasting — softer, paler, and less caramelized.

Carrot pieces spread in a single layer with visible space between them on a rimmed sheet pan.
Leave a little breathing room on the sheet pan. That small gap helps moisture escape, which is what turns plain carrots into browned oven roasted carrots.

6. Roast and toss halfway

Roast for 12 to 15 minutes, toss or flip, then continue roasting until the centers are tender and the edges are browned.

Carrots halfway through roasting on a sheet pan, being turned with a spatula as the edges begin to brown.
The halfway toss is not just busywork. It exposes new sides to the hot pan, so the carrots brown more evenly instead of roasting on one face.

7. Add glaze after the carrots start roasting

For honey, maple, or brown sugar carrots, let the carrots roast first and glaze second. Add the sweet glaze during the final 5 to 10 minutes or toss it with the carrots after roasting. For garlic butter carrots, warm the garlic in butter and toss with the finished tray.

Roasted carrots on a pan with a small bowl of honey or maple glaze nearby before the glaze is added.
Think of honey or maple as the finishing layer, not the main cooking step. Add it after browning so the glaze shines instead of burns.

8. Finish bright

Once the carrots are hot and browned, a small finish — lemon, herbs, flaky salt, chili, feta, tahini, yogurt, or toasted nuts — makes them taste brighter and more complete.

Roasting Time Chart for Carrots

The timer is a guide, not a contract. Thin carrots finish quickly; thick carrots need more time. Start checking early when pieces are thin, glazed, or close to the edge of the pan.

Carrot Type or CutOven TemperatureApprox. TimeBest Use
Thin diagonal slices425°F / 220°C15 to 20 minutesFast weeknight side
2-inch chunks425°F / 220°C20 to 25 minutesEveryday roasted carrots
2 to 3 inch diagonal pieces425°F / 220°C22 to 30 minutesBest default cut
Baby-cut carrots425°F / 220°C18 to 25 minutesNo-chop convenience
Whole slim carrots425°F / 220°C25 to 35 minutesHoliday presentation
Thick whole carrots400°F / 200°C35 to 45 minutesGentler cooking for large carrots
Large whole carrots with rich glaze400°F / 200°C35 to 50 minutesHoliday-style glazed carrots

How to Know Roasted Carrots Are Done

Roasted carrots are done when a fork slides into the center with light resistance. They should be tender but not collapsing. You want bend, not collapse.

Fork-Tender Roasted Carrots

The fork test matters more than the timer. Check the thickest pieces first, because they decide whether the tray is truly done.

A fork testing a roasted carrot piece to show a tender center and browned outside.
Use the fork test before pulling the tray. The carrot should offer light resistance, which means it is tender without turning soft or mushy.

The edges should look browned and slightly caramelized. If the carrots are browned but still firm in the middle, lower the oven to 375°F / 190°C and roast for a few more minutes. If they are soft but pale, the pan was probably crowded, the oven was too low, or the carrots were too wet.

Temperature is the next lever: hotter for browning, gentler for large carrots or heavier glazes.

Best Temperature for Roasted Carrots

The best default temperature for roasted carrots is 425°F / 220°C. It gives the best balance of browned edges and tender centers for most cut carrots. For larger whole carrots or heavier sweet glazes, move down to 400°F / 200°C. Choose 375°F / 190°C only for gentler roasting, such as after parboiling or when your oven runs hot.

Using a fan or convection oven? Start checking 3 to 5 minutes earlier. If your oven browns aggressively, use 400°F / 200°C for glazed carrots or thin pieces.

Once the carrots roast properly, the finish is where the same pan can become a weeknight side, a kid-friendly dinner vegetable, or the glossy holiday dish people actually take seconds of.

Honey, Maple, Brown Sugar and Garlic Butter Finishes

The glaze should shine, not swim. A light coating makes carrots glossy; too much glaze turns the pan sticky before the centers finish cooking. The carrots should taste like roasted carrots first, with sweetness around the edges.

Honey makes the carrots glossy and familiar, maple makes them deeper and more holiday-like, and garlic butter pulls the whole tray back toward savory dinner territory.

Sweet carrots also need a small counterpoint — lemon, vinegar, salt, black pepper, chili, or fresh herbs — so the flavor stays balanced. The lemon or vinegar at the end is small, but it is what keeps sweet carrots from tasting like dessert.

Looking for a specific finish? Jump to honey, maple, brown sugar, garlic butter, or savory roasted carrots without honey.

Glaze Formula Table

Use these amounts for a 2 lb / 900 g tray. Keep the glaze light for the main recipe, especially at 425°F / 220°C.

VersionFor 2 lb / 900 g CarrotsWhen to AddBest Finish
Honey roasted carrots1 to 2 tbsp / 15 to 30 ml honeyFinal 5 to 10 minutes or after roastingLemon, parsley, thyme, black pepper
Maple glazed carrots1 to 2 tbsp / 15 to 30 ml maple syrupFinal 5 to 10 minutes; use 400°F for heavy glazeButter, thyme, rosemary, chili flakes
Brown sugar carrots1 to 2 tbsp / 12 to 25 g brown sugar + oil or butterLight amount before roasting or near the endFlaky salt, lemon, black pepper
Garlic butter carrots2 to 3 tbsp / 28 to 42 g butter + 2 to 3 garlic clovesAfter roastingParsley, lemon juice
Honey garlic butter carrots3 tbsp / 42 g butter + 1½ to 2 tbsp / 22 to 30 ml honey + 3 garlic clovesBrush lightly near the end; toss more after roastingLemon, parsley, flaky salt
Honey balsamic carrots1 tbsp / 15 ml honey + 1 tbsp / 15 ml balsamic vinegarNear the endThyme, black pepper
Sweet spiced carrots½ tsp cumin + ½ tsp coriander + pinch chili + 1 tbsp honey + lemonSpices before roasting; honey and lemon afterCilantro, mint, yogurt, tahini

Honey Roasted Carrots

The best honey version should look glossy, not sticky. Use 1 to 2 tablespoons honey for 2 lb / 900 g carrots and add it near the end or after roasting. Finish with lemon, black pepper, flaky salt, parsley, thyme, or a tiny pinch of chili. These carrots work well beside a salty, smoky, or mustardy main like honey glazed ham.

Honey roasted carrots on a cream plate with lemon, herbs, black pepper, and a light glossy glaze.
Honey roasted carrots should taste sweet but still balanced. Finish with lemon, herbs, or black pepper so the glaze feels bright rather than heavy.

Maple Glazed Carrots

Maple carrots are the holiday version: buttery, shiny, and a little deeper than honey. Use 1 to 2 tablespoons maple syrup for 2 lb / 900 g carrots. For a heavier maple glaze, roast at 400°F / 200°C, use foil for easier cleanup, and toss more often. They sit nicely beside a creamy side like sweet potato casserole.

Maple glazed carrots with thyme, browned edges, and a warm buttery finish on a rustic plate.
Maple brings a deeper, cozier sweetness than honey. As a result, these carrots work especially well beside roast chicken, turkey, ham, or holiday mains.

Brown Sugar Roasted Carrots

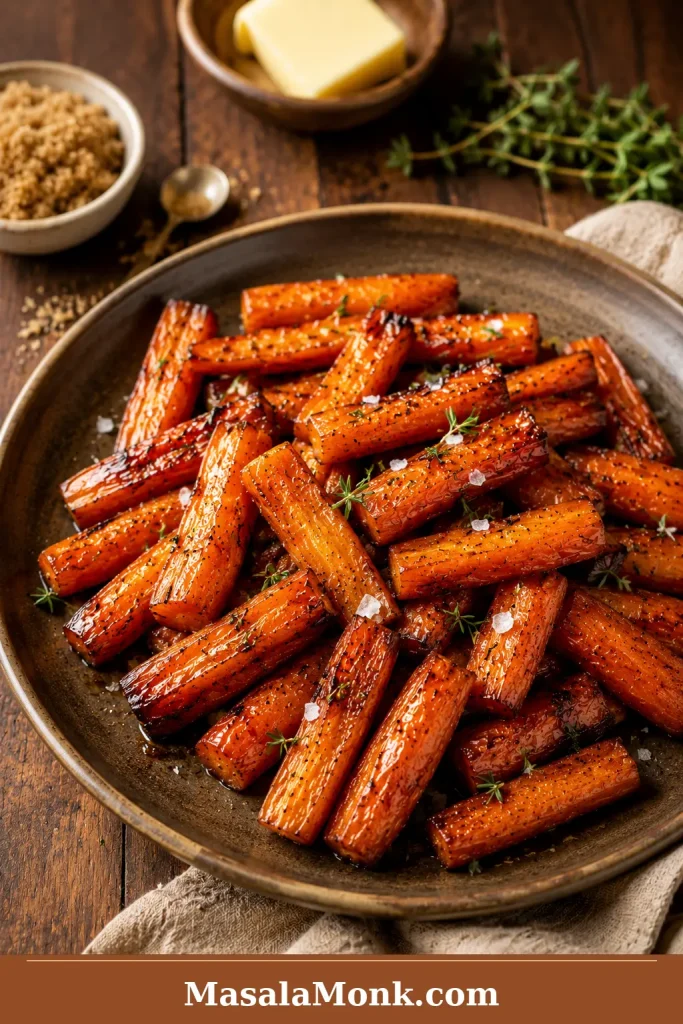
Brown sugar gives carrots a caramel-like flavor. Use 1 to 2 tablespoons brown sugar, mixed with olive oil or melted butter so it coats evenly. Balance the sweetness with lemon juice, vinegar, black pepper, chili, or flaky salt.

Brown sugar roasted carrots with caramelized edges, flaky salt, thyme, butter, and a glossy finish.
Brown sugar creates a richer caramel-like finish. However, a light hand matters here; flaky salt, lemon, or pepper keeps the side from tasting too sweet.

Garlic Butter Roasted Carrots

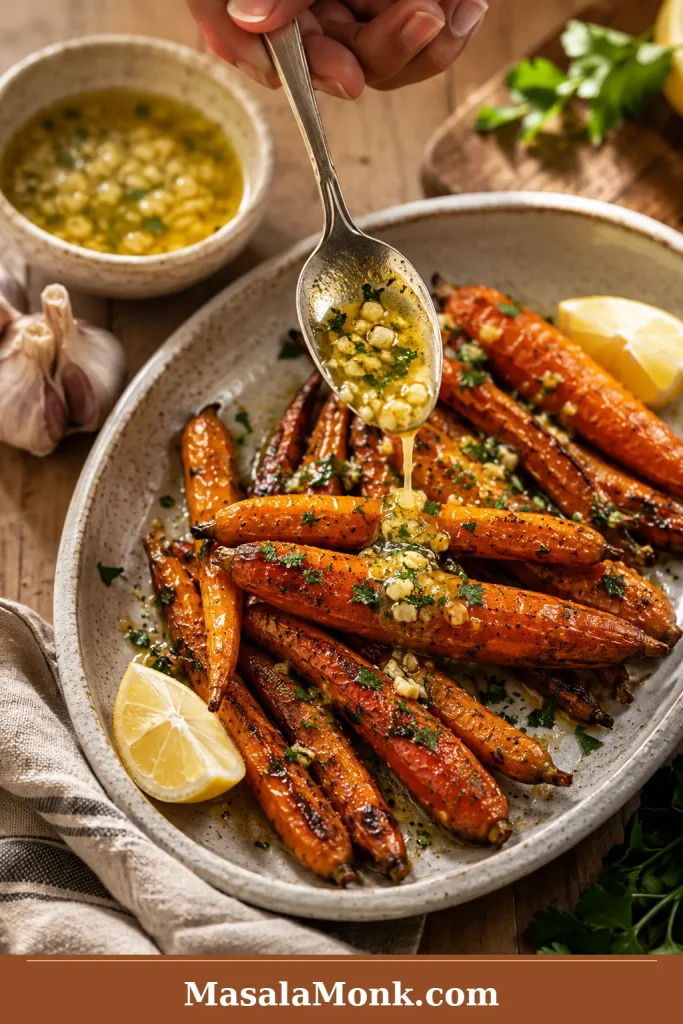
Garlic butter carrots should smell savory first, sweet second. Melt 2 to 3 tablespoons butter with 2 to 3 minced garlic cloves, warm just until fragrant, then toss with the roasted carrots at the end. Add parsley and lemon juice before serving. This version is especially good with cozy mains such as cream of mushroom chicken.

Garlic butter being spooned over roasted carrots with parsley and lemon on a ceramic plate.
Garlic butter is best added after roasting. The hot carrots melt it into the edges, while the garlic stays fragrant instead of turning bitter.

Honey Garlic Butter Carrots

For honey garlic butter carrots, warm 3 tablespoons / 42 g butter with 3 minced garlic cloves just until fragrant, then take it off the heat and stir in 1½ to 2 tablespoons honey. Brush a little over the carrots during the final few minutes, then toss with the rest after roasting for a glossy finish.

Honey Balsamic Roasted Carrots

For a tangy-sweet version, use 1 tablespoon honey and 1 tablespoon balsamic vinegar near the end of roasting. Balsamic gives the carrots depth and keeps the glaze from tasting only sweet.

Sweet Spiced Roasted Carrots

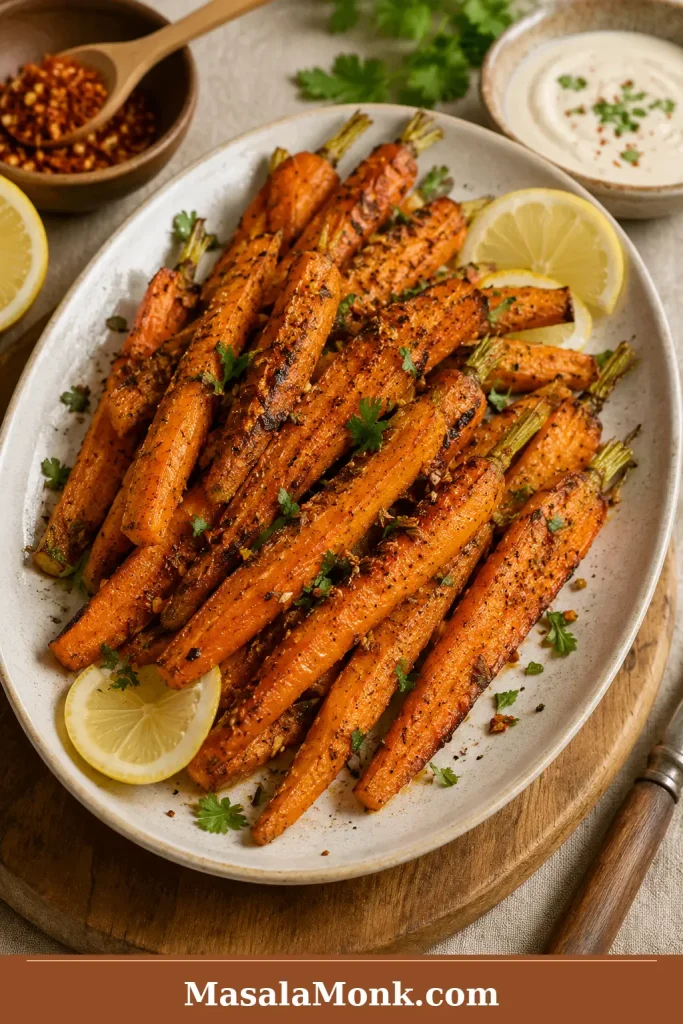
For a less-sweet version, season the carrots with olive oil, salt, pepper, ½ teaspoon cumin, ½ teaspoon coriander, and a small pinch of chili powder. Roast as usual, then finish with honey, lemon juice, and fresh herbs.

Savory roasted carrots with cumin, chili flakes, lemon, herbs, black pepper, and a creamy dip.
For savory roasted carrots, skip the sweet glaze and lean on cumin, chili, lemon, herbs, and salt. The oven still brings out the carrots’ natural sweetness.

Simple glaze timing: oil, salt, pepper, and garlic powder can go in before roasting. Honey, maple, brown sugar, lemon, vinegar, fresh herbs, yogurt, tahini, and delicate toppings are usually better near the end or after roasting.

Baby, Mini, Whole and Rainbow Carrots

Baby-cut carrots

Baby carrots and packaged baby-cut carrots roast well, but they need to be dry. Bagged baby carrots often hold surface moisture, which makes them steam instead of brown. Pat dry, toss with oil and seasoning, then roast at 425°F / 220°C for 18 to 25 minutes.

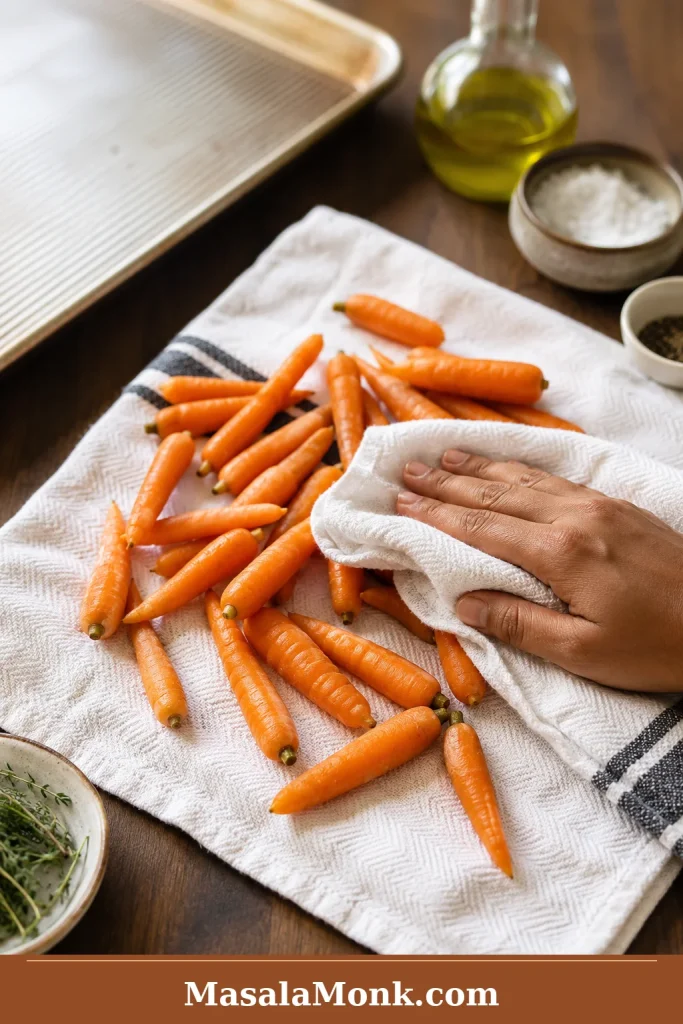
Raw baby carrots being dried on a kitchen towel before roasting, with a sheet pan and seasonings nearby.
A quick towel-dry gives baby carrots a better start. Less surface moisture means more browning, better texture, and less tray steam.

Mini carrots

Mini carrots roast like baby carrots, but timing depends on thickness. Slim mini carrots may finish around 15 to 18 minutes; thicker ones may need 22 to 25 minutes.

Whole carrots

Whole roasted carrots look beautiful on a platter. Use slim carrots when possible, or halve thick carrots lengthwise so the centers soften before the outside overcooks. Whole slim carrots usually take 25 to 35 minutes at 425°F / 220°C.

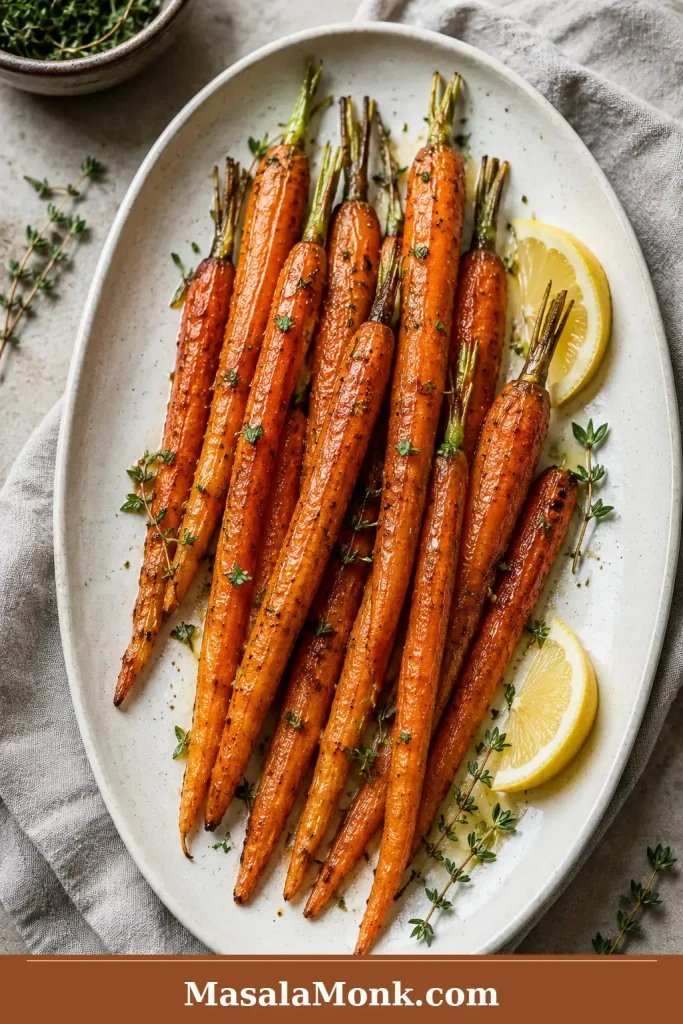
Whole slim roasted carrots arranged on an oval platter with herbs, lemon wedges, and browned edges.
Whole carrots make a simple side dish look more elegant. For the best texture, choose slim carrots or halve thicker ones before roasting.

Rainbow carrots

Rainbow carrots roast almost the same way as orange carrots. Cut them to similar thickness and finish simply: maple, lemon, herbs, feta, tahini, toasted nuts, or pomegranate is enough to make the plate feel special.

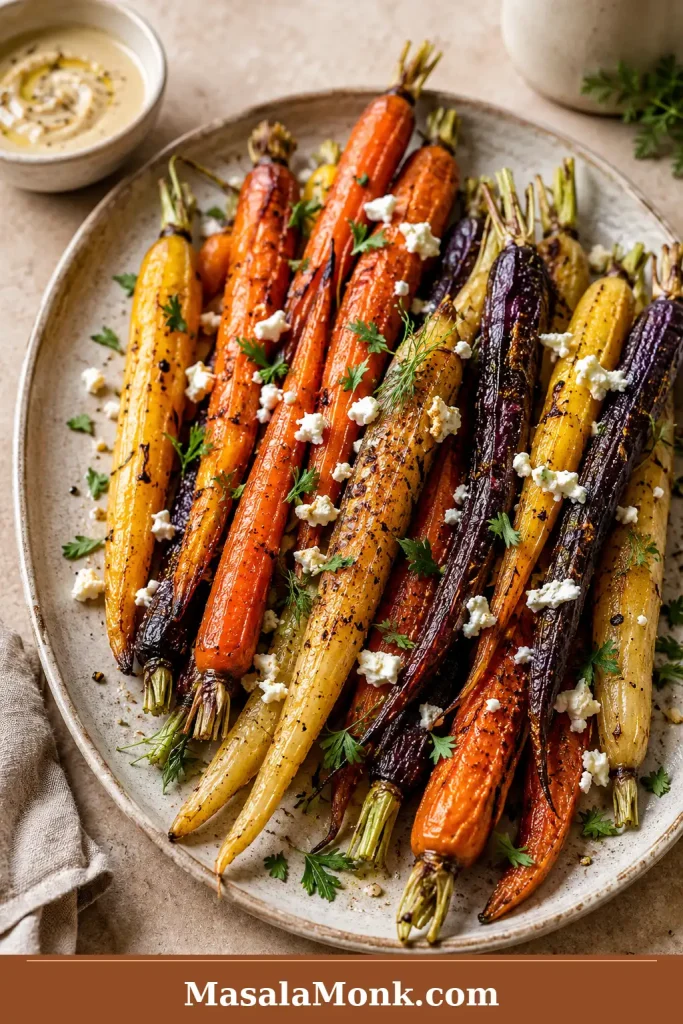
Rainbow roasted carrots in orange, purple, yellow, and pale colors with herbs, feta, and pomegranate.
Rainbow carrots cook like regular carrots, but they bring instant color to the table. Keep the toppings restrained so the roasted vegetables stay the focus.

How to Make Roasted Carrots for Holidays

For Thanksgiving, Christmas, Easter, or Sunday roasts, choose whole slim carrots or rainbow carrots if you want a platter that looks finished. They bring color, shine, and sweetness between creamy, buttery, rich dishes.

The holiday formula is simple: pretty carrots + light maple or honey glaze + herbs + one finishing touch. Try thyme and flaky salt, parsley and lemon, feta and pomegranate, or tahini and toasted nuts. The best tray should look glossy at the edges, smell sweet-savory, and still taste balanced beside all the creamy sides.

Holiday Roasted Carrots Platter

For a party table, the garnish should support the carrots instead of covering them. Choose one colorful finish, then keep the platter easy to serve.

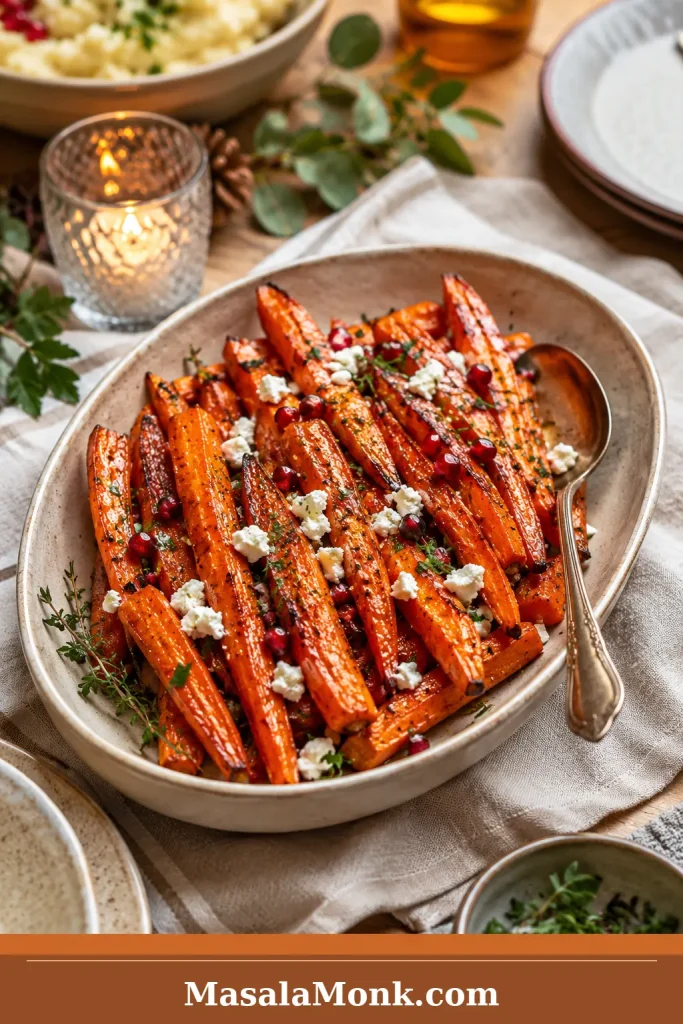
Holiday roasted carrots on a serving platter with herbs, light glaze, pomegranate, and a warm table setting.
For a holiday roasted carrots platter, use pretty carrots, a light honey or maple glaze, fresh herbs, and one colorful finish. The side feels festive without becoming fussy.

For a classic holiday spread, pair these carrots with one creamy side and one green vegetable. Green bean casserole gives the table that familiar savory-creamy contrast, while garlic mashed potatoes make the plate feel fuller without competing with the carrots.

Holiday shortcut: peel and cut the carrots 1 to 2 days ahead, mix the glaze separately, and roast the carrots fresh. If oven space is tight, slightly under-roast earlier in the day, then reheat and finish with herbs or garnish before serving.

Best Seasonings for Roasted Carrots

Think of seasoning as the mood of the tray. Choose one direction and keep the finish focused.

  • Classic: olive oil, salt, pepper, parsley.
  • Honey garlic: honey, butter, garlic, lemon.
  • Maple holiday: maple syrup, butter, thyme, chili flakes.
  • Brown sugar: brown sugar, butter, pepper, flaky salt.
  • Honey balsamic: honey, balsamic vinegar, thyme.
  • Herby: rosemary, thyme, dill, parsley.
  • Warm spice: cumin, coriander, paprika, cinnamon.
  • Creamy finish: yogurt, tahini, feta, or miso-maple drizzle after roasting.

Roasting Carrots With Other Vegetables

Carrots roast well with other vegetables, but timing matters. Potatoes, sweet potatoes, parsnips, cauliflower, and Brussels sprouts can share the pan if everything is cut thoughtfully and kept in one layer. Broccoli and asparagus cook faster, so add them later. Roast beets separately if you do not want color bleeding.

Potatoes need the most planning. Cut them smaller than the carrots or start them first. If you want a separate potato side, this ranch roasted potatoes recipe is a better second tray.

Air Fryer Roasted Carrots

The oven gives the best full-tray roasted carrots. Use the air fryer for small batches when the oven is full.

Cook carrots at 380°F to 400°F / 193°C to 204°C, shaking halfway. Thin pieces may take 10 to 12 minutes; thicker pieces may need 15 to 20 minutes. The air fryer is less forgiving with sticky glazes, so add honey or maple lightly, or toss with extra glaze after cooking. These carrots can go beside air fryer boneless pork chops when the oven is busy.

Air fryer roasted carrots with browned edges and herbs served beside an air fryer basket.
Air fryer roasted carrots work best in a loose layer. Shake the basket halfway, then add any sweet glaze lightly near the end.

If the first tray does not come out exactly right, the problem is usually easy to spot from the way the carrots look.

Troubleshooting Roasted Carrots

Roasted Carrots Troubleshooting Guide

Use the visual cues first, then check the table below for the likely cause. Most tray problems come back to moisture, spacing, cut size, time, or glaze timing.

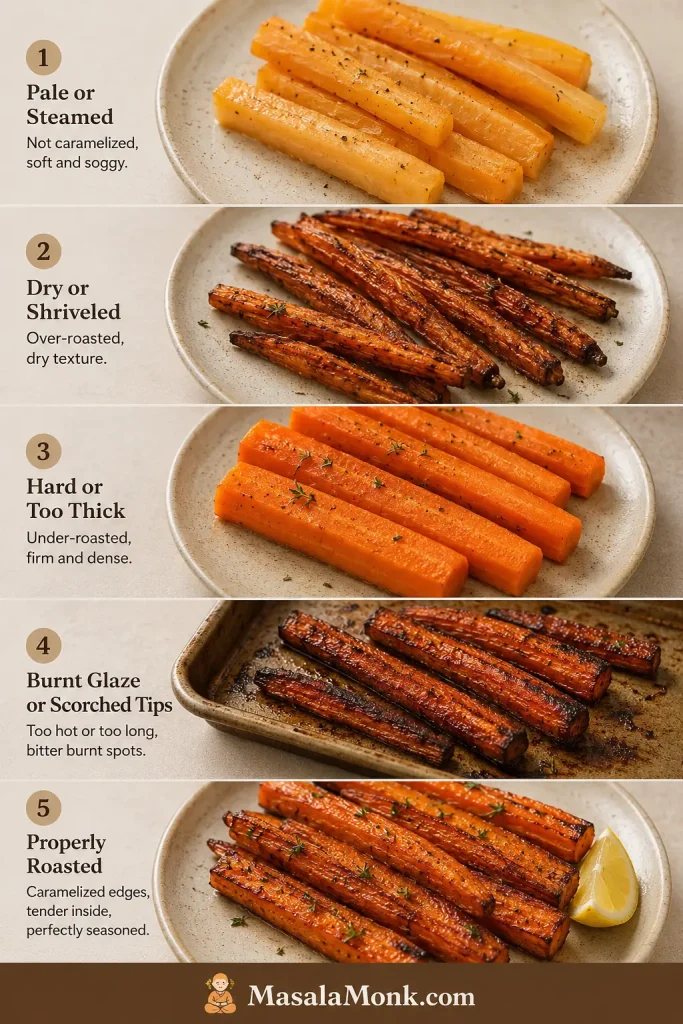
Five-panel troubleshooting guide showing pale steamed carrots, dry shriveled carrots, hard thick carrots, burnt glazed carrots, and properly roasted carrots.
Most roasted carrot problems show up in the way the tray looks. Pale means steam, dry means too thin or too long, hard means undercooked, and burnt usually means the glaze went on too early.

If your carrots come out dry, pale, mushy, hard in the center, or burnt at the tips, the fix is usually small. Use this table for the next tray.

Common Roasted Carrot Problems and Fixes

ProblemLikely CauseFix
Dry or shriveled carrotsPieces too thin, roasted too long, or carrots naturally dryCut thicker pieces, coat evenly with oil, avoid over-roasting, or parboil large/dry carrots first.
Mushy carrotsOvercooked, cut too small, or crowdedCut larger pieces, use one layer, and check earlier.
Hard carrotsPieces too thick, oven too low, or not enough timeKeep roasting until a fork slides in with light resistance; parboil very large carrots next time.
Pale carrotsOven too low, pan crowded, or carrots wetUse 425°F, dry the carrots, and give them space.
Honey burnedHoney added too early or too much usedAdd honey near the end or after roasting.
Maple glaze got sticky and darkToo much syrup or too much heat for too longUse less maple, toss more often, or roast heavy glazes at 400°F.
Garlic burnedFresh garlic added from the beginningAdd fresh garlic halfway, warm it in butter, or use garlic powder.
Uneven carrotsPieces different thicknessesHalve or quarter thick carrot tops lengthwise.
Baby carrots wateryWet from the bag or crowdedPat dry, use a hot pan, and roast in one layer.
Glaze too sweetToo much honey, maple, or brown sugarAdd lemon, vinegar, chili, herbs, black pepper, or flaky salt.

Fixed the issue? Return to the recipe card, choose a glaze finish, or go back to the top.

Should you parboil carrots before roasting?

Most weeknight trays do not need parboiling. A hot oven, even cuts, enough oil, and a single layer are enough.

Parboiling helps when carrots are large, dry, or leathery. Simmer in salted water until just crisp-tender, drain well, let the surface steam dry, then roast until browned. The center softens first, so the oven can focus on caramelized edges.

Make Ahead, Storage and Reheating

Roasted carrots taste best fresh, but the prep is easy to do ahead. Peel and cut the carrots 1 to 2 days in advance and store them in an airtight container in the fridge. If you store cut carrots in water, drain and dry them very well before roasting.

Store leftover roasted carrots in an airtight container in the refrigerator for 3 to 4 days, in line with general USDA leftovers and food safety guidance. Let the carrots cool before covering so steam does not collect inside the container and soften them further.

How to Store Leftover Roasted Carrots

Store the carrots so they stay useful, not soggy. A shallow airtight container helps them cool evenly and makes leftovers easier to add to quick meals.

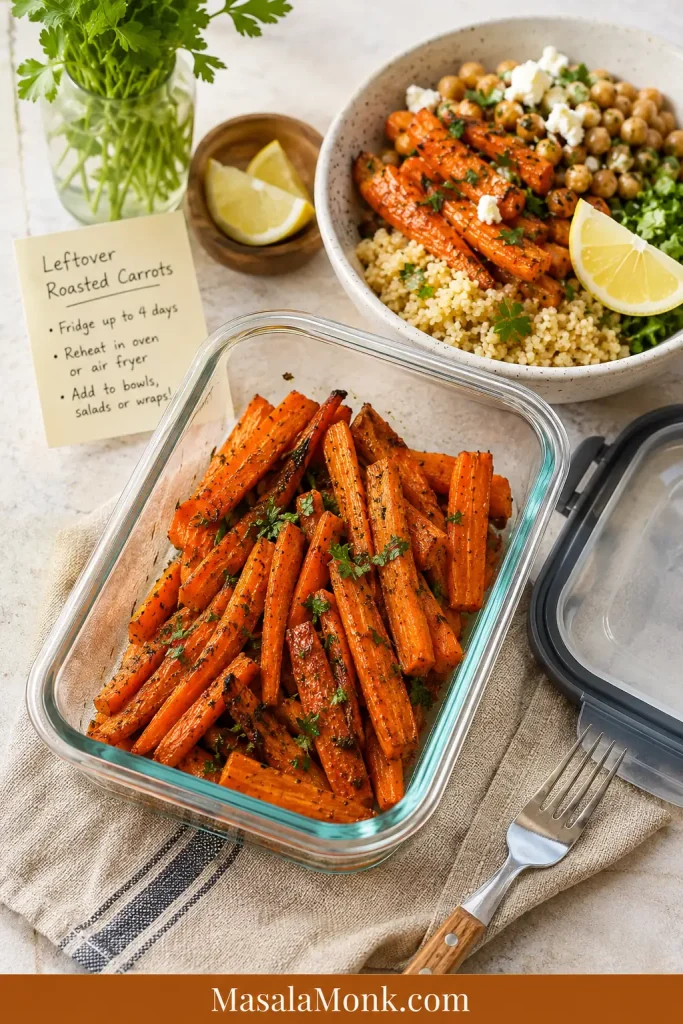
Leftover roasted carrots stored in a glass container beside a grain bowl, lemon, herbs, fork, and storage note.
Leftover roasted carrots can still work hard. Reheat them as a side, or add them to grain bowls, salads, wraps, couscous, soups, and quick meal-prep lunches.

Reheat in a 375°F / 190°C oven until warm, or use an air fryer for small portions. The microwave works, but it softens the edges. Leftover roasted carrots are good warm as a side, chopped into grain bowls, folded through couscous, tossed into salads with something tangy, or blended into a quick soup.

You can freeze roasted carrots, but they soften after thawing. Freeze them only if you plan to use them in soups, purees, sauces, or mash.

Making another tray? Back to the recipe card, check troubleshooting, or back to top.

What to Serve With Roasted Carrots

Roasted carrots bring sweetness, color, and warmth without demanding much attention from the cook. Match the finish to the rest of the plate.

  • Honey or maple glazed carrots: pair them with salty, smoky, or savory mains like ham, roast chicken, turkey, pork, or beef.
  • Creamy mains: finish the carrots with lemon, herbs, black pepper, or something crisp like cucumber salad.
  • Cozy dinners: garlic butter carrots work well beside whole chicken in the crock pot, beef roast, or pork tenderloin in the oven.
  • Fish or salmon: keep the carrots lighter with olive oil, lemon, dill, parsley, or a small honey-balsamic finish. They would work well beside this sockeye salmon recipe.
  • Vegetarian plates: use cumin, chili, lemon, tahini, yogurt, chickpeas, lentils, rice bowls, couscous, or quinoa.
  • Holiday plates: pair the carrots with one creamy side, one green side, and a bright garnish so they do not disappear among rich dishes.

FAQ

These quick answers cover the timing, temperature, glaze, make-ahead, and texture questions that usually come up after the first tray.

What temperature is best for roasting carrots?

425°F / 220°C is the best default. Use a gentler 400°F / 200°C oven for large whole carrots or richer maple and brown sugar glazes.

How long do carrots take to roast at 425°F?

Most cut carrots take 20 to 30 minutes at 425°F / 220°C. Thin slices can finish in 15 to 20 minutes; whole or thick carrots may need 30 to 40 minutes.

Do convection or fan ovens work for roasted carrots?

Yes. Use the same temperature and start checking 3 to 5 minutes earlier. For thin or glazed carrots, 400°F / 200°C may be safer in a strong fan oven.

Should carrots be covered while roasting?

No. Leave them uncovered so steam can escape and the edges can brown. Covering the pan gives softer, less caramelized carrots.

Do you peel carrots before roasting?

Peeling is optional. Fresh, thin-skinned carrots can be scrubbed well. Older or rough-skinned carrots usually taste and look better peeled.

Do baby carrots roast well?

Yes. Pat baby carrots dry first because they are often wet from the bag. Roast them in one layer at 425°F / 220°C for 18 to 25 minutes.

Should honey or maple go on before or after roasting?

Add honey or maple during the final 5 to 10 minutes, or toss it with the carrots after roasting. The carrots should roast first and glaze second.

Can I make roasted carrots without honey or maple?

Yes. Use olive oil, salt, pepper, garlic powder, and herbs, then finish with lemon or vinegar. The carrots will still taste naturally sweet from roasting, just less glossy.

Why did my roasted carrots burn?

The carrots may have been cut too thin, the oven may have been too hot for the glaze, or honey, maple, brown sugar, or fresh garlic may have gone in too early.

Why are my roasted carrots dry?

Carrots can turn dry if they are cut too thin, roasted too long, or not coated with enough oil. Cut medium-thick pieces and pull them when they are just fork-tender with browned edges.

Why are my roasted carrots still hard?

They were probably cut too thick, roasted at too low a temperature, or pulled too early. Keep roasting until a fork slides in with light resistance; for very large carrots, parboil first or roast longer at 400°F / 200°C.

Do you boil carrots before roasting?

Most cut carrots do not need it. Parboil large, dry, or leathery carrots until just crisp-tender, dry them well, then roast for softer centers and less shriveling.

Can roasted carrots be made ahead for holidays?

Yes, but they taste best freshly roasted. For holidays, peel and cut them 1 to 2 days ahead, mix the glaze separately, then roast fresh or slightly under-roast and reheat before serving.

Do carrots and potatoes roast well together?

Yes, but potatoes often need smaller cuts or a head start. Keep everything in one layer so both vegetables brown instead of steam.

Are roasted carrots better with oil or butter?

Oil is better for the base recipe because it handles high heat well. Butter gives richer flavor, but it is best mixed with oil, used in a glaze, or added after roasting.

Final Tips for Better Roasted Carrots

Once the pieces are even, the pan is roomy, and the glaze goes on late, roasted carrots become one of the easiest sides to trust.

  • Safest first tray: keep it simple with olive oil, salt, pepper, and garlic powder.
  • Glossy family side: add honey near the end and finish with lemon or herbs.
  • Holiday platter: use maple, butter, thyme, and one bright or pretty finish.

Once you have made the plain tray once, the rest becomes instinctive. Keep them plain and savory for a weeknight, glossy with honey for family dinner, maple-rich for holidays, or bright with cumin, chili, lemon, and herbs when the plate needs balance. The method stays simple; the finish does the work.

Back to top