Posted on Leave a comment

Roasted Carrots Recipe: Easy Oven Roasted Carrots With Honey, Maple & Garlic

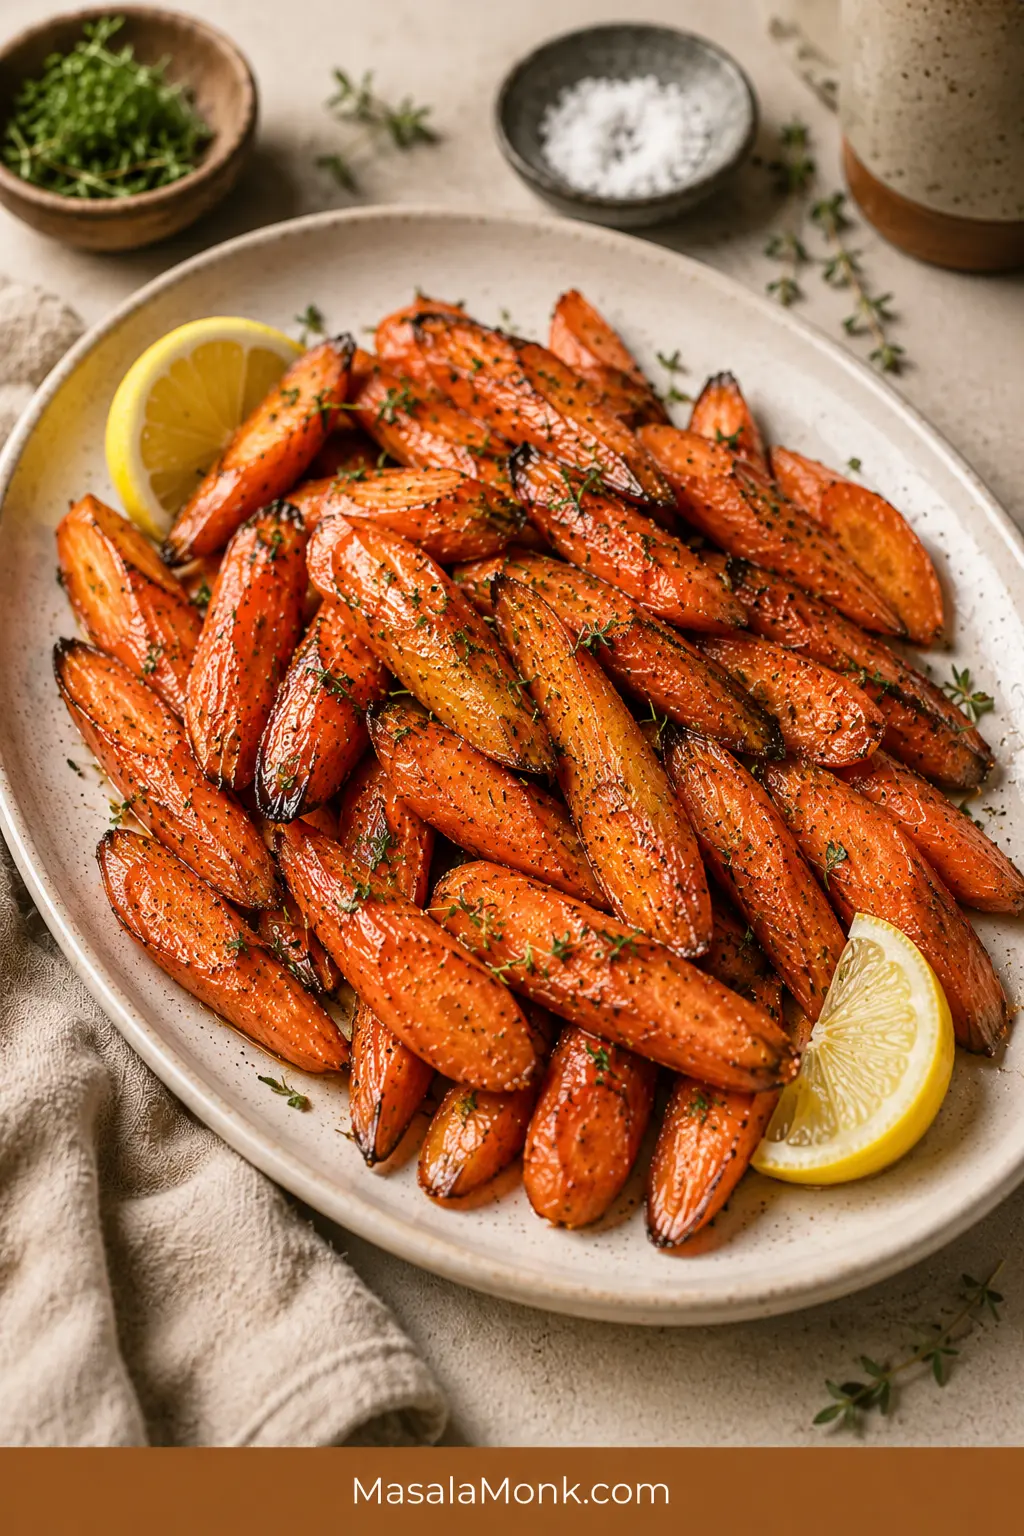
Roasted carrot pieces on a cream platter with browned edges, fresh herbs, lemon wedges, and a light glossy finish.

Roasted carrots should be easy: browned at the edges, tender through the center, and sweet enough to make everyone reach for more. The trouble is that carrots can also turn pale, dry, wrinkled, mushy, or sticky-burnt when the pieces are uneven, the pan is crowded, or the glaze goes in too early.

This roasted carrots recipe keeps the main method simple first: carrots, olive oil, salt, pepper, a hot oven, and a roomy sheet pan. Once that tray works, every other version is just a finish — honey roasted carrots, maple glazed carrots, garlic butter carrots, brown sugar carrots, baby carrots, whole carrots, rainbow carrots, or a prettier holiday platter.

The promise is dependable roasted carrots without babysitting the pan. Make the plain olive-oil tray once, then use the same method whenever you want a glossy honey finish, a buttery maple holiday version, a savory garlic butter side, or warm spiced carrots with cumin, chili, and lemon.

Quick Answer: How to Roast Carrots

Roast carrots at 425°F / 220°C for 20 to 30 minutes, depending on thickness. Cut them into even 2 to 3 inch diagonal pieces, toss with olive oil, salt, and pepper, then spread them in one layer on a rimmed sheet pan. They are done when the centers are fork-tender and the edges are browned.

For most cut carrots, 425°F / 220°C gives the best mix of browned edges and tender centers. Move down to 400°F / 200°C for large whole carrots, very thin pieces in a strong fan oven, or heavier maple and brown sugar glazes.

Honey and maple are least likely to scorch when added during the final 5 to 10 minutes or tossed with the carrots after roasting. Fresh garlic is best added halfway, warmed in butter first, or used as a finish. Garlic powder can go in from the start.

The rule that saves the tray: make the pieces similar in thickness, give them space, and add sweet glazes late. That is the difference between roasted carrots and steamed, dry, or burnt carrots.

Ready to cook? Jump to the recipe card. Still choosing a finish? Compare the roasted carrot versions.

Roasted Carrots Recipe Card

Easy Oven Roasted Carrots With Honey, Maple & Garlic Options

A reliable tray of oven roasted carrots for 2 to 3 inch carrot pieces, with browned edges, tender centers, and optional honey, maple, brown sugar, garlic butter, baby carrot, and rainbow carrot finishes.

Yield: 4 to 6 servings
Prep time: 10 minutes
Cook time: 22 to 30 minutes for 2 to 3 inch pieces
Total time: About 35 to 40 minutes
Method: Oven roasted
Oven temperature: 425°F / 220°C
Texture target: Fork-tender centers, browned edges
Diet: Vegetarian; vegan if using olive oil and maple syrup instead of butter or honey

Ingredients

  • 2 lb / 900 g carrots, peeled or scrubbed
  • 2 tablespoons / 30 ml olive oil
  • ½ to ¾ teaspoon fine sea salt, plus more to taste
  • ¼ teaspoon black pepper, or to taste
  • ½ teaspoon garlic powder, optional
  • 1 tablespoon / 15 ml honey or maple syrup, optional, for a light glaze
  • 1 to 2 tablespoons chopped parsley, thyme, dill, or chives
  • 1 to 2 teaspoons lemon juice, optional

Optional light glaze: use 1 tablespoon honey or maple syrup for a gentle shine, or up to 2 tablespoons for a sweeter finish. Add near the end of roasting or toss with the carrots after roasting. For a simple savory tray, skip the glaze and finish with herbs, lemon, and salt.

Instructions

  1. Heat the oven to 425°F / 220°C. Place a rack in the center of the oven.
  2. Wash and dry the carrots. Peel rough-skinned carrots, or scrub fresh thin-skinned carrots well.
  3. Cut the carrots diagonally into 2 to 3 inch pieces. Halve or quarter thick pieces lengthwise so the carrots are similar in thickness.
  4. Toss the carrots with olive oil, salt, pepper, and garlic powder if using. The pieces should look lightly shiny, not drenched.
  5. Spread the carrots in one layer on a large rimmed sheet pan. Give them space now, because a crowded pan can smell good and still give you pale carrots.
  6. Roast for 22 to 30 minutes, tossing halfway, until the edges are browned and the centers are fork-tender.
  7. For honey or maple roasted carrots, drizzle with honey or maple syrup during the final 5 to 10 minutes, or toss with the glaze just after roasting. The carrots should look roasted before they look glazed.
  8. Finish with herbs, lemon juice, and a little extra salt if needed. Serve warm.

Success Notes

  • Do not crowd the pan: use two pans if the carrots overlap.
  • Deeper browning: use a bare metal sheet pan.
  • Easy cleanup: use parchment rated for 425°F / 220°C for the basic recipe, or foil for sticky maple and brown sugar glazes.
  • Fresh garlic: add it halfway, warm it in butter first, or toss it with the carrots after roasting.
  • Baby carrots: pat them very dry before roasting so they do not steam.
  • Large or dry carrots: parboil until just crisp-tender, dry well, then roast for softer centers and less shriveling.
  • Fan or convection ovens: start checking 3 to 5 minutes earlier, especially with thin or glazed carrots.
  • Scaling: for every extra 1 lb / 450 g carrots, add about 1 tablespoon / 15 ml oil and ¼ teaspoon salt.
  • Doubling the recipe: use two sheet pans and rotate them halfway. Do not pile 4 lb / 1.8 kg carrots onto one pan.

Want the method explained with visuals? See the step-by-step guide. If your carrots usually turn pale, dry, or burnt, jump to troubleshooting.

The 5-Point Roasted Carrot Check

The tray usually fails before it ever goes into the oven. Run this quick check first and roasted carrots become almost boringly reliable.

  • Similar thickness: thick tops are halved or quartered so they cook with the thinner ends.
  • Roomy pan: carrots sit in one layer instead of steaming in a pile.
  • Dry surface: especially important for bagged baby carrots and mini carrots.
  • Protected garlic: garlic powder can start early; fresh garlic needs gentler timing.
  • Late sweet glaze: honey, maple, and brown sugar should shine, not burn before the centers soften.

The biggest visual fixes are usually pan spacing, even cut size, and late glaze timing.

Pan note: for better browning, use a roomy bare metal sheet pan. Parchment makes cleanup easier but gives slightly lighter edges. Honey and maple taste cleanest when the carrots already look roasted before the glaze goes on.

Which Roasted Carrot Version Should You Make?

Make the simple olive-oil tray first if you are unsure. The first tray teaches you more than any variation. Every version below uses the same roasting method; only the finish changes.

SituationBest VersionWhy It Works
First time making thisSimple olive oil roasted carrotsTeaches the timing without glaze risk
Kids or family dinnerHoney roasted carrotsGlossy, sweet, familiar
Thanksgiving, Christmas or EasterMaple butter carrots with thymeWarm, shiny, holiday-friendly
Roast chicken, beef or porkGarlic butter lemon carrotsSavory enough for rich mains
Less sweet versionCumin, chili, lemon and herbsWarm and bright without being sugary
Pretty platterRainbow carrots with feta, herbs or pomegranateColorful and finished-looking

Choose Your Roasted Carrot Finish

Once the base tray works, the finish decides the mood: plain and savory for a weeknight, honey-glossed for family dinner, maple-buttery for holidays, garlic butter for roast dinners, or cumin-chili-lemon when you want something warmer and less sweet.

After choosing a version, use this table to keep the finish balanced and timed correctly.

VersionFlavorWhat to AddTiming
Simple oven roasted carrotsSavory, sweet, cleanOlive oil, salt, pepper, garlic powderSeason before roasting
Honey roasted carrotsGlossy, sweet-savoryHoney, lemon, herbs, black pepperAdd honey near the end or after roasting
Maple glazed carrotsWarm, buttery, festiveMaple syrup, butter, thyme, chili flakesAdd maple near the end; use 400°F for heavy glaze
Brown sugar carrotsCaramel-like, richBrown sugar, butter or oil, flaky saltUse lightly and watch closely
Garlic butter carrotsRich, savory, butteryButter, fresh garlic, parsley, lemonToss with finished carrots
Baby or mini carrotsSweet, simple, quickOil, salt, pepper, optional honeyPat dry first; check around 18 minutes
Whole or rainbow carrotsElegant, colorful, naturally sweetMaple, herbs, lemon, feta, nuts, pomegranateCut evenly and finish after roasting
Sweet spiced roasted carrotsWarm, bright, lightly spicedCumin, coriander, chili, honey, lemonSpices before roasting; honey and lemon after

If you are cooking now, the recipe card above is enough. The sections below explain how to adjust the same tray for different carrot cuts, glazes, ovens, holiday servings, and the little problems that can make carrots turn pale, dry, or sticky-burnt.

Why This Roasted Carrots Recipe Works

A hot oven gives the tray its roasted flavor. At 425°F / 220°C, the edges can brown while the centers become tender instead of collapsing.

What Browned Roasted Carrot Edges Should Look Like

Use the browned edges as your visual cue. The centers should look tender, while the outside has enough color to taste sweet, savory, and roasted.
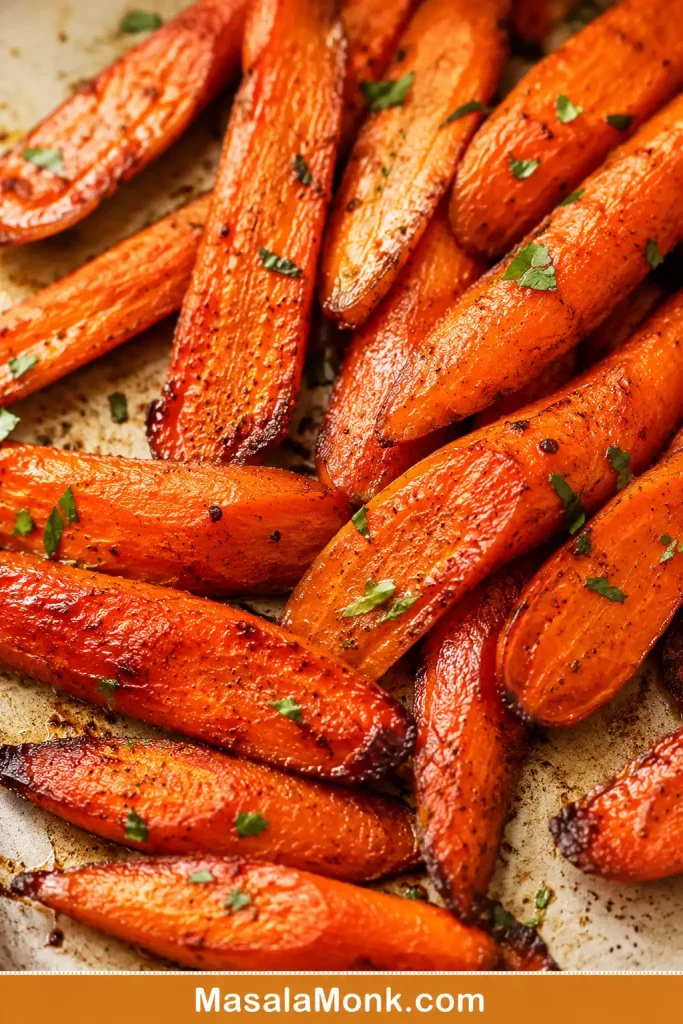
Close-up of roasted carrots with caramelized browned edges, black pepper, green herbs, and tender orange centers.
The browned edges are the flavor signal. Once the carrots look caramelized outside and tender inside, they only need a light finish to taste complete.

Even thickness makes the timing predictable. Carrots taper, so thick tops need to be split lengthwise. A single layer lets steam escape, which is why roomy pans brown better than crowded pans.

The glaze is controlled instead of dumped on early. A light glaze should cling to the carrots, not sit in puddles on the pan. Add it late and the carrots turn glossy instead of bitter.

If roasted carrots have disappointed you before, it was probably a cut-size, pan, or glaze-timing problem — not a carrot problem.

Roasted Carrots Ingredients and Smart Swaps

The ingredient list stays short because the oven does most of the work. What matters is starting with dry carrots, coating them lightly but evenly, salting them enough, and keeping sweet glazes controlled.
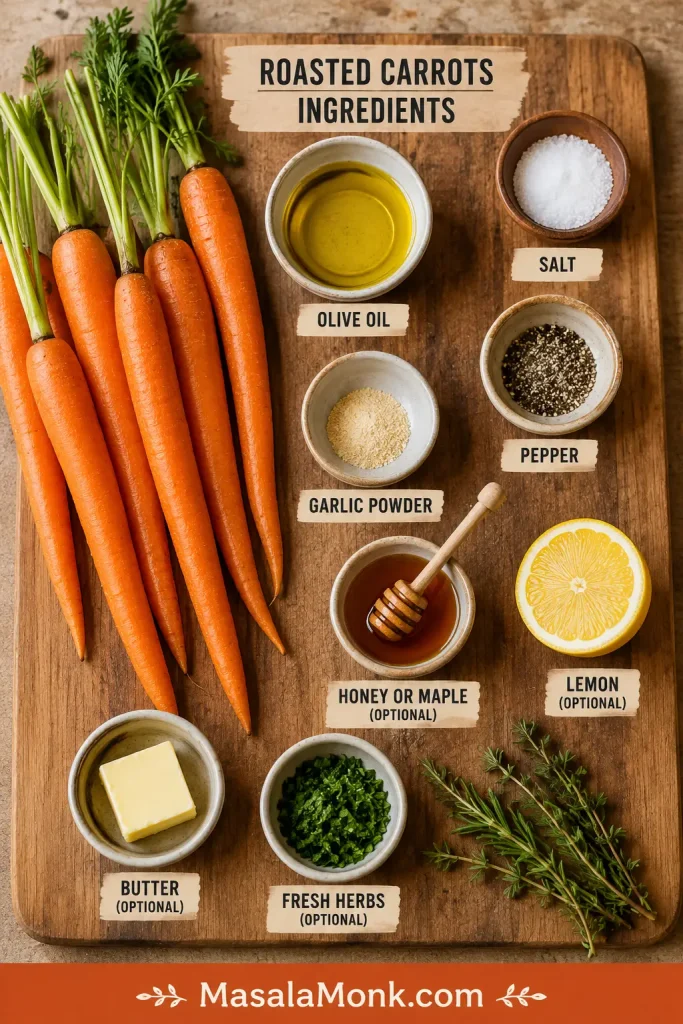
Carrots, olive oil, salt, pepper, honey, maple syrup, lemon, herbs, and butter arranged for making roasted carrots.
The base tray stays simple with carrots, oil, salt, and pepper. Then honey, maple, butter, lemon, garlic, or herbs can change the flavor without changing the method.
  • Carrots: medium carrots are easiest. Baby-cut carrots, mini carrots, whole slim carrots, and rainbow carrots all work, but very wet carrots need extra drying.
  • Olive oil: use about 1 tablespoon per pound / 450 g carrots. The pieces should look lightly shiny, not slick.
  • Salt and pepper: salt makes carrots taste sweeter and fuller; pepper balances the natural sweetness.
  • Garlic powder: the most reliable garlic option from the start because it does not burn as easily.
  • Fresh garlic: best warmed in butter, added halfway, or tossed with finished carrots.
  • Honey, maple or brown sugar: use lightly and add near the end or after roasting for a glossy finish.
  • Lemon, vinegar, herbs or chili: small bright finishes keep sweet carrots from tasting flat.
  • Butter: best as a finish or glaze; olive oil is easier for the main high-heat roast.

Best Pan for Roasted Carrots

The pan is where most roasted carrots are won or lost. Seasoning matters, but space matters more. A large rimmed sheet pan gives moisture room to escape, which helps the carrots brown instead of steam.

Crowded Pan vs Spaced Carrots

The same carrot cut can come out pale or caramelized depending on pan space. If the pieces overlap, spread them onto a second sheet pan before roasting.
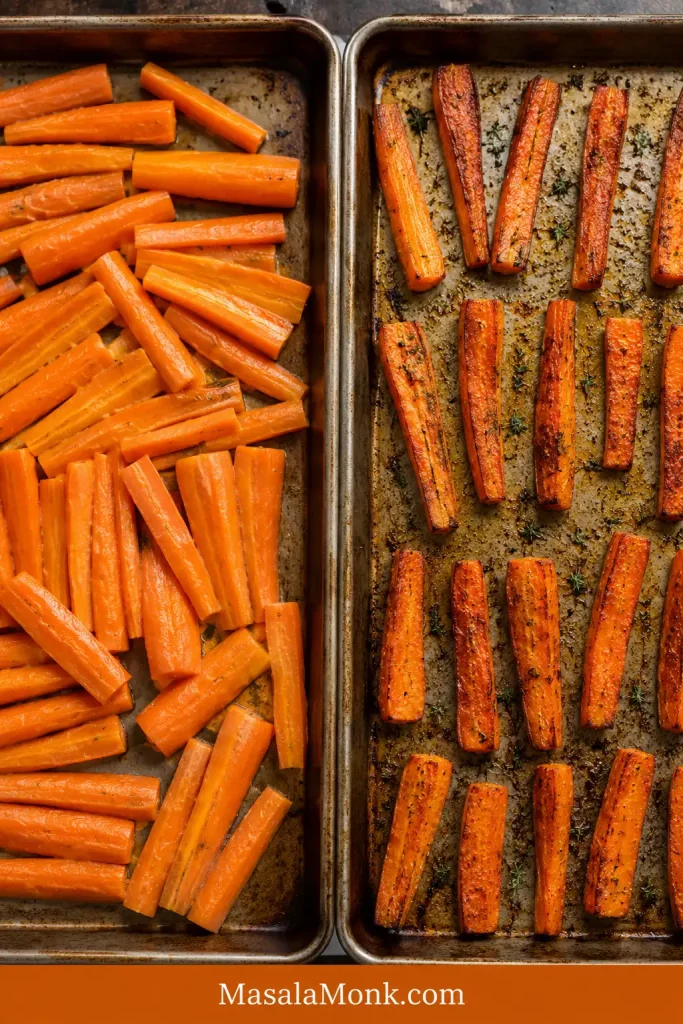
Side-by-side comparison of crowded pale carrots and properly spaced browned carrots on sheet pans.
Crowding changes the result fast. A second sheet pan is often the difference between soft steamed carrots and caramelized roasted edges.
  • Bare metal: best for deeper browning.
  • Parchment: easier cleanup if rated for 425°F / 220°C, with slightly lighter browning.
  • Foil: useful for sticky maple, honey, or brown sugar glazes.
  • Preheated sheet pan: helpful for wet baby carrots, but use carefully and skip it for your first heavy sugar-glaze batch.

How to Roast Carrots Step by Step

1. Heat the oven

Preheat the oven to 425°F / 220°C. A properly hot oven helps the carrots brown instead of slowly drying out.

2. Wash, dry and peel

Scrub the carrots well, then dry them. Peeling is optional for fresh, thin-skinned carrots. Older carrots with rough skins usually look and taste better peeled.

3. Cut even pieces

Cut the carrots diagonally into 2 to 3 inch pieces. Split thick tops lengthwise so the pieces are close in thickness, even if they are not identical in shape.
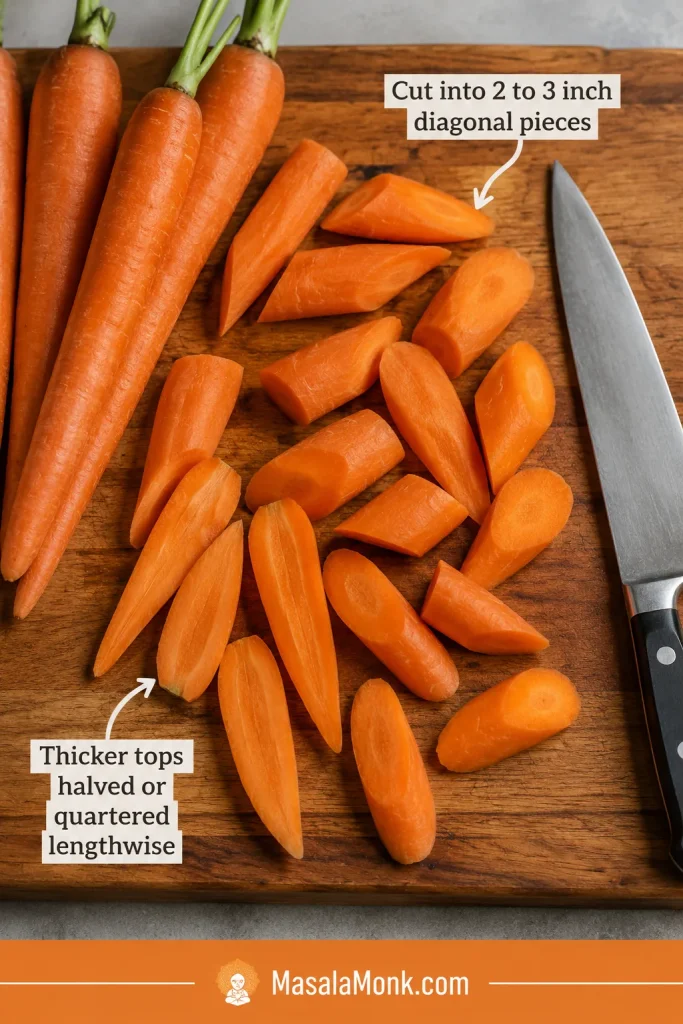
Carrots cut into 2 to 3 inch diagonal pieces on a wooden board, with thicker carrot tops split lengthwise.
Even thickness matters more than perfect shape. Therefore, split thick carrot tops lengthwise so the centers soften before the narrow edges dry out.

4. Toss with oil and seasoning

Toss with olive oil, salt, pepper, and garlic powder if using. The oil should coat the carrots lightly and evenly.
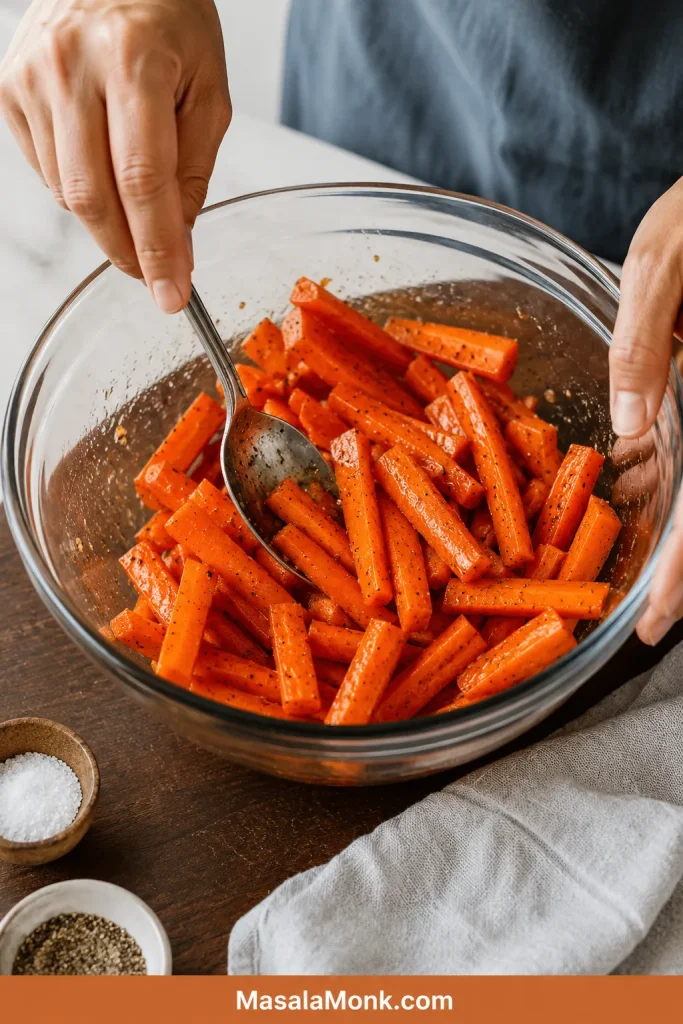
Carrot pieces tossed in a bowl with olive oil, salt, pepper, and seasoning before roasting.
Aim for a light, even coating before the carrots hit the pan. Too little oil can make them dry, while too much can make them greasy instead of roasted.

5. Spread with space

Give the carrots room on the pan. If they look crowded before roasting, they will taste crowded after roasting — softer, paler, and less caramelized.
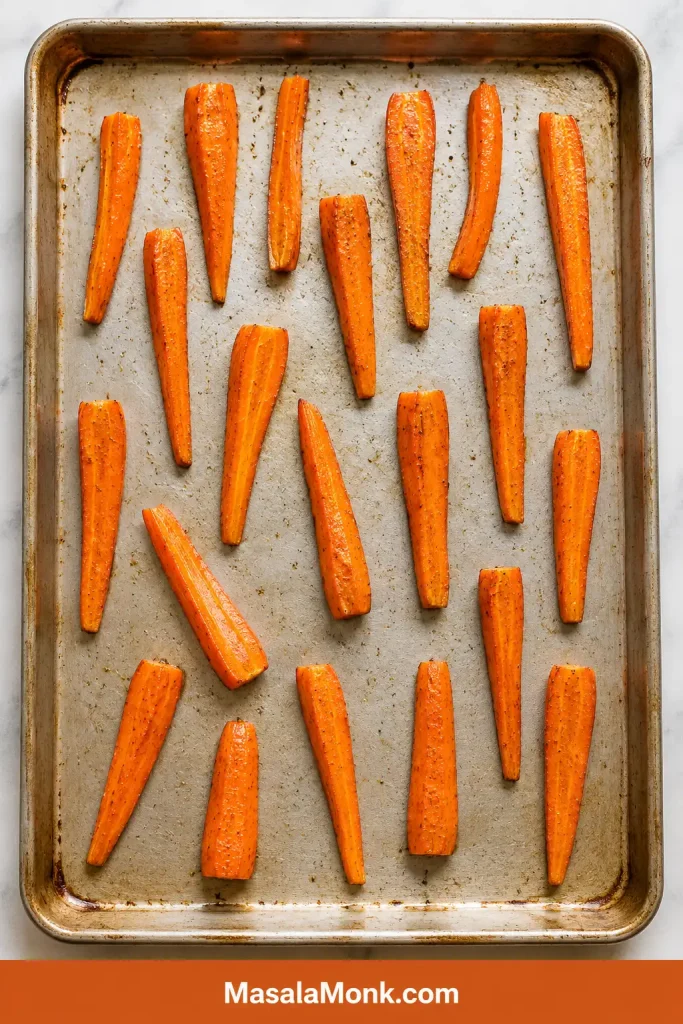
Carrot pieces spread in a single layer with visible space between them on a rimmed sheet pan.
Leave a little breathing room on the sheet pan. That small gap helps moisture escape, which is what turns plain carrots into browned oven roasted carrots.

6. Roast and toss halfway

Roast for 12 to 15 minutes, toss or flip, then continue roasting until the centers are tender and the edges are browned.
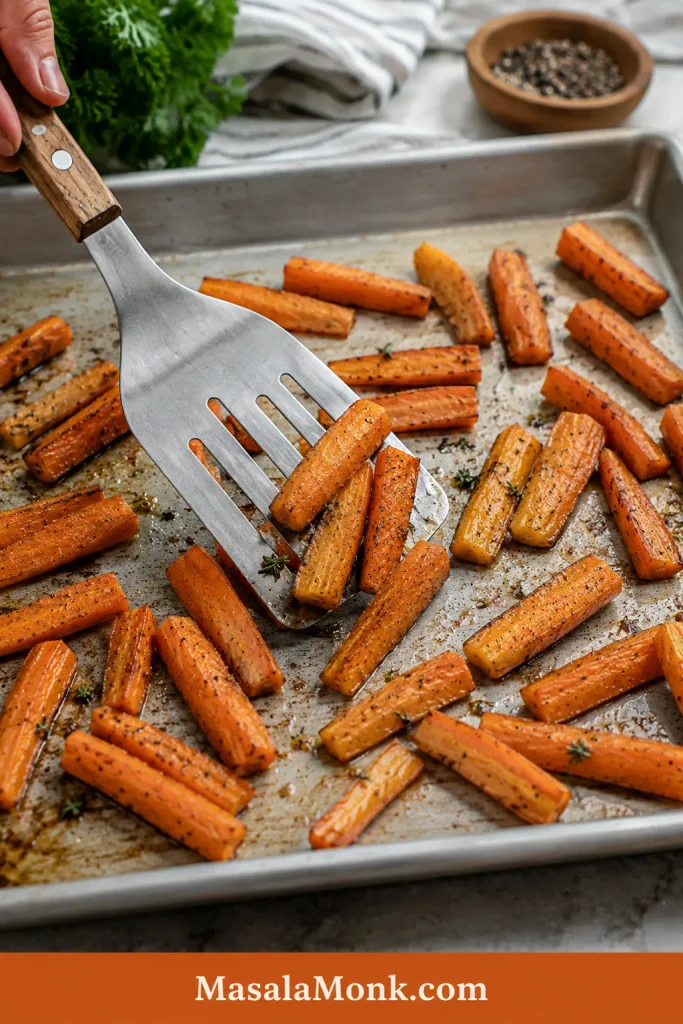
Carrots halfway through roasting on a sheet pan, being turned with a spatula as the edges begin to brown.
The halfway toss is not just busywork. It exposes new sides to the hot pan, so the carrots brown more evenly instead of roasting on one face.

7. Add glaze after the carrots start roasting

For honey, maple, or brown sugar carrots, let the carrots roast first and glaze second. Add the sweet glaze during the final 5 to 10 minutes or toss it with the carrots after roasting. For garlic butter carrots, warm the garlic in butter and toss with the finished tray.
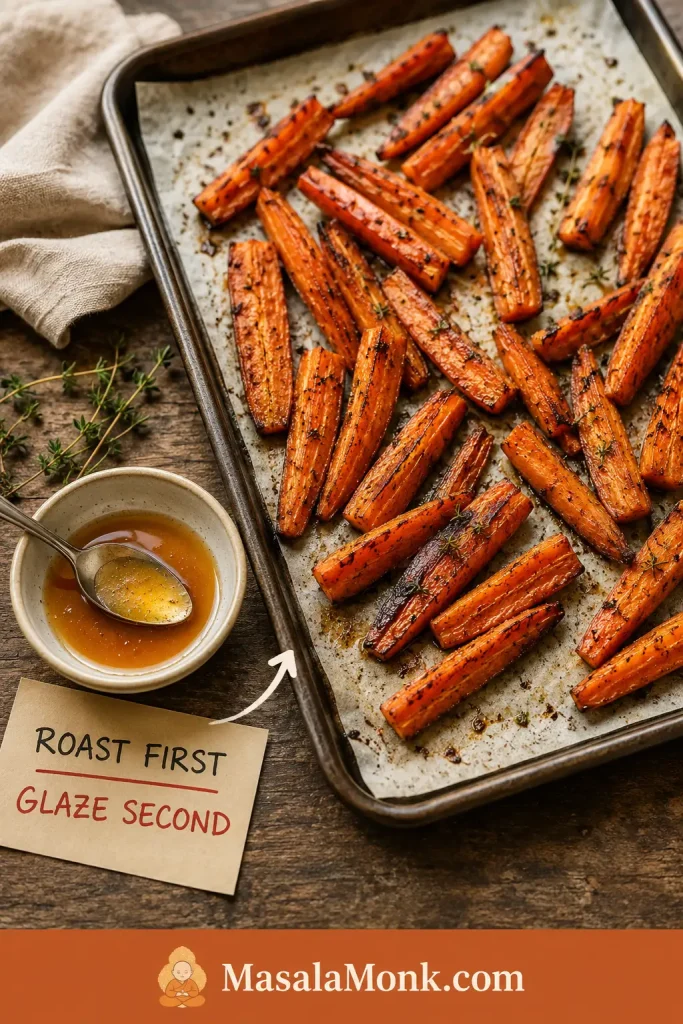
Roasted carrots on a pan with a small bowl of honey or maple glaze nearby before the glaze is added.
Think of honey or maple as the finishing layer, not the main cooking step. Add it after browning so the glaze shines instead of burns.

8. Finish bright

Once the carrots are hot and browned, a small finish — lemon, herbs, flaky salt, chili, feta, tahini, yogurt, or toasted nuts — makes them taste brighter and more complete.

Roasting Time Chart for Carrots

The timer is a guide, not a contract. Thin carrots finish quickly; thick carrots need more time. Start checking early when pieces are thin, glazed, or close to the edge of the pan.

Carrot Type or CutOven TemperatureApprox. TimeBest Use
Thin diagonal slices425°F / 220°C15 to 20 minutesFast weeknight side
2-inch chunks425°F / 220°C20 to 25 minutesEveryday roasted carrots
2 to 3 inch diagonal pieces425°F / 220°C22 to 30 minutesBest default cut
Baby-cut carrots425°F / 220°C18 to 25 minutesNo-chop convenience
Whole slim carrots425°F / 220°C25 to 35 minutesHoliday presentation
Thick whole carrots400°F / 200°C35 to 45 minutesGentler cooking for large carrots
Large whole carrots with rich glaze400°F / 200°C35 to 50 minutesHoliday-style glazed carrots

How to Know Roasted Carrots Are Done

Roasted carrots are done when a fork slides into the center with light resistance. They should be tender but not collapsing. You want bend, not collapse.

Fork-Tender Roasted Carrots

The fork test matters more than the timer. Check the thickest pieces first, because they decide whether the tray is truly done.
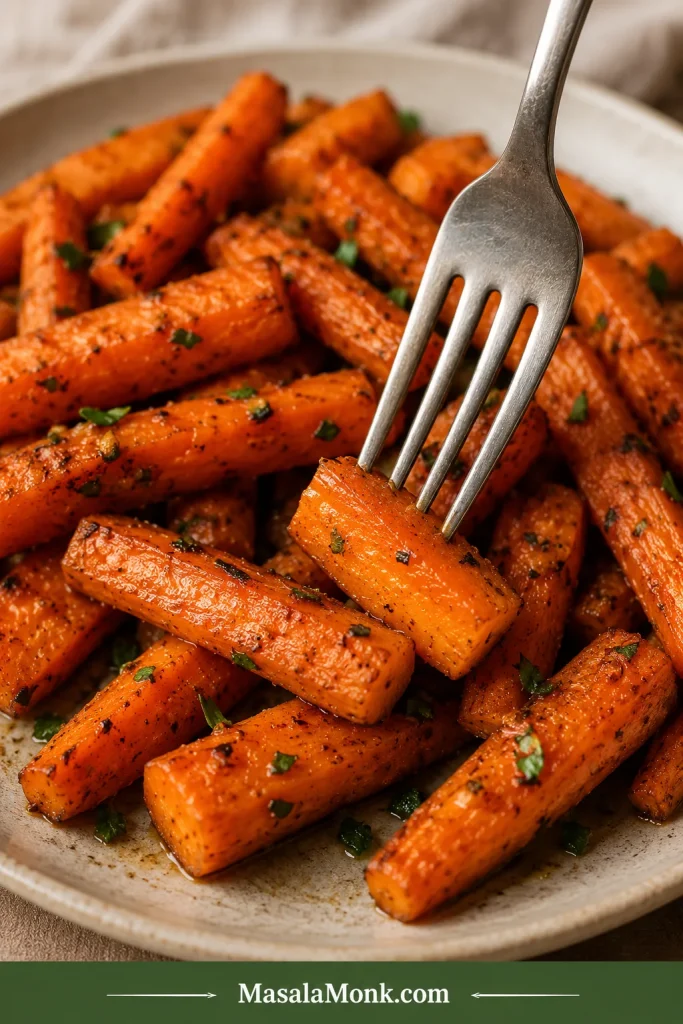
A fork testing a roasted carrot piece to show a tender center and browned outside.
Use the fork test before pulling the tray. The carrot should offer light resistance, which means it is tender without turning soft or mushy.

The edges should look browned and slightly caramelized. If the carrots are browned but still firm in the middle, lower the oven to 375°F / 190°C and roast for a few more minutes. If they are soft but pale, the pan was probably crowded, the oven was too low, or the carrots were too wet.

Temperature is the next lever: hotter for browning, gentler for large carrots or heavier glazes.

Best Temperature for Roasted Carrots

The best default temperature for roasted carrots is 425°F / 220°C. It gives the best balance of browned edges and tender centers for most cut carrots. For larger whole carrots or heavier sweet glazes, move down to 400°F / 200°C. Choose 375°F / 190°C only for gentler roasting, such as after parboiling or when your oven runs hot.

Using a fan or convection oven? Start checking 3 to 5 minutes earlier. If your oven browns aggressively, use 400°F / 200°C for glazed carrots or thin pieces.

Once the carrots roast properly, the finish is where the same pan can become a weeknight side, a kid-friendly dinner vegetable, or the glossy holiday dish people actually take seconds of.

Honey, Maple, Brown Sugar and Garlic Butter Finishes

The glaze should shine, not swim. A light coating makes carrots glossy; too much glaze turns the pan sticky before the centers finish cooking. The carrots should taste like roasted carrots first, with sweetness around the edges.

Honey makes the carrots glossy and familiar, maple makes them deeper and more holiday-like, and garlic butter pulls the whole tray back toward savory dinner territory.

Sweet carrots also need a small counterpoint — lemon, vinegar, salt, black pepper, chili, or fresh herbs — so the flavor stays balanced. The lemon or vinegar at the end is small, but it is what keeps sweet carrots from tasting like dessert.

Looking for a specific finish? Jump to honey, maple, brown sugar, garlic butter, or savory roasted carrots without honey.

Glaze Formula Table

Use these amounts for a 2 lb / 900 g tray. Keep the glaze light for the main recipe, especially at 425°F / 220°C.

VersionFor 2 lb / 900 g CarrotsWhen to AddBest Finish
Honey roasted carrots1 to 2 tbsp / 15 to 30 ml honeyFinal 5 to 10 minutes or after roastingLemon, parsley, thyme, black pepper
Maple glazed carrots1 to 2 tbsp / 15 to 30 ml maple syrupFinal 5 to 10 minutes; use 400°F for heavy glazeButter, thyme, rosemary, chili flakes
Brown sugar carrots1 to 2 tbsp / 12 to 25 g brown sugar + oil or butterLight amount before roasting or near the endFlaky salt, lemon, black pepper
Garlic butter carrots2 to 3 tbsp / 28 to 42 g butter + 2 to 3 garlic clovesAfter roastingParsley, lemon juice
Honey garlic butter carrots3 tbsp / 42 g butter + 1½ to 2 tbsp / 22 to 30 ml honey + 3 garlic clovesBrush lightly near the end; toss more after roastingLemon, parsley, flaky salt
Honey balsamic carrots1 tbsp / 15 ml honey + 1 tbsp / 15 ml balsamic vinegarNear the endThyme, black pepper
Sweet spiced carrots½ tsp cumin + ½ tsp coriander + pinch chili + 1 tbsp honey + lemonSpices before roasting; honey and lemon afterCilantro, mint, yogurt, tahini

Honey Roasted Carrots

The best honey version should look glossy, not sticky. Use 1 to 2 tablespoons honey for 2 lb / 900 g carrots and add it near the end or after roasting. Finish with lemon, black pepper, flaky salt, parsley, thyme, or a tiny pinch of chili. These carrots work well beside a salty, smoky, or mustardy main like honey glazed ham.
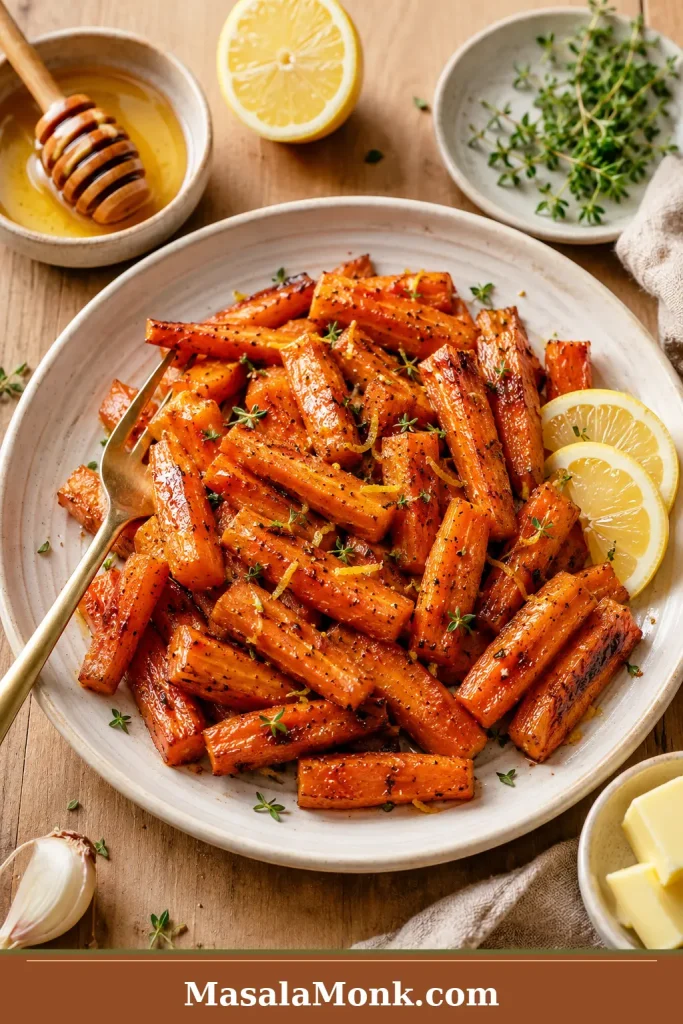
Honey roasted carrots on a cream plate with lemon, herbs, black pepper, and a light glossy glaze.
Honey roasted carrots should taste sweet but still balanced. Finish with lemon, herbs, or black pepper so the glaze feels bright rather than heavy.

Maple Glazed Carrots

Maple carrots are the holiday version: buttery, shiny, and a little deeper than honey. Use 1 to 2 tablespoons maple syrup for 2 lb / 900 g carrots. For a heavier maple glaze, roast at 400°F / 200°C, use foil for easier cleanup, and toss more often. They sit nicely beside a creamy side like sweet potato casserole.
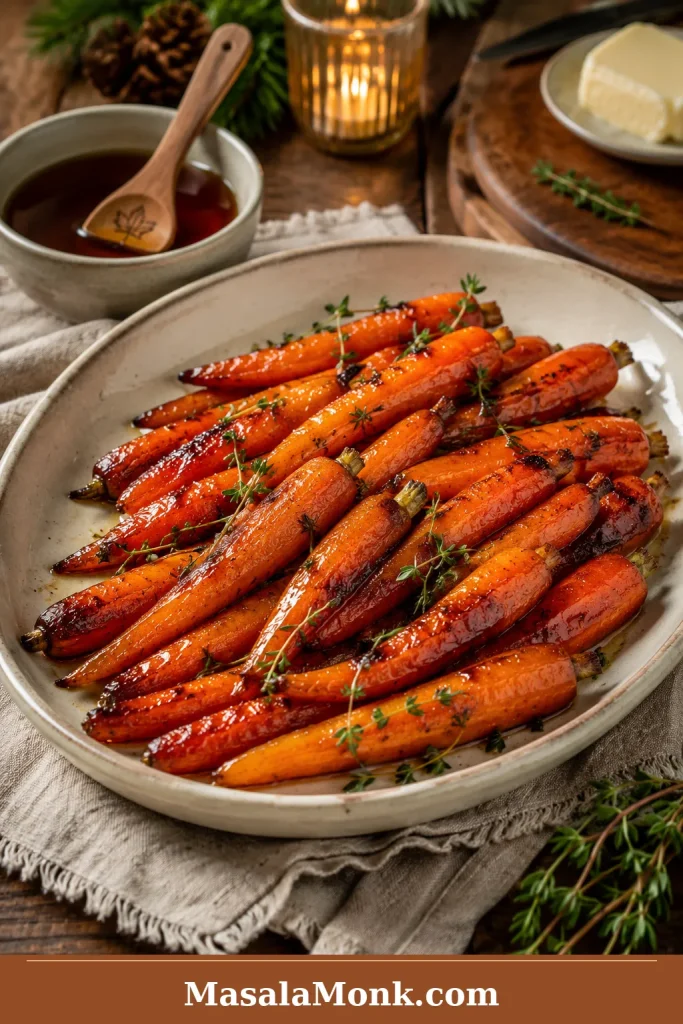
Maple glazed carrots with thyme, browned edges, and a warm buttery finish on a rustic plate.
Maple brings a deeper, cozier sweetness than honey. As a result, these carrots work especially well beside roast chicken, turkey, ham, or holiday mains.

Brown Sugar Roasted Carrots

Brown sugar gives carrots a caramel-like flavor. Use 1 to 2 tablespoons brown sugar, mixed with olive oil or melted butter so it coats evenly. Balance the sweetness with lemon juice, vinegar, black pepper, chili, or flaky salt.
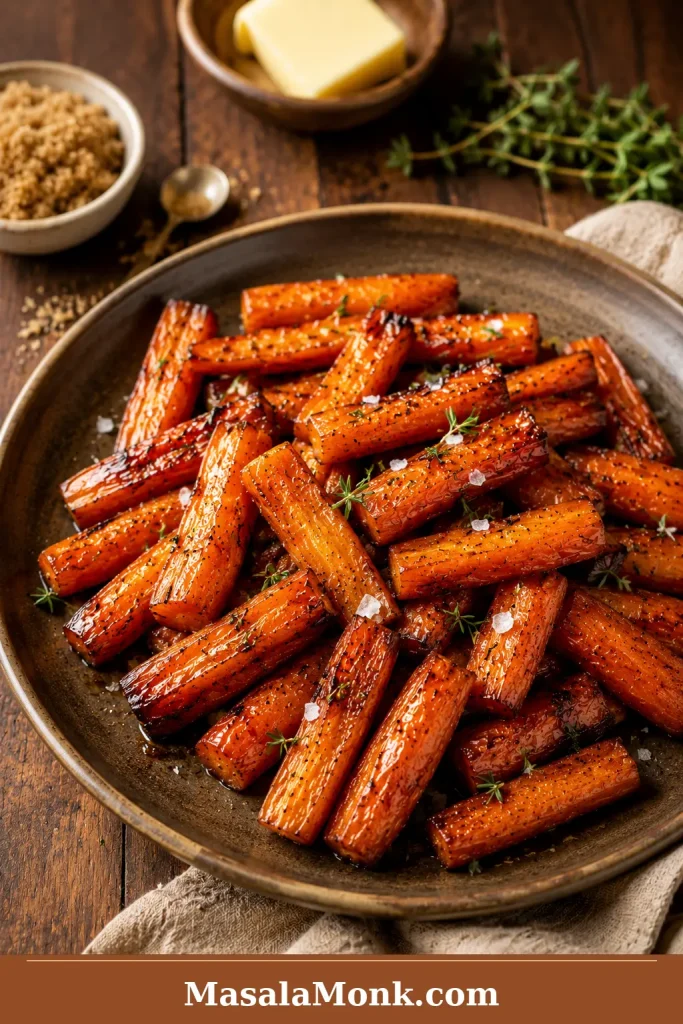
Brown sugar roasted carrots with caramelized edges, flaky salt, thyme, butter, and a glossy finish.
Brown sugar creates a richer caramel-like finish. However, a light hand matters here; flaky salt, lemon, or pepper keeps the side from tasting too sweet.

Garlic Butter Roasted Carrots

Garlic butter carrots should smell savory first, sweet second. Melt 2 to 3 tablespoons butter with 2 to 3 minced garlic cloves, warm just until fragrant, then toss with the roasted carrots at the end. Add parsley and lemon juice before serving. This version is especially good with cozy mains such as cream of mushroom chicken.
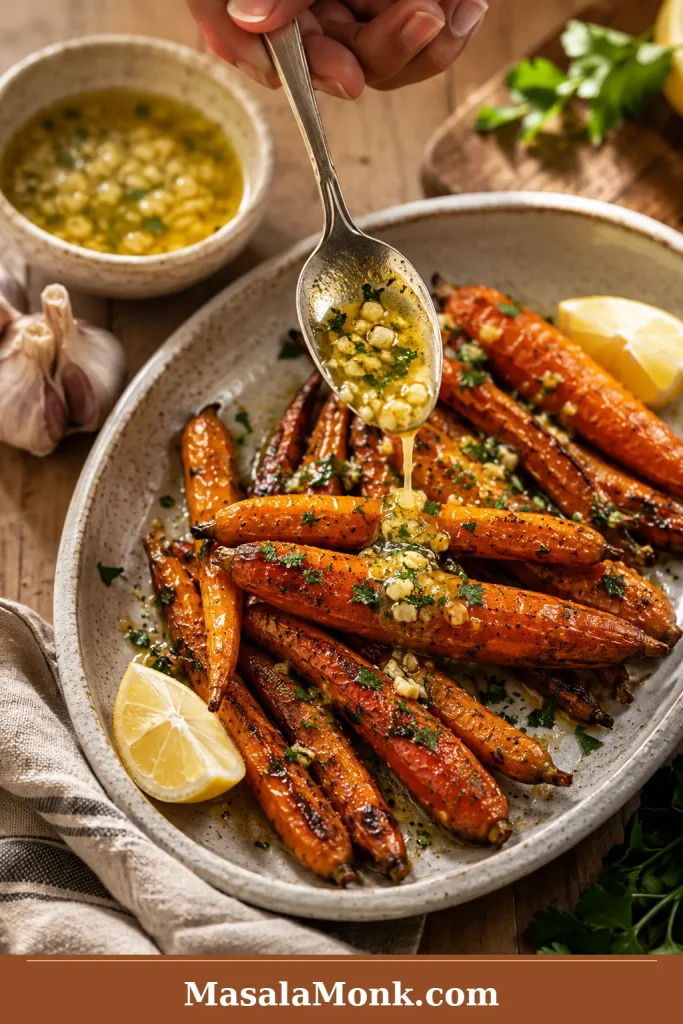
Garlic butter being spooned over roasted carrots with parsley and lemon on a ceramic plate.
Garlic butter is best added after roasting. The hot carrots melt it into the edges, while the garlic stays fragrant instead of turning bitter.

Honey Garlic Butter Carrots

For honey garlic butter carrots, warm 3 tablespoons / 42 g butter with 3 minced garlic cloves just until fragrant, then take it off the heat and stir in 1½ to 2 tablespoons honey. Brush a little over the carrots during the final few minutes, then toss with the rest after roasting for a glossy finish.

Honey Balsamic Roasted Carrots

For a tangy-sweet version, use 1 tablespoon honey and 1 tablespoon balsamic vinegar near the end of roasting. Balsamic gives the carrots depth and keeps the glaze from tasting only sweet.

Sweet Spiced Roasted Carrots

For a less-sweet version, season the carrots with olive oil, salt, pepper, ½ teaspoon cumin, ½ teaspoon coriander, and a small pinch of chili powder. Roast as usual, then finish with honey, lemon juice, and fresh herbs.
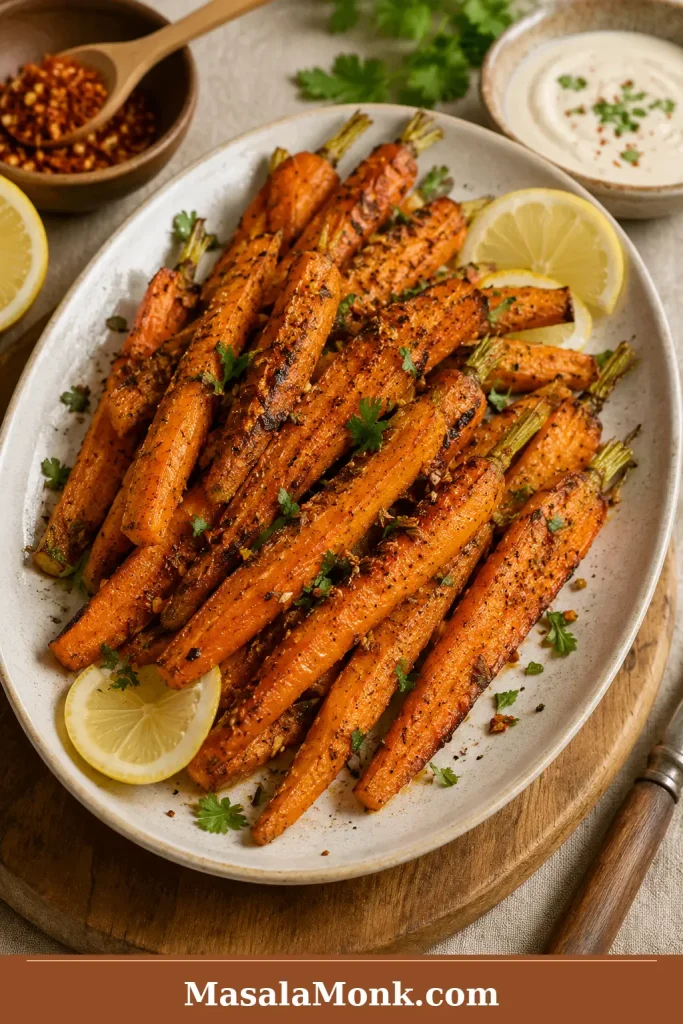
Savory roasted carrots with cumin, chili flakes, lemon, herbs, black pepper, and a creamy dip.
For savory roasted carrots, skip the sweet glaze and lean on cumin, chili, lemon, herbs, and salt. The oven still brings out the carrots’ natural sweetness.

Simple glaze timing: oil, salt, pepper, and garlic powder can go in before roasting. Honey, maple, brown sugar, lemon, vinegar, fresh herbs, yogurt, tahini, and delicate toppings are usually better near the end or after roasting.

Baby, Mini, Whole and Rainbow Carrots

Baby-cut carrots

Baby carrots and packaged baby-cut carrots roast well, but they need to be dry. Bagged baby carrots often hold surface moisture, which makes them steam instead of brown. Pat dry, toss with oil and seasoning, then roast at 425°F / 220°C for 18 to 25 minutes.
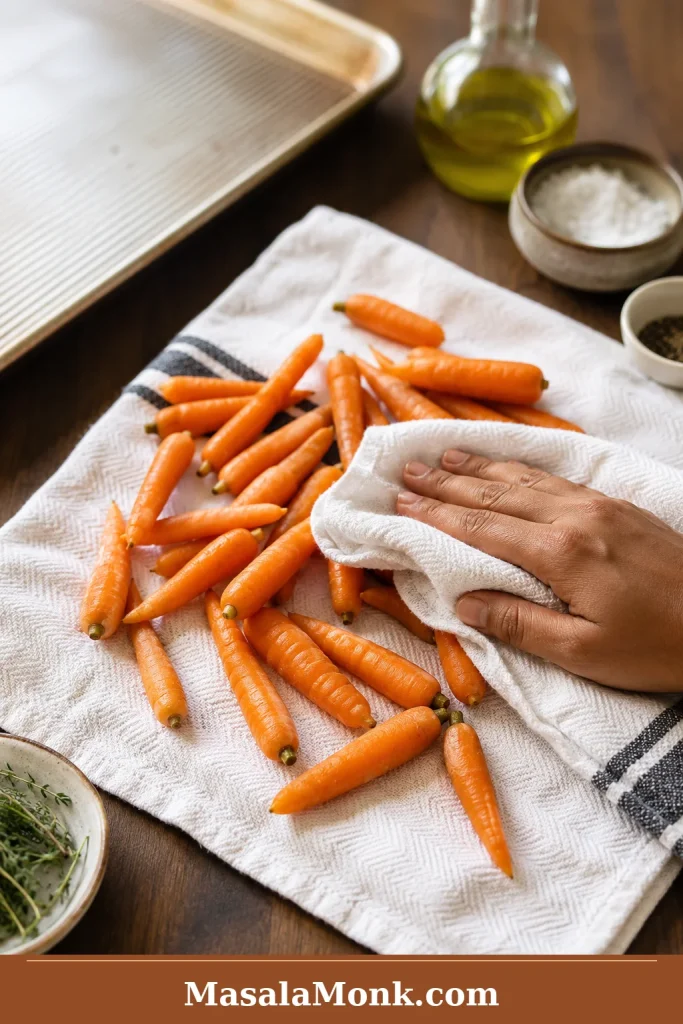
Raw baby carrots being dried on a kitchen towel before roasting, with a sheet pan and seasonings nearby.
A quick towel-dry gives baby carrots a better start. Less surface moisture means more browning, better texture, and less tray steam.

Mini carrots

Mini carrots roast like baby carrots, but timing depends on thickness. Slim mini carrots may finish around 15 to 18 minutes; thicker ones may need 22 to 25 minutes.

Whole carrots

Whole roasted carrots look beautiful on a platter. Use slim carrots when possible, or halve thick carrots lengthwise so the centers soften before the outside overcooks. Whole slim carrots usually take 25 to 35 minutes at 425°F / 220°C.
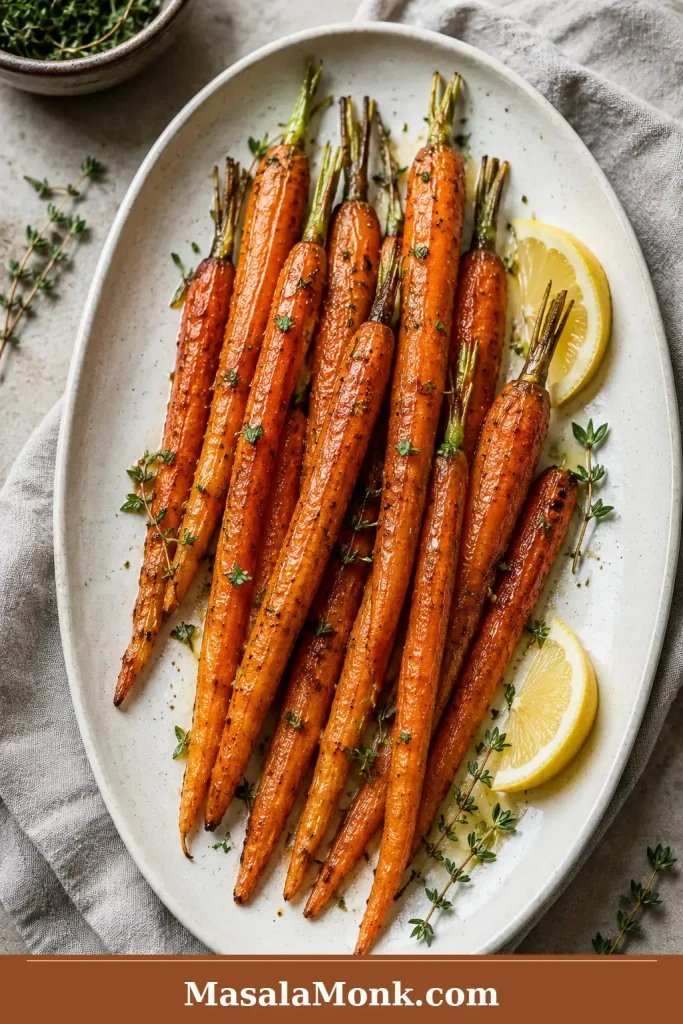
Whole slim roasted carrots arranged on an oval platter with herbs, lemon wedges, and browned edges.
Whole carrots make a simple side dish look more elegant. For the best texture, choose slim carrots or halve thicker ones before roasting.

Rainbow carrots

Rainbow carrots roast almost the same way as orange carrots. Cut them to similar thickness and finish simply: maple, lemon, herbs, feta, tahini, toasted nuts, or pomegranate is enough to make the plate feel special.
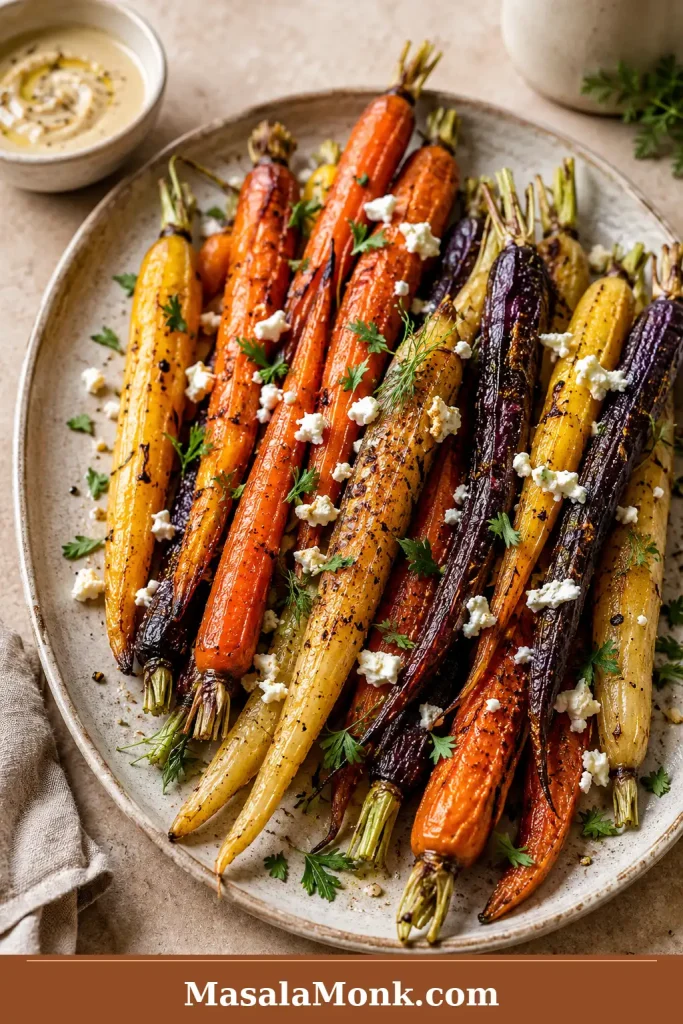
Rainbow roasted carrots in orange, purple, yellow, and pale colors with herbs, feta, and pomegranate.
Rainbow carrots cook like regular carrots, but they bring instant color to the table. Keep the toppings restrained so the roasted vegetables stay the focus.

How to Make Roasted Carrots for Holidays

For Thanksgiving, Christmas, Easter, or Sunday roasts, choose whole slim carrots or rainbow carrots if you want a platter that looks finished. They bring color, shine, and sweetness between creamy, buttery, rich dishes.

The holiday formula is simple: pretty carrots + light maple or honey glaze + herbs + one finishing touch. Try thyme and flaky salt, parsley and lemon, feta and pomegranate, or tahini and toasted nuts. The best tray should look glossy at the edges, smell sweet-savory, and still taste balanced beside all the creamy sides.

Holiday Roasted Carrots Platter

For a party table, the garnish should support the carrots instead of covering them. Choose one colorful finish, then keep the platter easy to serve.
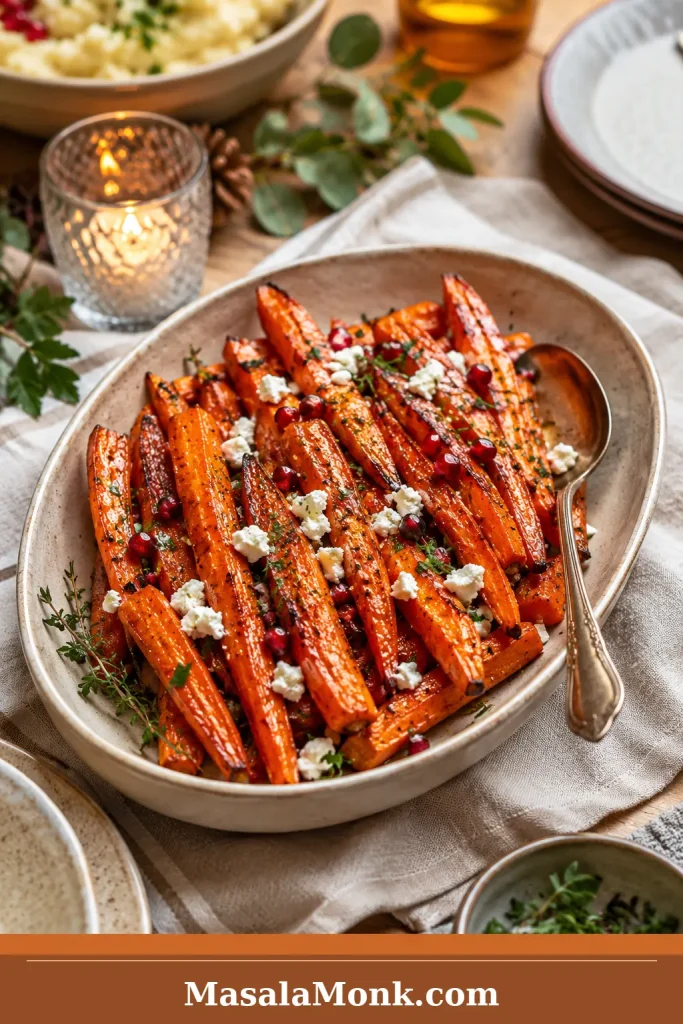
Holiday roasted carrots on a serving platter with herbs, light glaze, pomegranate, and a warm table setting.
For a holiday roasted carrots platter, use pretty carrots, a light honey or maple glaze, fresh herbs, and one colorful finish. The side feels festive without becoming fussy.

For a classic holiday spread, pair these carrots with one creamy side and one green vegetable. Green bean casserole gives the table that familiar savory-creamy contrast, while garlic mashed potatoes make the plate feel fuller without competing with the carrots.

Holiday shortcut: peel and cut the carrots 1 to 2 days ahead, mix the glaze separately, and roast the carrots fresh. If oven space is tight, slightly under-roast earlier in the day, then reheat and finish with herbs or garnish before serving.

Best Seasonings for Roasted Carrots

Think of seasoning as the mood of the tray. Choose one direction and keep the finish focused.

  • Classic: olive oil, salt, pepper, parsley.
  • Honey garlic: honey, butter, garlic, lemon.
  • Maple holiday: maple syrup, butter, thyme, chili flakes.
  • Brown sugar: brown sugar, butter, pepper, flaky salt.
  • Honey balsamic: honey, balsamic vinegar, thyme.
  • Herby: rosemary, thyme, dill, parsley.
  • Warm spice: cumin, coriander, paprika, cinnamon.
  • Creamy finish: yogurt, tahini, feta, or miso-maple drizzle after roasting.

Roasting Carrots With Other Vegetables

Carrots roast well with other vegetables, but timing matters. Potatoes, sweet potatoes, parsnips, cauliflower, and Brussels sprouts can share the pan if everything is cut thoughtfully and kept in one layer. Broccoli and asparagus cook faster, so add them later. Roast beets separately if you do not want color bleeding.

Potatoes need the most planning. Cut them smaller than the carrots or start them first. If you want a separate potato side, this ranch roasted potatoes recipe is a better second tray.

Air Fryer Roasted Carrots

The oven gives the best full-tray roasted carrots. Use the air fryer for small batches when the oven is full.

Cook carrots at 380°F to 400°F / 193°C to 204°C, shaking halfway. Thin pieces may take 10 to 12 minutes; thicker pieces may need 15 to 20 minutes. The air fryer is less forgiving with sticky glazes, so add honey or maple lightly, or toss with extra glaze after cooking. These carrots can go beside air fryer boneless pork chops when the oven is busy.
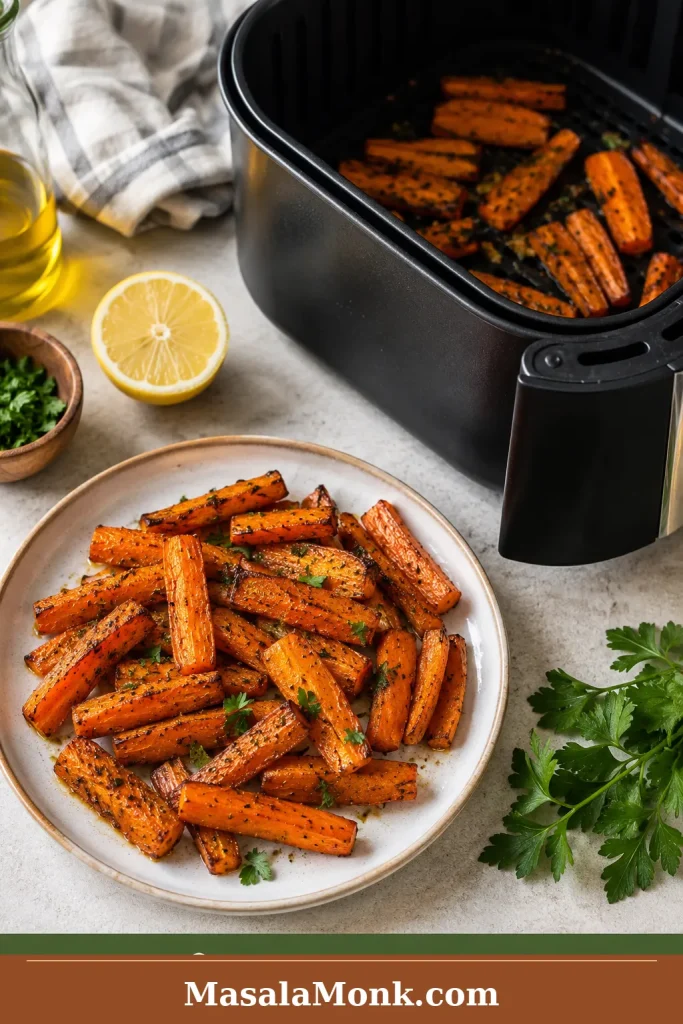
Air fryer roasted carrots with browned edges and herbs served beside an air fryer basket.
Air fryer roasted carrots work best in a loose layer. Shake the basket halfway, then add any sweet glaze lightly near the end.

If the first tray does not come out exactly right, the problem is usually easy to spot from the way the carrots look.

Troubleshooting Roasted Carrots

Roasted Carrots Troubleshooting Guide

Use the visual cues first, then check the table below for the likely cause. Most tray problems come back to moisture, spacing, cut size, time, or glaze timing.
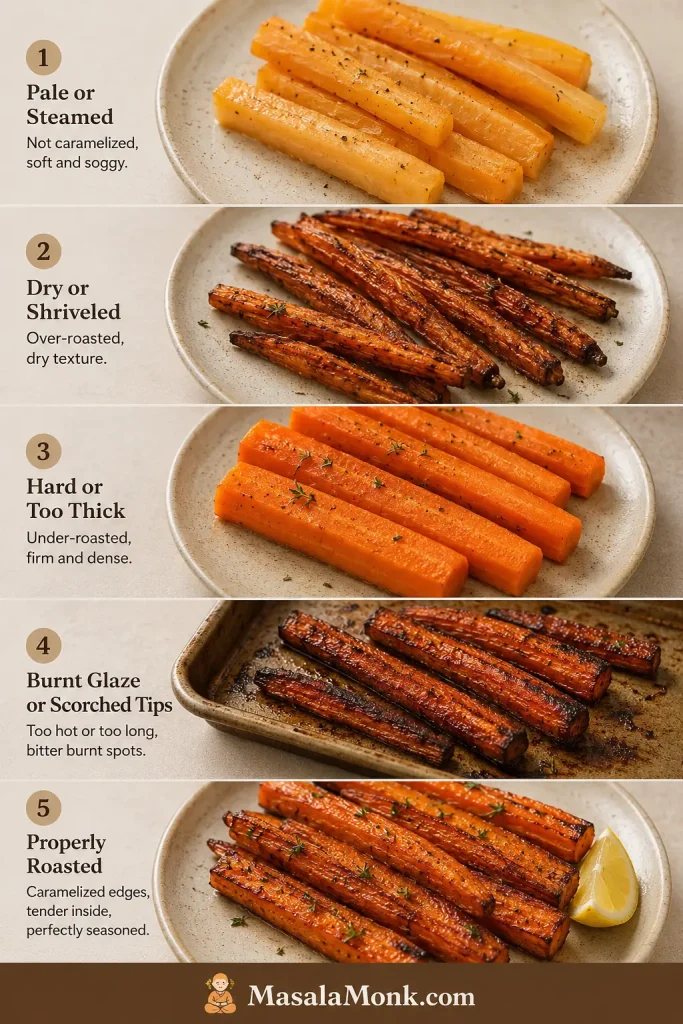
Five-panel troubleshooting guide showing pale steamed carrots, dry shriveled carrots, hard thick carrots, burnt glazed carrots, and properly roasted carrots.
Most roasted carrot problems show up in the way the tray looks. Pale means steam, dry means too thin or too long, hard means undercooked, and burnt usually means the glaze went on too early.

If your carrots come out dry, pale, mushy, hard in the center, or burnt at the tips, the fix is usually small. Use this table for the next tray.

Common Roasted Carrot Problems and Fixes

ProblemLikely CauseFix
Dry or shriveled carrotsPieces too thin, roasted too long, or carrots naturally dryCut thicker pieces, coat evenly with oil, avoid over-roasting, or parboil large/dry carrots first.
Mushy carrotsOvercooked, cut too small, or crowdedCut larger pieces, use one layer, and check earlier.
Hard carrotsPieces too thick, oven too low, or not enough timeKeep roasting until a fork slides in with light resistance; parboil very large carrots next time.
Pale carrotsOven too low, pan crowded, or carrots wetUse 425°F, dry the carrots, and give them space.
Honey burnedHoney added too early or too much usedAdd honey near the end or after roasting.
Maple glaze got sticky and darkToo much syrup or too much heat for too longUse less maple, toss more often, or roast heavy glazes at 400°F.
Garlic burnedFresh garlic added from the beginningAdd fresh garlic halfway, warm it in butter, or use garlic powder.
Uneven carrotsPieces different thicknessesHalve or quarter thick carrot tops lengthwise.
Baby carrots wateryWet from the bag or crowdedPat dry, use a hot pan, and roast in one layer.
Glaze too sweetToo much honey, maple, or brown sugarAdd lemon, vinegar, chili, herbs, black pepper, or flaky salt.

Fixed the issue? Return to the recipe card, choose a glaze finish, or go back to the top.

Should you parboil carrots before roasting?

Most weeknight trays do not need parboiling. A hot oven, even cuts, enough oil, and a single layer are enough.

Parboiling helps when carrots are large, dry, or leathery. Simmer in salted water until just crisp-tender, drain well, let the surface steam dry, then roast until browned. The center softens first, so the oven can focus on caramelized edges.

Make Ahead, Storage and Reheating

Roasted carrots taste best fresh, but the prep is easy to do ahead. Peel and cut the carrots 1 to 2 days in advance and store them in an airtight container in the fridge. If you store cut carrots in water, drain and dry them very well before roasting.

Store leftover roasted carrots in an airtight container in the refrigerator for 3 to 4 days, in line with general USDA leftovers and food safety guidance. Let the carrots cool before covering so steam does not collect inside the container and soften them further.

How to Store Leftover Roasted Carrots

Store the carrots so they stay useful, not soggy. A shallow airtight container helps them cool evenly and makes leftovers easier to add to quick meals.
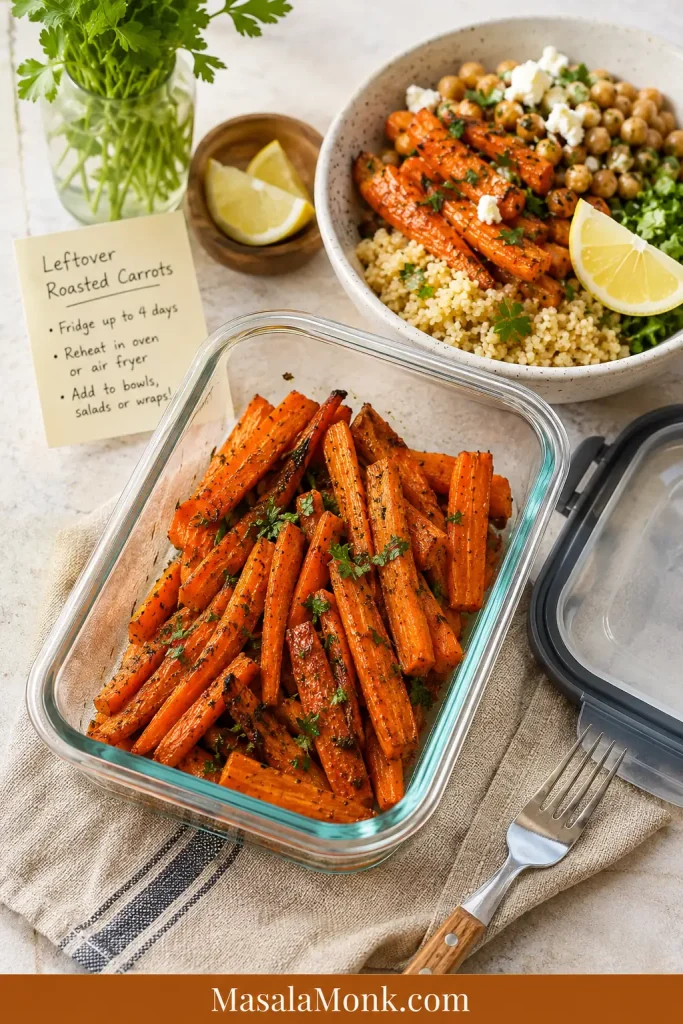
Leftover roasted carrots stored in a glass container beside a grain bowl, lemon, herbs, fork, and storage note.
Leftover roasted carrots can still work hard. Reheat them as a side, or add them to grain bowls, salads, wraps, couscous, soups, and quick meal-prep lunches.

Reheat in a 375°F / 190°C oven until warm, or use an air fryer for small portions. The microwave works, but it softens the edges. Leftover roasted carrots are good warm as a side, chopped into grain bowls, folded through couscous, tossed into salads with something tangy, or blended into a quick soup.

You can freeze roasted carrots, but they soften after thawing. Freeze them only if you plan to use them in soups, purees, sauces, or mash.

Making another tray? Back to the recipe card, check troubleshooting, or back to top.

What to Serve With Roasted Carrots

Roasted carrots bring sweetness, color, and warmth without demanding much attention from the cook. Match the finish to the rest of the plate.

  • Honey or maple glazed carrots: pair them with salty, smoky, or savory mains like ham, roast chicken, turkey, pork, or beef.
  • Creamy mains: finish the carrots with lemon, herbs, black pepper, or something crisp like cucumber salad.
  • Cozy dinners: garlic butter carrots work well beside whole chicken in the crock pot, beef roast, or pork tenderloin in the oven.
  • Fish or salmon: keep the carrots lighter with olive oil, lemon, dill, parsley, or a small honey-balsamic finish. They would work well beside this sockeye salmon recipe.
  • Vegetarian plates: use cumin, chili, lemon, tahini, yogurt, chickpeas, lentils, rice bowls, couscous, or quinoa.
  • Holiday plates: pair the carrots with one creamy side, one green side, and a bright garnish so they do not disappear among rich dishes.

FAQ

These quick answers cover the timing, temperature, glaze, make-ahead, and texture questions that usually come up after the first tray.

What temperature is best for roasting carrots?

425°F / 220°C is the best default. Use a gentler 400°F / 200°C oven for large whole carrots or richer maple and brown sugar glazes.

How long do carrots take to roast at 425°F?

Most cut carrots take 20 to 30 minutes at 425°F / 220°C. Thin slices can finish in 15 to 20 minutes; whole or thick carrots may need 30 to 40 minutes.

Do convection or fan ovens work for roasted carrots?

Yes. Use the same temperature and start checking 3 to 5 minutes earlier. For thin or glazed carrots, 400°F / 200°C may be safer in a strong fan oven.

Should carrots be covered while roasting?

No. Leave them uncovered so steam can escape and the edges can brown. Covering the pan gives softer, less caramelized carrots.

Do you peel carrots before roasting?

Peeling is optional. Fresh, thin-skinned carrots can be scrubbed well. Older or rough-skinned carrots usually taste and look better peeled.

Do baby carrots roast well?

Yes. Pat baby carrots dry first because they are often wet from the bag. Roast them in one layer at 425°F / 220°C for 18 to 25 minutes.

Should honey or maple go on before or after roasting?

Add honey or maple during the final 5 to 10 minutes, or toss it with the carrots after roasting. The carrots should roast first and glaze second.

Can I make roasted carrots without honey or maple?

Yes. Use olive oil, salt, pepper, garlic powder, and herbs, then finish with lemon or vinegar. The carrots will still taste naturally sweet from roasting, just less glossy.

Why did my roasted carrots burn?

The carrots may have been cut too thin, the oven may have been too hot for the glaze, or honey, maple, brown sugar, or fresh garlic may have gone in too early.

Why are my roasted carrots dry?

Carrots can turn dry if they are cut too thin, roasted too long, or not coated with enough oil. Cut medium-thick pieces and pull them when they are just fork-tender with browned edges.

Why are my roasted carrots still hard?

They were probably cut too thick, roasted at too low a temperature, or pulled too early. Keep roasting until a fork slides in with light resistance; for very large carrots, parboil first or roast longer at 400°F / 200°C.

Do you boil carrots before roasting?

Most cut carrots do not need it. Parboil large, dry, or leathery carrots until just crisp-tender, dry them well, then roast for softer centers and less shriveling.

Can roasted carrots be made ahead for holidays?

Yes, but they taste best freshly roasted. For holidays, peel and cut them 1 to 2 days ahead, mix the glaze separately, then roast fresh or slightly under-roast and reheat before serving.

Do carrots and potatoes roast well together?

Yes, but potatoes often need smaller cuts or a head start. Keep everything in one layer so both vegetables brown instead of steam.

Are roasted carrots better with oil or butter?

Oil is better for the base recipe because it handles high heat well. Butter gives richer flavor, but it is best mixed with oil, used in a glaze, or added after roasting.

Final Tips for Better Roasted Carrots

Once the pieces are even, the pan is roomy, and the glaze goes on late, roasted carrots become one of the easiest sides to trust.

  • Safest first tray: keep it simple with olive oil, salt, pepper, and garlic powder.
  • Glossy family side: add honey near the end and finish with lemon or herbs.
  • Holiday platter: use maple, butter, thyme, and one bright or pretty finish.

Once you have made the plain tray once, the rest becomes instinctive. Keep them plain and savory for a weeknight, glossy with honey for family dinner, maple-rich for holidays, or bright with cumin, chili, lemon, and herbs when the plate needs balance. The method stays simple; the finish does the work.
Back to top

Posted on Leave a comment

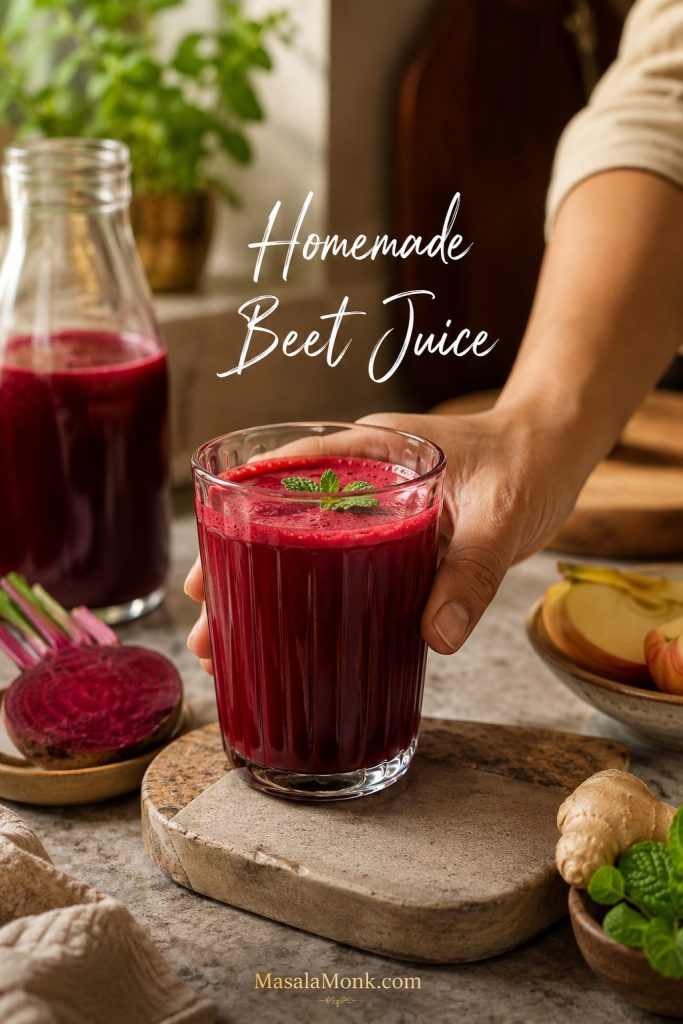
Beet Juice Recipe

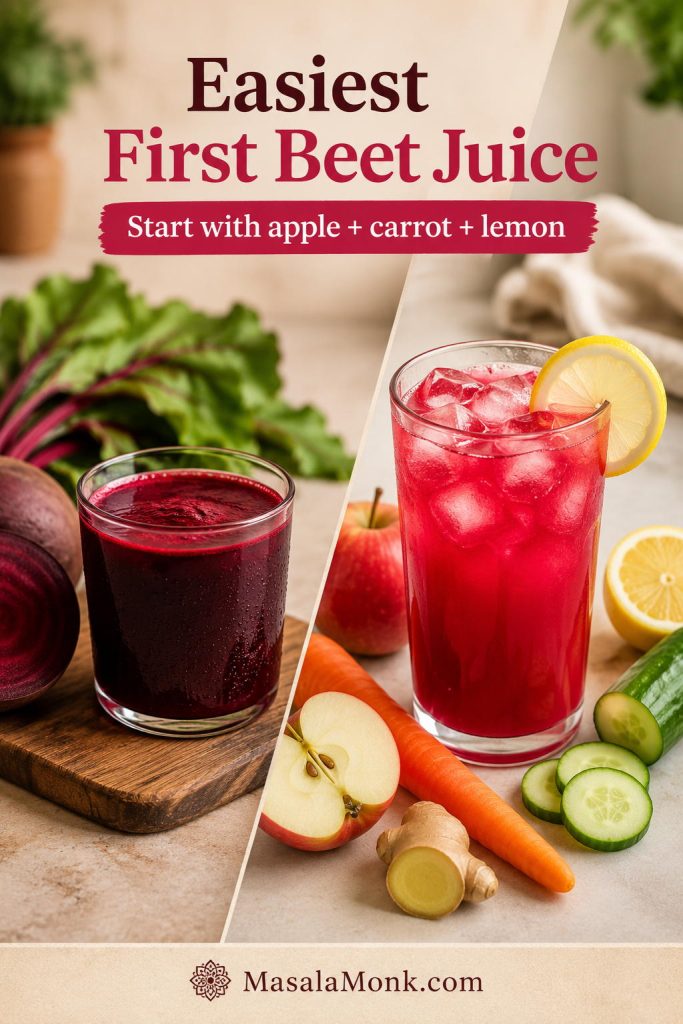
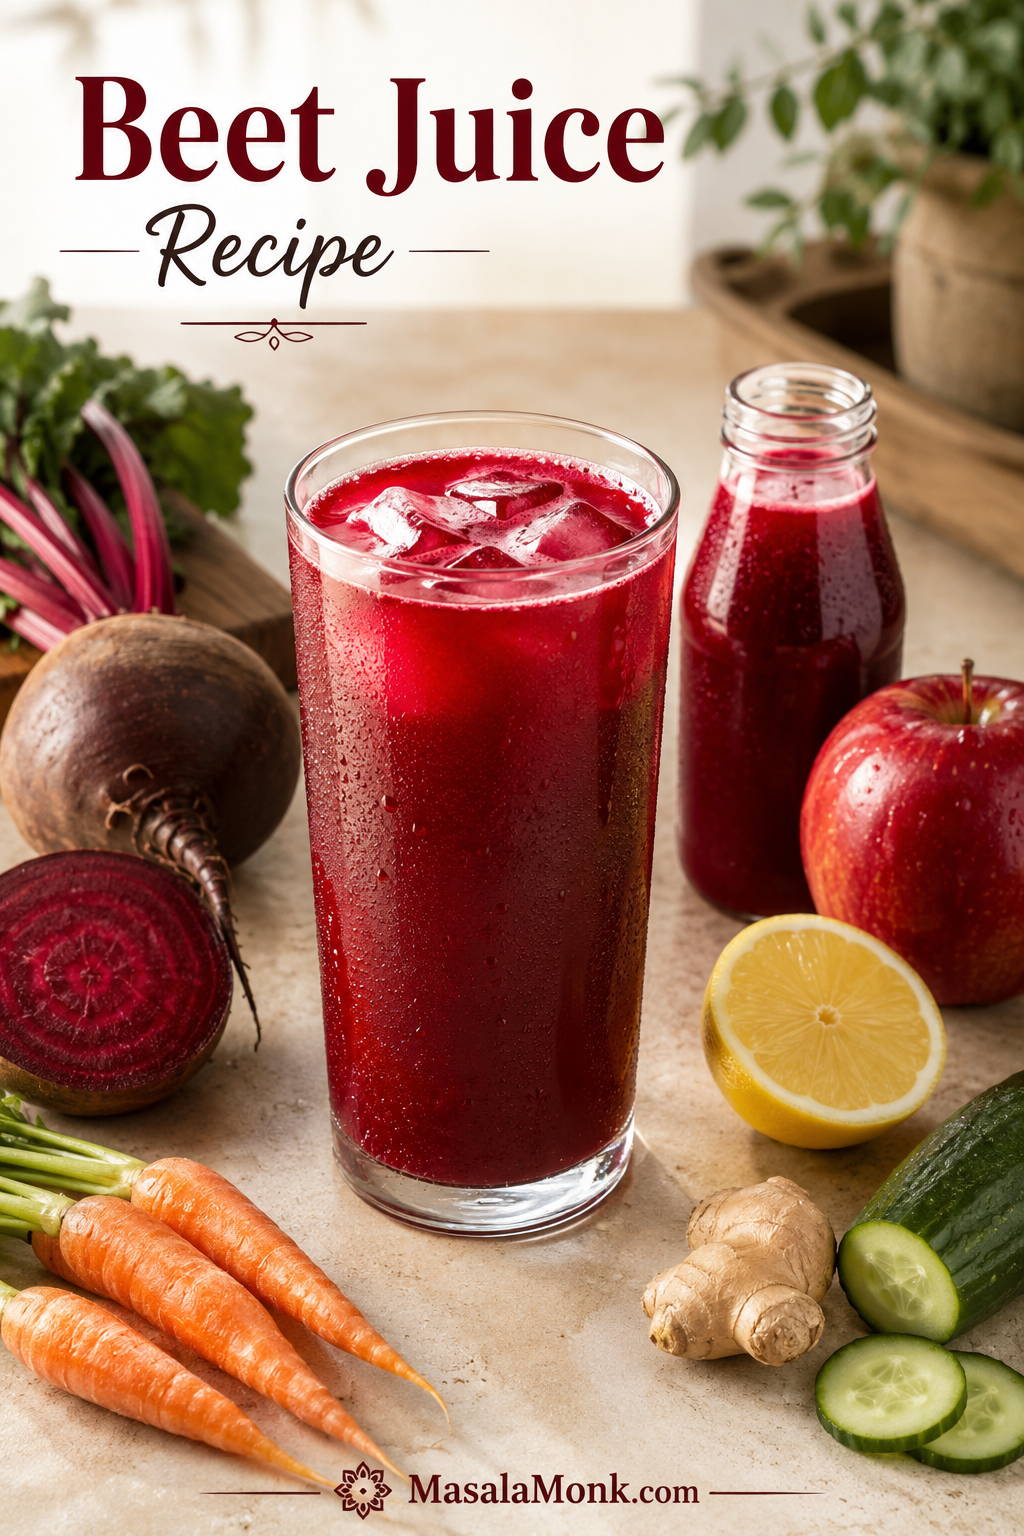
Chilled glass of ruby-red homemade beet juice with ice, a small bottle of juice, and fresh beetroot, carrots, apple, lemon, ginger, and cucumber on a light kitchen surface.

Beet juice can go one of two ways. Made carelessly, it tastes earthy, heavy, and a little too close to drinking a glass of soil. Made with the right balance, it turns into a chilled, ruby-red juice that tastes lively, lightly sweet, tart, and just spicy enough from ginger.

This beet juice recipe is for that second version. It uses raw beetroot for color and depth, carrot and apple for natural sweetness, lemon for brightness, ginger for lift, and optional cucumber to make the whole glass easier to sip. The first taste should feel clear and awake, not muddy.

This is not straight beetroot juice. It is a balanced beet-carrot-apple juice designed to taste cool, tart, lightly sweet, and easy to finish.

You can make this beetroot juice recipe in a juicer for the smoothest texture, or in a blender if you do not own a juicer. The blender version needs water and proper straining, but it still works beautifully when you know what the mixture should look and feel like. It is especially helpful if you are making it for the first time, dislike plain beetroot juice, or want a balanced glass without added sugar.

No juicer at home? Skip to the blender method. Already ready to make it? Jump to the full recipe card.

Start with the quick recipe, then come back to the sections below when you want to adjust the flavor, make it without a juicer, store it safely, or understand what the health claims actually mean.

Beet Juice Recipe Guide

Use this as a quick recipe first, then as a troubleshooting guide whenever you want a smoother blender batch, a less earthy glass, or a safer way to store leftovers.

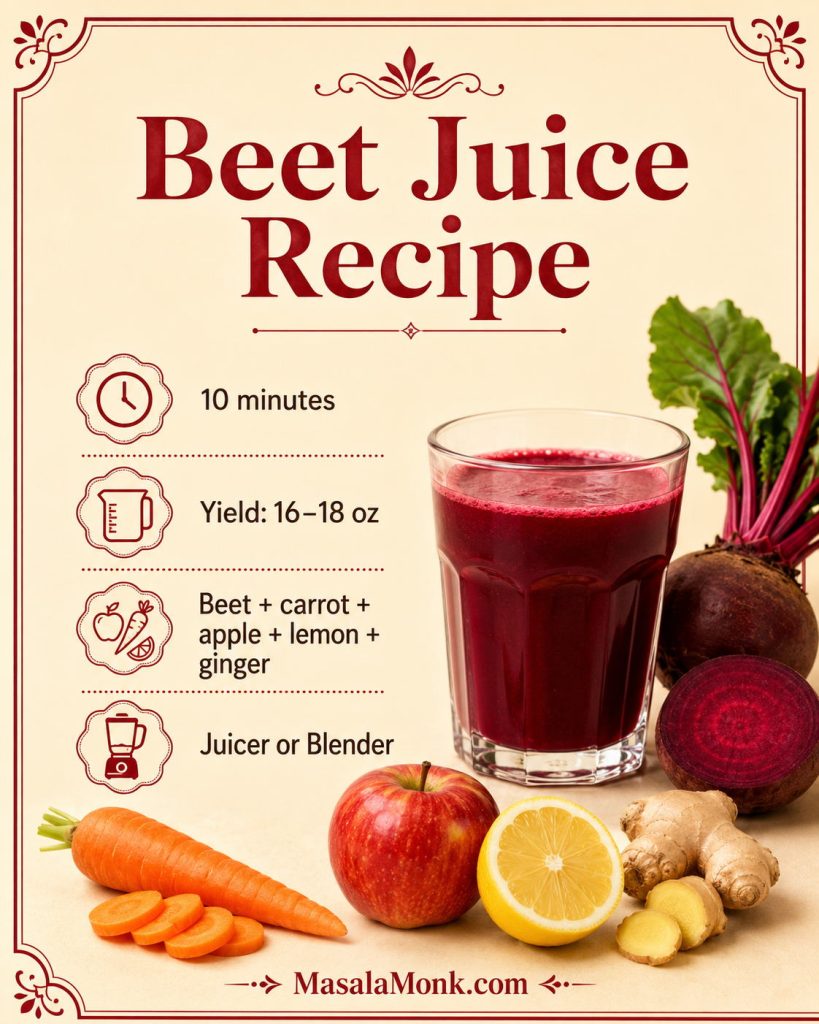
Quick Answer: How to Make Beet Juice

To make beet juice, juice or blend raw beetroot with carrot, apple, lemon, ginger, and optional cucumber. If using a juicer, feed the produce through the machine, then stir in the lemon juice and serve over ice. If using a blender, add cold water, blend until smooth, then strain through a nut milk bag, cheesecloth, or fine mesh strainer.

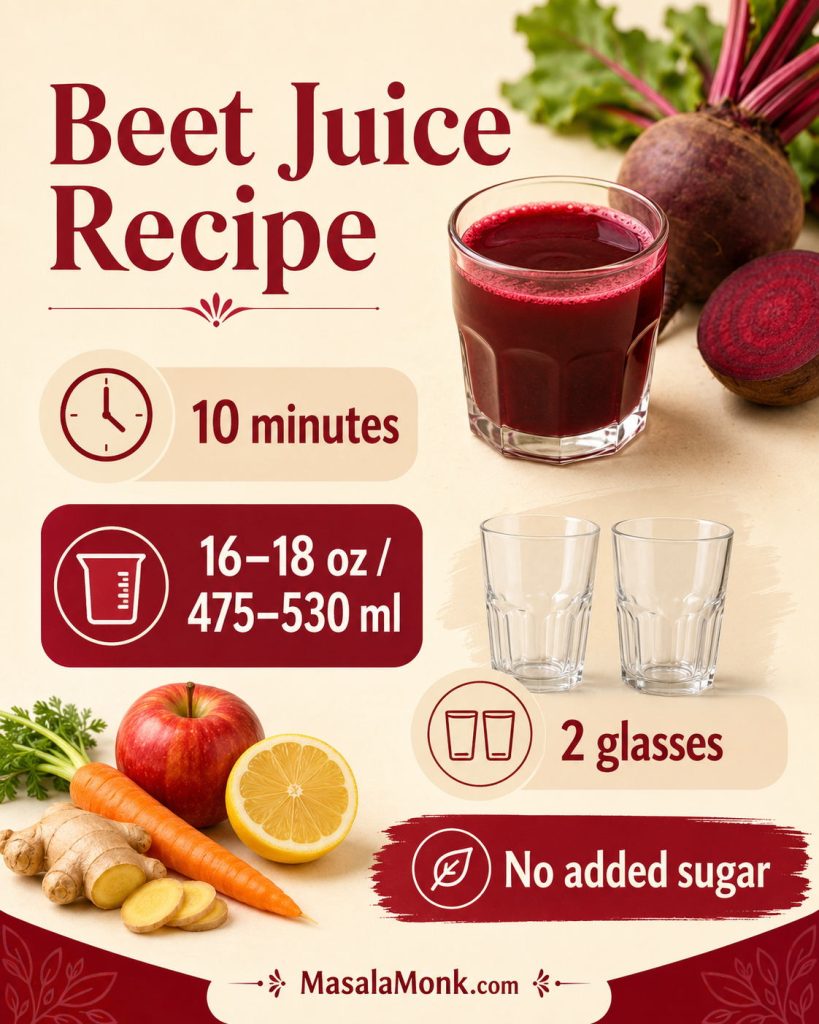
This beetroot juice recipe makes about 16–18 oz / 475–530 ml, enough for 2 standard 8 oz / 240 ml glasses or 3 smaller 5 oz / 150 ml servings. It takes about 10 minutes, uses no added sugar, and tastes brightest right after making. Here, beet juice and beetroot juice mean fresh juice made from raw red beetroot, not pickled beet brine, canned beet liquid, or beet powder mixed into water.

At-a-glance beet juice recipe graphic showing a glass of beet juice, 10 minutes, 16–18 ounces, two glasses, and no added sugar.
Since this fresh beet juice takes about 10 minutes and makes two glasses, it works best as a quick just-made drink rather than a big storage batch.

Easiest first glass: if your first memory of beet juice is something thick, muddy, or aggressively earthy, do not start with straight beetroot. Make the apple-beet-carrot version first, serve it over ice, then adjust lemon, cucumber, or ginger after tasting.

Split image comparing a darker straight beetroot juice with a brighter beginner-friendly apple, beet, carrot, lemon, ginger, and cucumber juice over ice.
When plain beetroot juice tastes too earthy, apple and carrot make the first glass gentler; then lemon, ginger, cucumber, and ice help it feel refreshing.

Still worried about the earthy flavor? See the taste fixes before you make your first batch.

Quick Beet Juice Formula

  • Base: 1 medium-large beetroot or 2 small beets, about 225–250 g / 8–9 oz
  • Balance: 2 carrots and 1 large apple for natural sweetness
  • Brightness: ½ lemon, about 15–20 ml juice
  • Lift: ½–1 inch fresh ginger, about 5–10 g
  • Lightness: ½ cucumber, optional, about 75–100 g / 3–4 oz
  • Blender only: ½–1 cup / 120–240 ml cold water
  • Serve: over ice, right after making

The 10-Minute Version

Juice or blend 1 beetroot, 2 carrots, 1 apple, ½ lemon, ½–1 inch ginger, and optional cucumber. If blending, add ½ cup / 120 ml cold water, blend for 45–60 seconds, strain well, and serve over ice. Add more water only if the blender needs help.

Serve it with breakfast, as an afternoon caffeine-free drink, or as a small pre-workout glass after you know how your body handles it.

Why This Beet Juice Recipe Works

The trick is not hiding the beetroot. It is balancing it. Beetroot gives the drink its deep color, earthy sweetness, and unmistakable flavor, but it needs the right supporting ingredients so the glass does not taste flat or muddy.

Carrot is the quiet helper here: it softens beetroot’s rooty edge without making the glass taste like fruit punch. Apple makes the drink more beginner-friendly. Lemon is the difference between a dull beet juice and one that tastes like it belongs in a glass with ice. Ginger adds a bright, spicy finish. Cucumber is the ingredient to add when the juice feels a little too serious, dense, or beet-forward.

For a beginner-friendly glass, keep beetroot to roughly one-third of the total produce volume and let carrot, apple, cucumber, and citrus do the balancing. If your batch tastes too rooty or heavy, it usually does not need sugar first. It needs acid, coldness, dilution, or a better mix.

Temperature matters too. Room-temperature juice tastes flatter and heavier than a chilled glass, so use refrigerated produce when possible or serve the finished glass over plenty of ice. The final drink should pour easily, taste lightly sweet and tart, and finish with gentle ginger warmth.

What Does Beet Juice Taste Like?

The drink tastes earthy, lightly sweet, mineral-like, and bold. That rooty note is the part people either love or struggle with. Straight beetroot juice can feel intense, especially if you are new to it.

The first sip of this version should be cool and lightly tart, with apple-carrot sweetness in the middle and gentle ginger warmth at the end. Juicer beet juice will feel thinner and clearer. The blender version, even after straining, may feel slightly fuller. Both should still pour like juice, not spoon like a smoothie.

Best beginner version: Use 1 small beet, 2 carrots, 1 apple, ½ lemon, ½ inch ginger, and ½ cucumber. This keeps the beet flavor present but not overpowering.

Once you like the base, adjust one thing at a time: more lemon for tartness, more apple for sweetness, more cucumber for lightness, or more ginger for heat.

Ingredients for the Best Beet Juice

The best glass needs contrast. You want enough beetroot for color and flavor, enough natural sweetness to soften the mineral notes, enough citrus to keep it crisp, and enough chill or cucumber to make it easy to sip.

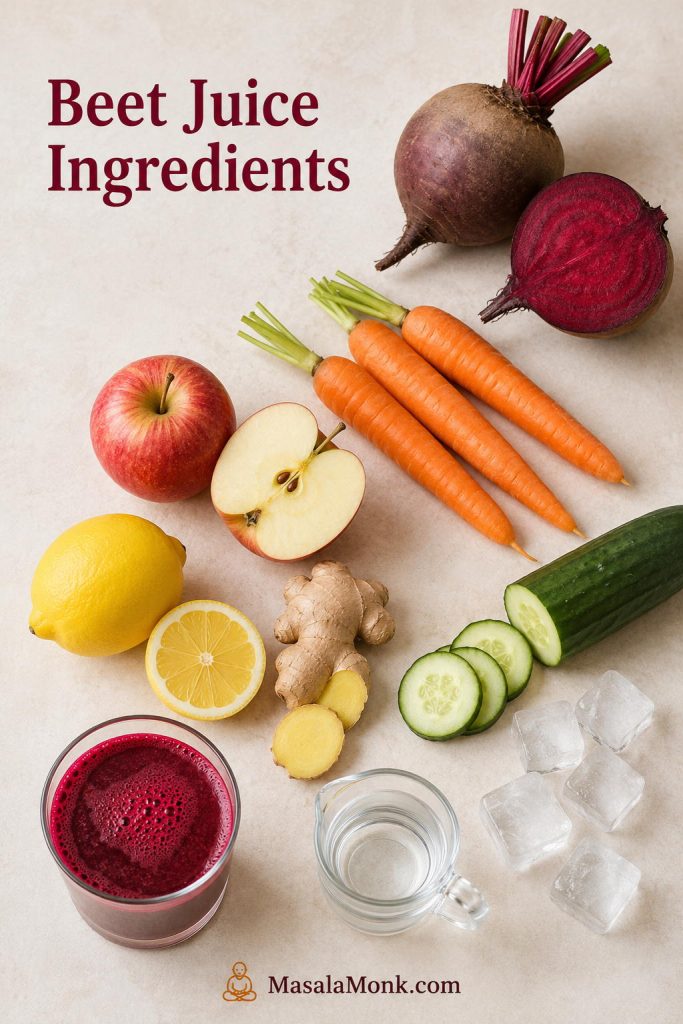
Overhead layout of beet juice ingredients including cut beetroot, carrots, apple, lemon, ginger, cucumber, ice, and water for the blender method.
Each ingredient has a purpose: beetroot adds depth, carrot and apple soften the flavor, lemon lifts it, and ginger gives the juice a cleaner finish.
IngredientAmountWhy it matters
Raw red beetroot1 medium-large or 2 small beets, about 225–250 g / 8–9 ozThe base of the juice; gives color, earthy sweetness, and the classic beet flavor.
Carrots2 medium, about 120–150 g / 4–5 ozAdds natural sweetness and helps round out beetroot’s deeper edge.
Apple1 large, about 170–200 g / 6–7 ozMakes the juice more beginner-friendly and naturally sweet without added sugar.
Lemon½ lemon, about 15–20 ml juiceBrightens the juice and keeps the beet flavor from tasting flat.
Fresh ginger½–1 inch, about 5–10 gAdds warmth, sharpness, and a lively finish.
Cucumber, optional½ small cucumber, about 75–100 g / 3–4 ozLightens the flavor and makes the juice more refreshing.
Cold water½–1 cup / 120–240 ml, blender method onlyHelps the blender move and controls thickness. Do not add it when using a juicer.
IceAs neededMakes the finished glass more refreshing.

Juice yield varies by beet size, carrot freshness, apple variety, juicer type, and how firmly you press the pulp in the blender method. The amounts above usually make about 16–18 oz / 475–530 ml strained juice. A juicer usually gives the clearest yield without added water, while the blender version may make a little more volume because of the water, but with a slightly softer flavor.

Beetroot

Use raw red beets for the brightest color and crispest flavor. Scrub them well because beets grow in soil and often carry grit around the root end. Peeling is optional if the beets are tender-skinned and scrubbed well, but peel them if the skin is rough, bitter, waxed, or hard to clean.

How to Choose Beets for Juice

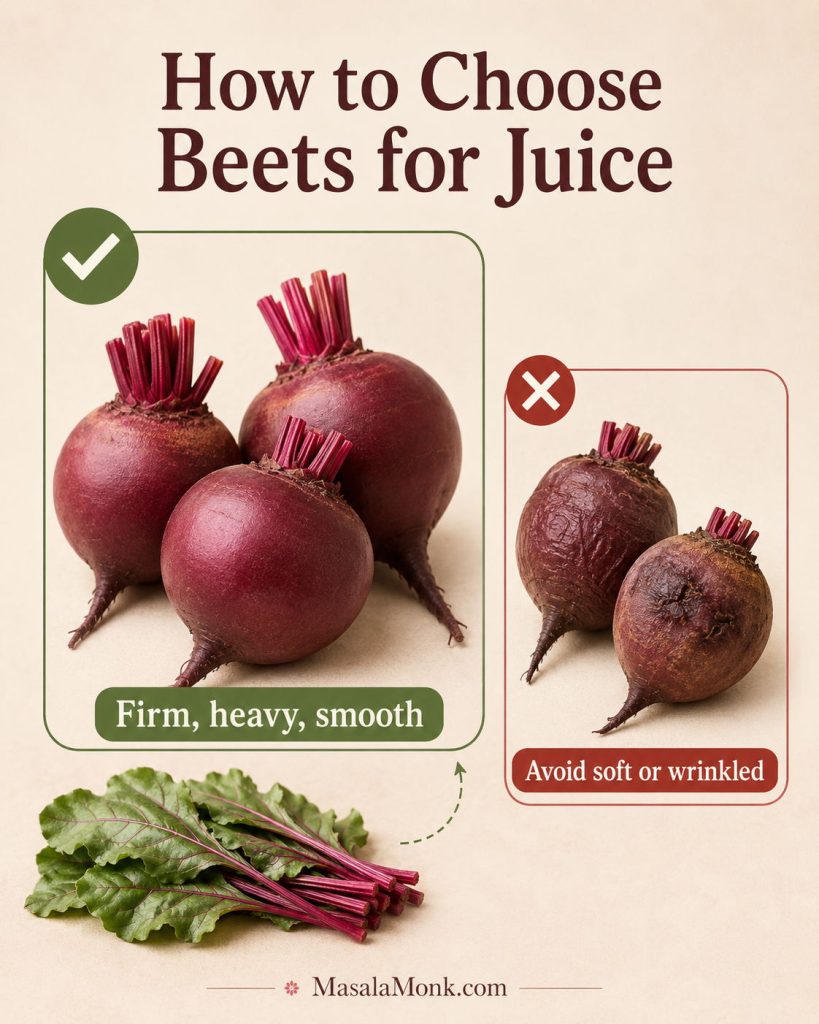
Choose firm, heavy beets with smooth skin and no soft, wrinkled, moldy, or badly bruised spots. Small to medium beets often taste sweeter and less woody than very large ones. If the beets come with greens attached, trim the greens off before storing, then scrub the roots well before peeling or cutting.

Produce guide showing firm fresh beets for juicing next to softer or wrinkled beets to avoid, with beet greens trimmed nearby.
Better beetroot juice starts before you juice anything, so choose firm, heavy, smooth roots and skip soft or wrinkled beets that can taste woody.

If your beets come with greens, save the tender leaves for cooking rather than adding a large handful to this juice. Beet greens can make the drink taste more grassy and bitter.

Carrot

Carrot is one of the easiest ways to make this drink taste better. It brings mellow sweetness without turning the glass into a fruit-heavy juice, and it also works beautifully in apple beet carrot juice, often called ABC juice. MasalaMonk’s guide to vitamins in carrots goes deeper into carrot juice, raw carrots, cooked carrots, and their key nutrients.

Apple

A crisp sweet-tart apple is ideal. Gala, Fuji, Honeycrisp, Pink Lady, or any good eating apple will work. Green apple gives a sharper, less sweet result. Red apple gives a softer, sweeter glass.

Lemon or Lime

Citrus makes the beet taste awake. Stir lemon juice in at the end if you are using a juicer, or peel the lemon and blend it with the produce if you are using a blender. Avoid blending too much white pith because it can make the drink bitter.

Ginger

Fresh ginger makes the flavor lighter and less heavy. Start with ½ inch if you are sensitive to heat. Use the full inch if you want a stronger beet ginger juice with a spicy finish.

Cucumber or Celery

Cucumber is optional, but it is one of the most useful ways to make the glass easier to drink. It increases the yield, cools the flavor, and gives the juice a more refreshing finish. Celery works too, though it tastes more savory and slightly salty. If you like the cucumber-lemon-ginger side of this recipe but want something lighter than juice, MasalaMonk’s guide to cucumber, lemon, and ginger water is a good companion.

Raw Beets vs Cooked Beets for Juice

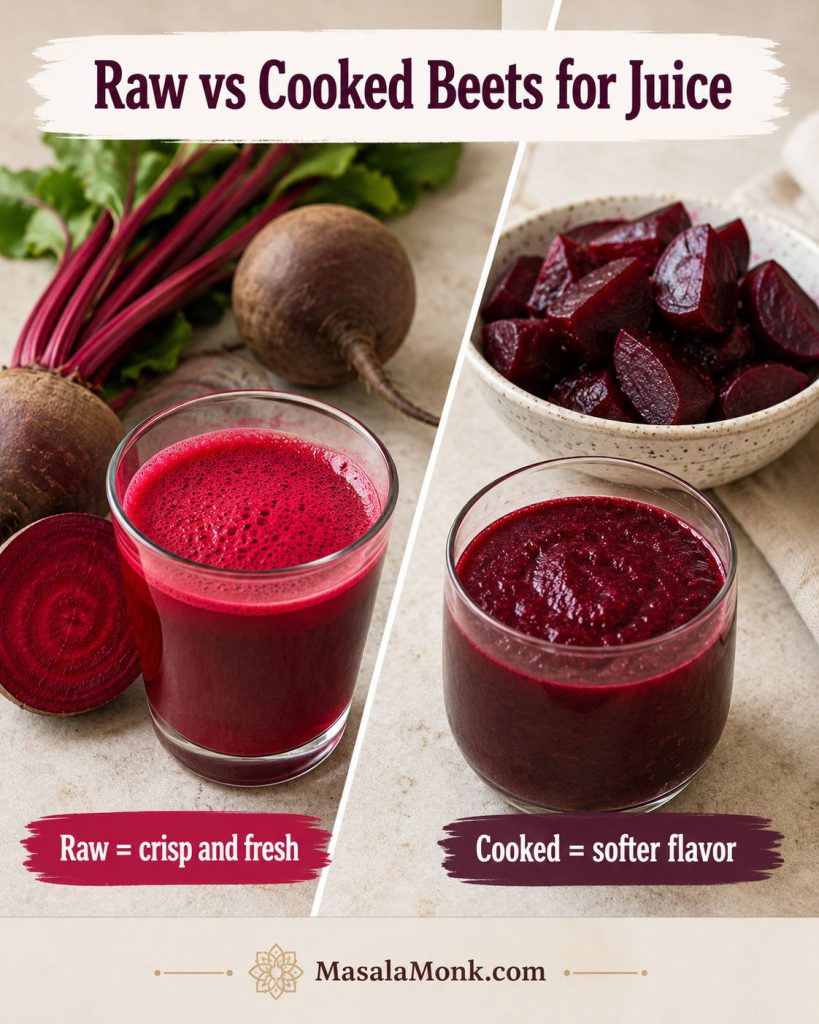
Use raw beets for the most refreshing beet juice. Raw beetroot gives the drink a crisp, earthy-sweet flavor. Cooked beets are softer and sweeter, but they make the drink taste more like cooked beet puree than just-made juice.

Comparison image showing raw beets with bright beet juice and cooked beets with a softer, thicker blended beet drink.
Raw beets make the crispest beet juice, whereas cooked beets create a softer blended drink that tastes closer to beet puree.

If you only have cooked beets, you can blend them with apple, lemon, ginger, and cold water, then strain the mixture. However, cooked beets do not work well in most juicers, and they will not give the same lively flavor as raw beetroot.

Avoid pickled beets for this recipe unless you specifically want a vinegar-heavy drink. Pickled beet juice has a completely different flavor profile because it usually contains vinegar, salt, and sometimes sugar.

How to Make Beet Juice in a Juicer

The juicer method is the fastest way to make a smooth, clear glass. It gives you the crispest flavor because you do not need to dilute the produce with water.

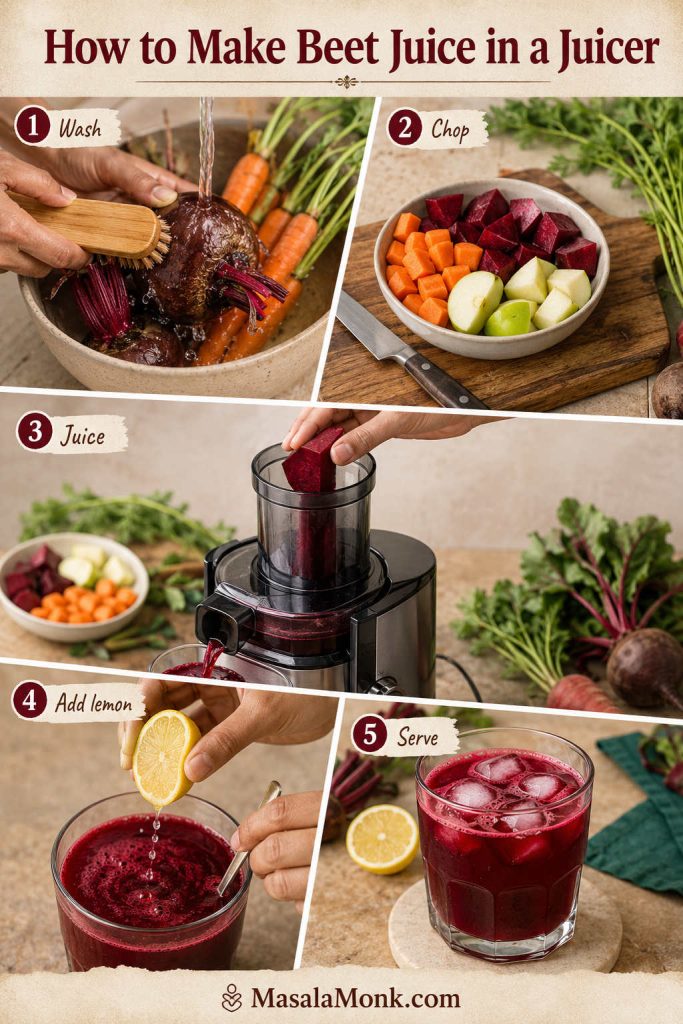
Step-by-step juicer method showing beets and carrots being washed, chopped produce, beetroot going into a juicer, lemon added to juice, and beet juice served over ice.
Because the juicer presses the produce directly, this method gives a smoother, more concentrated glass without needing blender water.
  1. Wash and scrub the produce. Pay special attention to the beetroot and carrots.
  2. Trim the beetroot. Cut off the root end and any rough top area.
  3. Peel if needed. Peeling is optional for tender-skinned beets that have been scrubbed well. Peel rough, waxed, or dirty beets.
  4. Cut everything to fit the juicer chute. Do not force oversized beet chunks through the machine.
  5. Juice the beet, carrots, apple, cucumber, and ginger. Alternate hard and softer produce so the juicer runs smoothly.
  6. Stir in lemon juice. Adding lemon at the end keeps the citrus flavor lively.
  7. Serve over ice. Drink right away for the brightest taste.

The finished juice should pour easily and look deep ruby-red, not thick like puree. Fresh juice naturally separates as it sits, so stir or shake it before drinking. If the flavor tastes flat, add a little more lemon. If it feels too heavy, pour it over extra ice or add cucumber next time.

How to Make Beet Juice in a Blender Without a Juicer

If you came here wondering how to make beetroot juice without a juicer, the blender method is the easiest place to start. It asks for one extra step — straining — but that step is what turns a thick beet puree into something you actually want to sip.

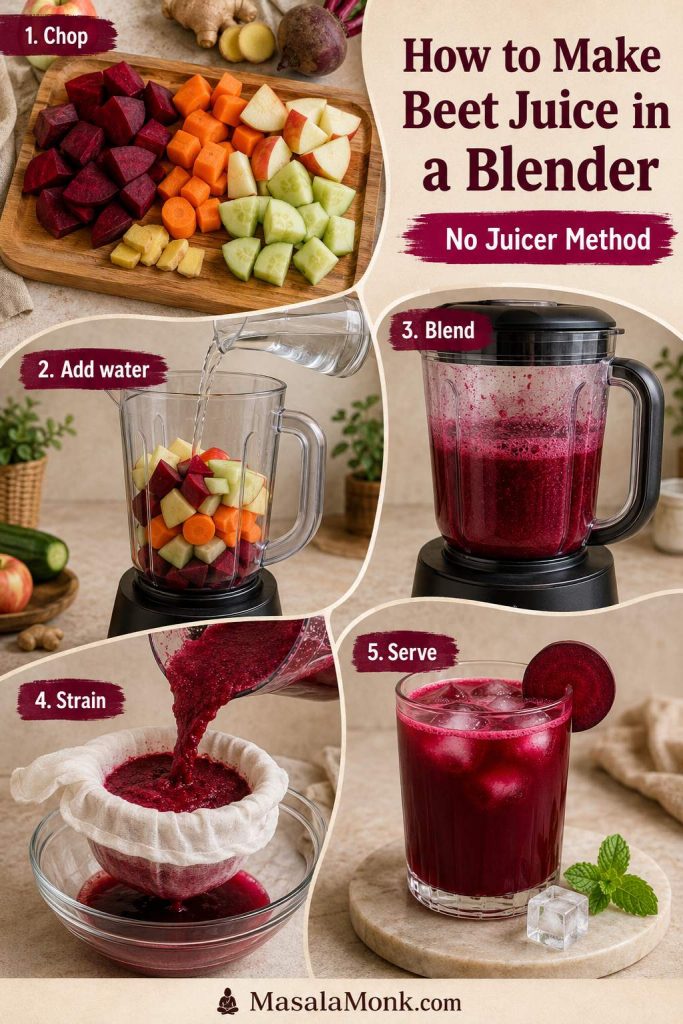
Step-by-step blender method showing chopped beetroot, carrot, apple, cucumber, and ginger, water added to a blender, blended beet puree, straining, and a final glass of juice.
For the no-juicer method, the goal is not a thick smoothie; use just enough water to blend, then strain until the juice pours cleanly.

Still deciding between tools? Compare juicer vs blender beet juice before choosing your method.

  1. Chop the produce smaller than you would for a juicer. Dice the beetroot, carrot, apple, cucumber, and ginger so the blender can handle them.
  2. Add ½ cup / 120 ml cold water first. This helps the blades move without making the juice weak.
  3. Blend on high for 45–60 seconds. The mixture should look like a smooth, thick ruby puree.
  4. Add more water only if needed. If the blender stalls or groans, pause, scrape down the sides, and add water 2 tablespoons / 30 ml at a time, up to 1 cup / 240 ml total.
  5. Strain the mixture. Pour it into a nut milk bag, cheesecloth-lined strainer, or fine mesh strainer set over a bowl or jug.
  6. Let it sit briefly, then squeeze. Give it 2–5 minutes to drain, then press or squeeze to extract as much juice as possible.
  7. Serve over ice. Drink while the flavor is still lively.

How to Strain Beet Juice Smoothly

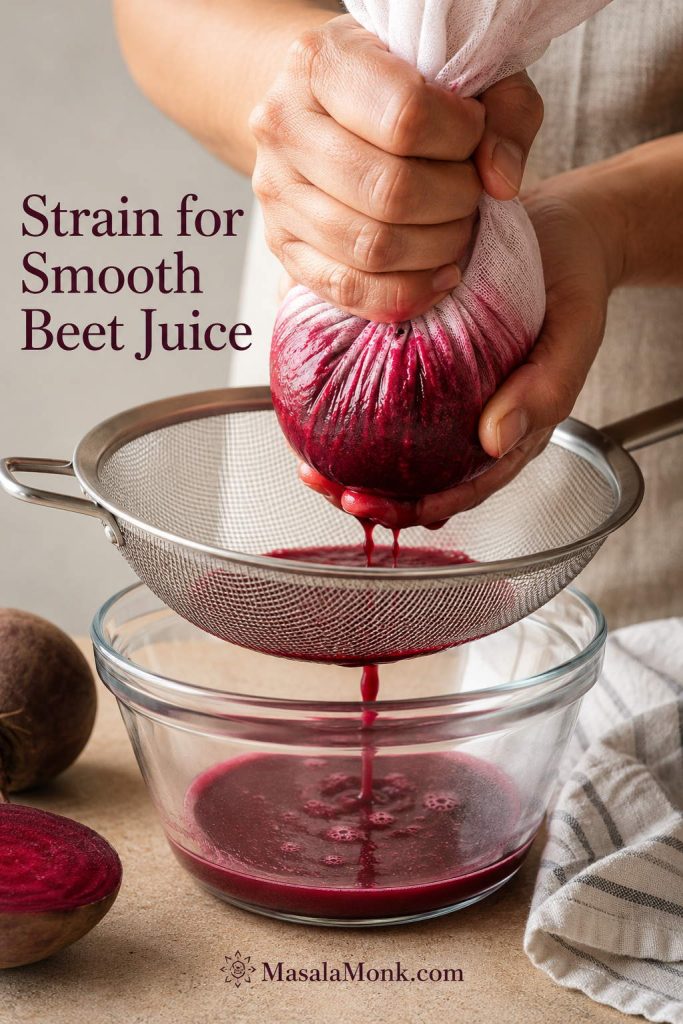
For blender beet juice, the straining step is where the texture changes from thick puree to a lighter drink. Give the pulp a few minutes to drain before squeezing, especially if you are using a nut milk bag.

Close-up of hands straining blended beet juice through a nut milk bag or fine mesh strainer into a bowl.
Straining is the step that turns blended beet puree into a lighter, smoother glass of drinkable beet juice.

Blender note: If your first batch looks more like a thick smoothie than juice, you have not failed. It just needs better straining, smaller beet pieces, or a little more patience while the pulp drains. If your blender is not very powerful, use the full 1 cup / 240 ml water and blend in two rounds if needed.

For a little more yield, add 2–3 tablespoons / 30–45 ml cold water to the squeezed pulp, stir or briefly blend again, then strain once more. Skip this second press if you want the strongest flavor.

If your batch is already too thick, watery, or sharp, jump to the troubleshooting guide.

Equipment Needed

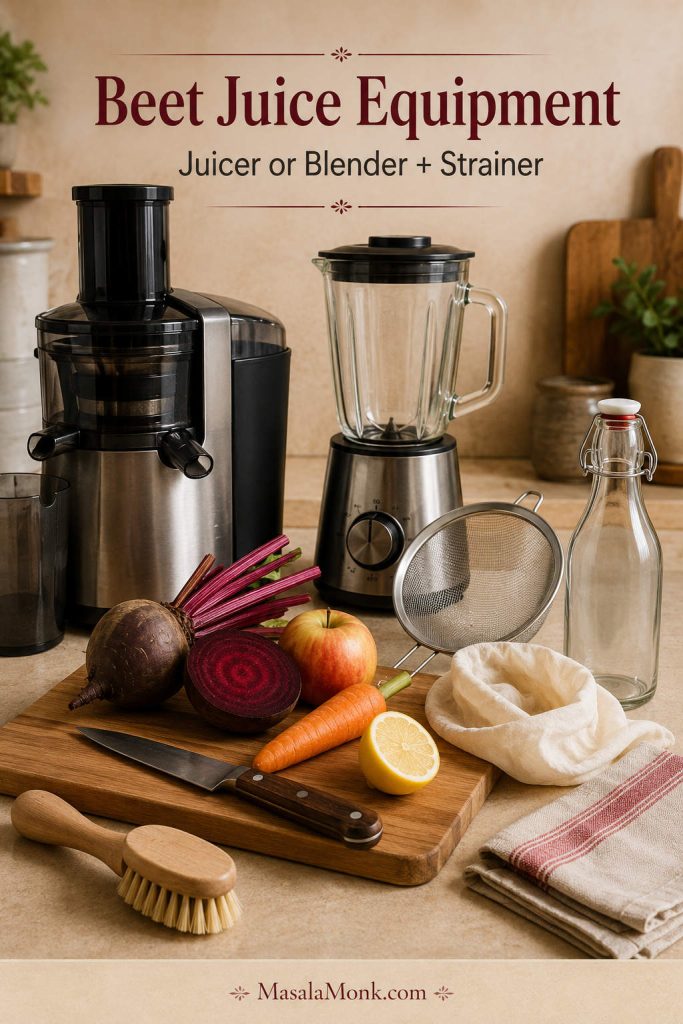
Beet juice is simple, but it is not tidy. A little setup saves you from pink fingers, stained towels, and a blender that refuses to move. A juicer gives the smoothest glass, while a blender works well as long as you give it enough liquid and strain properly.

Kitchen counter with beet juice equipment including a juicer, blender, strainer, knife, cutting board, vegetable brush, glass bottle, towel, and fresh produce.
Set up the juicer or blender, strainer, cutting board, and bottle before you start; as a result, beet juice prep stays cleaner and faster.
  • Juicer: best for thin, smooth juice with no added water.
  • Blender: useful if you do not own a juicer; you will need water and a strainer.
  • Nut milk bag, cheesecloth, or fine mesh strainer: needed for the blender method.
  • Vegetable brush: helpful for scrubbing raw beets and carrots.
  • Washable cutting board and knife: important because beet juice stains.
  • Glass bottle or jar: useful if refrigerating leftovers.

Stain warning: Beet juice is beautiful in the glass and ruthless on white towels. Wipe spills quickly, rinse tools right away, and use gloves if you do not want pink fingers.

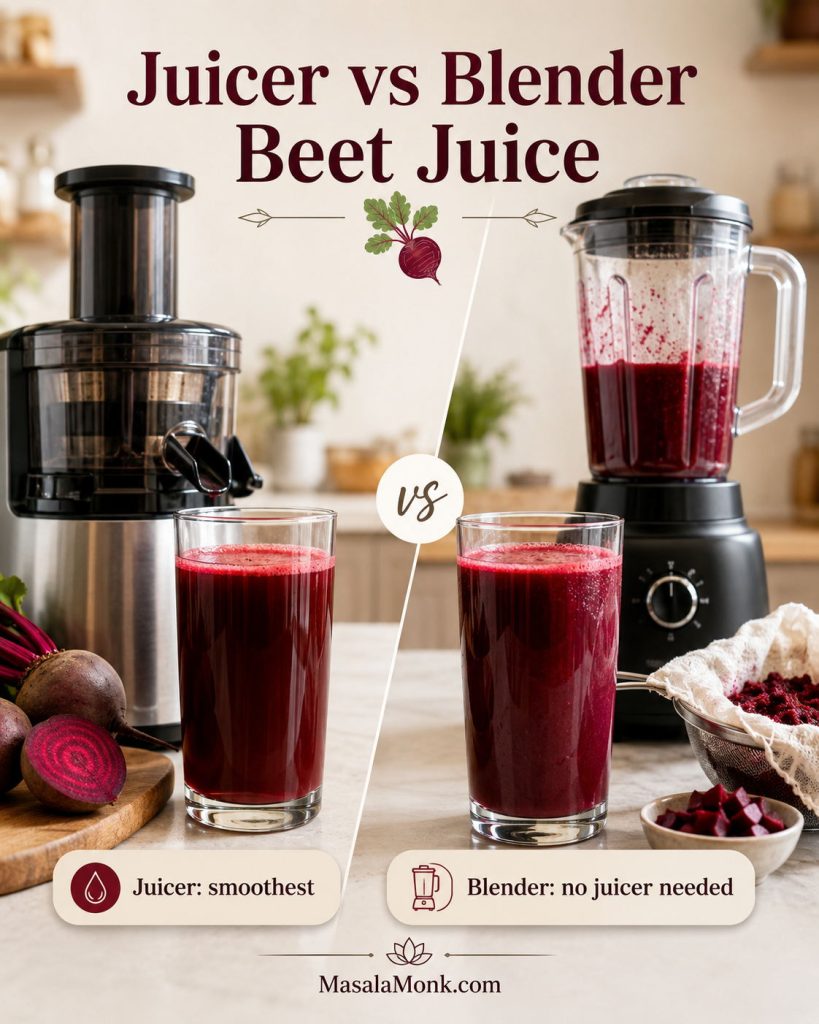
Juicer vs Blender: Which Method Is Better?

Both methods work, but they do not produce exactly the same drink. A juicer gives you a clearer, lighter result. A blender gives you more flexibility if you do not own a juicer, but you need water and straining.

Side-by-side comparison of beet juice made in a juicer and beet juice made in a blender with a strainer nearby.
Choose the juicer when you want the clearest texture, or use the blender when accessibility matters more than a perfectly light finish.
MethodBest forTextureProsCons
JuicerSmooth beet juiceThin, smooth, brightFast, no added water, smoothest juice textureRequires a juicer
Blender + strainerNo-juicer homesSlightly thicker but still juice-likeAccessible, flexible, works with common equipmentNeeds water and straining
Blender, unstrainedThicker blended drinkPulpy, smoothie-likeKeeps more fiber, less wasteNot a true clear juice
Beet powderConvenienceDepends on brand and mixingFast, shelf-stableNot the same flavor or texture as fresh beet juice

If you are deciding whether to buy a juicer, a cold press juicer is often preferred for fresh juice quality, while centrifugal juicers are usually faster and more affordable. MasalaMonk’s guide to cold press vs centrifugal juicers explains the difference in more detail.

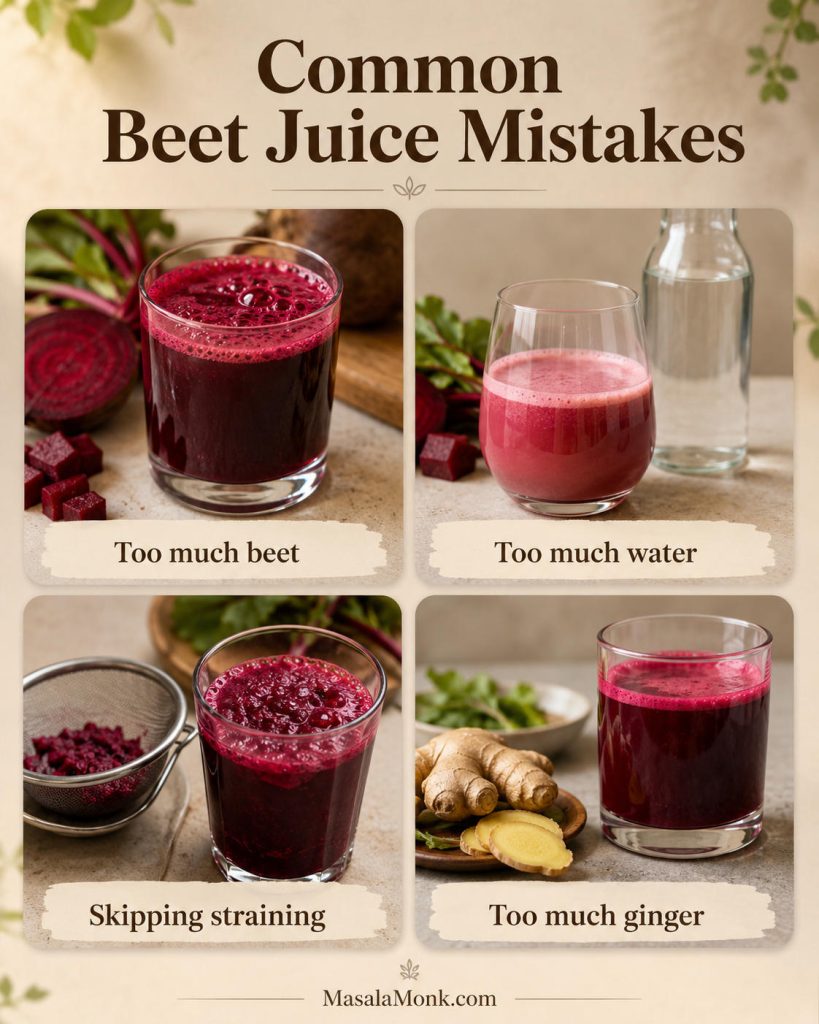
Common Beet Juice Mistakes to Avoid

Most disappointing batches come from a few simple mistakes. Before you start, avoid these and the drink becomes much easier to love.

Four-panel beet juice mistakes graphic showing too much beet, too much water, skipping straining, and too much ginger.
Most disappointing batches come from balance issues: too much beet, water, pulp, or ginger can make the glass taste heavy, weak, thick, or harsh.
  • Using only beetroot as a beginner: a pure beetroot batch can taste too intense. Start with apple, carrot, lemon, and ginger.
  • Adding too much blender water: begin with ½ cup / 120 ml and add more only if the blender needs help.
  • Skipping the strainer: unstrained blender juice will be thick and pulpy, closer to a smoothie.
  • Overdoing sharp ingredients: too much ginger or citrus pith can make the juice harsh or bitter, so start small and use lemon juice or peeled citrus.

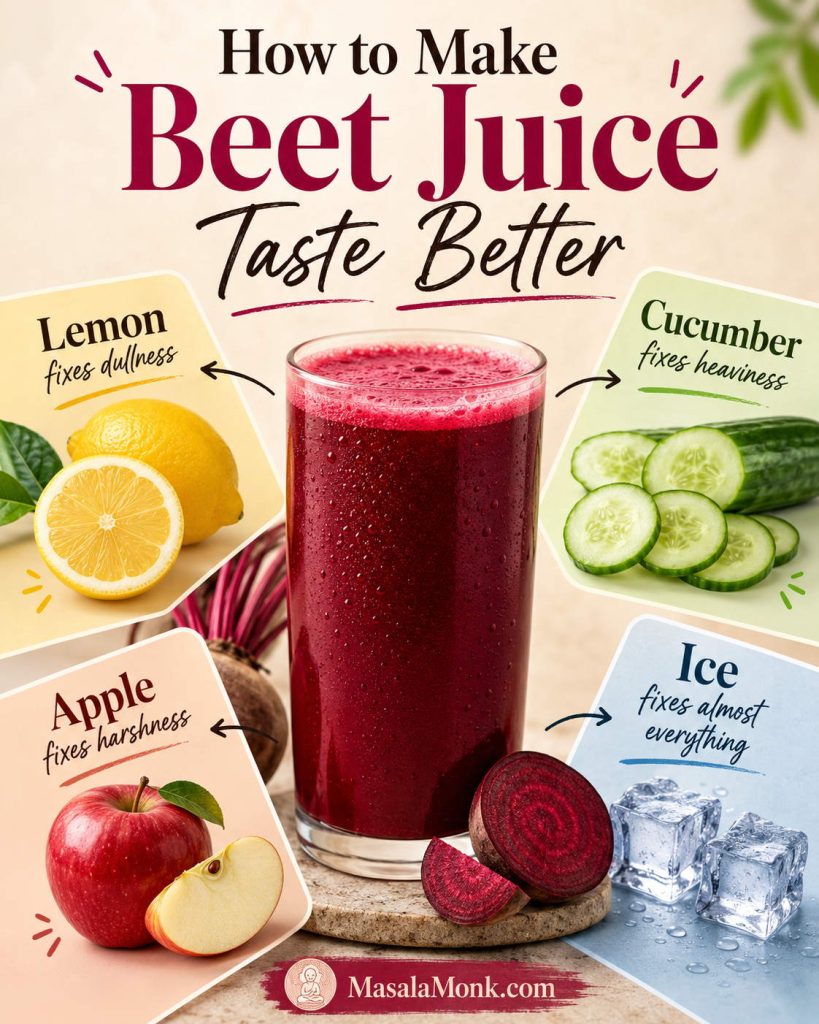
How to Make Beet Juice Taste Better

The main reason people give up on this drink is not the color or the effort. It is the taste. Beetroot is naturally earthy, so it needs brightness, sweetness, chill, or dilution to feel balanced.

Beet juice taste-fix graphic with lemon, cucumber, apple, and ice around a glass of beet juice.
A strong beet flavor usually needs contrast, not sugar; citrus, cucumber, apple, or ice can shift the drink from heavy to refreshing.
ProblemFix
Too earthyAdd more apple, orange, lemon, cucumber, or carrot.
Too sweetAdd lemon or lime, cucumber, celery, or a little extra ginger.
Too sharp from gingerUse ½ inch ginger instead of 1 inch next time. Dilute this batch with more apple, carrot, or cucumber juice.
Too thickUse a nut milk bag or cheesecloth and squeeze well. Add a little cold water if needed.
Too wateryUse less water next time. Start with ½ cup / 120 ml for blender juice and add only as needed.
Too bitterPeel citrus fully and avoid blending too much white pith.
Too strong for beginnersUse half a beet and increase the carrot or apple.
Not refreshingServe over ice or chill the juice before drinking.

The easiest beginner version is beetroot with both apple and carrot. The crispest version adds cucumber and lemon. The punchiest version leans on ginger and citrus. If the glass tastes flat, it almost always needs lemon. If it tastes heavy, it needs cucumber, ice, or less beet next time.

Remember this flavor rule: lemon fixes dullness, cucumber fixes heaviness, apple fixes harshness, and ice fixes almost everything.

Once the basic glass tastes right, the variations become much easier. You are not guessing anymore; you are choosing whether you want the drink sweeter, sharper, lighter, or stronger.

For the gentlest first variation, try the apple beet carrot juice version.

Best Beet Juice Variations

Once you know the base formula, this juice is easy to adjust. Use these variations as mini-recipes. The juicer method works as written. For the blender method, add ½–1 cup / 120–240 ml cold water and strain unless the variation says it is a smoothie.

Easy Beet Juice Combinations

VariationMini formulaBest for
Apple Beet Carrot Juice / ABC Juice1 beet + 1 apple + 2 carrots + ½ lemon + optional ½ inch gingerBeginner-friendly sweetness and a softer beet flavor
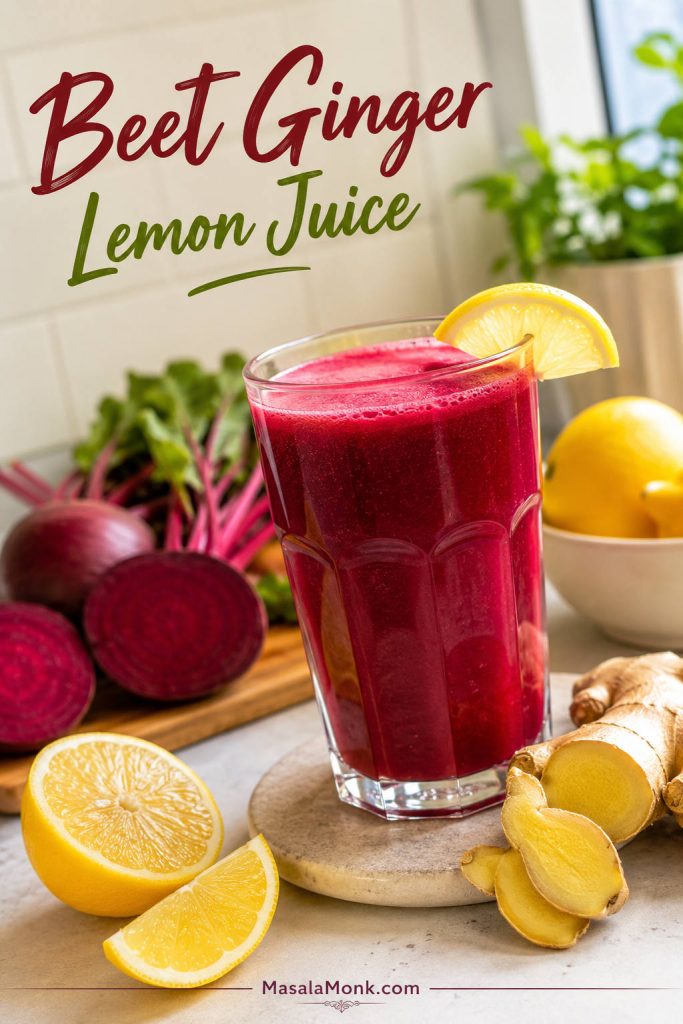
Beet Ginger Lemon Juice1 beet + 1 apple + ½ lemon + 5–10 g ginger + optional cucumberA sharper, livelier juice
Beet Orange Juice1 beet + 1 peeled orange + 1 carrot + 5 g gingerA citrusy breakfast-style glass
Beet Pineapple Juice1 beet + 1 cup pineapple chunks + ½ cucumber + ½ lemonA sweeter tropical version
Beet Pomegranate Juice1 beet + ½–¾ cup unsweetened pomegranate juice + ½ lemonA tart, deep red juice
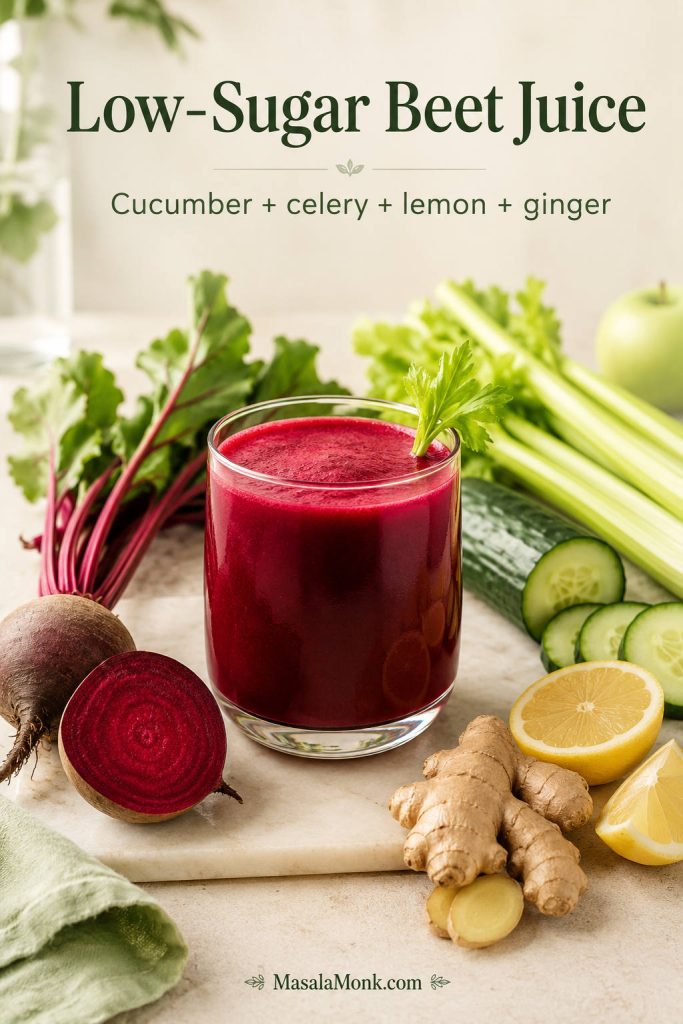
Low-Sugar Beet Juice½–1 beet + ½ cucumber + 1 celery stalk + ½ lemon + ½ inch gingerA lighter vegetable-forward version
Beet Turmeric Ginger Juice1 beet + ½ inch ginger + small piece fresh turmeric or ¼ tsp ground turmeric + ½ lemonA strong, spicy flavor
Beet Juice ShotBeet + lemon + ginger + small apple piece if neededSmall 2–3 oz / 60–90 ml servings
Beet Juice SmoothieBeet juice or blended beet + banana or berries + yogurt or plant milkA thicker, more filling drink

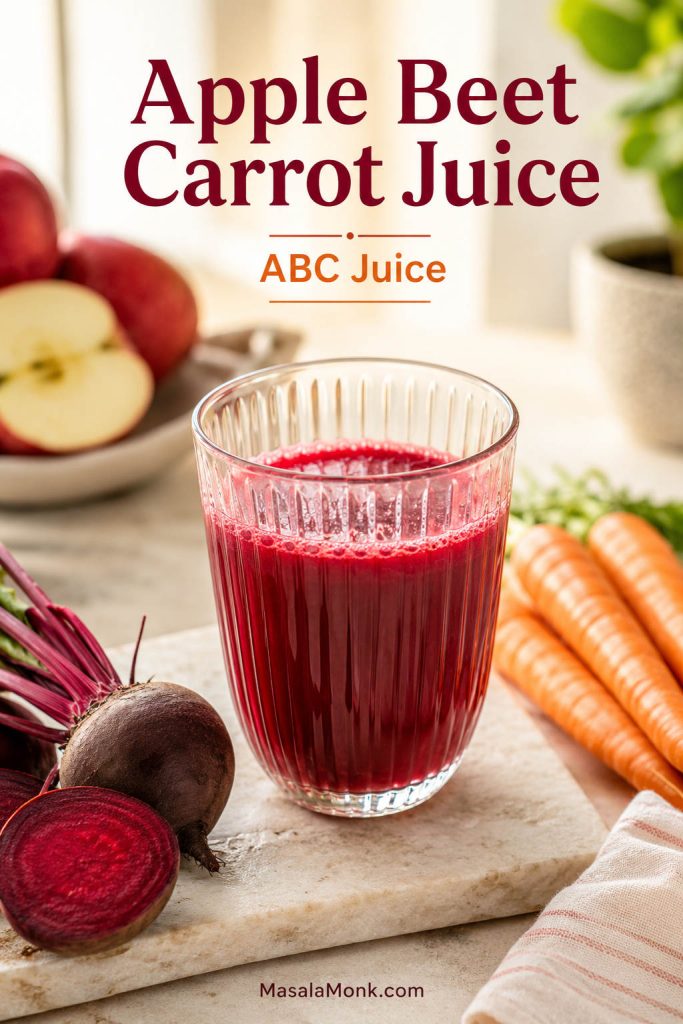
Apple Beet Carrot Juice / ABC Juice

This is the safest first version if beetroot usually tastes too strong to you. Use a sweet apple for a softer drink or green apple for a sharper one. The carrot keeps the juice mellow, so the beet still shows up without taking over the glass. For more beetroot drink ideas, including beet-ginger-turmeric and ABC-style combinations, see MasalaMonk’s guide to the power of beetroot and beet juice.

Glass of apple beet carrot juice with fresh apple, beetroot, and carrots on a bright breakfast-style kitchen surface.
Apple beet carrot juice, often called ABC juice, is the gentlest variation because carrot and apple mellow beetroot’s earthy edge.

Beet Ginger Lemon Juice

This version is sharper and less sweet. It is the one to make when you want beet ginger juice with a brighter, spicier finish. Start with less ginger unless you already know you like the heat.

Glass of beet ginger lemon juice with fresh lemon wedges, lemon half, ginger slices, and beetroot nearby.
Beet ginger lemon juice is the sharper variation, so it works well when you want more citrus brightness and a warmer ginger finish.

Beet Orange Juice

Orange makes the drink rounder and more breakfast-friendly. Peel the orange well so the white pith does not make it bitter. This is a good choice when you want something sweeter than lemon but brighter than apple alone.

Beet Pineapple Juice

Pineapple gives this variation tropical sweetness that helps soften the deep beet flavor. Cucumber keeps the drink from becoming too syrupy. This is especially useful when you want the juice to taste more fruity and less vegetable-heavy.

Beet Pomegranate Juice

Pomegranate makes the juice tart, deep, and bold. For the easiest version, use unsweetened pomegranate juice. If using fresh pomegranate arils, blend gently and strain very well, or juice them only if your juicer handles pomegranate arils cleanly.

Low-Sugar Beet Juice

This version skips most of the fruit and uses cucumber, celery, lemon, and ginger for a cleaner vegetable-forward flavor. It will not taste as sweet as the apple-carrot version, but it is lighter and more refreshing.

Glass of low-sugar beet juice with beetroot, cucumber, celery, lemon, ginger, and a small green apple in a light kitchen scene.
For low-sugar beet juice, lean on cucumber, celery, lemon, and ginger; that way, the drink stays vegetable-forward without tasting flat.

Beet Turmeric Ginger Juice

This has a strong, spicy flavor. Use turmeric carefully because it can dominate the drink. Add black pepper only if you already like that taste; it is not needed for the recipe to work.

Beet Juice Shot

A beet shot is stronger and smaller than a full glass. Keep the beet, lemon, and ginger more concentrated, then use just enough apple to soften the edge if needed. Serve 2–3 oz / 60–90 ml at a time.

Beet Juice Smoothie

To turn this into a smoothie, do not strain the blended mixture. Add banana, berries, yogurt or plant milk, and a little ginger. A smoothie keeps more pulp and fiber, so it will be thicker and more filling than strained beet juice. For more smoothie-style ideas, MasalaMonk’s guide to high-iron smoothies and shakes includes beetroot-friendly combinations that lean more filling than juiced.

Flavor comes first. Once the drink is something you actually enjoy, then it makes sense to talk about where it fits in a routine.

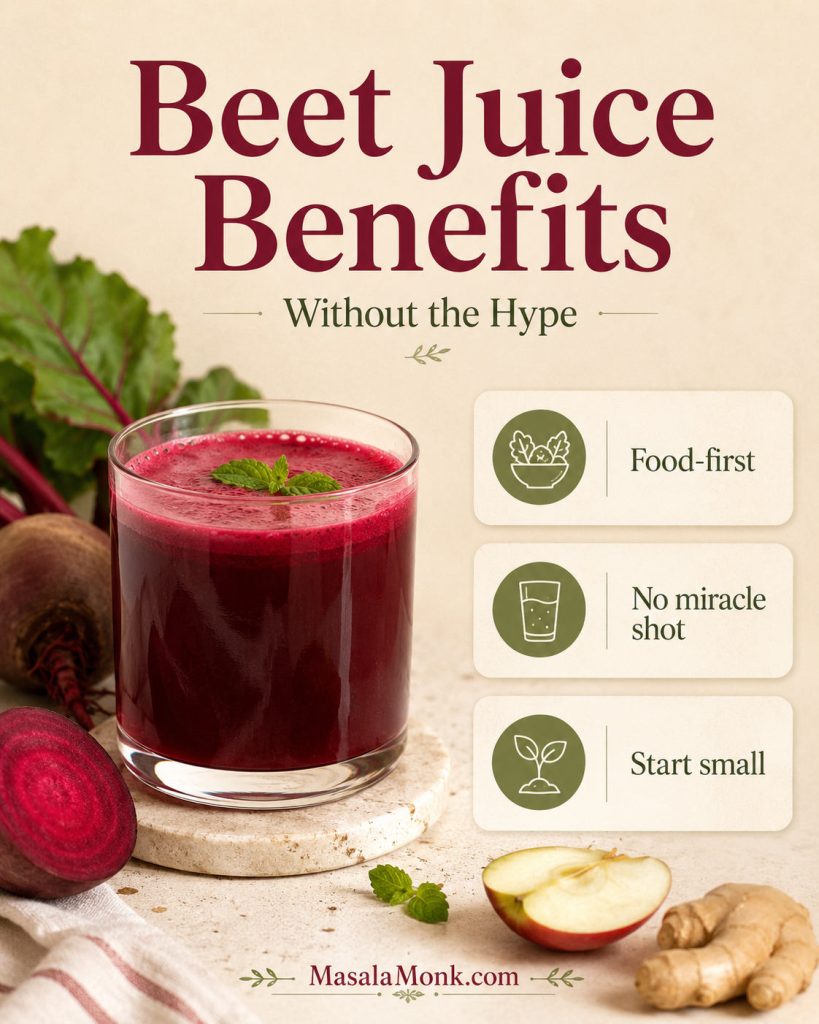
Beet Juice Benefits, Without the Hype

Once the flavor is right, the next question is usually what this drink actually does for you. The honest answer is that beet juice can be useful, but it works best when you treat it as food, not as a miracle shot.

Think of this as a bright vegetable drink with a few smart use cases: a small pre-workout serving, a lower-sugar vegetable-forward version, or an occasional way to enjoy beets when you do not feel like eating them.

Calm beet juice benefits graphic with a glass of beet juice, beetroot, and cards reading food-first, no miracle shot, and start small.
Beet juice can fit into a healthy routine, although it is still best treated as a food-first drink rather than a miracle wellness shortcut.

Planning to drink it often? Read the safety notes before making beet juice a daily habit.

Beetroot is naturally colorful, plant-rich, and known for dietary nitrates. Much of the research interest comes from those nitrates and their possible effects on cardiovascular markers. You can read more about that research background on PubMed.

At the same time, juice is not the same as eating whole beets. When you juice and strain beets, carrots, and apples, you remove much of the fiber. That makes the drink lighter and easier to sip, but it also means it is less filling than whole vegetables or a smoothie.

If you care about…Best way to use this juice
Blood pressure interestKeep servings moderate and check with a qualified professional if you take medication or tend to run low.
Workout useTry a small strained serving first, not a huge pulpy glass right before training.
Weight-conscious drinkingUse cucumber, celery, lemon, ginger, less fruit, and no added sugar.
Daily nutritionRotate it with whole vegetables, smoothies, meals, and other drinks instead of making it your only “healthy” habit.
Detox-style flavorUse cucumber, celery, lemon, and ginger for a crisp, light glass without treating it as a cleanse.

For a broader look at whole beets beyond juice, MasalaMonk’s guide to what beets are good for covers beetroot as a food, not just as a drink.

Is Beet Juice Good for Weight Loss?

For weight-conscious readers, the most useful approach is a moderate, vegetable-forward drink — especially when you keep fruit lower and skip added sugar. It is not a fat-loss shortcut, but it can fit into a balanced routine when the portion and ingredients make sense.

The same idea applies to other “weight loss drink” combinations too. MasalaMonk’s article on pineapple, cucumber, and ginger for weight loss separates useful habits from miracle claims without treating the drink as a shortcut.

Lighter Beet Juice Formula

  • ½–1 beetroot
  • ½ cucumber
  • 1 celery stalk
  • ½ lemon
  • ½ inch ginger
  • Optional: ½ green apple if you need a little sweetness

This version is less sweet and more vegetable-forward. For more fullness, choose an unstrained beet smoothie instead of strained juice because the smoothie keeps more fiber.

Beet Juice and Blood Pressure

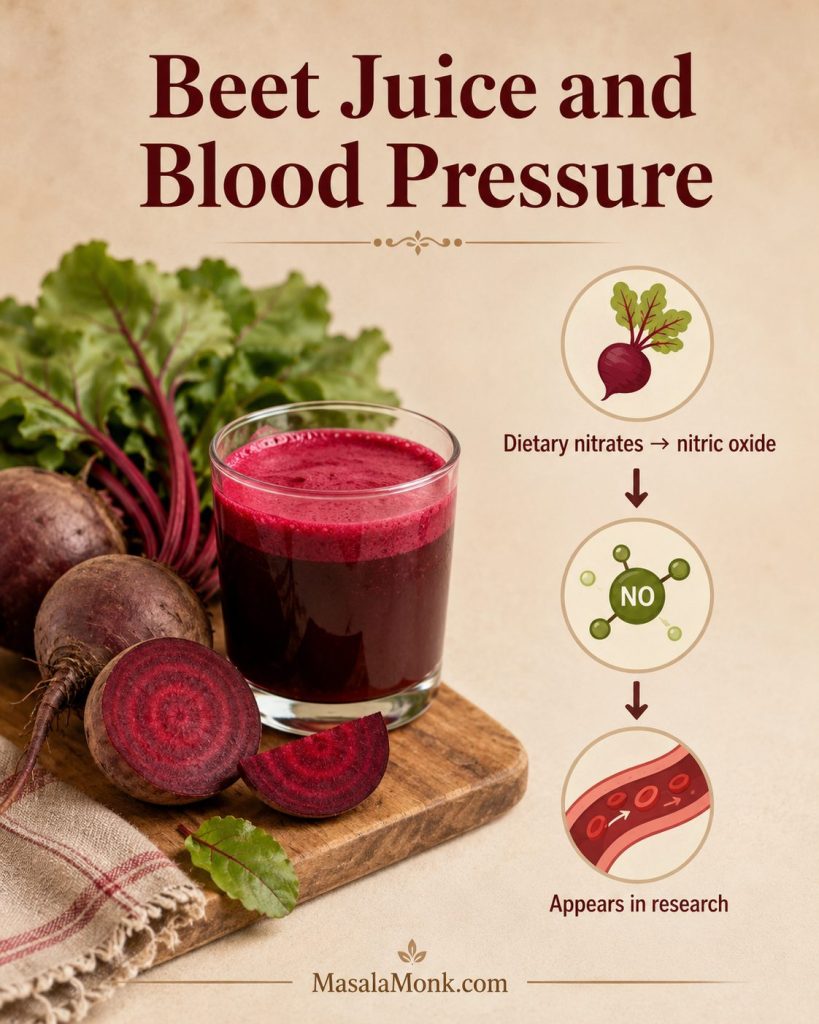
Beetroot contains dietary nitrates, which is why this drink often comes up in blood pressure conversations. Still, drinking it once in a while is different from turning it into a daily habit; regular use matters more if you already take medication or tend to run low.

Beetroot’s dietary nitrates can be converted in the body into nitric oxide, a compound involved in blood-vessel relaxation and blood flow, which is why beet juice appears in blood pressure research.

Educational graphic showing beet juice, beetroot, dietary nitrates converting to nitric oxide, and a simple blood-flow research cue.
The blood-pressure conversation around beetroot juice starts with dietary nitrates, so this is a research-aware food habit rather than a cure claim.

Any blood-pressure effect can vary by person, serving size, timing, and overall diet, so treat this as a food habit to discuss if it overlaps with medication or a medical condition.

If you have low blood pressure, take blood pressure medication, have kidney concerns, or manage a medical condition, treat regular beet juice as something to discuss with your healthcare professional rather than a casual daily habit.

For the broader caution list, see side effects and safety notes.

MasalaMonk has a deeper article on beets and blood pressure if you want a more focused discussion of fresh, canned, pickled, and juiced beets.

Is Beet Juice a Detox or Liver Cleanse?

If you like the word “detox” because you mean light, cold, vegetable-forward, and refreshing, beet juice can fit that mood. If you mean a drink that cleanses the liver, flushes toxins, or resets the body, it does not work that way.

Your liver and kidneys already do the work of filtering and processing waste. A glass of beet juice can be colorful and refreshing, but it should not be treated as a liver cleanse or cure.

For a detox-style flavor without the misleading promise, use beetroot, cucumber, celery, lemon, and ginger. It will taste crisp and clean, but it is still just a drink.

Beet Juice for Energy or Pre-Workout

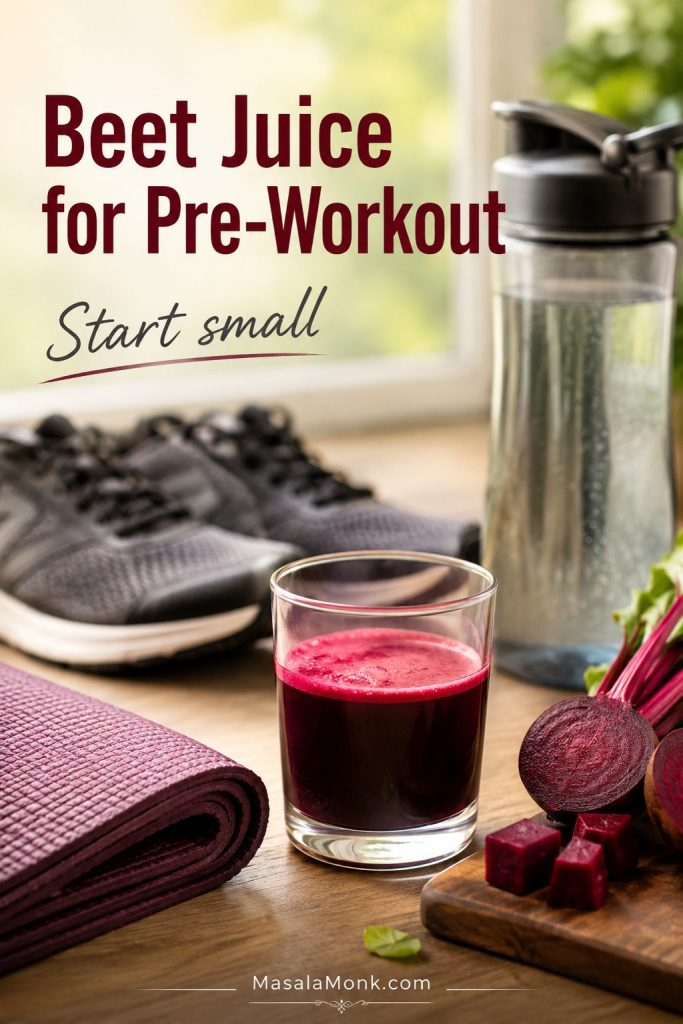
Runners, cyclists, and workout-focused readers often pay attention to beet juice because of beetroot’s natural nitrate content. If you want to try it before exercise, start with a small serving first. Some people tolerate it easily; others find that a large or pulpy drink feels too heavy before movement.

Small glass of beet juice near running shoes, a water bottle, a workout mat, and fresh beetroot in natural morning light.
Before using beet juice as a pre-workout drink, try a small strained serving first so you can see how your stomach handles it.

For a pre-workout style version, keep the flavor bright and the texture light: beetroot, orange or apple, lemon, and ginger works well. If you are using the blender method, strain it thoroughly so the drink is easier to sip before exercise.

For performance use, many beetroot juice studies focus on nitrate dose and timing rather than casual sipping, so treat a small pre-workout glass as an experiment, not a guaranteed effect.

When to Drink Beet Juice and How Much to Start With

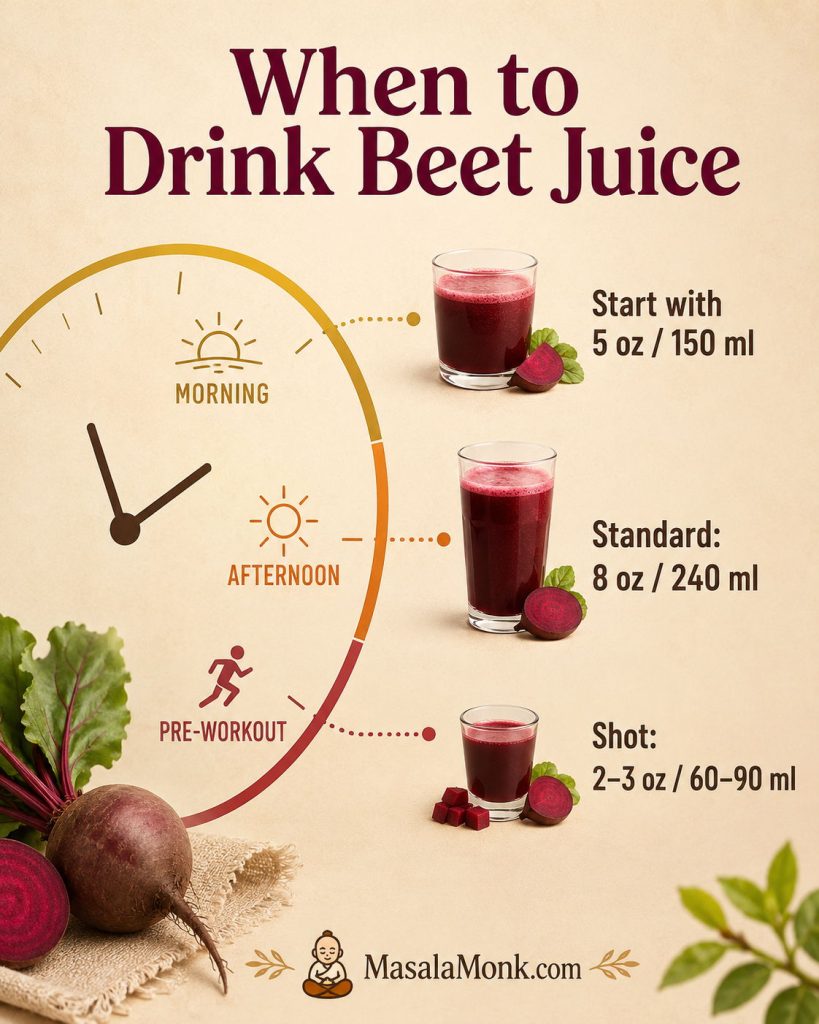
There is no single perfect time to drink beet juice. Choose the moment that fits how you want to use it and how your body responds. If you are new to this drink, start with a smaller serving because the flavor, color, and digestive effect can surprise people, especially if the glass is strong or ginger-heavy.

Timing and serving-size guide for beet juice with morning, afternoon, pre-workout cues and 5 ounce, 8 ounce, and 2–3 ounce serving sizes.
Start with 5 oz of beet juice, then adjust the timing and portion based on your routine, taste, digestion, and reason for drinking it.
  • Morning: a simple option with or after breakfast, especially if raw juice bothers your stomach on its own.
  • Afternoon: useful when you want something cool, colorful, and caffeine-free.
  • Before a workout: try a small strained serving first; avoid a large pulpy glass right before training.
  • Night: fine for many people, but skip it late if it bothers your digestion or makes you wake up to use the bathroom.
  • Daily: keep portions reasonable and rotate with whole vegetables, fruits, smoothies, meals, and other drinks.
  • Small serving: 5 oz / 150 ml
  • Standard serving: 8 oz / 240 ml
  • This recipe yield: about 16–18 oz / 475–530 ml
  • Beet shot: 2–3 oz / 60–90 ml

You do not need to turn beet juice into a daily project to enjoy it; a good glass now and then still counts. Occasional beet juice and daily beet juice are not the same decision, especially if you have blood pressure, kidney-stone, digestive, or blood sugar concerns.

After drinking beet juice, some people notice pink or red urine or stool. This is often called beeturia and can happen after eating or drinking beets. It is usually harmless, but if you are unsure whether the color is from beets or something else, or if you have pain or unusual symptoms, seek medical advice.

The sections below cover storage and safety because homemade beet juice is raw, deeply pigmented, and more concentrated than eating a few slices of beetroot.

Fresh Beets vs Canned Beets vs Beet Powder

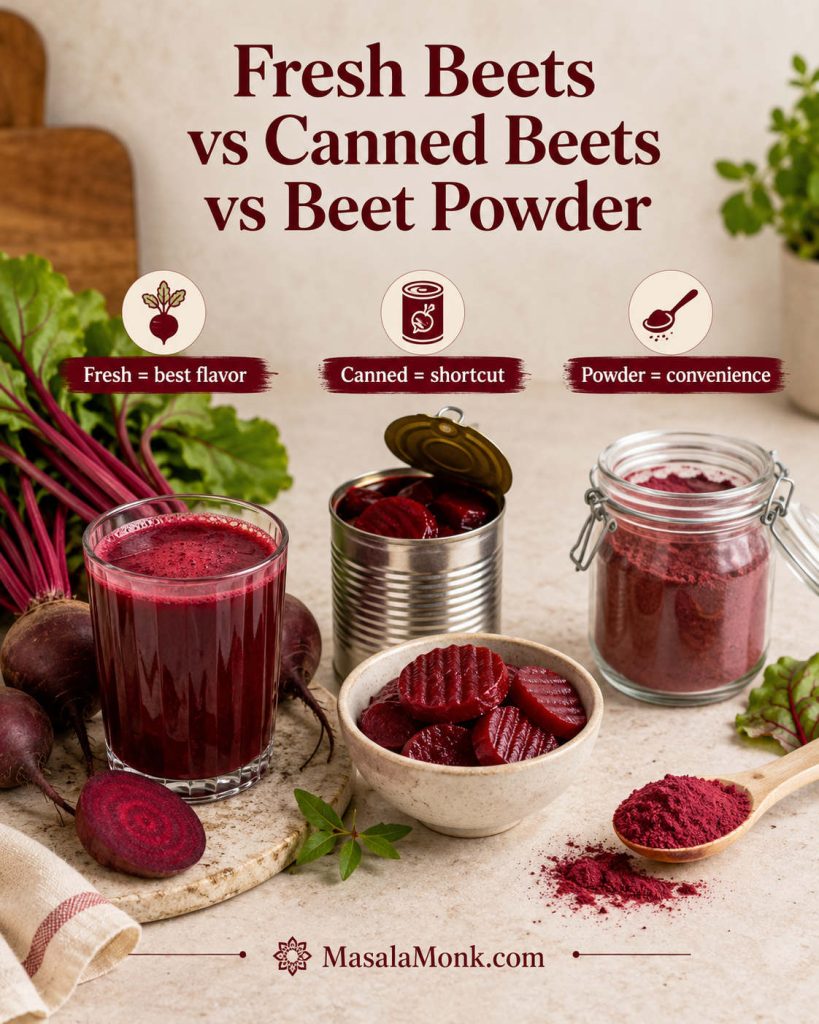
Fresh raw beetroot gives the best glass: brighter color, clearer flavor, and a more refreshing finish. Canned, cooked, pickled, and powdered beets can help in a pinch, but they each move the drink away from that just-made taste.

Comparison of fresh beets with beet juice, canned beets in a can and bowl, and beet powder in a jar and wooden spoon.
Fresh beets give homemade beet juice the brightest flavor; however, canned beets and beet powder can still work when convenience matters more.
OptionCan you use it?Best use
Fresh raw beetsYes, best choiceMain beet juice recipe
Cooked beetsYes, blender onlyEmergency shortcut, softer flavor
Canned beetsPossibleBlended shortcut; check salt, sugar, and additives
Pickled beetsNot idealOnly if you want a vinegar-style drink
Beet powderDifferent productConvenience drink, not the same as fresh juice

If you use canned beets, drain them well and check the label. Some canned beets contain added salt or sugar, and pickled beets contain vinegar that will completely change the flavor. If you use beet powder, treat it as a separate convenience drink rather than a true fresh beet juice recipe.

What to Do With Beet Juice Pulp

Beet pulp is not glamorous, but it does not have to go straight into the bin. If you use a juicer or strain the blender mixture, you will have pulp left behind. It is fibrous and deeply colored, so use it in small amounts where the color and earthiness make sense. Think of it as a small add-in, not the main event.

  • Add small amounts to veggie patties or fritters.
  • Stir into soups or stews where the color makes sense.
  • Mix into muffins, quick breads, or pancakes.
  • Blend into hummus or bean dips.
  • Freeze in small portions for later cooking.
  • Compost it if you do not want to cook with it.

Remember that beet pulp stains. If the pulp includes ginger and lemon, use it in recipes where those flavors will not feel out of place.

How to Store Beet Juice

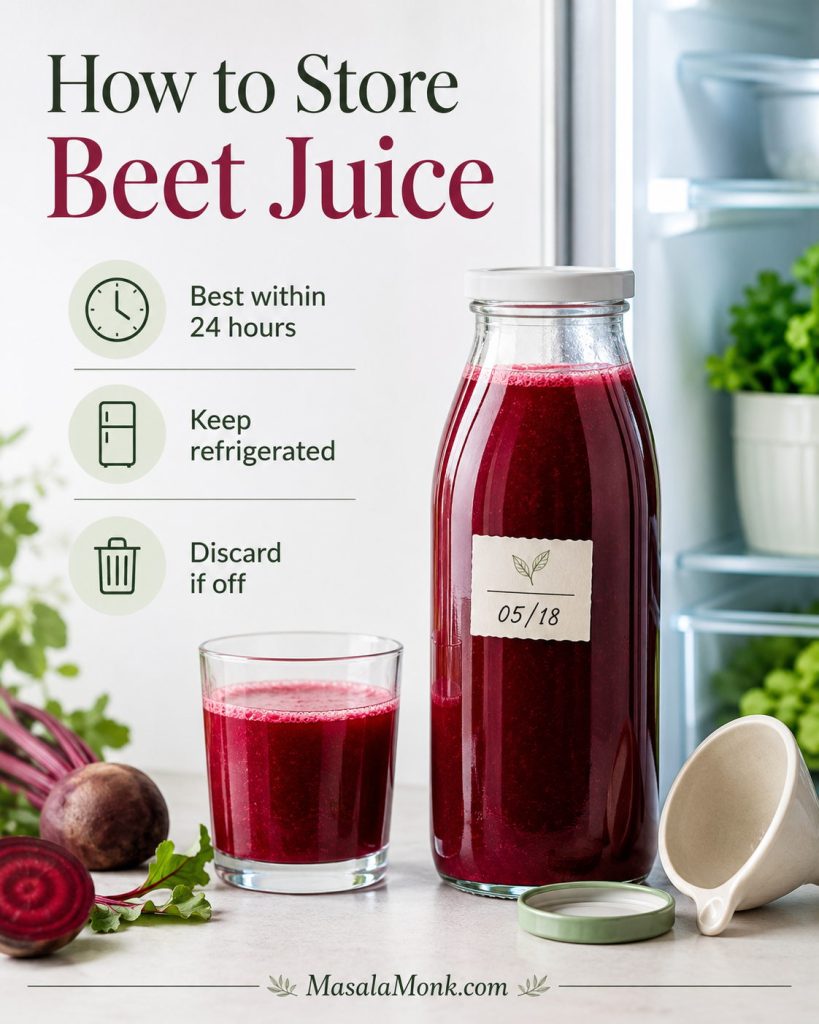
Just-made beet juice loses its sparkle quickly, so treat leftovers gently. It tastes best right after making, when the lemon is sharp, the ginger still tastes lively, and the beet flavor has not dulled. Because homemade raw juice is not pasteurized, it also needs careful storage if you are not drinking it right away.

Storage guide showing beet juice in a sealed glass bottle with a date label beside a glass of juice near an open refrigerator.
Since homemade raw juice is not pasteurized, the safest flavor window is short: chill it quickly, seal it well, and drink it soon.
  • Best flavor: drink immediately.
  • Best refrigerated quality: within 24 hours.
  • Maximum practical home storage: 24–48 hours in a clean airtight glass bottle in the refrigerator.
  • Room temperature: do not leave fresh juice out for more than 2 hours.
  • Refrigerator temperature: keep chilled at 40°F / 4°C or colder.
  • Serving after storage: shake or stir before drinking.
  • Discard if: it smells sour, fizzy, fermented, moldy, or off.

You can wash and chop the beetroot, carrot, apple, and cucumber a few hours ahead and refrigerate them in a covered container. Juice or blend just before serving for the liveliest flavor.

The FDA has a useful overview of fresh juice safety, especially because homemade raw juice is not pasteurized.

You can freeze beet juice in ice cube trays or small containers, but the flavor and texture will be less crisp after thawing. Frozen beet juice cubes are better for smoothies than for drinking plain.

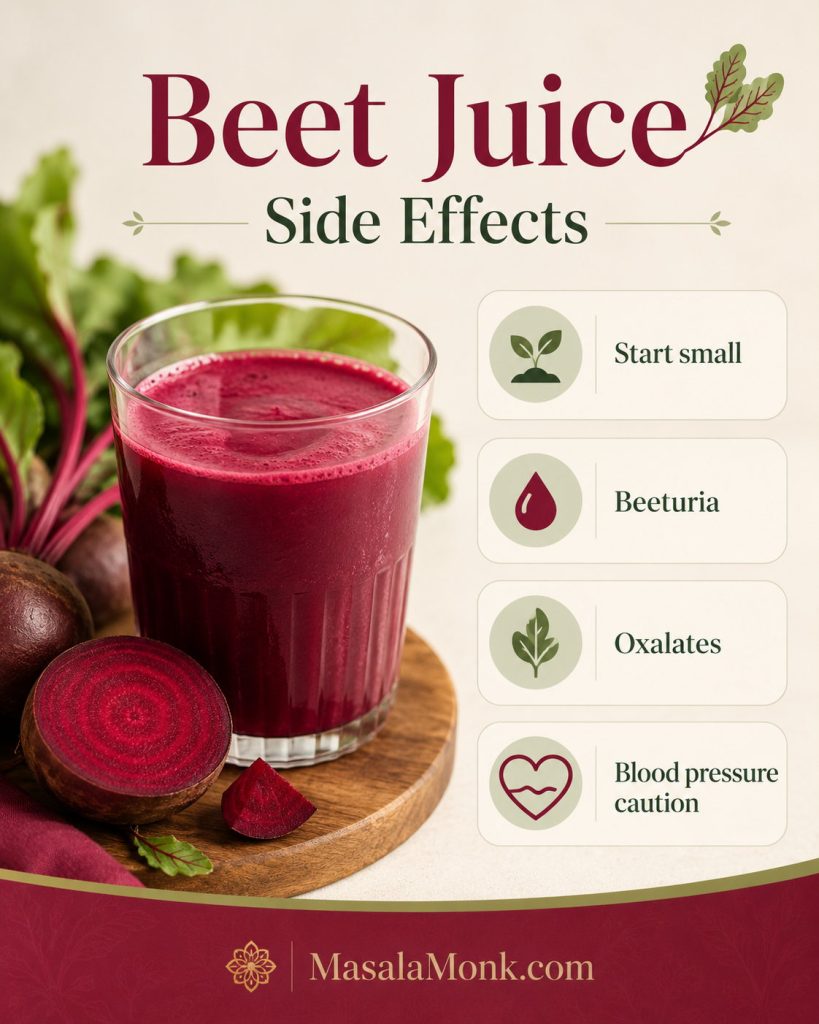
Side Effects and Who Should Be Careful

For most people, a moderate glass is simply a colorful way to enjoy beetroot. Still, start small the first time, especially if you plan to drink it often. Beet juice has a strong color, strong flavor, and for some people, a strong digestive effect too.

Beet juice side effects graphic with a glass of beet juice and safety cards for start small, beeturia, oxalates, and blood pressure caution.
Start with a modest serving if beet juice is new to you, especially if oxalates, digestion, beeturia, or blood pressure changes are concerns.
  • Red or pink urine/stool: Beet juice can cause beeturia, a temporary red or pink color change after eating or drinking beets.
  • Kidney-stone concerns: Beets contain oxalates, so people prone to certain kidney stones should be cautious.
  • Low blood pressure or medication: If you take blood pressure medication or have low blood pressure, ask a healthcare professional before drinking beet juice regularly.
  • Digestive sensitivity: Start with a smaller serving if raw juices bother your stomach.
  • Blood sugar management: If you manage blood sugar, fruit-heavy beet juices may need smaller portions or more vegetable-forward formulas.

For more detail on oxalates and beetroot, see MasalaMonk’s guide to beetroot and kidney health.

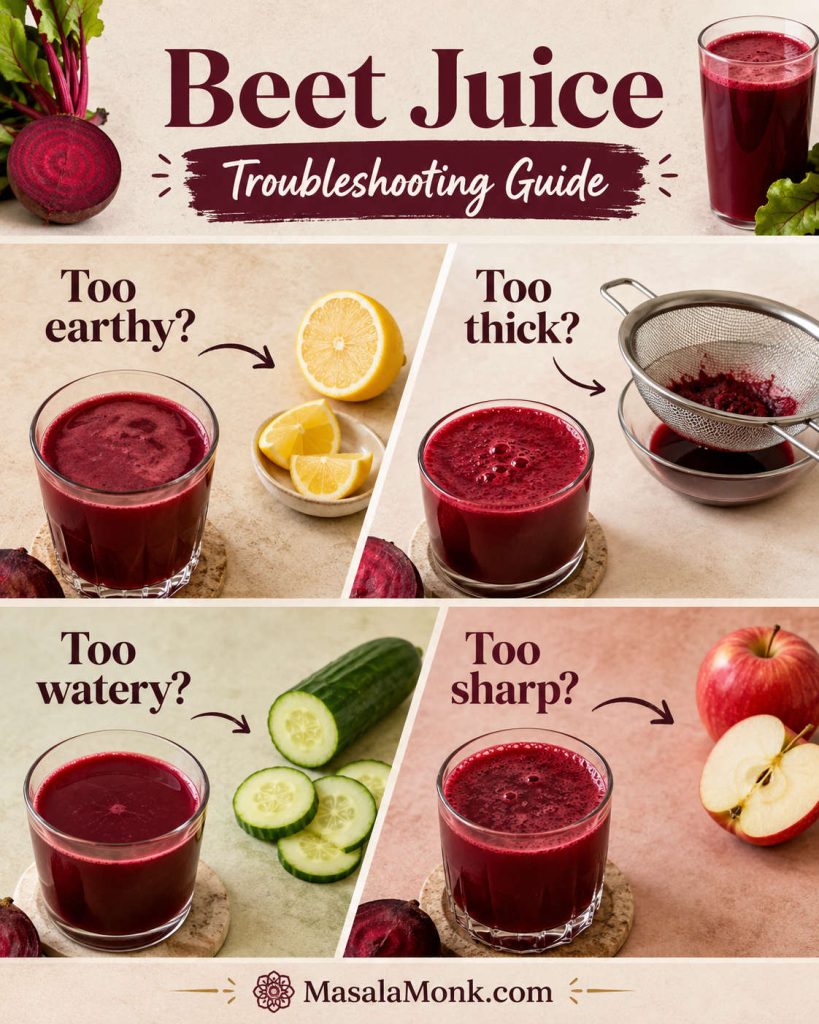
Beet Juice Troubleshooting

Beet juice is forgiving if you know what to adjust. If the batch did not taste the way you expected, do not throw it out yet. Most problems are fixable with lemon, cucumber, ice, apple, or another pass through the strainer.

Troubleshooting guide for beet juice with panels for too earthy, too thick, too watery, and too sharp, plus lemon, cucumber, apple, and strainer cues.
A failed batch is usually adjustable: sharpen a dull glass, lighten a heavy one, dilute harsh ginger, or strain again for smoother texture.
IssueWhy it happenedFix nowFix next time
Too earthyToo much beet or not enough acid/sweetnessAdd lemon, orange, apple, or cucumber juiceUse less beet and more carrot/apple
Too thickBlender juice was not strained enoughStrain again through cheesecloth or a nut milk bagChop smaller, blend smoother, and squeeze pulp well
Too wateryToo much water in the blenderAdd lemon, ginger, or a little more fresh juiceStart with ½ cup / 120 ml water only
Too sharpToo much ginger or lemonDilute with apple, carrot, cucumber, or iceStart with ½ inch ginger
Too sweetToo much apple, orange, pineapple, or pomegranateAdd lemon, cucumber, celery, or gingerUse the low-sugar variation
Separates in the glassFresh juice naturally separatesStir or shakeThis is normal

FAQs About Beet Juice

These are the small questions that usually come up after the first batch.

Juicer or blender: which is better for beet juice?

A juicer makes lighter, smoother juice without added water. A blender works well if you do not own a juicer, but the juice needs water and straining.

How much water do you add when making beet juice in a blender?

Start with ½ cup / 120 ml cold water. Add more only if the blender needs help, up to 1 cup / 240 ml total. Too much water makes the juice taste thin.

How do you make beet juice without a juicer?

Blend chopped beetroot, carrot, apple, lemon, ginger, and cold water until smooth. Then strain through a nut milk bag, cheesecloth, or fine mesh strainer and squeeze the pulp well.

Should you use raw or cooked beets for juice?

Raw beets are best for fresh juice. Cooked beets can be blended in a pinch, but they taste softer and less crisp. They are not ideal for juicing.

Do you need to peel beetroot before juicing?

Peeling is optional if the beetroot is fresh, tender-skinned, and scrubbed very well. Peel it if the skin is rough, dirty, waxed, or bitter.

How many beets make one glass of juice?

One medium-large beet, about 225–250 g / 8–9 oz, combined with carrot, apple, lemon, and ginger usually makes about two standard glasses of mixed beet juice. A medium beet on its own may give roughly ⅓–½ cup juice in many home juicers, though freshness, size, and machine efficiency can change that noticeably.

Why does beet juice taste earthy?

Beetroot naturally has an earthy, mineral-like flavor. Apple, carrot, lemon, ginger, cucumber, orange, and pineapple all help balance that flavor.

How do you make beet juice sweeter without sugar?

Add apple, carrot, orange, pineapple, or pomegranate. Apple and carrot are the easiest everyday choices because they sweeten the drink without overpowering the beetroot.

Is it okay to drink beet juice every day?

You can drink it regularly if it suits you, but you do not need to make it a daily habit to enjoy the recipe. Keep portions moderate, especially if you have kidney-stone risk, low blood pressure, digestive sensitivity, blood sugar concerns, or take blood pressure medication.

What is the best time to drink beet juice?

Morning is simple, afternoon works when you want something cool and caffeine-free, and pre-workout use is best tested with a small strained serving before you make it a routine.

Why does beet juice turn urine or stool red?

Beets can turn urine or stool pink or red. This is common after eating or drinking beetroot. If you are unsure whether the color is from beets, or if you have pain or unusual symptoms, seek medical advice.

What should you know about beet juice and blood pressure?

Beetroot contains dietary nitrates, so occasional juice is one thing; a daily habit is worth discussing with your healthcare professional if you take blood pressure medication or tend to run low.

How long does homemade beet juice keep?

Homemade beet juice tastes best immediately. Refrigerate it in a clean airtight bottle and drink within 24 hours for best flavor, or within 24–48 hours at most.

Can you use canned beets in beet juice?

You can blend canned beets with water, apple, lemon, and ginger in a pinch, but the flavor will be softer and less fresh than raw beetroot. Check the can for added salt, sugar, or vinegar.

How do you turn this recipe into a beet juice shot?

For a beet shot, use less apple and cucumber, keep the beet, lemon, and ginger more concentrated, and serve just 2–3 oz / 60–90 ml at a time. Beet shots are intense, so start small.

Tried it with apple, orange, cucumber, or ginger? Share which version finally made beet juice work for you — the best fixes often come from small adjustments.

Beet Juice Recipe

This is the balanced base version: beetroot for color, carrot and apple for sweetness, lemon for brightness, ginger for lift, and cucumber if you want a cooler, easier sip.

Make it in a juicer for crisp, smooth juice, or use a blender and strain it. Once you like the base, adjust lemon, apple, cucumber, or ginger to make the glass sharper, sweeter, lighter, or spicier.

The finished juice should pour easily, taste sweet-earthy and tart, and finish with gentle ginger warmth.

Saveable beet juice recipe card with a glass of beet juice, beetroot, carrot, apple, lemon, ginger, 10 minutes, 16–18 ounce yield, and juicer or blender method.
Save this beet juice recipe formula for the essentials: beetroot, carrot, apple, lemon, and ginger, made in either a juicer or a blender.
Prep Time10 minutes
Total Time10 minutes
Servings2 glasses
YieldAbout 16–18 oz / 475–530 ml

Estimated nutrition: One 8 oz / 240 ml serving is roughly 135–150 calories, with about 32–36 g carbohydrates depending on produce size and juicing method. Most sweetness comes naturally from the apple, carrot, and beetroot. Strained juice has much less fiber than whole produce or an unstrained smoothie.

Equipment: juicer or blender, fine mesh strainer or nut milk bag, knife, cutting board, and a clean bottle or jar if storing.

Ingredients

  • 1 medium-large raw beetroot or 2 small beets, about 225–250 g / 8–9 oz
  • 2 medium carrots, about 120–150 g / 4–5 oz
  • 1 large apple, about 170–200 g / 6–7 oz
  • ½ lemon, about 15–20 ml juice
  • ½–1 inch fresh ginger, about 5–10 g
  • ½ small cucumber, optional, about 75–100 g / 3–4 oz
  • ½–1 cup cold water, blender method only, 120–240 ml
  • Ice, to serve

Juicer Method

  1. Wash and scrub the beetroot, carrots, apple, cucumber, lemon, and ginger.
  2. Trim the beetroot and peel it if the skin is rough, waxed, or not fully clean.
  3. Cut the beetroot, carrots, apple, cucumber, and ginger to fit your juicer chute.
  4. Juice the beetroot, carrots, apple, cucumber, and ginger, alternating hard and soft produce as needed.
  5. Stir in the lemon juice.
  6. Pour over ice and drink immediately.

Blender Method

  1. Chop the beetroot, carrots, apple, cucumber, and ginger into small pieces.
  2. Add them to a blender with ½ cup / 120 ml cold water and the lemon juice.
  3. Blend on high for 45–60 seconds, until smooth. Add more water only if needed, up to 1 cup / 240 ml total.
  4. Pour the mixture through a nut milk bag, cheesecloth-lined strainer, or fine mesh strainer.
  5. Let it drain for 2–5 minutes, then press or squeeze the pulp to extract the juice.
  6. Optional: add 2–3 tablespoons / 30–45 ml cold water to the squeezed pulp, stir or briefly blend, then strain once more for a little extra yield.
  7. Serve over ice.

Notes

  • For a milder glass, use half a beet and increase the apple or carrot.
  • Use green apple for a sharper juice or red apple for a sweeter one.
  • For a lighter flavor, add cucumber.
  • For a sharper flavor, use the full inch of ginger and extra lemon.
  • If using a blender, strain the mixture for true beet juice. Unstrained beet juice will be thicker and smoothie-like.
  • Drink immediately for best flavor, or refrigerate in a clean airtight glass bottle for 24–48 hours.
  • For regular use or medical concerns, read the safety section above.

Once the recipe is made, serve the juice cold, taste before adjusting, and keep the glass balanced enough that it feels like a drink you chose — not a health chore.

Hand placing a glass of homemade beet juice on a kitchen counter with a bottle of juice, beetroot, apple slices, ginger, and herbs nearby.
A good homemade beet juice should taste balanced enough to sip slowly, not like something you have to force down for health reasons.

Back to top

Posted on Leave a comment

Carrots for Weight Loss: Nature’s Crunchy Slimming Superfood 🌱🥕

Carrots for Weight Loss

If you’re searching for a natural, tasty, and affordable way to support your weight loss journey, look no further than the humble carrot. Whether you like them raw, roasted, purple, orange, or even shredded into your salad, carrots are so much more than a lunchbox staple—they’re a nutritional powerhouse with science-backed benefits for weight management, gut health, and beyond. Let’s crunch into the details!


Why Carrots? The Nutritional Powerhouse

Carrots have a reputation for being good for your eyes, but they’re even better for your waistline. Here’s why:

  • Low in Calories, High in Volume: One cup of raw carrots contains only about 50 calories—but fills you up thanks to its fiber and water content (carrots are about 88% water!).
  • Rich in Fiber: With about 3.6 grams of fiber per cup, carrots slow digestion, promote fullness, and help keep those snack cravings at bay.
  • Packed with Antioxidants: Orange carrots are loaded with beta-carotene (a vitamin A precursor). Purple and black carrots go a step further, containing anthocyanins—powerful plant compounds linked to weight and metabolic benefits.
  • Blood Sugar Friendly: The glycemic index (GI) of raw carrots is low (~16), meaning they won’t spike your blood sugar and cause hunger rebound.

The Science: How Carrots Support Weight Loss

1. Satiety and Calorie Control

The fiber in carrots is your secret weapon against overeating. Studies show that fiber-rich veggies, like carrots, slow down digestion and trigger stretch receptors in your stomach, helping you feel full sooner and for longer.

Real-world tip: Eat a handful of carrot sticks 20 minutes before lunch or dinner (“veggie preload”). Research shows this can naturally reduce how many calories you eat at your main meal!

2. Gut Health: The Microbiome Connection

A 2025 animal study found that carrots fed to mice on a high-fat diet led to a healthier gut microbiome and better blood sugar control—without changing total calorie intake. Why does this matter? Because a happy gut microbiome is linked to easier weight management in humans, too.

3. Anthocyanins & Purple Carrots: Next-Level Benefits

Move over, orange—purple and black carrots contain anthocyanins, shown in observational studies to help with weight control and improved metabolic health. Roasted purple carrots, in particular, retain their antioxidant punch.

4. Small Changes, Big Impact

A 2024 study found that eating just baby carrots three times per week increased skin carotenoid levels (a marker of veggie intake and health) by over 10% in just one month. That’s a measurable change from a snack most of us love anyway!


Practical Ways to Eat More Carrots (and Love It)

1. Snack Smart

  • Raw carrot sticks are perfect for dipping in hummus, Greek yogurt, or salsa.
  • Make your own “carrot fries” by slicing and roasting with herbs—way lower in calories than potato fries.

2. Add Color to Your Plate

  • Grate carrots into salads, slaws, and wraps.
  • Toss purple carrot coins into roasted veggie trays for a rainbow of antioxidants.

3. Power Up Your Meals

  • Add shredded carrots to oatmeal for natural sweetness and a vitamin A boost.
  • Simmer chopped carrots into soups, stews, or even spaghetti sauce for extra fiber.

4. Try Carrot-Based Recipes

  • Carrot Smoothie: Blend carrot, apple, spinach, and a splash of orange juice.
  • Carrot & Lentil Soup: Fiber, protein, and comfort in a bowl.
  • Carrot Muffins: Use whole wheat flour and minimal sugar for a healthy breakfast treat.

Carrots vs. Other Snack Foods (Why They Win)

Snack (1 cup)CaloriesFiber (g)Sugar (g)Nutrient Quality
Carrots~503.6~6High
Potato chips~15010Low
Pretzels~10811Low
Grapes~1041.4~23Moderate

Action Plan: How to Add Carrots for Weight Loss

  1. Start Small: Swap one daily snack for raw or roasted carrots.
  2. Preload Meals: Eat a cup of carrot sticks before lunch/dinner.
  3. Mix It Up: Try different carrot colors (orange, purple, black) for variety and antioxidants.
  4. Snack Prep: Pre-slice carrots and store in water in your fridge for grab-and-go snacking.

The Bottom Line

Carrots are an easy, delicious, and affordable addition to any weight loss plan. They fill you up, satisfy cravings, nurture your gut, and support long-term health in ways few foods can match. Whether you’re counting calories, carbs, or just looking to eat healthier, carrots belong in your kitchen and on your plate.

So next time you reach for a snack—make it a carrot. Your waistline (and taste buds) will thank you. 🥕

1. Are carrots really effective for weight loss?

Yes. Carrots are low in calories, high in fiber, and have a high water content, which helps keep you full with fewer calories. Scientific studies also show that adding carrots to meals or as snacks can help reduce overall calorie intake.


2. Can eating too many carrots make you gain weight?

Carrots are very low in calories, so it’s unlikely unless you eat excessive amounts with high-calorie dips or toppings. Moderation and balanced portions are always key.


3. Is there a difference between eating raw and cooked carrots for weight loss?

Both forms are healthy. Raw carrots are slightly lower in calories and have a lower glycemic index. Cooking can enhance the absorption of certain antioxidants (like beta-carotene) but may raise the glycemic index slightly—still low compared to many foods.


4. Do carrots have too much sugar for people with diabetes or on low-carb diets?

No. Carrots contain natural sugars, but their overall carbohydrate content and glycemic load are low. Most people with diabetes can safely include carrots in their diets. As always, individual needs may vary.


5. Can eating carrots turn my skin orange?

Only if consumed in extremely high amounts (several pounds daily for weeks). This is called carotenemia and is harmless and reversible. For most people, this is not a concern.


6. Are purple and black carrots better for weight loss than orange carrots?

Purple and black carrots contain extra antioxidants (anthocyanins), which have been linked in studies to metabolic health. However, all carrot colors are low in calories and high in fiber, making them great for weight loss.


7. How many carrots should I eat per day for health benefits?

A serving a day (about 1 cup or 2 medium carrots) is beneficial. Eating carrots a few times a week, even in snack-sized portions, has been shown to improve health markers.


8. Are baby carrots as nutritious as regular carrots?

Yes! Baby carrots are just regular carrots cut and polished into smaller pieces. The nutrient content is nearly identical.


9. What’s the best way to include carrots in my diet for weight loss?

Snack on raw carrots, use them in salads, soups, or as a veggie “preload” before meals to curb appetite. Roasted, boiled, and grated carrots all work—just avoid high-calorie dips or frying.


10. Can I juice carrots for weight loss?

Carrot juice contains many nutrients, but juicing removes most of the fiber, which is essential for satiety and blood sugar control. Eating whole carrots is generally better for weight loss.

Posted on 1 Comment

Unlocking the Power of Vitamins in Carrots

Power of VITAMINS IN CARROTS

Carrots — crisp, sweet, earthy, and bright orange — are among the most loved vegetables globally. From school lunch boxes to gourmet kitchens, carrots feature prominently for good reason: they are loaded with essential vitamins that nourish your body in numerous ways.

But how much do we really know about what’s inside this humble root? Do carrots have Vitamin C? Are they a good source of Vitamin K? What other vitamins are in carrots? Let’s go beyond the basics and unlock the full power of carrot vitamins — their types, quantities, functions, and how best to consume them.

At Masala Monk, we believe in celebrating natural, nutrient-rich foods, and this post is your complete, evidence-based guide to the vitamins in carrots.


🧬 What Vitamins Are in Carrots?

Carrots are a low-calorie, high-fiber vegetable with a powerful vitamin profile. A single medium carrot (about 61g) delivers a wide spectrum of vitamins in modest but impactful amounts.

Here’s a breakdown of the key vitamins found in carrots:

VitaminAmount (per 100g raw)% Daily Value (DV)Health Function
Vitamin A (from Beta-Carotene)835 µg RAE93%Eye health, immunity, skin
Vitamin C5.9 mg7%Immunity, collagen, antioxidant
Vitamin K113.2 µg11%Blood clotting, bone strength
Vitamin B1 (Thiamine)0.066 mg6%Energy metabolism, nerve function
Vitamin B6 (Pyridoxine)0.138 mg11%Brain health, red blood cell production
Folate (Vitamin B9)19 µg5%DNA synthesis, pregnancy health

Let’s explore these in more detail.


🟧 Carrots and Vitamin A – The Beta-Carotene Superstar

If you associate carrots with better eyesight, you’re absolutely right. Carrots are best known for their very high Vitamin A content, primarily in the form of beta-carotene, a powerful antioxidant that the body converts into Vitamin A.

  • Beta-carotene gives carrots their signature orange hue and is fat-soluble, meaning it’s best absorbed with healthy fats.
  • One medium carrot can offer over 200% of your daily Vitamin A needs.
  • Regular intake supports night vision, strengthens immune function, and promotes healthy skin.

This makes carrots an important food for preventing Vitamin A deficiency, particularly in regions where this is still a concern.


🍊 Vitamin C in Carrots – Is It Enough?

One of the most searched questions is: Do carrots have Vitamin C?
Yes, carrots do contain Vitamin C, though they are not the richest source compared to fruits like oranges or kiwis.

Still, carrots contribute a meaningful 5.9 mg of Vitamin C per 100g, around 7% of the daily recommended intake.

Why Vitamin C Matters:

  • Acts as a potent antioxidant, protecting cells from oxidative damage.
  • Essential for collagen synthesis, which supports skin, joints, and connective tissue.
  • Improves iron absorption from plant-based sources — especially important in vegetarian diets.
  • Boosts immune system function, helping your body fight infections.

At Masala Monk, we recommend combining carrots with other Vitamin C-rich ingredients in fresh juices or salads — think carrot and amla juice, or carrot and citrus salad — to get the best of both worlds.


🩸 Vitamin K in Carrots – A Bone and Blood Health Ally

Another common question is: Do carrots contain Vitamin K?
Absolutely — and this vitamin is often overlooked.

Carrots provide about 13.2 µg of Vitamin K1 per 100 grams, which covers approximately 11% of your daily needs.

Vitamin K1 (phylloquinone) is crucial for:

  • Blood clotting: It helps produce the proteins necessary to stop bleeding after injury.
  • Bone metabolism: It aids in calcium regulation and supports bone strength, especially when consumed alongside Vitamin D.

Many people mistakenly believe leafy greens are the only way to get Vitamin K. While spinach and kale are rich sources, carrots offer a valuable supplementary dose, especially when consumed regularly.


⚡ B-Complex Vitamins in Carrots – The Unsung Heroes

While carrots shine for their Vitamin A content, they also contain several important B vitamins — particularly Vitamin B1 (Thiamine), B6 (Pyridoxine), and Folate (Vitamin B9).

💡 Vitamin B1 – Energy and Brain Support

  • Carrots contain 0.066 mg of Vitamin B1 per 100g, around 6% of the recommended daily intake.
  • Thiamine supports energy production by helping the body metabolize carbohydrates.
  • It plays a key role in nervous system function and brain health.

🧠 Vitamin B6 – Mood and Metabolism

  • Vitamin B6 helps produce neurotransmitters like serotonin and dopamine.
  • It supports hemoglobin production, impacting oxygen delivery throughout the body.

👶 Folate (Vitamin B9) – Essential for Life

  • Folate is critical during pregnancy, as it supports neural tube development in babies.
  • In adults, it contributes to DNA formation, cell repair, and heart health.

Together, these B vitamins enhance the body’s ability to generate energy, support cognitive function, and maintain a balanced mood — all in one delicious root.


🥗 How to Maximize the Vitamin Absorption from Carrots

Raw vs Cooked Carrots

  • Raw carrots retain more Vitamin C, which is heat-sensitive.
  • Cooking carrots enhances beta-carotene bioavailability, making more Vitamin A accessible to your body.
  • Steaming is ideal — it softens the fibers without losing too many nutrients.

Combine with Fats

Since Vitamins A, K, and beta-carotene are fat-soluble, consume carrots with healthy fats like:

  • Ghee (clarified butter) — a staple in Indian cooking
  • Olive oil — great in salads and roasts
  • Nuts and seeds — sprinkle over grated carrot for crunch

At Masala Monk, we love pairing carrots with traditional ingredients like mustard oil, sesame, or a drizzle of homemade nut butter to boost both flavor and nutrition.


🧃 Delicious Ways to Enjoy Carrots for Maximum Vitamin Intake

  1. Carrot Juice – Raw juice delivers Vitamin C and Folate with ease.
  2. Gajar Ka Halwa (Carrot Halwa) – When made with ghee and nuts, it becomes a beta-carotene-rich indulgence.
  3. Carrot Pickle (Gajar ka Achaar) – Preserves the goodness of carrots while adding probiotics.
  4. Carrot Soup – Cooked and blended carrots maximize Vitamin A absorption.
  5. Stir-Fried Carrot Sabzi – Traditional and nourishing when cooked lightly in spices and ghee.

Masala Monk’s community recipes offer several variations on these classics — always focused on taste and wellness.


🧾 Final Thoughts: Carrots Are More Than Just Vitamin A

In conclusion, carrots may be famous for their Vitamin A content, but they bring so much more to the table:

  • They do contain Vitamin C, making them a helpful addition to your daily immune support.
  • They are a moderate source of Vitamin K, supporting blood and bone health.
  • They contribute important B-complex vitamins like B1, B6, and Folate, essential for energy, mood, and brain function.

Whether you’re eating them raw, cooked, juiced, or pickled, carrots are a powerful, affordable, and versatile source of essential nutrients. At Masala Monk, we celebrate the everyday ingredients that support extraordinary health — and carrots are a shining example.


🧠 10 FAQs About Vitamins in Carrots

1. Do carrots have Vitamin C?
Yes, carrots contain about 5.9 mg of Vitamin C per 100g, contributing around 7% of the daily recommended intake. While not as high as citrus fruits, they still support your immune system and antioxidant needs.

2. Are carrots a good source of Vitamin K?
Yes, carrots offer 13.2 µg of Vitamin K1 per 100g, which helps in blood clotting and bone health. They’re a beneficial addition to a balanced diet.

3. Which vitamin is found in the highest quantity in carrots?
Carrots are especially rich in Vitamin A, primarily in the form of beta-carotene. A single carrot can fulfill 200% or more of your daily Vitamin A needs, supporting eye health and immunity.

4. Do carrots contain B vitamins?
Yes, carrots provide Vitamin B1 (Thiamine), B6, and Folate (Vitamin B9) — essential for energy metabolism, nervous system function, and DNA synthesis.

5. How does cooking affect vitamin levels in carrots?
Vitamin C can degrade with heat, so raw carrots retain more of it. However, cooking increases the bioavailability of beta-carotene, enhancing Vitamin A absorption.

6. Are raw or cooked carrots healthier?
Both offer unique benefits. Raw carrots preserve Vitamin C and enzymes. Cooked carrots (especially steamed or lightly sautéed) provide more accessible beta-carotene.

7. Can I rely on carrots alone for my Vitamin A needs?
Yes, if eaten regularly. The beta-carotene in carrots converts efficiently to Vitamin A, making them a reliable source — especially when consumed with healthy fats.

8. Is carrot juice a good way to get vitamins?
Yes, fresh carrot juice is rich in Vitamin A and C, and is easy to digest. However, it lacks the fiber found in whole carrots.

9. How many carrots should I eat daily to benefit from these vitamins?
Eating 1–2 medium carrots per day is typically enough to reap significant Vitamin A benefits, while contributing to your Vitamin C, K, and B-vitamin intake.

10. Do colored carrots (purple, yellow, red) have the same vitamins?
Yes, all carrots provide a similar core of vitamins. However, purple carrots are higher in anthocyanins (antioxidants), and red carrots may contain more lycopene. The vitamin profile (A, C, K, B) remains largely consistent.

Posted on Leave a comment

Carrots for Diabetics: Managing Blood Sugar with Nature’s Sweet Treat

Carrots, with their vibrant color and rich nutritional profile, are widely enjoyed as a delicious and healthy vegetable. For individuals with diabetes, understanding the impact of carrots on blood sugar levels is crucial for effectively managing their condition. In this comprehensive guide, we will delve into the relationship between carrots and diabetes, exploring whether they are suitable for diabetics and how they can be incorporated into a diabetic-friendly diet.

Are Carrots Good for Diabetics?

Carrots offer numerous health benefits for everyone, including individuals with diabetes. However, due to their carbohydrate content, they are a point of consideration for diabetics. Let’s explore why carrots can still be a valuable addition to a diabetic diet:

1. Rich in Nutrients: Carrots are packed with essential nutrients, including beta-carotene, vitamin A, vitamin K, and potassium. These nutrients play a vital role in supporting overall health and well-being.

2. Dietary Fiber: Carrots are an excellent source of dietary fiber, which is beneficial for diabetics. Fiber helps slow down the absorption of sugar and promotes better blood glucose control.

3. Low in Calories: Carrots are relatively low in calories, making them a guilt-free addition to meals and snacks. They can be a satisfying and nutrient-dense option for those looking to manage their weight.

However, it’s essential to be mindful of the carbohydrate content in carrots. They contain natural sugars and carbohydrates that can potentially impact blood sugar levels.

Are Carrots High in Sugar for Diabetes?

Maintaining stable blood sugar levels is a top priority for individuals with diabetes. Understanding the potential impact of carrots on blood sugar is key to managing diabetes effectively:

1. Glycemic Index (GI): The glycemic index (GI) of carrots is moderate. This means that they can cause a gradual and steady rise in blood glucose levels. However, the GI of carrots can vary depending on their preparation and how they are consumed.

2. Portion Control: Like any carbohydrate-containing food, portion control is essential when including carrots in a diabetic meal plan. Be mindful of the serving size to avoid rapid spikes in blood sugar.

3. Balance with Other Foods: Pairing carrots with sources of protein, healthy fats, and other non-starchy vegetables can help slow down the absorption of carbohydrates. This can contribute to better blood glucose management and reduce the impact of carrots on blood sugar.

4. Individual Sensitivity: Every individual may respond differently to foods, including carrots. Some diabetics may be more sensitive to certain carbohydrates than others, so monitoring blood sugar levels after consuming carrots is crucial.

Carrots in a Diabetic Diet

Incorporating carrots into a diabetic-friendly diet can provide various health benefits. Here are some practical tips for doing so:

1. Moderation: Enjoy carrots in moderation, keeping an eye on the overall carbohydrate intake. Work with a registered dietitian to determine the appropriate portion sizes for your individual needs.

2. Meal Planning: Include carrots as part of a balanced meal that consists of lean proteins, healthy fats, and non-starchy vegetables. This combination helps stabilize blood sugar levels and promotes overall well-being.

3. Cooking Methods: Opt for healthier cooking methods such as roasting, steaming, or sautéing rather than frying. These methods retain the nutrients in carrots and minimize the use of added fats.

Comparing Carrots to Other Vegetables for Diabetics

When it comes to choosing vegetables for a diabetic diet, it’s essential to consider their impact on blood sugar levels. Let’s compare carrots to other vegetables commonly included in diabetic meal plans:

1. Carrots vs. Potatoes: Carrots have a lower glycemic index compared to potatoes, which means they have a milder effect on blood sugar levels. In general, carrots can be a better option for diabetics looking to manage their blood sugar.

2. Carrots vs. Beets: Beets, like carrots, are nutrient-dense and contain natural sugars. However, beets have a slightly higher glycemic index than carrots. Moderation is key when incorporating beets into a diabetic meal plan.

3. Carrots vs. Sweet Potatoes: Sweet potatoes have a higher glycemic index compared to regular potatoes and carrots. While they can still be included in a diabetic diet, portion control and pairing with other foods are essential.

is carrot and beetroot good for diabetes?

Both carrots and beetroot offer unique health benefits for individuals with diabetes. Here are some potential advantages of including these vegetables in a diabetic-friendly diet:

1. Antioxidant Properties: Carrots and beetroot are rich in antioxidants, such as beta-carotene and betalains, which help combat oxidative stress and inflammation often associated with diabetes.

2. Heart Health: The dietary fiber and potassium in carrots and beetroot can contribute to heart health by supporting healthy blood pressure and cholesterol levels.

3. Eye Health: Carrots, known for their high vitamin A content, are beneficial for maintaining good vision. Additionally, beetroot contains lutein and zeaxanthin, which are essential for eye health.

How Many Carrots Can a Diabetic Eat a Day?

The recommended daily intake of carrots for diabetics can vary based on individual factors such as age, weight, activity level, and overall health. As with any food, moderation is key to maintaining stable blood sugar levels. Here are some general guidelines for portion sizes:

  1. Carbohydrate Count: One medium-sized carrot contains approximately 4-5 grams of carbohydrates. For individuals who follow a carbohydrate counting method to manage their diabetes, this can be considered as one serving of carbohydrates.
  2. Listen to Your Body: Pay attention to how your body responds to carrots. Some individuals may be more sensitive to carbohydrates, while others may tolerate them well. Monitor your blood sugar levels after consuming carrots to understand their impact on your blood glucose.
  3. Balance with Other Foods: When including carrots in your meals, pair them with other foods that provide protein, healthy fats, and fiber. This combination can help slow down the absorption of carbohydrates and minimize blood sugar spikes.
  4. Meal Planning: Work with a registered dietitian or healthcare professional to create a personalized meal plan that incorporates carrots and other nutritious foods while supporting your blood sugar management goals.

Can You Eat Carrots for Type 2 Diabetes? Understanding the Impact

Yes, you can eat carrots in type 2 diabetes. Carrots are a nutritious vegetable that can be included in a diabetic meal plan. They have a low glycemic index, which means they have a minimal impact on blood sugar levels when consumed in moderation. Carrots are also rich in fiber, which helps regulate blood sugar and prevent rapid spikes. However, it’s essential to practice portion control and include carrots as part of a balanced meal to manage blood glucose effectively. As always, consult with your healthcare professional for personalized dietary advice.

Let’s explore how carrots can play a role in supporting individuals with type 2 diabetes:

1. Rich in Fiber:

  • Carrots are a fantastic source of dietary fiber, which slows down the absorption of sugar in the bloodstream. This gradual release of sugar helps prevent sudden spikes in blood glucose levels.

2. Low Glycemic Index (GI):

  • The glycemic index of carrots is relatively low, meaning they have a gentle impact on blood sugar levels. Consuming foods with a low GI is beneficial for individuals with type 2 diabetes.

3. Loaded with Nutrients:

  • Carrots are a nutritional powerhouse, providing essential vitamins and minerals. They are rich in vitamin A, vitamin C, potassium, and antioxidants, contributing to overall health and well-being.

4. Portion Control:

  • While carrots offer numerous health benefits, it’s crucial to practice portion control. Eating large quantities of carrots may lead to a higher intake of carbohydrates, which can affect blood sugar levels.

Frequently Asked Questions (FAQs) About Carrots and Diabetes

1. Are Carrots Good for Diabetics?

  • Carrots can be included in a diabetic meal plan due to their low glycemic index and fiber content. They are a nutritious addition when consumed in moderation.

2. Can You Eat Carrots on a Diabetic Diet?

  • Yes, you can eat carrots on a diabetic diet. Be mindful of portion sizes and pair them with other non-starchy vegetables and lean proteins for balanced meals.

3. How Many Carrots Can a Diabetic Eat a Day?

  • There is no specific limit on the number of carrots a diabetic can eat. However, practicing portion control and considering your overall carbohydrate intake is essential for blood sugar management.

4. Do Carrots Raise Blood Sugar Levels?

  • Carrots have a low glycemic index and contain fiber, which slows down the release of sugars into the bloodstream. As a result, they have a minimal impact on blood sugar levels when eaten in moderation.

5. Are Carrots High in Sugar for Diabetes?

  • Carrots contain natural sugars, but they are not considered high in sugar, especially when compared to sugary snacks and desserts. Their fiber content helps regulate blood sugar levels.

6. How to Incorporate Carrots into a Diabetic-Friendly Diet?

  • Include carrots in balanced meals with proteins and healthy fats. Enjoy carrot sticks as a snack or blend them into smoothies with greens and Greek yogurt.

7. Are Raw Carrots Good for Diabetics?

  • Raw carrots are a nutritious choice for diabetics due to their fiber content and low glycemic index. They can be enjoyed as a crunchy and satisfying snack.

8. Can Diabetics Have Carrots and Beets?

  • Both carrots and beets can be part of a diabetic meal plan. Monitor portion sizes and be mindful of overall carbohydrate intake.

9. What Is the GI Index of Carrots?

  • Carrots have a moderate glycemic index, which means they have a gradual effect on blood sugar levels.

10. Are Carrots Bad for Diabetes?

  • Carrots are not bad for diabetes when consumed in appropriate portions. They offer valuable nutrients and can be part of a balanced diet.

Conclusion about Carrots: A Diabetic-Friendly Delight

Incorporate carrots into your diabetic meal plan for a nutritious and low-sugar option. With their low glycemic index and fiber content, carrots support stable blood sugar levels. From crunchy snacks to delicious smoothies, enjoy the health benefits of carrots while managing diabetes. Remember to consult professionals for personalized guidance, and savor the natural goodness of this vibrant vegetable on your health journey. Embrace carrots for a diabetic-friendly delight!

Remember, individual responses to food may vary, so it’s essential to work with a healthcare professional or registered dietitian to tailor your dietary choices to your specific needs and health goals.

Blog Tags: Carrots and Diabetes, Diabetic-Friendly Foods, Managing Blood Sugar, Diabetes Diet, Carrot Nutrition, Healthy Eating with Diabetes, Blood Sugar Management, Diabetic Meal Planning, Low-Glycemic Vegetables.