Posted on Leave a comment

Roasted Carrots Recipe: Easy Oven Roasted Carrots With Honey, Maple & Garlic

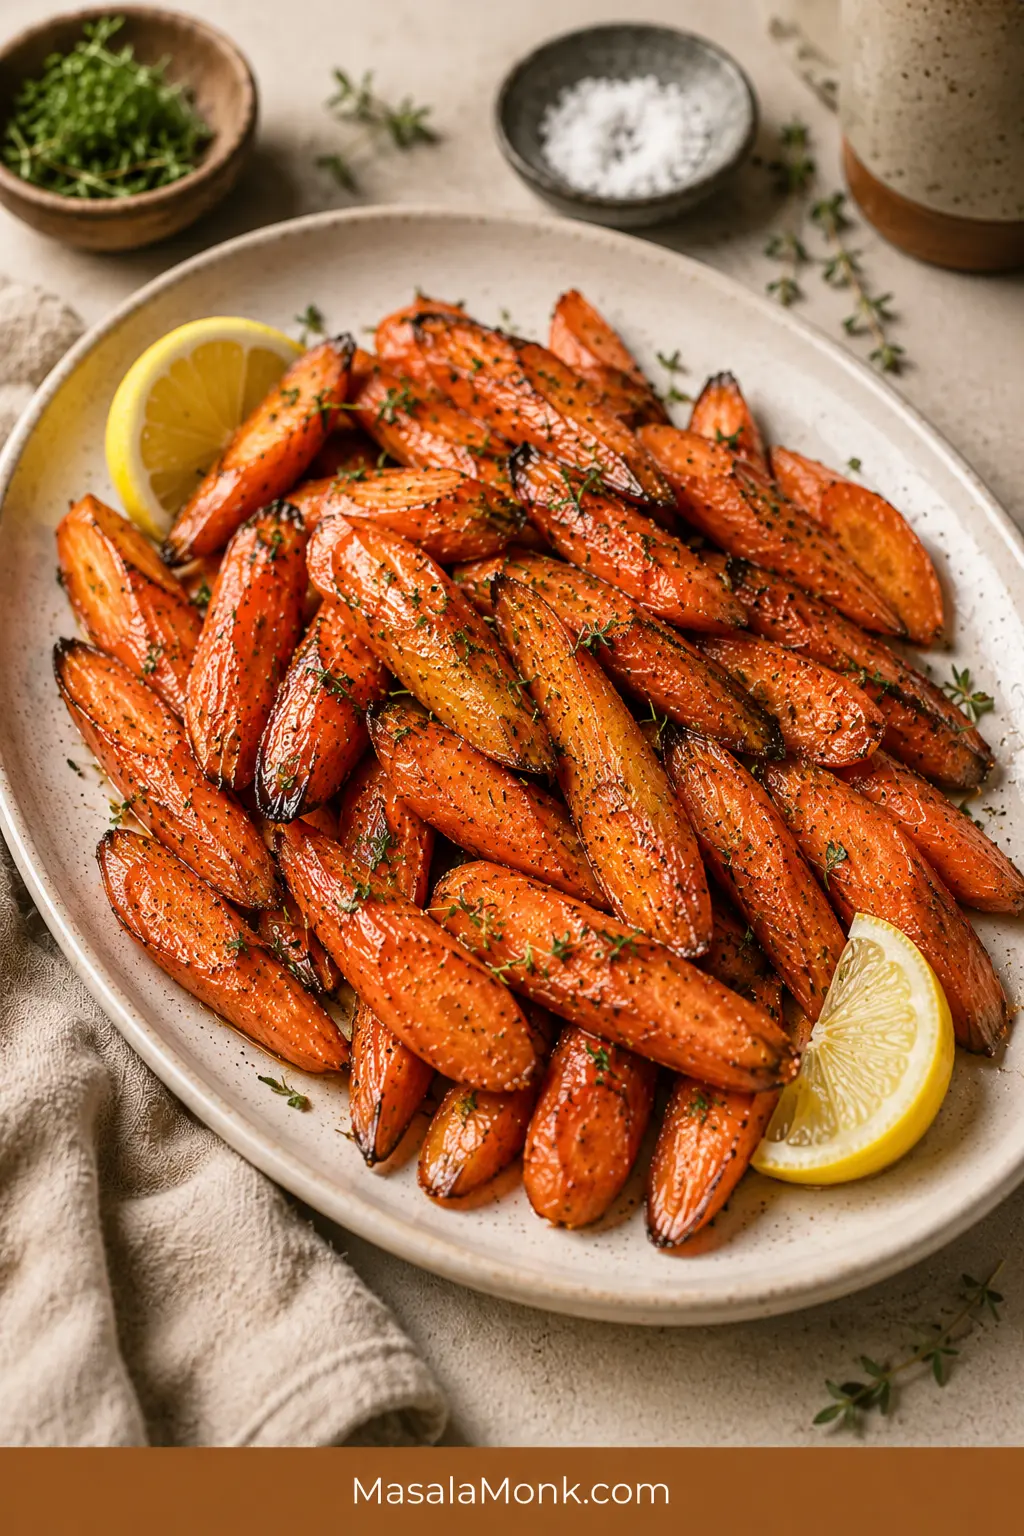
Roasted carrot pieces on a cream platter with browned edges, fresh herbs, lemon wedges, and a light glossy finish.

Roasted carrots should be easy: browned at the edges, tender through the center, and sweet enough to make everyone reach for more. The trouble is that carrots can also turn pale, dry, wrinkled, mushy, or sticky-burnt when the pieces are uneven, the pan is crowded, or the glaze goes in too early.

This roasted carrots recipe keeps the main method simple first: carrots, olive oil, salt, pepper, a hot oven, and a roomy sheet pan. Once that tray works, every other version is just a finish — honey roasted carrots, maple glazed carrots, garlic butter carrots, brown sugar carrots, baby carrots, whole carrots, rainbow carrots, or a prettier holiday platter.

The promise is dependable roasted carrots without babysitting the pan. Make the plain olive-oil tray once, then use the same method whenever you want a glossy honey finish, a buttery maple holiday version, a savory garlic butter side, or warm spiced carrots with cumin, chili, and lemon.

Quick Answer: How to Roast Carrots

Roast carrots at 425°F / 220°C for 20 to 30 minutes, depending on thickness. Cut them into even 2 to 3 inch diagonal pieces, toss with olive oil, salt, and pepper, then spread them in one layer on a rimmed sheet pan. They are done when the centers are fork-tender and the edges are browned.

For most cut carrots, 425°F / 220°C gives the best mix of browned edges and tender centers. Move down to 400°F / 200°C for large whole carrots, very thin pieces in a strong fan oven, or heavier maple and brown sugar glazes.

Honey and maple are least likely to scorch when added during the final 5 to 10 minutes or tossed with the carrots after roasting. Fresh garlic is best added halfway, warmed in butter first, or used as a finish. Garlic powder can go in from the start.

The rule that saves the tray: make the pieces similar in thickness, give them space, and add sweet glazes late. That is the difference between roasted carrots and steamed, dry, or burnt carrots.

Ready to cook? Jump to the recipe card. Still choosing a finish? Compare the roasted carrot versions.

Roasted Carrots Recipe Card

Easy Oven Roasted Carrots With Honey, Maple & Garlic Options

A reliable tray of oven roasted carrots for 2 to 3 inch carrot pieces, with browned edges, tender centers, and optional honey, maple, brown sugar, garlic butter, baby carrot, and rainbow carrot finishes.

Yield: 4 to 6 servings
Prep time: 10 minutes
Cook time: 22 to 30 minutes for 2 to 3 inch pieces
Total time: About 35 to 40 minutes
Method: Oven roasted
Oven temperature: 425°F / 220°C
Texture target: Fork-tender centers, browned edges
Diet: Vegetarian; vegan if using olive oil and maple syrup instead of butter or honey

Ingredients

  • 2 lb / 900 g carrots, peeled or scrubbed
  • 2 tablespoons / 30 ml olive oil
  • ½ to ¾ teaspoon fine sea salt, plus more to taste
  • ¼ teaspoon black pepper, or to taste
  • ½ teaspoon garlic powder, optional
  • 1 tablespoon / 15 ml honey or maple syrup, optional, for a light glaze
  • 1 to 2 tablespoons chopped parsley, thyme, dill, or chives
  • 1 to 2 teaspoons lemon juice, optional

Optional light glaze: use 1 tablespoon honey or maple syrup for a gentle shine, or up to 2 tablespoons for a sweeter finish. Add near the end of roasting or toss with the carrots after roasting. For a simple savory tray, skip the glaze and finish with herbs, lemon, and salt.

Instructions

  1. Heat the oven to 425°F / 220°C. Place a rack in the center of the oven.
  2. Wash and dry the carrots. Peel rough-skinned carrots, or scrub fresh thin-skinned carrots well.
  3. Cut the carrots diagonally into 2 to 3 inch pieces. Halve or quarter thick pieces lengthwise so the carrots are similar in thickness.
  4. Toss the carrots with olive oil, salt, pepper, and garlic powder if using. The pieces should look lightly shiny, not drenched.
  5. Spread the carrots in one layer on a large rimmed sheet pan. Give them space now, because a crowded pan can smell good and still give you pale carrots.
  6. Roast for 22 to 30 minutes, tossing halfway, until the edges are browned and the centers are fork-tender.
  7. For honey or maple roasted carrots, drizzle with honey or maple syrup during the final 5 to 10 minutes, or toss with the glaze just after roasting. The carrots should look roasted before they look glazed.
  8. Finish with herbs, lemon juice, and a little extra salt if needed. Serve warm.

Success Notes

  • Do not crowd the pan: use two pans if the carrots overlap.
  • Deeper browning: use a bare metal sheet pan.
  • Easy cleanup: use parchment rated for 425°F / 220°C for the basic recipe, or foil for sticky maple and brown sugar glazes.
  • Fresh garlic: add it halfway, warm it in butter first, or toss it with the carrots after roasting.
  • Baby carrots: pat them very dry before roasting so they do not steam.
  • Large or dry carrots: parboil until just crisp-tender, dry well, then roast for softer centers and less shriveling.
  • Fan or convection ovens: start checking 3 to 5 minutes earlier, especially with thin or glazed carrots.
  • Scaling: for every extra 1 lb / 450 g carrots, add about 1 tablespoon / 15 ml oil and ¼ teaspoon salt.
  • Doubling the recipe: use two sheet pans and rotate them halfway. Do not pile 4 lb / 1.8 kg carrots onto one pan.

Want the method explained with visuals? See the step-by-step guide. If your carrots usually turn pale, dry, or burnt, jump to troubleshooting.

The 5-Point Roasted Carrot Check

The tray usually fails before it ever goes into the oven. Run this quick check first and roasted carrots become almost boringly reliable.

  • Similar thickness: thick tops are halved or quartered so they cook with the thinner ends.
  • Roomy pan: carrots sit in one layer instead of steaming in a pile.
  • Dry surface: especially important for bagged baby carrots and mini carrots.
  • Protected garlic: garlic powder can start early; fresh garlic needs gentler timing.
  • Late sweet glaze: honey, maple, and brown sugar should shine, not burn before the centers soften.

The biggest visual fixes are usually pan spacing, even cut size, and late glaze timing.

Pan note: for better browning, use a roomy bare metal sheet pan. Parchment makes cleanup easier but gives slightly lighter edges. Honey and maple taste cleanest when the carrots already look roasted before the glaze goes on.

Which Roasted Carrot Version Should You Make?

Make the simple olive-oil tray first if you are unsure. The first tray teaches you more than any variation. Every version below uses the same roasting method; only the finish changes.

SituationBest VersionWhy It Works
First time making thisSimple olive oil roasted carrotsTeaches the timing without glaze risk
Kids or family dinnerHoney roasted carrotsGlossy, sweet, familiar
Thanksgiving, Christmas or EasterMaple butter carrots with thymeWarm, shiny, holiday-friendly
Roast chicken, beef or porkGarlic butter lemon carrotsSavory enough for rich mains
Less sweet versionCumin, chili, lemon and herbsWarm and bright without being sugary
Pretty platterRainbow carrots with feta, herbs or pomegranateColorful and finished-looking

Choose Your Roasted Carrot Finish

Once the base tray works, the finish decides the mood: plain and savory for a weeknight, honey-glossed for family dinner, maple-buttery for holidays, garlic butter for roast dinners, or cumin-chili-lemon when you want something warmer and less sweet.

After choosing a version, use this table to keep the finish balanced and timed correctly.

VersionFlavorWhat to AddTiming
Simple oven roasted carrotsSavory, sweet, cleanOlive oil, salt, pepper, garlic powderSeason before roasting
Honey roasted carrotsGlossy, sweet-savoryHoney, lemon, herbs, black pepperAdd honey near the end or after roasting
Maple glazed carrotsWarm, buttery, festiveMaple syrup, butter, thyme, chili flakesAdd maple near the end; use 400°F for heavy glaze
Brown sugar carrotsCaramel-like, richBrown sugar, butter or oil, flaky saltUse lightly and watch closely
Garlic butter carrotsRich, savory, butteryButter, fresh garlic, parsley, lemonToss with finished carrots
Baby or mini carrotsSweet, simple, quickOil, salt, pepper, optional honeyPat dry first; check around 18 minutes
Whole or rainbow carrotsElegant, colorful, naturally sweetMaple, herbs, lemon, feta, nuts, pomegranateCut evenly and finish after roasting
Sweet spiced roasted carrotsWarm, bright, lightly spicedCumin, coriander, chili, honey, lemonSpices before roasting; honey and lemon after

If you are cooking now, the recipe card above is enough. The sections below explain how to adjust the same tray for different carrot cuts, glazes, ovens, holiday servings, and the little problems that can make carrots turn pale, dry, or sticky-burnt.

Why This Roasted Carrots Recipe Works

A hot oven gives the tray its roasted flavor. At 425°F / 220°C, the edges can brown while the centers become tender instead of collapsing.

What Browned Roasted Carrot Edges Should Look Like

Use the browned edges as your visual cue. The centers should look tender, while the outside has enough color to taste sweet, savory, and roasted.
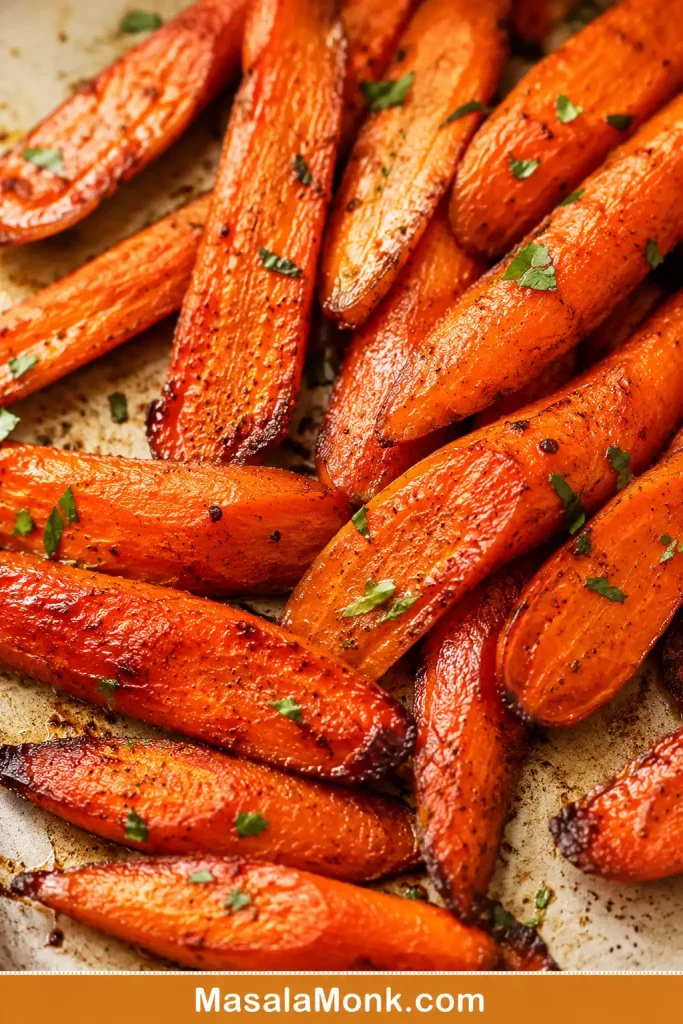
Close-up of roasted carrots with caramelized browned edges, black pepper, green herbs, and tender orange centers.
The browned edges are the flavor signal. Once the carrots look caramelized outside and tender inside, they only need a light finish to taste complete.

Even thickness makes the timing predictable. Carrots taper, so thick tops need to be split lengthwise. A single layer lets steam escape, which is why roomy pans brown better than crowded pans.

The glaze is controlled instead of dumped on early. A light glaze should cling to the carrots, not sit in puddles on the pan. Add it late and the carrots turn glossy instead of bitter.

If roasted carrots have disappointed you before, it was probably a cut-size, pan, or glaze-timing problem — not a carrot problem.

Roasted Carrots Ingredients and Smart Swaps

The ingredient list stays short because the oven does most of the work. What matters is starting with dry carrots, coating them lightly but evenly, salting them enough, and keeping sweet glazes controlled.
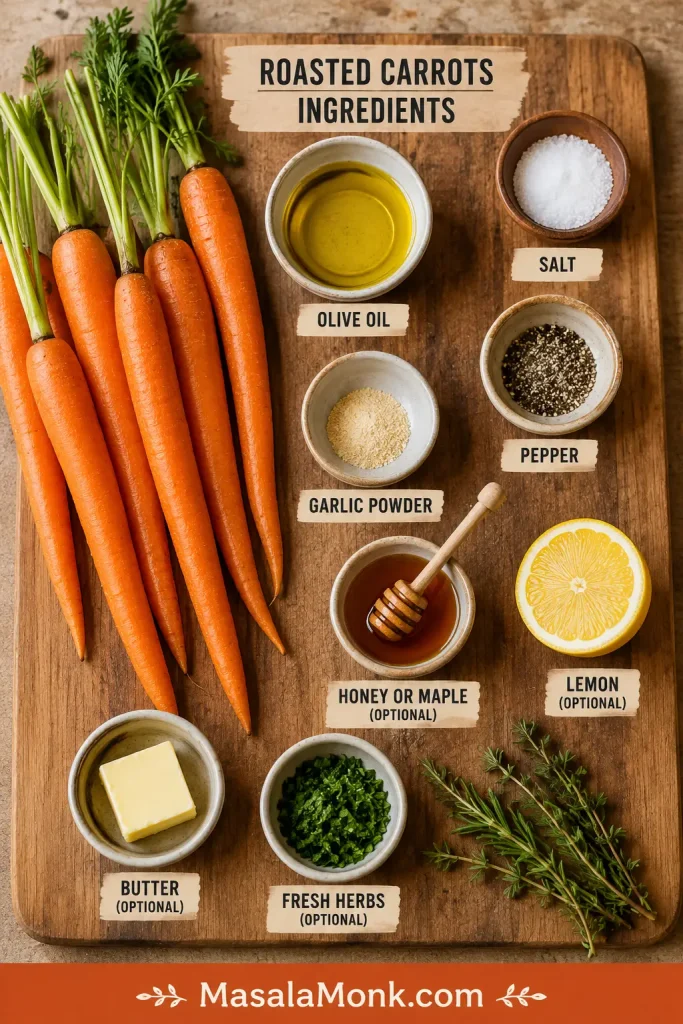
Carrots, olive oil, salt, pepper, honey, maple syrup, lemon, herbs, and butter arranged for making roasted carrots.
The base tray stays simple with carrots, oil, salt, and pepper. Then honey, maple, butter, lemon, garlic, or herbs can change the flavor without changing the method.
  • Carrots: medium carrots are easiest. Baby-cut carrots, mini carrots, whole slim carrots, and rainbow carrots all work, but very wet carrots need extra drying.
  • Olive oil: use about 1 tablespoon per pound / 450 g carrots. The pieces should look lightly shiny, not slick.
  • Salt and pepper: salt makes carrots taste sweeter and fuller; pepper balances the natural sweetness.
  • Garlic powder: the most reliable garlic option from the start because it does not burn as easily.
  • Fresh garlic: best warmed in butter, added halfway, or tossed with finished carrots.
  • Honey, maple or brown sugar: use lightly and add near the end or after roasting for a glossy finish.
  • Lemon, vinegar, herbs or chili: small bright finishes keep sweet carrots from tasting flat.
  • Butter: best as a finish or glaze; olive oil is easier for the main high-heat roast.

Best Pan for Roasted Carrots

The pan is where most roasted carrots are won or lost. Seasoning matters, but space matters more. A large rimmed sheet pan gives moisture room to escape, which helps the carrots brown instead of steam.

Crowded Pan vs Spaced Carrots

The same carrot cut can come out pale or caramelized depending on pan space. If the pieces overlap, spread them onto a second sheet pan before roasting.
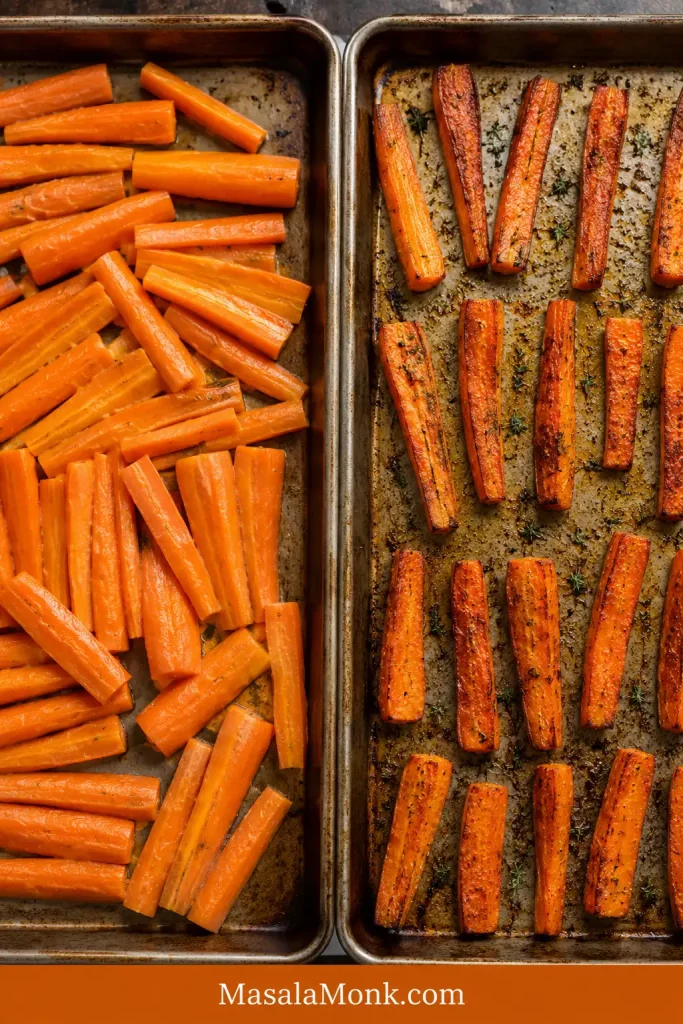
Side-by-side comparison of crowded pale carrots and properly spaced browned carrots on sheet pans.
Crowding changes the result fast. A second sheet pan is often the difference between soft steamed carrots and caramelized roasted edges.
  • Bare metal: best for deeper browning.
  • Parchment: easier cleanup if rated for 425°F / 220°C, with slightly lighter browning.
  • Foil: useful for sticky maple, honey, or brown sugar glazes.
  • Preheated sheet pan: helpful for wet baby carrots, but use carefully and skip it for your first heavy sugar-glaze batch.

How to Roast Carrots Step by Step

1. Heat the oven

Preheat the oven to 425°F / 220°C. A properly hot oven helps the carrots brown instead of slowly drying out.

2. Wash, dry and peel

Scrub the carrots well, then dry them. Peeling is optional for fresh, thin-skinned carrots. Older carrots with rough skins usually look and taste better peeled.

3. Cut even pieces

Cut the carrots diagonally into 2 to 3 inch pieces. Split thick tops lengthwise so the pieces are close in thickness, even if they are not identical in shape.
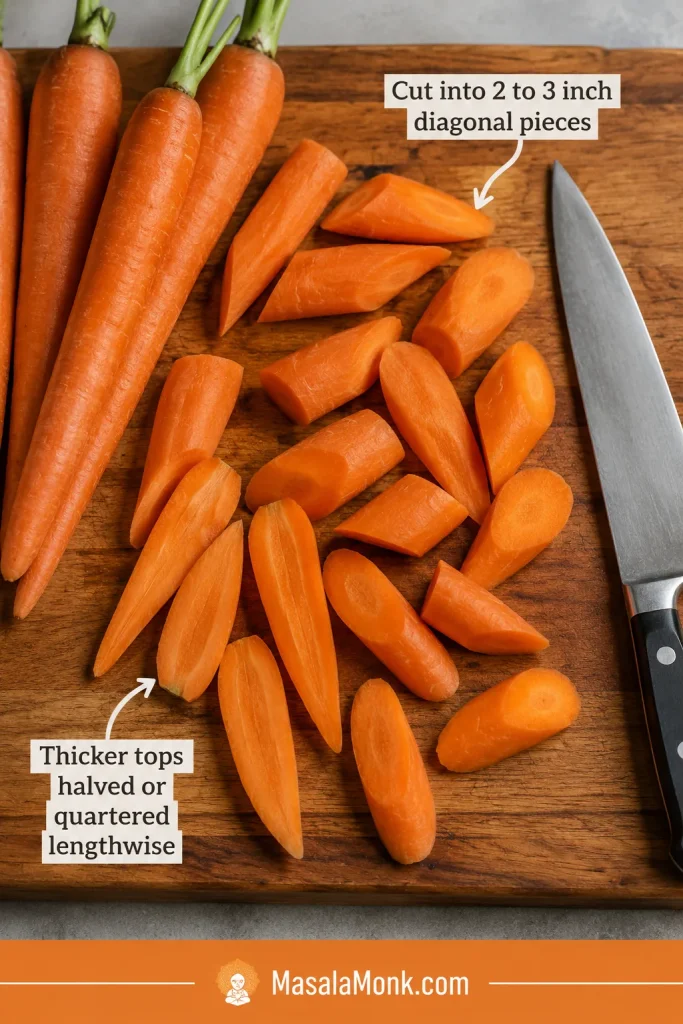
Carrots cut into 2 to 3 inch diagonal pieces on a wooden board, with thicker carrot tops split lengthwise.
Even thickness matters more than perfect shape. Therefore, split thick carrot tops lengthwise so the centers soften before the narrow edges dry out.

4. Toss with oil and seasoning

Toss with olive oil, salt, pepper, and garlic powder if using. The oil should coat the carrots lightly and evenly.
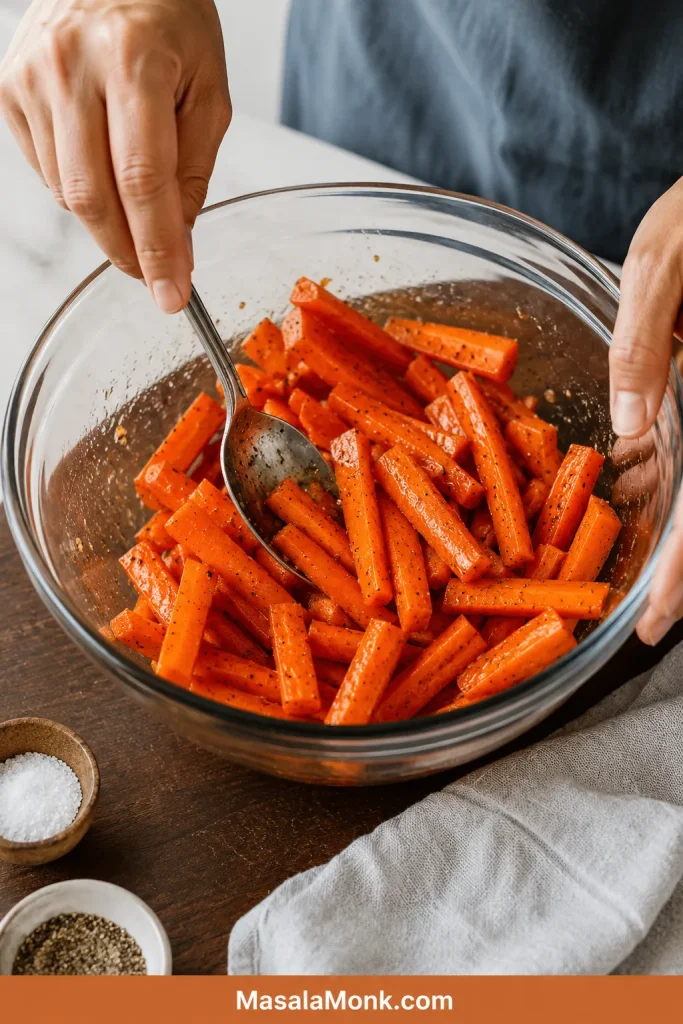
Carrot pieces tossed in a bowl with olive oil, salt, pepper, and seasoning before roasting.
Aim for a light, even coating before the carrots hit the pan. Too little oil can make them dry, while too much can make them greasy instead of roasted.

5. Spread with space

Give the carrots room on the pan. If they look crowded before roasting, they will taste crowded after roasting — softer, paler, and less caramelized.
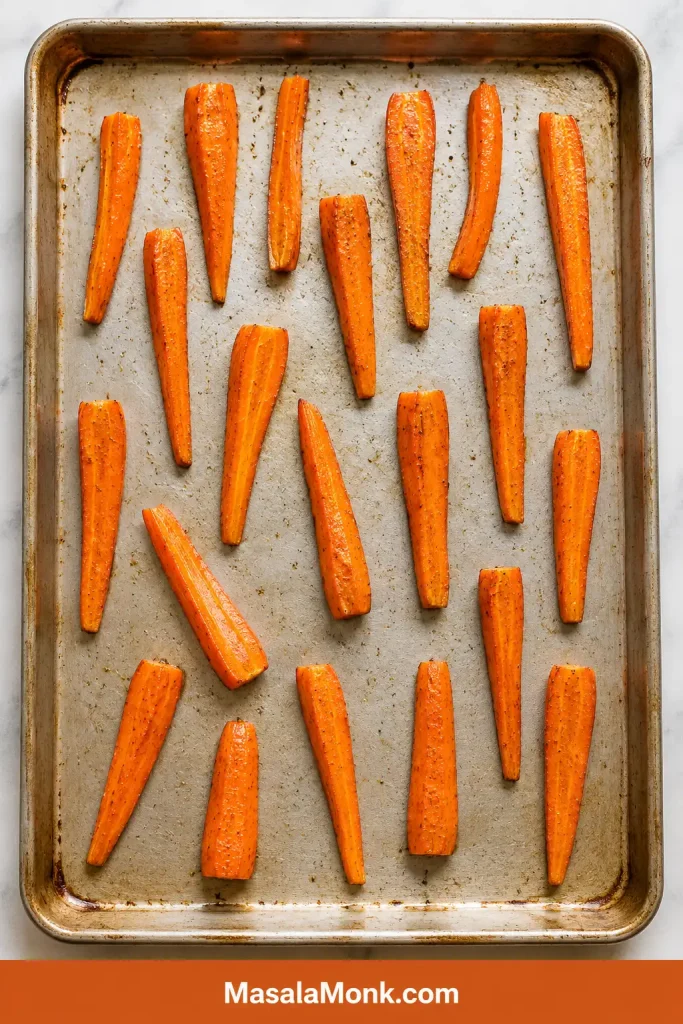
Carrot pieces spread in a single layer with visible space between them on a rimmed sheet pan.
Leave a little breathing room on the sheet pan. That small gap helps moisture escape, which is what turns plain carrots into browned oven roasted carrots.

6. Roast and toss halfway

Roast for 12 to 15 minutes, toss or flip, then continue roasting until the centers are tender and the edges are browned.
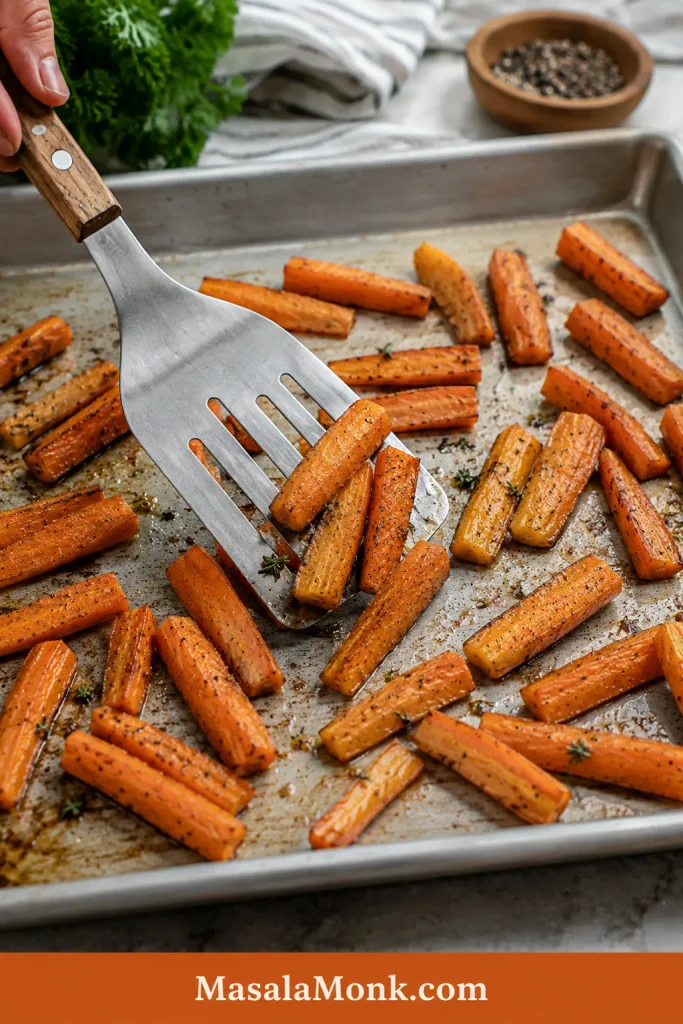
Carrots halfway through roasting on a sheet pan, being turned with a spatula as the edges begin to brown.
The halfway toss is not just busywork. It exposes new sides to the hot pan, so the carrots brown more evenly instead of roasting on one face.

7. Add glaze after the carrots start roasting

For honey, maple, or brown sugar carrots, let the carrots roast first and glaze second. Add the sweet glaze during the final 5 to 10 minutes or toss it with the carrots after roasting. For garlic butter carrots, warm the garlic in butter and toss with the finished tray.
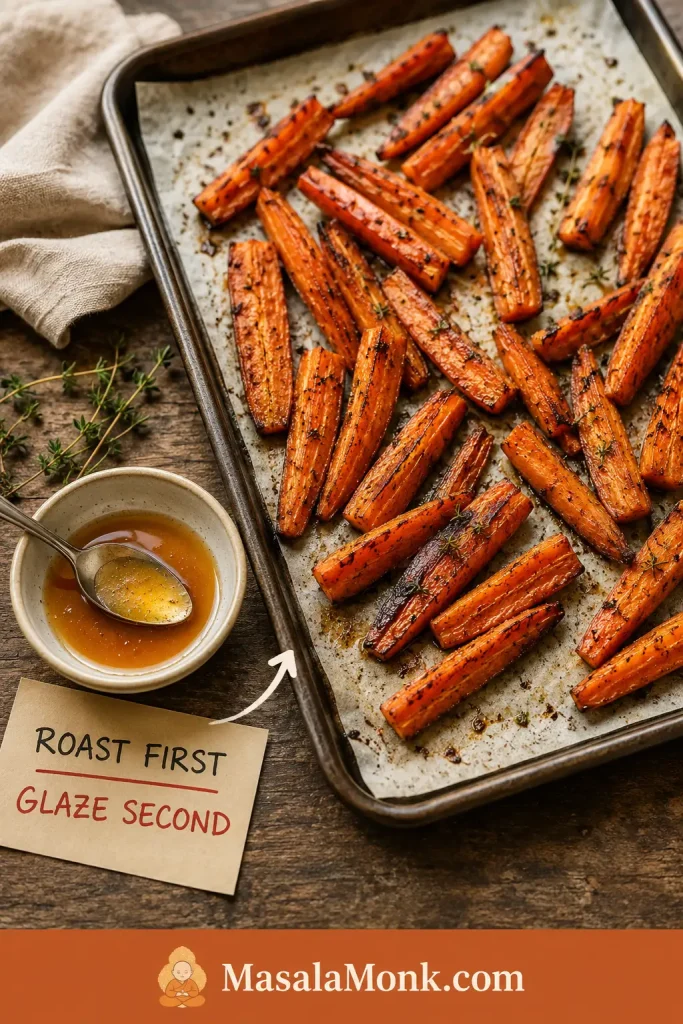
Roasted carrots on a pan with a small bowl of honey or maple glaze nearby before the glaze is added.
Think of honey or maple as the finishing layer, not the main cooking step. Add it after browning so the glaze shines instead of burns.

8. Finish bright

Once the carrots are hot and browned, a small finish — lemon, herbs, flaky salt, chili, feta, tahini, yogurt, or toasted nuts — makes them taste brighter and more complete.

Roasting Time Chart for Carrots

The timer is a guide, not a contract. Thin carrots finish quickly; thick carrots need more time. Start checking early when pieces are thin, glazed, or close to the edge of the pan.

Carrot Type or CutOven TemperatureApprox. TimeBest Use
Thin diagonal slices425°F / 220°C15 to 20 minutesFast weeknight side
2-inch chunks425°F / 220°C20 to 25 minutesEveryday roasted carrots
2 to 3 inch diagonal pieces425°F / 220°C22 to 30 minutesBest default cut
Baby-cut carrots425°F / 220°C18 to 25 minutesNo-chop convenience
Whole slim carrots425°F / 220°C25 to 35 minutesHoliday presentation
Thick whole carrots400°F / 200°C35 to 45 minutesGentler cooking for large carrots
Large whole carrots with rich glaze400°F / 200°C35 to 50 minutesHoliday-style glazed carrots

How to Know Roasted Carrots Are Done

Roasted carrots are done when a fork slides into the center with light resistance. They should be tender but not collapsing. You want bend, not collapse.

Fork-Tender Roasted Carrots

The fork test matters more than the timer. Check the thickest pieces first, because they decide whether the tray is truly done.
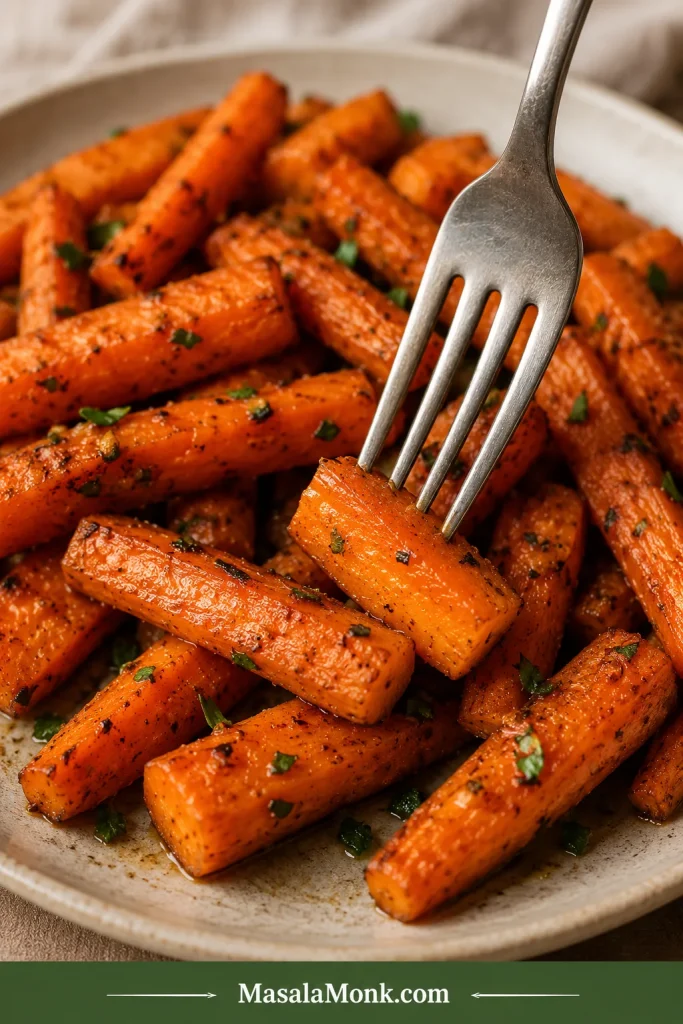
A fork testing a roasted carrot piece to show a tender center and browned outside.
Use the fork test before pulling the tray. The carrot should offer light resistance, which means it is tender without turning soft or mushy.

The edges should look browned and slightly caramelized. If the carrots are browned but still firm in the middle, lower the oven to 375°F / 190°C and roast for a few more minutes. If they are soft but pale, the pan was probably crowded, the oven was too low, or the carrots were too wet.

Temperature is the next lever: hotter for browning, gentler for large carrots or heavier glazes.

Best Temperature for Roasted Carrots

The best default temperature for roasted carrots is 425°F / 220°C. It gives the best balance of browned edges and tender centers for most cut carrots. For larger whole carrots or heavier sweet glazes, move down to 400°F / 200°C. Choose 375°F / 190°C only for gentler roasting, such as after parboiling or when your oven runs hot.

Using a fan or convection oven? Start checking 3 to 5 minutes earlier. If your oven browns aggressively, use 400°F / 200°C for glazed carrots or thin pieces.

Once the carrots roast properly, the finish is where the same pan can become a weeknight side, a kid-friendly dinner vegetable, or the glossy holiday dish people actually take seconds of.

Honey, Maple, Brown Sugar and Garlic Butter Finishes

The glaze should shine, not swim. A light coating makes carrots glossy; too much glaze turns the pan sticky before the centers finish cooking. The carrots should taste like roasted carrots first, with sweetness around the edges.

Honey makes the carrots glossy and familiar, maple makes them deeper and more holiday-like, and garlic butter pulls the whole tray back toward savory dinner territory.

Sweet carrots also need a small counterpoint — lemon, vinegar, salt, black pepper, chili, or fresh herbs — so the flavor stays balanced. The lemon or vinegar at the end is small, but it is what keeps sweet carrots from tasting like dessert.

Looking for a specific finish? Jump to honey, maple, brown sugar, garlic butter, or savory roasted carrots without honey.

Glaze Formula Table

Use these amounts for a 2 lb / 900 g tray. Keep the glaze light for the main recipe, especially at 425°F / 220°C.

VersionFor 2 lb / 900 g CarrotsWhen to AddBest Finish
Honey roasted carrots1 to 2 tbsp / 15 to 30 ml honeyFinal 5 to 10 minutes or after roastingLemon, parsley, thyme, black pepper
Maple glazed carrots1 to 2 tbsp / 15 to 30 ml maple syrupFinal 5 to 10 minutes; use 400°F for heavy glazeButter, thyme, rosemary, chili flakes
Brown sugar carrots1 to 2 tbsp / 12 to 25 g brown sugar + oil or butterLight amount before roasting or near the endFlaky salt, lemon, black pepper
Garlic butter carrots2 to 3 tbsp / 28 to 42 g butter + 2 to 3 garlic clovesAfter roastingParsley, lemon juice
Honey garlic butter carrots3 tbsp / 42 g butter + 1½ to 2 tbsp / 22 to 30 ml honey + 3 garlic clovesBrush lightly near the end; toss more after roastingLemon, parsley, flaky salt
Honey balsamic carrots1 tbsp / 15 ml honey + 1 tbsp / 15 ml balsamic vinegarNear the endThyme, black pepper
Sweet spiced carrots½ tsp cumin + ½ tsp coriander + pinch chili + 1 tbsp honey + lemonSpices before roasting; honey and lemon afterCilantro, mint, yogurt, tahini

Honey Roasted Carrots

The best honey version should look glossy, not sticky. Use 1 to 2 tablespoons honey for 2 lb / 900 g carrots and add it near the end or after roasting. Finish with lemon, black pepper, flaky salt, parsley, thyme, or a tiny pinch of chili. These carrots work well beside a salty, smoky, or mustardy main like honey glazed ham.
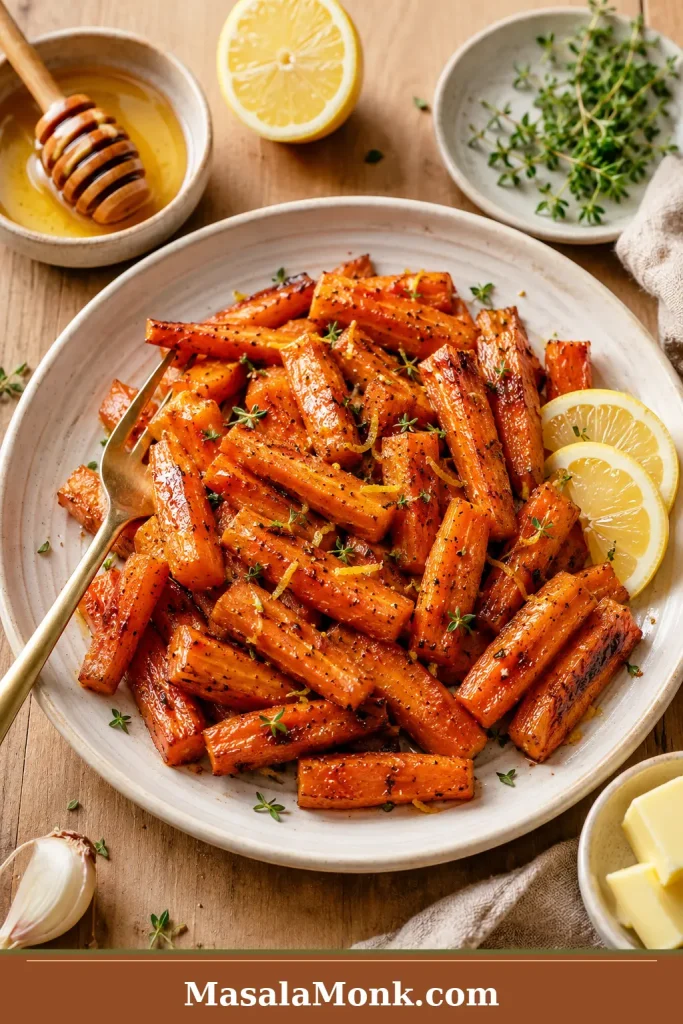
Honey roasted carrots on a cream plate with lemon, herbs, black pepper, and a light glossy glaze.
Honey roasted carrots should taste sweet but still balanced. Finish with lemon, herbs, or black pepper so the glaze feels bright rather than heavy.

Maple Glazed Carrots

Maple carrots are the holiday version: buttery, shiny, and a little deeper than honey. Use 1 to 2 tablespoons maple syrup for 2 lb / 900 g carrots. For a heavier maple glaze, roast at 400°F / 200°C, use foil for easier cleanup, and toss more often. They sit nicely beside a creamy side like sweet potato casserole.
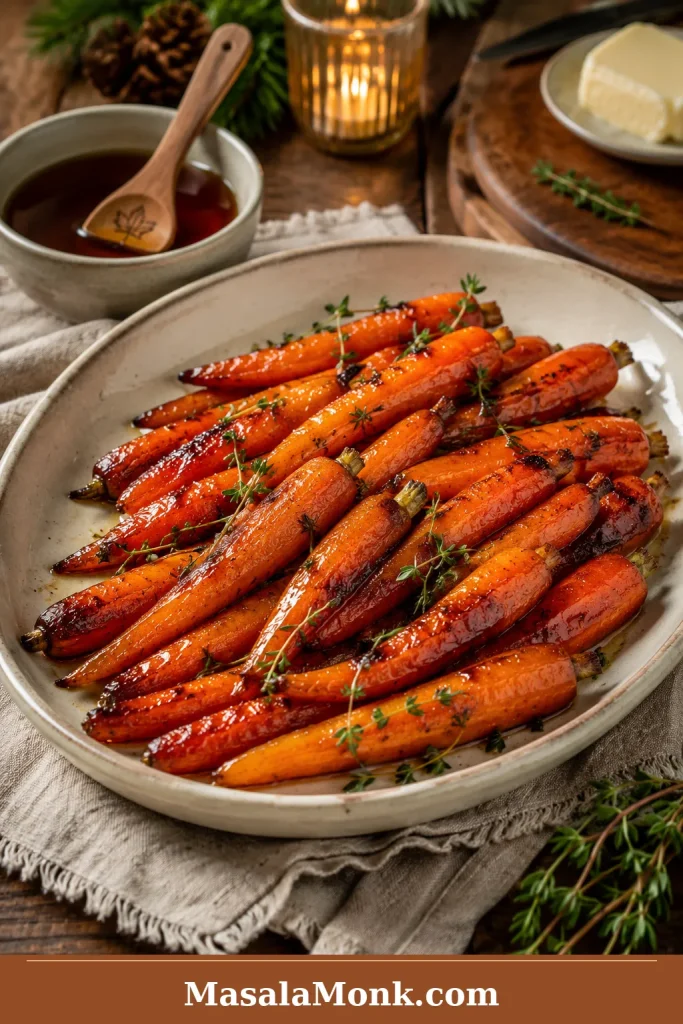
Maple glazed carrots with thyme, browned edges, and a warm buttery finish on a rustic plate.
Maple brings a deeper, cozier sweetness than honey. As a result, these carrots work especially well beside roast chicken, turkey, ham, or holiday mains.

Brown Sugar Roasted Carrots

Brown sugar gives carrots a caramel-like flavor. Use 1 to 2 tablespoons brown sugar, mixed with olive oil or melted butter so it coats evenly. Balance the sweetness with lemon juice, vinegar, black pepper, chili, or flaky salt.
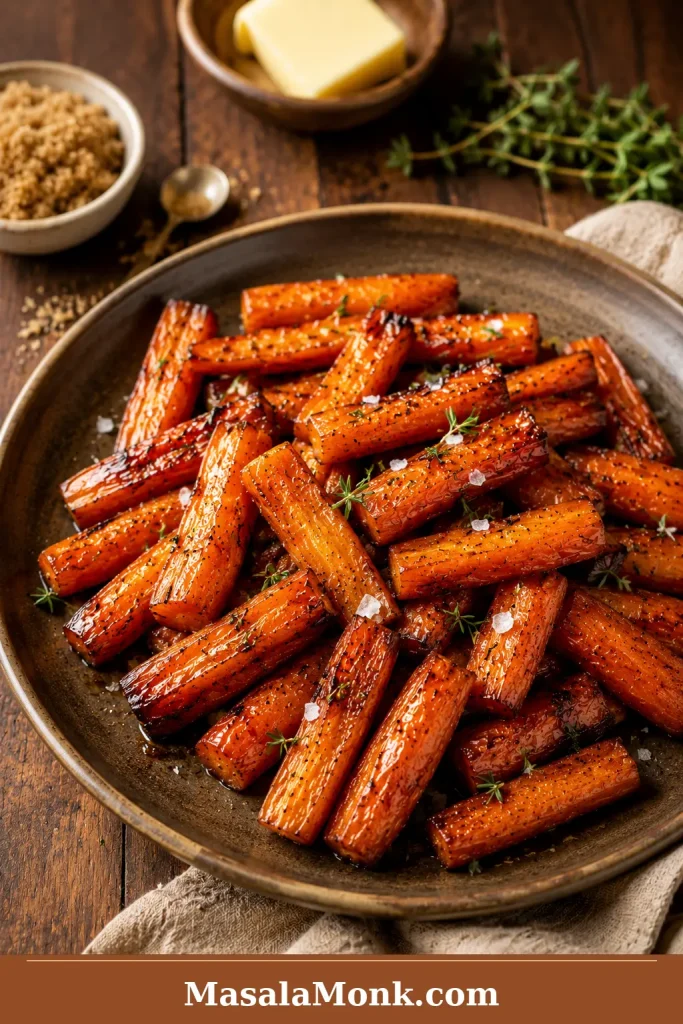
Brown sugar roasted carrots with caramelized edges, flaky salt, thyme, butter, and a glossy finish.
Brown sugar creates a richer caramel-like finish. However, a light hand matters here; flaky salt, lemon, or pepper keeps the side from tasting too sweet.

Garlic Butter Roasted Carrots

Garlic butter carrots should smell savory first, sweet second. Melt 2 to 3 tablespoons butter with 2 to 3 minced garlic cloves, warm just until fragrant, then toss with the roasted carrots at the end. Add parsley and lemon juice before serving. This version is especially good with cozy mains such as cream of mushroom chicken.
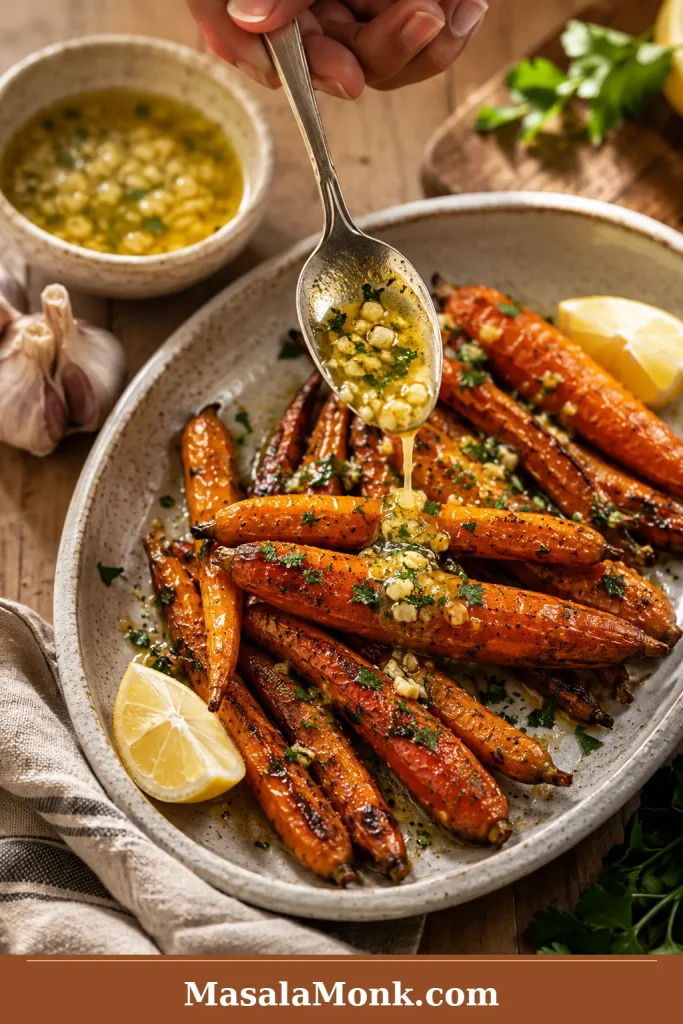
Garlic butter being spooned over roasted carrots with parsley and lemon on a ceramic plate.
Garlic butter is best added after roasting. The hot carrots melt it into the edges, while the garlic stays fragrant instead of turning bitter.

Honey Garlic Butter Carrots

For honey garlic butter carrots, warm 3 tablespoons / 42 g butter with 3 minced garlic cloves just until fragrant, then take it off the heat and stir in 1½ to 2 tablespoons honey. Brush a little over the carrots during the final few minutes, then toss with the rest after roasting for a glossy finish.

Honey Balsamic Roasted Carrots

For a tangy-sweet version, use 1 tablespoon honey and 1 tablespoon balsamic vinegar near the end of roasting. Balsamic gives the carrots depth and keeps the glaze from tasting only sweet.

Sweet Spiced Roasted Carrots

For a less-sweet version, season the carrots with olive oil, salt, pepper, ½ teaspoon cumin, ½ teaspoon coriander, and a small pinch of chili powder. Roast as usual, then finish with honey, lemon juice, and fresh herbs.
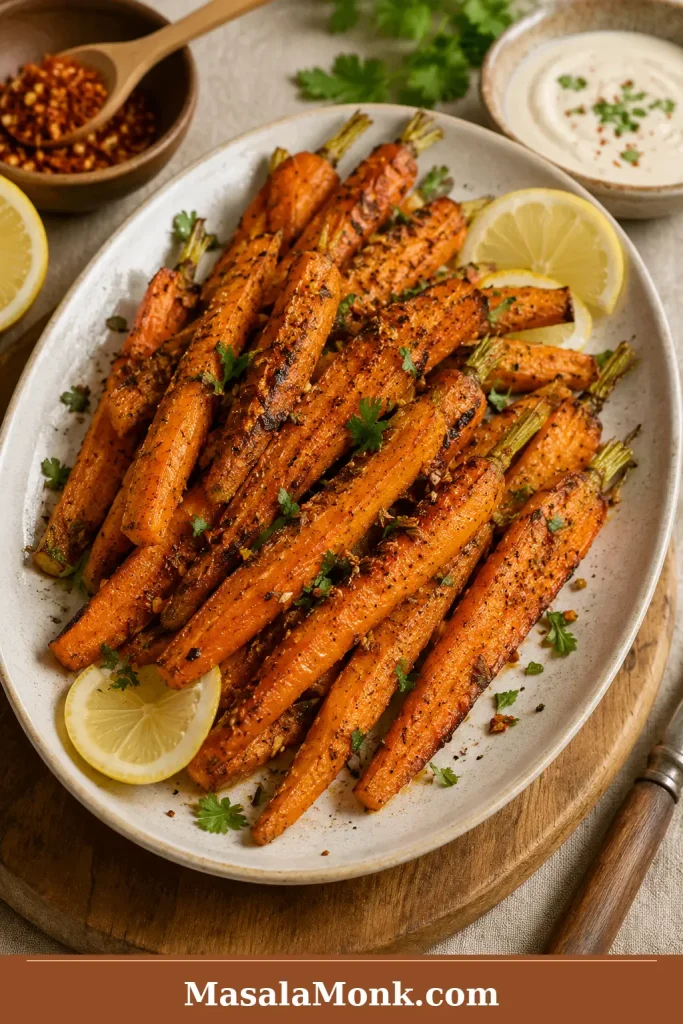
Savory roasted carrots with cumin, chili flakes, lemon, herbs, black pepper, and a creamy dip.
For savory roasted carrots, skip the sweet glaze and lean on cumin, chili, lemon, herbs, and salt. The oven still brings out the carrots’ natural sweetness.

Simple glaze timing: oil, salt, pepper, and garlic powder can go in before roasting. Honey, maple, brown sugar, lemon, vinegar, fresh herbs, yogurt, tahini, and delicate toppings are usually better near the end or after roasting.

Baby, Mini, Whole and Rainbow Carrots

Baby-cut carrots

Baby carrots and packaged baby-cut carrots roast well, but they need to be dry. Bagged baby carrots often hold surface moisture, which makes them steam instead of brown. Pat dry, toss with oil and seasoning, then roast at 425°F / 220°C for 18 to 25 minutes.
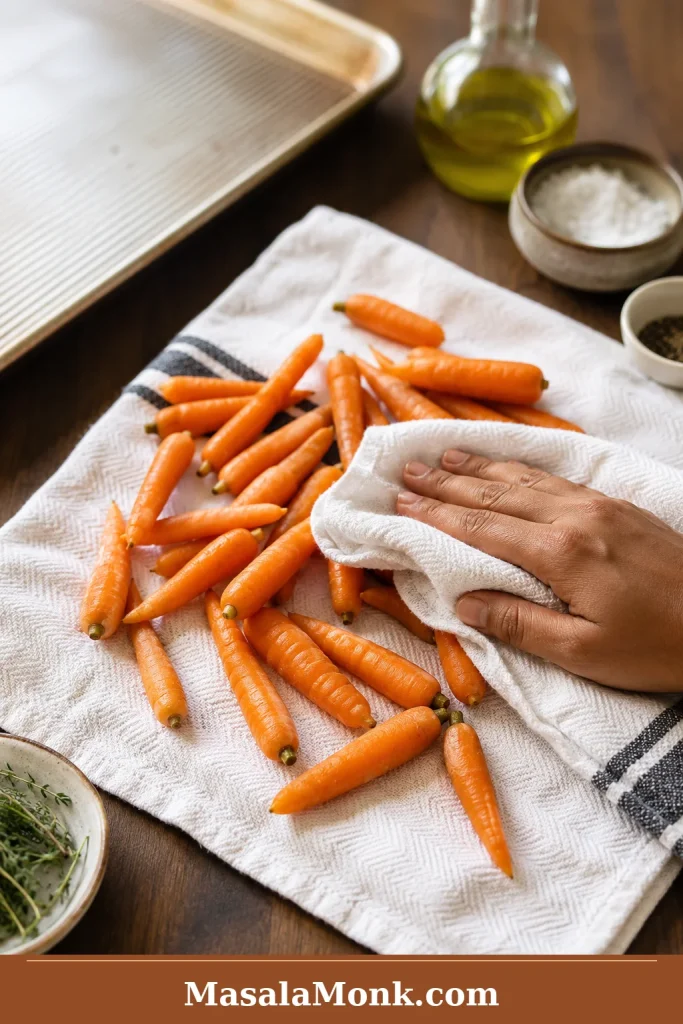
Raw baby carrots being dried on a kitchen towel before roasting, with a sheet pan and seasonings nearby.
A quick towel-dry gives baby carrots a better start. Less surface moisture means more browning, better texture, and less tray steam.

Mini carrots

Mini carrots roast like baby carrots, but timing depends on thickness. Slim mini carrots may finish around 15 to 18 minutes; thicker ones may need 22 to 25 minutes.

Whole carrots

Whole roasted carrots look beautiful on a platter. Use slim carrots when possible, or halve thick carrots lengthwise so the centers soften before the outside overcooks. Whole slim carrots usually take 25 to 35 minutes at 425°F / 220°C.
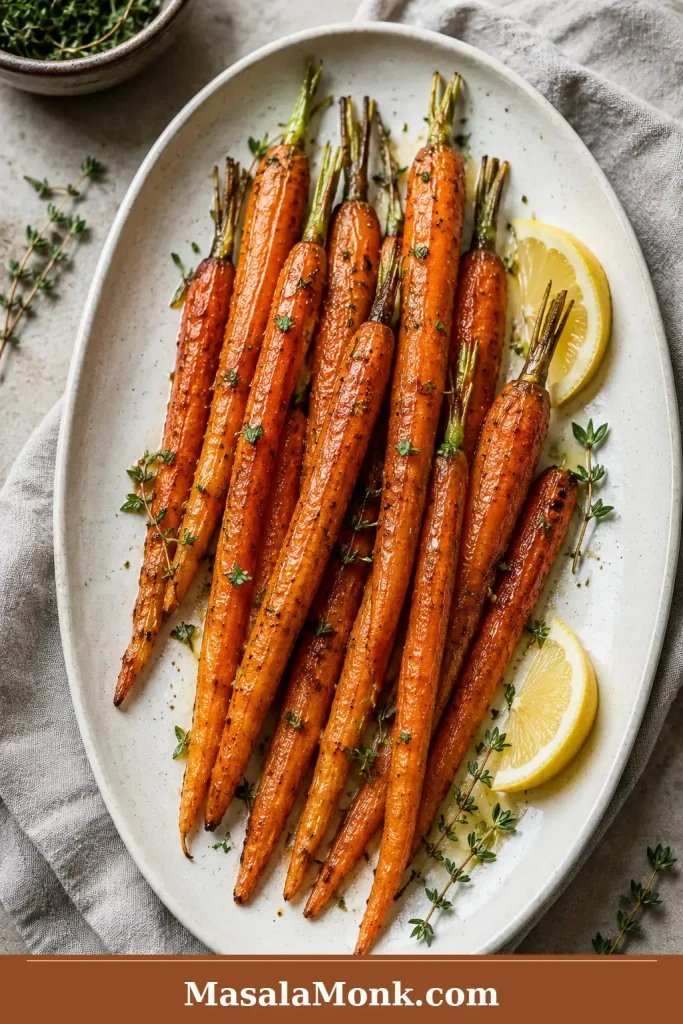
Whole slim roasted carrots arranged on an oval platter with herbs, lemon wedges, and browned edges.
Whole carrots make a simple side dish look more elegant. For the best texture, choose slim carrots or halve thicker ones before roasting.

Rainbow carrots

Rainbow carrots roast almost the same way as orange carrots. Cut them to similar thickness and finish simply: maple, lemon, herbs, feta, tahini, toasted nuts, or pomegranate is enough to make the plate feel special.
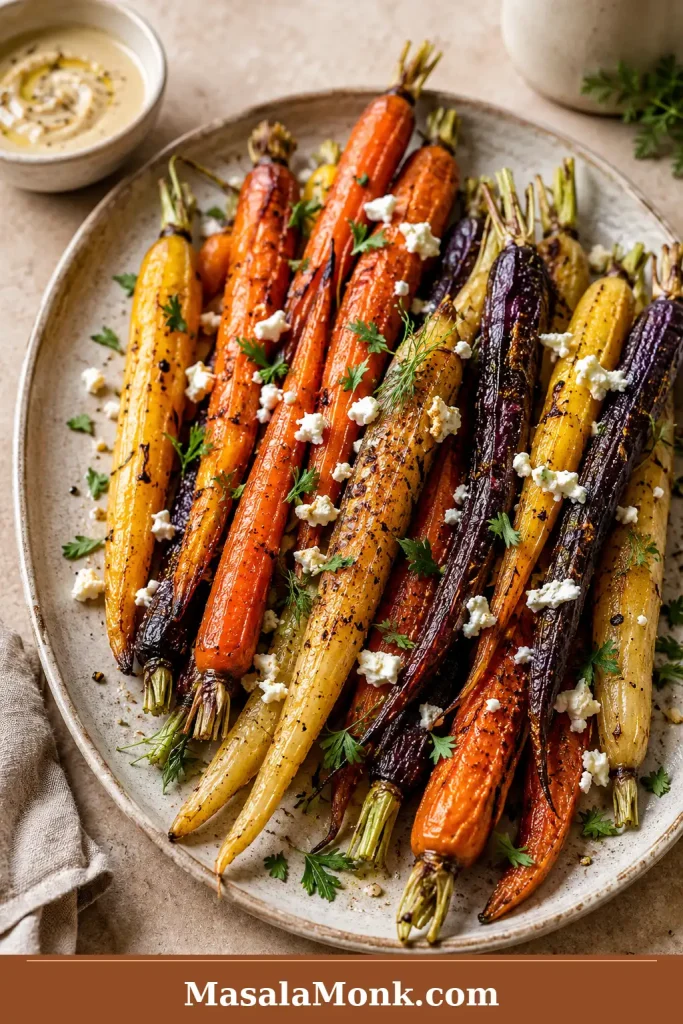
Rainbow roasted carrots in orange, purple, yellow, and pale colors with herbs, feta, and pomegranate.
Rainbow carrots cook like regular carrots, but they bring instant color to the table. Keep the toppings restrained so the roasted vegetables stay the focus.

How to Make Roasted Carrots for Holidays

For Thanksgiving, Christmas, Easter, or Sunday roasts, choose whole slim carrots or rainbow carrots if you want a platter that looks finished. They bring color, shine, and sweetness between creamy, buttery, rich dishes.

The holiday formula is simple: pretty carrots + light maple or honey glaze + herbs + one finishing touch. Try thyme and flaky salt, parsley and lemon, feta and pomegranate, or tahini and toasted nuts. The best tray should look glossy at the edges, smell sweet-savory, and still taste balanced beside all the creamy sides.

Holiday Roasted Carrots Platter

For a party table, the garnish should support the carrots instead of covering them. Choose one colorful finish, then keep the platter easy to serve.
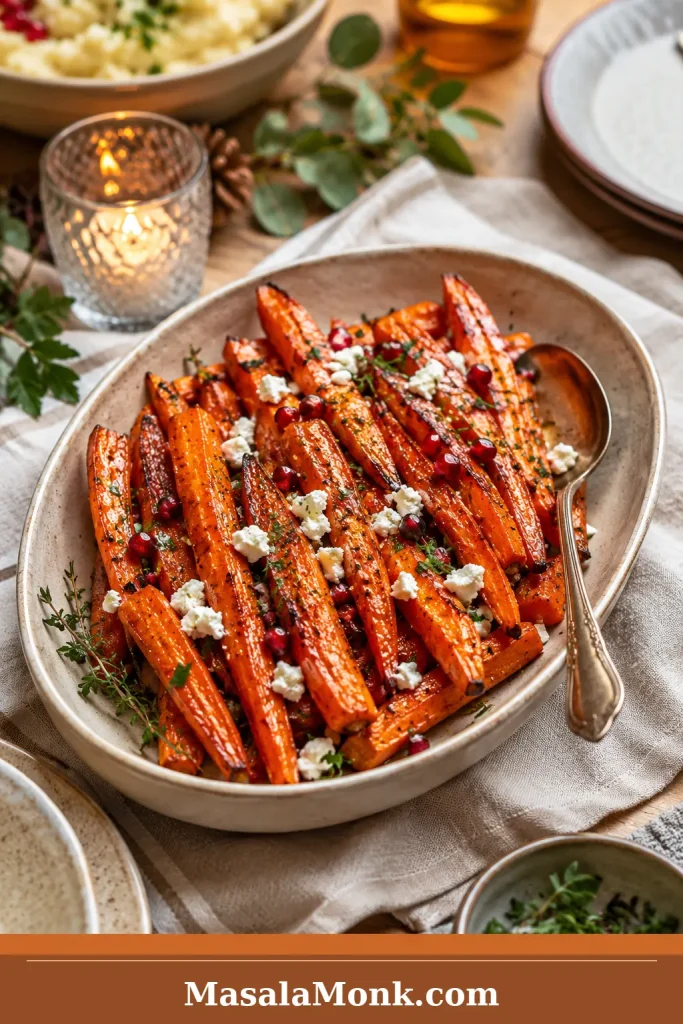
Holiday roasted carrots on a serving platter with herbs, light glaze, pomegranate, and a warm table setting.
For a holiday roasted carrots platter, use pretty carrots, a light honey or maple glaze, fresh herbs, and one colorful finish. The side feels festive without becoming fussy.

For a classic holiday spread, pair these carrots with one creamy side and one green vegetable. Green bean casserole gives the table that familiar savory-creamy contrast, while garlic mashed potatoes make the plate feel fuller without competing with the carrots.

Holiday shortcut: peel and cut the carrots 1 to 2 days ahead, mix the glaze separately, and roast the carrots fresh. If oven space is tight, slightly under-roast earlier in the day, then reheat and finish with herbs or garnish before serving.

Best Seasonings for Roasted Carrots

Think of seasoning as the mood of the tray. Choose one direction and keep the finish focused.

  • Classic: olive oil, salt, pepper, parsley.
  • Honey garlic: honey, butter, garlic, lemon.
  • Maple holiday: maple syrup, butter, thyme, chili flakes.
  • Brown sugar: brown sugar, butter, pepper, flaky salt.
  • Honey balsamic: honey, balsamic vinegar, thyme.
  • Herby: rosemary, thyme, dill, parsley.
  • Warm spice: cumin, coriander, paprika, cinnamon.
  • Creamy finish: yogurt, tahini, feta, or miso-maple drizzle after roasting.

Roasting Carrots With Other Vegetables

Carrots roast well with other vegetables, but timing matters. Potatoes, sweet potatoes, parsnips, cauliflower, and Brussels sprouts can share the pan if everything is cut thoughtfully and kept in one layer. Broccoli and asparagus cook faster, so add them later. Roast beets separately if you do not want color bleeding.

Potatoes need the most planning. Cut them smaller than the carrots or start them first. If you want a separate potato side, this ranch roasted potatoes recipe is a better second tray.

Air Fryer Roasted Carrots

The oven gives the best full-tray roasted carrots. Use the air fryer for small batches when the oven is full.

Cook carrots at 380°F to 400°F / 193°C to 204°C, shaking halfway. Thin pieces may take 10 to 12 minutes; thicker pieces may need 15 to 20 minutes. The air fryer is less forgiving with sticky glazes, so add honey or maple lightly, or toss with extra glaze after cooking. These carrots can go beside air fryer boneless pork chops when the oven is busy.
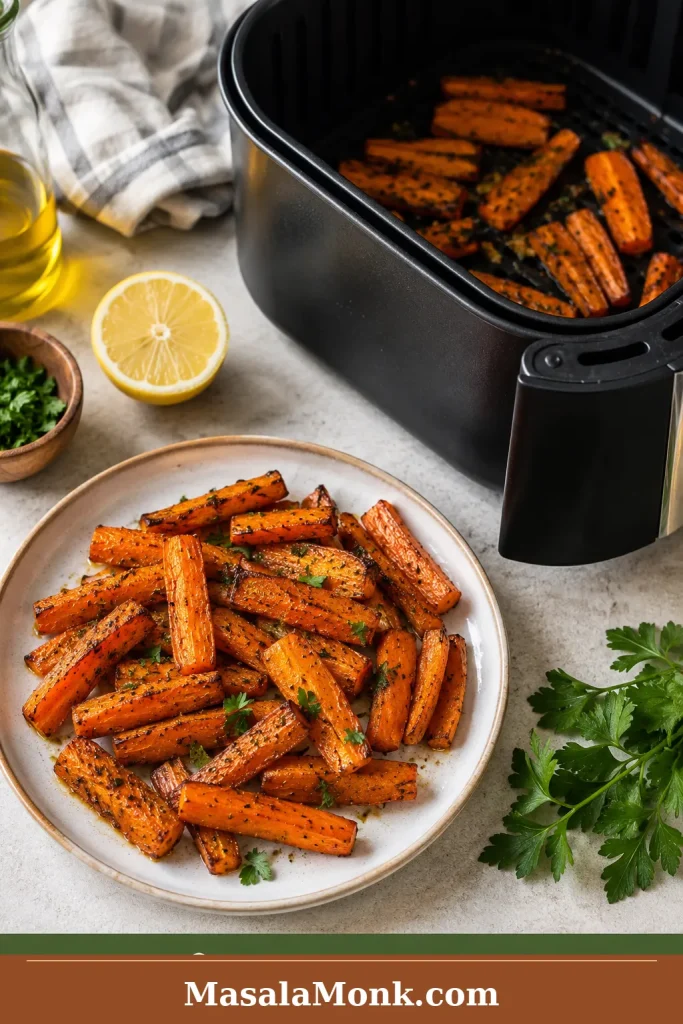
Air fryer roasted carrots with browned edges and herbs served beside an air fryer basket.
Air fryer roasted carrots work best in a loose layer. Shake the basket halfway, then add any sweet glaze lightly near the end.

If the first tray does not come out exactly right, the problem is usually easy to spot from the way the carrots look.

Troubleshooting Roasted Carrots

Roasted Carrots Troubleshooting Guide

Use the visual cues first, then check the table below for the likely cause. Most tray problems come back to moisture, spacing, cut size, time, or glaze timing.
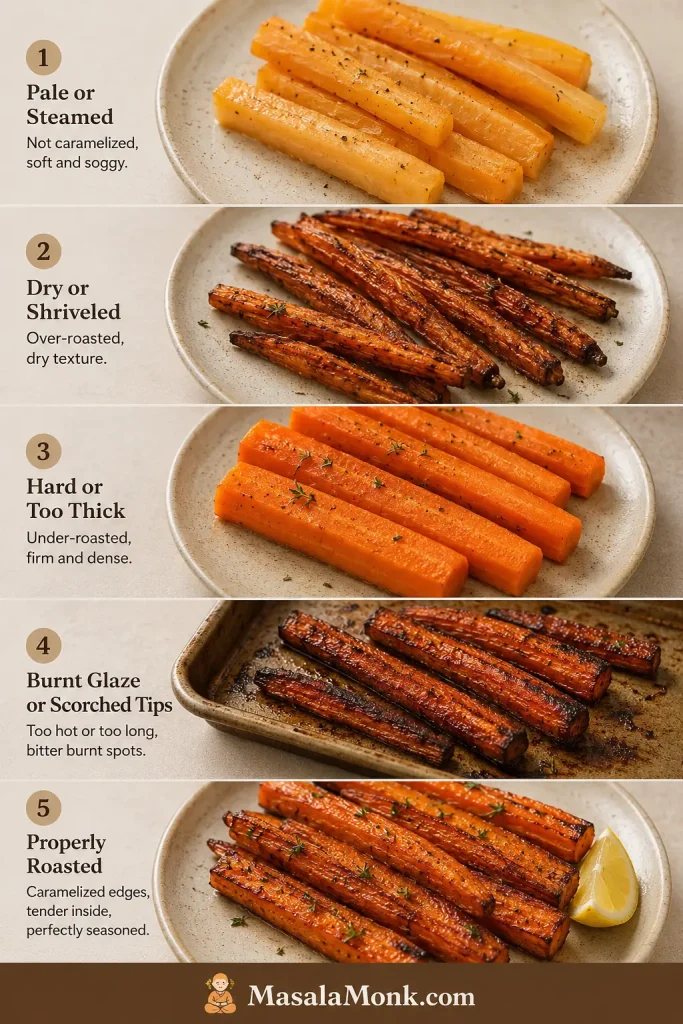
Five-panel troubleshooting guide showing pale steamed carrots, dry shriveled carrots, hard thick carrots, burnt glazed carrots, and properly roasted carrots.
Most roasted carrot problems show up in the way the tray looks. Pale means steam, dry means too thin or too long, hard means undercooked, and burnt usually means the glaze went on too early.

If your carrots come out dry, pale, mushy, hard in the center, or burnt at the tips, the fix is usually small. Use this table for the next tray.

Common Roasted Carrot Problems and Fixes

ProblemLikely CauseFix
Dry or shriveled carrotsPieces too thin, roasted too long, or carrots naturally dryCut thicker pieces, coat evenly with oil, avoid over-roasting, or parboil large/dry carrots first.
Mushy carrotsOvercooked, cut too small, or crowdedCut larger pieces, use one layer, and check earlier.
Hard carrotsPieces too thick, oven too low, or not enough timeKeep roasting until a fork slides in with light resistance; parboil very large carrots next time.
Pale carrotsOven too low, pan crowded, or carrots wetUse 425°F, dry the carrots, and give them space.
Honey burnedHoney added too early or too much usedAdd honey near the end or after roasting.
Maple glaze got sticky and darkToo much syrup or too much heat for too longUse less maple, toss more often, or roast heavy glazes at 400°F.
Garlic burnedFresh garlic added from the beginningAdd fresh garlic halfway, warm it in butter, or use garlic powder.
Uneven carrotsPieces different thicknessesHalve or quarter thick carrot tops lengthwise.
Baby carrots wateryWet from the bag or crowdedPat dry, use a hot pan, and roast in one layer.
Glaze too sweetToo much honey, maple, or brown sugarAdd lemon, vinegar, chili, herbs, black pepper, or flaky salt.

Fixed the issue? Return to the recipe card, choose a glaze finish, or go back to the top.

Should you parboil carrots before roasting?

Most weeknight trays do not need parboiling. A hot oven, even cuts, enough oil, and a single layer are enough.

Parboiling helps when carrots are large, dry, or leathery. Simmer in salted water until just crisp-tender, drain well, let the surface steam dry, then roast until browned. The center softens first, so the oven can focus on caramelized edges.

Make Ahead, Storage and Reheating

Roasted carrots taste best fresh, but the prep is easy to do ahead. Peel and cut the carrots 1 to 2 days in advance and store them in an airtight container in the fridge. If you store cut carrots in water, drain and dry them very well before roasting.

Store leftover roasted carrots in an airtight container in the refrigerator for 3 to 4 days, in line with general USDA leftovers and food safety guidance. Let the carrots cool before covering so steam does not collect inside the container and soften them further.

How to Store Leftover Roasted Carrots

Store the carrots so they stay useful, not soggy. A shallow airtight container helps them cool evenly and makes leftovers easier to add to quick meals.
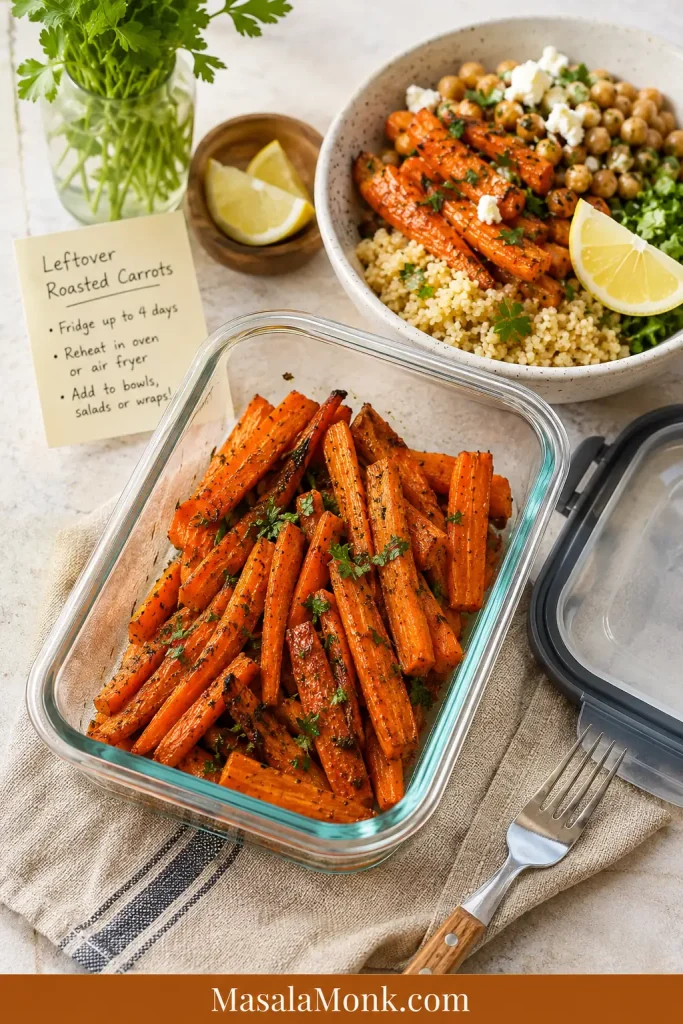
Leftover roasted carrots stored in a glass container beside a grain bowl, lemon, herbs, fork, and storage note.
Leftover roasted carrots can still work hard. Reheat them as a side, or add them to grain bowls, salads, wraps, couscous, soups, and quick meal-prep lunches.

Reheat in a 375°F / 190°C oven until warm, or use an air fryer for small portions. The microwave works, but it softens the edges. Leftover roasted carrots are good warm as a side, chopped into grain bowls, folded through couscous, tossed into salads with something tangy, or blended into a quick soup.

You can freeze roasted carrots, but they soften after thawing. Freeze them only if you plan to use them in soups, purees, sauces, or mash.

Making another tray? Back to the recipe card, check troubleshooting, or back to top.

What to Serve With Roasted Carrots

Roasted carrots bring sweetness, color, and warmth without demanding much attention from the cook. Match the finish to the rest of the plate.

  • Honey or maple glazed carrots: pair them with salty, smoky, or savory mains like ham, roast chicken, turkey, pork, or beef.
  • Creamy mains: finish the carrots with lemon, herbs, black pepper, or something crisp like cucumber salad.
  • Cozy dinners: garlic butter carrots work well beside whole chicken in the crock pot, beef roast, or pork tenderloin in the oven.
  • Fish or salmon: keep the carrots lighter with olive oil, lemon, dill, parsley, or a small honey-balsamic finish. They would work well beside this sockeye salmon recipe.
  • Vegetarian plates: use cumin, chili, lemon, tahini, yogurt, chickpeas, lentils, rice bowls, couscous, or quinoa.
  • Holiday plates: pair the carrots with one creamy side, one green side, and a bright garnish so they do not disappear among rich dishes.

FAQ

These quick answers cover the timing, temperature, glaze, make-ahead, and texture questions that usually come up after the first tray.

What temperature is best for roasting carrots?

425°F / 220°C is the best default. Use a gentler 400°F / 200°C oven for large whole carrots or richer maple and brown sugar glazes.

How long do carrots take to roast at 425°F?

Most cut carrots take 20 to 30 minutes at 425°F / 220°C. Thin slices can finish in 15 to 20 minutes; whole or thick carrots may need 30 to 40 minutes.

Do convection or fan ovens work for roasted carrots?

Yes. Use the same temperature and start checking 3 to 5 minutes earlier. For thin or glazed carrots, 400°F / 200°C may be safer in a strong fan oven.

Should carrots be covered while roasting?

No. Leave them uncovered so steam can escape and the edges can brown. Covering the pan gives softer, less caramelized carrots.

Do you peel carrots before roasting?

Peeling is optional. Fresh, thin-skinned carrots can be scrubbed well. Older or rough-skinned carrots usually taste and look better peeled.

Do baby carrots roast well?

Yes. Pat baby carrots dry first because they are often wet from the bag. Roast them in one layer at 425°F / 220°C for 18 to 25 minutes.

Should honey or maple go on before or after roasting?

Add honey or maple during the final 5 to 10 minutes, or toss it with the carrots after roasting. The carrots should roast first and glaze second.

Can I make roasted carrots without honey or maple?

Yes. Use olive oil, salt, pepper, garlic powder, and herbs, then finish with lemon or vinegar. The carrots will still taste naturally sweet from roasting, just less glossy.

Why did my roasted carrots burn?

The carrots may have been cut too thin, the oven may have been too hot for the glaze, or honey, maple, brown sugar, or fresh garlic may have gone in too early.

Why are my roasted carrots dry?

Carrots can turn dry if they are cut too thin, roasted too long, or not coated with enough oil. Cut medium-thick pieces and pull them when they are just fork-tender with browned edges.

Why are my roasted carrots still hard?

They were probably cut too thick, roasted at too low a temperature, or pulled too early. Keep roasting until a fork slides in with light resistance; for very large carrots, parboil first or roast longer at 400°F / 200°C.

Do you boil carrots before roasting?

Most cut carrots do not need it. Parboil large, dry, or leathery carrots until just crisp-tender, dry them well, then roast for softer centers and less shriveling.

Can roasted carrots be made ahead for holidays?

Yes, but they taste best freshly roasted. For holidays, peel and cut them 1 to 2 days ahead, mix the glaze separately, then roast fresh or slightly under-roast and reheat before serving.

Do carrots and potatoes roast well together?

Yes, but potatoes often need smaller cuts or a head start. Keep everything in one layer so both vegetables brown instead of steam.

Are roasted carrots better with oil or butter?

Oil is better for the base recipe because it handles high heat well. Butter gives richer flavor, but it is best mixed with oil, used in a glaze, or added after roasting.

Final Tips for Better Roasted Carrots

Once the pieces are even, the pan is roomy, and the glaze goes on late, roasted carrots become one of the easiest sides to trust.

  • Safest first tray: keep it simple with olive oil, salt, pepper, and garlic powder.
  • Glossy family side: add honey near the end and finish with lemon or herbs.
  • Holiday platter: use maple, butter, thyme, and one bright or pretty finish.

Once you have made the plain tray once, the rest becomes instinctive. Keep them plain and savory for a weeknight, glossy with honey for family dinner, maple-rich for holidays, or bright with cumin, chili, lemon, and herbs when the plate needs balance. The method stays simple; the finish does the work.

Back to top

Posted on 13 Comments

Vegan French Toast: 6 Easy Recipes (Pan, Air Fryer, GF & High-Protein)

Hand dusting powdered sugar over golden vegan French toast on a cooling rack; cover for 6 recipe variations including air fryer, gluten-free, and high-protein. How to make Vegan French Toast Recipes Post.

If you’ve been craving vegan french toast (Dairy and Egg Free) that delivers diner-level crisp edges and a plush, custardy center—without eggs or dairy—you’re exactly where you need to be. This guide starts with a reliable base batter and then branches into five more variations that cover air fryer convenience, freezer-friendly sticks, gluten-free tweaks, chickpea-powered protein, and a beautifully silky tofu custard. Along the way, you’ll pick up small adjustments that transform “pretty good” slices into the ones everybody fights over. Moreover, you’ll find helpful links to deepen your understanding—whether you want to make your own almond milk, understand browning, or choose better gluten-free bread.

Before we cook, a quick mindset: french toast isn’t only a recipe; it’s a tiny set of decisions—bread, batter thickness, soak time, and heat. Tweak those four, and breakfast turns into brunch. Consequently, this page is organized to help you see exactly which lever to pull for your situation, so you can enjoy a stack that’s crisp outside, custardy inside, and absolutely worth repeating.


Core Vegan French Toast Recipe (Pan Method)

A classic slice needs a custard that clings. Here, eggs are replaced with a plant-milk base and a spoon of starch, which acts as a gentle thickener. Once the dipped bread hits the pan, that thin coating sets into a delicate shell while the interior remains soft. As a result, you get structure and tenderness without scrambling a single egg.

Ingredients (serves 2)

  • 1 cup unsweetened oat or almond milk
  • 1 Tbsp cornstarch (or 1½ Tbsp arrowroot)
  • 1½ Tbsp sugar or maple syrup
  • 1 tsp vanilla extract
  • ½ tsp ground cinnamon
  • Pinch of fine salt
  • 4 slices day-old thick bread (vegan)
  • 1 tsp neutral oil + 1 tsp vegan butter
Crisp vegan french toast in a pan with berries, brushed steel knife and linen napkin in a classy, moody kitchen setting.
Pan-seared vegan french toast with maple and berries. A quick custard, a steady medium heat, and a minute on a rack—that’s the formula.

Method for Dairy and Egg Free French Toast

First, whisk the cornstarch with a splash of plant milk until lump-free. Then add the remaining milk, sugar, vanilla, cinnamon, and salt; whisk again until the mixture looks smooth and lightly thickened. Meanwhile, set a nonstick pan or griddle over medium and add the oil plus vegan butter; let the fats mingle and shimmer. Next, dip each slice for 10–20 seconds per side (or 30–60 seconds if you’re using thick-cut bread), let the excess drip, and lay it into the hot pan. Cook 2–3 minutes per side for regular slices or 3–4 minutes for thick ones, turning once, until each face turns deep golden and the edges feel crisp. Finally, transfer the slices to a wire rack for a minute so steam escapes and the underside doesn’t soften.

Why this works

Put simply, starch helps keep the recipe egg free and delivers the grip that eggs usually provide. It gelatinizes as it heats, which helps the custard hug the bread instead of sliding off. At the same time, a little sugar encourages browning, while vanilla and cinnamon do the aromatic heavy lifting. Importantly, the rack rest is not negotiable; by elevating the slice even briefly, you preserve that fragile crispness you just created.

Browning, briefly

Oat or soy milk often brown more readily than very lean almond milk because they typically carry more natural sugars and a touch more protein—two participants in the Maillard reaction (the chemistry that gives you that rich, toasty flavor). However, if almond milk is your favorite, you can absolutely get great color: keep the batter’s small dose of sugar, preheat thoroughly, and avoid crowding the pan. Prefer to control ingredients from the start? Try making your own with this straightforward tutorial for homemade almond milk (clean flavor, short ingredient list, and pleasantly affordable).


Vegan French Toast — Ingredients & Ratios

For consistent results, keep this pocket rule close: per 4 standard slices, use 1 cup plant milk + 1 Tbsp starch. If you’re cooking for a crowd, double everything; if your bread is especially thick, extend the soak rather than thinning the batter. Conversely, if your loaf is very fresh and soft, lightly pre-toast the slices for a sturdier crumb that holds its shape. Moreover, remember that sweetness in the bread itself counts; cinnamon-raisin and similar loaves brown faster and need a touch lower heat.

Also Read: Easy Homemade Oats Milk with just One Ingredient- Non Slimy, at last


Vegan French Toast — Step-by-Step & Browning Tips

To avoid sogginess, let the custard cling and then drip cleanly; don’t send it into the pan dripping rivers of batter. Next, keep the heat at medium—hot enough to brown, gentle enough to set the interior. In addition, rotate slices if your pan has hot spots, and, if needed, nudge the heat down for sugar-rich breads so the exterior doesn’t darken before the center firms. Curious about the science behind that gorgeous color? A friendly primer on the Maillard reaction shows why proteins plus sugars under heat equal deep flavor and golden edges.

As a tiny flourish, dust one face of the dipped slice with a whisper-thin veil of cornstarch just before it hits the pan, then cook that side first. Consequently, you’ll get a glassier, extra-crisp crust without altering the interior at all.


How to make Vegan French Toast in Air Fryer

Some mornings, hands-off wins. The air fryer delivers consistent browning, less stovetop babysitting, and easy batching.

Two slices of vegan french toast from the air fryer on a wire rack over a tray, maple drizzle and linen.
The air fryer takes over while you pour coffee—375°F, a mid-cook flip, and a brief rack rest for that diner-style crunch.

Whole slices

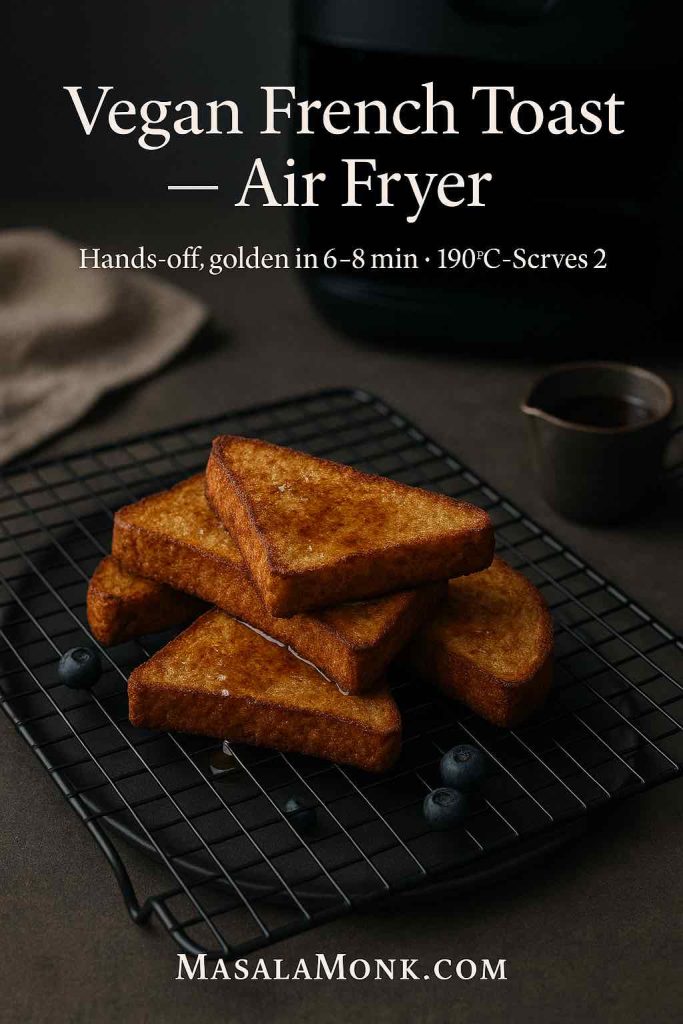
Preheat to 190°C / 375°F and lightly coat the basket. Meanwhile, dip and drain the slices, then lay them in a single layer—no touching corners. Cook 6–8 minutes total, flipping at 4 minutes. Because space equals crispness, work in batches and resist stacking. To keep the first batch snappy, set finished slices on a rack instead of a plate. For a helpful benchmark that lives in the same temperature neighborhood (even though it uses sticks), this air-fryer range for french toast sticks is a useful reference you can adapt to whole slices.

If your air fryer runs hot, reduce the temperature by 10–15 degrees and add a minute to the total time; if it runs cool, go the other way. Furthermore, if the underside looks pale after flipping, mist lightly with oil and continue—little adjustments like that make a visible difference to this Egg and Dairy Free French Toast Recipe.

Also Read: 5 Delicious High-Protein Vegan Meal Prep Ideas Using an Air Fryer


Vegan French Toast Sticks (Air Fryer)

These are a guaranteed hit: easy to hold, perfect for dunking, and surprisingly freezer-friendly.

How to

After dipping, slice each piece into 3–4 sticks. Next, for a snack-shop crunch, roll the wet sides in fine panko or lightly crushed cornflakes. Subsequently, arrange in a single layer and air-fry 7–9 minutes, shaking or flipping at 4 minutes. Finally, rest the sticks for 1 minute; the coating sets as it cools, so patience pays off.

Air-fried vegan french toast sticks with light cornflake crunch cooling on a tray, tongs and linen beside a maple ramekin.
Cut, coat, air-fry. A quick dunk, a light crumb, and a brief rack rest turn simple sticks into a snack-shop classic.

Make-ahead, the simple way

Bake or air-fry a full tray, cool completely, and freeze the sticks in a single layer on a sheet pan. Then bag them. Later, reheat straight from frozen—no thawing—in a hot air fryer or toaster oven until the edges sing. If you prefer a clear workflow, this tutorial on freezing and speedy reheats lays out the steps in a way that’s easy to adapt to vegan batter.

For packed-lunch convenience, include a small lidded container of maple or a quick cinnamon-sugar dip. Notably, sticks travel better than whole slices; they keep their texture longer and fit neatly into bento-style boxes.


Gluten-Free Vegan French Toast

Gluten-free french toast can be crisp and custardy—no compromises—if you start with the right bread and thicken the custard slightly.

Choose sturdier breads

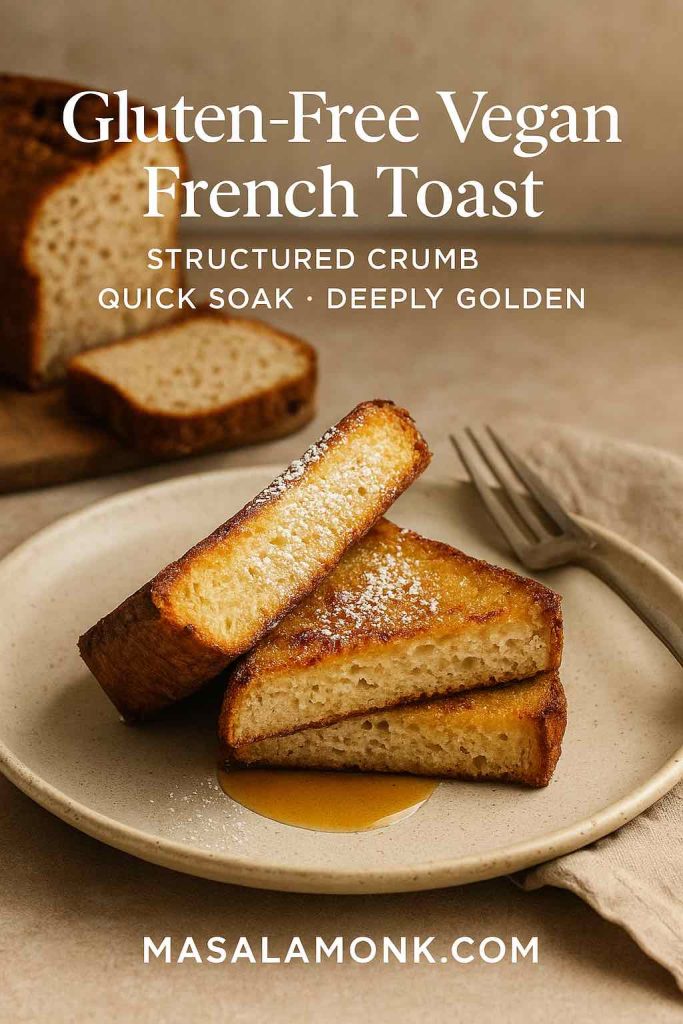
Seek out GF loaves that use psyllium husk (often with xanthan). In practice, psyllium forms a gel that mimics gluten’s elasticity, which helps slices survive a quick soak and a decisive flip. If you enjoy the “why,” this clear baking overview of psyllium’s role in structure explains how it strengthens doughs, while this sandwich loaf example shows the concept in a trustworthy recipe. Additionally, Bon Appétit’s take on psyllium for gluten-free baking is a handy companion read if you love nerdy kitchen notes.

Crisp gluten-free vegan french toast with powdered sugar on a stone counter; gluten-free loaf blurred in the background.
Structure first: choose a psyllium-supported GF loaf, dip briefly, then let the surface set before you flip for that deep golden finish.

Small tweaks, big payoff

  • Shorten the soak to 8–12 seconds per side; gluten-free crumb hydrates quickly.
  • Add ½ Tbsp extra cornstarch per cup of plant milk to the batter for a firmer set.
  • Prefer oat or soy milk when you want deeper browning on GF loaves.
  • If slices feel a touch dry after cooking, brush the edges with melted vegan butter just before serving.

Because readers often ask “who needs gluten-free, anyway?”, a concise explainer helps. This friendly overview—what is gluten—frames the basics without getting preachy. Consequently, you can give context without derailing the recipe.


High-Protein Vegan French Toast Recipe with Chickpea Flour

On days you want more protein and a gentle “eggy” vibe, chickpea flour (besan) shines.

Dairy and Egg Free Custard swap (serves 2)

  • 1 cup plant milk
  • 2 Tbsp chickpea flour
  • 1–2 Tbsp sugar or maple
  • 1 tsp vanilla, ½ tsp cinnamon, pinch salt
  • Optional ⅛ tsp baking powder for a soft lift
High-protein vegan french toast made with chickpea flour, crisp exterior and custardy interior on a ceramic plate.
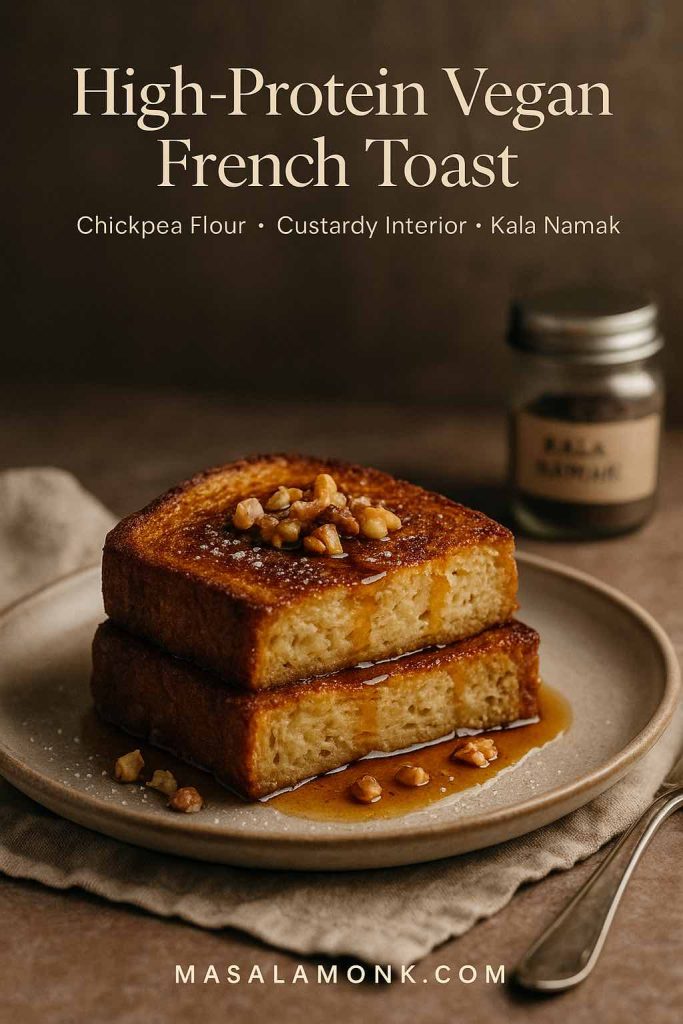
Whisk plant milk with besan, cook gently, then rest on a rack: the result is crisp edges and a protein-rich, custardy bite.

Whisk until perfectly smooth and proceed exactly like the base recipe. Because chickpea flour binds so well, thick slices flip confidently and come off the pan with crisp, tidy edges. Moreover, the gram-flour aroma leans subtly savory in a way that many people associate with classic diner toast—especially if you stir in a pinch of kala namak (black salt) for that faint eggy aroma.

If you enjoy seeing how gram-flour batters behave in other cuisines, Meera Sodha’s beloved Pondicherry toast is a delightful read; although it’s a savory cousin, it demonstrates how crisp and golden a chickpea batter can be.

Also Read: 5 Facts about Besan (Chickpea Flour) and Its Place in the Keto Diet


Silken-Tofu Vegan French Toast Recipe (Blended Custard)

Prefer a silkier, richer bite? Silken tofu emulsifies into a creamy custard that sets like a dream.

Blend this (serves 2)

  • 150 g silken tofu
  • ½ cup plant milk
  • 1–2 Tbsp sugar or maple
  • 1 tsp vanilla, ½ tsp cinnamon, pinch salt
Hand dusting powdered sugar over golden vegan French toast on a cooling rack; cover for 6 variations including air fryer, gluten-free, and high-protein.
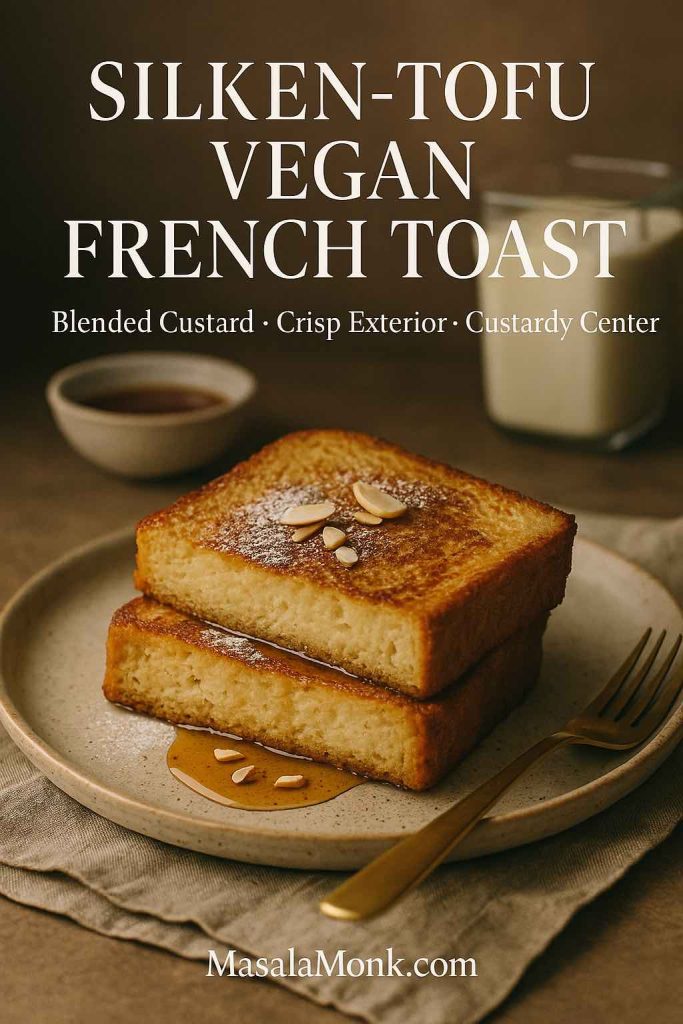
Blend silken tofu into the custard, cook low and steady, then rest briefly on a rack for a crisp edge and a velvet-soft middle.

Blend until completely smooth and glossy. Then dip briefly—this mixture clings—and cook over medium to medium-low so the surface doesn’t over-brown before the center sets. In addition, rest the slices on a rack for one minute to maintain that tender perimeter crunch.

If you’re currently avoiding soy, swing back to the starch-based master batter; it delivers excellent crispness with pantry staples and zero legumes. On the other hand, if you adore creamier centers, tofu delivers that “custard pull” when you cut the slice.

Also Read: ‘Tofu’ Instead of ‘Eggs’: 5 High Protein Plant-Based Breakfast Ideas


Flavor Add-Ins & Vegan Toppings

Once the base is set, it’s time to play. Because the batter is intentionally balanced, it welcomes many directions without seizing or splitting.

  • Vanilla-cinnamon classic: keep the base ratios as written.
  • Brown sugar + nutmeg: add 1 Tbsp brown sugar and a scant ⅛ tsp nutmeg to the custard.
  • Banana custard: mash ½ ripe banana into the mix and reduce plant milk by ¼ cup; consequently, you’ll get banana-bread vibes without going overly sweet.
  • Chocolate-hazelnut swirl: dot a dairy-free spread over hot slices so it melts into rivulets.
  • Bananas Foster topping: caramelize banana with a little vegan butter and brown sugar; optionally, finish with a splash of rum.
  • Ice-cream sundae breakfast: crown warm slices with a scoop of vegan vanilla and a ribbon of maple.

Meanwhile, if you like to prep a second dish the night before, a jar of creative chia puddings offers an effortless, dairy-free counterpoint—cool and creamy against hot and crisp. Alternatively, when you want a heartier plate, this roundup of quinoa breakfast and prep ideas delivers extra protein without crowding the skillet.


Bread Choices, Soak Times, and Crispness

Bread thickness, dryness, and sugar content steer results more than almost anything else, regardless of the custard you choose.

  • Thick, enriched loaves (vegan brioche or Texas-style sandwich bread) love a 30–60 second soak and 3–4 minutes per side. As a result, you’ll get that spoon-tender center people rave about.
  • Standard sandwich slices prefer a 10–20 second dip and 2–3 minutes per side cook—fast, tidy, weeknight-friendly.
  • Very fresh bread tends to go soft; therefore, pre-toast briefly to add backbone.
  • Cinnamon-raisin or sweeter breads brown faster; thus, reduce the heat slightly and lengthen the cook by 30–60 seconds.
  • Gluten-free loaves need shorter soaks and slightly thicker batter (see the GF section above).

Crucially, let slices rest on a wire rack rather than stacking them on a plate; otherwise, trapped steam softens the crust you carefully built. Additionally, if you want a glassier finish, dust one face of a dipped slice with cornstarch right before searing and cook that side first. Conversely, if you prefer a softer exterior, skip the dusting and cover the pan for the final minute to create a gentle steam.

Read More: Why is modern sandwich bread different from ‘real’ bread?


Plant Milks for Vegan French Toast (Oat vs Almond)

To keep Recipe of French Toast Vegan and free from dairy, choosing the milk is really important, as it shapes both flavor and color. By contrast with very lean almond milk, oat milk typically brings more carbohydrates—and sometimes a smidge more protein—which can deepen browning and enhance aroma. Nevertheless, almond milk has a wonderfully clean taste and keeps sweetness in check. Therefore, if you use almond milk, keep that small measure of sugar in the batter and preheat the pan until a drop of custard sizzles on contact. Furthermore, barista-style oat milks may be sweeter than you expect; if yours tastes notably sweet, reduce the added sugar by a teaspoon to maintain balance.

Prefer to skip additives and minimize packaging? Here’s a practical, step-by-step on almond milk from scratch you can keep on hand. Beyond that, consider experimenting with soy milk when you want extra browning; its protein content often nudges the Maillard reaction along.

Also Read: Coconut Milk Nutrition Facts & Glycemic Index Impact


Make-Ahead, Freezer-Friendly, and Crowd Service

If you’re cooking for more than two, organization beats speed. First, heat the oven to 95–120°C / 200–250°F and place a wire rack over a sheet pan. As each slice finishes, transfer it to the rack so it stays crisp while you finish the batch. Secondly, for brunch service, keep the pan at medium and rotate slices through in an even rhythm; it’s calmer than cranking the heat and hoping.

For weekly planning, the stick format is your friend. Prepare a double batch on Sunday, freeze them flat, and reheat on weekday mornings. Not only do they keep beautifully, but they also return to crisp with minimal fuss—especially in an air fryer. Meanwhile, if your family prefers whole slices, you can cool them on a rack, freeze between sheets of parchment, and reheat directly from frozen in a toaster oven.


Serving Ideas & Natural Pairings

Because the pan is already hot, you can build a small spread without extra stress. For instance, a bowl of berries and a spoonful of coconut yogurt turn a couple of slices into a complete breakfast. Alternatively, a wedge of citrus brightens heavier toppings like banana and brown sugar. Moreover, a sprinkle of toasted nuts or seeds adds welcome contrast—walnuts with maple, pistachios with rose syrup, almonds with cinnamon.

If you enjoy putting something make-ahead on the table, assemble a jar of chia pudding ideas the night before. For a higher-protein side, a warm quinoa breakfast bowl with fruit and nuts sits comfortably beside cinnamon-forward toast. And if you’re celebrating, vegan ice cream on hot slices never fails; it melts into the ridges like a sauce you didn’t have to make.


Troubleshooting on the Fly

  • Center still wet? Shorten the soak next time and add ½ Tbsp more starch per cup of plant milk. Also, give the slices another minute in a low oven on a rack; that gentle finish works wonders.
  • Edges burn before the interior sets? Lower the heat a notch and extend the cook by 30–60 seconds per side. Additionally, consider whether the bread is very sugary; if so, dial back batter sugar by a teaspoon.
  • Pale color? Preheat properly, avoid crowding (steam is the enemy of browning), and use oat or soy milk when you want deeper color. A dab more sugar in the custard can also help.
  • Slices fall apart when flipping? Reduce the soak, choose sturdier bread, and, for gluten-free, pick loaves with psyllium; the structure matters more than you think.
  • Texture too dry? Brush the edges lightly with melted vegan butter right before serving, or shorten the rack rest to 30 seconds instead of a minute.

Also Read: Vegan Keto Smoothie Kick-Start: 5 Macadamia Nut Recipes for Nutrient-Packed Mornings


The Six Vegan French Toast Recipes, At a Glance

For quick reference, here are compact summaries. Each follows the bread guidance above; timings assume medium heat on the stove or a preheated 190°C / 375°F air fryer.

1) Vegan French Toast — Pan (Base)

  • Batter: 1 cup plant milk + 1 Tbsp cornstarch + 1½ Tbsp sugar + 1 tsp vanilla + ½ tsp cinnamon + pinch salt.
  • Dip: 10–20 sec/side (30–60 sec for thick slices).
  • Cook: 2–3 min/side (3–4 for thick), then rest on a rack.

2) Vegan French Toast — Air Fryer (Whole Slices)

  • Batter: same as base.
  • Cook: 6–8 min total at 190°C / 375°F; flip at 4 min.
  • Note: leave space between slices for crispness; mist lightly with oil if needed.

3) Vegan French Toast Sticks — Air Fryer

  • Batter: base batter.
  • Form: cut each dipped slice into 3–4 sticks; optionally coat in fine panko or crushed cornflakes.
  • Cook: 7–9 min at 190°C / 375°F; shake/flip at 4 min.
  • Freeze & reheat: cool completely, freeze flat, then bag; reheat directly from frozen.

4) Gluten-Free Vegan French Toast

  • Batter: base batter + ½ Tbsp extra cornstarch per cup.
  • Bread: sturdier GF loaf with psyllium.
  • Dip: 8–12 sec/side.
  • Cook: 2–3 min/side; rest on a rack.

5) High-Protein Vegan French Toast — Chickpea Flour

  • Batter: 1 cup plant milk + 2 Tbsp chickpea flour + sugar + vanilla + cinnamon + salt (optional ⅛ tsp baking powder).
  • Dip/Cook: as base; go slightly lower/slower for thick bread.
  • Aroma tweak: a pinch of kala namak adds that classic breakfast note.

6) Silken-Tofu Vegan French Toast — Blended Custard

  • Batter: blend 150 g silken tofu + ½ cup plant milk + sugar + vanilla + cinnamon + salt until silky.
  • Dip: brief; this custard clings well.
  • Cook: medium to medium-low so it sets before over-browning.

Parting thought

Above all, remember that vegan french toast is more technique than trick. With a clingy batter, a measured soak, steady heat, and a short rest on a rack, you’ll serve stacks that taste as indulgent as anything from your favorite brunch spot—only friendlier to your pantry and your routine. Now pass the maple, pour the coffee, and enjoy the kind of breakfast that makes the whole day feel easier.

Also Read: Eggless French Toast Recipe – Crispy, Fluffy & Totally Irresistible!

FAQs

1) What is the best plant milk for vegan French toast?

Oat milk usually browns faster and tastes fuller; almond milk stays cleaner and less sweet; soy milk boosts Maillard browning thanks to protein. Choose based on flavor and color goals.

2) How do I get crisp edges and a custardy center without eggs?

Use a clingy batter (about 1 cup plant milk + 1 Tbsp starch for 4 slices), dip just long enough for the crumb to hydrate, cook over steady medium heat, then rest slices on a wire rack for one minute.

3) Why is my vegan French toast soggy?

Excess batter and overcrowding trap steam. Let slices drip cleanly, keep space in the pan, and avoid ultra-fresh bread unless lightly pre-toasted.

4) How long should I soak the bread?

Standard sandwich slices: 10–20 seconds per side. Thick vegan brioche or Texas toast: 30–60 seconds. Gluten-free slices: 8–12 seconds since the crumb hydrates quickly.

5) Which bread works best?

Day-old, sturdy loaves hold shape and deliver structure. Enriched vegan brioche gives a plush interior; plain sandwich bread is weeknight-friendly; psyllium-based gluten-free loaves flip reliably.

6) Can I make gluten-free vegan French toast?

Absolutely. Slightly thicken the batter (+½ Tbsp starch per cup of milk), shorten the soak, and choose a GF loaf with psyllium for elasticity and resilience.

7) What’s the ideal pan temperature?

Medium. Too hot scorches edges before the center sets; too low dries the slice without browning. A faint sizzle on contact signals you’re in the sweet spot.

8) How do I keep the exterior from burning on sweeter breads?

Dial the heat down a notch and extend cooking by 30–60 seconds per side. Cinnamon-raisin and similar loaves caramelize quickly, so patience pays off.

9) Can I use an air fryer for vegan French toast?

Yes. Preheat to 190°C / 375°F, arrange slices in a single layer, flip at the halfway point, and rest on a rack. For sticks, cut each slice into 3–4 pieces and cook a touch longer.

10) How can I add more protein?

Swap the starch for 2 Tbsp chickpea flour (besan) per cup of milk, or blend silken tofu into the custard. Optionally add a pinch of kala namak for a classic breakfast aroma.

11) What if my slices tear when flipping?

Reduce soak time, pick sturdier bread, and slide a thin spatula under the crust side first. For gluten-free, the psyllium crumb matters more than thickness alone.

12) How do I boost browning without over-sweetening?

Maintain a small amount of sugar in the batter, preheat thoroughly, and prefer oat or soy milk. Alternatively, dust one dipped face very lightly with cornstarch and cook that side first.

13) Can I meal-prep or freeze vegan French toast?

Definitely. Air-fry or bake sticks, cool completely, freeze flat, then bag. Reheat from frozen in an air fryer or toaster oven until crisp at the edges.

14) What toppings match vegan French toast?

Fresh berries, citrus wedges, toasted nuts, coconut yogurt, or a drizzle of maple keep balance; dairy-free chocolate-hazelnut spread or quick caramelized banana leans indulgent.

15) How do I adjust sweetness across milks and breads?

Taste your milk first—barista-style oat can be sweeter—then trim added sugar by 1 teaspoon if needed. Conversely, lean almond milk benefits from keeping the full measure for flavor and color.

16) What’s the quick ratio I should memorize?

Per 4 slices: 1 cup plant milk + 1 Tbsp starch + 1½ Tbsp sweetener + 1 tsp vanilla + ½ tsp cinnamon + pinch salt. Dip, sear over medium, then rack-rest to finish.

Posted on Leave a comment

Carrots: The Perfect Snack for a Healthy Lifestyle

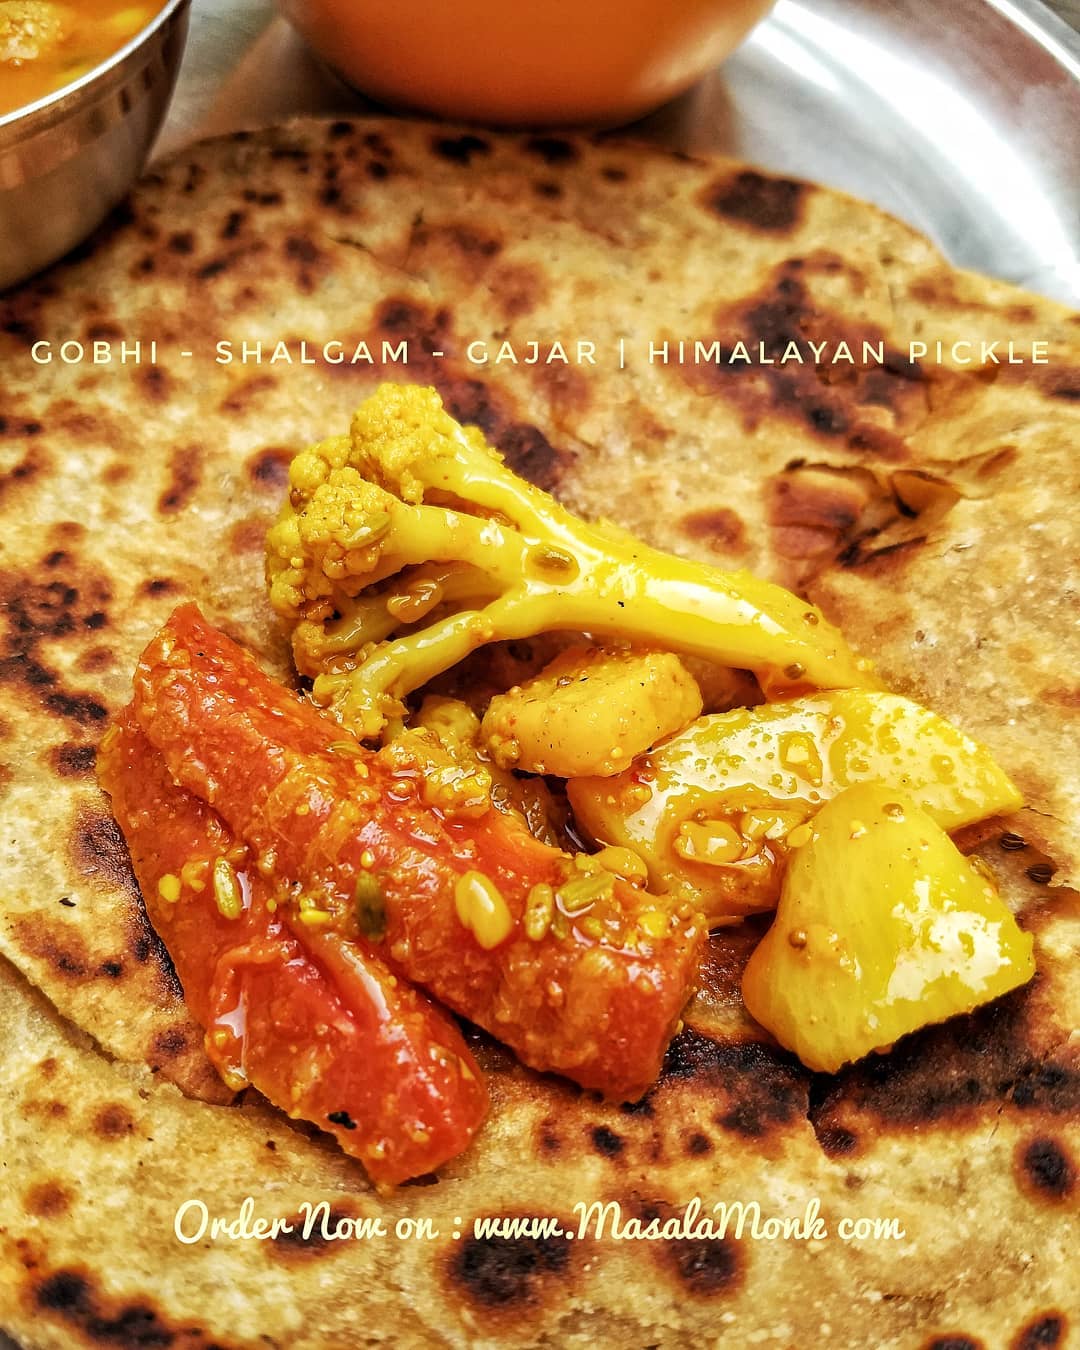
buy Gajar Gobhi Shalgam pickle achar online

When it comes to snacking, finding options that are both delicious and nutritious can be a challenge. But look no further than the humble carrot! With its natural sweetness, satisfying crunch, and numerous health benefits, carrots make for an excellent snack choice. In this in-depth blog post, we’ll explore why carrots are the perfect snack for a healthy lifestyle, their exceptional nutritional profile, the advantages they offer, creative ways to enjoy them, and tips for incorporating them into your snacking routine. Get ready to elevate your snack game with this vibrant and nutrient-packed vegetable! 🥕🌱

🌱 Nutritional Powerhouse Carrots are a nutritional powerhouse, packed with vitamins, minerals, and dietary fiber that contribute to overall health and well-being. They are an excellent source of vitamin A, providing a whopping 428% of the daily recommended intake in just one medium-sized carrot. Vitamin A is crucial for maintaining healthy vision, supporting immune function, and promoting vibrant skin. Carrots also contain significant amounts of vitamin K, vitamin C, potassium, and dietary fiber, making them a nutrient-dense snack option.

🥕 Low-Calorie and Satisfying One of the key advantages of snacking on carrots is their low-calorie content. With just about 25 calories per medium-sized carrot, they are an ideal choice for those watching their calorie intake. Despite being low in calories, carrots are high in dietary fiber, which contributes to feelings of fullness and satisfaction. This fiber-rich content helps prevent overeating and can support weight management goals by curbing hunger and reducing the need for less healthy snacks.

🌱 Promote Digestive Health Carrots are rich in dietary fiber, both soluble and insoluble, which plays a crucial role in supporting digestive health. The fiber in carrots adds bulk to your stool, aiding in regular bowel movements and preventing constipation. Additionally, the soluble fiber in carrots acts as a prebiotic, promoting the growth of beneficial gut bacteria. A healthy gut microbiome is essential for optimal digestion, nutrient absorption, and overall well-being.

🥕 Nutrient Absorption Pairing carrots with a source of healthy fats can enhance the absorption of fat-soluble vitamins found in carrots, such as vitamin A. The body needs dietary fat to absorb and utilize fat-soluble vitamins effectively. Consider enjoying your carrots with a side of hummus, Greek yogurt dip, or a drizzle of olive oil to maximize the bioavailability of these important nutrients.

🌱 Convenient and Versatile Carrots are a convenient and portable snack option that requires minimal preparation. They come in a natural, ready-to-eat package, making them a go-to choice for busy individuals and those on the go. Carrots are also highly versatile and can be enjoyed in various forms. You can eat them raw as carrot sticks, slice them into rounds for a crunchy snack, or grate them to add texture and flavor to salads, sandwiches, and wraps.

🥕 Kid-Friendly and Fun Carrots are not only nutritious but also appealing to children. Their naturally sweet flavor and satisfying crunch make them a favorite among kids. Get creative by cutting carrots into fun shapes or making carrot “fries” by baking them with a sprinkle of seasoning. By introducing carrots as a regular snack option, you can instill healthy eating habits in your children from an early age.

🌱 Snacking Tips with Carrots Here are some practical tips to help you incorporate carrots into your snacking routine:

  1. Preparation: Wash and peel carrots, if desired, and cut them into sticks or rounds for easy snacking. Preparing a batch of carrot sticks or rounds in advance and storing them in the refrigerator in an airtight container will ensure they are ready to grab when hunger strikes.
  2. Pair with Dips and Spreads: Carrots pair well with a variety of dips and spreads. Consider enjoying them with hummus, Greek yogurt dip, tzatziki, or guacamole for added flavor, texture, and nutritional value.
  3. Roasted Carrot Chips: If you’re looking for a crunchy alternative to raw carrots, try making roasted carrot chips. Thinly slice carrots into rounds, toss them with olive oil, salt, and your favorite seasonings, then bake them in the oven until crispy. These flavorful chips are perfect for snacking on their own or as a side accompaniment to your favorite dishes.
  4. Add to Salads and Wraps: Grate or julienne carrots to add a pop of color, texture, and nutrients to your salads, wraps, or sandwiches. They provide a satisfying crunch and blend well with other vegetables and proteins.
  5. Blend into Smoothies: Don’t limit yourself to enjoying carrots solely as a snack. Blend them into smoothies for an extra boost of vitamins, minerals, and fiber. Combine carrots with fruits, leafy greens, protein powder, and your preferred liquid base for a refreshing and nutrient-packed beverage.
  6. Explore Carrot-Based Recipes: Go beyond snacking and explore carrot-based recipes such as carrot soup, roasted carrot hummus, carrot muffins, or carrot cake energy balls. These delicious creations offer a unique twist on traditional recipes while allowing you to benefit from the nutritional goodness of carrots.

🥕🌱 By incorporating carrots into your snacking routine, you can enjoy a delicious, nutrient-dense, and satisfying snack that supports your overall health and well-being. Whether enjoyed raw, roasted, or incorporated into other dishes, carrots offer a convenient and versatile option to keep you energized and nourished throughout the day. So, grab a carrot, dip it, snack on it, and savor the benefits of this vibrant vegetable!