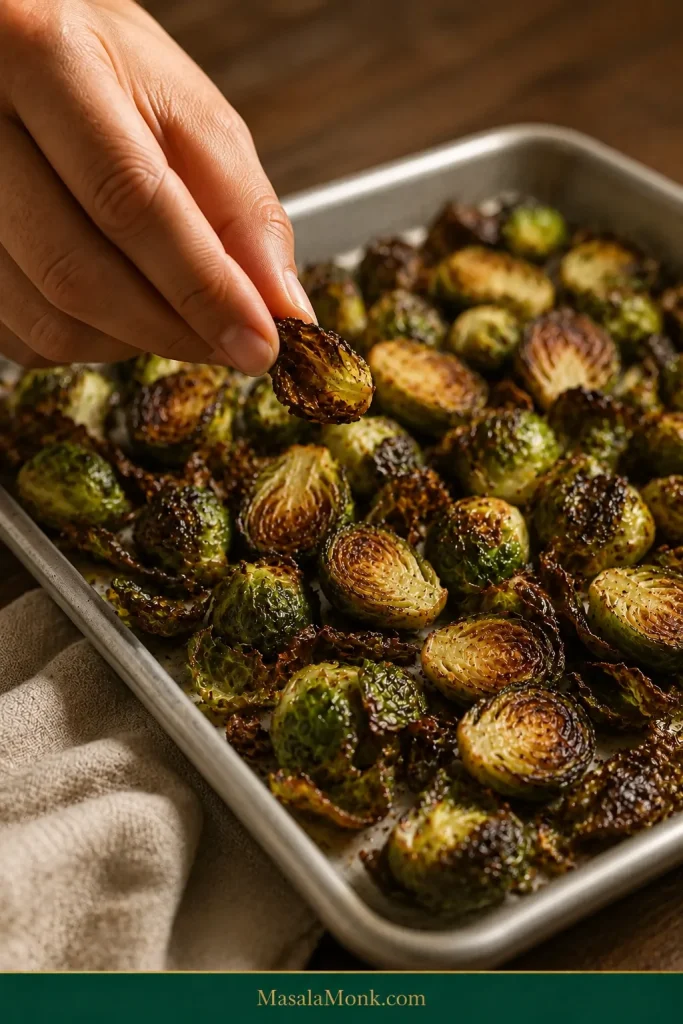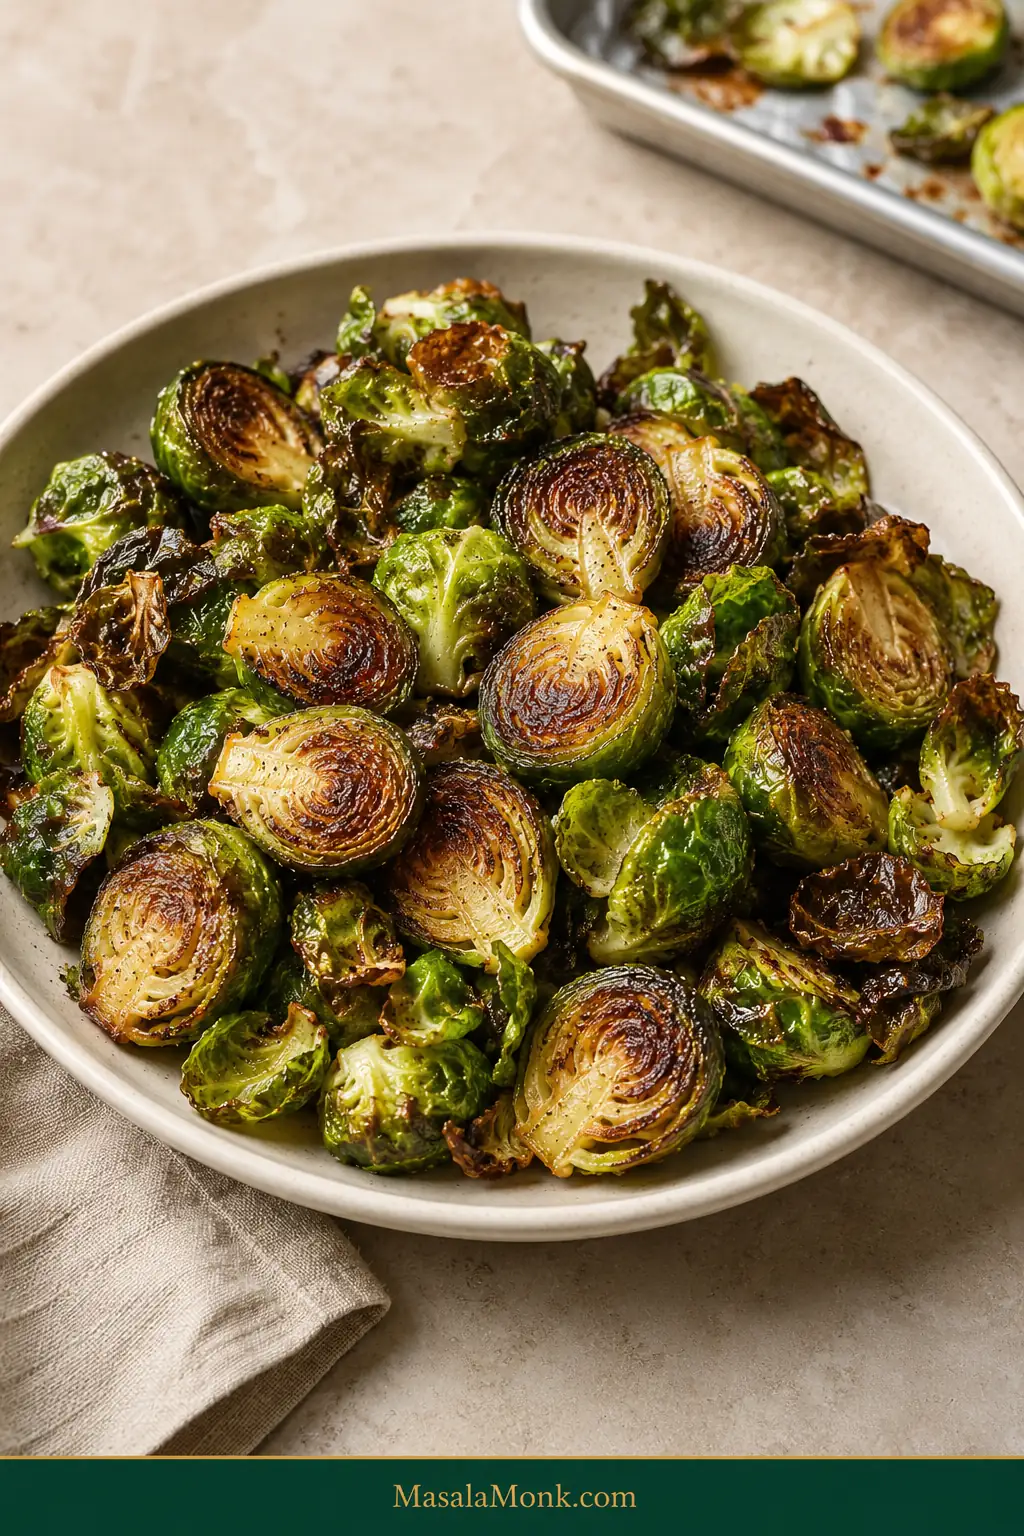
Roasted Brussels sprouts are at their best when the flat sides turn mahogany-brown and caramelized, the outer leaves become crisp, and the centers stay tender without collapsing into mush.
If the Brussels sprouts you remember were pale, soft, and aggressively cabbage-like, the surprise is how different they taste once they get real color: nuttier, faintly sweet, and much harder to stop picking from the pan.
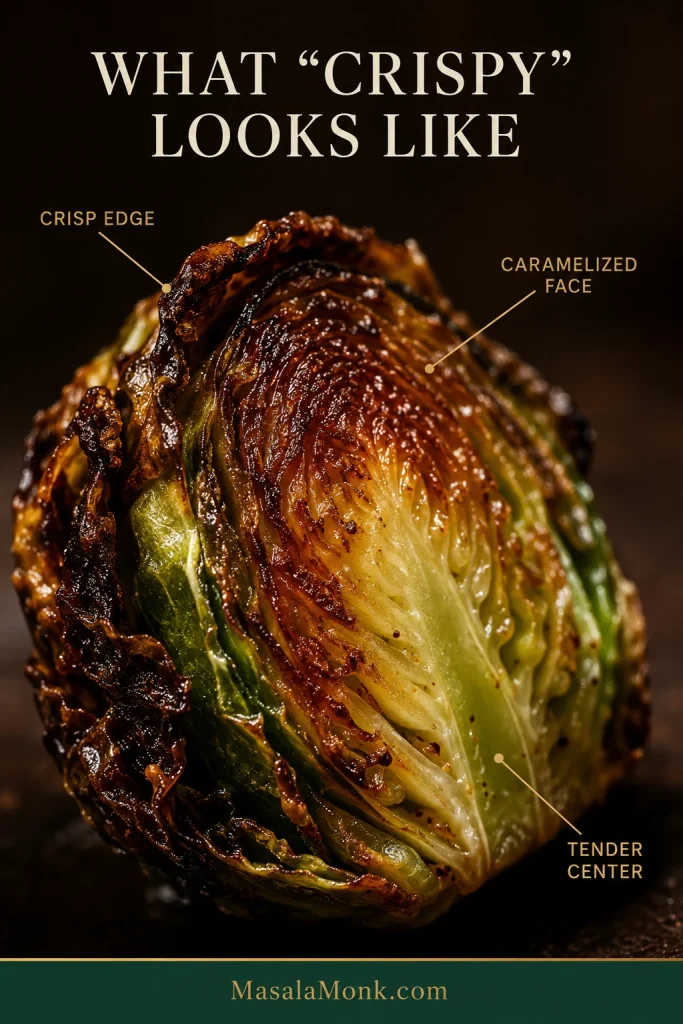
All you need is fresh Brussels sprouts, olive oil, salt, pepper, a roomy sheet pan, and a 425°F / 220°C oven. Here, “crispy” means crisp edges and deeply browned surfaces around a tender center—not a sprout that crunches dry all the way through like a chip.
Quick Answer: How to Roast Brussels Sprouts
- Heat: Set the oven to 425°F / 220°C.
- Rinse and dry: Rinse the whole sprouts under running water, then dry them very well.
- Cut: Halve average Brussels sprouts lengthwise and quarter unusually large ones.
- Season: For 1½ lb / 24 oz / 680 g sprouts, use 2 tbsp / 30 ml olive oil, ½ tsp fine sea salt / about 3 g, and ¼ tsp black pepper.
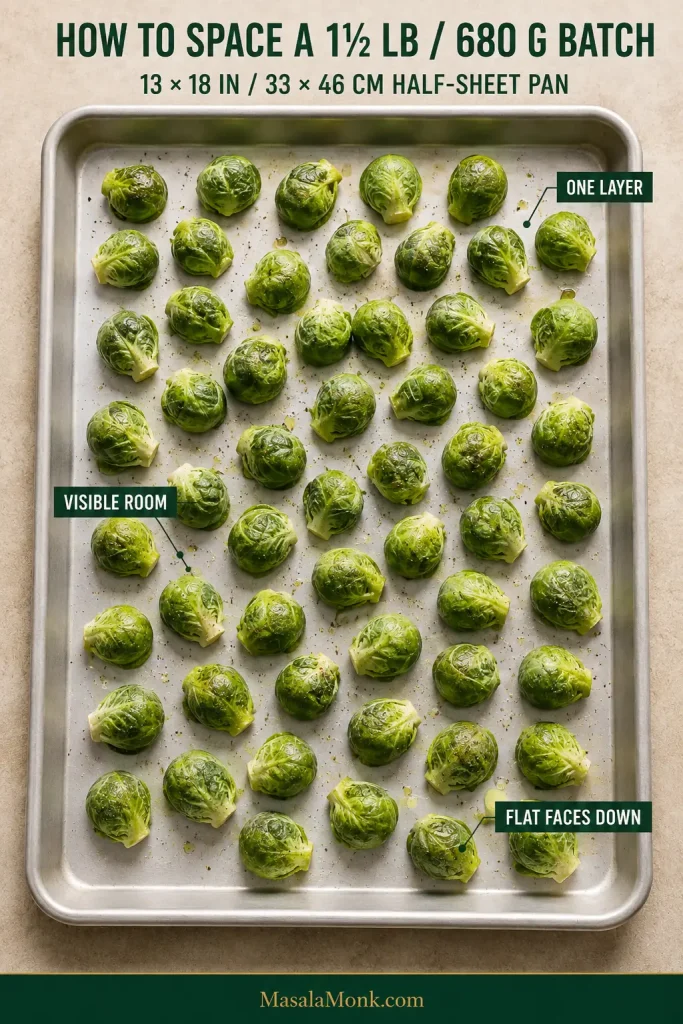
- Arrange: Spread them in one uncrowded layer with the cut sides facing down.
- Roast: Start checking at 17–18 minutes. Most average-size sprouts finish around 20–25 minutes. Stop when the undersides are richly browned and the centers have the texture you enjoy.
Let the clock tell you when to look. Let color and tenderness tell you when to stop.
Roasted Brussels Sprouts Recipe
Prep time: 10 minutes
Roast time: about 20–25 minutes
Total time: about 30–35 minutes
Yield: 4 generous side servings or about 6 smaller holiday portions
Oven: 425°F / 220°C
As written, the recipe is naturally vegan and gluten-free.
Equipment
- Large rimmed half-sheet pan, about 13 × 18 in / 33 × 46 cm
- Chef’s knife
- Cutting board
- Large mixing bowl
- Clean kitchen towel or paper towels
If your baking sheet is much smaller, roast the sprouts in batches or divide them between two pans. Packing everything onto one sheet works against the browning we want.
Ingredients
- 1½ lb / 24 oz / 680 g fresh Brussels sprouts
- 2 tbsp / 30 ml extra-virgin olive oil
- ½ tsp fine sea salt / about 3 g, plus more to taste
- ¼ tsp freshly ground black pepper
- Lemon wedges, optional
Method
Preheat and Prep the Brussels Sprouts
- Heat the oven to 425°F / 220°C. Set a rack around the middle of the oven.
- Rinse and dry the sprouts while they are still whole. Rinse them under running water—there’s no need to soak them—then dry them very well with a clean kitchen towel or paper towels.
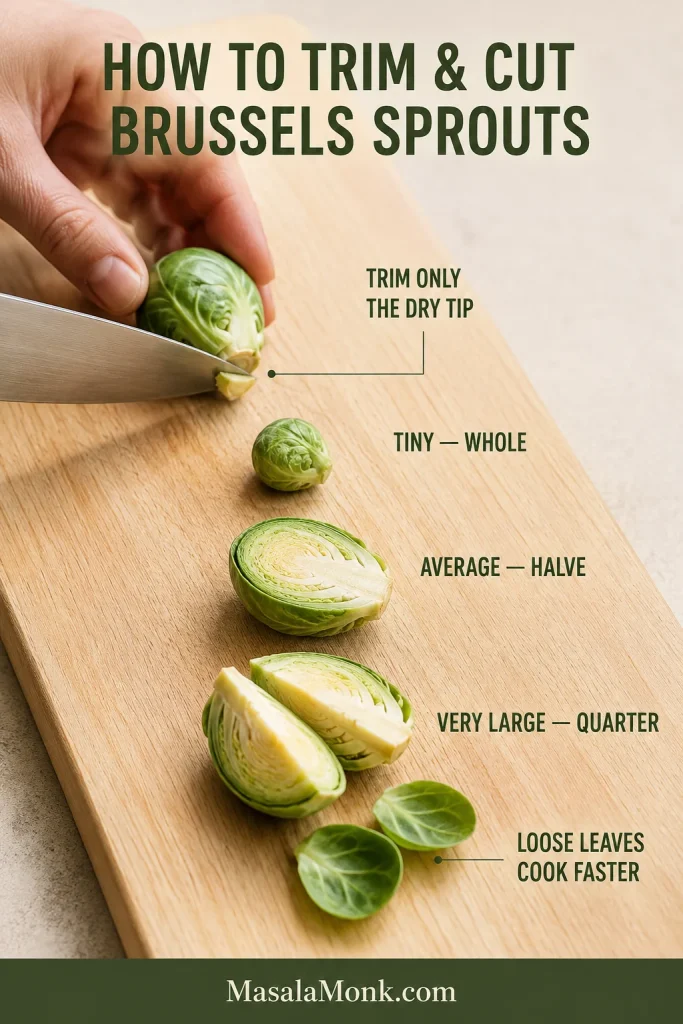
- Trim and cut. Slice off only the dry end of each stem; leave enough attached to hold the leaves together. Remove yellow or badly damaged outer leaves. Halve average sprouts lengthwise through the stem and quarter unusually large ones the same way. Set aside any clean leaves that fall free; they cook much faster than the larger pieces, so roast them separately or add them only near the end when you can watch them closely.
- Season. Toss the cut sprouts with the olive oil, salt, and pepper until every piece has a light glossy coating. There should be no puddles of oil left in the bowl.
Arrange, Roast and Finish
- Give them room. Spread the sprouts in one layer with visible space around most pieces.
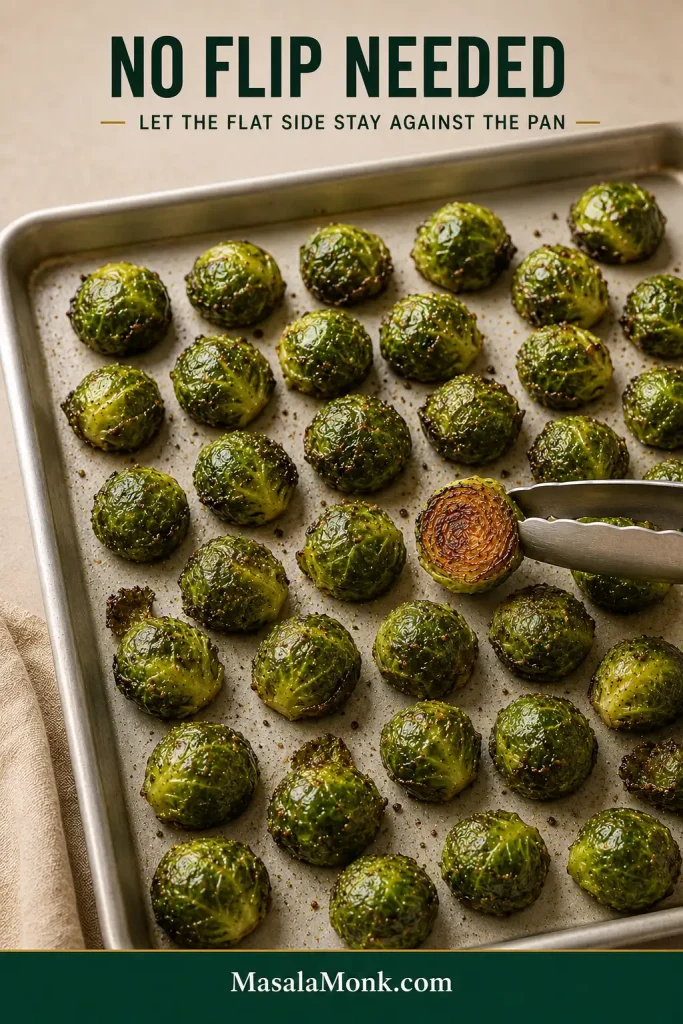
- Turn the cut sides down. Put the largest flat face of each halved or quartered sprout directly against the baking sheet.
- Roast without fussing with them. Begin looking at 17–18 minutes. Average-size sprouts usually finish around 20–25 minutes, although small sprouts, dark pans, and hot-running ovens can move faster.
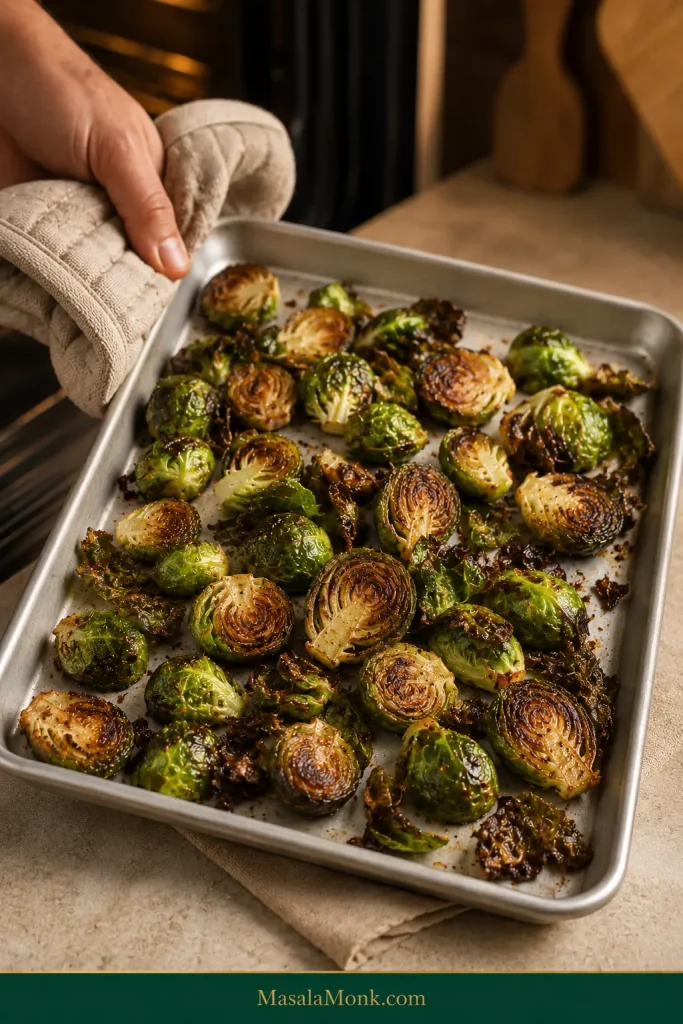
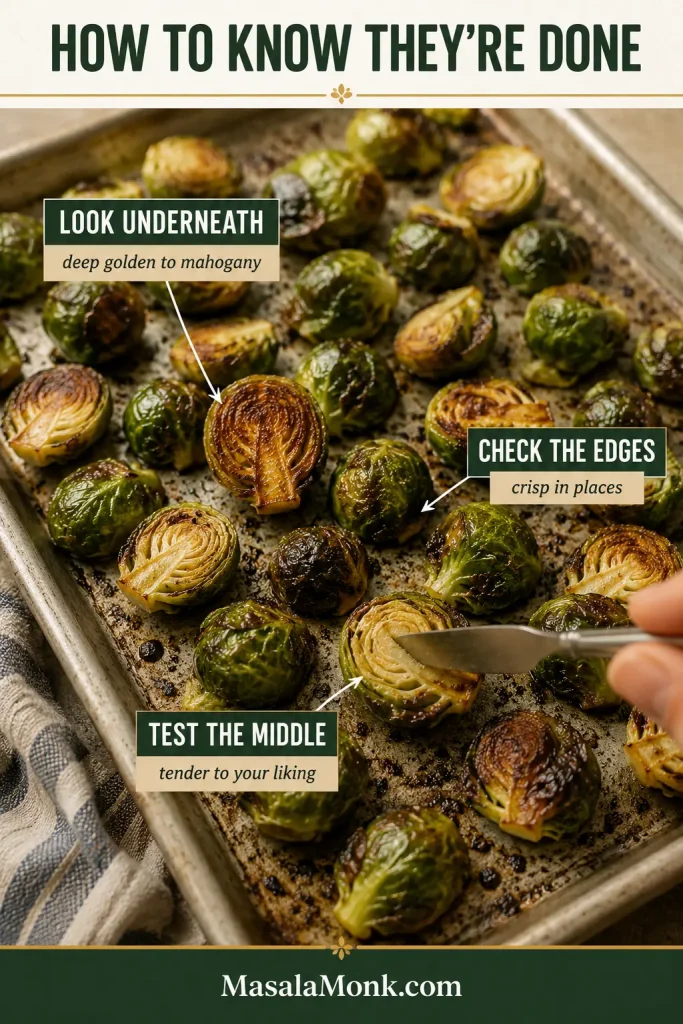
- Check the food, not just the timer. They are ready when the undersides have developed deep color and a knife or fork enters the centers with the amount of resistance you prefer.
- Taste while hot. Add another pinch of salt if needed and finish with lemon or one of the flavor ideas later in the post.
Serve soon after roasting for the crispest edges.
Cooking right now? The recipe above is enough.
In This Guide
MAKE THEM WELL
- 5 Rules for Crispy, Caramelized Brussels Sprouts
- How to Choose and Cut Brussels Sprouts
- How to Know When Brussels Sprouts Are Done
- Best Temperature for Roasting Brussels Sprouts
CONTROL THE RESULT
PLAN & SERVE
- What to Serve With Roasted Brussels Sprouts
- Can I Substitute Frozen Brussels Sprouts?
- Make Ahead, Store & Reheat
5 Rules for Crispy, Caramelized Brussels Sprouts
The recipe tells you what to do. These five ideas explain why it works.
1. Similar thickness helps everything cook at the same pace. Heat takes longer to reach the middle of a thick piece, which is why an oversized sprout can darken outside while staying hard inside.
2. Dry surfaces brown sooner. Water has to evaporate before strong browning can get underway. The FDA recommends rinsing fresh produce under running water. There’s no need to soak the sprouts; once rinsed, thorough drying is what matters for roasting.
3. Oil should form a light coating. Dry patches brown poorly, while puddled oil can leave the tray heavy and greasy.
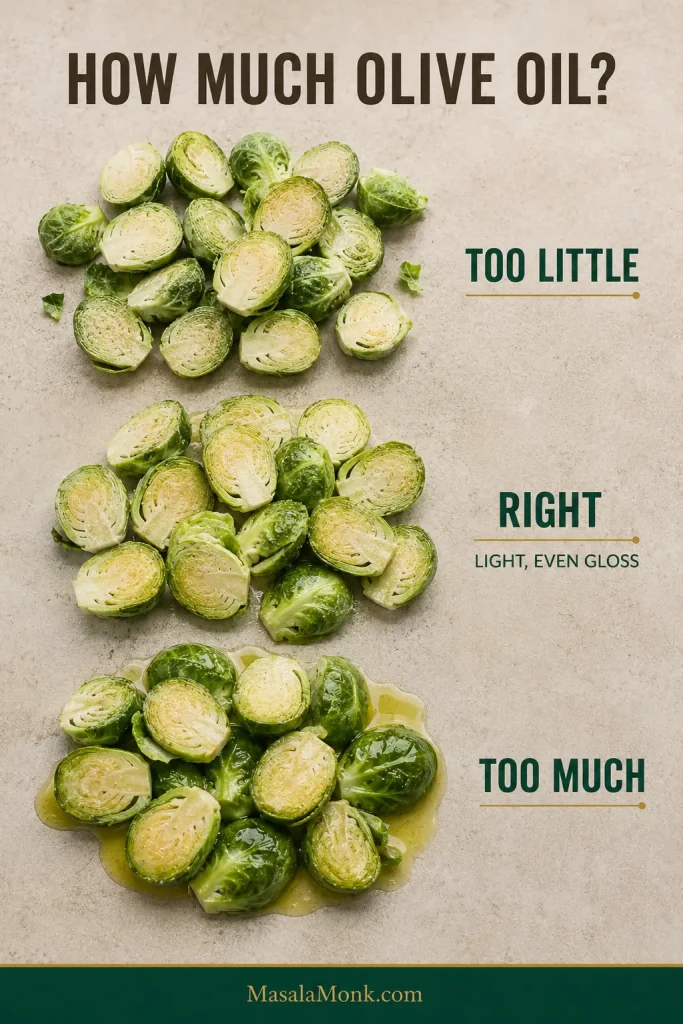
4. Crowding traps steam. Moisture escapes around well-spaced pieces. Crowd the pan and that moisture gets trapped around the sprouts.
Double the ingredients, not the pan density.
Doubling. Use two sheet pans rather than crowding one. If the pans roast on separate racks, swap their positions top-to-bottom and rotate them front-to-back partway through if your oven browns unevenly.
5. Flat contact builds the deepest color. The broad cut face gives each sprout a large surface to caramelize directly against the hot baking sheet.
How to Choose and Cut Brussels Sprouts
When you have a choice, look for firm, fresh-looking Brussels sprouts with tight green leaves. A reasonably similar size range makes even roasting easier, although real bags rarely cooperate perfectly.
Halve average sprouts and quarter very large ones. Tiny sprouts can stay whole, though they give you less flat surface for caramelization. Aim for roughly similar cooking thickness even when the pieces are not identical.
Trim conservatively. Cutting away only the dry stem tip leaves enough of the base intact to keep the layers from falling apart as you halve or quarter them.
How to Know When Brussels Sprouts Are Done
Once they’re roasting, the sprouts themselves tell you more than the timer does.
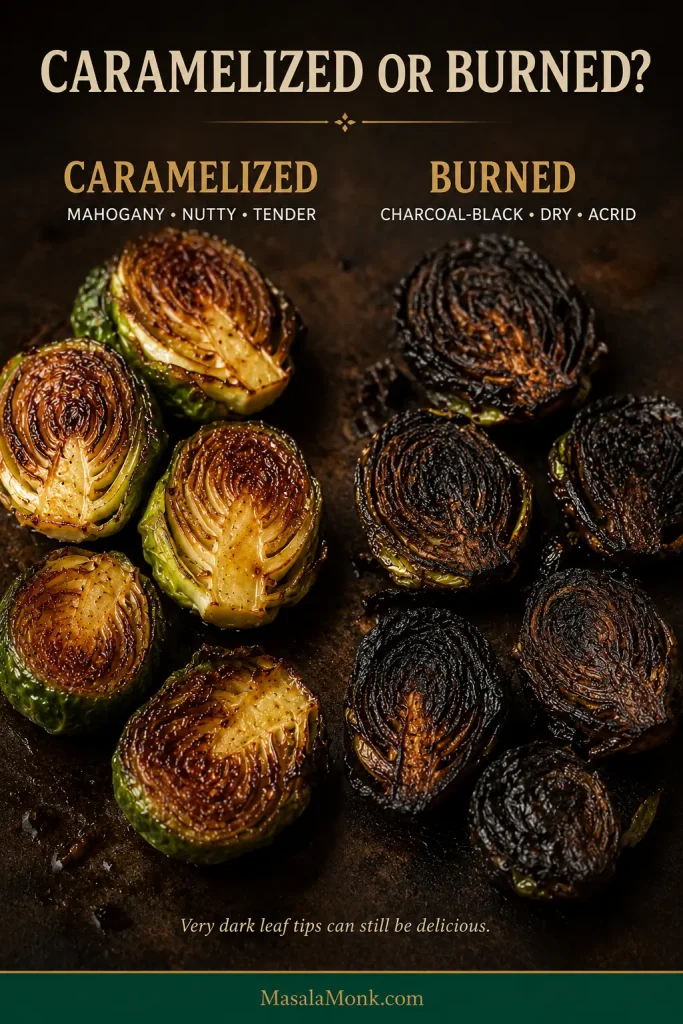
- Look underneath. The cut face should be deep golden brown through mahogany, not pale green with a few tan spots.
- Look at the edges. The exposed outer leaves should be crisp and brittle in places. A few very dark tips are fine when they taste roasted and nutty rather than acrid.
- Test the middle. Slide in the tip of a small knife or fork. The sprout should be tender while still holding its shape.
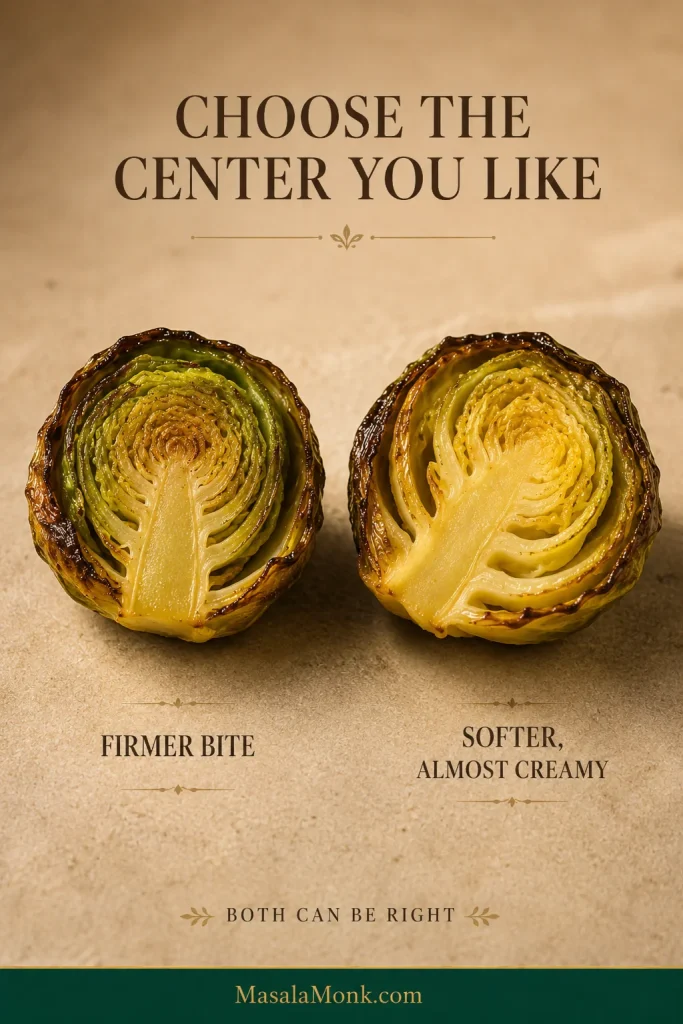
Choose the Center You Like
Pull the tray once the outside is well browned but the middle still offers a little resistance if you enjoy a firmer bite. Leave the sprouts a little longer if you prefer the center soft and almost creamy.
There is no single perfect center here. The right stopping point is the one you actually enjoy eating.
Deeply caramelized is not the same as burned. Properly browned sprouts smell nutty and sweet-savory. Burned ones taste acrid or charcoal-bitter and may be dry through the middle. If they already taste good, there is no prize for chasing one more shade of brown.
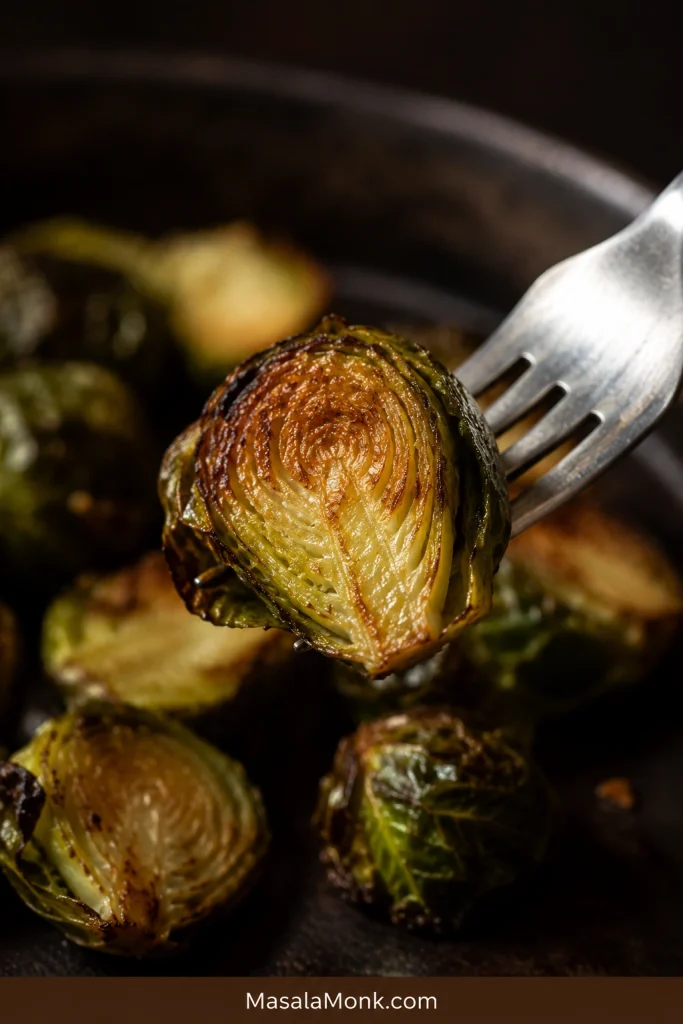
A good tray has contrast: brittle little edges, a burnished underside, and a center that gives when you bite into it.
The same doneness cues work at every oven temperature. What changes is how quickly the exterior develops color relative to how quickly the middle softens.
Best Temperature for Roasting Brussels Sprouts
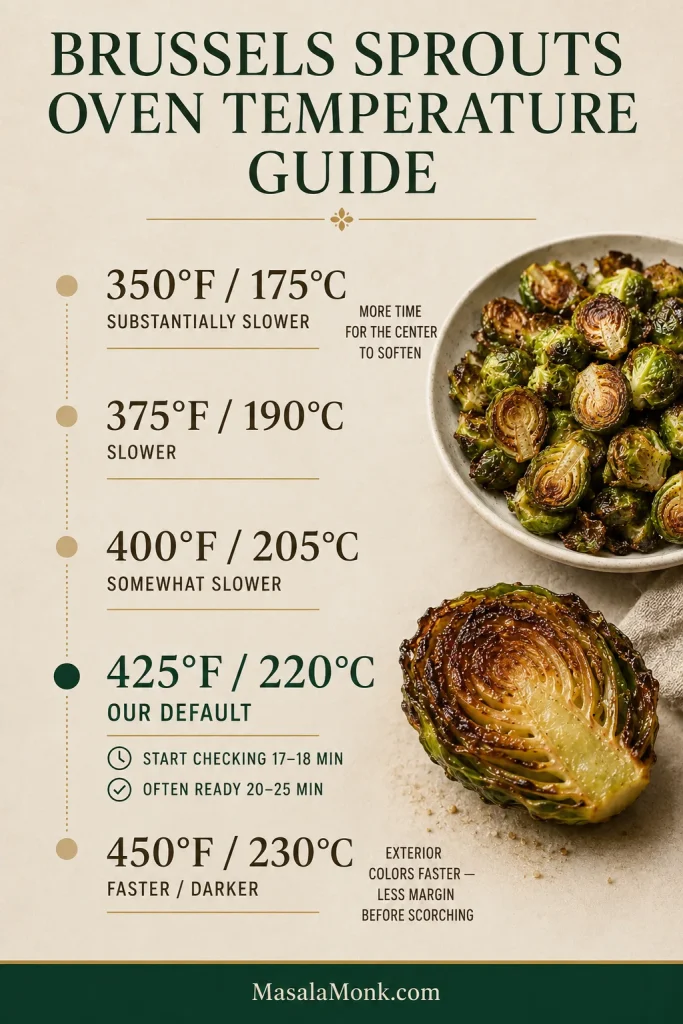
Lower heat gives the centers more time to soften before deep color develops; hotter roasting builds that color faster. 425°F / 220°C gives a particularly useful balance for this method.
Another dish sometimes gets to decide the oven temperature, especially during a holiday meal. The sprouts can still work; their appearance and tenderness simply become even more important than the clock.
| Oven | Compared With 425°F | What to Expect |
|---|---|---|
| 350°F / 175°C | Substantially slower | Centers soften well before deep color develops |
| 375°F / 190°C | Slower | Gentler, more gradual browning |
| 400°F / 205°C | Somewhat slower | A reliable middle ground |
| 425°F / 220°C | Default method | Start checking at 17–18 minutes; often ready around 20–25 minutes |
| 450°F / 230°C | Faster | Rapid, darker browning with less margin before thin edges scorch |
These are relative guides, not alternate exact timers. Sprout size, baking-sheet material, oven behavior, and the tenderness you prefer all move the endpoint.
Using a toaster oven? Keep it at 425°F / 220°C on the bake setting, use a small enough batch to leave real space between the pieces, and start watching around 15 minutes. Depending on sprout size and the appliance, a small batch may take roughly 15–25 minutes.
When Another Dish Sets the Oven Temperature
If scalloped potatoes already have the oven at 375°F / 190°C, leave it there and let the sprouts take longer rather than forcing a separate oven schedule for one side dish.
Small Roasting Choices That Change the Result
You don’t need to flip the sprouts. Leaving the flat sides against the baking sheet gives them uninterrupted contact and deeper caramelization. For a firmer center, pulling the tray sooner is the simpler adjustment.
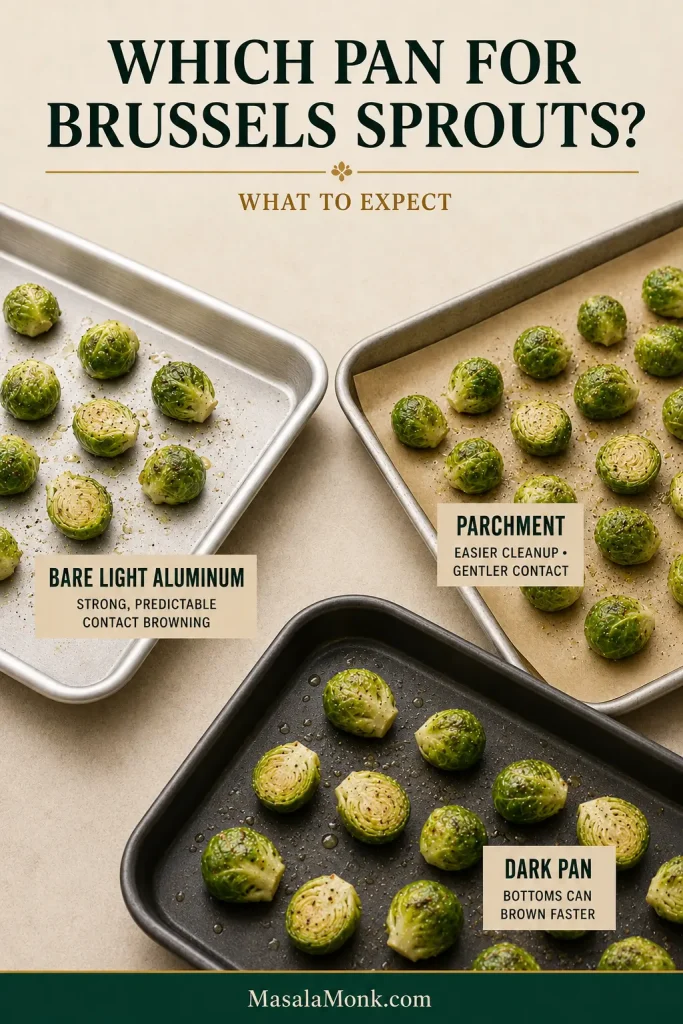
A bare, light-colored aluminum sheet pan gives strong, predictable contact browning. Parchment is perfectly workable when easier cleanup matters, though the underside may color a little more gently. Dark pans tend to brown the bottoms faster.
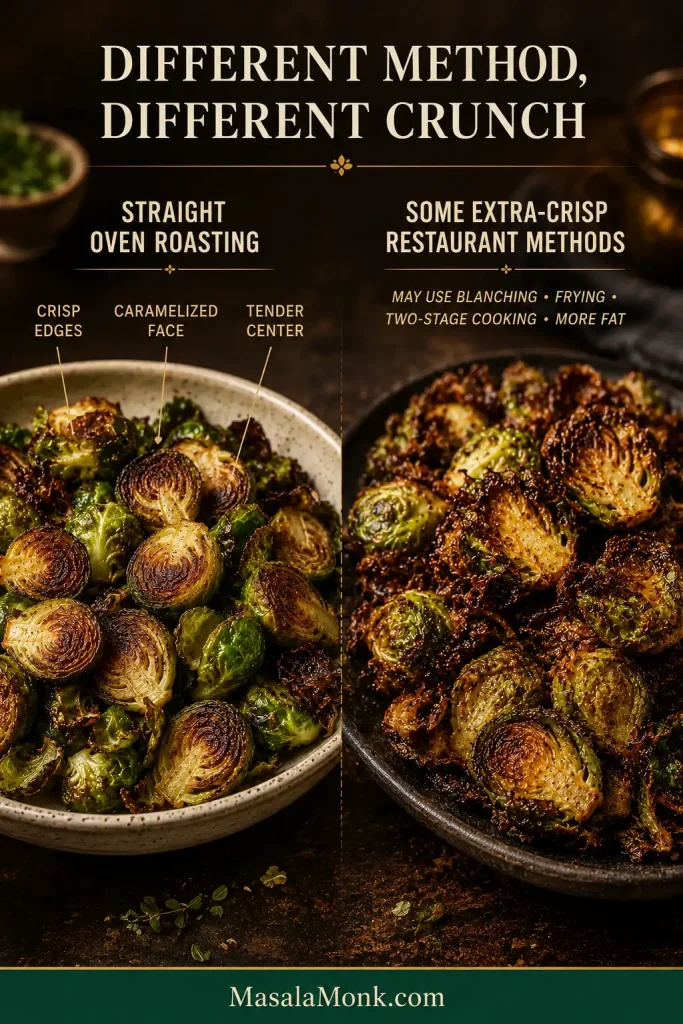
Starting with a room-temperature sheet pan is enough for this method. Preheating can give the bottoms a head start. Blanching or steaming first can give the centers a head start before high-heat browning, which is why some restaurant-style methods use it. You don’t need that extra step for this straightforward roasted version.
Should You Marinate Brussels Sprouts Before Roasting?
For the crispest result, skip a wet marinade. Extra liquid delays browning, while sugary marinades can darken before the centers are tender. Roast with oil and dry seasonings, then add balsamic, citrus, honey, maple, or another wet finish afterward. For exact starting amounts, jump to the measured flavor finishes. If you do marinate them, drain off the excess before roasting.
Already tender but still too pale? A brief turn under the broiler can add the missing color. Stay nearby—the thin outer edges can move from beautifully browned to genuinely burned very quickly.
Brussels Sprouts Troubleshooting
Brussels sprouts that refuse to crisp are usually too wet, too crowded, not making enough contact with the baking sheet, or not getting enough heat. The appearance of the tray usually tells you which problem you have.
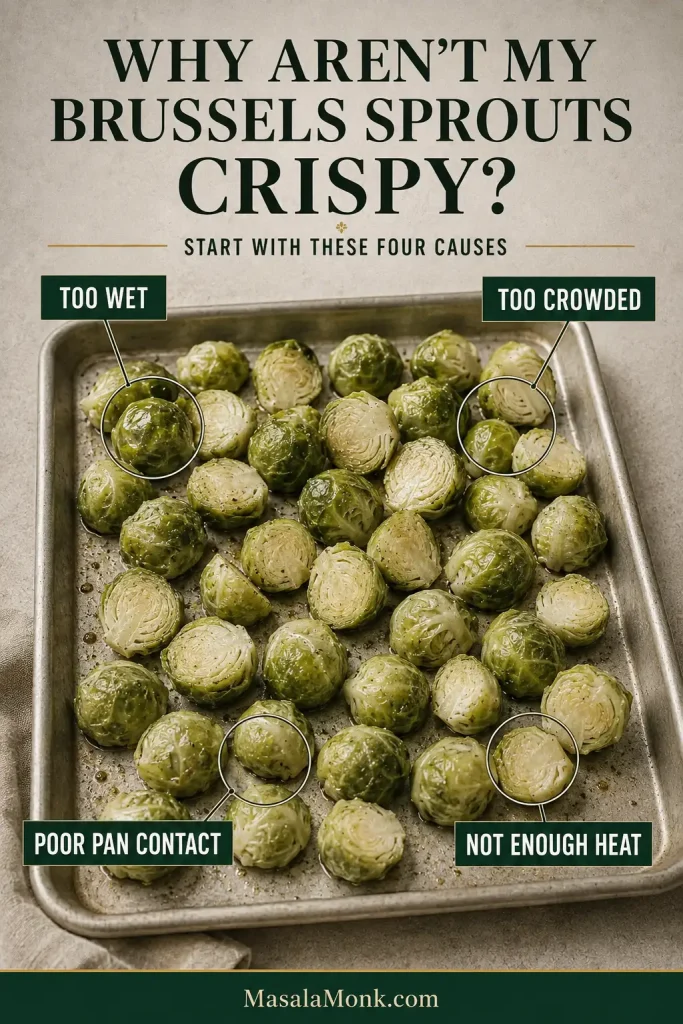
The Most Common Problems
- Pale and soft — Spread the pieces out and keep roasting if they still have some structure. A wet or crowded tray needs more time before strong browning begins. A larger sheet and drier sprouts will help on the next batch.
- Tender but still pale — They have cooked through without developing enough contact color. A brief broil can rescue this batch; keeping the flat faces in direct contact with the baking sheet helps the next one.
- Dark outside but hard in the middle — Remove any finished pieces and return the hard ones to the oven. Very large sprouts are the usual culprit, so cut those outliers smaller next time.
- Too soft — They have simply passed the center texture you prefer. They may still taste excellent; on the next tray, trust the center earlier.
- Greasy instead of crisp — Lift the sprouts from the excess oil with tongs or a slotted spatula. On another batch, stop adding oil once the surfaces are lightly glossy rather than wet.
- Outer leaves scorched before the centers were ready — Remove anything that tastes acrid. A hot-running oven, dark pan, or especially small pieces can all make the outside brown too fast, so check those first on the next tray.
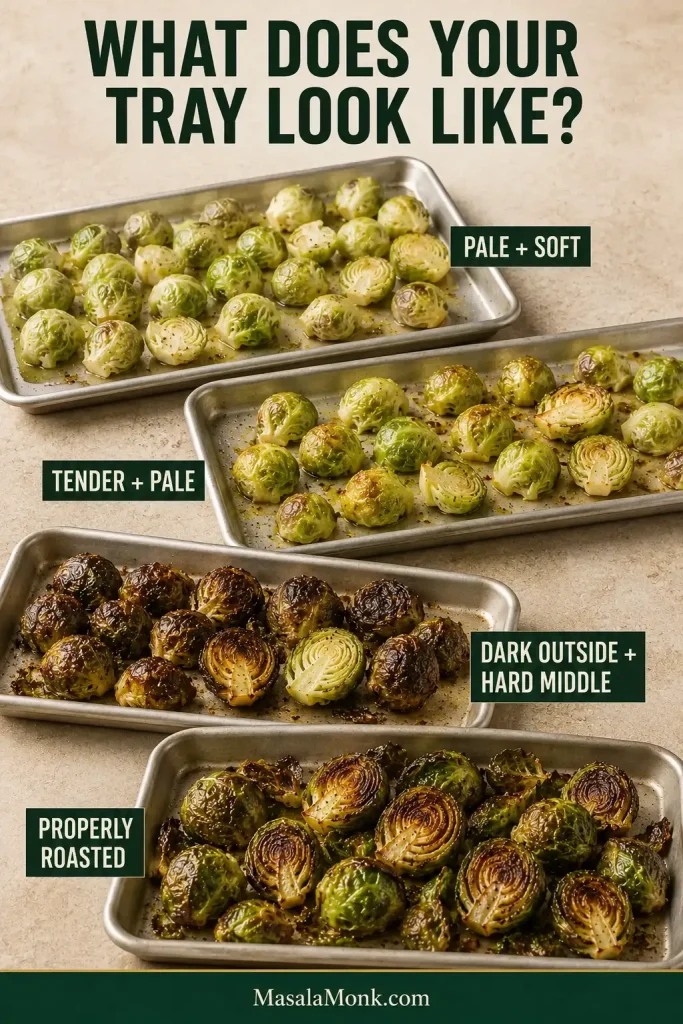
A Few Less Common Problems
- Strong cabbage or sulfur smell — The sprouts have spent too long cooking gently in a moist environment. Spread them out and continue uncovered if they still need cooking; once tender, serve promptly and brighten them with lemon.
- Bitter but not burned — Check the salt first, then try lemon, Parmesan, balsamic, or a restrained sweet finish. A little more caramelization can also take the edge off that bitterness.
- Acrid or charcoal-bitter — That is actual burning. Discard the worst pieces and pull the next tray sooner. If the bottoms are scorching much faster than the rest of the sprouts, use parchment or switch to a lighter-colored baking sheet.
- A double batch came out soft — Too many sprouts probably shared one baking sheet. Move half the batch to a second sheet pan if dinner can wait a few more minutes; use two pans from the beginning next time.
When food in your oven consistently finishes much earlier or later than recipes suggest, a simple oven thermometer can tell you whether the temperature inside matches the number on the dial.
Restaurant-Crispy vs Straight Oven Roasting
A home-roasted tray can be beautifully browned and still not crunch like a restaurant appetizer. Some restaurant versions are blanched, fried, cooked twice, or finished with considerably more fat and aggressive heat.
That does not make the oven version a failure. Once the centers taste good, stop roasting rather than sacrificing them in pursuit of a texture this simple method was never meant to produce.
Choose Your Finish
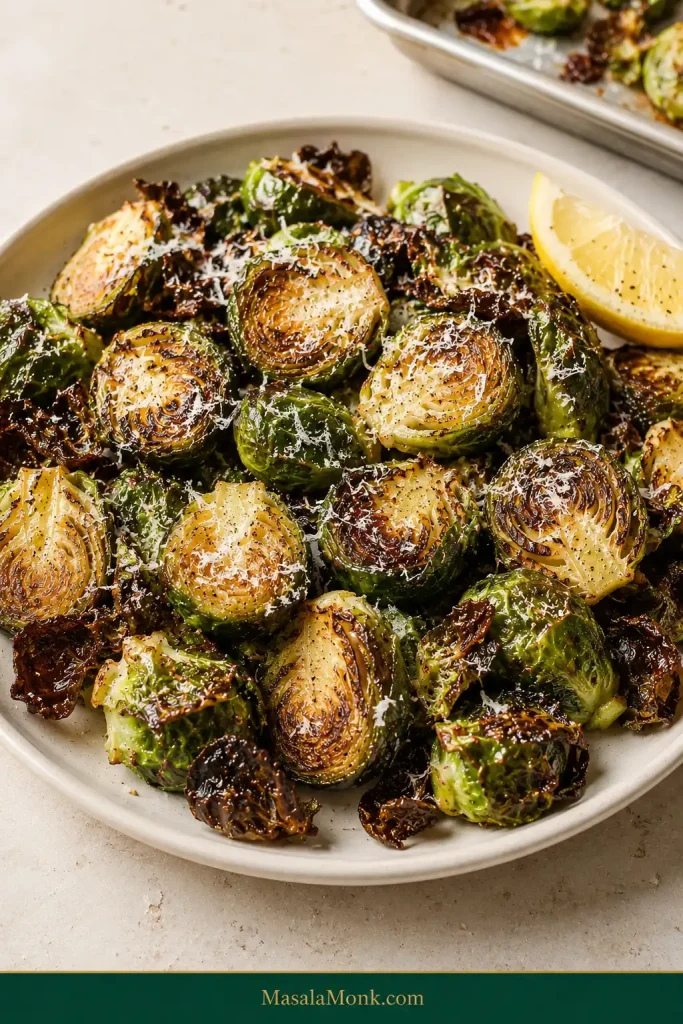
Once the sprouts are roasted, this is where the tray gets personal. Olive oil, salt, and pepper are enough on their own, but a small finish can take the same batch in a brighter, cheesier, sweeter, tangier, or spicier direction.
Not sure where to start? Use lemon and Parmesan. Lemon wakes up the deep roasted flavor, while Parmesan adds salt and nuttiness without covering the sprouts in sauce.
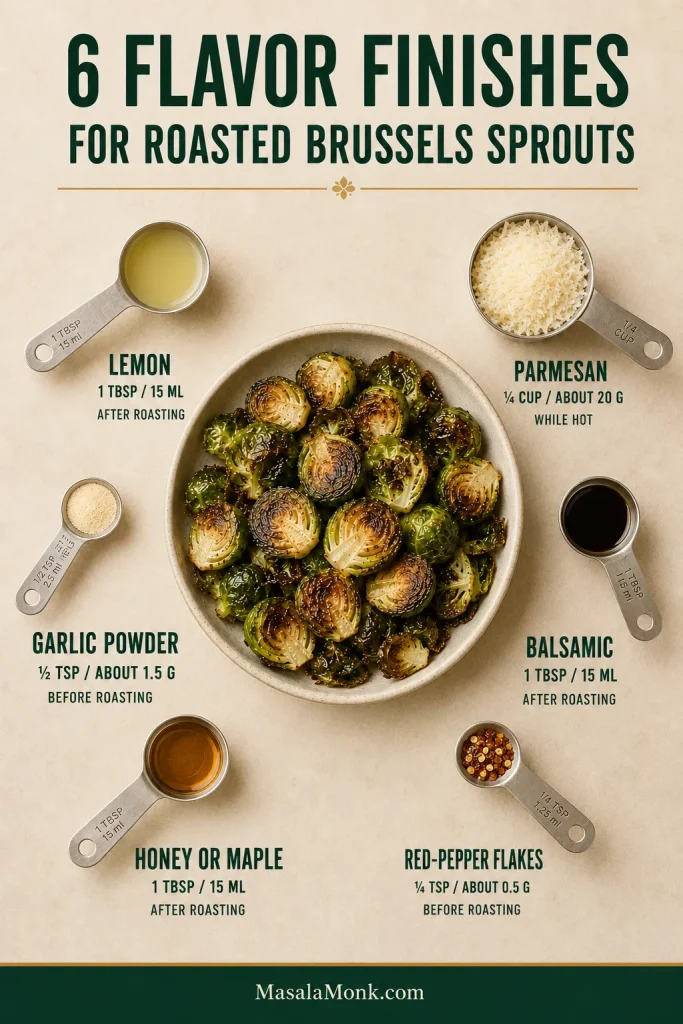
Measured Flavor Finishes
These are conservative starting amounts for the 1½ lb / 680 g batch. Once you know your favorite finish, adjust freely.
| Finish | Starting Amount | When to Add |
|---|---|---|
| Lemon | 1 tbsp / 15 ml fresh lemon juice | After roasting; add more to taste |
| Parmesan | ¼ cup / about 20 g finely grated Parmesan | Toss with the sprouts while hot; taste before adding more salt |
| Garlic powder | ½ tsp / about 1.5 g | Add with the salt and pepper before roasting |
| Balsamic vinegar | 1 tbsp / 15 ml | Drizzle over the finished sprouts |
| Honey or maple syrup | 1 tbsp / 15 ml | Add after roasting and toss |
| Red-pepper flakes | ¼ tsp / about 0.5 g | Add before roasting |
With balsamic, honey, or maple, think finish, not bath. You want enough to complement the caramelized surfaces without soaking the crisp edges.
For another vegetable that takes honey, maple, and garlic especially well, try roasted carrots. For sweet heat, use a light drizzle of hot honey sauce instead of plain honey.
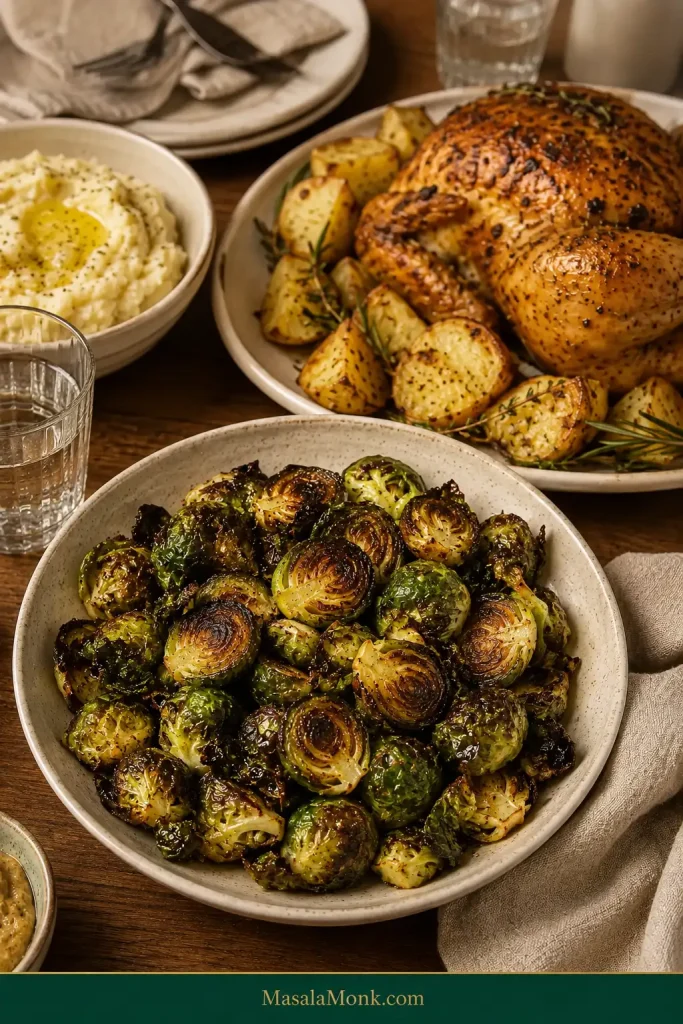
What to Serve With Roasted Brussels Sprouts
Their deep roasted flavor and nutty caramelized edges make Brussels sprouts easy to pair with both simple proteins and richer mains.
For a weeknight dinner, serve them beside baked chicken breast or honey garlic salmon. Lemon or Parmesan is especially good when the main dish already brings a sweeter glaze.
On a holiday table, roasted Brussels sprouts also fit naturally beside ham, turkey, stuffing, scalloped potatoes, or mashed potatoes. When the rest of the plate is rich, a bright lemon or restrained balsamic finish keeps the sprouts lively.
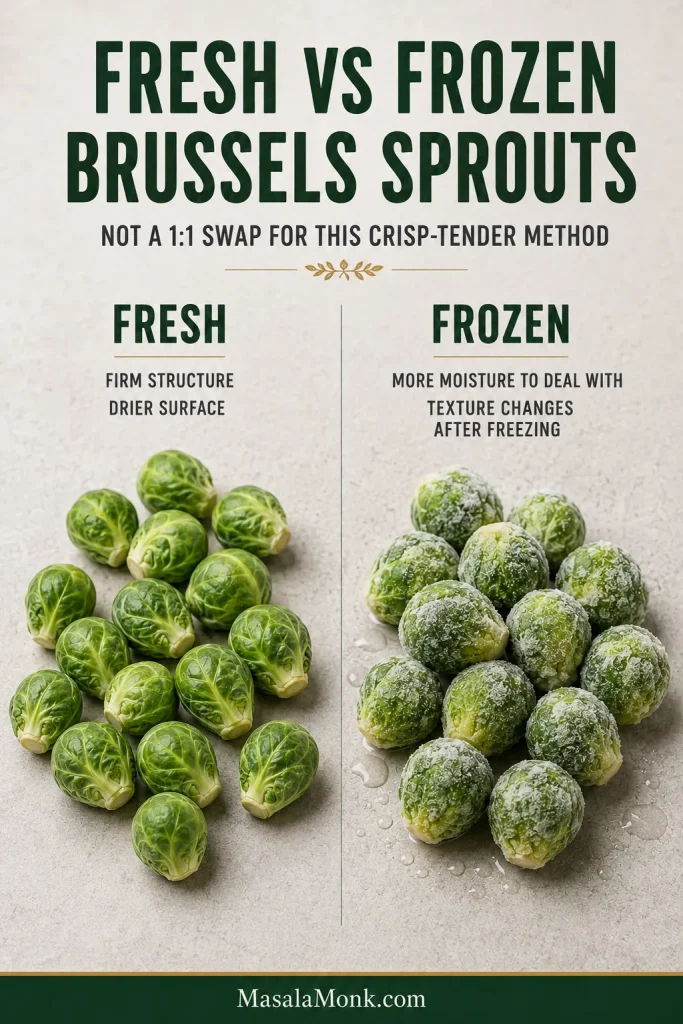
Can I Substitute Frozen Brussels Sprouts?
Not if you’re after the crisp edges and tender centers you get with this method. Frozen Brussels sprouts can certainly be roasted, but freezing changes their structure and they release much more moisture as they heat.
Use fresh sprouts for the method on this page. Frozen Brussels sprouts are better treated as their own roasting method rather than dropped into these timings and expected to behave the same way.
Make Ahead, Store and Reheat
Prep Ahead and Transport
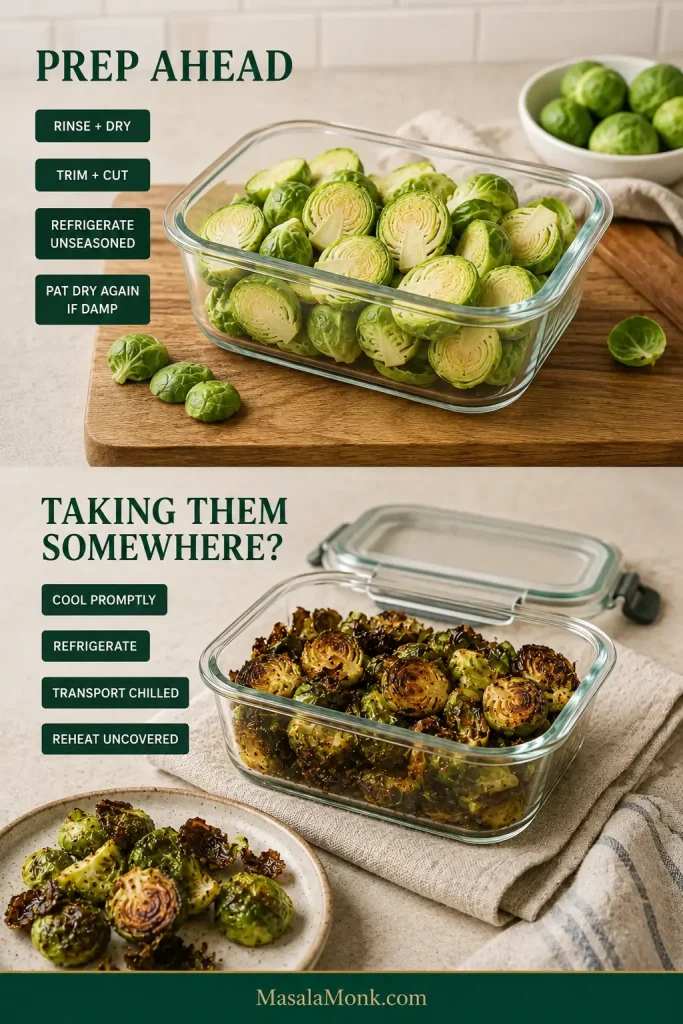
Prep ahead. Rinse and dry the sprouts, then trim and cut them up to 1 day ahead and refrigerate them covered. Keep them unseasoned until you are ready to roast. If they look damp after refrigeration, pat them dry again before adding the olive oil, salt, and pepper.
Roasting ahead is possible, but the edges are best straight from the oven. For Thanksgiving, Christmas, or another busy meal, doing the knife work early and roasting close to serving is usually the better compromise.
When something like honey glazed ham already controls the oven, use the temperature guide above rather than squeezing the Brussels sprouts onto a smaller, crowded tray just to speed them up.
Taking them somewhere? Hot sprouts soften when trapped under a lid or tight foil. Roast close to serving when possible; otherwise cool and refrigerate them promptly, transport them chilled, and reheat uncovered at your destination. Without reheating, expect softer edges.
Store and Reheat Brussels Sprouts
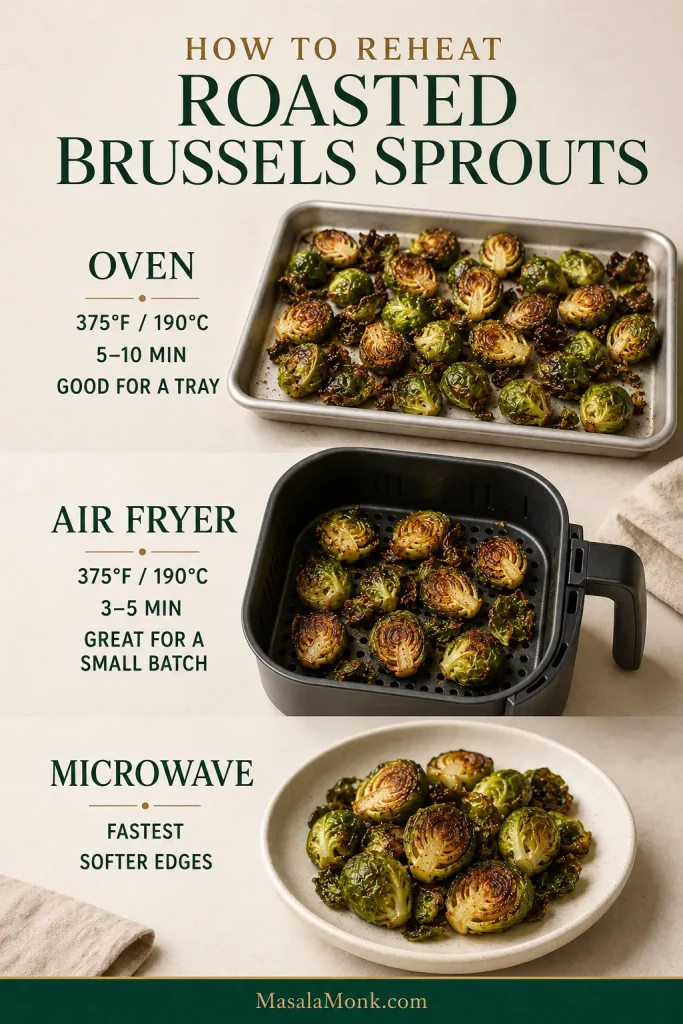
Storage. Refrigerate cooked Brussels sprouts promptly and use them within 3–4 days, in line with USDA leftovers guidance.
Oven reheating. Spread the sprouts over a baking sheet and warm them at 375°F / 190°C for about 5–10 minutes, until hot and beginning to crisp again.
Air-fryer reheating. For a small batch, use 375°F / 190°C for about 3–5 minutes. Already-dark edges can move quickly, so watch them near the end.
The microwave is fastest, but it softens the exterior. That may be perfectly acceptable for Tuesday lunch; it simply won’t recreate a tray fresh from the oven.
Use the Leftovers
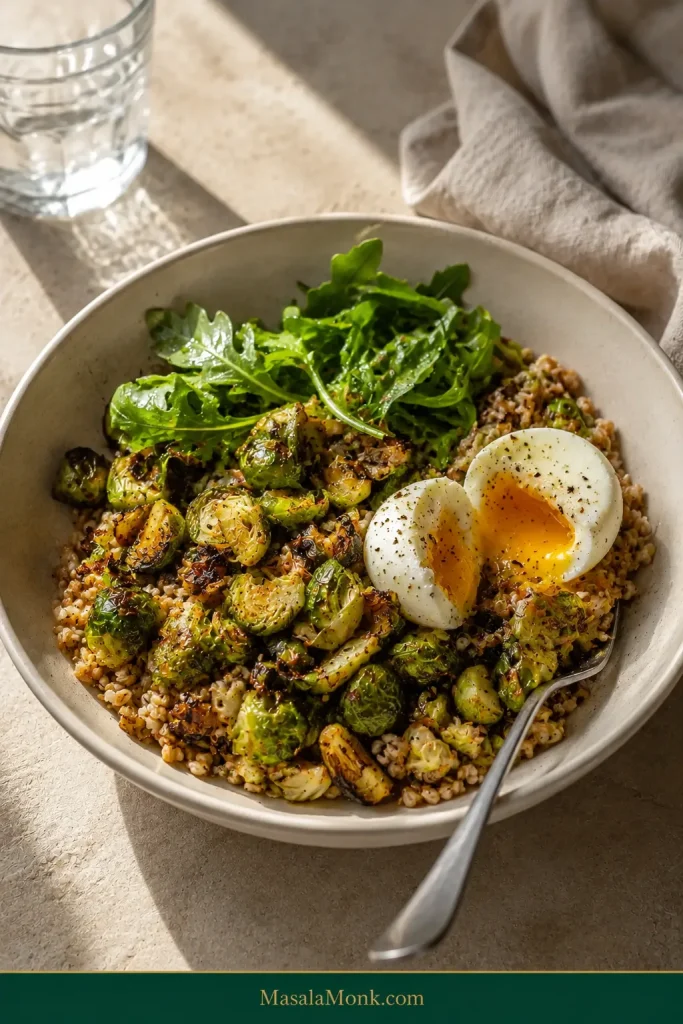
Leftovers are also good chopped into grain bowls, salads, pasta, or eggs, where softer edges aren’t a problem.
Once You Know What to Look For
After a tray or two, you probably will not need this recipe beside you anymore. You will recognize the moment the Brussels sprouts are ready.
Serve them hot—and if a few crisp little leaves disappear before the pan reaches the table, that is entirely understandable.