
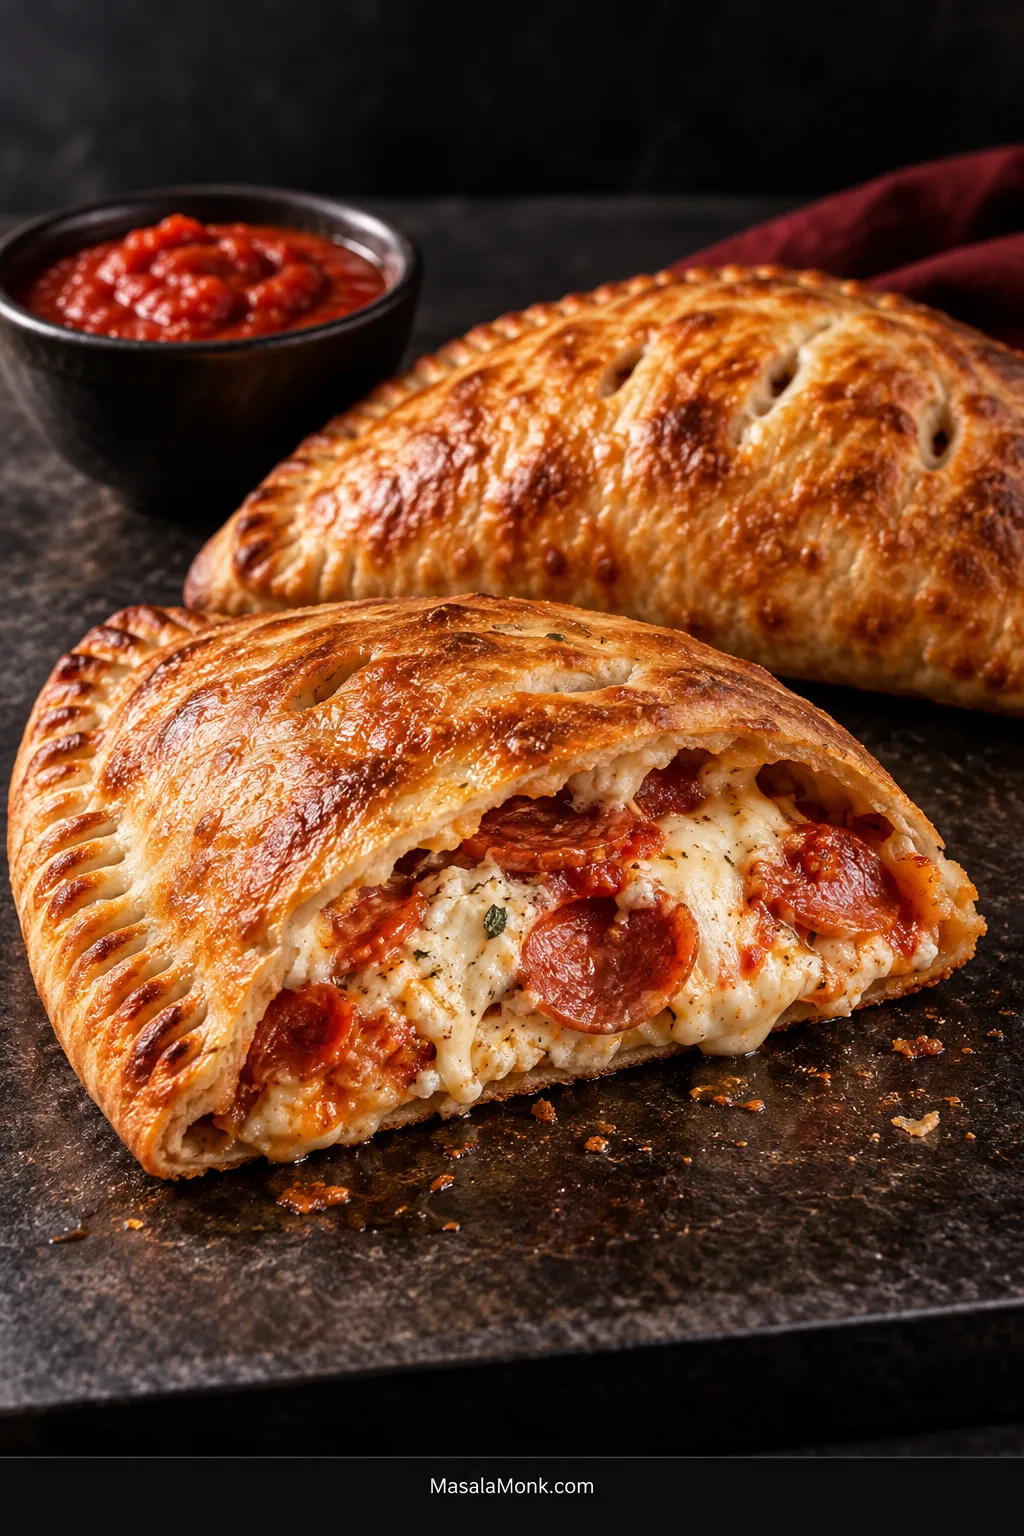
Cut into a good calzone while it is still warm and the crust gives a little crack before the cheese pulls apart underneath it. The outside is browned and crisp, the center is creamy and stretchy, and a little marinara on the side gives you all the comfort of pizza in one satisfying fold.
You can make that at home with regular pizza dough. No special calzone dough or pizza oven is required. What matters is leaving the dough enough room to close and keeping excess moisture out of the filling, so the crust can brown before trapped steam softens it.
This calzone recipe makes four generous calzones with a crisp, sturdy crust, ricotta-mozzarella filling and pepperoni. The measurements give you a reliable starting point, but they aren’t a reason to force an overfilled calzone shut. If the dough won’t come easily over the filling, take a little out.
4 calzones
About 7½–8 in / 19–20 cm each
180 g dough each
About 160 g total filling each
450°F / 230°C
Start checking at 15 minutes
Four things that help: let tight dough relax · control excess moisture in the filling · leave a clean border · vent before baking.
Calzone Recipe
A cheese-and-pepperoni calzone with a crisp browned crust, creamy ricotta-mozzarella center and marinara for dipping.
Oven: 450°F / 230°C
Dough: 720 g total, divided into 4 × 180 g portions
Finished size: about 7½–8 inches / 19–20 cm each
Filling: about 160 g total per calzone, including sauce
Total: about 1 hr 20 min–2 hr 5 min, plus extra dough-rest time if needed
Ingredients
Dough
- 720 g / 1 lb 9 oz pizza dough, homemade or refrigerated store-bought
Filling
- 240 g / 8½ oz whole-milk ricotta, after pouring off any obvious separated liquid
- 200 g / 7 oz low-moisture whole-milk mozzarella, shredded
- 40 g / 1½ oz finely grated Parmesan or Pecorino Romano
- 100 g / about 3½ oz thinly sliced pepperoni
- 60 g / ¼ cup thick marinara or pizza sauce, plus more for dipping
- 1 tsp dried oregano
- ¼ tsp freshly ground black pepper
- ¼ tsp crushed red pepper flakes, optional
- Fine salt, only if needed
For finishing
- 1 large egg
- 1 tbsp / 15 ml water
- 1–2 tsp olive oil, for lightly greasing the baking sheet
Equipment
- 1–2 rimmed baking sheets, ideally about 13 × 18 inches / 33 × 46 cm
- Kitchen scale
- Fork for crimping
- Sharp knife
- Pastry brush
- Rolling pin, optional
A pizza stone or baking steel is optional. It can give the underside stronger heat and deeper browning, but a baking sheet is all you need for the main method.
Method
1. Let the dough relax
Let refrigerated pizza dough sit covered at room temperature until the refrigerator chill has gone and the dough opens without immediately snapping back. For many doughs, 30–60 minutes is enough; a particularly cold or tight dough may need longer.
2. Heat the oven
Heat the oven to 450°F / 230°C with a rack slightly below the center. Lightly oil a baking sheet.
3. Mix the filling
Pour off any obvious whey around the ricotta; there’s no need to press a normally thick ricotta dry. Stir it with the mozzarella, Parmesan or Pecorino, oregano, black pepper and red pepper flakes if using.
Taste the cheese mixture before adding salt. Parmesan or Pecorino is already salty, while the pepperoni and sauce will add more once everything is assembled.
4. Portion the dough
Divide the dough into four 180 g / about 6⅓ oz portions. Shape them gently into loose balls and let them rest for about 5 minutes.
5. Stretch the dough
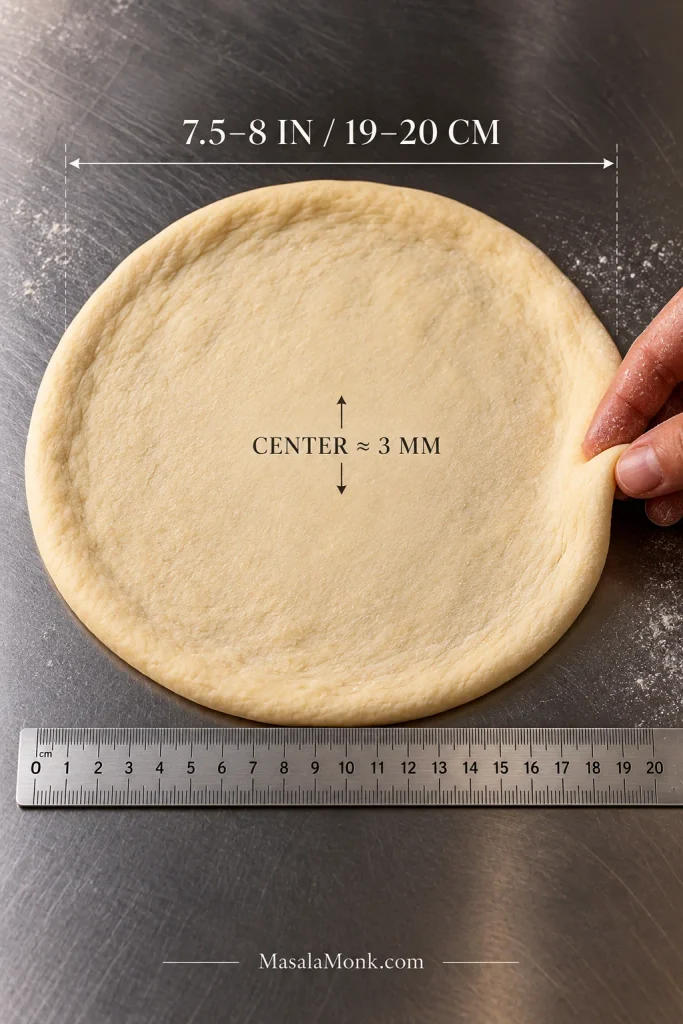
Work with one portion at a time. Stretch or roll it into a round about 7½–8 inches / 19–20 cm across, roughly ⅛ inch / 3 mm through most of the center with a slightly thicker outer edge.
The dough is ready when it feels supple enough to fold but still strong enough to lift. If you can almost see the work surface through the center, stop. Dough that tightens again while you’re shaping it usually needs only a short 5–10 minute covered rest before you continue.
6. Fill one calzone
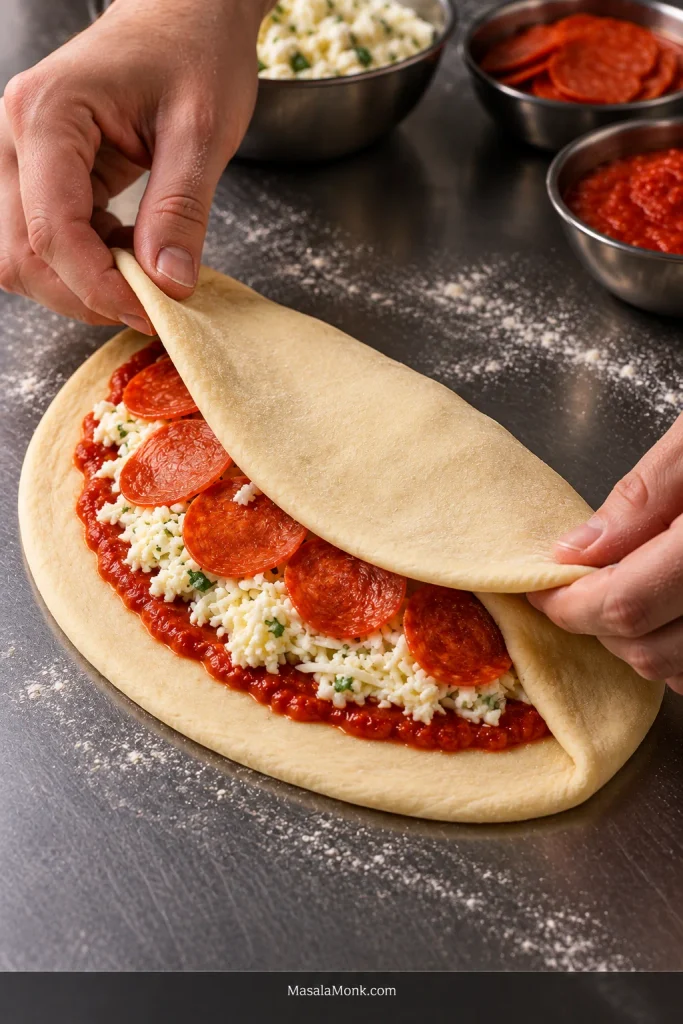
Set the stretched round on the lightly greased baking sheet. Spoon about 15 g / 1 tbsp sauce over one half, leaving a clean 1-inch / 2.5-cm border. Add one quarter of the cheese mixture—about 120 g / 4¼ oz—and about 25 g / 1 oz pepperoni.
That tablespoon of sauce is deliberately modest. For an even drier cheese filling, leave it out and serve all of the marinara alongside.
Spread the filling into a low mound. This recipe aims for about 160 g / 5⅔ oz total filling per calzone, including the sauce. If the empty half won’t reach comfortably over the filling, take some out.

7. Fold and seal
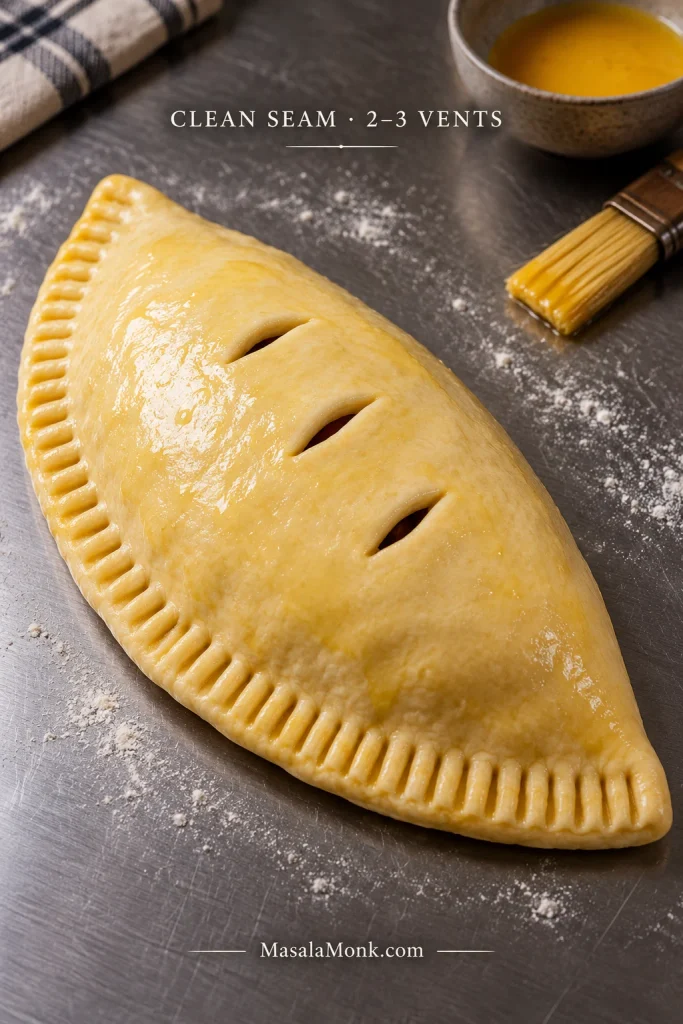
Fold the empty half over the filling and ease out any obvious large pocket of air. Move sauce, cheese or pepperoni away from the border, then press the edges together all the way around. The strongest seal is dough against dough.
Crimp firmly with a fork, including the ends and corners. If the border feels dry, run a lightly moistened fingertip around it before sealing. For a sturdier rim, fold the narrow crimped edge over itself once and press lightly.
8. Repeat, egg wash and vent
Repeat with the remaining dough. Leave enough space around the calzones for hot air to circulate. If all four fit on one sheet without touching or crowding one another, bake them together. Otherwise, bake in two batches.
Beat the egg with 1 tbsp / 15 ml water and brush a thin layer over the tops. Cut 2–3 short vents into each calzone. Bake reasonably soon after filling and sealing so the raw dough isn’t sitting against the moist filling for long.
9. Bake until the top and bottom are browned
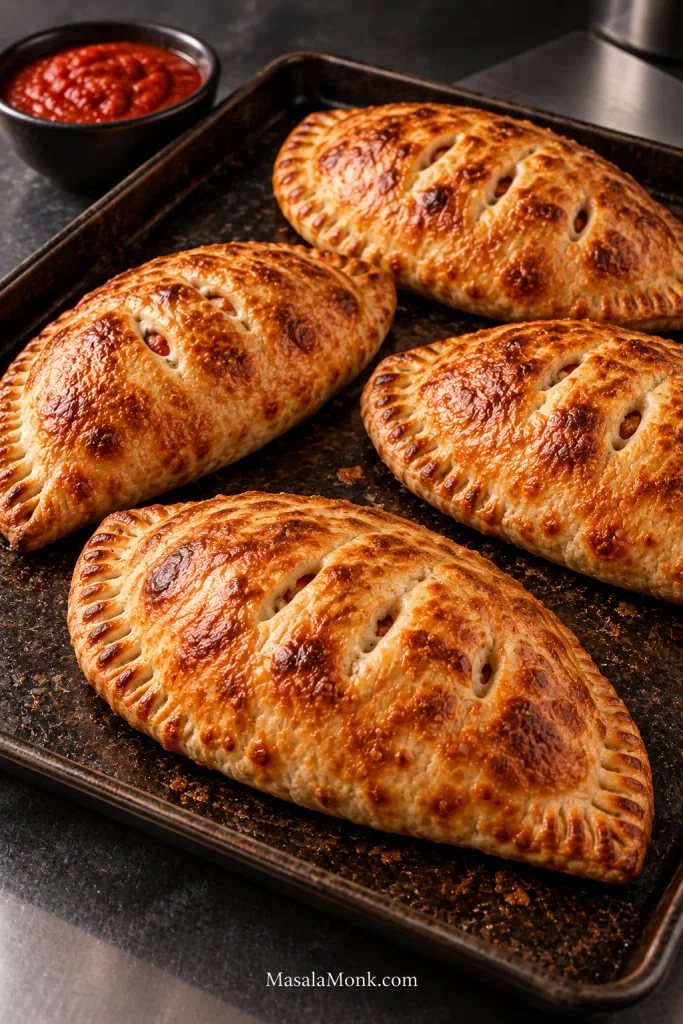
A calzone is done when the top is golden brown, the underside is firm and browned, and the filling is fully melted and may be bubbling at a vent. Start checking at about 15 minutes. In many ovens, the total bake will land somewhere around 18–25 minutes.
10. Rest and serve
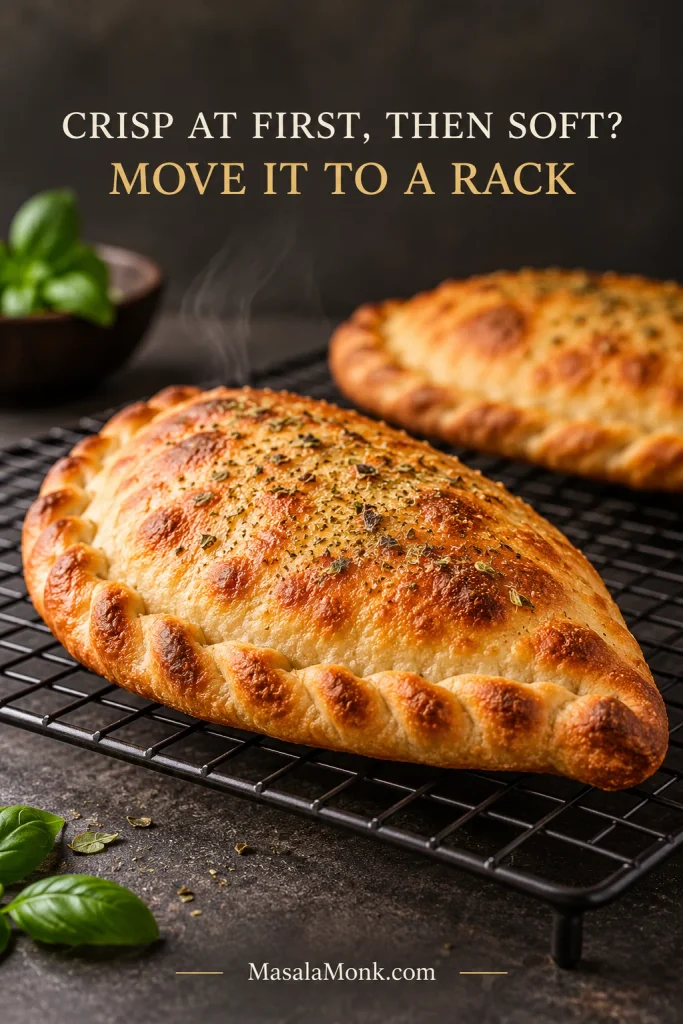
Let the calzones rest for 5–10 minutes. After the first few minutes, move them to a wire rack so steam doesn’t collect underneath and soften the crust. The filling will also settle a little before you slice.
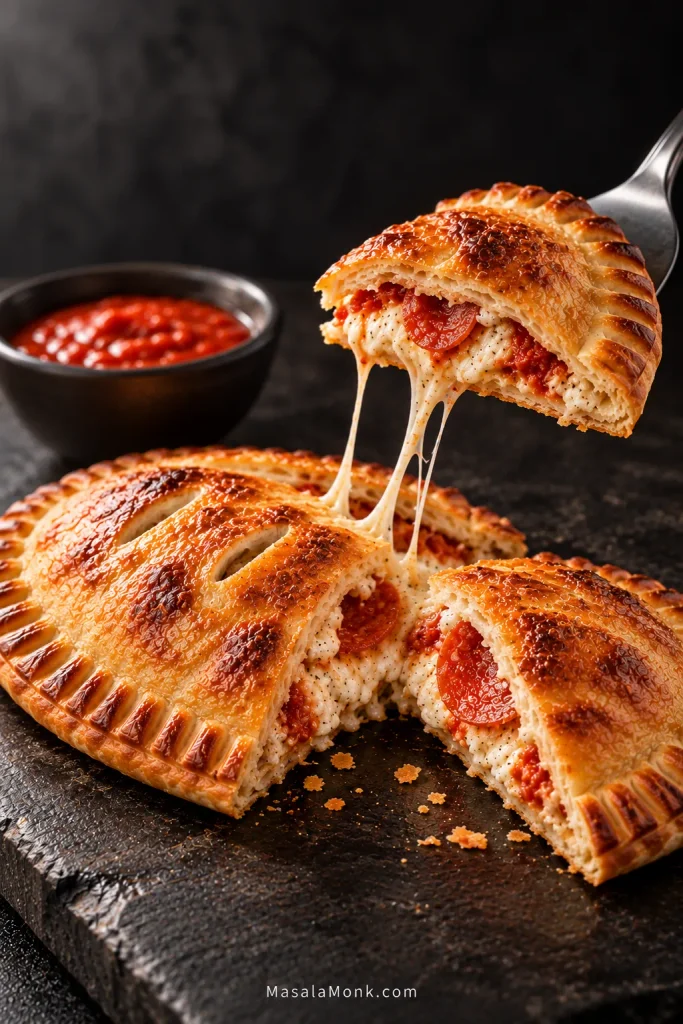
Cut through the middle while they’re still warm and serve with extra marinara for dipping.
Troubleshooting ↓ Filling Ideas ↓ Back to Top ↑
You can cook from the recipe above and get on with dinner. What follows is for the parts a list of steps can’t fully show: why dough keeps shrinking, what makes a filling behave inside folded dough, how to tell when the bottom is really baked and what to change if something goes wrong.
In This Guide
Make the Calzone
Fix Problems
Make It Yours
Why This Method Works
A good calzone has to survive the fold before it ever reaches the oven. The dough needs to be relaxed enough to close without strain, the filling needs to stay put instead of spreading toward the seam, and the bottom needs enough heat to set while everything inside becomes hot and melted.
Unlike an open pizza, a calzone traps much of the moisture released by its filling inside folded dough. Tight dough pulls against the seal, and extra filling adds even more strain.
Meanwhile, water from loose ricotta, vegetables or too much sauce turns to steam and can soften the crust from inside. Give the dough time and keep the filling within what it can hold, and the whole process becomes much easier.
Ingredients & Filling
In practice, that starts with a filling that’s creamy enough to stay soft after baking but firm enough to sit in a mound on the dough. Whole-milk ricotta gives it that creamy base, low-moisture whole-milk mozzarella supplies the melt and stretch without much extra water, and Parmesan or Pecorino brings concentrated savory flavor.
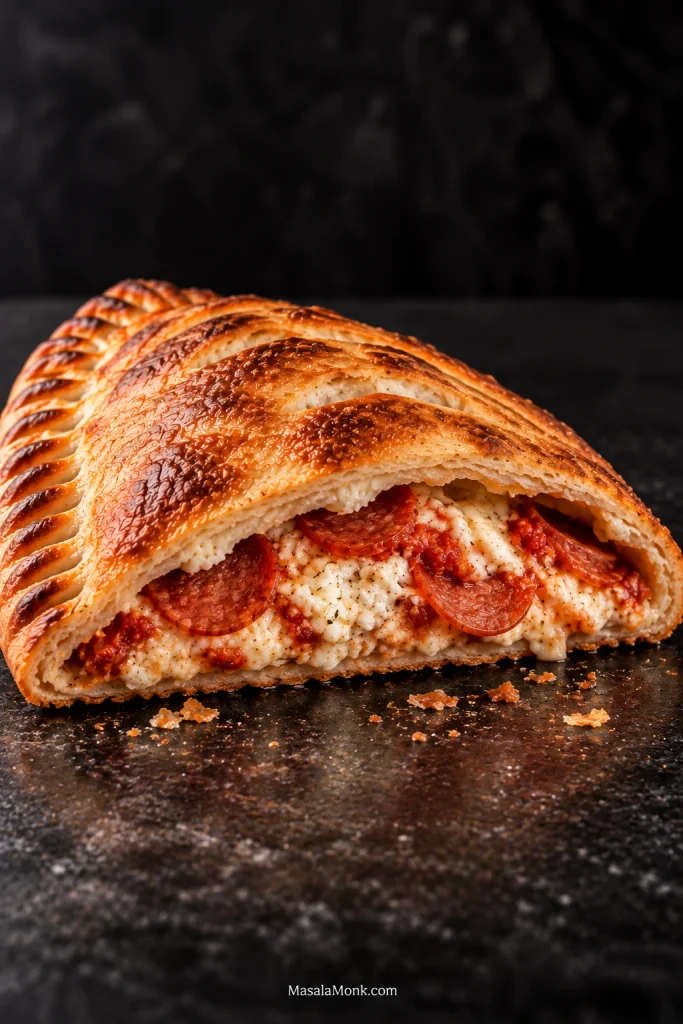
Pour off any obvious separated whey before weighing out the 240 g ricotta. A normal thick ricotta doesn’t need prolonged draining or pressing. Low-moisture mozzarella is the better choice here because fresh mozzarella contains considerably more water and isn’t a straight one-for-one substitute in an enclosed calzone.
Thin pepperoni distributes easily through the filling, while a thick marinara is easier to control than a loose sauce. Use only a little inside and save the rest for dipping. If you’d like to make your own, try our homemade marinara.
Other fillings follow the same physical rule: deal with excess water before it reaches the dough. Squeeze cooked spinach dry, cook mushrooms until their released liquid is gone, and sauté watery vegetables such as peppers or onions. Meat goes in already cooked and drained of excess grease. Let hot fillings cool before assembly.
Creamy is good; runny is not.
Work With the Dough
Store-bought pizza dough works perfectly well here, as does homemade dough. What matters more is how cold it is. Straight from the refrigerator, it often feels rubbery and keeps pulling itself back into a smaller round.
Give refrigerated dough its longer warm-up before you begin—often 30–60 minutes at room temperature, sometimes more. Once the chill has gone, it becomes noticeably easier to open.
If it tightens again halfway through shaping, cover it and leave it alone for another 5–10 minutes. Flour helps when the surface is sticky; time is what relaxes a tight dough.
Stop stretching while the center still feels strong enough to lift. You want it thin enough to fold easily, but not so thin that the work surface is clearly visible through it. Leave the outer edge a little thicker so there’s enough dough to make a firm seal.
There’s no need to knead or punch down refrigerated dough again just to make it cooperate. If you’d rather start from scratch, use our Easy Homemade Pizza Dough.
Fill, Fold & Seal ↓ Back to Recipe ↑
Fill, Fold & Seal
The easiest calzone to seal is one that still has some slack in the dough after it’s filled. Once folded, it should look like a neat half-moon, not a parcel stretched tightly around its contents. That little bit of slack also gives the seam a better chance of staying closed as the filling heats and pressure builds.
Give the filling room
Leave about 1 inch / 2.5 cm of clean dough around the edge and spread the filling in a low mound. A tall pile puts more strain on the top and makes it easier for sauce or cheese to reach the seam. If the empty half won’t reach comfortably over the filling, take some out.
Close the seam
As you fold, gently ease out any obvious large pocket of air. Clear stray filling from the border, press dough directly against dough and crimp firmly with a fork. Pay particular attention to the two ends, where a small gap is easy to miss. For an extra-sturdy rim, fold the narrow crimped edge over itself once.
Vent before baking
Cut 2–3 short vents through the top so expanding steam has a route out. Vents release steam; they don’t dry out a wet filling.
Bake Until the Bottom Is Ready Too
A calzone is done when the top is golden brown, the underside is firm and browned, and the filling is fully melted and may be bubbling at a vent. At 450°F / 230°C, start checking around 15 minutes; many calzones will need about 18–25 minutes in total.

If the top is browned but the base is still pale, move the tray lower for the remaining bake. Conversely, if the top is coloring too quickly before the bottom is ready, loosely shield it with foil.
For future batches, a thoroughly preheated pizza stone or steel can give the underside stronger heat from the start. Check the bottom earlier when using one because it may brown faster than it does on a sheet pan.
Once baked, rest the calzones for 5–10 minutes. Move them to a rack after the first few minutes so steam can escape underneath and the bottom stays crisp.
Then make the first cut while they’re still warm. You want a crust with some bite around a soft, melted center—not a flood of cheese escaping onto the plate.
Back to Recipe ↑ Troubleshooting ↓
Calzone Troubleshooting
If something went wrong, the symptom usually points to the fix.
A crust that’s soft from the moment it leaves the oven usually points toward a wet filling or weak bottom heat. If it was crisp at first and softened while sitting on the tray, steam collecting underneath is the more likely culprit; move the next batch to a wire rack after its initial rest.
Leaks, Soggy Crust & Doneness
| What happened? | Likely cause | What to change |
|---|---|---|
| The seam burst | Too much filling, filling caught in the border, a weak seal or pressure building inside | Use a little less filling, clear the border carefully, crimp the entire seam and cut clear vents. |
| The bottom is soggy | Wet filling, too much sauce, assembled calzones sitting too long, or weak bottom heat | Remove excess moisture, keep the sauce modest, bake soon after assembly and give the underside stronger heat. |
| The inner crust is gummy or doughy | The dough is thick around the filling, the filling is too wet or heavy, or the exterior is browning before the inner dough cooks through | Stretch the center more evenly, reduce excess moisture or filling, and shield the browned top if the calzone needs more oven time. |
| The filling isn’t fully melted or hot | The calzone needs more baking time or the filling went in very cold | Continue baking; if the crust is already well browned, shield the top loosely with foil. |
| Filling leaks onto the pan | Filling reached the seam or part of the edge didn’t seal | Keep the border clean and inspect the entire crimp before baking. |
Dough, Browning & Serving Problems
| What happened? | Likely cause | What to change |
|---|---|---|
| The bottom burns | Very strong bottom heat, a low rack, dark pan or a hot-running oven | Raise the rack first. If your oven consistently runs hot, reduce the temperature slightly. |
| The calzone balloons dramatically | A large pocket of air or expanding steam is trapped inside | Ease out obvious air before sealing and make sure the vents are open. |
| The dough keeps shrinking | It is still cold or tight | Cover it and give it another 5–10 minutes before stretching again. |
| The dough tears | It was stretched too thin or too aggressively | Give tight dough more time and stop while the center is still strong enough to lift. |
| The top browns too quickly | The surface is coloring before the rest finishes baking | Move the tray lower or loosely shield the top with foil. |
| Cheese gushes out when sliced | The filling is still extremely hot and fluid | Give the calzone 5–10 minutes to rest before cutting. |
Back to Recipe ↑ Filling Ideas ↓ Back to Top ↑
Filling Ideas
The main recipe gives each calzone about 120 g / 4¼ oz cheese filling + 25 g / 1 oz pepperoni + 15 g / 1 tbsp sauce. For the variations below, cheese filling means the ricotta-mozzarella mixture from the main recipe. Swap ingredients within that baseline so the finished calzone stays close to the original filling load.
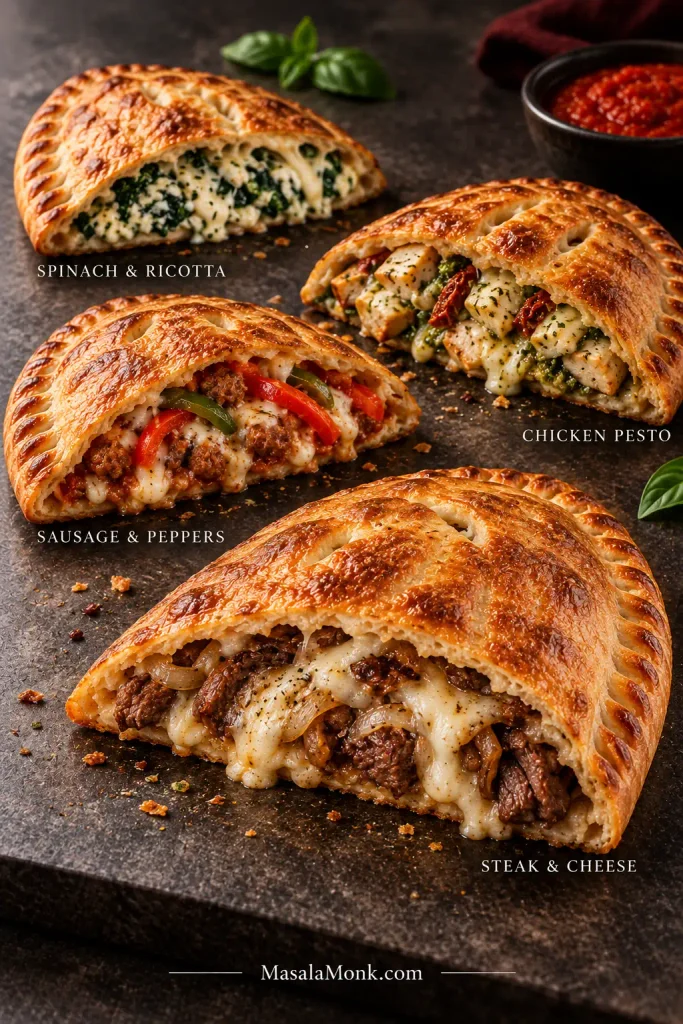
Spinach & Ricotta
For a creamy spinach filling, use about 105–110 g / about 3¾–4 oz cheese filling with 25–30 g / about 1 oz cooked spinach that has been squeezed very dry, plus the usual 15 g / 1 tbsp sauce. Leave out the pepperoni. If you want to keep it, reduce the cheese filling enough to make room.
Sausage, Peppers & Cheese
For savory sausage with sweet softened peppers, use 95 g / about 3⅓ oz cheese filling, 25 g / about 1 oz cooked, well-drained sausage, 20–25 g / about ¾–1 oz cooked peppers and the usual 15 g / 1 tbsp sauce. If you want those same flavors as a full meal, see our Sausage and Peppers.
Chicken Pesto
For a herby, garlicky filling, use about 100–105 g / about 3½–3¾ oz cheese filling, 35–40 g / about 1¼–1½ oz cooked chicken and about 10–15 g / 2–3 tsp pesto. Skip the marinara here; the pesto takes its place.
Steak & Cheese
For a richer steak-and-cheese calzone, use roughly 110–115 g / about 4 oz cheese filling, 30–35 g / about 1–1¼ oz thinly sliced cooked steak and the usual 15 g / 1 tbsp sauce. Adding cooked onions or peppers? Remove about the same weight of cheese filling to make room.
Whichever filling you choose, something cool and crisp is a good contrast to a hot, cheesy calzone. A cucumber salad brings freshness, acidity and crunch without making the meal heavier.
Make Ahead, Store & Reheat
Making them ahead: prepare the filling and portion the dough separately, then refrigerate them. Before assembling, let the dough lose its chill and relax as described above; keep the filling cold until you’re ready to use it. This avoids leaving moist filling against raw dough for an extended time.
Refrigerating: refrigerate baked calzones promptly and don’t leave them at room temperature for more than 2 hours. Store them in an airtight container and use within 3–4 days.
Freezing: let baked calzones cool, wrap them individually and freeze. For best quality, use within about 3 months.
Reheating: for the most even result, thaw frozen calzones in the refrigerator first. You can also reheat them from frozen; allow extra time. Reheat at about 350°F / 175°C until hot throughout—typically 10–15 minutes for refrigerated calzones, depending on size. If checking with a thermometer, aim for 165°F / 74°C in the center. An air fryer also works well for restoring the exterior; the microwave is quicker but leaves the crust much softer. For the underlying storage and reheating safety guidance, see the USDA Food Safety and Inspection Service guidance on leftovers.
Calzone vs. Stromboli
Folded pocket = calzone. Rolled log = Stromboli. Both can use pizza dough and similar fillings, but the construction—and the way those fillings sit inside—is different.
For the rolled version, see our Stromboli Recipe with Pizza Dough.
The best calzone isn’t the fullest one. Give the dough room to close, keep the filling under control and let the oven do the rest. After a few quiet minutes on the rack, cut through the browned crust while the center is still hot and stretchy.








